Egilman
-
Posts
4,377 -
Joined
-
Last visited
Content Type
Profiles
Forums
Gallery
Events
Everything posted by Egilman
-

F-86F-30 Sabre by Egilman - Kinetic - 1/32nd scale
Egilman replied to Egilman's topic in Non-ship/categorised builds
I agree Ken, He is/was a real artist with this one, and being a first release I imagine the technical aspects of molding have gotten better with time... This is my first and only Kinetic kit so far and I'm thoroughly impressed with it's level of detail... Especially for a first release.... I will eventually build another Kinetic Kit, and, as of right now I fully recommend them as 1st rate model makers... I may locate another one, and give it the full museum display treatment, (a few things I would have done differently for a better part alignment/fit) This kit deserves that level of treatment... The next installment is coming as soon as I get over the fever and shakes, I'm suffering from MSW withdrawals right now... {chuckle} Good to see them back up and online.... -
F-86F-30 Sabre by Egilman - Kinetic - 1/32nd scale
Egilman replied to Egilman's topic in Non-ship/categorised builds
It's a 2007 first issue Ken... The first kit they marketed.... Yes it has to be sealed, the finish although hard surfaced will come off rather easily with finger oils... Paul Cordyrette recommended future and when I built the P-51 I sealed it with a coat of future brushed on and allowed to thoroughly cure... It didn't change the look or reflectiveness any just darkened it ever so slightly.... So after I break it down and do the Rub n Buff touch up's it will get a coat to seal it in before I do the detail painting... It's such a realistic impression that I'm still amazed at it and I've been looking at it for a few days now... -
Yep, those are some tiny tiny parts.... (and probably in a location you will never see them) Molding tech is advancing... Rapidly...
-
F-86F-30 Sabre by Egilman - Kinetic - 1/32nd scale
Egilman replied to Egilman's topic in Non-ship/categorised builds
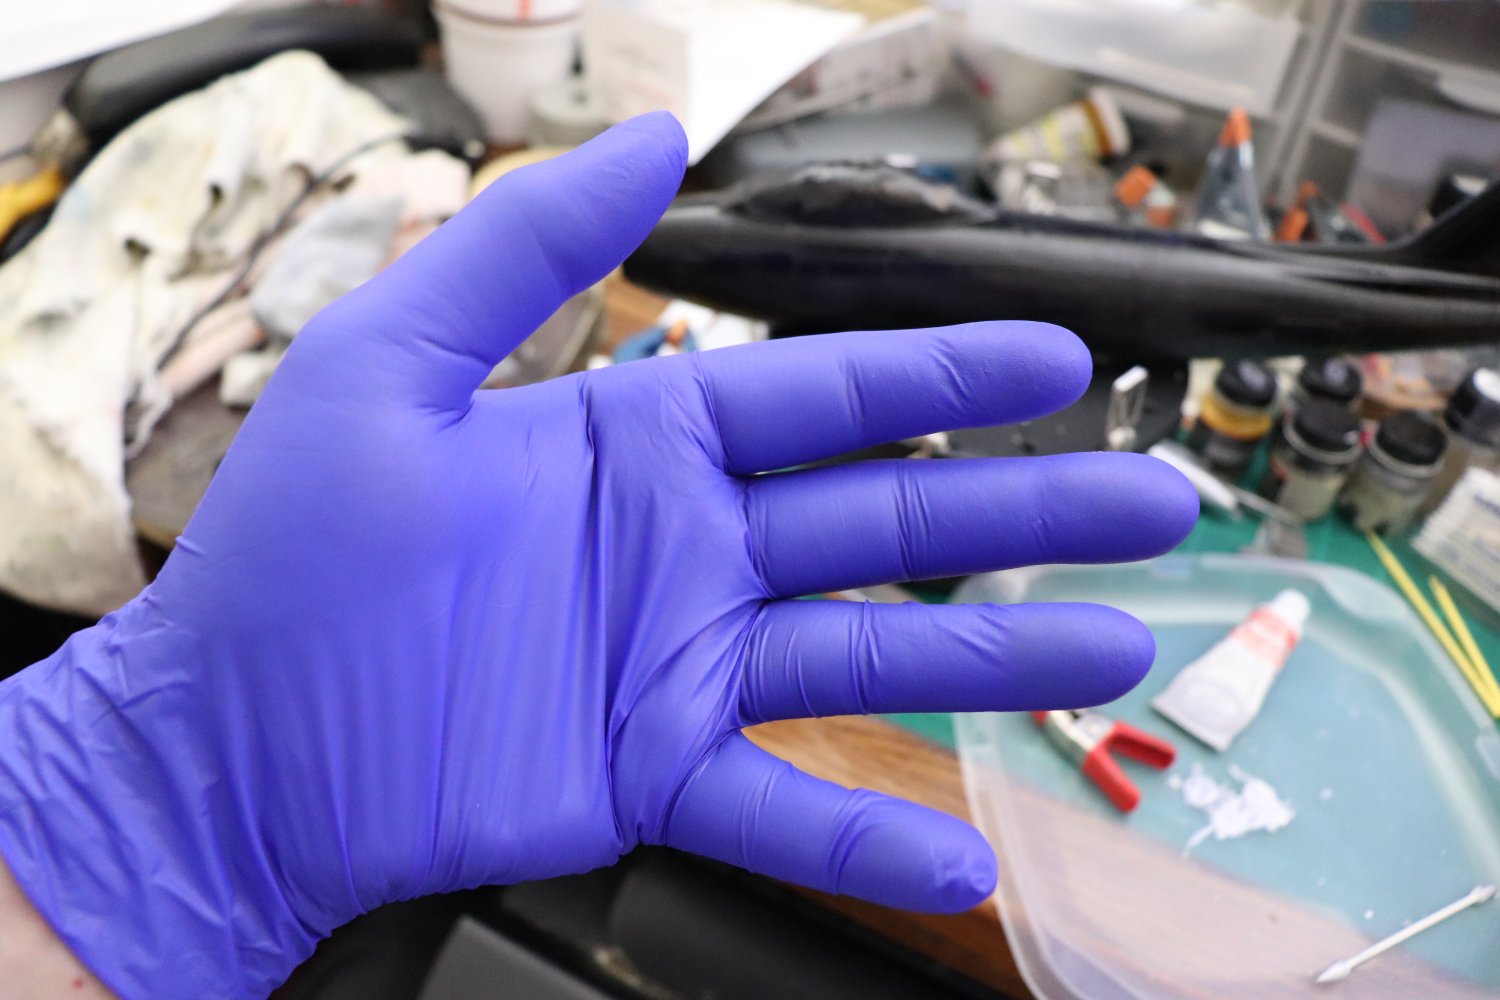
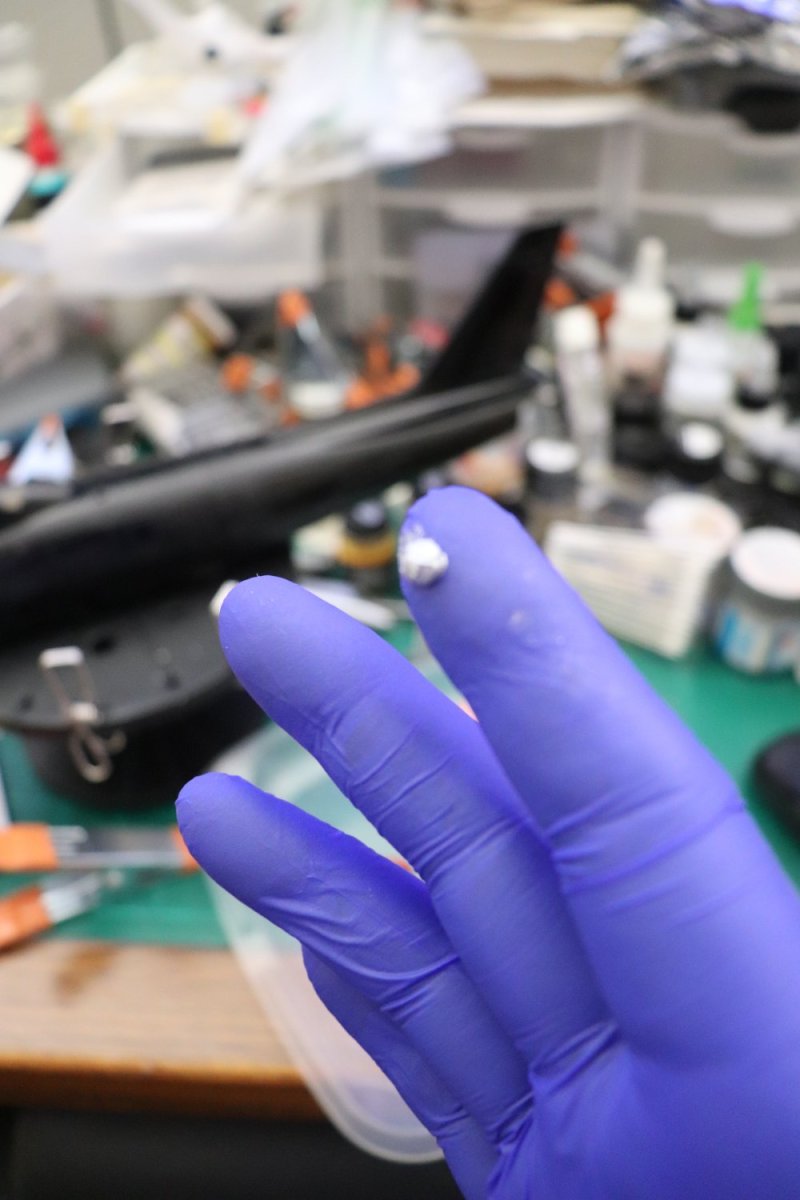
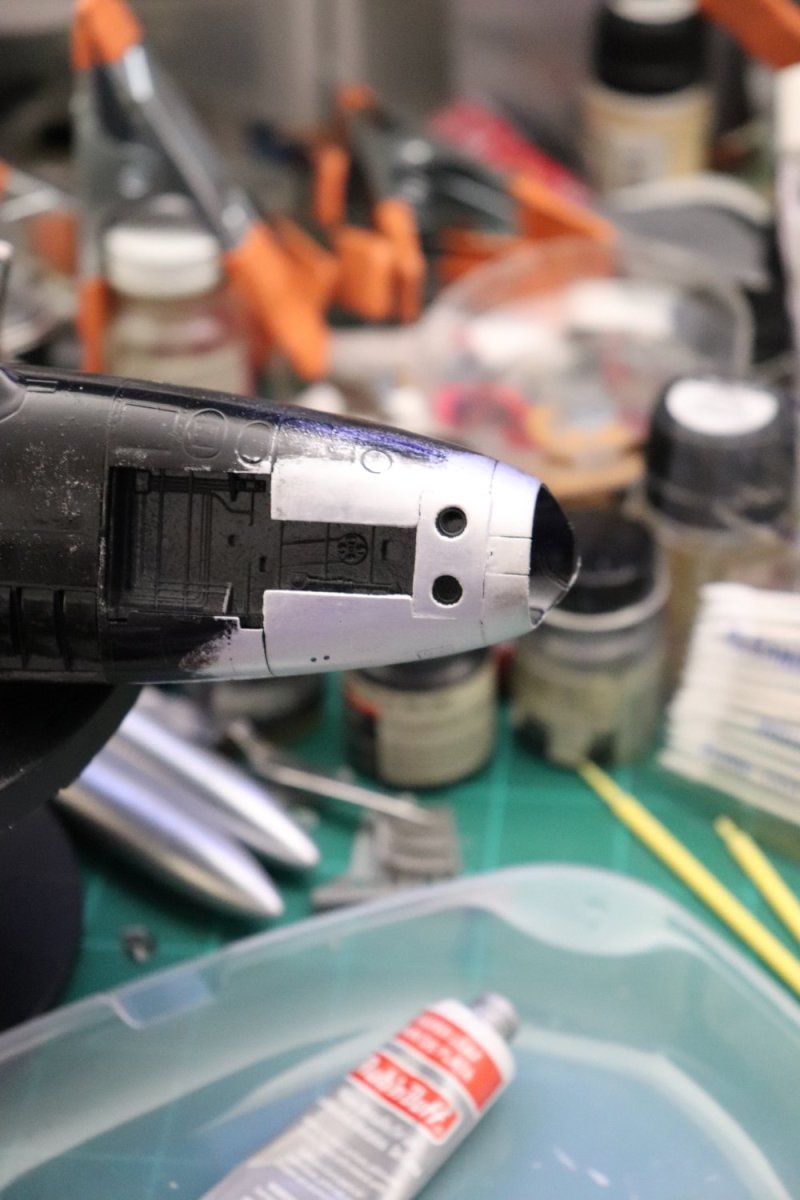
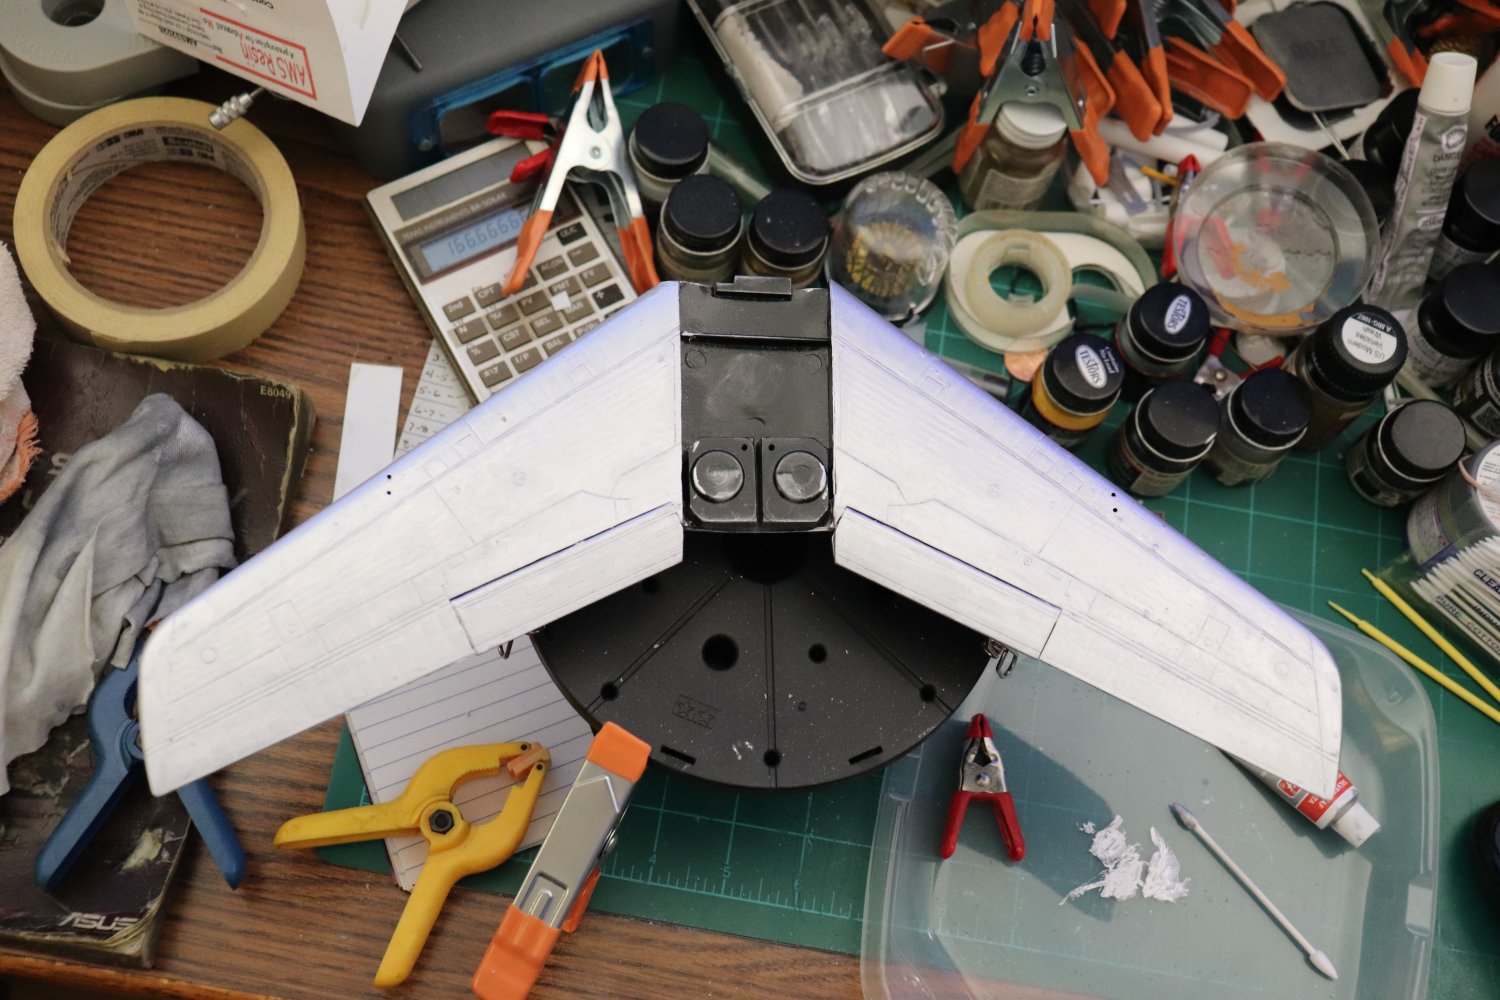
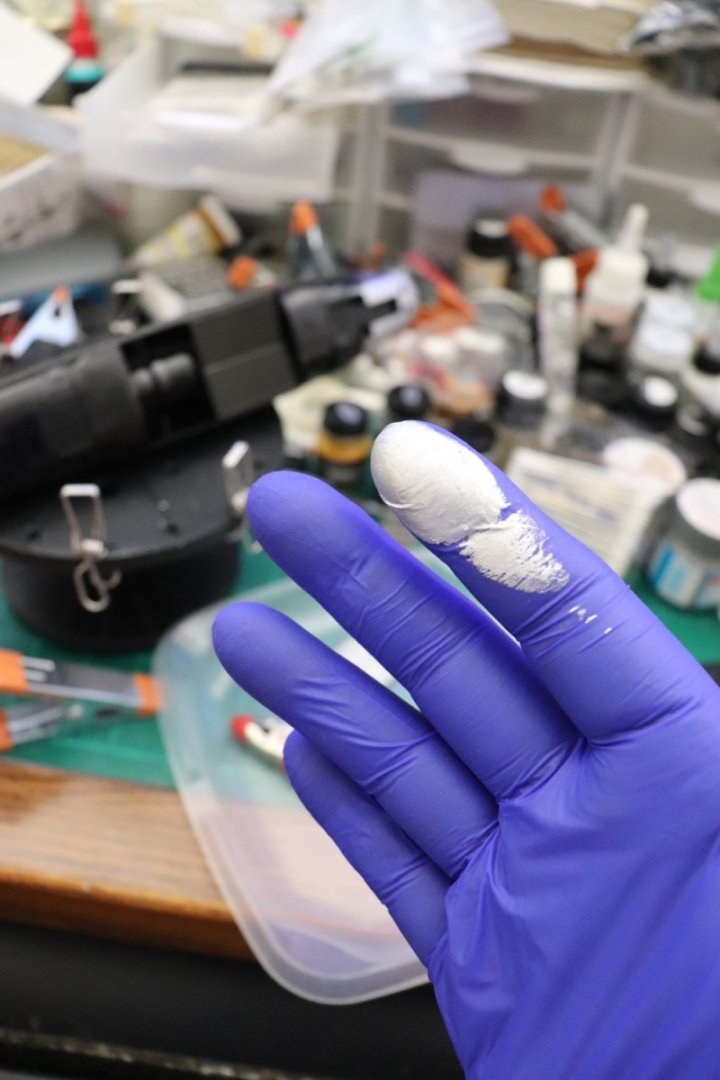
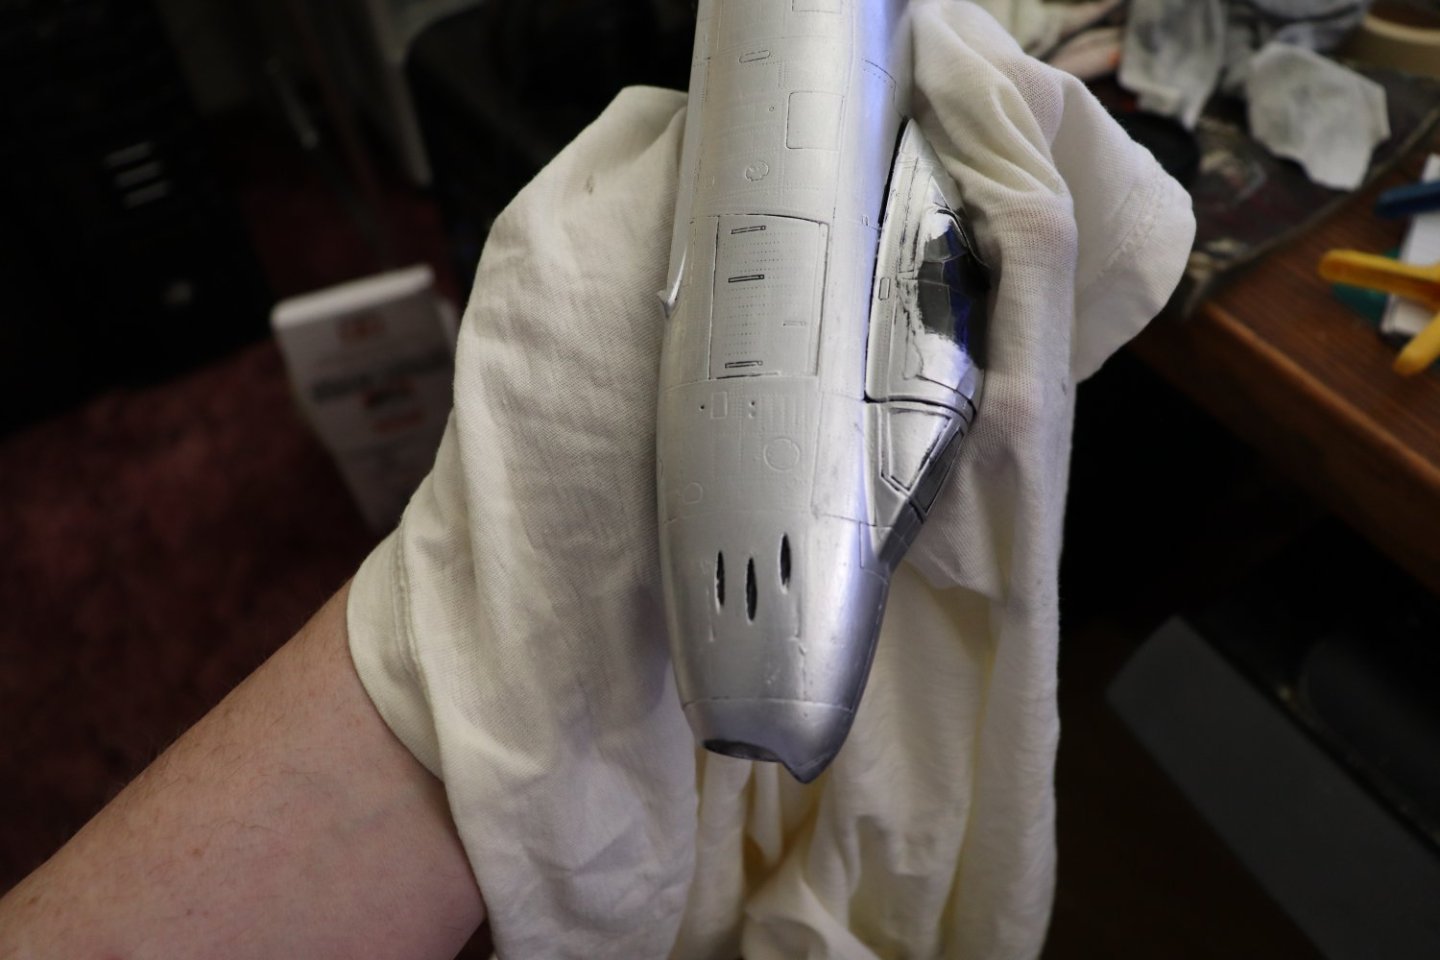
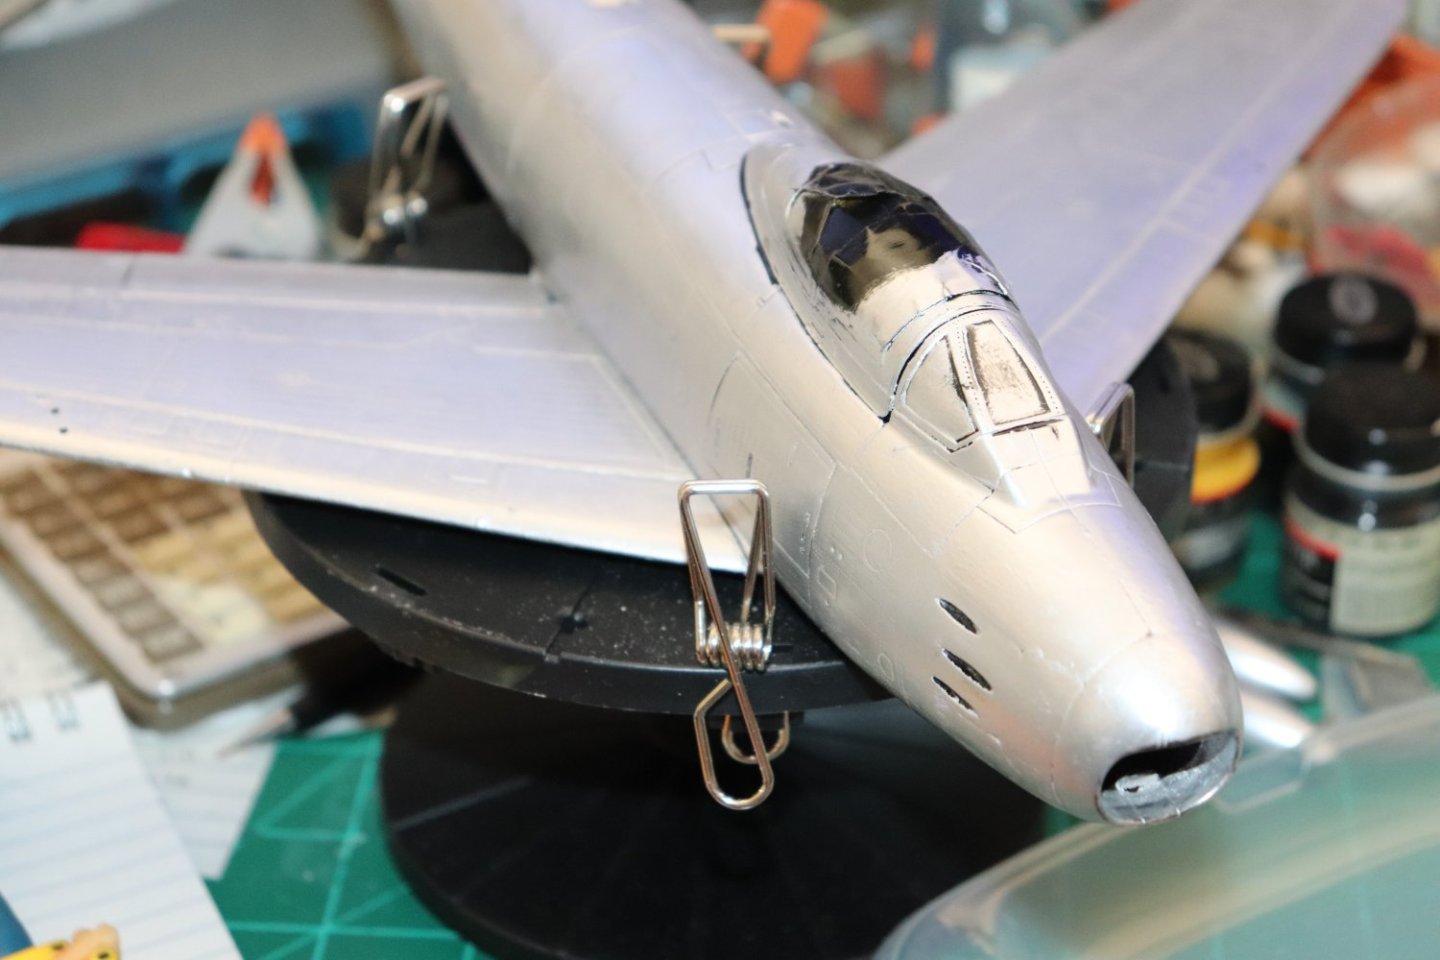
Update: Rub n Buff how I apply it... I start by using nitrile gloves.... You can do it without the gloves, but it does make whatever you touch a bit messy, it will come off the fingers with IPA... We first start by applying a dab on your finger... You then press the dab between your fingers to thin it out you want to apply as thin a coat as possible less is better in this application... Then, you just spread it directly on the gloss painted surface of your model... Do not allow it to dry, if you start to feel your fingers dragging on the surface the wax based Rub n Buff is dry, get another dab and repeat the process until your surface you want silvered is covered... Once covered, and allowed to dry for a time (I go overnight) use a fine grain, lint free cloth, (t-shirt cloth is what I use) and rub out the surface.... Just like applying paste wax to your car, rub it on, buff it out.... When done it will feel silky smooth.... the cloth will glide over the surface and be careful it's easy to drop your model... With the fuselage covered she looks like this... Of course there is some touching up that is needing to be done and that is done with a pointed q-tip which you can get at Hobby Lobby... What she looks like in the sunshine.... Onwards.....


- 585 replies
-
- 13
-

-

-
F-86F-30 Sabre by Egilman - Kinetic - 1/32nd scale
Egilman replied to Egilman's topic in Non-ship/categorised builds
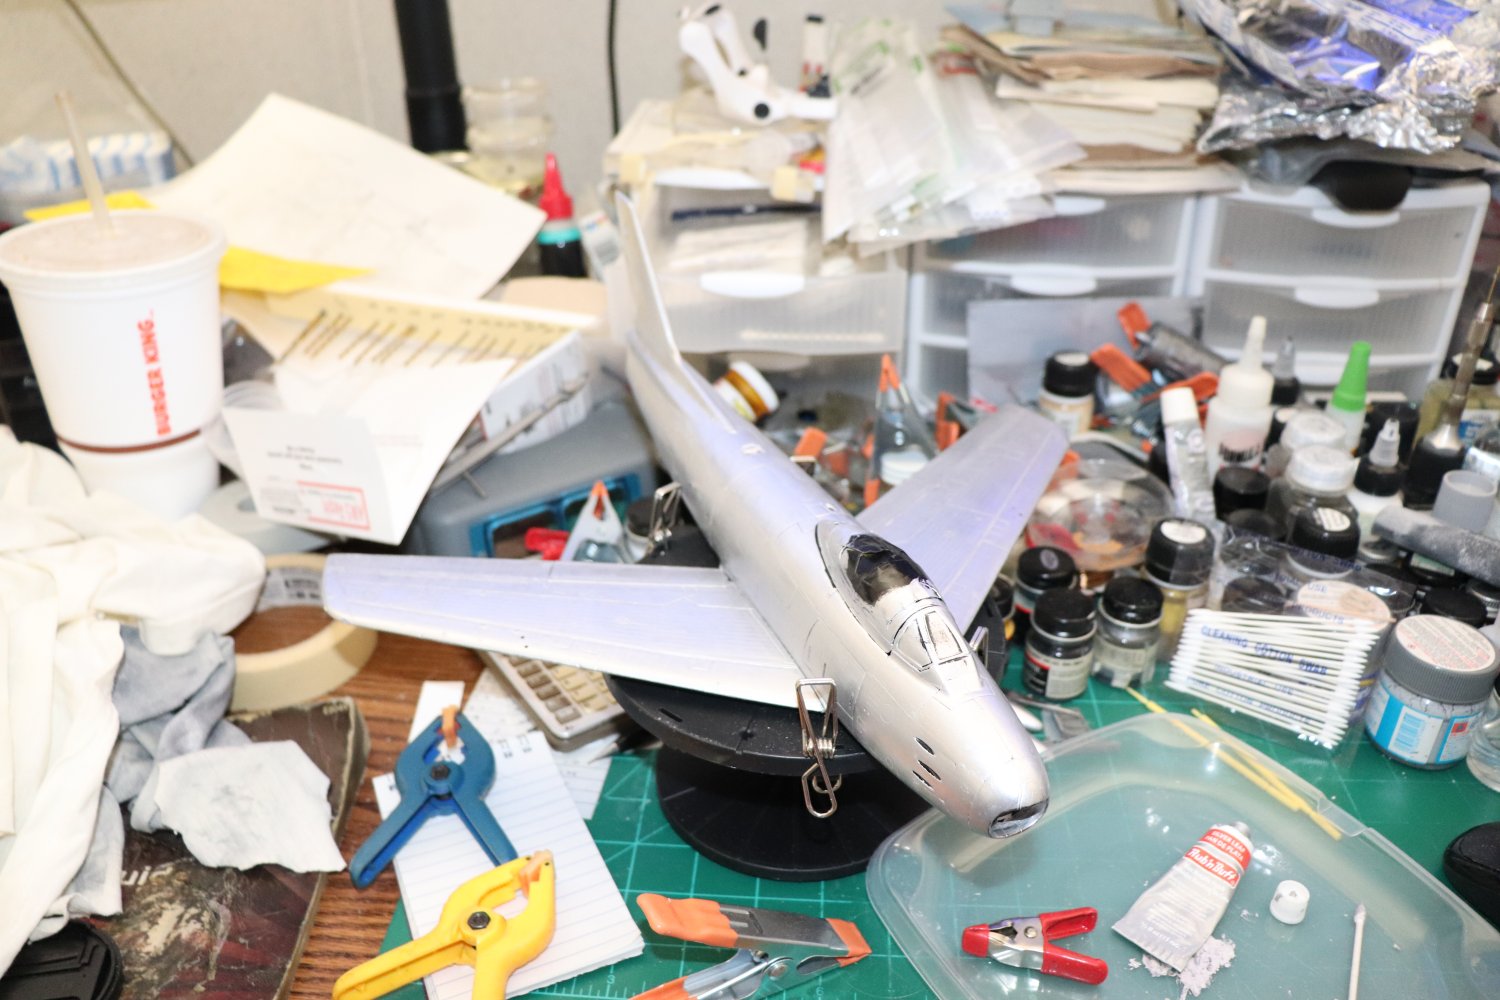
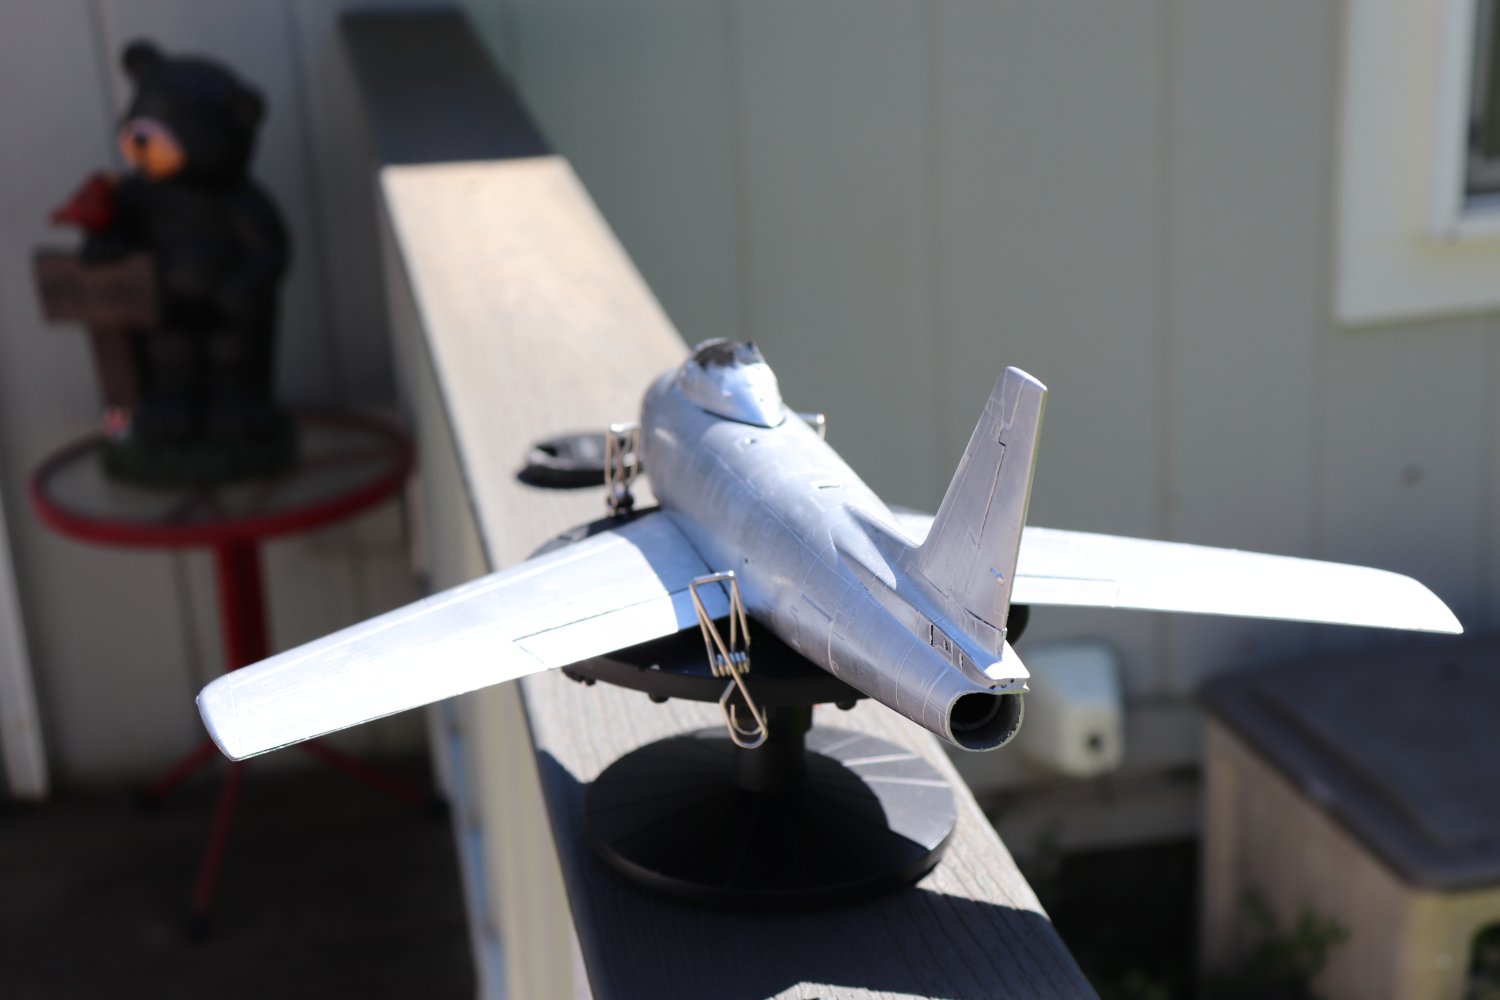
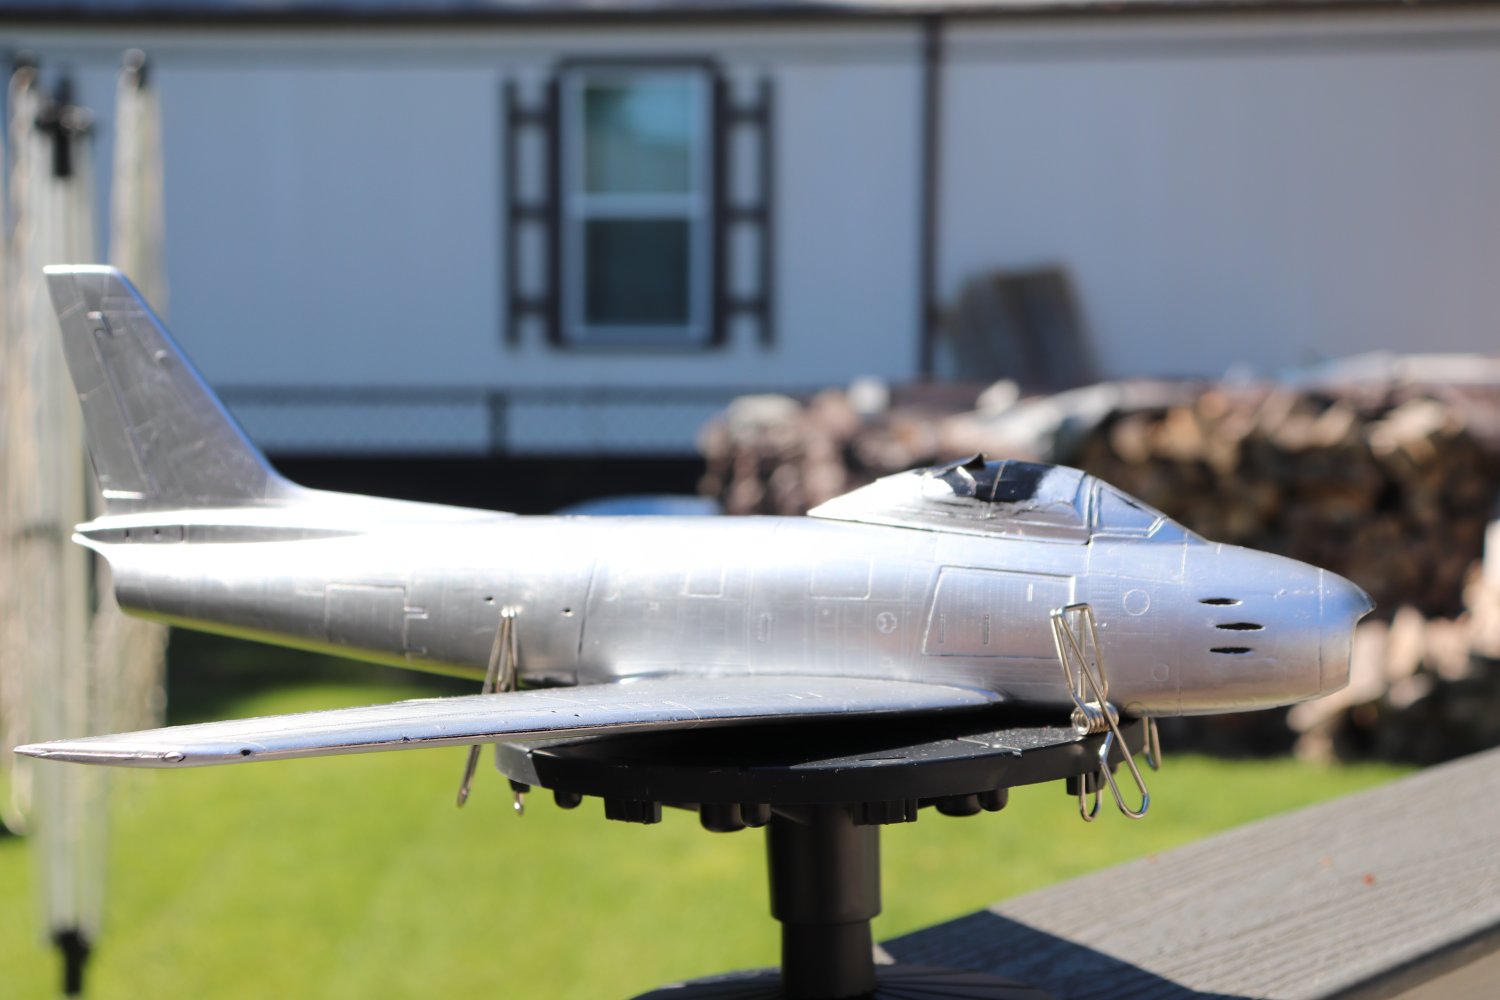
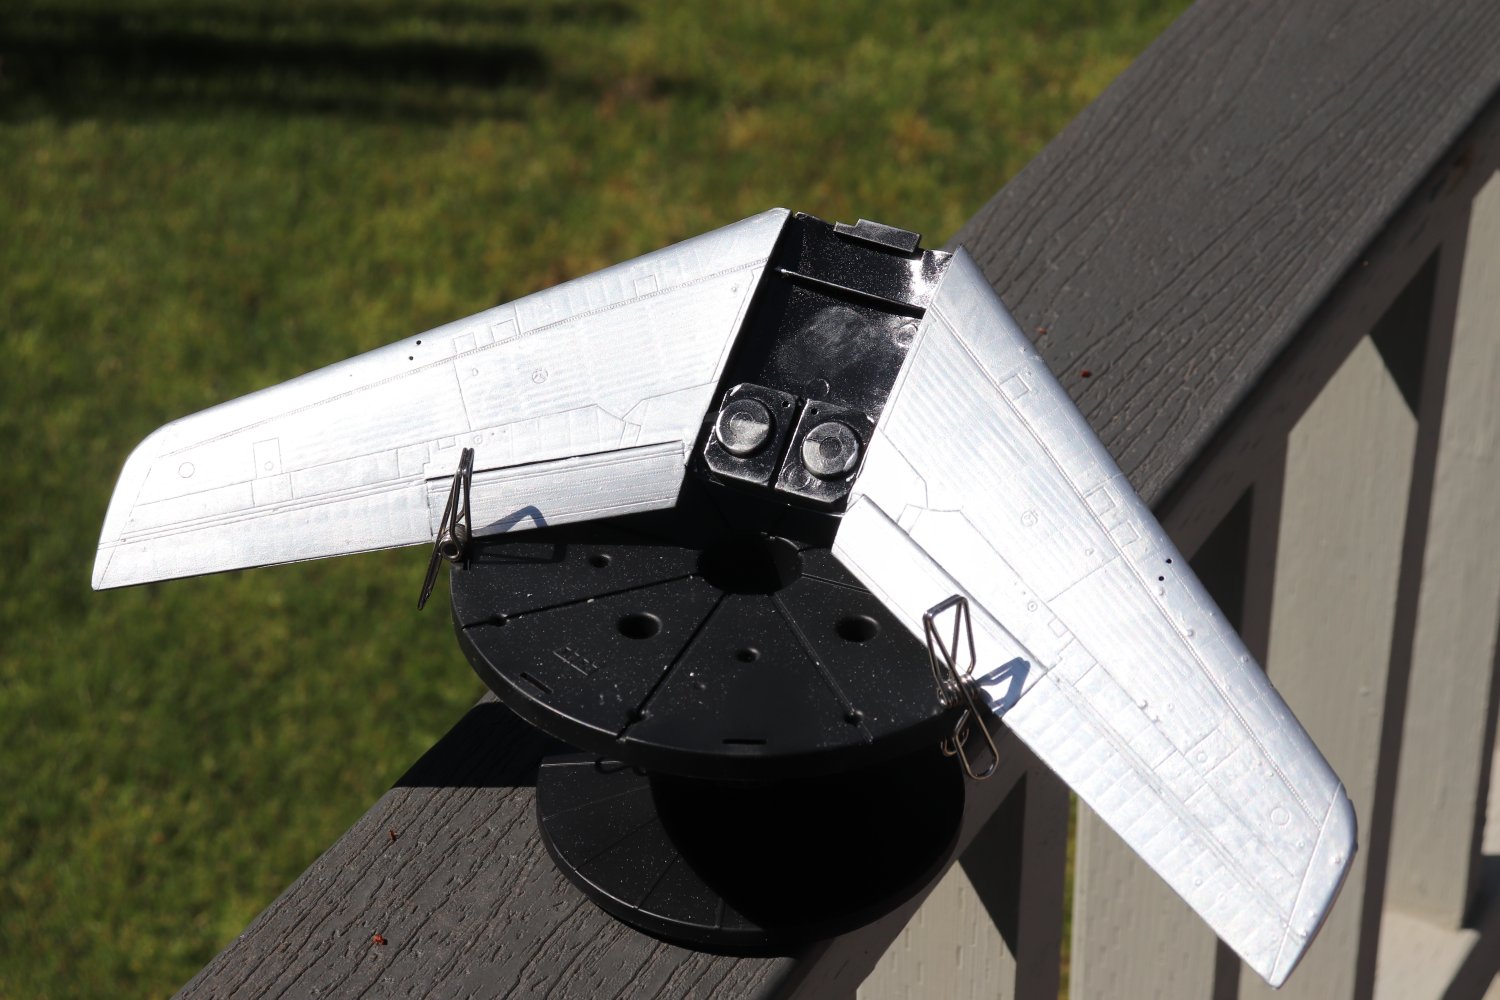
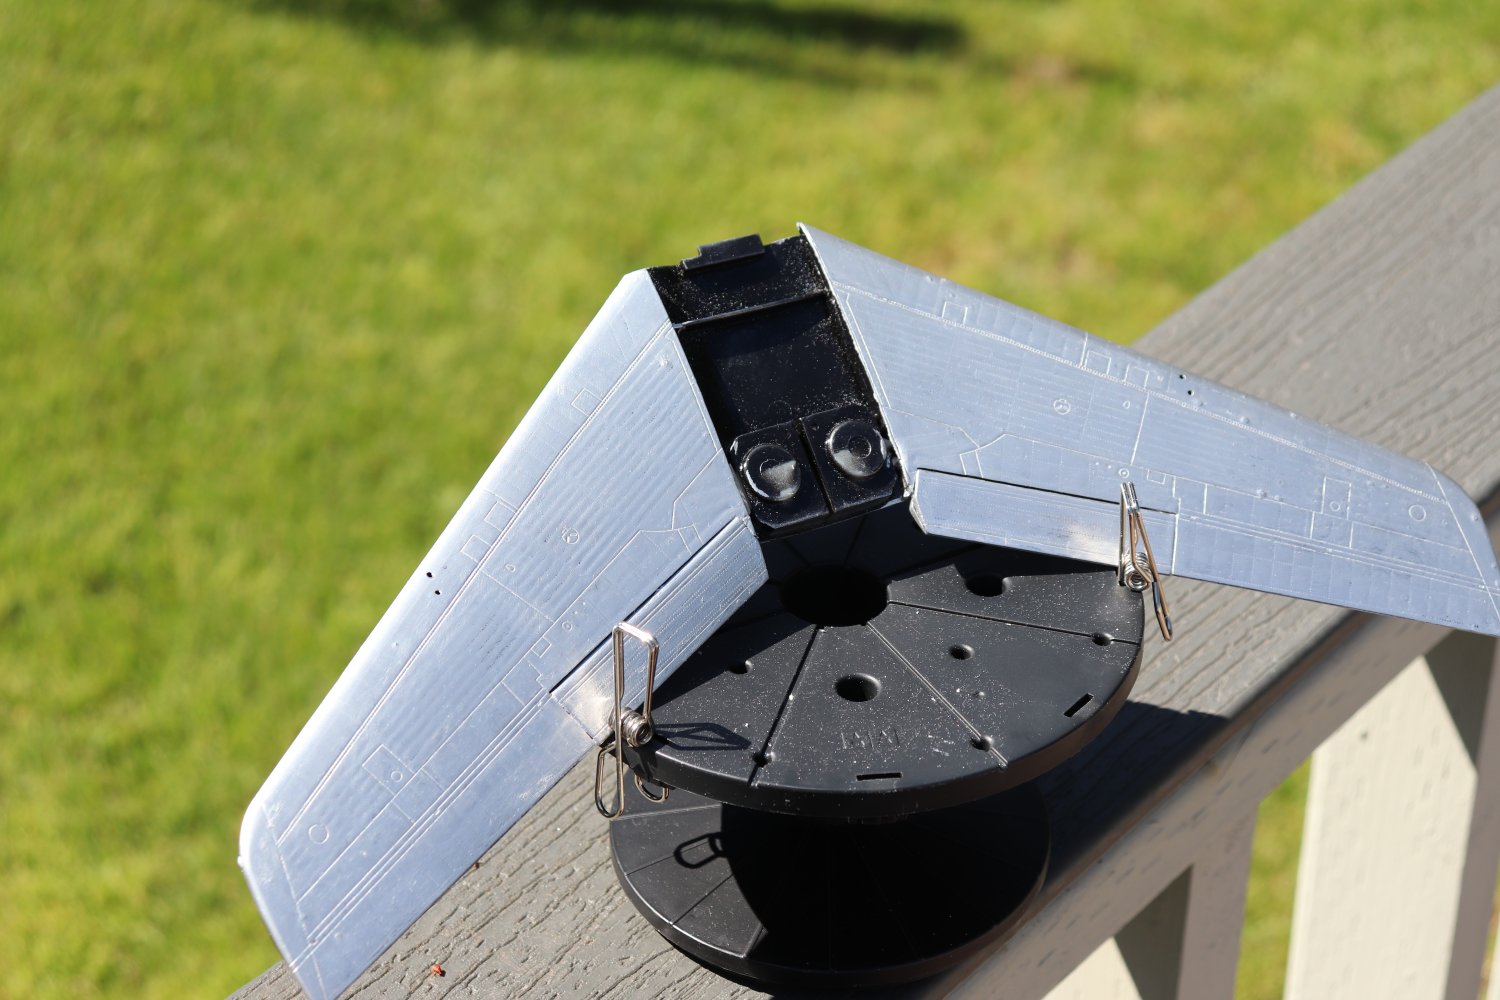
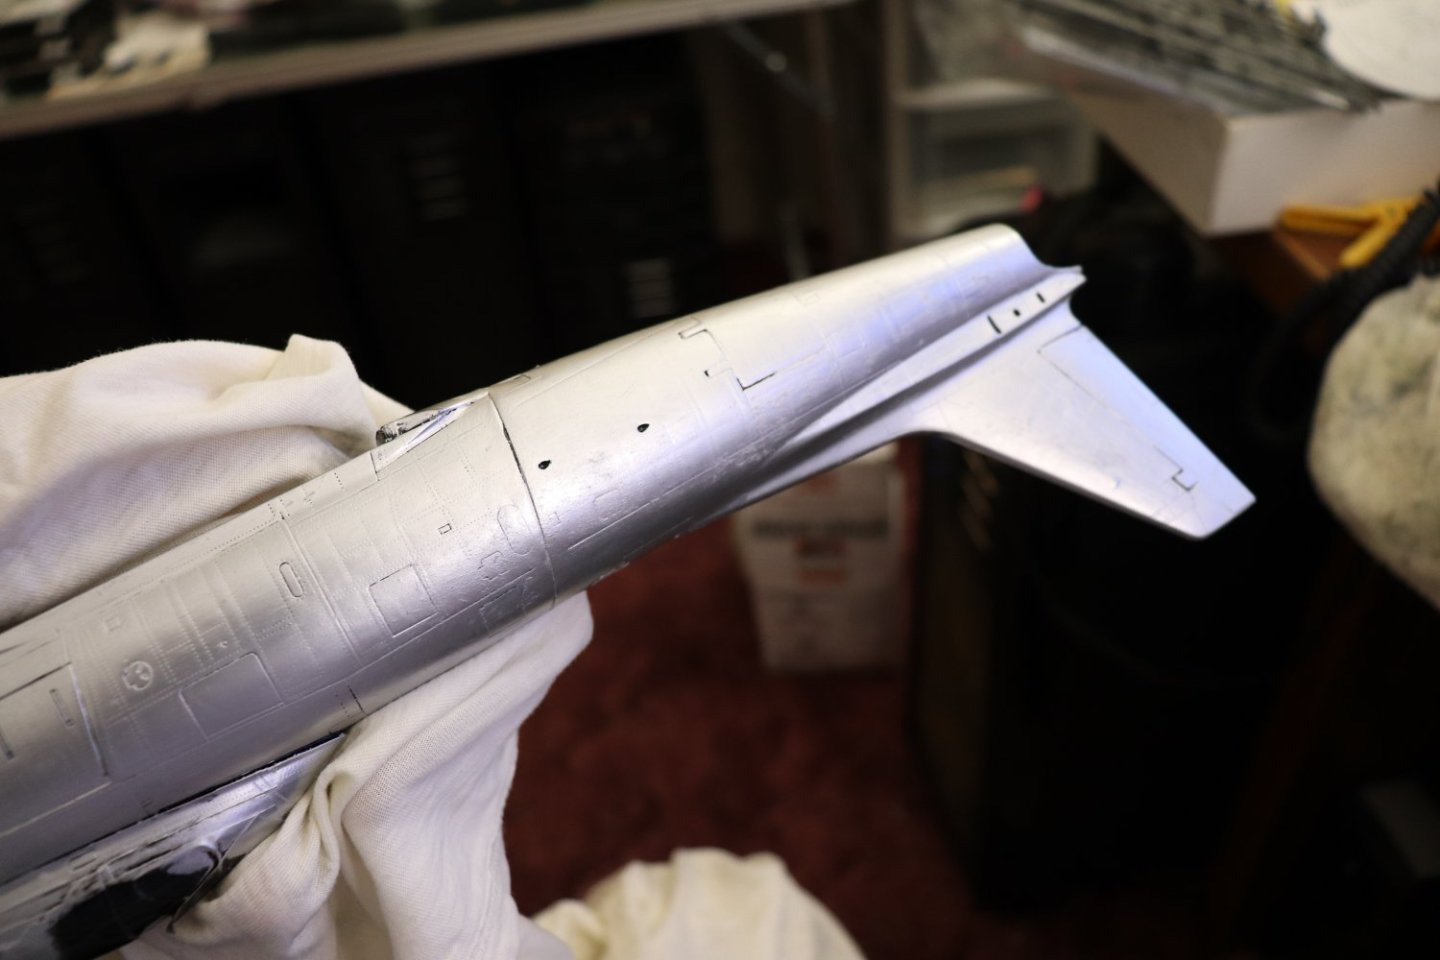
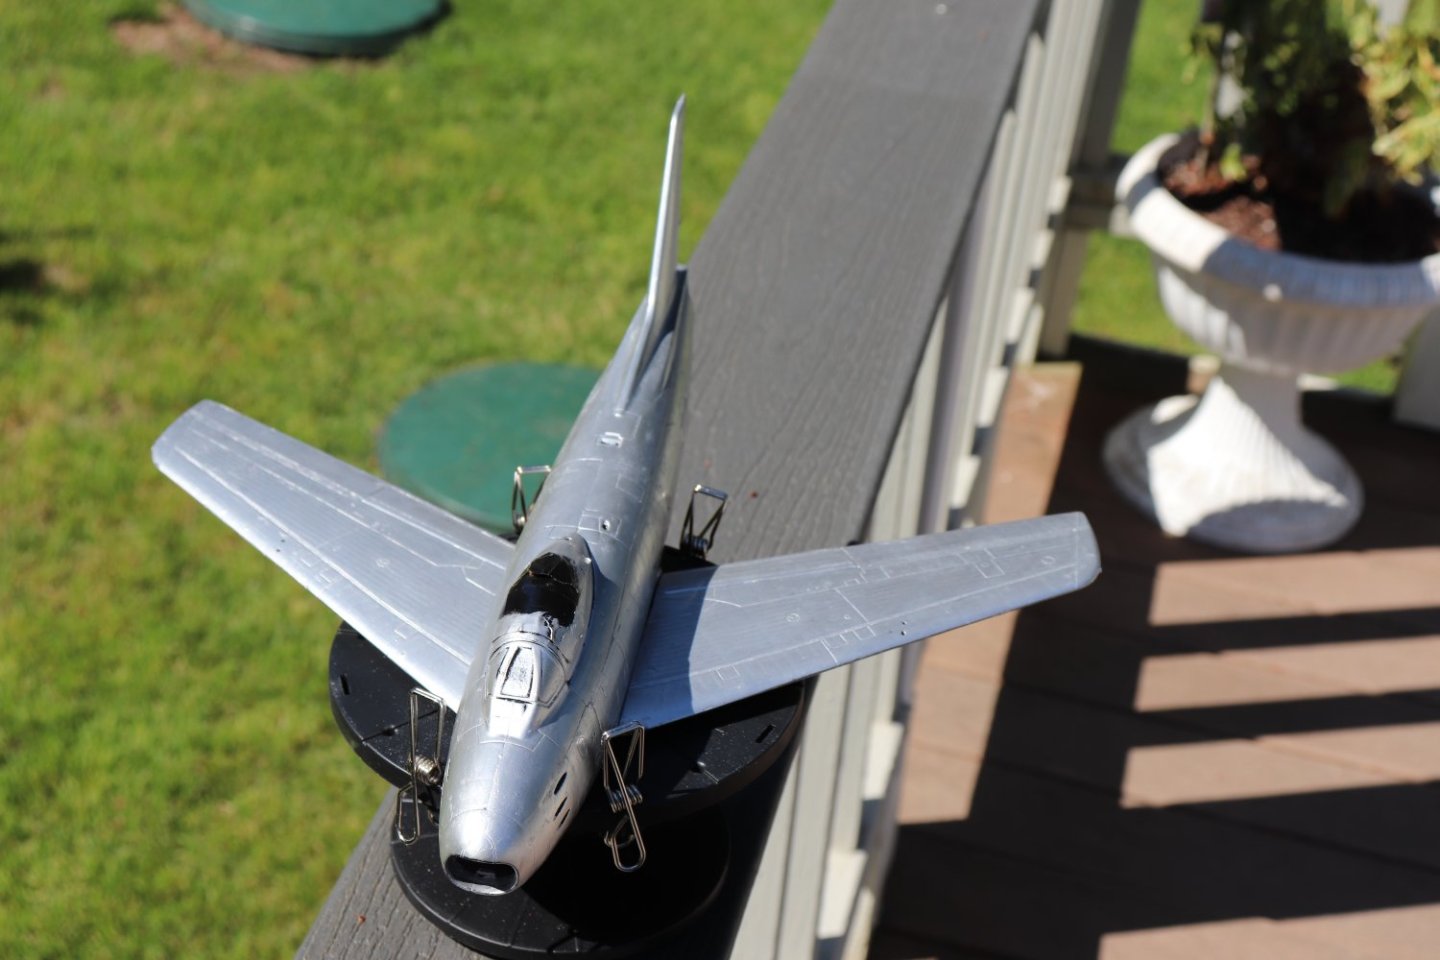
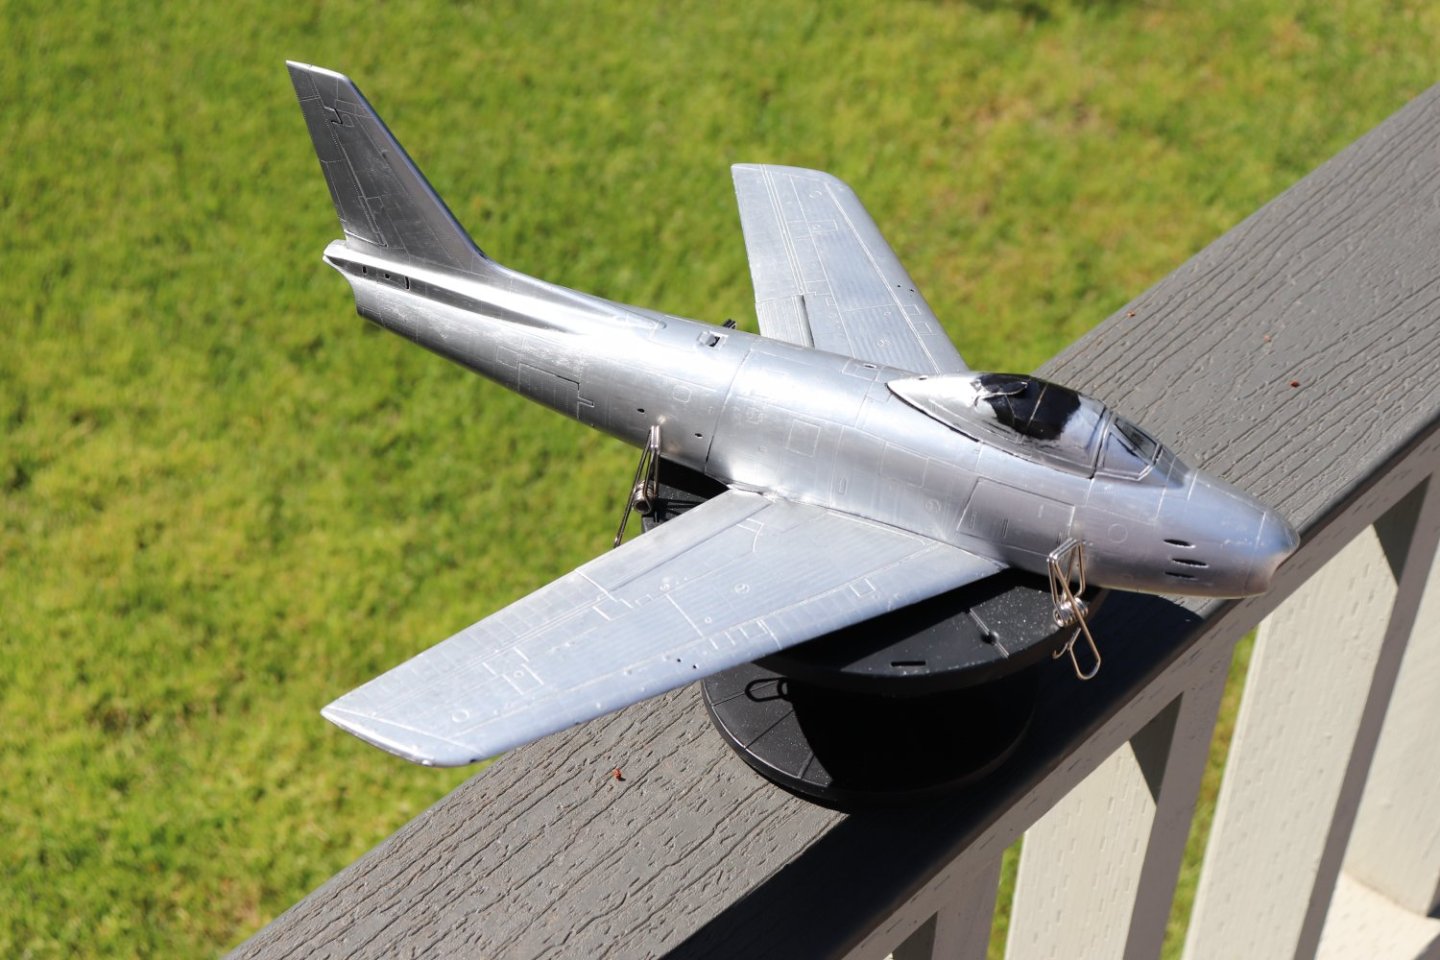
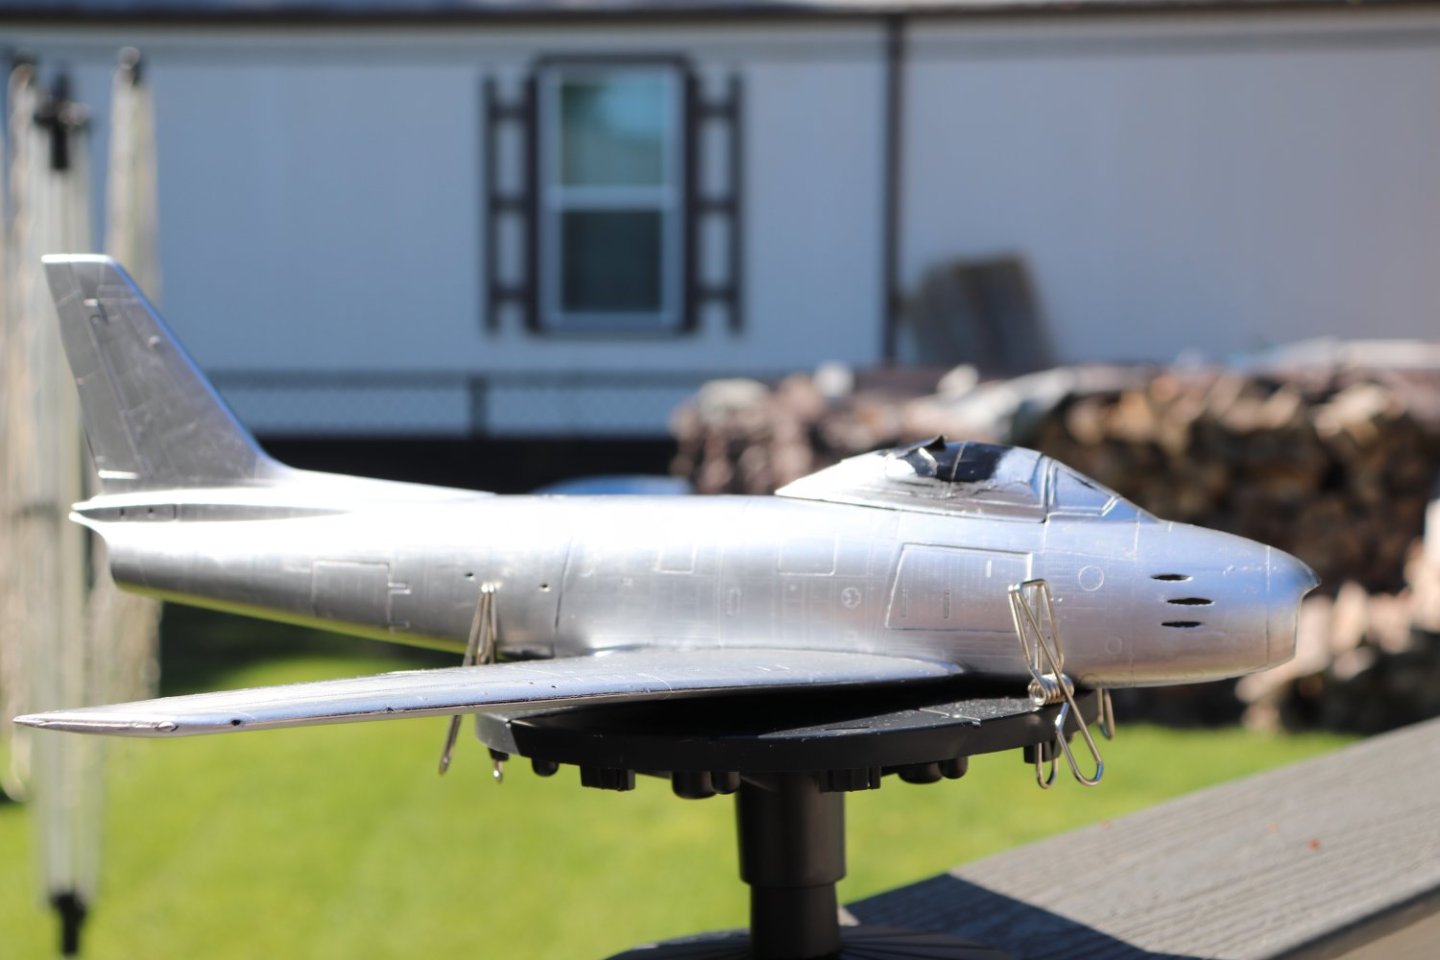
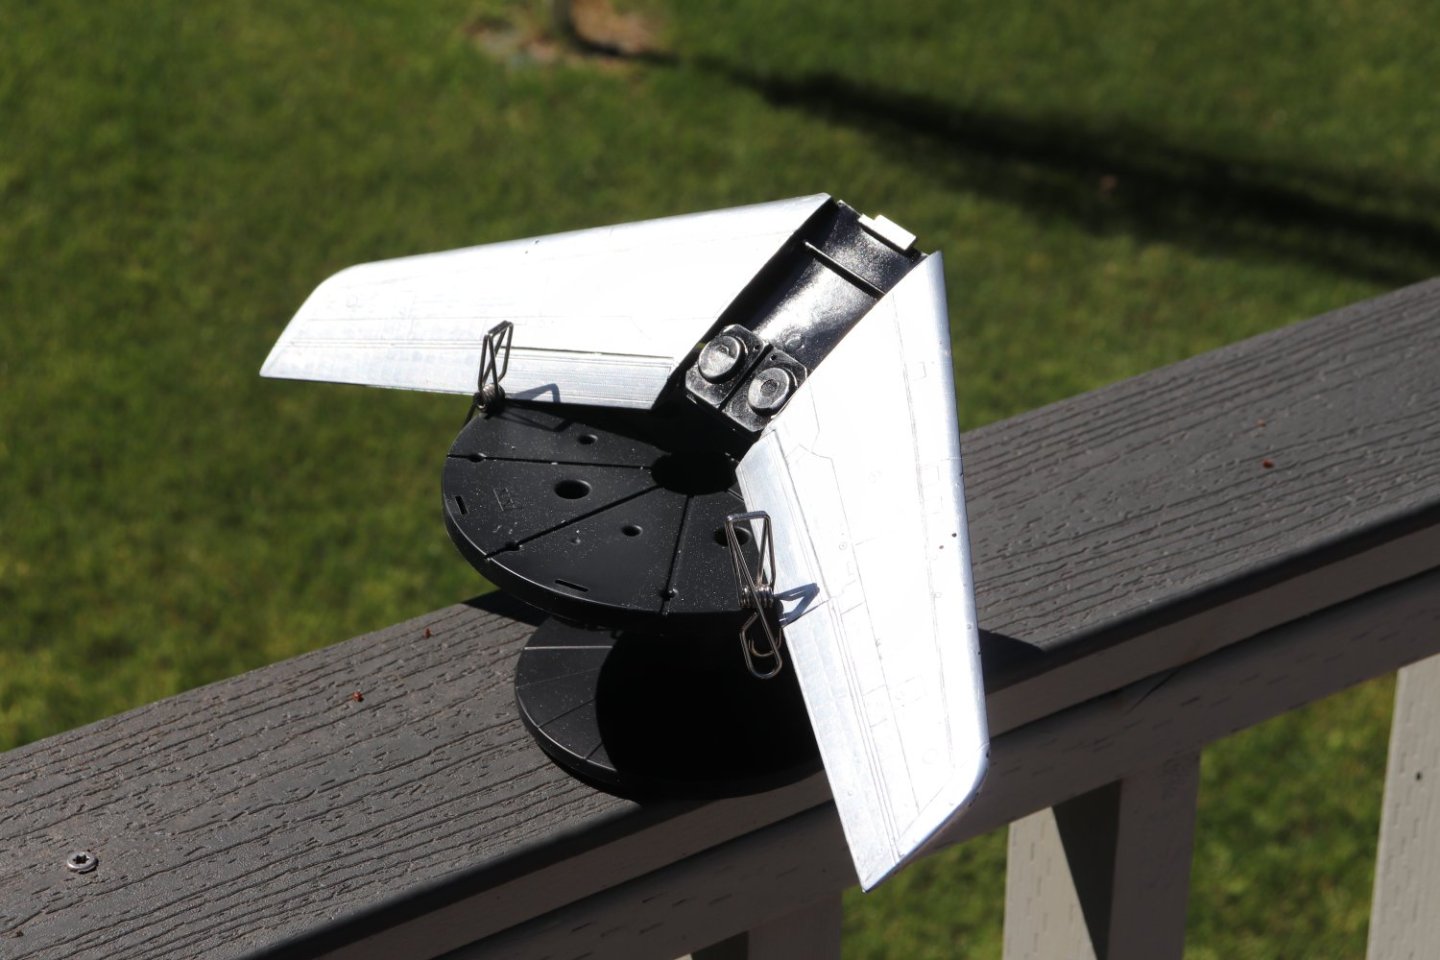
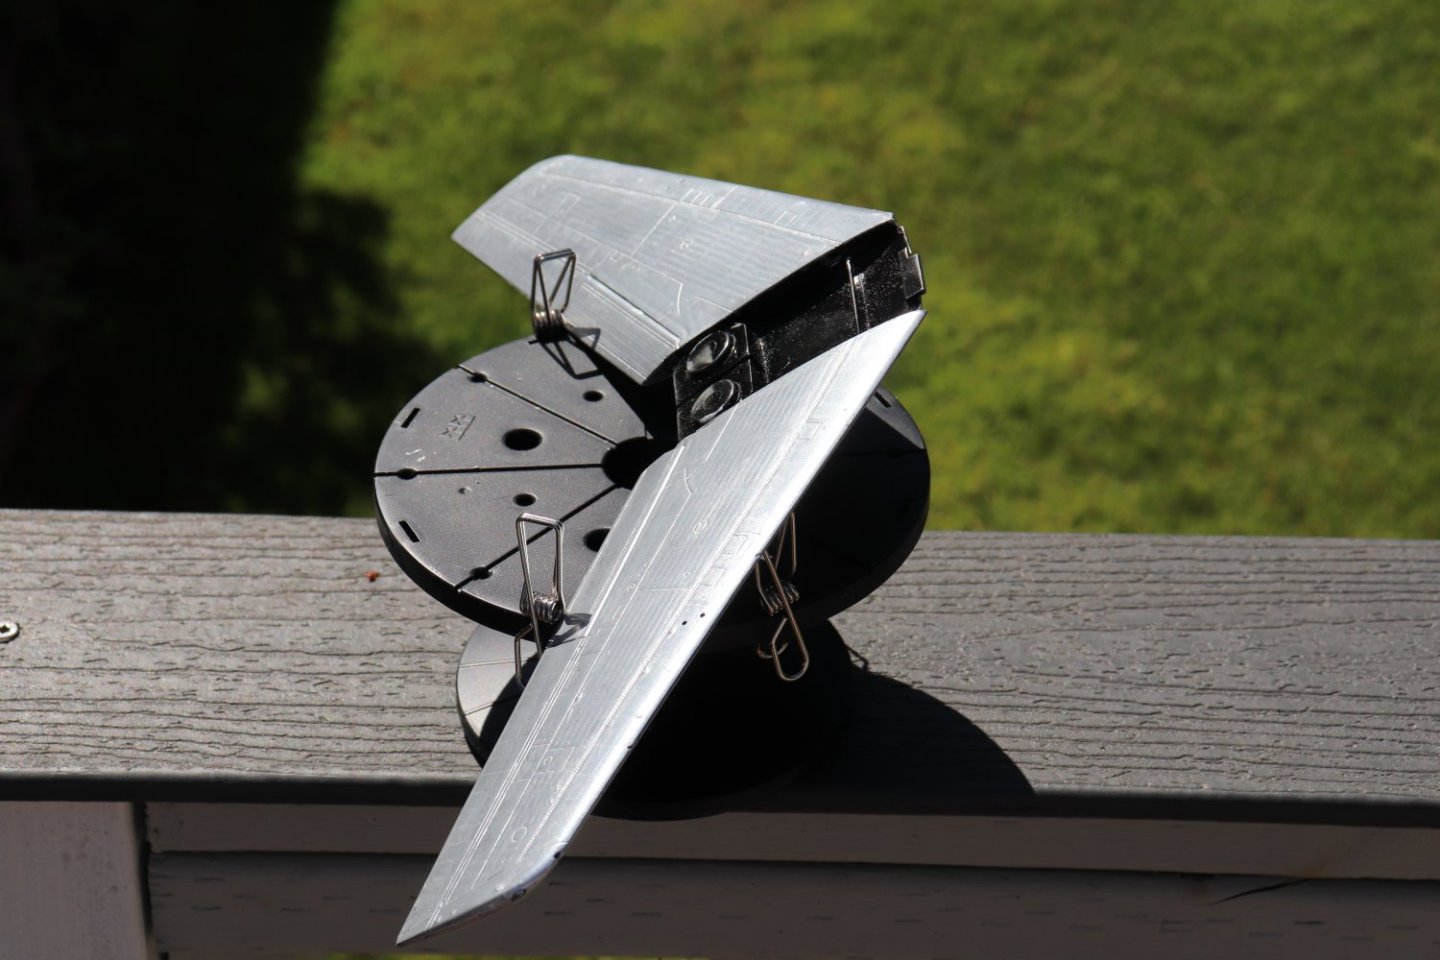
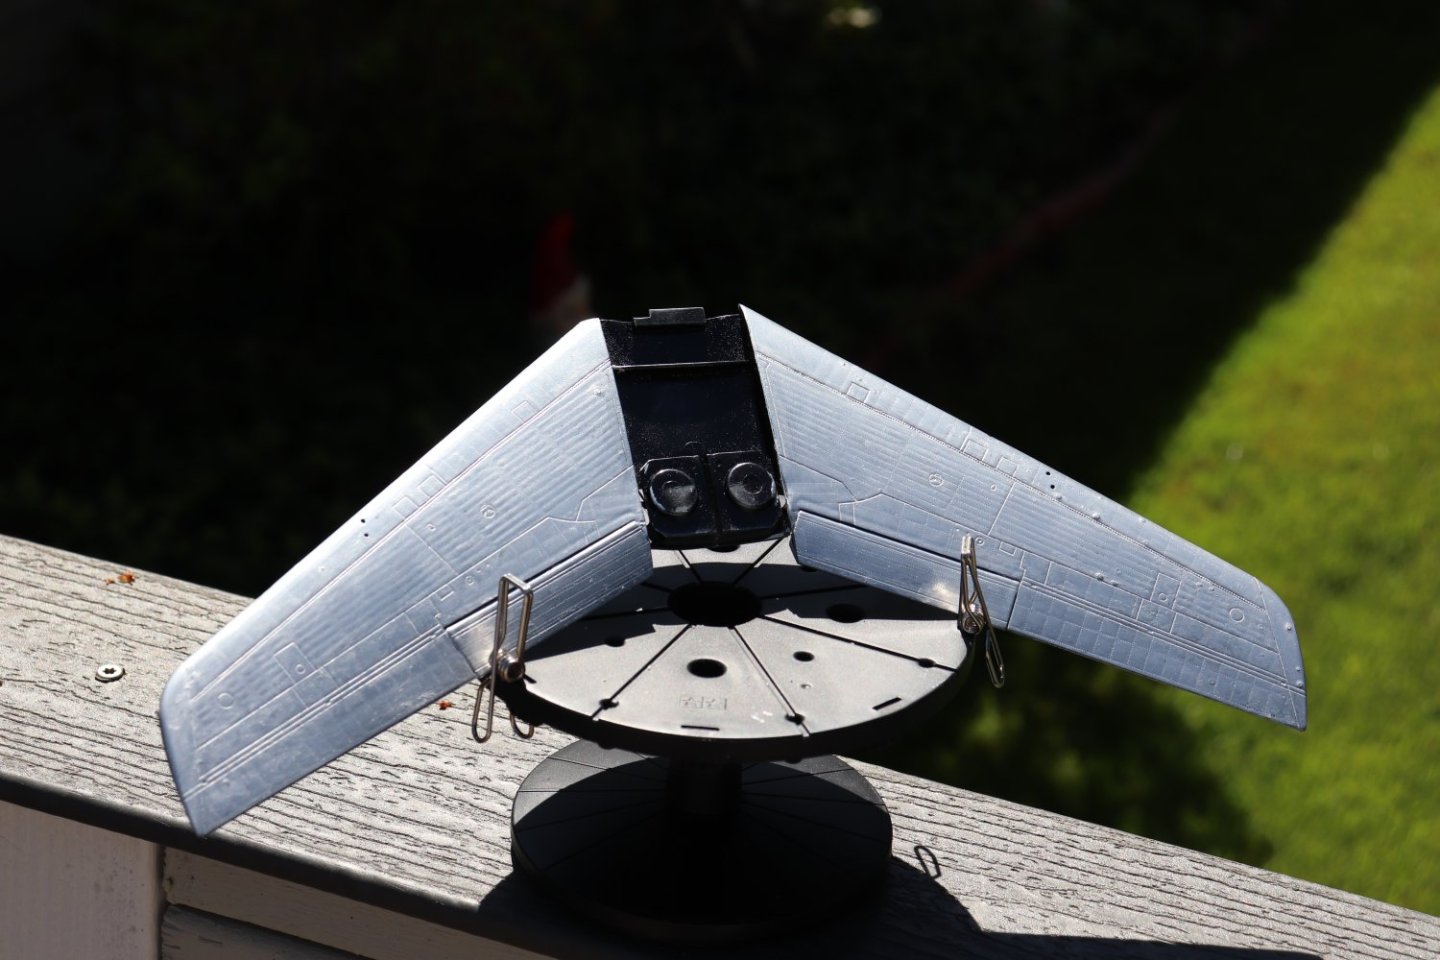
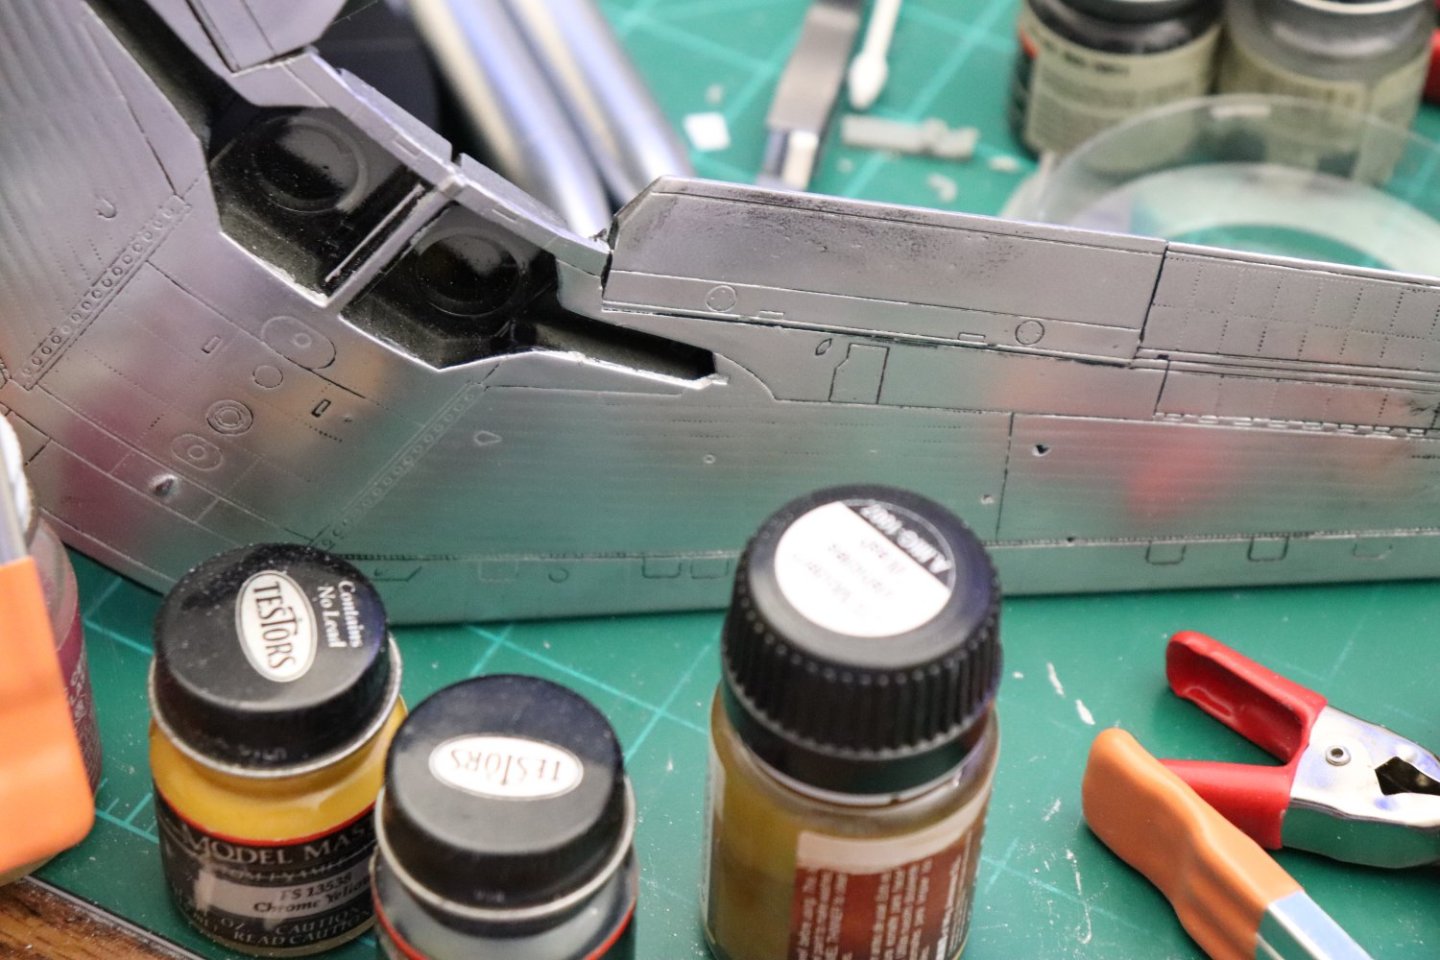
Thanks Dan... Yep it's there... A few pics... Bare plastic... You see nothing but the rivet lines.... But once the wing surface becomes shiny.... You see the stressed skin surface... It was pretty much invisible on the bare plastic... Look at the back wing, the rivet lines coincide with the very subtle stressed skin effect they somehow molded into the surface... And still being very subtle, it shows up under the silver, an effect of realism I still don't know how they did it.... It's absolutely amazing, nothing I've ever seen before.... They modeled stressed skin, and did it very effectively....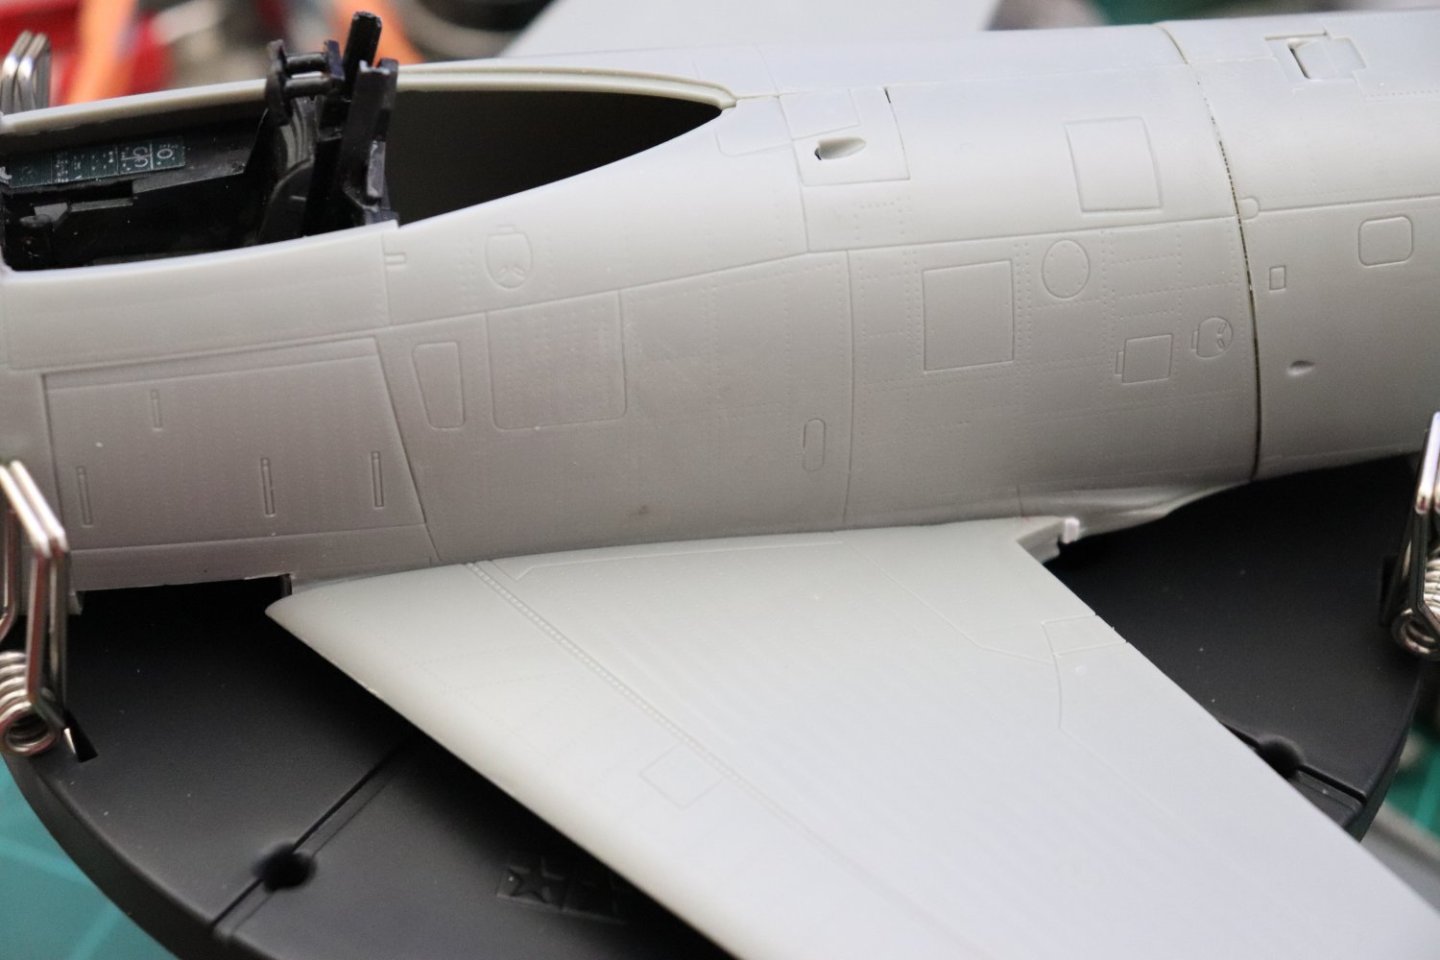


-
F-86F-30 Sabre by Egilman - Kinetic - 1/32nd scale
Egilman replied to Egilman's topic in Non-ship/categorised builds
Thanks Brother, it looks the part.... Appreciated Alan, sometimes perseverance pays off... I hope so my friend... now to replicate it on the fuselage... I don't know about the master part Mark, but at least I'm hoping I can take the mystery out of the Rub n Buff finish, It's been around for decades but no one has been willing to fully document it ... There is nothing else like it.... and nothing that will replicate it... -
Hey Brother... https://www.ebay.com/itm/275053236806 Ho Scale... reasonable price...
-
Beautiful shot my friend, ever think of a second career? {chuckle}
-
It's been a couple of decades since I've been in a machine shop My friend, brings back memories.... Modern Irons are a bit better in the quality department than the stuff they used back in the day, but yeah I can remember some stuff that broke everything that touched it... (except the diamond dusted cutter) I'm in, pulling up the comfy chair as I speak...
-
Like I said straight of the Sinai peninsula and into your shrinkage machine for your shelf... Another gift from the master armorer.... Thanks my friend...
-
The venerable ol' D7, the tractor that built America... One of the most successful crawler designs in history.... I'm in brother...
-
F-86F-30 Sabre by Egilman - Kinetic - 1/32nd scale
Egilman replied to Egilman's topic in Non-ship/categorised builds
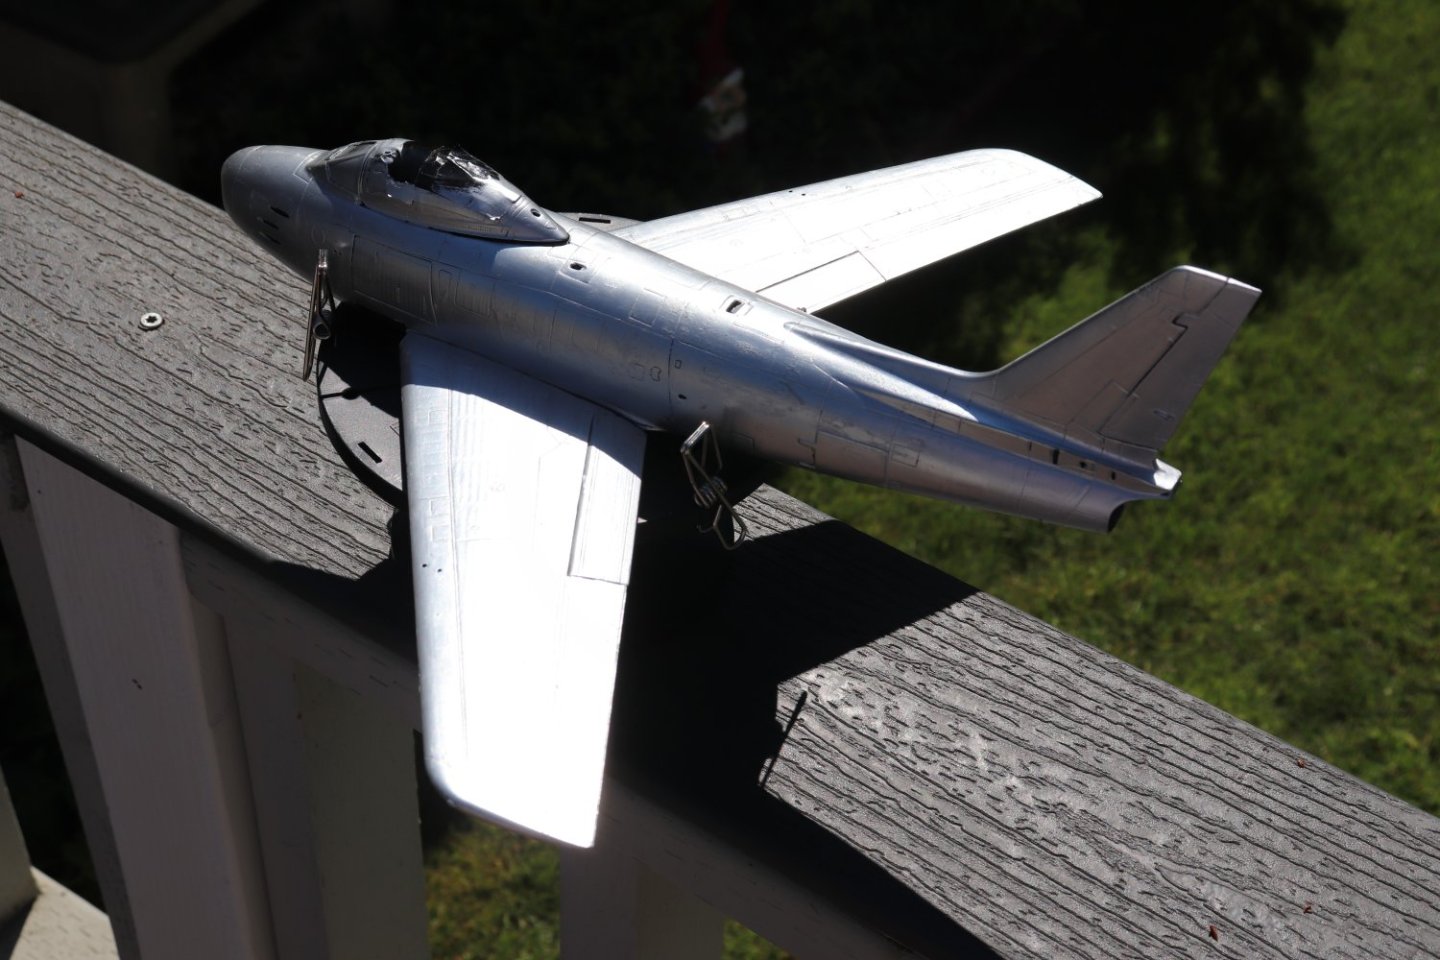
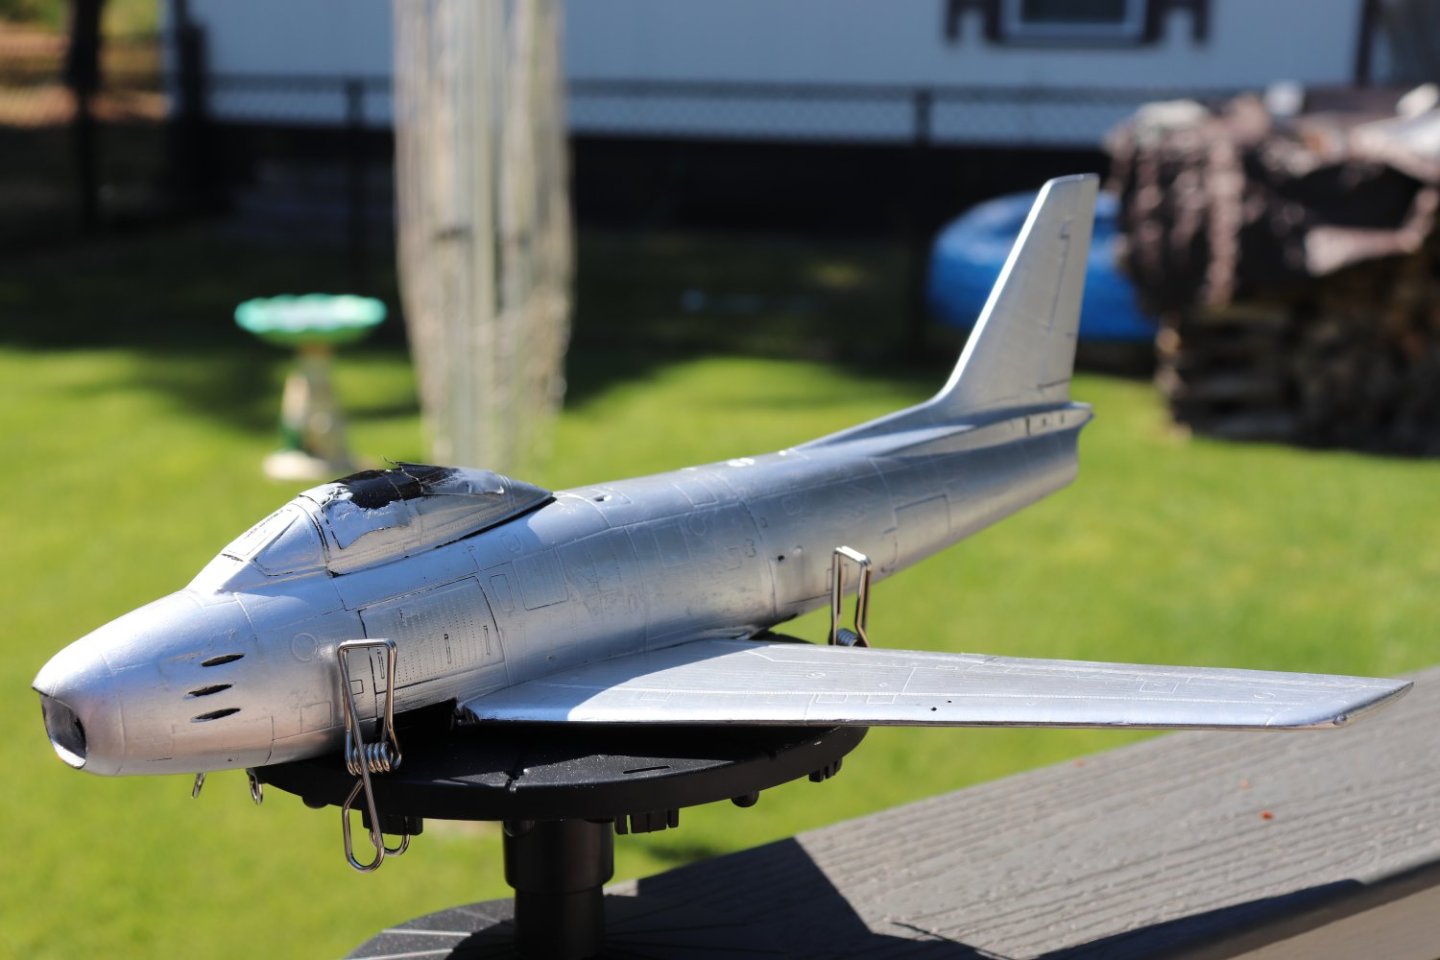
Thanks Jav!!! This afternoon, the sun came out.... So I took the wing out to back porch to get some natural sunlight shots to confirm what I think I have... Direct reflection... Now she should start turning bluish silver as the aspect changes.... I think I've found the secret to doing this finish.... That is perfect coloration which changes as the light conditions and angle changes.... YAY TEAM!!!! When I do the fuselage I will spell out the steps to getting this effect... It looks even more stunning in real life.... Looks real... I'm pleased with it....

- 585 replies
-
- 14
-
-

-
F-86F-30 Sabre by Egilman - Kinetic - 1/32nd scale
Egilman replied to Egilman's topic in Non-ship/categorised builds
Second RnB coat applied to the upper wing surfaces.... Looks good from here, consistent aluminum sheen with slightly darker splotches in streaks, I can't wait to get this out in some real sunshine... With high flash to show the reflectivity.... The slightly darker streaks wash out in heavy light... It literally glows!!! Yea Team! that is exactly the effect I was looking for.... Real sunlight will tell the tale.... Got to get the second coat on the bottom and then on to the fuselage and empennages.... I think it's going to turn out nice..
- 585 replies
-
- 16
-
-
-

-
F-86F-30 Sabre by Egilman - Kinetic - 1/32nd scale
Egilman replied to Egilman's topic in Non-ship/categorised builds
Yes Thank you brother and Thanks to you all!!! it is really really appreciated.... Yes the details that showed up under gloss black are still showing under the silver, it absolutely floors me that I couldn't see it when in bare plastic, hopefully I can do it justice... -
F-86F-30 Sabre by Egilman - Kinetic - 1/32nd scale
Egilman replied to Egilman's topic in Non-ship/categorised builds
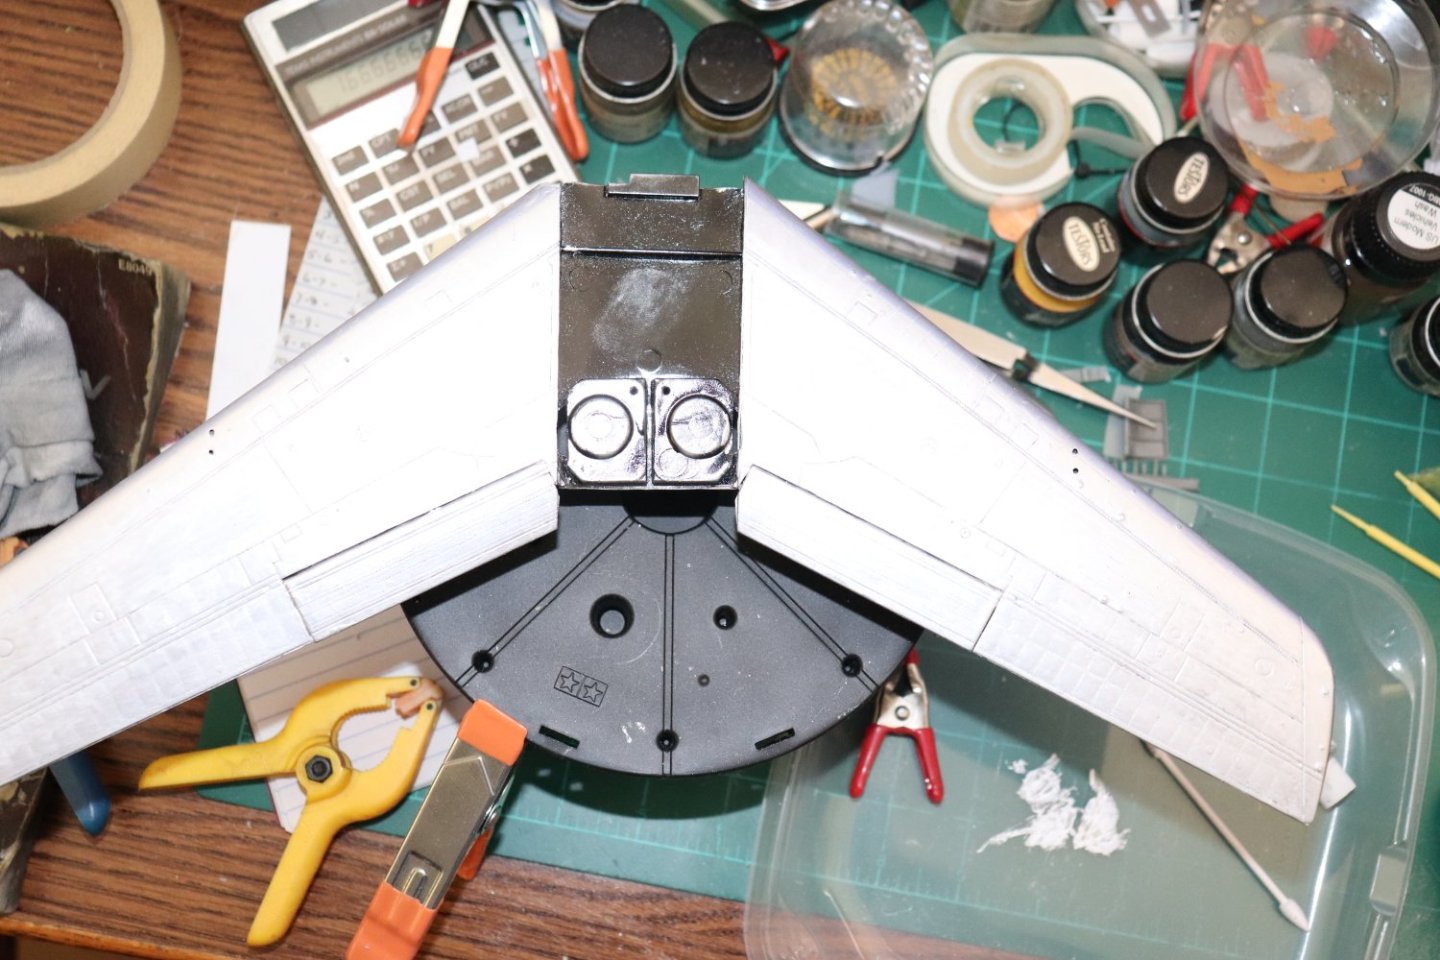
This was an all metal bird as you well know, and flying surfaces were built out of the same stuff they sheeted the fuselage and wings with, .030 T-80 aluminum... So the flying surfaces are the same color as the main structures... The only places they used a different material was the gun ports which were made of a stainless steel casting and functioned as the the barrel end support to keep them from vibrating around when fired... It had to be stout, and at the tail they had a 16 gauge pressed steel ring connected to the main longerons to act as a tailpipe support... Since it made direct physical contact to the engine tailpipe and frame of the aircraft it had to be stronger and able to withstand the heat transfer from the tailpipe... I will be using pewter coloration for both as in certain light conditions you don't notice them but in others they stand out like neon signs... So I'm going for a little show without overpowering the aluminum surrounding them... The look I'm going for.... They both show on the outside of the aircraft and were polished like the aluminum was... the only place we get heat discoloration is the inside of the tailpipe fairing itself, it took on that blackish brown heat cycle color, but you will hardly see it as the kit provides the red FOD cover for the exhaust as well as the nose... All you will see is a little brownish ring on the inside under the tail for the exhaust... They were very clean aircraft, and they took pride in keeping them that way...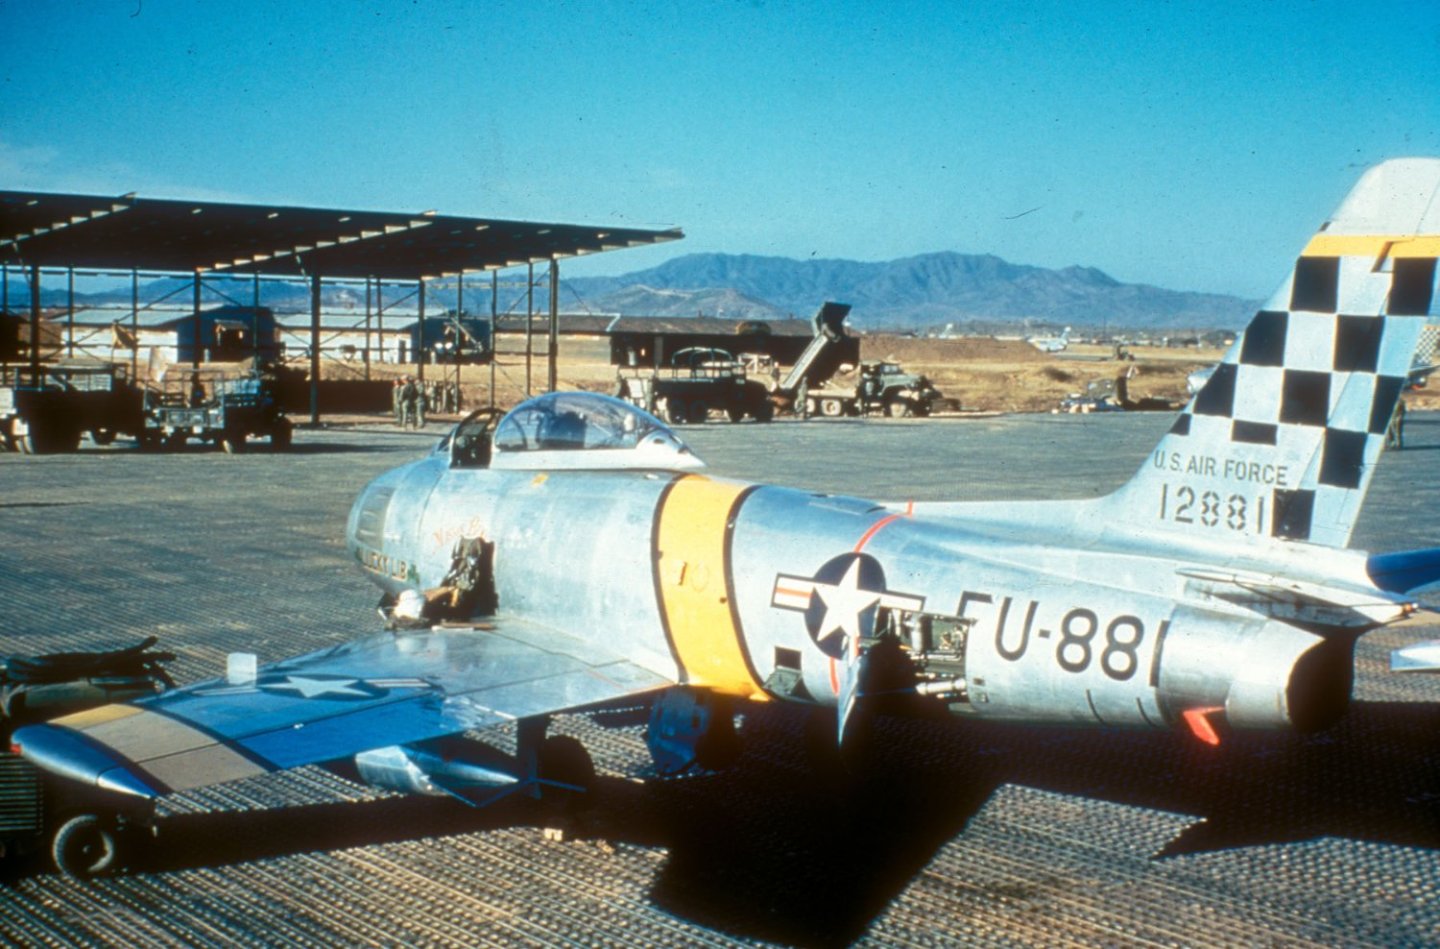
-
F-86F-30 Sabre by Egilman - Kinetic - 1/32nd scale
Egilman replied to Egilman's topic in Non-ship/categorised builds
Thanks Ed, I certainly hope it does.... -
F-86F-30 Sabre by Egilman - Kinetic - 1/32nd scale
Egilman replied to Egilman's topic in Non-ship/categorised builds
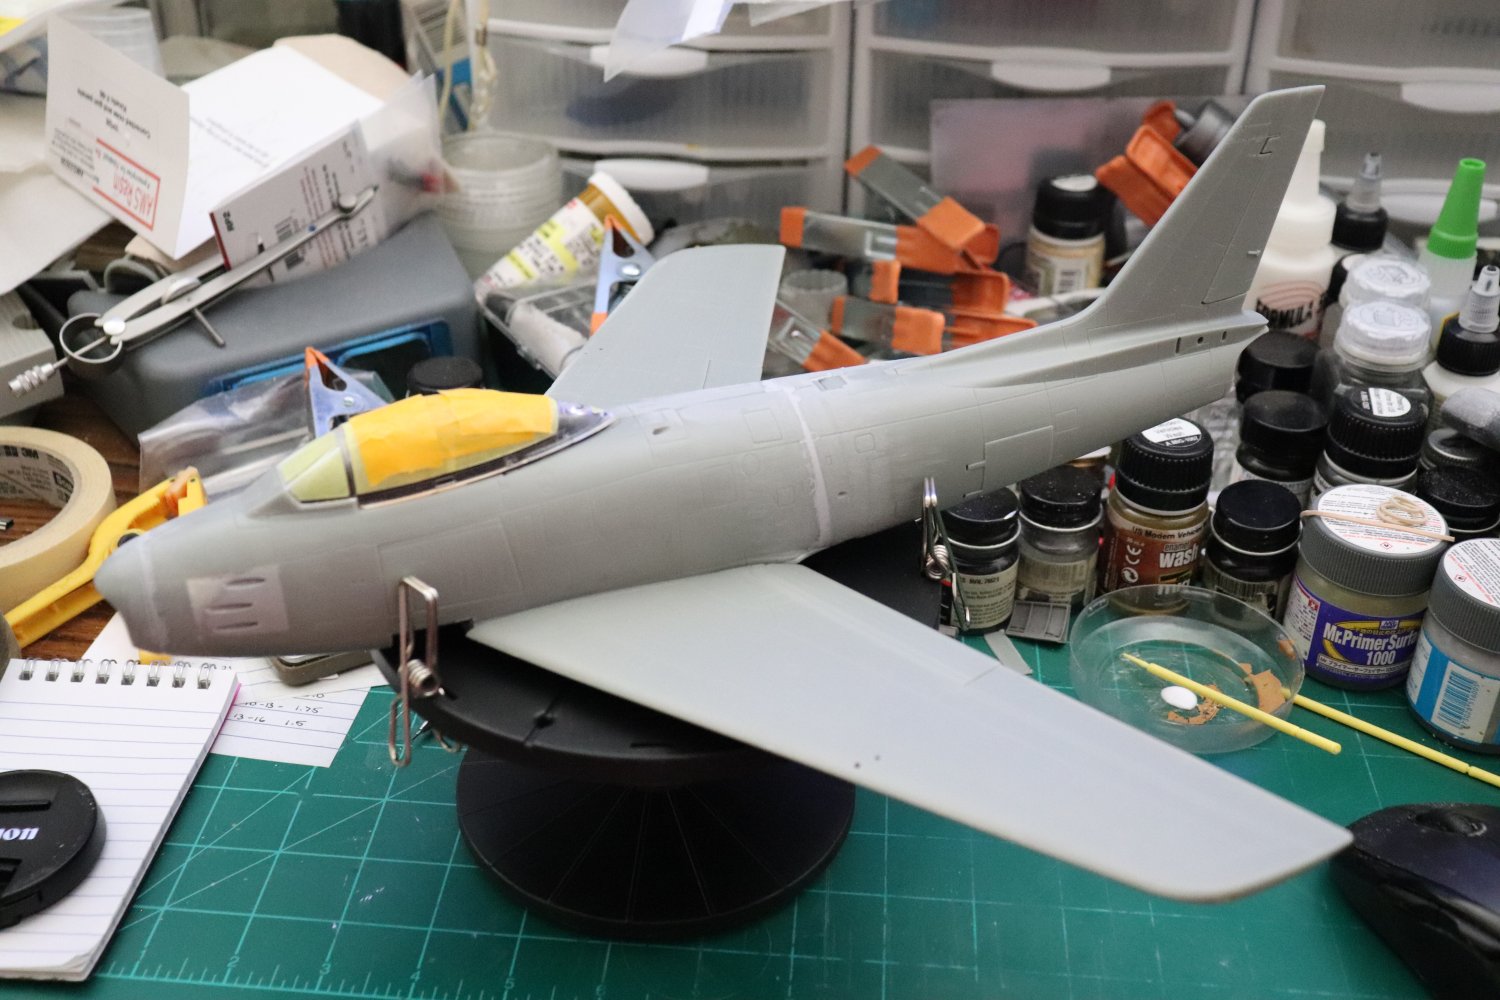
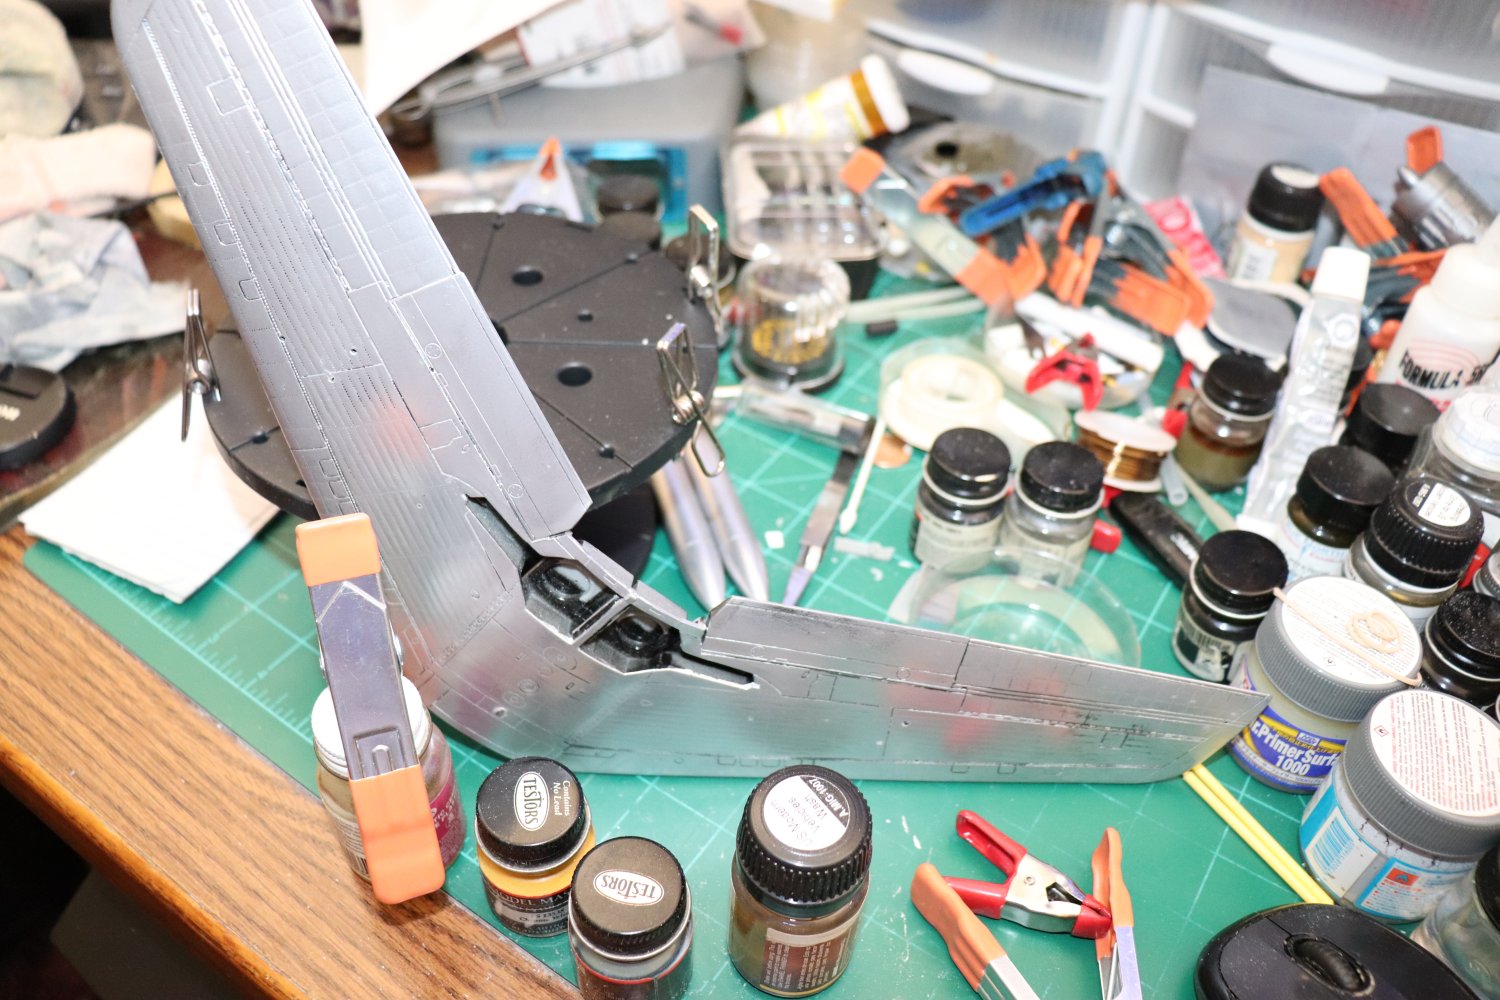
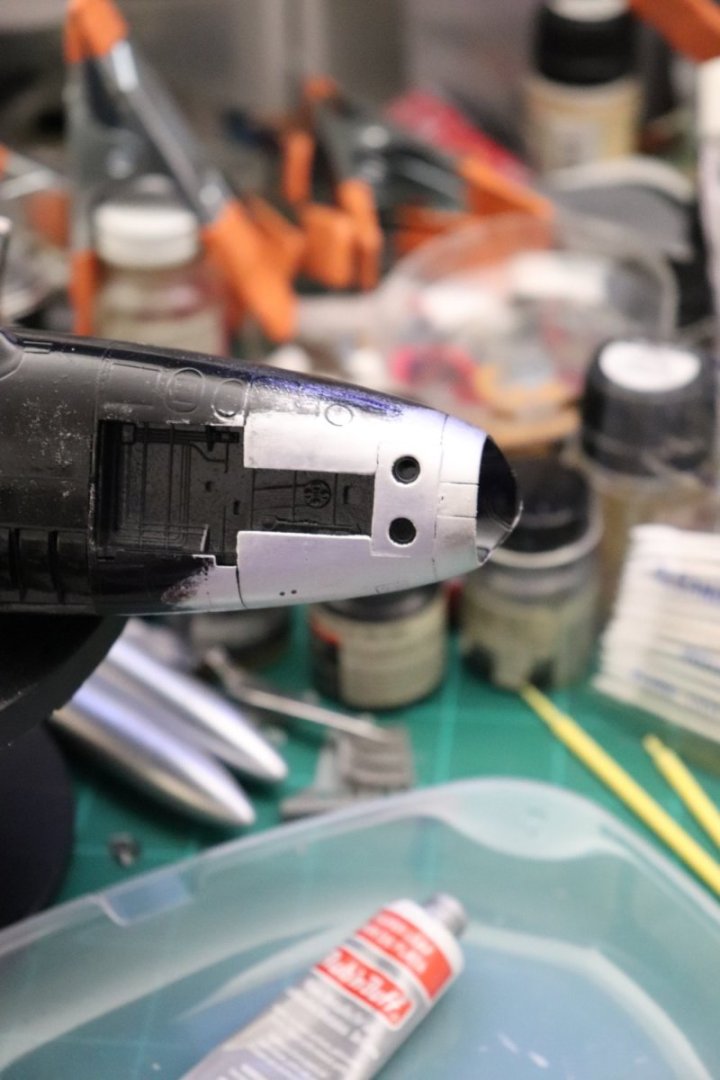
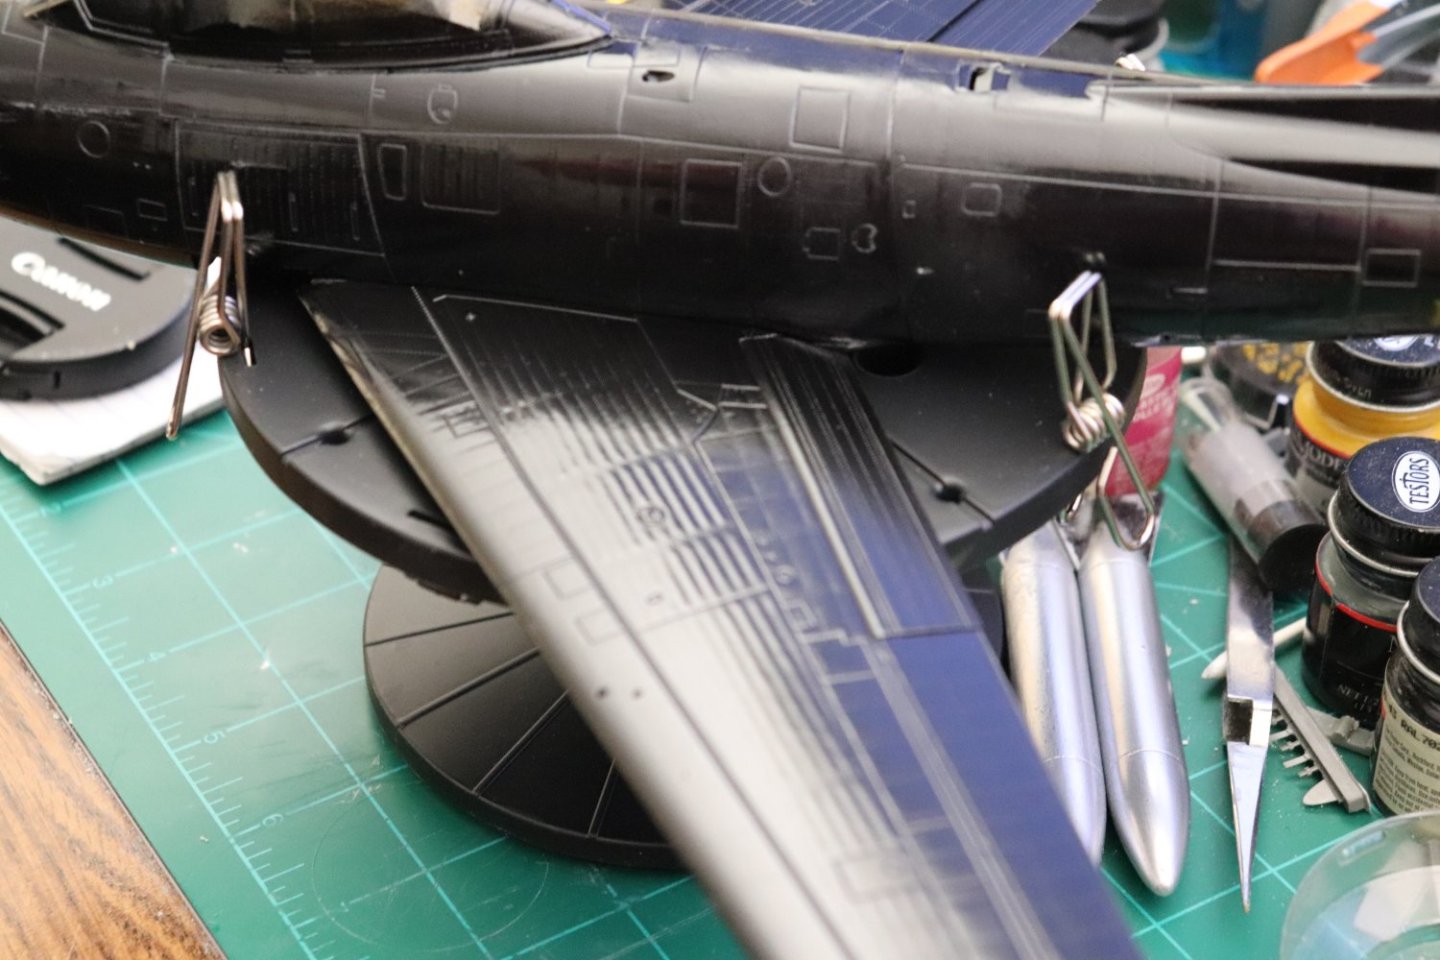
Another update, the first application of Rub n Buff to the wings... It's not perfect, I'm going to have to go over some of the lines with a Qtip to get them silvered.... Getting there.... Onwards...
-
F-86F-30 Sabre by Egilman - Kinetic - 1/32nd scale
Egilman replied to Egilman's topic in Non-ship/categorised builds
Thank you brothers, it has taken a bit of a load off my mind, but that being said, he only eliminated two types and they still have that unexplained mass they found on the CT scan.... It's a relief but I'm not out of the woods yet... They have to come up with some kind of explanation.... The lab who processed the biopsy did say it was cancerous and of unknown origin... Mistakes are made, but this one is a biggee if it is a mistake... So we are still waiting.... Not quite ready to crack the champaign yet.... -
F-86F-30 Sabre by Egilman - Kinetic - 1/32nd scale
Egilman replied to Egilman's topic in Non-ship/categorised builds
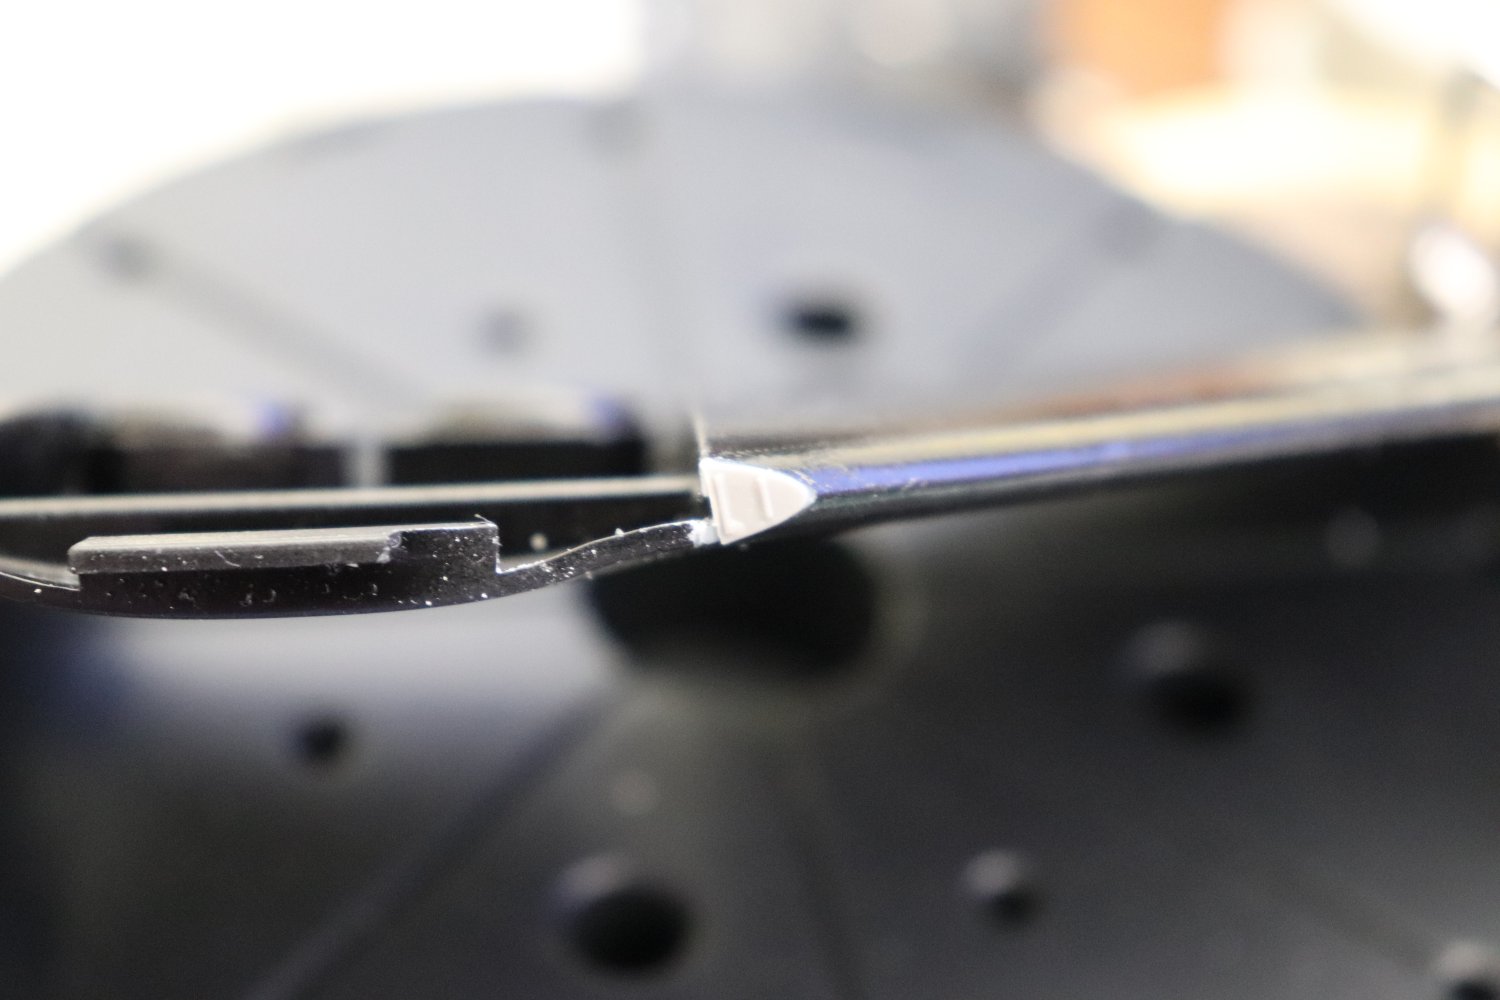
Another very tiny detail to add before silvering.... The 6/3 wing root cutout for the Ammo Door/Step... And yes, the stress ribs were angled like that... ( note; the Hasegawa kit has a more rounded leading edge, I'm going to leave it as the aluminum paint will fill the slight difference) Now to figure out how to drop a short cable off it to hold the removable part...
-
F-86F-30 Sabre by Egilman - Kinetic - 1/32nd scale
Egilman replied to Egilman's topic in Non-ship/categorised builds
Yep the man above is always watching.... Thank you.. -
F-86F-30 Sabre by Egilman - Kinetic - 1/32nd scale
Egilman replied to Egilman's topic in Non-ship/categorised builds
I know that brother, I got it, (just speaking to those that didn't) and yeah they went back to the Stars & Bars national insignia during Korea leaving everything else red, but during WWII everything was red including the insignia... -
F-86F-30 Sabre by Egilman - Kinetic - 1/32nd scale
Egilman replied to Egilman's topic in Non-ship/categorised builds
Thanks Dennis, I'm getting ready to silver her up.... Thank you and everyone for the good wishes... I just finished the dual scope procedure today, Doc said no cancer, top or bottom, didn't know what the mass was they found but it isn't stomach or colon cancer... He's ruminating on Diverticulitis, a huge relief if it is (common ailment for people our age) Will see my attending in a few days, maybe they will have a clue at that point.... Thanks all for the well wishes and prayers, My friends... they helped greatly...- 585 replies
-
- 10
-
-
-
Very Very well done... Looks like it drove right in off the Sinai desert...
-
F-86F-30 Sabre by Egilman - Kinetic - 1/32nd scale
Egilman replied to Egilman's topic in Non-ship/categorised builds
Thanks my friend, yeah they were a surprise to me when I saw them, I've never seen that on an injection molded kit before... That's an incredible level of detail I wish you all could see in real life, the pics don't do it justice... -
F-86F-30 Sabre by Egilman - Kinetic - 1/32nd scale
Egilman replied to Egilman's topic in Non-ship/categorised builds
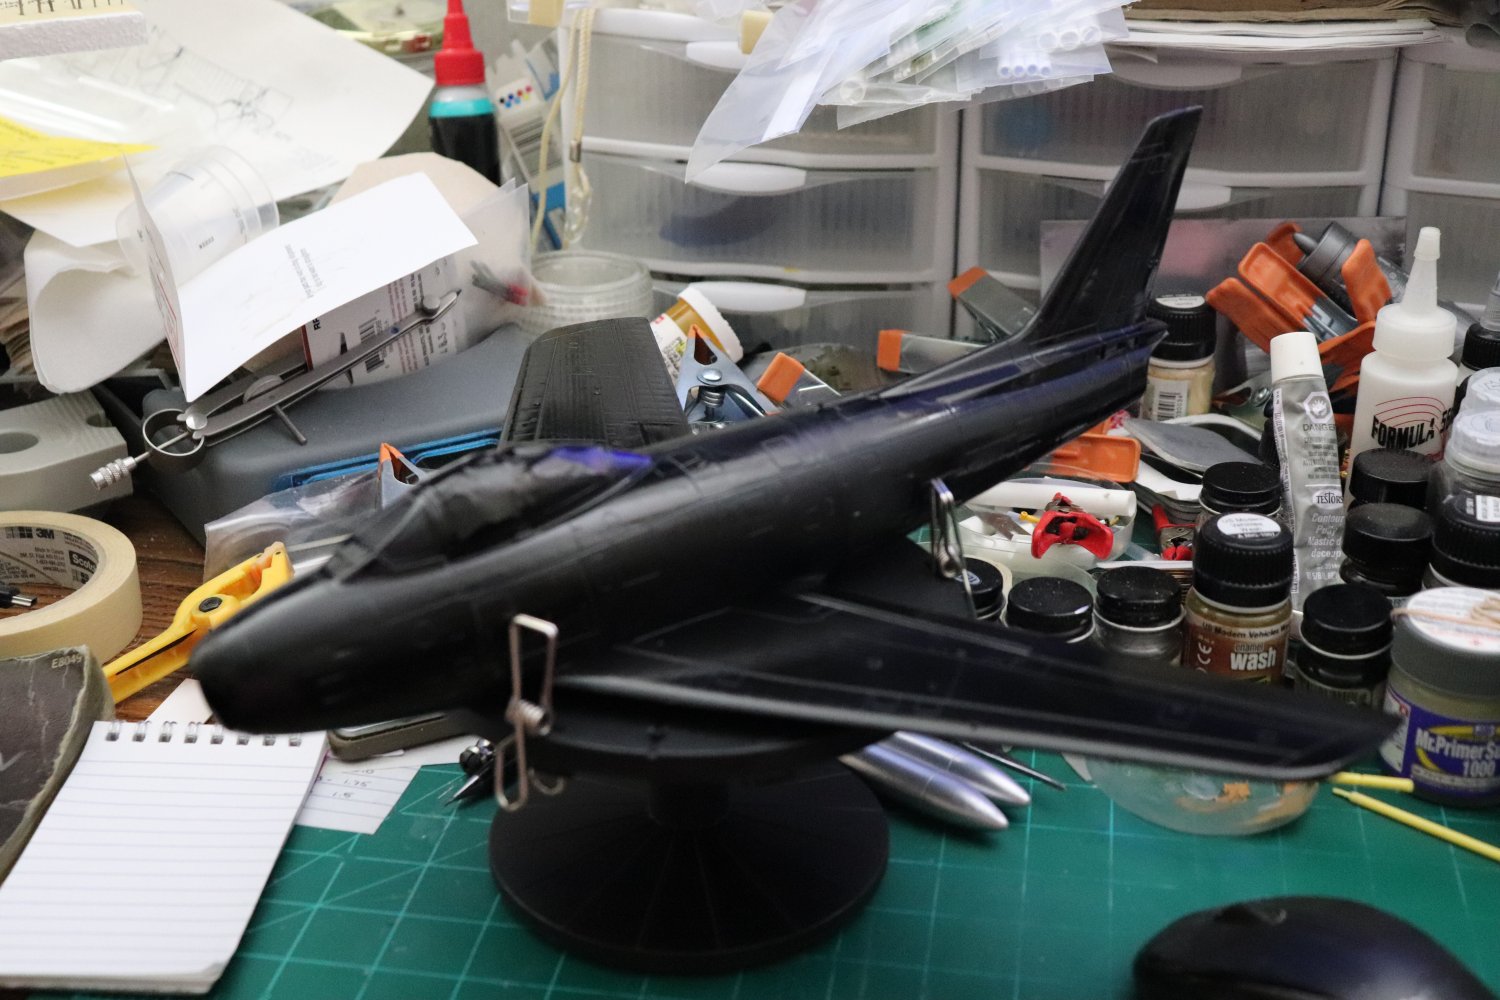
Yep, that was the standard for all black aircraft in those days, not so much today...