Egilman
-
Posts
4,382 -
Joined
-
Last visited
Content Type
Profiles
Forums
Gallery
Events
Everything posted by Egilman
-

F-86F-30 Sabre by Egilman - Kinetic - 1/32nd scale
Egilman replied to Egilman's topic in Non-ship/categorised builds
Yep, it's old school I know but also the easiest, fastest way to do it... Thanks brother... -
F-86F-30 Sabre by Egilman - Kinetic - 1/32nd scale
Egilman replied to Egilman's topic in Non-ship/categorised builds
{chuckle} I'm just second guessing myself brother... Up is they way they should be... Just kidding myself thinking it should be otherwise... Probably the drugs I'm taking for pain... (yech) -
Balance counterweights to stop stabilizer flutter in a dive...
-
F-86F-30 Sabre by Egilman - Kinetic - 1/32nd scale
Egilman replied to Egilman's topic in Non-ship/categorised builds
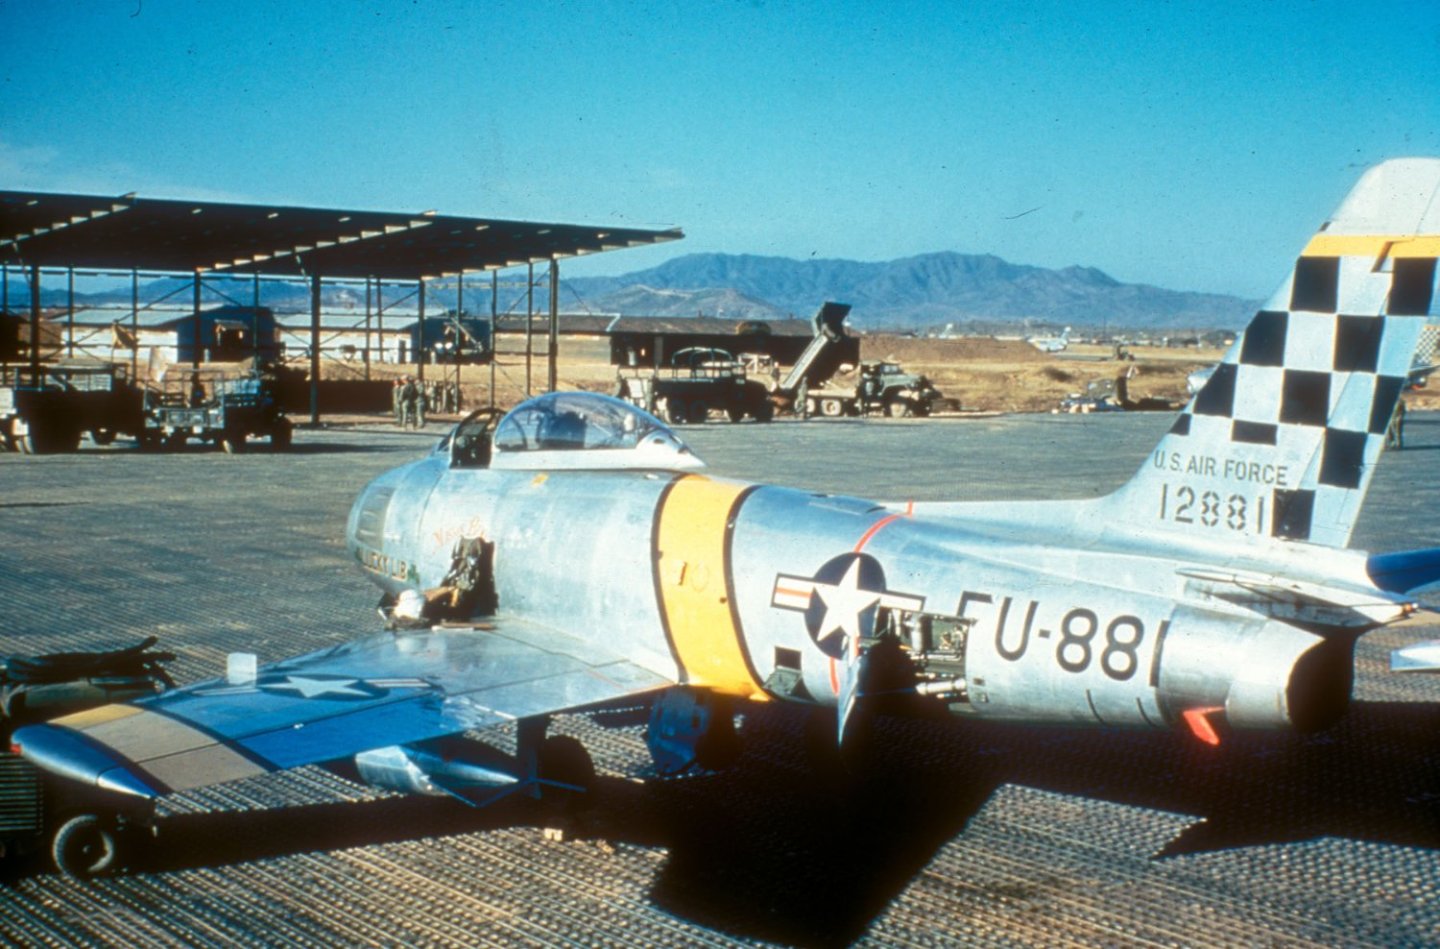
Ok my friends, Moment of decision time... Flaps up or down? They need to be glued now before I do the final filling and sanding if positioned up.... 98% of the field photos I have show them up, they are only down when landing, taking off or under maintenance... all other times they are up... The reason is they were electro mechanical in actuation, they had a two position switch in the cockpit, up or down... The pilots manual says once on the ground you reset the switch to neutral, (up) Even the maintenance manual say the same unless your repairing them... I've read some stories where occasionally the pilot would forget this and leave them down and would usually get commented by the crew chief about it... But it does look attractive with them down, that's the draw... I guess I'm answering my own question aren't I? {chuckle} Here is where she is at material fills sanded down.... It's time to make the decision... What do you all think?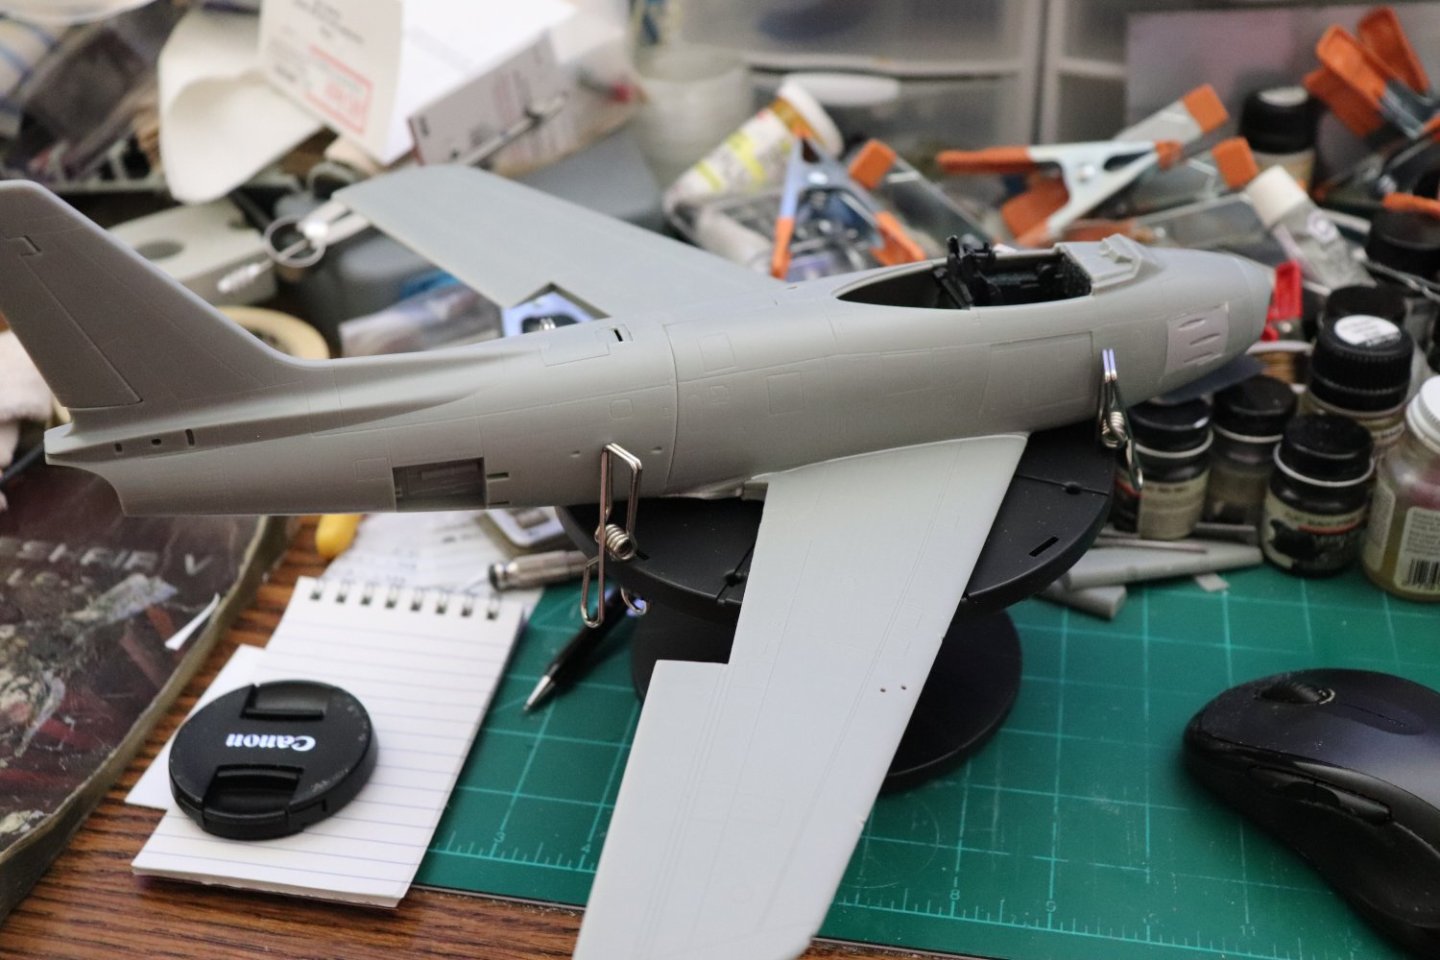
- 585 replies
-
- 11
-

-
Beautiful build brother... So precise.... What I wouldn't give for those gluing skills... They are so important to building in paper...
- 98 replies
-
- 13
-
-
F-86F-30 Sabre by Egilman - Kinetic - 1/32nd scale
Egilman replied to Egilman's topic in Non-ship/categorised builds
Thank you Ken... I do have a bit of a supply of that material layin about here, might as well put it to use {chuckle} And thank you brother I can use all the good word with the big guy I can get... nil desperandum my friend, nil desperandum -
1/72nd scale anchor chain... https://kilokits.com/products/model-ship-anchor-chains Looks a bit small to me I, what I would do is measure the gap between the lips of the anchor winch and divide by two then order the correct size...
- 460 replies
-
- 4
-

-
-
- Finished
- Flower-class
- (and 1 more)
-
F-86F-30 Sabre by Egilman - Kinetic - 1/32nd scale
Egilman replied to Egilman's topic in Non-ship/categorised builds
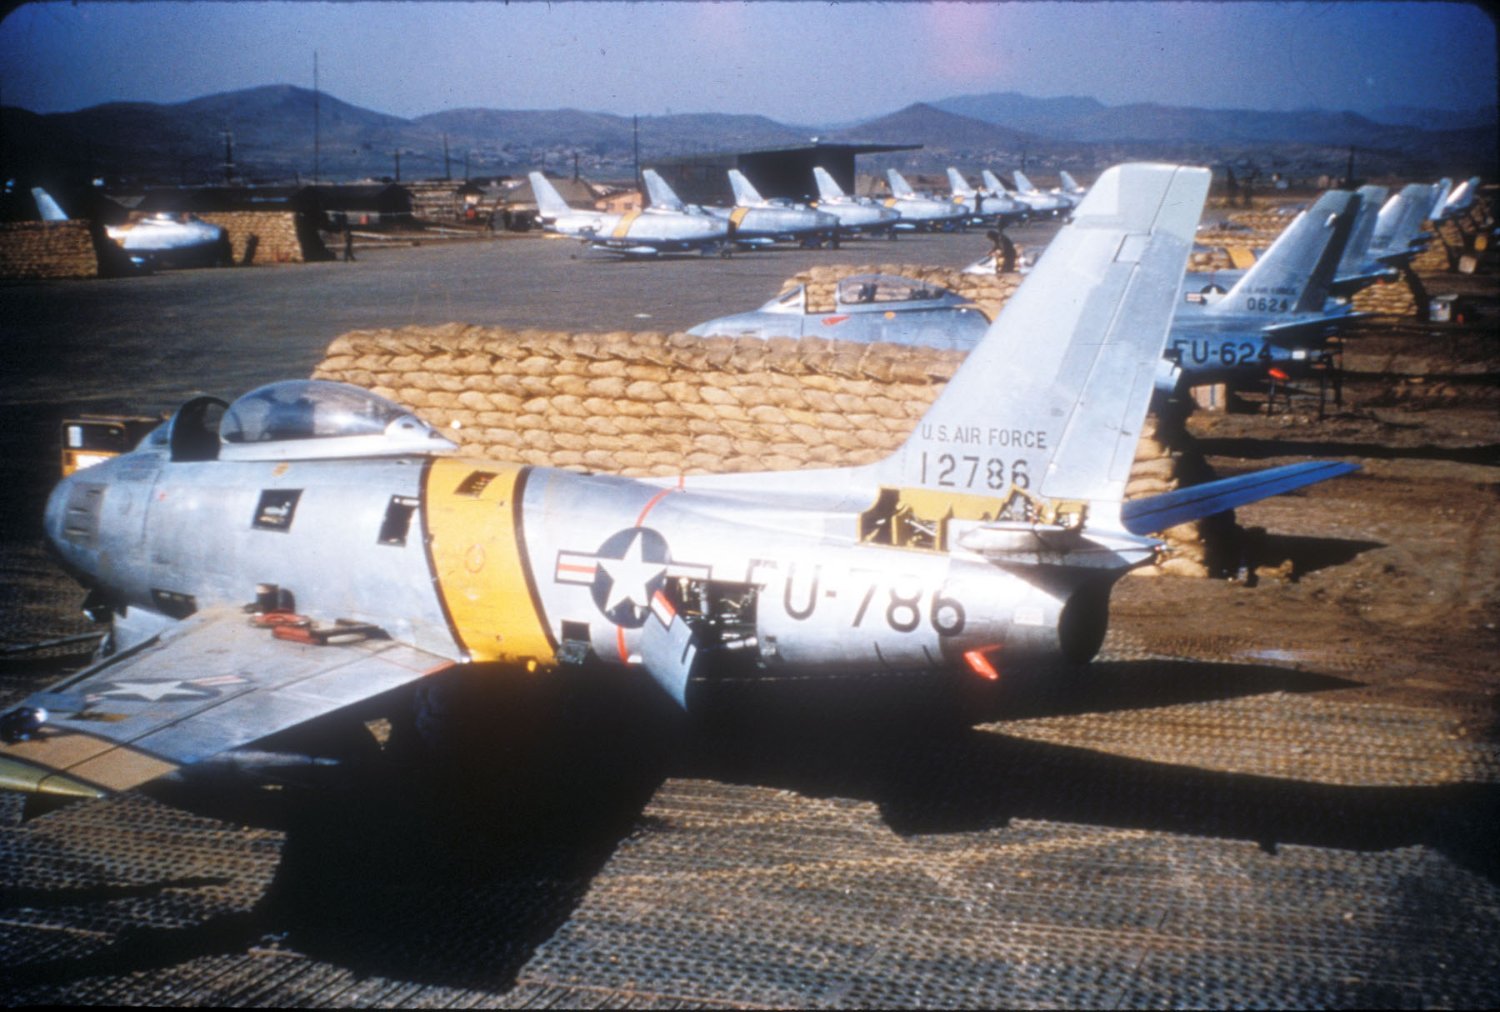
Nice shot brother... she is pretty... All of the Sabre's were a beautifully designed aircraft.... That one has been europeanized and has the Martin Baker ejection seat... (that is why the canopy is sitting flat when opened rather than it's pronounced forward slant... Thanks brother... -
AVRO Lancaster by Papa - FINISHED - Airfix - 1/72
Egilman replied to Papa's topic in Non-ship/categorised builds
A good flat coat will take care of the shininess of the decals, but don't get any on those brilliant canopies... Excellent Build very impressive especially in that scale... -
I would go along with Mark's suggestion, the larger one will be more appropriate for the size of the ship US Destroyers and Destroyer Escorts used 14' to 18" link chain...
- 460 replies
-
- 4
-
-
- Finished
- Flower-class
- (and 1 more)
-
F-86F-30 Sabre by Egilman - Kinetic - 1/32nd scale
Egilman replied to Egilman's topic in Non-ship/categorised builds
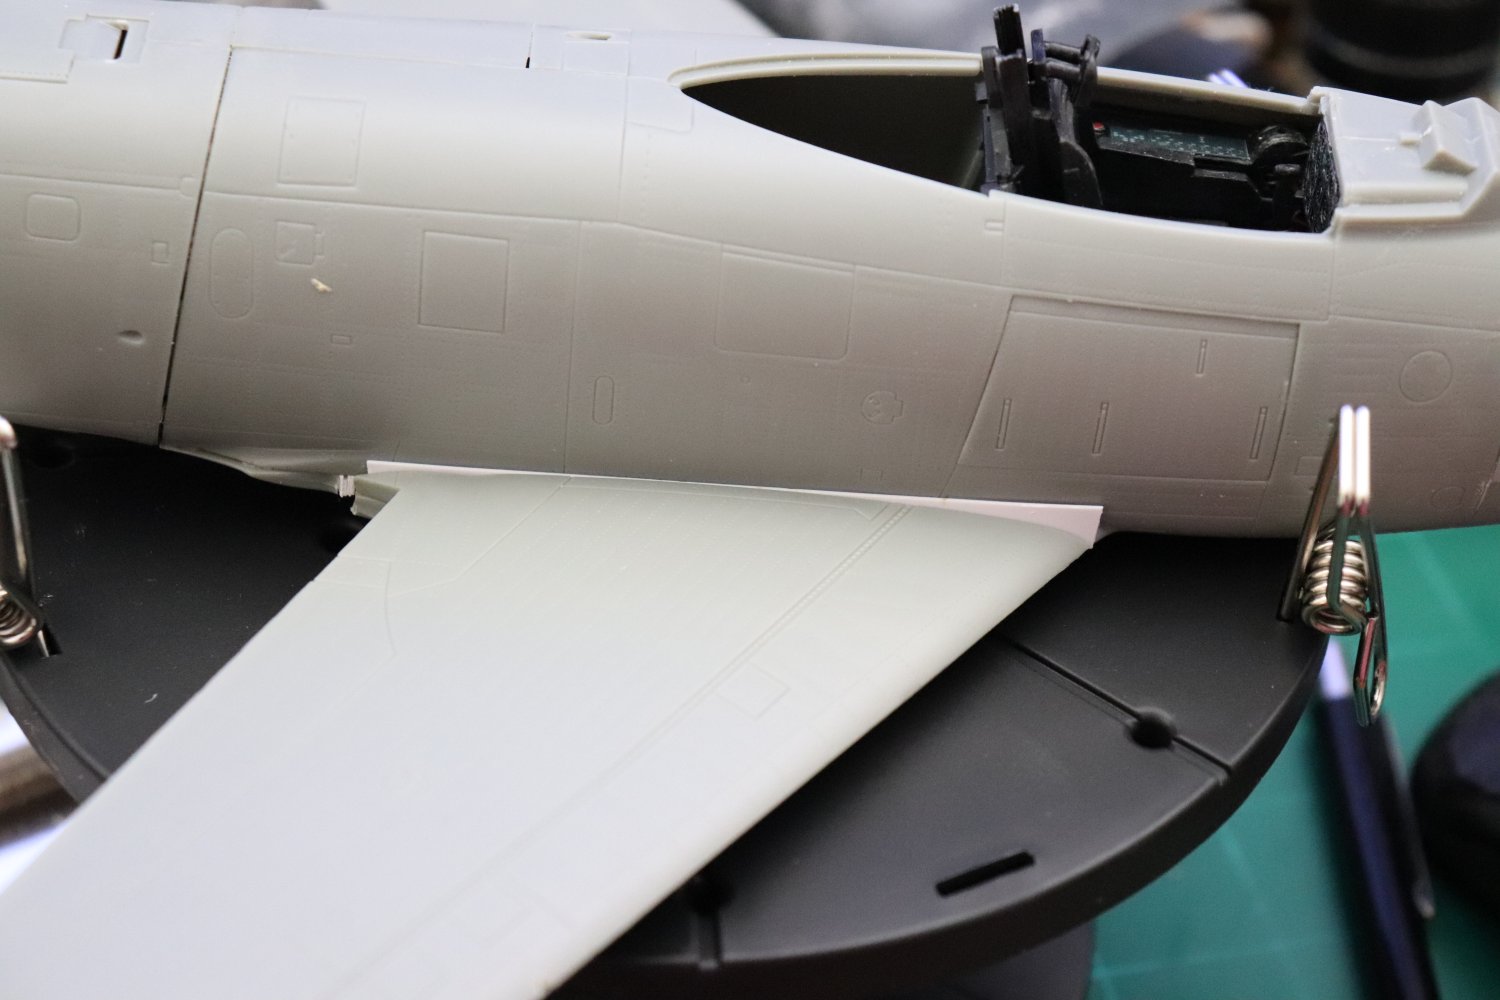
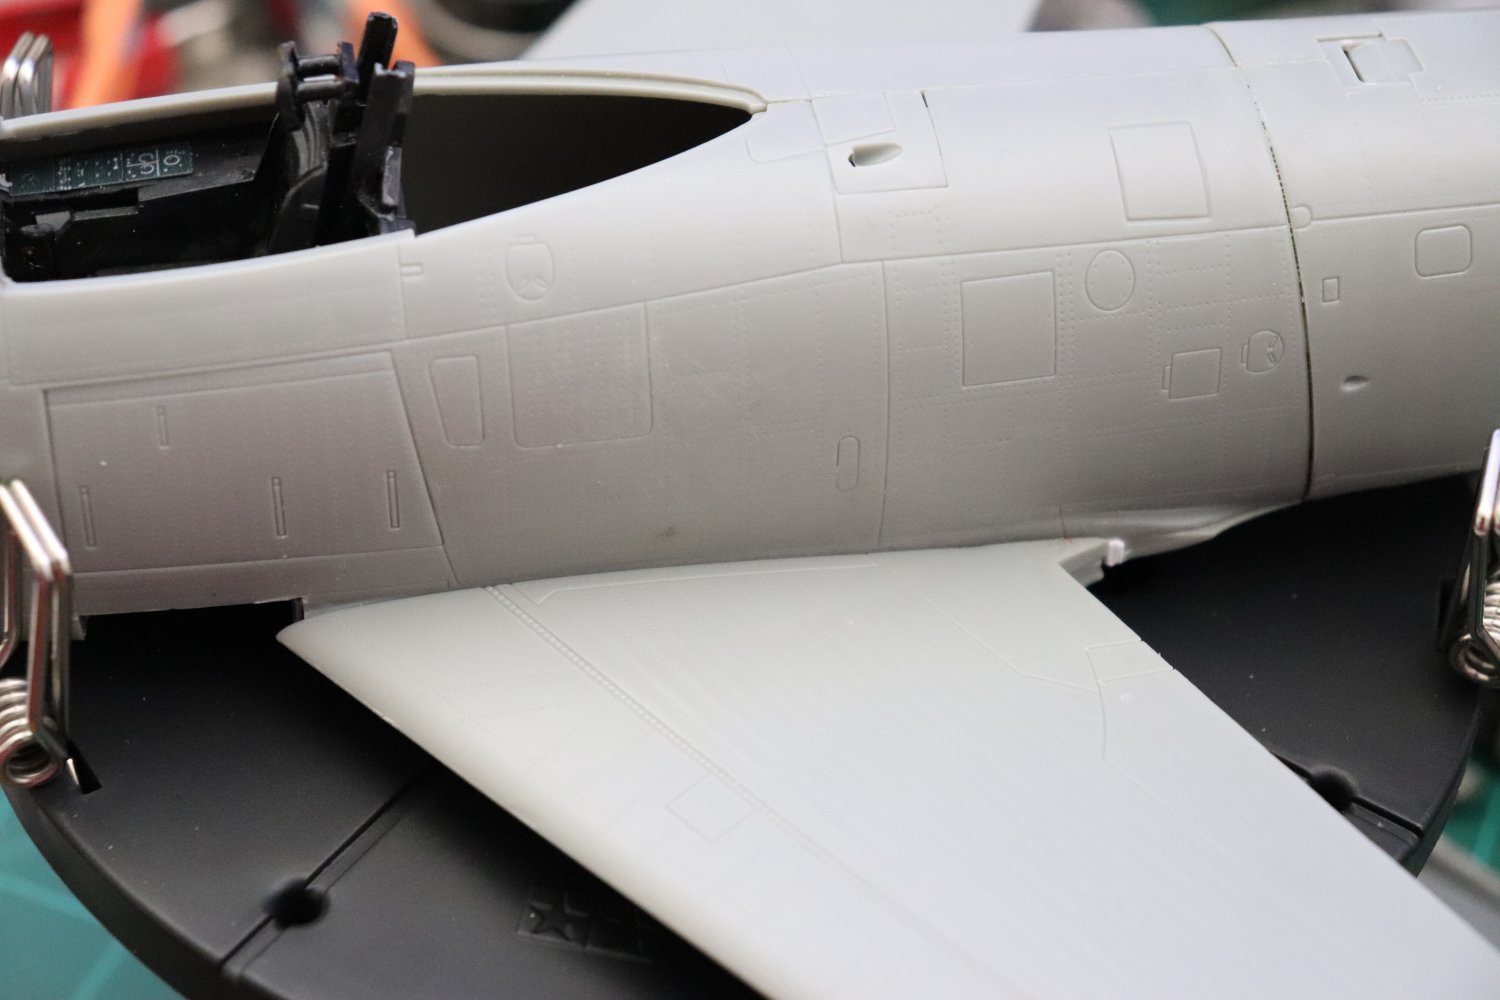
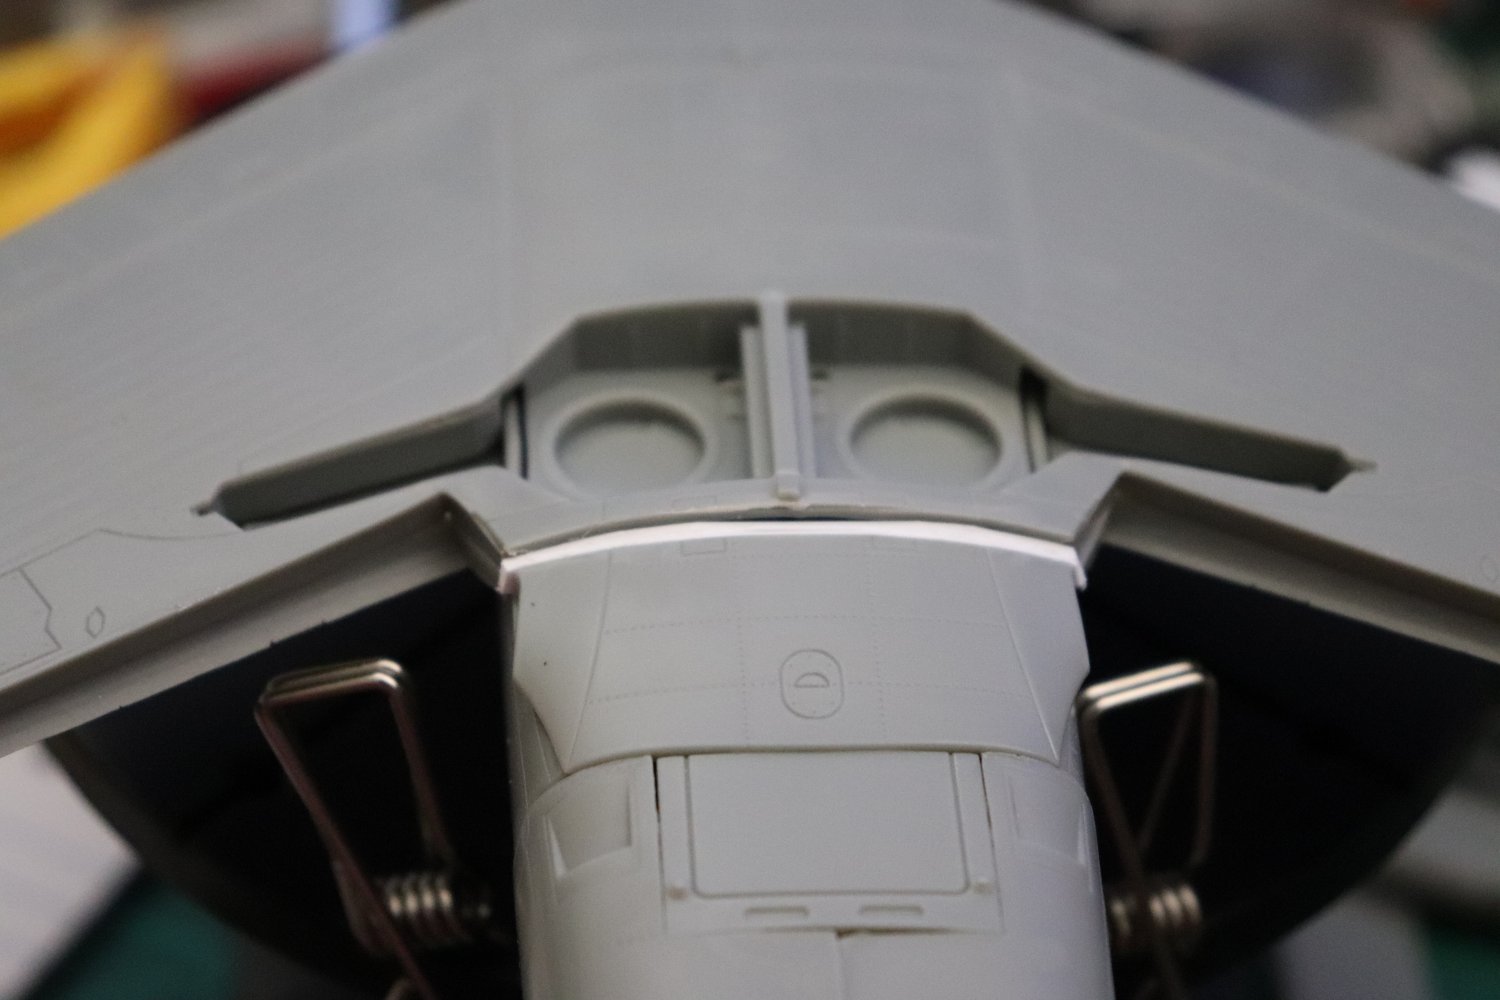
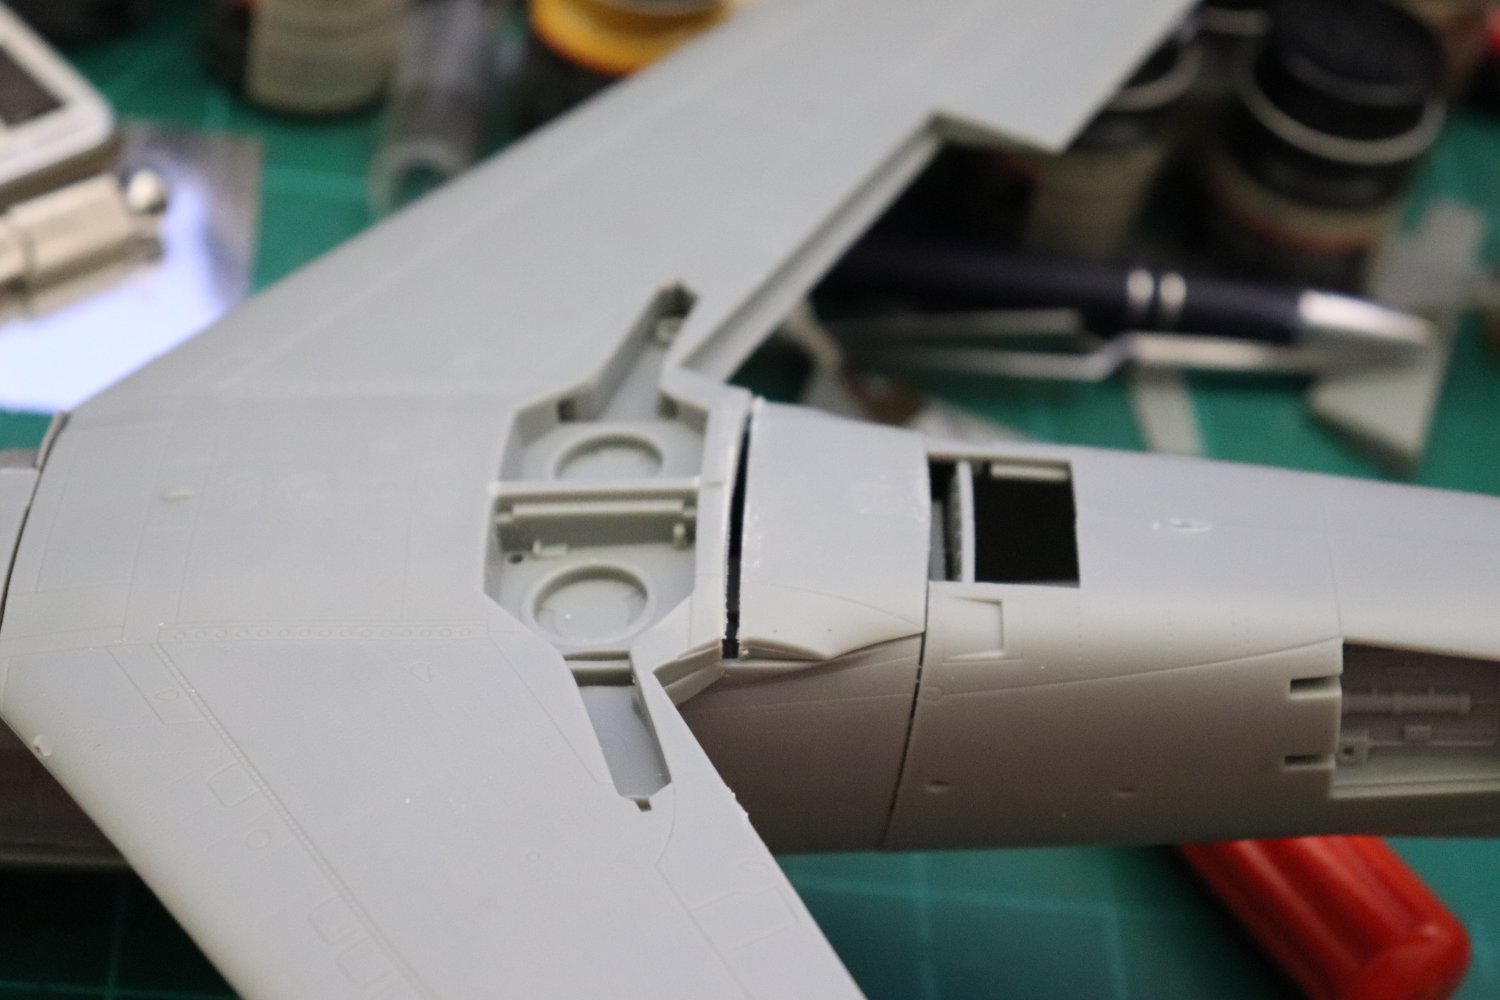
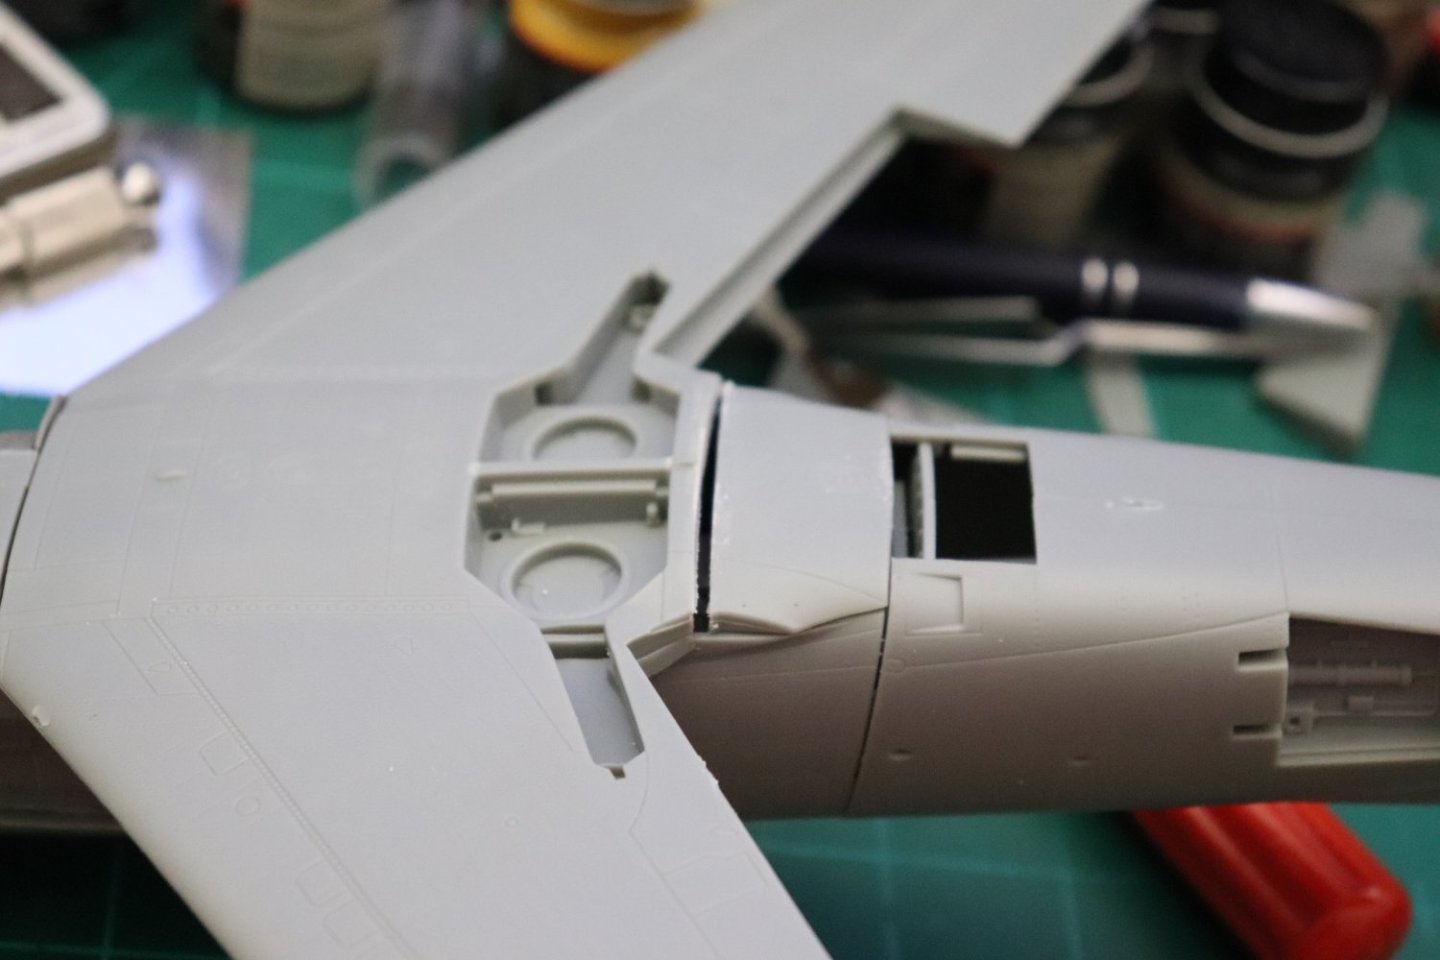
And another short update... The wing roots.. The left wing root is the one that will have it's leading point cut off for the open Ammo Bay door, so the adjustment will be on right wing root... Creating the dihedral closed the gap about half way, leaving a little more than a paper thickness gap... A piece of .015 should easily fill that gap... Testing the idea.. Nice.... And it feels solid... The big question? what does it do for the left side.... The tiny gap is gone.... Excellent! now to glue it in and shave it to profile.... I love it when a plan comes together... {chuckle} And I hope I ain't boring you guys as I'm pretty sure all of you have done exactly this process before... So I'm posting it for those modelers that don't know how to do this, explaining it to someone works, pics work better... Thanks Brothers for being patient and following along.... EG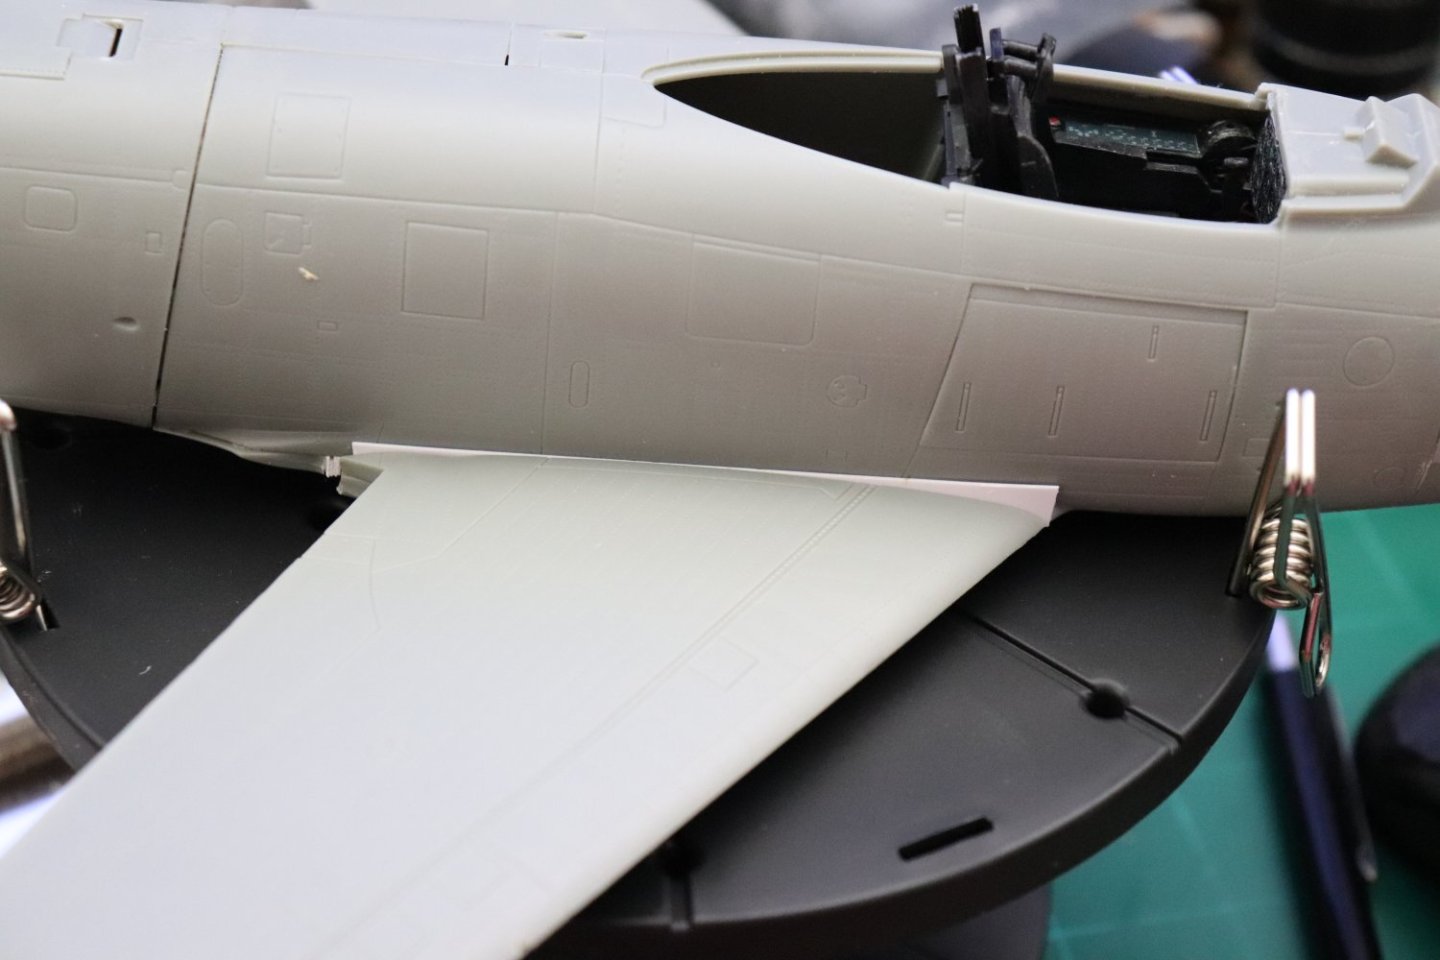

-
F-86F-30 Sabre by Egilman - Kinetic - 1/32nd scale
Egilman replied to Egilman's topic in Non-ship/categorised builds
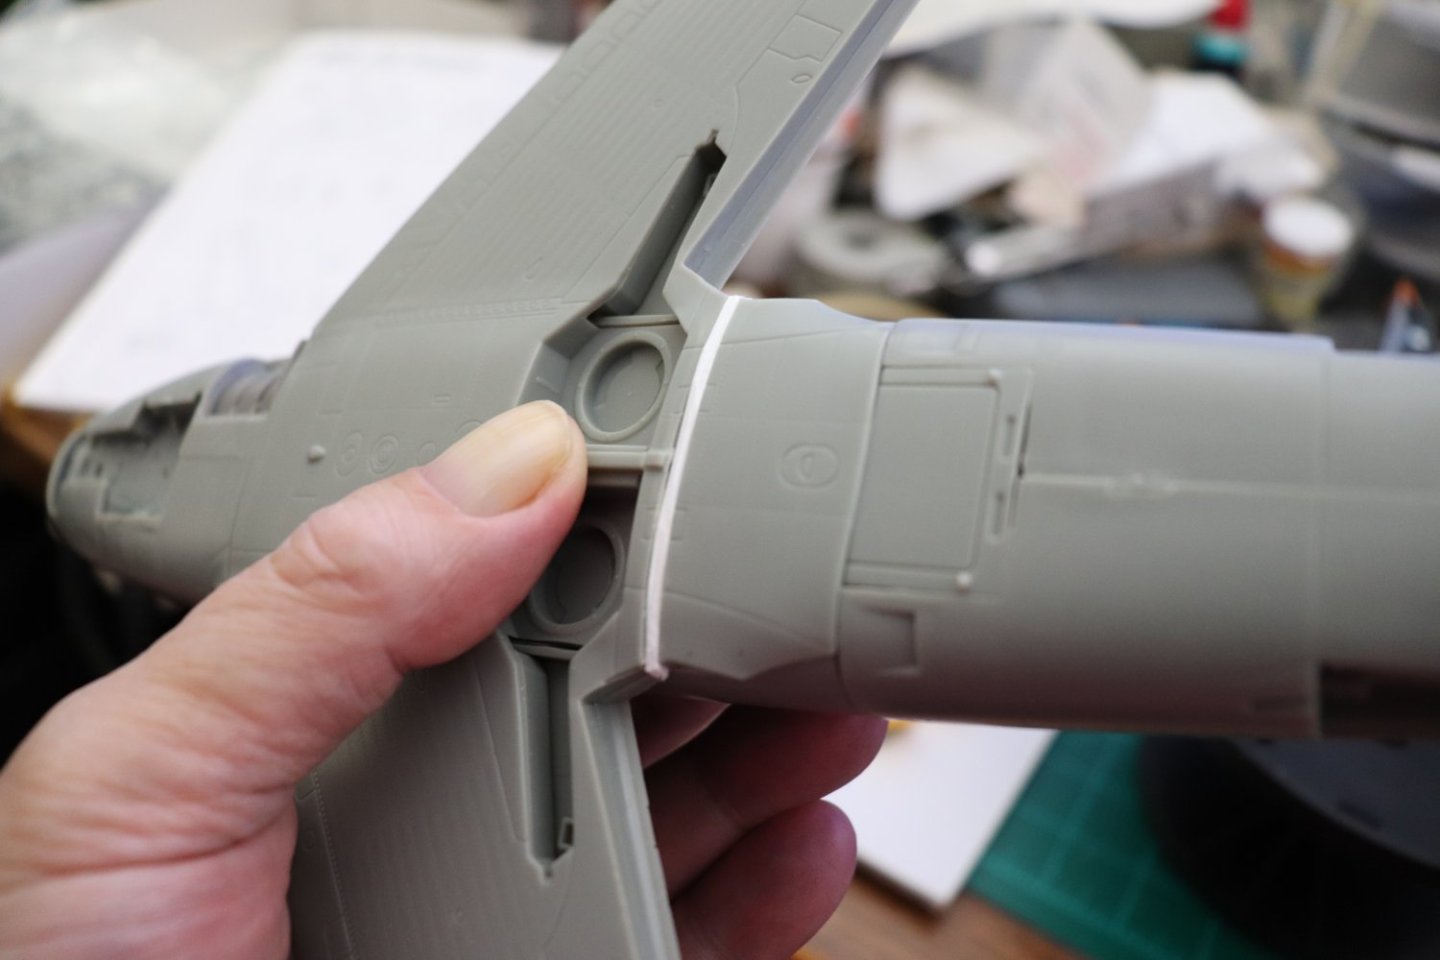
Short update, Filling the gap... well I showed you why I needed to cut off the center fuselage tail from the wing, when I heat bent the wing adding the dihedral it shrank the fuselage tail about a 1/16th of an inch... (accurately measured, not as bad as it first looked) My cut was a little off (crooked) So I straightened the gap using my knife and created a flat to glue filling strips to... .060 = 4 .015 strips I laid them in like this... Gluing each successively and using my tiny scissors I trimmed them close as each one dry... Once they were all glued and dry I test fitted the wing to make sure the joint is filled and tight... That works, a solid block of plastic once sanded smooth a skim of Mr Surfacer 1000 and I should be good to go... A lot easier than it initially looked... Onwards... Next up checking the wing root gaps....


-
F-86F-30 Sabre by Egilman - Kinetic - 1/32nd scale
Egilman replied to Egilman's topic in Non-ship/categorised builds
Thank you Alan, No problem, I'll get there sooner rather than later... I'm glad your finding my little experiments useful... It makes it worth it.... -
F-86F-30 Sabre by Egilman - Kinetic - 1/32nd scale
Egilman replied to Egilman's topic in Non-ship/categorised builds
Thank you Mark, it was a rude awakening for me, but the Oncologist seems very optimistic with the outcome... Like this is no sweat... I'm hoping I'm reading him right... Thanks Ed.... Thanks Jack. You too OC... Thank You! I have high hopes Dan, I intend to keep on keeping on... maybe a bit slower, but I'm not going to quit that's for sure... Thanks Lou, Prayers are welcome, with the big guy on my side how can I not survive this... Right now the Admiral is taking it harder than I am... such is life... I debated for three days wether I wanted to mention it or not, thought I would cause there was a few time I was a bit loopy and wanted to make sure I didn't say something stupid cause of the drugs I now have to take for the pain, they work well as long as I am consistent with them... I'm glad it's working for your family and friends, it makes it easier to believe there is a longer term outlook... I will survive this... Thanks everyone, I don't want to turn this away from it's purpose, but I thought it would be better if you all knew just in case... your support will be a great help as we get this figured out... Onwards with life, onward with the build... Update in a few... -
F-86F-30 Sabre by Egilman - Kinetic - 1/32nd scale
Egilman replied to Egilman's topic in Non-ship/categorised builds
Thanks Jav, I've broken way too many off in the past and the recurve of the fuselage into the horizontal stabilizer is a major headache... Yep, much easier to put them on last... -
Just a suggestion brother, the fabric covered tail surfaces, I would use a tint to darken then about a half shade... They were painted dope and weathered out a hair darker than the bare metal... Beautiful paintwork my friend, it's going to be a real beauty....
-
F-86F-30 Sabre by Egilman - Kinetic - 1/32nd scale
Egilman replied to Egilman's topic in Non-ship/categorised builds
Thanks Brother... Exactly, it needs a stable solid fill and the only way to do that is add material... Plastic stripping is the way... Putty will shrink over time and destroy the finish.... Agreed my friend... and I remember the decal issue from your build... (and your very nice, well executed fix for it...... The decal position is from the point of the flap to the ... to the upper corner of the hydraulics service panel and about 6" behind the cabin vent.. (showing under the tail of the open canopy) the Fuel Filler Cover is centered in the yellow stripe... As far as the instructions, yep they are incorrect, so, for the markings, I will be using walkaround images for most stencil placement and historical photos for the markings... But another thing it reveals upon careful study... Many of the scribed panels on the model are incorrect as well... The major panels are good, it's the access/maintenance panels that are wrong... I'm not going to fill and rescribe, that is too much work so Ill go with the flow place the decals in as correct a position as I can and forgo black basing, they do not need to be highlighted anymore than they will be naturally..... As an aside, thanks for the reminders my friends, please keep them coming when you see one... RL is trying it's darndest to stop me but this build is kinda keeping me going... My wonderful docs gave me a difficult birthday present last weekend... The big "C" don't know where it originated from but it's there... So if I seem a bit loopy or forgetful please understand, this is a temporary situation and I will beat it eventually and we caught it early I've been told... So please bear with me as I beat this thing... The doc seems real confidant that once they identify it they can kill it... Thank you all and keep the suggestions and reminders coming, they are a big help in keeping me ontrack...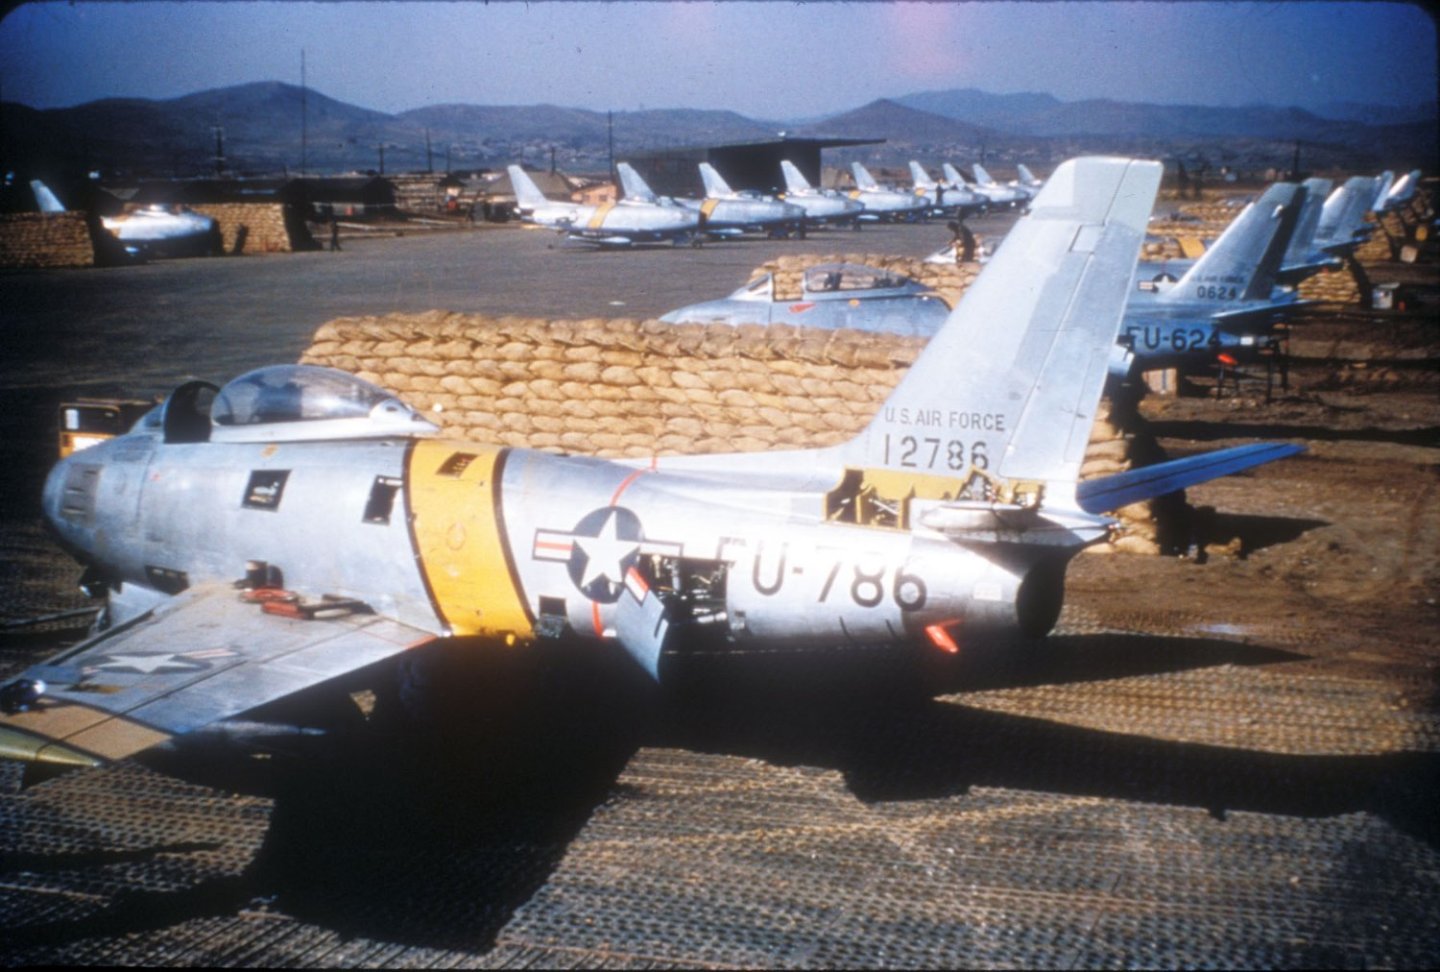
-
F-86F-30 Sabre by Egilman - Kinetic - 1/32nd scale
Egilman replied to Egilman's topic in Non-ship/categorised builds
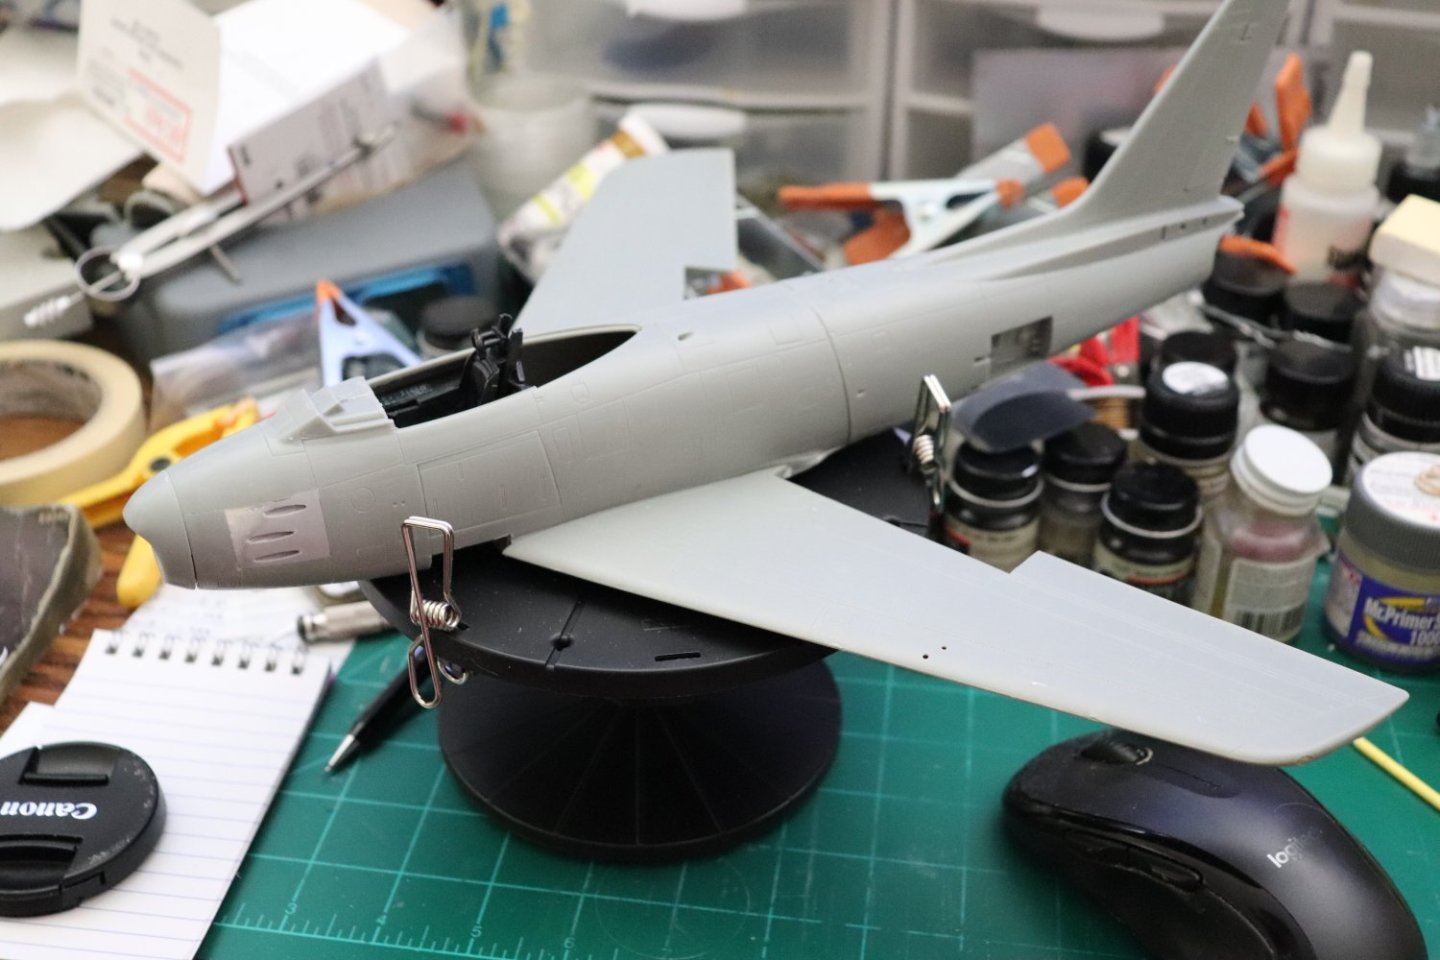
Yes that angled line is where it breaks... I'm beginning to believe that this model was designed to be shown split with the tail on it's dolly with the engine hanging out the back... The fuselage thickness from the aft half to the forward half has too many thickness variations to match up perfectly... I'm gonna have to sand away most of the surface detail to get them to match smoothly... I'm gonna try and fill as much as I can but I'm not going to destroy it's looks with too much sanding... I probably shouldn't have added the dihedral to the wings even though it would be noticeable... I think I'm gonna tack the Gear Covers ,Canopy & Speed Brakes in place with canopy glue to do the finish... There are only two places that need a darker sheen to the surface, the two gun panels of course and one that lines the tail under the horizontal stabilizers, the rest is aluminum... Maybe I'm being too critical.... Filling and sanding up next.... The gaps in the wing roots are small and at this distance aren't that noticeable, even up close they can hardly be seen... Still debating on flaps down or up, Speed Brakes open or closed.... I haven't found a image I like yet... Anyway, this is where she sits right now.... Onwards...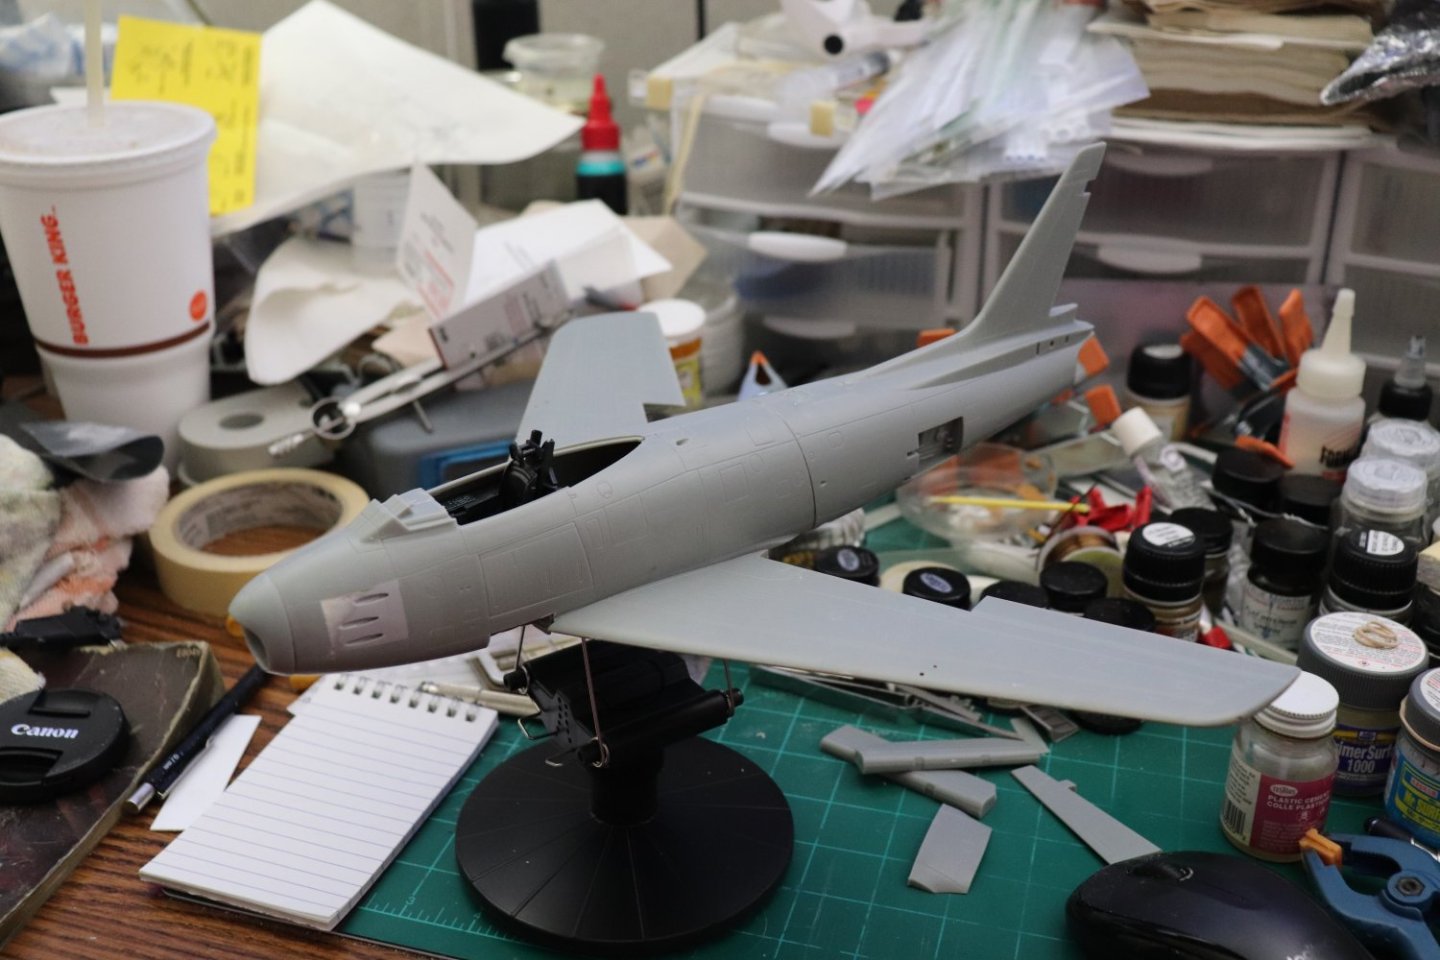
- 585 replies
-
- 12
-
-
F-86F-30 Sabre by Egilman - Kinetic - 1/32nd scale
Egilman replied to Egilman's topic in Non-ship/categorised builds
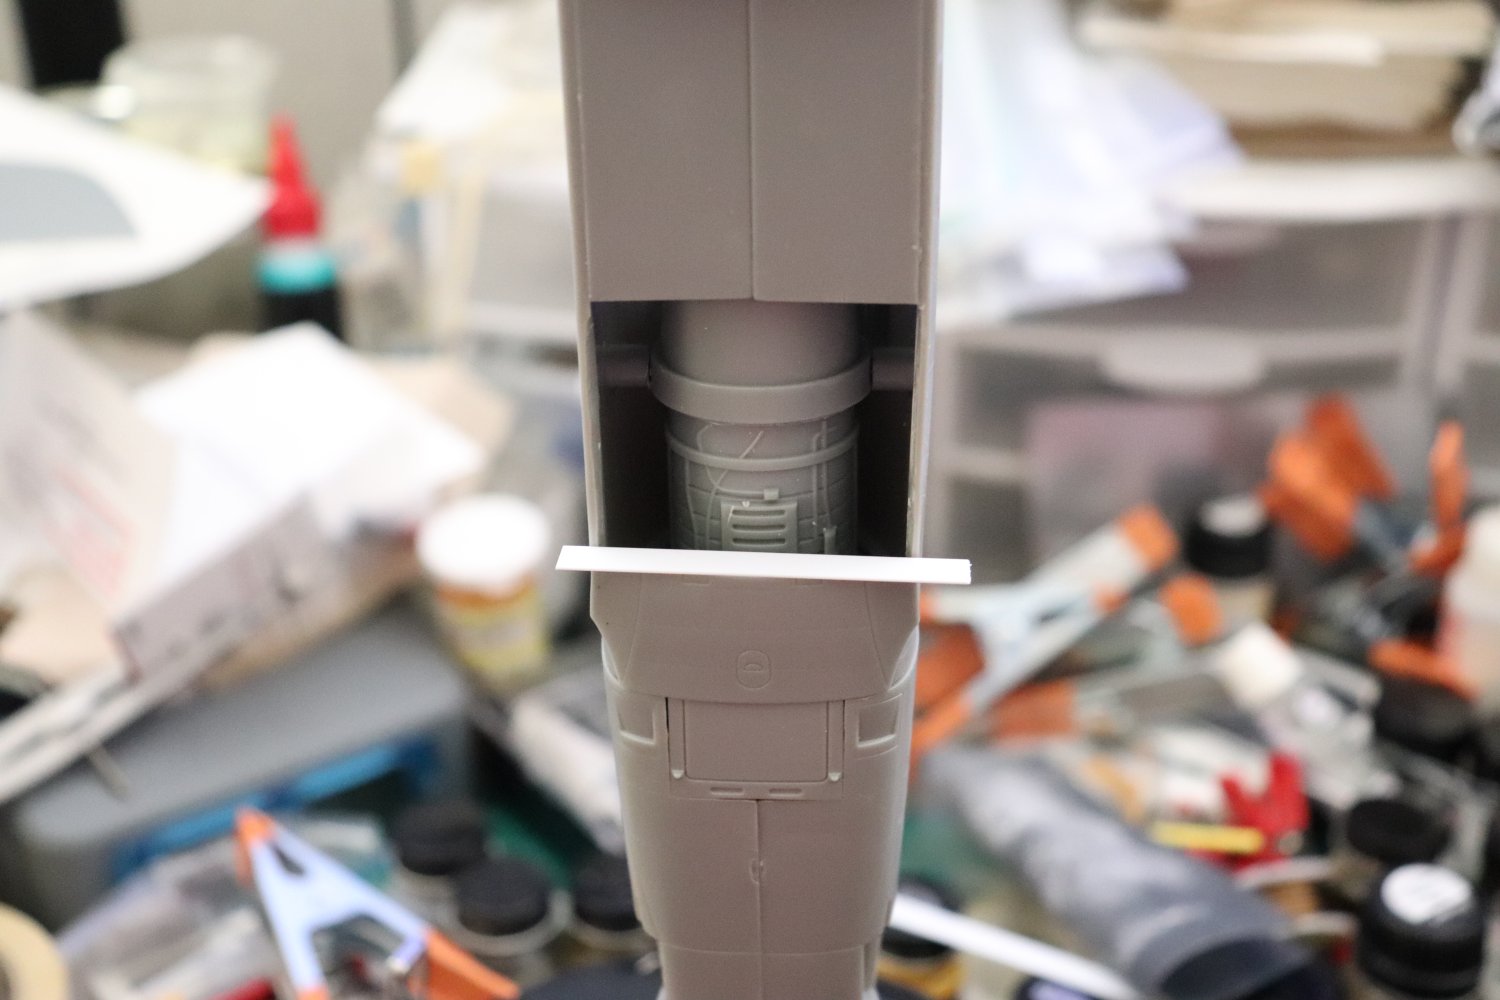
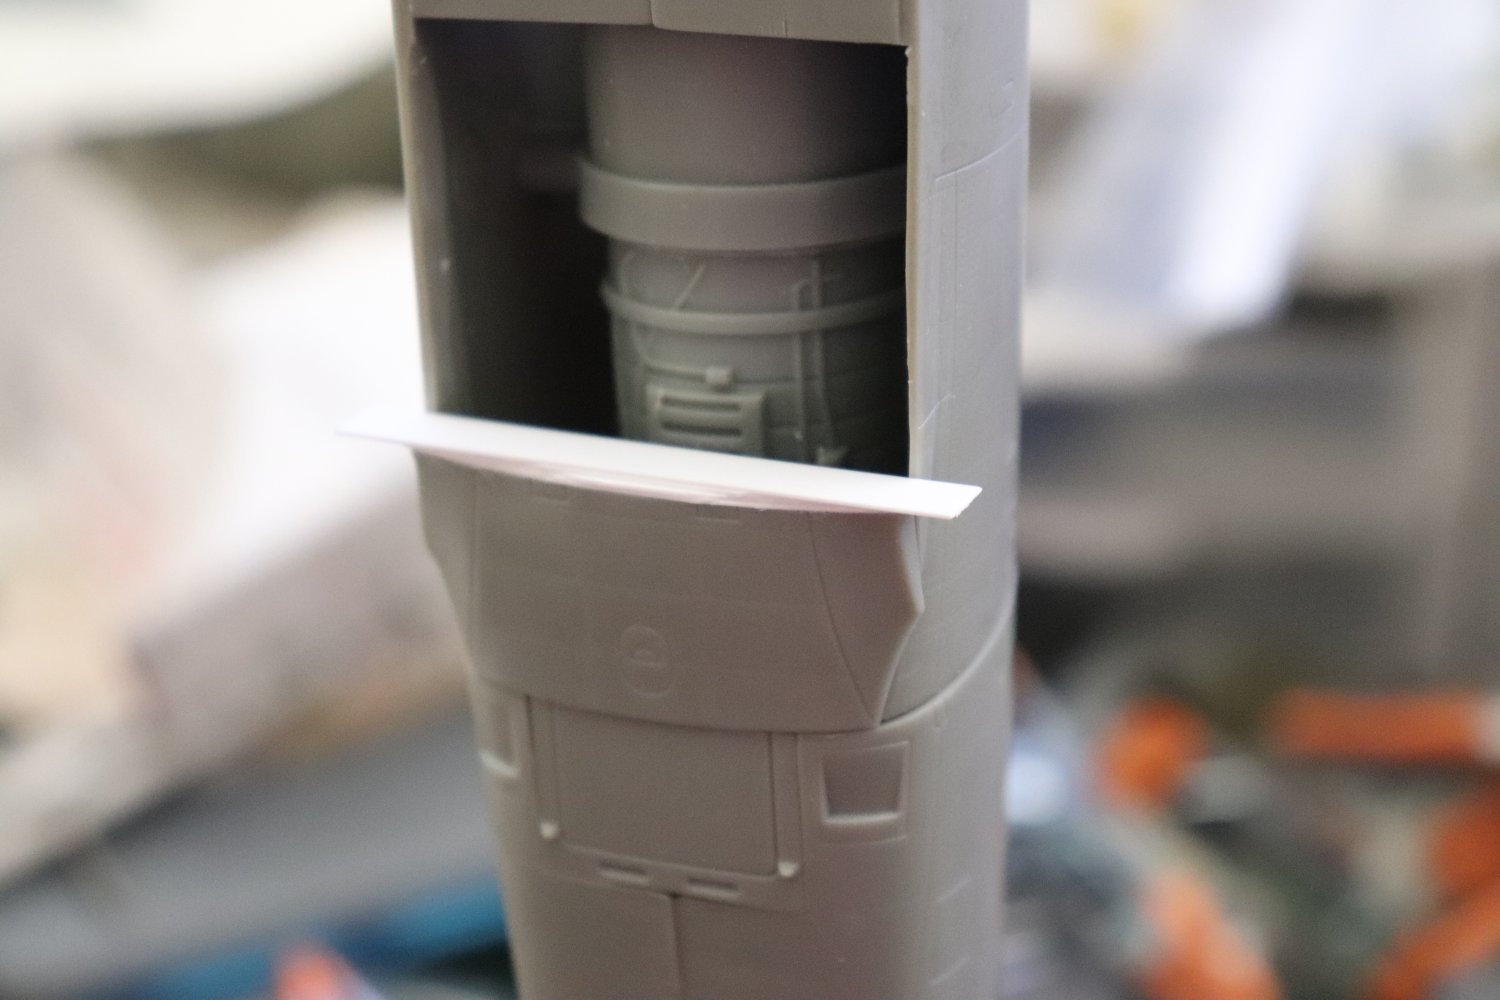
Update... The plastic shrinkage issue.... I cut off the fuselage tail from the lower wing section, a pretty straightforward cut across the fuselage just aft of the landing gear bays.... To illustrate the shrinkage issue, I fitted the wing and the fuselage section into the positions they will take when glued together... See the gap? That is how much the plastic shrank with only about 5 minutes light heat... That gap is almost an 1/8th inch... I already checked the wingspan to see if that changed and no it didn't... (thank god) Sometimes we get lucky... This is a formulation of styrene I've not encountered before... Most styrene will just sag and melt in heat, this styrene shrinks before it sags... Fortunately, this is easily fixable, I think I just dodged a bullet... {chuckle} Sometimes we just don't know what we are dealing with.......
- 585 replies
-
- 11
-
-
F-86F-30 Sabre by Egilman - Kinetic - 1/32nd scale
Egilman replied to Egilman's topic in Non-ship/categorised builds
Thanks brother, it's an easy fix but one must be careful with the heat... The tailplanes are fine, they are a simple pin connection into the hole and they have the proper angle already will be using Gators Grip to install them as given the tricky nature of the plastic I don't want to take a chance that the glue will weaken the pin allowing them to sag... This plastic is interesting... it will shrink before it will sag if too much heat is applied, I'm going to have to cut the rear fuselage tail off the wing section ahead of the landing gear bays and reinstall it and fill the gap afterwards. It did warp a bit during the cooling after applying the heat.... I was expecting it so it's not a big deal, and will show pics when I've figured out exactly how to do it... The wing root gap is still going to require some strip filling to close it up completely but it is a lot closer now than it was... I'm just glad I didn't destroy the wing doing this, it was a bit of a gamble given the strange way this plastic responds to gluing and heating... Almost PVC like.... As I get into it, it's becoming a little bit more involved than the instructions let on... I mean you can build a decent looking model straight out of the box, even adding aftermarket, but correcting some of the (rather minor) issues is getting technically complex... Nothing I haven't done before.... (and it's helping to keep my mind off some RL issues that are a pretty heavy weight now) Onwards... -
Yep, they were bulky.... Going to be a nice addition to the collection....
-
She looks beautiful right now... As far as the decaling? I have faith....
-
F-86F-30 Sabre by Egilman - Kinetic - 1/32nd scale
Egilman replied to Egilman's topic in Non-ship/categorised builds
Thanks Mike, I have several of their products I use frequently Mr Surfacer 500 & 1000 to be exact... Great products for what they are intended for... (filling spaces where sanding is undesirable) and I agree, use in a well ventilated area... CMK's parts are pretty good getting up there with Eduard in quality and their casting is the equal of Eduard... I'm sure as time wears on their instructions will improve which is an area that all the aftermarket companies could improve upon... One of the most fun parts of this hobby is learning and engineering the changes to make the model more than just a generic representation of the object... Kinda bring the basic object to life, (and more accurate to boot) It's why I like this hobby so much.... (as we all do brother) -
F-86F-30 Sabre by Egilman - Kinetic - 1/32nd scale
Egilman replied to Egilman's topic in Non-ship/categorised builds
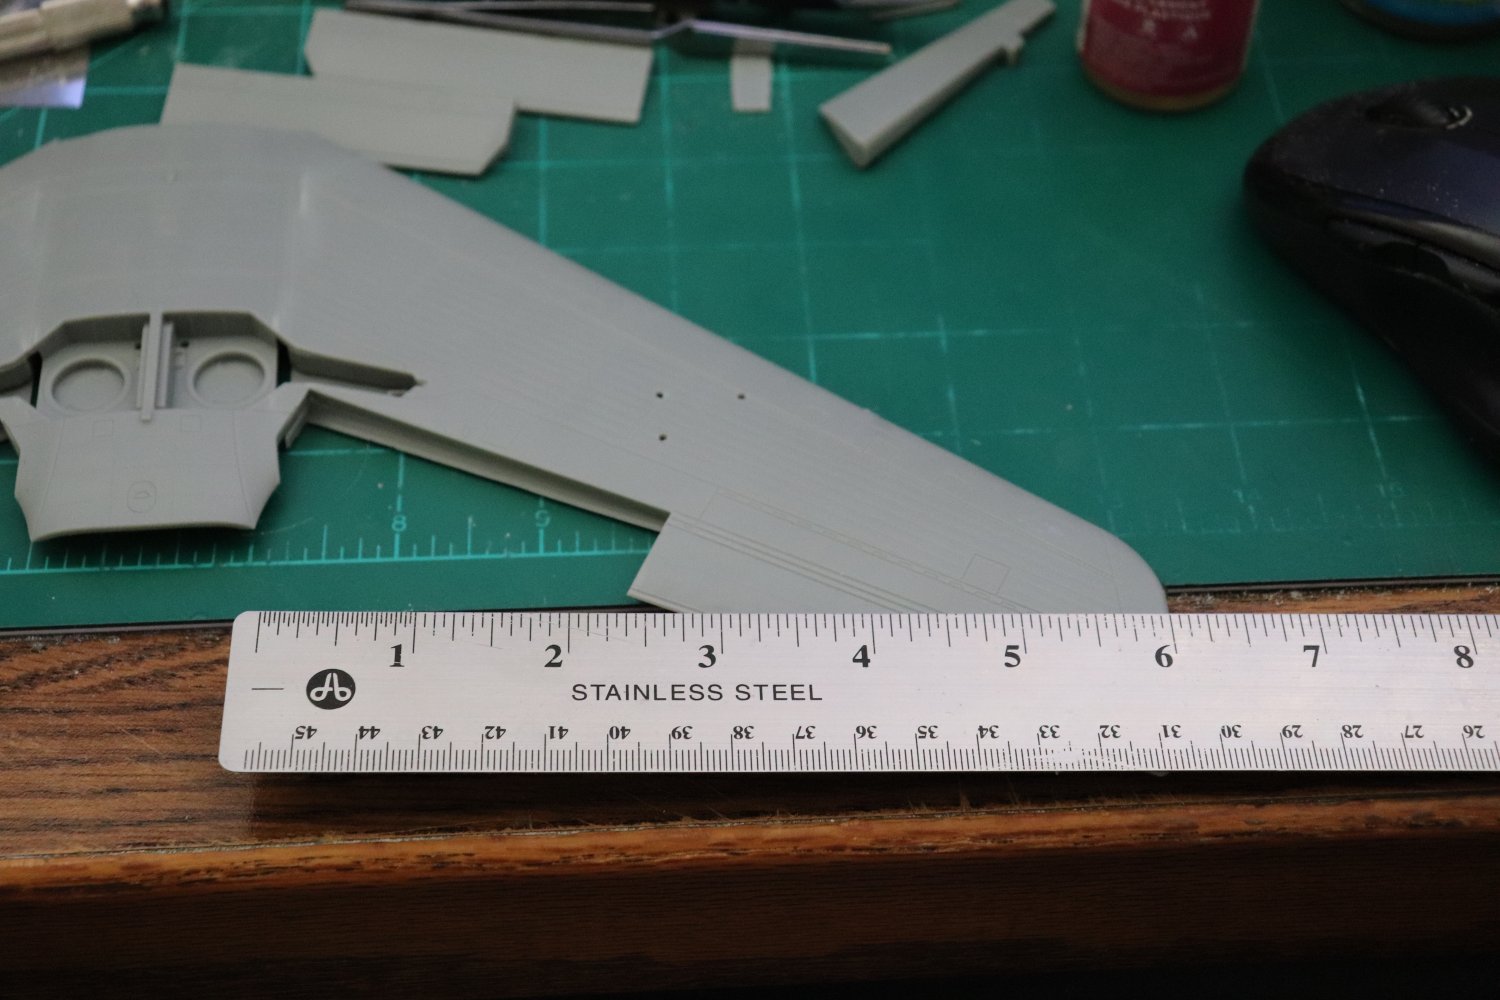
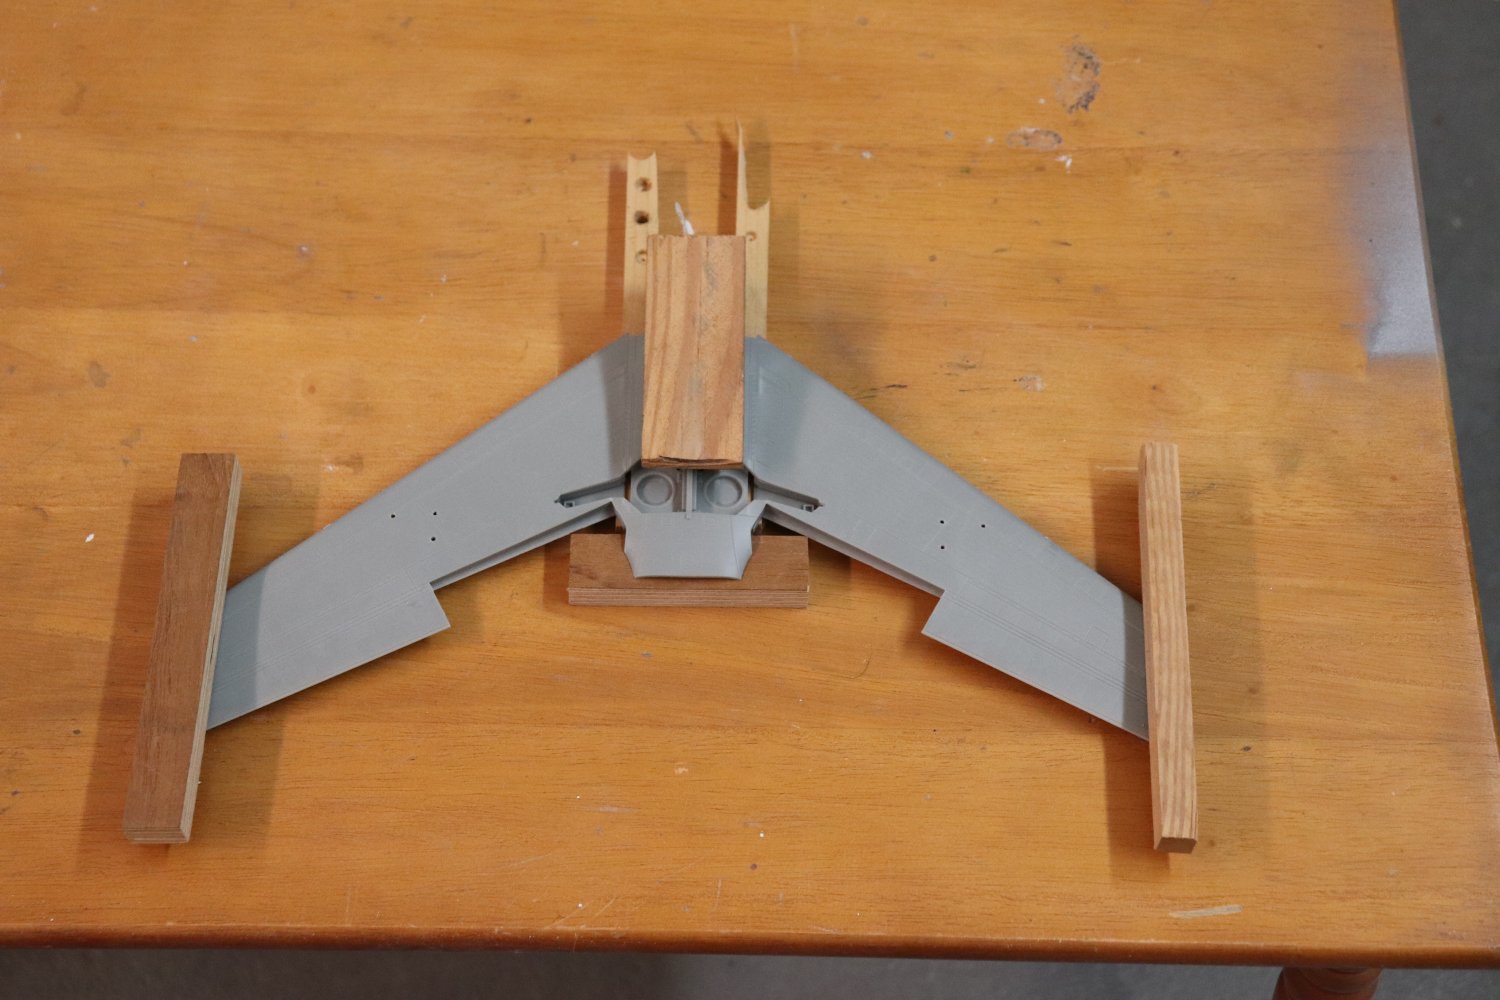
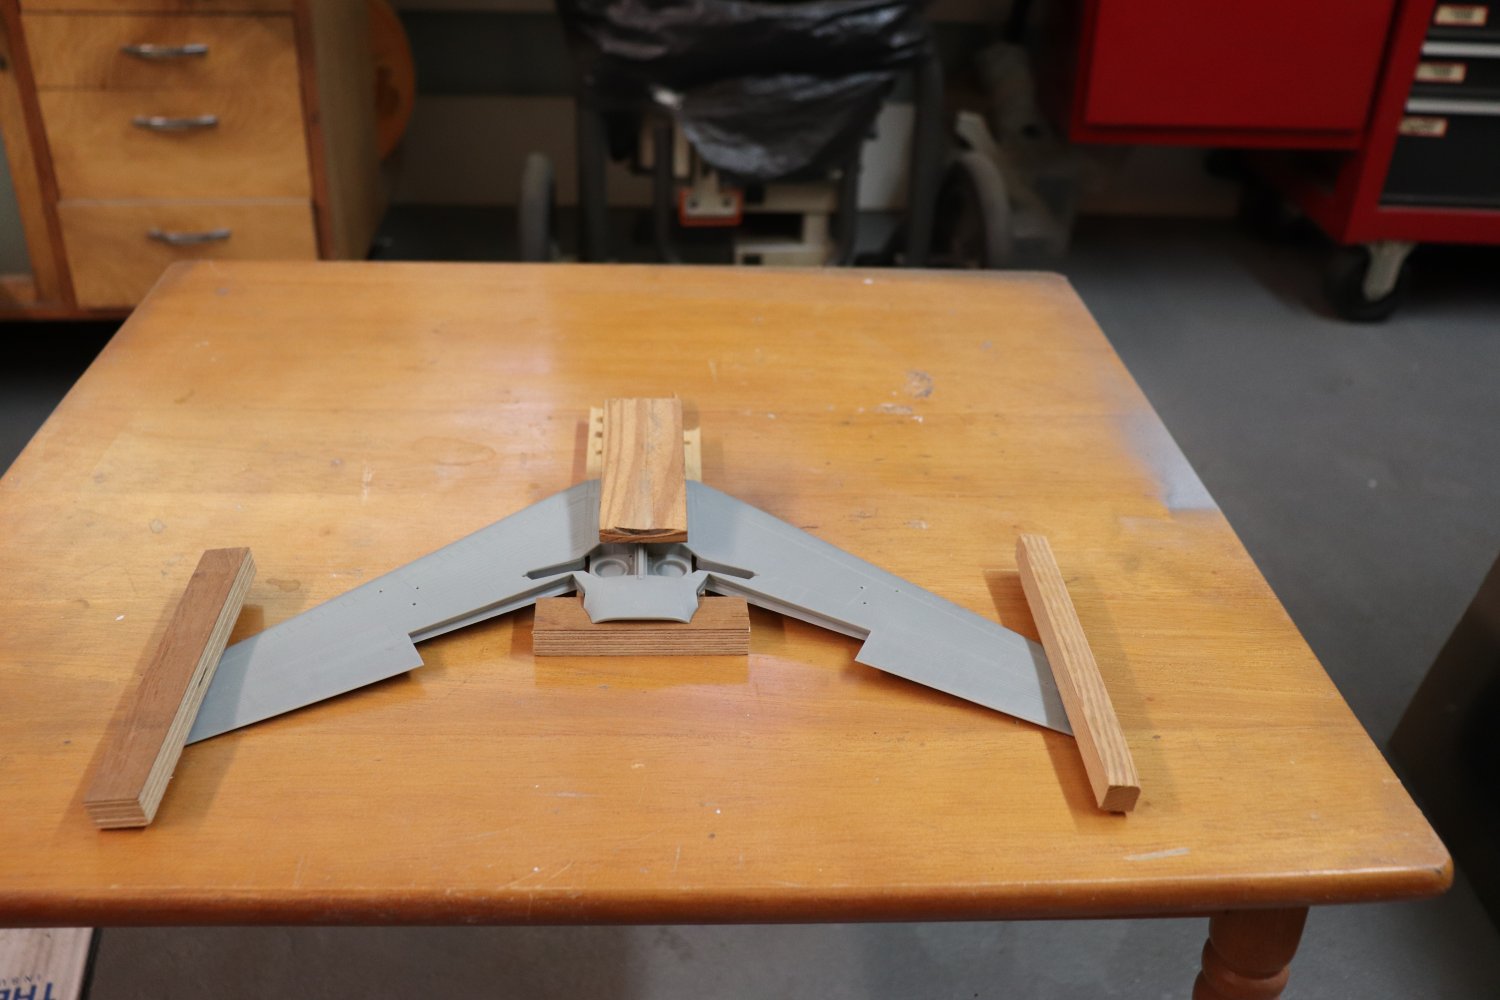
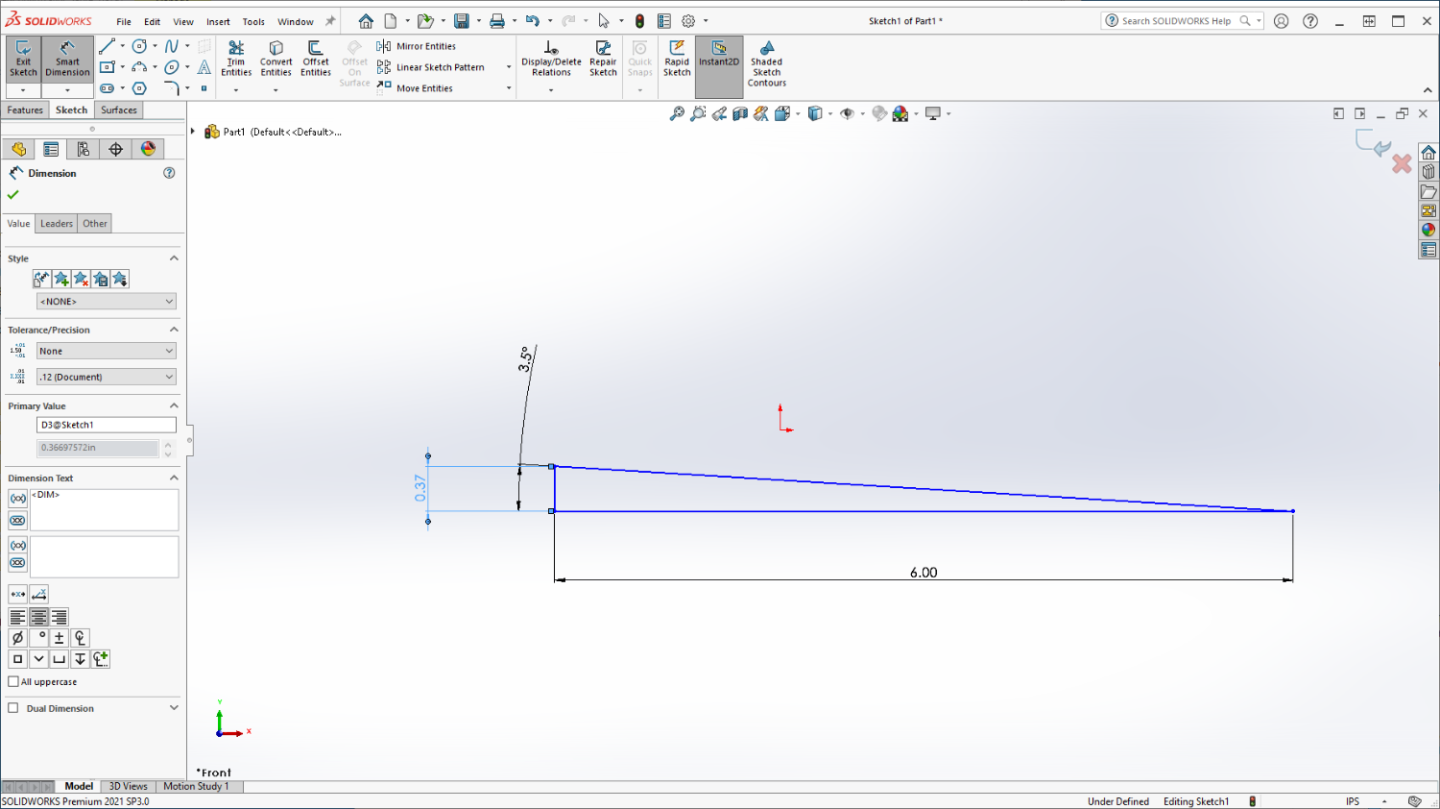
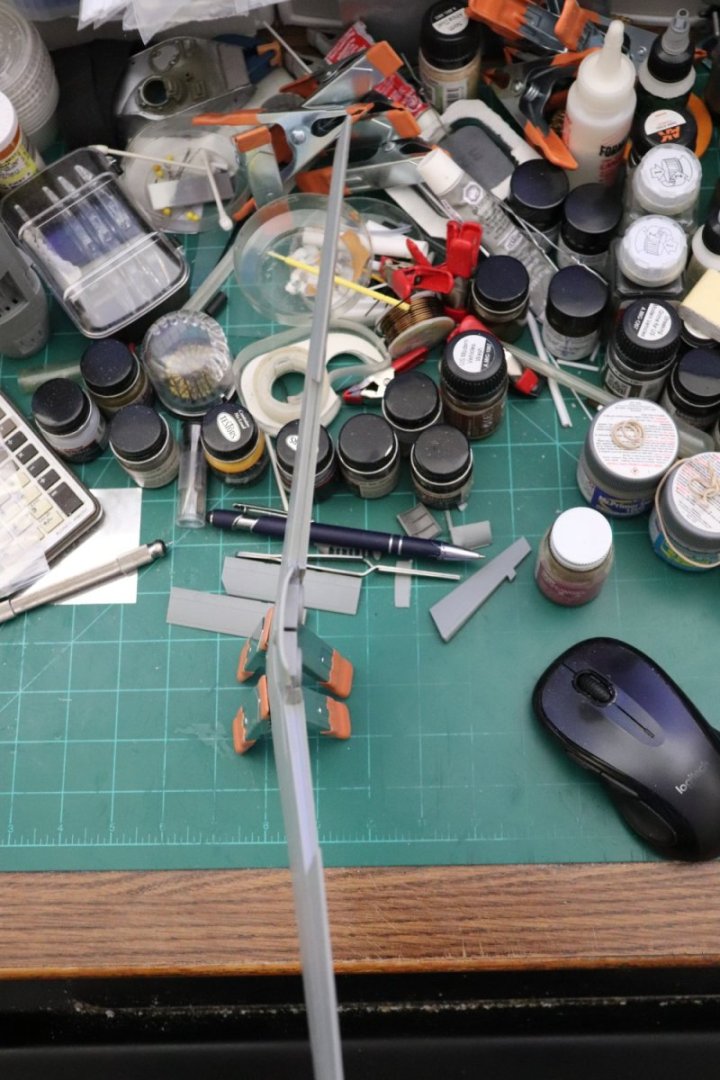
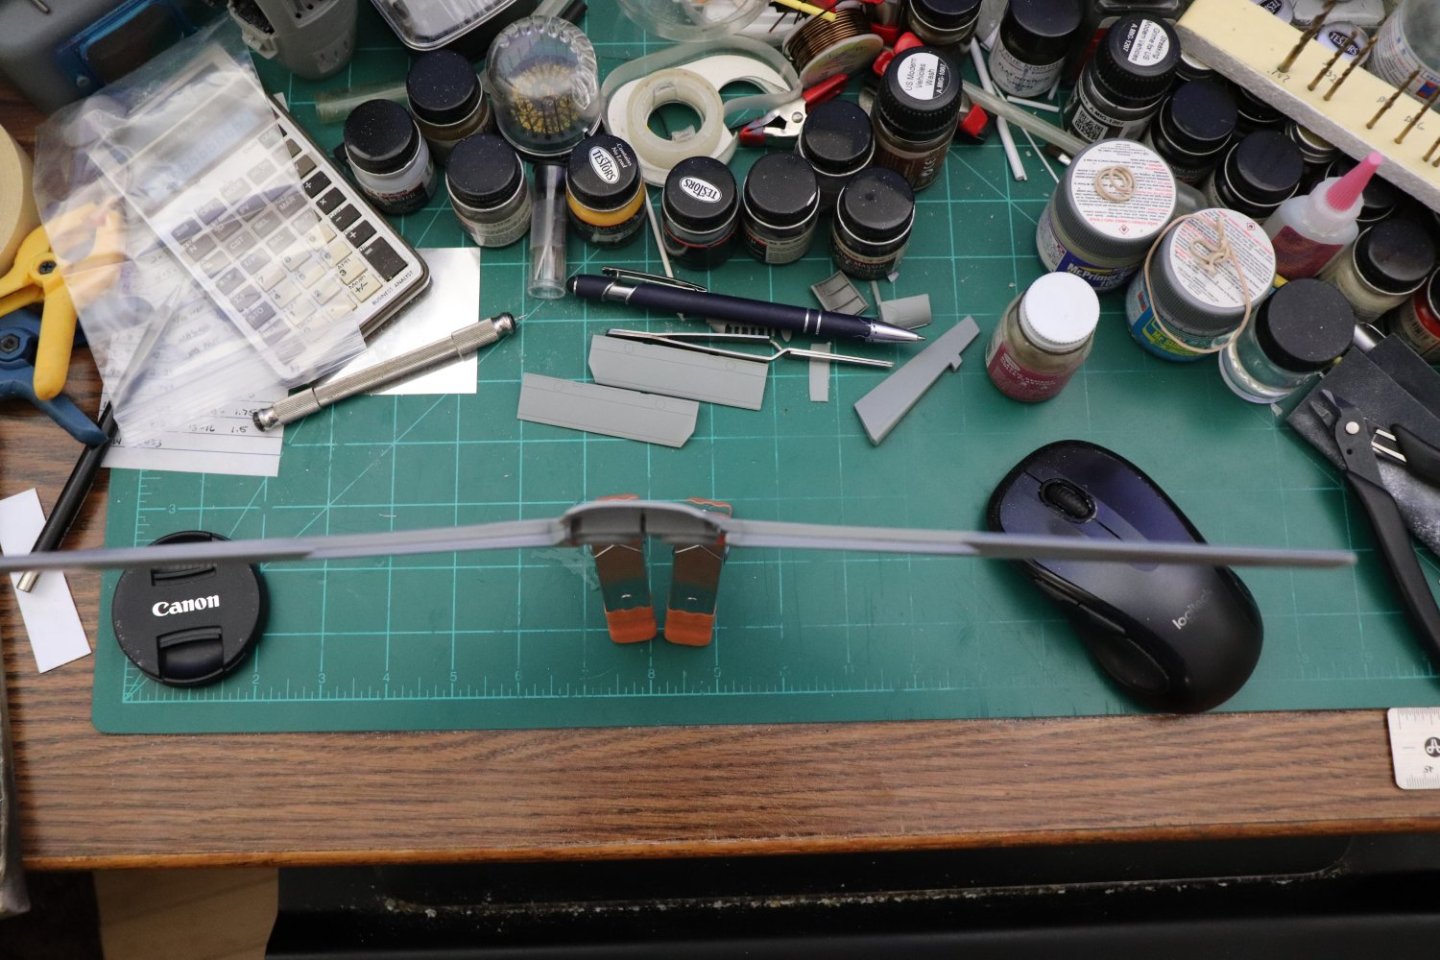
Ok Brothers, another update.... Plastic bending... The wing on this kit was molded flat... Unfortunately the real aircraft has a 3.5 degree dihedral to it... Dihedral is upsweep, the wing tips are higher than the wing root... And on the F-86 it was barely noticeable but it is there... So how do we go about making the wing tips higher than the roots without warping the wing? Heat gun... But first we have to figure out how much to bend the wing at the root for a 3.5 degree upsweep... The length of the wing in scale is 6 inches from root to tip... To figure out how much lift we need we turn to solidworks... This consists of drawing a horizontal line 6" long and a corresponding line at an angle to that line... Then we measure the angle between the lines and set it to 3.5 degrees... Then you draw a vertical line joining the open end of the two lines and measure it... in this case 3/8th of an inch is how much we need to raise the wing tips.... So how do we go about this in real life? Working upside down, you use a 3/8th piece of wood just wide enough to support the wing roots on the center and place a block on the center to hold them flat... You then place a couple of pieces of light wood on the wing tips to increase their weight a bit to let gravity work in our favor... WE then take a standard painters heat gun on it's mildest setting and gently apply heat along the wing root on the bottom side watching carefully as the wing tips settle to the bench surface... Remove the heat frequently cause you do not want to overheat the plastic.. (which can happen awful fast) when the wing settles to the surface remove the heat and allow to cool, then do the same to the opposite wing, allowing it to completely cool when it has settled... At this point you remove the blocks at the wing tips and check if the tips are still settled on the bench surface, if not another slight application of gentle heat to the wing not touching and allow it to cool completely... (takes about 10 minutes) At this point you have added dihedral to your wing.... Maintaining the straightness of the wing itself.... without damaging any details on the wing surface... Next up, assembling and fitting the wing to the fuselage.... (sometimes this process will warp the rear center section of the wing a little bit, you will need to adjust the fit) This is the old school process of adjusting a wing... More later... Onwards...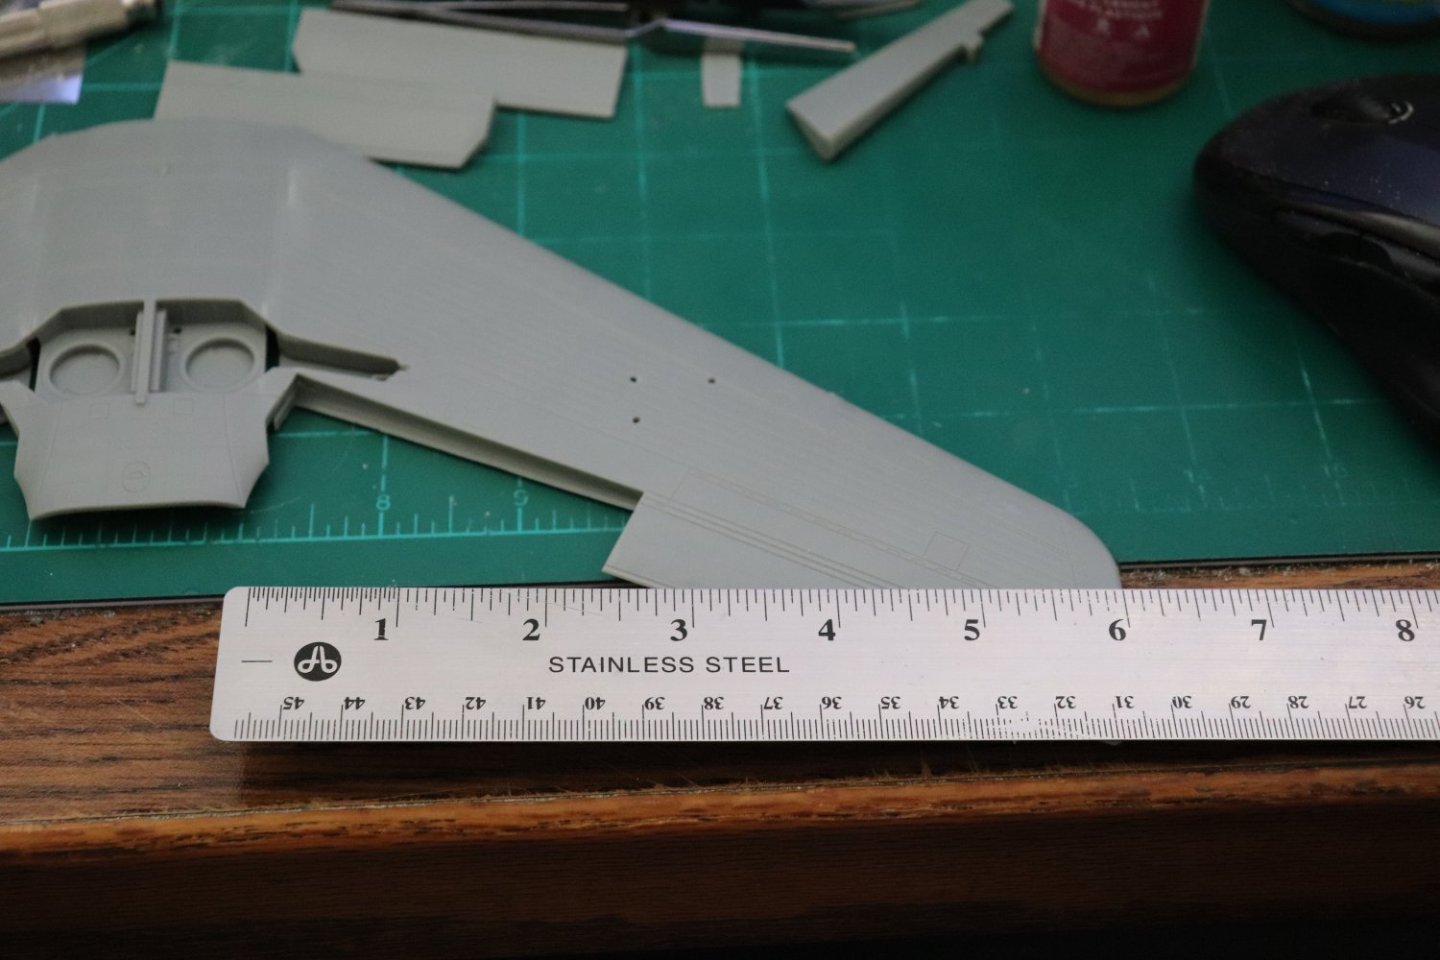


- 585 replies
-
- 15
-
-

-
Looking good brother... Setting the tracks is the right move in my opinion, they are nice looking tracks, production molding is getting better and better...