Egilman
-
Posts
4,377 -
Joined
-
Last visited
Content Type
Profiles
Forums
Gallery
Events
Everything posted by Egilman
-
 Beautiful rendition of a Nieuport 11 Bebe' brother.... You need a DH II and a Eindecker to go with it (in keeping with the period) {chuckle}
- 98 replies
-
- 10
-

-
F-86F-30 Sabre by Egilman - Kinetic - 1/32nd scale
Egilman replied to Egilman's topic in Non-ship/categorised builds
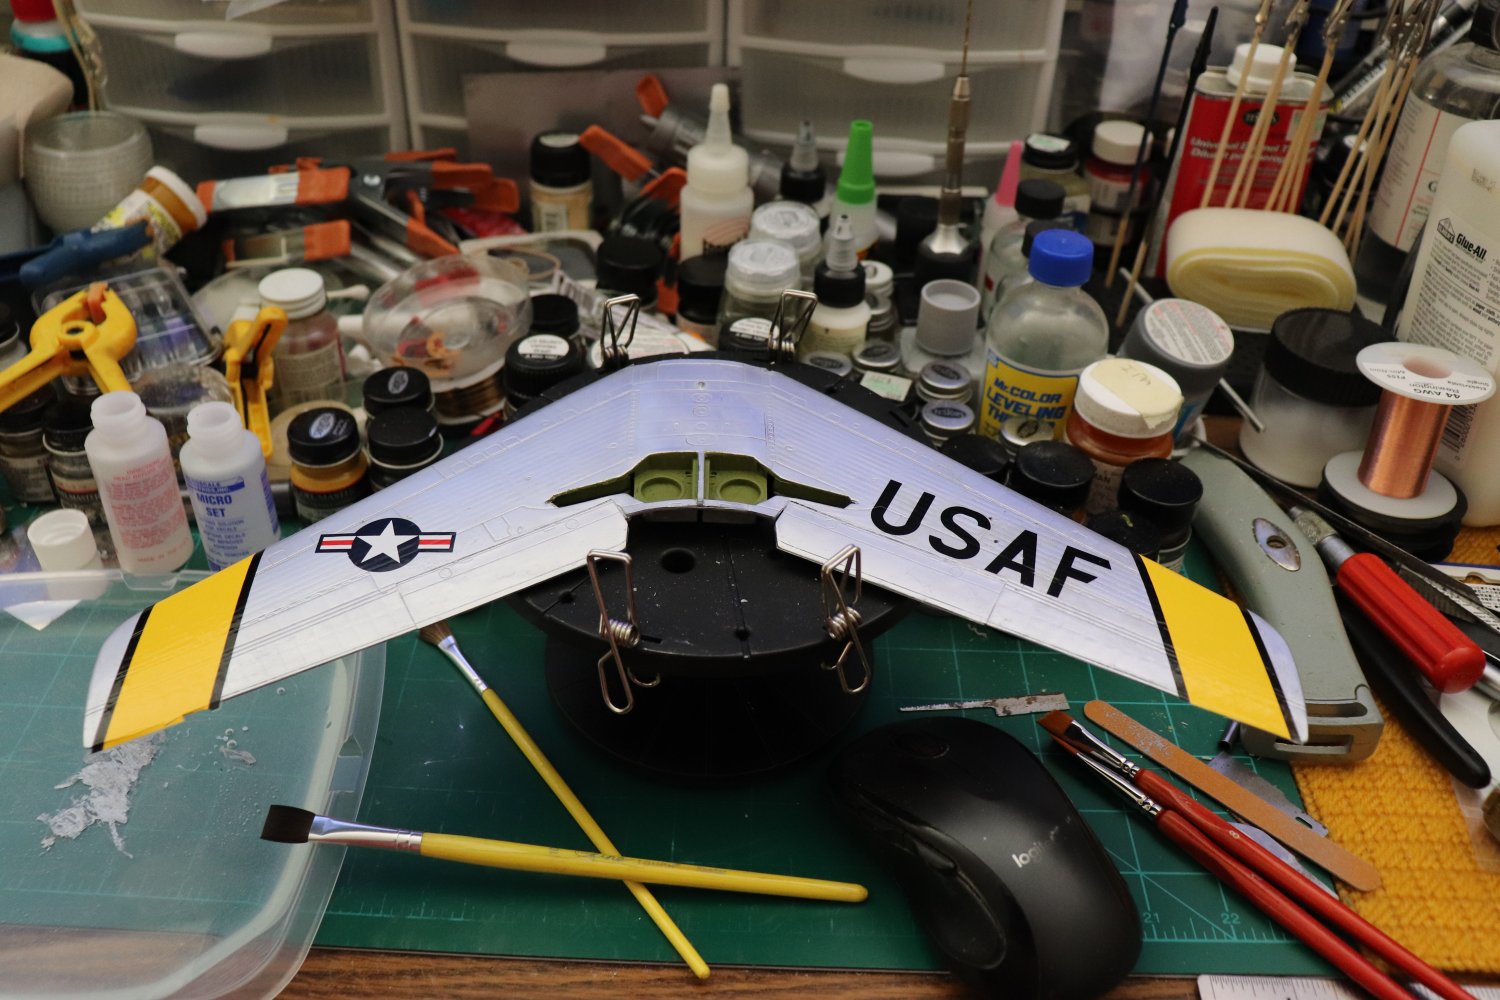
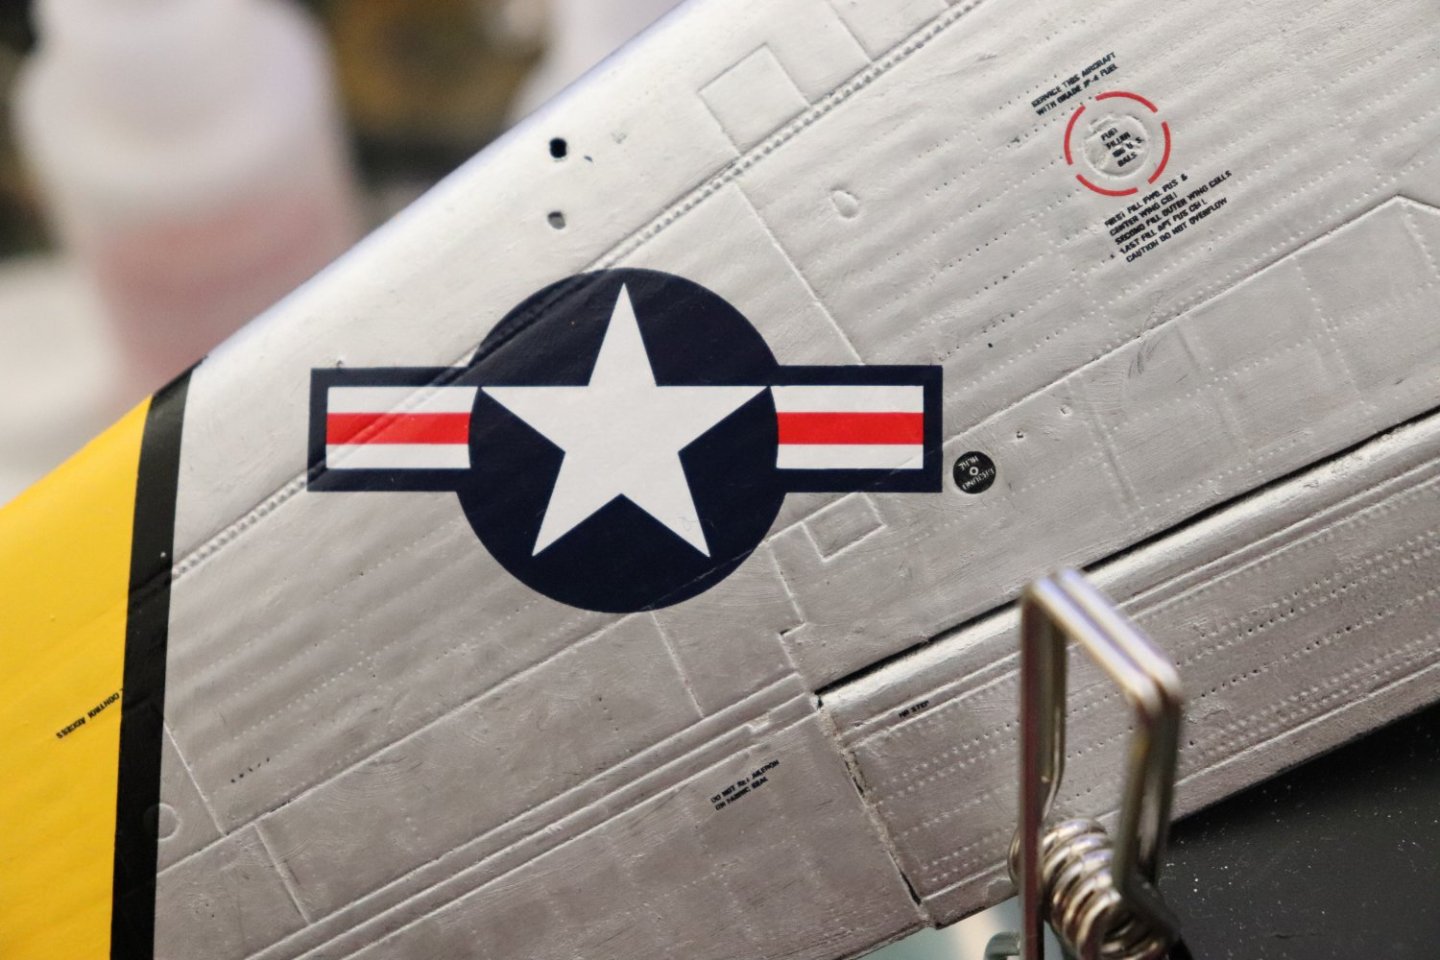
Another short stabilizer update... The left one seems to have gone down ok.... You can see where it split around the trim tab actuator but that's an easy touch up.... I went ahead and put on the right side.... Still has to finish drying but it looks like it is conforming to the surface fine, you can also see where they got the angle a slight bit off, not worth screwing with... They have gone down fine, I don't know what the problem with the fuselage main stripe was but it doesn't look like it's effecting the rest of the sheet.... (which is good, the stars and bars are pre-cut for the speed brakes, I sure would hate losing those... I would have to cut the Print-Scale ones manually, ouch) So, what I'm going to do is continue to put the rest of them on except for those that have to go over the stripe... They will have to wait for painting....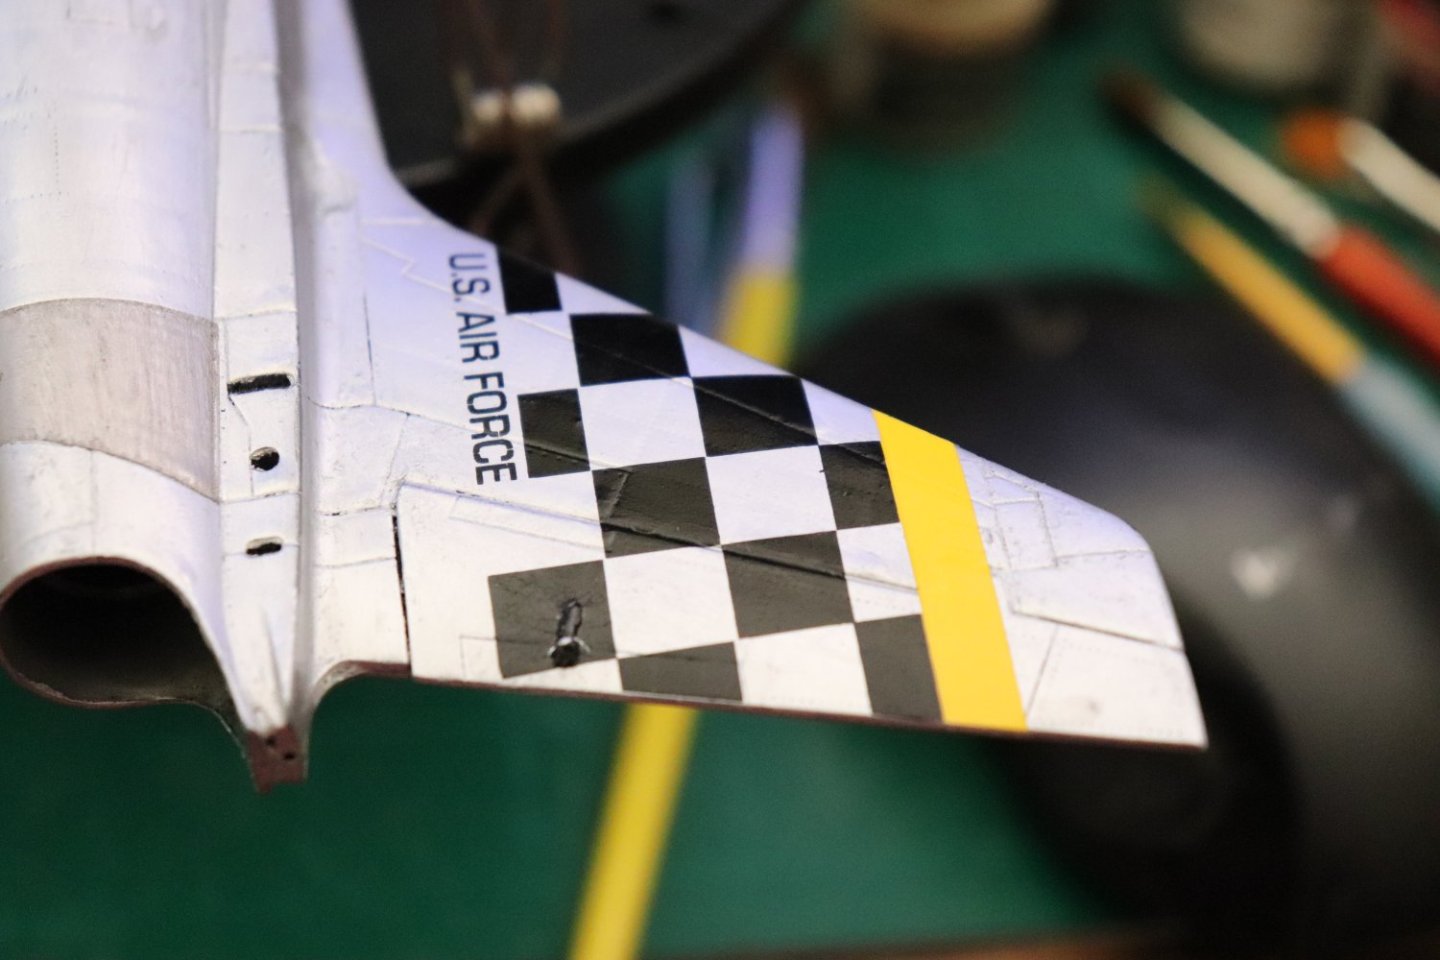

- 585 replies
-
- 16
-
-
True that! Sorry Rik....
-
Yep they estimated it would take six mainframes to keep the system running through the entire mission, but they only had room for five.... So they kept a crew working on and monitoring them 24/7 My understanding was #5 had been running for almost 8 hours all by itself before they finally got #1 restarted as backup... They didn't have self testing routines back in those days, mechanical faults had to be tracked down one by one and from what I read, #2 was dead/kaput, #3 was going to take another 24 hours to get back up and #4 was 12 hours into figuring out what caused it to go down.... It was speculated that if the mission had run another two days they would have completely lost the mainframes.... Now that would have been a disaster...
-
F-86F-30 Sabre by Egilman - Kinetic - 1/32nd scale
Egilman replied to Egilman's topic in Non-ship/categorised builds
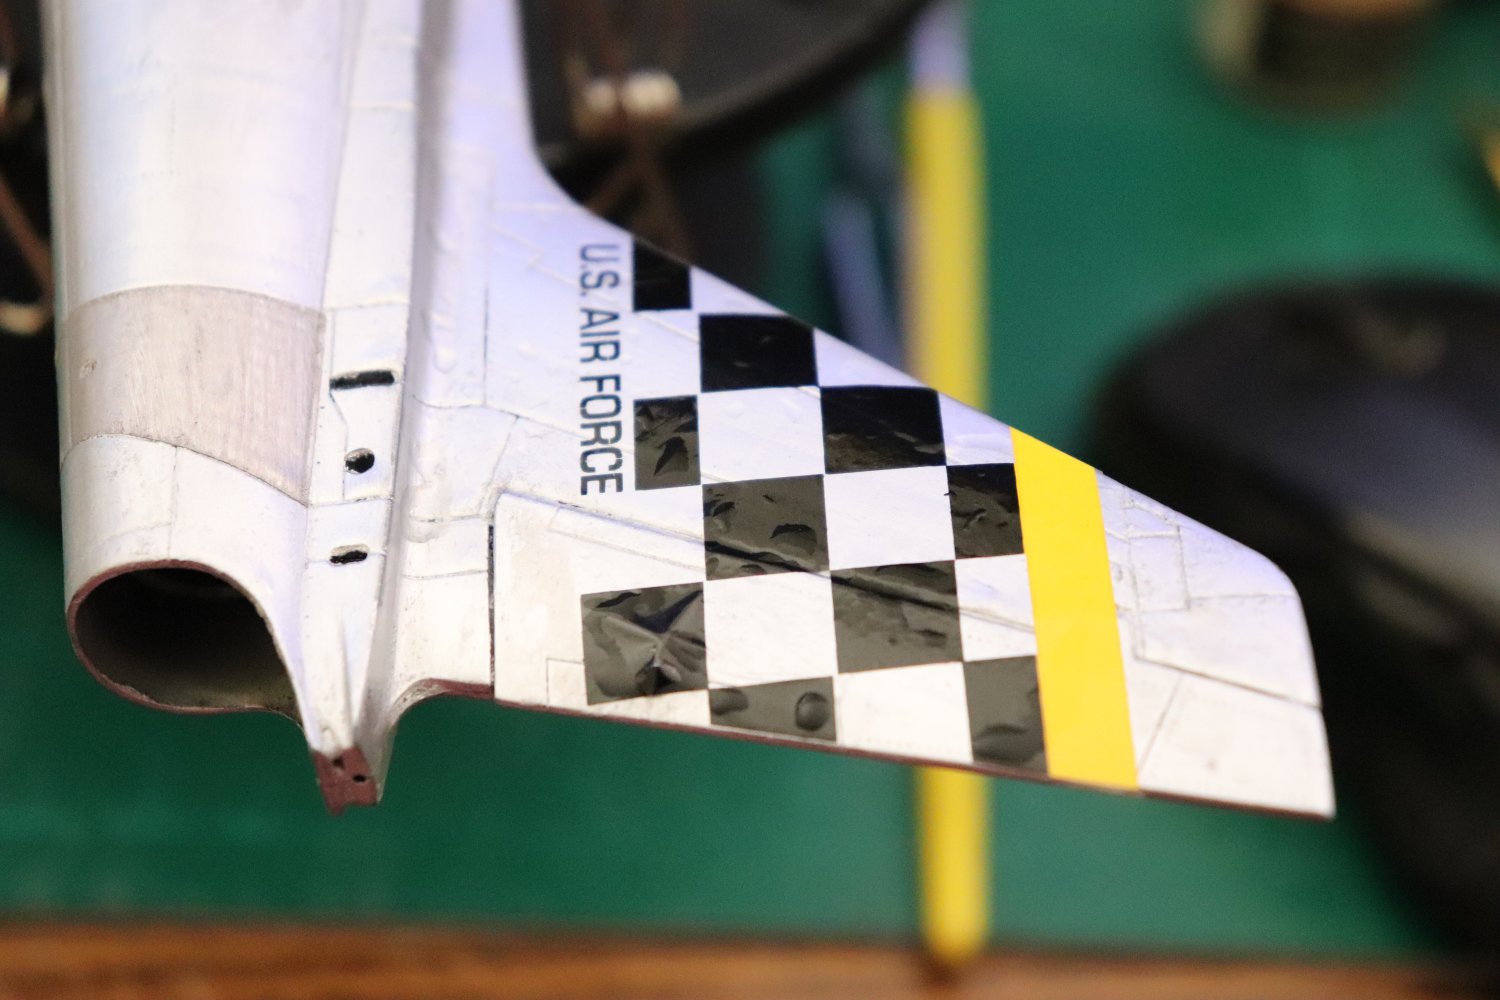
Short update.. The second largest decal the left side vertical stabilizer decal.... Waiting for it to shrink from the Micro Sol.... Seems like it went on ok.... When it dries completely, I'll do the right side and see what I get...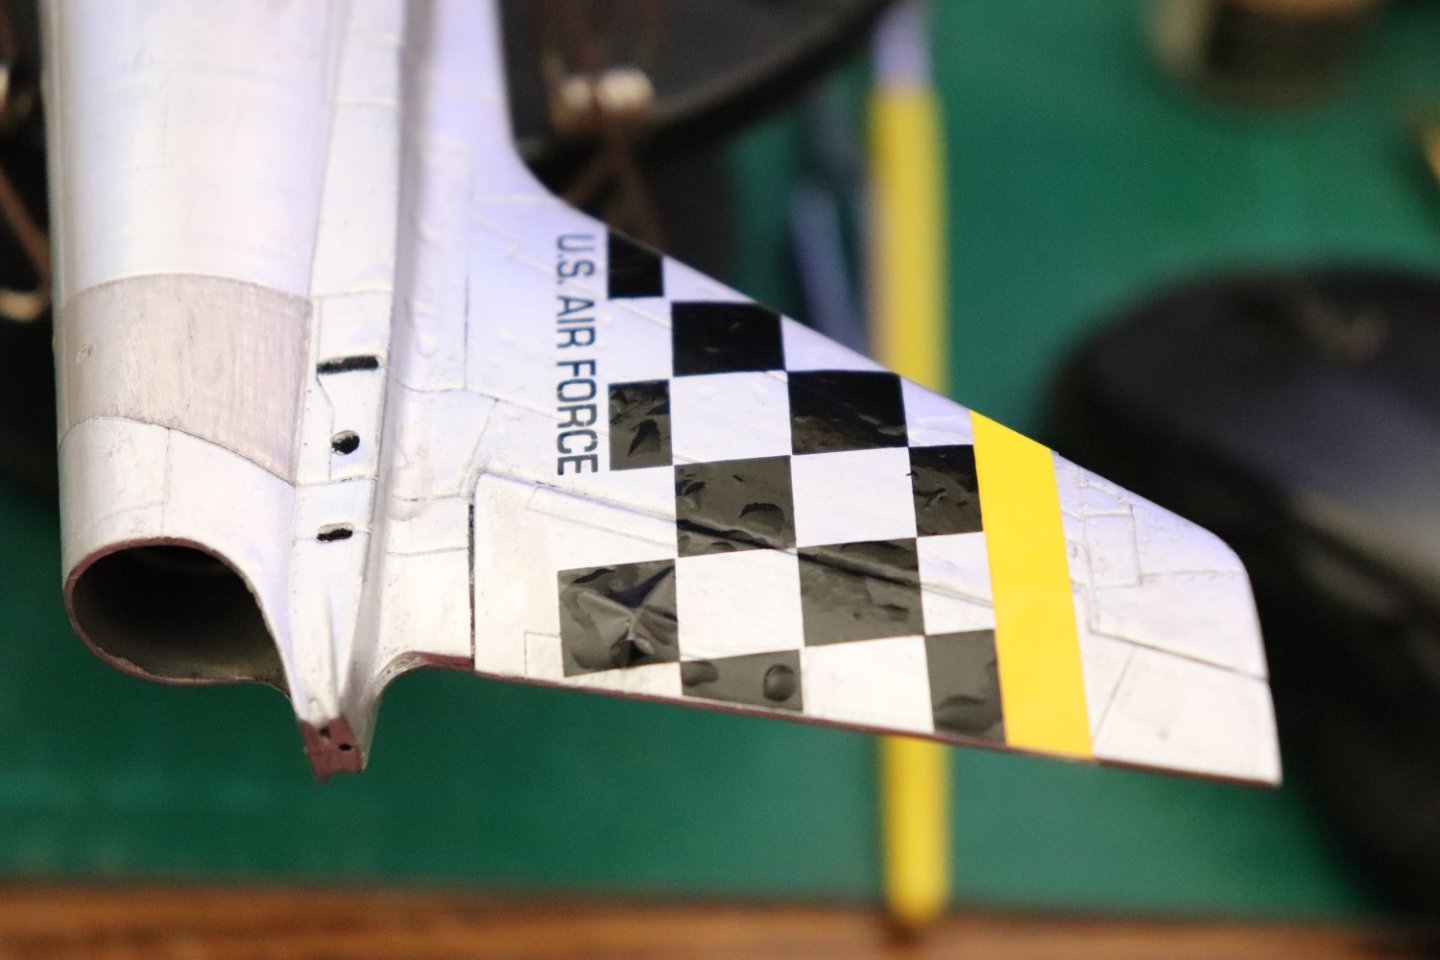
- 585 replies
-
- 10
-
-
And the onboard computer systems of the Apollo Command Module and LEM combined were less powerful than a TI-80 hand held calculator... I'm a member of several fora that go into detail on the software engineering that went into the Apollo missions... And, there is an actual simulator that is running the command software to this day.... The mechanical and structural engineering was a wonder, but without the software engineering they never would have got off the ground much less walked on the moon...
-
And the very very top of it including the stack cover would be powdery black from the soot... (that is if it was an operating tractor) Beautiful work my friend.... The heavy iron master...
-
F-86F-30 Sabre by Egilman - Kinetic - 1/32nd scale
Egilman replied to Egilman's topic in Non-ship/categorised builds
And that gives you all the right to ask any damn question you like... IMHO.... {chuckle} -
Yep and from time to time the same phenomenon occurred with various fast cars characterized by the nose of the car lifting off the track and the car doing the cartwheel fore and aft down the track.... in the '80s it happened in one spectacular crash during a Nascar race at 220+ MPH and a study was commissioned by Nasa with the aid of MIT to find out why... The Reason? The cars that were rising and flipping all had hard surface underbody pans, the idea was to reduce drag by having a smooth surface underneath, what they failed to realize was as they started slipstreaming the upper car bodies to reduce drag, they were beginning to take the shape of airfoils... The curved upper surface was serving to create lift like an airplane wing rather than push the car tighter to the surface... The cars wanted to fly.... CAN-AM realized this effect way back in the '50's and solved the problem by redesigning the car bodies into wedge shapes and adding downforce wings to the rear of the cars, Formula 1 followed suit soon after with wings fore and aft, upside down airfoils using the lifting properties of airfoils to keep the car glued to the track... They can actually drive on the roof upside down when at speed... (wind tunnel proven) The downforce created actually slows the car by about 20% from it's absolute top speed.... Why did it take till the '80's for the genuises of Nascar to follow suit? They drove wedge shaped cars through out the '70's... Engineering can take some strange turns and sometimes basic principles get lost in the transition.... The Stanley Steam land speed racer had a flat plywood floor that closed up all the spaces, the shape of the body was like an upside down canoe, the flat under floor acted like a sail in the wind... A deadly lesson missed back in the day....
-
F-86F-30 Sabre by Egilman - Kinetic - 1/32nd scale
Egilman replied to Egilman's topic in Non-ship/categorised builds
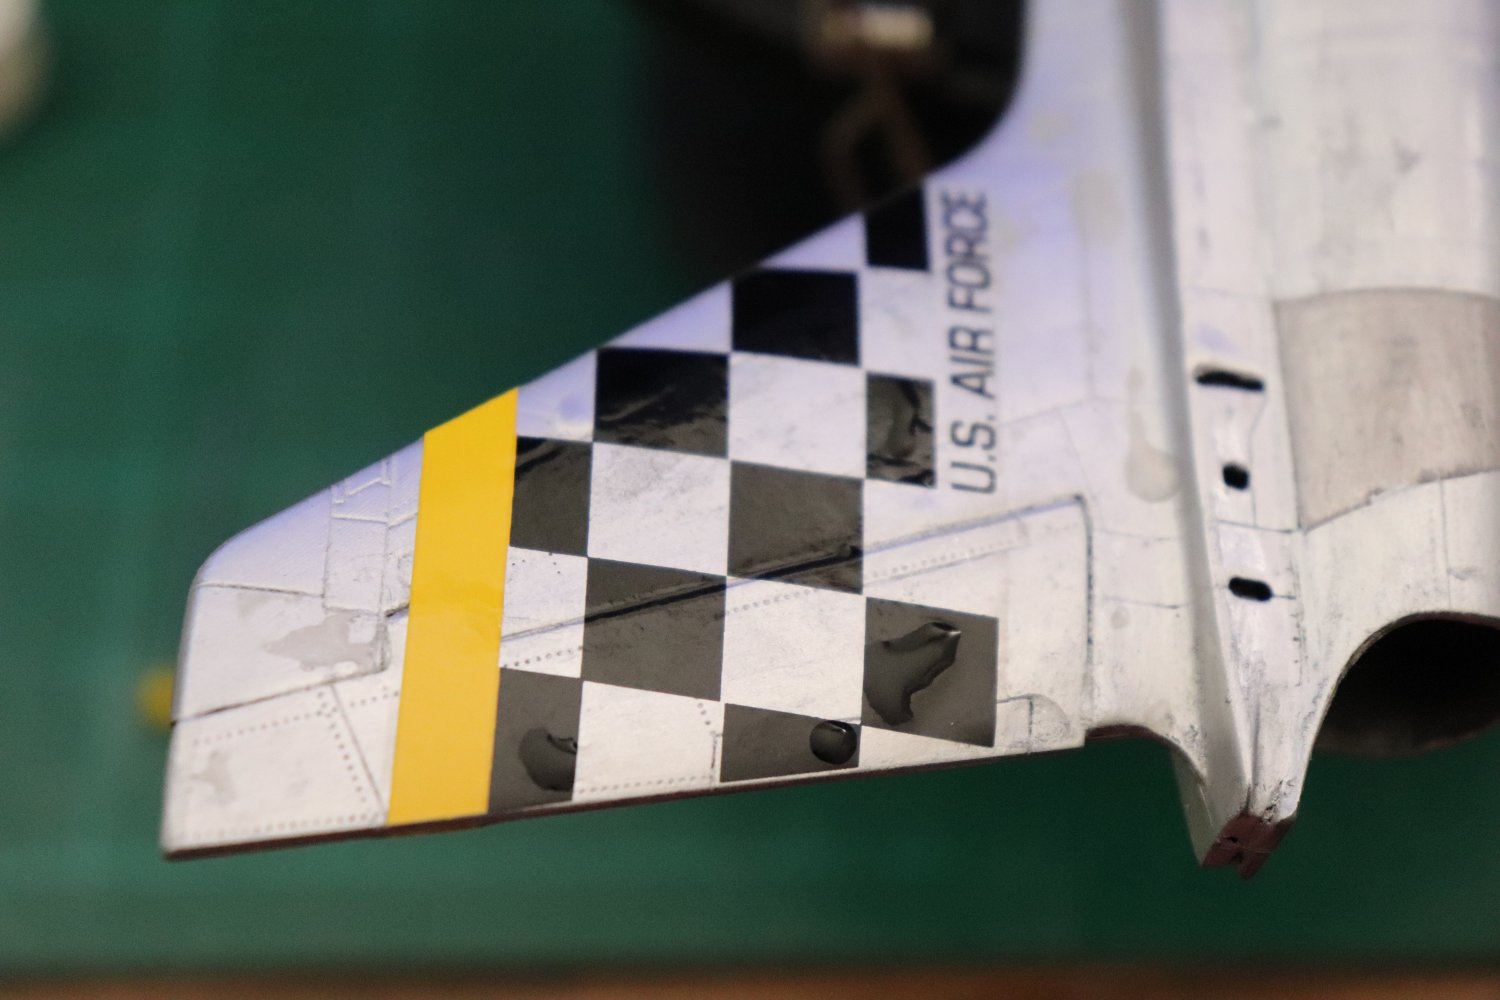
Every year brother, the insurance company pays for it... last checkup no cataracts, but we all know that could change... My glasses are prescribed for driving/distance but they may need adjusting... I've already put in the order for the paint with True North... They say 5-7 days to get here... I guess I can work on the landing gear and empennages while I wait... I'm debating on trying the Verticle stabilizer decal, that black checkerboard one which is fairly large as well... Better to know now rather than later... -
F-86F-30 Sabre by Egilman - Kinetic - 1/32nd scale
Egilman replied to Egilman's topic in Non-ship/categorised builds
Thanks Alan.... Yeah I find the 2.5 -3.5's the best for FOV & magnification, the higher ones narrow the view so much that you have to really be on top of what your working on... Just have to get used to wearing them... -
F-86F-30 Sabre by Egilman - Kinetic - 1/32nd scale
Egilman replied to Egilman's topic in Non-ship/categorised builds
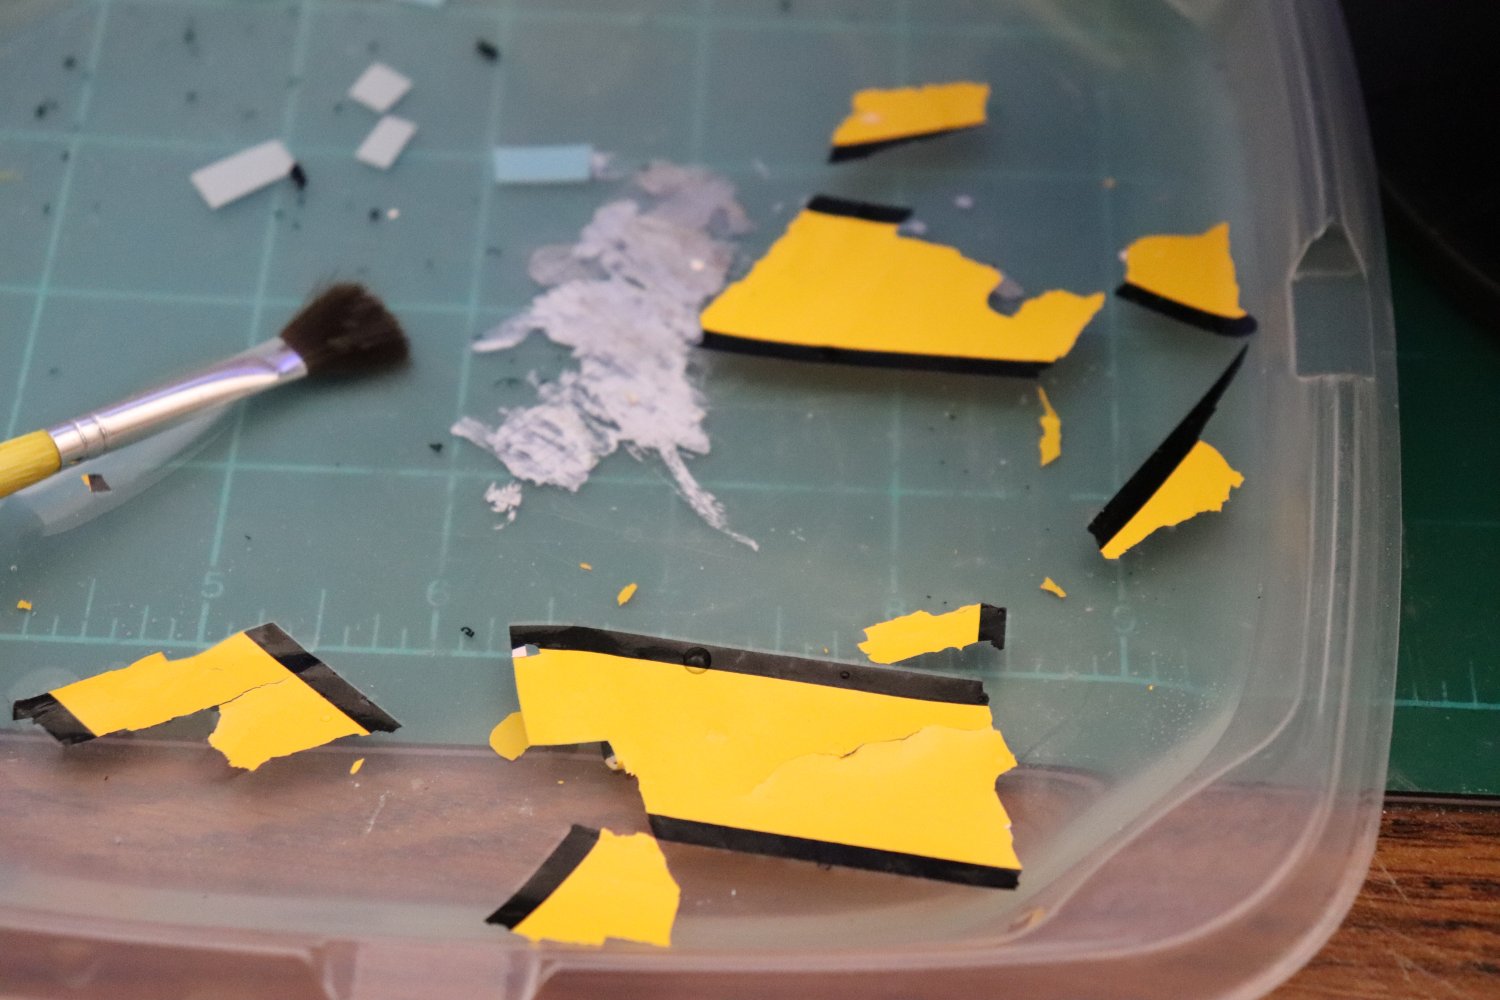
Well, it was going too good to last... The big yellow fuselage stripe? Didn't even make it off the backing paper... Now I've got to do it the hard way... And yeah, it has to go on first.... And wouldn't you know it? that's right, I'm out of Insignia Yellow.... {chuckle} Oh well, the life of a plastic hacking modeler... {chuckle} Onwards...
- 585 replies
-
- 11
-

-
-
My pleasure... His record setting run of 127 mph was set a few days before the attempt which killed the driver, they knew it would go faster and they were trying... the 150 MPH wasn't recorded as a record cause of the failed second run, so according to the land speed record rules the 2nd attempt speed couldn't be certified... After that The Stanley company quit doing speed runs.... A damned shame if you ask me...
-
Yep eccentric timing is everything with these engines, a two cylinder version of this same engine is what powered the Stanley Steam Car to 150 MPH in 1906? (experimental version) at Daytona... when it was returning on it's certification run, it's flat bottom caught a gust of air off the beach and flipped, disintegrating itself and the driver... It had cleared the gates at over 160 on the return before it flipped.... At the time, it was the fastest mechanical device on the planet... Locos were doing 80, cars were lucky to get up to 30, and airplanes were barely cracking 70 mph.... When fine tuned, they were very powerful, and very high revving as well.... (depending on how they were engineered)
-
That's excellent Brother... The tracks have that loosely tight look they all have when run for a bit.... I take it your going to leave it in Cat Yellow rather than OD? Excellent choice in my opinion... She really is looking the part....
-
F-86F-30 Sabre by Egilman - Kinetic - 1/32nd scale
Egilman replied to Egilman's topic in Non-ship/categorised builds
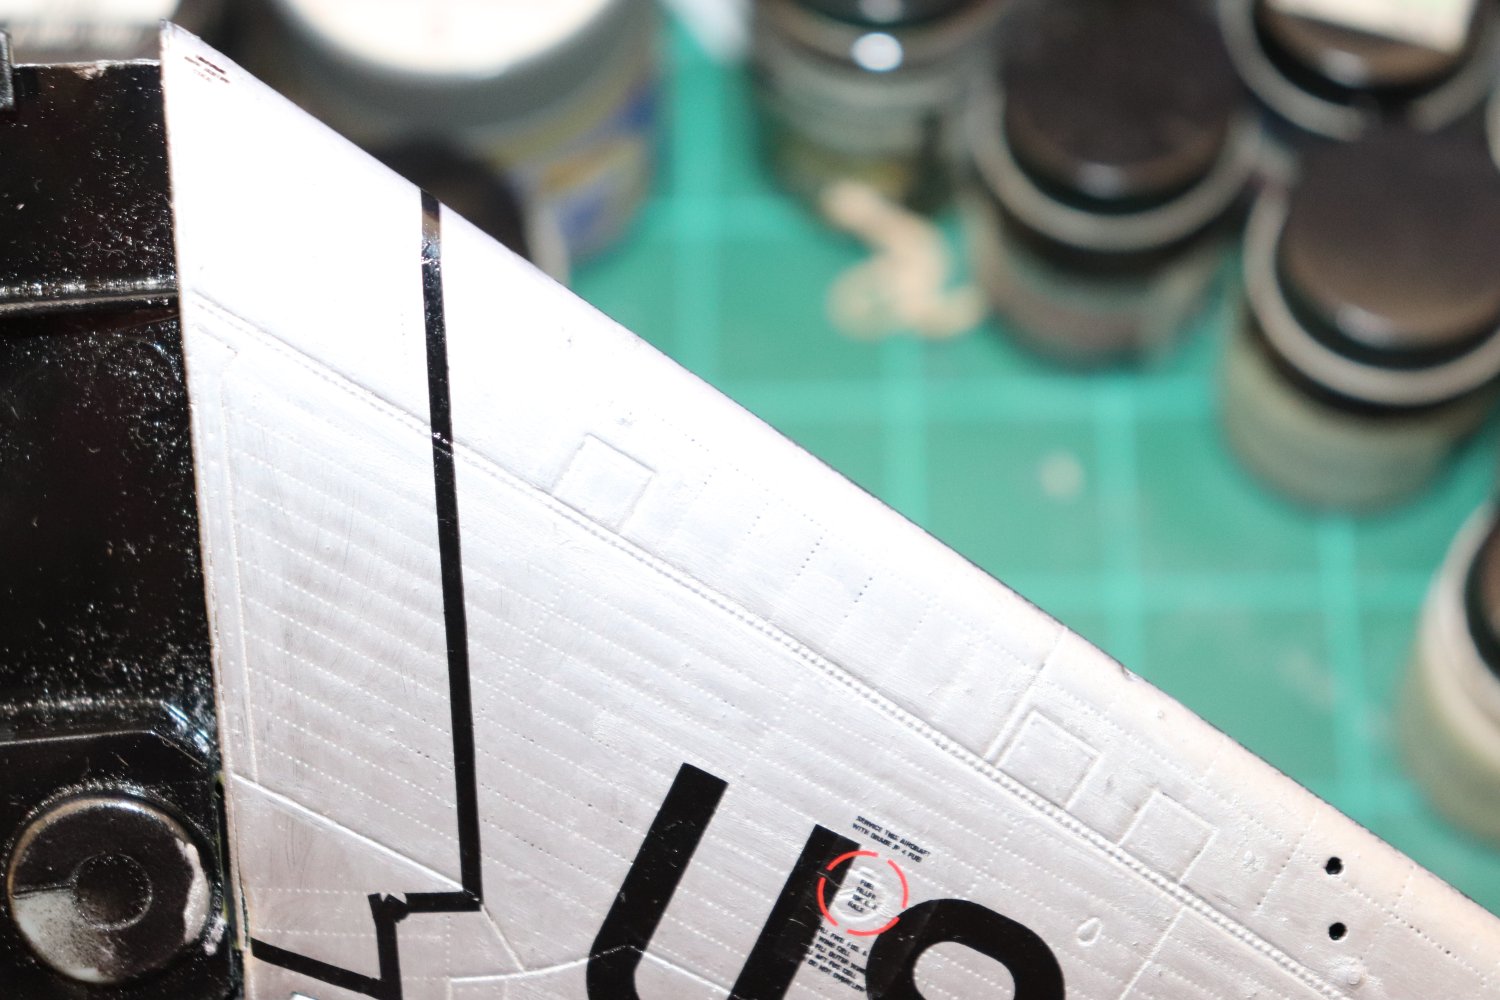
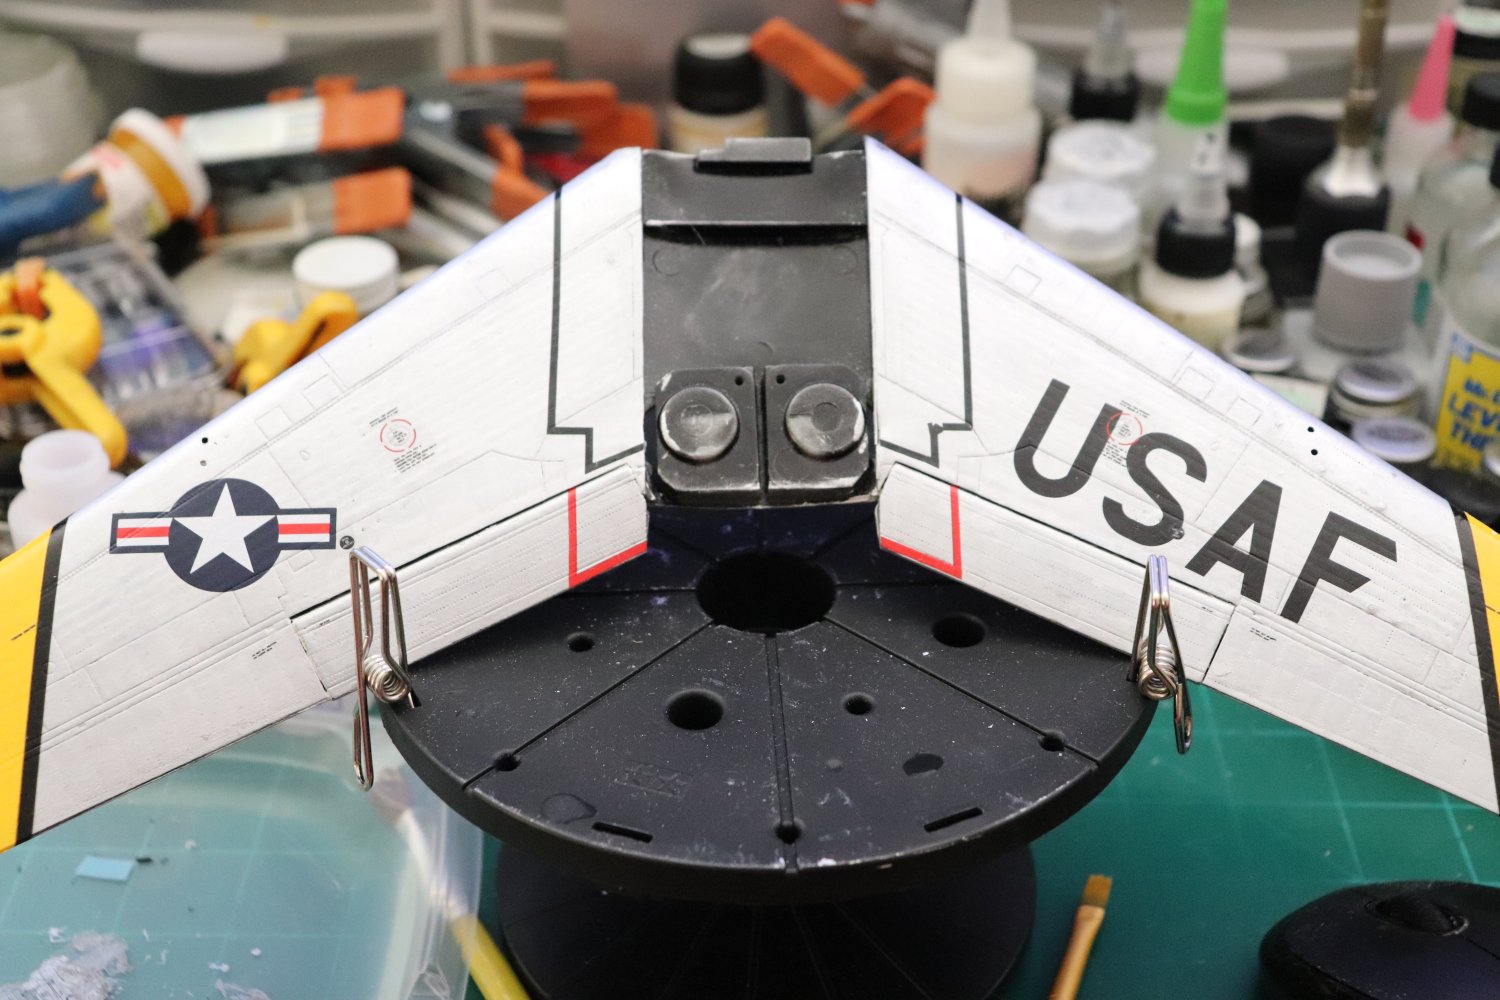
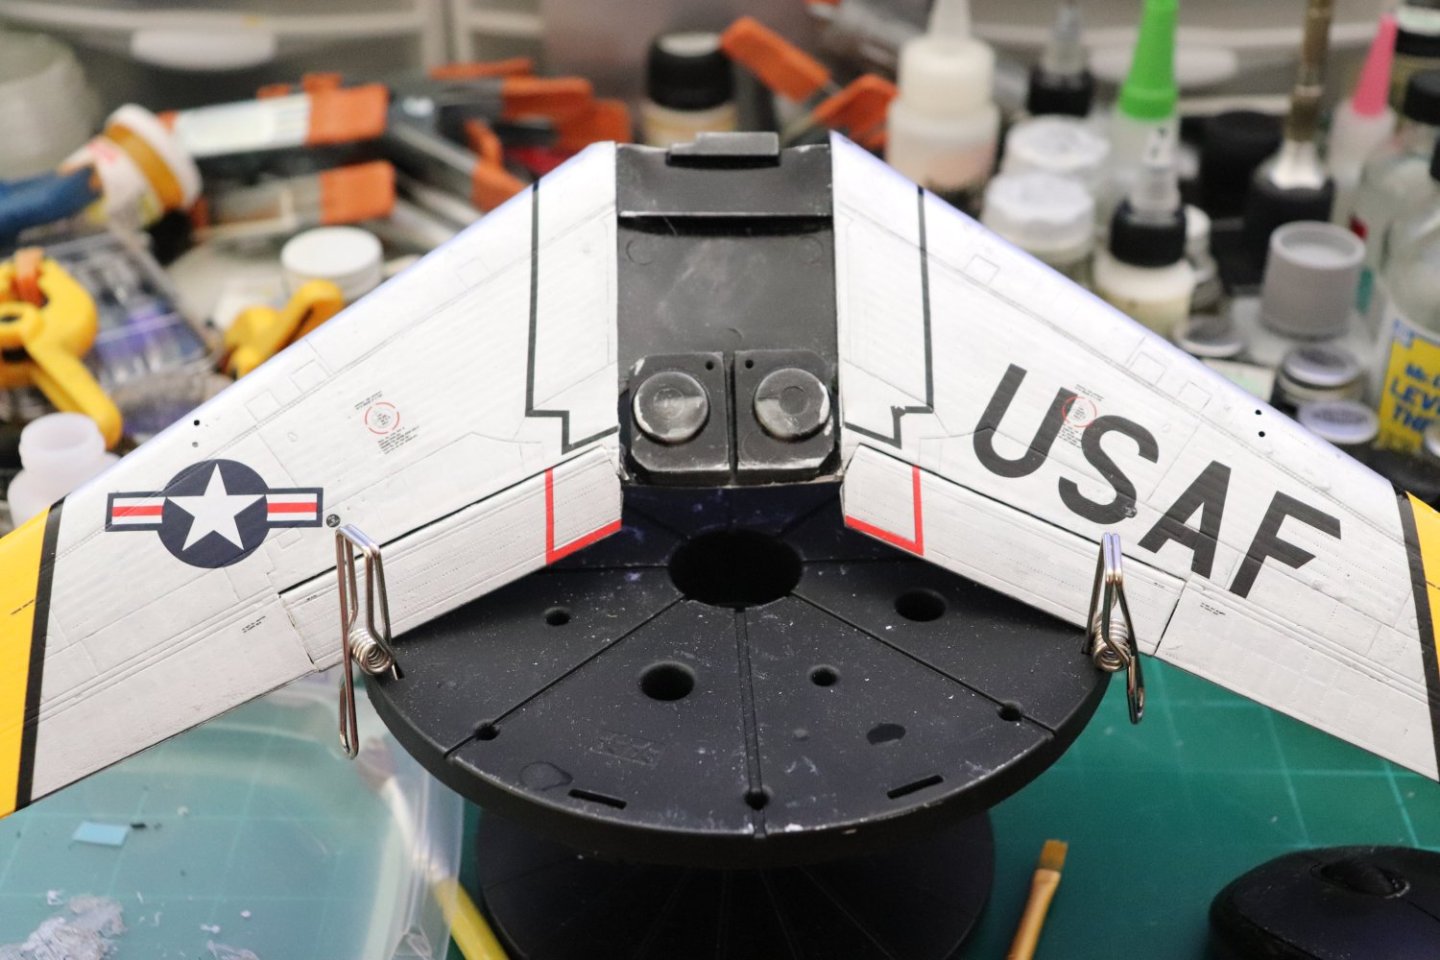
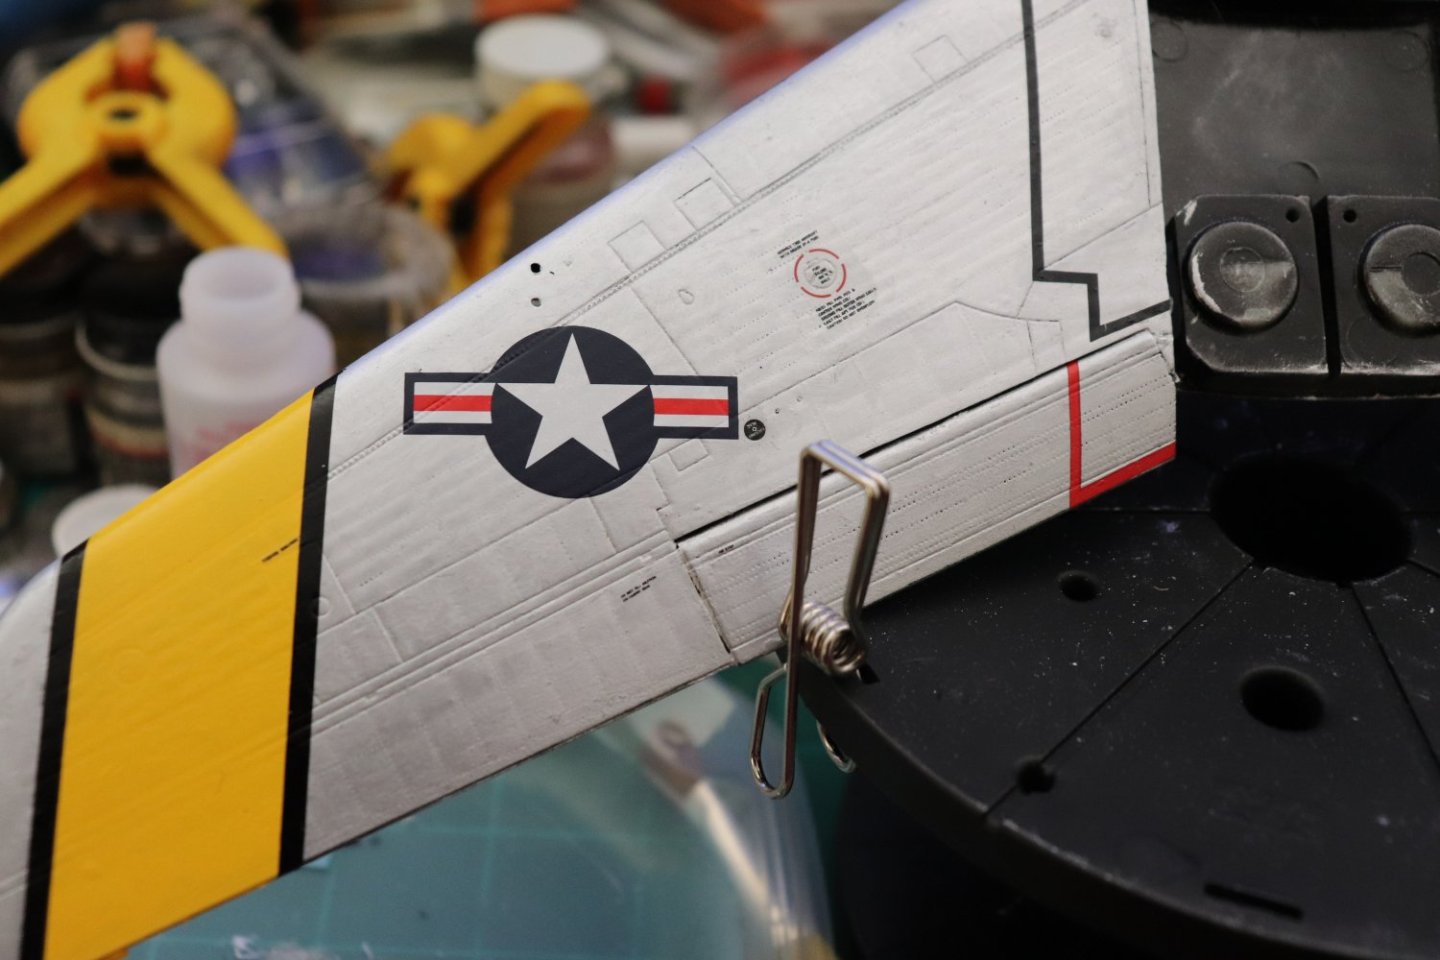
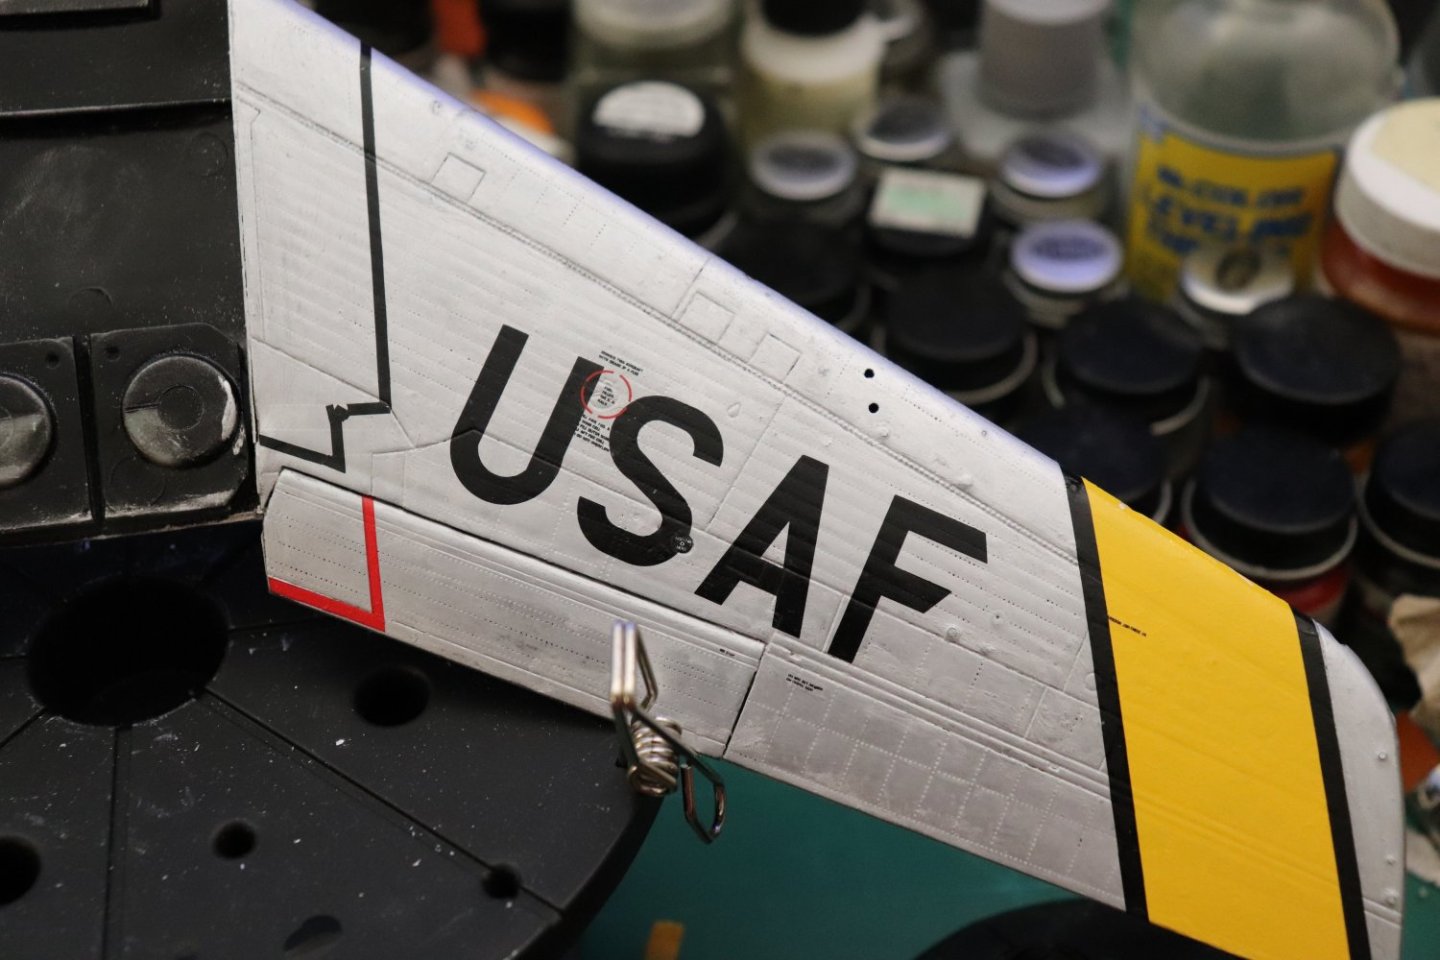
Another short update... Upper wing surfaces.... They were brittle especially the long thin walkway stripes, also, Kinetic left them long which means they have to be trimmed on the ends, another needless difficult task in application.... You can easily see here why the technical details needed to go over the insignia markings, not really a hassle, but makes the order of application a bit complicated at times... Anyway the upper wing surface is now done as well, time for the decal sealing coat of future... (after I fix some of the tiny fracture issues) On to the fuselage my friends...
- 585 replies
-
- 12
-

-
-
F-86F-30 Sabre by Egilman - Kinetic - 1/32nd scale
Egilman replied to Egilman's topic in Non-ship/categorised builds
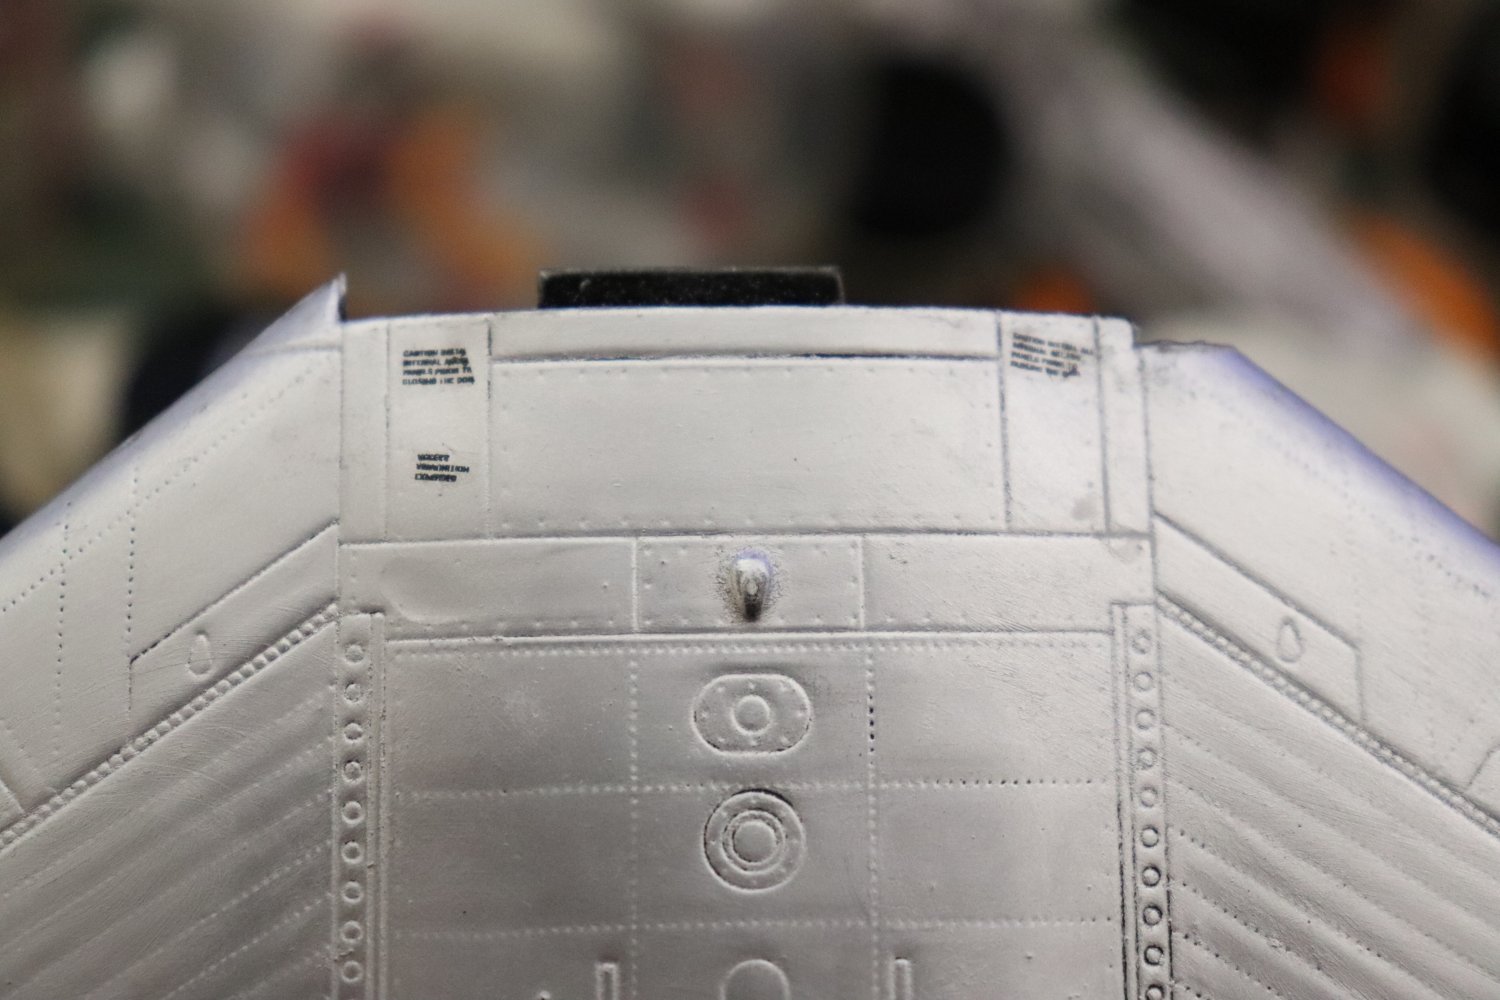
Thanks Jav... I didn't notice it either until I made it real shiny for the RnB finish, then the reflections of it stood out where you couldn't miss it... Stealth details {chuckle} I was hoping that they would come thru when the finish was completed and they did... It does have an overall effect that you can't replicate... And it's the first time I've ever seen it on an injection molded kit... There is some amazing technology being applied to our hobby, is it a wonder that the prices keep going up? (but when this kit was released over a decade ago it listed at 39.99 I wonder if they really knew what the effectiveness of their artwork was)- 585 replies
-
- 10
-
-
F-86F-30 Sabre by Egilman - Kinetic - 1/32nd scale
Egilman replied to Egilman's topic in Non-ship/categorised builds
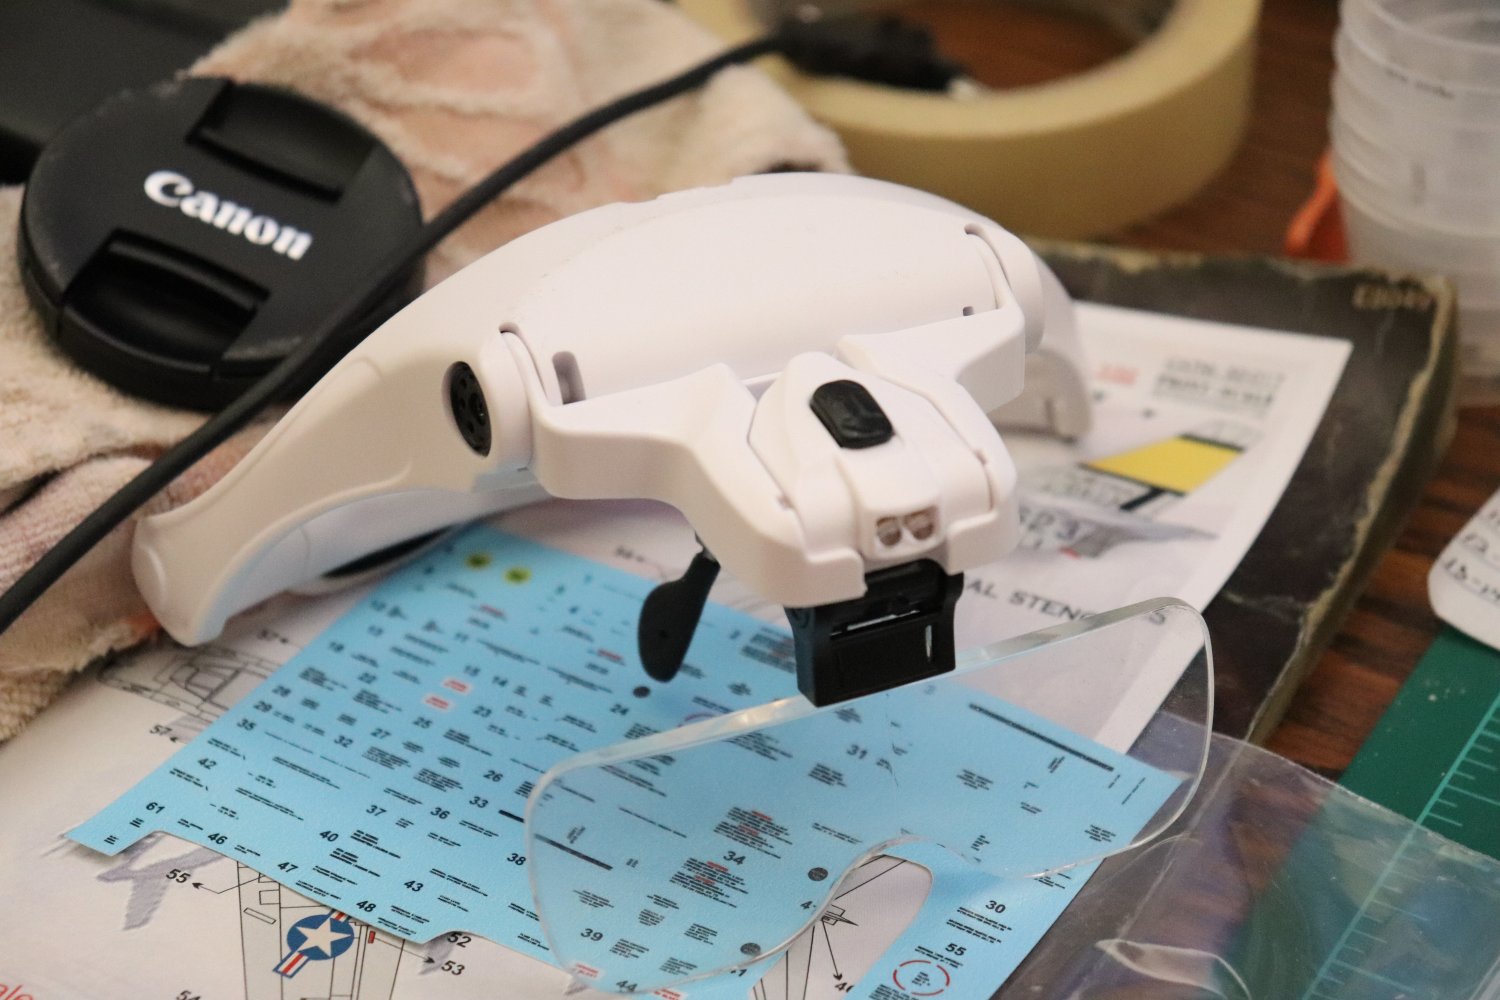
A few years back I broke down and bought a set if these... They work beautifully, this is how I know it's my eyes getting older, even using the highest mag lens in the kit I still can't read them, sometimes can't even see if they are upside down or not... We all have to get old.... It's not going to stop me though, and I'll do the best I can.... When they get to the point where I cant focus on them at all is when I'll stop... Medical is really slowing me down at this point..... anyway..... Onwards...!!!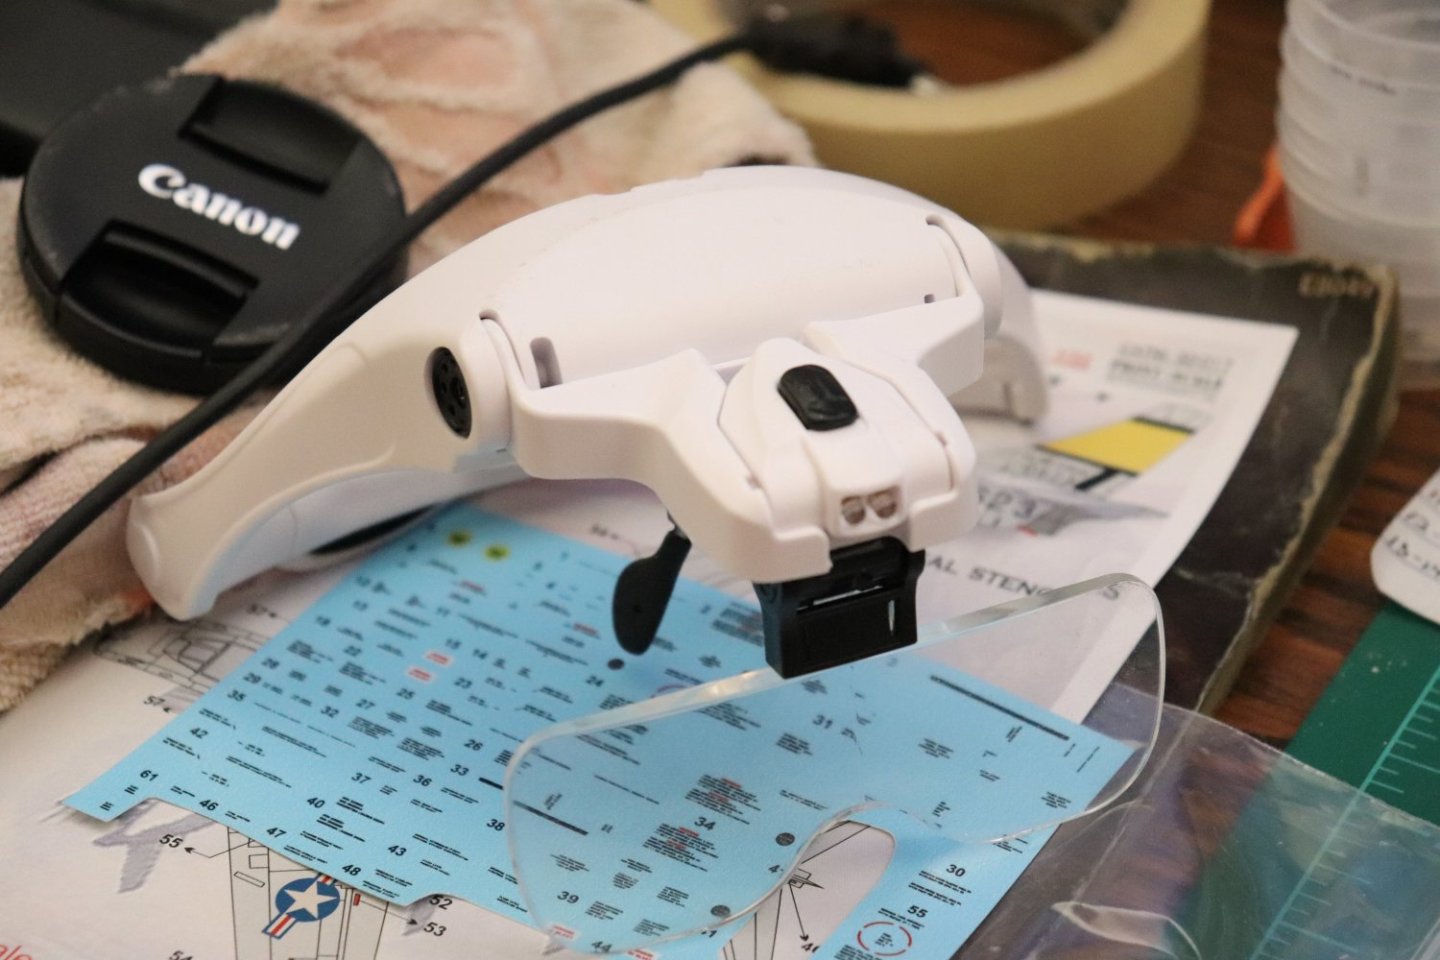
- 585 replies
-
- 11
-
-
F-86F-30 Sabre by Egilman - Kinetic - 1/32nd scale
Egilman replied to Egilman's topic in Non-ship/categorised builds
Thanks OC.... Yeah, Micro Sol works great for sucking down decals.... 30 years of using it and I've still not found anything better... -
F-86F-30 Sabre by Egilman - Kinetic - 1/32nd scale
Egilman replied to Egilman's topic in Non-ship/categorised builds
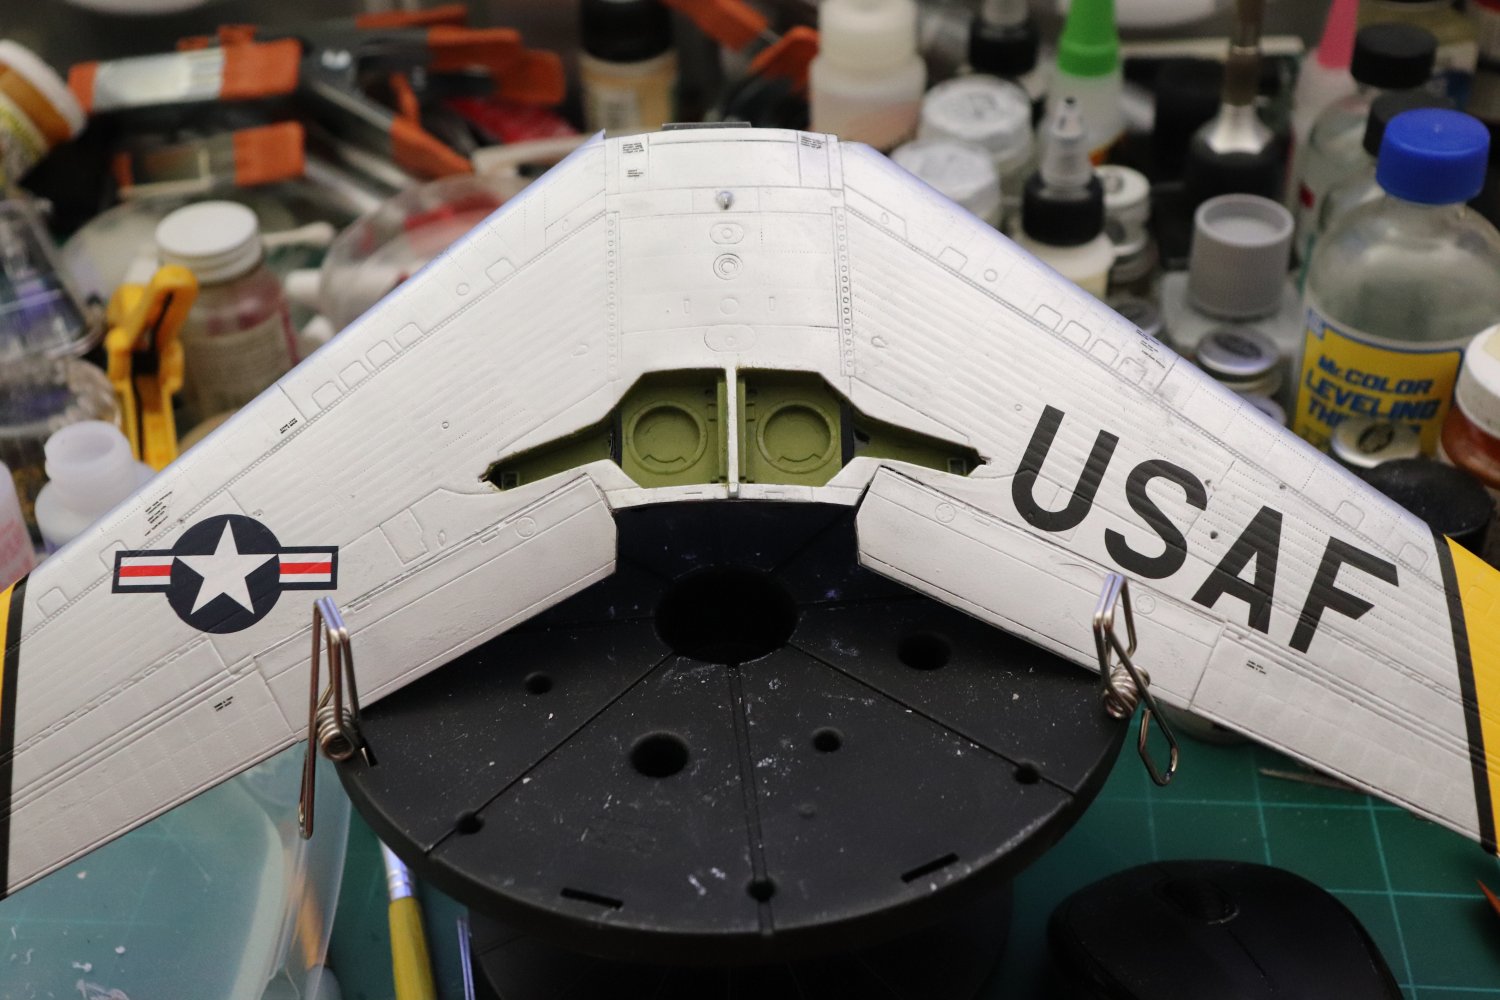
Bottom of the wing... Done decaling except for trimming & clearcoating My eyes are so bad I can't read them anymore.... Probably be the last time I go to this level of decaling.... But anyways, on to the top side of the wing... There's even more of them there... Onwards....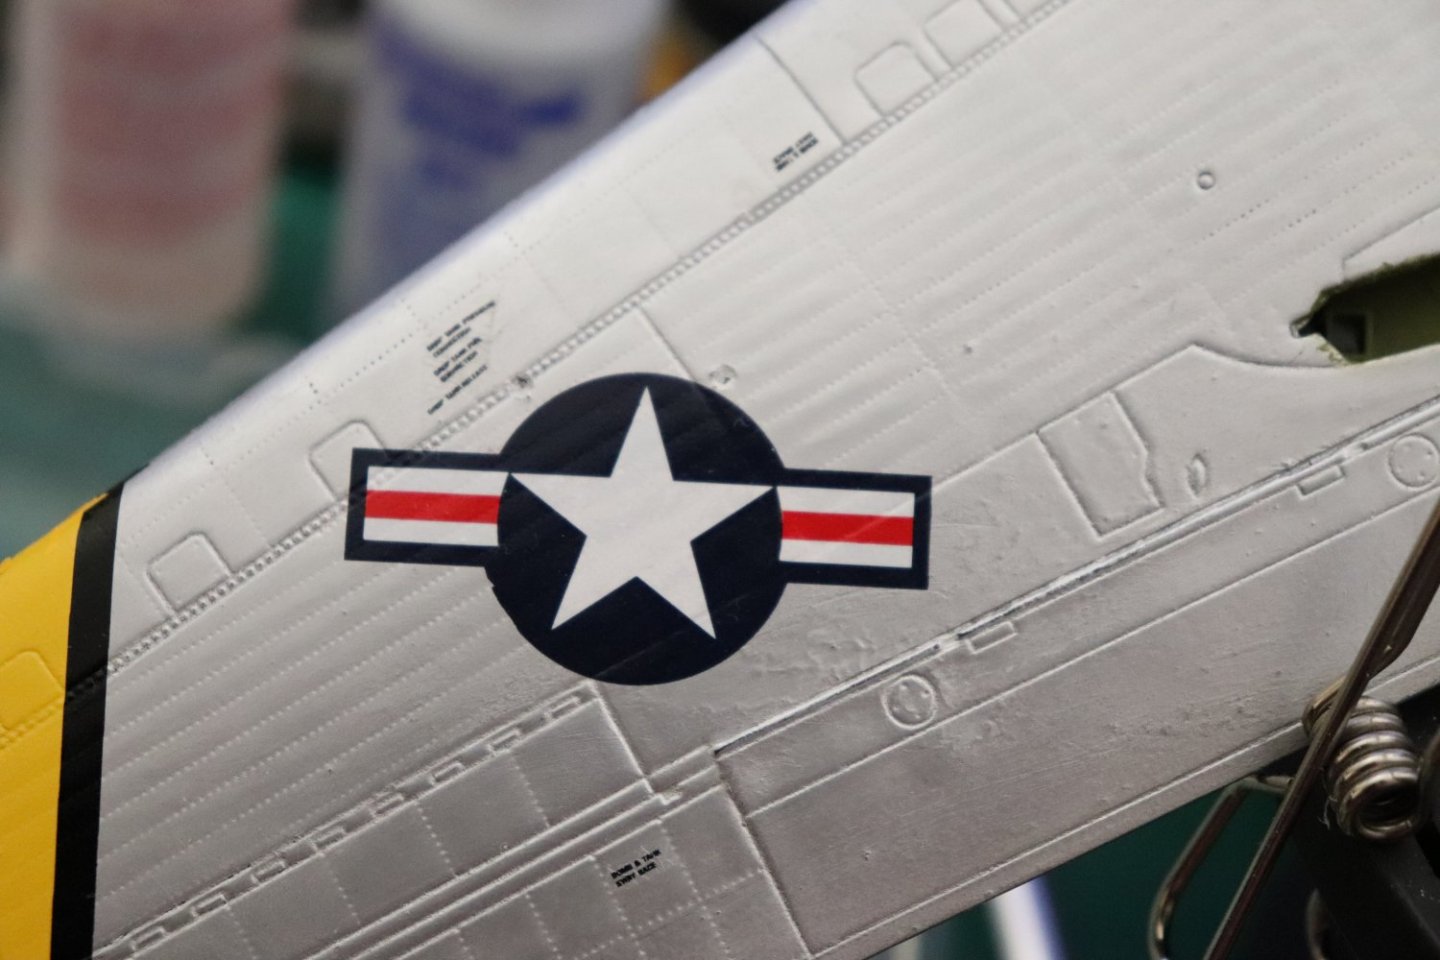


- 585 replies
-
- 12
-
-
We live life first brother, there is a whole big world out there... Whatever you decide to do we are with ya... (and yeah once it goes on my shelf as well)... I've been known to leave things out when they are redundant or never seen once the fuselage is closed as well, I consider myself in good company brother...
-
F-86F-30 Sabre by Egilman - Kinetic - 1/32nd scale
Egilman replied to Egilman's topic in Non-ship/categorised builds
Thank you Andy... It would if I had some brother, the decals are not as bad as some I've worked with, it just takes patience and thankfully there isn't a lot of them... If I have to go to paint that's not an issue either, it was just unexpected is all... -
F-86F-30 Sabre by Egilman - Kinetic - 1/32nd scale
Egilman replied to Egilman's topic in Non-ship/categorised builds
Short Update.... Beginning the decaling process... This is going to take a while, the Decals are marked 2007, 15 years old and I've already had one split... Not sure who made the decals but 15 years? they shouldn't be splitting... Wing bottom first... Given the fragileness of the decals this will be a slow process, set a few, let them dry set a few more... The main decals have to go on first cause the technical decals have to go over some of them... Wing bottom first so I could judge how well the decals react, I guess I found out.... Also there aren't too many of them so it lets me judge on how to approach the remaining ones... The yellow stripe on the fuselage is going to be the difficult one... Fortunately the Print-Scale set does give me the black border stripes for the yellow ID bands, so if the Kinetic decals disintegrate I'll have a way to recover... Wish me luck I'm going to need it... EG
- 585 replies
-
- 13
-
-
Classic single pin plate tracks... Lots of repetitive gluing.... Will look fantastic when done...
-
F-86F-30 Sabre by Egilman - Kinetic - 1/32nd scale
Egilman replied to Egilman's topic in Non-ship/categorised builds
Well Brother, your now introducing government into the equation.... {chuckle} and that point all attempts at determination of the stupidness of questions goes out the window... I believe government has the franchise on stupid questions... (heck they created the standard in the first place) Before government we only had to deal with fool questions... That is a lot higher standard that stupid questions... Fool questions represent a lack of knowledge not stupidity, questions where the government already knows the answers are stupid questions... (and the government inundates us with them daily) You haven't asked a stupid question yet... (no fool questions either so don't go there) {chuckle} Besides anyone willing to stand in an open helicopter door and fly around at 120 kts at less then 100 ft altitude is entitled to ask any question they want to.... They've earned the right...