Egilman
-
Posts
4,377 -
Joined
-
Last visited
Content Type
Profiles
Forums
Gallery
Events
Everything posted by Egilman
-
 Brother, that is one of the best jobs of tonal masking I've ever seen, and the first using metallic's.... Very, Very well done... And thanks for showing the proper technique... Not too many know how to do it correctly... Very nice...
 -
F-86F-30 Sabre by Egilman - Kinetic - 1/32nd scale
Egilman replied to Egilman's topic in Non-ship/categorised builds
Thanks Lou... It's one of my favorites as well, I'm sure one can turn up on your shelf eventually, trust me, stranger things have happened.... As far as promised builds, RL sometimes has a way of making liars out of everyone... As well may be the case in my situation... I need to ask the doc some more direct questions about my situation, but it appears there may be a model yard sale in my future, cause clearly I'm never going to build everything I have... Right now I have some RL issues I need to deal with both legal and financial, and to be honest model building is taking a back seat to them... Need to make sure the admiral is taken care of before I'm unable to do it kind of stuff... When the muse and time returns I will finish up what I've started as much as I am able... But my dream projects probably will never be realized.... As time allows I will still plug along as always.... Life goes on so they say... So cheer up my friend Not going anywhere if I can help it... {chuckle} (I know your yanking my chain my friend, no worries) Will continue to post as able to... Carry on my friends... EG- 585 replies
-
- 11
-

-

-
F-86F-30 Sabre by Egilman - Kinetic - 1/32nd scale
Egilman replied to Egilman's topic in Non-ship/categorised builds
Thanks Brother.. I don't know if I will do that much Ken, I was thinking about a mat of some type to highlight the aircraft but right now I have a few other issues to handle that have made themselves a priority... -
F-86F-30 Sabre by Egilman - Kinetic - 1/32nd scale
Egilman replied to Egilman's topic in Non-ship/categorised builds
Thank you Brothers, it is really appreciated.... -
Bristol Beaufort by AJohnson - FINISHED - Airfix - 1:72
Egilman replied to AJohnson's topic in Non-ship/categorised builds
I remember that one, was a bear not getting glue on the hinges... Mine was the retractable landing gear on the monogram F3F, geared to the prop, pull it out and the gear engages and when turned it raised/lowered the landing gear... There a lot of memorable kits from back then.... I agree with Alan, beautiful work.... -
Bristol Beaufort by AJohnson - FINISHED - Airfix - 1:72
Egilman replied to AJohnson's topic in Non-ship/categorised builds
Yep twin Lewis Guns, very effective and the last of the drum fed medium machine guns... And they represented the wooden guide vanes for the torpedo very well, they stabilized the torpedo while it was dropping from the aircraft and broke off when it entered the water.... Excellent work my friend.... Impressive... -
Bristol Beaufort by AJohnson - FINISHED - Airfix - 1:72
Egilman replied to AJohnson's topic in Non-ship/categorised builds
I'm in Brother... The Beaufort was one tough aircraft, I can imagine the hell that was visited upon it to bring one down... -
Absolutely! I second this technique for the same reasons... When you do a putty mask you shoot off the putty, not at it... Distance then dictates the sharpness of the edge allowing for the natural air current pattern to give you a soft edge... Distance determines how soft the edge is... Varying the size of the putty mask will also cause the softness of the edge to vary... It's an excellent technique for getting a natural edge for those sprayed on patterns.... As Craig says don't allow the paint to collect against the mask, it will pull off with the mask if that happens...
-
Yep, not as widely as it was in the 60's but still available from Wal Mart, Amazon and Crayola who now owns the rights to it... (you can also find it in Dollar Tree from time to time) I no longer use it, opting for a Blue Tack derivative from Lock-Tite that leaves nothing behind....
-
Oh yes, and the oil formulation they used in it to make it pliable would attack some paints as well... The trick was to find an overcoat that put a hard shell over the paint... How do you think future became the hard shell overcoat of choice... {chuckle} That's a part I also love about this hobby, the experimentation that goes on to find out what works... Keep on truckin' brother, looks like it's gonna be another stunner when done...
-
F-86F-30 Sabre by Egilman - Kinetic - 1/32nd scale
Egilman replied to Egilman's topic in Non-ship/categorised builds
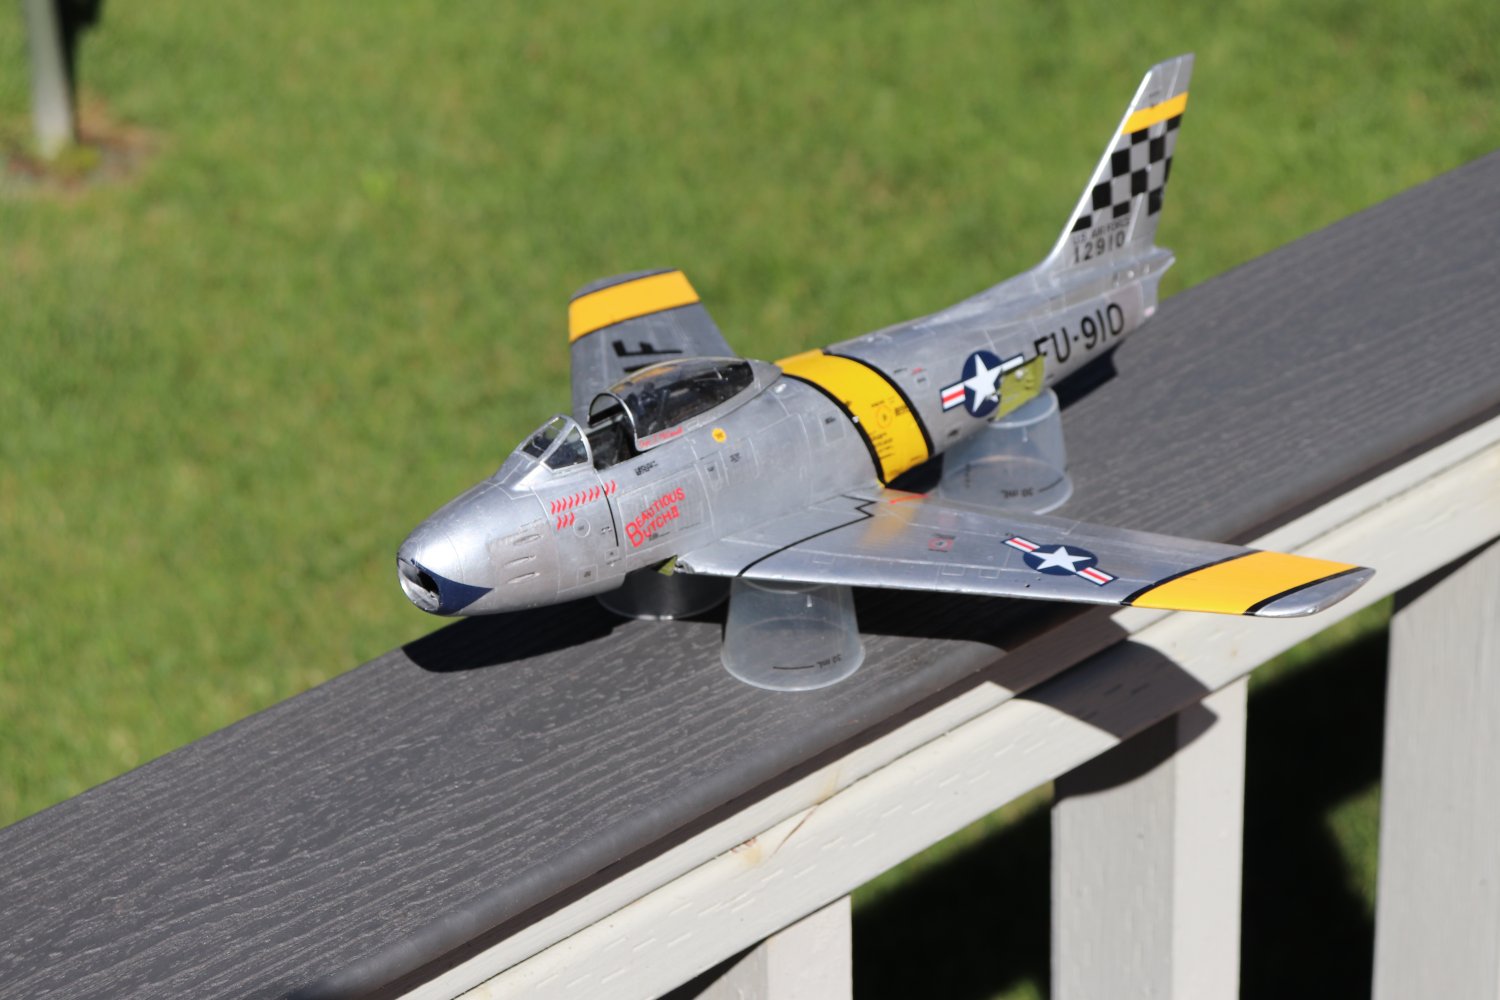
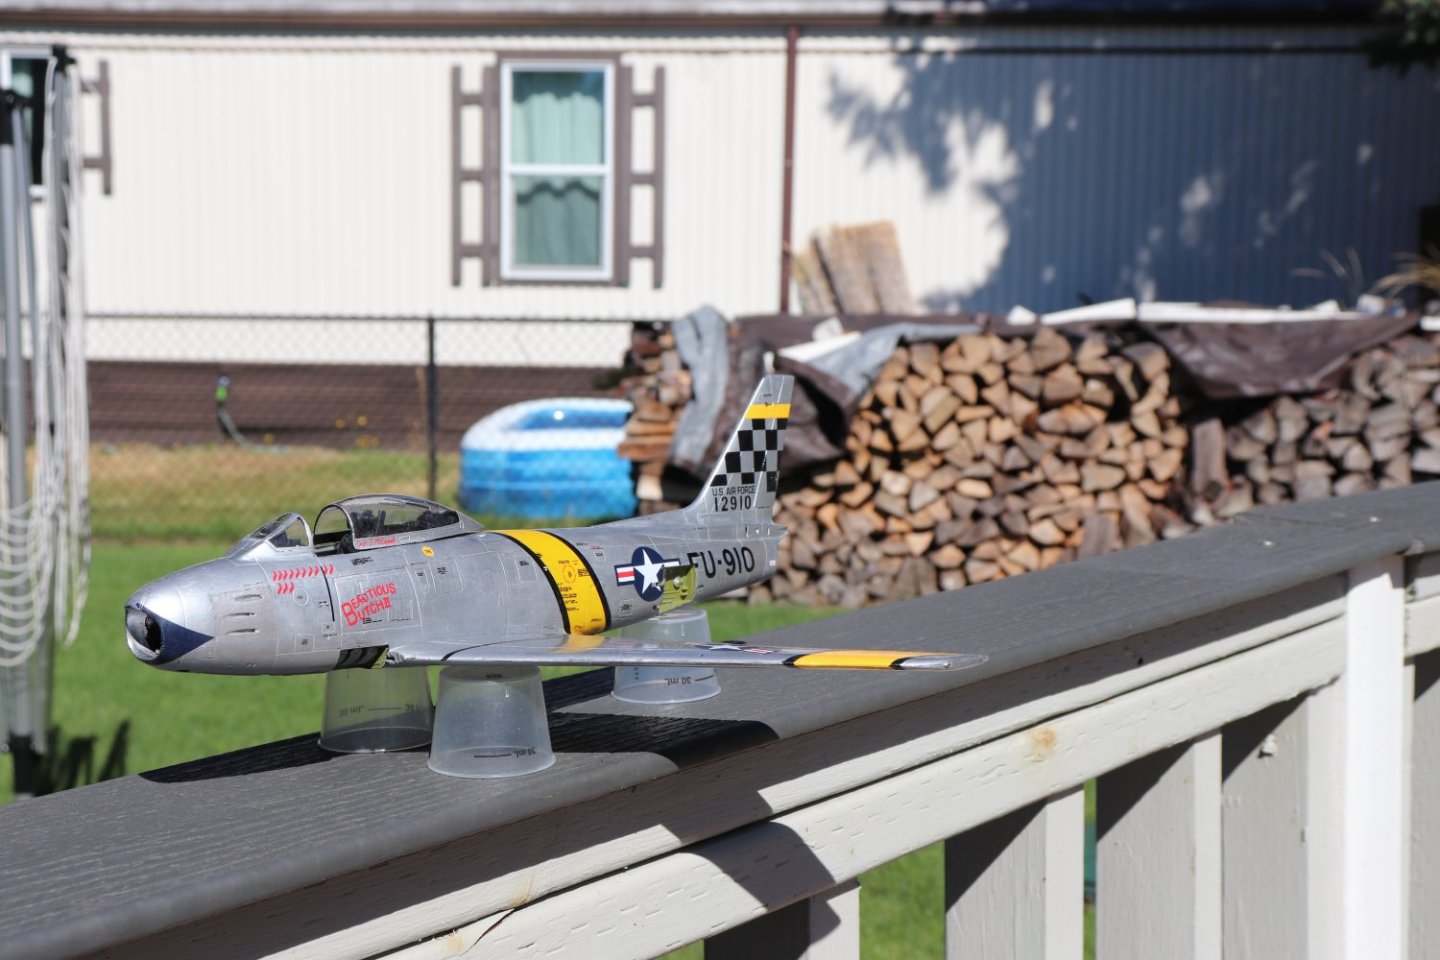
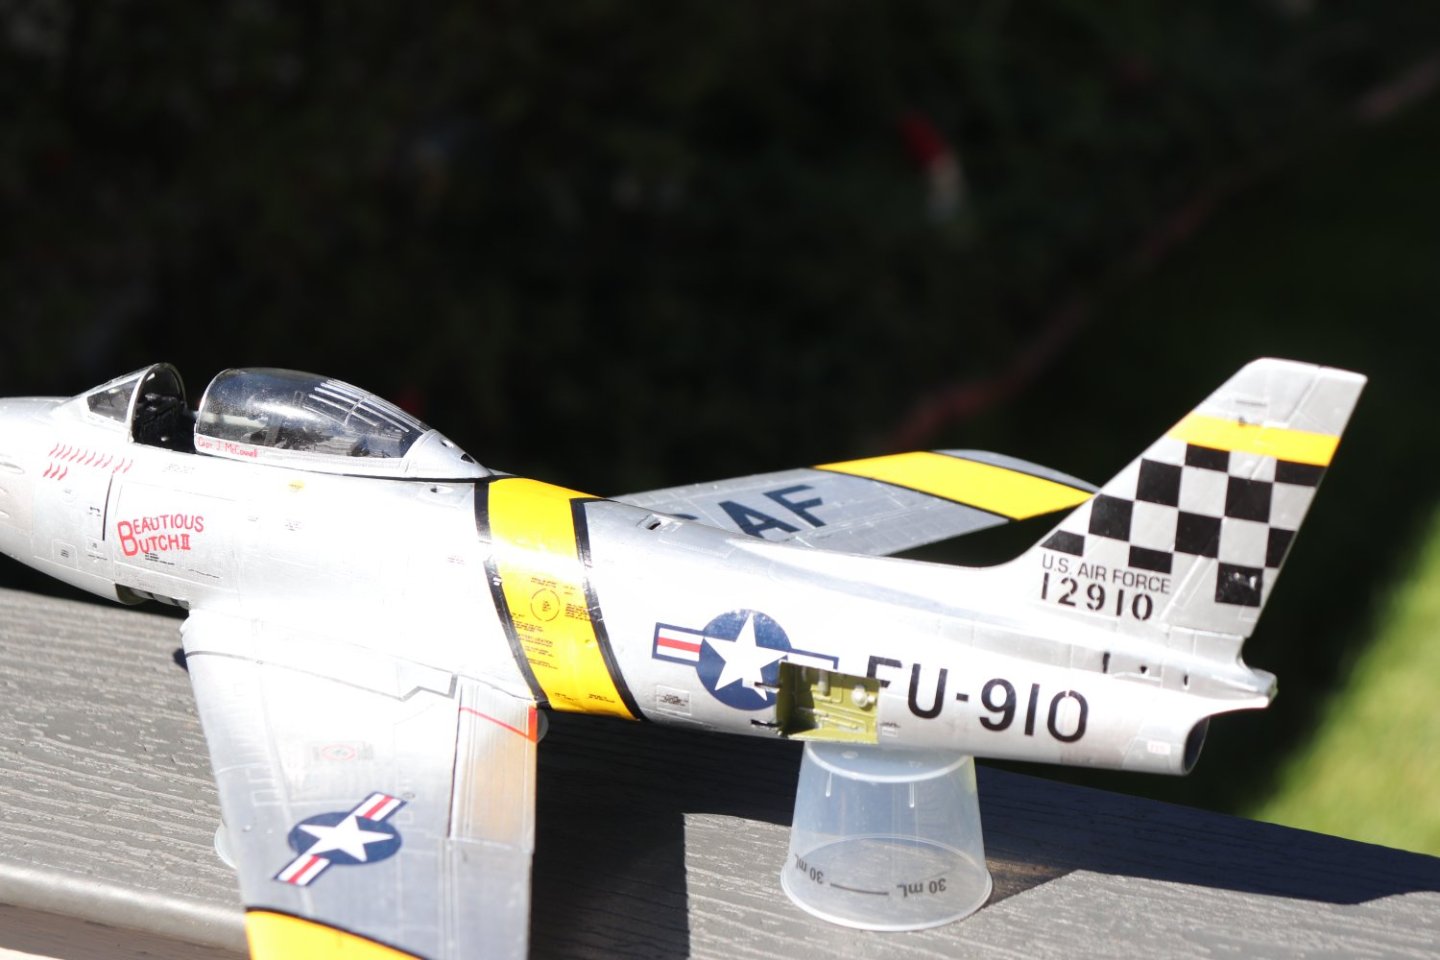
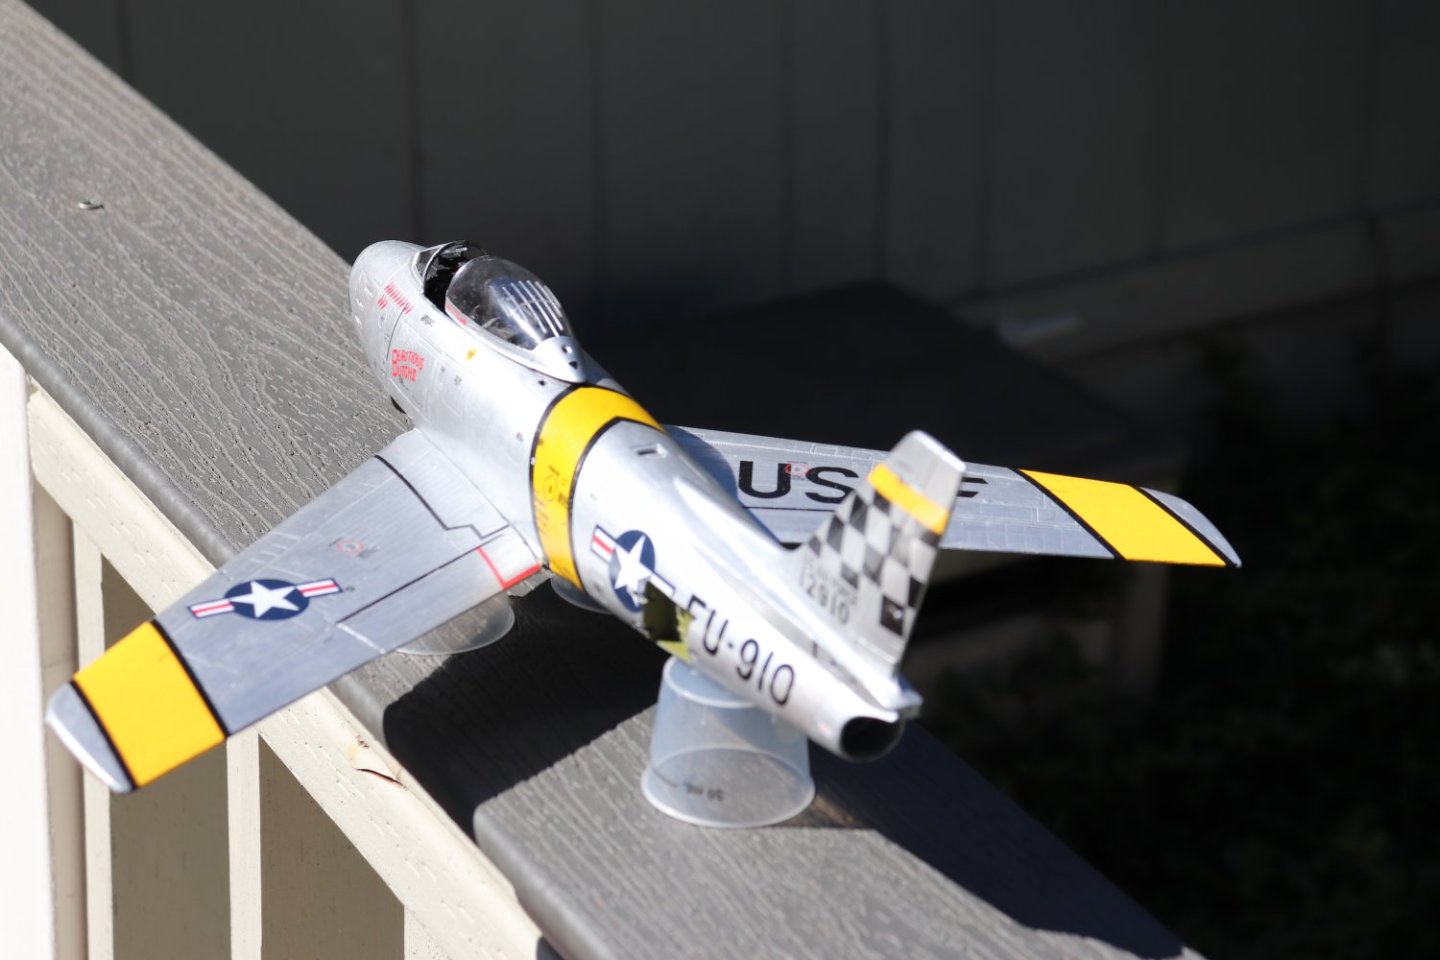
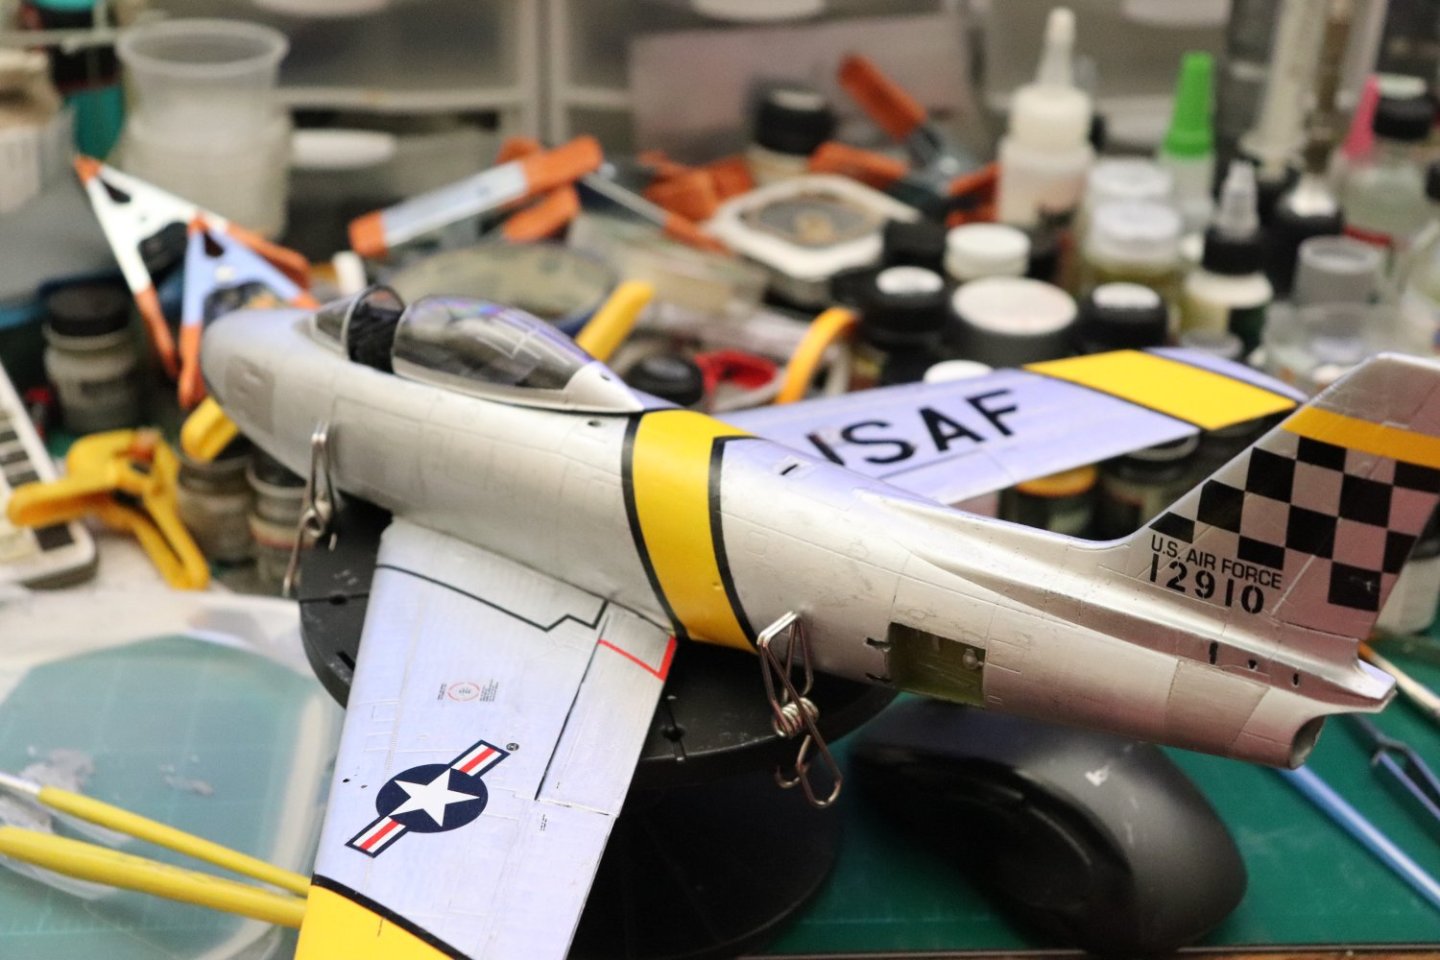
Thank you Brothers.... Just want you all to know how much your support is appreciated... I went out and took a few more shots of the left side... Outside, since the Lord has graced us with beautiful sunny skies today.... I Never pass up the opportunity to enjoy such gifts... Here they are.... It never ceases to amaze me at how much better models look in direct sunlight.... Trying to figure out an appropriate backdrop for when I get her finished, I want her sitting in a semi-realistic setting... before I call her done... Anyway... Onwards... (snails pace yes, but still moving forward, no looking back) EG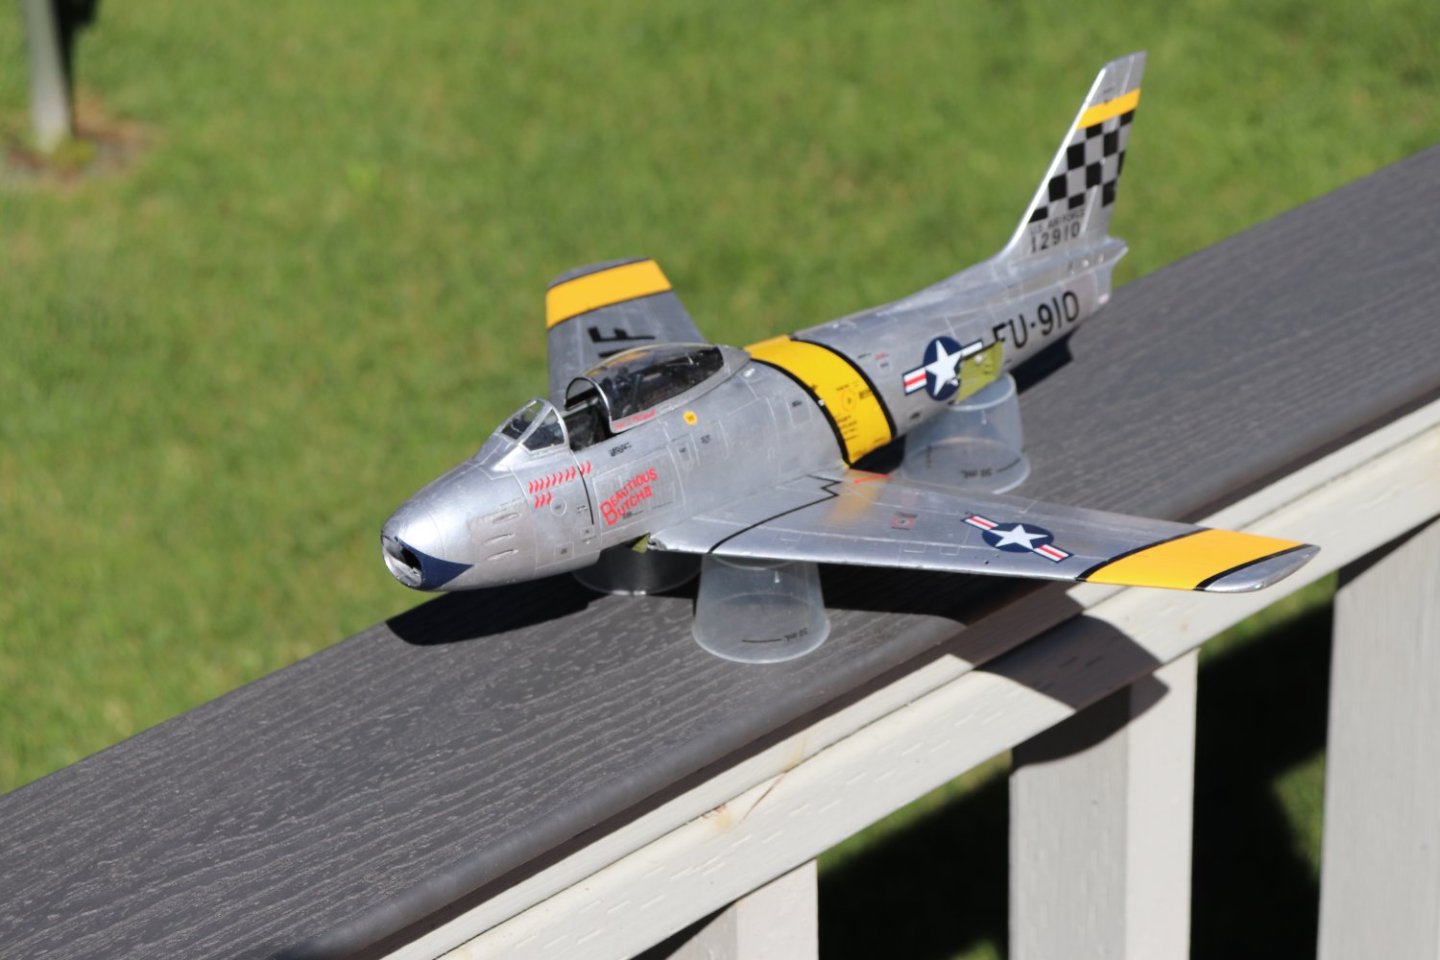
- 585 replies
-
- 16
-

-
-
Silly Putty is what we used for this type of masking in the old days before Blue Tack, and now AK getting into the act... Very old idea... But it's the only way to do some styles camouflage...
-
F-86F-30 Sabre by Egilman - Kinetic - 1/32nd scale
Egilman replied to Egilman's topic in Non-ship/categorised builds
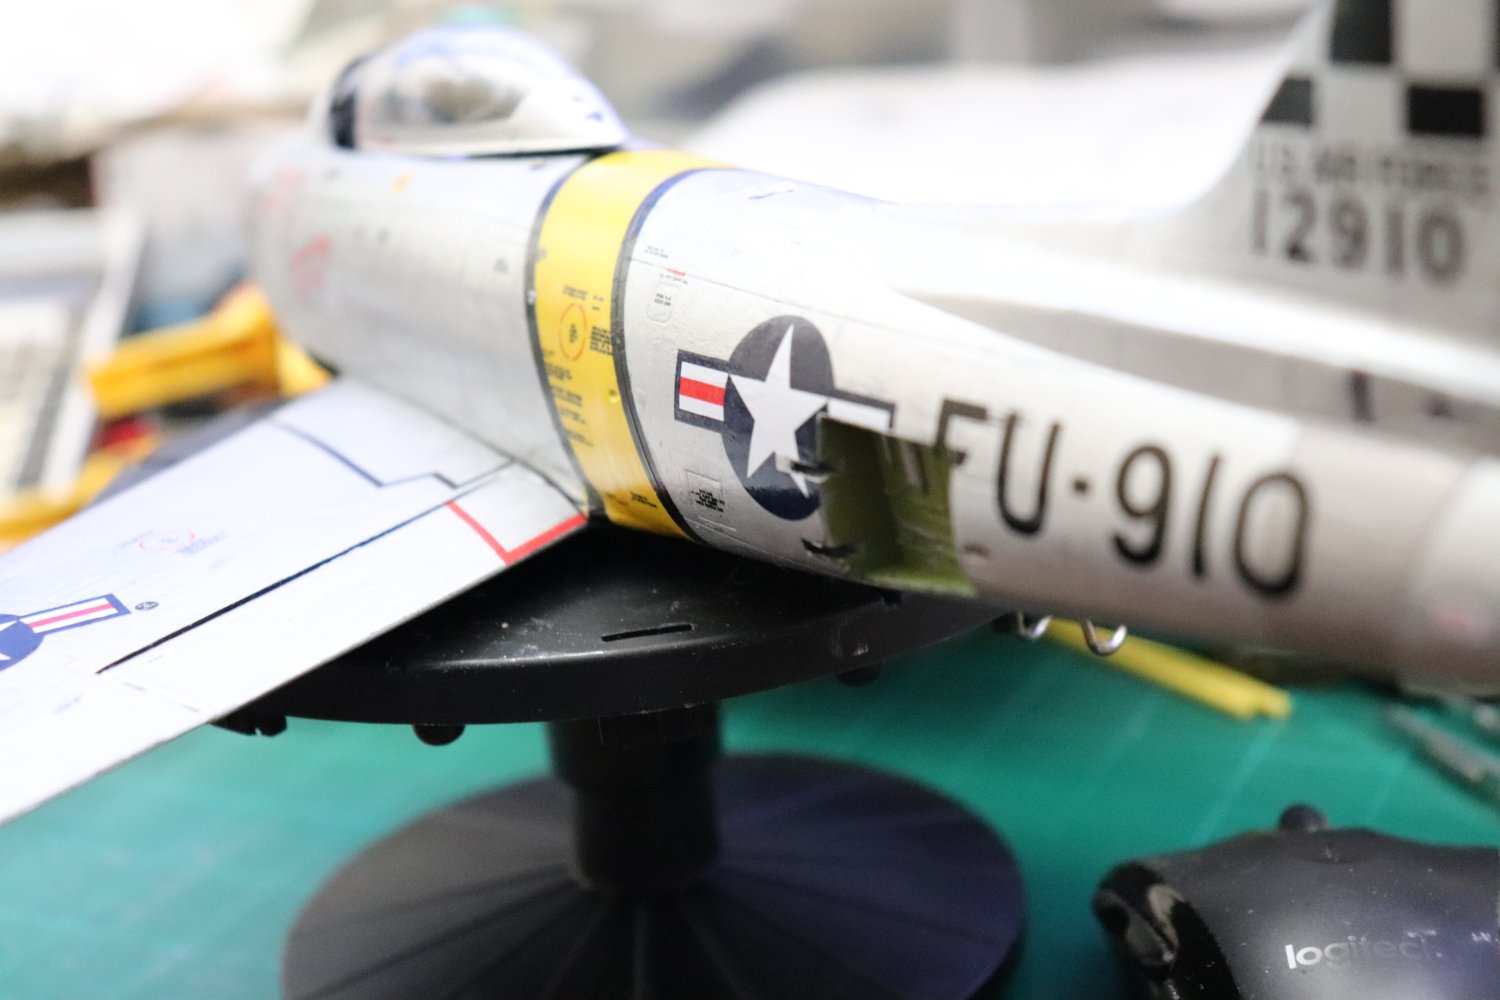
Thank you all... I know it's been a while since I've posted an update, RL is intervening in a hard way right now, but I have been plugging along as best I can... Decaling is about 3/4th's done, Just the right side of the fuselage to go... Here are some pics of the slow progress... There were a lot of those technical decals, still some to go all down the right side... Sorry for the slow progress but health is a major concern right now, keeping the muse going is getting difficult... But I swear I'm gonna get this one done... Thanks every one for following... It means a lot...
- 585 replies
-
- 15
-
-
-
F-86F-30 Sabre by Egilman - Kinetic - 1/32nd scale
Egilman replied to Egilman's topic in Non-ship/categorised builds
Thanks Dave... Thanks Jack, it was testing me... Thanks Mark, Amen Brother.... Thank You OC... Thank You Ed... Thank you Alan, It's appreciated... Thanks Mike, If anyone gets something out of them it's my pleasure... Thanks Craig, I'm still hoping... Thank you Brother, yep a classic jet, one of the most beautiful airplanes ever created.... -
F-86F-30 Sabre by Egilman - Kinetic - 1/32nd scale
Egilman replied to Egilman's topic in Non-ship/categorised builds
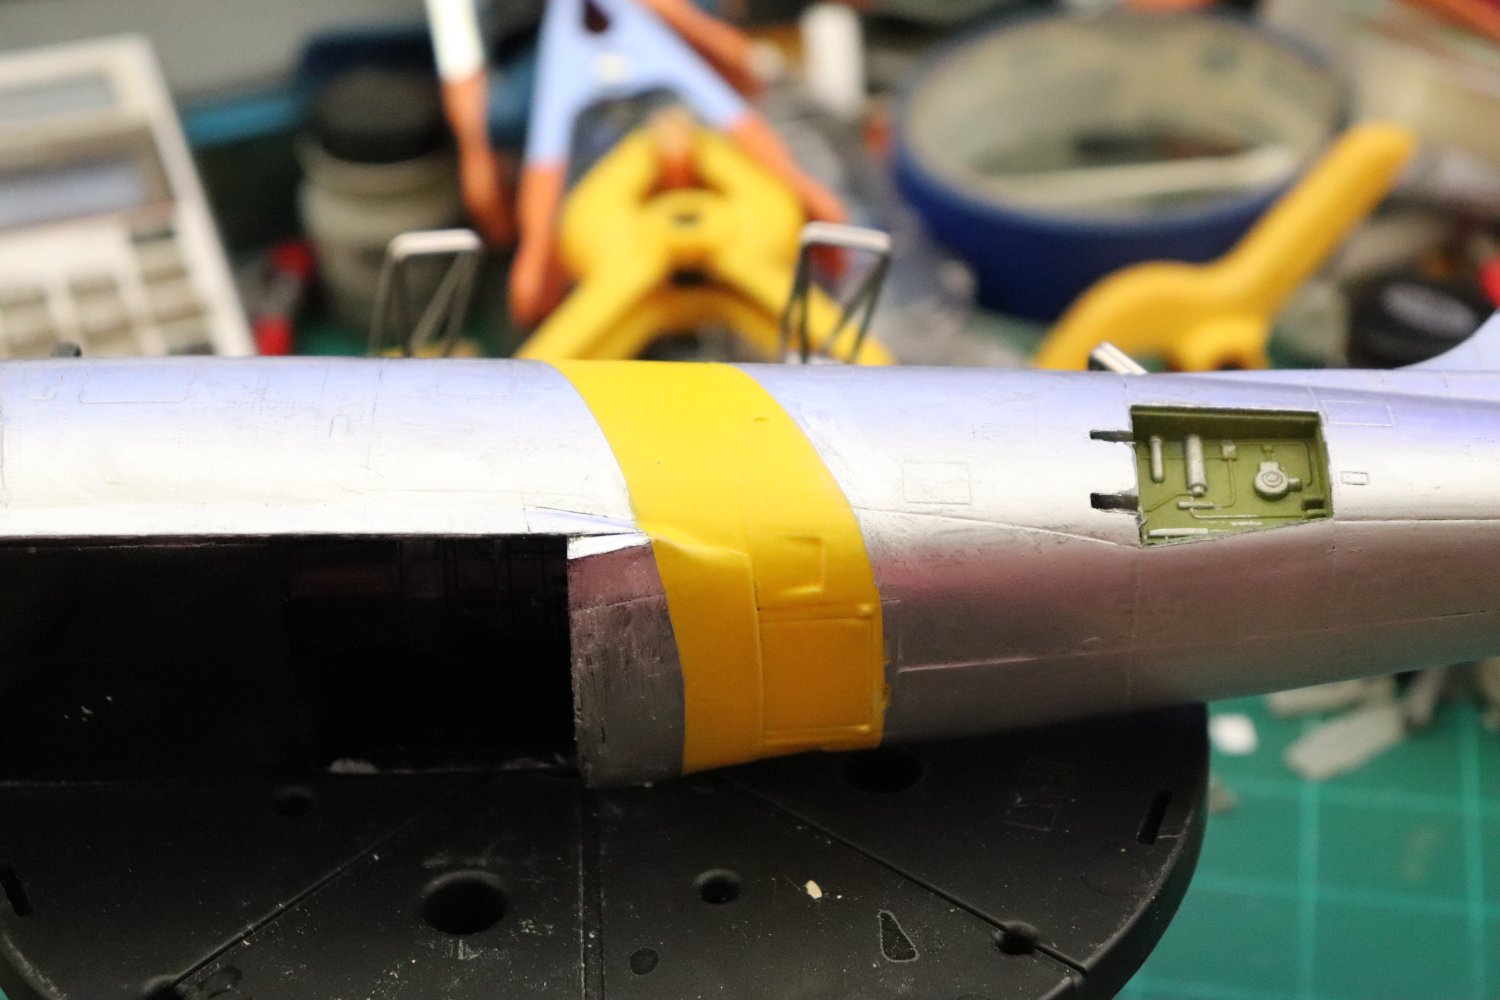
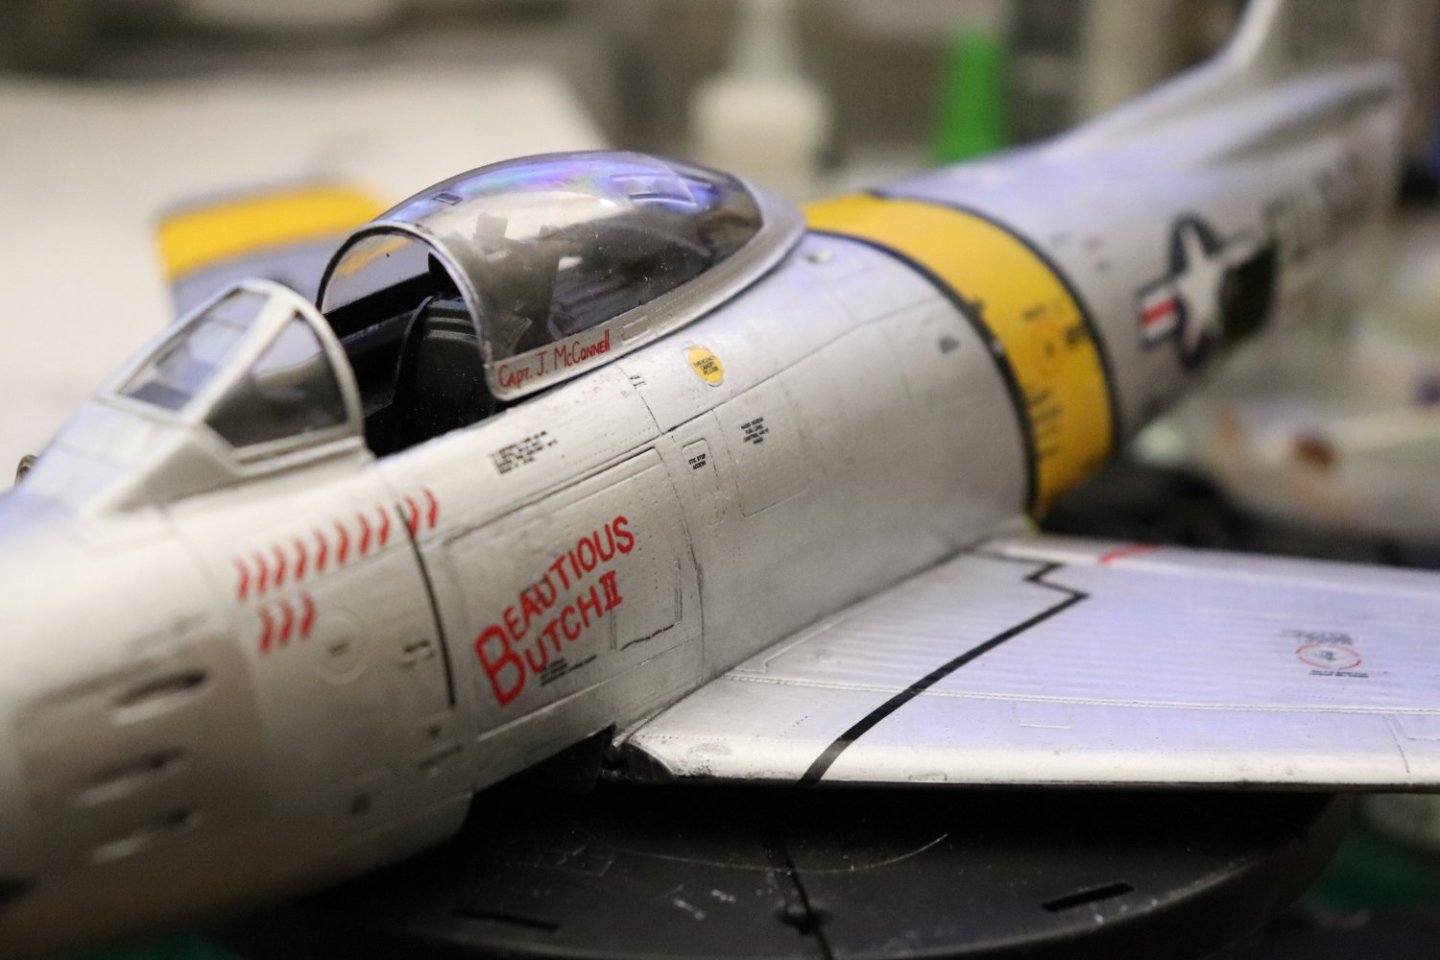
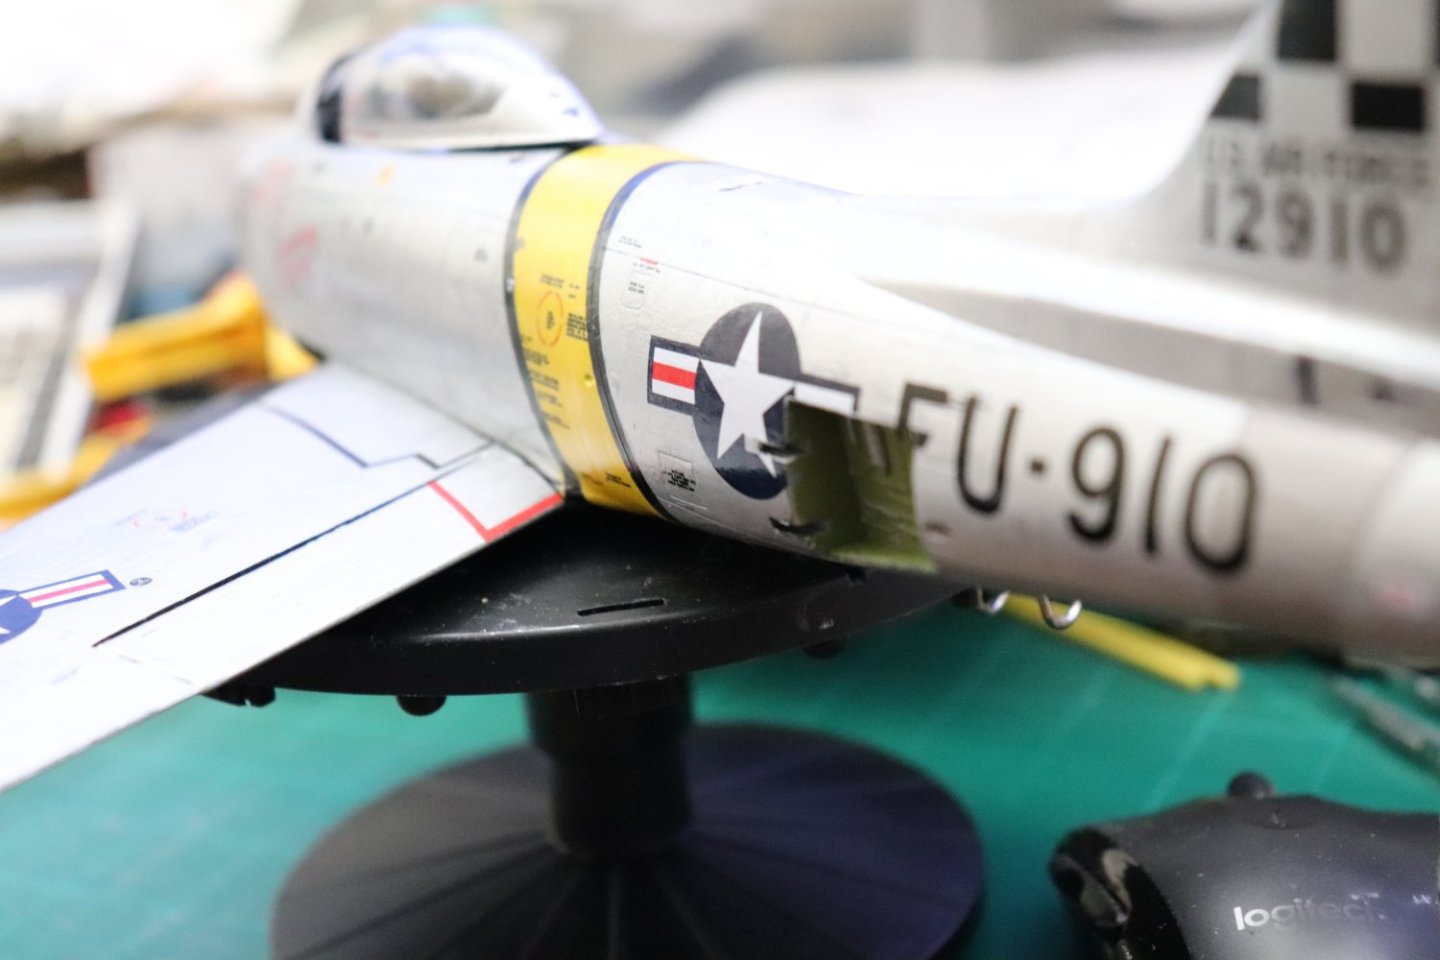
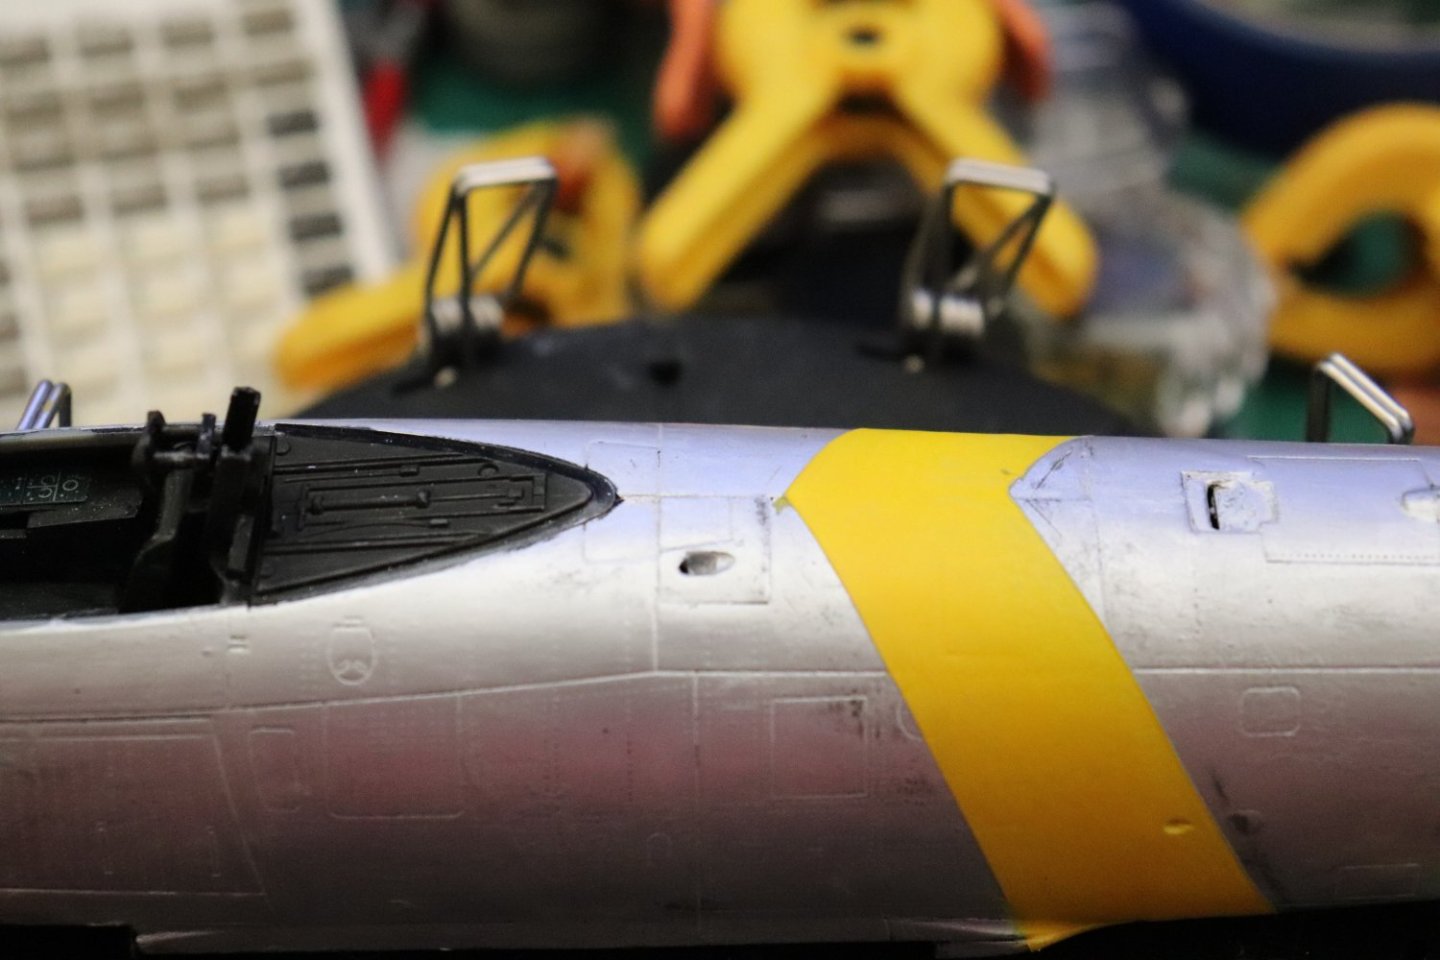
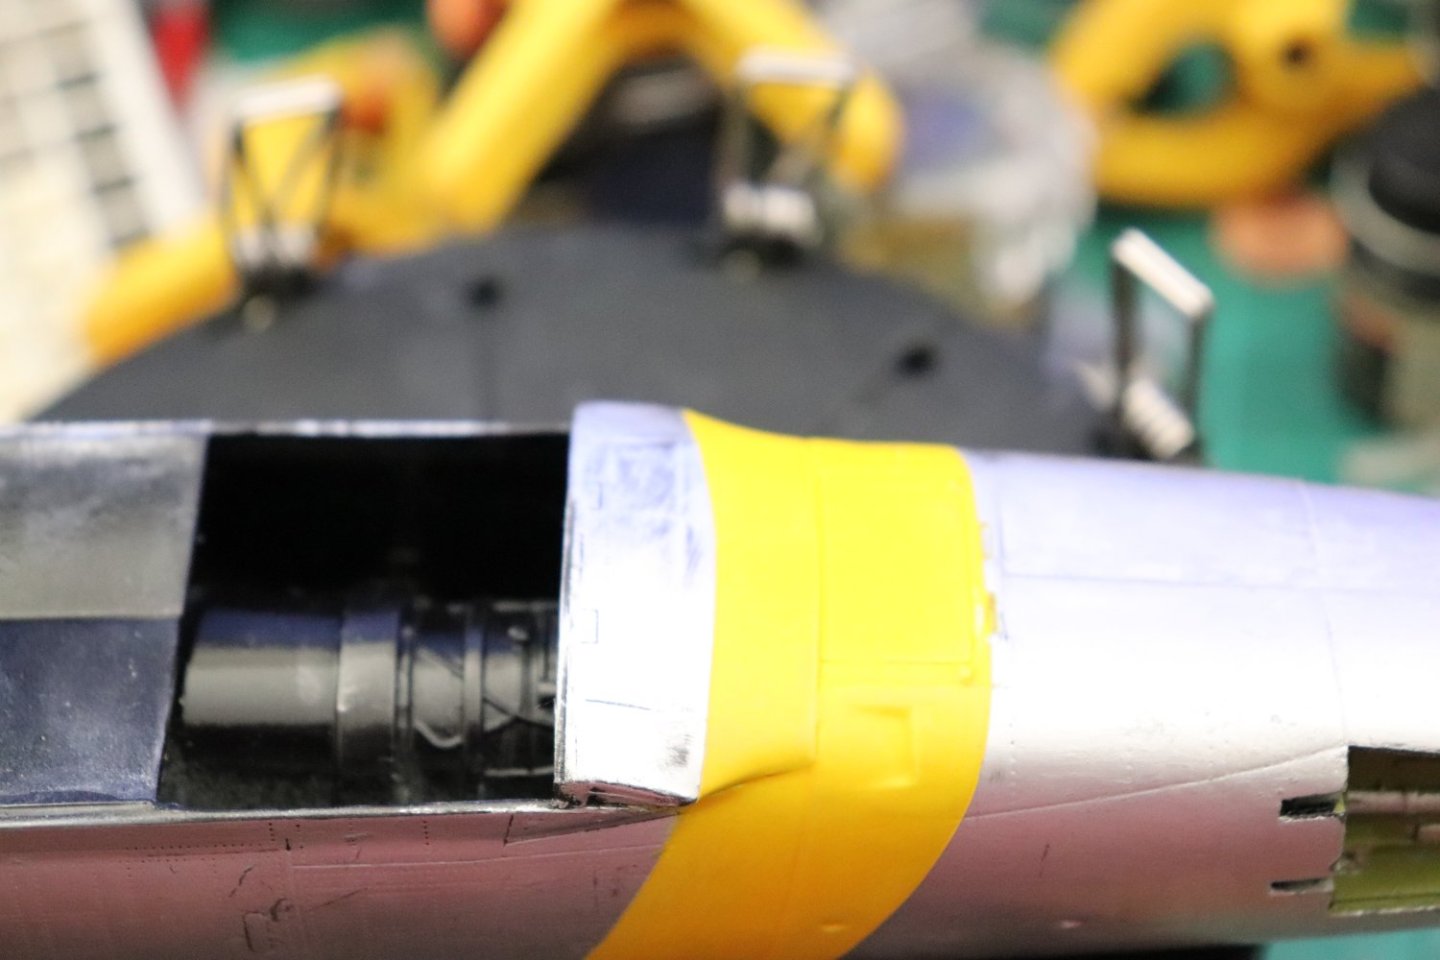
Ok Brothers another short update.... Fuselage Stripe.... Accurate pointed stripe, 32 inches wide on the fuselage with the fuel port centered in the stripe... (properly located) I just thought you all would like to see the outcome with all the angst that went into what usually would be a nothing job... (if the decal didn't disintegrate) Now the finishing path is clear barring any other disasters... ONWARDS... (finally)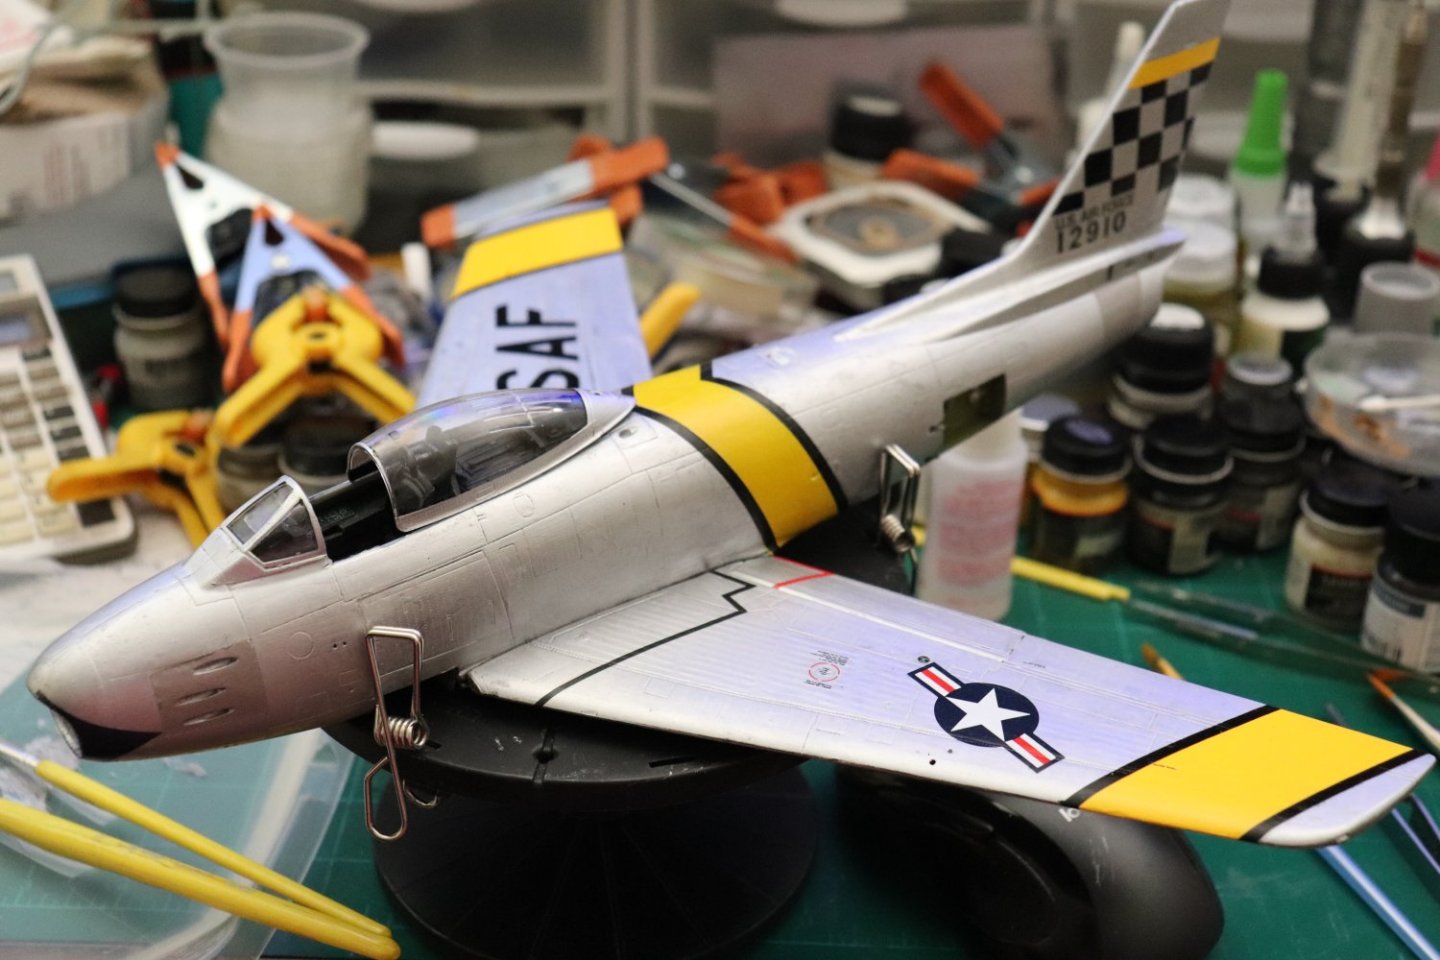
- 585 replies
-
- 18
-
-
-
Three for the outside of the Panel Hood & Five for the Panels themselves with Black instruments...
-
Congratulations My Friend, a hard to get and well deserved honor...
-
Internal cleaning is the the same as an airbrush, just run your thinner or cleaning fluid thru it till it runs clear... For those one off colors it can't be beat... and replacement spray buttons are available from the vendors website My understanding is it will spray 12oz of paint according to the manufacturer, they give you a 6oz bottle with it and 3oz bottles are available from the makers website.... They also sell replacement cartridges.... They have a kit for 39.95 on the website that offers multiple cannisters, bottles, (6 & 3oz) spray units, (the part between the Bottle & Cannister) Spray Buttons and Pickup tubes in both long and short sizes... The bottles all have lids as well... All round a complete setup... I will find out cause I ordered one.... I've always dreaded painting the light gloss colors, they never lay right or even... (like USN Buff) This solves that problem forever... (as long as they continue to make it)
-
It was for me.... That's why I figured that others in the same boat would appreciate it...
-
Russian plane cockpits are some of the hardest colors to figure... Not a whole lot of good photography of them.... Blue/Grey or Blue/Green? heck of a decision to make...
-
F-86F-30 Sabre by Egilman - Kinetic - 1/32nd scale
Egilman replied to Egilman's topic in Non-ship/categorised builds
I know Jack, they only go to 320 grit, I have the entire set 100 to 320 grit... they are what I used to knock the ridge down... -
F-86F-30 Sabre by Egilman - Kinetic - 1/32nd scale
Egilman replied to Egilman's topic in Non-ship/categorised builds
Thanks Jack... From those links I found what I should have... https://www.micromark.com/Dual-Angle-Sanding-File-Set-Multiple-Grits-Set-of-9 from 60 to 12000 grit, perfect for the application.... Didn't even know they made such a critter, I already have the buffing pads, (3200 - 12000 Hobby Lobby) but they are too wide, good for flat surfaces, but next to impossible to control where your buffing on a compound curve... That's why I didn't use them... Right tool for the job ands all that.... Thank you, filed in the learn something new every day section... (and ordered as well) -
F-86F-30 Sabre by Egilman - Kinetic - 1/32nd scale
Egilman replied to Egilman's topic in Non-ship/categorised builds
Very good point Dan Thank You... I'm using what I had and being a compound curved surface a stick that could be manipulated on the bias was the best technique I thought of as it would leave a lot less disturbance of the surrounding surfaces than a sheet would... 320 is the smallest grit I have in stick form... It didn't take much to knock the ridge down, just a few passes with no pressure at all.... 600 would have been better 3200 even better yet, but find me a narrow stick sander in 600 much less 3200... {chuckle} We are stuck using the tools we have on hand... What it really shows is how thin the RnB actually is, only a mil or two... But recovery is easy.... -
F-86F-30 Sabre by Egilman - Kinetic - 1/32nd scale
Egilman replied to Egilman's topic in Non-ship/categorised builds
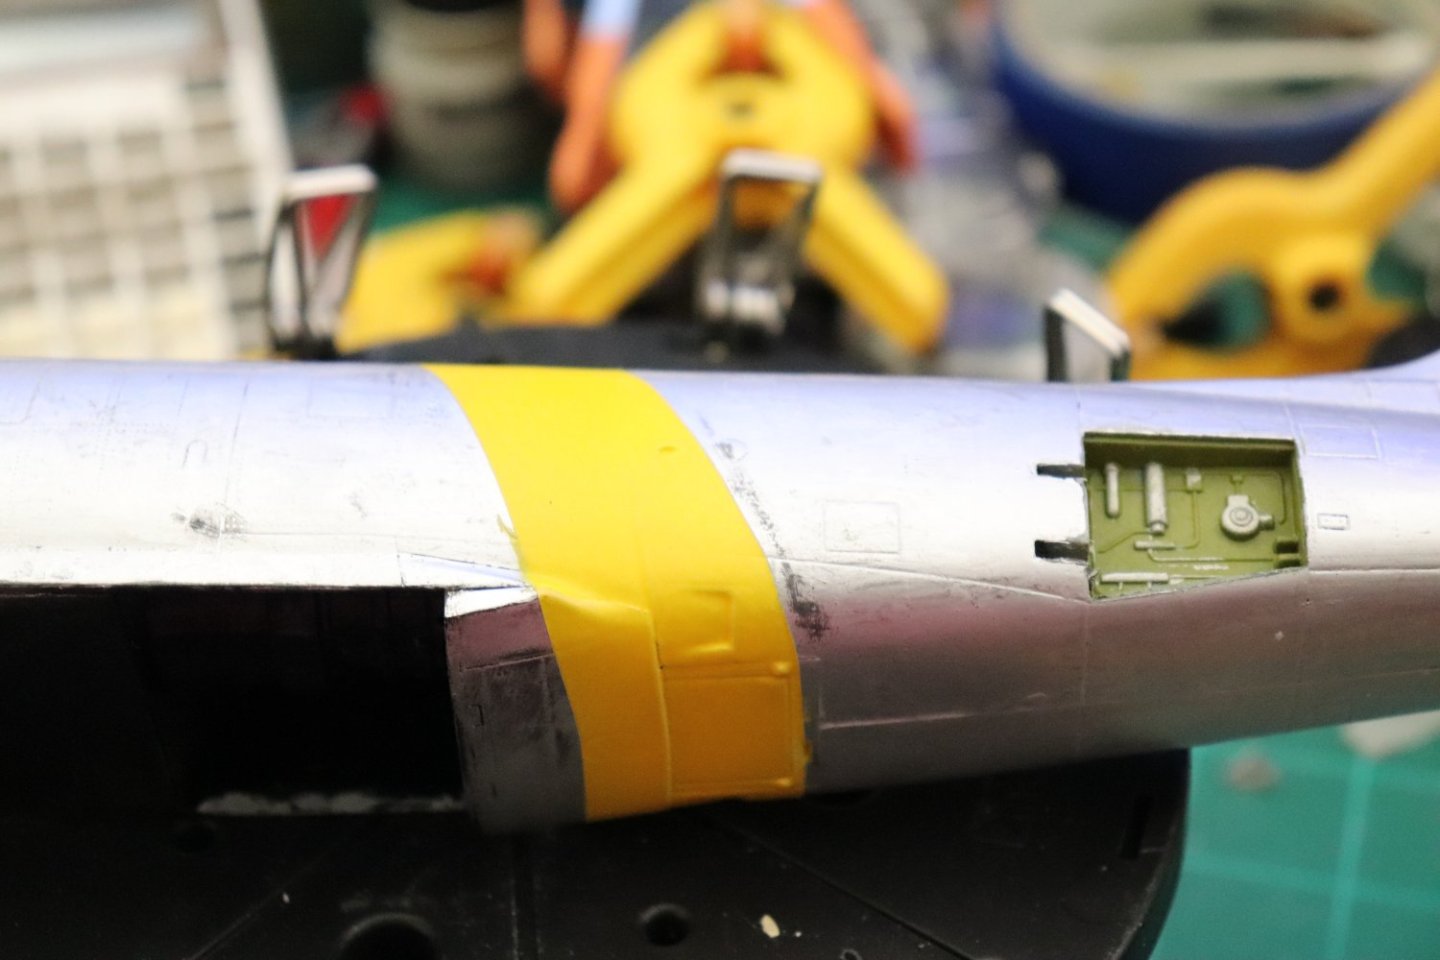
Update... Yes the painting with the heavy masking left a ridge that needed to be knocked down before finishing... Hard to see but you can really feel it, it would show badly when shined up and decaled... Knocking it down requires the use of a medium grade thin sanding stick... 320 grit... And of course no matter how careful you are your going to break down the RnB finish as well... so before we can hard shell with future, we need to retouch the RnB finish... That looks good.. one of the great things with Rub N Buff is retouches are easy a slight skuff and a pointed q-tip is all it takes... Next up Decaling.... Onwards...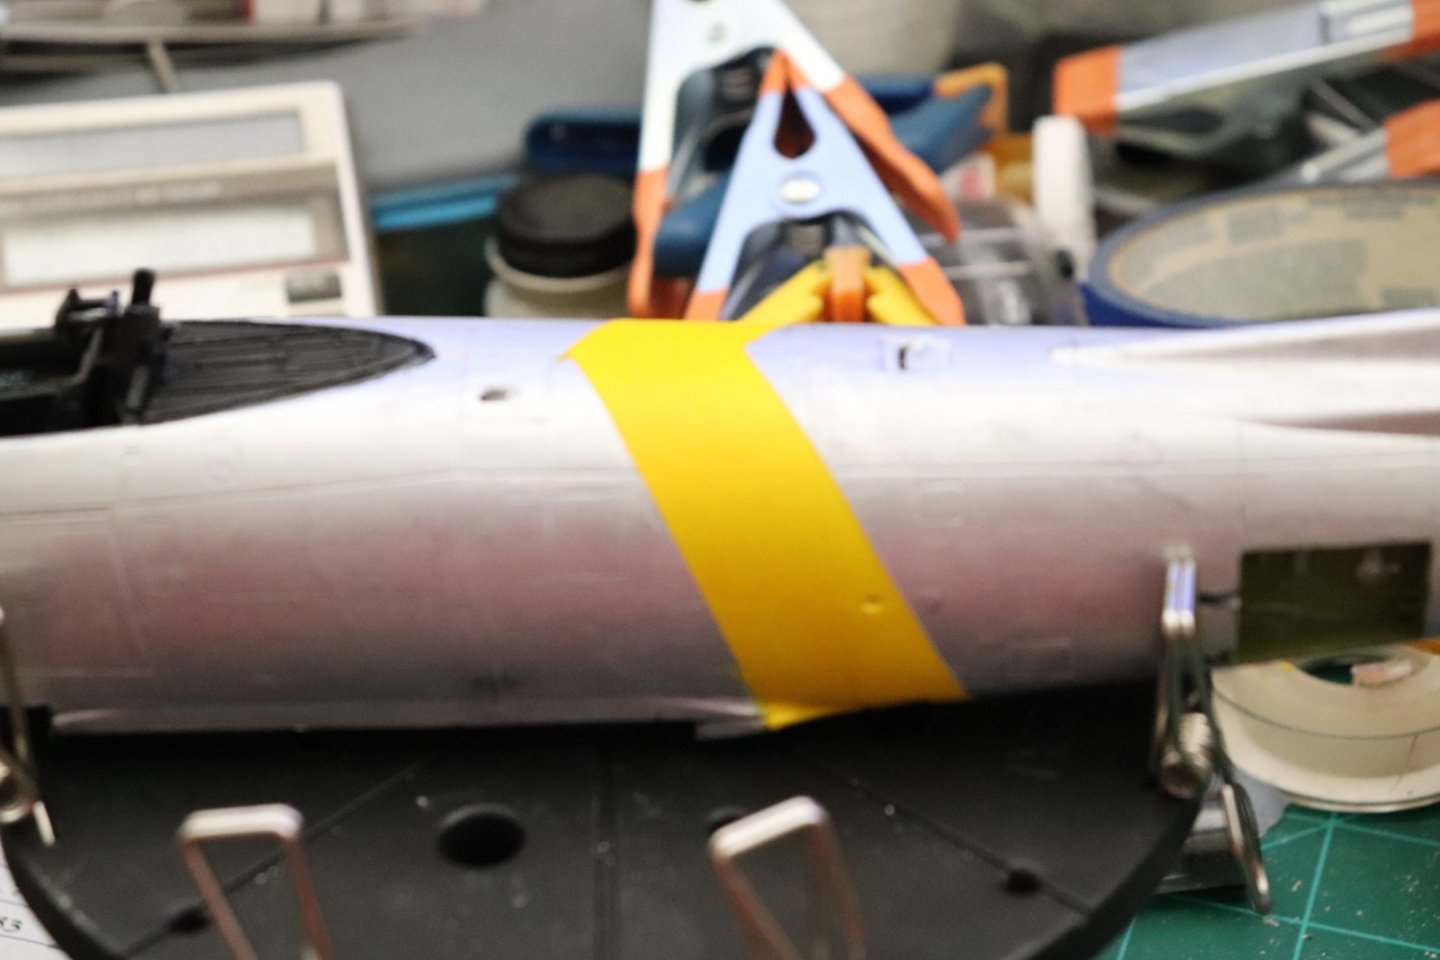

- 585 replies
-
- 12
-