Egilman
-
Posts
4,385 -
Joined
-
Last visited
Content Type
Profiles
Forums
Gallery
Events
Everything posted by Egilman
-

F-86F-30 Sabre by Egilman - Kinetic - 1/32nd scale
Egilman replied to Egilman's topic in Non-ship/categorised builds
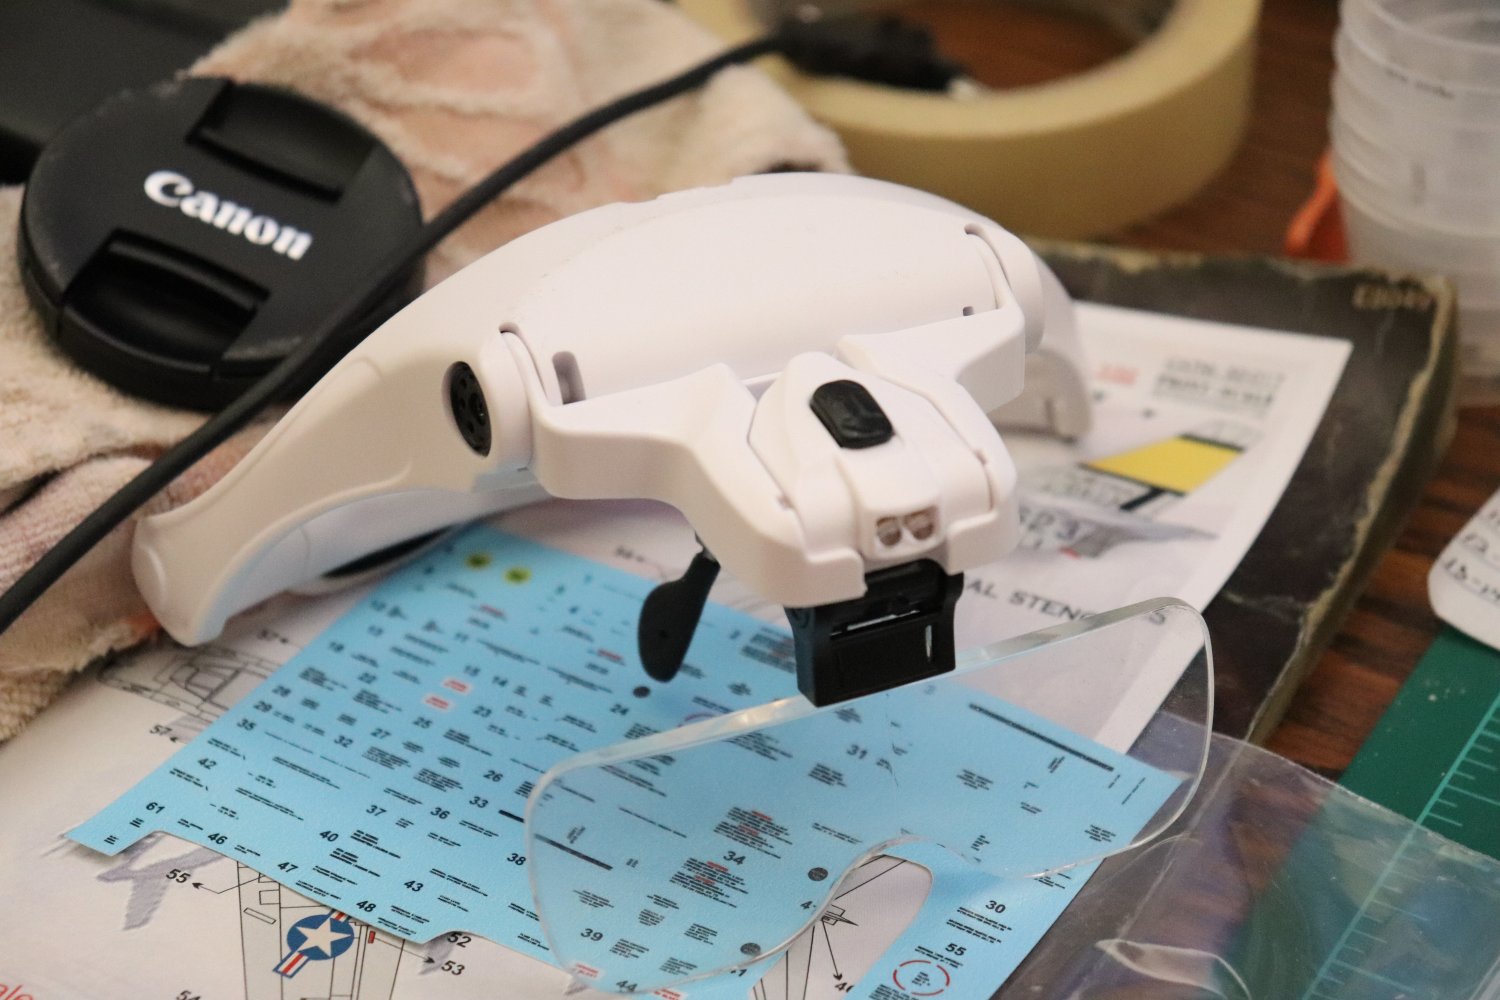
A few years back I broke down and bought a set if these... They work beautifully, this is how I know it's my eyes getting older, even using the highest mag lens in the kit I still can't read them, sometimes can't even see if they are upside down or not... We all have to get old.... It's not going to stop me though, and I'll do the best I can.... When they get to the point where I cant focus on them at all is when I'll stop... Medical is really slowing me down at this point..... anyway..... Onwards...!!!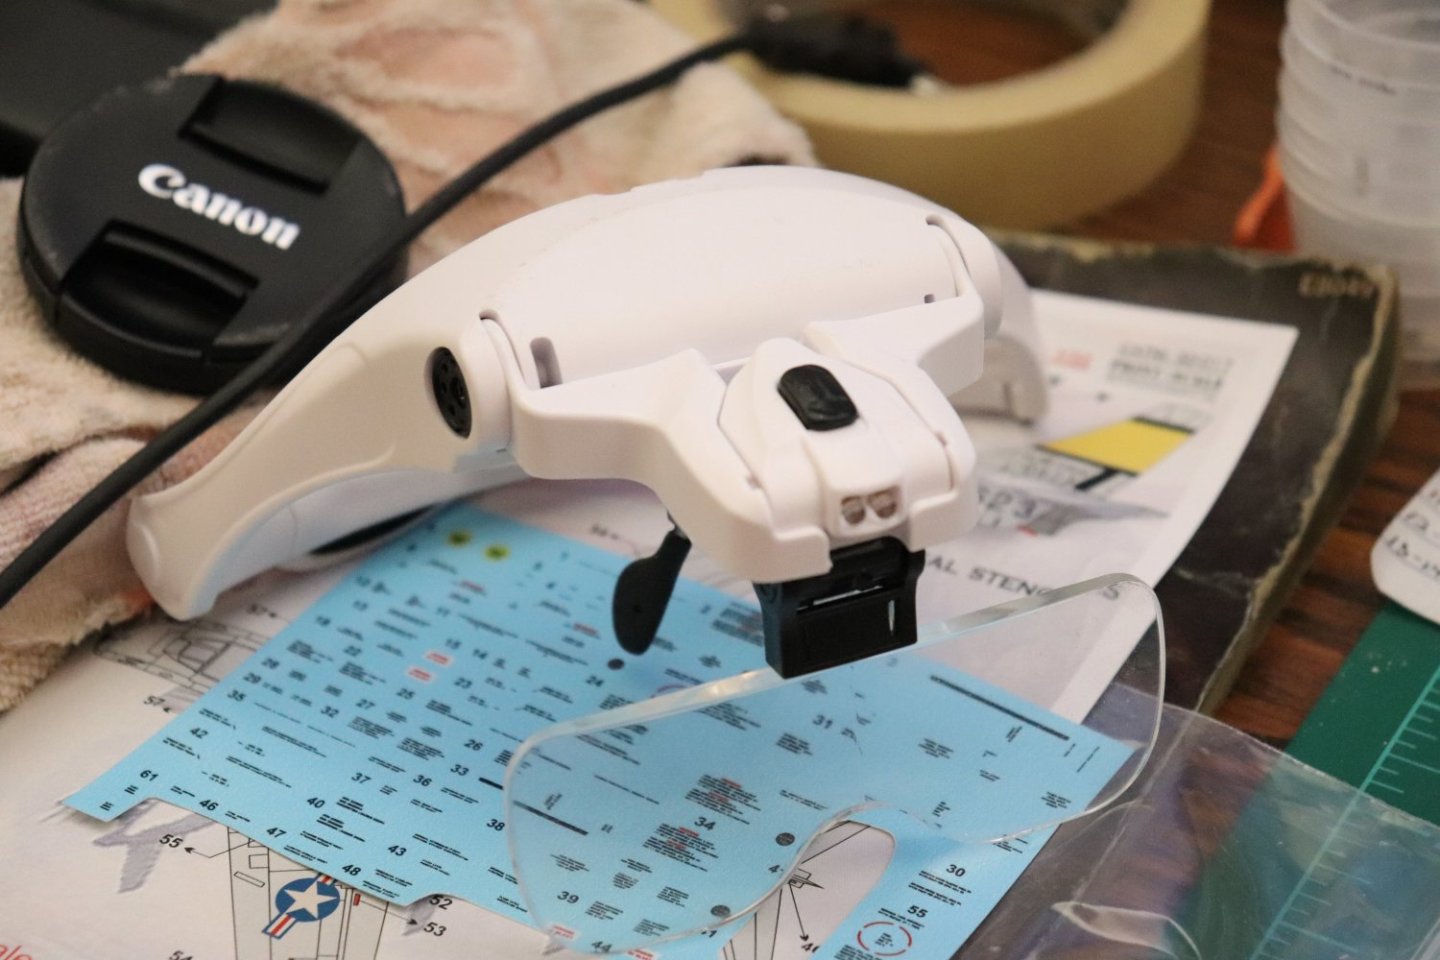
- 585 replies
-
- 11
-

-
F-86F-30 Sabre by Egilman - Kinetic - 1/32nd scale
Egilman replied to Egilman's topic in Non-ship/categorised builds
Thanks OC.... Yeah, Micro Sol works great for sucking down decals.... 30 years of using it and I've still not found anything better... -
F-86F-30 Sabre by Egilman - Kinetic - 1/32nd scale
Egilman replied to Egilman's topic in Non-ship/categorised builds
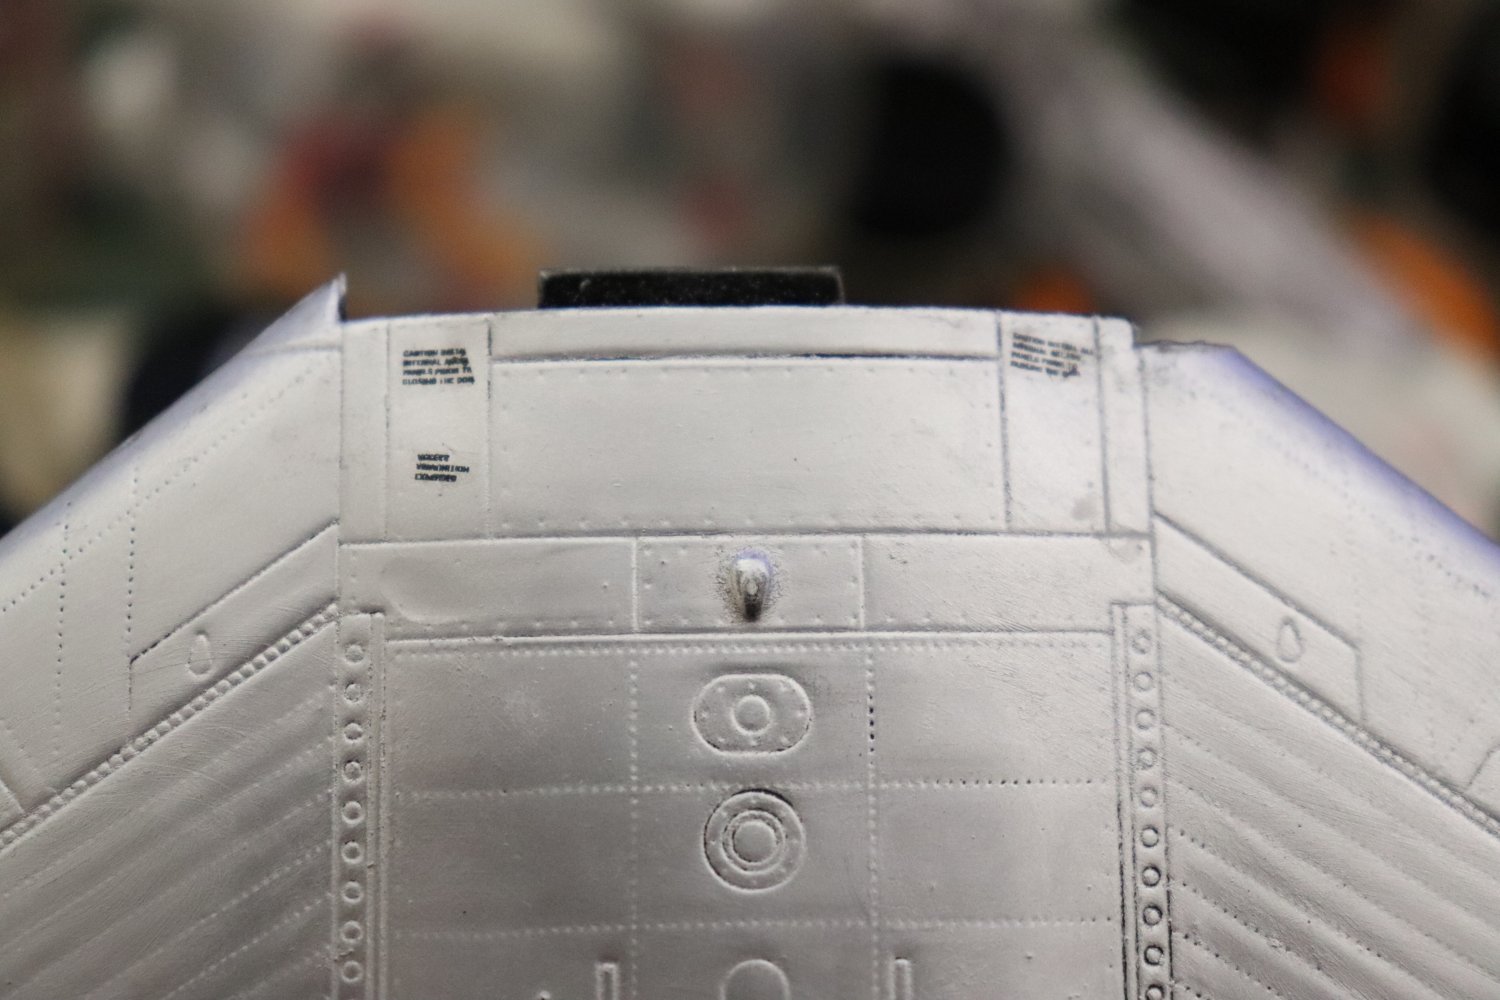
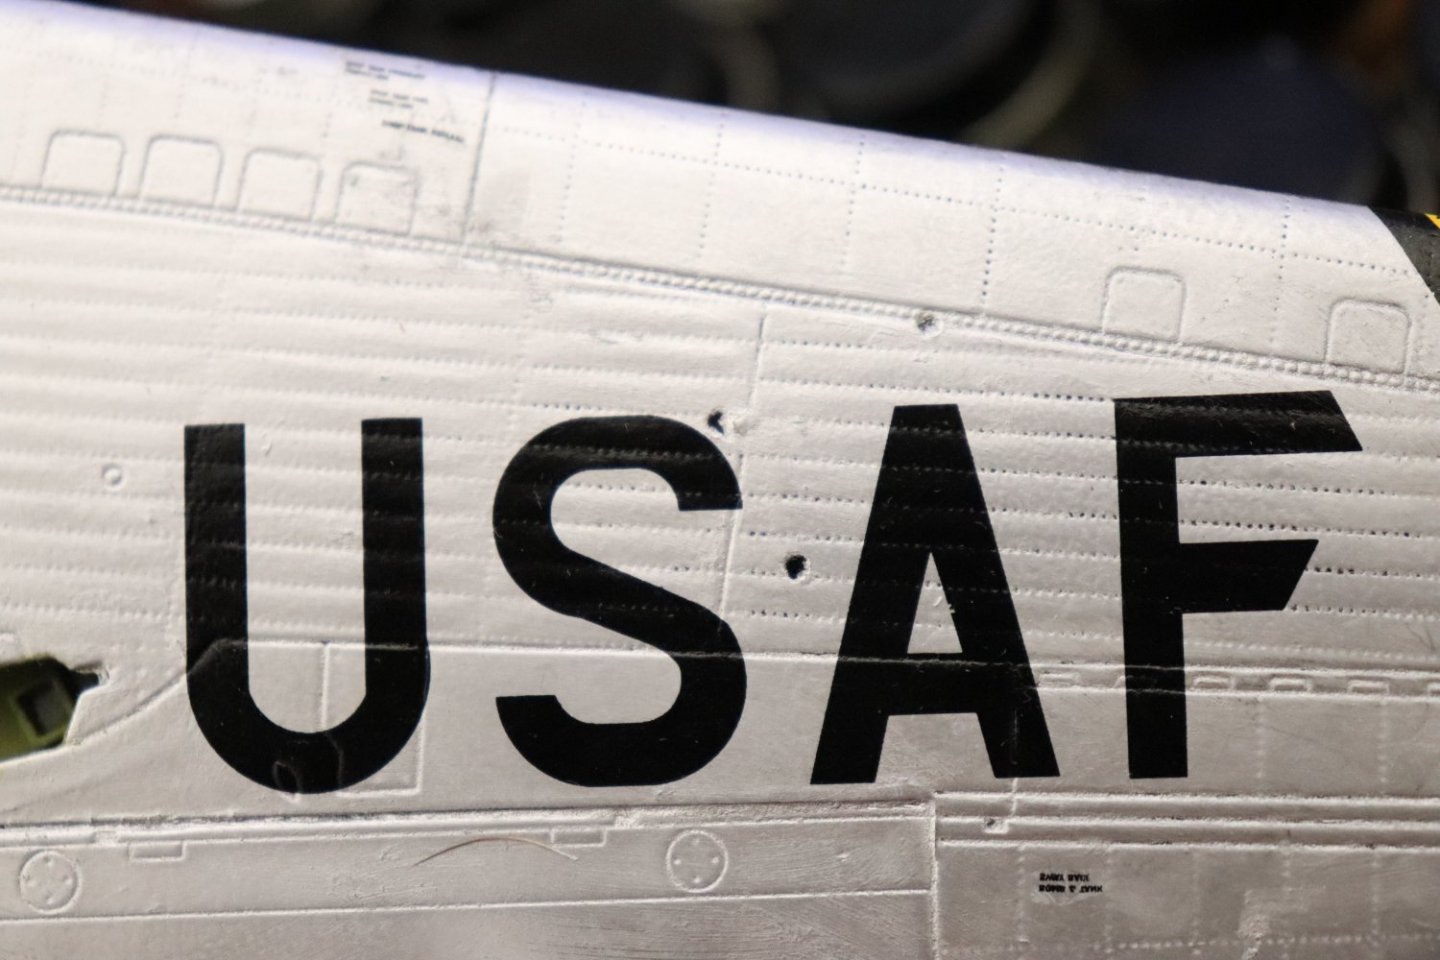
Bottom of the wing... Done decaling except for trimming & clearcoating My eyes are so bad I can't read them anymore.... Probably be the last time I go to this level of decaling.... But anyways, on to the top side of the wing... There's even more of them there... Onwards....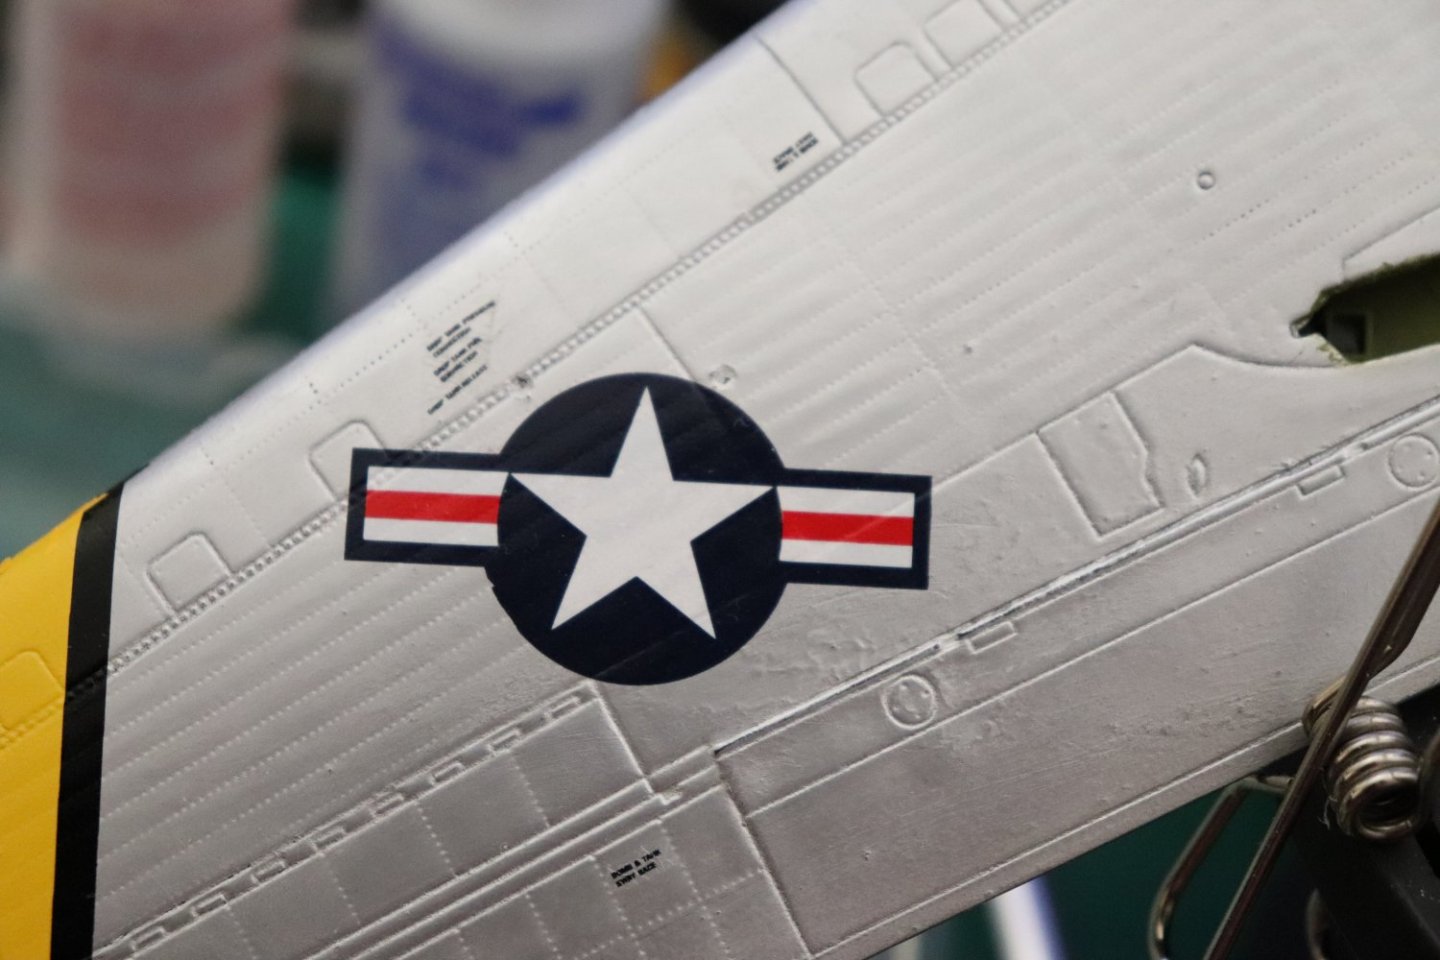


- 585 replies
-
- 12
-
-
We live life first brother, there is a whole big world out there... Whatever you decide to do we are with ya... (and yeah once it goes on my shelf as well)... I've been known to leave things out when they are redundant or never seen once the fuselage is closed as well, I consider myself in good company brother...
-
F-86F-30 Sabre by Egilman - Kinetic - 1/32nd scale
Egilman replied to Egilman's topic in Non-ship/categorised builds
Thank you Andy... It would if I had some brother, the decals are not as bad as some I've worked with, it just takes patience and thankfully there isn't a lot of them... If I have to go to paint that's not an issue either, it was just unexpected is all... -
F-86F-30 Sabre by Egilman - Kinetic - 1/32nd scale
Egilman replied to Egilman's topic in Non-ship/categorised builds
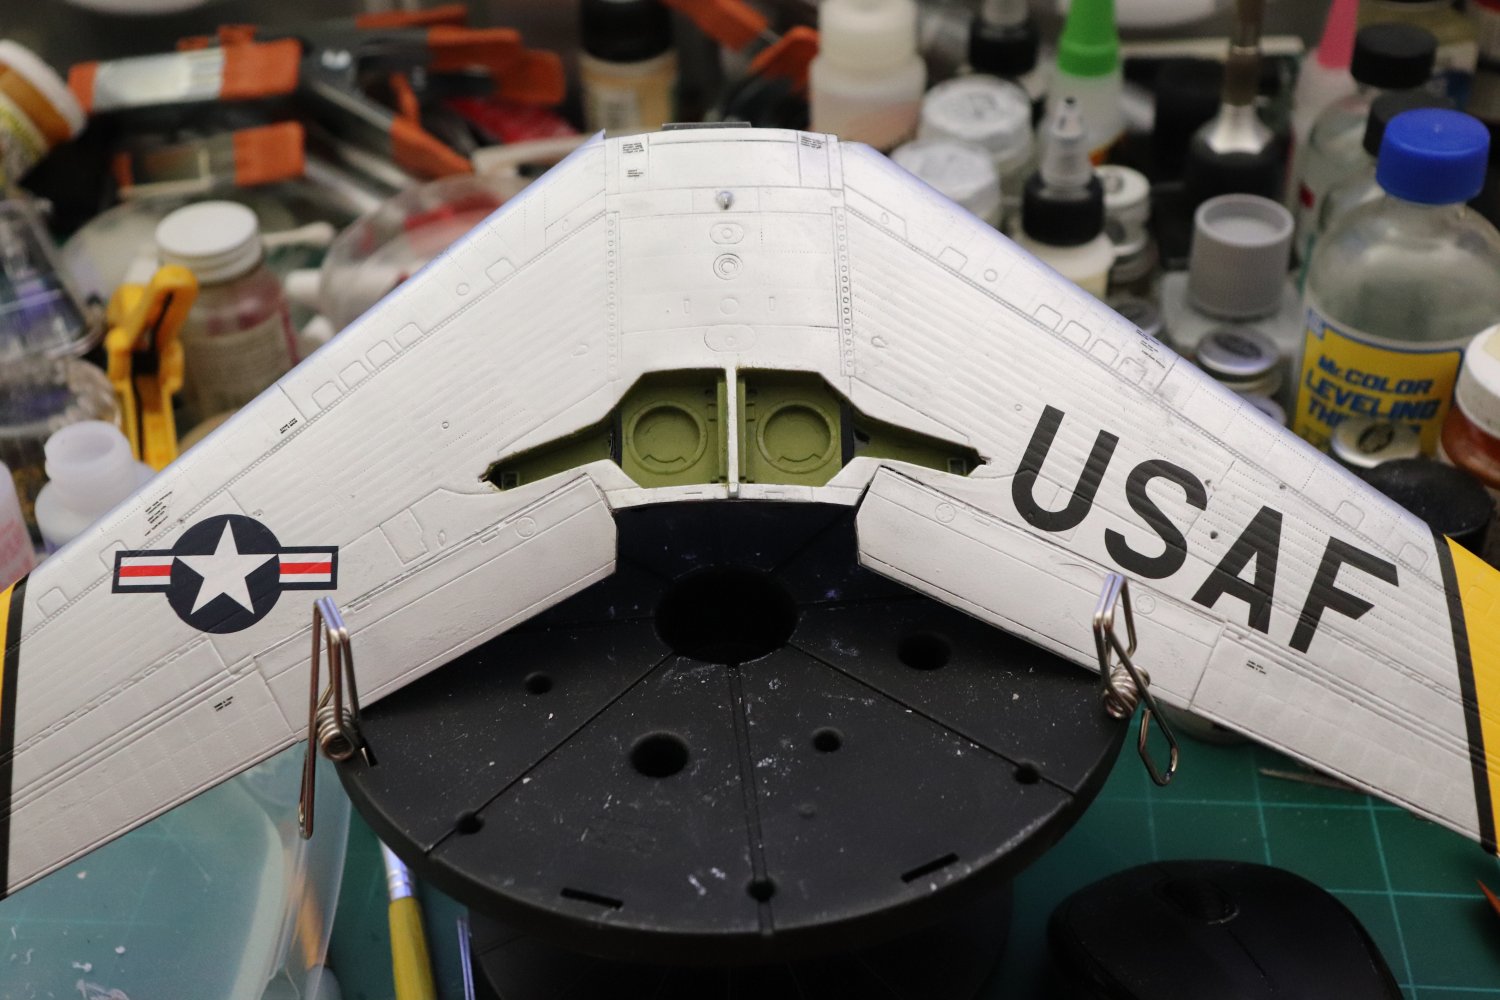
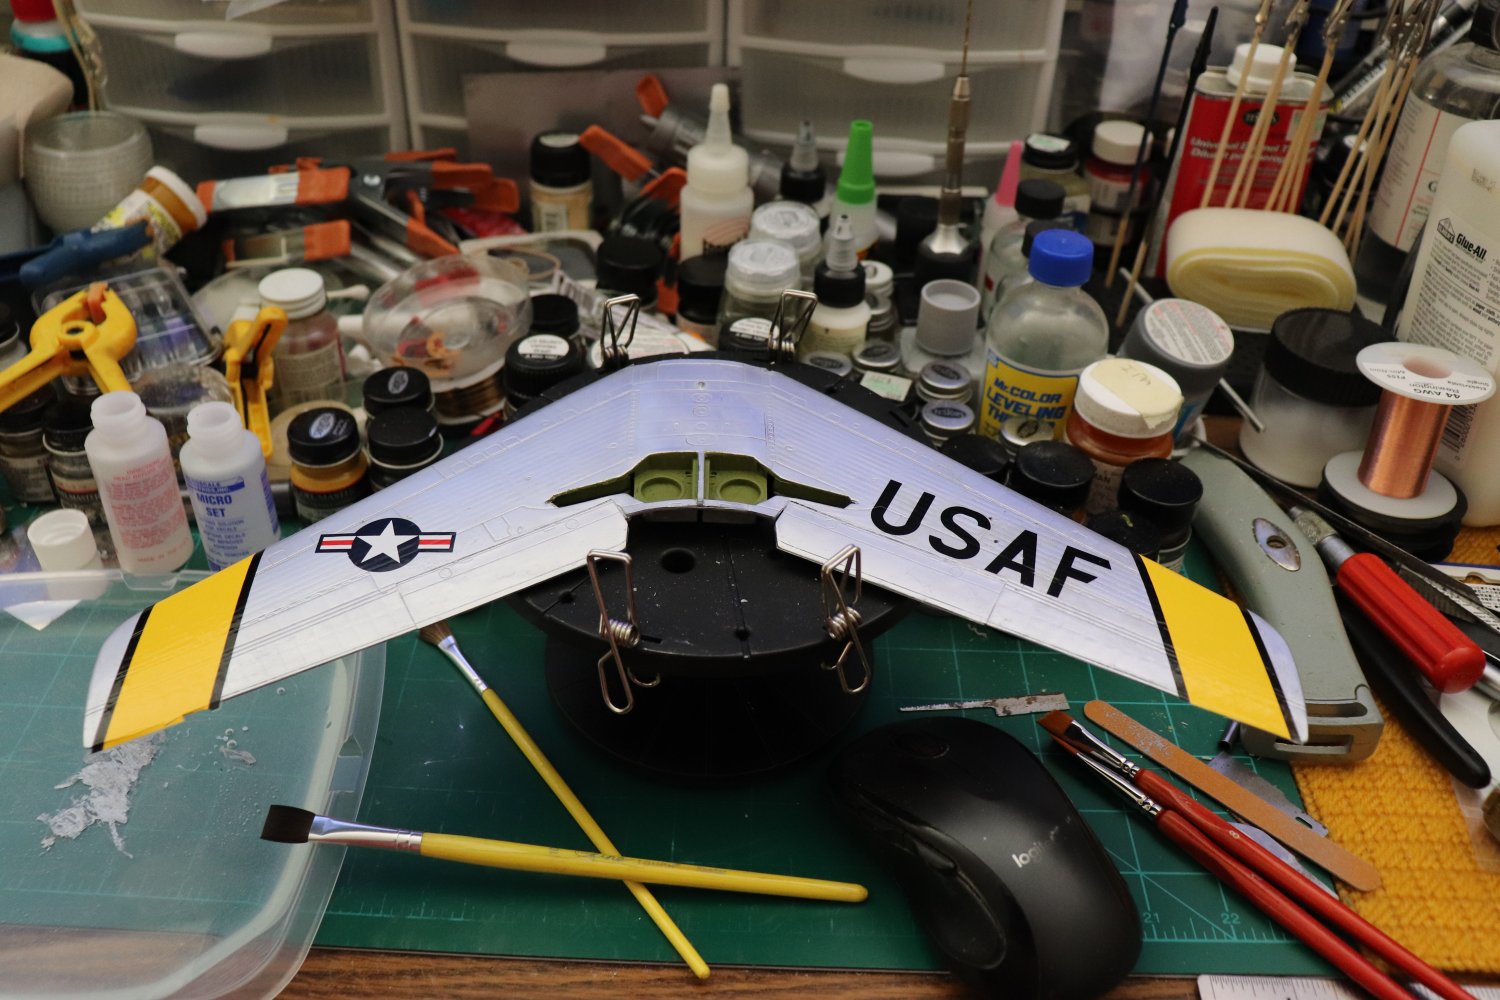
Short Update.... Beginning the decaling process... This is going to take a while, the Decals are marked 2007, 15 years old and I've already had one split... Not sure who made the decals but 15 years? they shouldn't be splitting... Wing bottom first... Given the fragileness of the decals this will be a slow process, set a few, let them dry set a few more... The main decals have to go on first cause the technical decals have to go over some of them... Wing bottom first so I could judge how well the decals react, I guess I found out.... Also there aren't too many of them so it lets me judge on how to approach the remaining ones... The yellow stripe on the fuselage is going to be the difficult one... Fortunately the Print-Scale set does give me the black border stripes for the yellow ID bands, so if the Kinetic decals disintegrate I'll have a way to recover... Wish me luck I'm going to need it... EG
- 585 replies
-
- 13
-
-
Classic single pin plate tracks... Lots of repetitive gluing.... Will look fantastic when done...
-
F-86F-30 Sabre by Egilman - Kinetic - 1/32nd scale
Egilman replied to Egilman's topic in Non-ship/categorised builds
Well Brother, your now introducing government into the equation.... {chuckle} and that point all attempts at determination of the stupidness of questions goes out the window... I believe government has the franchise on stupid questions... (heck they created the standard in the first place) Before government we only had to deal with fool questions... That is a lot higher standard that stupid questions... Fool questions represent a lack of knowledge not stupidity, questions where the government already knows the answers are stupid questions... (and the government inundates us with them daily) You haven't asked a stupid question yet... (no fool questions either so don't go there) {chuckle} Besides anyone willing to stand in an open helicopter door and fly around at 120 kts at less then 100 ft altitude is entitled to ask any question they want to.... They've earned the right... -
F-86F-30 Sabre by Egilman - Kinetic - 1/32nd scale
Egilman replied to Egilman's topic in Non-ship/categorised builds
Thanks Gentlemen, it is much appreciated... Yes I was a bit disappointed that they turned out as light as they did... They need to be a tad darker... I think I know why they came out so light, I rubbed on the Pewter over the Silver when I should have black based the panels first giving that dark undercoat.... I've debated over the last few hours on should I attempt to correct it, but I think the risk of screwing the pooch is just too great, in person they do show up from 20 ft away across the room so is it worth it? I think I'm going with no it isn't worth it the risk is too great... and a lesson learned for the next time... Decals coming next.... EG -
The P-51 is an aircraft that is beautiful in design, no matter where she is... On the ground or in the air... Especially when wearing red.... Beautiful job.... She looks the part...
-
F-86F-30 Sabre by Egilman - Kinetic - 1/32nd scale
Egilman replied to Egilman's topic in Non-ship/categorised builds
Amen... {chuckle} -
F-86F-30 Sabre by Egilman - Kinetic - 1/32nd scale
Egilman replied to Egilman's topic in Non-ship/categorised builds
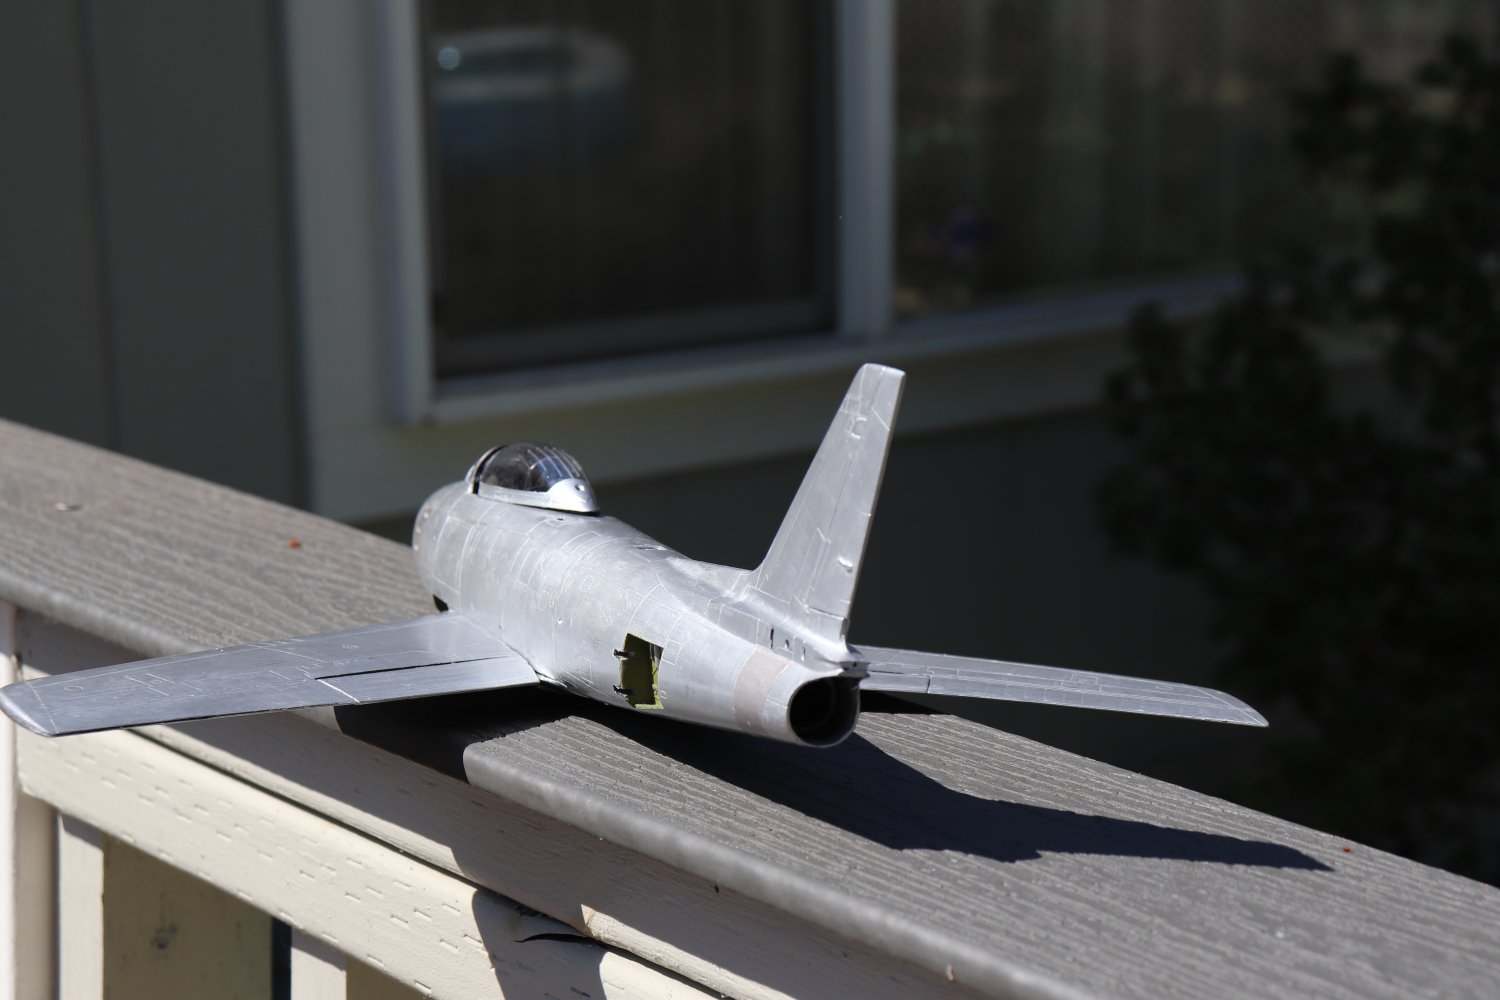
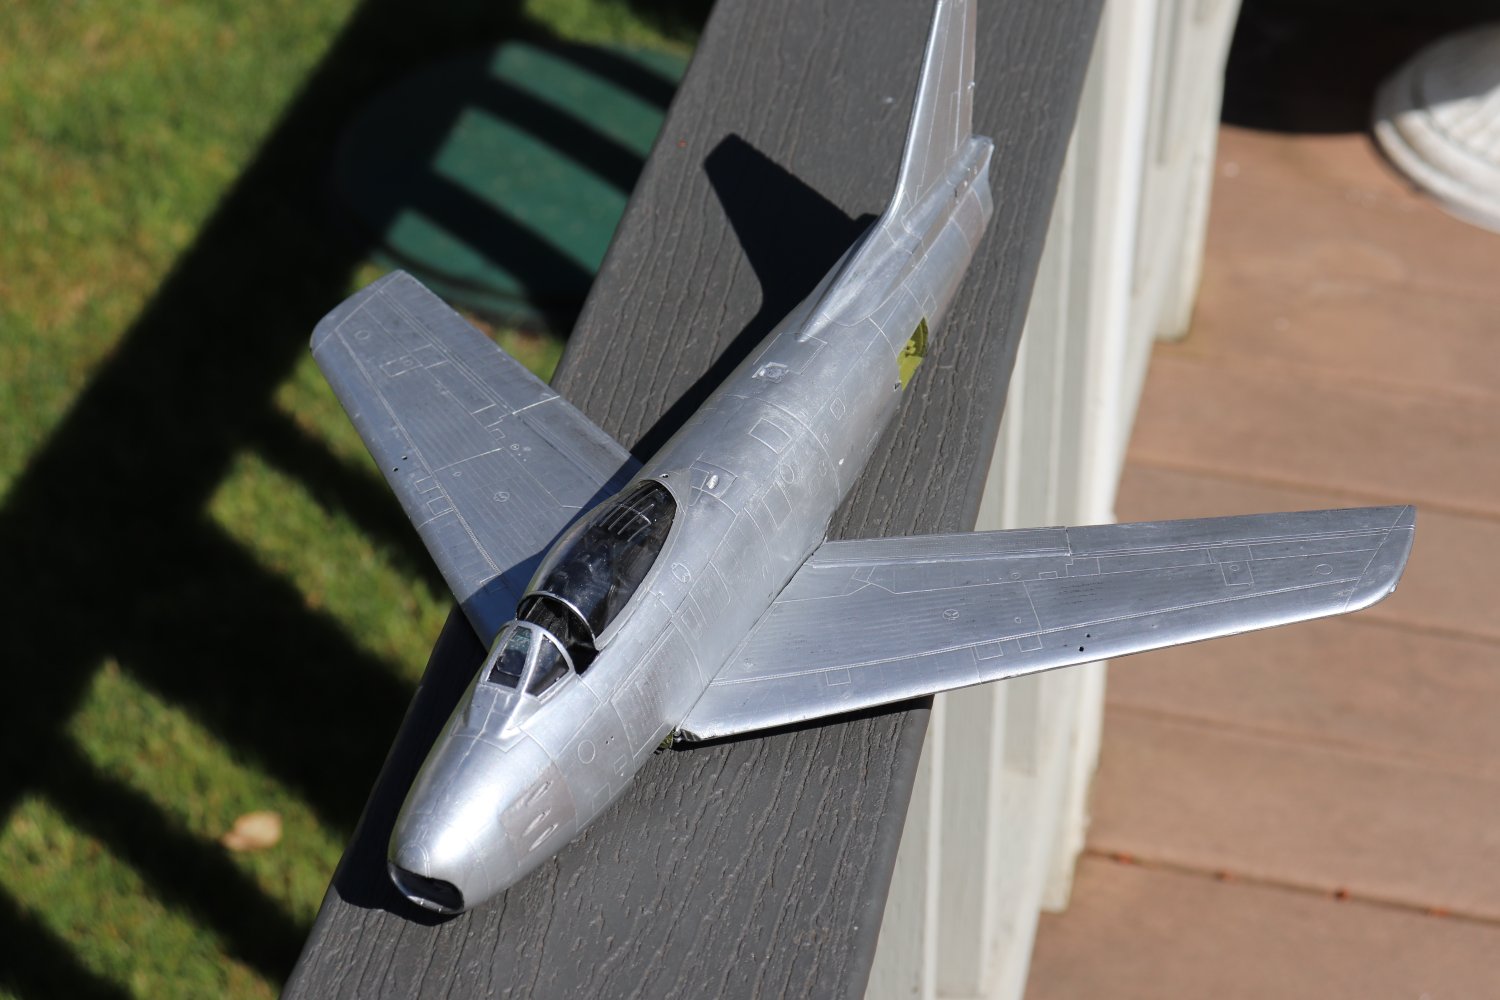
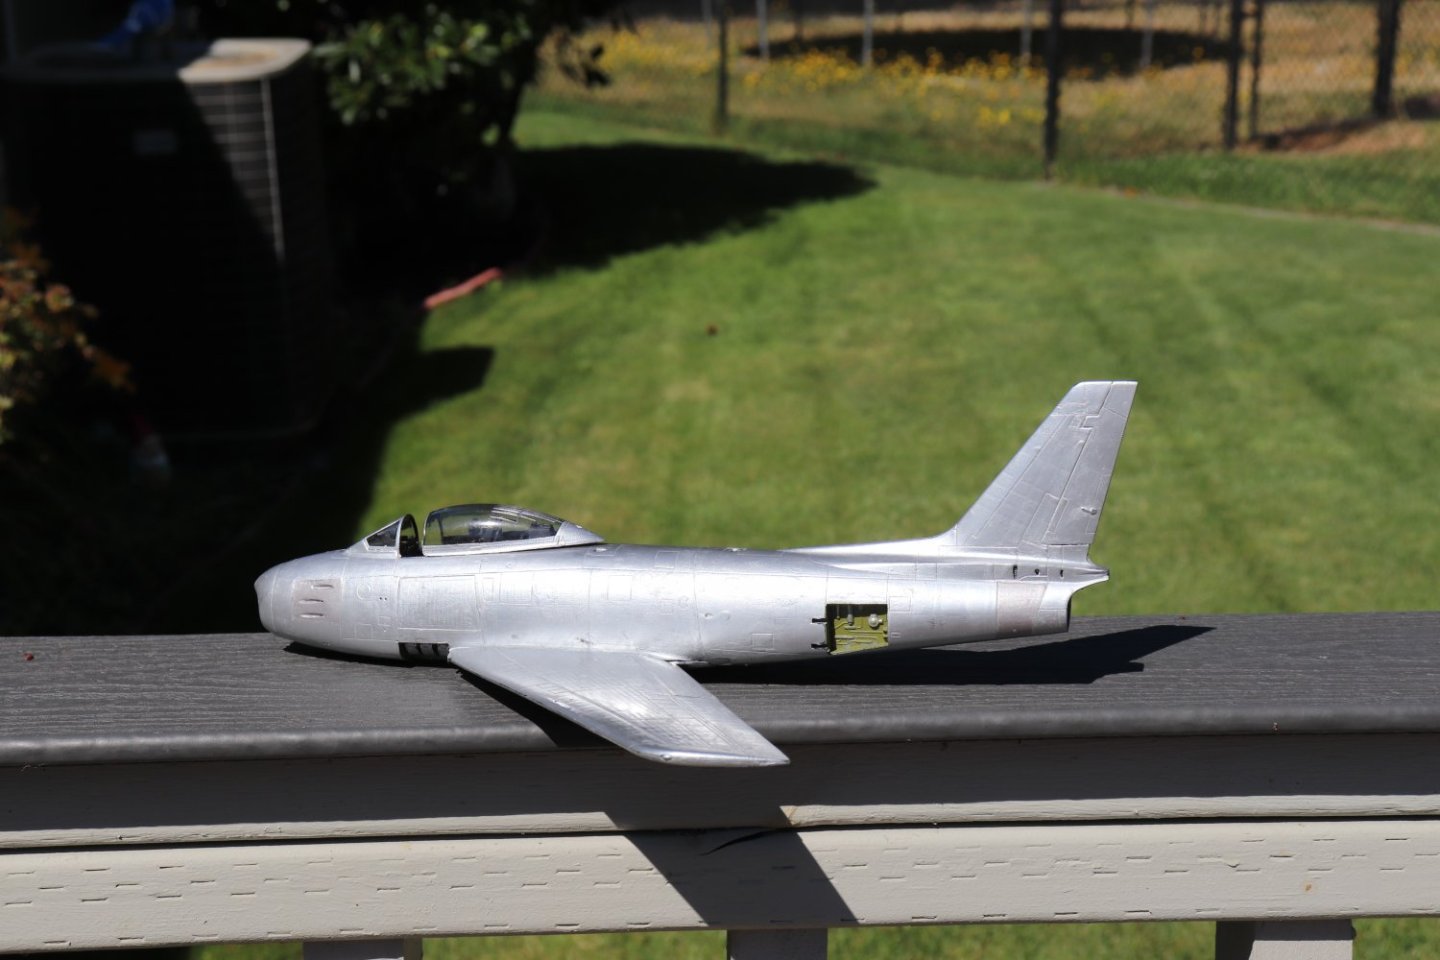
Well another short update, basic finishing is done, and I got her out in the sunshine for a few pics.... I'll let them speak for themselves... Time for decals.... The highlighted panels don't wash out in bright sunlight, they should have been a tad darker, but they are very close to the look I was trying to achieve.... Next up, Decals, they will be coming from the Kinetic set for the subject aircraft and from Print Scale for the technical stencils... There are a lot of them.... And the mail just told me my RnB order arrived at my mailbox a minute ago... I now have everything to finish this bird.... Onwards my friends... (and please tell me what you think of the completed finish, your opinions are very valuable to me my friends)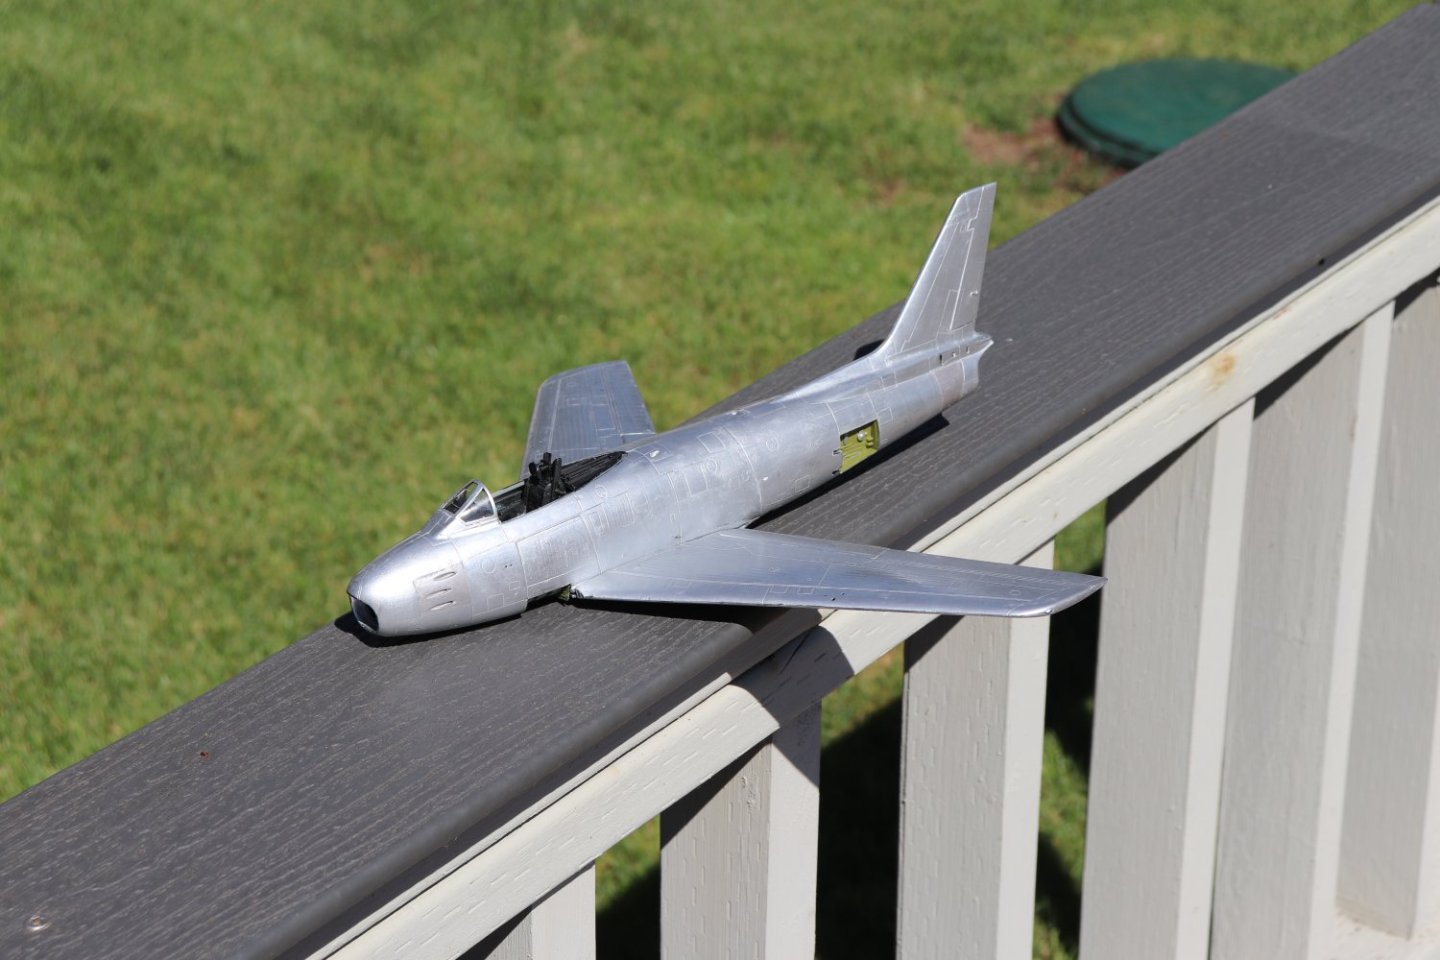


-
F-86F-30 Sabre by Egilman - Kinetic - 1/32nd scale
Egilman replied to Egilman's topic in Non-ship/categorised builds
{chuckle} Since I hold the strong belief brother that there is no such critter as a stupid question, Lou, I really don't think I'm ever going to hear one either... Although I do appreciate the sentiment my friend... But I will apologize for my somewhat oscinine commentary at times... (I never got accepted to miss Bedilia Trulane's charm school, (I wouldn't have graduated anyways) she considered me too obtuse) Any question you may decide to ask is welcome here... (hopefully I'll have a somewhat incisive answer) -
F-86F-30 Sabre by Egilman - Kinetic - 1/32nd scale
Egilman replied to Egilman's topic in Non-ship/categorised builds
Thanks Alan... yes directly over the Future with frisket tape... (the frisket tape is the same orange tape you can get at Hobby Lobby) It gives a good clean edge.... Every bit as good as Tamiya tape.... And there are no stupid questions my friend.... -
For the Stuka the maximum dive angle was 85 degrees, for the Dauntless it was 90... we must remember these were slow aircraft 320 knots clean.... They learned this with the Curtis helldivers in the 30's.... The SB2C had a max dive angle of 65 degrees, but then it was a 450 knot aircraft the faster the aircraft the lower the dive angle... The Stuka and Dauntless flown by an experienced pilot were deadly dive bombers cause they could go almost vertical... Jets, the F-105 & F-104 had a maximum dive bombing angle of 45 degrees... The faster they get, the lower the dive angle for bombing... Ken would know, from a vertical dive, what is the recovery allowance? for the F-86 it was 5500 feet... Don't know what it was for the F-4... And the planes are so fast today and using guided munitions I don't believe they do dive bombing anymore... No real need to...
-
F-86F-30 Sabre by Egilman - Kinetic - 1/32nd scale
Egilman replied to Egilman's topic in Non-ship/categorised builds
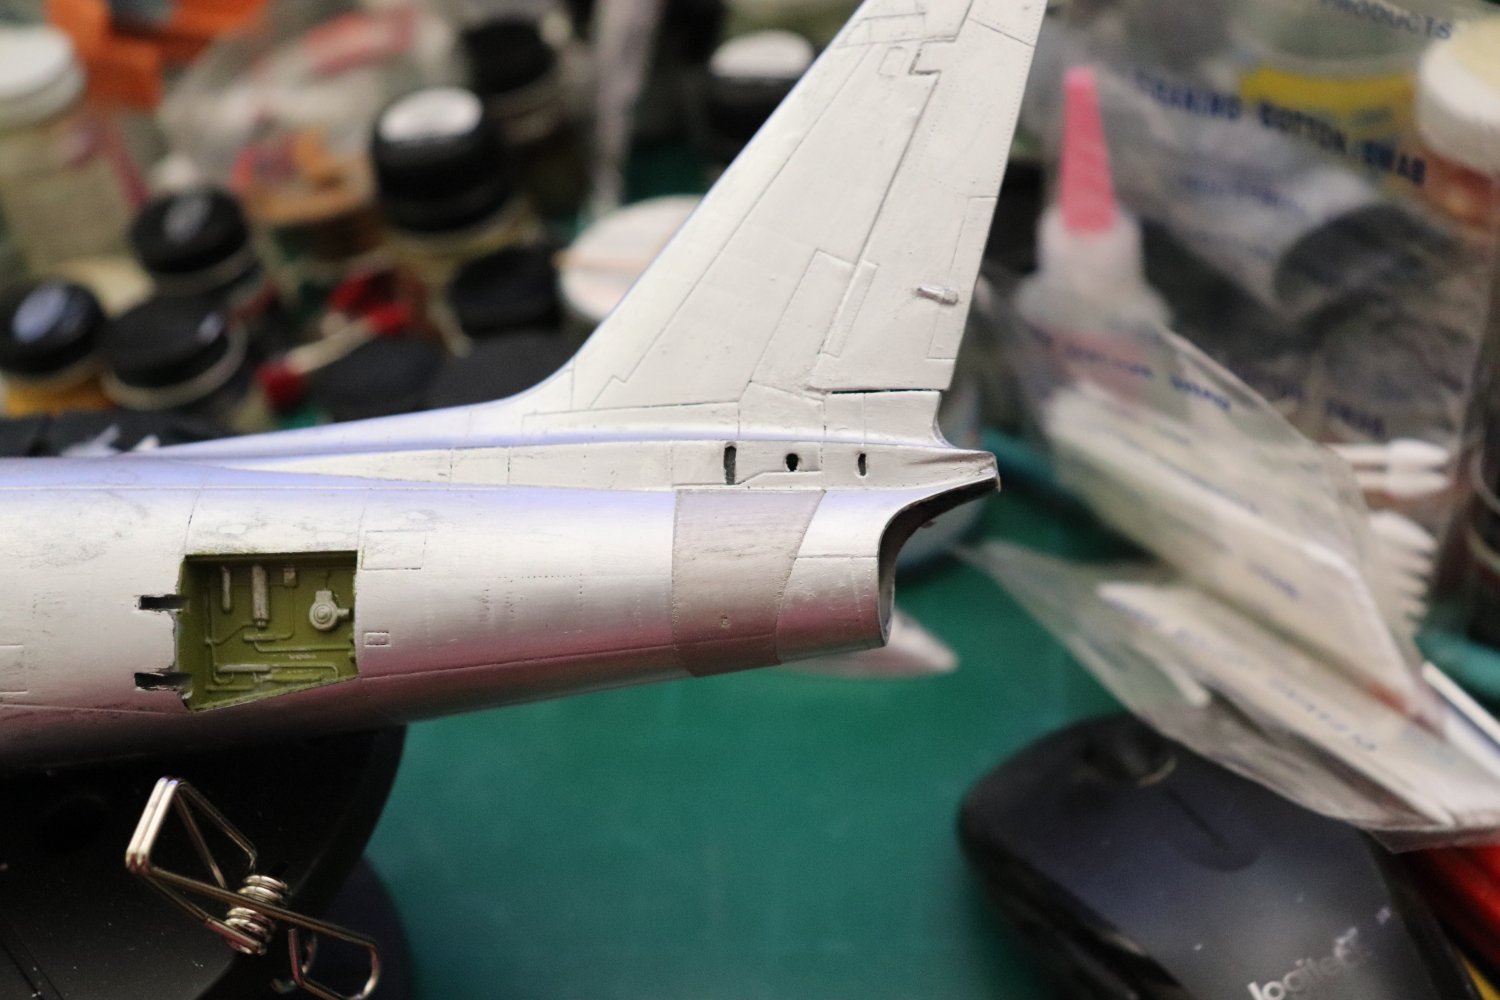
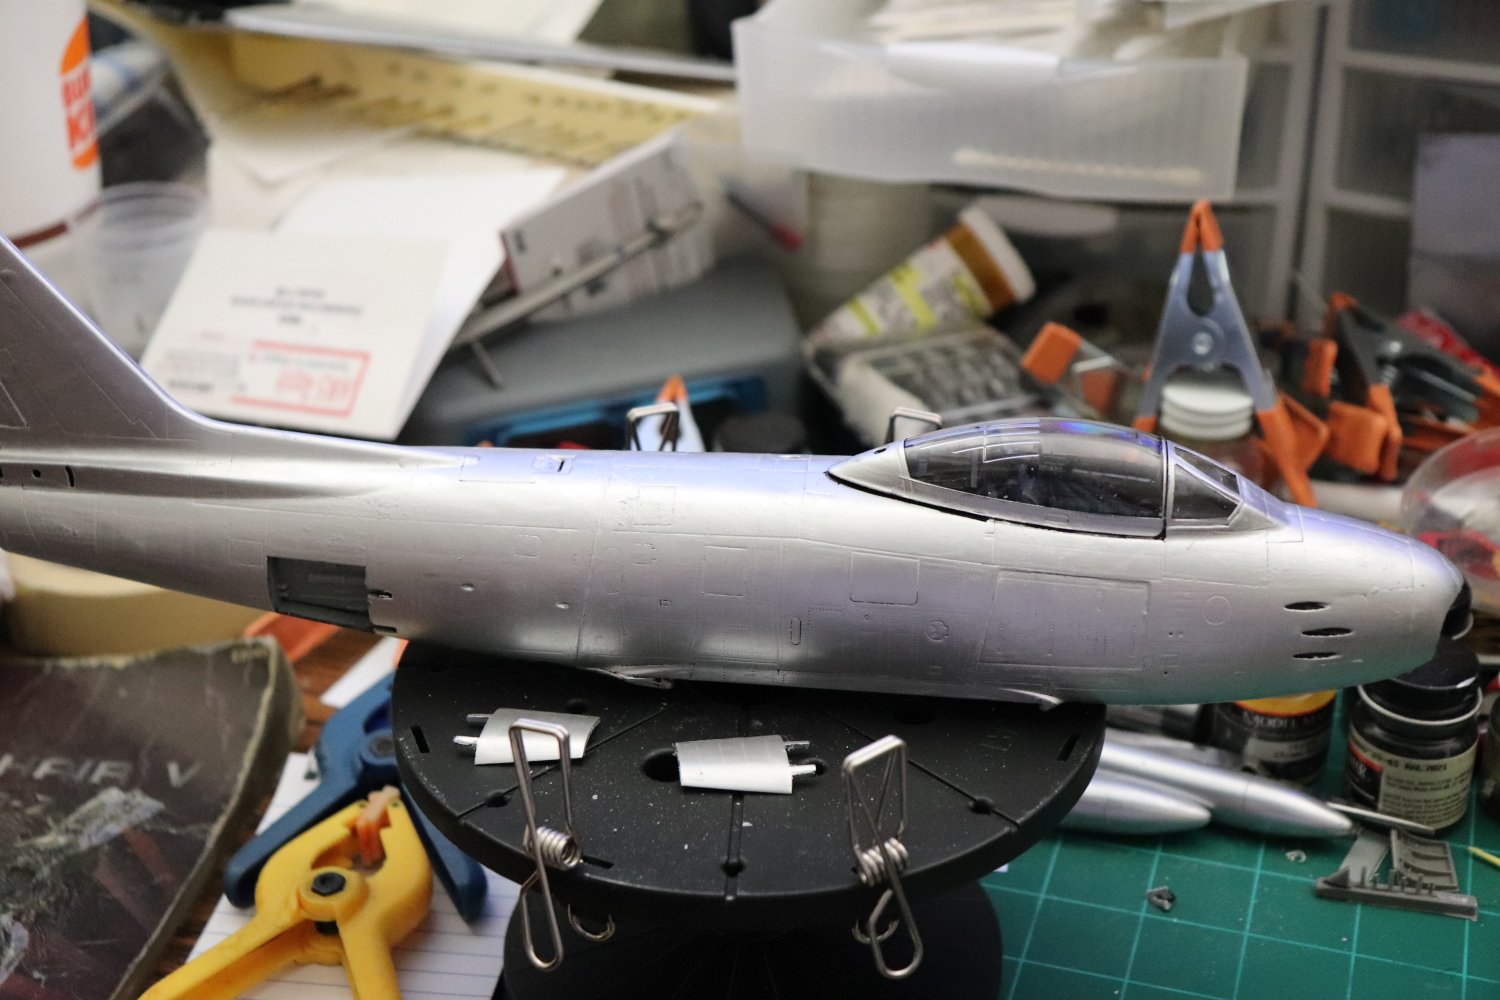
Well progress is going slow but I'm making progress... First coat of future is down and I've painted out the bays, Interior Green is the specified color... I also put the Pewter on the gun ports and tail support... Just pulled the masking and waiting for it to dry before I buff it out.... Looks to me like it is close to an accurate shade of polished steel, but we will know for sure once it's rubbed out and in the sunlight... I've got some RnB Ebony coming, (if it ever gets here) to do the inside of the tail pipe and aft shroud..... Anyway It may be going slow, but it is going... {chuckle} Onwards!!!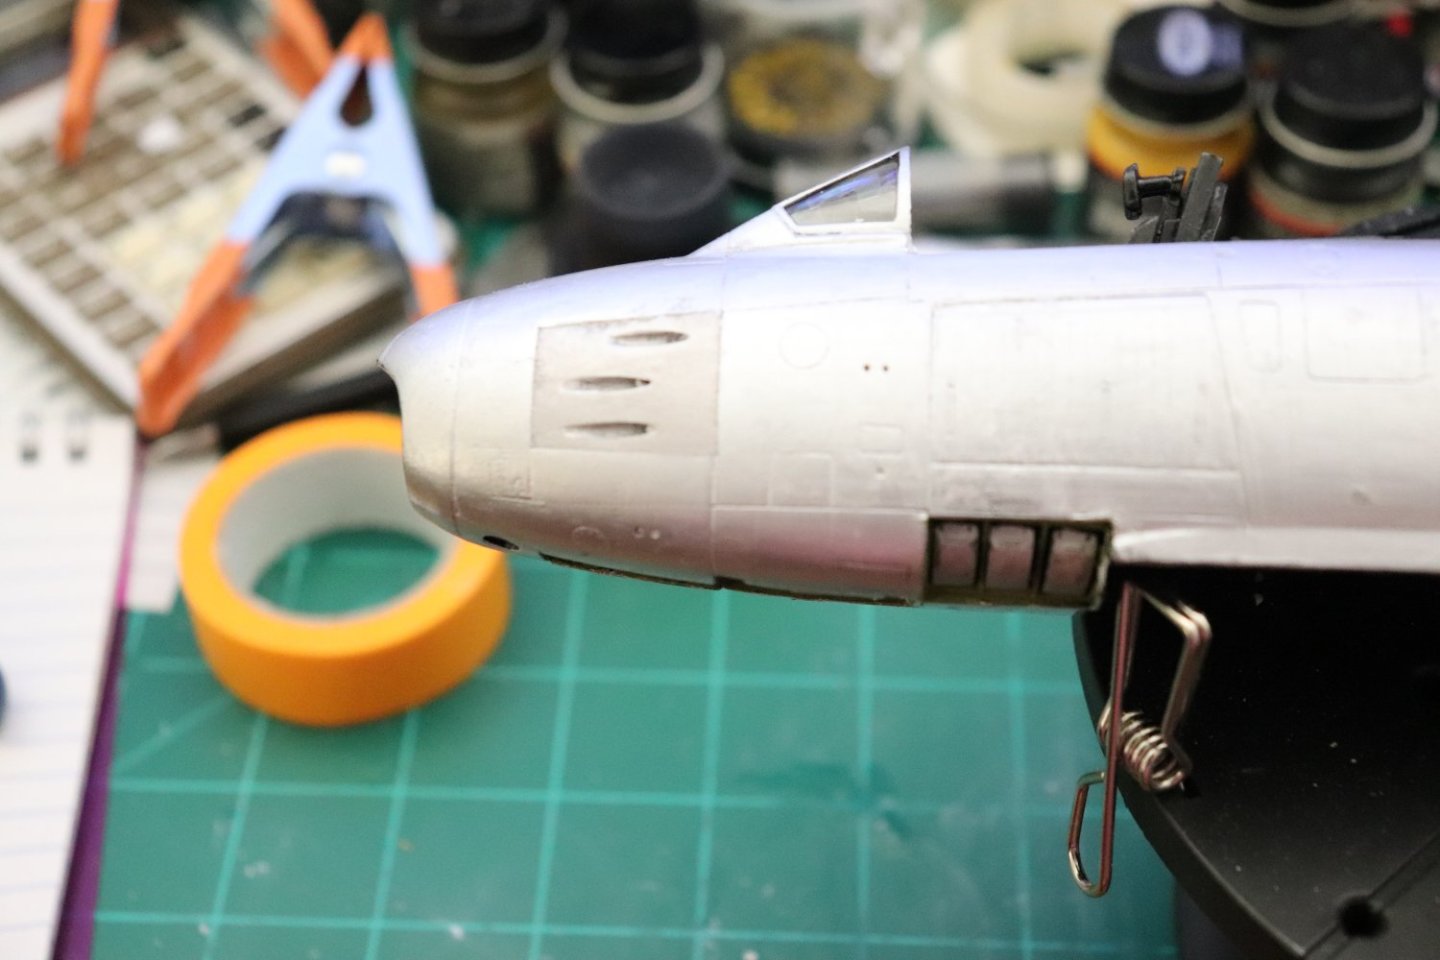

-
F-86F-30 Sabre by Egilman - Kinetic - 1/32nd scale
Egilman replied to Egilman's topic in Non-ship/categorised builds
Thank you OC, It's appreciated... -
That's my technique as well for the really really tiny taps, I got tired of replacing them.... {chuckle} Hand tapping very fine stuff is an art in itself...
-
Thanks Chris for the explanation, I assume your using wire that is stiff enough to hold position against the slight tension of the EZ line... Sometimes the simplest methods escape you... sorry..
- 98 replies
-
- 13
-
-
OK, how do you keep the interplane struts lined up so accurately? If you don't mind me askin'
- 98 replies
-
- 10
-
-
In the Movie "The Train" Burt Lancaster (1964) gives a good demonstration of re-lining a locomotive drive rod bearing through Babbit pouring....
-
Never thought of using Evergreen with a syrette, that's a heck of an idea... Evergreen can be thinned quite well and as long as air doesn't get to it it doesn't dry out that much.... (unless you leave it sit for a year or two)...
- 98 replies
-
- 11
-
-

-
You too brother, gonna make a list for the big guy, (don't know how much pull I got in that department but whatever I've got will be sent) take care of yourself....
-
Absolutely brother, stay well.... I'll be mentioning you to the big guy tonight... Onwards! don't let them stop you...
-
F-86F-30 Sabre by Egilman - Kinetic - 1/32nd scale
Egilman replied to Egilman's topic in Non-ship/categorised builds
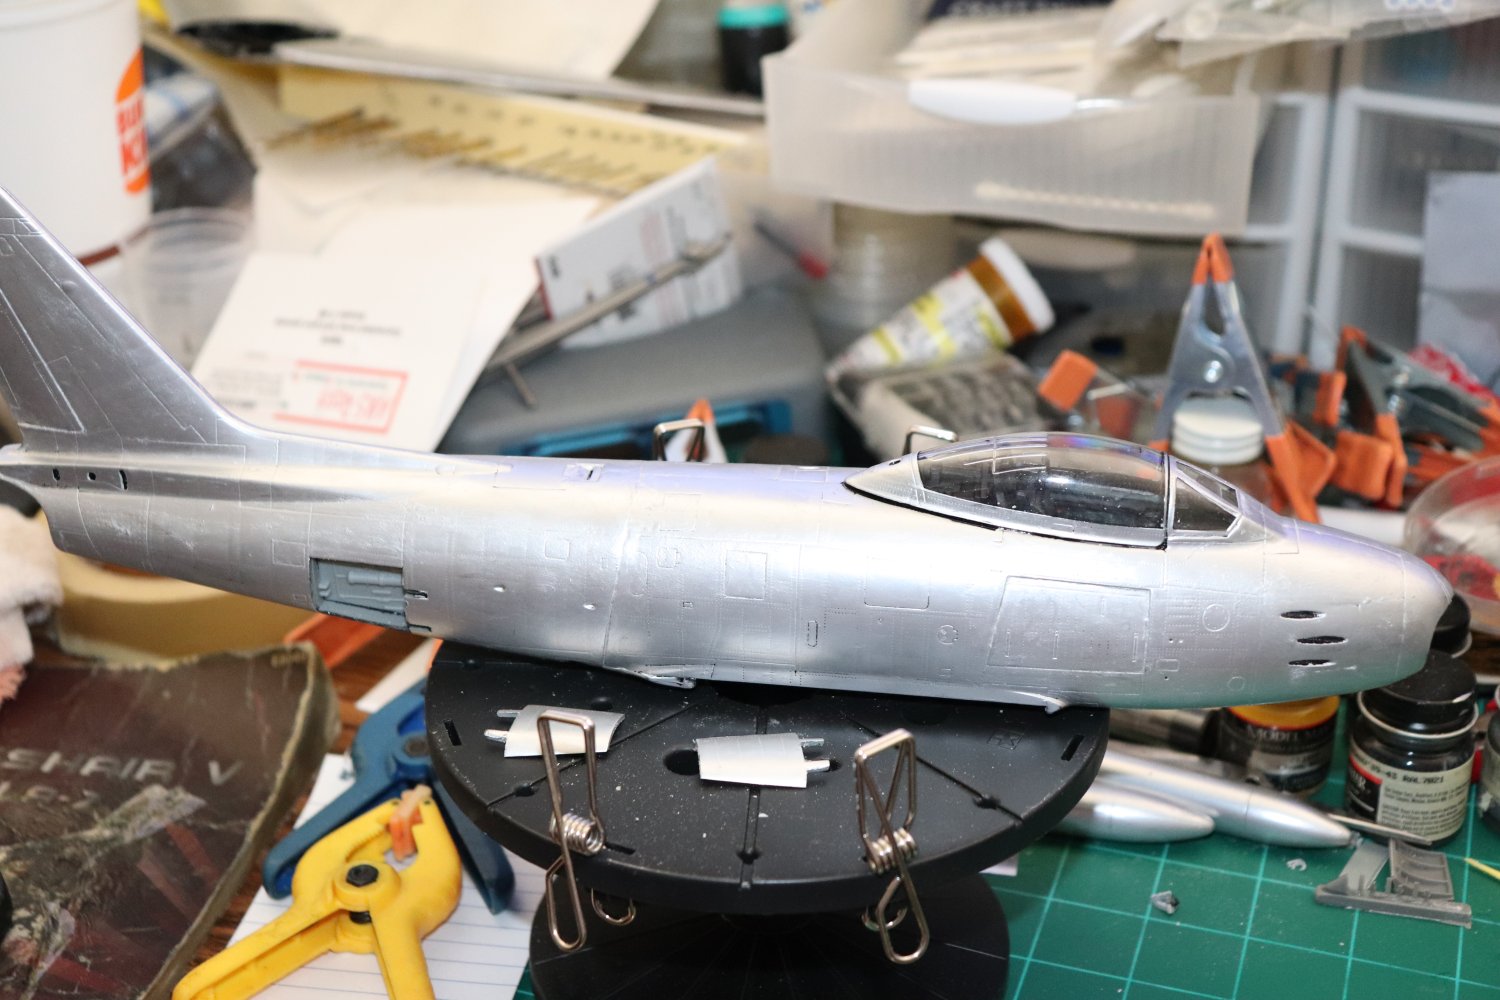
Short update Brothers.... Touchups are done, and I de-masked the canopy.... Hi Flash... No Flash... I think she certainly looks the part.... (and looks like a missed a couple of touchups) {chuckle} Easy enough fix.... Onward....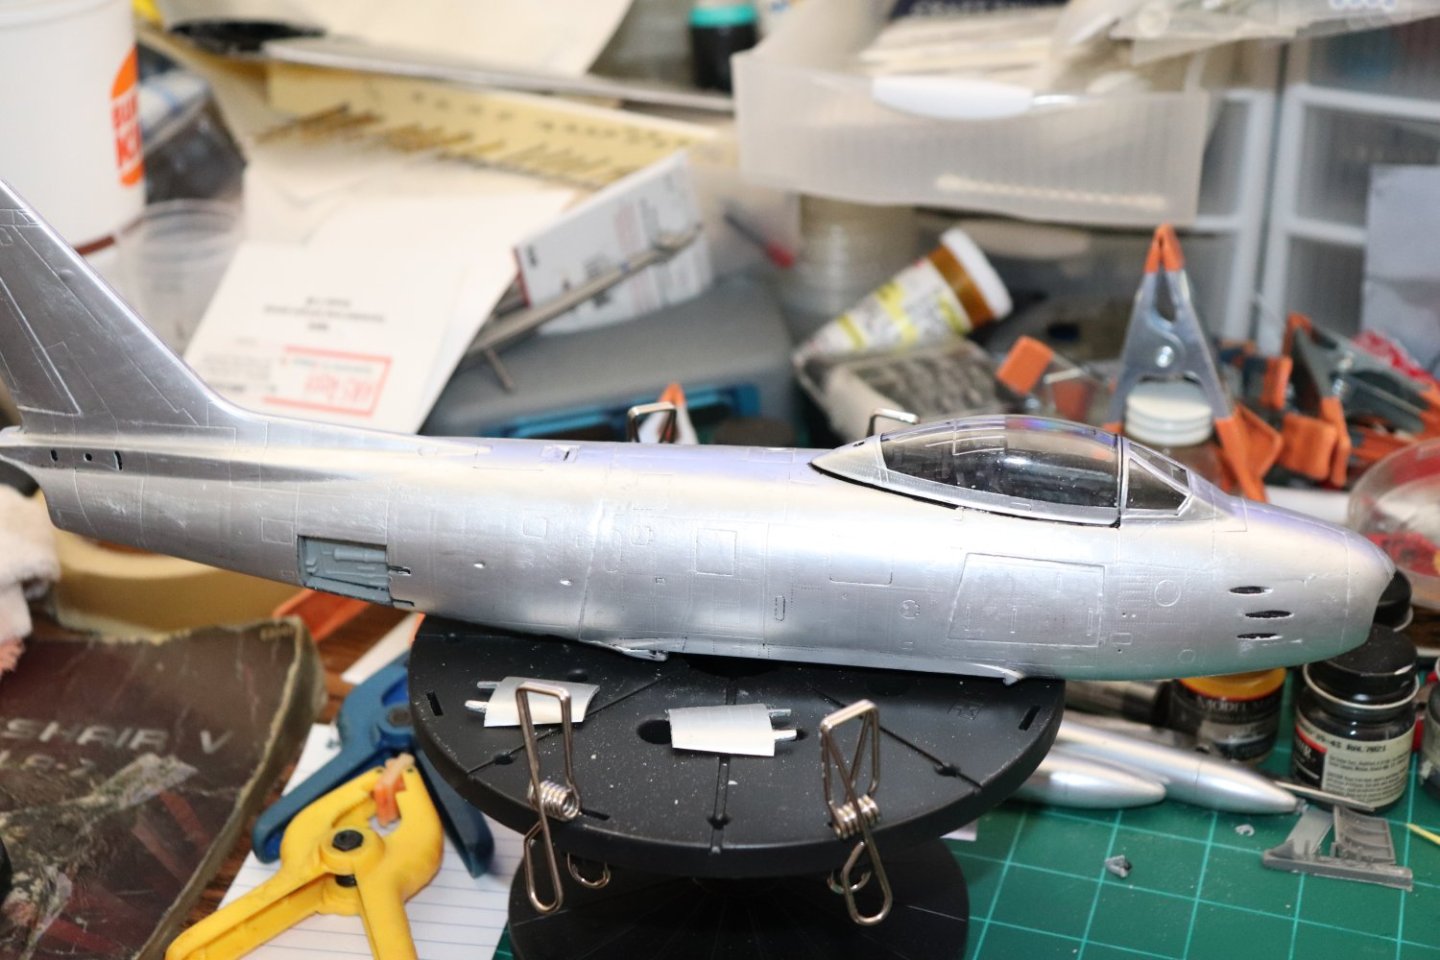

- 585 replies
-
- 13
-