Egilman
-
Posts
4,382 -
Joined
-
Last visited
Content Type
Profiles
Forums
Gallery
Events
Everything posted by Egilman
-

F-86F-30 Sabre by Egilman - Kinetic - 1/32nd scale
Egilman replied to Egilman's topic in Non-ship/categorised builds
I know that brother, I got it, (just speaking to those that didn't) and yeah they went back to the Stars & Bars national insignia during Korea leaving everything else red, but during WWII everything was red including the insignia... -
F-86F-30 Sabre by Egilman - Kinetic - 1/32nd scale
Egilman replied to Egilman's topic in Non-ship/categorised builds
Thanks Dennis, I'm getting ready to silver her up.... Thank you and everyone for the good wishes... I just finished the dual scope procedure today, Doc said no cancer, top or bottom, didn't know what the mass was they found but it isn't stomach or colon cancer... He's ruminating on Diverticulitis, a huge relief if it is (common ailment for people our age) Will see my attending in a few days, maybe they will have a clue at that point.... Thanks all for the well wishes and prayers, My friends... they helped greatly...- 585 replies
-
- 10
-

-

-
Very Very well done... Looks like it drove right in off the Sinai desert...
-
F-86F-30 Sabre by Egilman - Kinetic - 1/32nd scale
Egilman replied to Egilman's topic in Non-ship/categorised builds
Thanks my friend, yeah they were a surprise to me when I saw them, I've never seen that on an injection molded kit before... That's an incredible level of detail I wish you all could see in real life, the pics don't do it justice... -
F-86F-30 Sabre by Egilman - Kinetic - 1/32nd scale
Egilman replied to Egilman's topic in Non-ship/categorised builds
Yep, that was the standard for all black aircraft in those days, not so much today... -
F-86F-30 Sabre by Egilman - Kinetic - 1/32nd scale
Egilman replied to Egilman's topic in Non-ship/categorised builds
The sabre's in Korea weren't equipped for night fighting, they were day fighters only.... {chuckle} -
A lot of pilots gave a name to their crates which was generally placed on both sides, but some put the name only on the left side and put their wives/crew chief's names/nicknames on the right side, a practice that continued through the Korean War...
-
Resin kits are a trip unto themselves brother.... Study your research and break out all the skills you will need them.... But they build beautiful, quality models when done... I just received my M-6 HST in the mail yesterday a complete resin model which has similar issues along with a warped top plate... Practice patience and it will go together brilliantly... You can do it....
-
Eye Candy is always welcome brother, testing or not...
-
I'm in brother, pulling up the comfy chair now...
-
F-86F-30 Sabre by Egilman - Kinetic - 1/32nd scale
Egilman replied to Egilman's topic in Non-ship/categorised builds
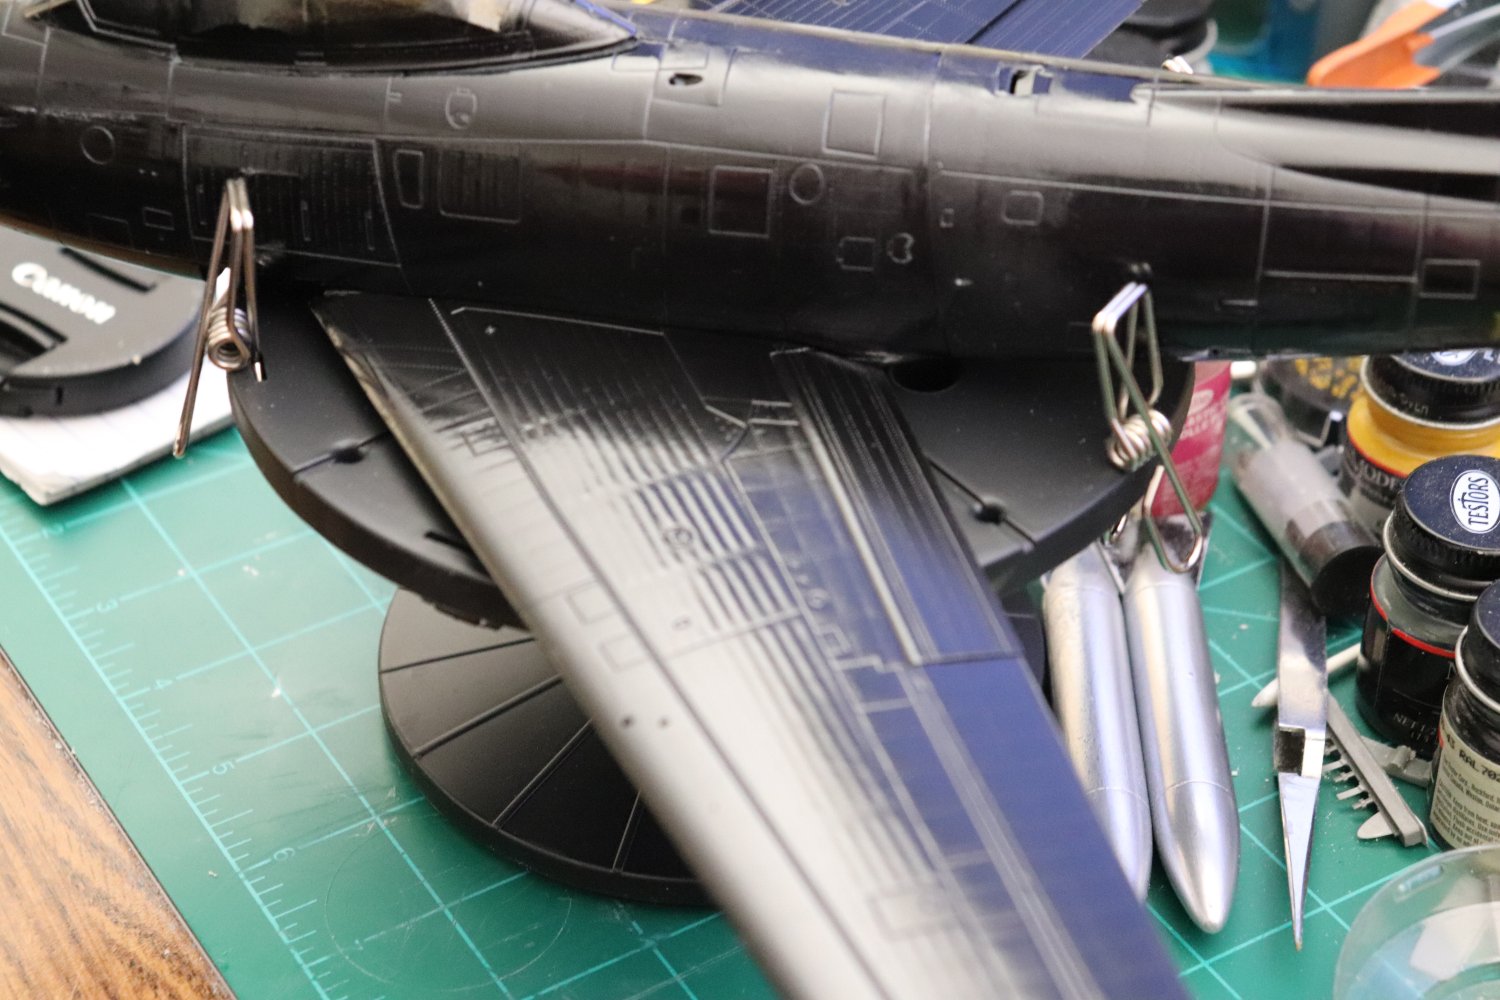
Tamiya Thin Grey... it's the best thin primer available... Something else, she is now dry, and very reflective... I saw something I didn't see when she was in bare plastic.... Talk about detail? look at those wing panels and the subtle details that come out when shiny!!! Astounding! You don't see that while working in bare plastic during building.... I can see why the old reviews rave about this kit now, it was called a revolution in molding tech...... I was wondering what made this kit so special in their eyes, I can see why now...

- 585 replies
-
- 16
-
-
-
F-86F-30 Sabre by Egilman - Kinetic - 1/32nd scale
Egilman replied to Egilman's topic in Non-ship/categorised builds
Well, here she is, painted..... The paint is still a bit tacky so silvering will have to wait a bit until she fully cures.... But looking good so far....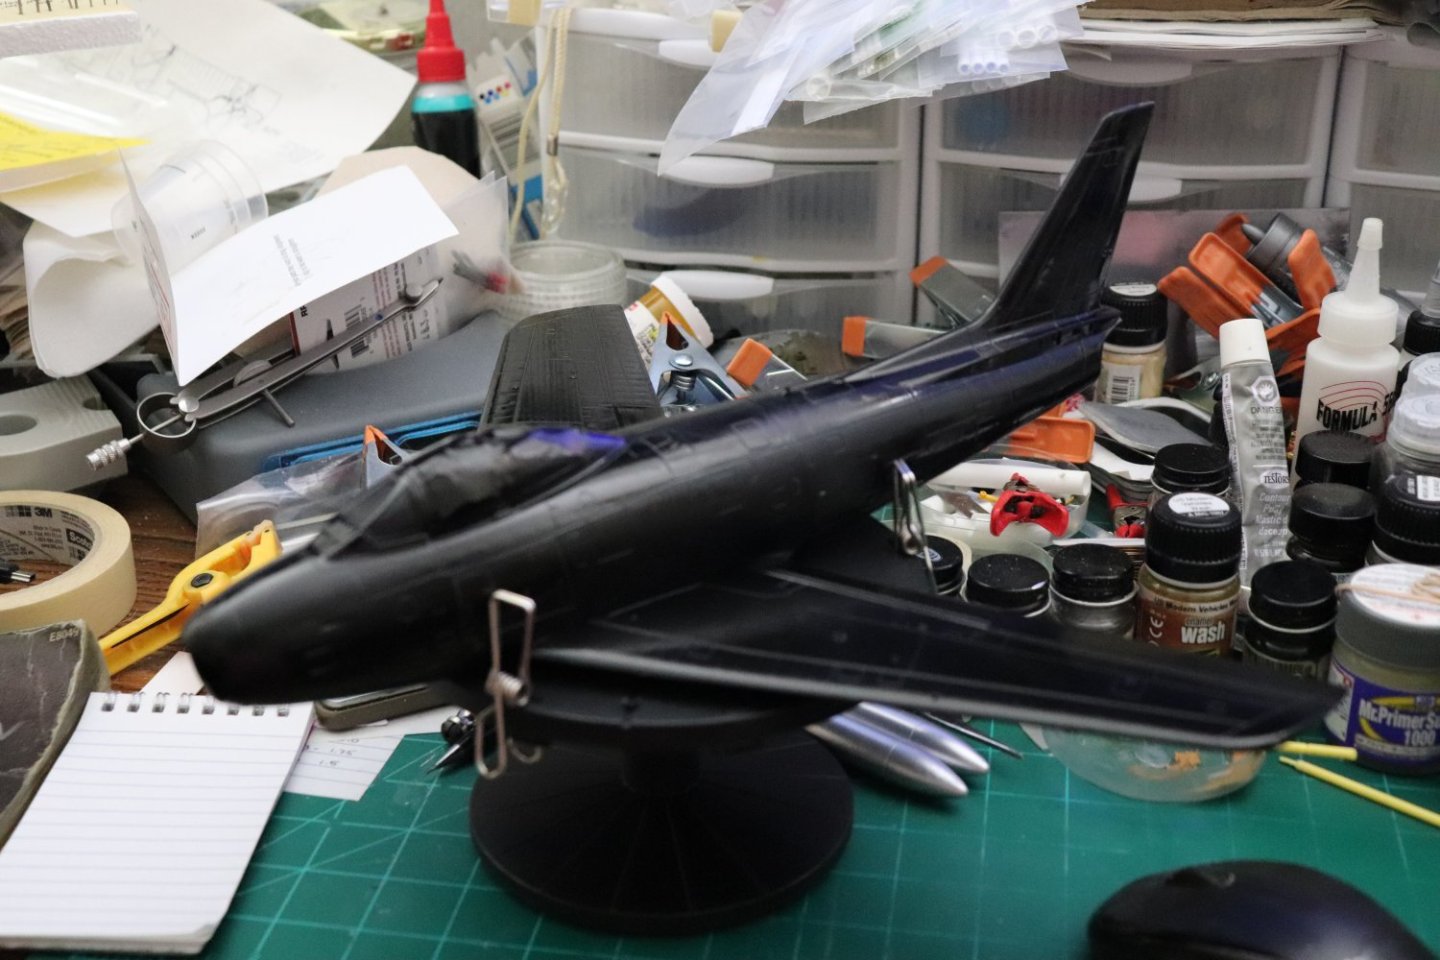
- 585 replies
-
- 13
-
-
Thank you brother...
-
F-86F-30 Sabre by Egilman - Kinetic - 1/32nd scale
Egilman replied to Egilman's topic in Non-ship/categorised builds
UHF Radio antenna encased in the plexiglass canopy....... -
F-86F-30 Sabre by Egilman - Kinetic - 1/32nd scale
Egilman replied to Egilman's topic in Non-ship/categorised builds
Ready for paint.... As close as I can make her... Onwards...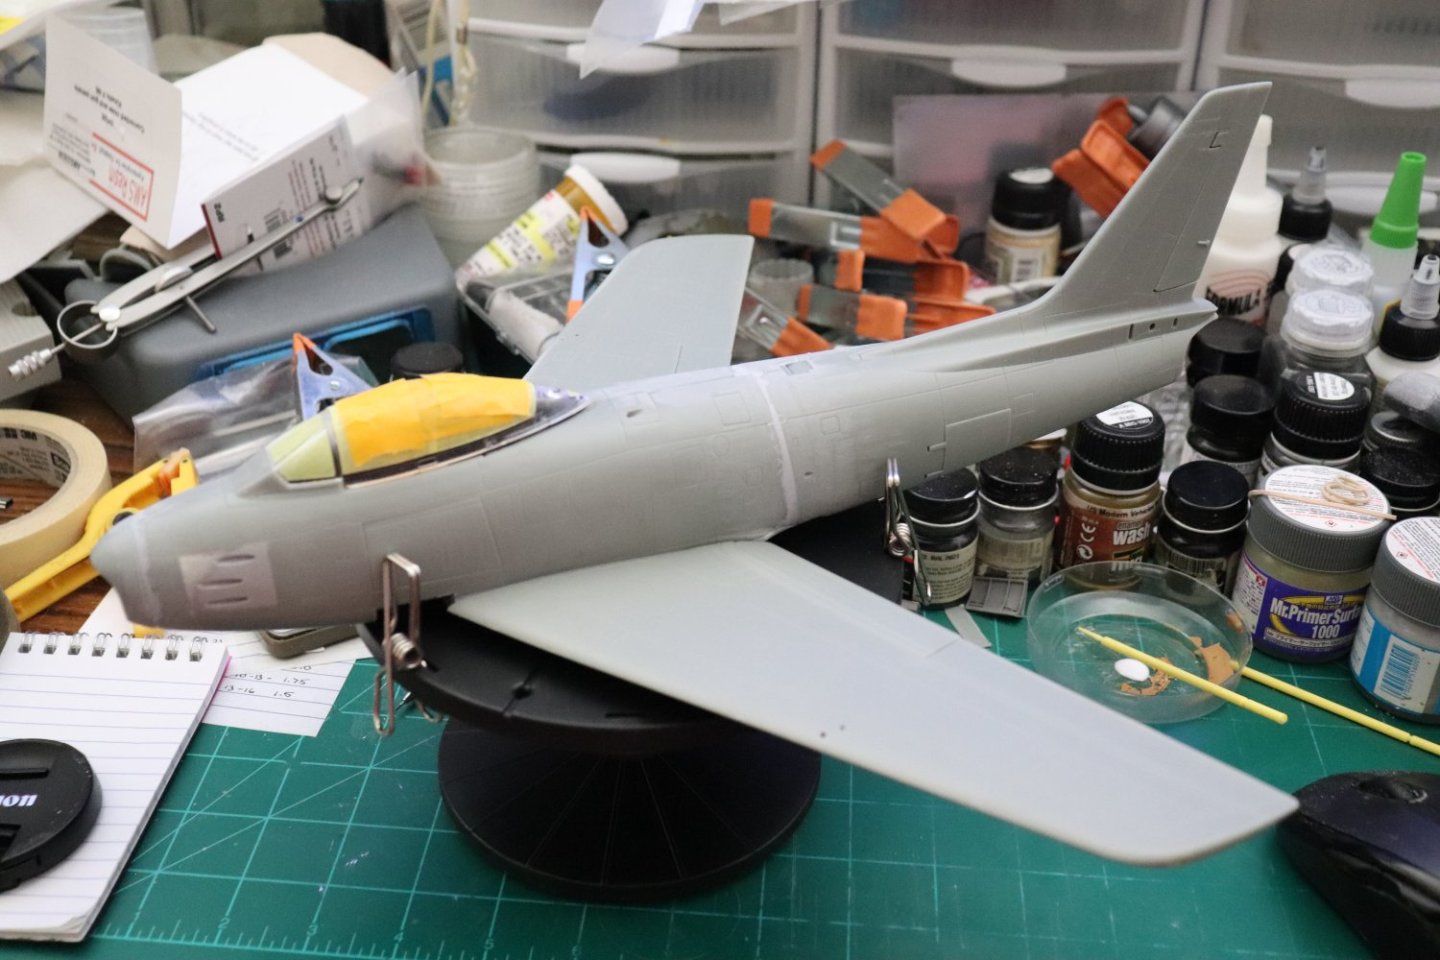
- 585 replies
-
- 11
-
-
F-86F-30 Sabre by Egilman - Kinetic - 1/32nd scale
Egilman replied to Egilman's topic in Non-ship/categorised builds
I'm sure of that.... -
He was, it's part of the gun stabilization system... The Abrams has a similar one as well
-
F-86F-30 Sabre by Egilman - Kinetic - 1/32nd scale
Egilman replied to Egilman's topic in Non-ship/categorised builds
Yeah, that upper one is a bit out of focus, but it doesn't matter, like you say there really isn't any difference between the blue and black... So I'm going with the black, it is what most use for shiny silver and it looks just a bit deeper... Right now I'm finishing up the fuselage for painting... base sanding is done, (at least as much as I'm going to do) and masking off the canopy.... The Eduard Masks can be interesting at times but they are much easier than any other method I've used... Once masked they get tacked to the fuselage for the painting and silvering... Easier to do it all at once.... I wish I could have experienced all that action that you guys lived... I'll bet there is nothing else like it...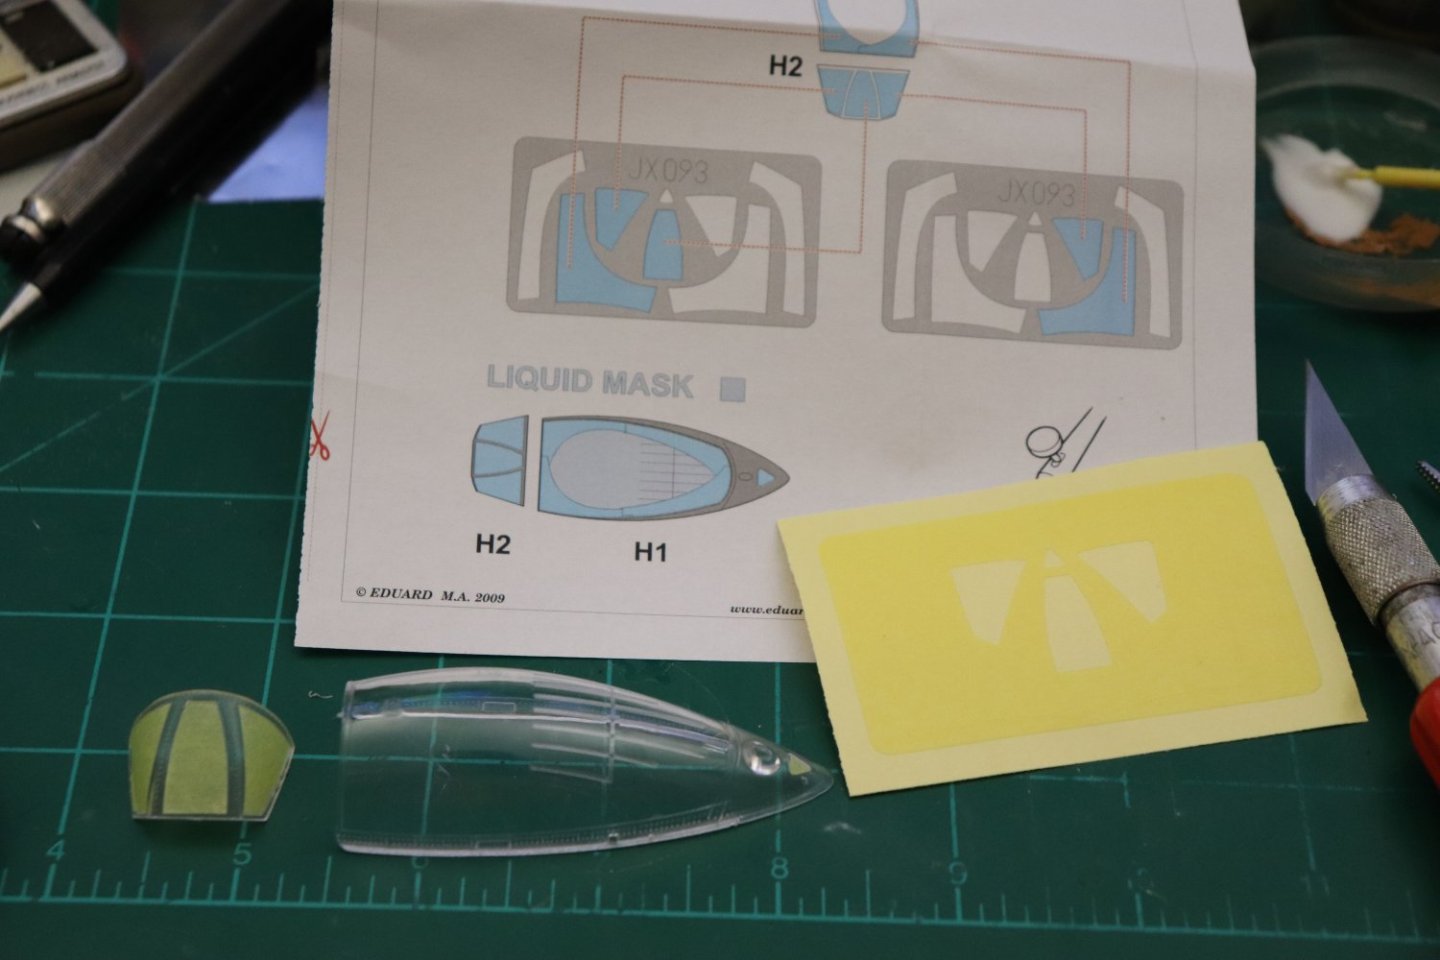
- 585 replies
-
- 12
-
-
F-86F-30 Sabre by Egilman - Kinetic - 1/32nd scale
Egilman replied to Egilman's topic in Non-ship/categorised builds
Update, just a simple test, Blue or Black? Bright flash... No flash... For the life of me I can't tell a difference.... Not even a slight one...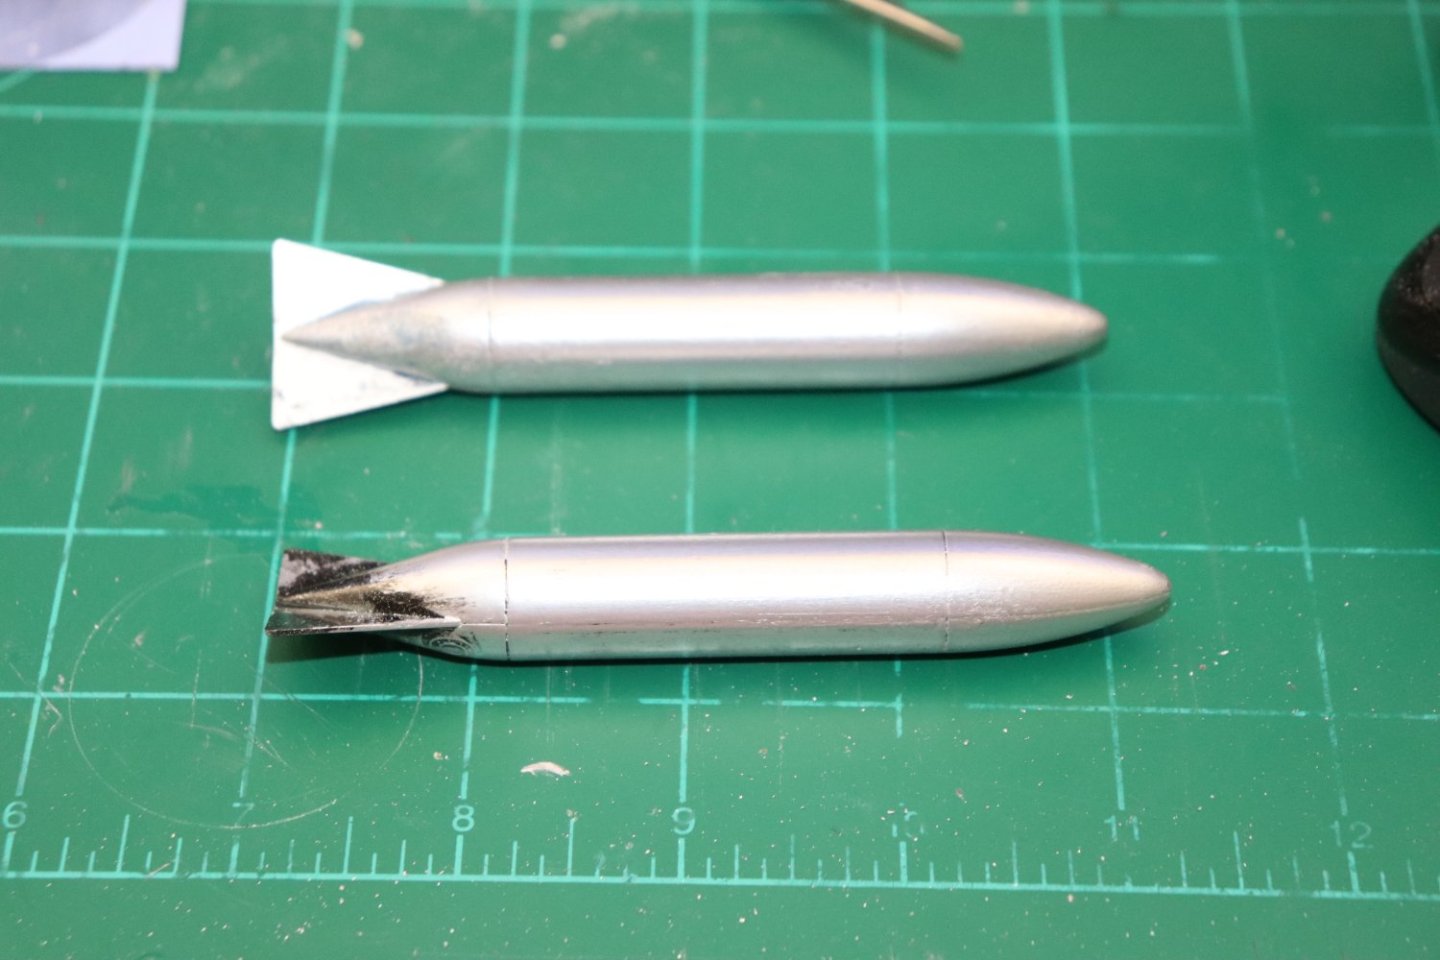

-
Those are some fine looking M1919A1's.... great molding work to produce those...
-
F-86F-30 Sabre by Egilman - Kinetic - 1/32nd scale
Egilman replied to Egilman's topic in Non-ship/categorised builds
With two J-79's and afterburners? who needed wheels? {chuckle} -
F-86F-30 Sabre by Egilman - Kinetic - 1/32nd scale
Egilman replied to Egilman's topic in Non-ship/categorised builds
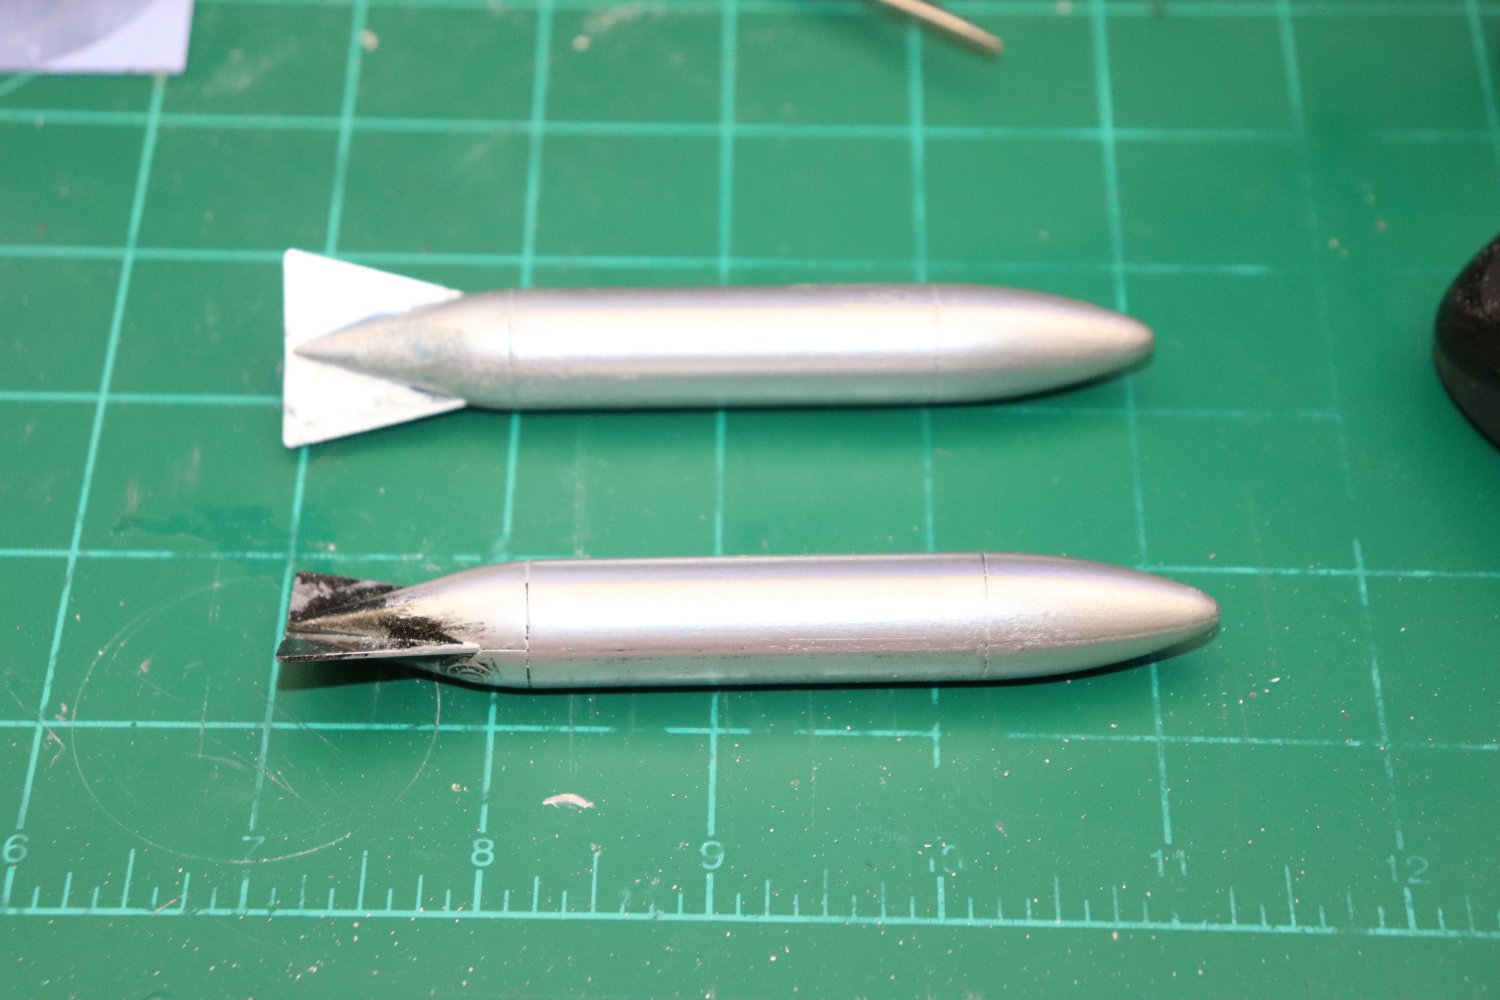
Thanks Ken, These aren't those kind of drugs my friend, simple pain relivers... I have TO 1F-86F-1 & 2 as my data manuals I also have the illustrated parts breakdown for the aircraft... TO 1 is the flight manual and TO 2 is the maintenance manual... Maximum mechanical swing for the flaps is 50 degrees, maximum operational swing is 45 degrees... They were either open or closed, there was no middle setting for the flaps... And being electro-mechanically servo operated, there was no low pressure sag either... The flight manual says that as soon as they were on the ground and below 80kts they were to set the flaps to lock, (full retraction) when taking off, once past 140kts again set to lock... They were only used to supply low speed lift, at speeds higher than 140 kts they destroyed the handling characteristics of the airplane... Now the gear doors and speed brakes were hydraulically and pneumatically operated respectively, without the engine turning, they were always hanging open... Normally closed.... Agreed Lou, except I have the straight skinny right out of the book for this one... No doubt about it, Brother Ken is the man in the know on this stuff... As far as fading the paint from black to blue I don't have those abilities quite yet and haven't struck on a good way of doing that... so one will be gloss black and the other gloss blue angels blue.... What little I've done with RnB says that is the way to go... Still in the beginnings of learning to work with it here.... Sprayed them about an hour ago, (spent most of the day dealing with Dr's) As soon as they are dry will be metalizing them in silver and we will see if there is any real difference... The P-51 I did was in flat grey primer when I did her.... -
Yep that was a very busy beast....
-
That is a massive aircraft in 1/32 scale.... I"m in...
-
F-86F-30 Sabre by Egilman - Kinetic - 1/32nd scale
Egilman replied to Egilman's topic in Non-ship/categorised builds
Oh brother are they working... loopy as heck right now... {chuckle} Thanks... No need to stretch to specific moment in time.... I've glued them in the up position, the way they should be in real life... (it's the way I usually build representing real life... I couldn't do it any other way and be me in all honesty) So she is ready for gap filling and finishing... But beforethat, I'm going to do the RnB on the extra 200 gal. drop tanks they so graciously provided... (not used on the aircraft I'm depicting) Now Paul Cordryette explained that you can change the appearance by using different base paints, super shiny finish you use gloss black, dull you use flat black, you can also vary the hue of the finish by using different colors... So, one will be blue based and and one will be black based, lets see how much difference there is in the final finish before I apply it to the entire aircraft...