.jpg.8f8939eb11584d346cdeb2a7ec4e1e42.jpg)
Kusawa2000
-
Posts
394 -
Joined
-
Last visited
Content Type
Profiles
Forums
Gallery
Events
Everything posted by Kusawa2000
-

kit review 1:120 USS Susquehanna - WoodyJOE
Kusawa2000 replied to James H's topic in REVIEWS: Model kits
Clare: Sounds like a plan! see ya in shore leave.. Mike Draper -
kit review 1:120 USS Susquehanna - WoodyJOE
Kusawa2000 replied to James H's topic in REVIEWS: Model kits
Clare: One piece of advice.. if you are going to use paint to colour the wood on your woody joe kit (the japanese cedar is very bleached in its colour), I would recommend puritan pine Minwax stain for the natural wood colour and Vallejo or other pigment paints for the grey roof and white paneling. I think any acrylic or enamel paint would be too thick for the cedar wood that is provided. I also have 2 Woody Joe kits waiting to be built. 🙂 They are a nice break from rigging and they are a real topic of conversation when on display. I also found them a great souvenir if you have had a chance to visit Japan. Mike Draper Whitehorse, Yukon -
kit review 1:120 USS Susquehanna - WoodyJOE
Kusawa2000 replied to James H's topic in REVIEWS: Model kits
For anyone who is interested in getting a woody Joe kit, this is the website that I ordered through.. I had no problems ordering and they were willing to answer any questions you may have. Wooden Scale Model Kits / Woody JOE (zootoyz.jp) hope that helps Mike Draper Whitehorse, Yukon -
kit review 1:120 USS Susquehanna - WoodyJOE
Kusawa2000 replied to James H's topic in REVIEWS: Model kits
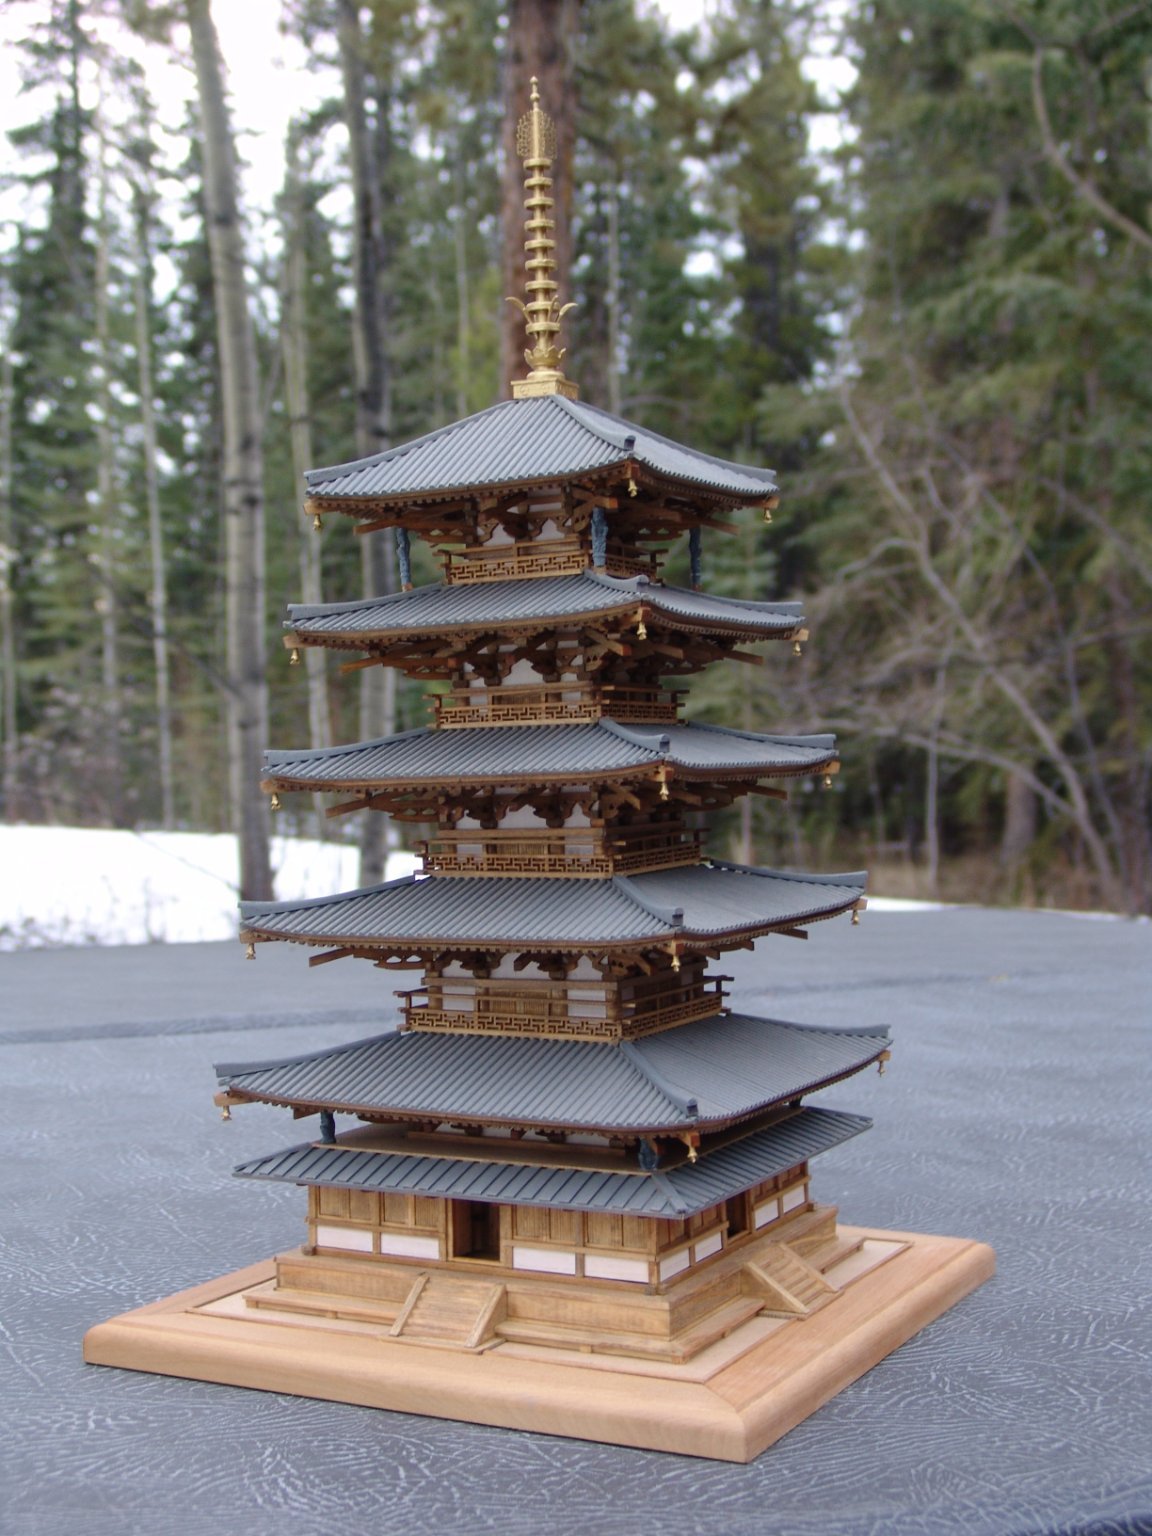
I have bought several of there temple kits and the kit of the Yamato and there work is amazing. The wood is well cut and the instructions are pretty intuitive even though they are in japanese. I dont know about there ship kits but if the temple kits are any indication I would recommend them very highly. Here is a pic of the Joruji Temple model I built a few years ago.
-
NRG VIRTUAL WORKSHOP - AUGUST 21
Kusawa2000 replied to kurtvd19's topic in NAUTICAL RESEARCH GUILD - News & Information
Toni: Thanks for holding the workshop! Good attendance and a lot of helpful information. Appreciate you taking the time in putting it together... Conducting a ZOOM presentation is not the most fun experience but you certainly made it look easy! 🙂 Thanks again Mike Draper -
Chuck: Thanks.. Appreciate the update! MIKE
-
Chuck: any ETA on the laser cut parts for chapter 7 as well as a chapter? MIKE
-
James: Thanks for letting me know.. just wanted to make sure I did everything correctly at my end... Mike Draper
-
John: I found that as well and added the information but it didnt seem to make a difference when I posted on MSW. But I have dropped a line to Kurt and we will see what happens! Thanks Mike Draper
-
thanks! I will try that! Mike Draper
-
Quick question? How do you add the logo with your name when you post on the Forum. I am a member of the NRG but I dont see anywhere in my settings that enables that to happen. Am I missing something? Mike Draper
-
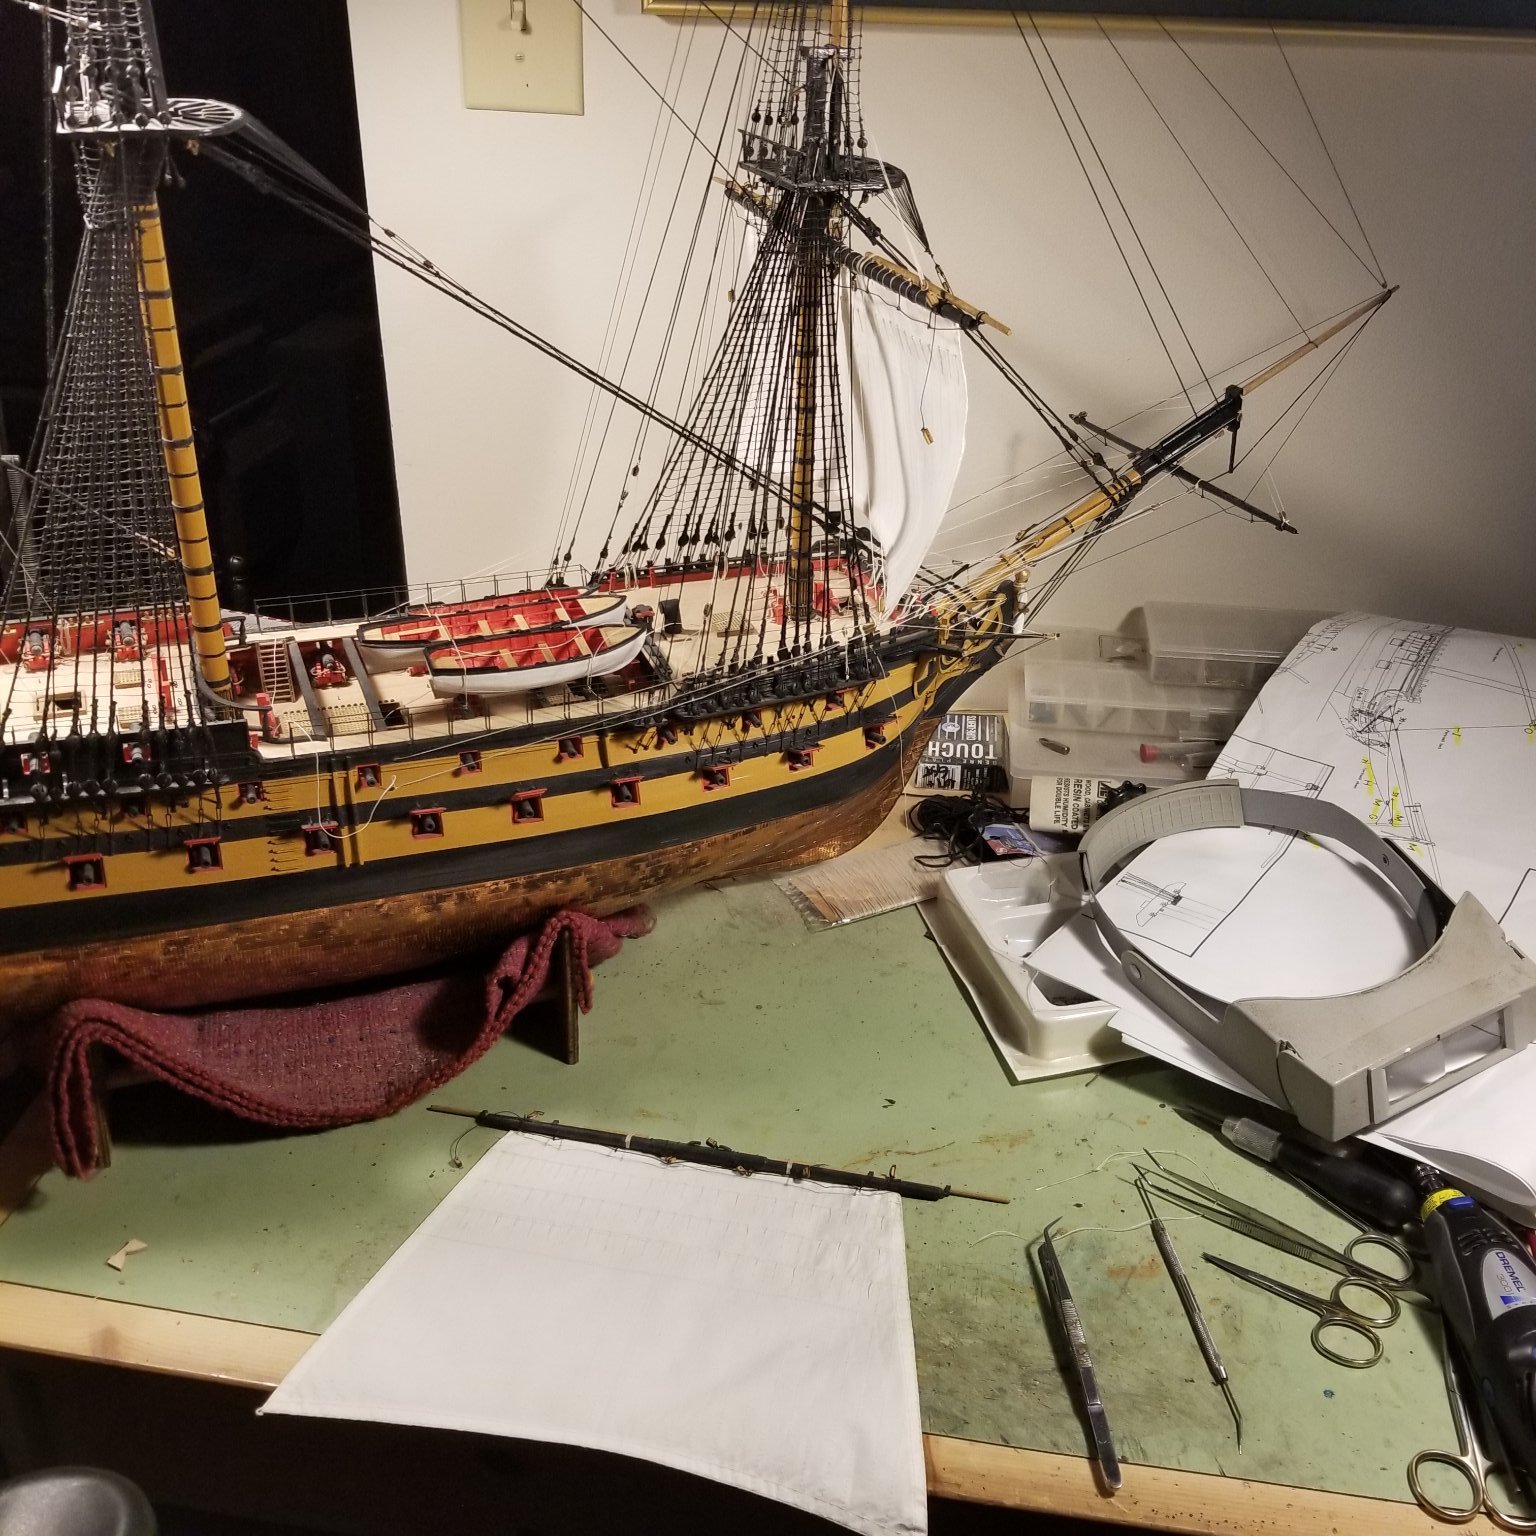
Rick: And thanks for the post! I have to admit there are some days I wonder what I was thinking when I decided to put sails on the Agamemnon but it does add a whole different dynamic to the ship. Thanks again Mike Draper
-
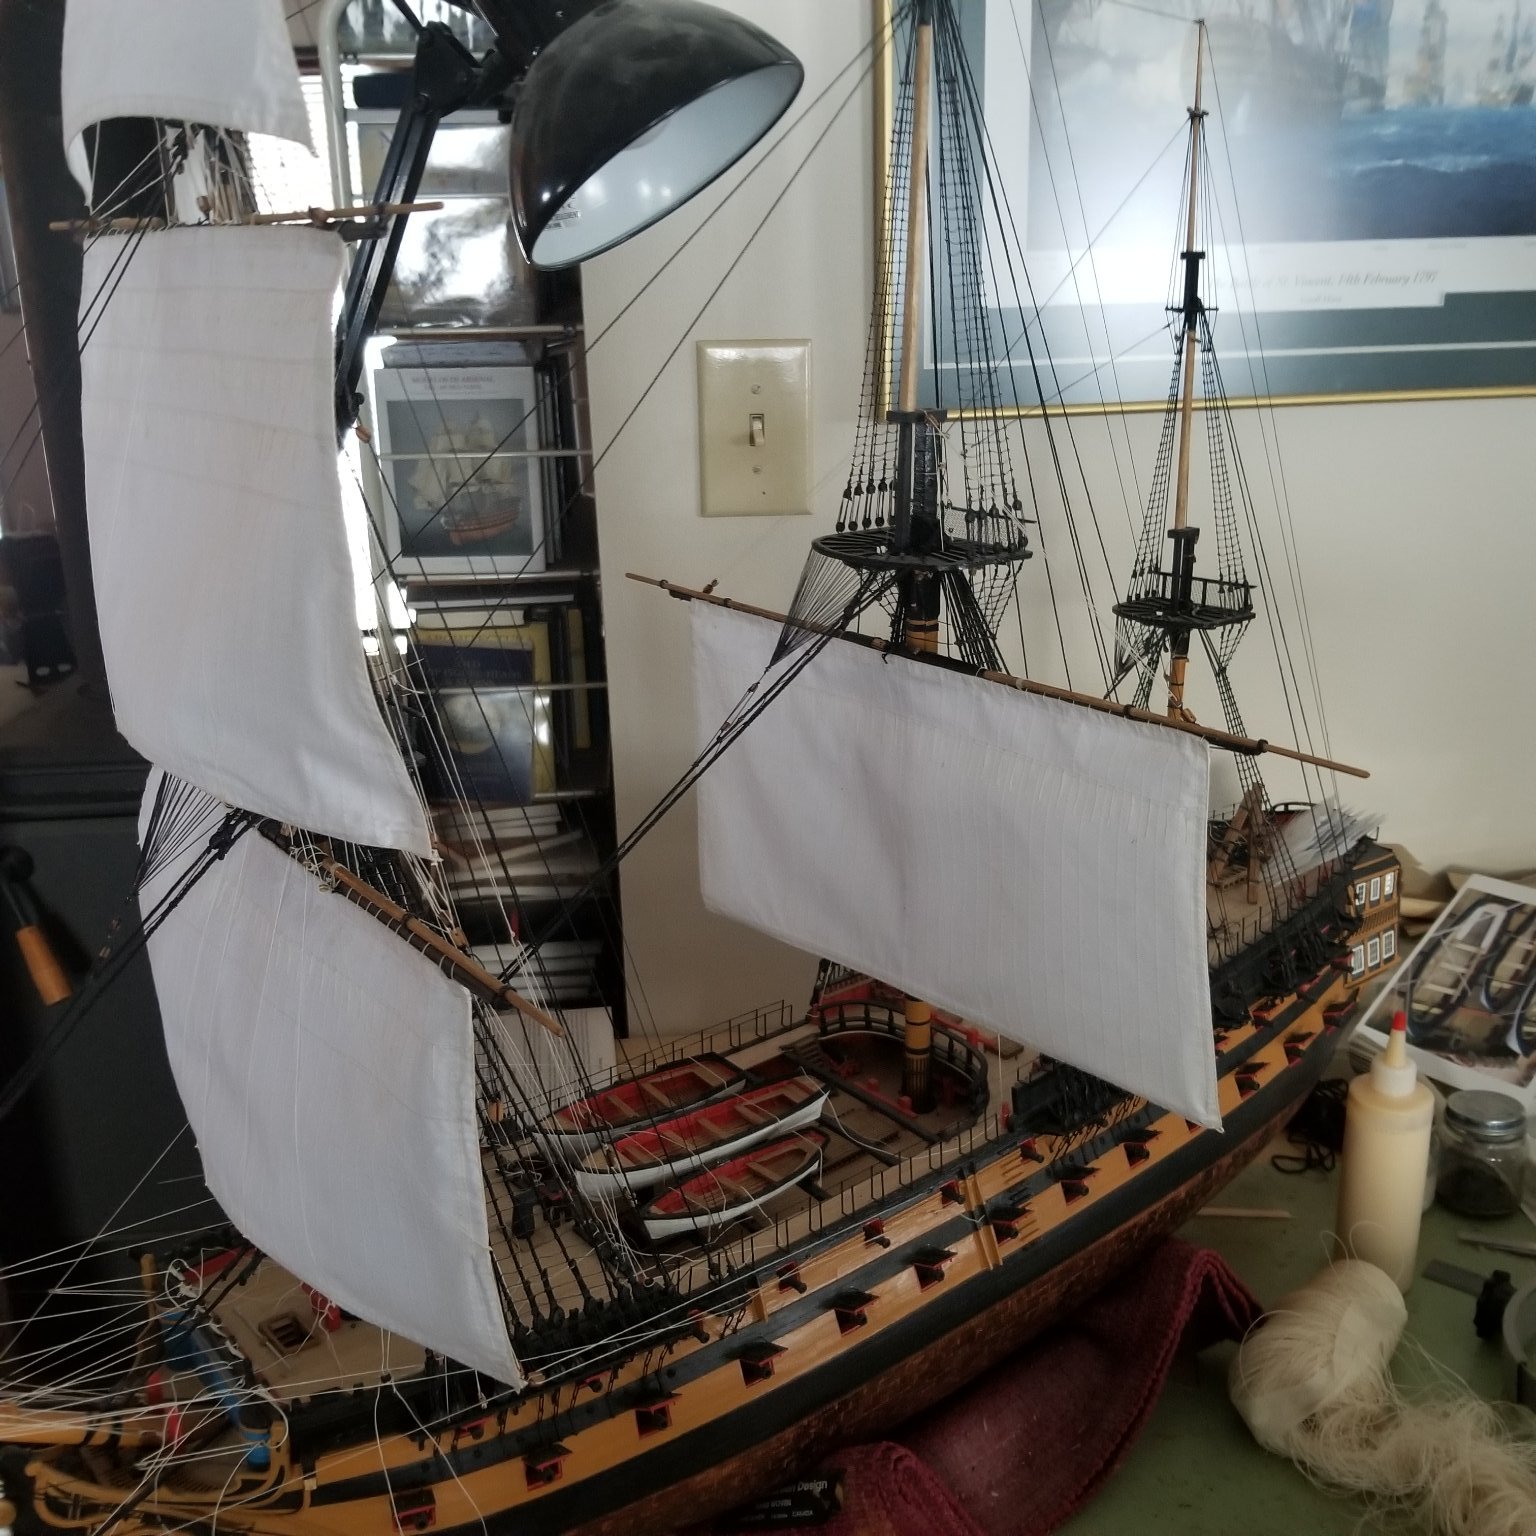
Everyone: a quick update on the rigging of sails on the Agamemnon. Finally got the lower main course sail on.. its size has a advantage its weight helps keep the rigging line tight! More pics to come soon Mike Draper Whitehorse, Yukon

- 150 replies
-
- 8
-

-
- agamemnon
- caldercraft
- (and 1 more)
-
Gord (the other Agememnon builder) have met up and talked "shop" and had a good giggle over the fact we were building the same ship... Mike Draper
- 150 replies
-
- 1
-
-
- agamemnon
- caldercraft
- (and 1 more)
-
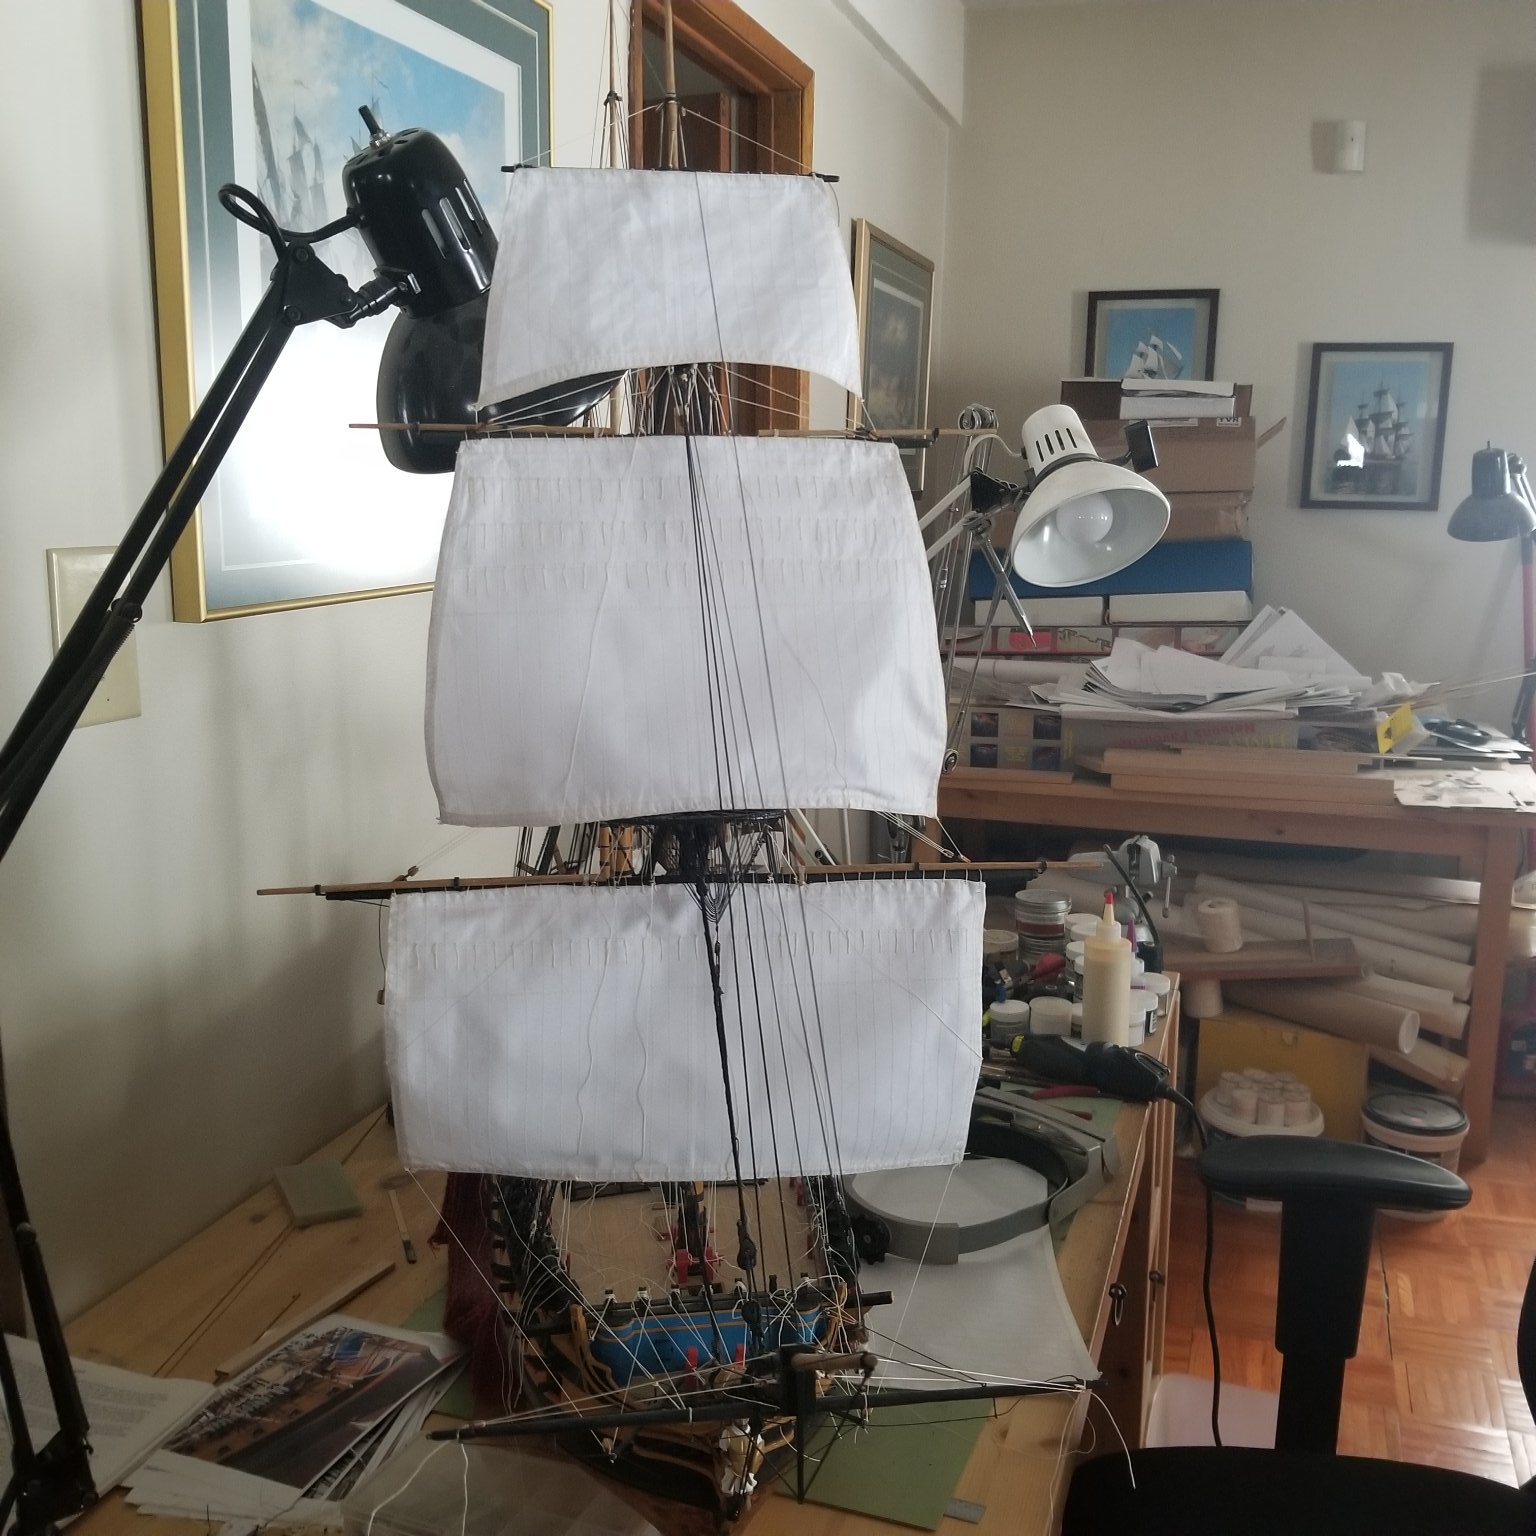
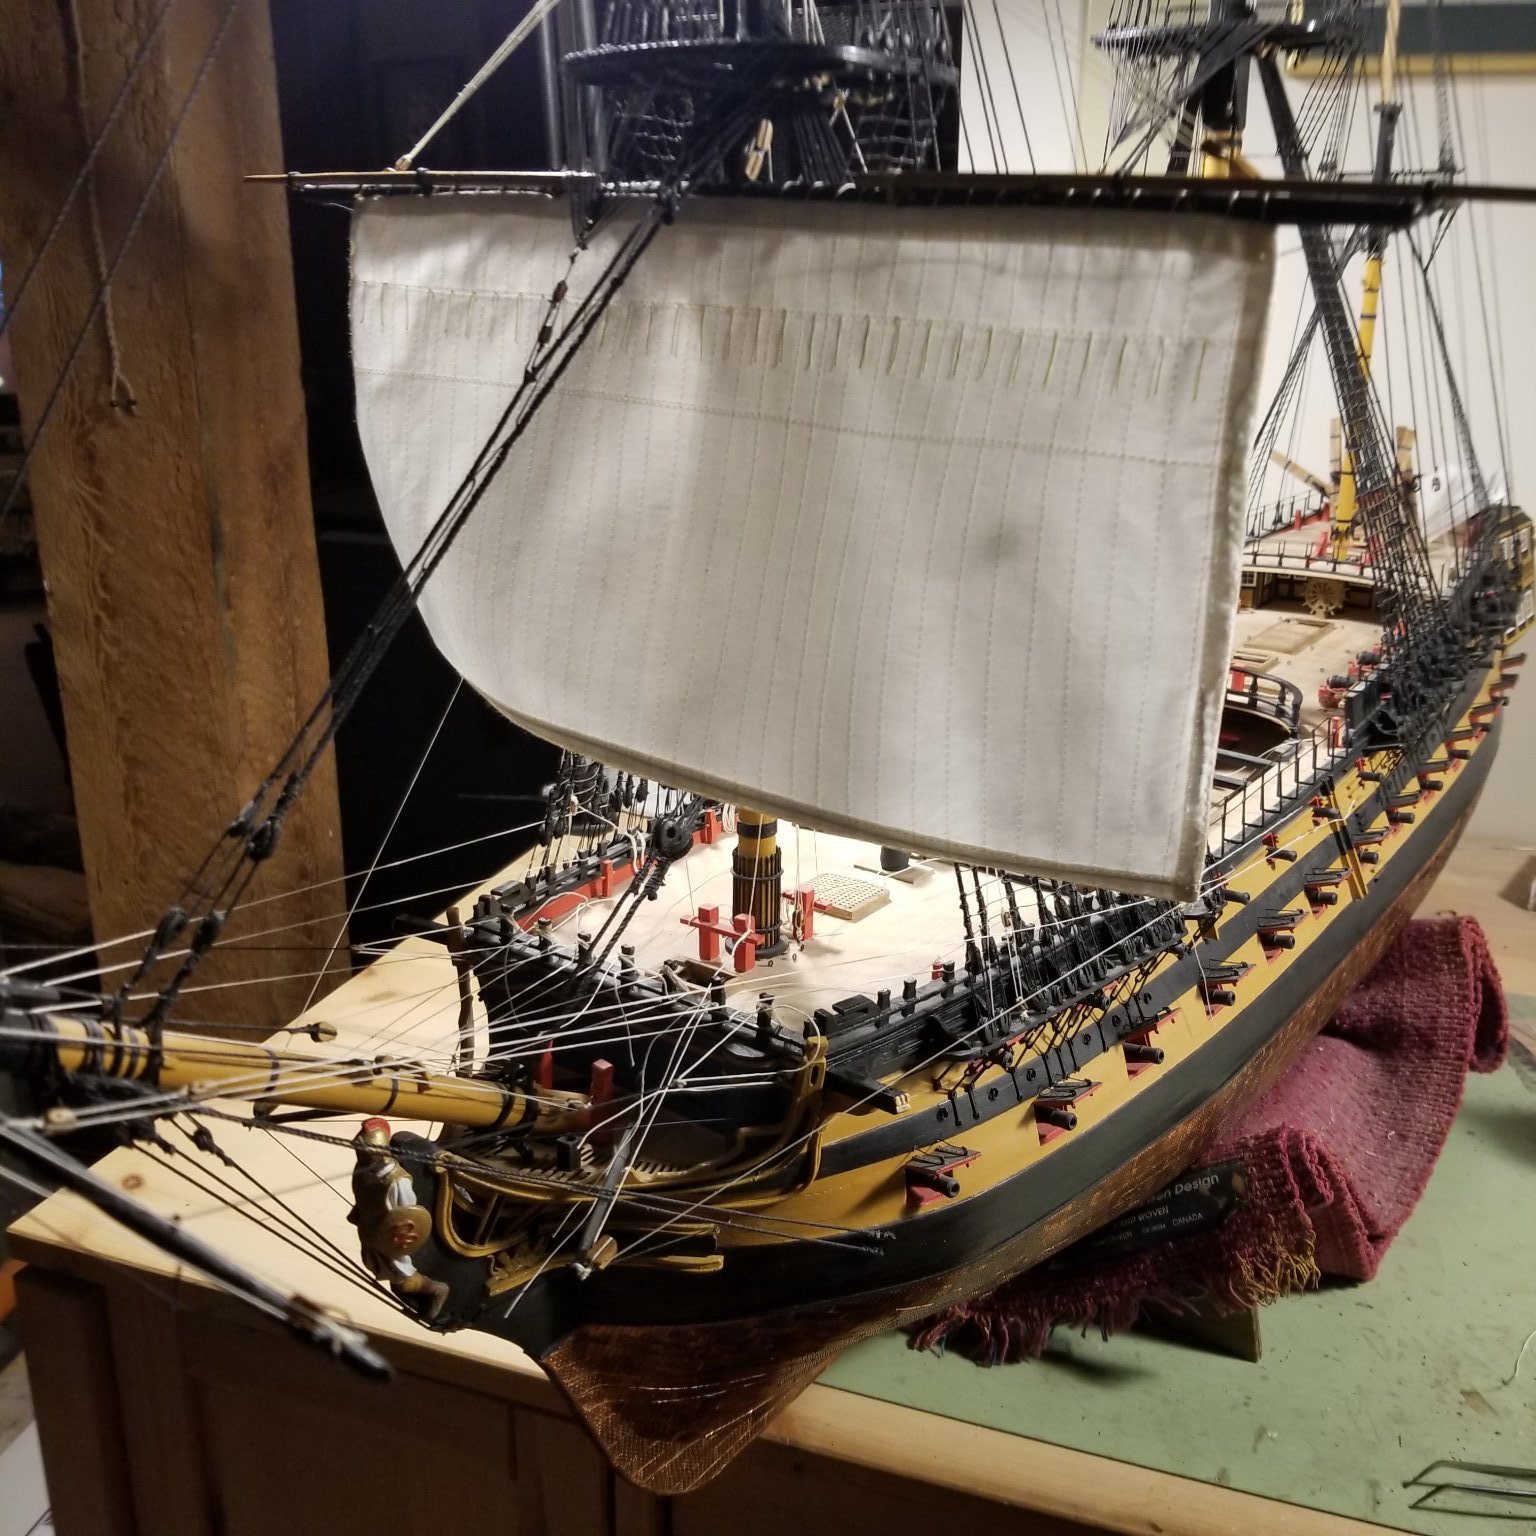
Everyone: Just a quick progress pic.. the foremast sails are mostly rigged.. leaving the bowlines and brace lines off for now until I get the job sails up. Now Im going to tackle the main mast lower course. Im still amazed how large these sails are! Mike Draper

- 150 replies
-
- 9
-
-
- agamemnon
- caldercraft
- (and 1 more)
-
Jack: My mistake. Thanks for clarifying that point for me. You are correct that CAF is developing that project. You will certainly will have your hands full with the Cumberland, the HMS Victory 1765 and the HMS Princess Royal 1773. Its good to hear that you are making sure all your projects are legally licensed. Do keep us posted on all of your efforts. Mike Draper
-
Jack: This is good news about the HMS Cumberland. Please keep us posted on any developments and any pictures you have to share. While we are on teh subject of new kits, I remember you were talking about a new kit of the HMS Bellona. Any updates on that? Mike Draper
-
If anyone asks you why Monty Python is so funny even today, ask them to tell you about their worst story of customer service and then play them the "dead parrot sketch"... a lot of things just dont change.... 🙂 Mike Draper
-
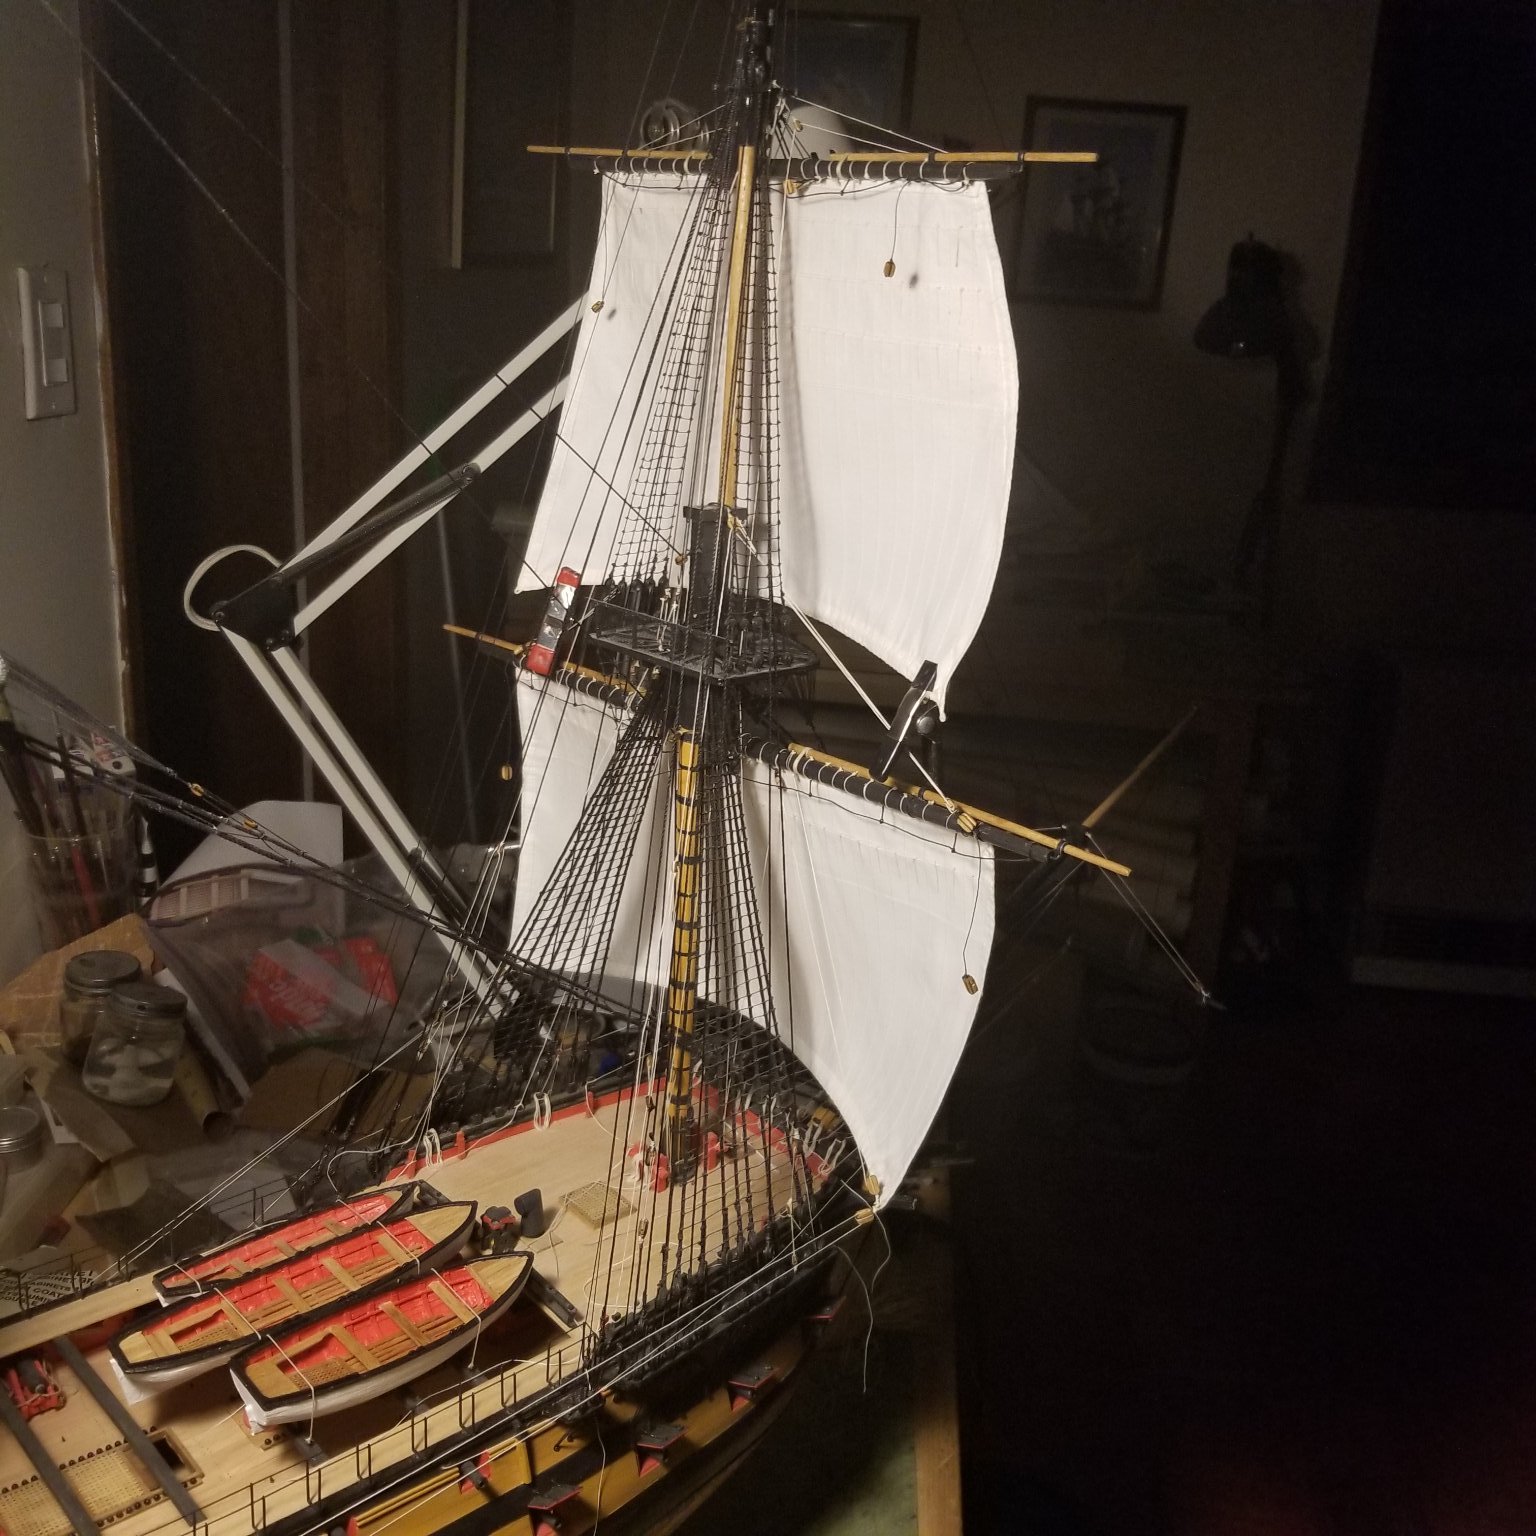
Everyone: Managed to get the foretop sail on last night. There is still a lot of rigging to be added but its roughly in the place where I want it. Its good to finally see some progress at my end. Getting the sails in the place where you want them and trimmed right is a painful exercise with tweezers and a visor.. and now Im working up the mast, its more standing than sitting. More pics to follow! Mike Draper

- 150 replies
-
- 6
-
-
- agamemnon
- caldercraft
- (and 1 more)
-
Chuck: Same here. Its been a long time coming! Mike Draper
-
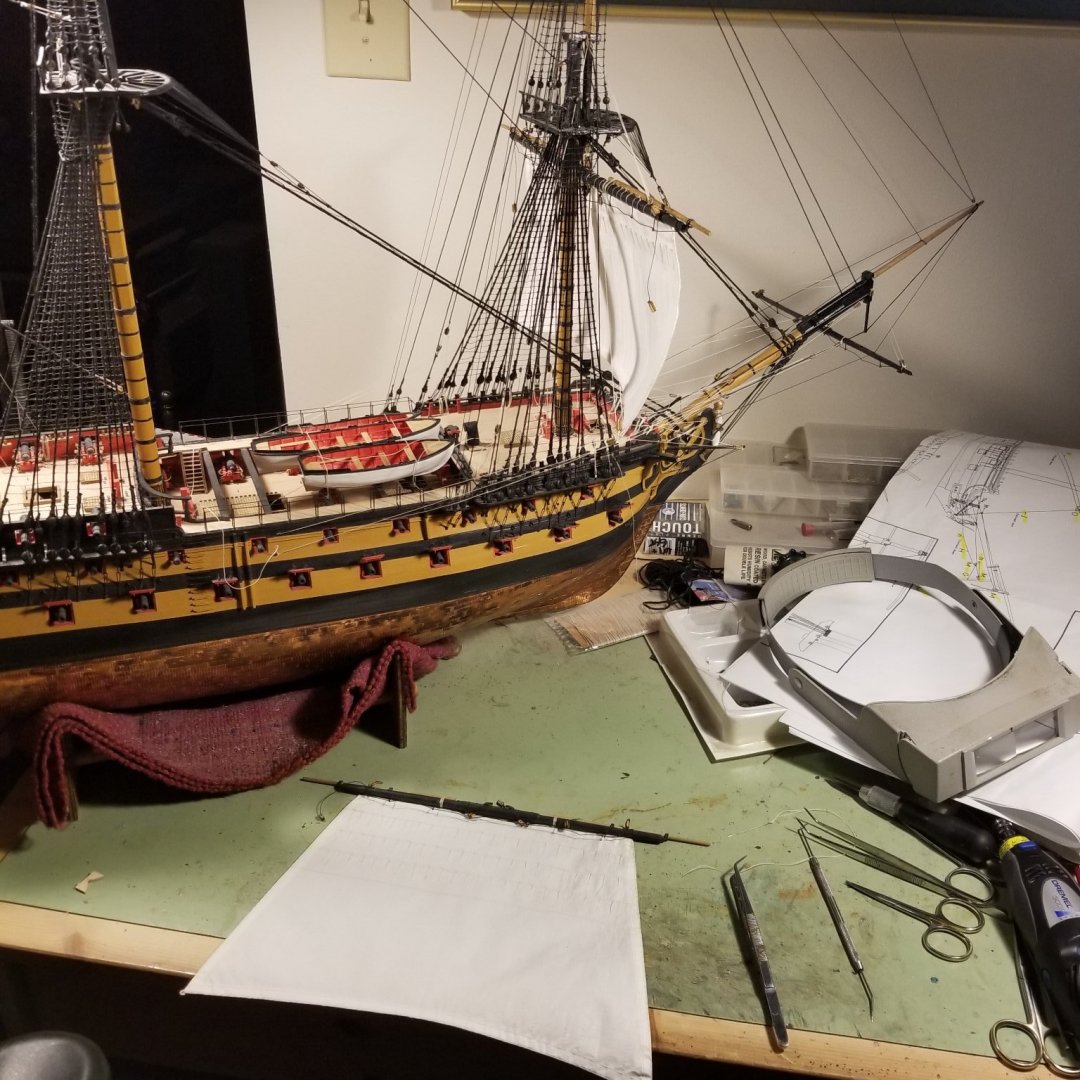
Everyone: Just a quick update pic. Got most of the rigging done on the lower fore course either than leech lines and clew lines. Plan to get the sails up first for the foremast before I get the leech and clew lines done. And Im holding off tying all the lines down permanent I get all the rigging done. I find each sail has its own personality and in turn affects other sails so until all the rigging is done I keep my options open 🙂 More pics to come soon! Mike Draper
- 150 replies
-
- 10
-
-
- agamemnon
- caldercraft
- (and 1 more)
-
I dont know if you are aware but the Seaways "ships in scale" magazine had proposed a few years ago to have a building log published in their magazine of the Caldercraft Surprise kit. There was a request by Seaways to submit proposals on who would write the series of articles (this was over 10 years ago now) and I was lucky enough to be the successful choice. I was pretty stoked about it and we were all waiting for the kit to be released but as you all know, no kit was ever released so no building log was ever written and released. The completed kit has made its appearance at a few model shows in Europe (from what I have seen on the internet) but either than that, its been radio silence. Too bad as I think they had a really neat kit that would have got a lot of peoples attention. Mike Draper
-
Everyone: Its been a while but I finally have a sail on the ole Agamemnon. Its been a lot of trial and error but I have the lower fore course. Still have a lot of fiddling to do but I want to get the rest of the sails on the foremast rigged before I start trimming lines. In any case, its a good feeling to finally have made some progress

- 150 replies
-
- 8
-
-
- agamemnon
- caldercraft
- (and 1 more)
-
Chuck: will the laser parts for chapter 5 be out at the same time on the 22nd? Mike Draper
-
looking forward to seeing the chapter... Definite thumbs Up MIKE