HOLIDAY DONATION DRIVE - SUPPORT MSW - DO YOUR PART TO KEEP THIS GREAT FORUM GOING!
×


Bill97
-
Posts
2,704 -
Joined
-
Last visited
Content Type
Profiles
Forums
Gallery
Events
Everything posted by Bill97
-
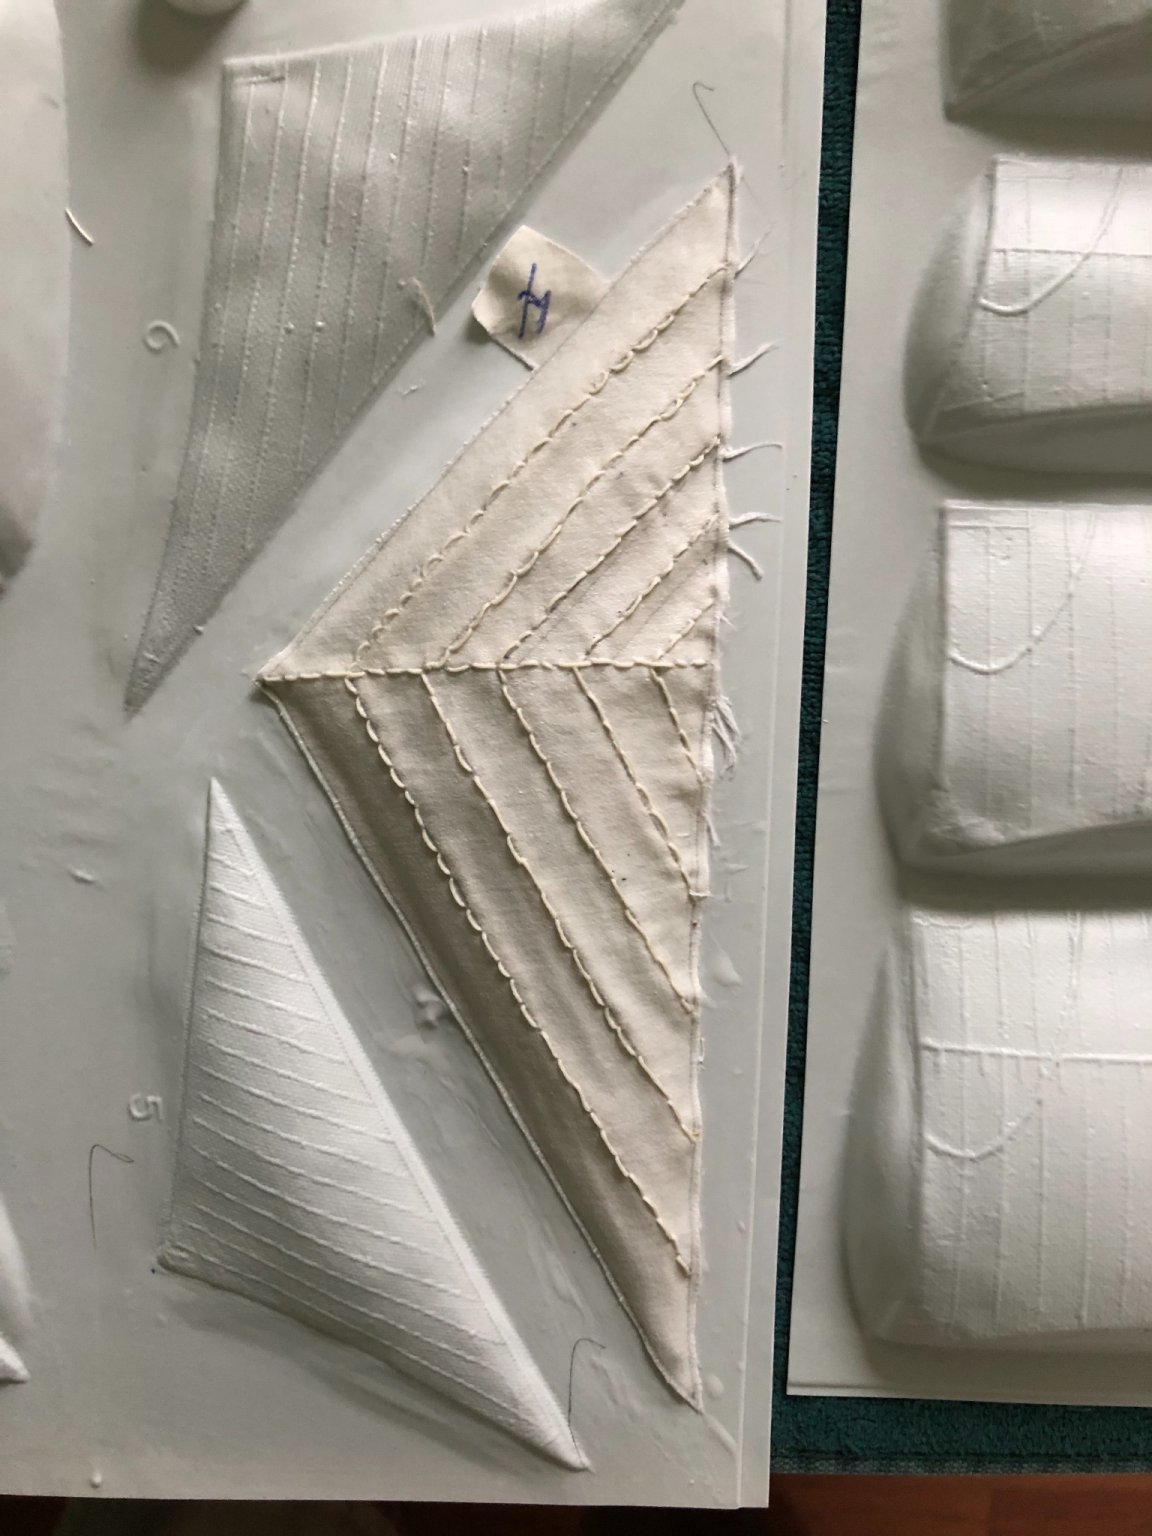
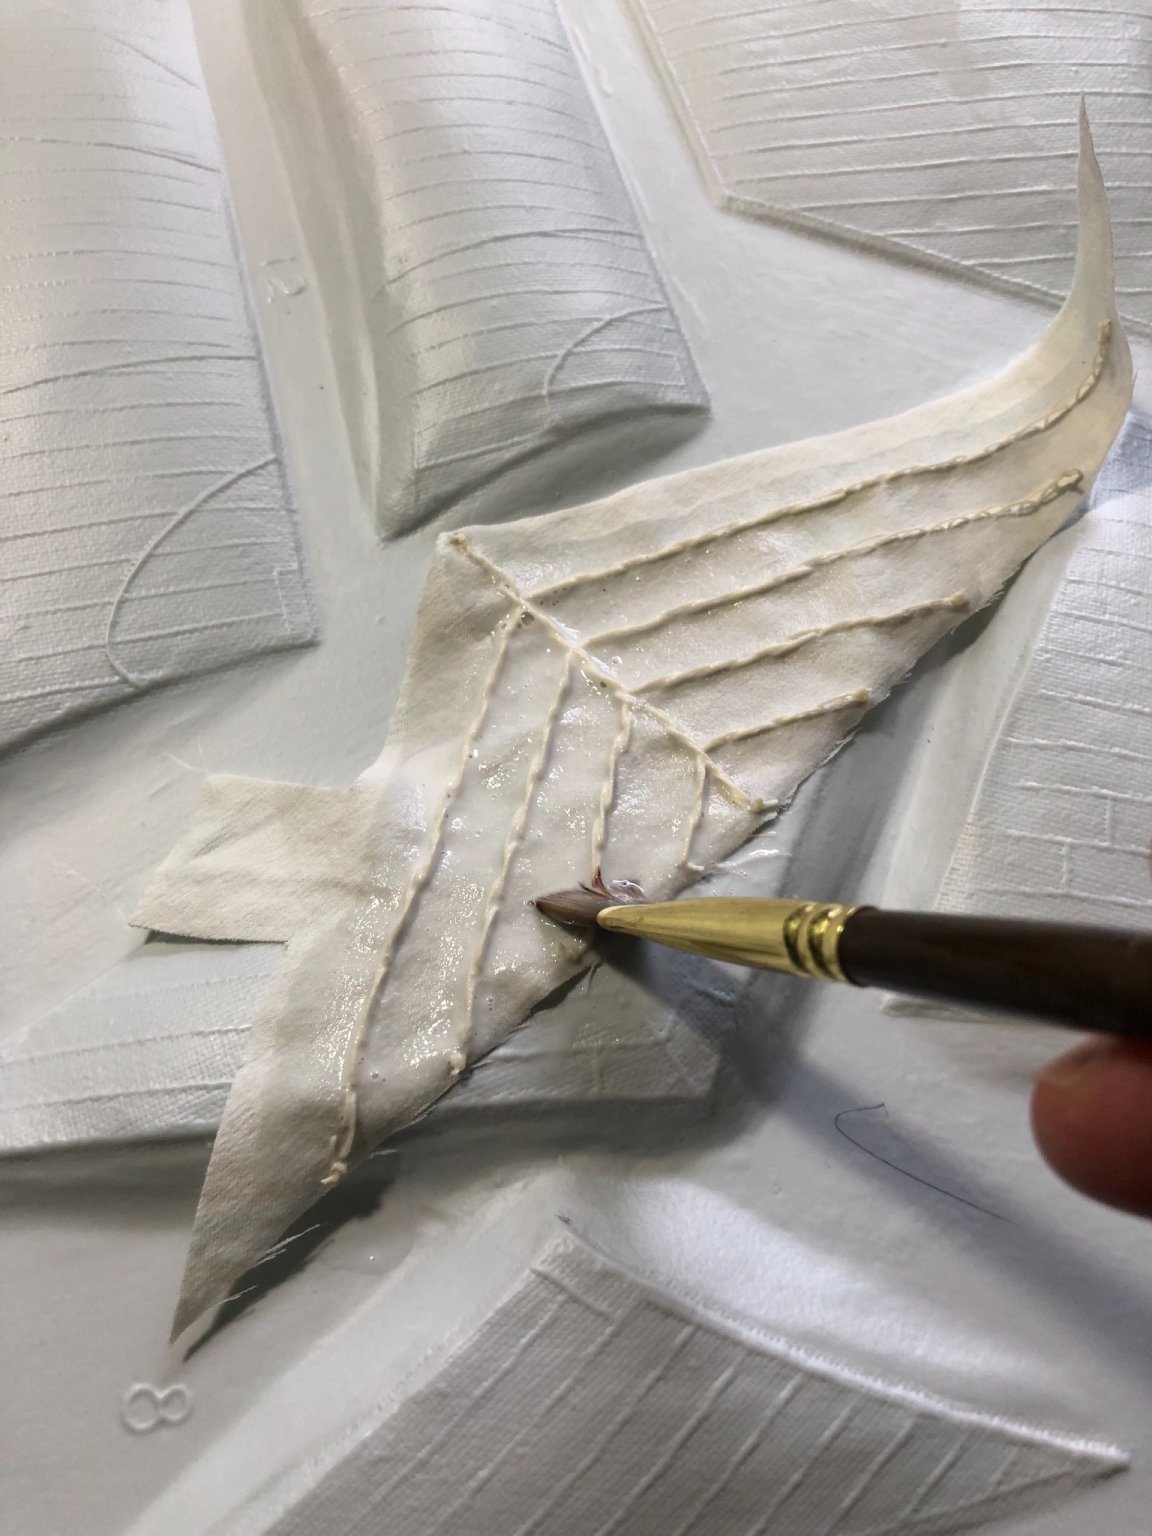
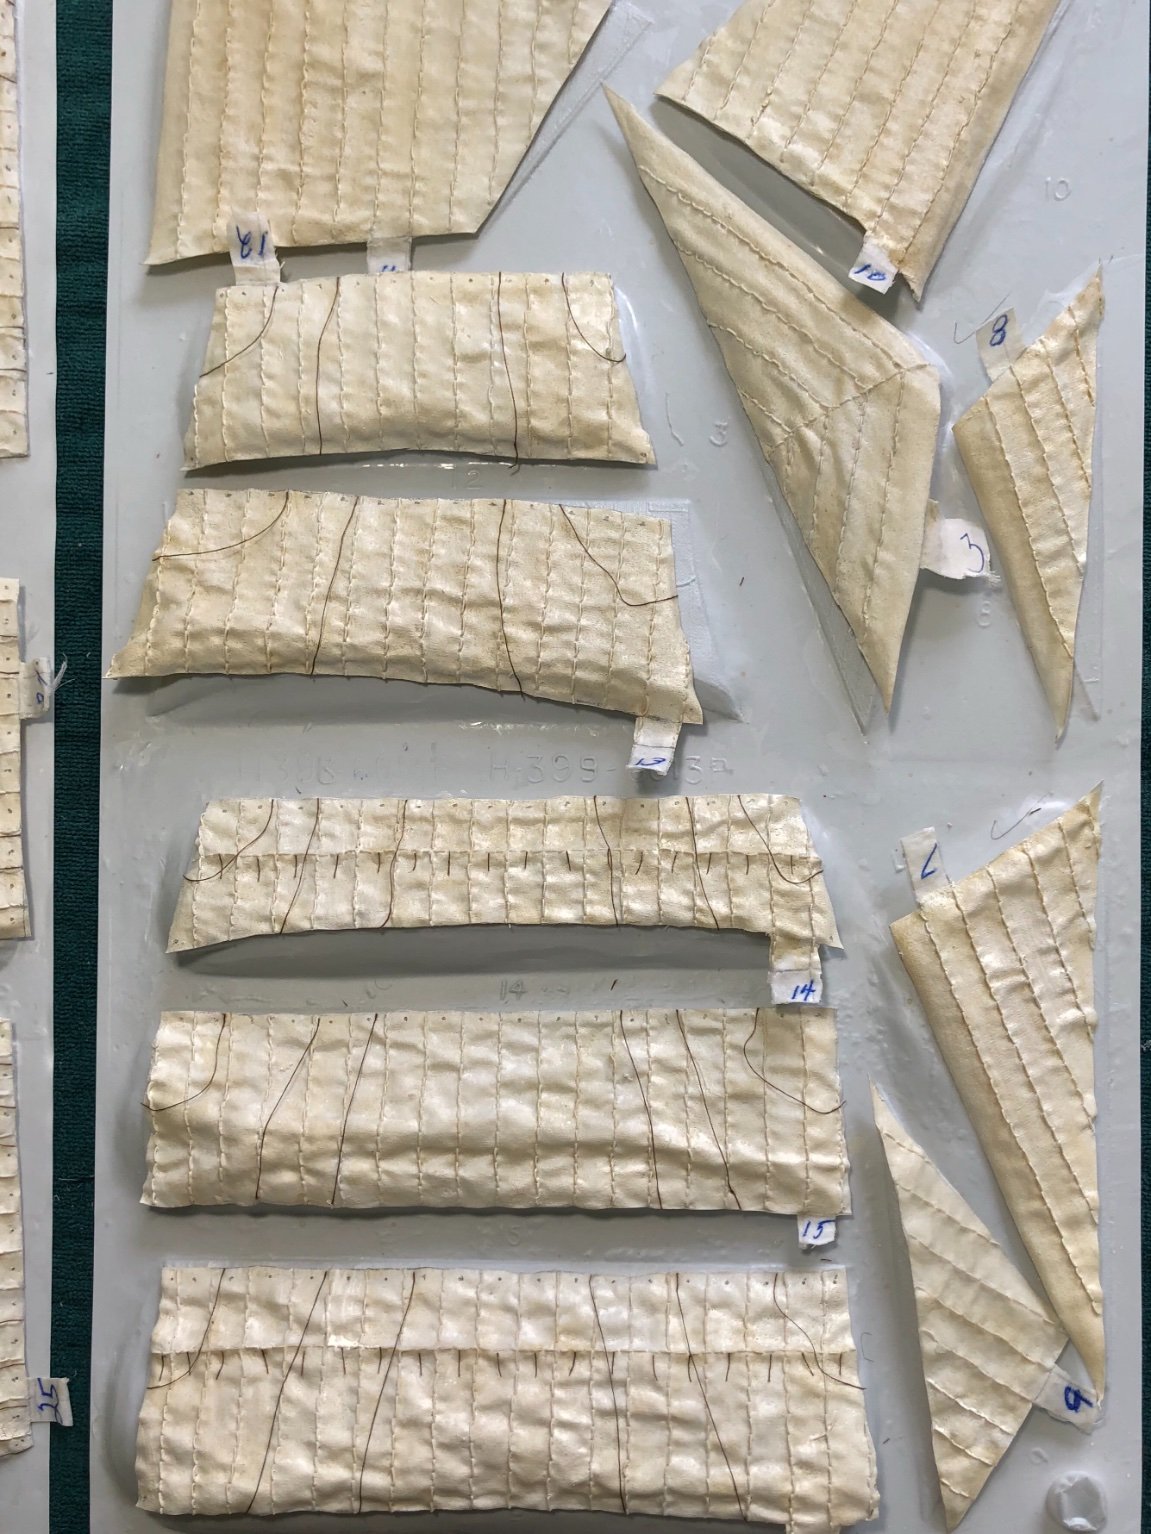
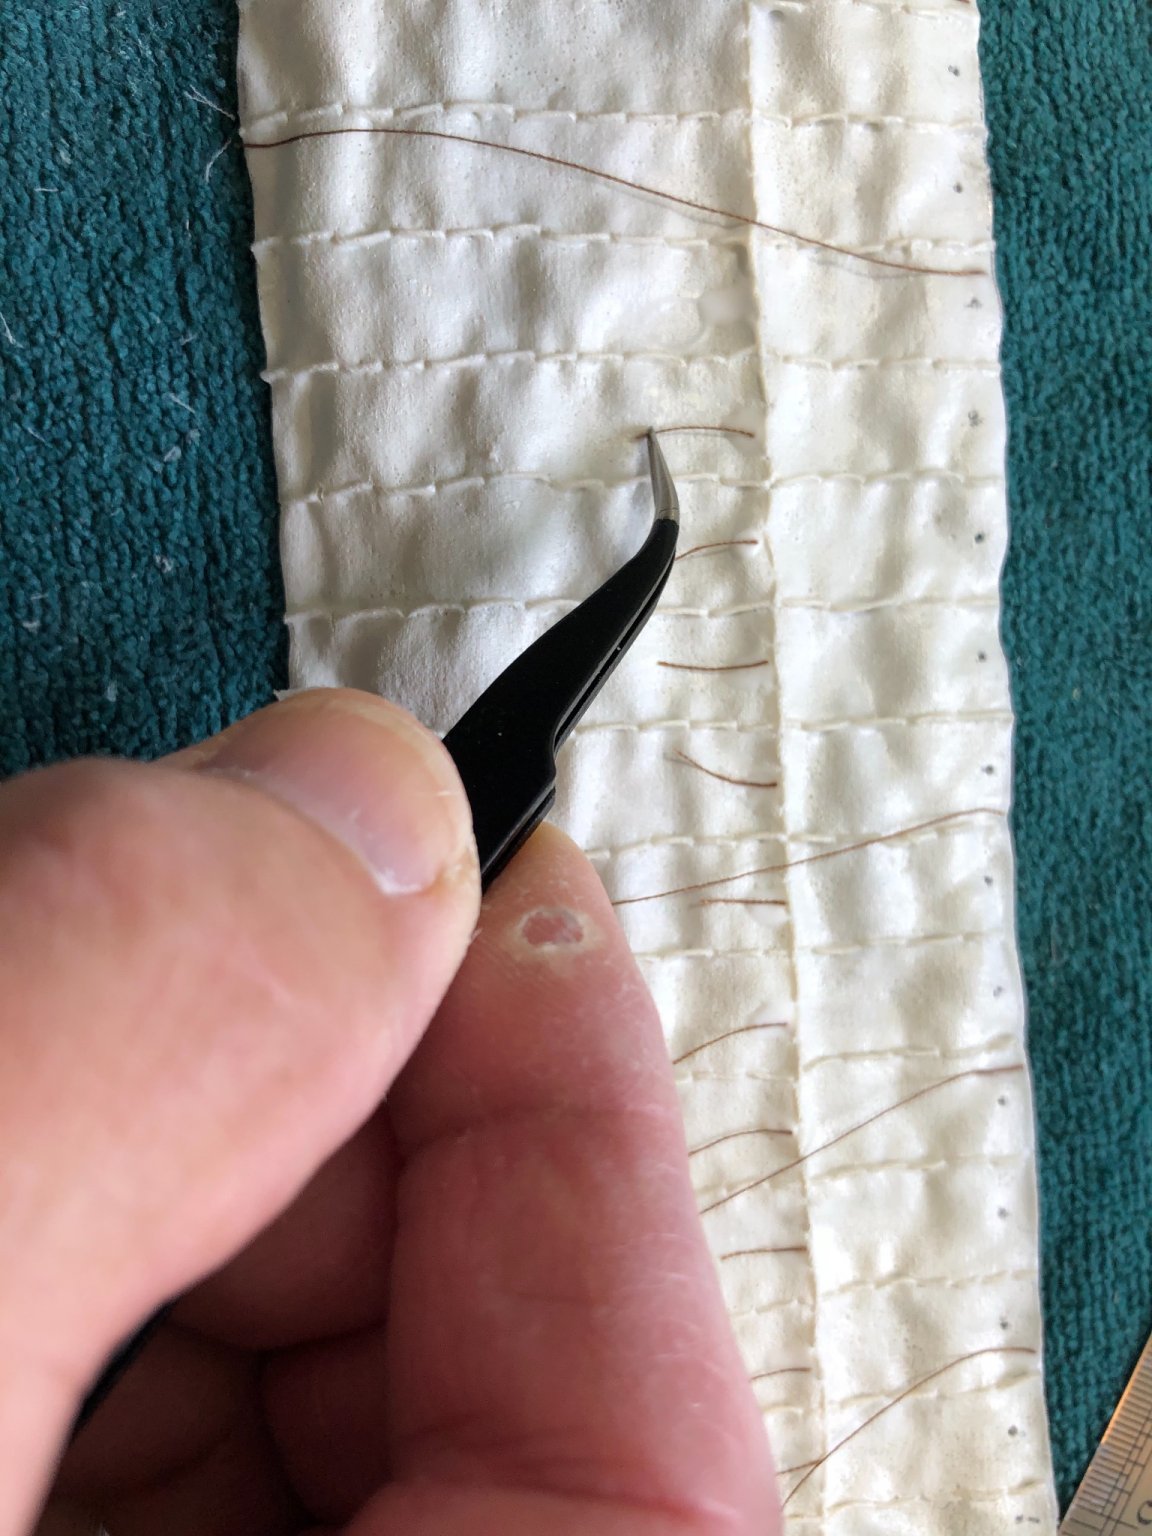
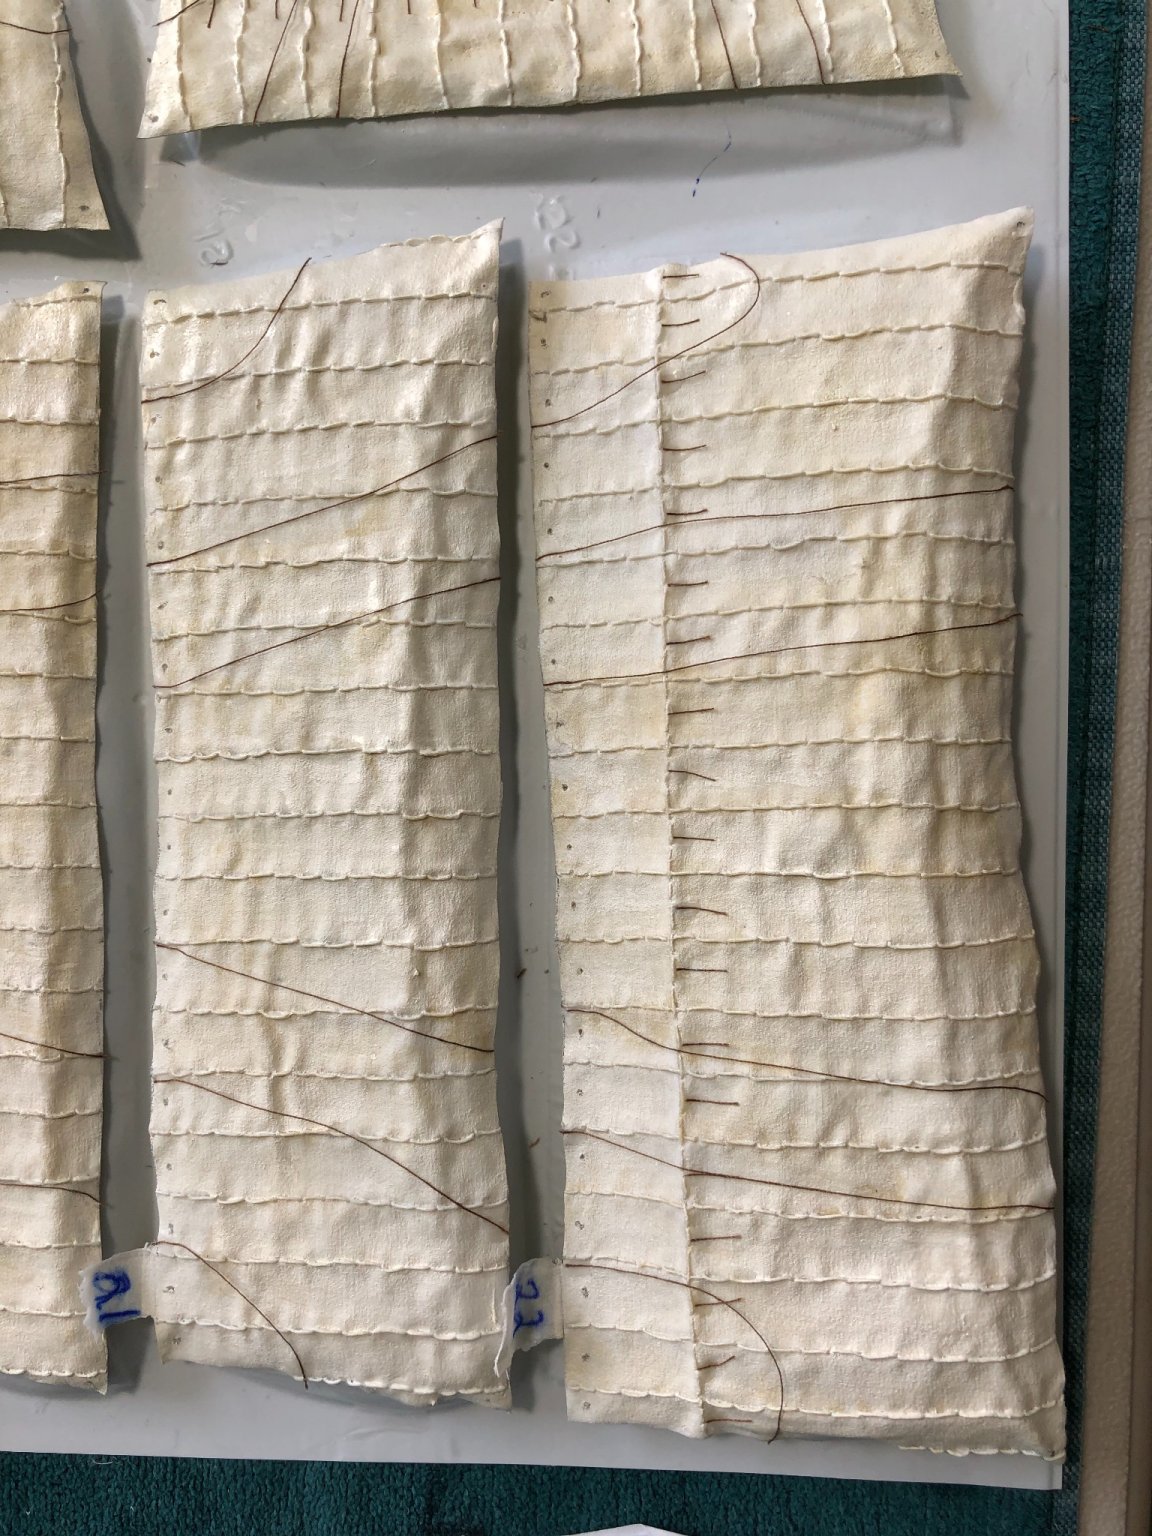
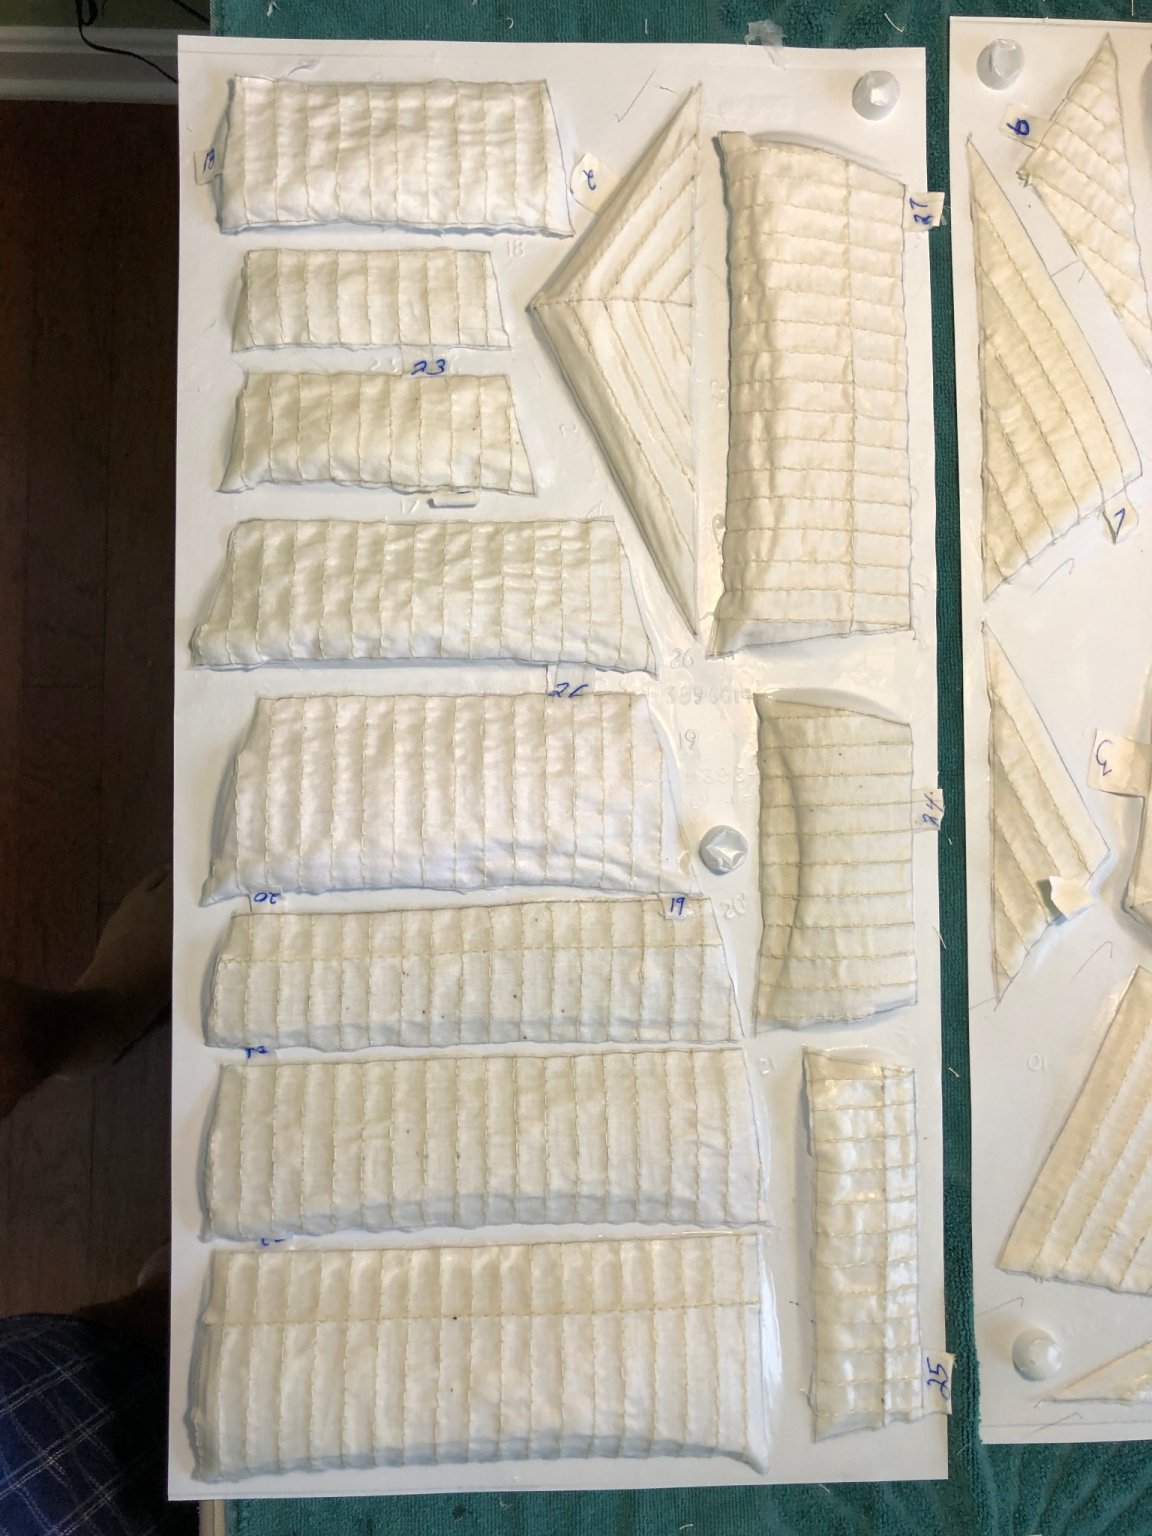
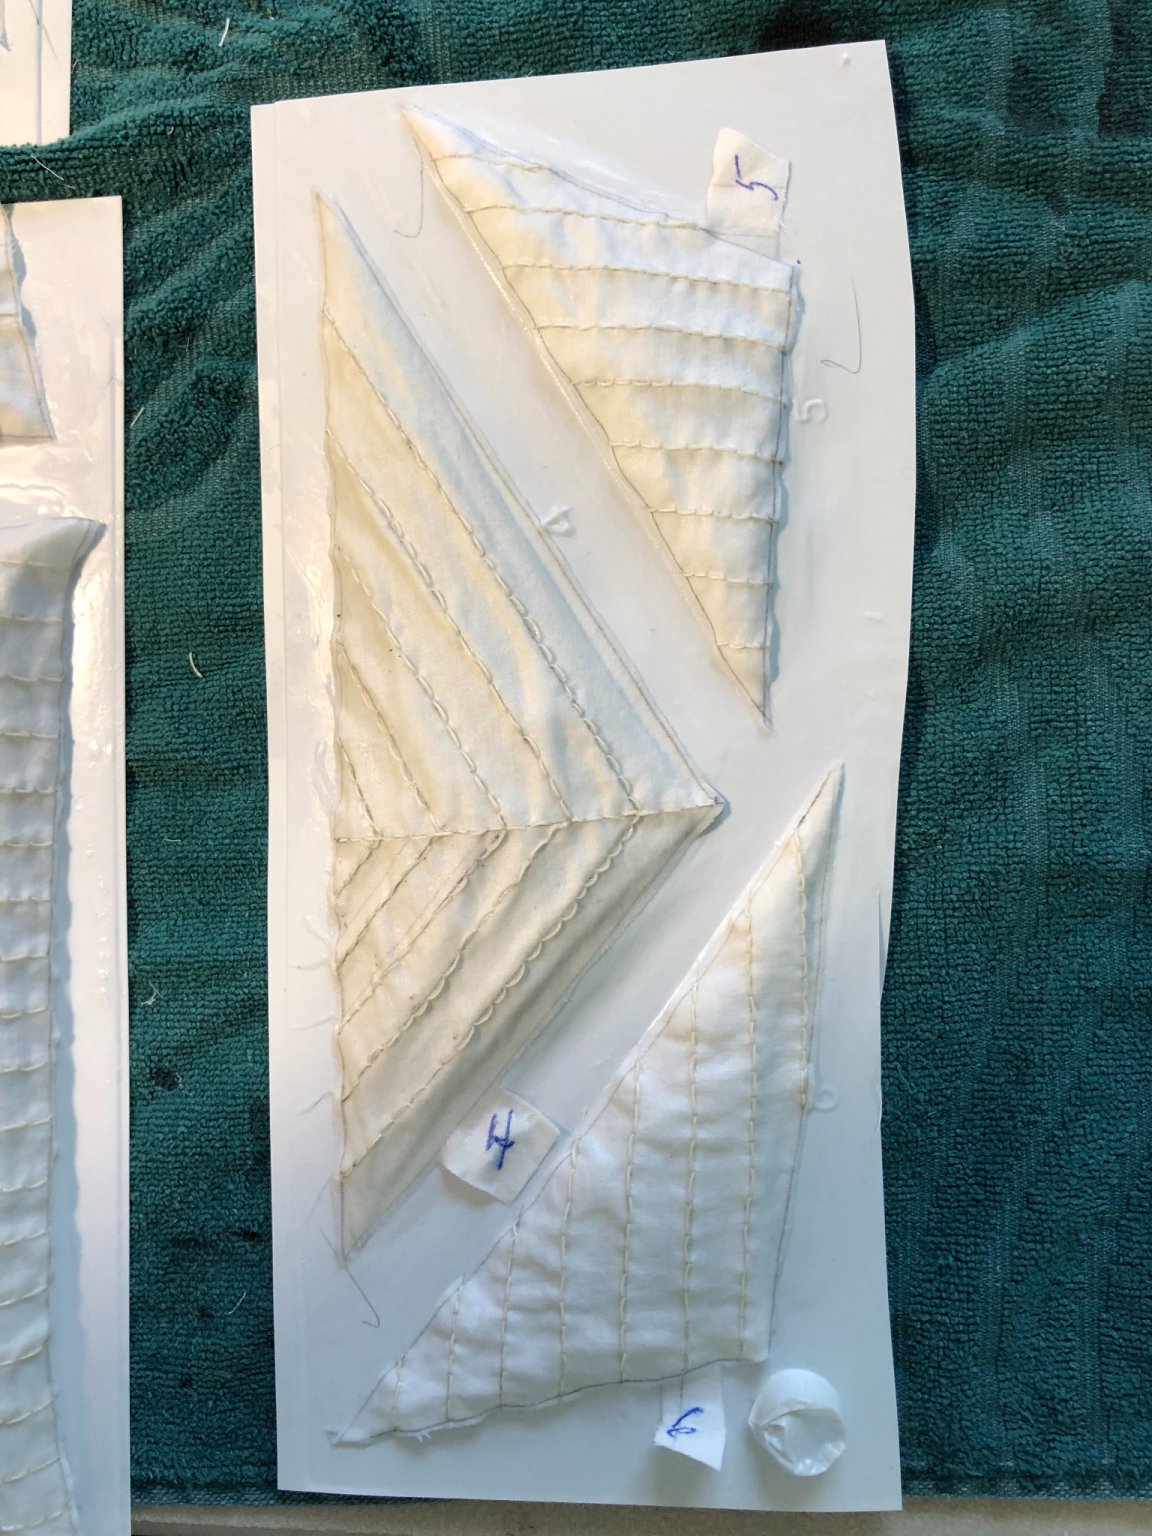
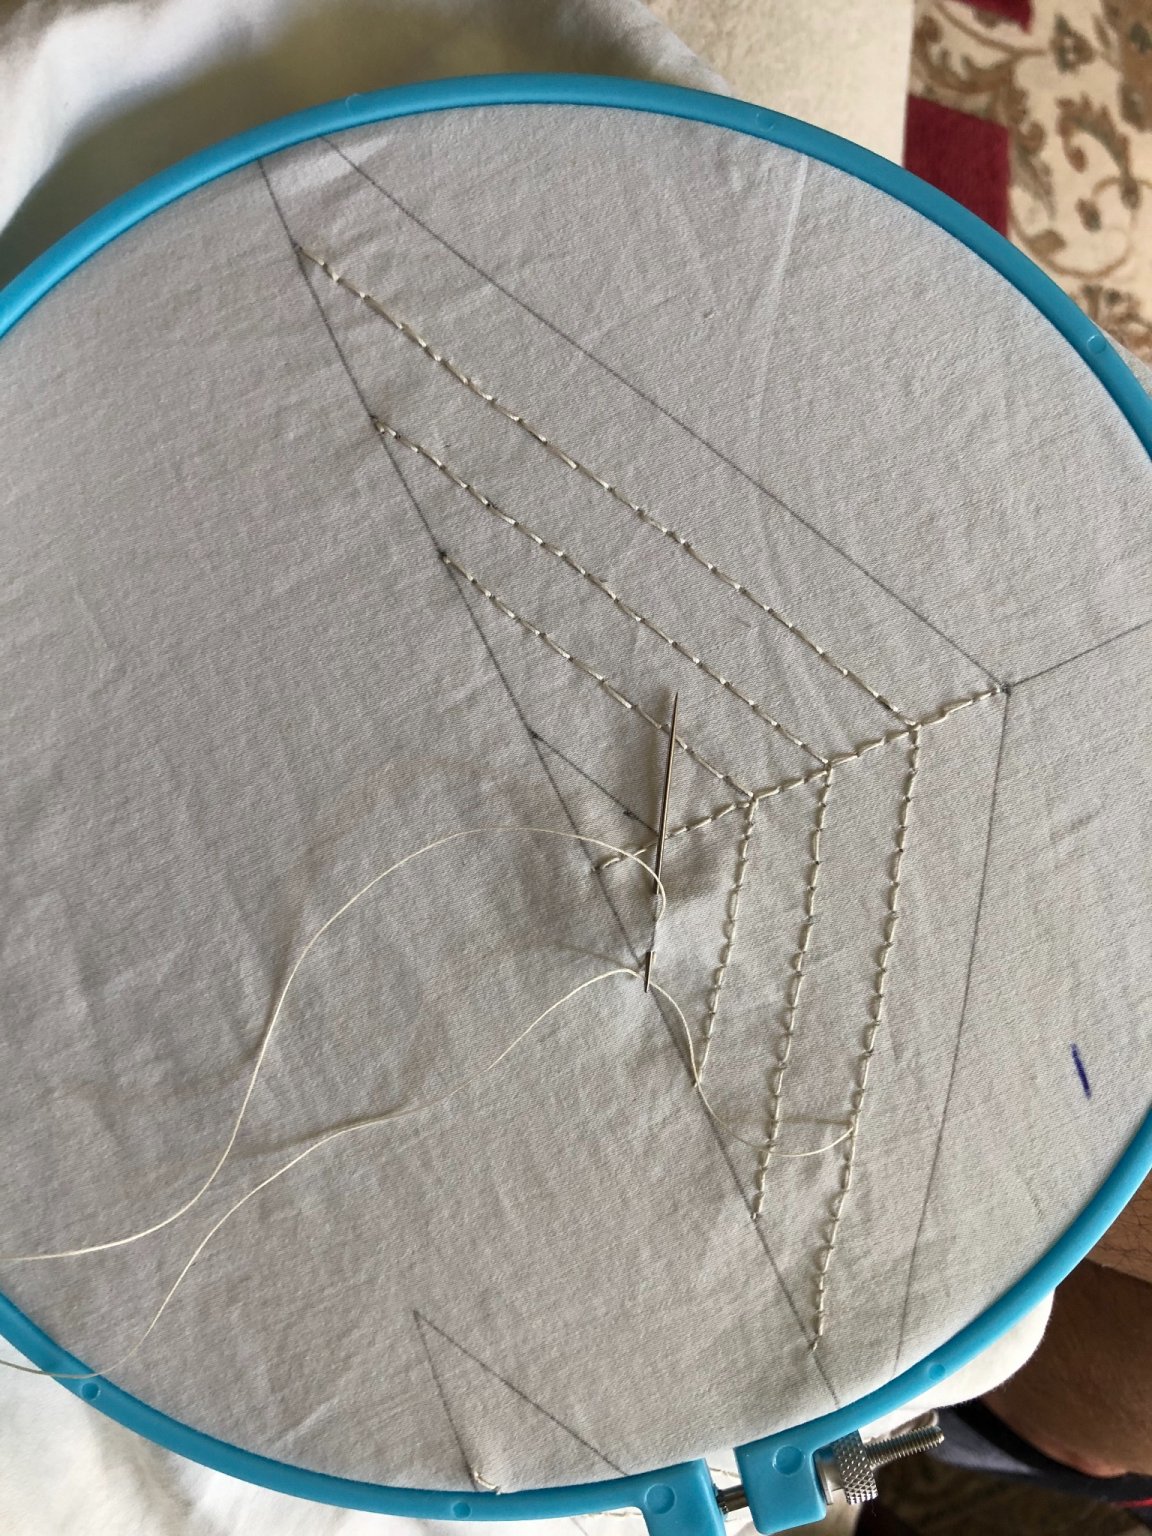
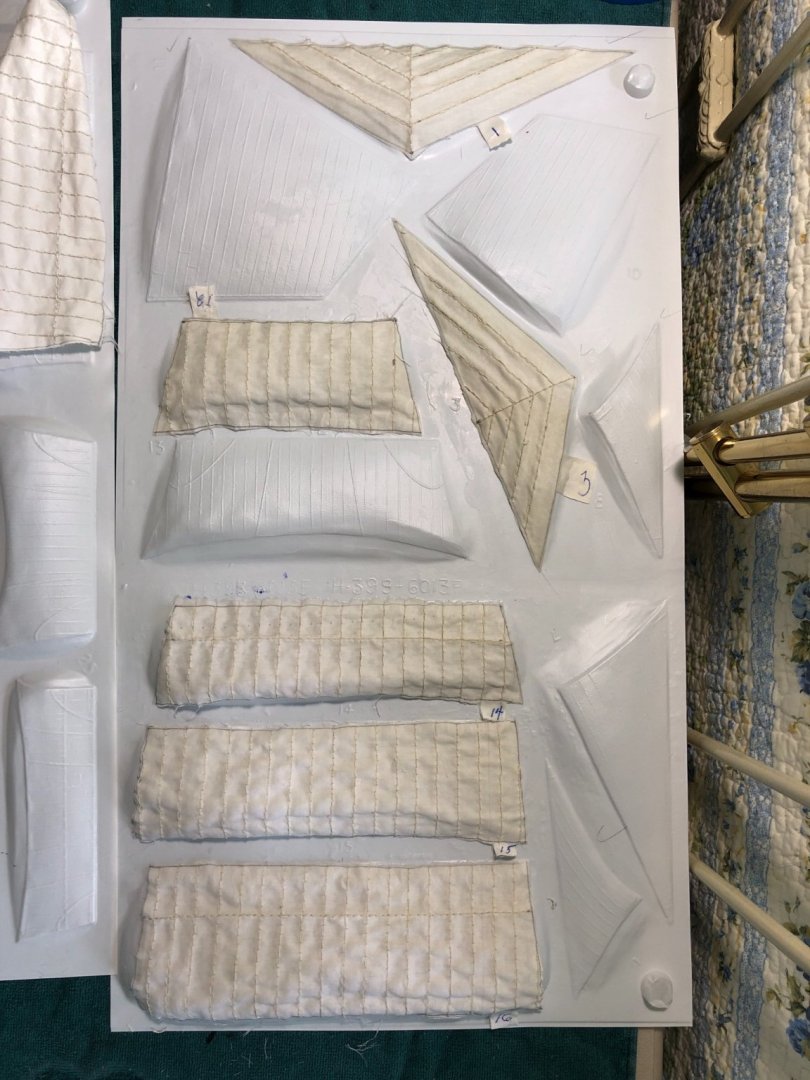
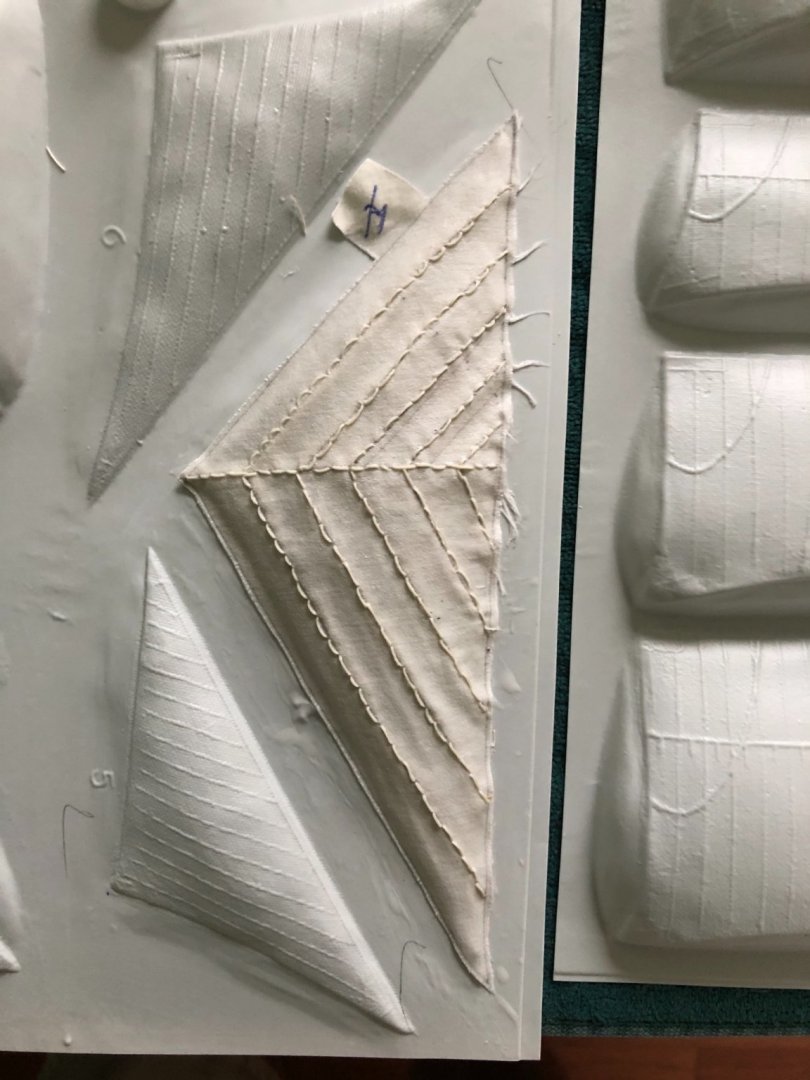
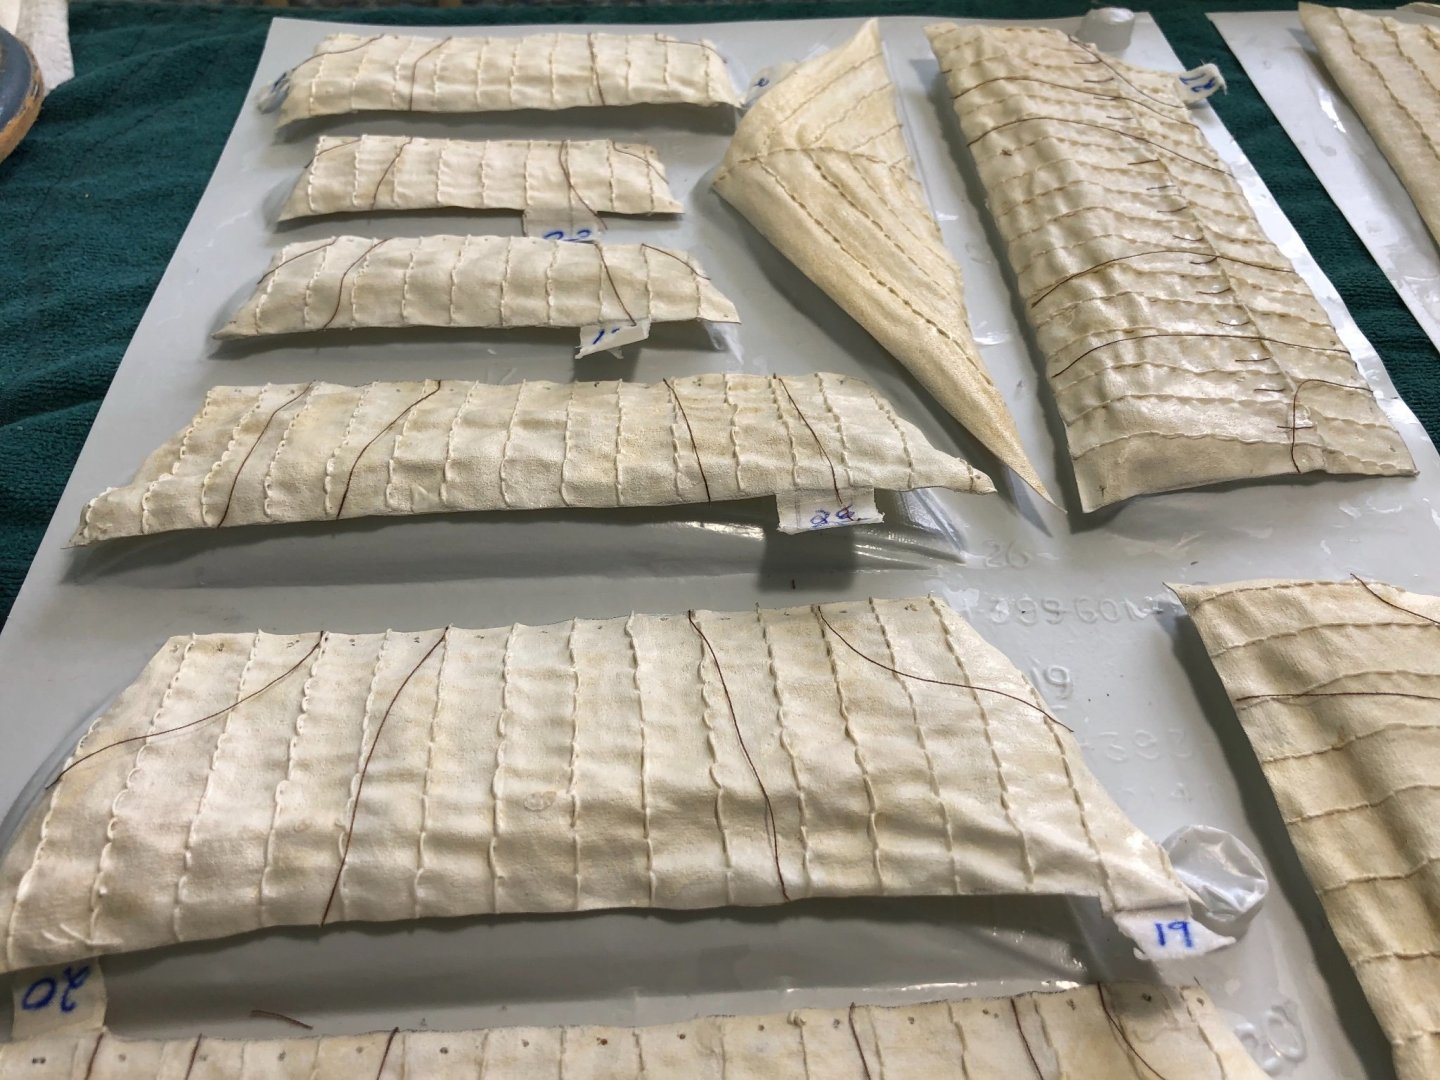
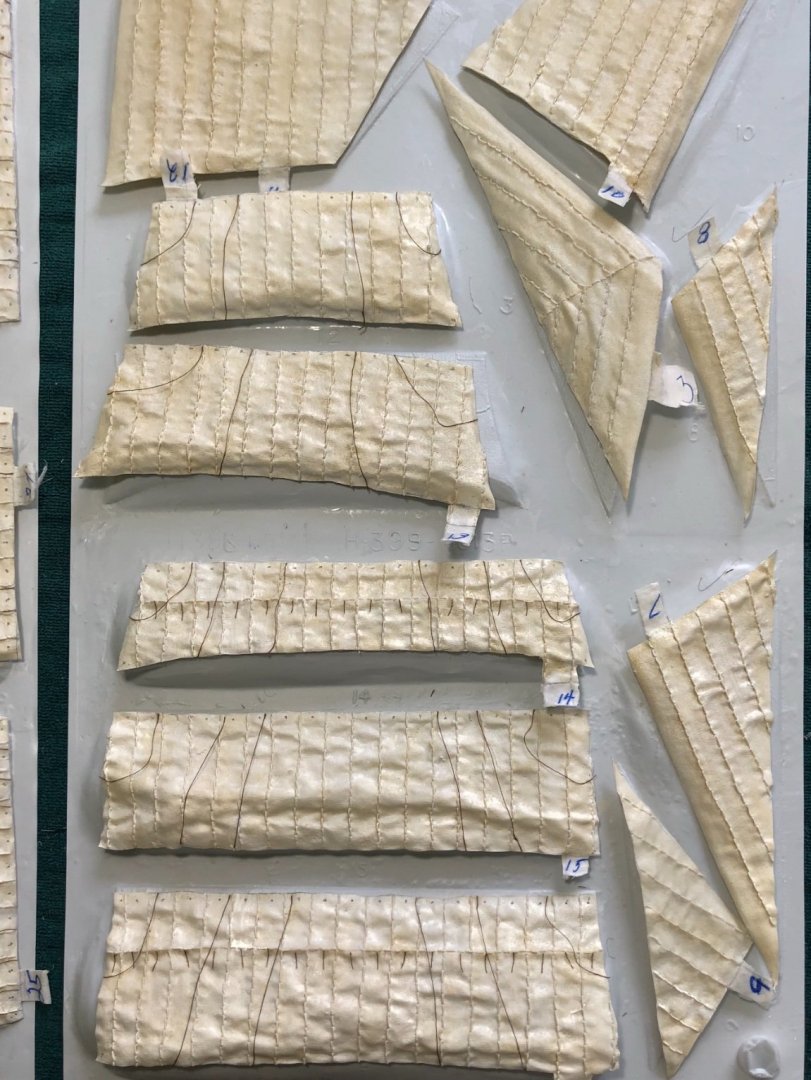
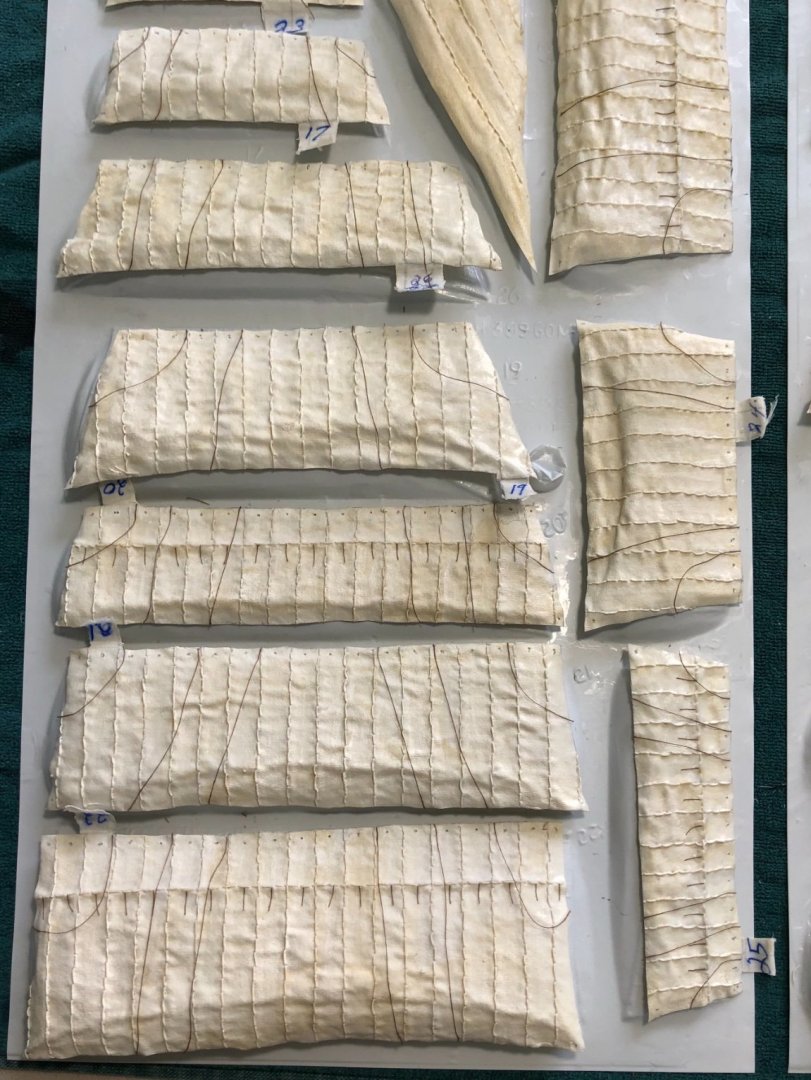
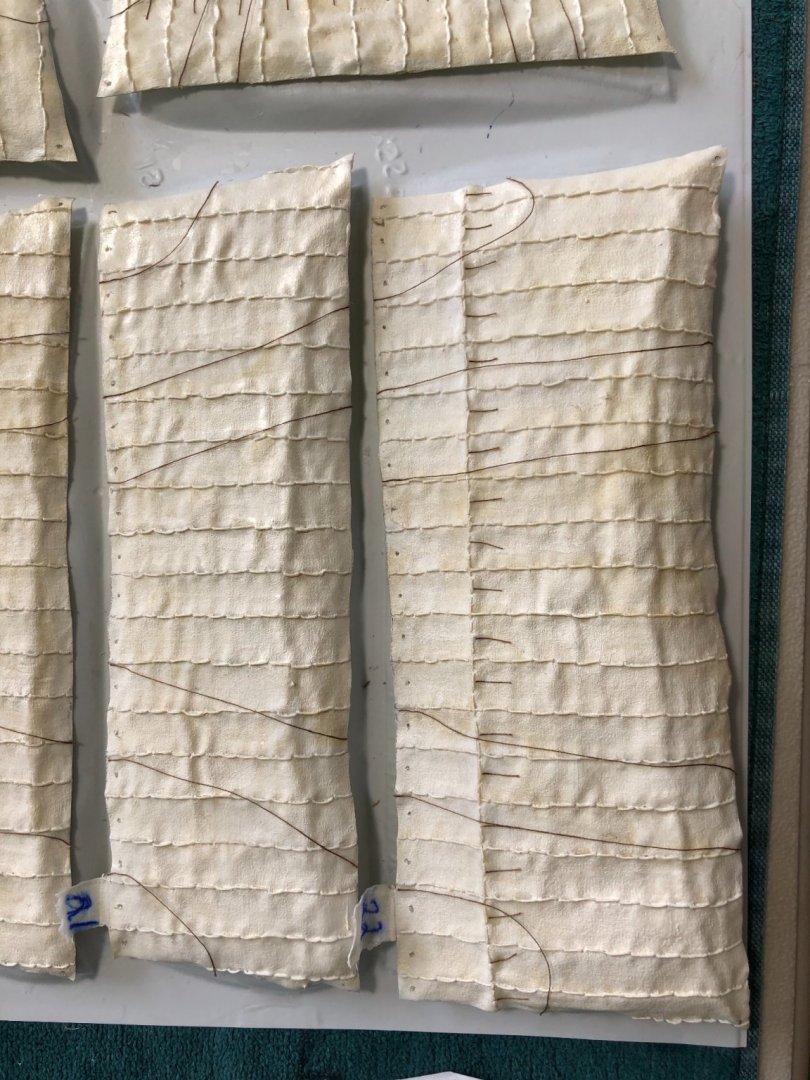
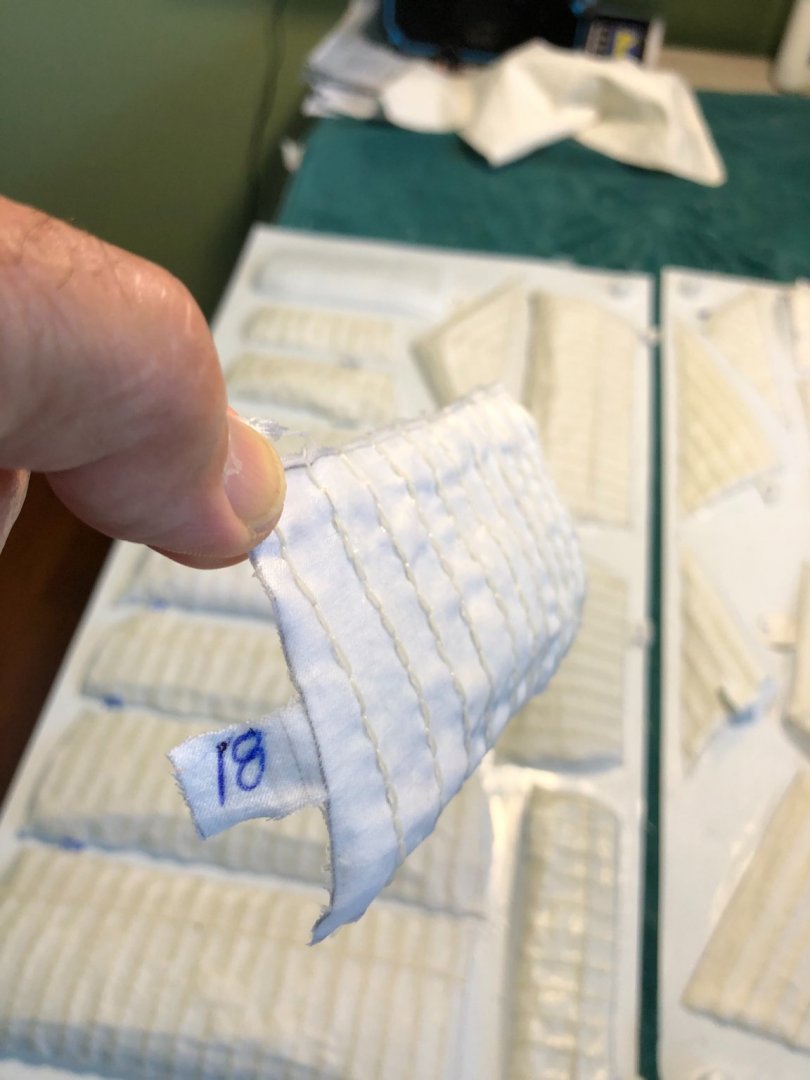
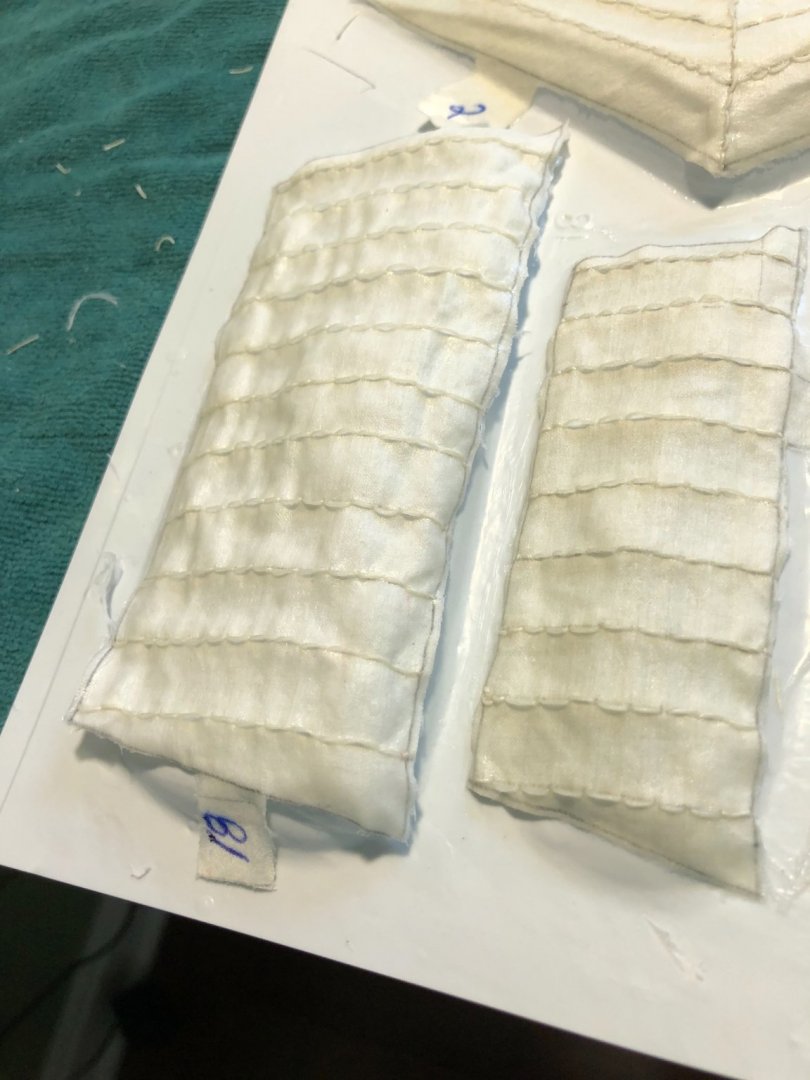
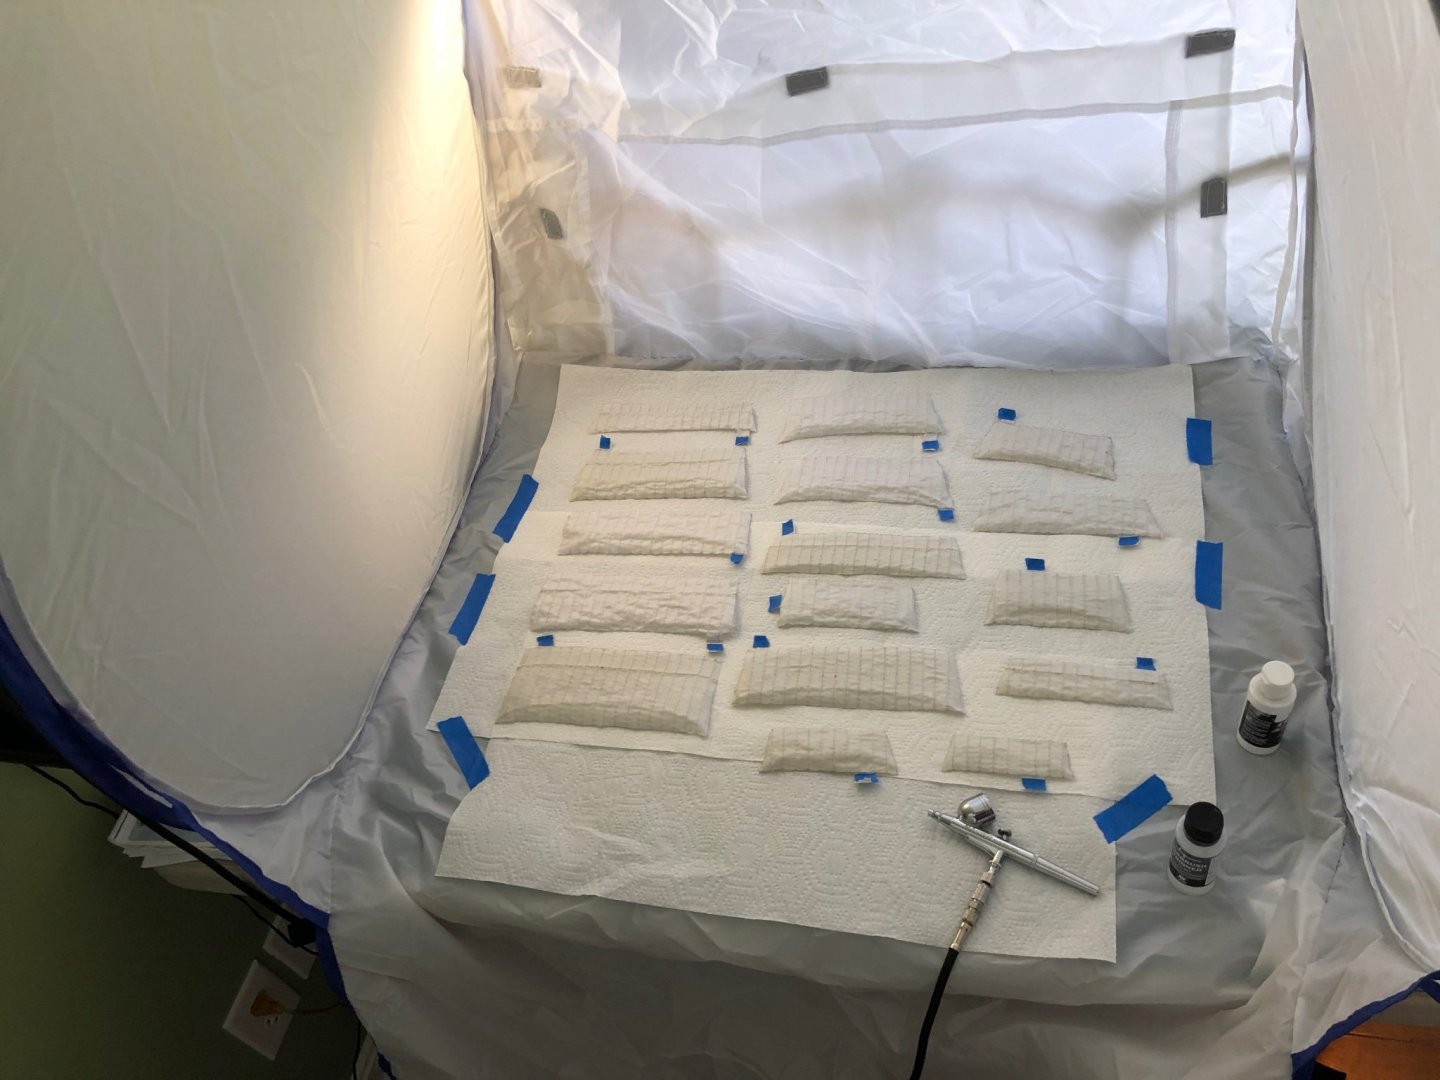
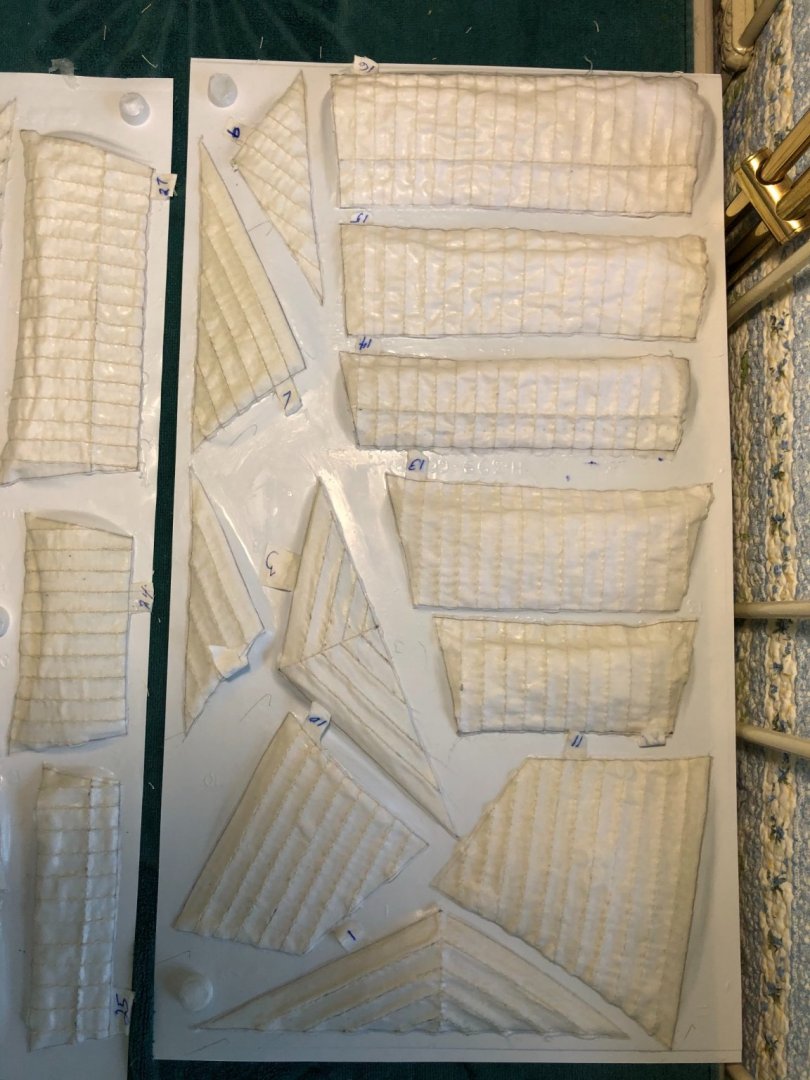
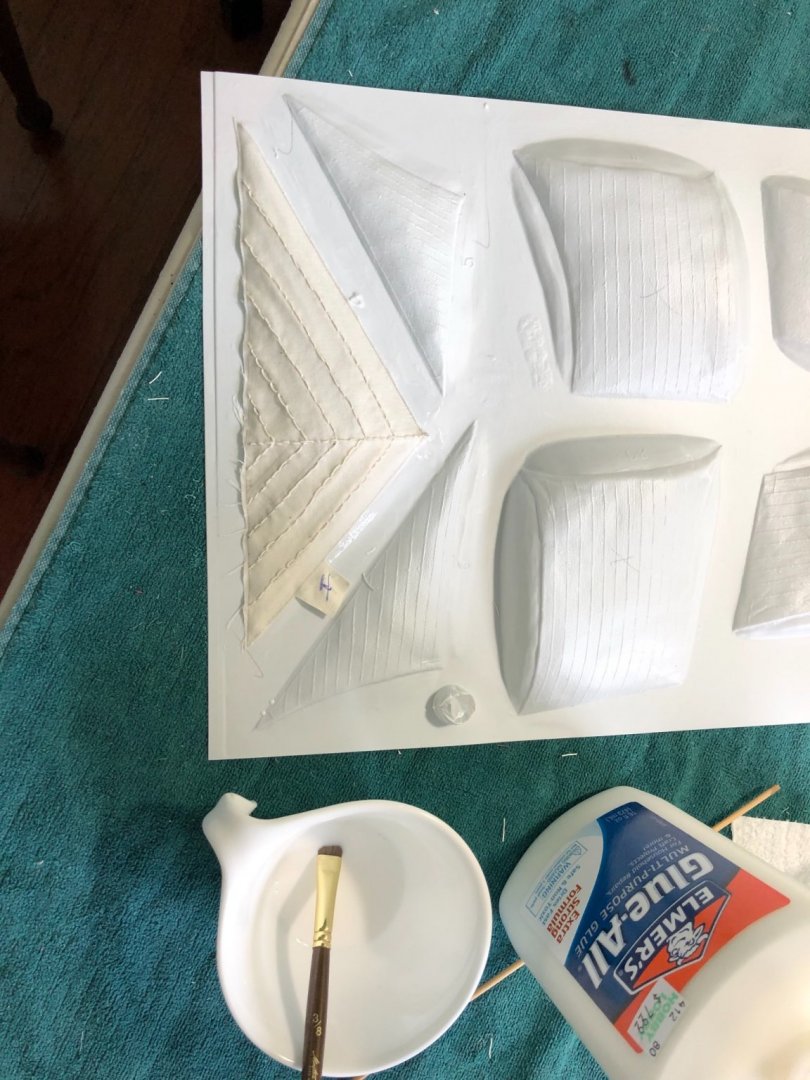
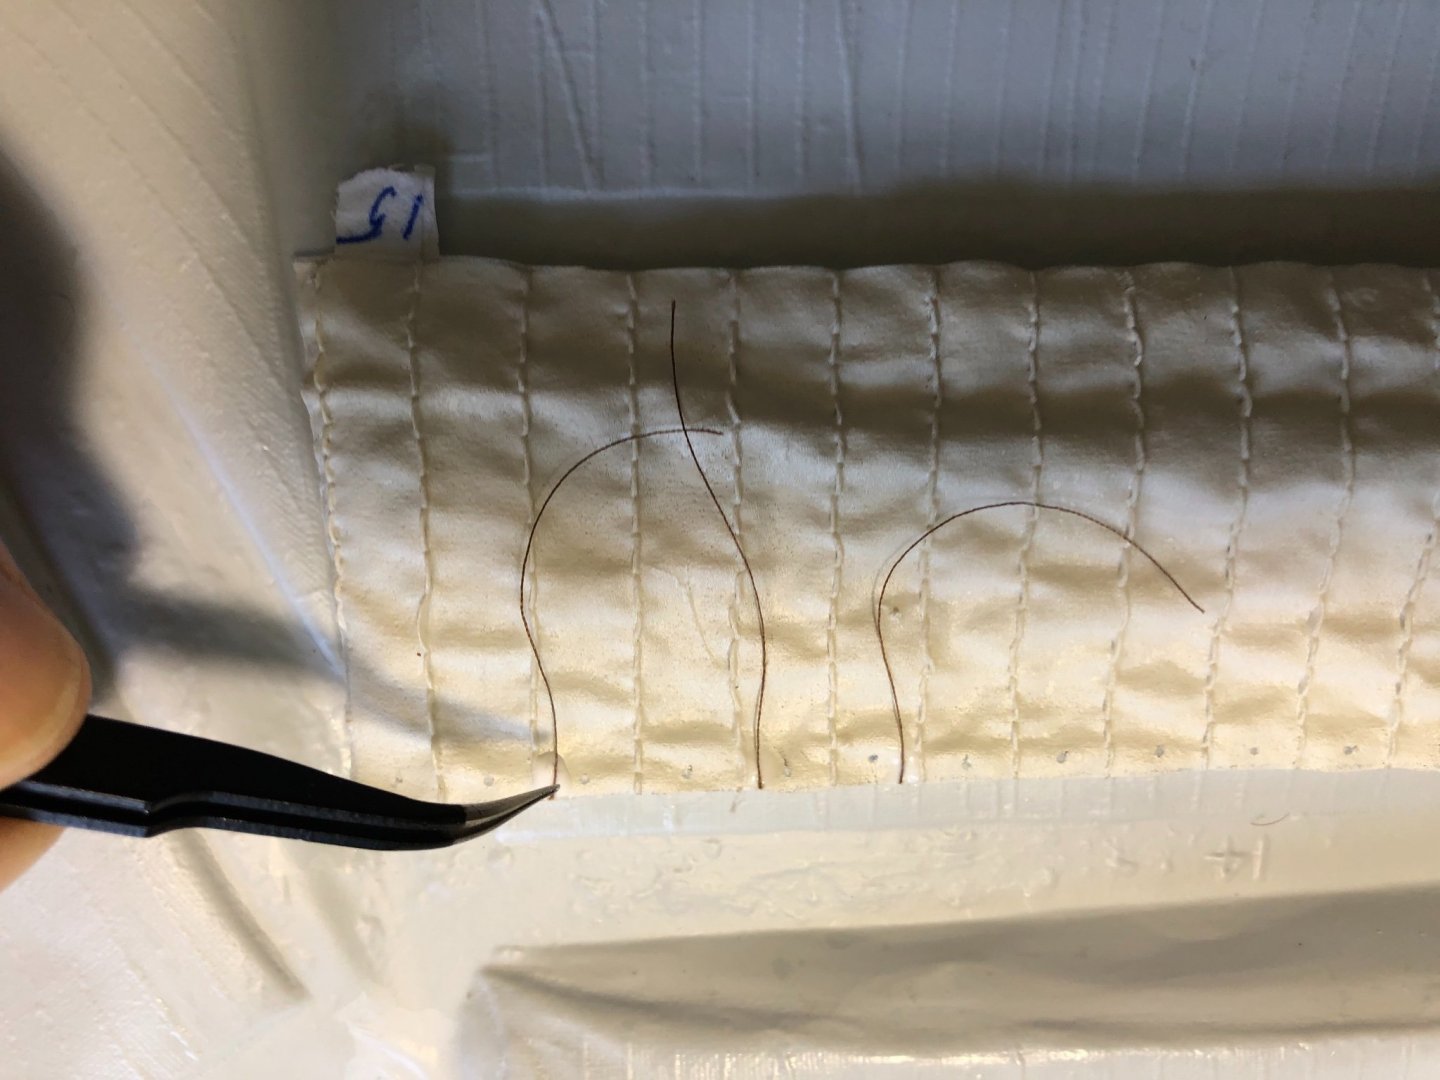
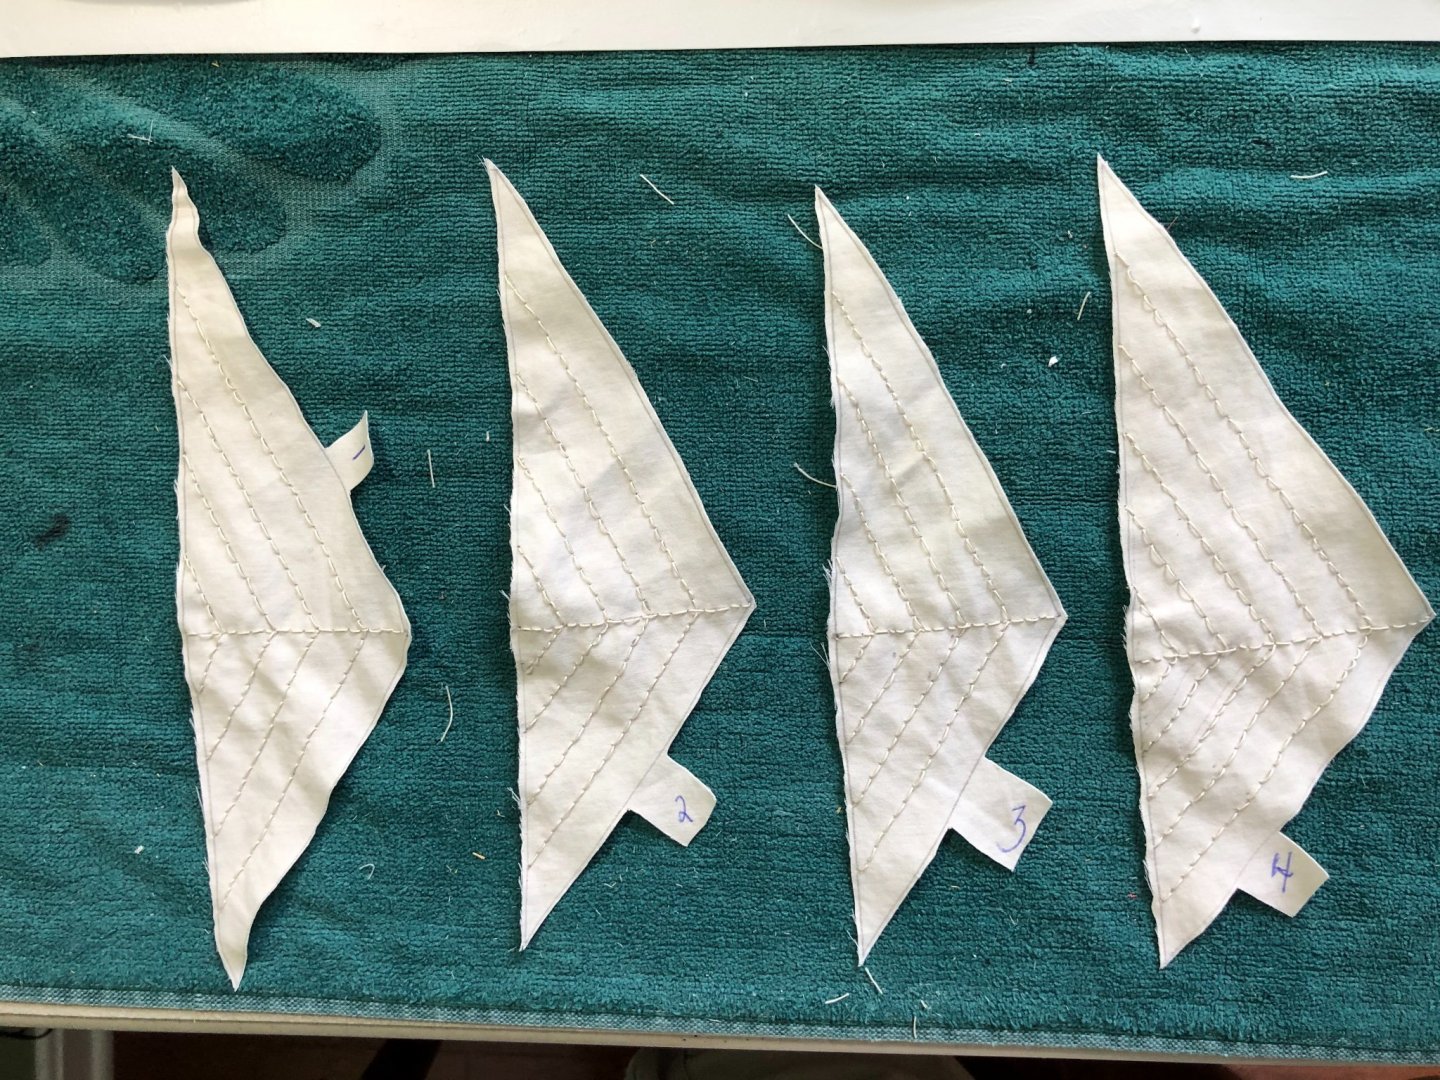
Kevin this is my sail process. Kind of a combination of ideas I have seen. I included a handful of pictures to help it make sense. I use the plastic sails that come with the kit as a sort of mold. I first measure the distance between the molded lines on the plastic sails. If real close I measure to ever other line. I then transfer that measurement to a standard piece of copy paper filling it with parallel lines end to end and side to side. I then make several copies to have enough to make the needed sail patterns. Using a ruler, string to measure curved areas, or whatever is needed to accurately transfer the 3D plastic sail shape to the paper I draw a 2D pattern making sure I keep the lines matching the sail lines. I then select the particular cloth I want to use for the sails and draw lines on it exactly as I did on the paper. Cover enough cloth with lines for all the paper sails to fit. I then use the paper patterns to transfer the shapes to the cloth. Again paying attention to the lines. Once I have all the sails drawn on the cloth i hand it off to my living wife! We do not have a sewing machine so she land stitches all the lines in all the sails, including in horizontal lines shown on the plastic sail. I give her plenty of time to work on this. In fact I am work on my Victory patterns soon. Once they are all stitched I cut them out and lay them on the corresponding plastic sails. Then I make a solution of 50/50 water and white glue. Using the solution I paint the sails with a brush coating them thoroughly and form the cloth to the plastic sail. Use the plastic as a sort of mold to shape the wet cloth. Once this is done I let it dry for a day or so. After which the sails can be popped loose of the mold and after a little trimming you have a perfectly matching billowed cloth sail to the plastic sail. The glue prevents the thread from raveling. Once complete you can use paint or antique as you desire. You can also add additional threads and whatever else you want to further enhance the look. Punch a series of holes along the top for threads to tie to the yard and you are ready to go. I have used this same process on all my ships except the Constitution.


-
Thanks Ian and Kevin. Kevin my sails are hand made with help from my wife. Will explain how I did them.
-
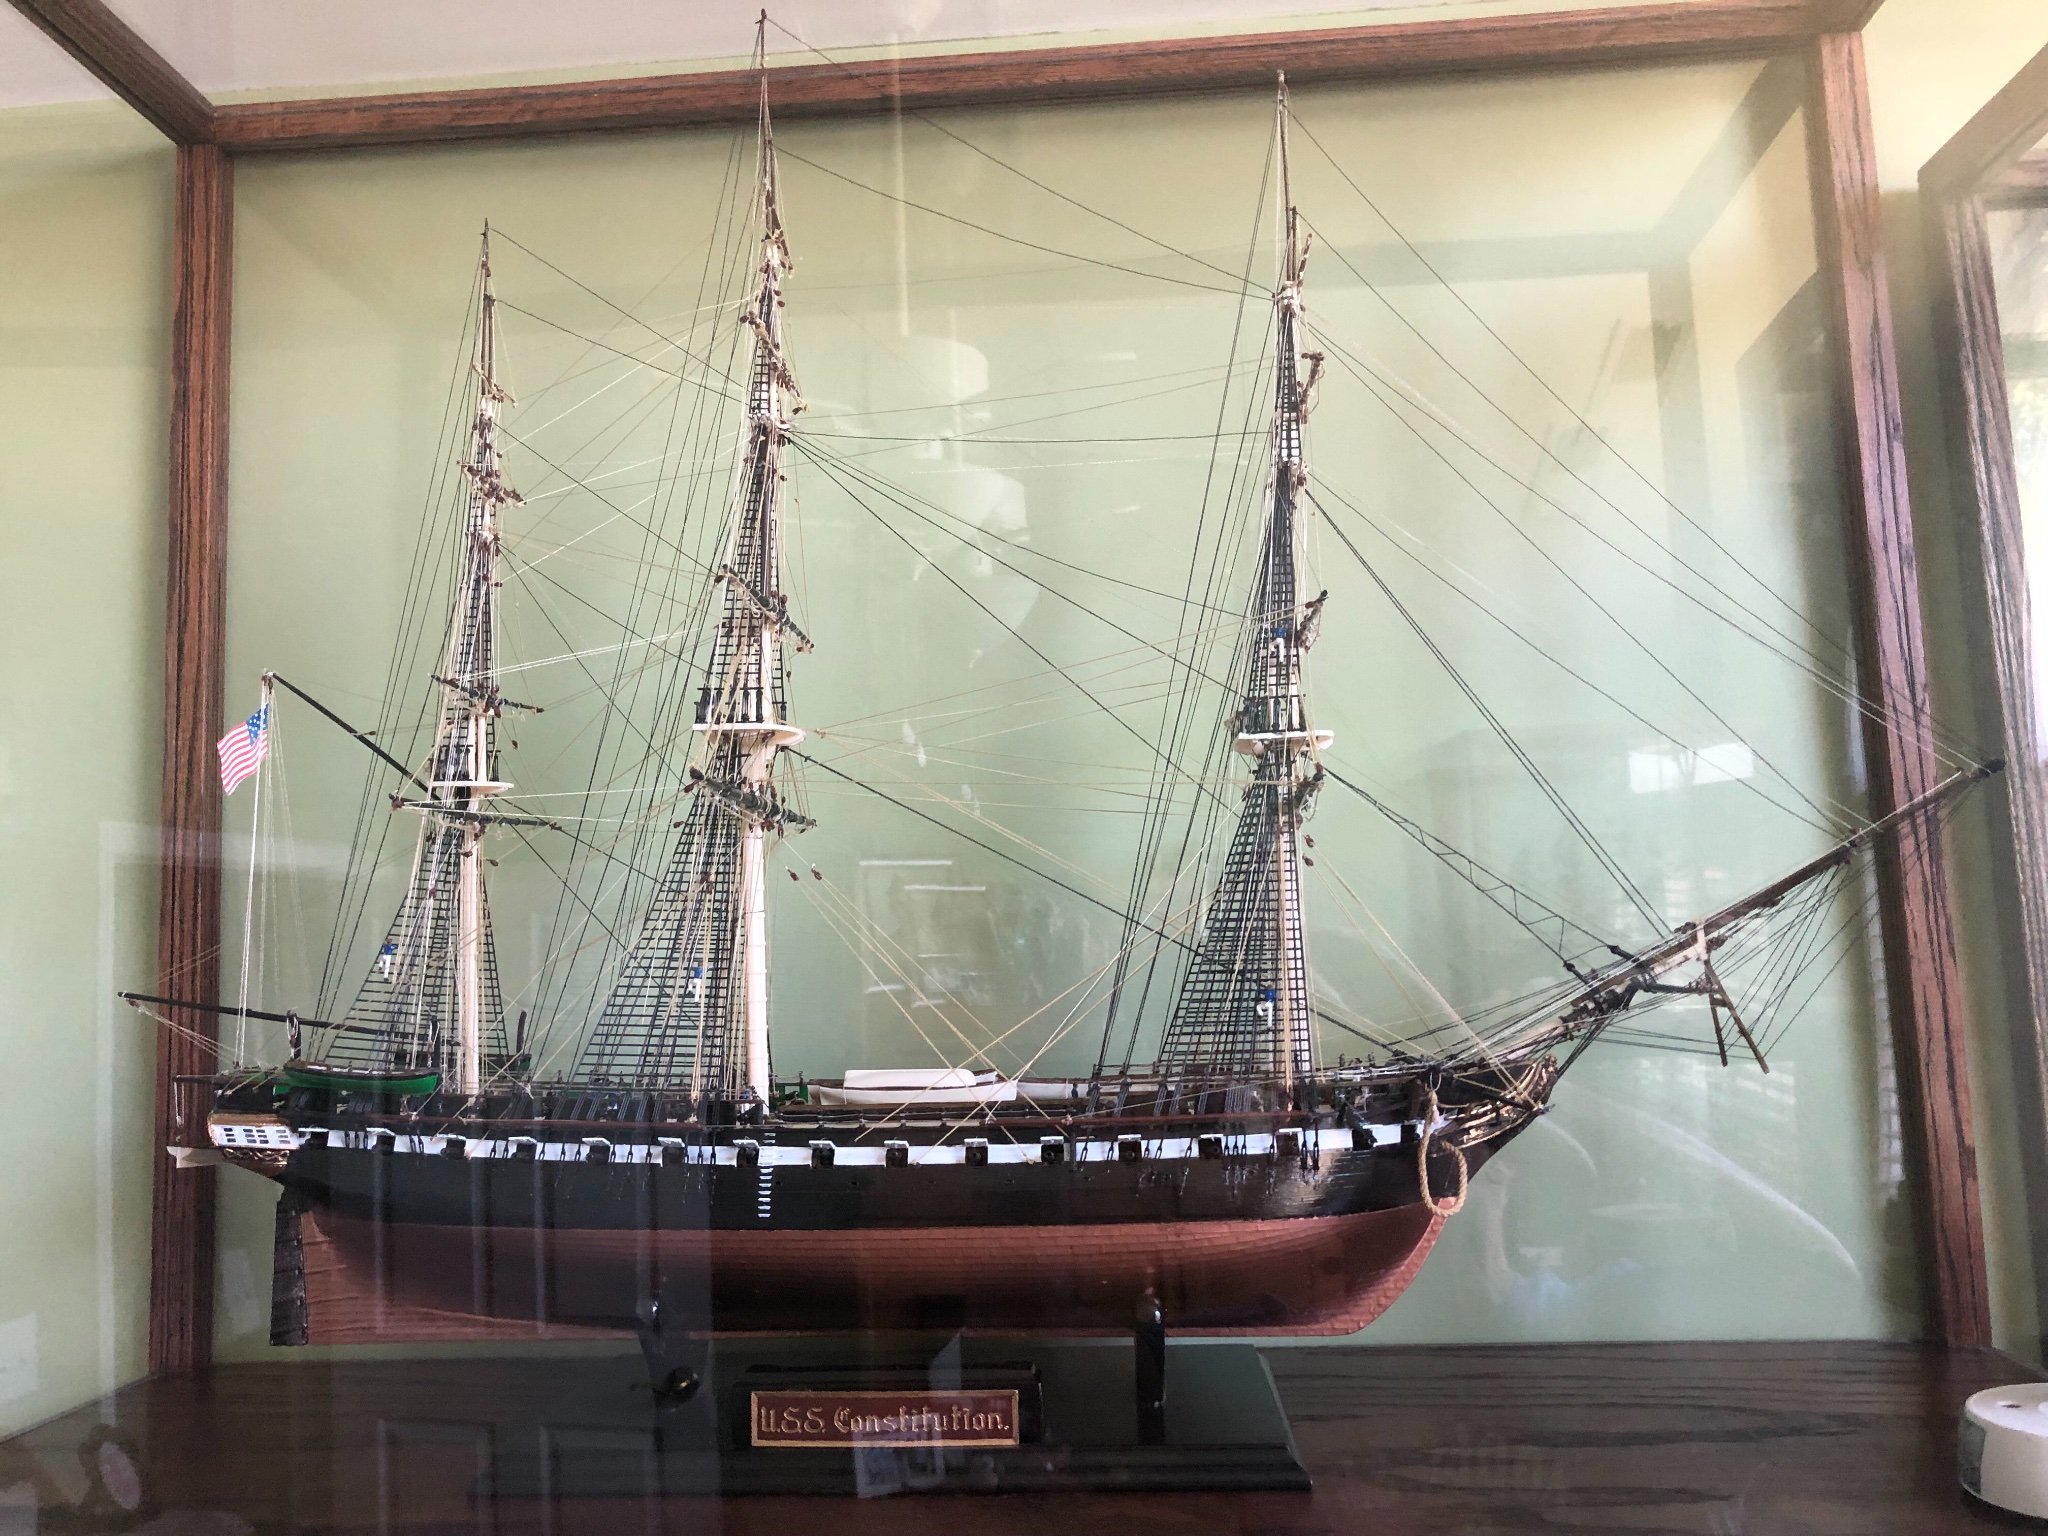
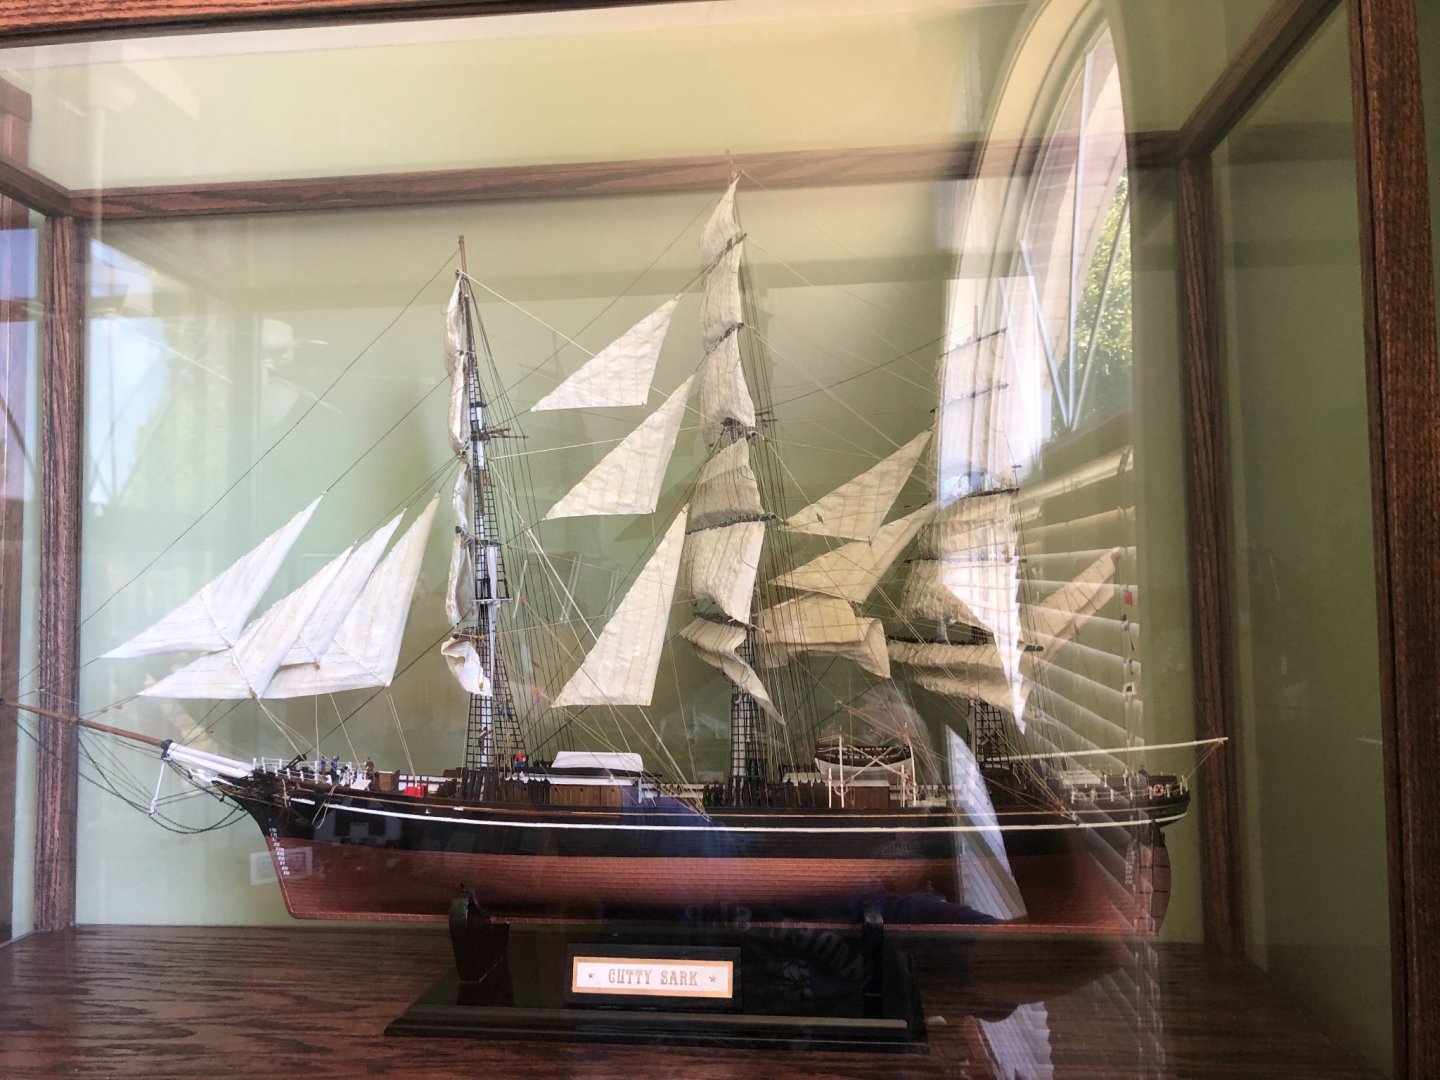
Here are my Constitution and Cutty Sark in display cases. Constitution only one I have left the sails off. Really liked being able to see the rigging. Agree with everything you said, especially those shroud/ratline assemblies. Not used since these two models.

-
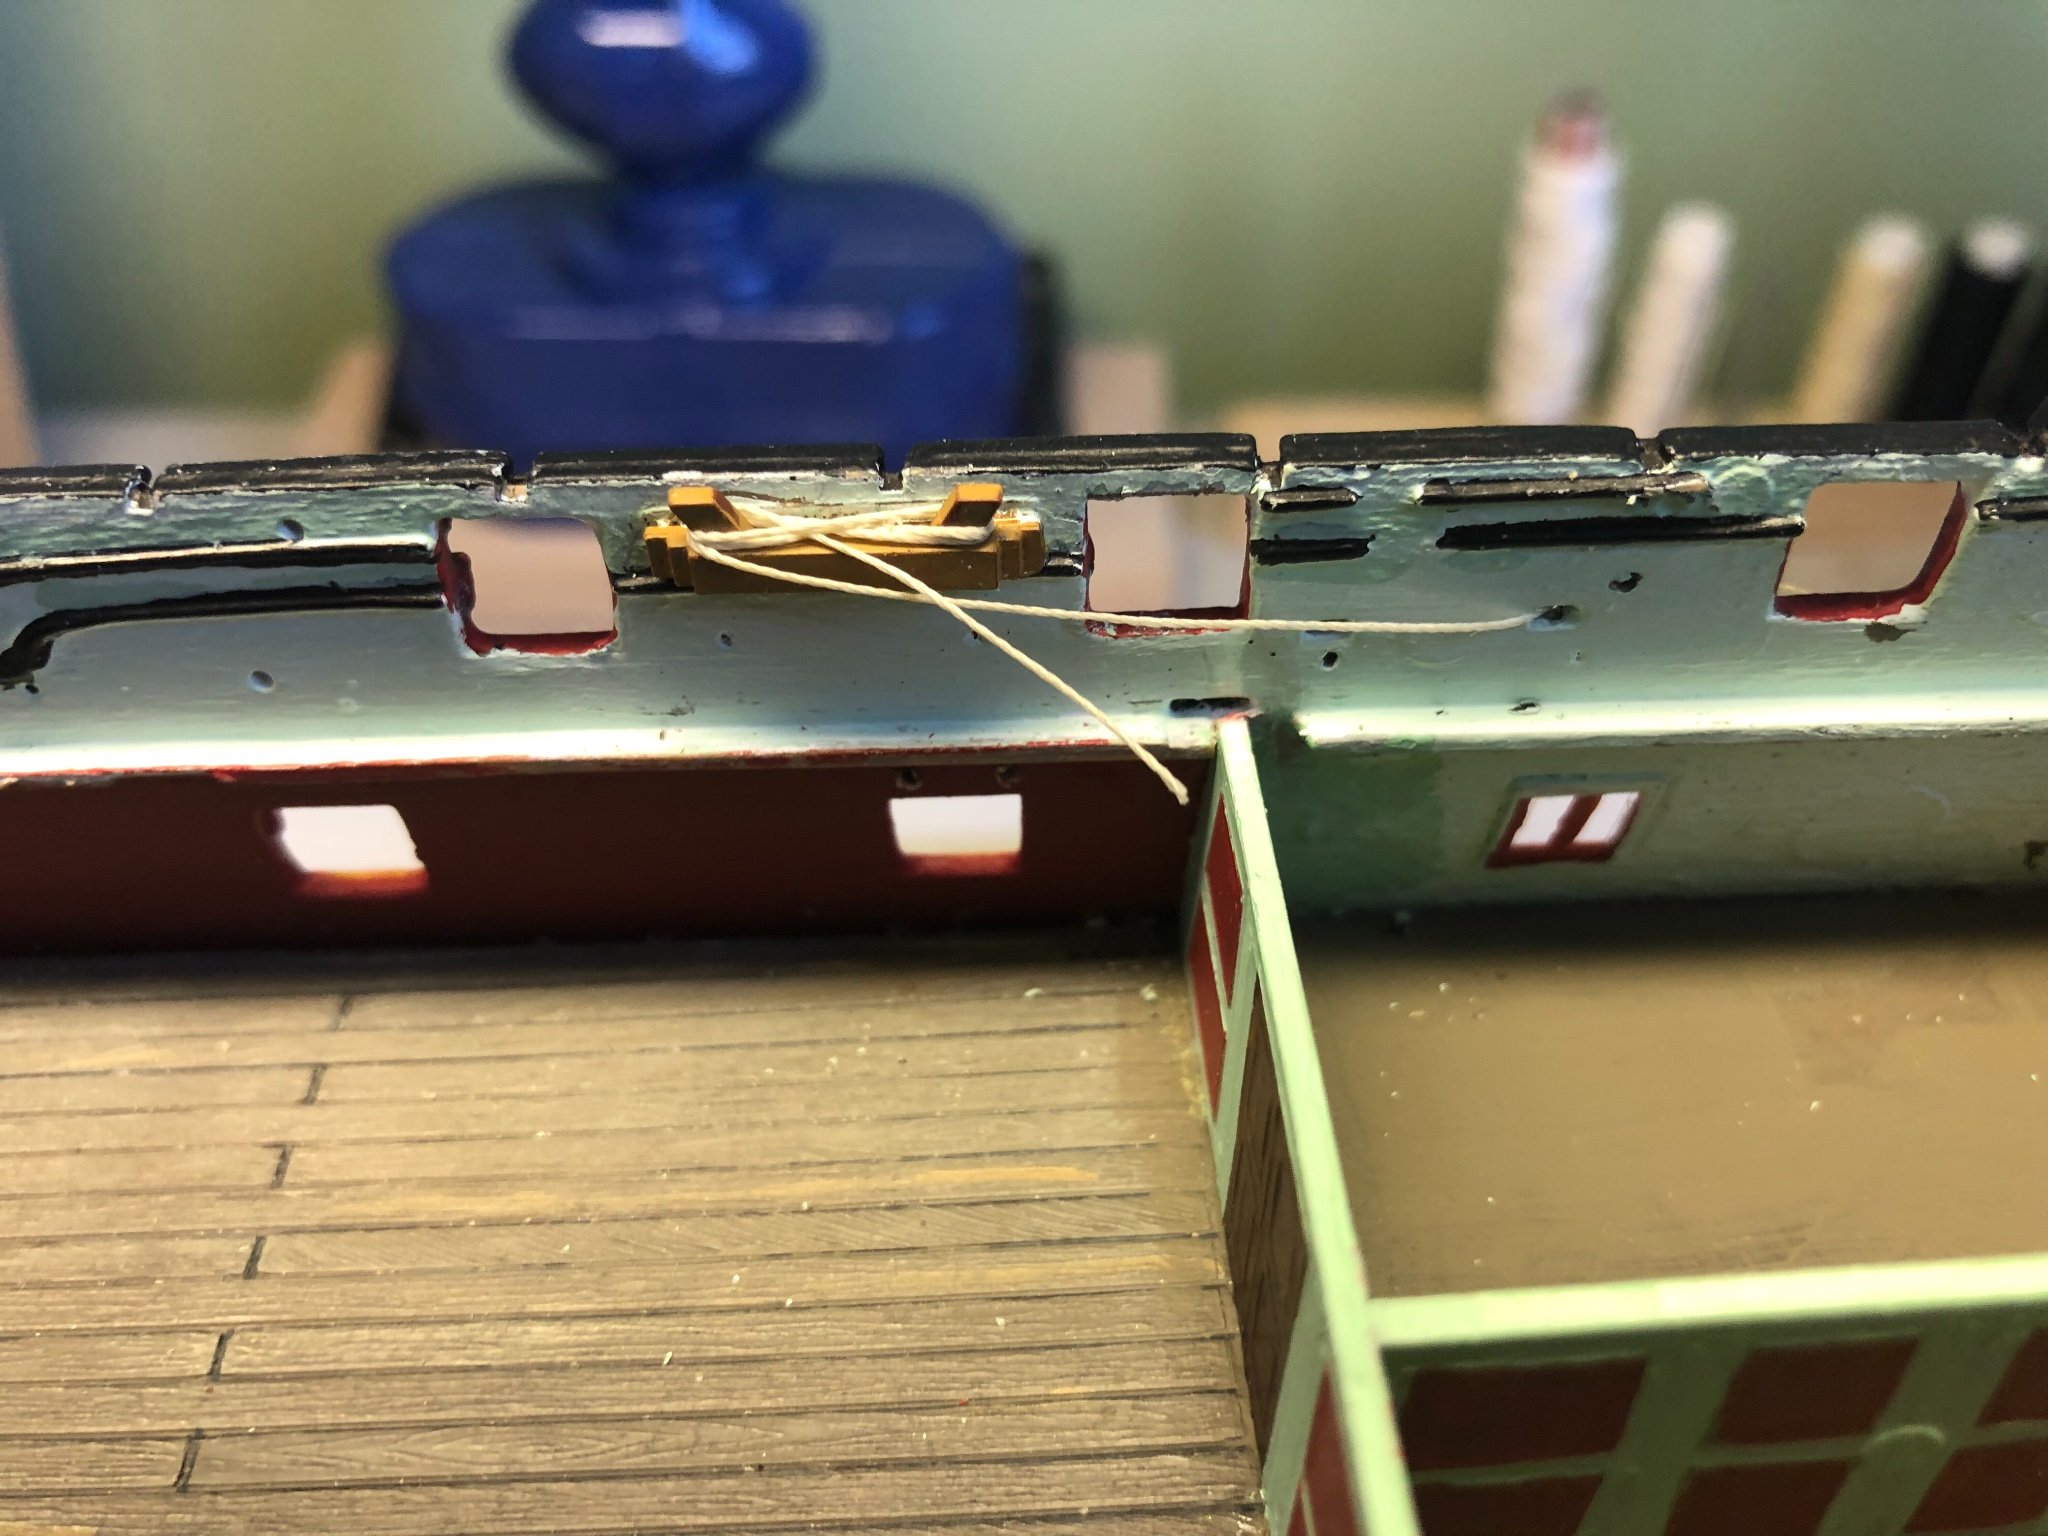
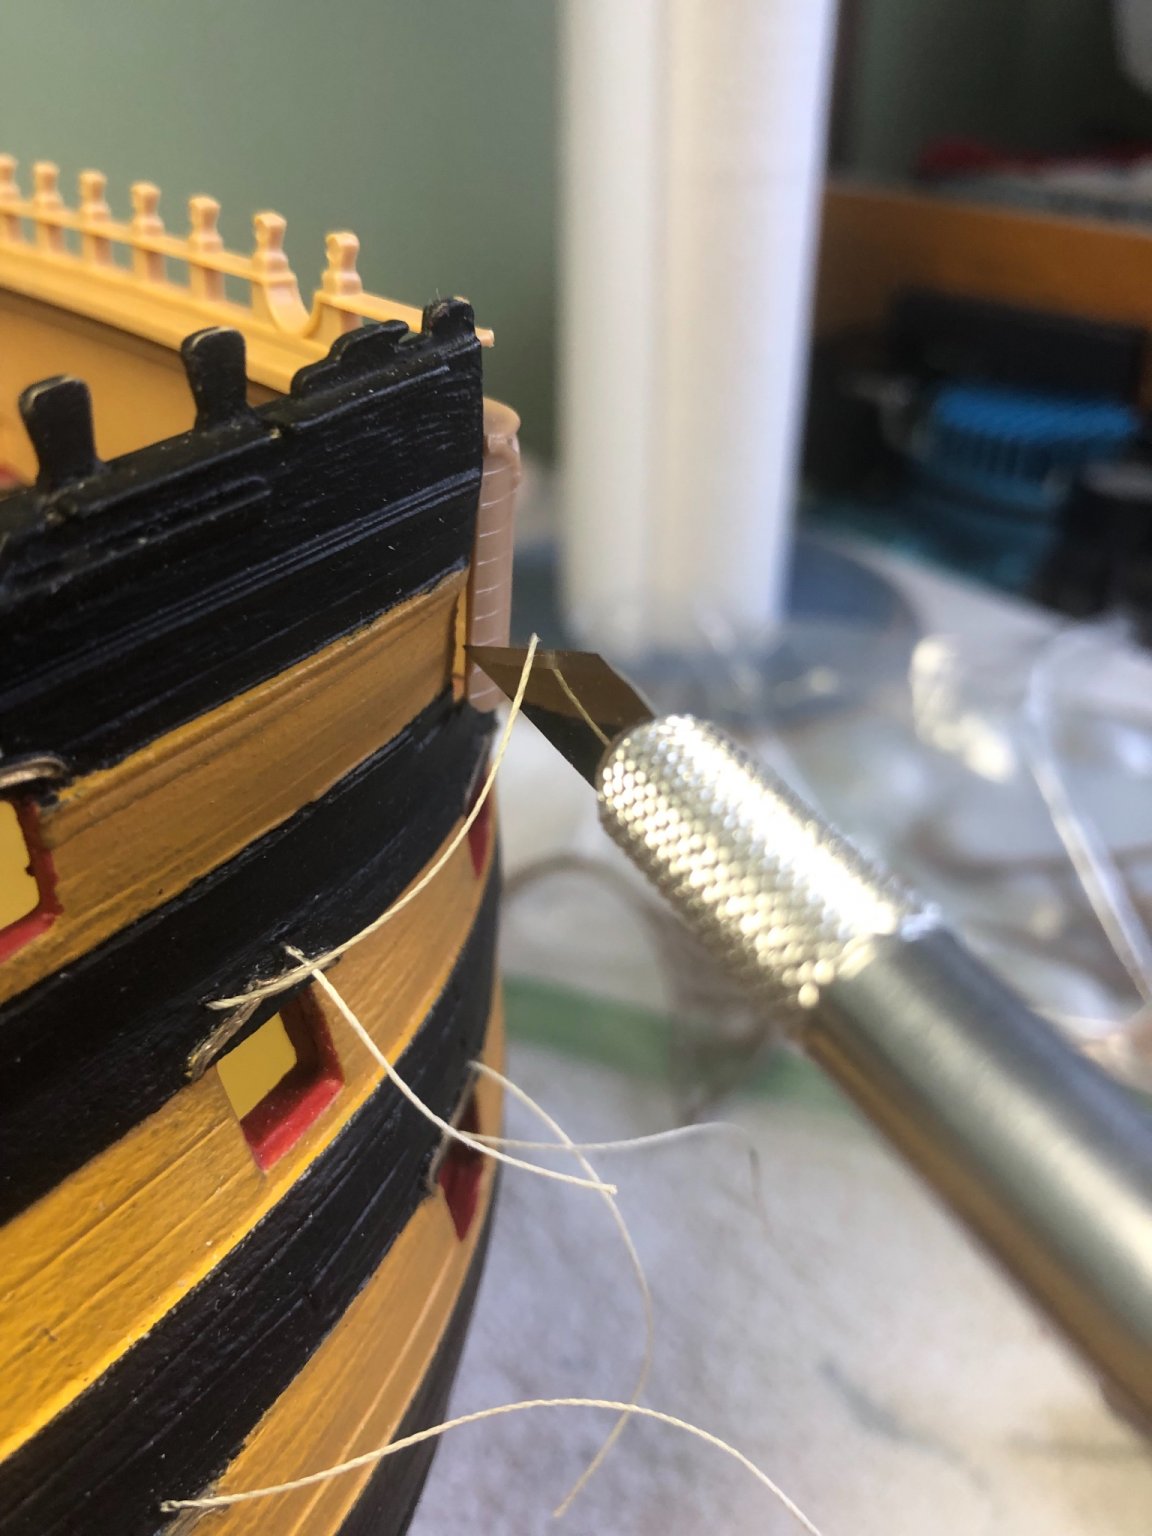
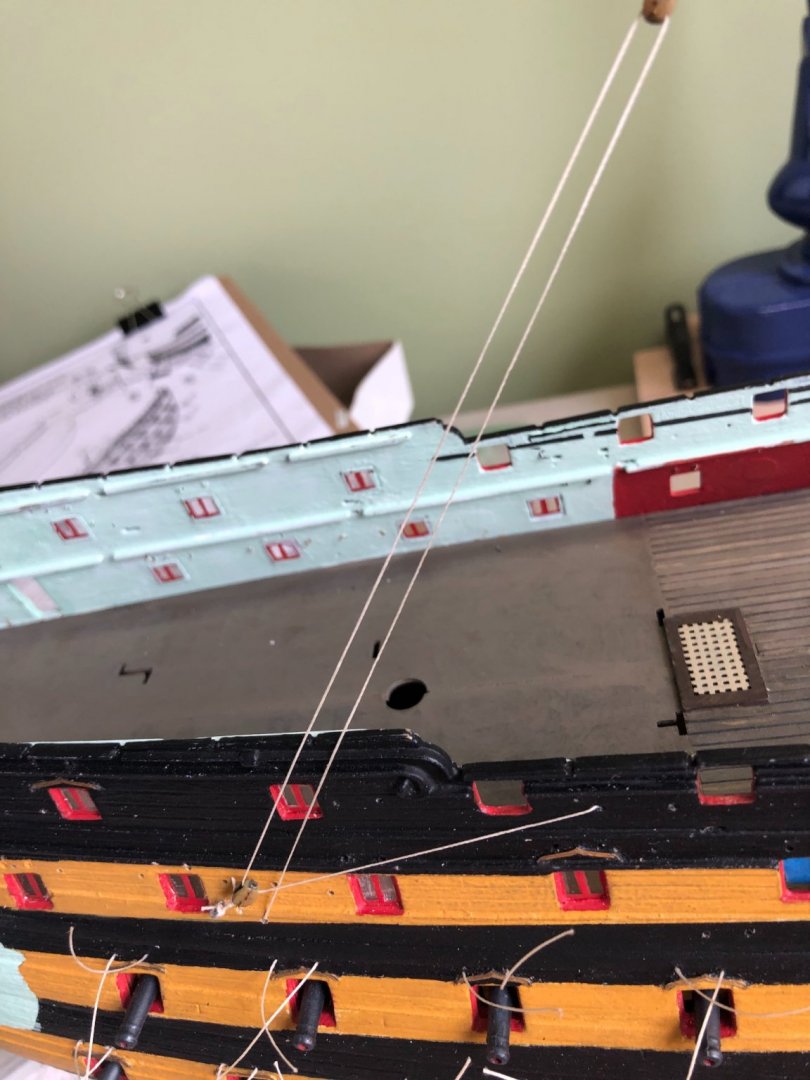
Ok Ian this is my plan for that sheet. Two eyebolts near each other. A long strop with a block attached to one eyebolt. The sheet line tied to the other eyebolt passing through a loose block (for now) that will eventually attach to the sail and then returning back to the block on the strop and through a hole in the hull to a cleat.
-
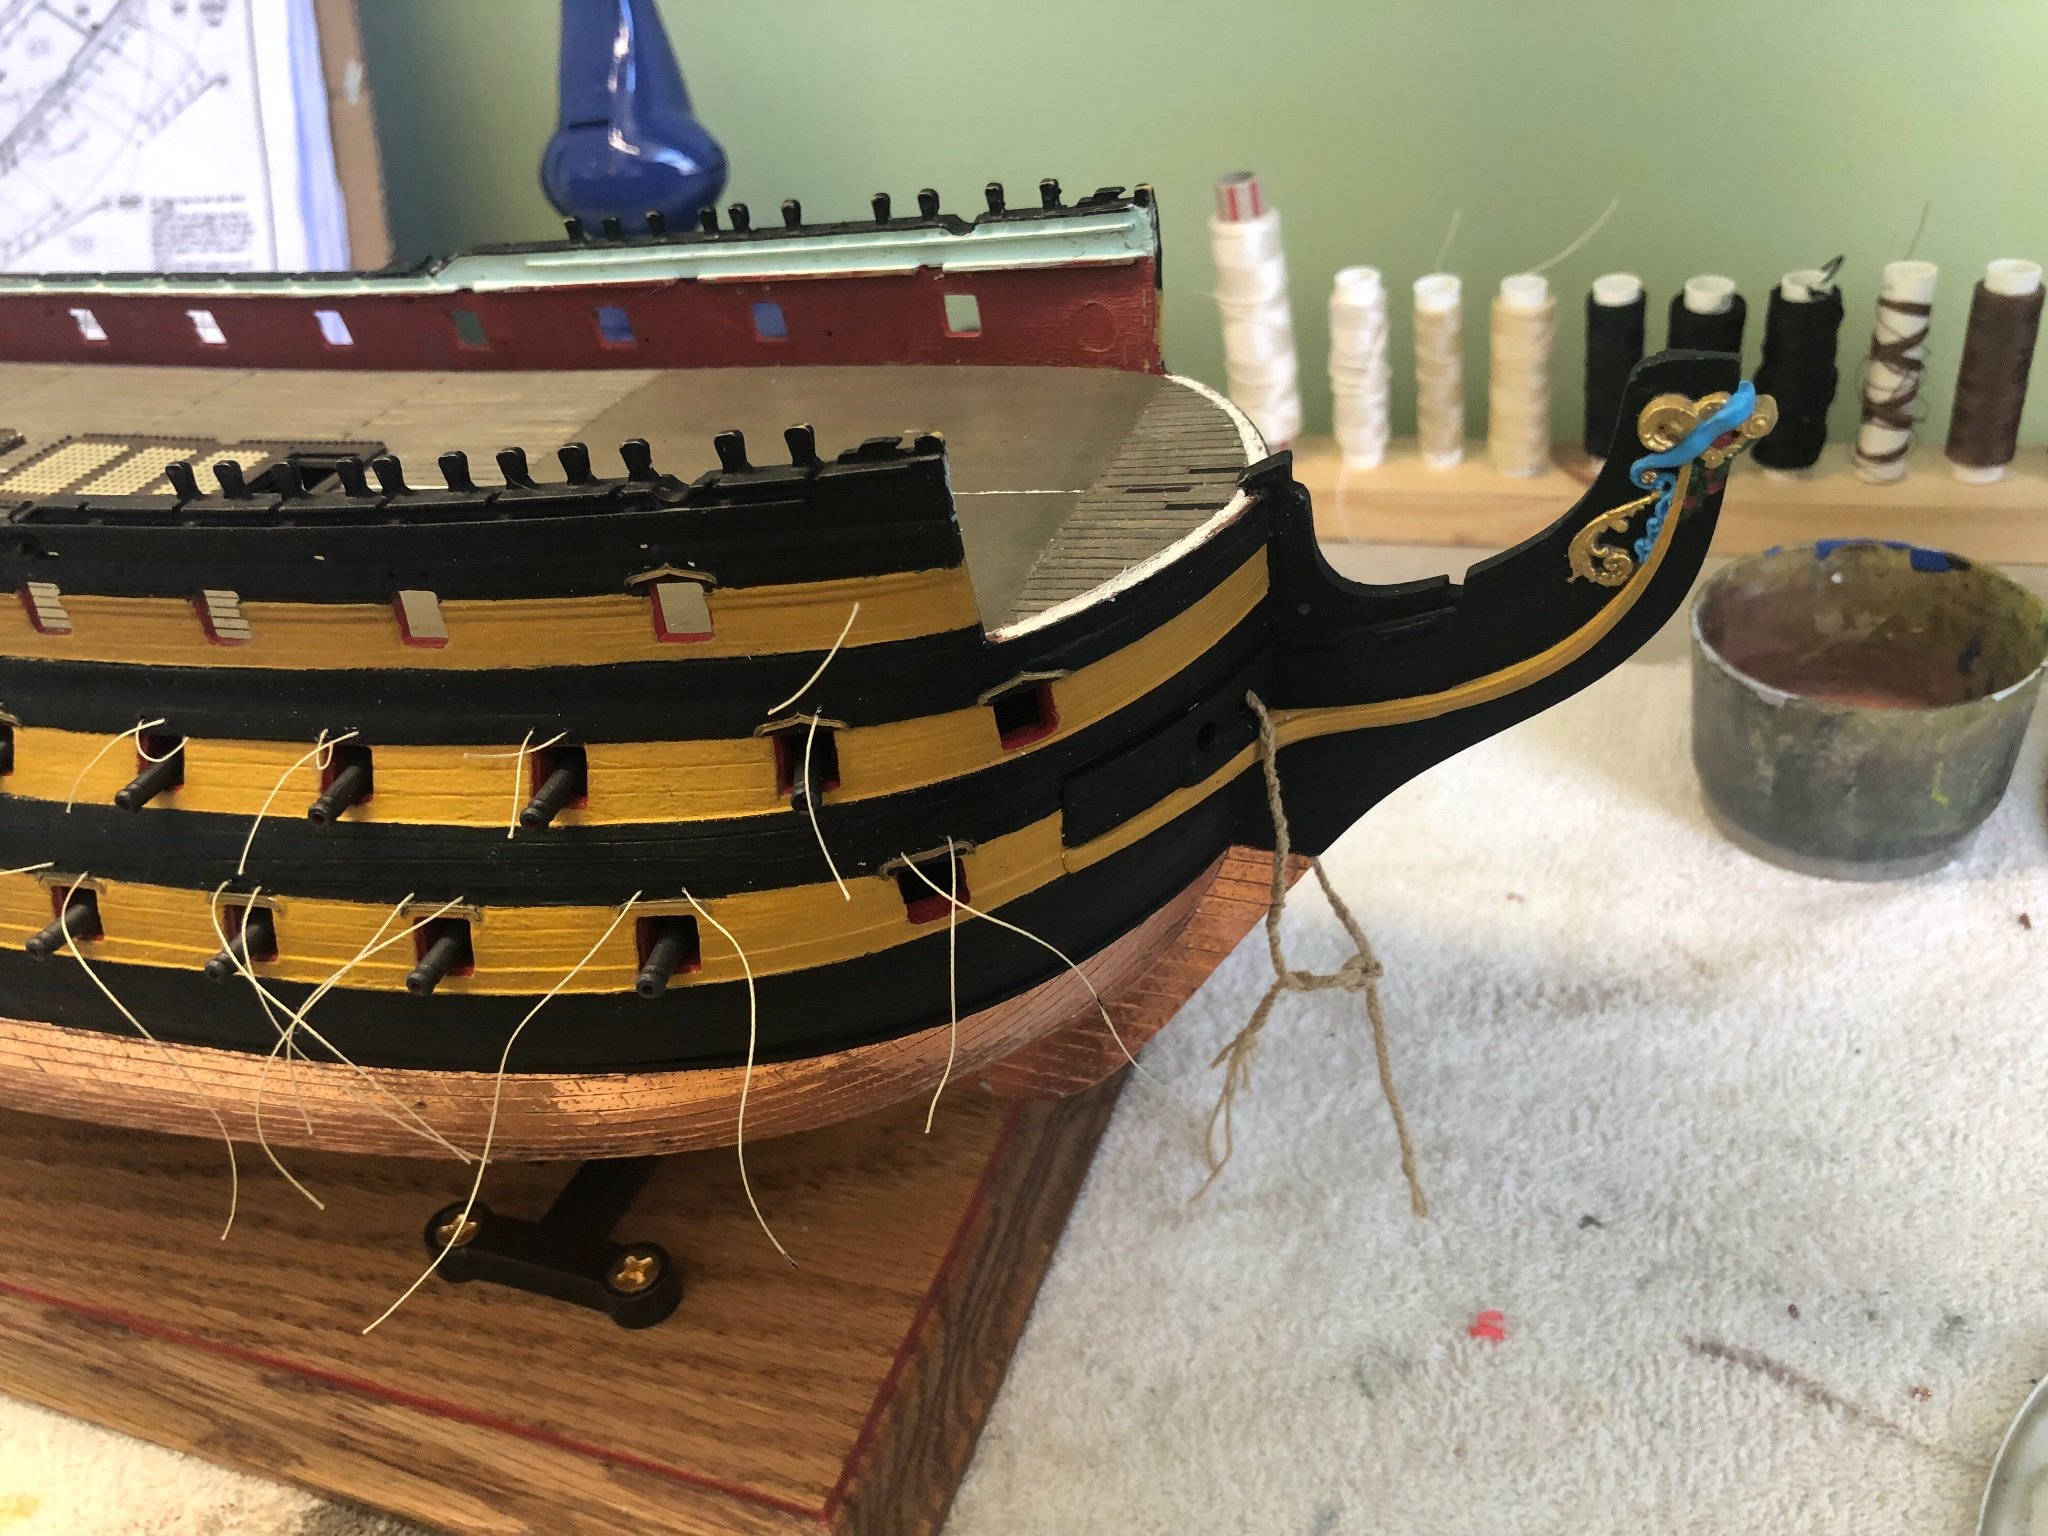
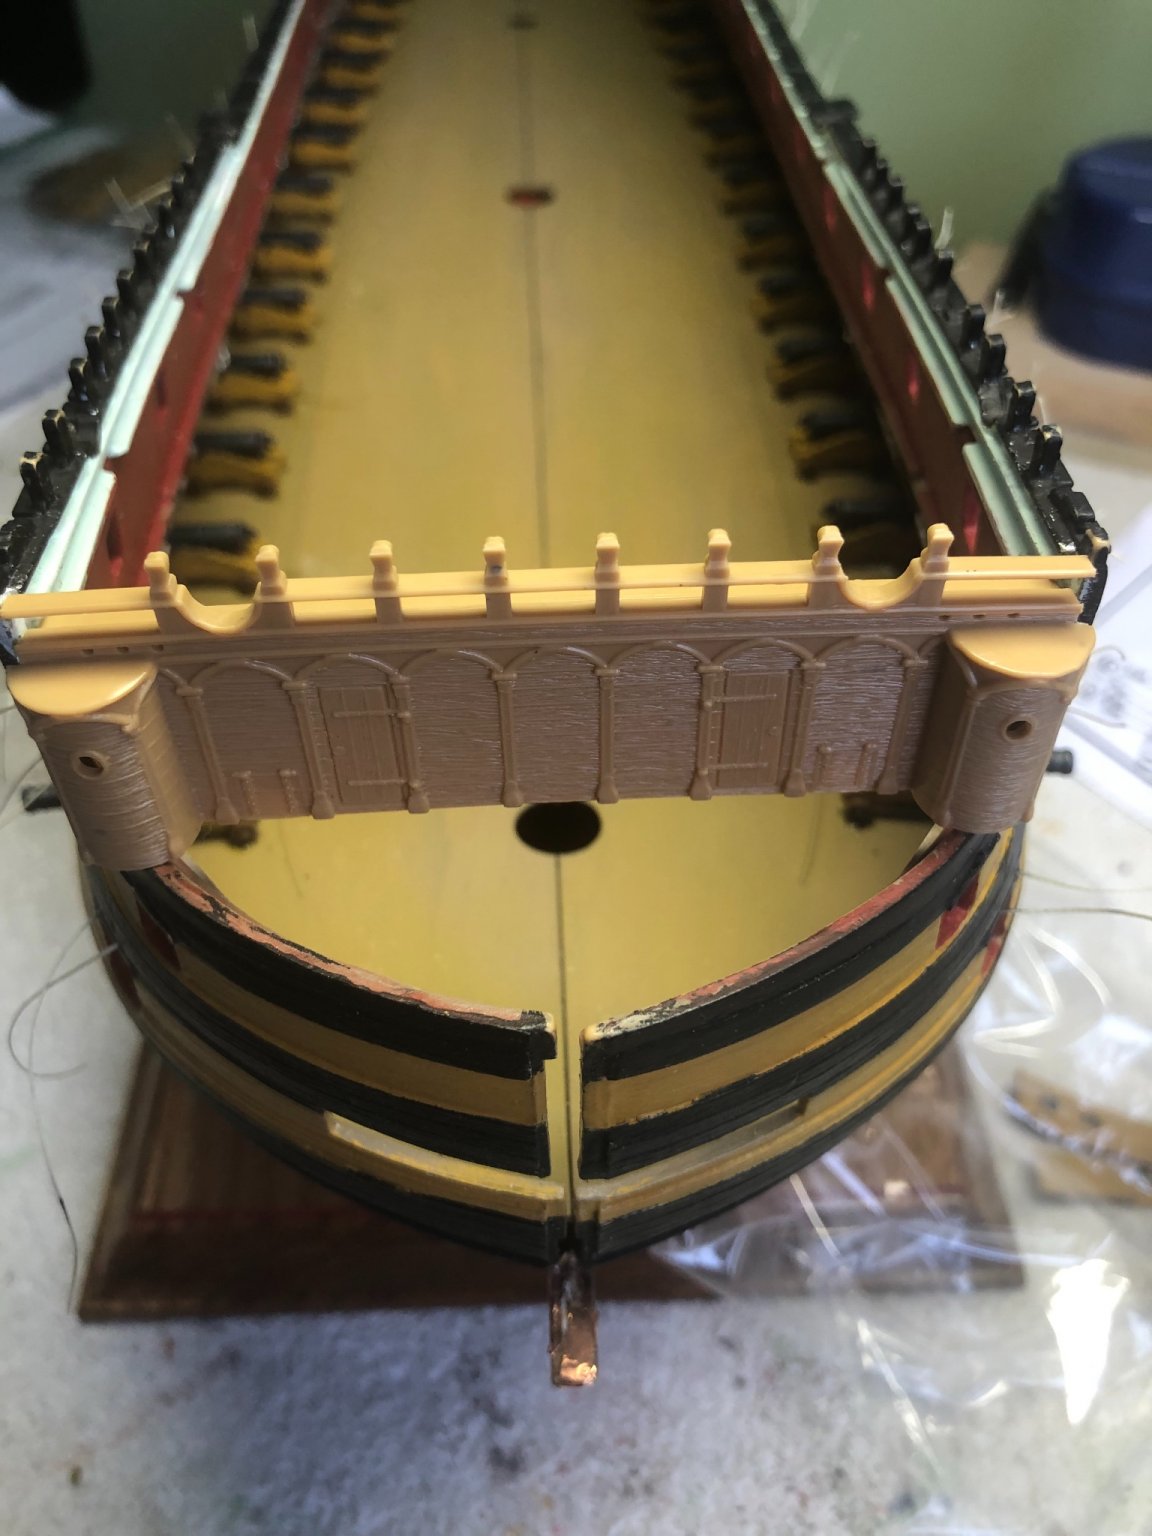
Thanks Ian. I think I might have it now. Hopefully. Your two photos show I have it right on for two of the 3 so far. Will let you know how the back one goes. Added some of the parts to the Upper Deck and worked on the Admiral’s little home! Still want to spruce it up with a little miniature furniture. Added a little black wash to the 3 stairs to show some wear.


-
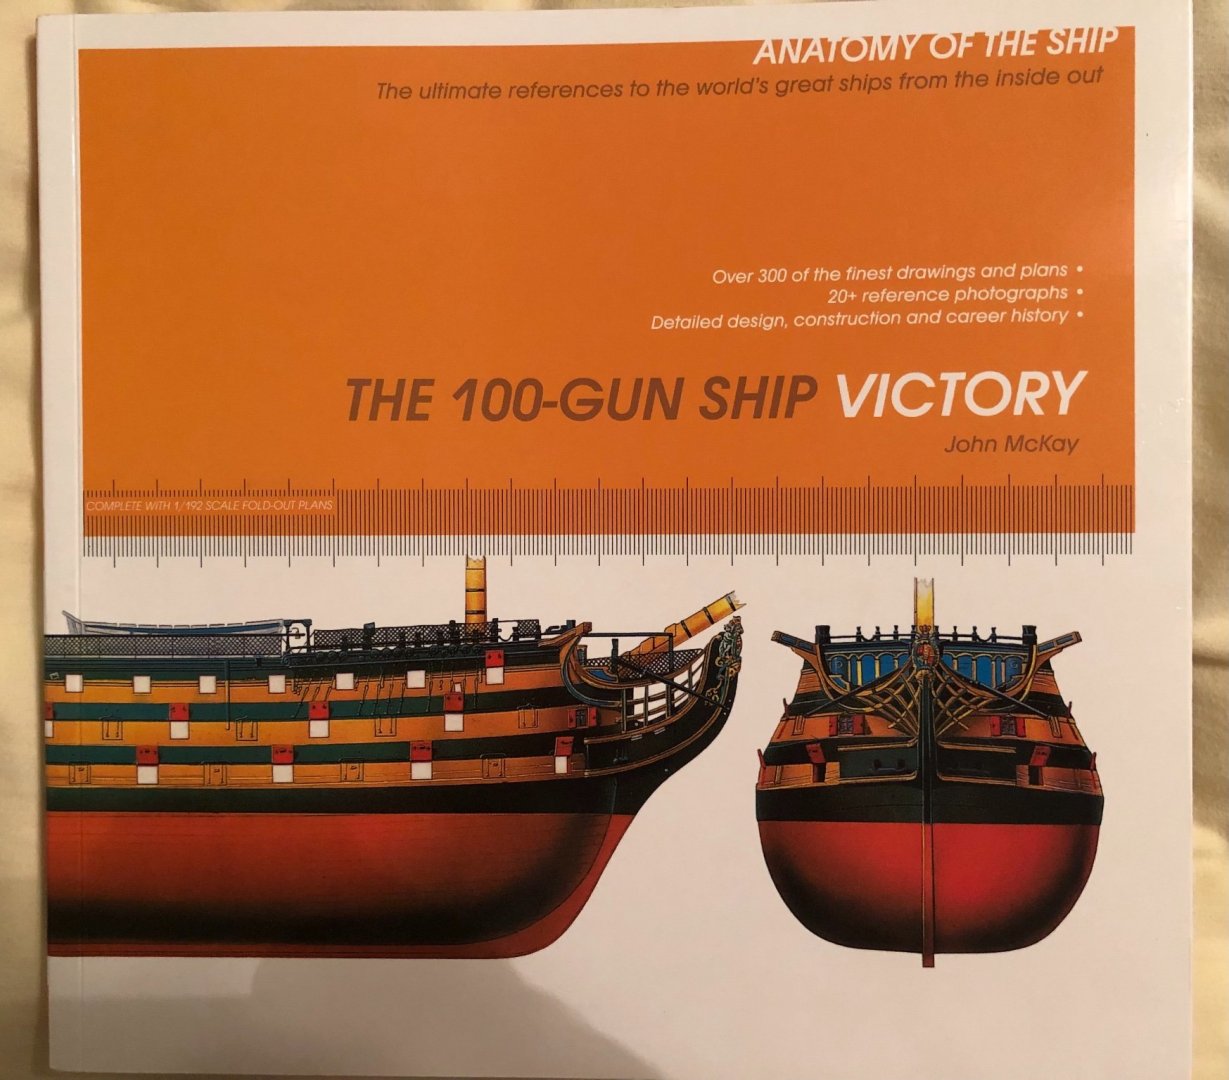
GrandpaPhil is this the book you are talking about? I have it in my Victory library. Will have to give it a good look through.
-
Kevin I think you are right and I will do the same with dry fitting and maybe not analyze so much. I read an interesting comment on another site from someone who is also building the Victory and was struggling with the rigging. He said previously built the Revell 1/96 USS Constitution, a model I have also built. Until I started the Victory the USS Constitution had by far the most detailed rigging of any ship I have built. Don’t know if you have seen it or built it, but the rigging is pretty thorough. It even includes all the foot ropes on the yards and rigging of the cannons on lower decks. What was good with Revell and this kit was a full separate instruction book just on the rigging. It was sequential to the point of saying tie this tan line, or black line of this length from this point to that point. The guy making the comment said he was just going to rig his Victory using the Constitution rigging instructions. Not sure how close a US ship of the time compares to a British ship, but it is a thought. I too have that Constitution rigging manual.
-
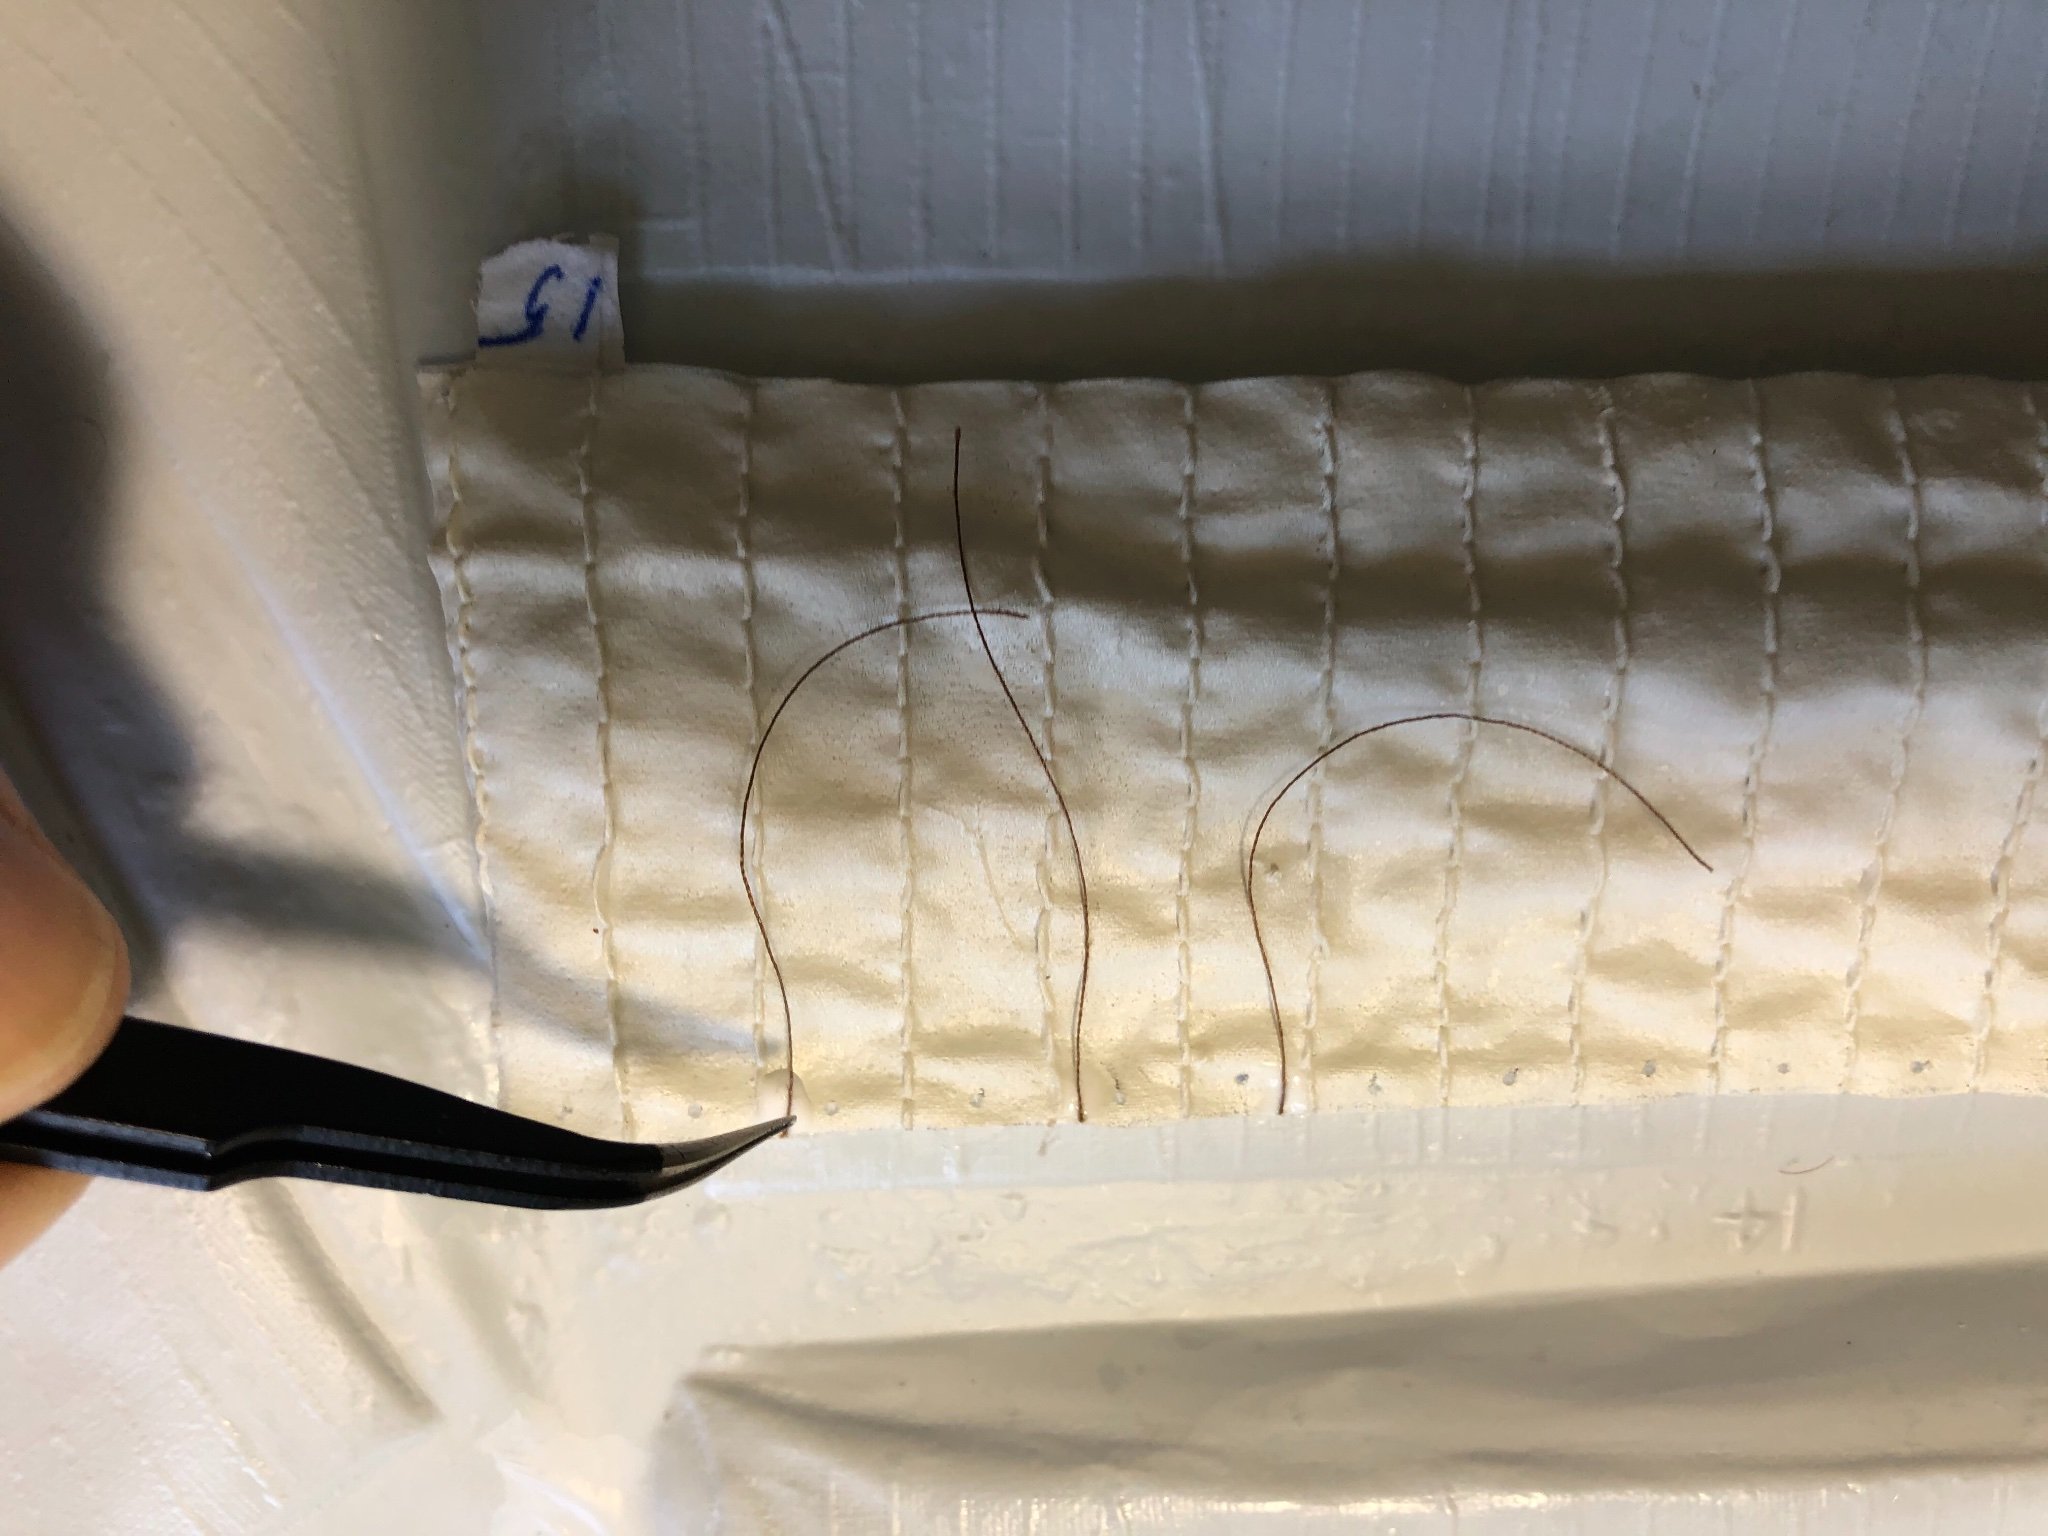
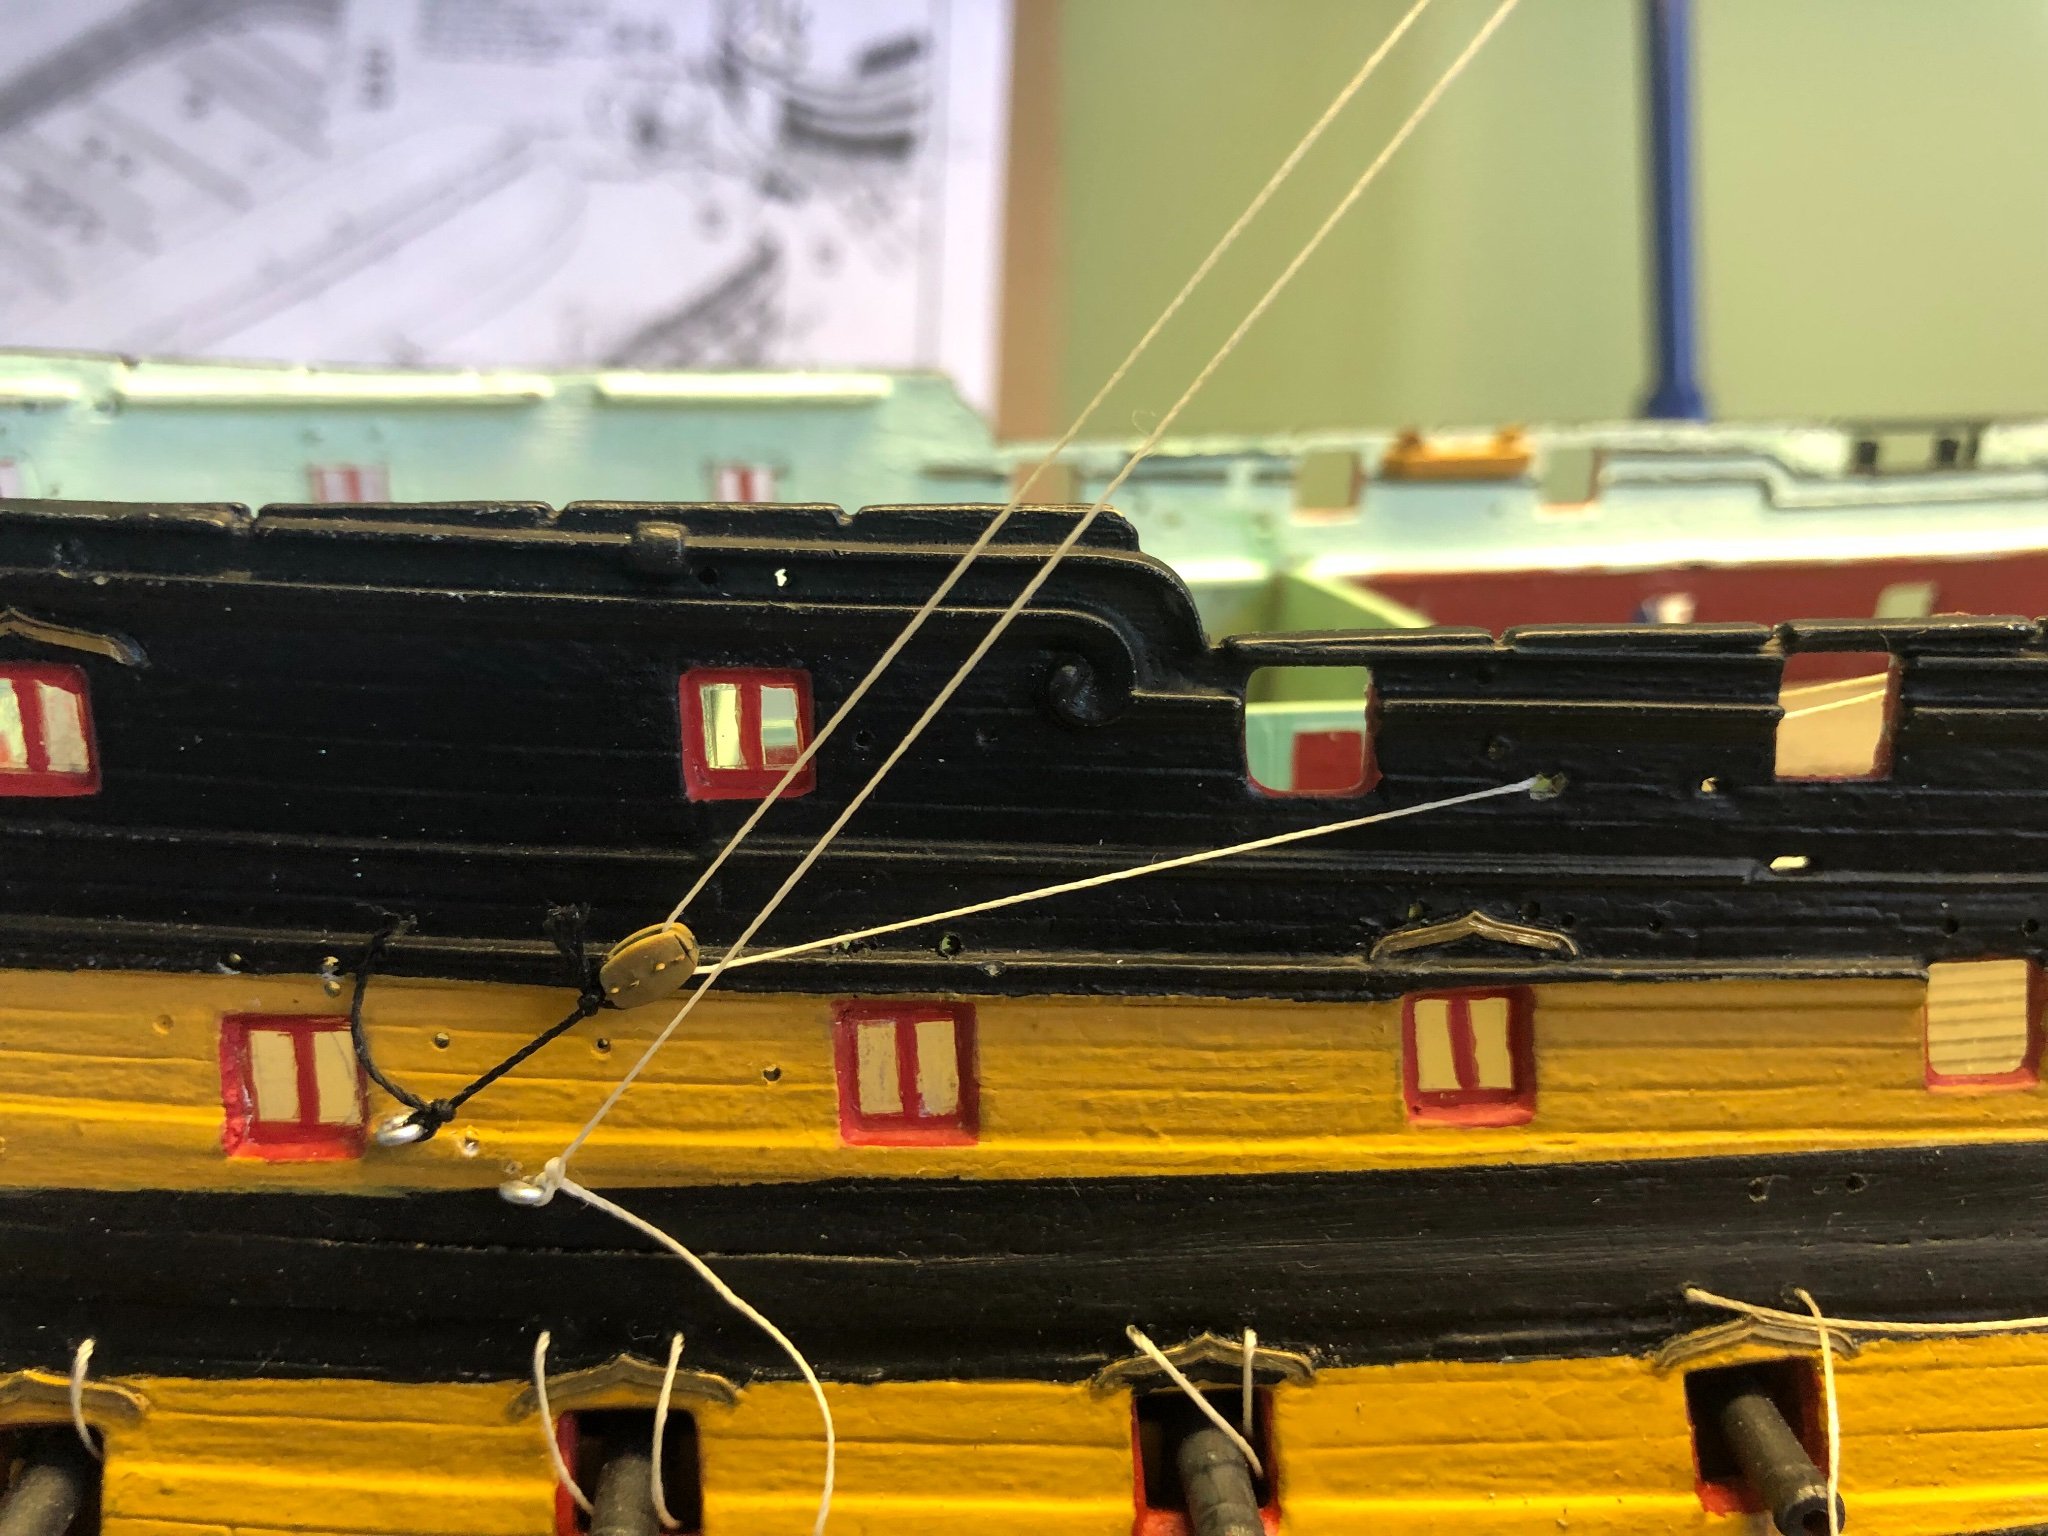
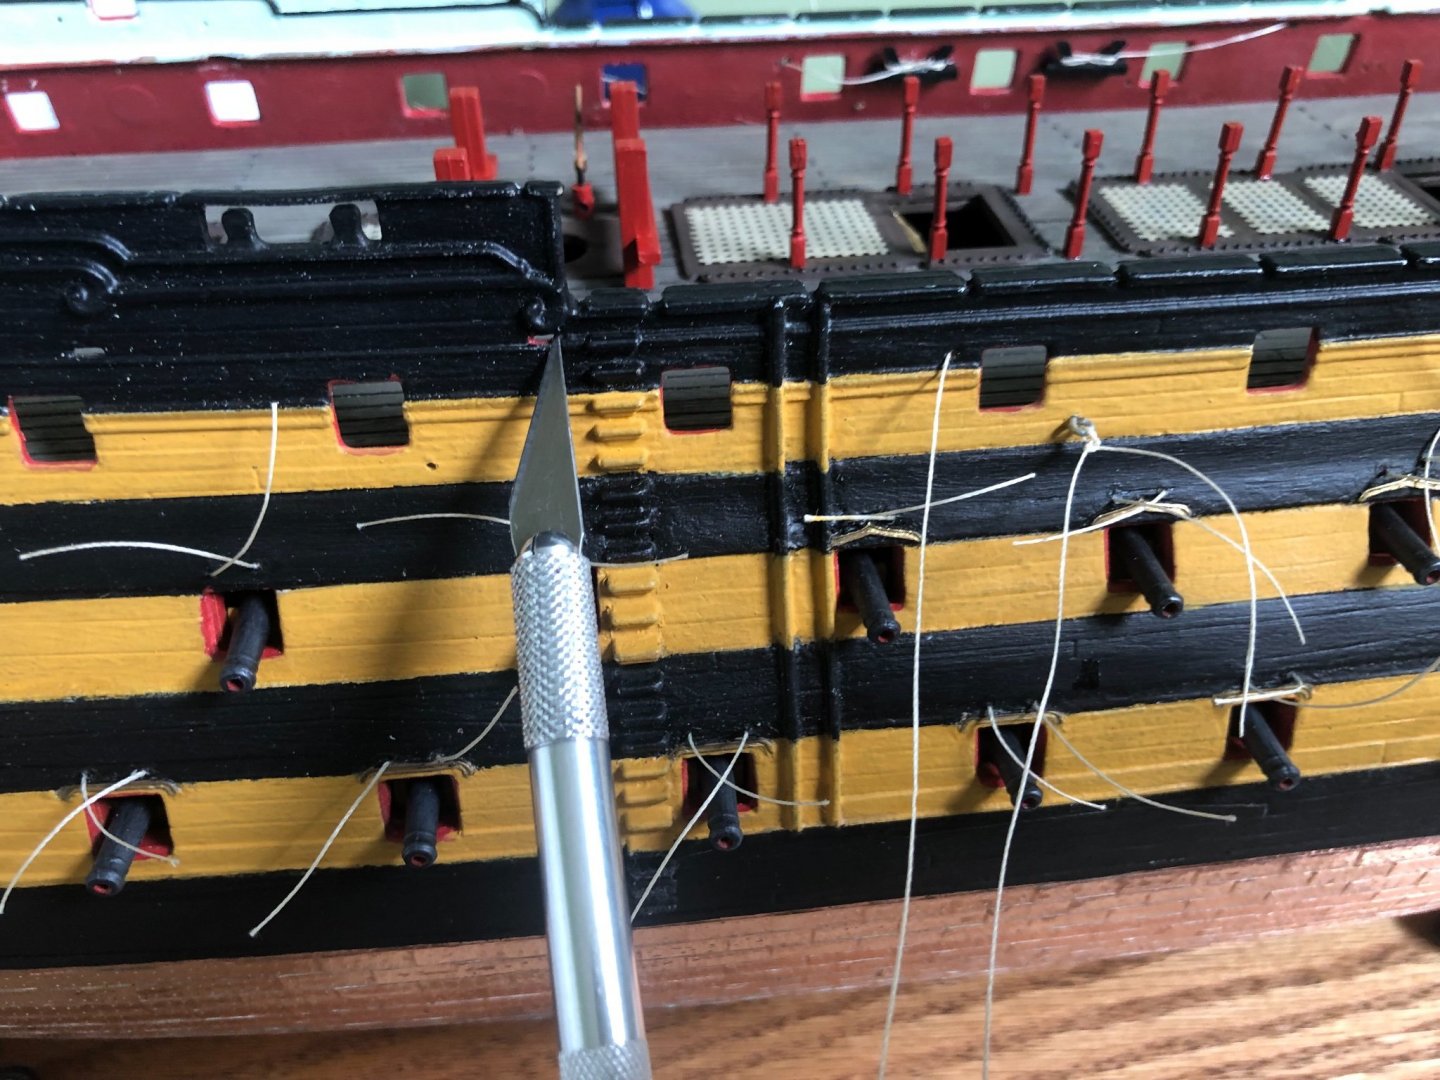
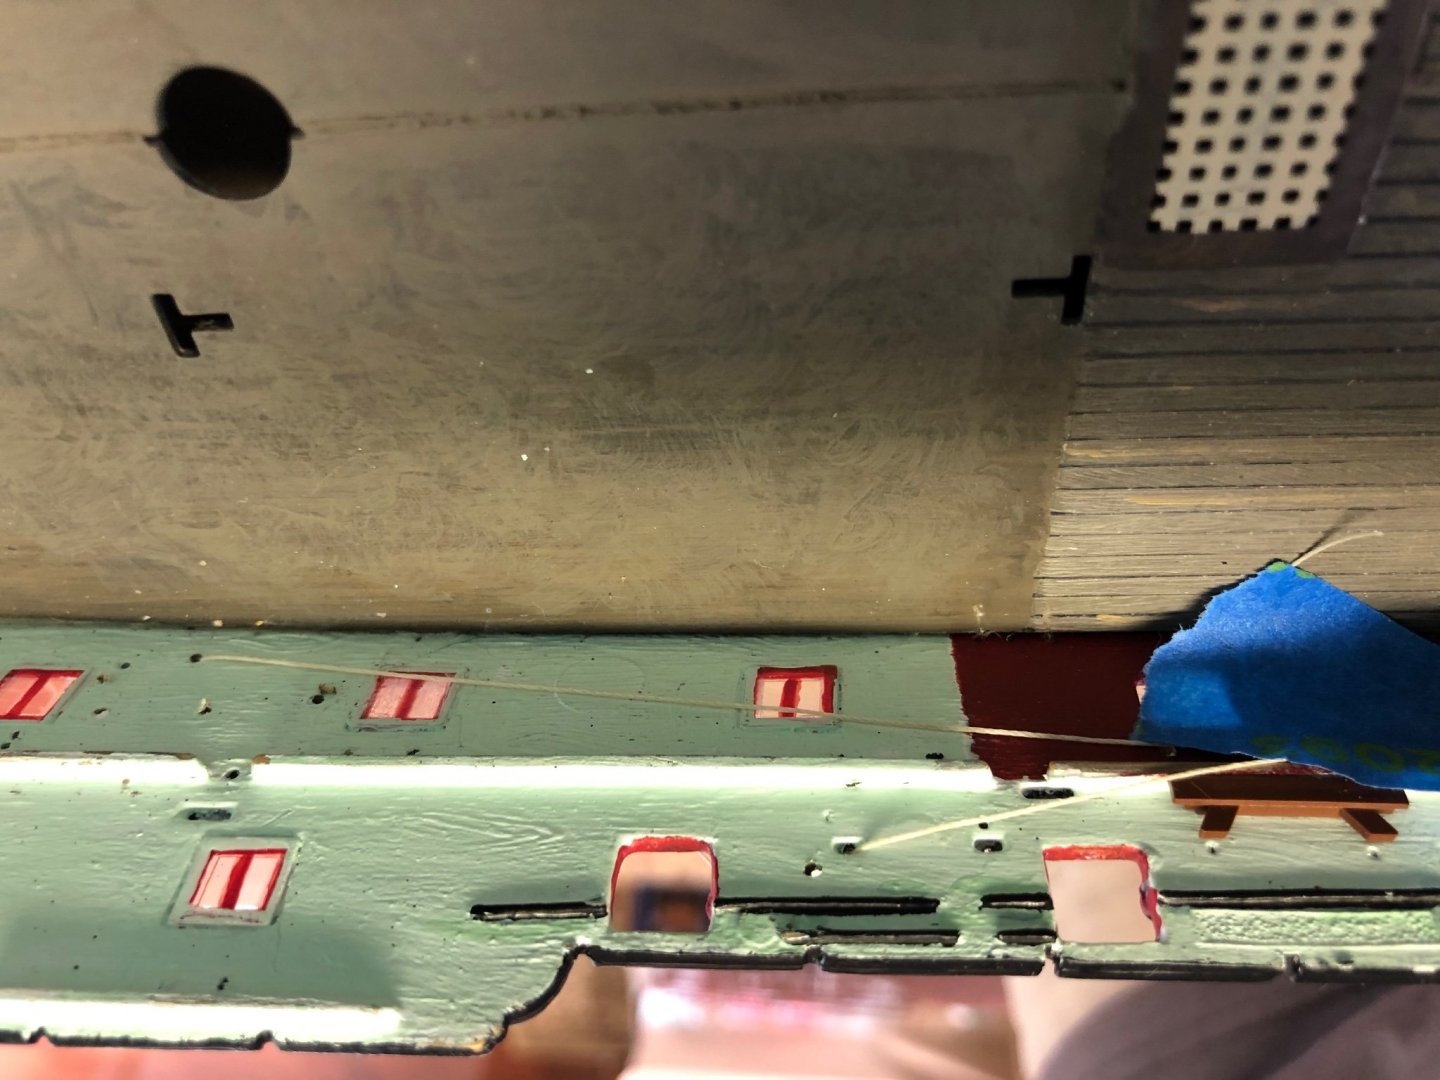
Yes Kevin they are. I got the front two sheets on each side pretty clearly and easily but this back one is a head scratcher. You made a very interesting point in your last comment. The lose end going through the rectangle hole. I was thinking they should do that but when I looked at bishophobby’s pictures I see that he ran his through just one of the other holes. Made me wonder if the rectangular holes served some other purpose. I included a photo bishop’s rigging and mine done like his. I pointed my exacto knife to the rectangle holes. Should I untie these sheets and take the loose end through the holes I am pointing to them to the cleat?
-
Thanks Daniel and I like that application. But still what happens to the end of that line after it passes through that lower block? Any idea?
-
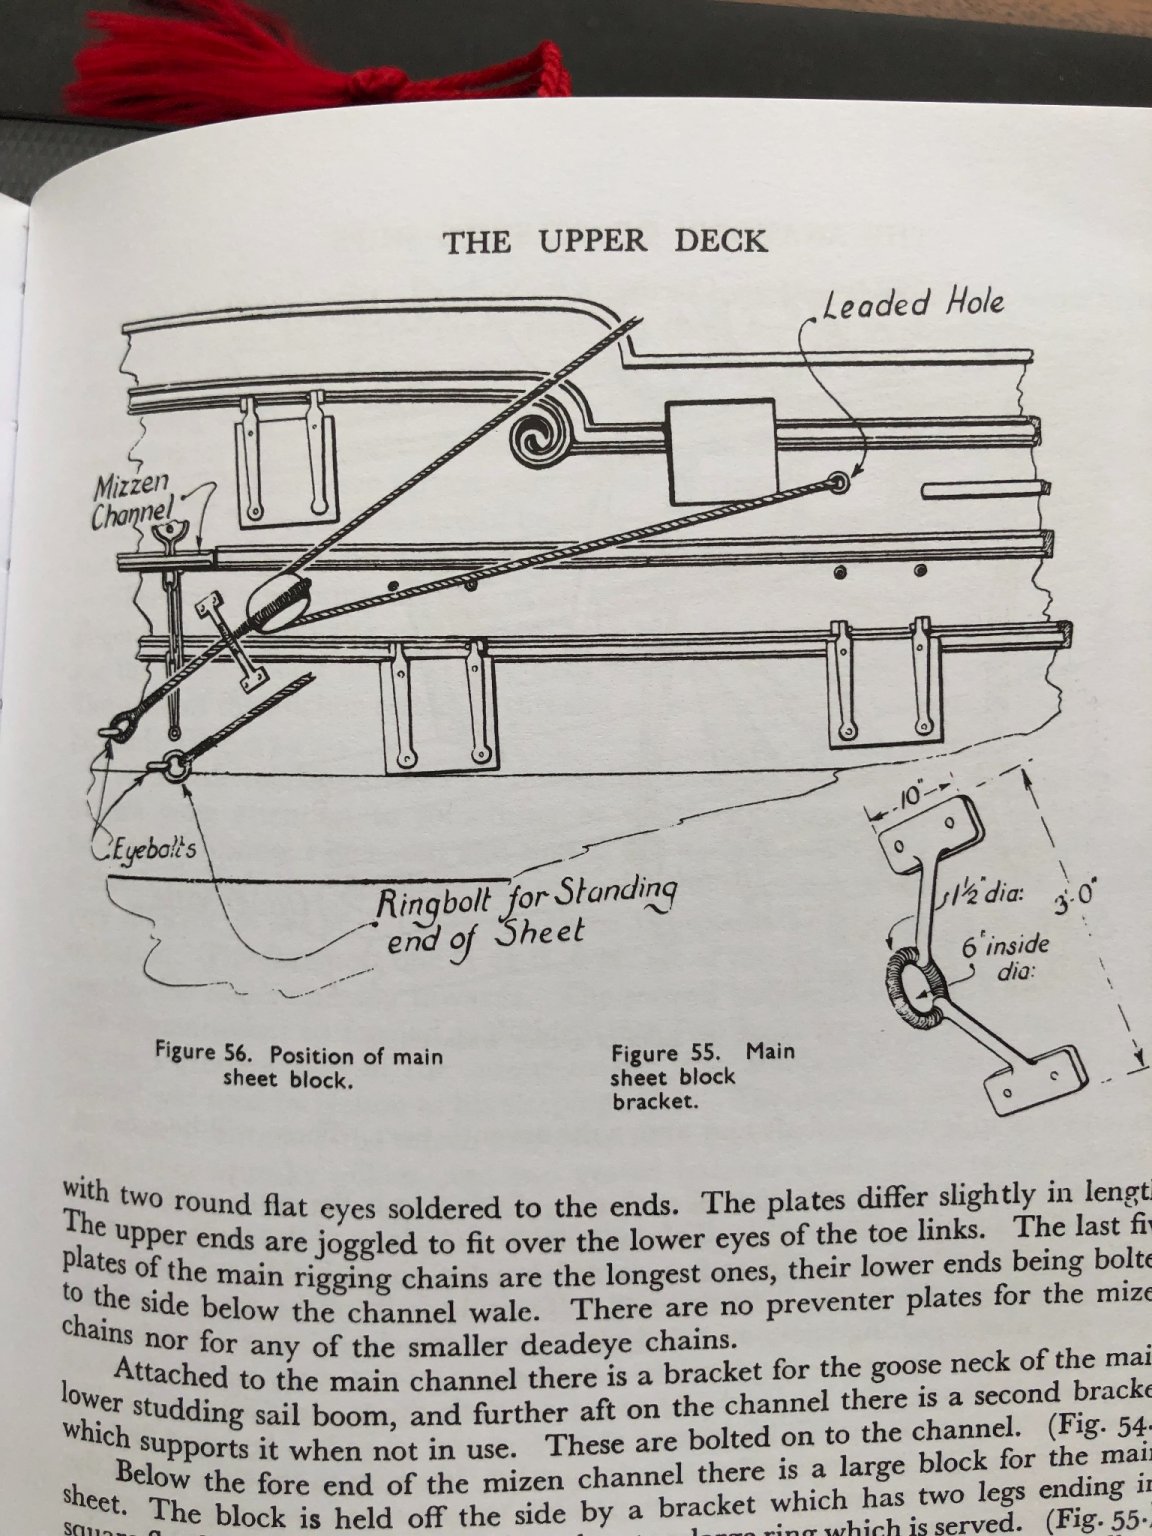
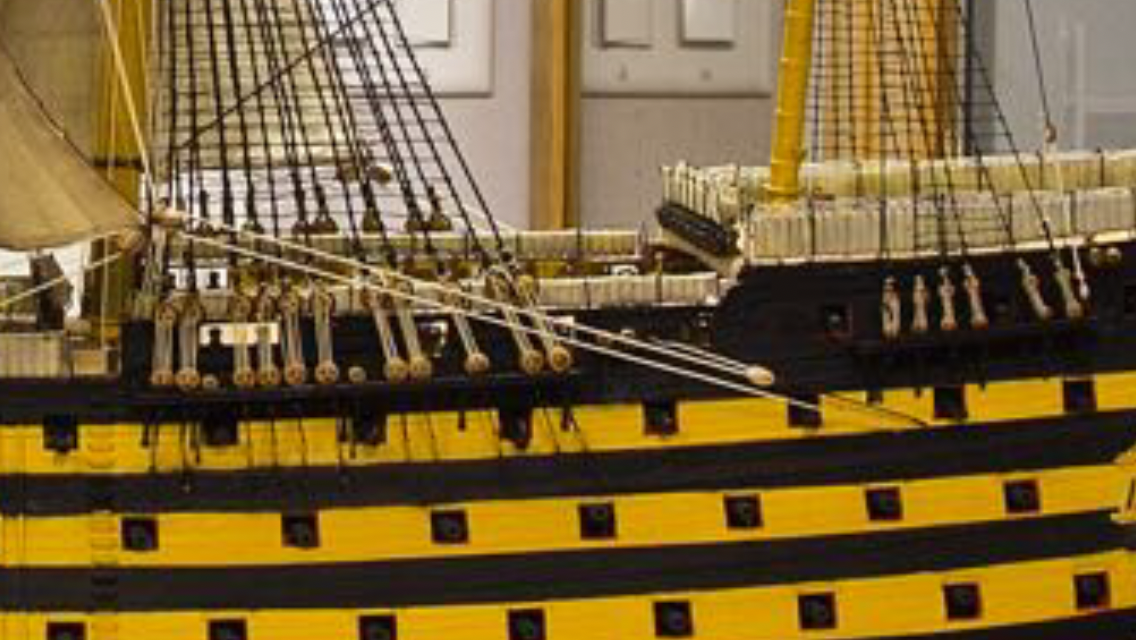
Good morning Marc. I took your advice and looked at bishophobbie’s build log, which I keep bookmarked along with several others. I saved one of his photos for this discussion. Hope that is OK. The photo shows the sheet line I am analyzing. What did he do there? Head scratcher. It appears there is a block attached to the hull by way of a black thread which I assume is to an eyebolt. A tan thread starts at the same area where the eyebolt looks to be. Does it also tie to the eyebolt? Does it pass through a hole in the hull and tie to a cleat inside somewhere? That line then goes up to a block that will be used later with the mast then back down and through the leaded hole and then to the cleat. That part is clear. But what is going on at the start of that line somewhere near the eyebolt? You have the instructions but to make it easier I attached what Heller says to do and a photo of area.

-
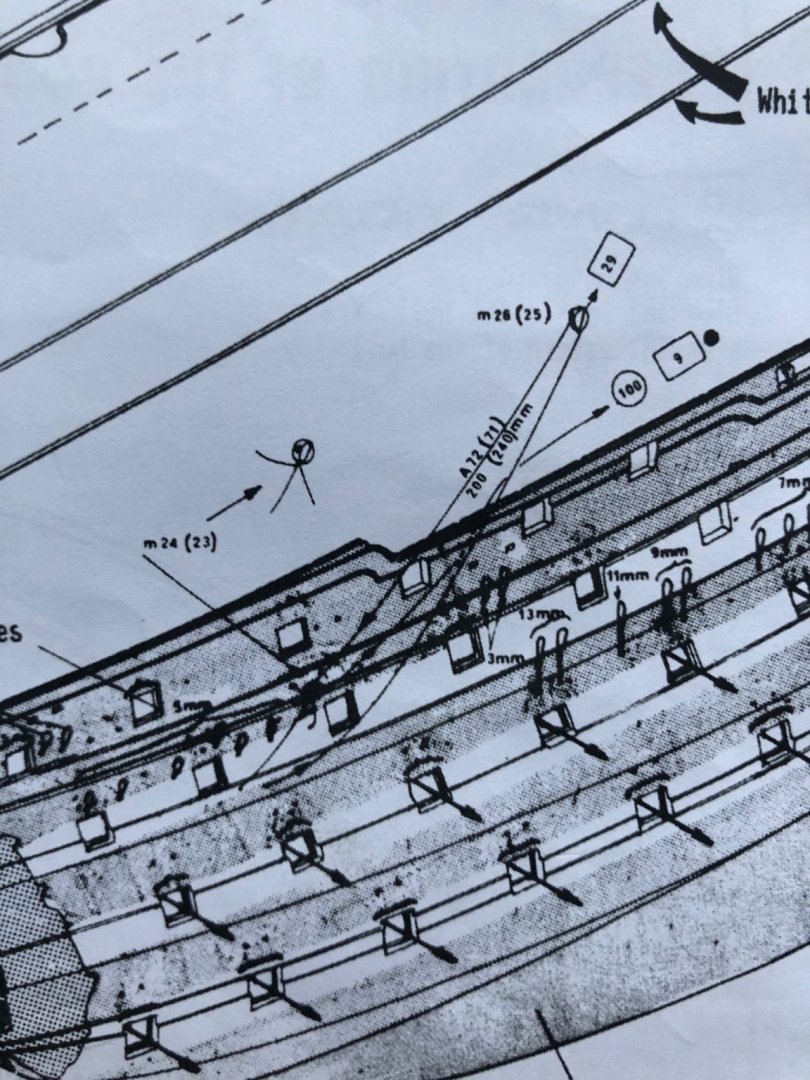
OK my friends before I proceed with with this step, do I have this sheet right? Started at a hole through the hull, went up to a block that will eventually be attached to a yard/sail, then back down through another block fixed to the outside of the hull, then back through another hole in the hull. Both ends attached to a cleat on the inside wall of the hull. Problem I had/have is I have no way of knowing if I am running the sheet line through the correct holes in the side of the ship. The instructions are so vague in that it does not clearly show the specific holes. If it looks like I am going through the wrong holes please let me know. The picture in Longridge’s book is confusing in answering this question.

-
Ian as I used to tell my kids “you hollered before you were even hurt” 😀. I was mistaken and looking at the first few parts (41) wrong. The pins are on there just not where I thought they would be. I was just expecting them to be placed a different way than the pins will have them. Operator error this time. 😀
-
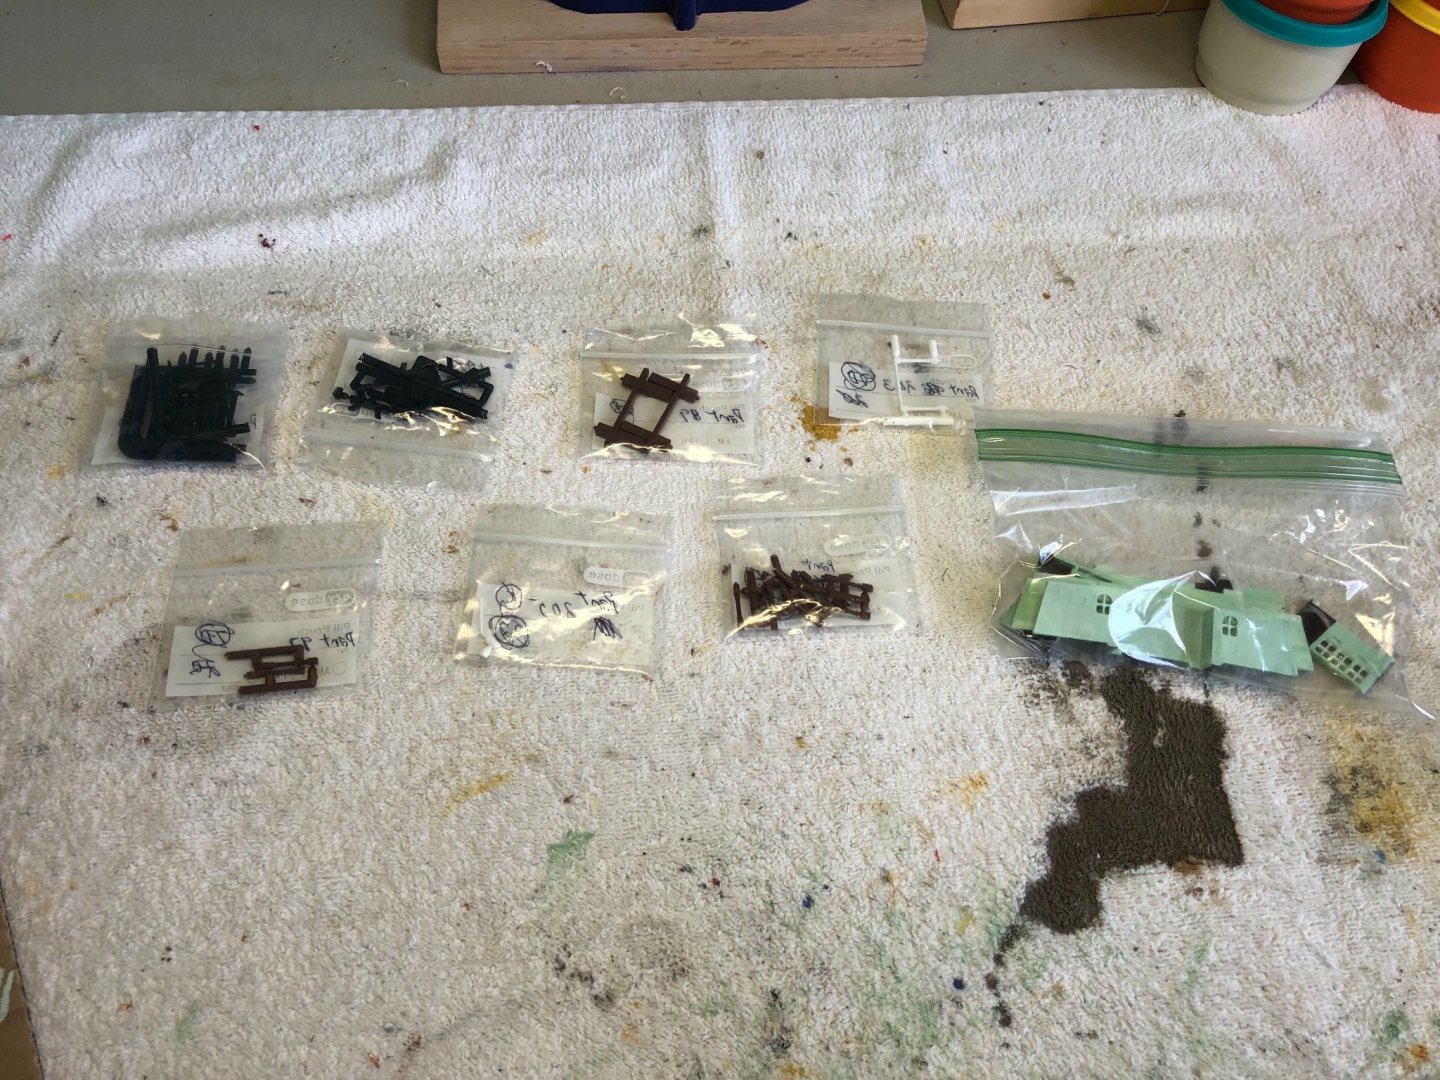
Paragraph 1 of Step 9. All the parts included in that paragraph picked out, packaged, and ready to paint.

-
This is just a curiosity and maybe more a question for the moderators. Do you guys ever get multiple pings of the same notification? I will sometimes open this site and have a high number of notifications. When I click on notifications there will be numerous replications of the same notification. The attached photos are screenshots of a couple examples.


-
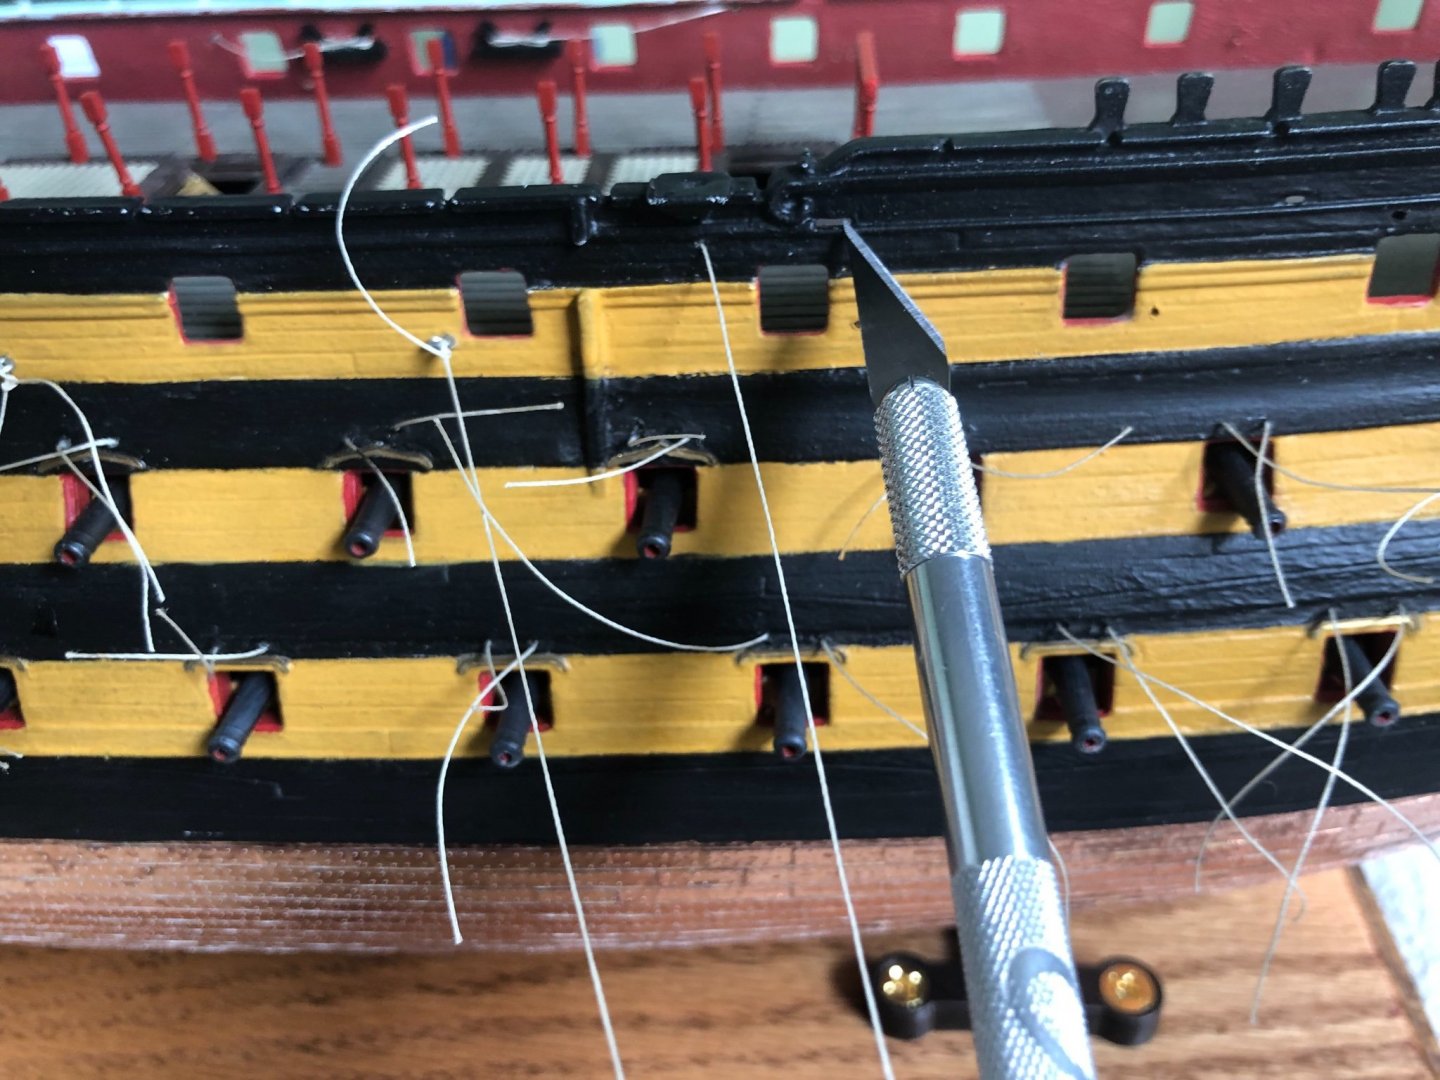
Thank you Kevin. Hopefully it will be as helpful to others as all of the help others have been to me as I have gone through. Something I think I just noticed, and I may be wrong. I picked out the next handful of pieces from the kit to begin painting. When I examined them for any needed cleanup I noticed there are no connection type additions. You know like little pins on the bottom of a piece that is to be inserted into a predrilled hole on the ship with glue for a solid joint. These look like they will just be a smooth but joint. Not seen that before on other models.
-
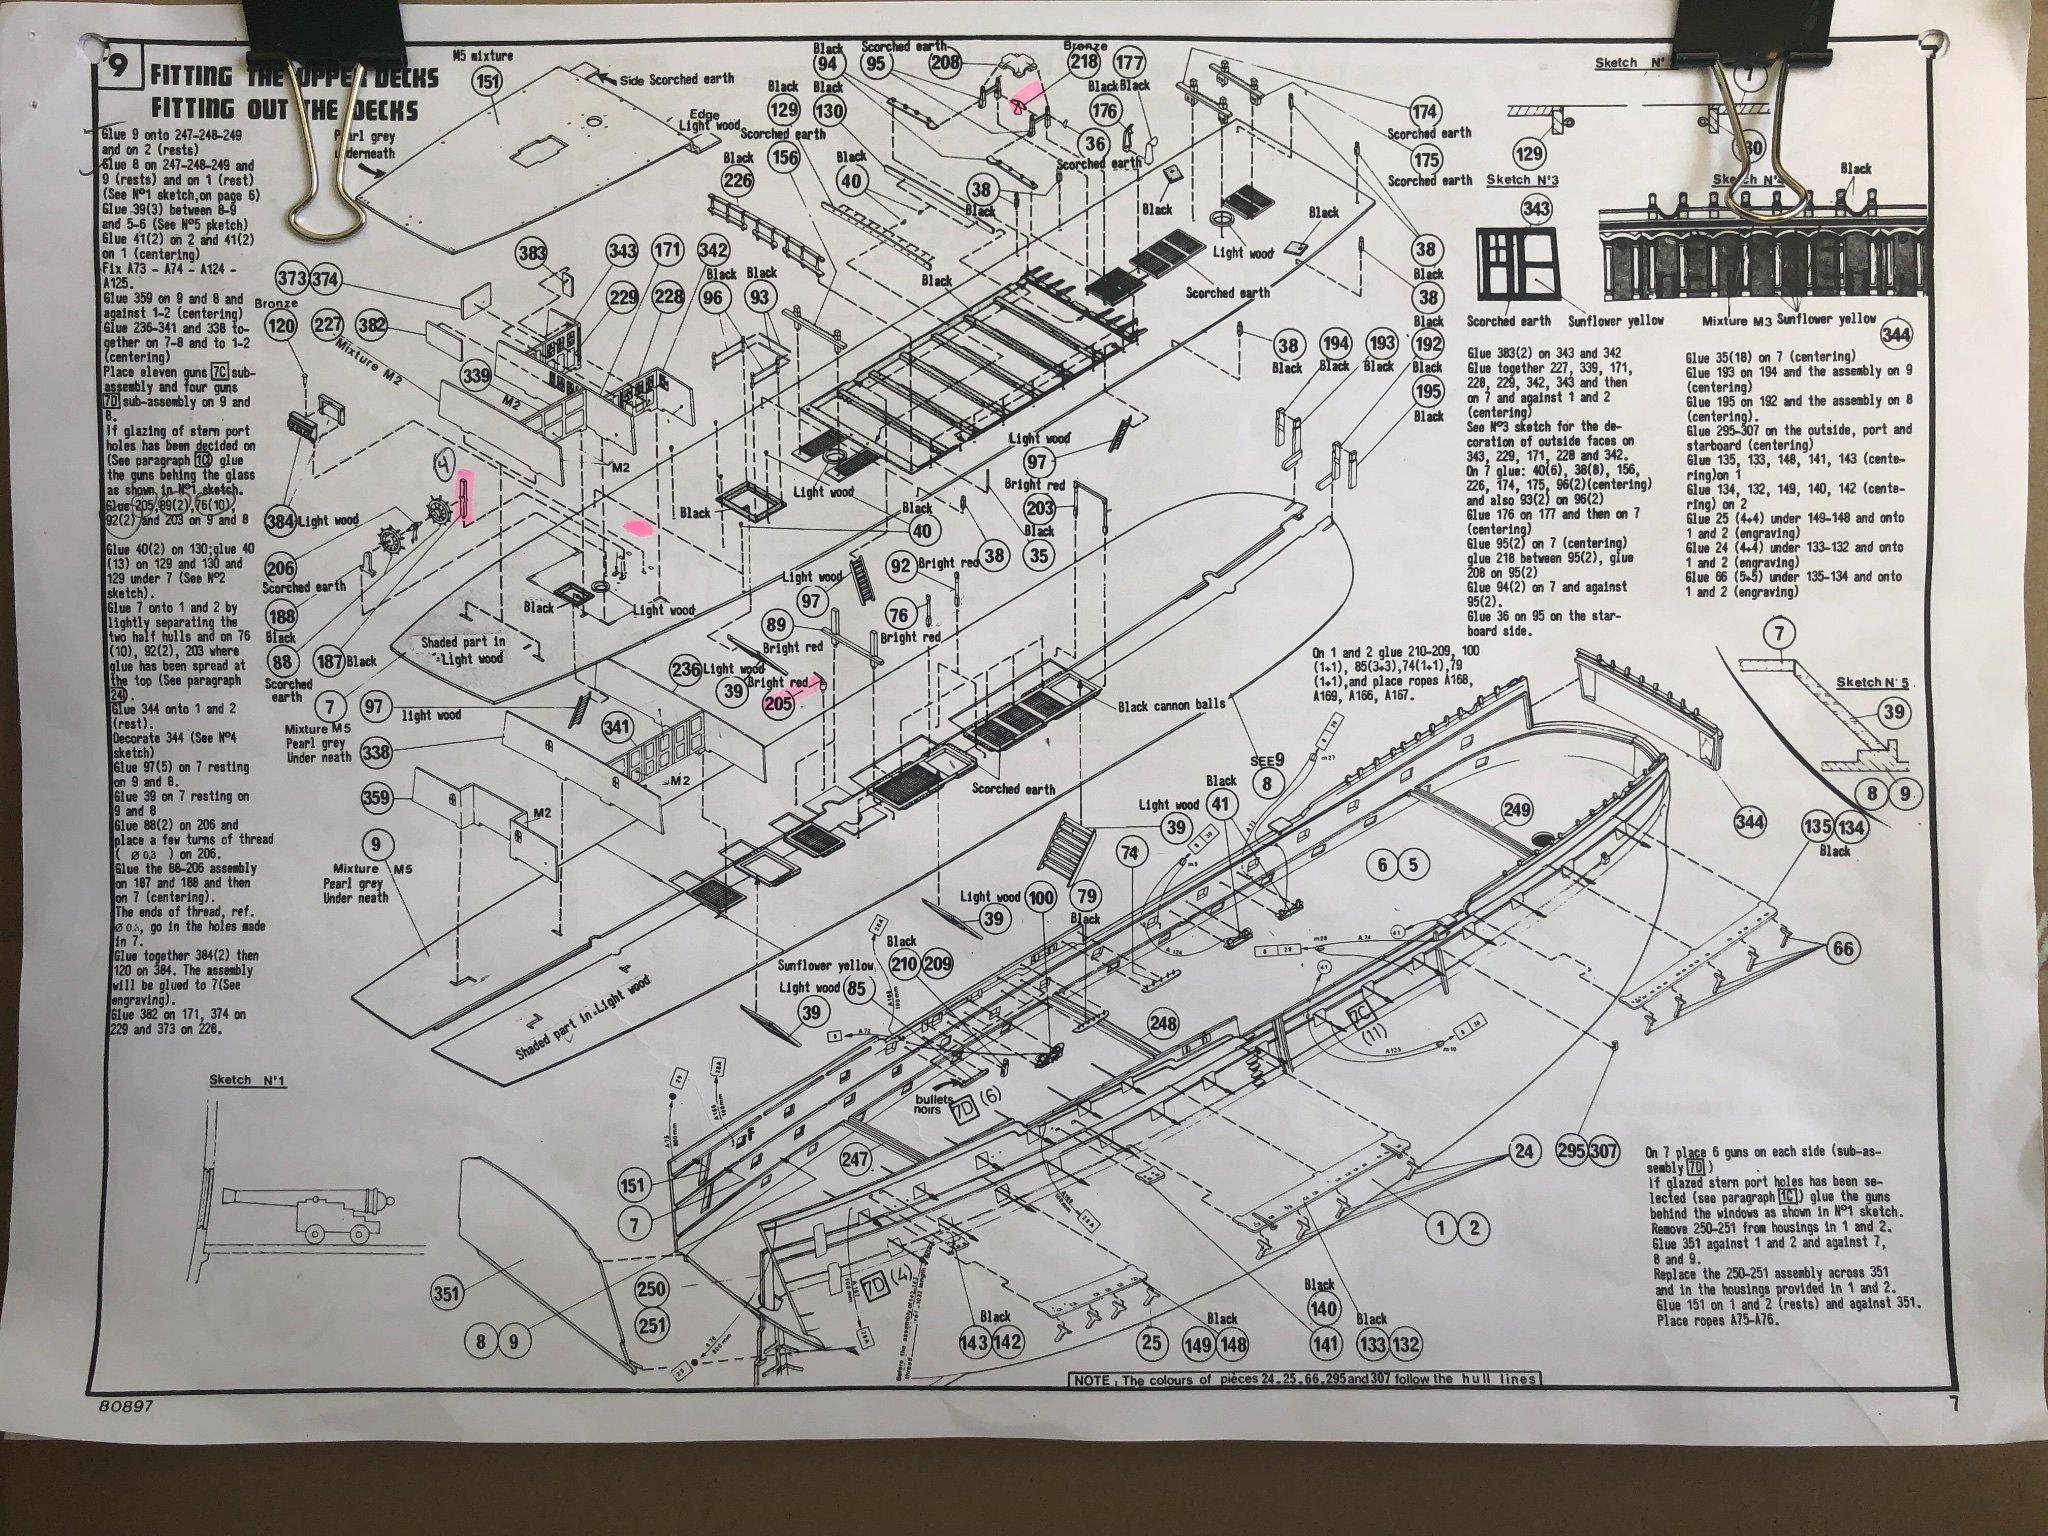
Thanks Ian. My plan so far is to follow step 9 sequence just as written, I hope. For sure going to get those lines in before the quarter deck. I have read ahead the first section of Step 9, located the designated pieces for painting, including 41 and 100, and plan to tinker with that for a few days. Definitely a lot to do in Step 9. Will be referring to Longridge’s book as well as you guys builds. I am finding I have to keep referring to my etched parts from Daniel to make sure I don’t skip a part I got from him. I did a cross reference of my etched parts with the kit instructions and highlighted the part in the instructions that needs to be replaced by a etched part (notice the pink highlighter on the page 9 photo above). Thanks as well Old Collingwood. That explains the overhang. Bill
-
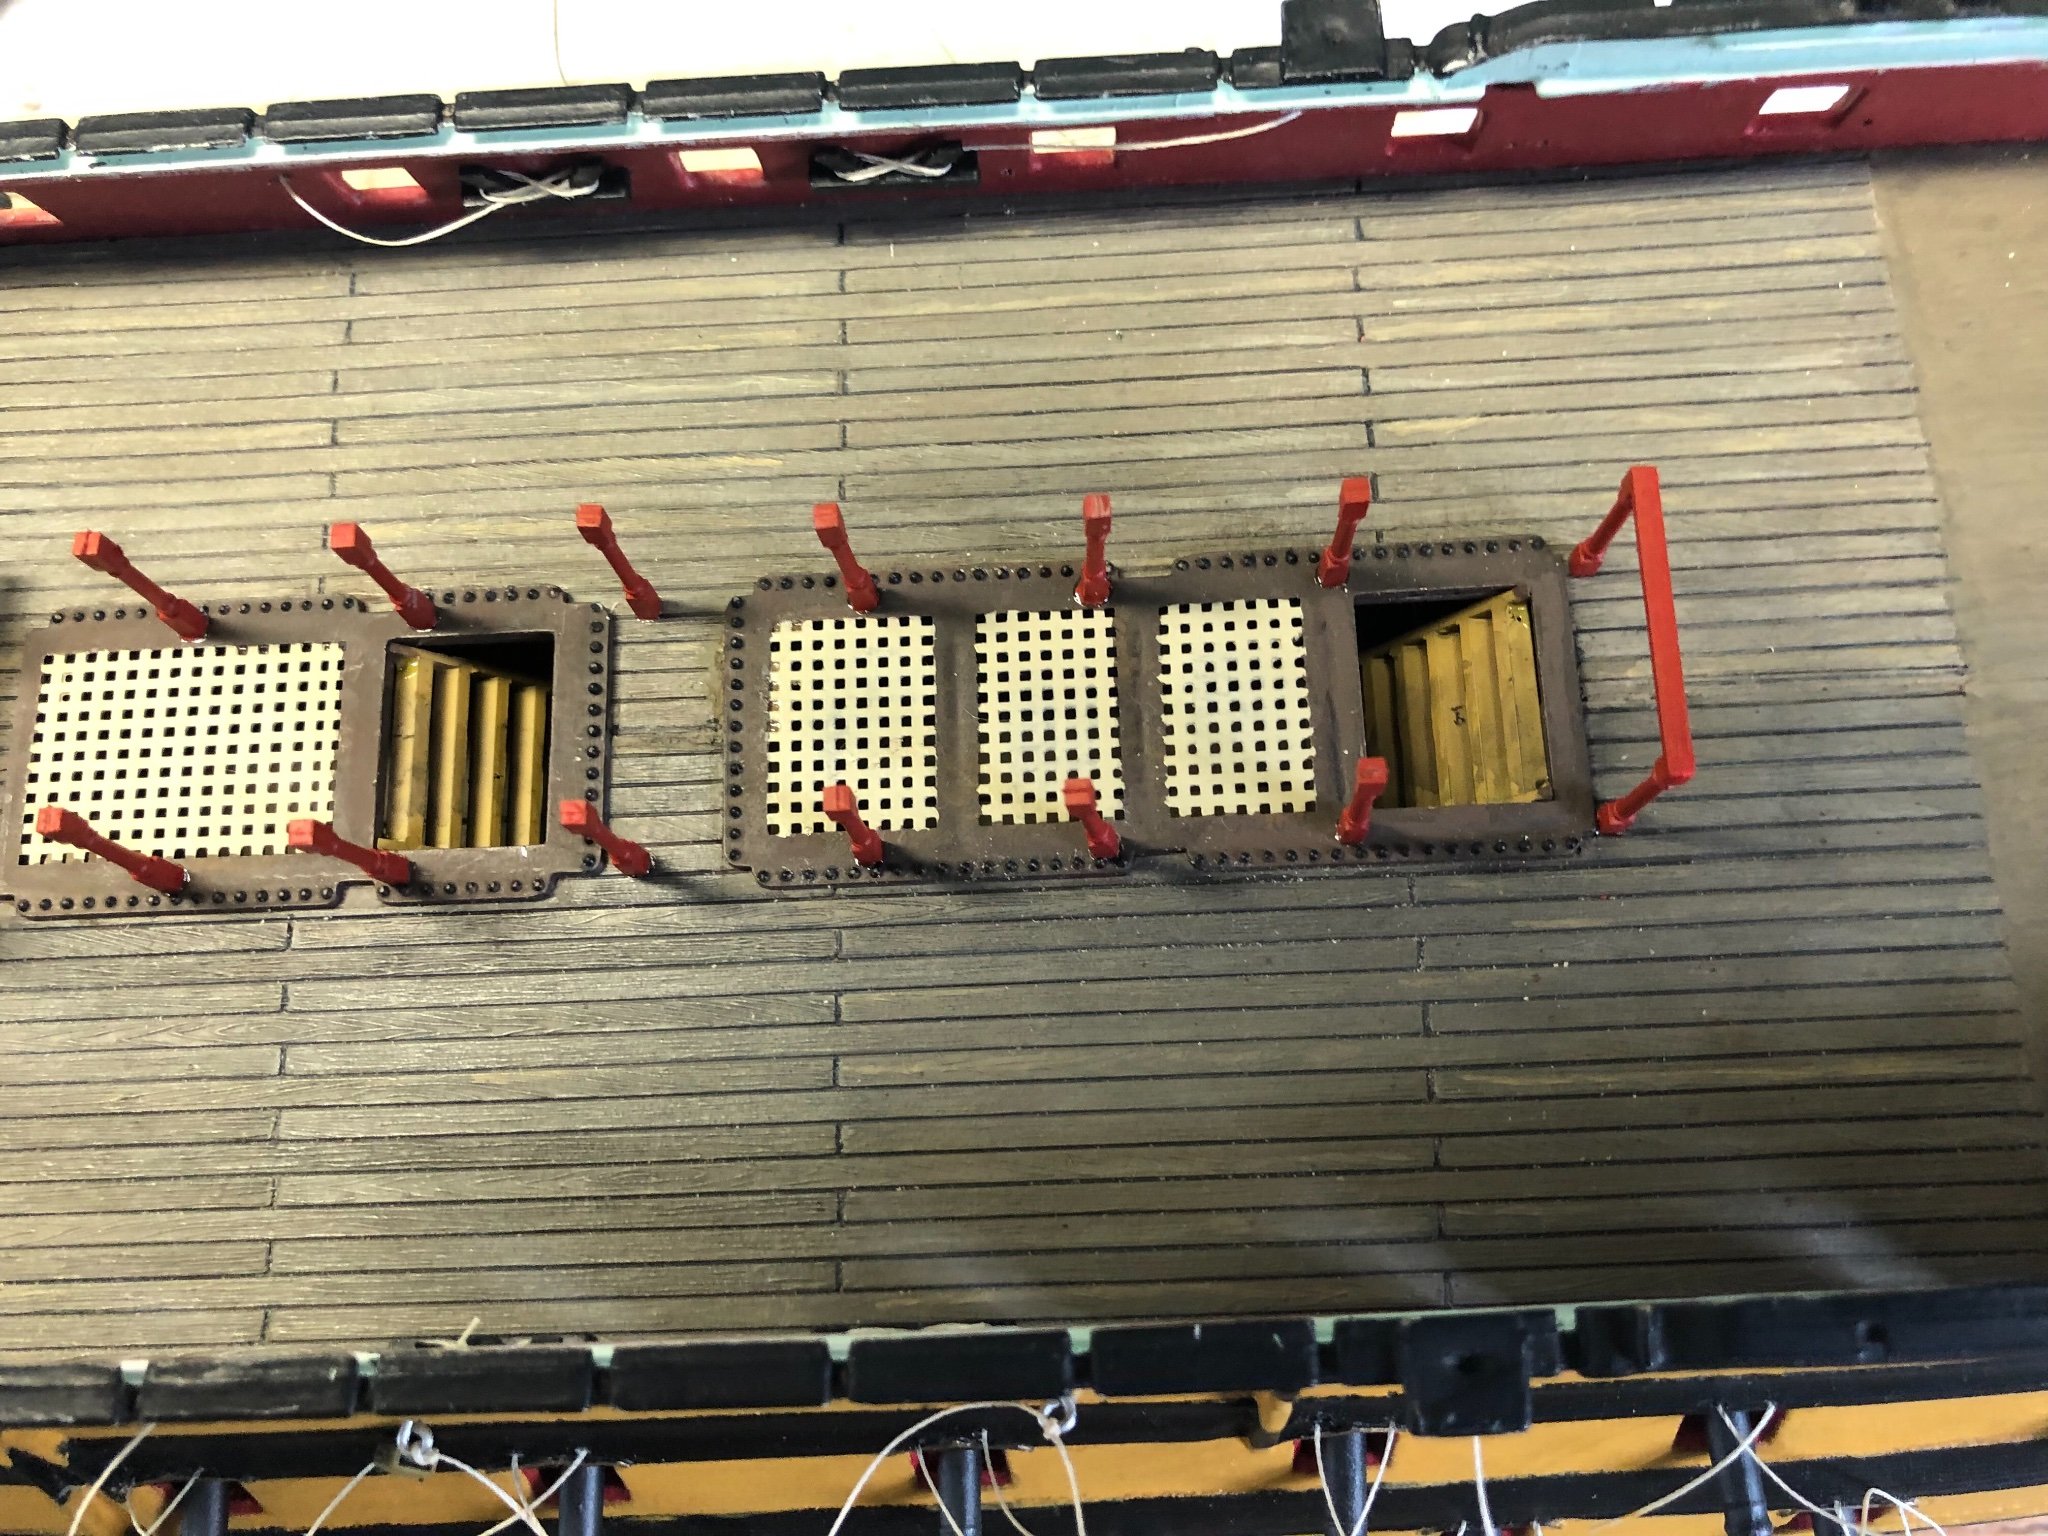
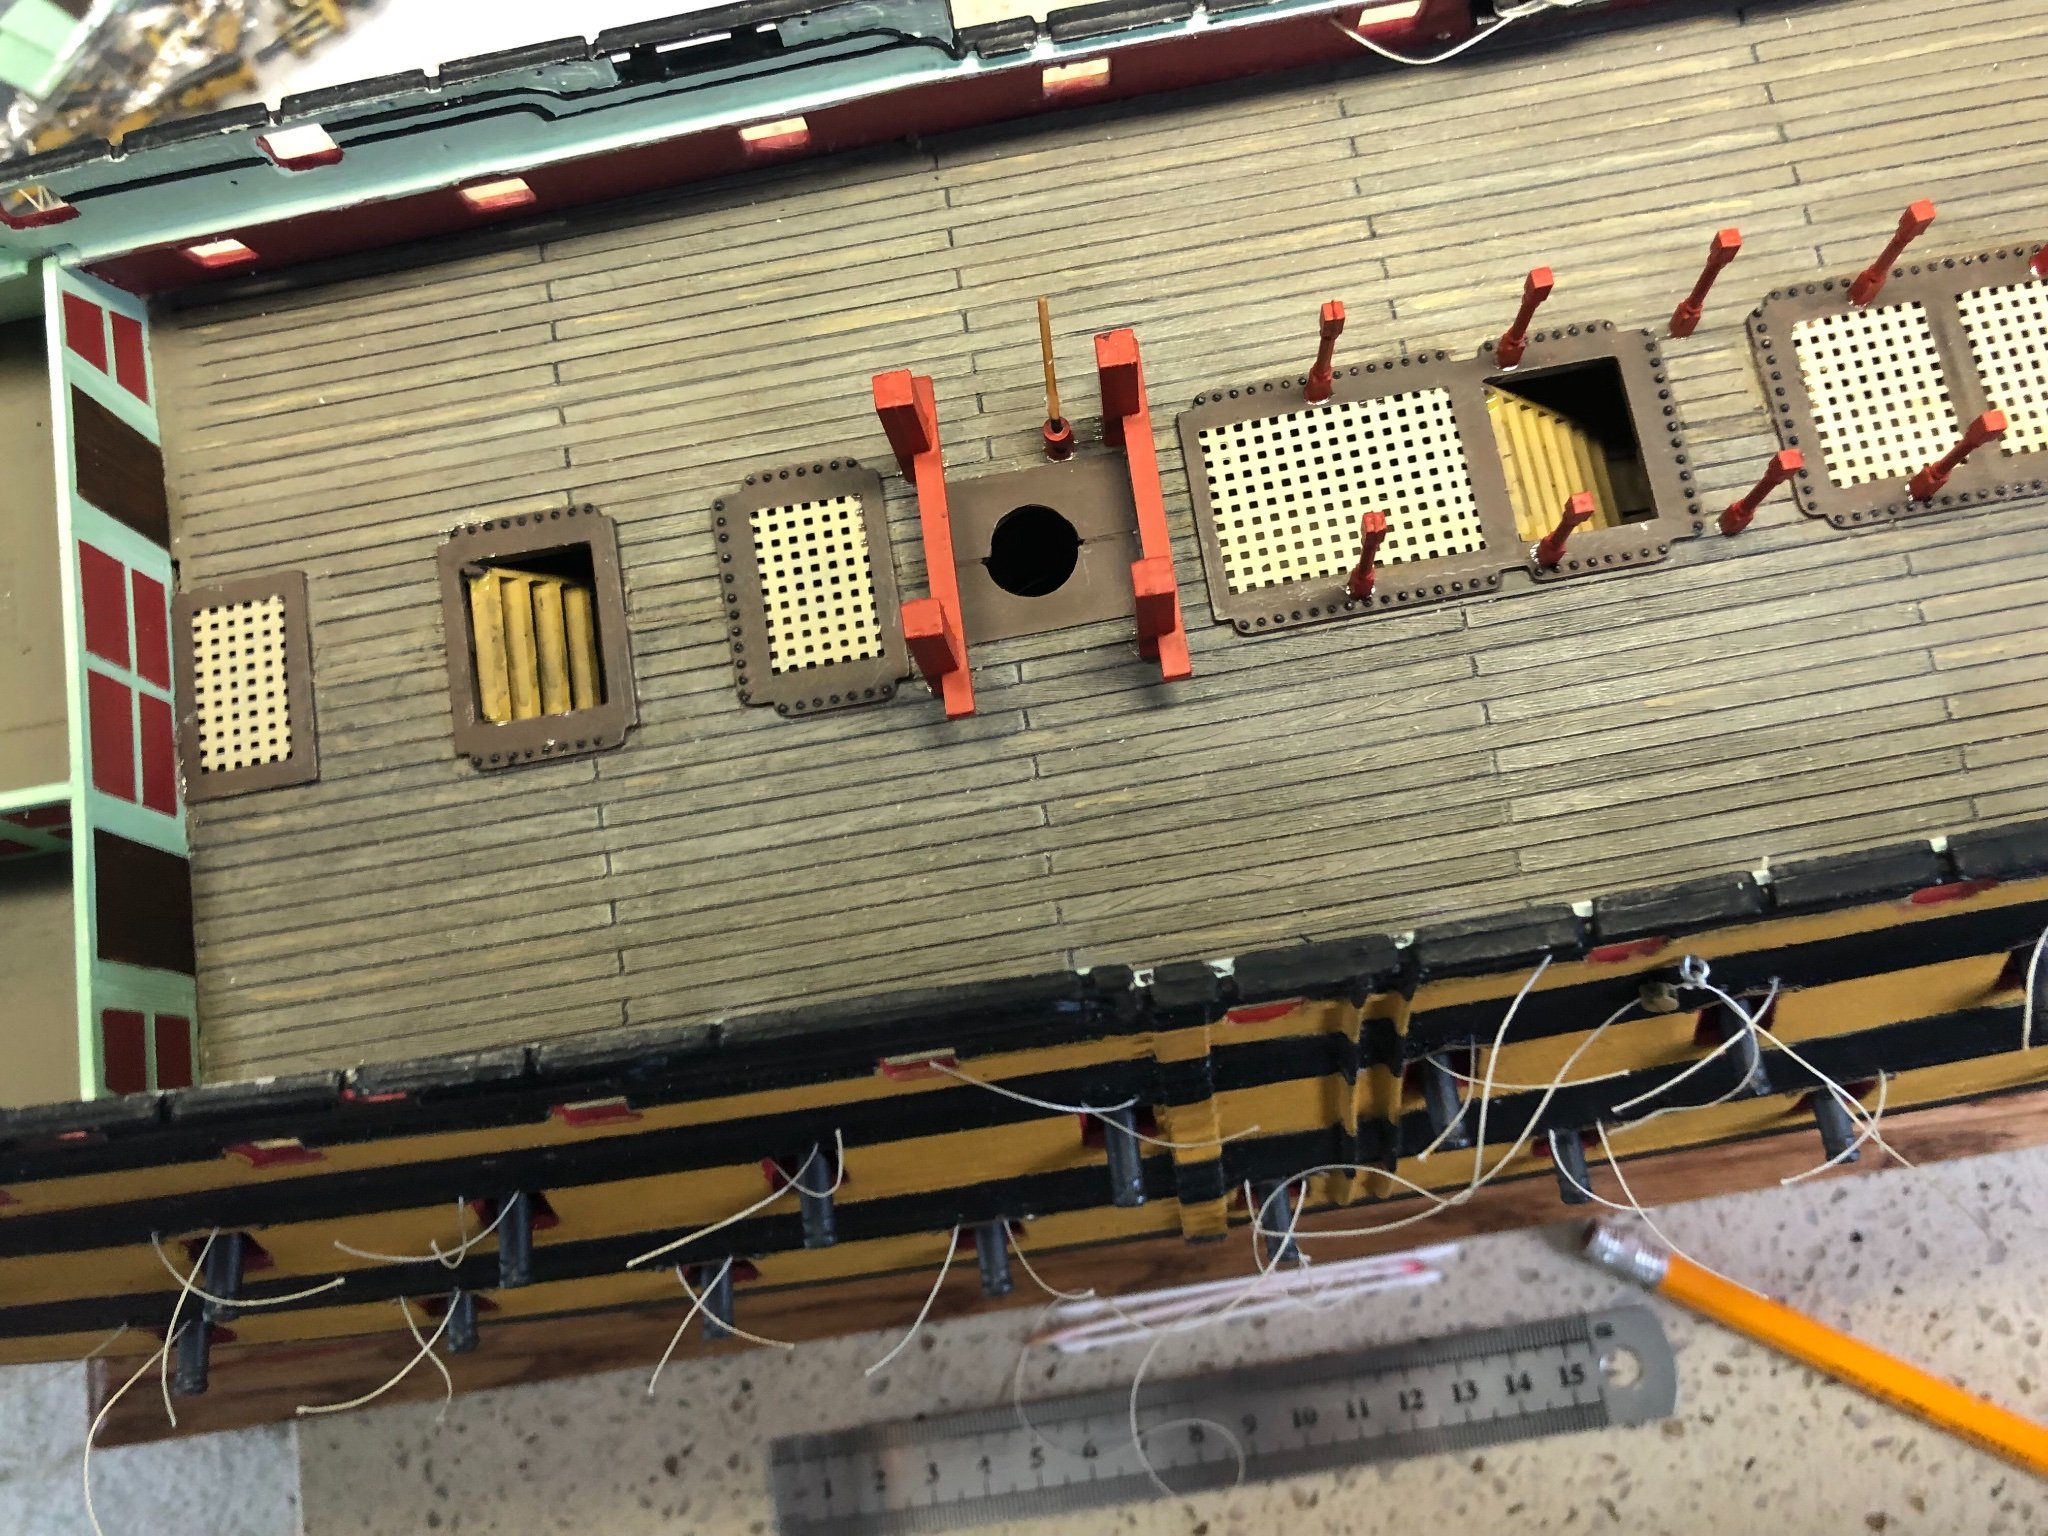
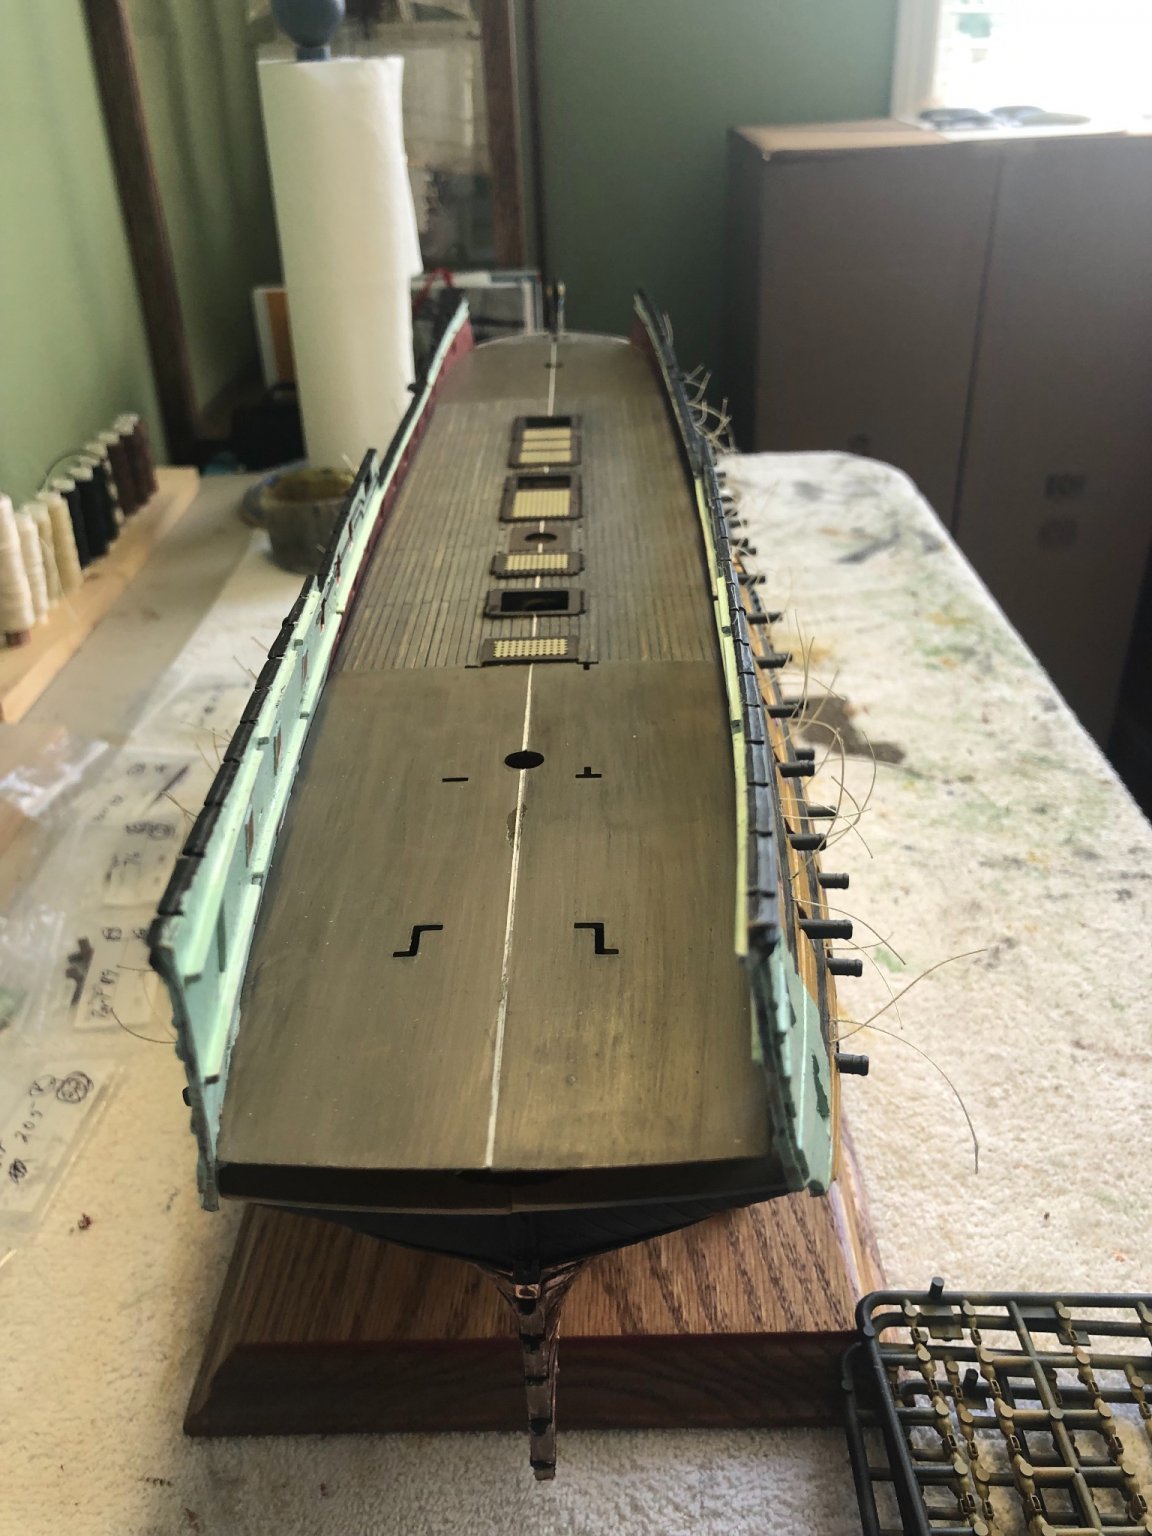
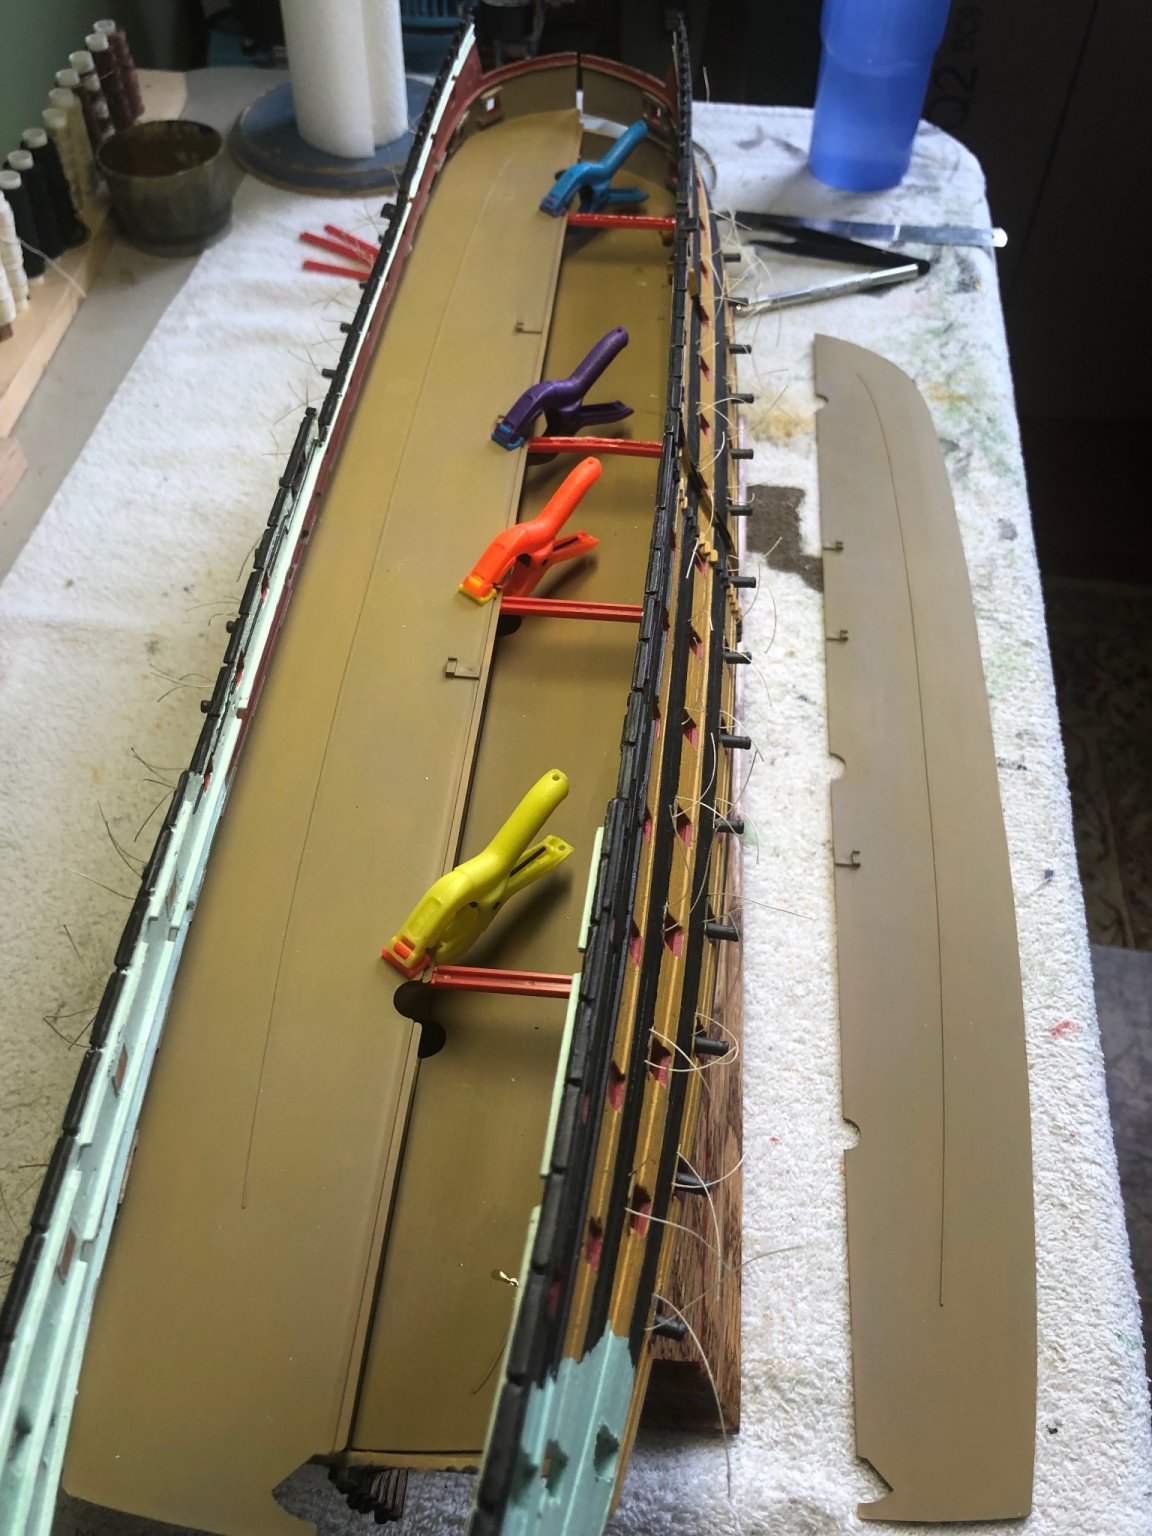
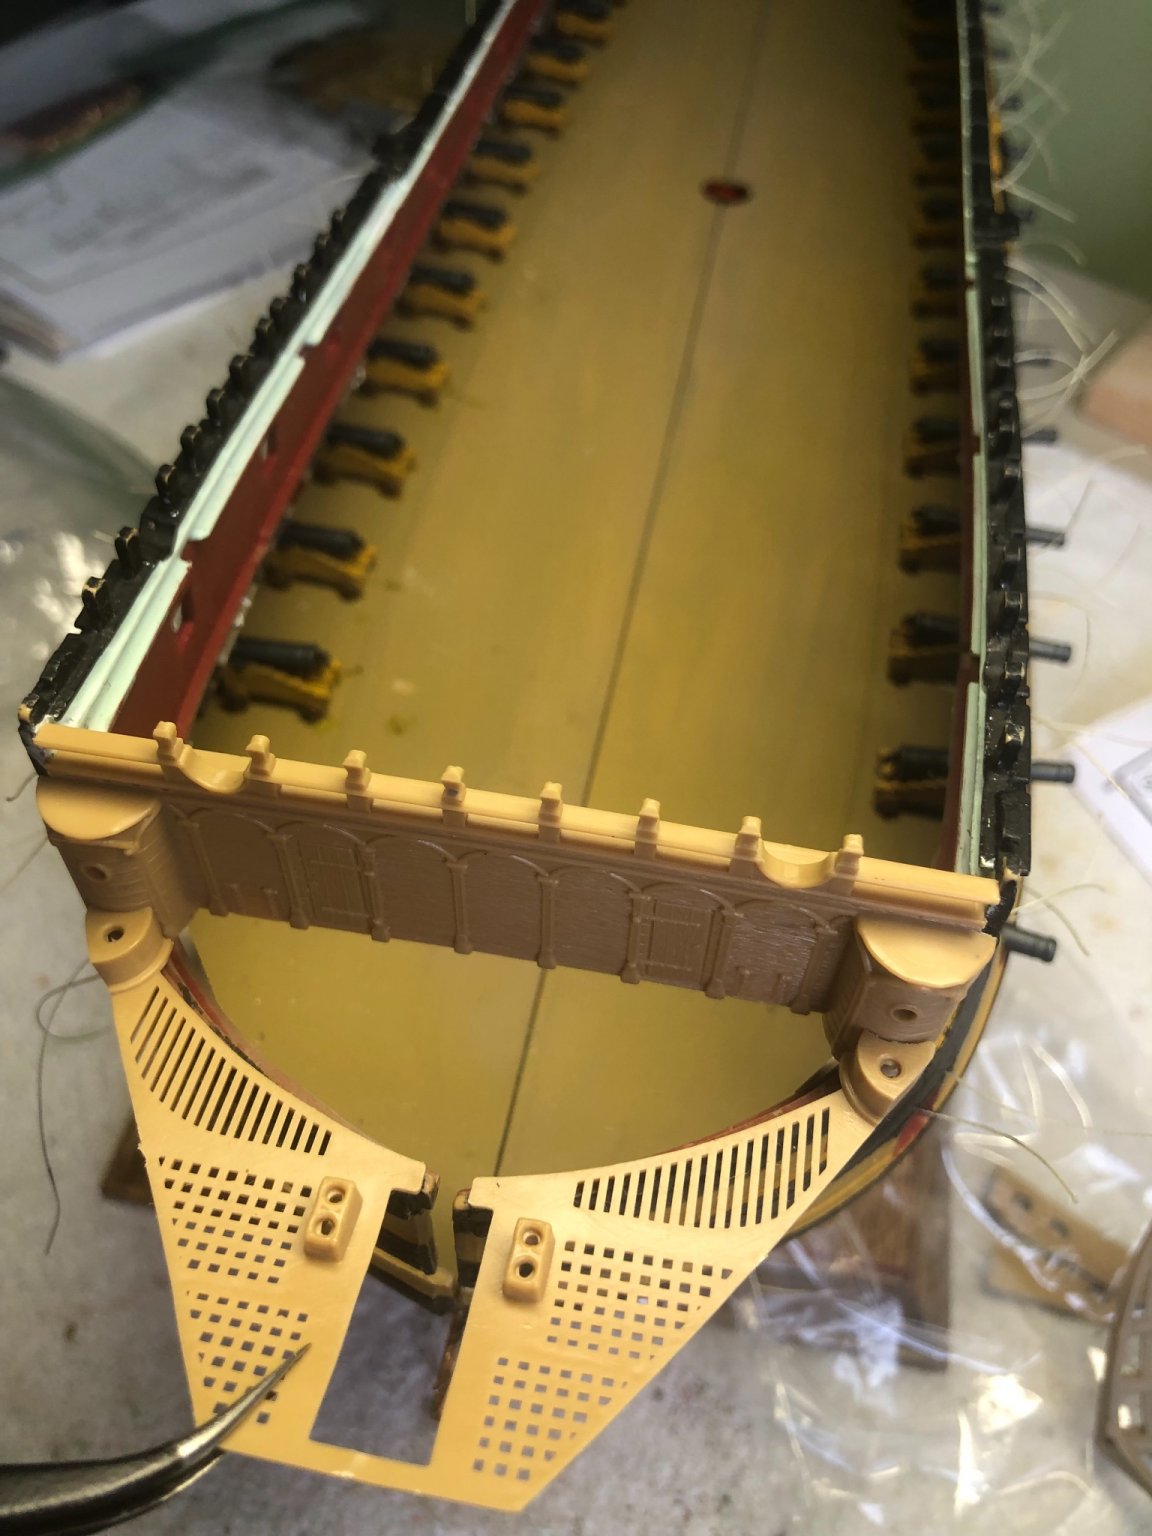
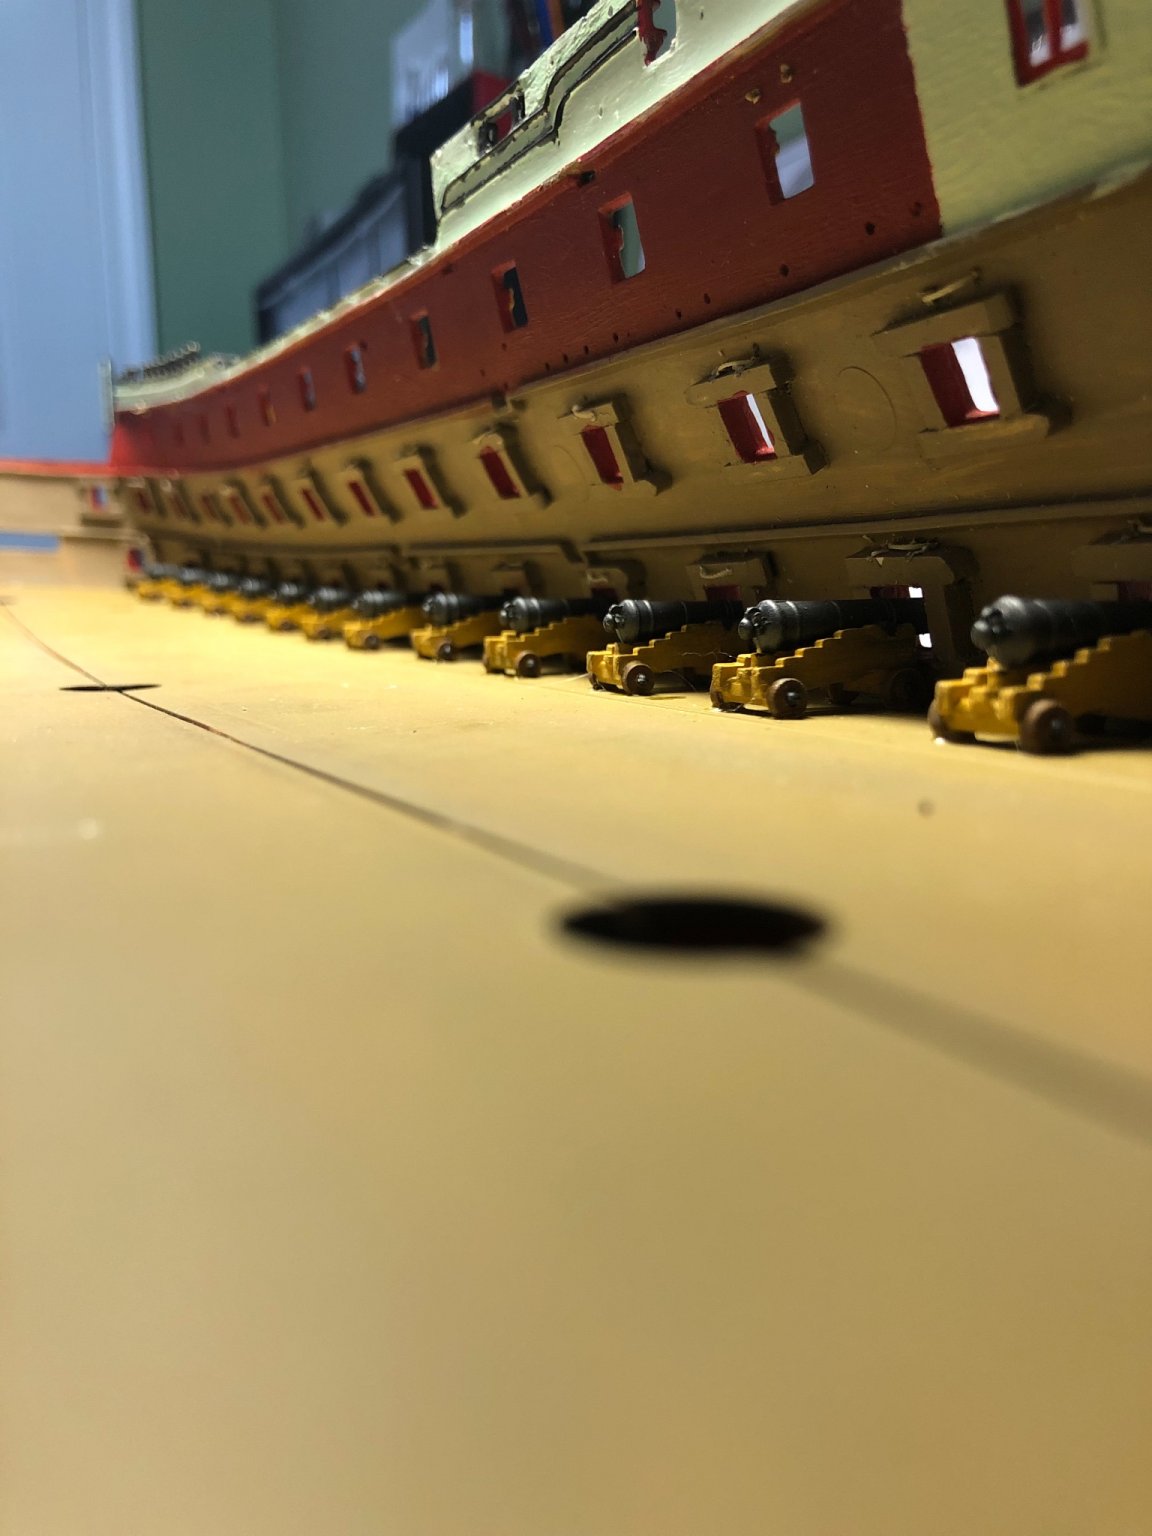
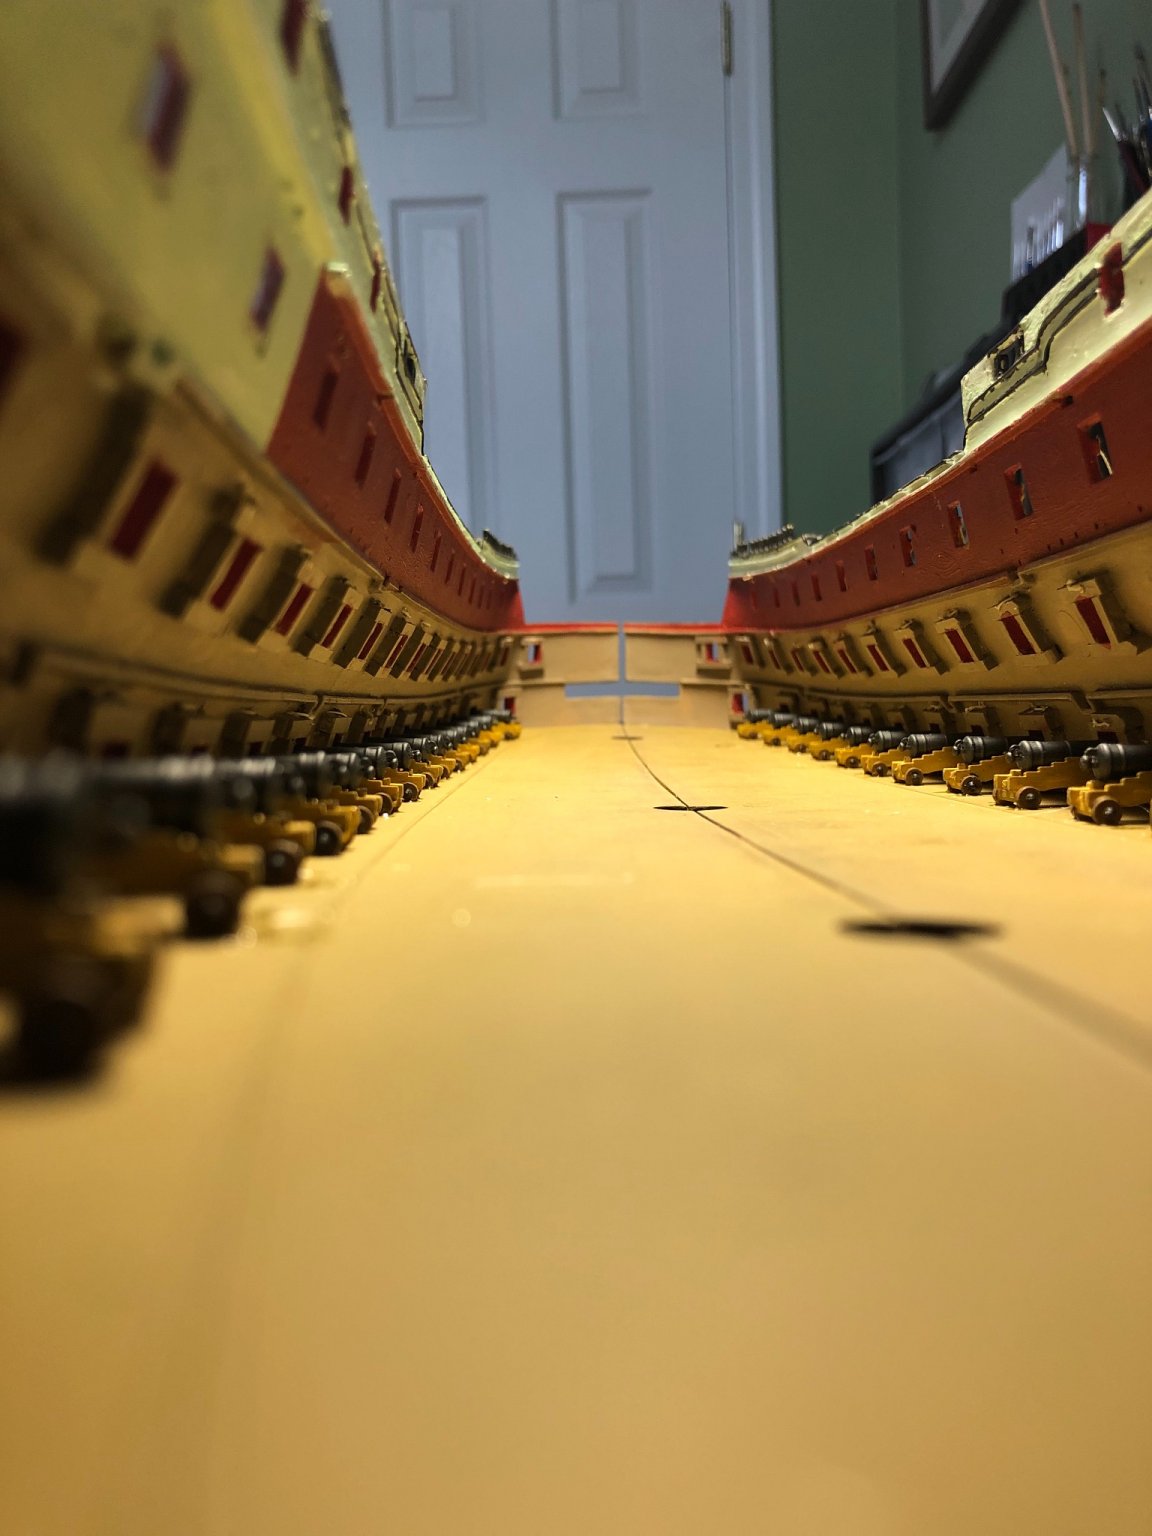
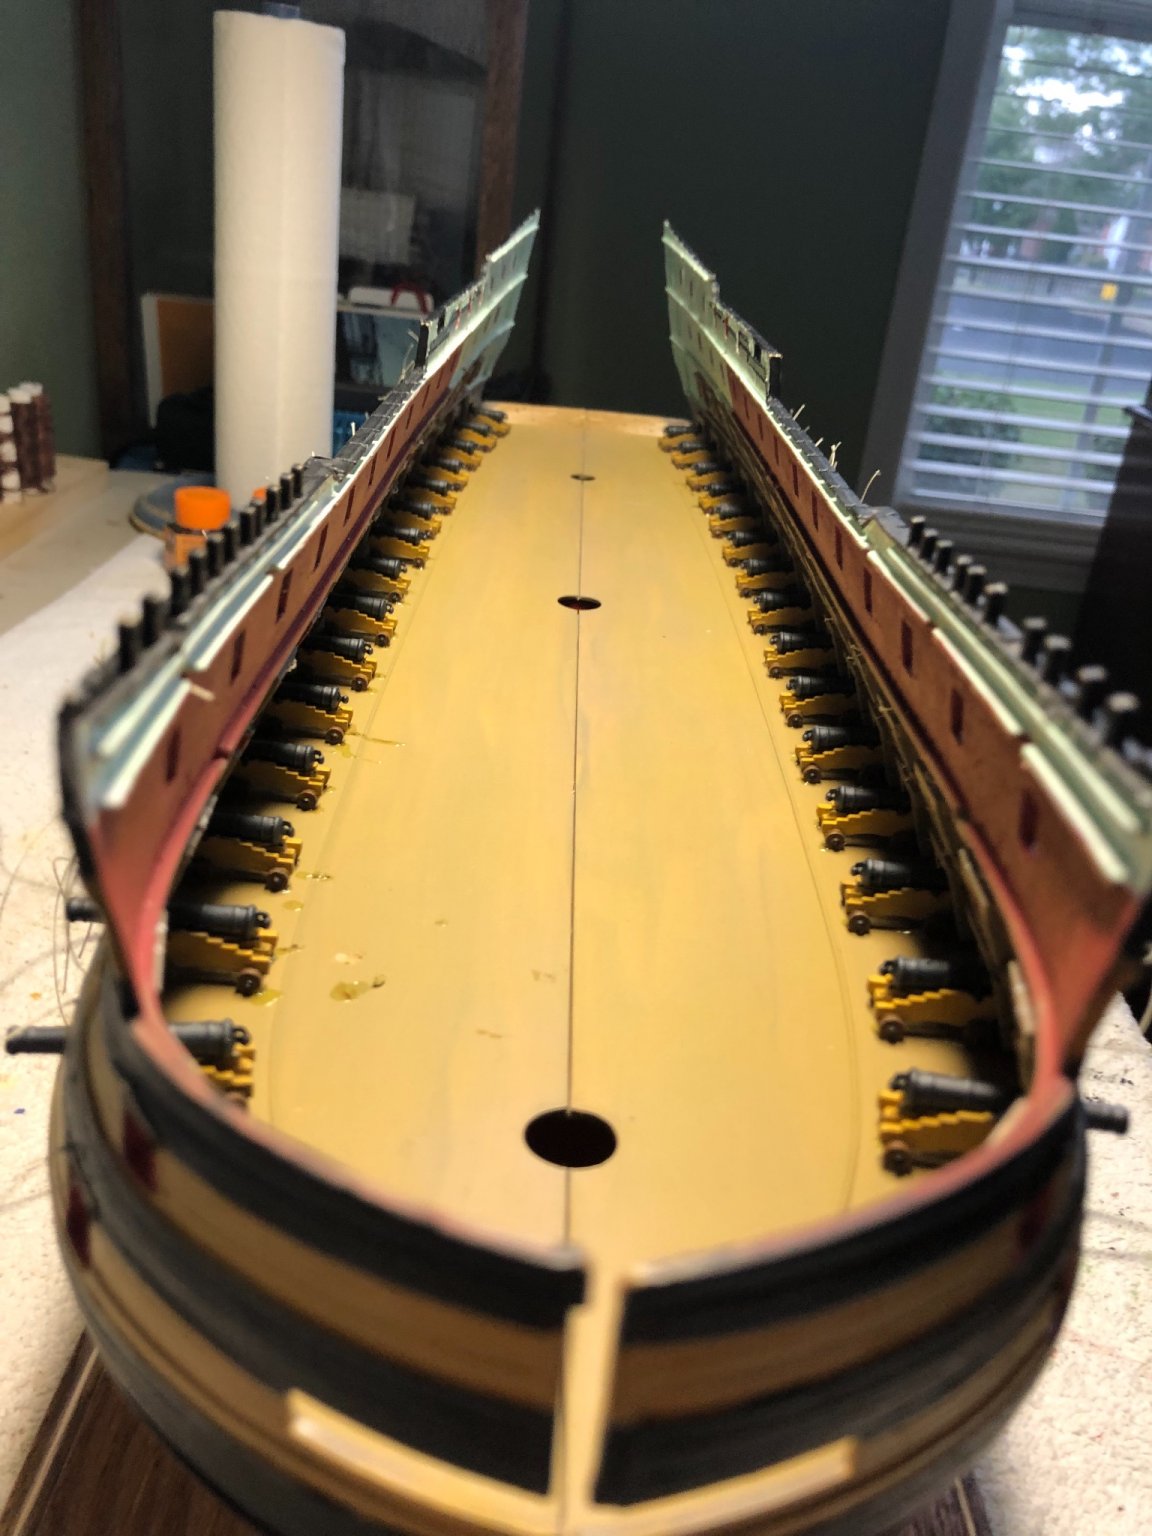
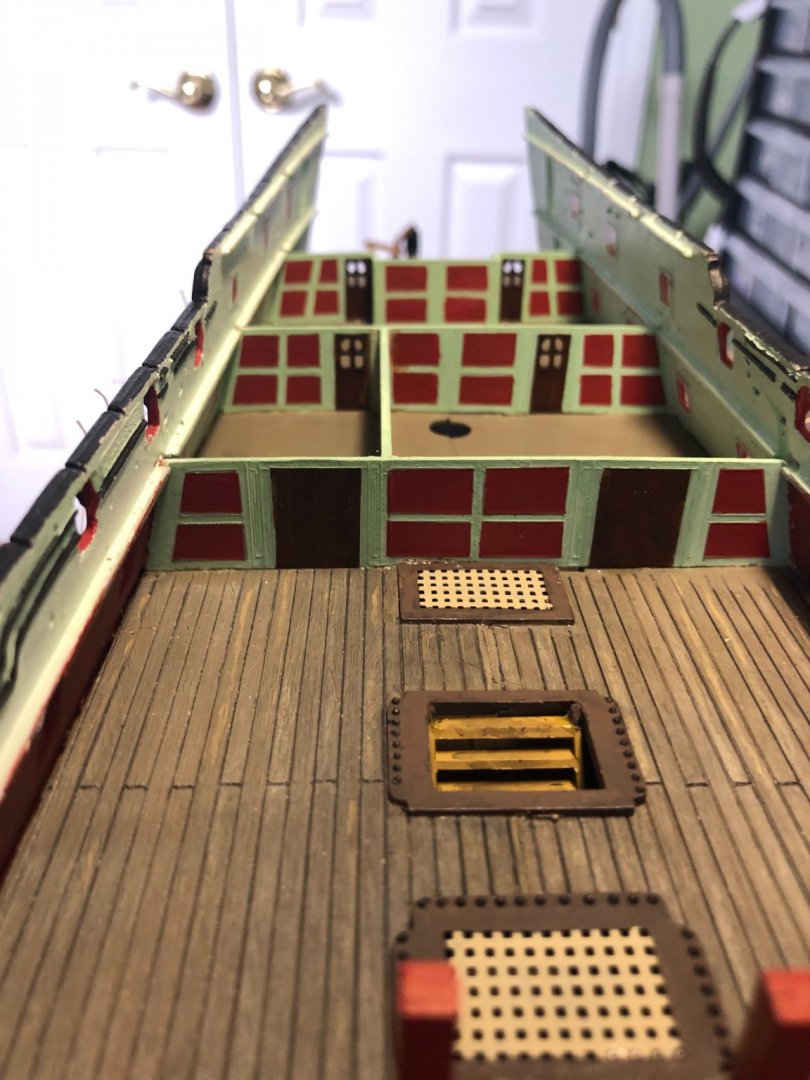
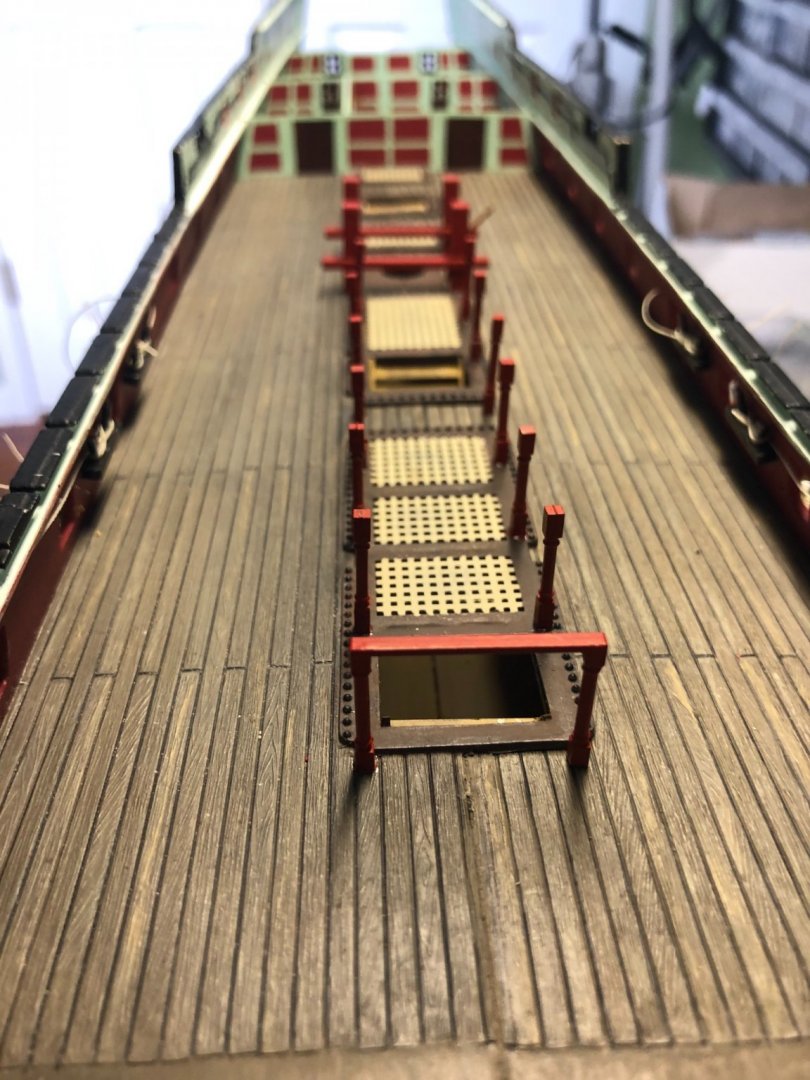
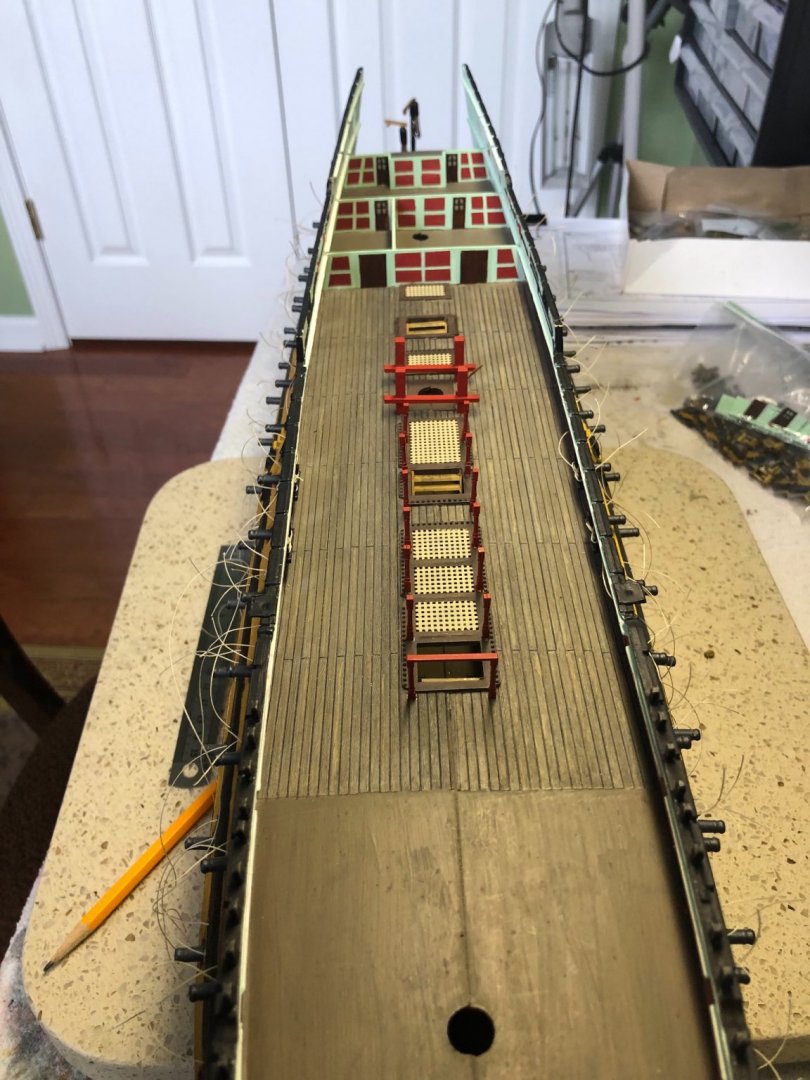
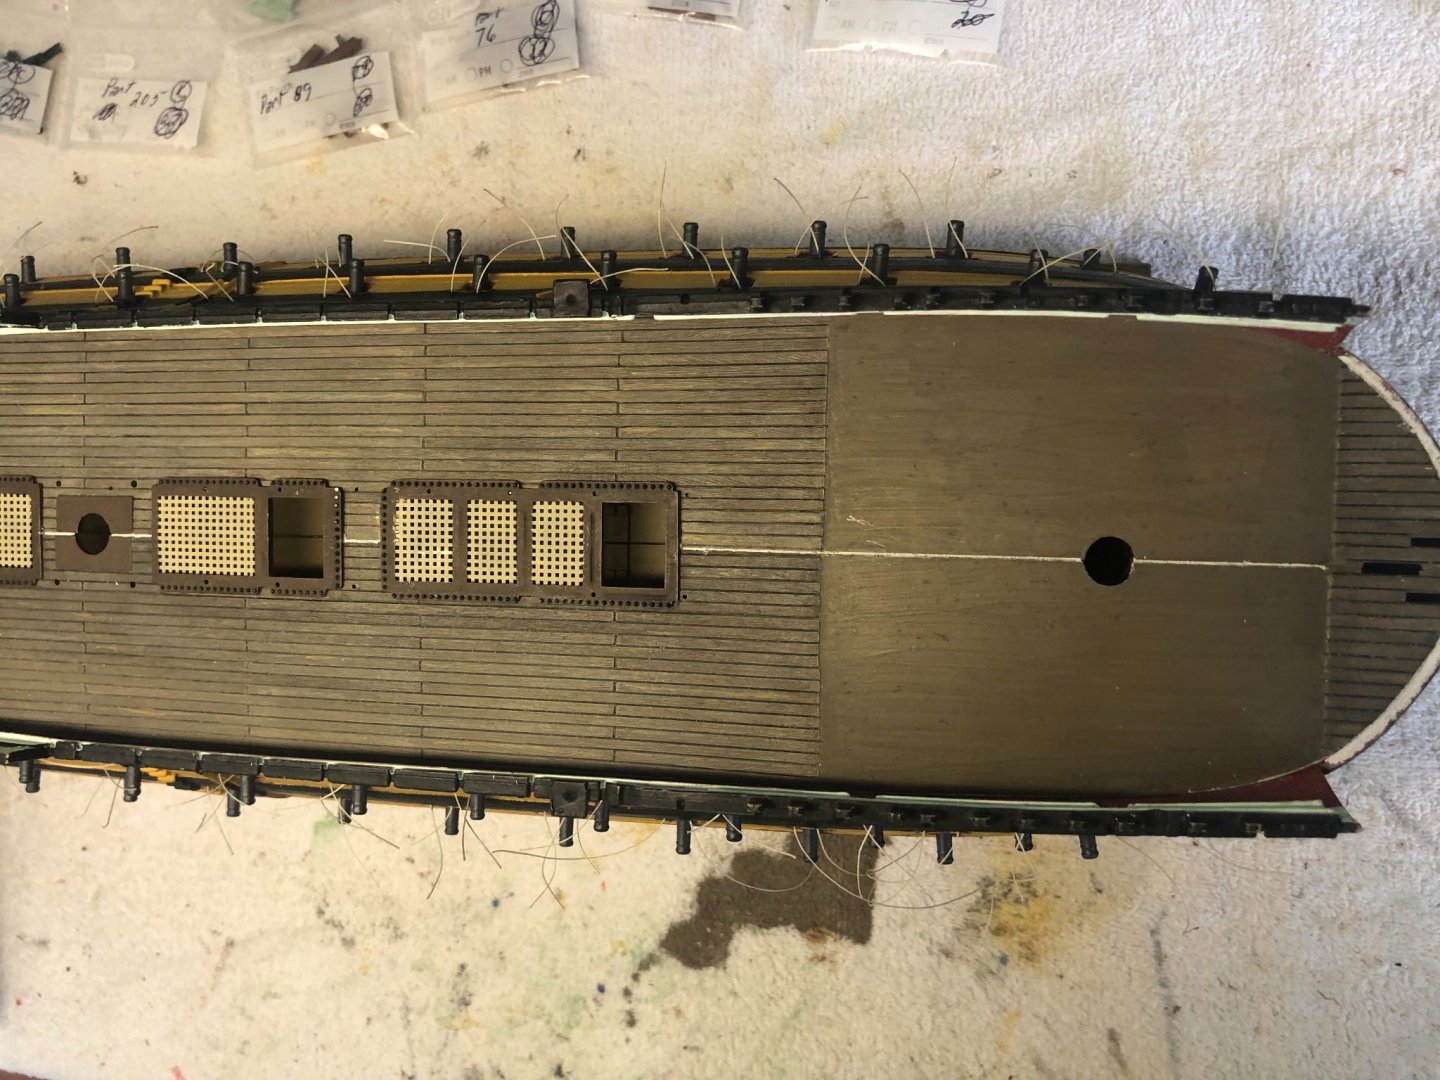
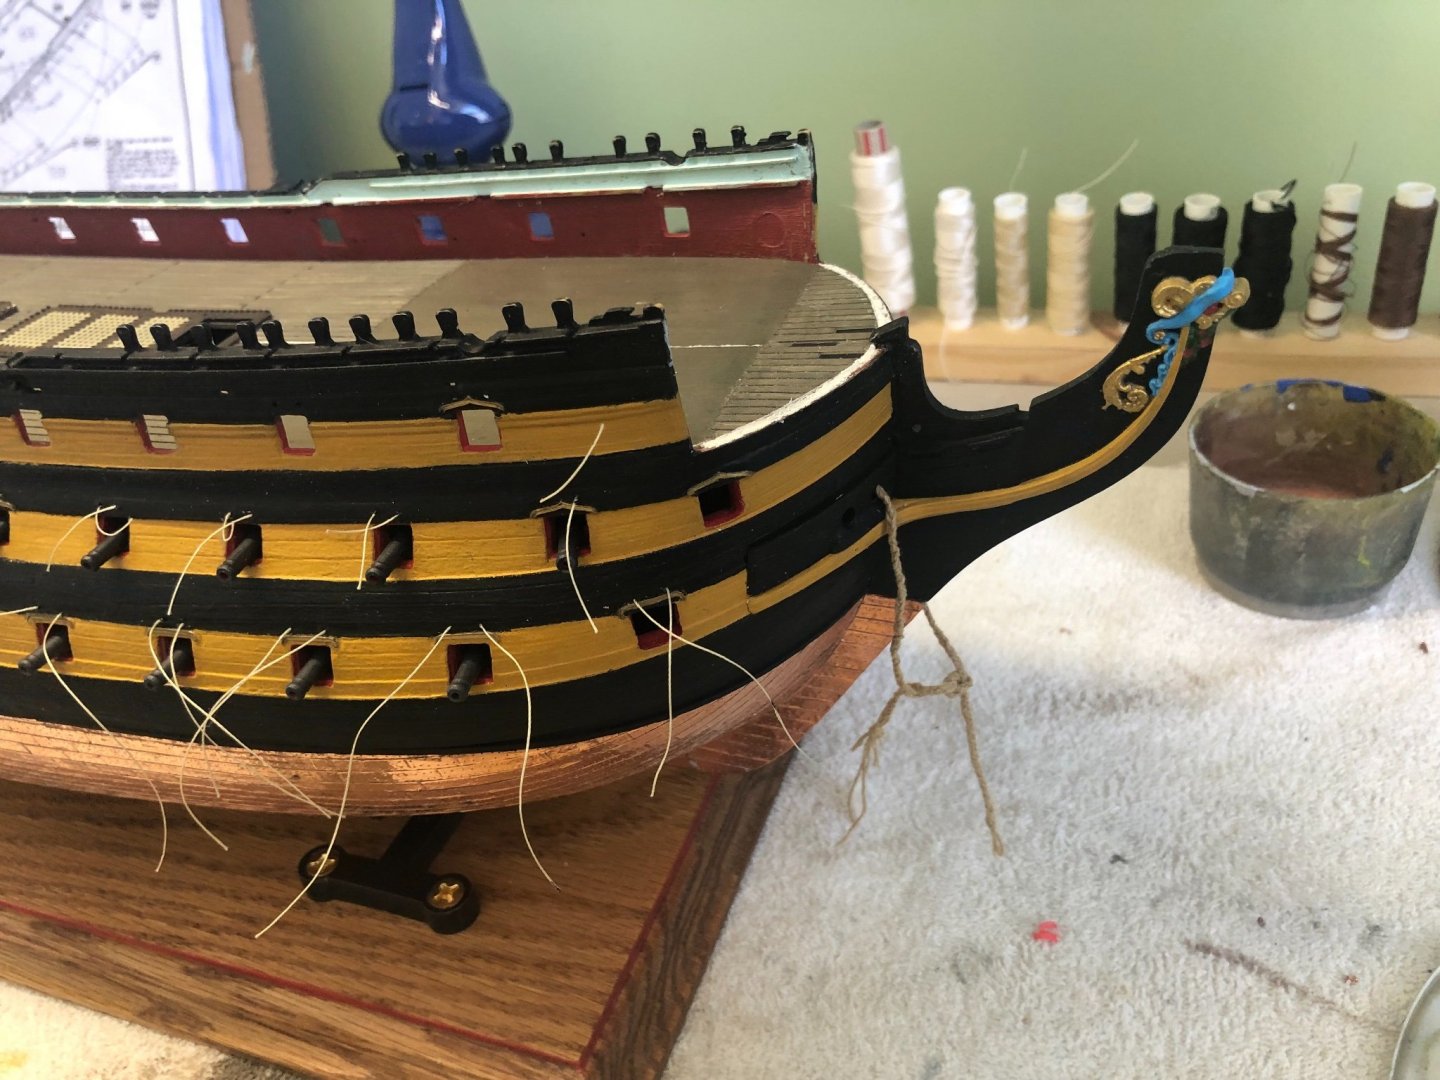
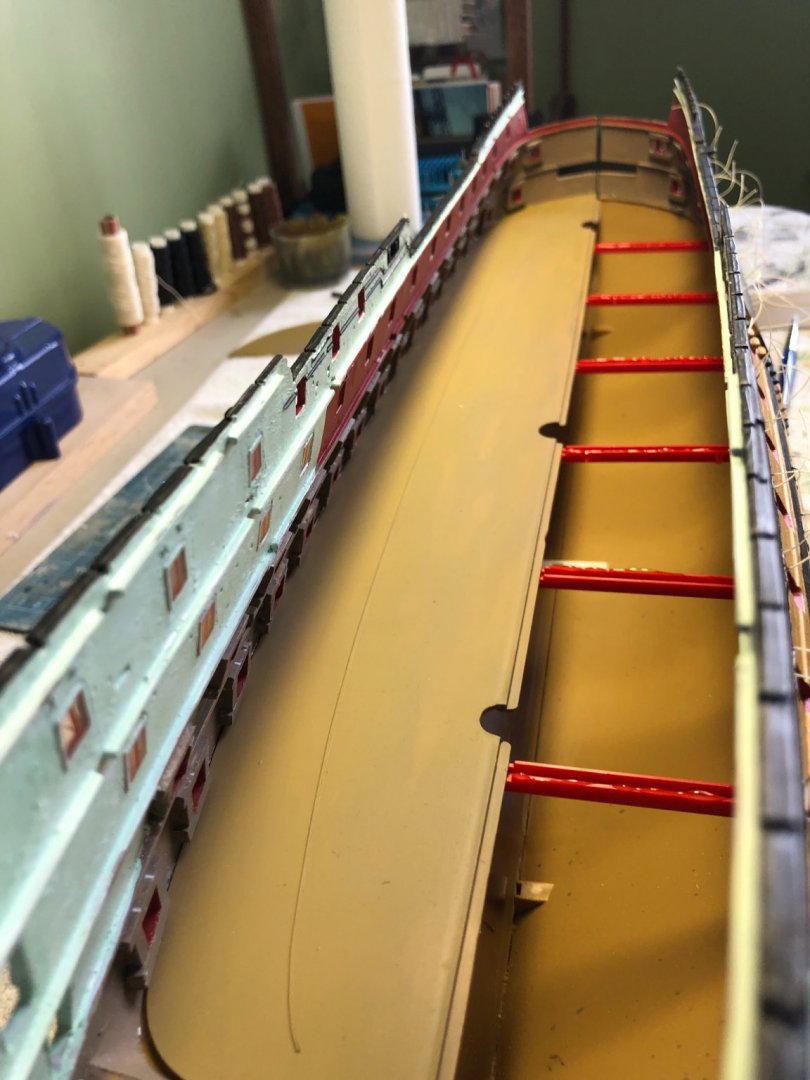
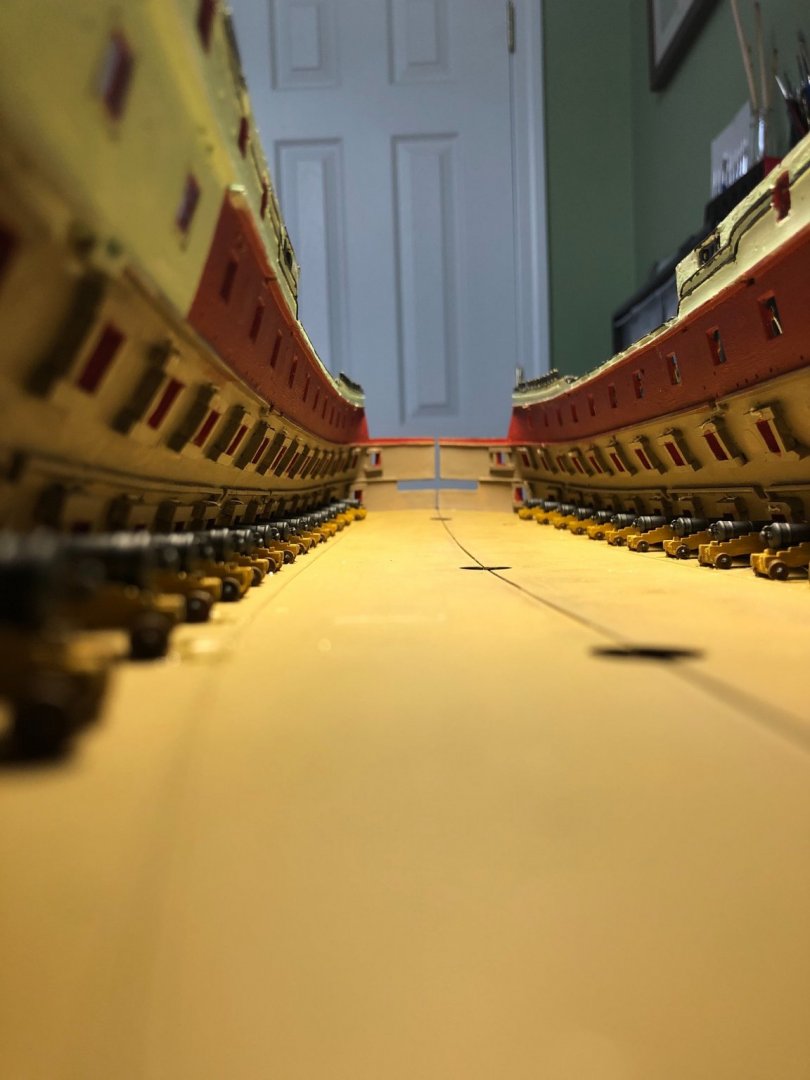
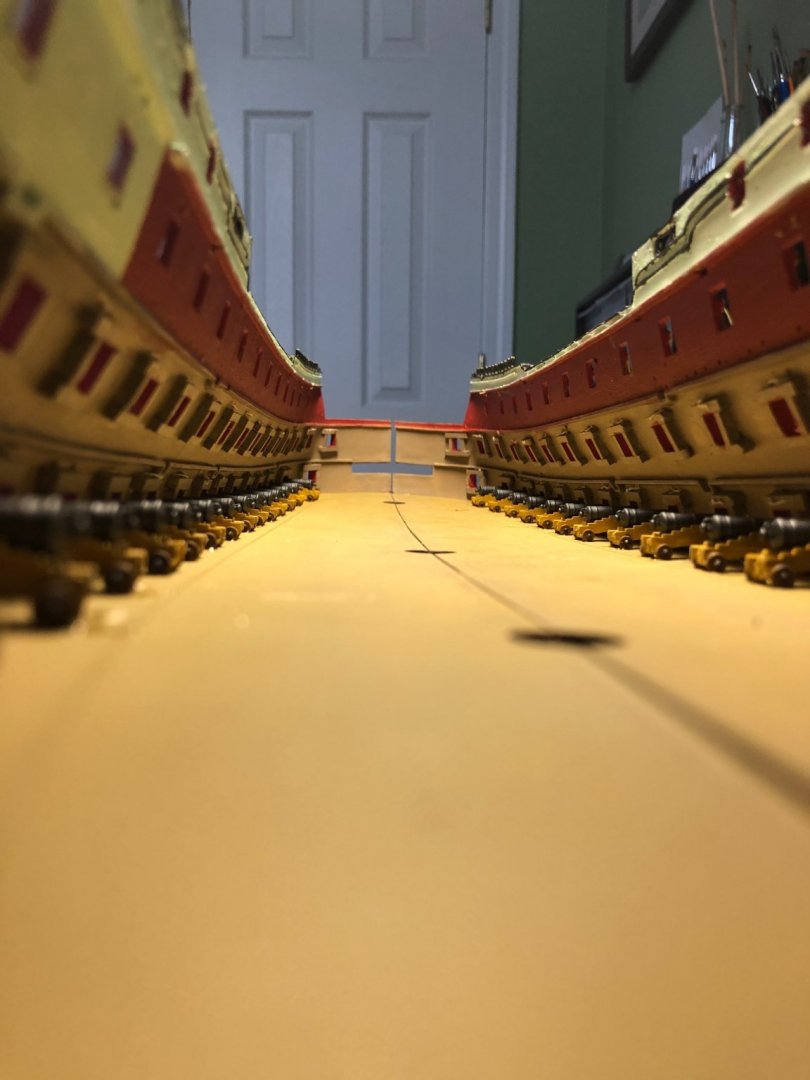
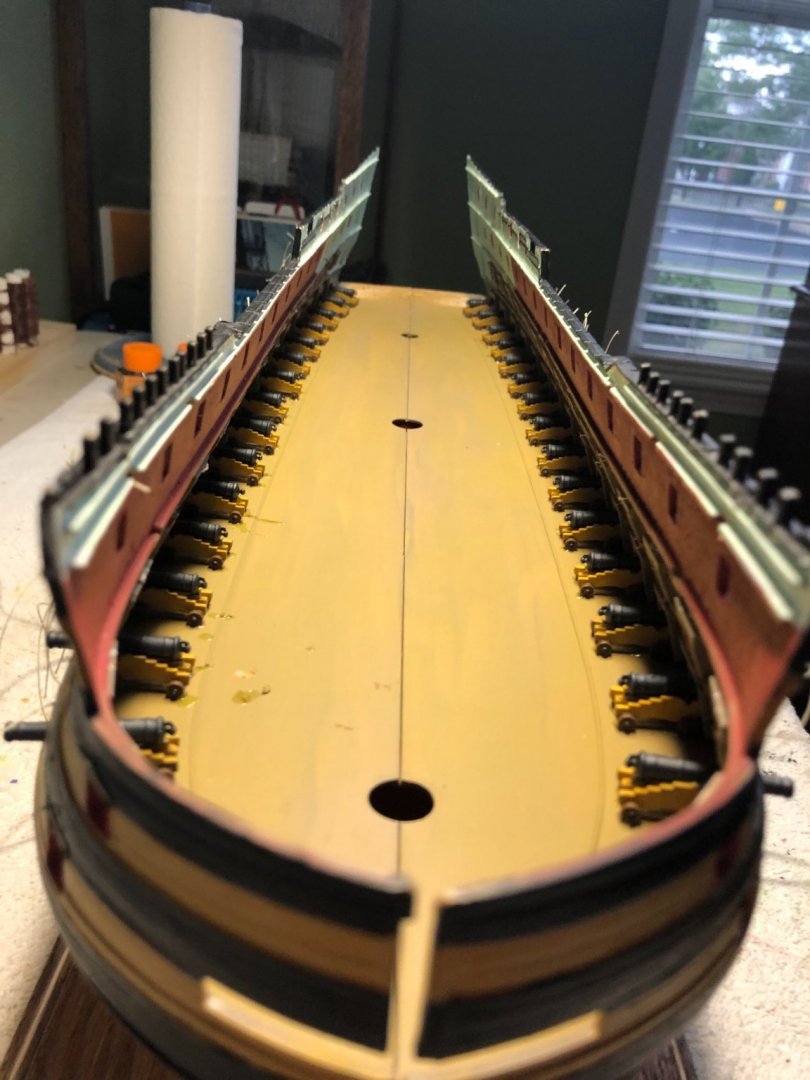
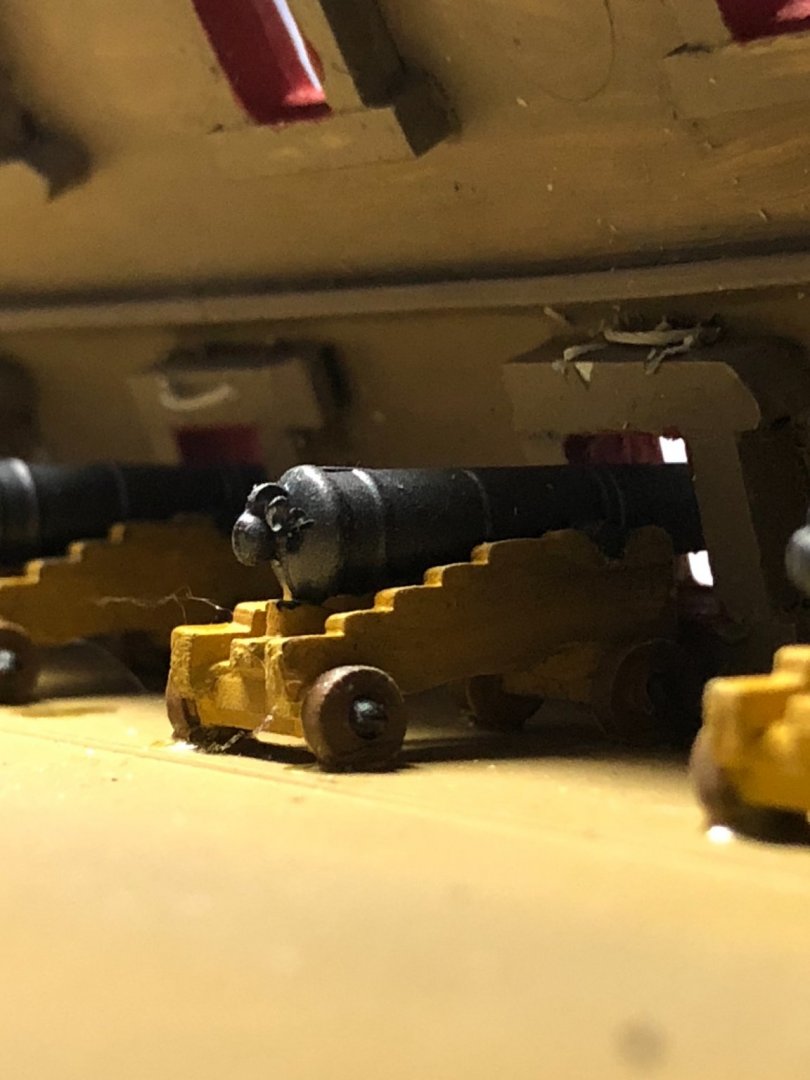
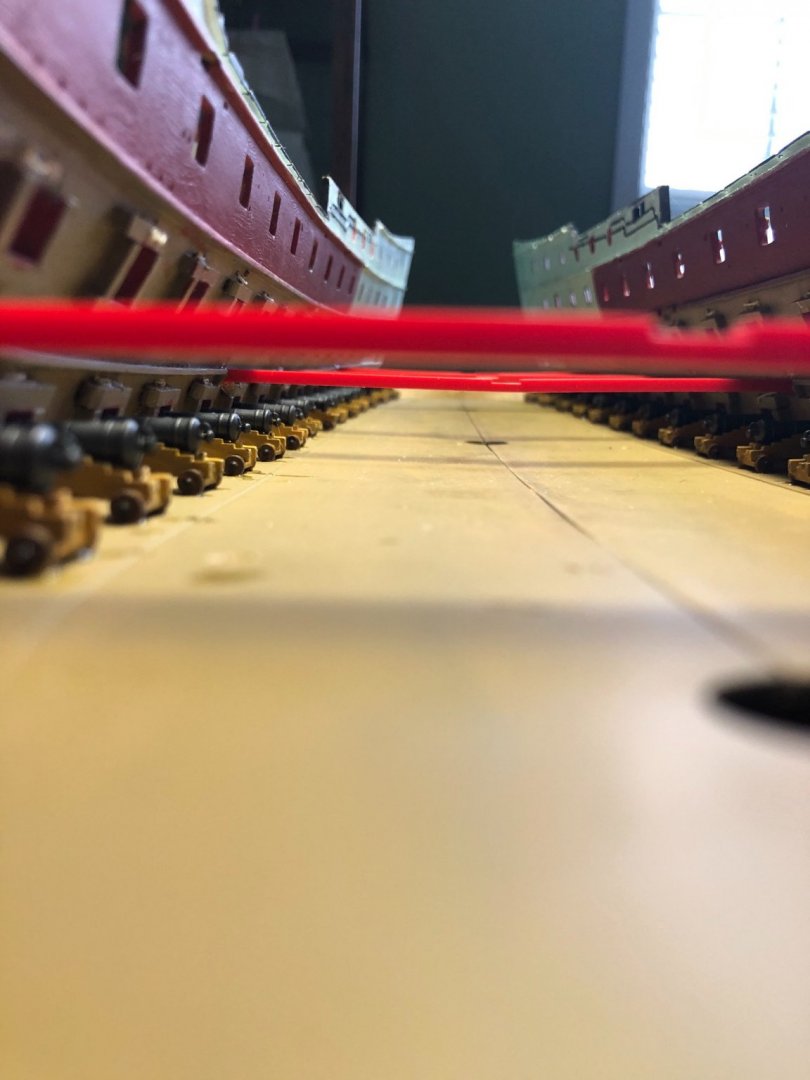
Working my way up! Lower and Middle decks in. Sixty cannons mounted in out position. Upper deck put in and putty applied to seam down the center. Once it drys I will gently sand and touch up deck paint. Now on to a whole lot of painting of parts that will go on these decks and the next one up.


-
Thanks Ian.
-
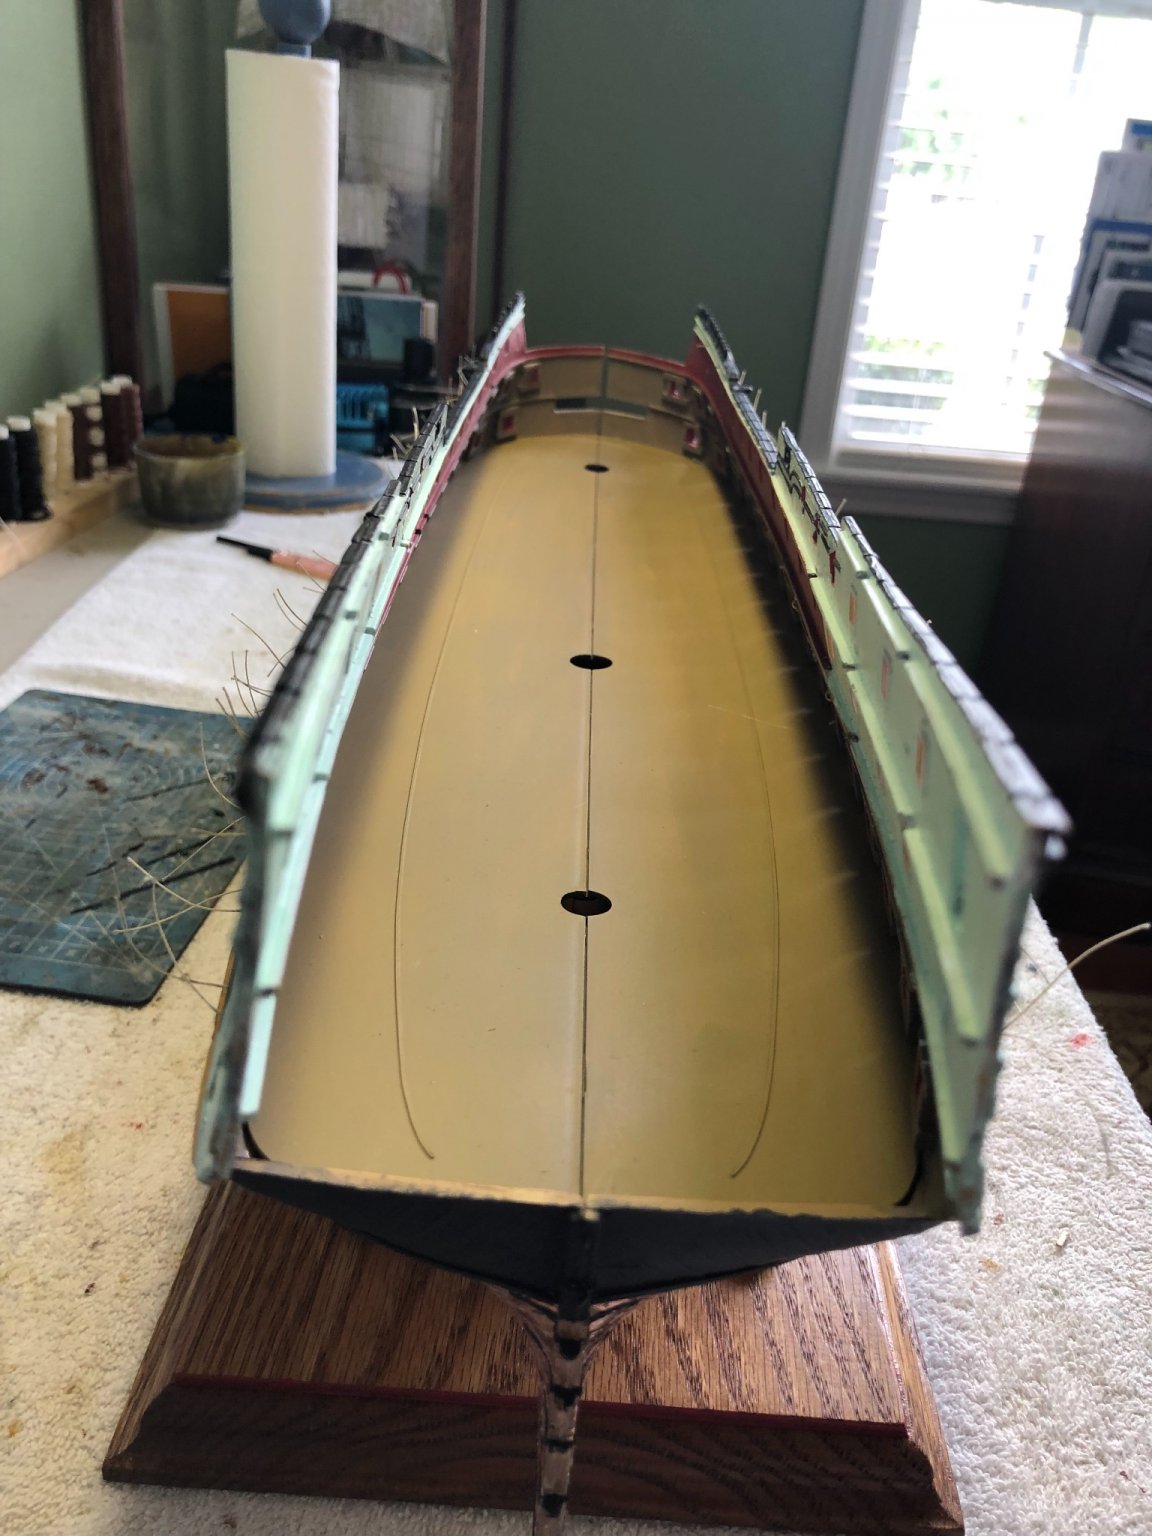
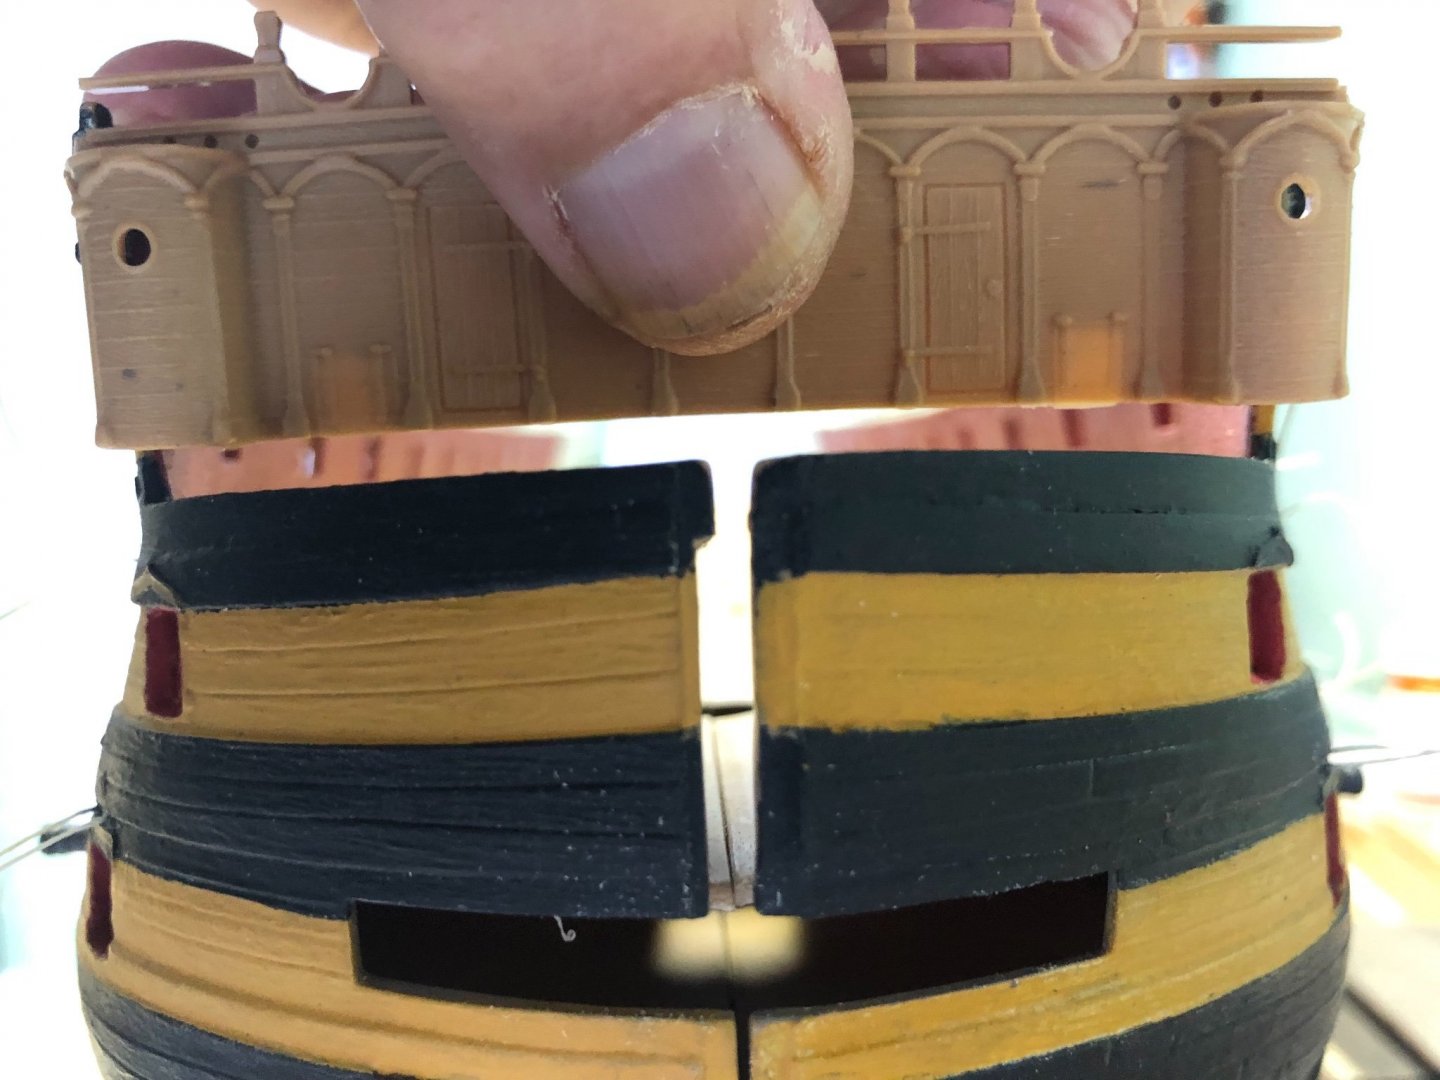
Thanks Marc. The more I tinker with it the more I think you are correct. Everything seems to fit perfectly except for the bottoms of the round houses. The flooring section matches up to it. And if the hull was wider at that point the deck would would not reach the sides. Guess I will just proceed and see what happens. Need to look ahead and see if something covers the open part of the roundhouse on each side.


-
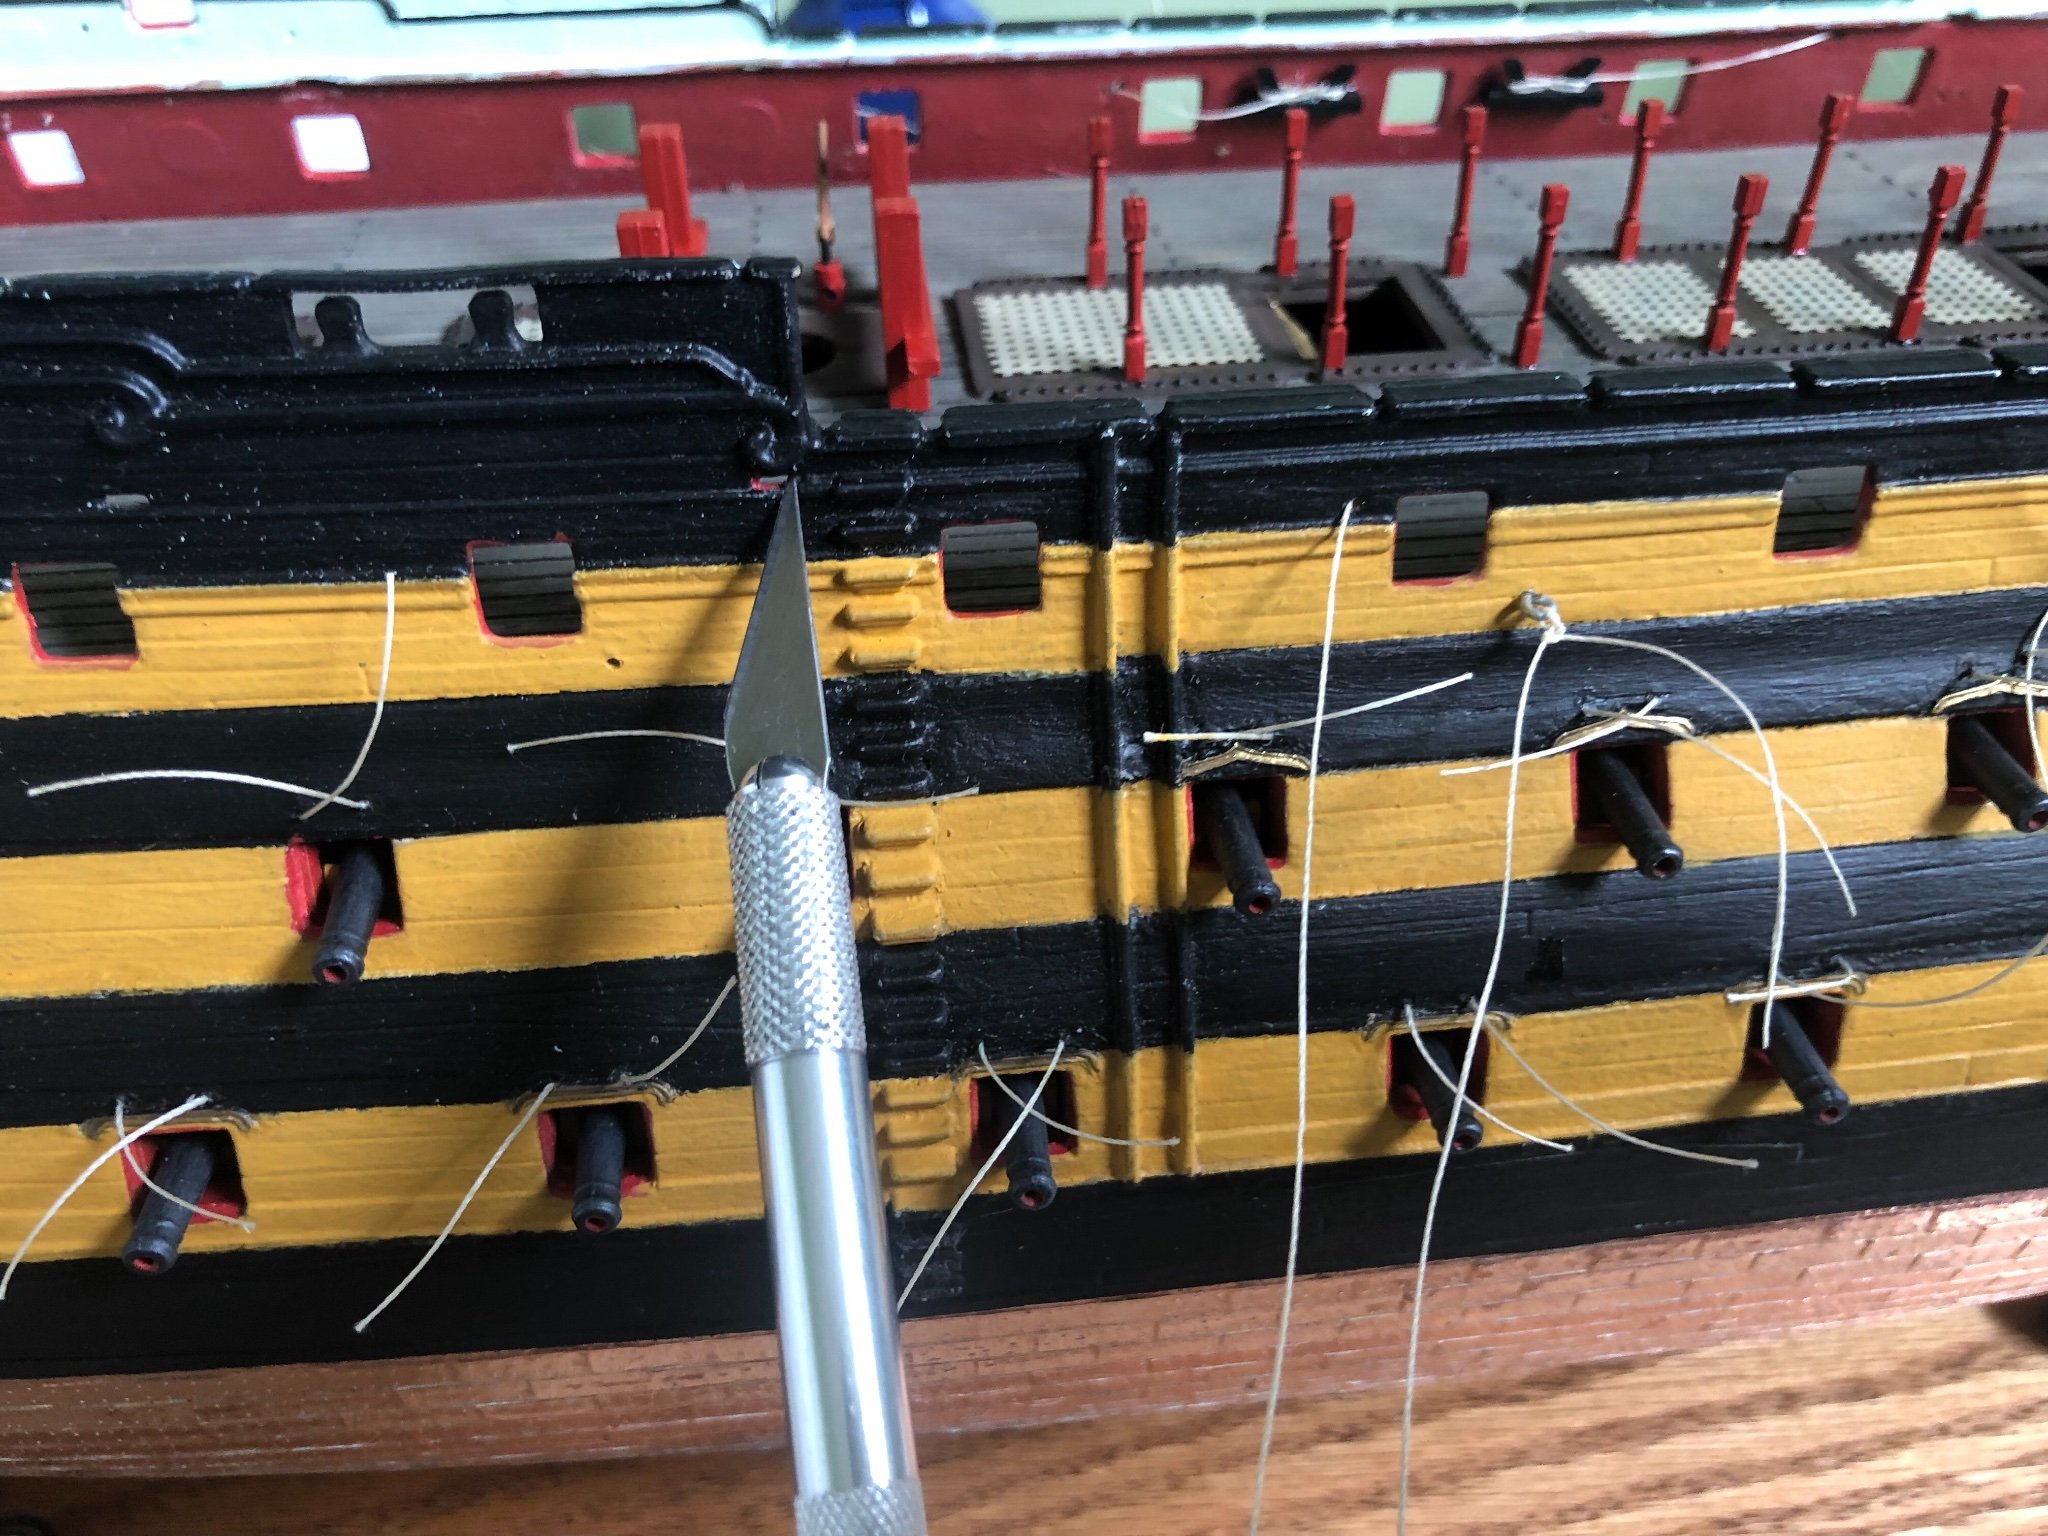
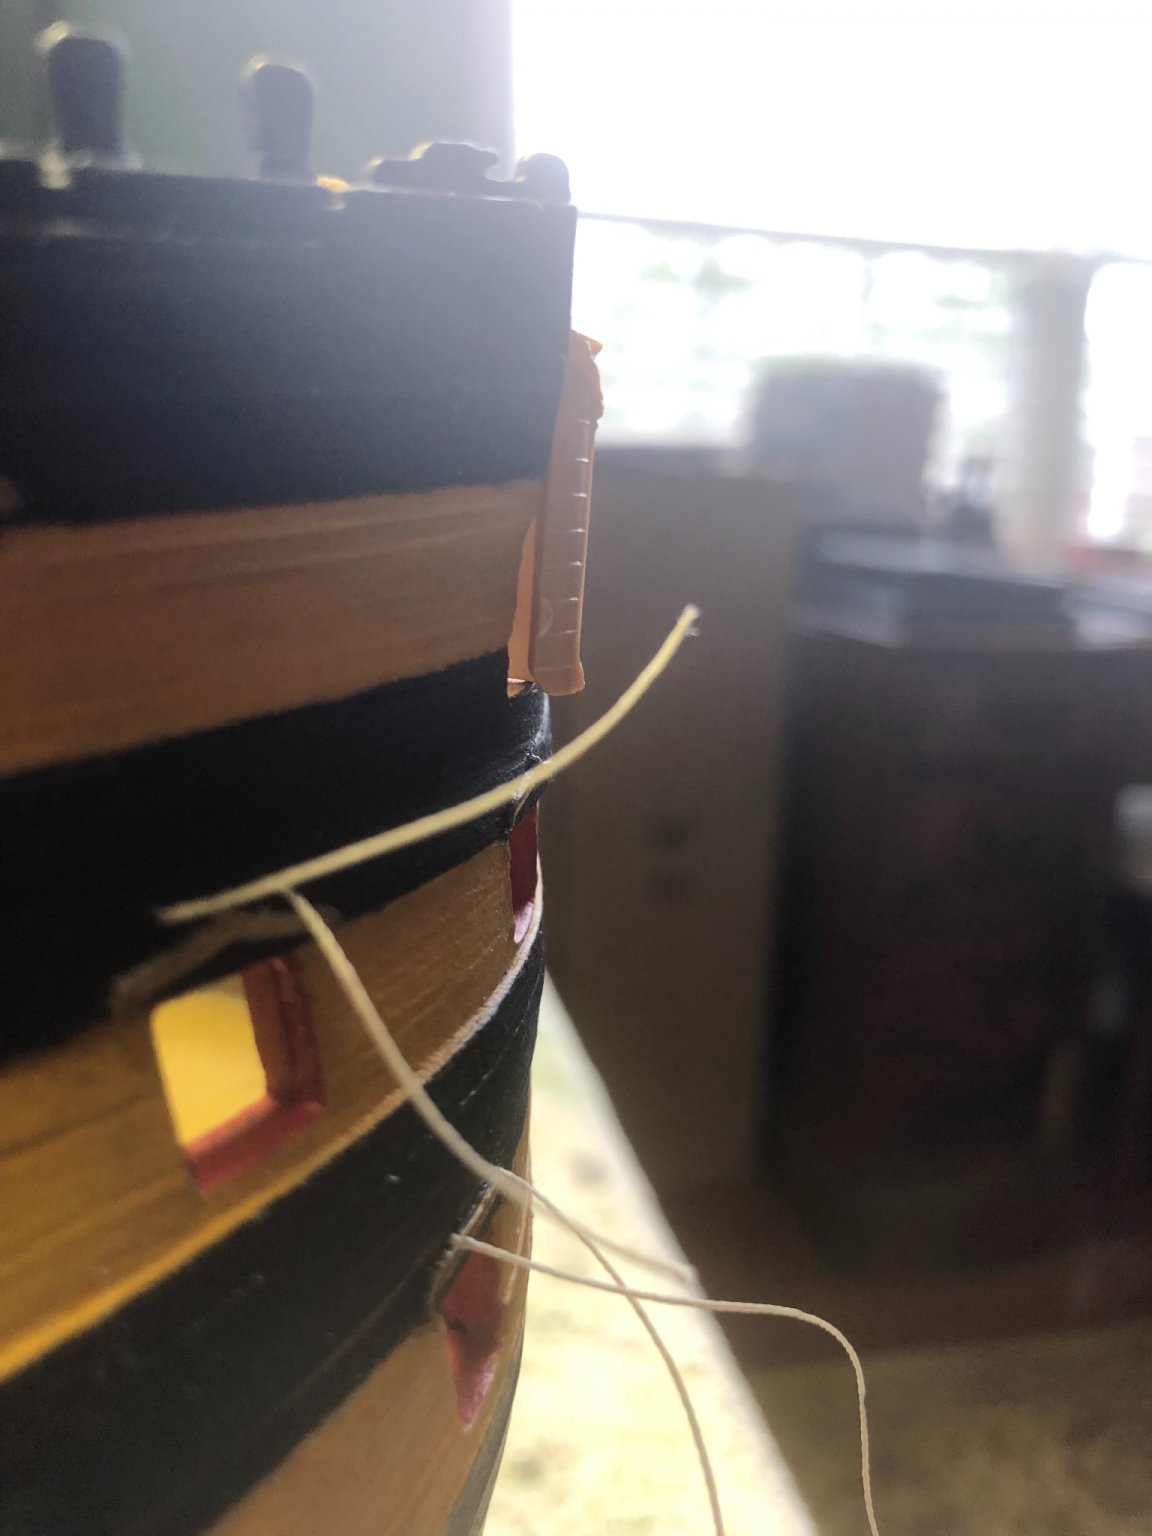
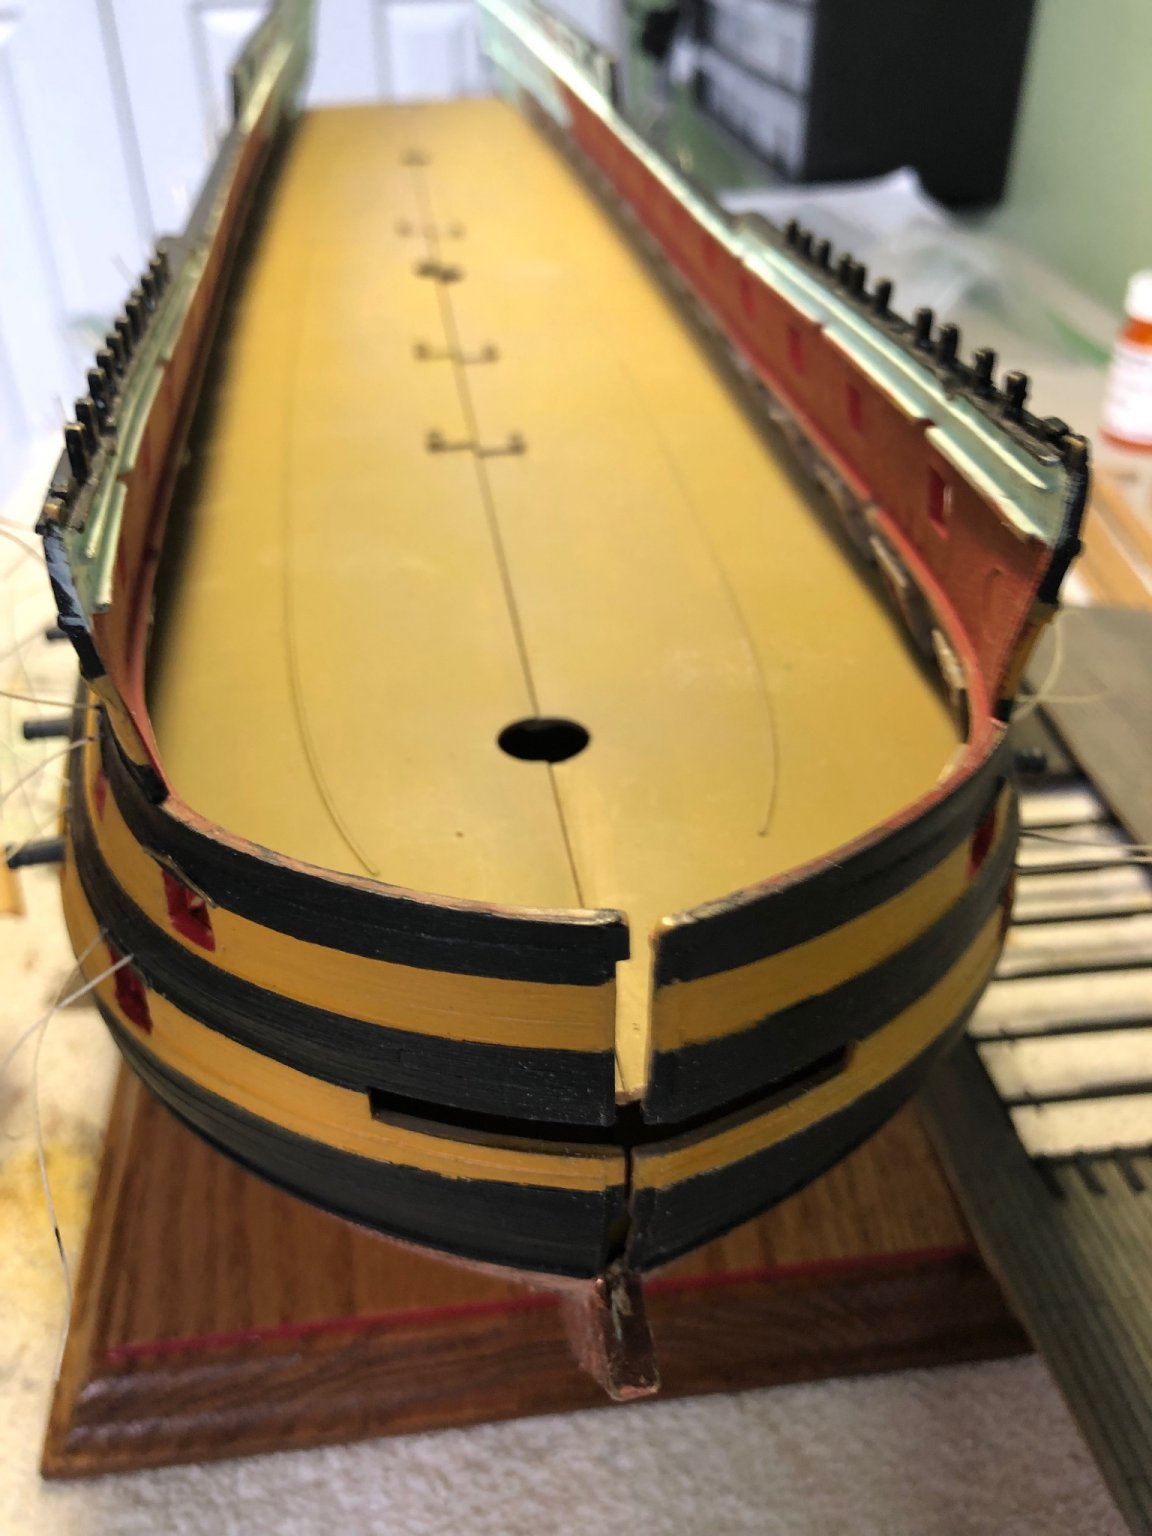
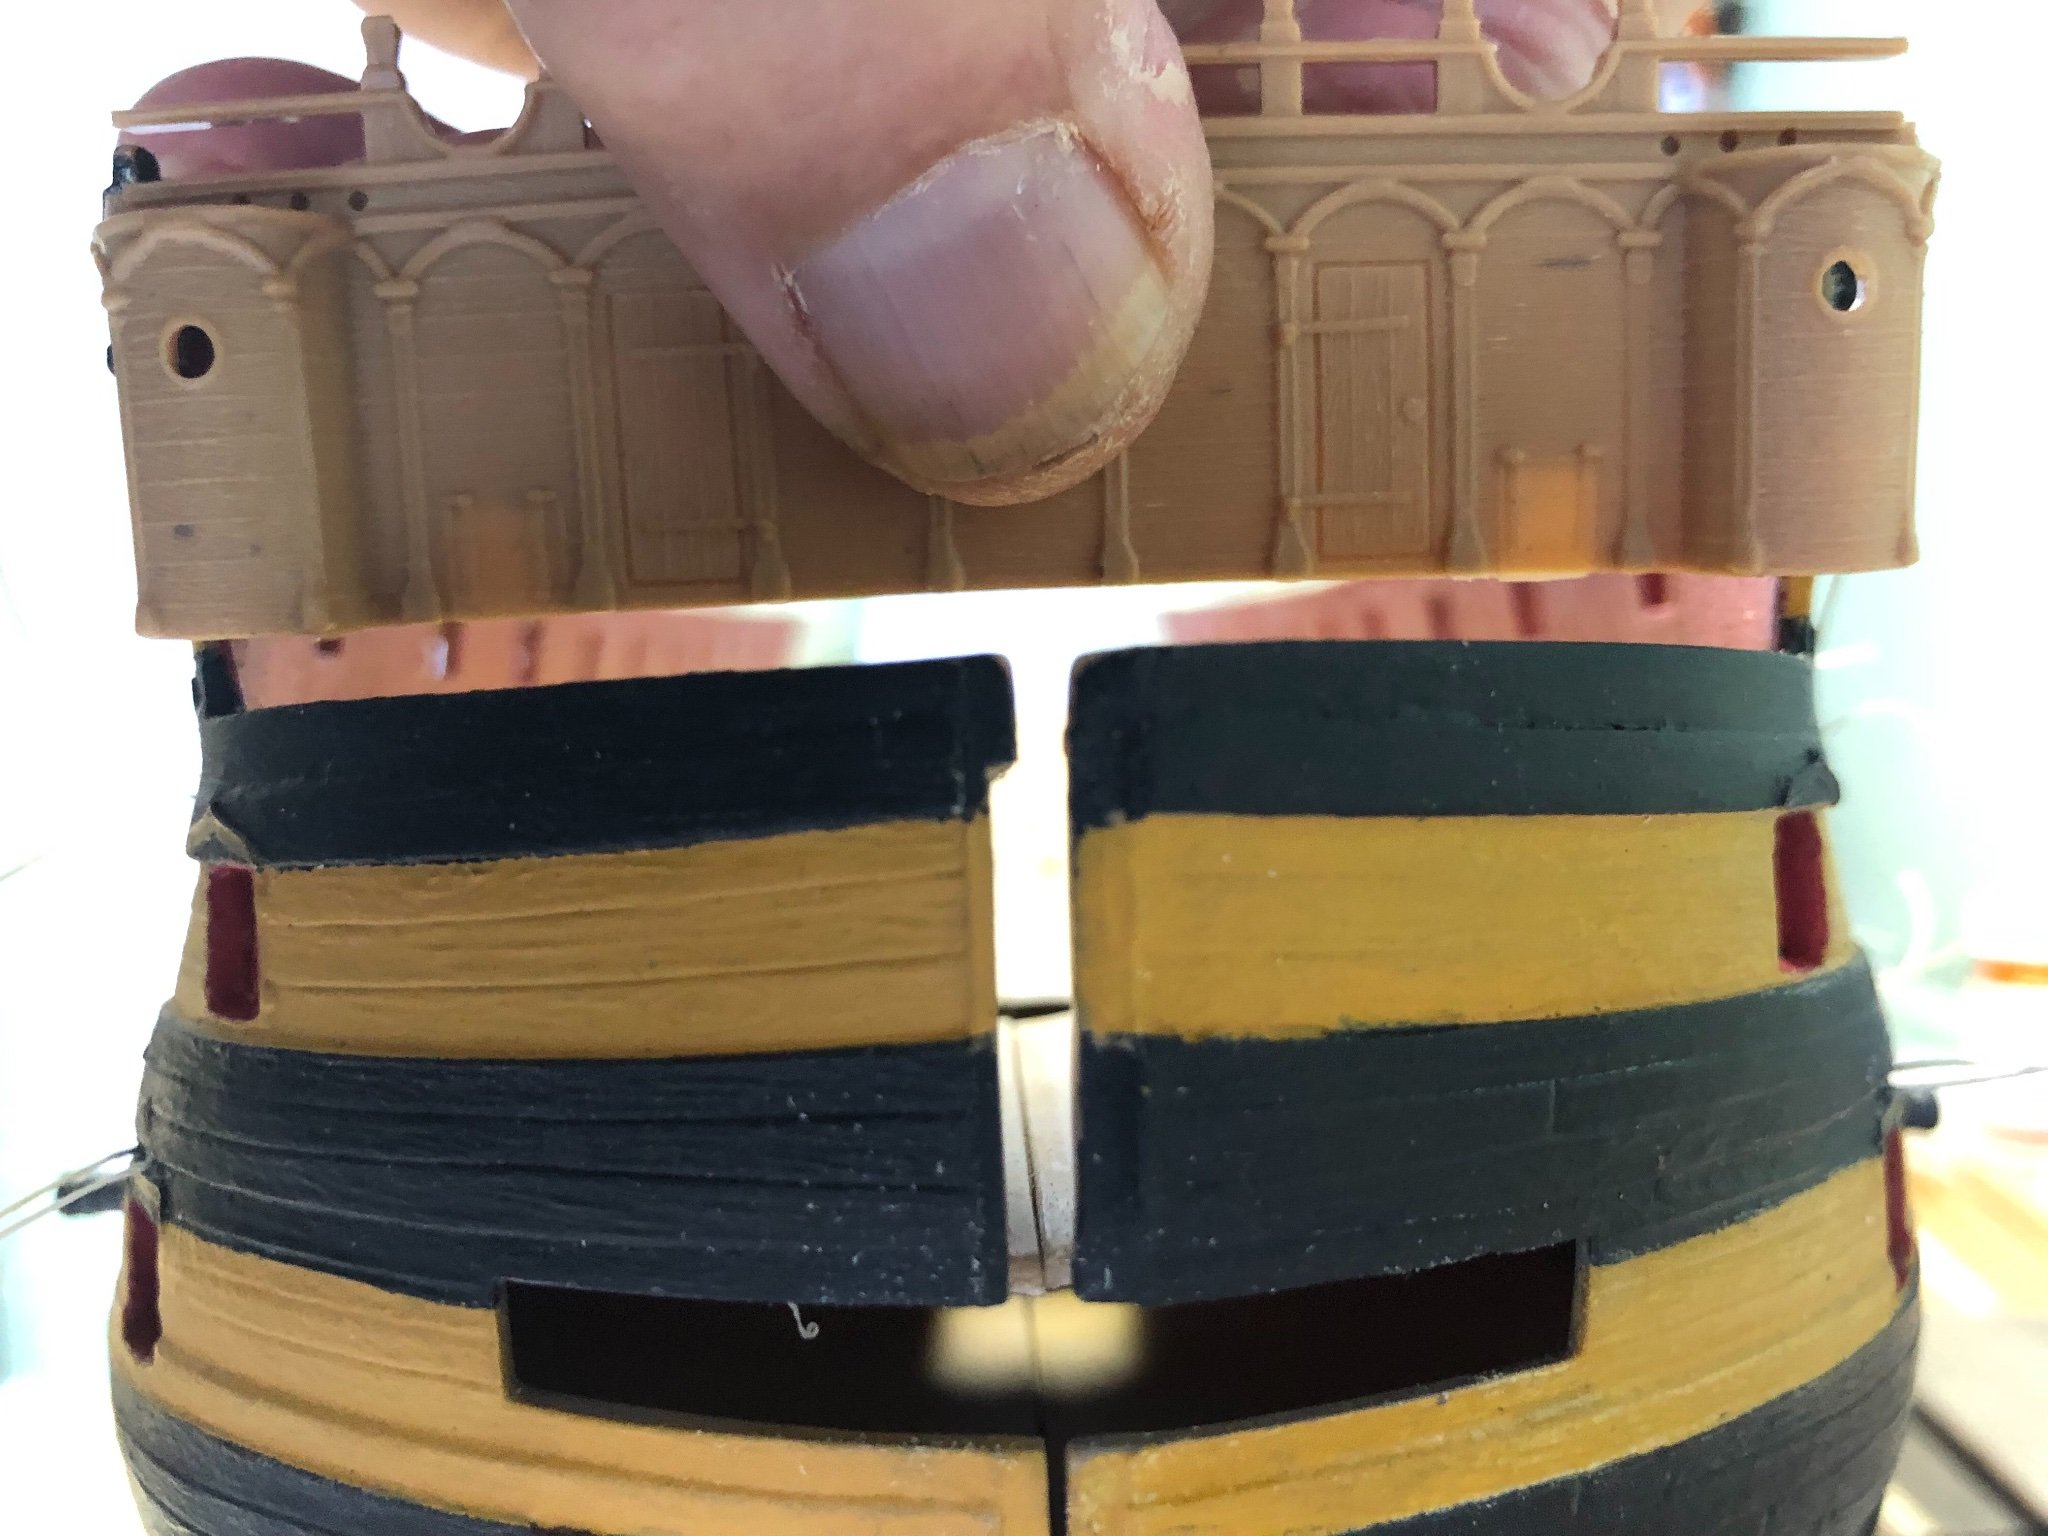
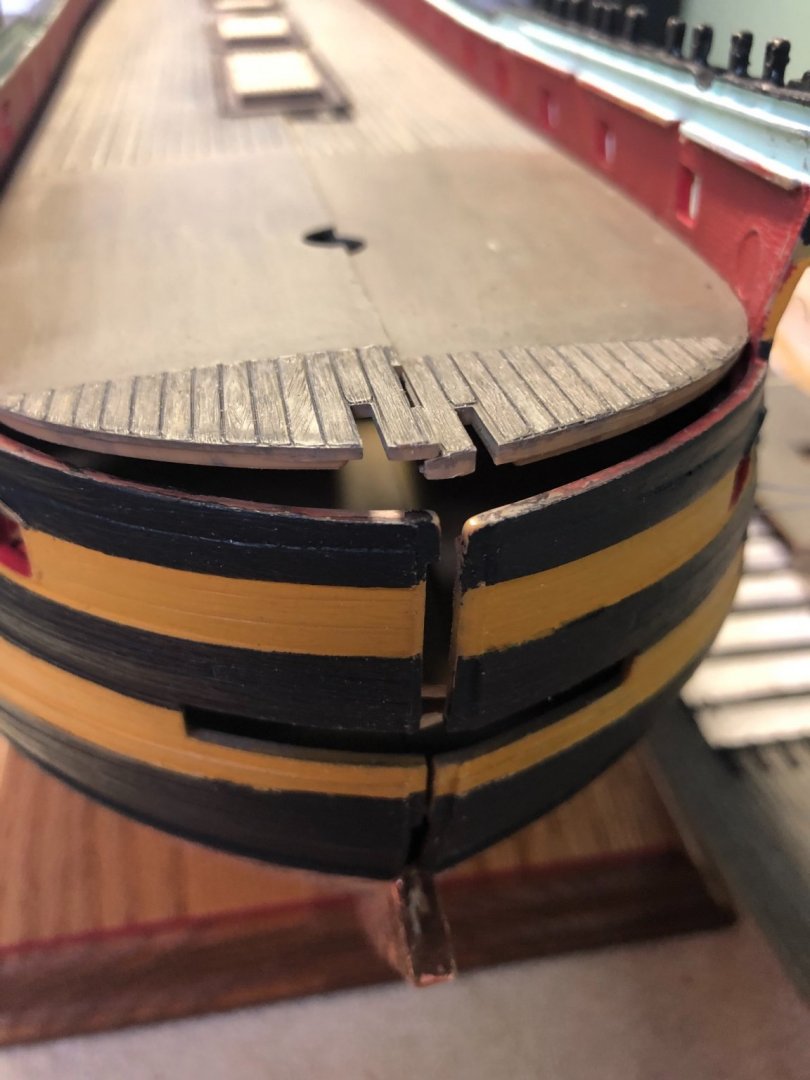
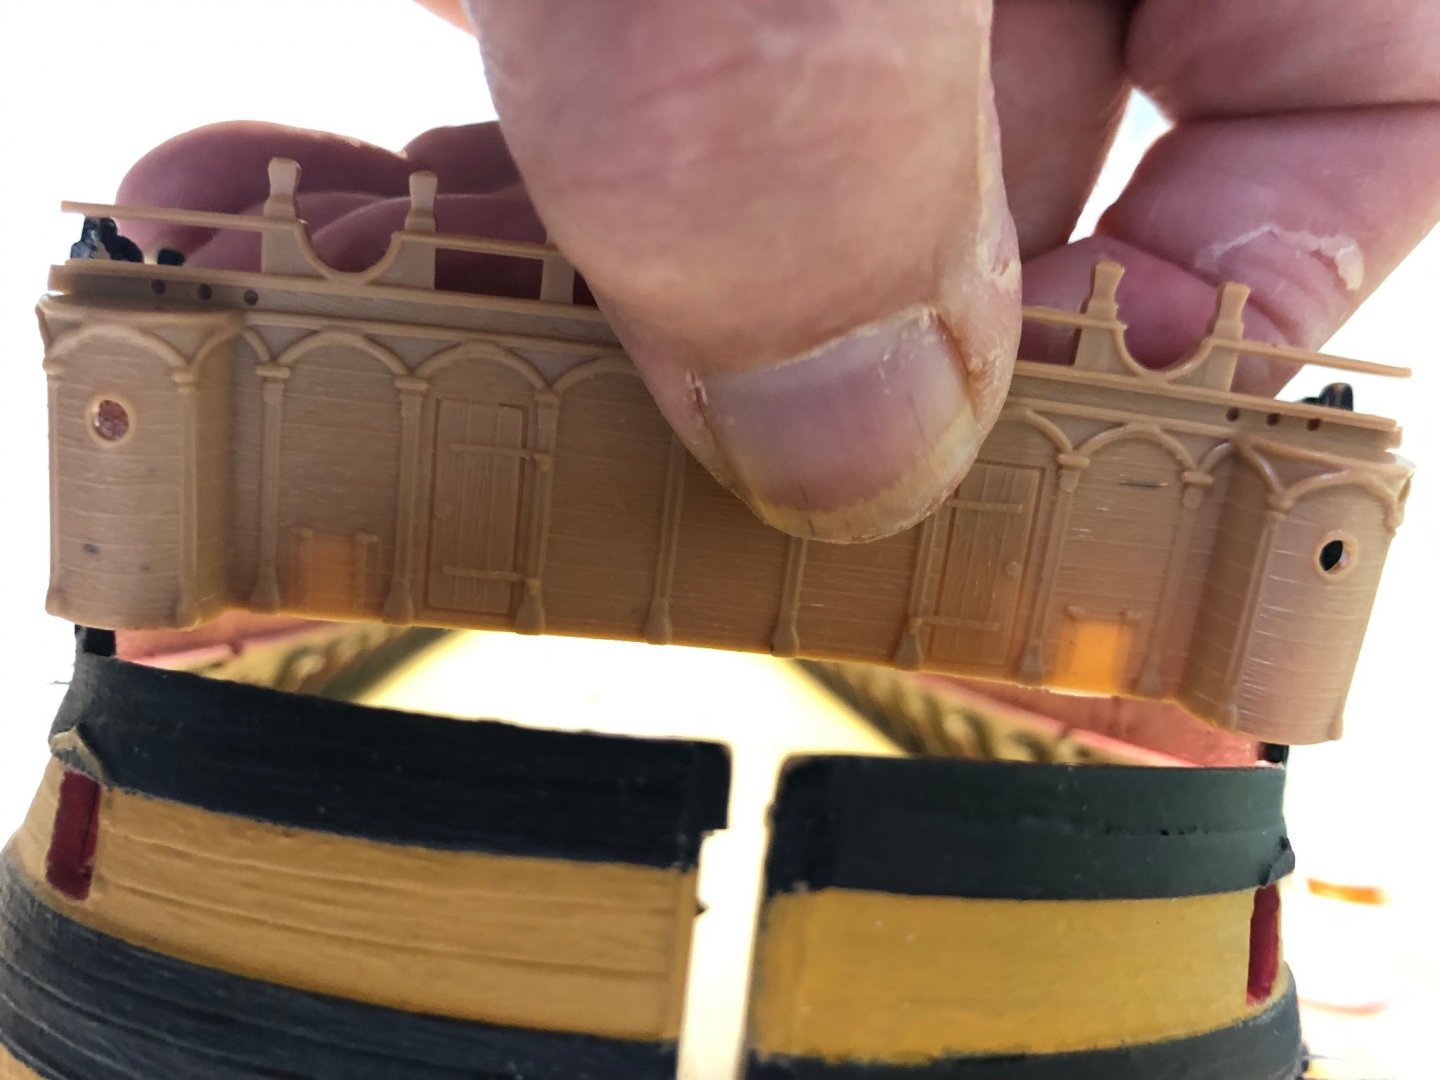
HELP!! Ok my friends I need you to tell me if I have done something wrong before I go any further. Yesterday I put in the Lower deck and the 30 guns. Today I am dry fitting the Middle deck which was snug and needed to be sanded a bit. I also skipped the Upper deck and dry fitted the Quarter deck just to check the width of the space. The Quarter deck was really snug but fit perfectly once I got it in. All good so far until I was curious about the obvious slant of the opening at the top of the bow where the bulkhead goes. It is wider at the top than the bottom. I held the piece up to the opening (as you can see in photos) and discovered it is to wide at the bottom? All the deck pieces are really tight. Did I do something wrong when I put in the Lower deck? Only thing I have glued in so far


-
Thanks Marc for the YouTube link. Really enjoyed watching that. Kevin I have actually not read either of those series. Will have to make a library trip. Thanks
-
As I mentioned, I watched it before and enjoyed it. But this time after working with the Victory model, and others, I found myself attracted to the rigging and the physical features of the ship more than the plot! 😀