


Balclutha75
-
Posts
179 -
Joined
-
Last visited
Content Type
Profiles
Forums
Gallery
Events
Everything posted by Balclutha75
-
 Andrew, I'm so very sorry to this tragic news. My deepest and heartfelt condolences to you. It's a beautiful photo of you guys. I have really enjoyed following your build log, filled with your wit, intelligence and humor, and I look forward to your return when you are ready. Nelson
 -
Larry, thanks for that. There are quite a few discussions here in various Viking ship build logs (binho, liteflight, Jack P, Matt H, among others come to mind, hope I have those right). Questions about if and when the shields might have been mounted. As I recall, your explanation is a good one. Louie da Fly, a Viking expert here, has posted quite a few good links to shield information. I can easily dig those up if you have not seen them. (No pun intended on "dig those up".) One problem with some of the kits apparently, perhaps even mine, is that as designed the kit would prohibit rowing with the shields mounted.
-
Cathead, thanks for checking in, much appreciated! The answer to new kit or fiddling with the old one is: both of the above! I did get a new kit and have been s.l.o.w.l.y moving forward on it. There have been some screw ups, but I'm up to the sheer strake now. There still exists the problem of that strake having moved away from the frame no matter what I tried. It's better than the first attempt and I am forging ahead with a possible solution that I think will look OK. The jury is still out. My plan has been to get the hull completed to a point where I'm satisfied, and then start a new build log with a few entries catching up to the current work. With luck that could be in a few weeks. I purchased a pack of #8 sewing sequin pins and will experiment with adding rivets. I have the original kit for experimentation. Bottom line: still at it and still having fun, even contemplating what the next kit might be. I lurk around here several times a week and have been keeping an eye on your ship, which is looking great. Hope the rough times in your life have eased off a bit. Your deck is looking nice as are the crew members, not to mention that bottle of mead! I have a 28mm Lagertha figure on order to keep my Captain Aegir in check. He gets impatient with my progress. Thanks again.
-
Hi Eric, Nice progress you've made, in spite of the frustrations and issues. In case it slipped your mind, here is killickthere's log entry where he discusses his 2,000 rivet solution using lace pins. Yet another option. I'm wondering what I'll do at this stage, presuming I get this far in my Take Two attempt on my kit.
-
A simple congratulations to you, sir. What an amazing journey. Hats off, bottoms up!
-
I wondered the same thing. If you look at the photo of the instructions Matt posted above, Fig 15, "Planking Courses Compacted" according to my translation, you really can't see why scoring was necessary. And in fact, here is a build log from Mike Dowling where he says "I felt no need to cut along the strakes, as suggested in step 12 of the instructions". And later he notes, "the bow and stern the steps on the frames are of no use at all. It was impossible (for me, at least) to lay the strakes against the frames. I ended by fairing the the frames and erasing the steps." I also struggled with those frames at bow and stern, as I think you are as well Eric. The steps were only useful to me as a position guideline. Well, I decided to order another kit from Ages of Sail, perhaps a first round defeat, but it makes sense for me.
-
Thanks Louie, and I’ve really enjoyed all the Viking history stuff you have posted on various logs. Glad you survived the Battle of Hastings!
-
As a newbie modeler all I can offer is it’s looking good. But I just finished reading “The Hard Way Around: The Passages of Joshua Slocum” by Geoffrey Wolff. Highly recommended if you haven’t seen it. Good luck on your build.
- 70 replies
-
- 2
-

-
- Spray
- bluejacket shipcrafters
- (and 1 more)
-
That all sounds pretty reasonable, but they will (hopefully) look cool on a calm bookshelf. 😀
-
Matt and Louie, thanks so much for spending time on this. I have seen Matt's excellent log, and he even answered a question for me about a step that I'm not even close to yet. 🙂 I did see the instruction about scoring the wood, but I was worried that I'd break the plank if I attempted that, especially after the step above where they recommended soaking the wood in a 50/50 glue solution first. But clearly that's something I'll have to experiment with and should have tried that on some scrap pieces before forging ahead. Matt, thanks for that clarifying photo as I had not noticed it previously. Much appreciated.
-
Thanks for the comments , much appreciated. cathead and liteflight, I've noted your logs, seen that I'm not the only one with this kind of problem, and trust you guys will come up with a good solution. Louie, yes irony is more accurate, as of course no harm was meant or implied, I think I understand what you are saying as a fix, and I do have a couple of small metal C-clamps. But I'm reasonably sure the frame will crack if I attempt that without somehow softening the hull. It's a lot stiffer than I thought it might be. I've considered just continuing as is, winding up with a new length to beam ratio, then shimming the frames and extending the deck area. But the shields would look terrible hanging at that angle, though I could leave them off and consider it a cargo boat. No doubt in the real world that craft's seaworthiness would be compromised, which I might not care about for a shelf model. But I'm leaning towards the Skipper's solution and some small business for Ages of Sail. Then I can use this one for practice: staining, painting, shaping the mast, dying and sewing the sail, tying the rigging. Every step of that will be something new for me, and no doubt I'll get something else wrong. I could construct a better keel jig and a Jack Aubrey style frame alignment tool. Part of the apprentice journey I suppose, even at seventy-mumble! By the way, md1400cs, that was funny. Thanks again. - Nelson
-
Thanks md1400cs! I'm actually pleased with how it generally looks, and have had a lot of fun working on it.
-
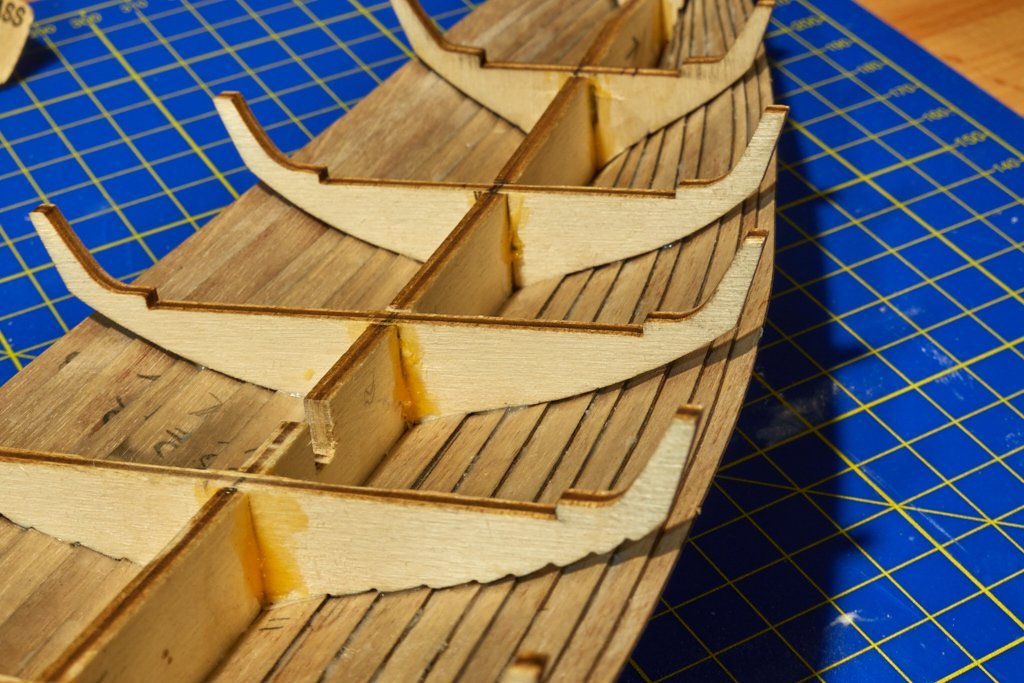
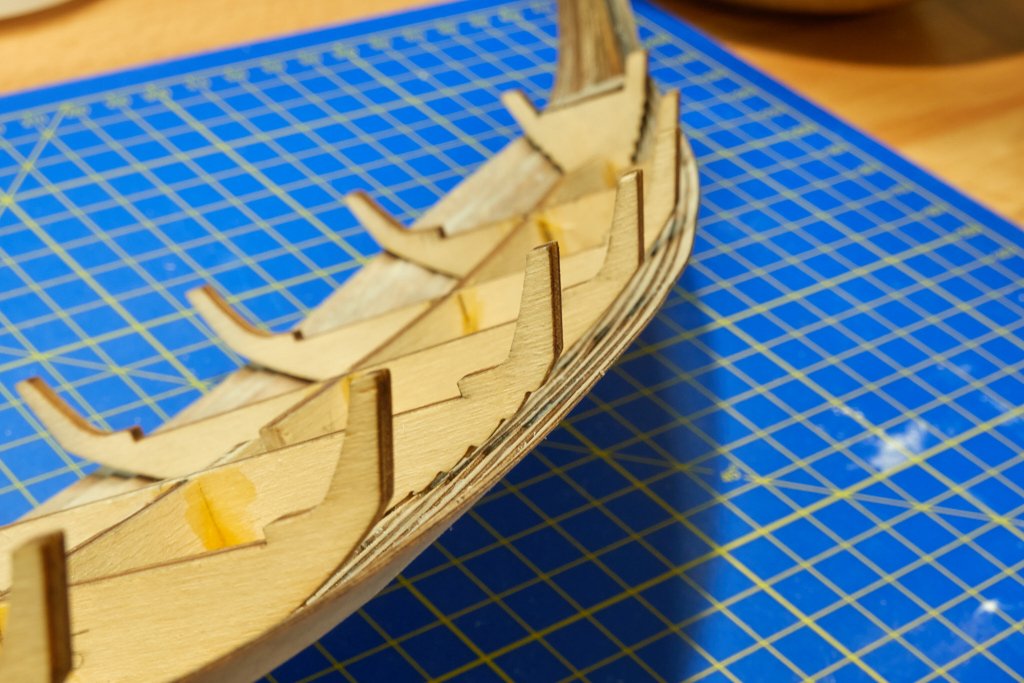
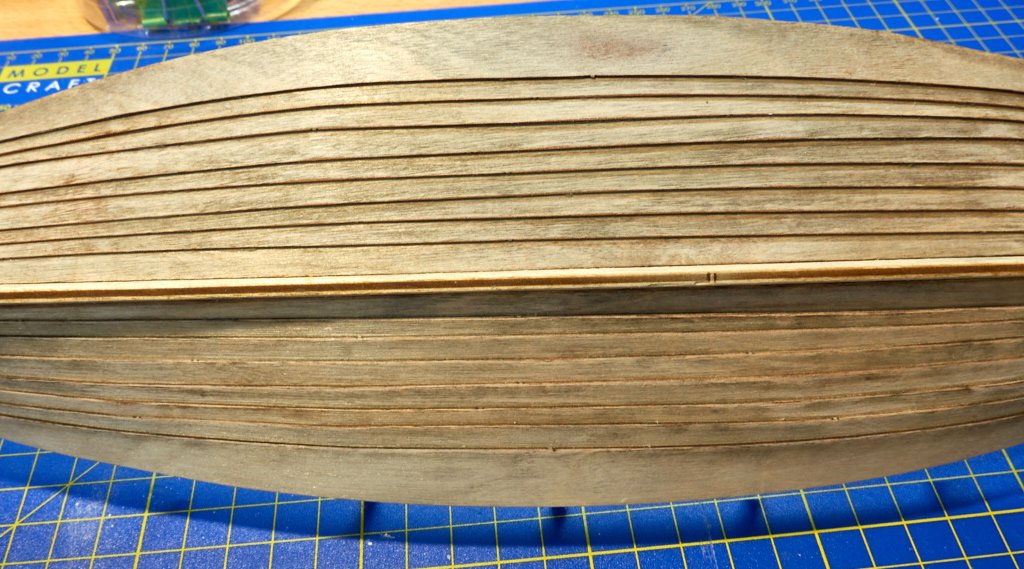
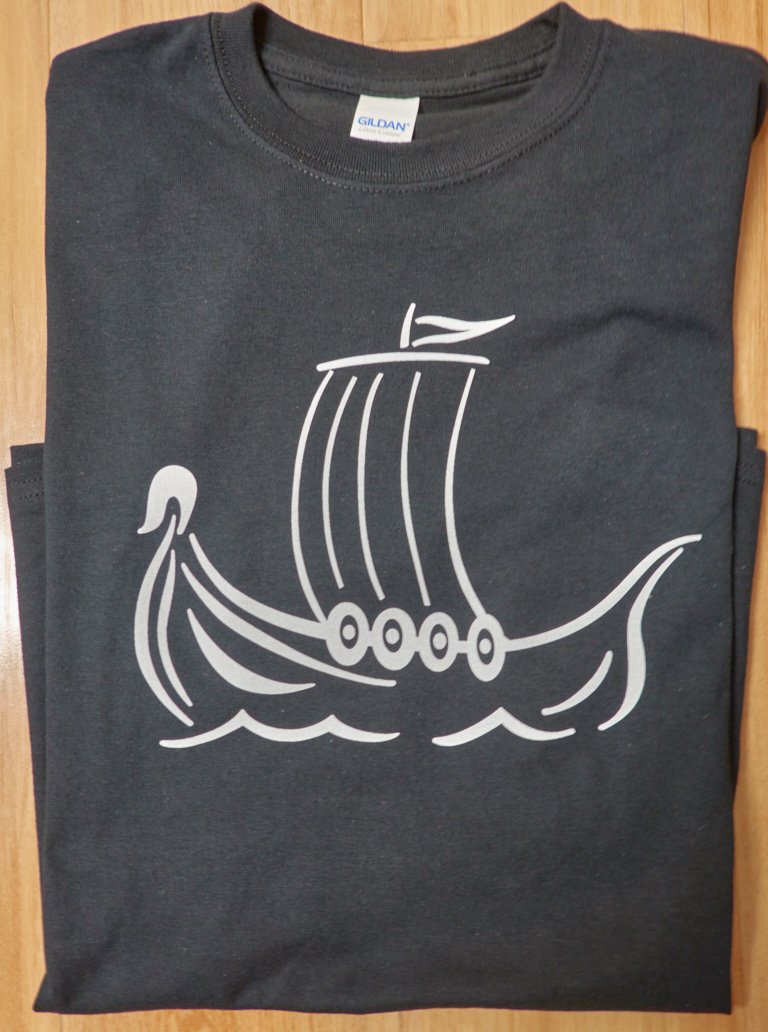
I suspect many of you have been waiting on tenterhooks to see how this build has been progressing, and that you can recognize sarcasm when you see it. I've slowly moved forward in between several large home projects, and have now reached a possible impasse. The hull planks have been moving steadily away from the frames for several strakes. I saw this happening but figured I would come up with something near the last strake. And I think I have: my goose is cooked! As you can see, the angle of the upper strakes needs to be more vertical. I've thought of steaming or soaking the entire side of the boat and bending inward so I can glue to the frames. But I suspect disaster lies down that path (?). The Skipper (she doesn't want to be an Admiral) has said that for "only" $108 I should chalk this up to a learning experience, get another kit, and start anew. There is clearly some benefit to that strategy, and perhaps the next best move. I suppose some solace can be found in James H's build log. He is an MSW Admin who gave a generally favorable review to this kit. But the last entry in his nice log simply says: "Struggling with pre-formed ply planking at moment, so put on hiatus." By the way, I turned 71 last month and the Skipper got me a very nice stylized Viking boat T-shirt. Looks great!
-
Thanks for posting and good luck moving forward. Indeed, this should be helpful for future builders. I've run into a similar issue on my Amati build, fairly serious it seems to me. I'll try to post an update to my build log with a similar hope - offer help to the next beginner tacking the kit. Still, you've got a nice boat looking here.
-
Very belated Happy Birthday and congrats on getting a photo in the NRG calendar! I bought one last night, got the shipping notice already, and after the fact saw the thread about it here. Cool!
-
Also sorry to read of these troubles. I can't offer any help, but it looks like you have some great minds working on it. I'm having a similar problem on my Amati kit, as more planks are glued they are getting farther and farther away from the frames. I'm about to turn the corner and be above deck. Not sure what I'll do as there will be a gap between the frame and plank that shouldn't be there. I don't recall other Amati builders having this problem. Hopefully there will be a solution, but I'll burn that bridge when I'm standing on it. Good luck with your issues.
-
Andrew, Yes, the Jack P log is another masterpiece, full of all kinds of fascinating diversions, like yours. Here is where he drills the holes for his nails. He may mention the source farther down. I should reread the whole thing. Lace making pins were new to me. I've since downloaded a catalog (catalogue?) from the Tichy train group that has lots of track nails. Rolling your own crossed my mind and I even wondered if I could use square stock, but I let that thought quickly go. - Nelson
-
In case you missed this guiding light, check out killickthere's log which has good info how he put 2,500 rivets in his Billing Oseberg. He used lace making pins. There may be other options I've looked into. But I'm not yet sure if I'll cross that bridge for my Amati kit, or burn it!
-
Thanks for the encouragement Steven! There are a number of construction flaws I could point out, but all in all, considering it's a first ever model so far it's "OK". Next up, I've just purchased a can of MinWax pre-stain conditioner and will start experimenting with applying stain to some scrap pieces.
-
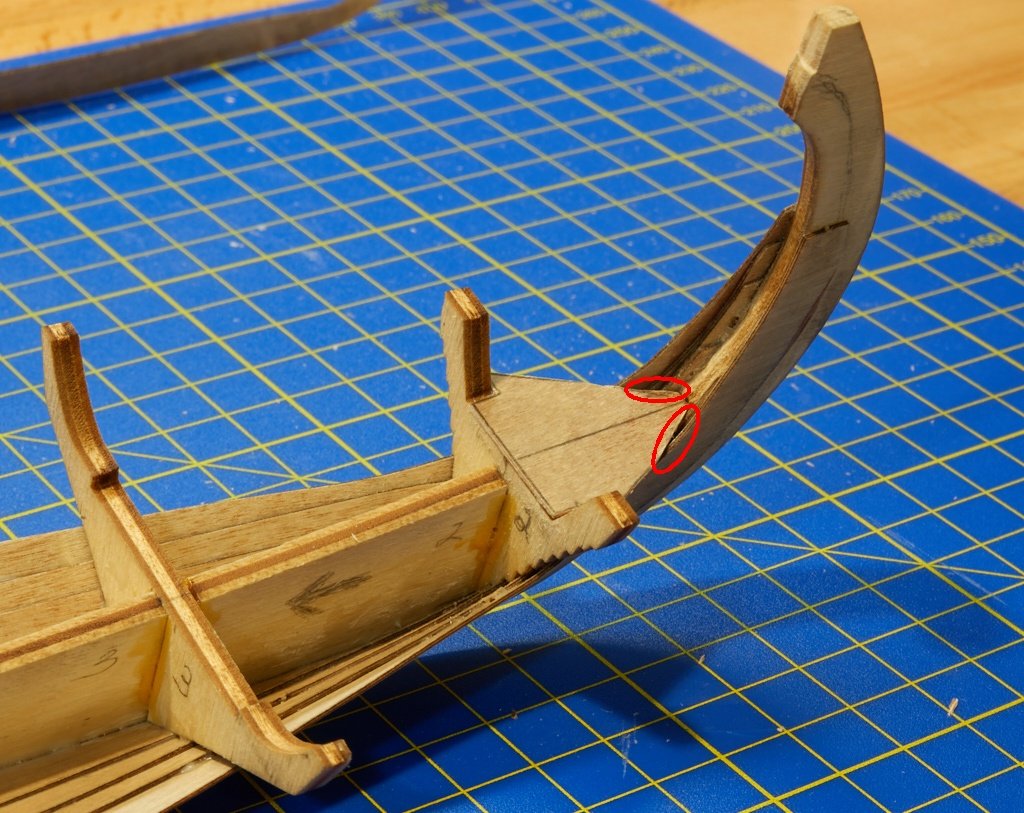
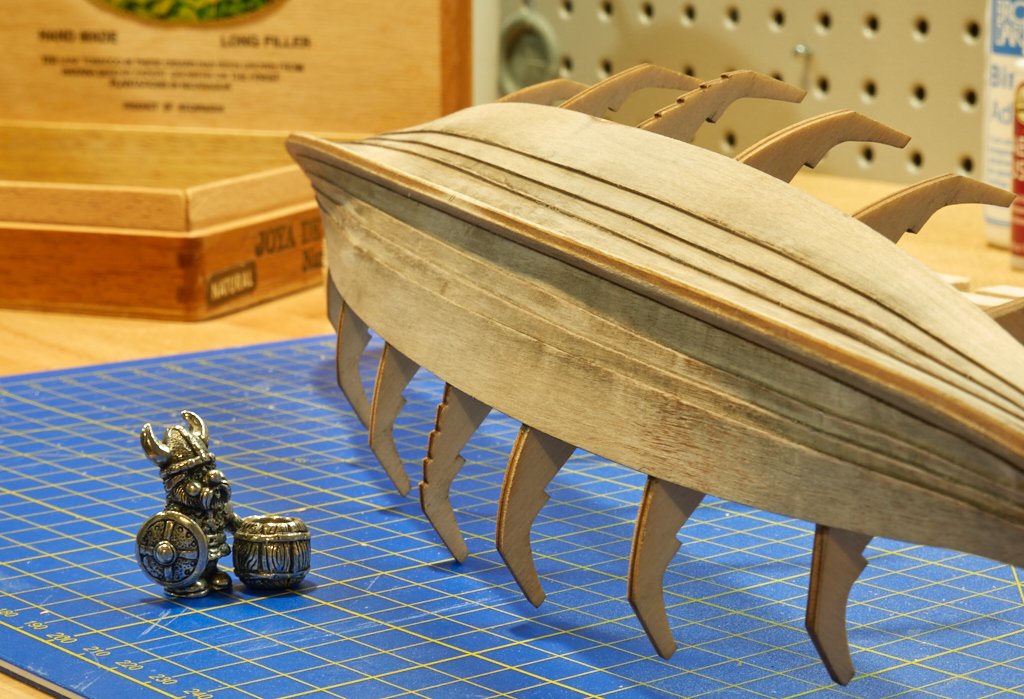
Making some slow progress, now have four strakes on each side, but want to point out a problem in case it helps another beginner some day. Kind of related to my shim question above. After the 4th strake I dry fitted the bow and stern deck pieces and they didn't fit. The strakes were bent in to far after the last frame. So I'm having to sand a bit off each of the decks. Now I'm planning to glue these pieces before adding any more strakes, which should help reestablish the proper curve to the hull. The circles show where I had to sand to get the deck to fit. Here's Captain Aegir, in authentic Viking garb, checking out the hull. He wishes Floki was working on it instead of me, but so far he's not planning to cut back on my ale allowance.
-
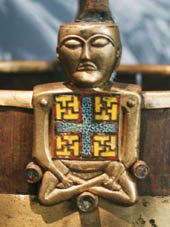
The red-yellow resonates with me because I was thinking to make my top two strakes red and yellow, and do the sail similar colors. But I also like your red-yellow-blue, 7th one down, I guess reminiscent of the Sea Stallion. In any case another great use of your 3D modeling. The "Oseberg Buddha" has a bit of red-yellow theme. I have a couple books on my bookshelf with red and yellow dust jackets that look nice. Non-Viking related but kind of classics in their genre.
-
Looks nice to me. Your 3D model visualization is pretty cool. Can I ask a question here? From post #76 it looks like those strakes are already glued in place. Does that mean you'll paint carefully using masking tape? As opposed to painting before gluing? Thanks.
-
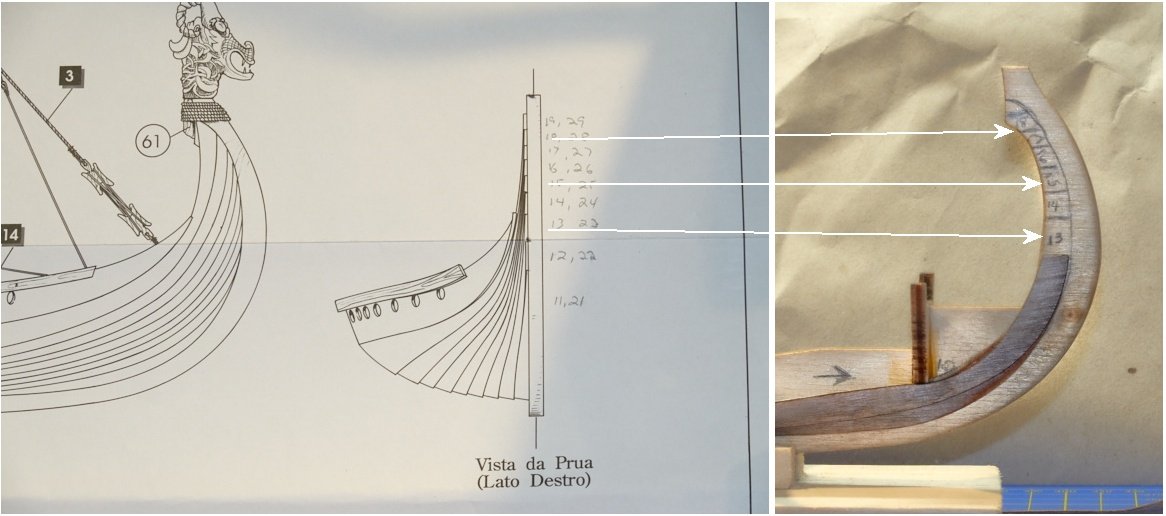
My little shim seemed like it achieved the desired effect. Whether it was actually necessary or not is an open question, but I'm glad I did it. I did do something I had thought of earlier up thread - used my new divider to transfer the distances on the 1:1 scale drawing to the bow. Presumably that will help in correctly positioning the strakes as I proceed with gluing.
-
Ditto that, really cool! I'm curious to see what you have planned for the black and red and by the way, thanks for that interesting color chart and history you posted a few week ago. I bookmarked it for future reference at the time.