Balclutha75
-
Posts
179 -
Joined
-
Last visited
Content Type
Profiles
Forums
Gallery
Events
Everything posted by Balclutha75
-
 Thanks for sharing this process, it's all been super educational for me. I was interested in your staining before removing the planks, something I had been scratching my head about. I decided to glue first stain later. Good luck and stay well!
 -
Another vote (from a complete newbie, so worth less than $0.02), for Walnut A. Agree with Cathead that the mahogany Is too red. Did you decide against oak? The Model Expo paints I have are short, squat bottles. Now I see there’s a practical reason for that. Thanks for the linguistic lesson. Louie, your Hasting Battle looks incredible.
-
Thanks Steven, I’ll probably go this route. But no worries, no doubt I’ll have something worse visible to everyone before I’m done.
-
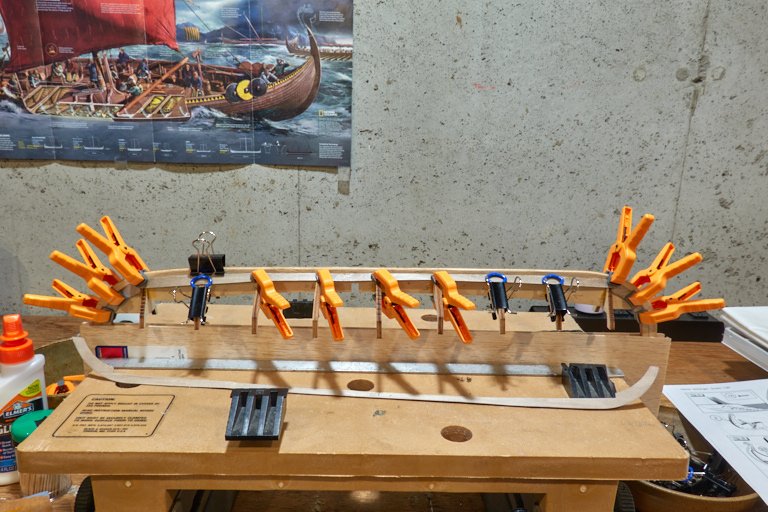
Thanks, yes that could work and I'll do that. Actually, the shadow is not as bad as it looks in the photo because more clamps will help, but they obstructed what I was trying to show. My wife said I should just ignore it, but it's kind of fun to think through a solution to the problem. And I think it will look better. I'll wait another couple days before gluing. Hopefully the finished model will have "coolness". 🙂 By the way, as you can see I'm making use of the clamps you showed me. I found the soft handled ones at the pharmacy a week ago. I like the colors since I can find them easily.
-
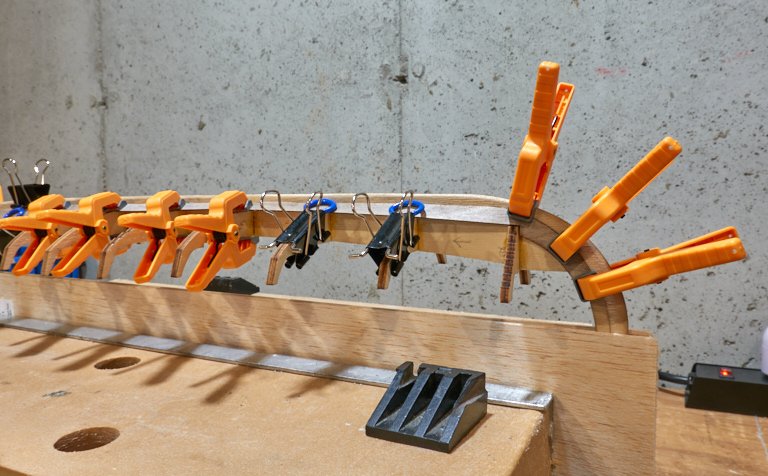
Don't know if this shows it any better. So far it's the best option I'm coming up with that's within my skill set.
-
I'm enjoying your build log Andrew, as I stumble along on my Viking ship. Seems like Viking ships rule on this forum right now. My plan is also to go with a walunt / oak mix, so I'll be interested to see what you come up with, and will presumably learn as you go. I have paints from Mode Expo on hand already. Nelson
-
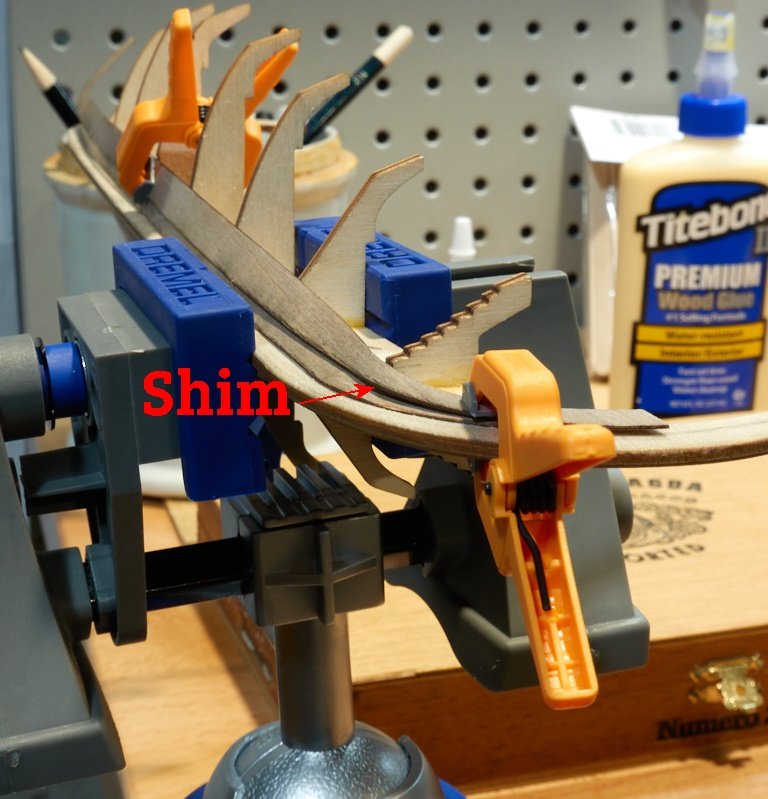
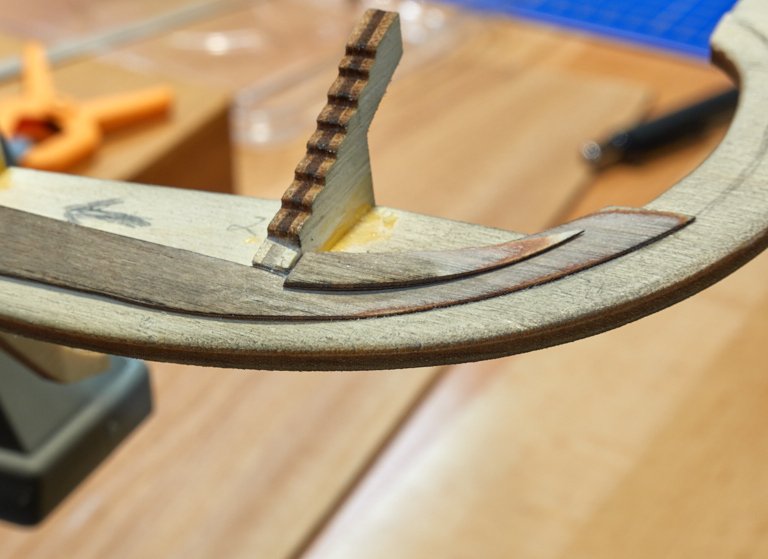
Thanks, but not quite so fast Steven! 😄 I have a screw up in the planking. Due to poor fairing of the frame, excessive clamping, or some other combination of missteps, I've broken the smooth curve of the hull at the last frames. This photo should indicate it, though this a bit exaggerated, it's not quite this bad. You can see the divot in the garboard strake. My plan for making it better is to place a tapered shim under the next plank, something like this. Then the next plank can resume the desired curve. It looked pretty good when I laid the next plank on top of the shim, it kind of disappears. Please stop me before I start gluing if someone has a better idea. Thanks! Nelson
-
With the dog days of summer here I've been maximizing outdoor time and haven't done much on the boat in recent weeks. But the other day I decided to take a step forward and glue the garboard strakes. I first bent them with the water immersion technique mentioned above, and the result seemed pretty good. This is where she sits right now. (Starboard side view, bent port side plank sitting in front) With this bending technique - soak, clamp, glue, clamp - I can only do max one strake per day, and since that won’t happen it will be well over a month before the hull is planked. I’ll report back then. Being my first ever build, at this point I have no idea how good of a job I’m doing or if things will turn out well. Perhaps that’s makes this hobby seem like an adventure!
-
I was mostly kidding! I'll no doubt at least give it a try and see what happens, that will be some months from now. I'll report back either way. Thanks.
-
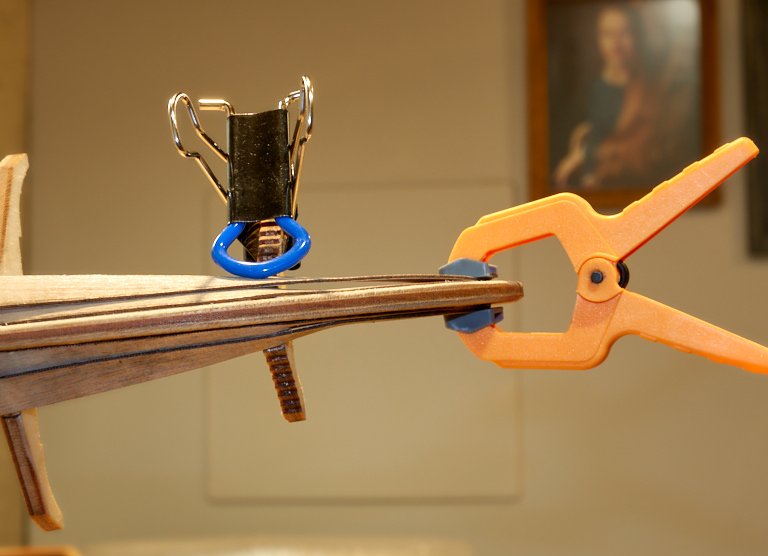
Eric, thanks again, really appreciate it. I found "soft grip binder clips" on amazon, a Staples brand, so I can probably find them at any office store. Great idea, whoever thought it up, I'll give it a try. The clothespin trick is new to me as well, thanks for that. Now I'm looking around the house and wondering what other things I might have that could be useful!
-
killickthere, you may have convinced me that I shouldn't go there! Just kidding ... kind of. As a newbie to this it's exciting to see all the possibilities out there. Jury still out on what I'll be able to accomplish, but the talent and willingness to help on MSW is impressive. With any kind of luck I'll be able to contribute some day. Thanks for your detailed info.
-
Sure, thanks. This is a new hobby for me so I'm still the kid in a candy store. I did a quick Ebay search and found some pins "Bridal & Lace Pins", two different sizes but the difference is just length. You really did nice work with those!
-
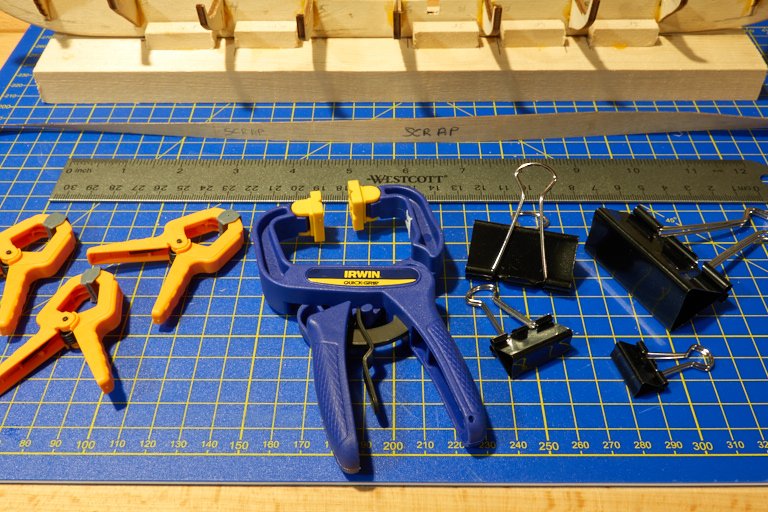
Thanks again Eric. Here is my meager clamp library so far. (I have more than pictured, but those are the only styles.) The ones you pictured would probably do the trick, or in any case be handy to have. Looks like you sacrificed a binder clip in order to make two of your clamps, maybe slid some plastic/vinyl tubing over the arm? I used hot tap water for the first try, but when I practice on the second piece I might add some hot water from a tea kettle, see what happens.
-
Ditto that! I've wondered about the iron anchor that came with my Amati kit. Didn't feel right, yours looks great. Are these the kind of lace pins you used? https://www.amazon.com/dp/B000PSFC46/ Thanks.
- 35 replies
-
- 1
-

-
- oseberg
- billing boats
- (and 1 more)
-
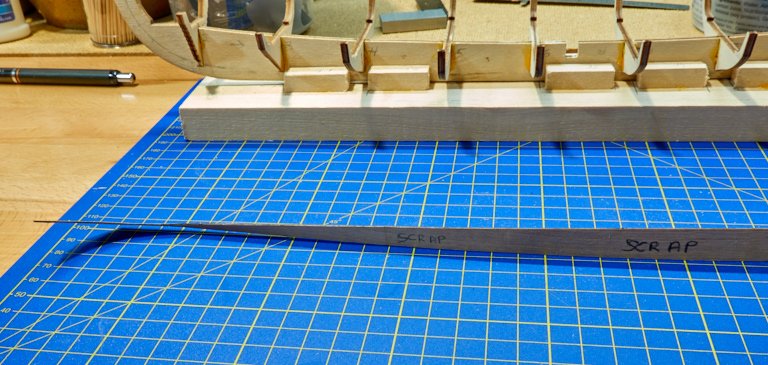
Eric, Thanks much for the information Here's where things are so far. A couple days ago my wife let me use her curling iron, about the same diameter as those blank benders. I cut a scrap strip from the plank sheet, so I'm using the same plywood. I got the wood wet, but didn't have any luck with the iron. Next she gave me an old aluminum baking pan she never uses. I soaked the strip in there for several hours, then clamped it to the frames to dry. The result is ... ... which I think is a step in the right direction. There might be a small clamp divot, but I wasn't paying attention, hadn't seen your reply yet. It could have been there, but in any case it's minor. I'll experiment with another scrap piece with this in mind. The frames are pre-stiled (thanks for defining that), so yes that will help. Soon I'll bend the real plank, but will rehearse clamping it before applying the glue. The clamps I have tend to slide off frames 3 and 9, so I'll have to figure that out. Thanks again!
-
Thanks much Matt. I started a build log and can post questions there, but appreciate it. Good luck on your next project.
-
Nice job on the “Jack Aubrey Frame Jig”. I discovered that after I haphazardly glued my Viking frames. Yours will hopefully turn out great.
-
Looks nice! If mine comes out half as good I’ll be happy.
-
bigpetr, Thanks for that thought. The Amati instructions say "Before applying upper strakes it is advisable to make small cuts (along dotted line) ... These cuts will help the wood to bend and to lean into the lower stake for an easy glueing". However your post got me thinking. I just received a pointed divider from Model Expo. I guess I can use that to transfer the distance between strakes from the plans to the model, and make tick marks on the frames, just like a real model builder! - Nelson
-
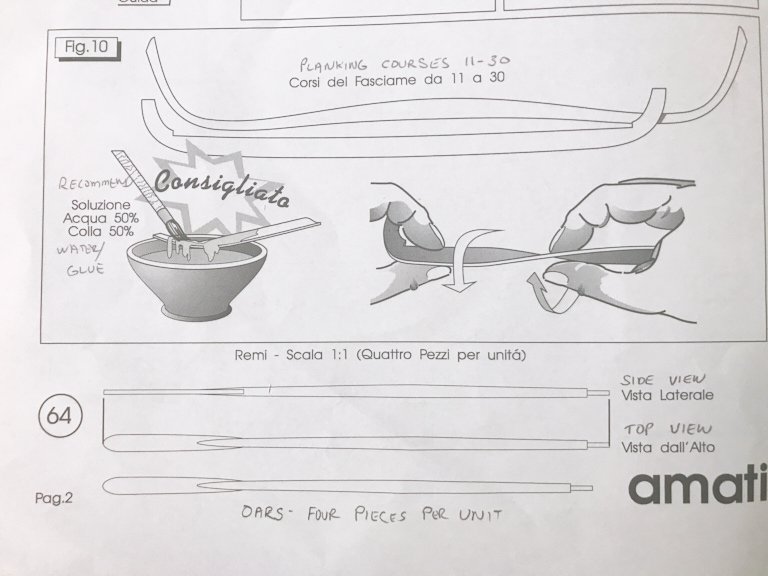
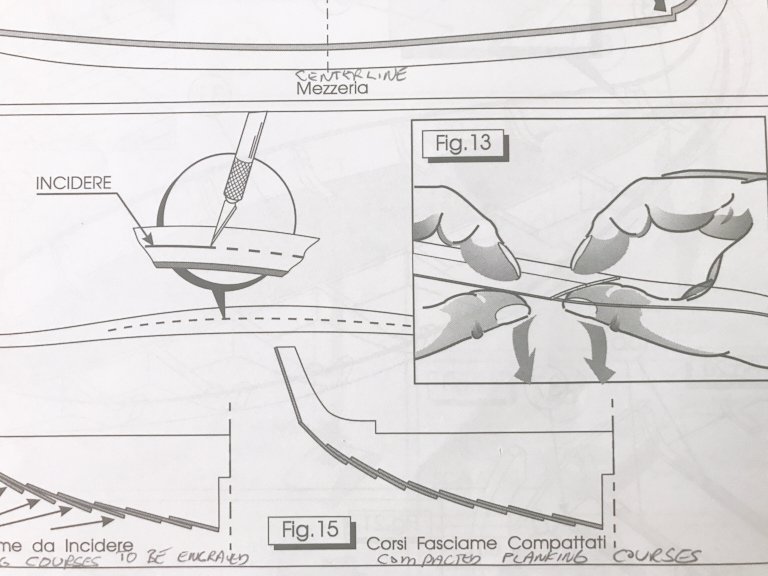
Thanks for the encouragement Steven. I have not looked at many scratch build logs since they can be intimidating to a newbie! But I'll take you advice and dive in. Here's my question, which may be answered in a log, but I'll post here anyway. The planks need to be both bent and twisted. Amati says to soak the planks in 50/50 solution of white glue and water, and also to score the center of the plank with a blade. I'm not too thrilled about doing that, as I'm pretty sure I'll mess it up. What if I tried to bend the planks using heat and water? I've seen Chuck's planking video and he makes using the travel iron look easy (ha-ha). I could get one of those irons, or invest in a basic plank bender. Seems like that would be more interesting and educational than the water/glue/score process. I could practice on strips from the plank sheets. Thoughts appreciated. But I will look through more logs. And I am having fun! Thanks, Nelson
-
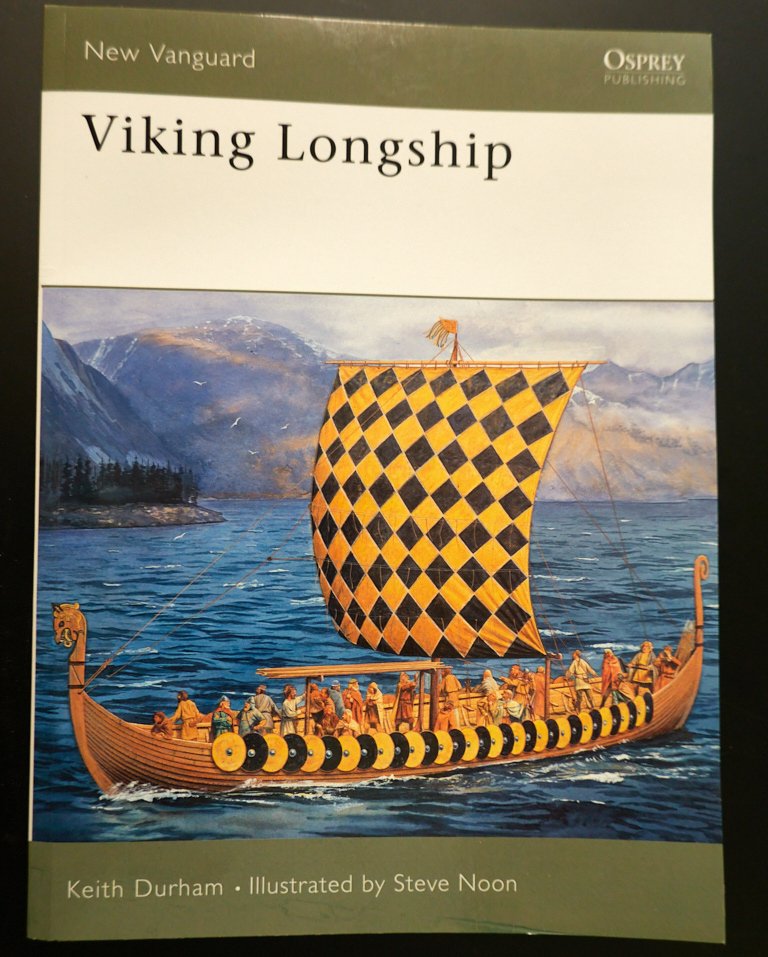
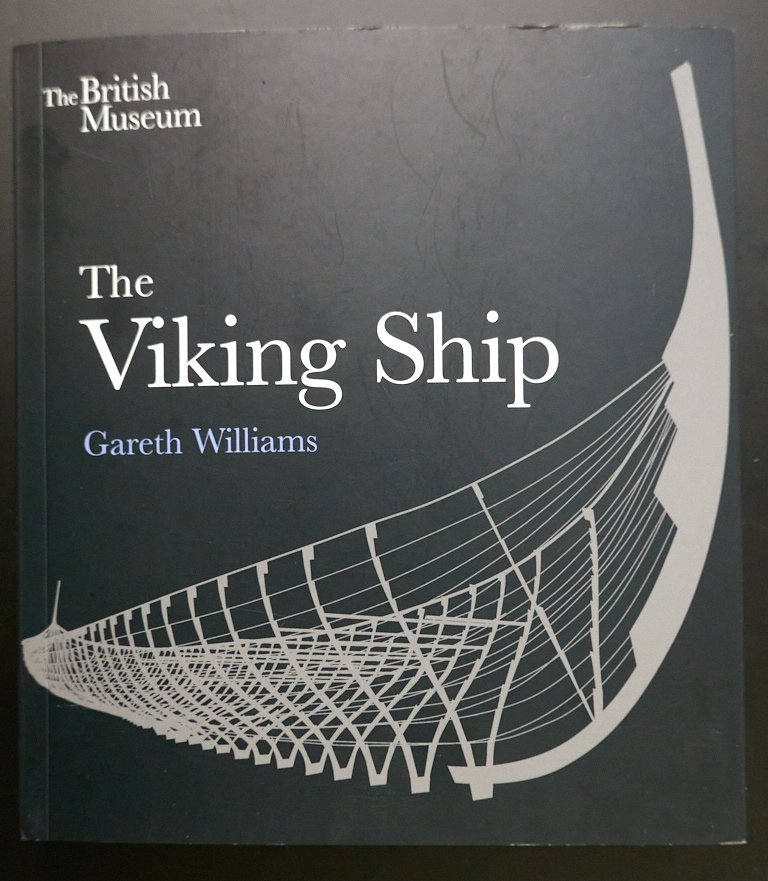
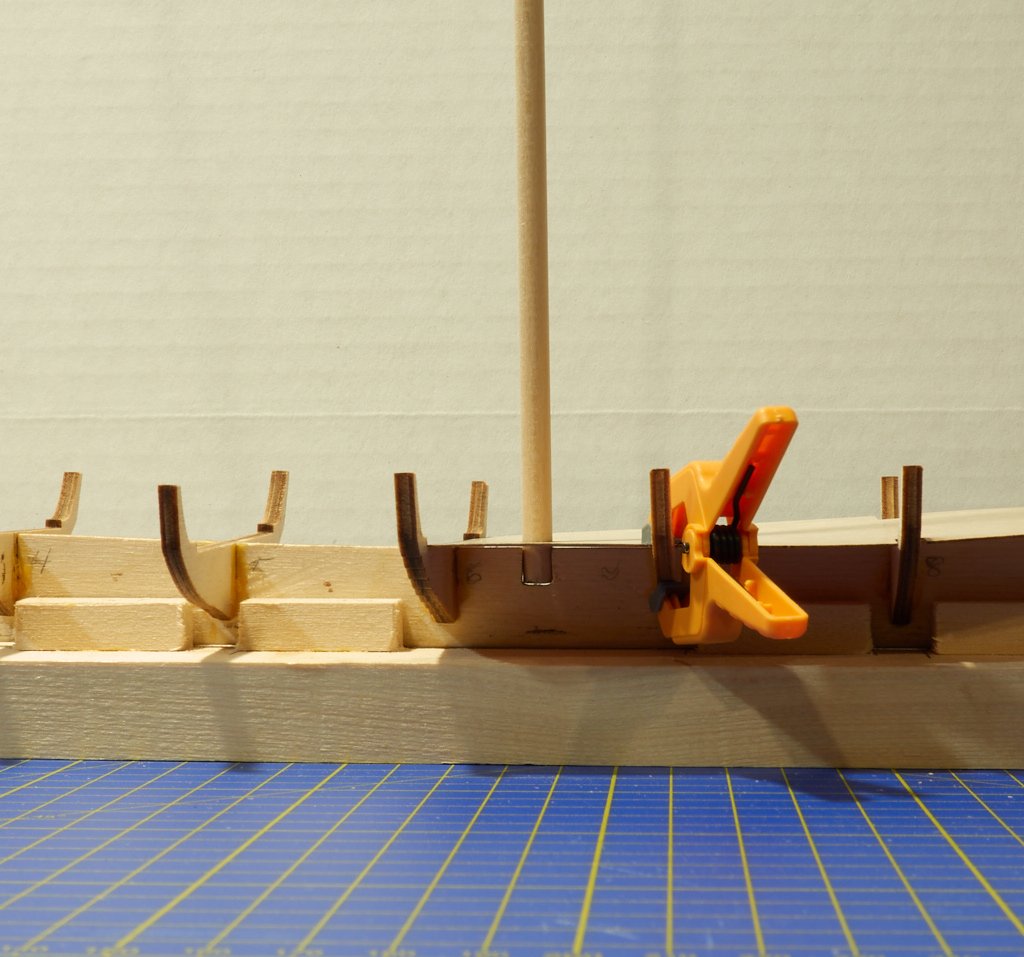
For research I purchased these two books. Both are enjoyable and give a layperson background to Viking ship history and construction. There is plenty of stuff to find online and I have a bunch of links saved if anyone is interested, some of which came from MSW. Last night we started watching a 3-part YouTube series “Evolution of the Viking Longship”. That link is the first episode, it’s pretty good. At this point I tried to fit the mast and learned that the slot in the keel was too narrow to accept the dowel, so I filed that out. I realize this is not an exciting photo to you guys, but I was pleased I discovered this before the deck or planks were glued. Learning the importance of dry fitting. Next up: the intimidation of planking the hull. I will definitely have a question or two. - Nelson
-
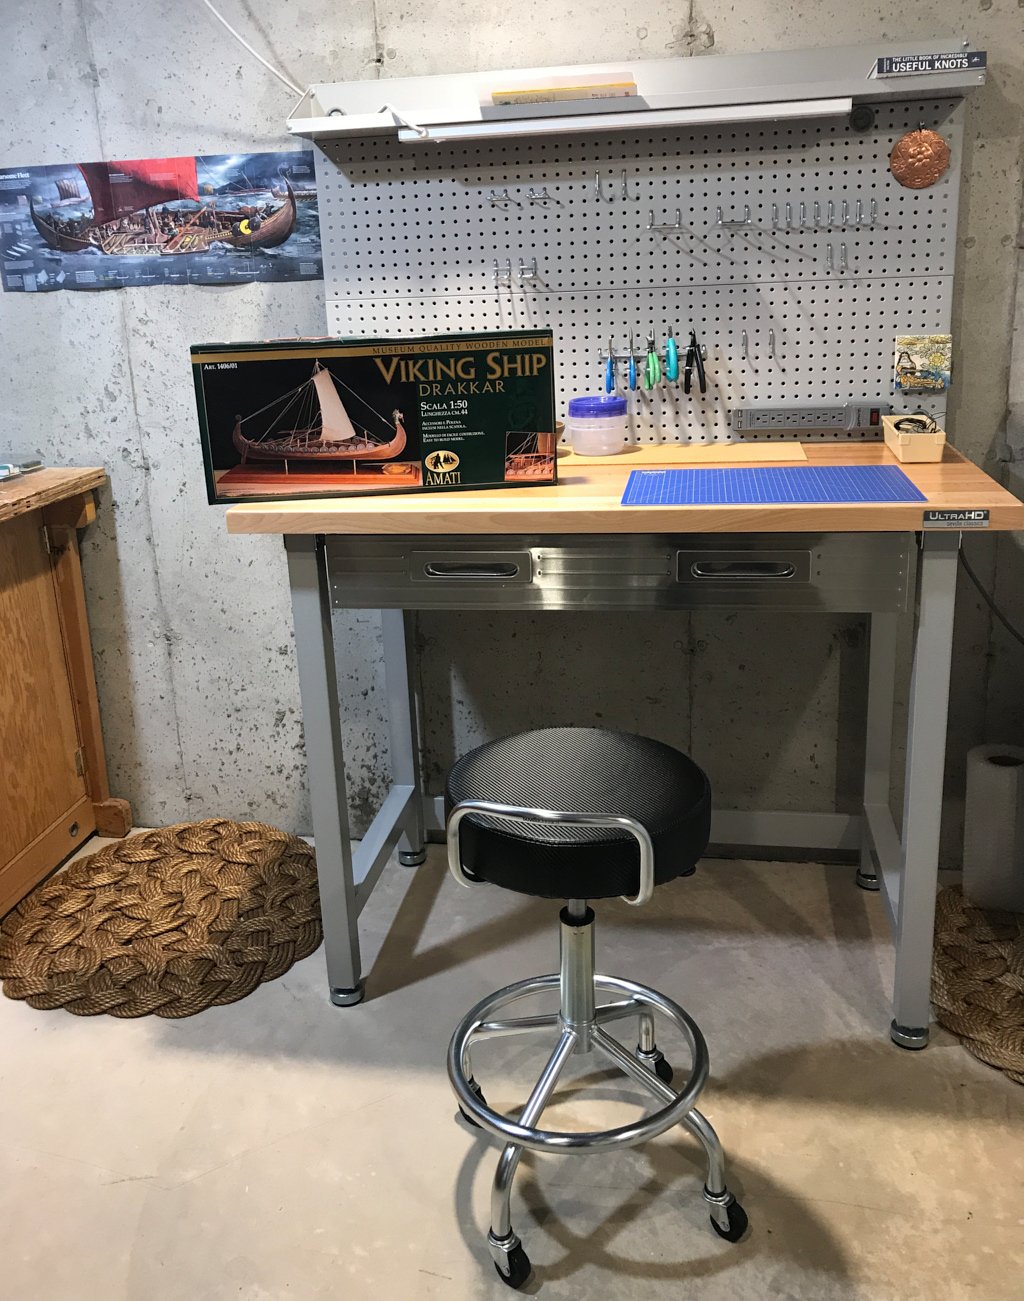
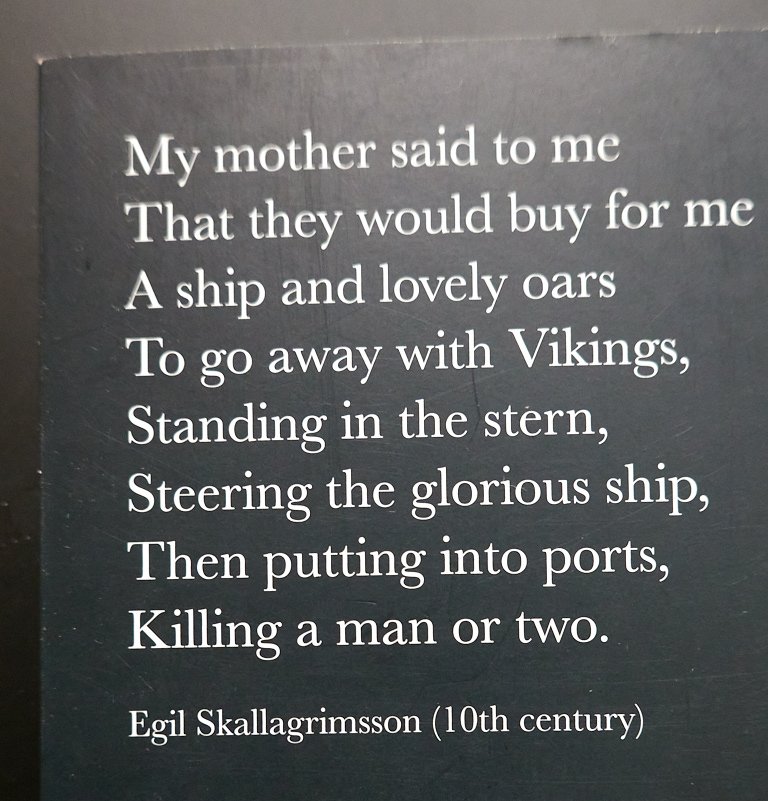
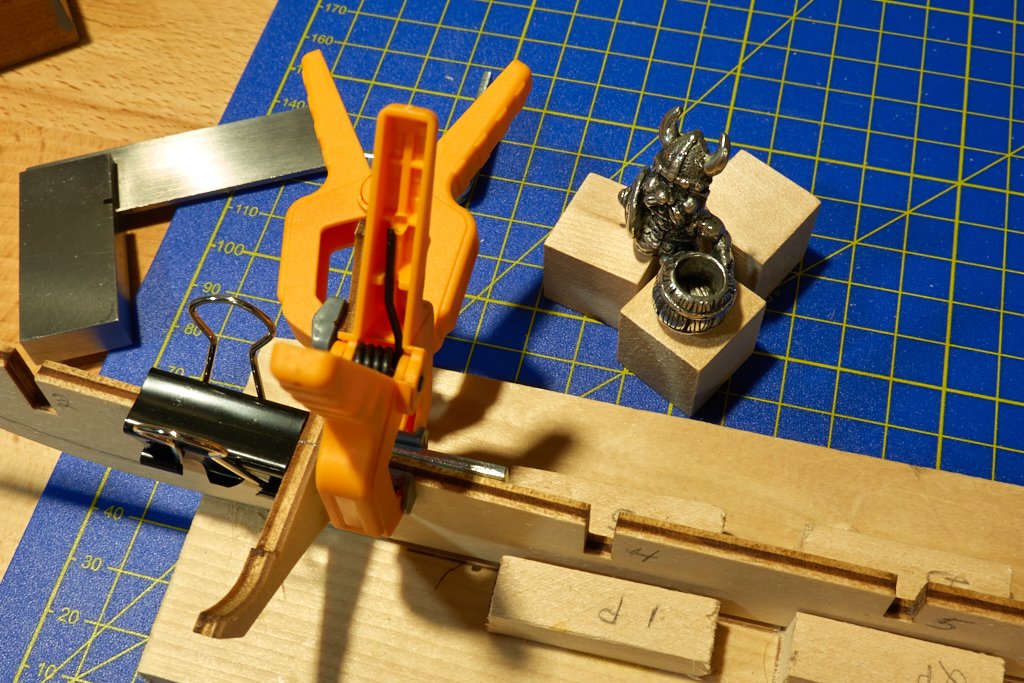
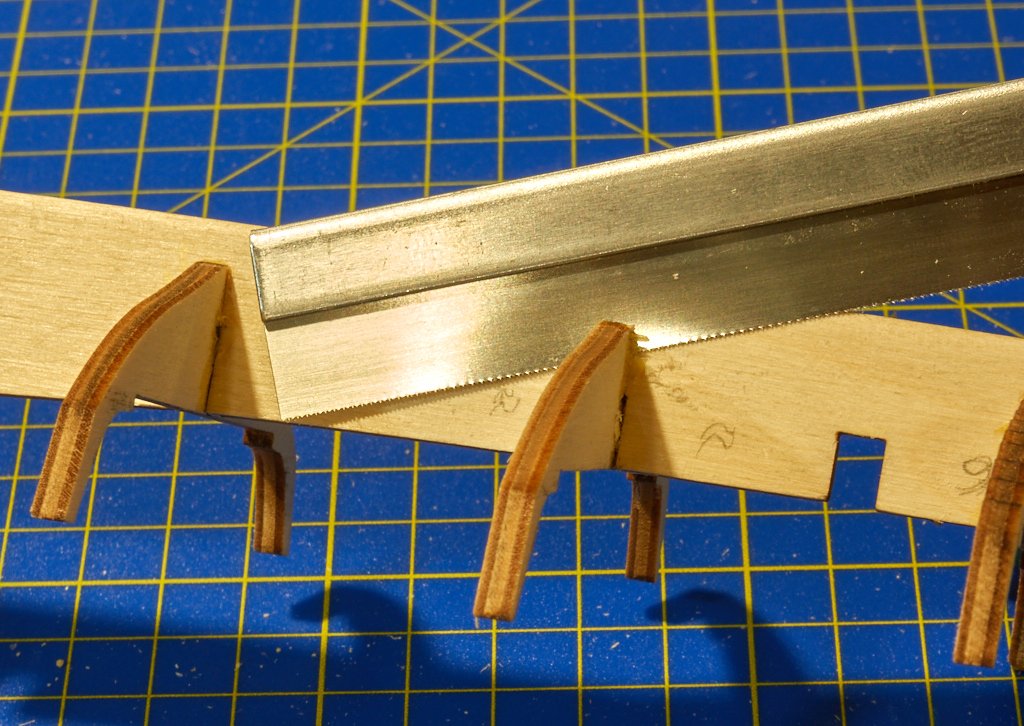
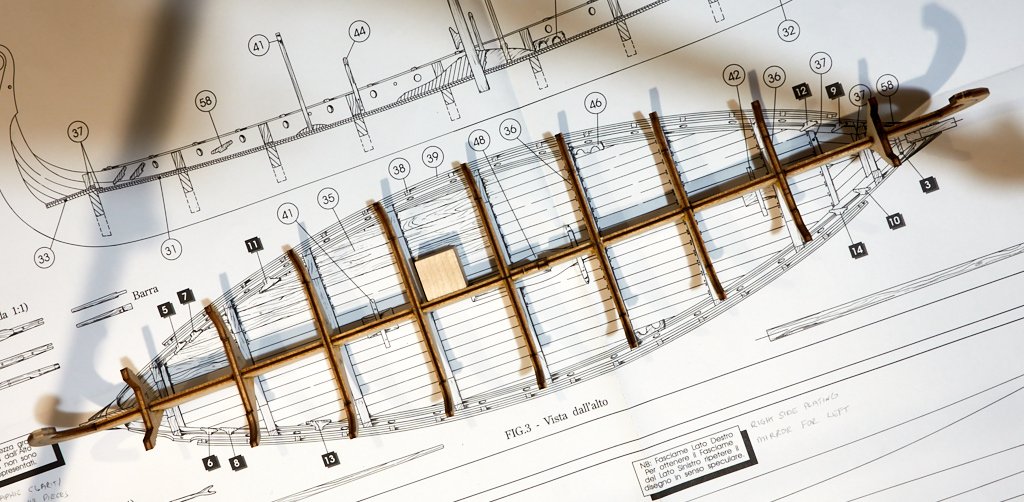
Thanks for looking at my first ever build log! For my first wooden model project I chose the 1:50 Amati Drakkar Viking ship for several reasons. The kit seemed challenging enough, but not too challenging, and perhaps forgiving of beginner errors. We shall see. Being optimistic, I have a perfect shelf to display the finished model. We recently finished binge watching “The Vikings” and “The Last Kingdom” mini-series, so we’re on board the Viking craze bandwagon. Criticism and comments on my build or log are welcome. Praise is also accepted, but only if warranted. 😊 For starters I wanted a dedicated workbench and found a nice one on amazon. The kit and a few preliminary tools came from Ages of Sail. More tools were ordered from Model Expo. The folks at both of those two shops were extremely helpful. I checked the kit’s “List of Materials” and everything was present and accounted for. The first step in the instructions is to draw a guideline for the strakes at the stem and stern. I copied the 1:1 scale drawing and used cutouts from that. A part not listed in the kit is a more ornate curve for the stern. James H’s MSW build log pointed that out to me. This curve is apparently based on the Oseberg ship reconstruction, which itself comes from images on 9th century coins and picture stones. So, my very first cut was to remove existing curve from the stern. The replacement is on the right. The next decision was how to square the frames to the keel. On my kit the frames were rather loose fitting. I looked through several build logs of this kit but didn’t find a precise answer. Matt H suggested using Lego blocks, which seemed good. But I don’t have any, and didn’t want to buy a huge set of them. I found some 59-cent hardware store brackets in my household tools. I convinced myself, probably incorrectly, that these were square. I used one and cautiously started gluing with Titebond II. Here is Captain Aegir watching the progress. When done I dry fitted the deck and realized that I screwed up two frames: #7 was tilted several degrees to port, and #5 was 1 mm above the level of the keel, creating a gap between the deck and keel from frames #4 to 6. I tried ungluing with 91% isopropyl alcohol, but that didn’t seem to work. That stuff is hard to come by these days anyway. After thinking about it, I decided to use my new razor saw to cut through the joint. After cutting the four legs of the “H” I easily squared off #7. Repeated gentle wiggling on #5 allowed me to remove it and file the slots so it’s level with the keel. The frames are now all glued, no doubt not perfect, but hopefully good enough. After going through all that I discovered jack.aubrey’s build log of a Dusek Viking boat. He posted a simple solution to squaring the frames that I wished I had seen earlier. Live and learn. - Nelson


-
WOW! I just chanced upon this thread and it is exhilarating! Jim, to my eye you have captured the essence of being at sea. If I can offer a comparison, a few years ago I was in an Alpine Museum and saw an exhibit of Gabriel Loppé paintings. This artist was completely familiar with his subject, including its most subtle nuance, and is able to convey it on canvas. A viewer is transported to the place and time. Your work is similar. Thanks much for sharing.
-
Thanks Steven. I'm not far along in the build, just finishing the frames and starting to think about the dreaded strakes and fairing! I'll try to cobble a build log together later this week, no doubt it would be good to have one. I'm moving slowly on it, especially as it's summer on our side of the world. Thanks again for this informative log Jack. - Nelson
- 170 replies
-
- 2
-
-
- gokstad
- dusek ship kits
- (and 1 more)