Balclutha75
-
Posts
179 -
Joined
-
Last visited
Content Type
Profiles
Forums
Gallery
Events
Everything posted by Balclutha75
-
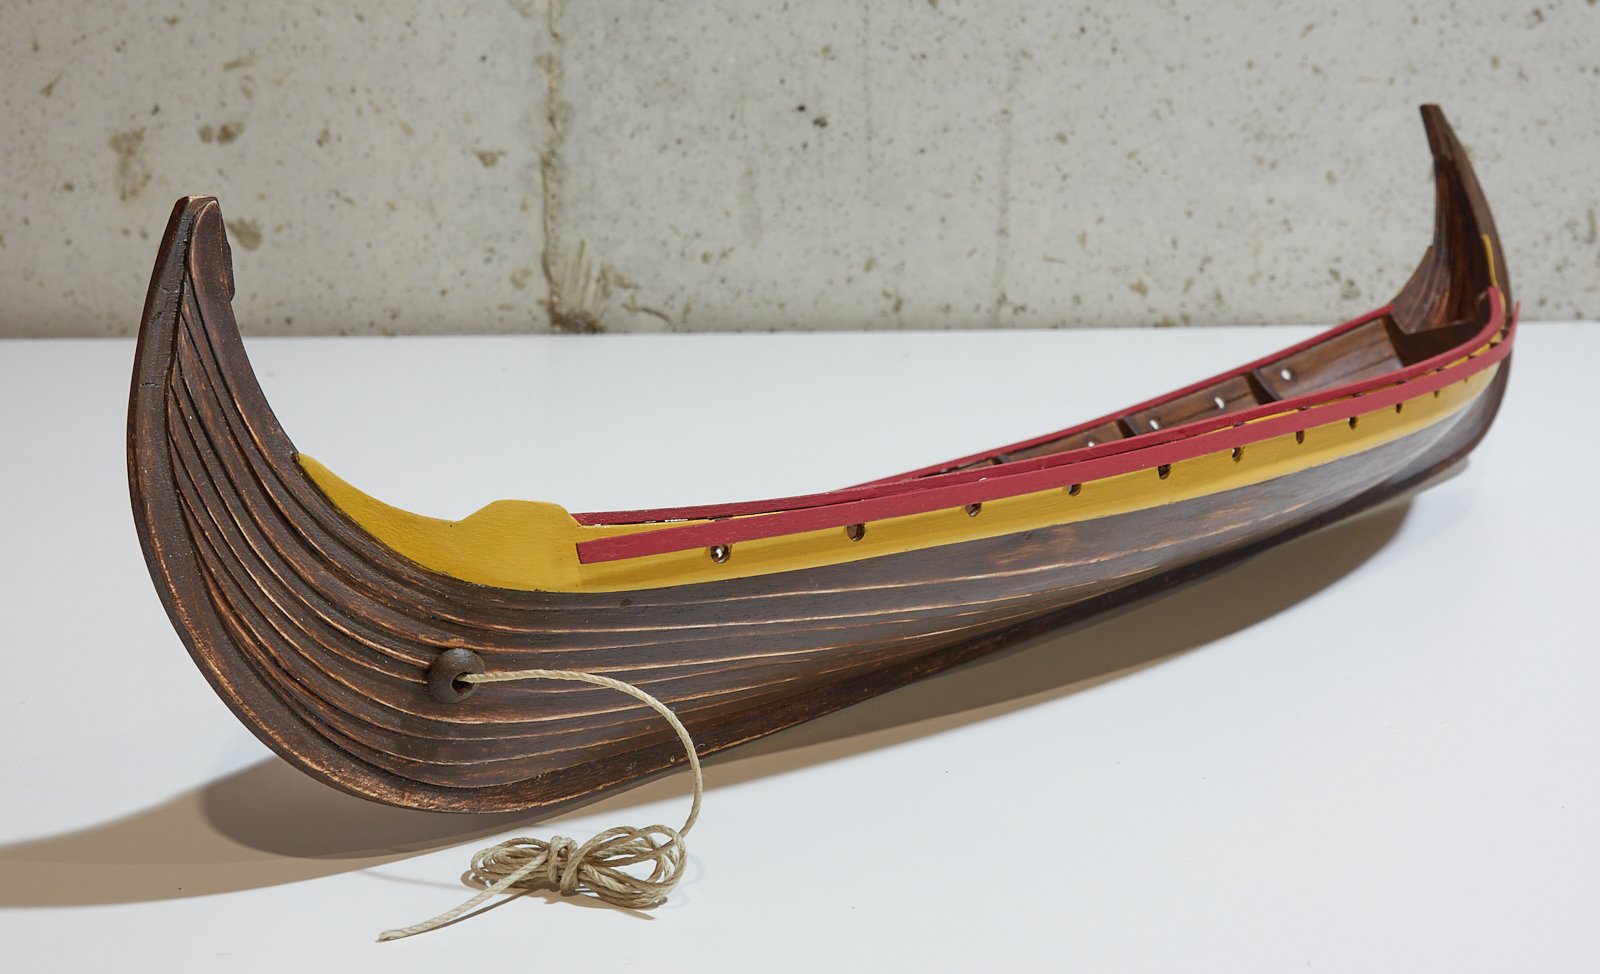
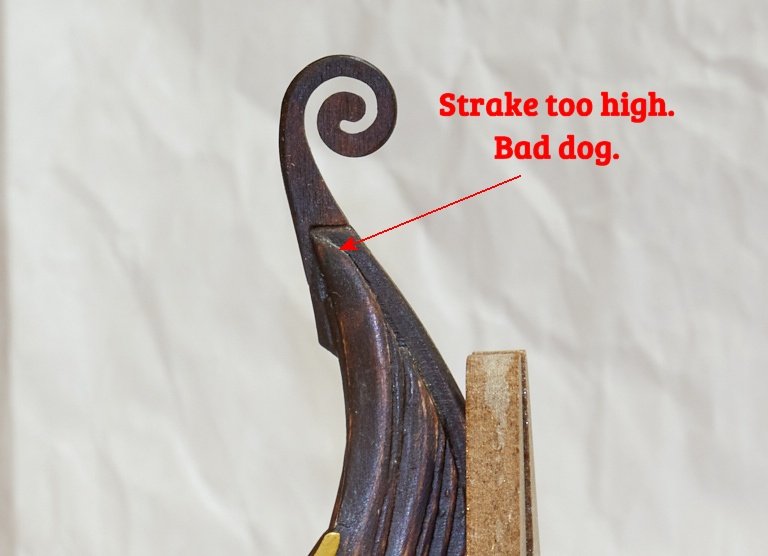
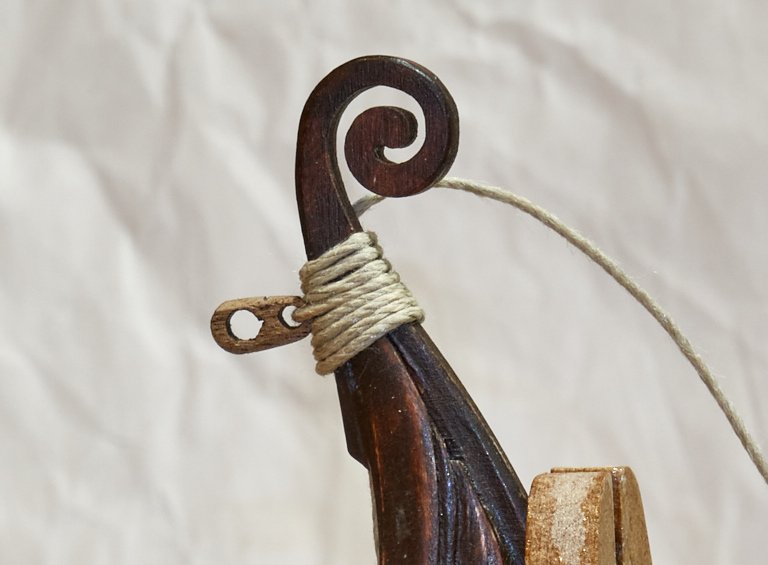
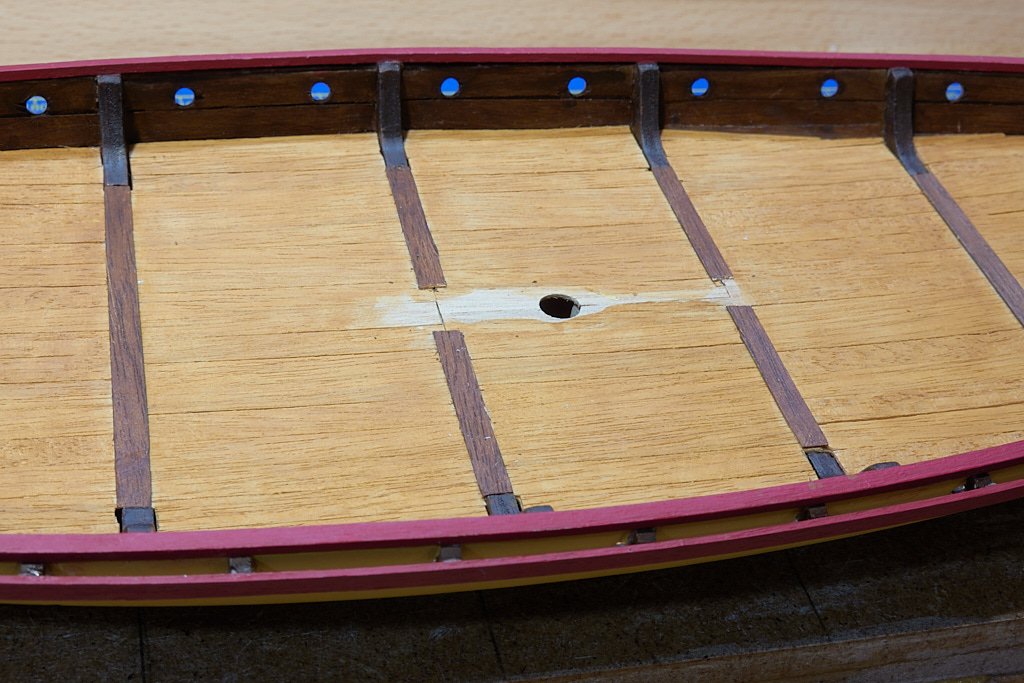
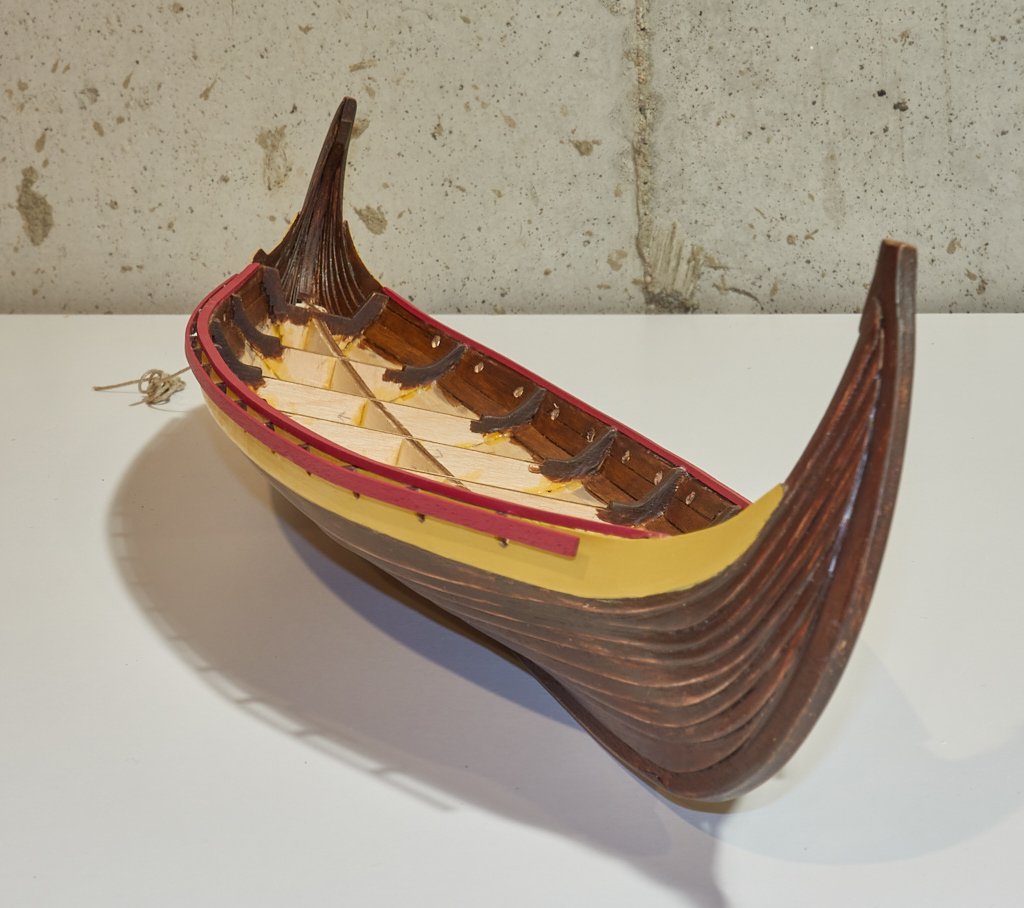
 Making progress on sanding the spars and beitass. Looking good as far as I'm concerned. However I did see a problem with my hull workmanship. Amati calls for a hole drilled in the stern keel for the braces coming from the yard. However, due to my poor job on the hull, the strakes are shifted too far aft and there is no room for that hole, unless I drilled the through strake or higher up in the dragon's tail. To be honest I wasn't crazy about the hole there anyway, so I decided I would lash some rope around the keel and use one of the kit supplied blocks for the brace. Something like so (first pass attempt, not glued or snugged up yet): Let me know if that is a bad idea, otherwise forging ahead here. I think it will look OK since that block matches the ones that will be hanging from the yard.
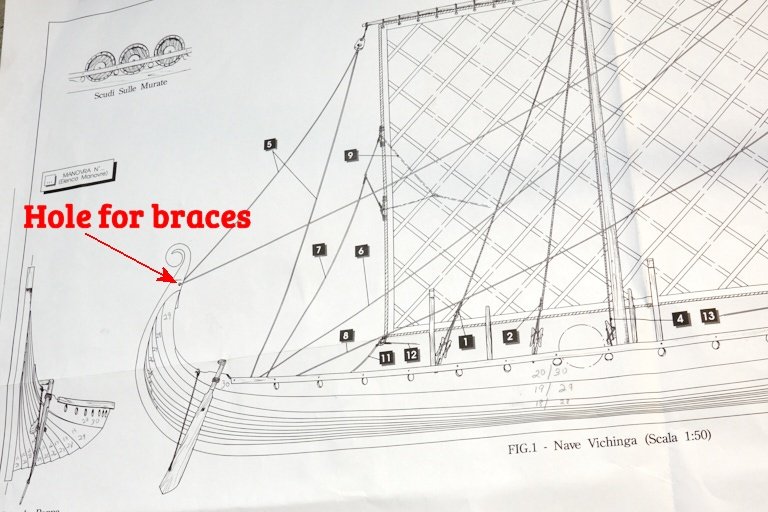
-
Ditto that. Looking forward to what End Of The Line comes up with, as I haven't crossed that bridge yet, but I agree the Amati supplied piece looks out of place. There's one on this page that looks nice, scroll down to the second and third pictures. http://users.stlcc.edu/mfuller/ravensborg2014.html
-
Looking really nice, sir. I have two of these kits and managed to break three trestles arms. I reinforced the mast fish trestle, but only with tapered pieces near the stem. What you did looks nice. I've glued that one to the deck, but I'm certain I'll break it off before I'm done.
-
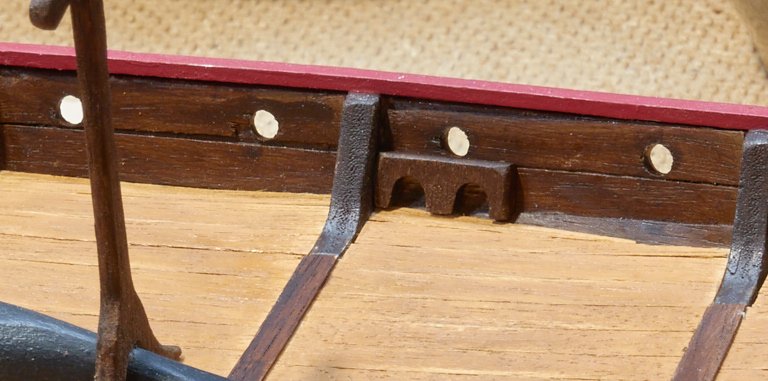
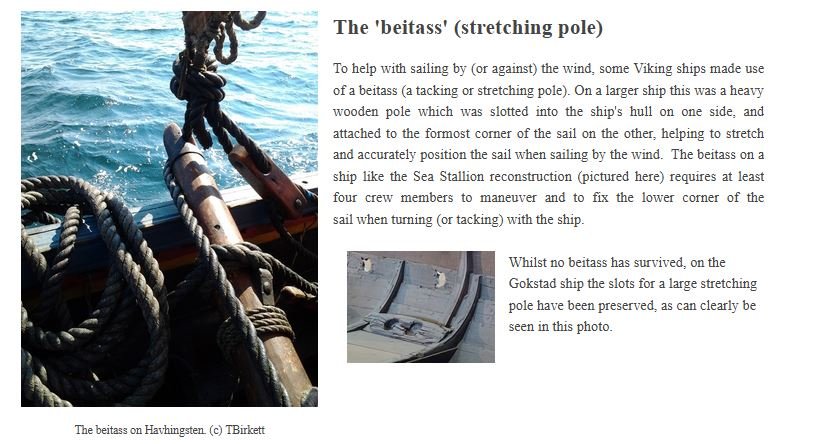
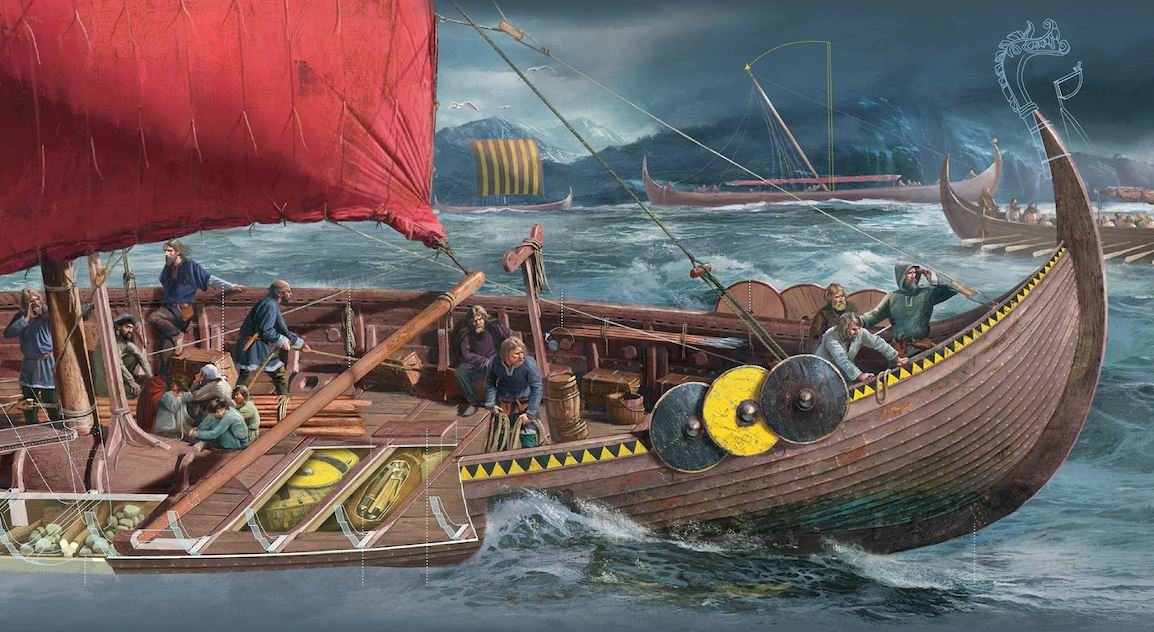
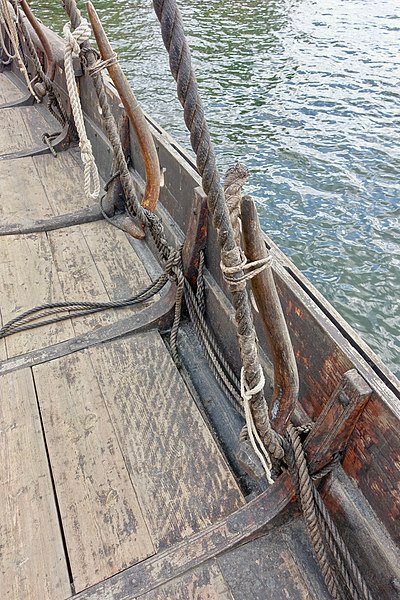
A quick post about a somewhat obscure and confusing (at least to me), part of the Amati Drakkar kit. Part number 46 is called "swinging boom steps" in the Amati English translation. The installation instructions are not clear and I've seen it installed at least three different ways in build logs or galleries. I think what Amati has in mind is to simply lay it against the bulwarks, something like this. But what the heck is it for? Some web searching led me to this page: http://www.worldtreeproject.org/exhibits/show/ships/shipfeatures I didn't fully understand that, but then I noticed the foldout picture of a Viking ship from National Geographic that I actually have on the wall of by my workbench. It shows one in action. And you can see the slots on the port side next to the man pulling on the line. My Osprey book calls the pole a beiti-***, instead of beitass, and the little part in question the beiti-*** block. Surprisingly I could find neither of those terms on MSW. The Oxford Companion to Ships and the Sea has this to say: https://www.oxfordreference.com/view/10.1093/oi/authority.20110803095456313 beitass: The old Norse name for a luff spar which was used in Viking ships, particularly the knarr, to hold the luff of the sail taut, thus enabling the vessel to claw off to windward. A step was fitted in the vessel just forward of the mast with one or two socket holes each side, and the end of the beitass was stepped in one of these when in use. Carry on.
-
I agree, I'm a total newbie and will never have this kind of skill, but Olha's videos are indeed fantastic, fun to watch and professionally done. Thanks and congrats Olha.
-
Still following along. Your posts are really interesting and your shields look good to me.
-
Great job and log entry. I discovered that as well, but a little too late in the game. Nice idea using the pins also. I had trouble in the area too and came up with various clamping ideas, but pins seem like a good solution. There is a new MSW member, Stickman, he has about exactly this. Hopefully he sees your log.
-
Yes, Matt has done a great job here, he's one of my heroes. I keep referring back to this log. FWIW, I tried scoring the planks using scrap pieces, the strips left on the sheet after the planks were removed. They were similar in thickness and shape to the actual planks. It didn't work for me. Either the score was too shallow, or else the test piece snapped. Hopefully you will have more success. Good luck Ric, and hope to see a build log from you.
-
Thanks Eric! I'm thinking it will look OK too. Maybe I'll experiment with some additional lighting on photos, but I won't sweat that one. BTW, I did experiment on some scrap pieces with actually weathering the deck with various secondary colors, that was my original plan. But my experiments led to the conclusion that It's best to leave well enough alone. I may revisit.
-
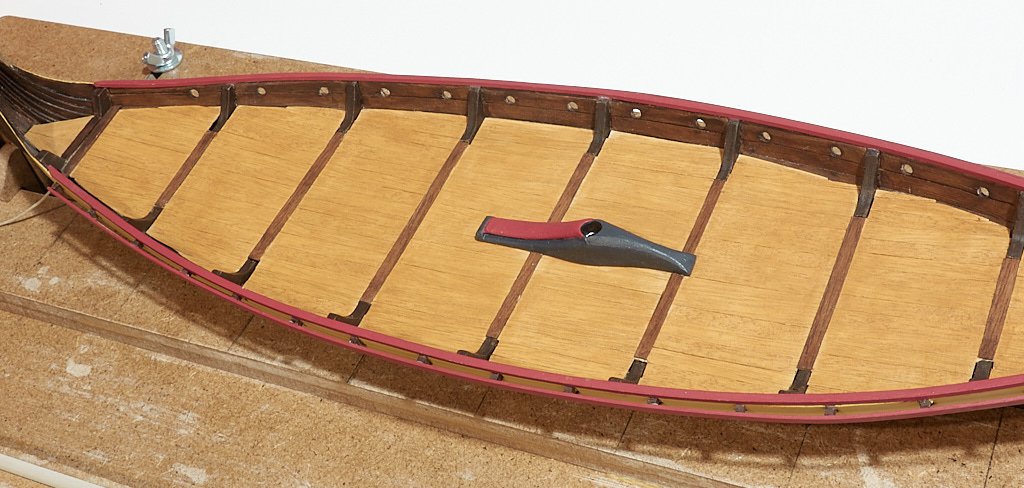
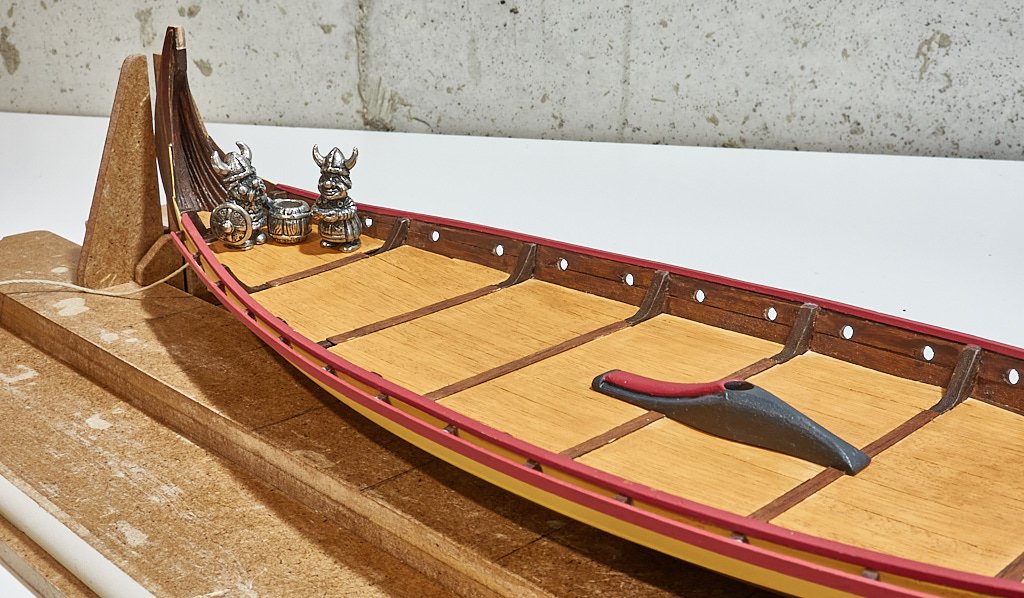
Thanks much for the comments guys, really appreciate it. The deck is down now and stained. It's pretty rough looking compared to most of the models on this website, but I'm pleased with it. After experimenting with several color options I wound up with a water based stain called Saman Golden Wheat that I ordered from amazon. I want to stick with water based paints because I don't have great ventilation in my work area and don't want to mess around with solvents. So easy to clean up with soap and water. Is it my imagination or do models look worse in photos than they do in person? I see all kinds of little flaws here, which must exist, but maybe some of them are increased by lighting glare. In any case, I'll have a look after I post this! Captain Aegir was struggling with the deck stain, decided he needed an Admiral by his side, and has been joined by Admiral Helga. She is pleased with color. I followed the Amati suggestion of staggering the planks, and decided to paint the mast fish. The piece supplied by the kit is copper colored metal, which I didn't like. I contemplated trying to carve one myself from a piece of wood, but am happy with the paint. For the two deck cross beams that are under the mast fish, I did not put any glue on that center. That allowed me to cut them away so the mast fish sits flush to the deck, which worked out fine. Here's a photo before the mast fish was glues in place. I used CA glue for that. Still having fun with this and generally satisfied with how it looks, given what I knew about my skill set going into this hobby. On the deck trestles next.
-
Cool, I'll be glad to follow along if you don't mind, looks like she's coming along very nicely. Perhaps you have seen my stumbling efforts at building this kit, so I'm always glad to get pointers. I had the exact same thought about the dragon head, it looks a little corny. I haven't decided what to do but I have several pictures of various replacement options kind of like the one you show, but I'm uncertain of my ability to carve one. Your thoughts on pins vs cleats for the rigging has me thinking. Thanks.
-
As you know I'm new to this hobby, but I'll concur having to unglue is not one of the more enjoyable things to be done! I've found it a necessary skill. 😁 Looks like you have it in hand. Those pictures from that Osprey book have a legend that I did not send you when I sent the other stuff. There, they call it a "shroud-pin or vantnale". A search on that turn up a Wiki page: https://commons.wikimedia.org/wiki/File:Saga_Oseberg_Details_shroud-pins_or_vantnales_to_secure_the_shrouds_to_the_hull,_gunwale,_oarholes,_knees,_deck_etc_Viking_ship_replica_2012_Tønsberg_harbour_Norway_2019-08-16_04305.jpg
-
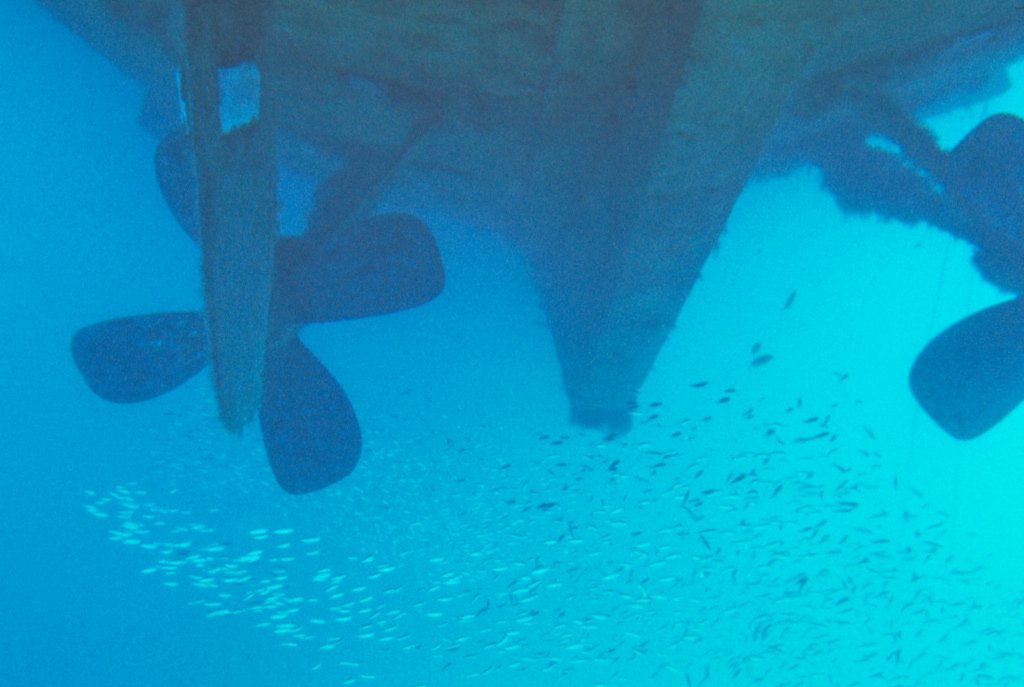
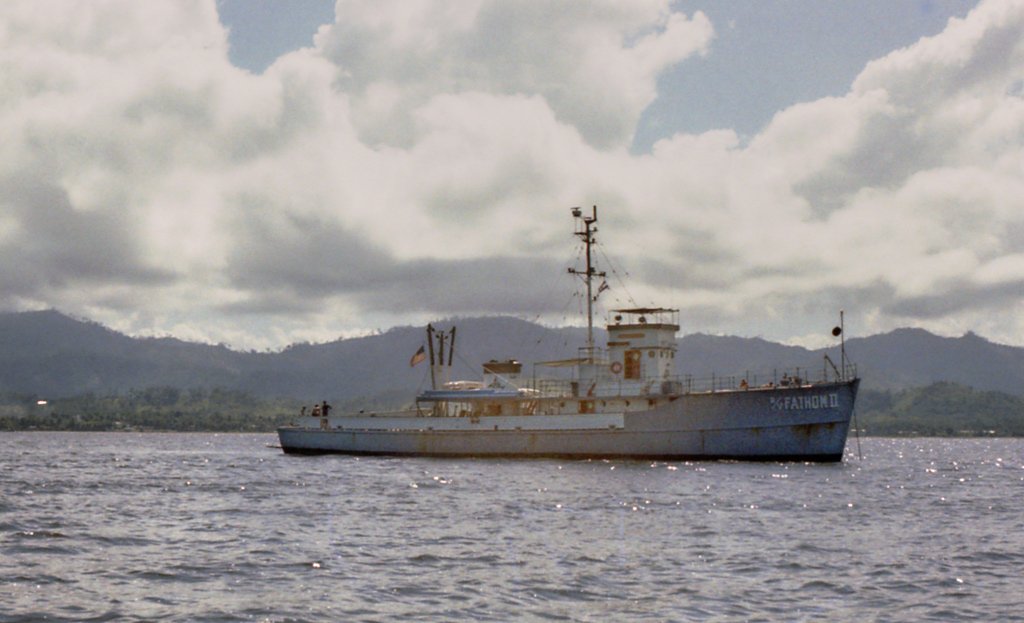
I happened to see this build and think you have a beauty shaping up. Cousteau was a high-school hero of mine (mid-1960's) and I owned copies of both The Silent World and The Living Sea by the time I was 15, kind of weird for a kid. In 1971 I spent a year working on a boat called the RV Fathom II, that we outfitted for salvage work in the Caribbean. It was a YMS minesweeper and at the time we thought it might have come from the same shipyard as the Calypso, though I'm not sure of that now. But I can say with certainty that it had 4-bladed props. Here's a couple pictures if you are interested. Of course, Calypso may be different. R/V Fathom II in the harbor at Puerto Cortez, Honduras. Good luck on your build.
- 70 replies
-
- 3
-

-
- calypso
- billing boats
- (and 1 more)
-
Making progress on the deck now, the planks are all glued. I've started experimenting with stain colors, and perhaps even learning some weathering techniques. (This is different than just doing a poor beginner's job so that it kind of looks weathered, although that may yet be the outcome!) For now I'll share this one photo from last week of the sub-deck being glued into position. Captain Aegir came aboard to inspect his cargo of precious stainless steel ingots.

-
Thanks Eric, much appreciated! For me it was the right decision to get the second kit, even if it's still not going to be a masterpiece. But I'm having a lot of fun and learning all the time. The shield rail is part of the Amati kit. Working on the deck planks now. Coincidentally I just finished scanning something that I'm going to send you regarding your rigging question from your log. It's from an Osprey book I have "The Viking Longship" by Keith Durham. It might be useful. I don't think I can post it here since it's copyrighted.
-
I'll admit to being confused for a moment, but then got straightened out. I confuse easy in any case. Thanks for posting this information. Some of it has gone over my head, but it's pretty interesting. Seems like CA is a good tool to have around and use in the proper situation.
-
Thanks guys, this is what I learned by trial and error. I have to glue some small parts to an already stained surface but will sand the stained piece beforehand.
-
Xtreme newbie modeler here, with a question for you guys. I just used some CA glue on my model for the first time. It's the DAP RapidFuse, one of the thicker varieties, with a 30 second set time. Based on my observations, it seems CA glue will bond, at least to some degree, on painted, stained, or sealed wood. But PVA glue will not bond in these situations. Is that accurate? Apologize if this is covered above, but I didn't see it.
-
Nice work Eric. You have given me some inspiration for my much smaller and rougher kit. Thanks. I also decided rivets were not worth the effort, but might reconsider at some point. I'd only need about 200 if I did along the frames only, and maybe 800 if I did all of the hull. Less than 1/4 of what you need. They will be largely invisible when the model is on display.
-
Thanks for the likes guys, appreciated. Nice thought Steven, but getting impossible. The first hull has been used for a variety of experiments including stain colors, varnish, plank bending with heat, gluing the cap rail, and most recently installing rivets. The brass rivets that come with the kit are too large, I think. The heads are 1.6 mm diameter or 80 mm / 3 1/4 inches to scale. Seems oversize. But I did use a sanding drum on a Dremel to make them smaller and flatter. Also tried #8 sequin pins, which have smaller heads. I blackened them with Birchwood Casey Brass Black and installed about a dozen on the old hull. I decided I could possibly pull it off successfully, but also that it's not worth the effort. Most of the rivets will be hardly visible when the ship is displayed, especially given how dark the hull is. There are some Tichy Train Group plastic rivets in smaller sizes that may be worth looking at, potentially easier to work with. But at the moment the plan is to skip the rivet step. Coincidentally I just now saw cathead's log and see he arrived at a similar conclusion. Thanks for the comment. - Nelson
-
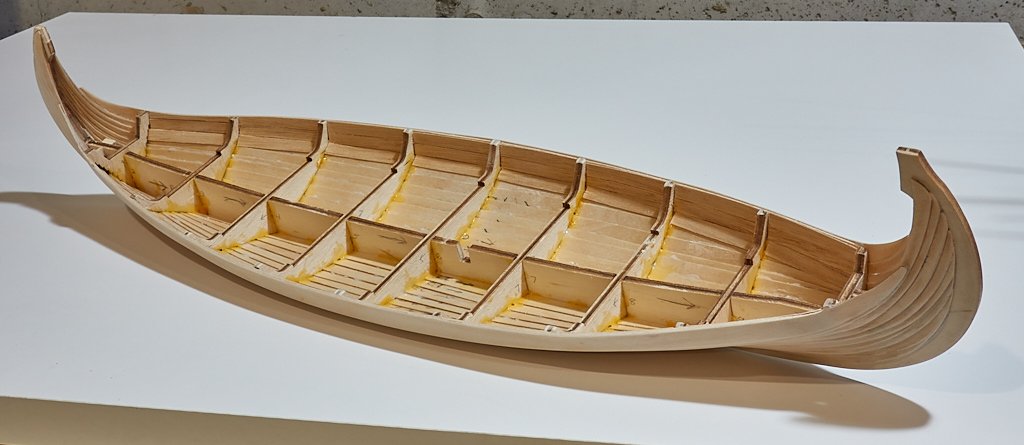
However, strake 9 still resisted this technique. After several tries I decided to install a boxwood strip as a shim. This solved the gap problem but the boxwood looked terrible on the inside of the gunwale. Since I have the two kits I decided to take some deck planking from the first kit and use it to line the gunwale, hiding the boxwood. Somewhere I saw a photo of a replica Viking boat that had apparently done this. If any justification was needed, that was good enough for me. Finally, the hull was complete. I stained it with a mix of cherry and walnut, added the cap rail, painted the yellow strake, drilled the oar holes, attached the shield rail and the rudder block. All of this went smoothly. The shield rail standoffs were my first use of CA glue and I was impressed. I can see its value in the right situation. I used DAP RapidFuse which is thicker that regular Super Glue and has a 30 second set time. Next, on to the deck and more new territory in my modeling education!
-
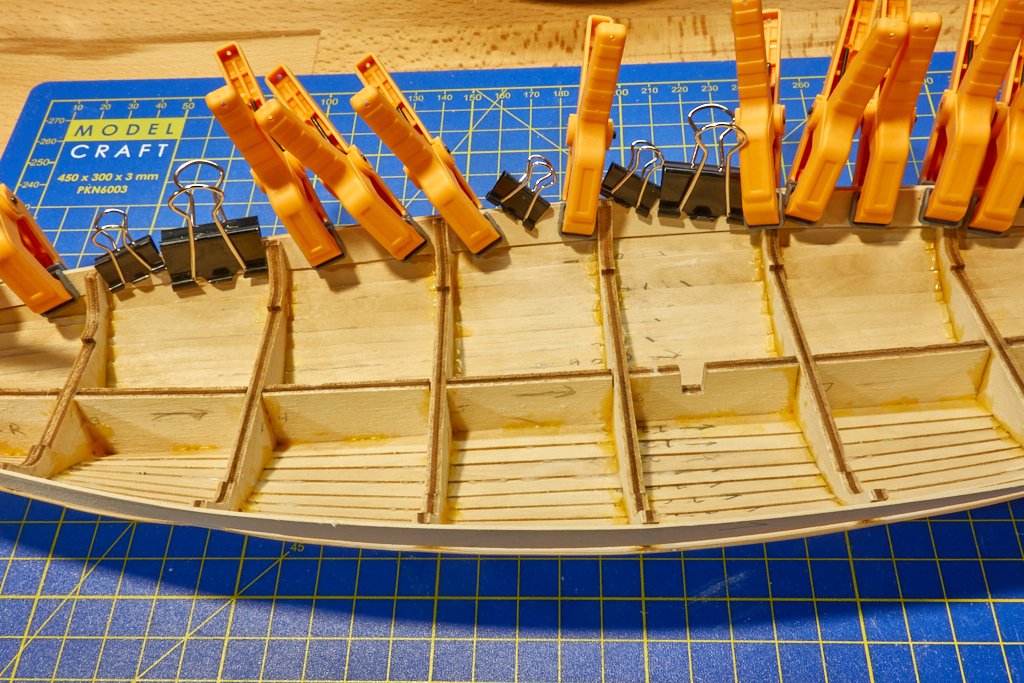
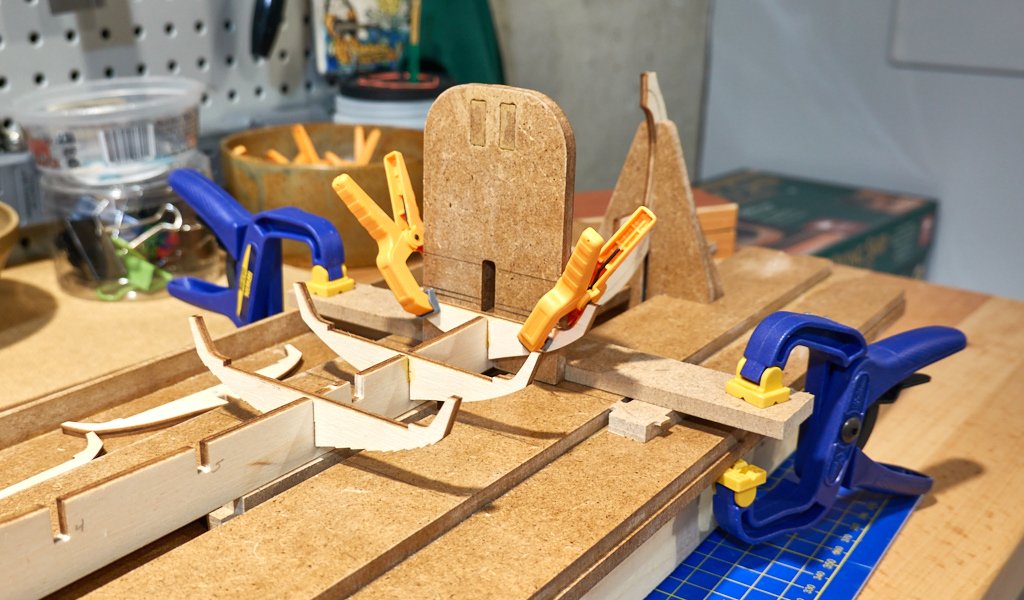
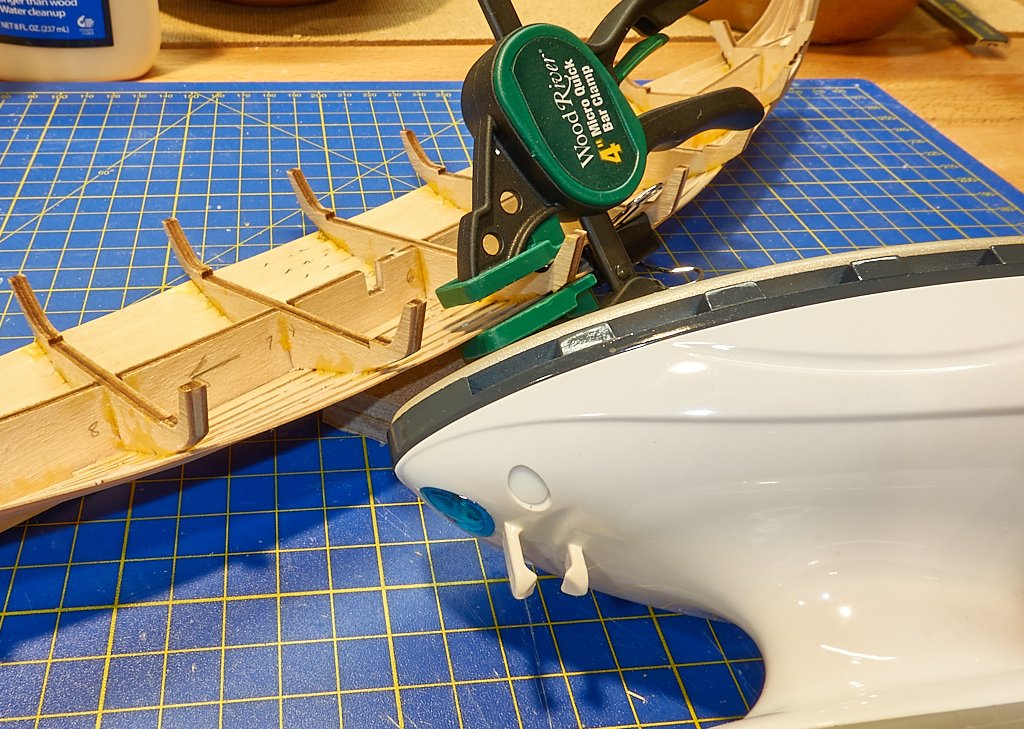
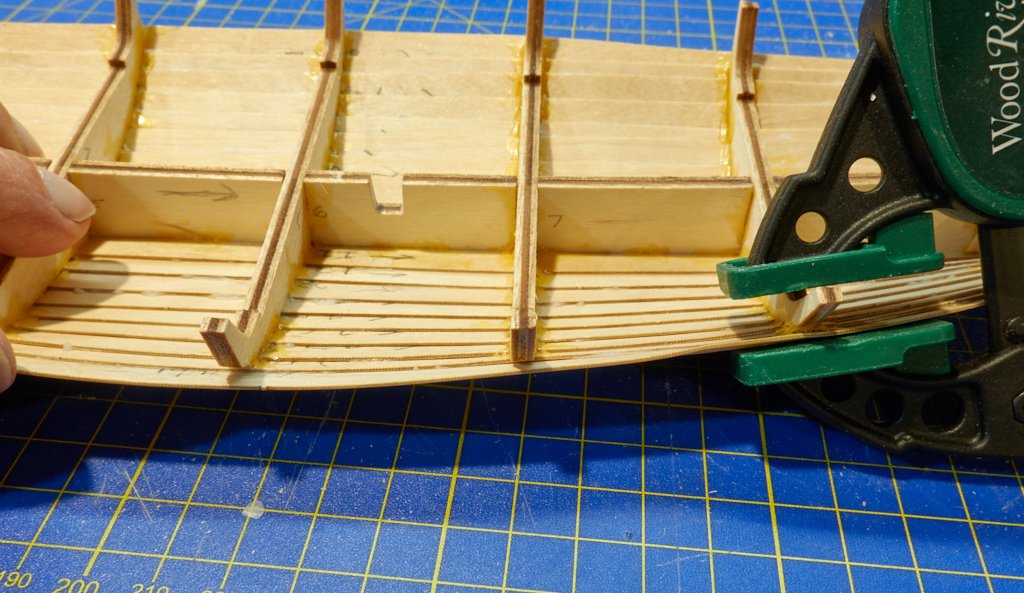
Here is a brief recap of some decisions made along the way. One of the problems I had on the first kit was that the frames were not square to the keel. This was because I used some 99 cent hardware store brackets for alignment. For this round I decided to purchase a Hobbyzone Small Building Slip. It gets decent reviews and cost $34 in the USA plus shipping. It’s better than anything I could cobble up. With a minor modification I was able to fashion a poor man’s “jack aubrey style” alignment jig. On to the framing. Interestingly the strake plywood in this kit was quite different from the first kit, lighter colored and more rigid, harder to bend in the narrow direction. In fact, I snapped the garboard strake when gluing it, something that never was close to occurring on the first kit. Breaking the strake was a disappointment, but I repaired it so even I have trouble finding the spot, so it was actually a good learning experience. But as I continued framing I still could not get the strakes to lay flat on the frames, a déjà vu experience. Using scrap pieces, I tried the Amati instruction’s suggestions of soaking in 50/50 glue solution and scoring the strakes so they bent, but had poor results from that. I learned that applying heat with a travel iron seemed to work. However, I had no good way to clamp the hot wood, and it would unbend when cool. Then I thought, what if I glued the overlapping part of the strakes first? The glue could act as the clamp so I could heat and bend the remainder of the strake. I tried this and it worked really well for strakes 6,7 and 8. You can see in these photos where I heated the strake and it conforms to the ribs. I’d make my way down the strake two ribs at a time. It was actually fairly easy and those new Woodcraft clamps helped a lot. I had to get the strake hot enough to bend but not so hot that the glue melted. This was learned from experimentation on scrap.
-
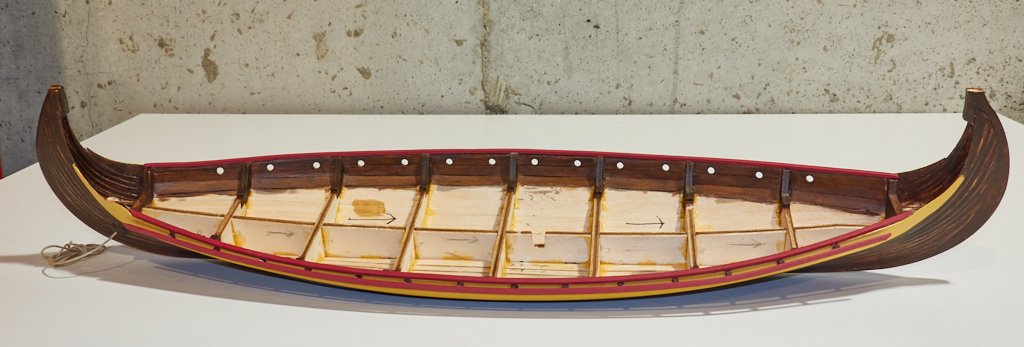
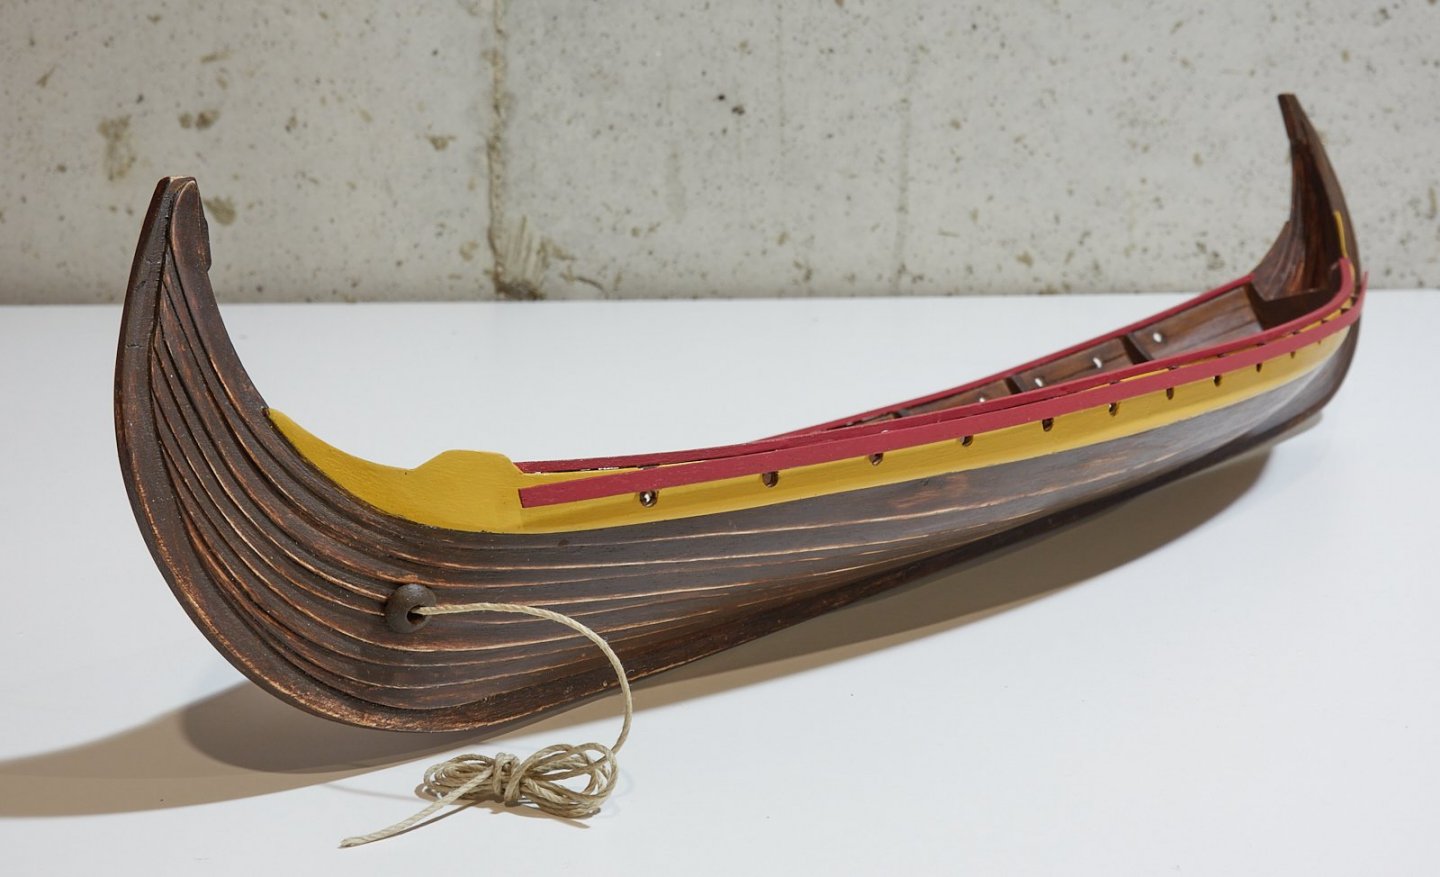
In the belief that it’s better to get back on the horse than walk away, I decided to try again to construct the Amati Drakkar model. Of course, it’s better to not fall off the horse in the first place, but that option doesn’t usually exist for me. My first attempt ended when I decided that the hull was not forming along the ribs properly and was pulling too far away as I approached the gunwale. As it turned out I abandoned ship too soon. I have since learned that, with some effort, I could have disassembled the hull and tried again. Live and learn. Here is the hull as it looks today. Kind of a funky and beat-up appearance, looks like it’s had a few encounters with reefs or other solid objects. The cap rail on the gunwale is not part of the Amati kit, but fashioned from boxwood strips. Also, the planking inside the gunwale is not part of the kit, but an addition that I decided to add for reason I'll explain in a subsequent post. I always liked the red and yellow combination and thought I’d at least do my sail that way. So I needed no convincing, but cathead’s log convinced me that the red and yellow was a nice combination. In Matt H’s log I learned of the minor problem inserting the rope for the rudder after the deck is installed, so I decided to take care of that detail in advance.
-
Thanks bigpetr, of course I have to get the holes drilled in the correct location when I get to that step! The discussion on shields and other details of Viking customs is fascinating, thanks guys. The lack of solid evidence in certain cases would, it seems, allow some leeway for a novice modeler to chose personal aesthetic appeal over complete historical accuracy, since the latter may not exist. Here is another article, which I probably originally found on MSW: http://www.hurstwic.com/history/articles/manufacturing/text/norse_ships.htm which says: "The crew's shields may have been arrayed along the gunwales, held in place by a shield rack outboard of the ship. This kept them out of the way, but also provided some slight additional protection against wind and waves.", ... and "Perhaps shields were displayed only for battle, or to make the ship look especially fine when approaching land. Landnámabók (S.156) tells of Hella-Björn Herfinnsson who sailed into Bjarnarfjörður with his ship lined with shields. Afterwards, he was called Skjalda-Björn (Shield-Björn)." Note they hedge their bets with words like "may" and "perhaps". Personally I think in a heavy sea the shields would not be much use, perhaps (there's that word) even be a hindrance. As Louie says, it would be interesting to see if it's been tried on a replica. Lining them up for display or intimidation does make sense to me.