.jpg.2c2c29e54623bd7b752bc2cdab599665.jpg)
Danstream
-
Posts
713 -
Joined
-
Last visited
Content Type
Profiles
Forums
Gallery
Events
Everything posted by Danstream
-
.thumb.jpg.c459ce4140b54c12eddb8eedfd446df3.jpg) Thank you Alan, I am happy that you like the work done on the LG. As you might have noticed, there were quite a number of steps involved (i.e. a number of different coatings), but, eventually, it is easy to obtain a satisfactorily result. Actually, if the mould is good, most of the job is done by the wash 🙂. Presently, I am repeating all the coatings with the wheels. I have just finished decaling the fuselage, omitting some of the many stencils. King regards and thanks for all the 'like's! Dan
Thank you Alan, I am happy that you like the work done on the LG. As you might have noticed, there were quite a number of steps involved (i.e. a number of different coatings), but, eventually, it is easy to obtain a satisfactorily result. Actually, if the mould is good, most of the job is done by the wash 🙂. Presently, I am repeating all the coatings with the wheels. I have just finished decaling the fuselage, omitting some of the many stencils. King regards and thanks for all the 'like's! Dan- 137 replies
-
- 11
-

-
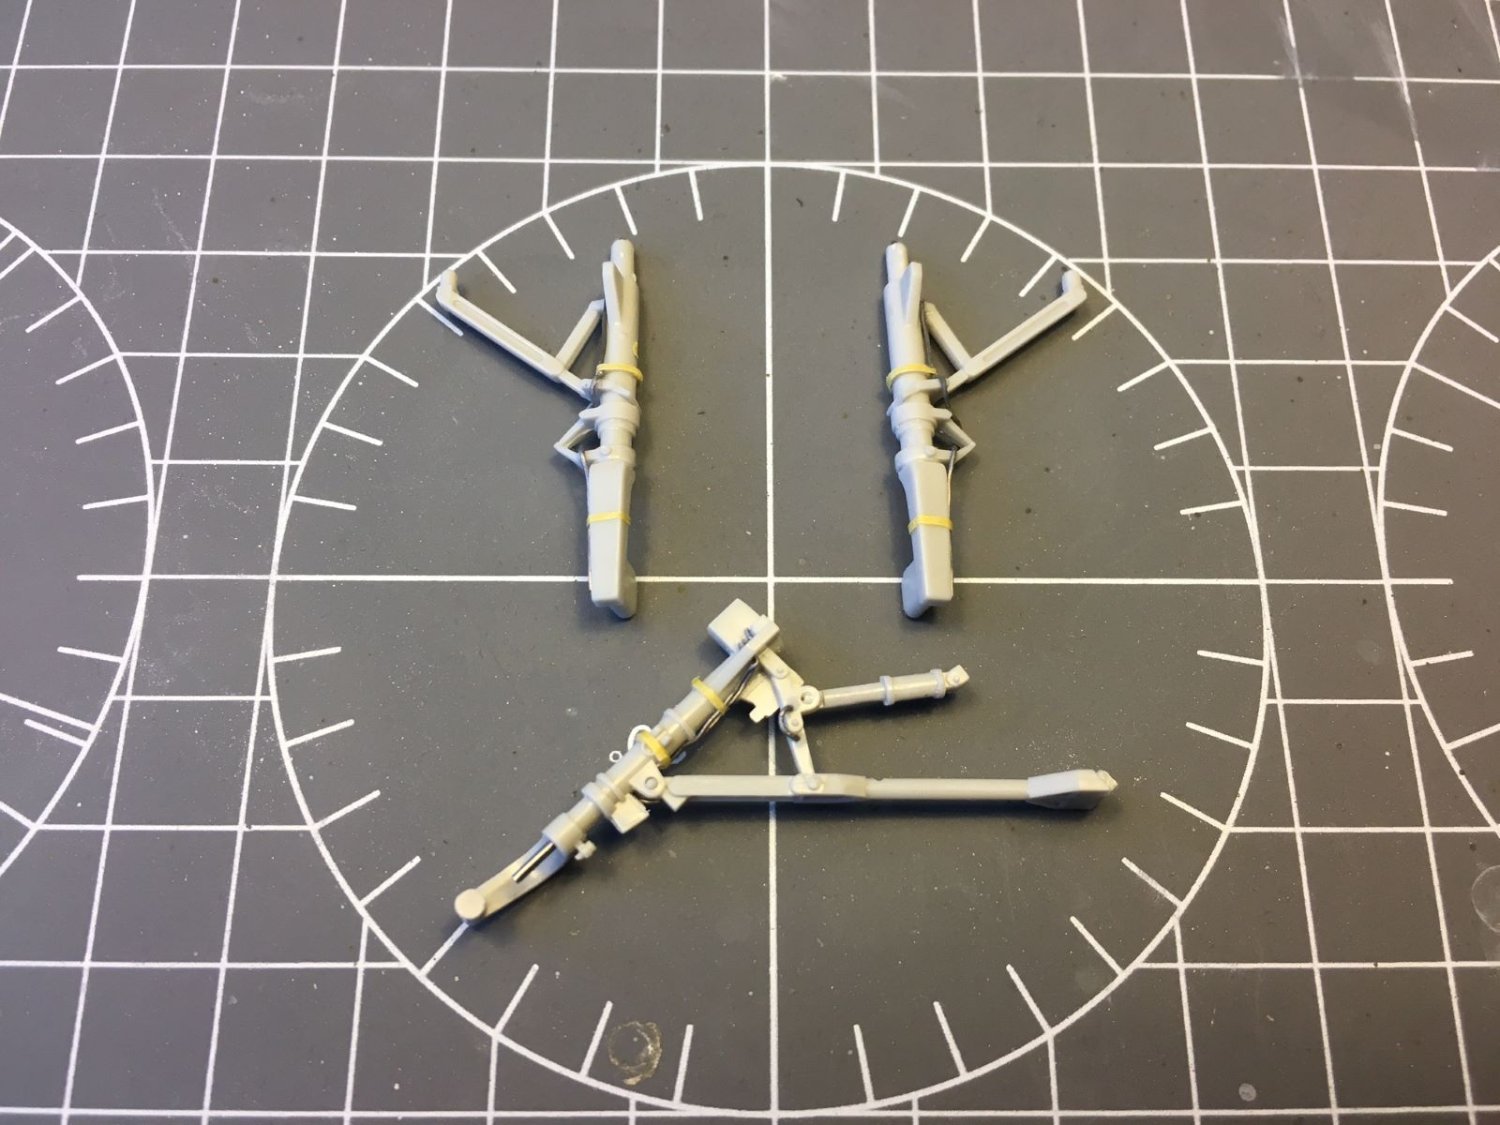
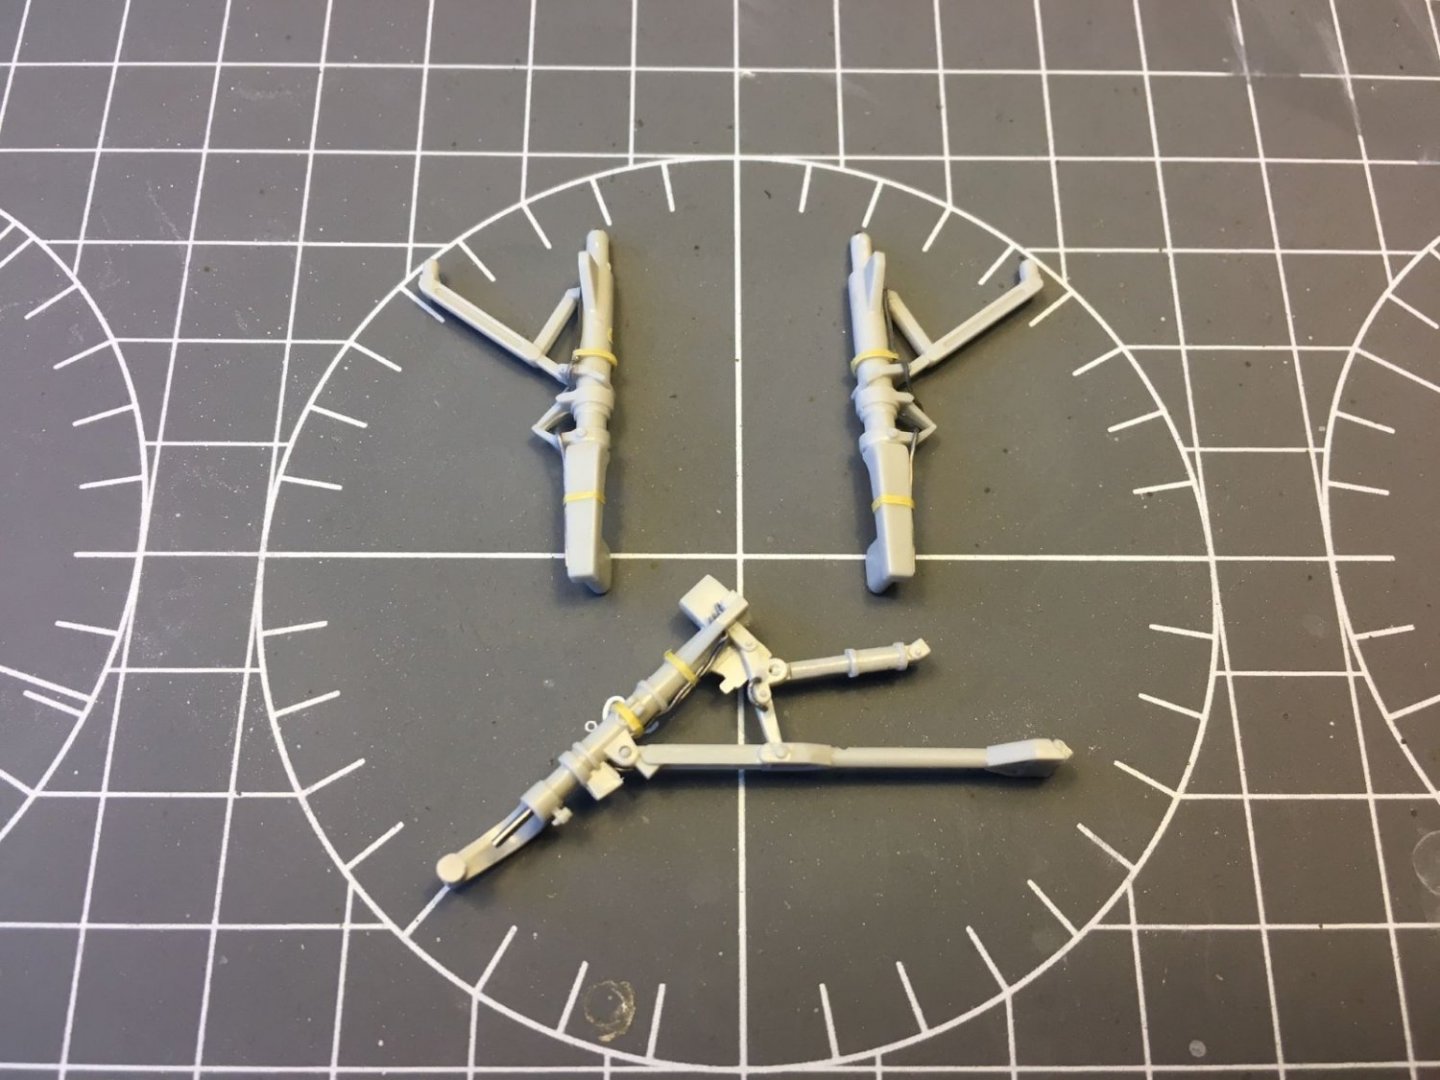
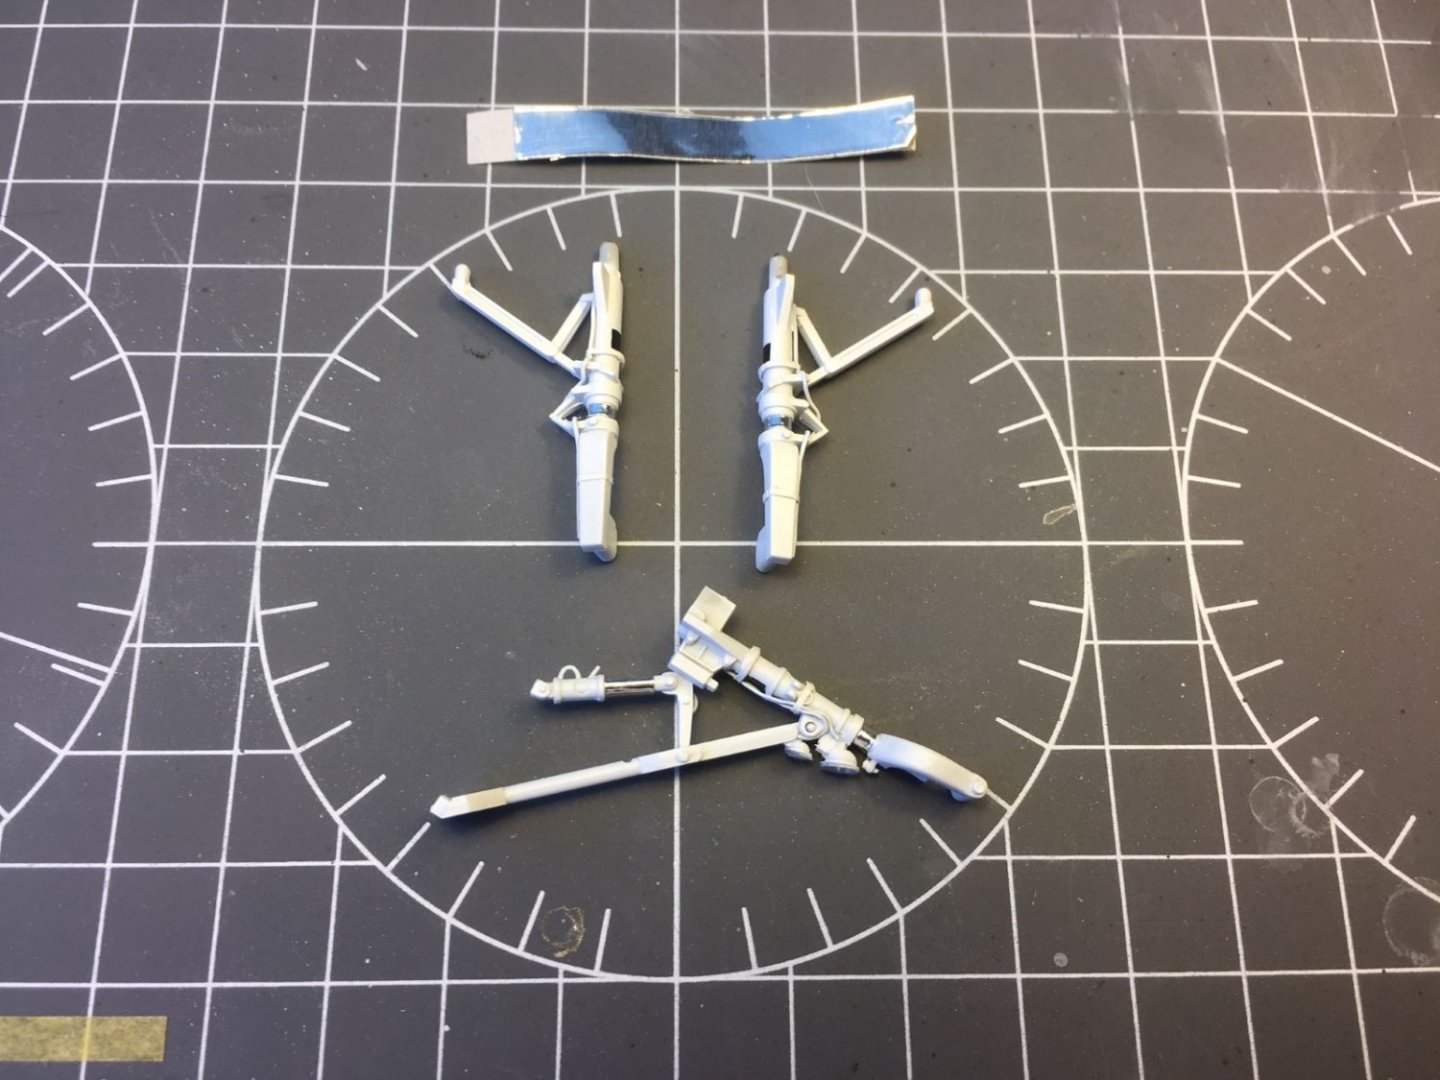
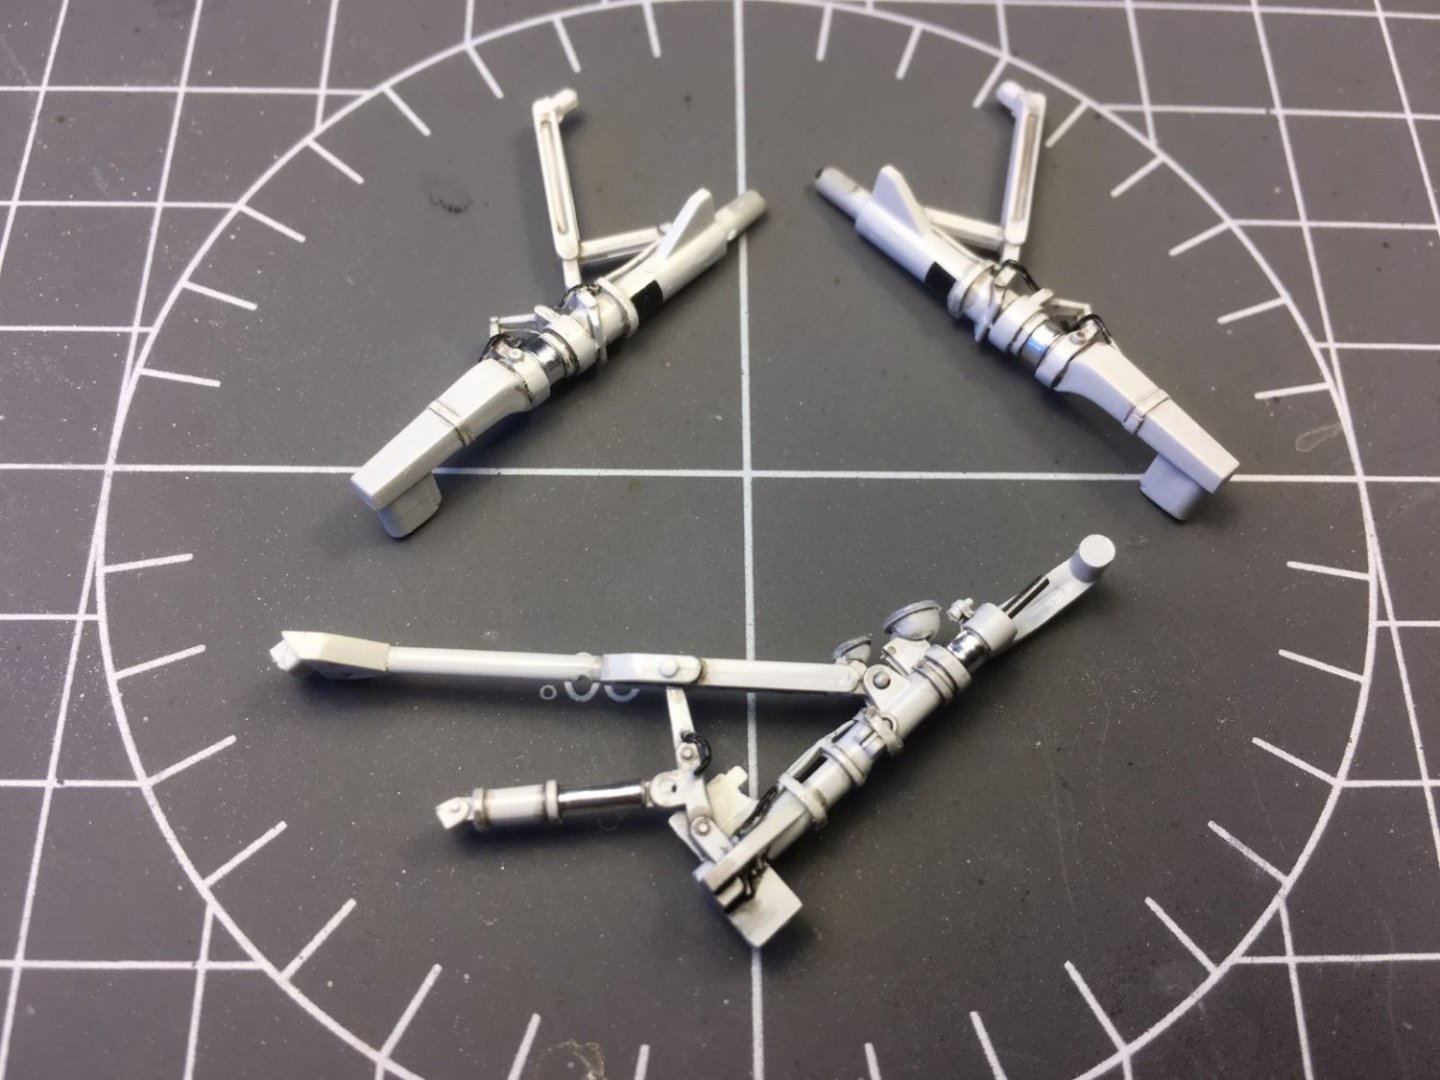
Hi, while going on with decaling, I tackled the modeling of the landing gears. The kit provides a fair, quite accurate representation of the main structural parts. The legs were provided split in half and you have to insert a metallic rod in the vertical element before closing the halves. One end of the metallic rod inside the forward leg protrudes outside and it is supposed to get clamped into the wheel. This is the first time I see such a feature. The first step was to add few lead wires to busy up a bit the parts: Then, I sprayed a light coat of primer followed by a satin white and I glued on the landing lights. To render the shiny struts of the shock absorbers and the oleo, I used a strip of thin self adhesive aluminium foil. The placards are made with small pieces of decal. After that, I painted black some portions of the wires and sealed everything with a coat of gloss clear varnish. At this point, details can be picked up by applying a black wash (Tamiya panel liner): That's all for now, Thanks for following, Dan
- 137 replies
-
- 14
-
-

-
@amateur, I visited the museum about three years ago, and, yes I could see the thing hanging from the ceiling. I can easily believe that they were noisy planes. What impressed me were the sheer dimensions of the aircraft. Kind regards, Dan
-
Excellent model Javlin! Nicely assembled and finished. The paintwork of an otherwise just drab finish came out very interestingly textured and very realistic. I repeat what I said, the transparent parts are very sharply done. Bravo! Dan
-
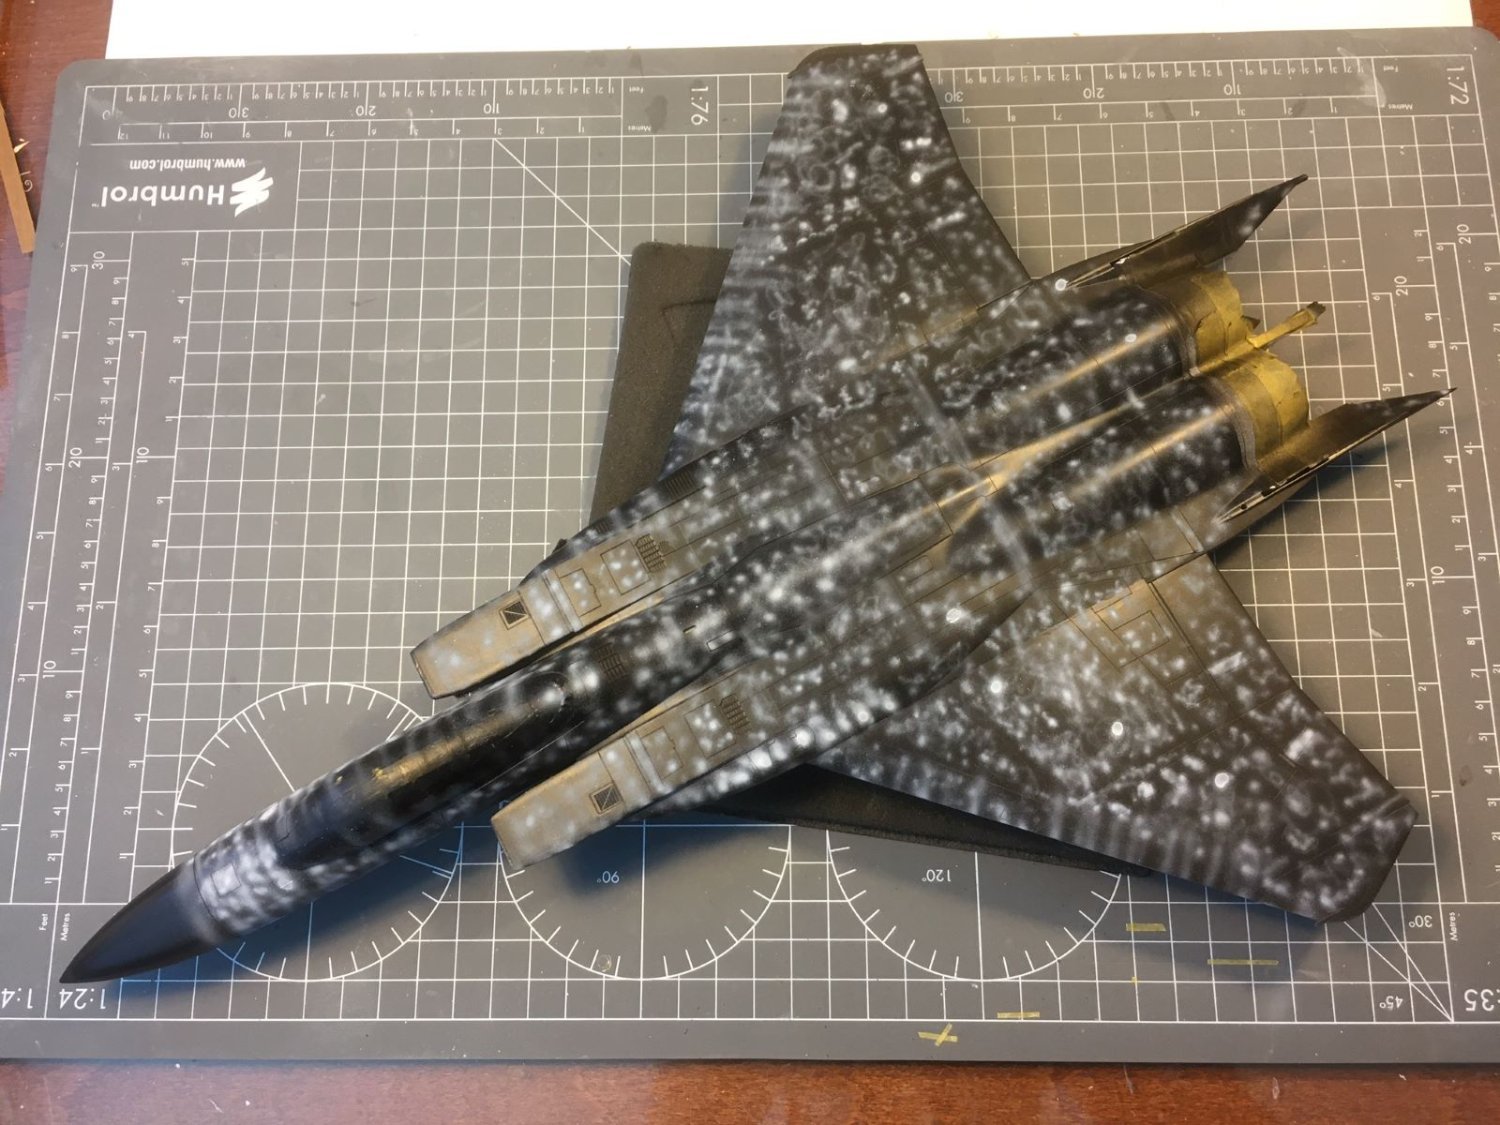
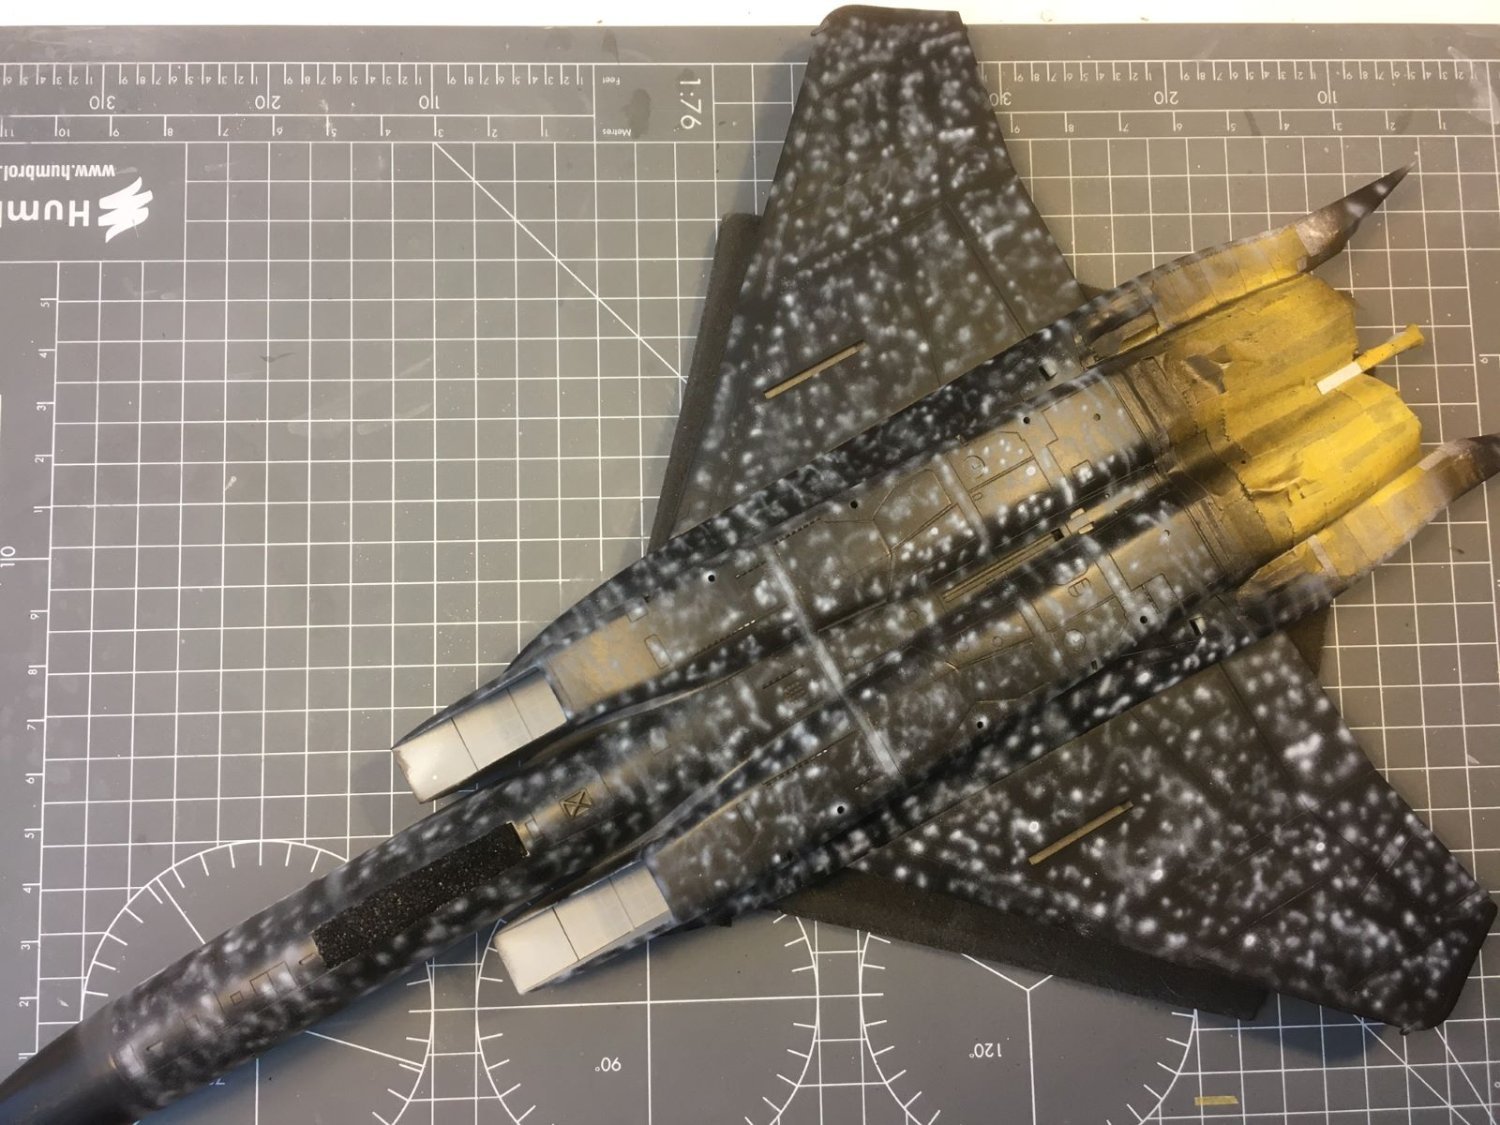
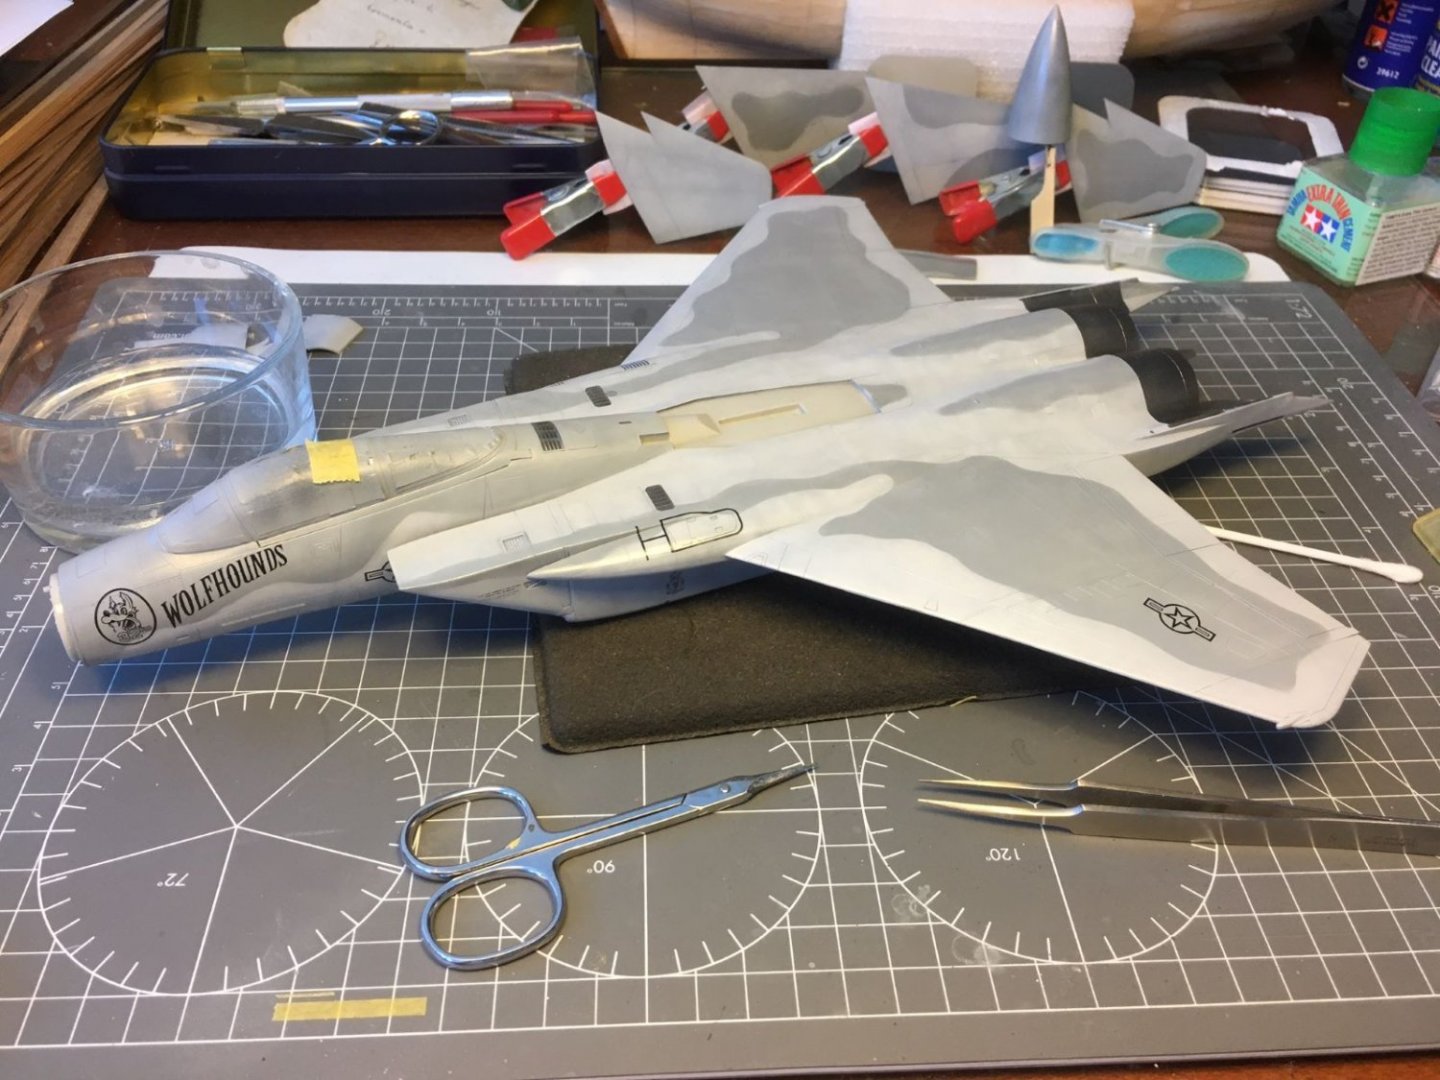
Hi, I had little time for the hobby lately and I am posting just few images to show that the build is going on. From the images above, I noted a blemish in the filler located next to the cannon opening which I could not ignore and hence had to be corrected. Then, after a light wet sanding of everything, I sprayed a second layer of gloss clear to prepare the surfaces for the decals: I sourced a decal sheet that contained the service stencils and one for the insignias of the 32nd Squadron which was based in the Netherlands since the early 50's at the Soesterberg Air Base. The squadron was under Royal Netherlands Air Force control, therefore it was the only American Squadron that was under the command of a foreign nation. The role of the 32nd TFS was to guard the West-European air space which stretched right up to the Iron Curtain. Below, I just started to apply the decals: This is an early scheme which will display the high-visibility stencils as I found in some pictures on the web (note: I find strange that the diagram around the fueling port is so larger than the outline of the port, but I do not have other options). That's all for the moment, best regards, Dan

- 137 replies
-
- 10
-
-
I see a great paintwork nicely finished by the decals. The transparencies also turned out very sharp. This will be a terrific model. Dan
-
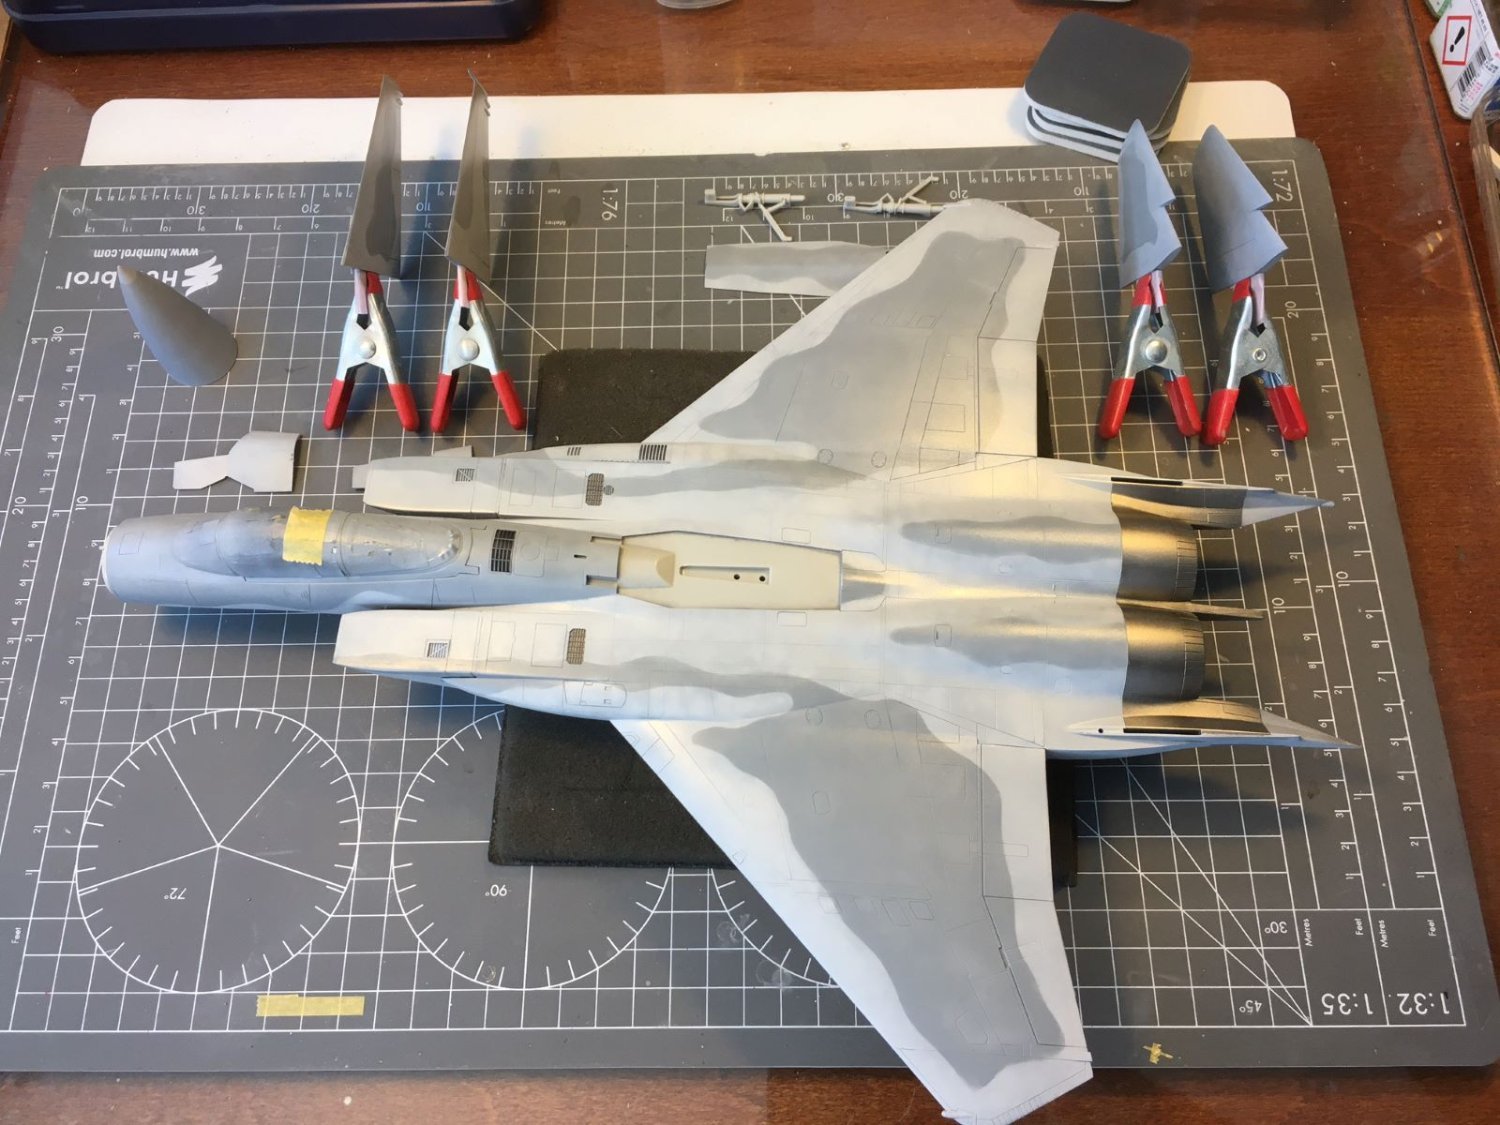
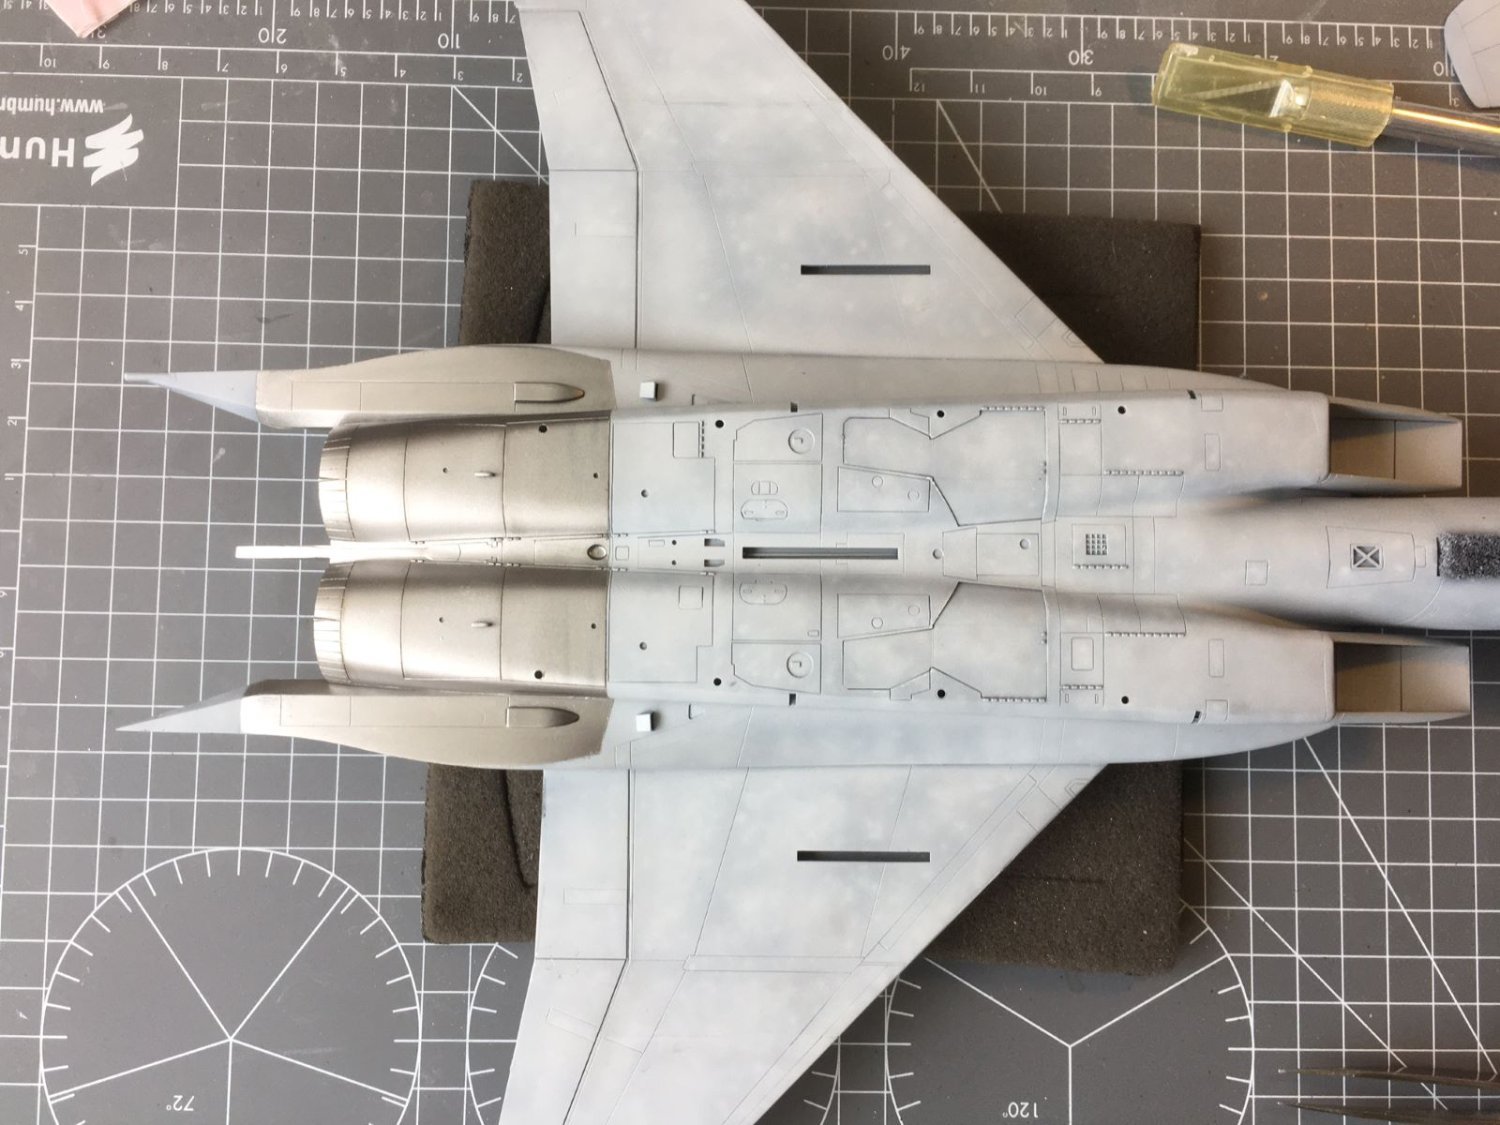
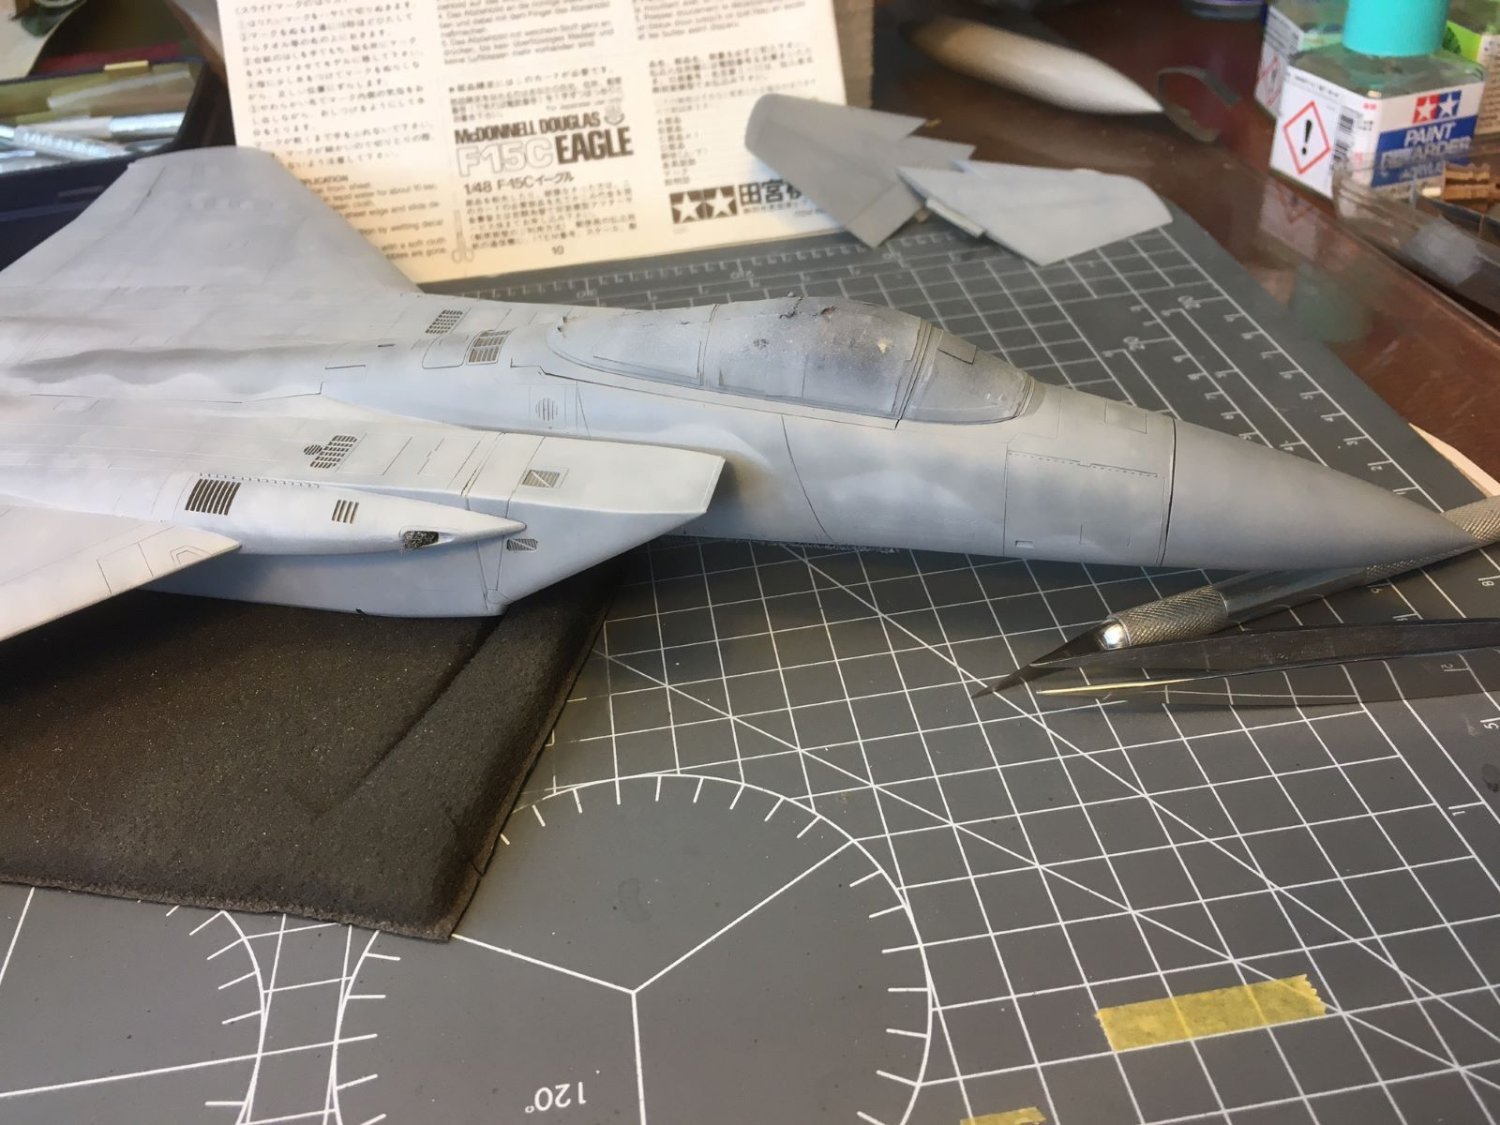
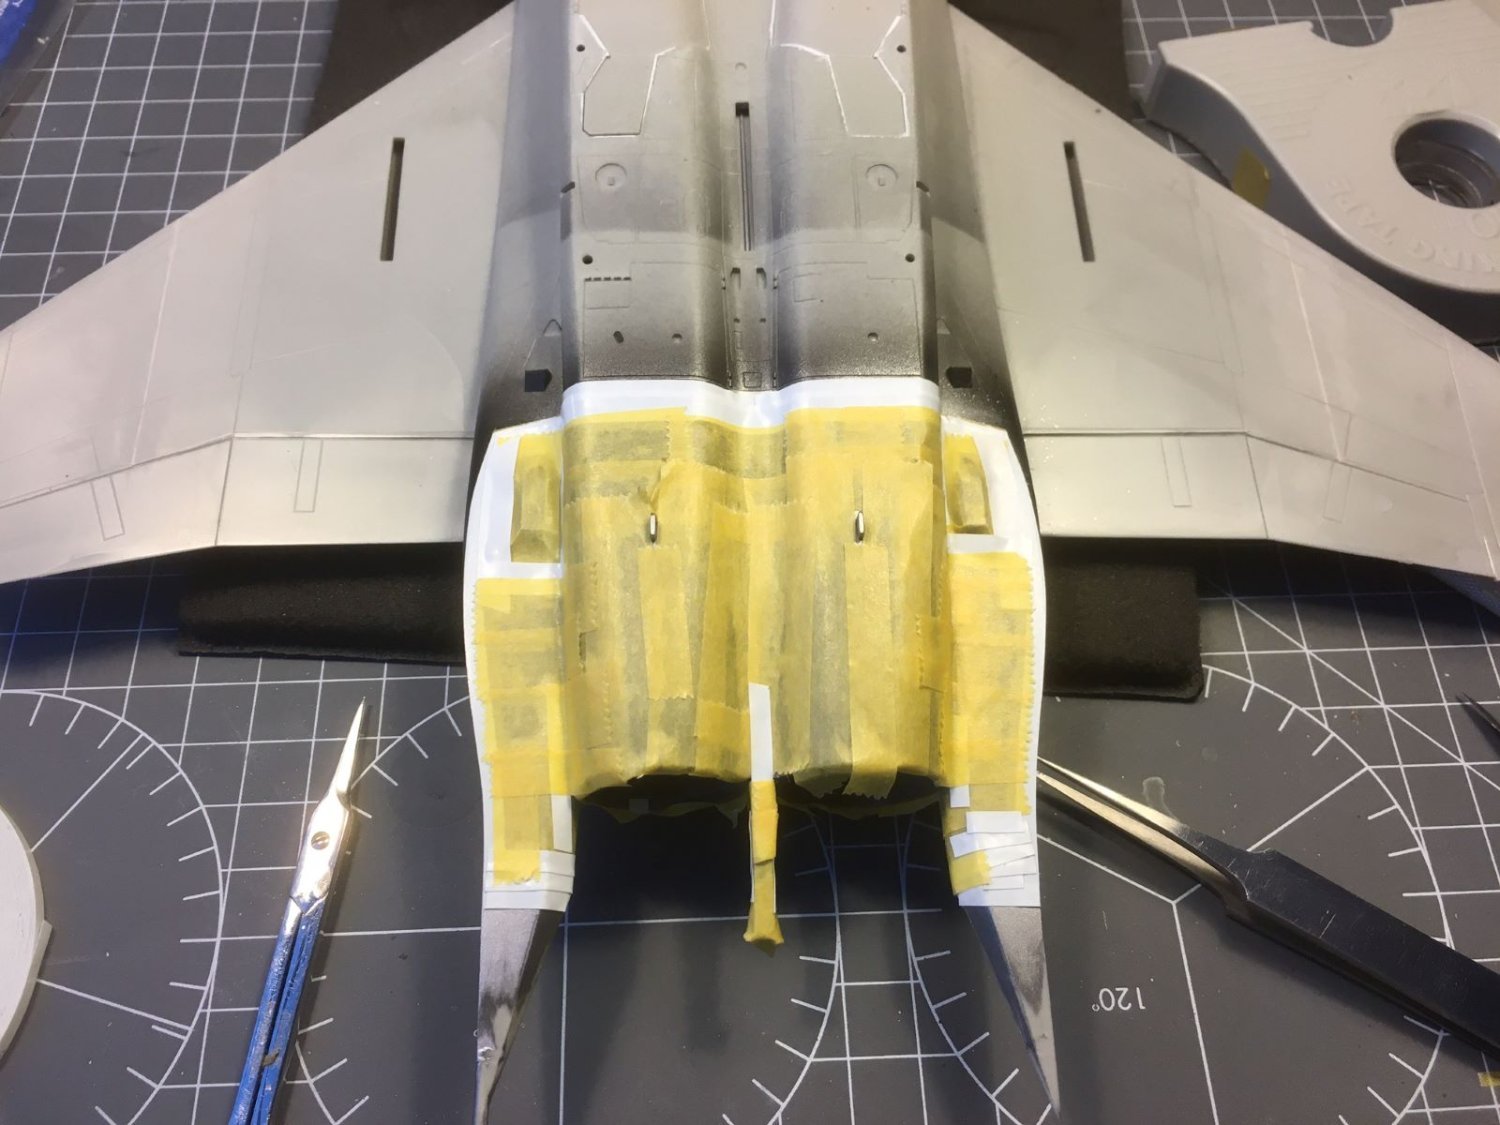
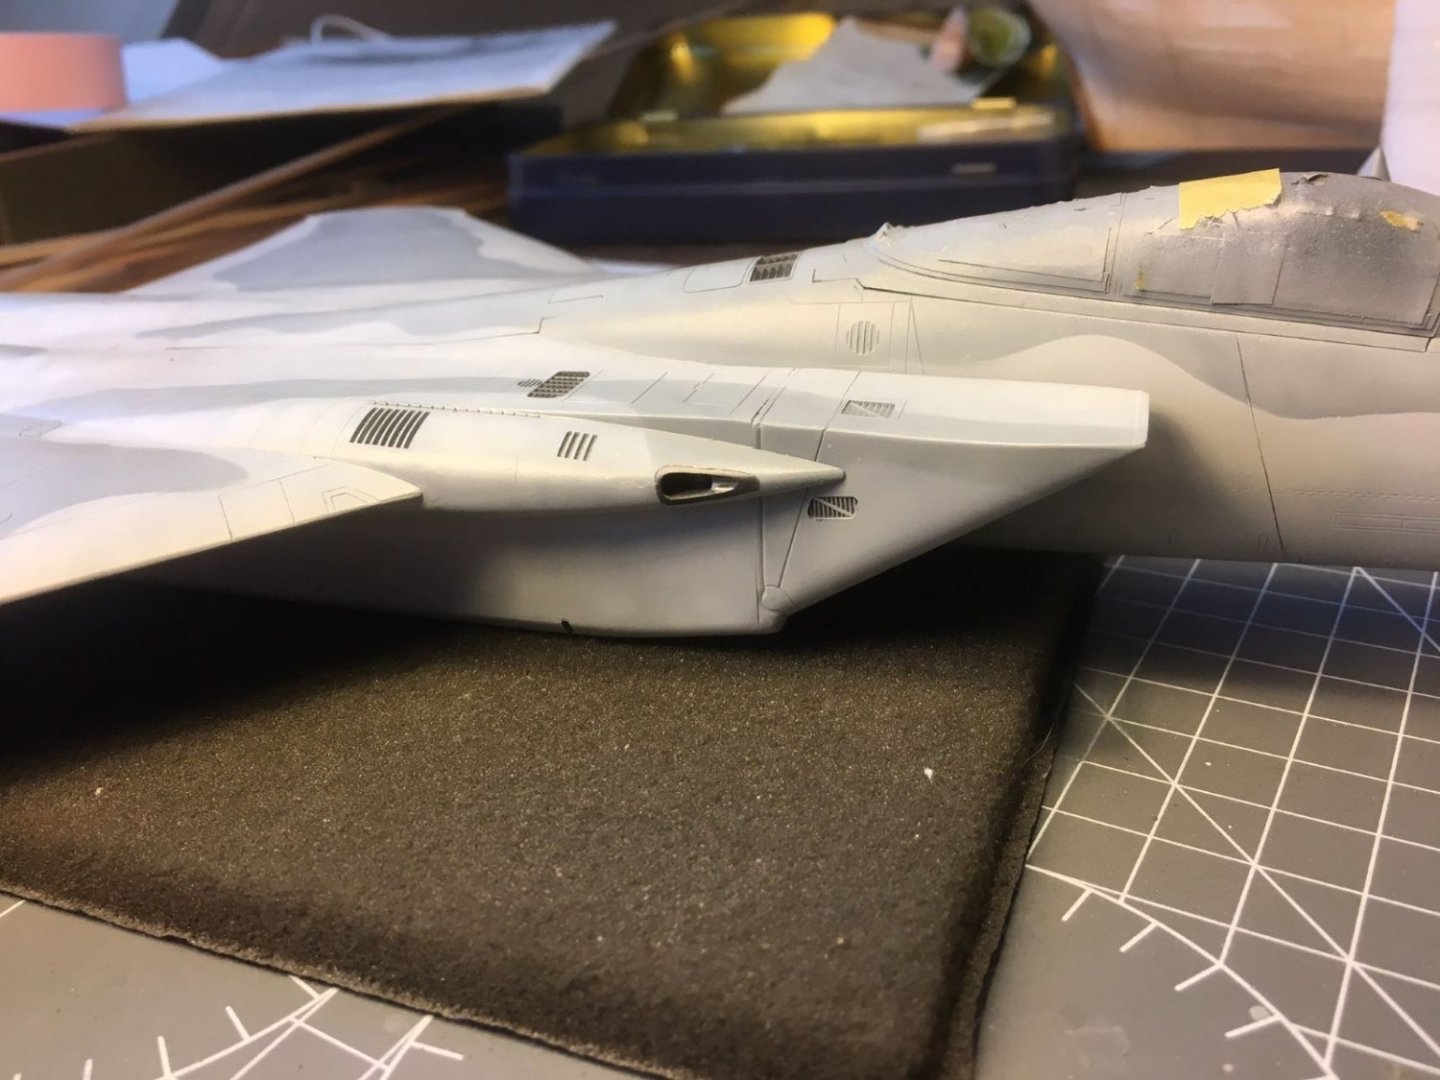
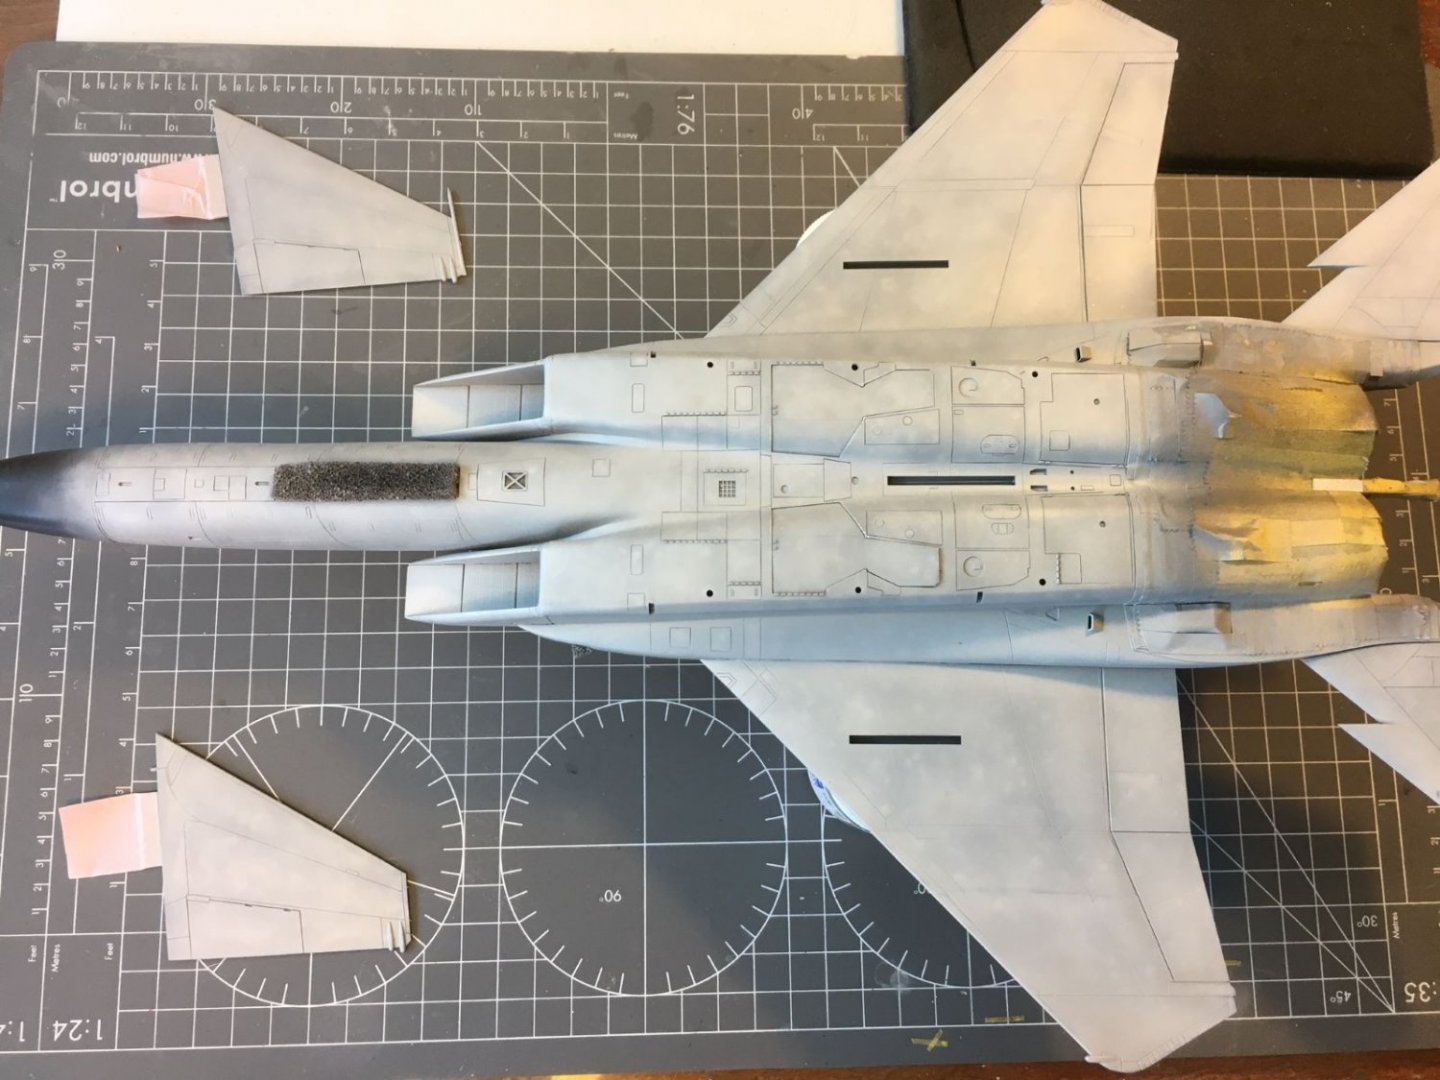
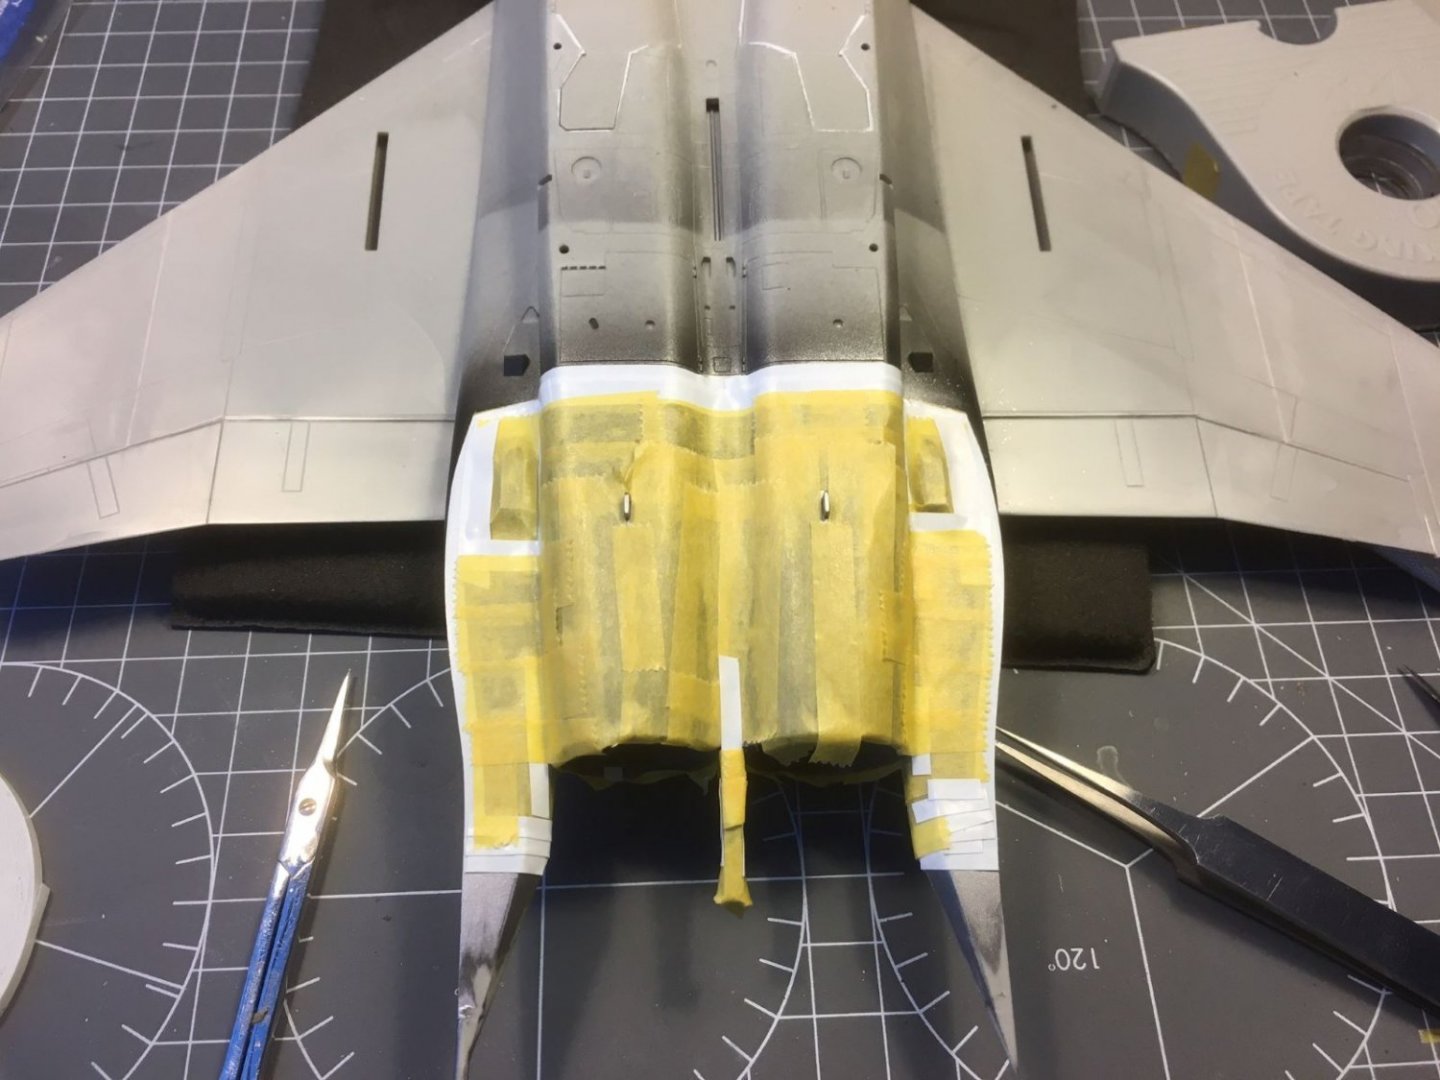
Hi all, some little work done over the weekend, painted the control surfaces and posed together with the main body to see the effect. Then a first light coat of Tamiya gloss followed by a light wet sanding. Before a second coat, I masked some details to get a metallic paint on the cannon opening and on the largest dorsal grilles: I sprayed on these details a coat if Vallejo metallic 'steel' obtaining some points of interest on the large upper surface. The simplified cannon opening gained a bit of detail: Meanwhile, waiting for the gloss coat, I started to work on the landing gears. That's all for now, kind regards, Dan

- 137 replies
-
- 14
-
-
OK, beside 'talent' which is a big word and I do not consider applicable to me, the other two ingredients are correct. I started with brush painting (my other hobby is actually... 'brush painting') and then I moved to airbrush. However, I soon realized that the time spent in airbrushing models was too short, too insufficient to learn reasonably the basic techniques and, in addition, it needed a long preparation in building the model before I could get into action with it. Hence, I started to spray paint on scrap cardboard and the like trying several effects that I wanted to reproduce. This way, I could get some of the 'time' and the 'experience' that were needed. Excuse me for this unsolicited long digression and thanks to all of you that offered benevolent comments and 'likes' 🙂, cheers, Dan
- 137 replies
-
- 10
-
-
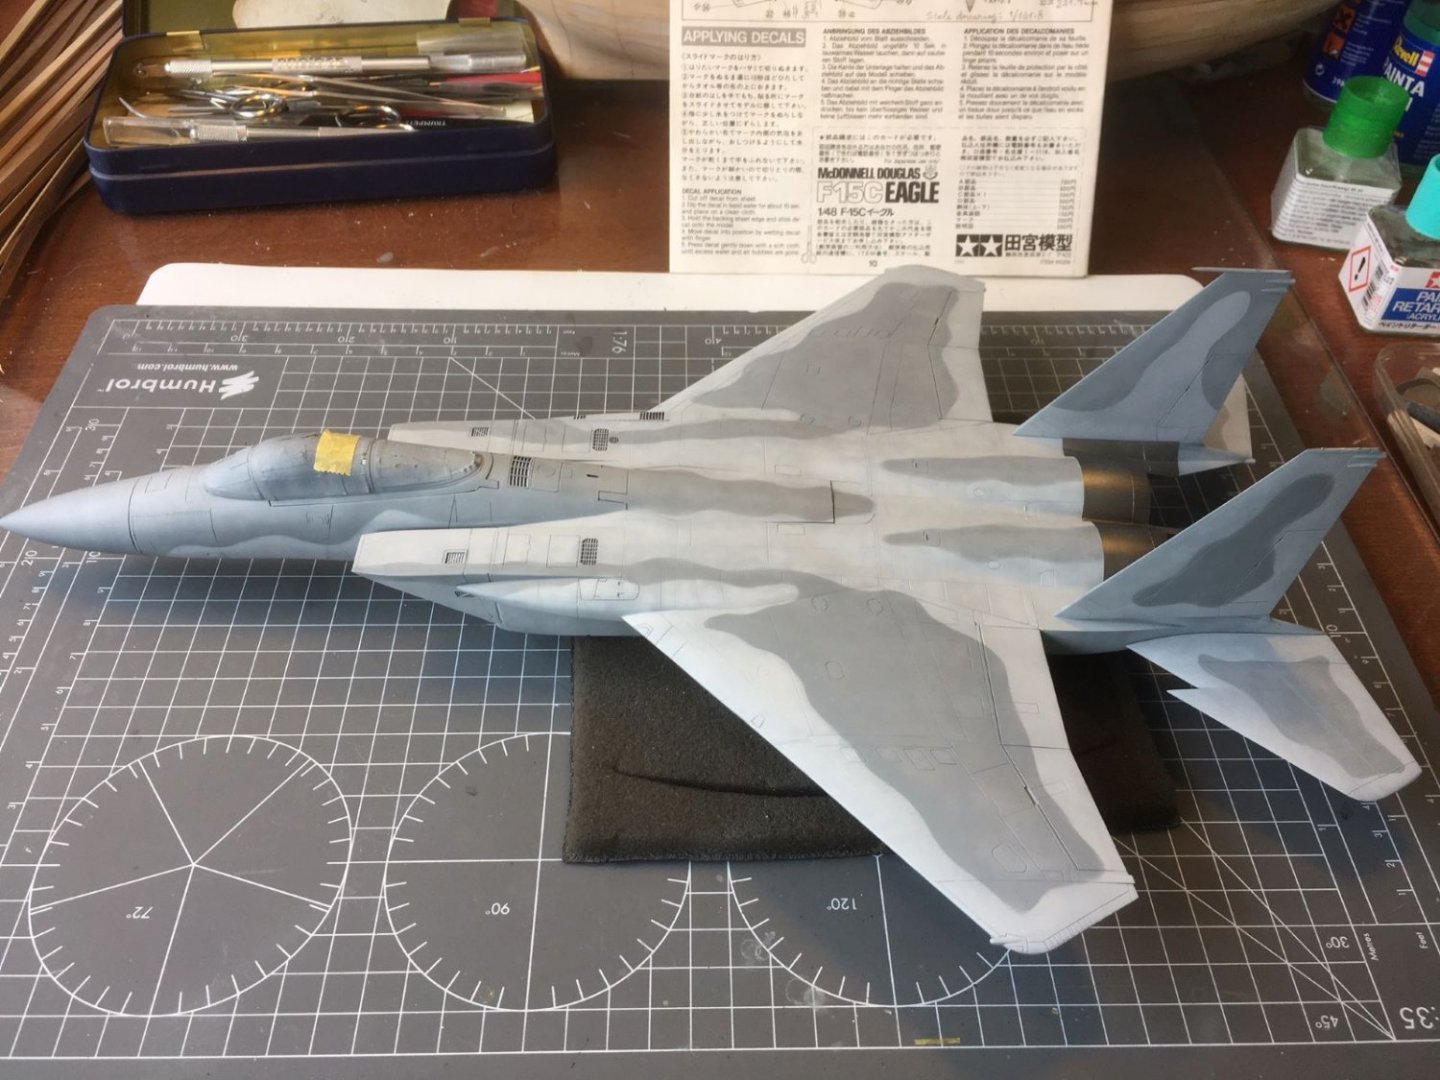
A small update, after a long series of touch ups, where I was correcting oversprays of one color just to make oversprays on the other one, I consider the main airframe finally done. Not perfect, but good enough for me. The two fins need to be finished, then a coat of gloss will follow. Cheers, Dan

- 137 replies
-
- 12
-
-
-
Thank you, @Old Collingwood, for you kind note. I am glad you find it good. Still working on the greys, it is taking longer than expected, but it is a hobby, so it is ok. Kind regards, Dan
-
I like your rendering of the Africa camouflage. The result is very convincing. Waiting to see more, cheers, Dan
-
Fine model, very nicely executed. The presentation in the display case is very elegant. Congratulations, Dan
-
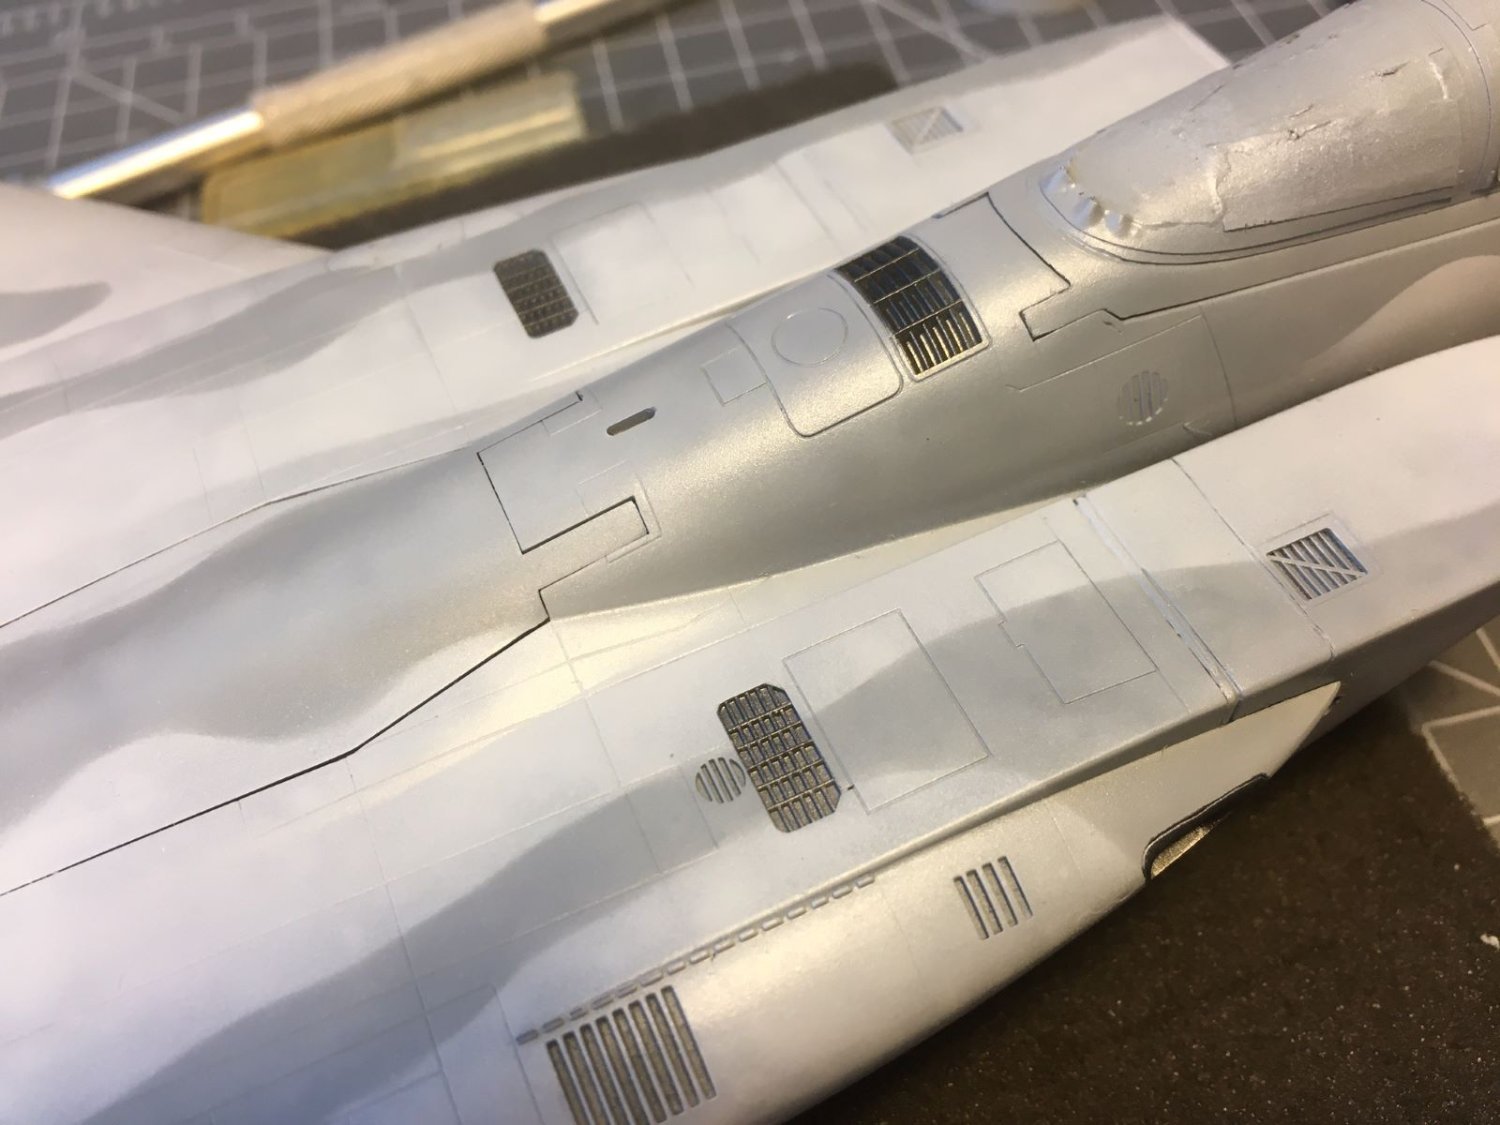
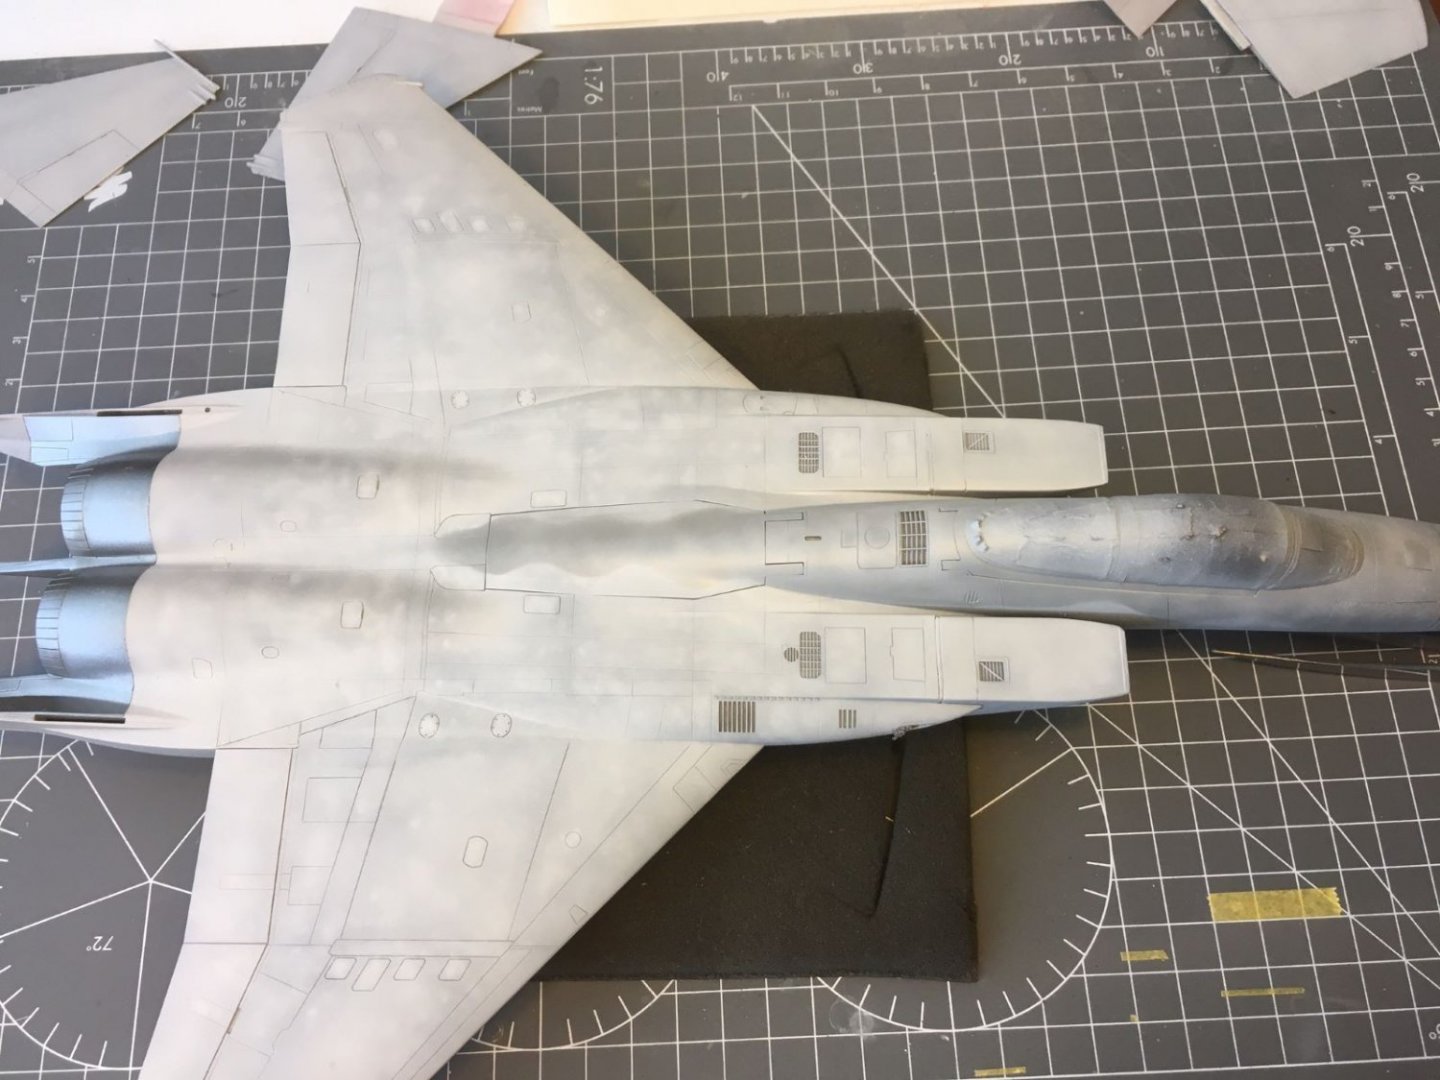
Slowly going on with the camo scheme. Worms of blu-tack applied as masking material: The area above once sprayed with the dark ghost gray: I need to touch up some areas on the spine which did not have enough contrast. This is the drawback of spraying one area at the time because it is difficult to keep the right consistency between the different applications. By the way, I have also repaired the metallic panels: At close distance, some blemishes of the surface can still be noticed, but I will have to live with that. Thanks for following, Dan

- 137 replies
-
- 11
-
-
@king derelict and others, I am glad that you like it. It's a bit of work, but it is one way to make an uniform grey surface more interesting. In addition, for the aircraft I have in mind there are pictures showing them quite weathered. kind regards, Dan
-
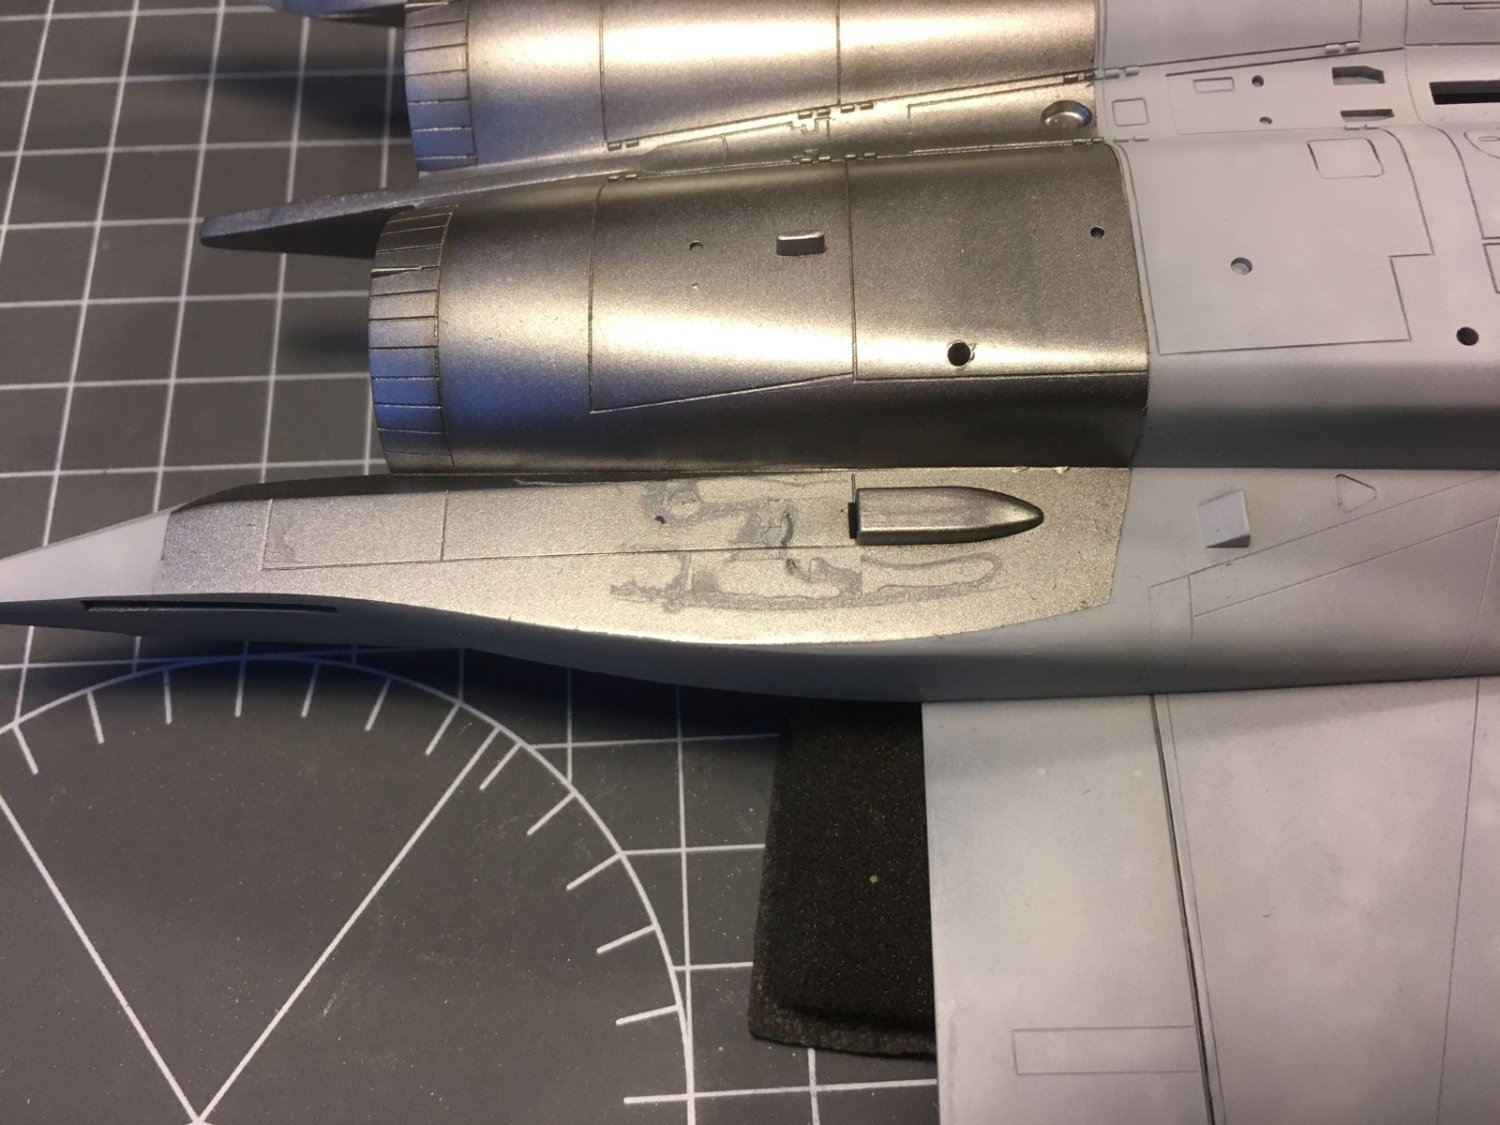
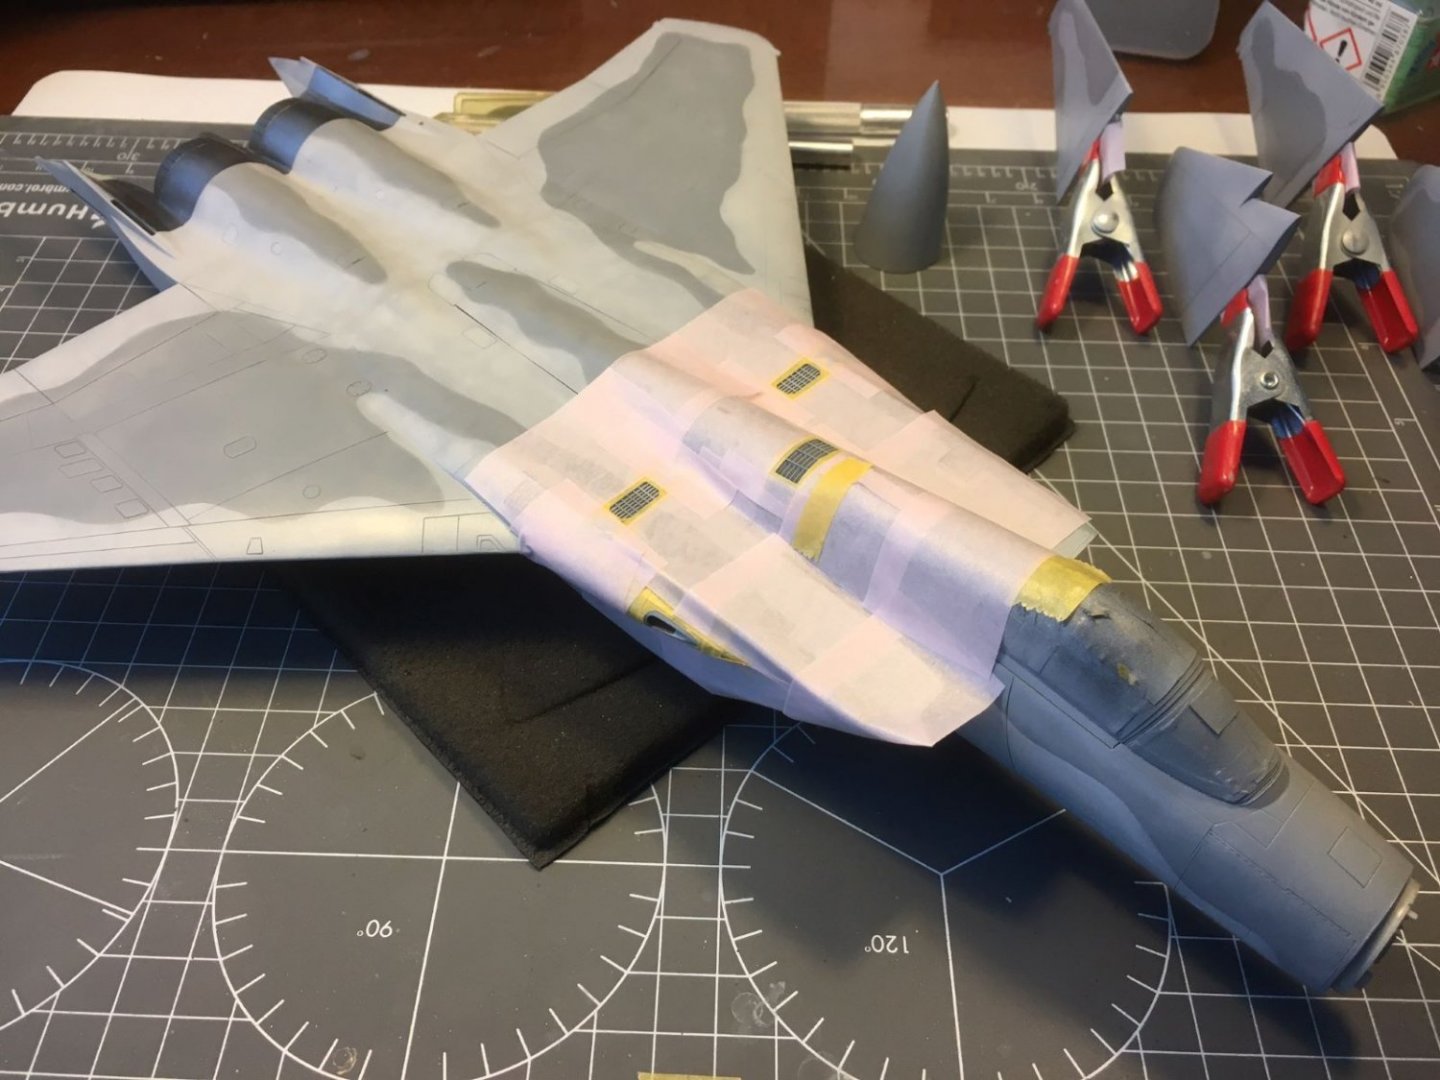
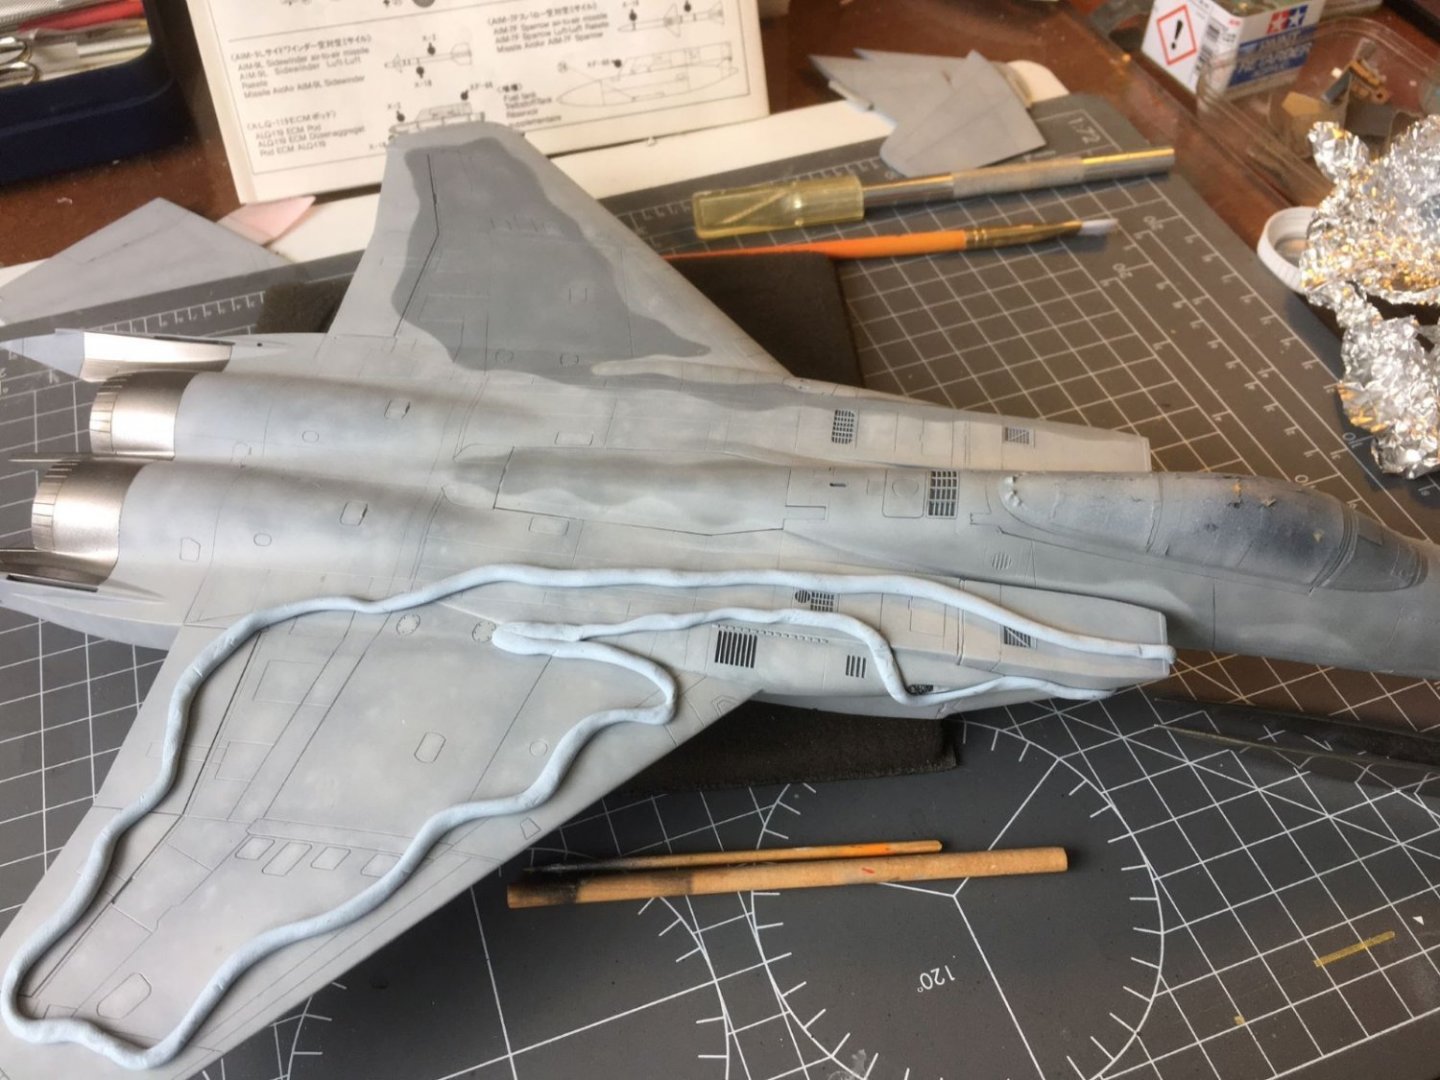
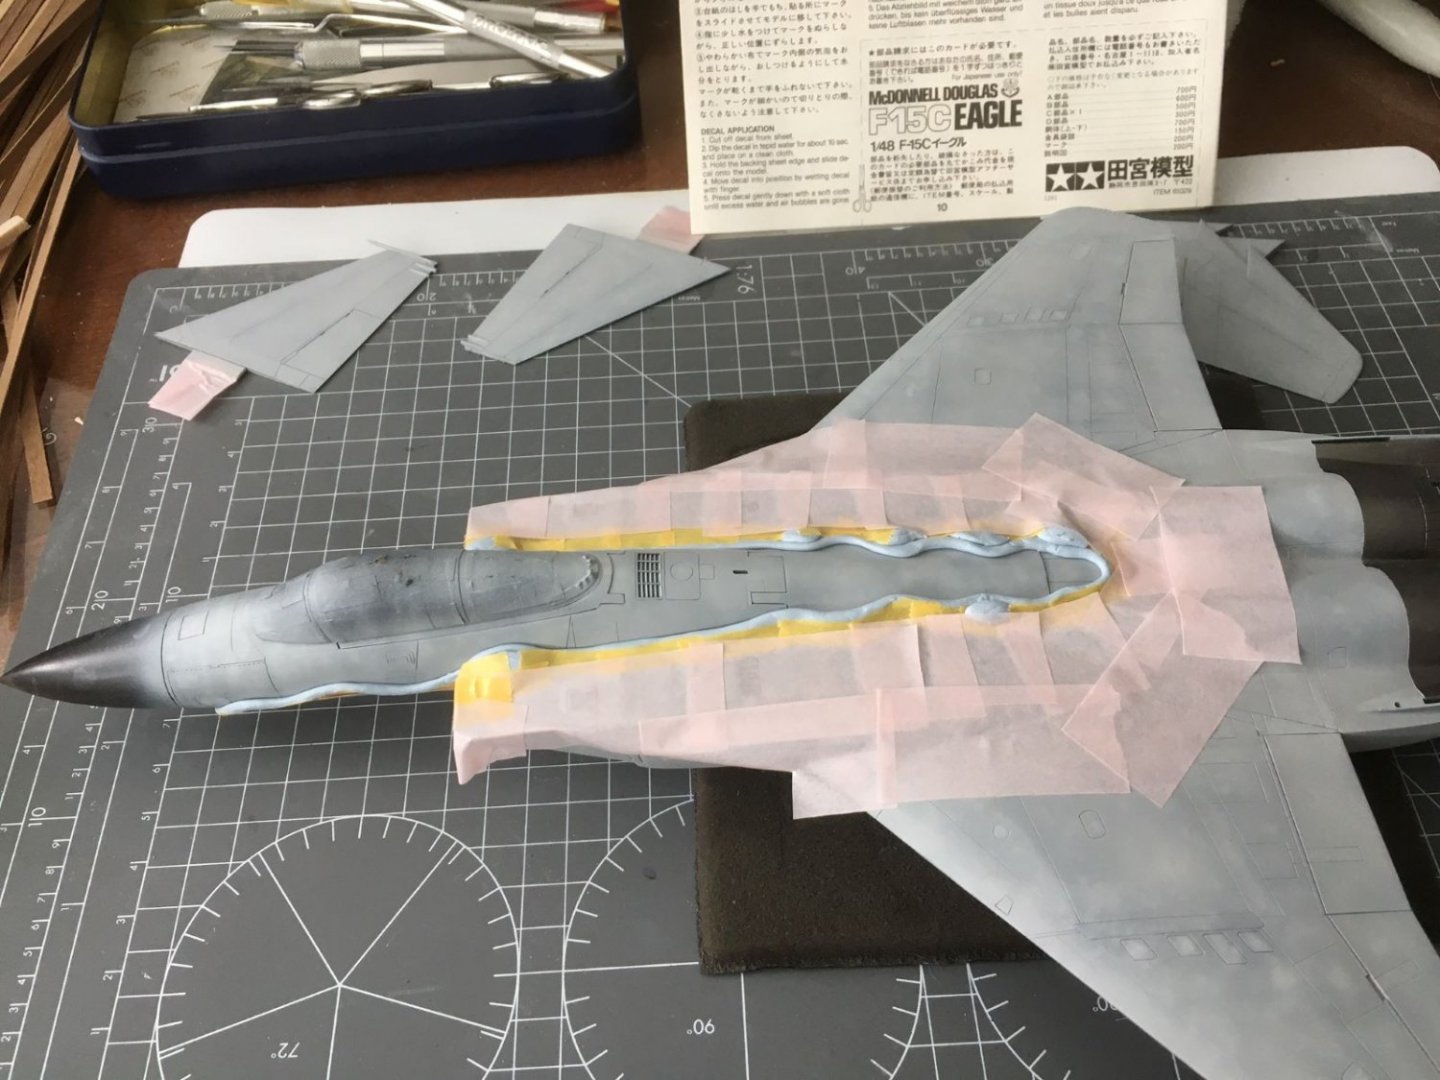
Hi, after having declared the light gray application as finished, I removed the masking of the metallic panels because I was anxious to see whether the metallic surfaces were spoiled by the prolonged contact with the adhesive of the tape. Fortunately, the Vallejo metallic withstood well the adhesive. However, there was a problem because, while spraying the grey paint, not having closed the airbrush cup with its lid, I spilled some paint onto the masked area. The very thinned paint found its way through the tape and marred one part of the metallic finish. 🤬 Due to the limited extension of the damage, I think that it can be repaired, but that is very annoying. After having prepared the paint mix for the darker gray, I started masking the most difficult and curved area on the forward of the airframe. For that, I wanted to use rolls of blu-tack which I never tried before. I am going to do one area at the time, so to limit to a minimum the time the blu-tack will remain in contact with the paint. I sprayed the dark grey making irregular blotches of color. Eventually, I think that the blu-tack worked reasonably well and it did not leave any oily markings on the paint. Now, I need to go through the rest of the darker areas and that will take some time. And, yes, I will have to repair the marred metallic panel as well. Best regards, Dan


- 137 replies
-
- 12
-
-
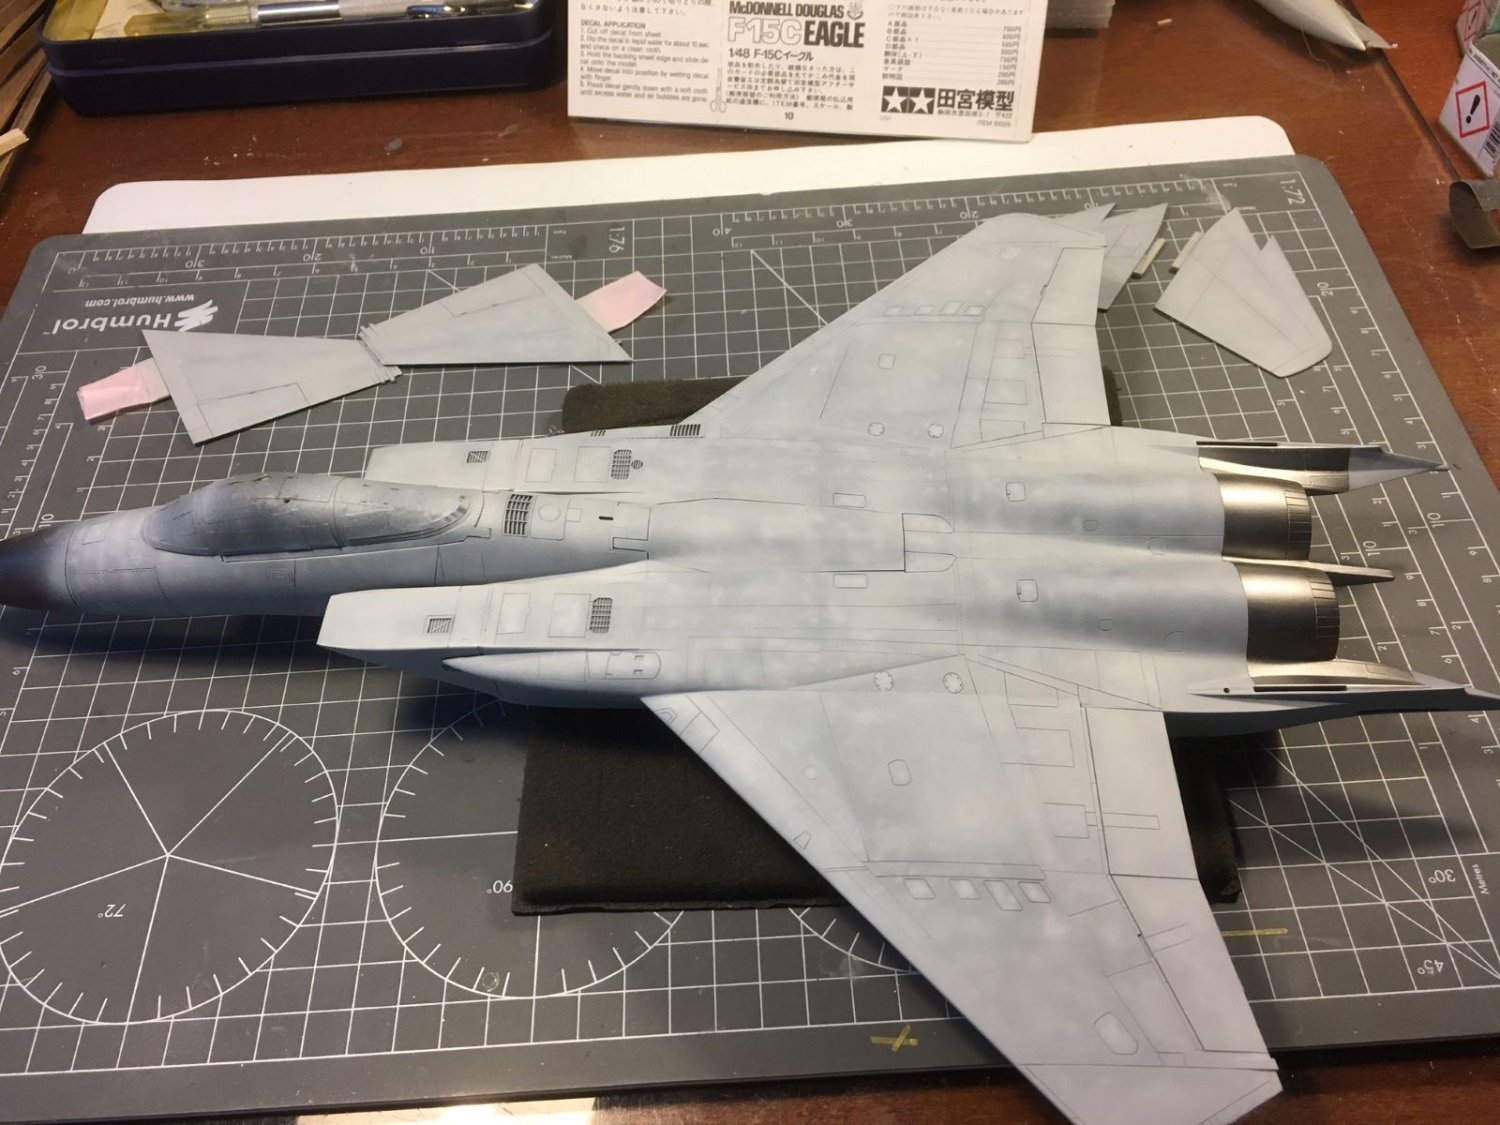
And I am glad to share my build with you! Then, please find a small addition to the color build up which now looks pretty final after few additions of paint. I have saturated a bit more the coverage. You have to consider that the darker grey zones will be added to the wings and to the back of the fuselage. The bottom looks ok, some weathering will complete its final look. Transparent layers that will be added for decals and inks usually tend to smooth the contrast. That's all for now, best regards, Dan


- 137 replies
-
- 13
-
-
-
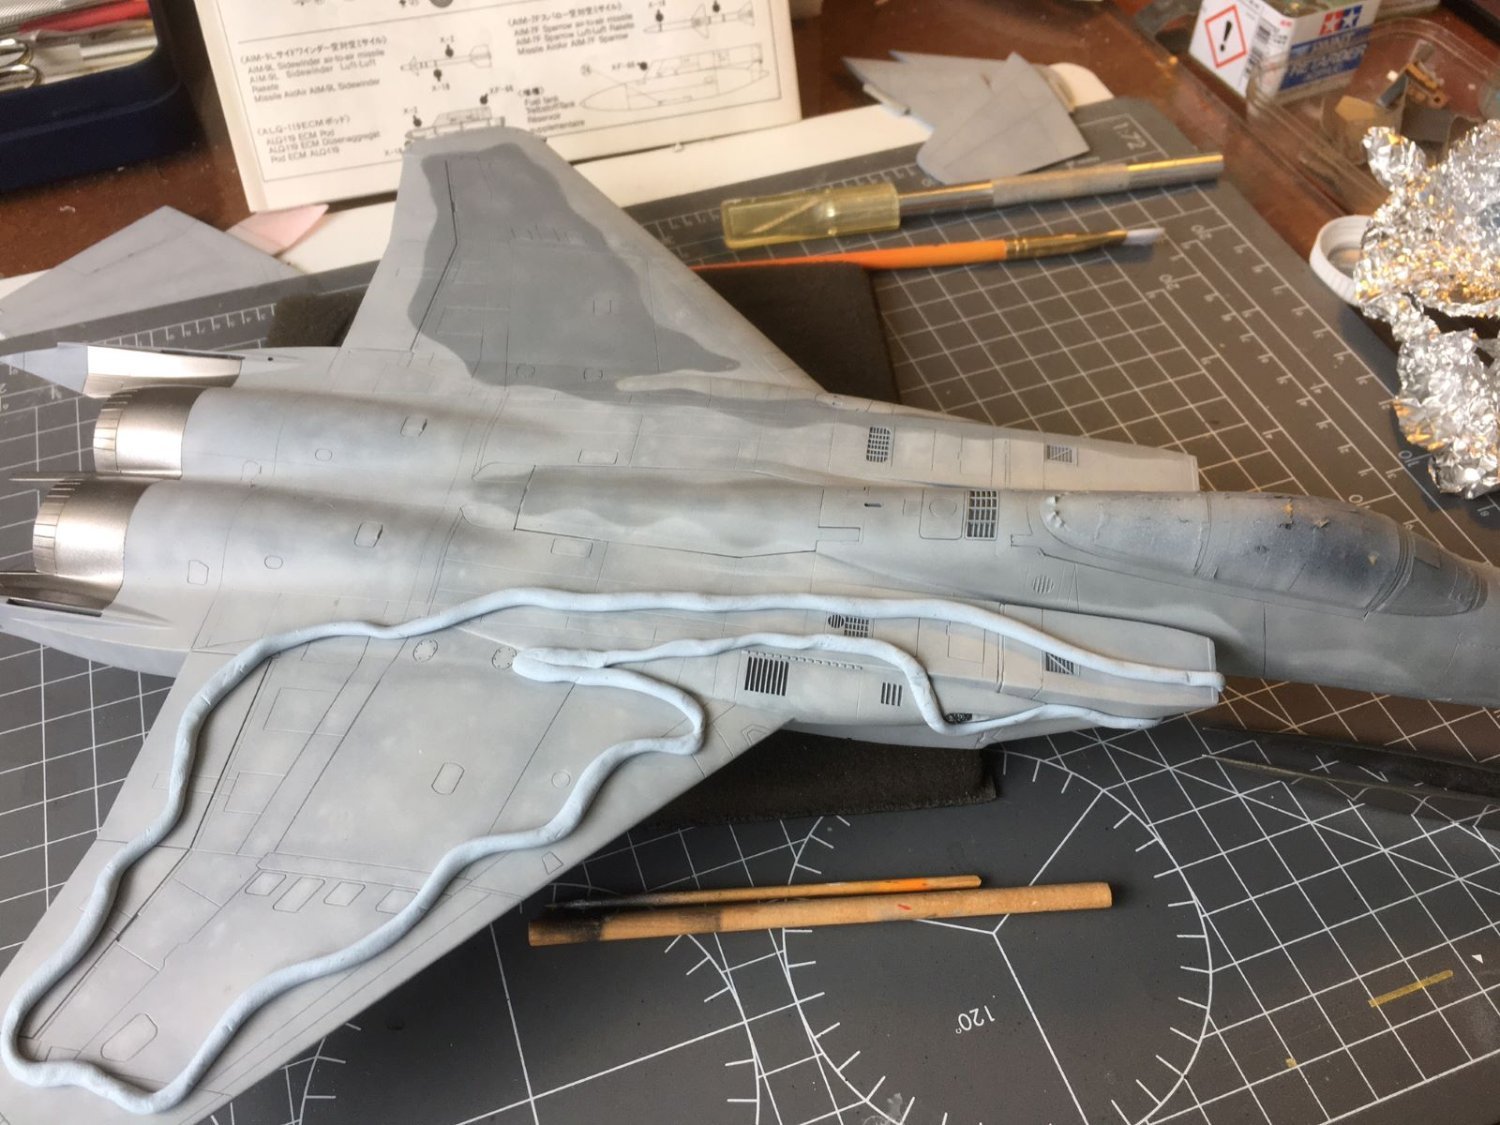
Indeed, the very first livery was 'Air Superiority Blue' tones. Apparently, the blue didn't give the expected mimetic result because it made the silhouette of the plane appear dark and quite visible against the sky background. The 'Compass Ghost Scheme' replaced it.
-
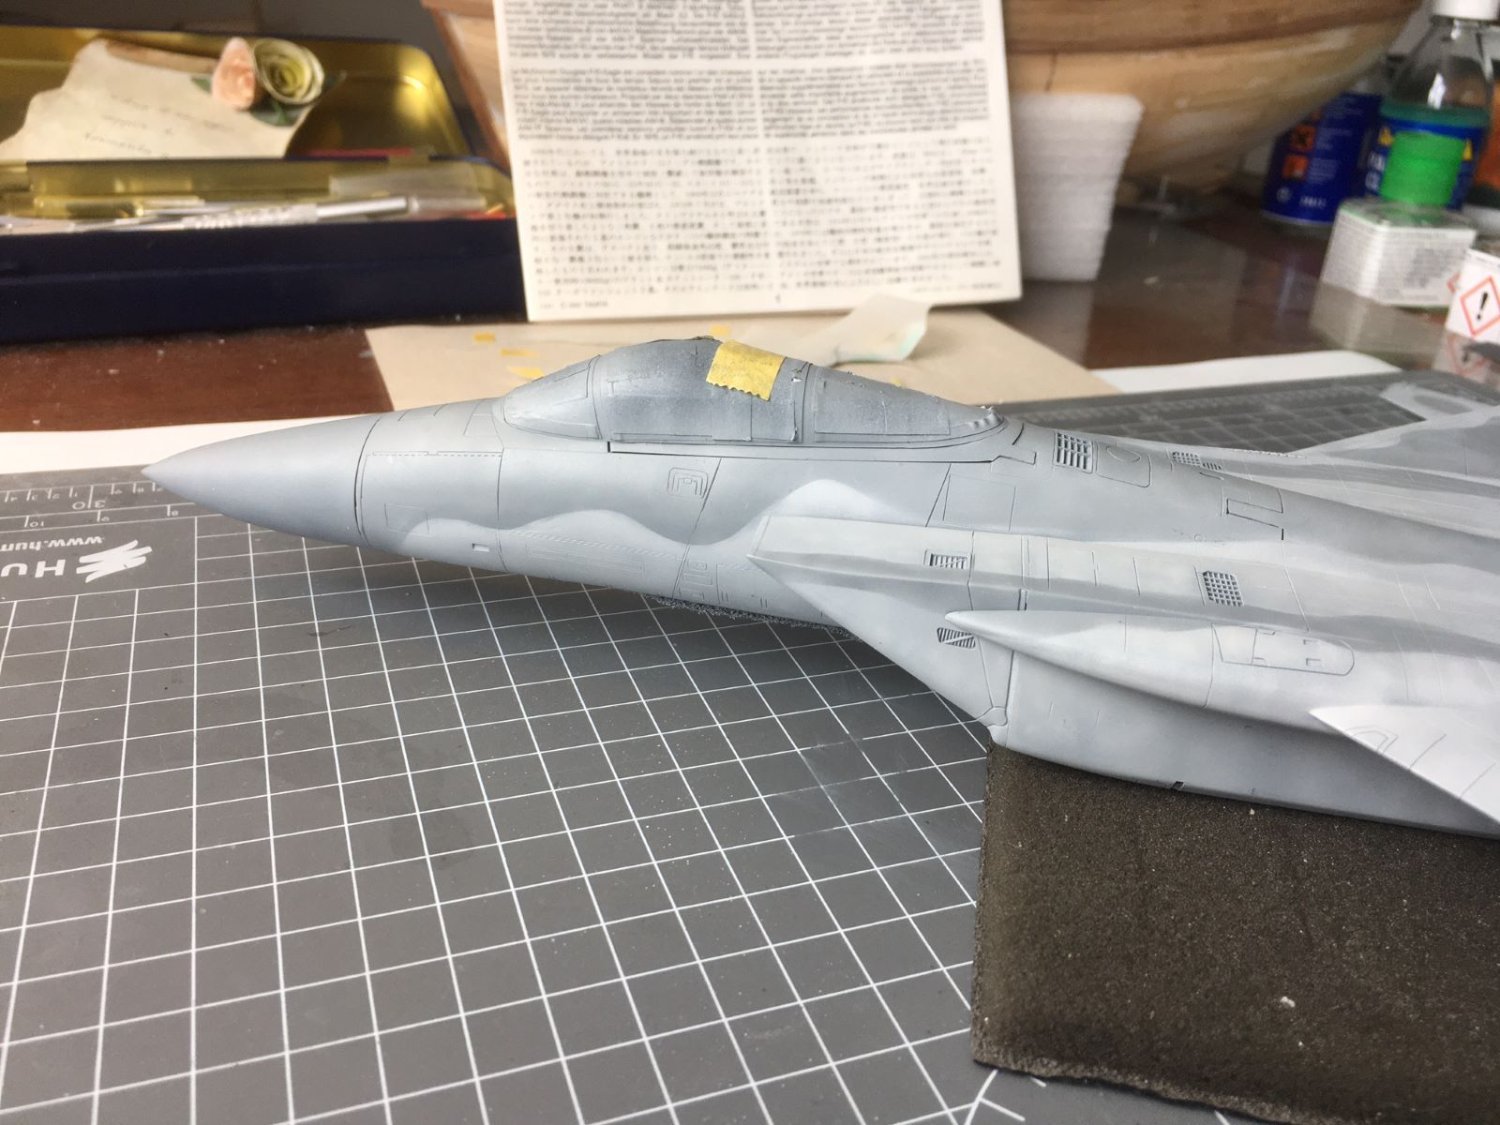
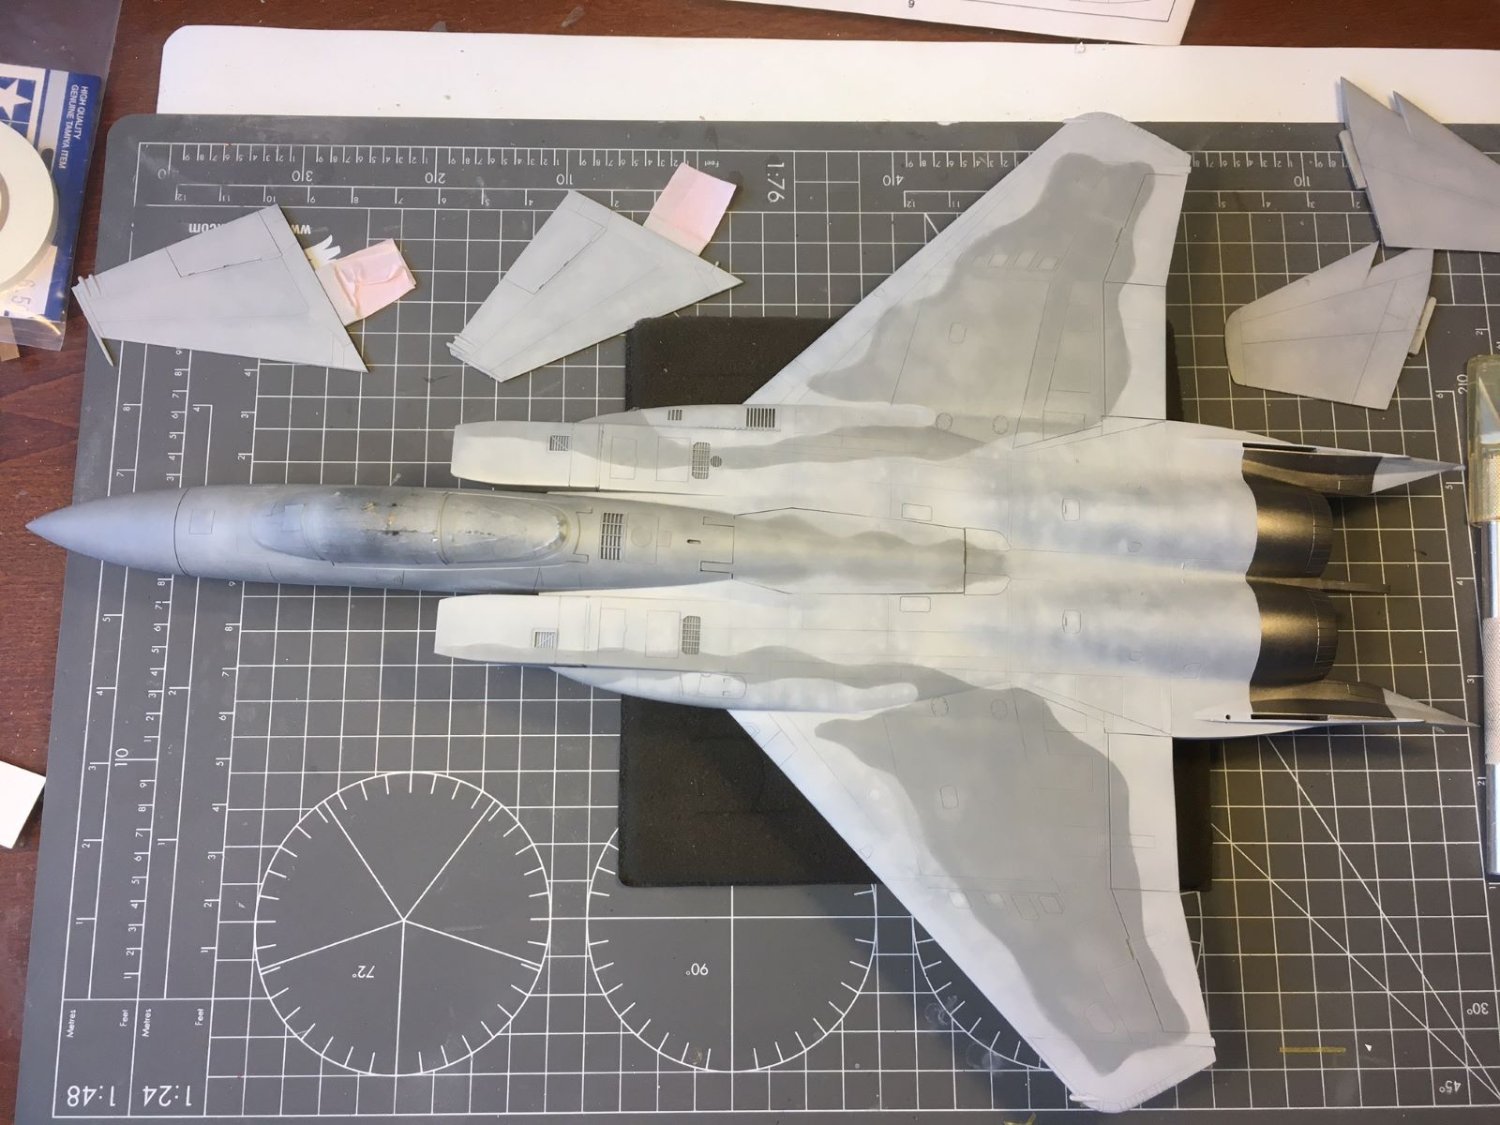
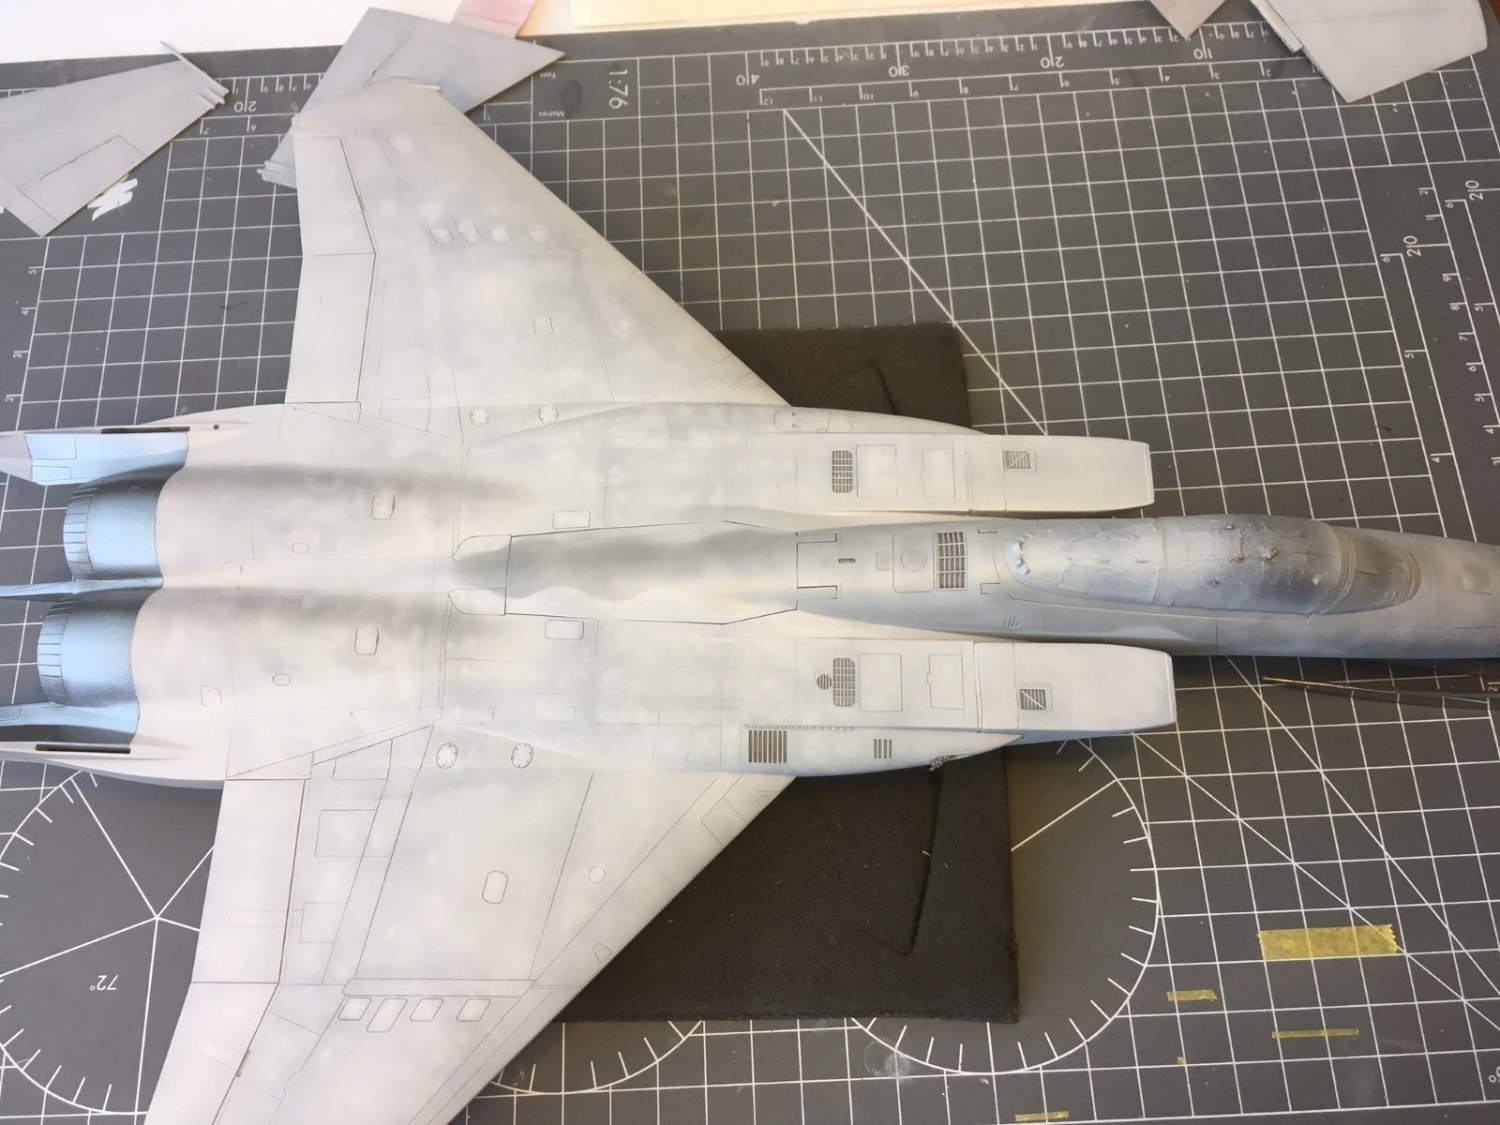
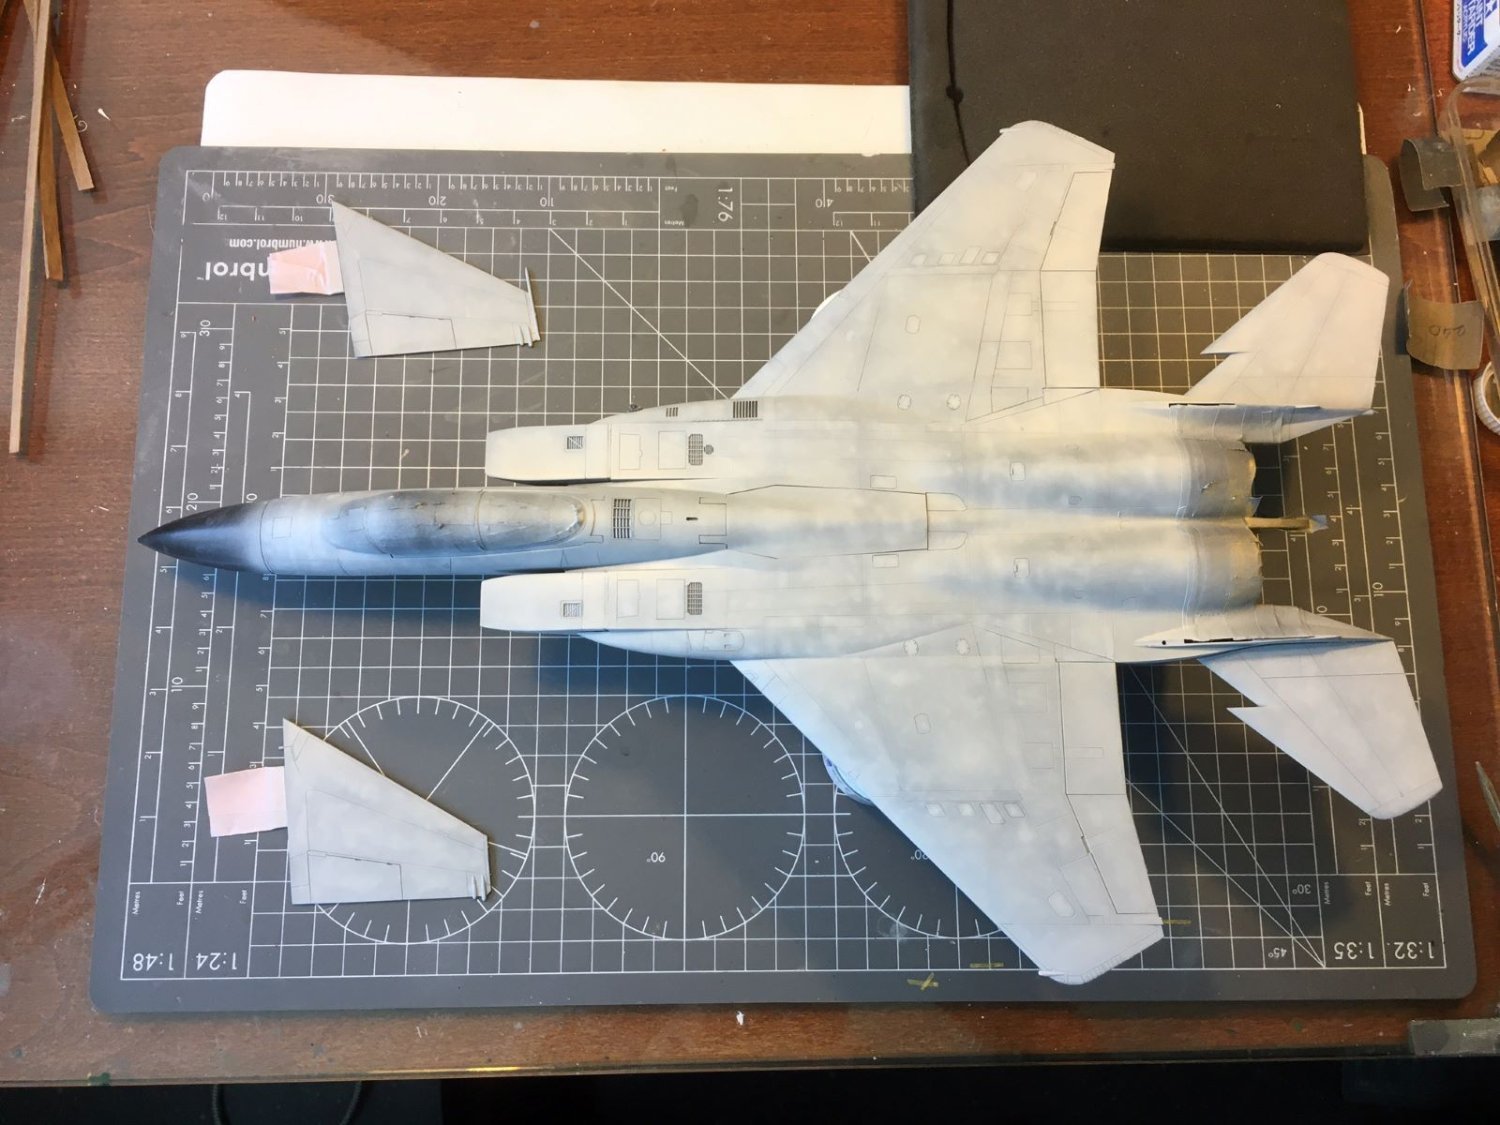
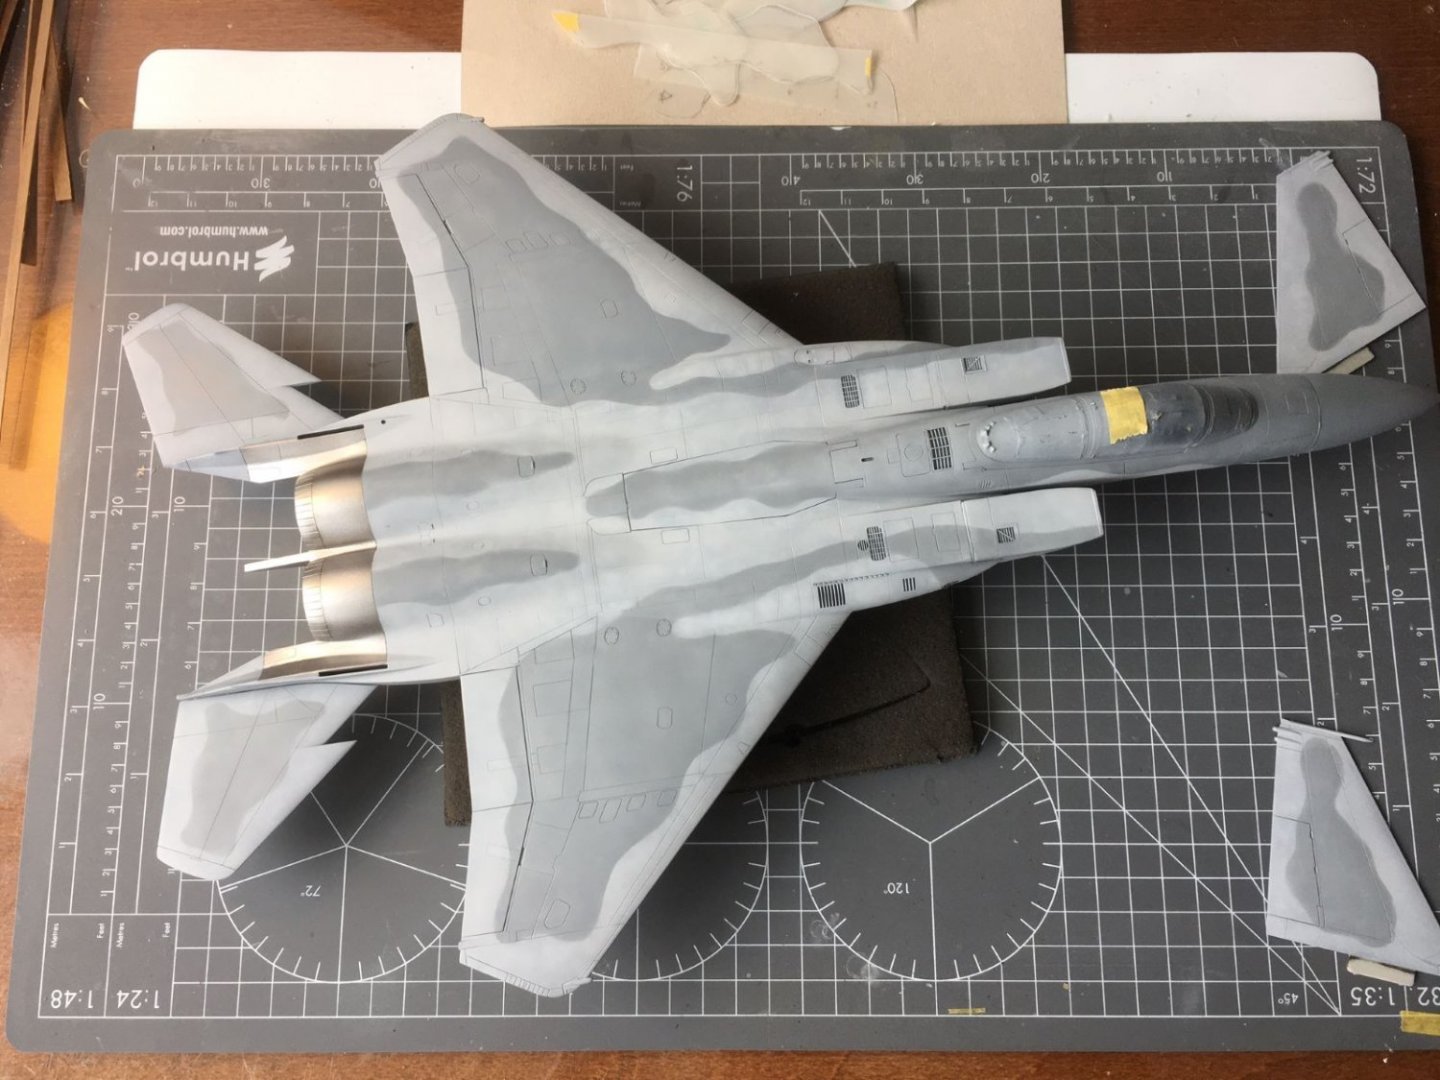
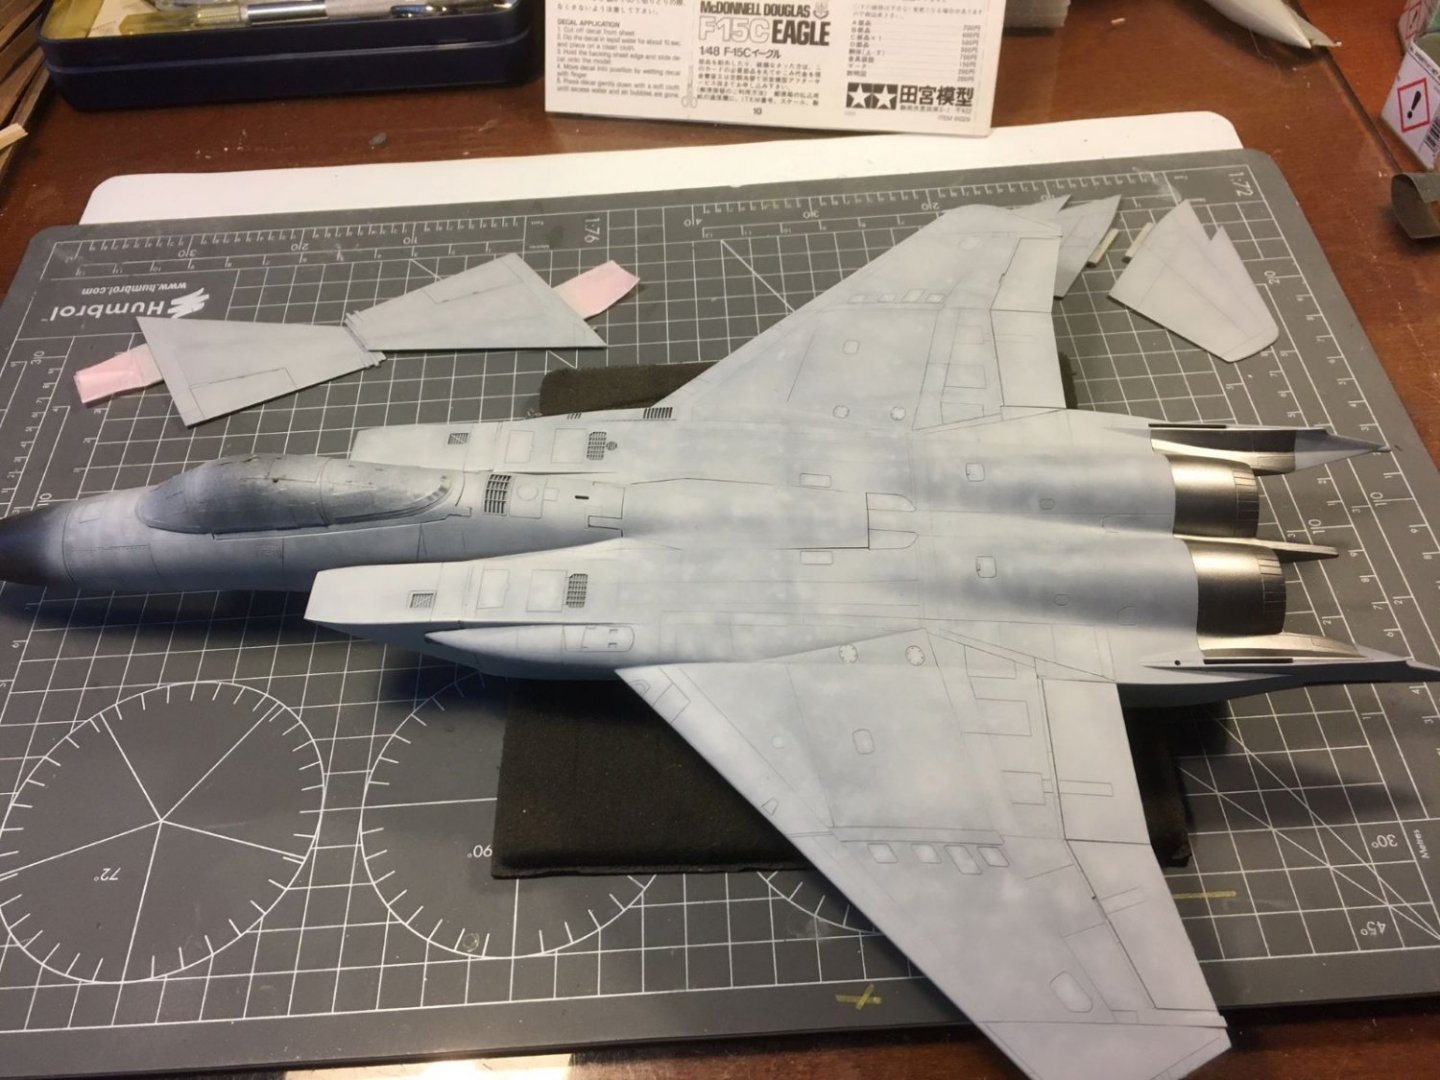
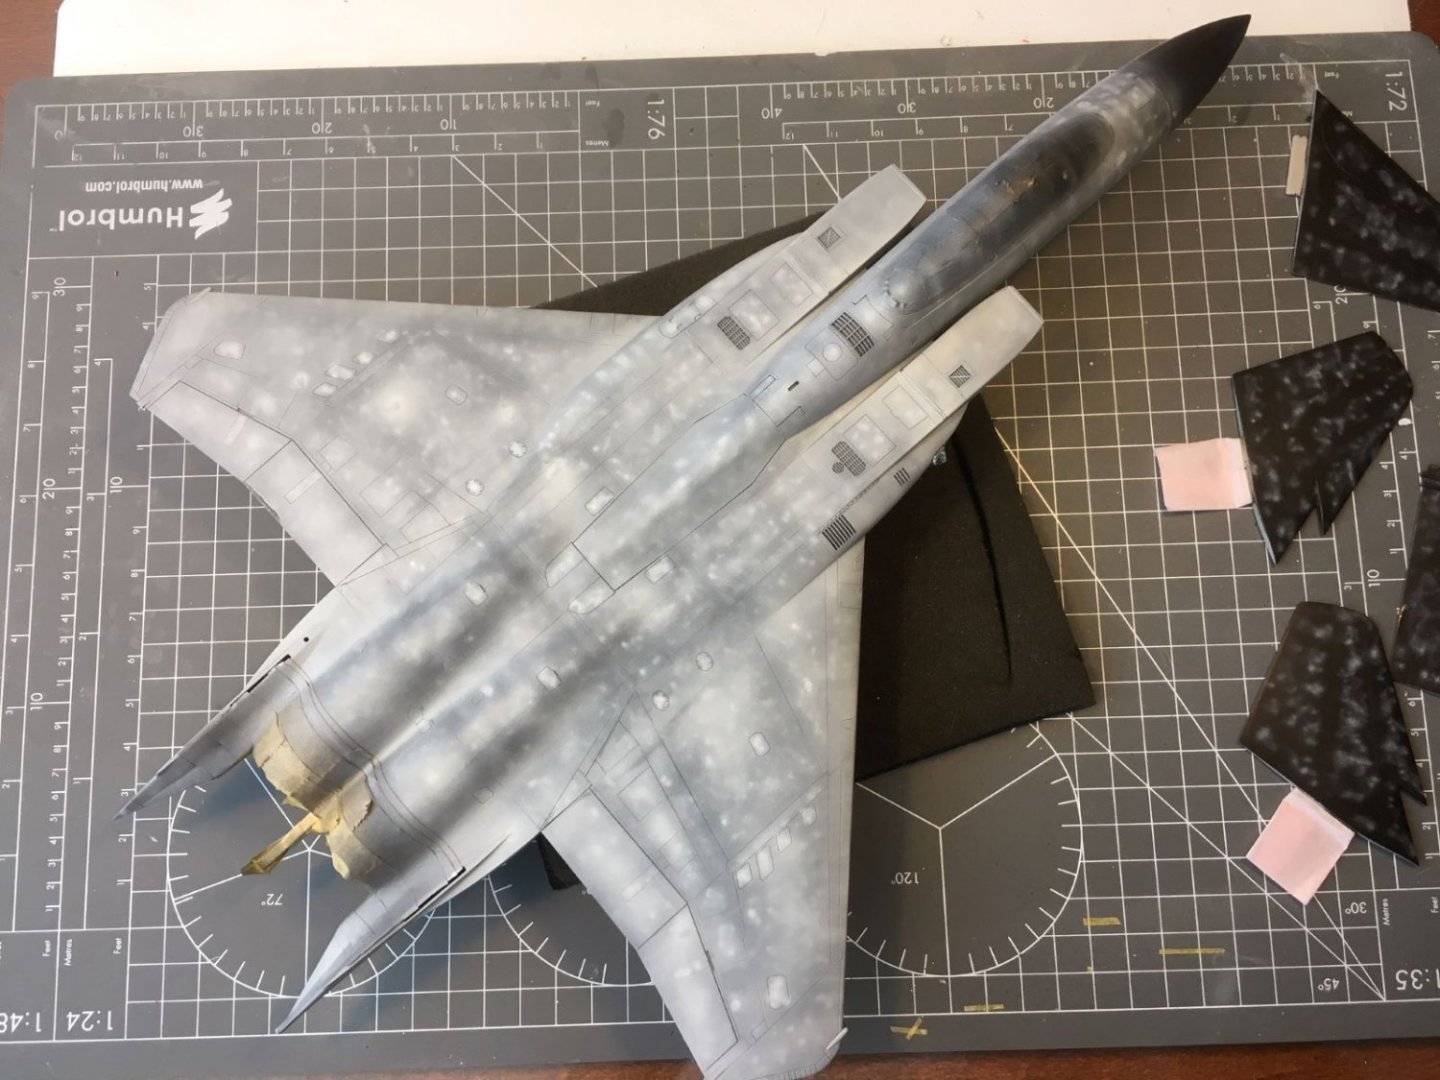
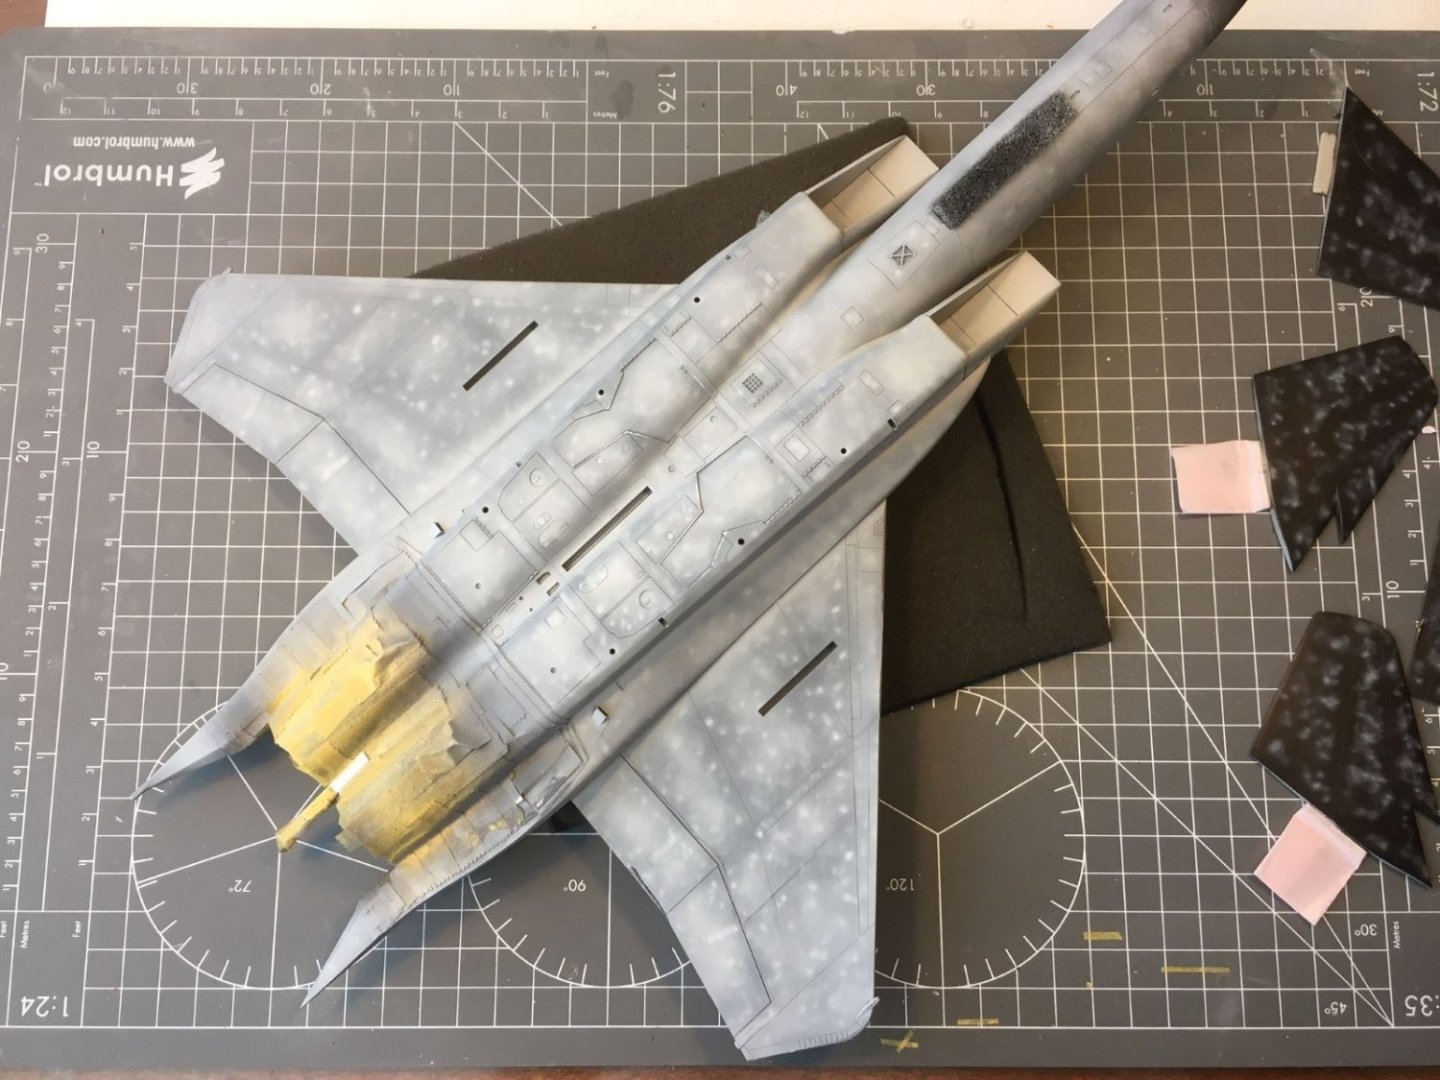
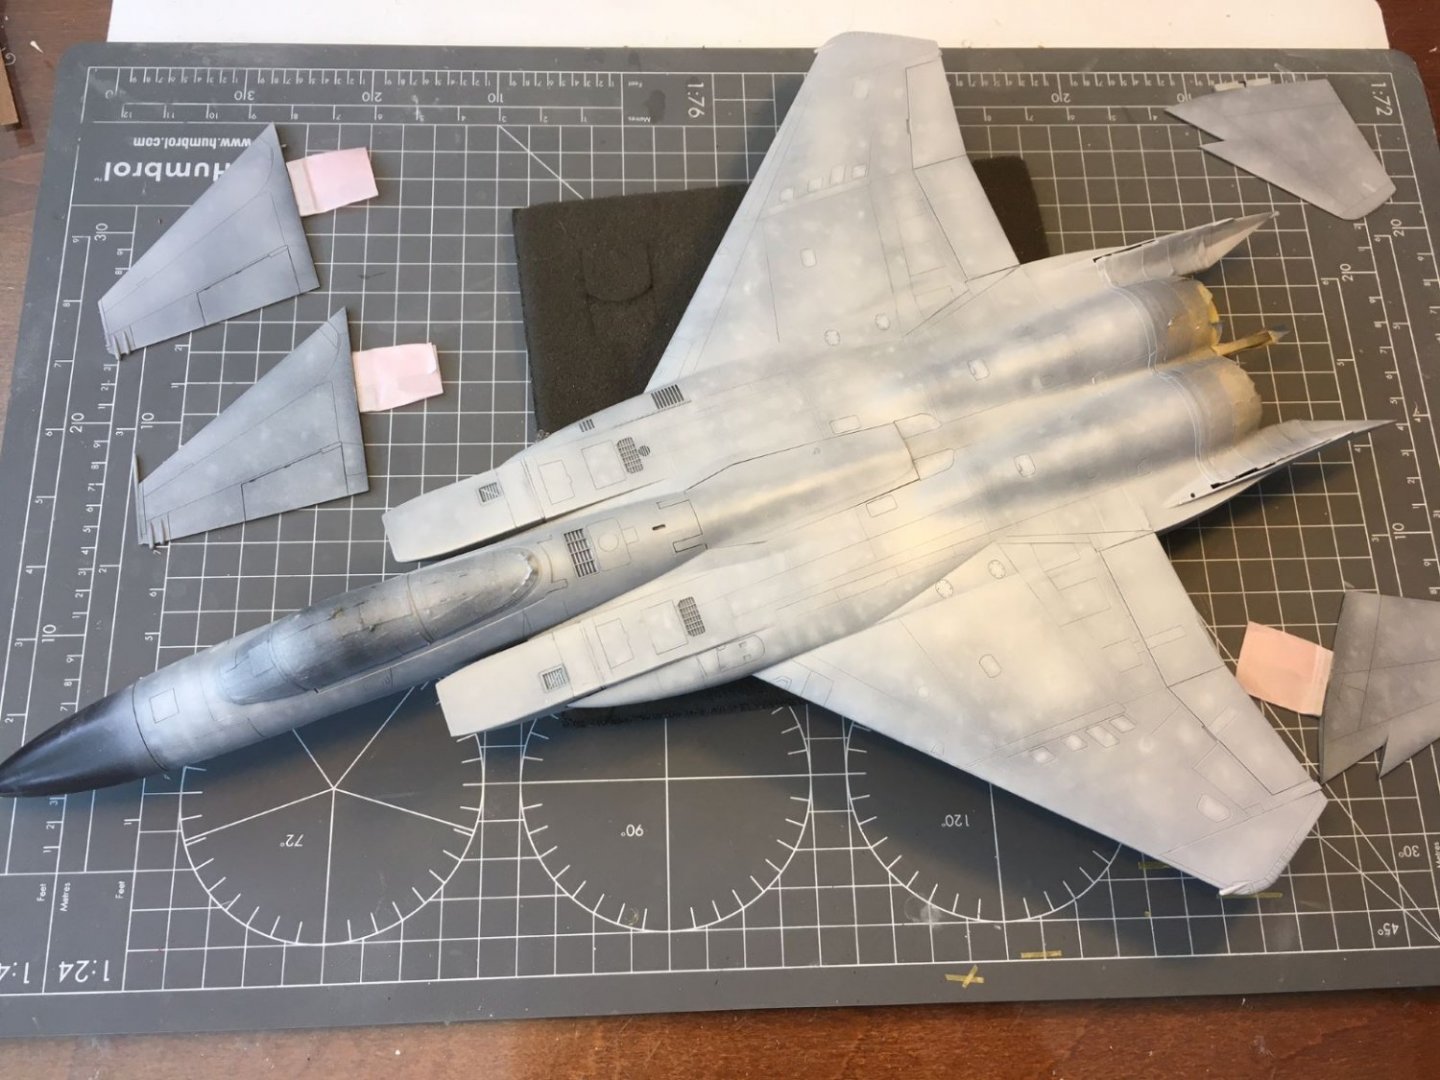
Hi, I started the application of the camouflage which, for the livery I chose, is the early one designated as 'Compass Ghost Scheme' made with a Light Ghost Grey background FS 36375 with areas on the upper surface of Dark Ghost Grey FS 36320. Using Tamiya paints, I found that the lighter grey can be rendered with 1 part of XF-19 and 2 or 3 parts of XF-2. For the darker gray, I will use a mix of 1 part XF-66, 1 part of XF-54 and 3 parts of XF-2. I usually thin a lot the paints and I also add a dose of clear paint to the mix to make it more transparent. Just for fun, I am posting few progressive applications of the light grey to show to whom might be interested, the non-uniform coverage of the paint. Considering the darker areas that will follow, I think I am almost there. Next I will continue with some local filling in with some grey variations. Kind regards, Dan
- 137 replies
-
- 10
-
-
F-86F-30 Sabre by Egilman - Kinetic - 1/32nd scale
Danstream replied to Egilman's topic in Non-ship/categorised builds
It is good to see you back in action. The last print of the engine looks great. Dan -
Mitsubishi A6M2b by CDW - Tamiya - 1:72 scale - Finished
Danstream replied to CDW's topic in Non-ship/categorised builds
Nicely done, carefully assembled and painted. Congrats, Dan -
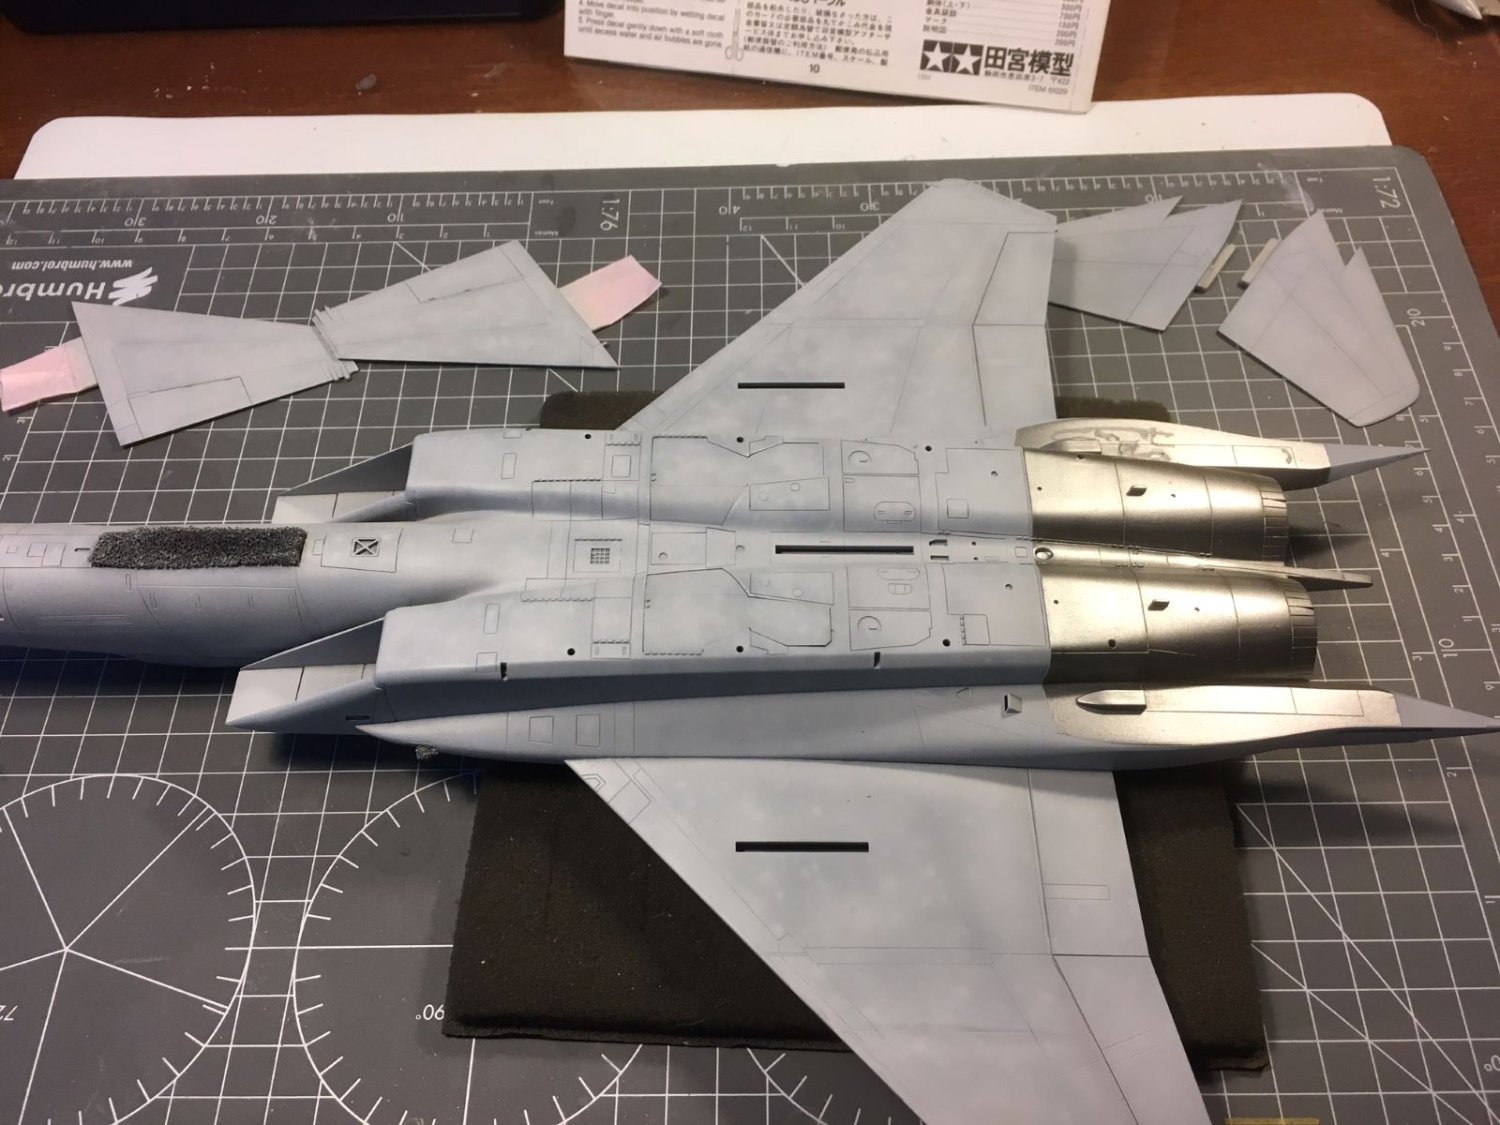
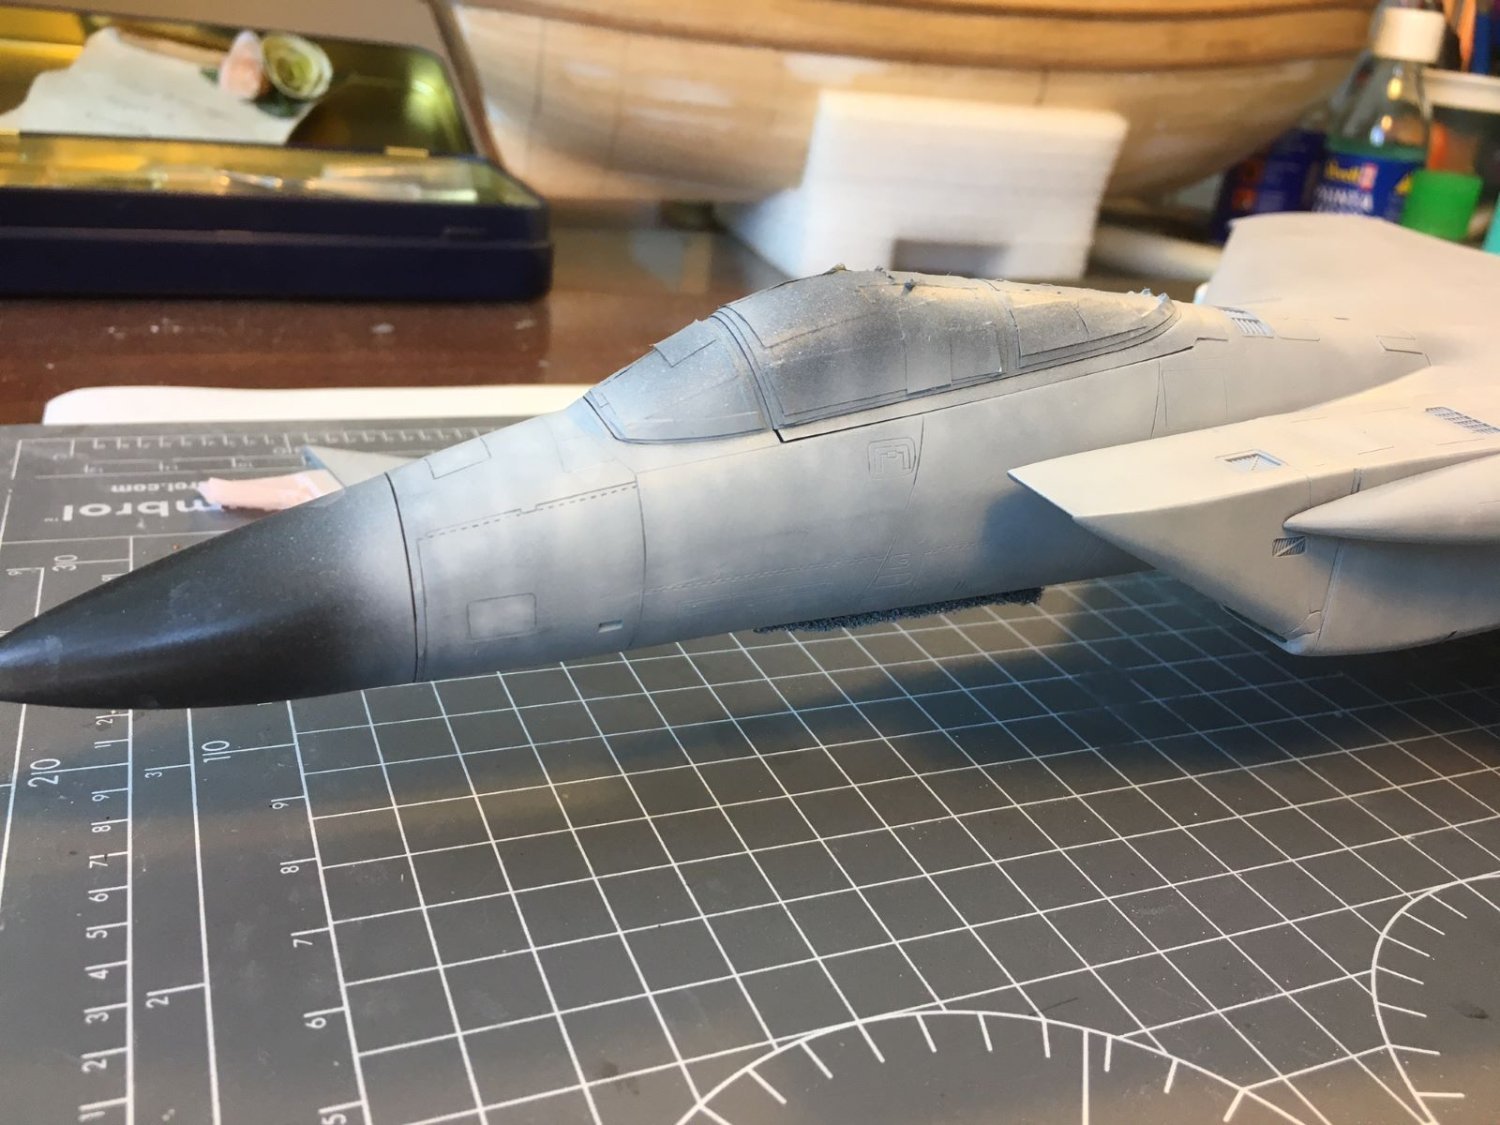
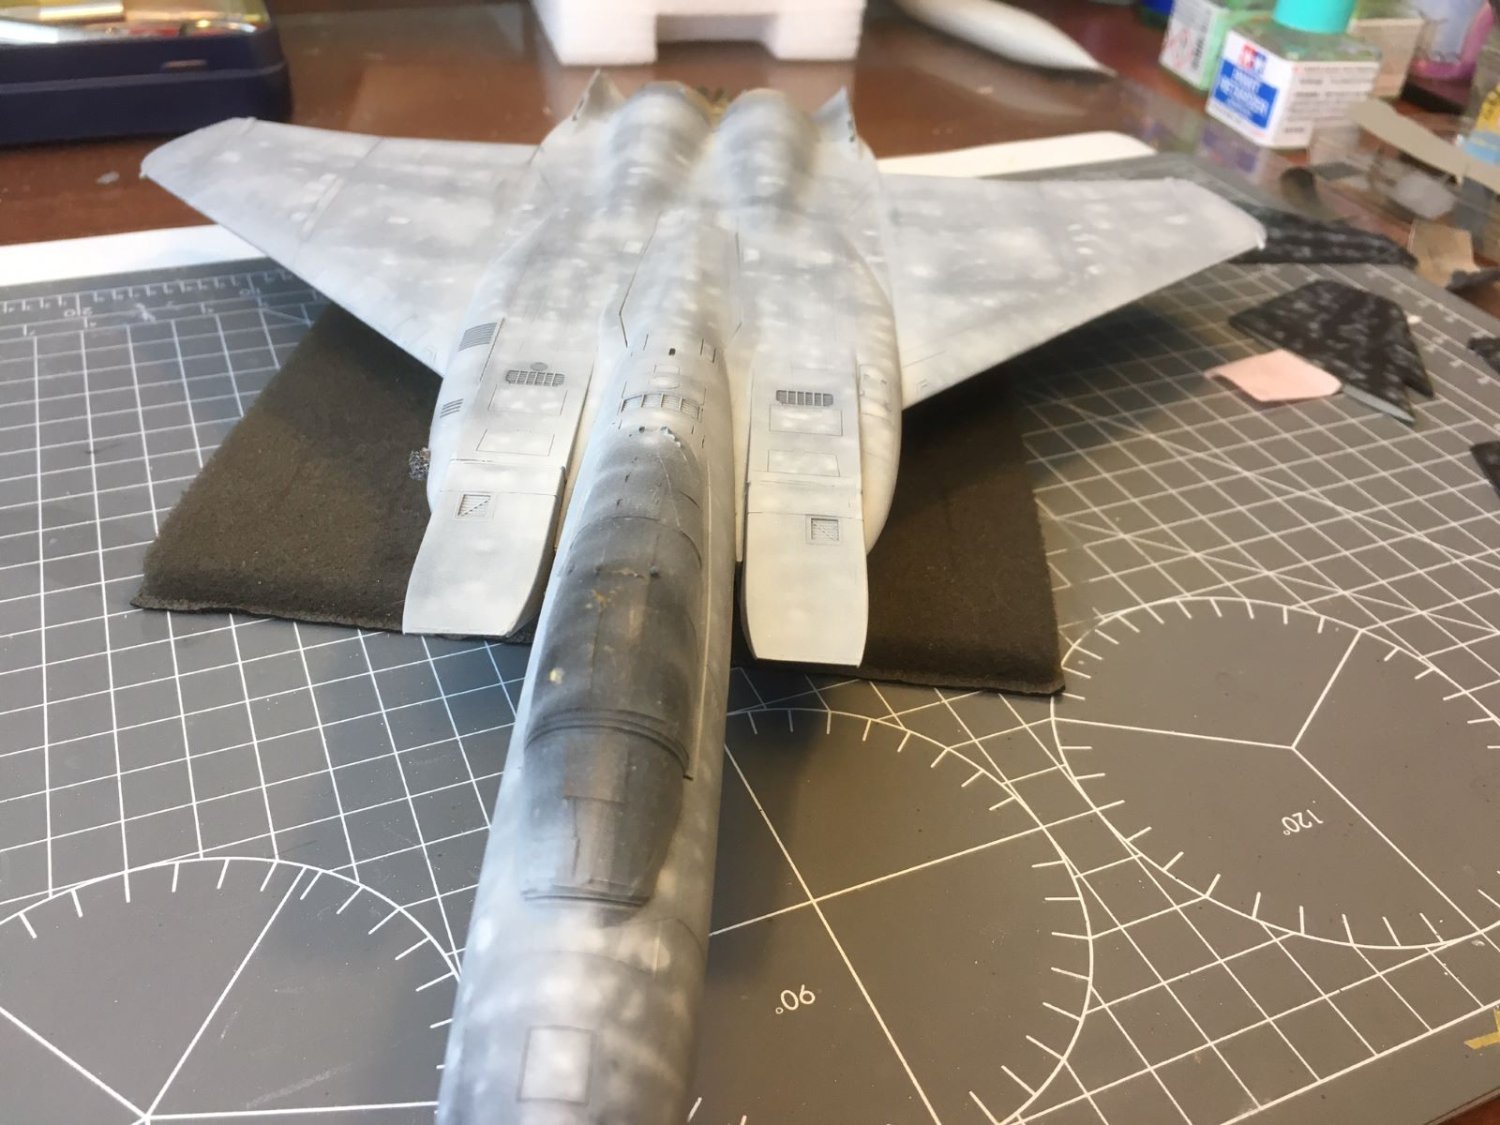
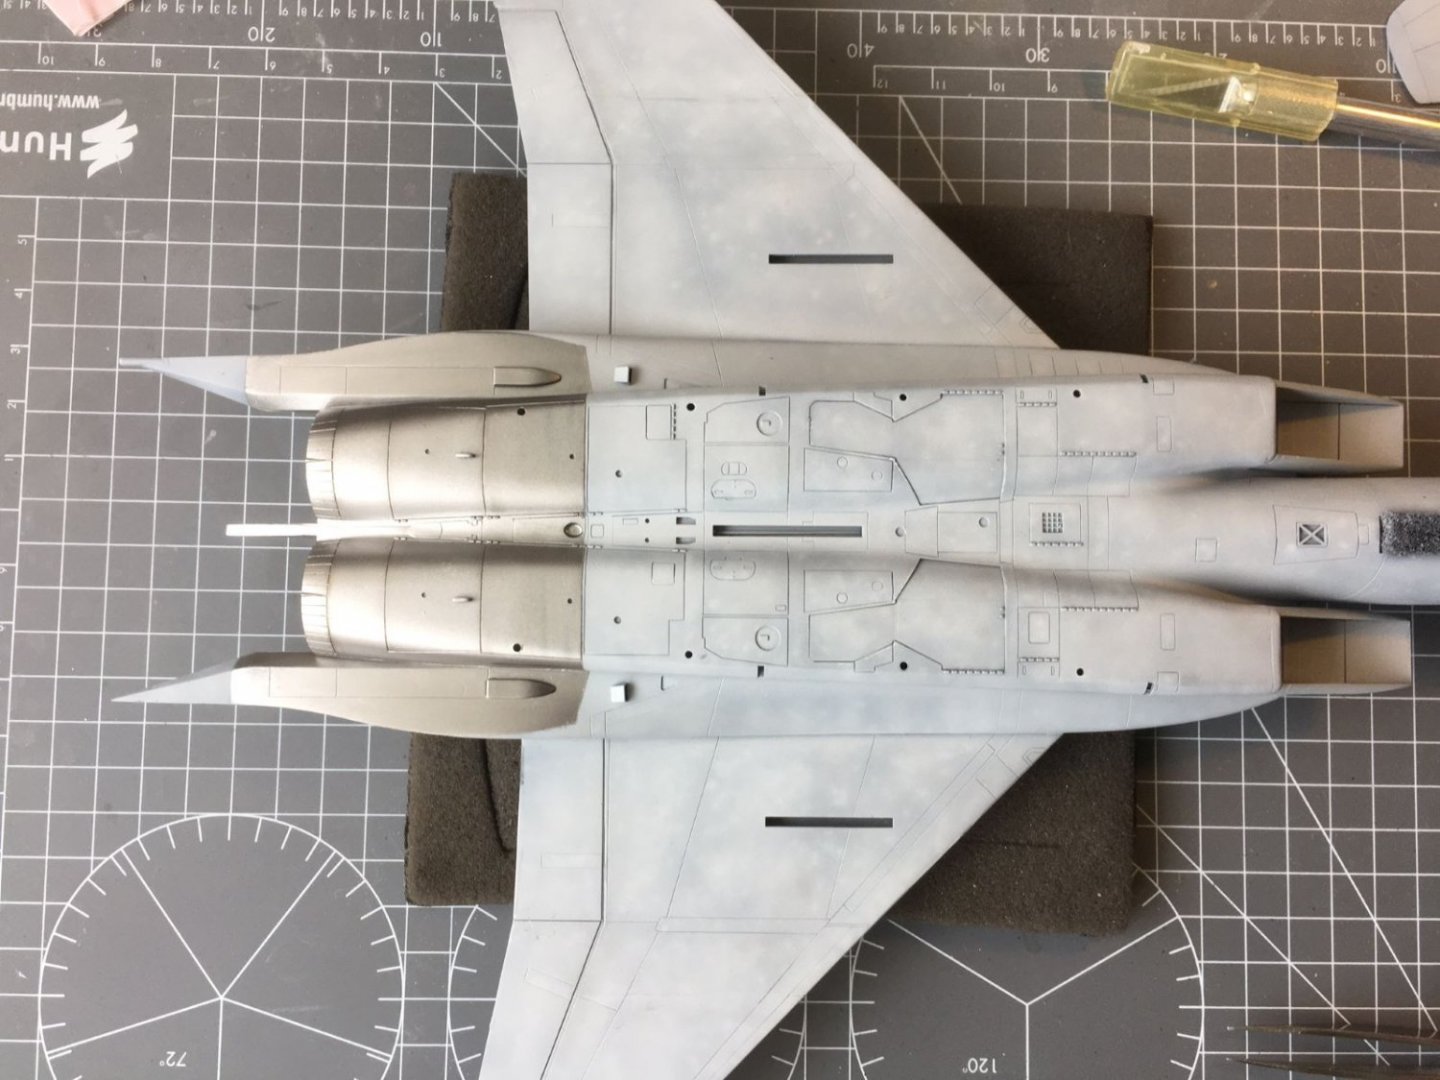
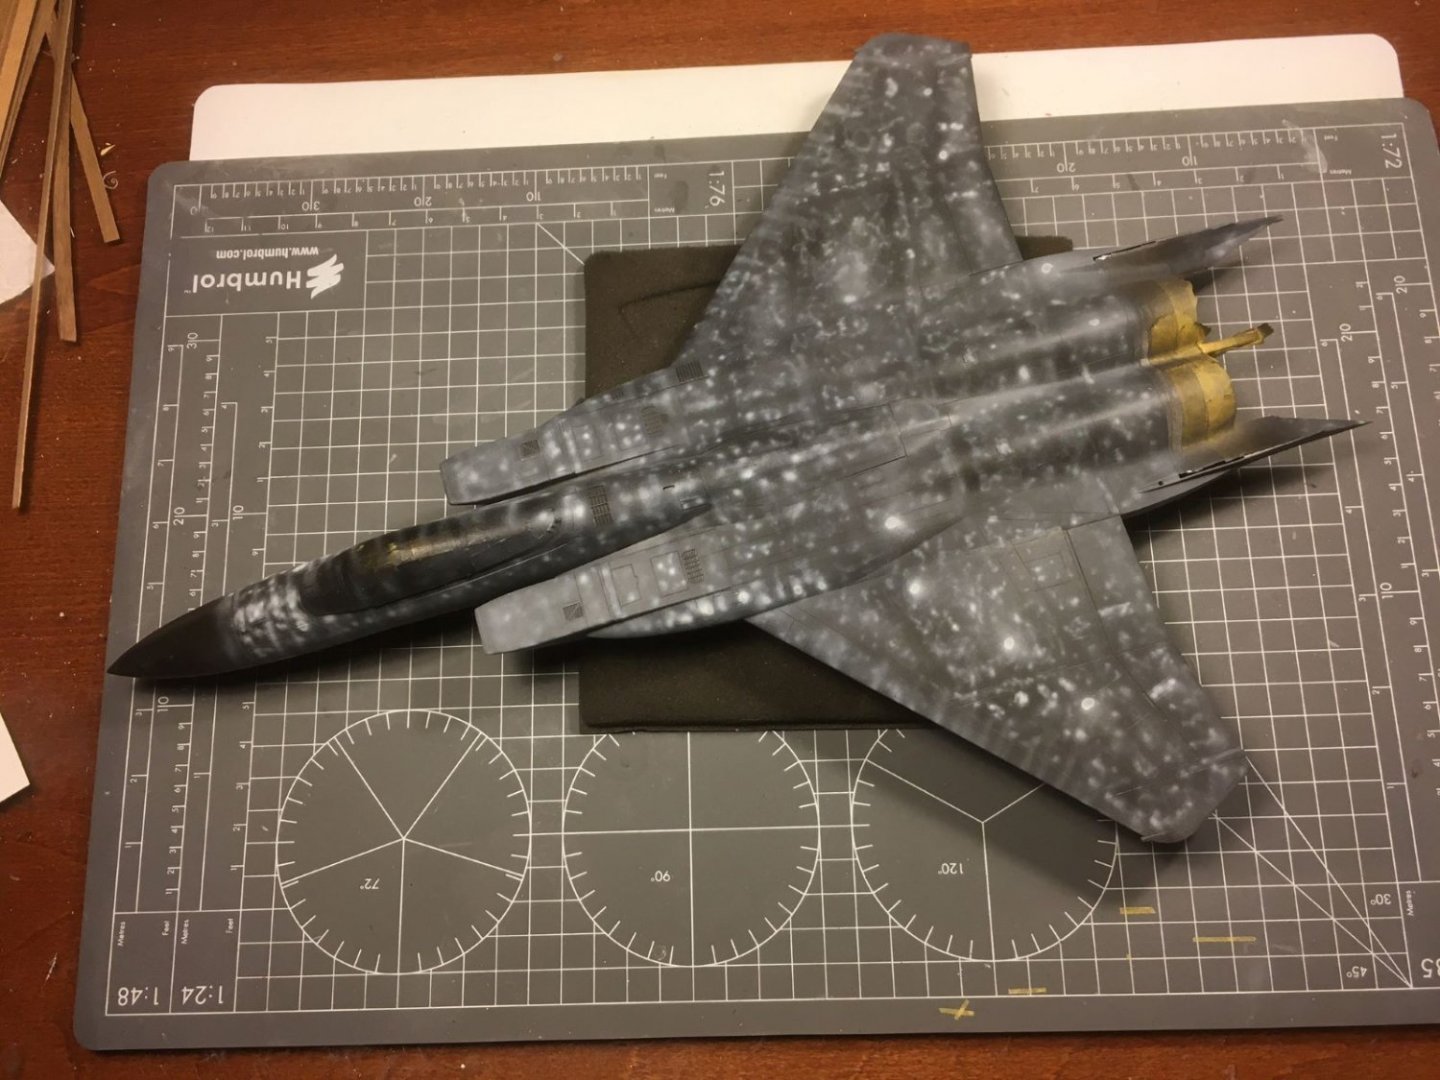
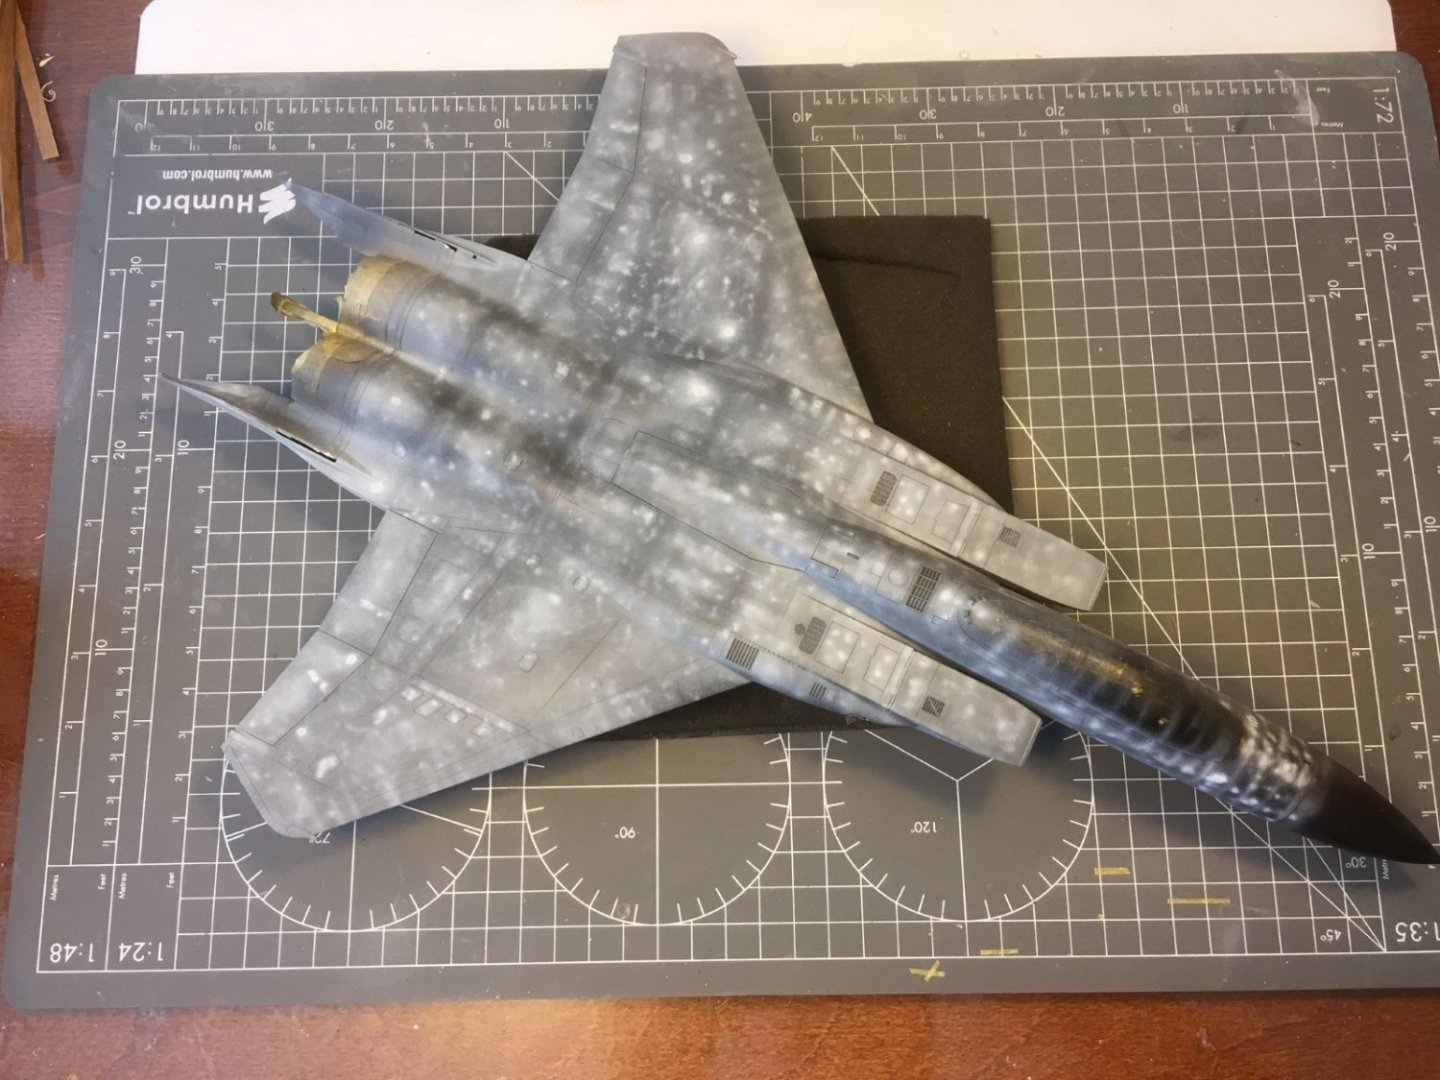
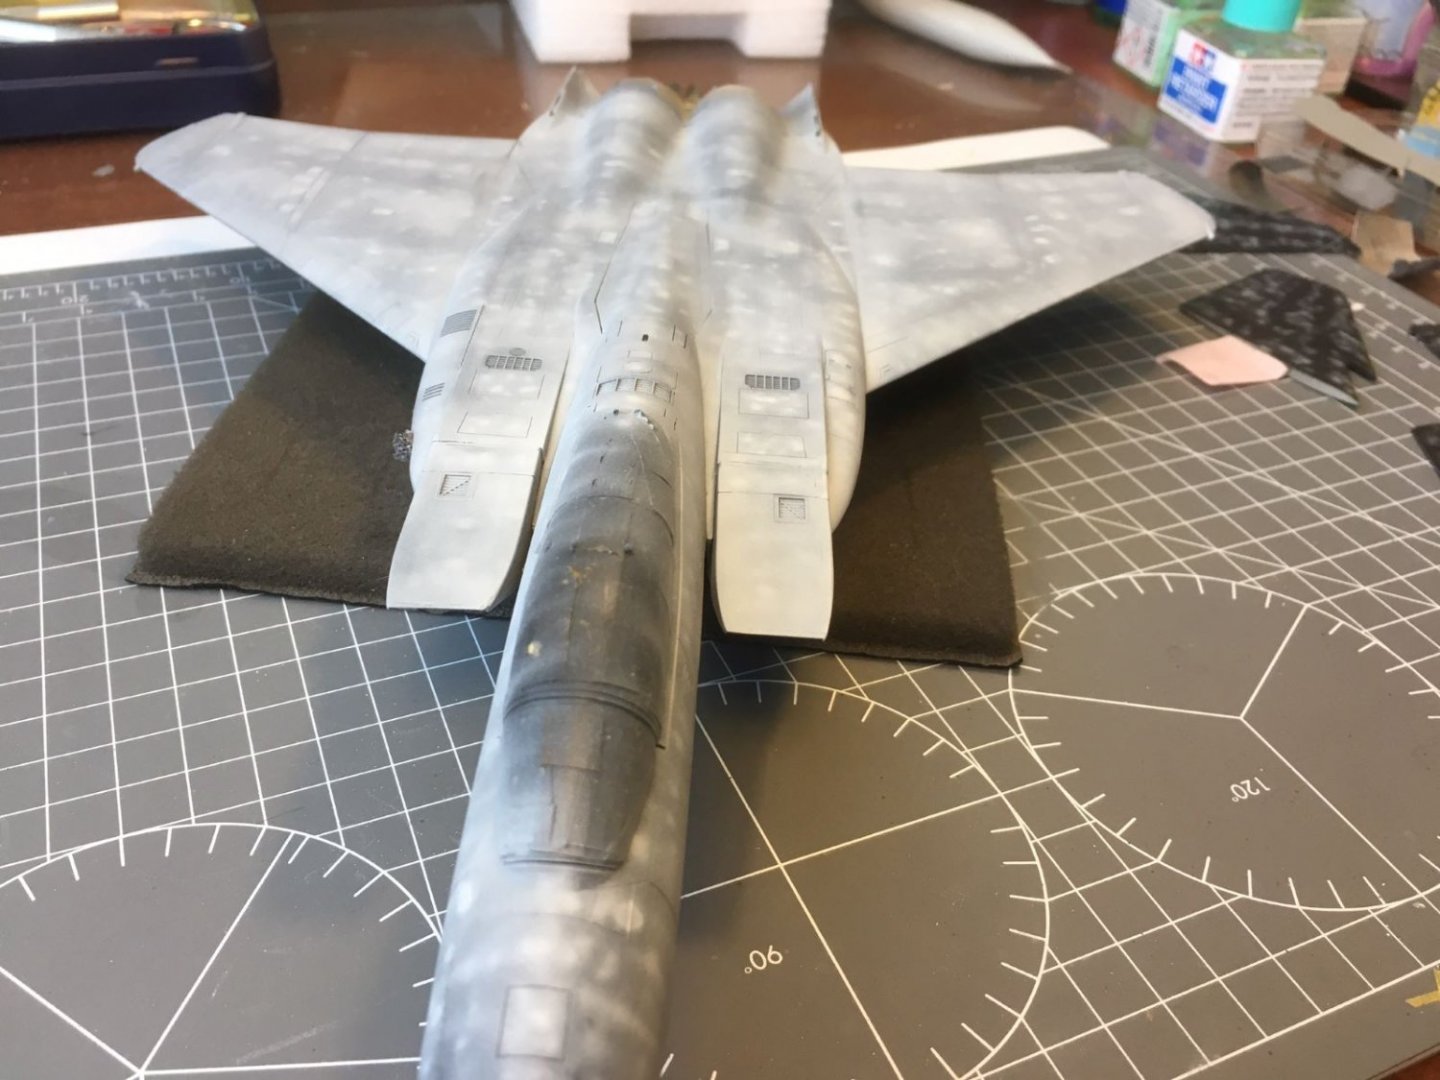
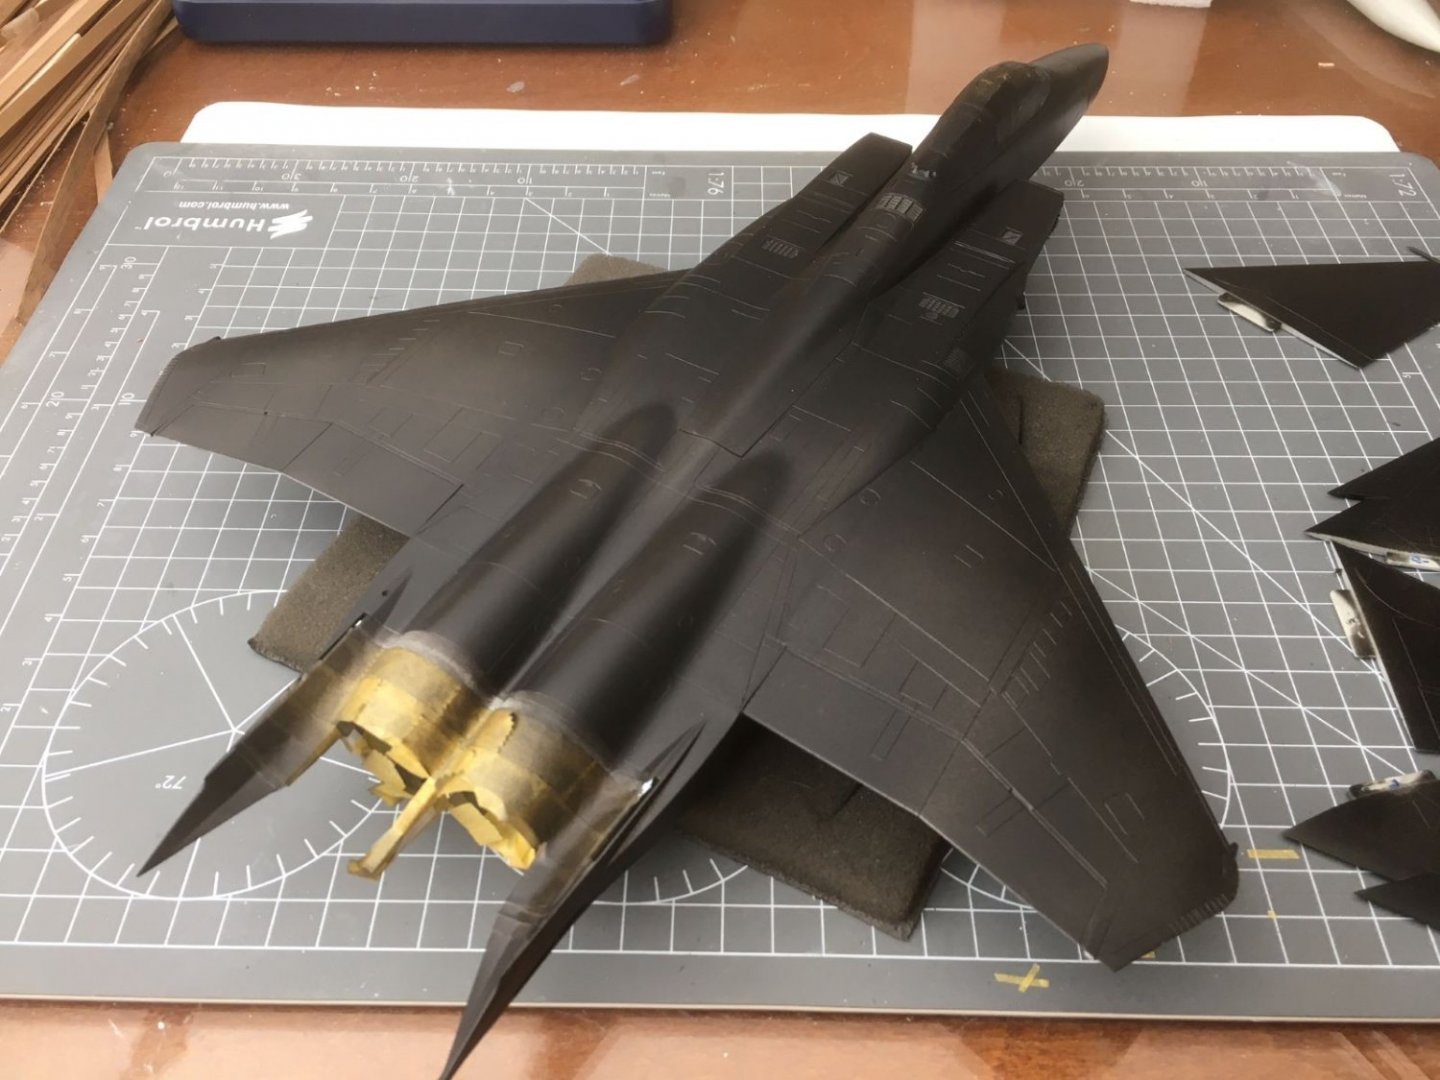
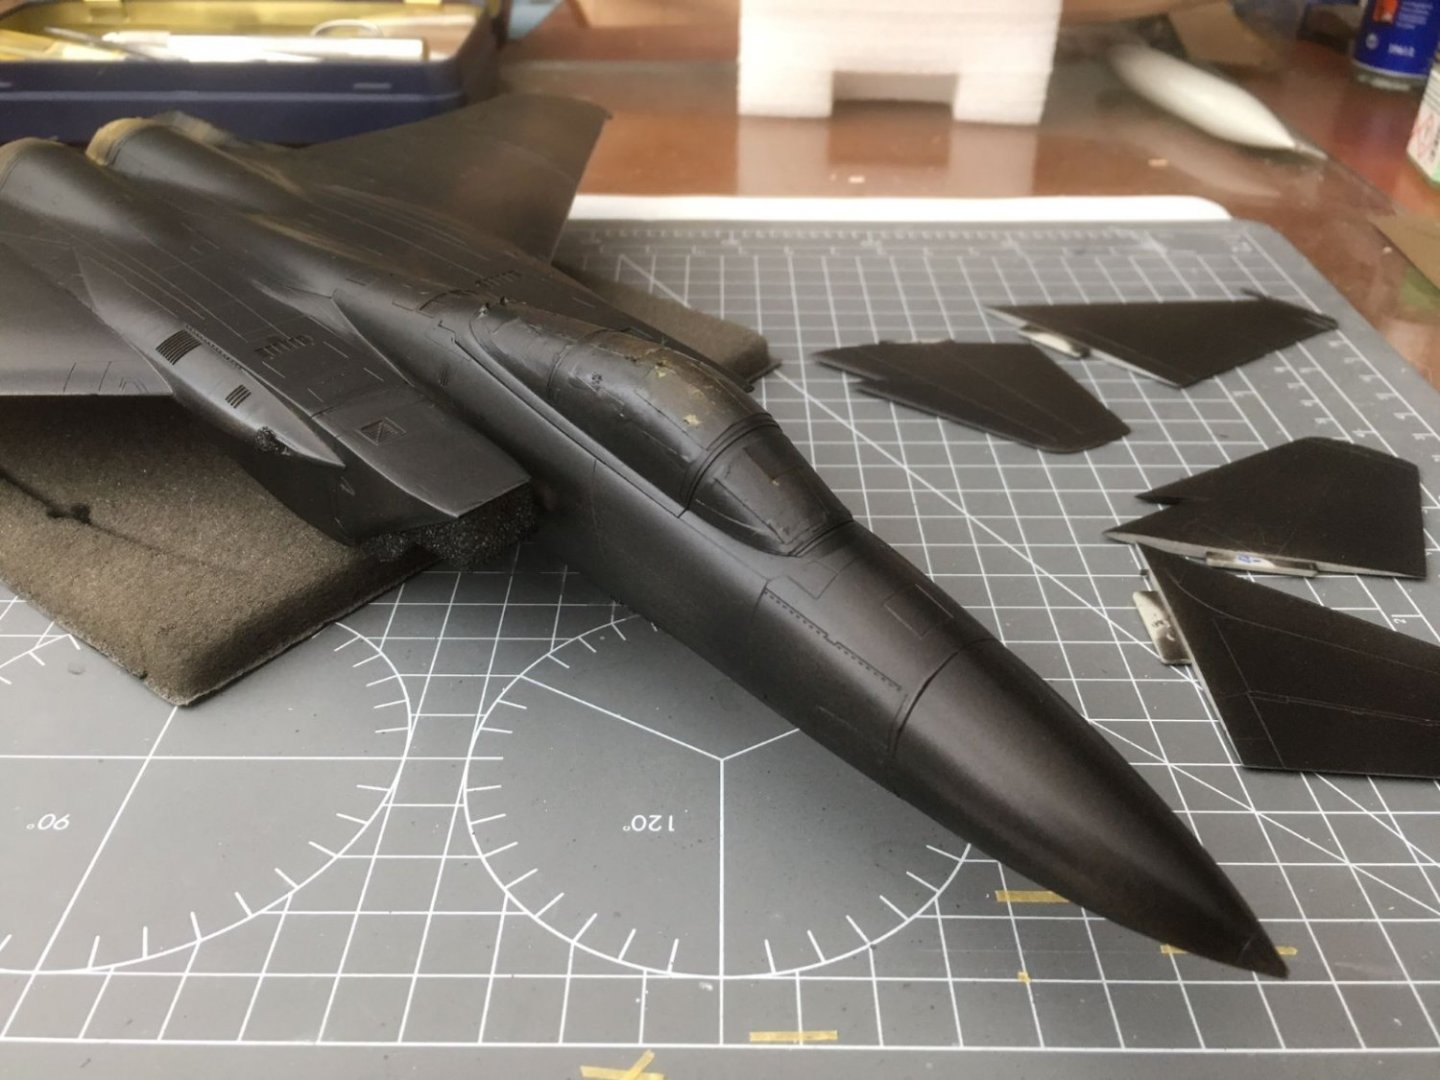
Hi, back home on Friday, fully recovered. Spending 8 days with yourself in a room was a meditative experience. Now back to business, paint had the chance to fully cure, hence I could mask the metallic panels. Then, I sprayed the rest with light coats of Gunze semi-gloss black. I did not aim at a full deep coverage, preferring a very light layer instead. Admittedly, despite its age, the surface details of this model are very nicely done. All black, it looks very spiffy and cool, like a bat-plane, practically. After addressing few blemishes of the filled joints, white, random mottles and wiggles were applied to obtain a background texture for the grey paint. Next, I will carefully wet sand everything with micro-mesh pads to obtain a smooth-shiny surface ready to receive the first grey tone. Best regards, Dan


- 137 replies
-
- 11
-
-
-
F-86F-30 Sabre by Egilman - Kinetic - 1/32nd scale
Danstream replied to Egilman's topic in Non-ship/categorised builds
Good luck @Egilman, may everything go well. I will be waiting for you continuing this build very soon. Cheers my friend, Dan -
Hi all, thanks for your kind messages. They are of help for me! Yes, I am vaccinated with two shots, I did not take a third one. Symtoms are not too bad and not related to breathing functions, just sweating and strong headhaches, but according to the experience of other people, they should disappear in few days. In the boredom of being confined in a room, I will keep reading this site with even more interest. 🙂 Cheers, Dan
-
Took Covid while in a business trip, I am now confined in a hotel room for seven days. This is very annoying. This means there will be no progress for a while. Thanks Denis, the airbrush is a very nice tool and you can get very smooth finish once you get some experience. Some consider it not very practical, indeed you need a lot of operations for preparing it and for cleaning it afterwards, but it is a hobby and I think that the whole activity of building models is mostly entirely not practical 🙂 Cheers, Dan
-
Another paper marvel. After the streamlined surfaces of a Spitfire, no doubt that the quality of this will be equally impressive. Dan
- 150 replies
-
- 12
-