HOLIDAY DONATION DRIVE - SUPPORT MSW - DO YOUR PART TO KEEP THIS GREAT FORUM GOING! (Only 72 donations so far out of 49,000 members - Can we at least get 100? C'mon guys!)
×

.jpg.2c2c29e54623bd7b752bc2cdab599665.jpg)
Danstream
-
Posts
747 -
Joined
-
Last visited
Content Type
Profiles
Forums
Gallery
Events
Everything posted by Danstream
-
.thumb.jpg.c459ce4140b54c12eddb8eedfd446df3.jpg) I love this model, it looks like the real thing (In the States, you would say 'like the real McCoy', wouldn't you?). Cheers, Dan
I love this model, it looks like the real thing (In the States, you would say 'like the real McCoy', wouldn't you?). Cheers, Dan -
Impressive model! As already said, good paint job for the camouflage. Glad that no sign of the accident with the paint you mentioned is visible. Dan P.S. Just one comment if I may, about the pathfinder antenna ring. Typically the ring didn't have a circular cross section, but it was more like a flat ribbon (where the wire coils were coiled next to each other). I make it with a soldered strip of photo-etch fret. I am making this comment only because of the size of the model it would be noticeable. Otherwise, it looks OK anyway.
-
Sorry to hear about the leaks, a painful experience which I hope will be soon over. The dark sea grey finish looks great. Best regards, Dan
-
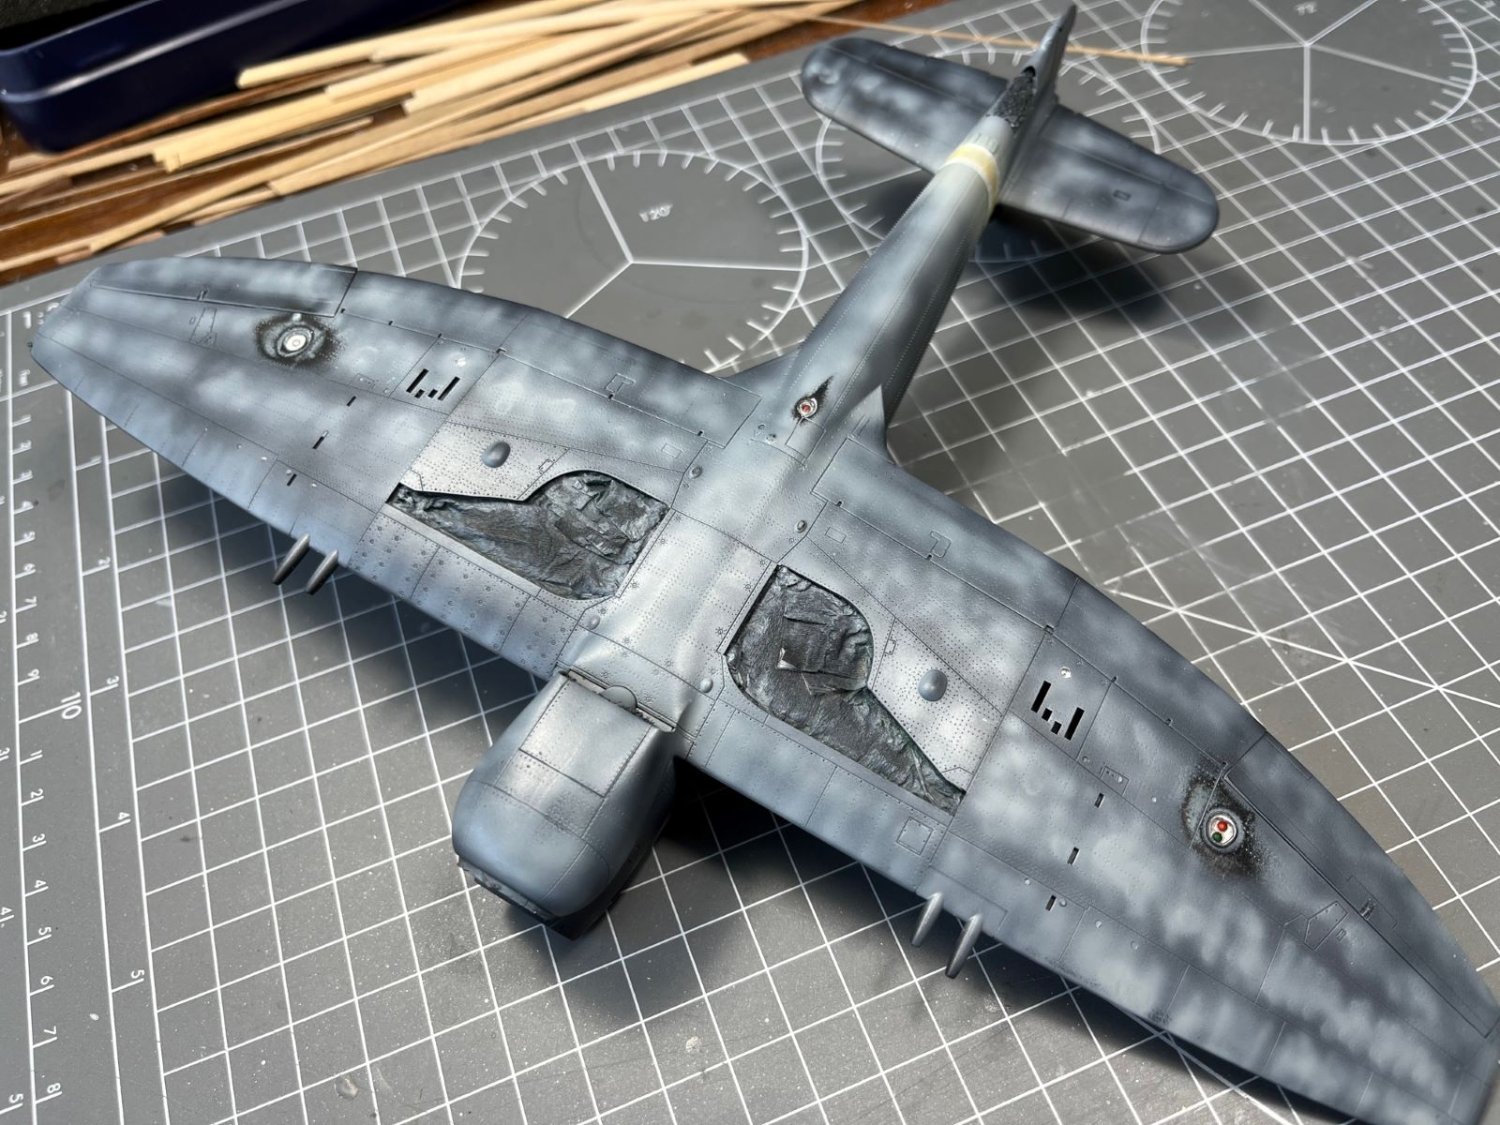
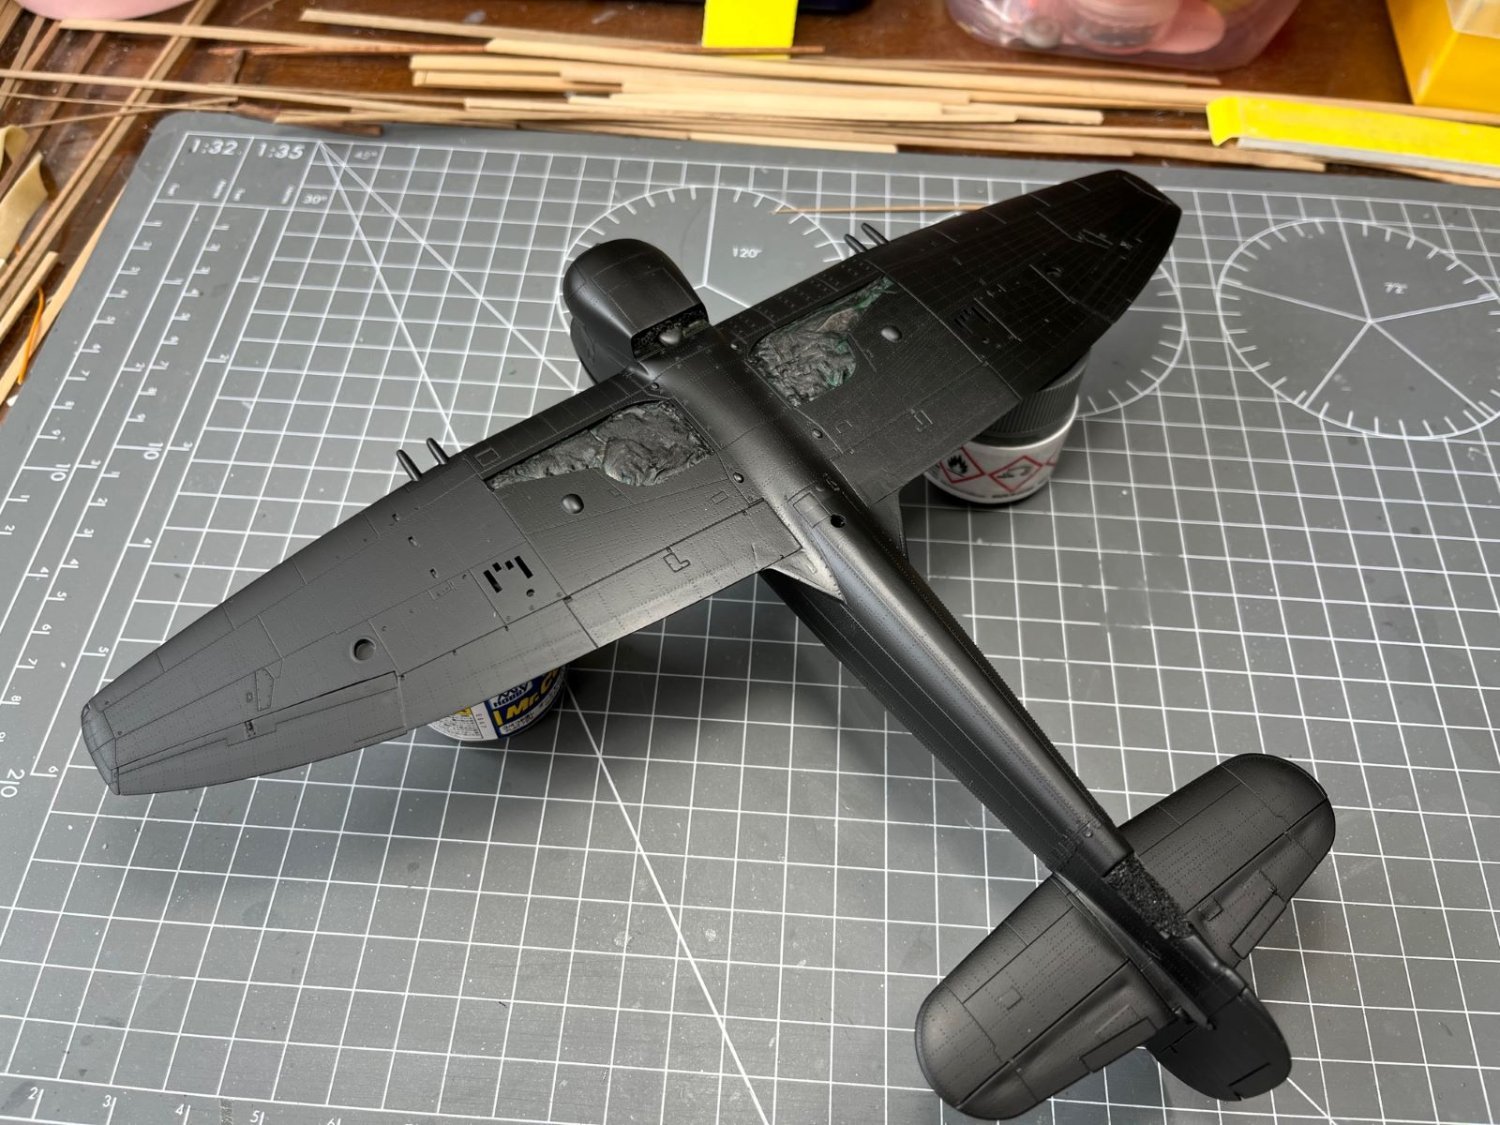
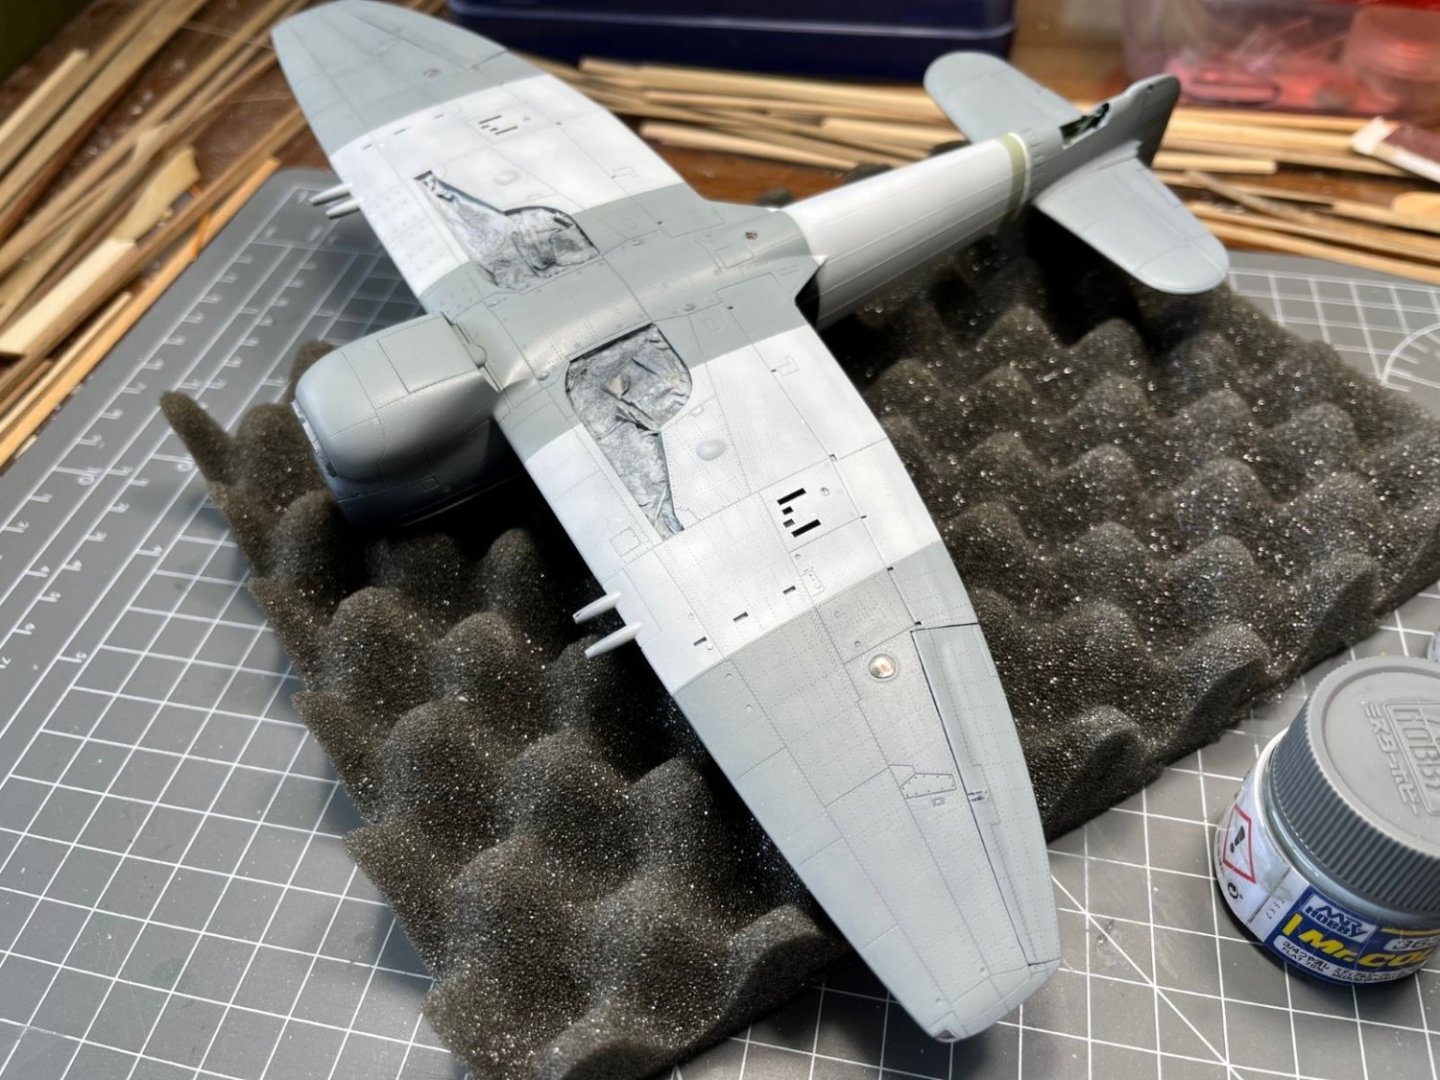
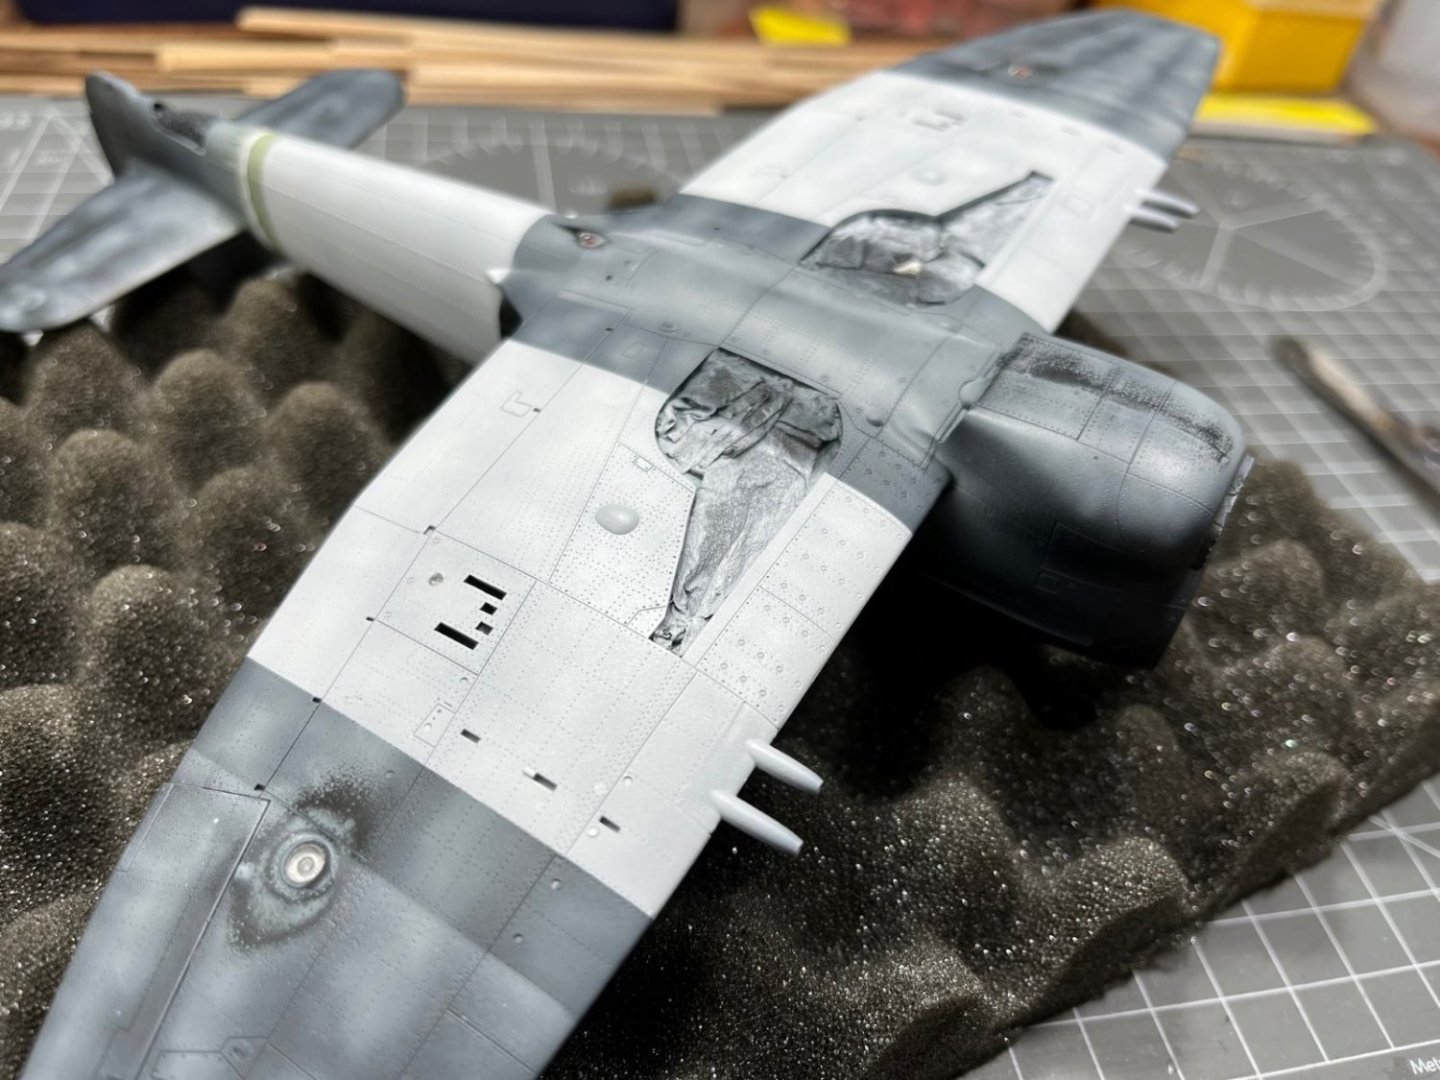
Hi all, just few pictures of the Tempest underside which I sprayed with Mr. Color 'medium sea grey' in a patchy fashion. Then I sanded all the surfaces with a wet 4000 grit pad. I the last picture, one of the drawback of this kit is visible on the foreground aileron. In fact, the control surfaces, that are molded as thick parts, show some sink marks due to the shrinkage of the plastic. Unfortunately, I did not address these marks and I will have to live with that. Best regards, Dan
- 115 replies
-
- 11
-

-
Thanks for all your suggestions. One place I would like to visit is the Kennedy Space Center. Cheers, Dan.
-
@CDW Thanks for your tips. I will be on a business trip for 15 days, so not much time to visit places. However, I should have a week-end off, in that case, I will relax and look around and surely I will consider your suggestions. Thanks, Dan
-
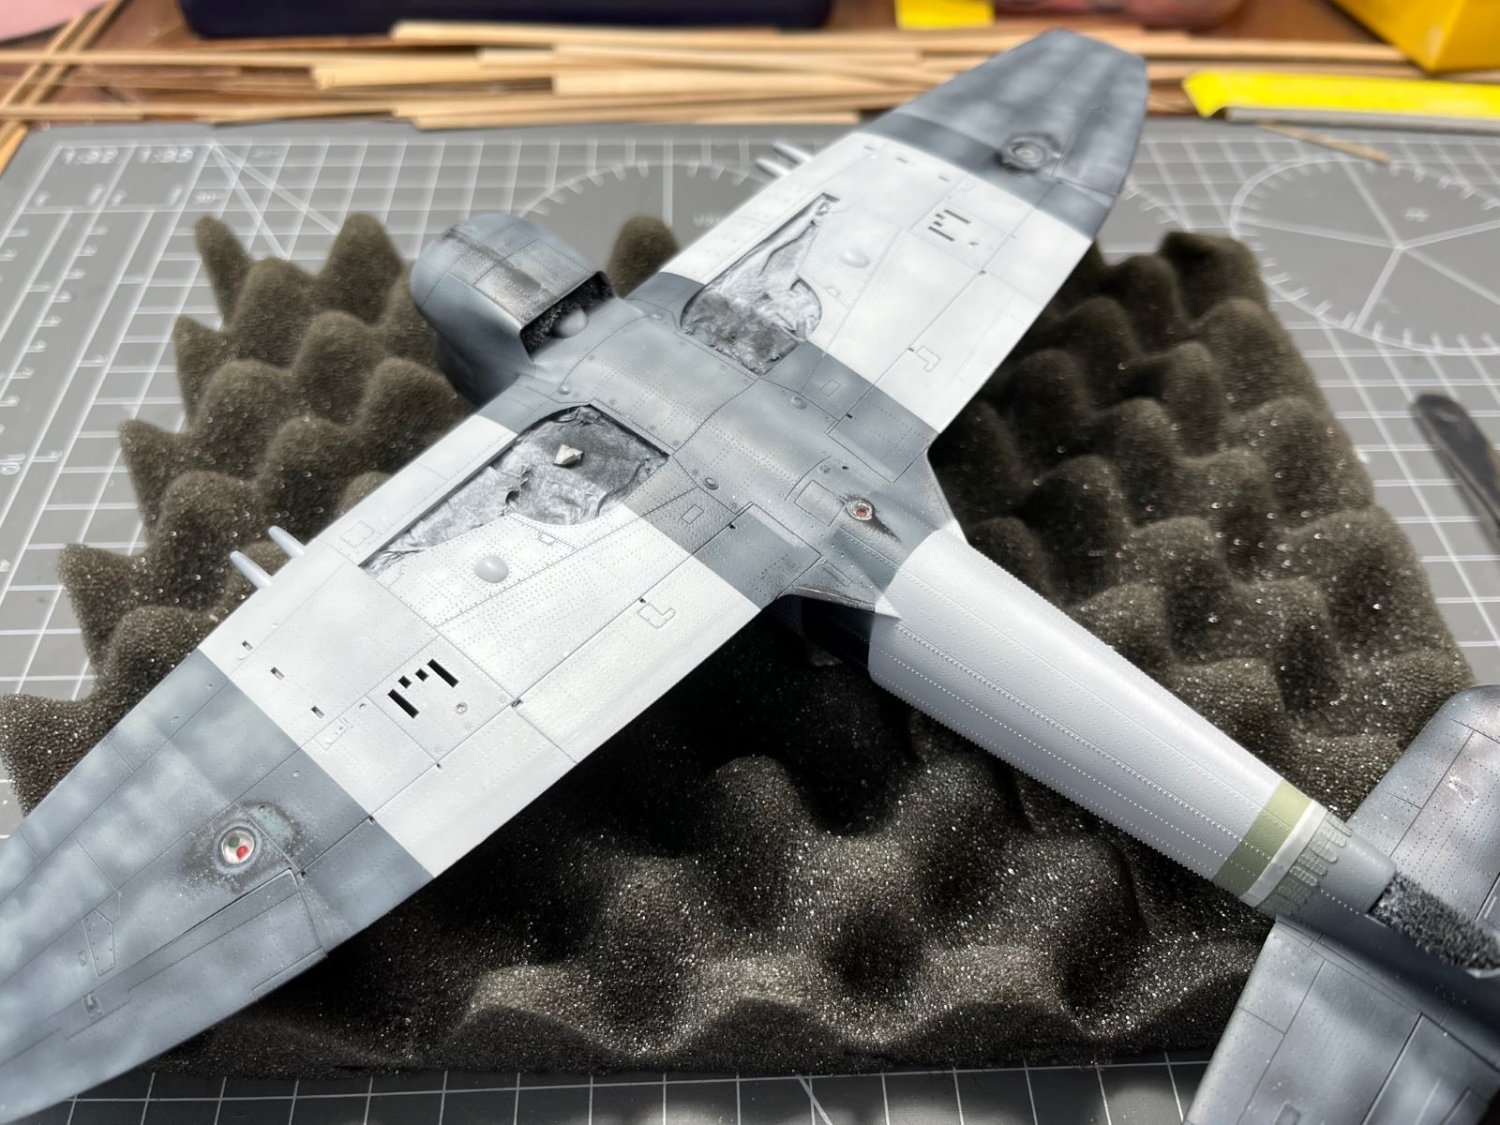
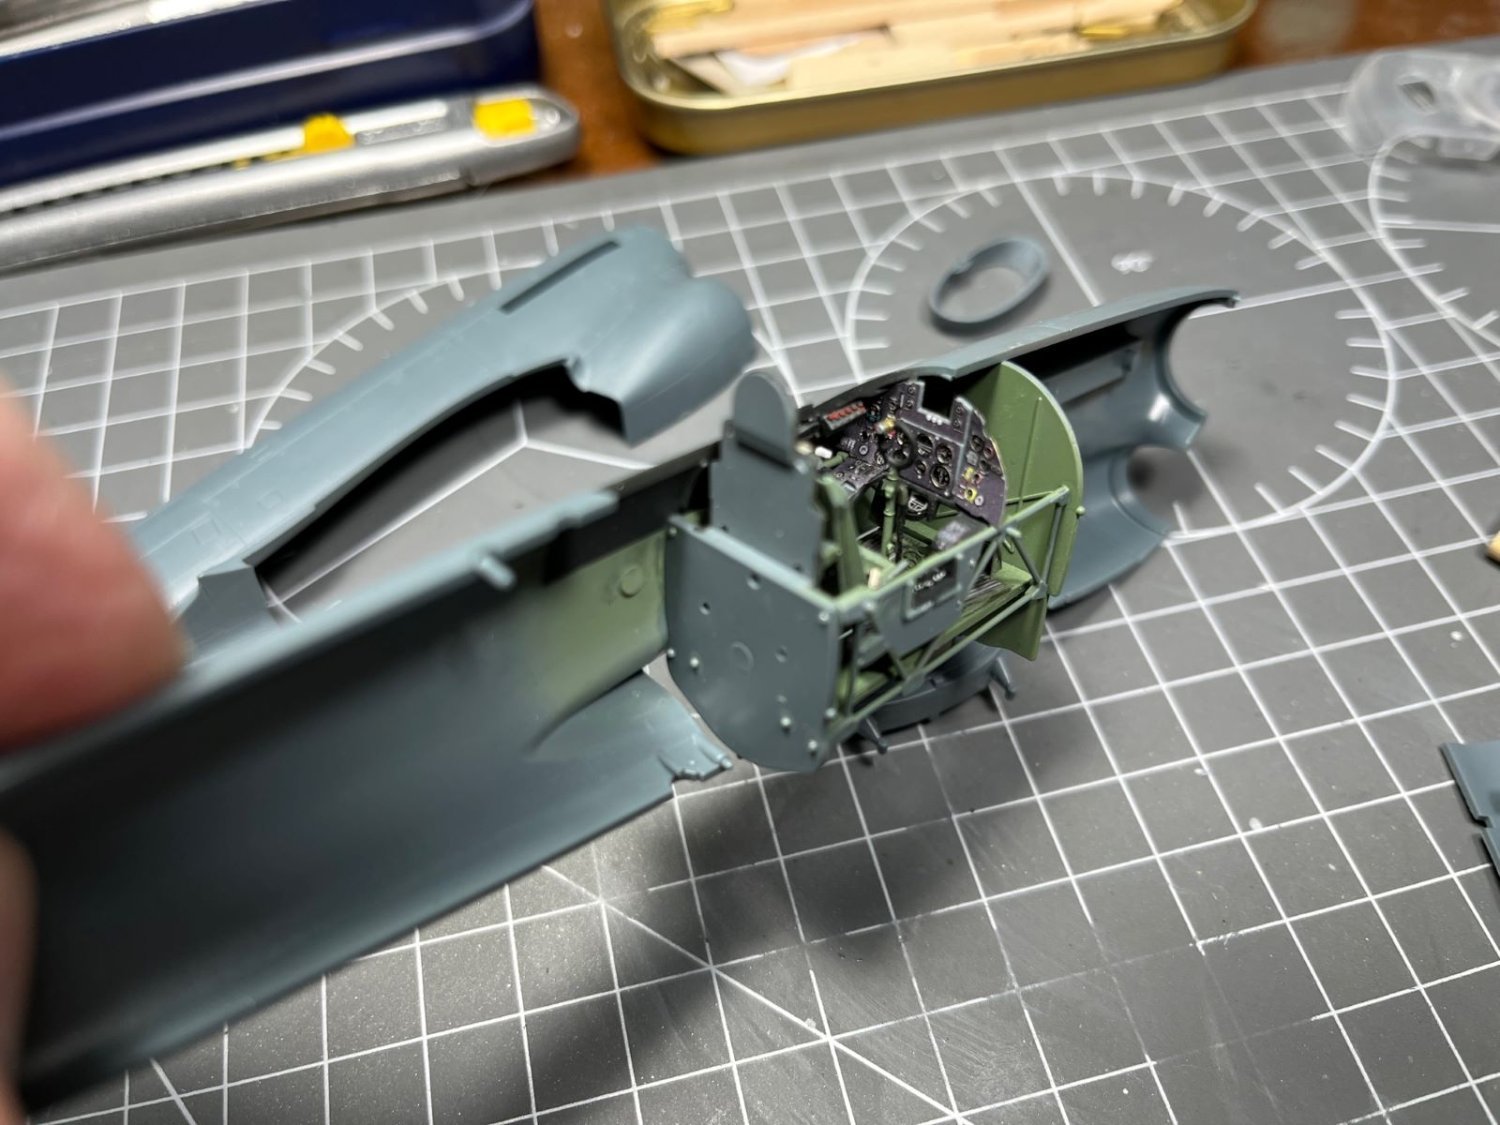
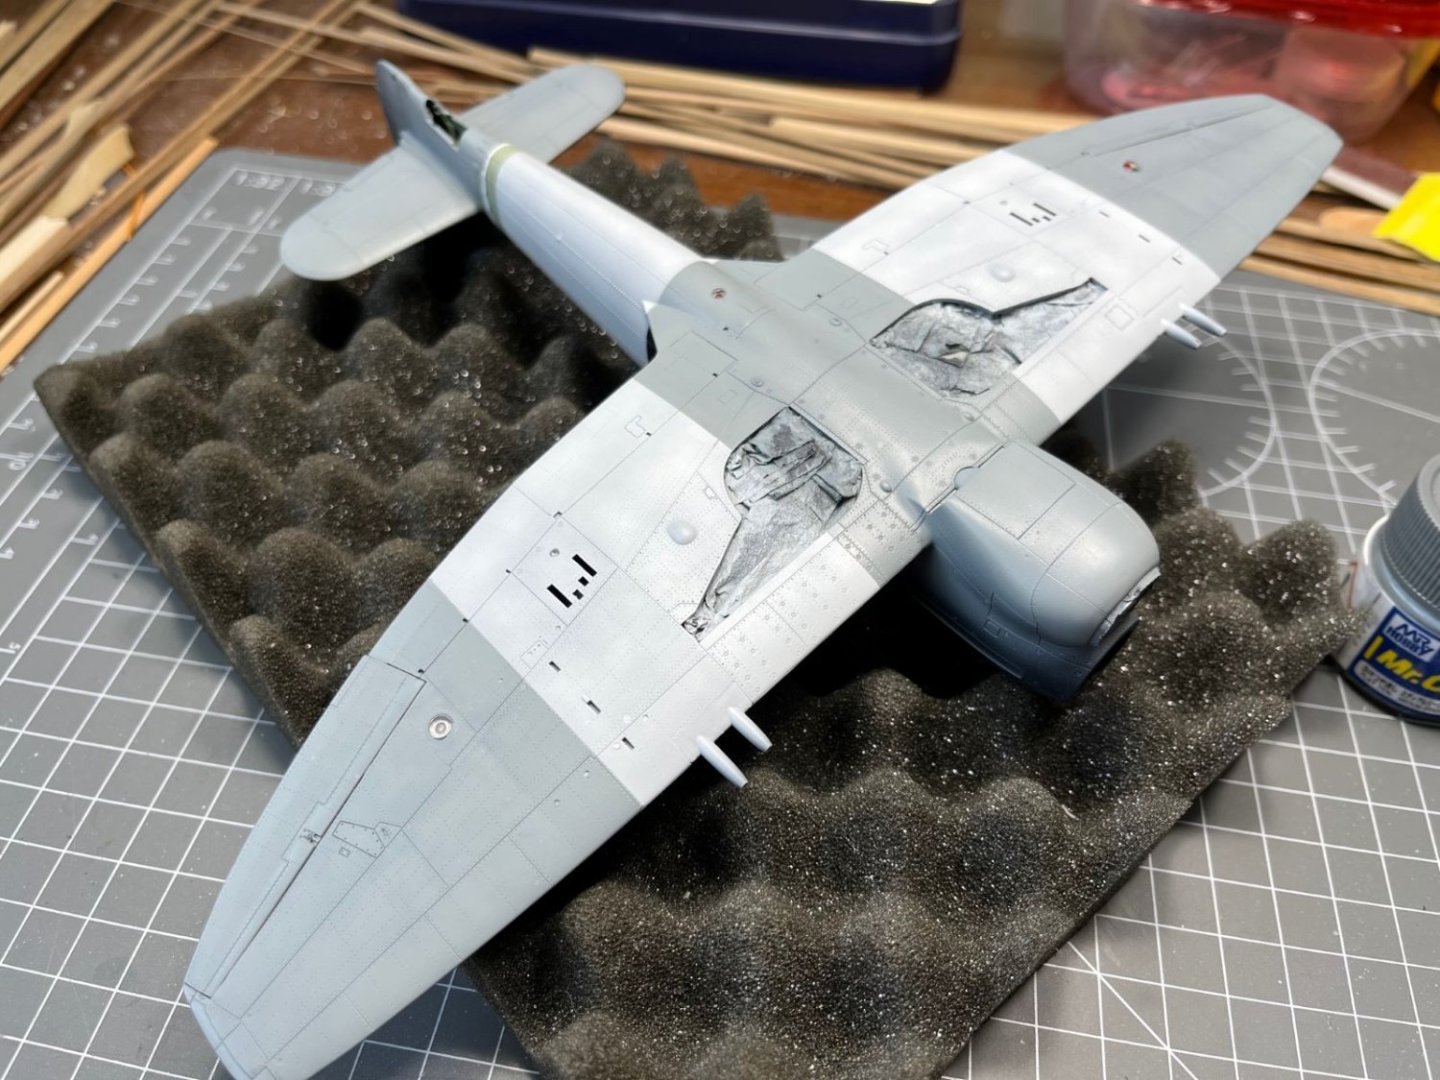
Hi all, few more steps with the Tempest. I started to lay down the first layer of sea medium gray on the bottom in a semi-random pattern to create tonal variations. I realized that it is better to put on the various lights at this stage (actually, perhaps it would have been better to install them before closing the wings). I sanded them flushed with the wing surface and polished them to restore their transparency. After that, I switched to the white areas that will be required for the invasion stripes. I chose one of the scheme with the full invasion stripes which, although more complex to paint, is in my view more spectacular. I wanted a slight off-white hue, so I added a bit of grey to the white paint and I kept the layer transparent so to let some of the black to be seen through (although the effect is not very noticeable in the pictures). As said earlier, the surface details of this kit are very good and this can be noticed on the painted surfaces: However, the kit has also some small drawback that I discovered during the assembly, but overall I am quite pleased with it. Great, you will enjoy it, when you start with the cockpit, pay attention with the truss structure of the cockpit, it can break just looking at it. Hi Craig, I will be located at (or close to) Cape Canaveral. Cheers, Dan


- 115 replies
-
- 10
-
-
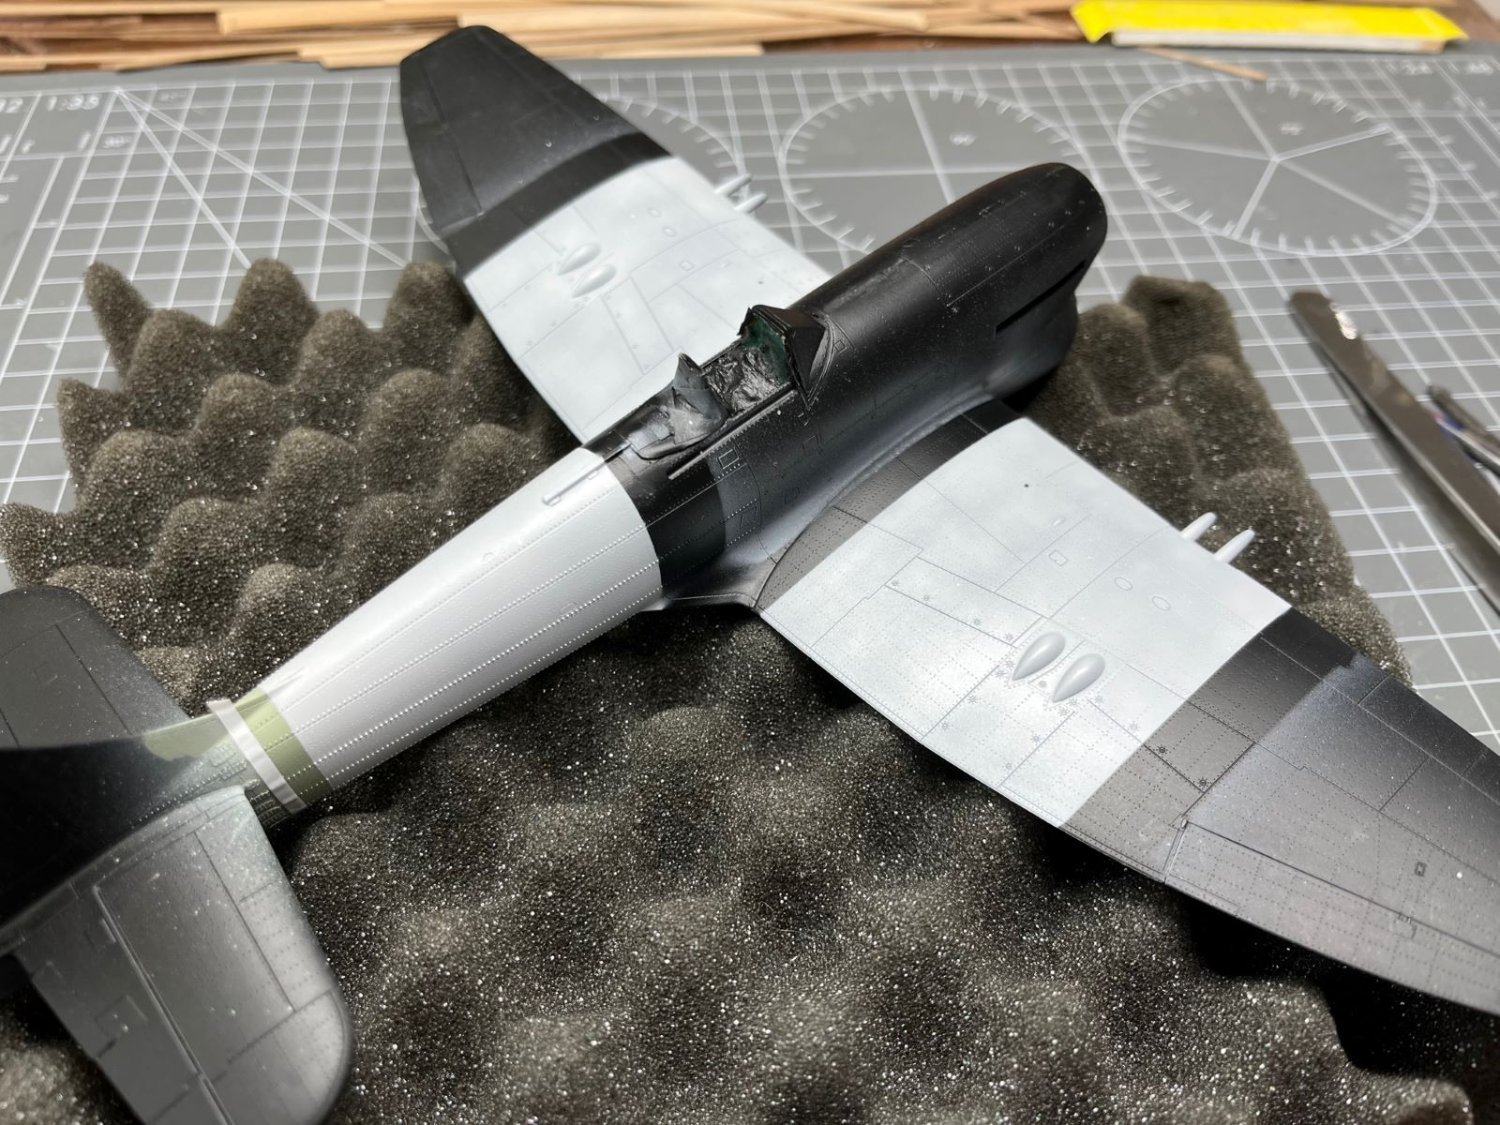
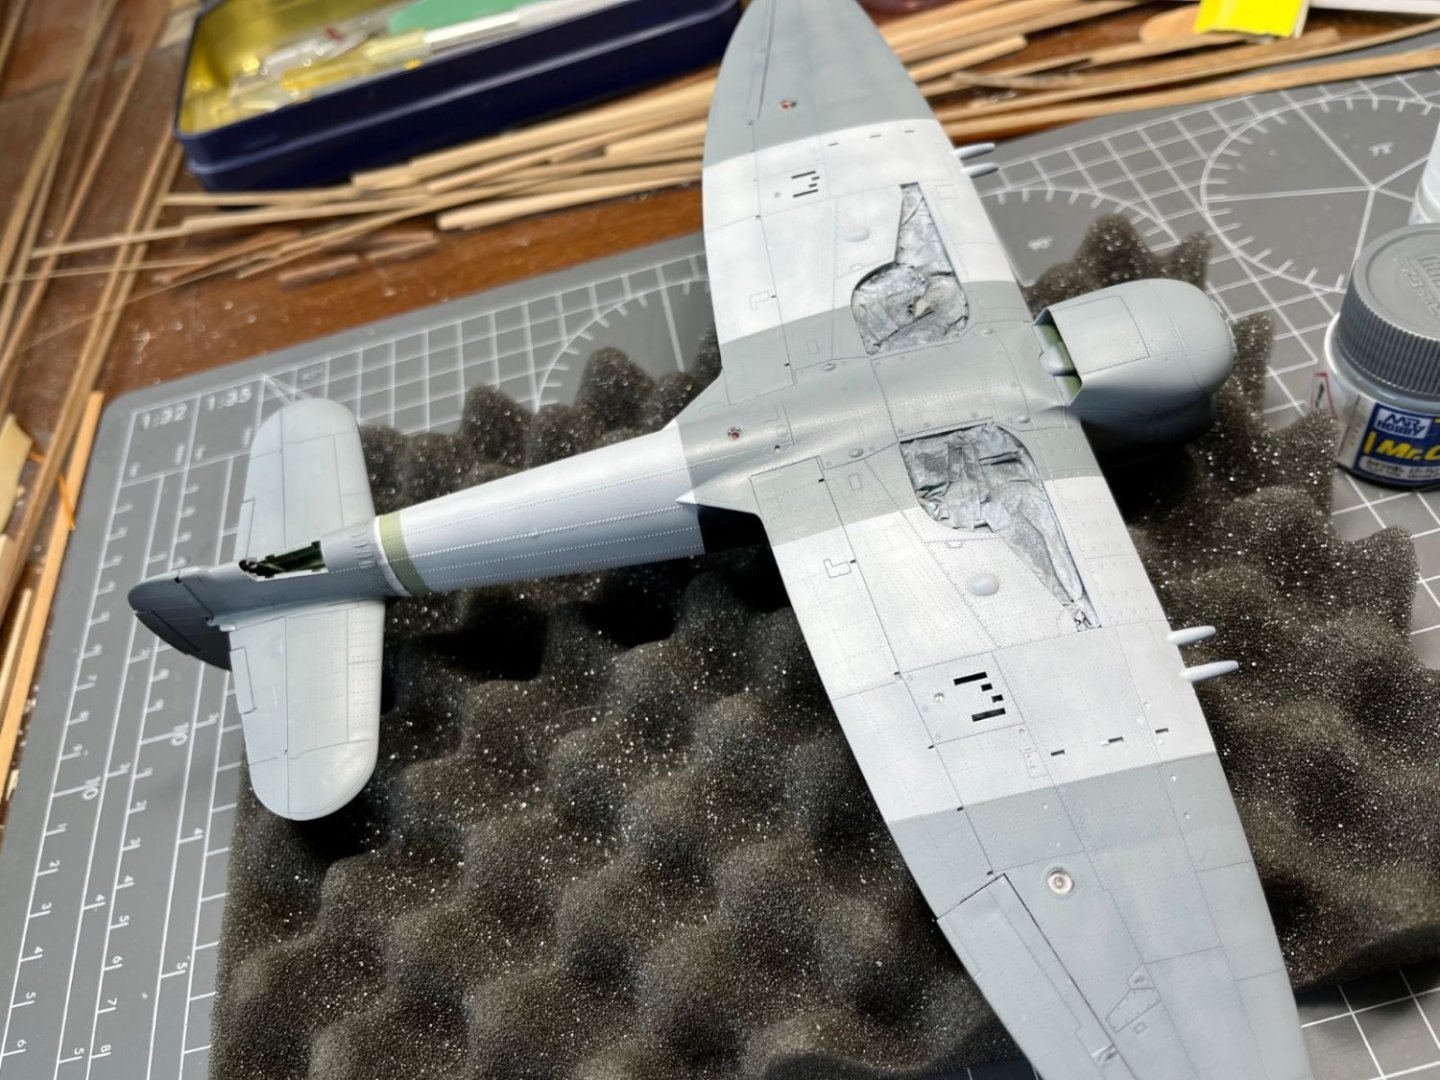
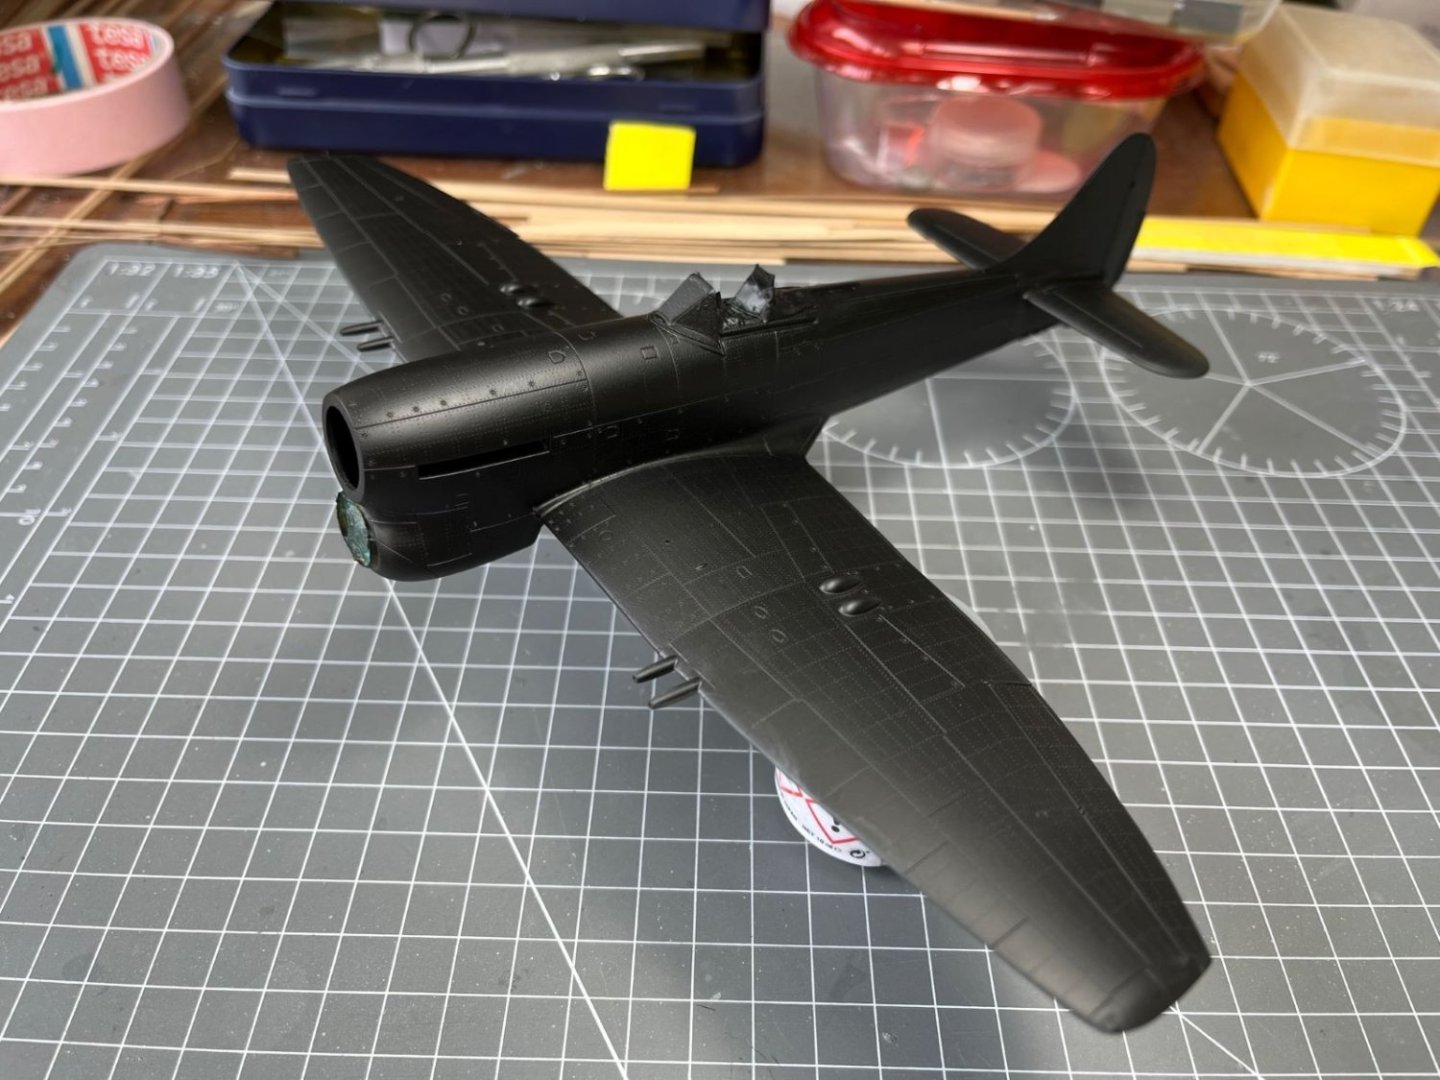
Hi all, life keeps me away from the hobby room, hence I have only few progress to show. I have completed the assembly of the airframe and glued the last left fishplate. Here, the wing root junction filled with a very thin sprue wire. The nice interior cockpit will be practically invisible when the last closing part will be glued on. The tail surfaces were completed with the controls in their neutral position. I moved only the trim tabs slightly. Finally, masking with the provided masks for the transparent parts and with kleenex tissues for the rest in preparation of the primer was also completed. After spraying a black primer, a black beauty emerged: I will have to fix few blemishes before progressing with the paint, but the paneling and riveting is very noticeably good. I am progressing slow because of my work that after about twenty years will bring me again in the States, in Florida, on the second half of June. I am very excited about that. That is all for now, best regards, Dan


- 115 replies
-
- 13
-
-

-
Following your comments to my build, I took the opportunity to follow your link to this build of yours. That's simply amazing, your carvings are exquisite miniatures. I will take my time to go through your posts, but for sure I will shamelessly try copying your techniques. You already resolved some of my troubles I had in continuing the second planking of my build. kind regards, Dan
- 208 replies
-
- 1
-
-
- kitbashing
- Woodcarving
- (and 4 more)
-
@Katsumoto Bedankt voor je mooie woorden! Peter, thank you for your kind words, you make me blush 😄! I am glad you like my build. I know I am going sooo slow, it is because I am not a ship builder and also because I am distracted by other modelling works. Thanks also for the many 'like's. Dan
- 42 replies
-
- 3
-
-
- first build
- artesania latina
- (and 1 more)
-
Beautiful neatly done model of a very sexy and curvy jet 😍 Congrats, Dan
-
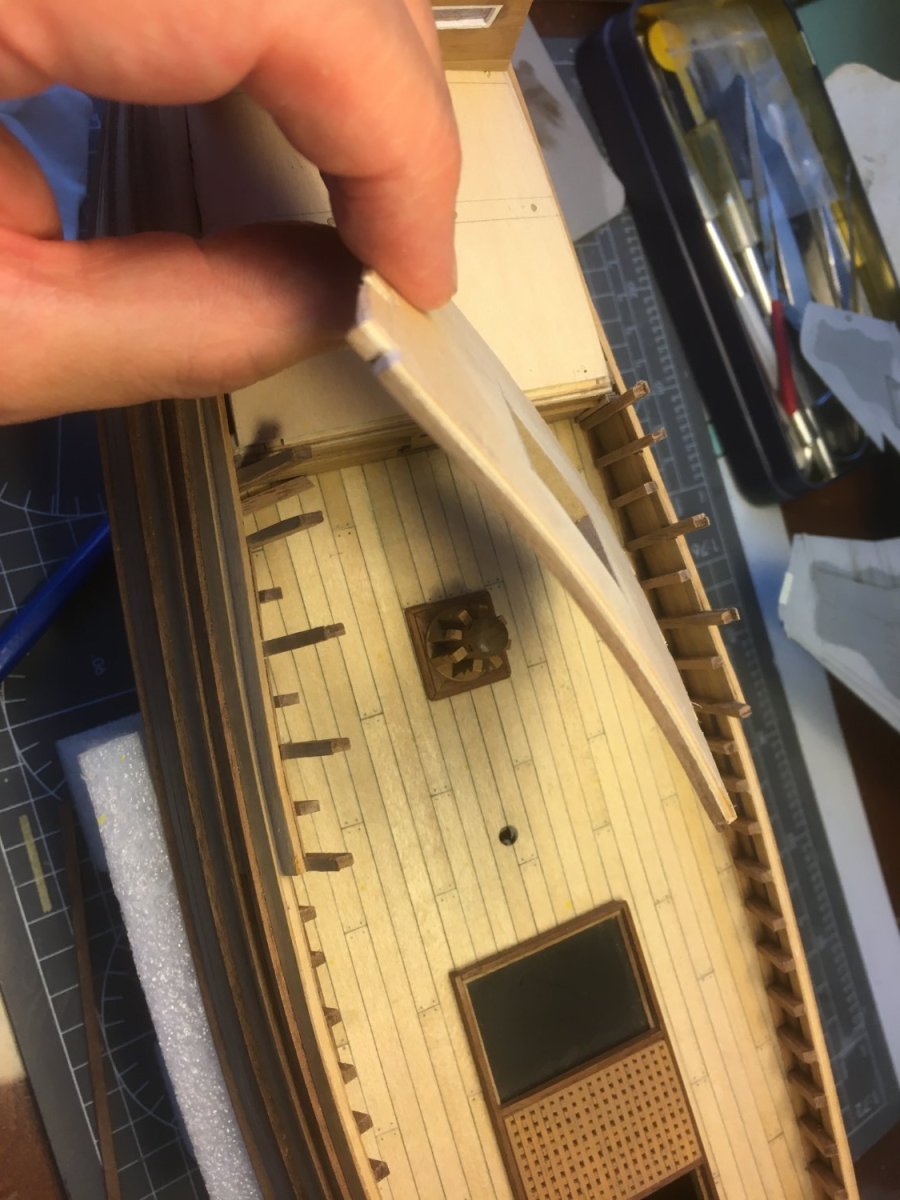
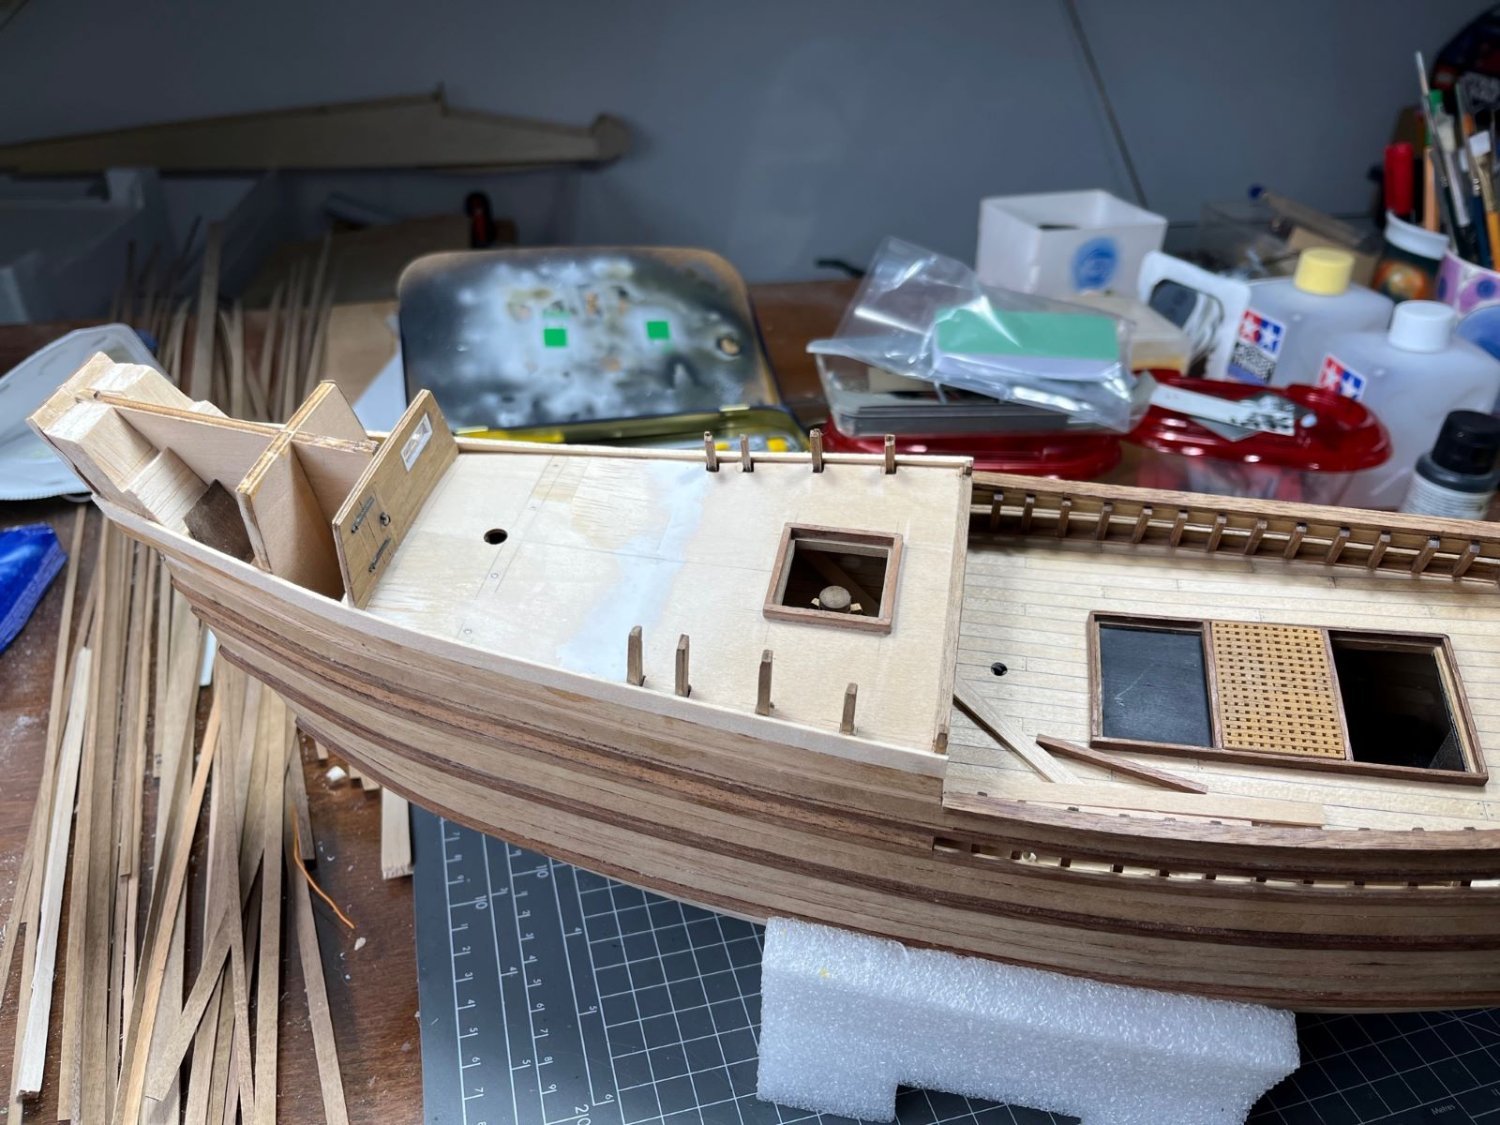
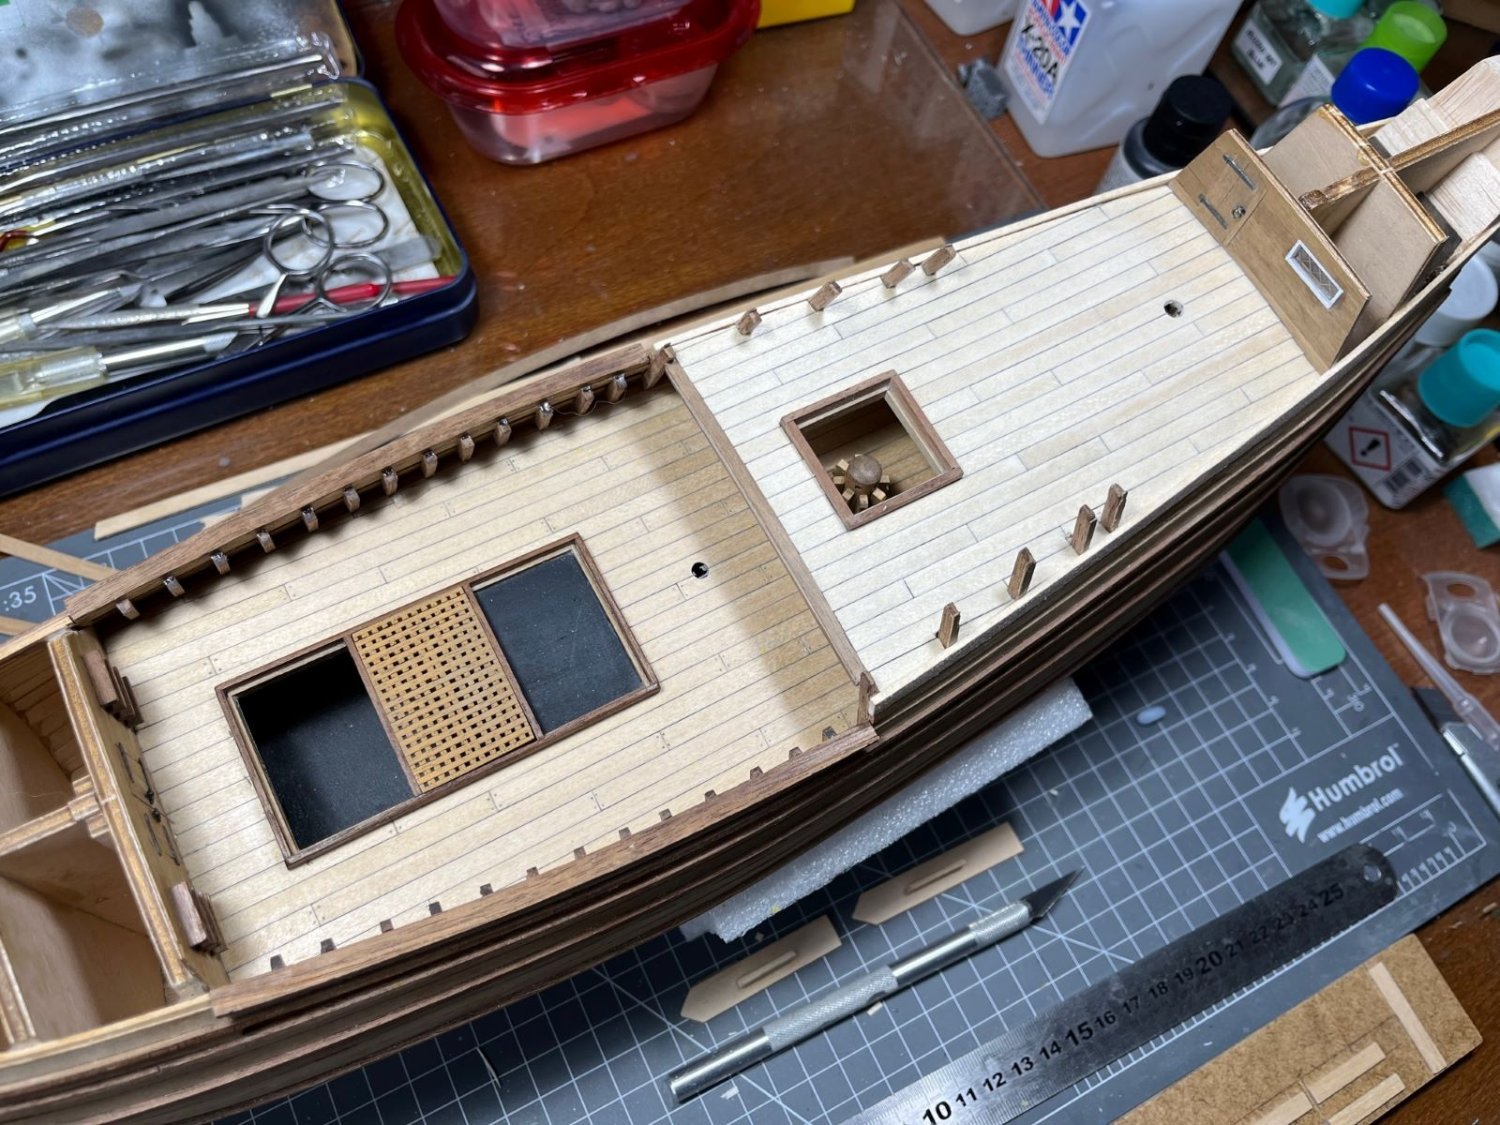
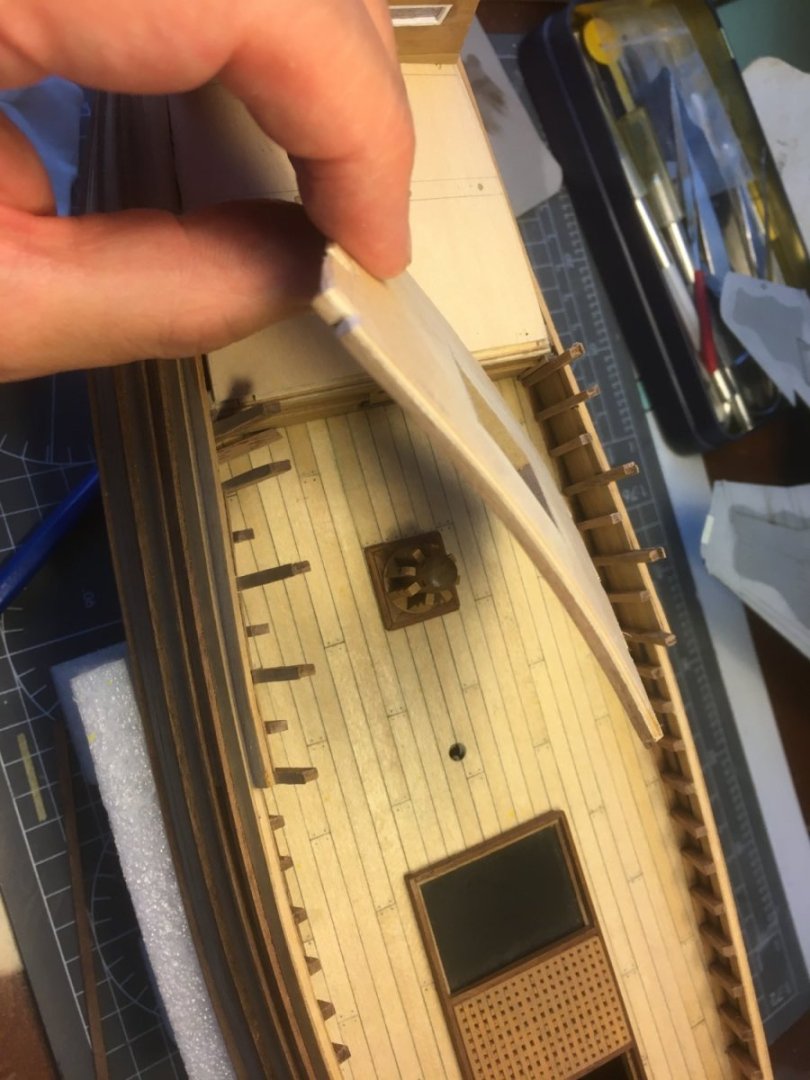
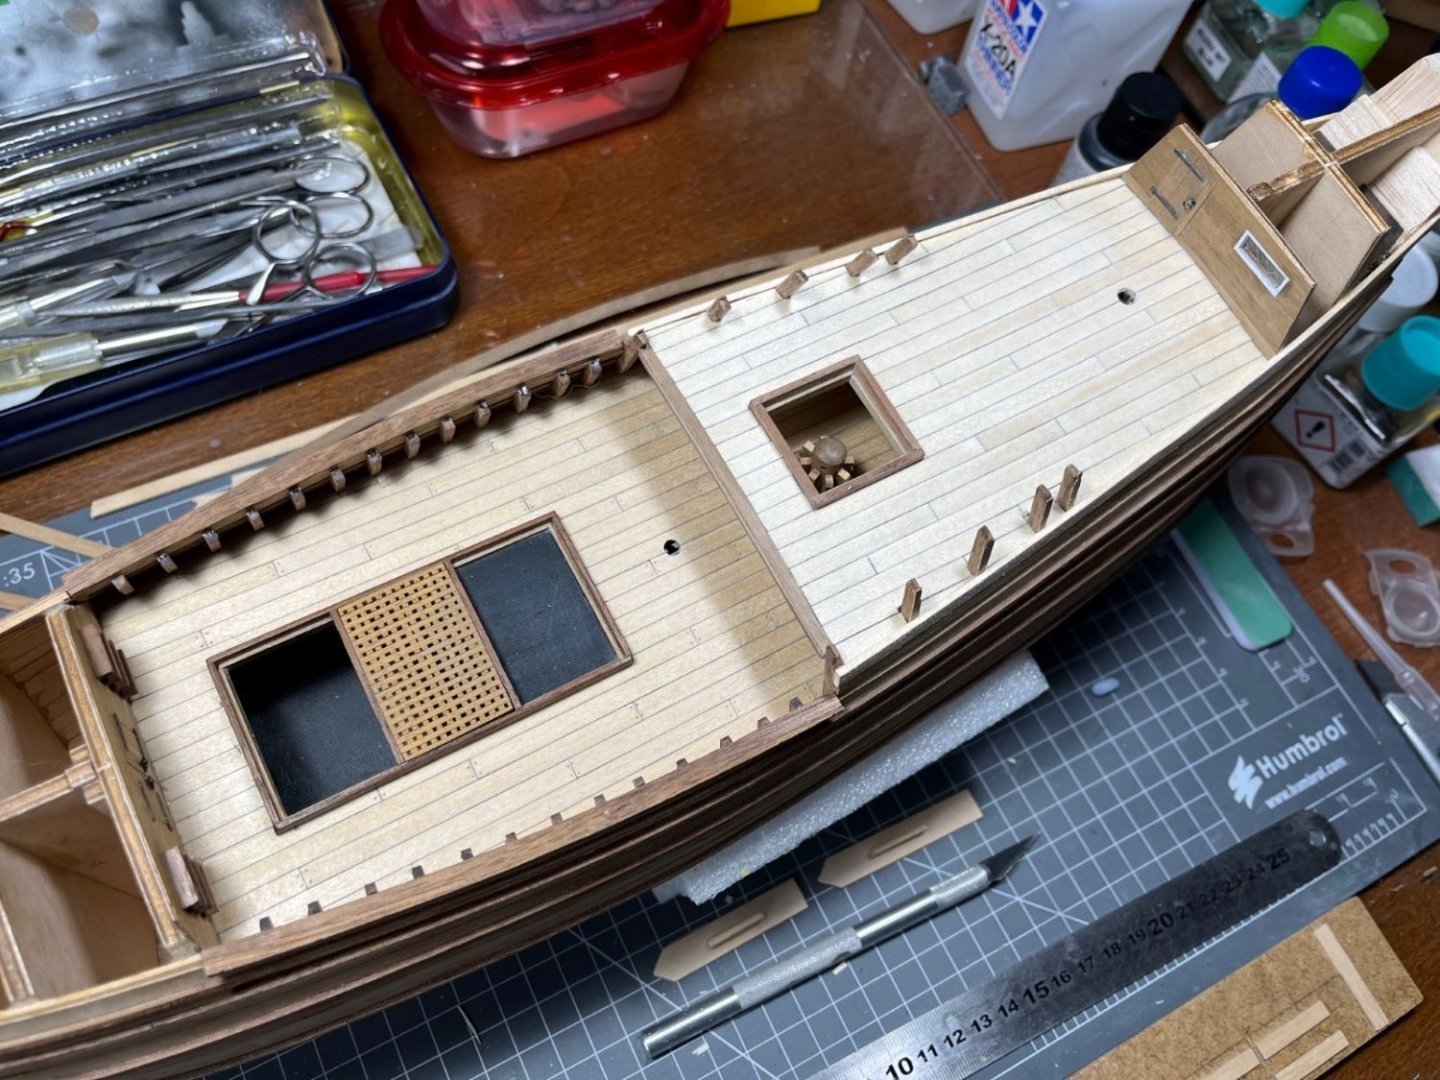
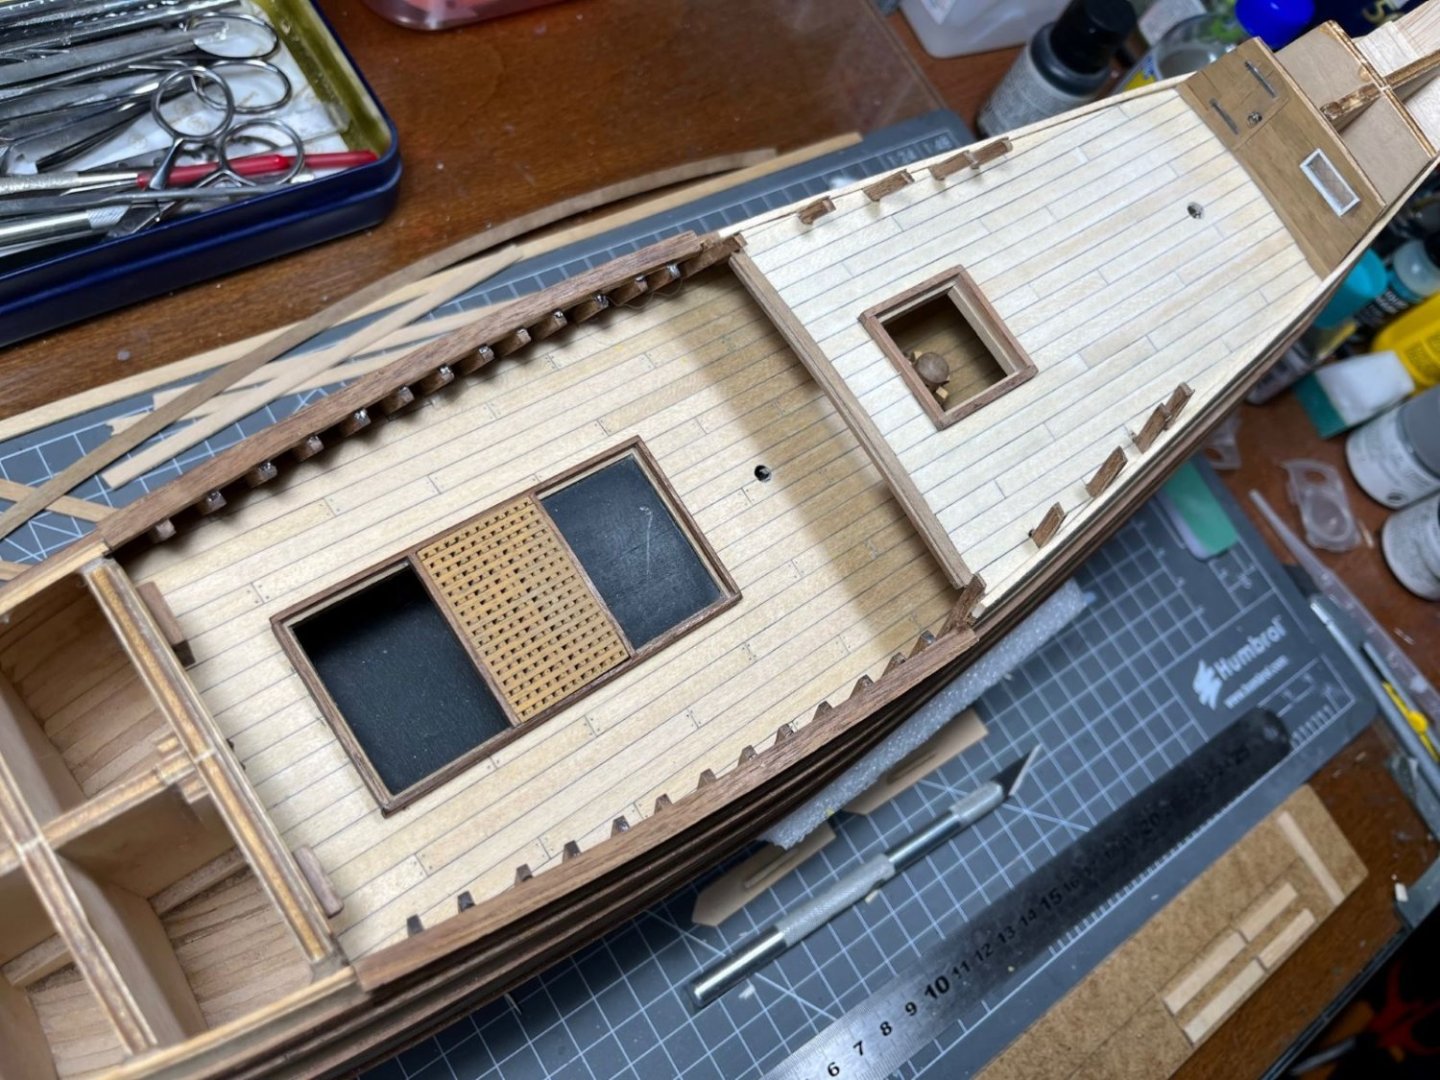
Hi all, I resumed my build of my Mayflower after one and half year. I managed to build the extension of the upper deck and to bend it as necessary. It was built of a 3-layers 1.5 mm plywood and I chose the layer orientation that offered the least resistance. I bent it soaking it in water and heating it on a curved steel cooking pot. Once glued in place, the junction was smoothed and this is the way it looked: meanwhile, I furnished the poop cabin bulkhead and finished the bulwark of the mid deck. Some pictures after gluing the deck planks: That's all for now, kind regards, Dan

- 42 replies
-
- 9
-
-
- first build
- artesania latina
- (and 1 more)
-
Hi, just to show you my progress on the split flap repair. This is how it looks after filling with sprue, filler, engraving new lines and rivets: Actually, it is not easy to see the result, hence I sprayed some Surfacer to get a grey, uniform finish: Getting there, but the picture close up revealed few blemishes that I still need to address (I also made an incorrect rivet line). Best regards, Dan

- 115 replies
-
- 13
-
-
Yes, I agree with that. But as @Egilman said, it is a sort of artistic license. I consider the model as a 'reproduction' of the real thing, which is different from scaling it down 48 times. That means that it has to convey the feel of the real thing, with its volumetric presence and its multitude of surface details. Of course, one can bring it to a level of exaggeration such that it easily appears ridiculously fake. There is another technical aspect that I consider important: once you have a model with negative panels, I find that having the bottom of the grooves not darkened, makes the model to appear more like a toy, while having them darkened gives it a more realistic look, perhaps because light is trapped better in the grooves and it is less reflected off. @CDW, at any rate, in the last posted pictures above, the panels look great in my opinion. Dan
-
B-25 C/D by Javlin - Airfix - 1/72 - PLASTIC
Danstream replied to Javlin's topic in Completed non-ship models
You made a remarkable display, Kevin. It freezes a moment of action very well. The model also looks very good, but I guess the display takes all the attention. Kind regards, Dan -
@Egilman, @mtaylor, I don't know the reason for splitting the parts like that. I could think that that might easy the design of the molds or avoid problems of production. Anyway, in one of their aftermarket lines, Eduard offers a flap replacement for those who wants to pose the flap deployed. This flap is a metallic, rectangular panel and the molded parts on the kit parts need to be cut and removed. I might consider that for the next Tempest (I have also a Tempest mk II to build, which I would like to finish with a High Speed Silver livery). Kind regards, Dan
-
@CDW, yes the molding of the kit is really good, it is a pleasure to look at. Perhaps, the tri-dimensionality of the details might be a tad overdone, but it looks extremely good. The riveting tool is a 'RB Production - RB-T010' (https://www.aviationmegastore.com/en/modelling/rivet-r-mini-rivet-tool-rb-productions-rb-t010-90405.html) It is quite cheap and works reasonably well. You have to use the tool head with a normal blade holder. Kind regards, Dan
-
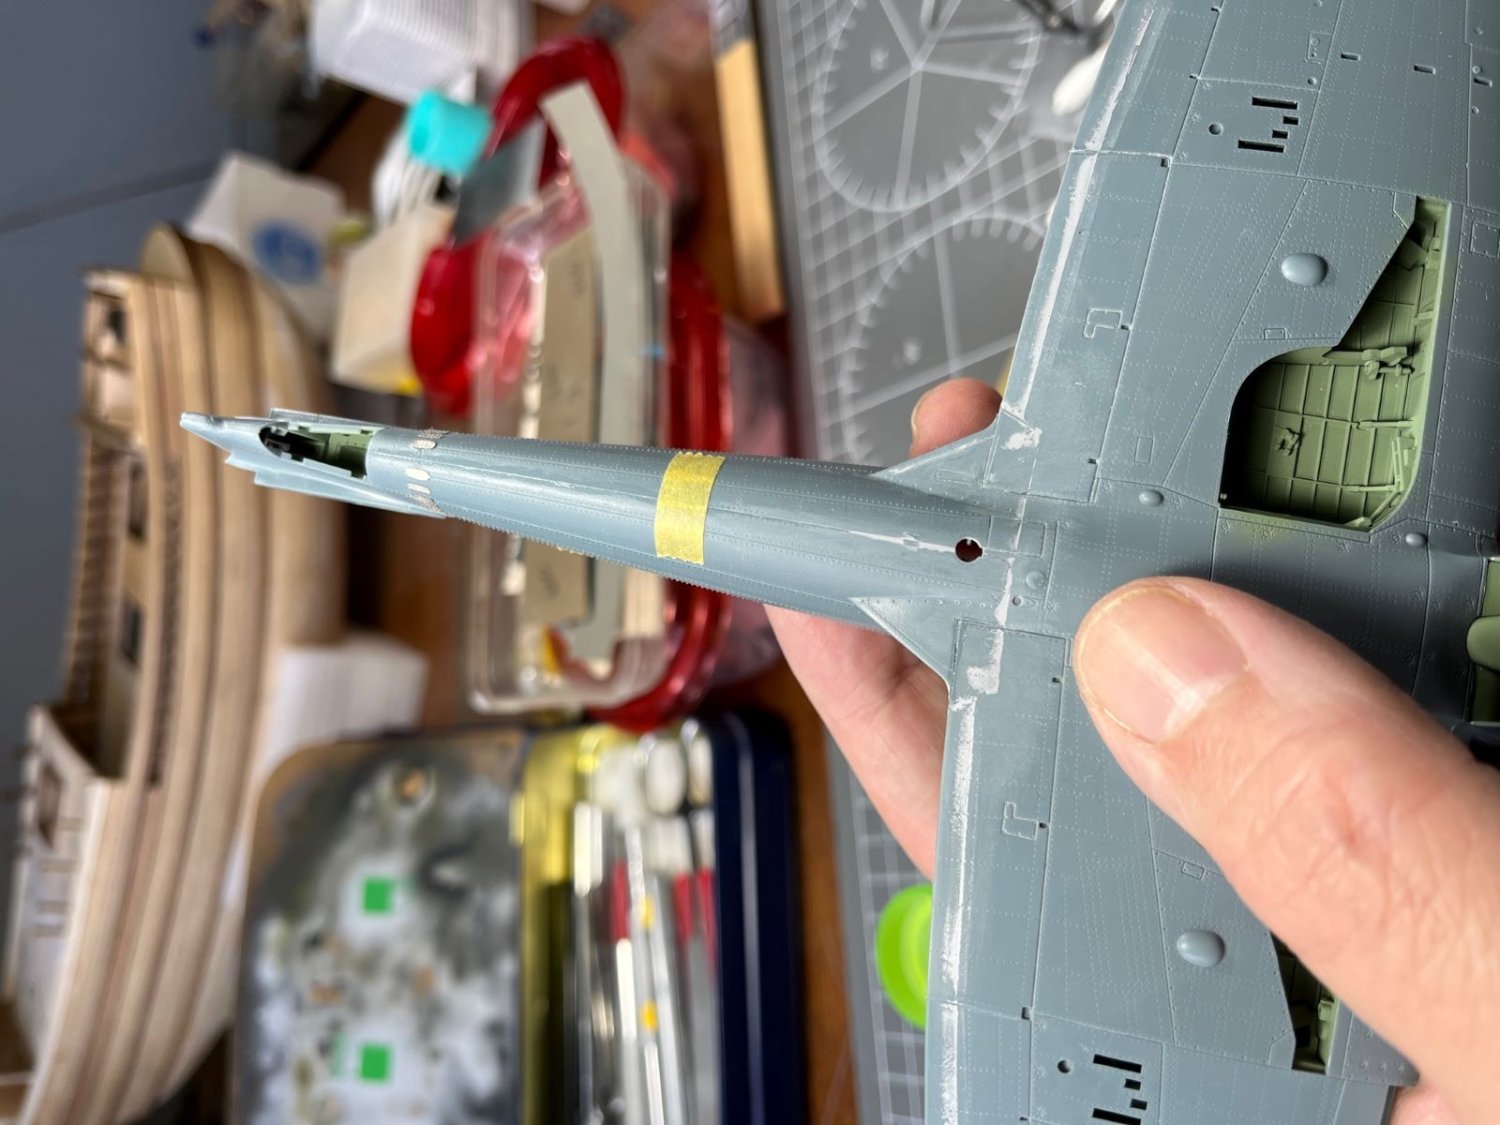
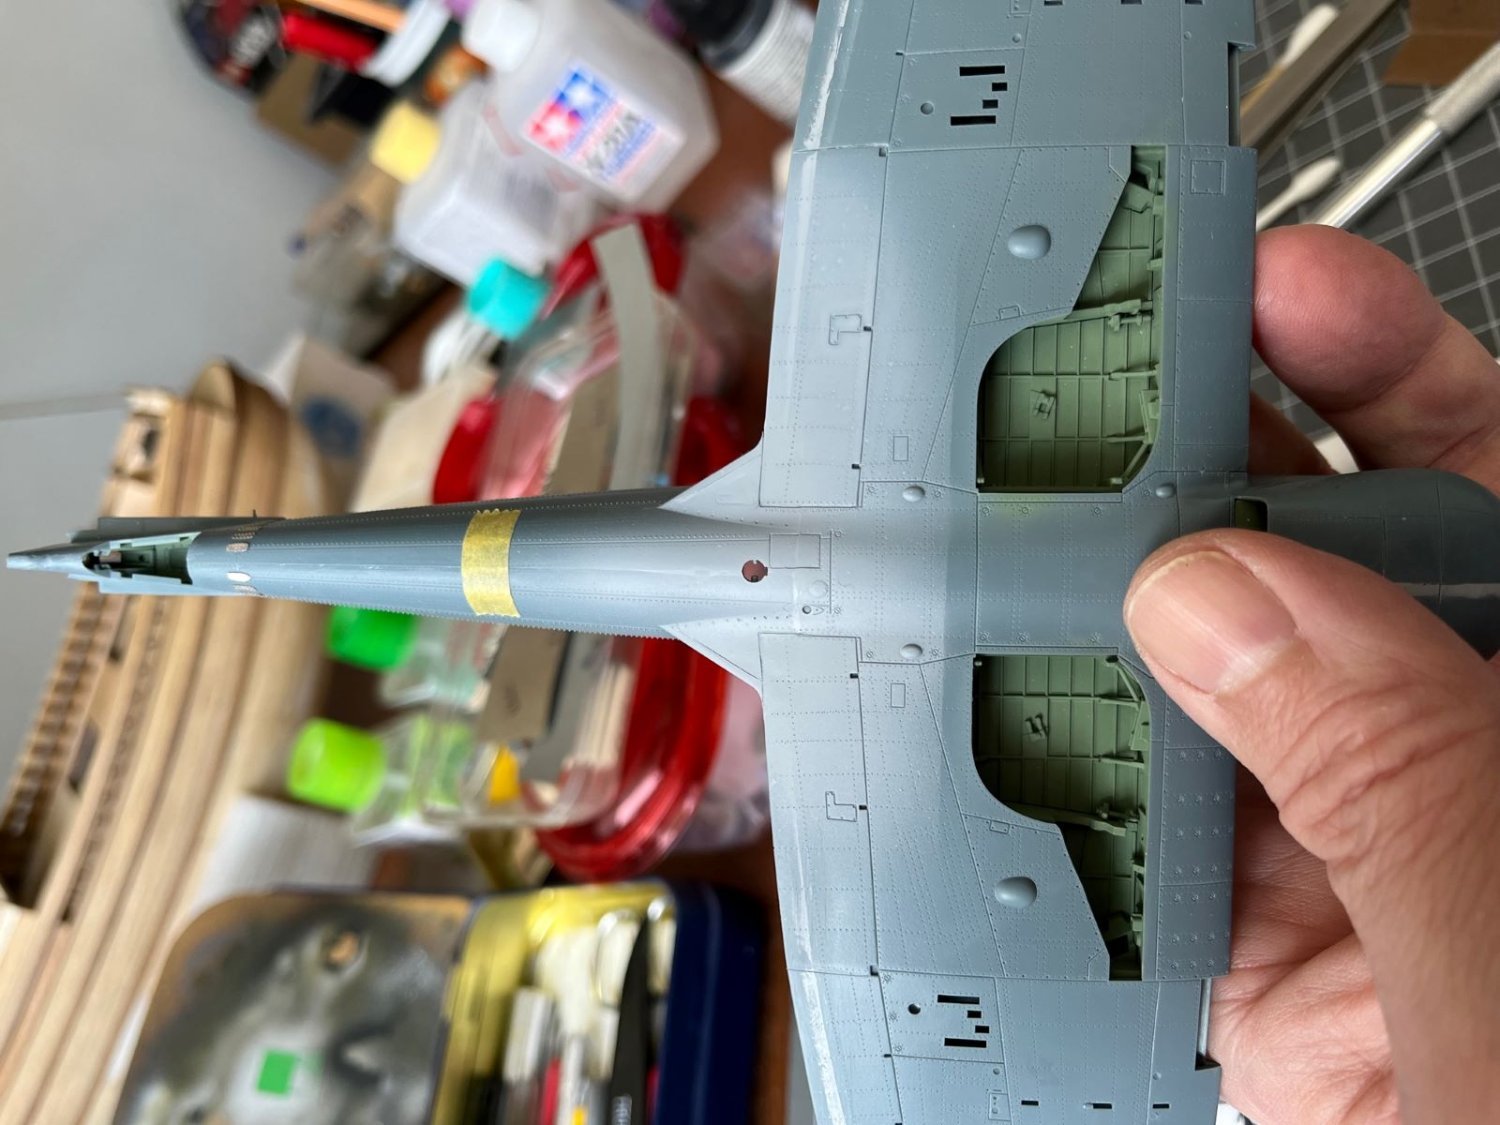
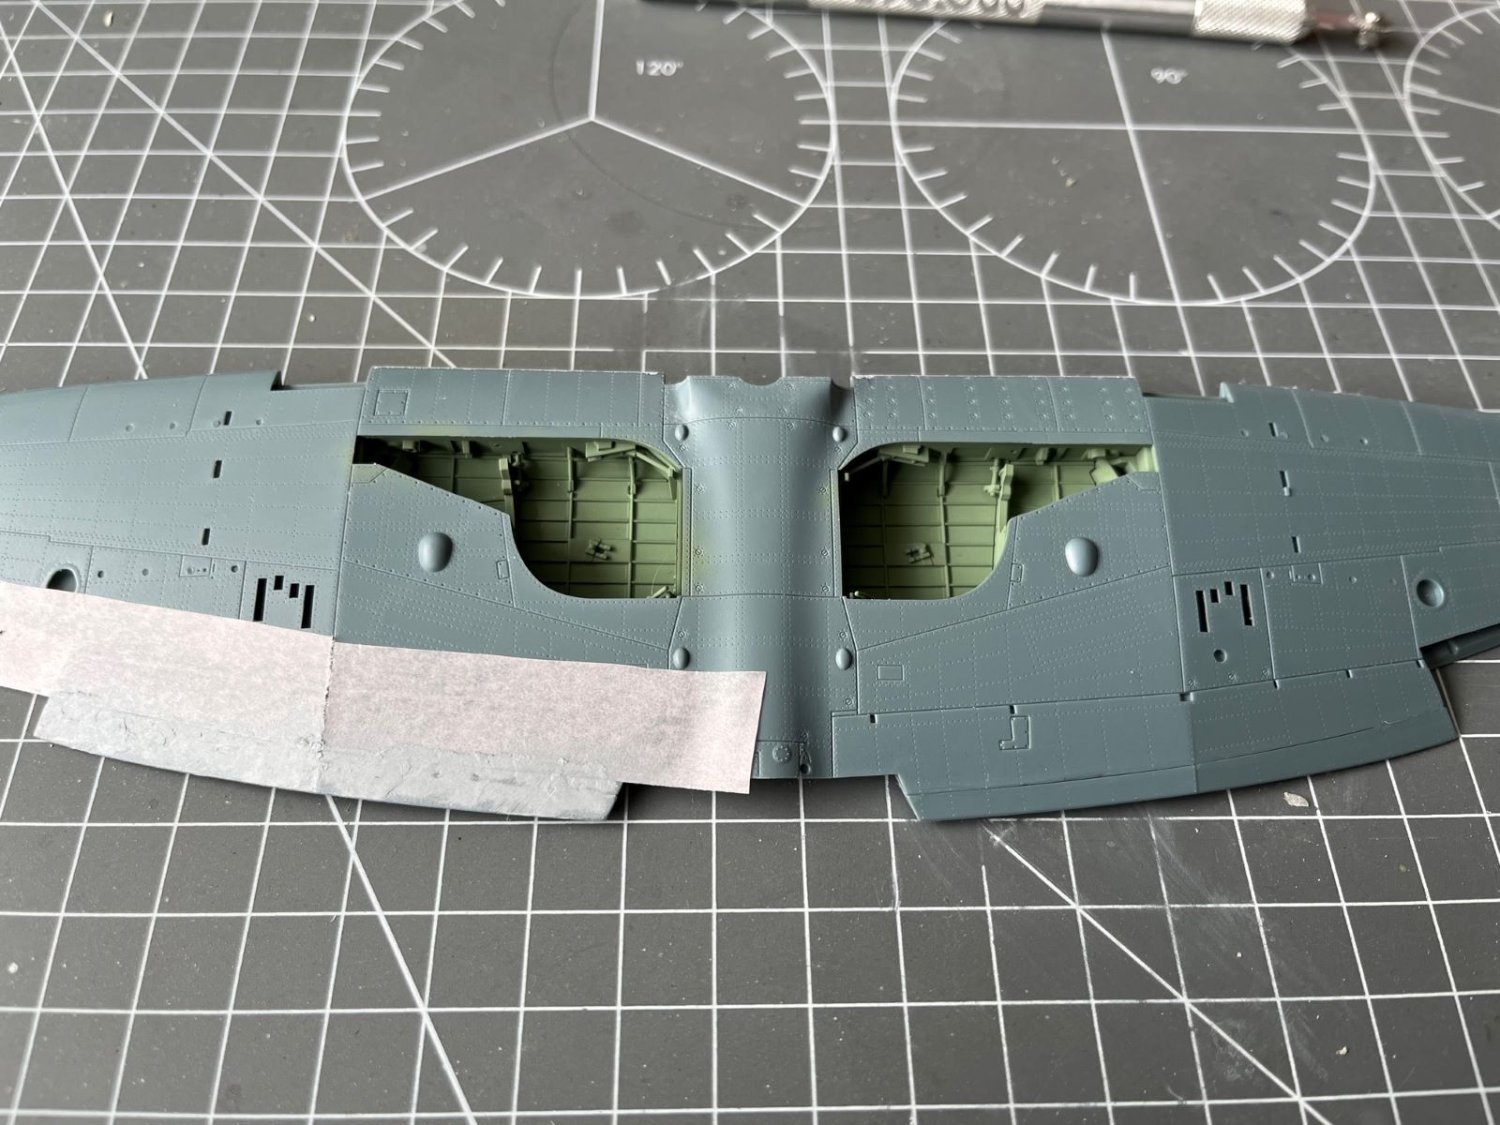
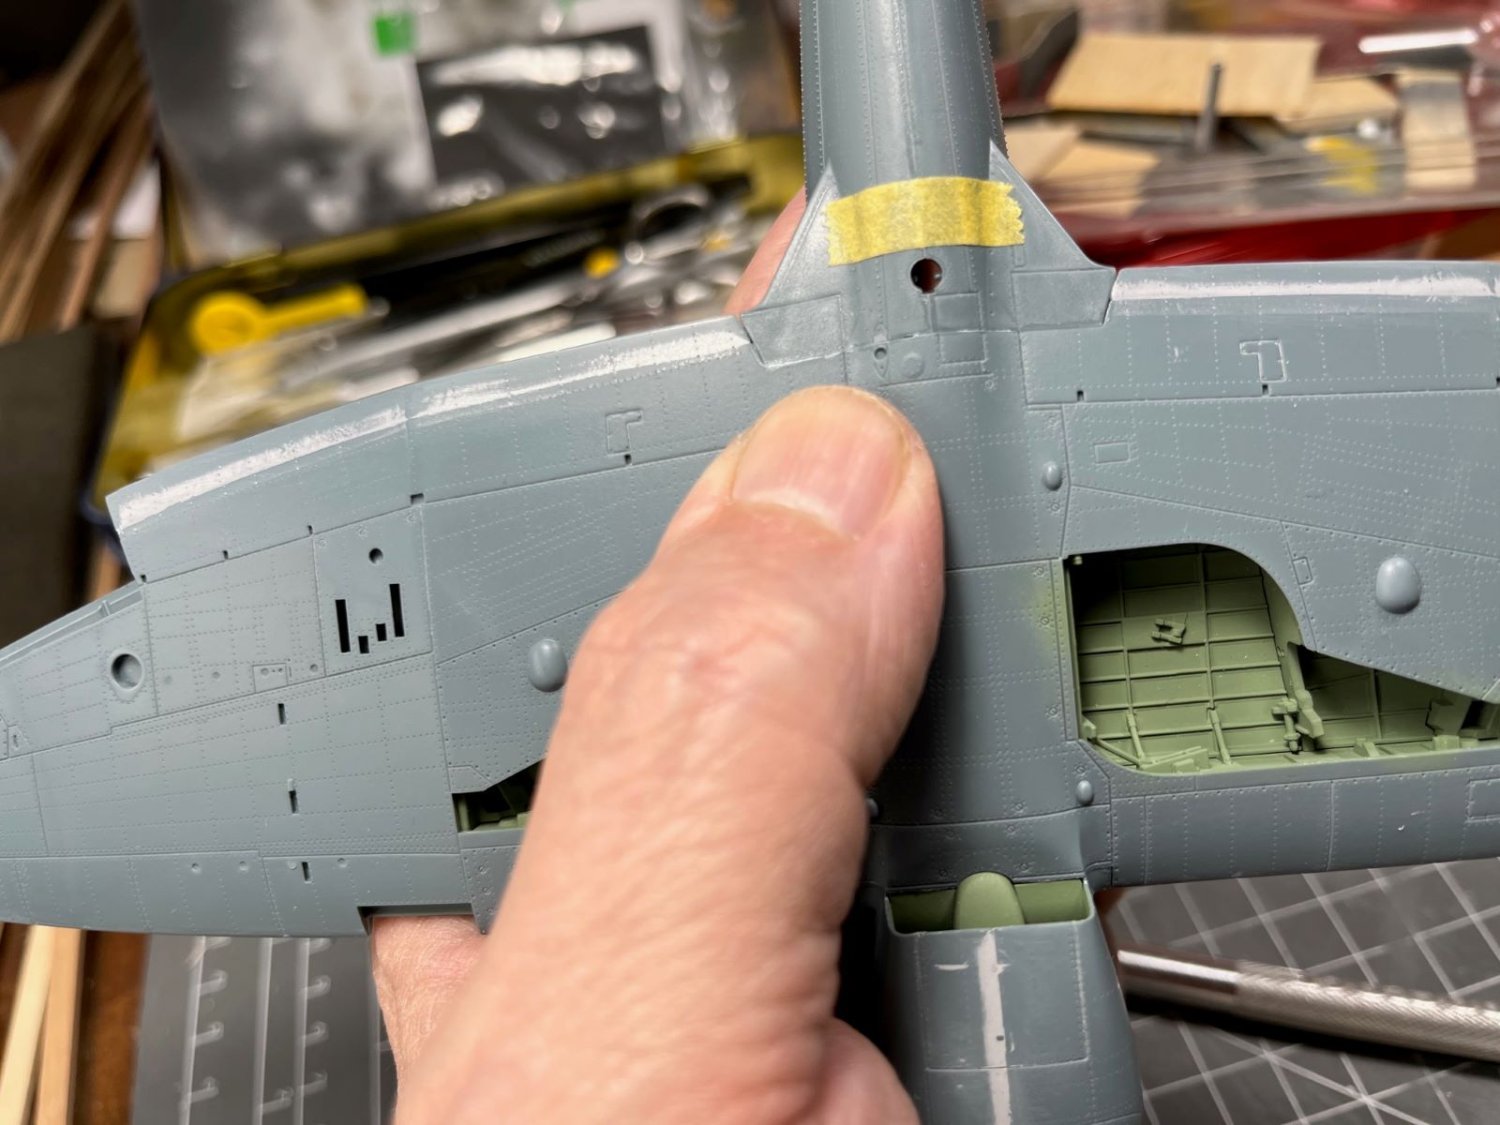
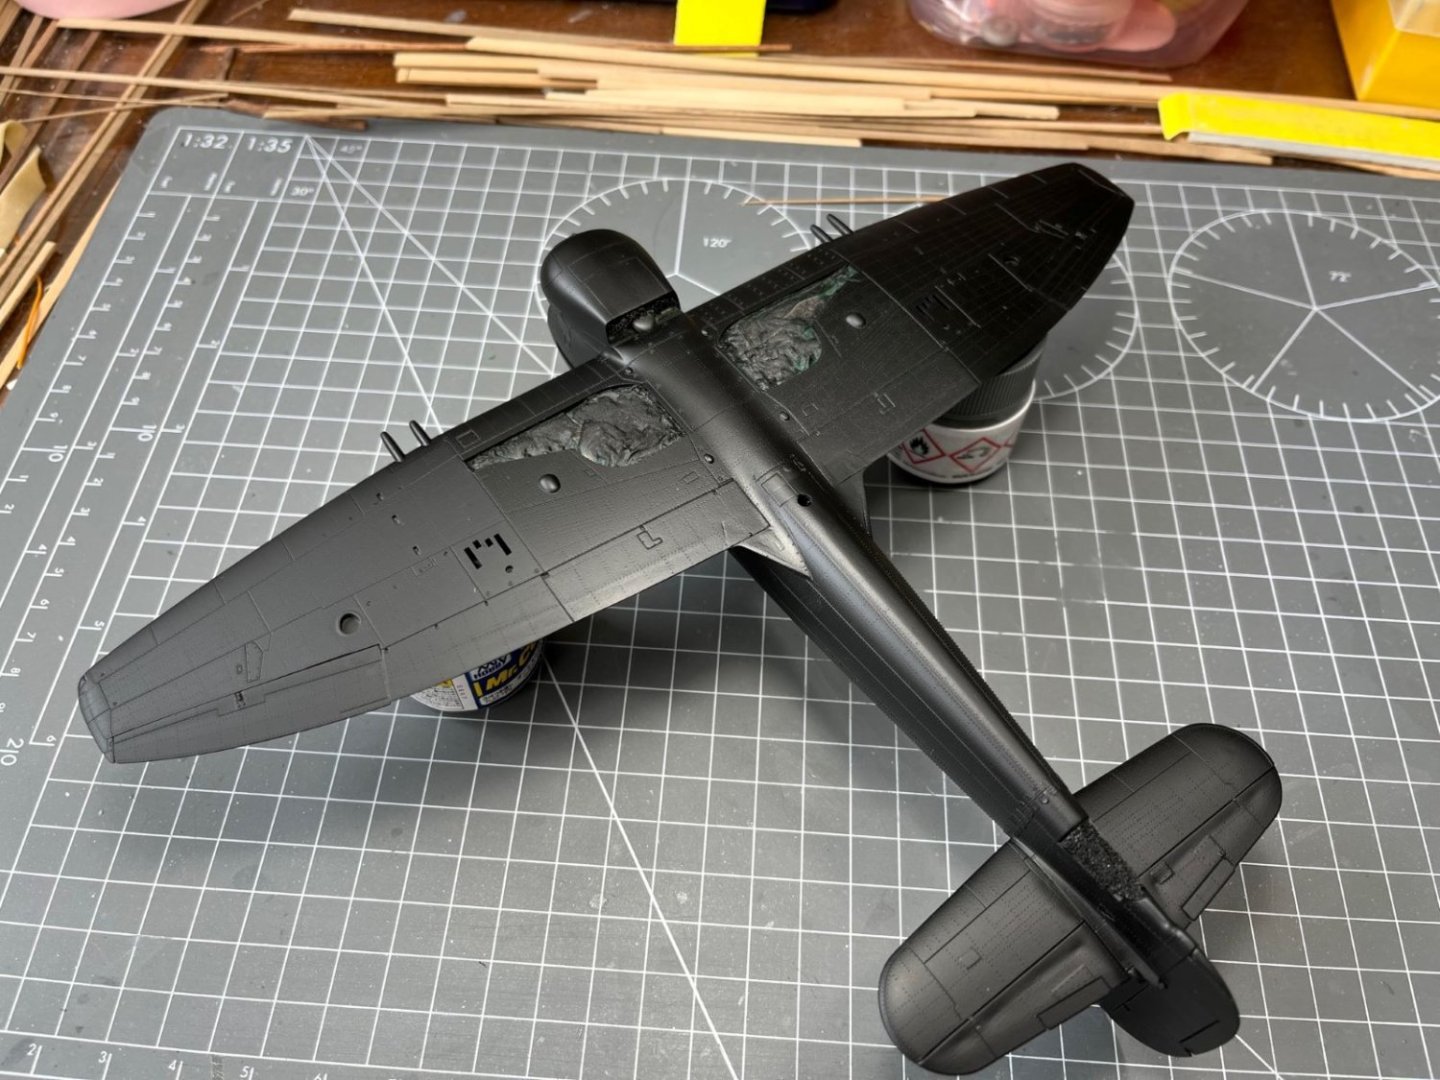
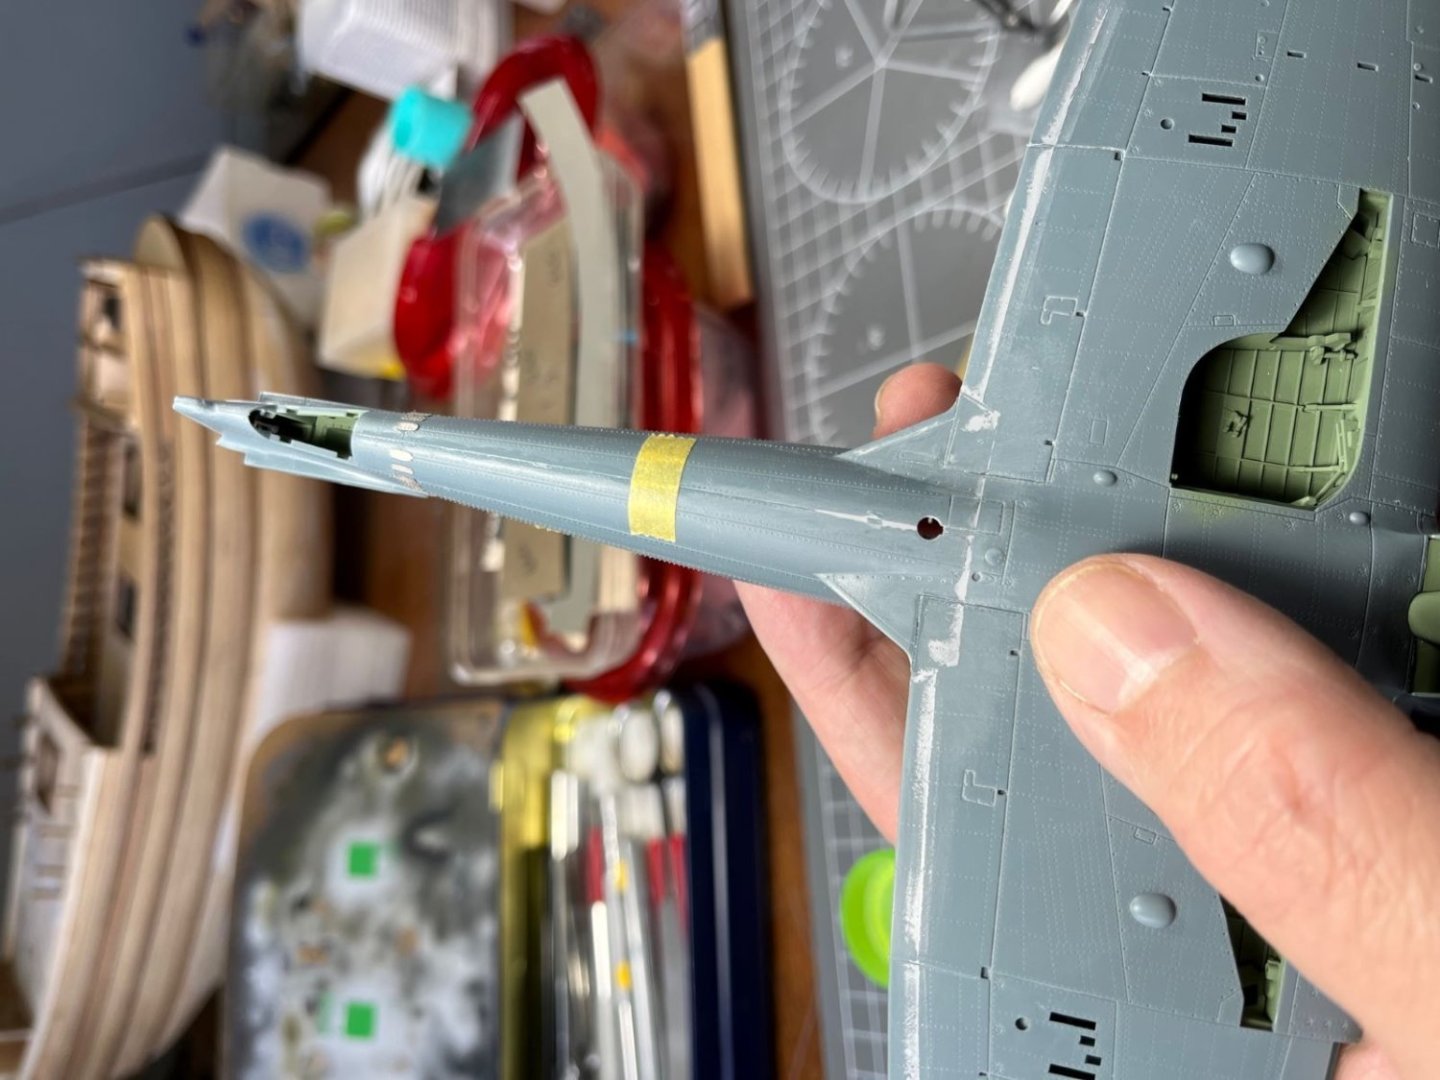
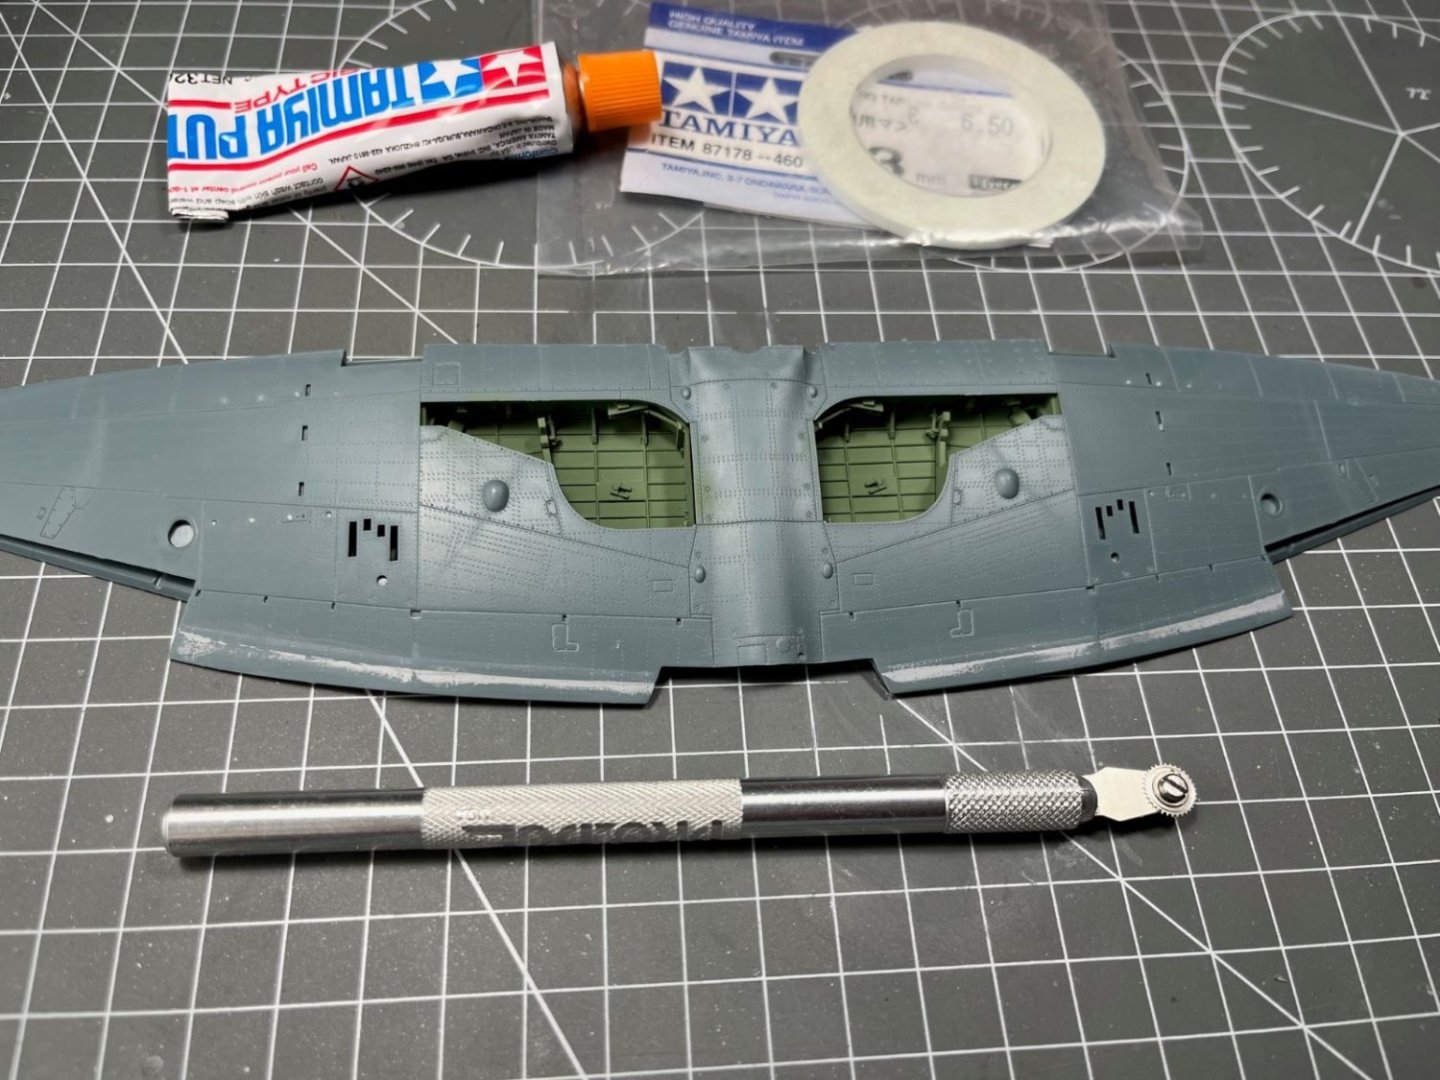
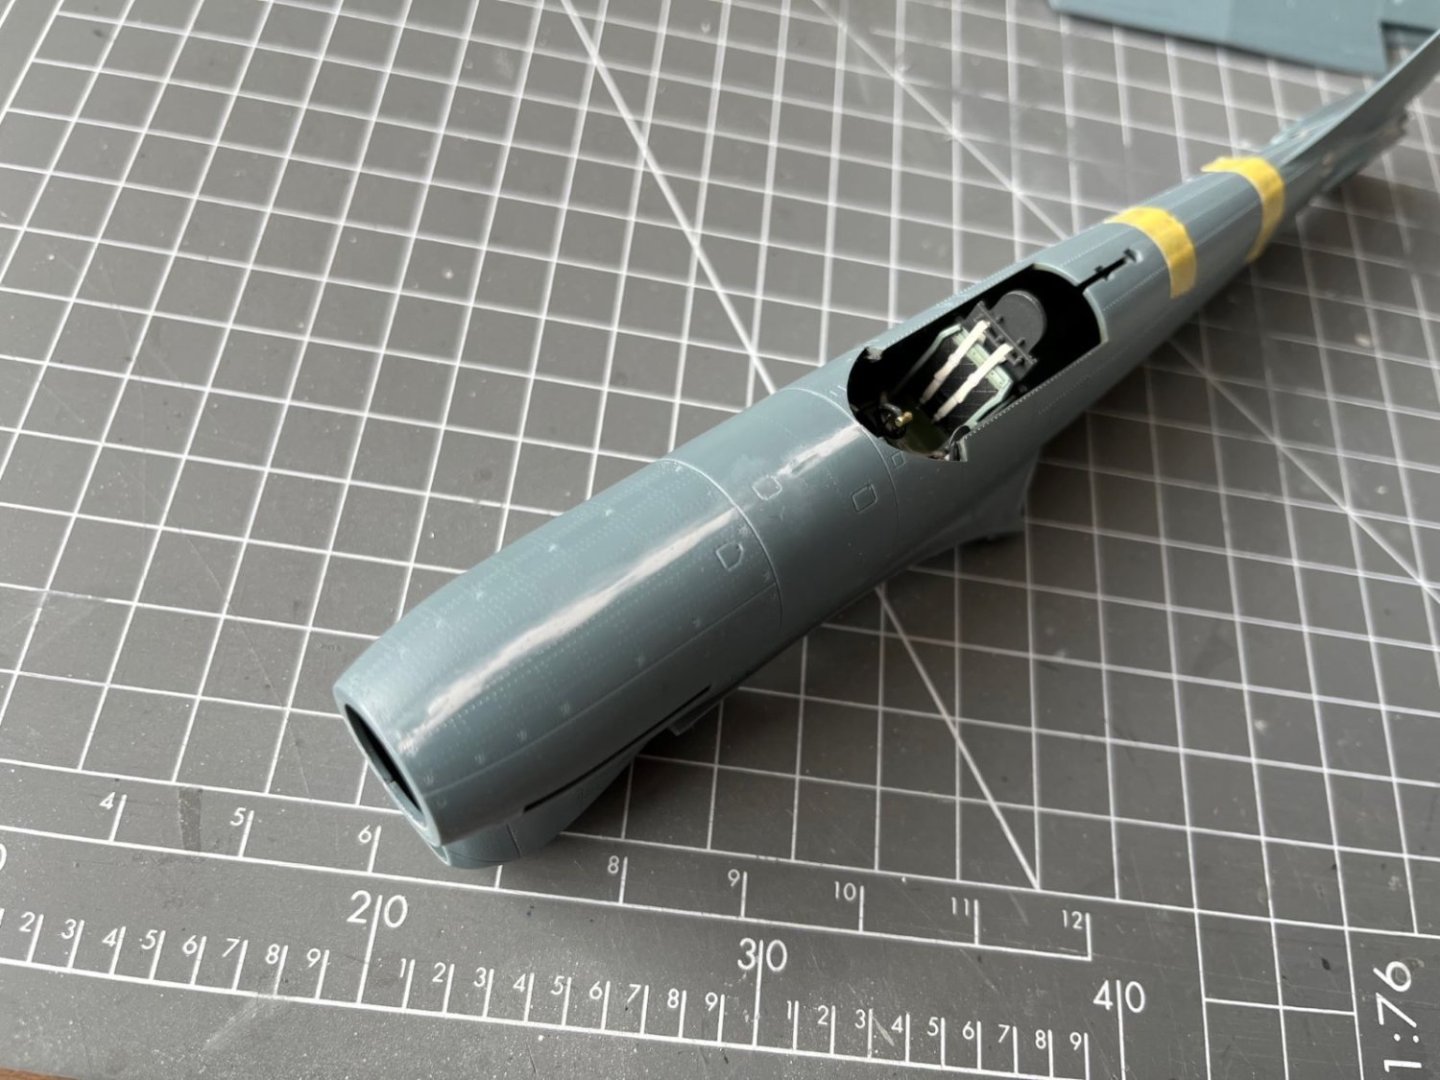
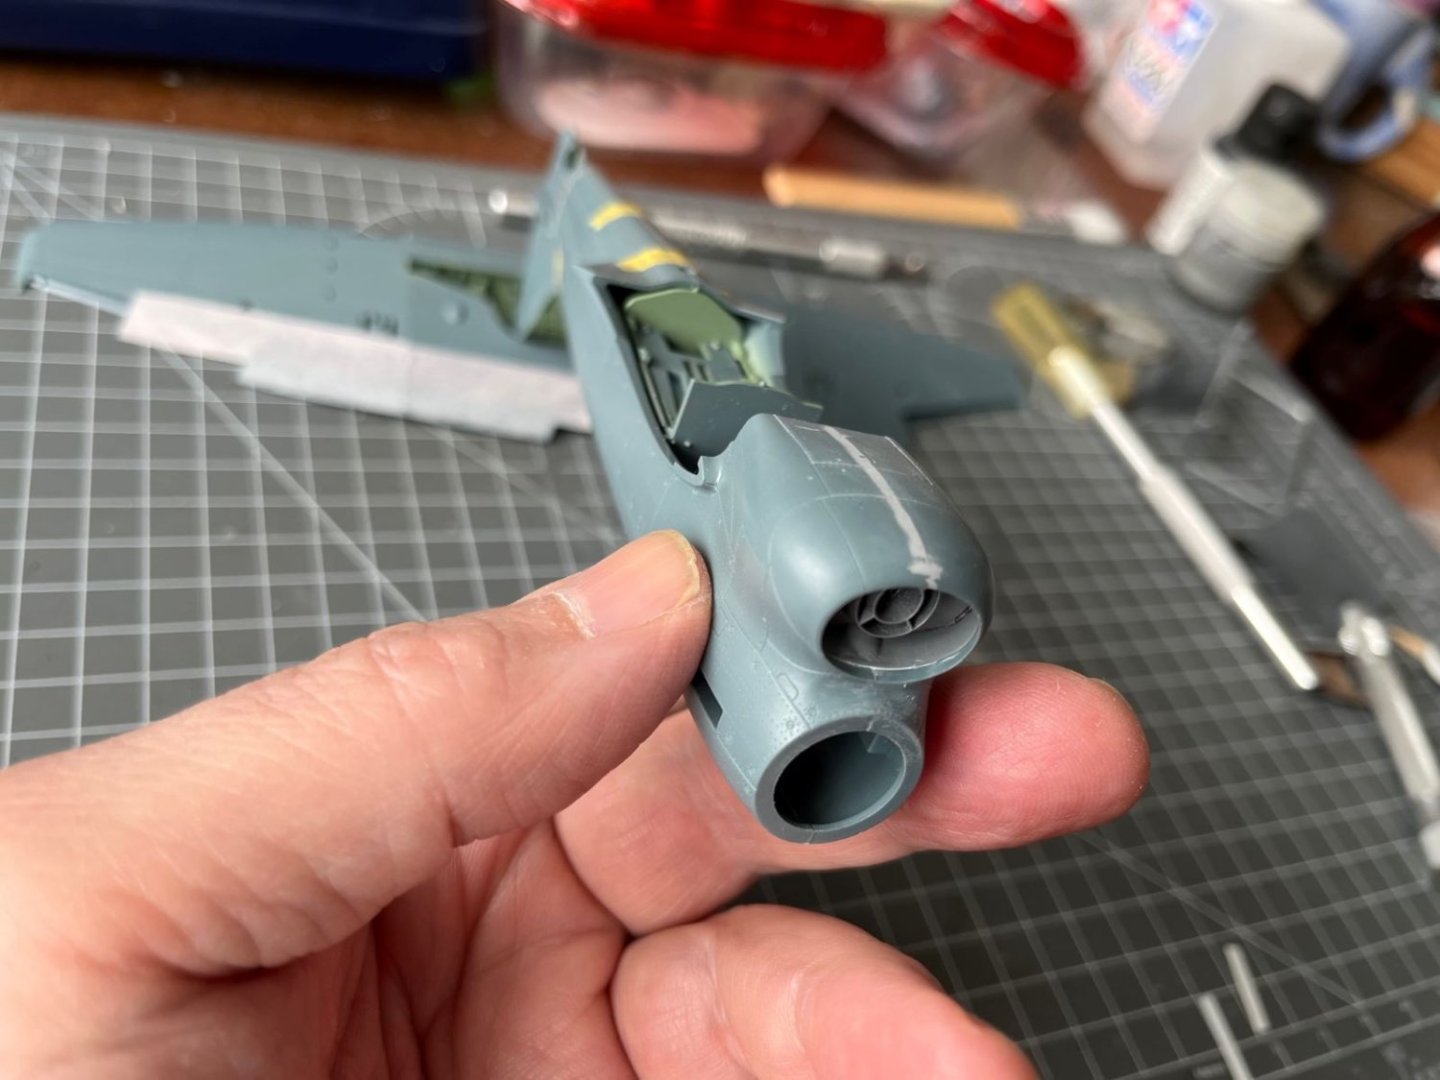
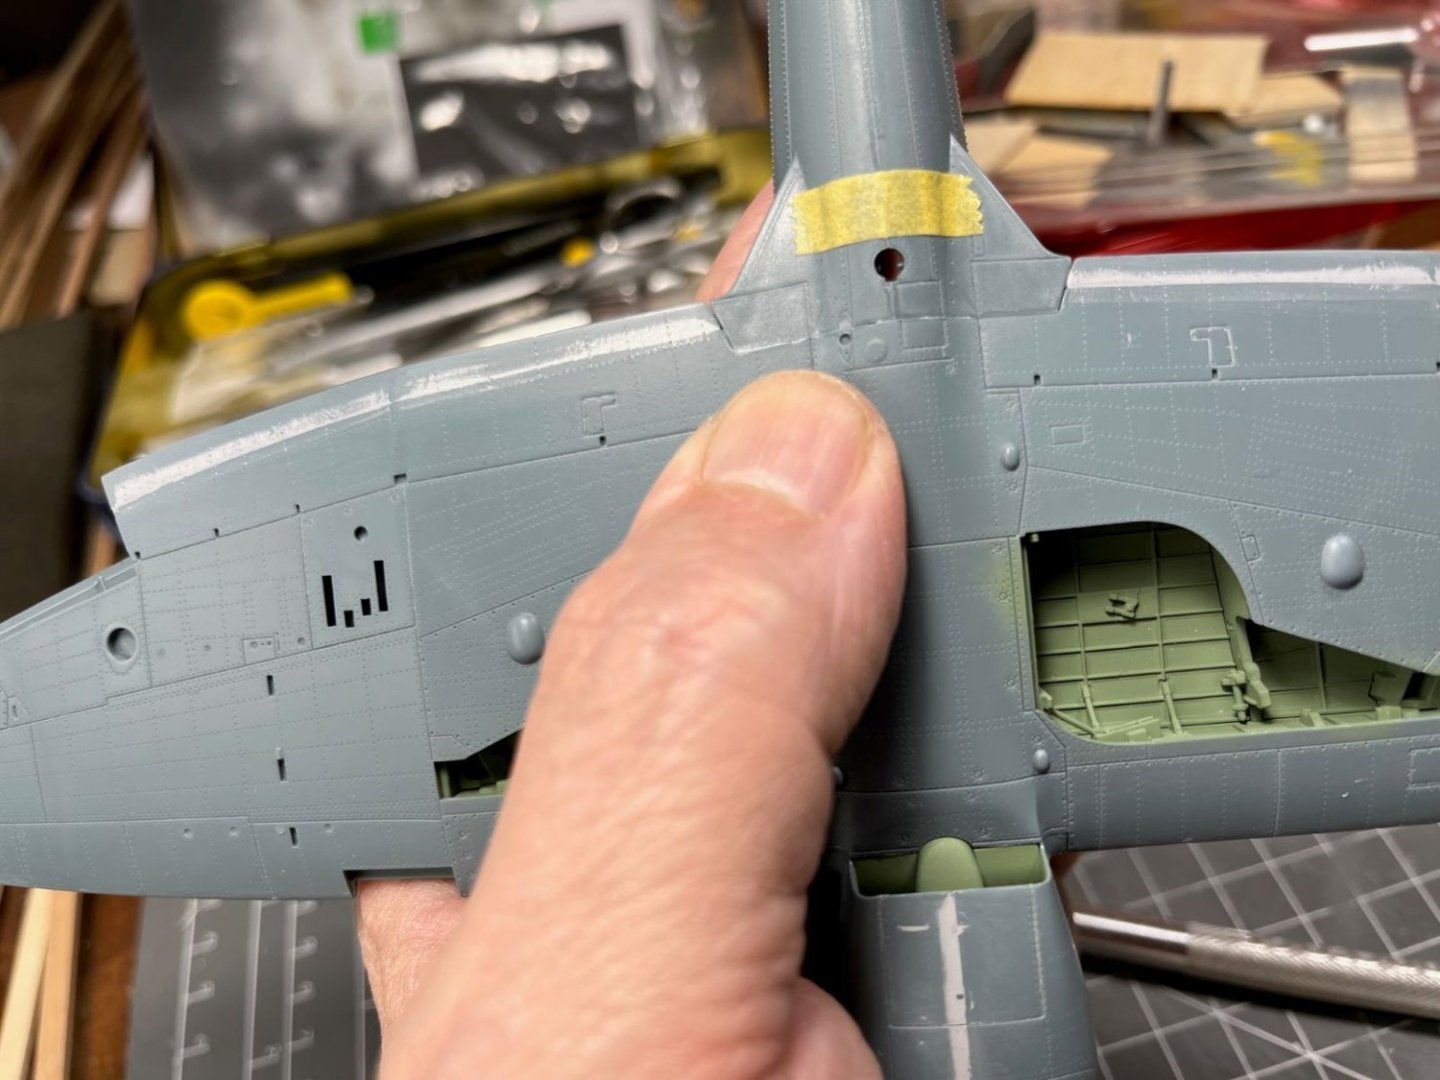
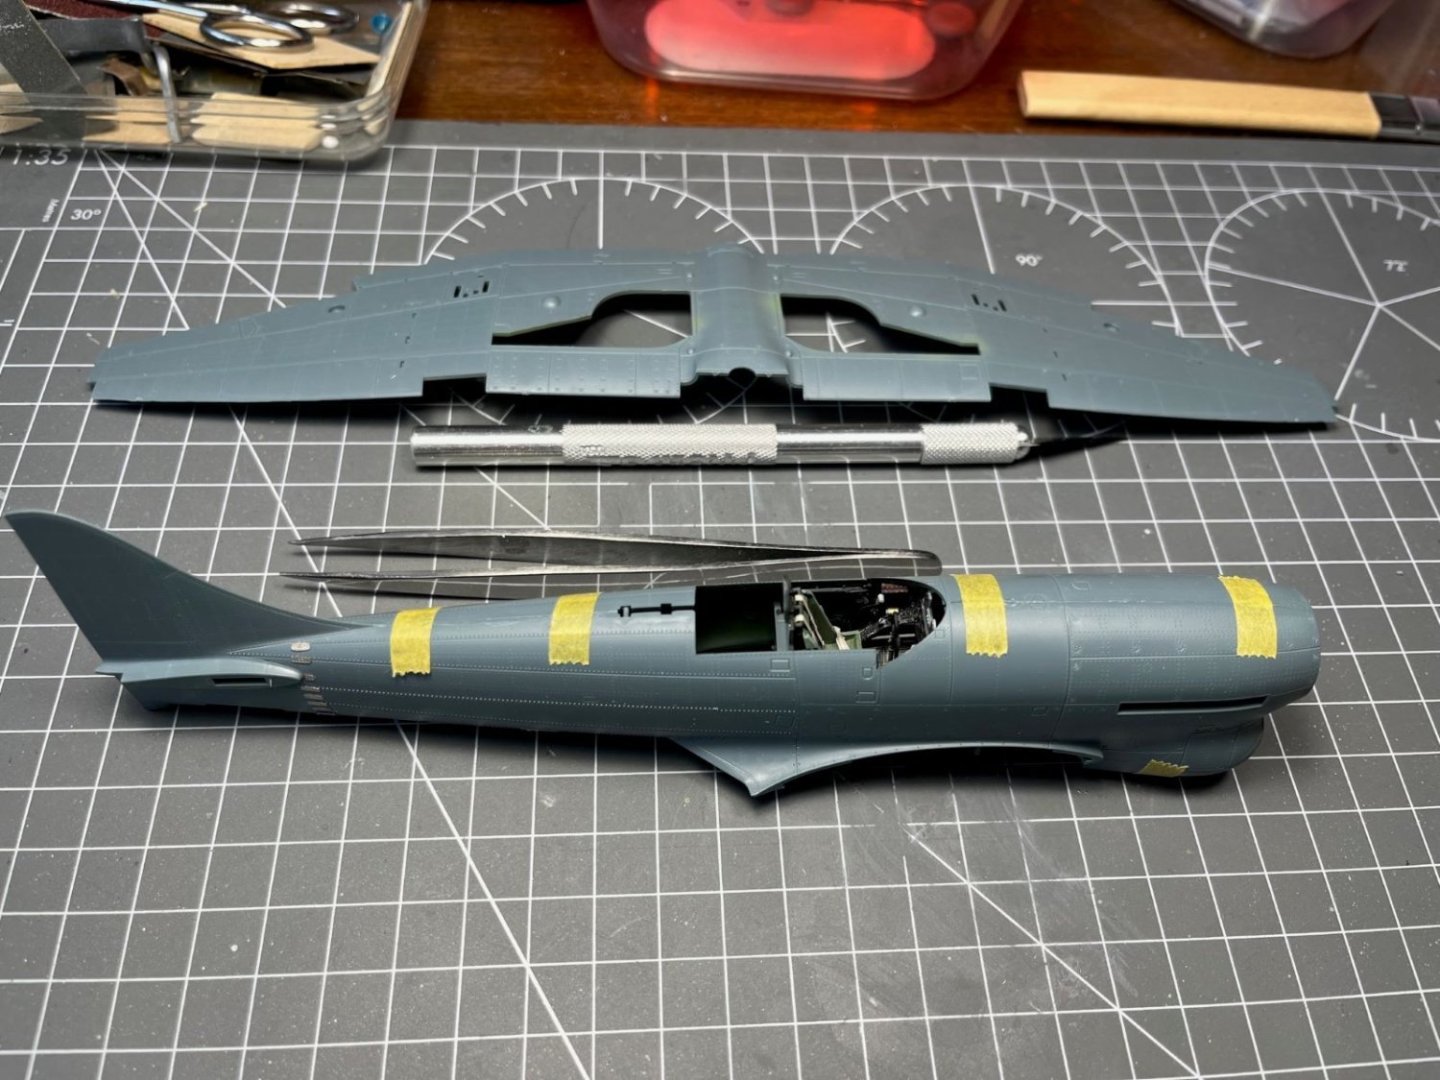
Thanks Javlin. Indeed, lot of power, lot of striking weapons. I went on with assembling the upper halves to the lower part. Note the nice details of the landing gear wells. The trailing edge of each wing is part of the upper half. While this solution gives a neat trailing edge, the junction line, which is now on the lower surface, needs some care. Here, the right half is still untreated, while the left received some Tamiya putty to conceal the junction line. After sanding, this is the result: I restored the rivet lines that were obliterated with the tool shown above. Other minor filling were required on the forward parts of the fuselage, while the rear part is just fine with the glue oozed from the junction which will require only some sanding. Inside the air intake of the chin radiator, there was a tiny gap left which I filled with water based Vallejo filler. This is ideal for these small corrections which are in areas difficult to access. In fact, you can simply clean off the excess with a wet cotton swab without the need of any sanding. Once the wing was finished, I glued it on the fuselage. However, there is a problem with the junction on its lower surface, close to my thumb in the picture below: The problem is with the surface of the split flap which should be an uninterrupted rectangular part. Instead it is crossed by the fuselage-wing junction lines. I will address this detail next, by filling the gaps with stretched sprue wires. To the next instalment, kind regards, Dan

- 115 replies
-
- 13
-
-
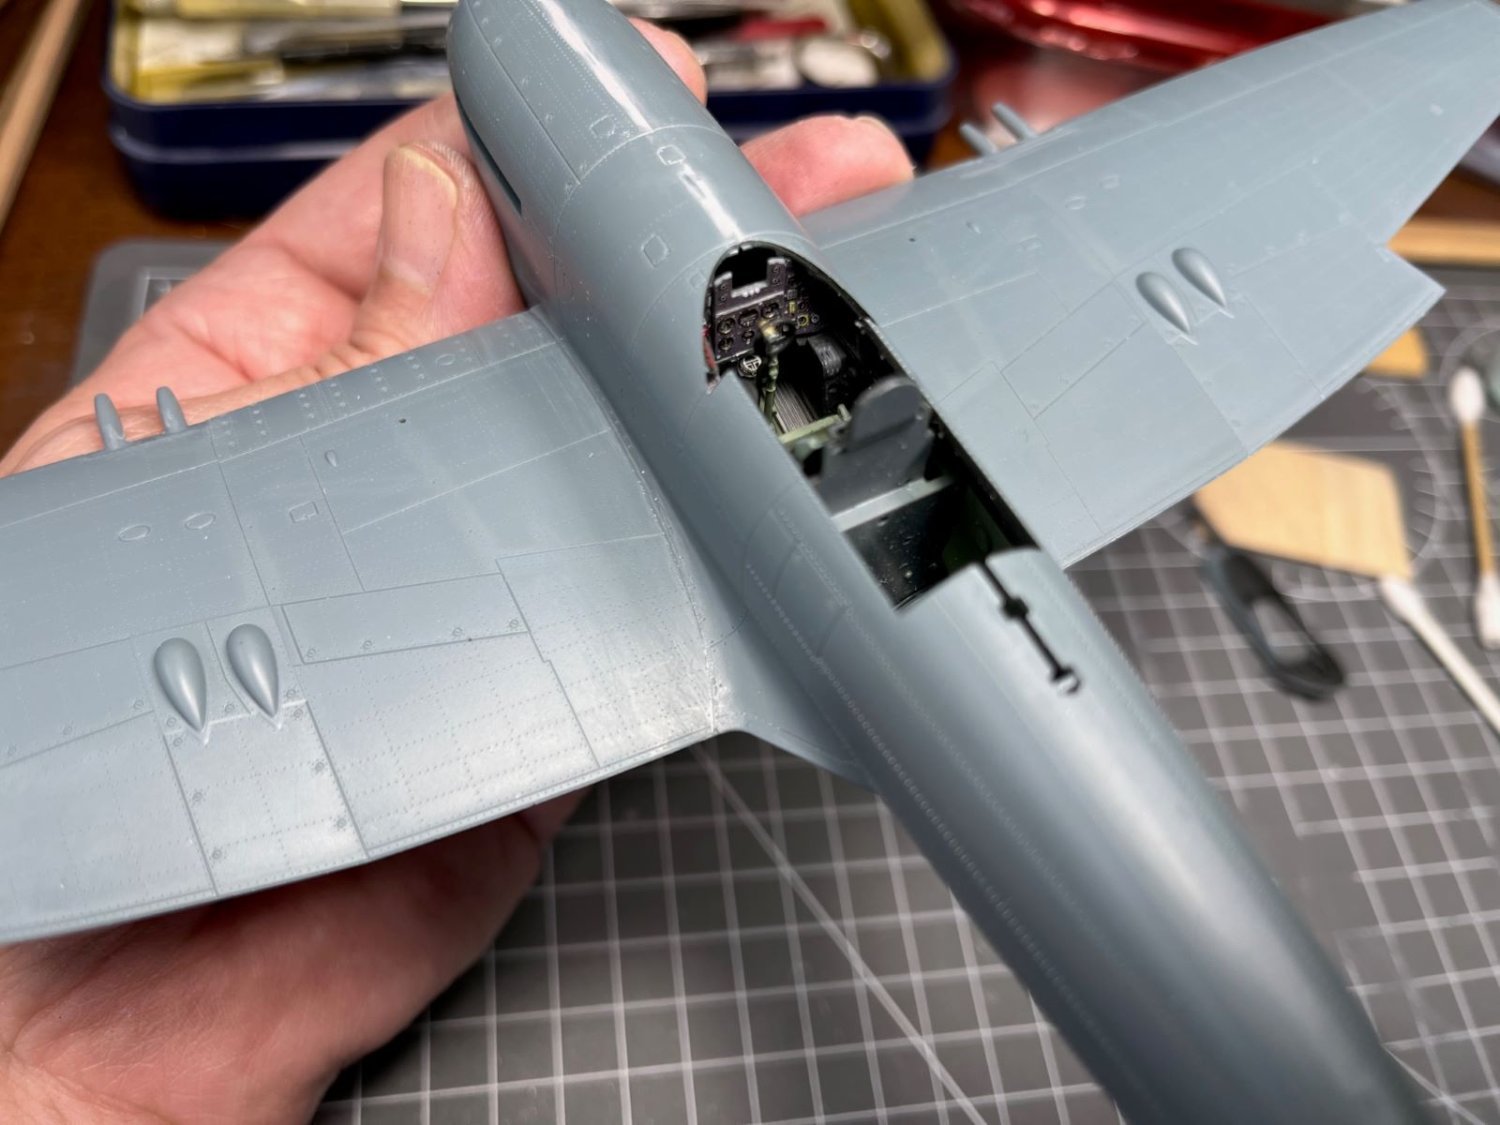
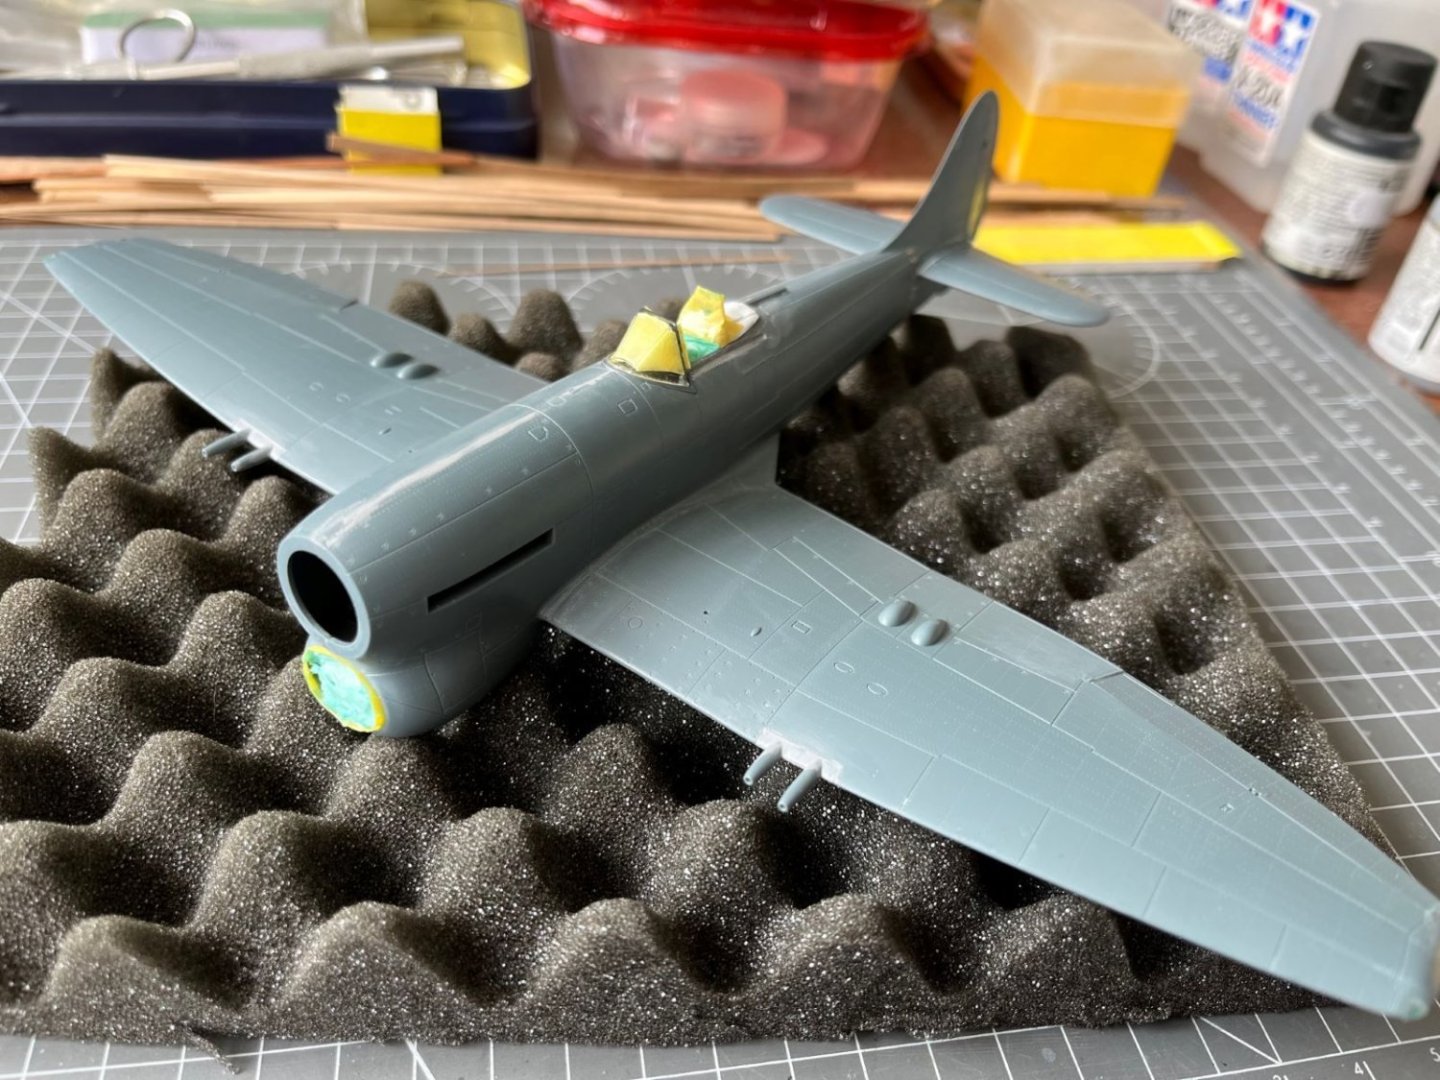
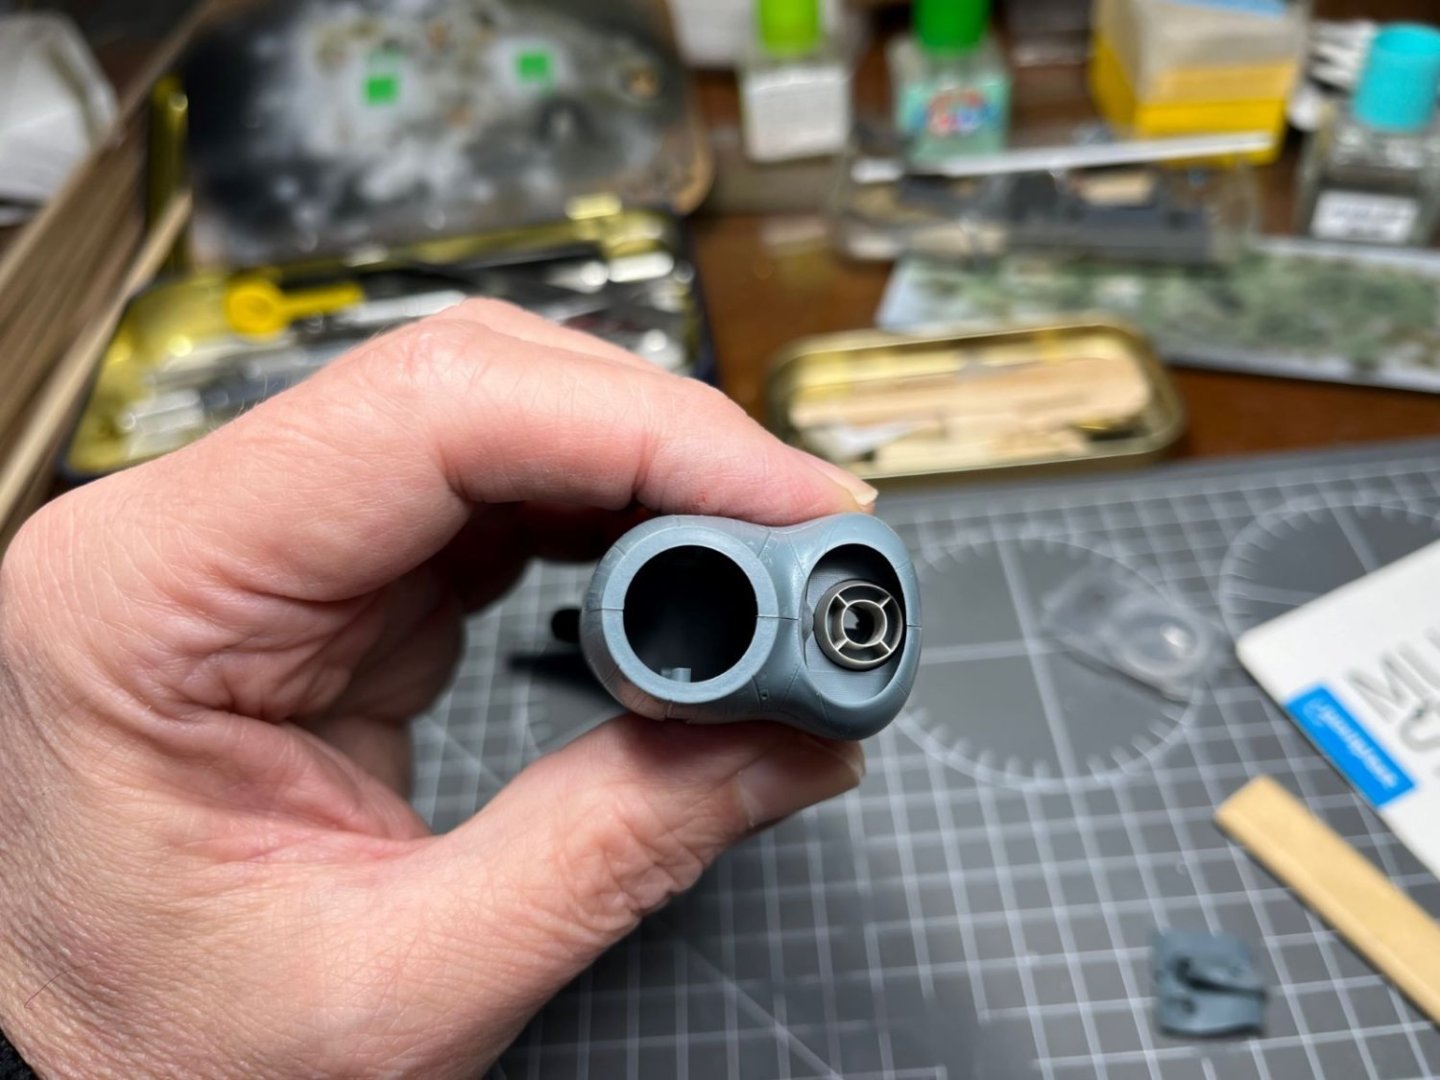
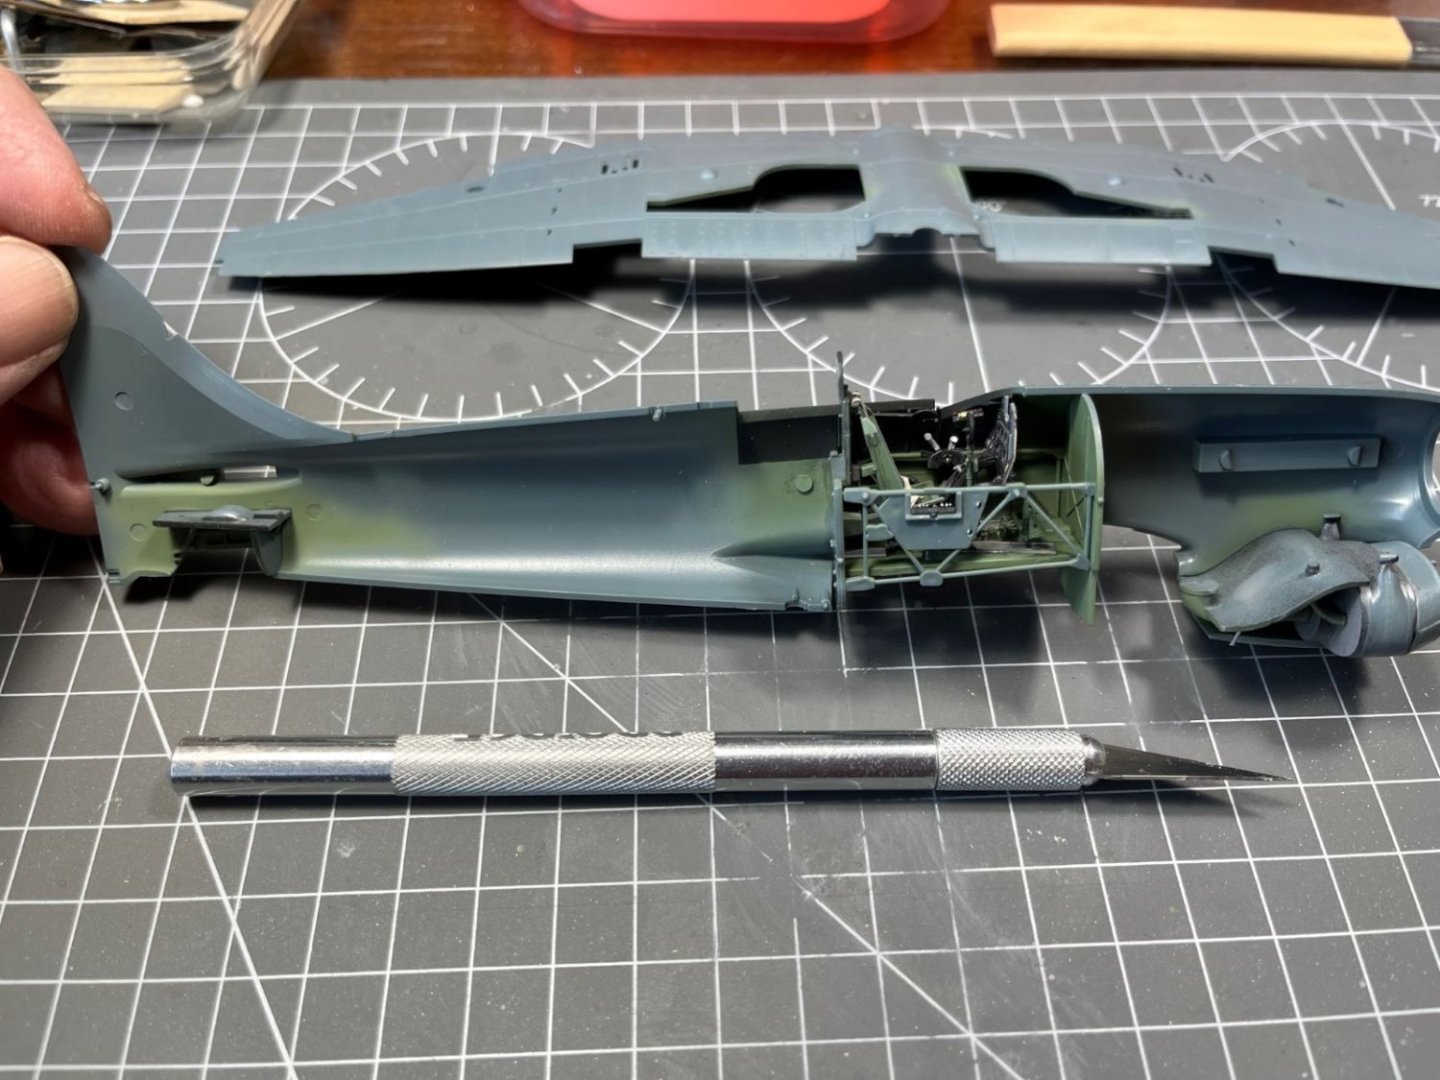
Hi, I resumed my Tempest and made some little progress. I bought the Eduard resin for central circular radiator which really is a fine addition to this nice kit. Cockpit completed and all the necessary elements were painted and added to the half fuselage. Finally the halves went together with no problems: That's all for now, wing will come next. Cheers, Dan

- 115 replies
-
- 13
-
-
Nice result Andy. Neat build, I like the way you have weathered the propeller. I built some time ago the Beaufighter and I find it a nice kit. A weak point to pay attention to is the assembly of the landing gear. Cheers, Dan
-
Yes, but for totally different reasons. In modern jets, the whole moving surface is because of the physics of transonic/supersonic flight. Cheers, Dan
-
Handley Page Heyford by RGL - FINISHED - Matchbox - 1/72
Danstream replied to RGL's topic in Non-ship/categorised builds
At the beginning of your build, I wrote: Actually, you greatly surpassed my prediction! You have an awesome model, full of lovely details. Congrats, Dan -
Excellent results, congratulations CDW. Take a well deserved virtual applause! Dan
-
Dear all, I am not very responsive in these days, because I am busy with my 'other' work and I will be also busy with repainting the rooms of the house (which FS no. I am going to use, you might wonder). Hence, my modeling output rate, which was anyway very slow, will go down to zero for the next couple of weeks. I will continue to read about your progress though. Best regards, Dan
- 115 replies
-
- 10
-
-
Handley Page Heyford by RGL - FINISHED - Matchbox - 1/72
Danstream replied to RGL's topic in Non-ship/categorised builds
Great! With some care, it should turn out a beauty. Does anybody know the reason for that 'inverted' configuration? Cheers, Dan