HOLIDAY DONATION DRIVE - SUPPORT MSW - DO YOUR PART TO KEEP THIS GREAT FORUM GOING! (Only 72 donations so far out of 49,000 members - Can we at least get 100? C'mon guys!)
×

.jpg.2c2c29e54623bd7b752bc2cdab599665.jpg)
Danstream
-
Posts
747 -
Joined
-
Last visited
Content Type
Profiles
Forums
Gallery
Events
Everything posted by Danstream
-
.thumb.jpg.c459ce4140b54c12eddb8eedfd446df3.jpg) Hi all, after my post above where I referred to Tamiya XF-54 for the RAF ocean grey, I searched on internet and found that this color is not a good match because apparently it doesn't have enough blueness. Not wanting to give you wrong indications, I am writing this correction. However, Tamiya is now producing their XF-82 which is supposed to match specifically the RAF OG. Perhaps, you could search for this paint just to get some clue about how it looks like. Obviously, I will get this latter color for my model (or the equivalent Gunze). Cheers, Dan
Hi all, after my post above where I referred to Tamiya XF-54 for the RAF ocean grey, I searched on internet and found that this color is not a good match because apparently it doesn't have enough blueness. Not wanting to give you wrong indications, I am writing this correction. However, Tamiya is now producing their XF-82 which is supposed to match specifically the RAF OG. Perhaps, you could search for this paint just to get some clue about how it looks like. Obviously, I will get this latter color for my model (or the equivalent Gunze). Cheers, Dan -
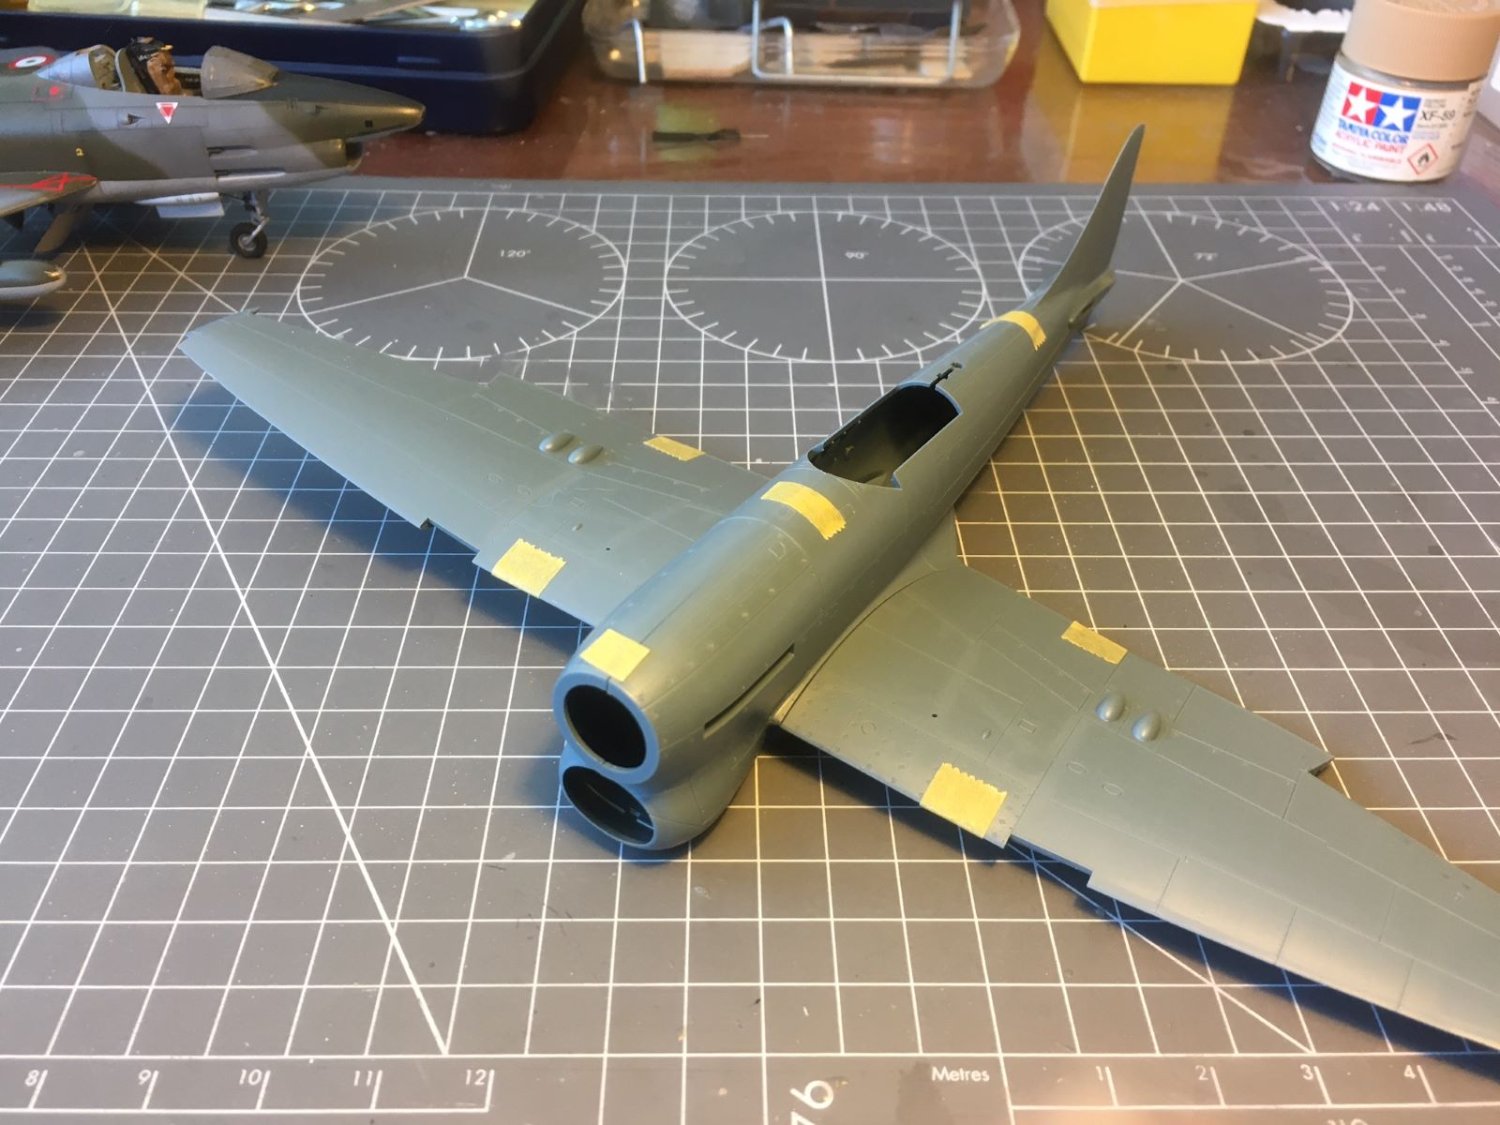
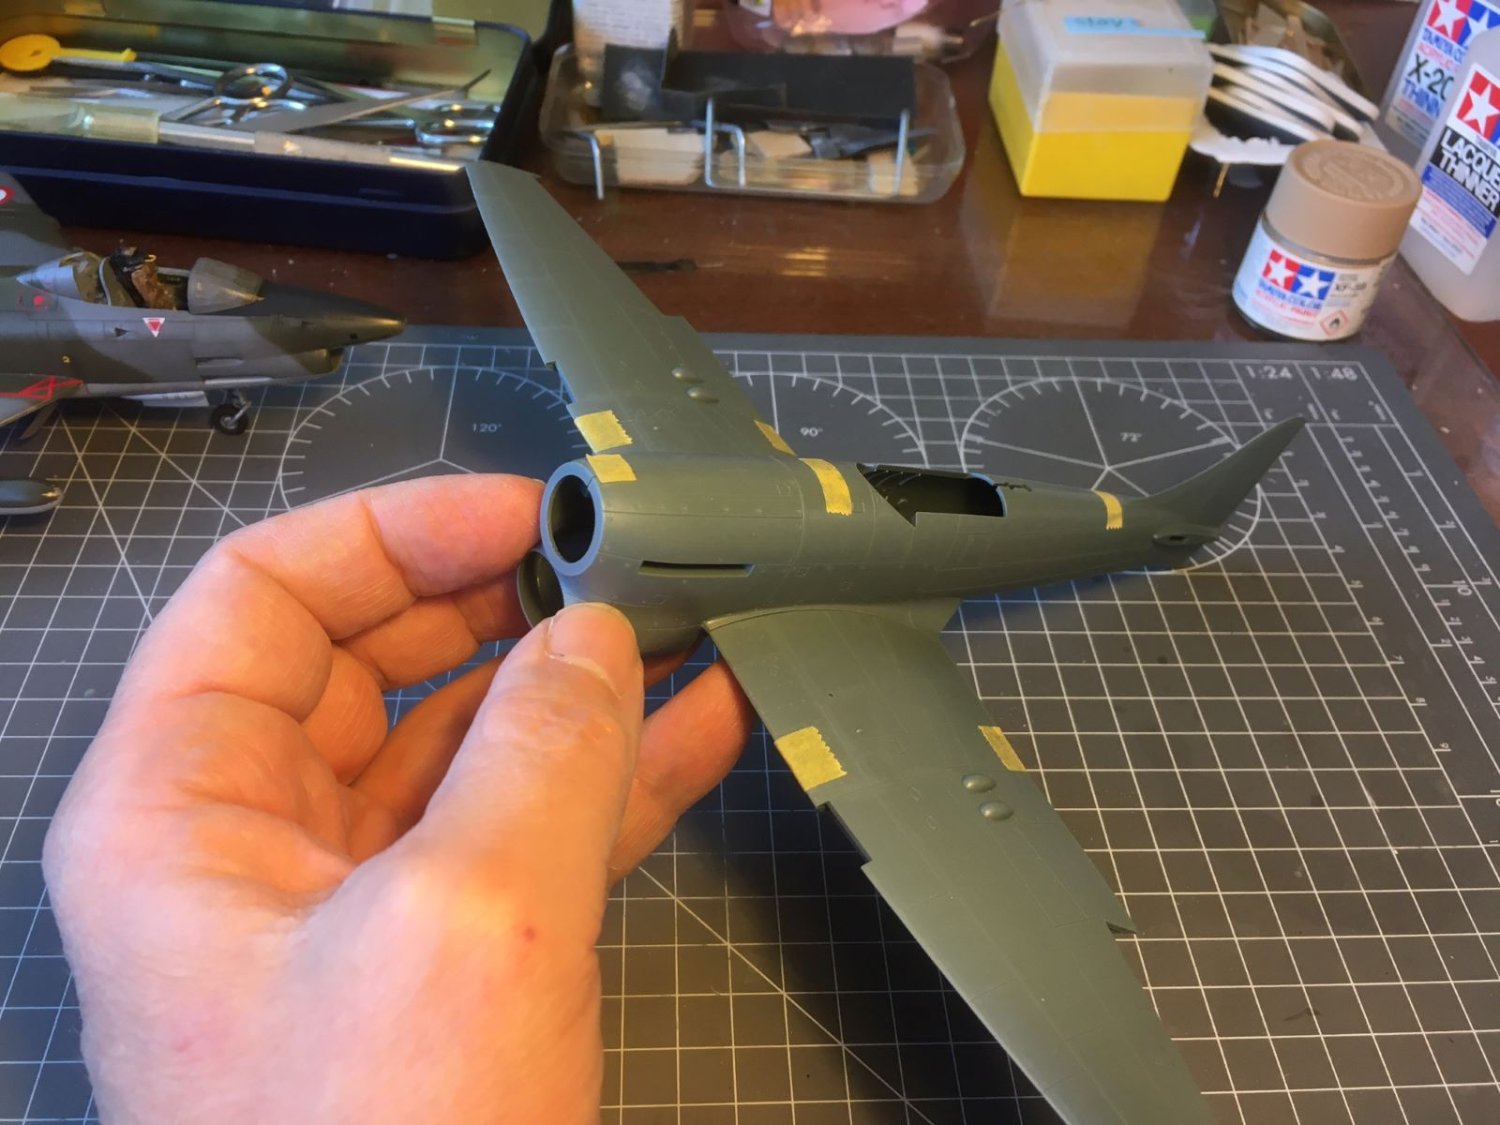
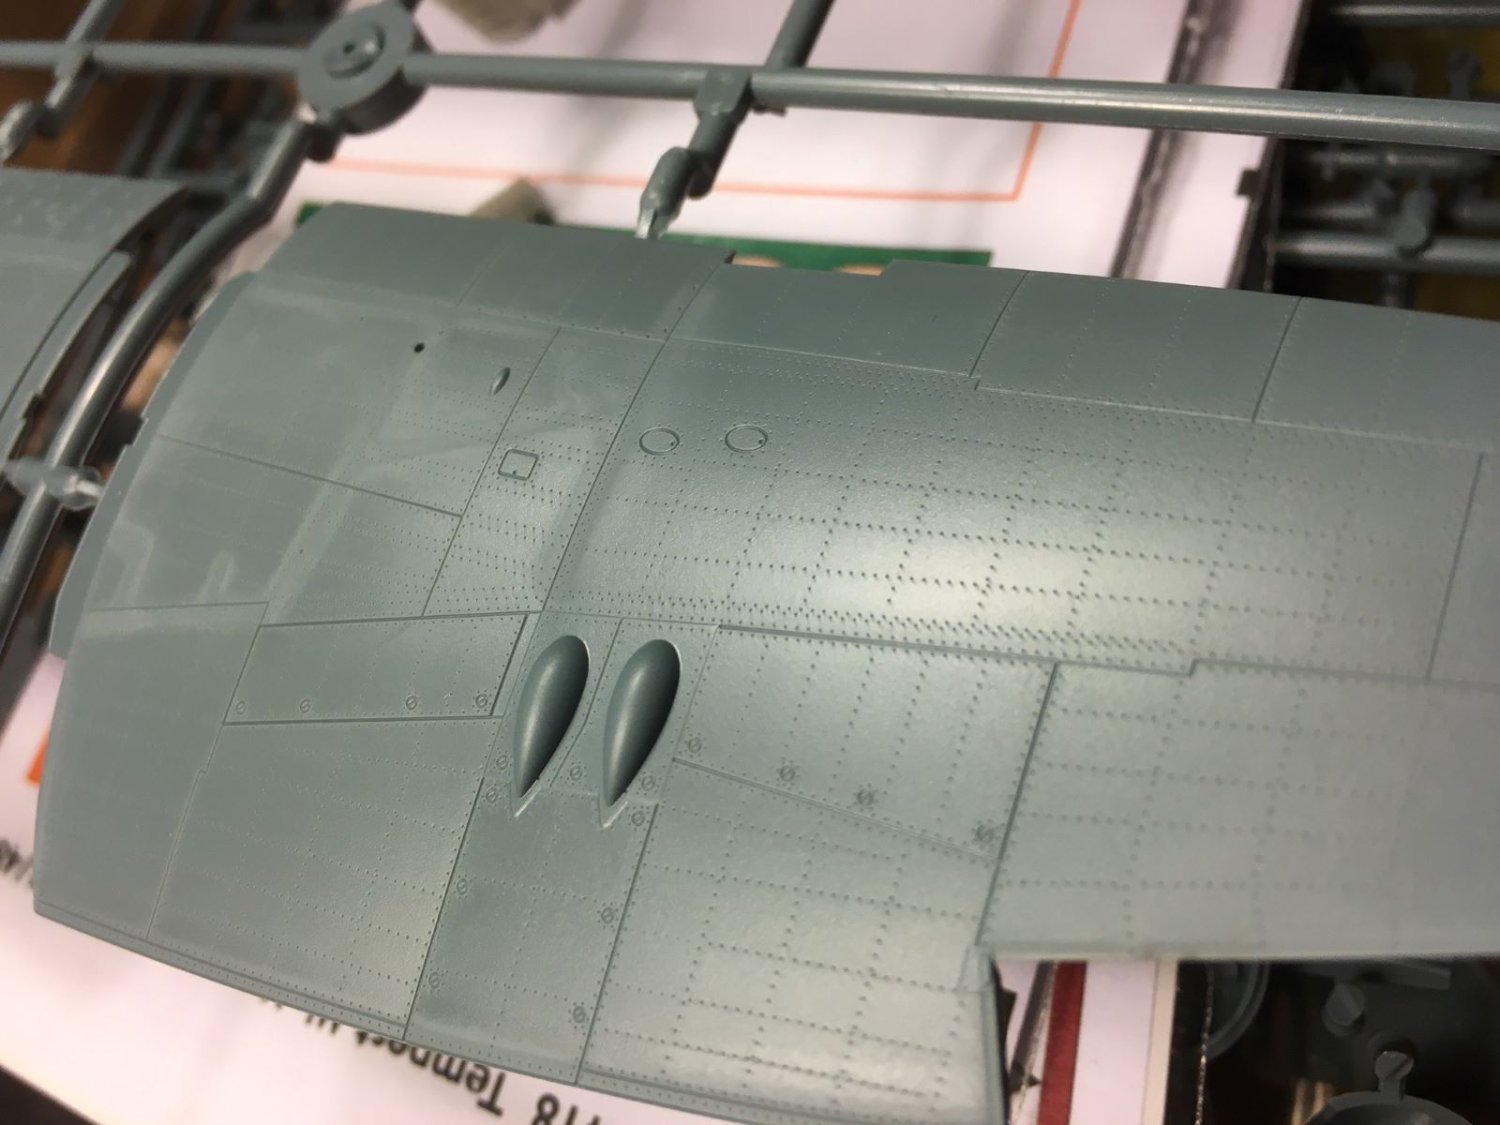
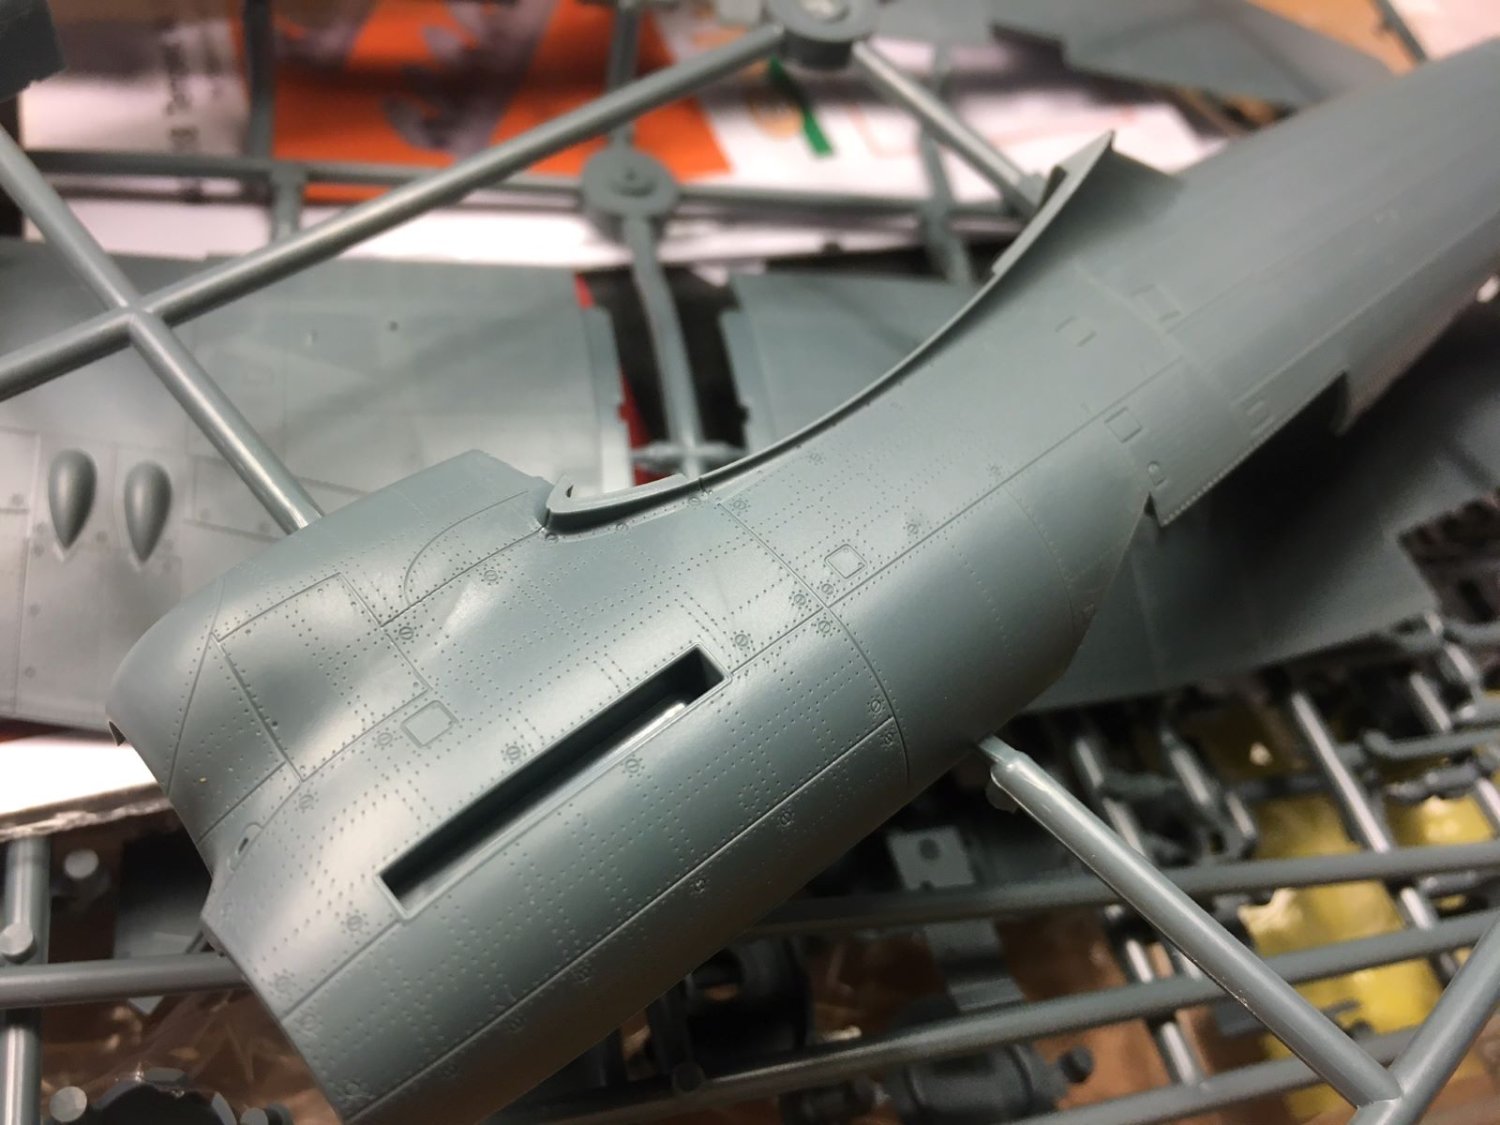
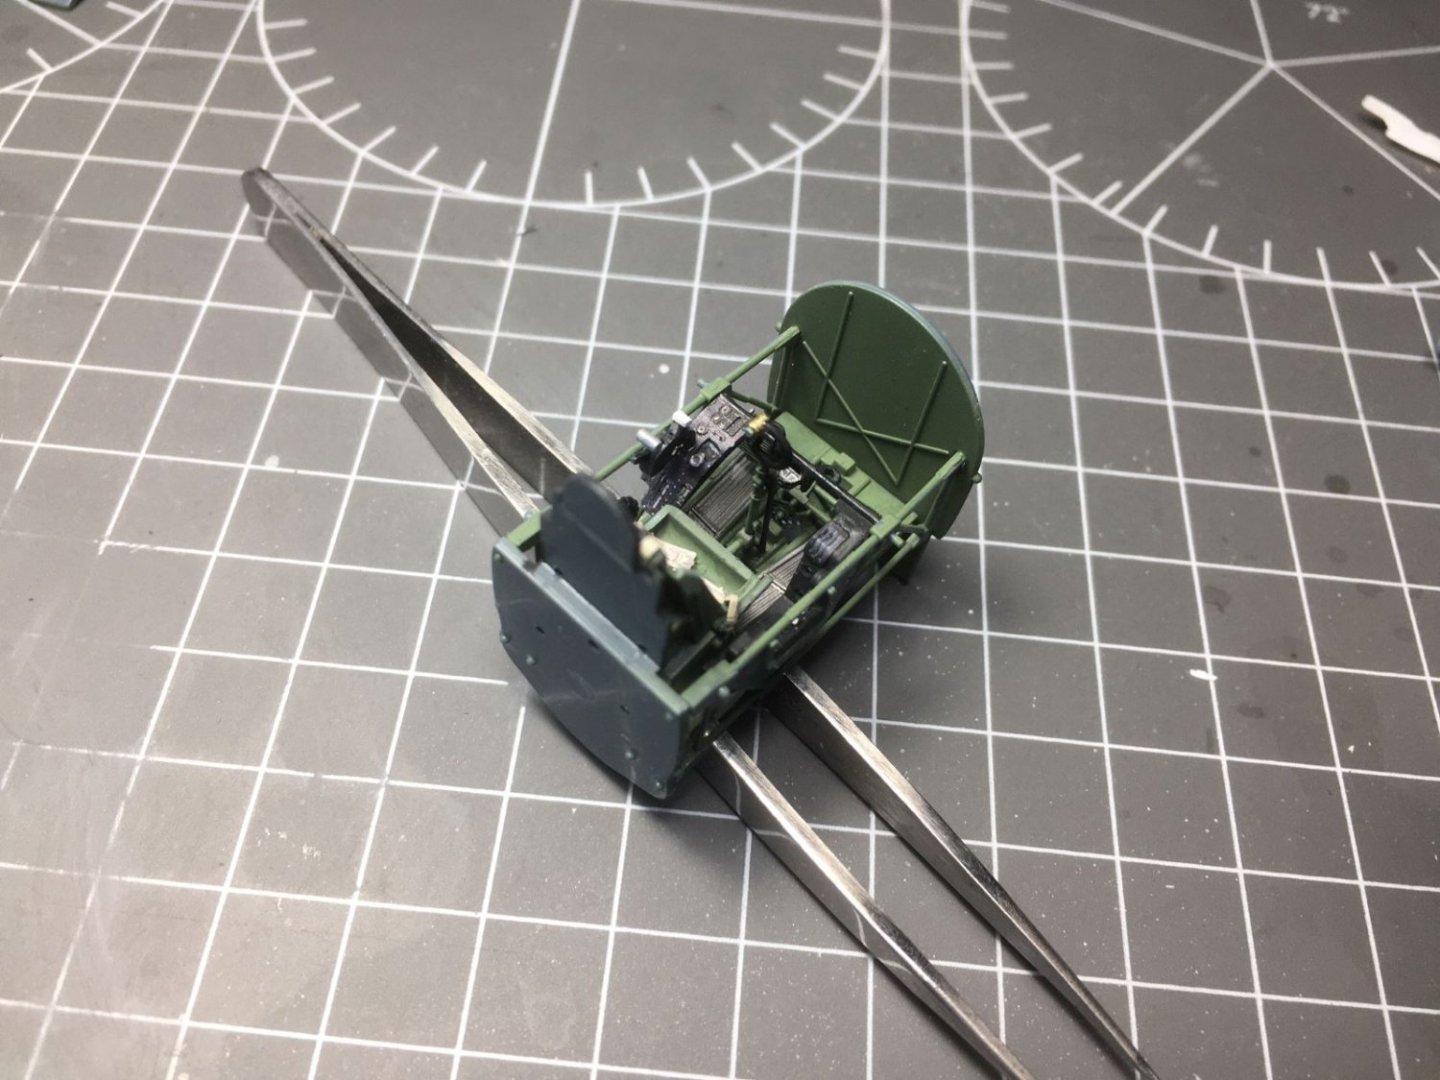
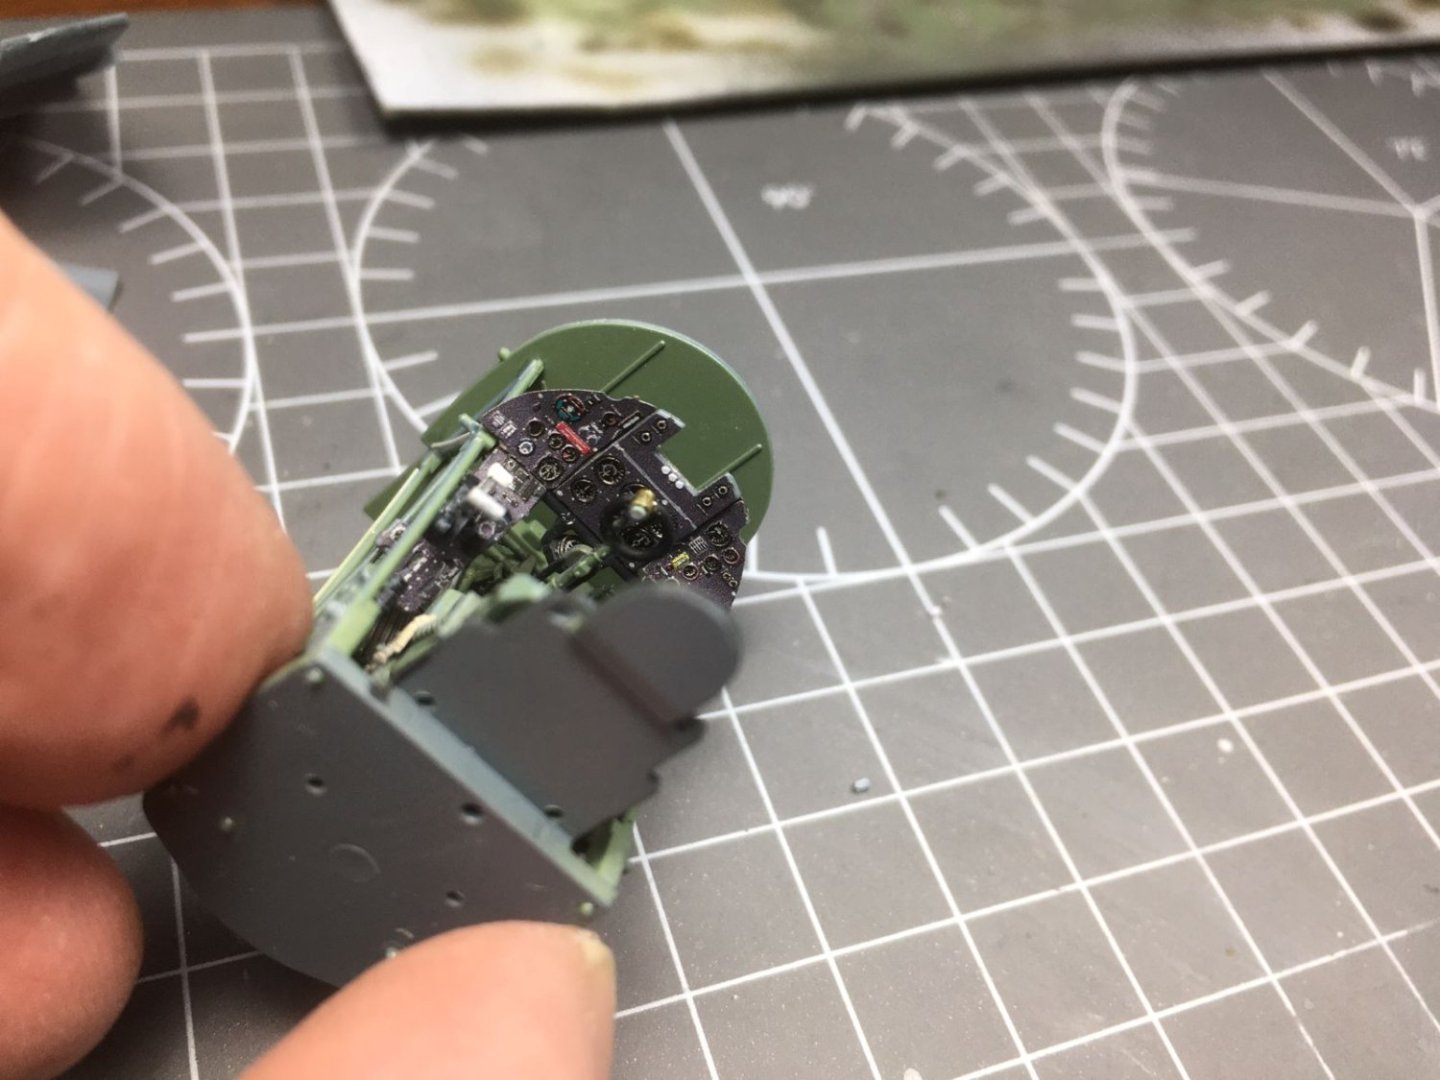
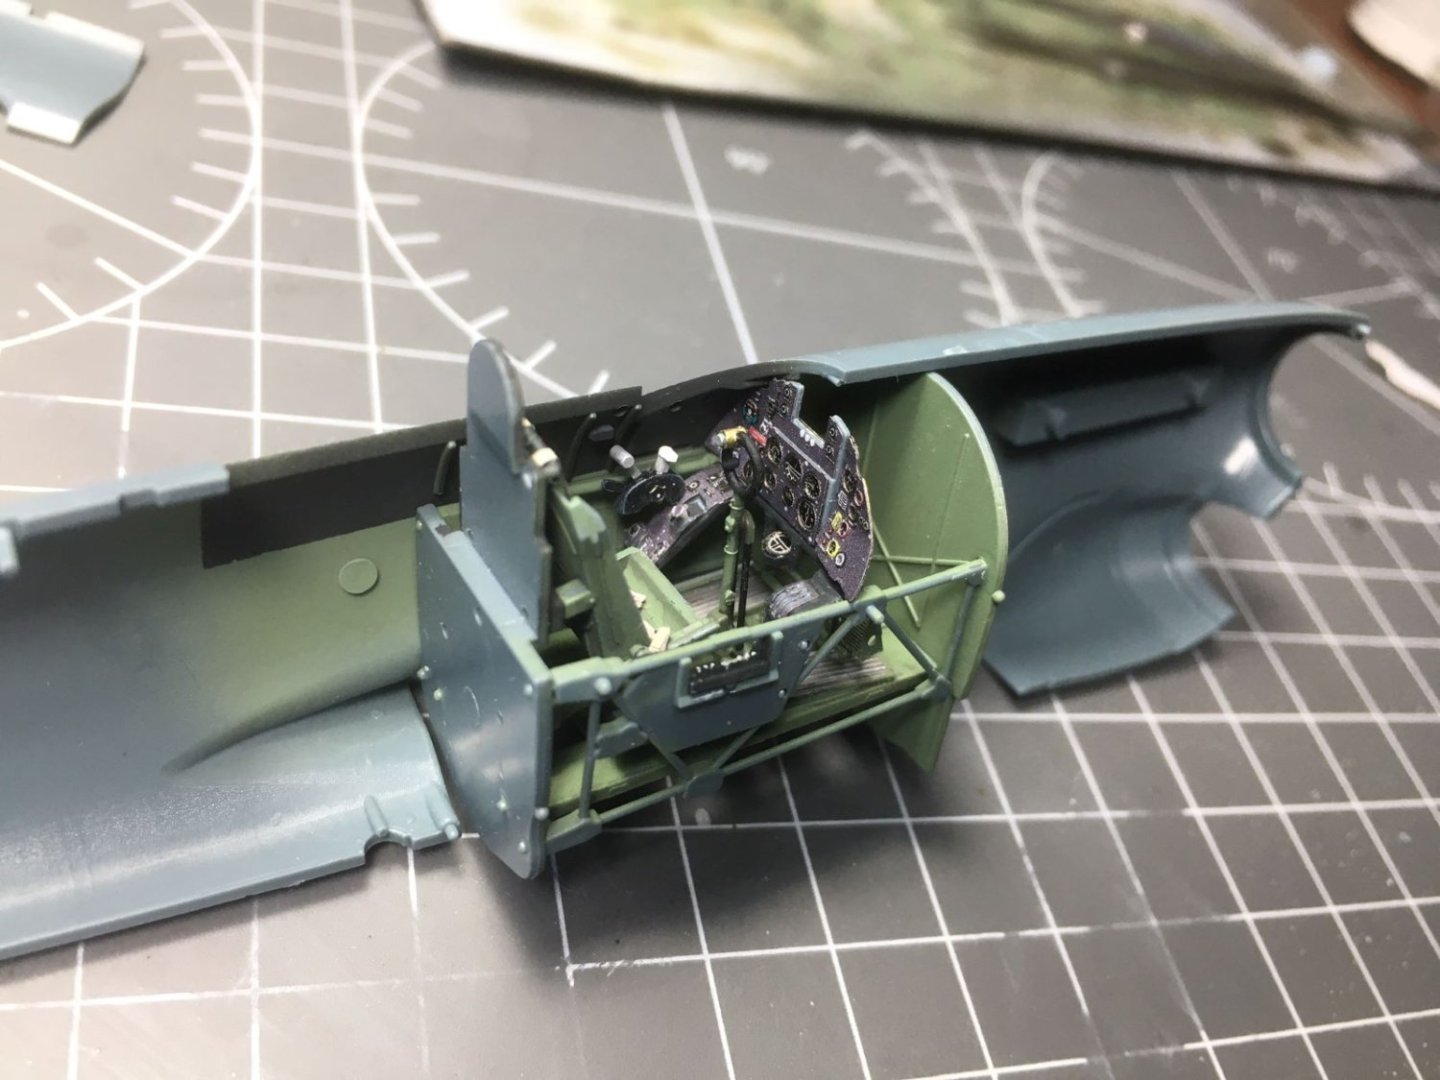
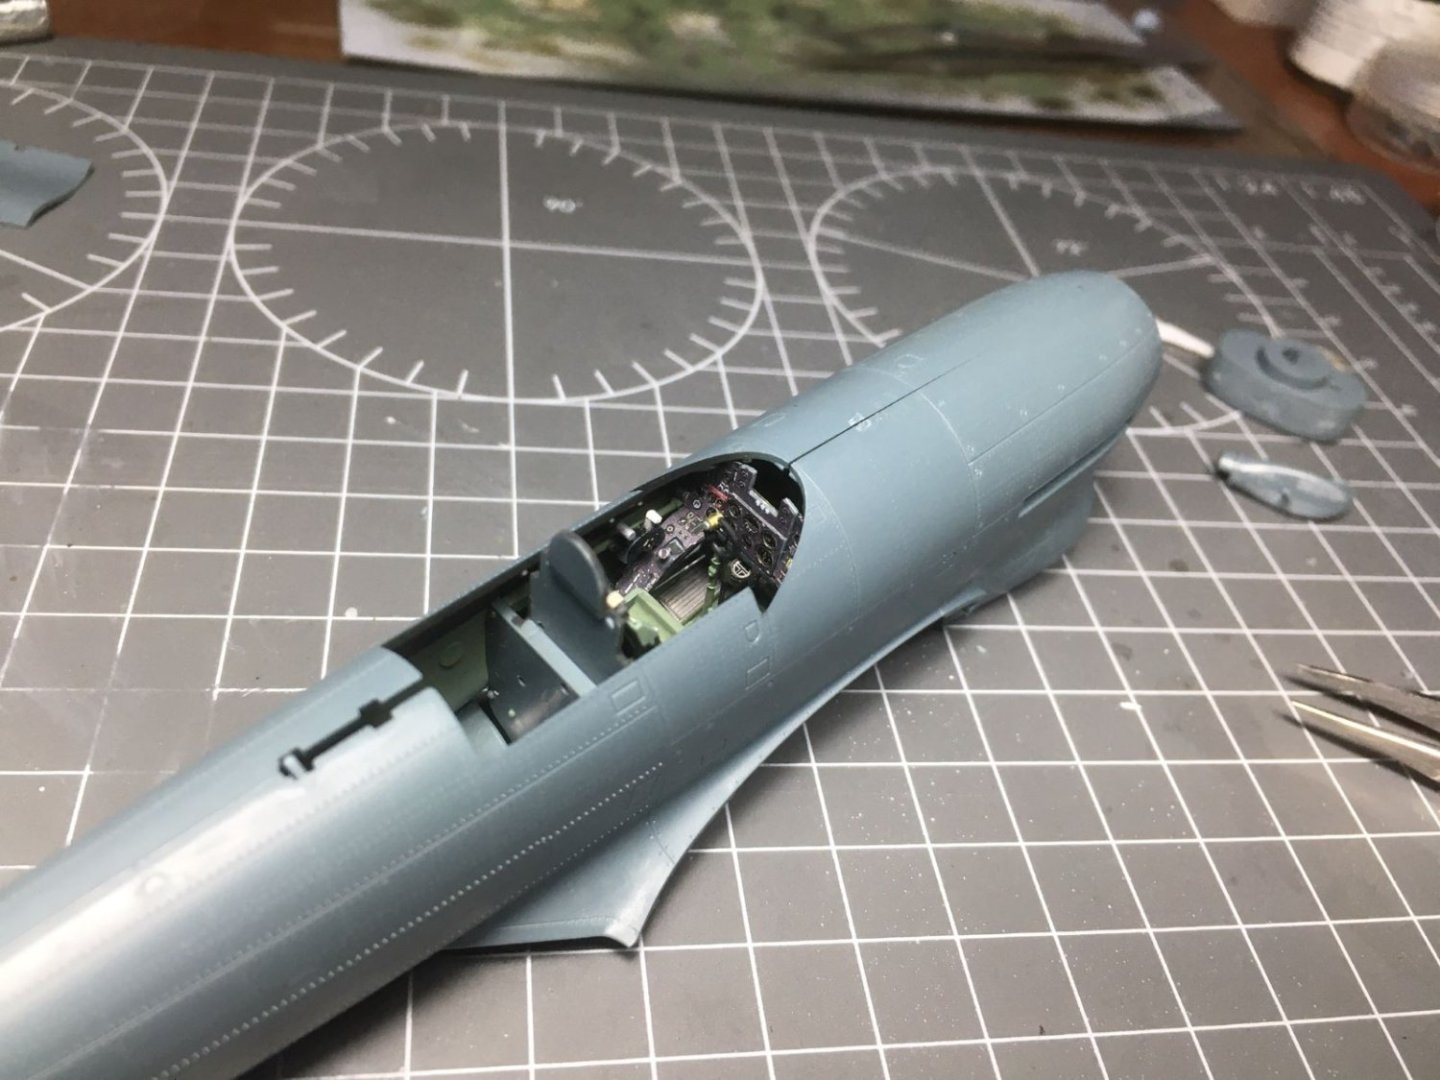
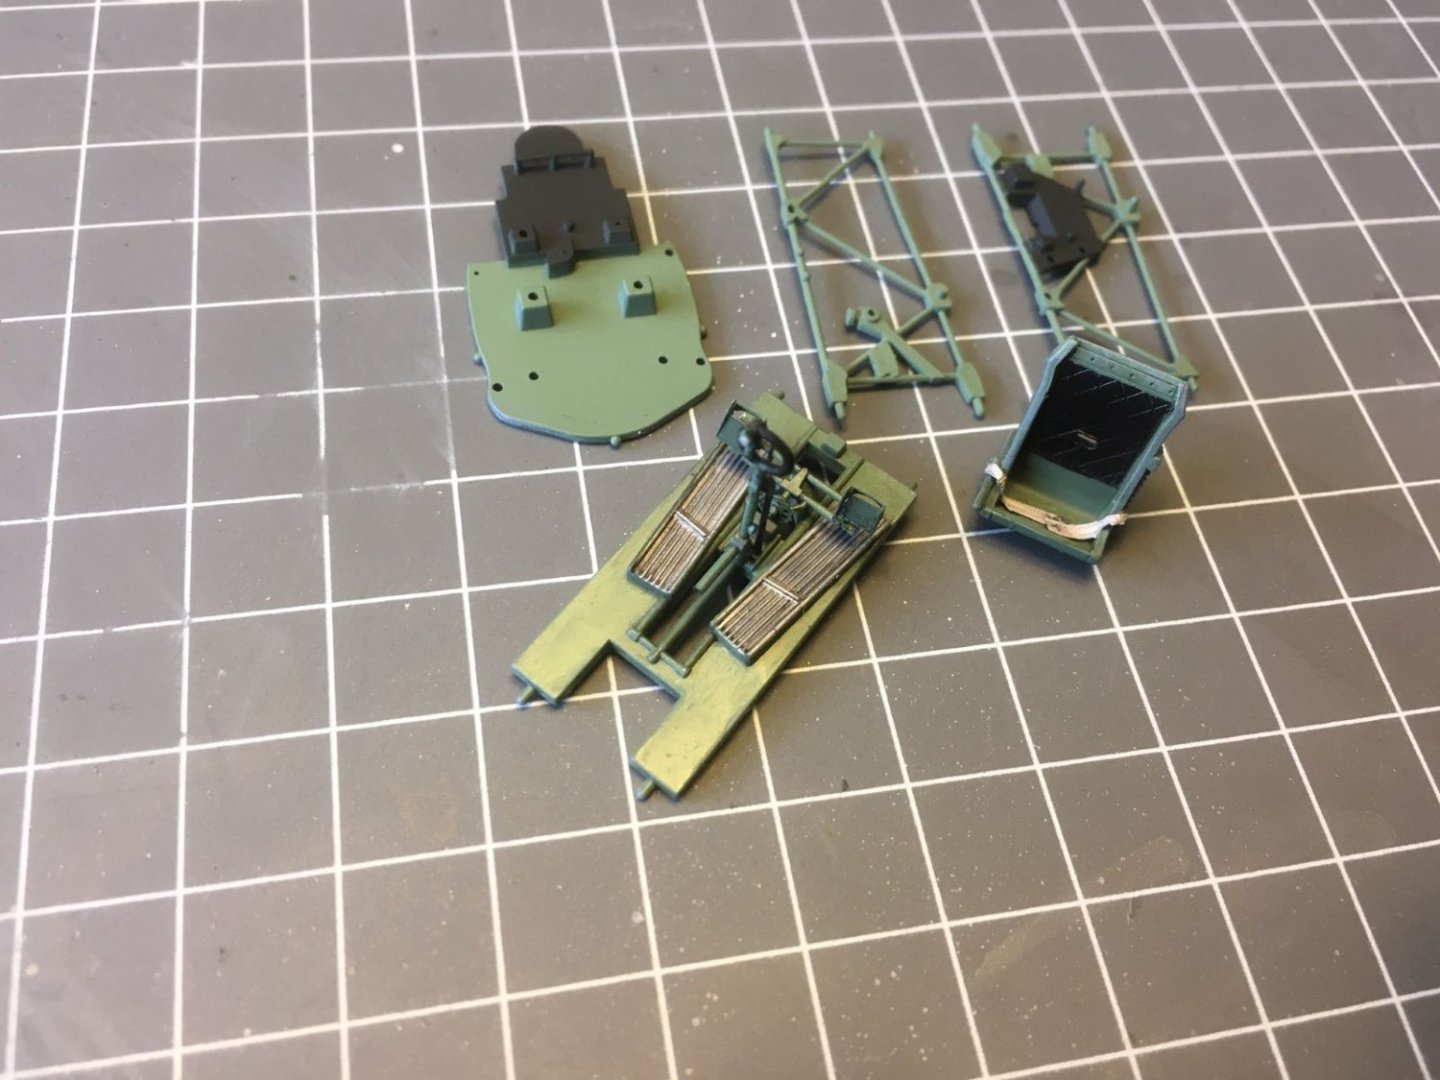
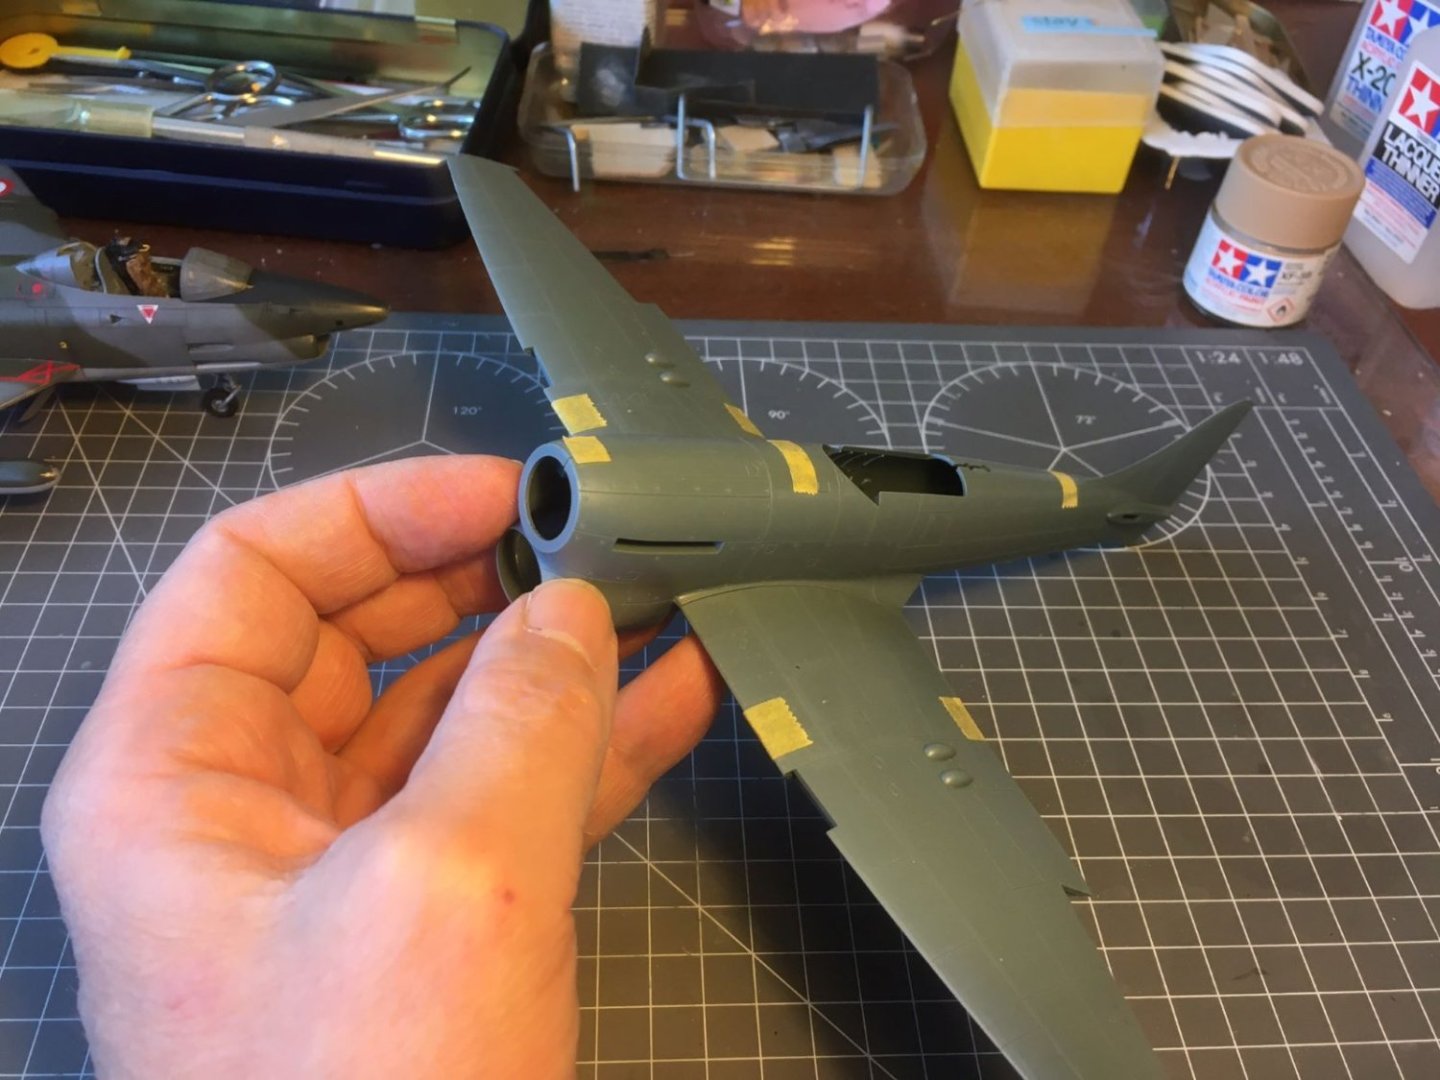
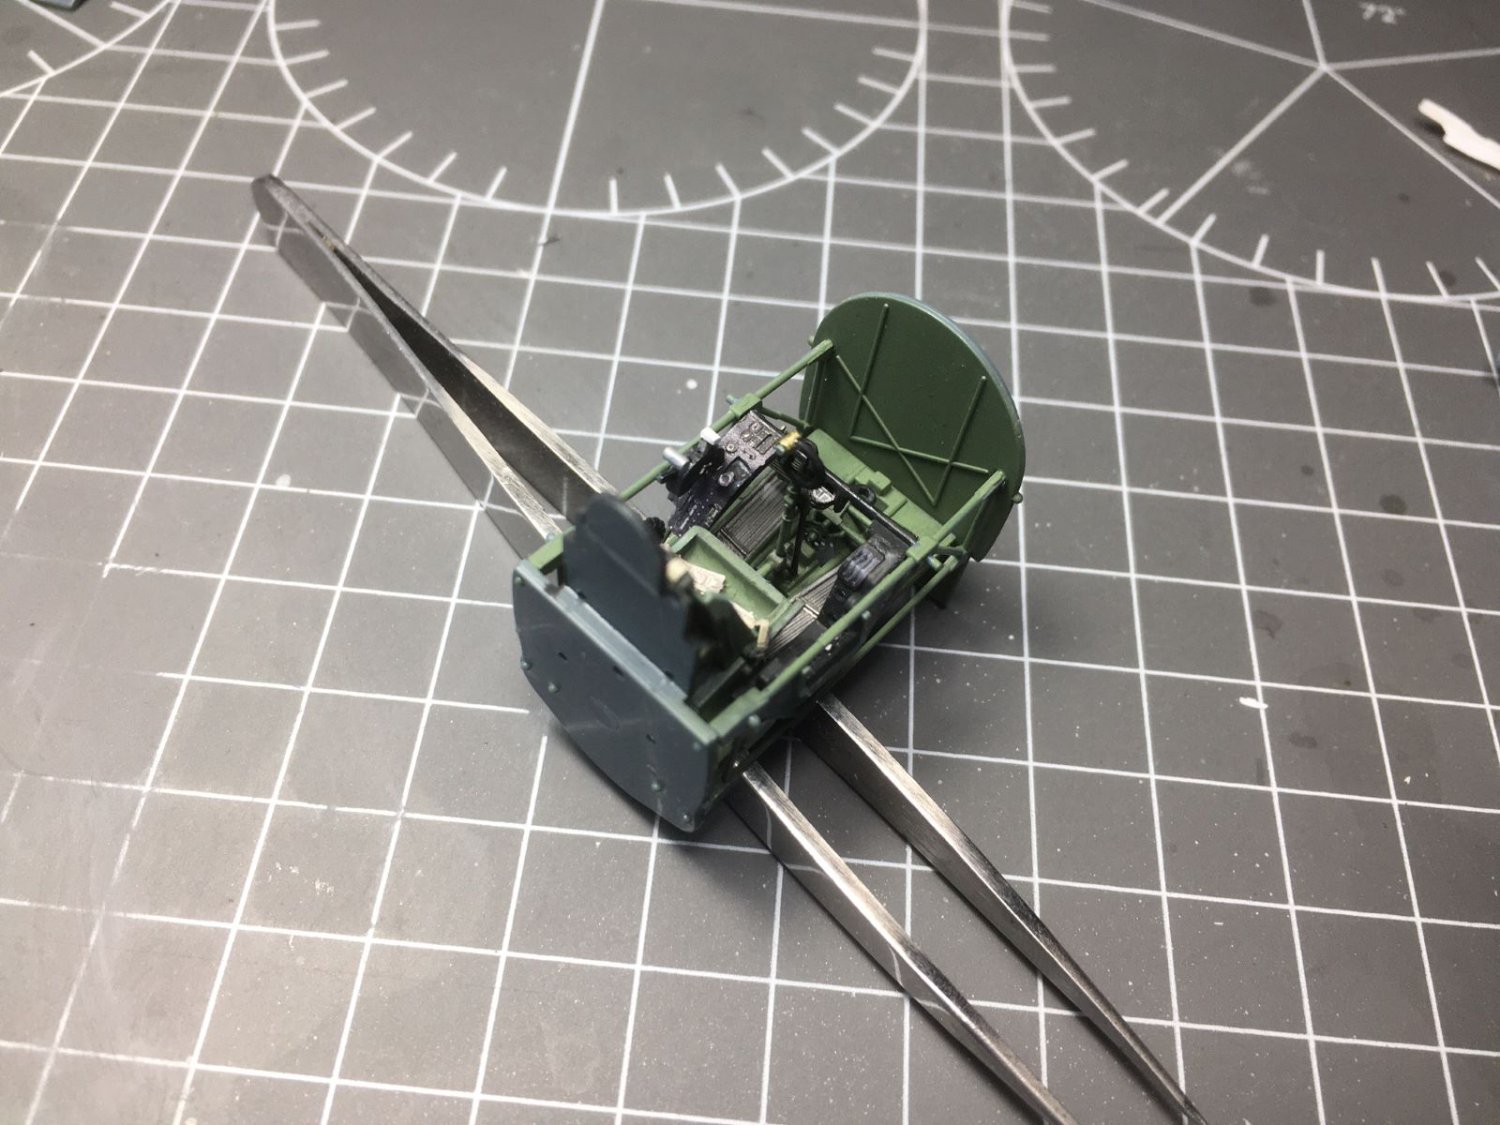
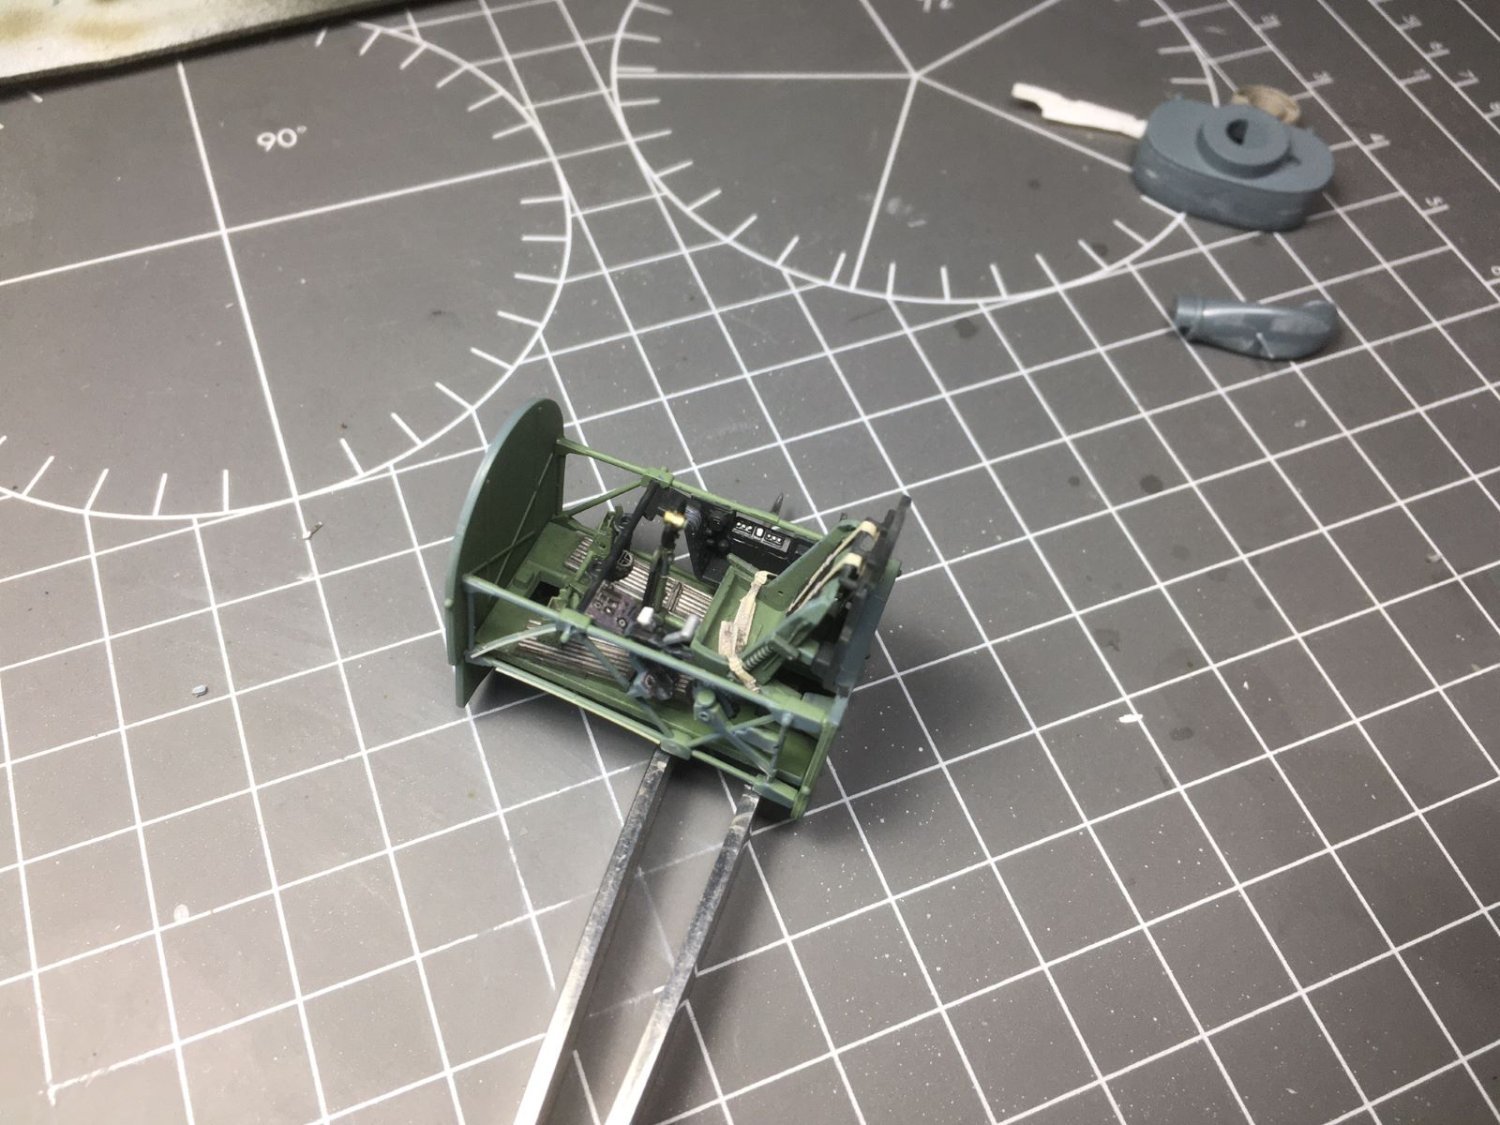
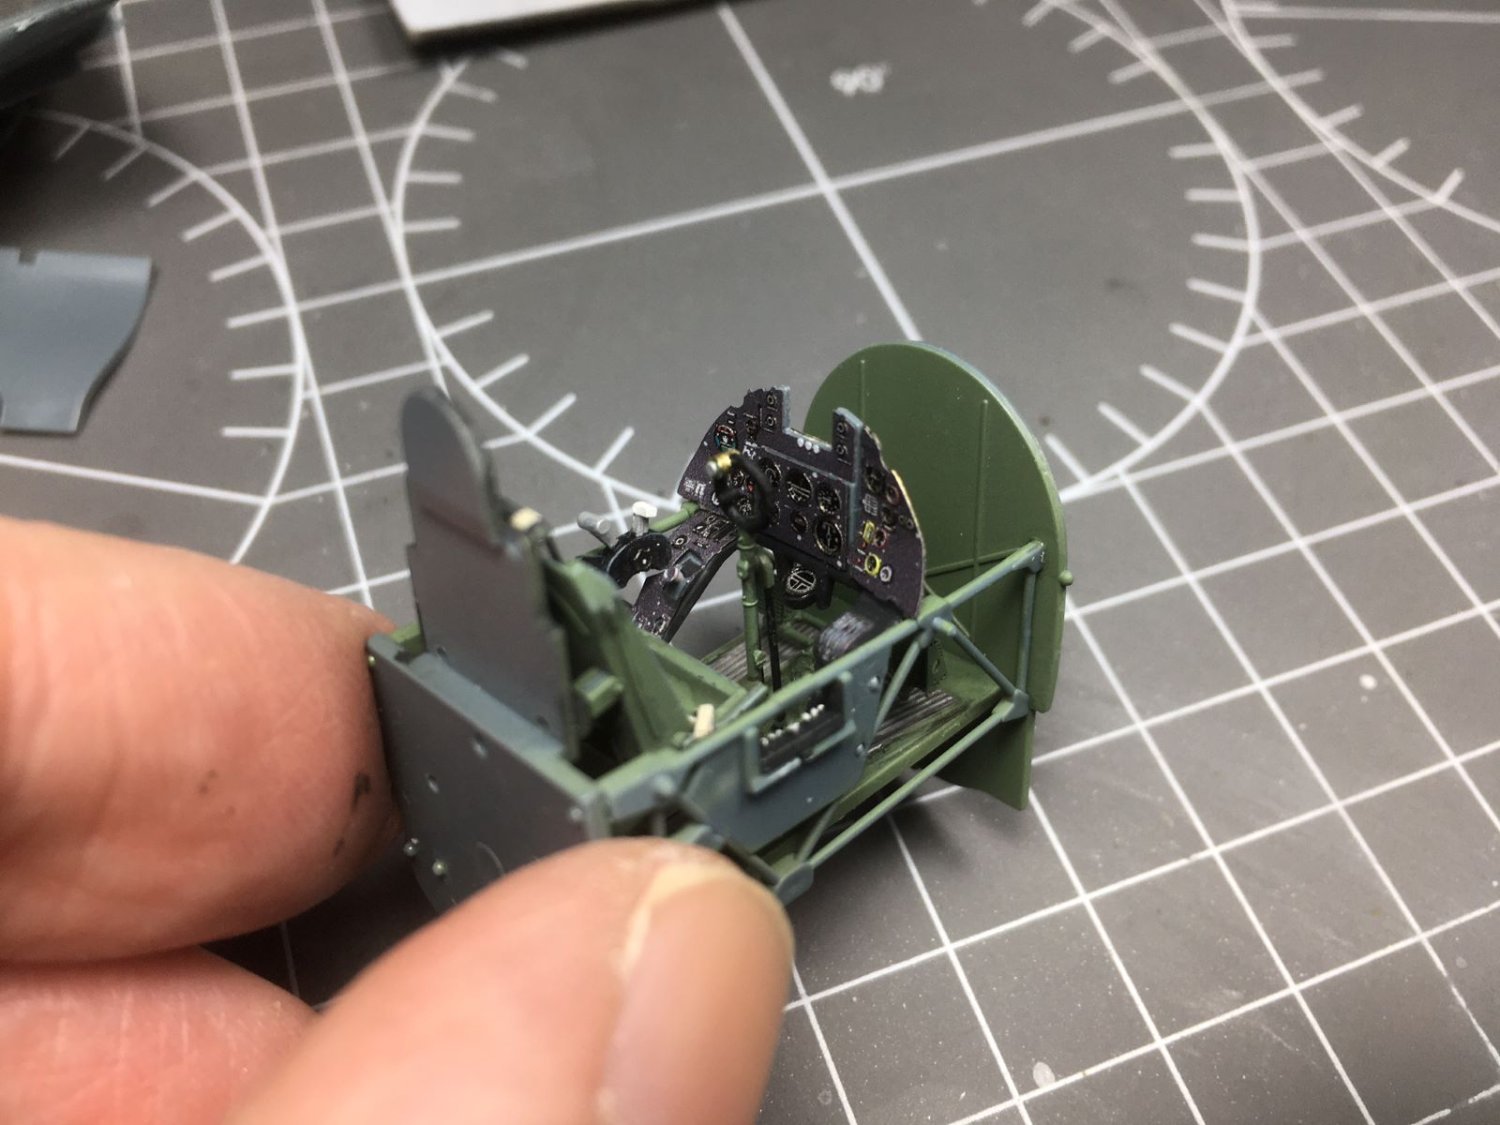
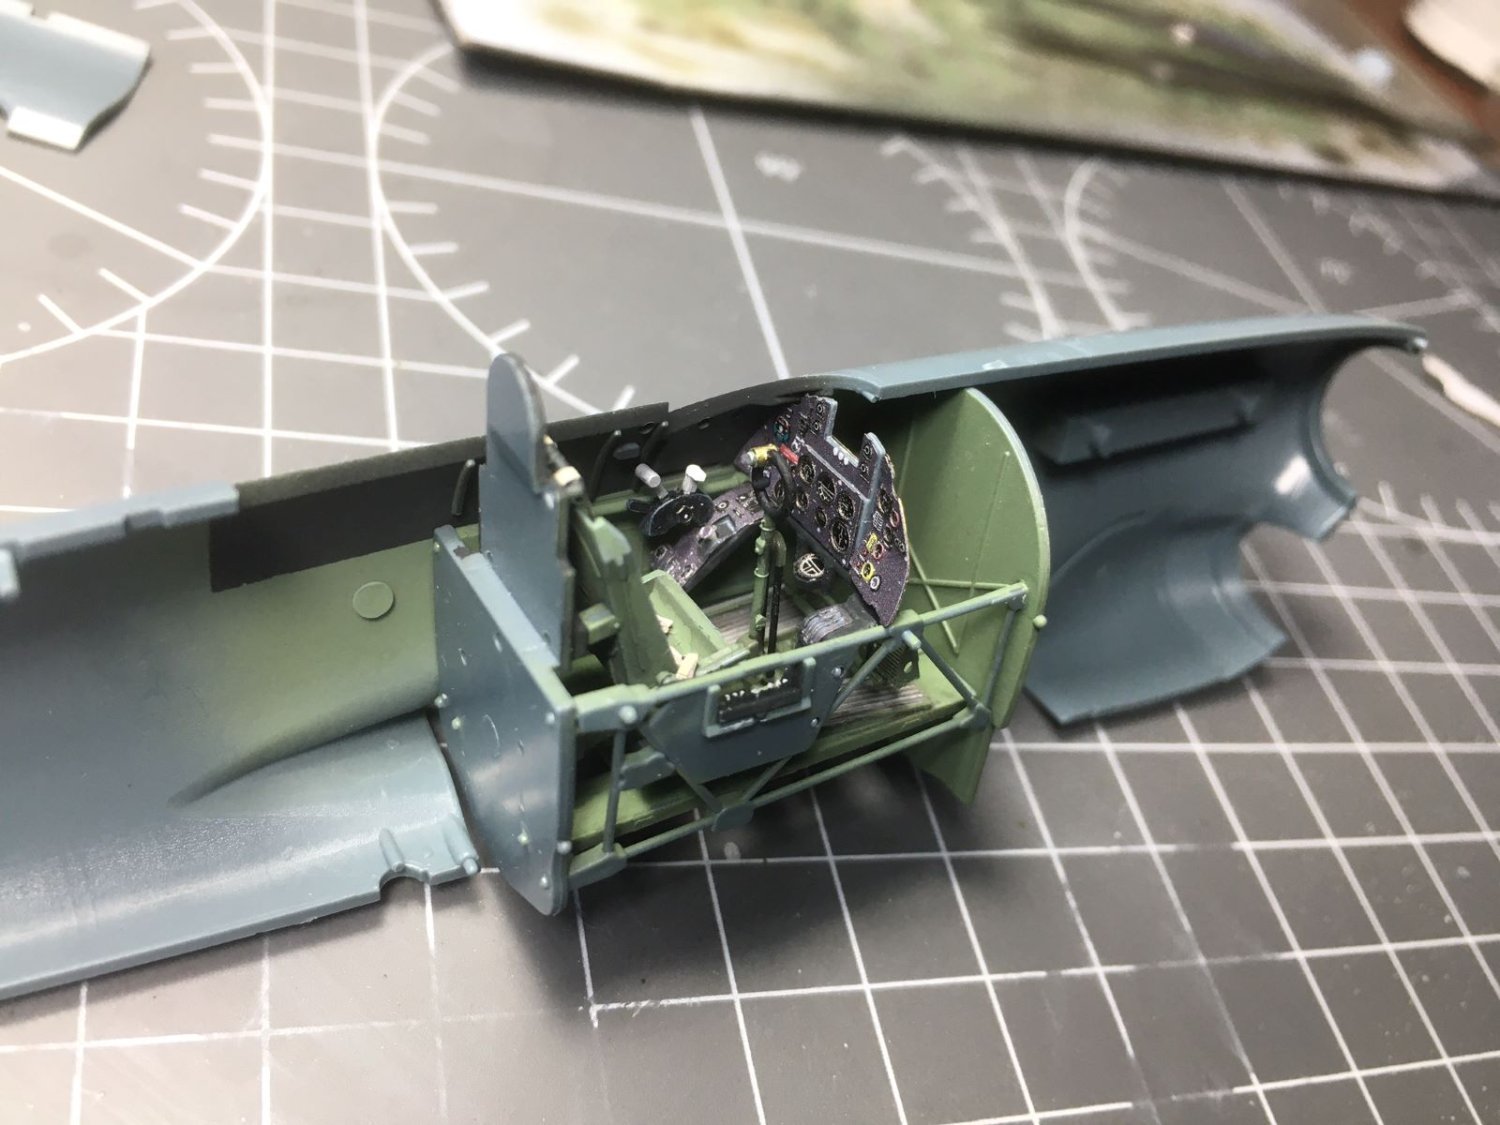
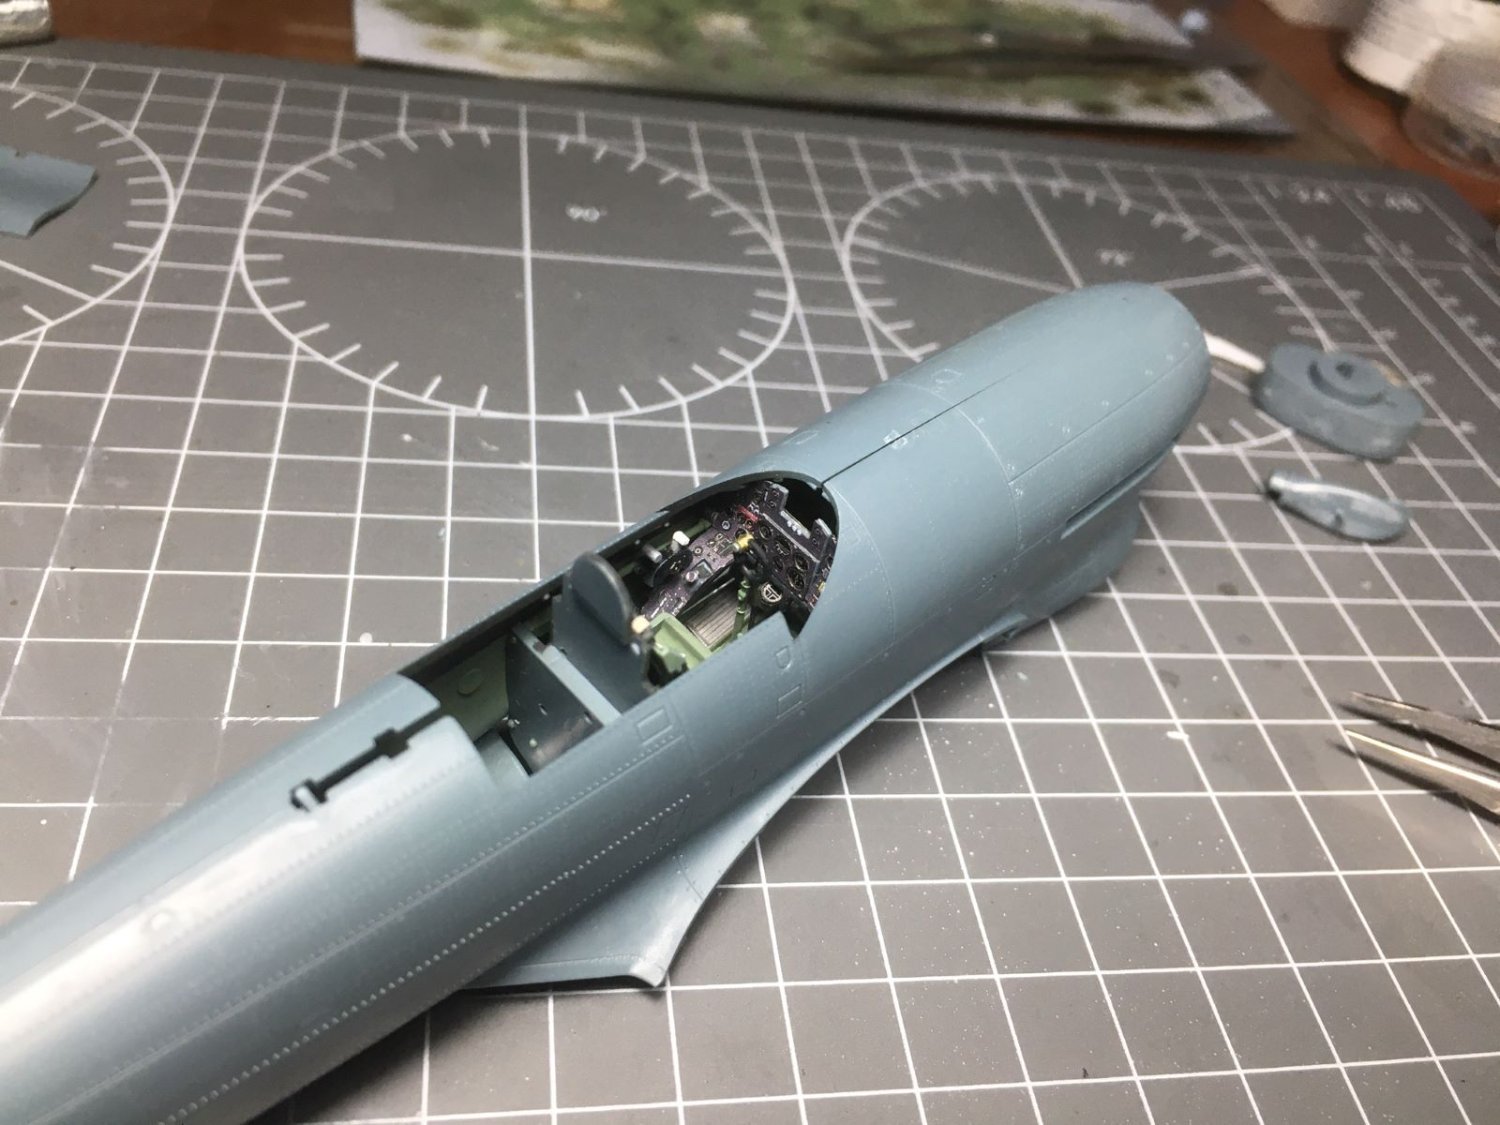
Back to my Tempest, I finished the office which took some time because composed by many small parts and photoetched included in the kit. Cradle made of tubes, typical of Hawker of that period (stressed skin, frames and stringers from the tail to the cockpit rear bulkhead, tubular truss for the cockpit to firewall and engine bearer made also with a tubular truss). Unfortunately, I forgot to thin the edges of the seat which are obviously too thick. Now it is too late and I will have to live with that. Then, the nice photoetched IP made of five parts: (excuse my big fingers dirty of paint). The cockpit posed inside the fuselage: Probably, not much will be seen once the fuselage is closed up. This is a dry fit: That is all for now, preparing the chin radiator that needs to be included when closing the halves. Cheers, Dan


- 115 replies
-
- 15
-

-

-
I am a user of Tamiya acrylics and for my Tempest I am going to use theirs XF-54 Dark Sea Grey and XF-81Dark Green (RAF). I find that these are good matches. These are also the color I used for early NATO camouflage. Cheers, Dan
- 146 replies
-
- 10
-
-
Very accurately done, a good dose of patience, but it looks nice. Cheers, Dan
-
Thanks Mark! That's the reason I took that pictures. I had momentarily put the model on the sill and it looked so cool that I quickly took a picture of it. Thanks Andrew, I spent an awful lot of time with that model, I also riveted it, enlarged the diameter of the rear fuselage, added new vortex vanes, etc., etc. Practically there wasn't a single piece of the kit that I didn't not scratched or modified. But at the end of the day, I was quite satisfied with the results. Dan
-
Indeed, Re-scribing is a real chore, usually I do the strict necessary to restore panel lines after filling and sanding of junctions, but this time I re-scribed everything and corrected some inaccurate paneling pattern. In many cases, I had to redo lines because slipping and scratches, not always l had luck at the first attempt. Thank you for your compliments, Dan
-
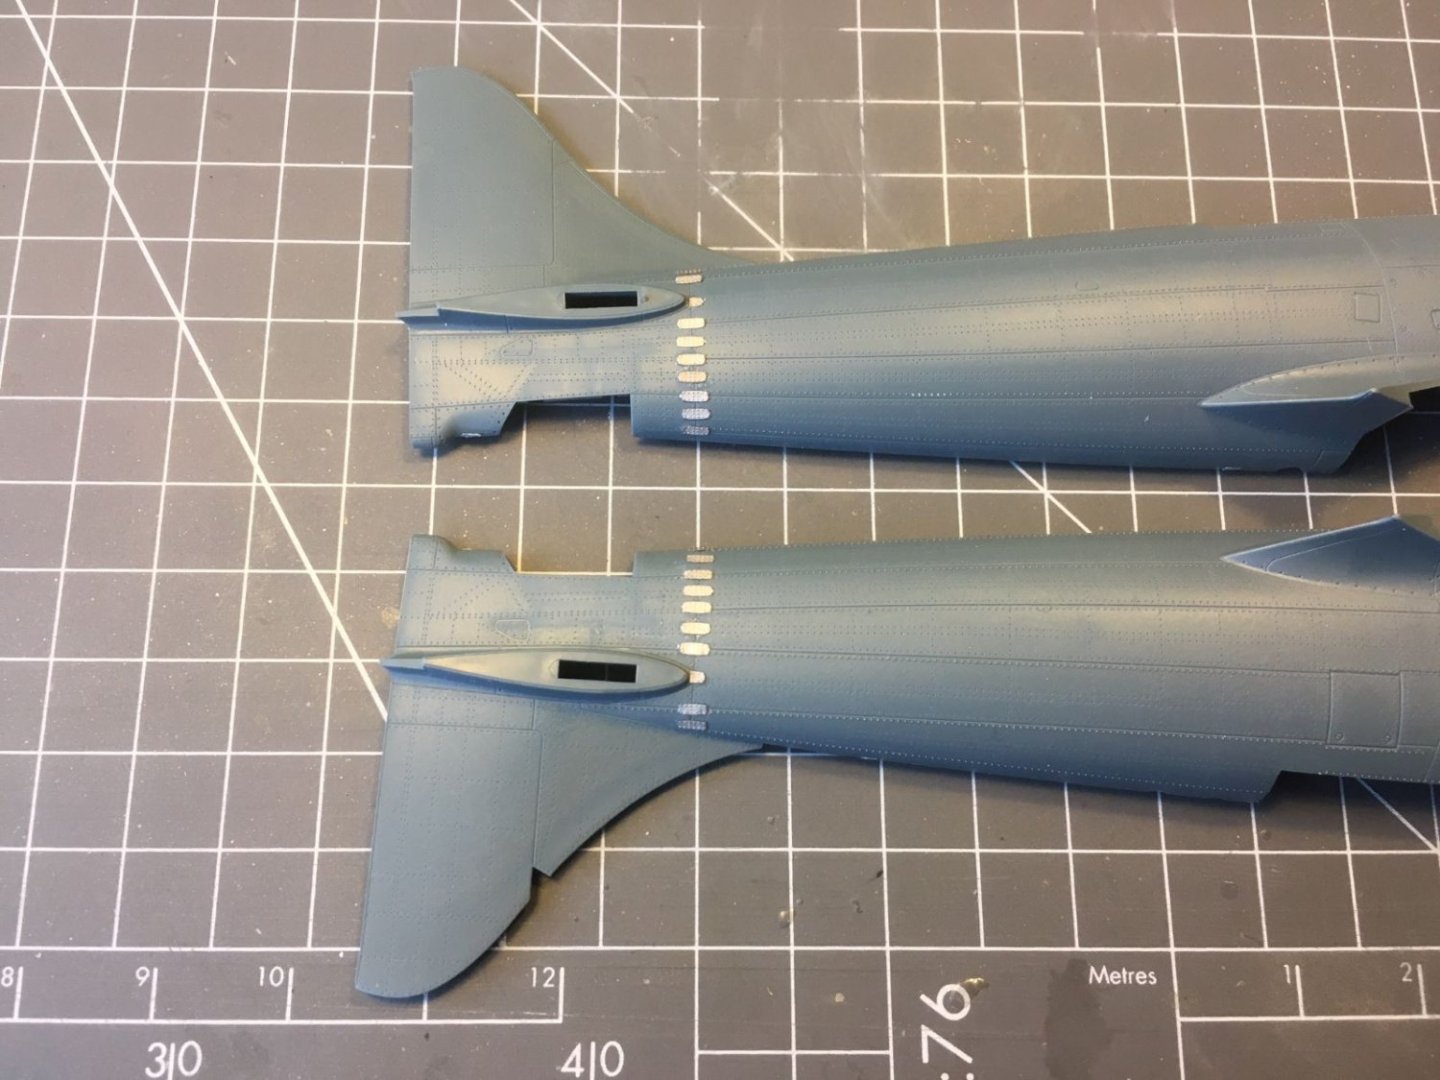
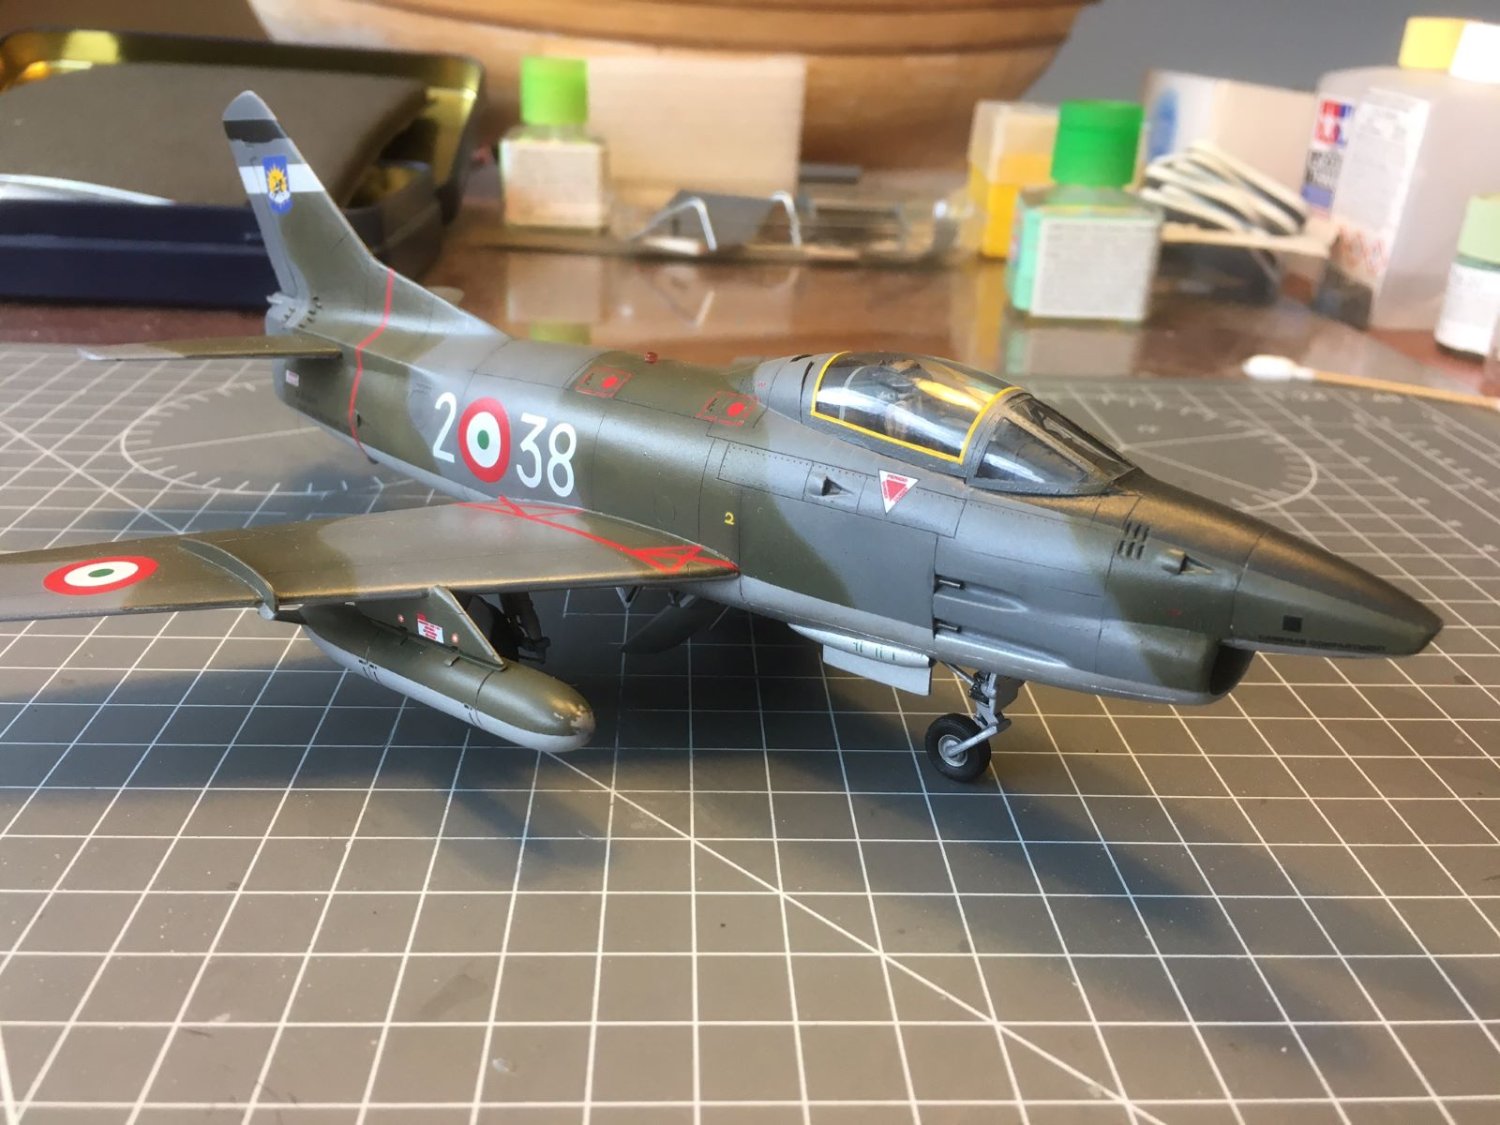
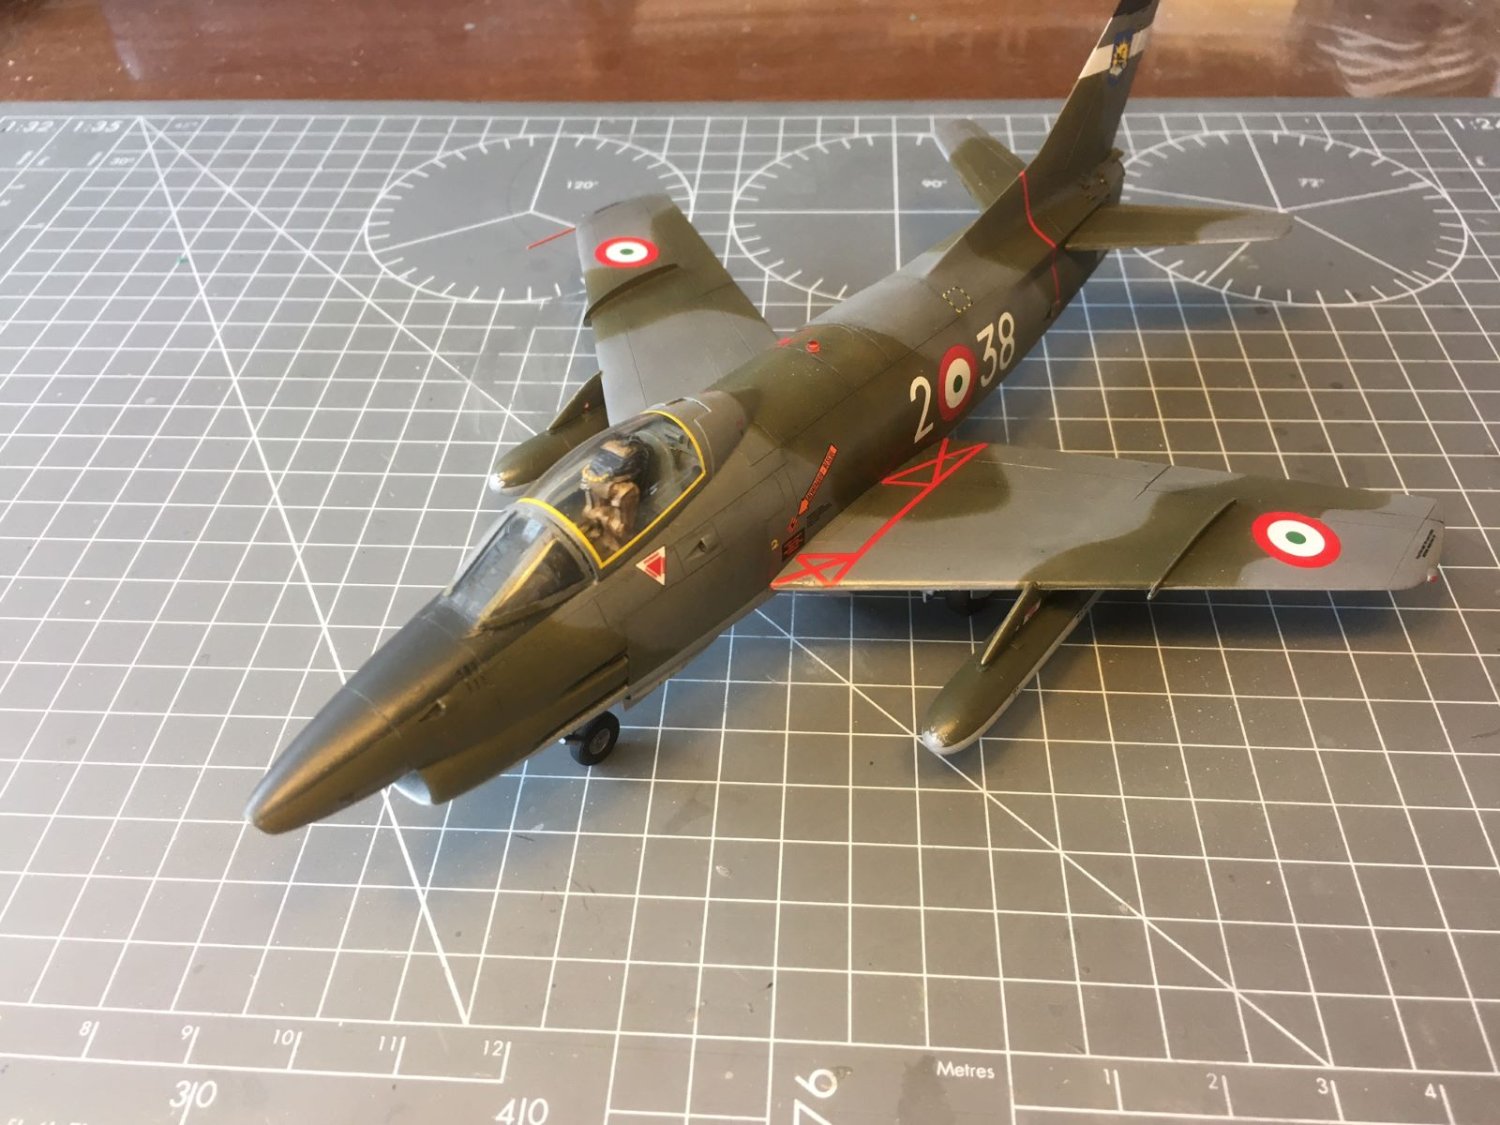
Hi all, not great progresses to show, but many small parts that need some preparation. Finally, I completed gluing the plates on the tail, only one remaining, but that will go once the fuselage is closed. Interiors received some colors (XF-71 interior green and XF-69 NATO black): Pedals made by folded PE and black wash applied: As said, not much to show. However, I finished another model I was working on and OC showed some interest in it, so, if you don't mind, I would like to propose few pictures of it. The subject is the small Italian tactical jet Fiat G.91 R and the kit is the very old Italeri/ESCI kit in 1:48 scale. This is a moody picture of it quickly taken on the sill of my window in a rainy day: The kit was with raised panels and I rescribed the entire airframe. I addition, I made numerous modifications to some incorrect features (but I did not corrected all of them). With a blue background showing the nice lines of this aircraft typical design of the early '60s. By the way, the colors used for the early NATO camouflage are exactly the same ones that I am going to use on my Tempest: I hope you like my model. Now I will continue full time on my Tempest. Best regards, Dan
.thumb.JPG.949ca27f2ff2283d63b36e73e0b1843d.JPG)


.thumb.JPG.1ca36aa57cfd8d76cce03bab77c486d5.JPG)
.thumb.JPG.5357fabe49f7b7c2e8ce479f8f009870.JPG)
- 115 replies
-
- 16
-
-
-
Dear all, while posting, I got an error message with the following details: Your IP: 84.25.194.193 URL: modelshipworld.com/topic/33879-hawker-tempest-mk-v-by-danstream-eduard-148-scale/?failedReply=1 Your Browser: Mozilla/5.0 (Windows NT 10.0; Win64; x64) AppleWebKit/537.36 (KHTML, like Gecko) Chrome/110.0.0.0 Safari/537.36 Block ID: XSS015 Block reason: An attempted XSS (Cross site scripting) was detected and blocked. Time: 2023-03-05 05:51:09 Server ID: 19006 Is this requiring an action by me or you can do something on your side? Thanks for your help, Dan Update: apparently, I resolved the issue by deleting the content of the editor and rewriting anew my post. When I submitted the new post, I didn't get any error and the post is now uploaded regularly. Kind regards, Dan
-
Good start Andy. Dan
-
You are a wizard and your magic is amazing. To me, the illusion of the lights and of a outdoor world works perfectly. Bravo, Dan
-
I bet this is going to turn out a head turner. Good progress on the interior. Cheers, Dan
- 75 replies
-
- 12
-
-

-
Thanks OC, I spent quite a lot of time and work on the very old and inaccurate Italeri kit of the G.91, but I was committed to get a decent replica out of it, being my memories (related to aviation) as a kid associated to this small jet. Furthermore, I started working as a young engineer, more than 37 years ago, in the factory in Turin, in Italy, where these planes were designed and built. At that time, the company was called Aeritalia, not Fiat anymore, and G. Gabrielli, the chief designer of Fiat (the 'G' in the name) had retired, but documents of the plane were still around. If you are interested, once finished, I will post here some photos of my G.91. Kind regards, Dan
- 115 replies
-
- 10
-
-
-
Hi Patrick, I am amazed by your collection of vehicles. Another thing that amazes me is the finish you get using Tamiya paints by brush. Tagging along, Dan
-
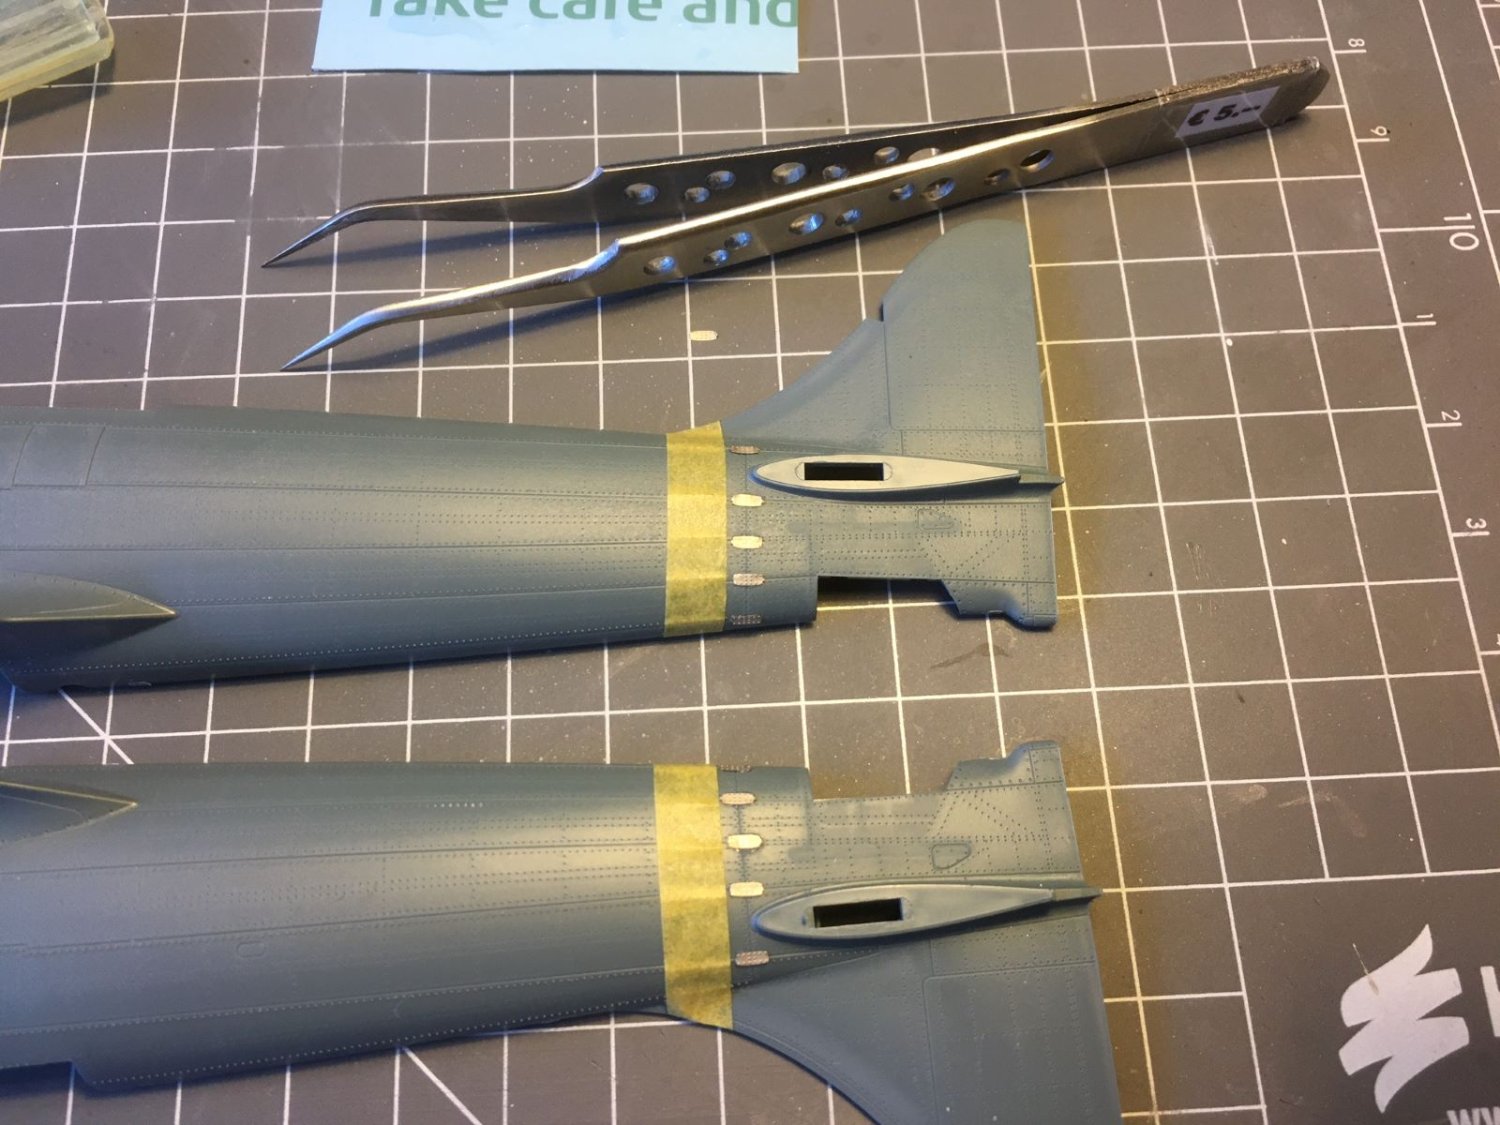
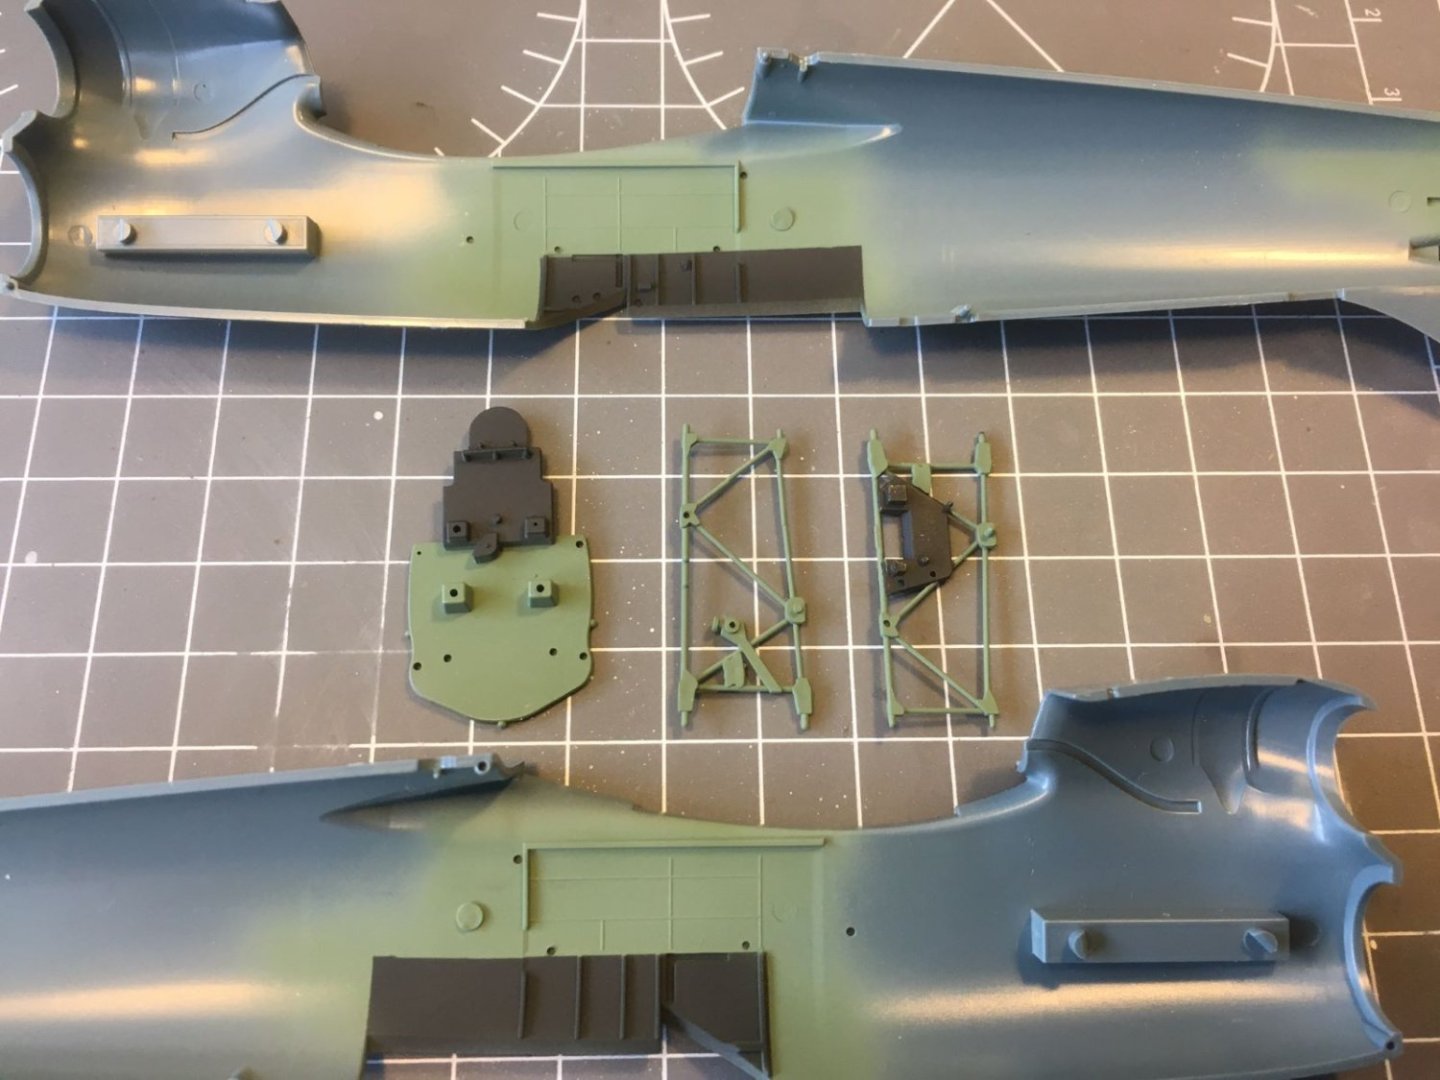
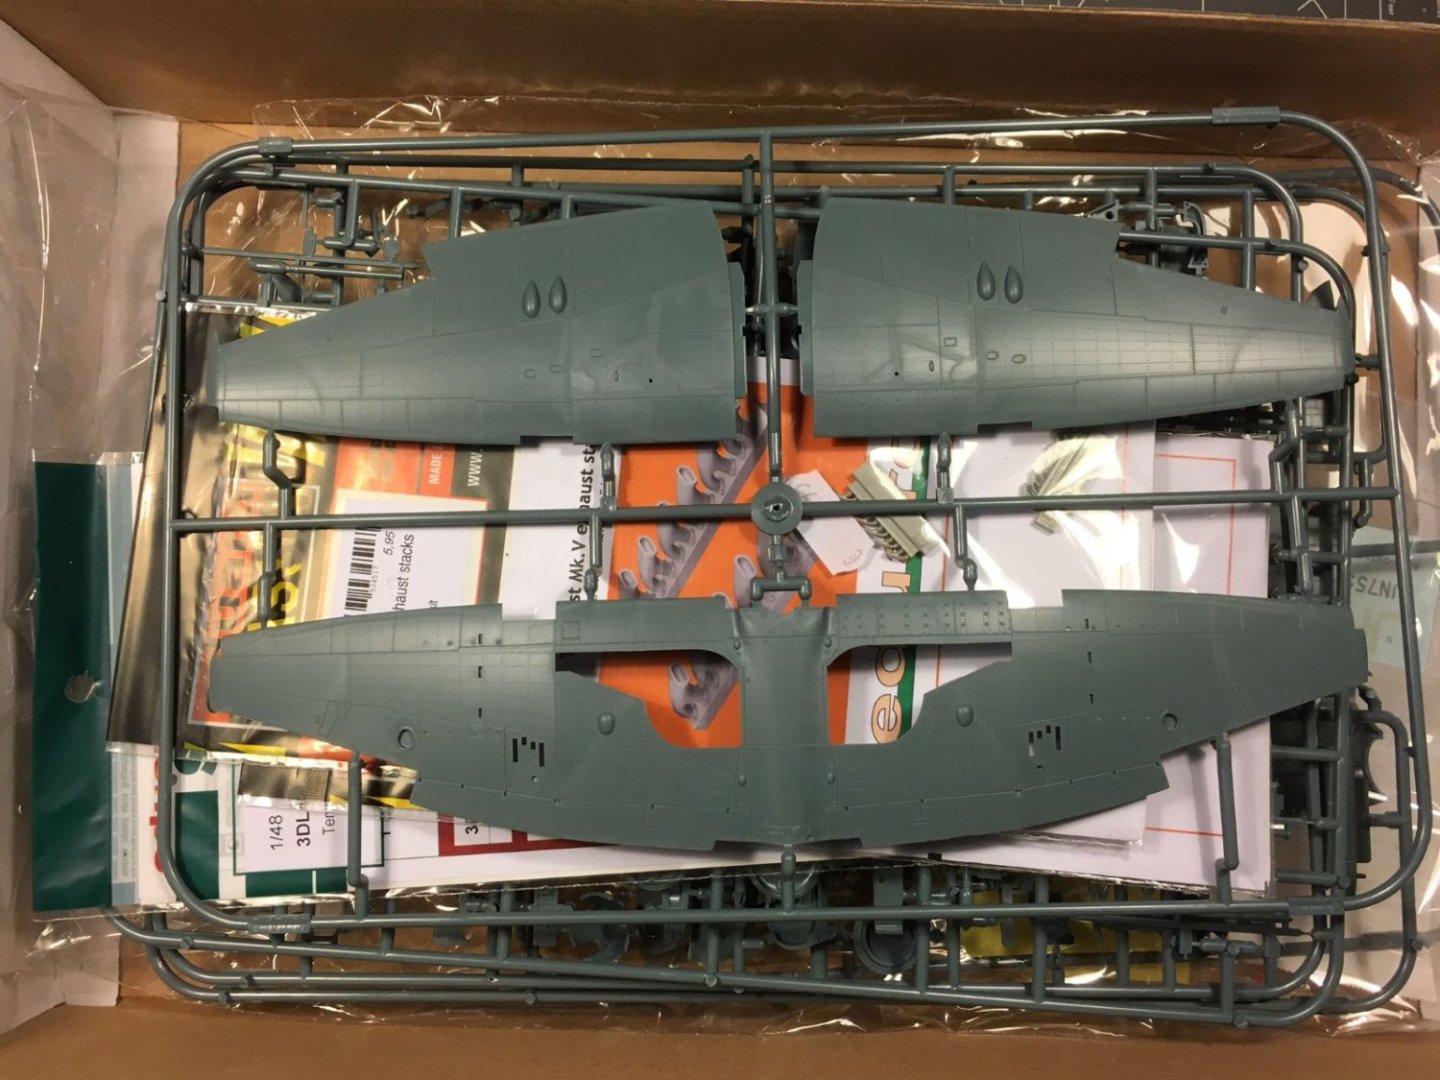
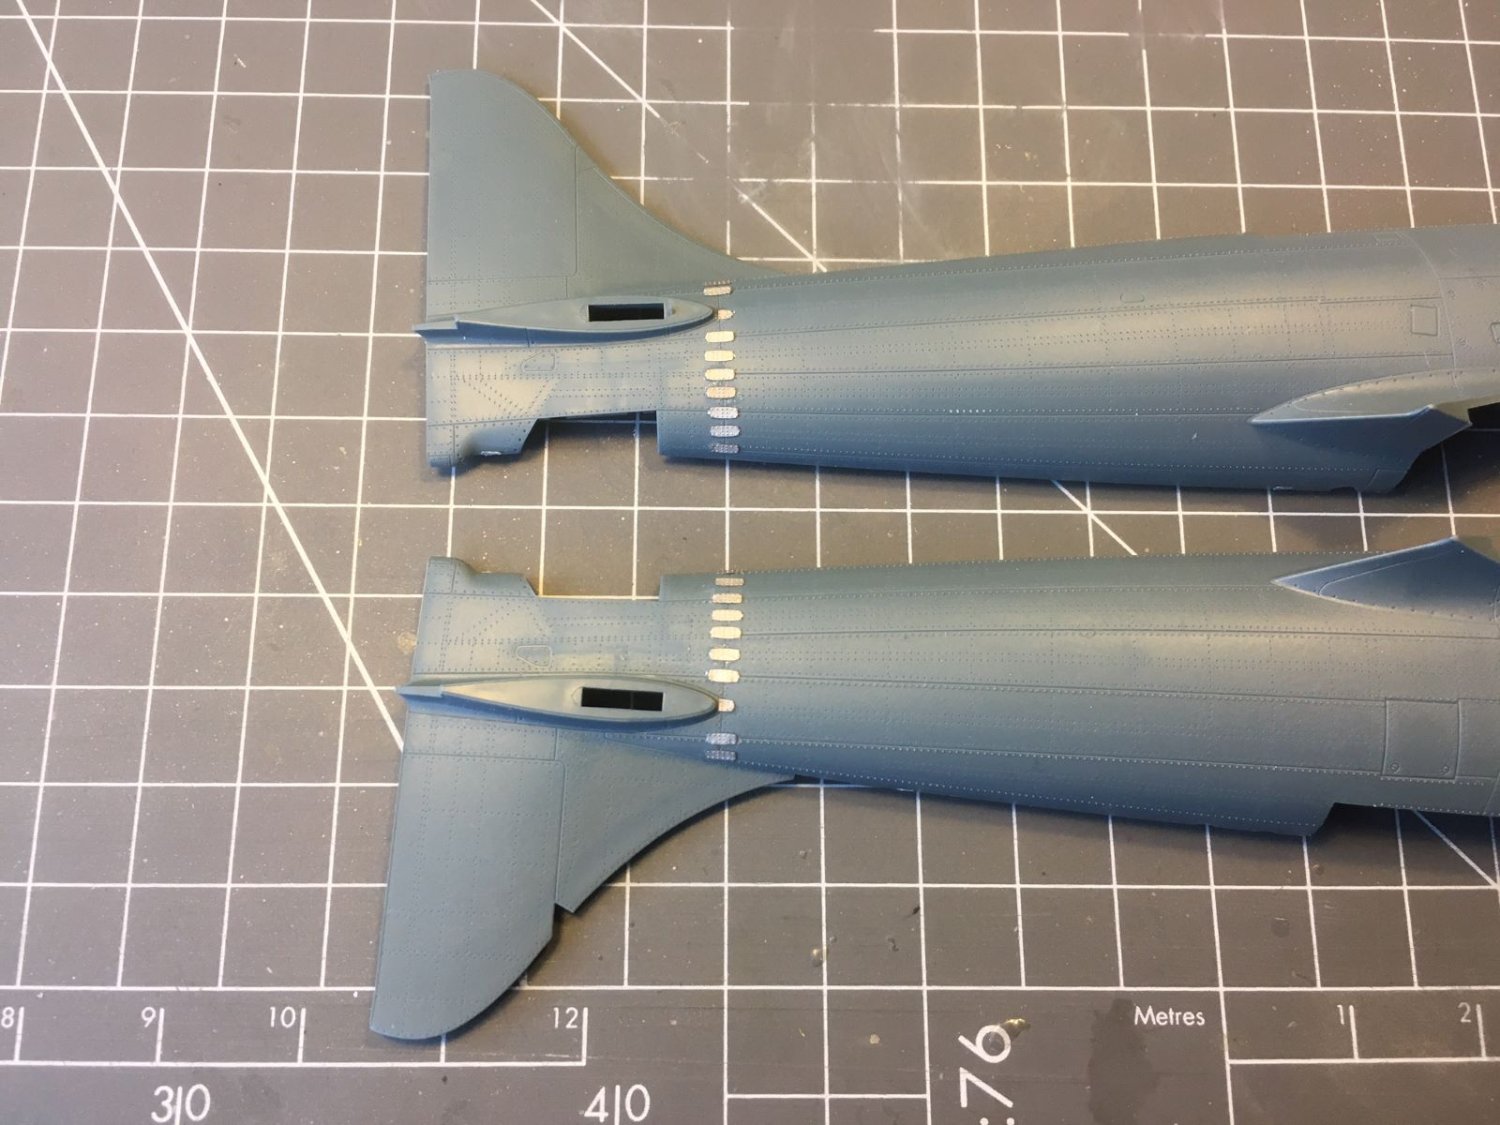
Hi all, although I am quite enthusiastic about this kit, I had not the time to do much. I am posting few picture just to show that the build had started. This is a preliminary dry fit which showed a very good precision of the main parts: I am working on the cockpit parts, but I also started a subject that the instructions defers to a later stage. It is about gluing a number of fishplates which stiffens the tail assembly of the real aircraft. I thought that it would be easier to do that with the fuselage halves flat on the table. The work is very tedious and I can do only few of them at the time. Eduard provided the fishplates in the photoetched fret (thoughtfully, they provided them in excess of what is strictly needed). So far, I glued on only half of them (I only glued every second one) and I still need to complete it. I used a thick CA glue which fills in the irregularities of the surfaces and I bought the tweezers showed in the picture that were really useful to position the plates. I degreased the plastic with IPA and activated the back surface of the plates (which is a fancy way to say that I sanded the back of the fret with a very fine grit 🙂). Not much, but this is all for now, greetings to all, Dan


- 115 replies
-
- 13
-
-
Very nice display and great model. With all panels open and the crew around you show a story behind it. well done, Dan
-
Nice build and good result with the black finish. Stencils look good too, with no silvering. Congrats, Dan PS - Should Langley have succeeded with his machines before the Wright, we would now talk of 'aerodromes' (I like the terms 'aeroplane' or 'airplane' better).
-
Sea Harrier FRS1 by AJohnson - FINISHED - Airfix - 1:72
Danstream replied to AJohnson's topic in Non-ship/categorised builds
One of the most distinctive British jet ever, yes of course I will follow. It is one of the kit that I would like to have. By the way, I am late, but I would also like to congratulate for your neat Sea Harrier and the family portraits. Cheers, Dan -
Hi Mike, your model turned out a beauty. Very carefully assembled and painted with nice, smooth finish, clean transparents and with no unrealistic weathering. Very very nice to look at. Congrats, Dan
-
Very nice smooth finish. Cheers, Dan
-
Thank you all, for your replies. It will be great to have you following and keeping a good eye on me. Cheers, Dan
-
Not sure I have got the right sense of your line. Is it a criticism to the real aeroplane? Or a deficiency of the model? In the former case, we can do very little about it and anyway it is arguably difficult to get a good combat plane without a great engine. In the latter case, see the post from @Egilman listing possible options. Anyway, it is not my intention to include the engine. I will be satisfied with rendering the feel of the original, buttoned up airframe. If you are interested, I will be glad to have you following. Kind regards, Dan
-
Dear all, I'd like to share with you my next build of the mighty, pugnacious looking Hawker Tempest Mk. V. The kit is the awesome Eduard new tool, last generation plastic, in its 'Profipac' edition which I got as a gift to myself for the past Christmas. The great artwork displays one of these Tempest decorated with invasion stripes in full action against a German V1 over the British countryside. I could simply not resist getting it (actually I also got a 'Limited Edition' Tempest Mk II also by Eduard, but it will be the subject of a later build). The box is packed with high quality parts to which I added few Eduard's aftermarket extras. I find the level of detail of the surfaces fantastic perhaps equaled only by the latest Tamiya models. I don't know if, once enlarged 48 times, it would look right, but, for me, it will make a fantastic miniature rendition of a real airframe construction. The Tempest was a predecessor of the Sea Fury, the model of which I have built some time ago. I can't wait to start it although, as usual for me, I am afraid it will not be a quick one. I hope it might be of interest to some of you, best regards, Dan


- 115 replies
-
- 19
-
-
-
It is amazing, it looks so real. Mind get a reset when you post one of those pictures of yours with your gigantic spectacles. Continuing watching, Dan
-
Spitfire MK I by Danstream - Tamiya - 1/48 - PLASTIC
Danstream replied to Danstream's topic in Completed non-ship models
Thanks for your comment. Good luck with your Spitfire, I hope you will post your build here. The Spitfire is always a beautiful subject and the Eduard offering is awesome. Cheers, Dan


.JPG.adba9d52078b0e93db7737e66967241b.JPG)
.JPG.ce7a47ecc1f3aba58b39d3bc8aca54f5.JPG)
.JPG.fa2f0d09d30c6f789860888d3ff5657a.JPG)