


Gazzarian
-
Posts
42 -
Joined
-
Last visited
Content Type
Profiles
Forums
Gallery
Events
Posts posted by Gazzarian
-
-
I hope you don't mind a pic from another build on your log. Also as I'm not in sync with a site devoted to historical authenticity (which i respect but don't follow). But I did want to get a weathered, battered look from my first attempt at this genre. Unfortunately my mental arithmetic was out, the depth markers should have been 5mm not 4mm apart. Oh well, even my ma never claimed I was bright ha ha!

-
Thank you! I'll give it a go.
- VTHokiEE and Old Collingwood
-
 2
2
-
What a great idea for the deadeyes! Looks much more solid than a bent piece of wire.
By the way, going back earlier in your build, were you able to drill holes for pins in the edges of the channels? That's where I am and the wood looks very thin for drilling holes in the edge.
- Old Collingwood and VTHokiEE
-
2
-
Thanks mate! I went a bit off piste with mine but that phase is over and am back to following the instructions! However have been distracted by other things and haven't done much recently. I hope I'll be able to post some updates on my log before too long, but it's definitely a learning process for me, I ain't doing as well as you and others on here!
- VTHokiEE and Old Collingwood
-
2
-
Your model is looking wonderful, and when - if - i get to the rigging stage I'll be reading your blog very closely, so thank you!
-
On mine, which I've attempted to civilianise as I'm not a fan of things military, I am experimenting with a companionway and skylight (they are not fitted yet though an might not be). I bit off more than I could chew though and have slightly lost my way. Hopefully will recover!
-
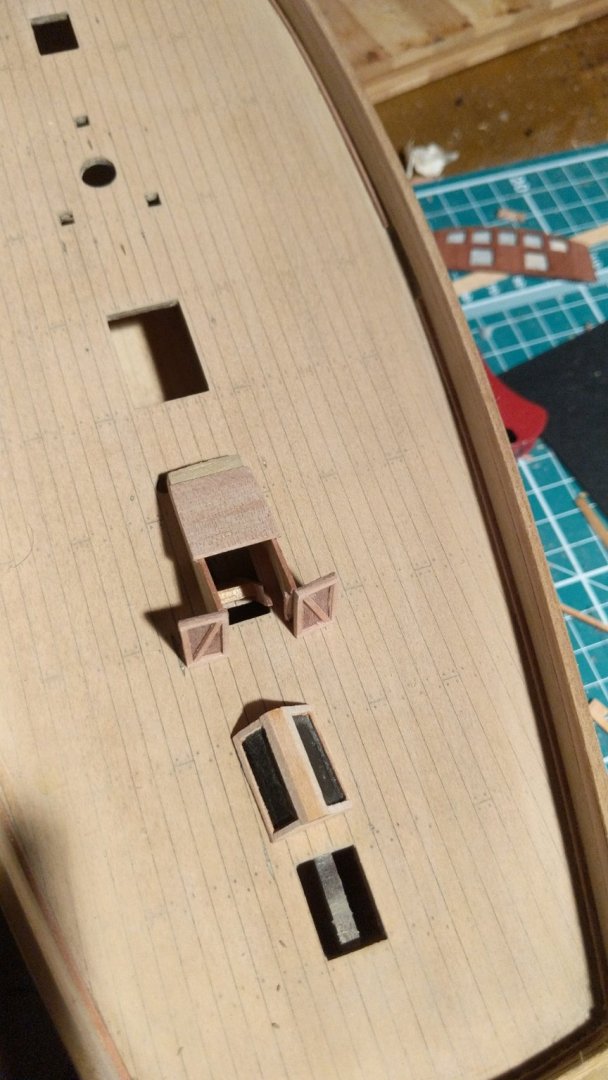
It is a lovely kit, building it is an enjoyable journey and I especially appreciated the thoughtfulness of its design. There is quite a large gap between two of the bulkheads - I think 4 and 5 - and care needs to be taken when planking there to avoid a flat patch in the hull shape. I saw that one other builder packed it out with balsa block to maintain the curve.
The false deck includes precut holes for the deck ringbolts but the manual makes no mention of how to transfer these through the deck planking, which is something to think about.
Anyway, enjoy the build!
-
Thank you, as is yours and you are a long way ahead of me!. I wondered about the batten, I will look at that link, appreciate it. This site is amazing for really helpful input.
On your point about more emulation, I have ben reading a book by a pro model maker who warns against attempting too much detail. But that doesn't mean that you are wrong.
-
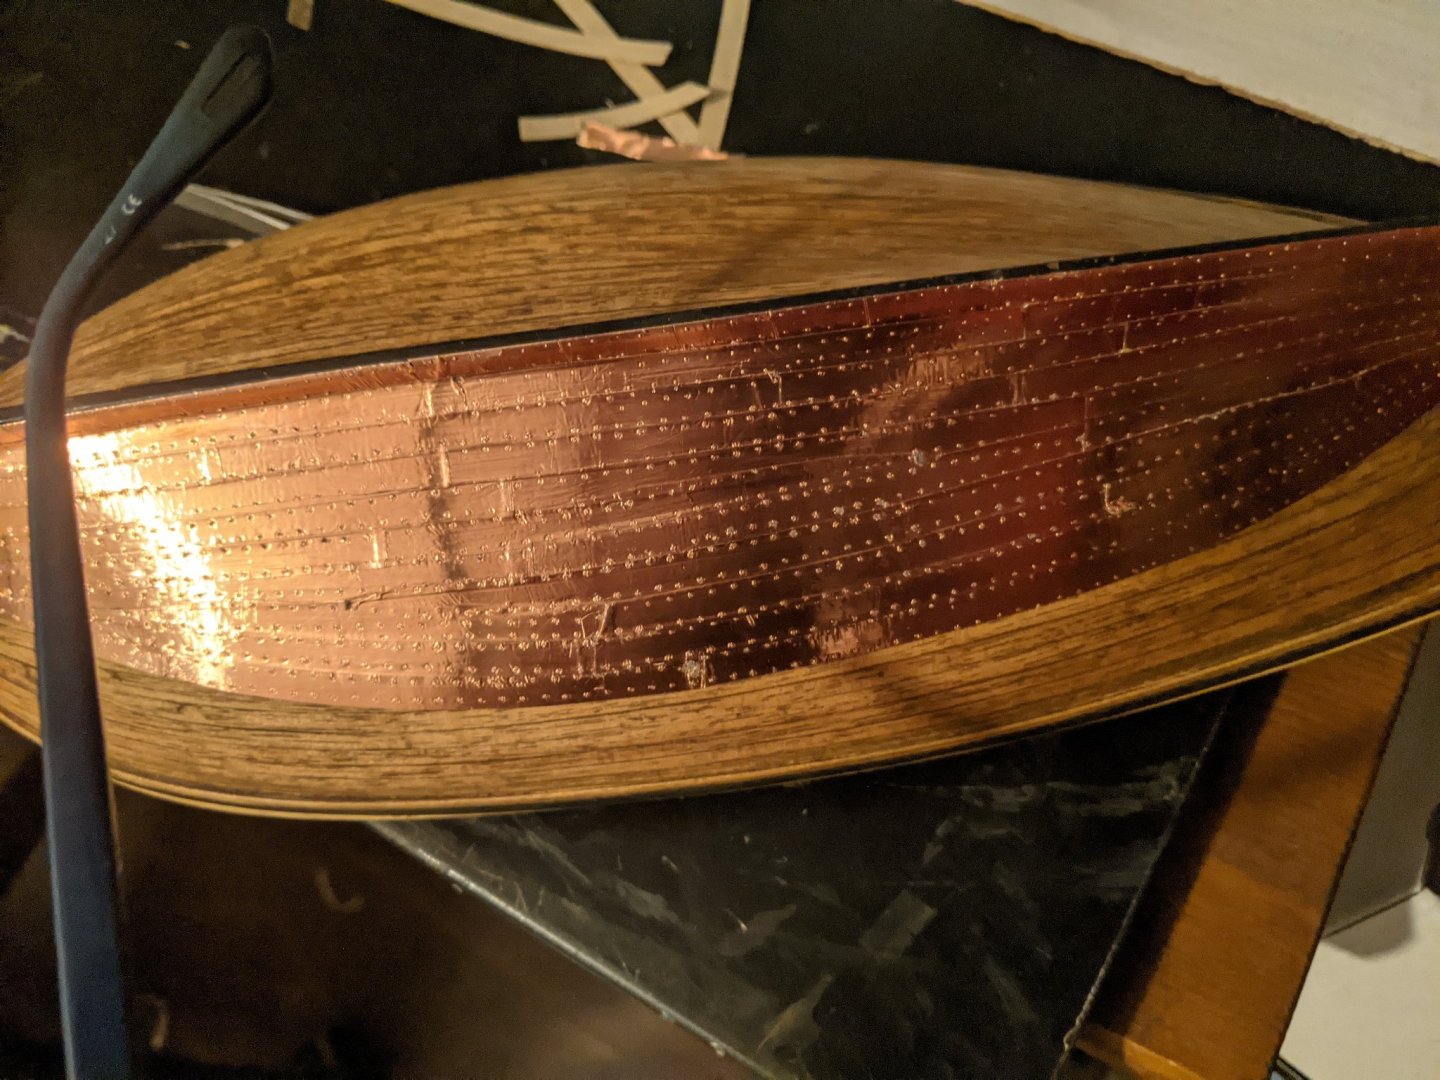
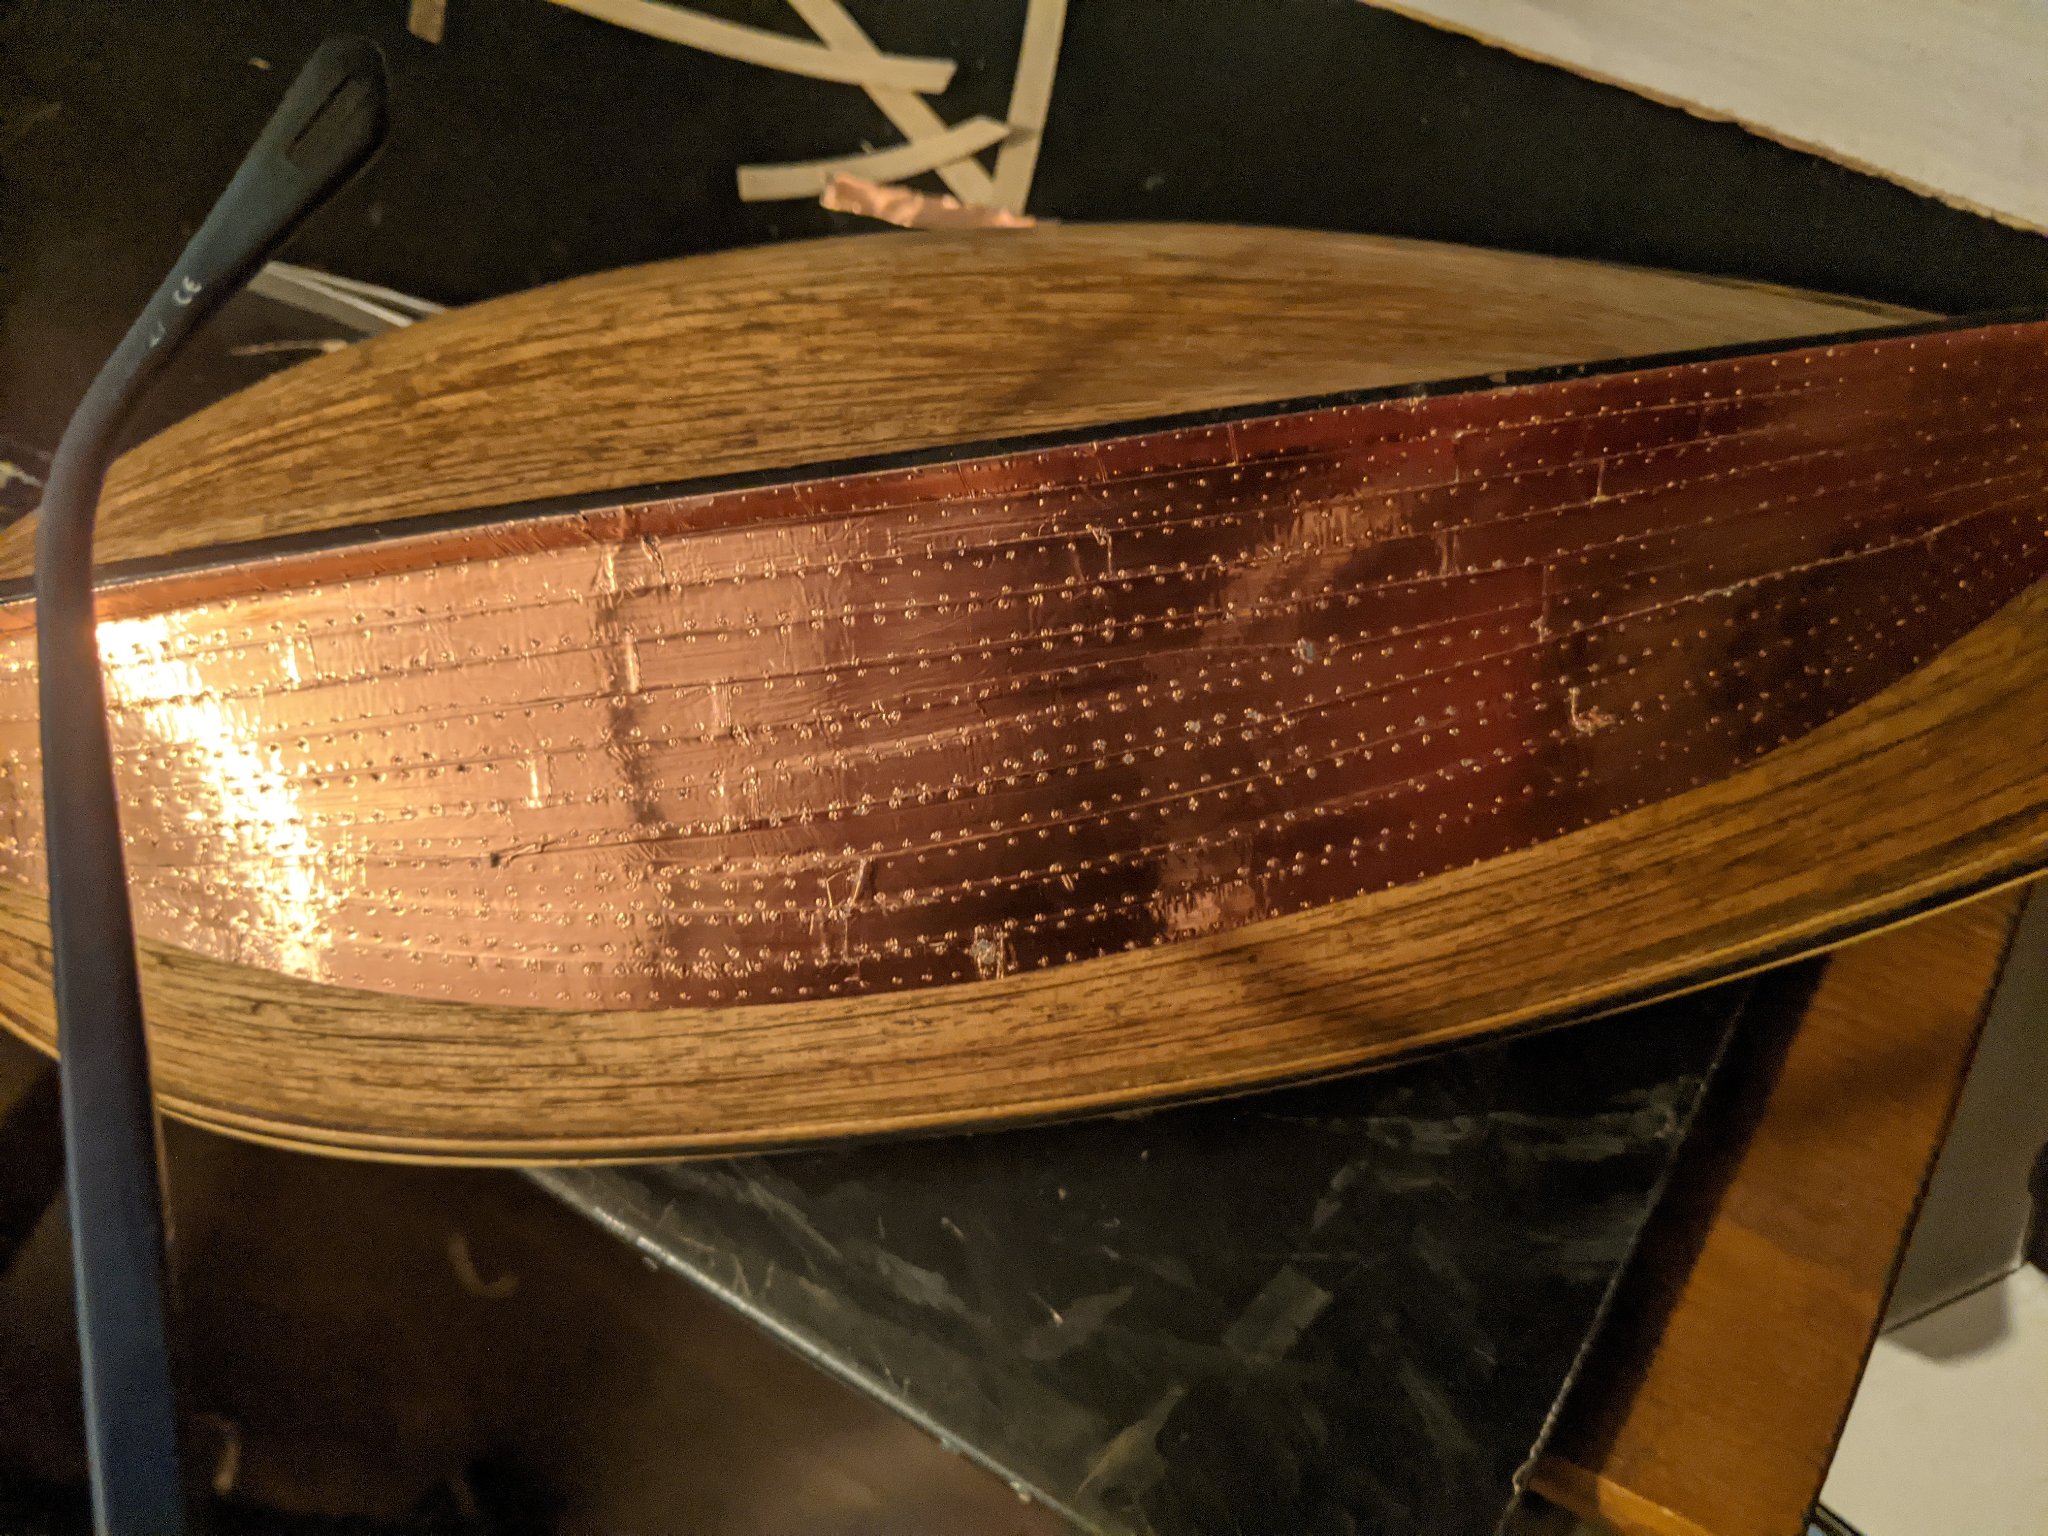
Failed first attempt at coppering, I will remove it and try again. Interesting learning process though. Despite what it said in a guide I found on here to using copper tape, I don't think you can overlap the ends as it makes those lumpy bits. Learning all the time, and getting a lot wrong ha ha!
-
8 hours ago, jpalmer1970 said:
Thanks for this log - it is going to be really helpful for me in the future.
Yes, same sentiment from me.
-
Thanks Glenn, I'll look for it.
-
I don't think we have wipe on poly here in the UK? I'm not sure what it is. I just don't like paint (or it doesn't like me, as I am an idiot ha ha!). Anyway, look, I'm just learning, and I really value your comments. This site has been so helpful that I did make a token donation, I felt it right as I have learnt so much. I'm loving this journey and I don't really care if I mess up along the way.
-
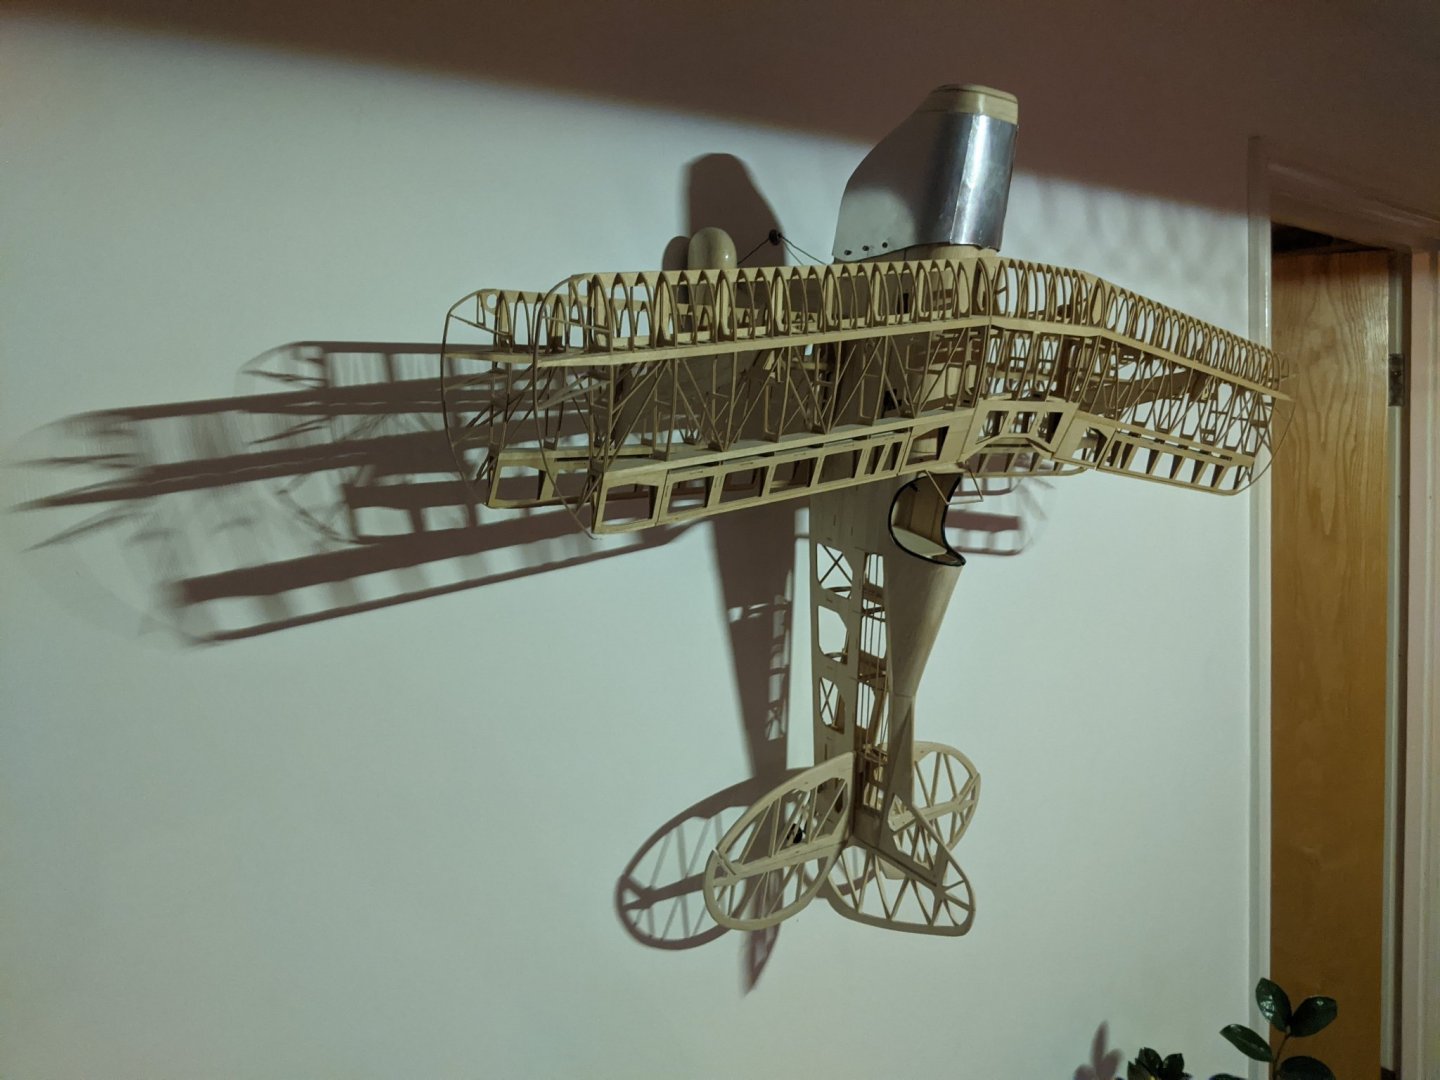
Well, if I'm allowed, I'll just share a different kind of thing I made few years back. I used to be an aerobatic display pilot so this topic was dear to my heart ha ha! (Then again I was in the navy for a bit, am from a naval family, and also used to navigate racing yachts but these days I'd rather never actually be on a boat again. I like them to look at though.
-
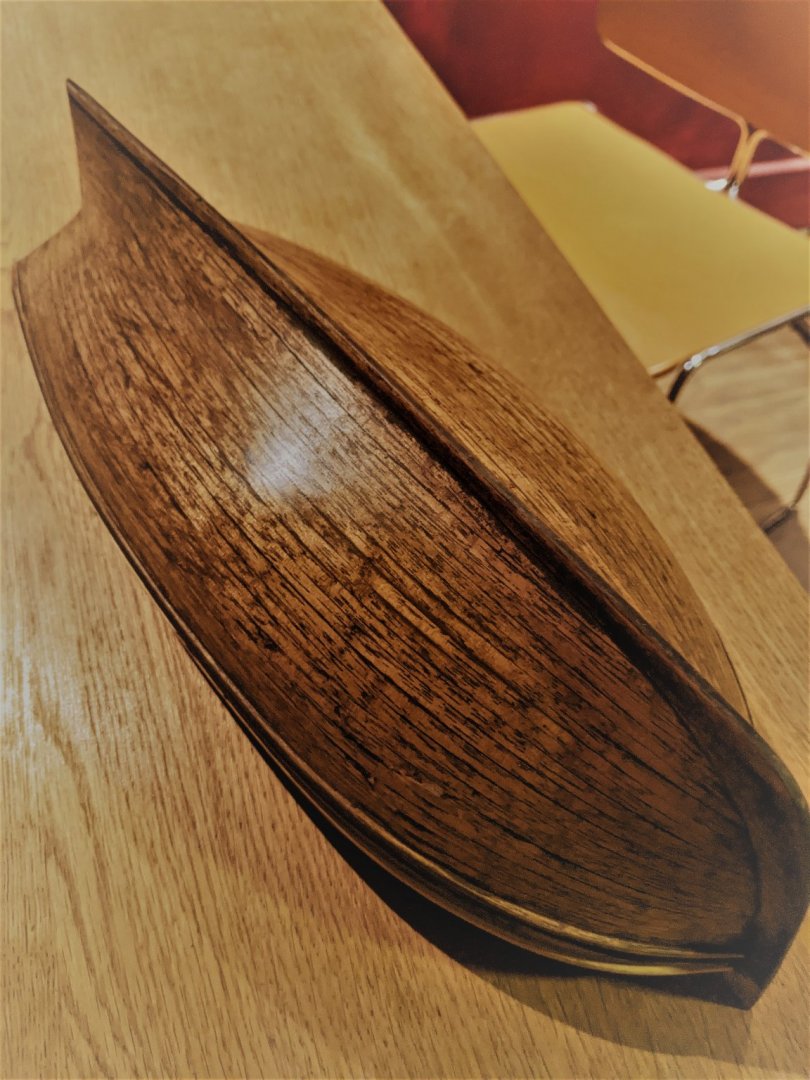
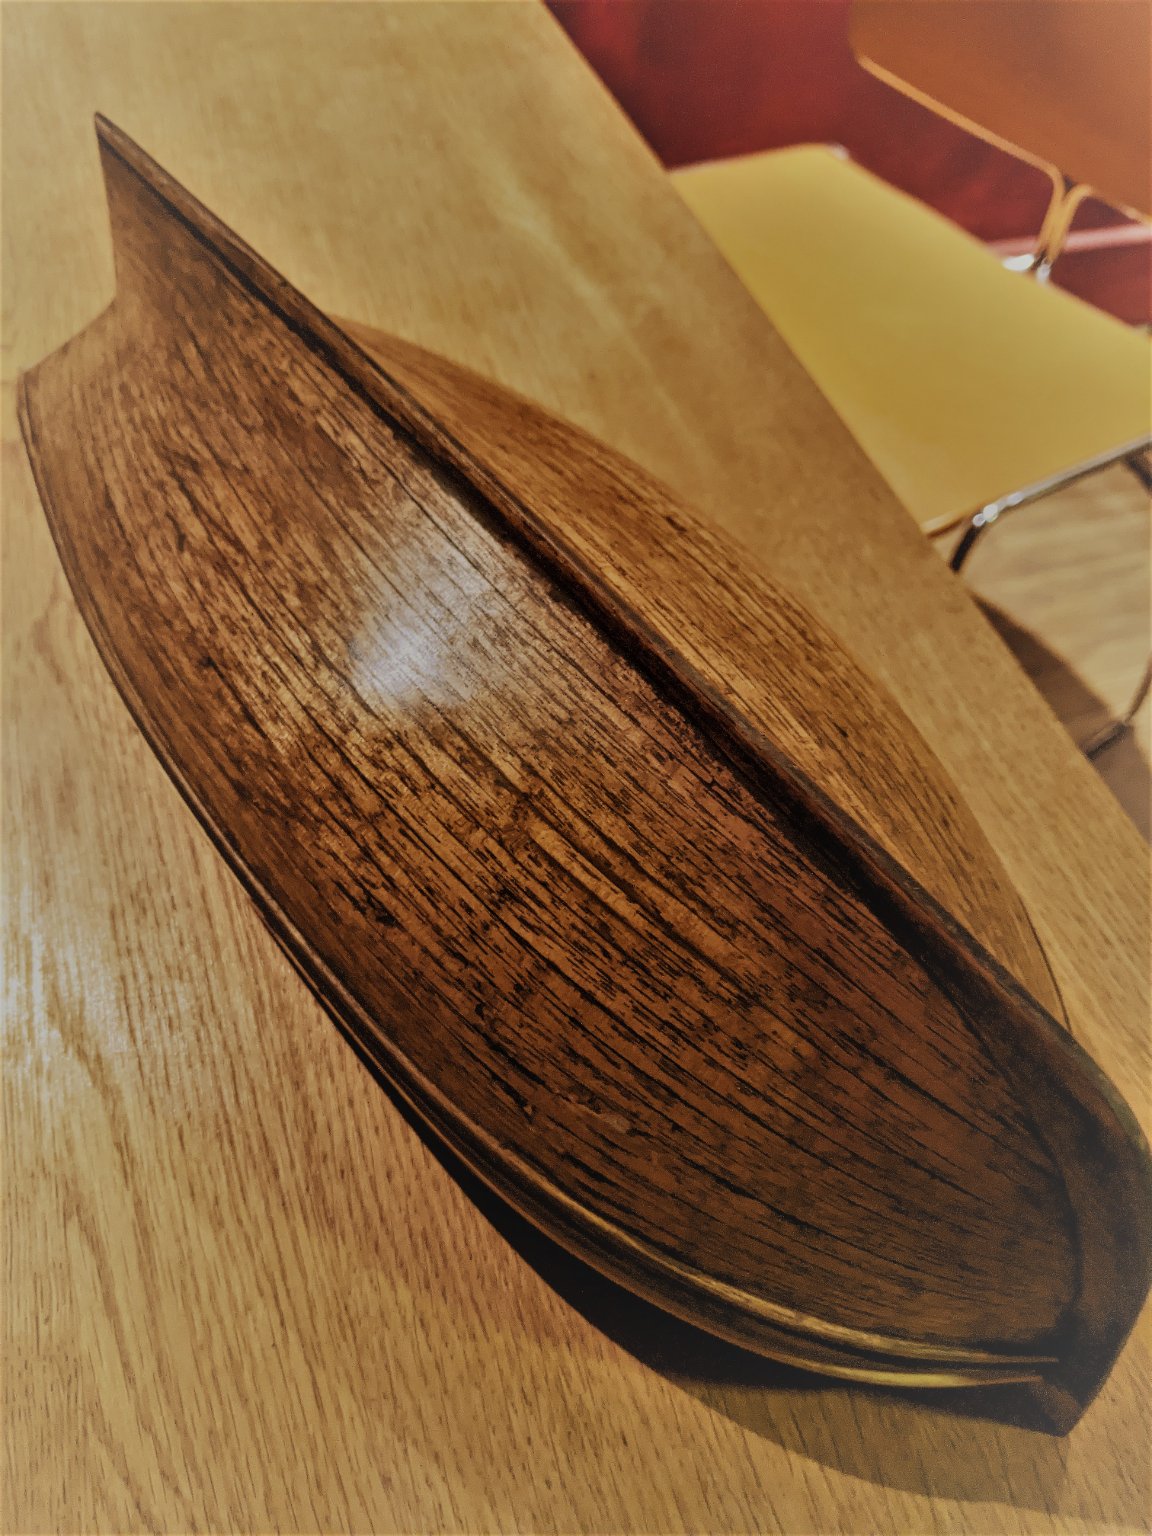
Well your comment was very helpful as it triggered me to do something that I kind of knew had to be done. But that's the joy of staining; as I am an infant at this, I think it's just experiment and sand off if you don't like it. This really is my first time ha ha! Anyway, I have arrived at this which I really like. Keel and stem will be black.
- VTHokiEE, GrandpaPhil, KARAVOKIRIS and 1 other
-
4
-
Ha ha well put Glenn. I've decided it's a rubbish one. Which I think is what you meant, and you'd be correct if you did. I've just sanded the whole lot off and will try again.
-
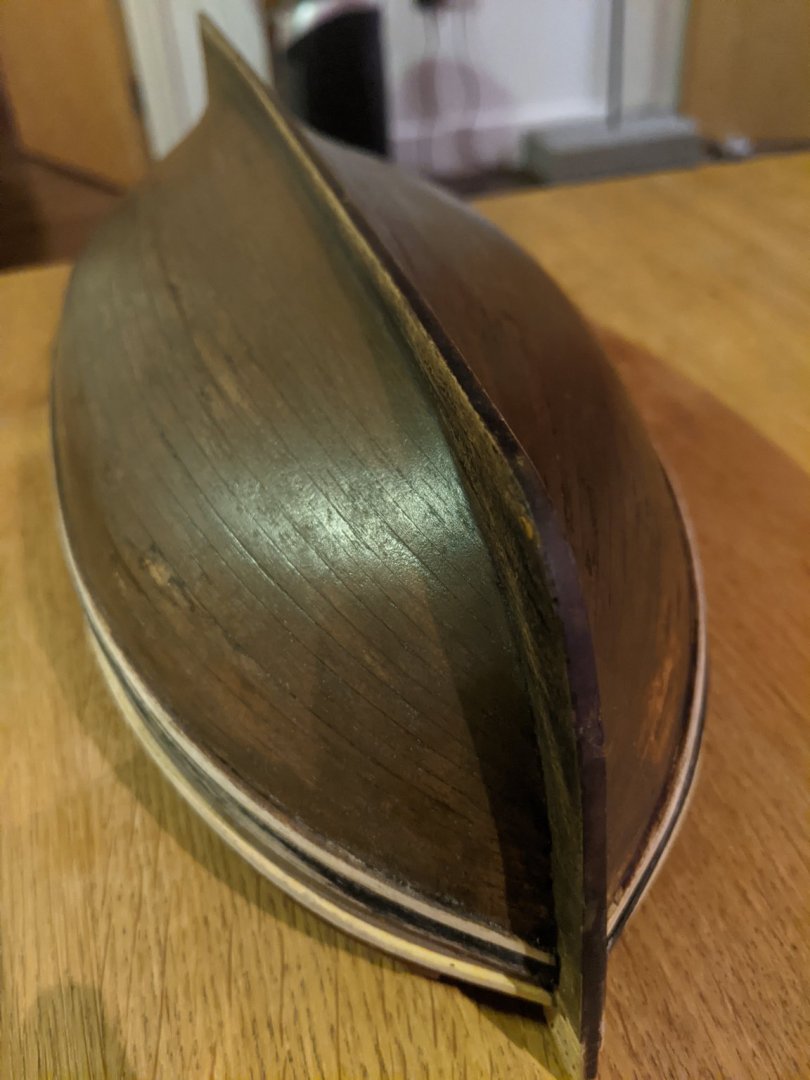
Quick update in case anyone is looking.
I wanted a battered antique look to the hull, so attempted that using various layers of different stain and sanding. Didn't entirely work (you could say that it looks like a lump of chocolate with bits of mould on it). But the colour variations are rather less dramatic in the flesh than in the pic. And anyway it's my first attempt at planking, so....that's my story and I'm sticking to it! Have learnt a lot for next time.

- Ryland Craze, KARAVOKIRIS and CiscoH
-
3
-
Hi all
I'm trying to build a civilianised version of a 1/64 British navy cutter and want to hang a boat off stern davits, which I will have to scratch build. I'm fine with the davits themselves, but don't know how falls work or what they should look like, both at the davit and the boat ends. Can anybody help? Thanks in advance if you can.
-
-
Well I'm a rank amateur too, but, hey, it's a hobby! You did well not to buy that Hobby Zone thing, it's really not very good, cheap mdf. You can do better with strips stuck to a board to hold the keel and a suction vice to keep it vertical, I think. My HobbyZone slip is now tucked away.
You're off to a good start, clearly. Looks like you've marked out fairing lines? I just finished my first planking and Chuck's edge bending videos were extremely helpful, life became much easier once I had absorbed what he was getting at. 3D geometry.
Enjoy your build. And your retirement!
-
-
Thank you for replies. Did indeed edge bend, 0.5mm tanga. Almost finished now, my first attempt at planking, hope I can gently sand it without going too far....

- mtaylor and jim Landis
-
2
-
Thanks VTH. Haven't yet installed the bulwark planks or top rail but will keep an eye out for that when I do.
-
-
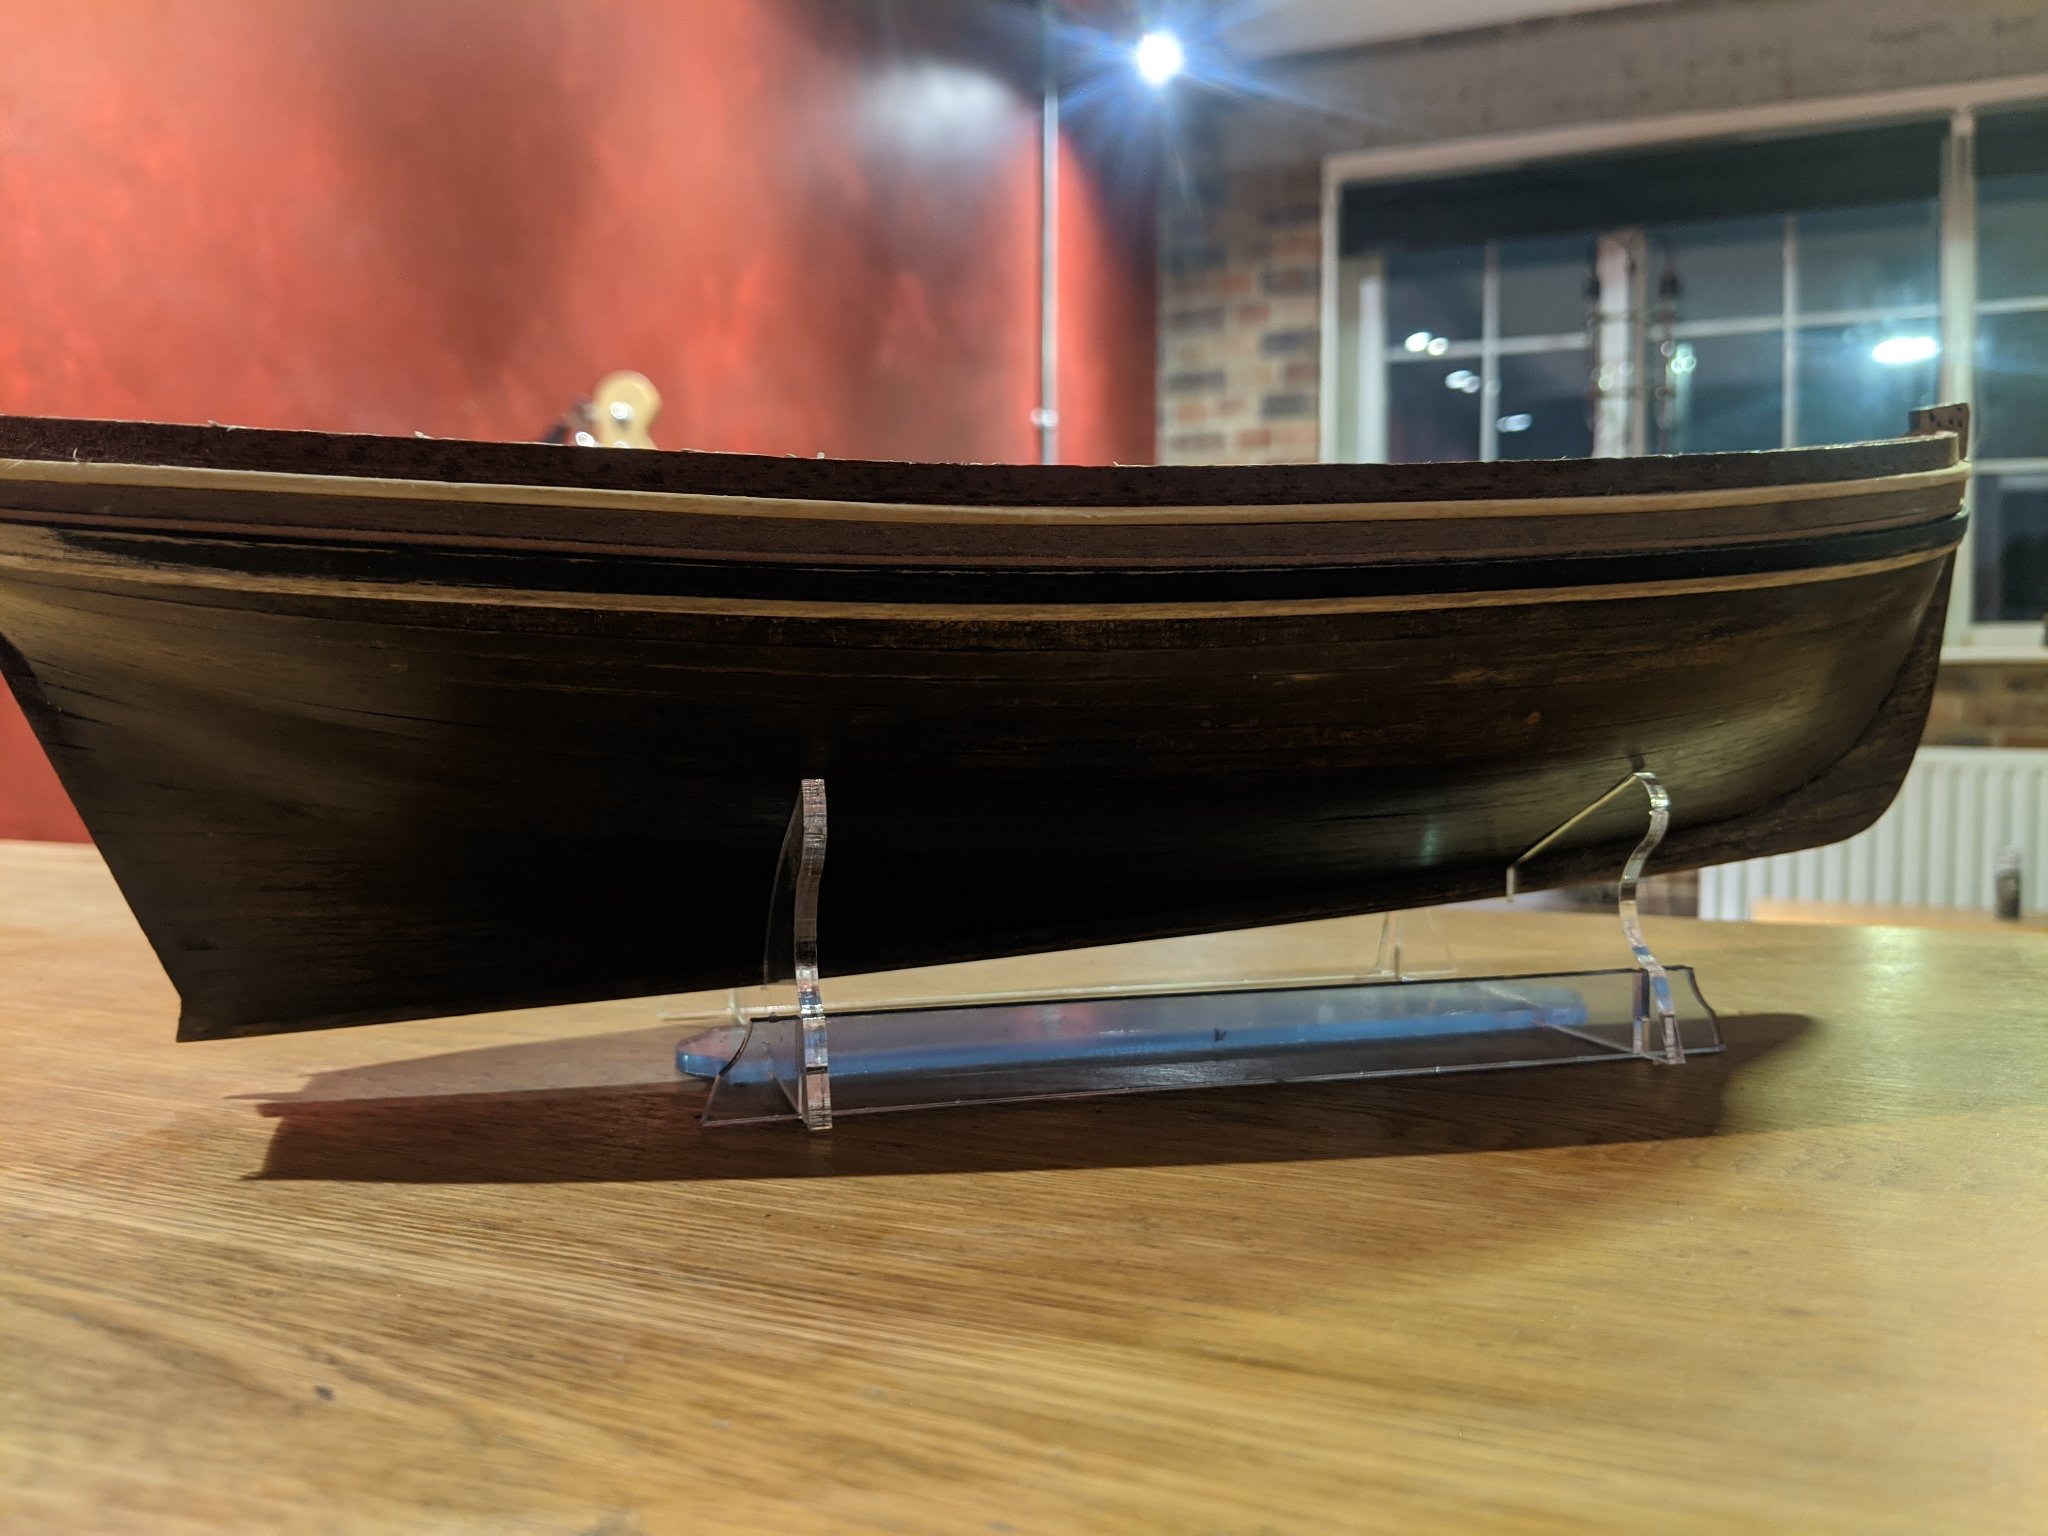
Perhaps a slightly better sense of it now that second planking is nearly done (before sanding and tidying up). Think I might tone down to two brighter strips though, they are looking a little incongruous.

- VTHokiEE, KARAVOKIRIS and Ryland Craze
-
3


HM Cutter Sherbourne by Dfell - FINISHED - Caldercraft - 1:64
in - Kit build logs for subjects built from 1751 - 1800
Posted
Lovely build. I really like the dark wood colour of the hull, how did you achieve that?