
Eugenio Treviño
-
Posts
123 -
Joined
-
Last visited
Content Type
Profiles
Forums
Gallery
Events
Everything posted by Eugenio Treviño
-
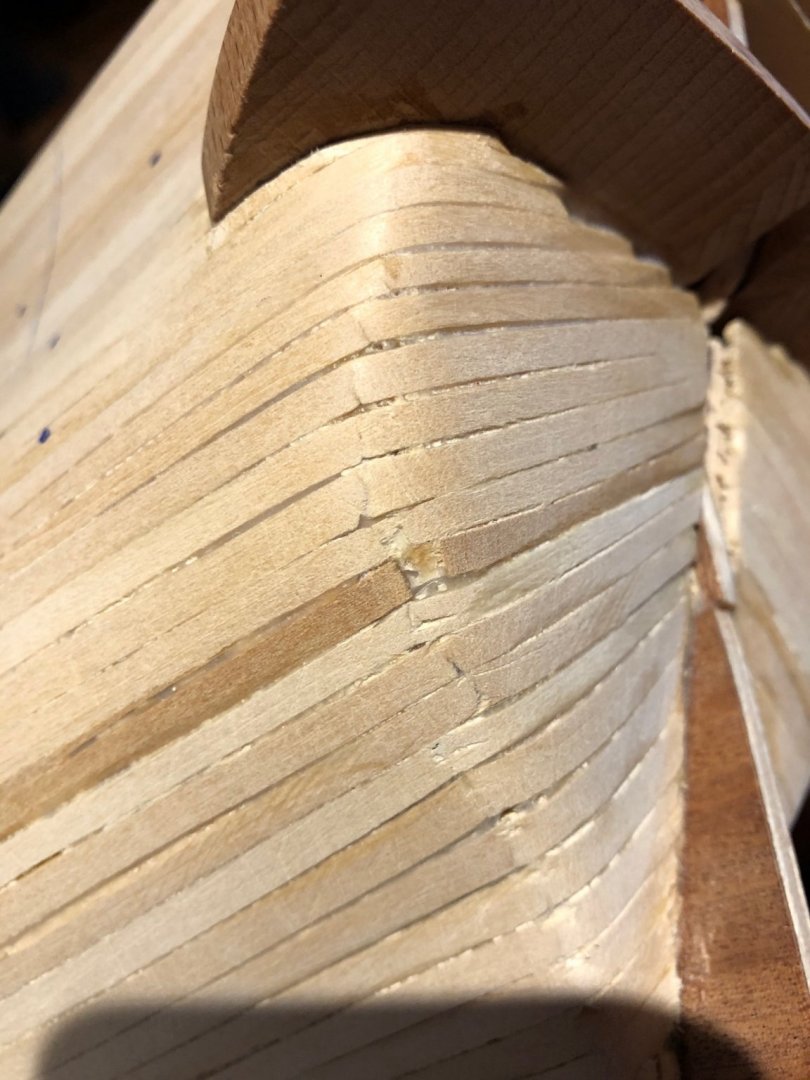
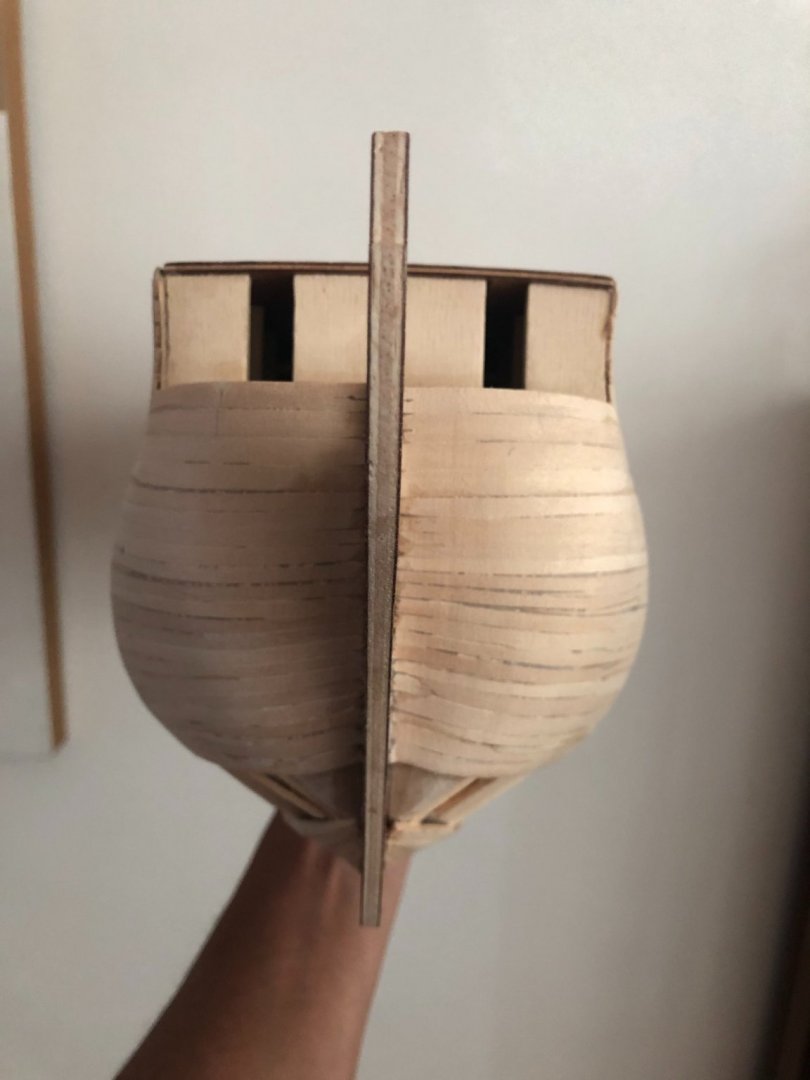
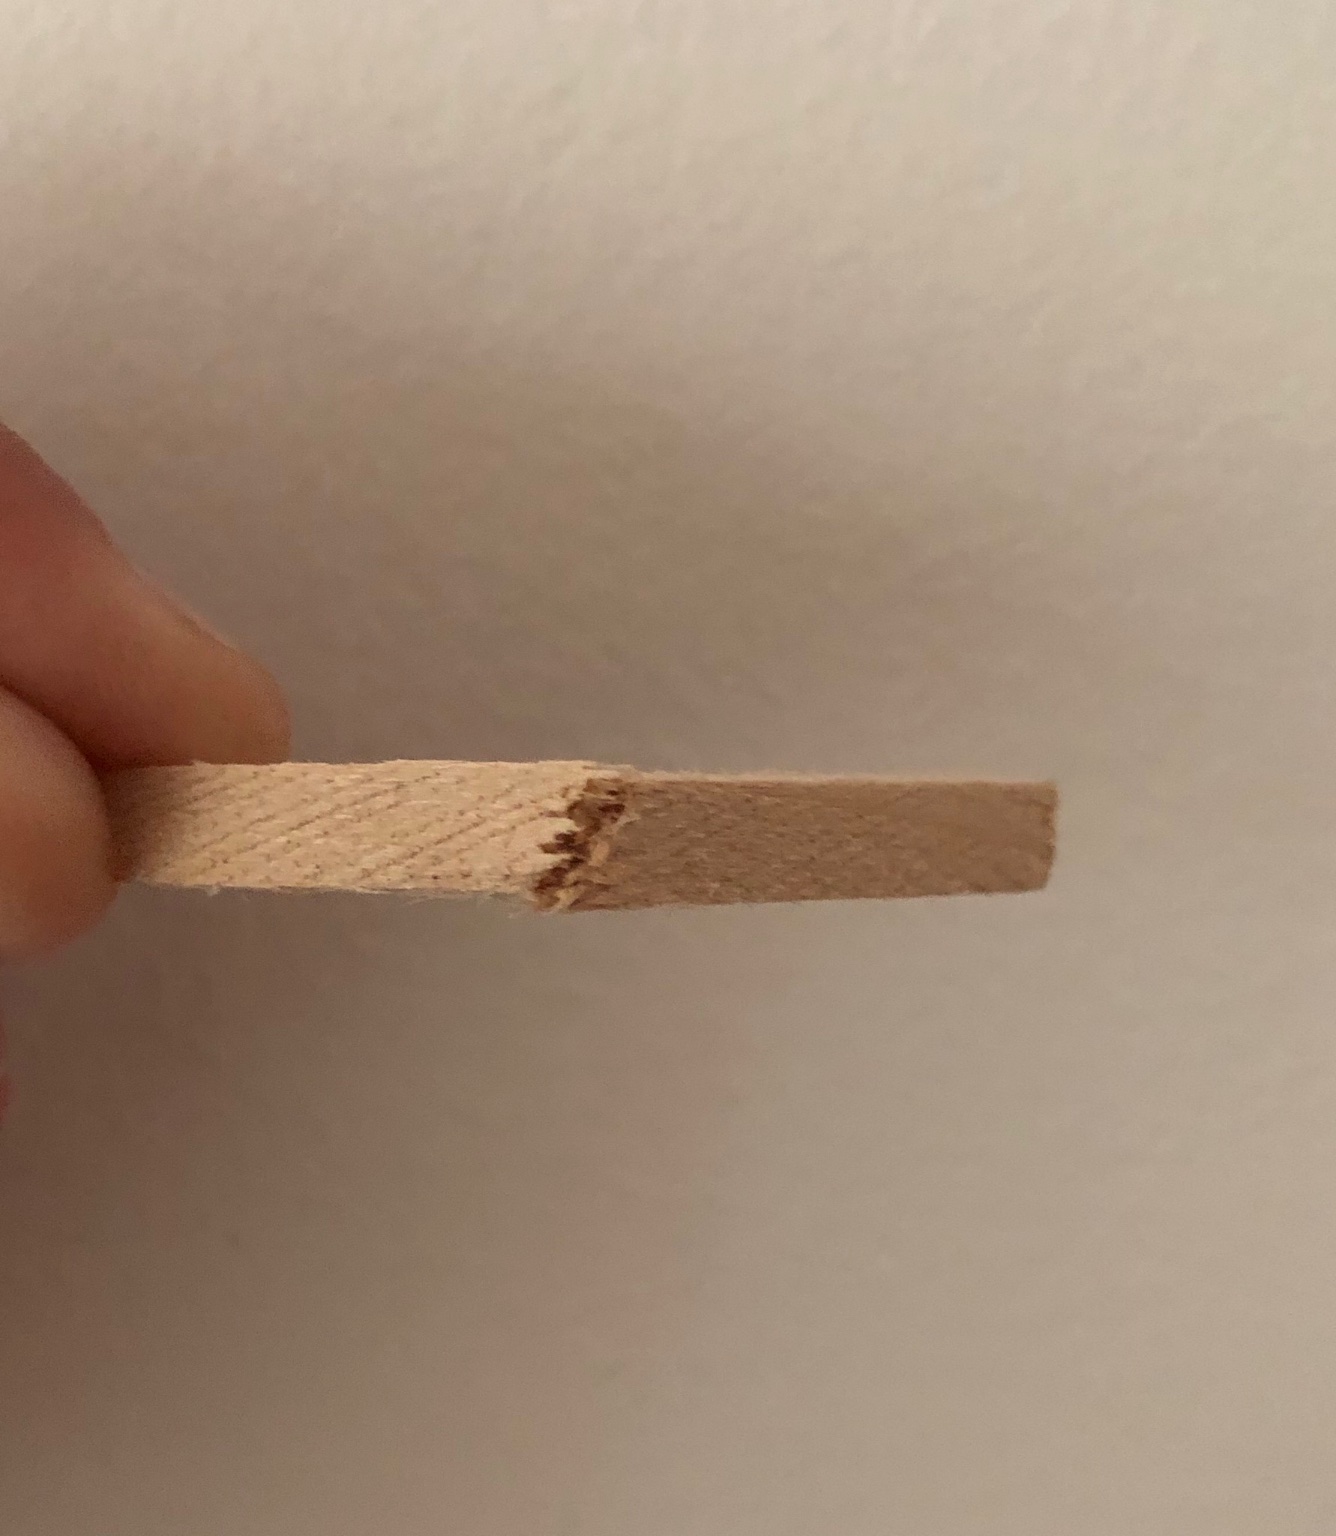
Hi Ronald. I have just finished the first planking of my Corel’s Victory. I experienced the same situation (planks braking at the stern curvature despite any kind of treatment). Nevertheless, I carry on planking the rest of the segment and then just added a drop of CA glue at the braking point, pressed with a screwdriver to even the surface and sand out the area. The result is good enough and will be covered by the second planking. Keep up the good work !!!

-
Many thanks for your support Richard!!! I am enjoying the build a lot. I decided to cut the gun ports before doing the second planking. Although the instructions don’t say that, I consider the second planking will cover all errors and miss cuts that may happen in the process. I will load some picks soon. Best regards,
-
I have just experienced the same great customer service from Corel with a similar situation as the one described by dogged almost 7 years ago. Got by email the instructions booklet. Best regards to all!
-
Nice video Jock2000! Keep up the good work and updating us! Best regards.
-
Hi Nicolas! Did you started your Corel Victory? How is build going? Best regards.
-
Hi Hadesmr! Do you have more pics to share? How is the build going? Best regards!
-
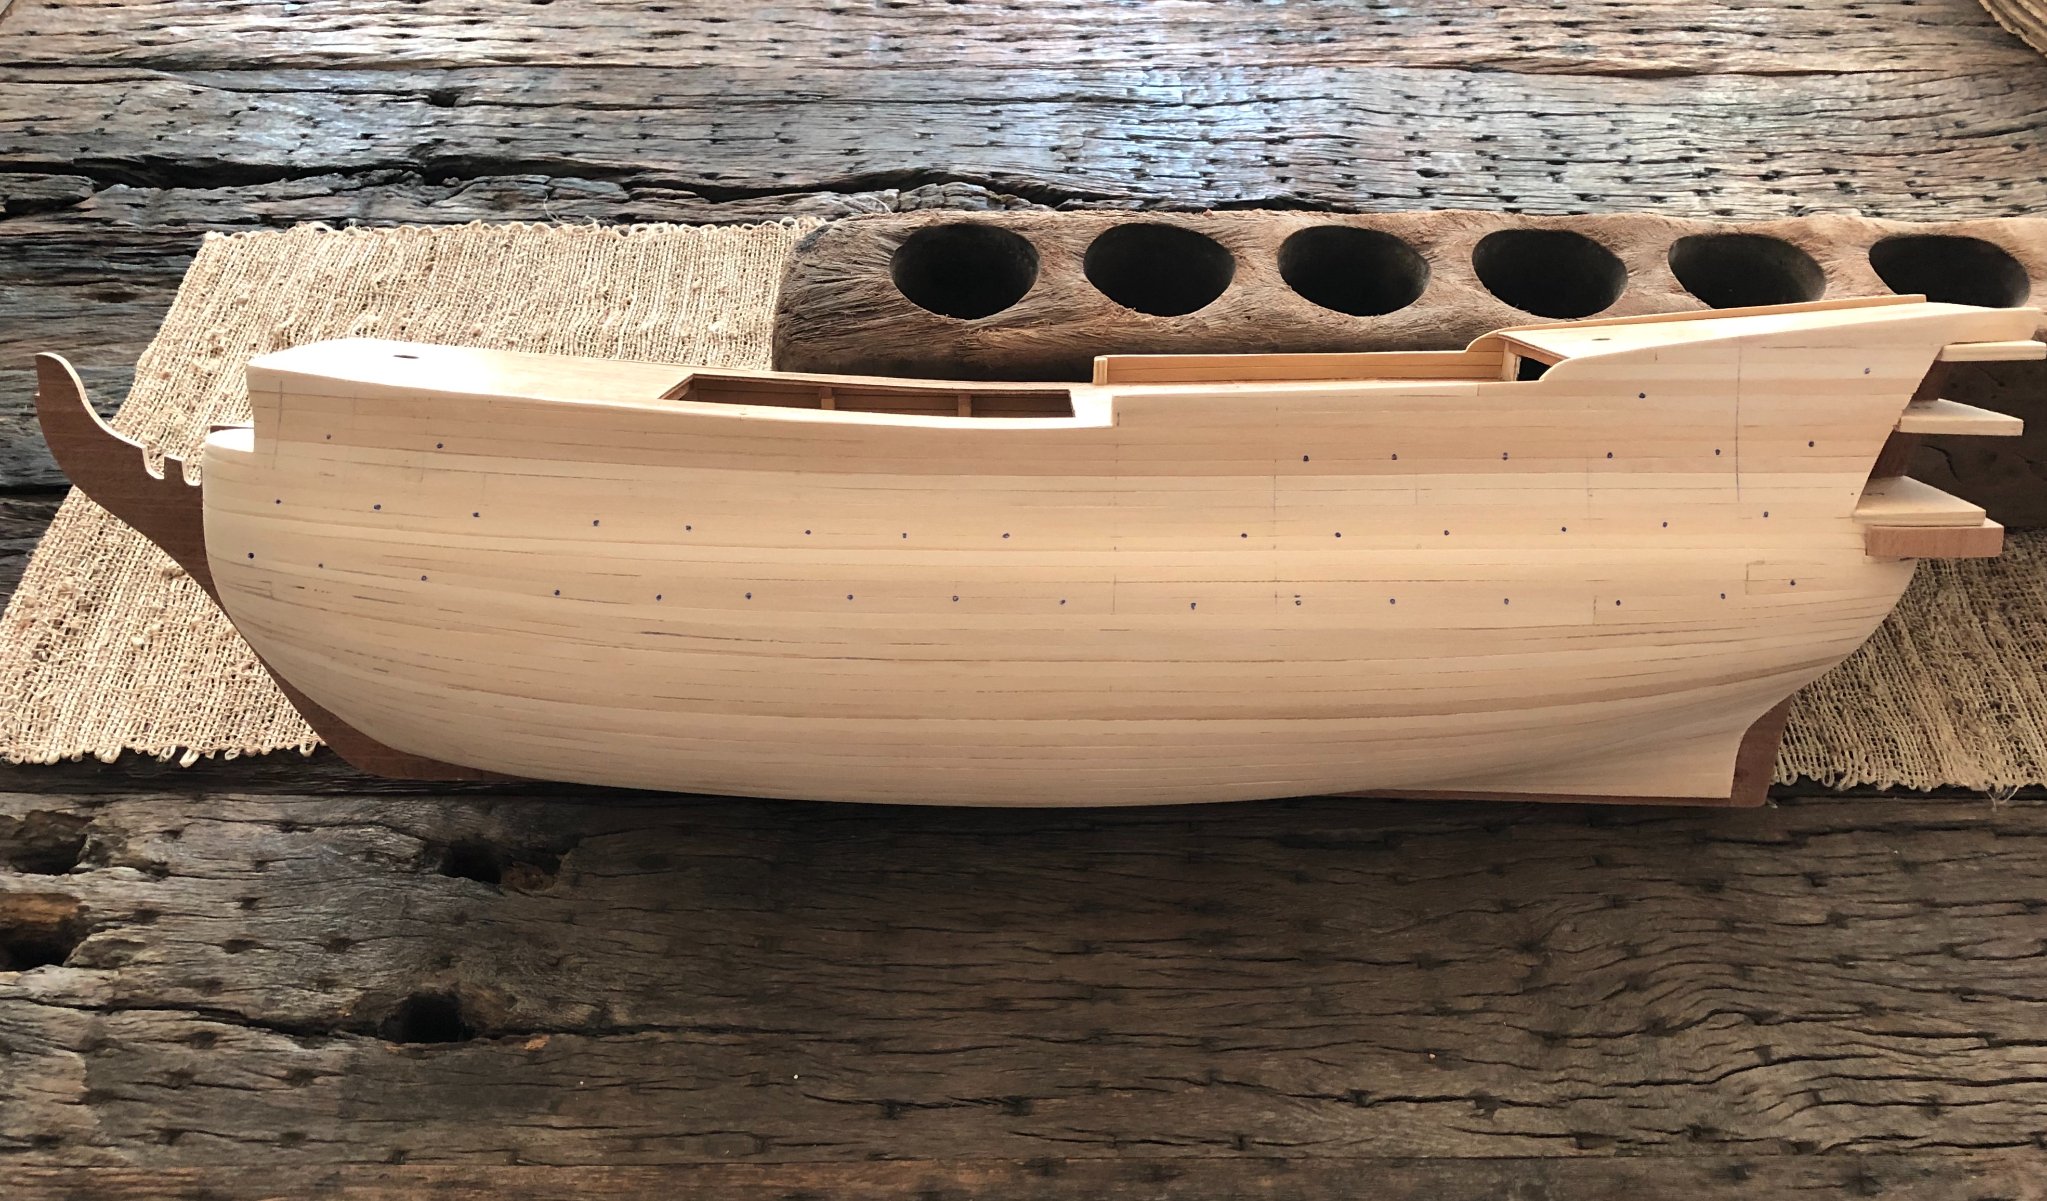
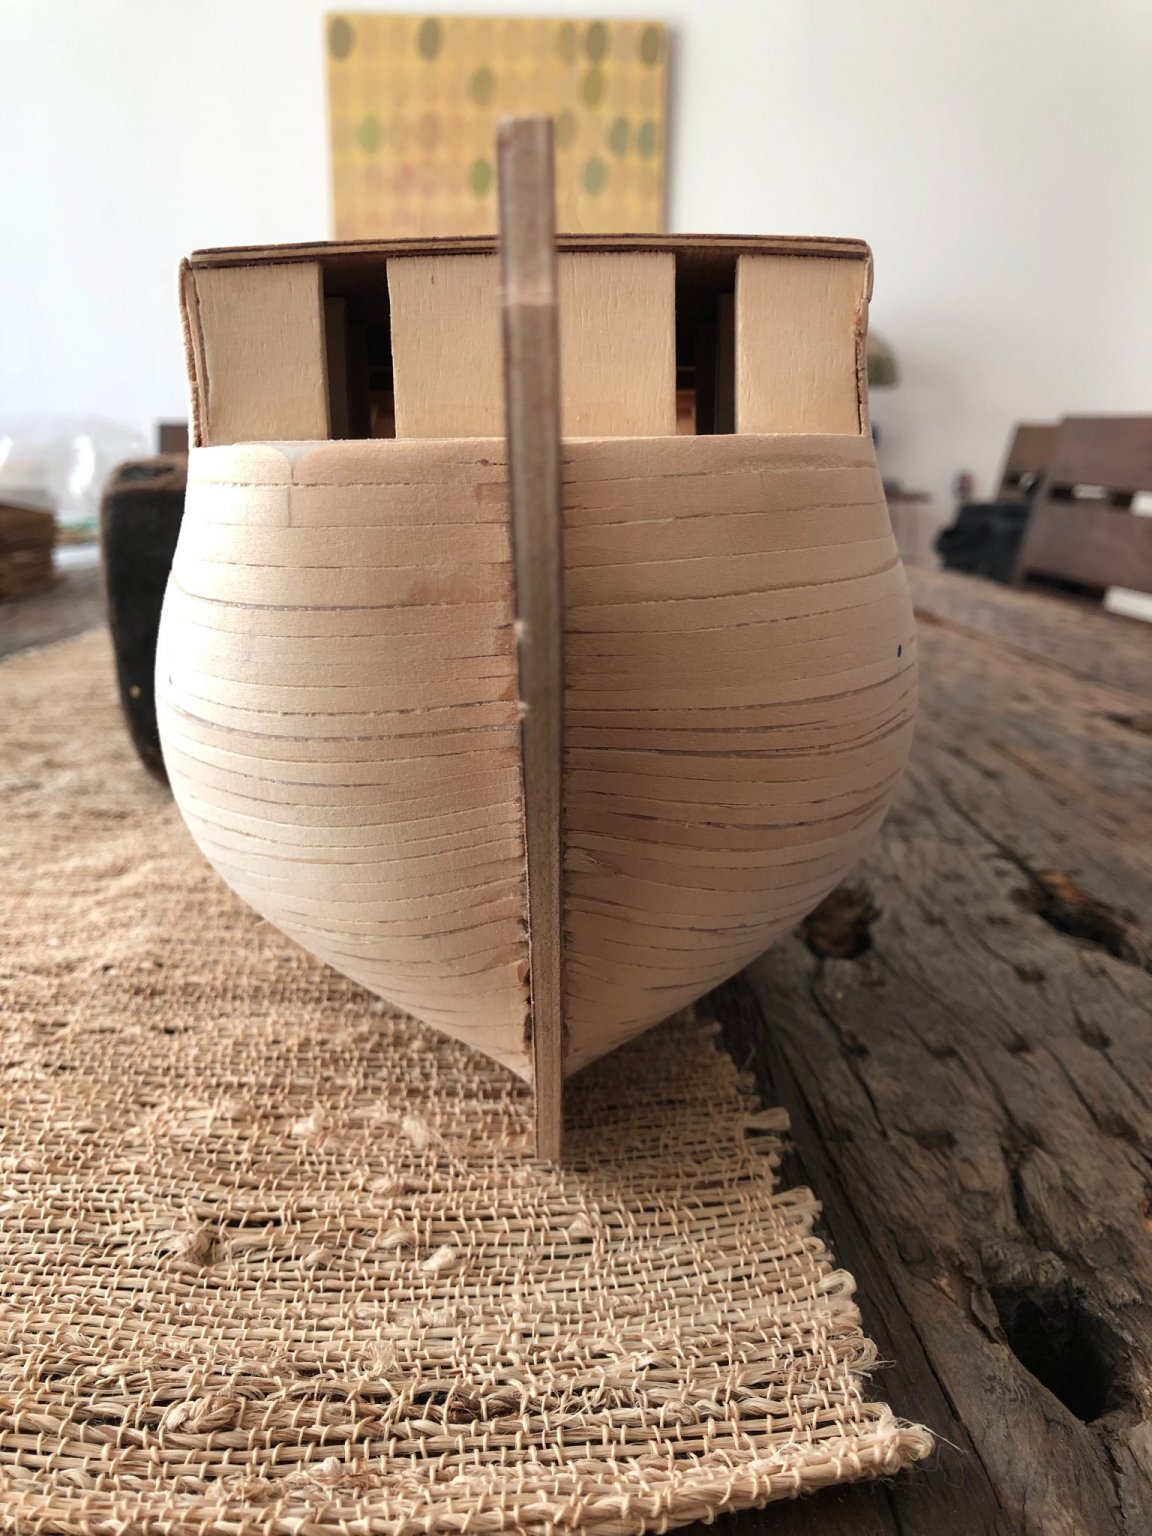
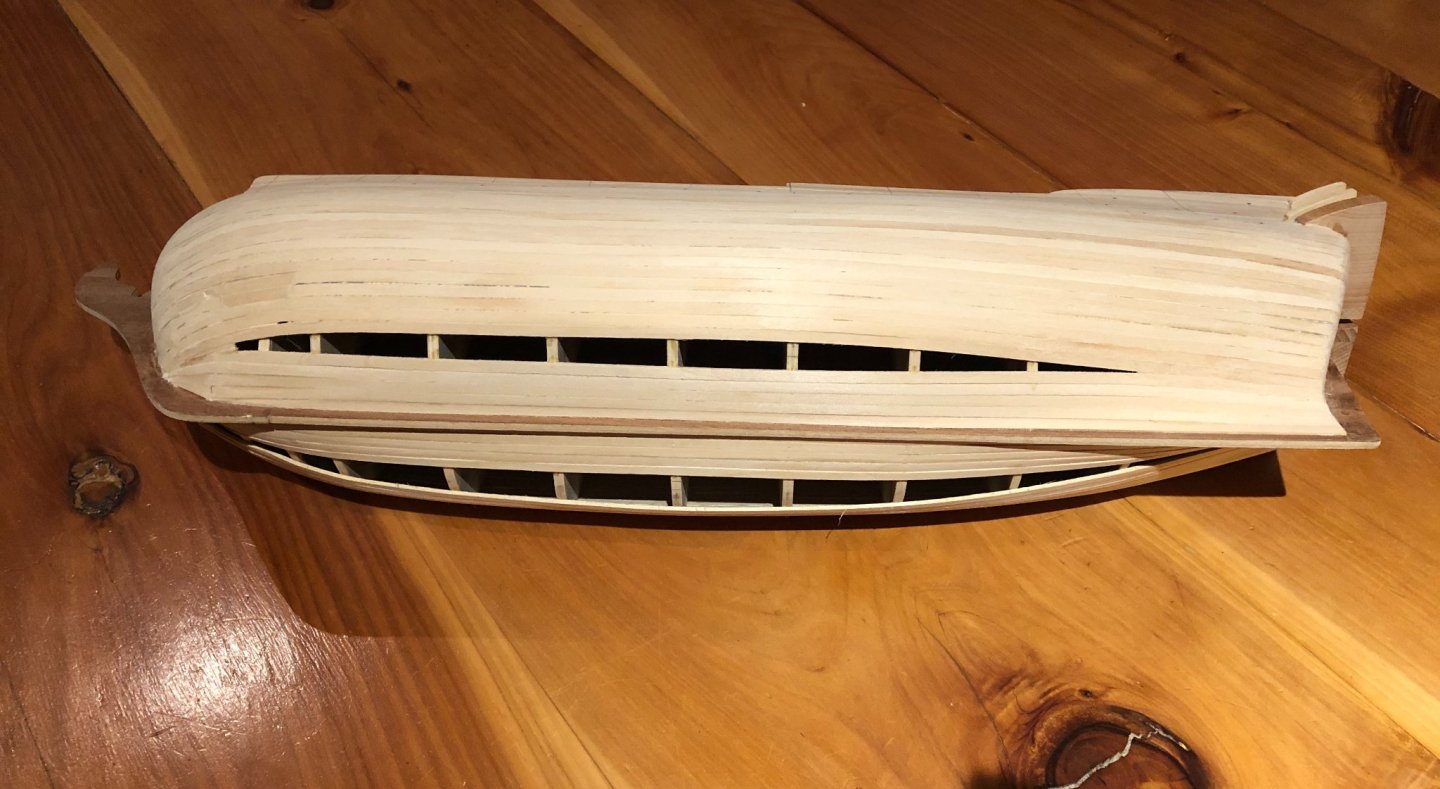
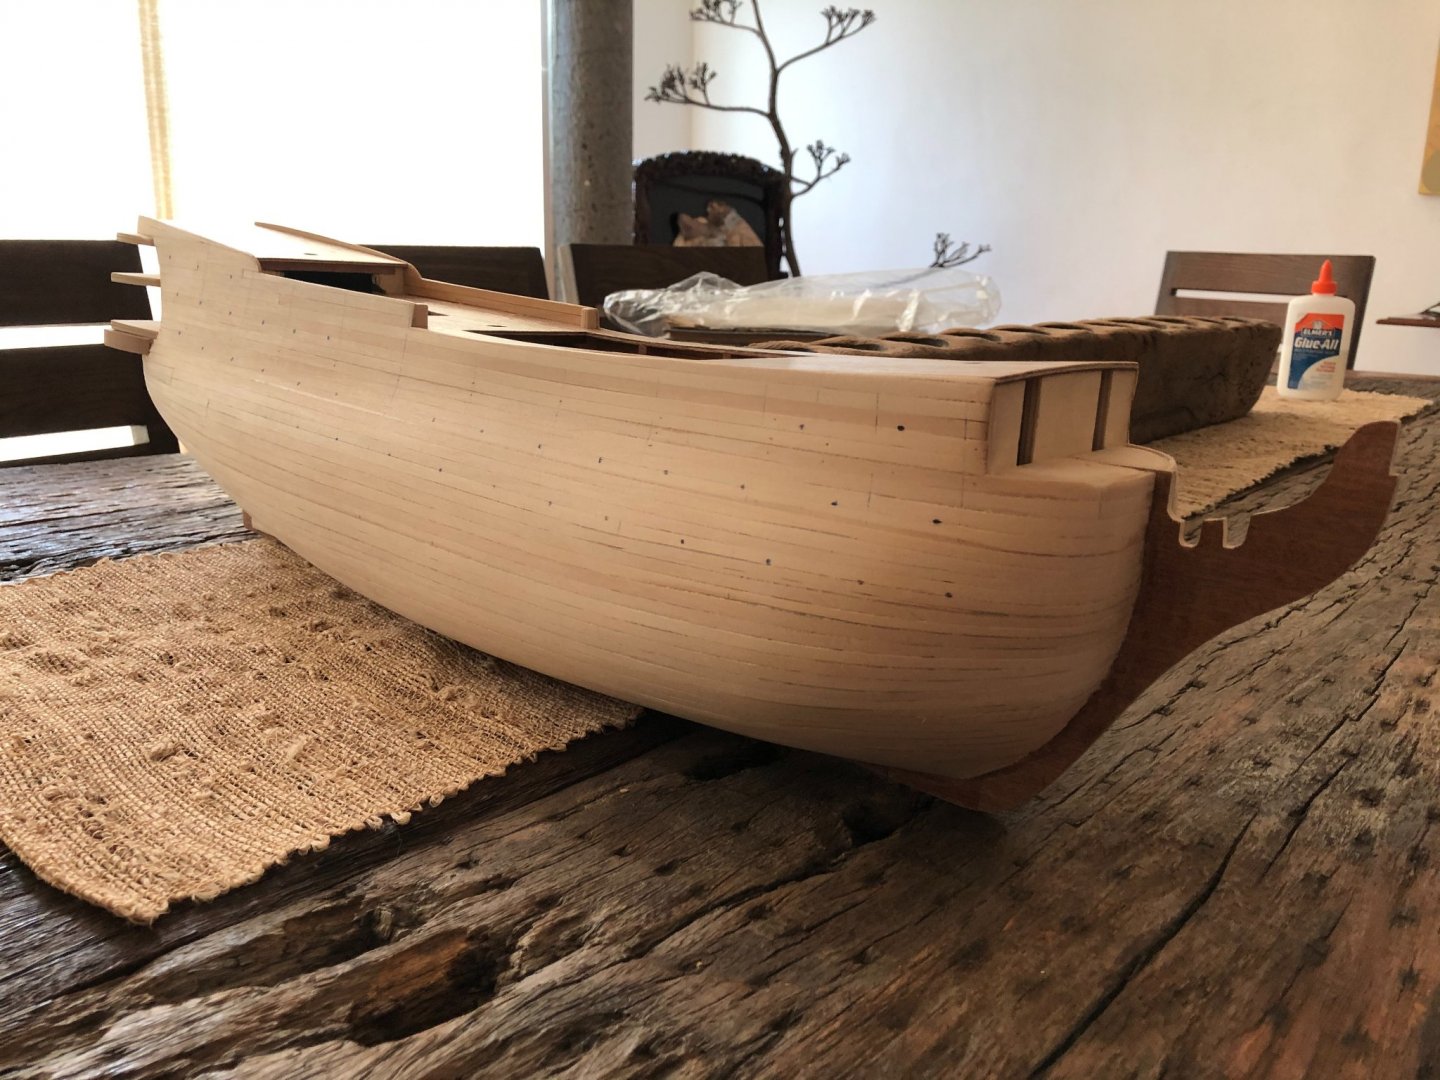
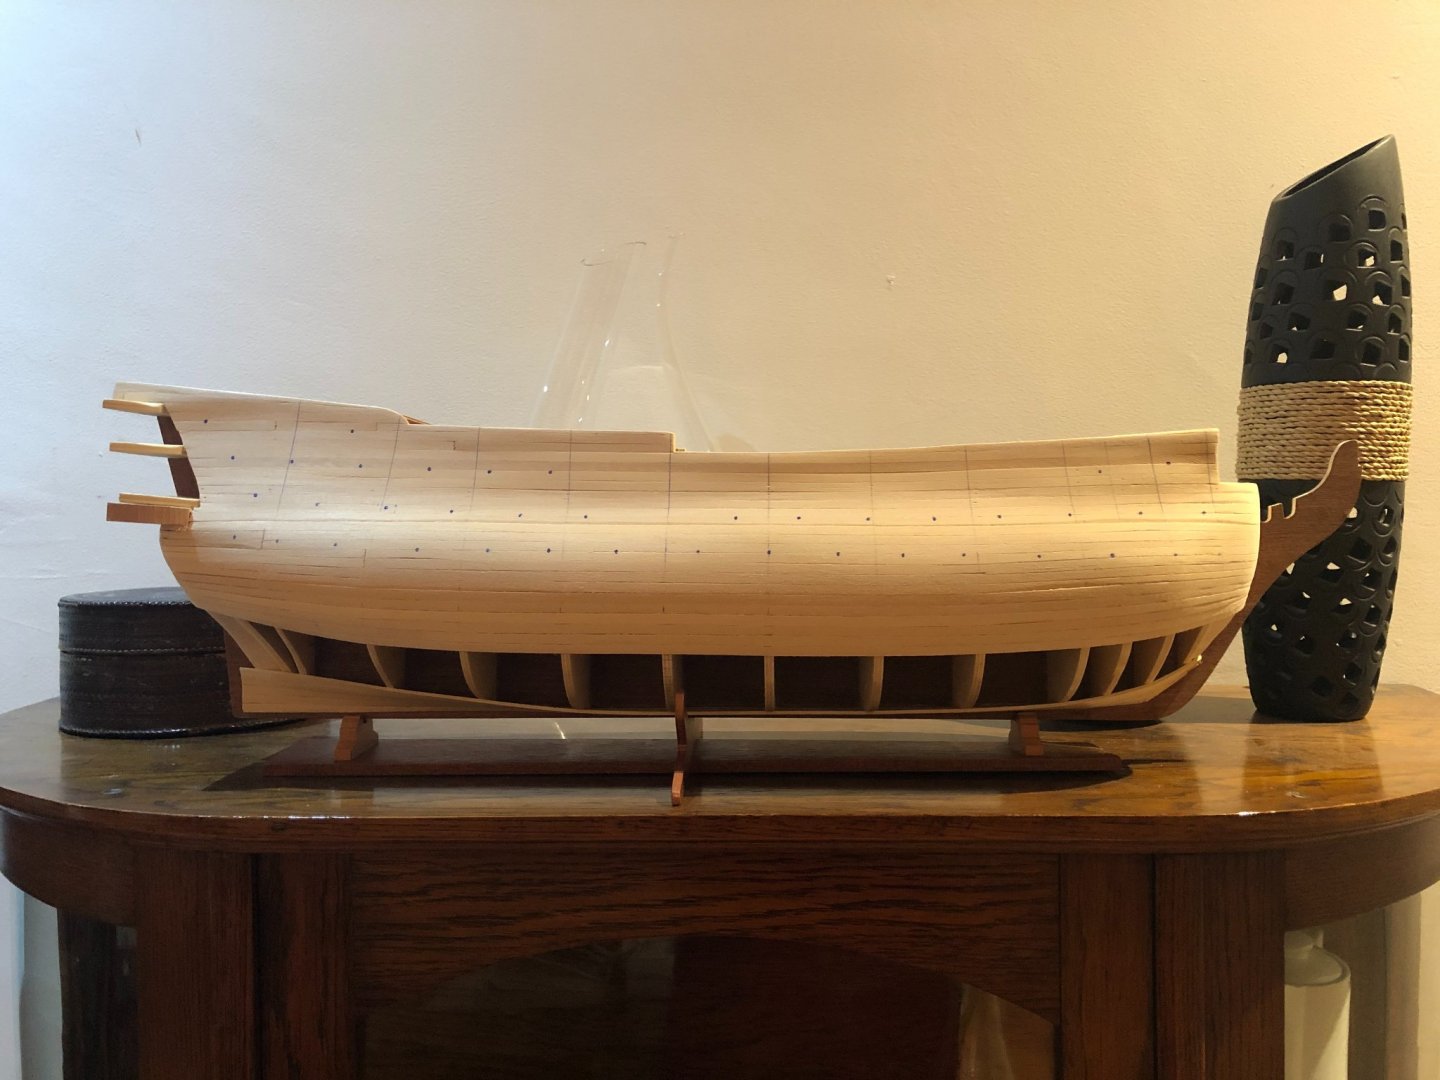
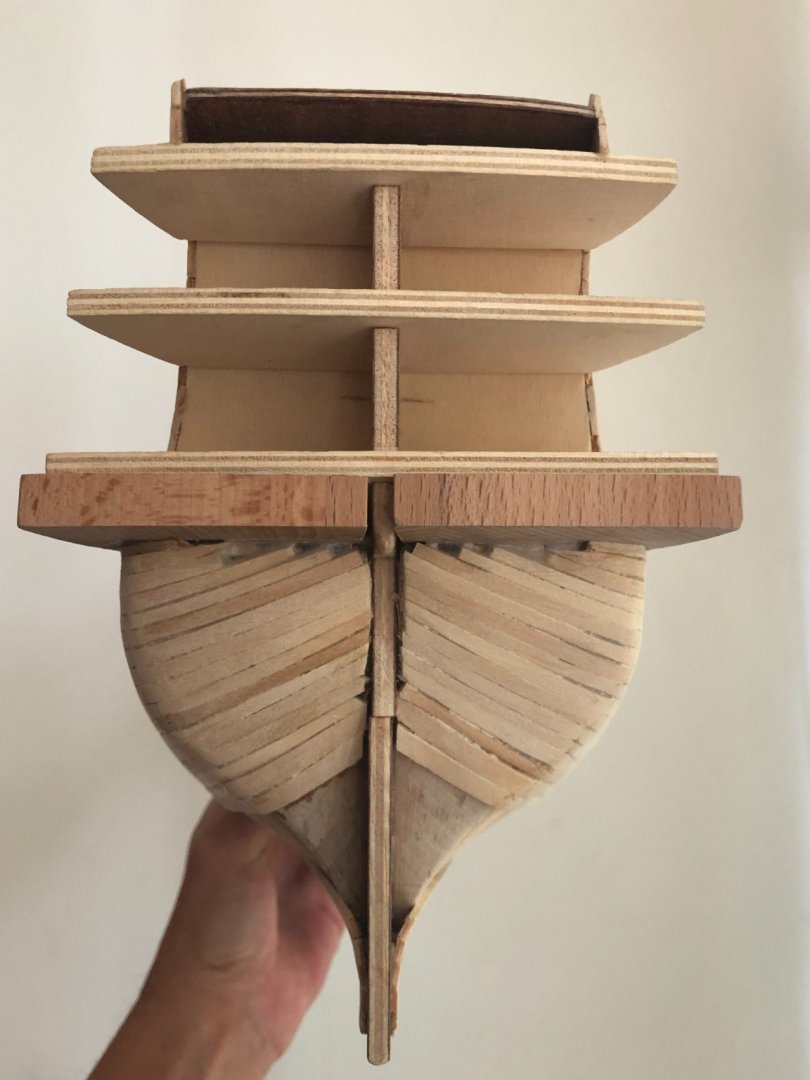
First milestone achieved!!! I have just finished the first planking of my HMS Victory! Despite there are a lot of errors and mistakes I am really satisfied with the outcome, considering this is just my second planking. I learned a lot and, contrary to what happened with my first experience, I enjoyed it a lot. Thanks to all who posted a Victory build log. A learn a lot from you! Pics attached. Best regards, Eugenio.
.thumb.jpg.6b63874d4244e899b931f8ddda71ab7c.jpg)


-
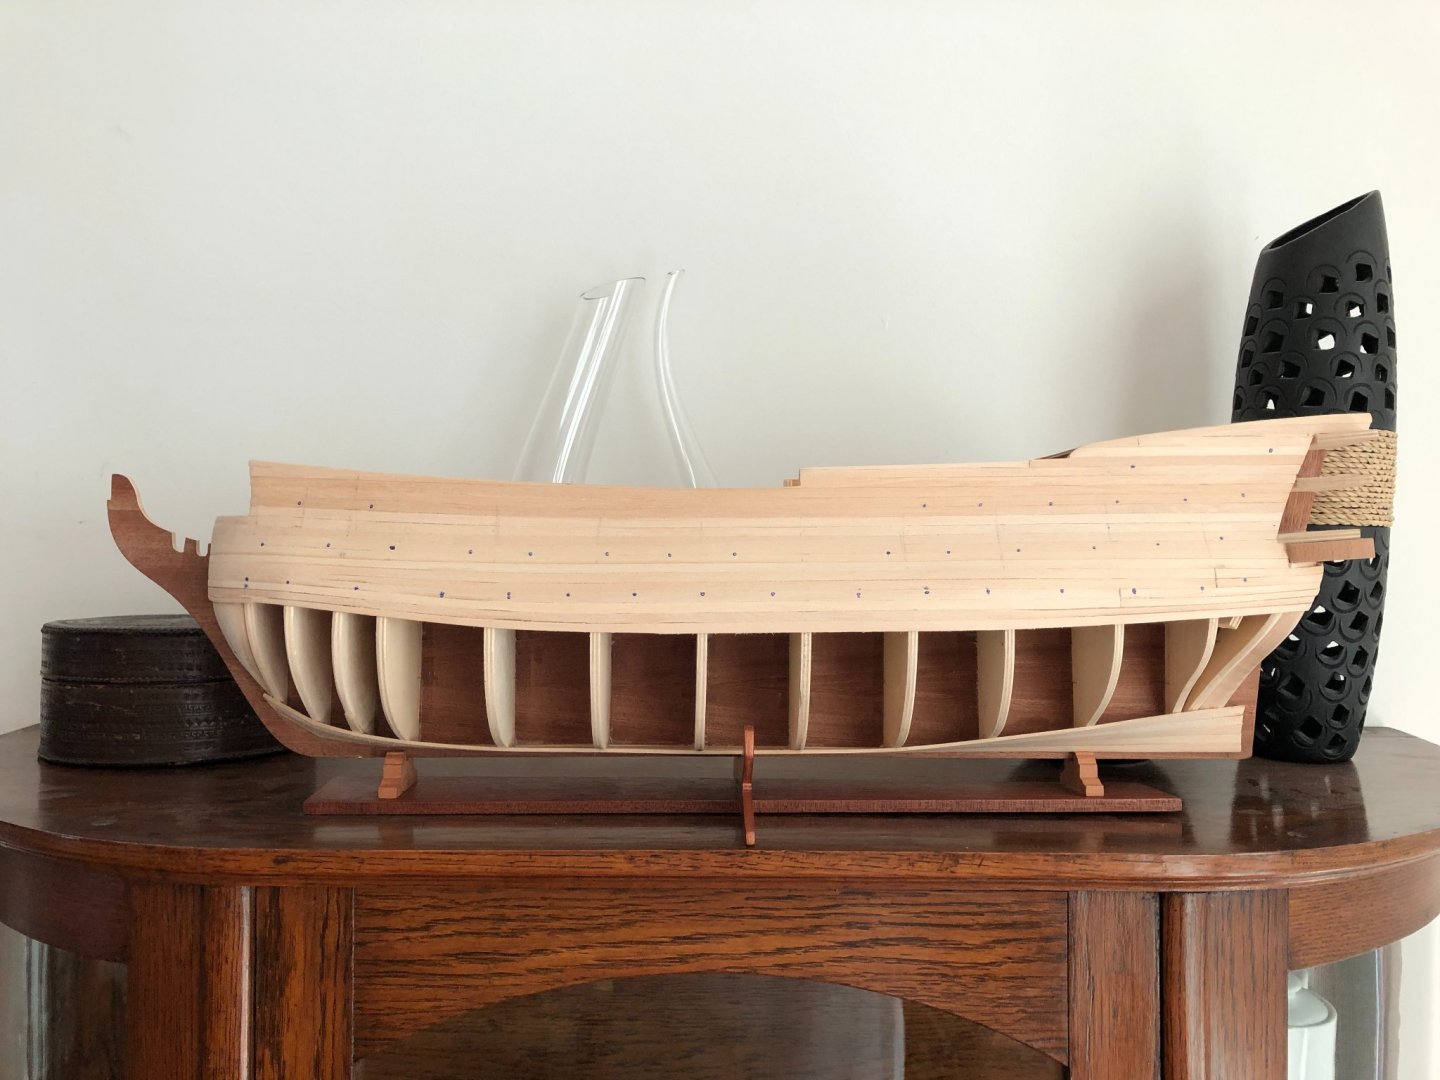
Hi everybody: Having a lot of free time now work is going pretty fast. Doing 4 planks a day (a pair on each side). I shape the planks and fix them early in the afternoon, let them dry and sand them at night. Soaking the planks for half an hour and applying heat with a hair dryer has been enough to shape the planks. I am tapering them based on what I see is needed to have an even plank line. The wood for this first planking is very malleable. I use white glue in between the planks and CA glue for the plank-frames bond. This is just my second planking after the Artesania Latina Swift, so many mistakes have been made. But my ultimate goals for this first planking is to learn about the process, learn how to work the wood, learn about shaping and tapering the planks and having a smooth, even, correct shape surface; so I am starting to loose the fear on committing errors that can be corrected. For me, this first planking is low value-added work (in terms of spending more working hours to make it look better). For the second planking my approach will change, I will be more patient, looking for a beautiful finish. Picks attached. Thanks for looking, best regards.

-
Jonesey thanks for posting on my build log. We are on the same boat, literally !!!! How is yours going? I am having a lot of free time now, so work is going pretty fast. I will update my log today. Doing 4 planks a day (a pair on each side). I shape the planks and set them early in the afternoon, let them dry and sand them at night. Soaking the planks for half an hour and applying heat with a hair dryer has been enough to shape the planks. I use white wood glue in between the planks and CA glue for the plank-frames bond. This is just my second planking after the Artesania Latina Swift so many mistakes have been made, but the ultimate goal for this first planking is to have a smooth, even, correct shape surface; so I am starting to loose the fear on committing errors that can be corrected. For the second planking my approach will change, looking for a beautiful finish. Considering I am a little bit ahead of you, please let me know if you have any questions. Best regards,
-
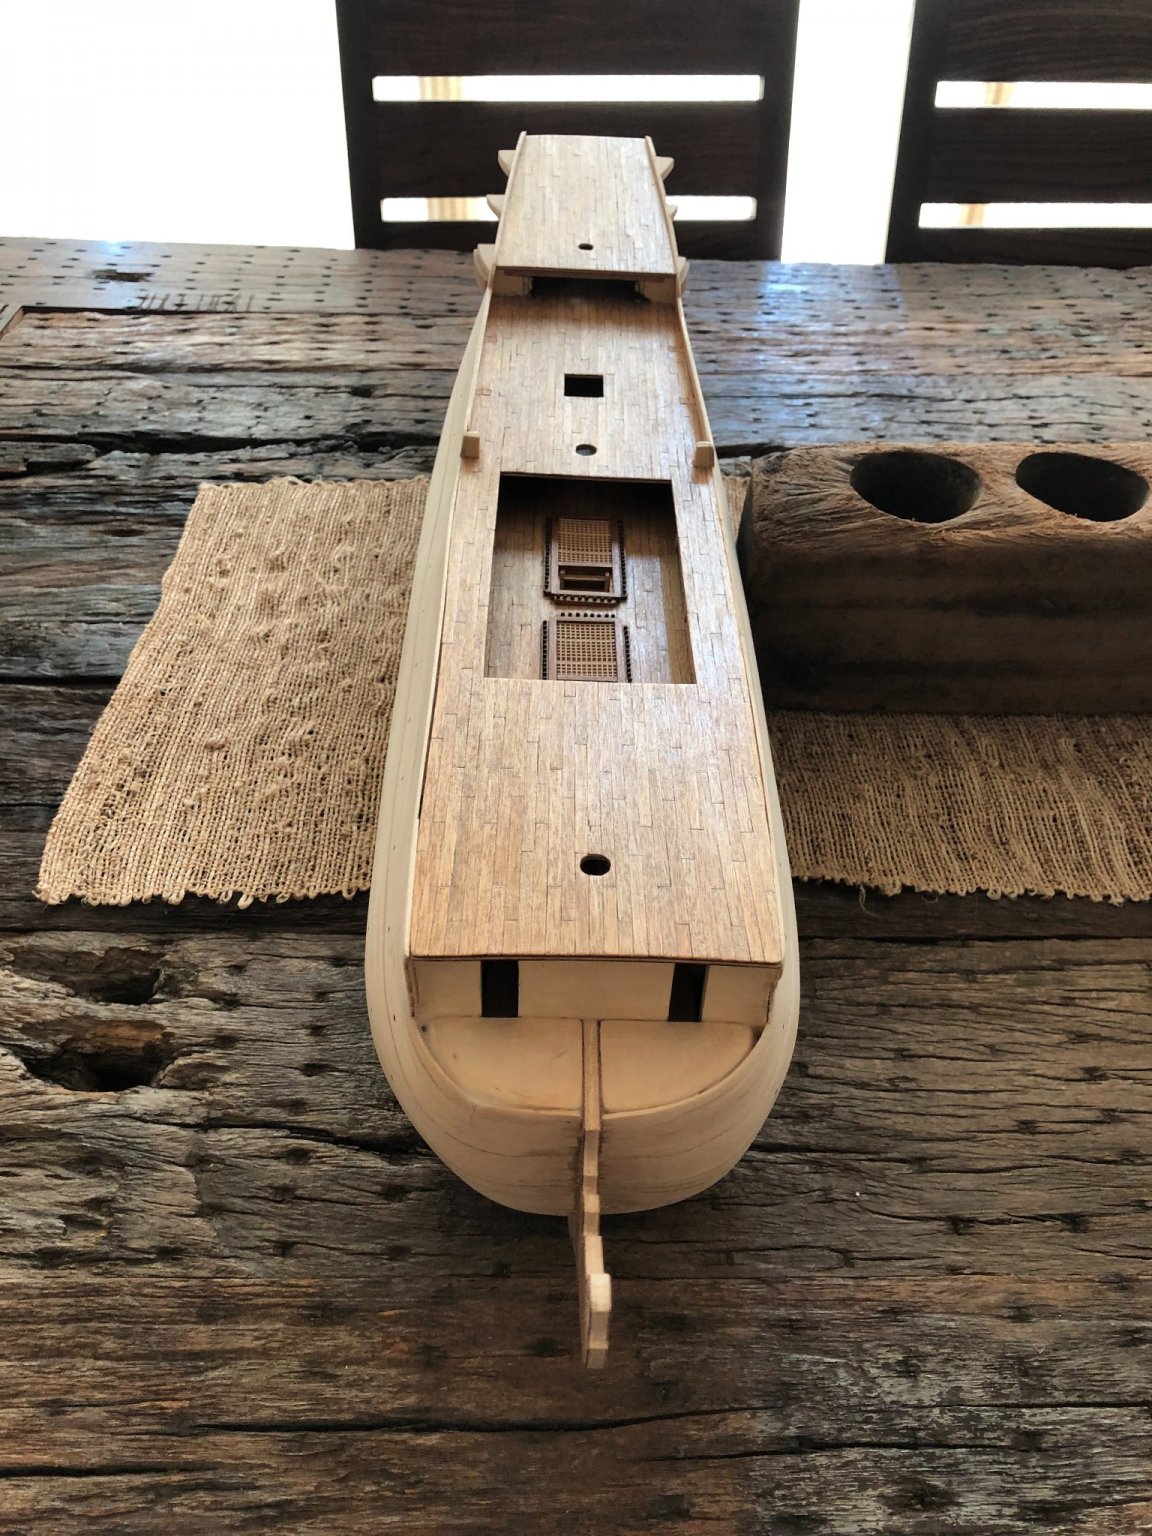
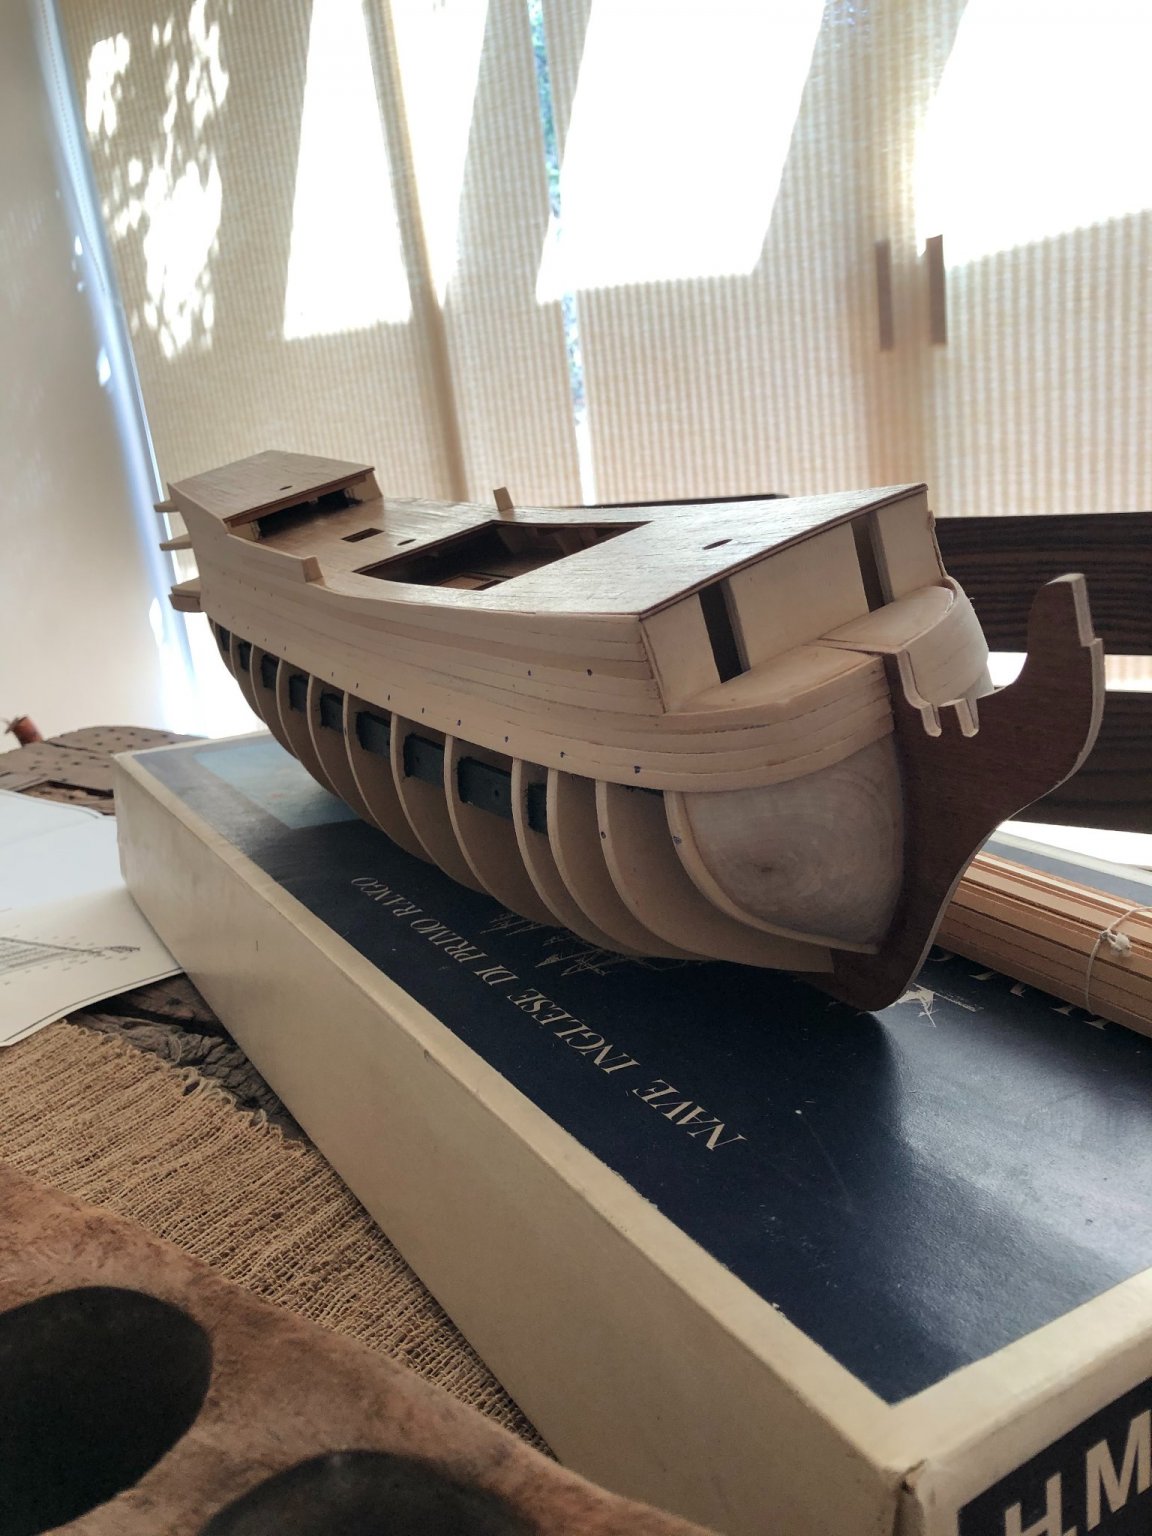
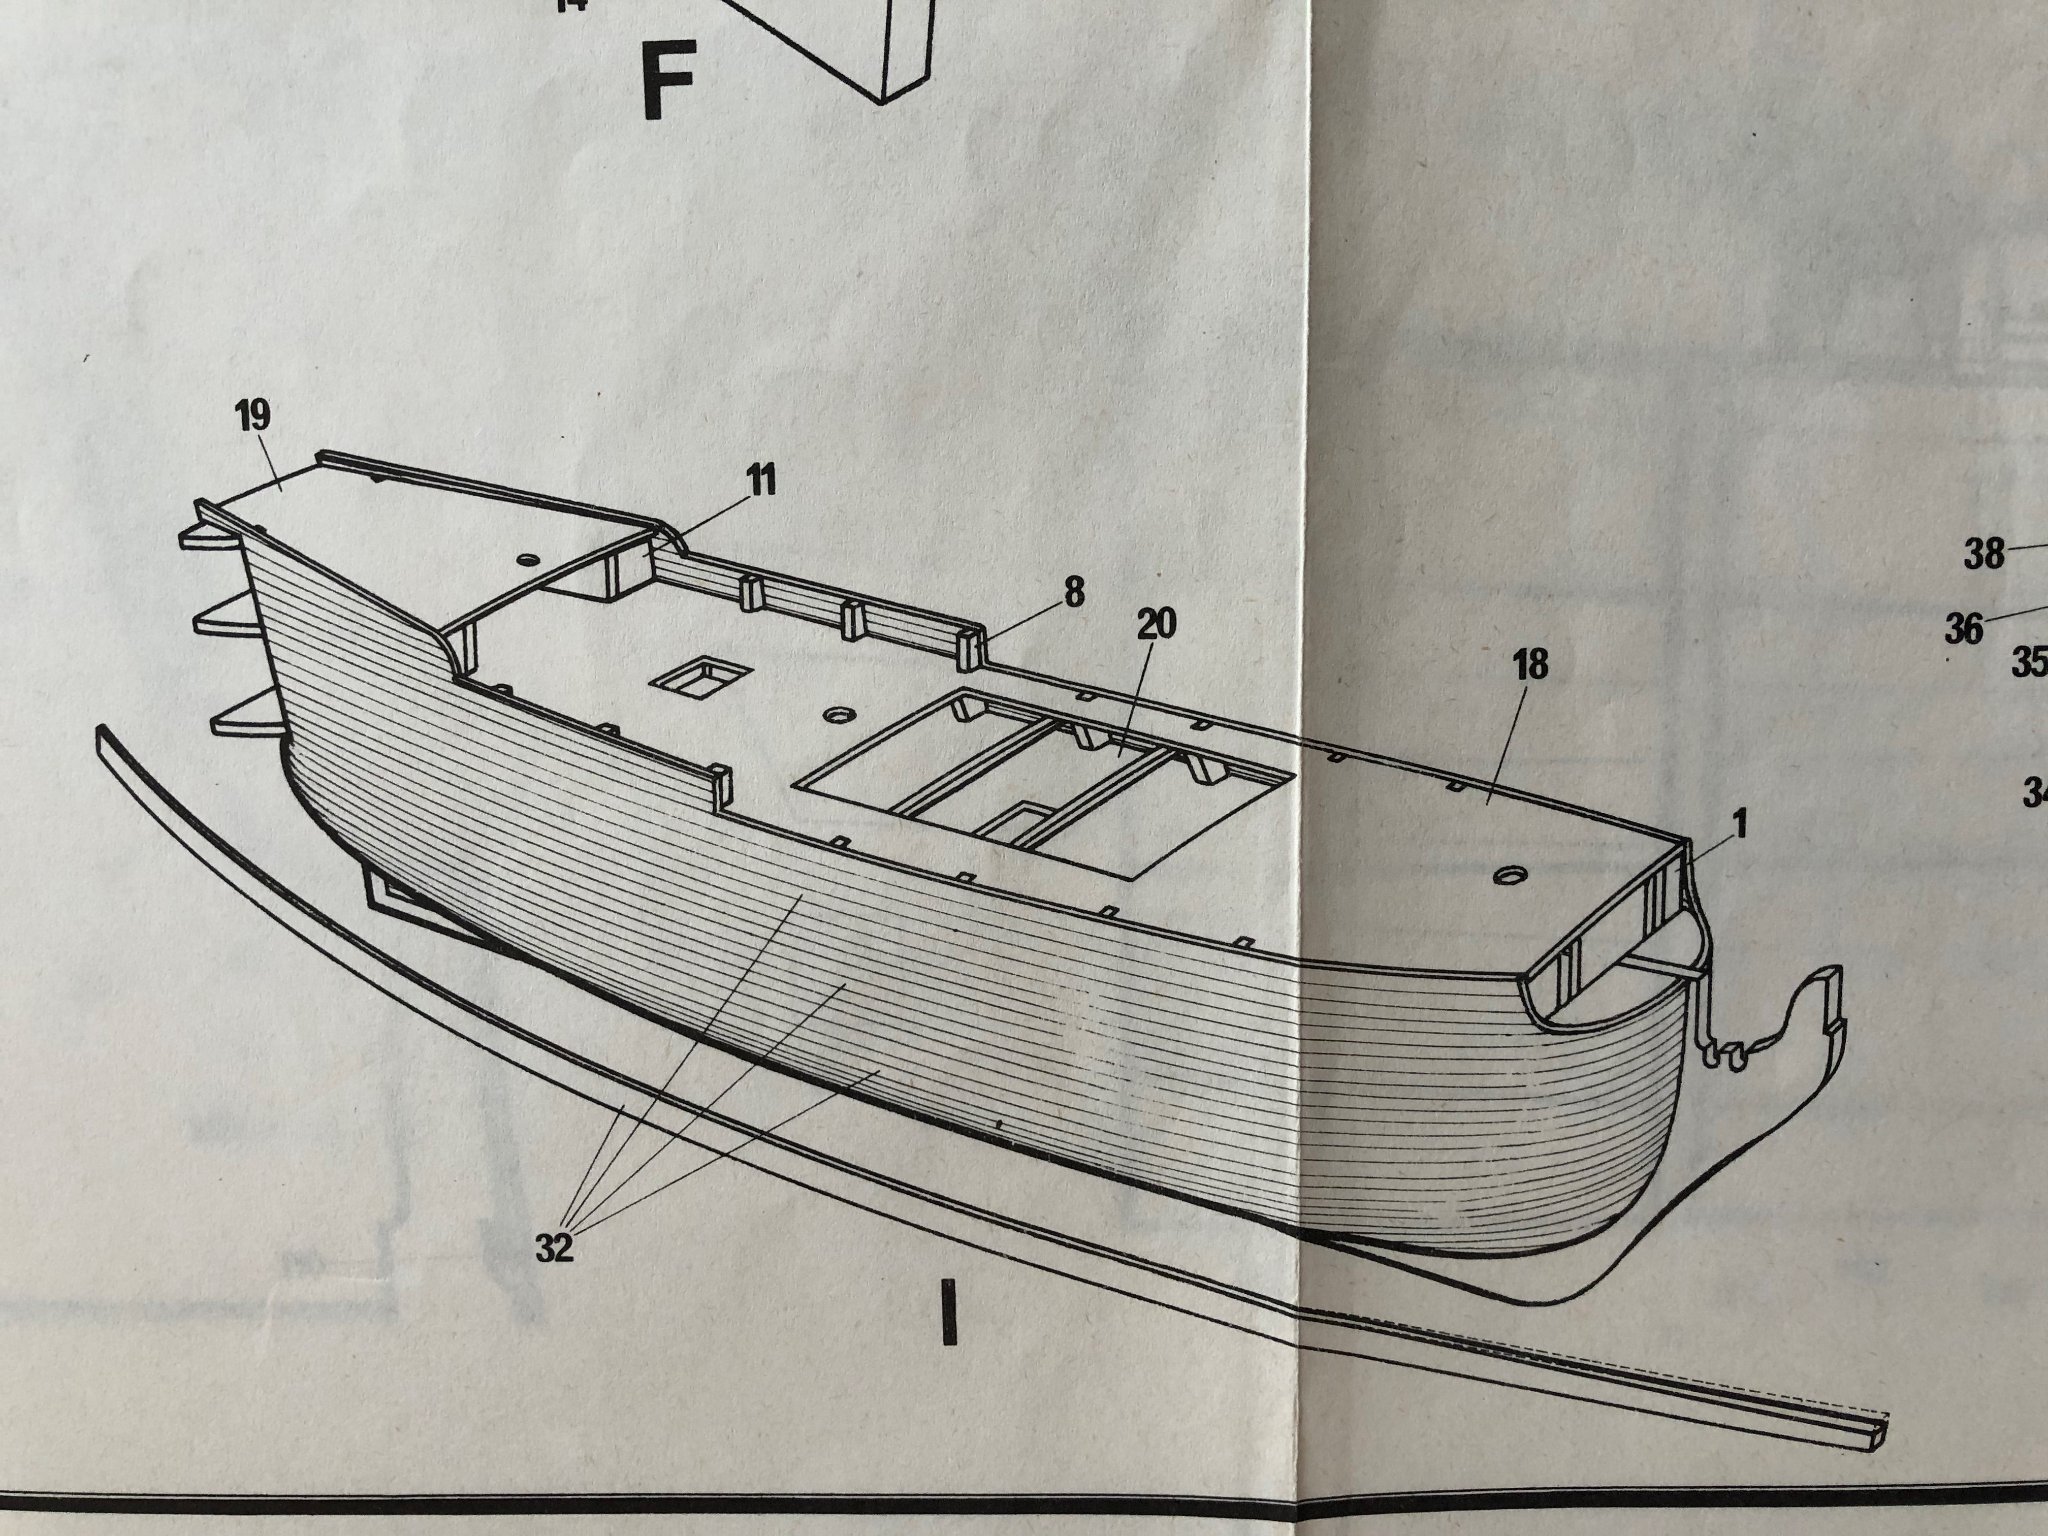
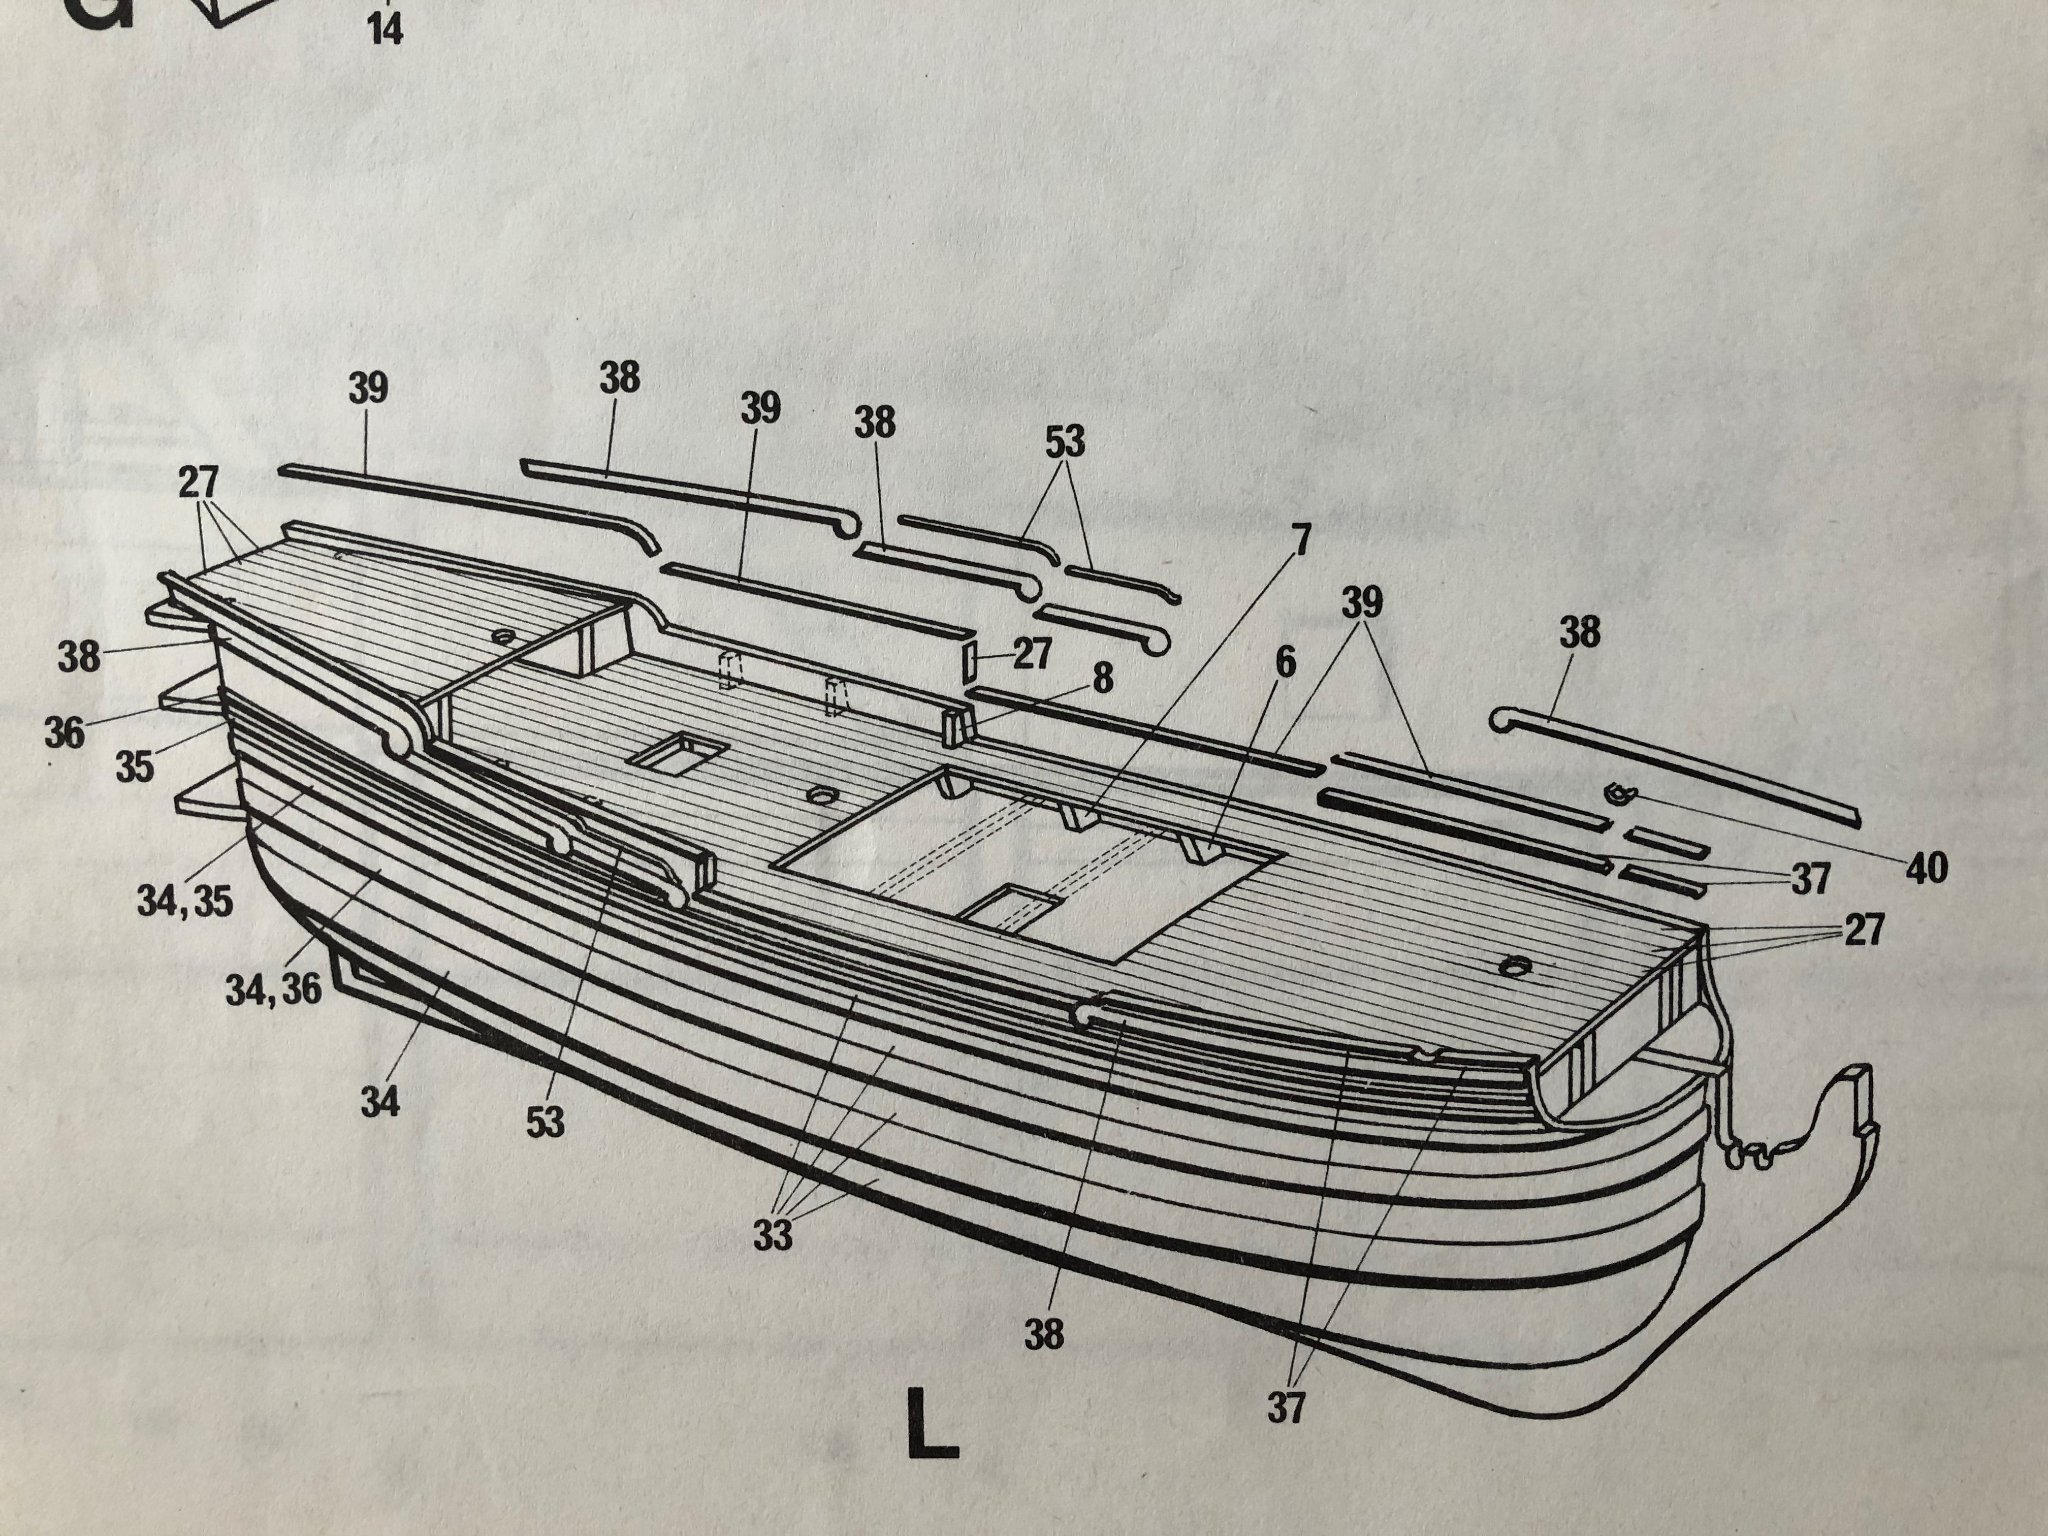
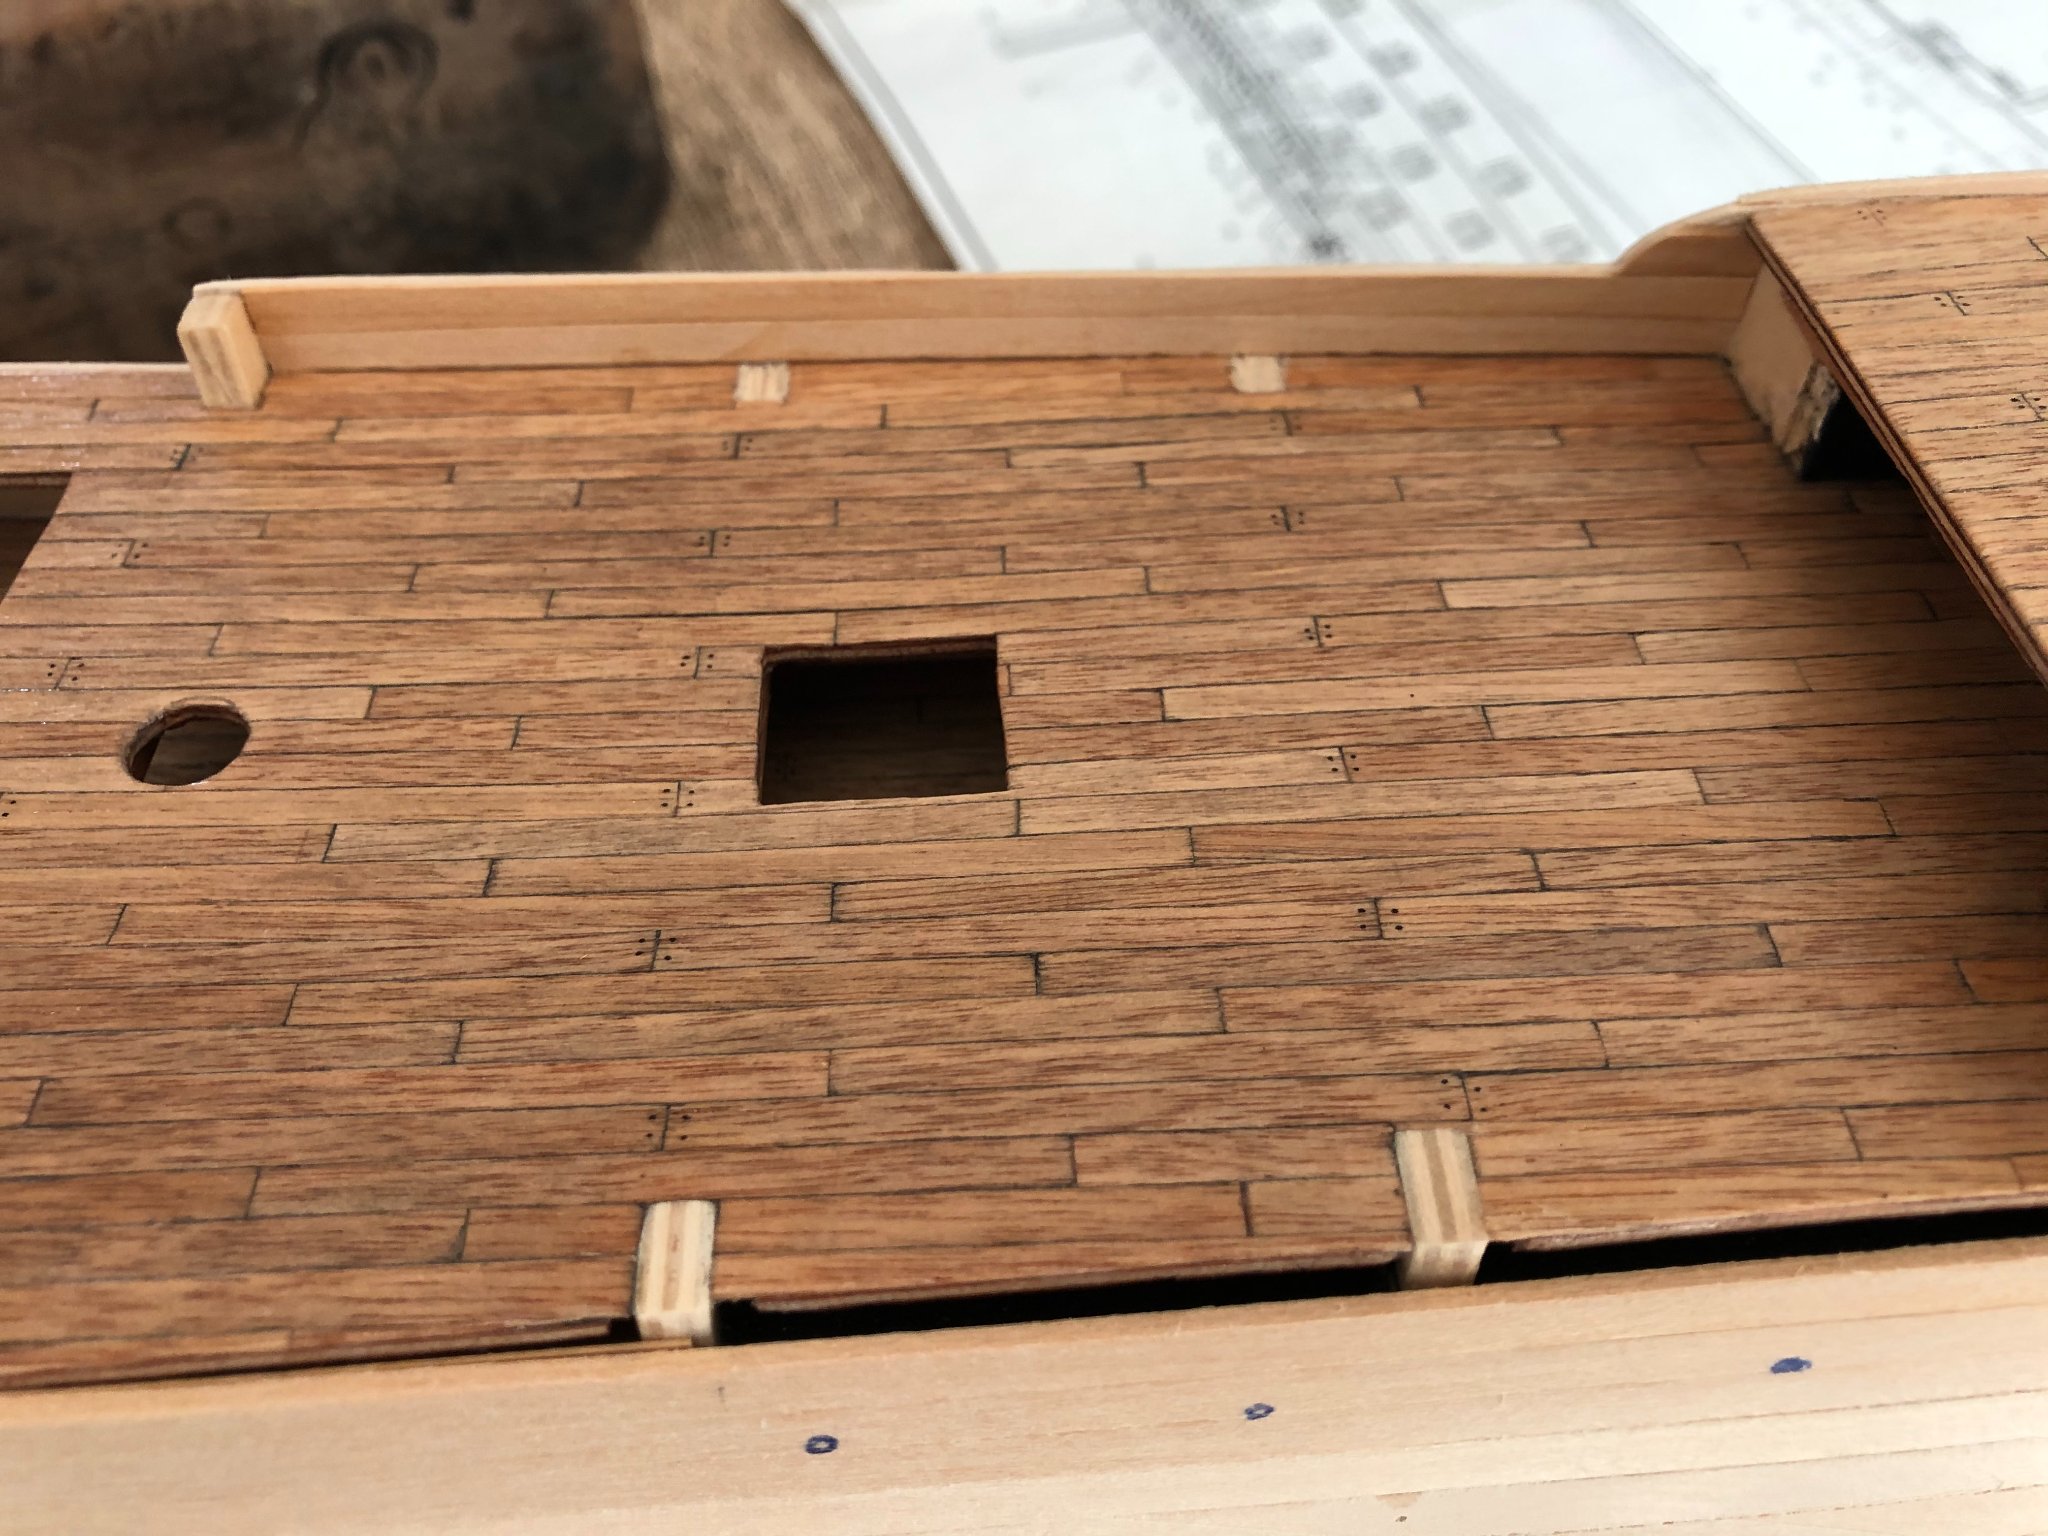
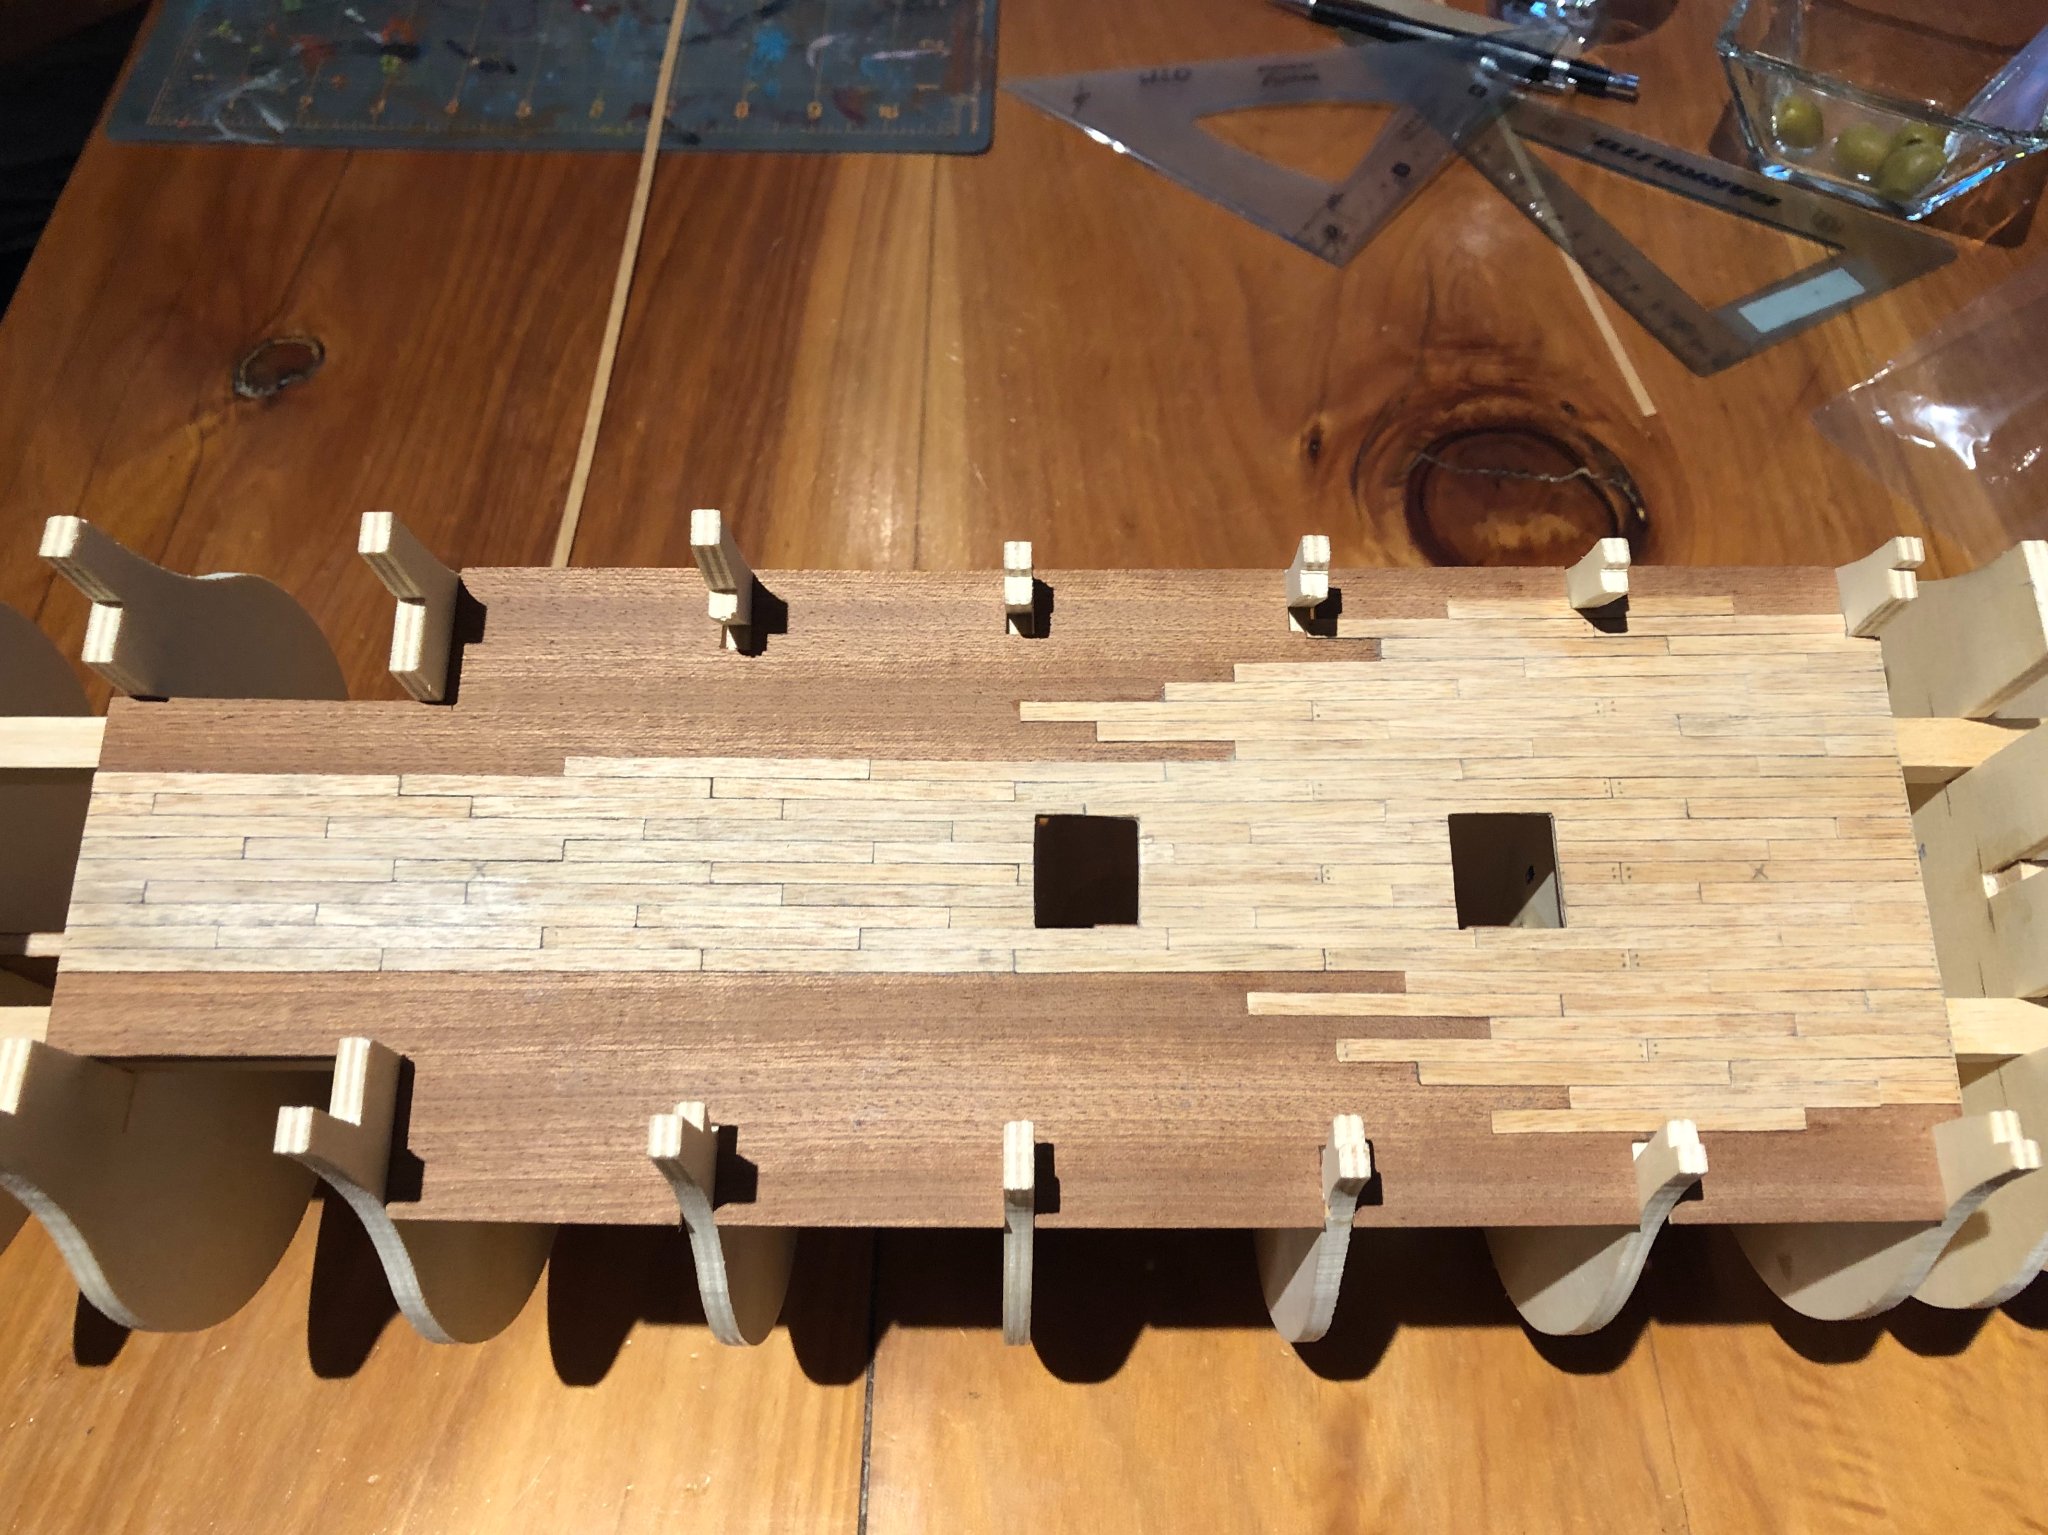
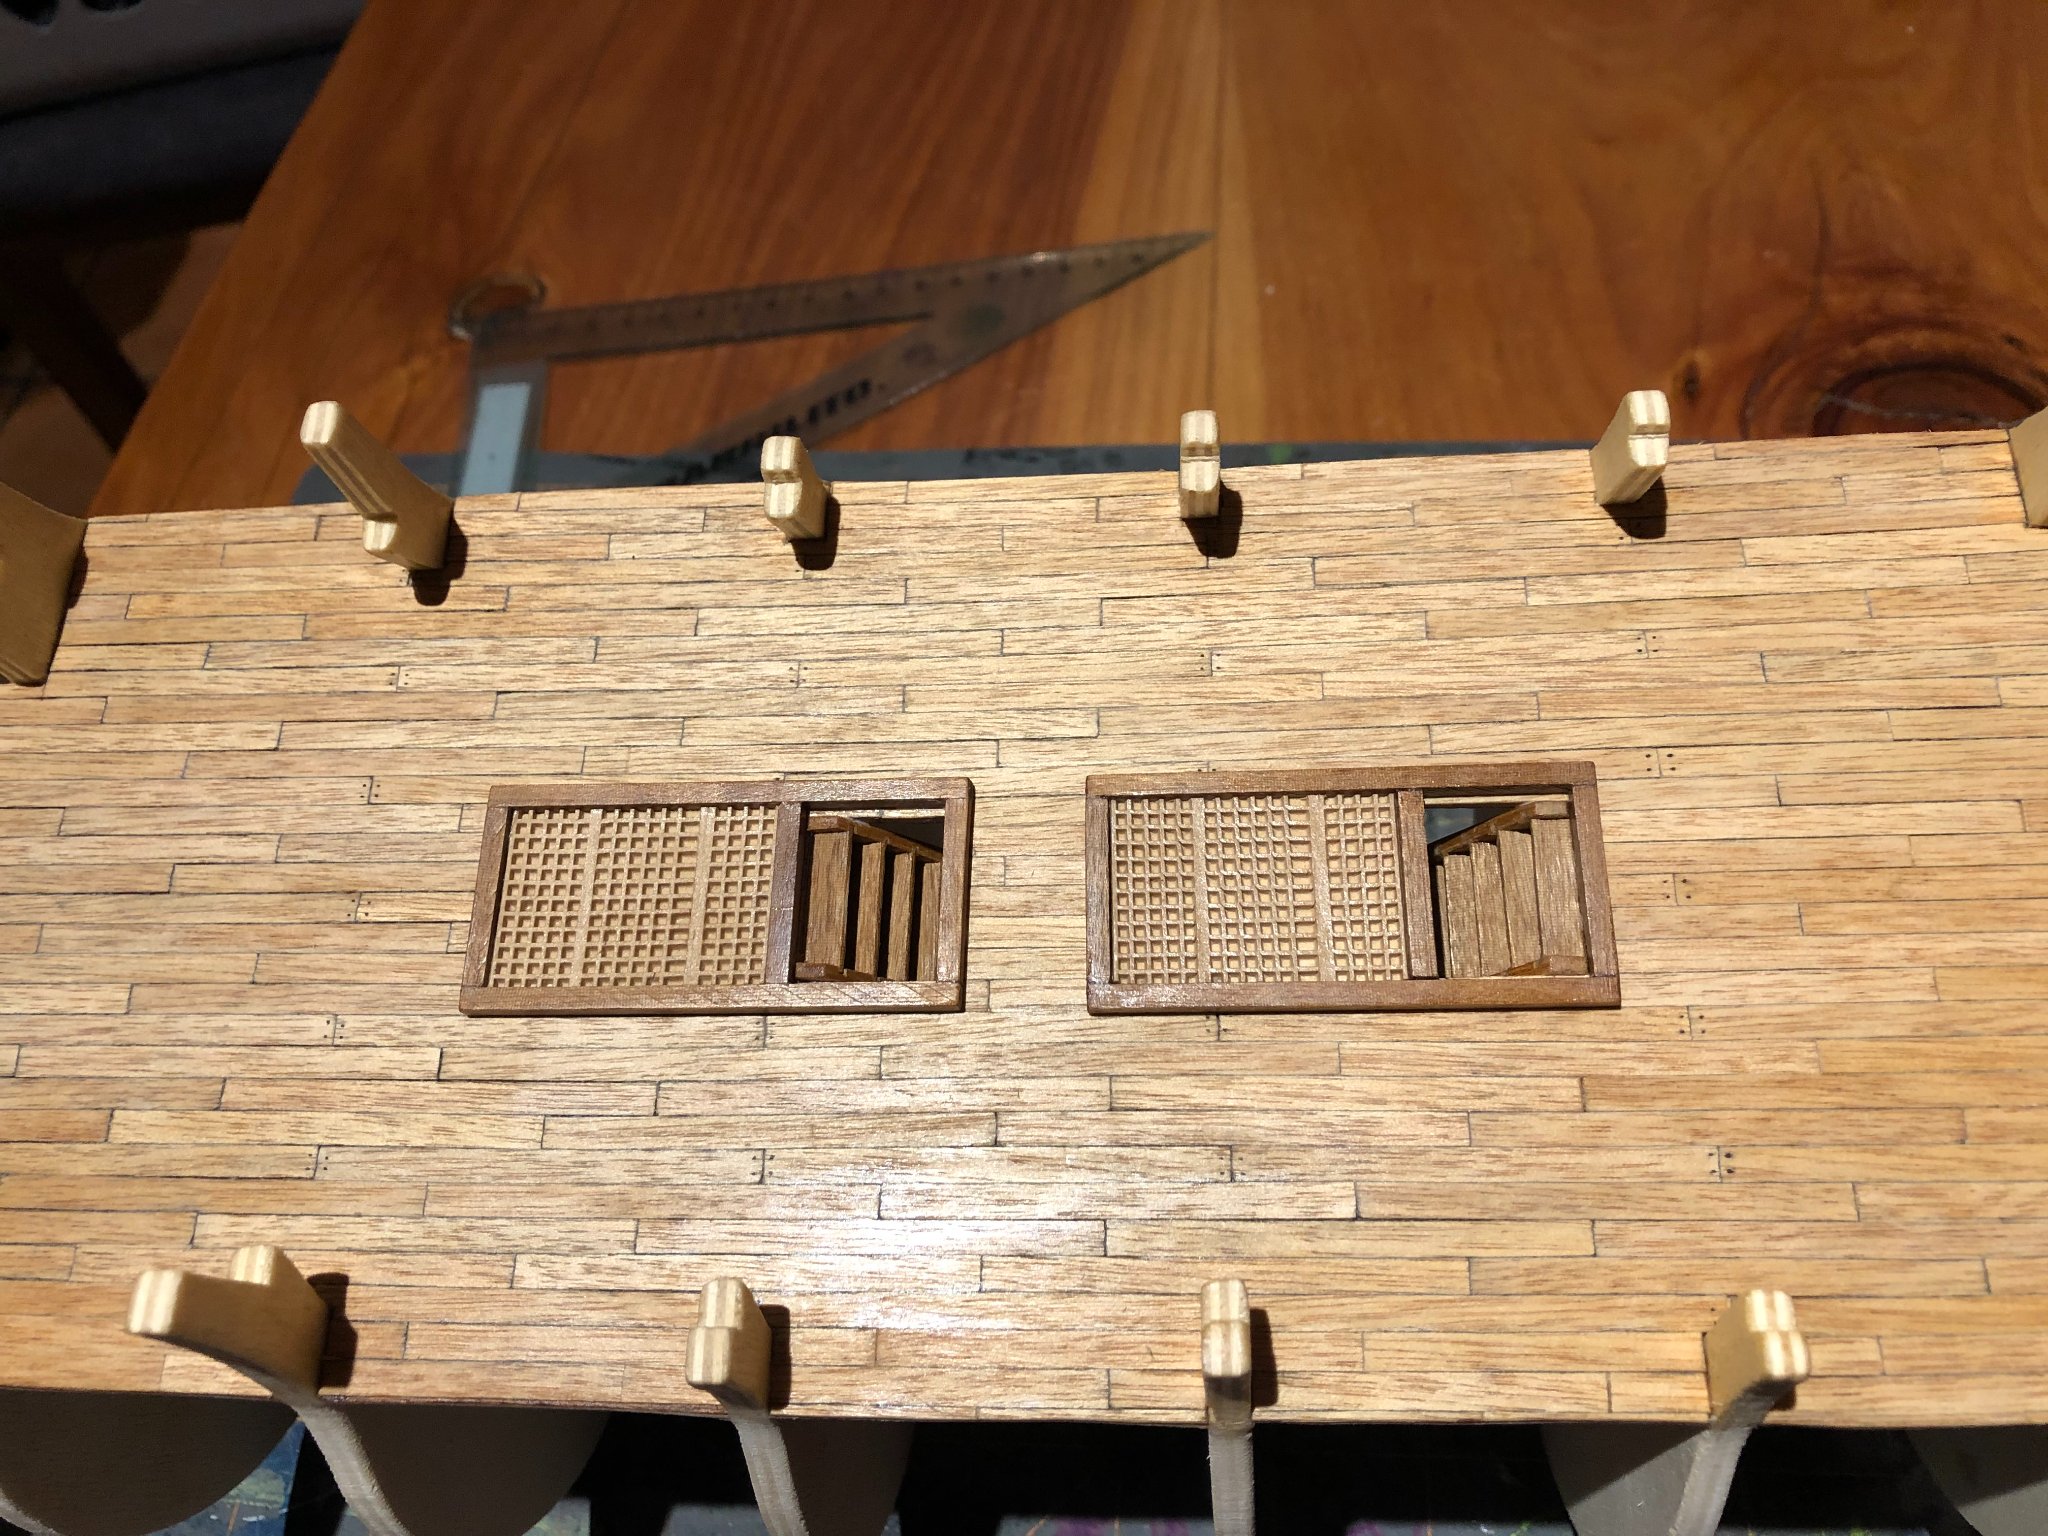
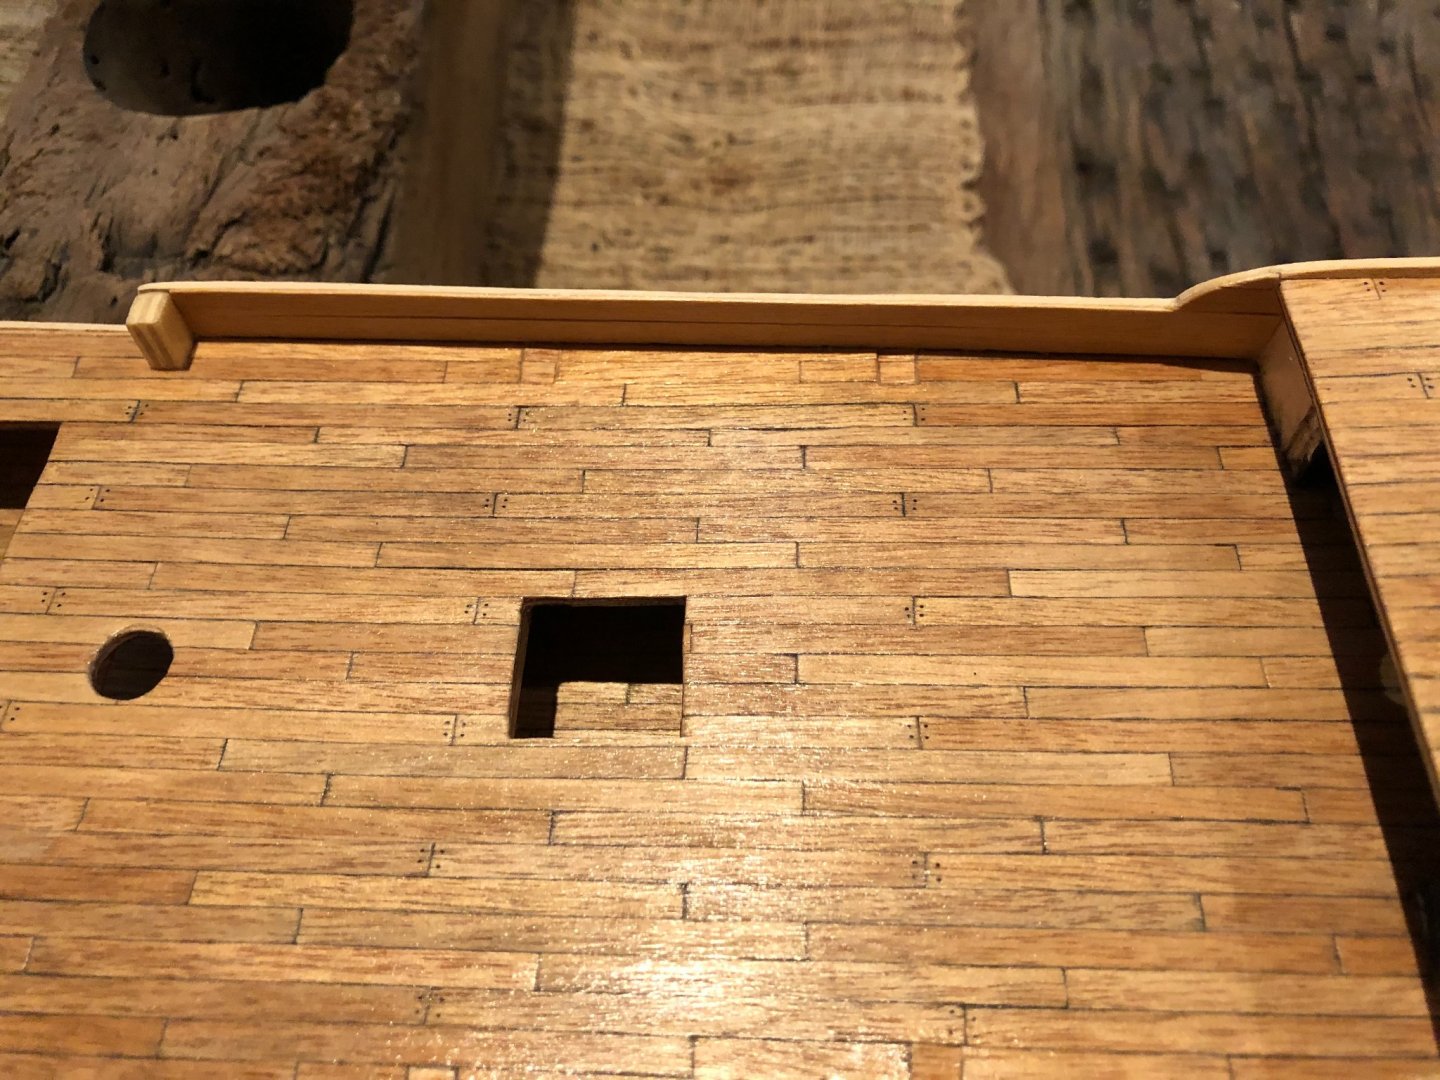
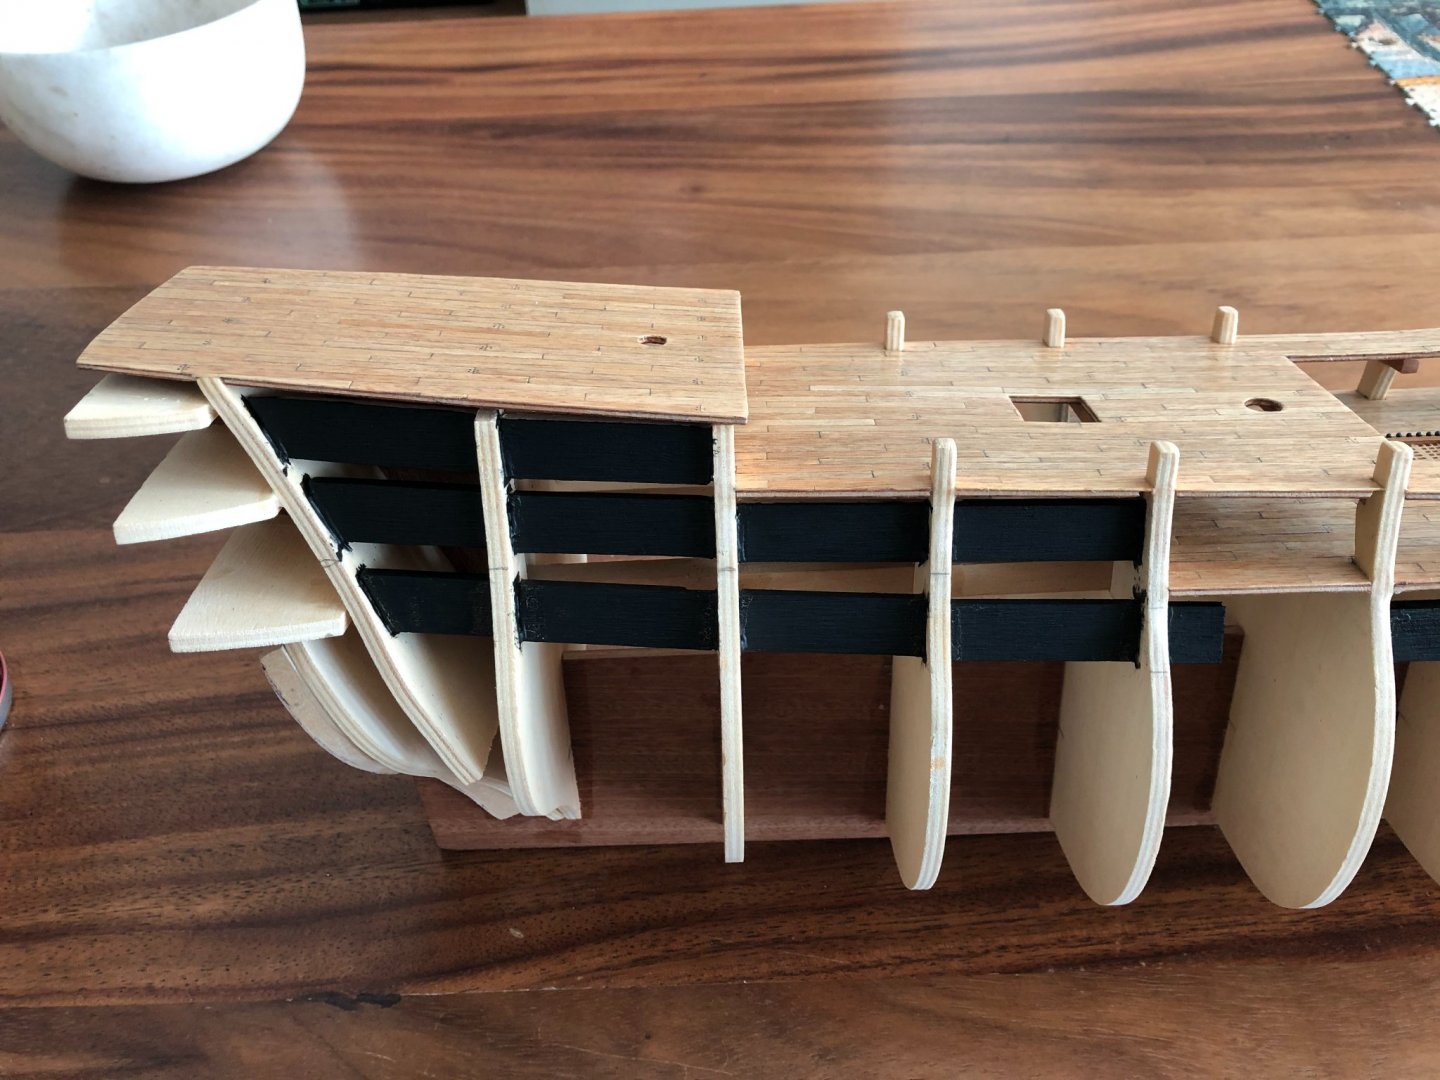
The first confusion, mistake, error, blame the instructions, blame your wife, blame anybody but you !!! Dear friends: Visiting other Corel-Victory build logs I found a discussion about the instructions not been clear on when to cut the tips of planks 9 and 10. Of course, as Murphy's law indicates, by that time, I already committed the error. It is not a significant one and it has been corrected (in some way), but it is interesting to really question why instructions are so poor? As I mentioned in my new member introduction, I have always built plastic models (mainly Tamiya and Italeri) and they have neat, clear, engineer's proof instructions. Why not Corel? As you can see in the first picture, on this step you are instructed to set the upper deck and poop decks. If you do so, you need to plank the upper deck in order to plank the area between both of them. But it is till the next step (second pic) when they timidly tell you to cut the plank tips (by means of a dotted line). I hope I will be able to limit the ammount of errors !!!


-
Hi fellow modelers! After studying a lot of post here in the forum related to the HMS Victory, the Corel Kit and planking, I started the planking process. I set the first plank at the lower deck level as indicated in the instructions and continued with two pairs on each side downwards. Then I moved upwards, considering that the upper side did not require a lot of work on the the planks and that will allow me to keep studying how to proceed on the lower level towards the keel. Pictures attached. Please let me know if you have any question. Best regards, Eugenio.


-
Hi edwinb: I am also in the process of planking my Victory. Keep up the good work! How do you find the 1:200 scale for a ship like this? Isn’t it too small? Best regards, Eugenio.
-
Excellent work. Have you finished it? If so, can you post some more picks? Best regards, Eugenio.
-
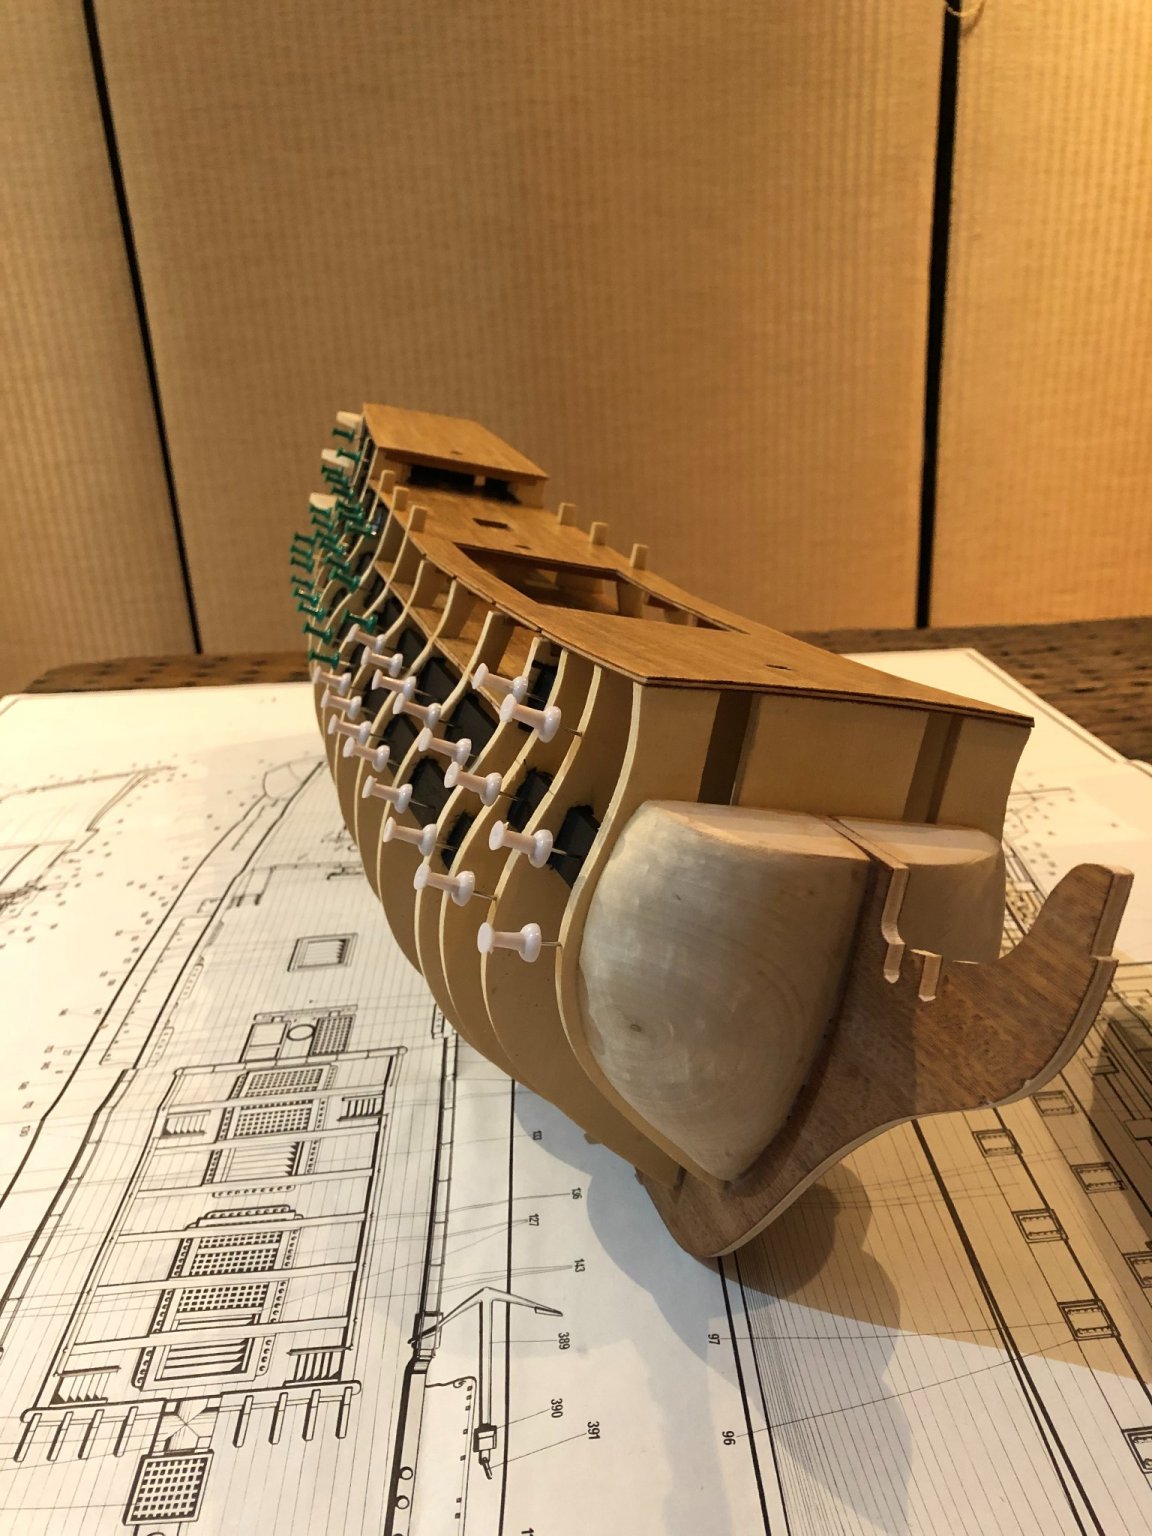
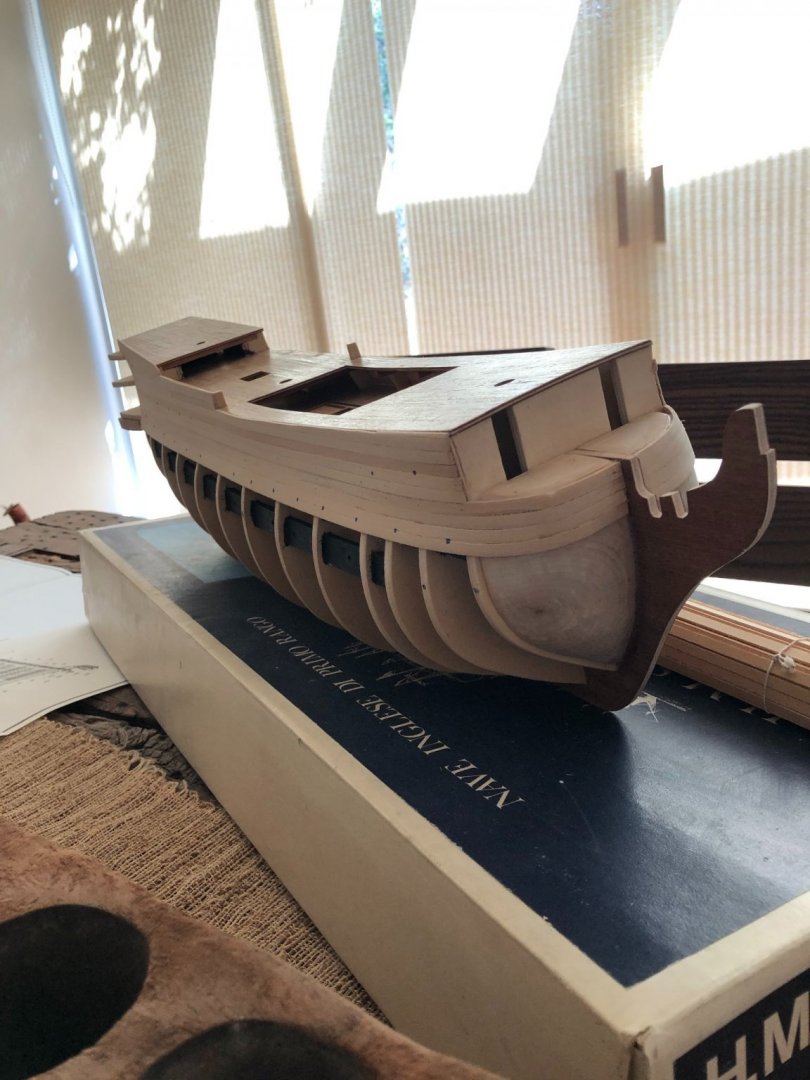
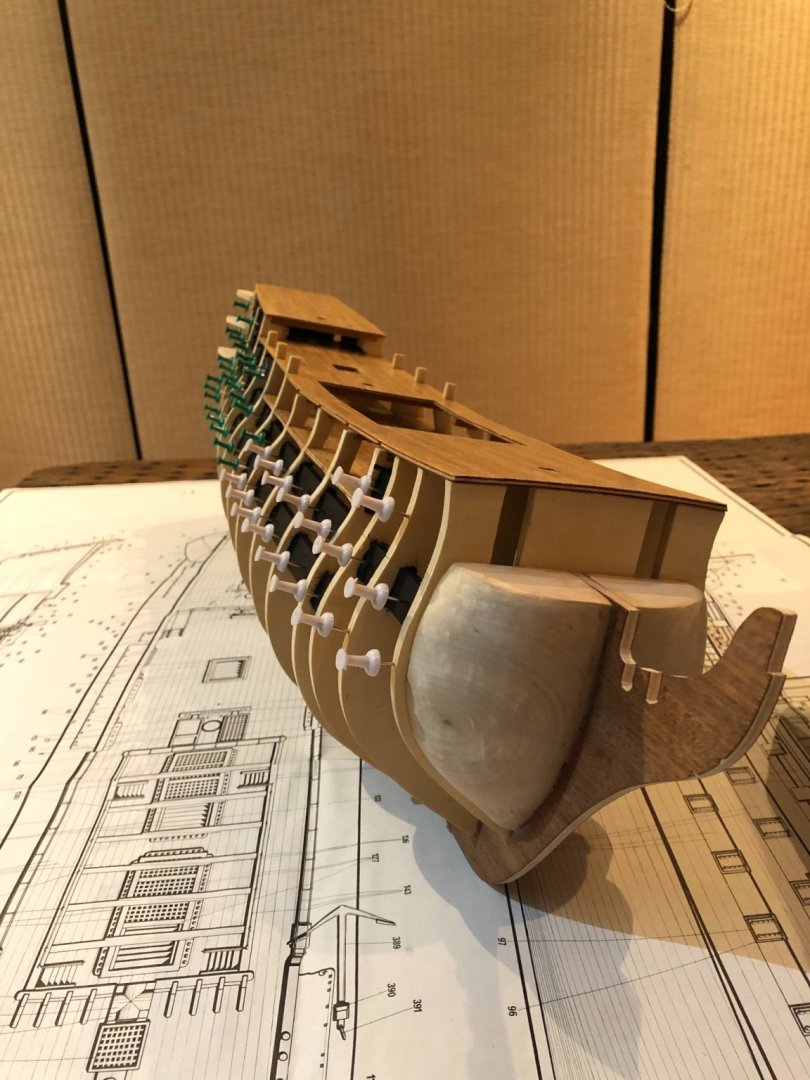
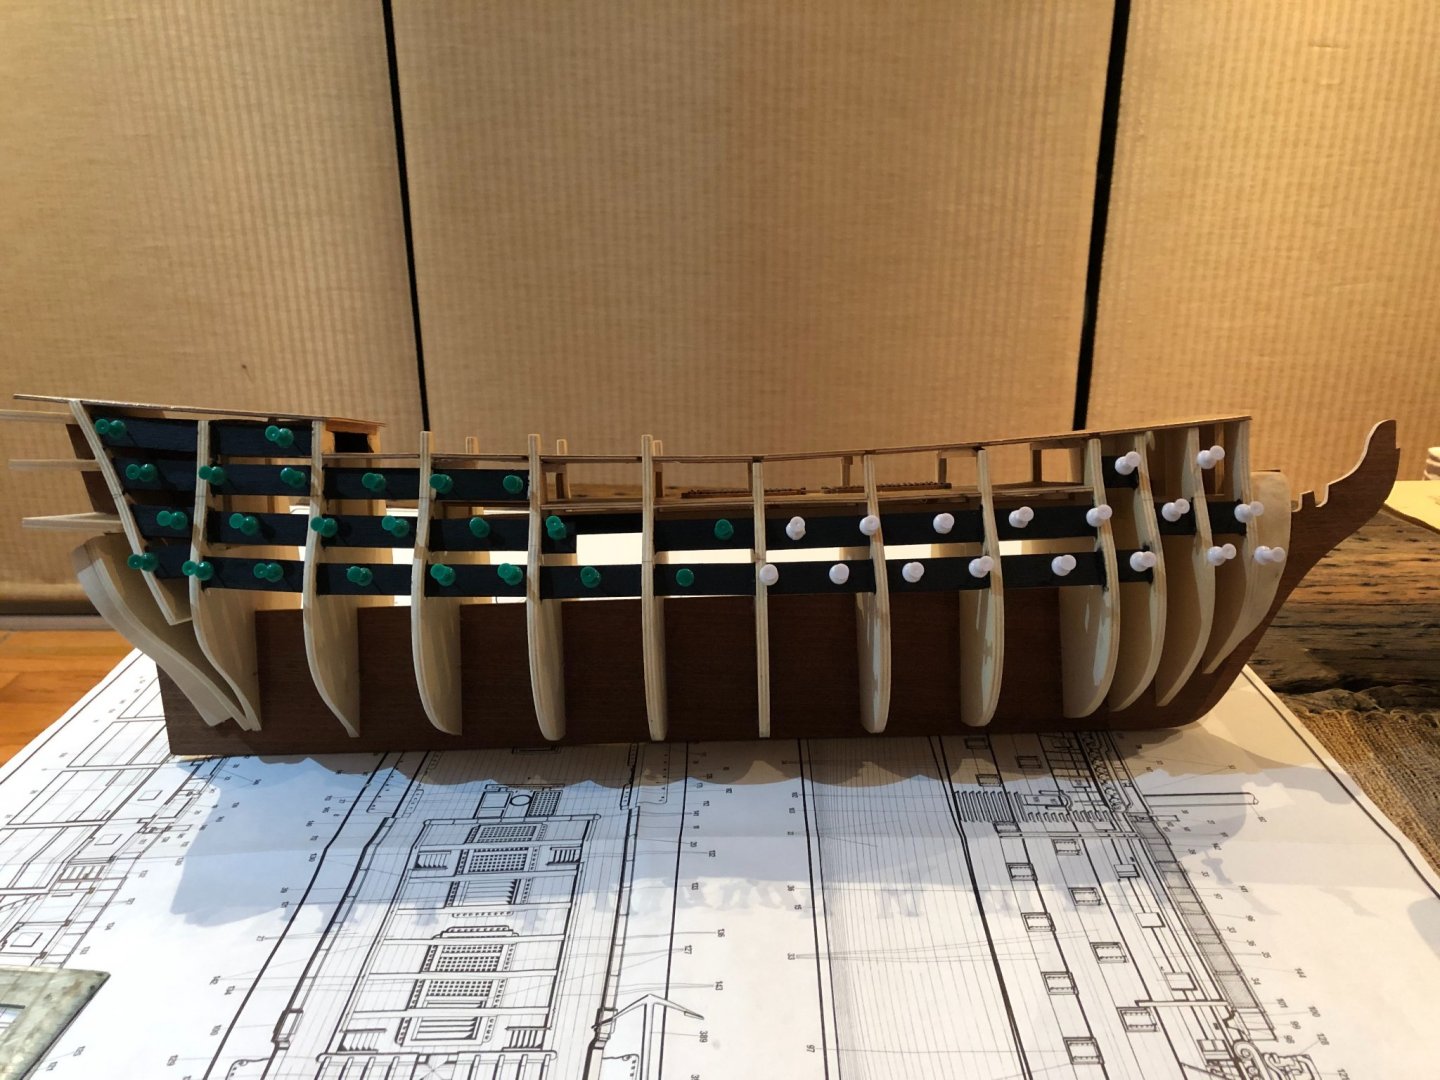
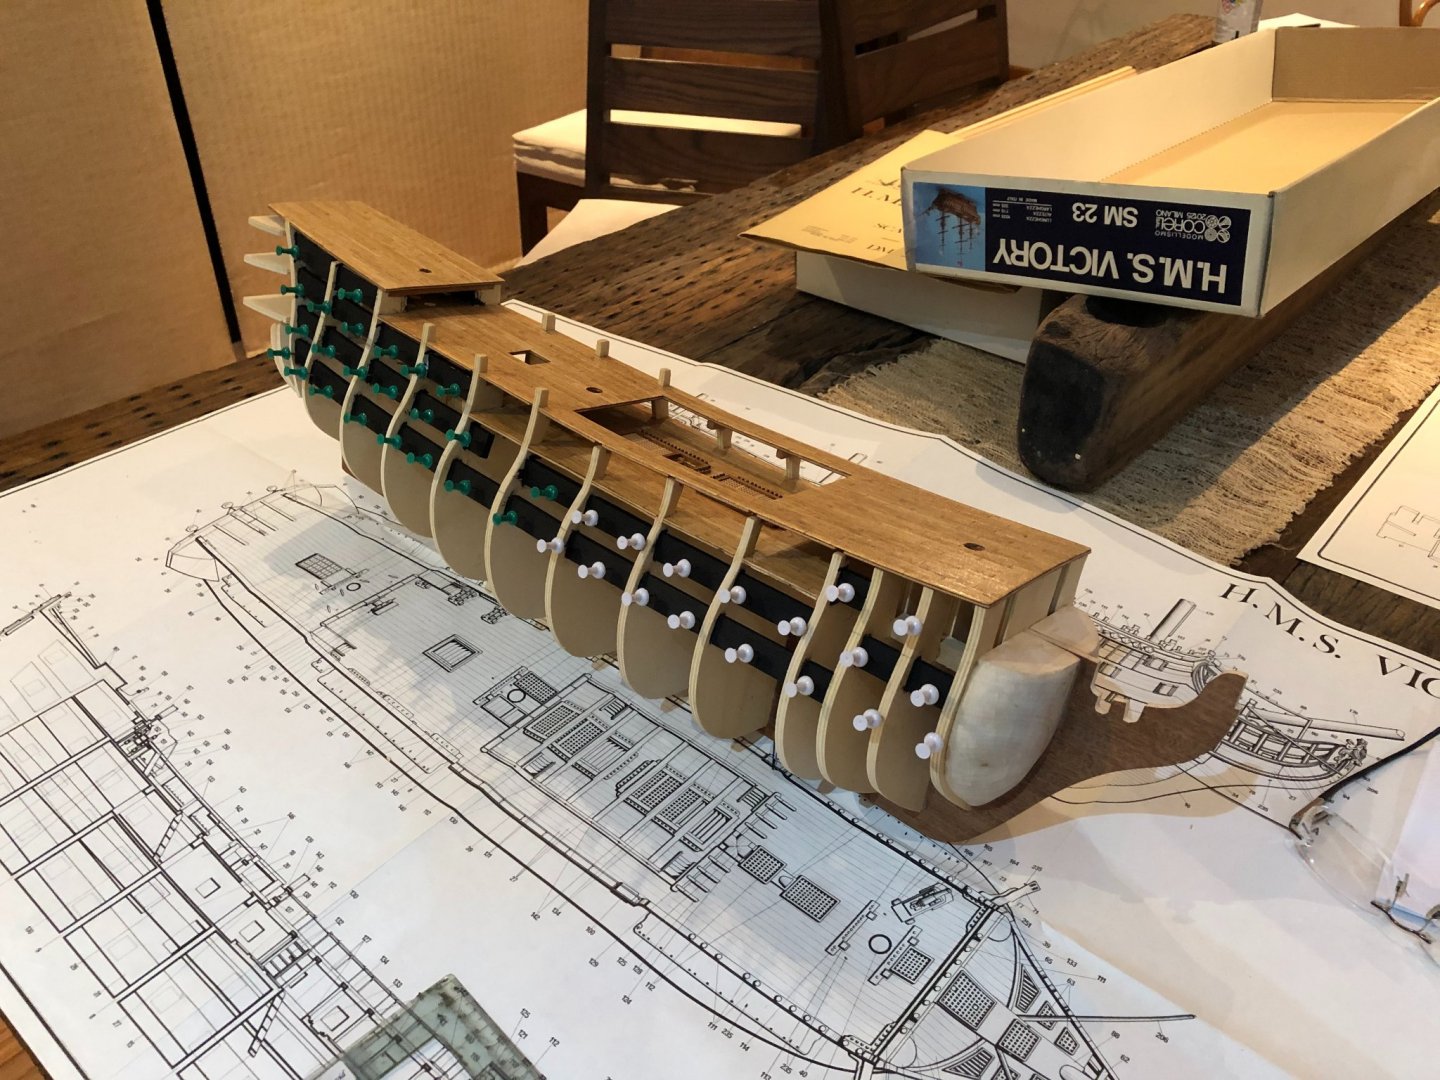
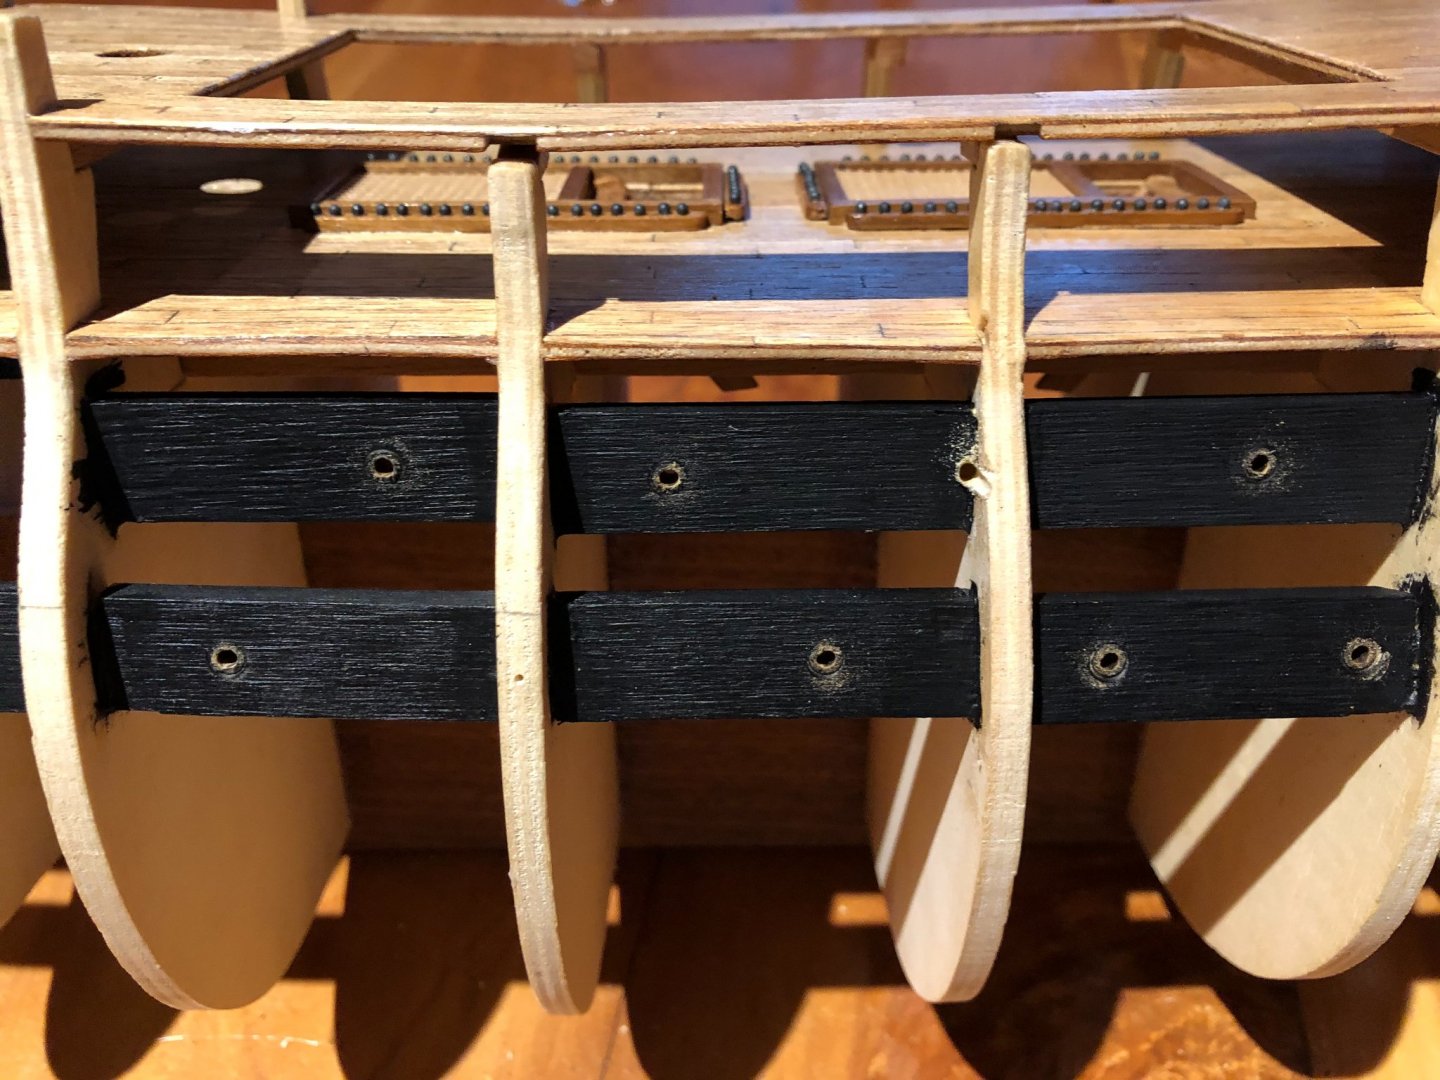
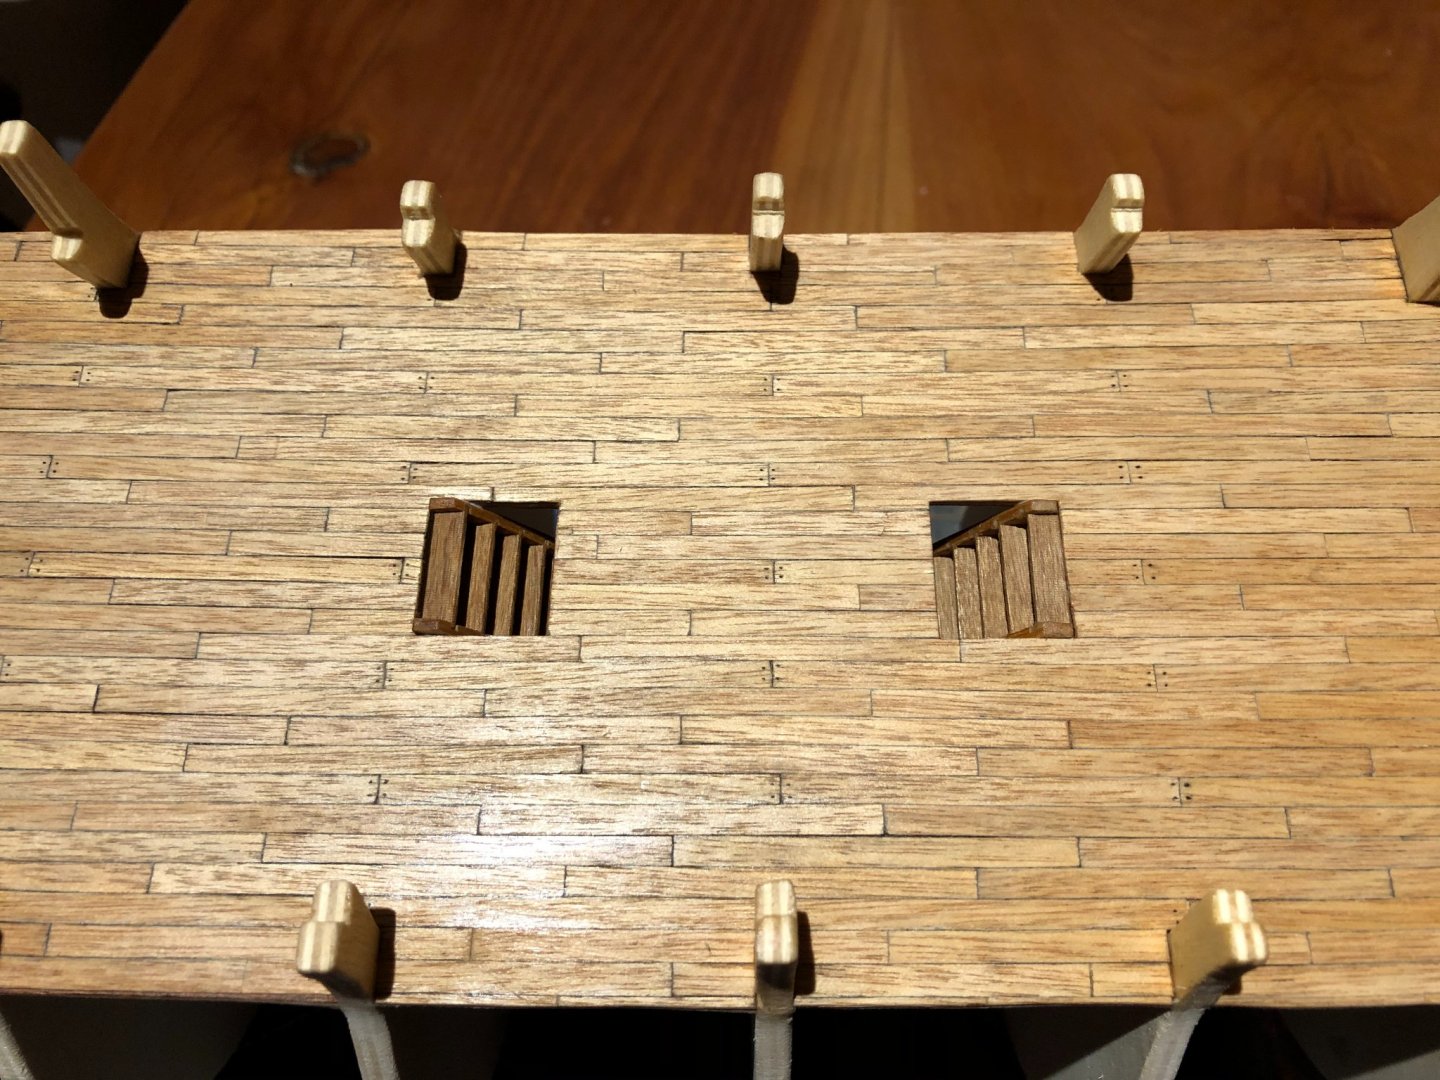
Setting the half-gun holders. This part also required more work than expected. Every piece must be cut, sand and glue in its correct position. After setting all the holders and painting them black, I decided it was a good idea to mark the cannon's position and check its alignment. For that I used some standard pins. Pic attached. After checking I had a good alignment, I decided to drill the cannon holes before planking. This may allow to have them ready for later work with them, and to recheck their position and alignment with the real ones. I think this will save time and efforts after planking and may be useful when opening the gun ports through the planking. Before my next action, I will spend some time studying the planking tutorials and tips and preparing my plan to start planking. Wish me luck !!!

-
Posted today ! Thanks.
-
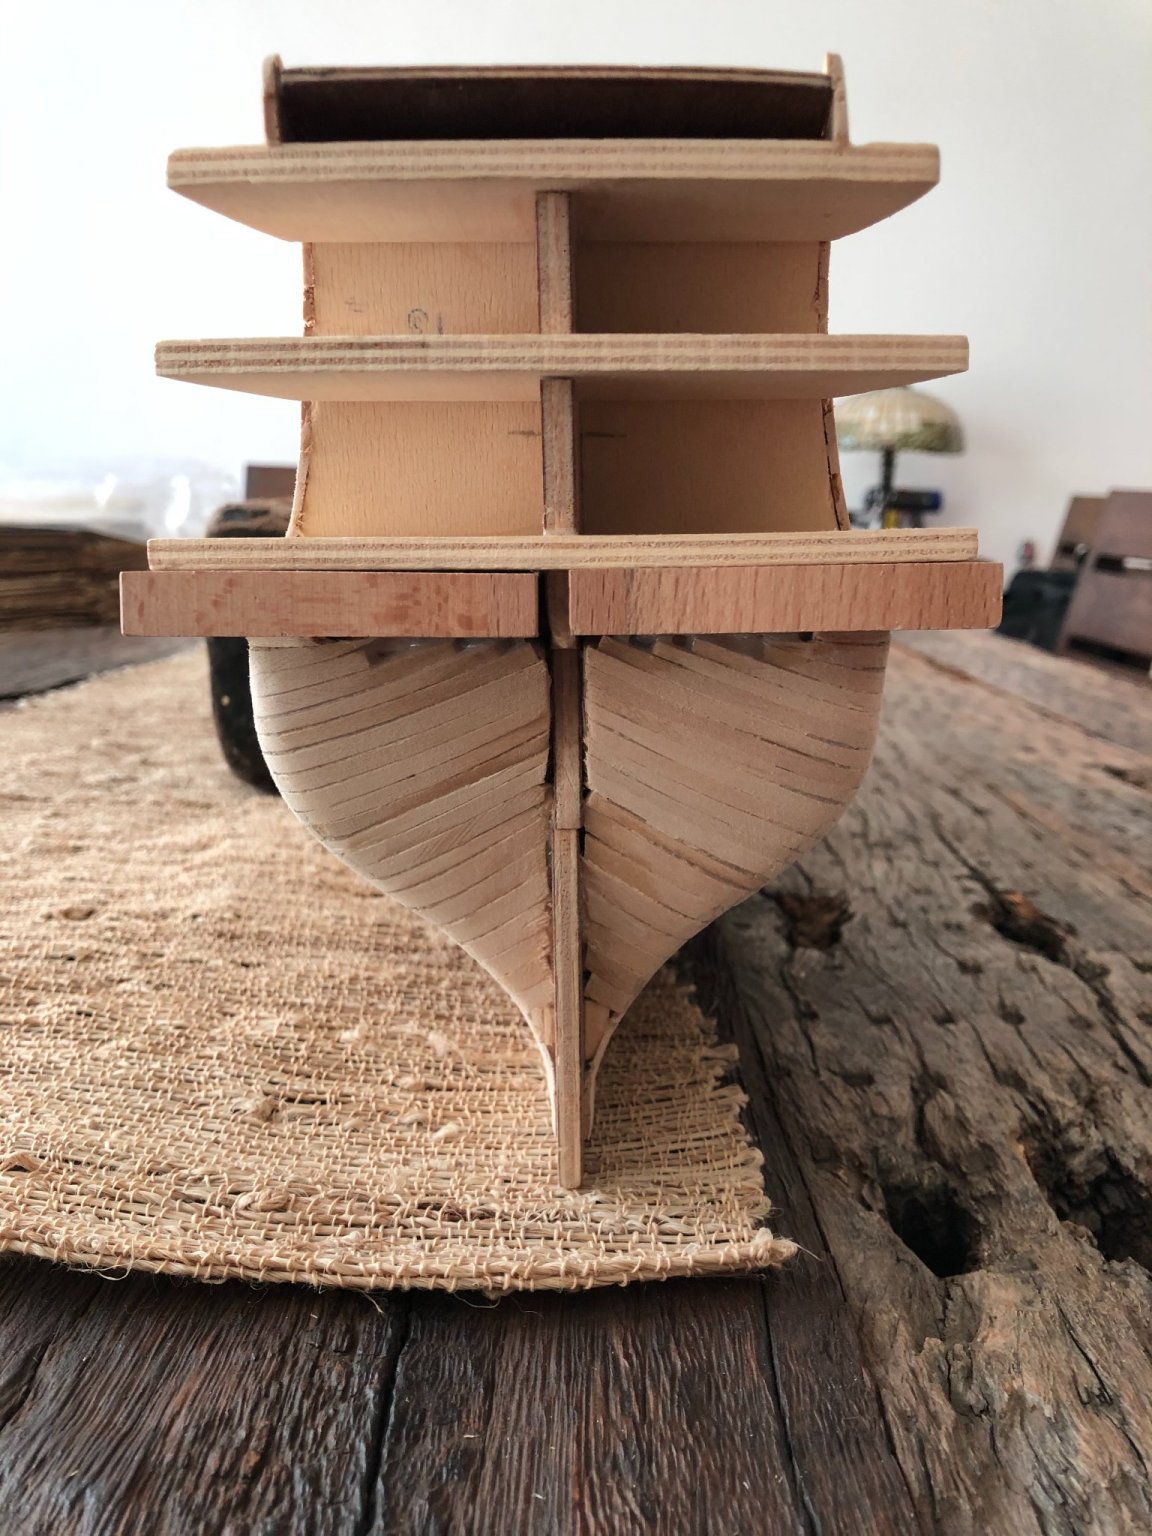
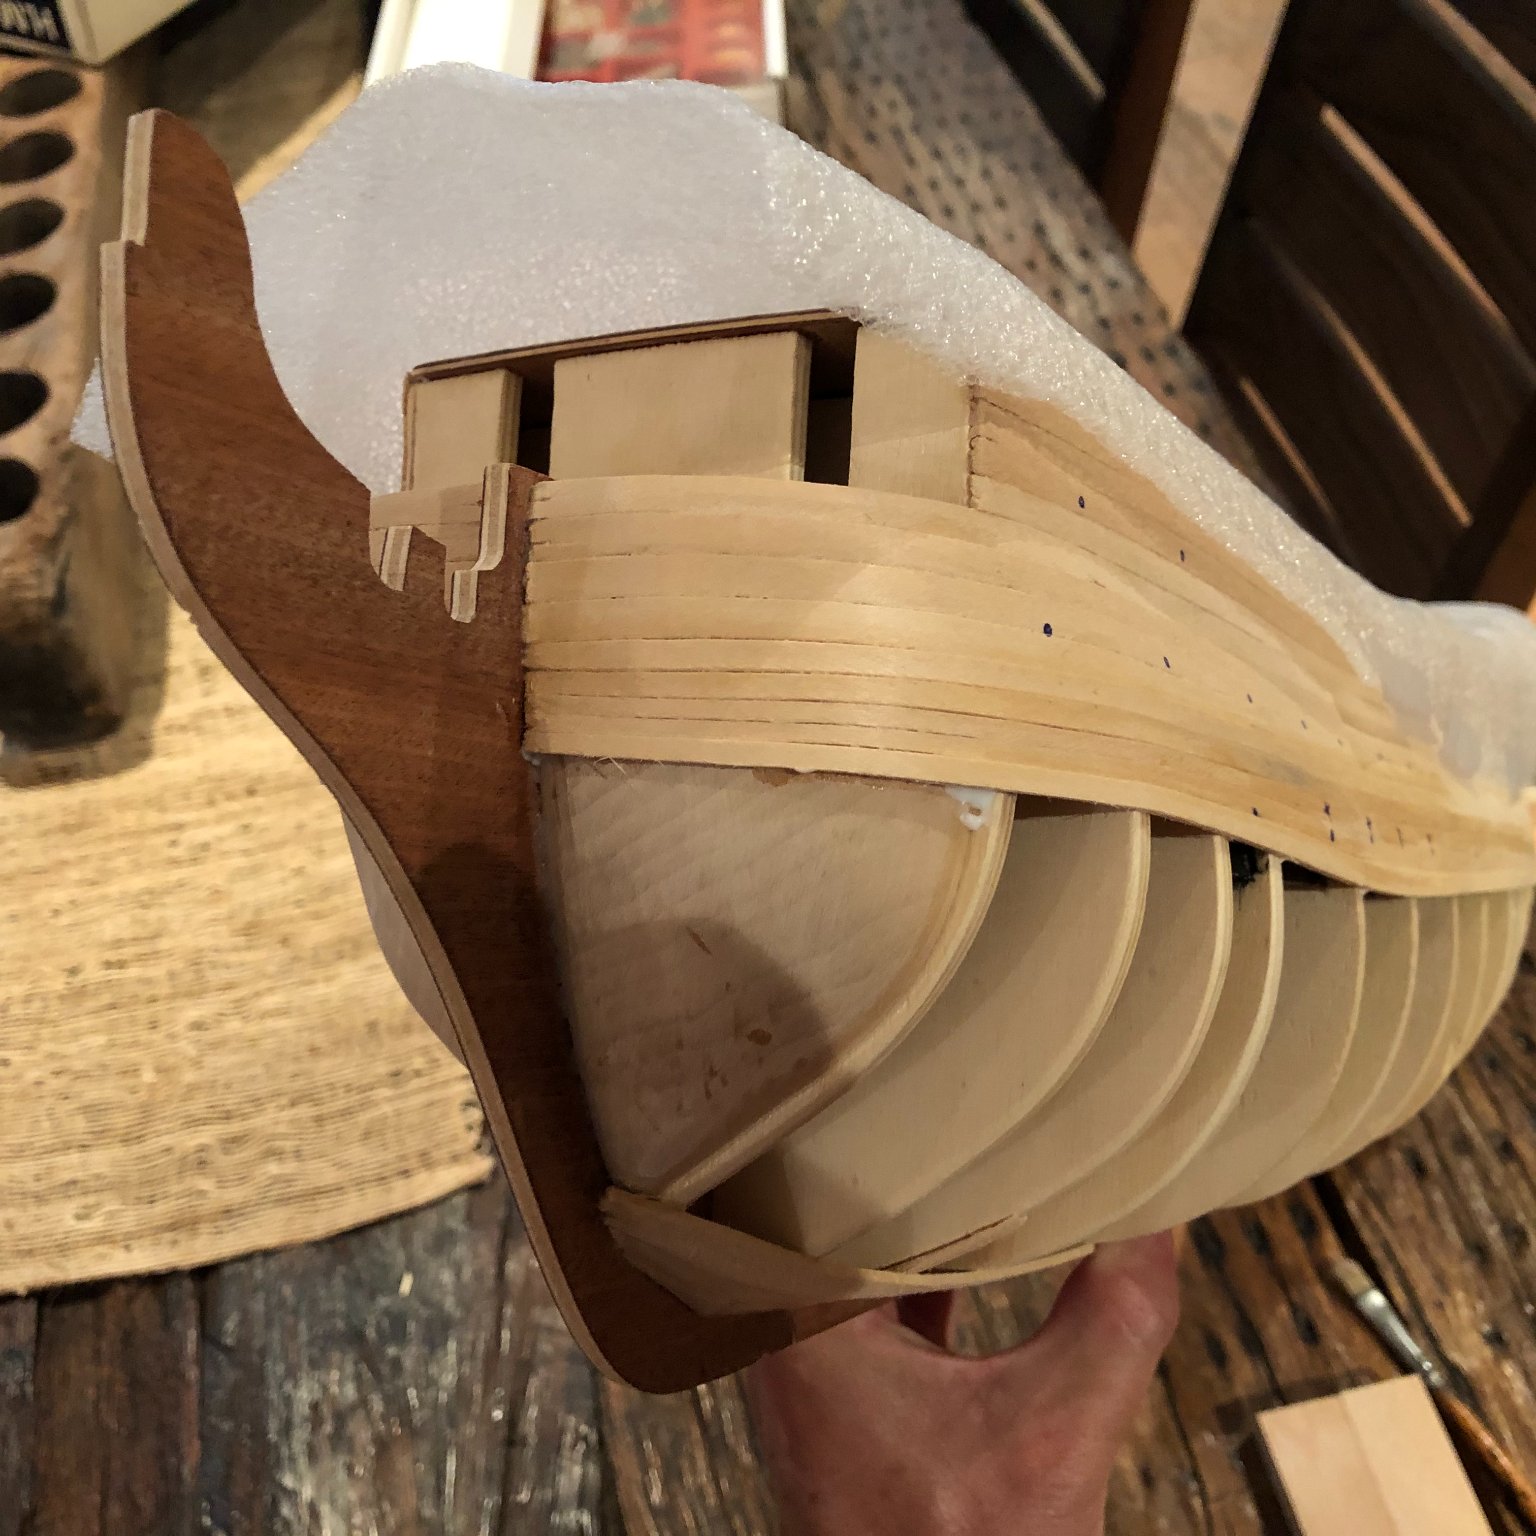
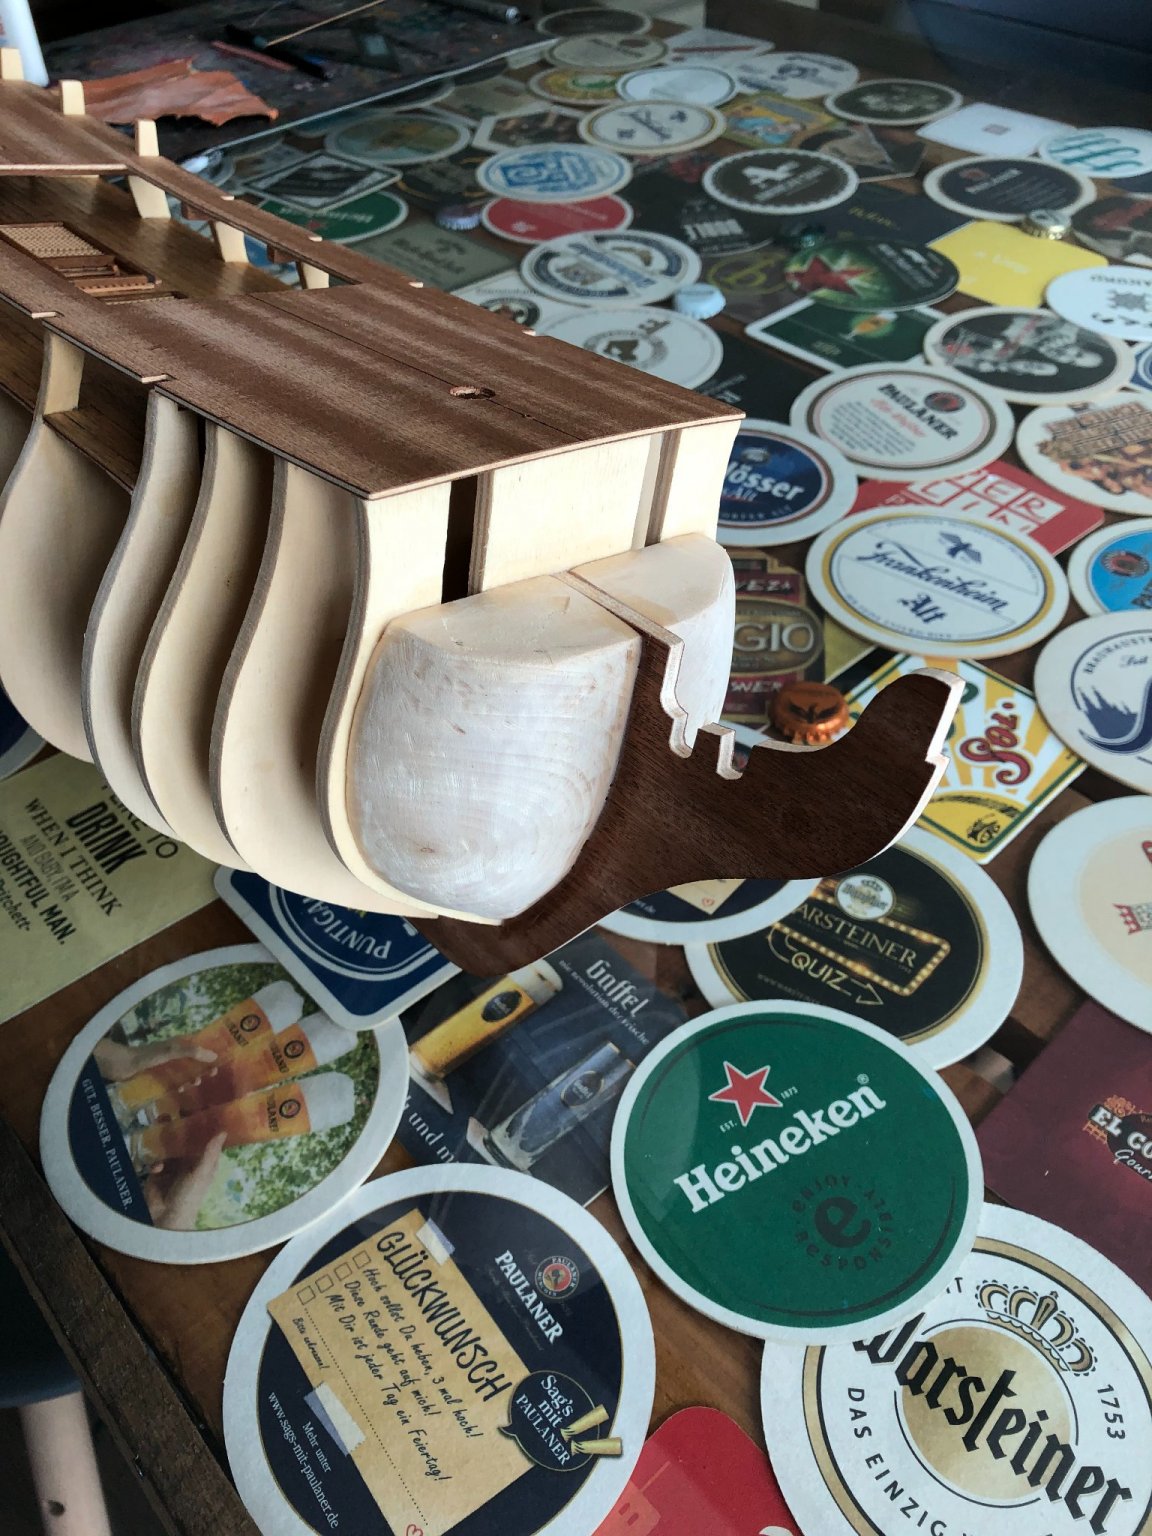
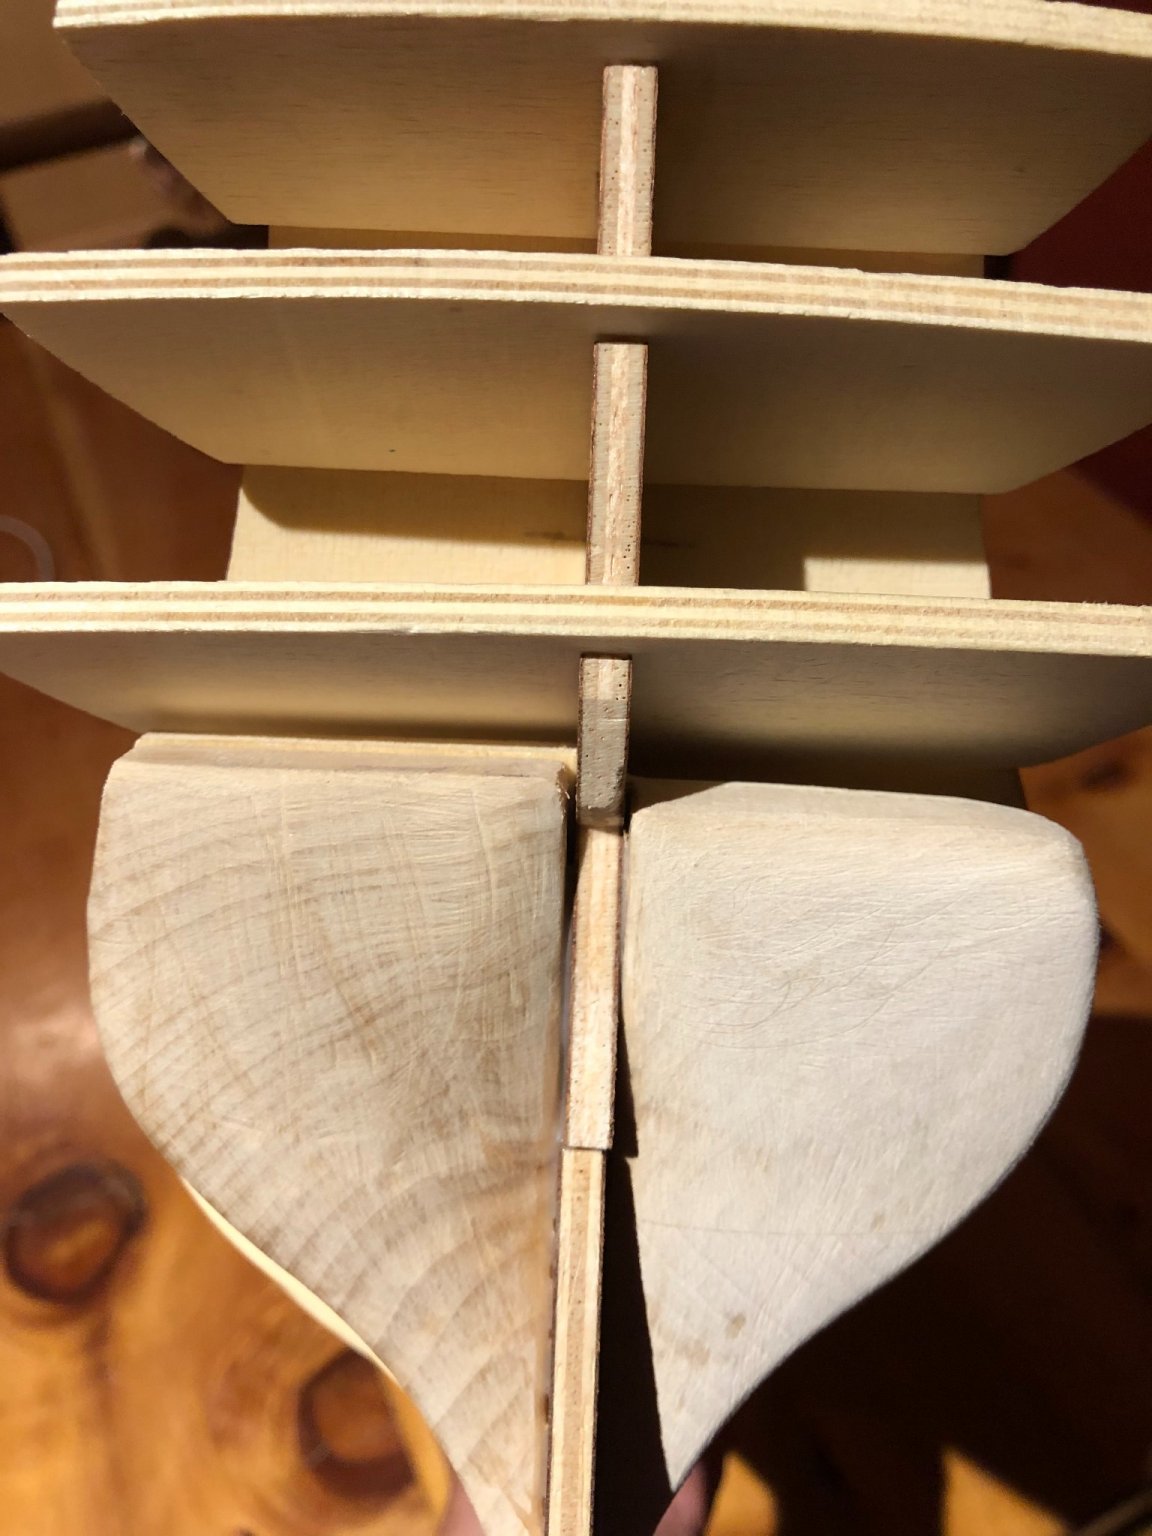
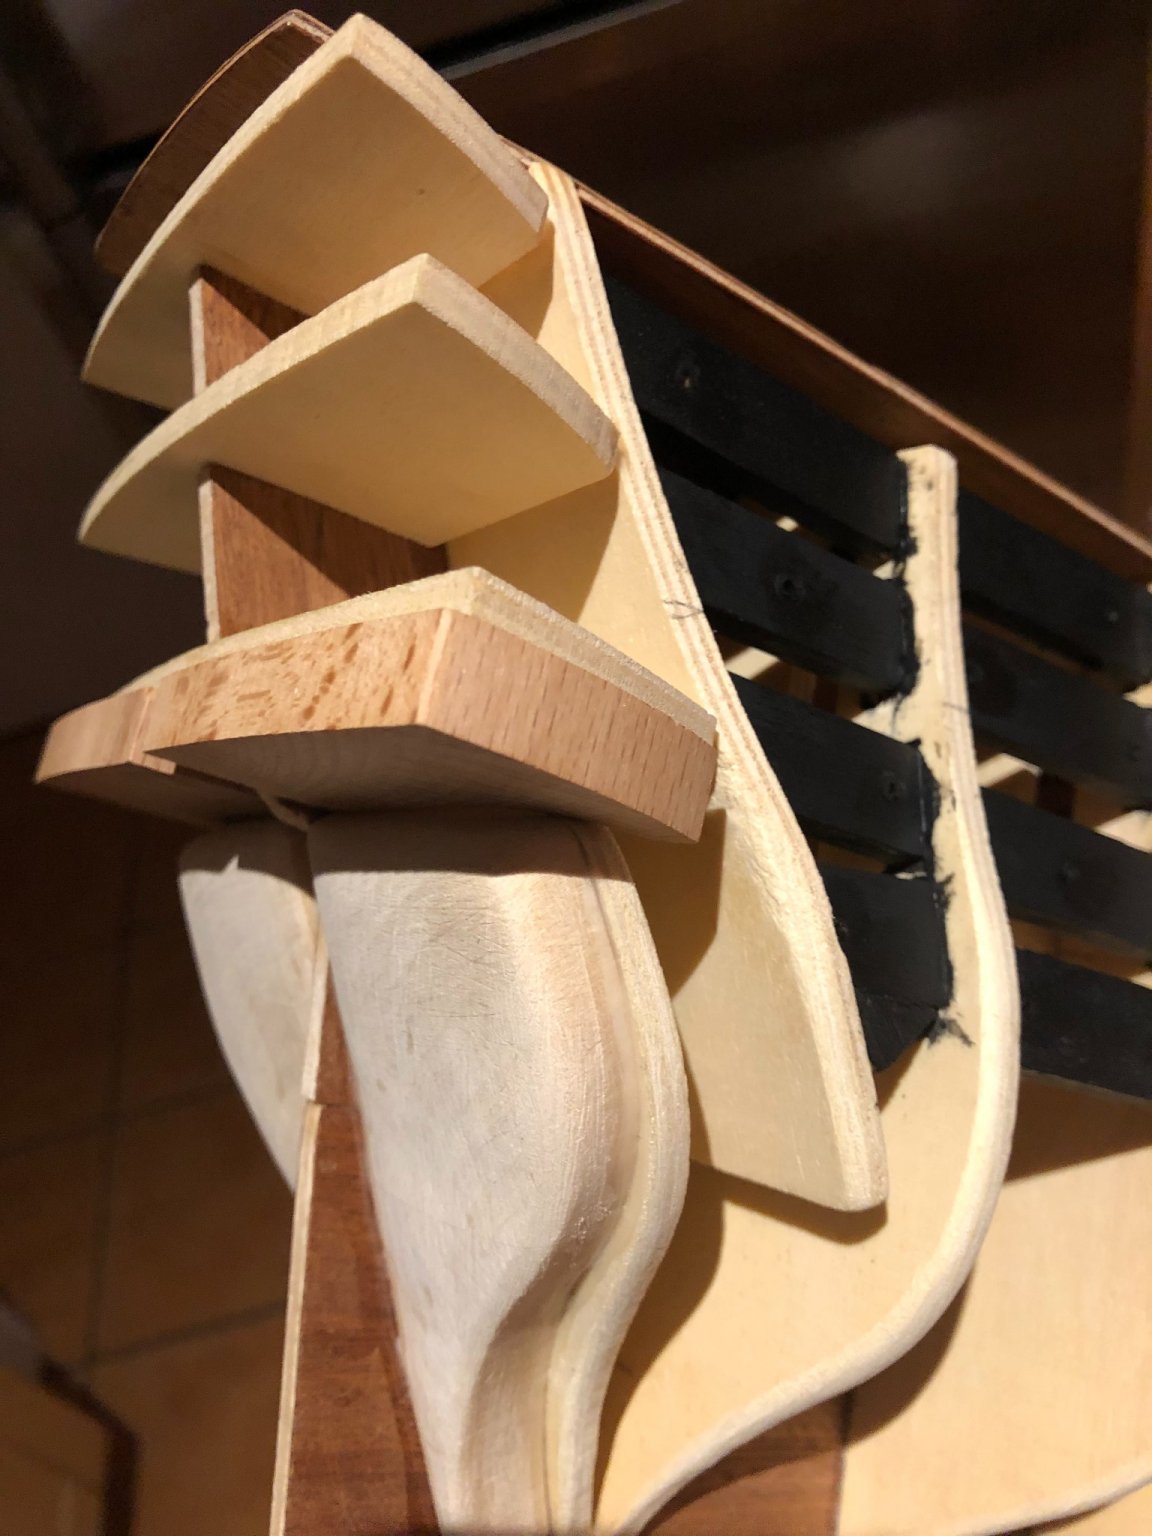
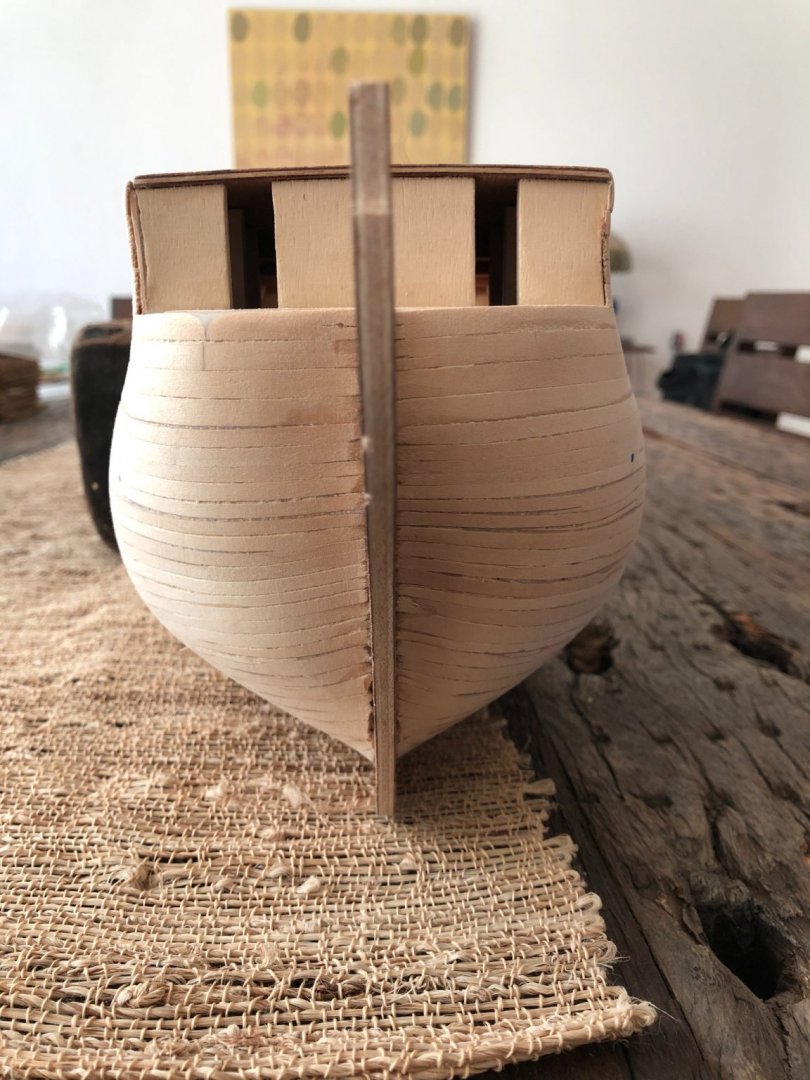
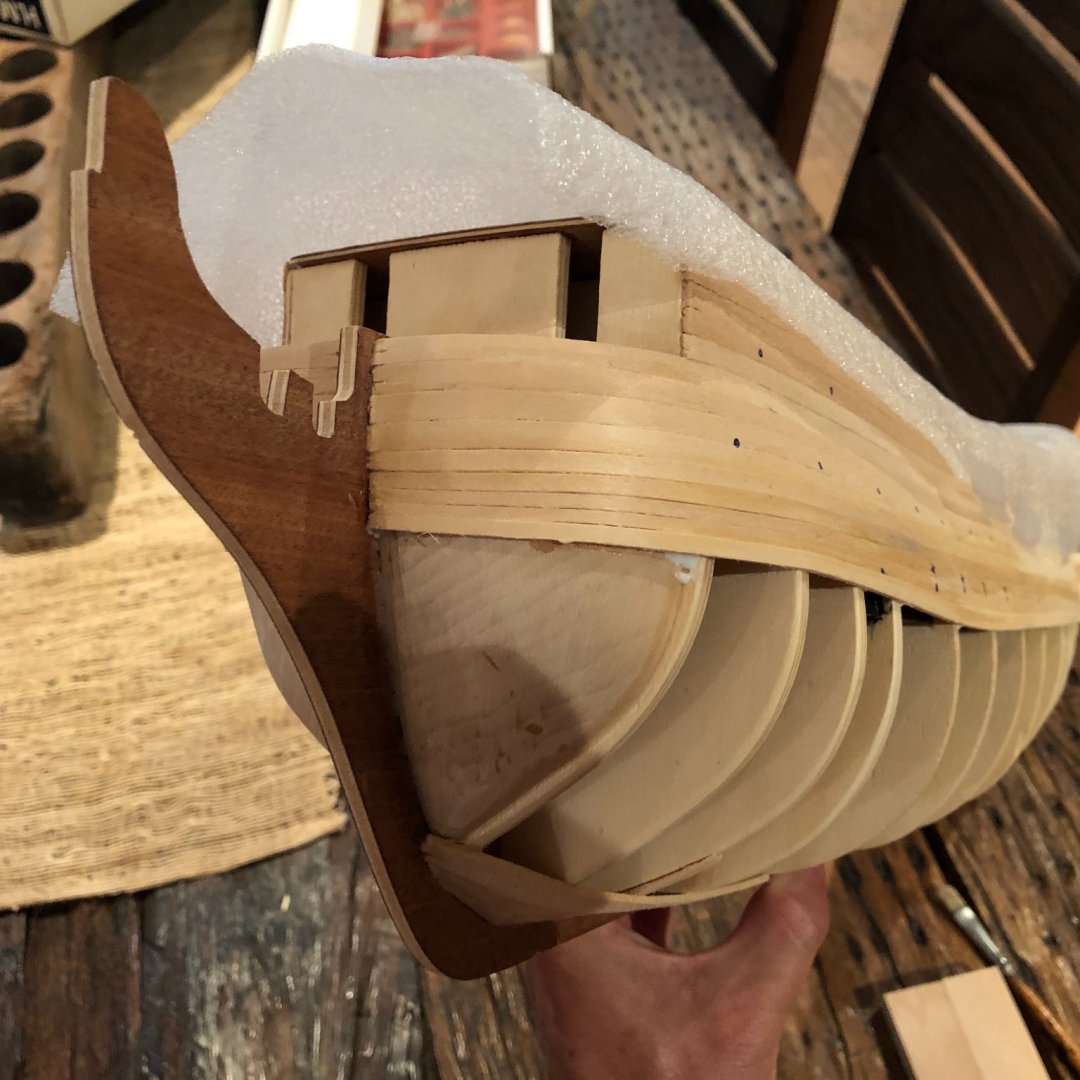
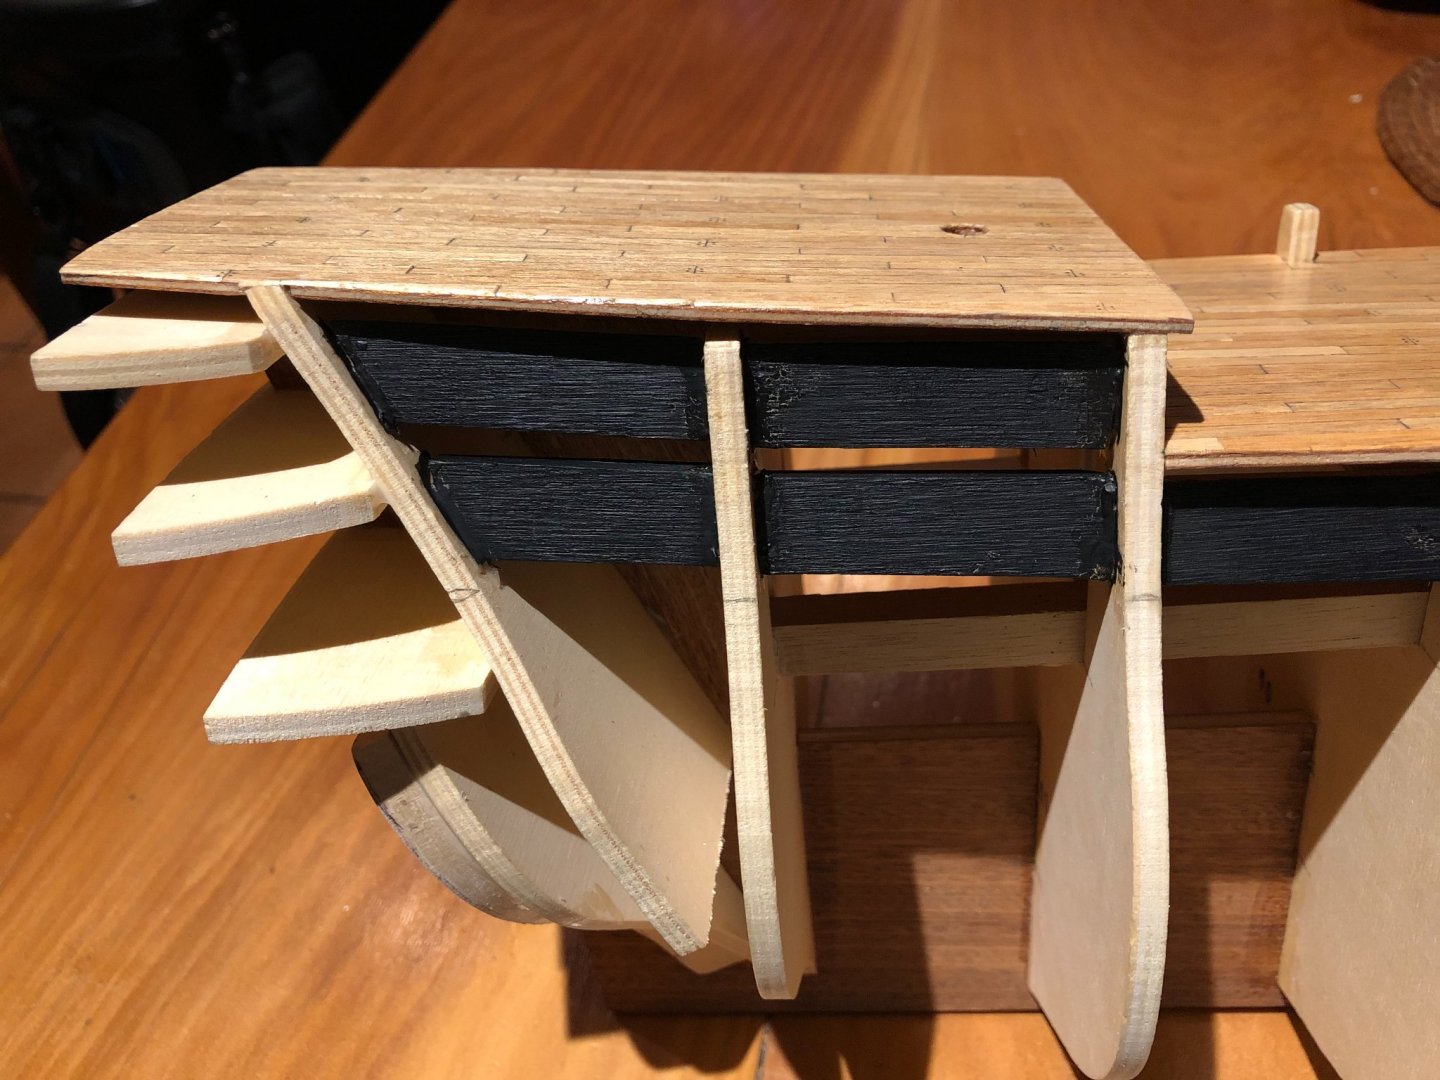
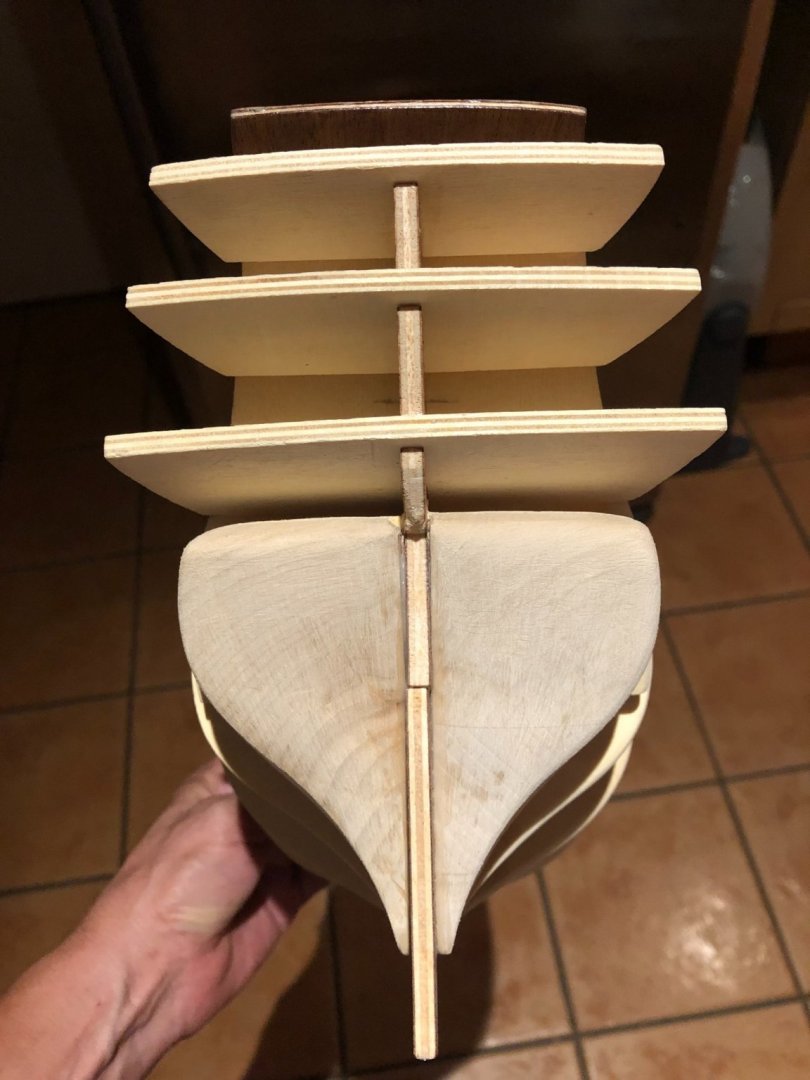
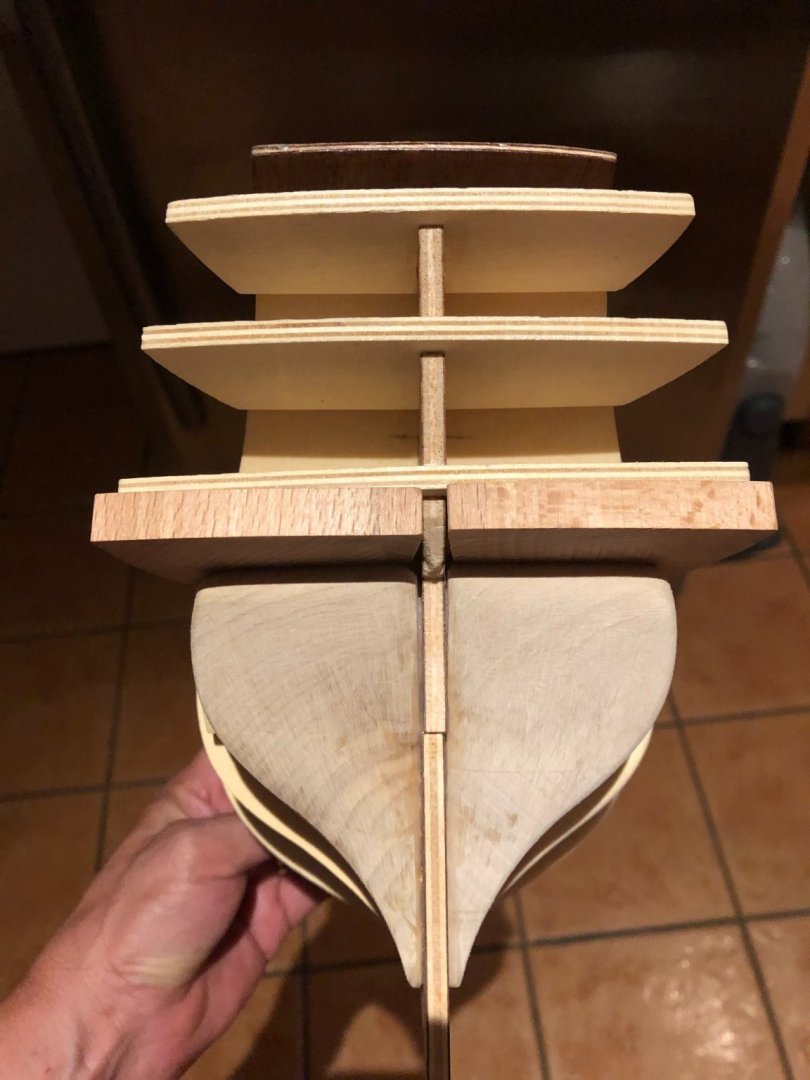
Bow and stern fillers. In my opinion this is a major flow of the kit. What is the point of forcing the modeler to reduce by sanding almost 2/3 of a block of wood to produce a piece? No value adding work in my opinion. Also, in the plans and instructions it is not clear how this final piece must fit, especially on the stern side, considering the addition of pieces number 50 and 51 the upper and lower counters. Please note how the stern fillers need further sanding in order to allow the upper counter (piece number 50) to fit in (last 4 picks). A question for those of you who have passed this stage: Do you think that attaching the upper counter before may help to have a better planking? The instructions suggest fixing it after planking; over it. But it looks difficult as it is now. Or I made a mistake sanding the filler and frame 14 too much and the piece to be adjusted was the counter?


-
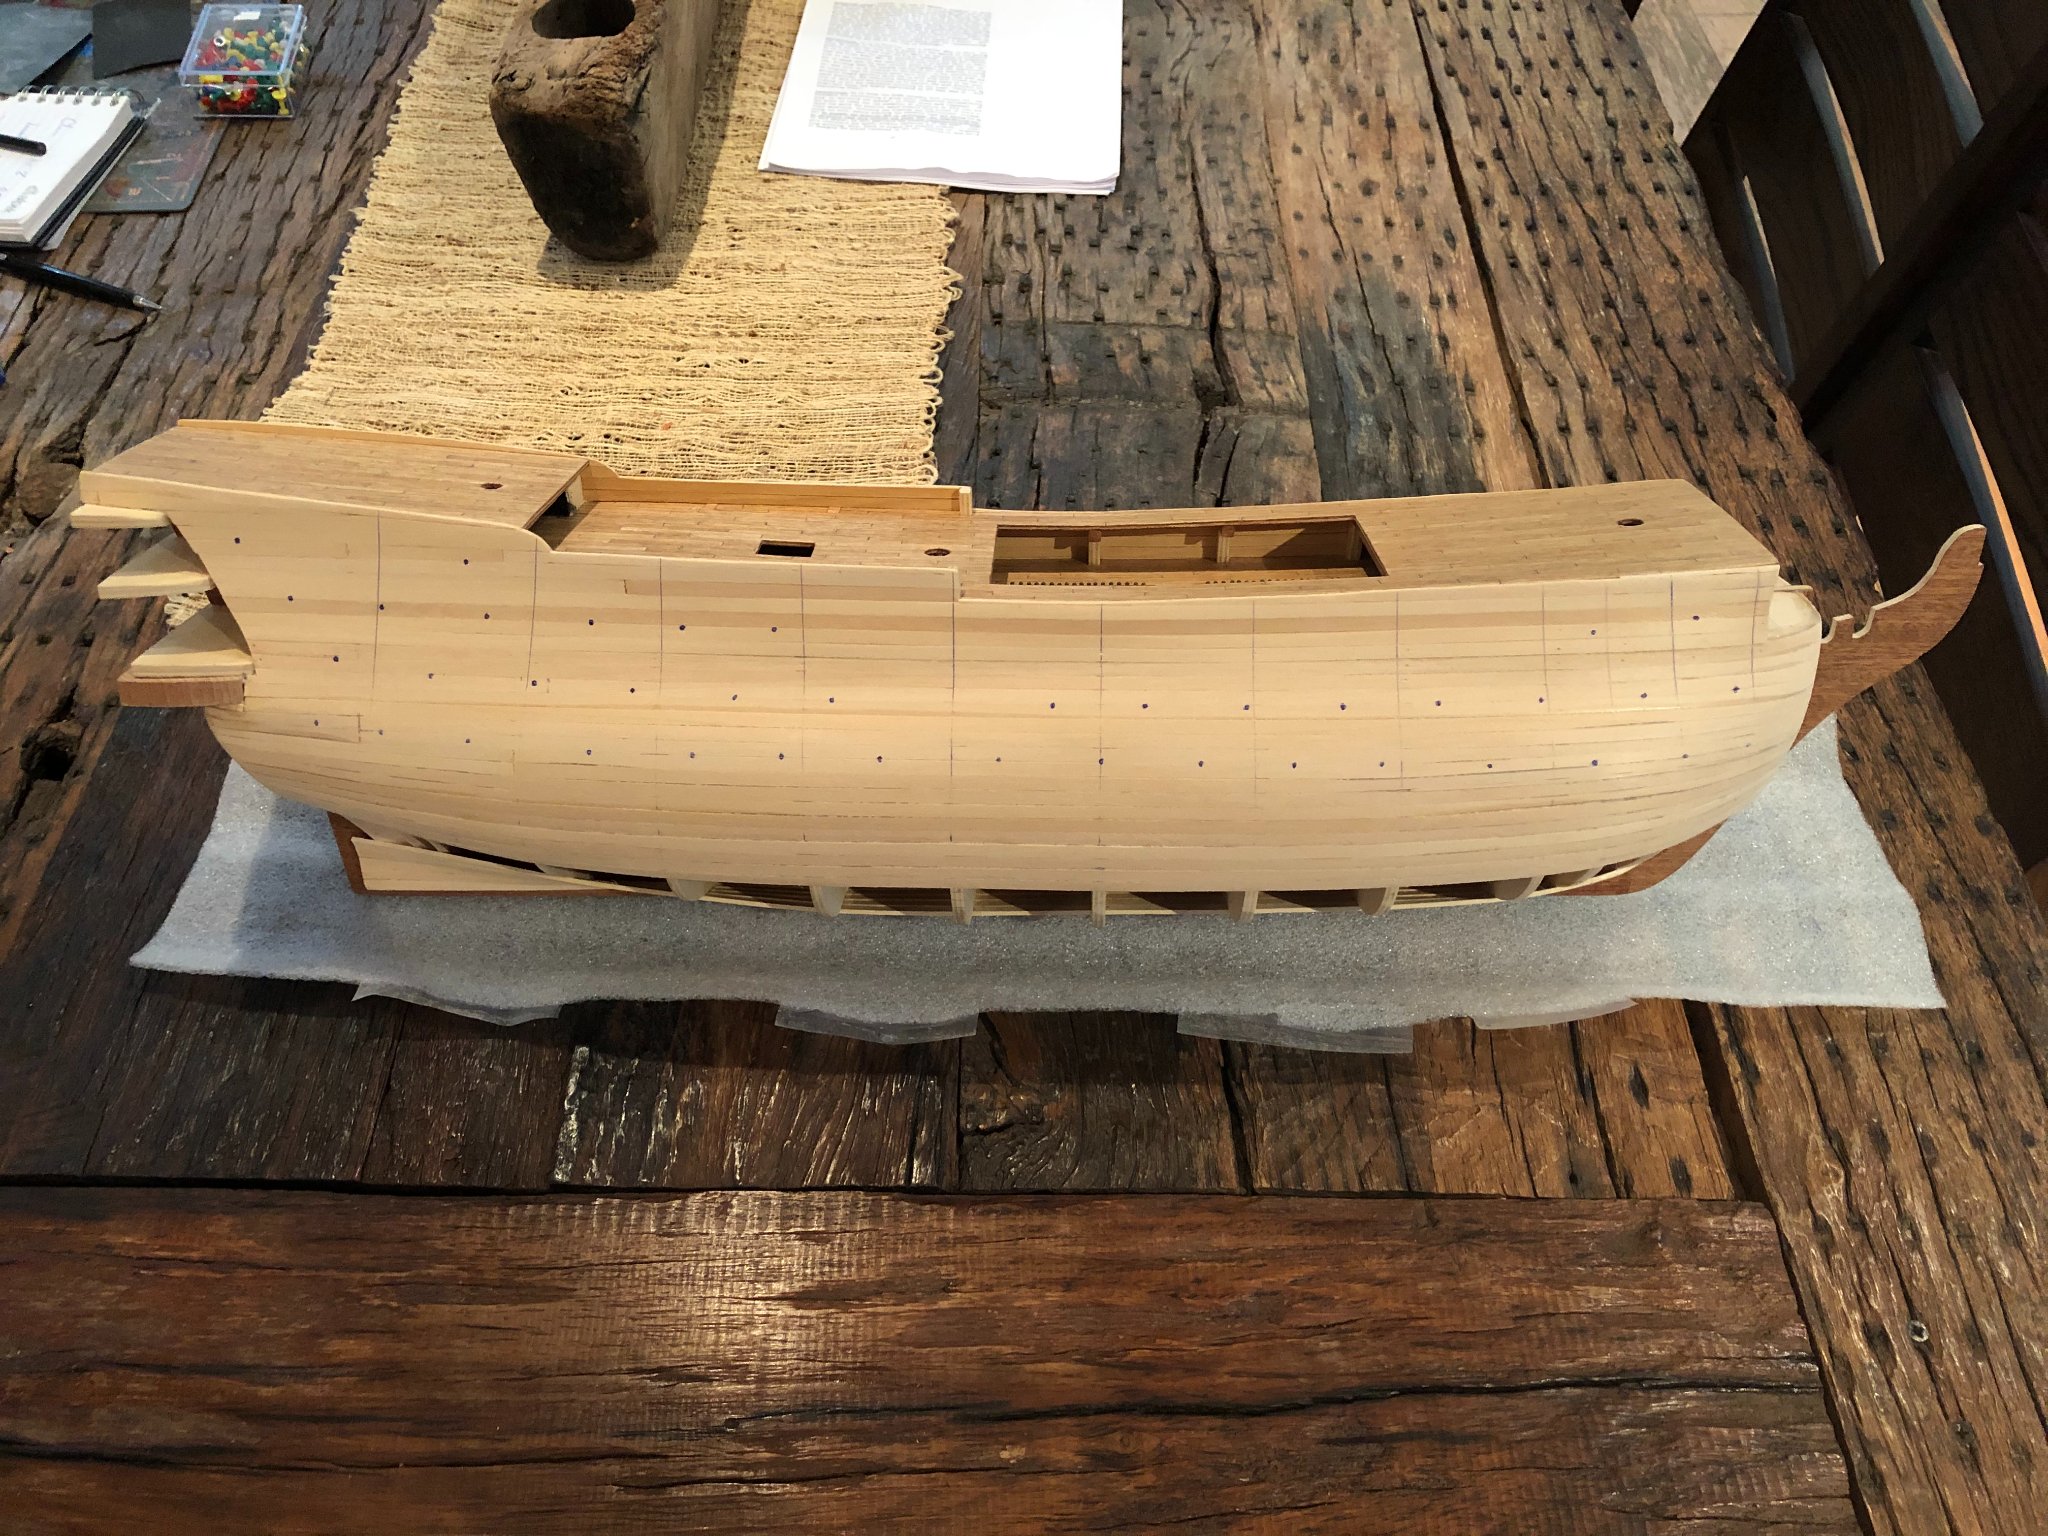
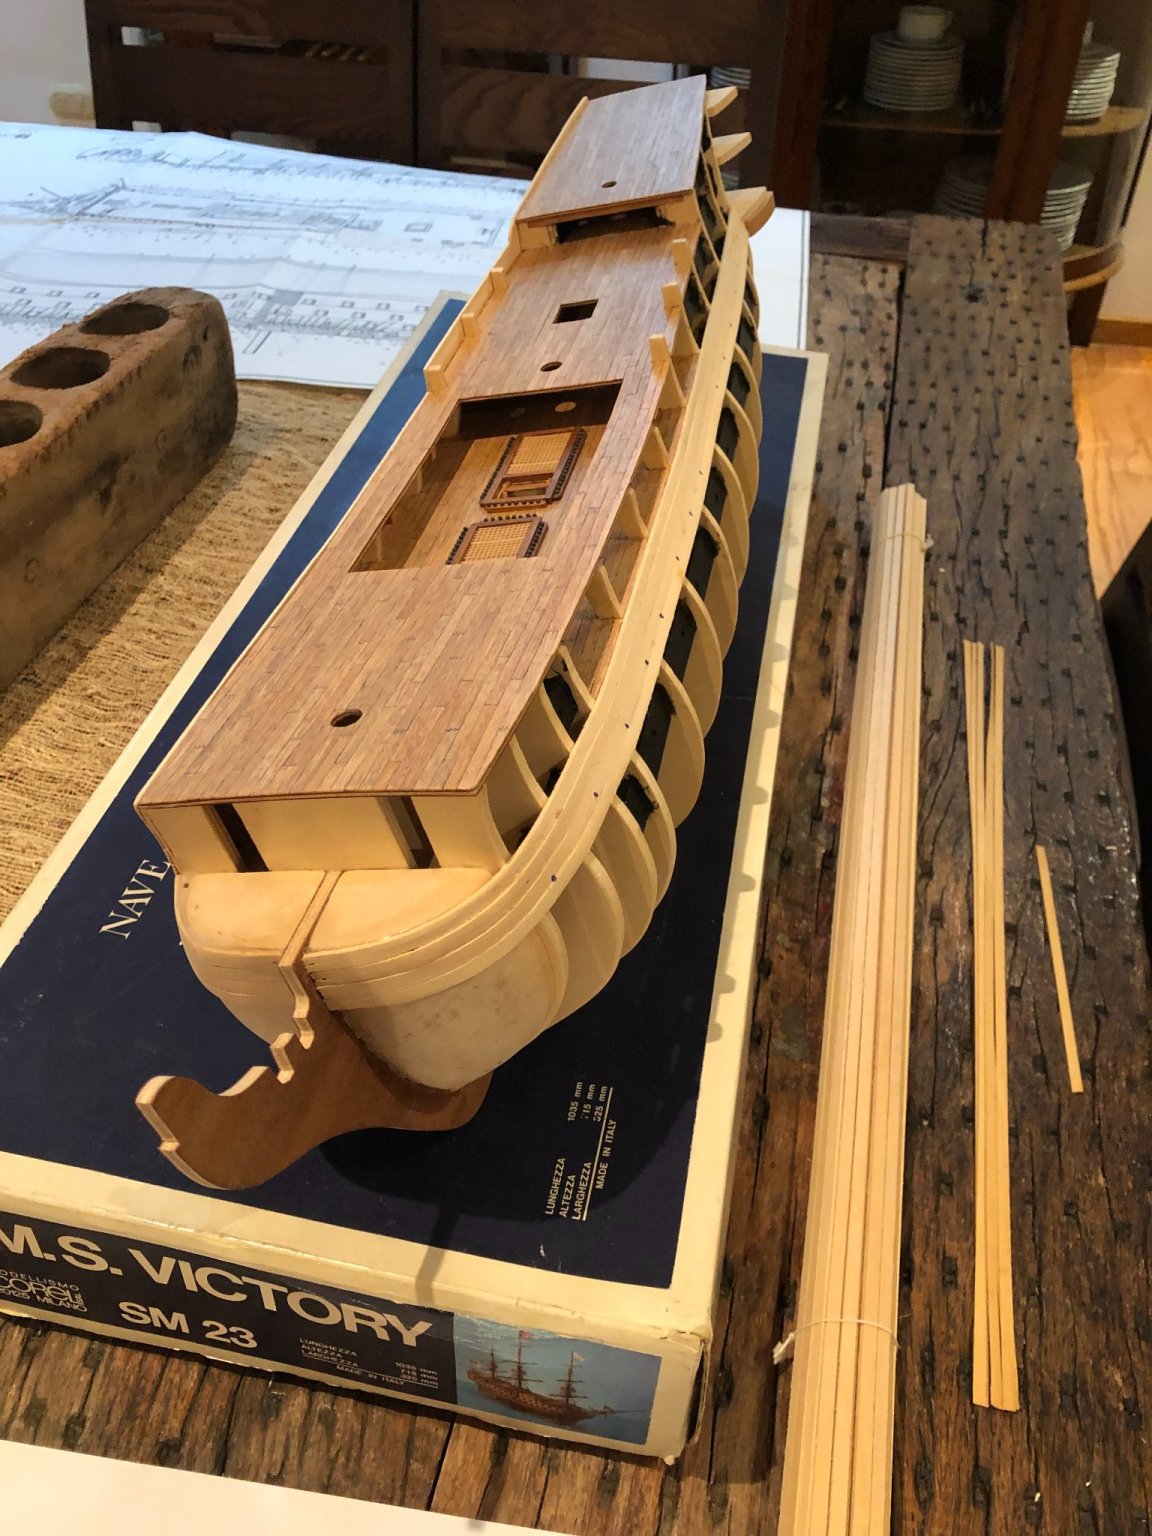
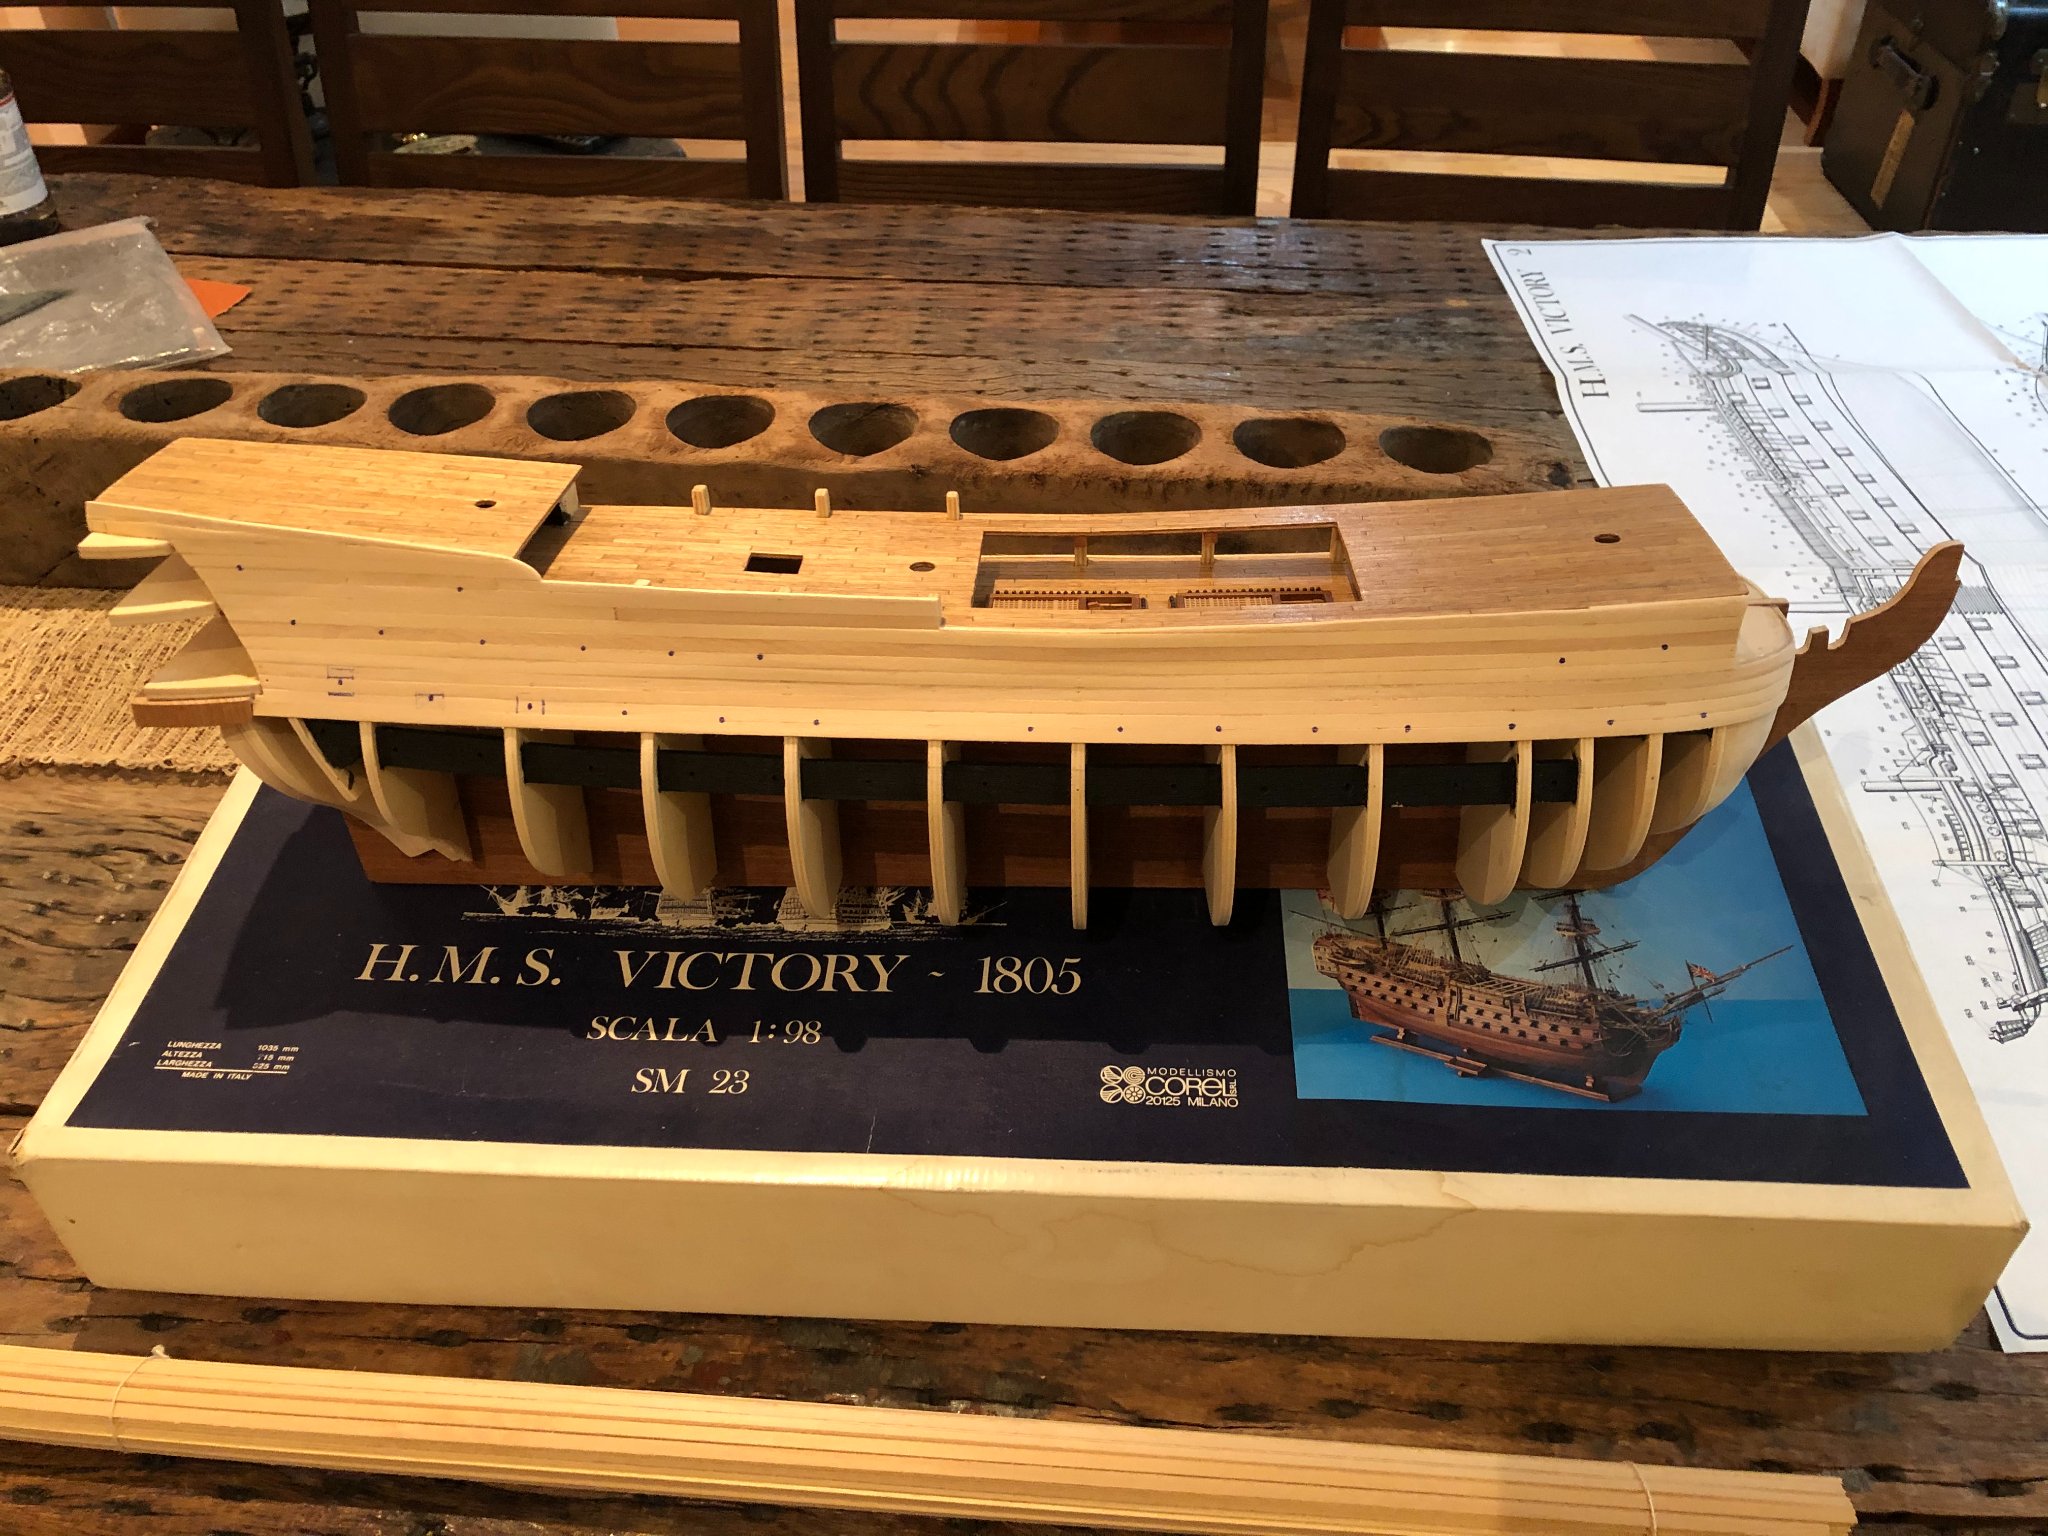
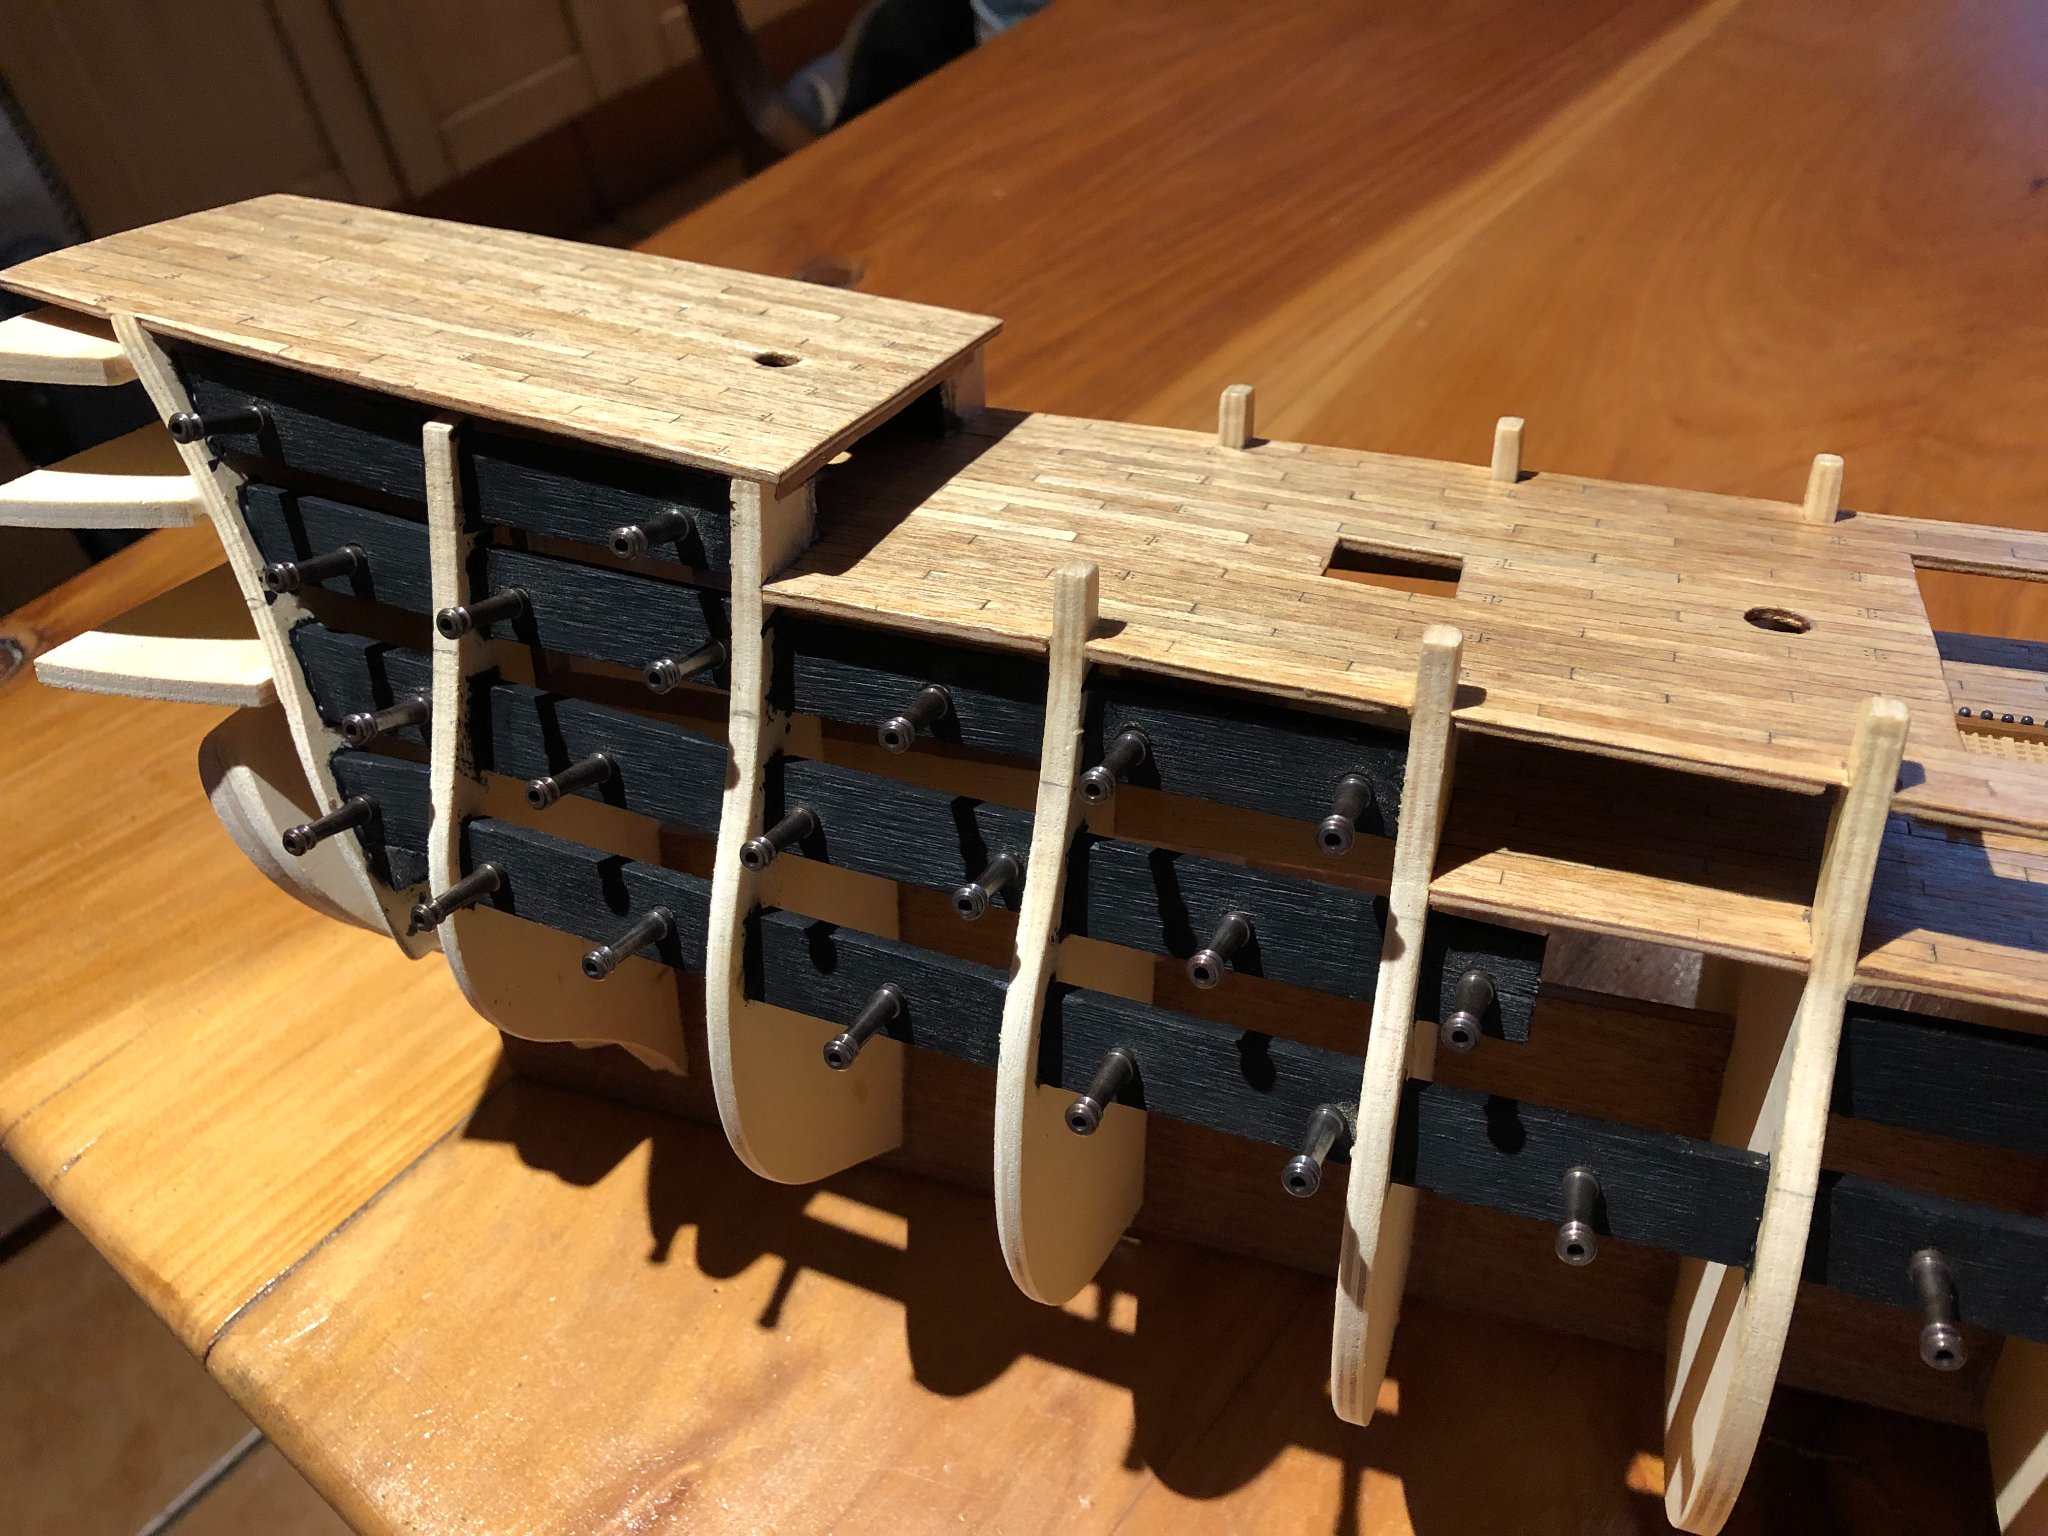
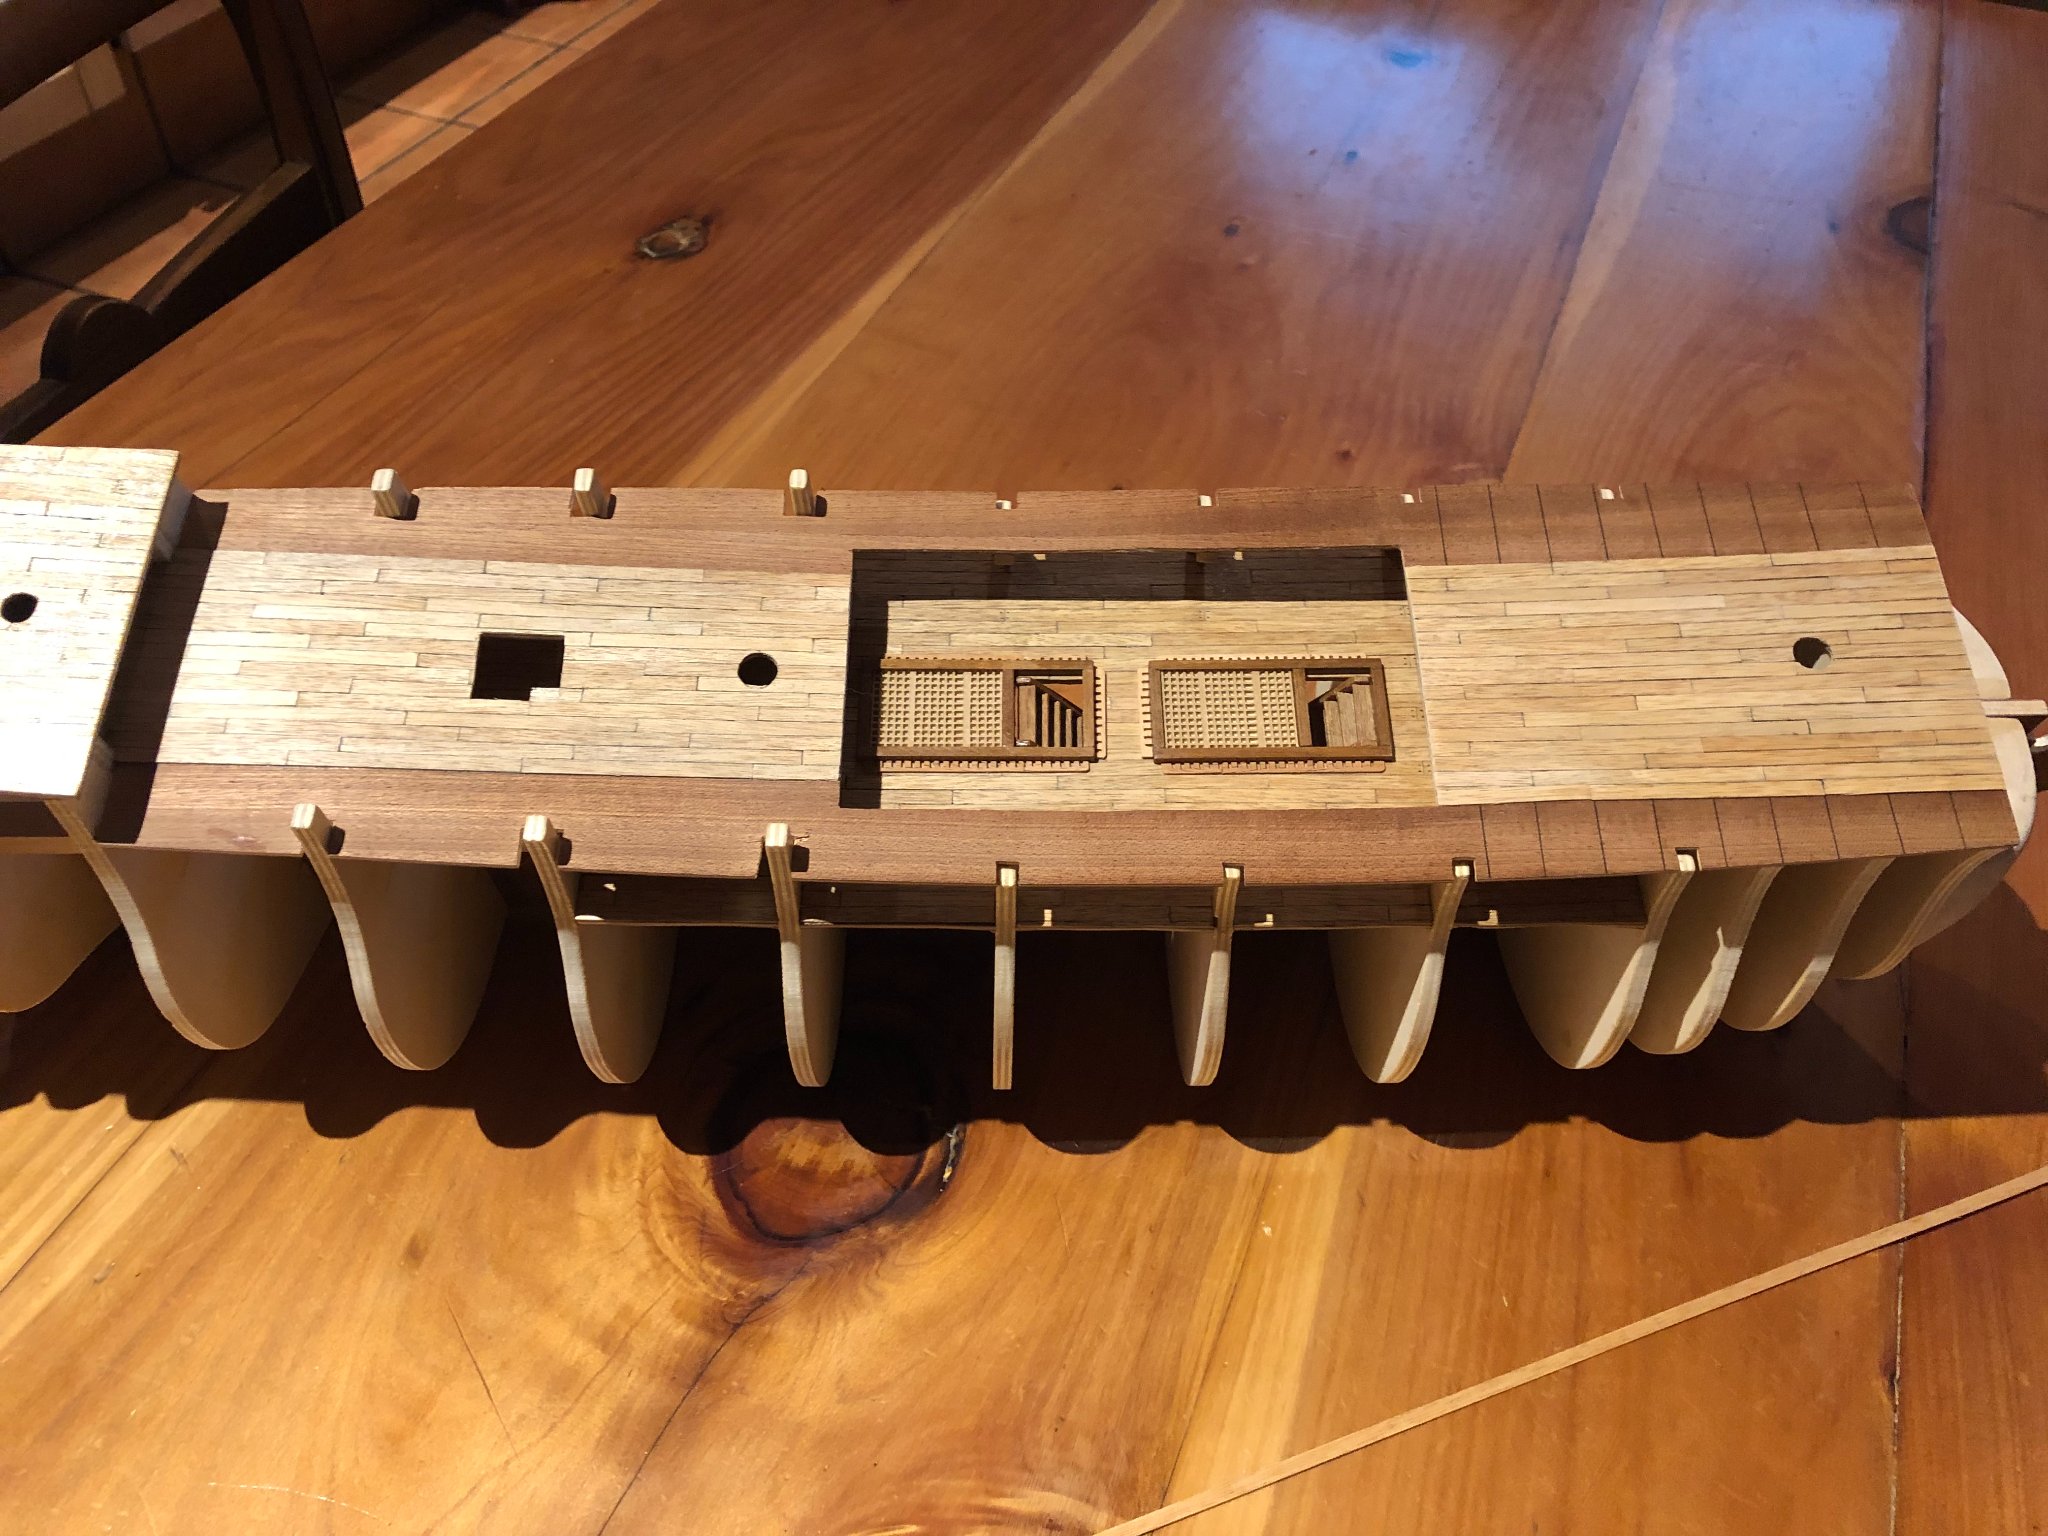
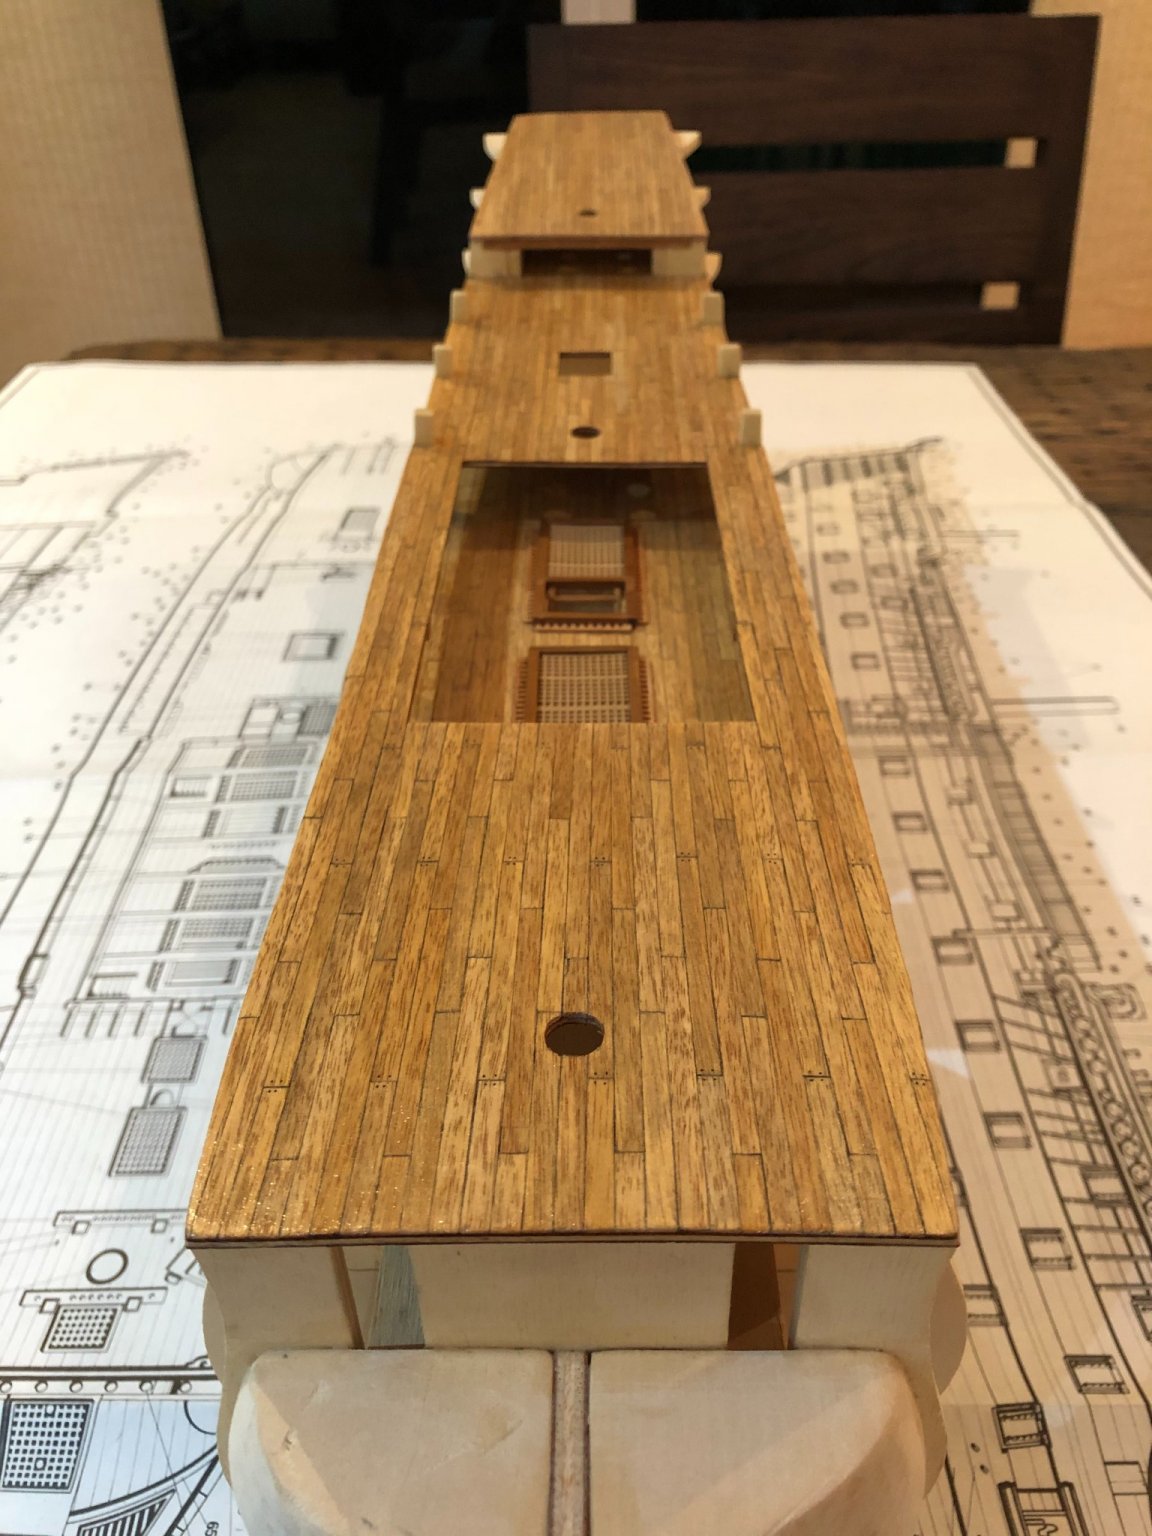
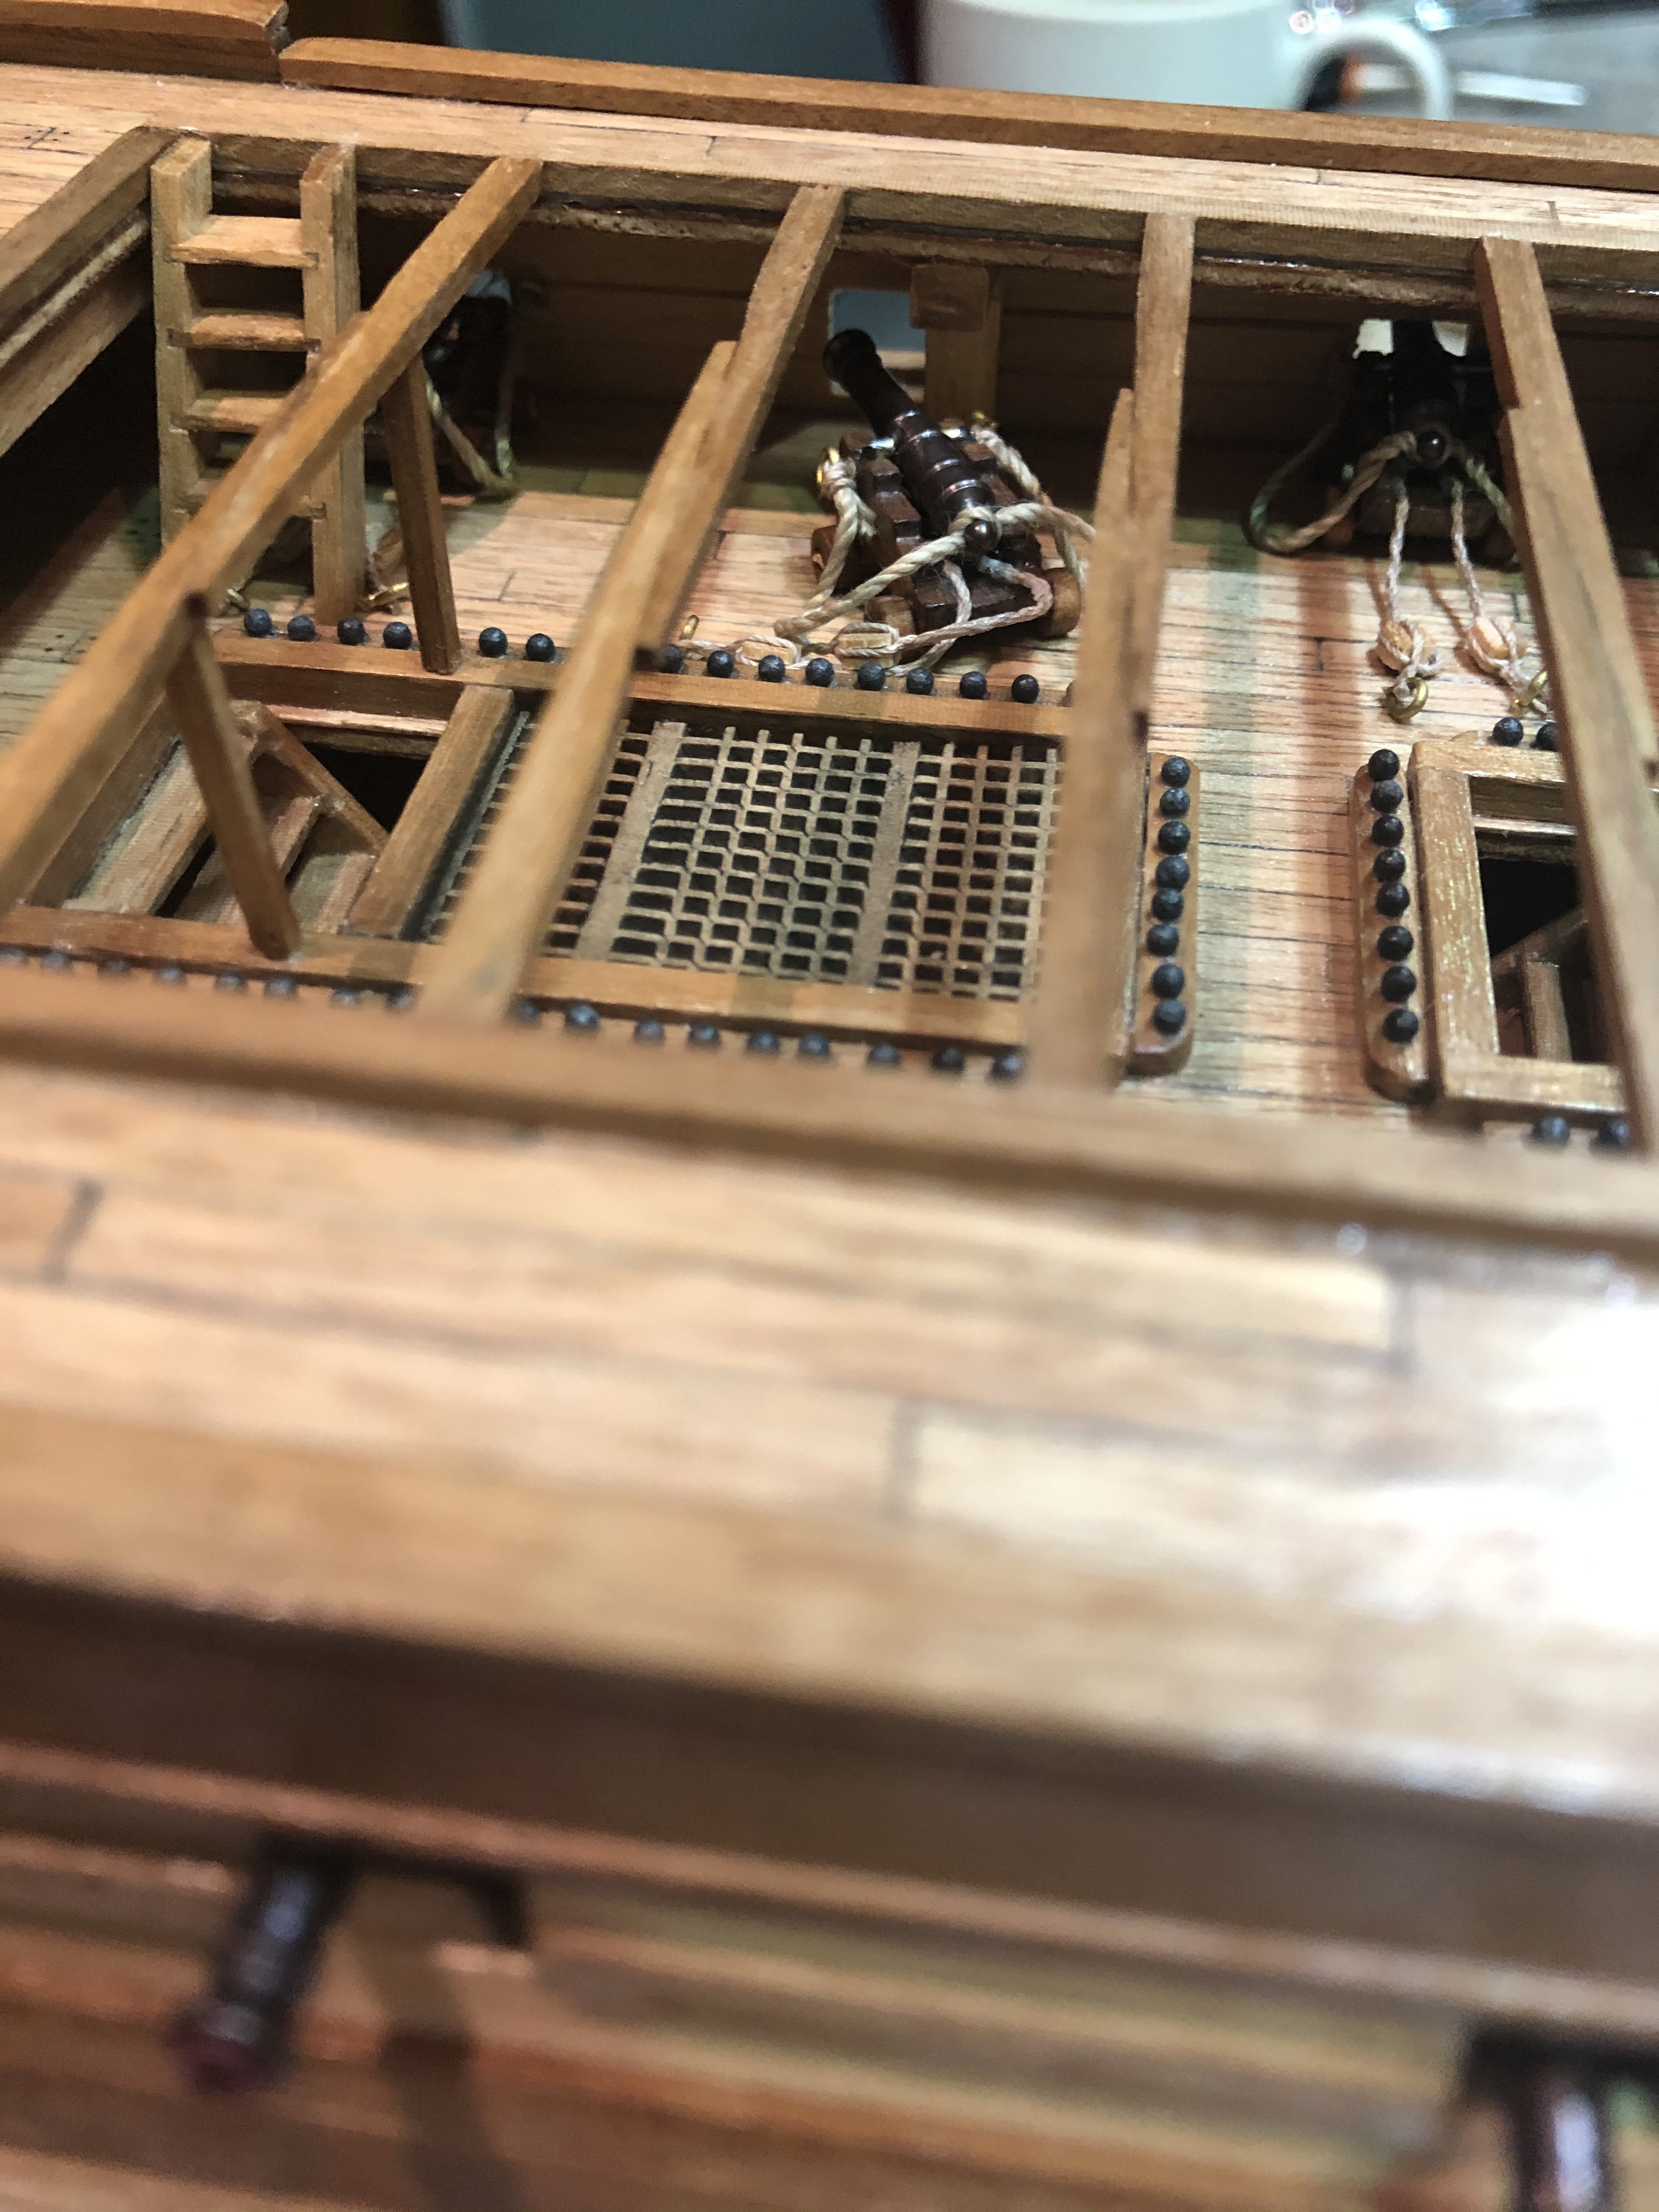
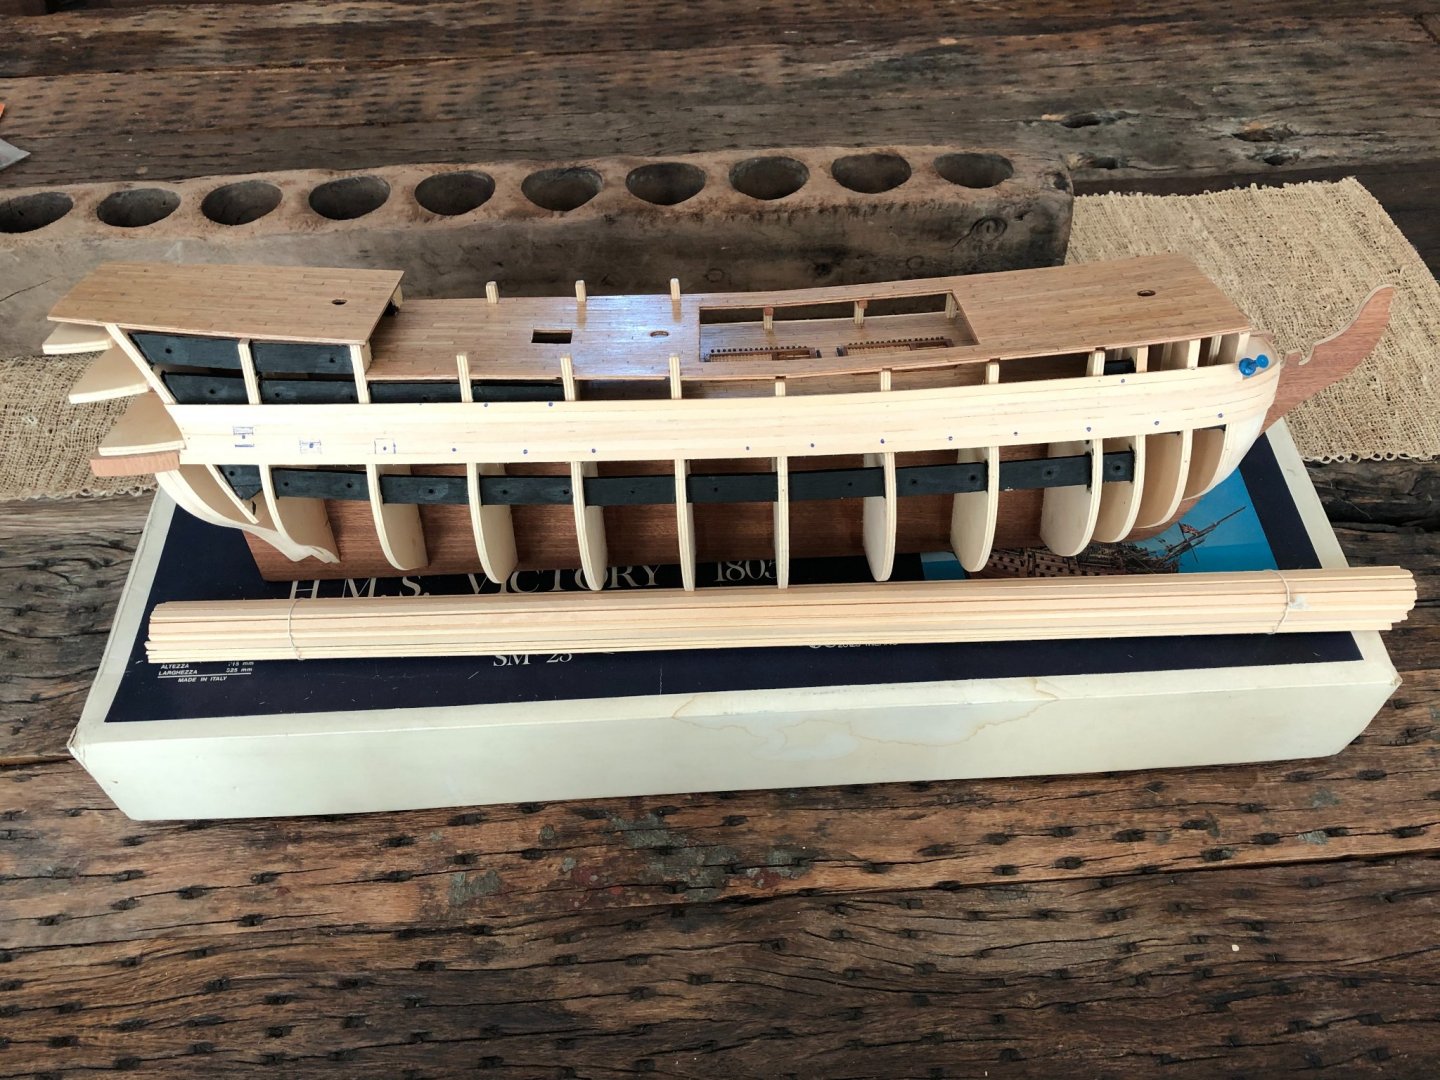
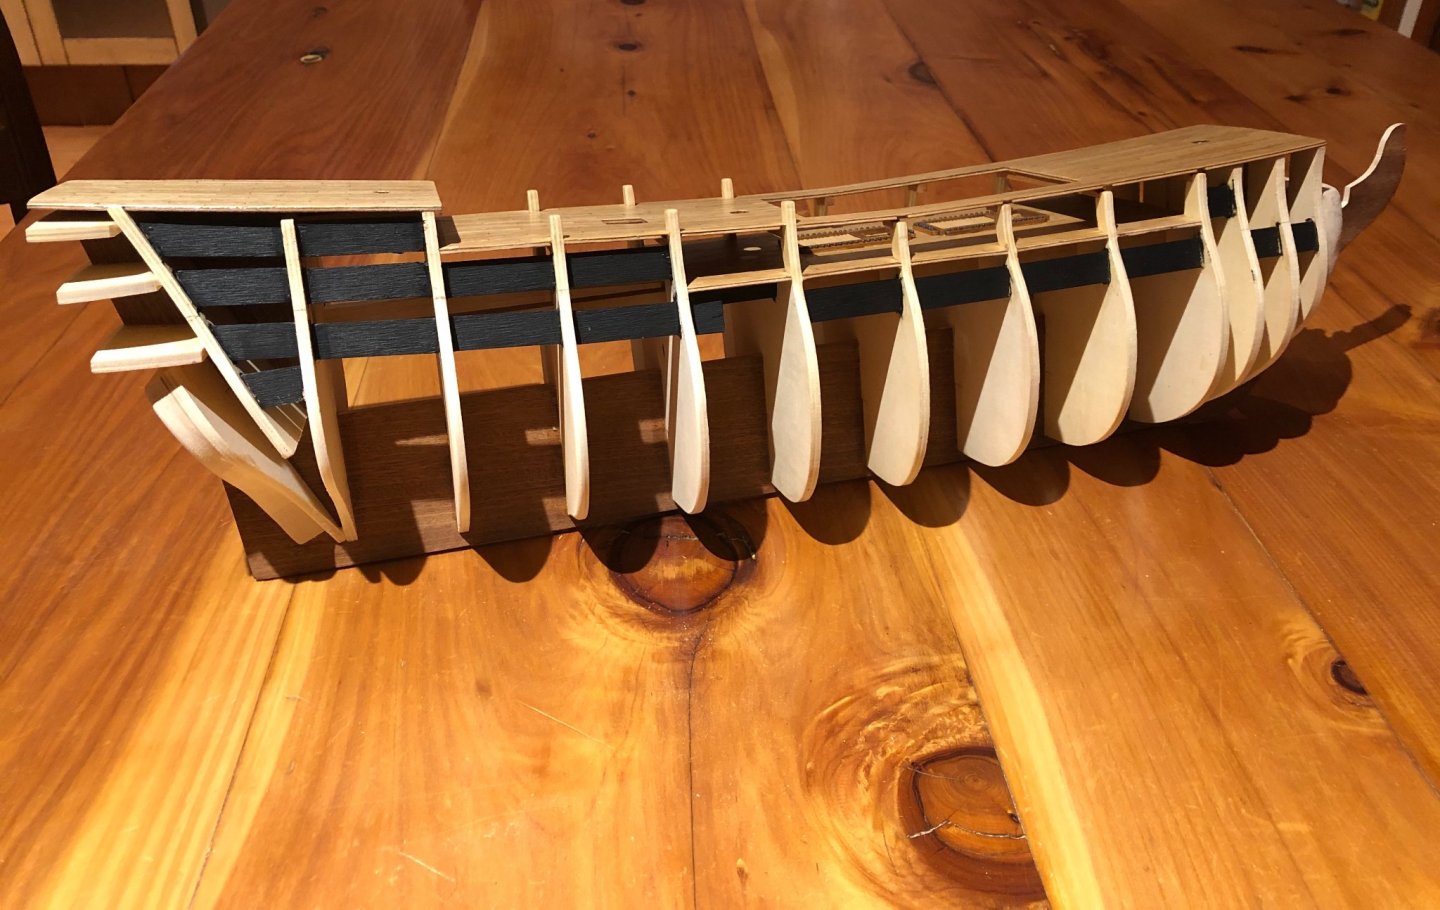
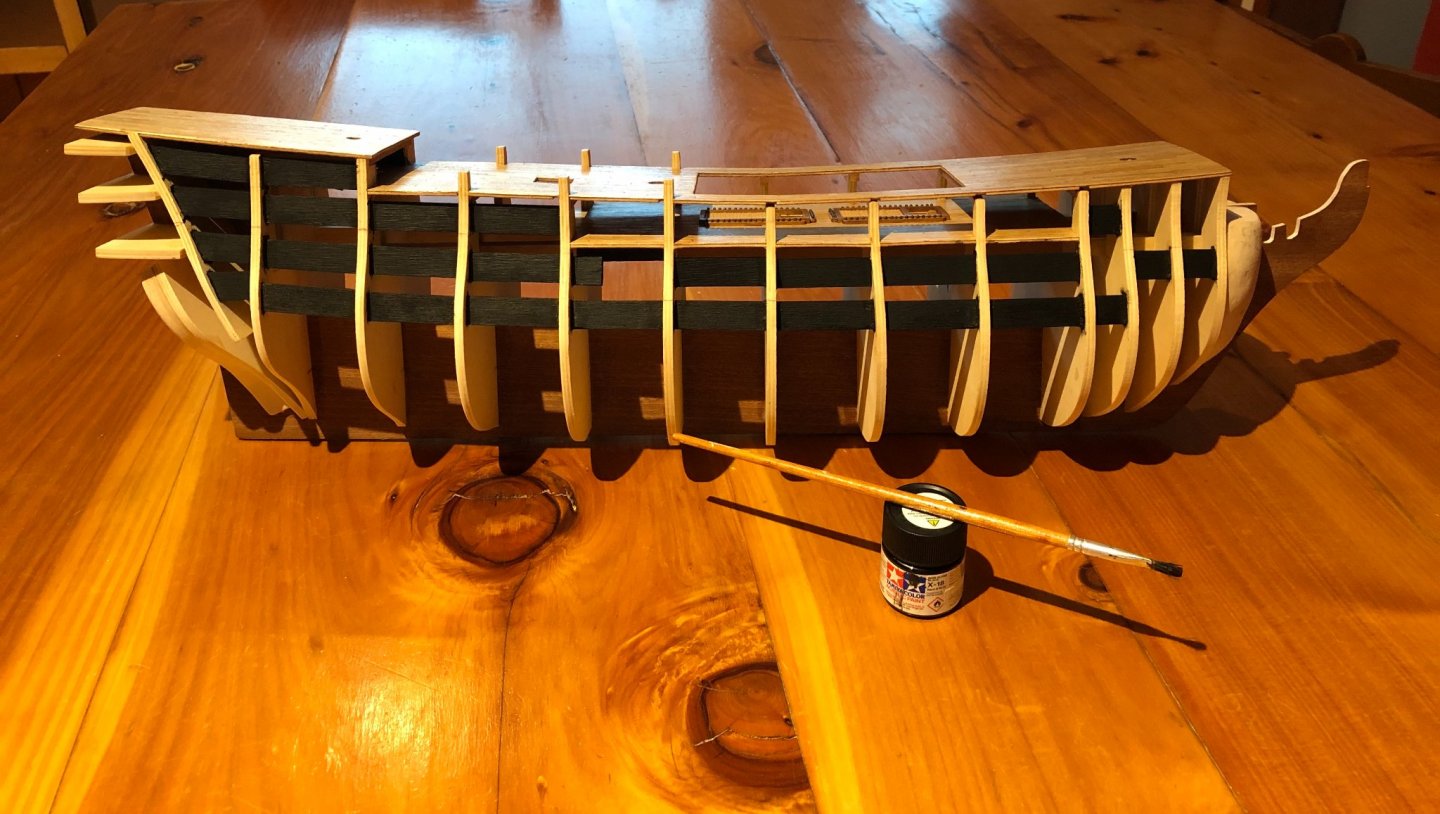
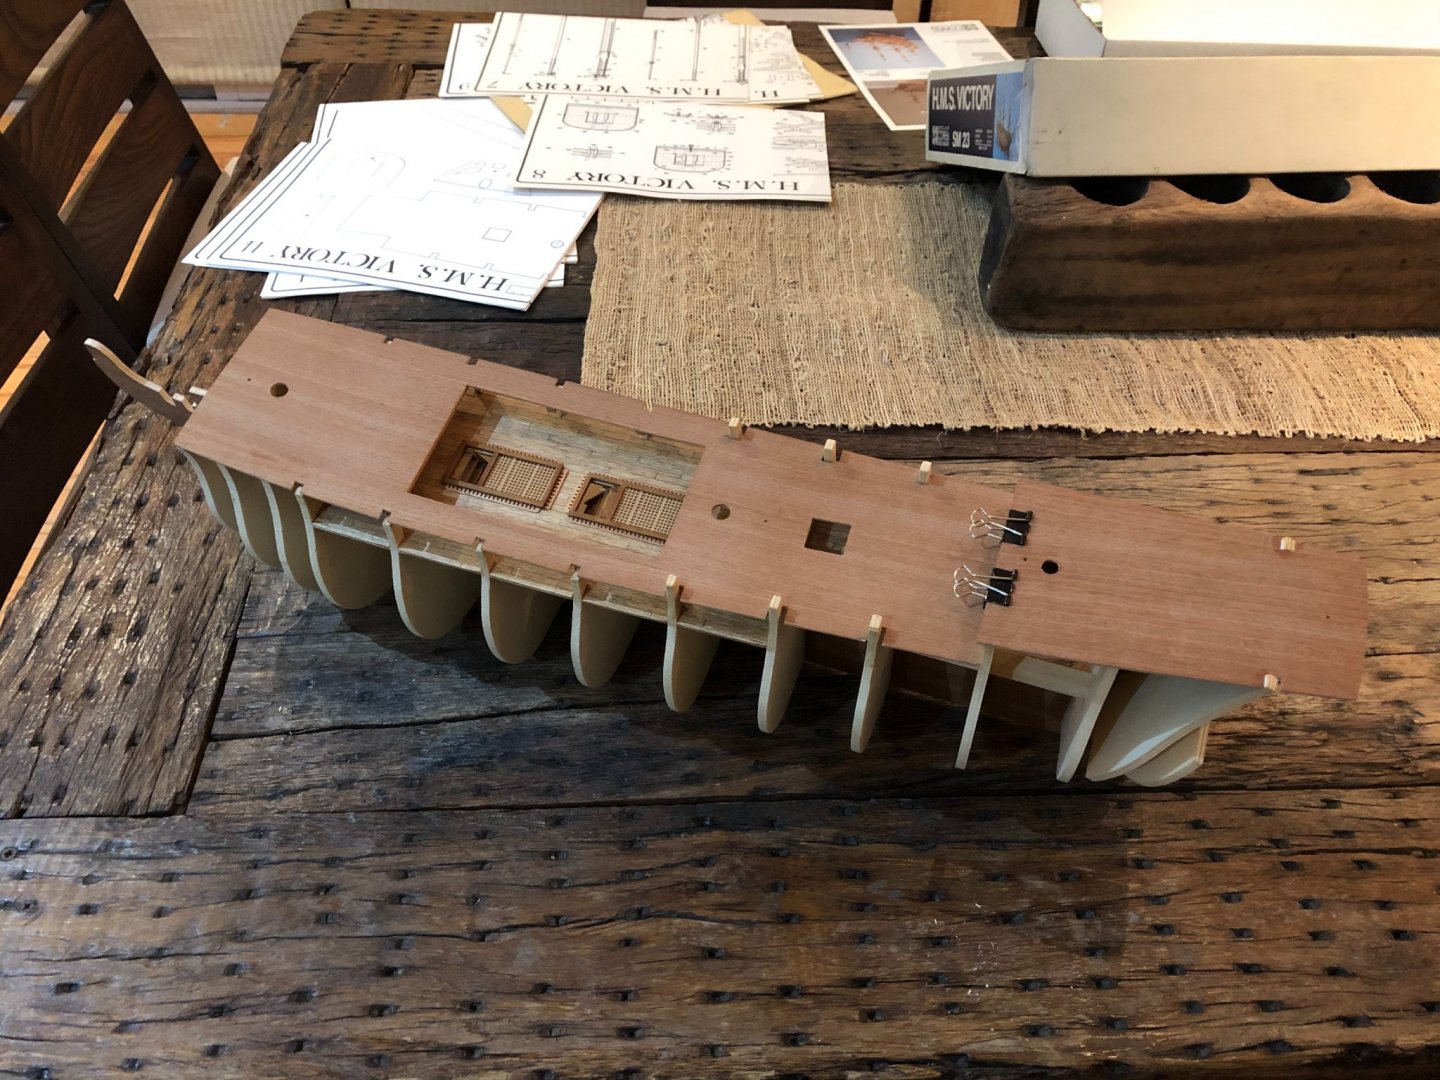
On the second stage I set up the deck beams and the upper and poop decks; planked both decks and placed the lower deck's shot garlands. Both decks were set in place fairly easy, but the upper deck did require the re-shape of two frame grooves. Same technick for planking these decks was used. Here are the picks:


-
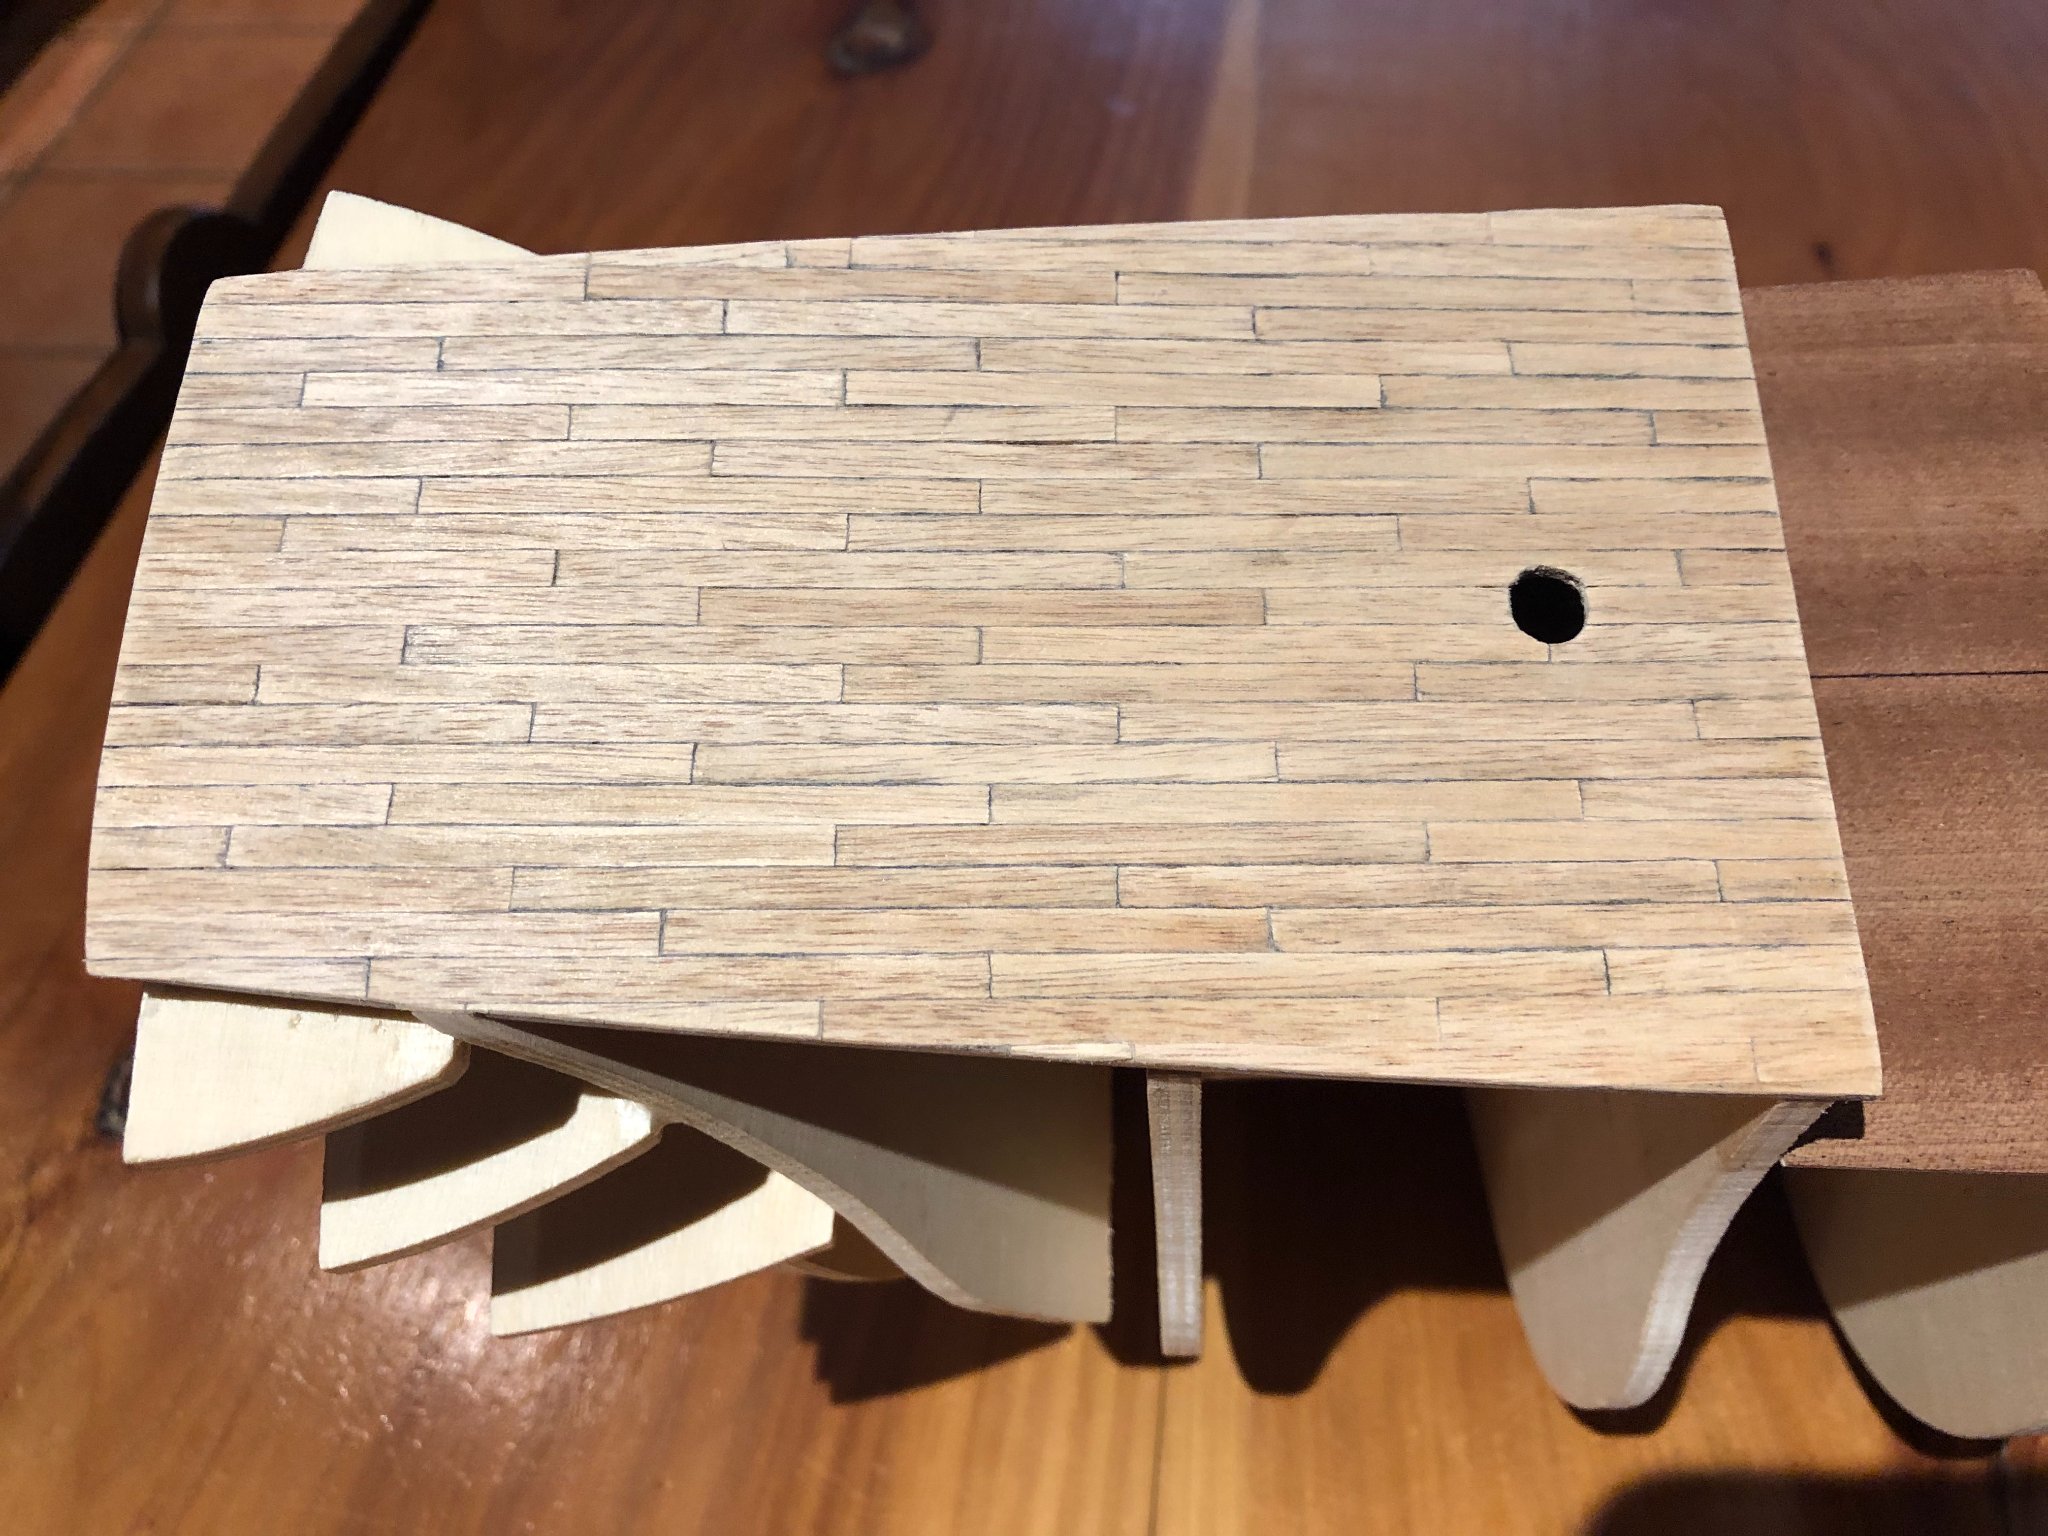
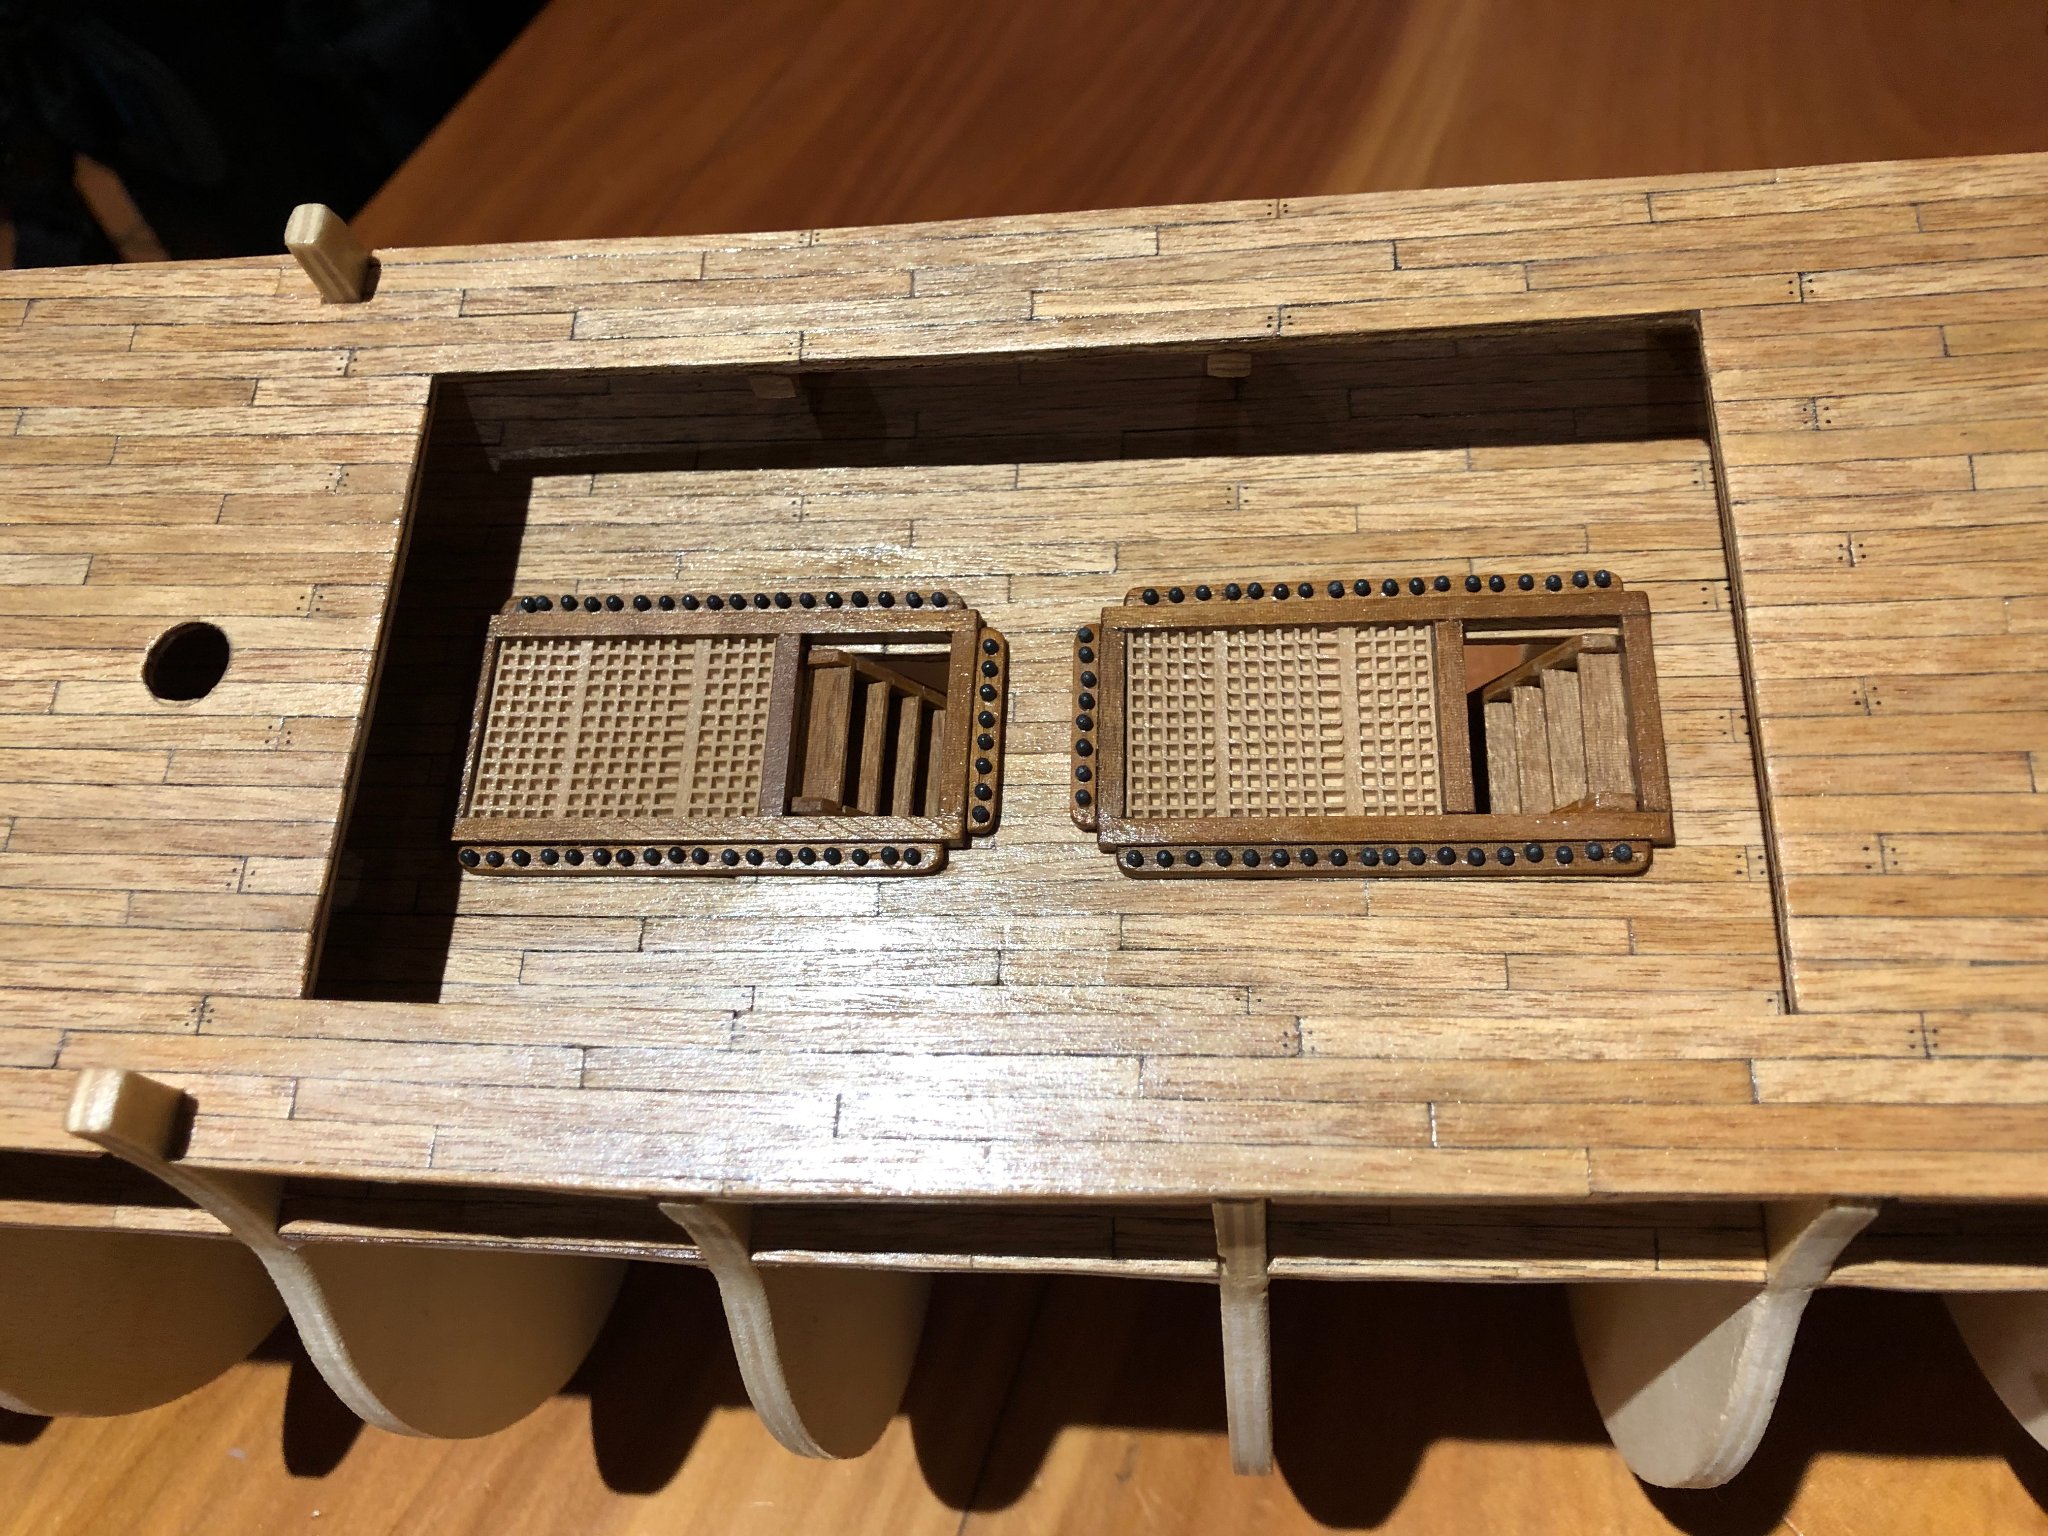
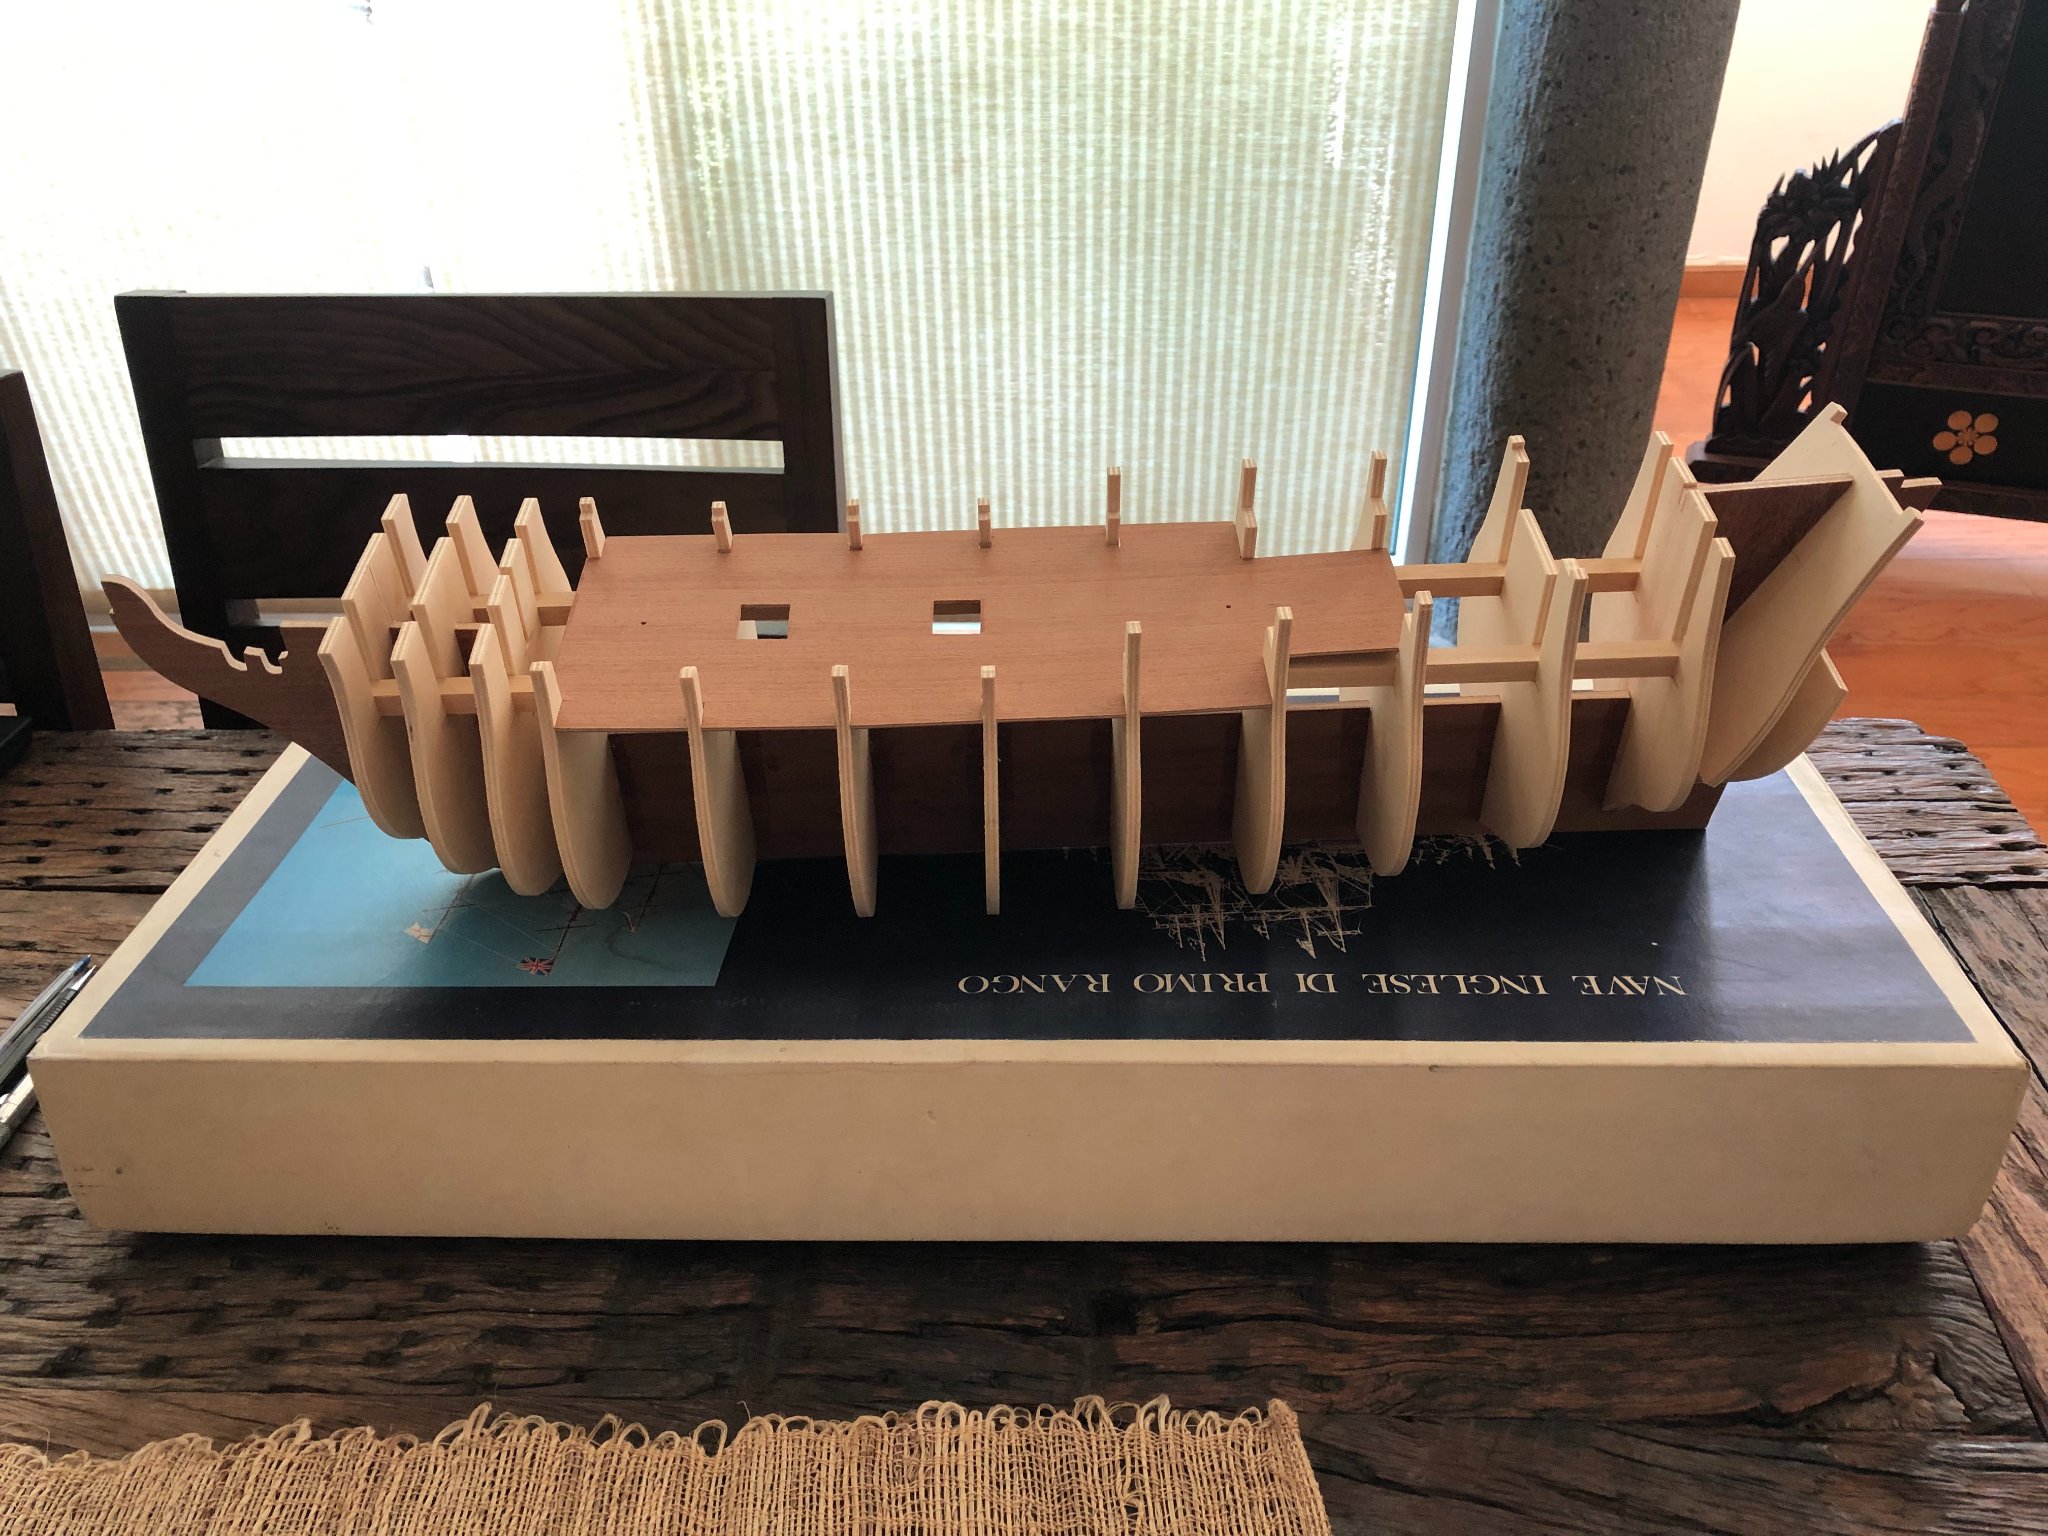
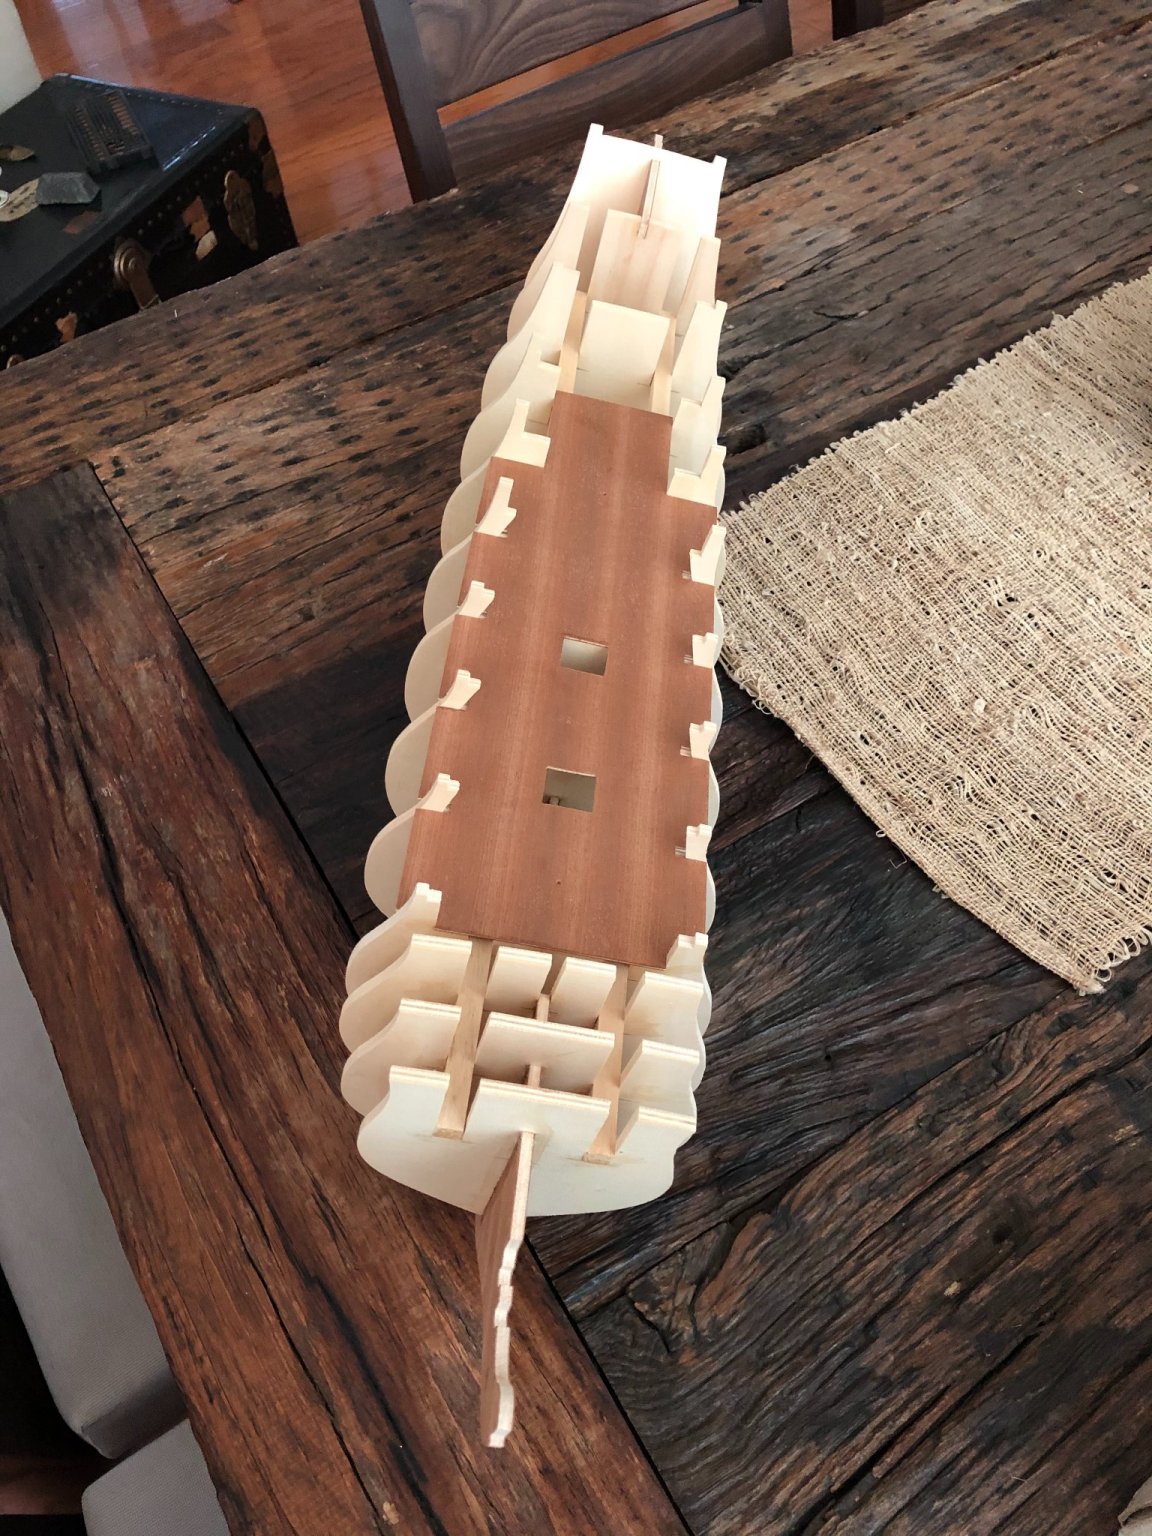
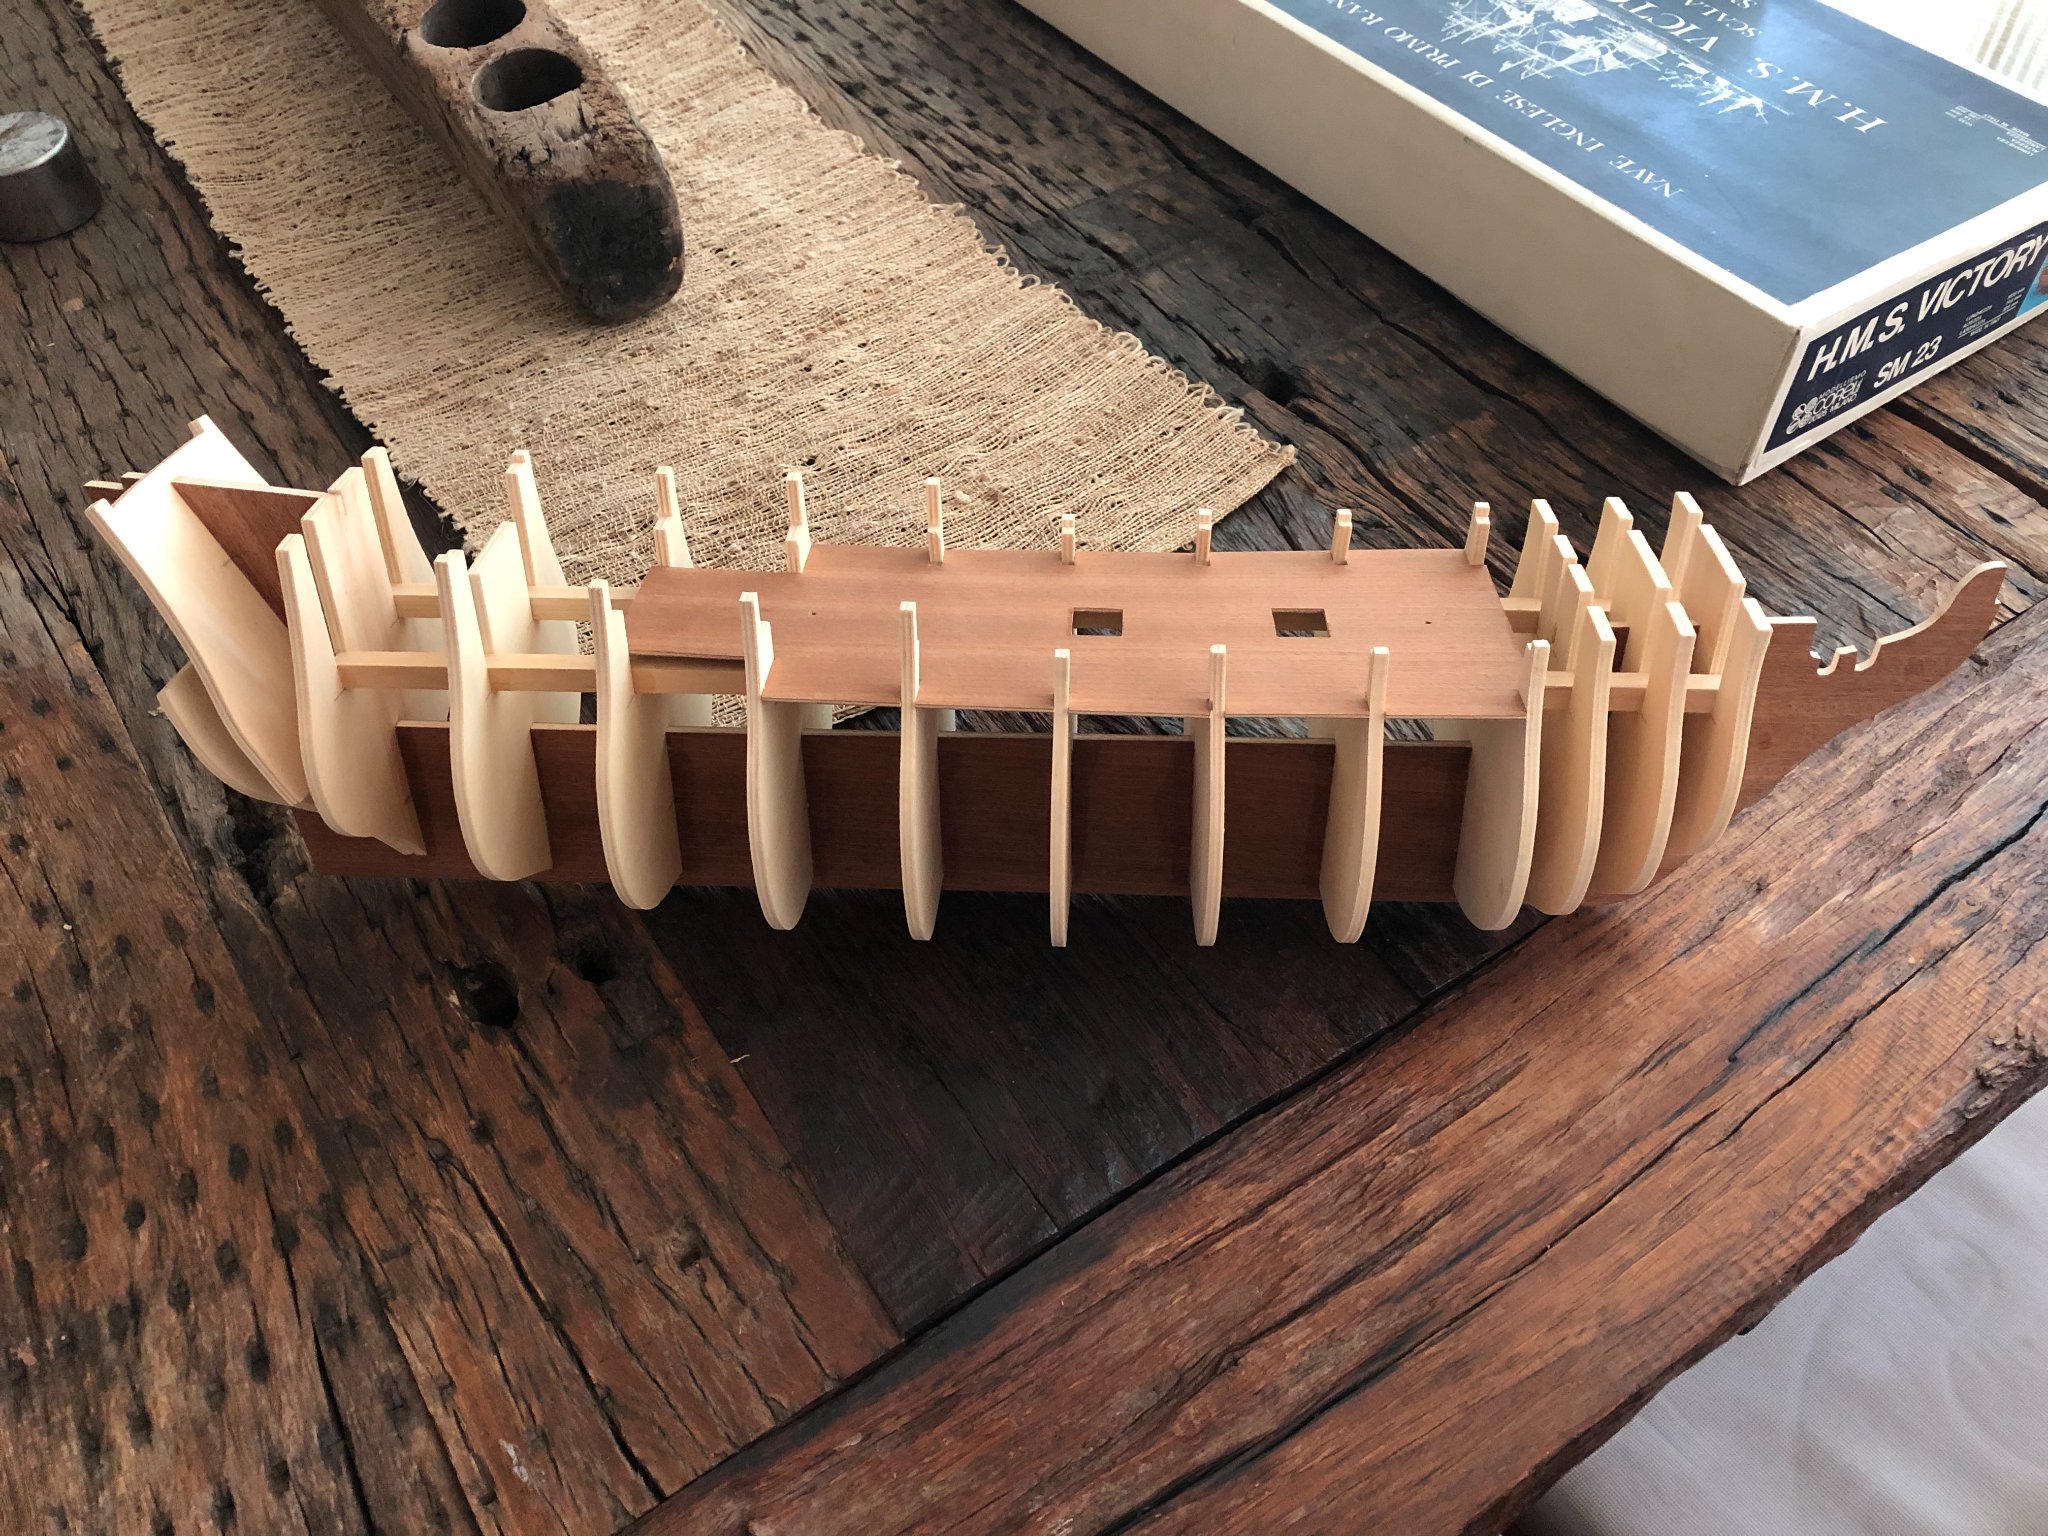
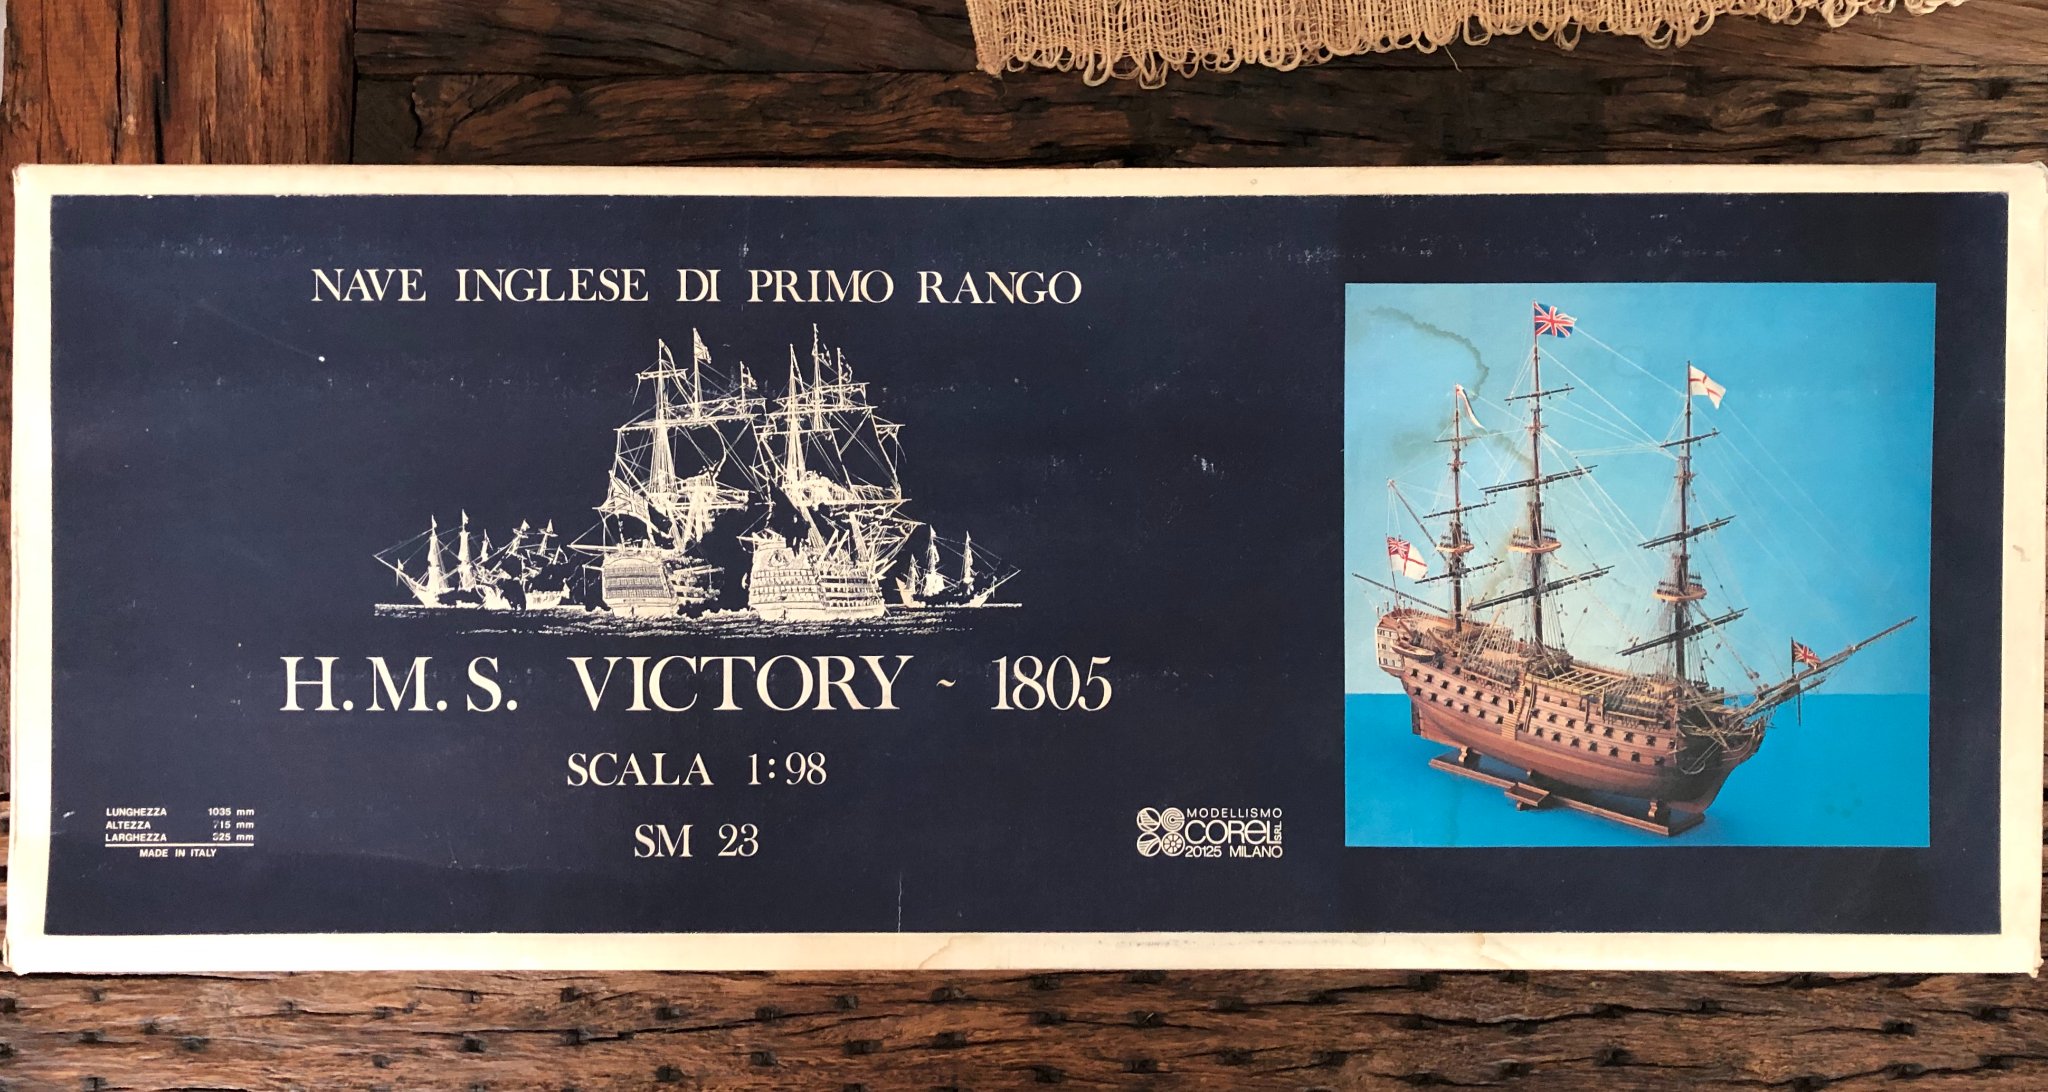
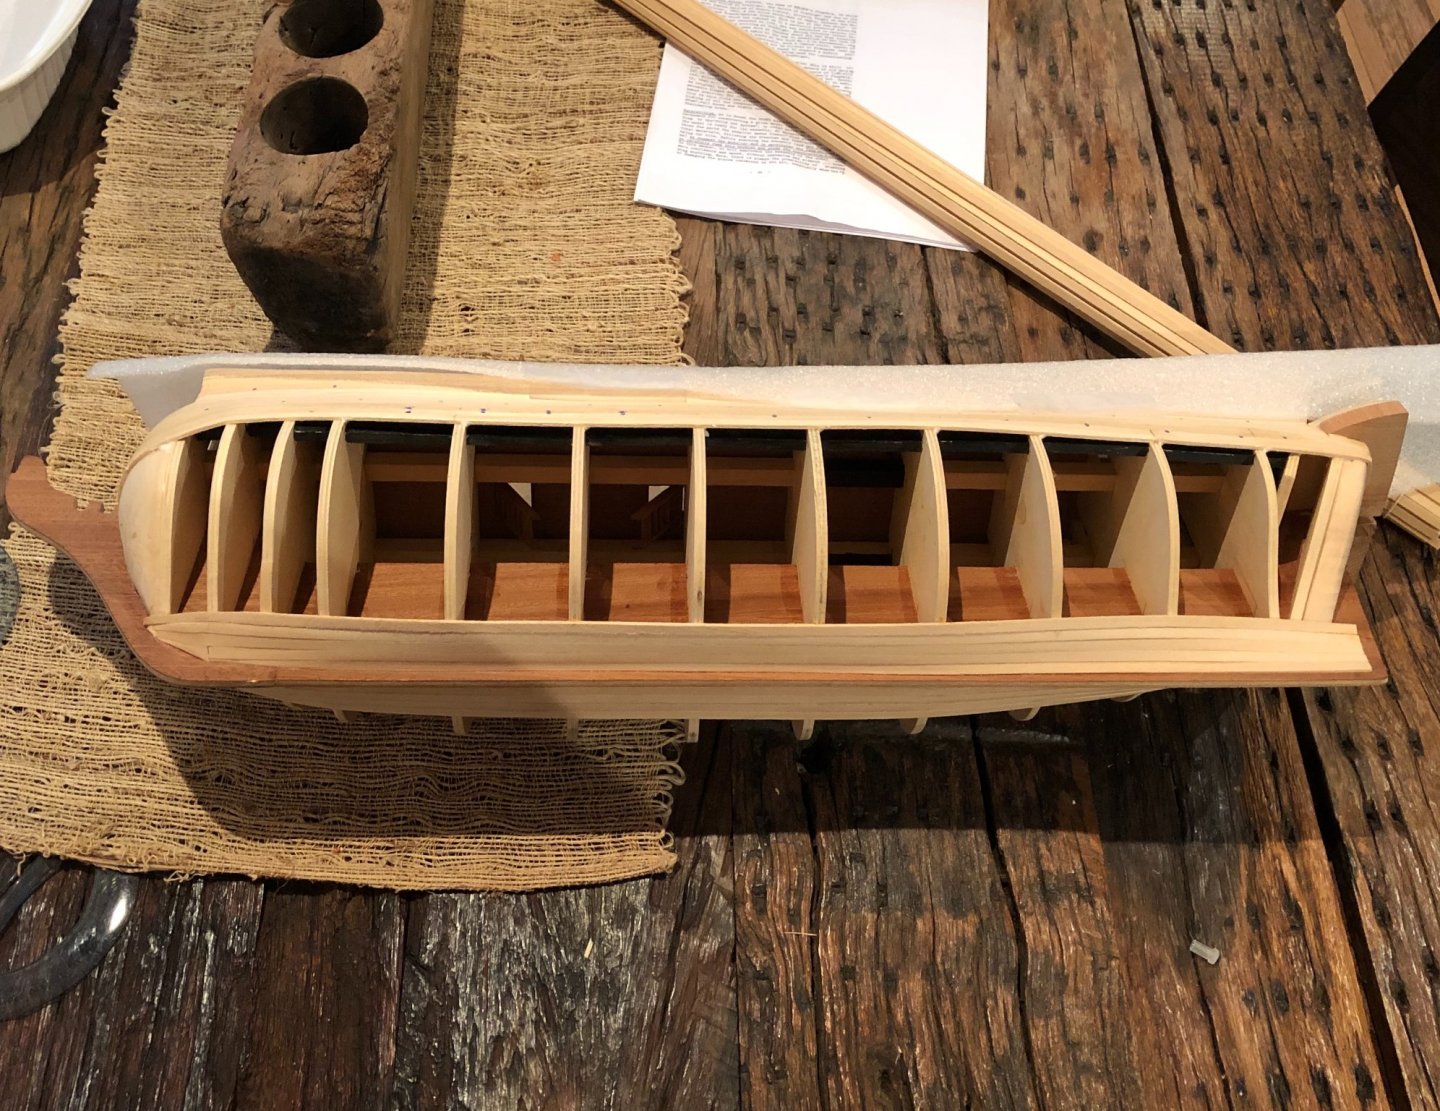
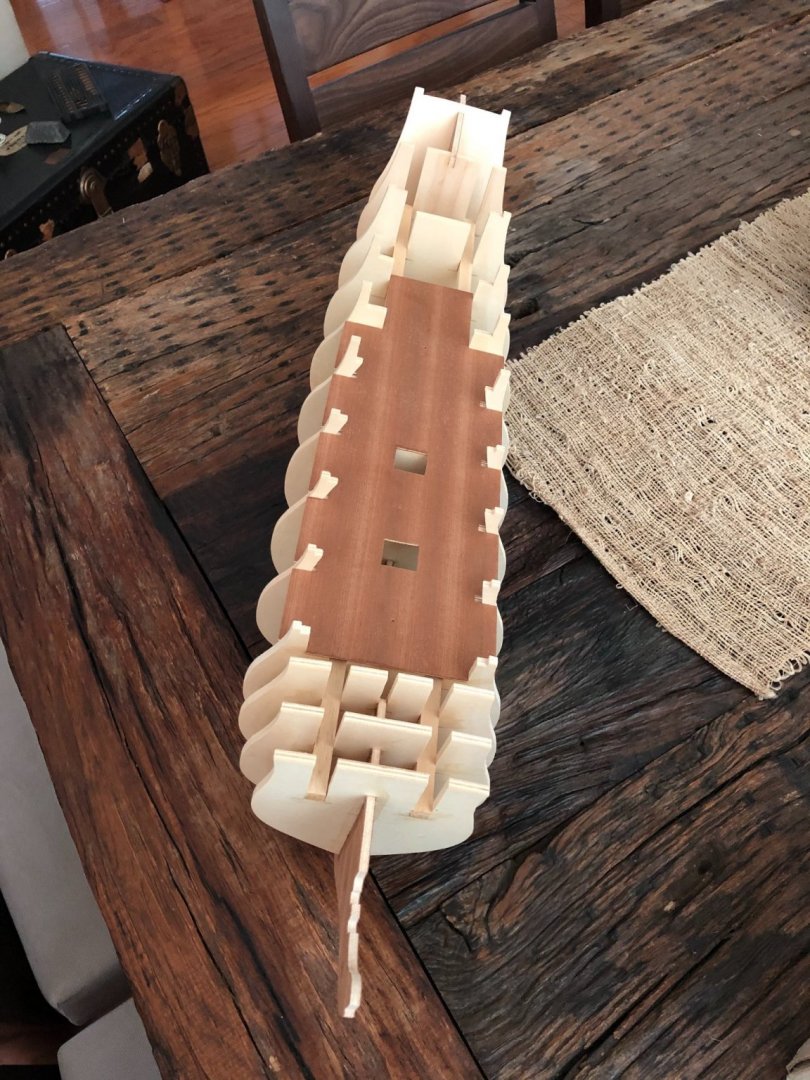
Hi everybody ! As I mentioned on my new members introduction, I restarted my modeling hobby during this lockdown after many years of inactivity. Searching for a new plastic kit online, I found a really good opportunity to get a HMS Victory Corel model at a fraction of retail value. The price was so tempting and the model so challenging that I decided to buy it. It arrived home on August 28th, so it has been almost a month of great enjoyment. This is only my second wood model ship after the Artesania Latina's Swift. I was satisfied with the result, but planking it was really a nightmare. I hope this time I will do it much better with your advice. These are some pics of the first stage, setting the frames, keel, lower deck and longways beams; planking of the lower deck, construction of the stairs and setting of the lower deck gratings. Contrary to what I had read, all pieces fit together perfectly, and very little sanding and correcting was needed. I set the planks with the three-butt pattern, used a soft pencil to highlight the edges and used semi-gloss polyurethane varnish. Second stage picks will come soon. Any comment and advice are welcome!!! Eugenio.


-
Wow ! Your deck planking is awsome !!! I am also building the Corel HMS Victory. I will post my build log very soon. Lets enjoy the journey !!!
-
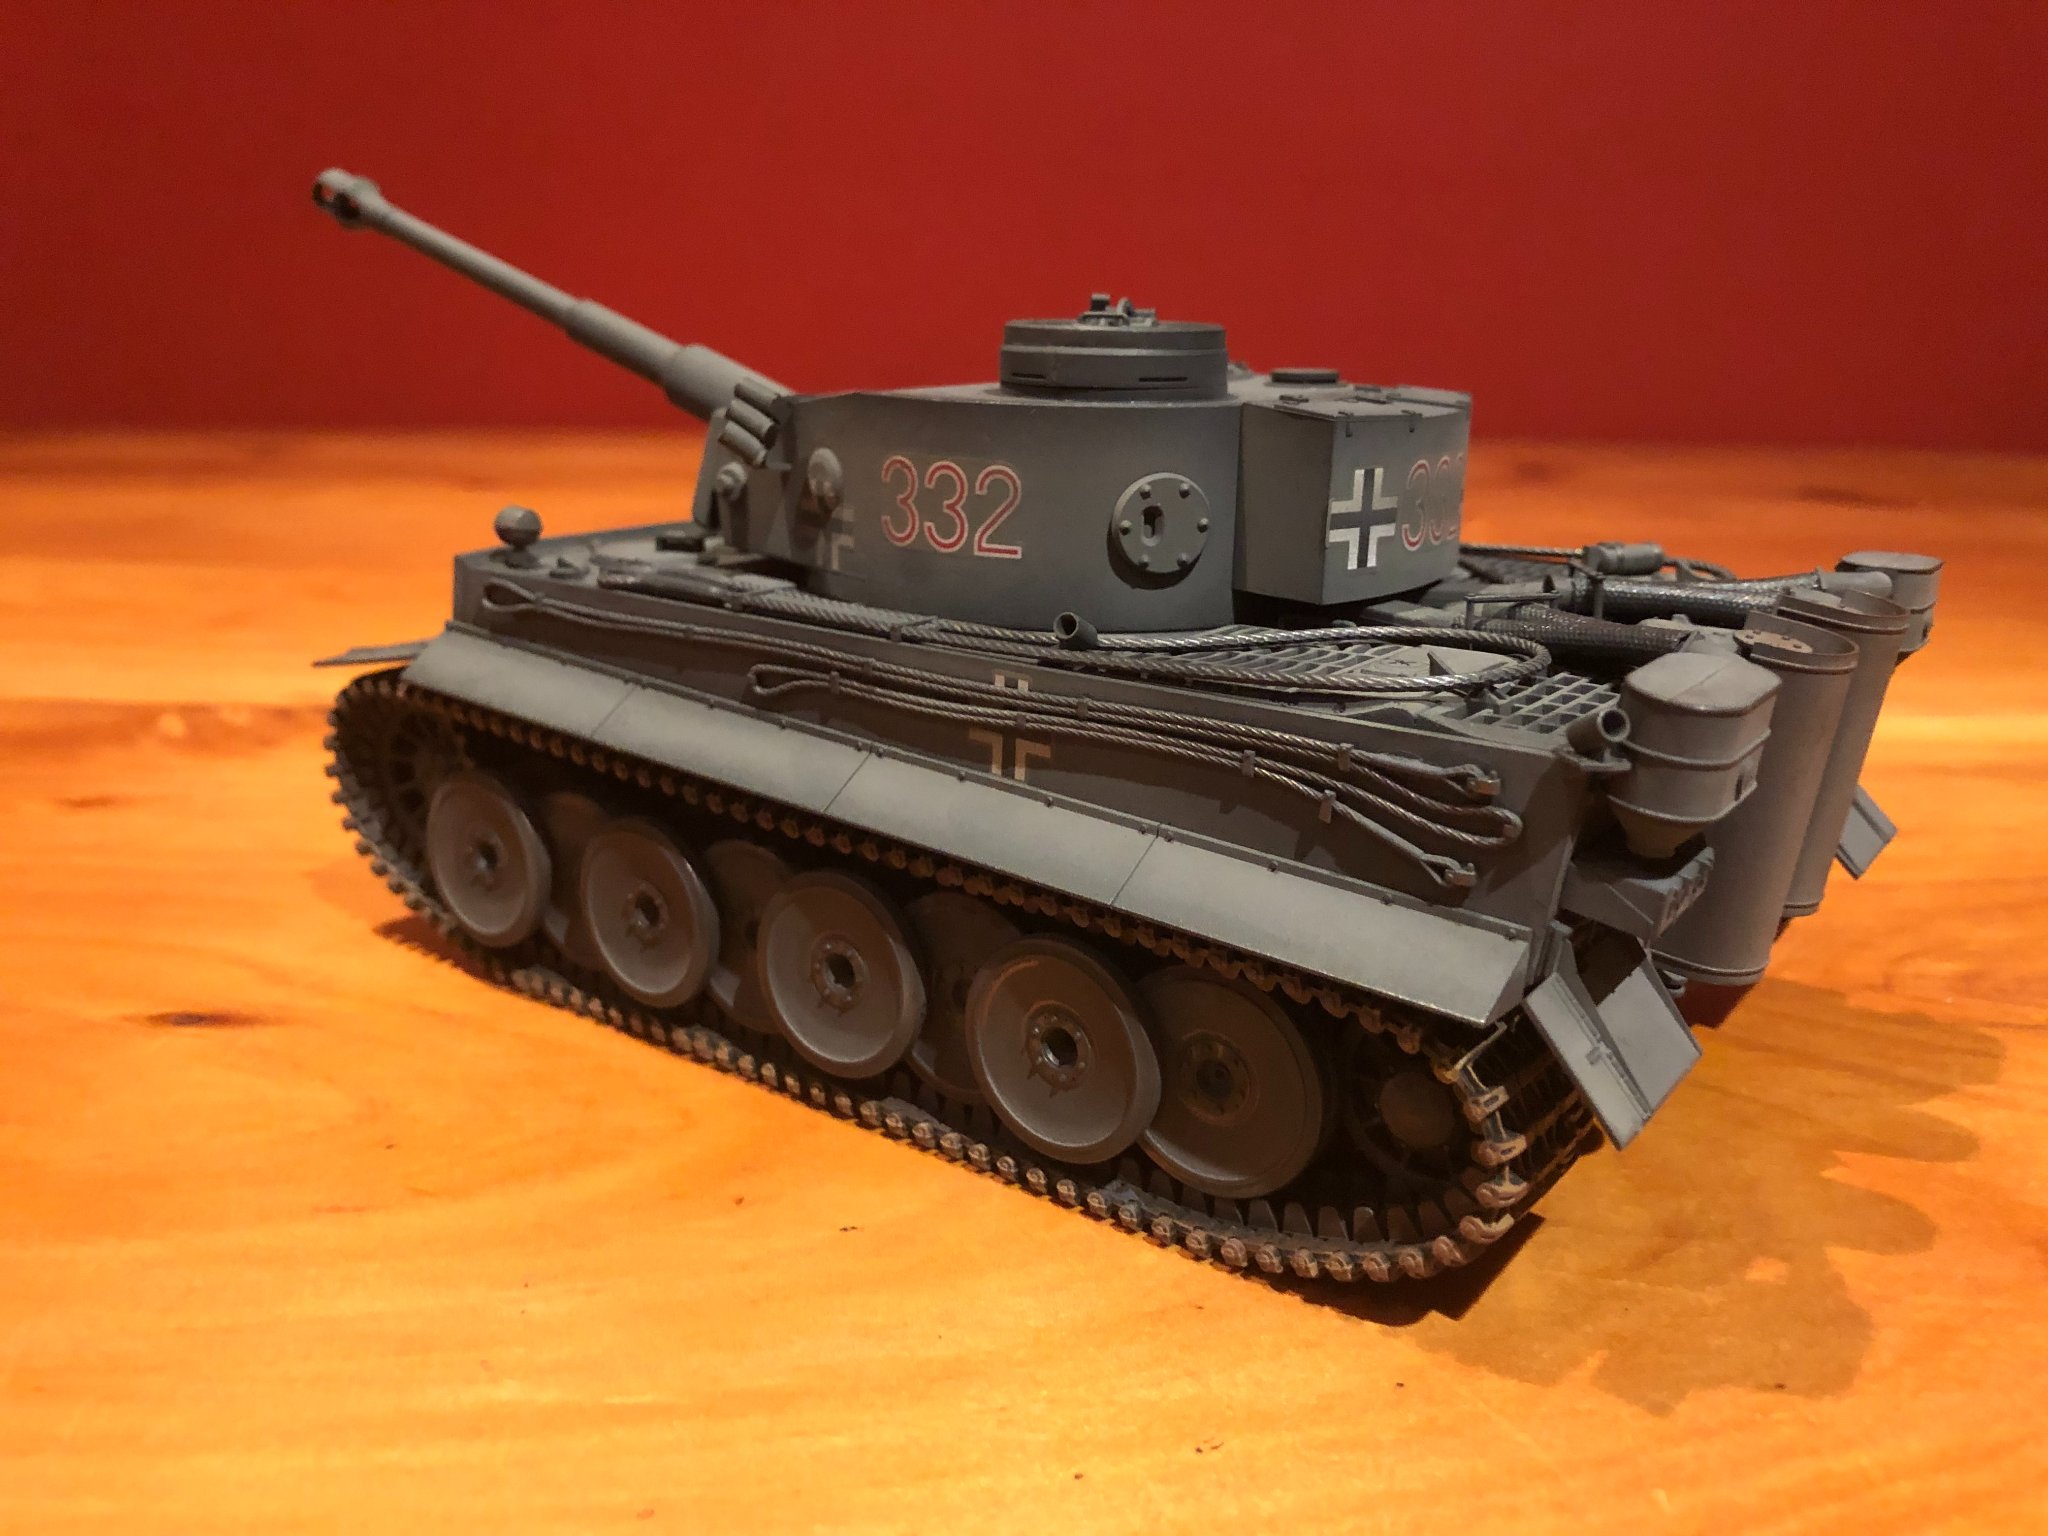
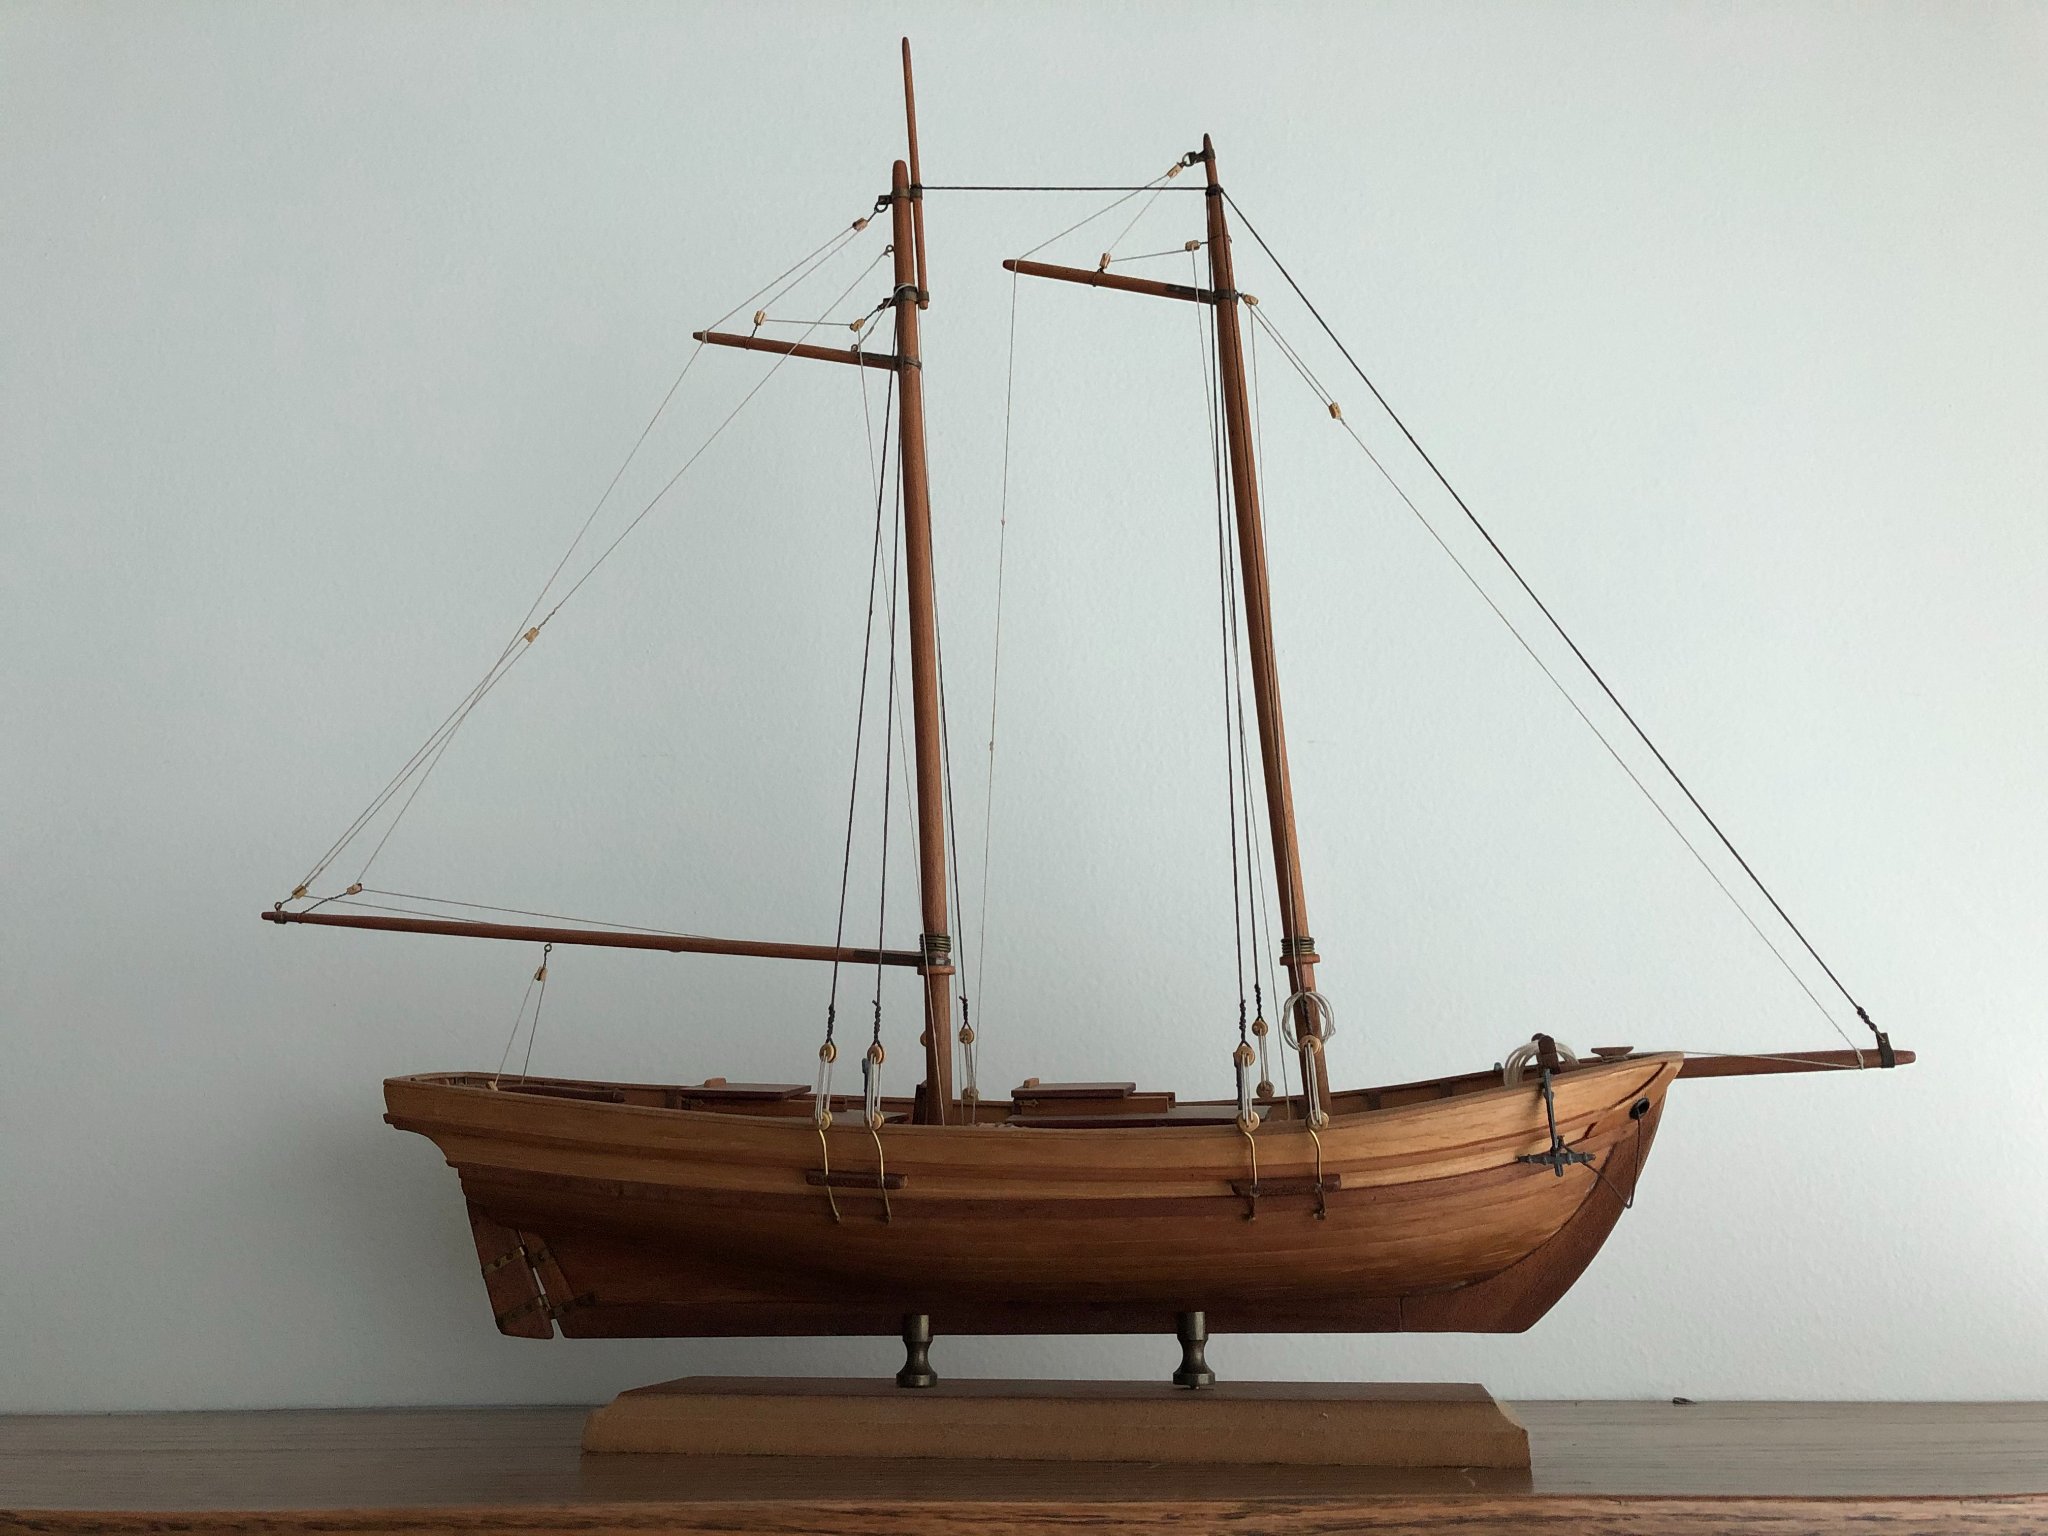
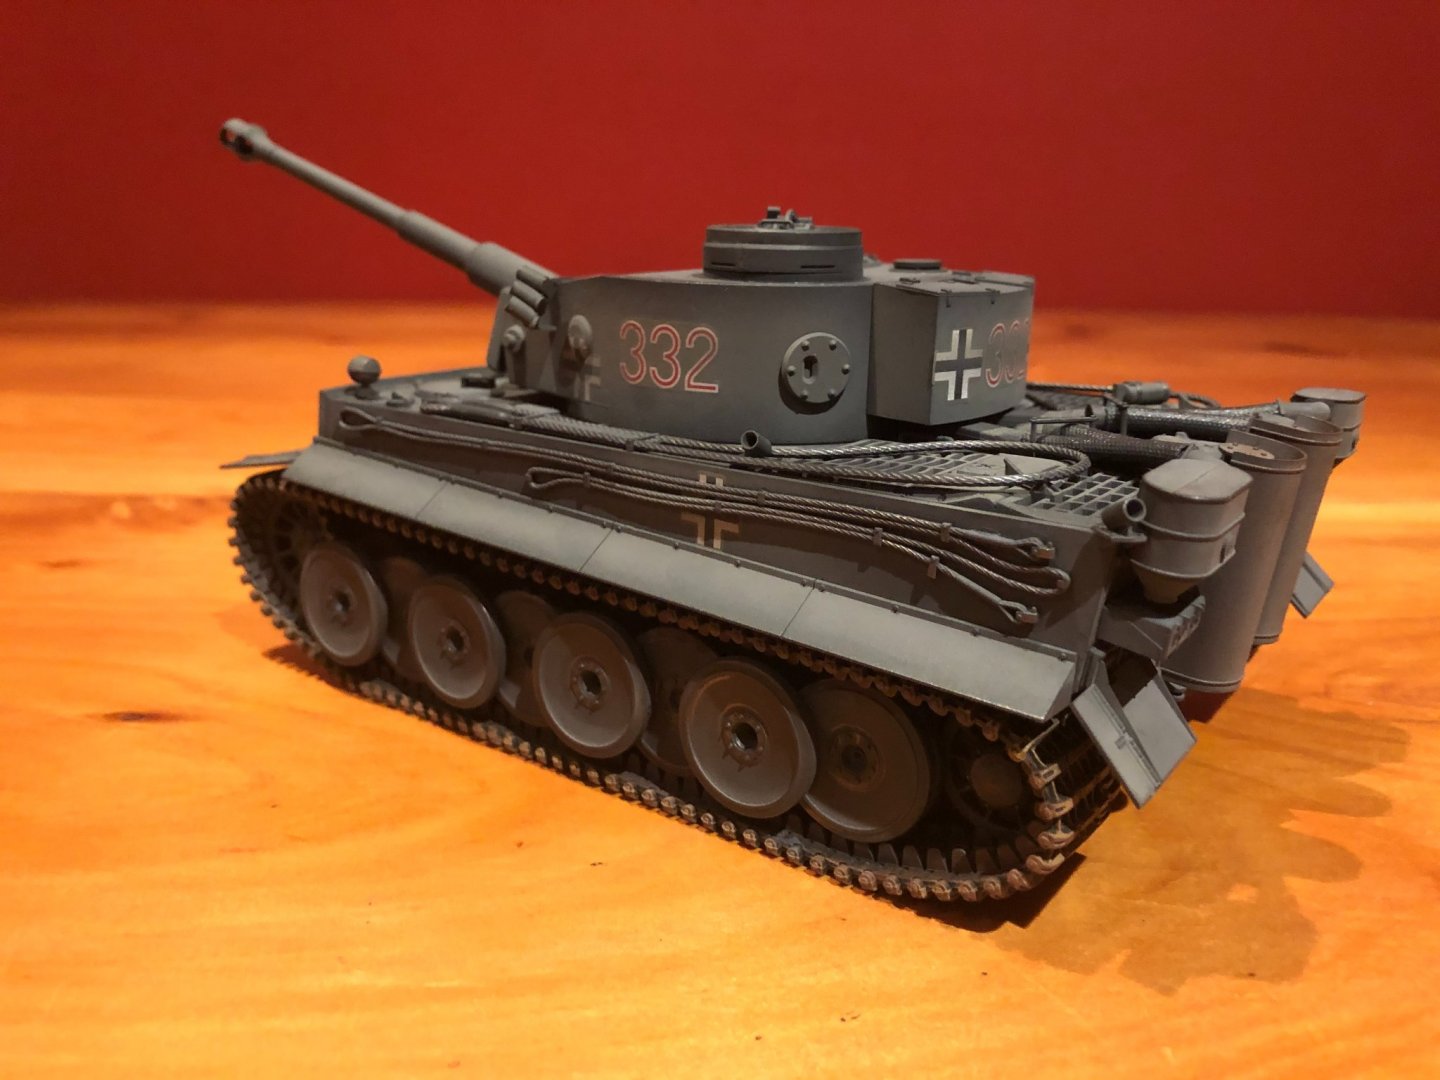
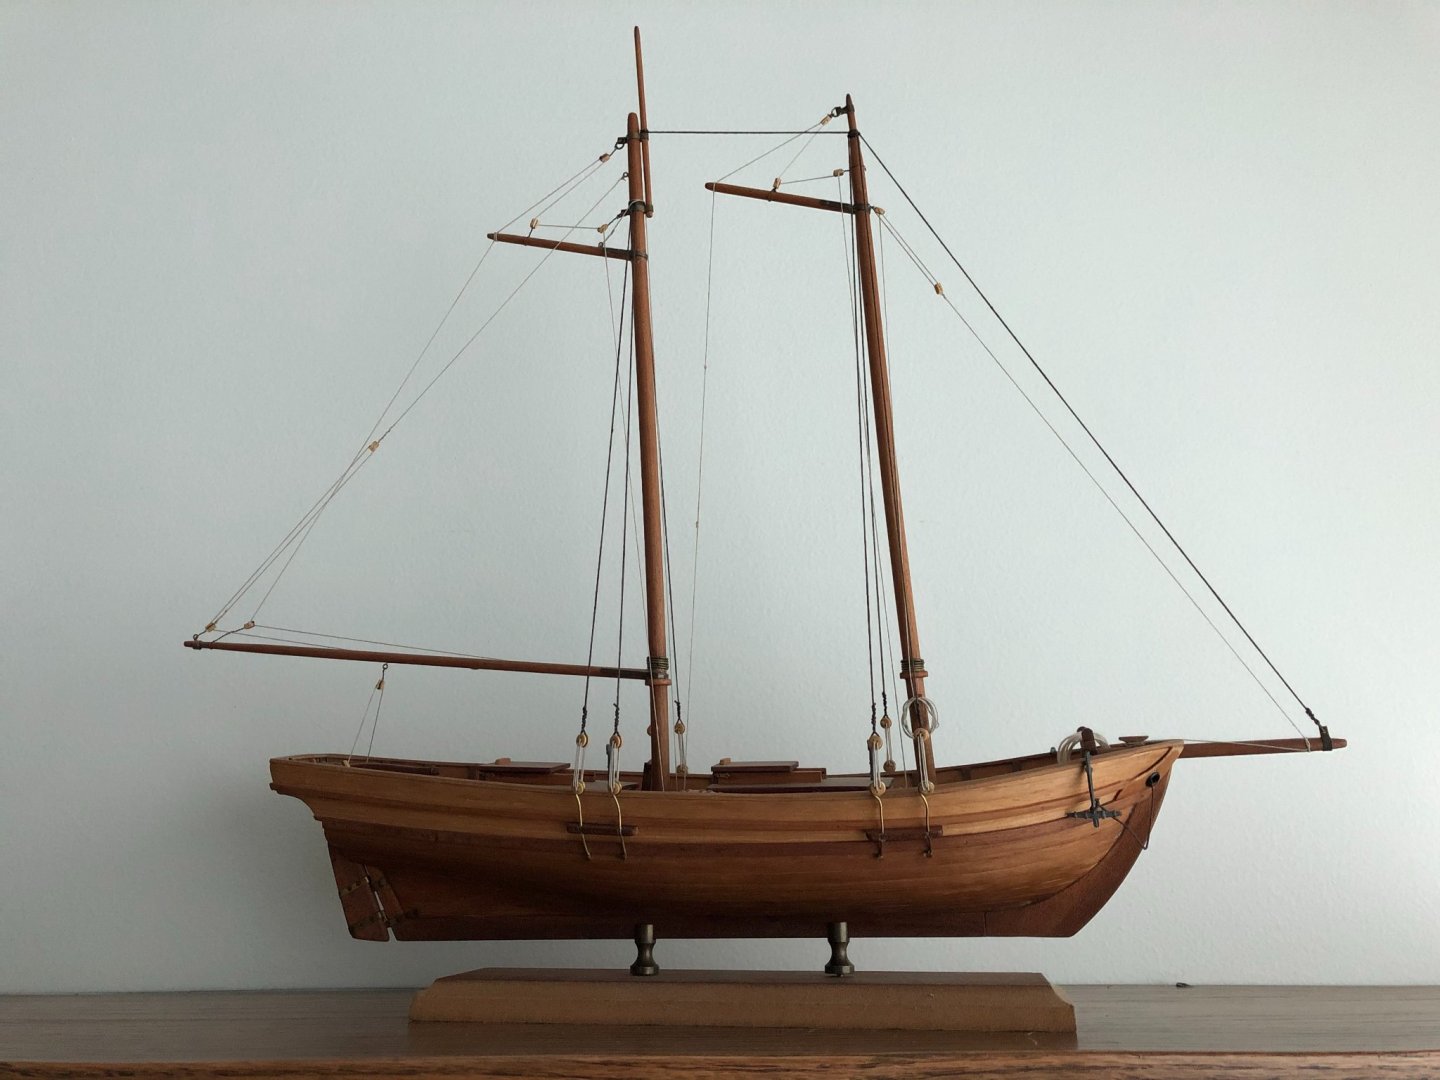
Hi everybody. These six months staying at home encouraged me to retake modeling, a hobby that I abandoned for several years. I have done almost exclusively plastic models. The last one I finished last month is 1992 Nigel Mansell's Williams Renault. I saw him winning Mexico grand prix that year and I bought this Tamiya model around 1995! I also like military models. Pics of some of the recent ones I made are also attached. My first experience with wooden ships was long time ago, when someone gave me this Artesania Latina Swift model. I can tell you that planking this one was like visiting hell 3 times!!! I didn’t know there were wood bending technics and I did it just by applying force, glue a lot of filling material and hours of sanding; and all without proper tools! I was so frustrated after that, that I left it without rigging and decided to never again try a wooden ship. But 10 years later I came back to it, rigged it and finished it. And now I am here with a Corel HMS Victory model with me !!! I will be sharing with you my building log and for sure asking for help when planking this beauty ! Best regards, Eugenio.


- 11 replies
-
- 11
-


.jpg.1ff9757d50d0c0664a5760c51ad740ff.jpg)