
Eugenio Treviño
-
Posts
123 -
Joined
-
Last visited
Content Type
Profiles
Forums
Gallery
Events
Everything posted by Eugenio Treviño
-
Great work Richard! Looking forward for your coppering of the hull. Best regards.
-
Robert after setting the supports I recommend you to mark them with the position of the cannons and drill the holes and paint them black. This will help you to mark them in the first planking easily. Take a look to post 4,5 and 8 in my log. Best regards!
-
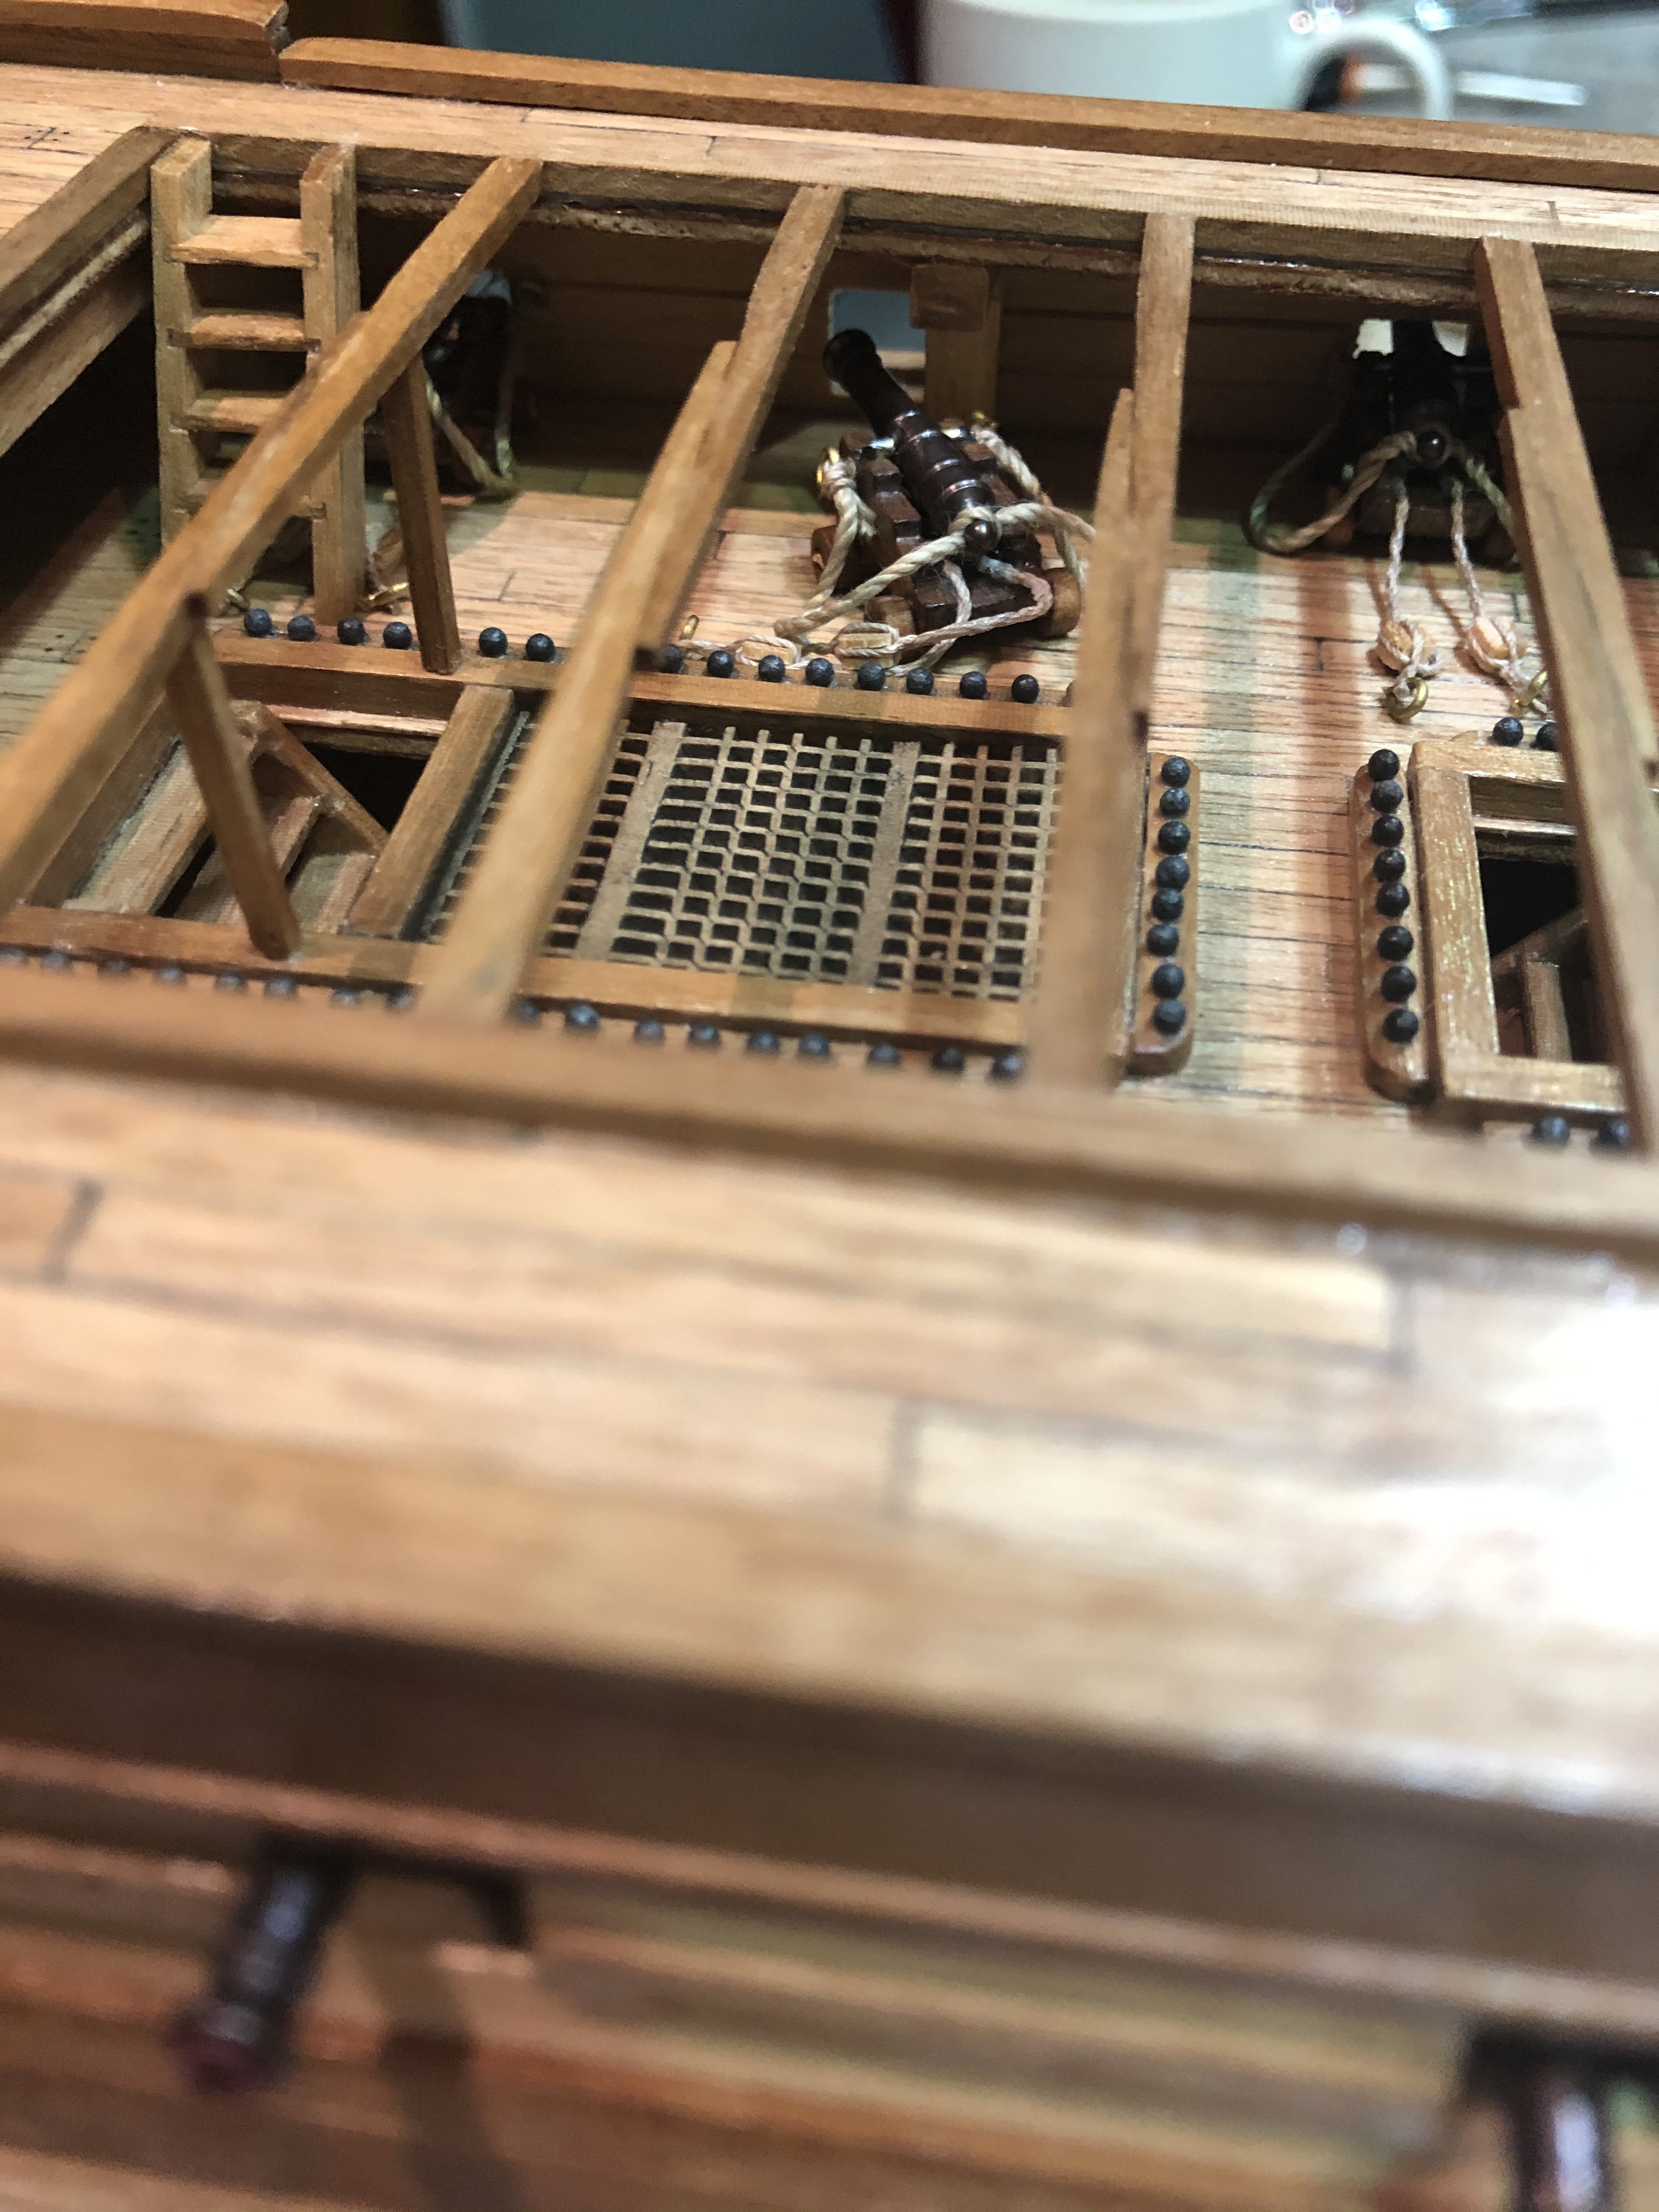
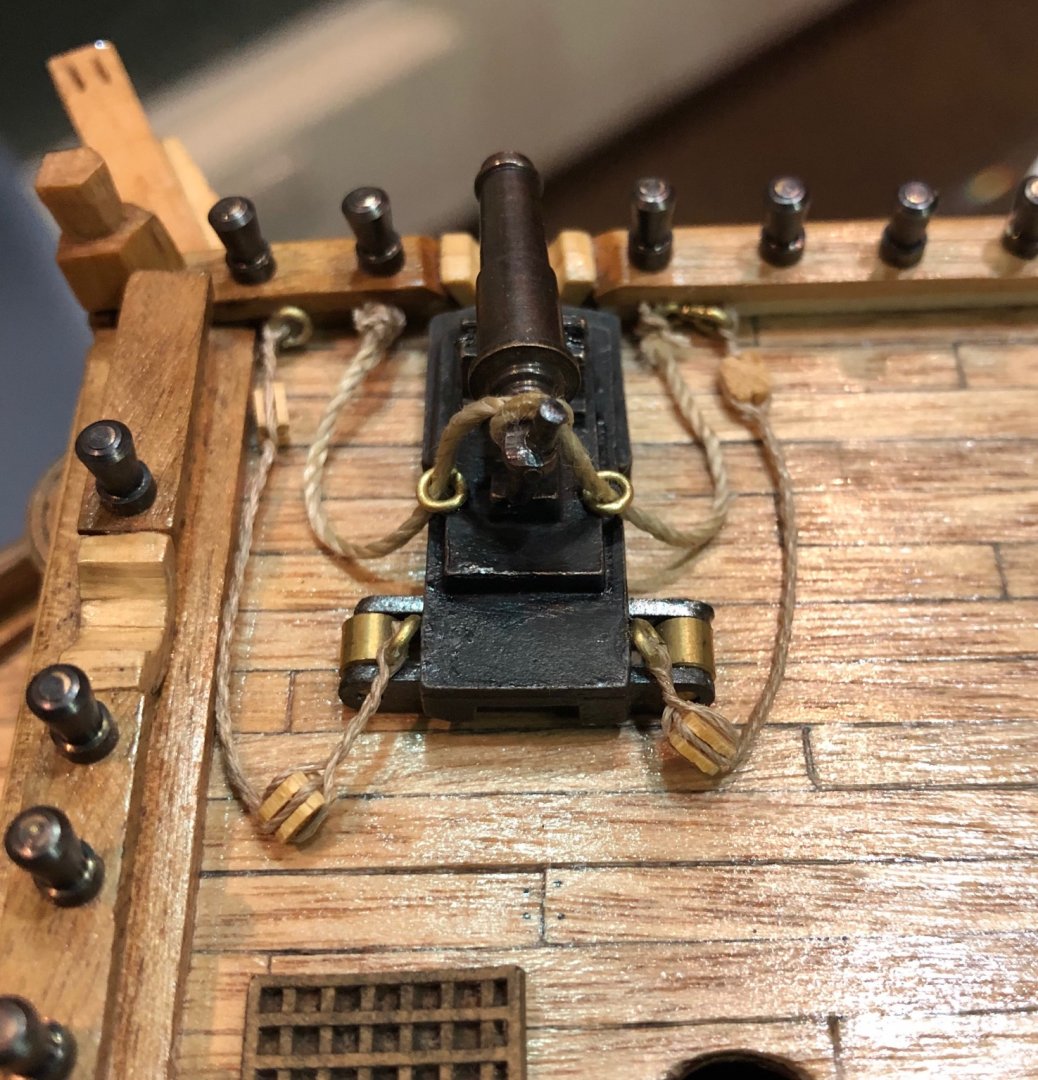
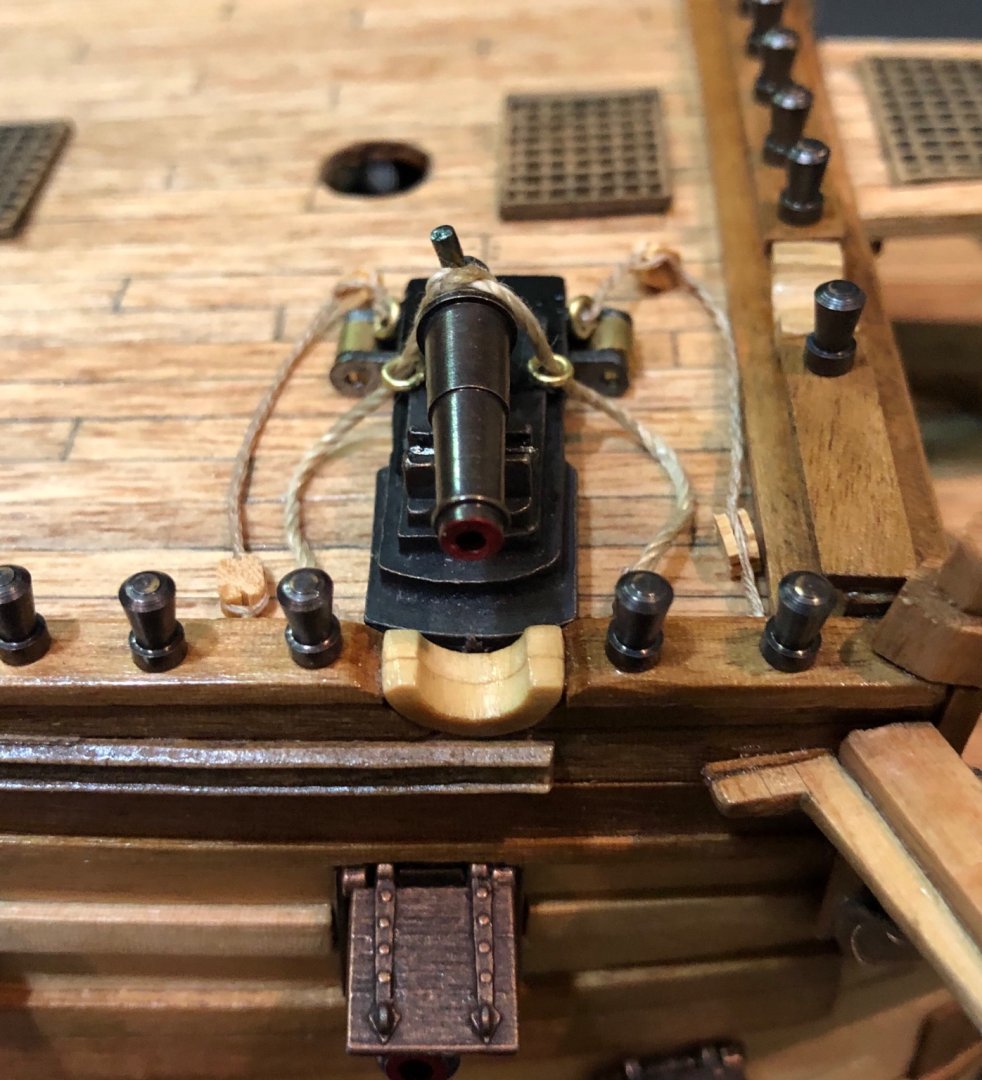
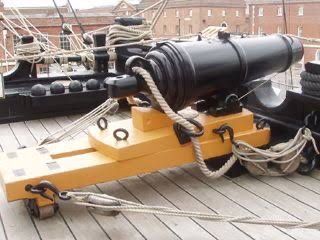
Time for rigging and setting the carronades. This time I followed some pictures of the original ones, so these are much more accurate and detailed. Here are the pics!!!
-
Robert, by no means I am considering that !!! I appreciate all your comments and I know exactly what you mean. Please feel free to let me know all your opinions. I just wanted to emphasize that I am being a little bit eclectic with the build, not paying too much attention to historical accuracy or trying to make an exact replica. In my opinion, these kinds of kits are not good enough for that purpose. A scratch build is the way to go if that is your desire. Or invest in additions to the kit and in tools to modify the kit. And I am not interested now. Let's see on the next build. Additionally, positive feedback is a treasure. If oneself is humble enough to accept positive feedback and learn from it, greatness will be knocking at the door. I like to see people doing things better than me (your cannons is an example), because next time mine will be better !!! Unfortunatly I built them before you !!! Have you checked how many HMS Victory build logs are in the site? Have you checked how many have been finished ??? I want you, Nicolas, Emmet, the few others with active Corel´s kits build logs and myself to be successful and finish the build enjoying the process. There are many that never got there. Let’s keep this fantastic friendship and build the most beautiful Victory's ever !!!
-
Robert I hope you are doing great!!! I noticed the same thing. The difference between Corel’s plan and pictures of the real thing. I just followed the plan. As you know my interest is not related with the historical accuracy, so I did what looked nicer to me. So discard the way I am doing it as a reference. I hope someone can give us good information regarding the way they were rigged in 1805. Keep up the great work. I like a lot what you are doing. Your lower deck looks fantastic!!!
-
Robert: I have just posted in my blog some pictures showing the cannons in place. 6 on the upper deck and 14 in the lower deck (7 each side on the smaller ports without port lids). Those ports are smaller .8 x .8 cm. Yours will look nicer with the brass holders you installed. Best regards, Eugenio.
-
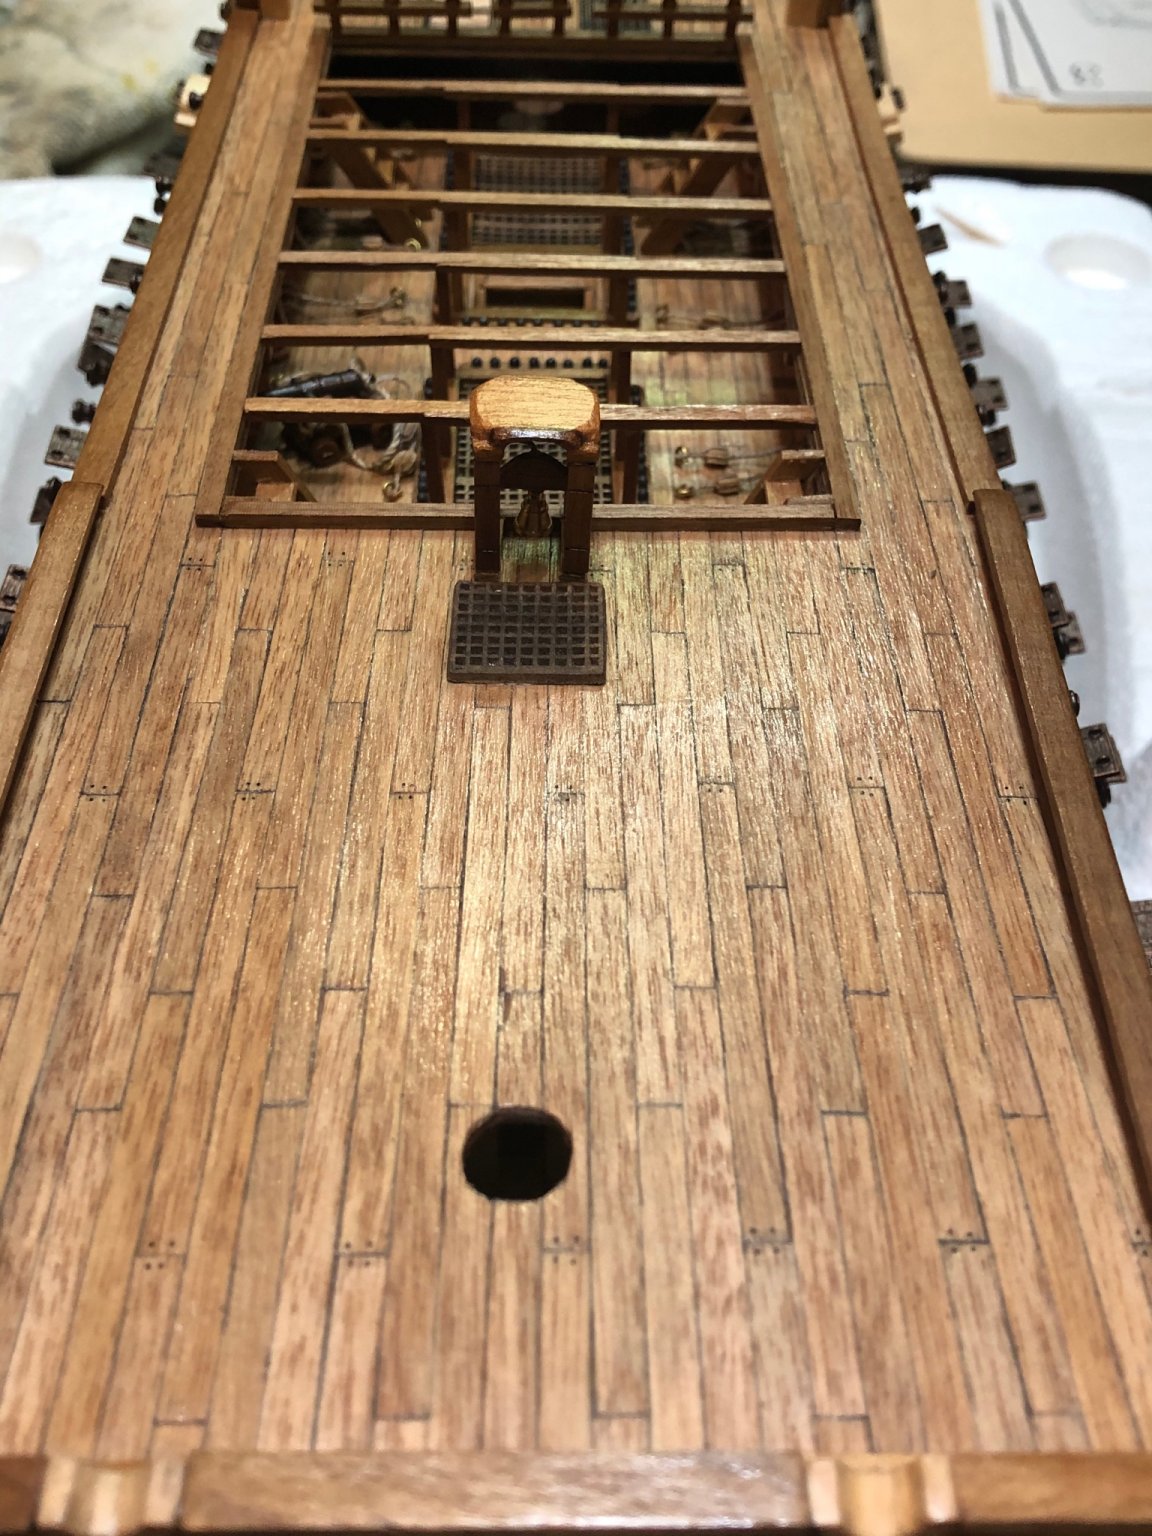
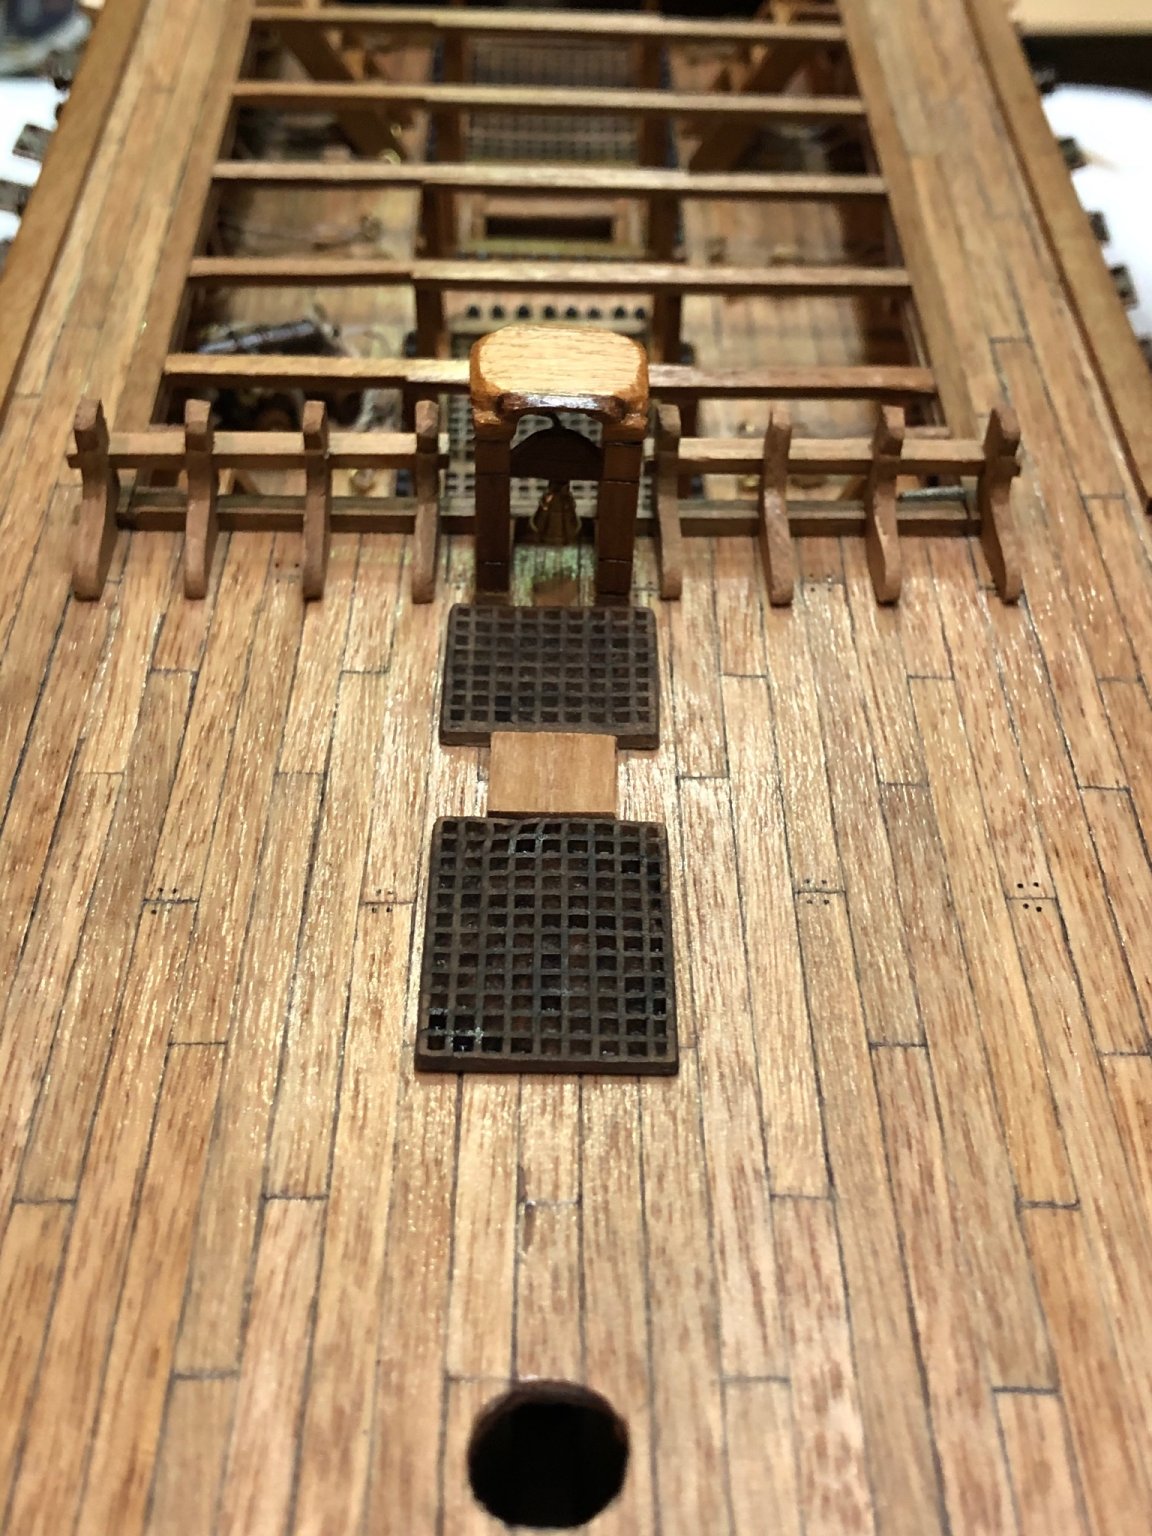
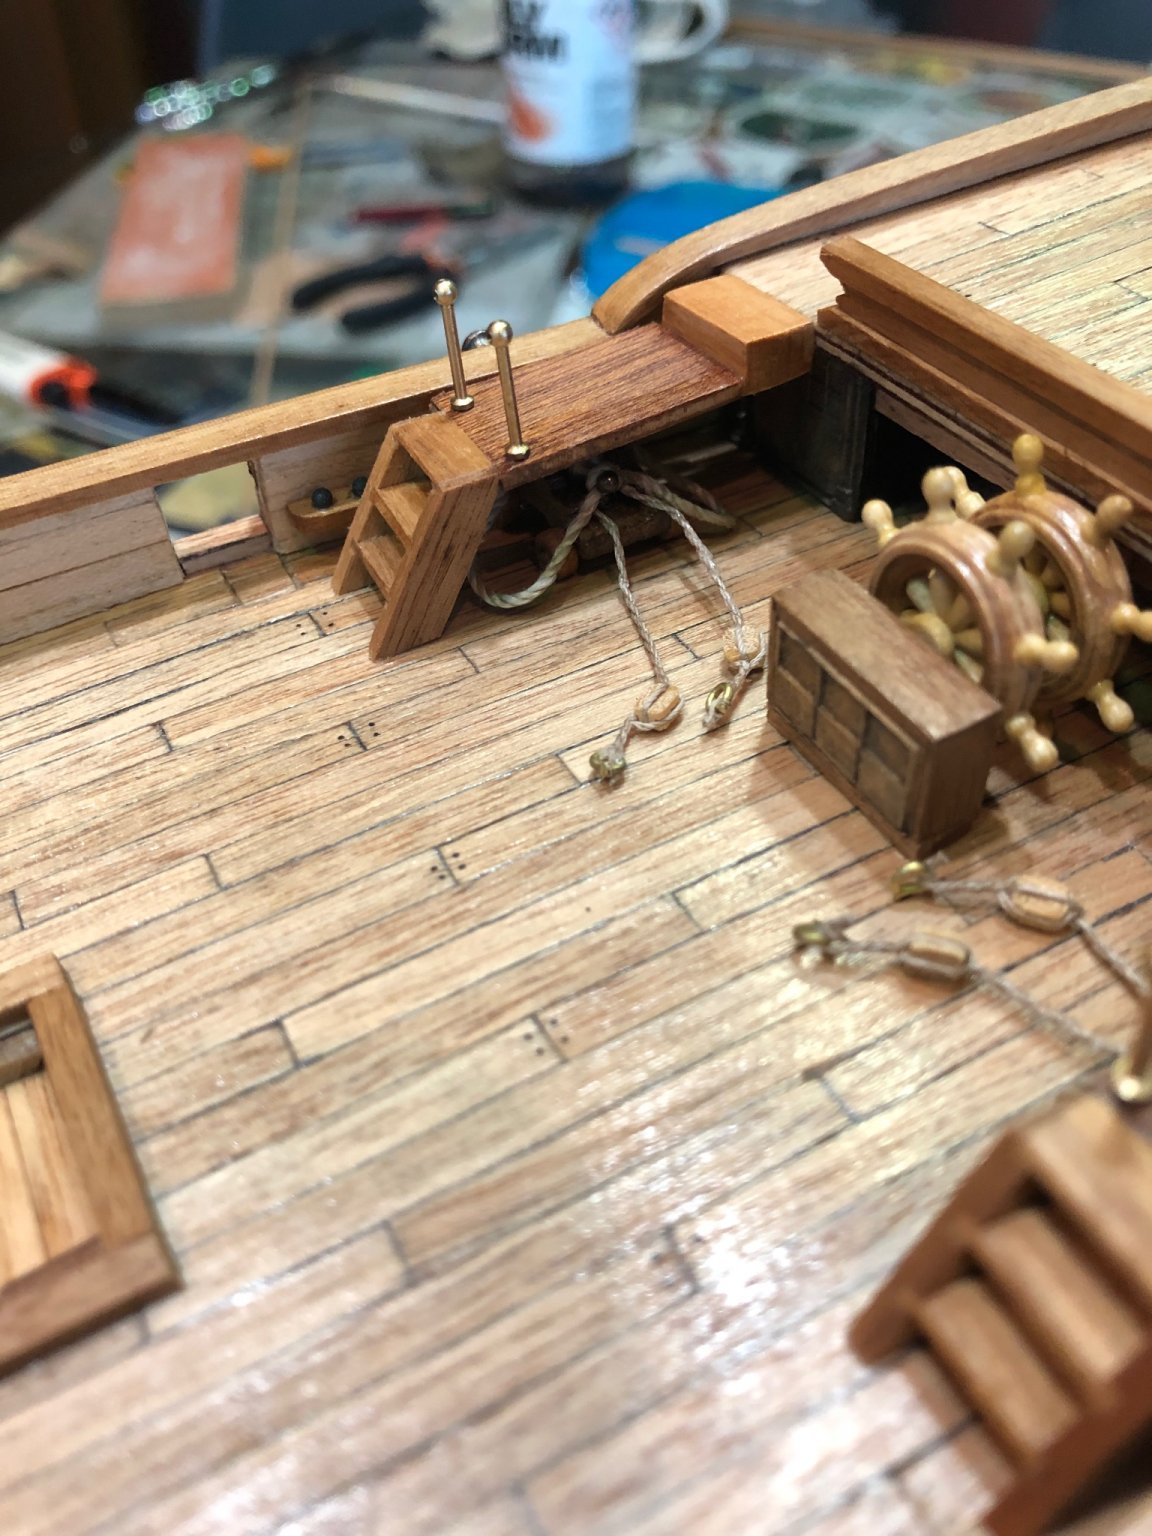
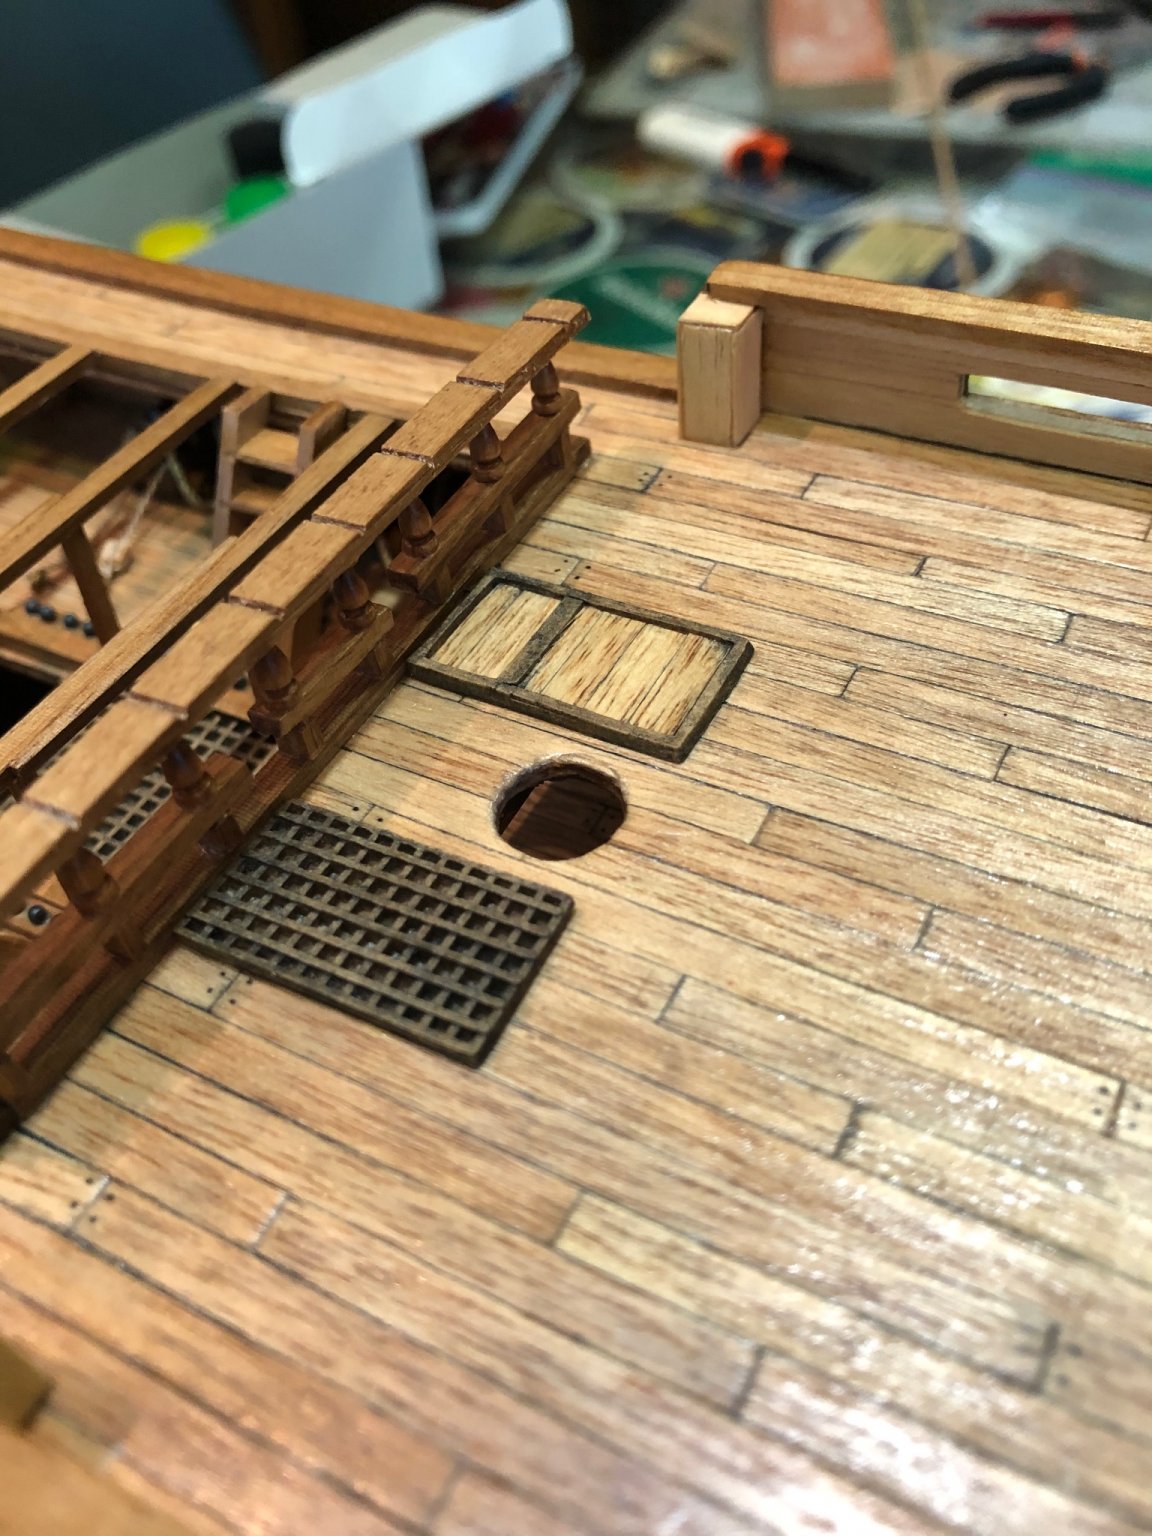
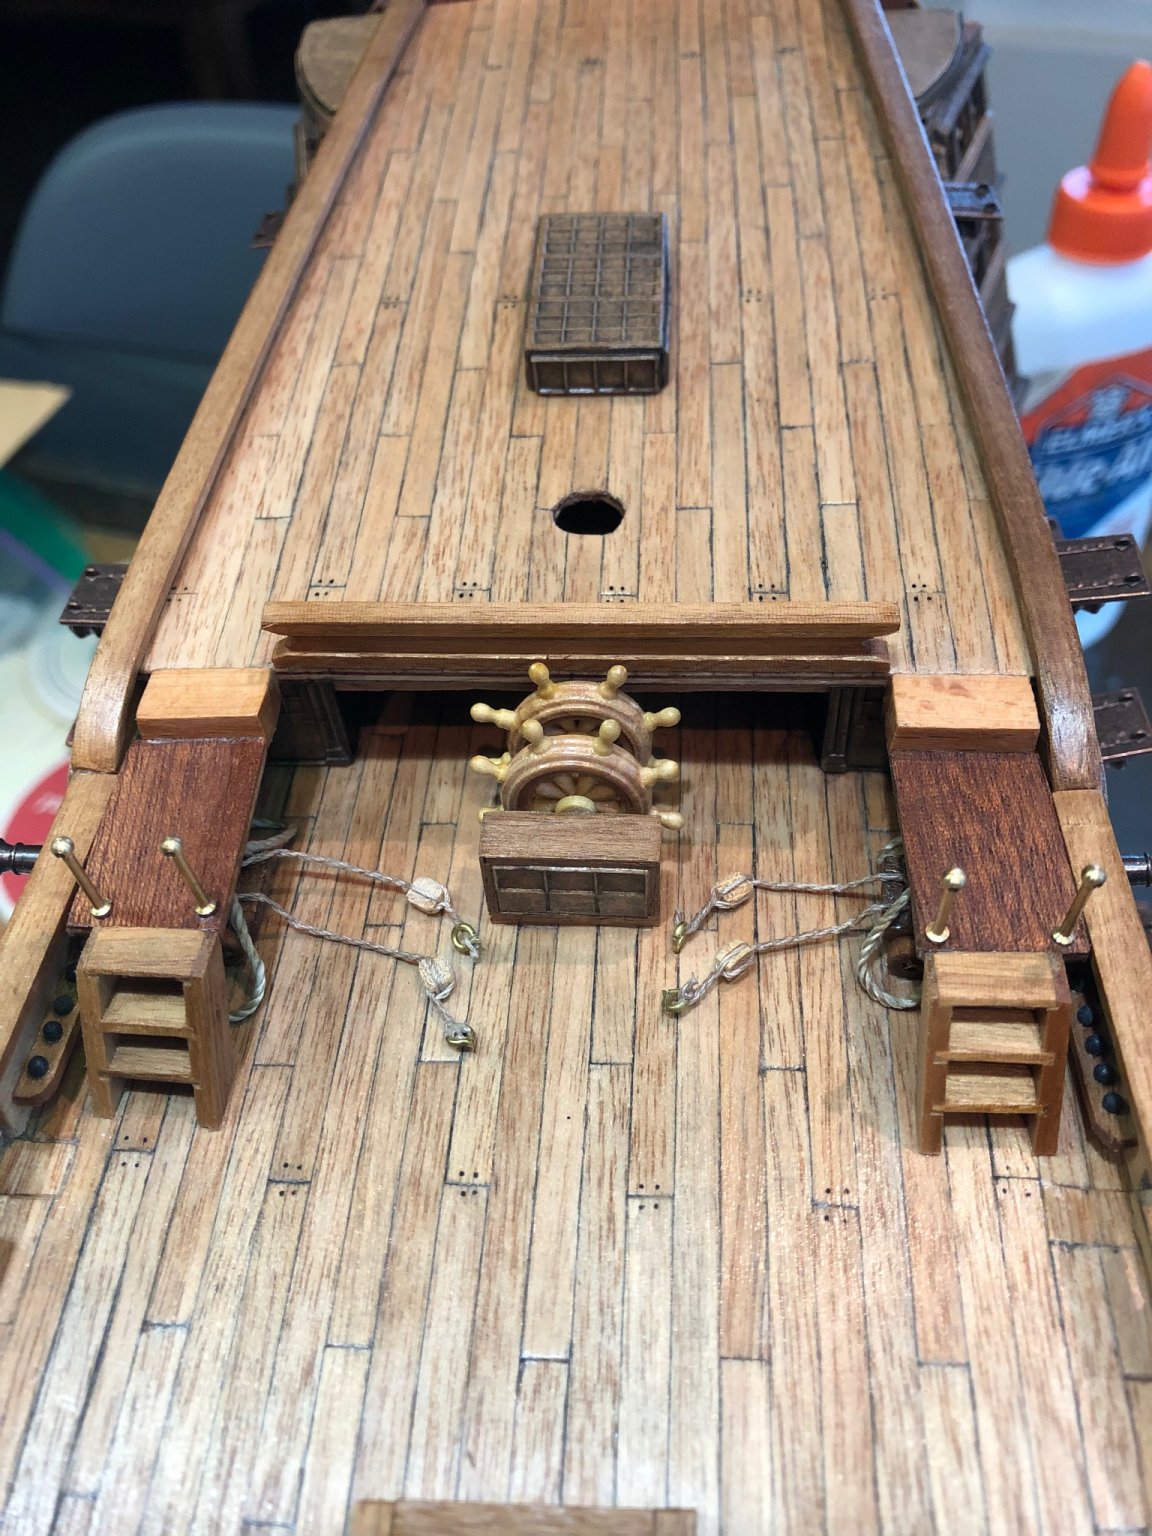
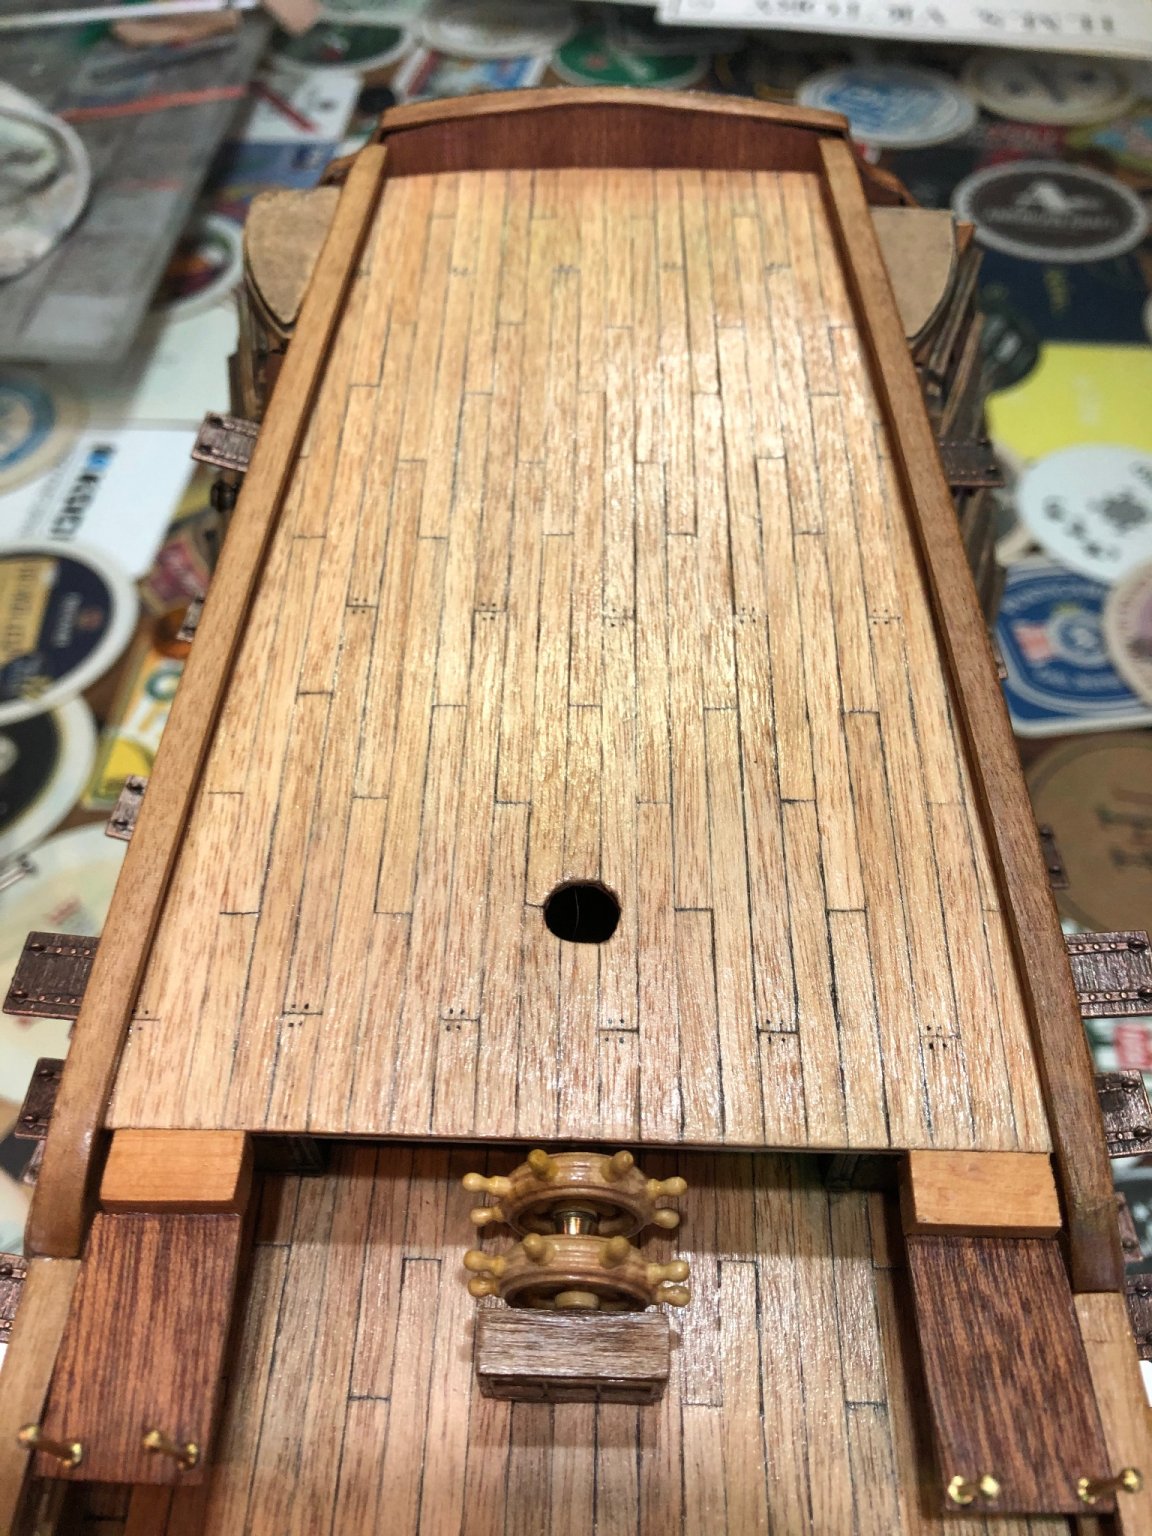
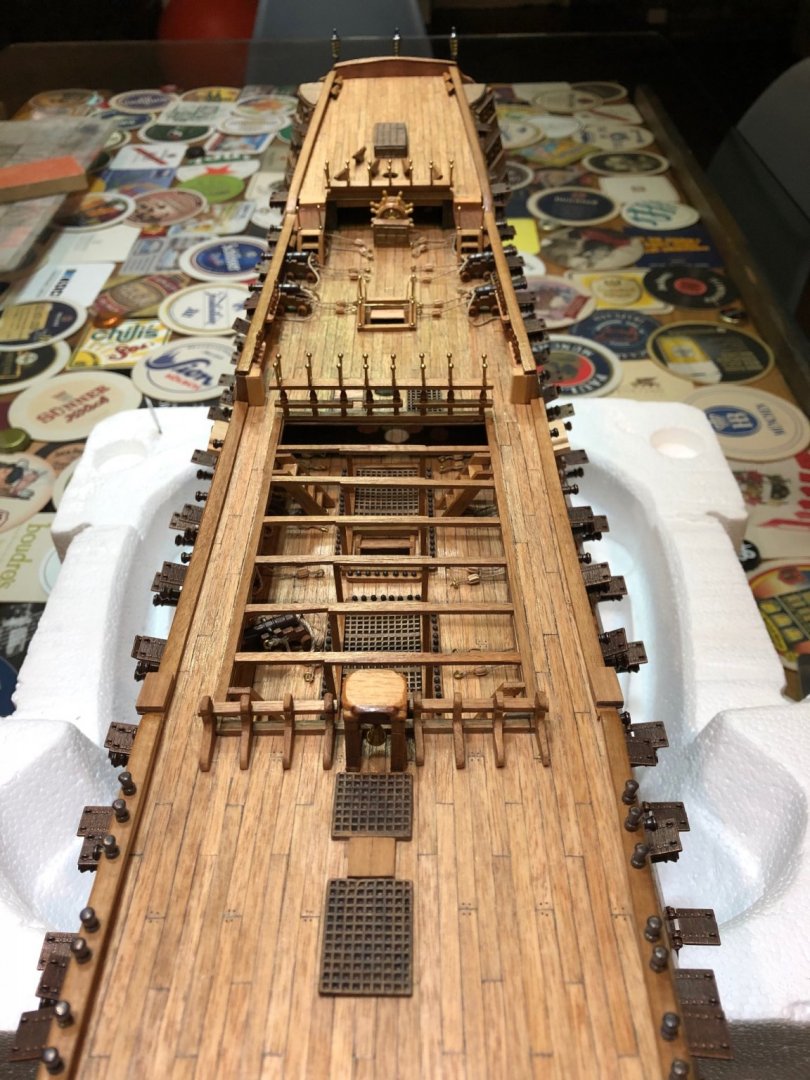
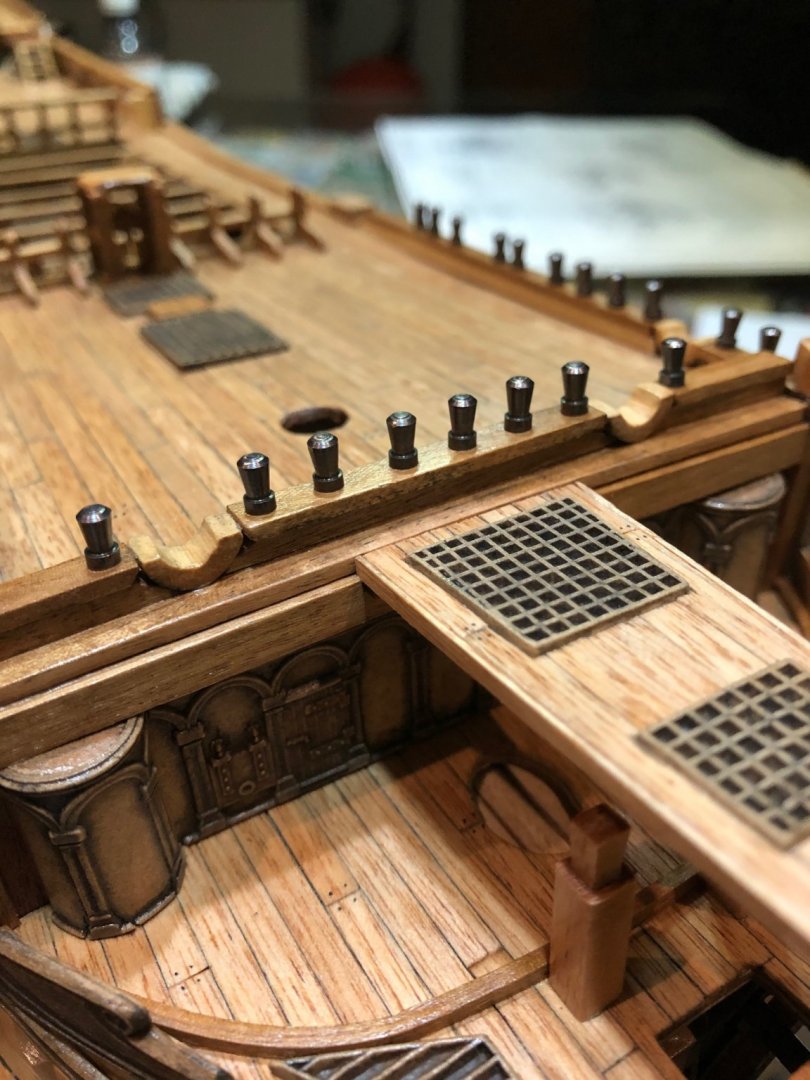
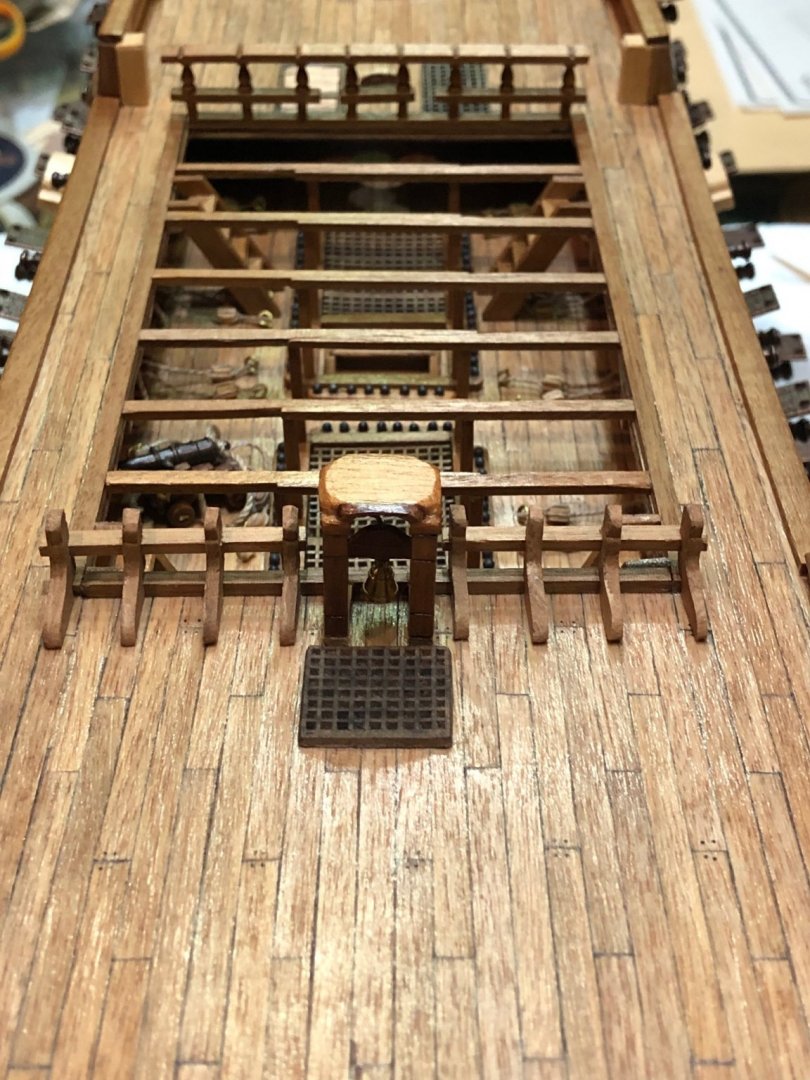
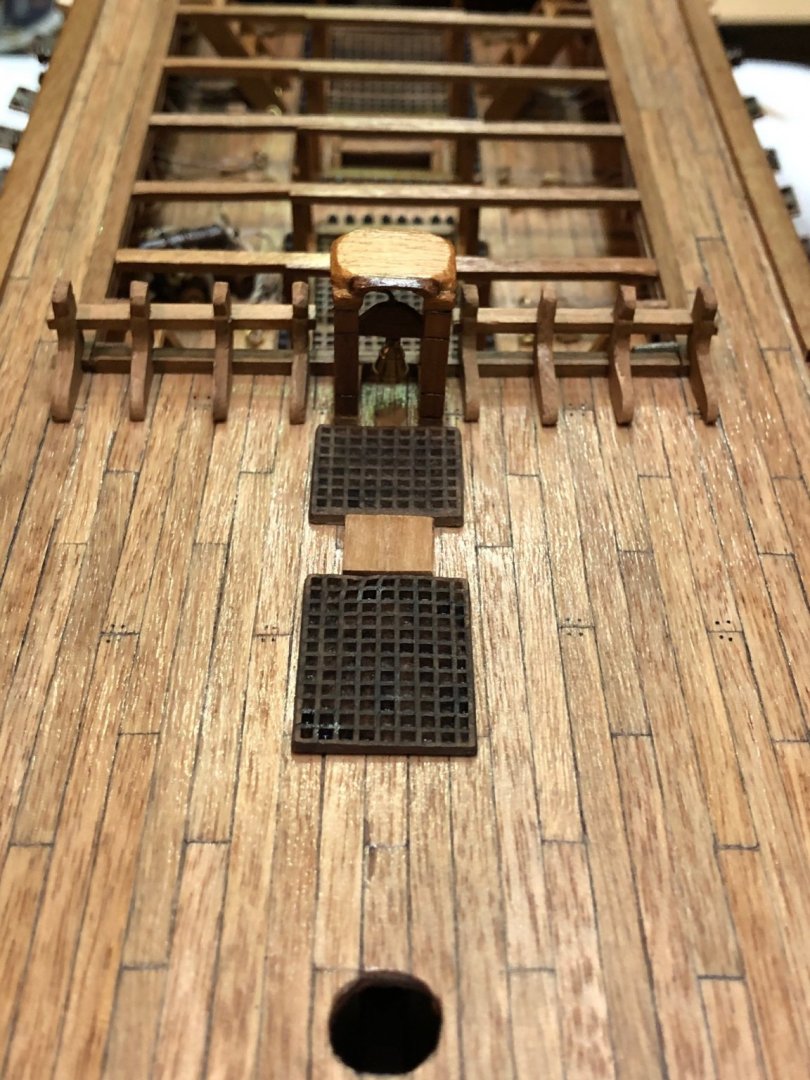
Richard thank you very much. I am very happy realizing that I am getting closer to finish the second stage of the build. But that also scares me, because I have no idea of how to face the rigging!!! But with the help of this forum I am sure I will do a decent job. Some more work in the decks was done. Rigging and placing all the cannons and some other details. I am not completely satisfied with the stair’s hand rails and with all brass pieces in general. They are too “flashy”. Maybe some weathering would help. I will consider that. Here are the picks !!!


-
Very nice work Robert. Congratulations!!!
-
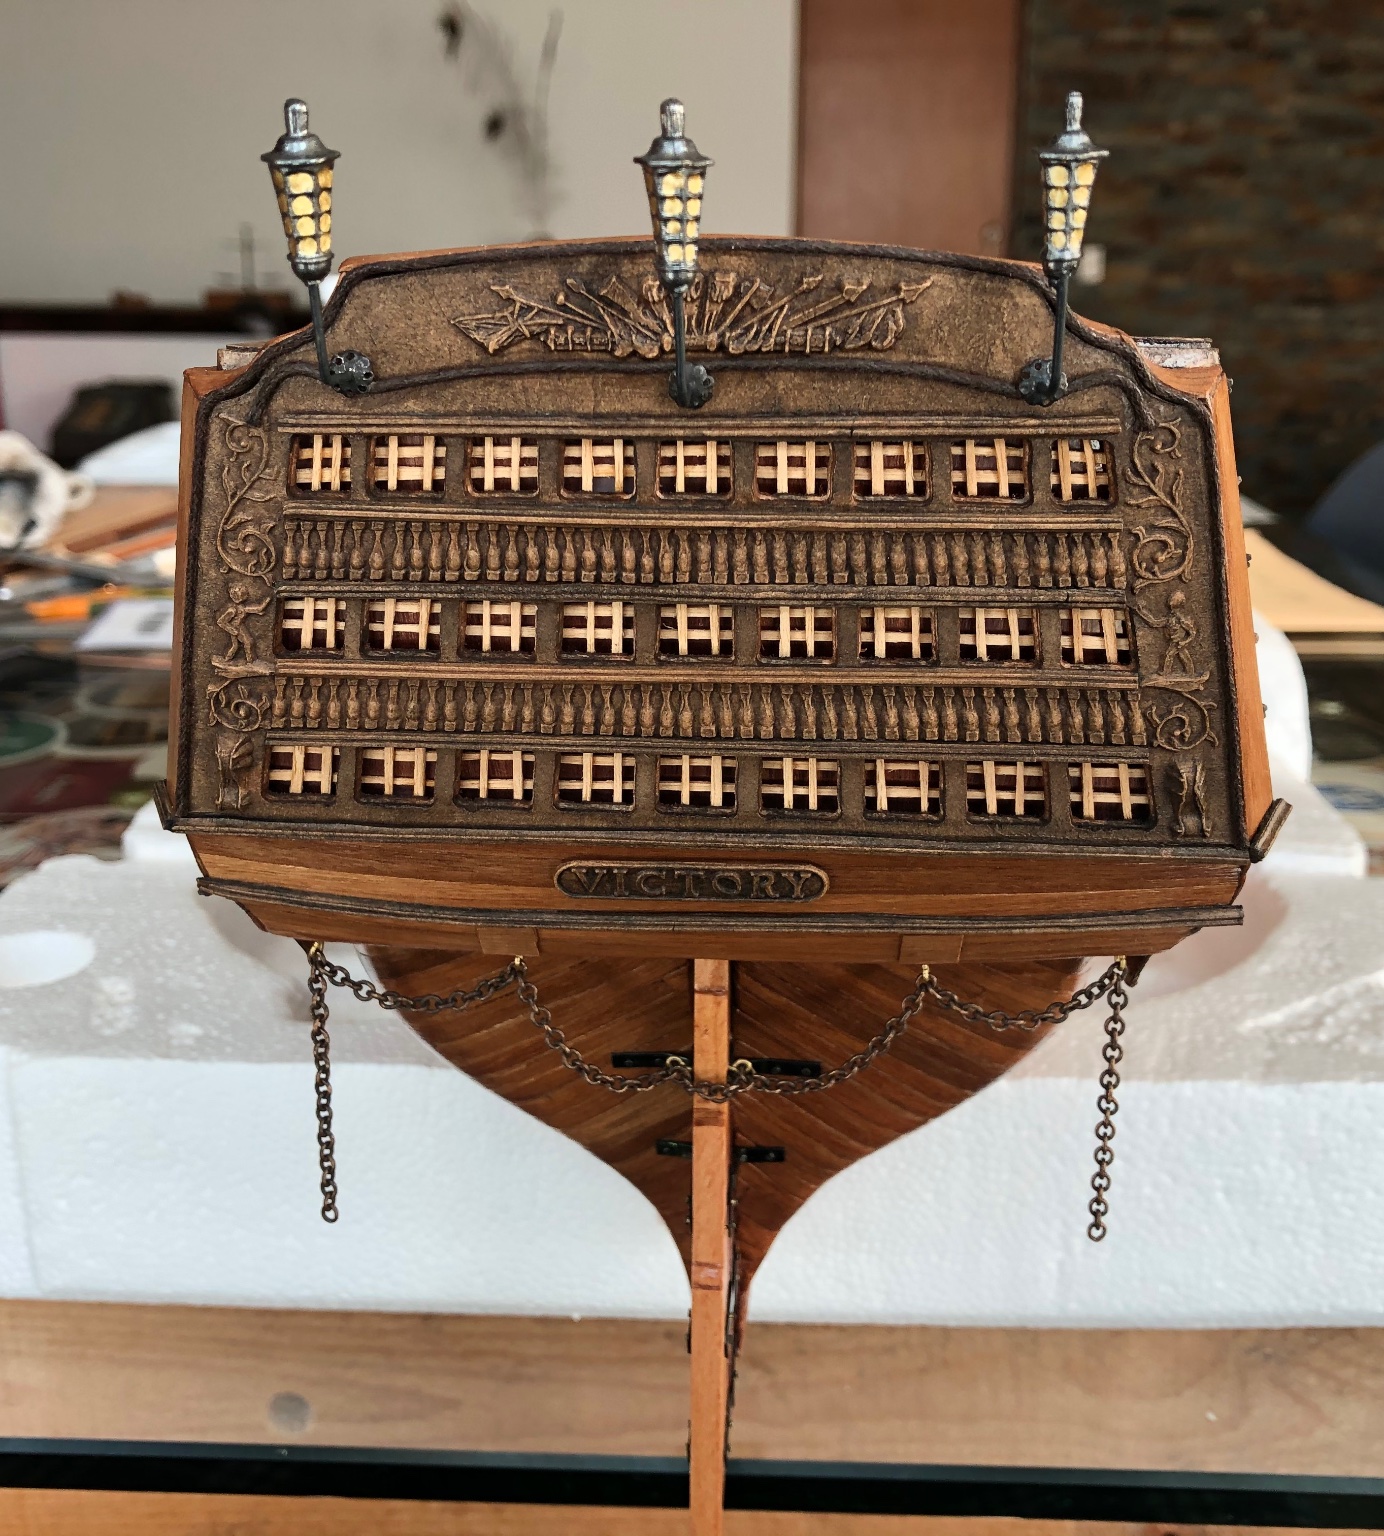
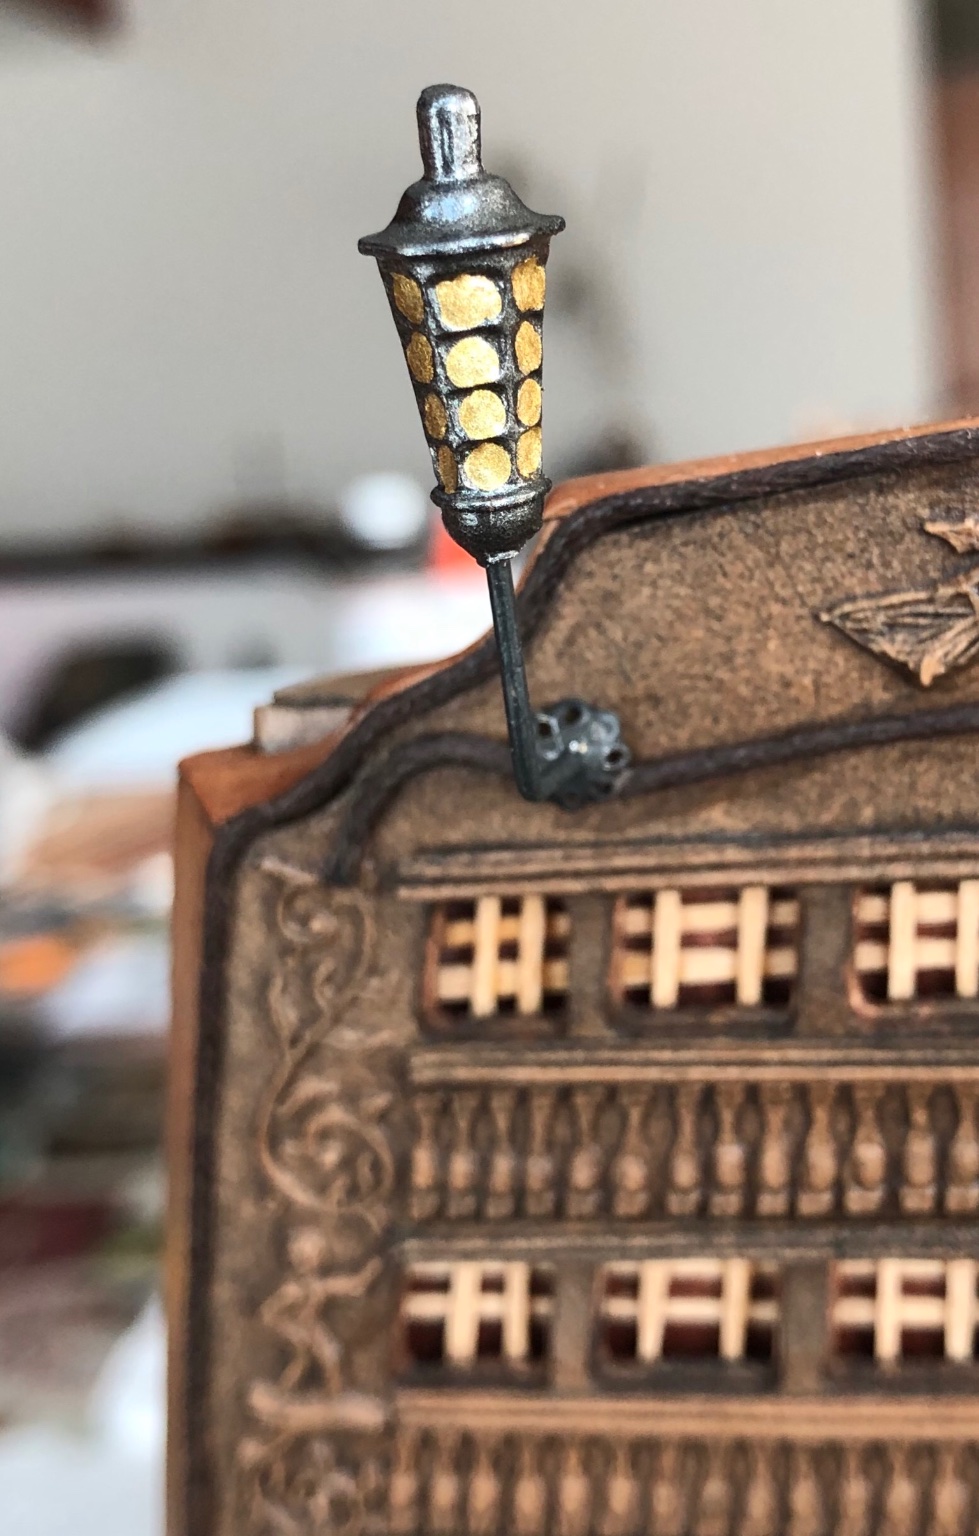
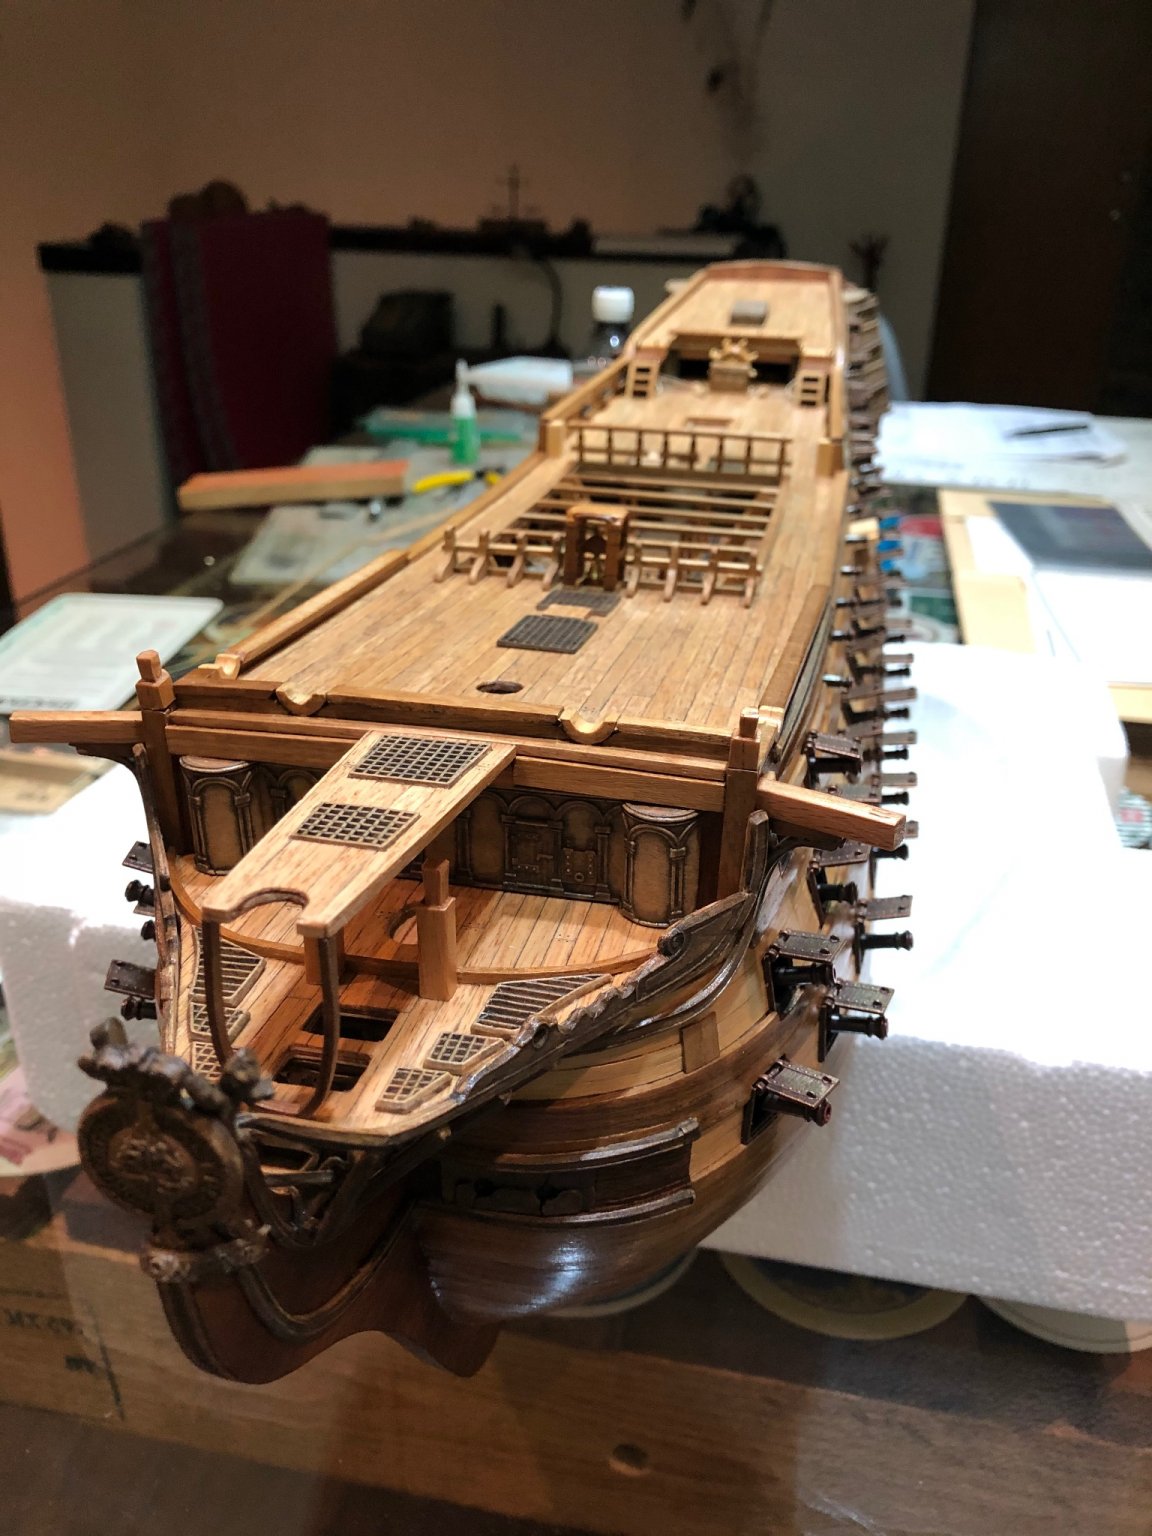
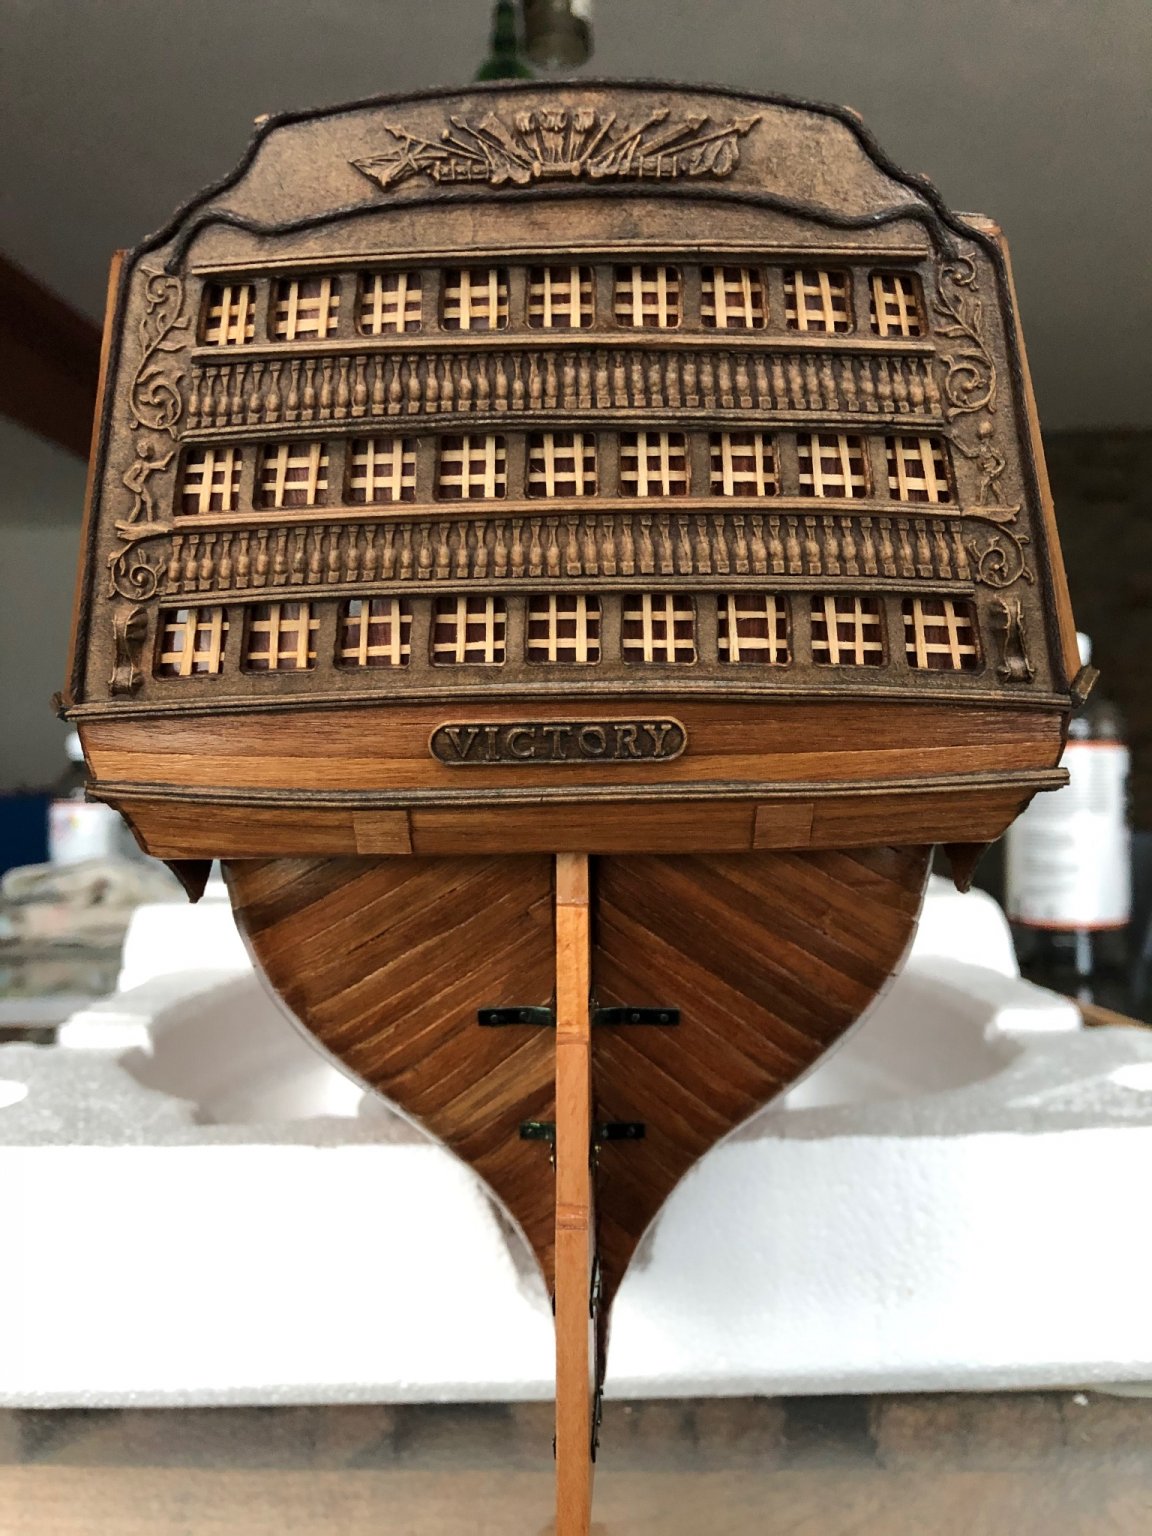
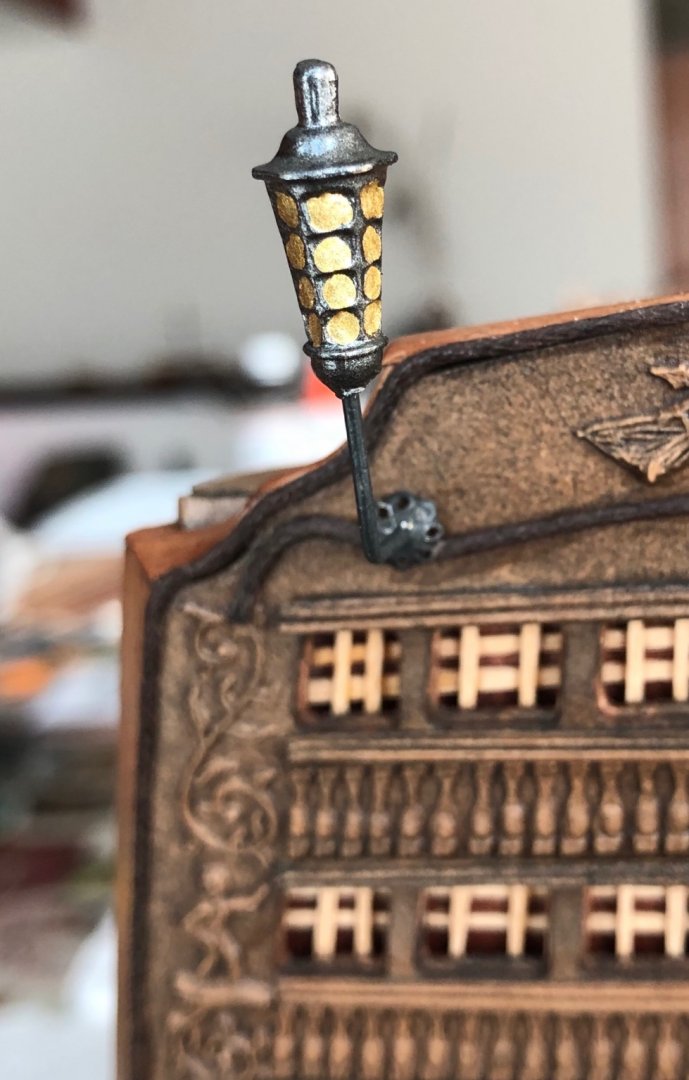
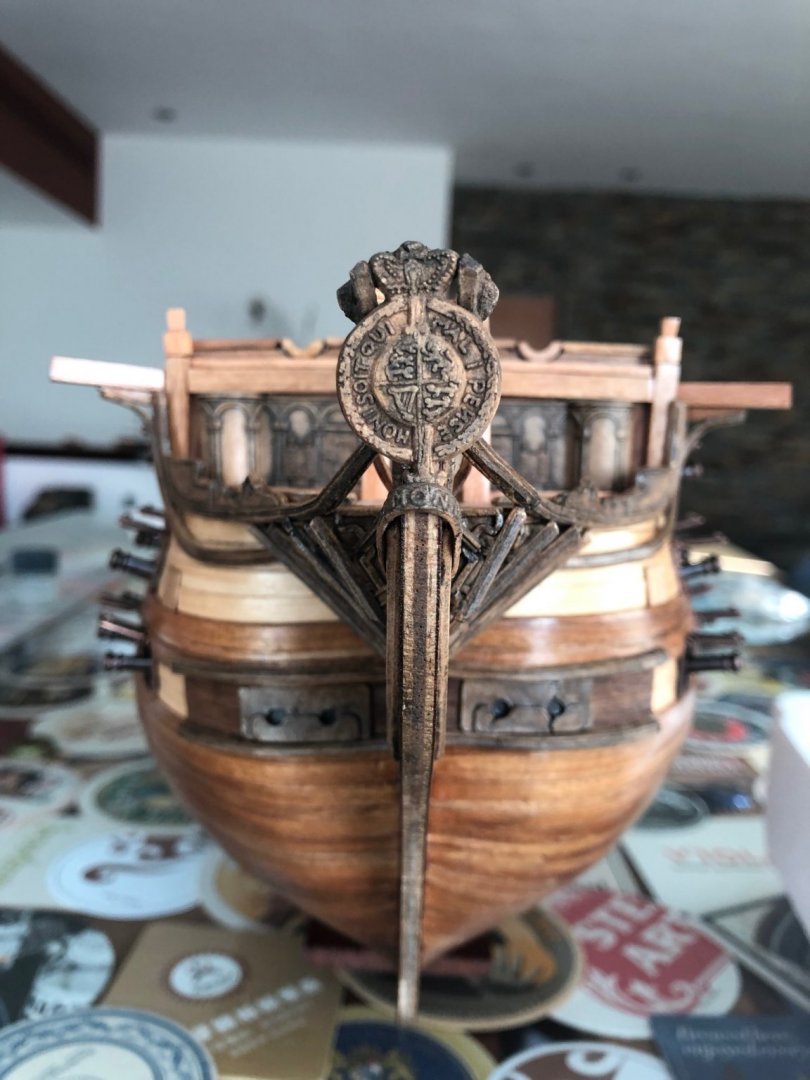
Hi everybody: Some more work in the stern area. I installed the rudder chain and the lanterns. The chain provided in the kit is completely out of scale. I may change it later for a more accurate one. The lanterns provided were modified in size and painted to be a little bit more realistic. Here are the picks!!! Best regards.

-
Rach, thank you very much! Nicolas, thanks and congratulations on your new home!!! I spent some fun time drilling the holes for the timber heads. First time to do something like this. Here is the pick !!! Best regards.
-
What a wonderful work of art. Congratulations!!!
-
Robert: Take special care with the stern fillers. Corel’s plans show you must sand out half of them. I did it that way and as you noticed in my blog, that turned out into an incorrect shape of the hull on the stern side (they needed much more sanding). Check how much you need to sand out in order to get a more gentle curvature specially on the lower part closer to the keel. Keep up the good work !!!
-
Thank you very much Rach for your nice comments!!! I appreciate them!!! Some more details added. Here are the picks !!!


-
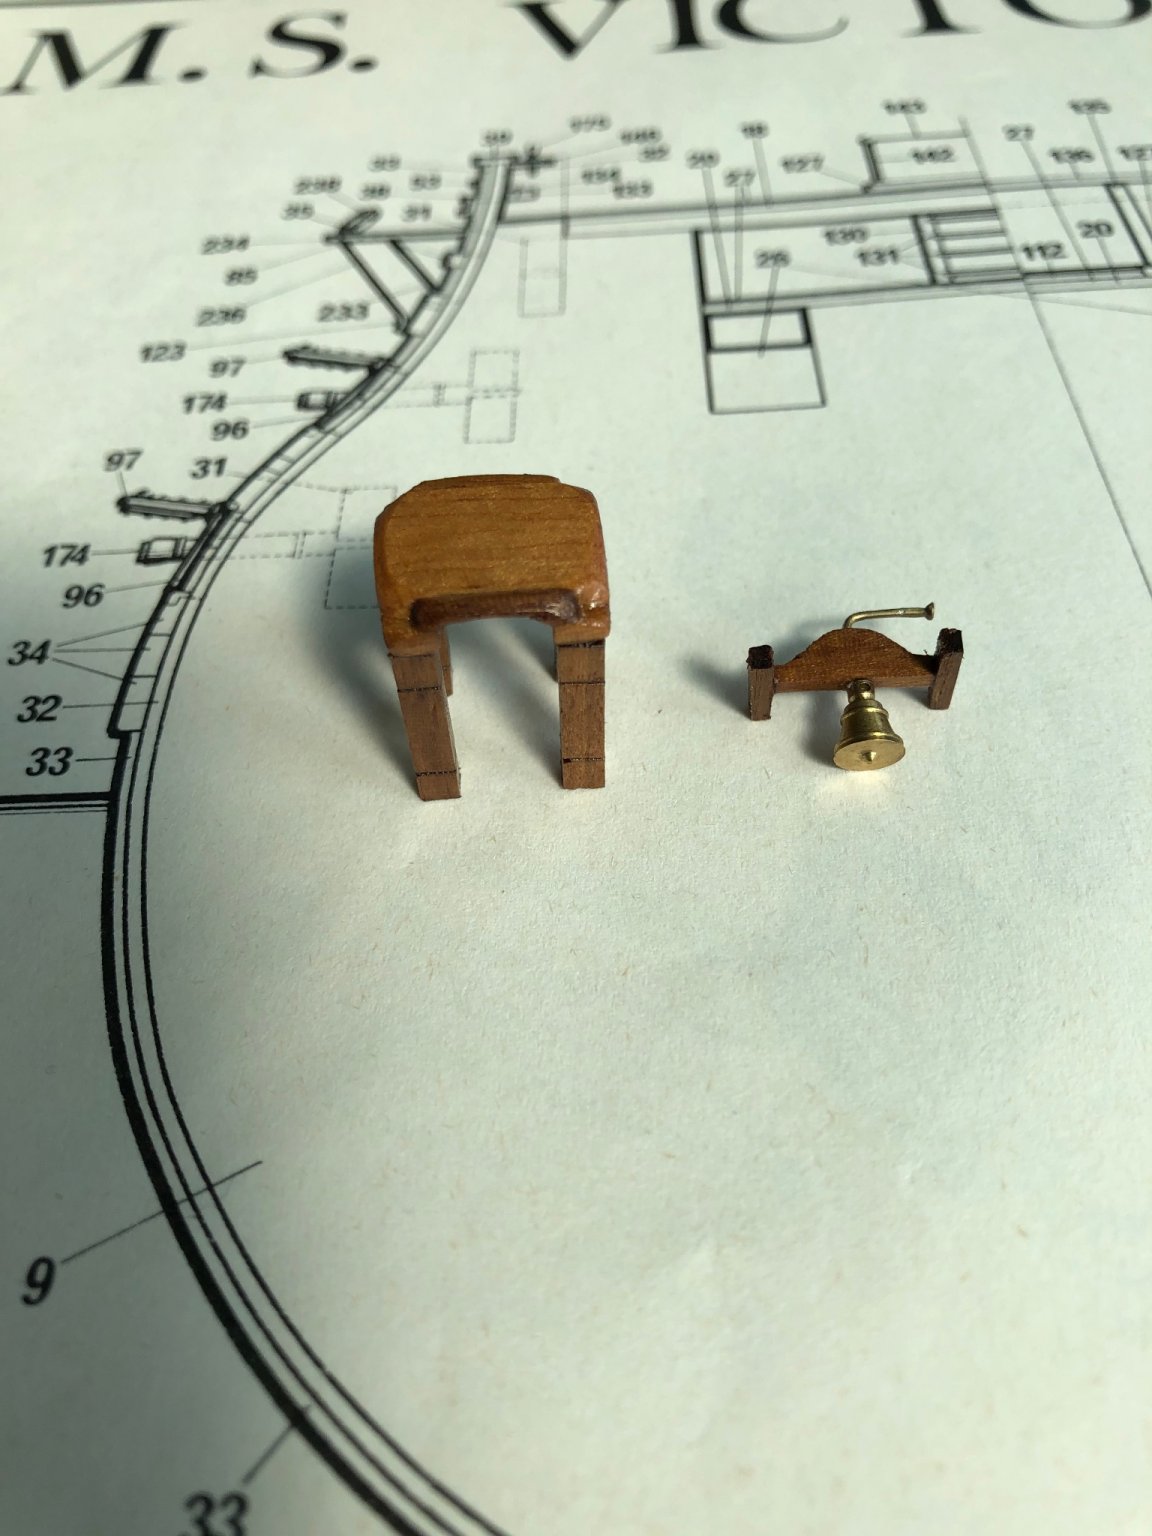
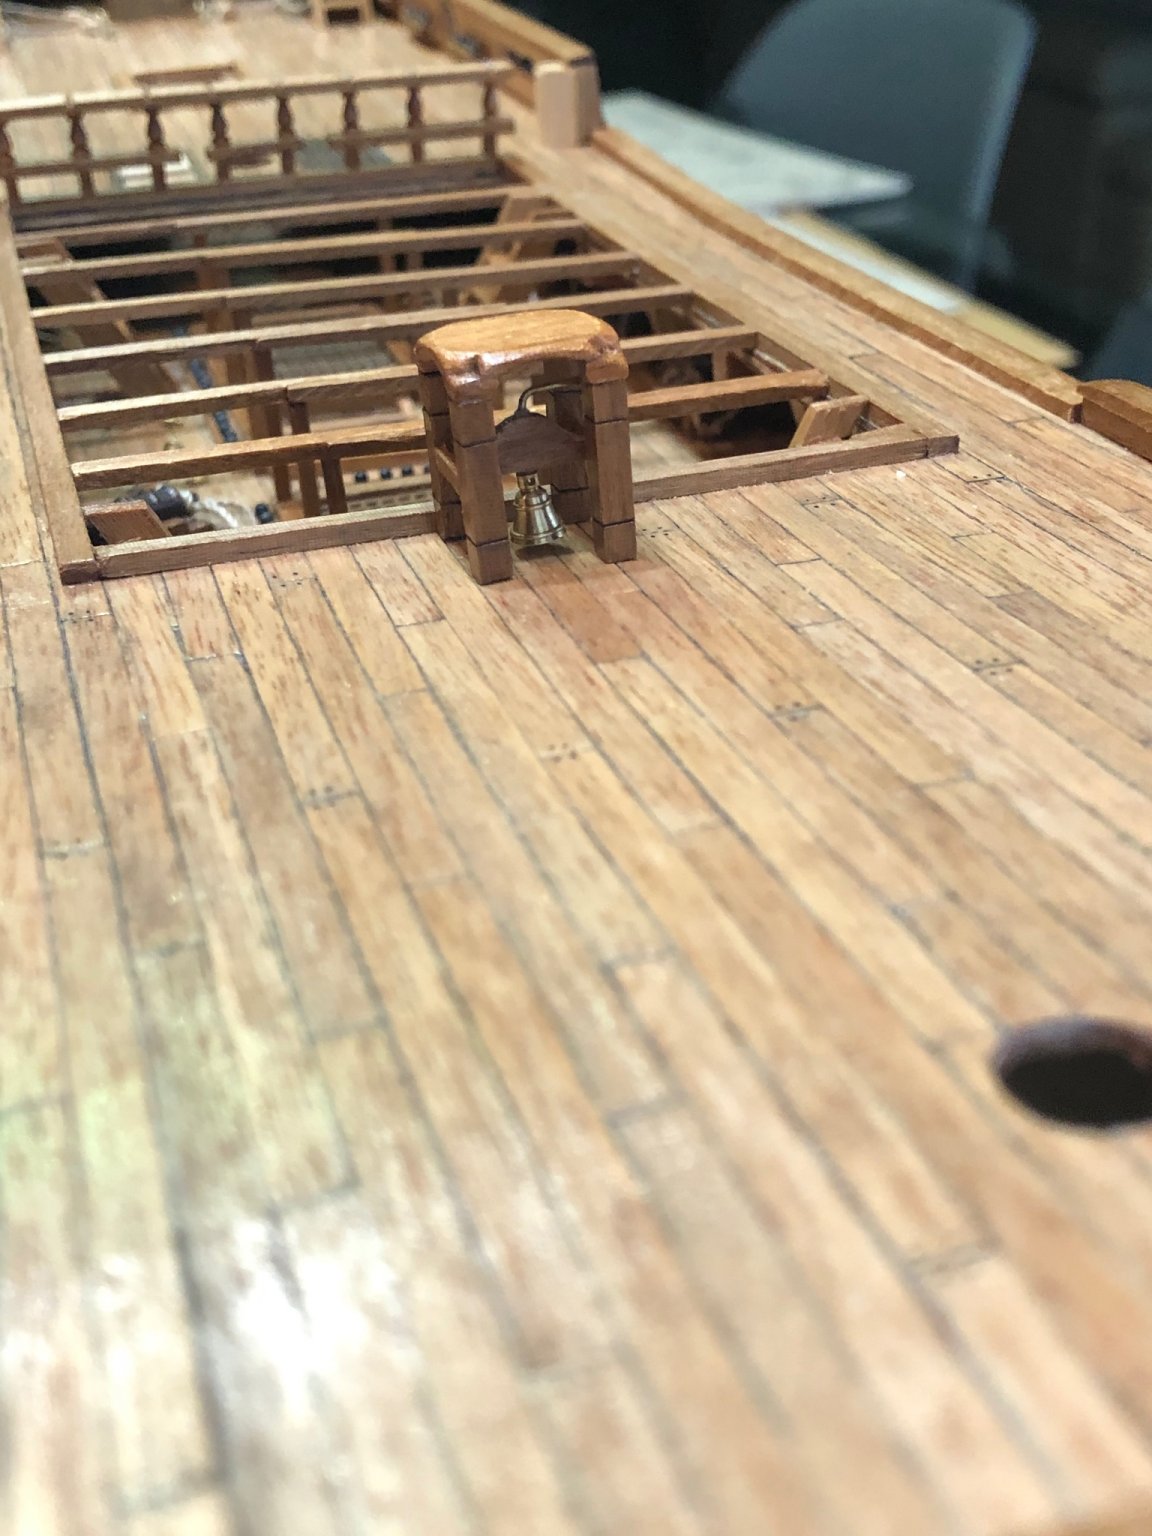
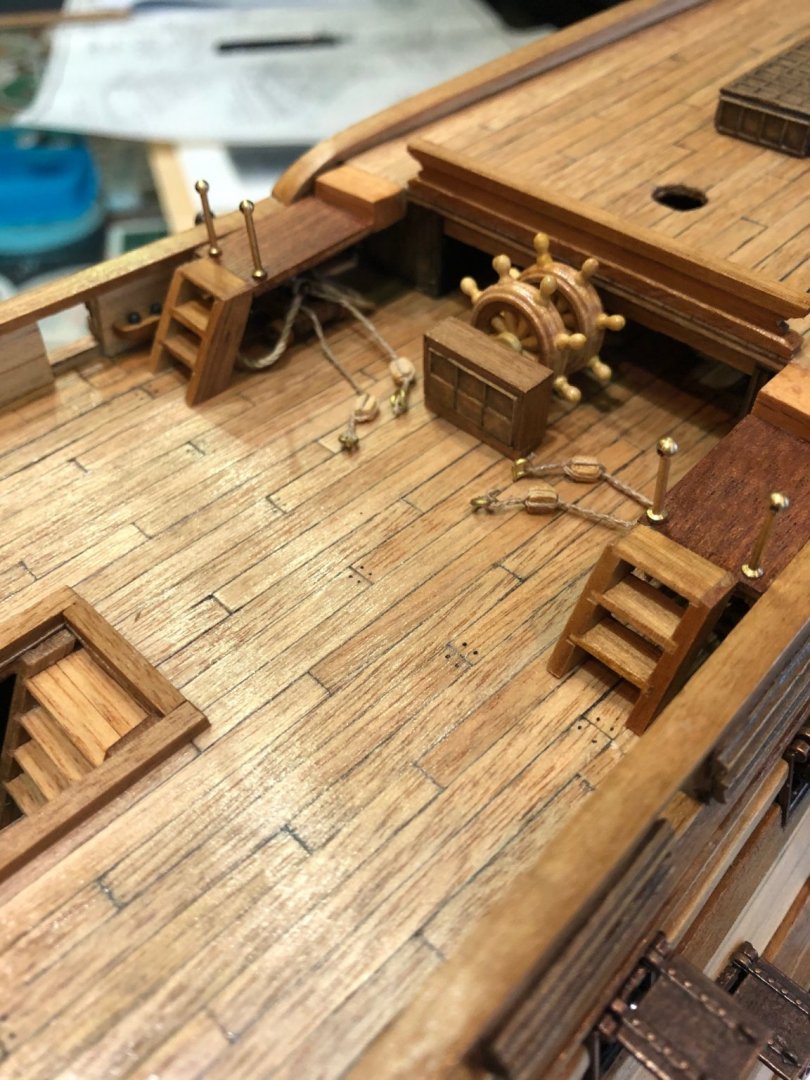
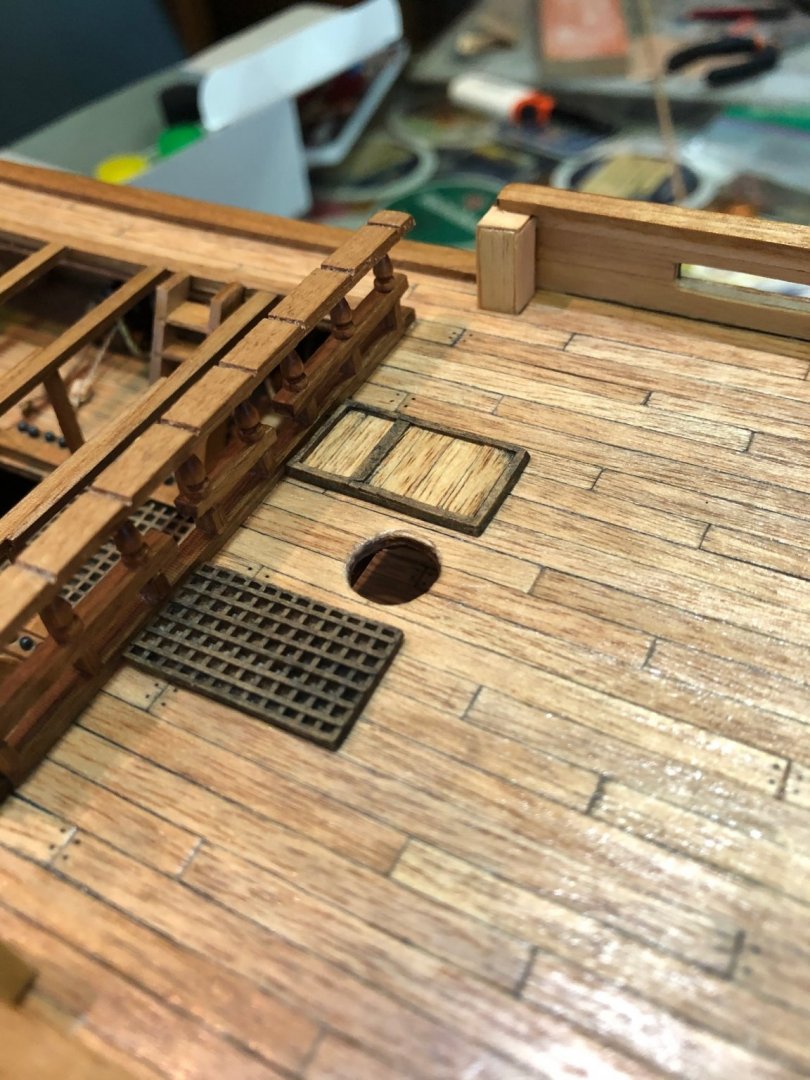
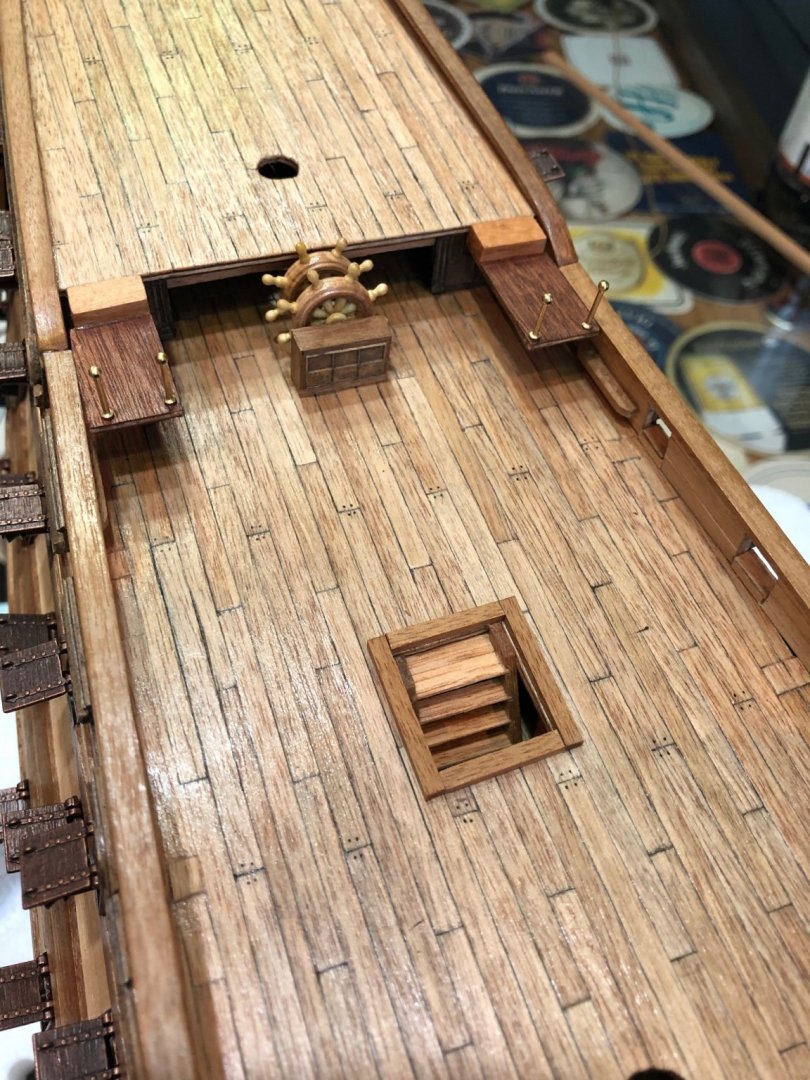
Some more details done. Here are the picks !!!


-
Beautiful, I love your work and your videos. Thank you very much for sharing. Looking forward for some photos with a nice background!!!
- 358 replies
-
- 1
-

-
- occre
- santisima trinidad
- (and 1 more)
-
Wonderful work!!! The weathering is fantastic. Very realistic. Can you post a picture of the whole ship to appreciate all her beauty?! Best regards.
- 358 replies
-
- 2
-
-
- occre
- santisima trinidad
- (and 1 more)
-
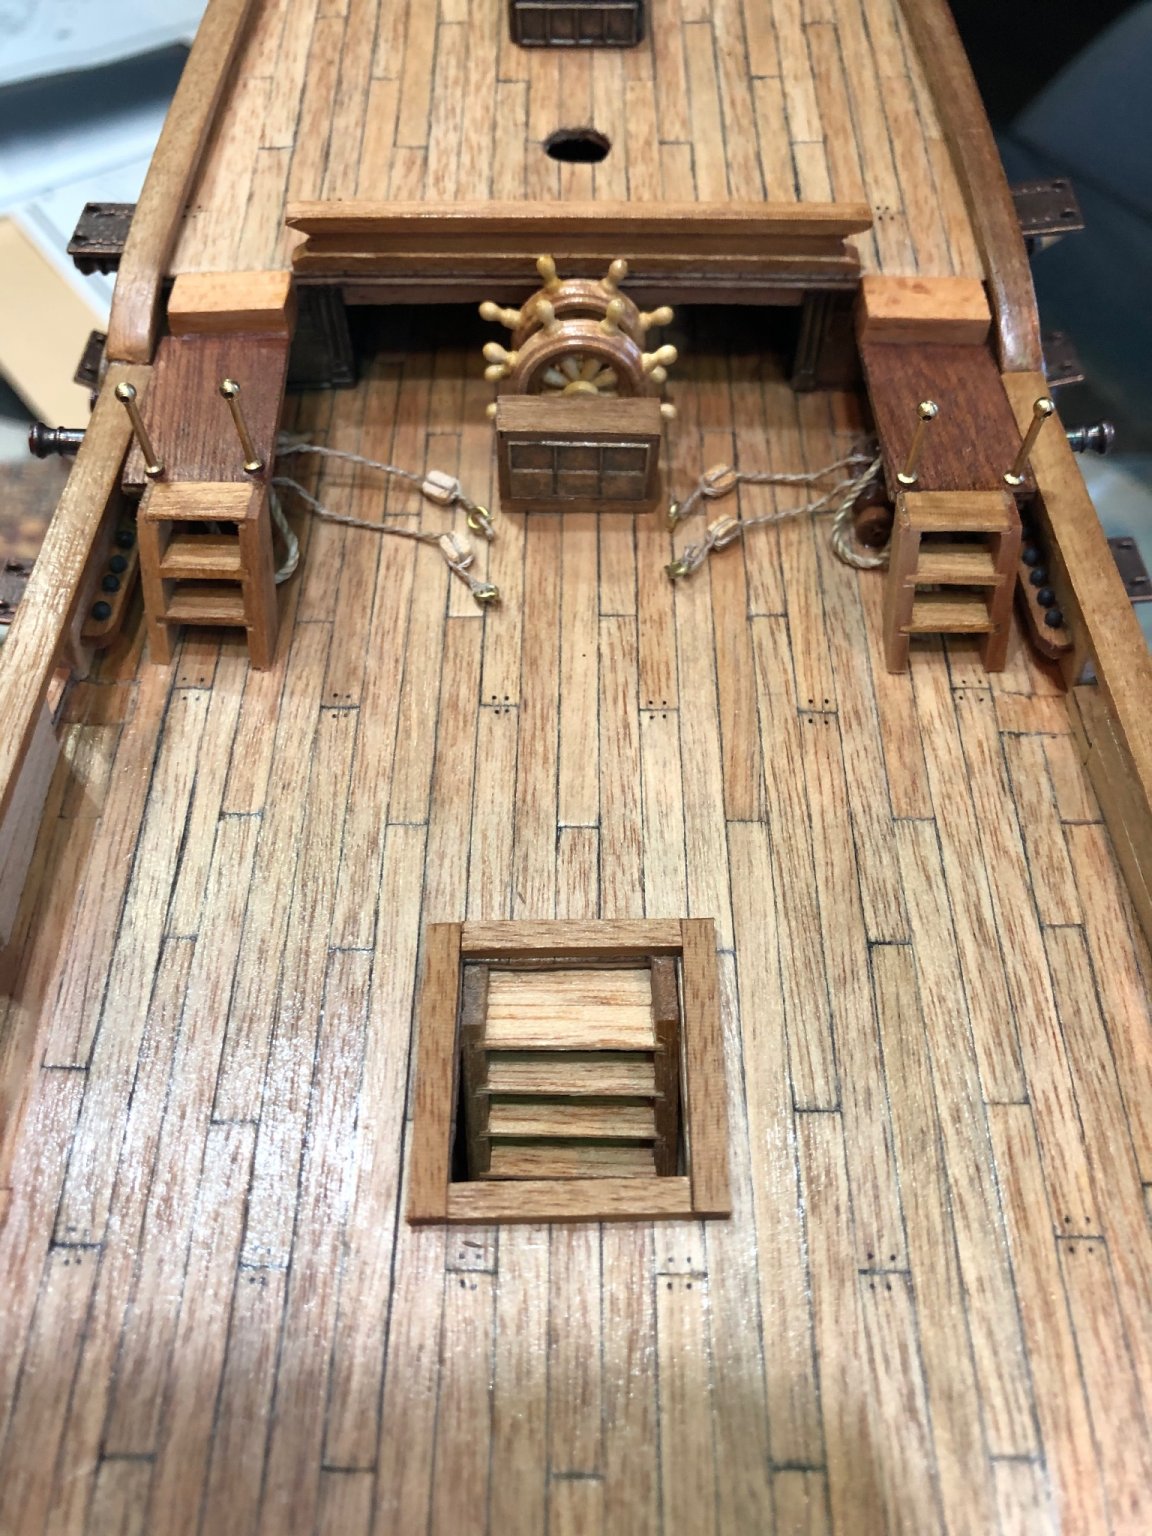
Friends: Some more work done. Polyurethane varnish on the stern area and some work on the upper deck. I decided not to use the gilded rope provided for the stern galleries ornaments, and instead I used a dark brown one, to avoid a “flashy” look. Here are the picks !!!


-
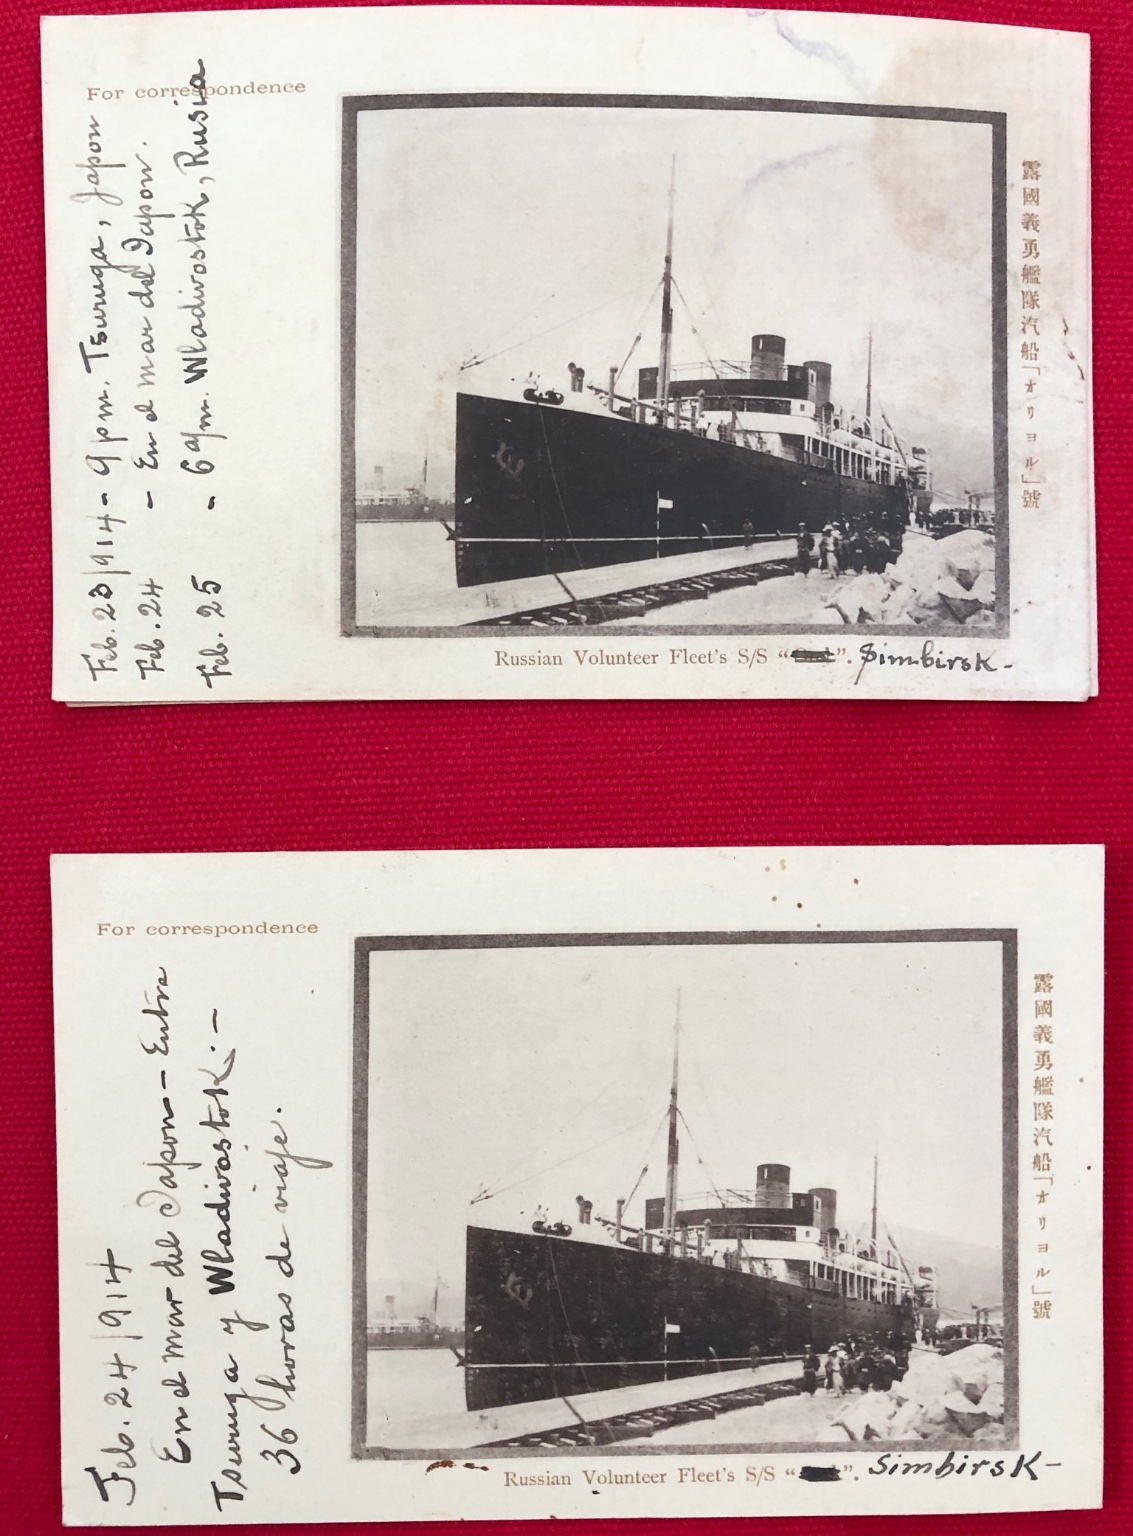
Roger: I have never been to Harbin. The closest has been Beijing in winter. Also very cold. But even Chinese people complain about Harbin’s cold !!! This was an around the world trip done by my great grandfather. Mexico - Japan was done through the Pacific, this is the return trip. It was an assignment to buy weapons for the Mexican Army. His photo attached. Best regards, Eugenio.

-
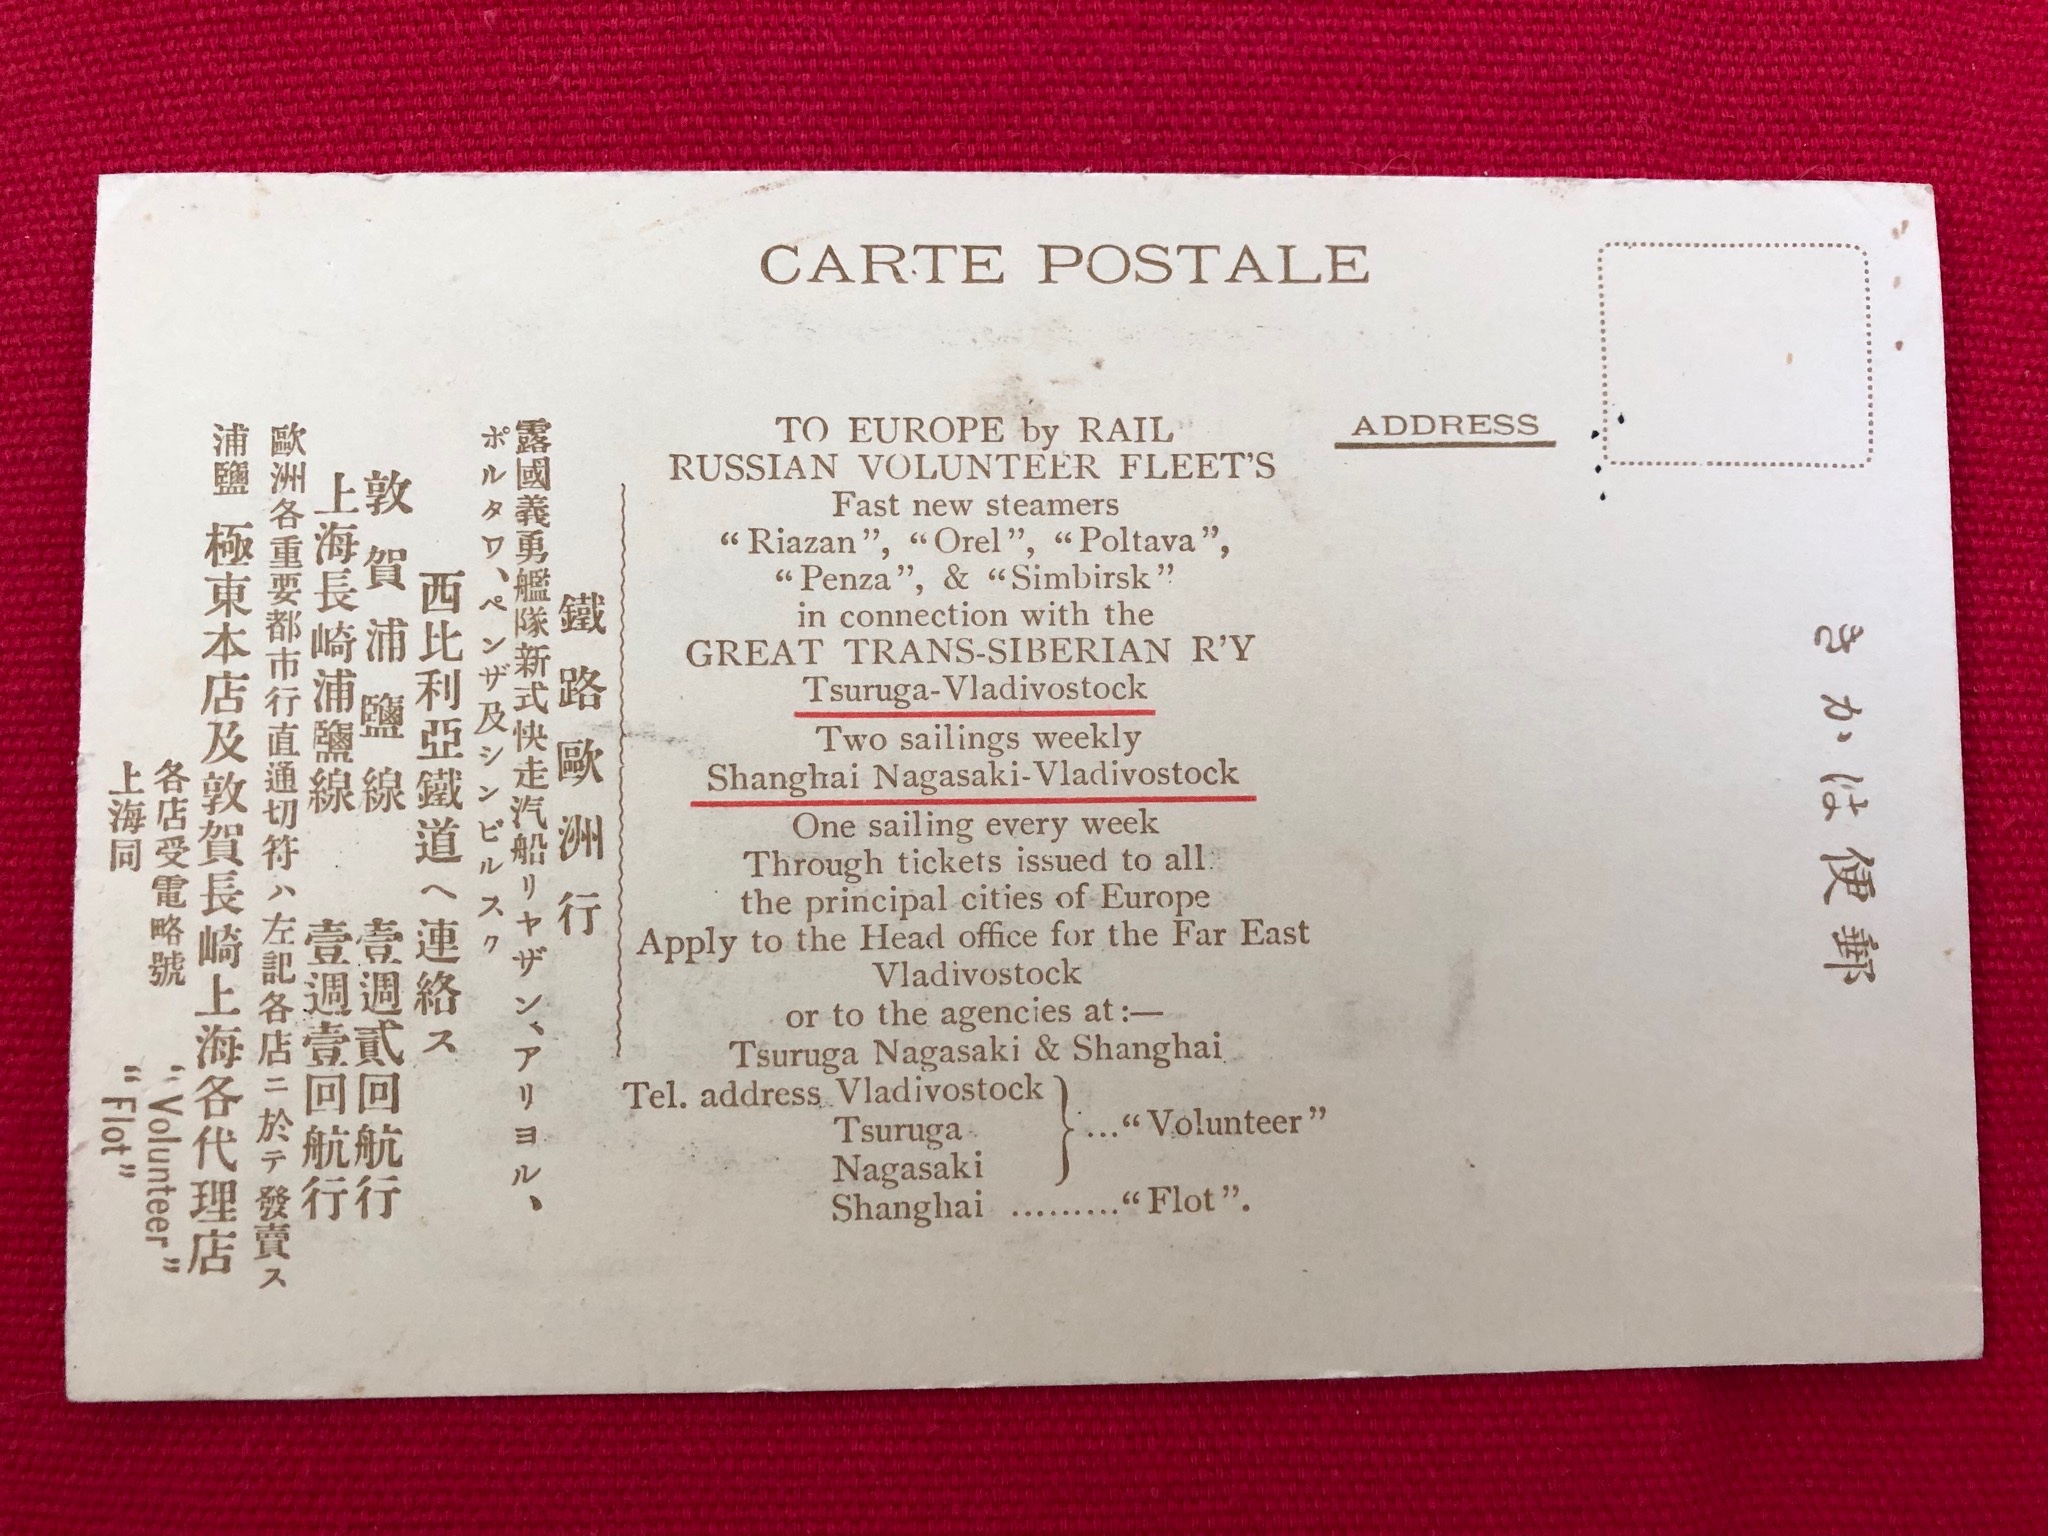
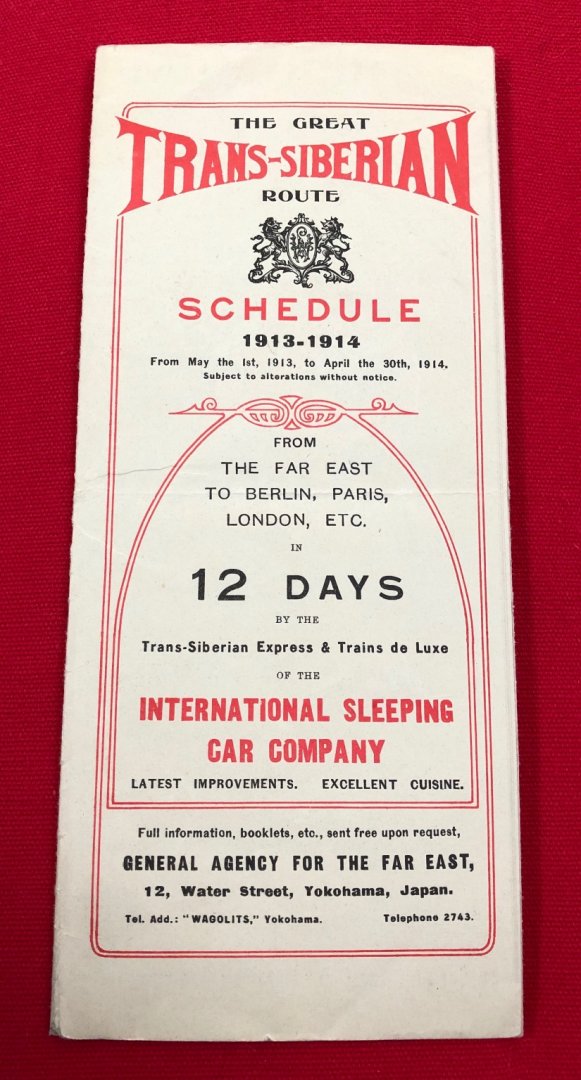
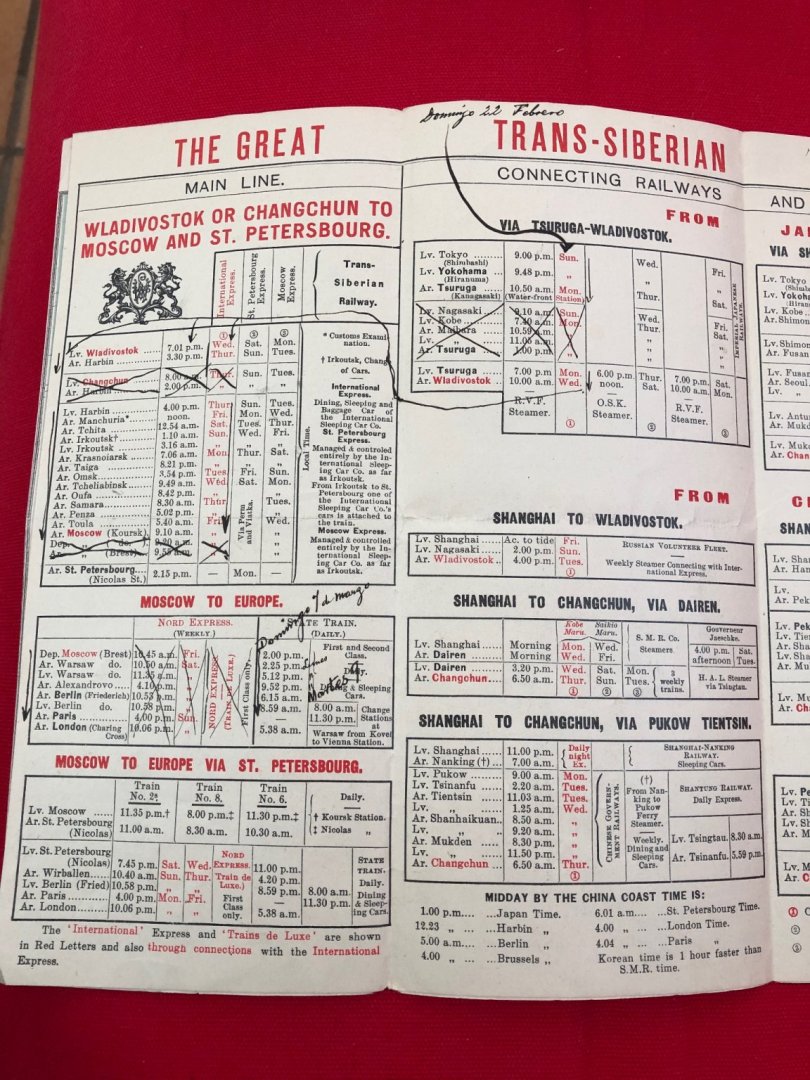
Nice postcard of the SS Simbirsk covering the route Tsuruga-Vladivostok. (In fact, the photo is of the SS Orel. The trip was done on the Simbirsk). Part of the journey from Tokyo (Feb 22), to Moscow (Mar 1), to London (Mar 9) by the Trans Siberian Rail in 1914. Final destination was Mexico City. No date of arrival, but it was a long one !!! Here are the picks!!!


-
Robert it looks really great. Excellent work!!!
-
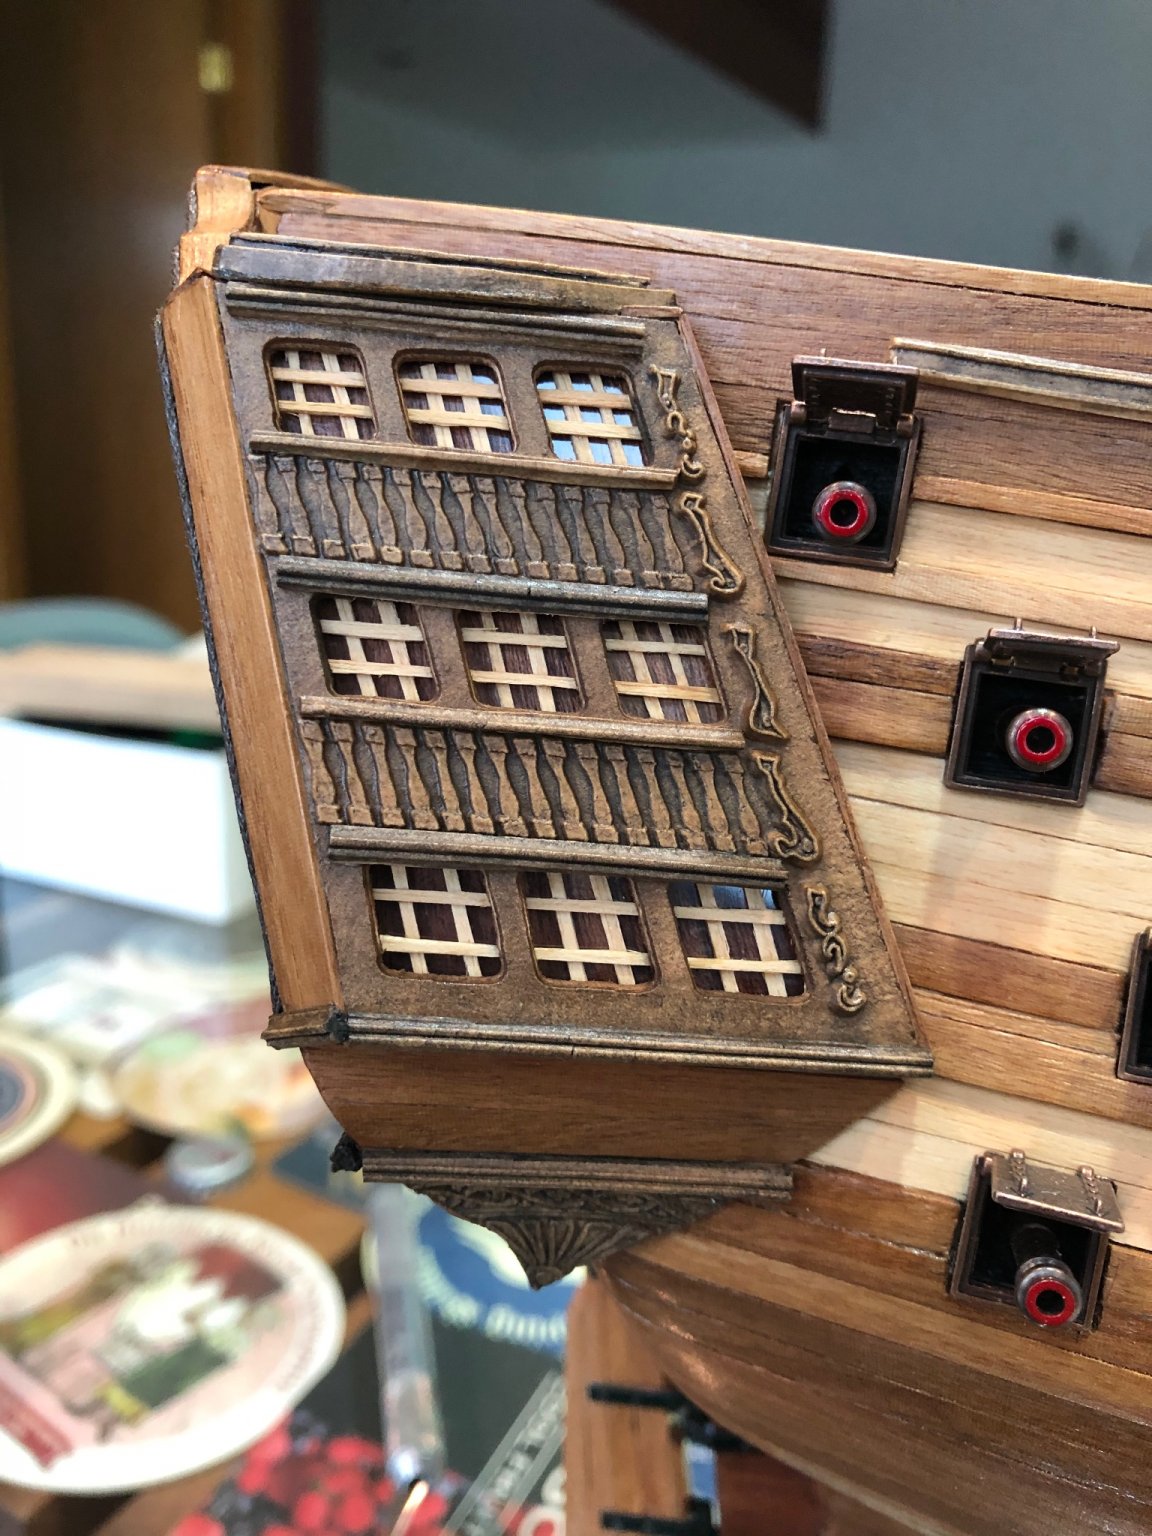
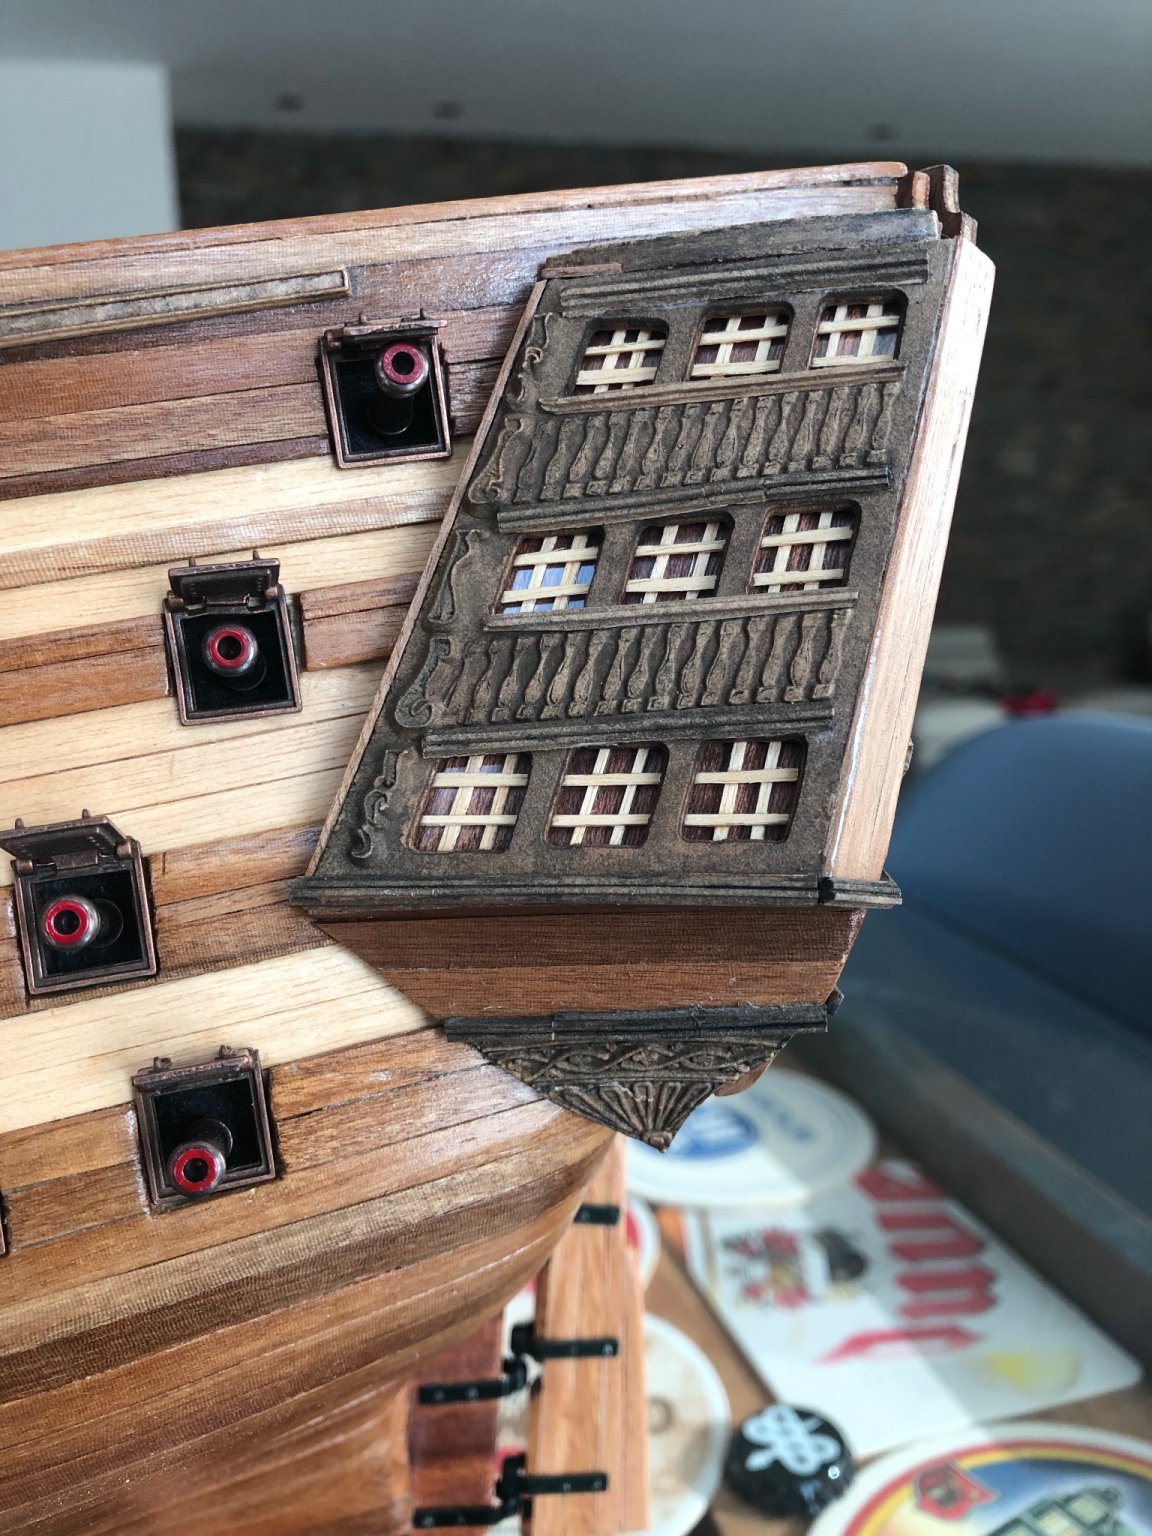
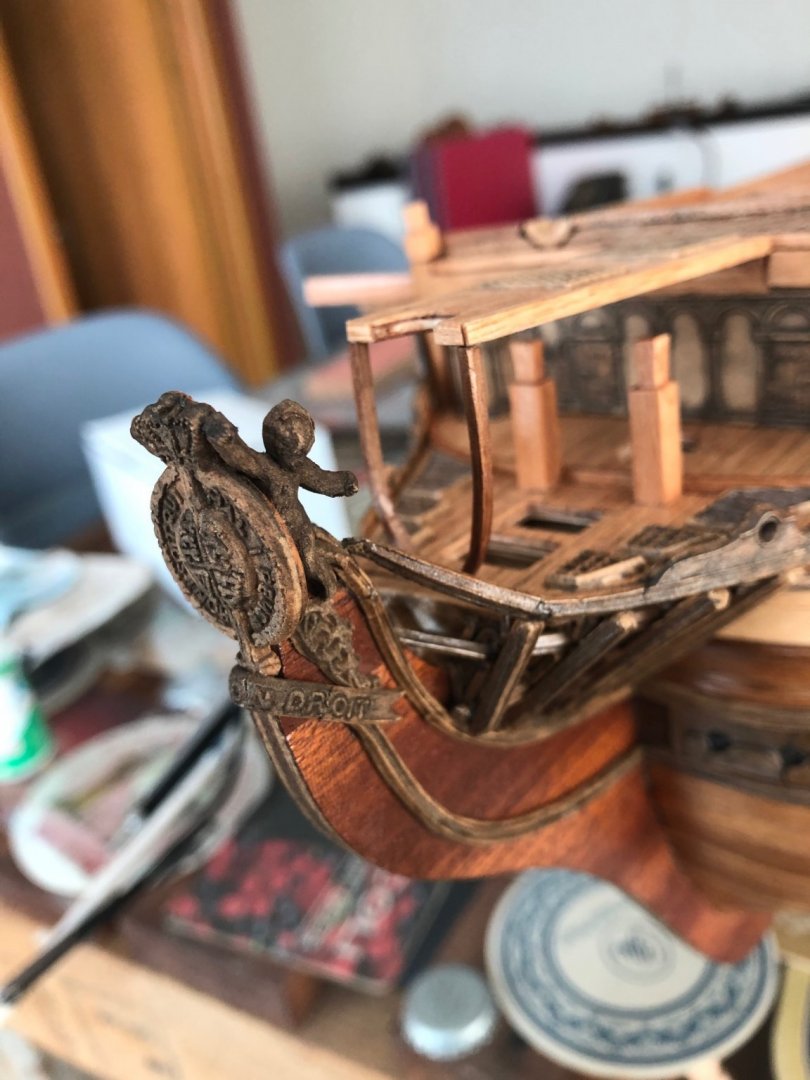
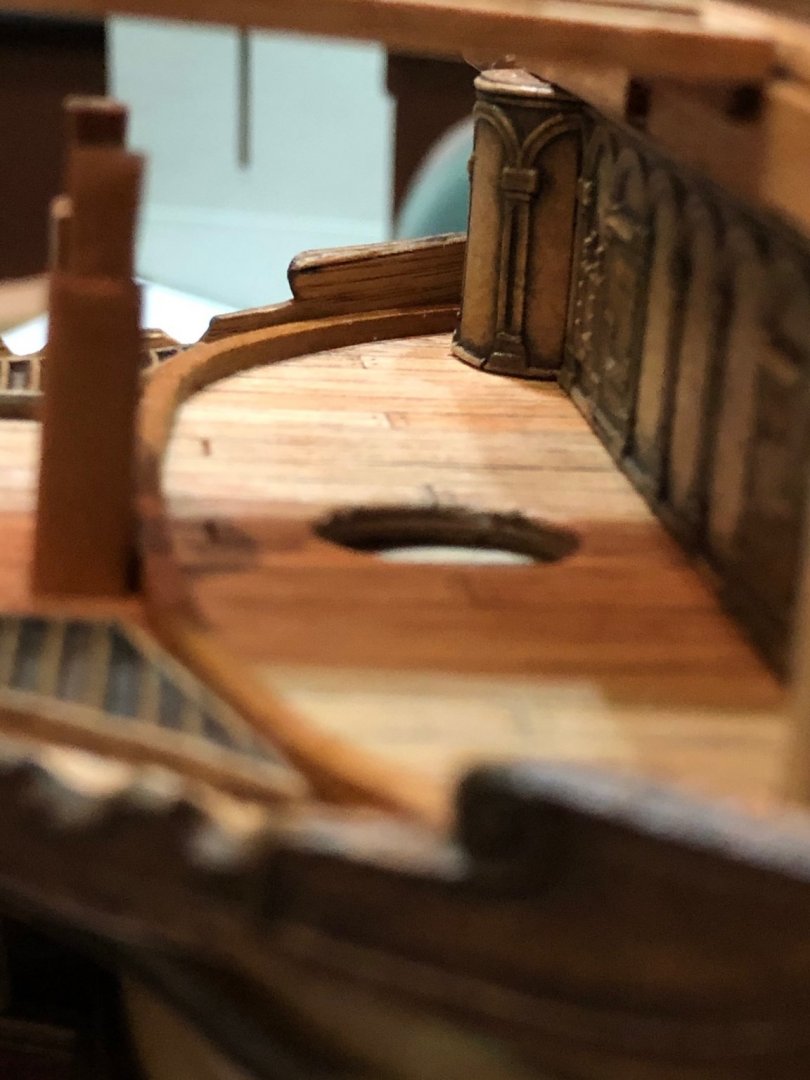
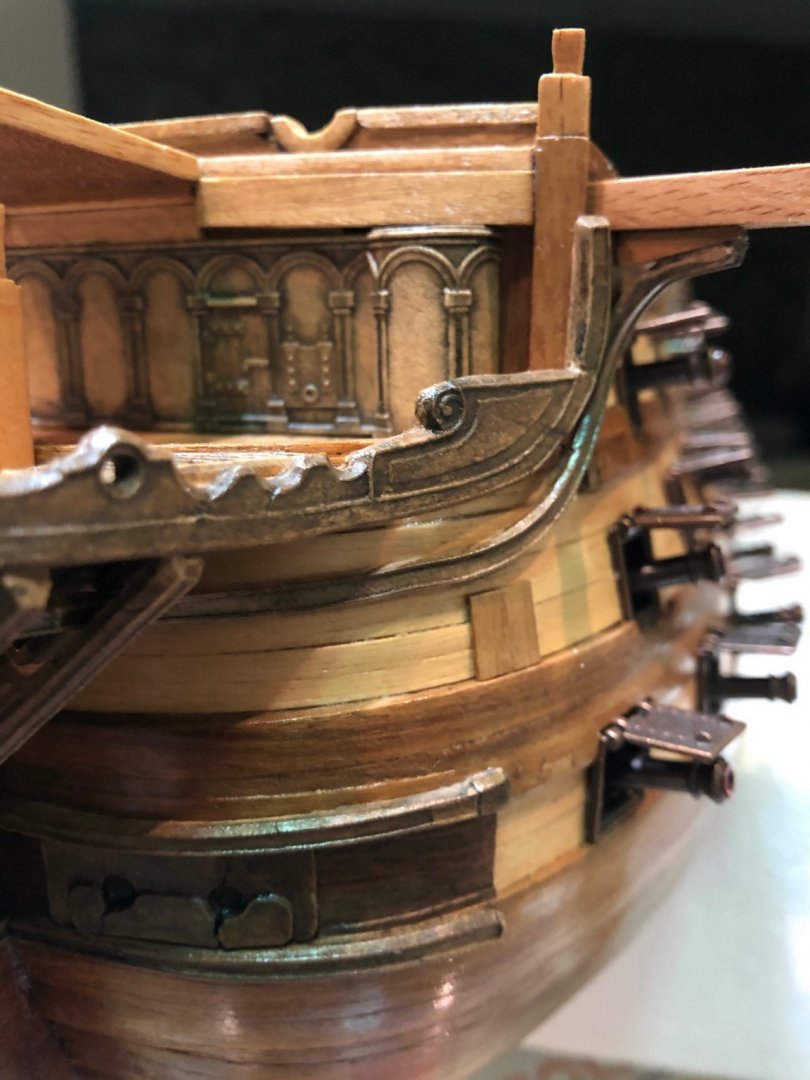
David, thank you very much for your kind words!!! I continued the work on the stern galleries and the figure head. I liked the old wood finish and the glass effect on the windows. Best regards to all and... Here are the picks!!!

-
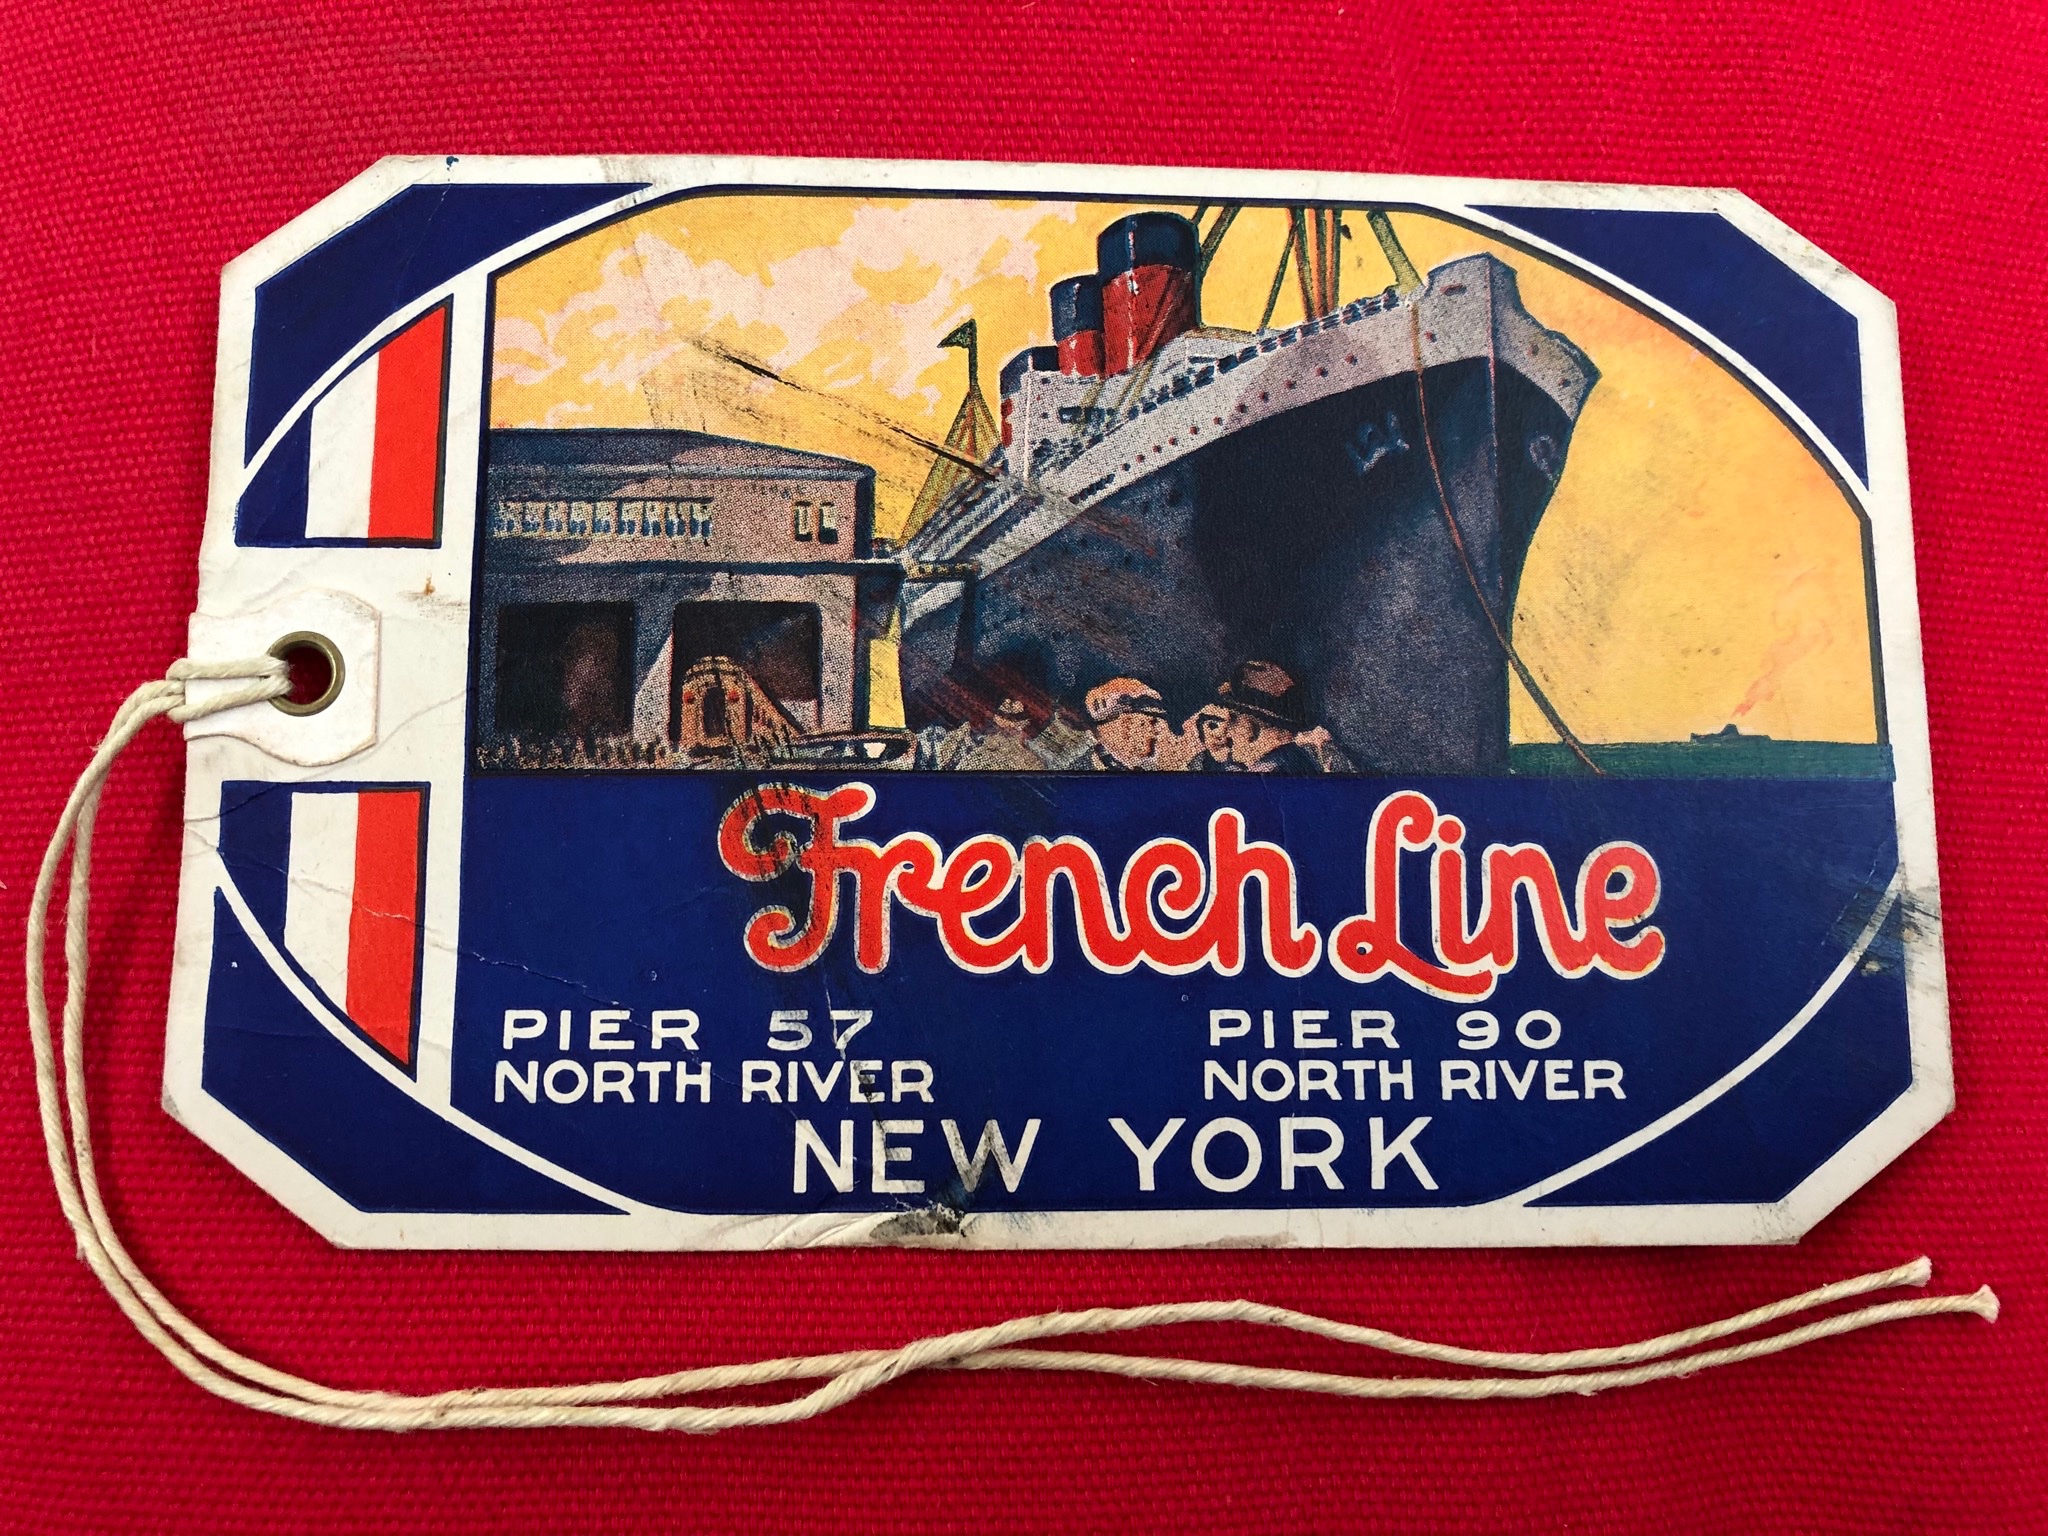
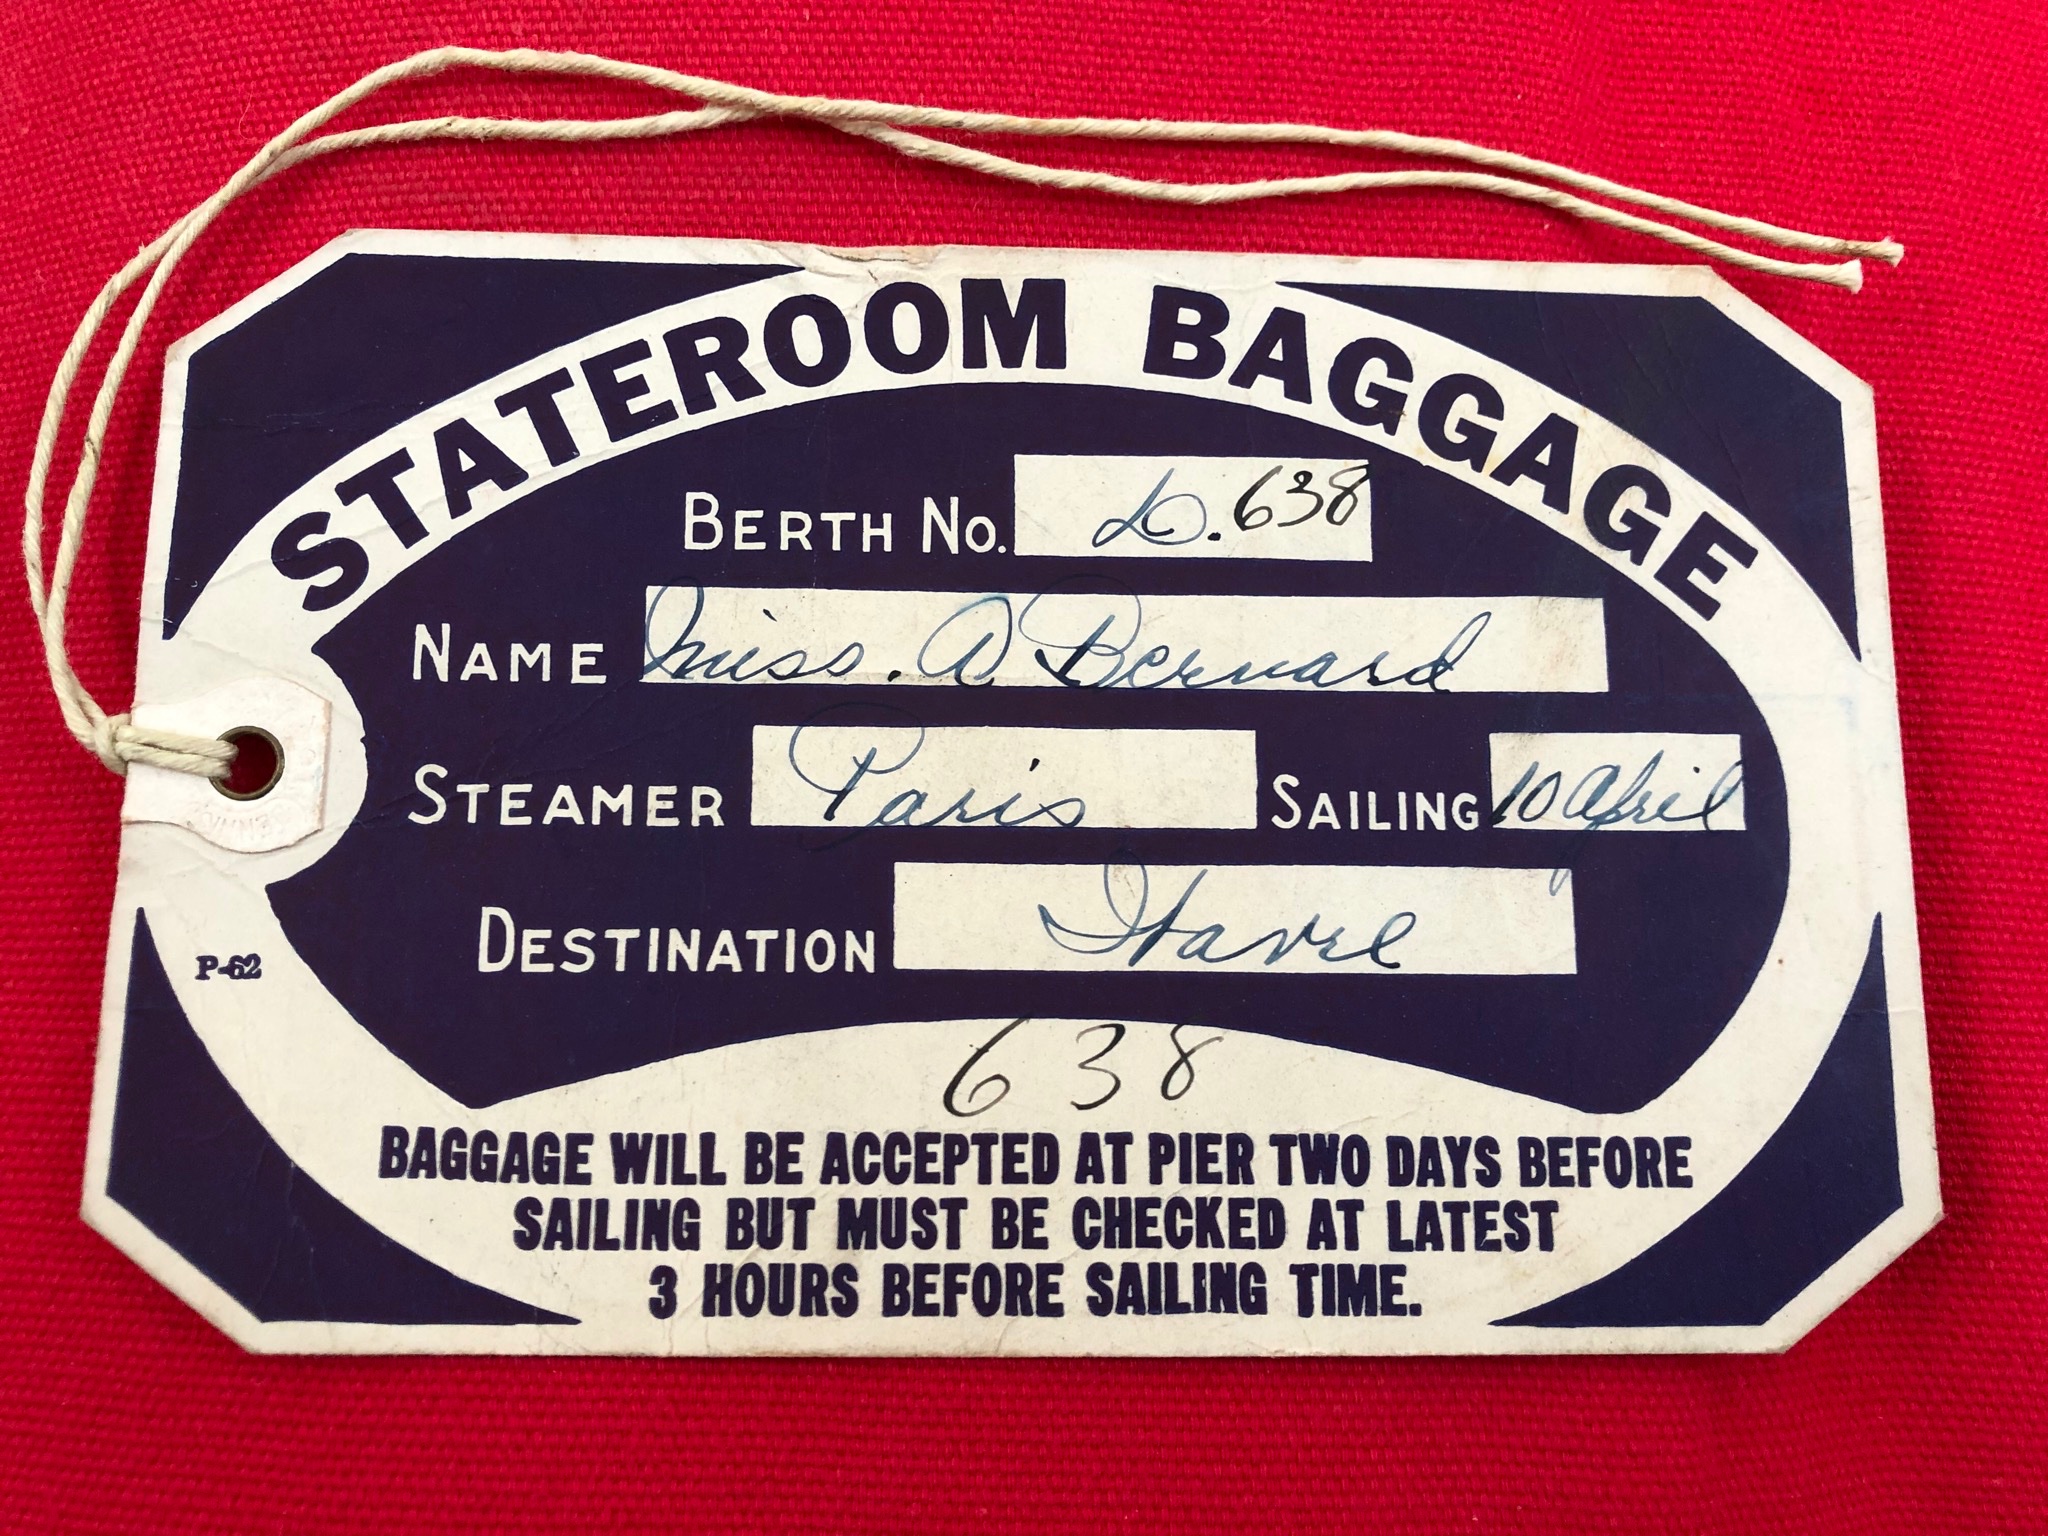
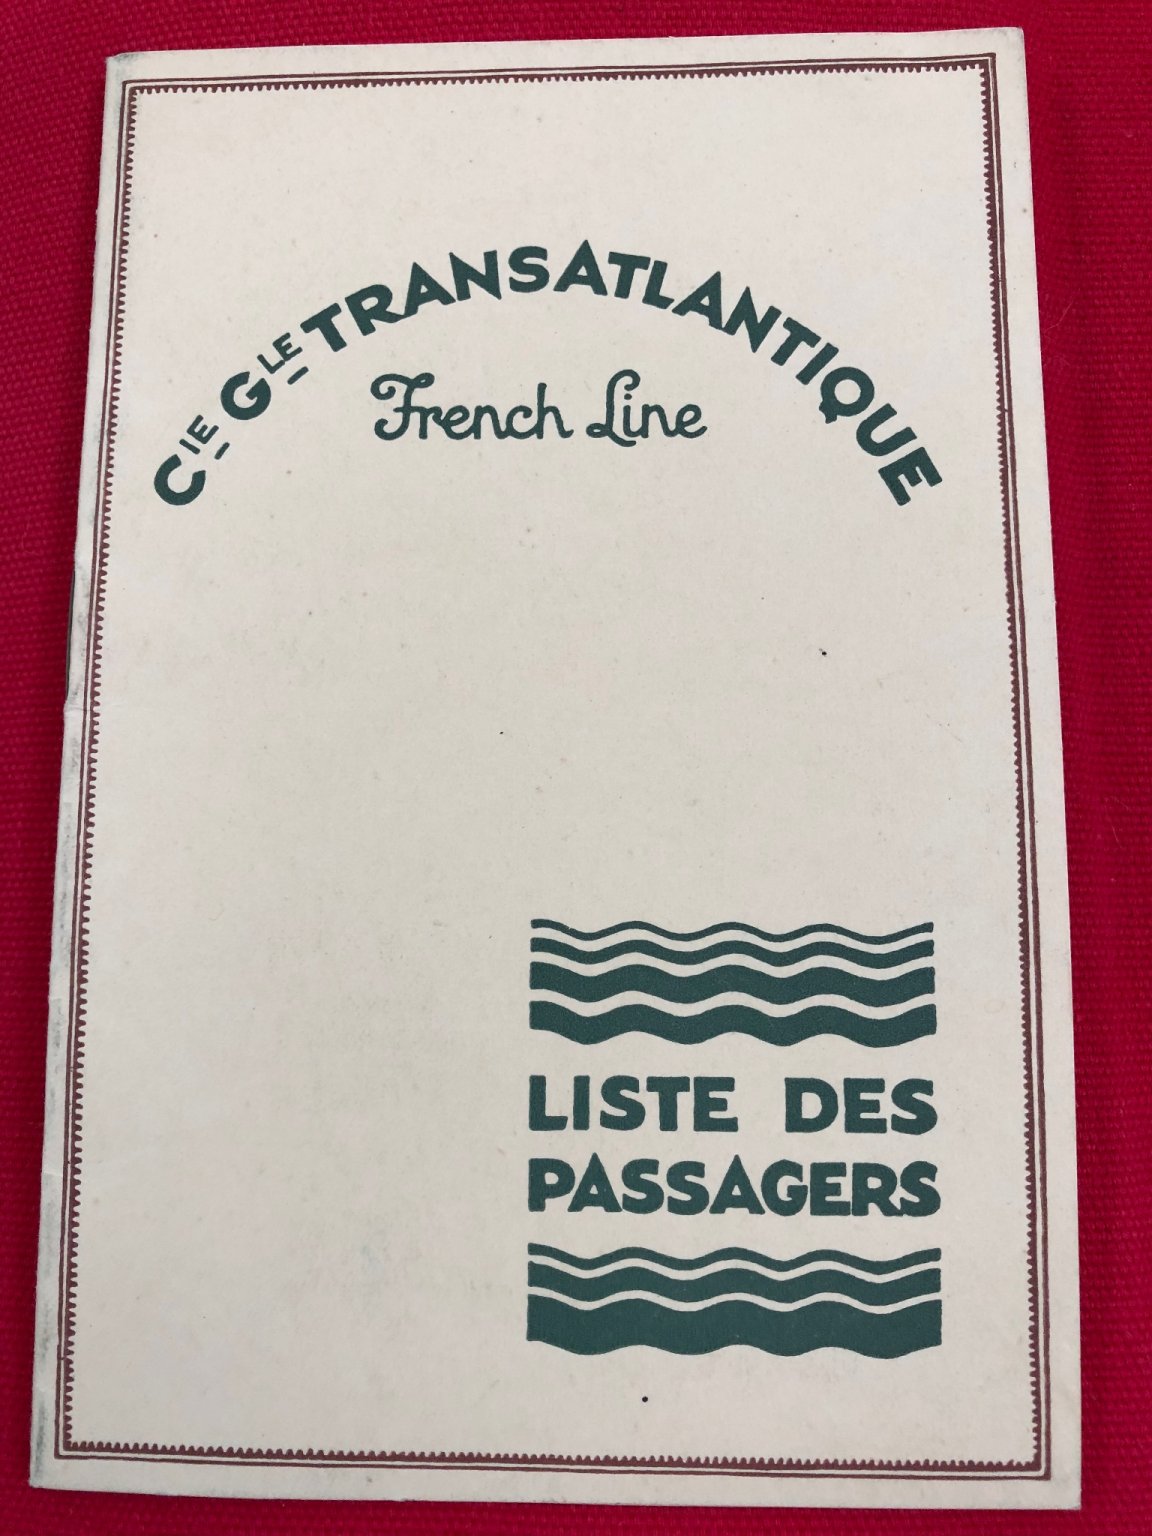
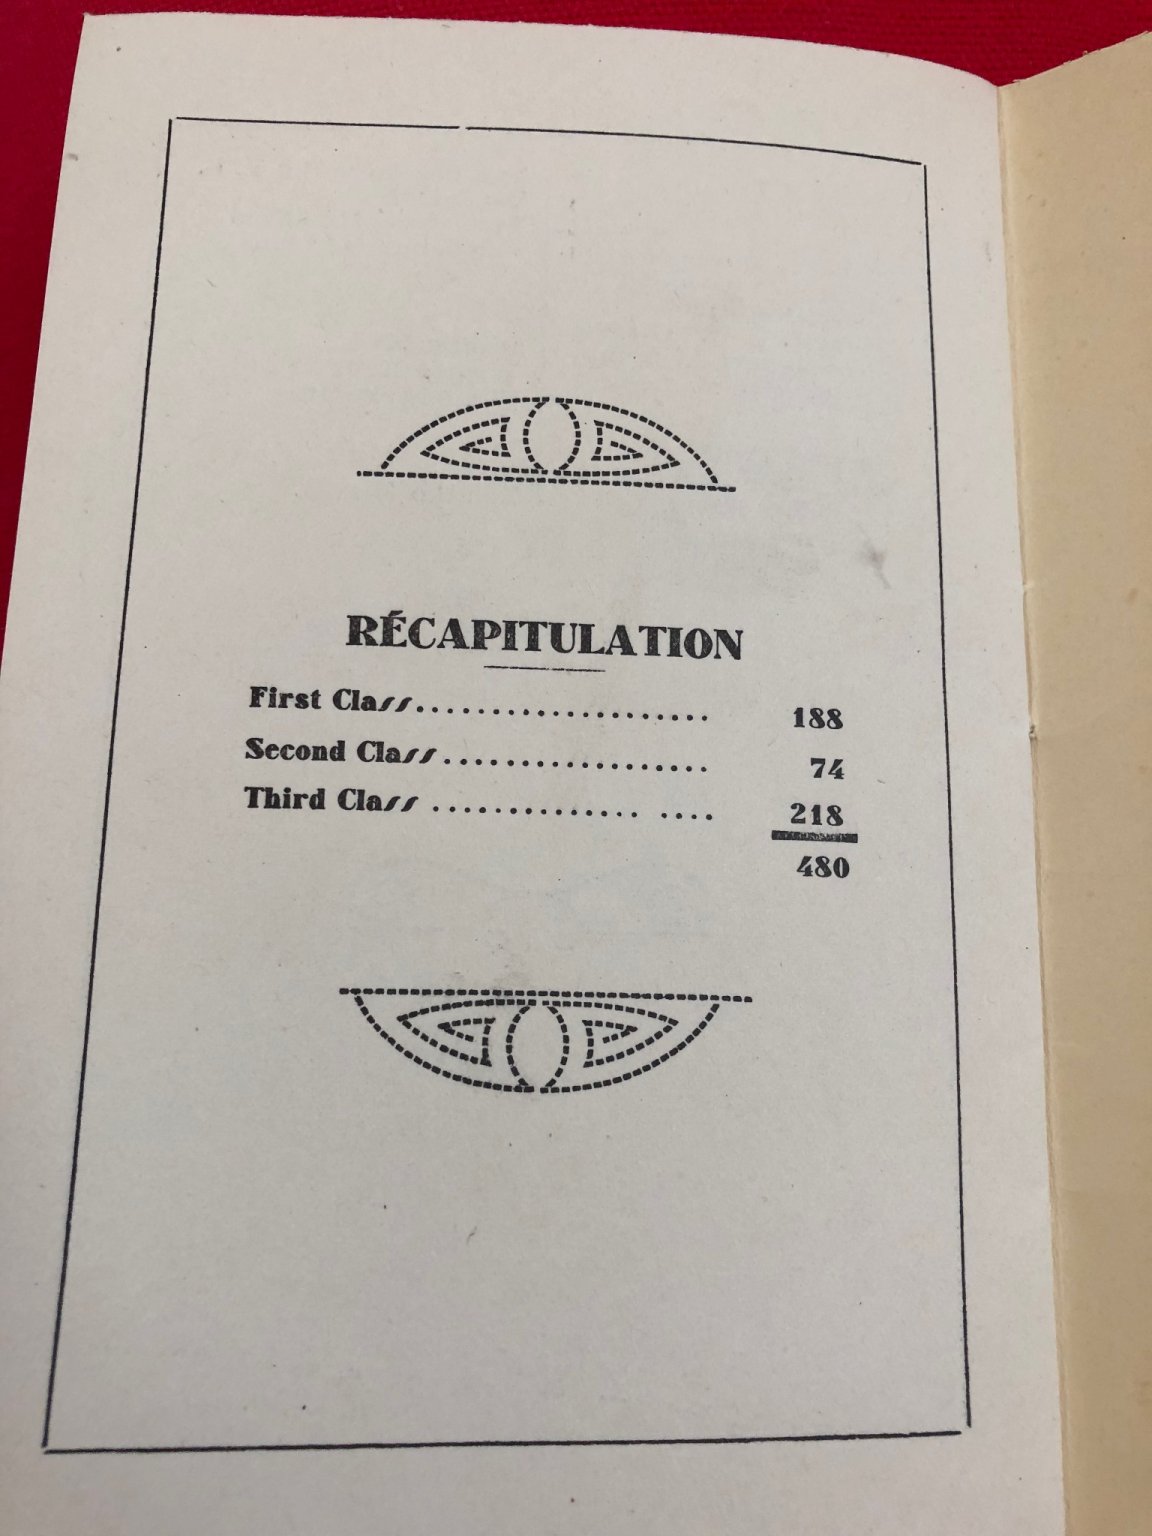
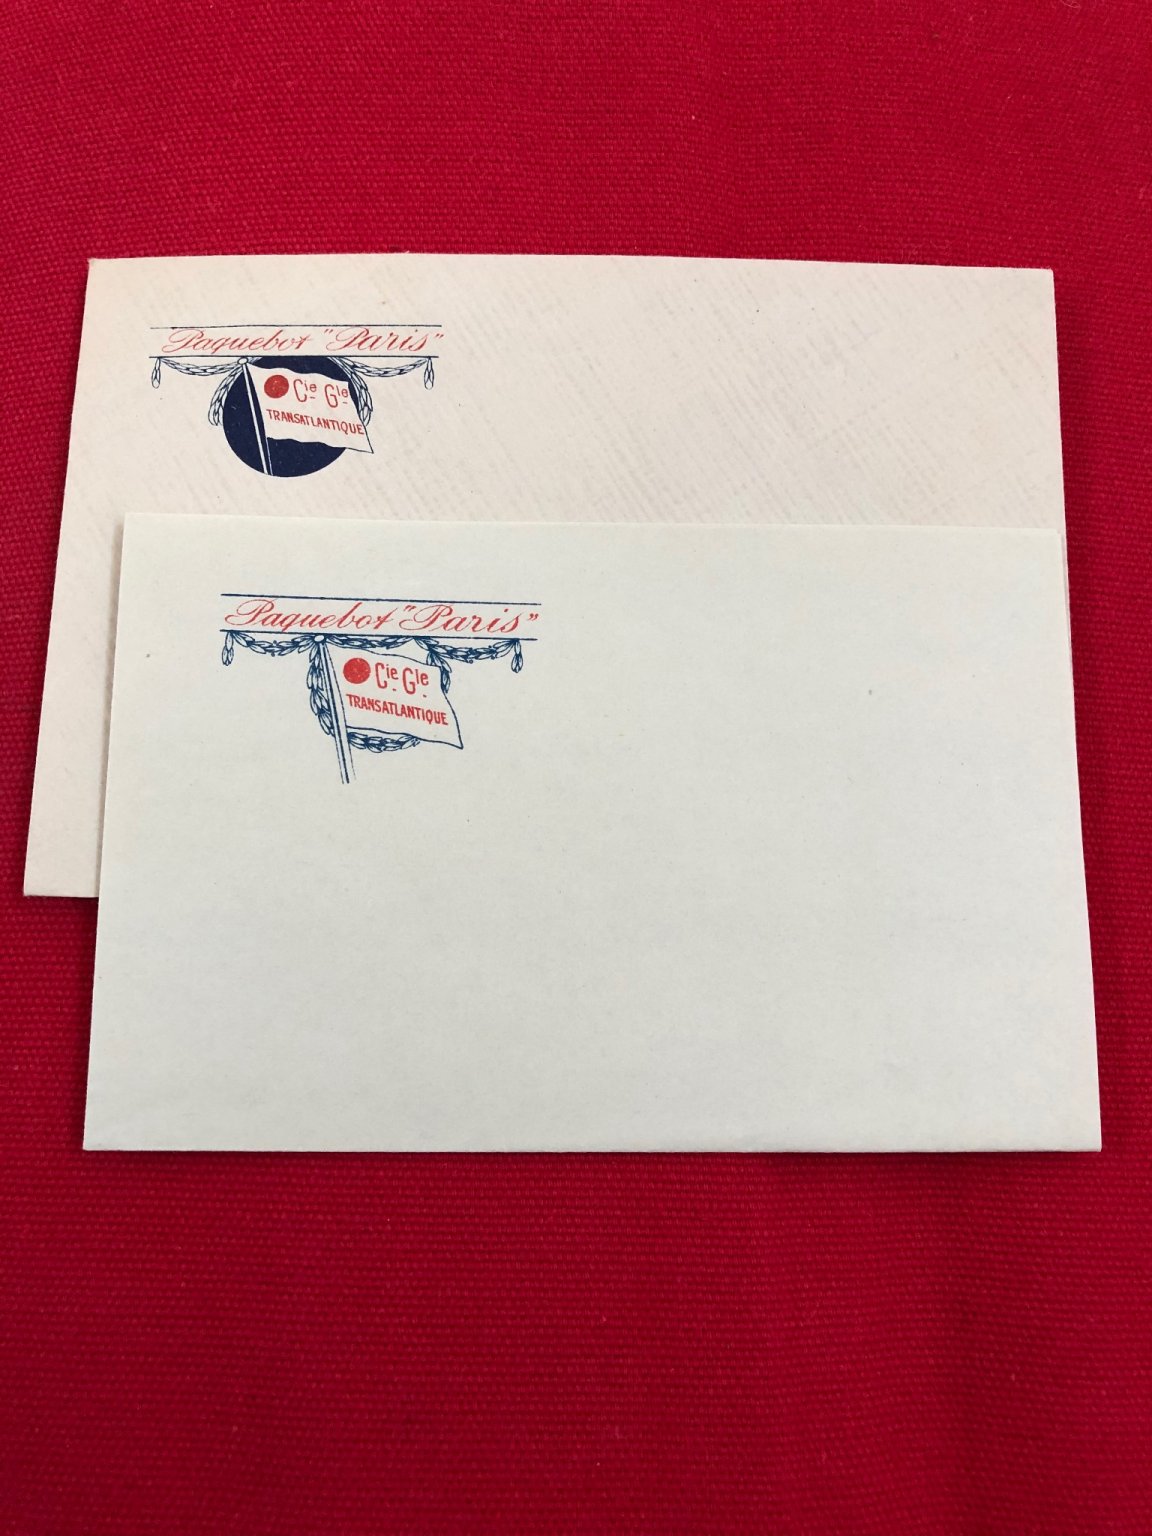
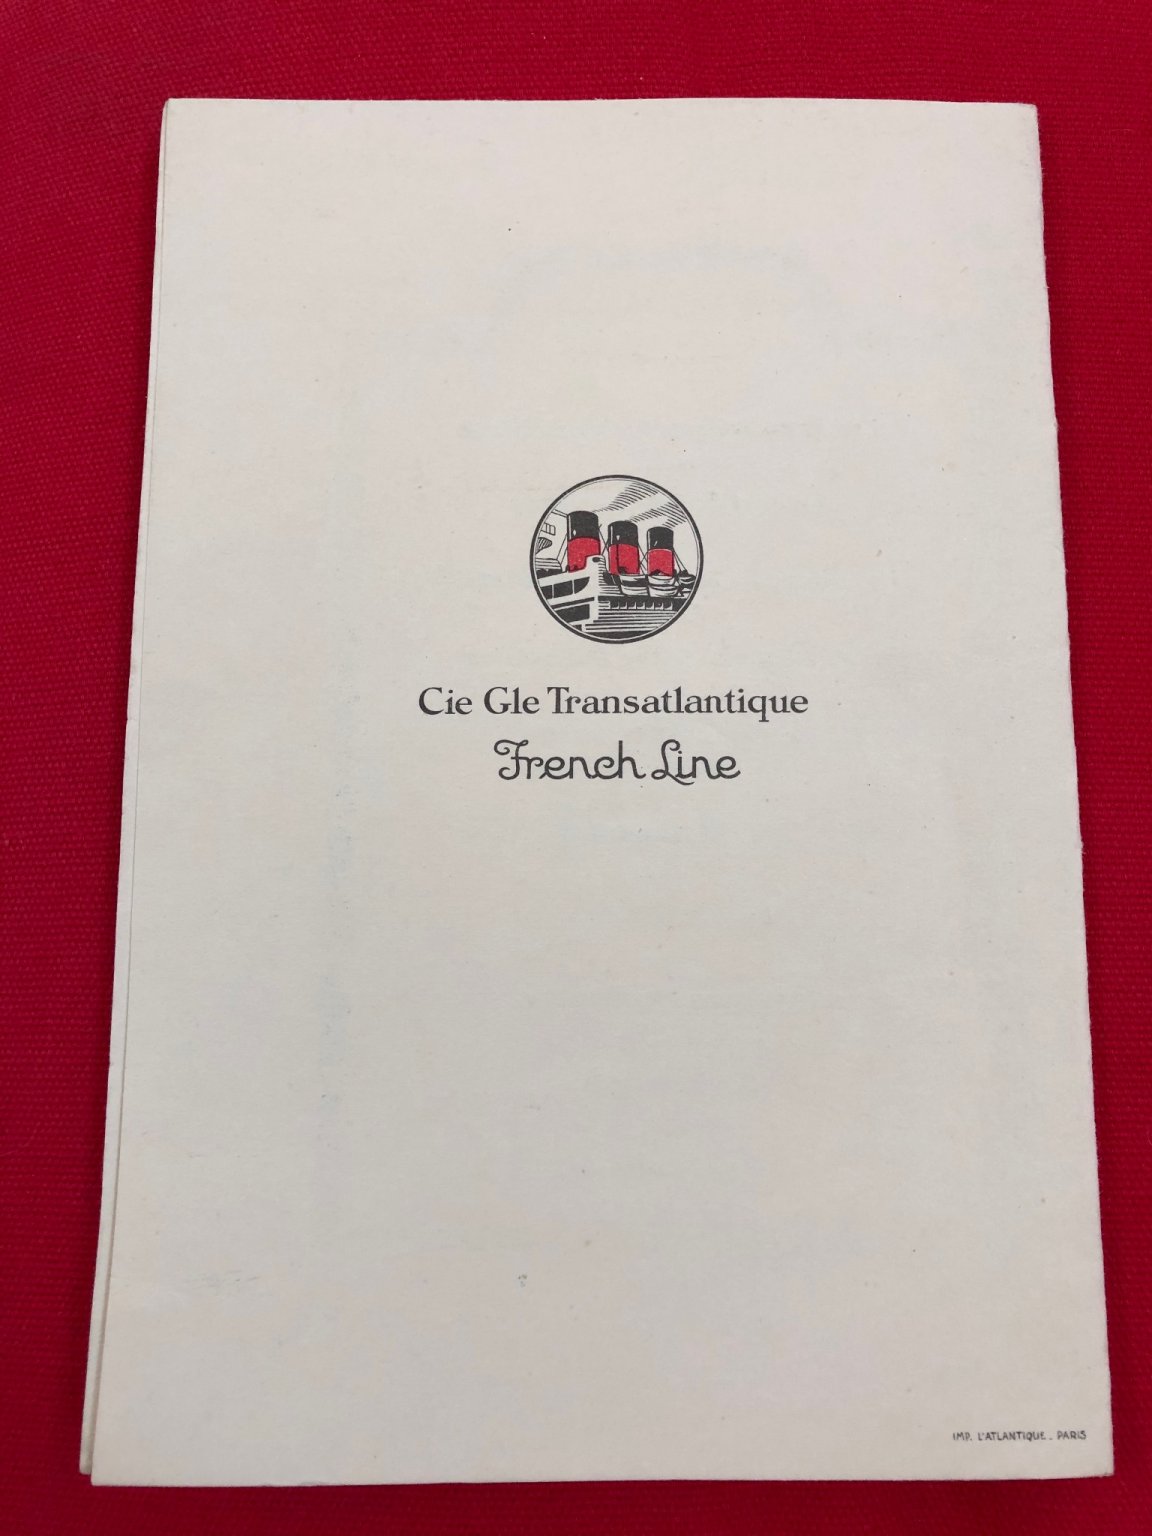
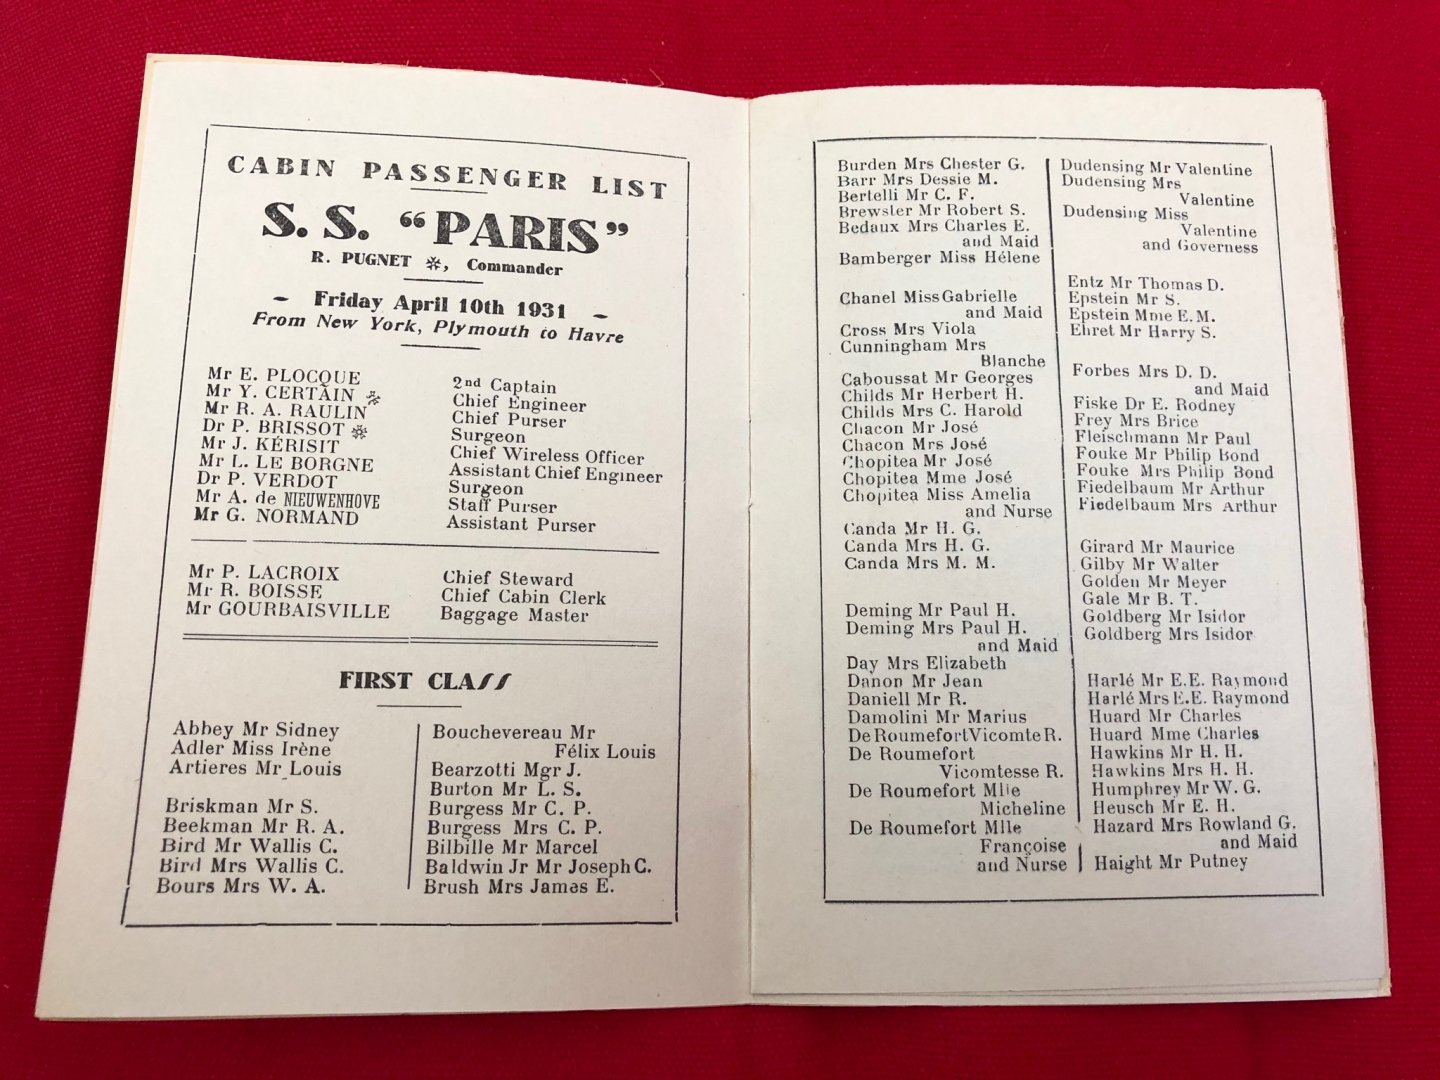
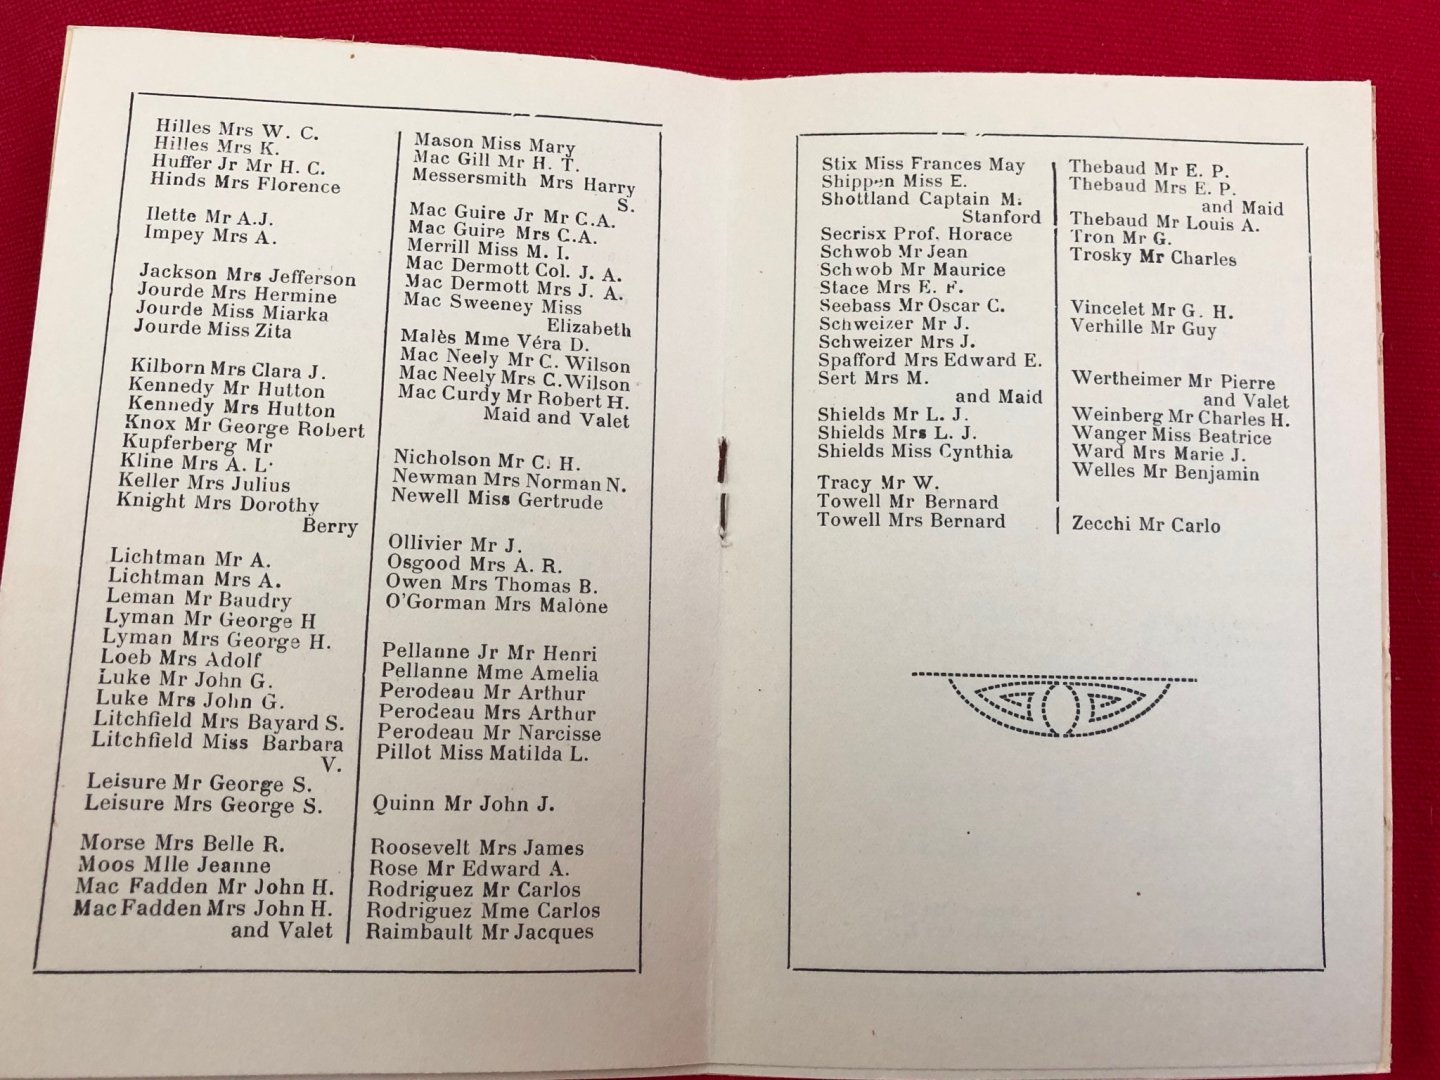
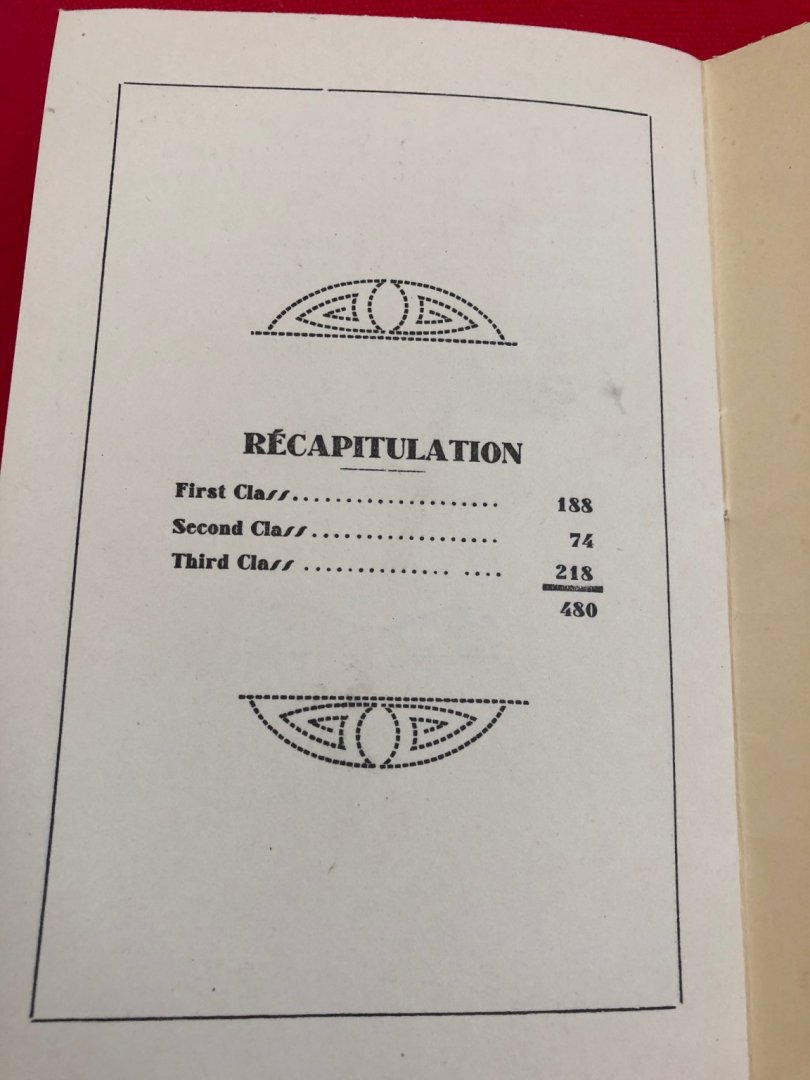
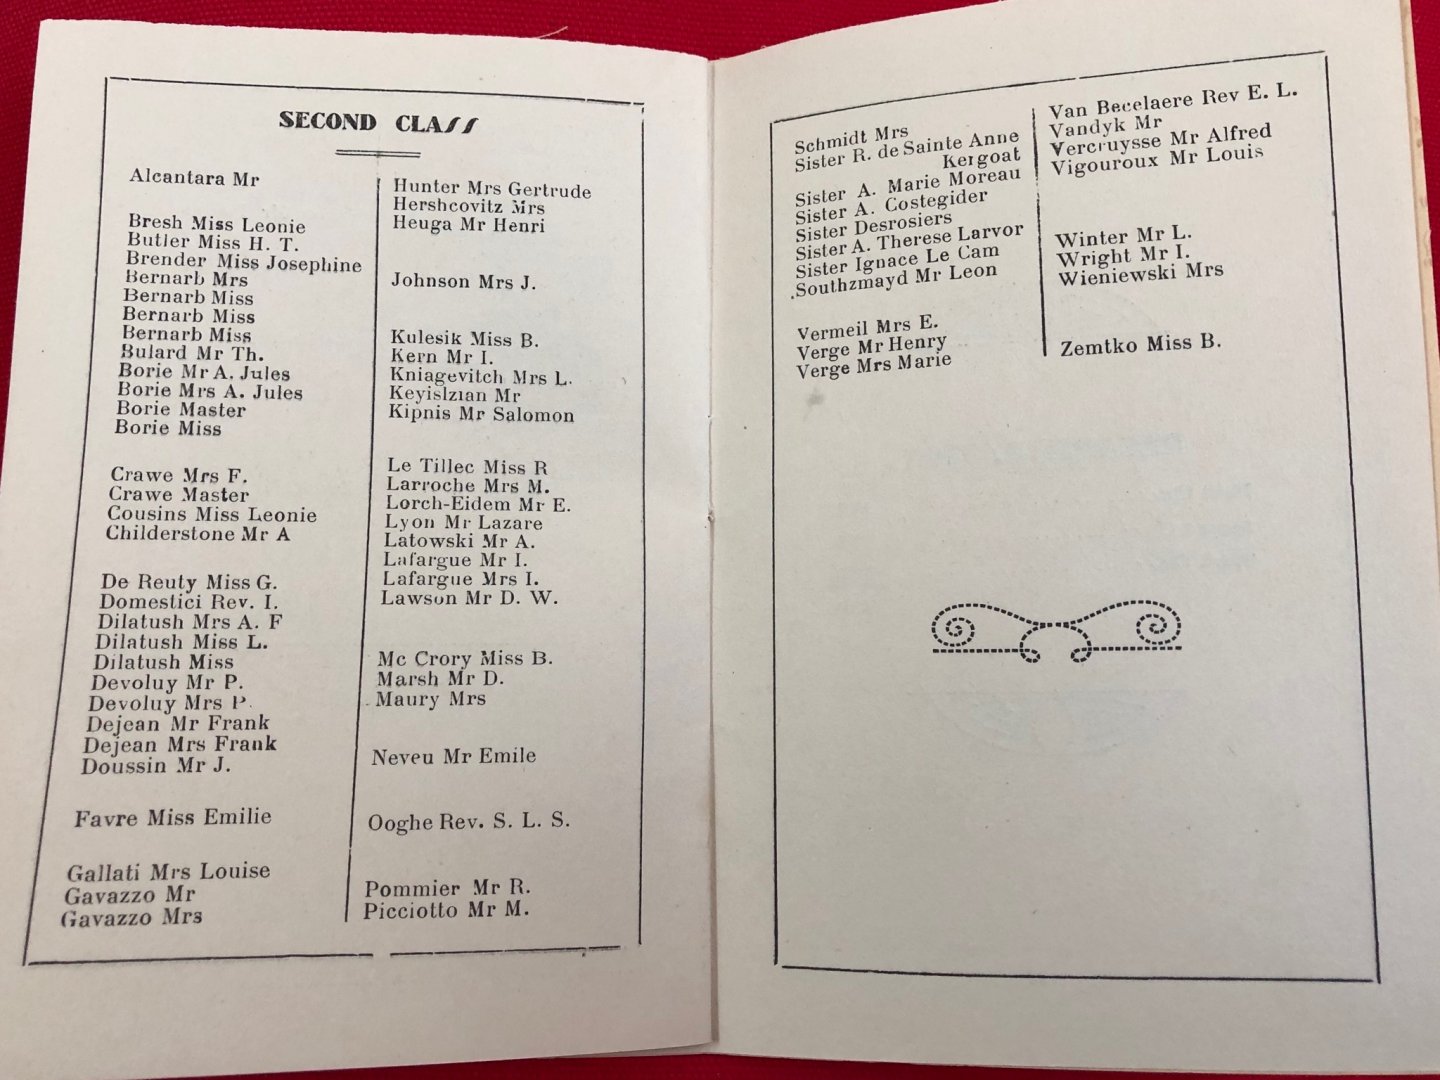
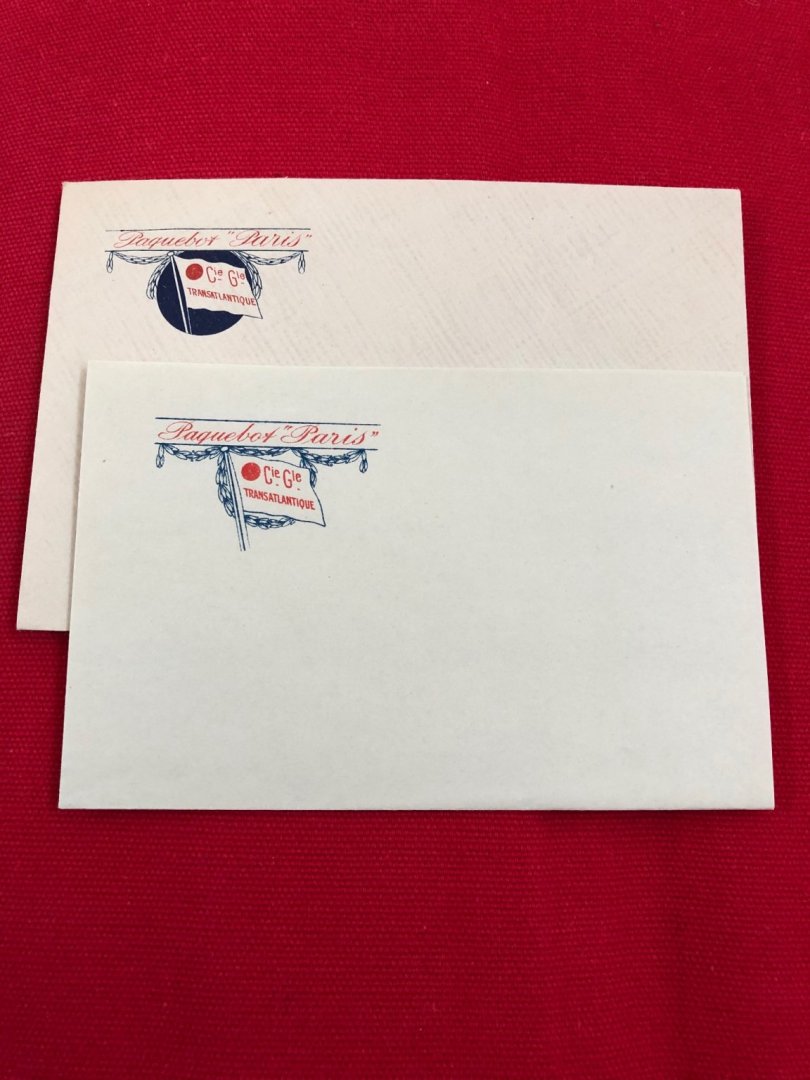
French Line. S.S. Paris. Memorabilia. 1931.
Eugenio Treviño posted a topic in Nautical/Naval History
Continuing the showing of some of the memorabilia I found. This one is of the French Line’s route New York - Havre. I hope this is interesting to someone. Here are the picks!!!


-
- 1
-
-
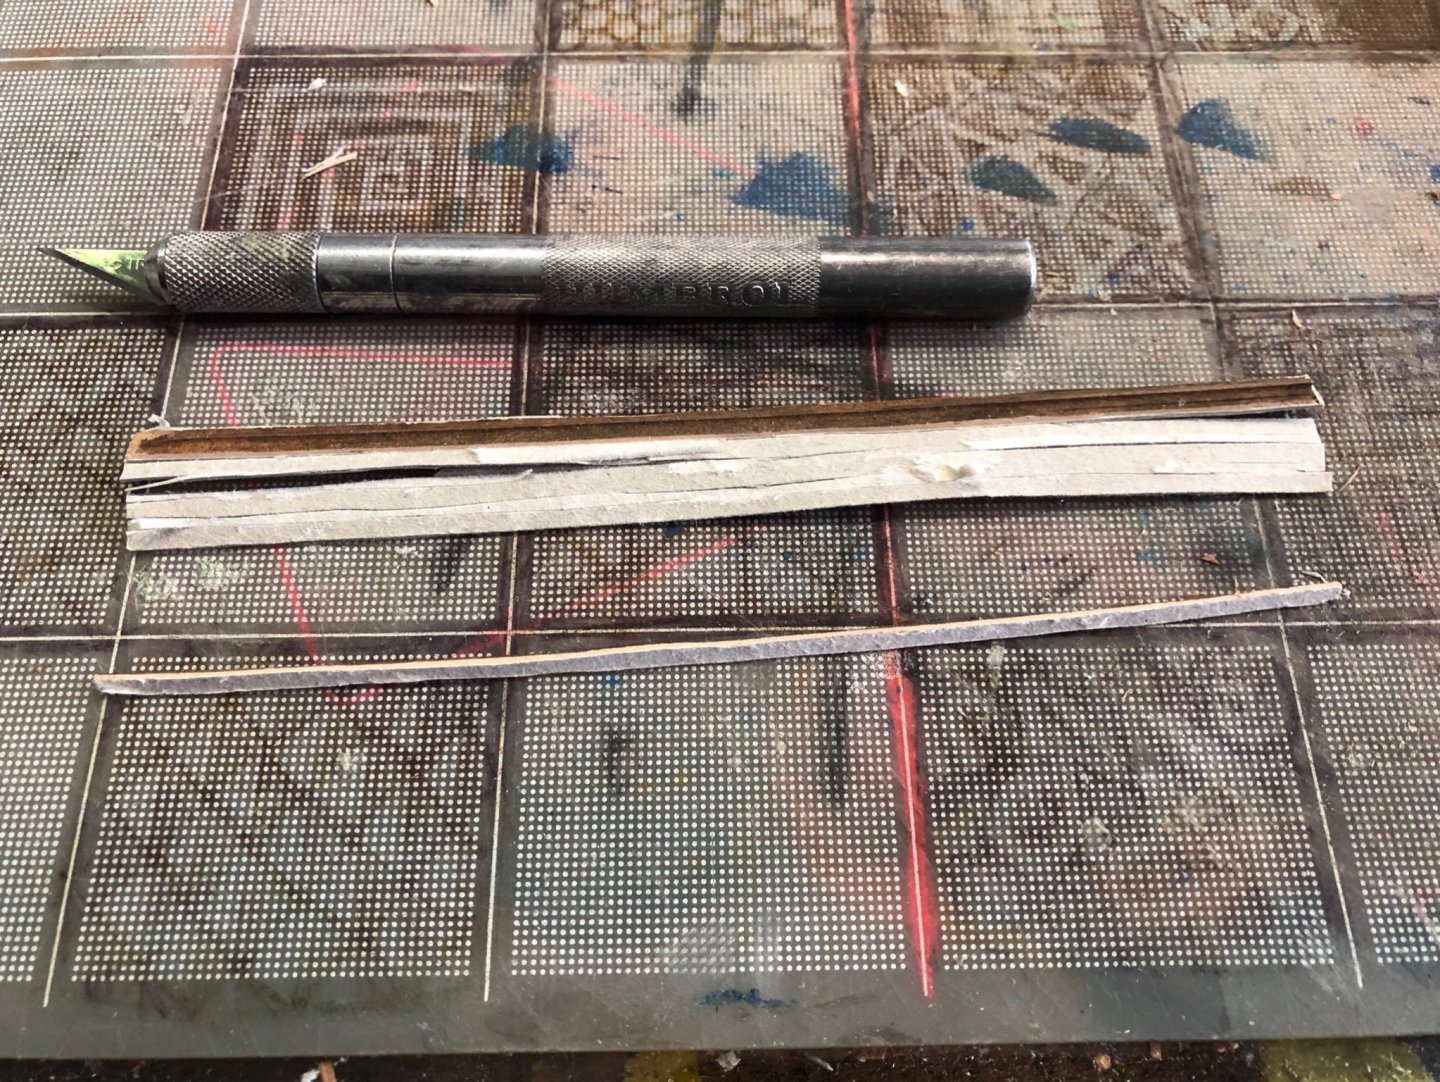
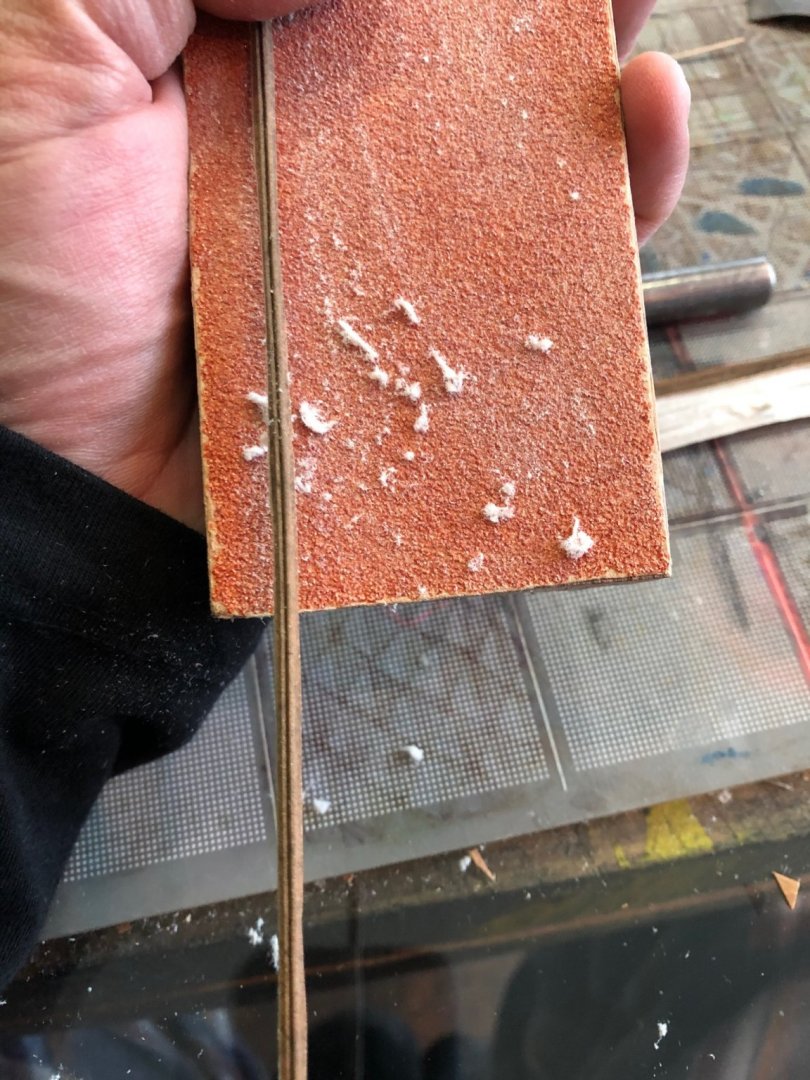
Robert: I started hating the pressed wood pieces. It is a fragile material, difficult to cut and finish correctly. I broke several. I learned a little bit late that if you wet them, you can mold them much better. But now, with the experience I got, I think it is not so bad. The cardboard is layered. In most of the pieces I left the inner layer and applied glue over it. In others, I sanded out all the cardboard (see picks), and in 2 of them, pieces 54 and 79, I covered the cardboard side with Tanganyika wood. Piece 79 because I am not using paint and the cardboard side is visible (see pick) and number 54 to ad strength because it is very fragile. I cut the pieces with knife, but the result is far from good in the molding stripes (see pick). Taking time and not being in a rush is very important. I think that with your experience working with wood, it is going to be much more easier. If in the future you have specific questions let me know. Best regards. Eugenio.
-
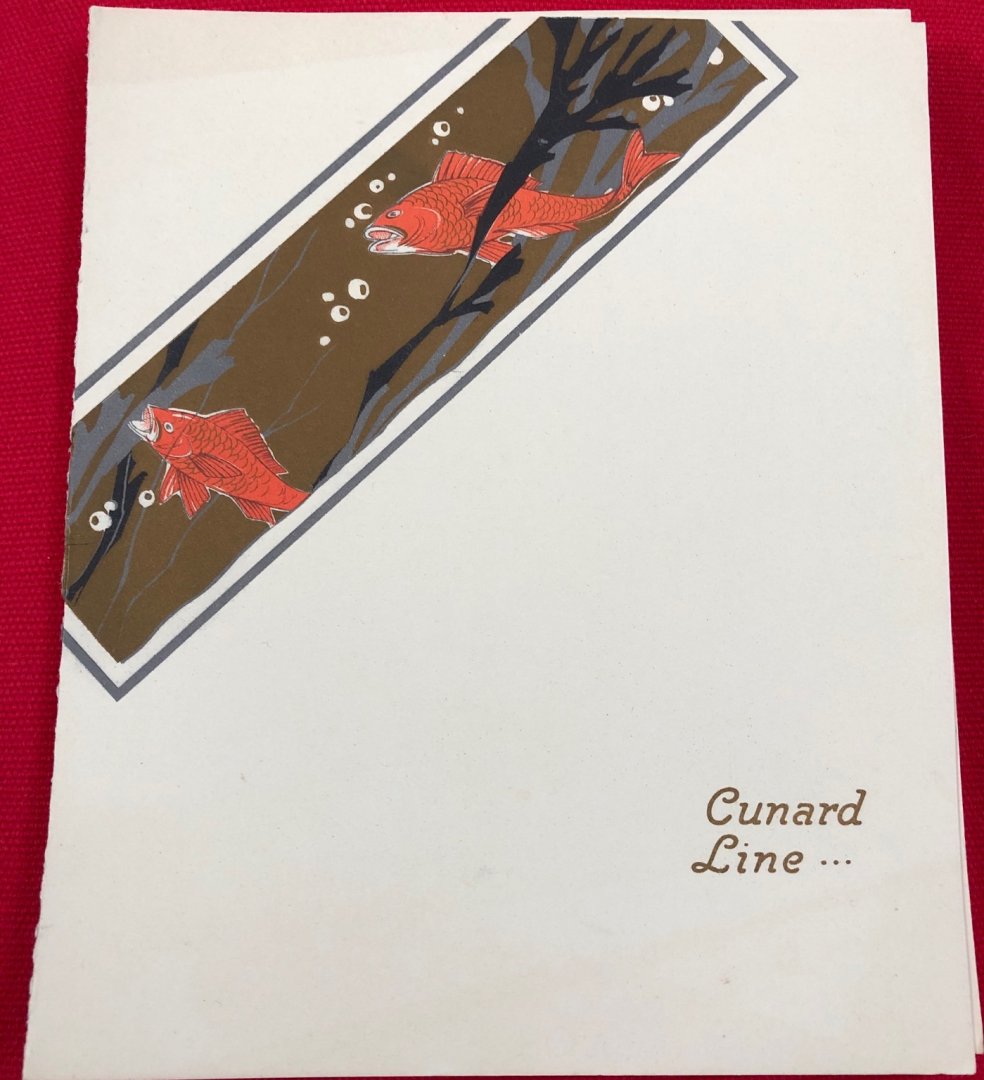
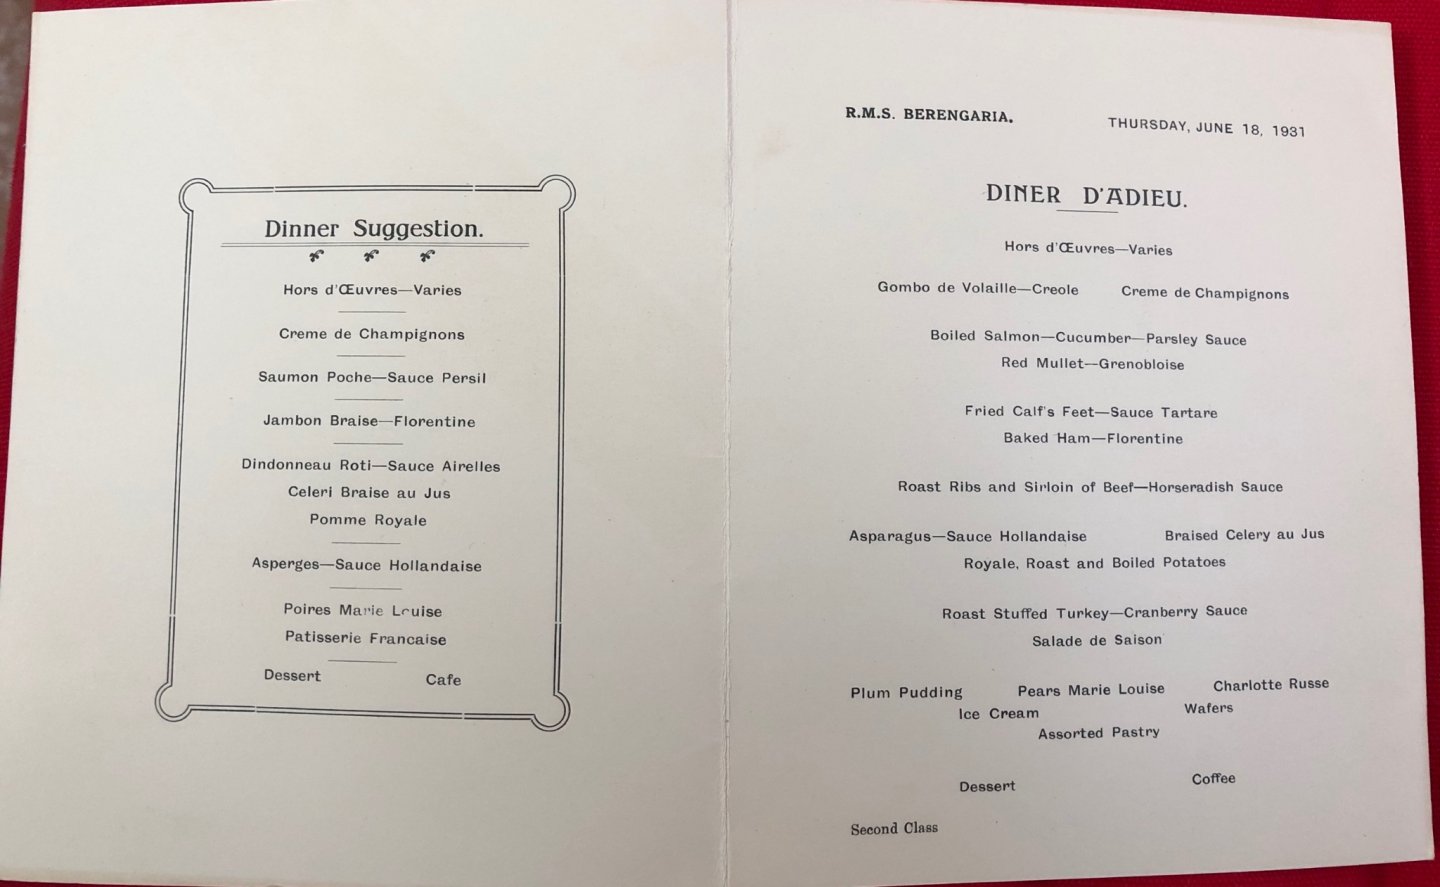
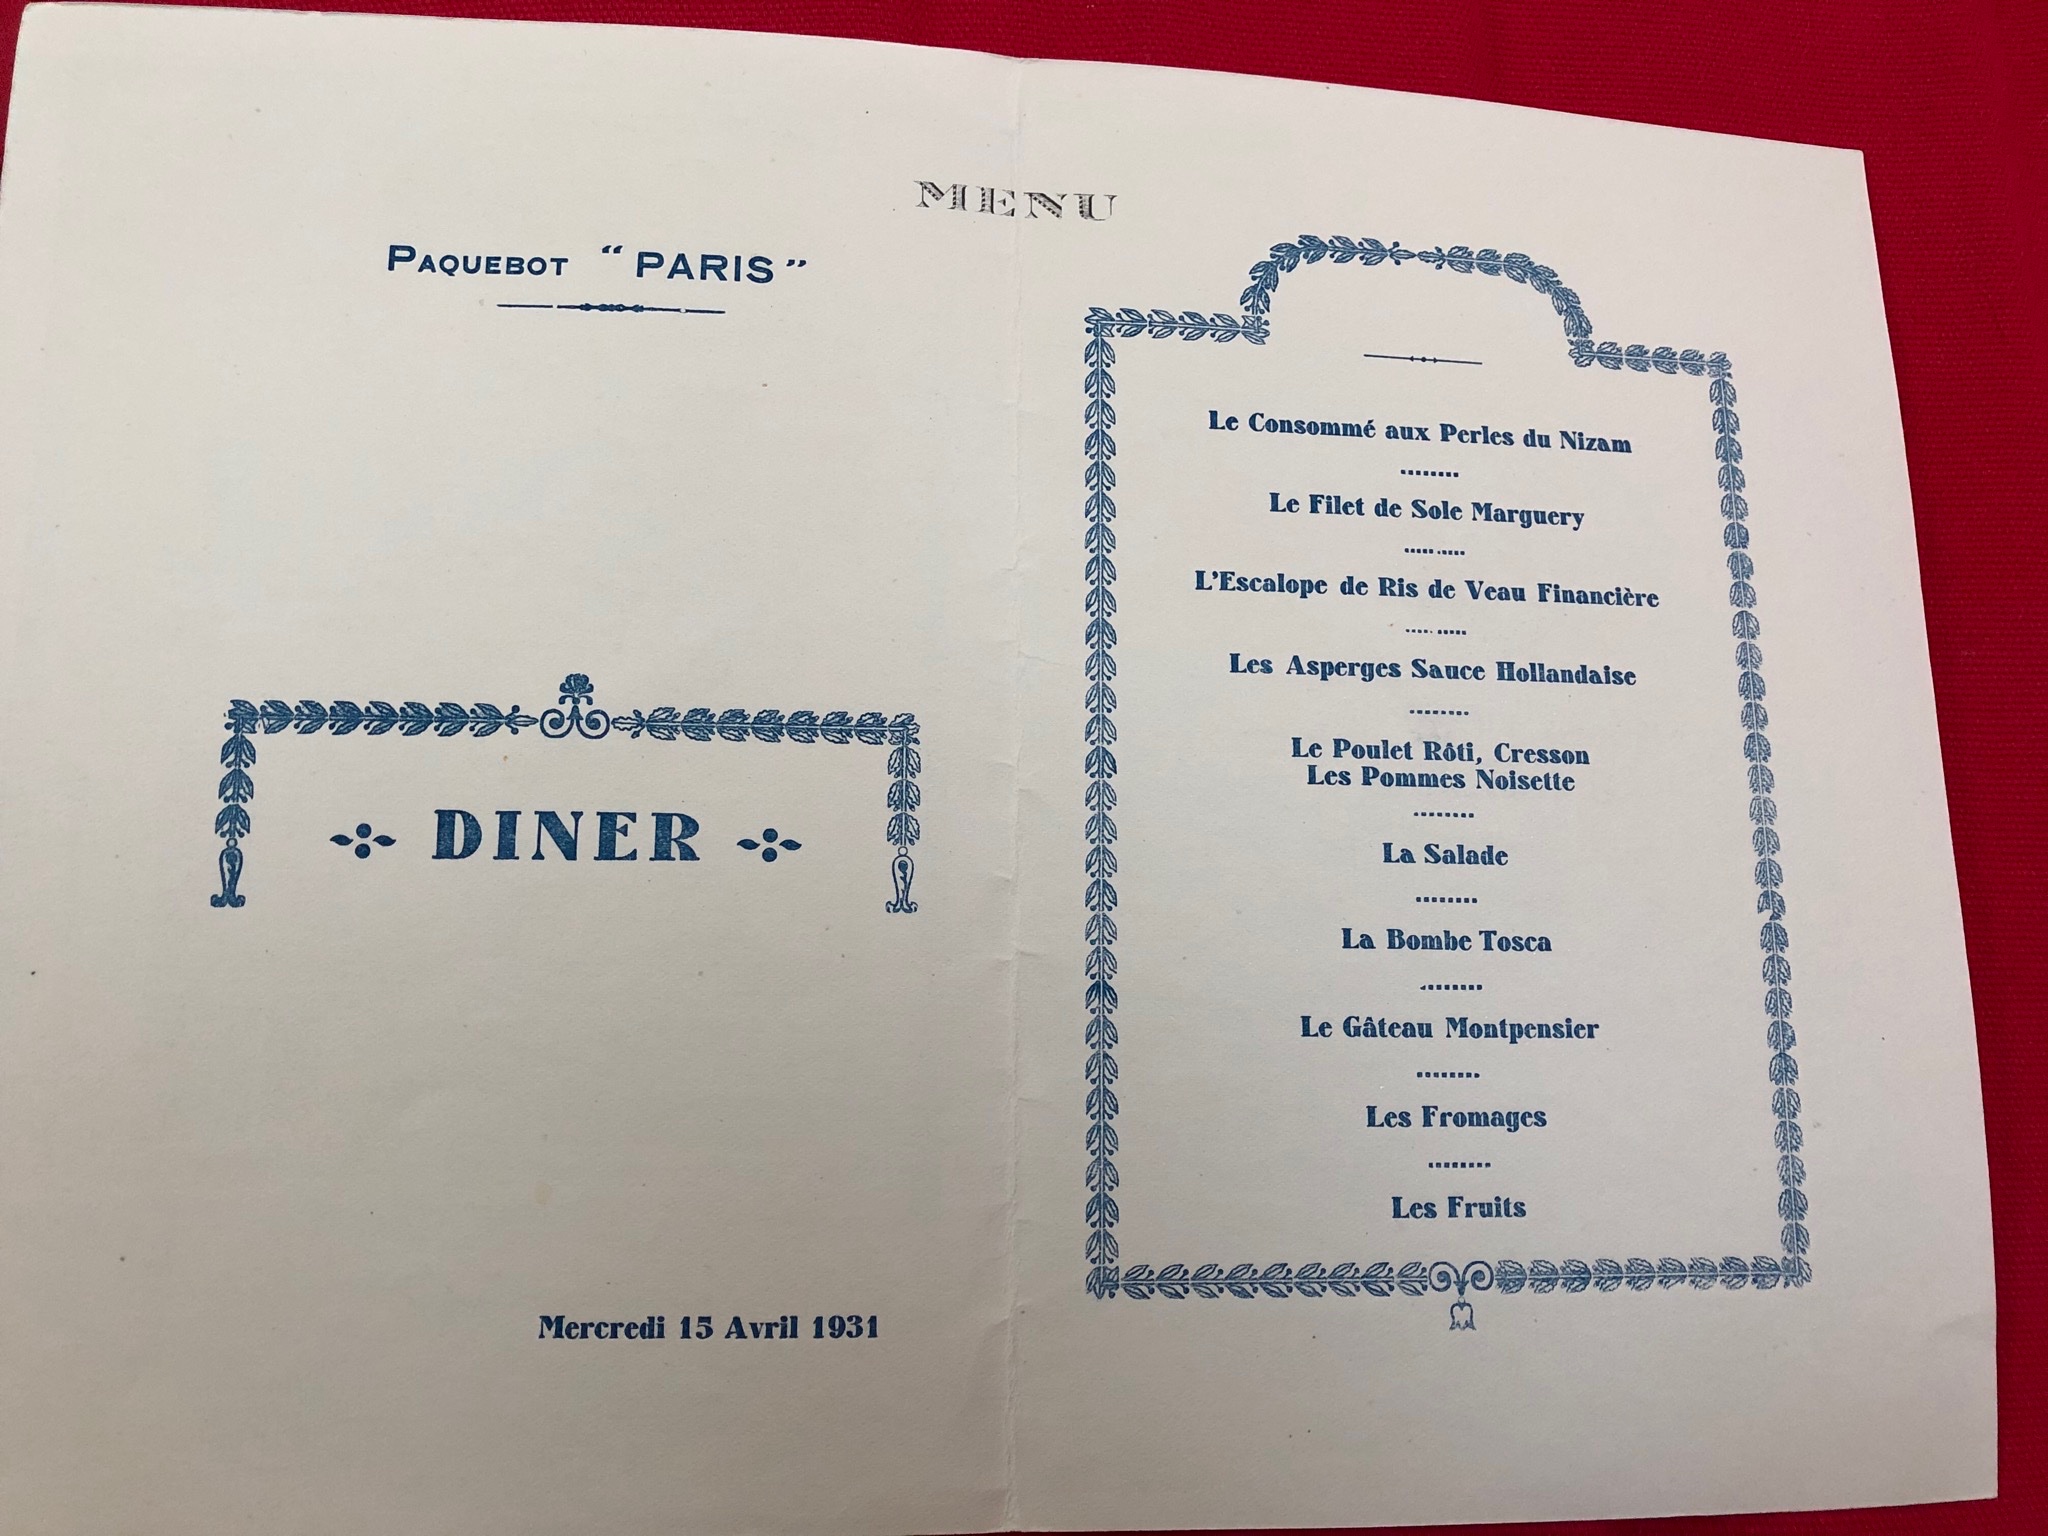
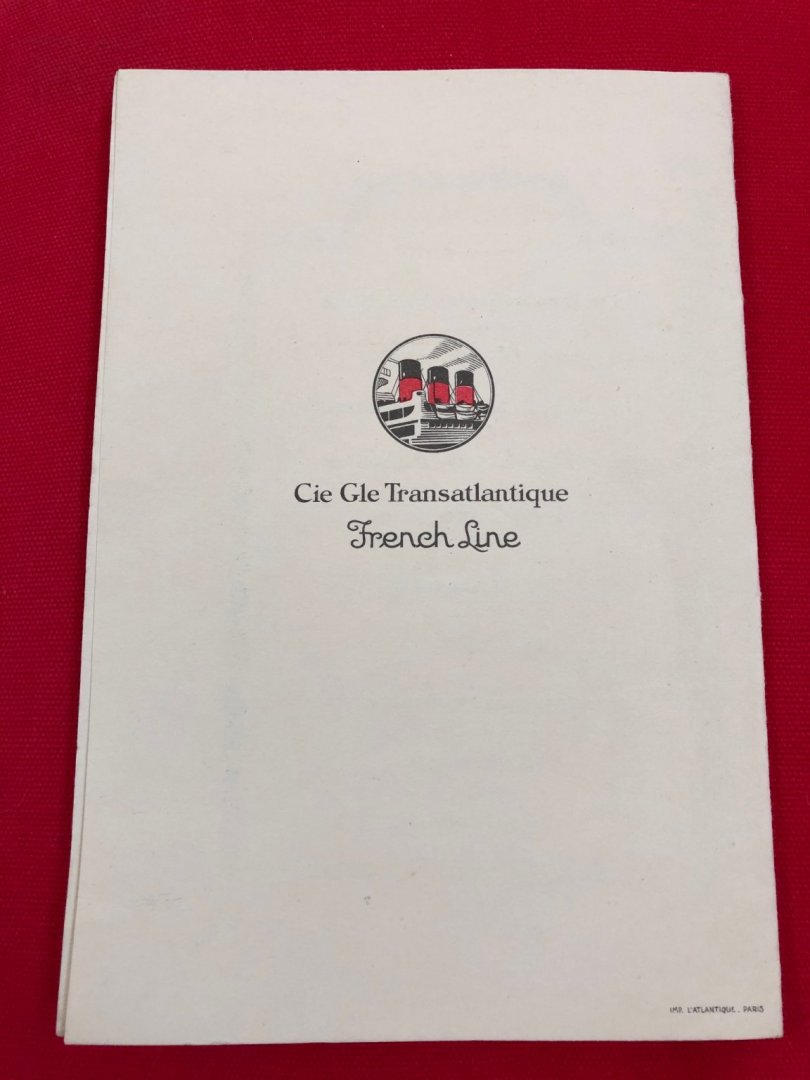
I found the menu For the last dinner on board. Here are the picks!!!