
Eugenio Treviño
-
Posts
123 -
Joined
-
Last visited
Content Type
Profiles
Forums
Gallery
Events
Everything posted by Eugenio Treviño
-
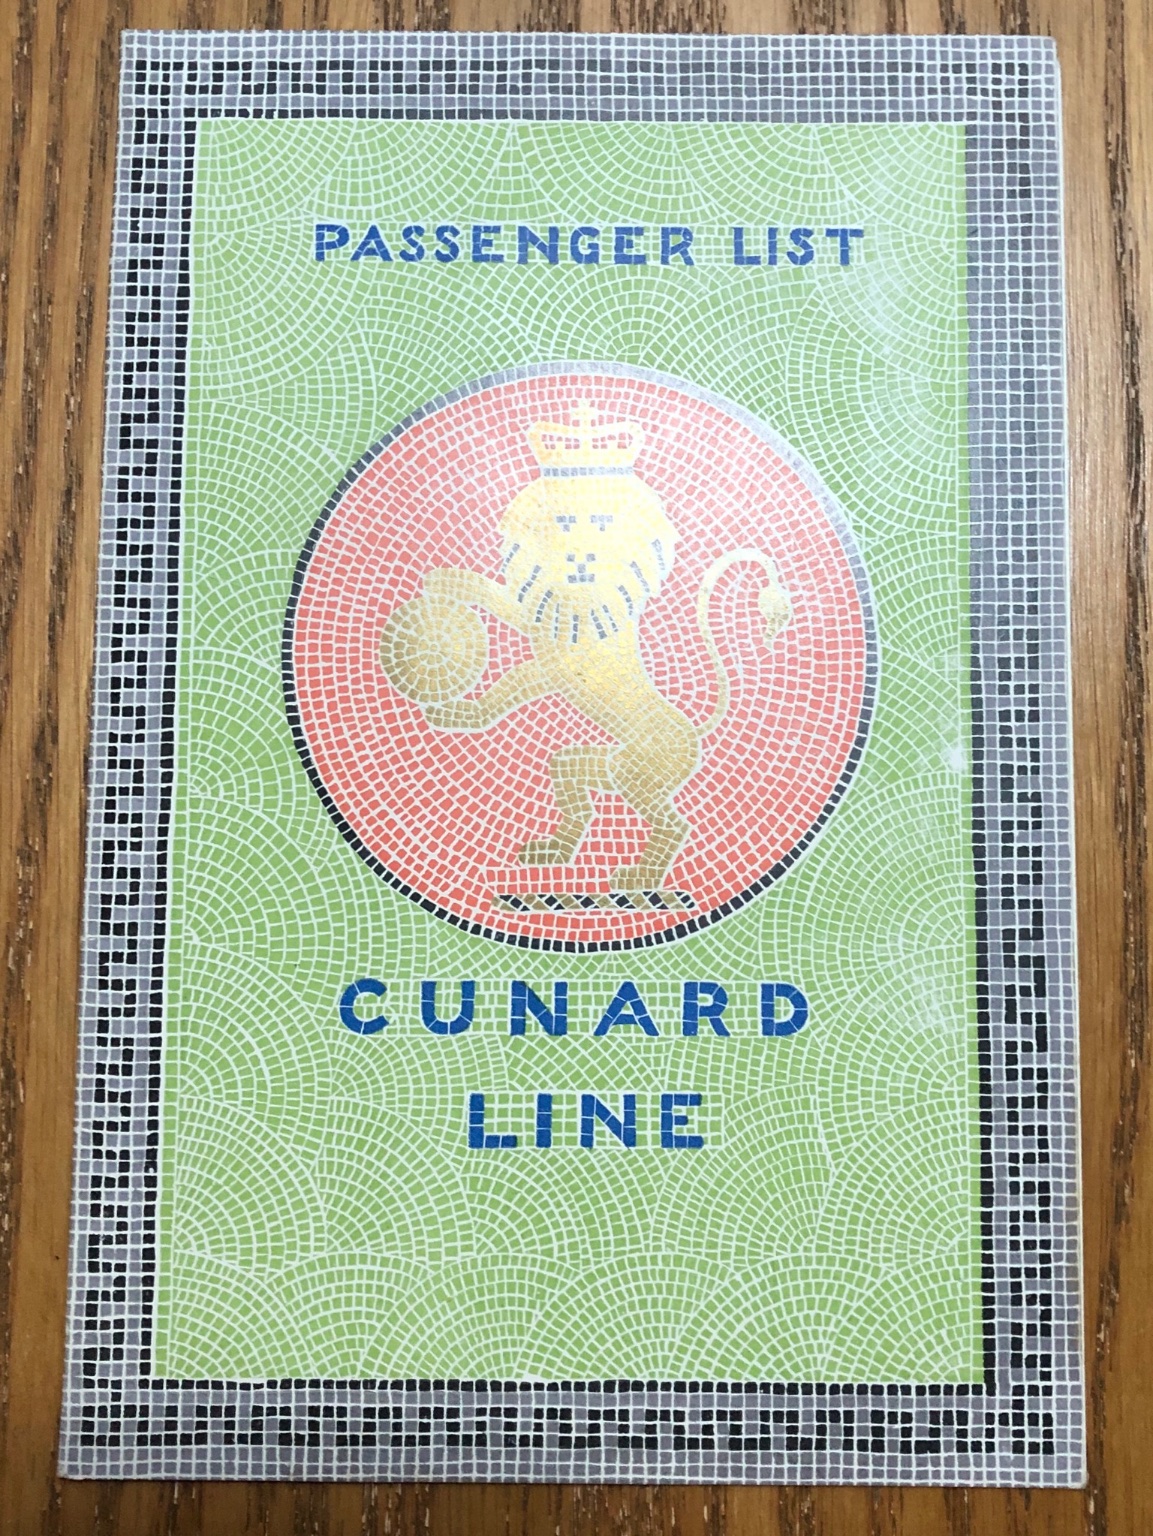
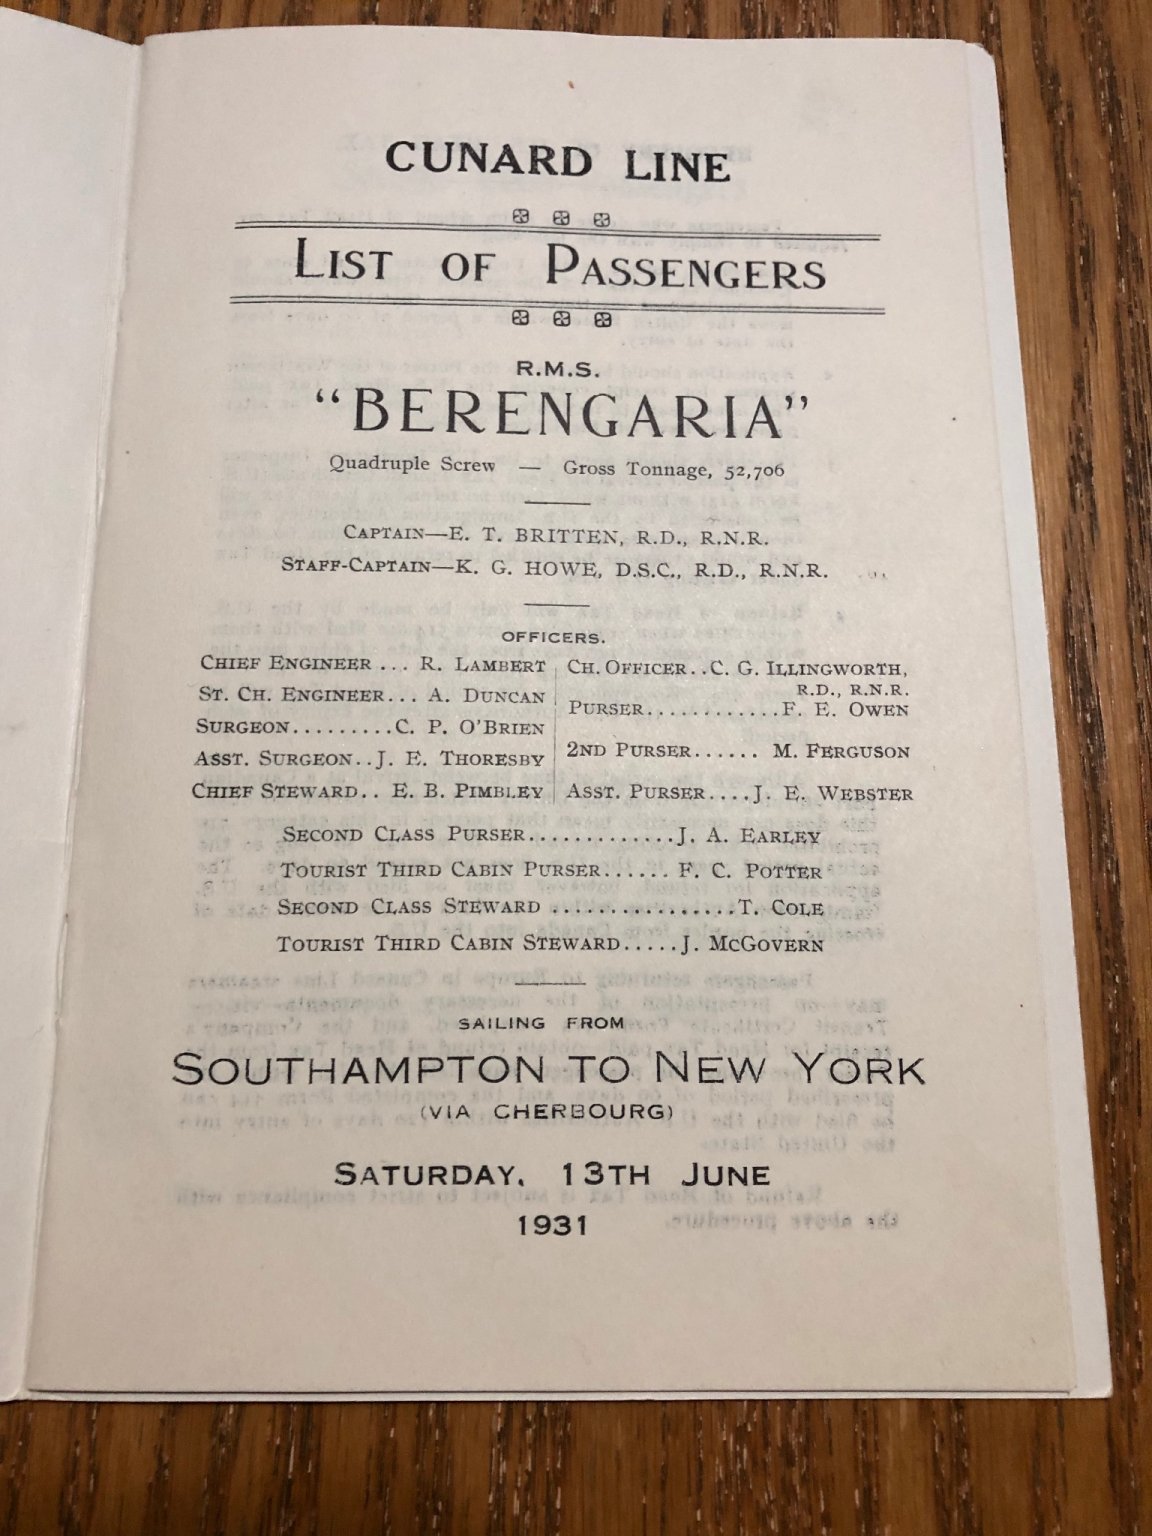
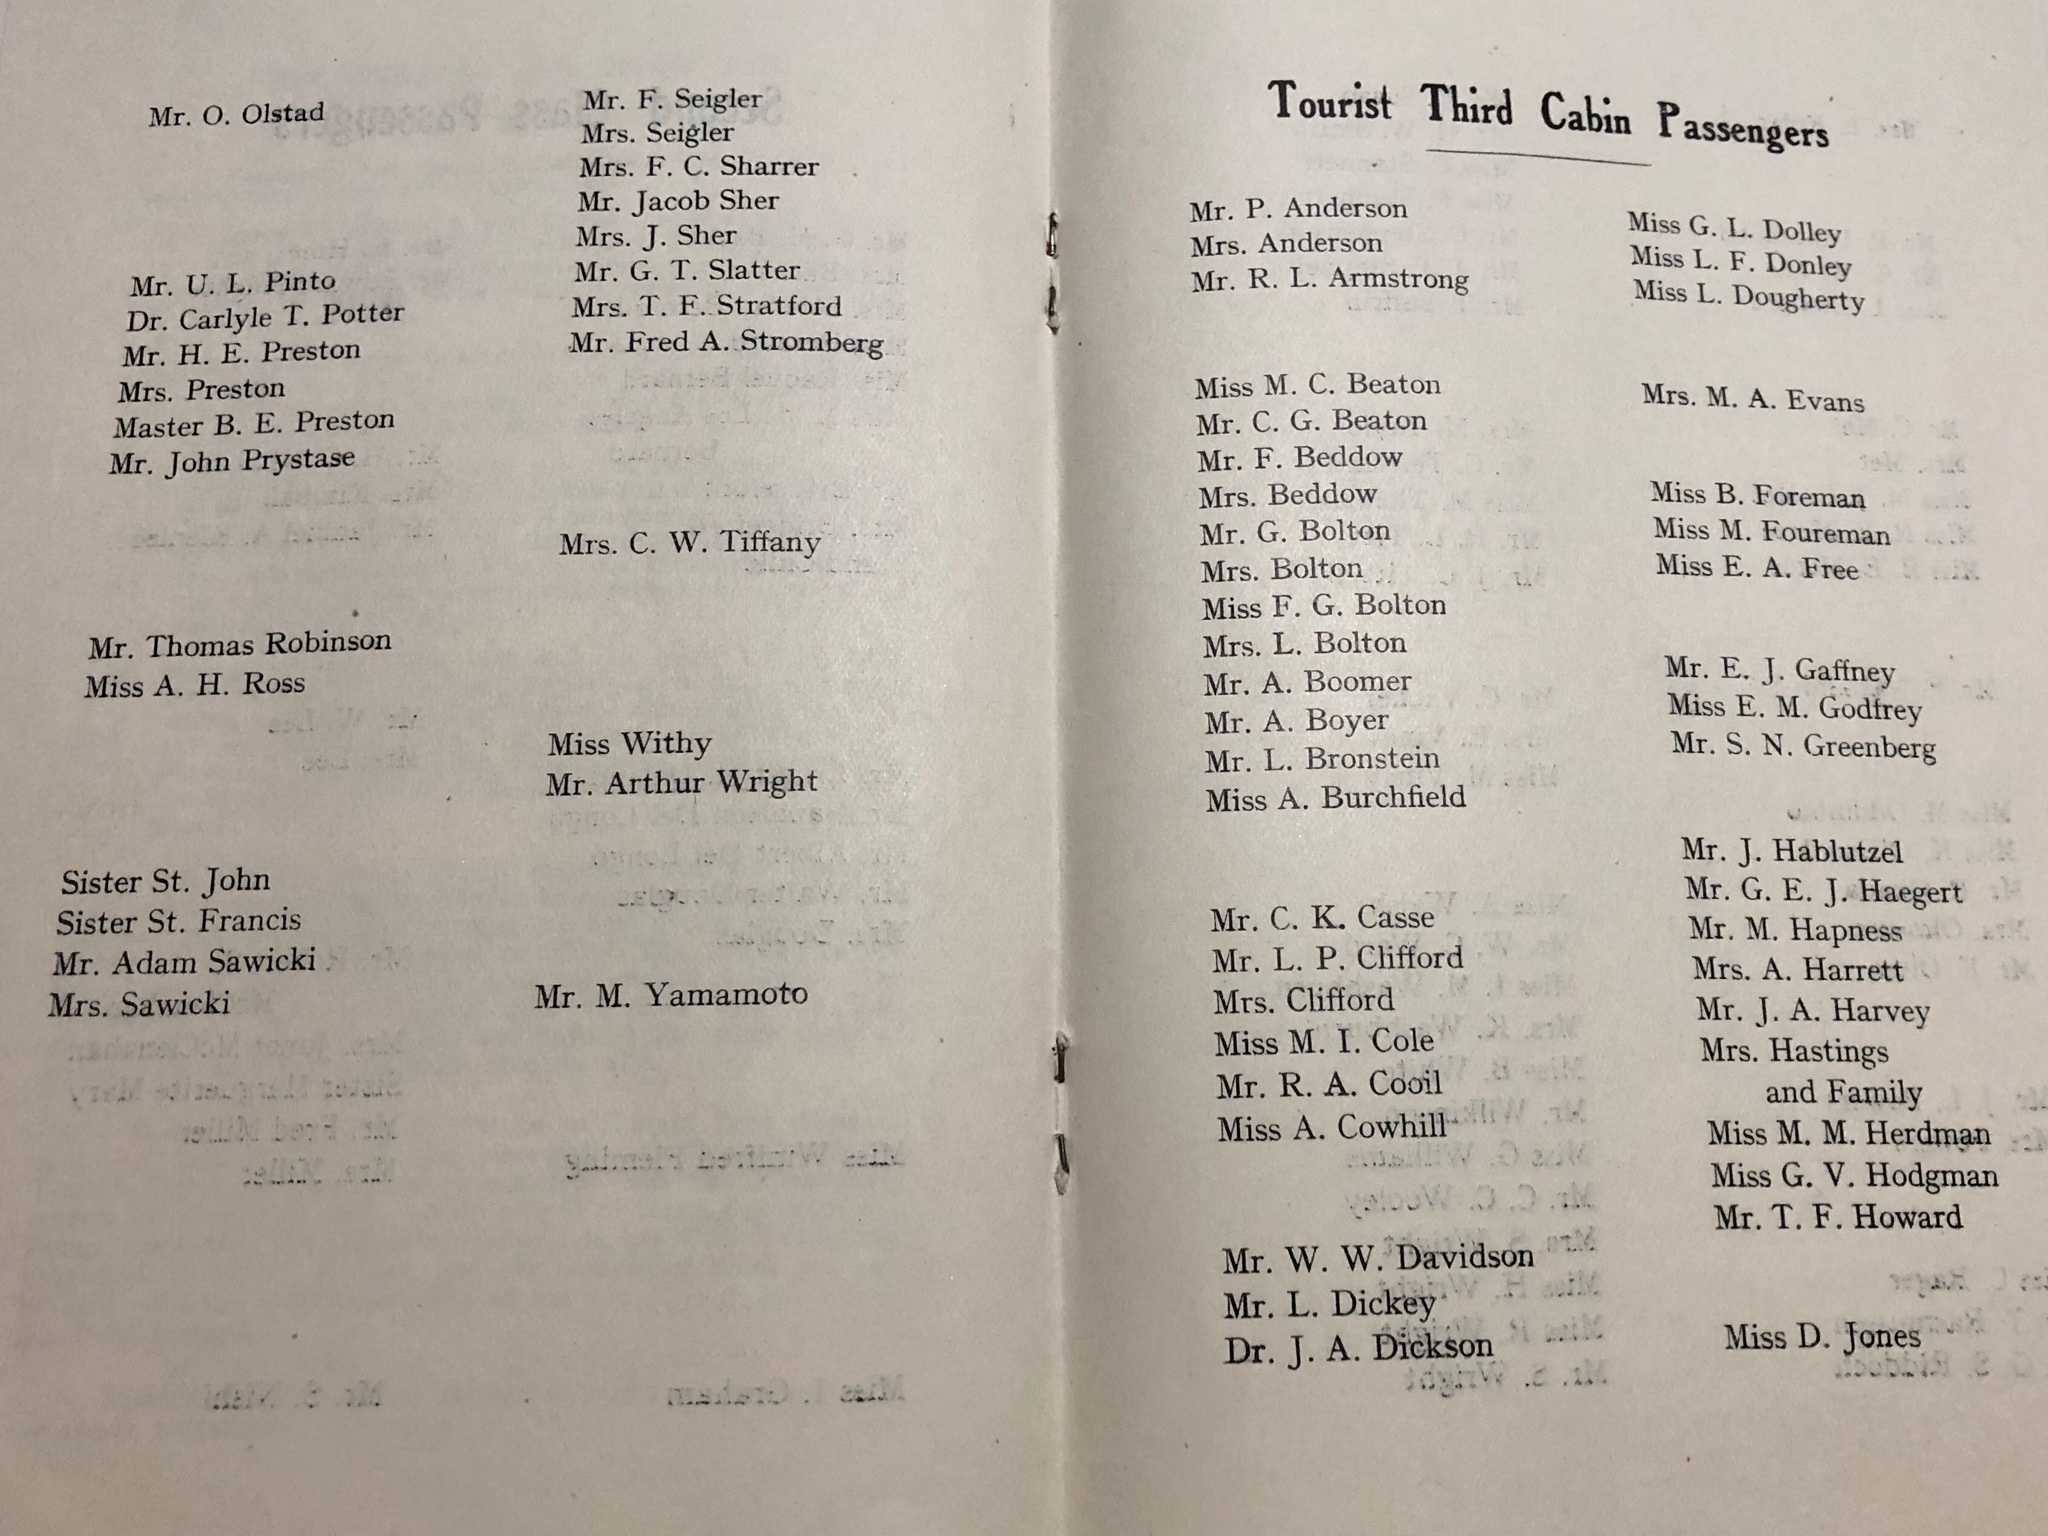
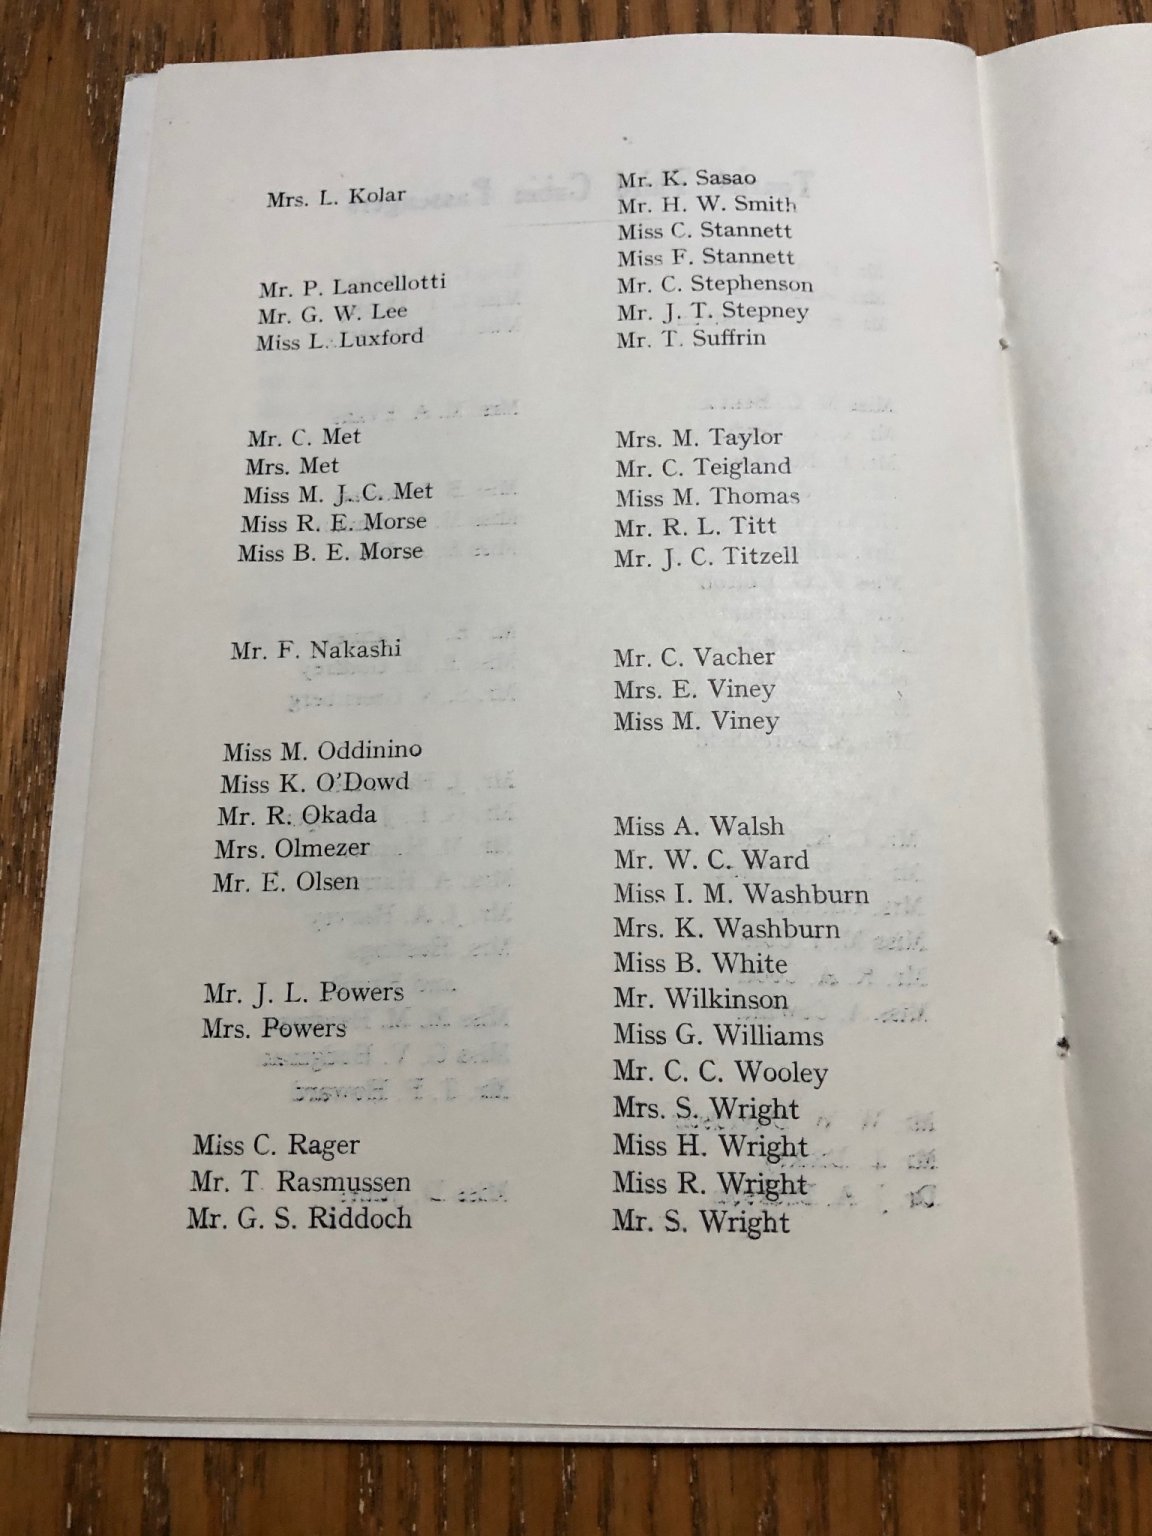
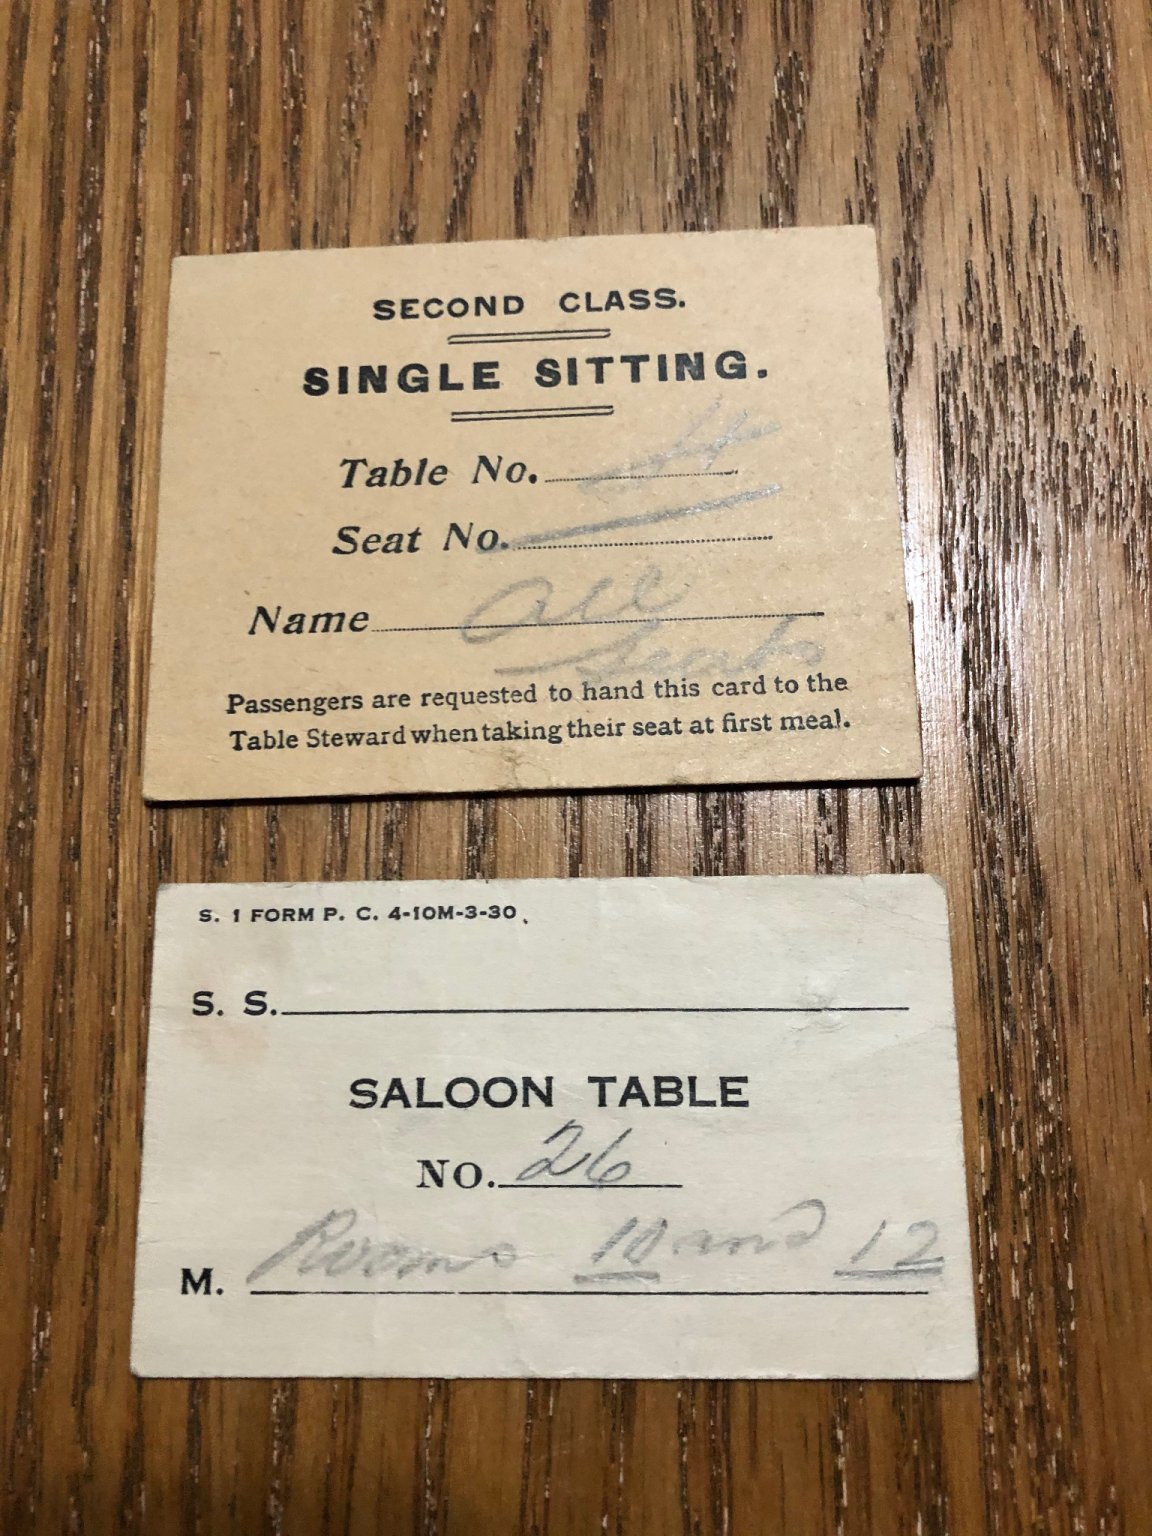
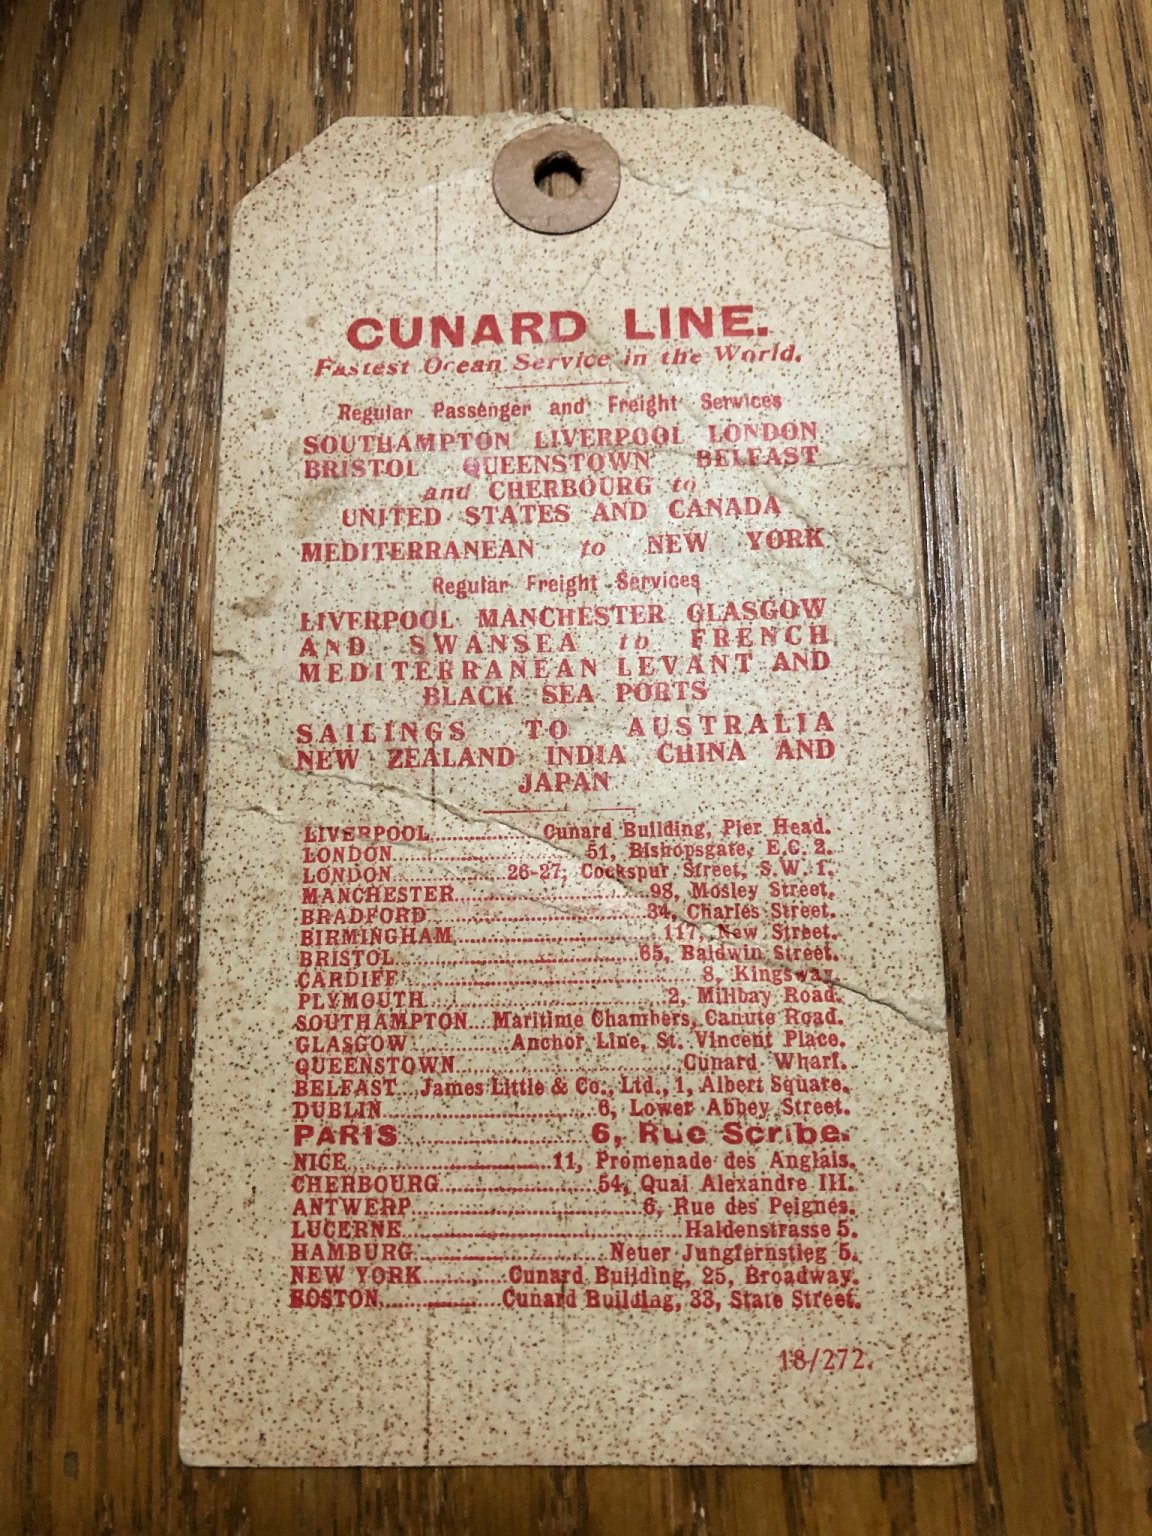
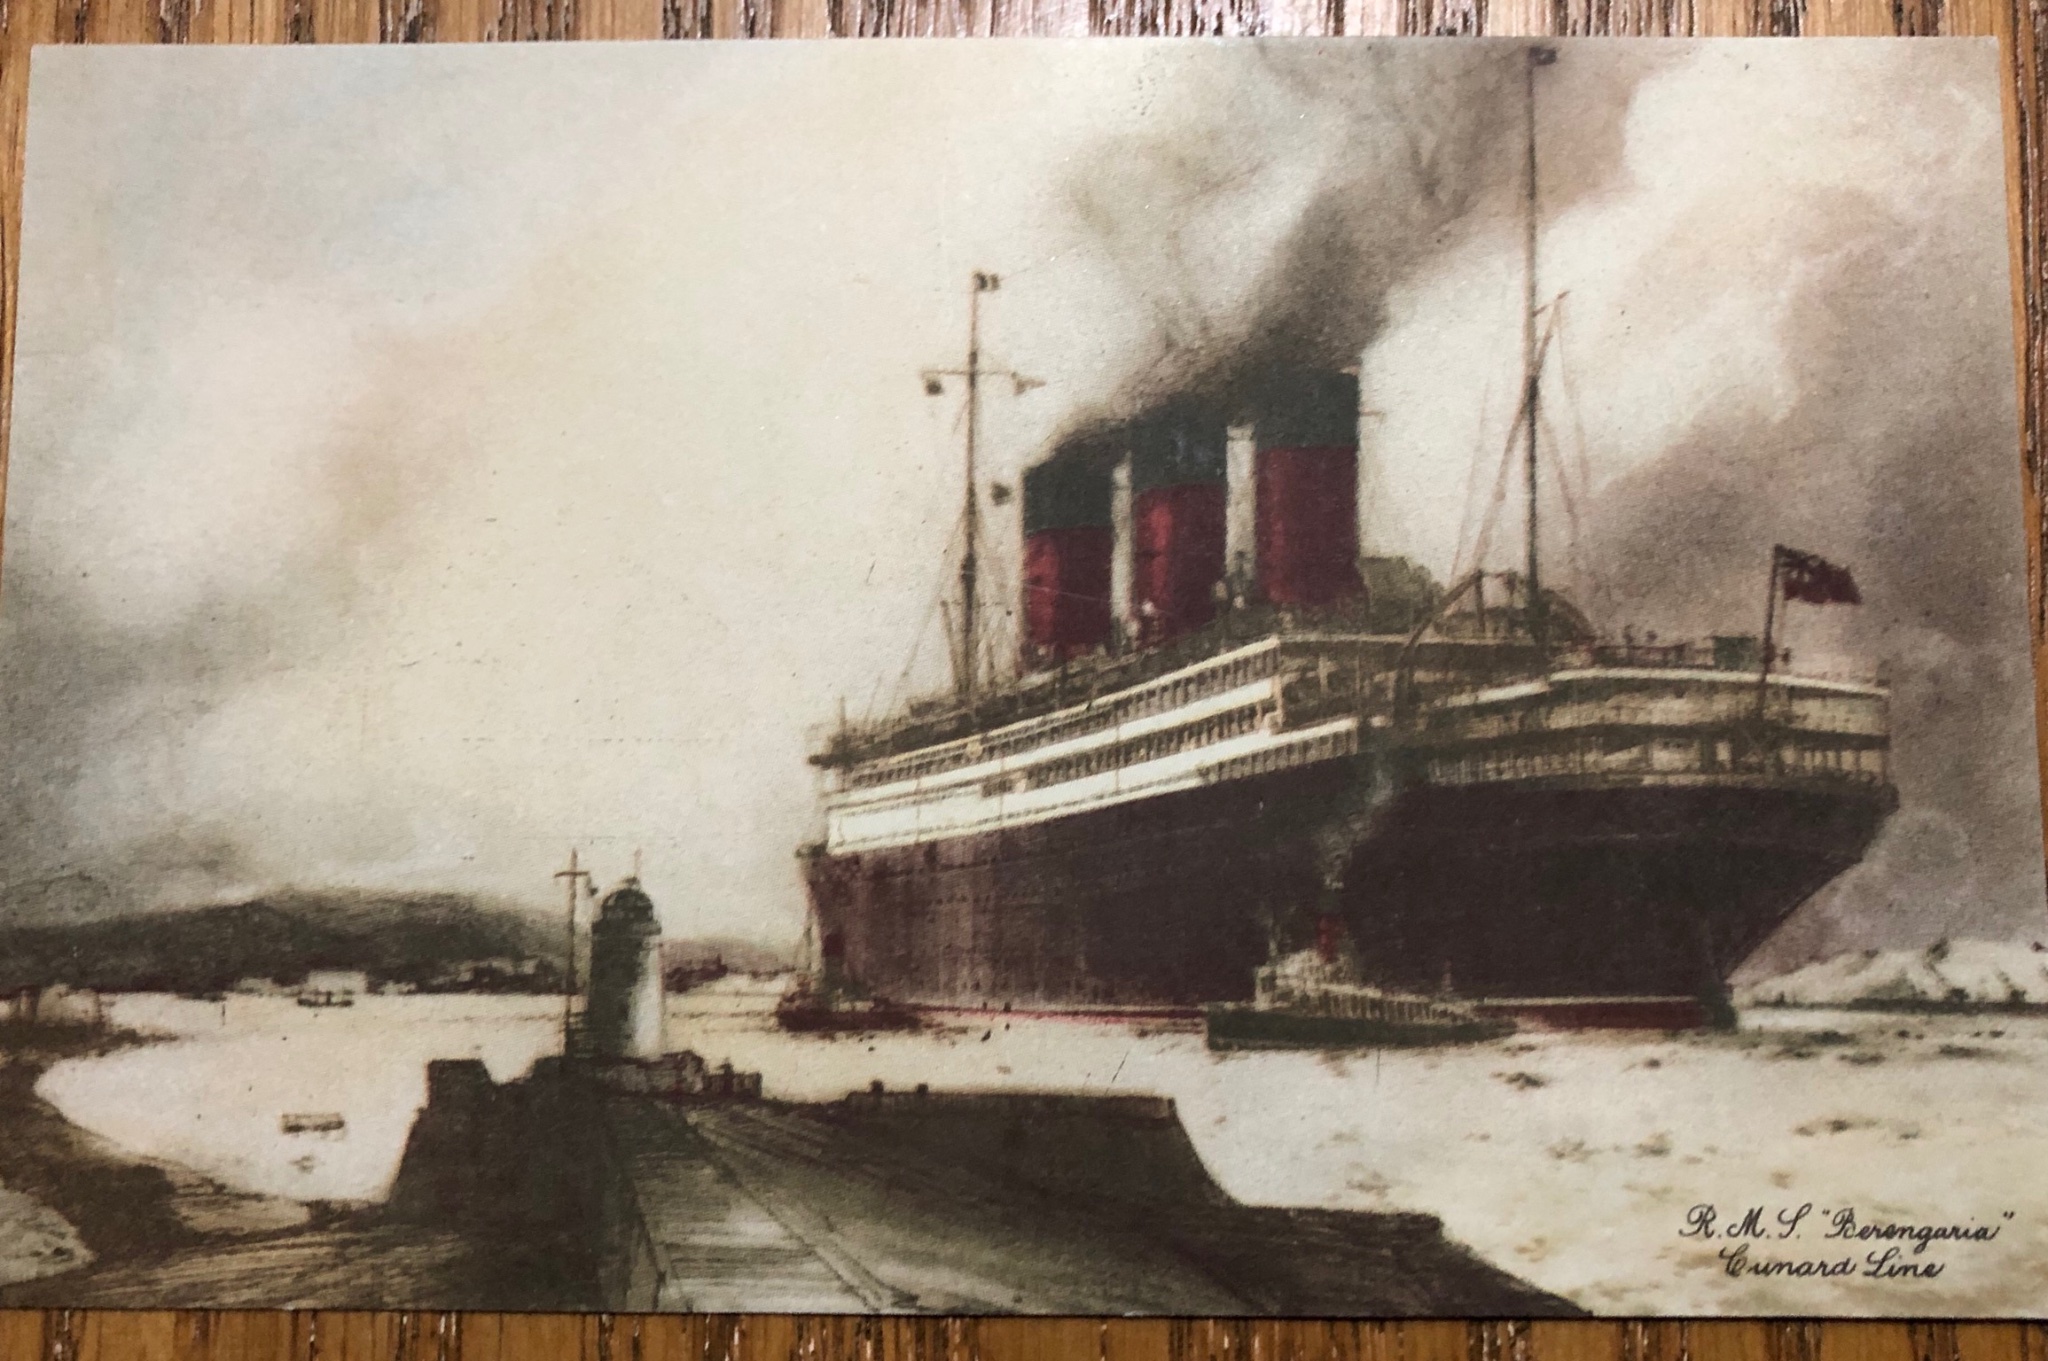
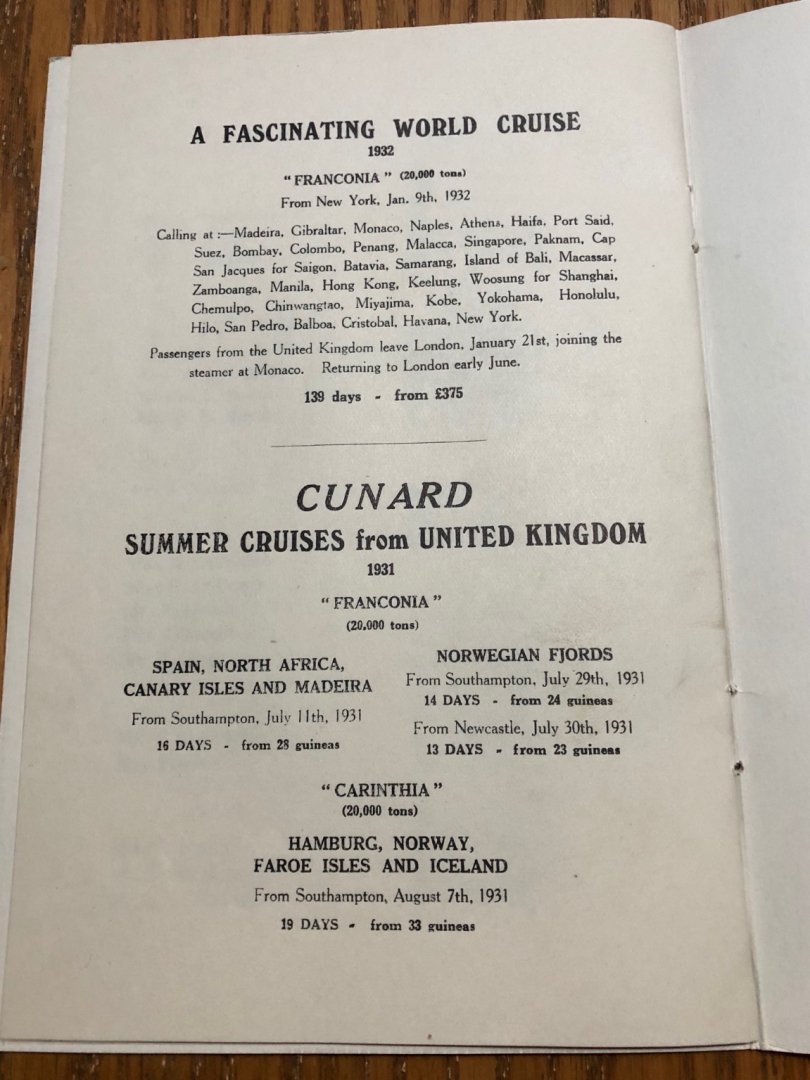
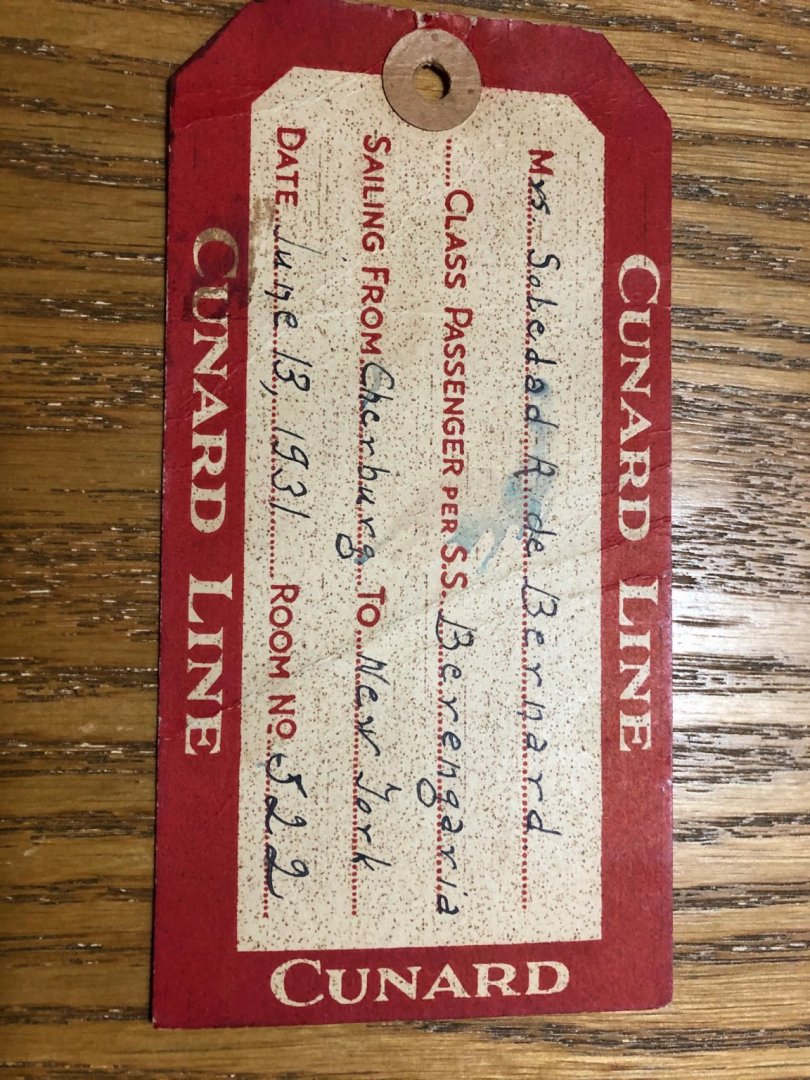
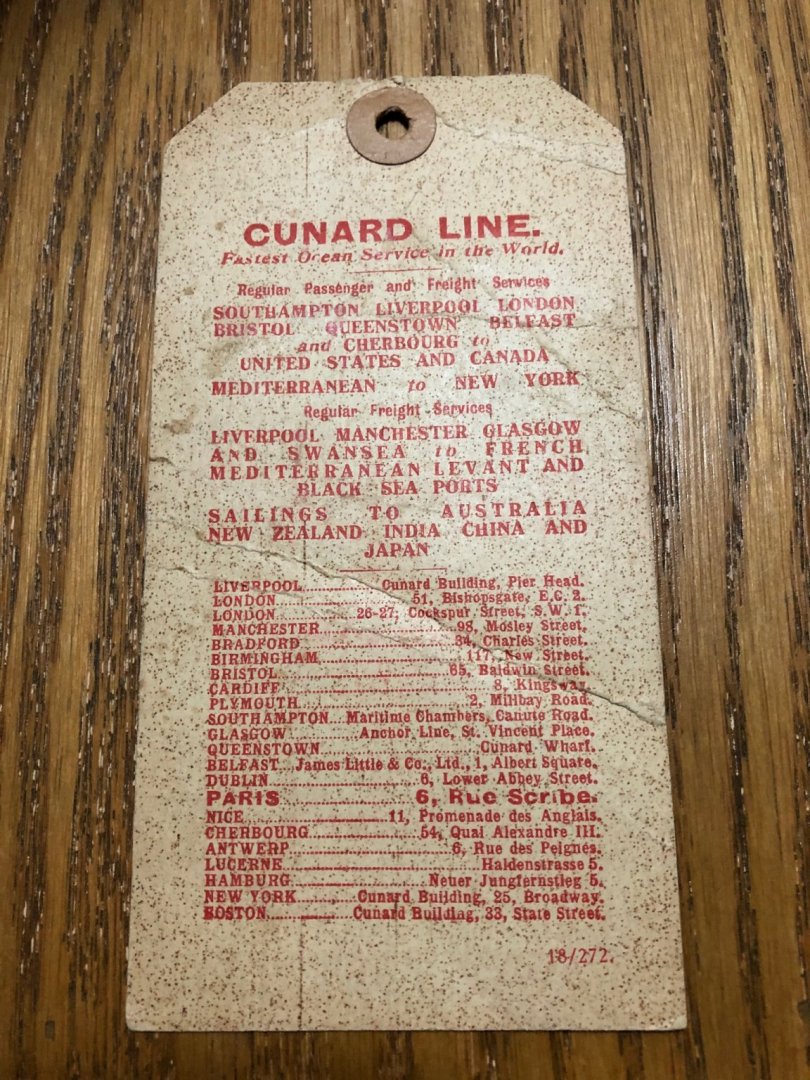
A curiosity for those interested. Imagine to receive a printed passenger list while boarding a plane nowadays. But if you are not in first class you cannot know who is in there!!! Life has changed! Hope you like it. Here are the picks!!!


-
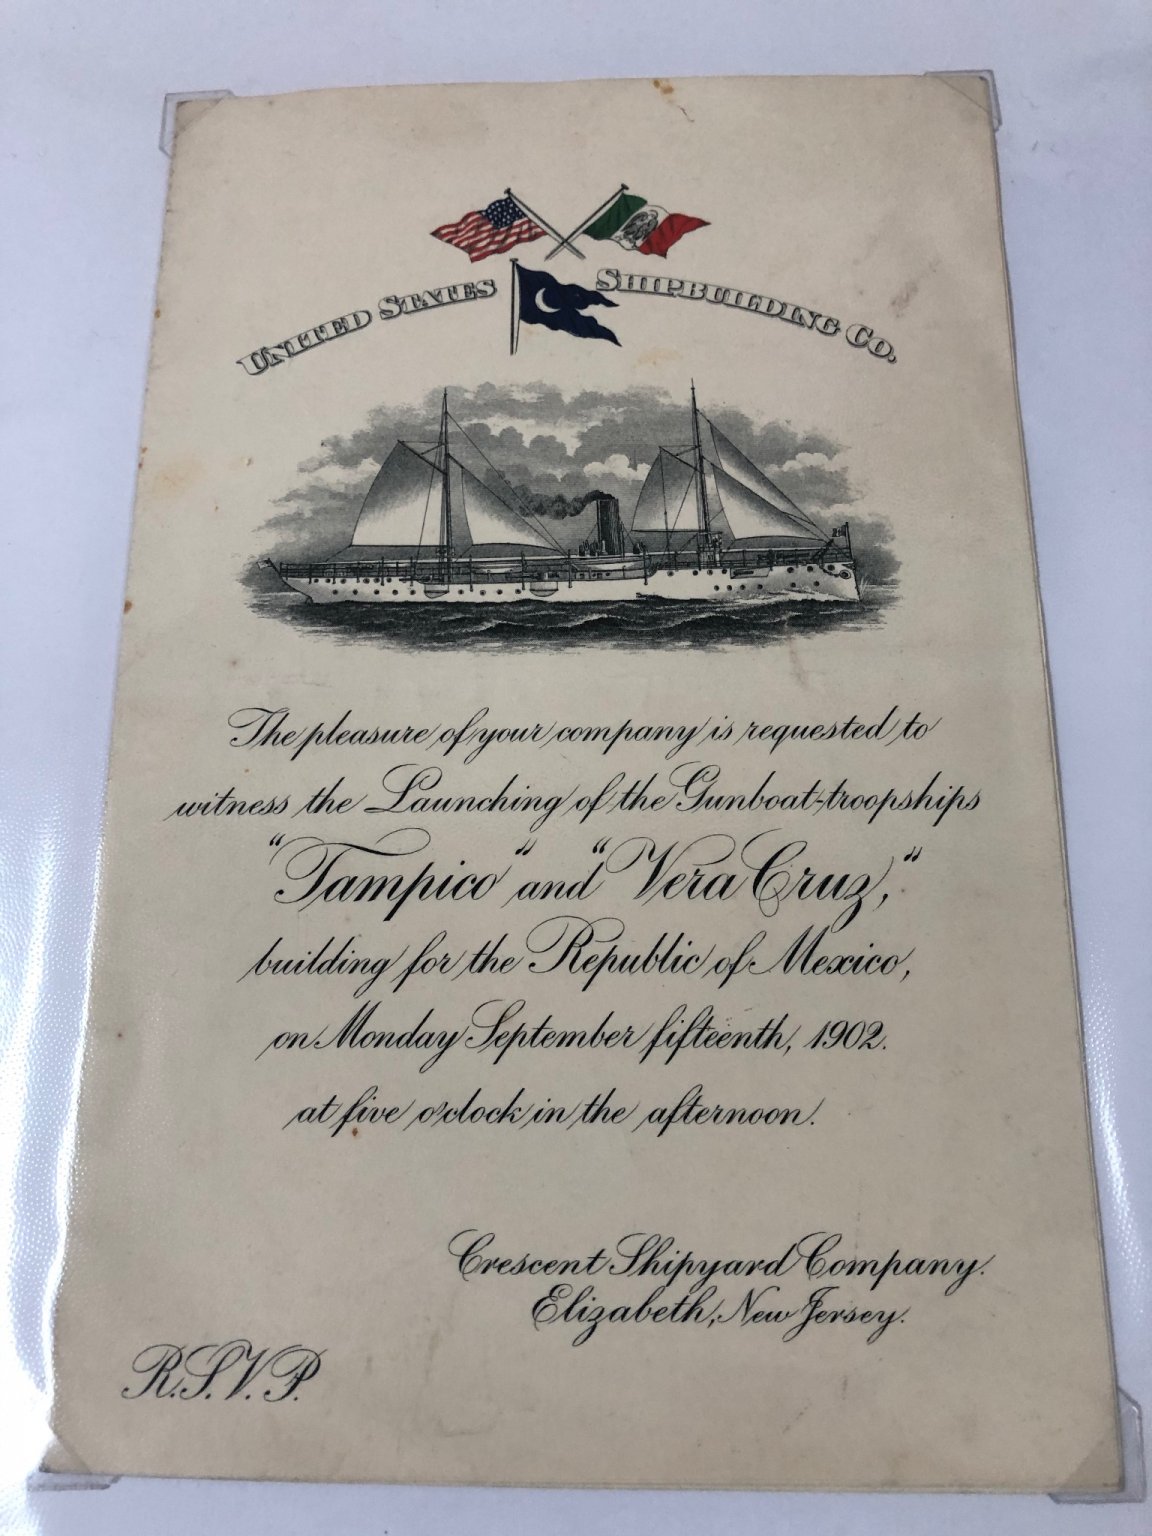
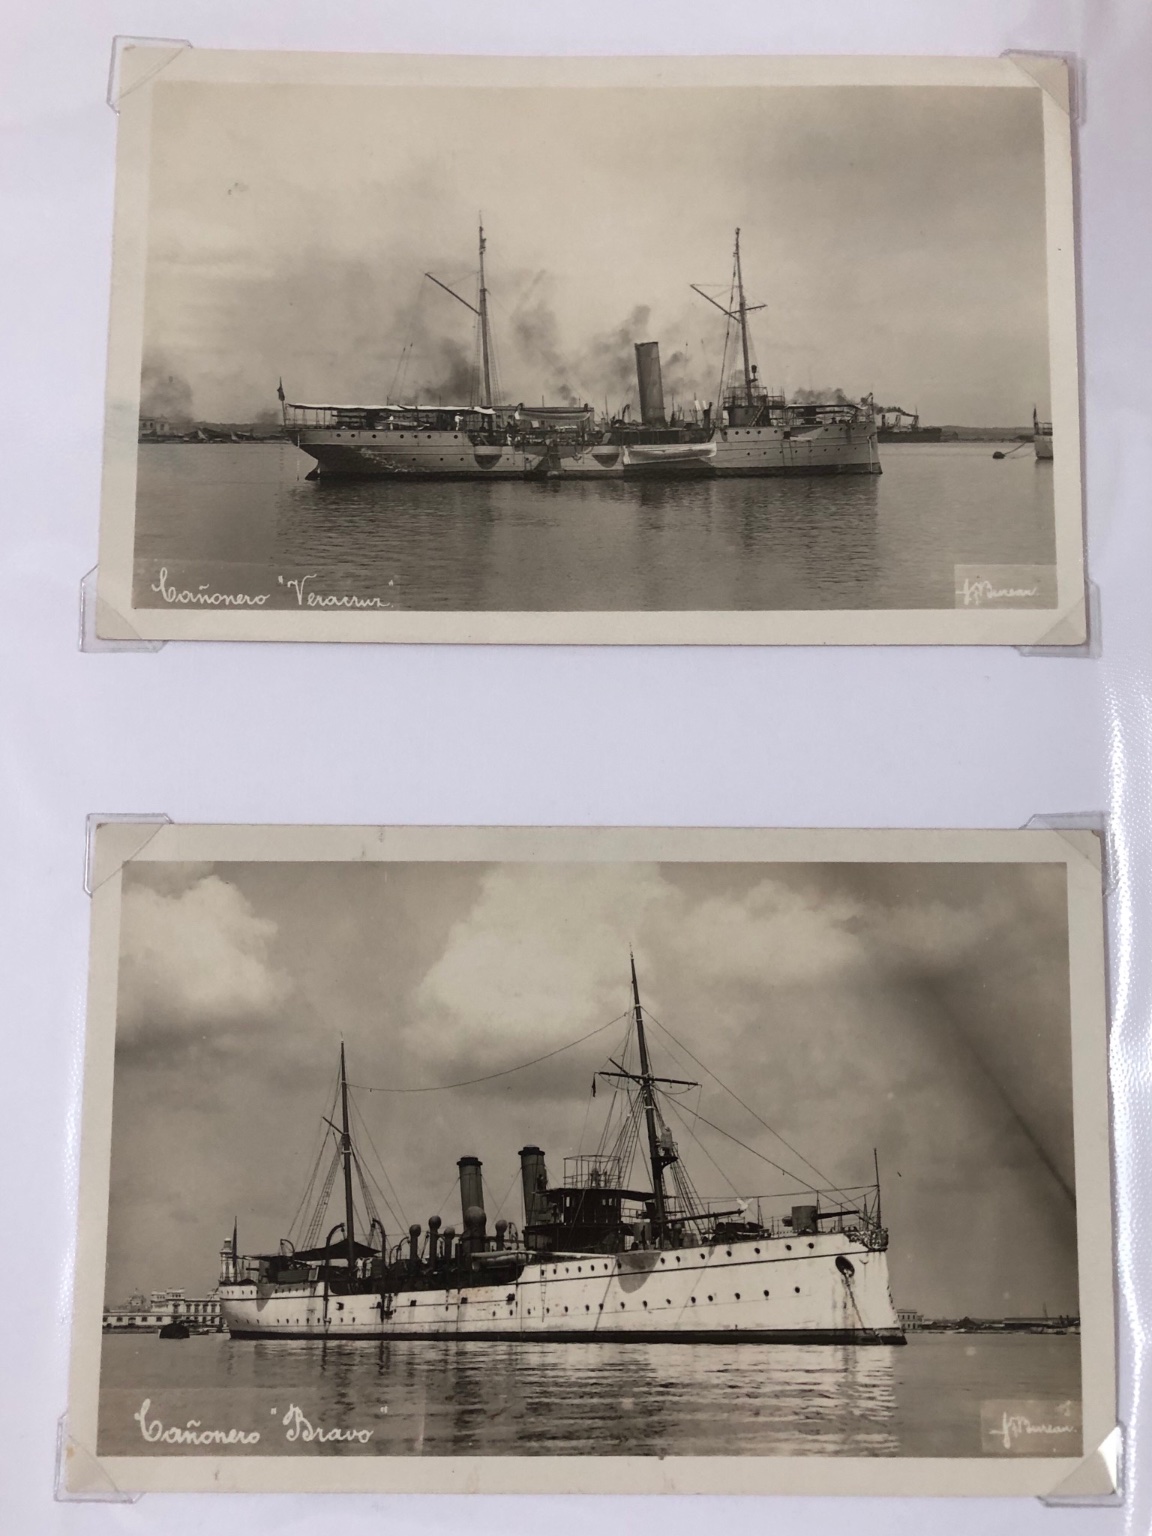
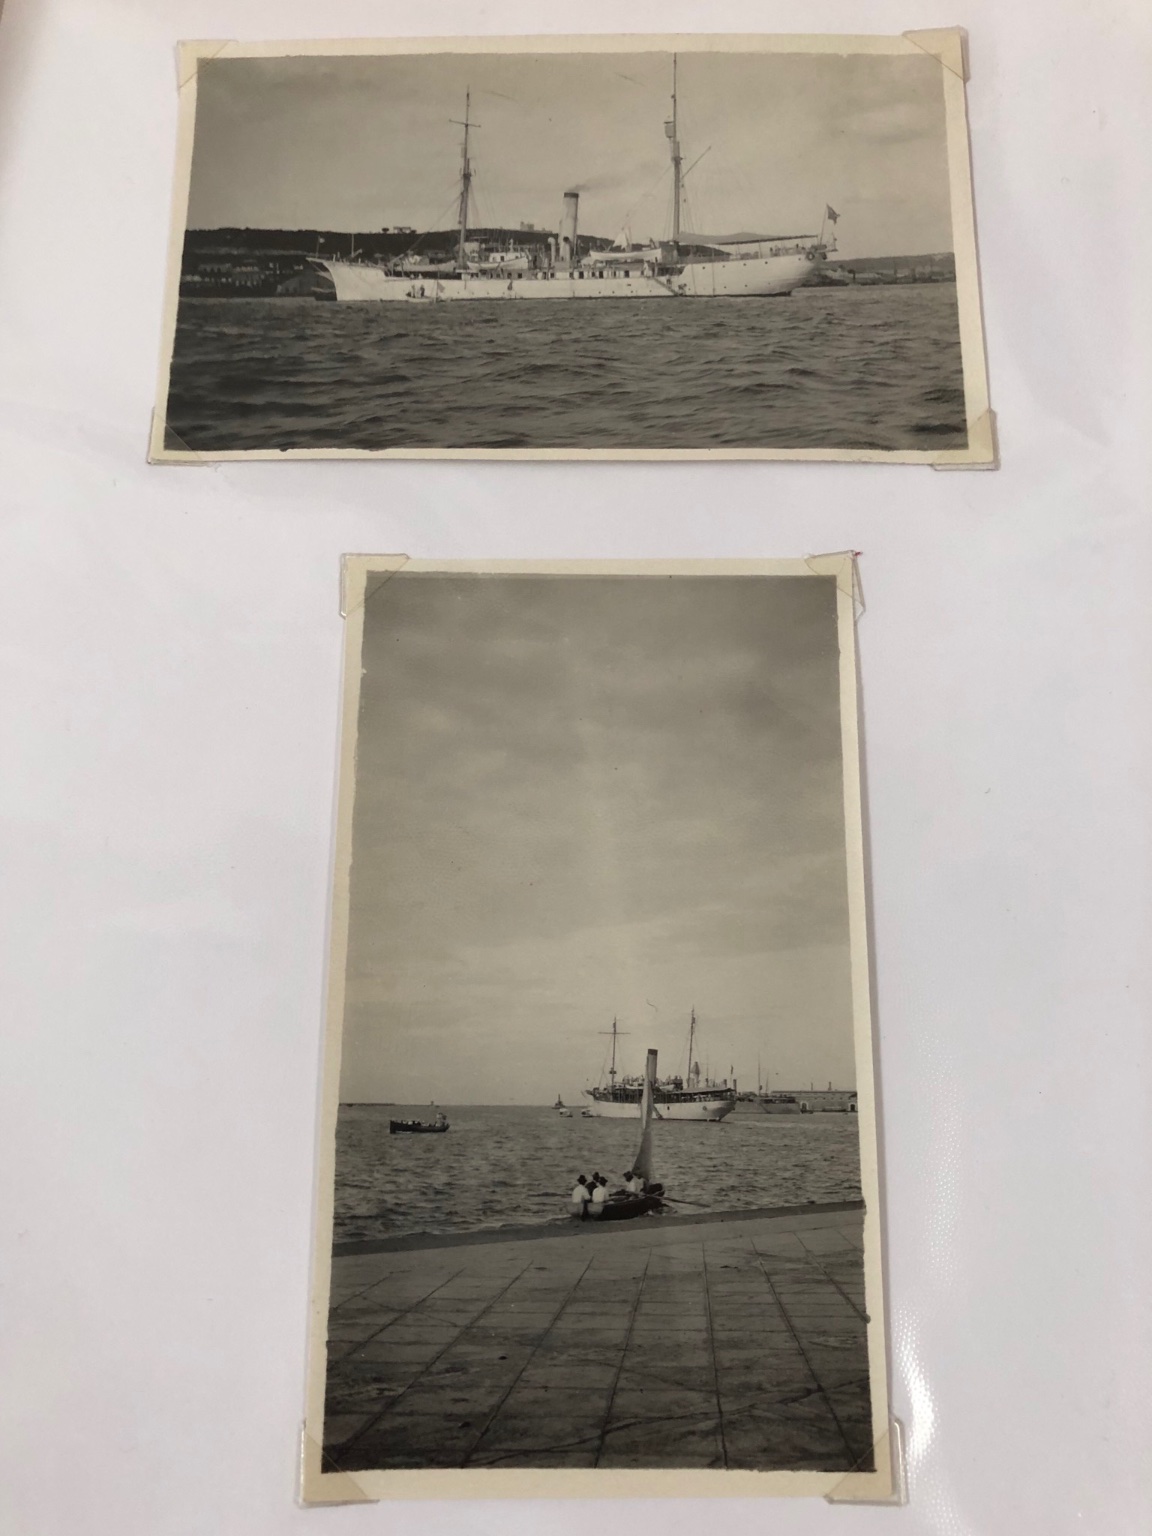
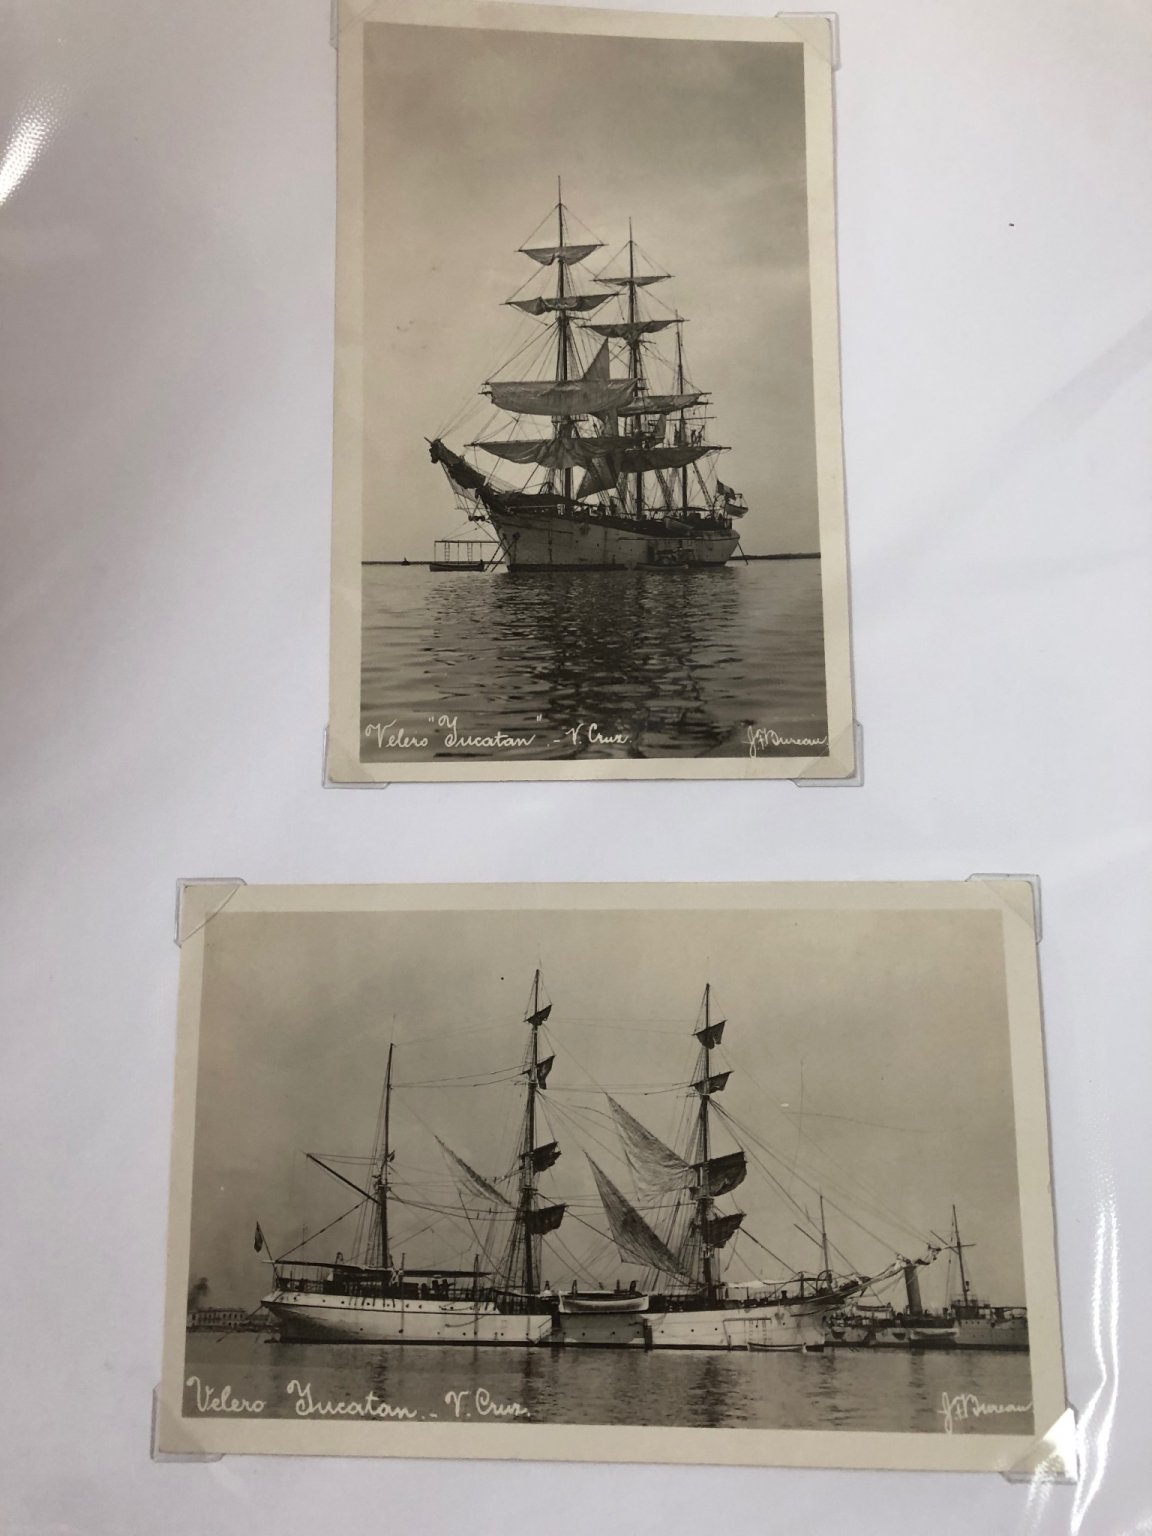
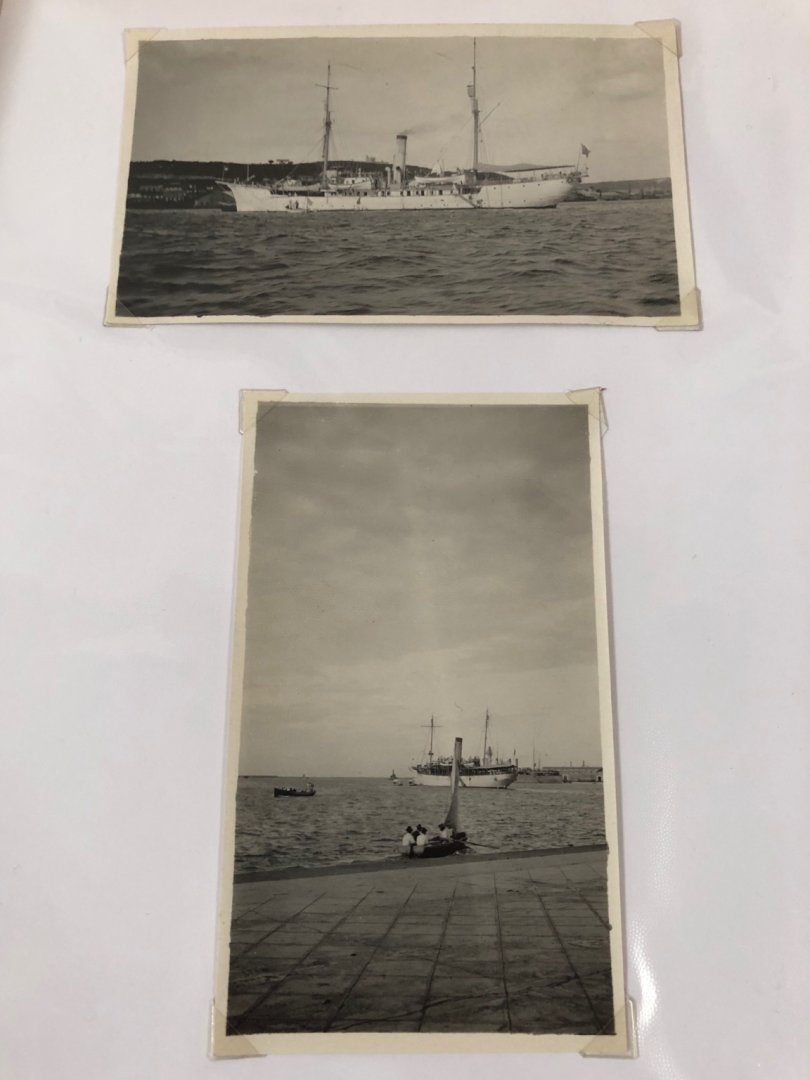
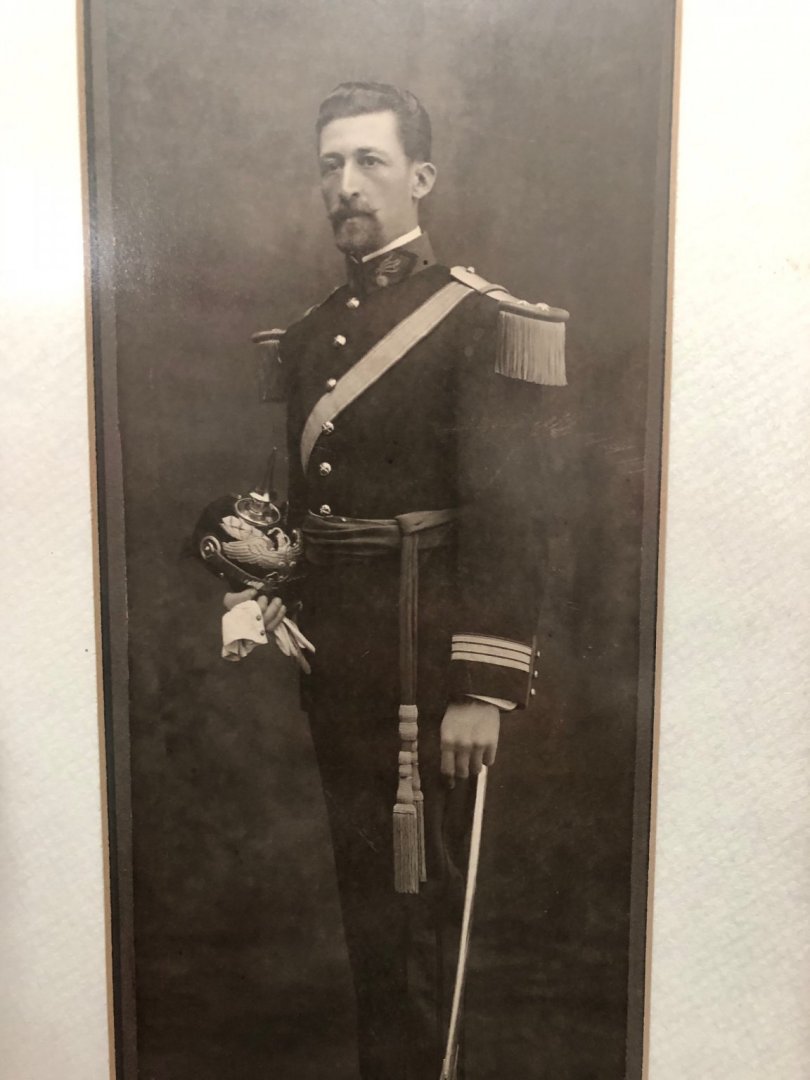
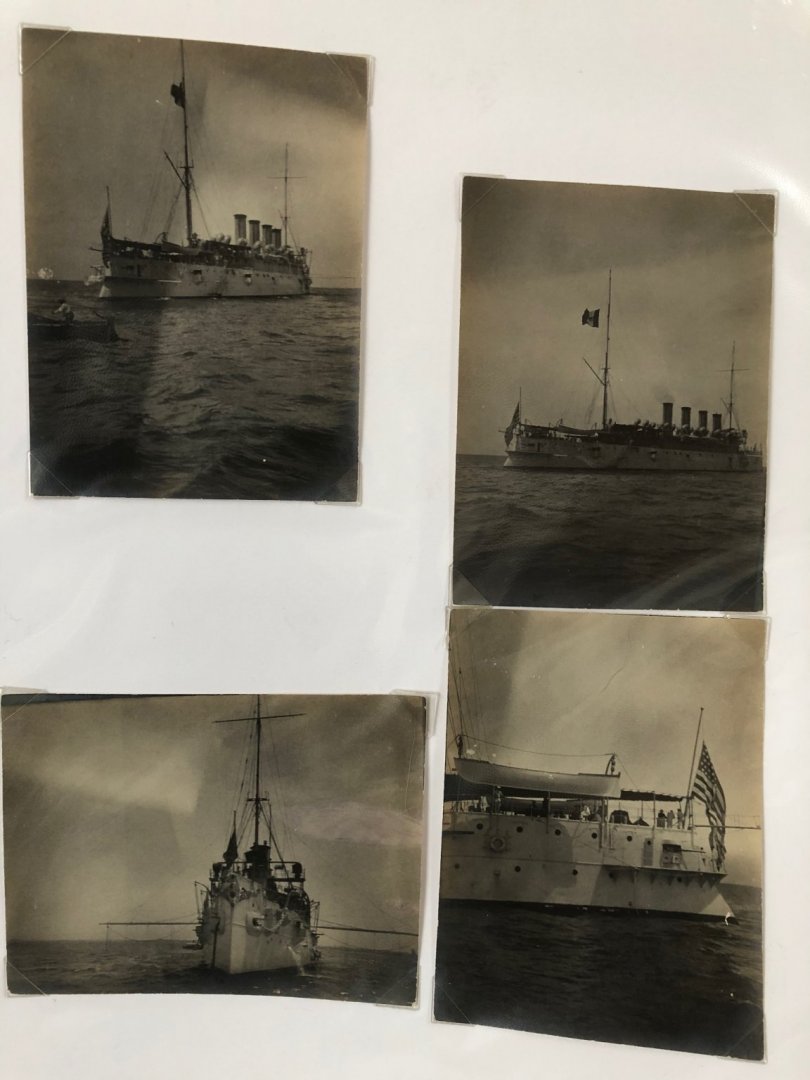
Friends: Looking for some documents, I found some old postcards, photos and an invitation that may be of interest and I want to share with you. These belonged to my great grandfather Miguel Bernard, who was general of the Mexican army during the revolution period (picture attached). Information of these two gunboats can be found on the net, specially for the Tampico; that during the revolution was taken by their officials and fought against president Victoriano Huertas’ forces, was sank and re discovered in 2019. Huerta was the traitor who killed President Madero in 1913. I lost my scanner cable 😬 but if someone is interested, as soon as I find it I can do some scans. The Yucatan and Bravo are also pictured here. Best regards to all, Eugenio.


- 1 reply
-
- 4
-

-

-
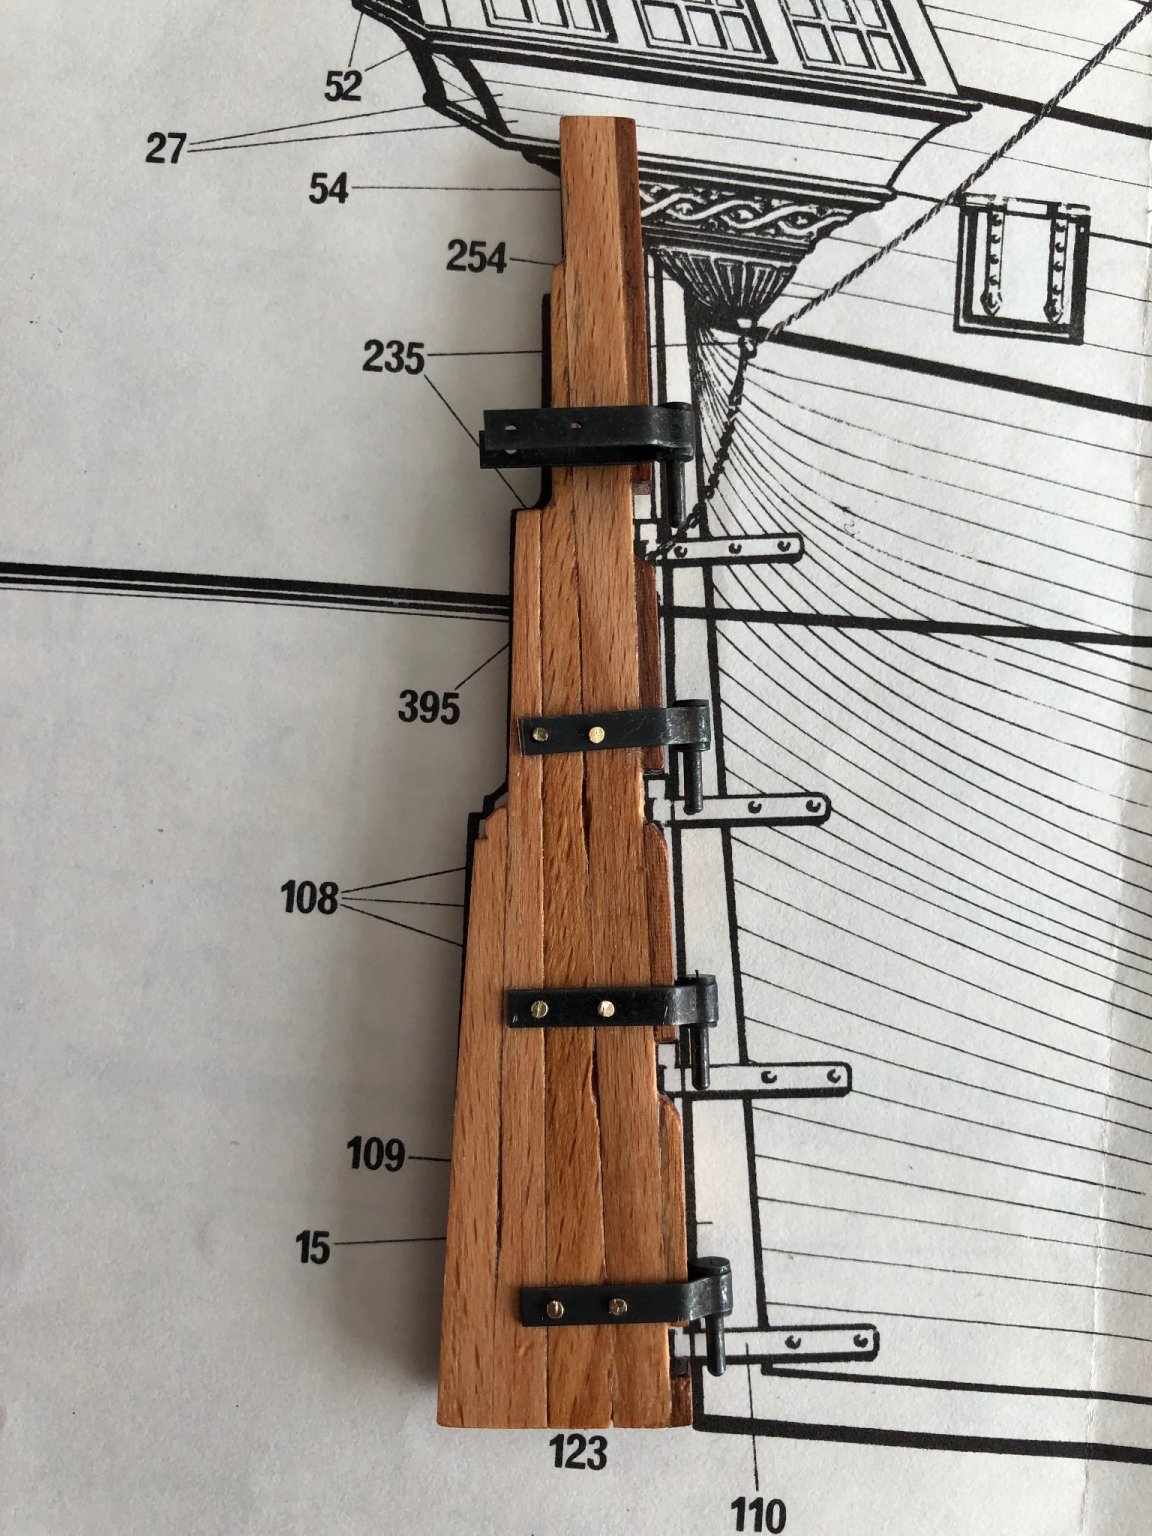
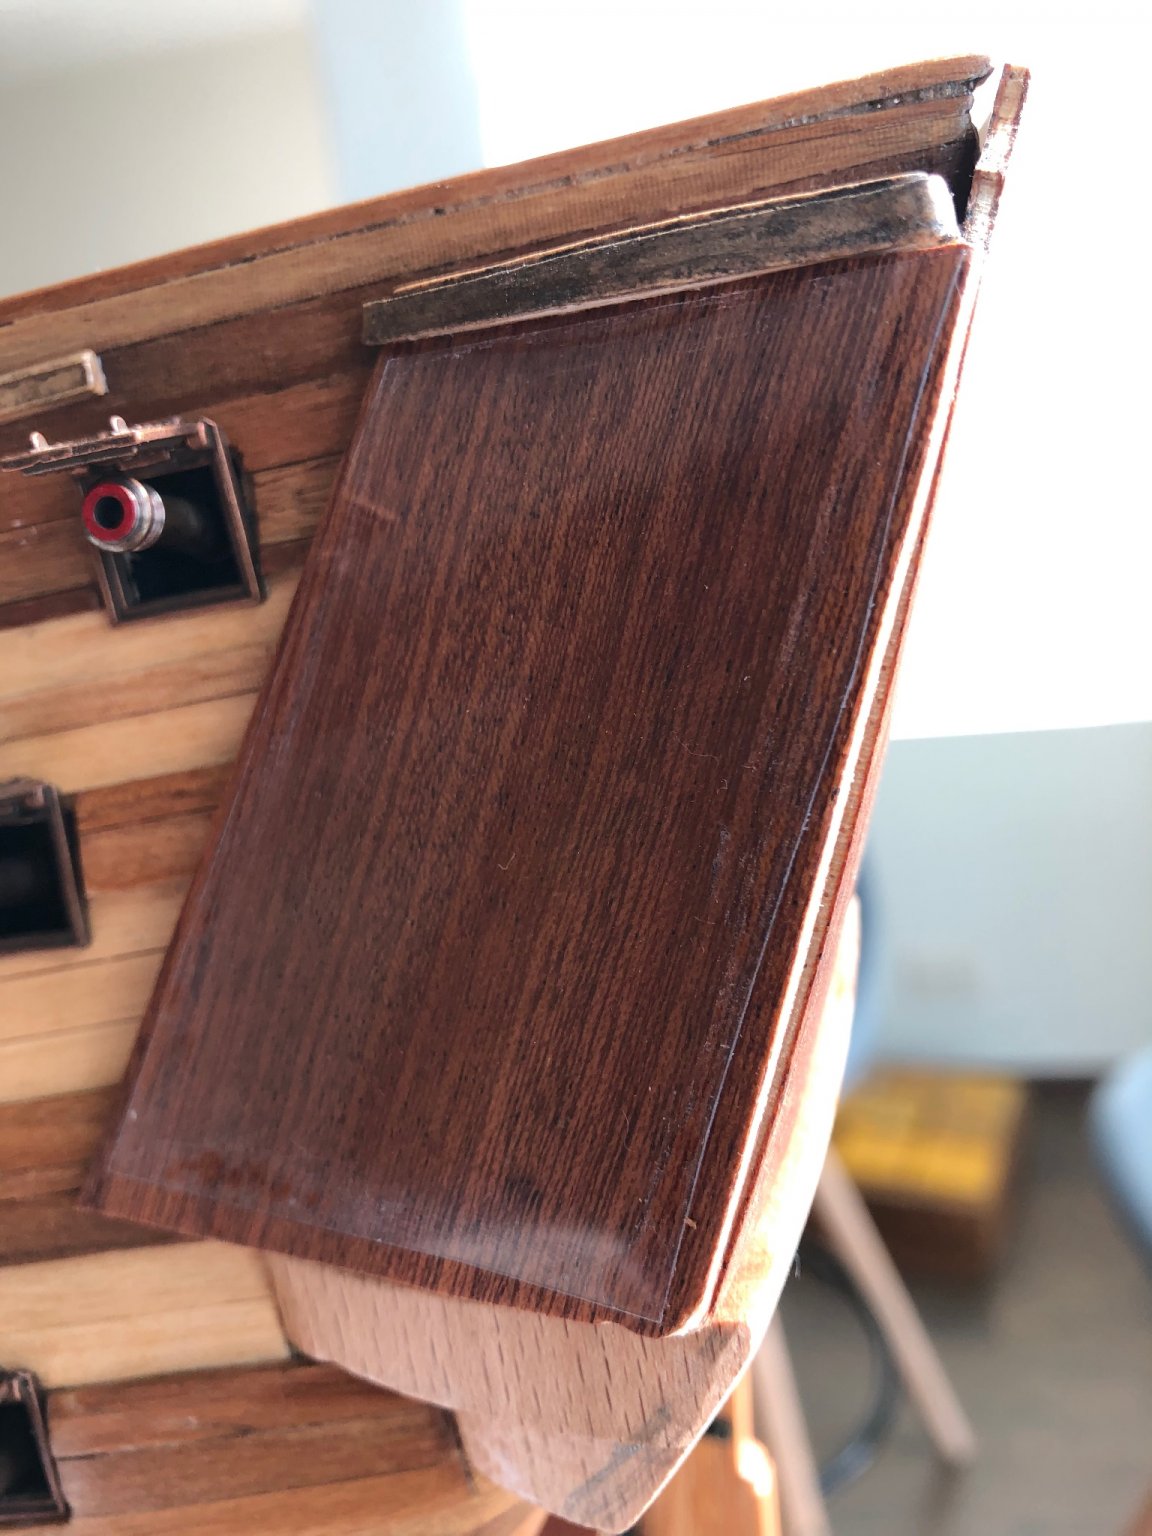
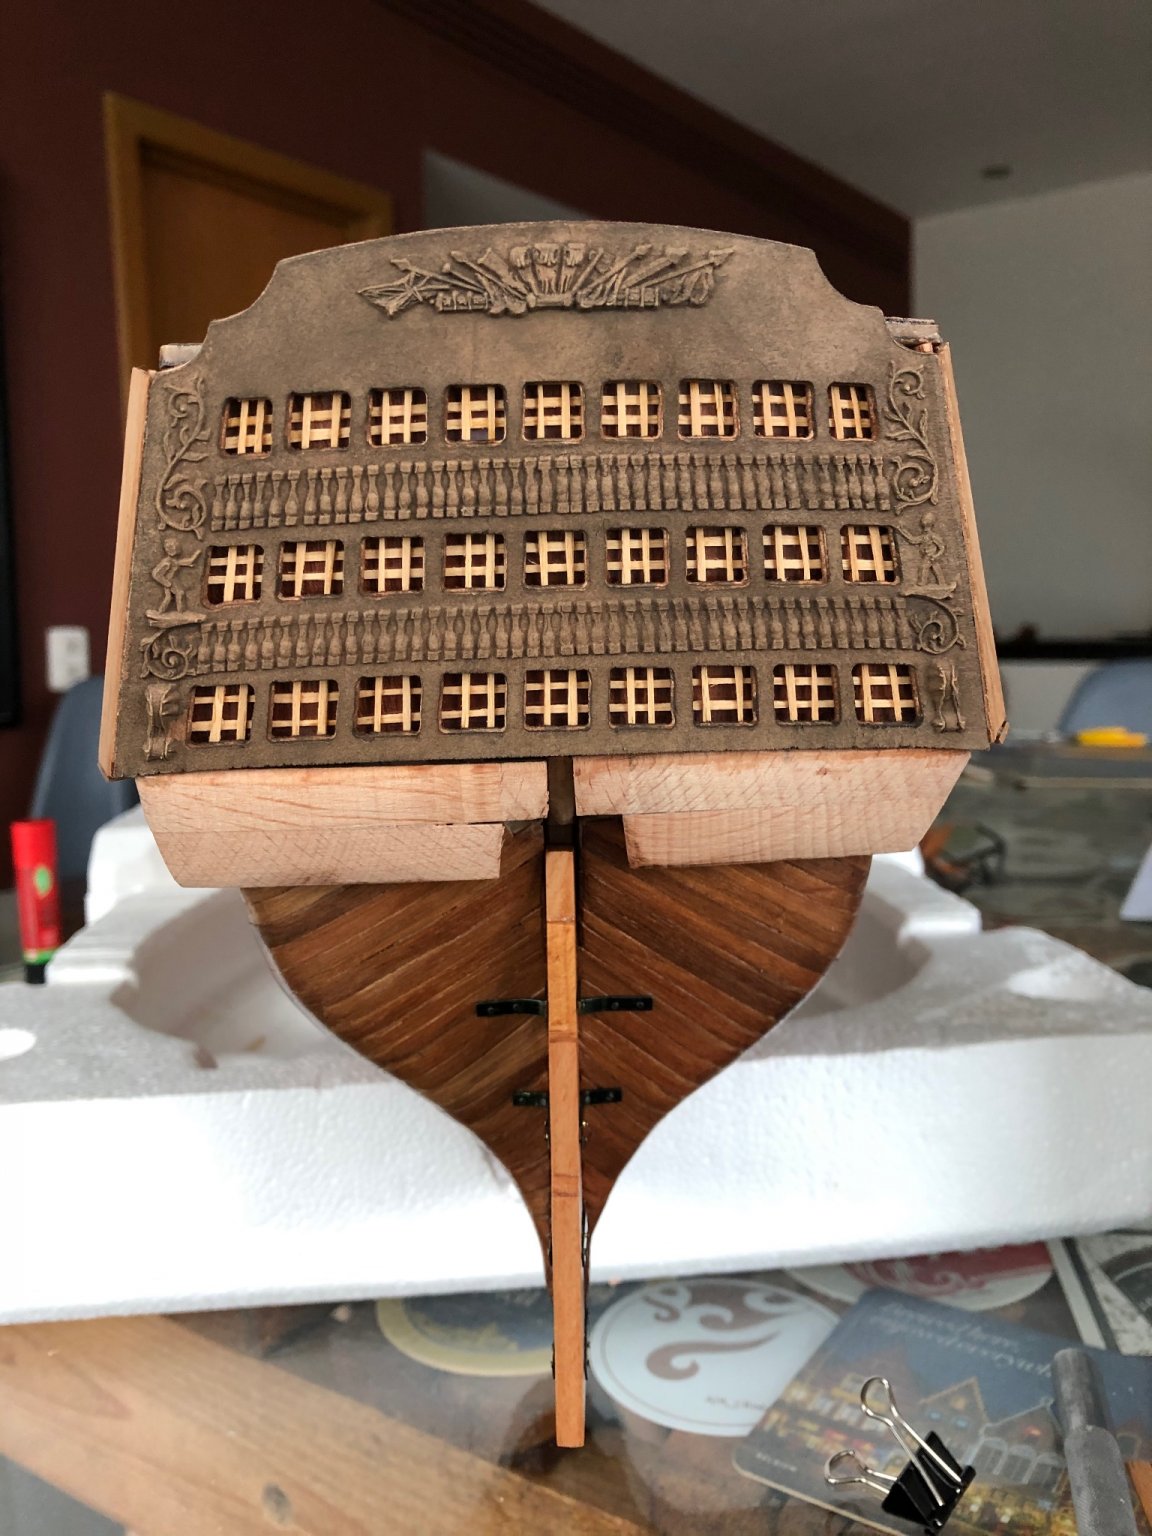
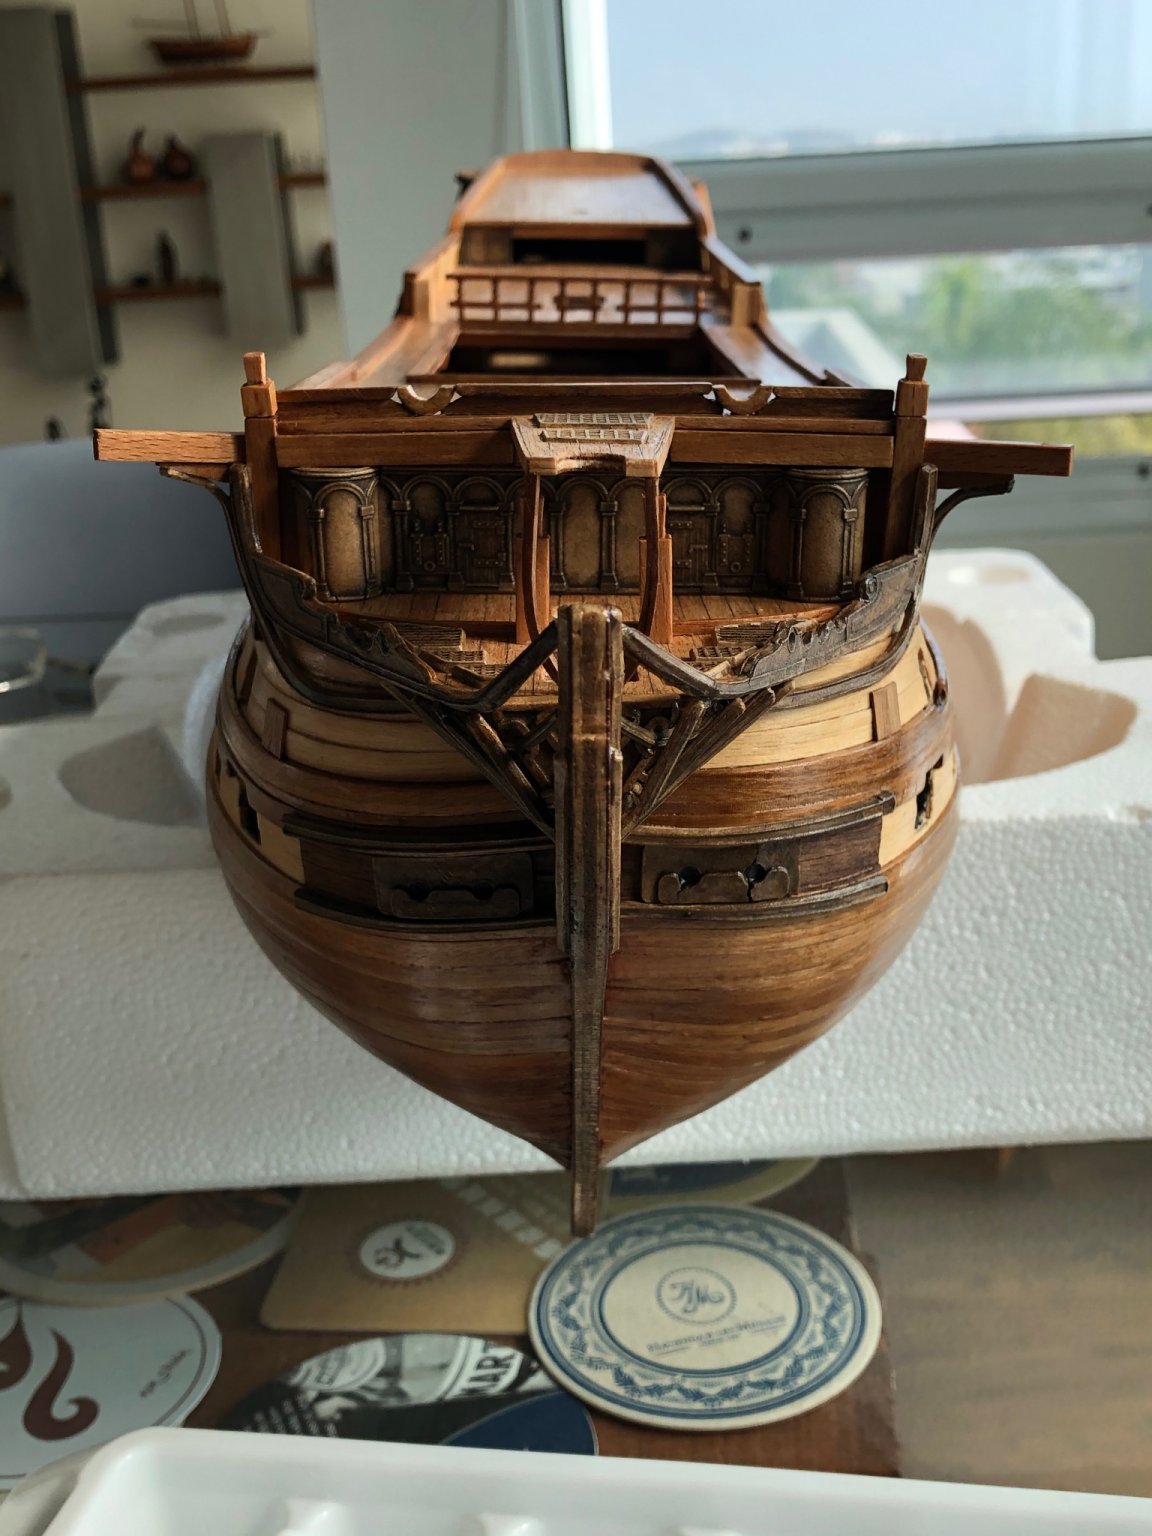
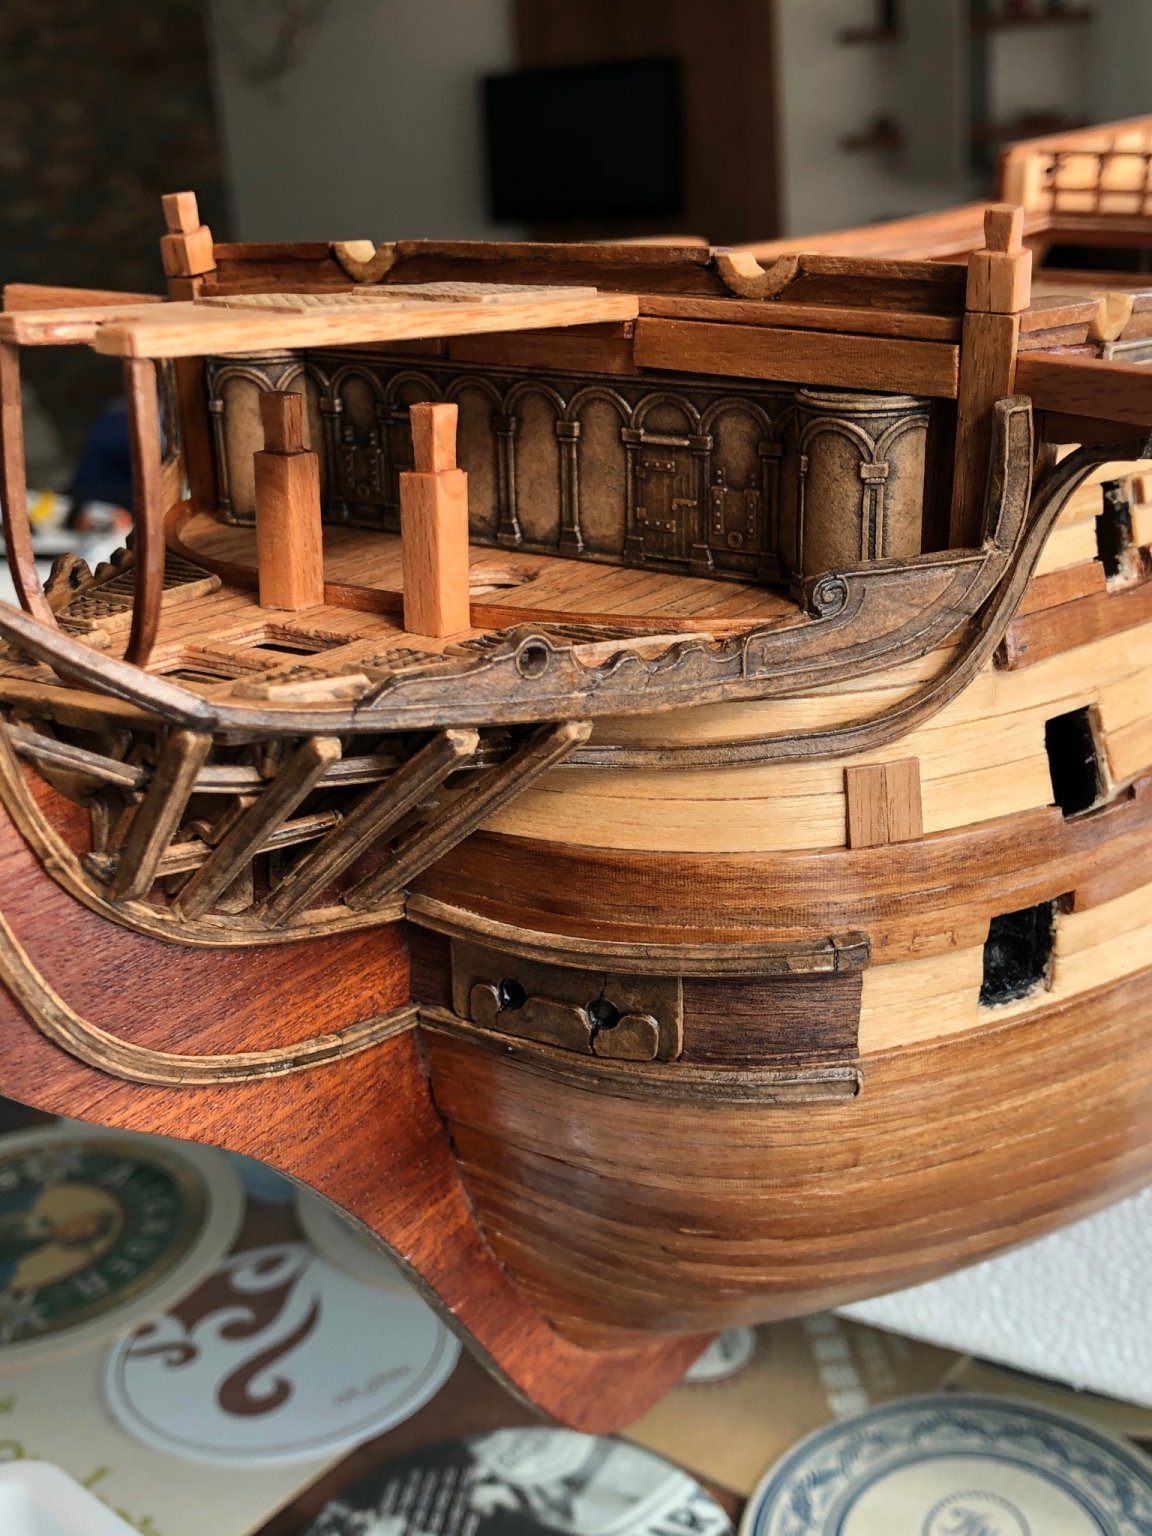
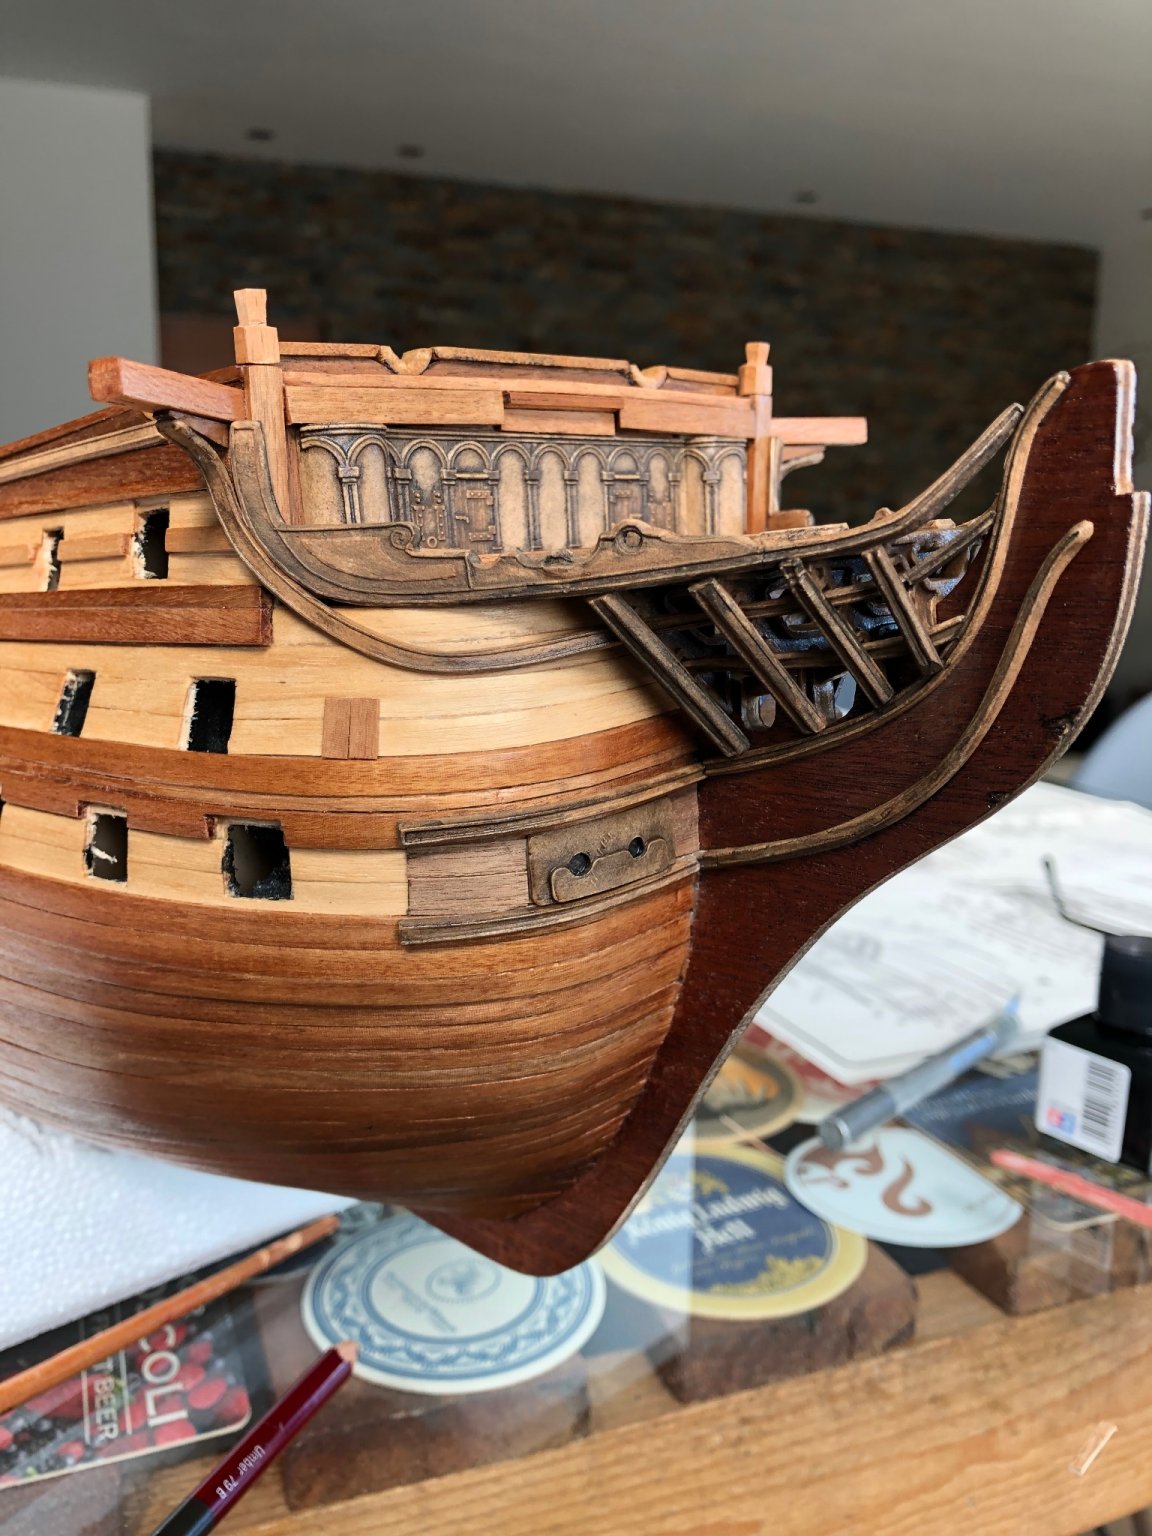
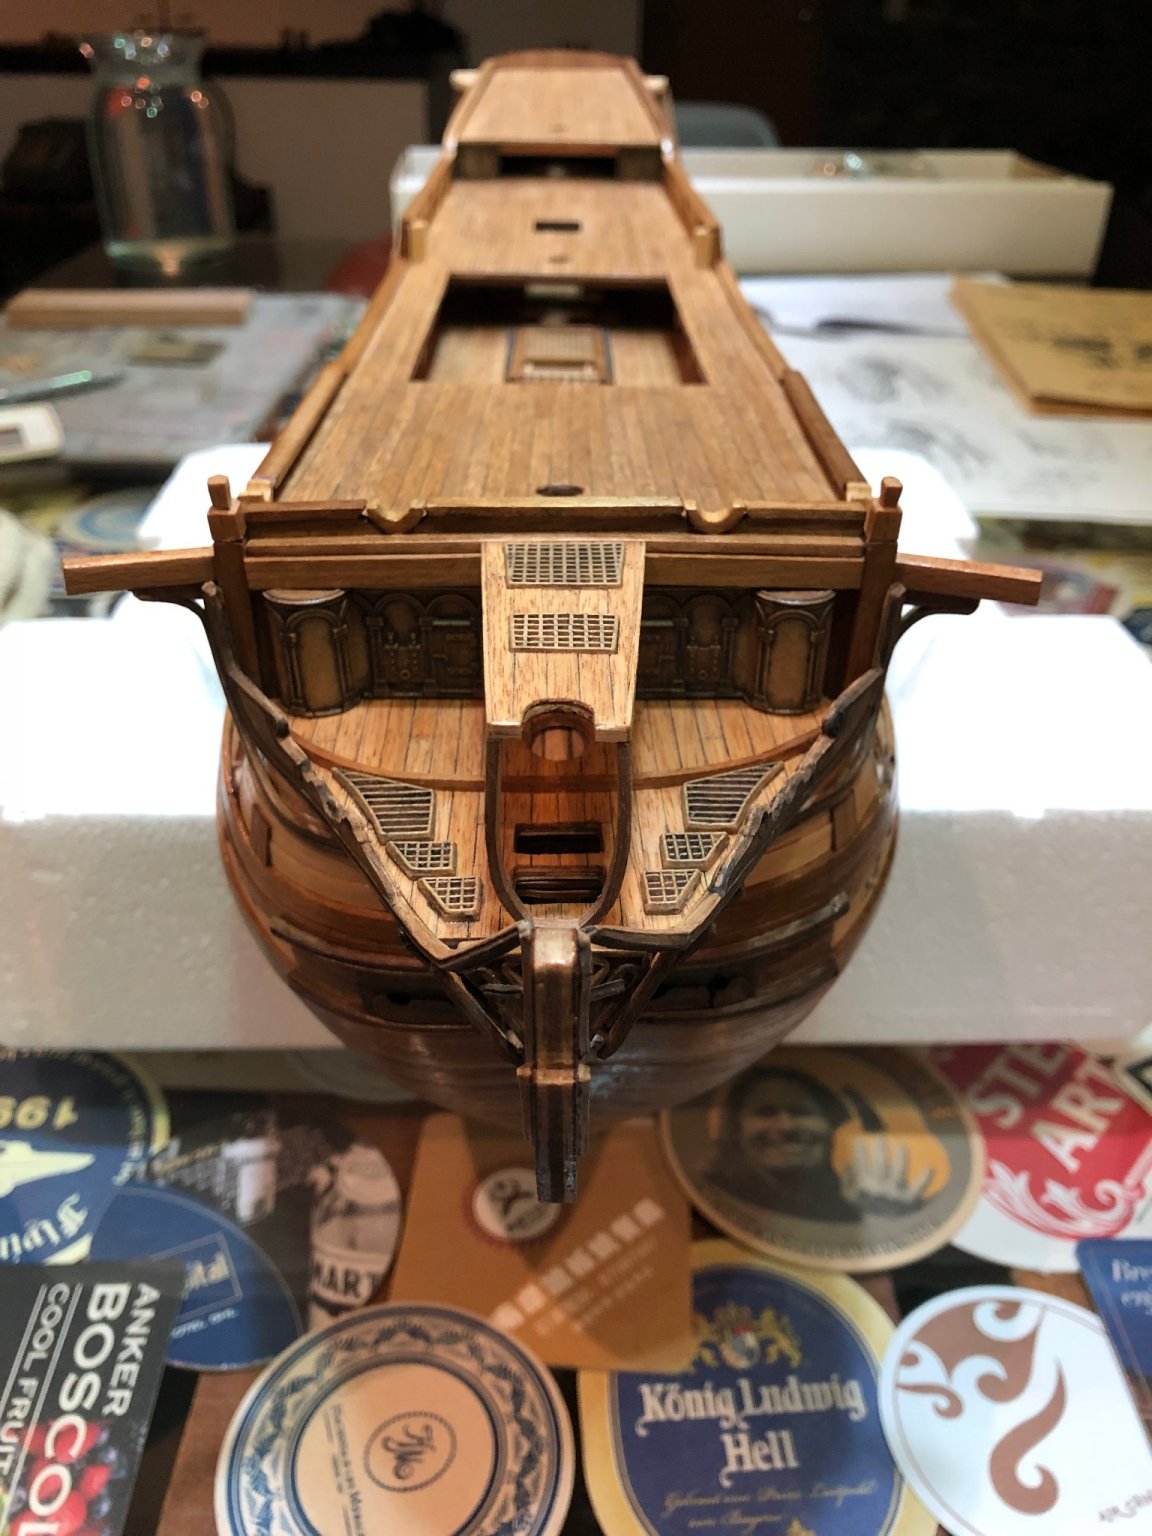
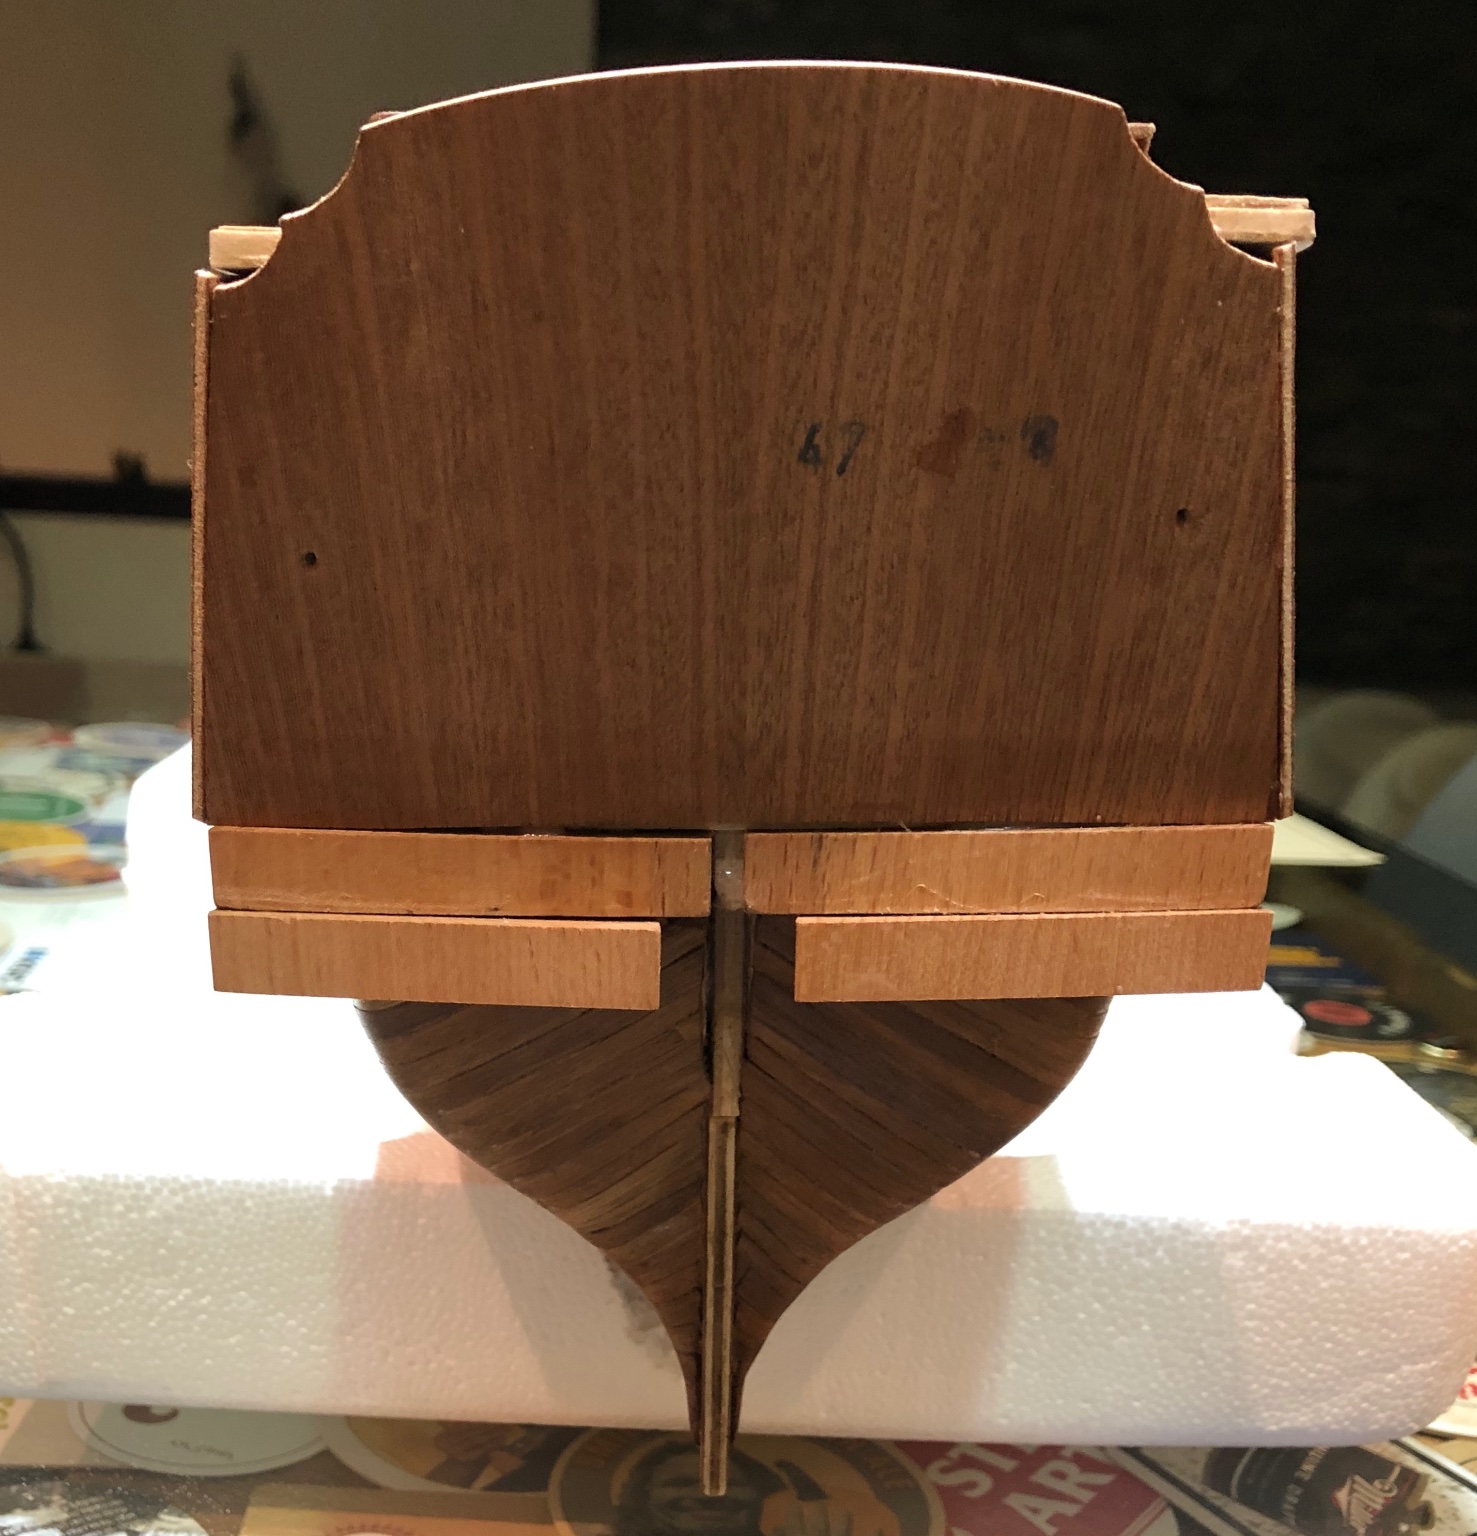
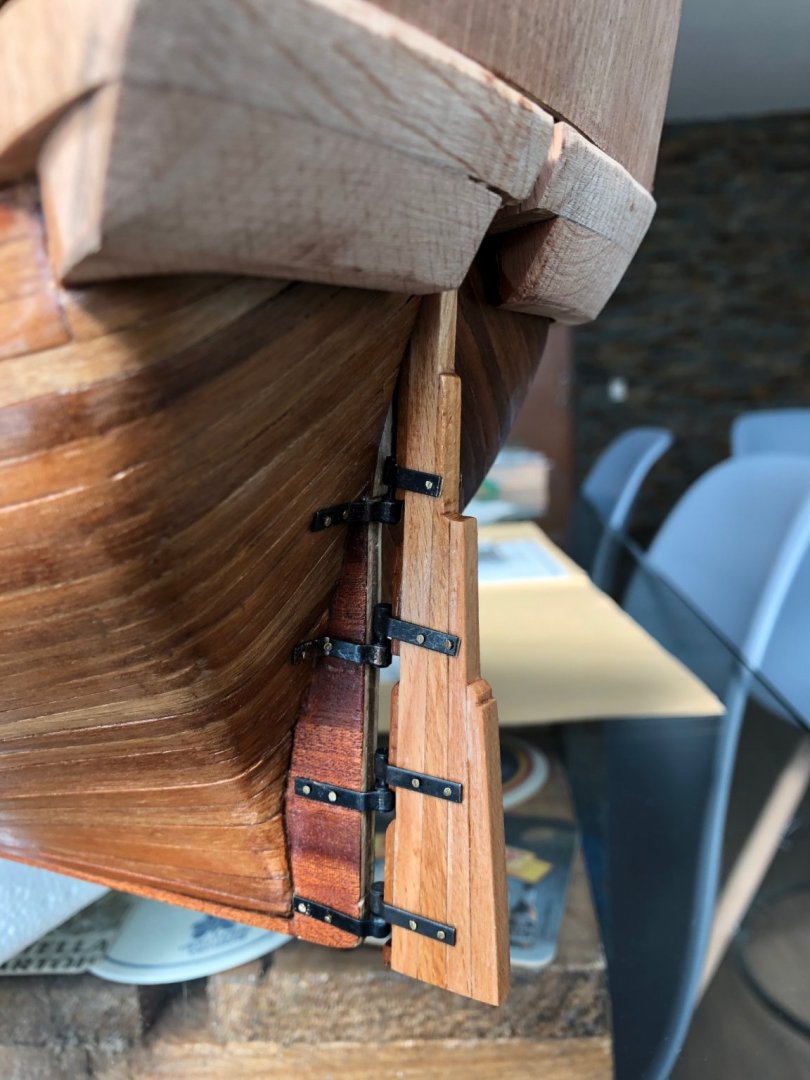
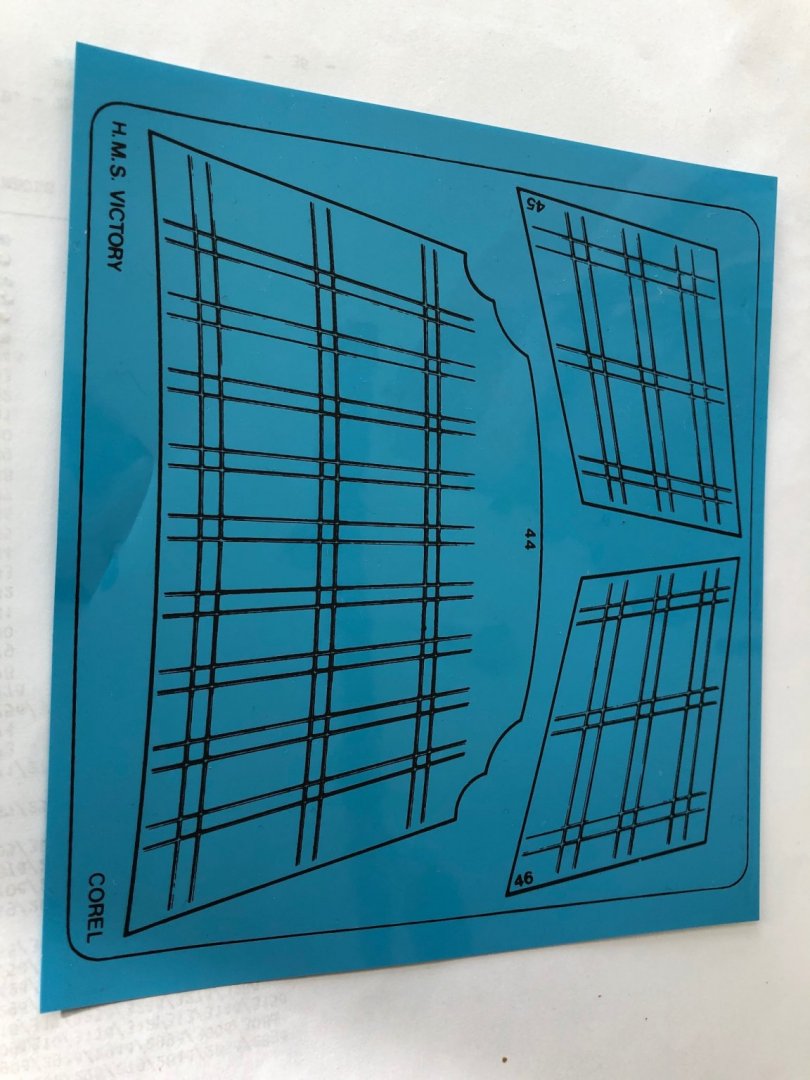
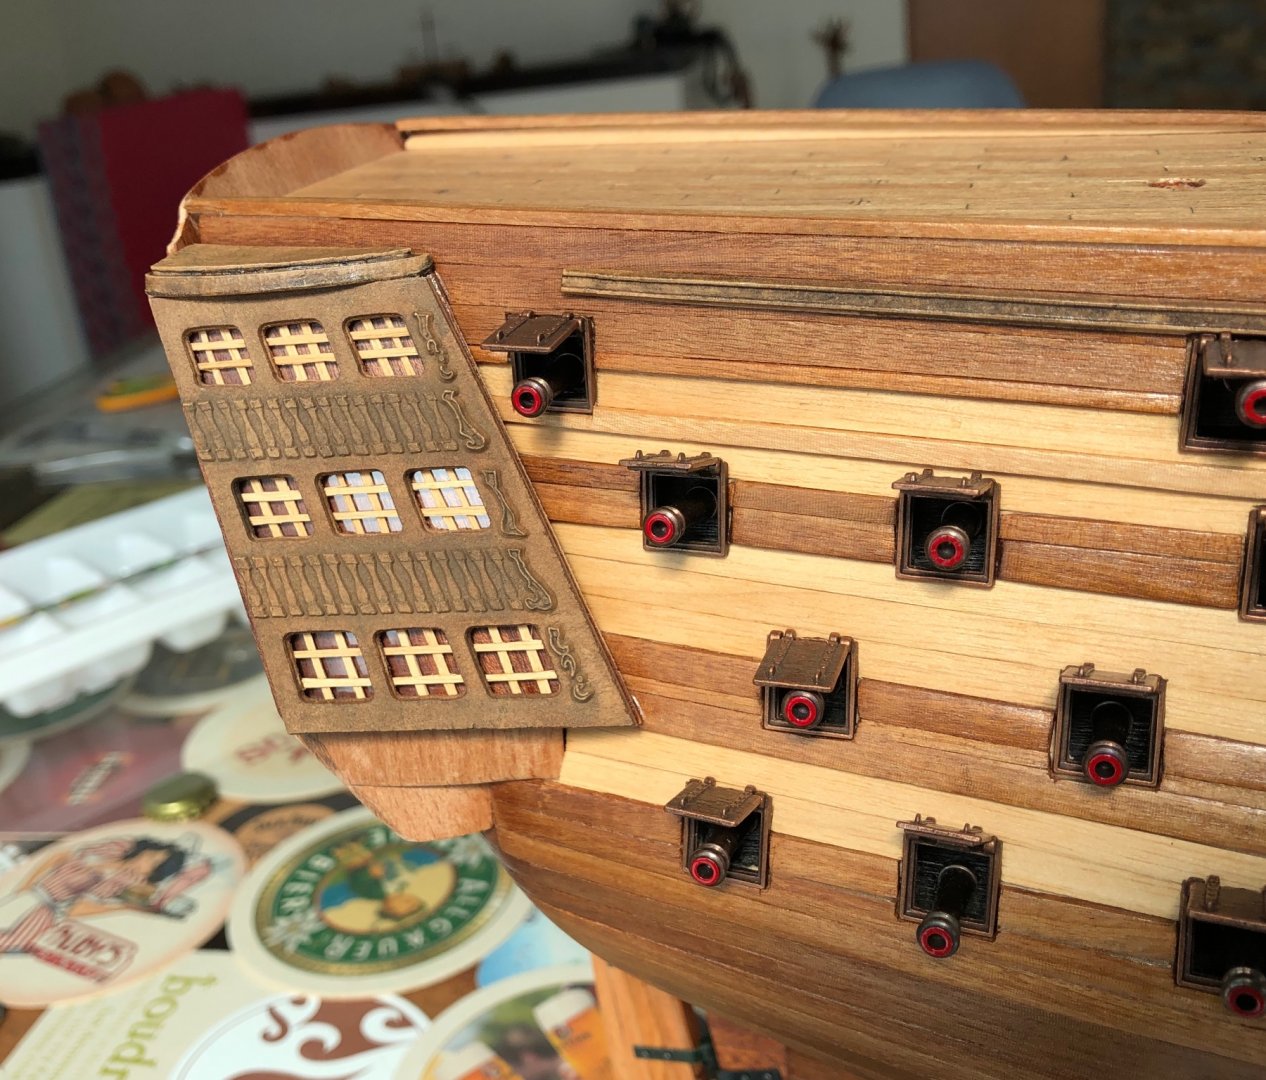
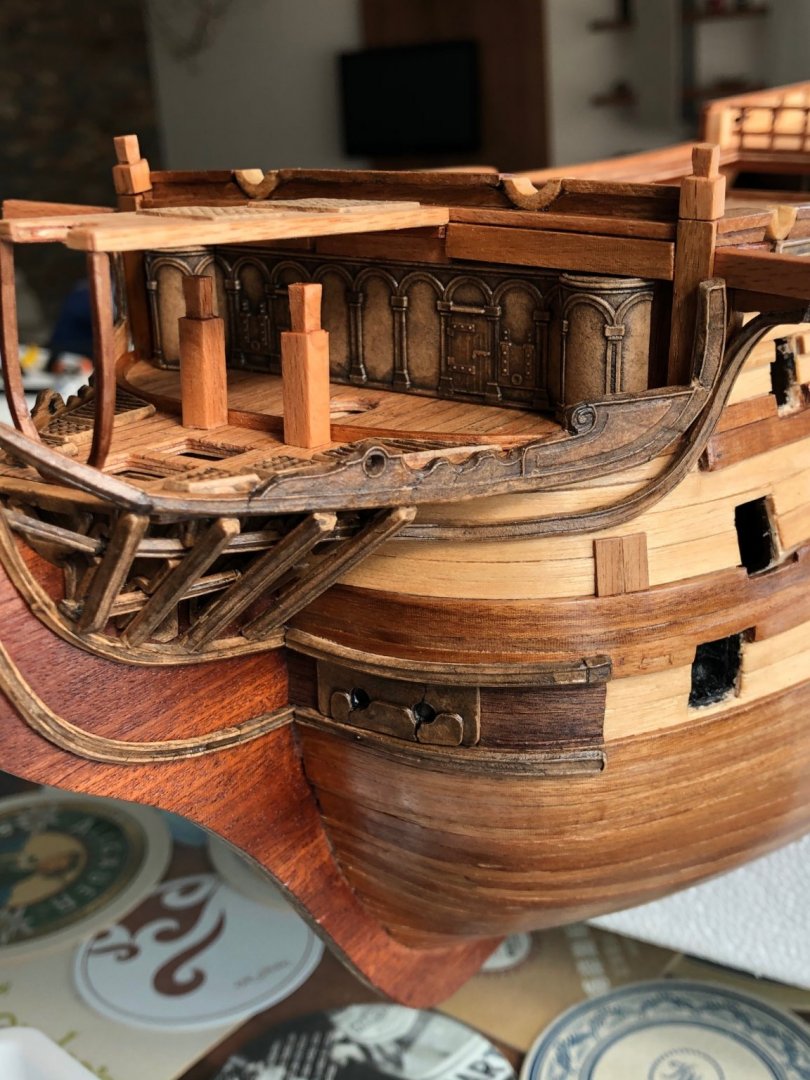
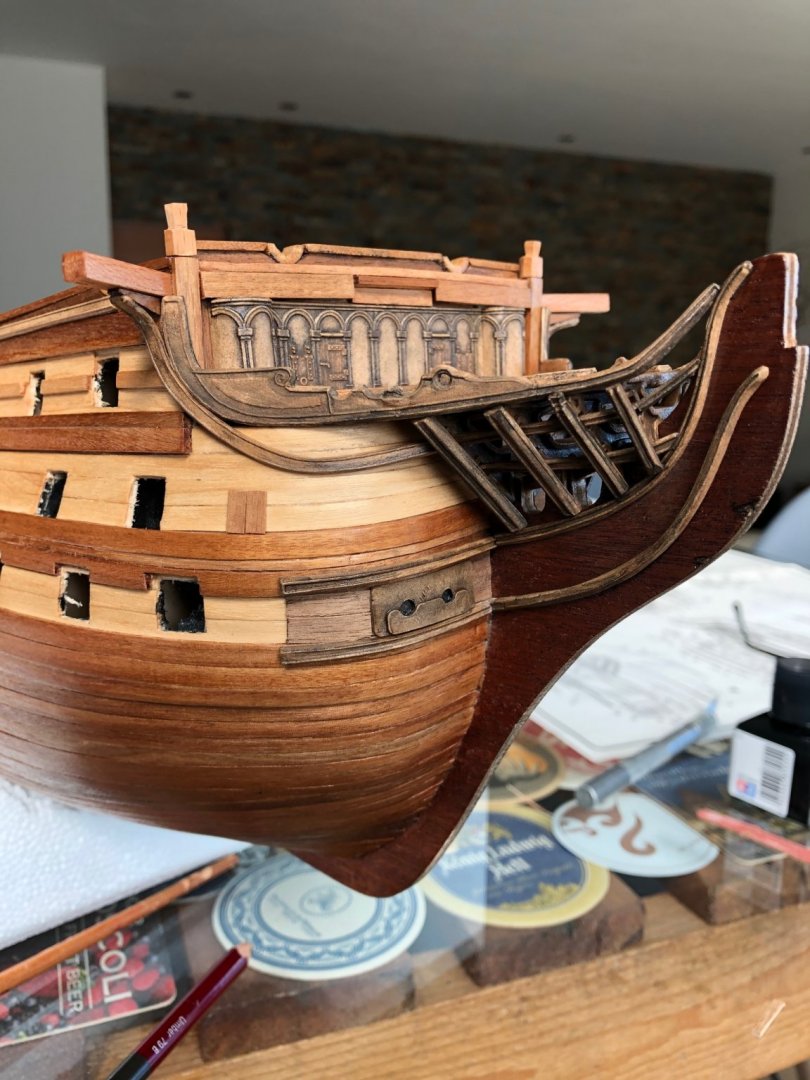
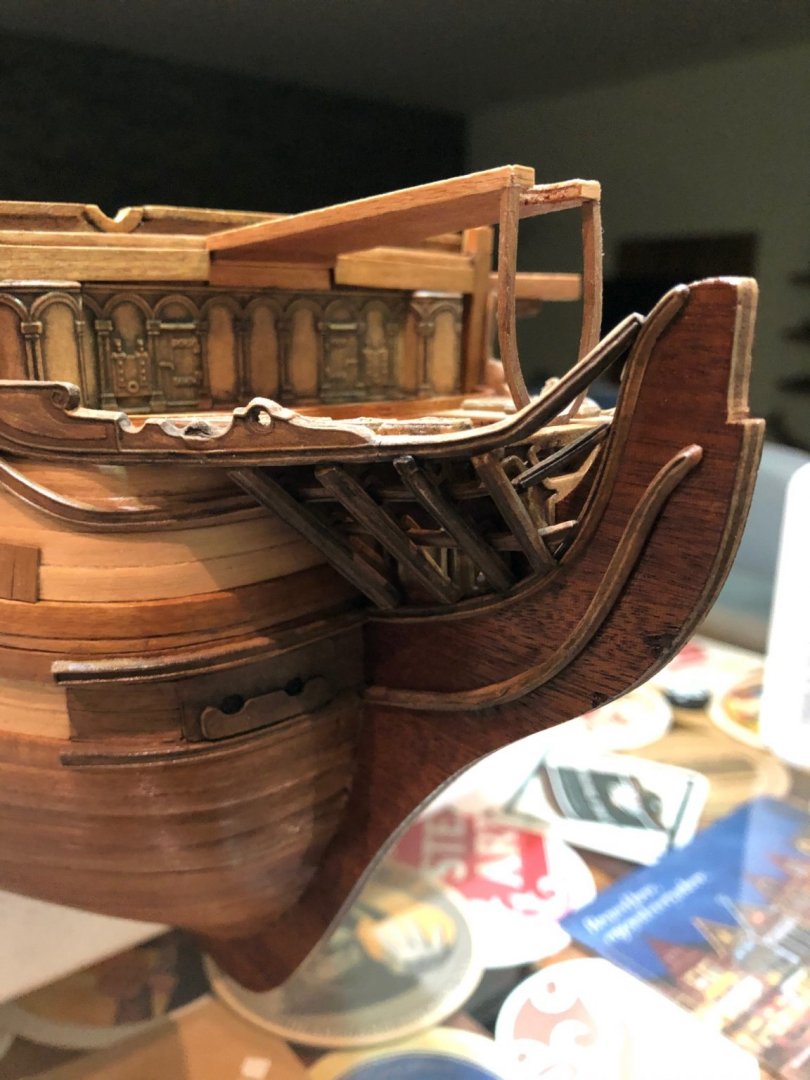
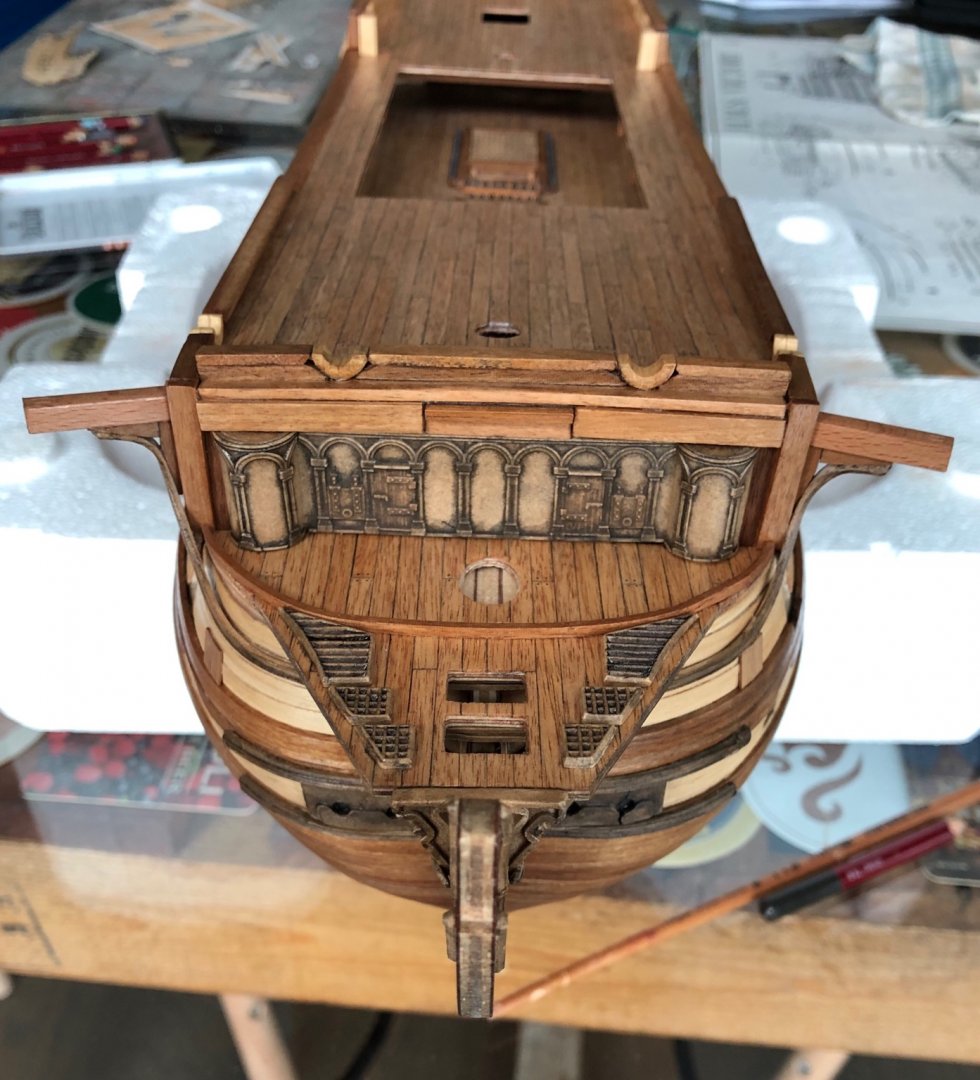
Hi friends. Done some work on the stern area. Finished the rudder and set the galleries. I decided not to use the blue acrylic provided to simulate the curtains and windows and made my own arrangement. Press wood is supposed to be painted, but I used the same method to weather the galleries than the one used on the bow pieces (Tamiya’s panel accent brown and black and brown pastel powder). I used a transparent acrylic to simulate the window glass and thin stripes of wood to produce the window frames. Here are the picks!!!


-
Roberts, congratulations!!! Very nice and clean job. Great start. Your patience will reward you with a great model.
-
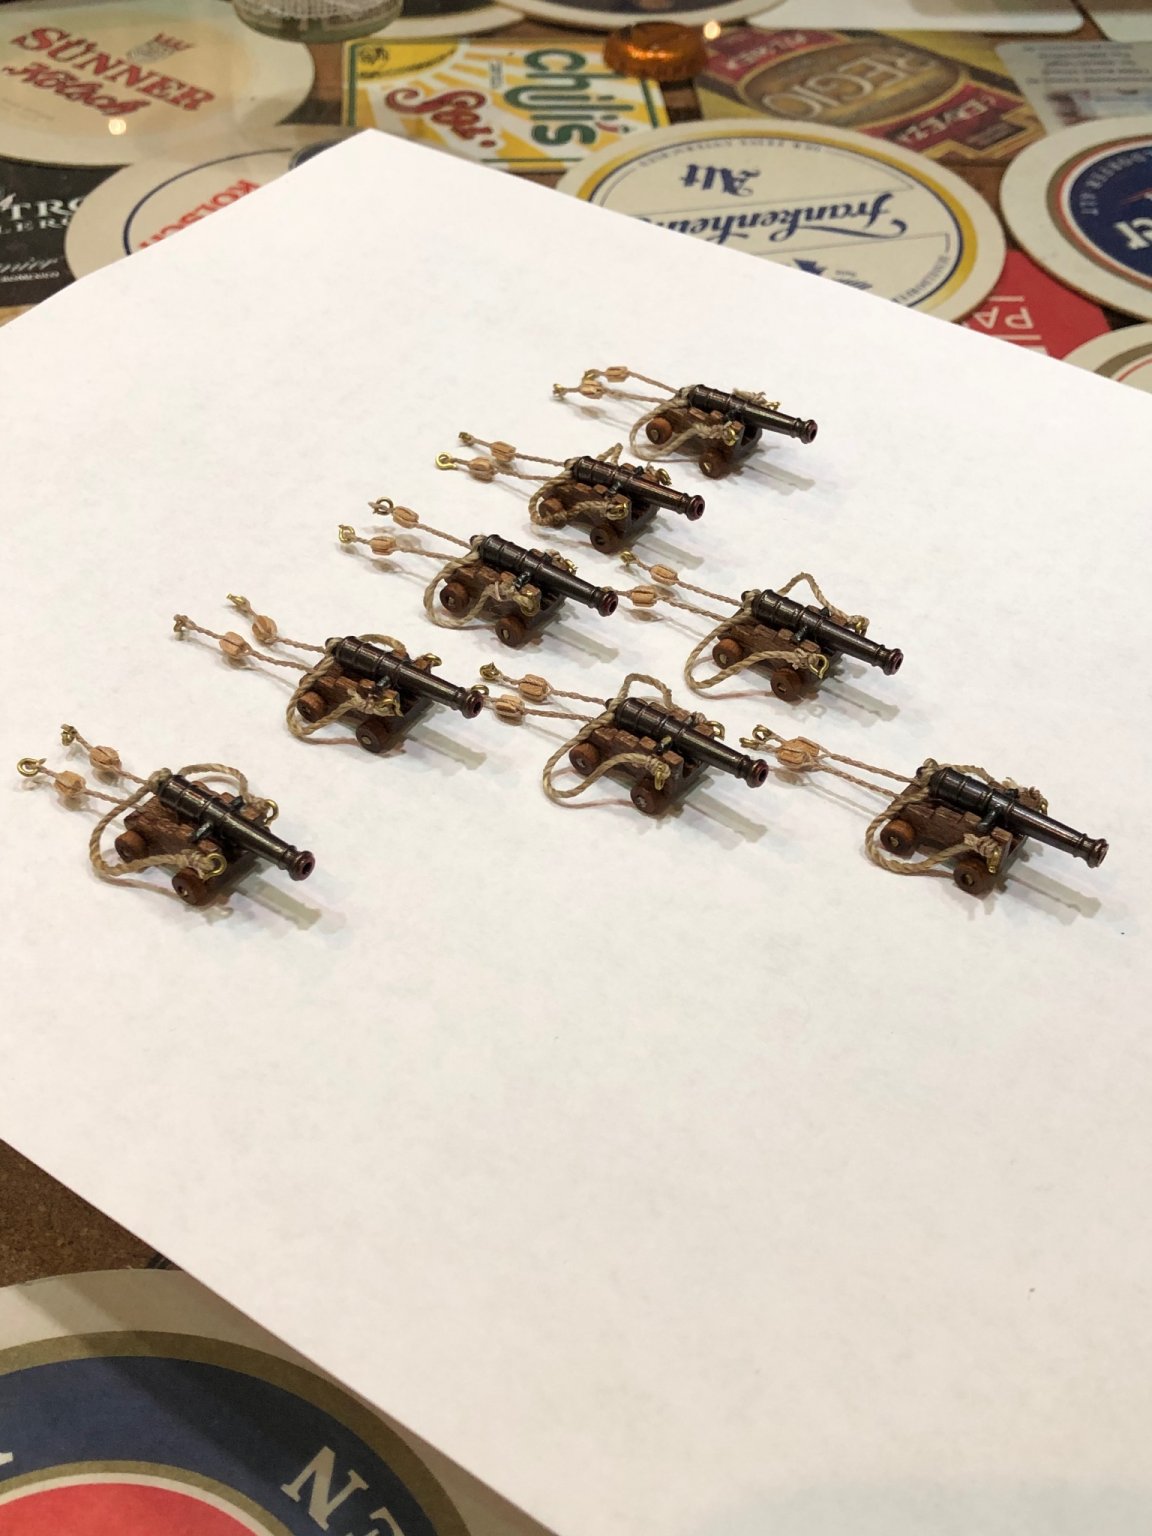
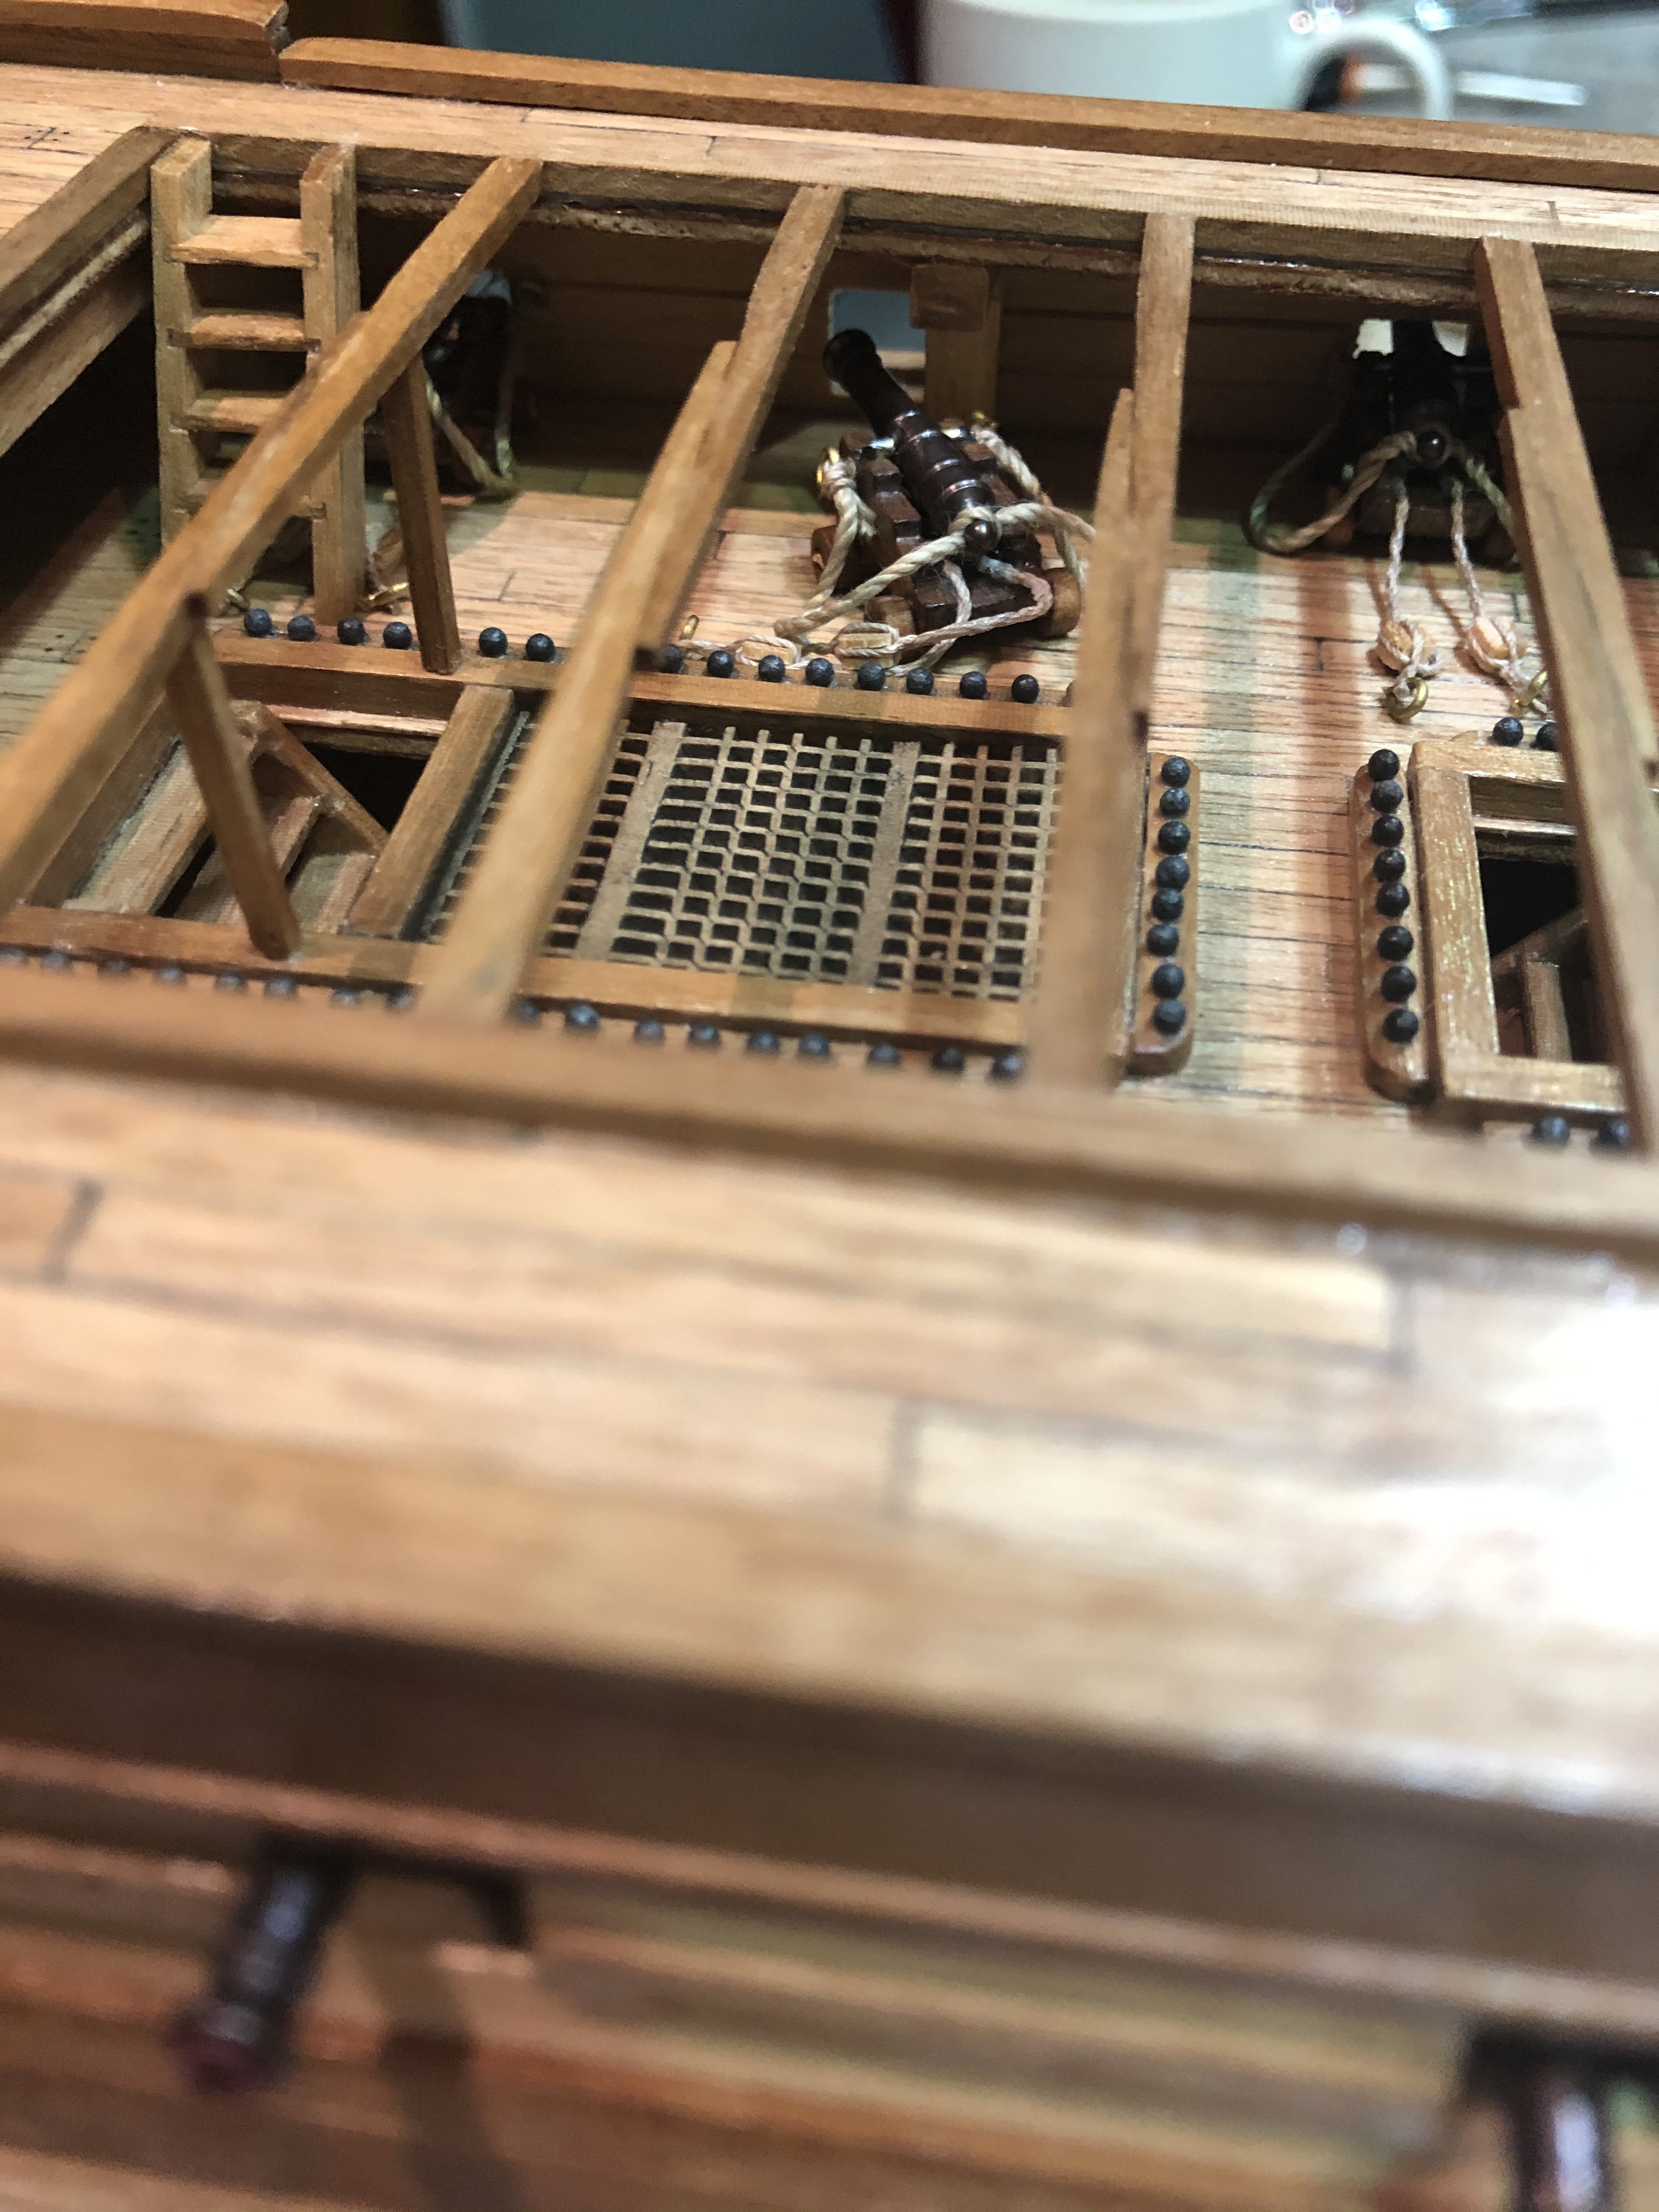
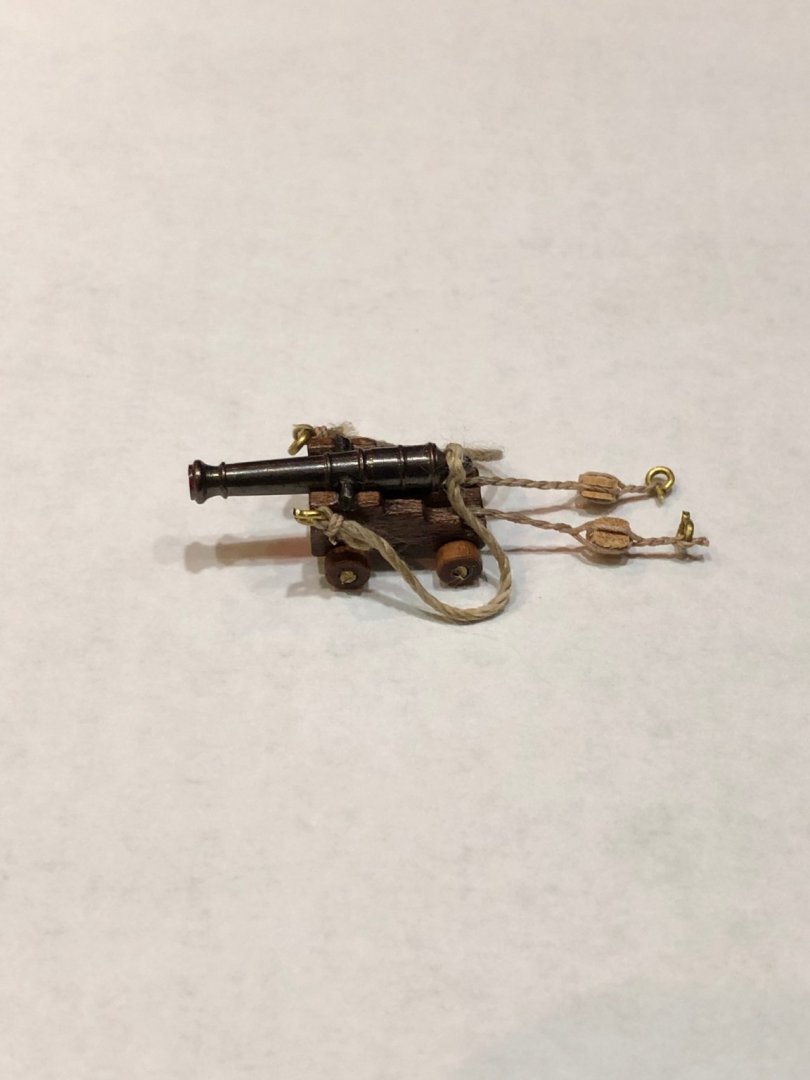
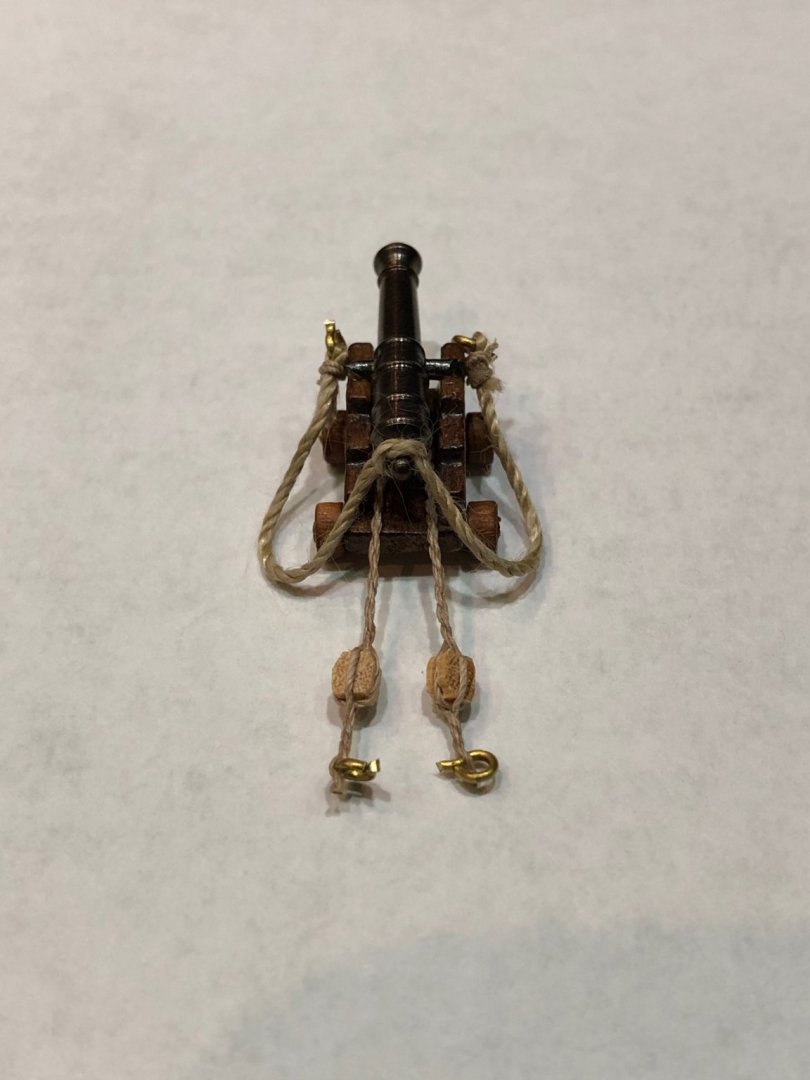
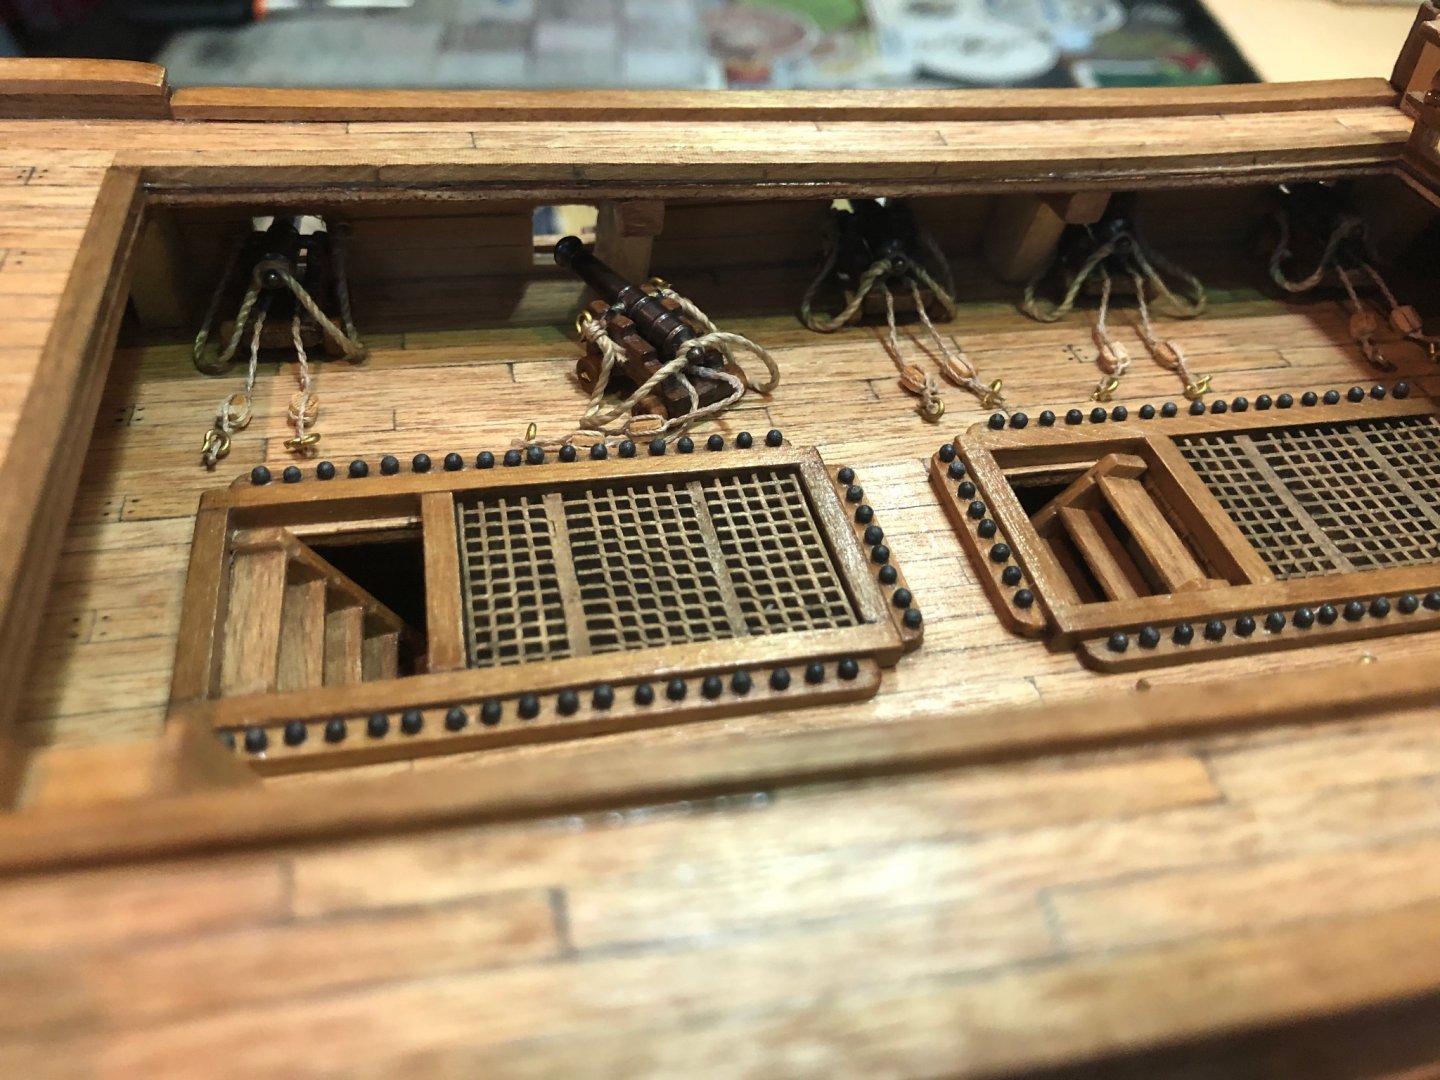
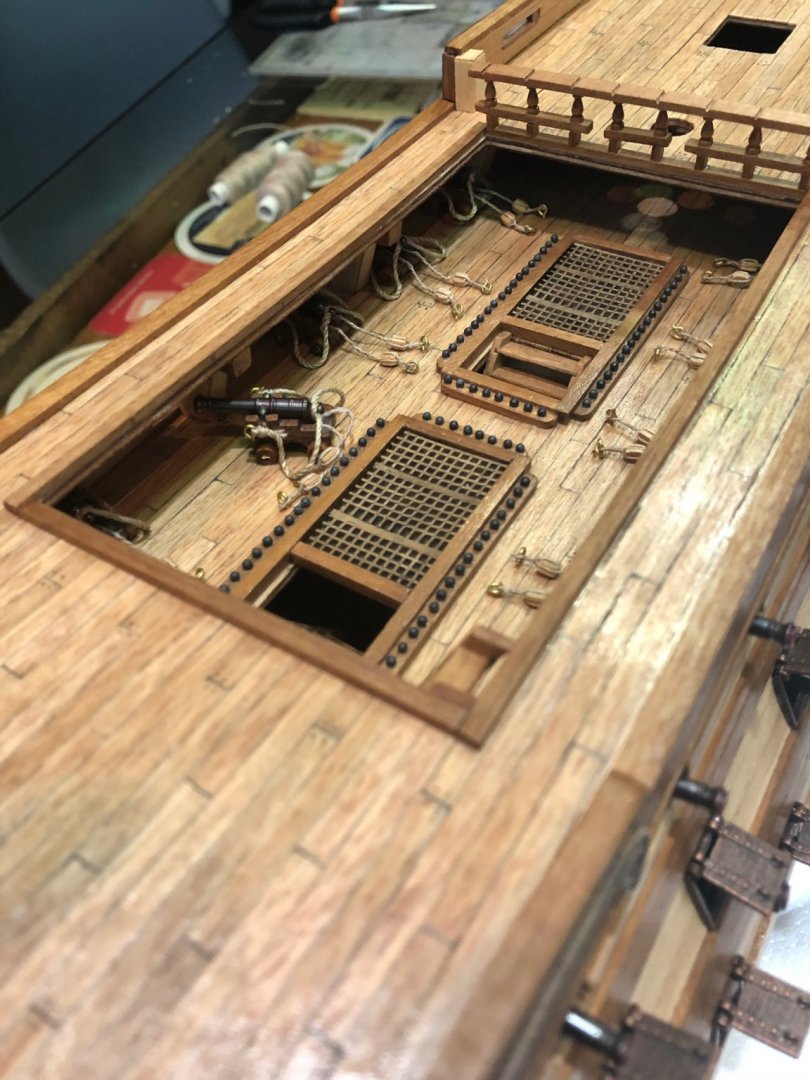
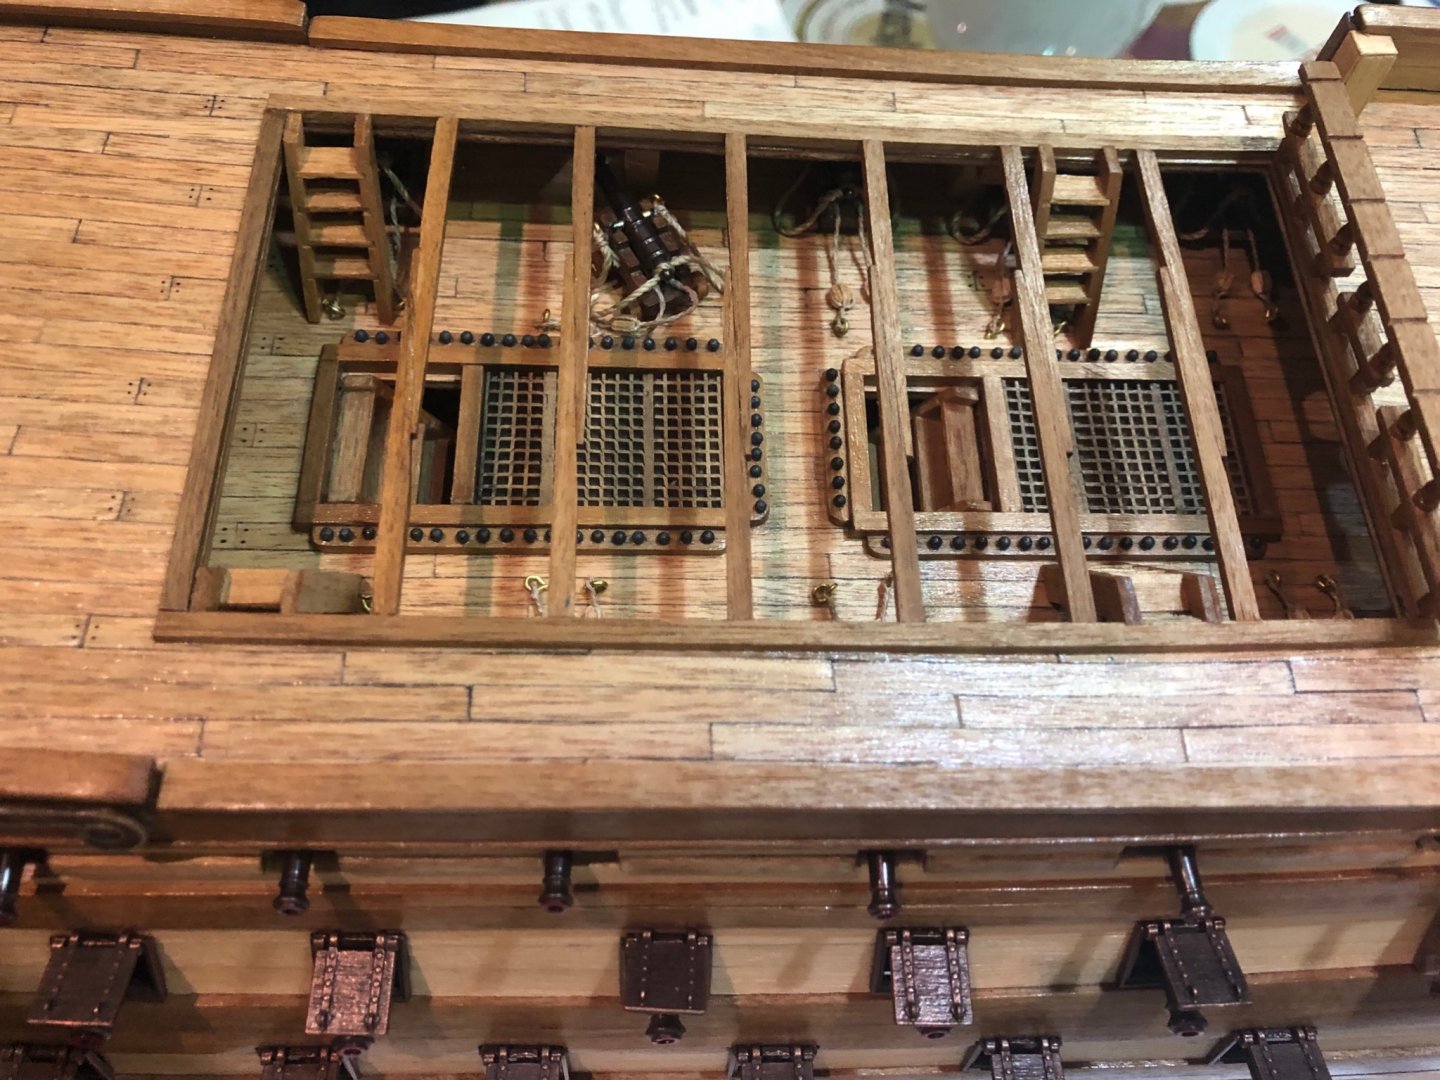
Dear friends: With a lot of help from my wife I was able to rig the lower deck cannons. It is a simplified rigging but I think it will do ok. The lower deck is almost finished. Here are the picks !!!


-
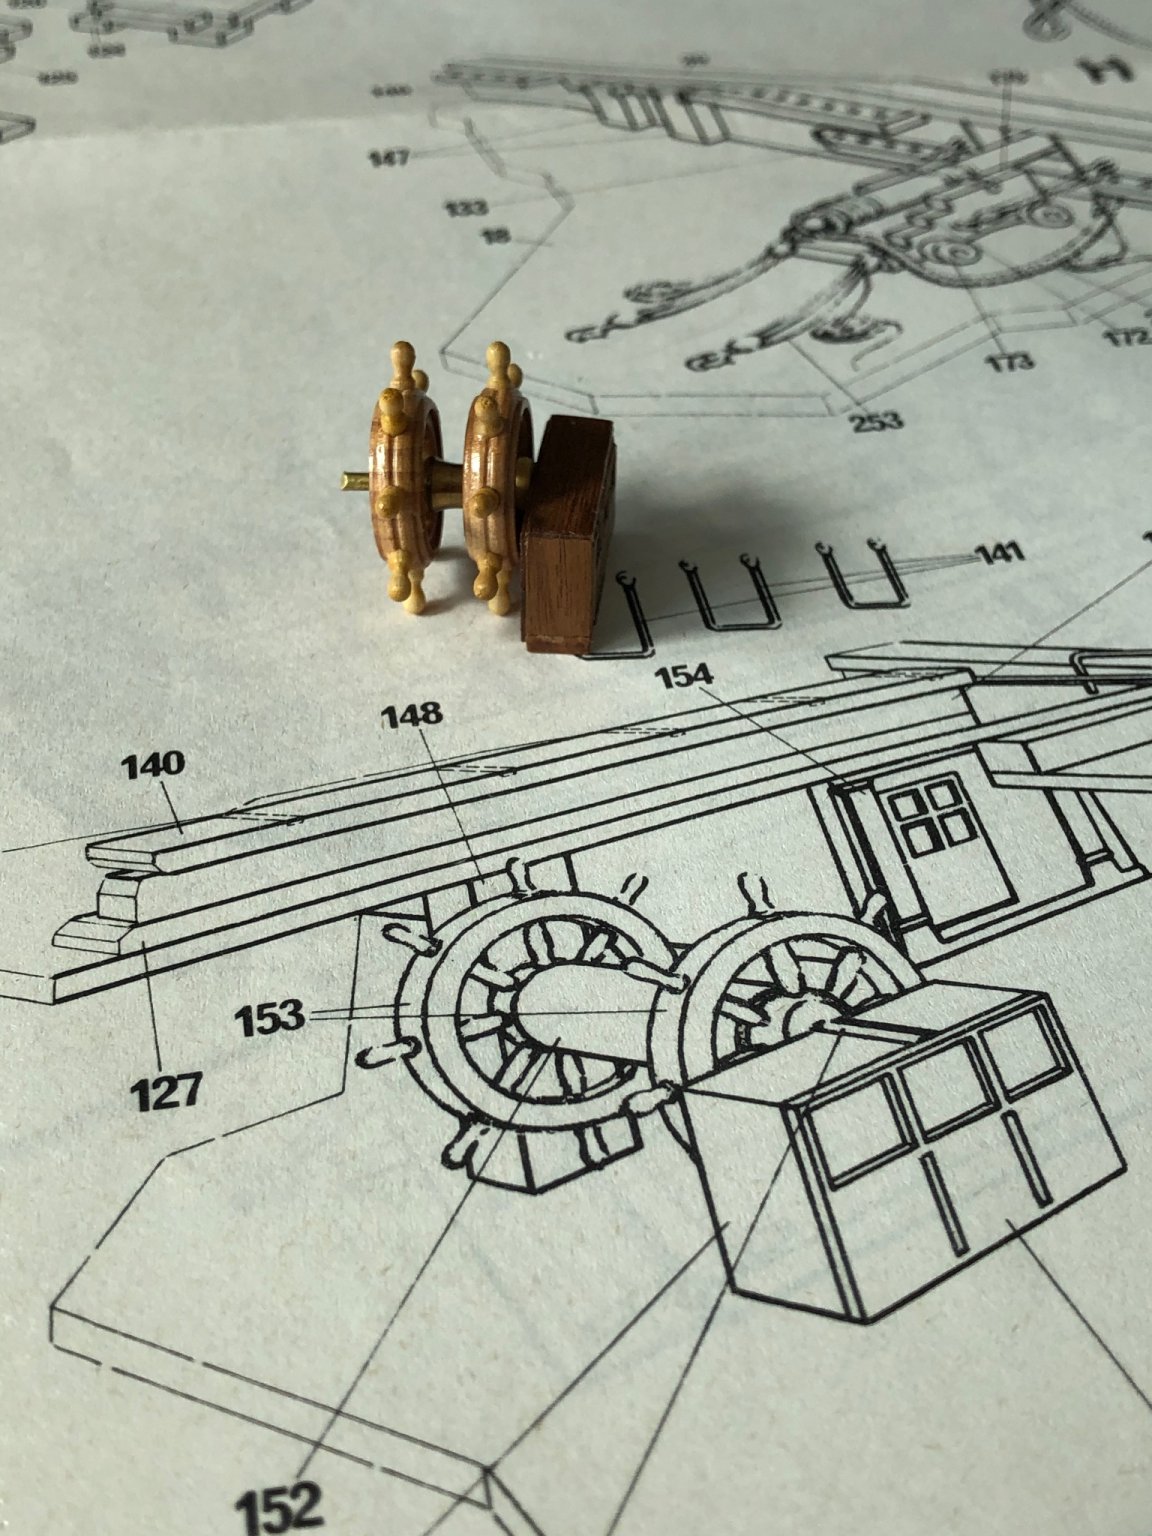
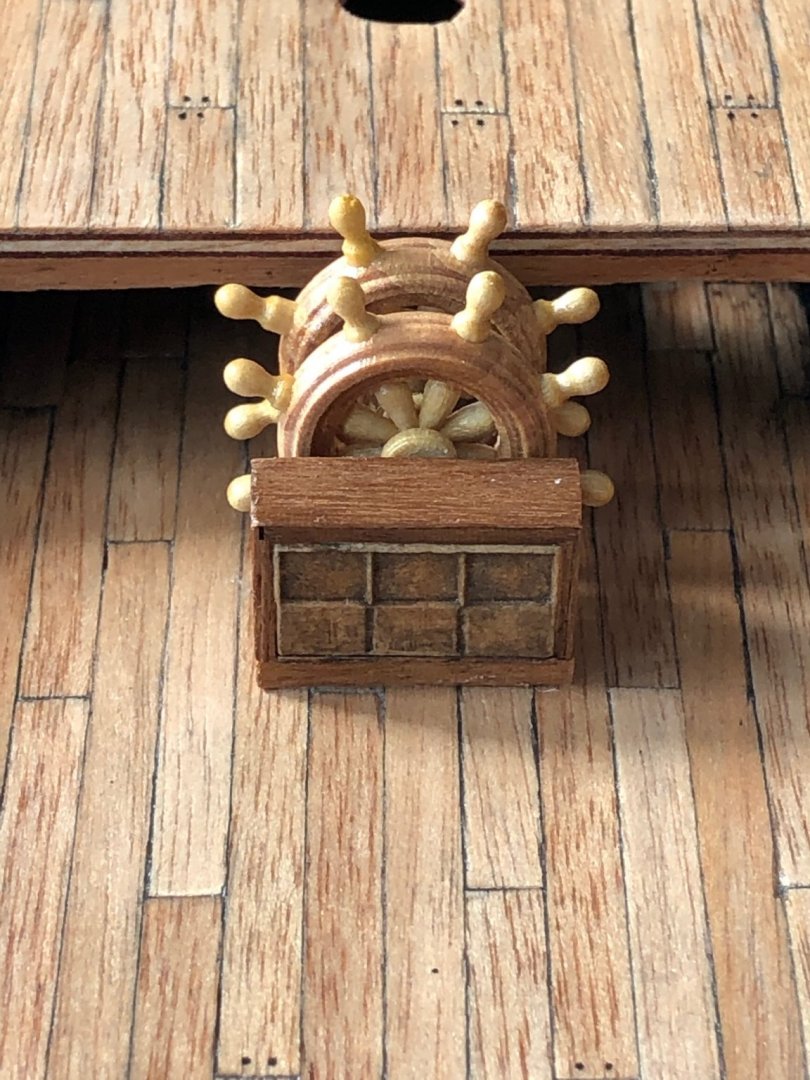
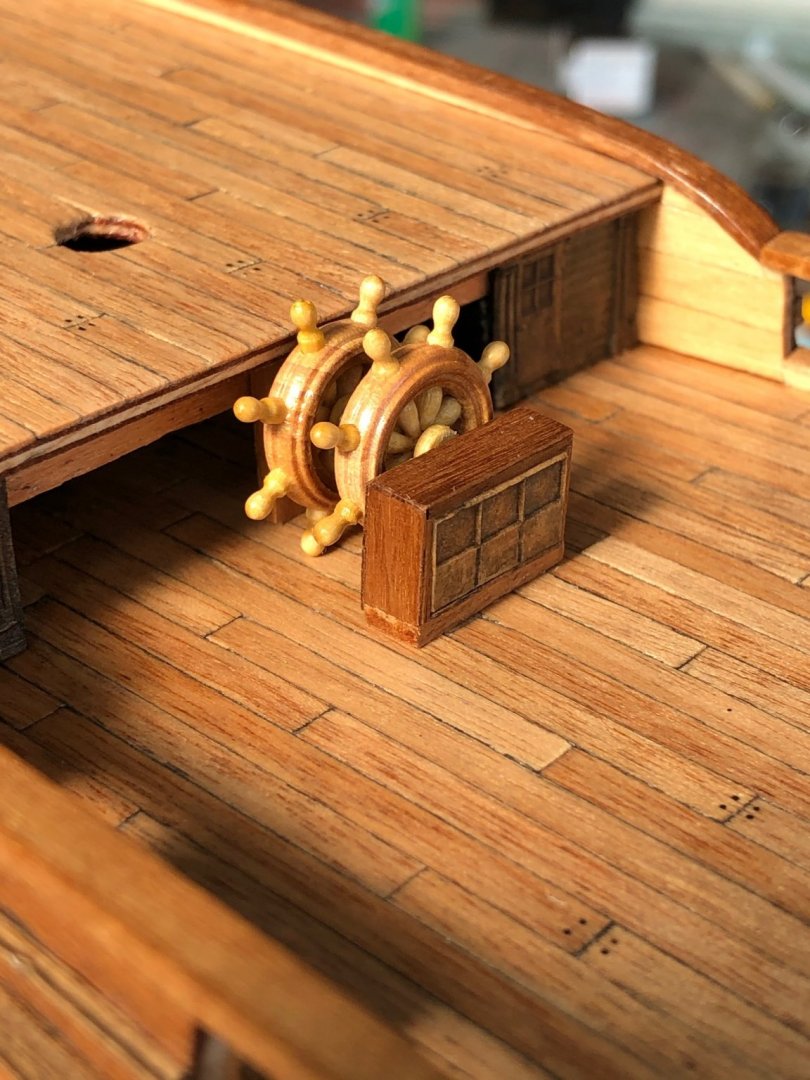
Kranck thank you very much for your support. I built the helm structure with some modifications. I planked the binnacle and changed the wheel spacer for a metal one. The helm is out of scale, but that is the one provided in the kit. I may change it later if I can get one of the correct size. I like the final result. Here are the picks!!!

-
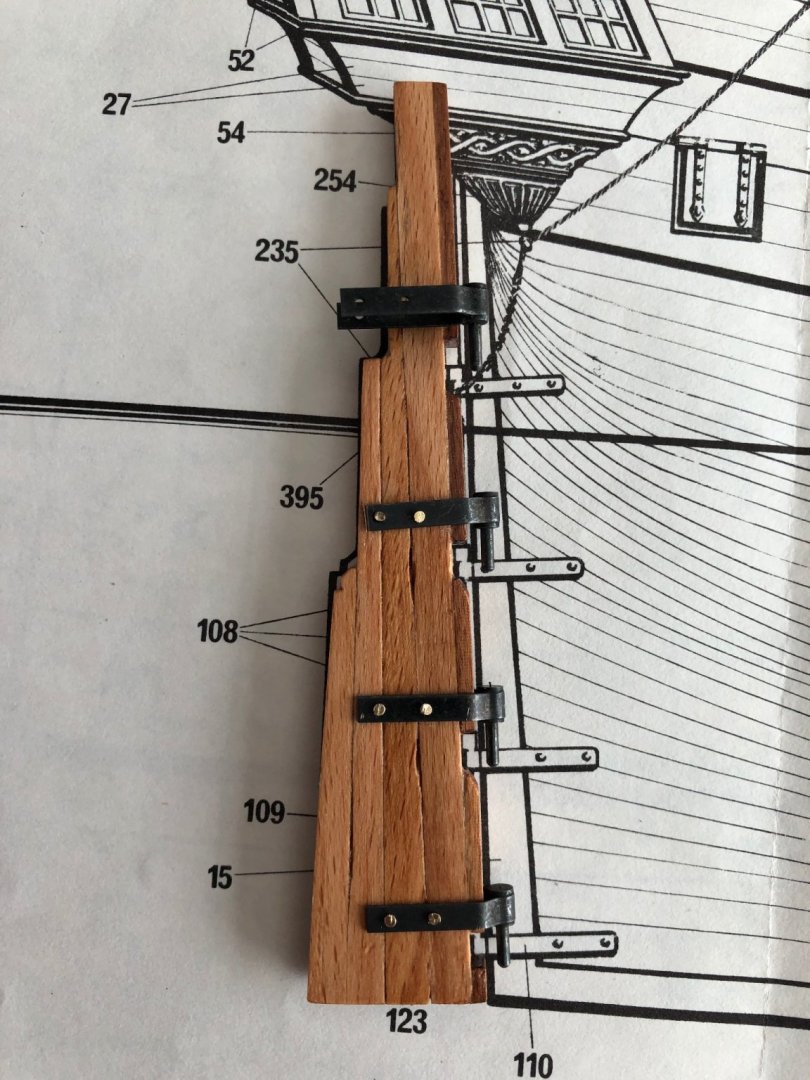
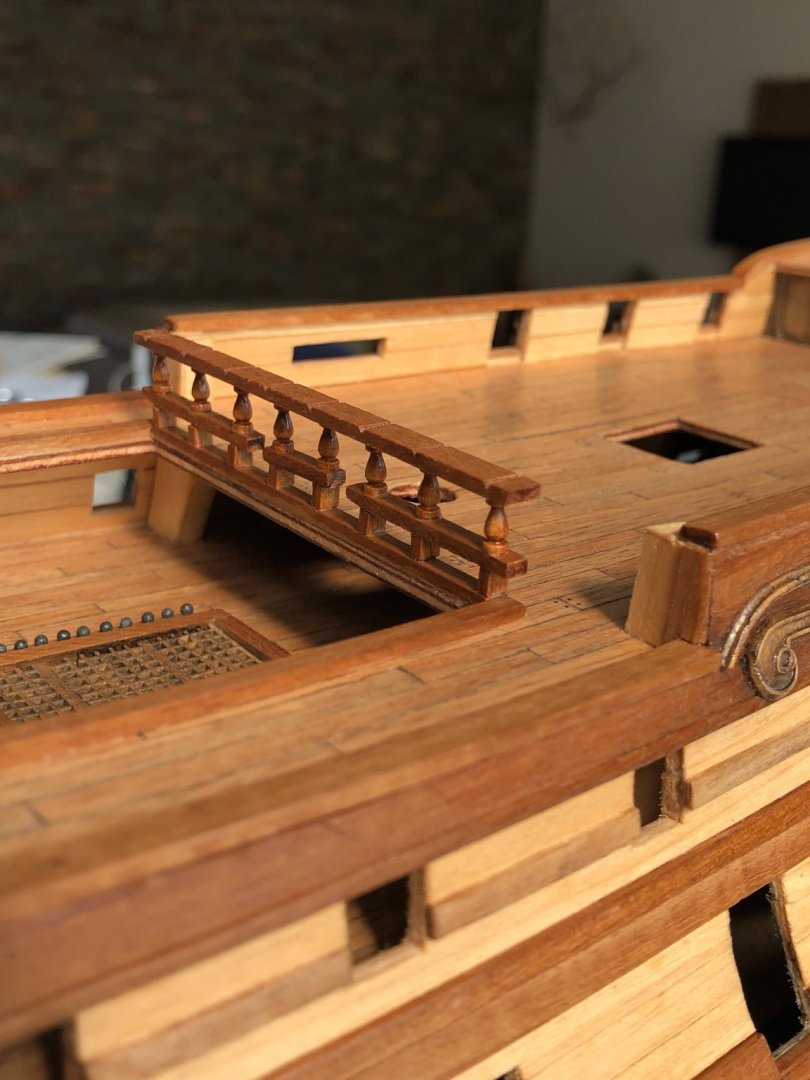
Nicolas very nice work !!! Congratulations. As you mentioned, the curvature of the main wales is different than the planks of the first planking. Therefore the second planking has also a different curvature. When setting the upper and poop decks you will need to cut those planks to deck level. I set the decks first, so when planking I trimmed the planks to level. When planking the decks take care of 3 issues: 1. First remove the tips of planks (bulkheads) 9 and 10. See post number 6 in my log to avoid that error. 2. Plank the space between the upper deck and the poop deck before setting the poop deck. 3. When cutting the beams of planks (bulkheads) 6 and 7 also cut the one on number 11. That is not shown on the instructions. I didn’t do it and it doesn’t looks ok. The height at that point is not ok. See attached pick.
-
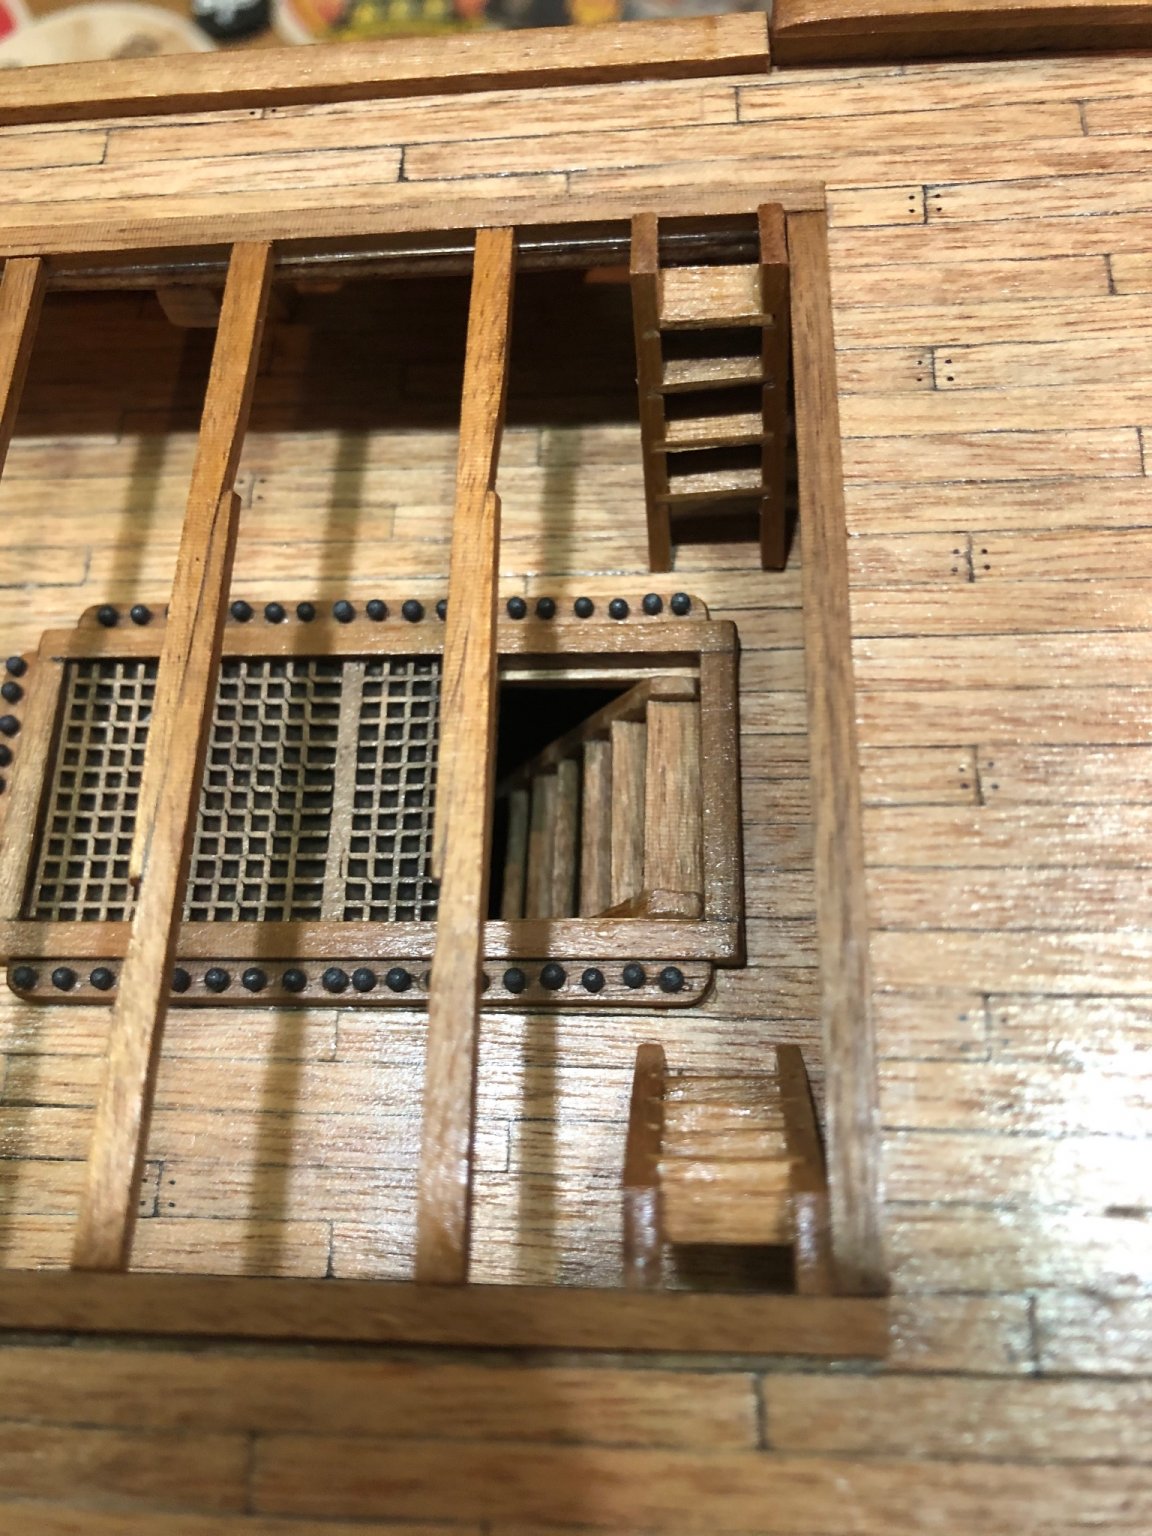
Roberts: Those gaps will be covered by the deck planking. No problem. When planking the decks take care of 3 issues: 1. First remove the tips of planks (bulkheads) 9 and 10. See post number 6 in my log to avoid that error. 2. Plank the space between the upper deck and the poop deck before setting the poop deck. 3. When cutting the beams of planks (bulkheads) 6 and 7 also cut the one on number 11. That is not shown on the instructions. I didn’t do it and it doesn’t looks ok. The height at that point is not ok. See attached pick. Regarding the stairs, they are not supported below the deck. But if you glue them correctly they will stay there without a problem. See second pick here and pick number 8 on post number 4 of my log. Keep up the good work. Happy new year!!!


-
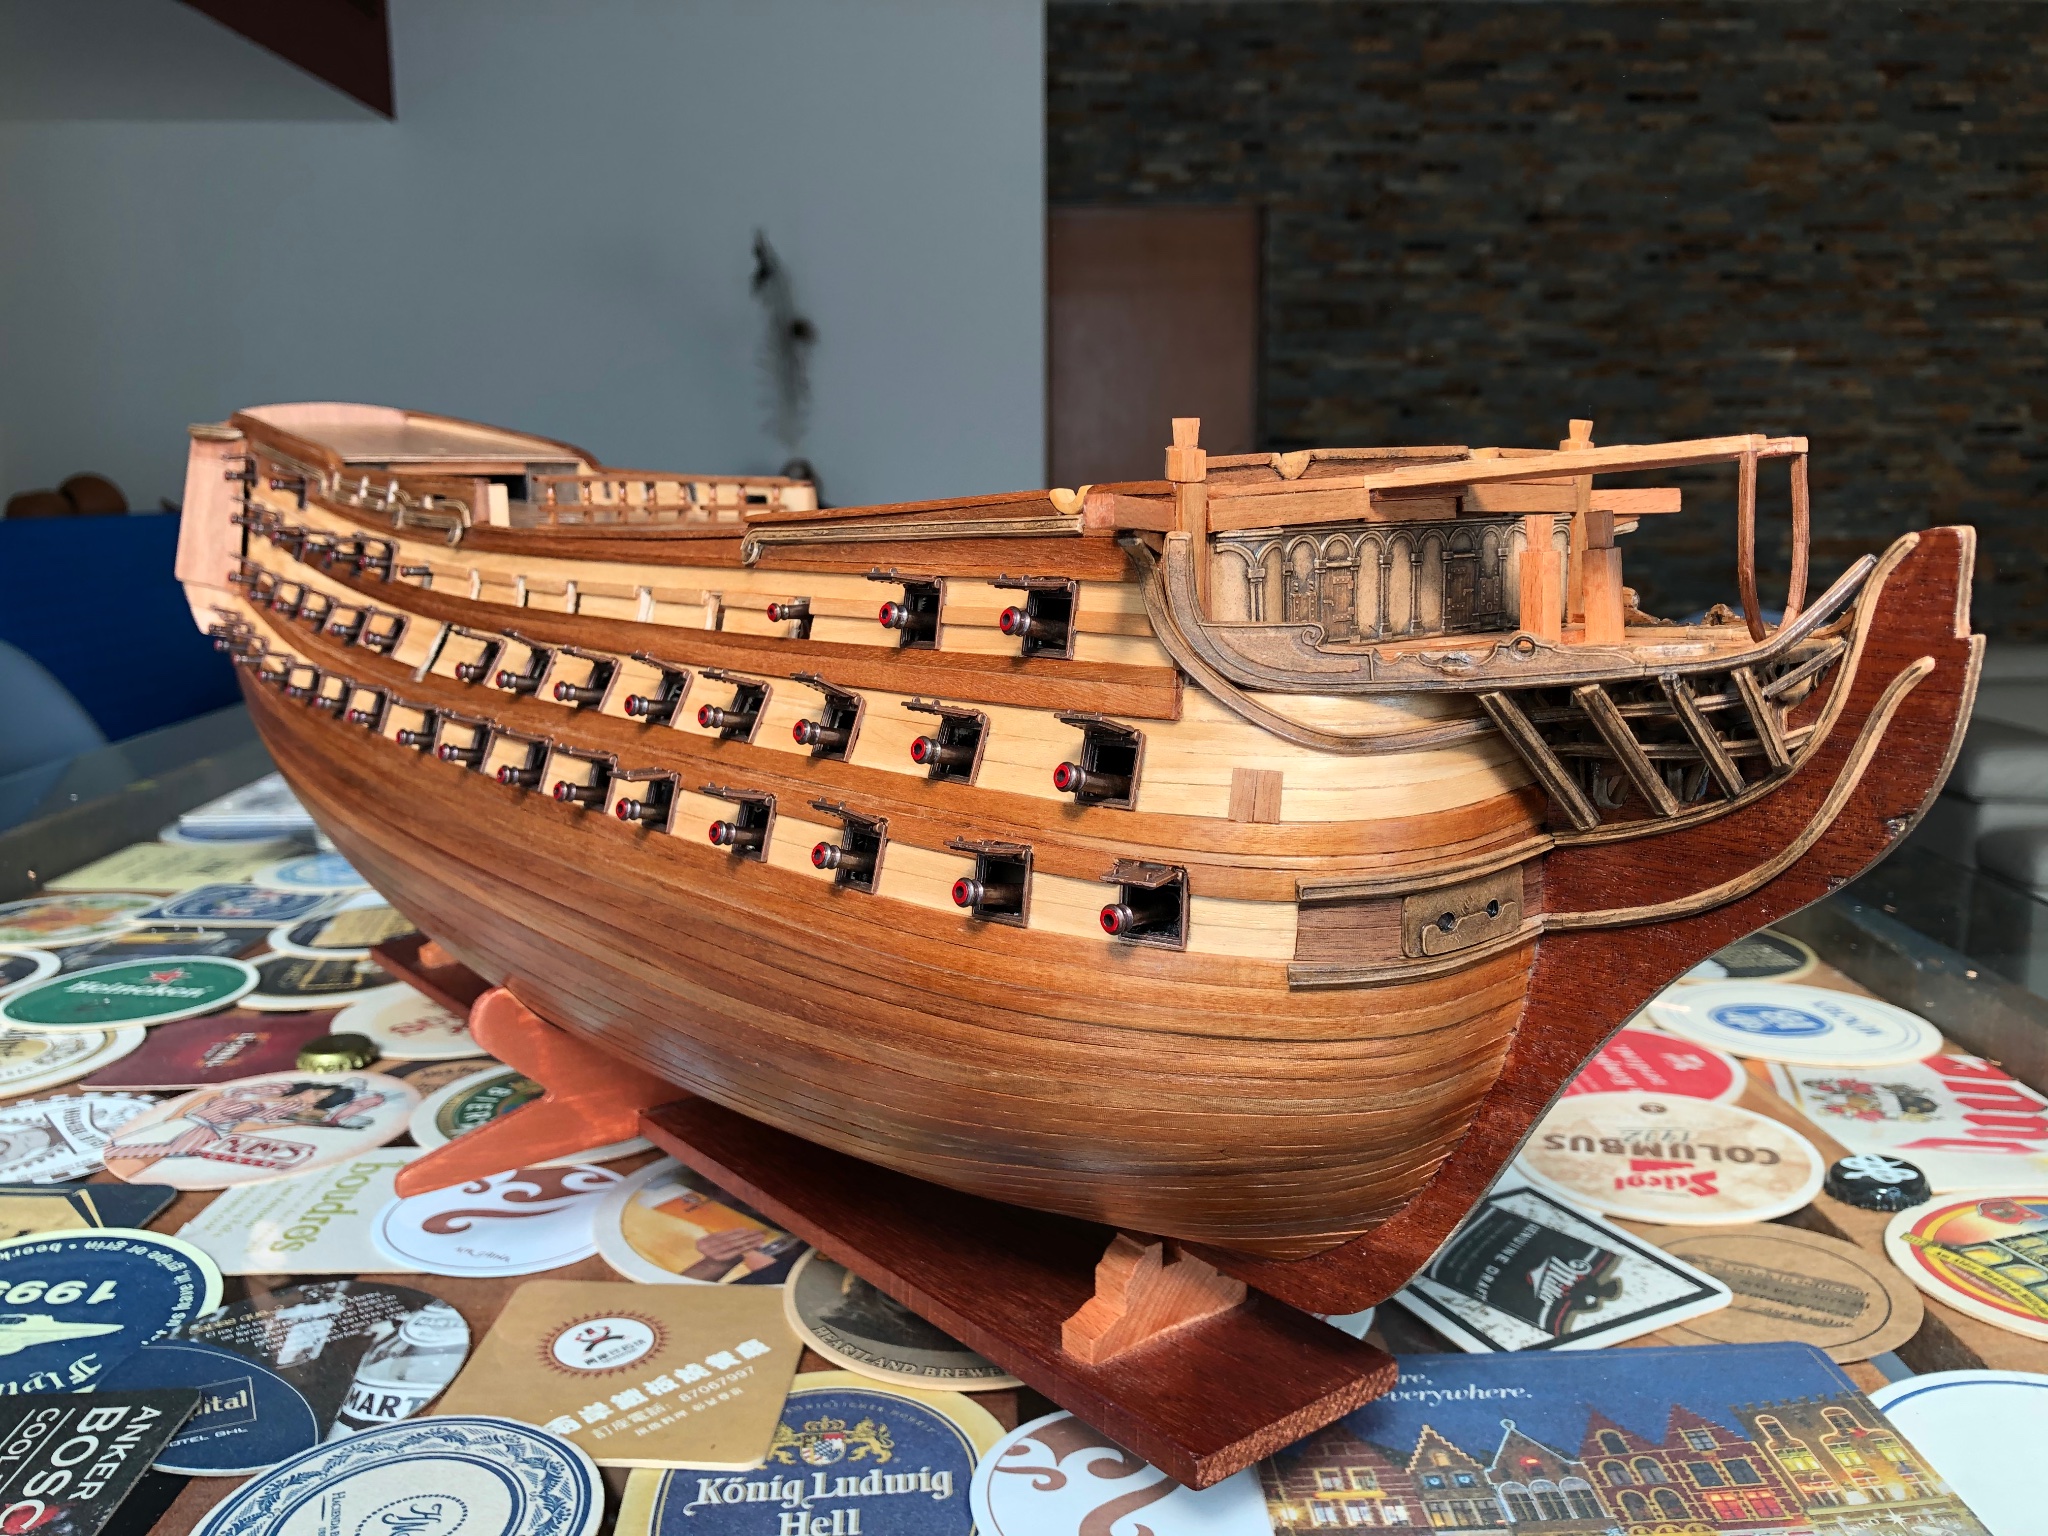
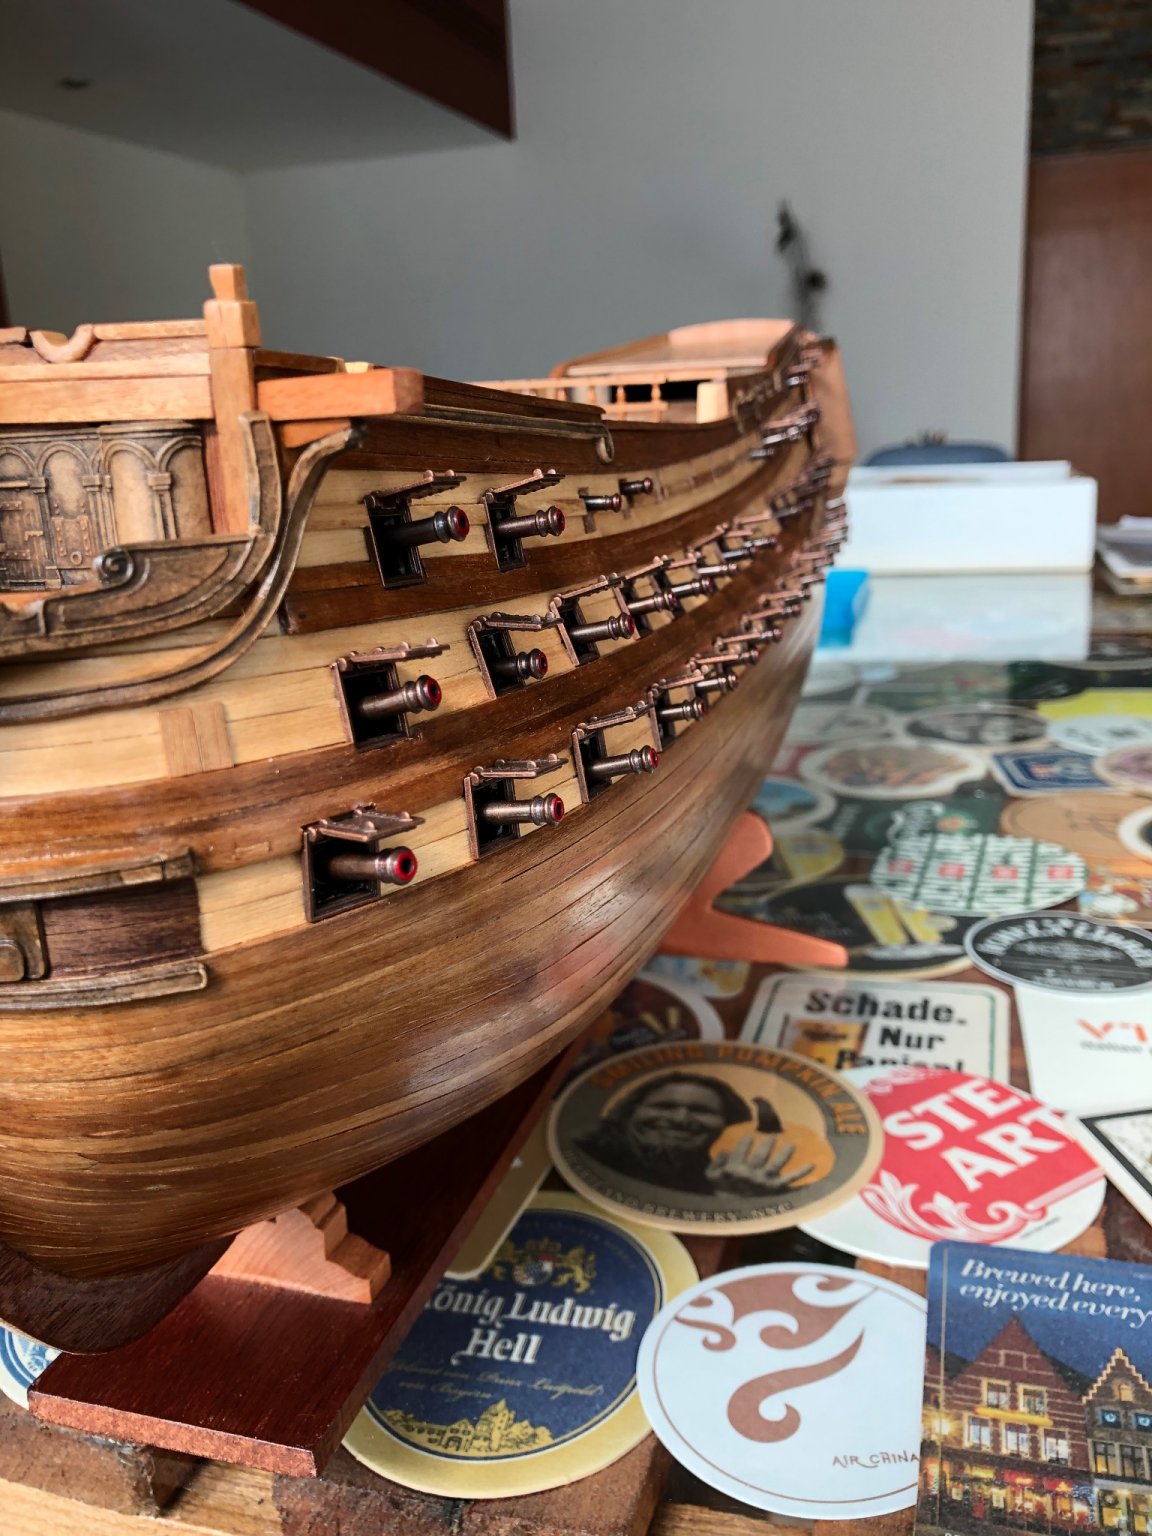
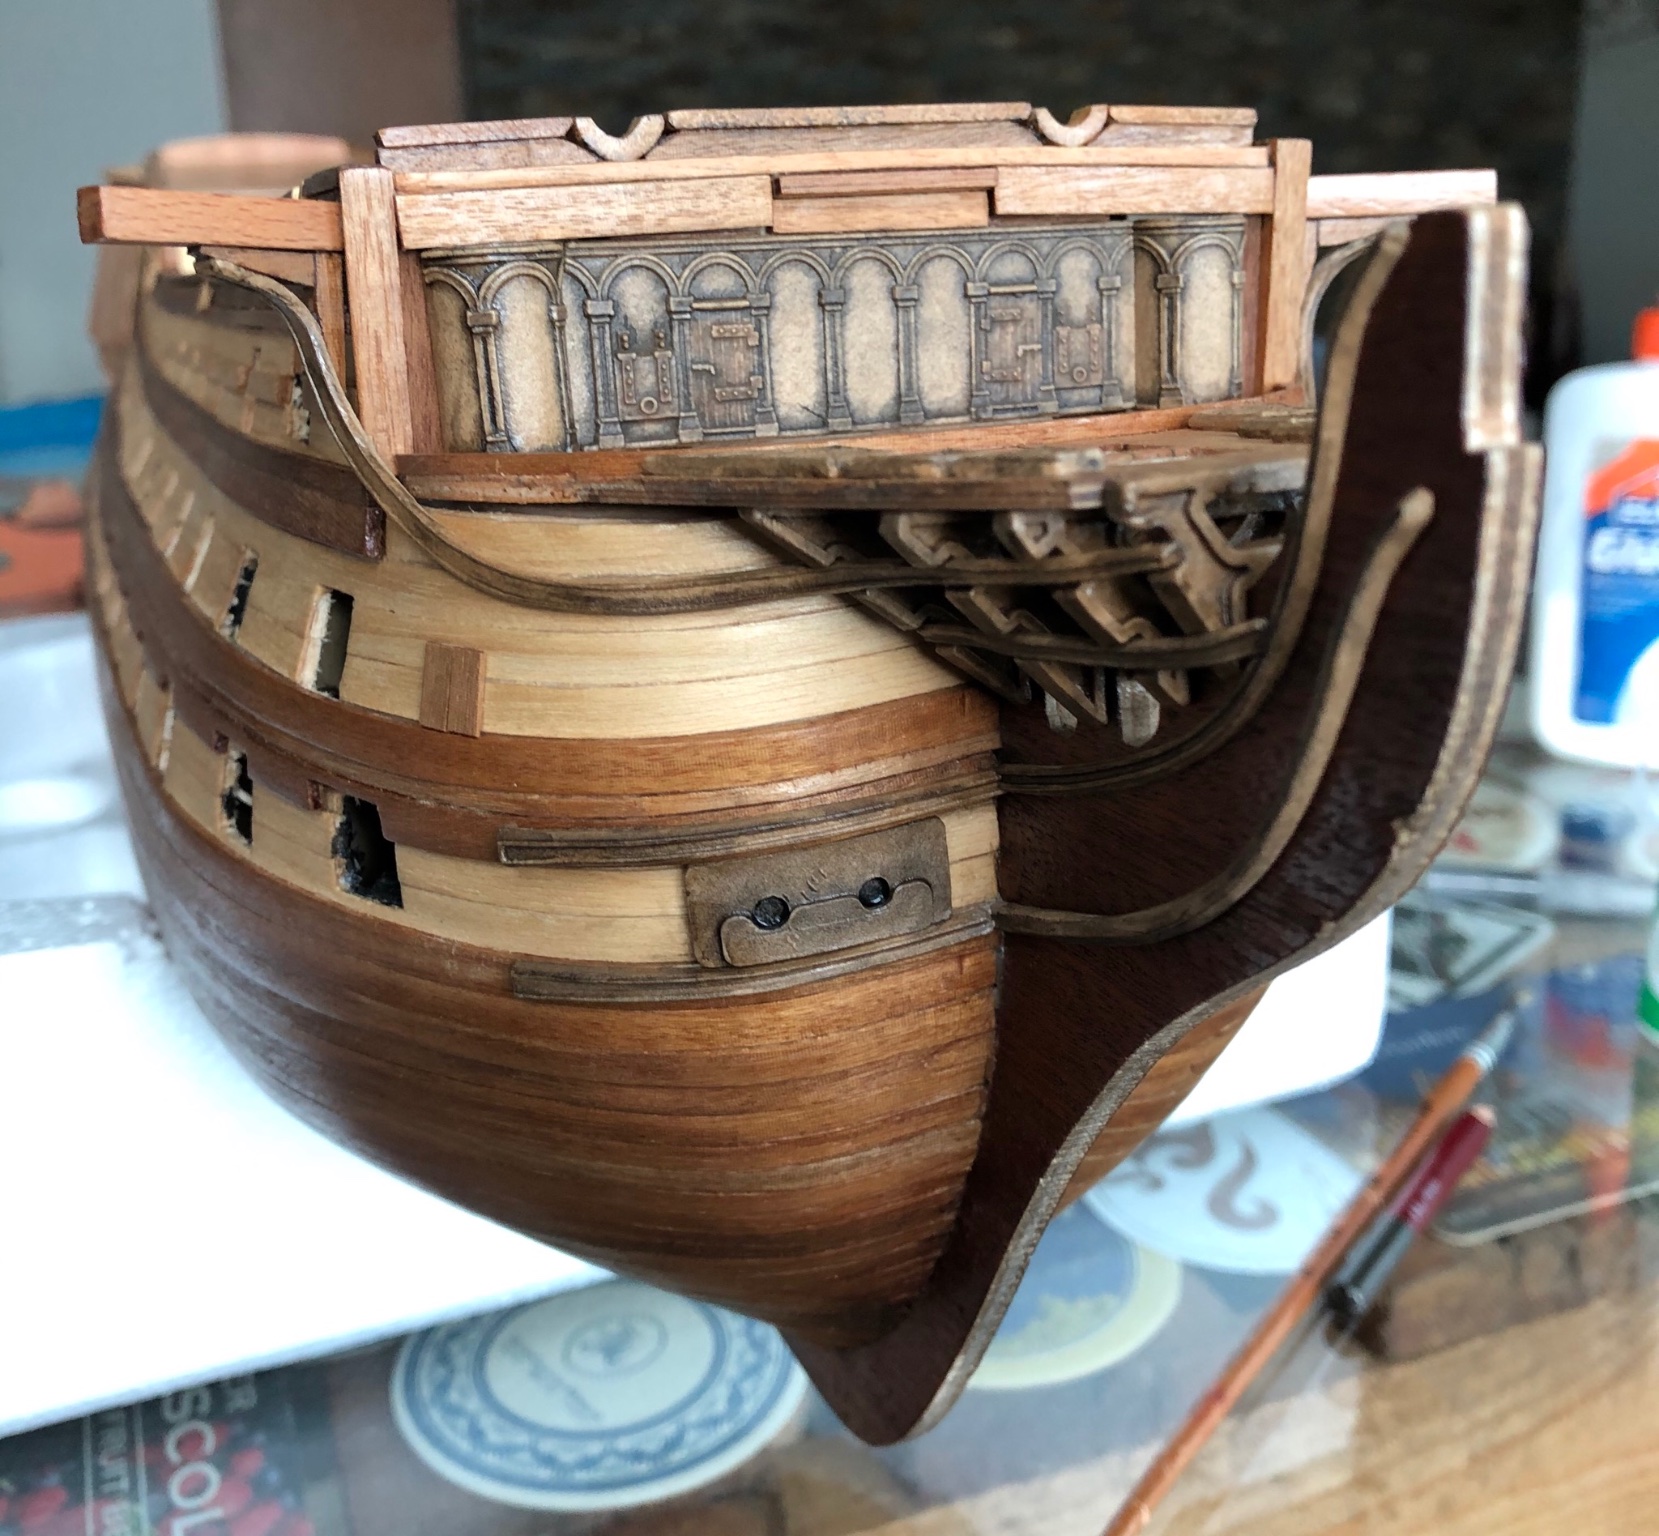
Thank you very much Roberts. You are also starting solid !!! I didn’t resist the temptation to go for the gun ports, cannons and main entrance. Here are the picks!!!


-
Roberts you are going to enjoy this model! I started mine 4 months ago. My build log may help you to avoid the mistakes I made. Enjoy the journey!!!
-
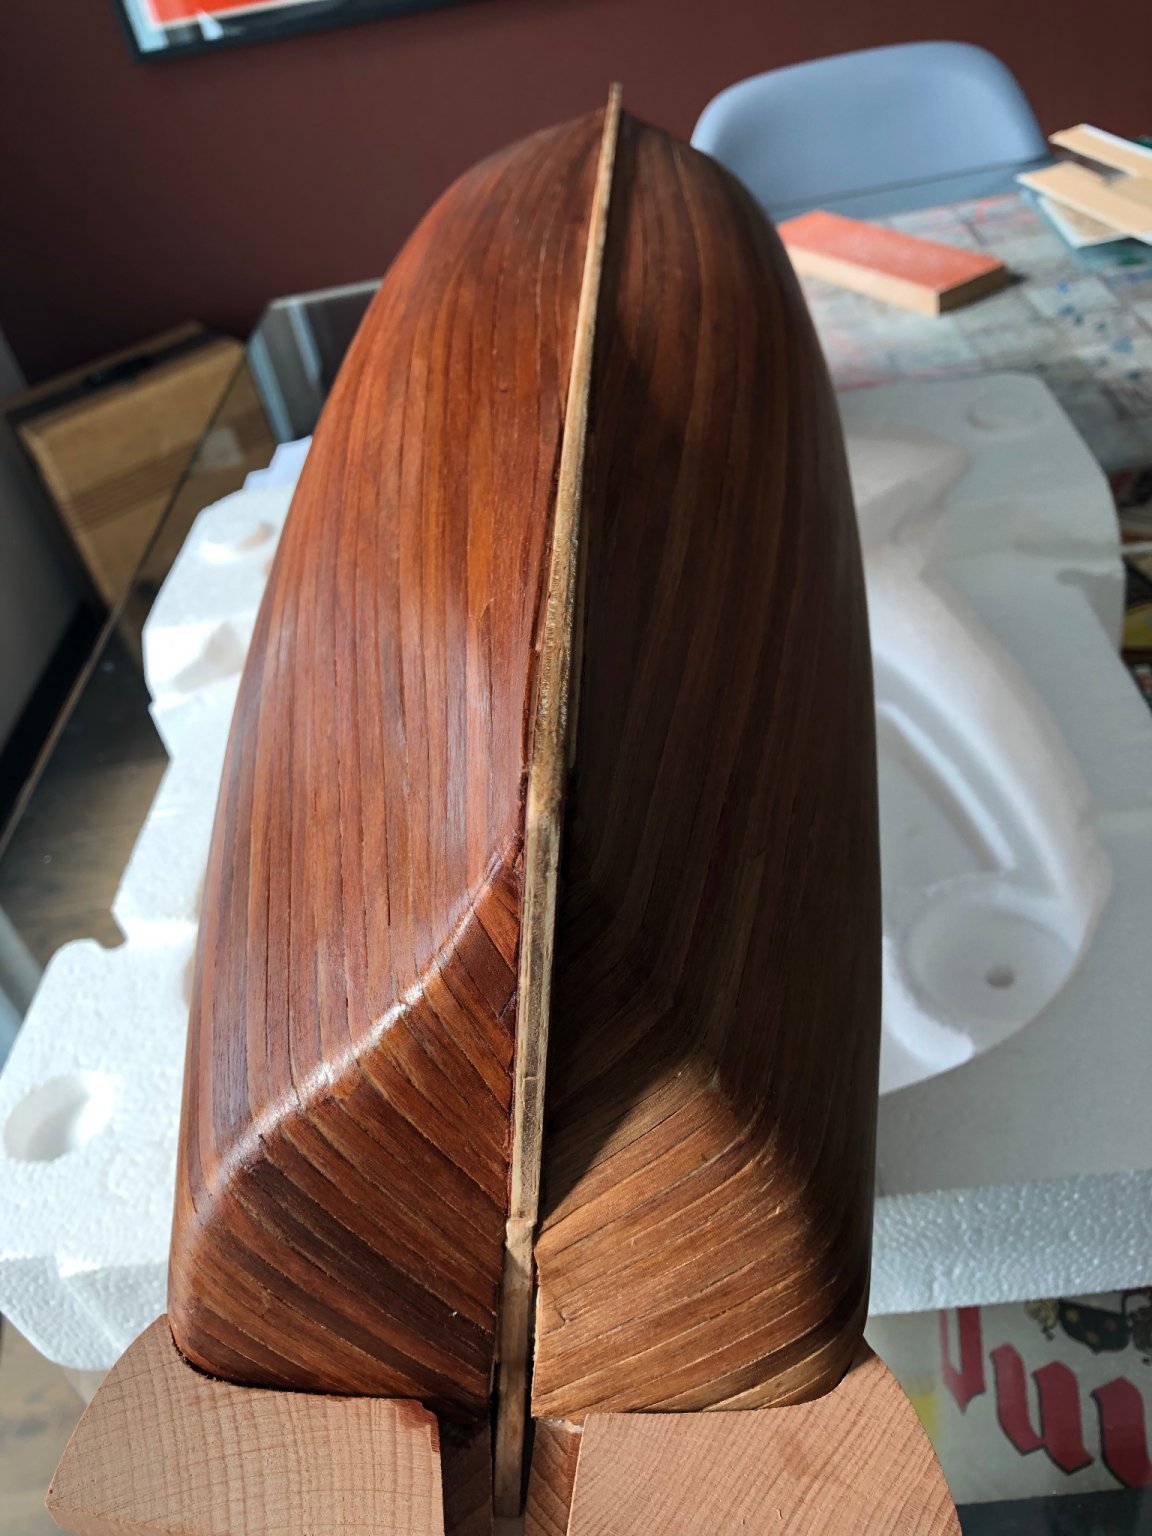
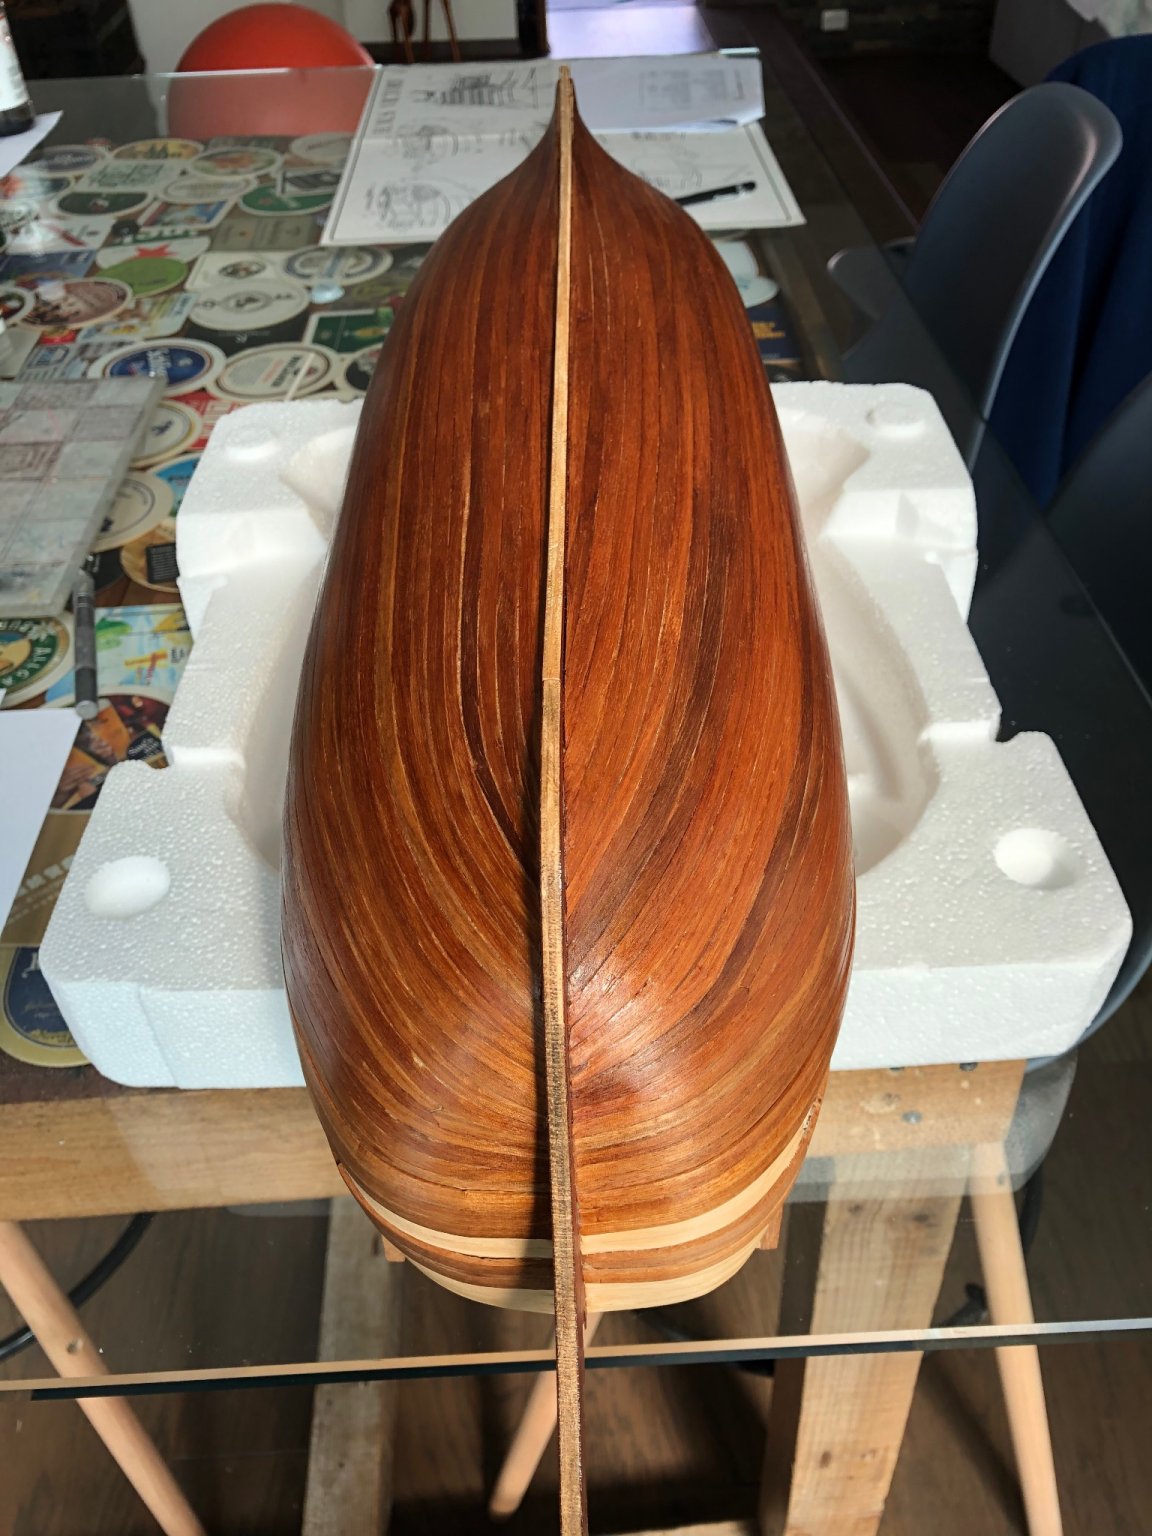
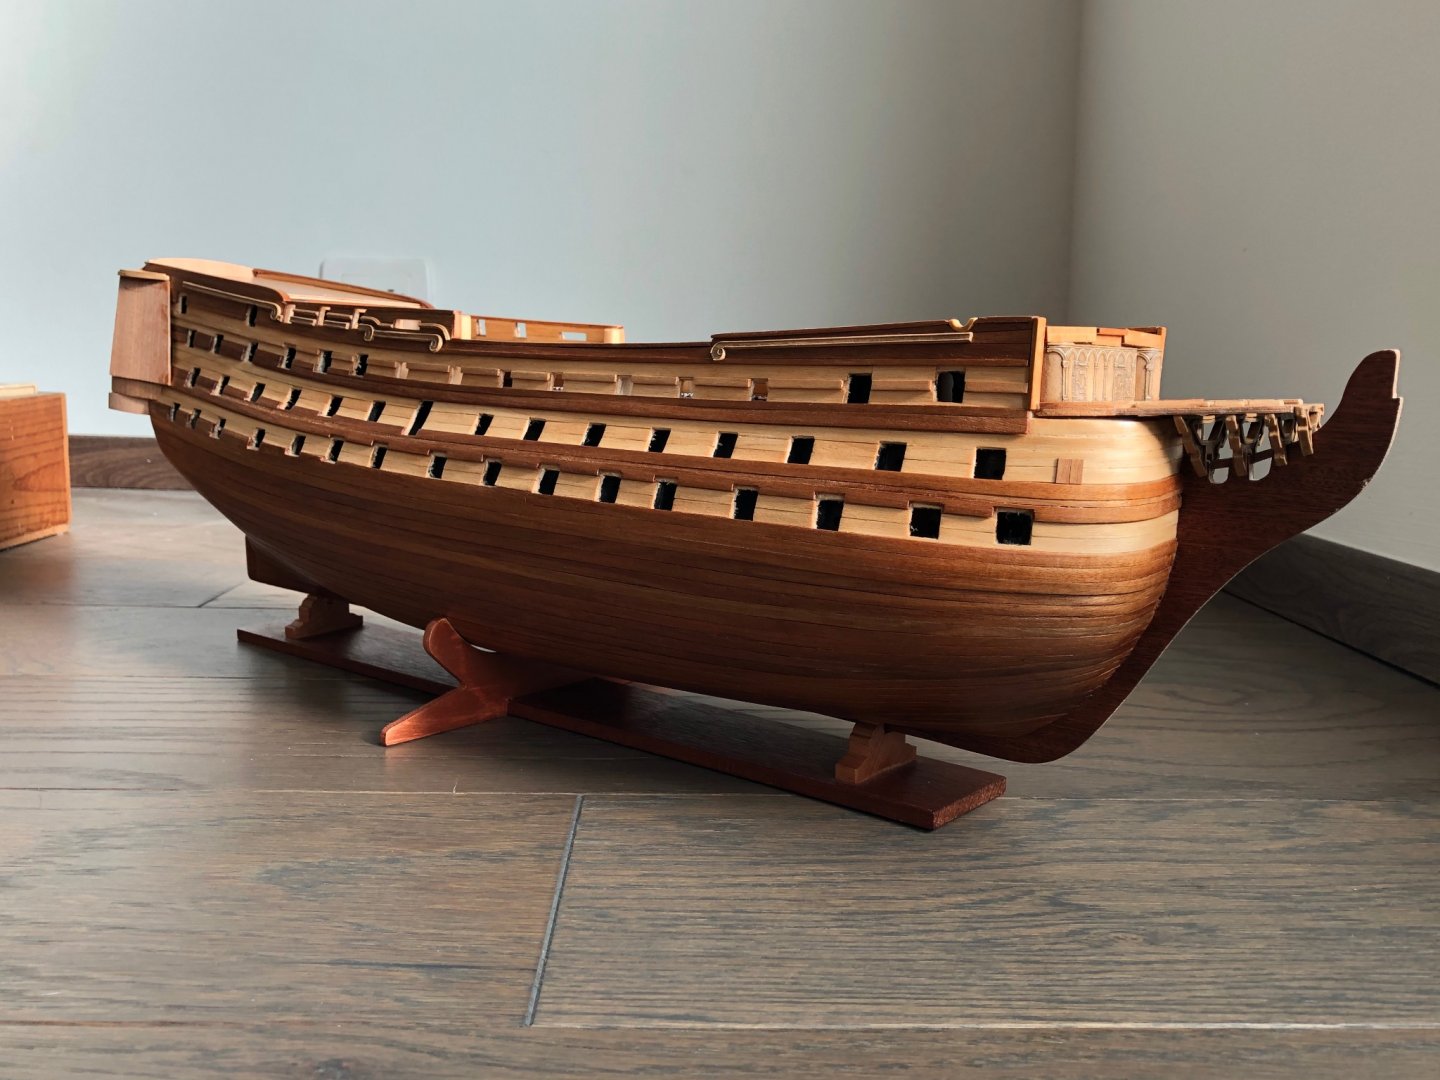
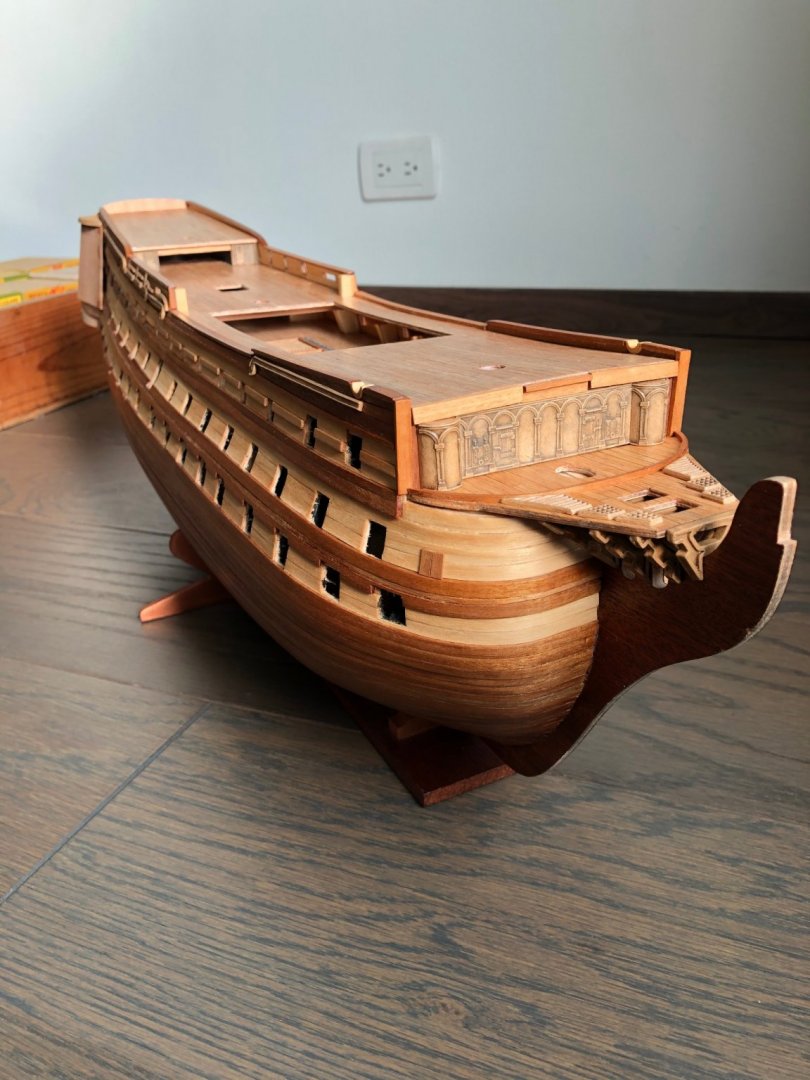
Friends: Second coat of varnish applied and some details in the bow and deck. Here are the picks!!!


-
Then he said to them, “The Sabbath was made for man, not man for the Sabbath”. Bigcreekdad: I am new to ship modeling and new to this forum, but questions like yours are common to all hobbies once you go deep into them. I have been a philatelists for many years, even got a price at New York’s World Stamp Show in 2016, but I decided to stop exhibiting because I was tired of complying with rules set by the establishment. Rules that in my opinion were absurd or constrained my desire, taste and way of setting an exhibit. I wanted to do something different, Something new, but if you did so, then you could not exhibit or your exhibit get a low mark. And in this forum I have found the same thing. Which is not good or bad, it is just the way forums like this are. Just take a look at my build log. This is the latest recommendation I got by someone telling me I built my model incorrectly: “I would put this model aside and do something simpler, but correctly and efficiently“. For sure he is right, but not having an exact replica of the real vessel is wrong? Or keep building a model with an error is wrong? In my opinion, by no means!!! My build is surpassing my own expectations and that’s the only thing matters for me. So if you are building a model and want to keep the pear wood finish, in my opinion and please just my opinion, go for it!!! I agree with you, copper plating is not as beautiful as a natural wood hull. For sure some people may say: Oh dear, that’s not the way it must be! You need to copper plate it in order to finish it, to make it perfect!!! But having a beautiful model, just as you want it, would be the perfect thing for you!!! Best regards and enjoy the holidays!!! 😉
-
Hi Alnike. Thanks for your post. Can you please explain what is the feed? Based on your pictures I suppose it is the base of the stern galleries. Is that correct? If that is what you mean, I can tell you that this is the result of carefully following Corel’s plans and instructions!!! 😅 So it is another proof that they are not so good. This is just my second model and my only goals are to get more knowledge and experience working with wood and to do something challenging during this lock down. I use to go on business trips 40 weeks a year. Imagine my situation being at home since March !!! I took the chance to go for this model that may not be for beginners because I will learn much more doing it than doing an easy one! And at the end, all my friends and relatives will be impressed by it 🤪. Any suggestion or help is appreciated. Please let me know what do you consider I can do to correct it if it is still possible. Your model is amazing. Congratulations!
-
My best wishes to all for Christmas and the New Year!!! I am really happy of finding this forum and learning from all of you! Some more work on the bow. Here are the picks!


-
WalrusGuy: The boat is amazing!!! I love all the detail you put in it. I wish you all the best for Christmas and the New Year ! Keep up the great work !!!
- 950 replies
-
- 1
-
-
- syren
- model shipways
- (and 1 more)
-
Hi LFNokia. Since I joined the forum I have been following your build log and watching your videos. Your work is fantastic. Your weathering effects are outstanding. Congratulations, you are close to complete a great model. I am looking forward to build the Santísima Trinidad in the future after getting some more experience. I wish you the best for Christmas and the New Year !!!
- 358 replies
-
- 1
-
-
- occre
- santisima trinidad
- (and 1 more)
-
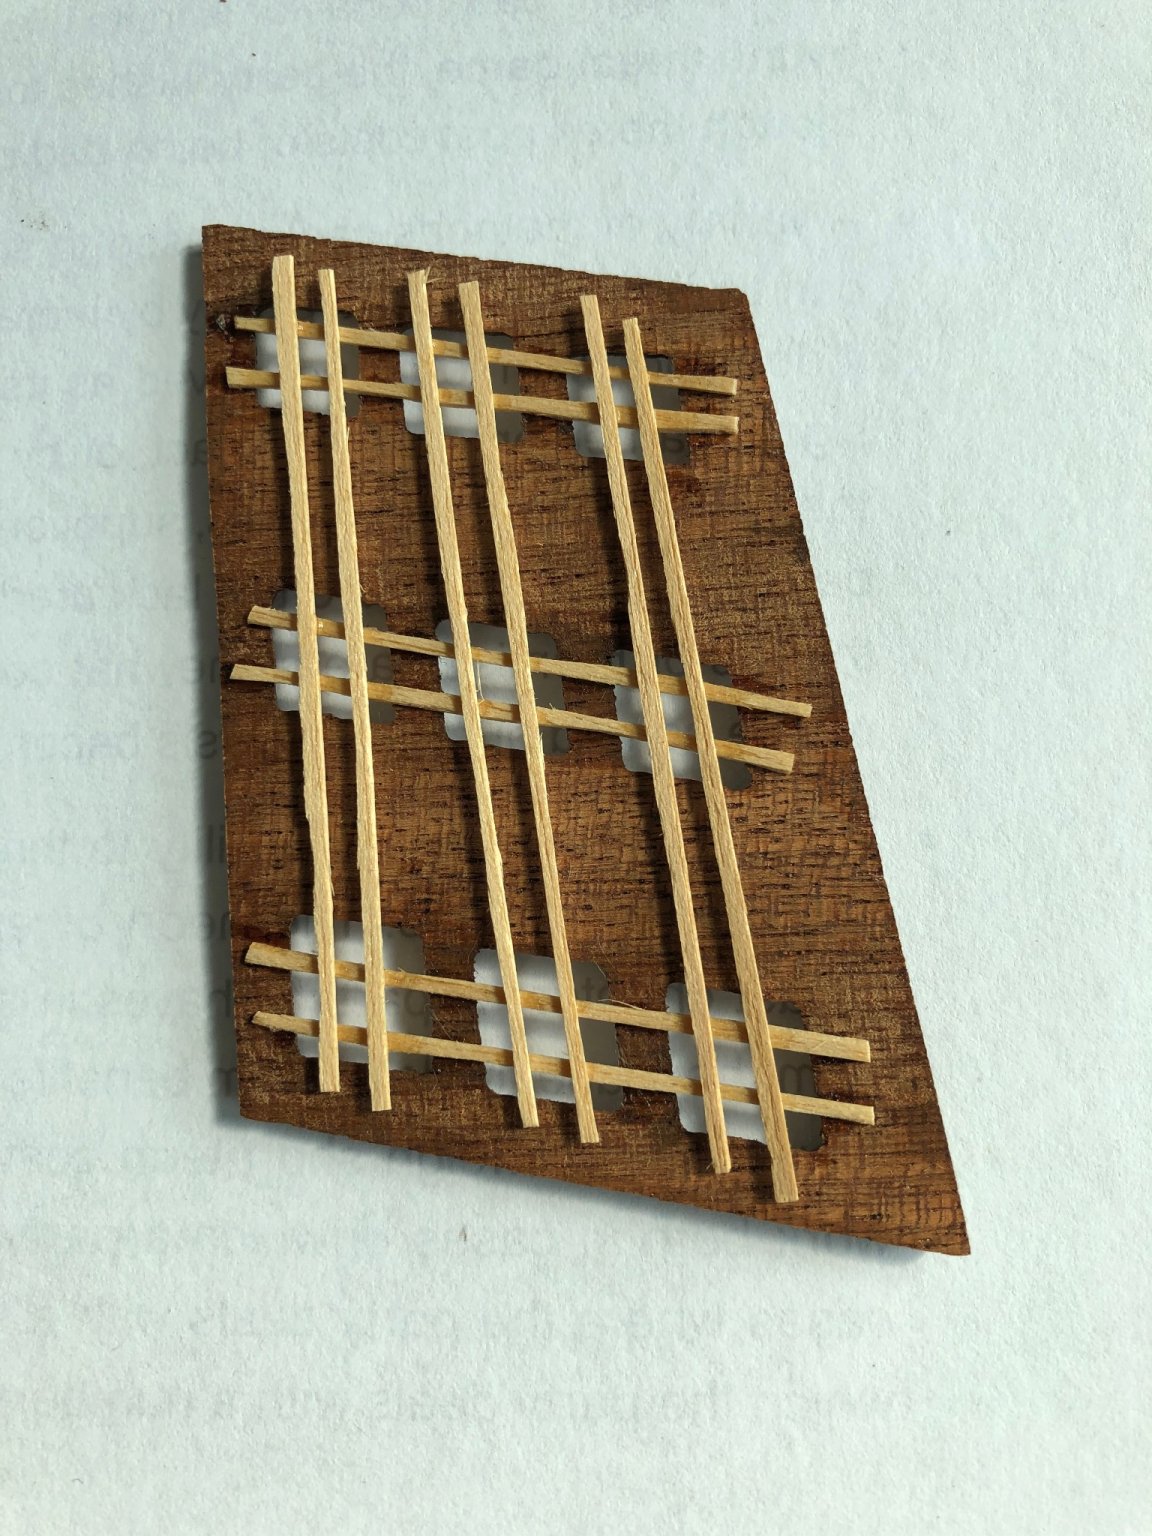
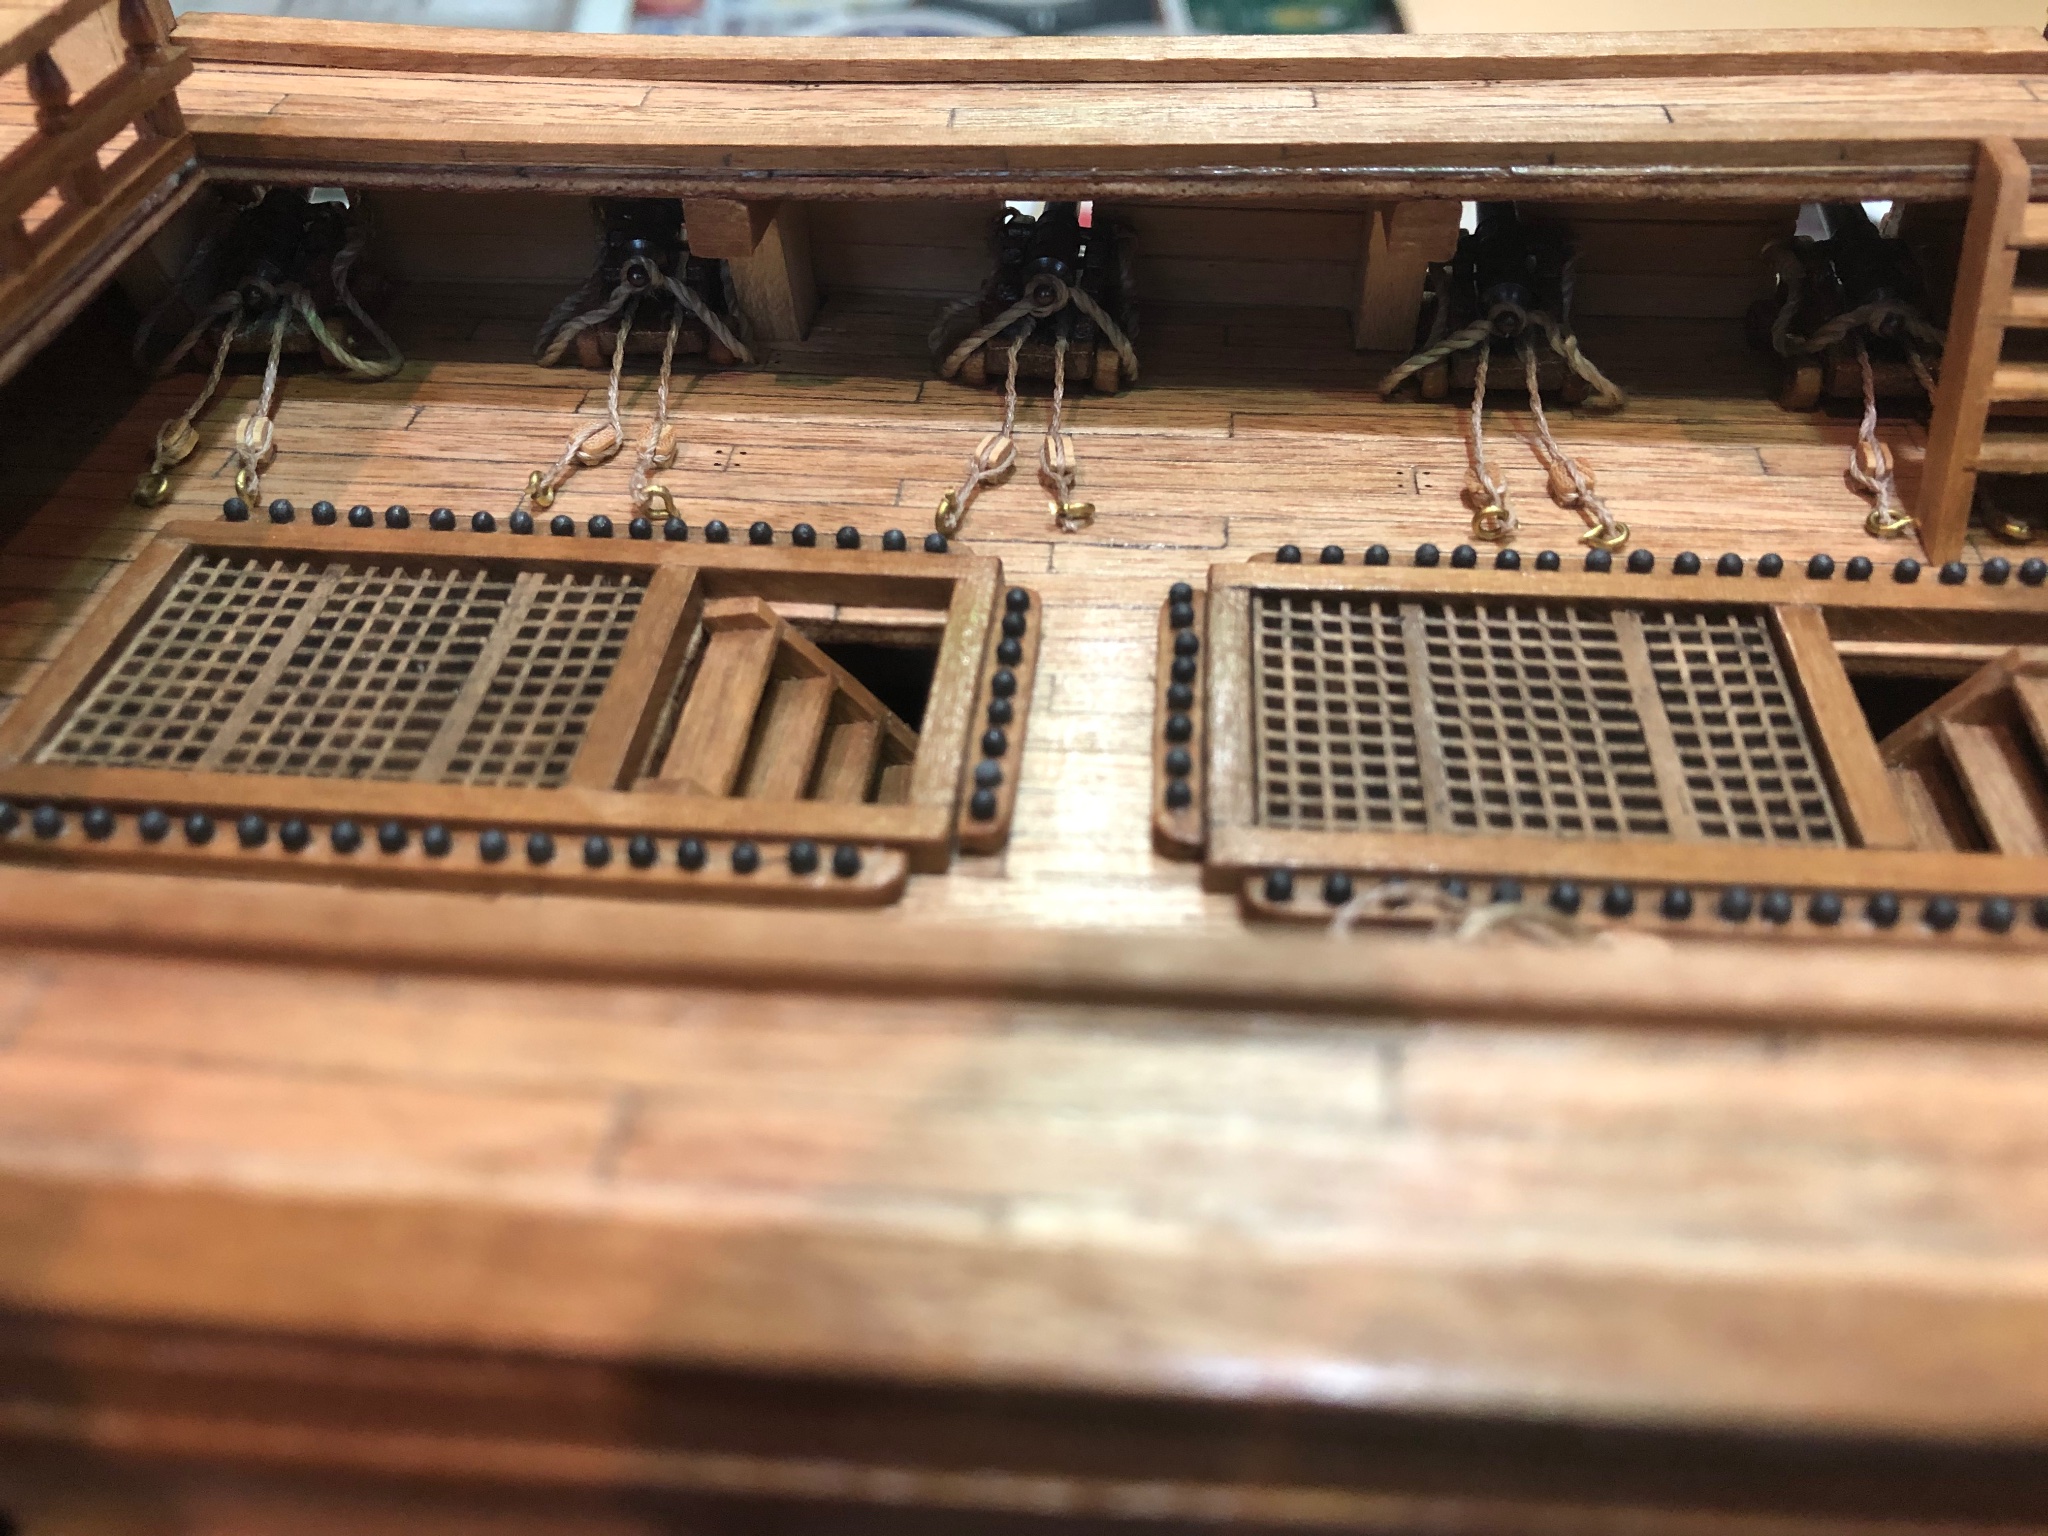
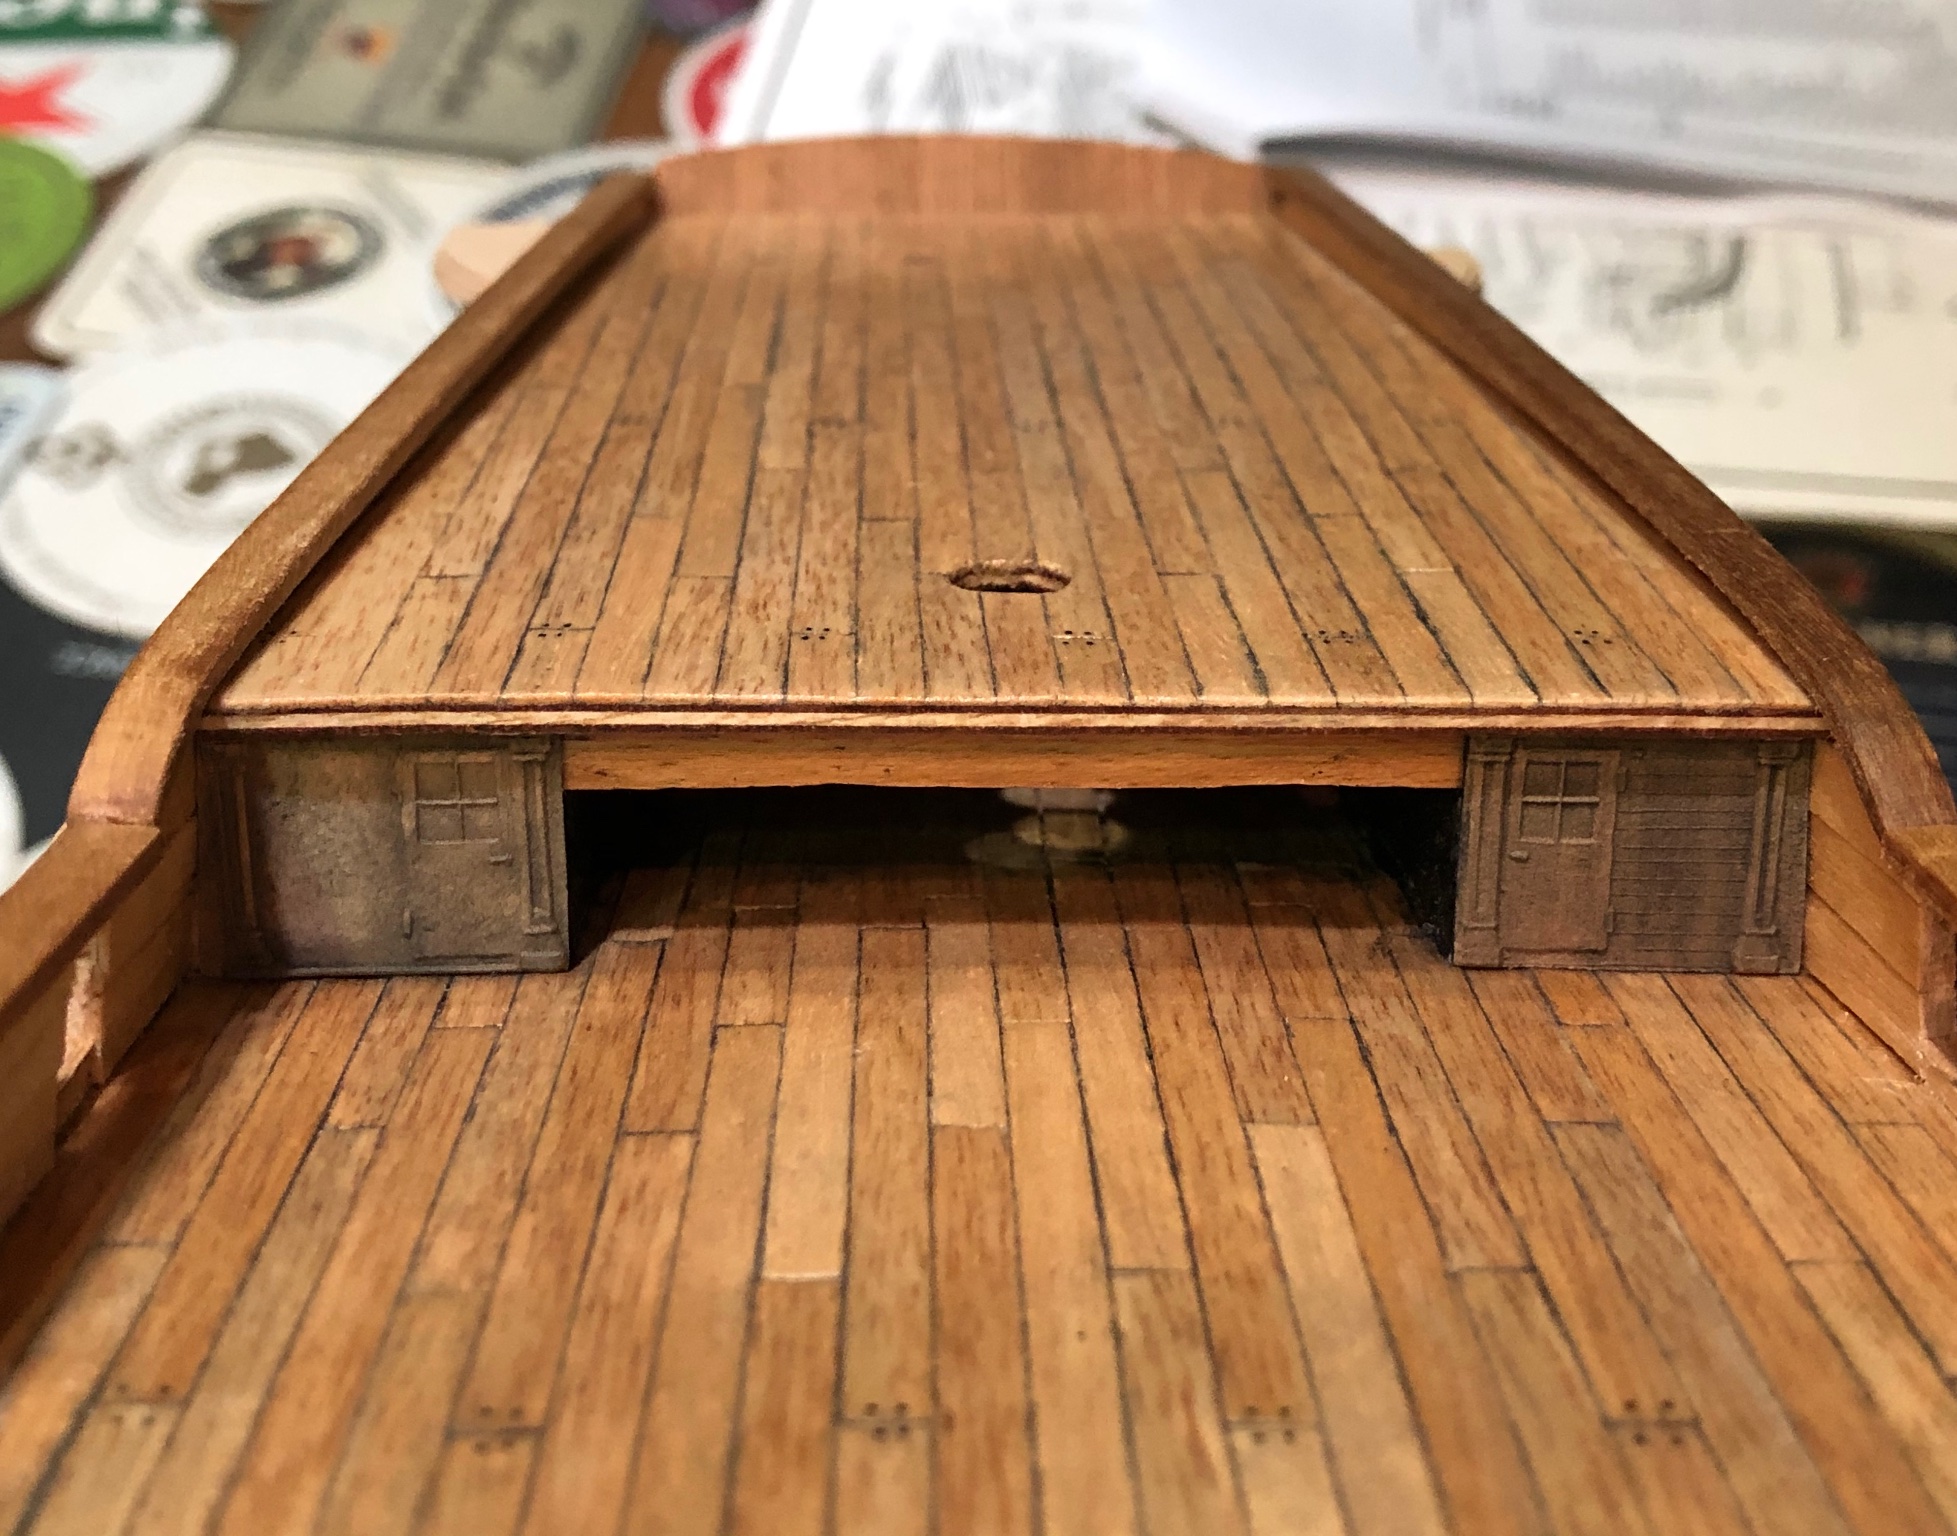
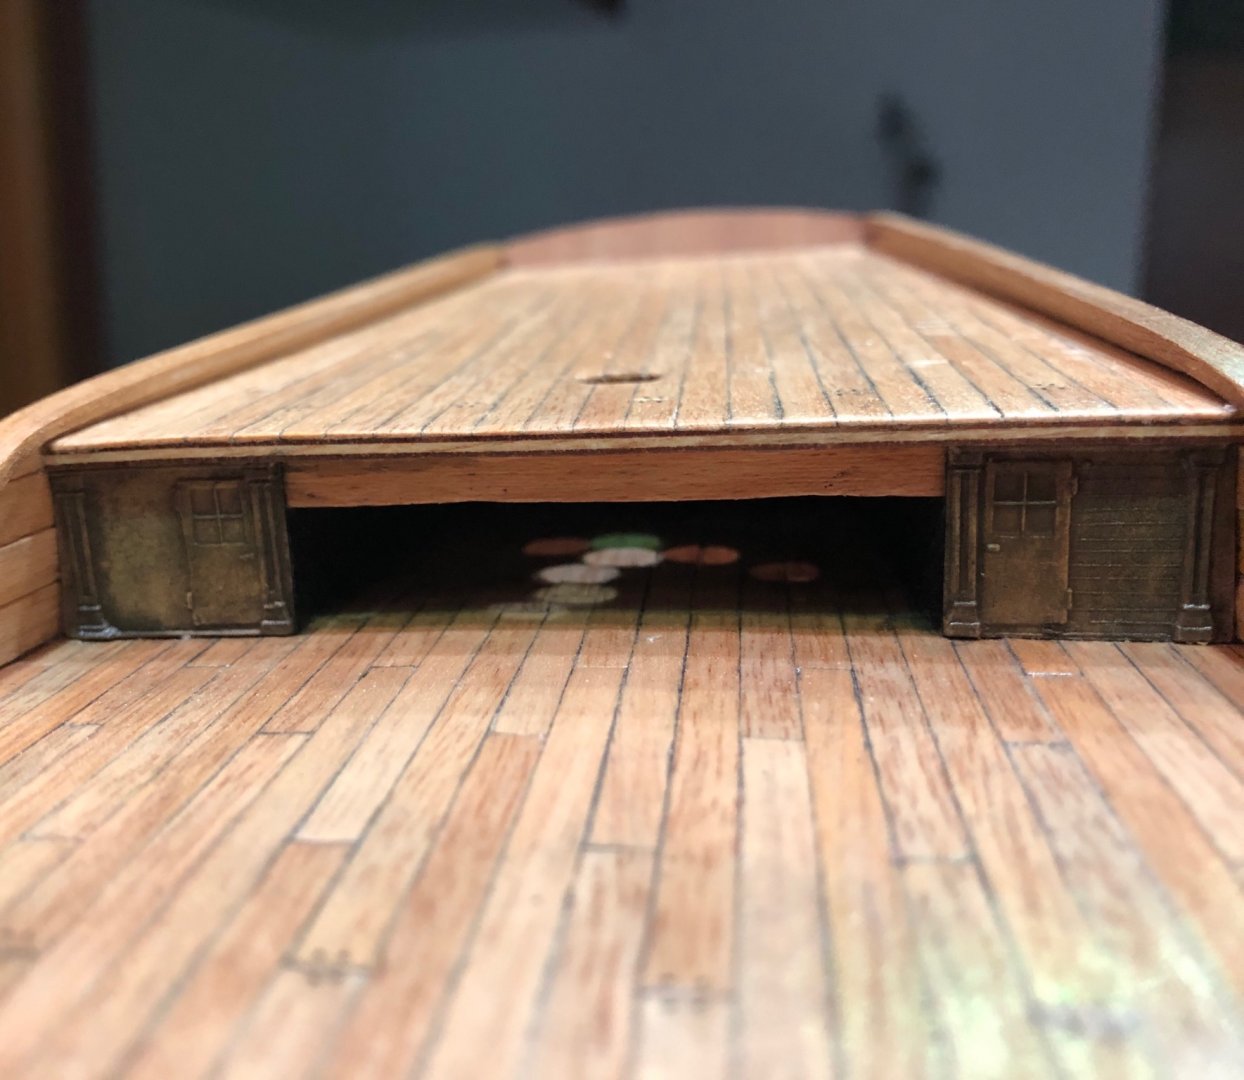
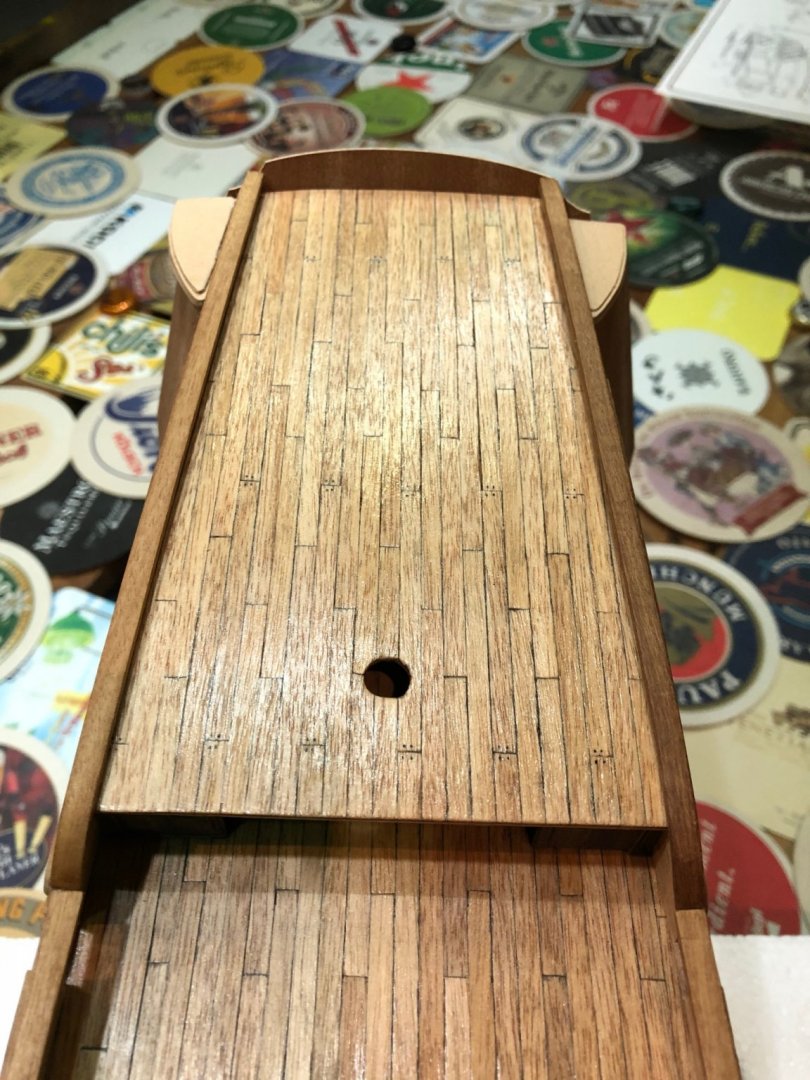
Hello ! The original marine walk is made out of plywood as it is supposed to be painted. I am avoiding paint, but I did not like the plywood look, so I decided to cover it with the deck’s planking. I kept the press wood gratings as in the other areas. Just weathered them a little bit. Here are the picks of the original and covered piece. Best regards.
-
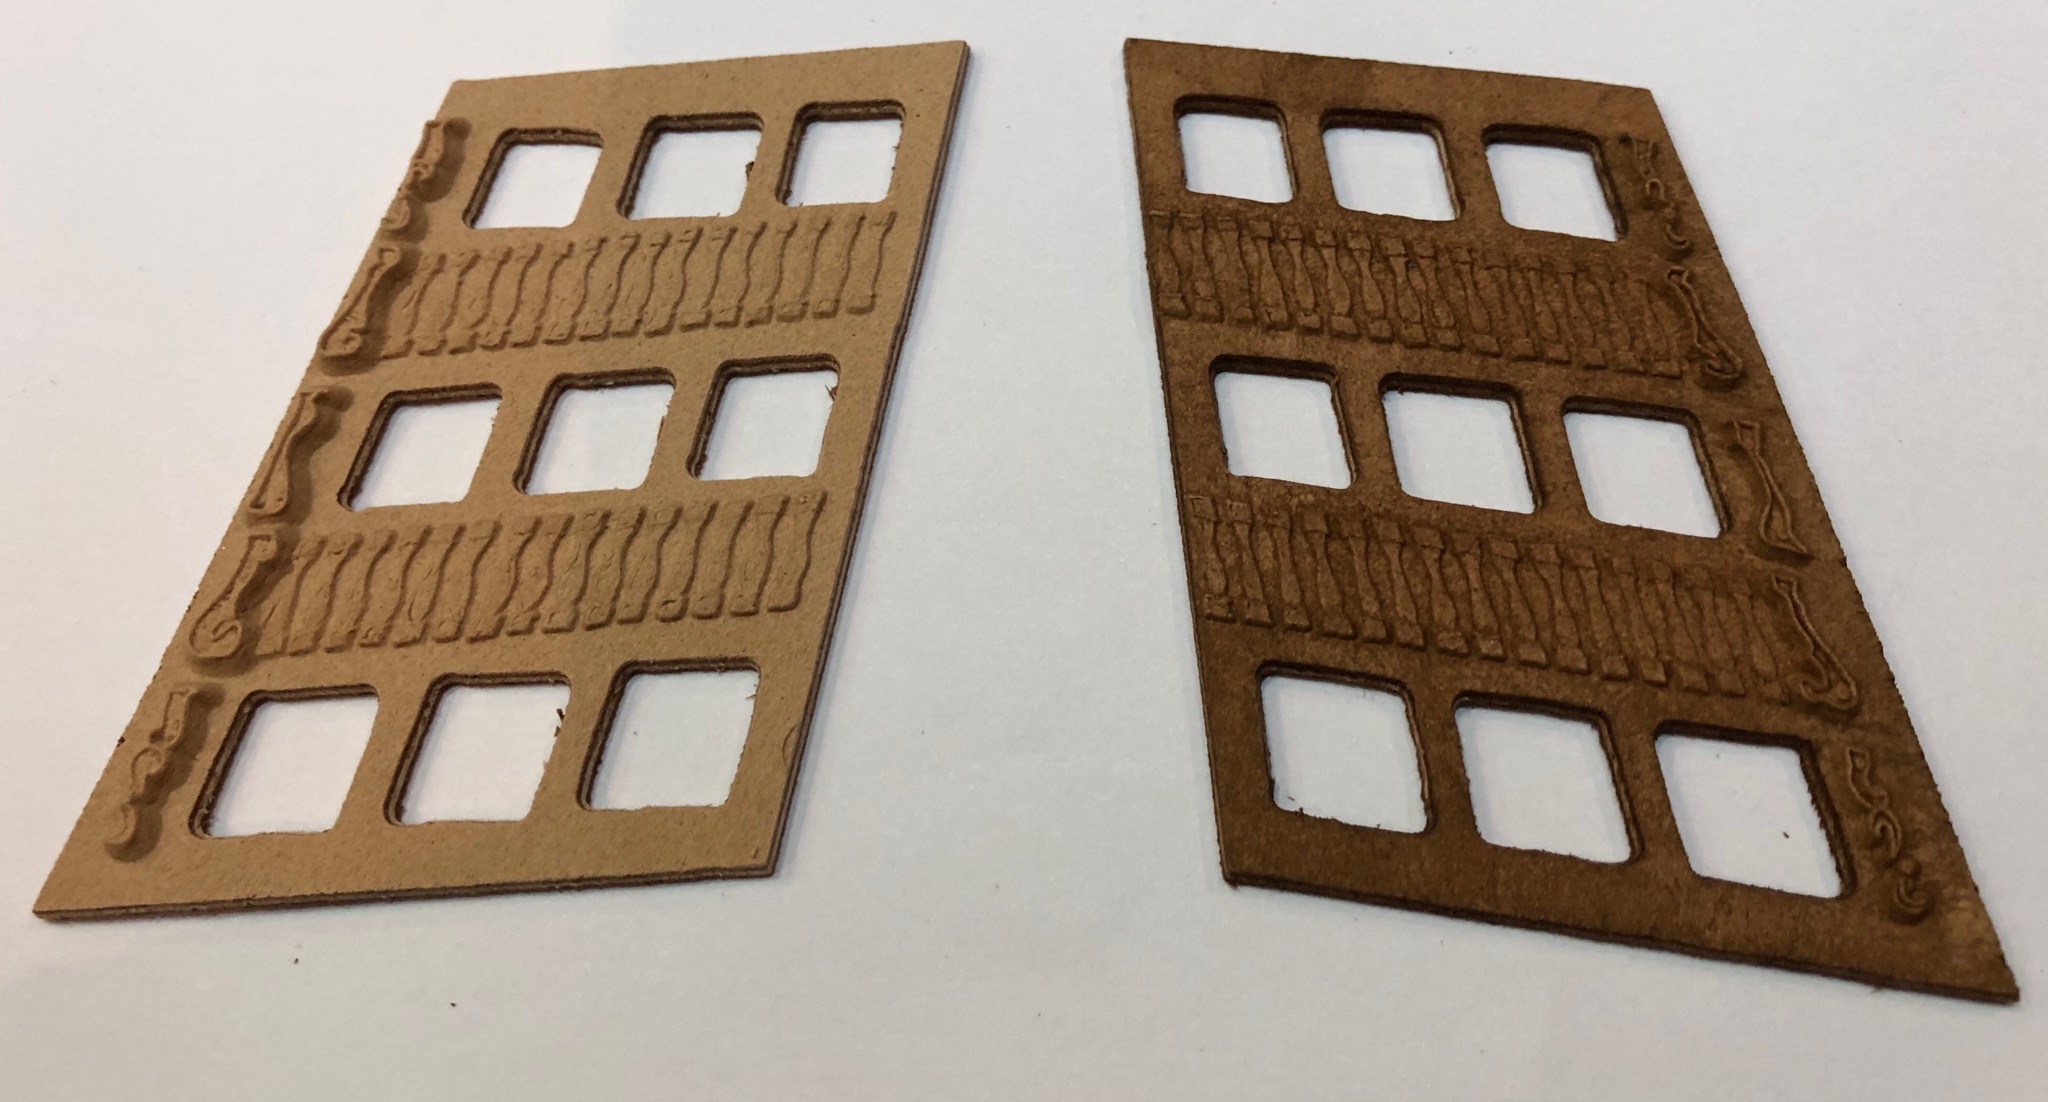
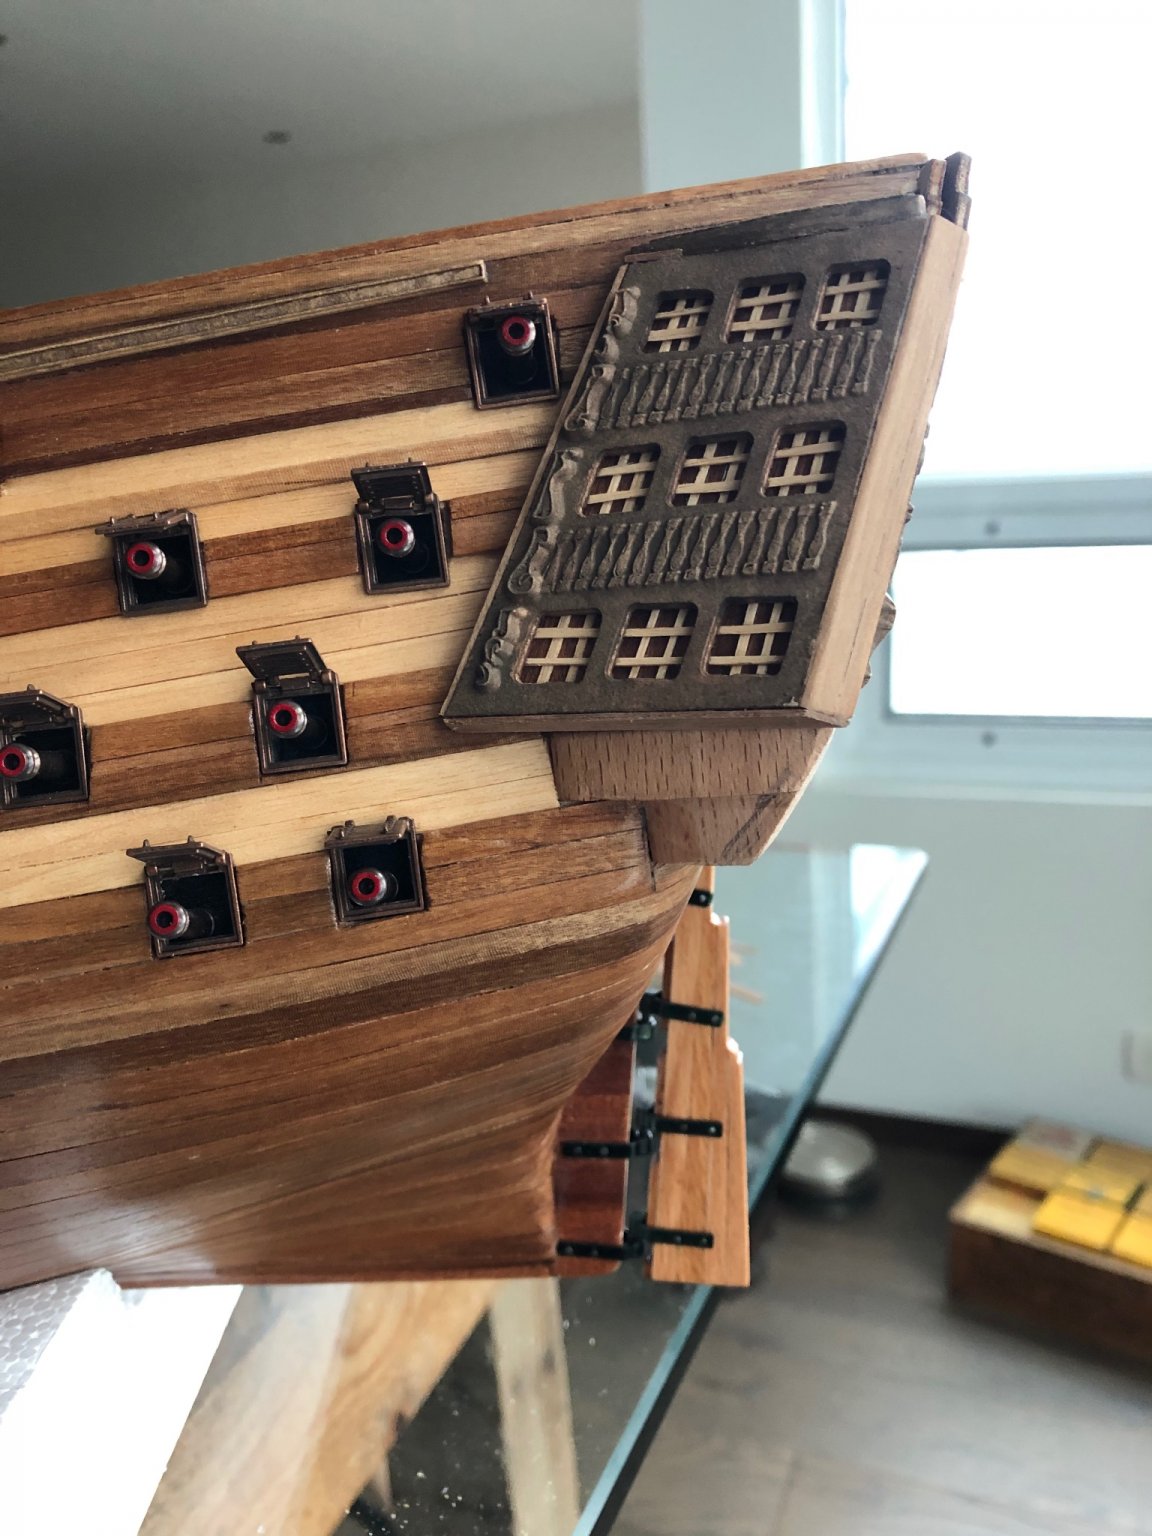
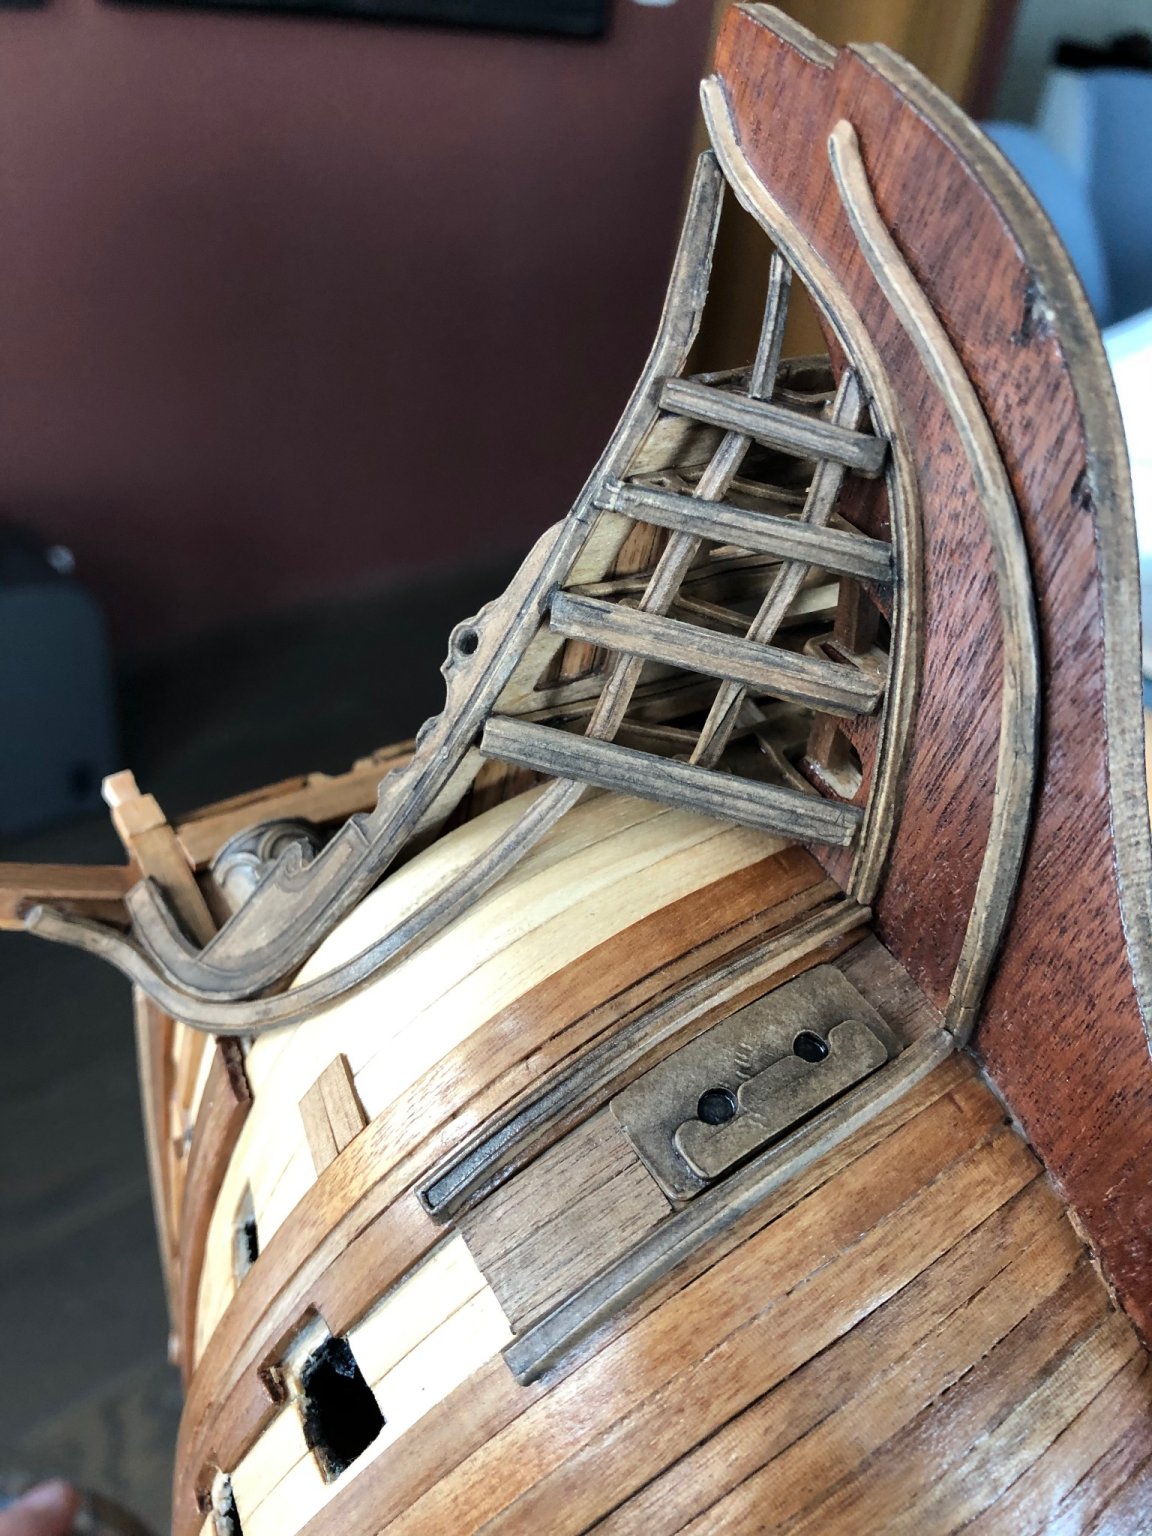
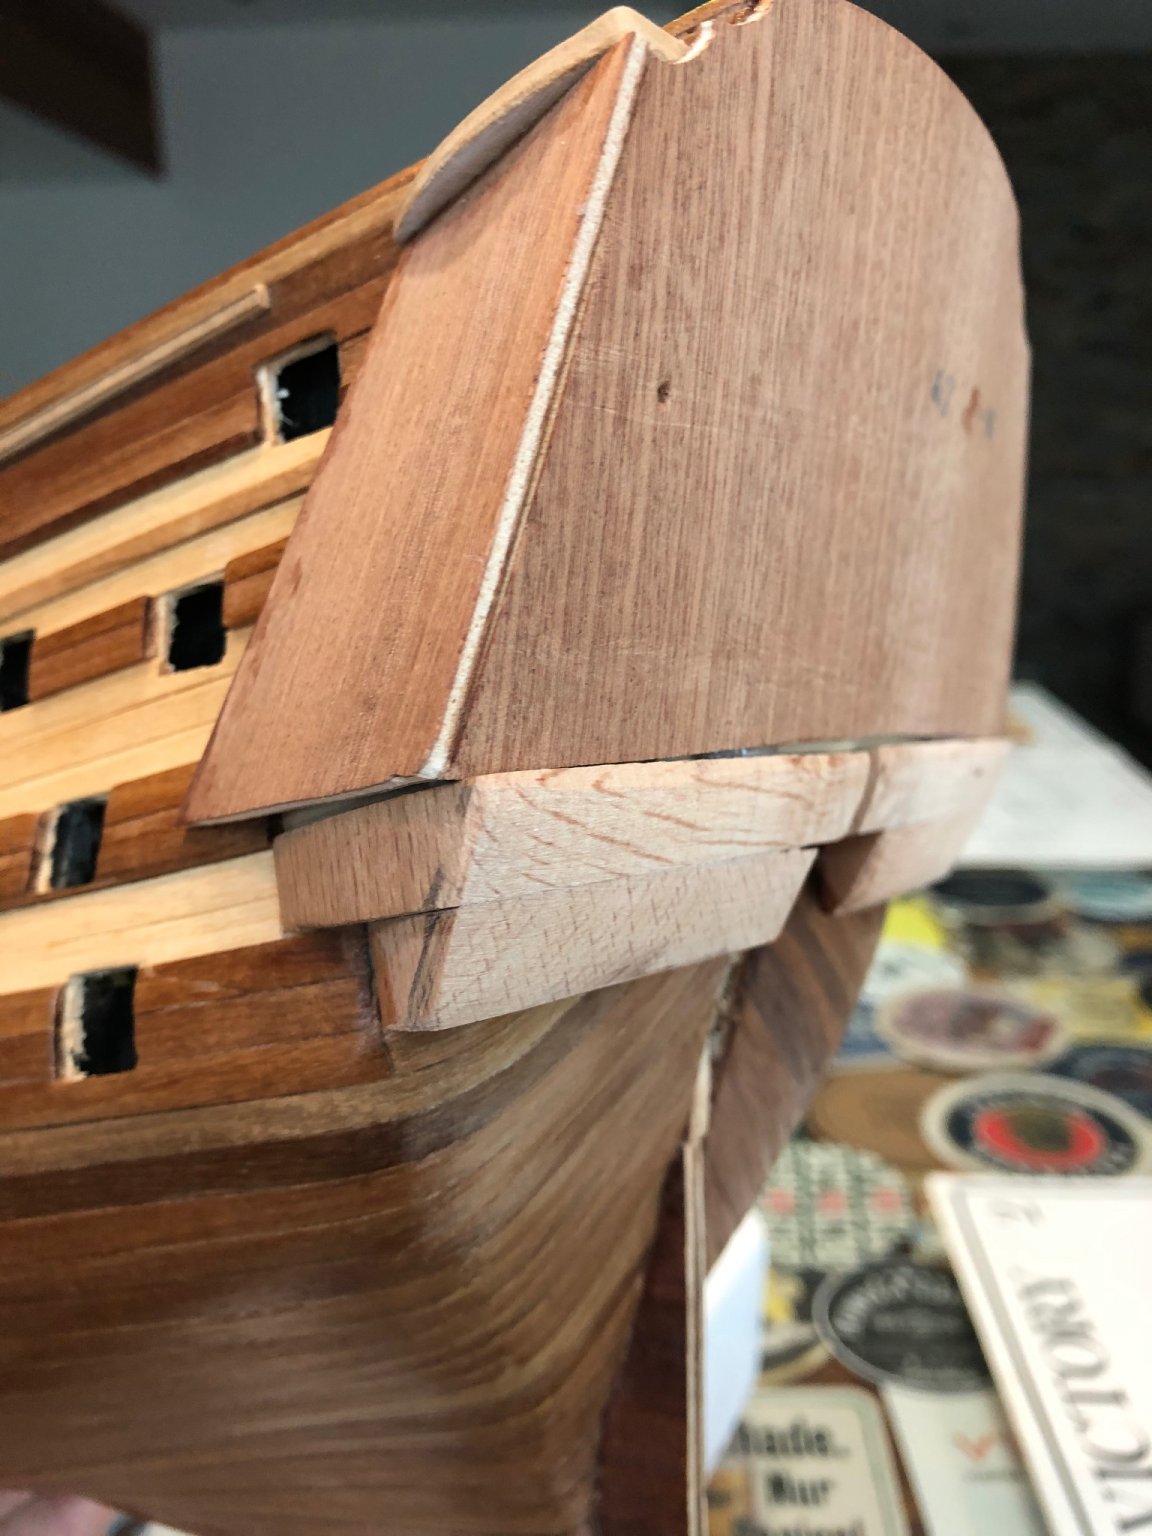
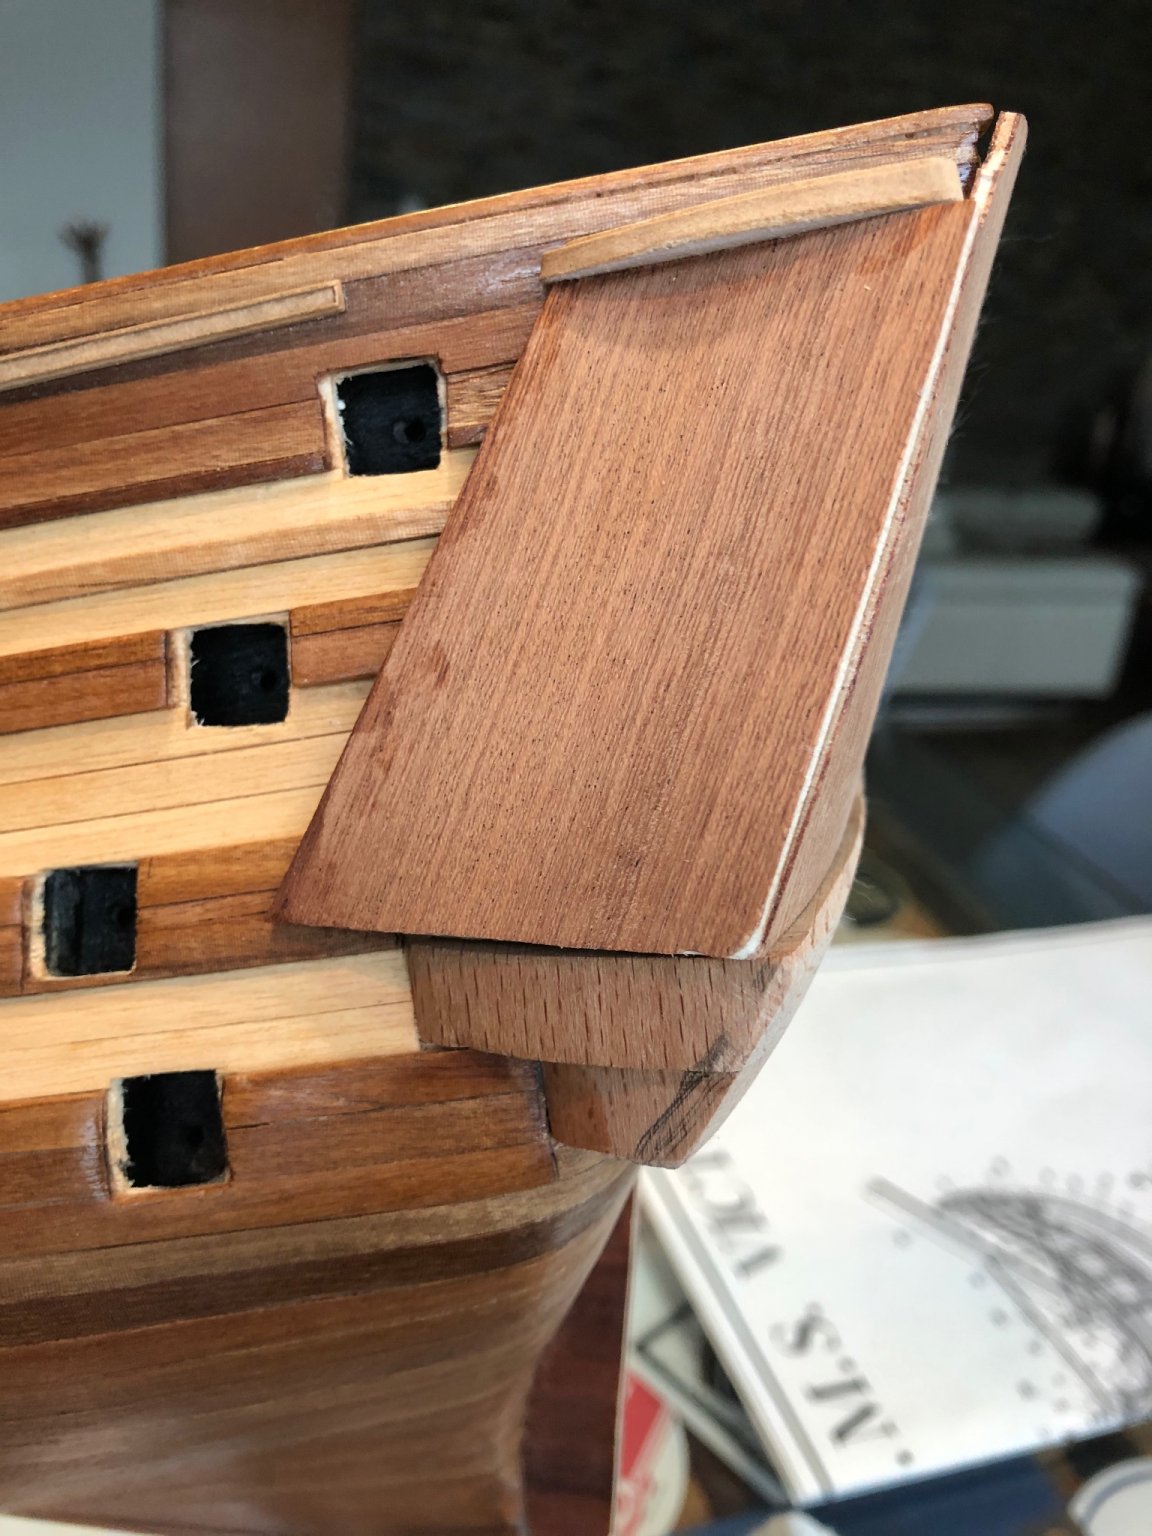
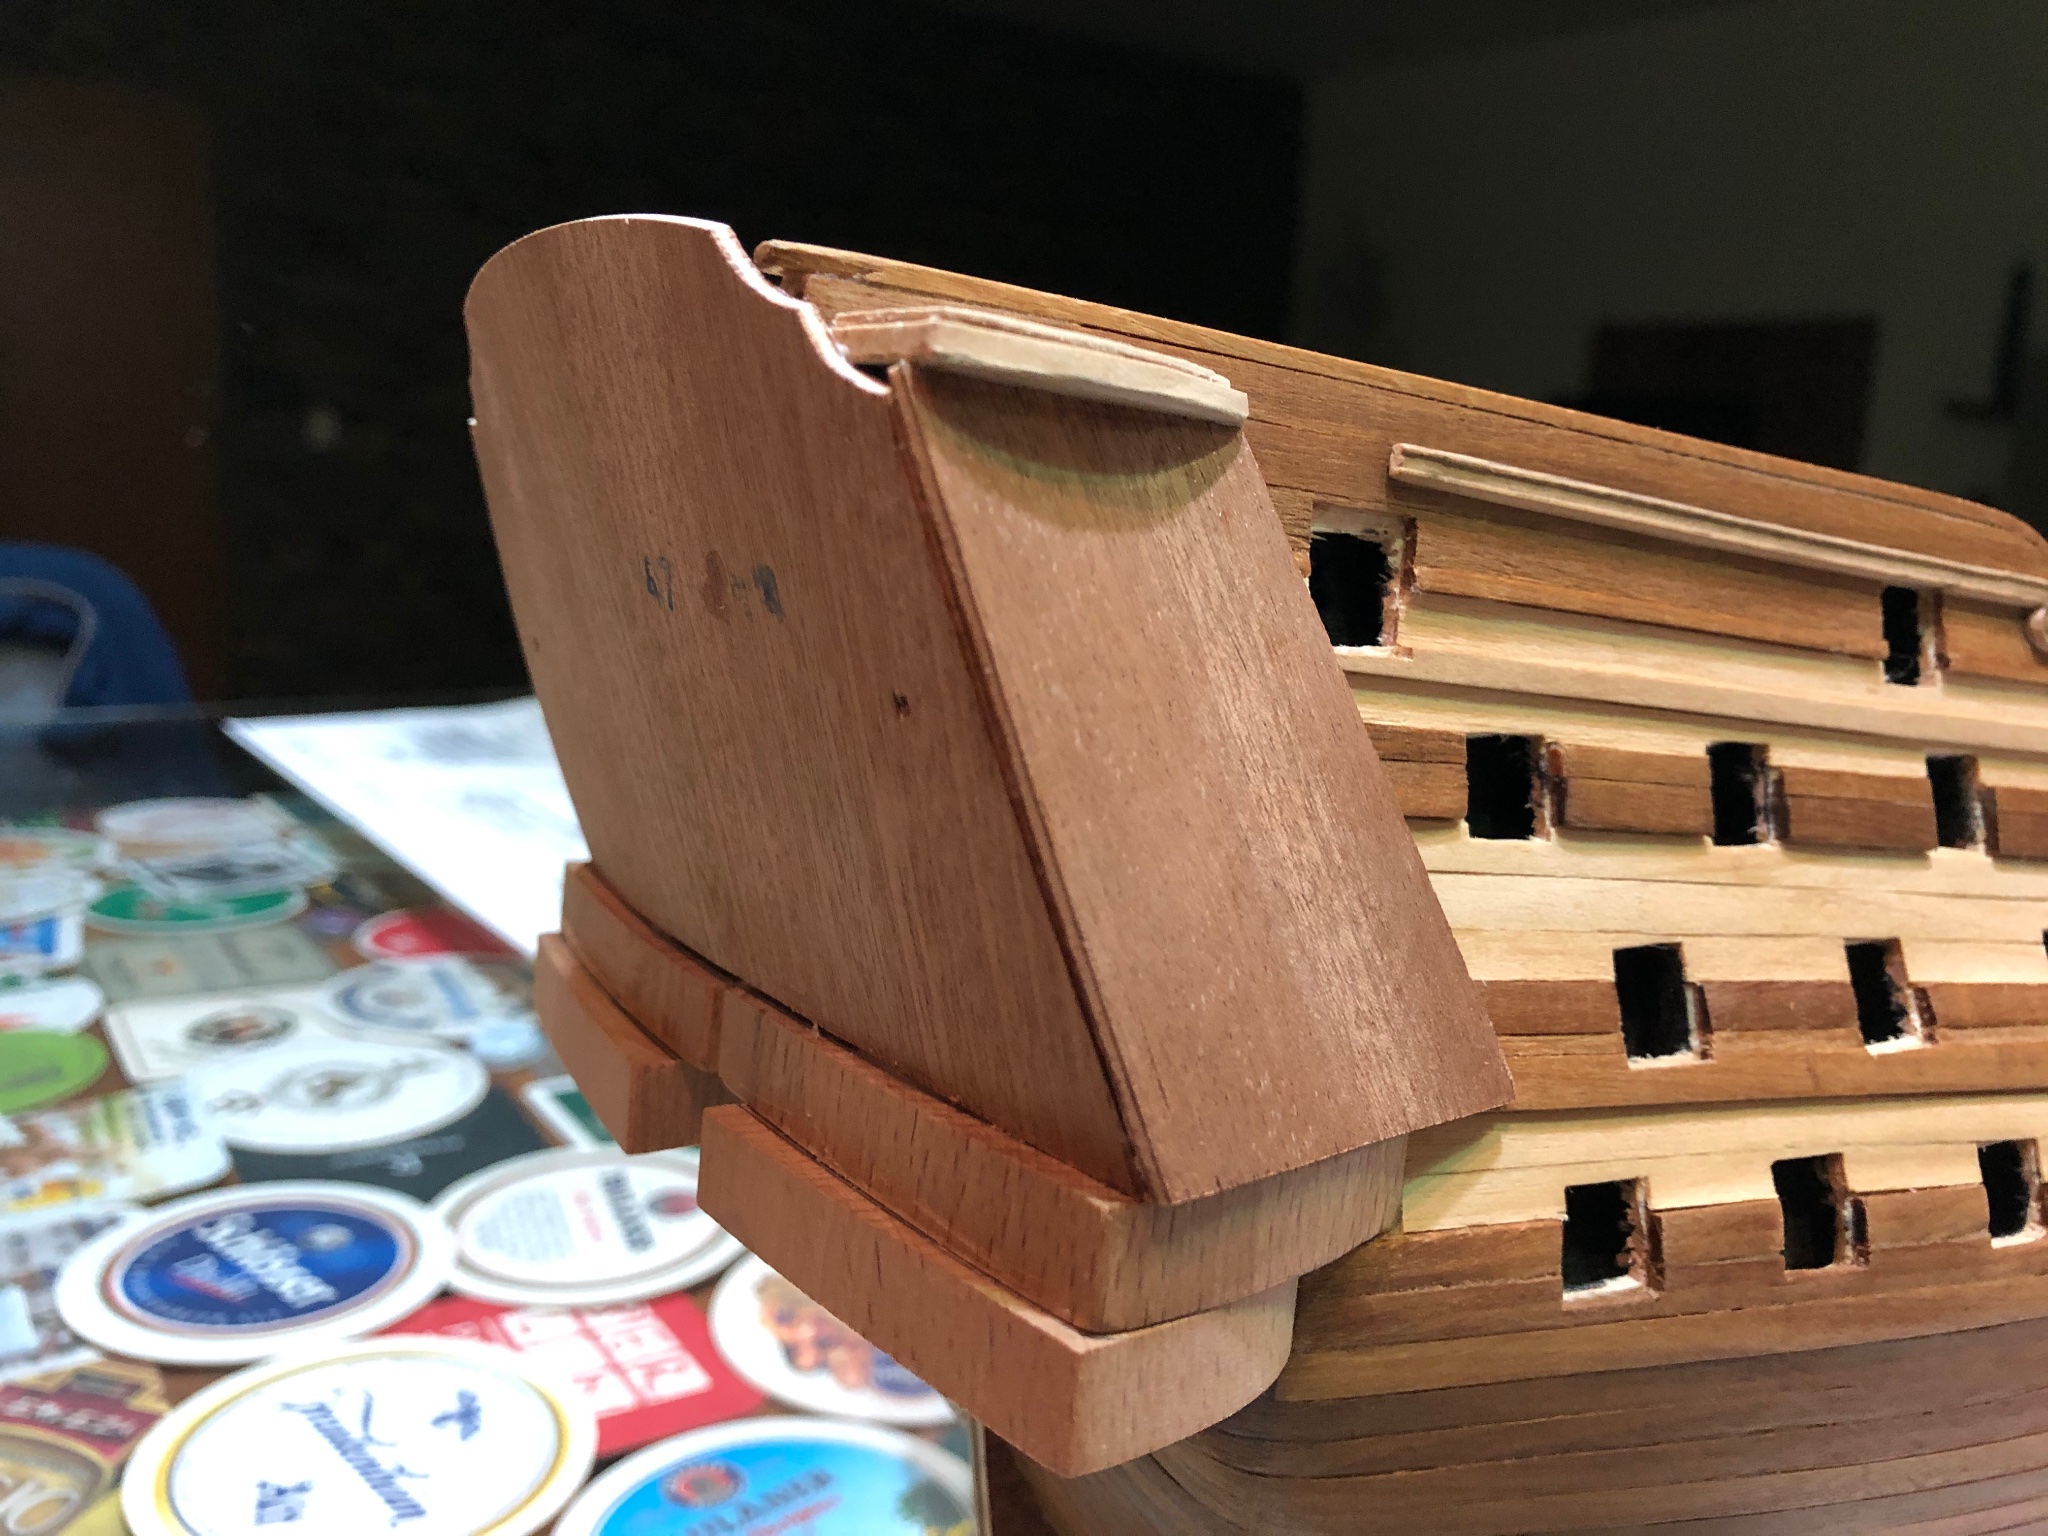
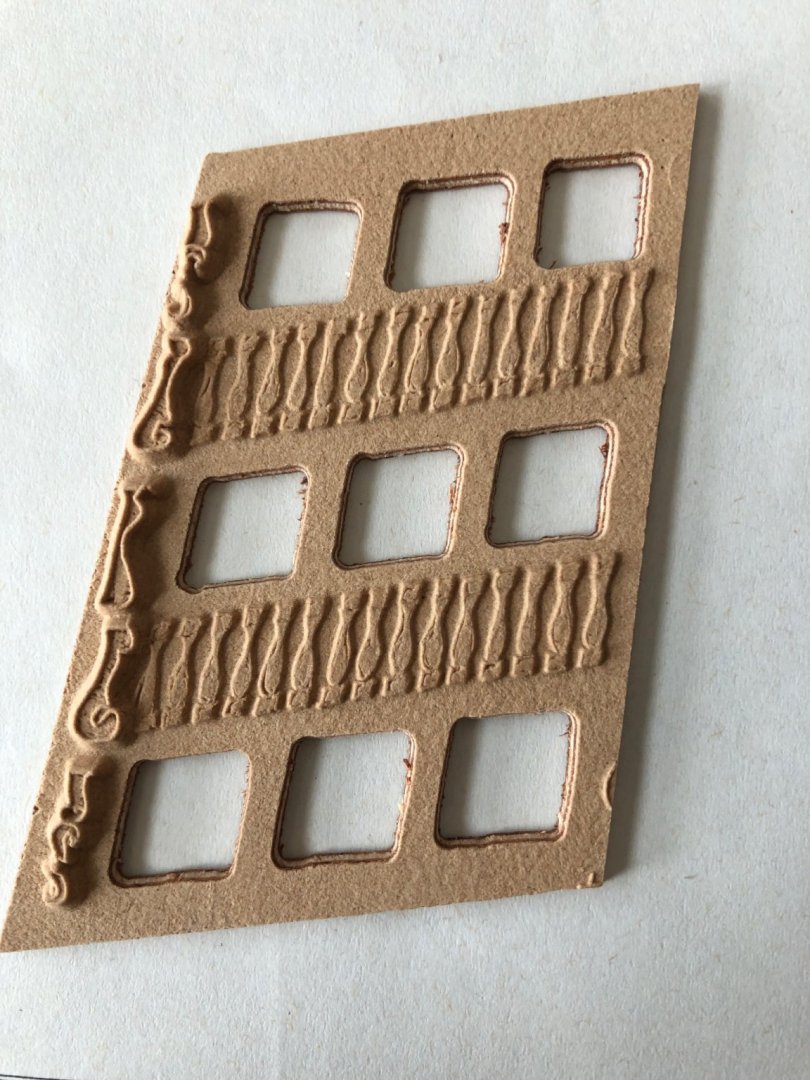
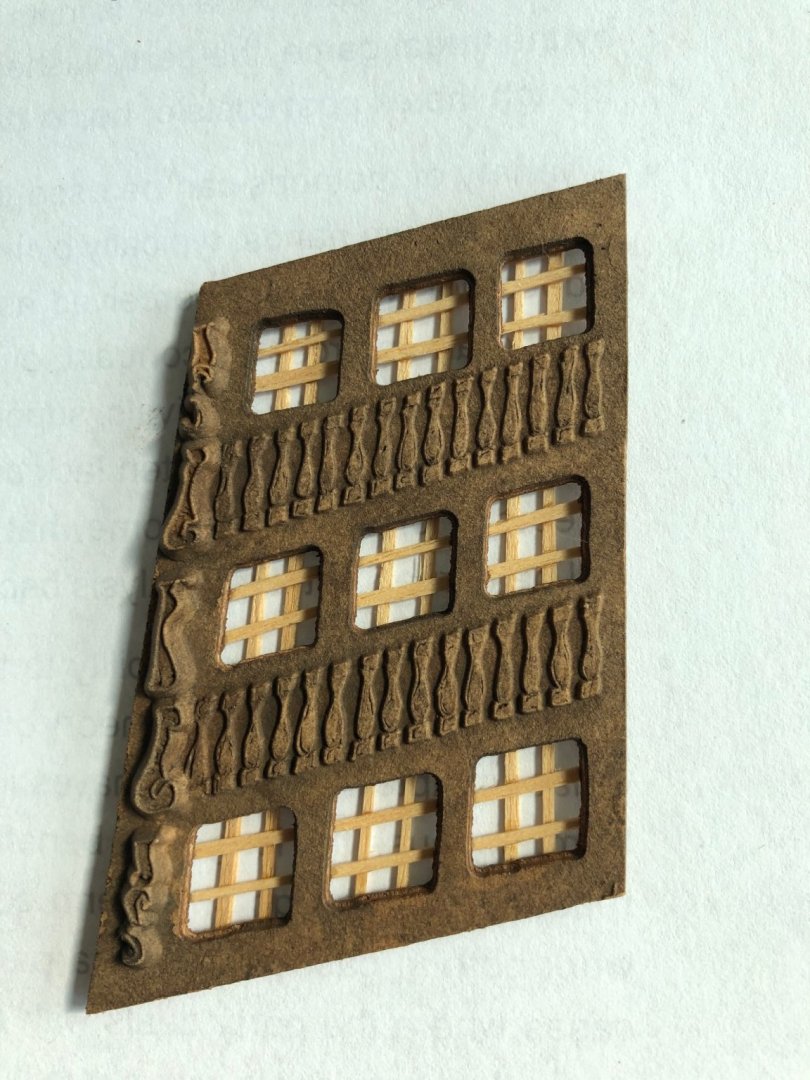
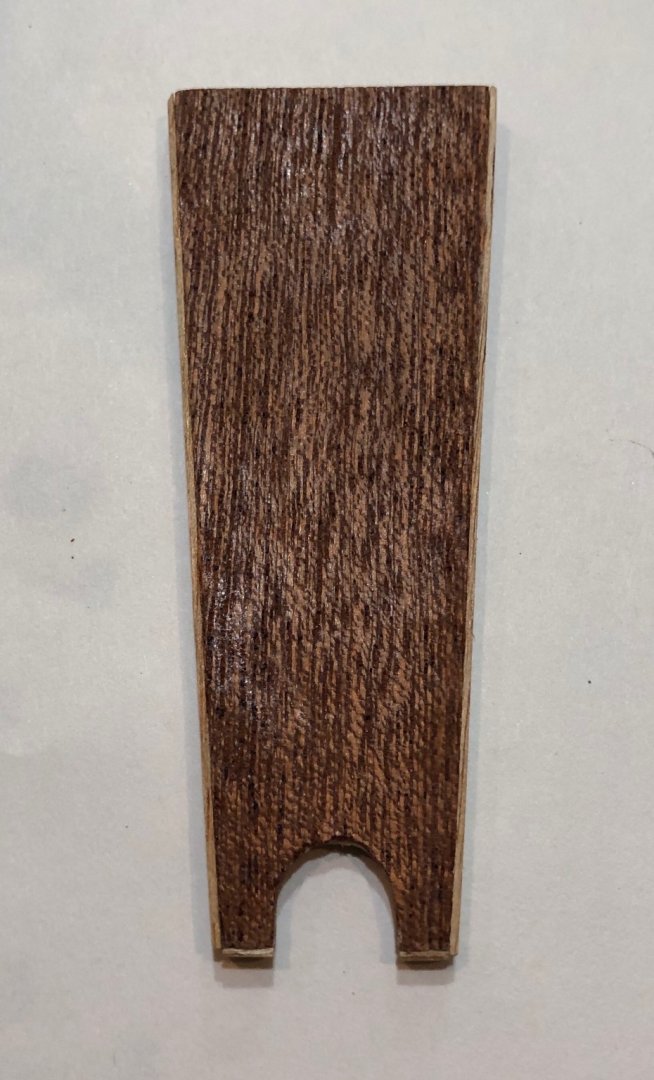
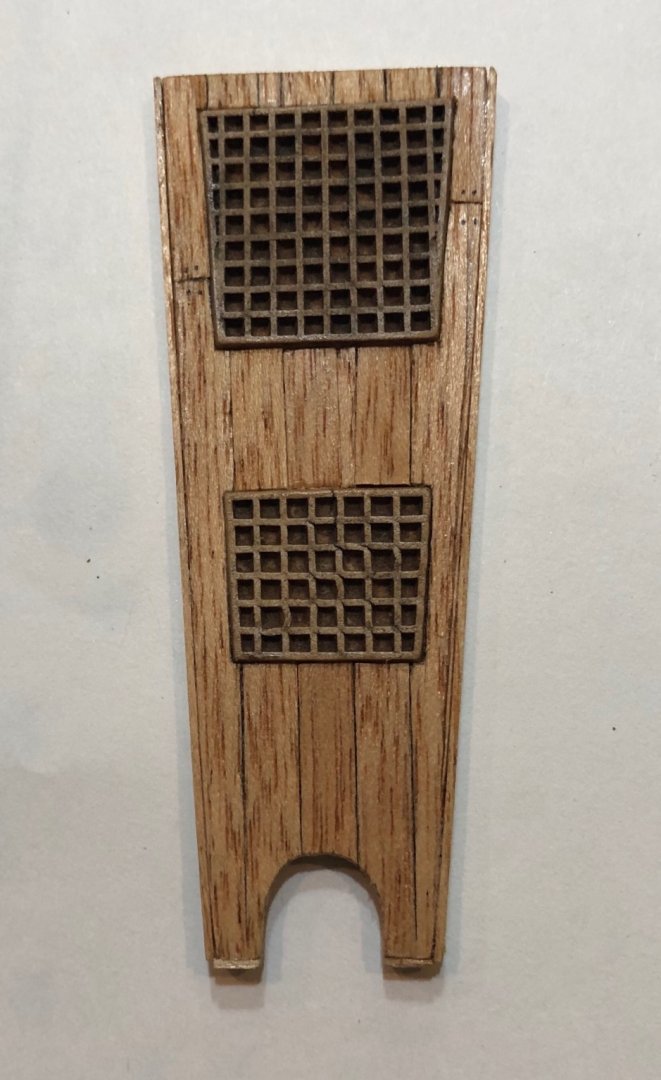
Hi friends. Working on the bow’s details. I fixed some of the pressed wood ornaments; they are very fragile, so I broke them several times. Wetting them helped a lot, but in general it is a lousy material. I also tried to add a more realistic look to those pieces. I added Tamiya’s black and brown panel accent fluids. I think that gave them a better look. Here are the picks. Best regards.

-
Thank you WalrusGuy. Your support is encouraging!!! Today I sanded down to shape the stern galleries’ counter supports. Best regards.


-
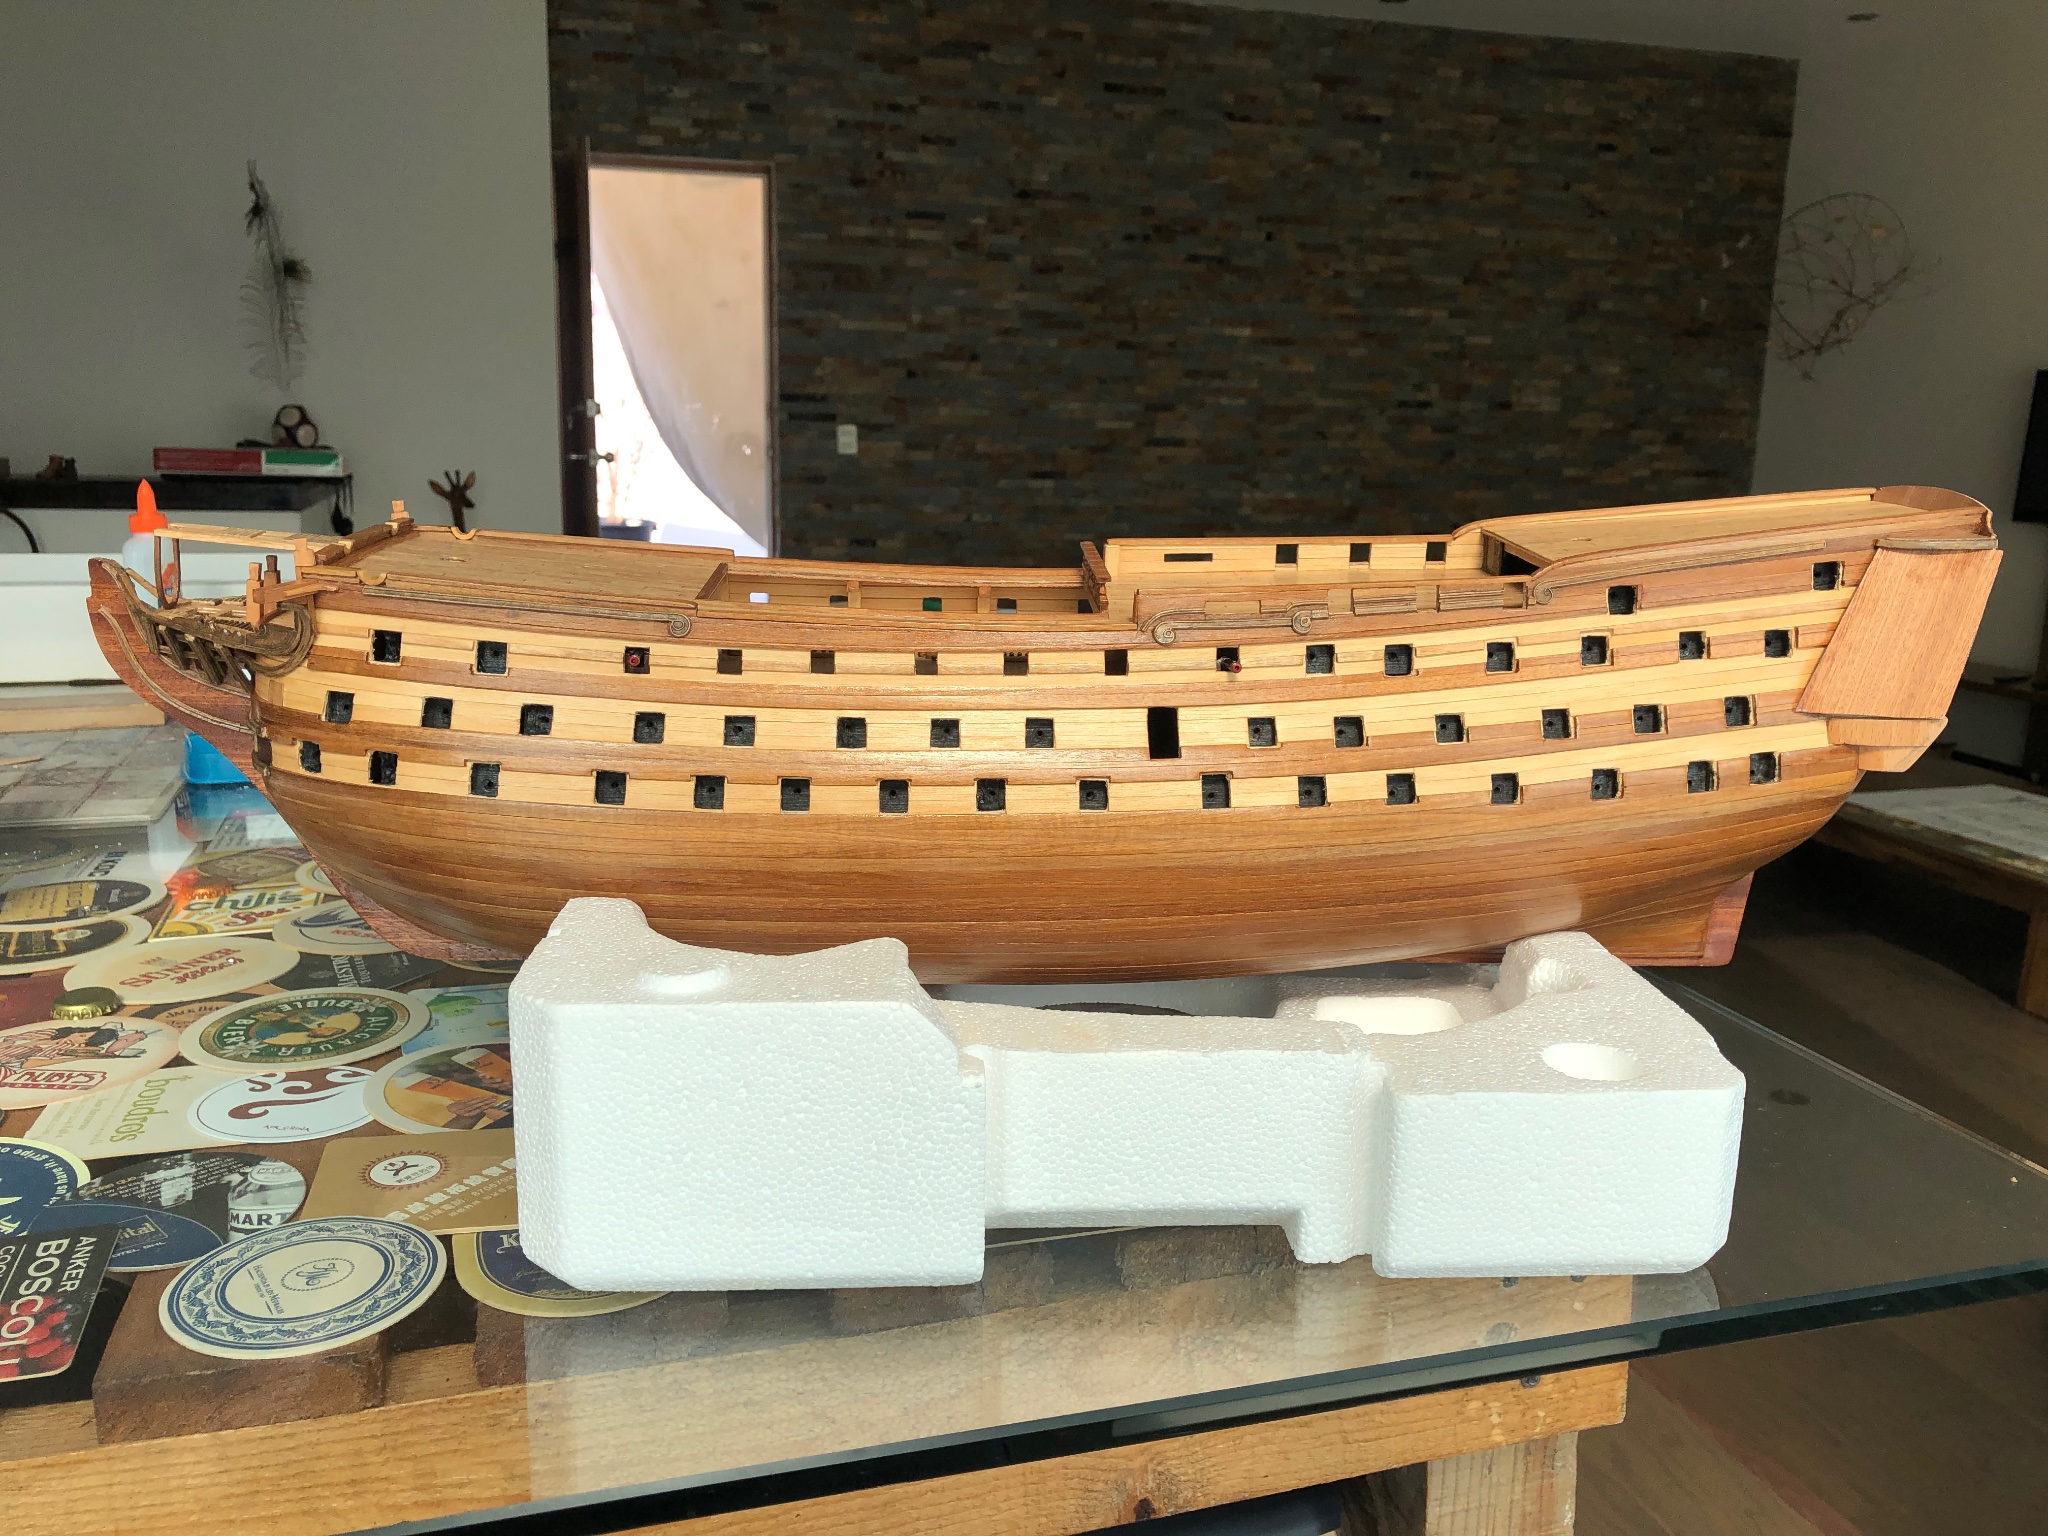
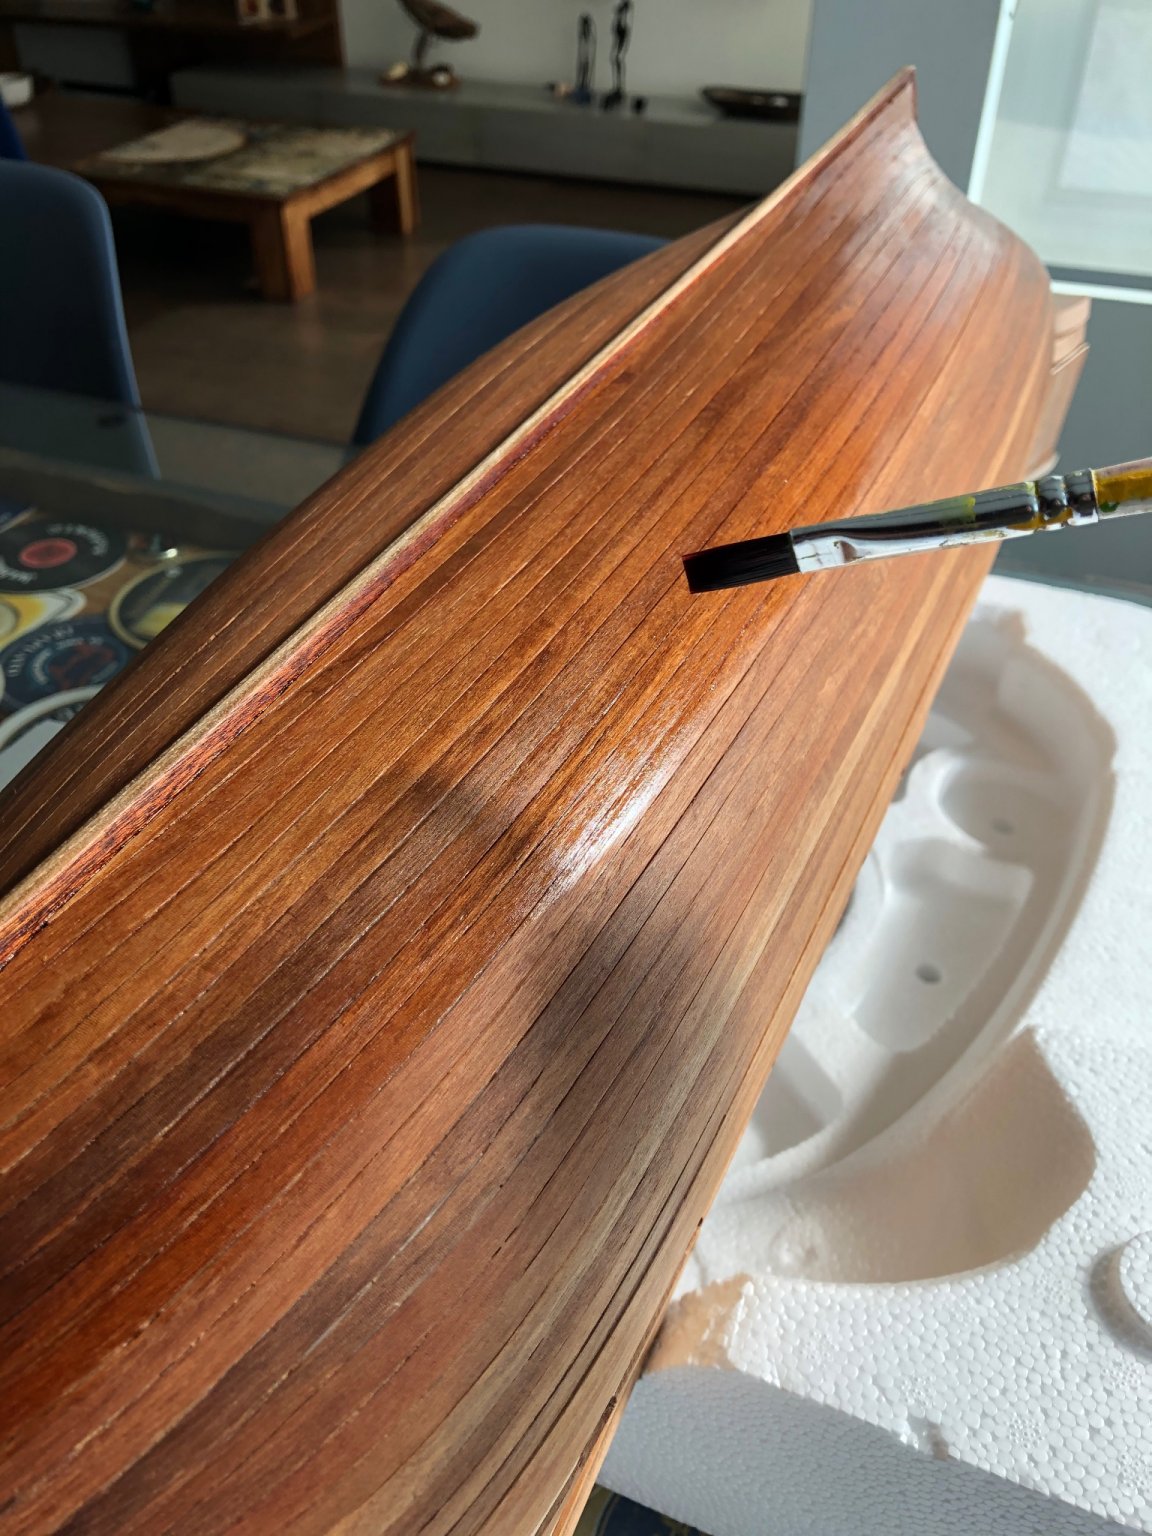
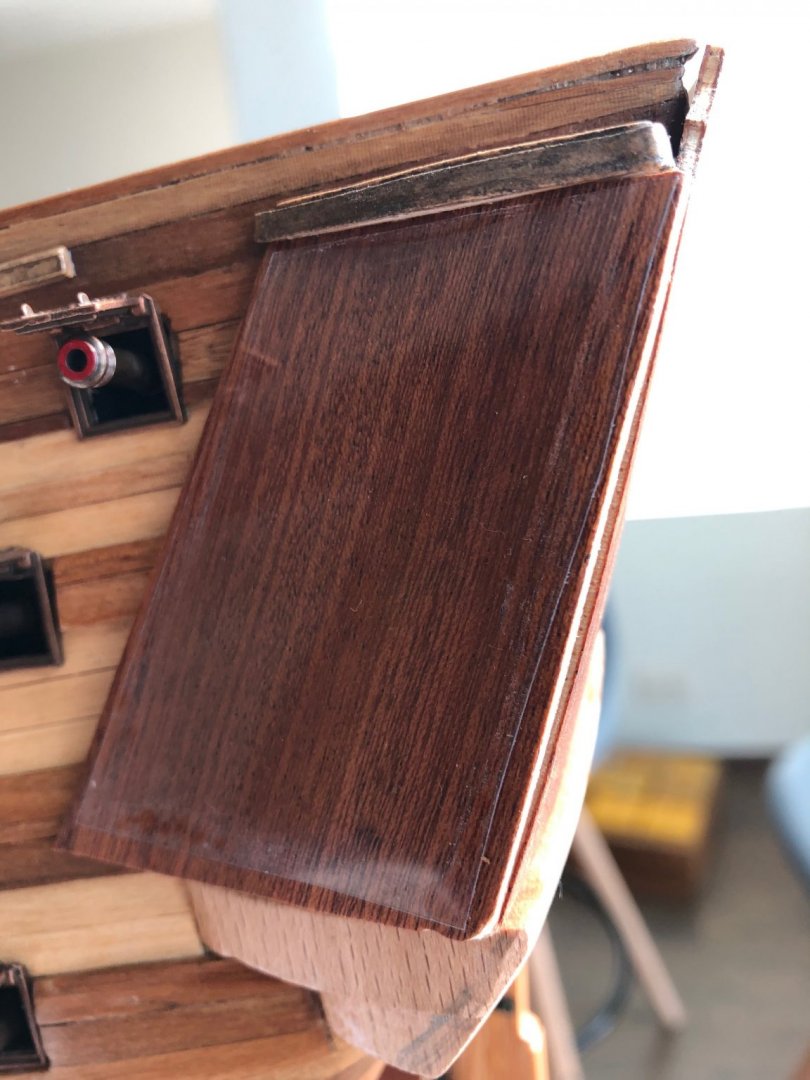
Hi Charlie Pal. I used sand paper # 150 to sand the whole hull, a cutter for scrapping glue stains and dull polyurethane varnish on my walnut second planking. Here are the picks. The last one is the final result after the varnish dried. Best regards.


-
What a wonderful model !!! Congratulations !!! I will take an in depth look to your build log while working on mine. All the best, Eugenio.
-
First layer of dull Polyurethane varnish applied by hand and assembly of bow structures. Here are the picks!!!


-
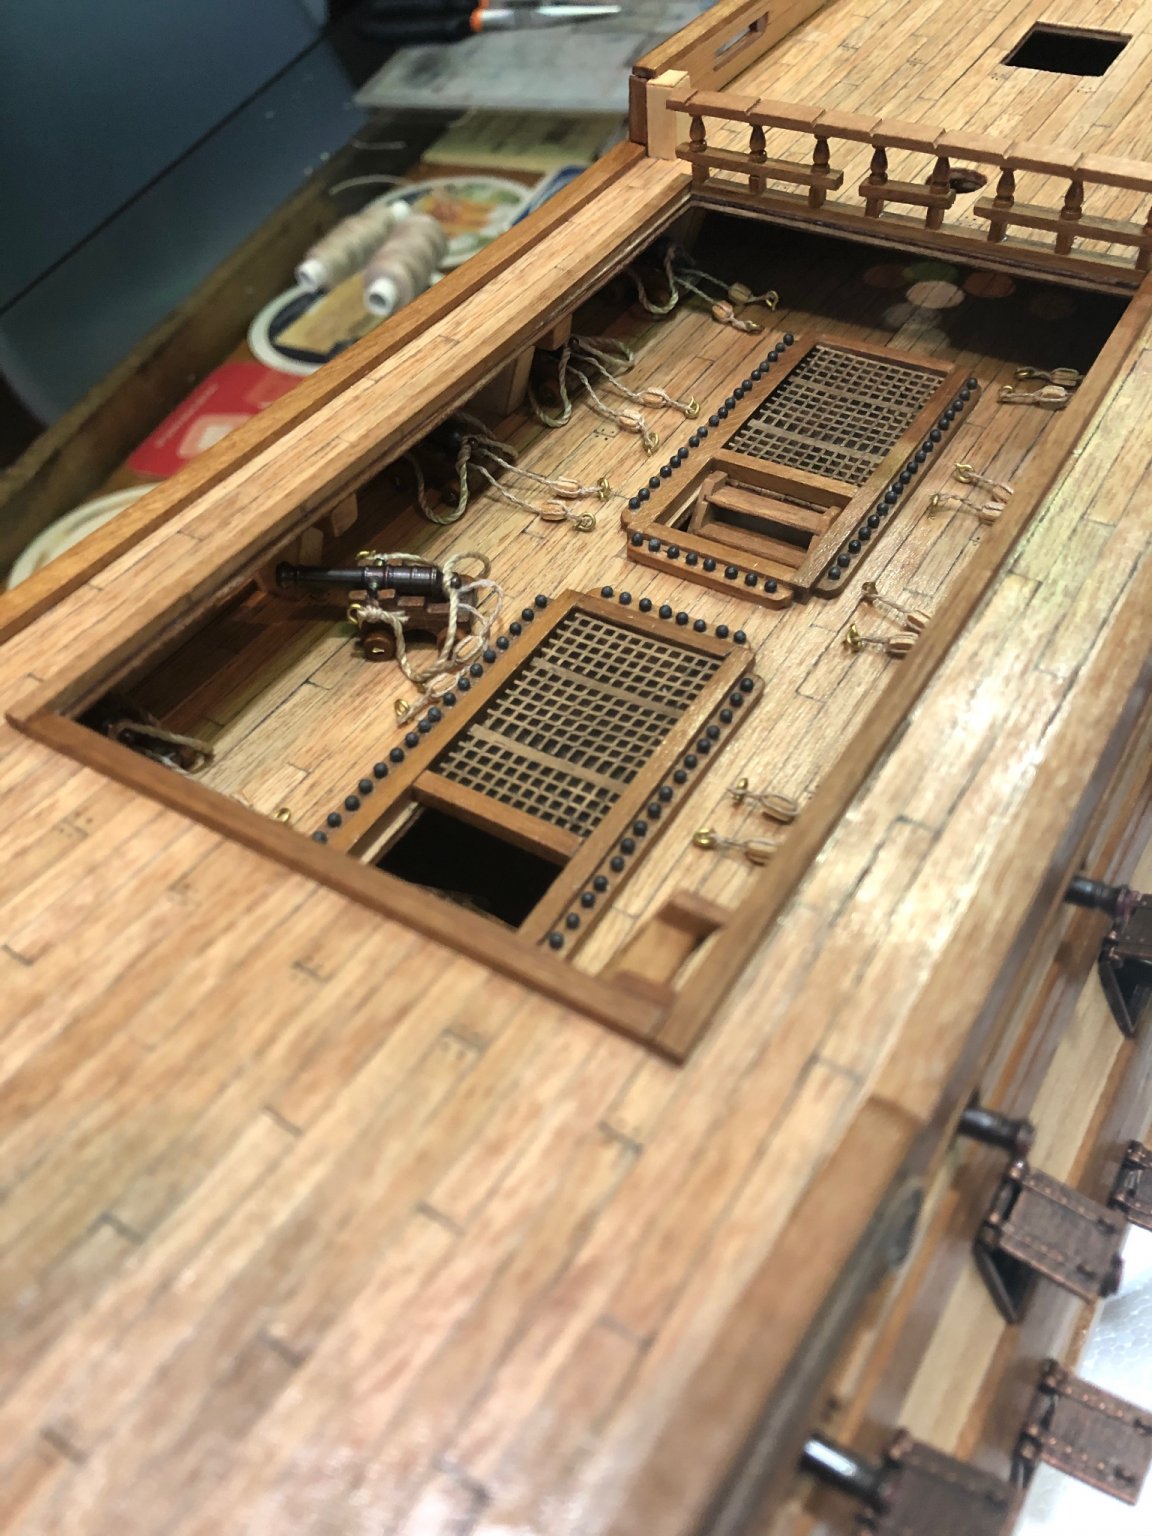
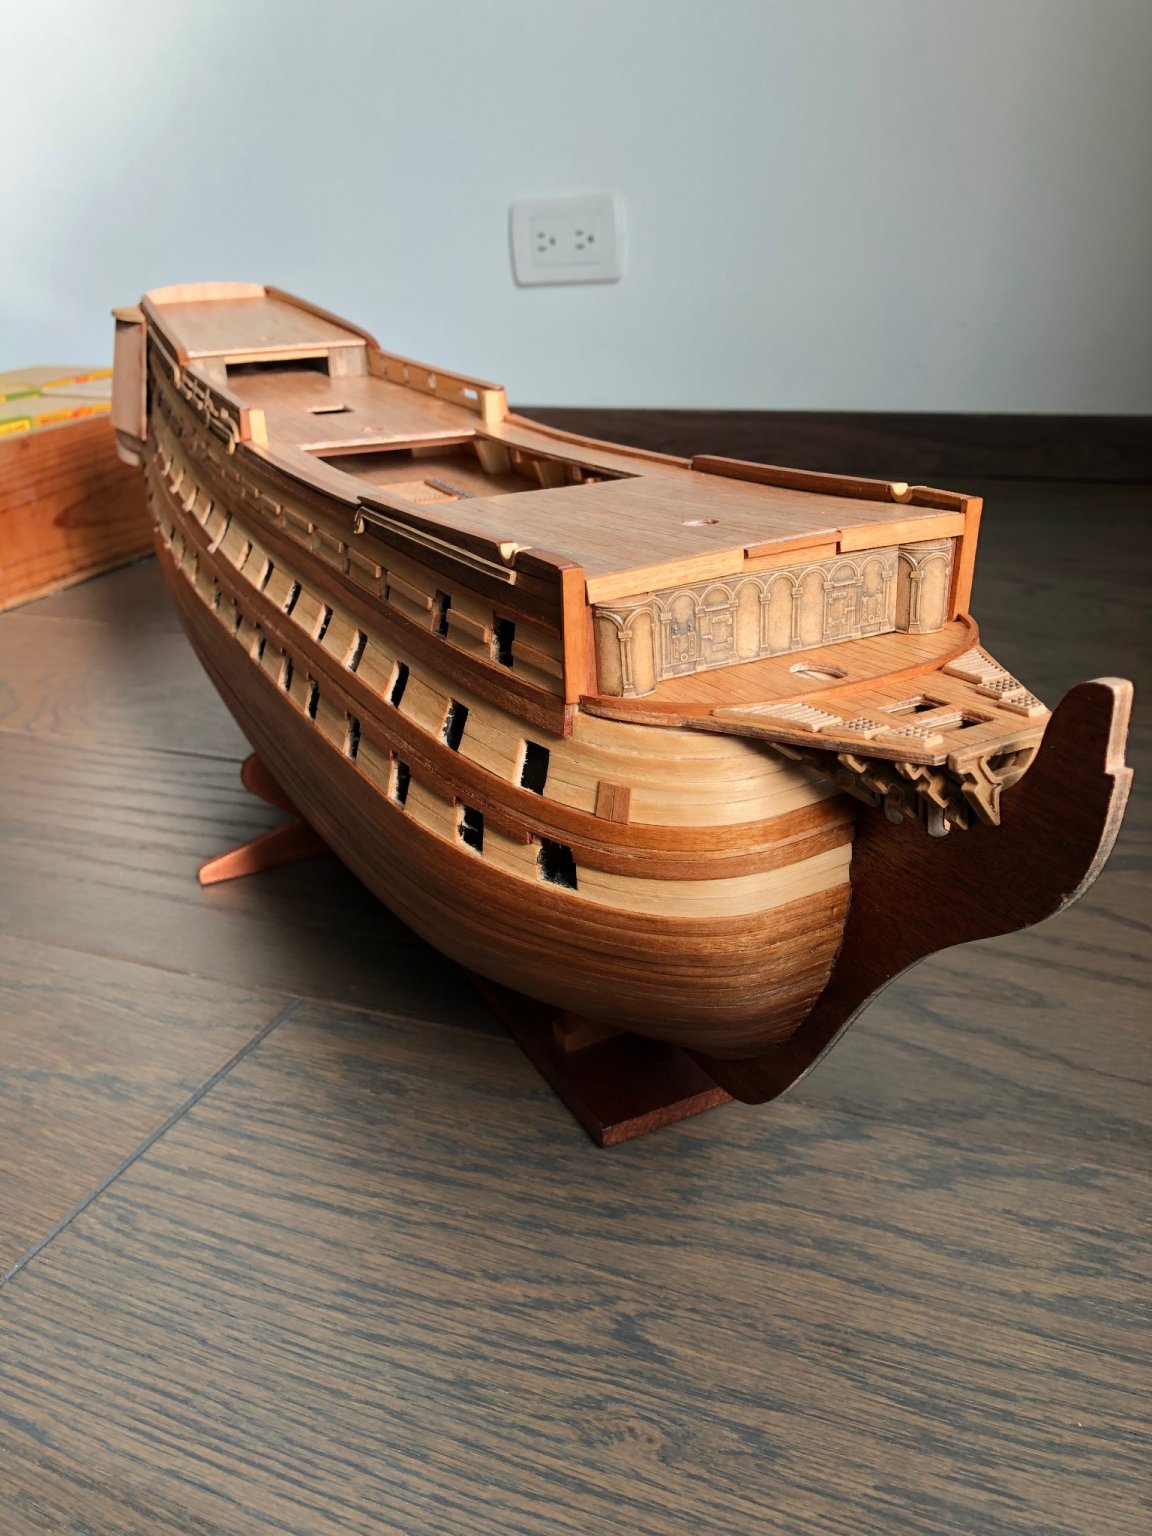
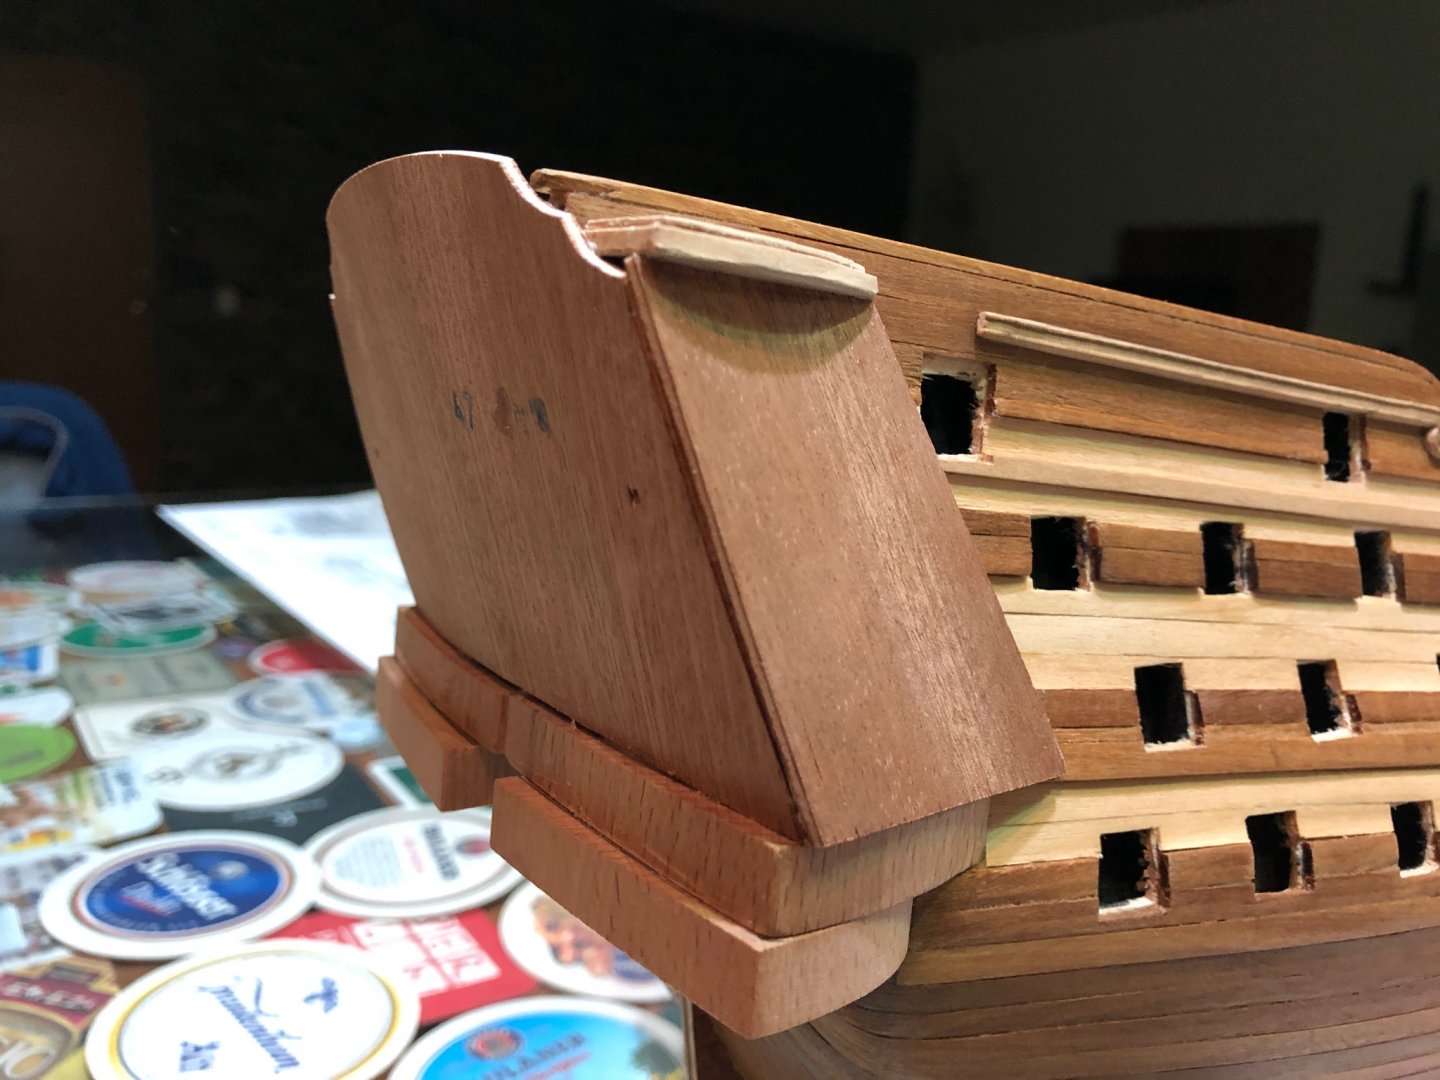
Some more work added during the weekend. The stern will need some work to align all the pieces and make them as symmetrical as possible. This is the stage where you start noticing your mistakes during the frame assembly and planking, and also the lack of precision of the kit’s pieces. I am not 100% satisfied with the pressed wood pieces. But I do not want to use paint. Any comment or suggestions? Here are the picks. Best regards.


-
Congratulations, your craftsmanship is outstanding!!! I love the netting it looks great. And my opinion and please just my opinion, is that it will look nicer without hammocks. Keep up the great work!!!
- 950 replies
-
- 2
-
-
- syren
- model shipways
- (and 1 more)
-
Sheerline I agree with you, planking below the wales is the most difficult thing to do. But you know what, your planking is great!!! Congratulations!!! I wish you all the best for Christmas and the New Year!!!