MORE HANDBOOKS ARE ON THEIR WAY! We will let you know when they get here.
×

Eugenio Treviño
-
Posts
123 -
Joined
-
Last visited
Content Type
Profiles
Forums
Gallery
Events
Everything posted by Eugenio Treviño
-
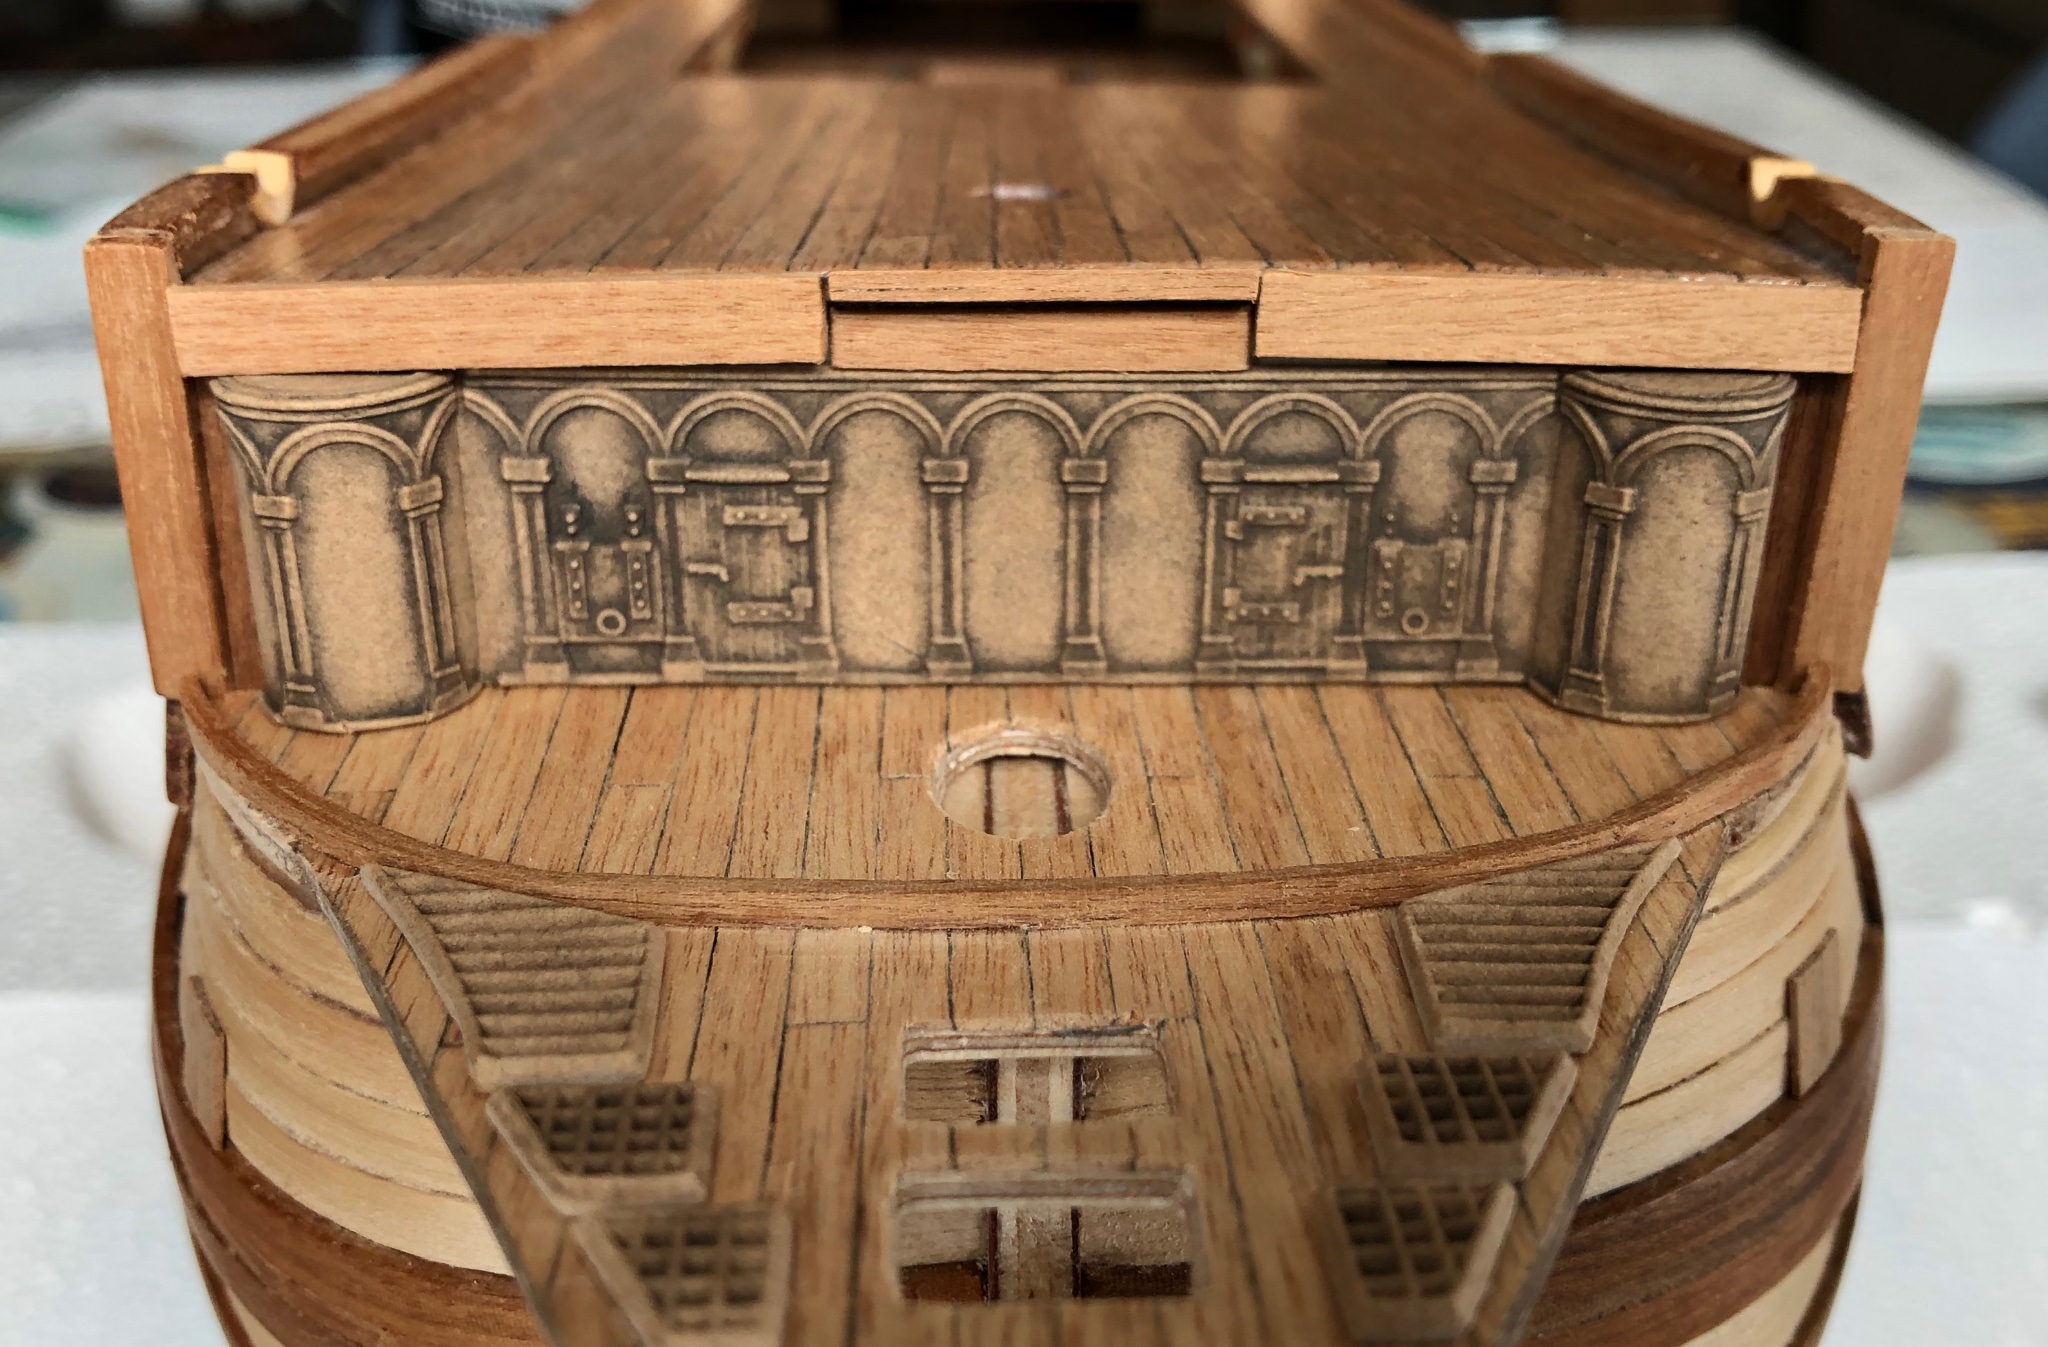
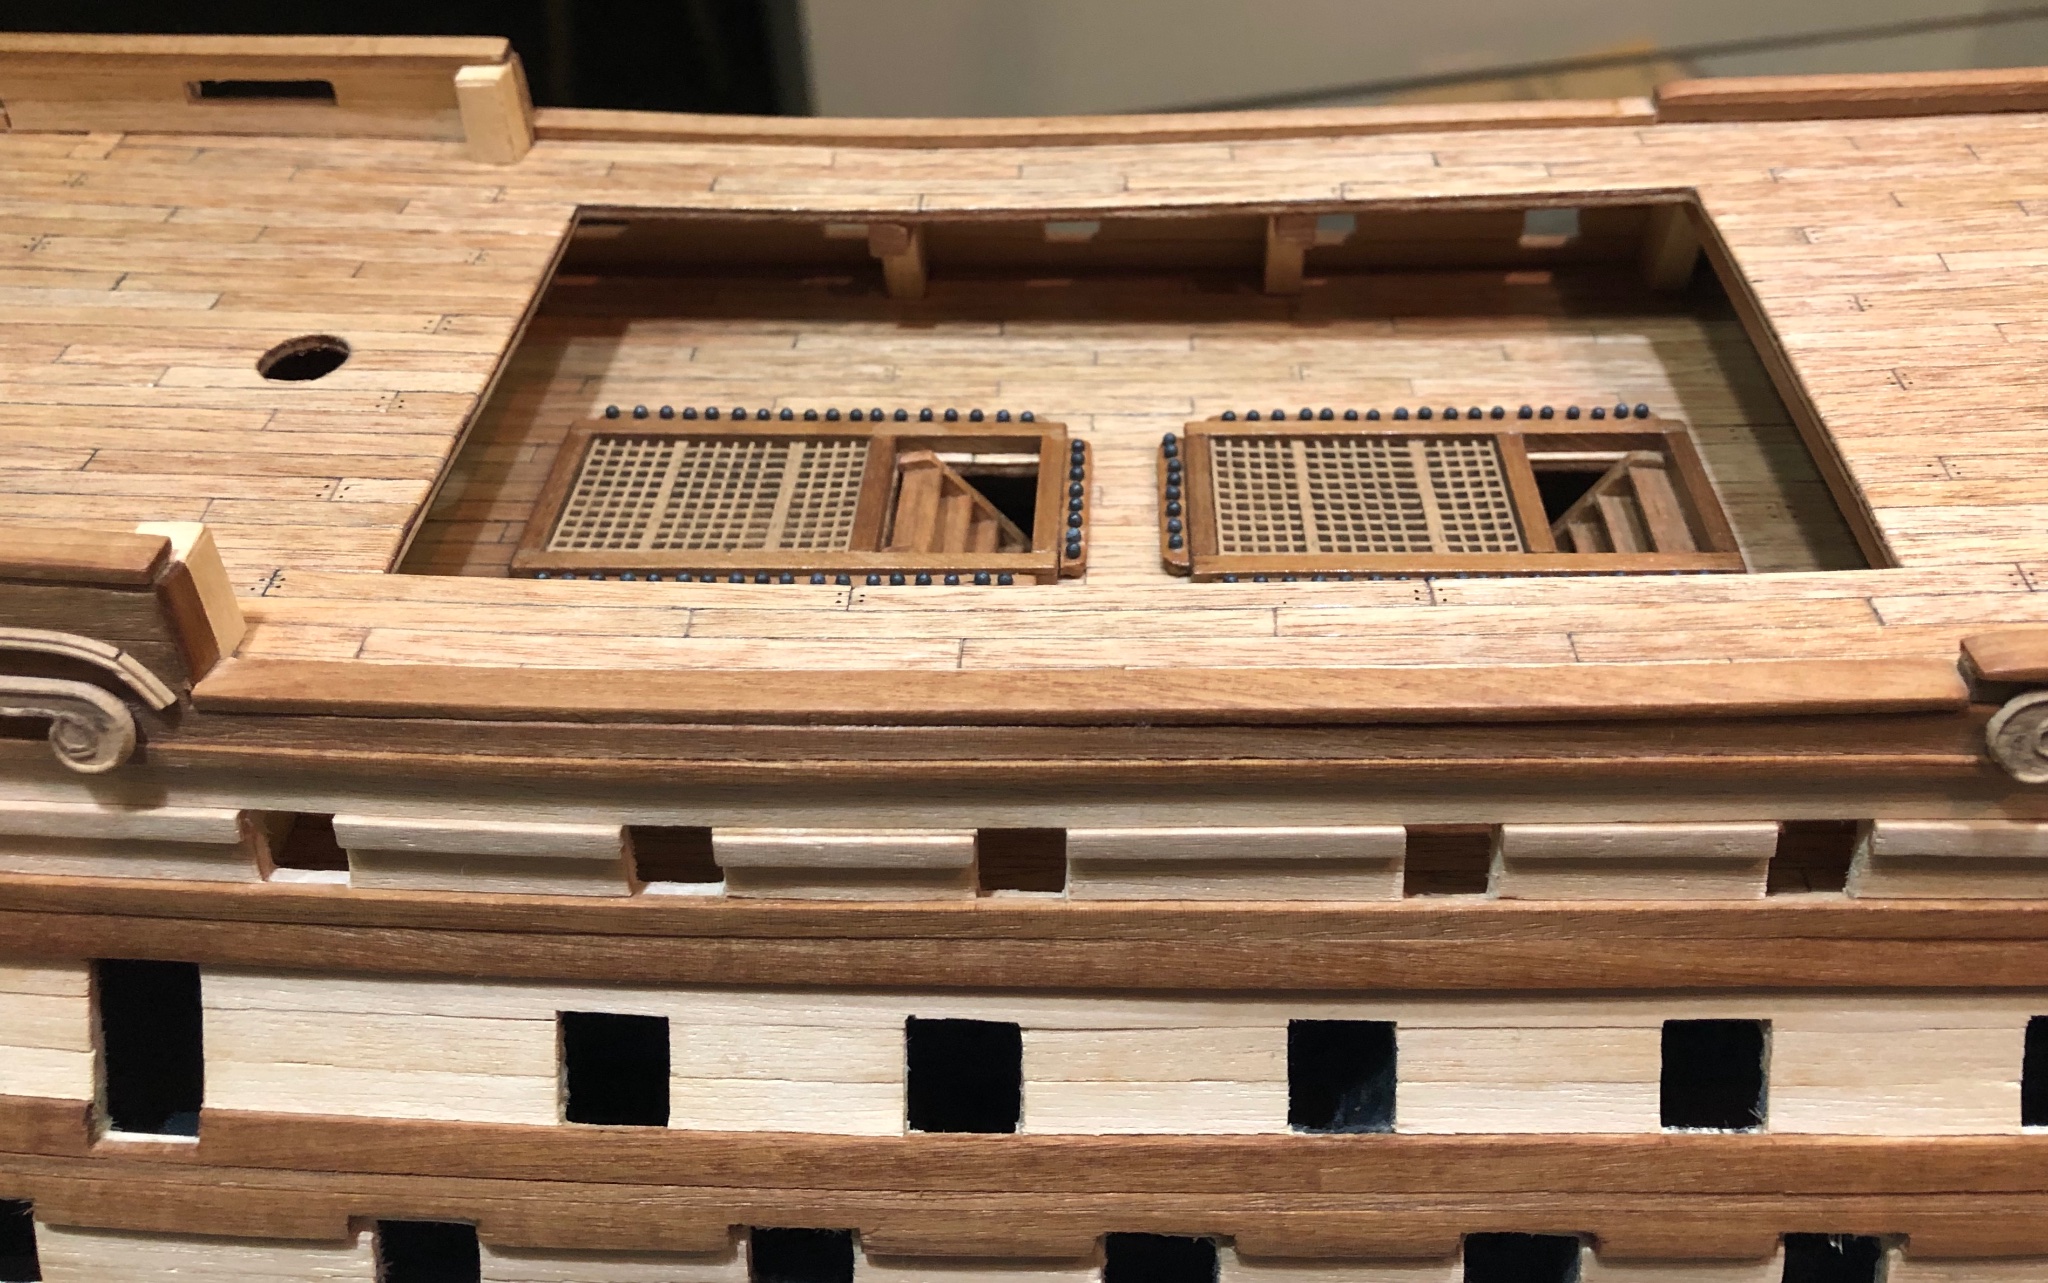
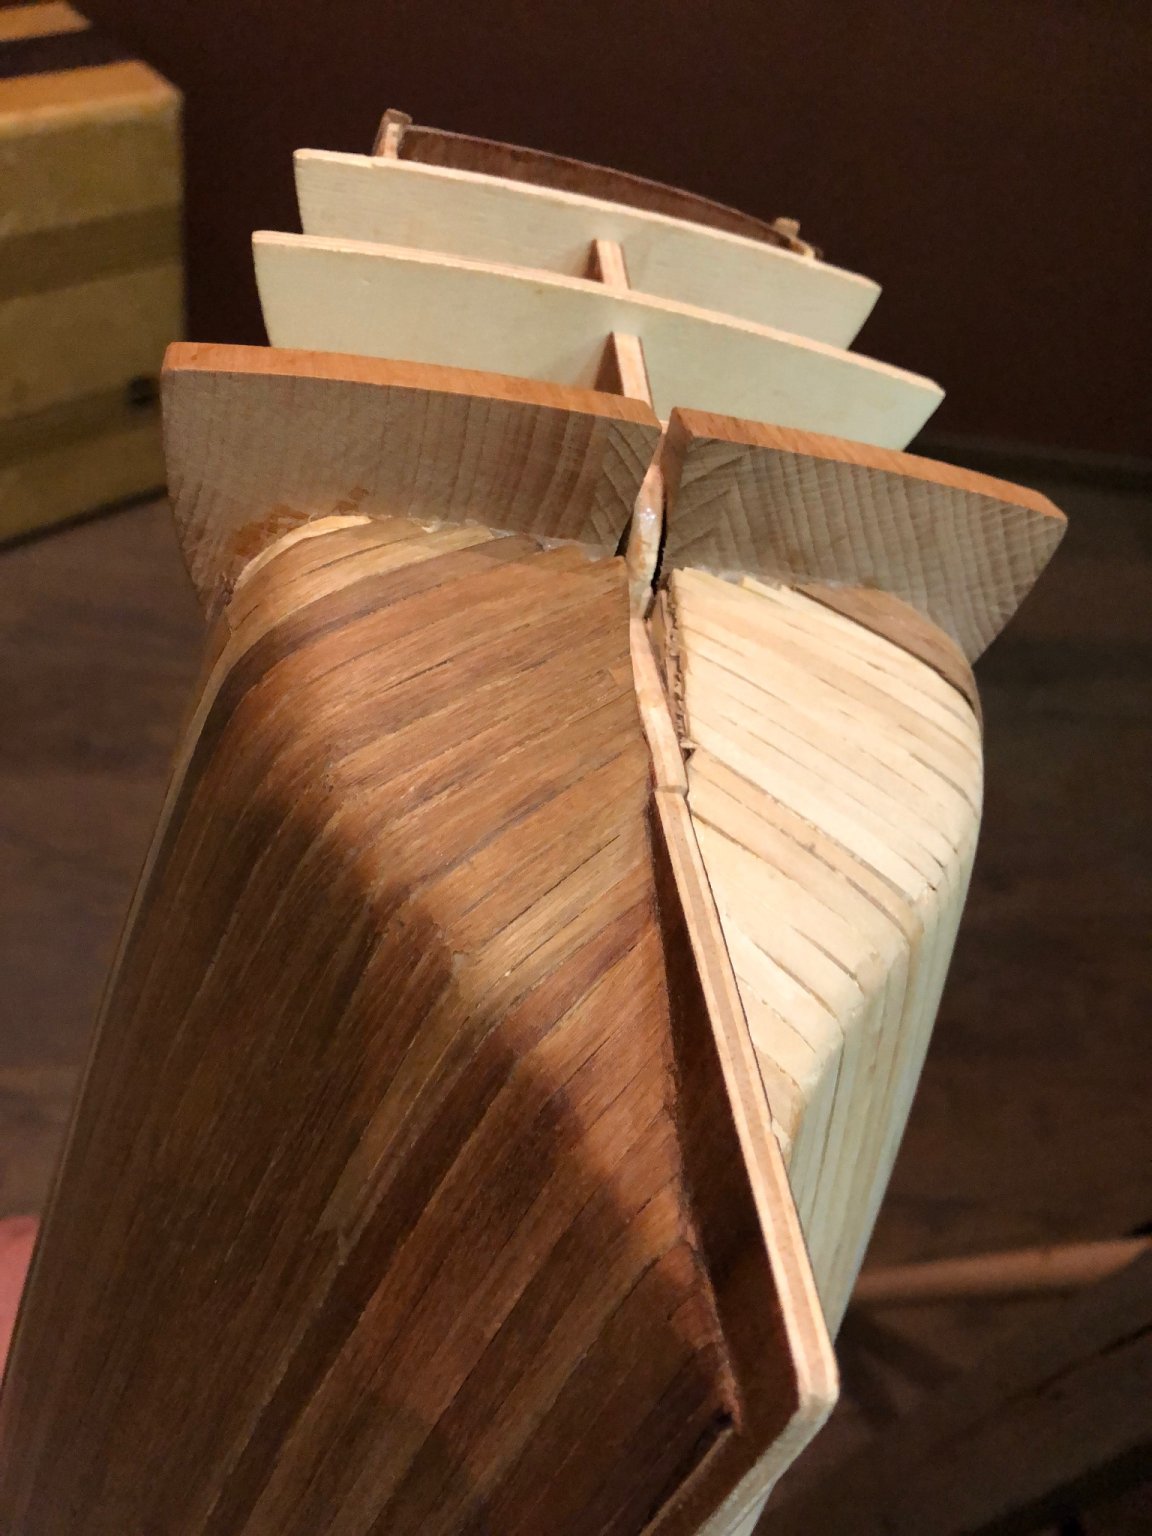
Hi friends !!! This is just the second time I work with wood, but the first time to work with pressed wood. The breakhead bulkhead is made out of this material. Because I decided not to use paint I decided to go with a kind of dry brush technique with pastel color powder to weather it. This is the result. Do you like it? Any comment or suggestion? Best regards,

-
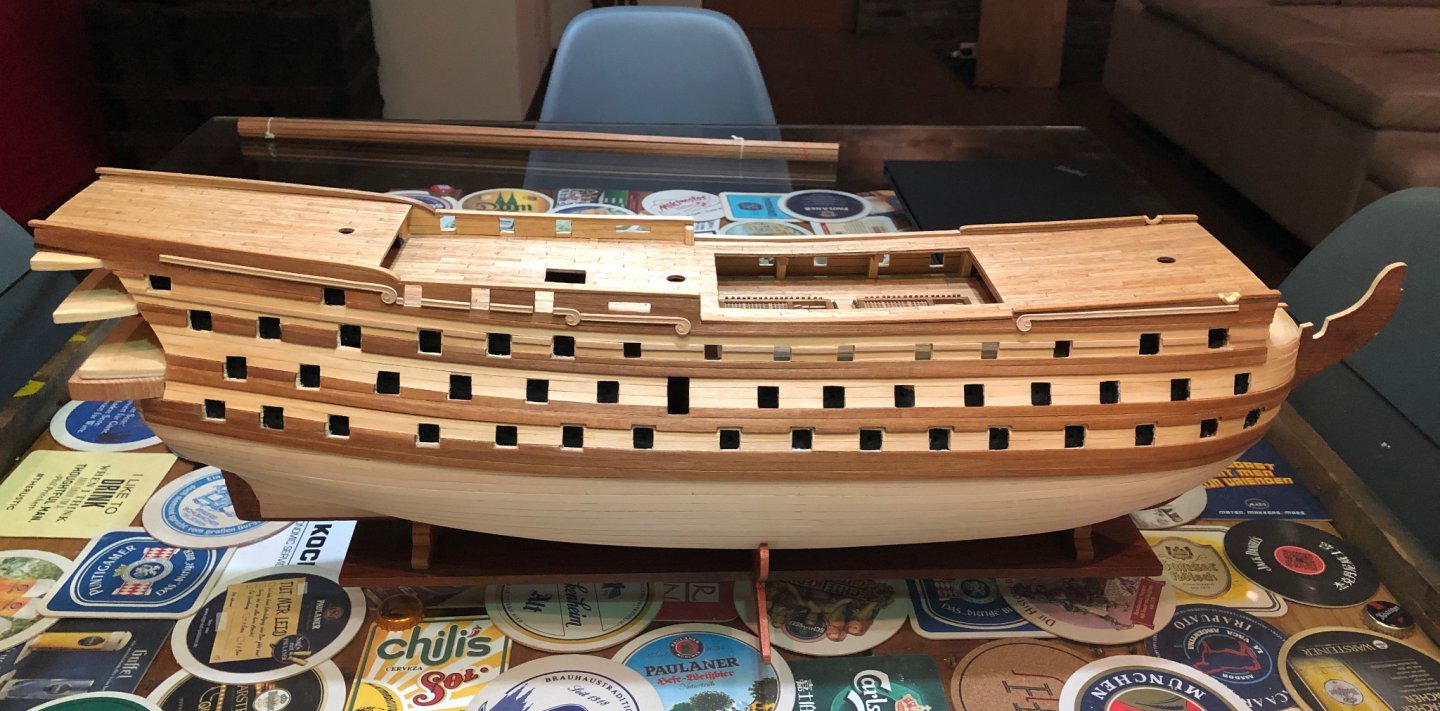
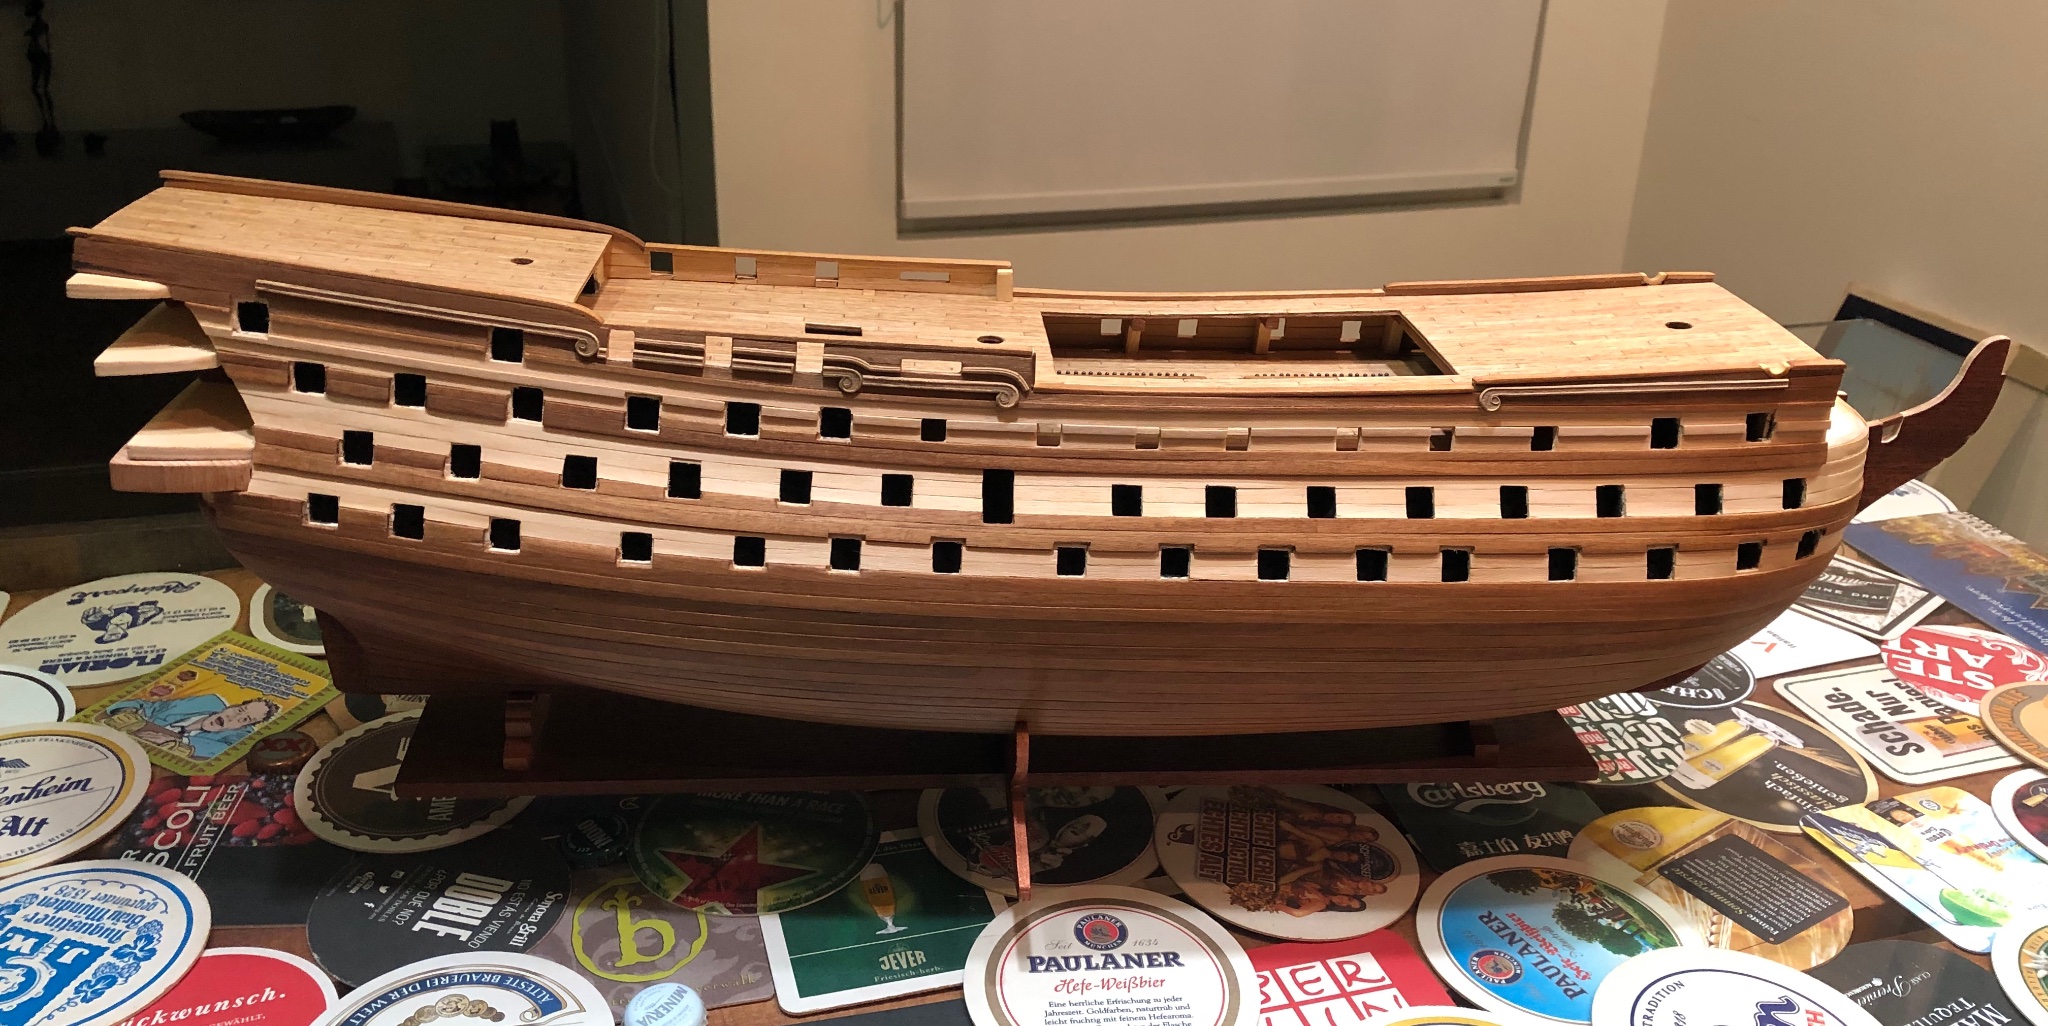
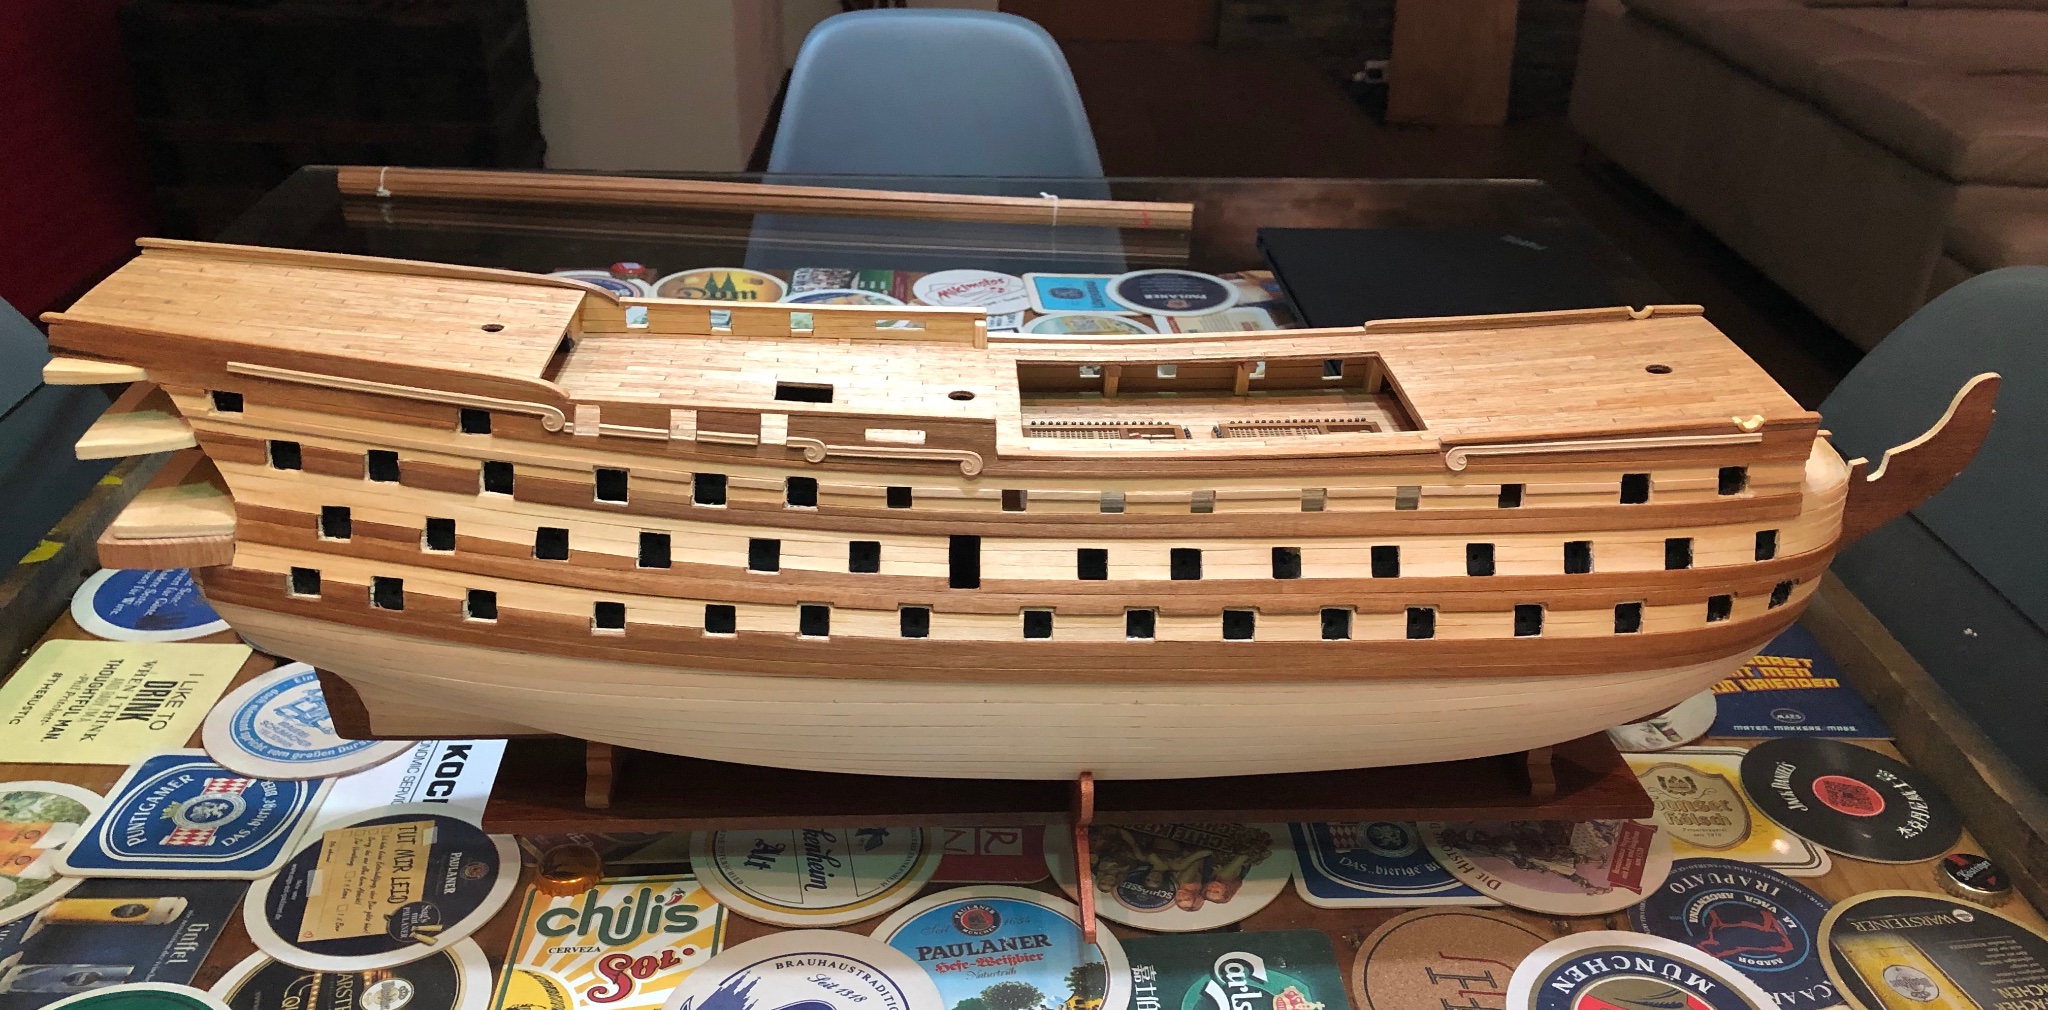
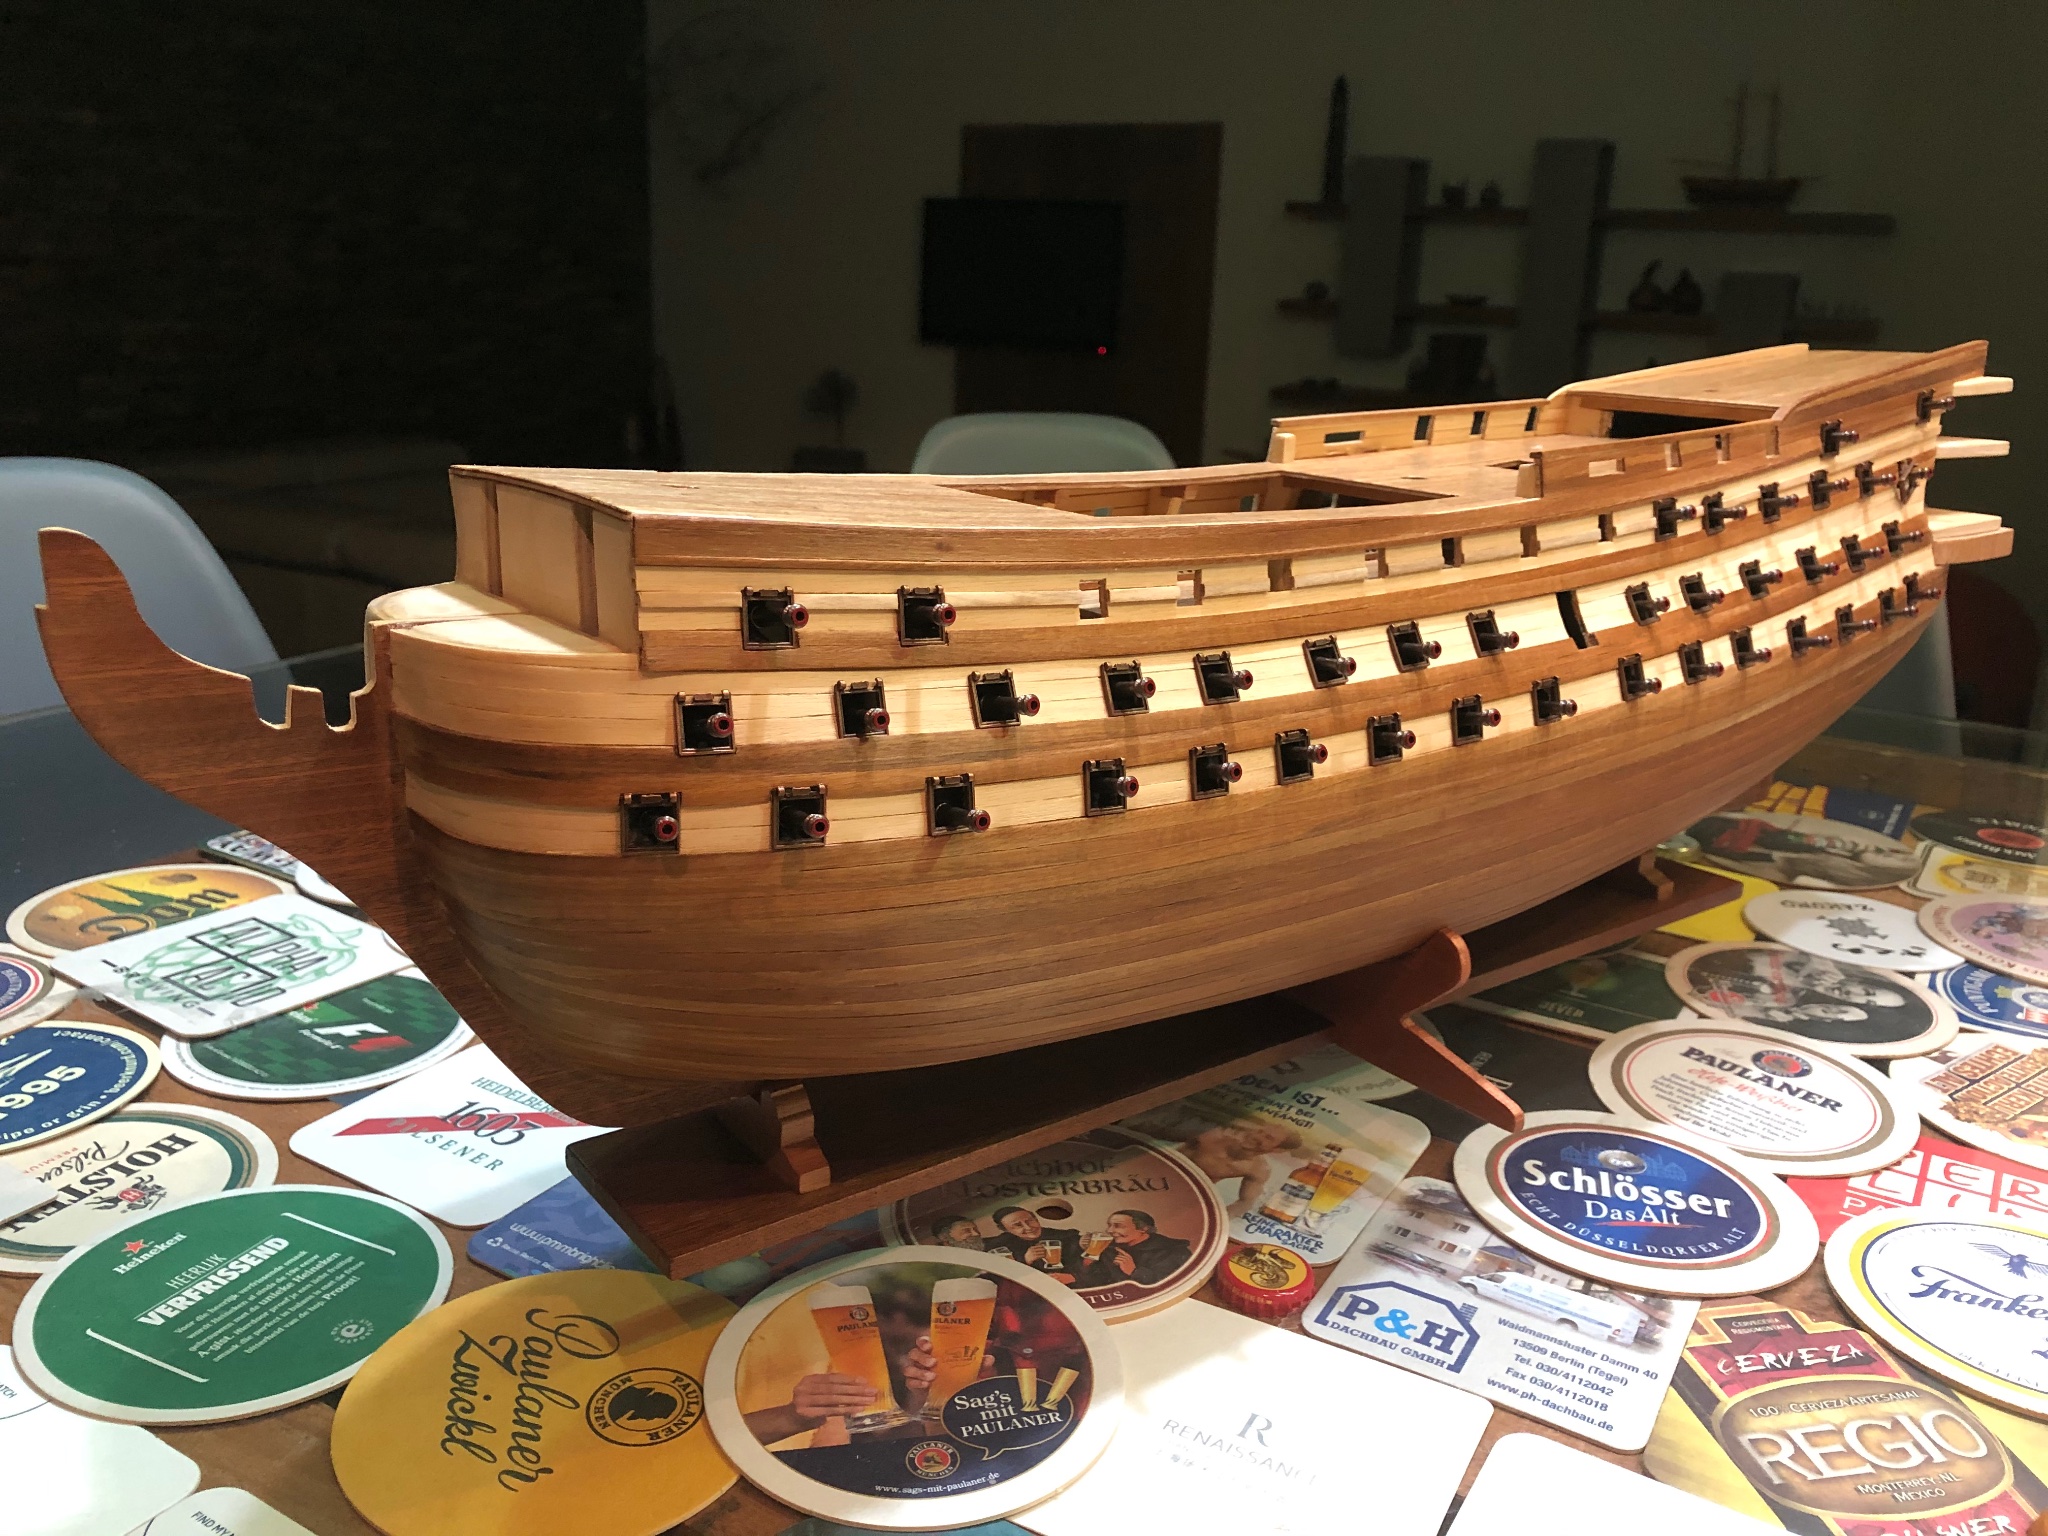
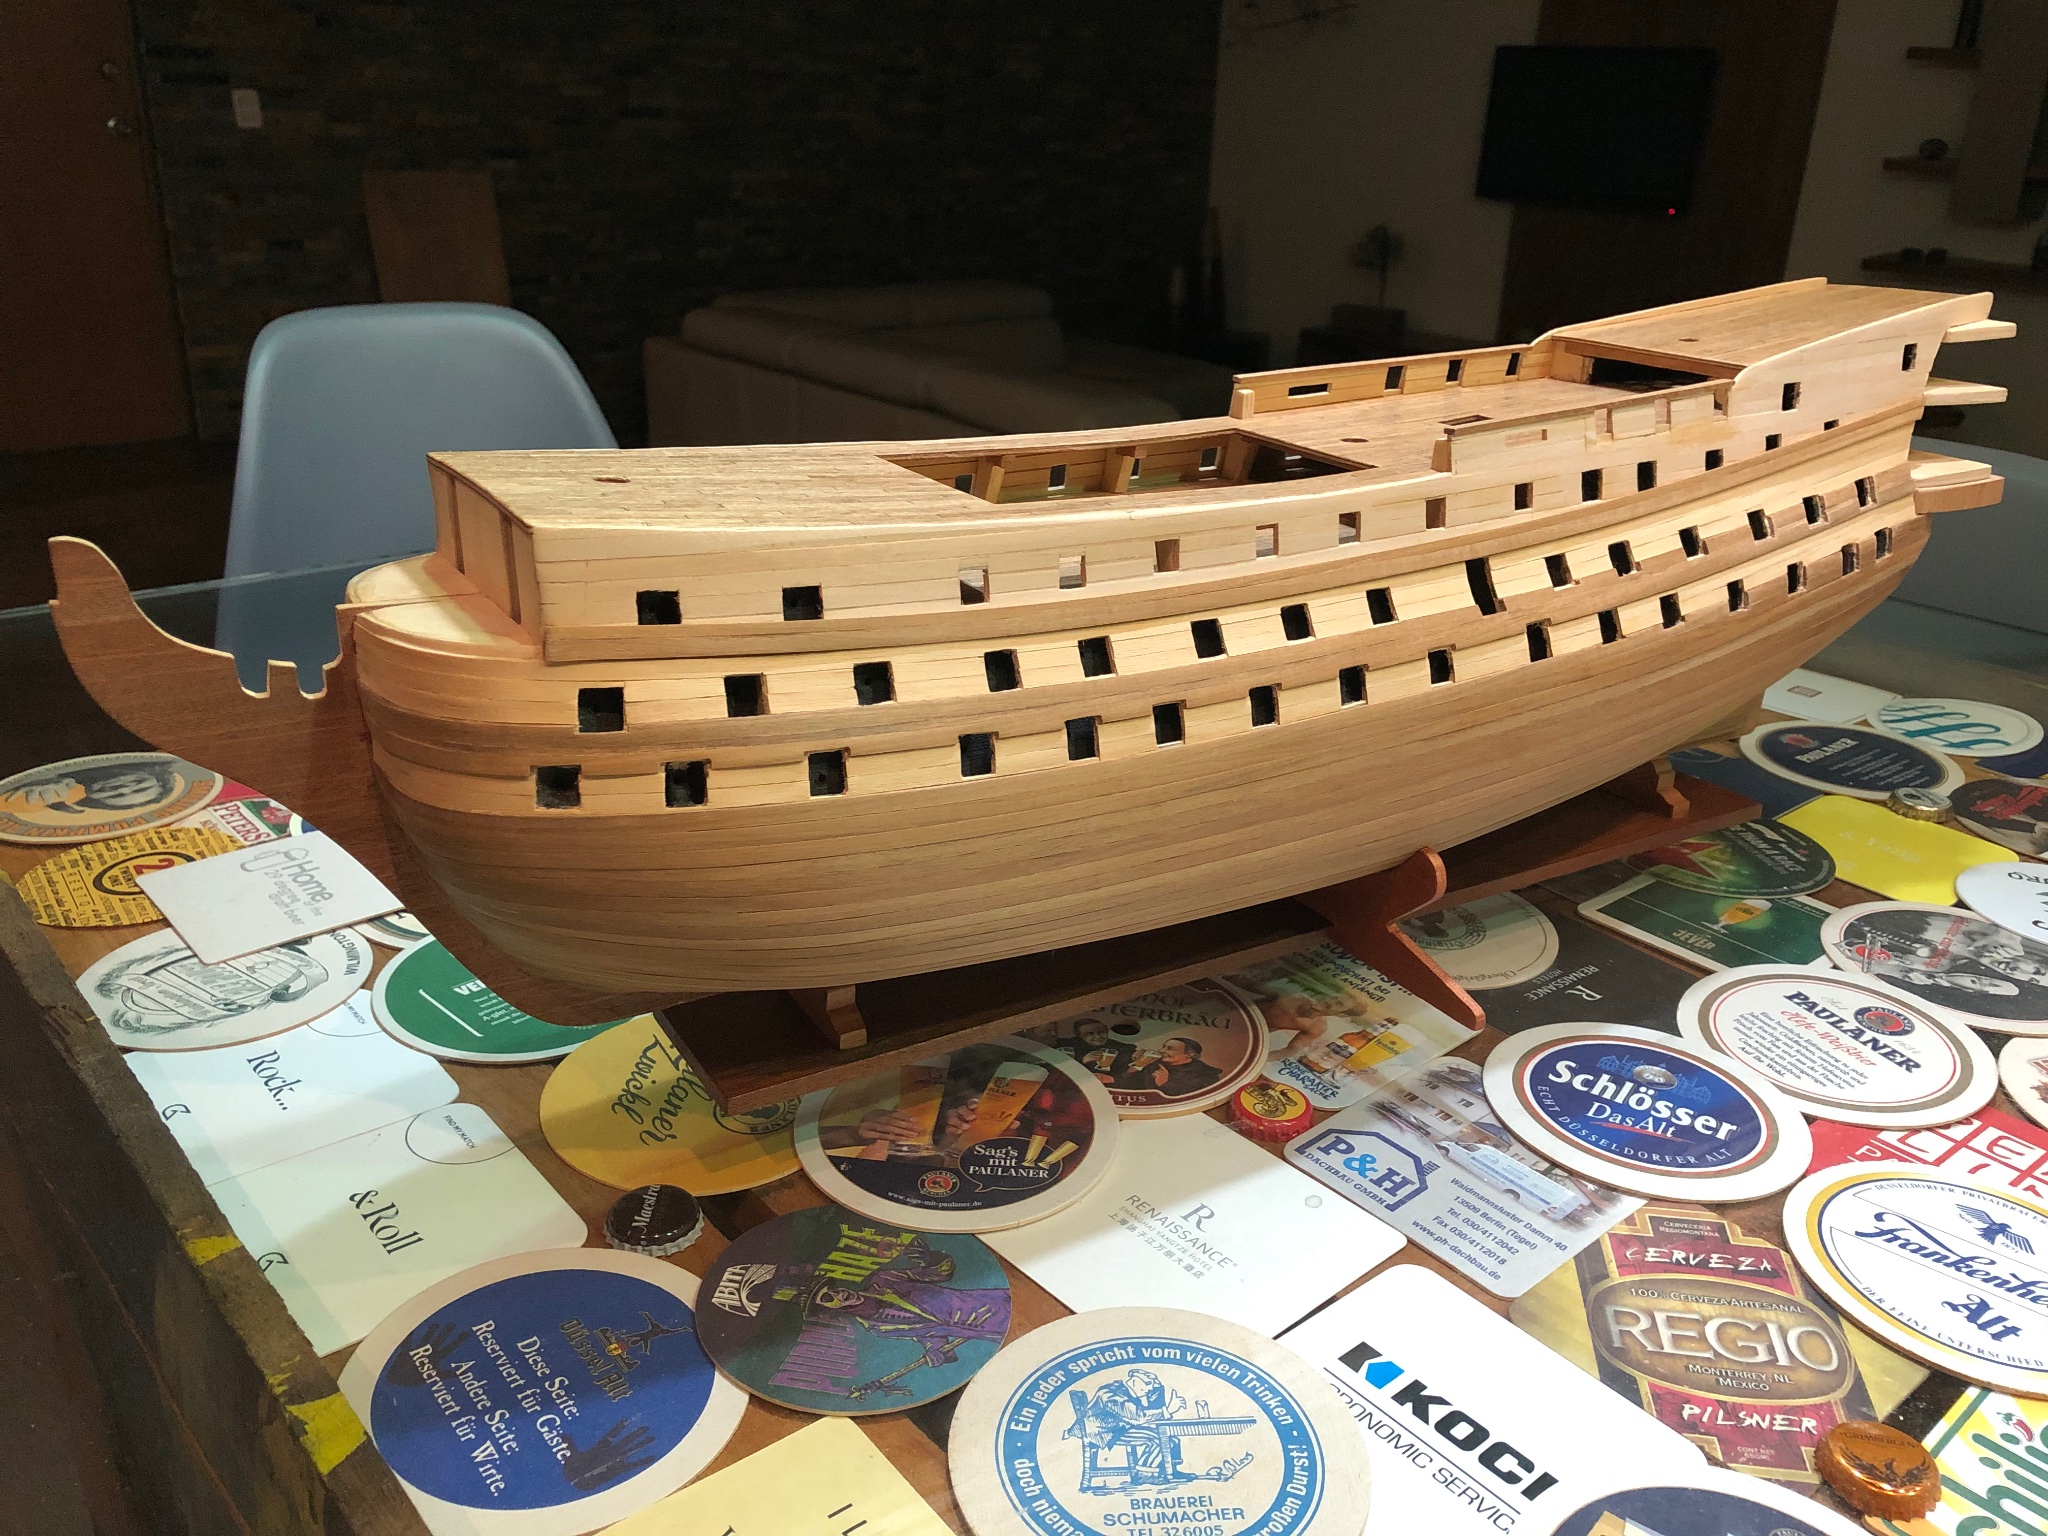
Friends, planking finished !!!! 3 months 11 days to reach this milestone. I am really happy with the result. Far from perfect, but much better than my initial expectations. Some pics here. Best regards to all.


-
Nicolas, here are some pics of the stern. I hope they will help you. Piece #50 is already attached. Number 51 will go underneath it. Covering that small part not planked. Best regards.


-
Charlie, I would try with a fine sandpaper. I did it with my Victory’s second walnut planking to take out glue stains without a problem. Do it slowly and check the progress. If you see it is not going ok you can stop doing it. In fact, if you are going to apply varnish, a good sanding is recommended. Best regards.
-
Excellent and detailed work Richard !!! Congratulations !!!
-
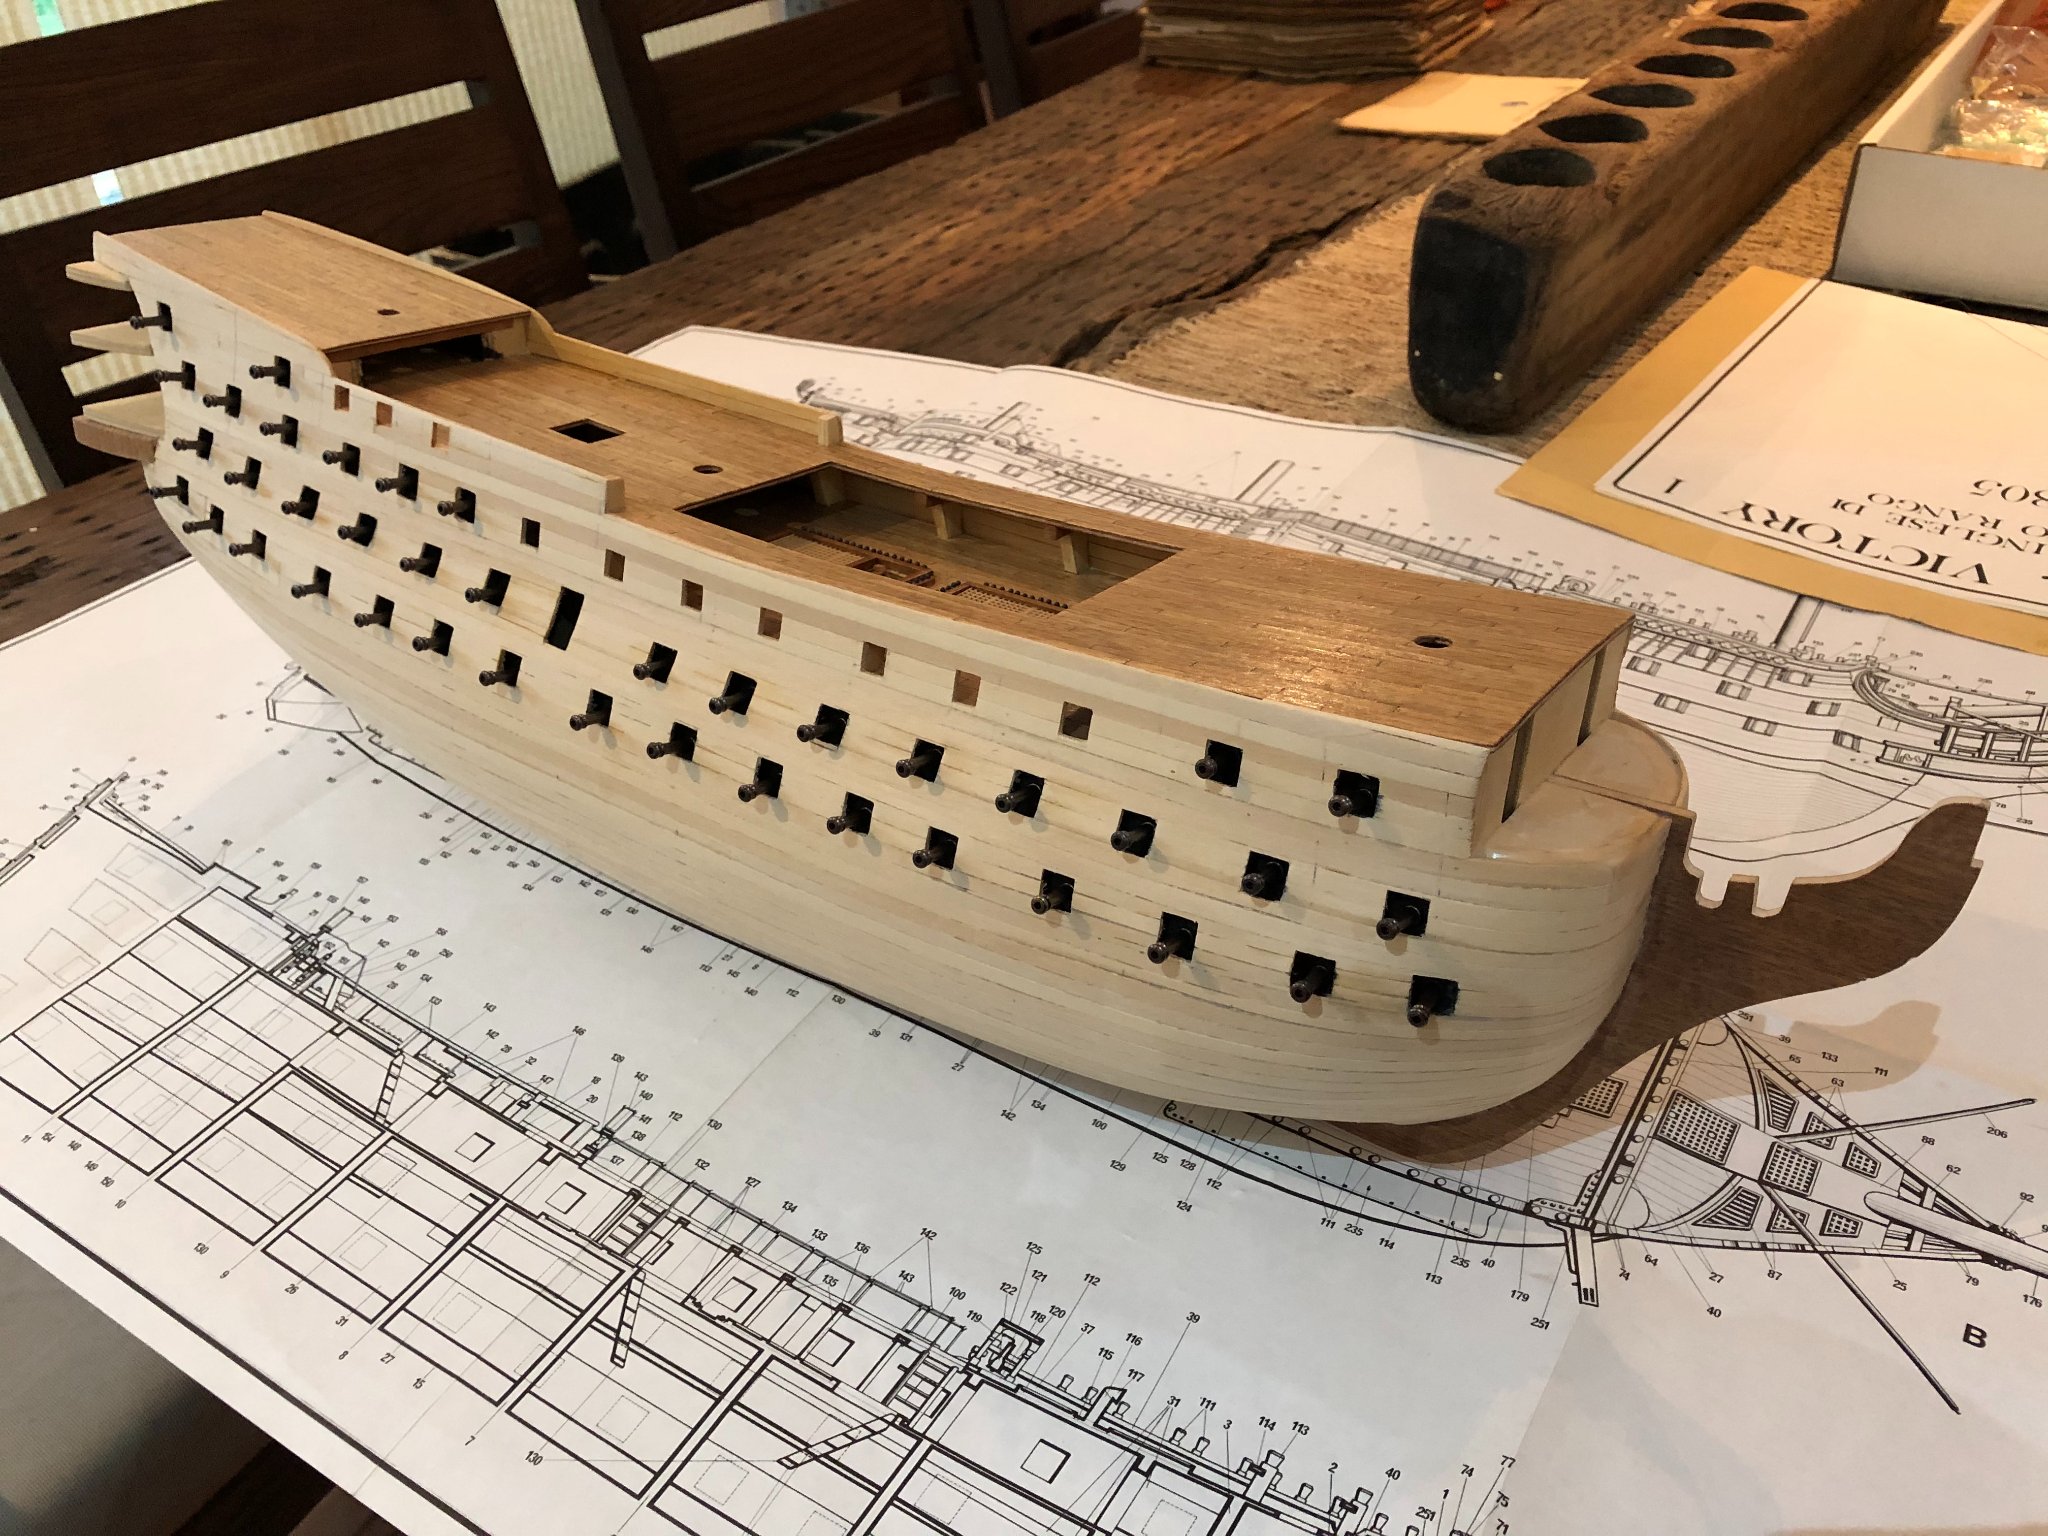
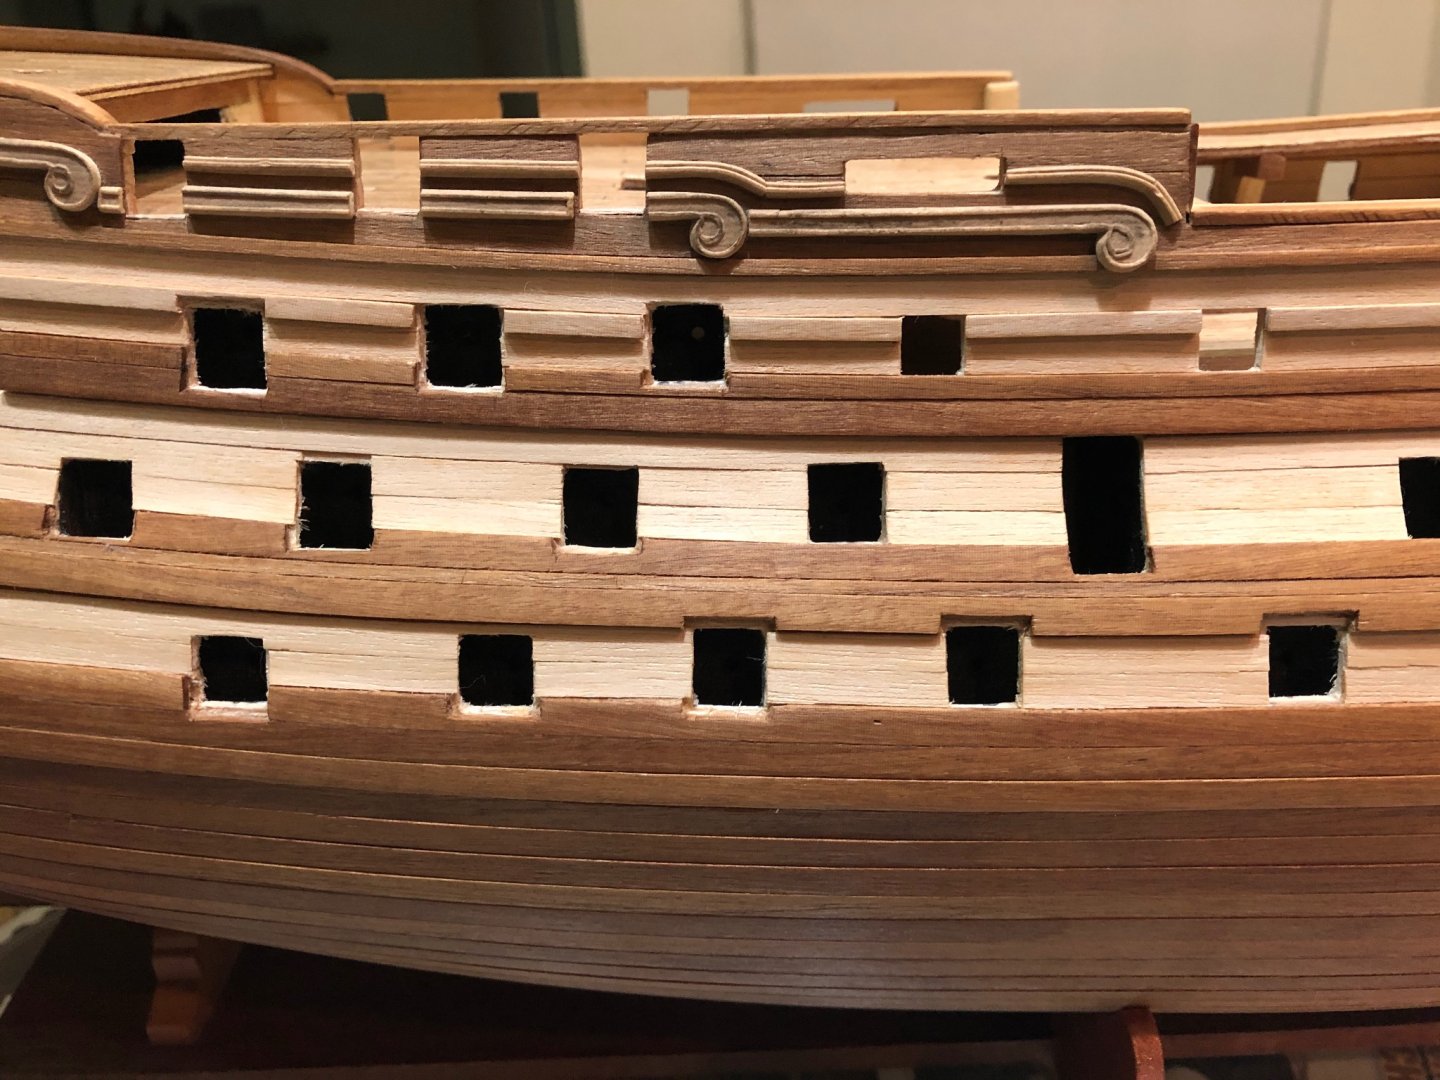
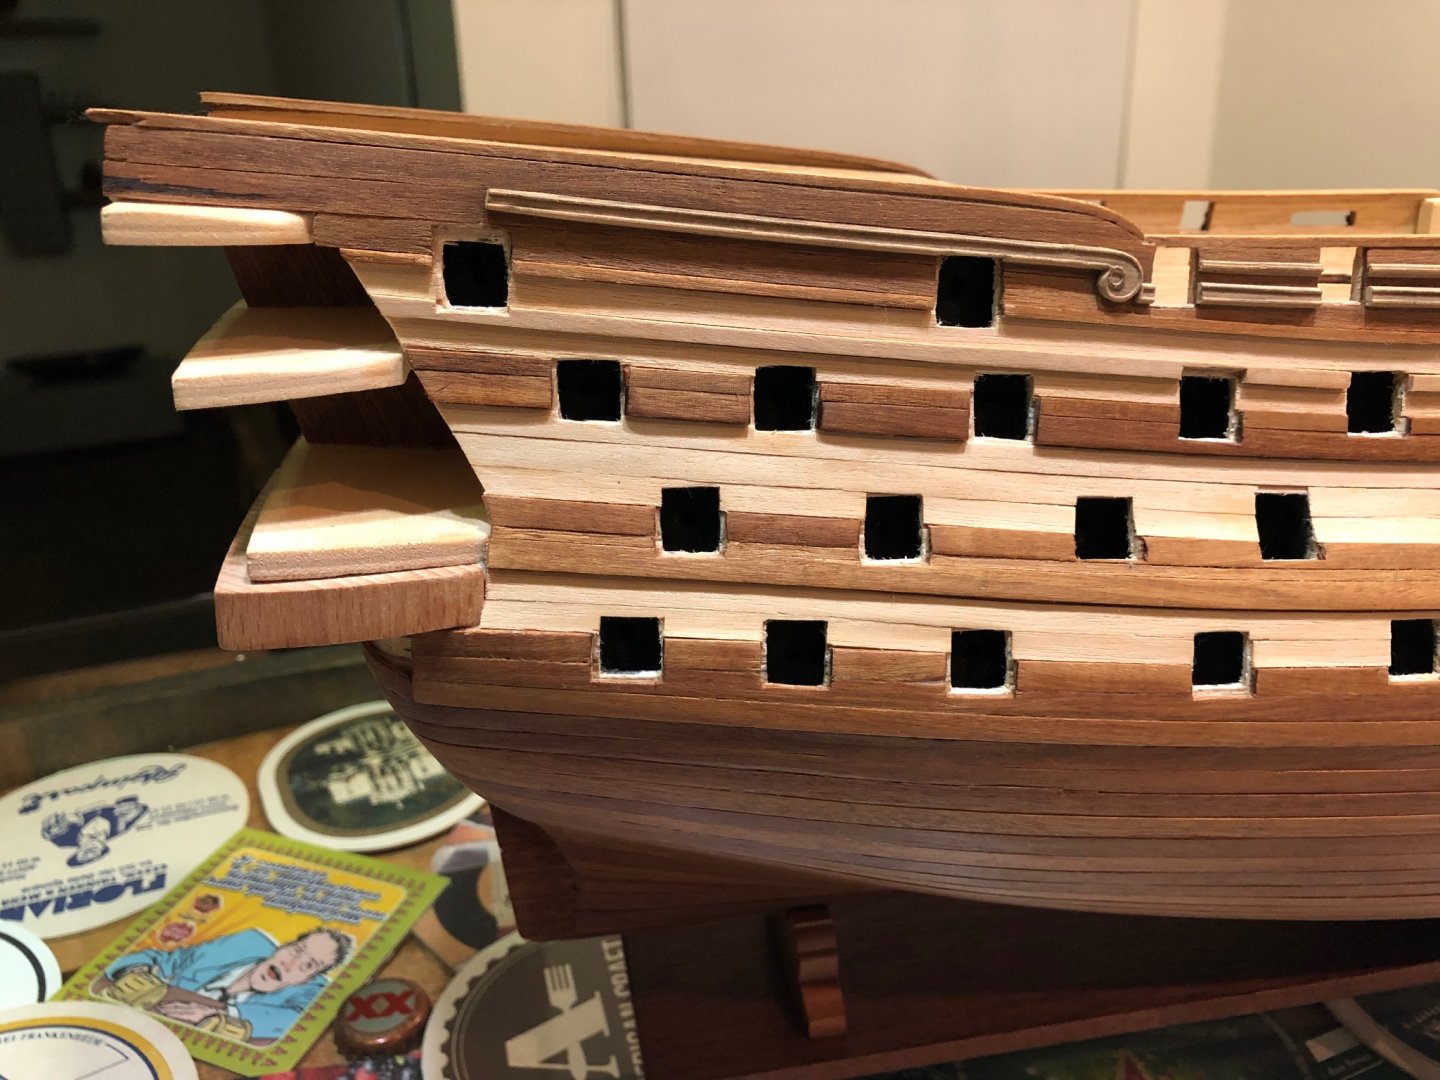
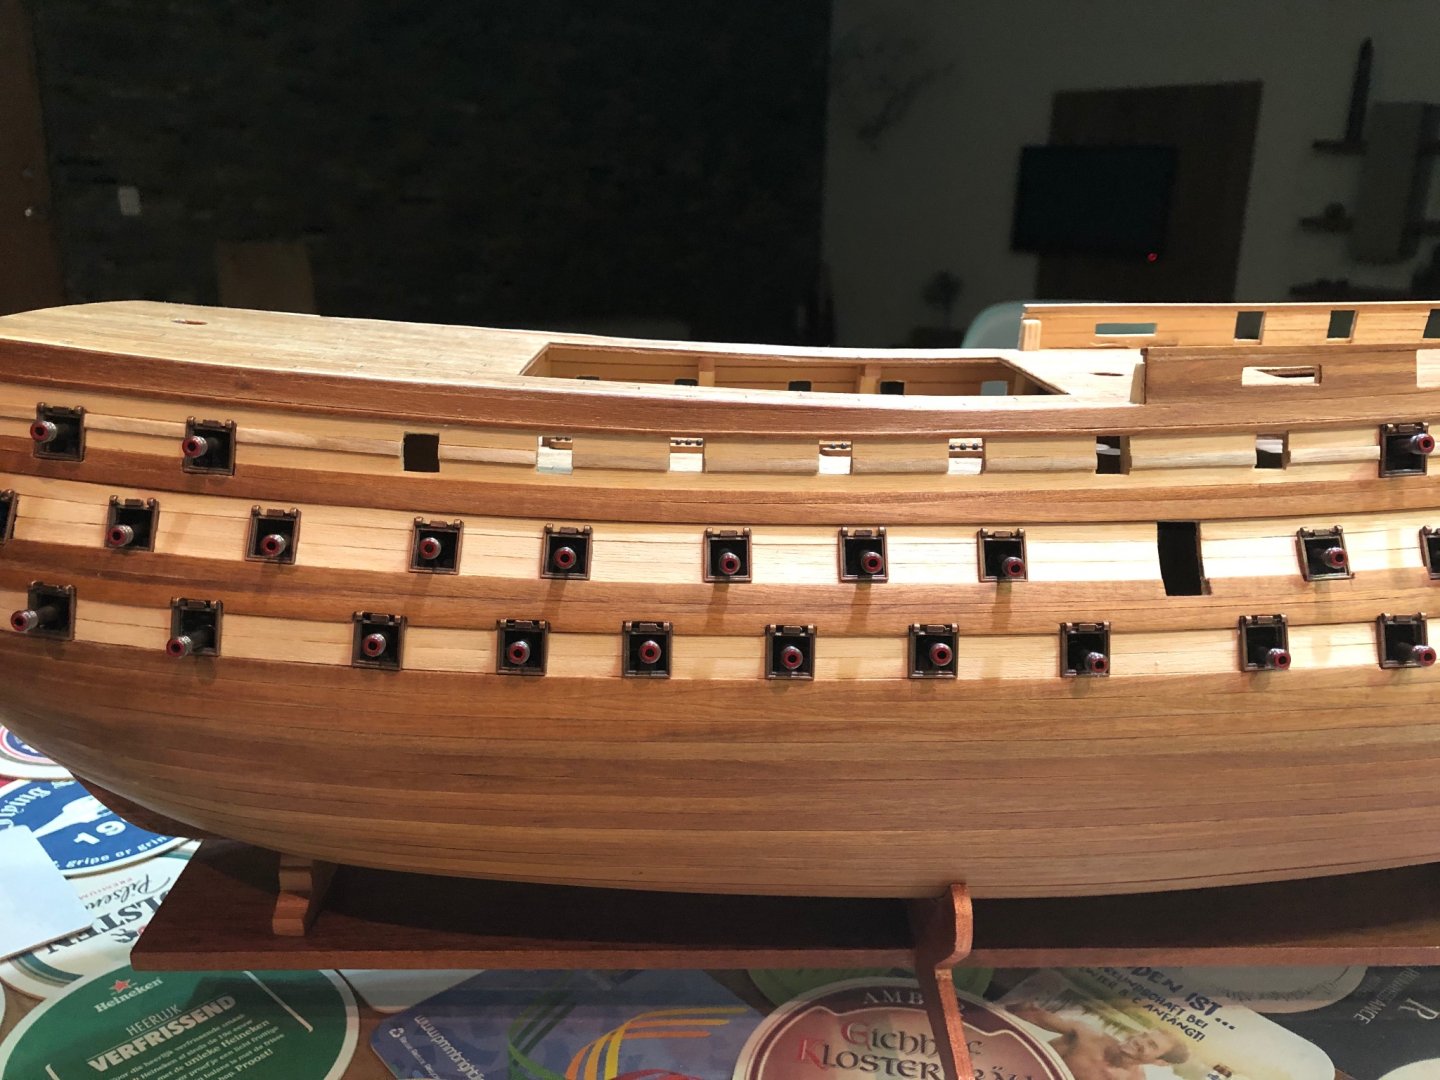
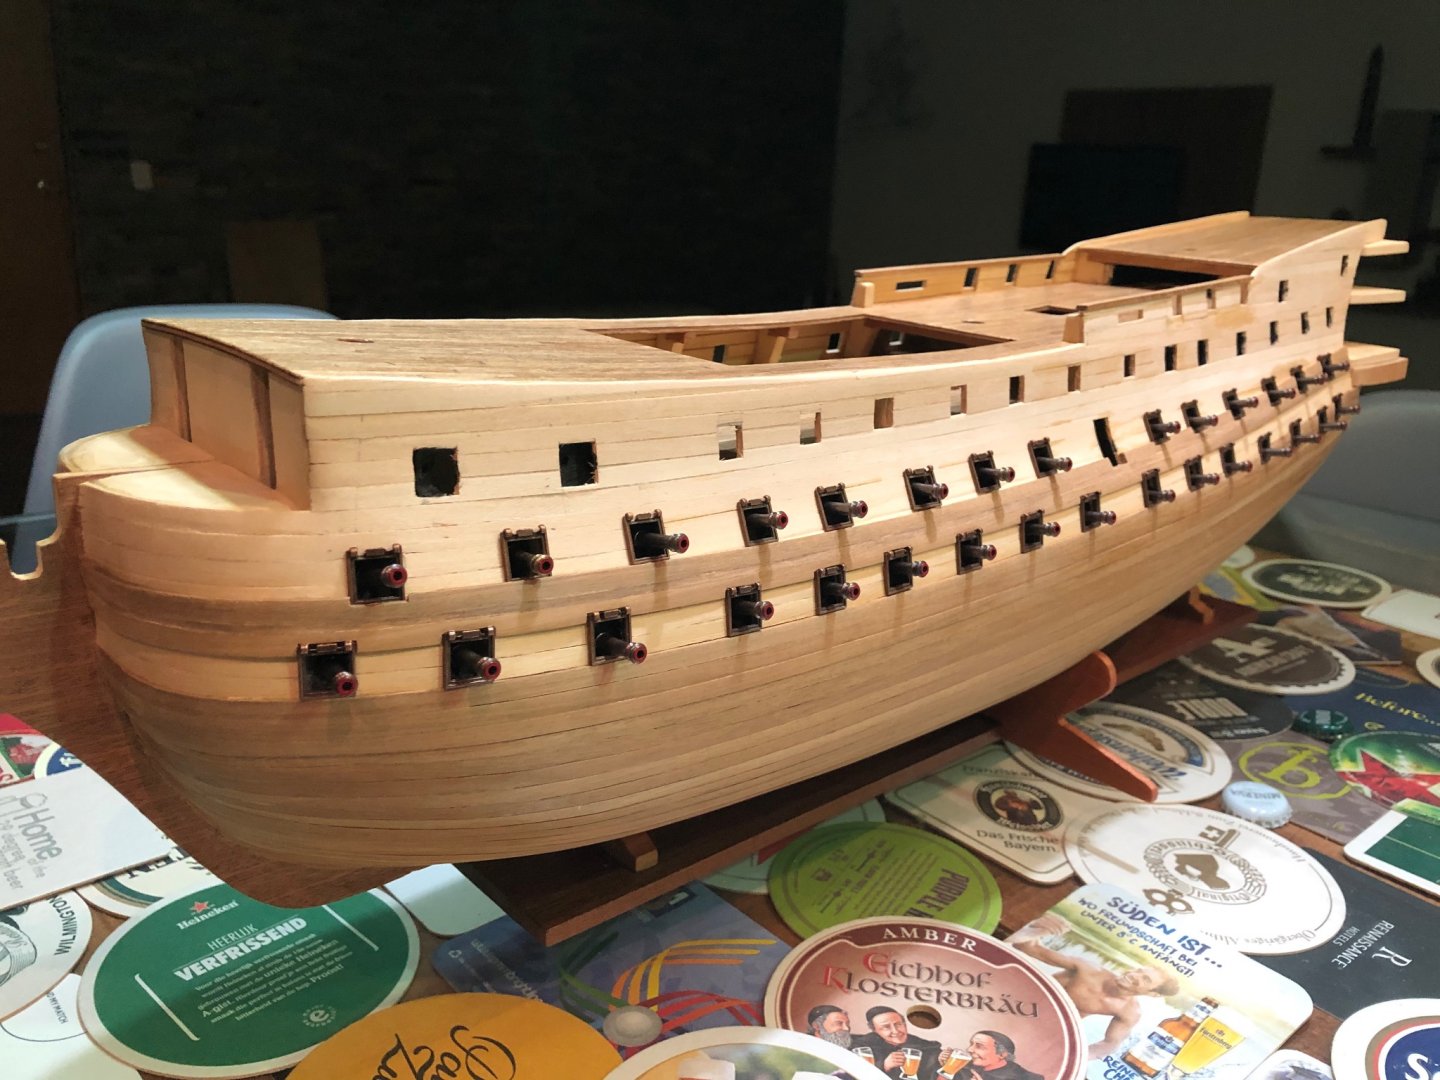
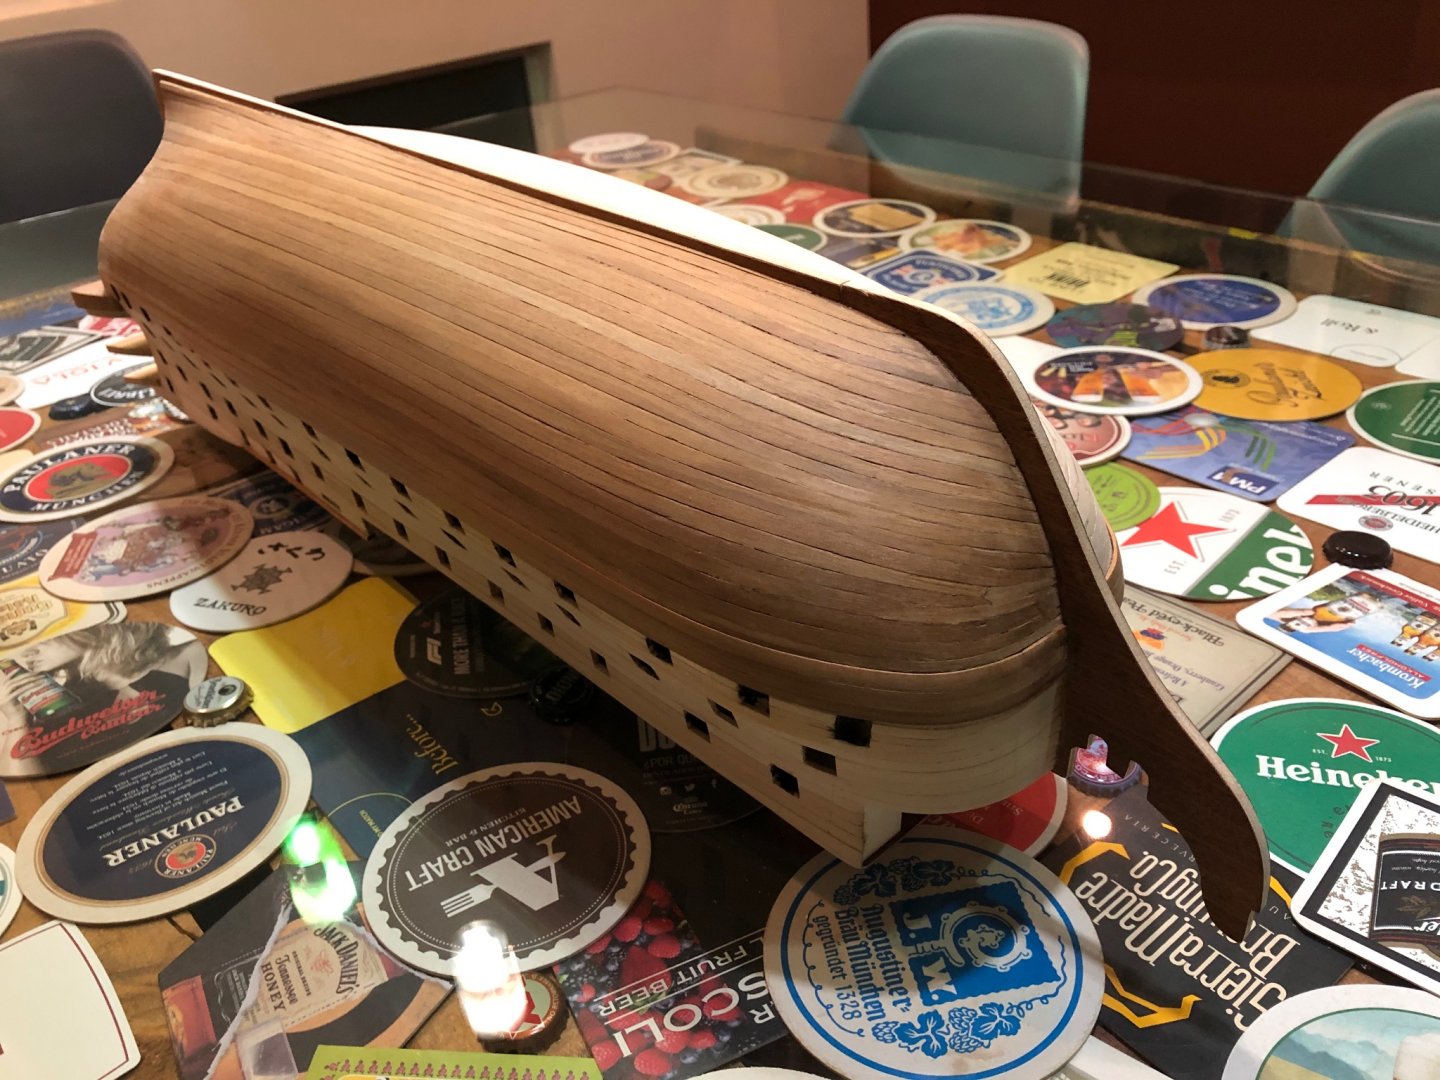
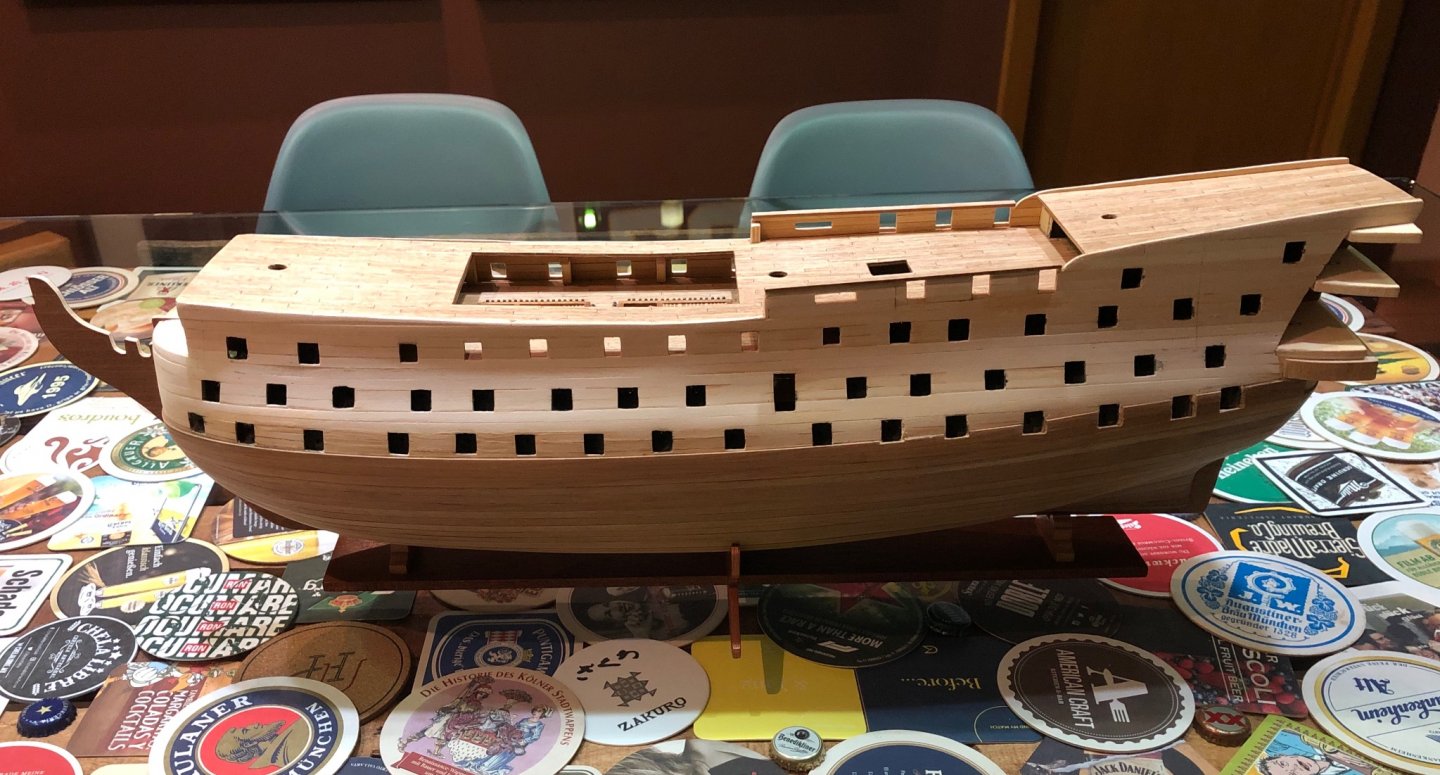
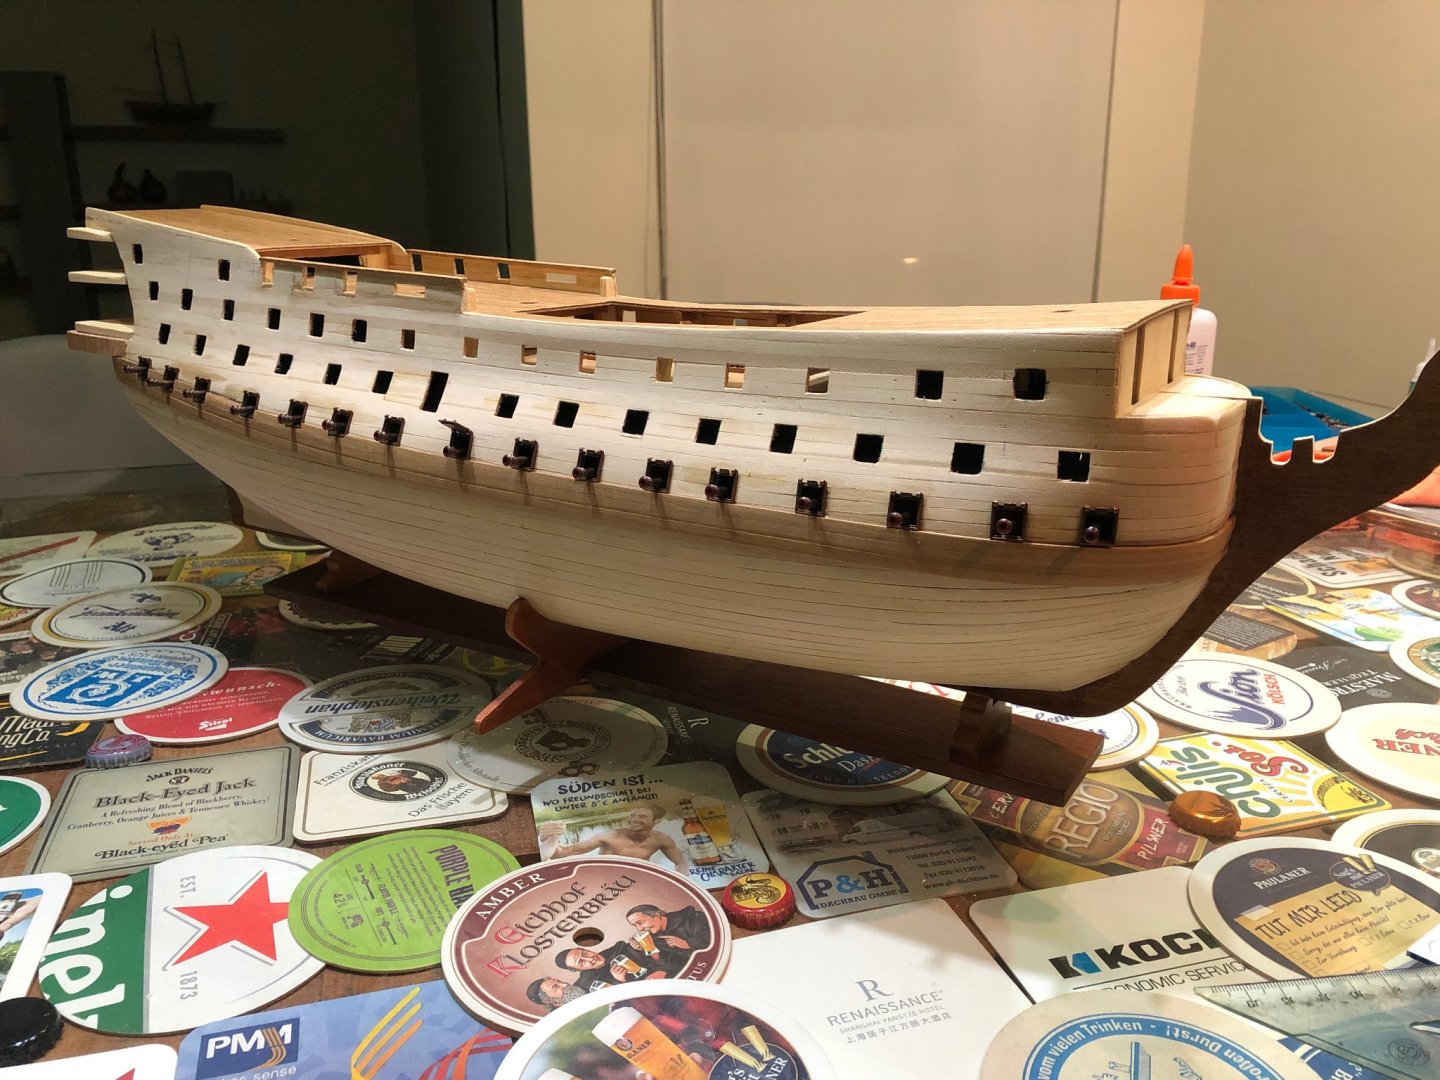
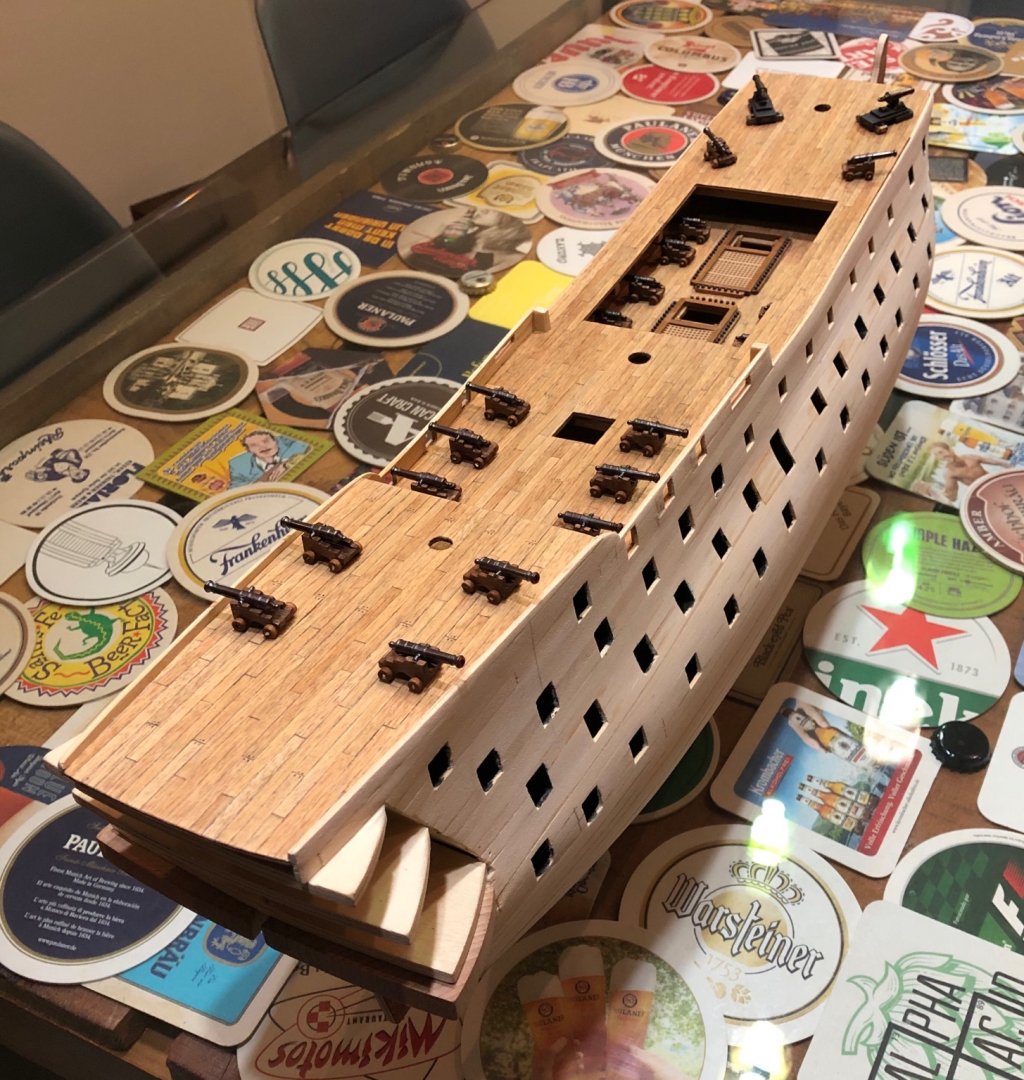
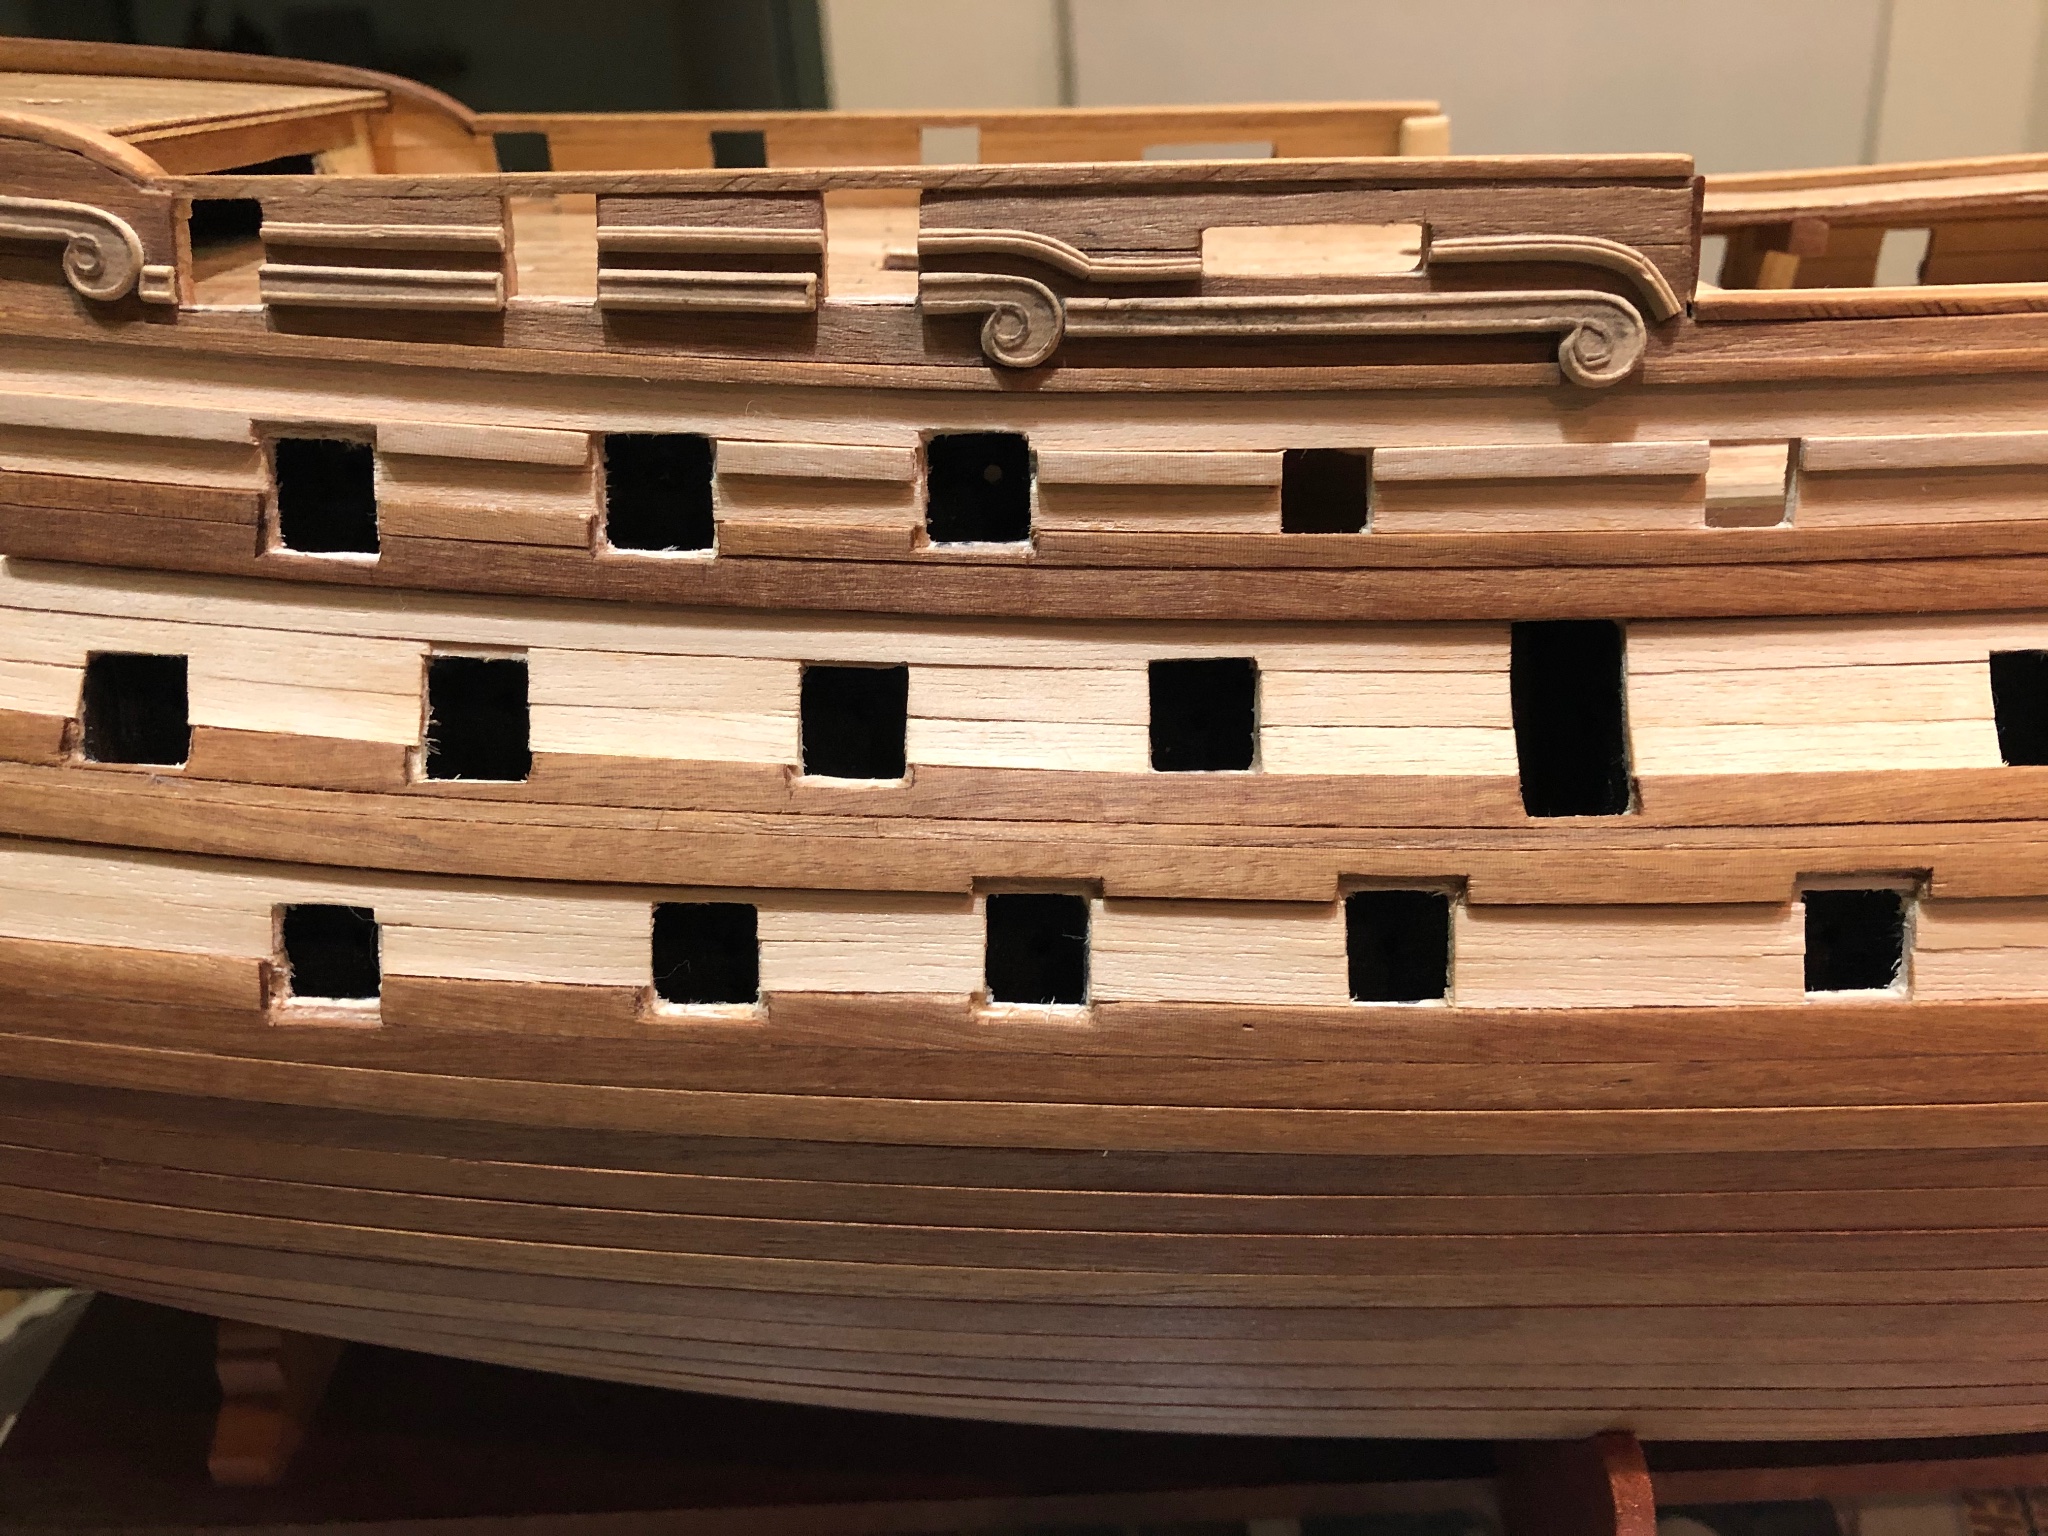
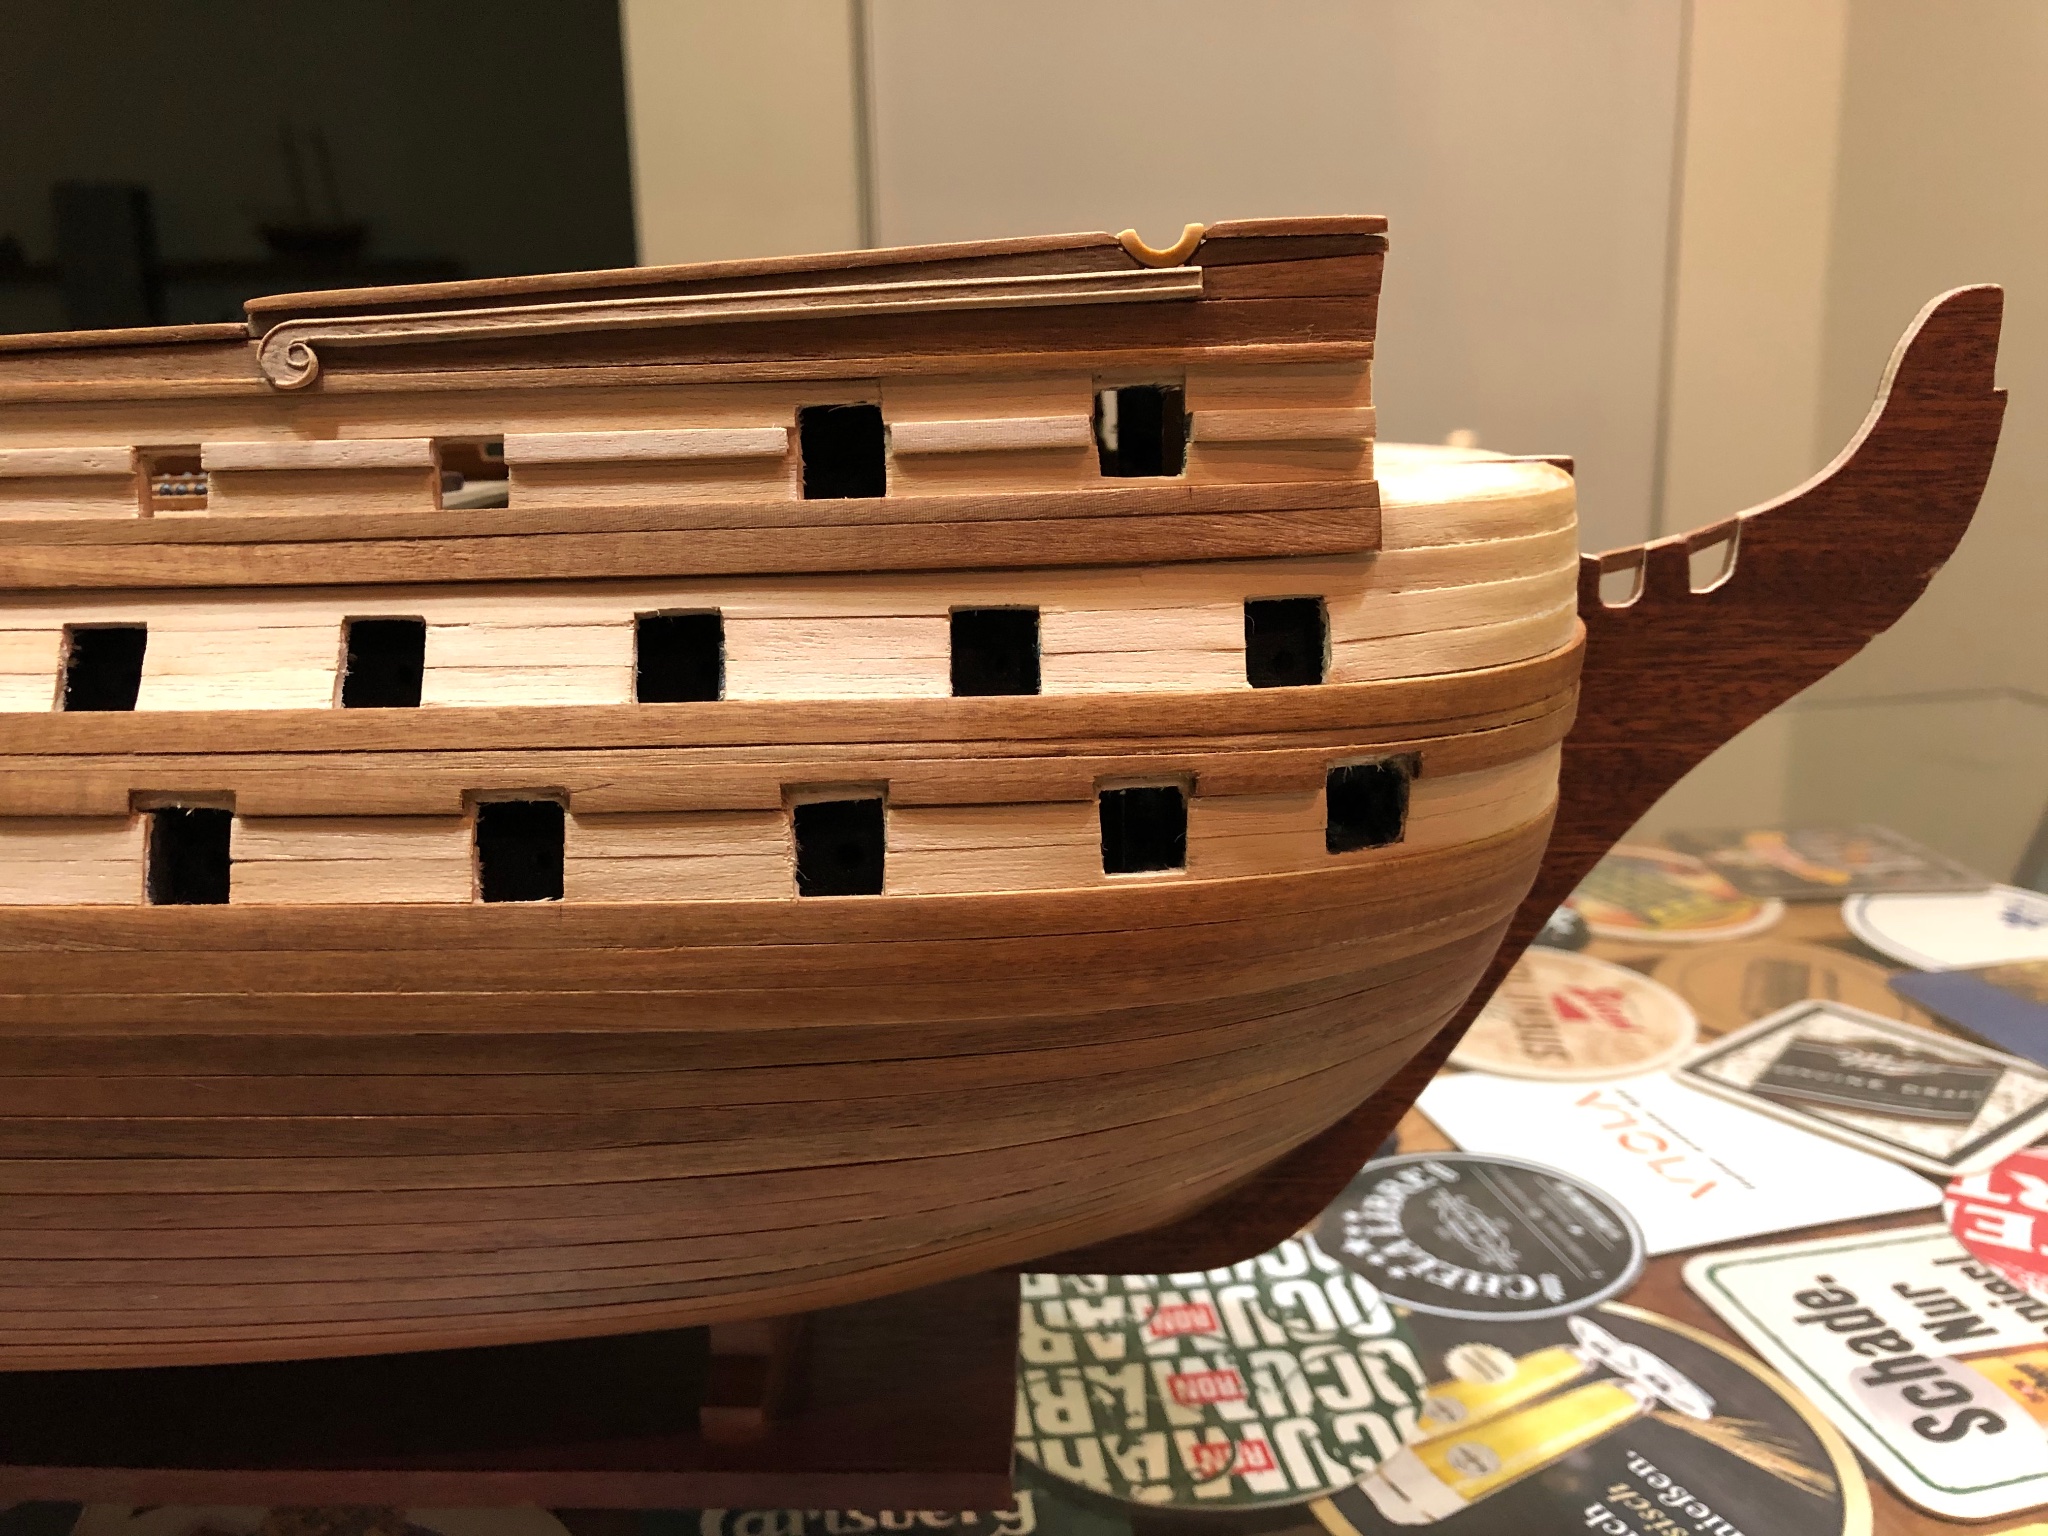
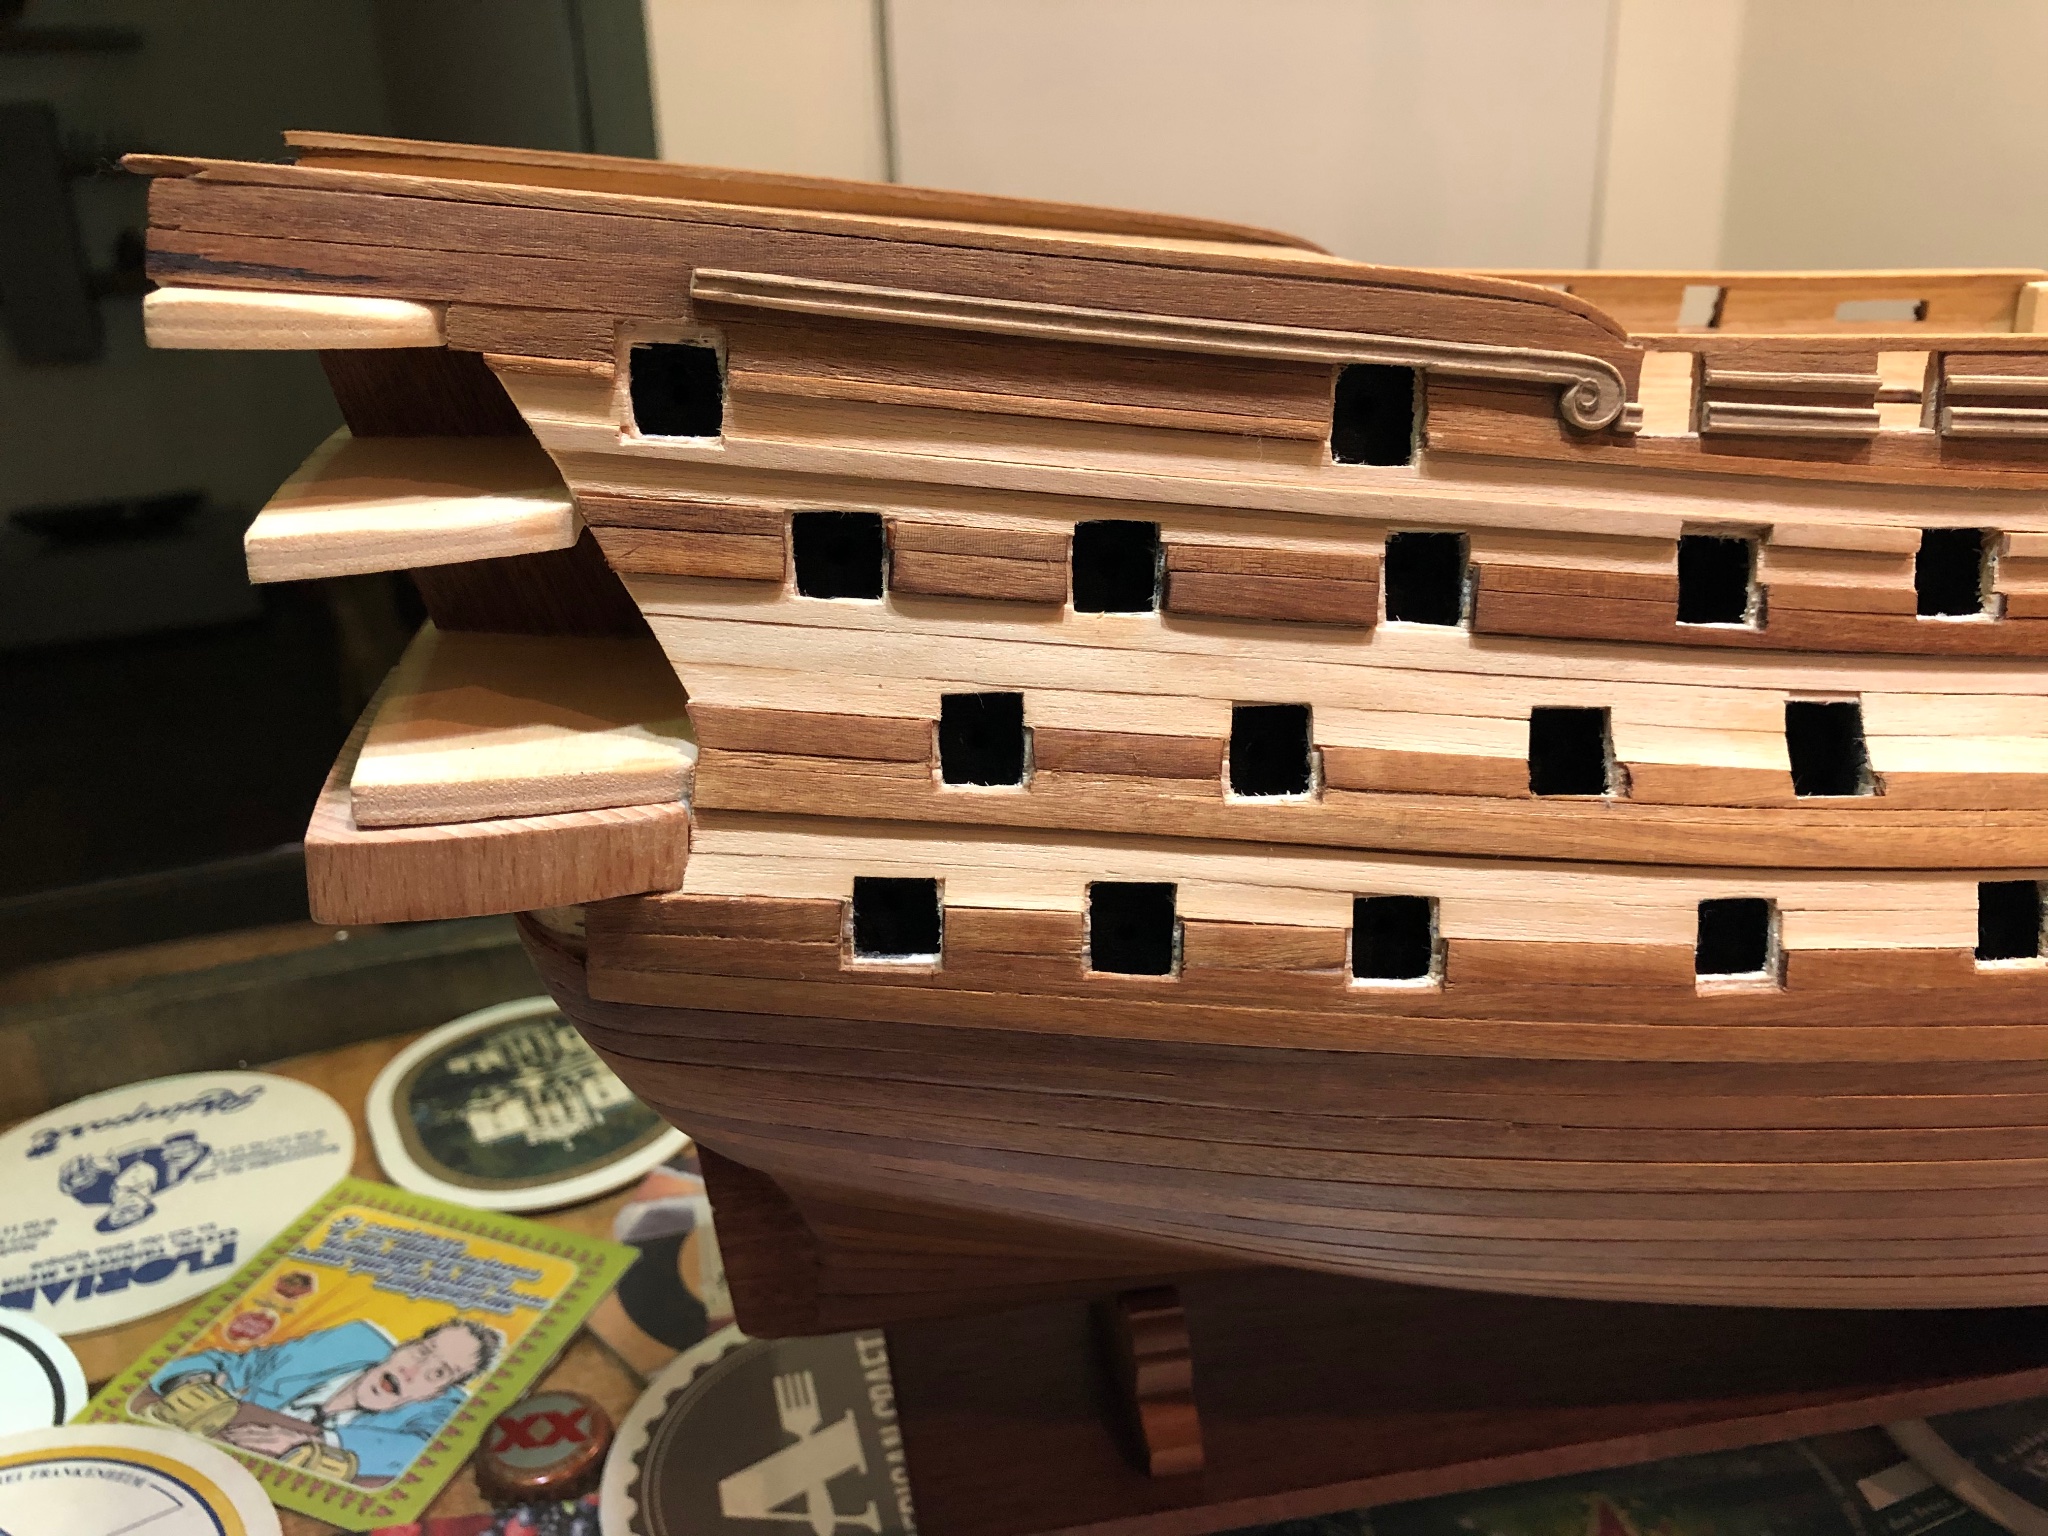
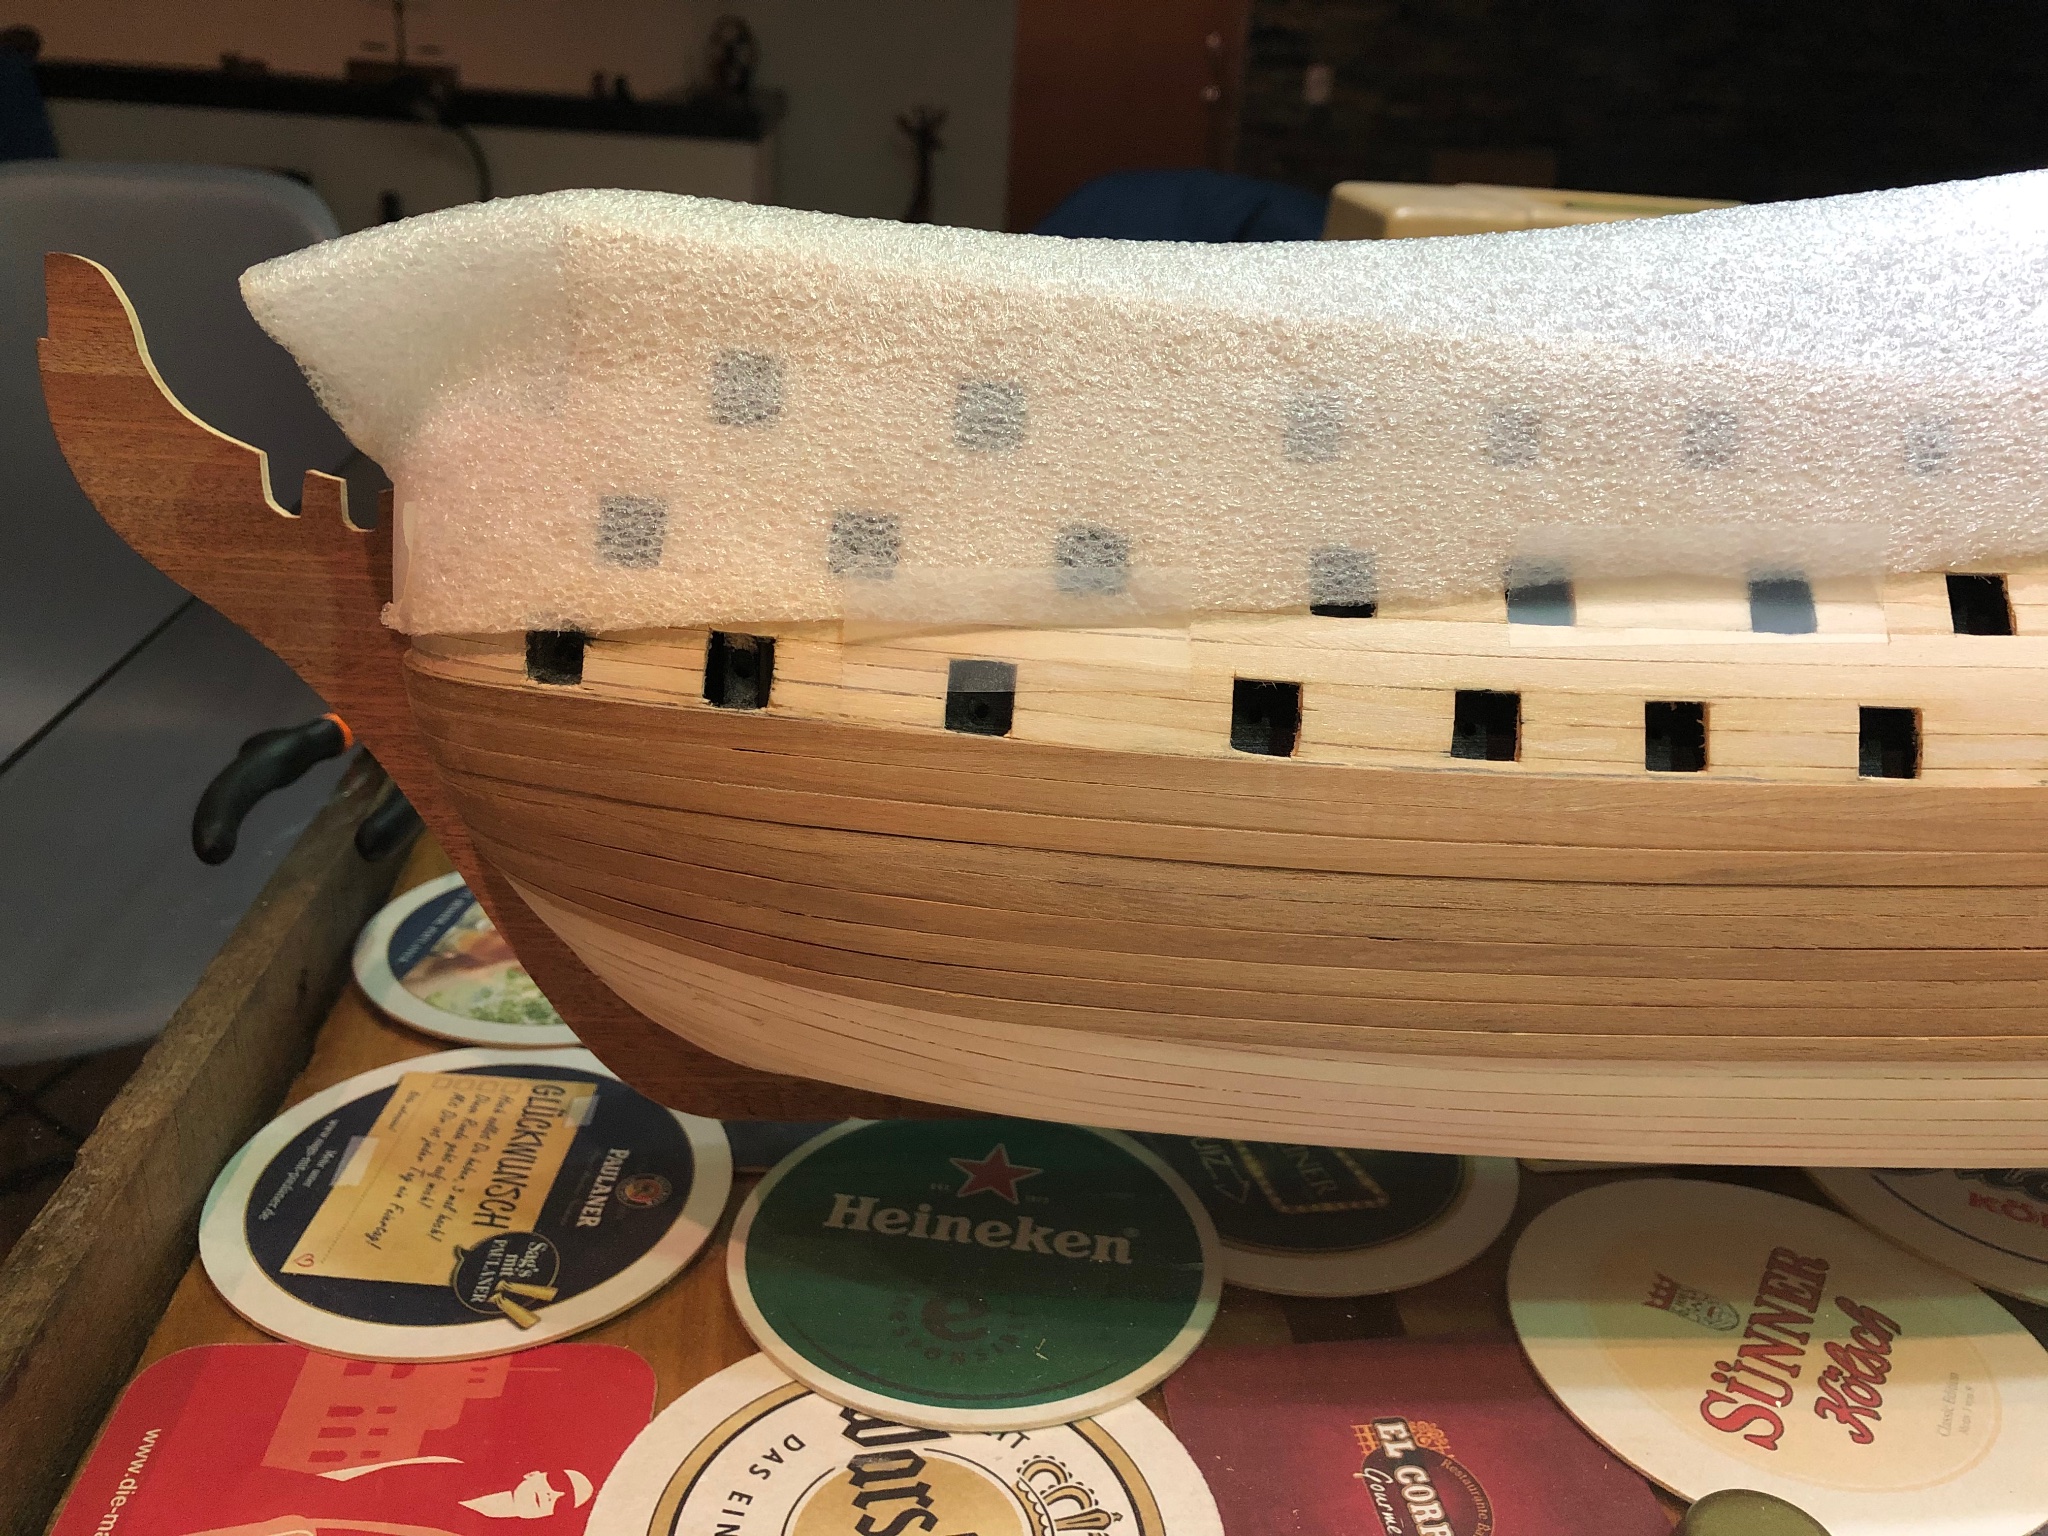
Starboard upper part planking is finished now. I am getting tired of planking, and the lower part is still pending!!! I will start that final part on Sunday. In general I am satisfied with the result. The only thing I don’t like is some gun port’s position. Some pics now. Best regards.

-
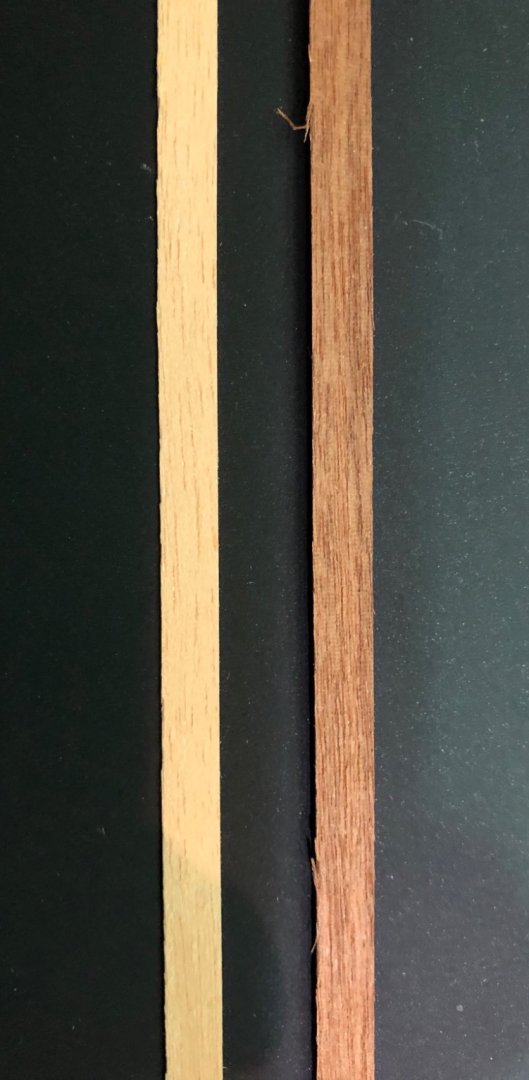
Nicolas I cannot tell you what kind of wood it is. It is a leftover from either the Artesanía Latina’s Swift or Scottish Maid. It is very thin compared with the one provided for the Victory. Best regards!!!

-
Nicolas, regarding the position of the gun ports, I started by marking them on the gun holders (piece 31) and drilling the holes. Then I transferred the position of those holes To the first planking while doing it. So you get a “correct” positioning marking of all of them when you finish the planking. Please see post # 4,5,8 and 12 on my build blog. My suggestion is to drill a small hole on the first gun port of each row and from there start positioning the whole line. Do not do it in those that go directly in a frame. Keep up the good work!!!
-
Nicolas it is great you started your build log!!! It will help you to plan and show your progress. You almost finished the first planking, which in my opinion is the hardest thing to achieve for someone starting in the hobby. Keep up the good work!!!
-
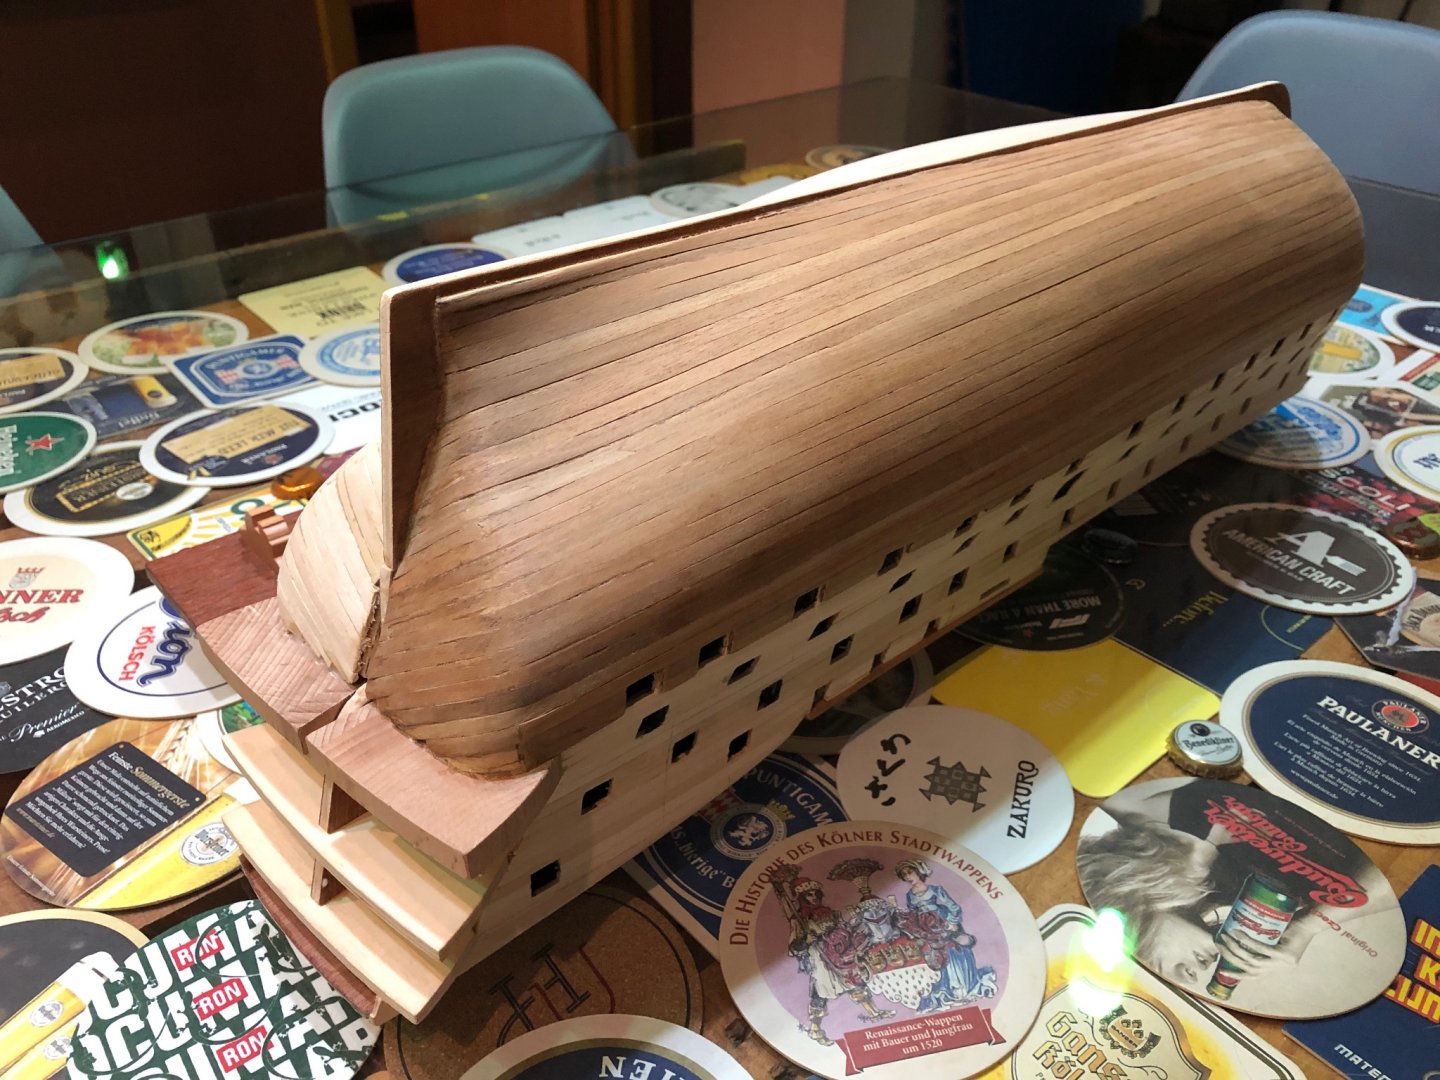
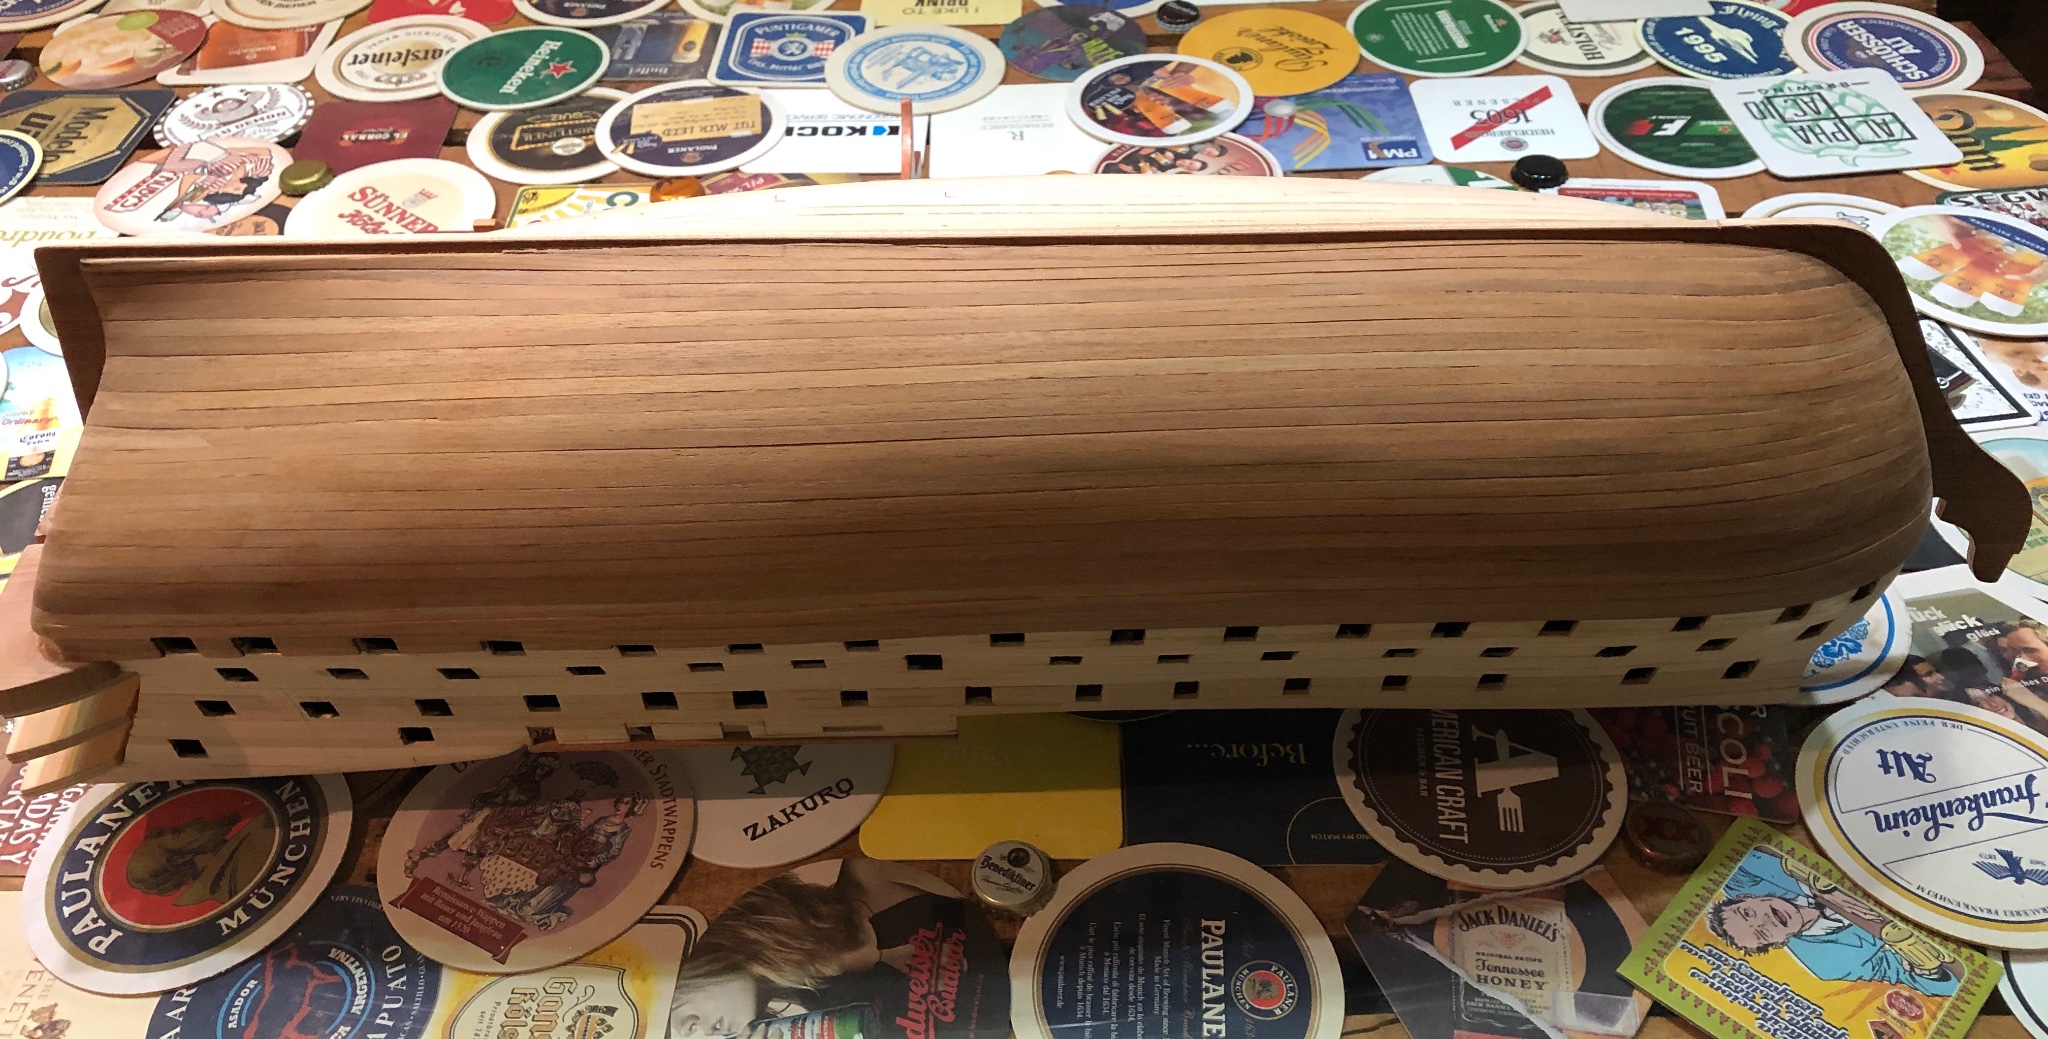
Port side second planking finished!!! A lot of fun work in the past few days and finally the port side second planking is finished. There are a lot of mistakes, but some make up will cover most of them. I am not satisfied with the position of some of the gun ports, and the shape of the lower stern; but overall I think it looks good. I need a rest from planking, so I may do something different before committing with the starboard side. Pics here. Best regards,


-
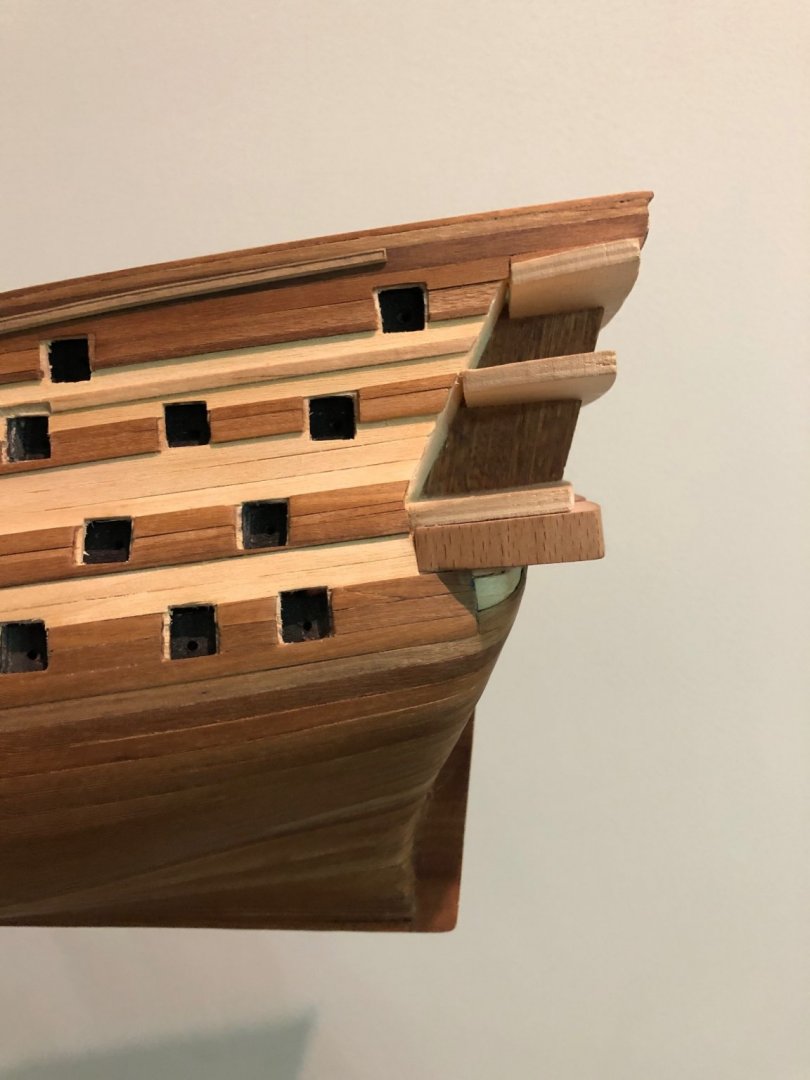
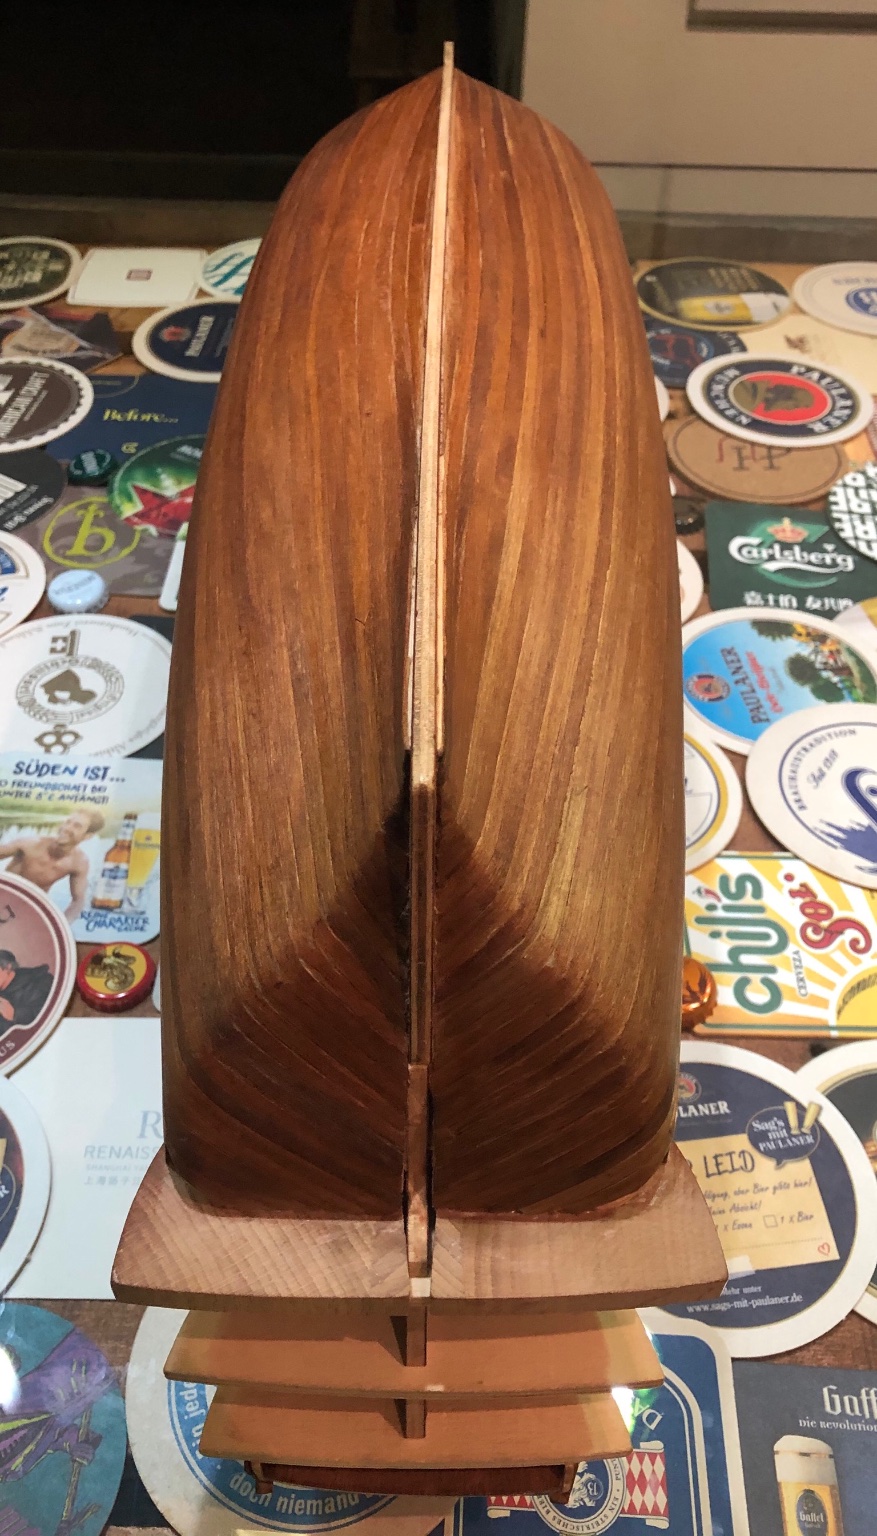
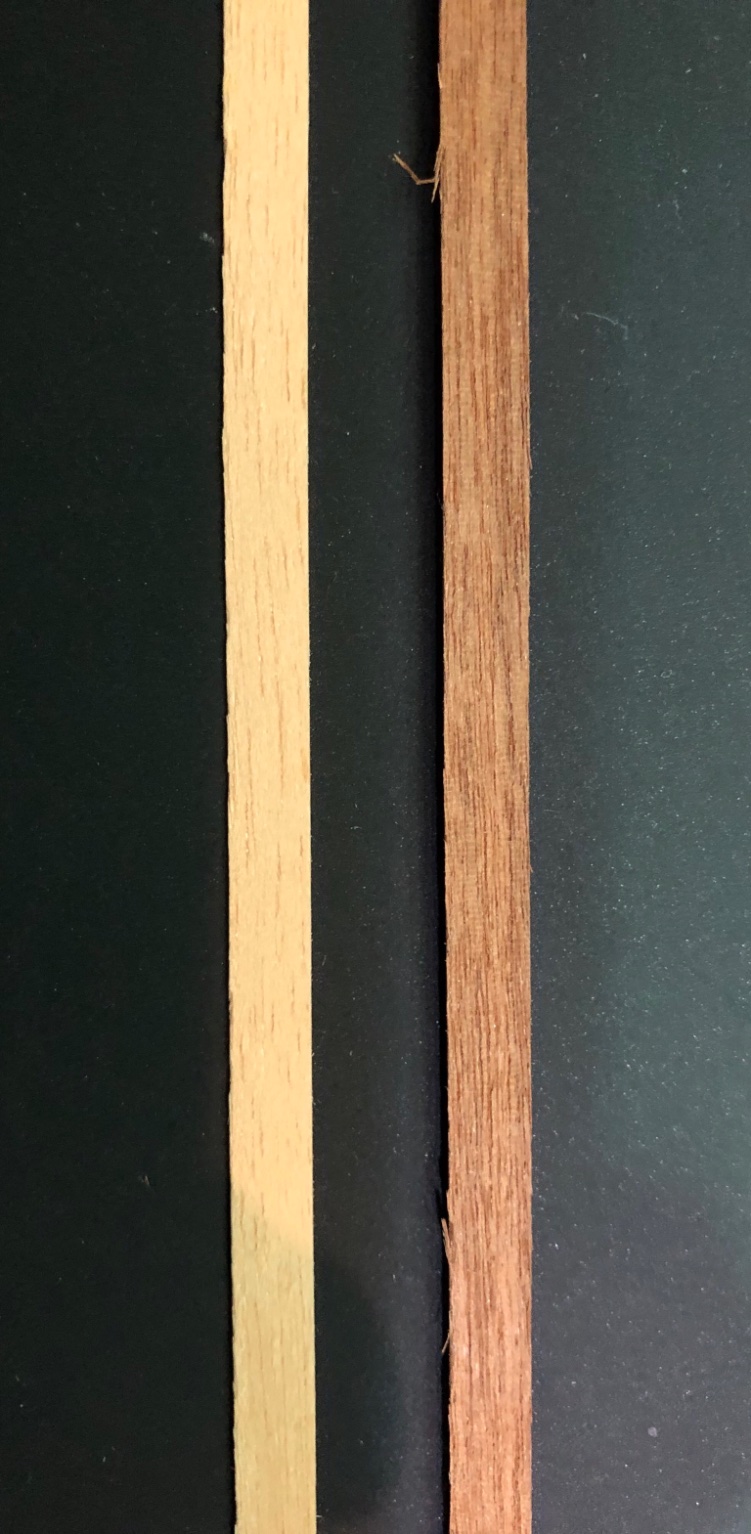
I have decided to keep the natural wood, so no painting will be done. In order to produce the 3 color stripes of the hull sides, I will use a different wood, alternating it with the walnut provided. The lines will not be horizontal as in the real thing, but that will allow me to keep the natural wood finish and will give an idea of the design. Here are the pics. Best regards!!!
-
Nice to see you back. Your planking is excellent! Great job!!! I am also working on the second planking. Best regards.
-
Congratulations!!! Your work is an inspiration. Really beautiful!!!
- 414 replies
-
- 2
-

-

-
- caldercraft
- victory
- (and 1 more)
-
Thank you very much WalrusGuy !!! Your support encourages me to keep the effort! Because of my job, I used to travel a lot. Now I have 8 months doing home office. Modeling has been one of the things preventing me from throwing my wife and 3 daughters through the window!!! Or throwing myself !!! I also like philately. I collect Mexican stamps. But at this time modeling has been a better option. And who knows how long this will take. So I need to keep working on the Victory. Thanks again and best regards!
-
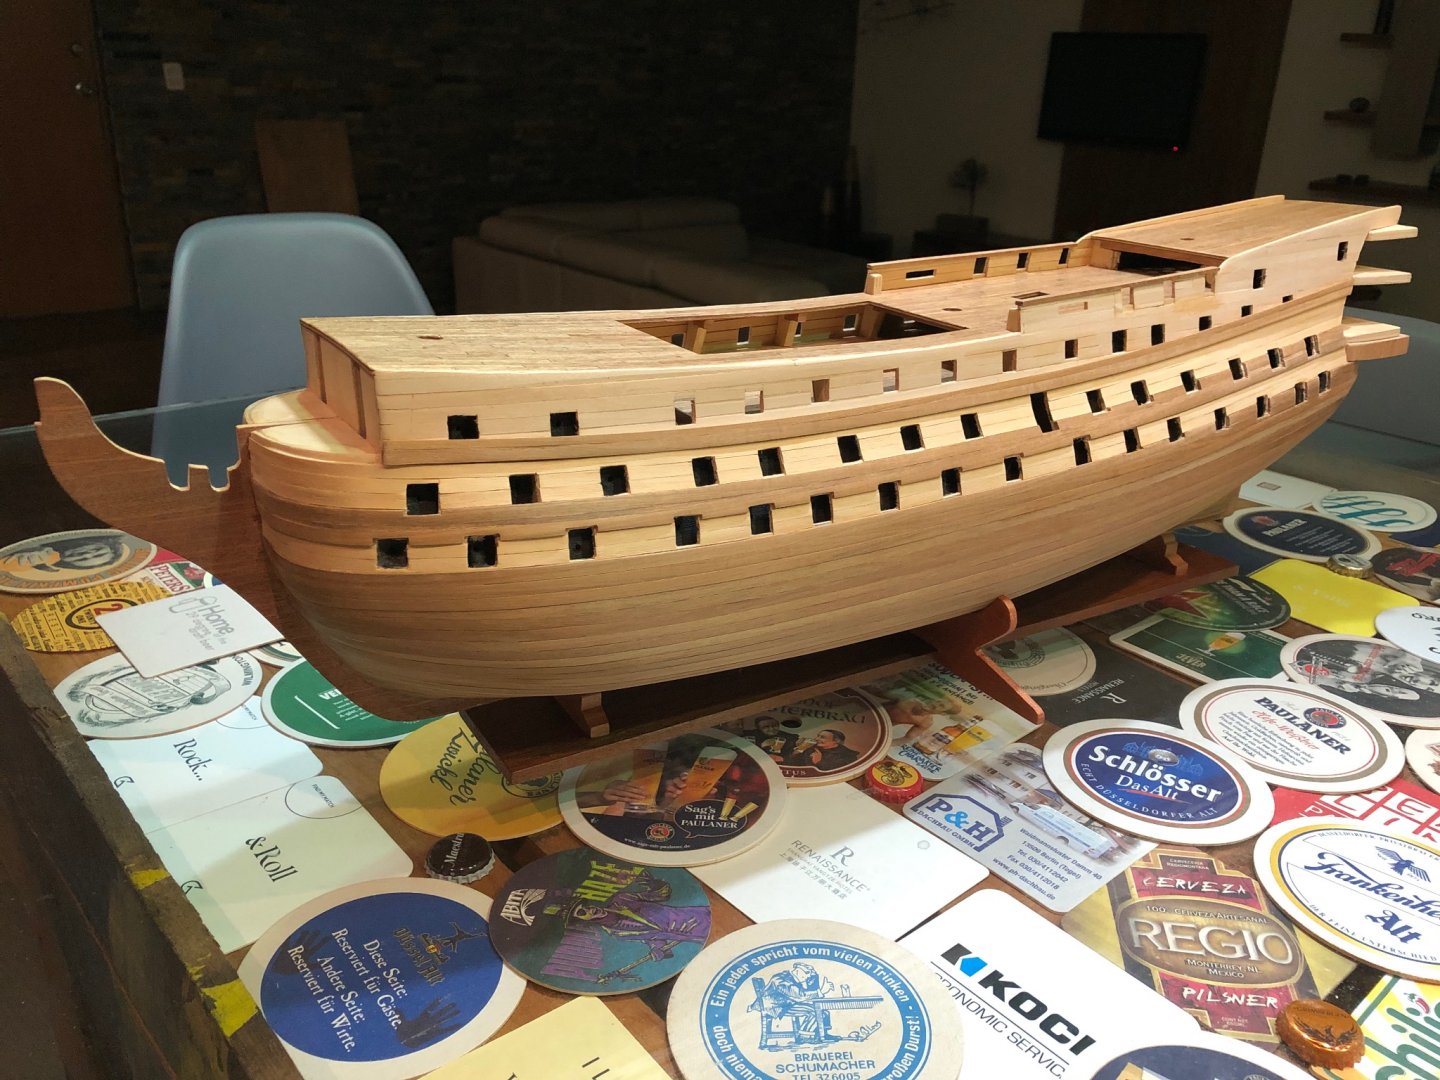
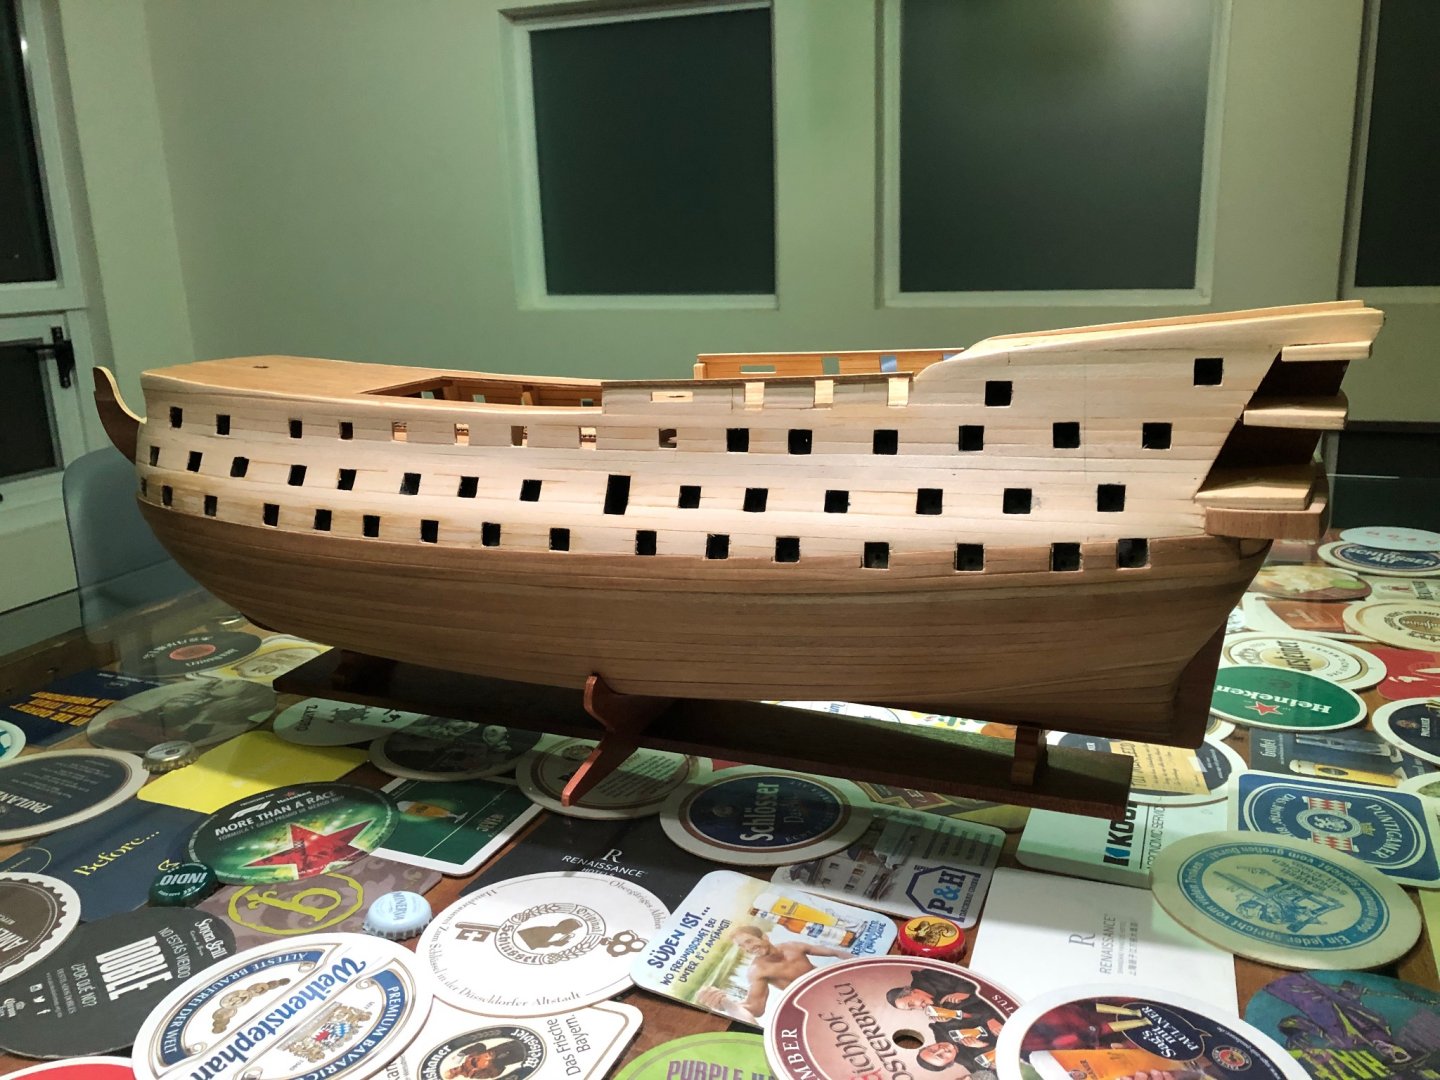
Planking on the port side from the lower wale to the keel is finished!!! I am tired of planking. I think I will do something different before continuing with the starboard side. I think that a nice sanding and a good varnish coat will enhance the look. Not decided if I will paint it or not. That decision will come later. Best regards,

-
Karleop: Thank you very much for your kind words. I am just a beginner, but I am learning a lot and enjoying the build. It is amazing to see the craftsmanship that you and many other member have. I loved your last build’s pics! Planking on the port side continues. I think it is looking good. Best regards, Eugenio.


-
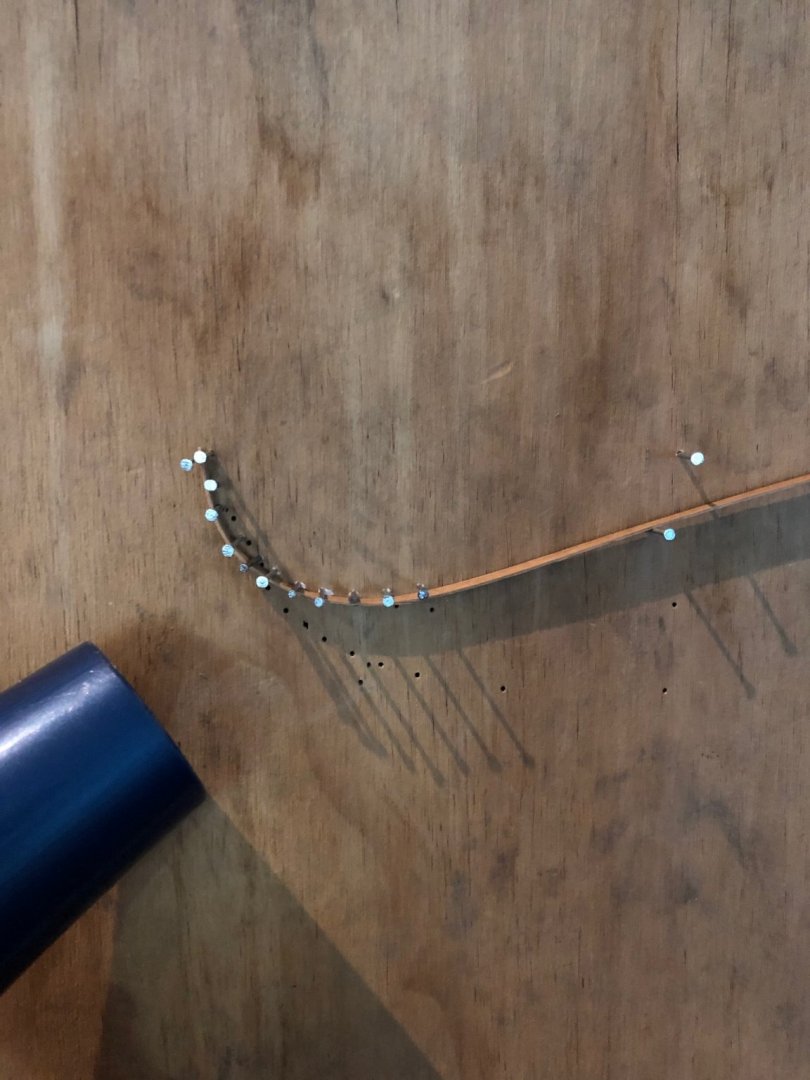
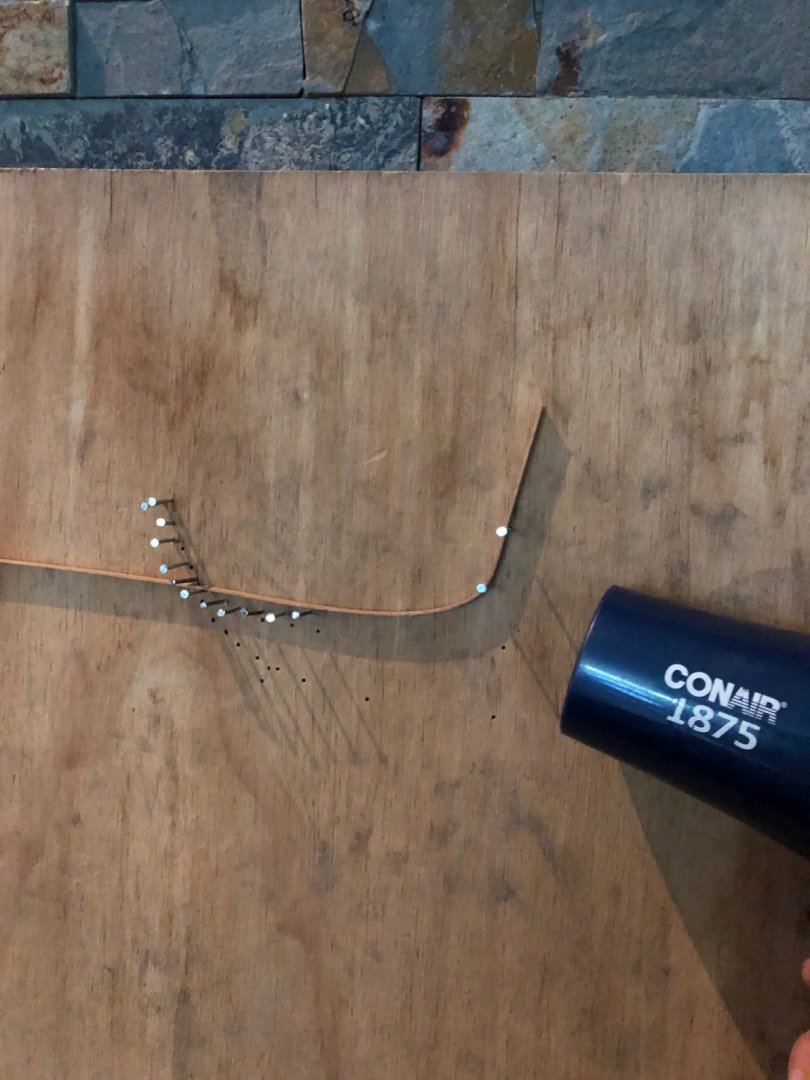
Nicolas, this is how I bend the planks. First I soak them for about 30 minutes. Then, while heating with the hair dryer, I slowly bend the planks using this simple arrange of nails in a wood pice with the bow and stern curvatures. This are 5 mm x 2 mm Walnut planks. Best regards,
-
More planks added today. I am liking how it looks. Not perfect, but I think that after a good varnish coat it will look nice !


-
Second planking started!!! I started the second planking with the lower wales as the instructions indicate. No problem bending the 2 mm. walnut stripes soaking them and heating with the hair dryer. Best regards.


-
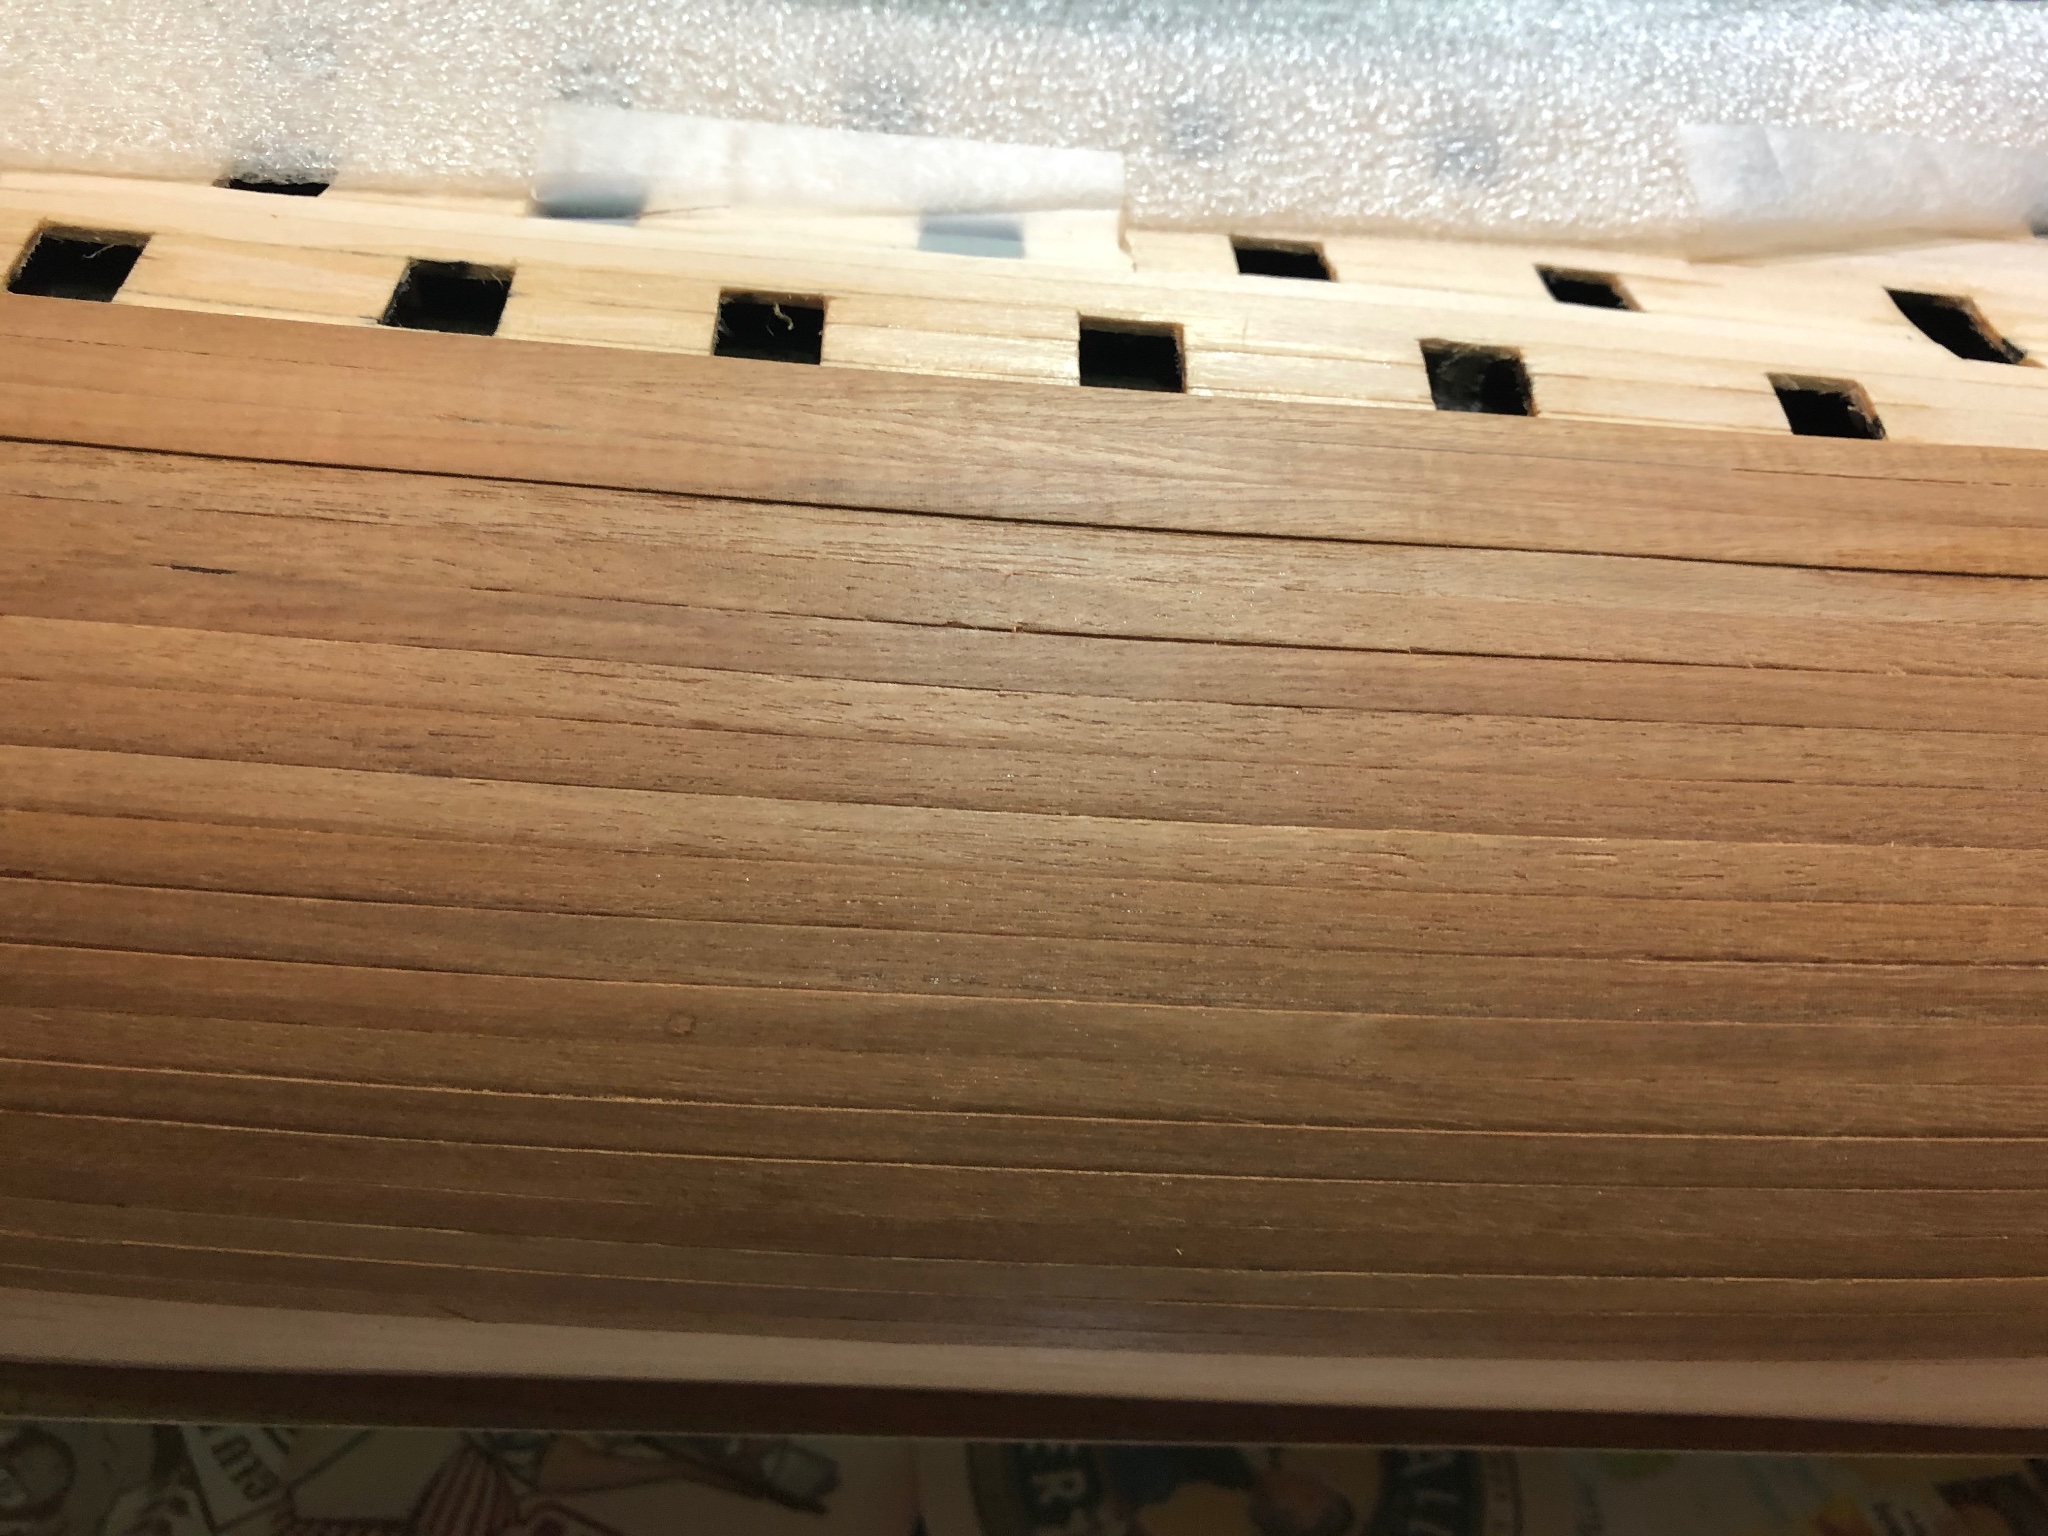
This pic shows how I glued the planks. You can see the CA glue drops (marked in red) in the frames and the white glue along the previous plank.
_LI.thumb.jpg.c9fa9118497b335dabf76ac6497cf899.jpg)
-
Nicolas I agree with Louie, we need your build log and photos !!! Hope to see you soon !!!
-
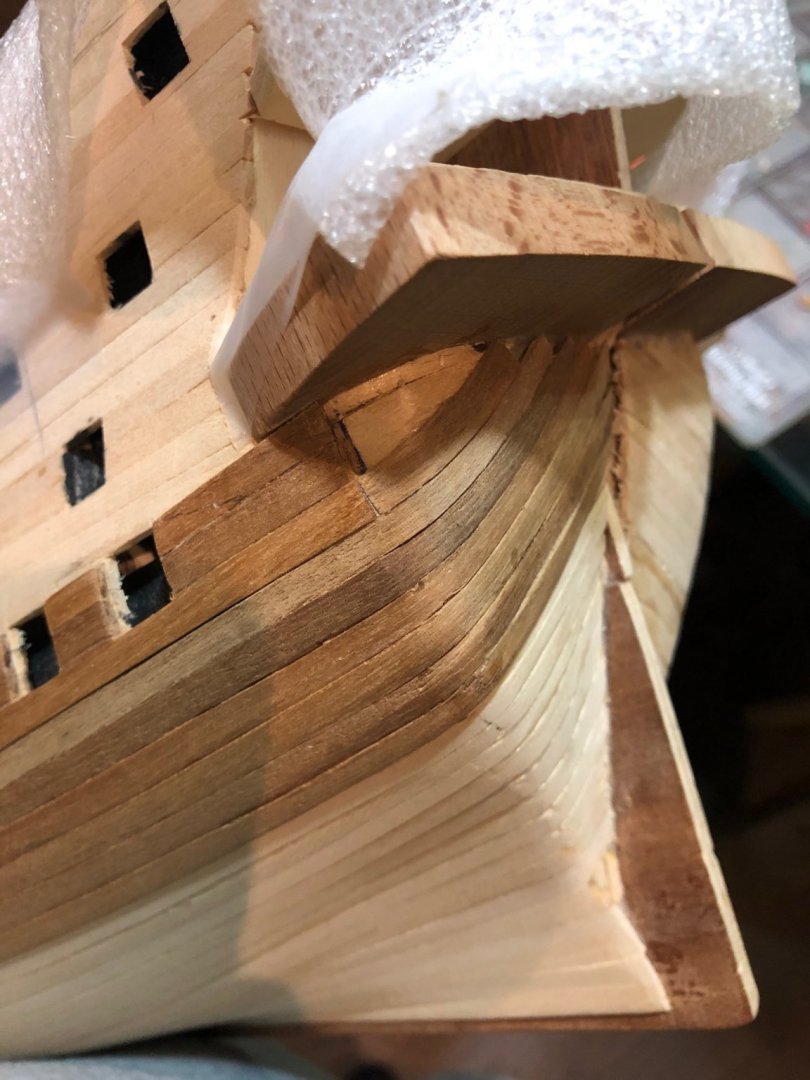
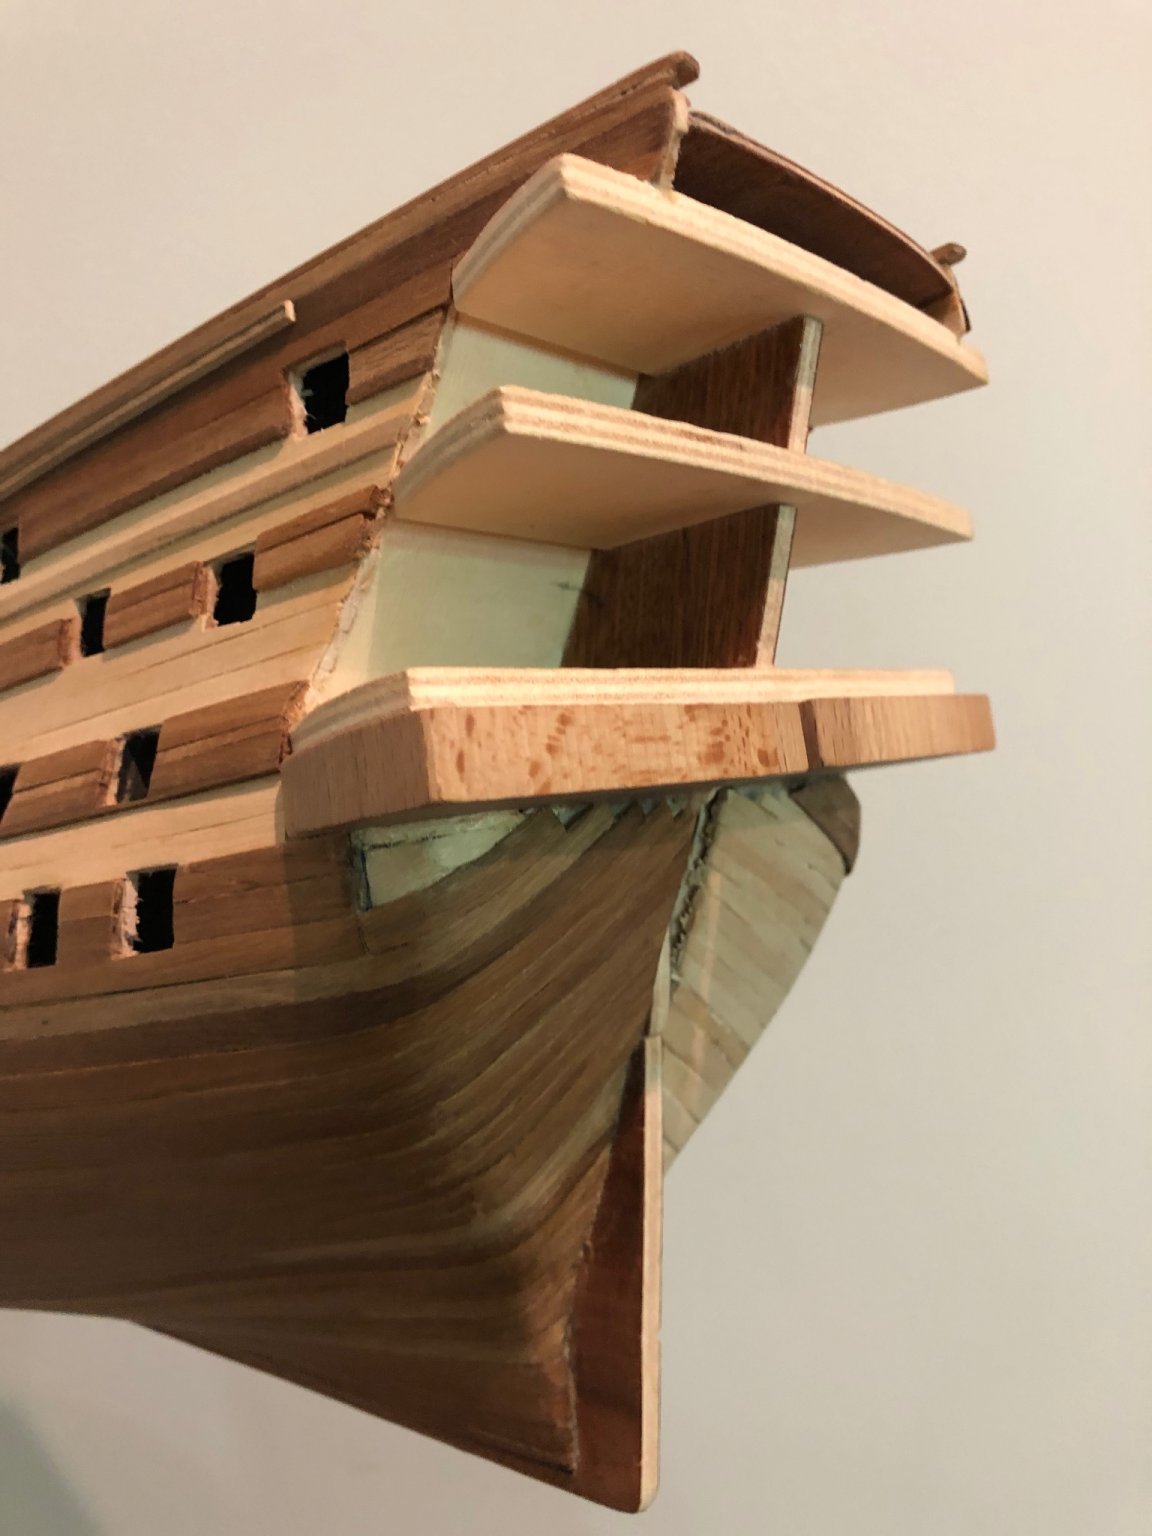
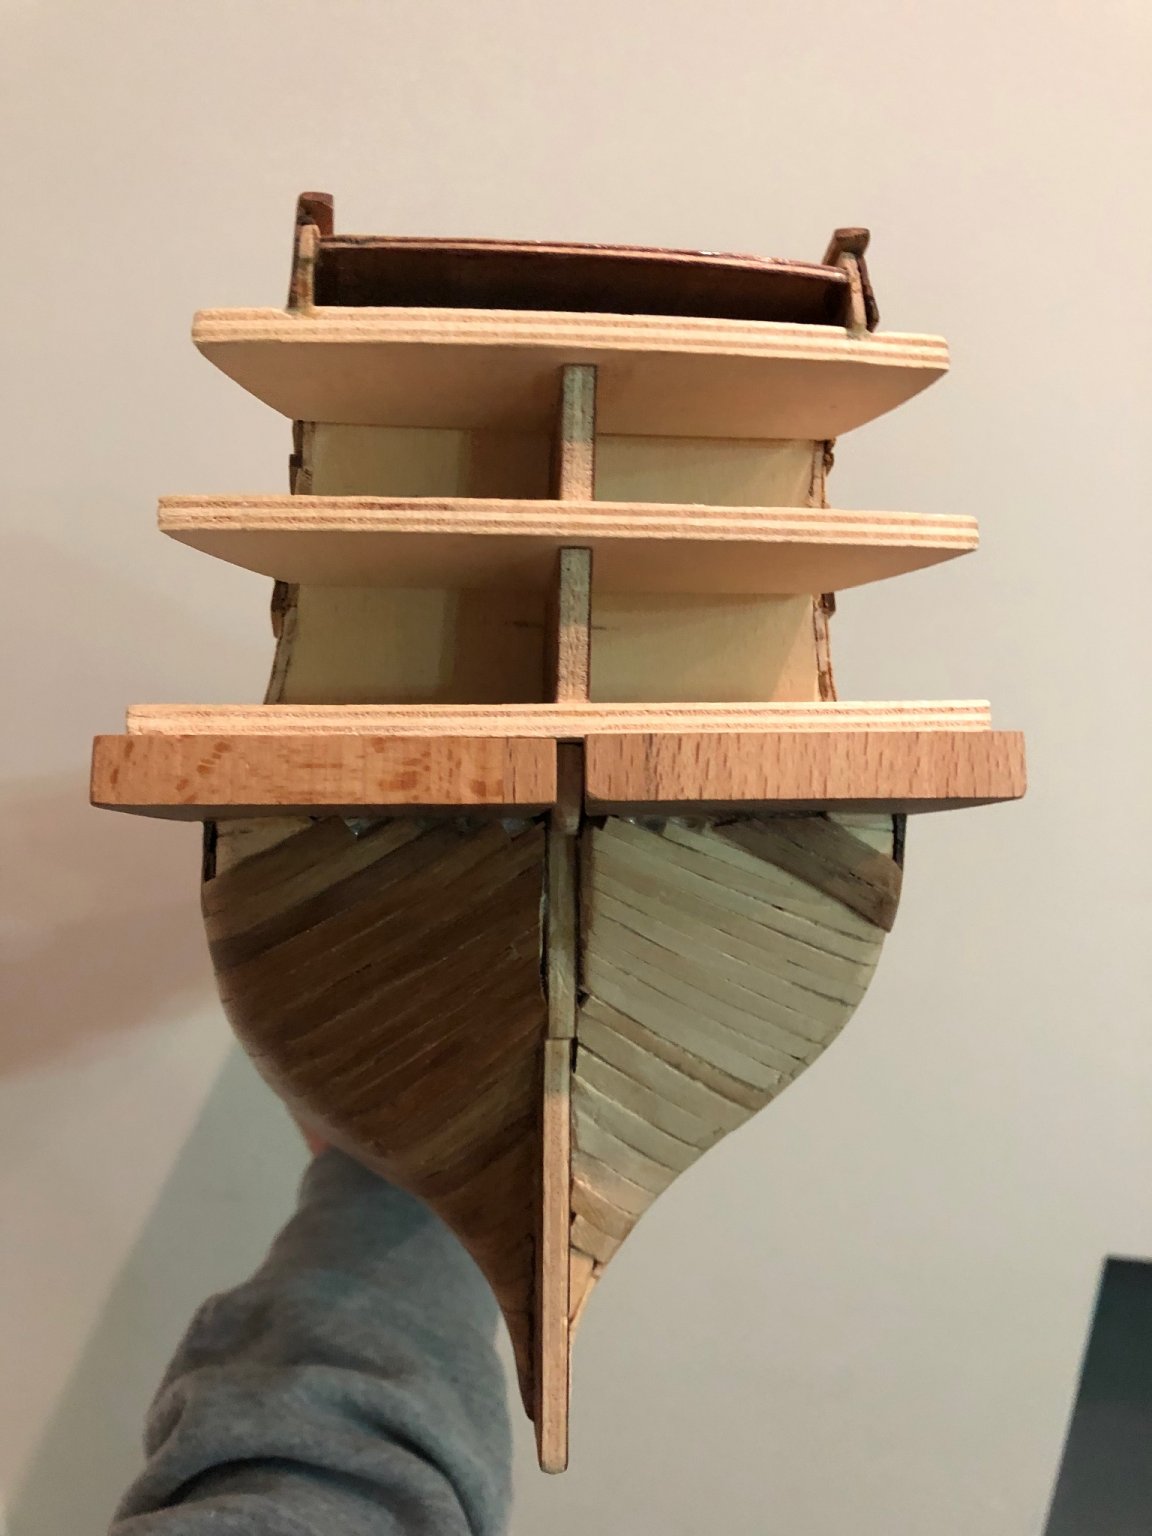
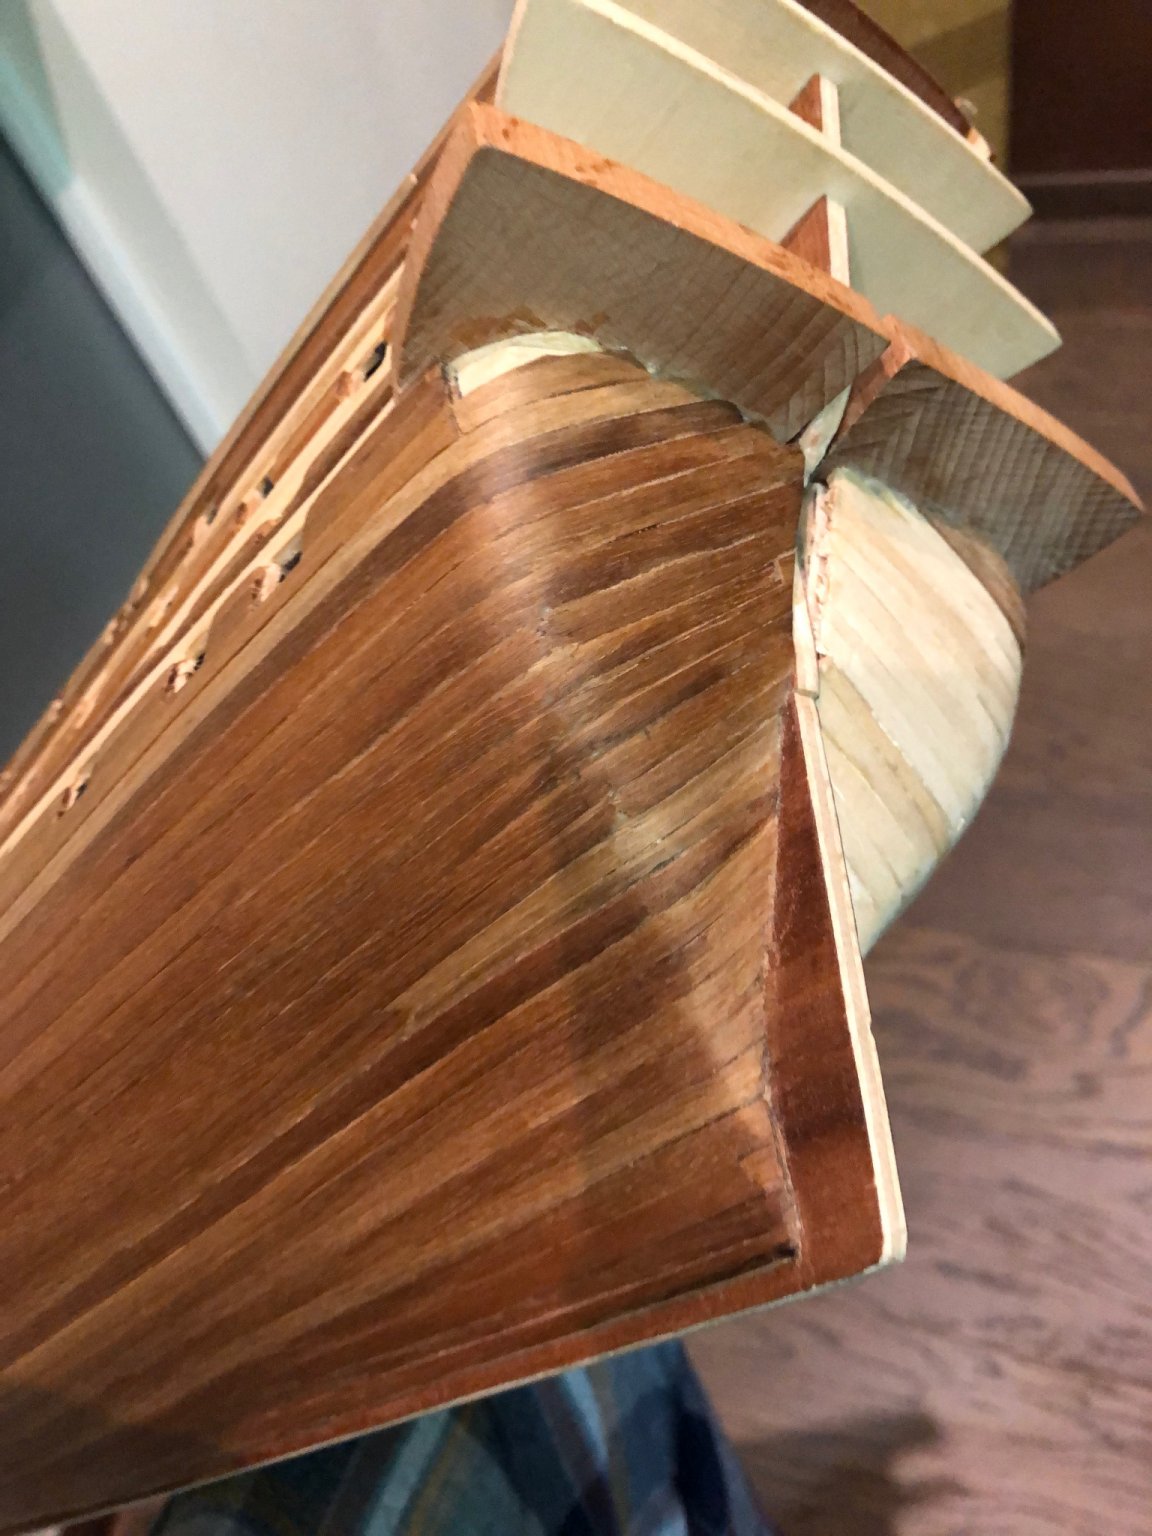
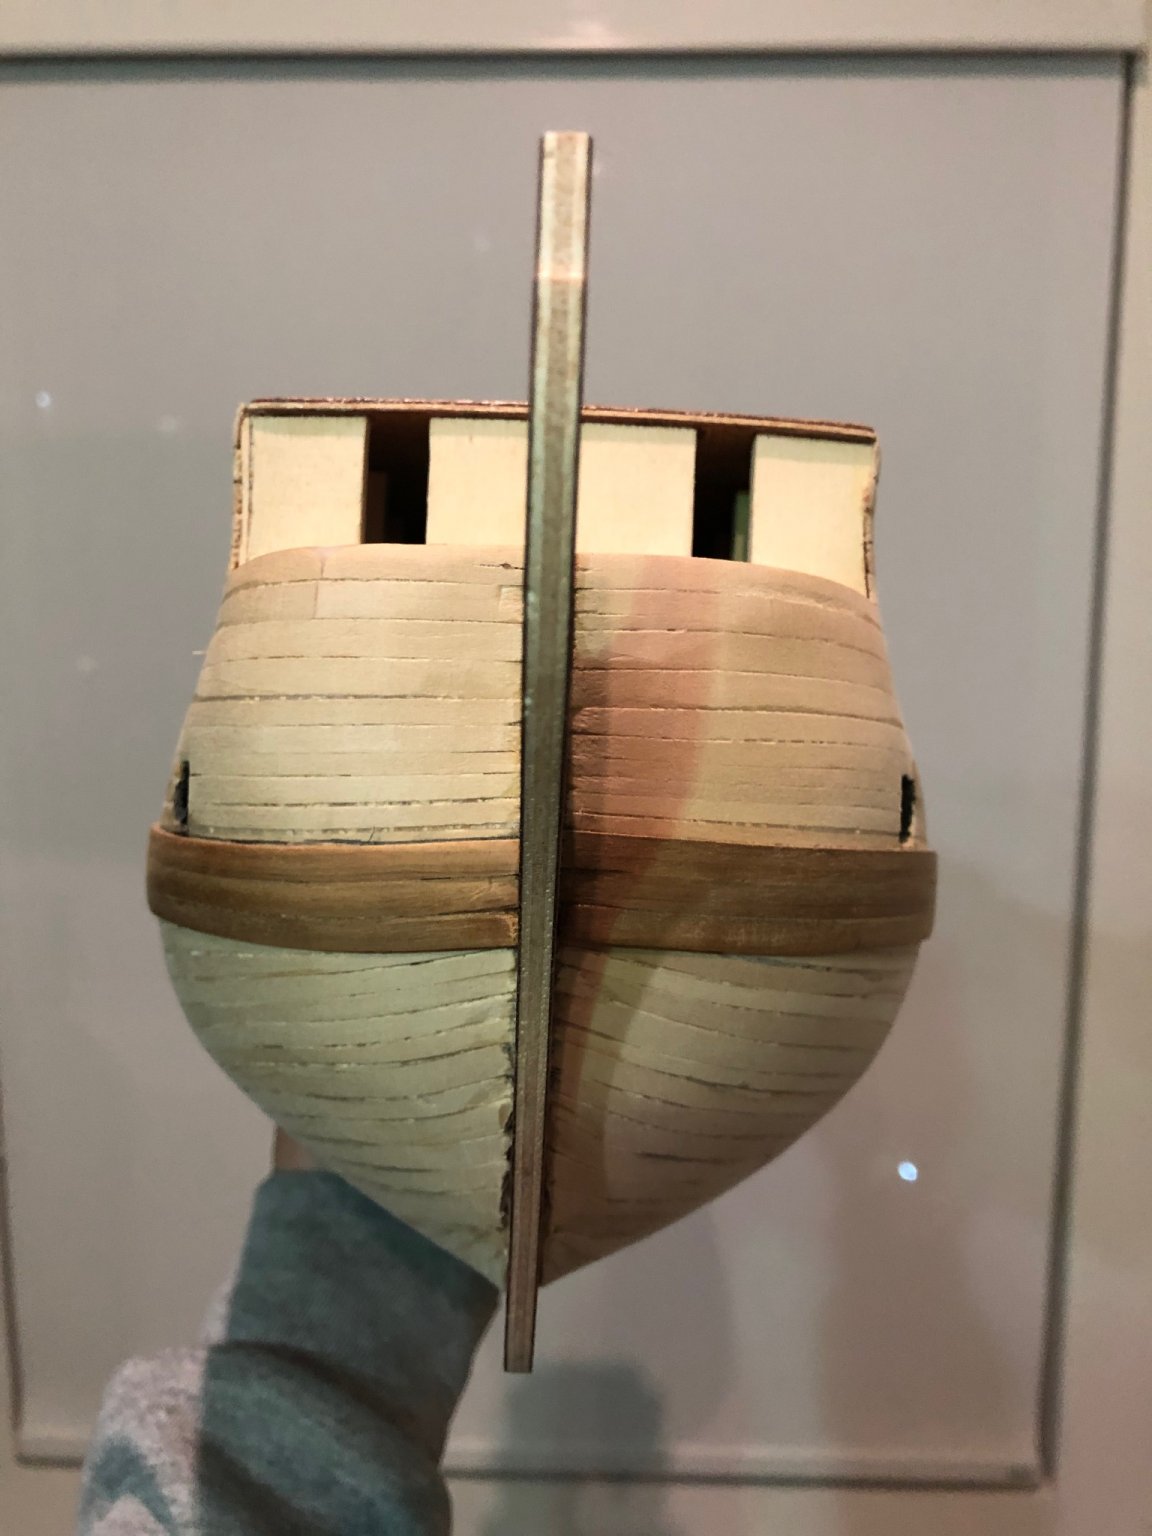
Nicolas thank you very much for your kind comments! You are right, my stern fillers are terrible!!! I am not very patient with work that I consider is not adding value. I cannot understand why Corel gives you huge pieces of wood in order to produce pieces that are less than 50% the original size, just by cutting and sanding and based on a terrible plan showing only one or two angles. In fact, a couple of forum members mentioned in a post that the curvature at the stern doesn´t look ok. They said it is too sharp. They may be right, but I didn’t notice it on time. Maybe the fillers needed further size reduction. I tried different ways of doing the stern curvature. If you see the first pics I posted on October 27th, you can see that I started by cutting the planks near the stern in order to work with a smaller piece of wood to produce the curvature by heating it with a hair dryer after a 30 minutes soak (first 2 planks going into the stern curve). But that resulted in a lot of work, the piece was very small, I was burning my fingers with the hot air and the piece partially broke at the curvature. My second approach was to mark the area of the curvature with a pencil, soak the plank 30 minutes, heat it to produce the curvature and then glue it into position and cut the excess length. I made a few that way, but the result was the same, the plank partially broke. Then I noticed that the wood provided in the kit for the first planking was very malleable when wet. I could bend it a lot with my hands without heating, so I took my chances and bent it and glued it still wet. The plank broke the same way than the previous efforts, but a lot of work was saved. I repaired all the breaking points by adding a drop of CA glue and pressing with the tip of a screwdriver. In my opinion the secret of the planking process was the way I glued the planks. CA glue is very effective if the wood is moistened. I put a drop of CA glue (Loctite high viscosity) on the bow filler/keel intersection and on each frame, and white glue along the previous plank lower edge. So, when placing the new plank (from bow to stern), I make sure it was tightly positioned against the previous one at each frame where the CA glue was. If the wood is moistened, it will have a strong instant bond, that may allow you to keep placing the plank in a nice tight pattern. At the stern curvature I let the plank partially break and glued it at the stern filler and cut the excess. Then I repaired all the breaking points and sanded the area. I am sorry if my explanation is not good enough. Please let me know. Best regards, Eugenio.
-
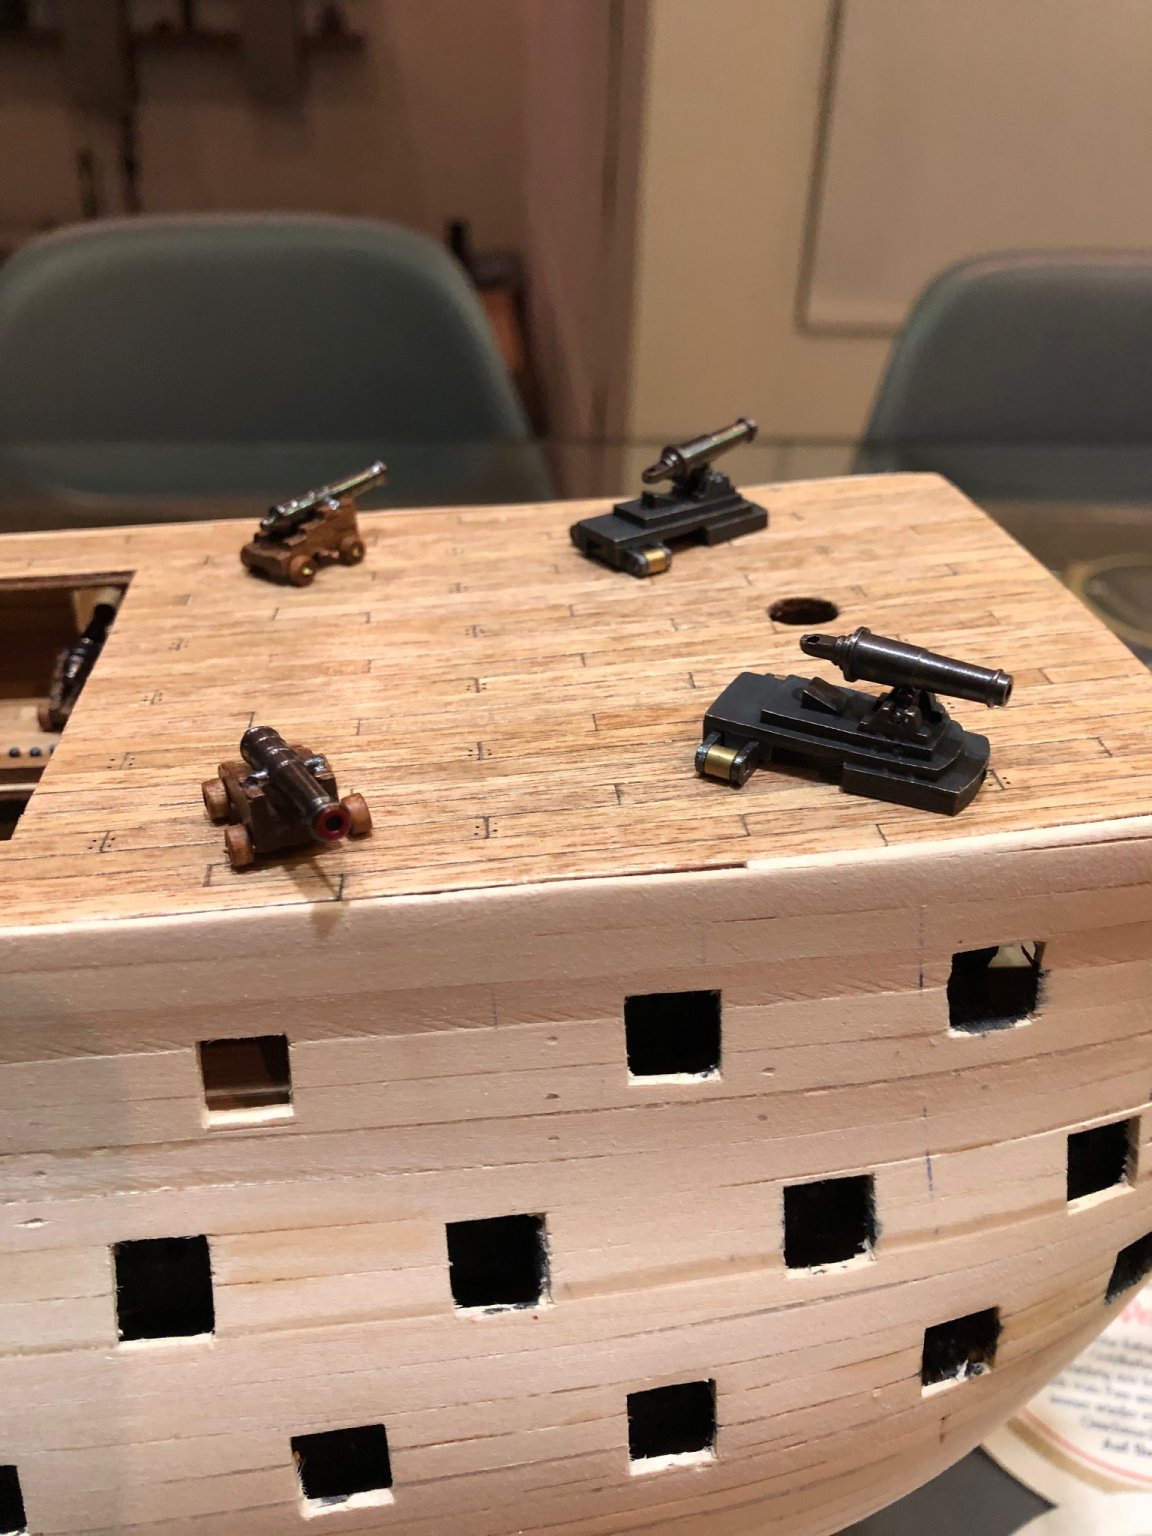
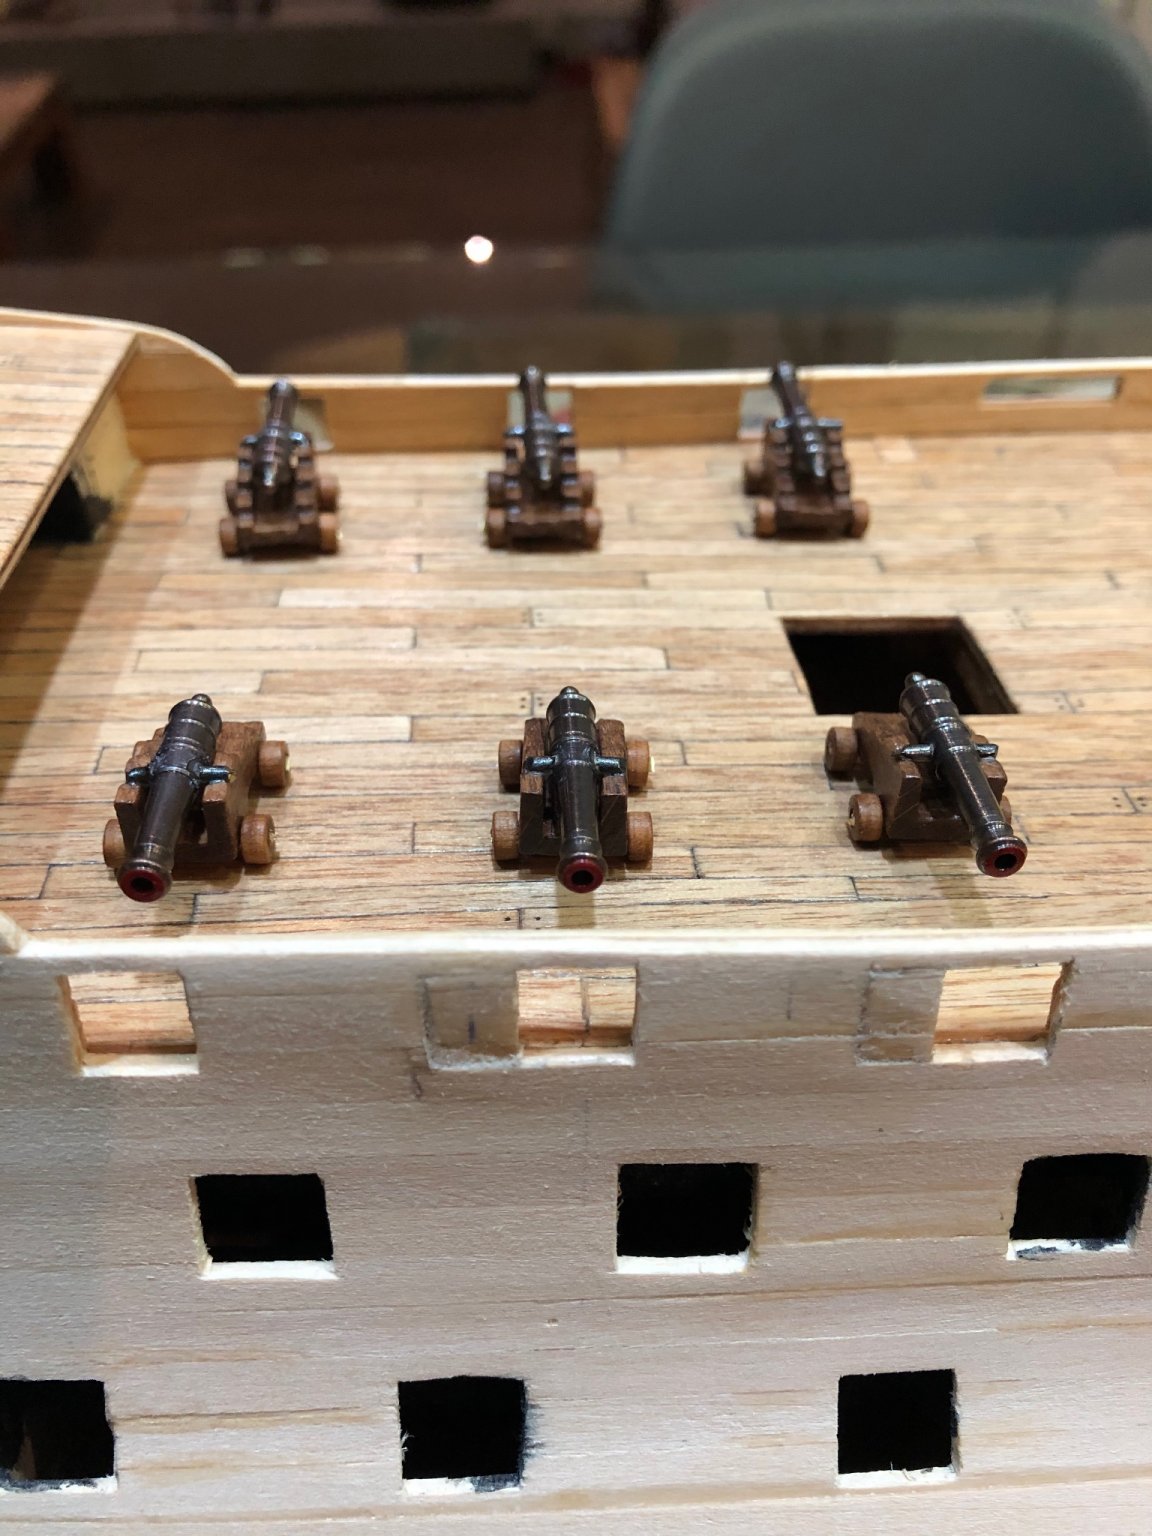
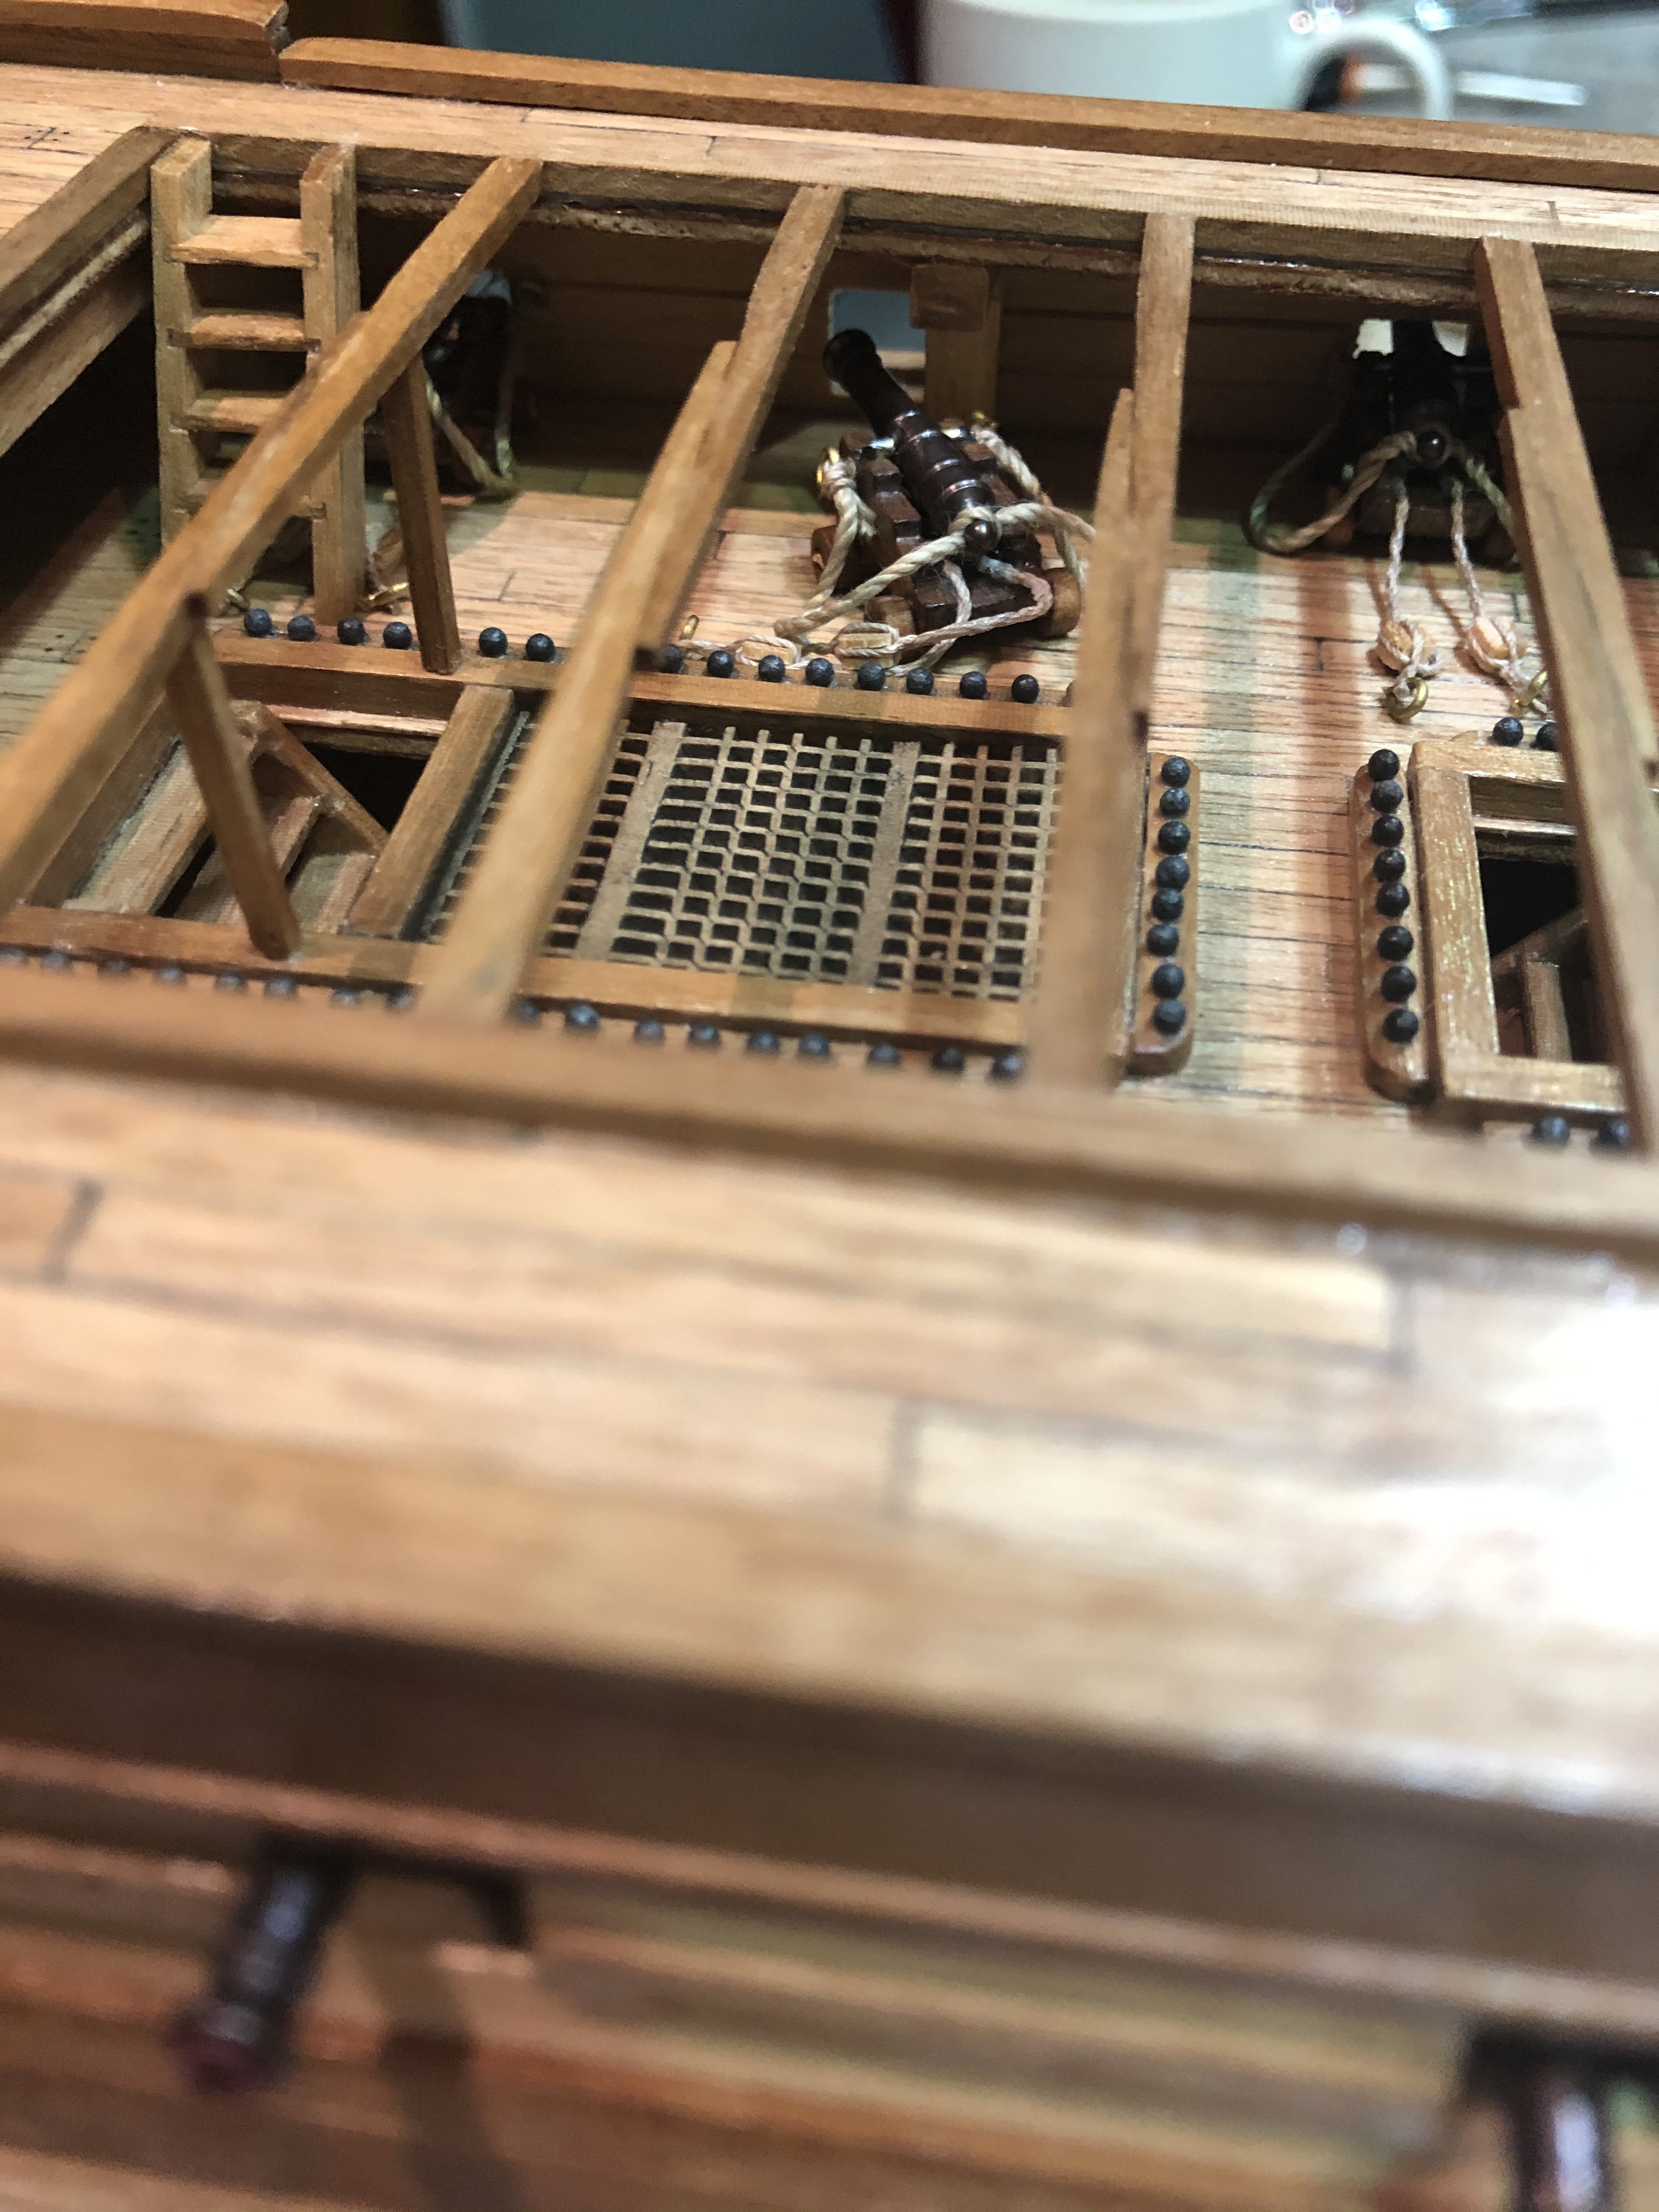
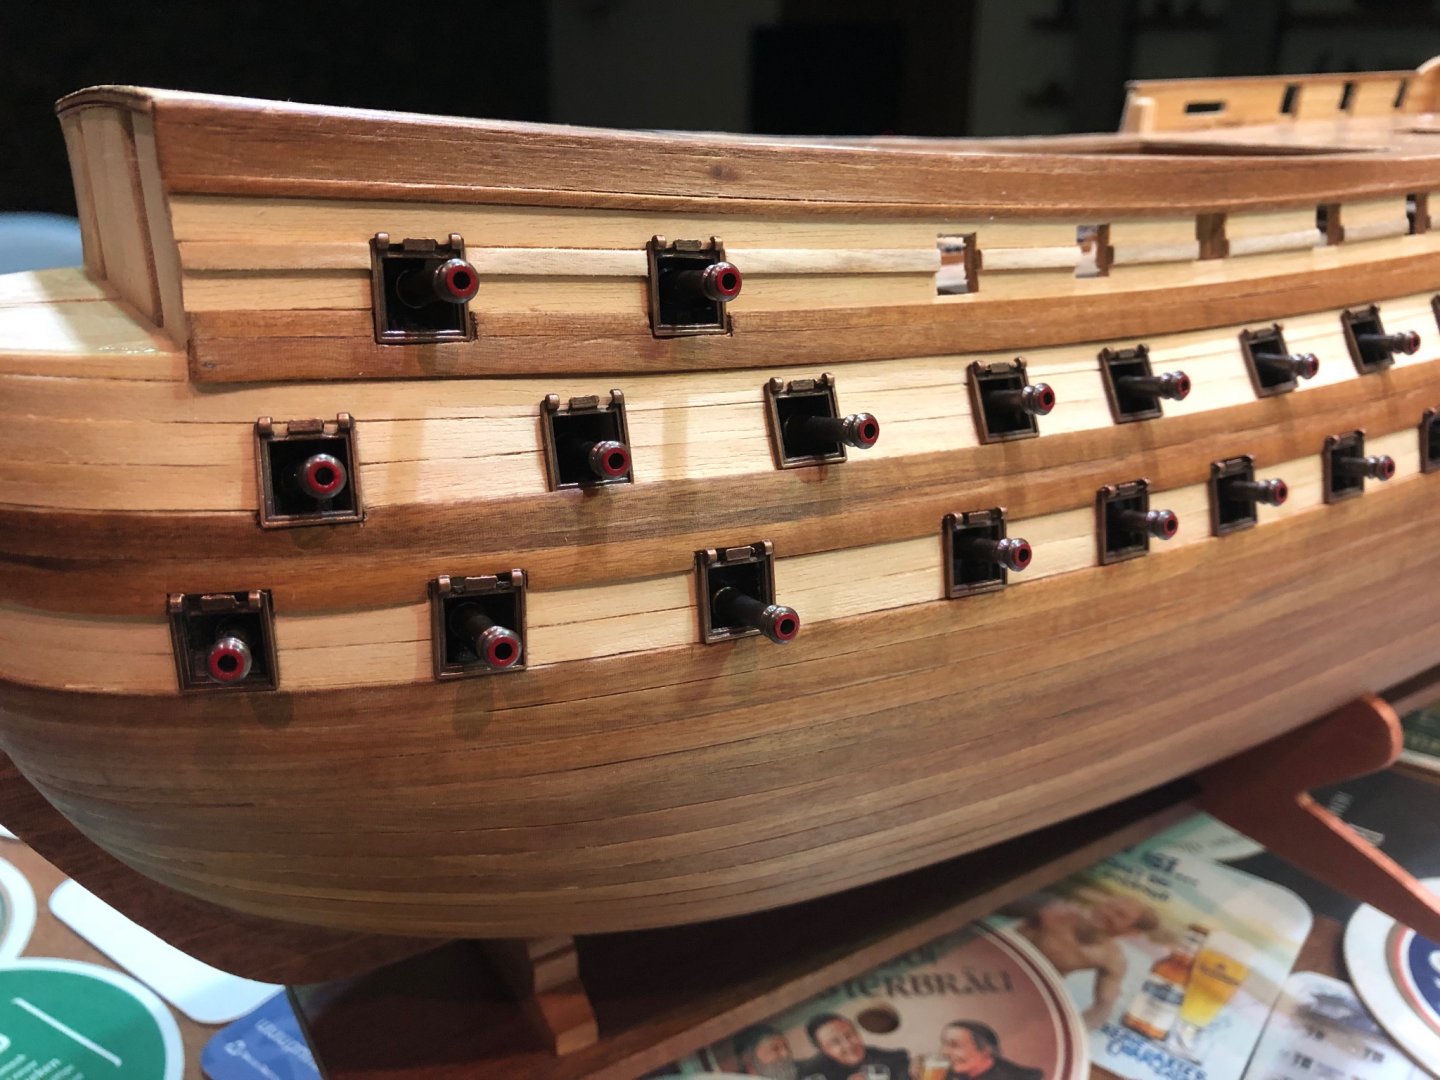
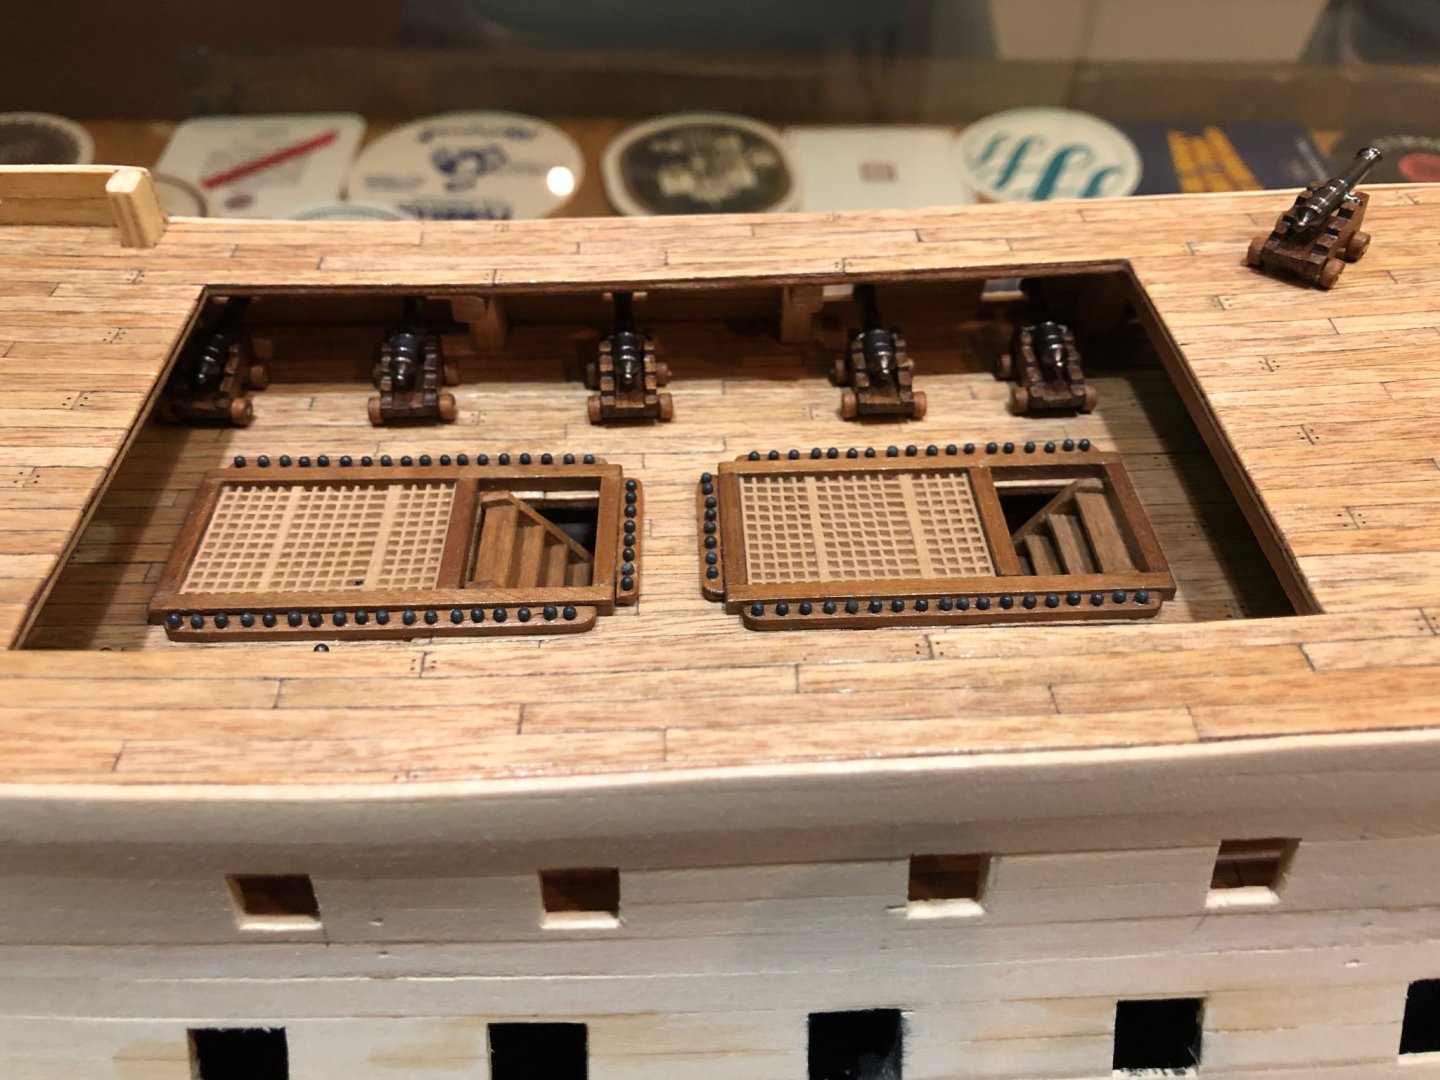
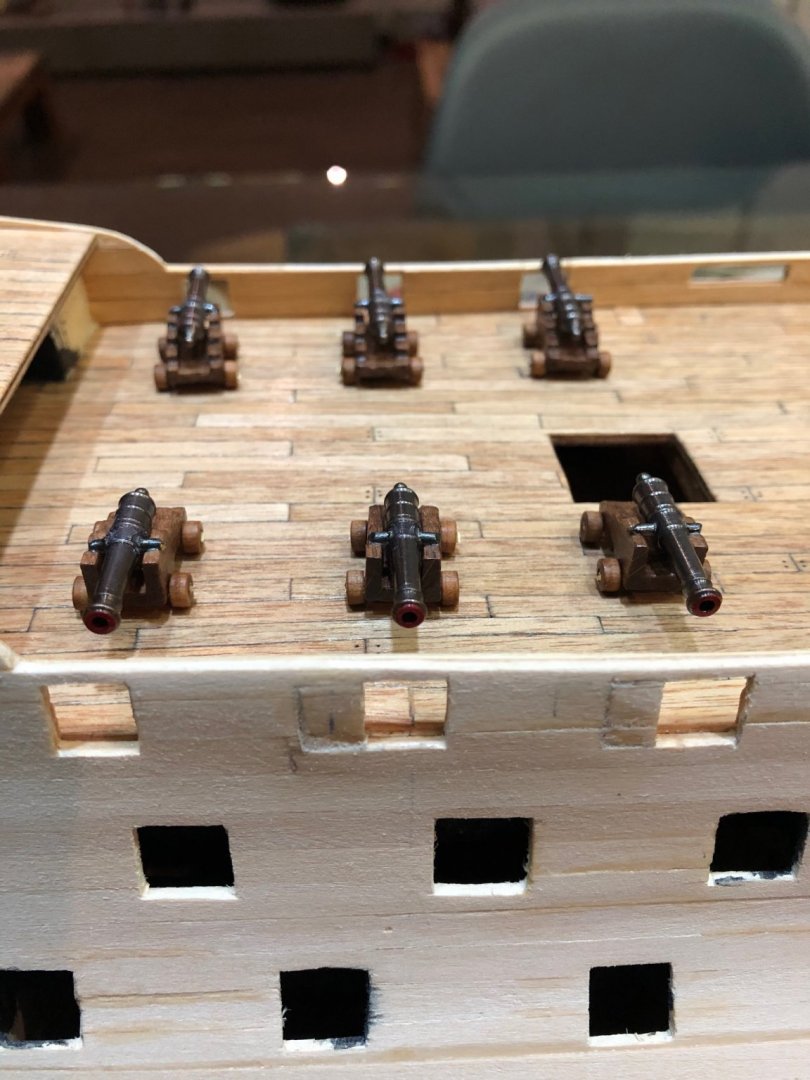
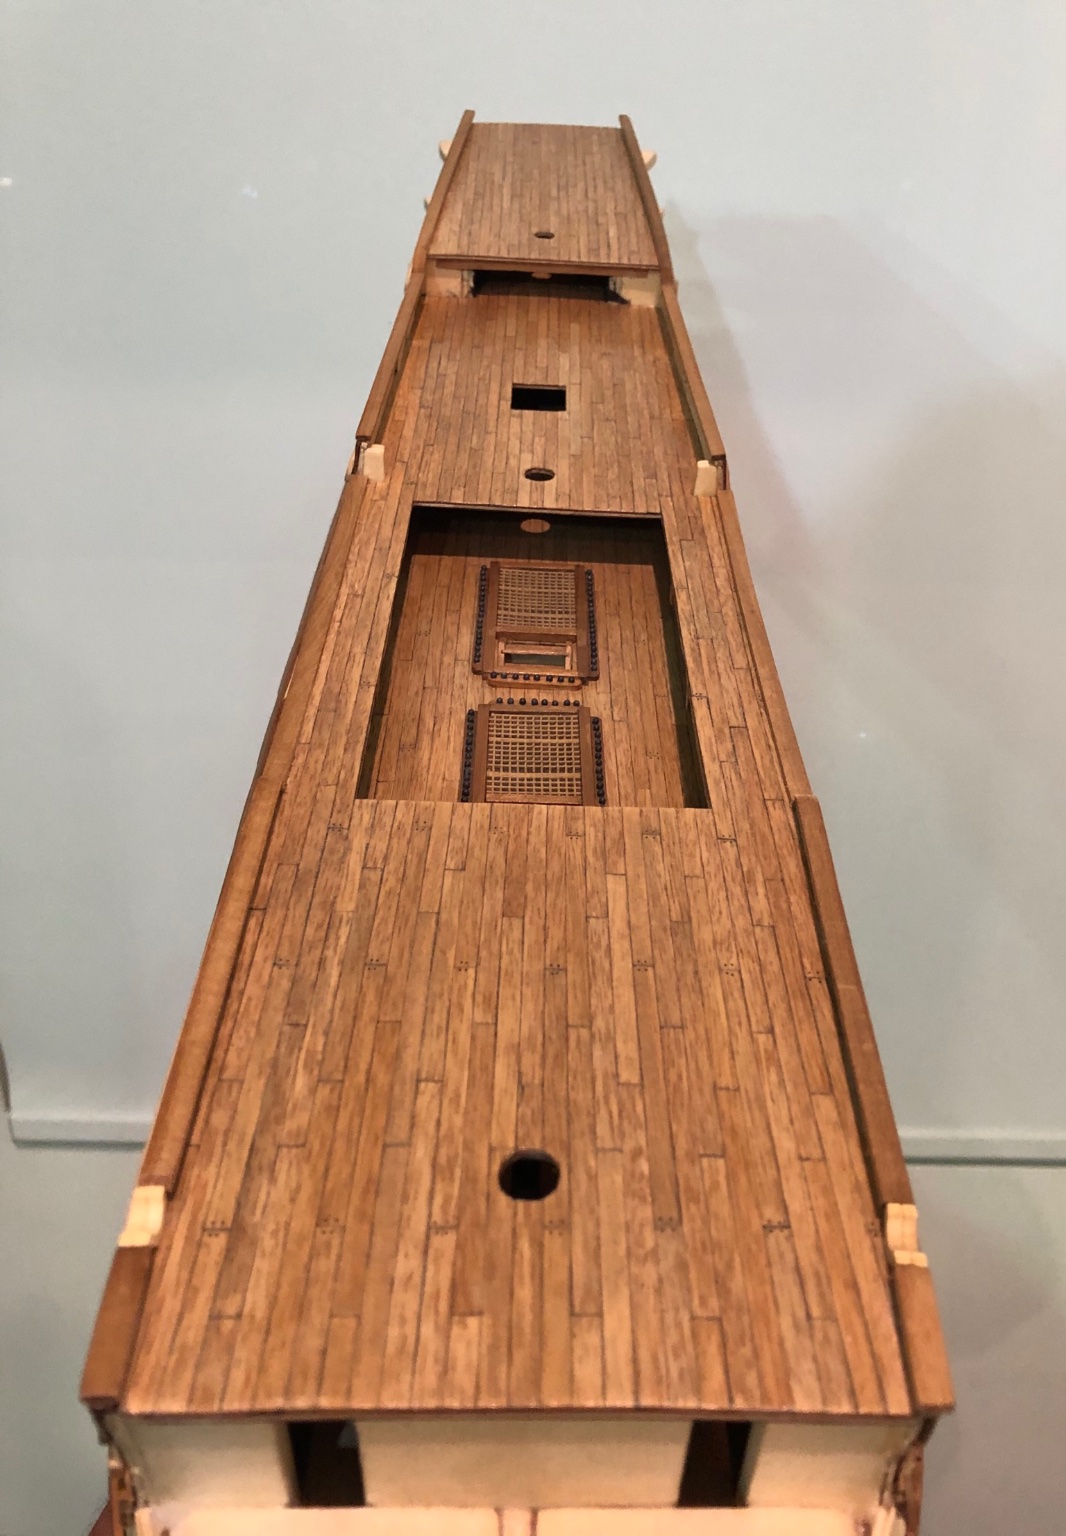
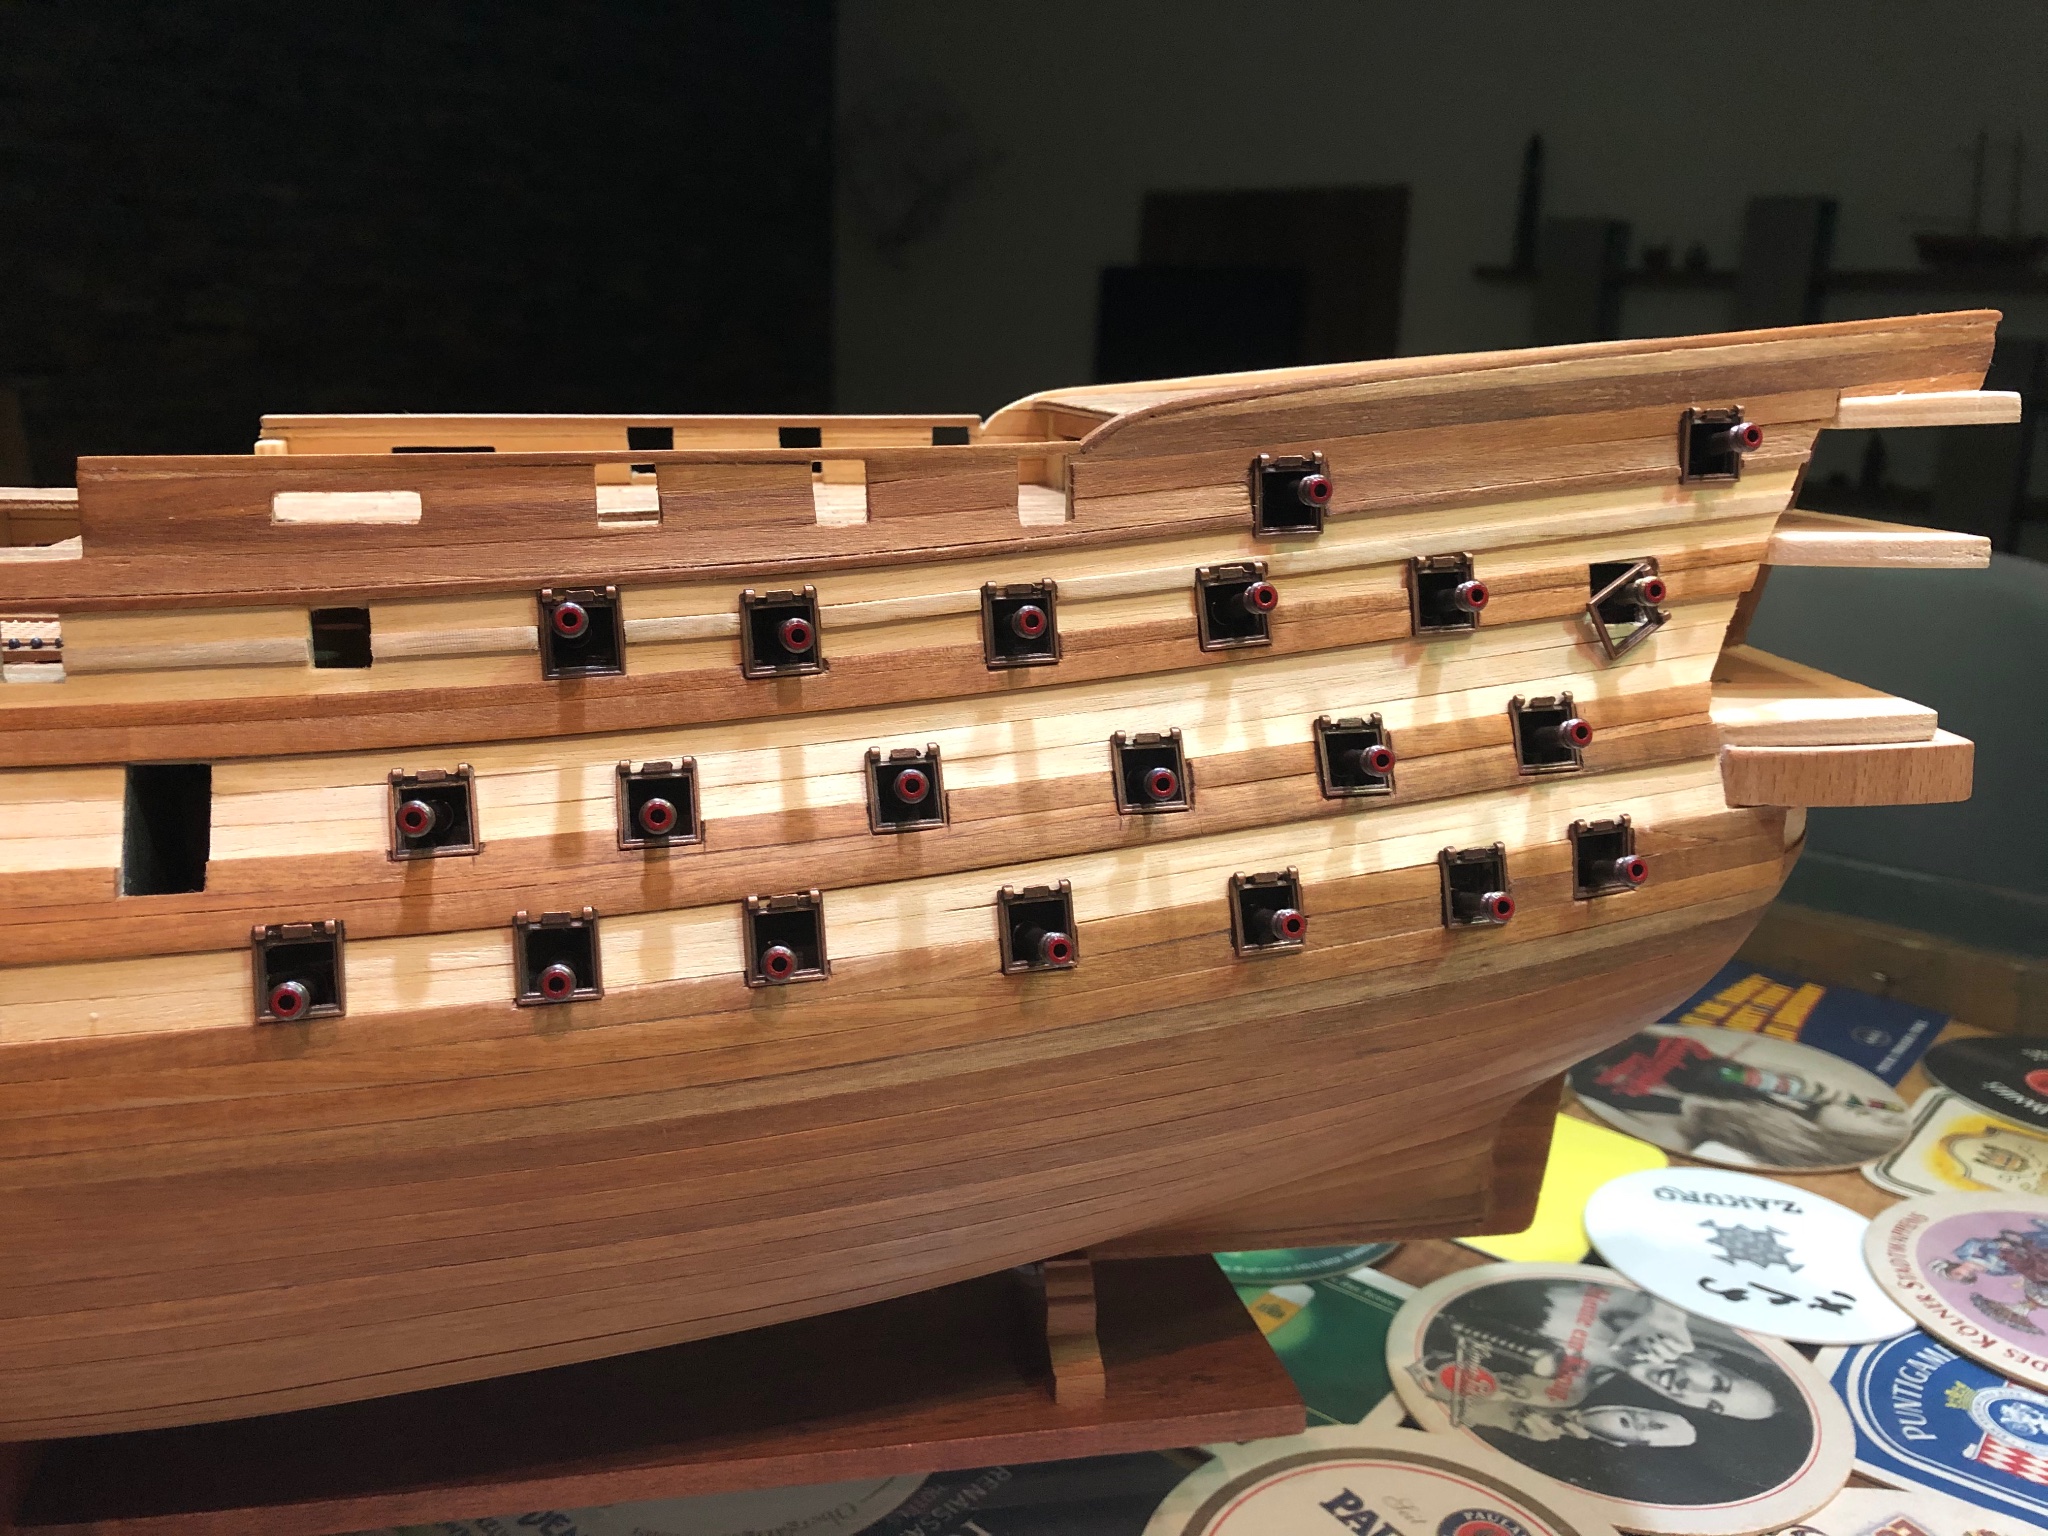
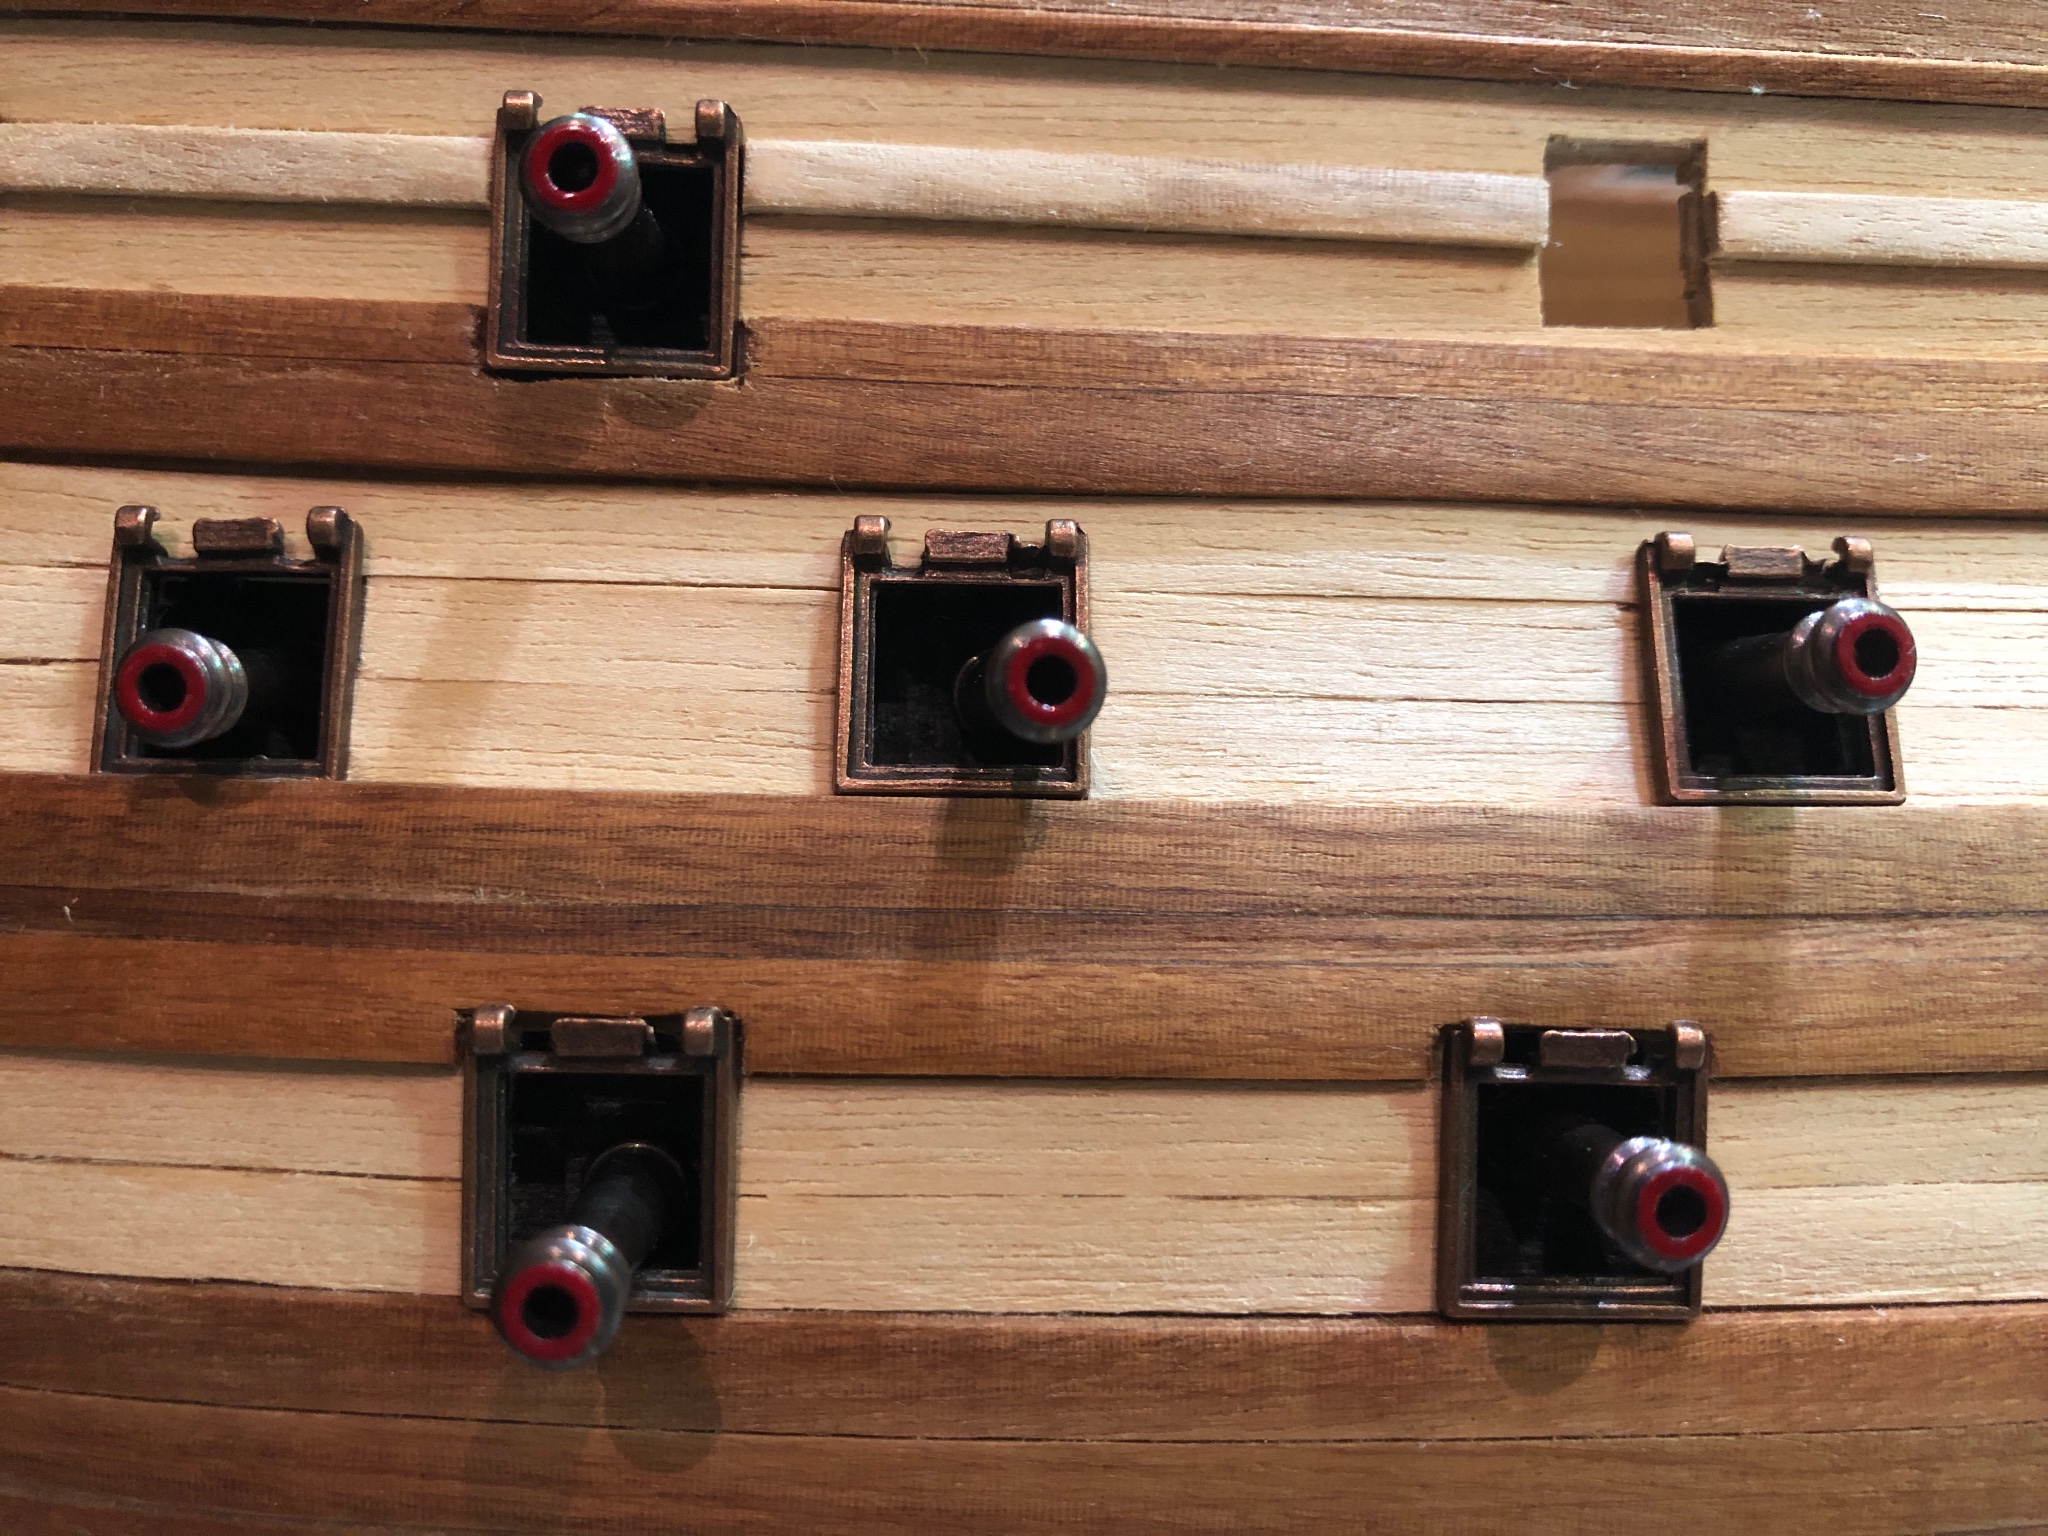
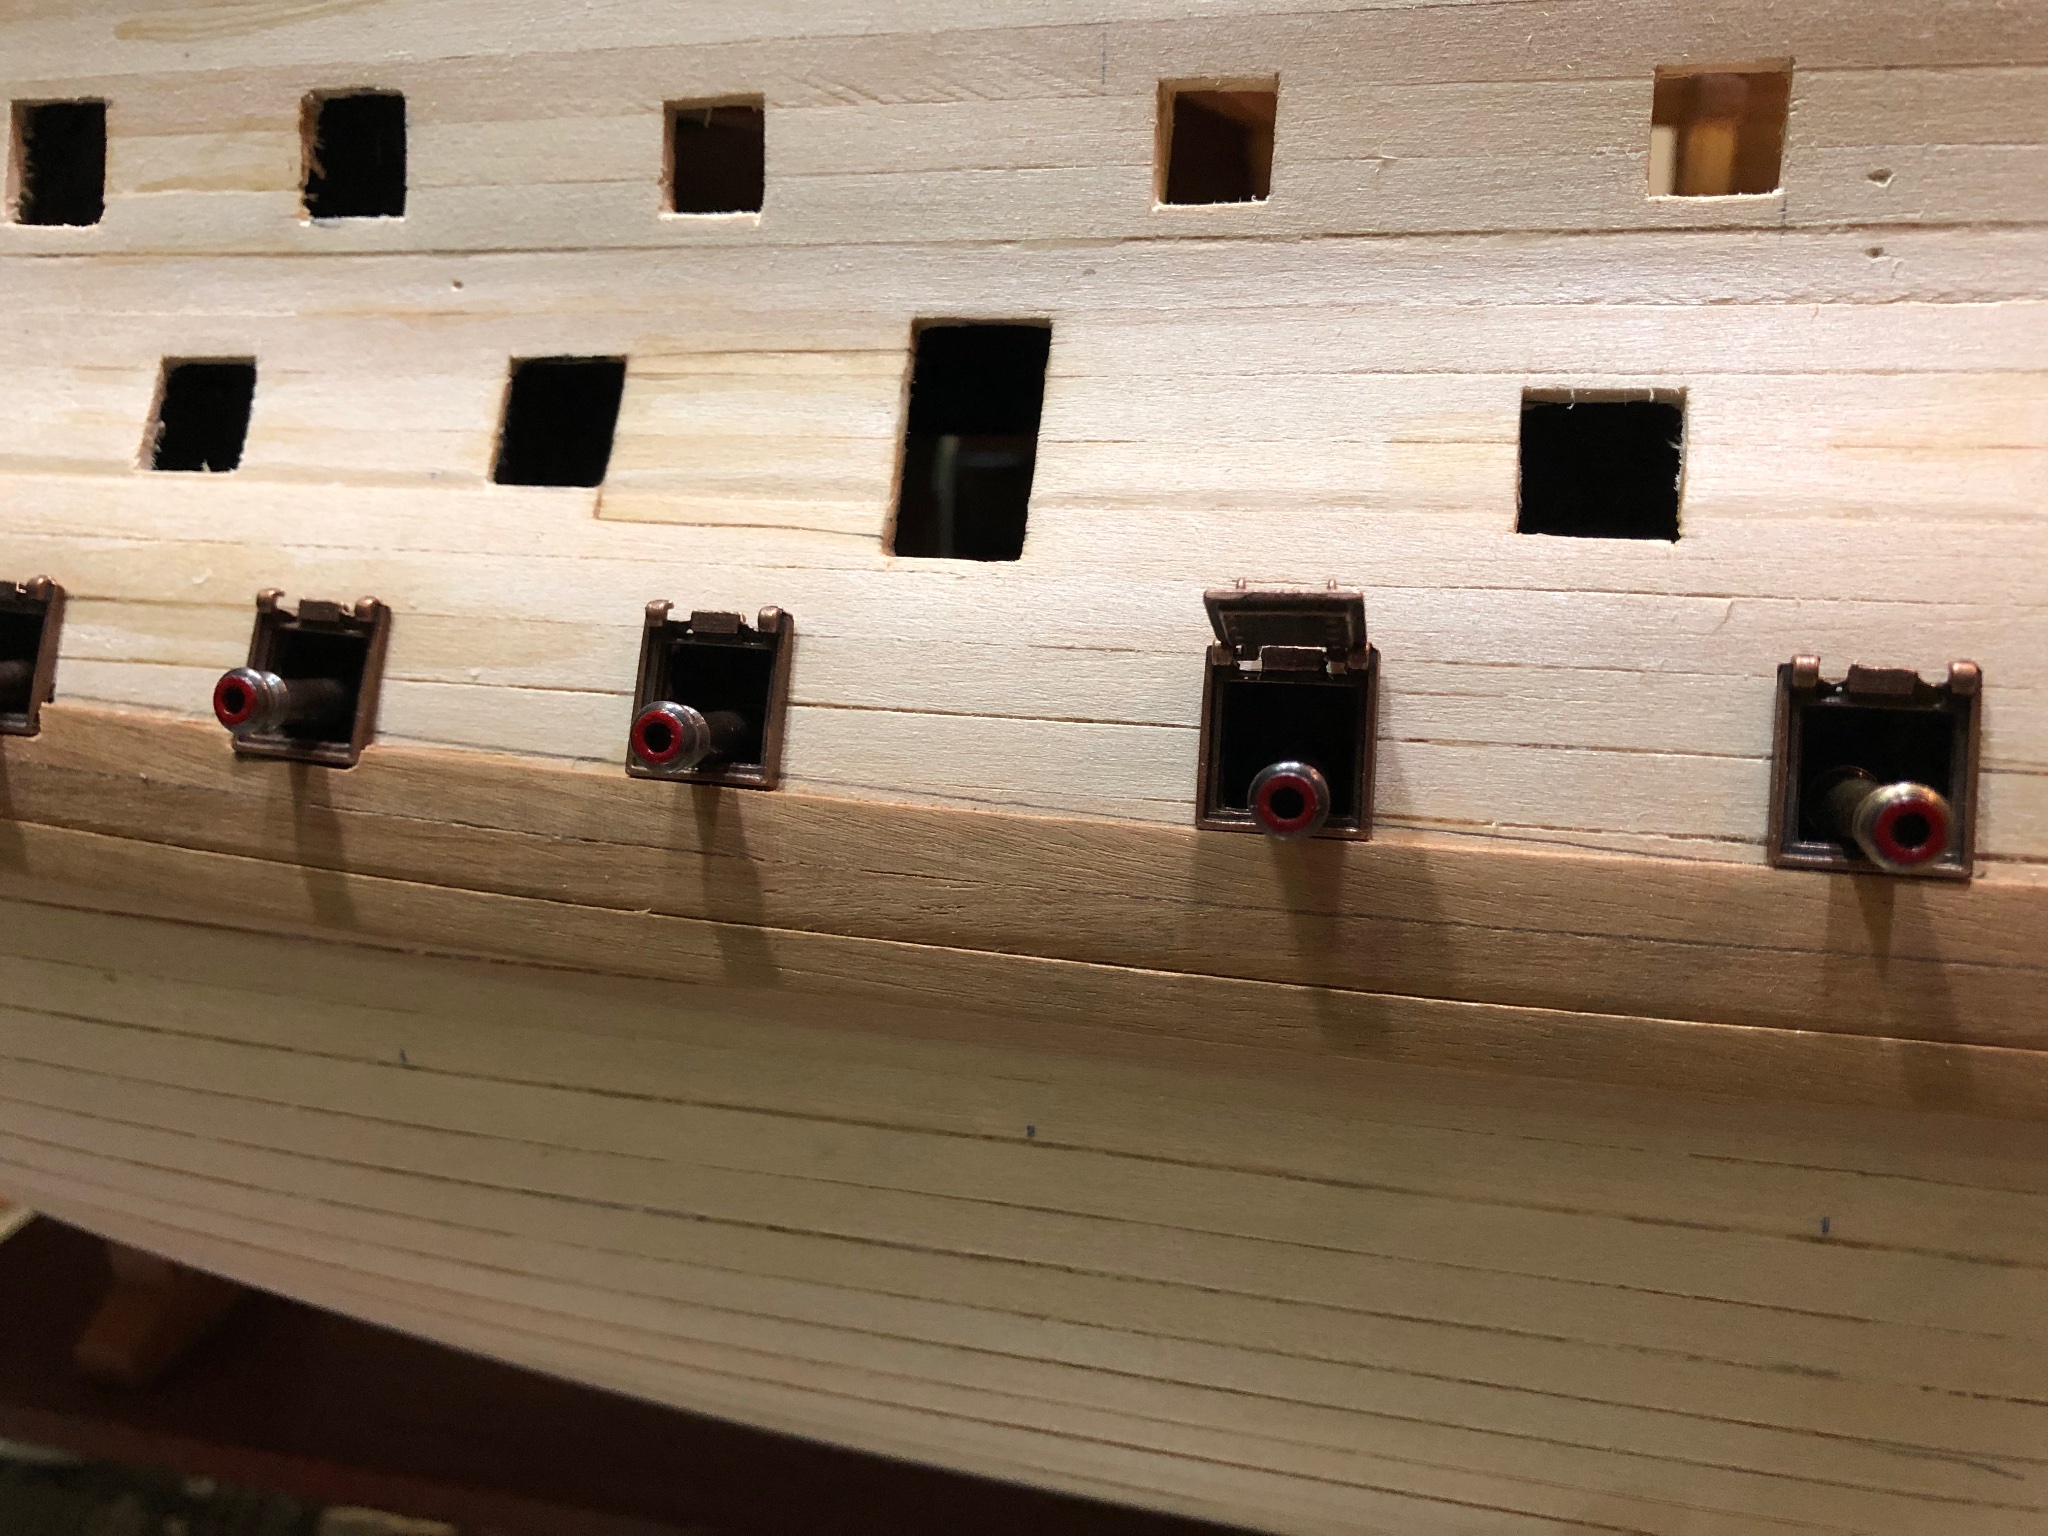
Thank you very much for your kind words Richard! It is a motivation to keep working diligently. This weekend I decided to take a rest from planking and worked on the cannons and carronades. I coated the carriages with PU varnish, painted the muzzle tips red and the trunnions gun metal. Putting the cannons in placed showed me that I cut the deck gun ports slightly low, so I will need to correct that. A few pics attached. Best regards,

-
Richard your planking looks great! Keep the good work! Best regards.
-
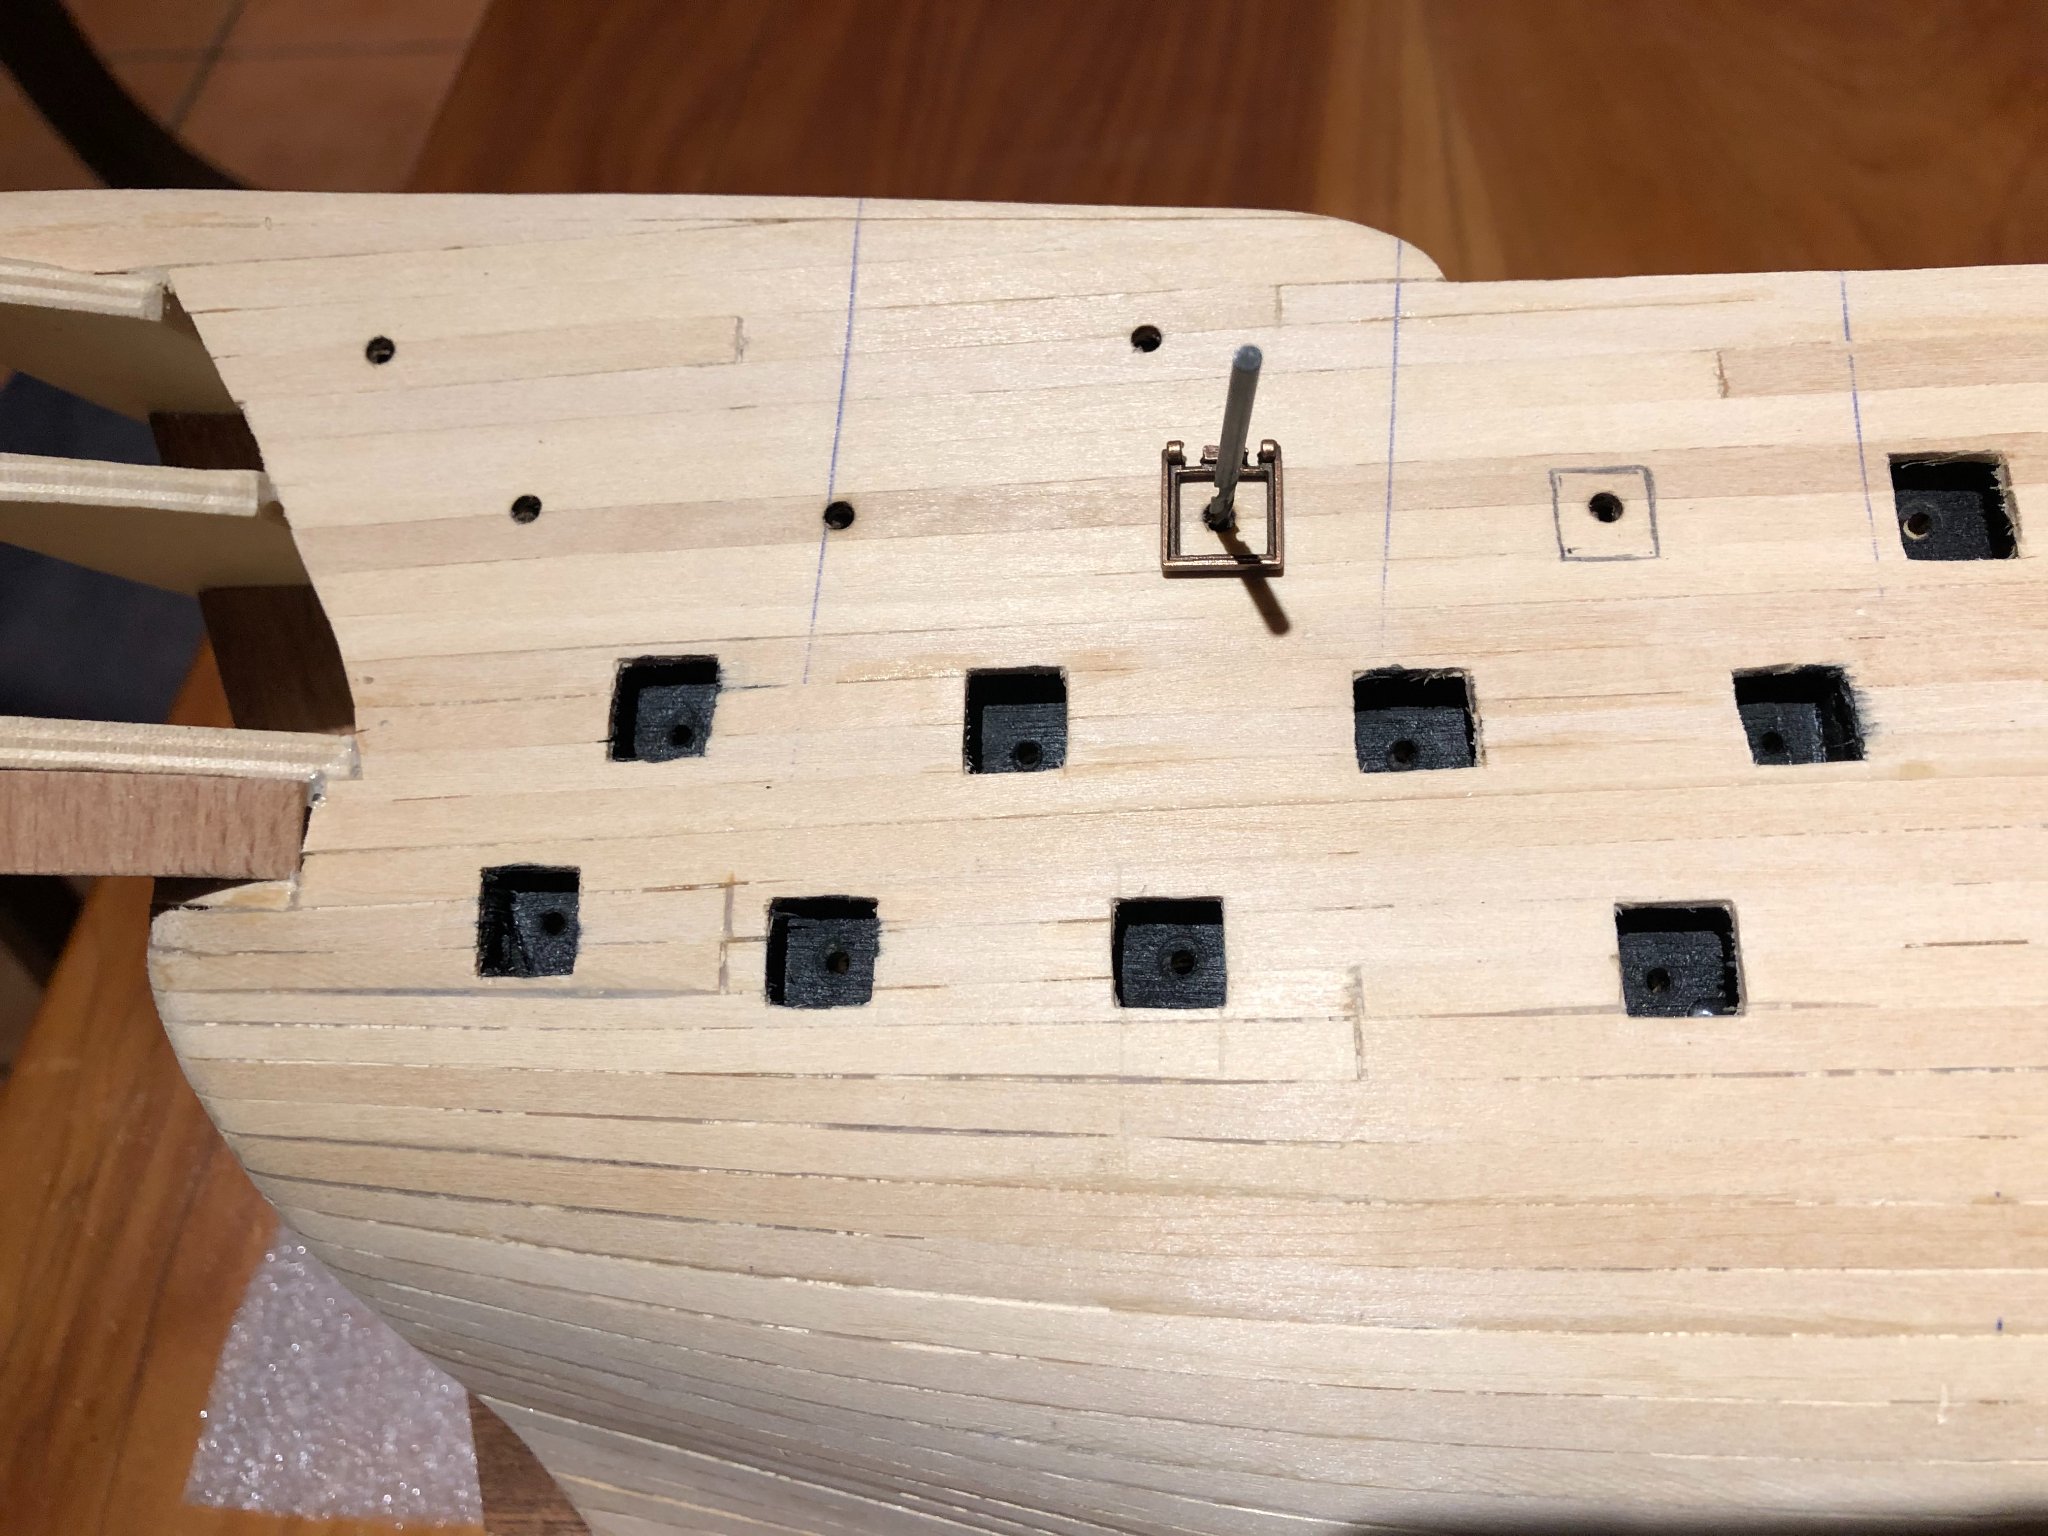
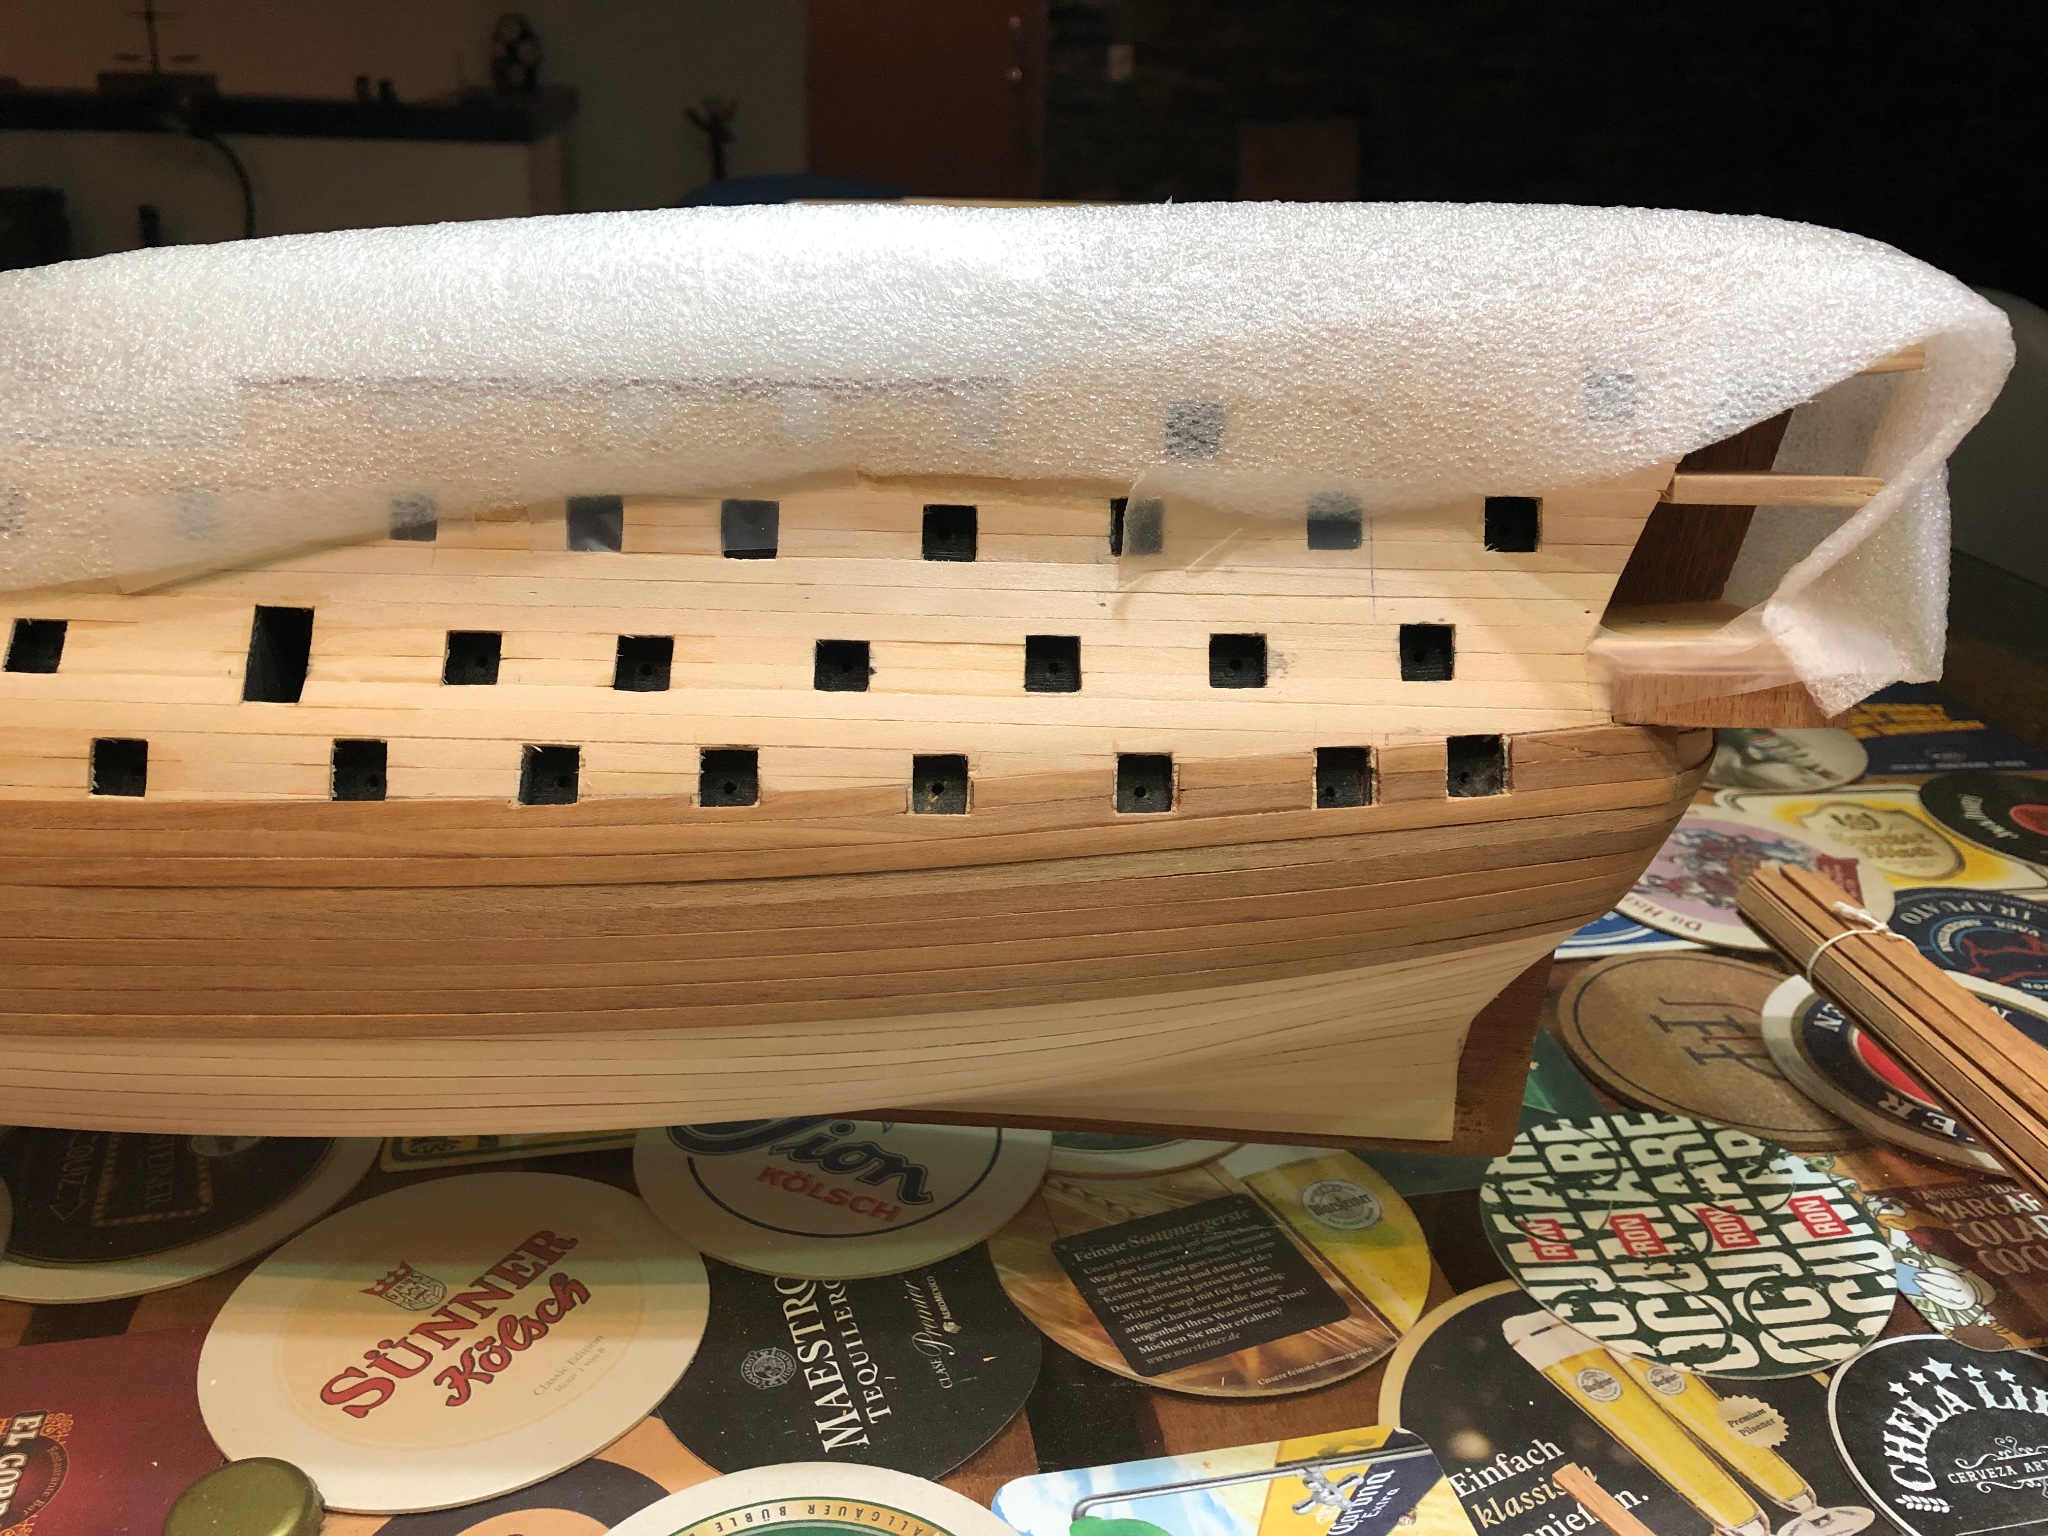
Starboard gun ports opened. Corel’s instructions indicate to set the second planking before opening the gun ports. I decided to open them first because any mistake or miss cut can be covered by the second planking. The first pick shows the process. First open a hole where the original pen markings were set. Then inserting the drill to find the hole on the gun port’s supports. Then marking the area to be cut using one of the gun port frames. Then cutting by hand with a new blade. Best regards,


_LI.jpg.5b7ce11f77b77964fd4945c57e4519ea.jpg)