HOLIDAY DONATION DRIVE - SUPPORT MSW - DO YOUR PART TO KEEP THIS GREAT FORUM GOING! (83 donations so far out of 49,000 members - C'mon guys!)
×


DaveBaxt
-
Posts
1,324 -
Joined
-
Last visited
Content Type
Profiles
Forums
Gallery
Events
Everything posted by DaveBaxt
-
First class workmanship on the rigging David and I agree with scrubbyje27. Beautiful model ship throughout.
-
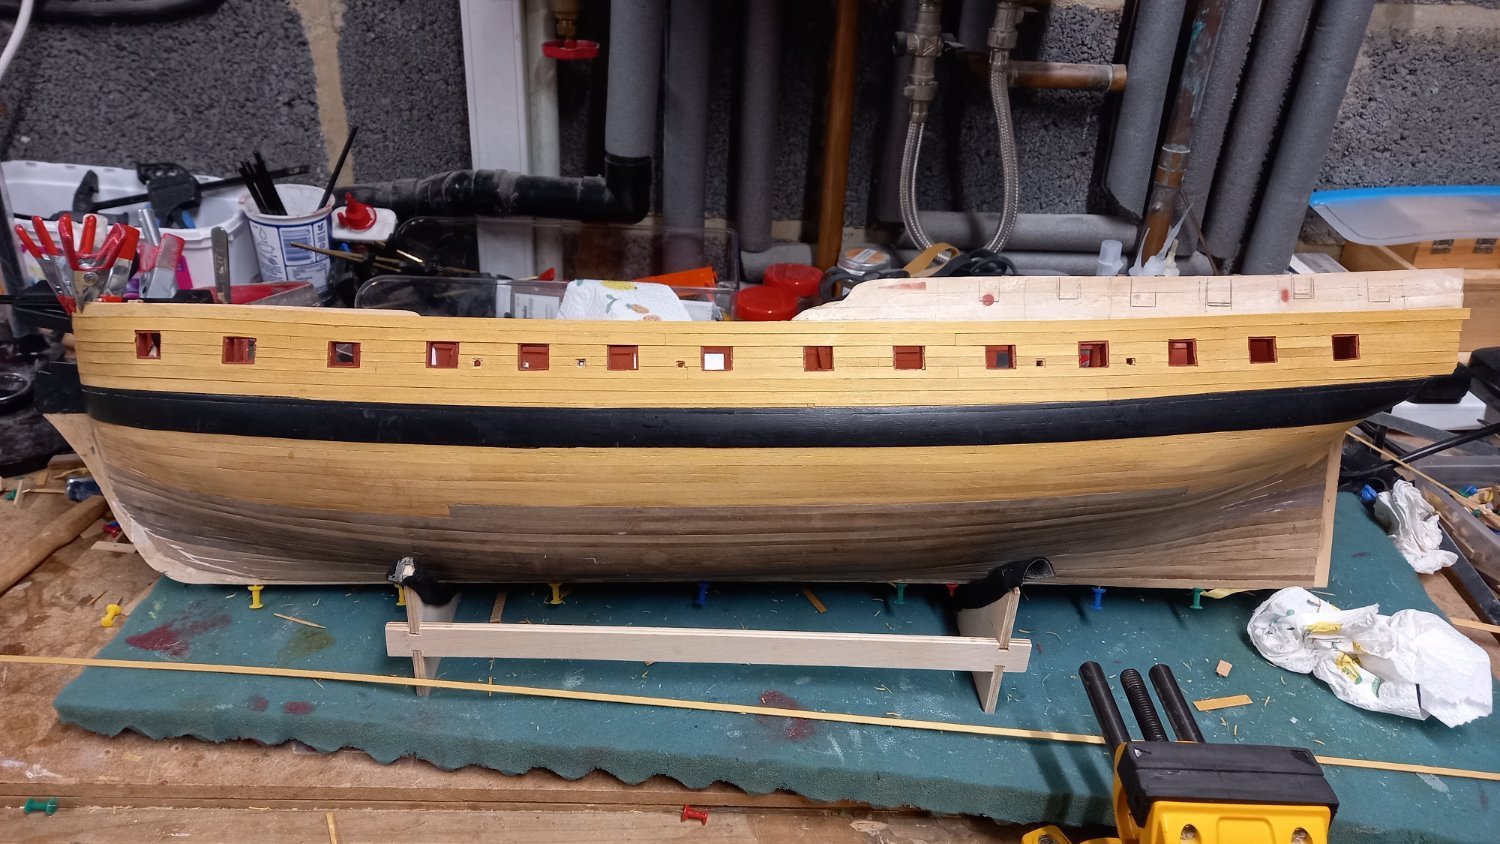
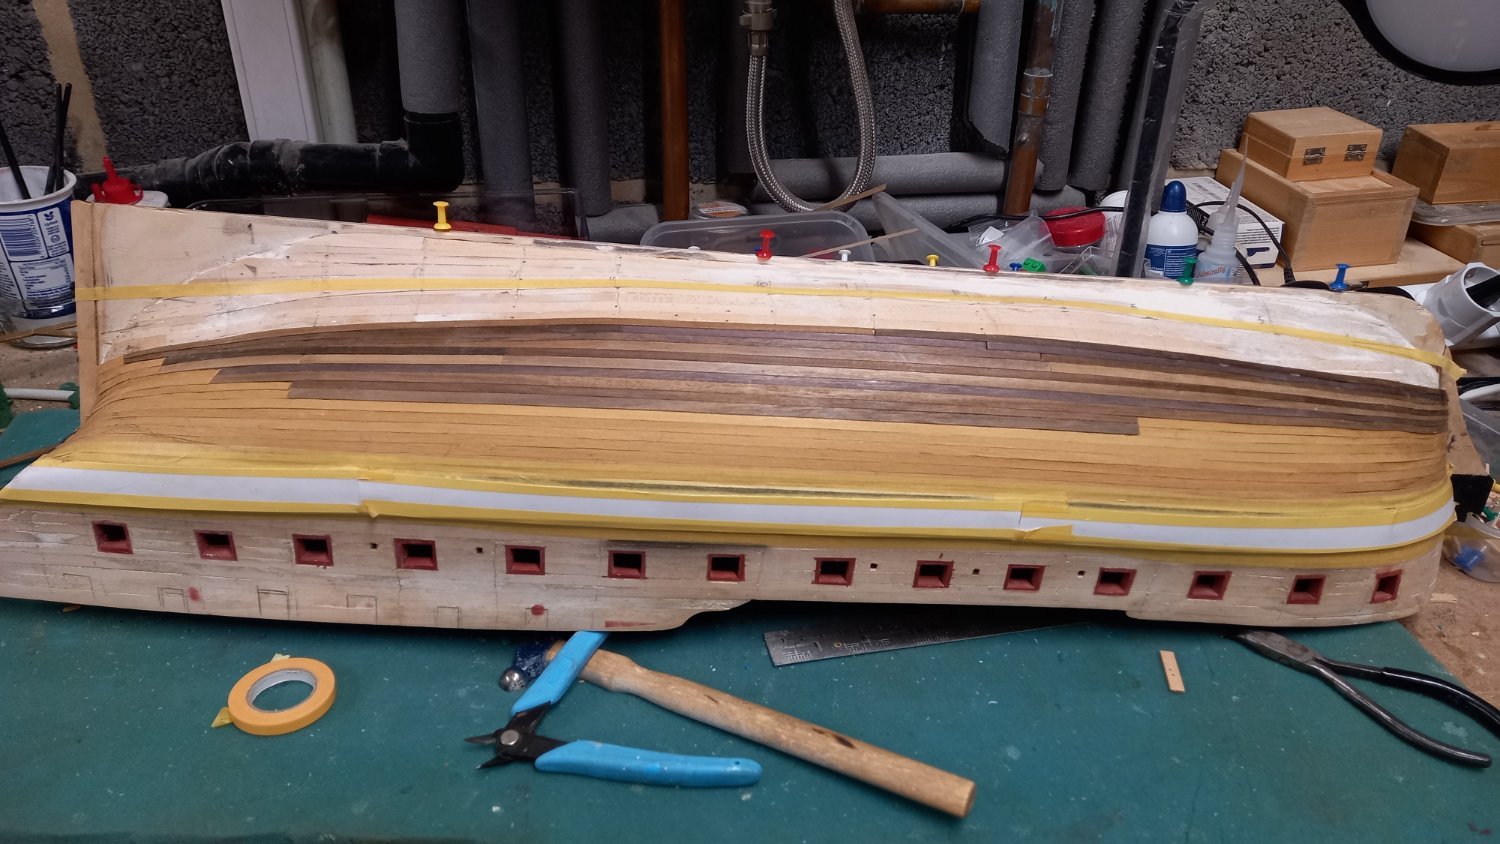
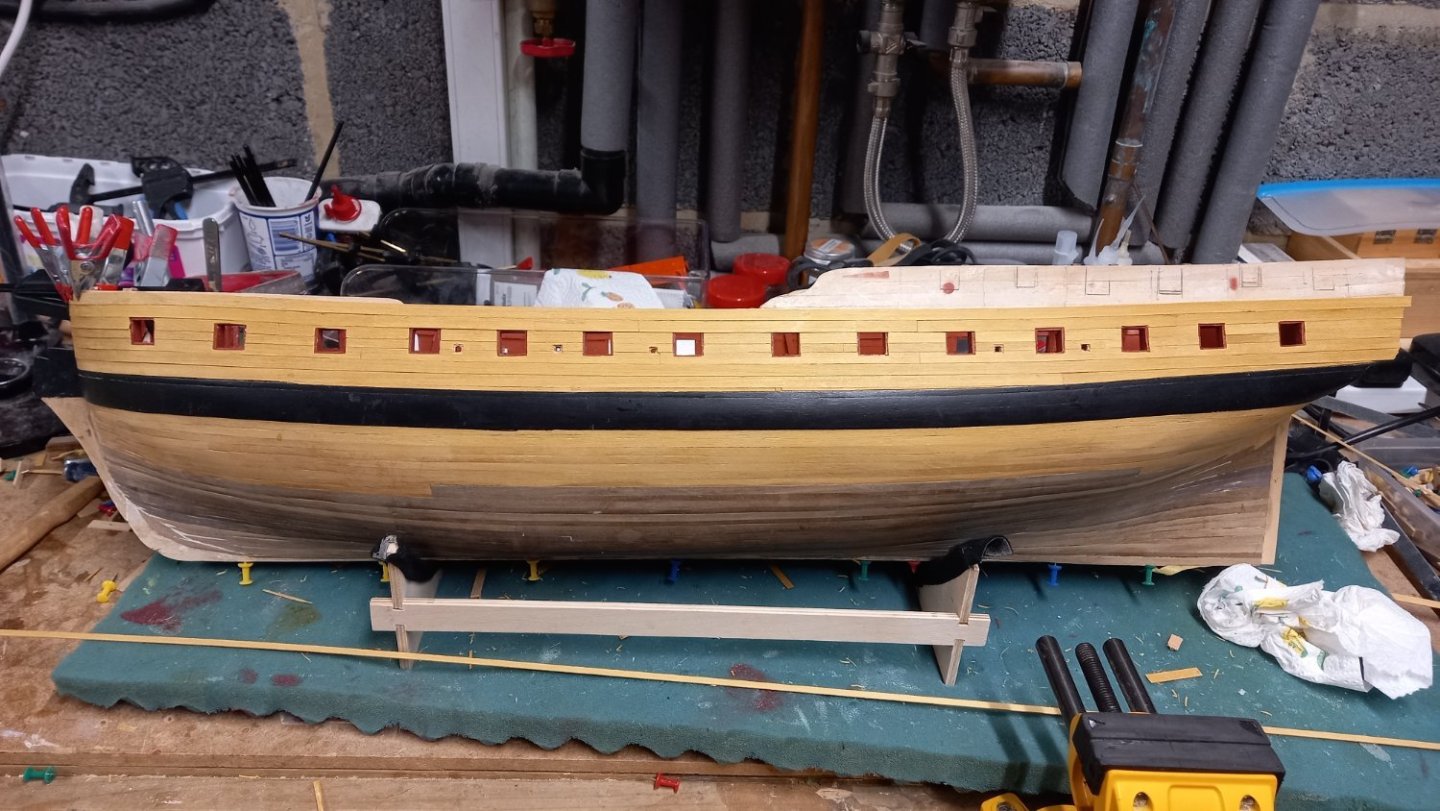
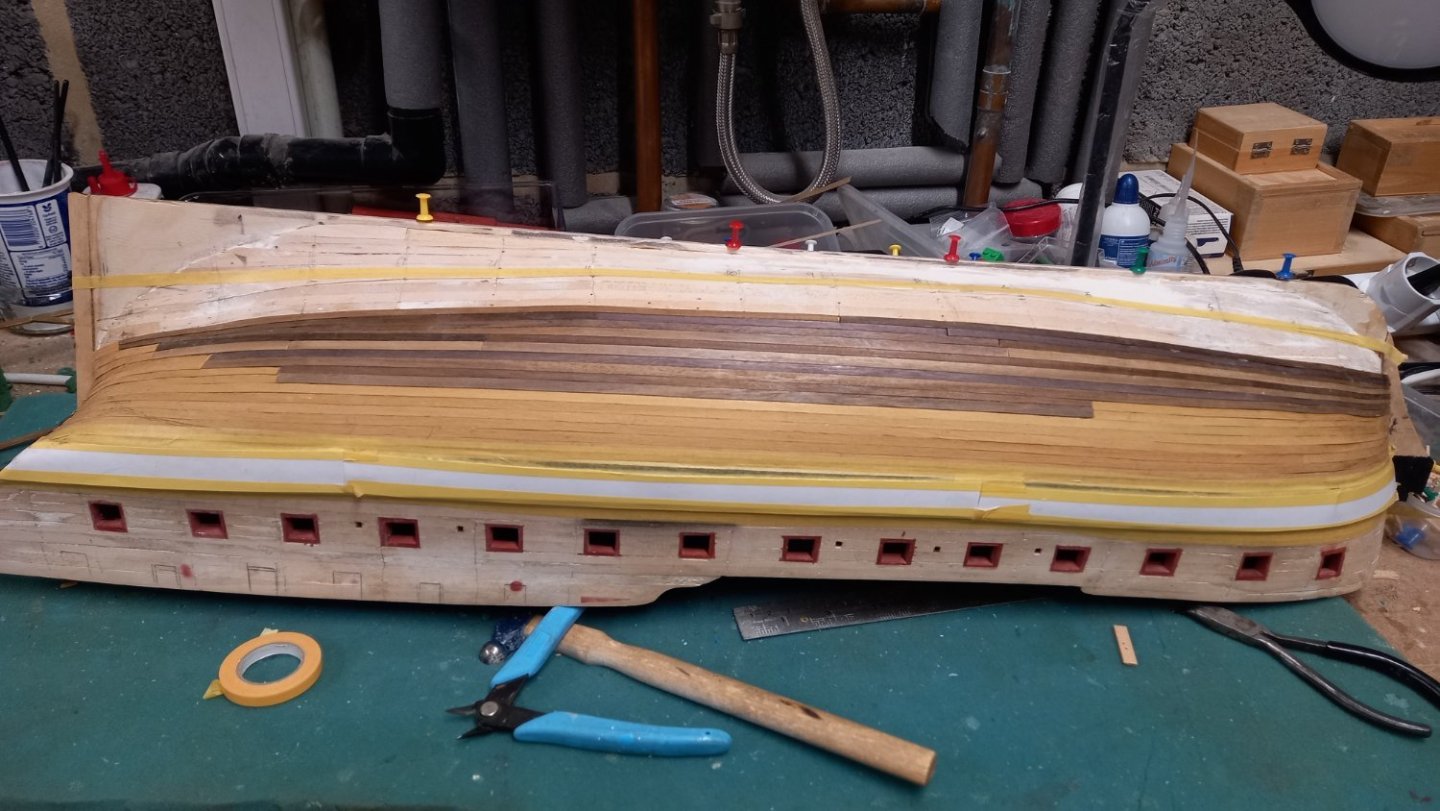
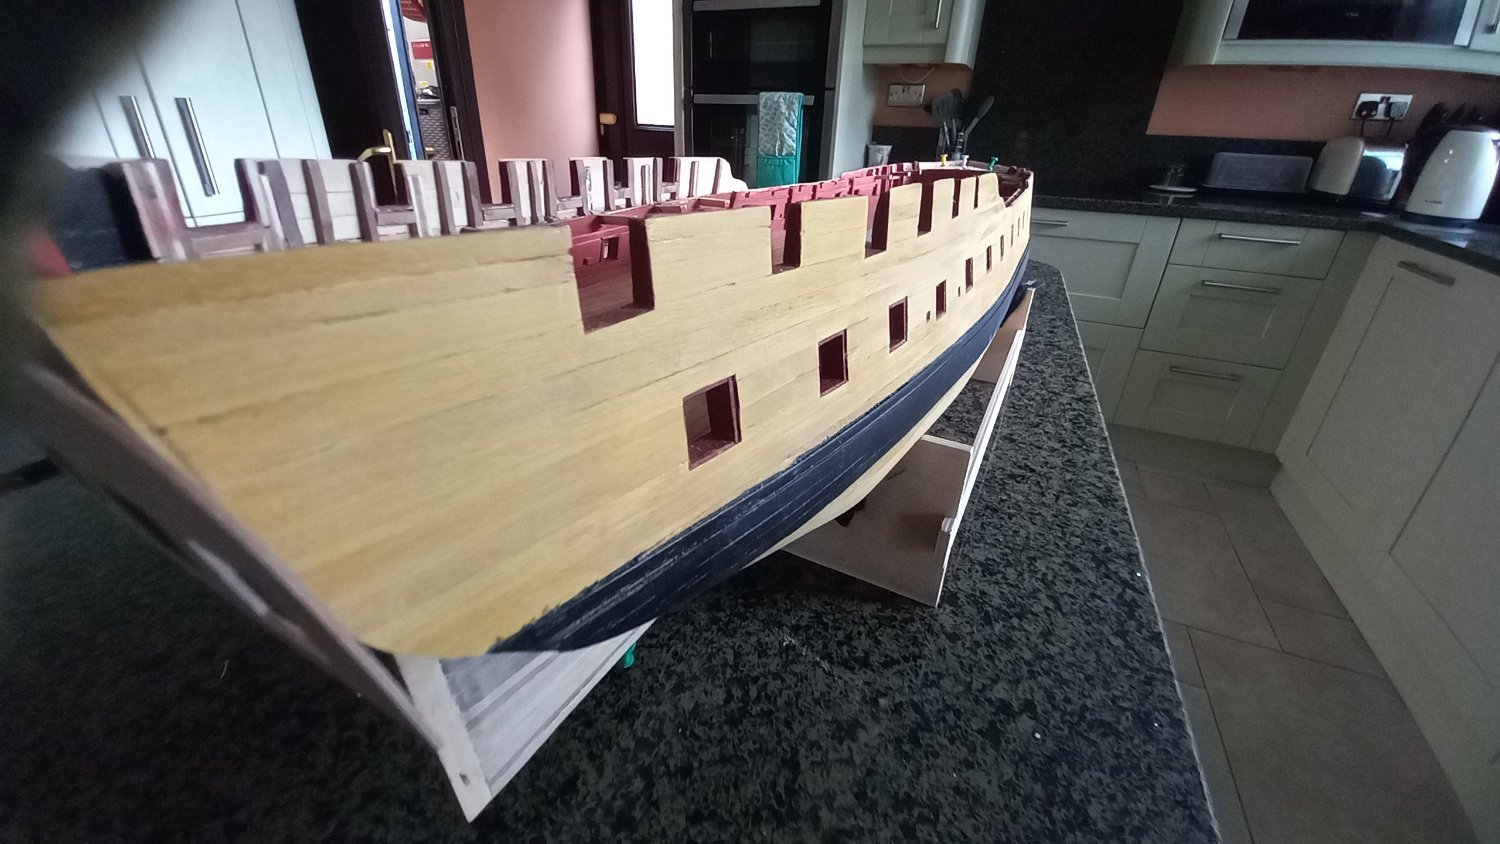
Finished off the second layer of planking and lined the gun ports. I still need to cut out the square sections for the ventilation scuttles and holes for the scuppers to complete the hull. Next up will be the fitting of the Quarter galleries and the stern gallery. I am still not 100% sure as to the correct position of the quarter galleries other than Jason suggestion of lining up the windows with the gun ports and the windows in the stern facia. I might even use some of the rails to see how these look when all is put together before gluing I will also probably try airbrushing the parts before assembly rather relying on masking tape to get clean edges.


-
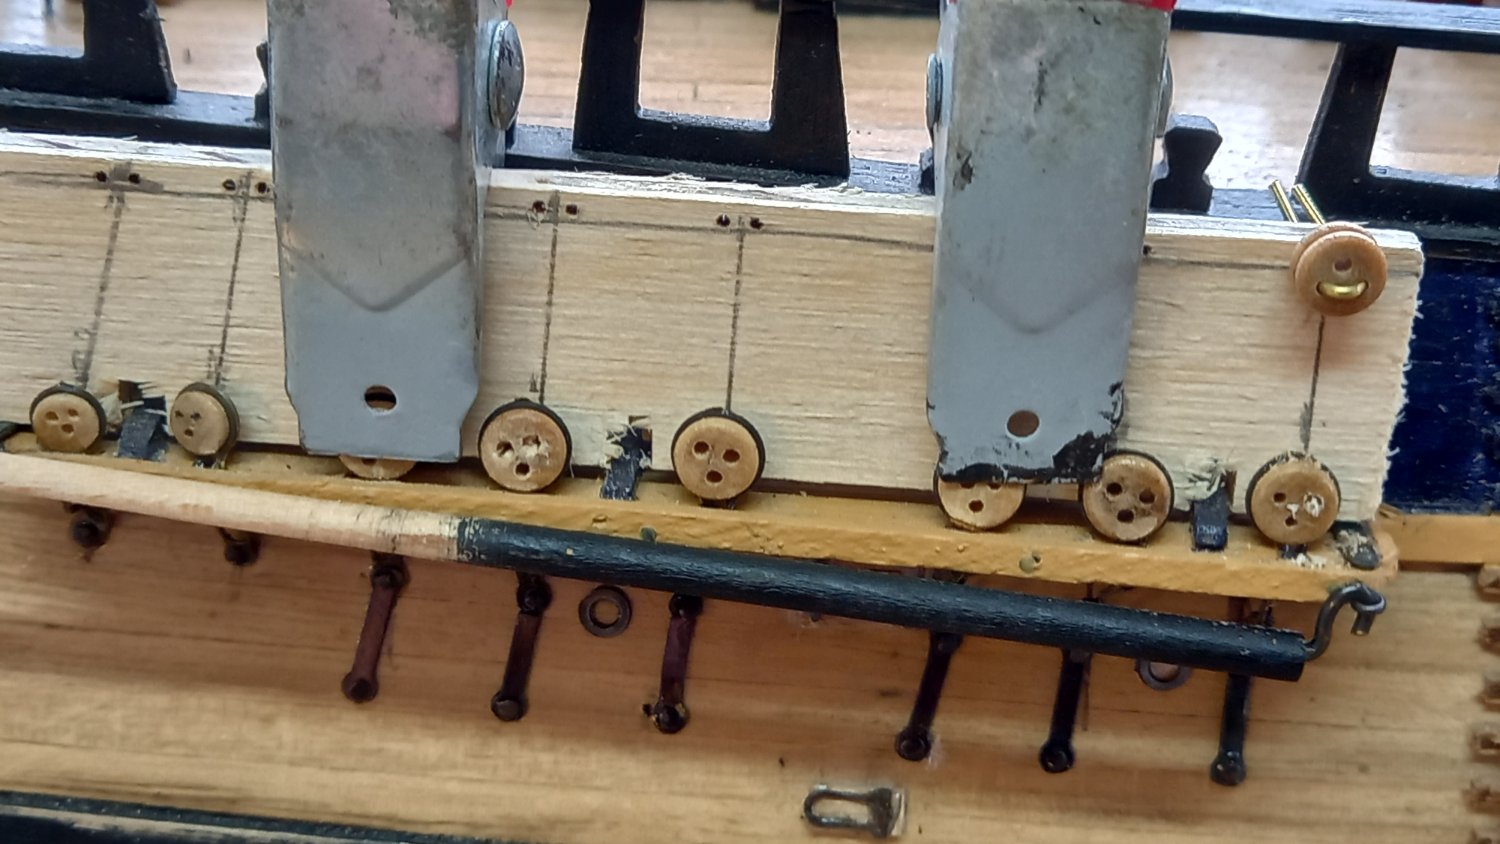
I am not sure if this is what your after, but here is a jig I made for attaching the upper dead eyes to the lower ones and to keep them level. Good luck and I hope you find what your looking for. best of luck.

-
If i am honest, I am torn, I do like a challenge but sometimes find the Diana a step to far and quite stressfull at times. I have also had my eye on the Agamemnon and wonder if this has similar issues and again would be problematic . I have also built up quite a large stock of both walnut and lime and I could probably have enough wood to build a ship from scratch but fear that is probably beyond my skill level. So it would be a shame not to use all the spare stock I now have if I now changed tack. I only started building the Diana as I have recently become the owner of the AOTS book and wanted to build this as acurately as possible from a kit. I am also running out of space and wonder were I am going to put these larger models and then I see the smaller ones produced by Vanguard and build by the likes of your good self and Delf and these are by far the most beautiful models. Thanks again Andrew for your input it is always appreciated Thank you for you input Stevinne and an interesting idea. I do have internet access but fear its not free, however it would work if I I could down load the book in one go rather than have to be connected whilst I am reading as I might not always be connected. Perhaps an idea whilst I am at home if not. Best regards Dave.
-
I don,t think Caldercraft have done anything for a while Andrew but could be wrong. I think I might be moving away frm |Caldercraft in the future due to how much I have spent extra on boxwood and also on rigging and replacing the cannon and the boats. I have probably doubled what I spent on the initial kit . Propably cheaper going with Vanguard, as I have used a lot of there parts anyways.
-
Thank you Andrew, you are always the first to reply. Sounds just what I need .I also enjoyed the movie with Russel crowd. If it is the same thing.
-
As I have a few holidays due in the next 12 months or so and as I will also spend some time travelling some distance by coach and ship . I thought it would be nice to read something other than ships construction. I am looking for something 18th century to early 1800s and I have just bought a couple of books on Trafalger, to give you an idea. Any biography would also be suitable or even fiction set in those days would be really good. As my luggage allowance will be limited Kindle books would be best and usually cheaper too,) however paper back would be ok but I think hard back would probably not be suitable.Any recomendations would be appreciated. Best regards Dave
-
Thank you Allan for your comments regarding the Boxwood. I am unsure what type of Boxwood it is but it is not the Castello boxwood as that is the other type of boxwood I have and sourced from a different supplier here in the UK. This type is very yellow and I think it will look god when I sand it. Unfortunately I bought more than I actually needed and have quite a bit left over and it is quite expensive. Fortunately I still think it is worth the extra cost and hopefully I can utilise it somewhere else on the model and show it off as I also think it is a fine looking wood. I might have to fined another supplier of Boxwood for my next project but find it difficult for ready cut planks.
-
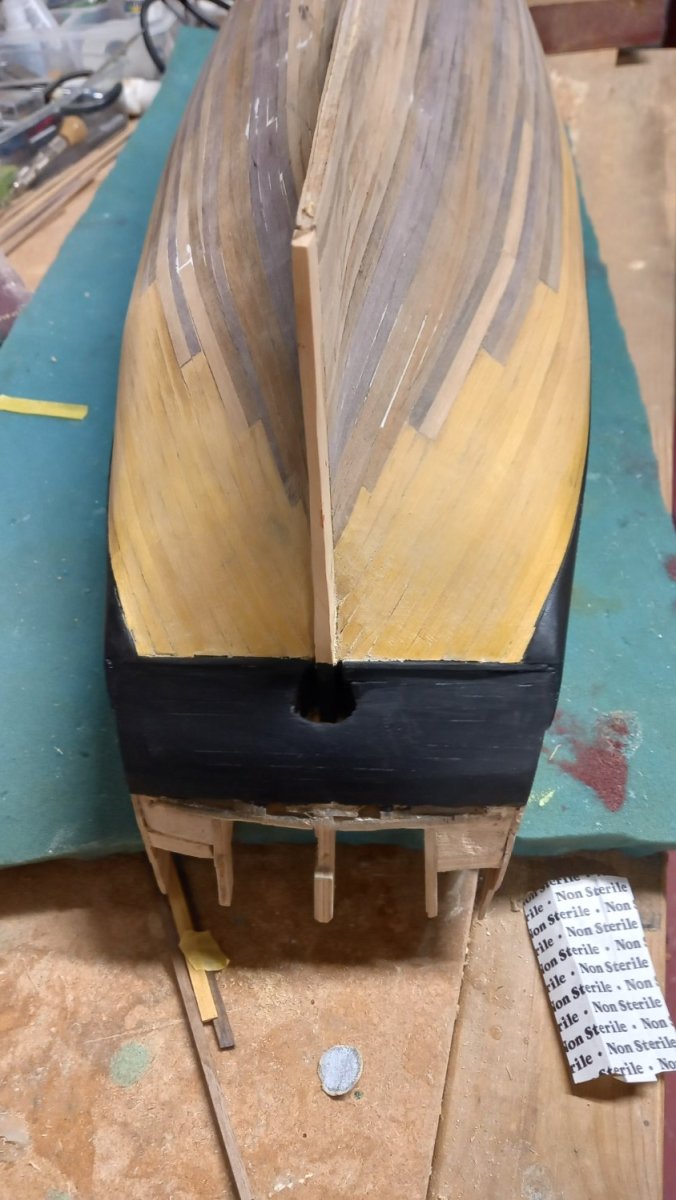
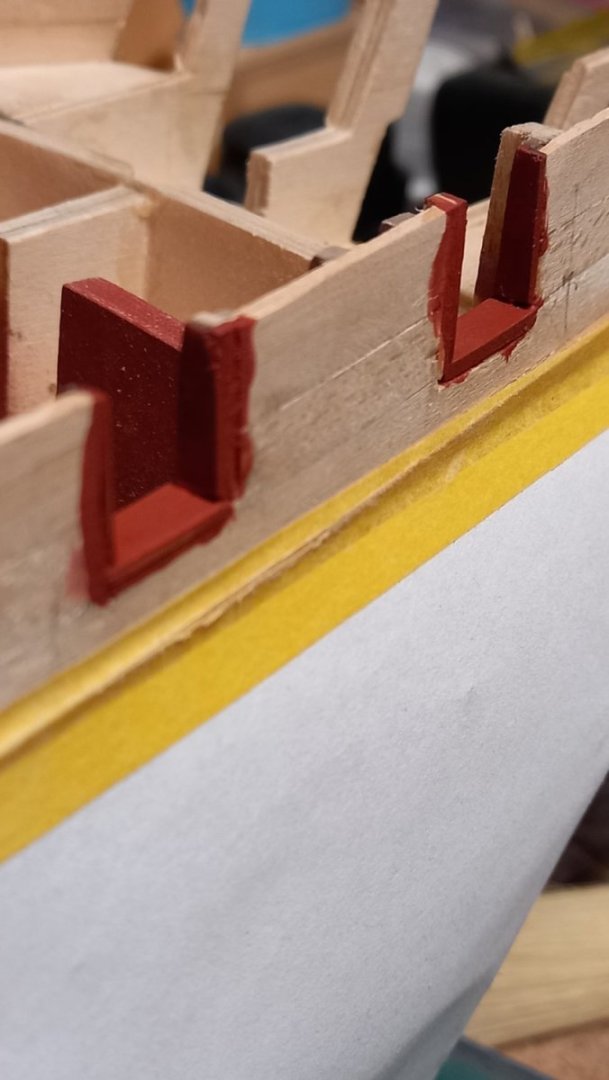
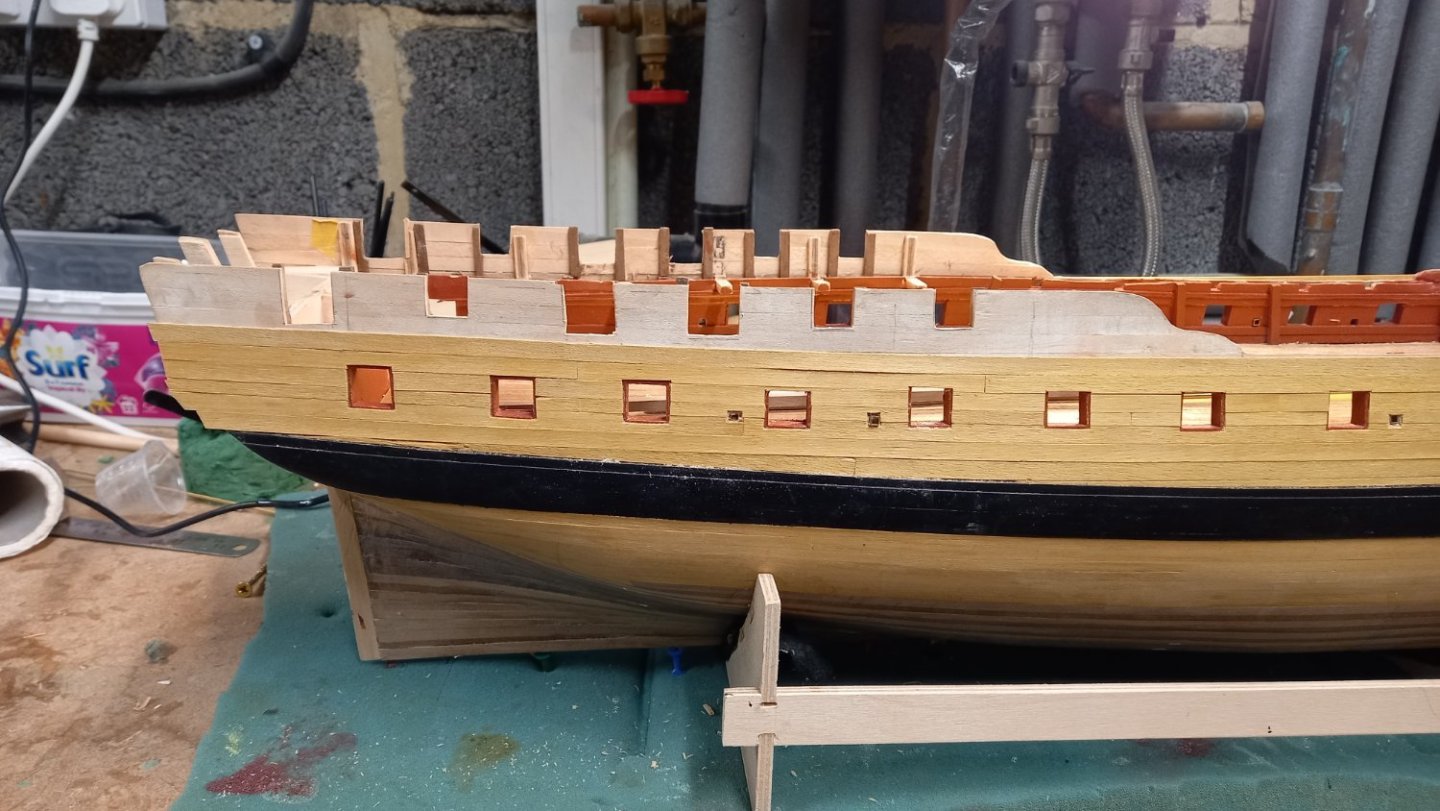
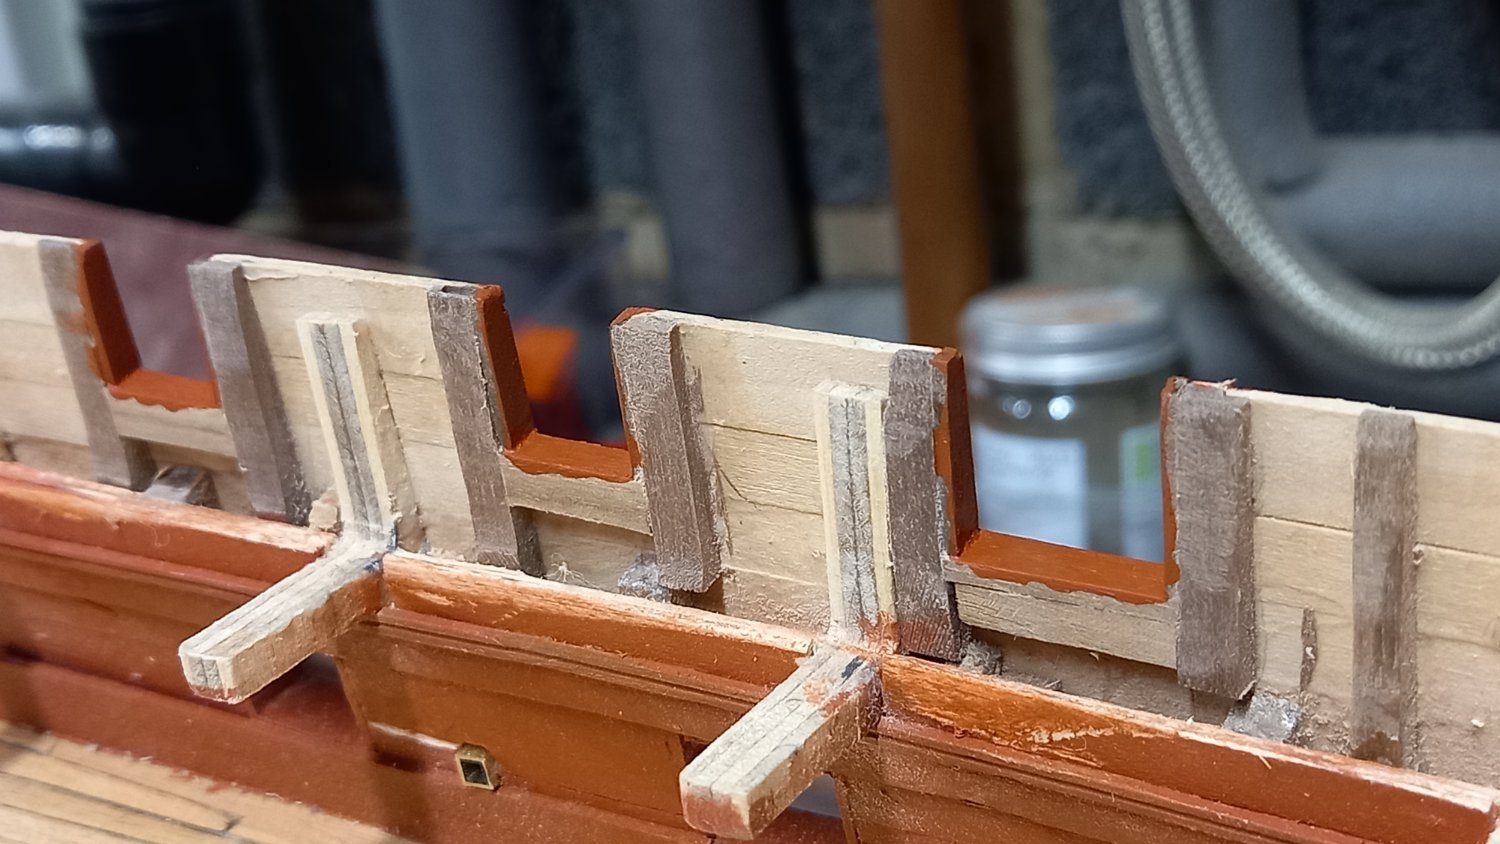
Some progress with the second planking above the wale has been made but I have found the boxwood I am using a lot different than my other boxwood and a bit unpredictable . This boxwood seems to have a larger grain than boxwood previously used.and has a tendency to split, when cutting the sweeping ports and gun ports , I even tried using shellac before cutting hoping it would cut cleaner and not split so much with linited success I therefore ended up just marking the recess with a number 11 scalple blade and cutting them away from the workpiece with a sharp micro chisel.which I found easier. Perhaps if I had used a harder wood for the gun port linings ( I used lime and tanganika ) I could have cut them after gluing into position I now realise that whilst the above method worked in a fashion, it would have been much easier if I has steppped the linings and cut the second planking flush with the edges of the gun ports . I think this is a valuable lesson learned and unsure why I attempted the above method in the first place. After fitting a few planks it also became evident when using 6mm planks that when reaching the top of the gun ports towards the aft end and when cuting out the piece for the gun ports it would leave the strip very thin and weak, so I therefore decided to fit a 4.5mm wide plank in between two 6mm planks. hopefully this is a reasonable solution and does not distract on the whole. Oversized sections of first planking removed for quarter deck gun ports to allow for liners. I have used the templates provided for guidence as this seemed to have previously worked out for positioning of quarter galleries and for main mast shrouds when checked. See page 4.According to AOTS Diana the quarter deck bulwarks are tapered and narrower toward the top so will need to consider this when making the gun port k liners. I would also like to support the bottom liners again using 3 mm square walnut, even if these make life difficult when fitting the false deck lator down the line..
.thumb.jpg.b2484066a3c6740e49dee0f2786cce93.jpg)
-
Wow as I thought it would be, excellent set up and so tidy too. You are a credit to the hobby I will definitely need to buck my ideas up a bit. Thank you Mark for sharing a photo of your workshop with us. Dave
-
Great to see you hard at it Mark in these few summer months when usually things are a bit quiet . Your workmanship is something to behold and perhaps one day If possible I would like to view your setup . Cheers for sharing your build with us. Dave
-
Great work on the mouse and very realistic David. Thanks for showing us which sticking plaster you used as I have been unable to get such good woven effect. Also making those open hearts are not for the feint hearted so well done as I think you have made an excellent job of them. Good to see you still at it during the summer months.
-
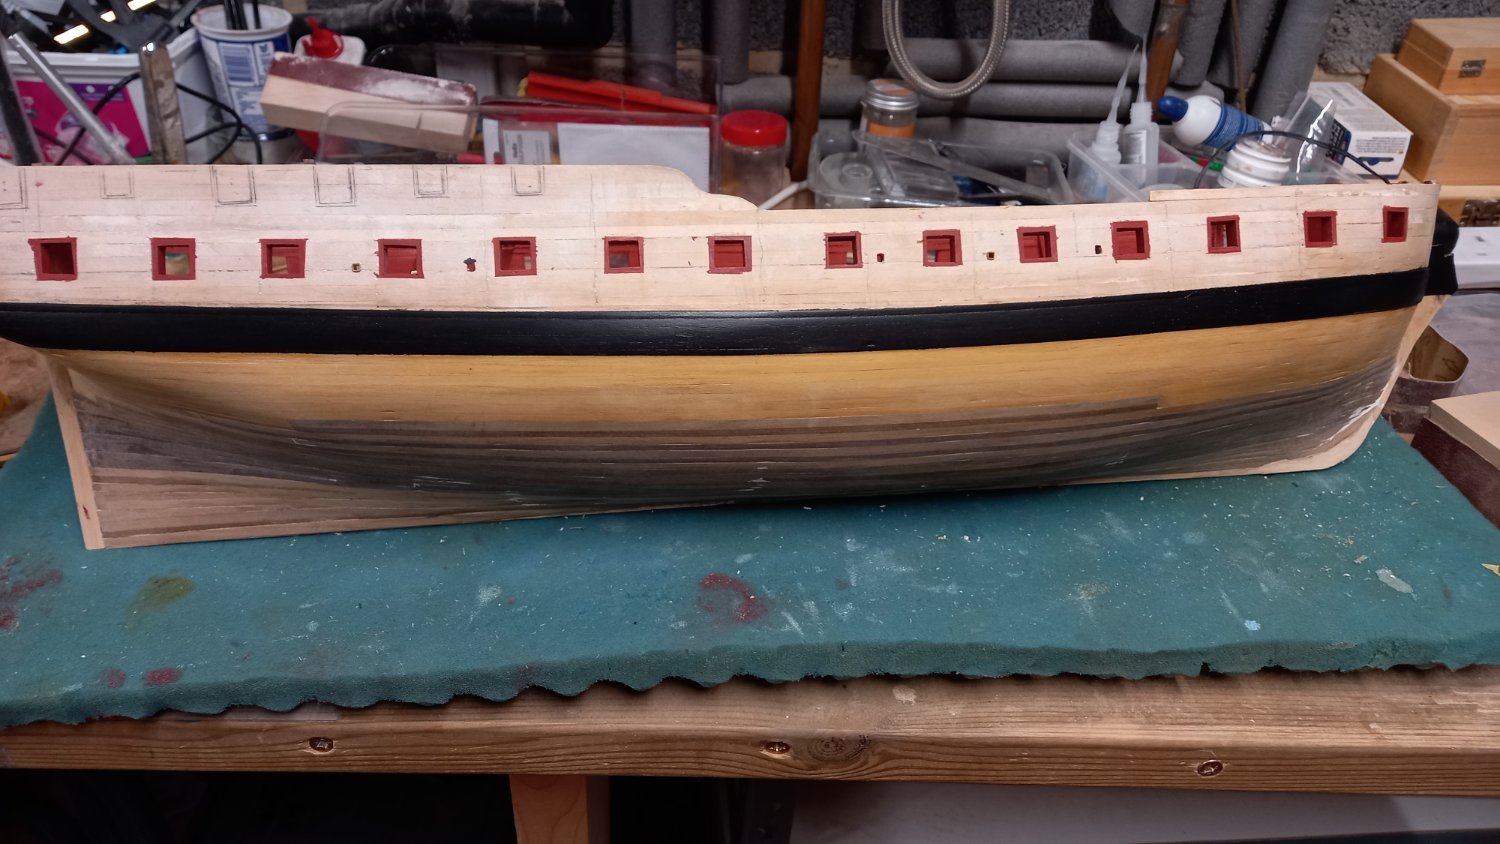
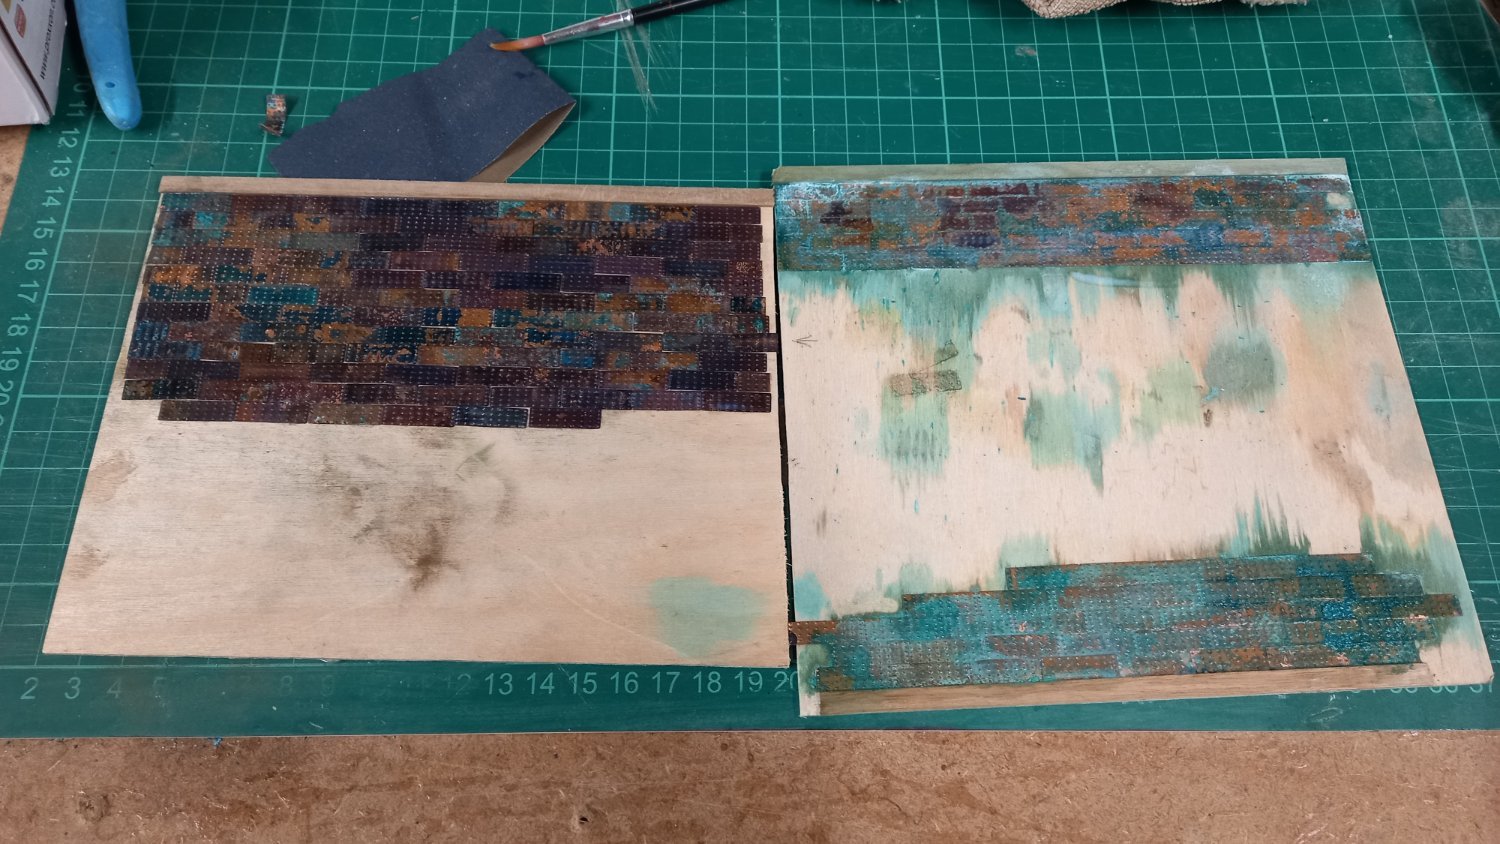
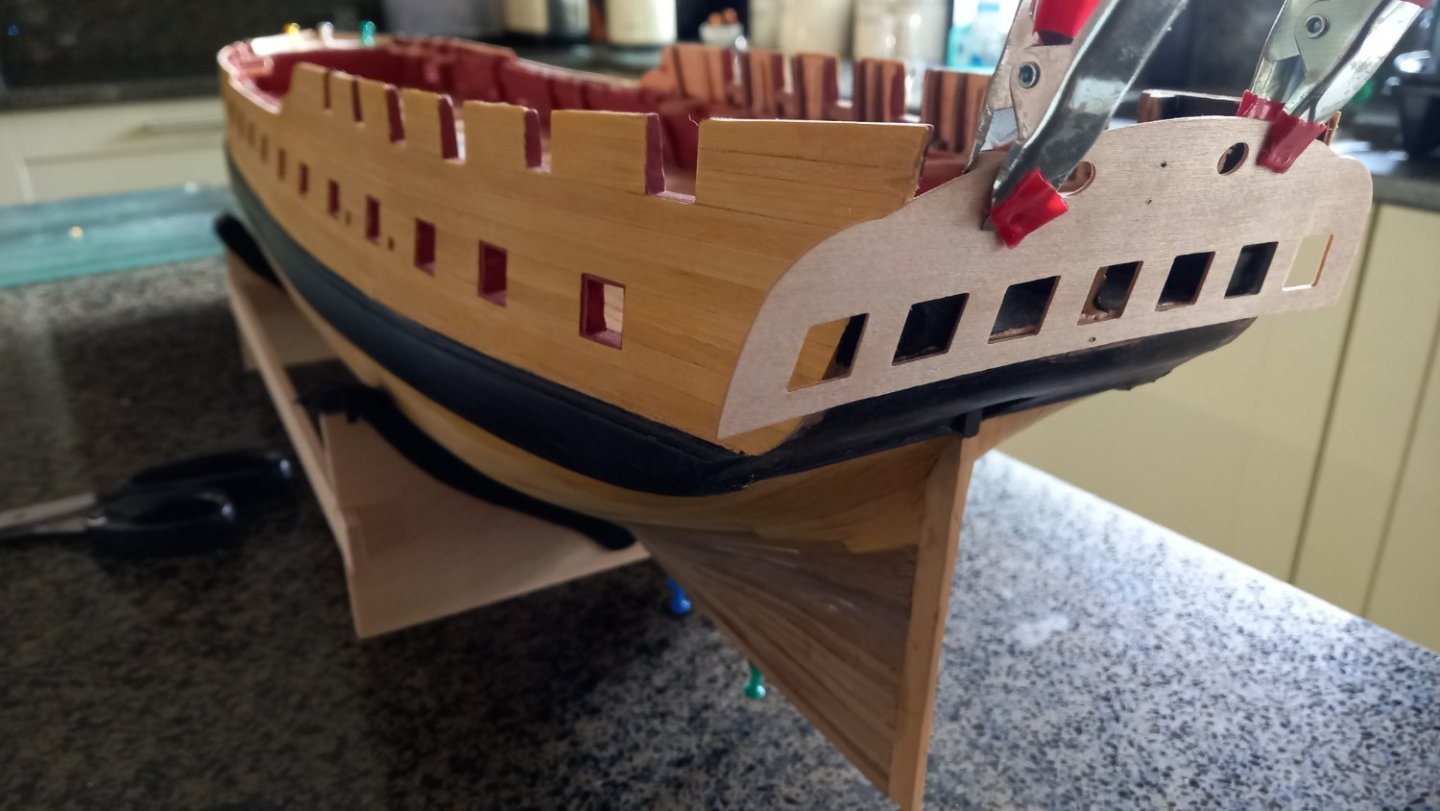
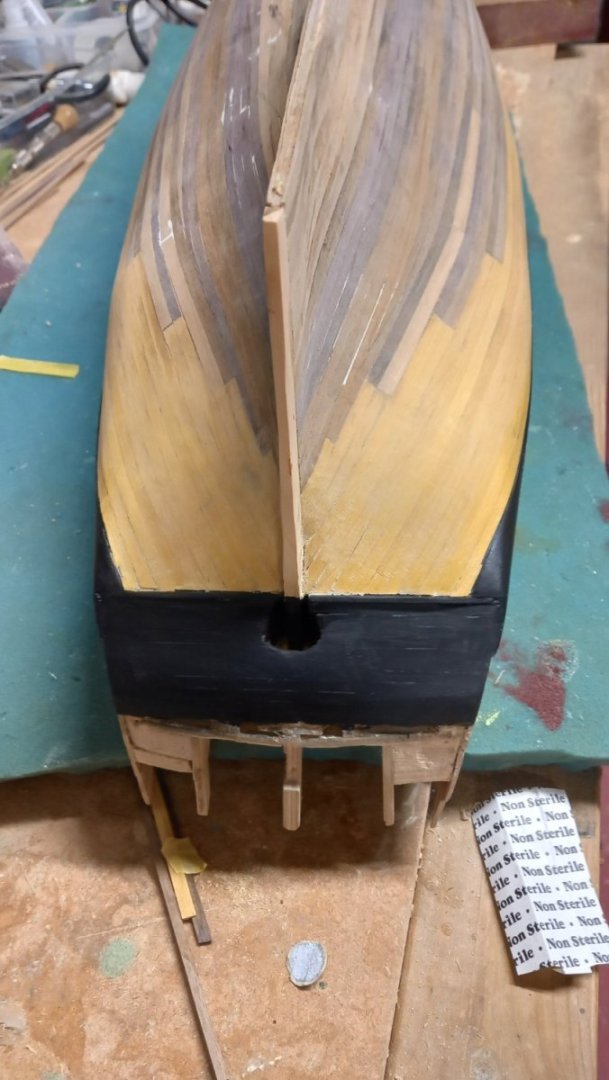
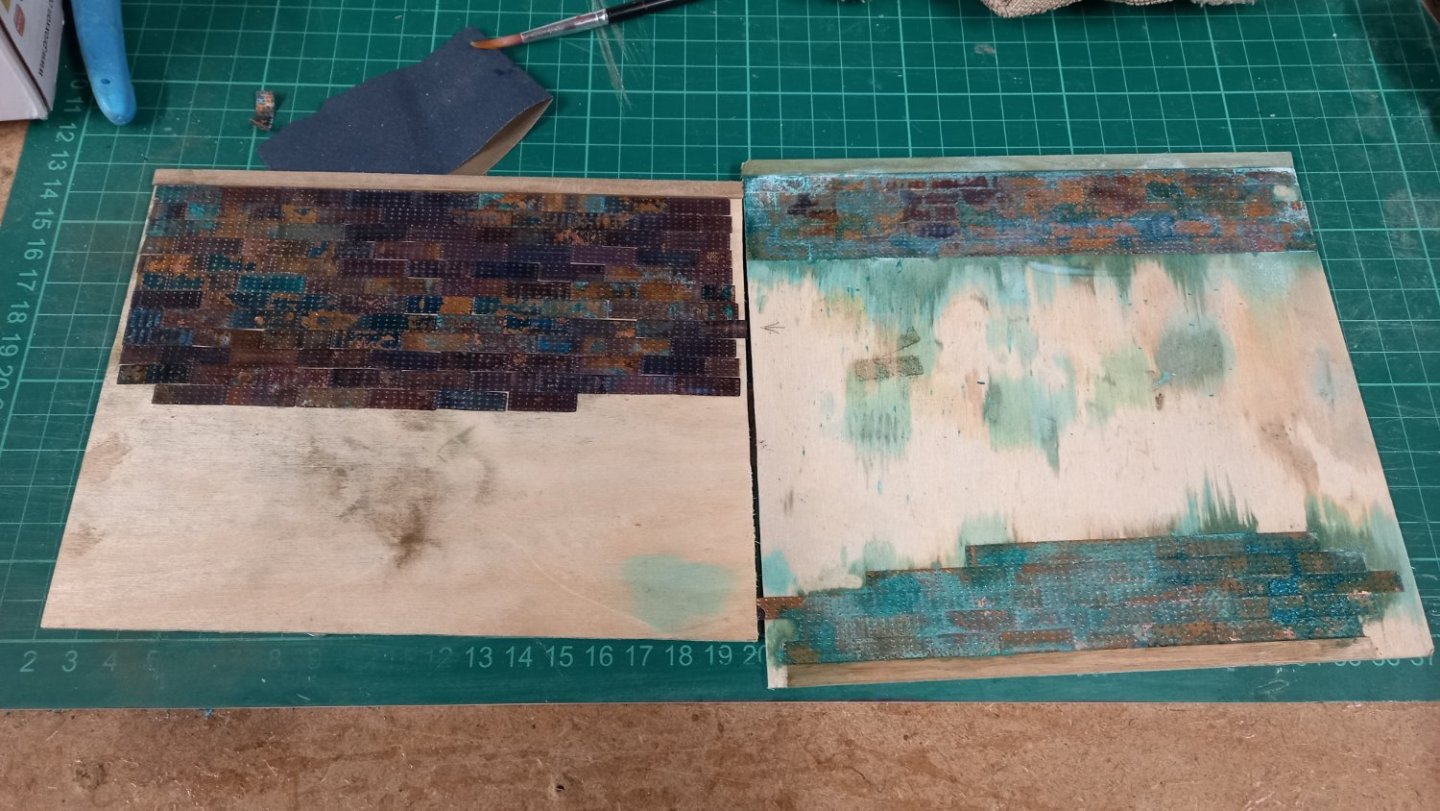
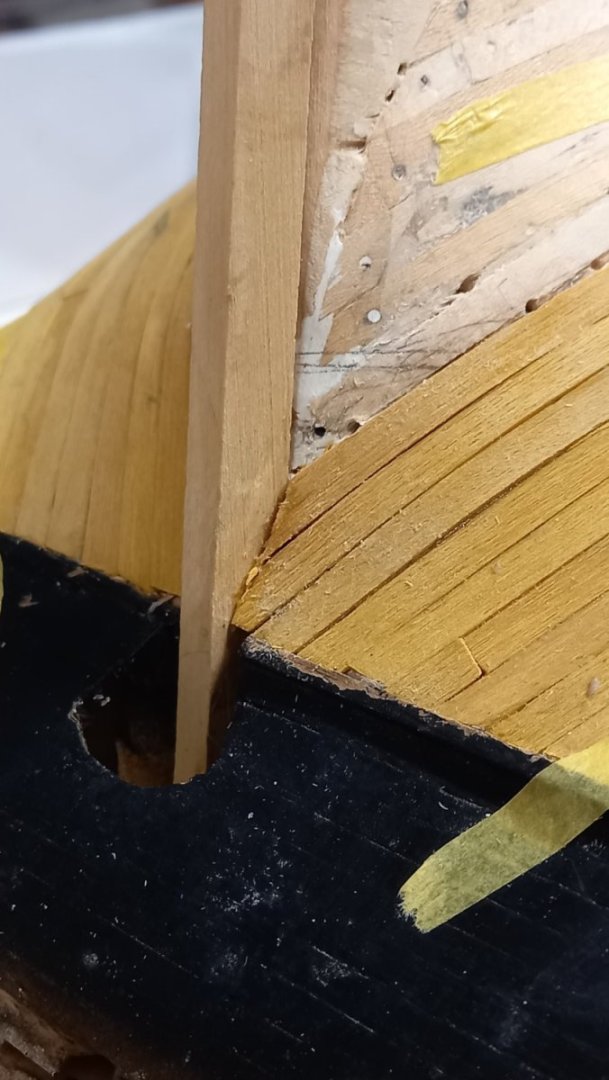
.Second planking below the wale completed and an attempt to taper the stern post was made but not entirely happy with the result. Next time I will probably do this off the model and start with a thicker piece of boxwood. Next up will be the planking above the wale and I expect this to be tricky ensuring I leave a 0.5mm recess on the bottom and sides of each gun port except for the ones which have lids. Here I will make a recess on all of the gun port sides, top and bottom. I have done a number of experiments using the spare copper plates which came with the kit. On the right there are two groups using a mixture of either white wine vinegar and ammonia and salt added to the plates after they were glued to the wood the other side were plates glued after they were treated with red wine vinegar and Miracle grow. In both cases the tiles were pickled for 30 miniutes to remove any grease etc. I even soaked some of the tiles on the left in brass black for just a few seconds which turned them a lot darker. I believe the process of pickling allowed the patina to work quite quickly but think that this might be a bit too much. The tiles on the left although are probably quite realistic but a bit too patchy for my taste. As yet I am not totally happy with the results so far and I am now considering air brushing the tiles once they have been glued to the hull but unsure about copper and which primer to use before using dirty downs acrylic and aged copper acrylic. I still need to do some more experiments before deciding which way to go. Any advice on the matter would be welcome I I am away tomorrow for a break in the Peak district to do some walking with the family . As the weather forecast is not too great, I might have to take a small project.perhaps one of the boats or the something similar with me but at the risk ending up being divorced haha.


-
Thank you Alistair for clearing that up regards following the waterline was actually at a later date and now wonder what the other builders of the Diana have done. You also metioned the difficulty of trimming plates and wonder how other modellers manage them, especially the Amati ones , being photo etched, they are much thinner than the Caldercraft kit supplied ones. Even so I thought it was a matter of cutting them with a scalpe knife away from the model before gluing them. However I have since found a video on the Amati website whereby the guy in the video runs a battern along the gore line and uses this as a guide to cut the plates. This seems like a good idea at first but think removing sections of the glued plates would leave damaged areas of wood underneath.https://www.amatimodel.com/en/how-to-copper-plate-a-model-ship-video-tutorial/
-
Thank you Alistair for your input and thanks for the photo as it clearly shows what is required.Your input is always welcome. I thought that the two top rows( the last two rows to be fitted) are to follow the water line but I got this from an old book so perhaps I could be wrong. However it is done that is clearly a nice job.
-
Good luck .I spent many hours trying different ways to try and mass produce them on my Bounty but still need to improve a lot.
- 310 replies
-
- 1
-

-
- Diana
- Caldercraft
- (and 1 more)
-
Some really nice work there Alistair and a credit to the hobby. Thank you for sharing your build with us.
-
Thank you Alister and welcome aboard. Its good to get another comformation regards laying the tiles side by side and as I am doing this for the first time it is not without some trepidation. I am just about gettting my head around forming a plan but still unsure about gore lines and where to put them . I can see from DaviidEN , Jason and Dunnocks Diana all of the plates look symmetrical when viewing from the stem looking aft and do wonder if this just follows up from the keel of is it acheived by shaping the plates. I am hoping it will become evident once I get going.I will try and get around and take a look at your fly log and hopefully get a few more tips. Any advice or links to good articles on this would be indeed be welcome.
-
Thank you again Jason your input as always is appreciated and thanks for the tip regards working with the plates. I am still unsure whether or not to move straight onto the copper plating next or to finish the planking above the wale . I will probably follow the instructions whilst i do some experimenting with the spare Caldercraft tiles.
-
Thank you Allan. I have spent quite a lot of time on whether to use plates at all or not . The only problem I have been informed is that they are probably still slightly to thick and therefore I have been advised that it is better to not overlap them. Once I have weather the plates and from an observation view point I don,t think it will be noticed anyway. For the record I have toyed with a number of ideas including copper tape and making paper plates and soaking in shellac. All good ideas and perhaps I will try these another time. However |I thought I should at least explore this avenue at least once.
-
Some great looking coils of rope there David and compliments the rest of your neat looking rigging. As always throughout your build she is looking truely amazing.
- 310 replies
-
- 2
-
-
- Diana
- Caldercraft
- (and 1 more)
-
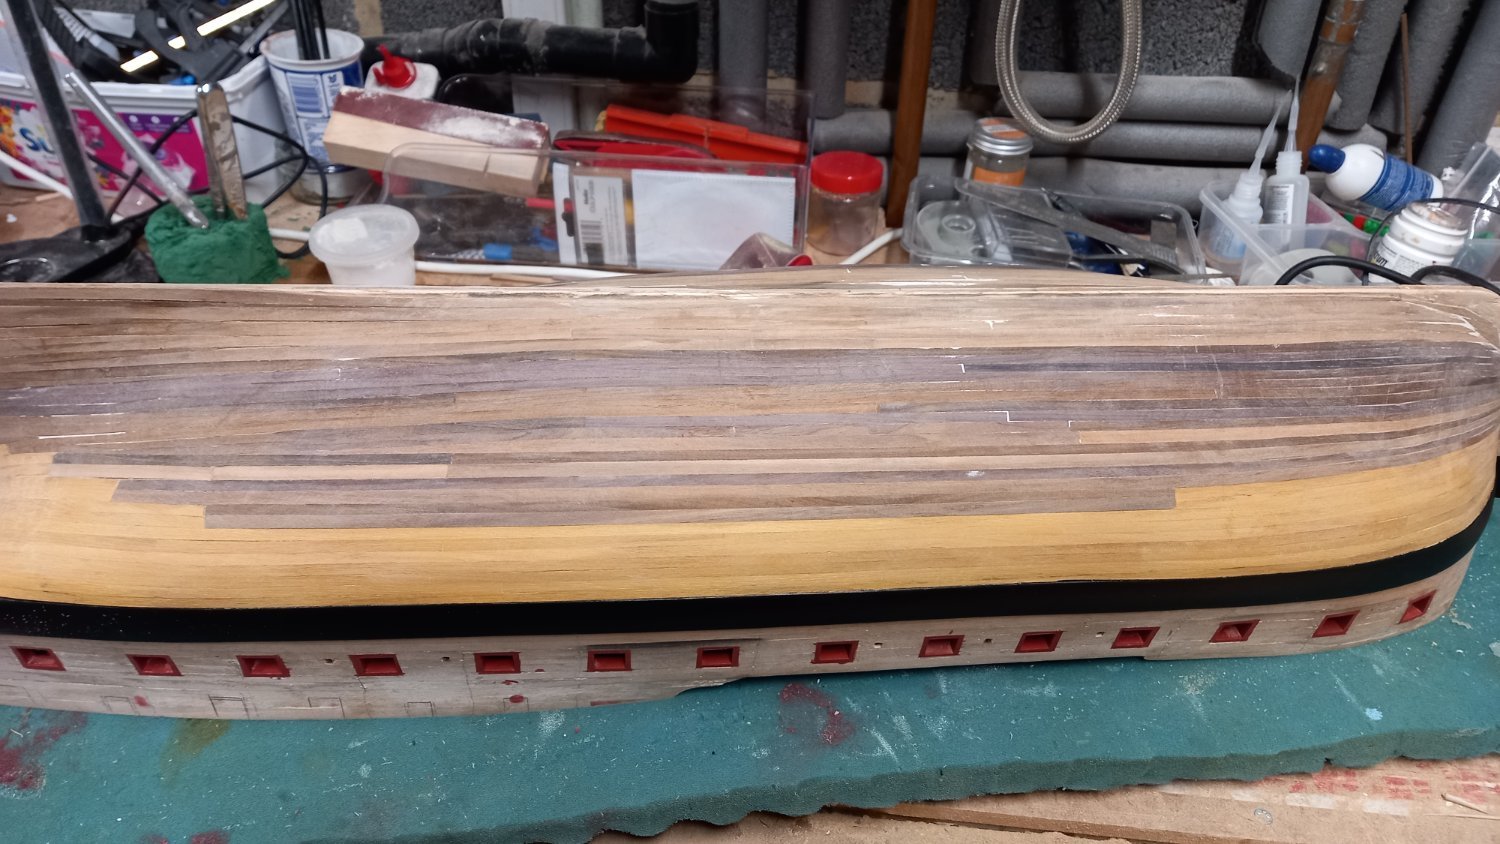
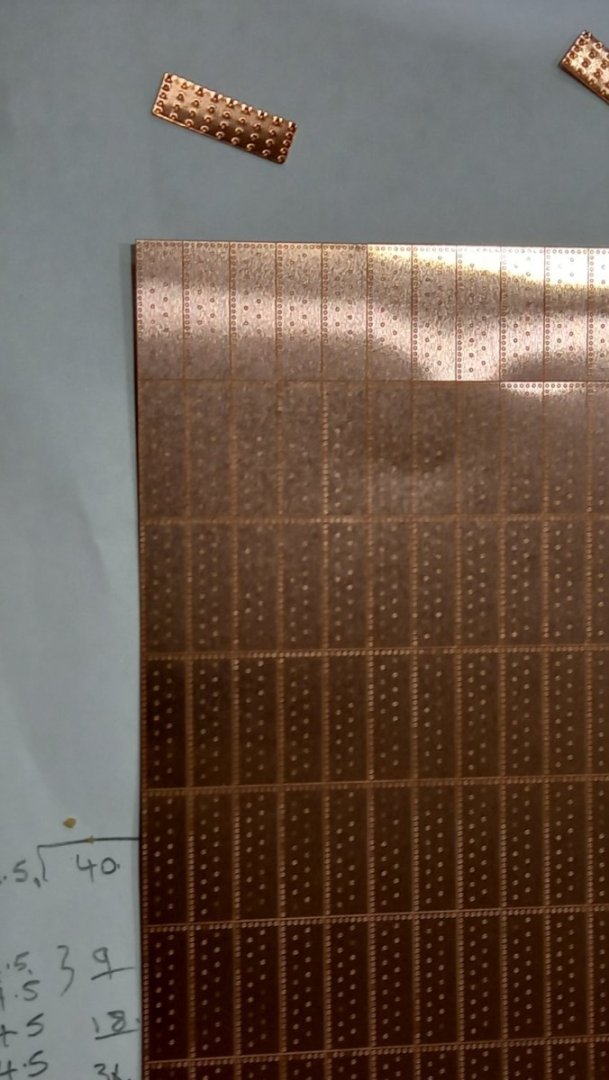
I have been making steady progress with the second layer of planking and completed the first 2 of the 4 zones below the main wale. This has been mainly 0.7mm thick boxwood above the water line and I am now into my 3rd zone and have started laying in some of the 1mm thick walnut strakes which needs a bit of soaking for 20 mins prior to bending around the bow. .My plan was to go from 2 x 4.5mm wide boxwood giving me a width of approximately 9mm, to 1x 5mm and 1 x 4mm walnut which also gives me 9mm, however the walnut strips are quite a bit oversize so needed a shaping to remove any gaps. when the different woods lie next to each other. I continued this method untill all the planks were below the water line and continued with walnut only. I have also glued the boxwood stern post into position at this point I have also given some thought to the copper plates and have decided to not use the ones supplied by Caldercraft and use them for experimenting with only. I have ordered some photo etched plates from Amati which seems to be the go to copper plates for a number of people other than those using copper tape. It was my original idea to just paint the bottom with copper and verdigis green to give the bottom a look of weathered copper but thanks to DavidEN I have now decided to emulate his HMS Diana and weather the copper plates using Red wine Vinegar and Miracle grow. I still need to do some experimenting using the CC supplied copper plates to find out if it is better to do these plates individually or after they have been glued to the hull. ( I think doing them individually might be a long process so might see if these can be done in groups of say 50 off the model)I also think I will use thick CA glue for securing the plates directly onto the un-treated walnut. I am not sure about sealing the wood first with Shellac as origonally thought. I have now received the replacement copper plates from Amati and you can see from the photo that there is a big difference in the size of the nails. The Amati ones being much smaller . Infact the CC ones look more like rivets. So at the moment I am very happy with them . So far so good.
-
Sorry I have not replied to this sooner. But a thank you to all people who have particicipated in this discussion and also something which I would like to carry out a few experiments of my own to see what looks best from a distance. I have already done some test of just painting with an airbrush a mixture of weathered copper ( brown) and verdegris which I think was quite pleasing. However I am still not totally convinced this is the best way forward. Another thing which I am unsure is whether or not to seal the wood prior to gluing any copper tape or plates and have considered using shellac but wonder if this is necessary .
-
here is the Link where David has posted his mixture and the results of using miracle grow and red wine vinegar.
-
I am considering creating a patinad look to copper plates and have seen excellent results using miracle grow( plant ferilizer) and red wine vineger. However once the required patina look is achieved what is available to seal this to prevent further corrosion or change in colour which will not react with the patina. I have seen available coatings such as Everbrite or Simple coat but don,t think these are available in the uk. So what is? otherwise perhaps shellac or polyurathane can be used but unsure if I want anything with a gloss or semi gloss finish.I came across this product . Unsure as it is very expensive. https://www.goldleafsupplies.co.uk/metal-effects-permacoat-extreme-473ml-4318/ Another but cheaper https://www.amazon.co.uk/Rustins-5890135-HHW-Metal-Laquer-125/dp/B004ZK4F3O/ref=sr_1_3?crid=3G2OMDBVVVRU3&keywords=copper%2BPatina%2Bsealer&qid=1688634024&sprefix=copper%2Bpatina%2Bsealer%2Caps%2C102&sr=8-3&th=1 What do you guys think? Thank you best regards Dave


.jpg.76d4d3a7c456d41a0e627aed66e5edea.jpg)