Check out our new MSW Sponsor Innocraftsman
×


DaveBaxt
-
Posts
1,324 -
Joined
-
Last visited
Content Type
Profiles
Forums
Gallery
Events
Everything posted by DaveBaxt
-
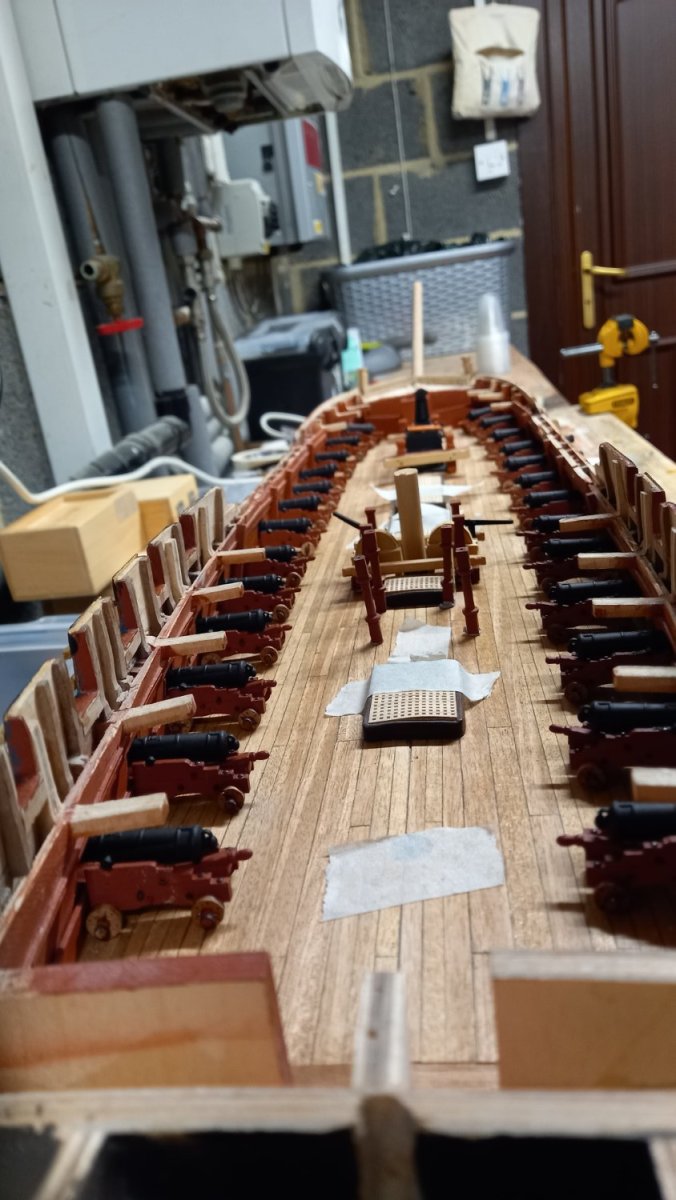
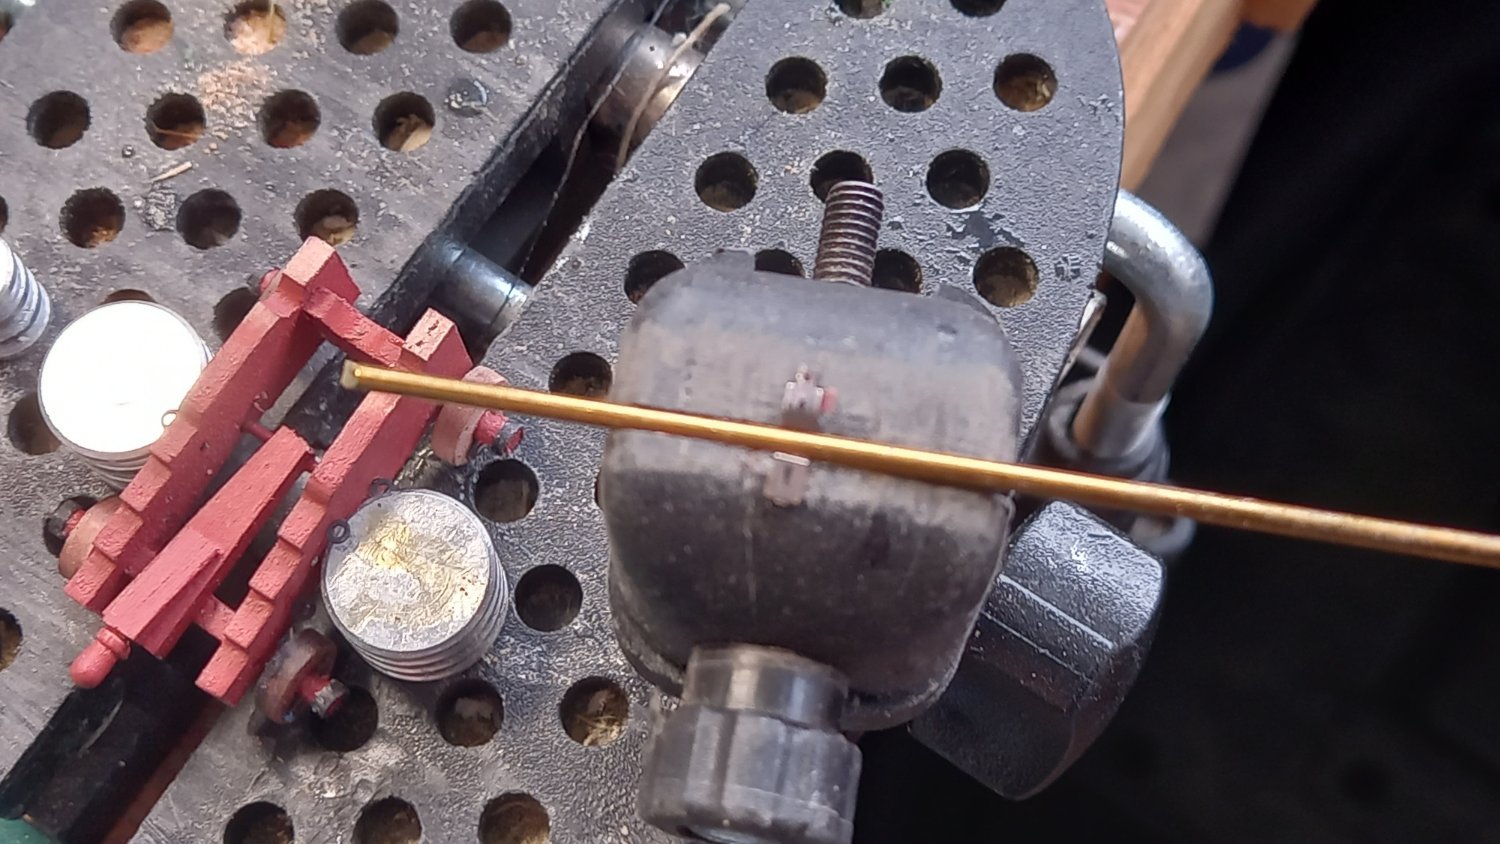
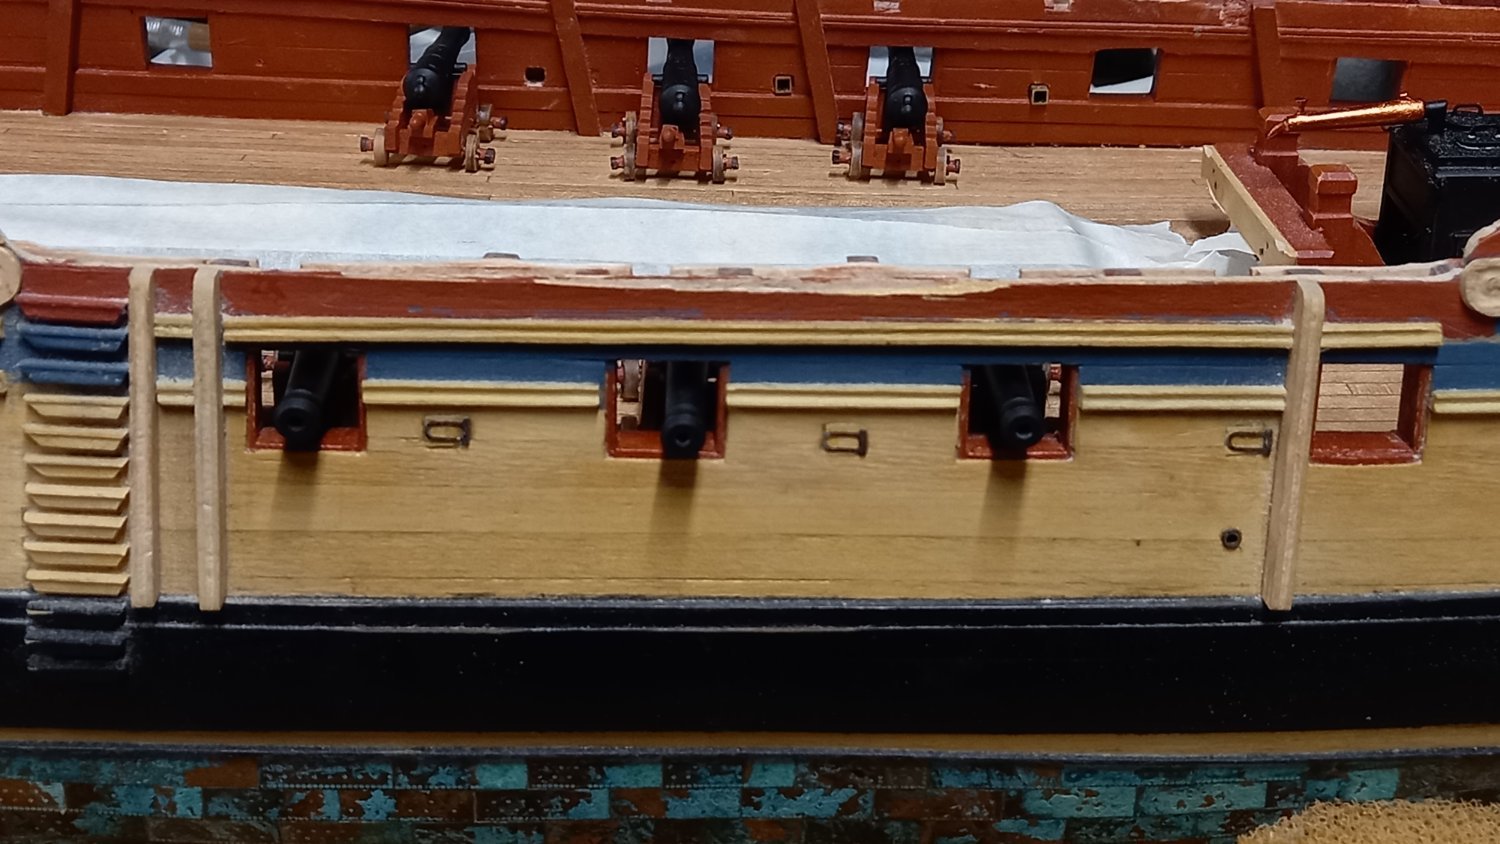
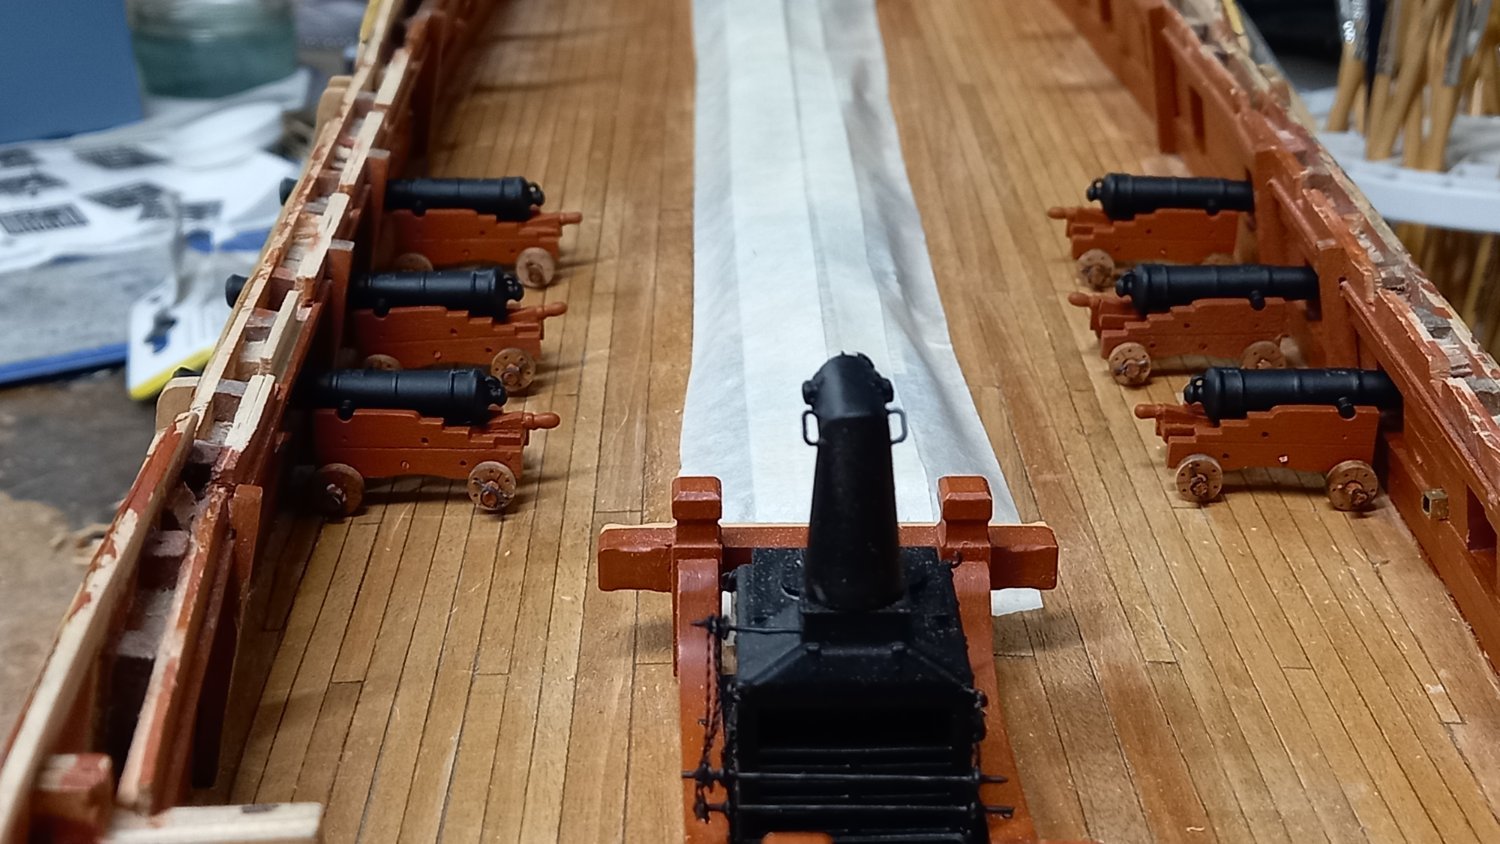
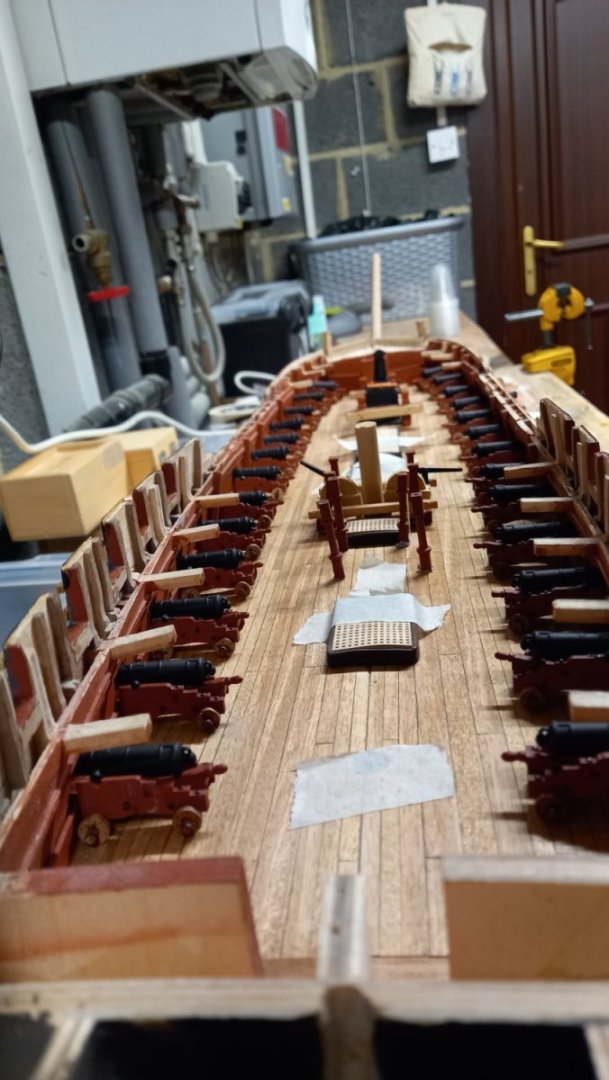
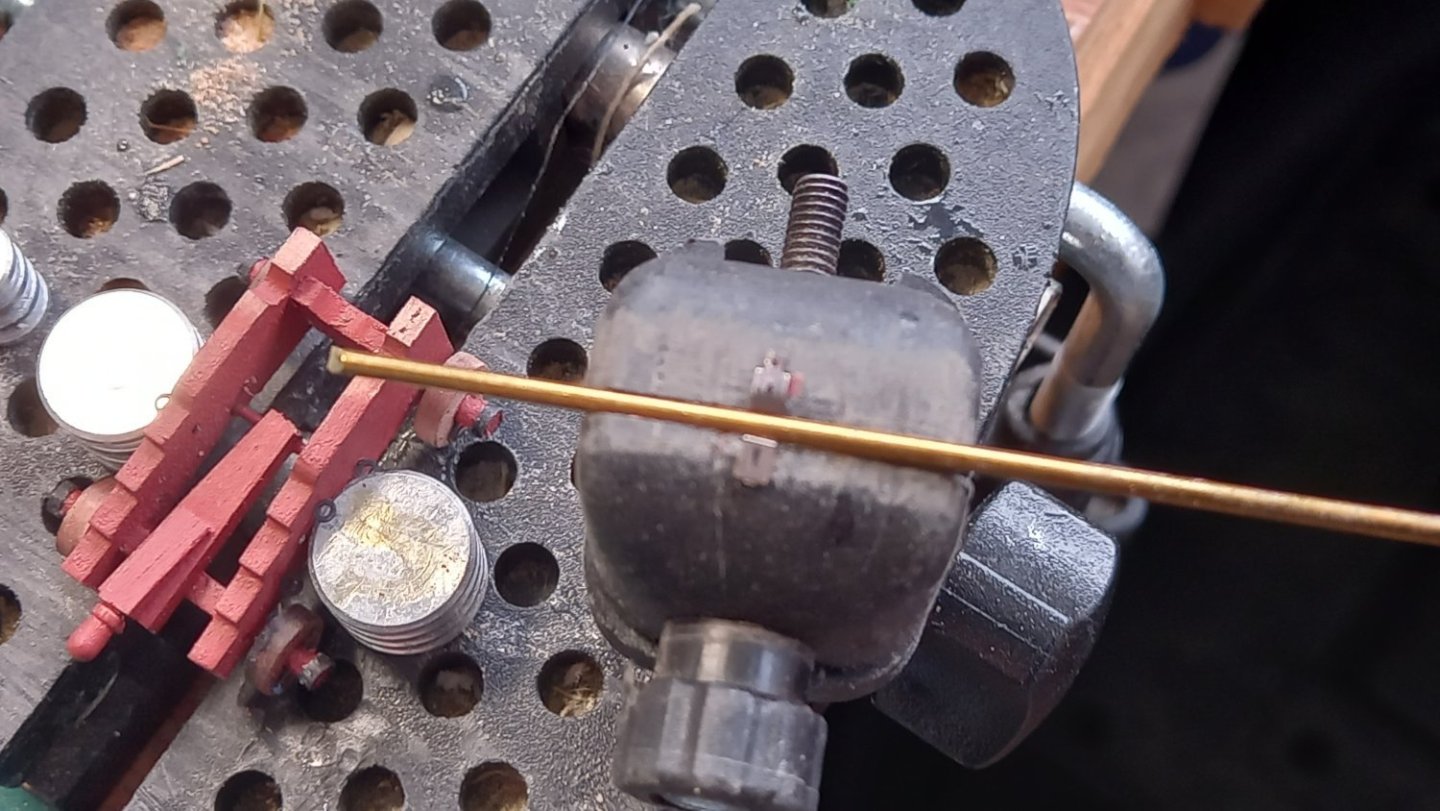
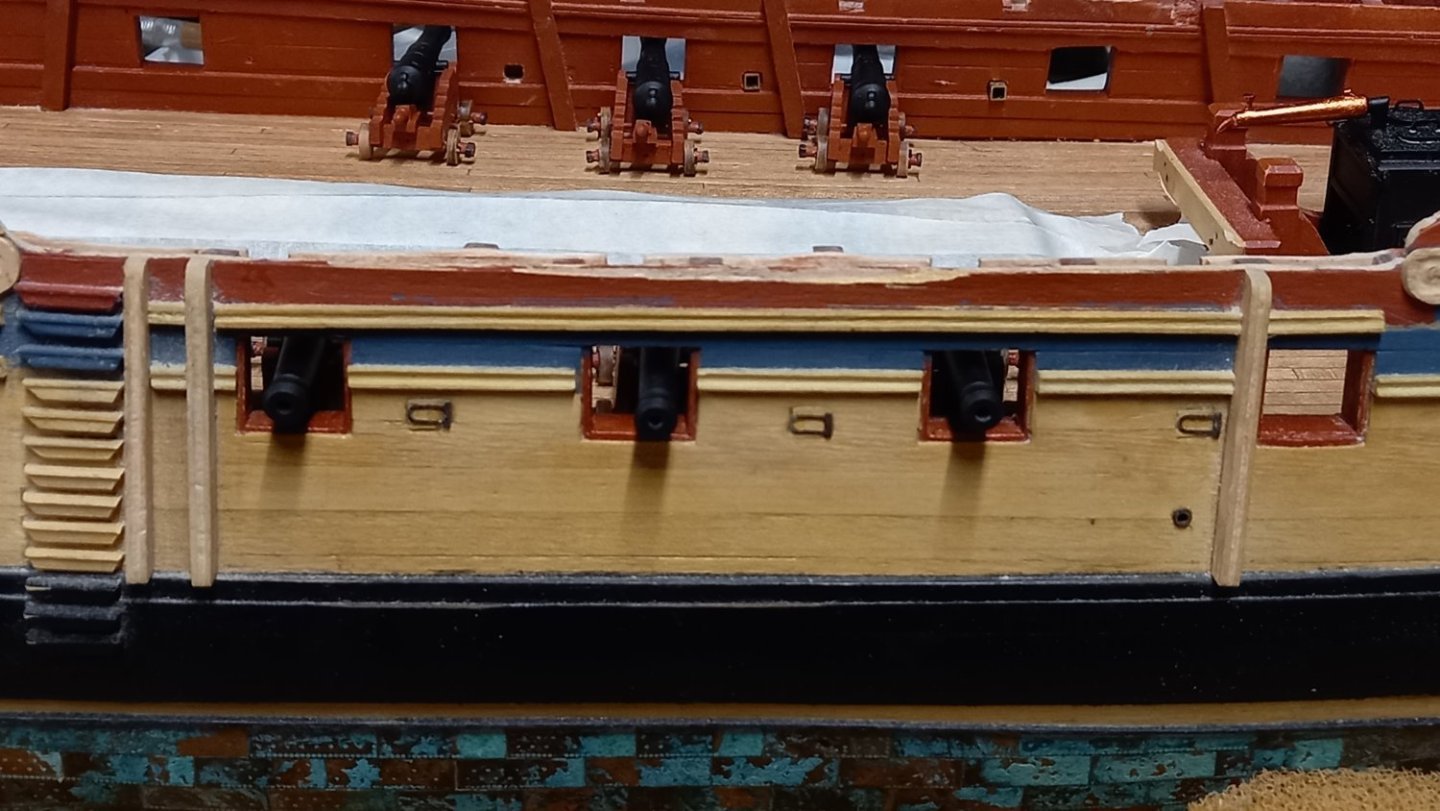
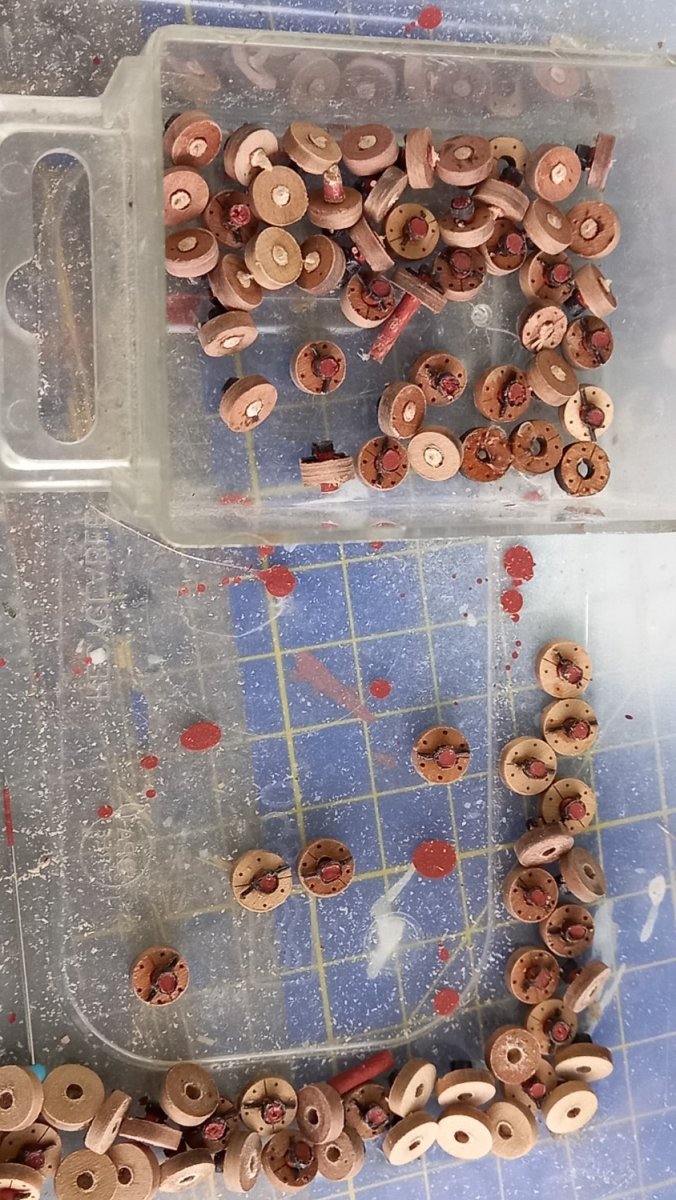
It has been a while but I am still here. In between working on jobs around the house I returned to working on the 18Lb cannon and started adding some of the many brass fittings to the carriages . Unfortunately some of the fittings were too small for my skill level but I managed to attach most of them.I ended up destroying a few of the capsquares due leaving them in the pickling process pryor to blacking them too long and it took me a couple of attempts as to the best approach for bending them over the trunnion. Whilst working on the 18Lb cannon and waiting for some brass eye bolts for the chain pump brake bushes, which unfortunatetly turned out to be too large for the 1:64 scale, so have decided to try and make these bushes out of styrene or purhaps brass would be better. Next up for deck fittings will be the capstan which is supplied by Vanguard models as again I think the Caldercraft ones are not so great. Here are lots more trucks, axle and linch pins to make up. A bit of overthinking bending the capsquares around some brass rod . I found the best approach was to glue one of the capsquare to the one side side of the carrage and just bend the capsquare over the trunnion. There is still a fair way to go with the finer brass parts such as the capsquare eyebolt and cap square bolt and not forgetting the breeching ropes and tackle before I think of adding the top deck.

.thumb.jpg.f511619abac6409969ef9ac7c9757719.jpg)
-
Nice work on the soldering. Well done!
-
Heater for sealing the end of rigging rope.
DaveBaxt replied to DaveBaxt's topic in Modeling tools and Workshop Equipment
Thank you gregory for taking up so much of your valuble time and laying that out for me . Also appreciated the link on Amazon and will get one ordered soon as. Nice looking rope work too and can definately see an inprovement on what I produce. Best regards Dave -
Informative video about 18th Century Sailing Battleships
DaveBaxt replied to Peanut6's topic in Nautical/Naval History
Enjoyed that very much, so thank you for the link. -
Heater for sealing the end of rigging rope.
DaveBaxt replied to DaveBaxt's topic in Modeling tools and Workshop Equipment
Thanks again everyone for trying to help me. Looks like a bit of trial and error which seems to be a lot of what this hobby is about and more pleasing when you eventually overcoem something.Best regards Dave -
Heater for sealing the end of rigging rope.
DaveBaxt replied to DaveBaxt's topic in Modeling tools and Workshop Equipment
Cheers Alan. I have a small pair of shears but quite often cut too close to the knot and it can be very frustrating epecially if I haven,t practiced in a while. I might try and get some very sharp nail clippers and see if I have bettr luck with those. Thank you to all who have tried to answer my questions and have given me a few ideas for the next time I am attempting the rigging again. I always find this the most frustrating part of the model build. Best regards Dave -
Heater for sealing the end of rigging rope.
DaveBaxt replied to DaveBaxt's topic in Modeling tools and Workshop Equipment
Definately interested as I am looking for a new soldering iron anyway. Cheers -
Heater for sealing the end of rigging rope.
DaveBaxt replied to DaveBaxt's topic in Modeling tools and Workshop Equipment
Thank you Allan for your quick response and confirming what I was already thinking myself but you put some meat on the bones sort of speak. I did however notice that on the video that the rigging in question were the ends of ratlines and wonder if the were indeed made of cotton or something synthetic. -
I came across a video on Tiktok ( sorry but unable to upload the link) of an electric tool which looks like a pencil and is hollow, with two wires which go into the bottom of this tube like structure. I am assuming there is no switch so the end of this tool, so could possibly be a constant heat source and perhaps not the safest tool out there .I have not seen this tool for sale anywhere. I have a couple of questions regarding this tool First off ,Would this tool work on cotton thread or only synthetic, or not at all? Second question, Are these for sale anywhere? Third question, Is this something worth making or perhaps adapting a soldering iron could be used. If you can get a cordless one I think this would be ideal, if it would work that is. In the past I have been using shelac as well as PVA and super glues for sealing knots but all have different issues . Personally I don,t think sealing the ends of running rigging using such a tool as above would work as surely it would leave burn marks? and last , How come I have not come across this before now? Any advice on the above tool would be appreciated. Unfortunately there are a lot of videos out there which don,t use best practices and perhaps this is just another one. Best regards Dave
-
Andrew if you do decide to change the belaying pins then Cornwall models sell 5mm brass ones. Something I have never tried if not black (blackening) then as previously mentioned would need painting but not sure what colour you would think of painting them. Just a thought but I would be interested in what you decide.
-
Welcome aboard Louise from South Africa and look forward to seeing your first project.You are now officially in very good hands although not so much myself as i am a relative novice too.Best Regards Dave .
-
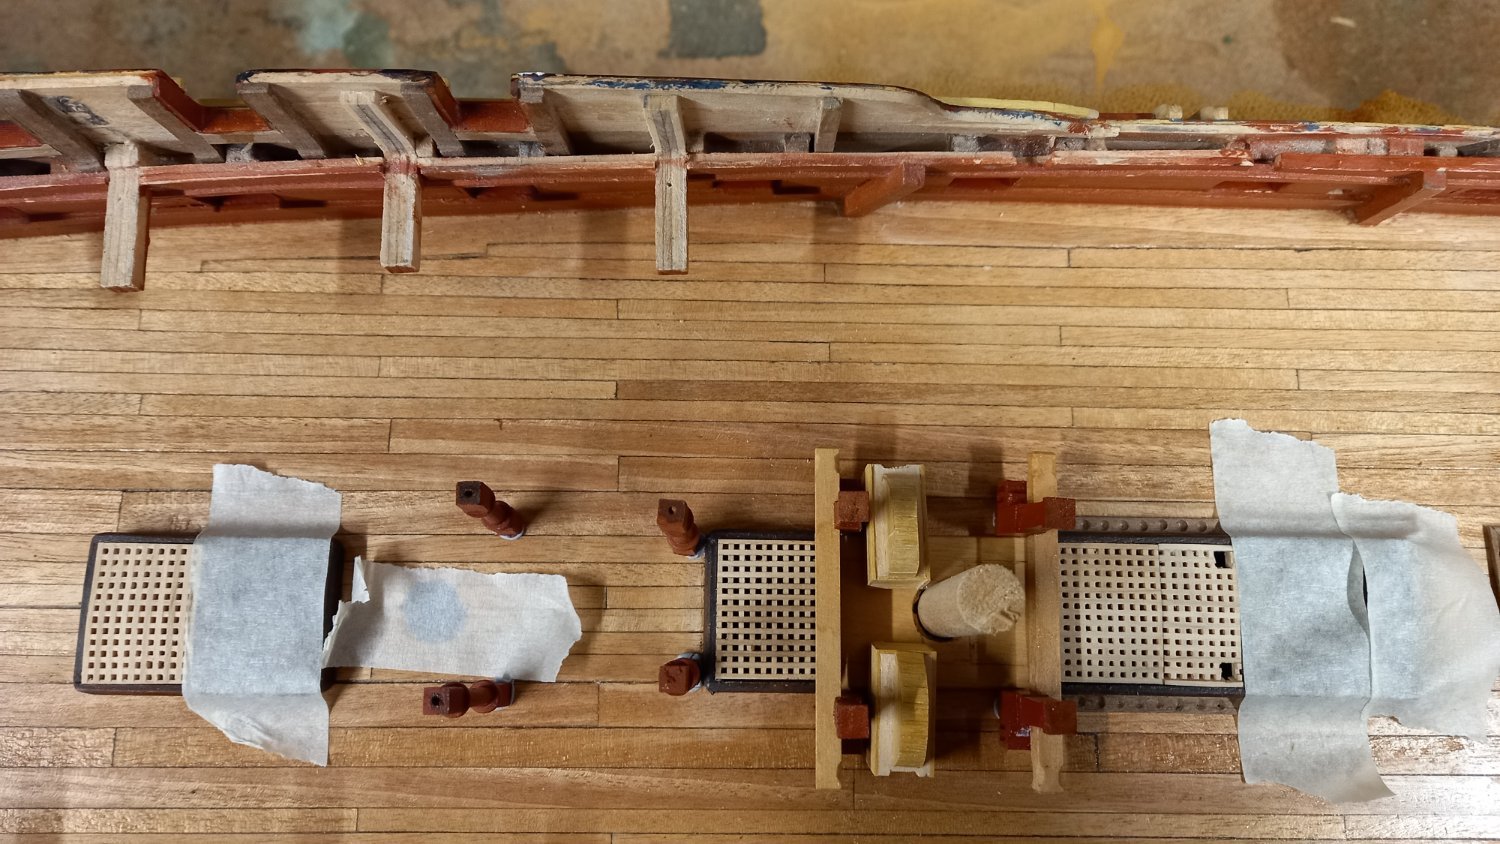
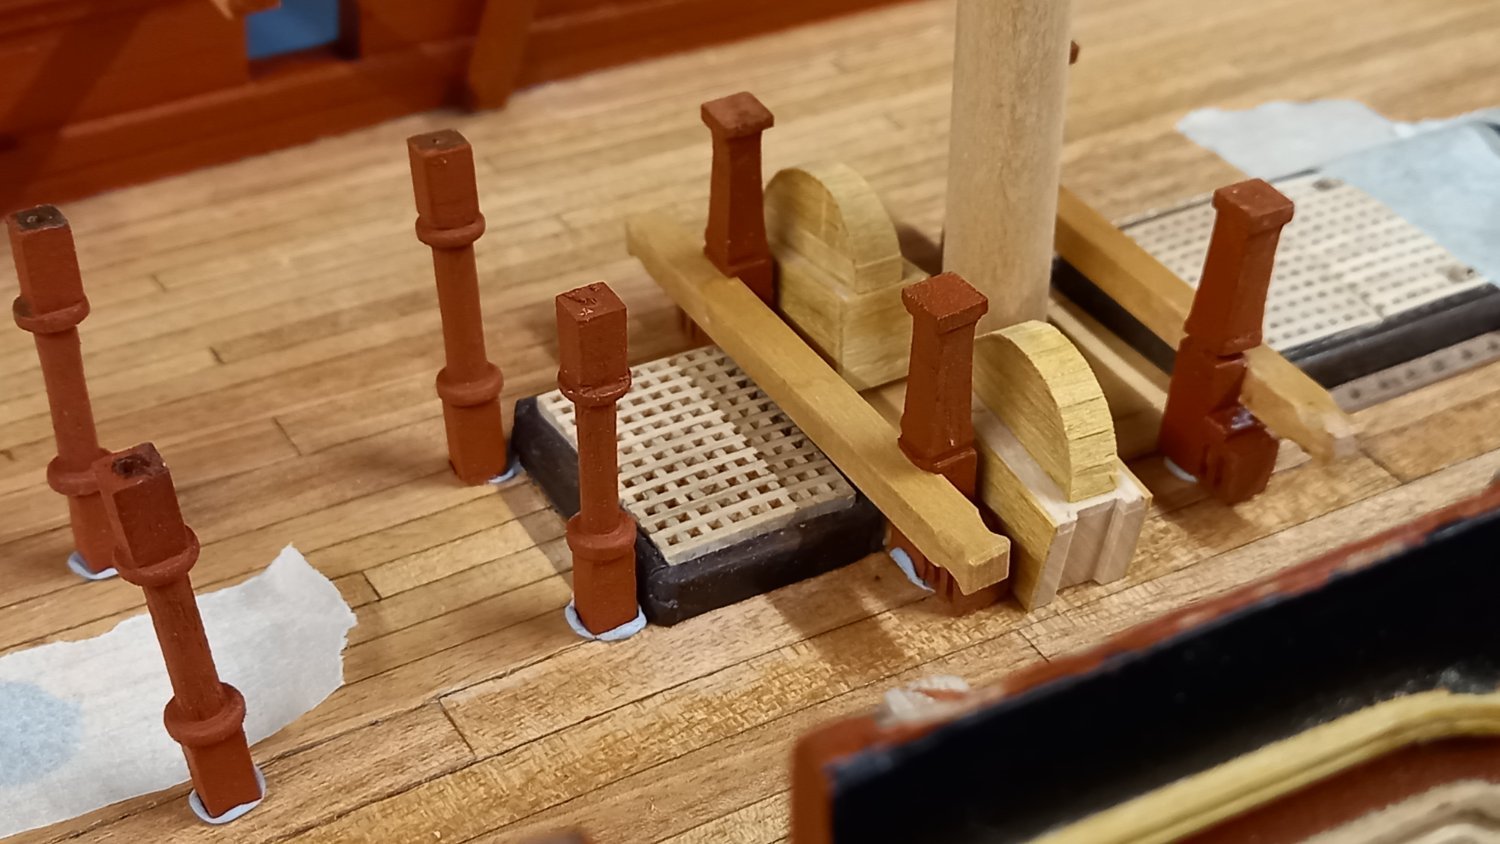
Returned from holiday and whilst waiting for a few spare parts( dome head pins for gun carrgages) and a number of smaller items I changed tack and instead of continueing with the 18lb guns, I made a start on the jeer and topsail biits together with the brake handle posts and Chain pumps. I am currently attempting to make the bushes for the chain pump brakes out of styrene but finding styrene difficult to work with as it does not cut too well and is impossible to machine as it just melts. I suppose I will just have to make them by hand I suppose. The height of the chain pump cisterns still need to be determined once I have made and fitted the chain pump brakes


-
There are always frustrations along the way but credit to you for overcoming them and making a really nice example of the anchor rings.
- 152 replies
-
- 2
-

-
- Vanguard Models
- Cutter
- (and 2 more)
-
Good to see you back and not too far to go either. Sometimes it is good to take a break which is what I have done with my Endeavour build which is almost a year now. I had planned on just taking a short break from the rigging to start on the HMS Diana butt his has taking me a lot longer than I thought and I am still nowhere near at the same level as the Endeavour. Good luck with your Bounty and I look forward to watching your progress. Regards Dave
-
Great idea regarding the brass tube for cutting a square hole. Something I wish I had tried earlier on my Bounty and Endeavour windlass. I see the usual very high standard of workmanship. Best regards Dave
-
You have made lots of progress since I have been away on holiday and good to be back and what a surprise to see how far on, you are. We'll done and as expected she looks amazing.
- 152 replies
-
- 2
-
-
- Vanguard Models
- Cutter
- (and 2 more)
-
Thank you sizzolo for the link. Which is a very fine build with some excellent workmanship. I am no expert but as I understand it, the rivet pattern you mentioned is in fact nails and again they are too small to see at 1:64 and above, at least at a normal viewing distance. However again I do believe everyone should do what they are happy with as it is their model. I suppose it all depend upon what you are trying to achieve.
-
All this talk of where the overlap is top or bottom, fore or aft . However I was under the impression that the thickness of copper plates which are supplied in most kits or even copper foil are too big for a lot of the scales used ie 1:64,1:72 any scales lower than 1:64 then perhaps then perhaps we might get away with these copper plates supplied in kits. I recently applied the amati copper plates on my model at a scale of 1:64 and did not have any overlap. Not sure if this is correct but at the time I thought so. Correct me if you do not agree.
-
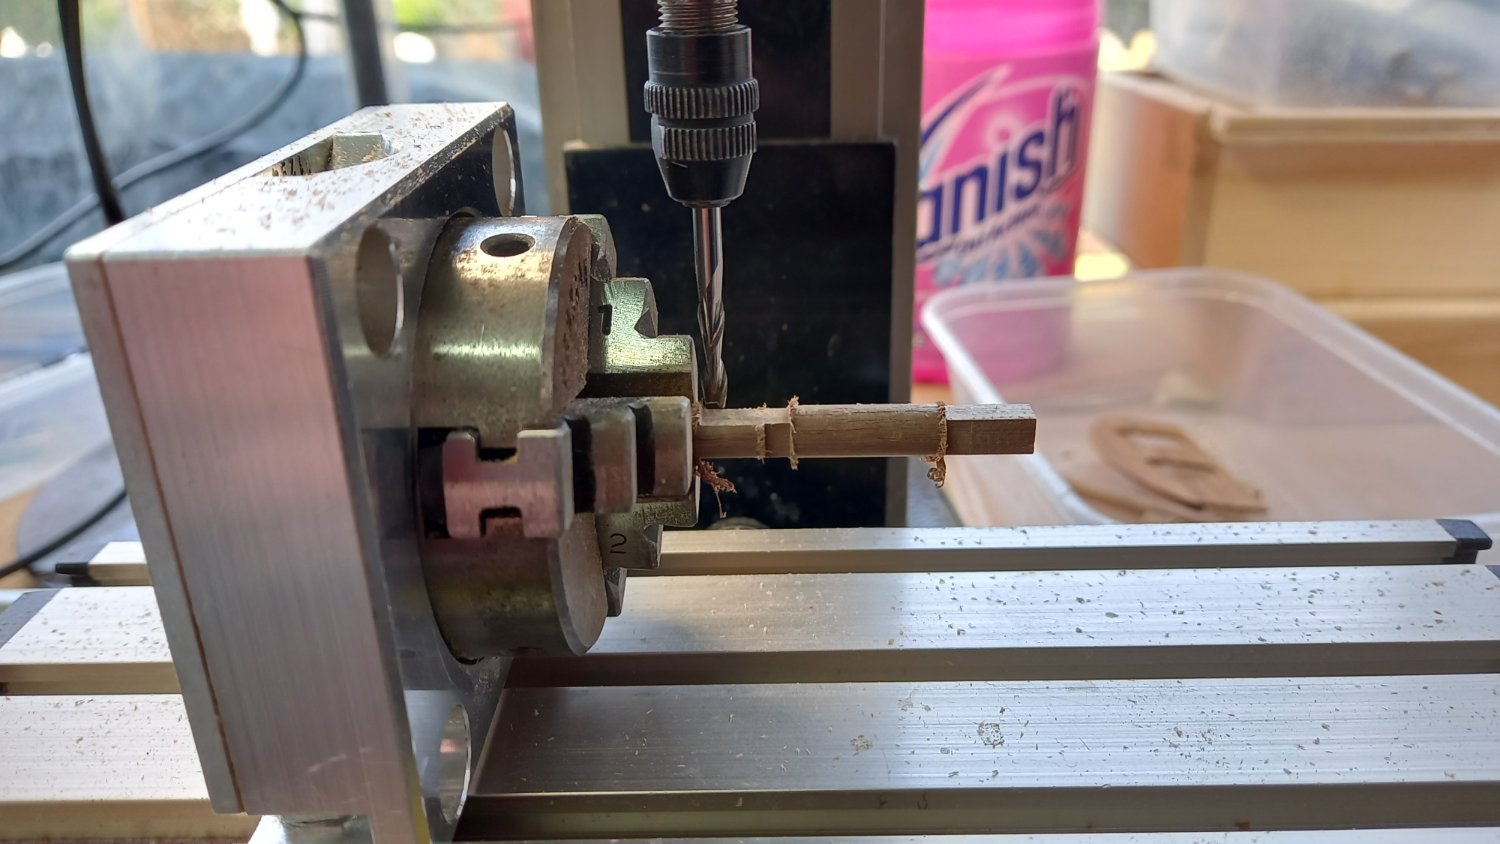
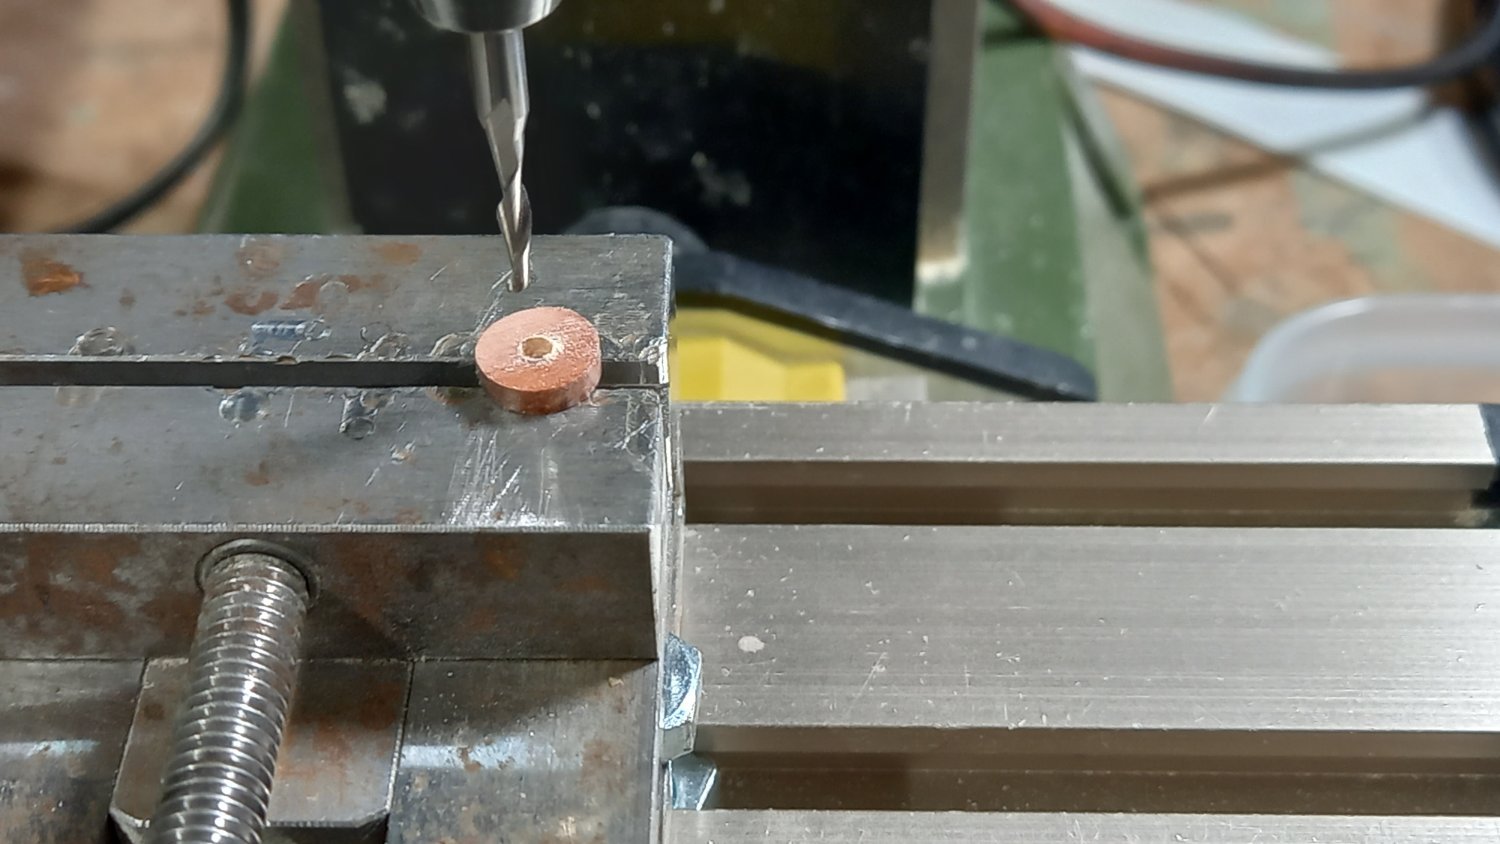
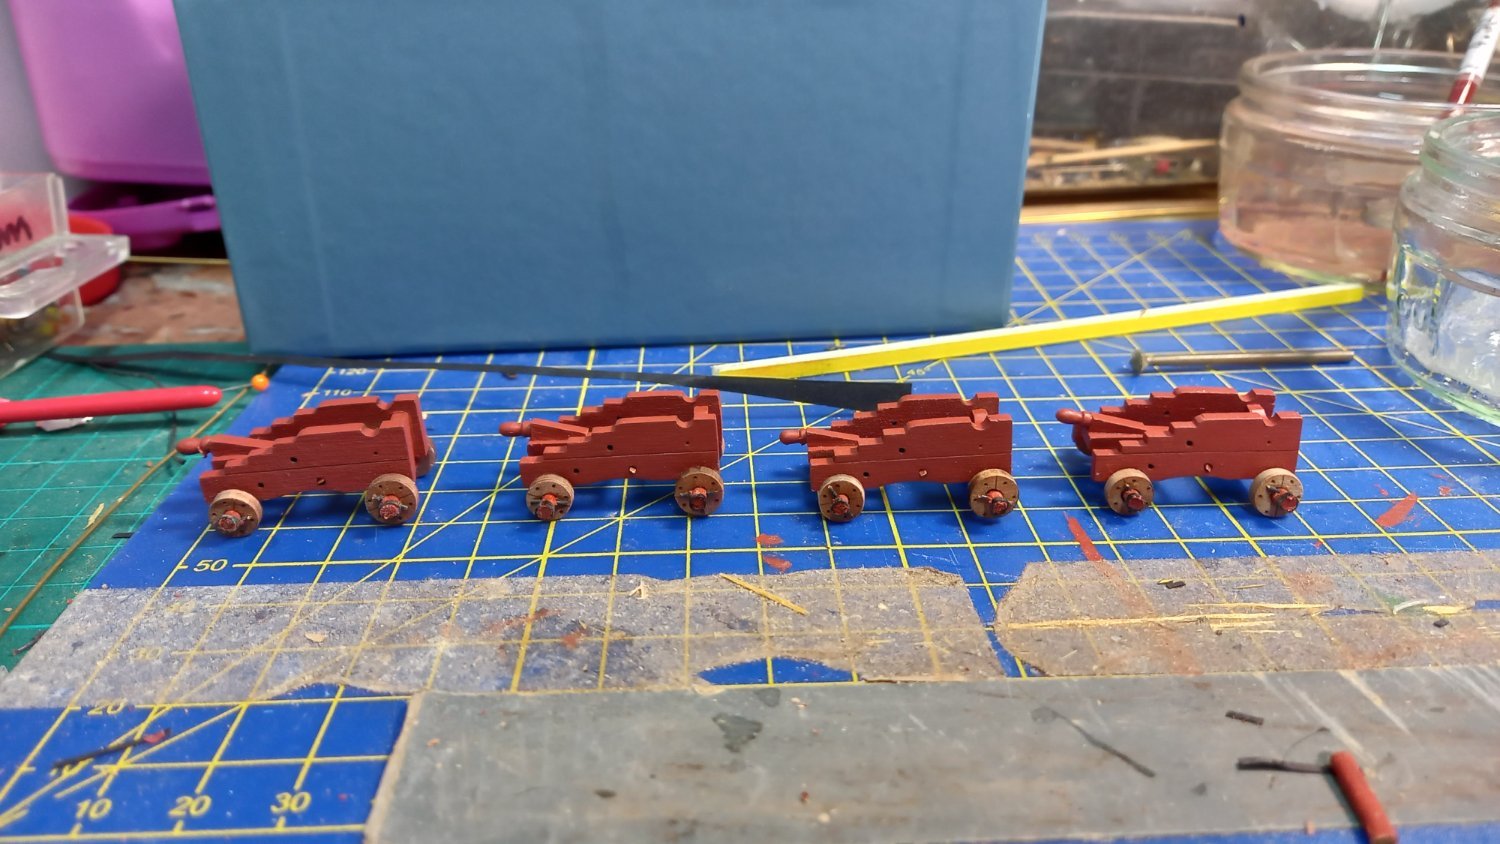
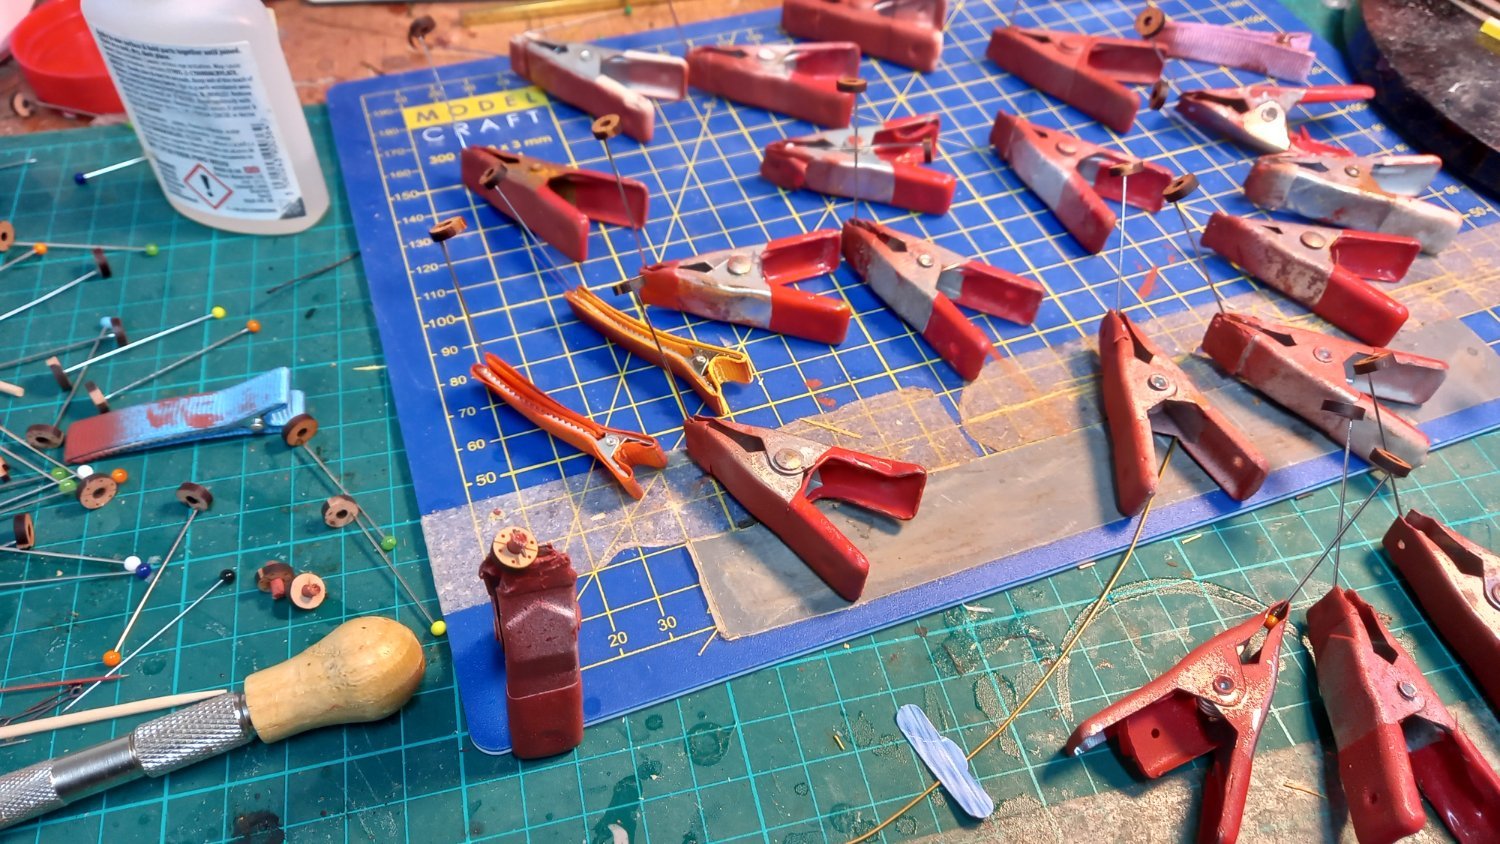
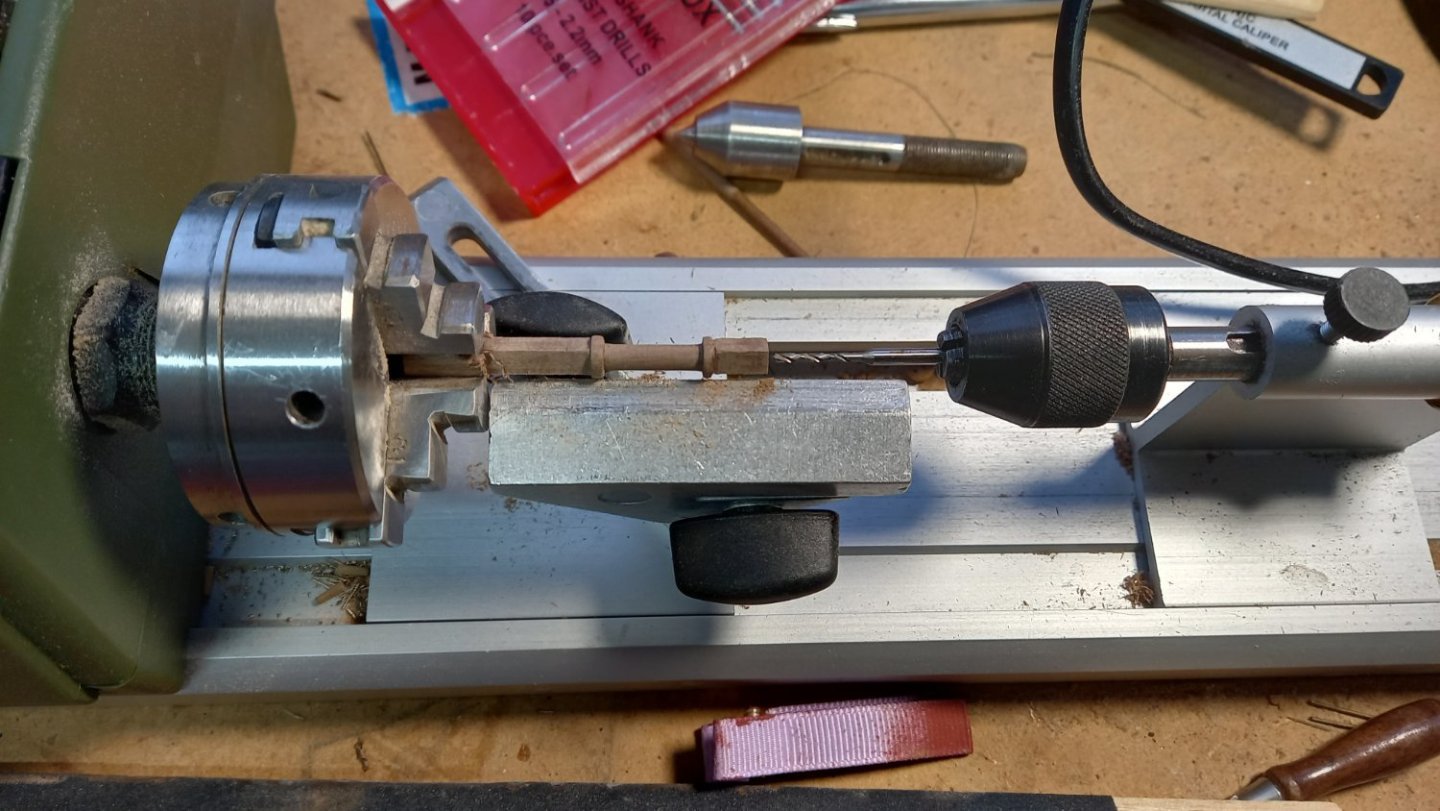
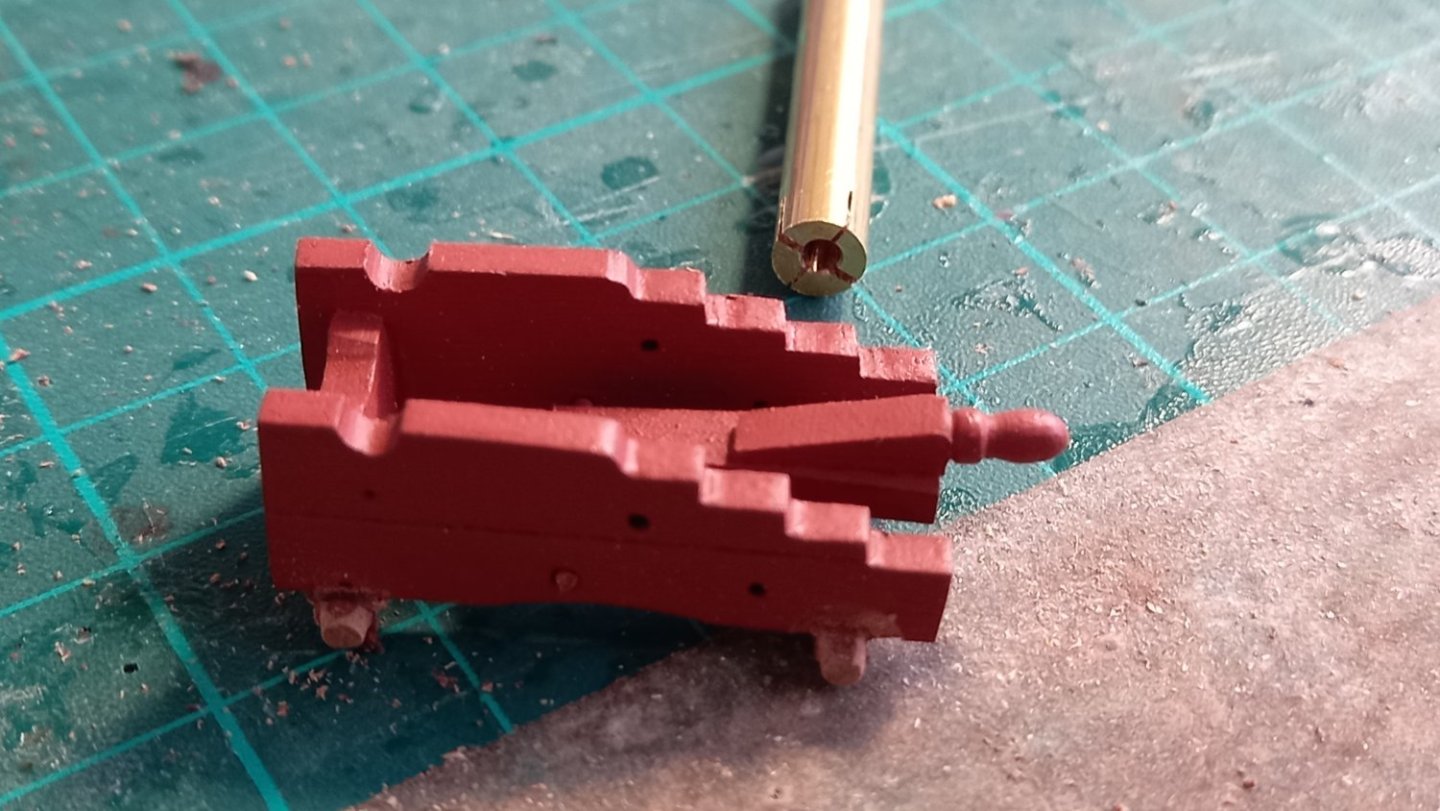
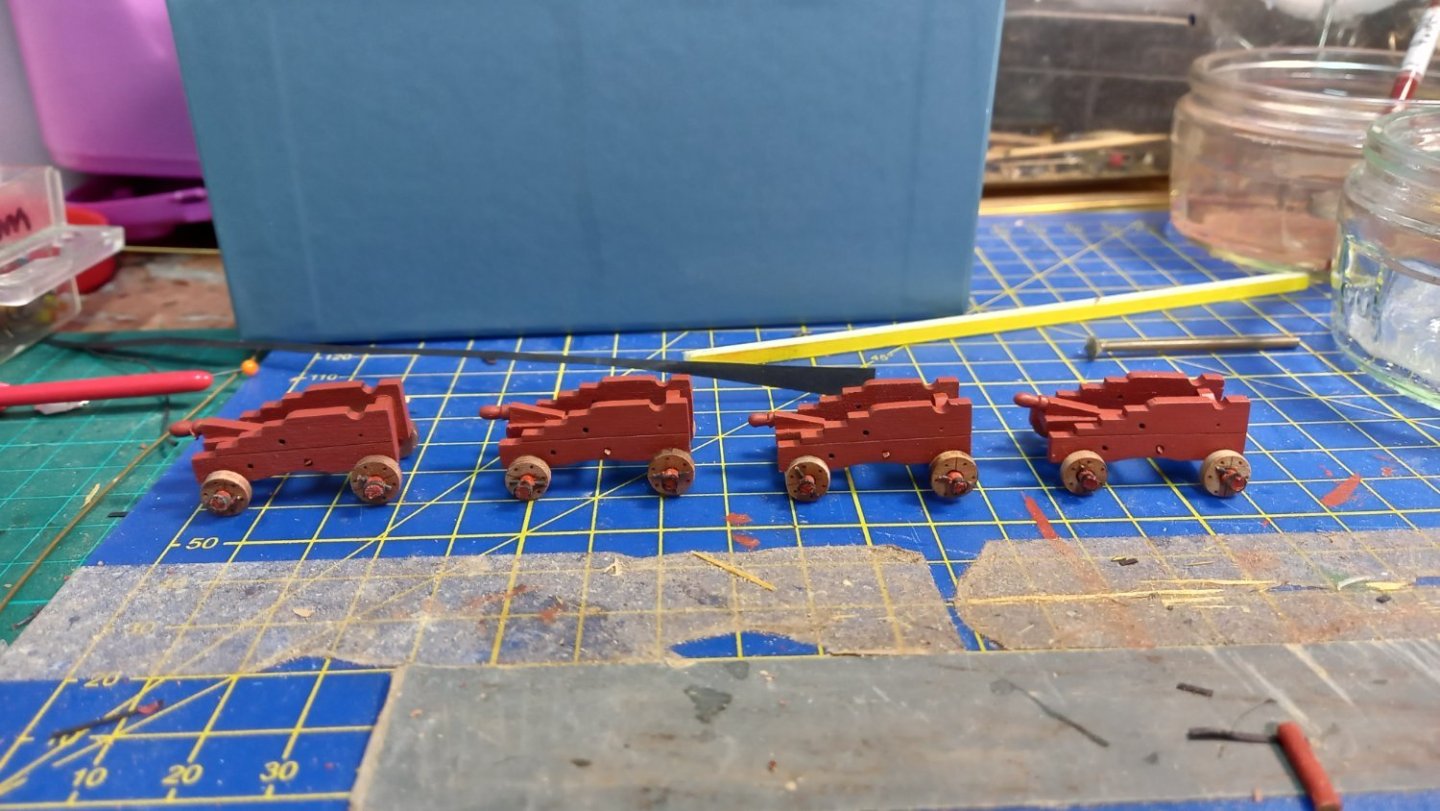
Unfortunately I did not have any bolts or threaded bar to enable me to remove the char on several trucks at once. Nor did I have any dowel the correct size . My solution was to use what was in front of my eyes and use the piece of the round axle at the back and grip each piece indivifually. This was a slow process and required a bit of patience. Once this was completed I then cut off the excess and drilled a small recess . After removing the square end of the axle using a copy of Allans rounding off tool but leaving 1 mm protruding to fit into the recess ,The newly formed trucks with the round axle is then glued into position. I I still need to add all the small fittings which I have previously blackened using brass black and I also need to add the trucks to some more of the carriages to complete the 18Lb cannon. However in the mean time I am off on a winter holiday in a couple of days ( packing tomorrow) but who knows I might get a chance to do a few more trucks before I go haha. Although I am away on a Carribean adventure hopefully I will still get to look in on you guys from time to time. Thanks again for all your likes and support. Best regards Dave


-
Unbelievable workmanship , every part and joint is exceptional and you must work to very fine tolerances . I especially like the look of those partners . A big thank you for sharing your build with us.
-
Allan sorry for the confusion. Andrew is correct . Please forgive me as I should have removed the char from the trucks, the gap you see is where the truck is joined to the pear sheet to keep it all together. My plan is to keep this on the bottom when fixed to the axles where it wont be seen. My original plan was to paint the trucks red orche once everything is sealed with shellac but have decided to leave the trucks clear to show off the nice detail . I am afraid its poor workmanship on my behalf and really I should have removed the char. I have no evidence as to whether or not Trucks were painted other than modellers preference. Thank you for the tip regarding the cocktail stick Andrew but unfortunately the hole is too large for a cocktail stick...... now if I could just find a couple of nuts and some threaded bar...... perhaps I could pop these into my lathe and sand the rest , these ones I could use where the cannon won't be seen Andrew .......Thanks for giving me the idea anyway..Best regards Dave
-
The trucks themselves are not iron rimmed only the axles which is in the AOTS Diana book. For what it's worth there is no such detail on the Caldercraft drawing either. Thanks for the link which I will have another look at.
-
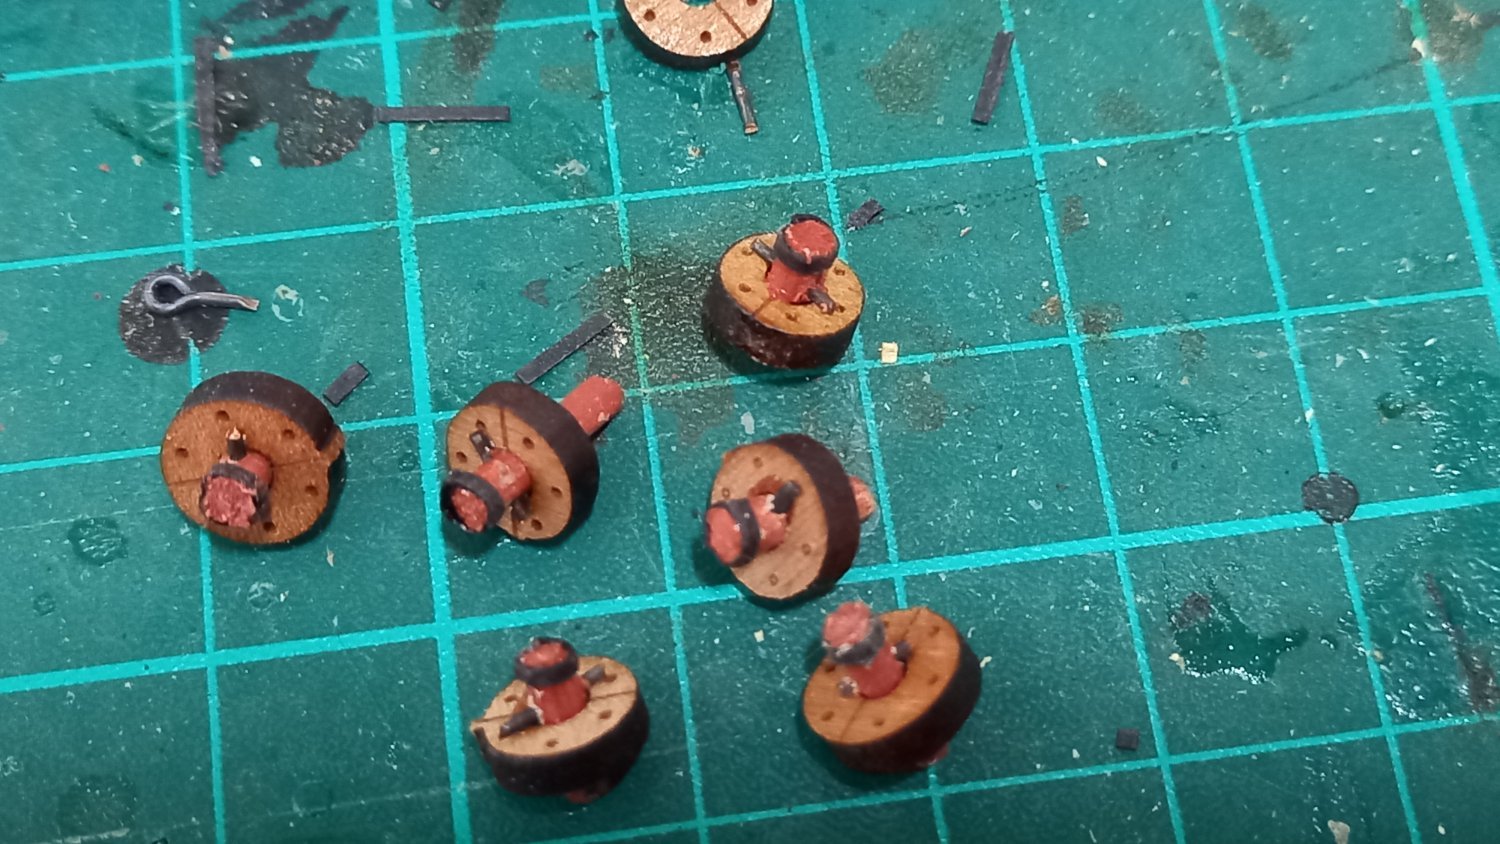
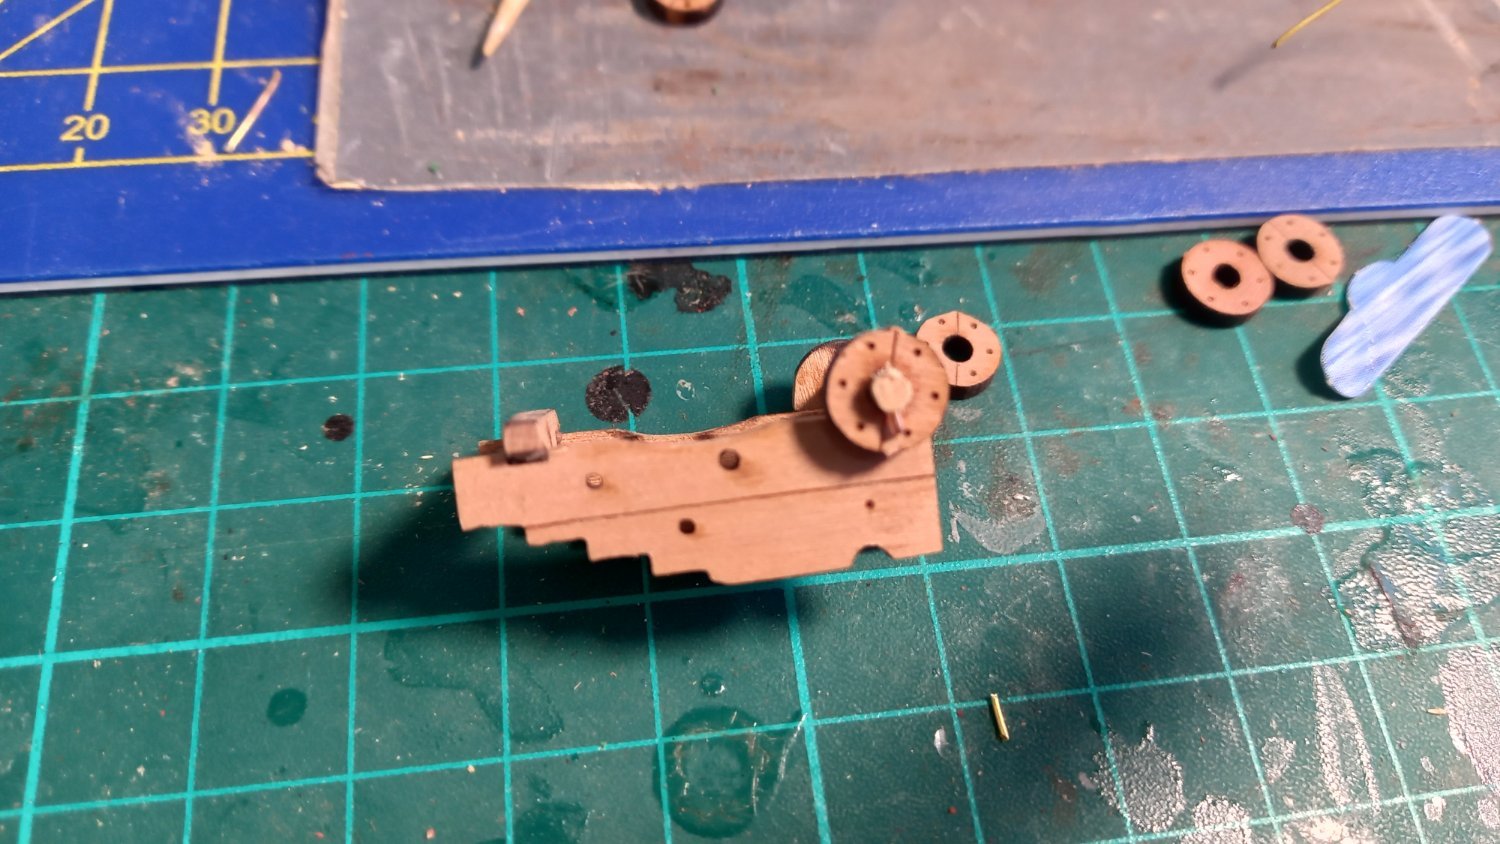
Thank you Allan for your input and I like the look of the tool you made and feel that is something I could make for the future. However for this model I am using pearwood carriages from Vanguard models rather than make my own which I have managed to do on my Endeavour.(6) In answer to your question the axles are aquare and I should have rounded the corners off before gluing the carriages together. However I am not sure if there is sufficient material to make a perfectly round axle. So instead I have decided to have a go at making my own as A Johnson did on his Trial cutter . ( A big thanks to Andrew for showing me how this is possible) I will pretty much remove all of the square part of the axle which enters the truck and then attach round axles with small pins for the linch pin and hopefully this will give a bit more detail look quite realistic.Here are a few photos of my progress son far. Its a slow process but hopefully I will get there in the end. The above photo clearly shows the square ends and then replaced by 2mm lime dowel and pinned using part of a copper eyelet. Hopefully after cleaning up, touching up the paint and using black card for the iron hoops on the ends of the dowel will look relistic. I now wish I used better material than the lime dowel as it does look a bit rough. Hopefull it will clean up a bit better. Thank you once again for your valued input and for have another look at my build log. I would also like to thank everyone for their likes and for taking anoth look at my Diana build log


.jpg.d19cf5dac61527e7e9df7dd3a62a75db.jpg)