HOLIDAY DONATION DRIVE - SUPPORT MSW - DO YOUR PART TO KEEP THIS GREAT FORUM GOING! (83 donations so far out of 49,000 members - C'mon guys!)
×


DaveBaxt
-
Posts
1,324 -
Joined
-
Last visited
Content Type
Profiles
Forums
Gallery
Events
Everything posted by DaveBaxt
-
Masking tape for curves .
DaveBaxt replied to LEGION 12's topic in Painting, finishing and weathering products and techniques
When you mention using spray a clear coat to seal the edges, can we using shelac instead or if not can you be more specific please. Also can the clear coat be applied by a brush? -
This is an interesting question and I look forward to a few good answers. Nice work by the way
-
Hopefully someone will come along and help you out with that. I look forward to see you solving the issue of joining them together .
-
Excellent idea making those shapers with a horizontal milling head and wonderinng if I could do the same using a vertical milling head and clamping the knife blade vertical. Your rails have turned out amazingly well.
-
Thank you Allan for your kind words.
-
Thank you for your comments Andrew.You have a wise head on your shoulders going with Vanguard as this is the most difficult one I have tried building so far but so far enjoying the challenge that it brings, but not every day haha.
-
Thank you for your reply RossR.and No Idea. I know I feel the same way. very nearvy I took me a full day to figure out and build the frame but it was worth while in the end as and I am quite pleased with the result.
-
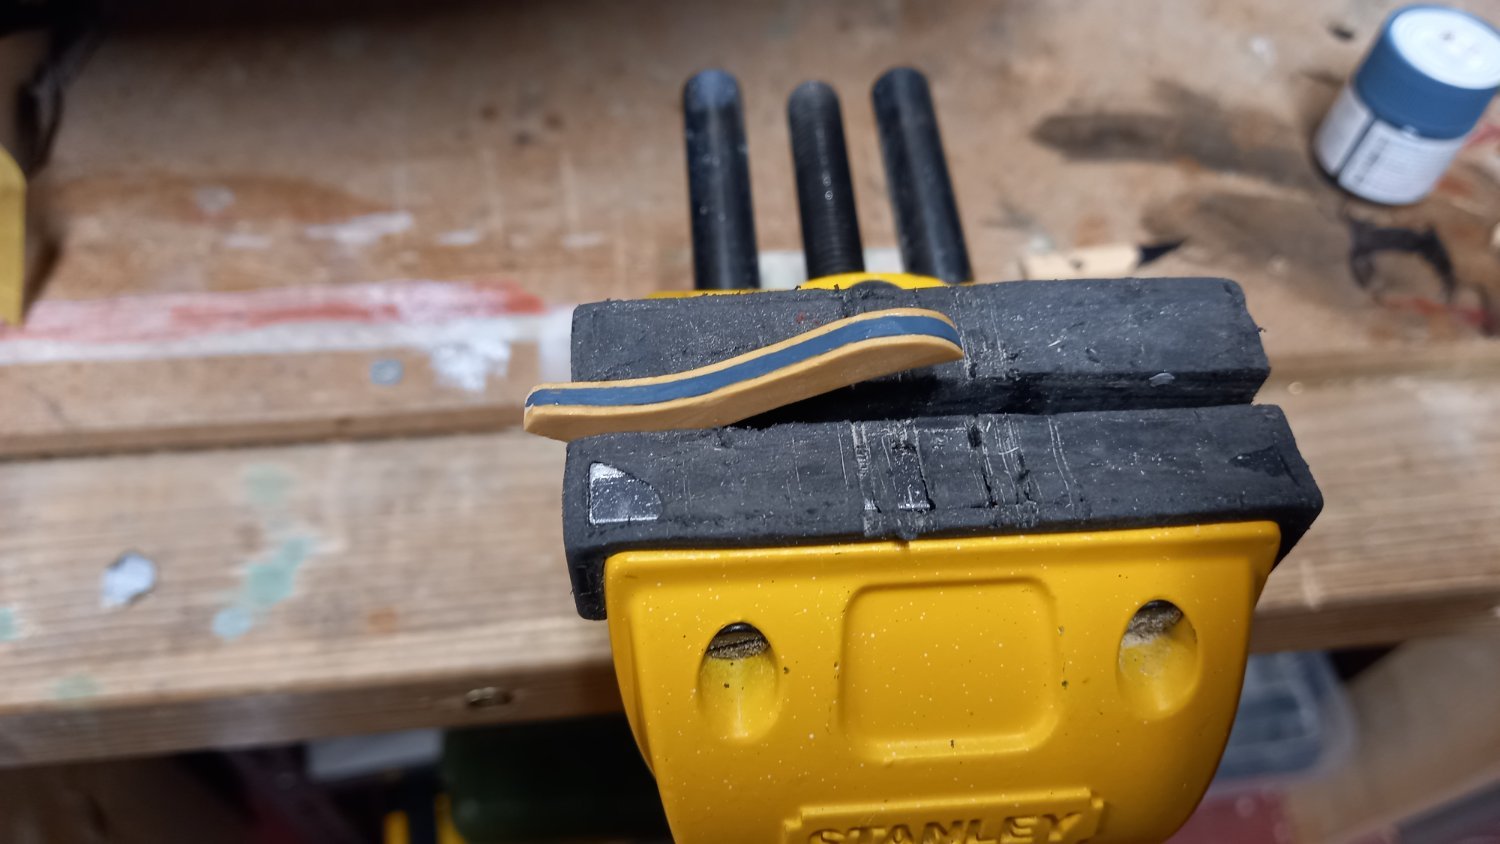
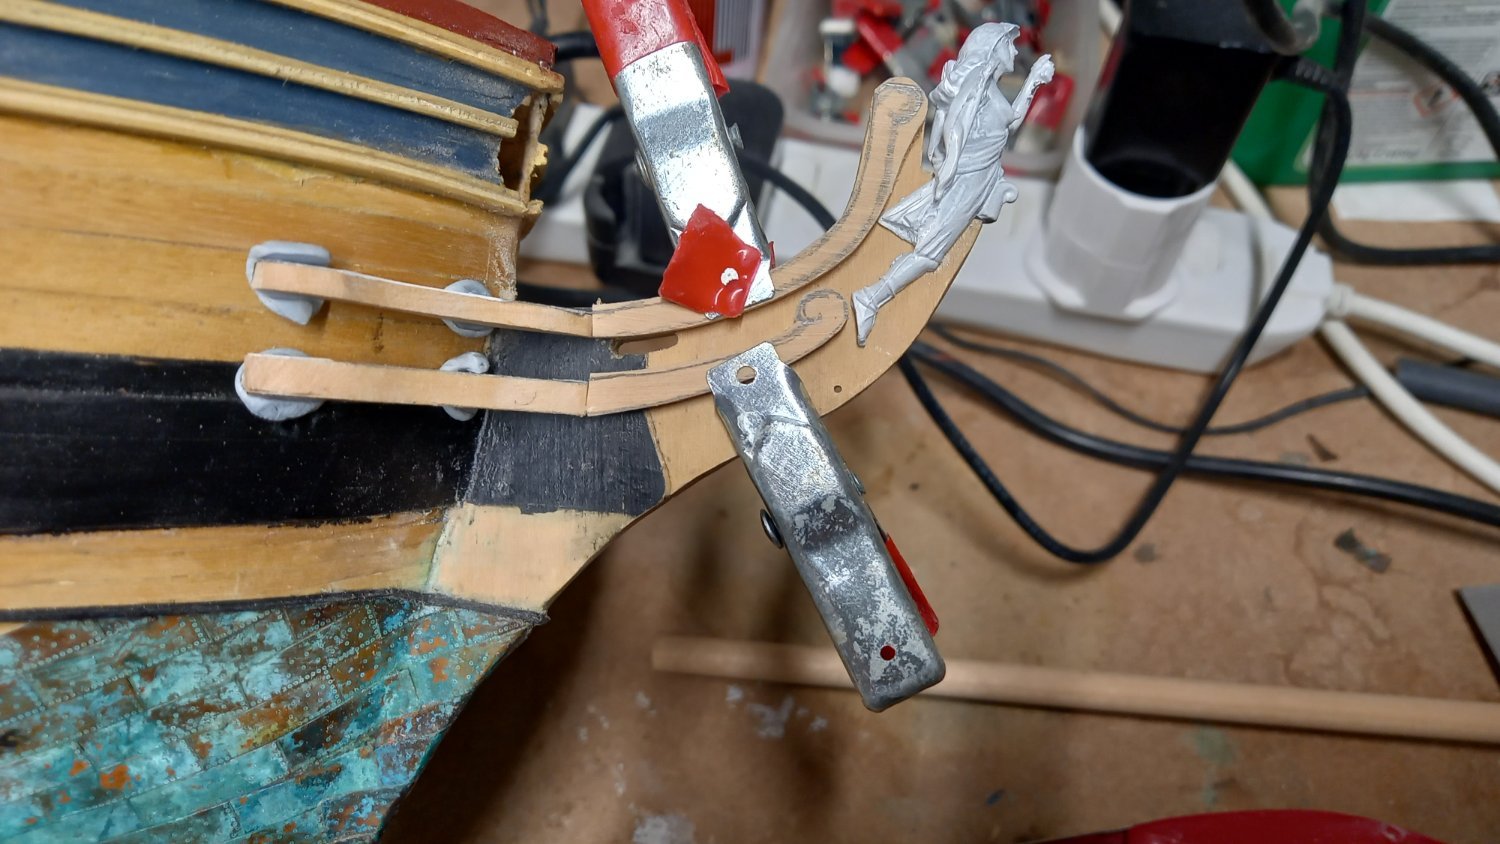
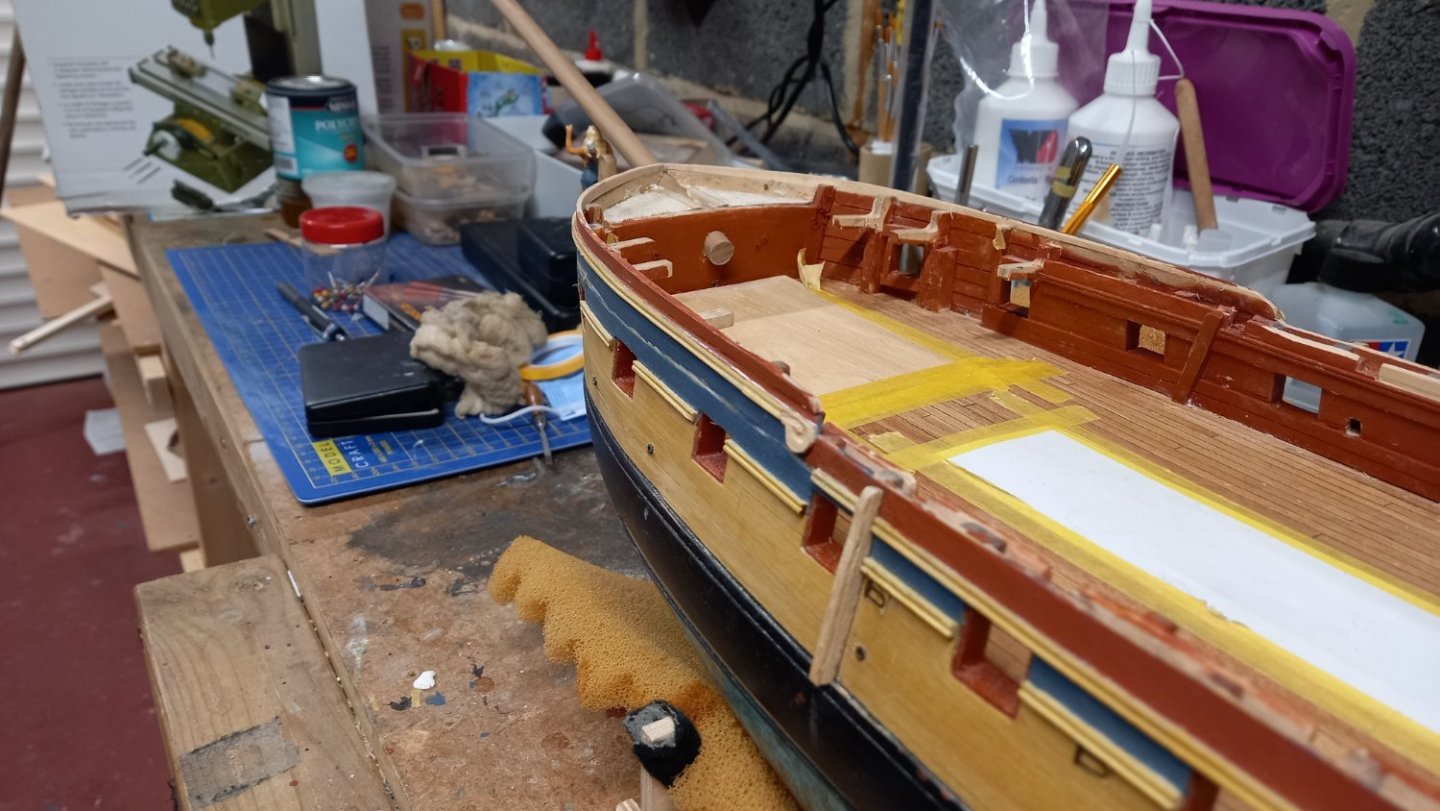
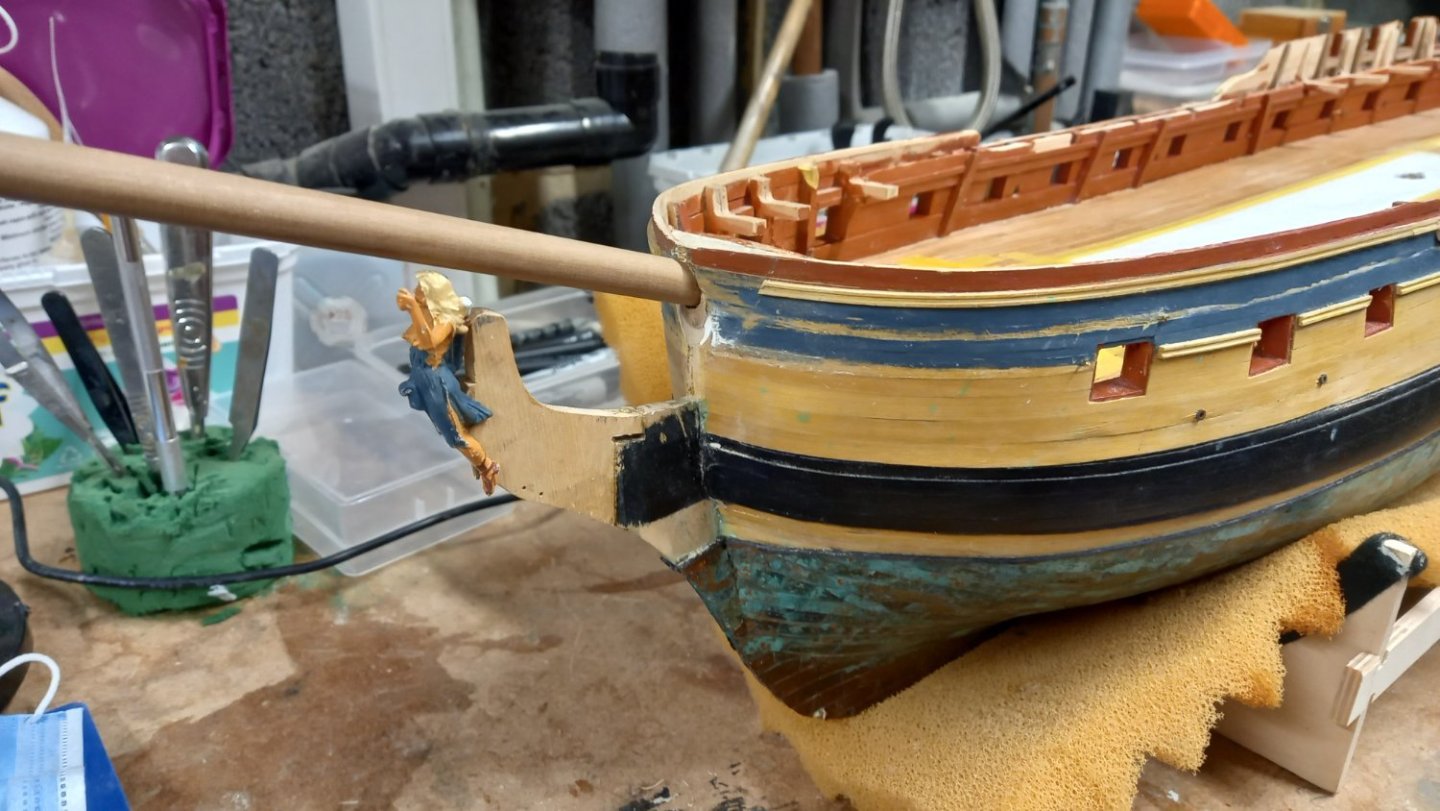
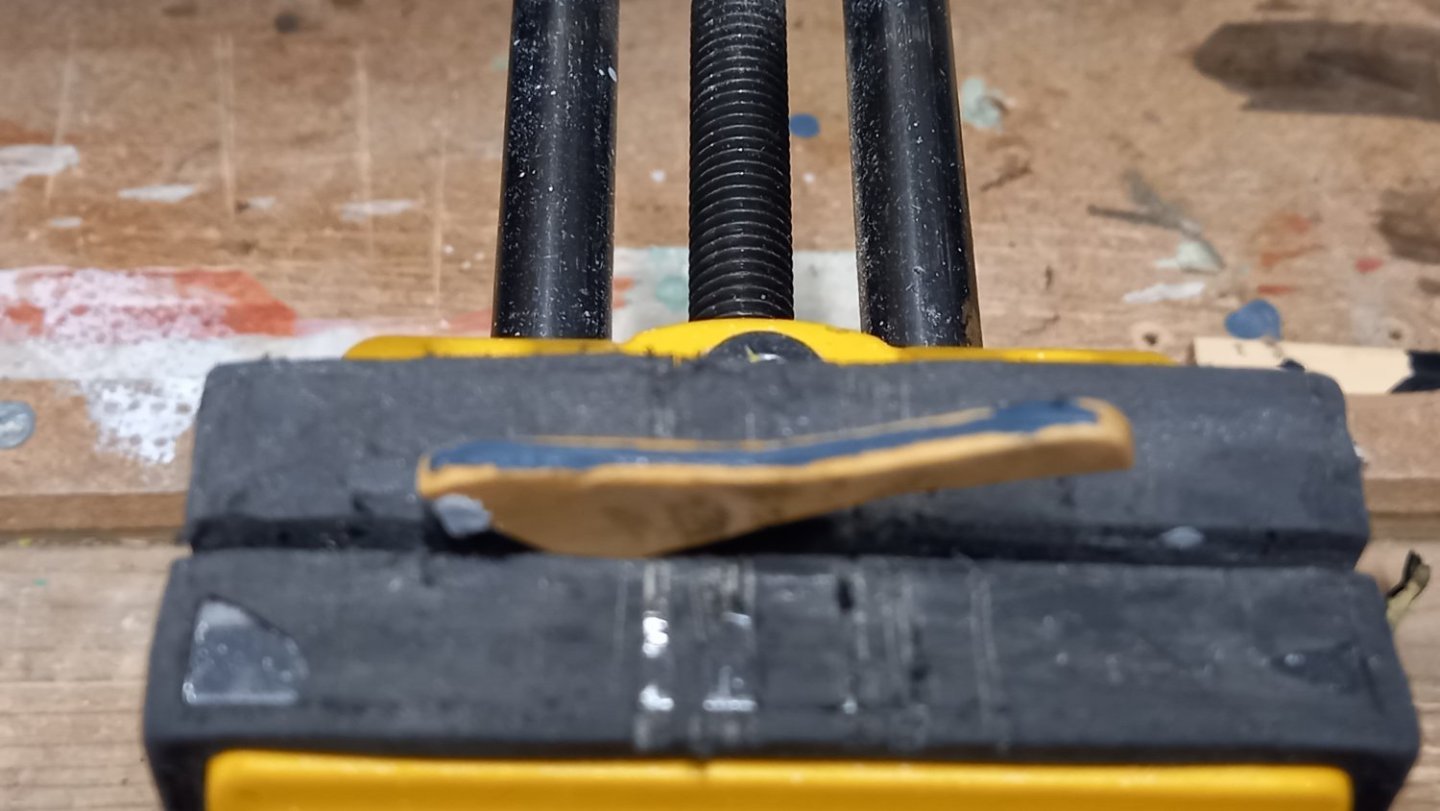
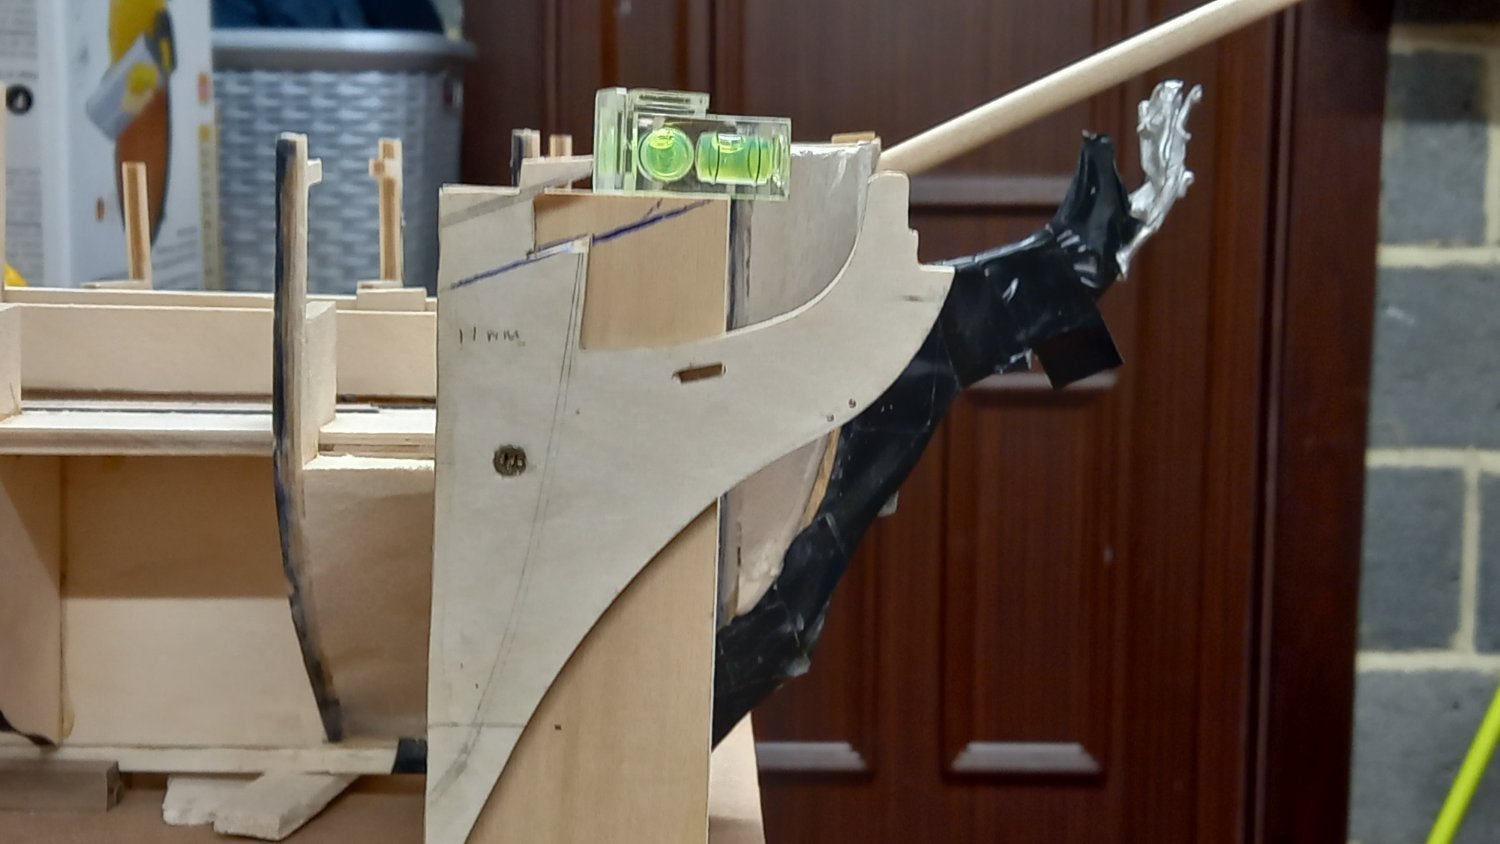
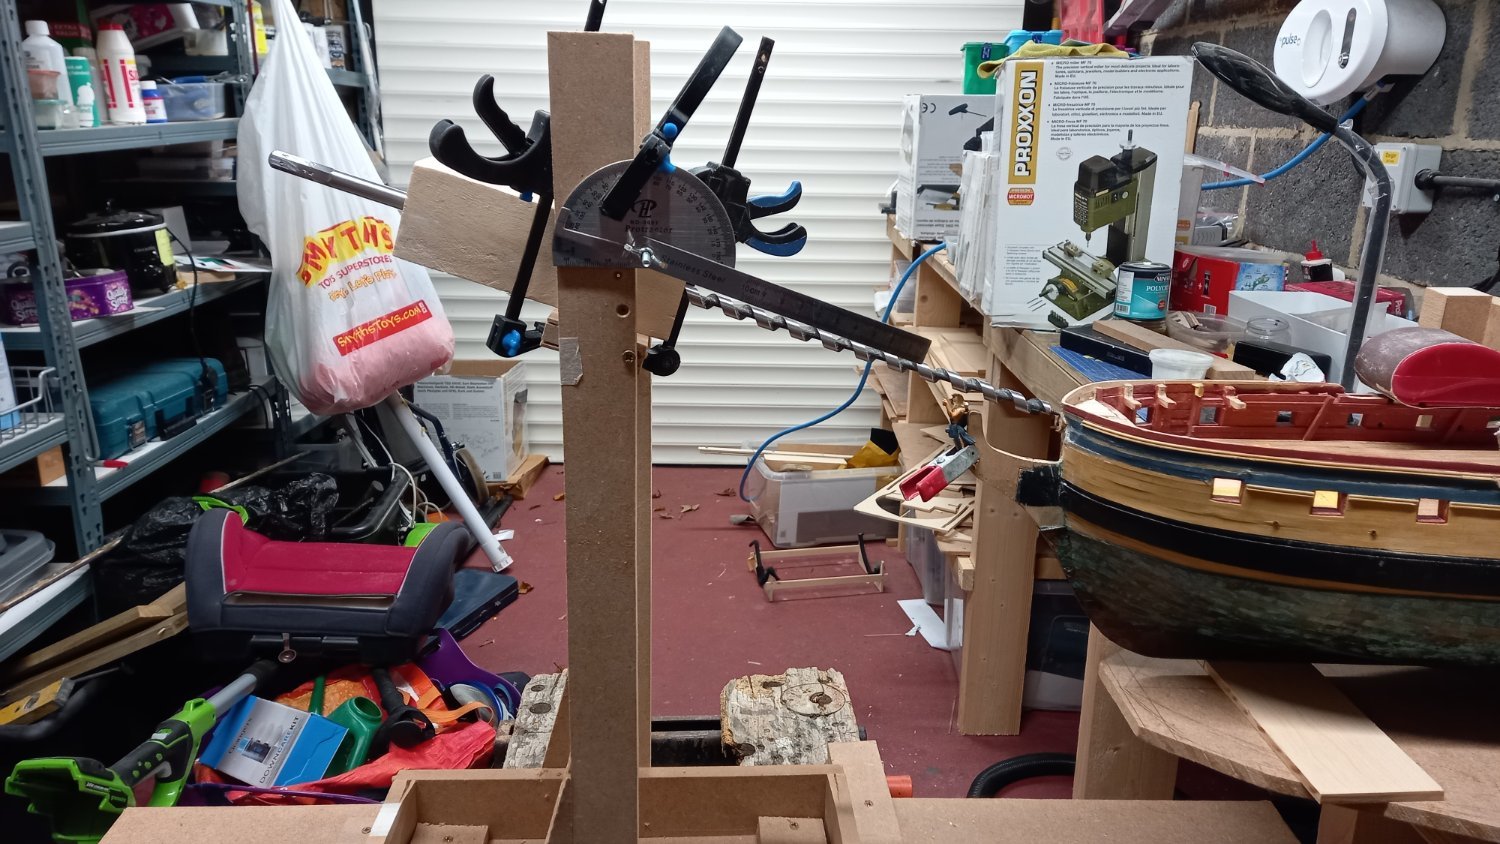
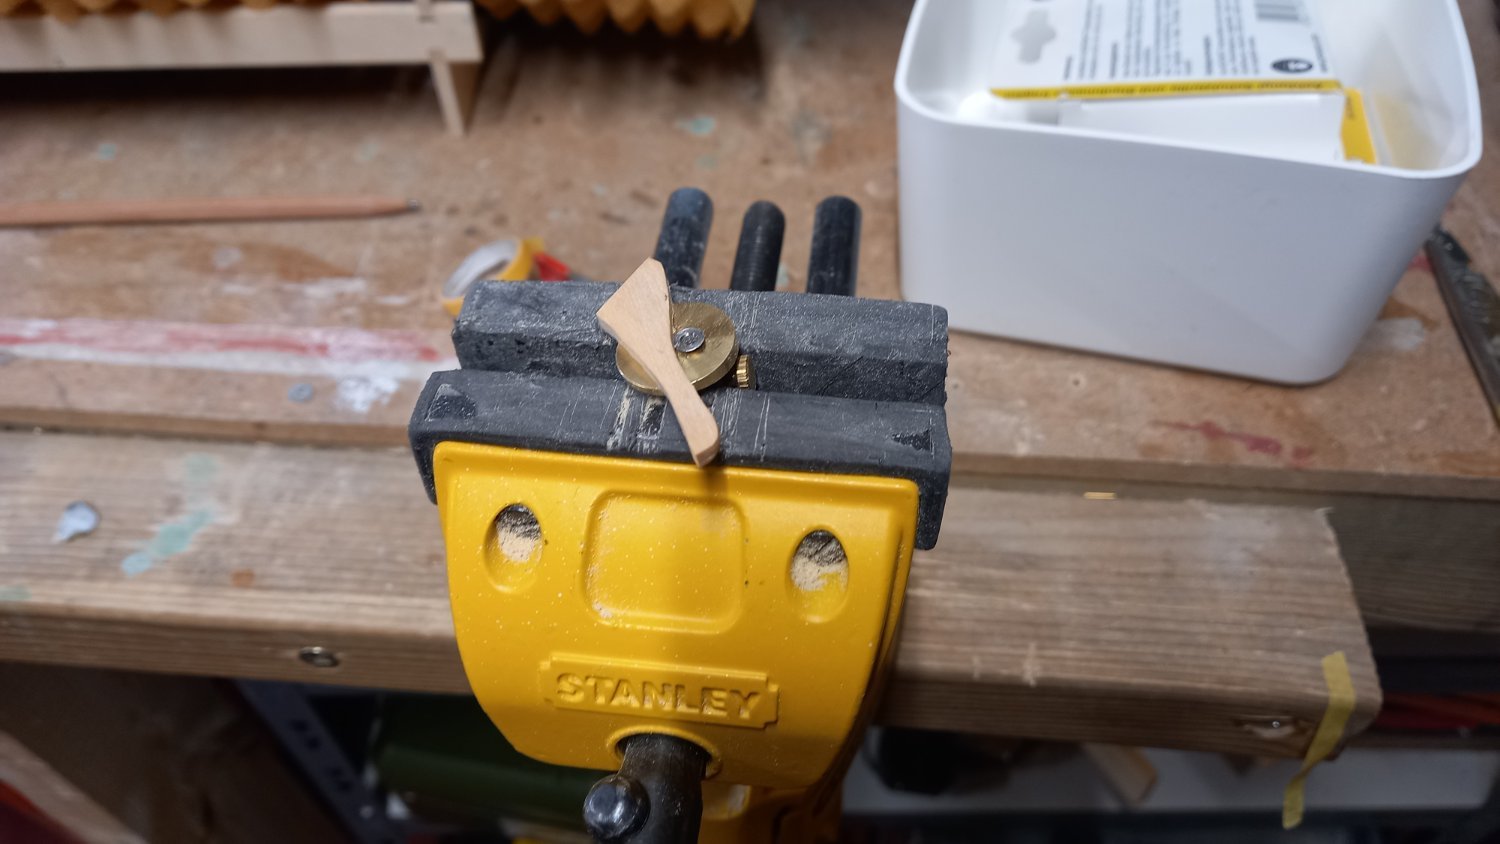
Continuing with the head rails and stem . You can see there is something not quite working out with the gammonning knee. I can see from Dunnocks Diana blog that this needs to be thinner and a different shape altogether so proceeded to make a new one from boxwood. Another problem I have noticed when placing the gammoning knee in position that the bowsprit hole is too low and this is confirmed when try to fit the figure head in position and a 10mm dowel in the bowsprit hole. I could have swore that I had allowed for ths figure head when drilling the hole earlier in the build. Here is a reminder. I have spent some time removing the rails from the bow in orde to sort out this problem with the bowsprit hole and I decided to blug the hole with a 10mm dowel and filler. Eventually after securing the ship as level as possible using a frame, I managed to drill a hole using a long 10mm drill bought for this purpose at an angle of 20 degrees( copied from the AOTS drawing) and this time it looks to be inline with the stem post and at the correct height. Here is the drilling in action. The above work has held me up somewhat but needed doing. I now need to clean up the paint work and replace the rails on the bow. I have managed to make some progress with the head rails but have found this very frustrating but have kept at it . The main problem I was having was trying different methods to get the correct decorative relief on the rails but after several attempts I don,t think I could come up with anything better than just using this tool. Here I tried to make one with a shaper which looked ok ( before painting) but did not turn out too well and did not look similar to other models .I also tried using modellers masking tape which was not great so ended up going free hand which is the best I can do


.thumb.jpg.e71d7ae6fe82f27c1d59a2045dec276d.jpg)

-
Thank you again for the explanation regards the cannon carriages jig and breeching Ropes. I also agree regards the curvature of the hatch covers They look beautiful!
- 152 replies
-
- 2
-

-
- Vanguard Models
- Cutter
- (and 2 more)
-
Really nice work on those boats with excellent detail. Looks to be a fantastic build log and thank you for sharing with us. I look forward to your progress. Dave
-
I would like to follow on if I may as I am only just slightly ahead of you in building the Diana but work quite slowly. I would be especially interested to know how you make the hole for the bowsprit with the stem in place. Good luck with this project and I look forward to your progress. Best Regards Dave
-
Head Rails
DaveBaxt replied to DaveBaxt's topic in Building, Framing, Planking and plating a ships hull and deck
Thank you again for confirming what I was beginning to think and after looking closely at another AOTS drawing shows that if the bolster was fitted between the cheeks they would as you have suggested be too low for the appropriate deck. Once again I would like to thank you for your time and patience. Best regards Dave. -
Head Rails
DaveBaxt replied to DaveBaxt's topic in Building, Framing, Planking and plating a ships hull and deck
Thanks for the photos Dave and the explanation. I have started to do the filling pieces in exactly the same way as you have just discribed and as you have said it is faily tricky hopefully I will get there in the end. I always seem to take off more material than is required and have to start again so trying to do as much as possible by hand which a slow process. Best regards Dave -
Head Rails
DaveBaxt replied to DaveBaxt's topic in Building, Framing, Planking and plating a ships hull and deck
Thank you Allan for explaining that and as I am using boxwood and possibly 3mm or more in thickness( again I am unsure of this size ) I have found boxwood difficult to bend even after soaking for 24 hours and then heat bending but can give it another try. I think carving it to the same shape as the hull using thicker wood and shaping both front and back surfaces may be a better approach, as this would ensure that the holes remain parallel. If this is the case? I too did not fit filling pieces on my Hms Bounty build but I am thankful for that as I was non the wiser at the time being my first period ship nor on my Endeavour too( second build). Perhaps you are correct and therefore fitting a filling piece was not the norm, however I have seen a number of other Diana build logs with some very good examples and the filling pieces do look rather grand but your points are duly noted.For the record I noted on your example that the bolster appears to be between the upper and lower cheeks , where as on the Caldercraft Diana it appears to be higher up and is above the space where the filling piece is fitted and wonder what the signifigance of this is but perhaps both bolster and filling piece give added stength between the cheeks? Best regards Dave -
Head Rails
DaveBaxt replied to DaveBaxt's topic in Building, Framing, Planking and plating a ships hull and deck
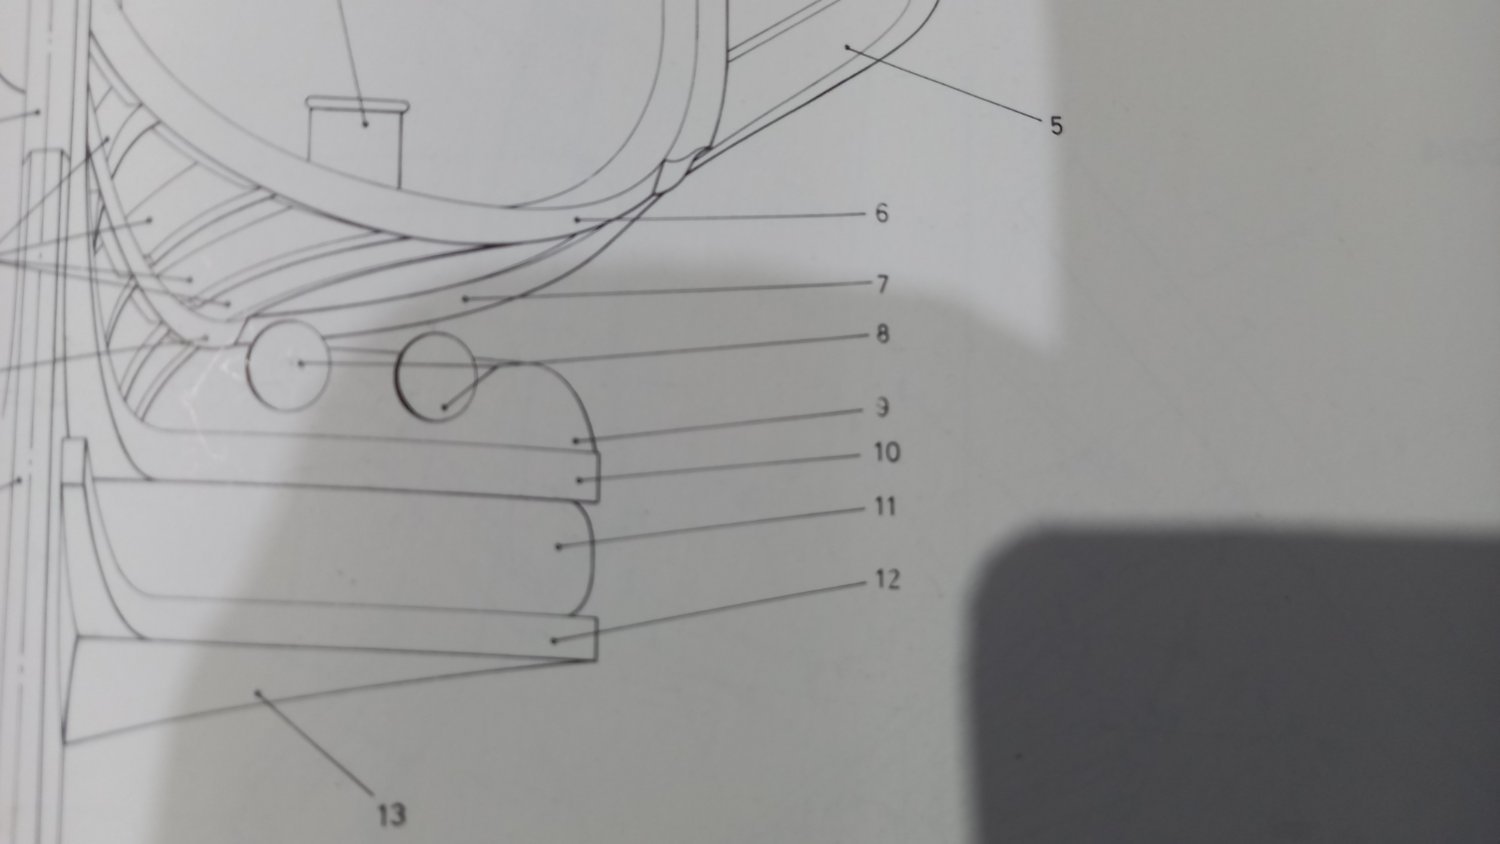
Thank you Allan for your prompt reply. The Caldercraft instructions show parts called the upper and lower cheeks which are glued to the upper and lower rails. The parts I am questioning are the pieces of timber which are between the upper a lower cheeks and are like a bracket between the hull and stem post . The pieces of wood I am referring is the piece which has the hawse holes and is called a bolster (9)and the other piece is called a filling piece. (11). Please see attached photo .Sorry for the confusion I should have stated this earlier. My earlier question was how to make such things as I am unsure whether these follow the shape of the hull by bending them around the hull or are they made from thicker pieces and shaped to fit the shape of the hull and wheter they are flat . Unfortunately I do not pocess the books you mention but I am always on the look out to see if I could pick up something second hand as I understand these are one of the best volume out there. Sorry again for creating any confusion and thank you again for your patience.Best regards Dave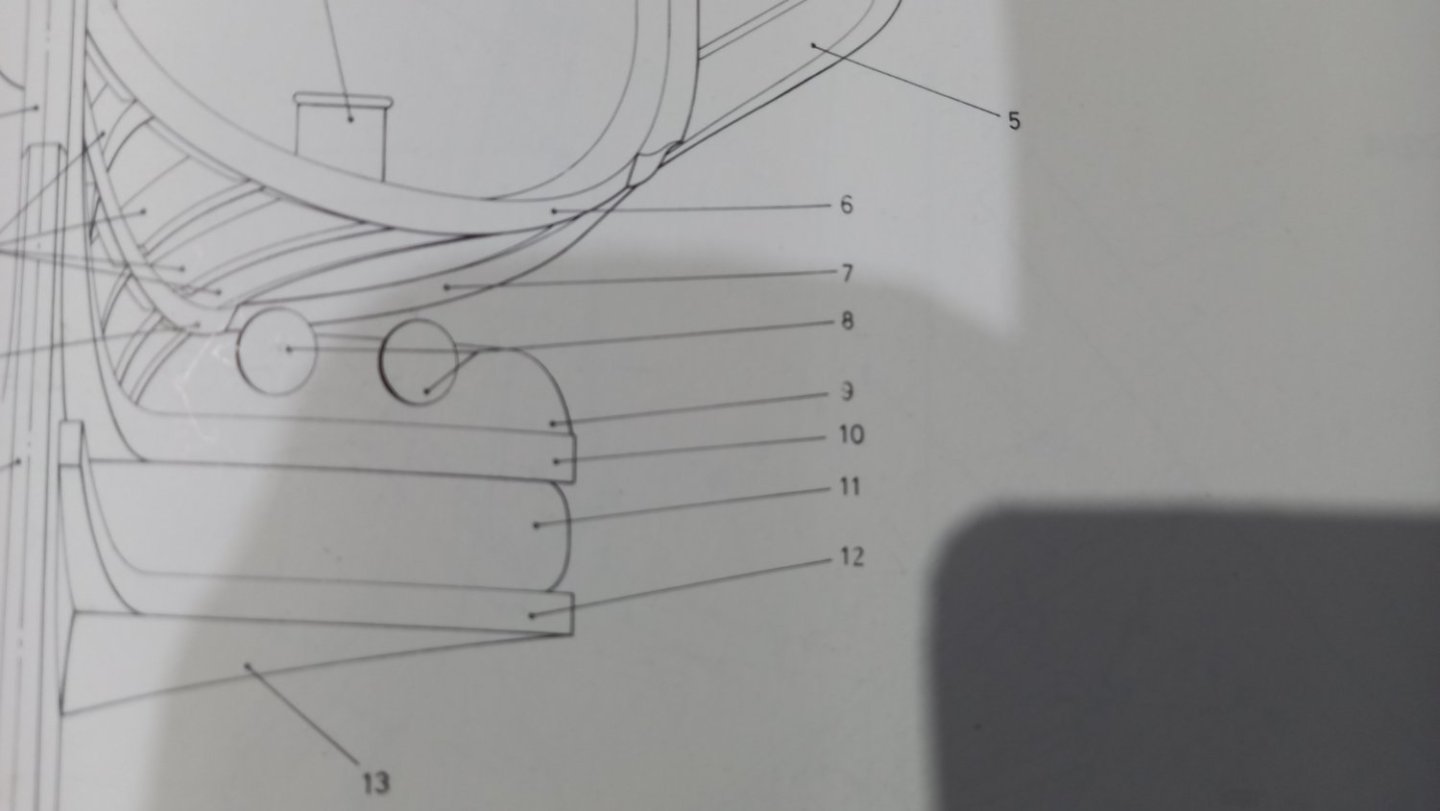
-
I have come to the point in my build where I am attempting to make most of the components for the head rails on my HMS Diana build 1794 and the parts in question are the pieces above and inbetween the cheeks. I am unable to fathom how these are constructed and what thickness at 1:64. I am also unsure how to construct these out of boxwood. Once these are shaped can they be bent to the shape of the hull or is it easier to make them out of thicker material and hollowed out to the same shape as the hull ( similar to the upper and lower cheeks) One more question if I may . Is the facing surface of these pieces flat or are they too curved to follow the line of the bow. Hope this is making sense Best regards Dave
-
Great approach to first planking Andrew and very well explained for us with lots of photos. It looks almost as if you don,t need a second layer of planking. and so quick too! I can hardly keep up with your progress and you must be working flat out.
-
Thank you David for your reply. I have been looking at your build log and think you have made a cracking job on the head rails. Thanks to your good self and others such as DavidEN and Beef Wellington I have eventually got my head around how it all comes together but found the drawings on both the Caldercraft instructions and the AOTS drawings very difficult to understand. I have already made a few mistakes and will need to make some of the boxwood parts a gain so I see where you are coming from.
-
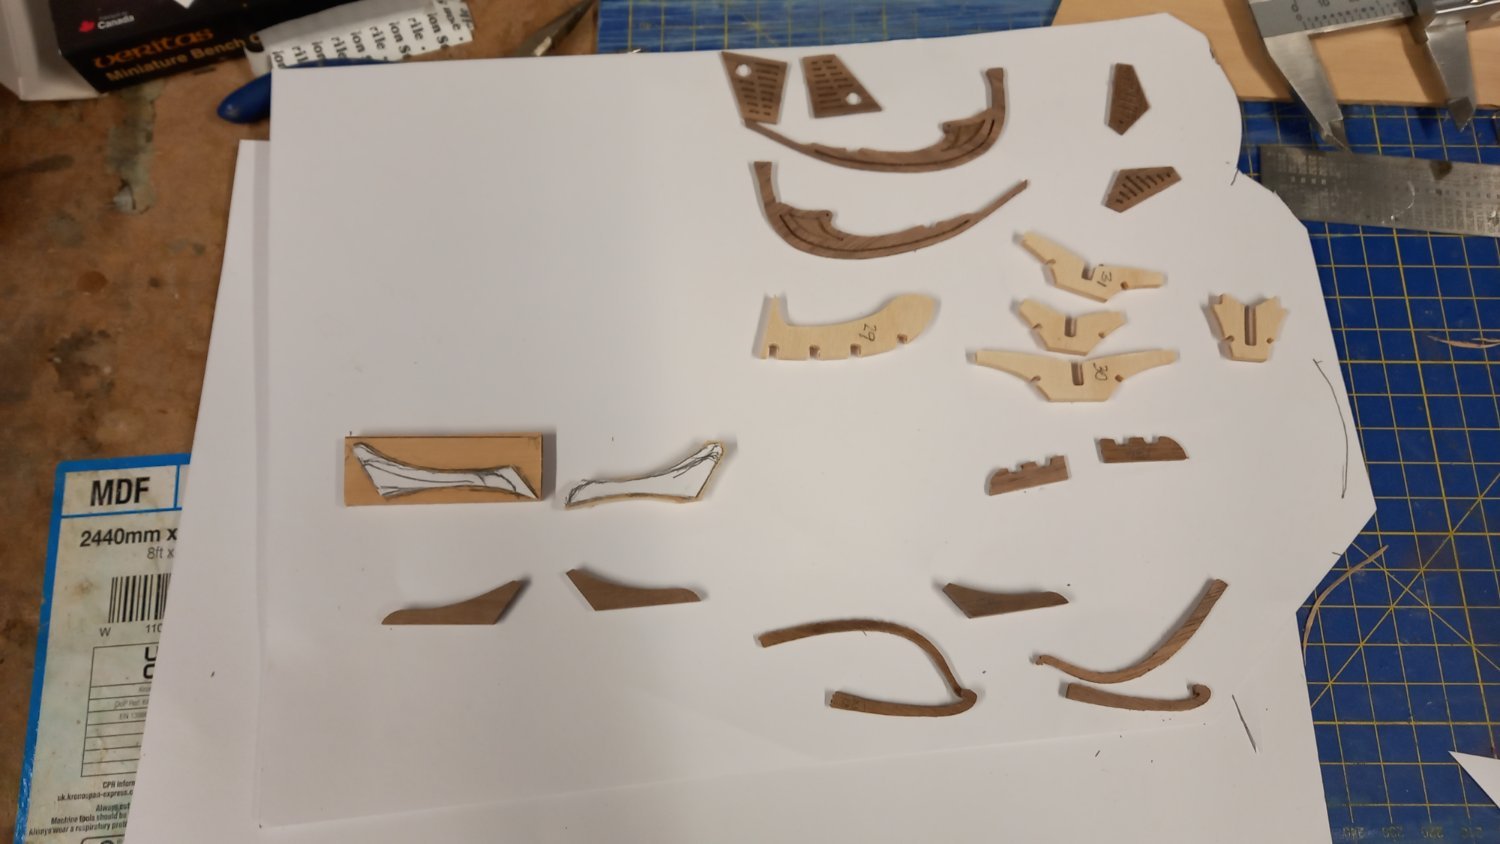
I am almost at the point of 9 months since starting this project and as the winter is almost upon us ( or it seems like it anyway) here in the uk, it is time I stopped working on the Diana in my garage,which is draughty and cold and return to finishing off the rigging on my Endeavour build. However before I do switch projects I would like to continue a little longer on the Diana and finish off the head rails. As I understand this is probably the most difficult part of the build so would like to complete this so that I won,t be jumping into the deep end on my return in possibly 6 months time. I have Re fitted the stem post which after breaking off at the gammonning hole at some time in the past( Planking) and I left it off until I had filed out the hole for the Bowsprit which according to Lees book 'The Masting and rigging of English ships of war' and my calculations is 11mm dia at the widest part.( This was worked out from 1794 and not upto 1794 and this works out the same as the AOTS Diana., I will not be using the Ramin dowels supplied by Caldercraft as it is my intention of making the masts from square boxwood stock. Head rails After removing several parts from the walnut and plywood sheets ( see photo below) It is clear that some of these parts are at least on the flimsy side and at worst the incorrect size or shape. Perhaps my hull is not the exact shape so I have therefore decided to make as many of these as possible from boxwood. First I found that the upper and lower cheeks weren't long enough so fashioned 4 of these and shaped them to fit the hull and stem post and then roughly cut out the upper and lower rails as these will need to be modified in an attempt to make them similar to the rails fitted to the hull I also need to paint the Figure head which is suggested in the following photo.


-
Always good to see another Sphinx and would like to follow this one from beginning to end as I will hopefully get around to doing this one in the future. Looking great so far and I look forward to your progress.
-
Cheers Allan. I have tried to get LOS here in the UK but found it prohibitively expensive. If you say you can use it on the model and wipe off after use, then perhaps it is time to have another look and see what's available. Being able to blacken the copper plates after the copper plates are in place would in my view be a game changer. I have not tested brass black on wood or paintwork to see what the effect would be but I might give it a try. If it oxides brass/ copper then expect it would be corrosive butI am unsure of the processes involved as chemistry is not my strong point.Thanks again for another great tip.
-
I just used Birchwood Casey Brass black . I think most gun stockists have it here in the Uk. I think it works quite well with copper as well as brass and easy to control the depth of blackening. I do however always soak the copper in acertone before blackening and even pickle it if it will fit in my cooking pot, more so with brass.. It is quite expensive for a small bottle but i water it down using distilled water and goes a long way.
-
Really nice work shaping the pewter and looks amazing. Scuppers are another level of excellence.
-
Good Idea regarding making a jig for the carriages David and something I would like to try in the future . Nice work on those breaching Ropes and thanks for the info regarding 3 x the length of the barrel, something for my note book. Cheers. As usual some great workmanship.
- 152 replies
-
- 3
-
-
- Vanguard Models
- Cutter
- (and 2 more)


.jpg.f9d9ecea2ea44ead24ee856886c97071.jpg)