
HOLIDAY DONATION DRIVE - SUPPORT MSW - DO YOUR PART TO KEEP THIS GREAT FORUM GOING! (Only 13 donations so far - C'mon guys!)
×


jct
-
Posts
1,519 -
Joined
-
Last visited
Content Type
Profiles
Forums
Gallery
Events
Everything posted by jct
-
THX for the likes and comments...may be another few days till I get back to it...work is looming is ugly head yet again and a couple home projects will take priority...see you all in a few
- 258 replies
-
- 3
-

-
- harriet lane
- model shipways
- (and 1 more)
-
Nice...I especially like the expose fasteners on the bunker fronts, nice touch
- 75 replies
-
- 3
-
-
- model shipways
- picket boat
- (and 1 more)
-
Sweet, really like the way you've chosen to display her
- 165 replies
-
- 1
-
-
- finished
- model shipways
- (and 1 more)
-
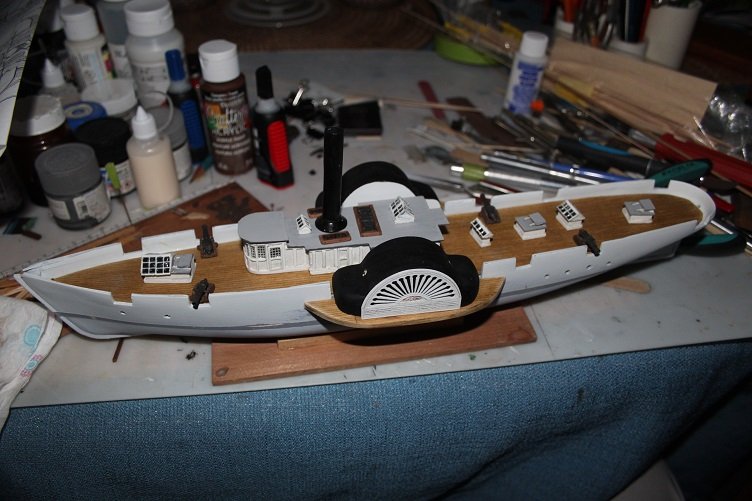
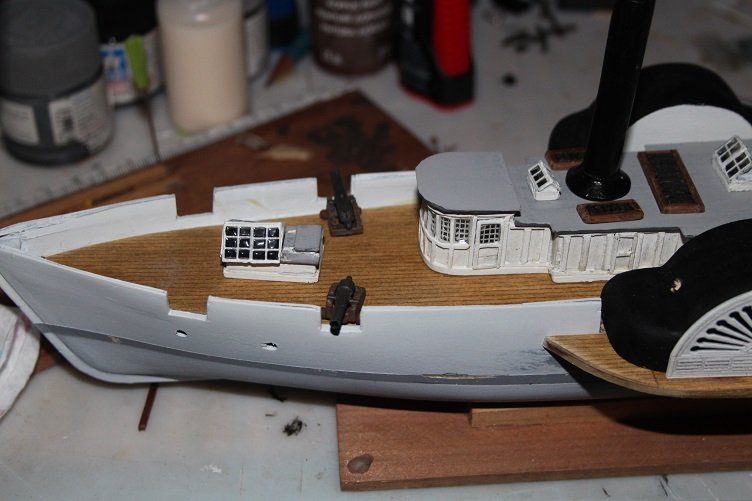
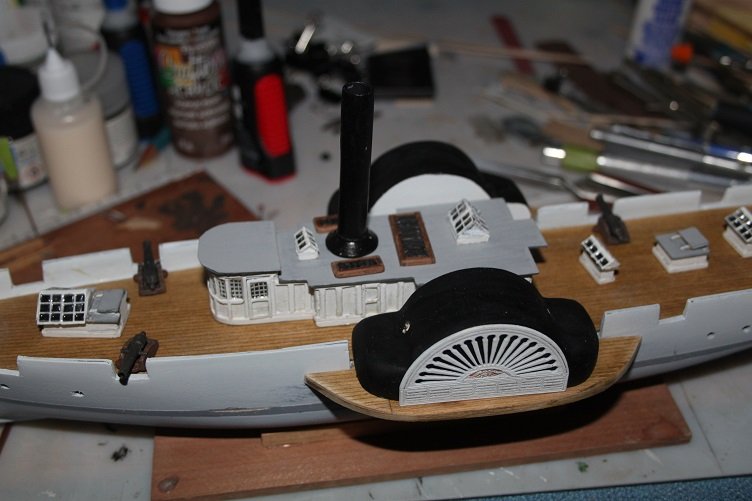
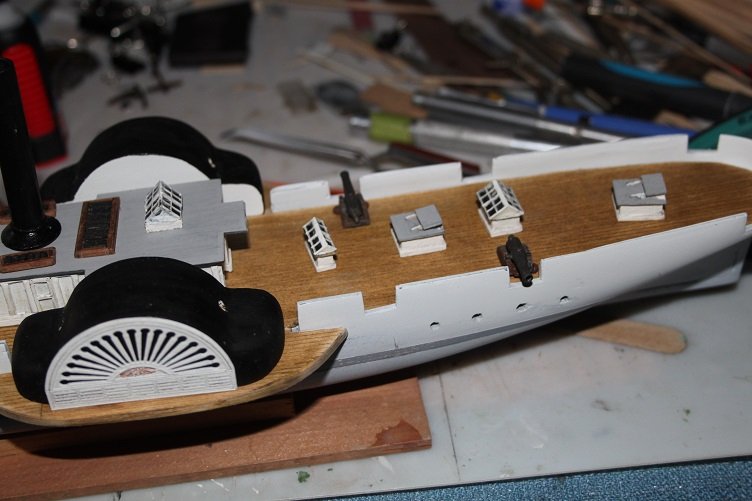
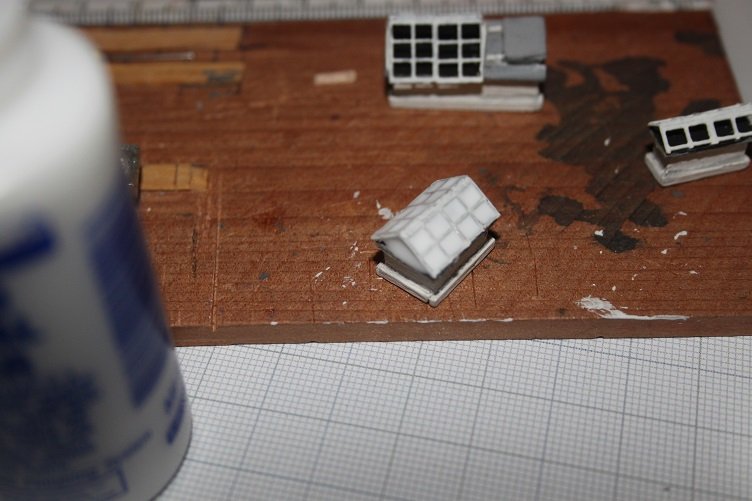
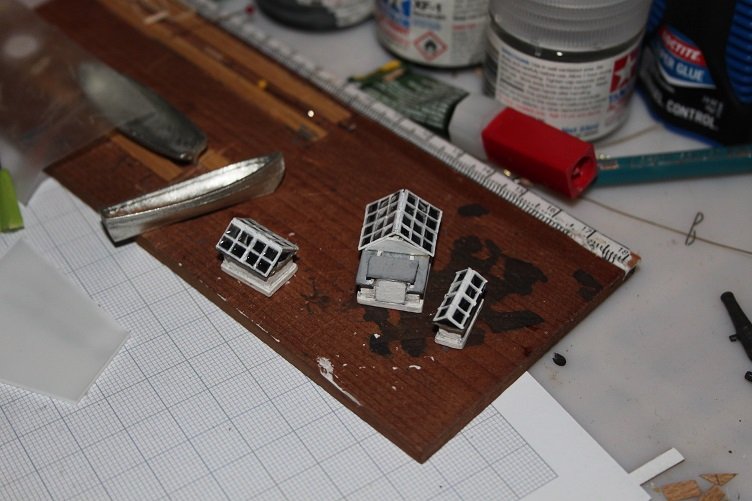
Here is the mockup promised earlier... I already see the framing around the fiddley grates is too thick, it will get trimmed by a good half of its current thickness, all else seems to fit ok, all current positions a approximate...when the time for mounting arrives measurements will be transferred off the plans...pics follow THX for the likes
- 258 replies
-
- 8
-
-
- harriet lane
- model shipways
- (and 1 more)
-
Good question Denis...they go on the roof of the pilot house surrounding the stack, the plans show them raised slightly above the surface of the roof, so they may just sit there...i'm gonna mock up all the deck furniture later today...I'll see what it looks like then decide obtw thanks for the likes J
- 258 replies
-
- 2
-
-
- harriet lane
- model shipways
- (and 1 more)
-
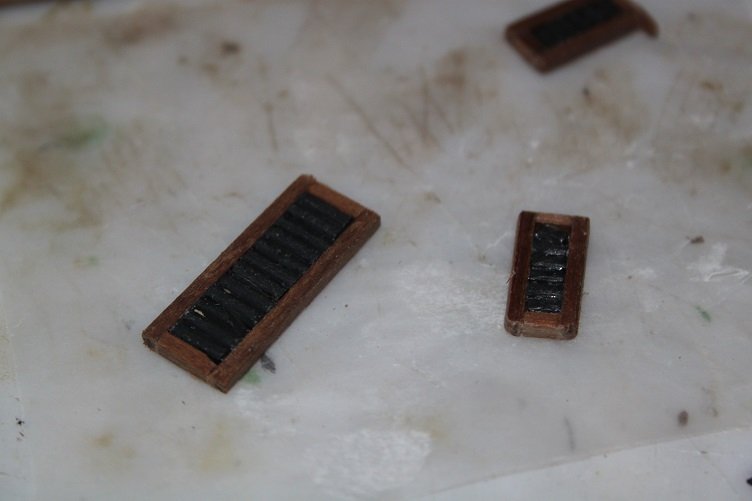
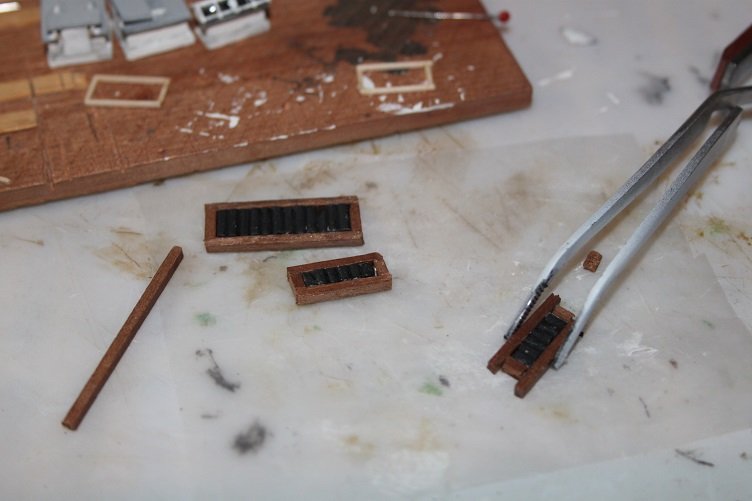
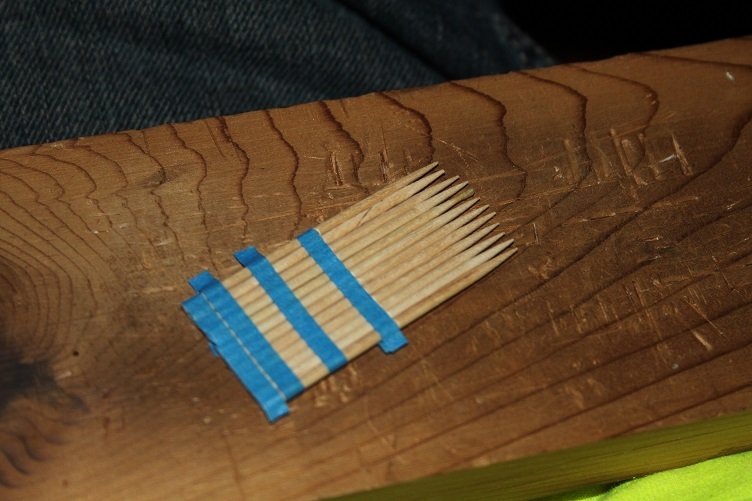
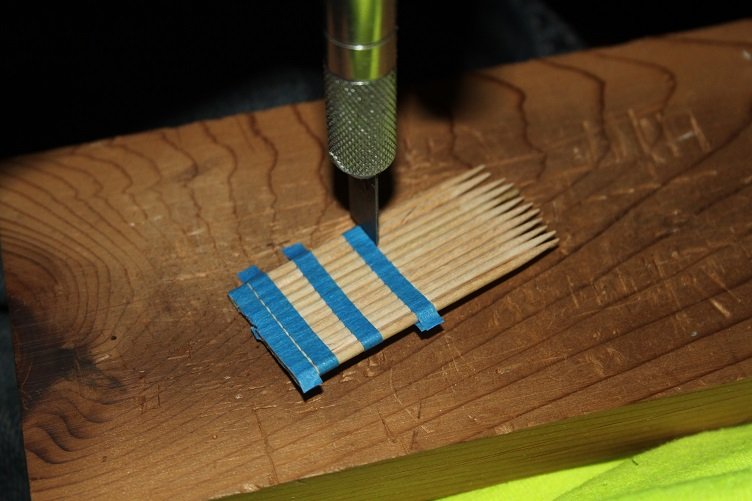
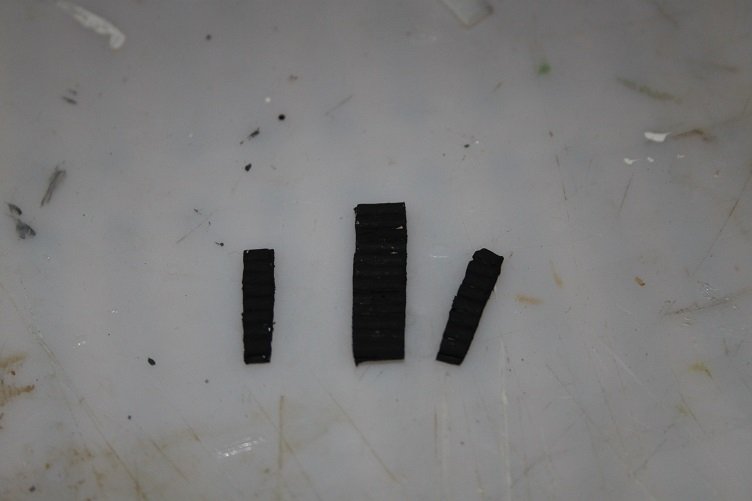
Hi everyone, An update on the HL...I decided to stick with the lil stuff and finished the two additional skylights for the top of the pilot house, construction was the same as those already complete so not much else to say about those....I then turned my attention to the fiddey grates, a bit of research was required on my part as I had no idea what these suckers were or what they should look like...seems they are basically just grates that covered ventilation shafts/spaces surrounding the stack, best description I could find..."the vertical space above a vessel's engine room extending into its stack, usually covered by an iron grating. Also applied to the framework around the opening itself" So with that in mind I started to work... I wanted to represent the iron bars which is kinda what the plans show, so I used 1/8 in making tape to group toothpicks together, the tape was to serve two purposes...to hold everything together and serve as size guides for cutting Once everything was trimmed down the individual "grate" received a coat of black paint at this point each grate was framed out with some walnut from the spare box they need a little touch up and a clear finish on the frames...that's all for now, thanks for your time and attention J
- 258 replies
-
- 7
-
-
- harriet lane
- model shipways
- (and 1 more)
-
Wow...looking at the model I amazed there were that many crew...it's a wonder they all fit!
- 75 replies
-
- 2
-
-
- model shipways
- picket boat
- (and 1 more)
-
Hey Len, Nice start I love the hatch...I think you could move all the engine components aft , it would free up some crew space. I never could find out how many crew were aboard when she saw action, but I bet it was fairly crowded
- 75 replies
-
- 3
-
-
- model shipways
- picket boat
- (and 1 more)
-
Thanks much Len...I have attempted to use white glue but I found the consistency of the normal stuff is too thin to work for me, there may well be a trick to it I'm unaware of though...
- 258 replies
-
- 1
-
-
- harriet lane
- model shipways
- (and 1 more)
-
Thanks to everyone for all the likes, I enjoy the deck furniture as well, adds life to the project...I'm thinking I will jump of to the hull, give the hands a break (arthritis) plus I'm kind of anxious to copper the hull...the kit comes with some 1/2 inch foil but that's hit the spares box. I plan to use some thinner stuff from my stained glass supplies, will save the hassle of trimming the width. J
- 258 replies
-
- 3
-
-
- harriet lane
- model shipways
- (and 1 more)
-
Hi Len, I'm looking fwd to your spin on the Picket....I keep the weathering light on mine, thinking that they were fairly new...but at the end of the day it's your boat just enjoy the build J
- 75 replies
-
- 2
-
-
- model shipways
- picket boat
- (and 1 more)
-
I'm in as well, Hi Len...it's my understanding that there were two boats purchased specifically for the Albemarle mission, so they were fairly new.
- 75 replies
-
- 4
-
-
- model shipways
- picket boat
- (and 1 more)
-
Thanks everyone for the likes...Denis I suspect it is the same, different manufacturer, different name, but the same...I've used it on clear parts as well, for those unfamiliar...it's fairly easy to use, dip a toothpick in the bottle and run it around the opening you want to "glaze" and let it dry, Pics show the results Complete and dry Still a little touch up needed on these guys...two more skylights to make then its on the the fidley grates, unless I jump to finishing the main hull, depends on how the meat hooks feel after all this little stuff Thanks for looking in, J
- 258 replies
-
- 8
-
-
- harriet lane
- model shipways
- (and 1 more)
-
Hi Denis...plan is to use Microscale Kristal Kleer, similer to white glue in application but is just that crystal clear
- 258 replies
-
- 2
-
-
- harriet lane
- model shipways
- (and 1 more)
-
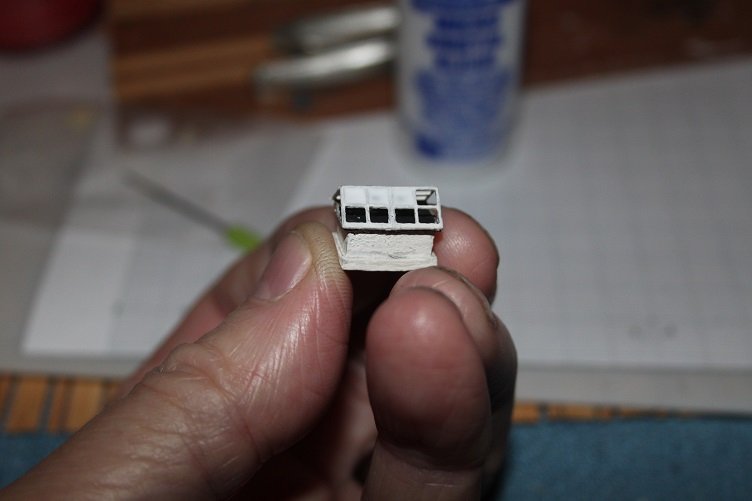
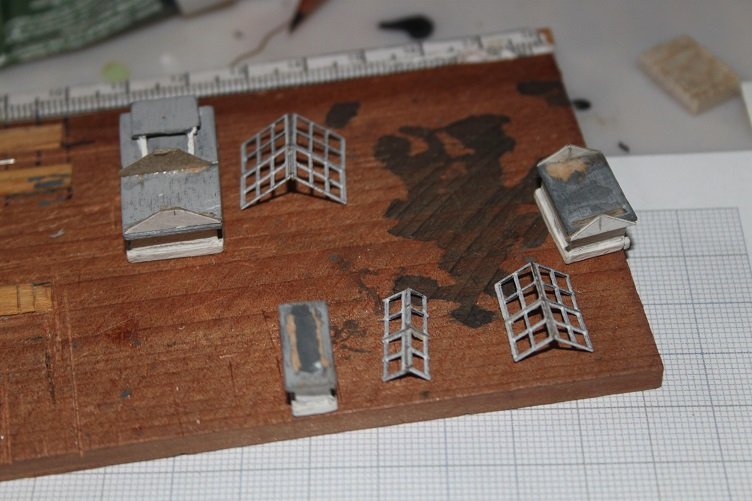
Thank you all for all the likes and comment...appreciate them all, Just a short update...great weather here today and I'm trying to take advantage and get a lot done, so I'm running between projects The skylights have been strengthened and trimmed to their final size The deck houses were prepped by just blacking out the interiors and the skylights were painted with a couple coats of white Well that's all for now (told you all it was short) hopefully more tomorrow THX again J

- 258 replies
-
- 7
-
-
- harriet lane
- model shipways
- (and 1 more)
-
Glad to have you aboard Len...the build has been fun but has its challenges as well, I think if you just built it up as the instructions recommend it could be considered a beginner kit...but I'm afraid i'm way to far round the bend for that...Did you post a build log of your Picket? That was a really fun build too
- 258 replies
-
- 2
-
-
- harriet lane
- model shipways
- (and 1 more)
-
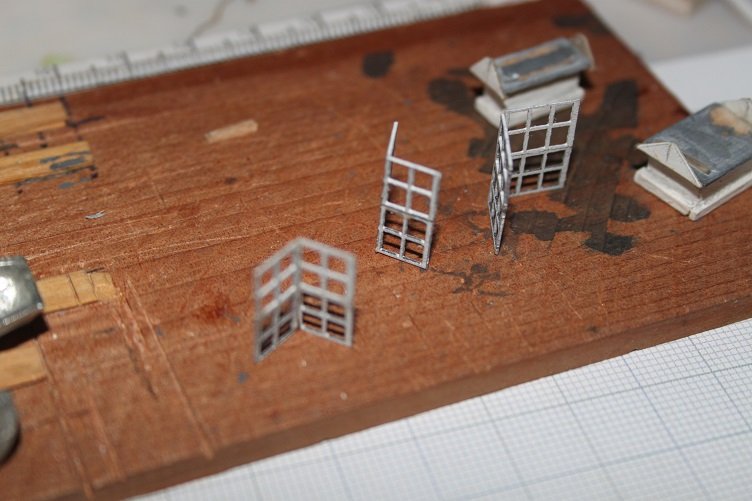
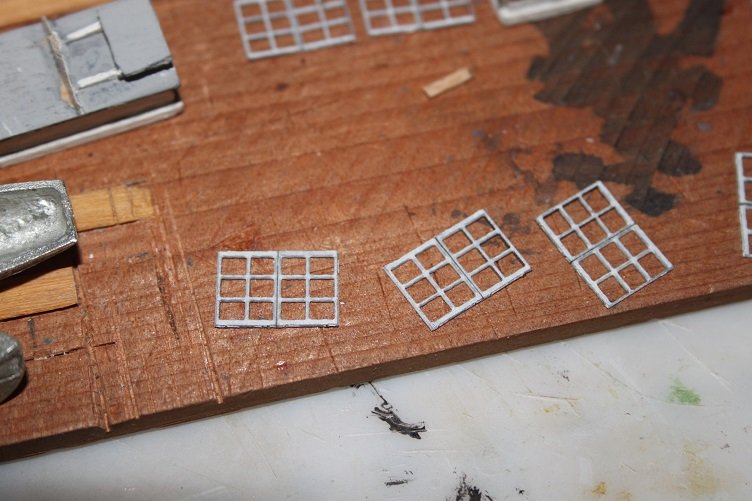
Thanks everyone for the likes...ya Pop you guys got blasted big time, we were primed for it here but it split and went right around us...crazy, well I did get some time to play with the new window frames, got them primed and started the build up process...pics and commentary follow: Primer coat Separate frames cut from the support frame They were then glued together at the center Two sets were trimmed down to two panes per side and the third left at three, the were then glued together at the correct angle to match the desired pitch for the deck house where they will ultimately live. These little guys are definitely fragile so I'm letting them set overnight before I do anything else with them, plan to strengthen the peak joint with CA once they firm up a little. That's it for now, as always thanks for your time and attention J
.JPG.c77a1bd4083fe2ee81da804200d32bfc.JPG)
- 258 replies
-
- 6
-
-
- harriet lane
- model shipways
- (and 1 more)
-
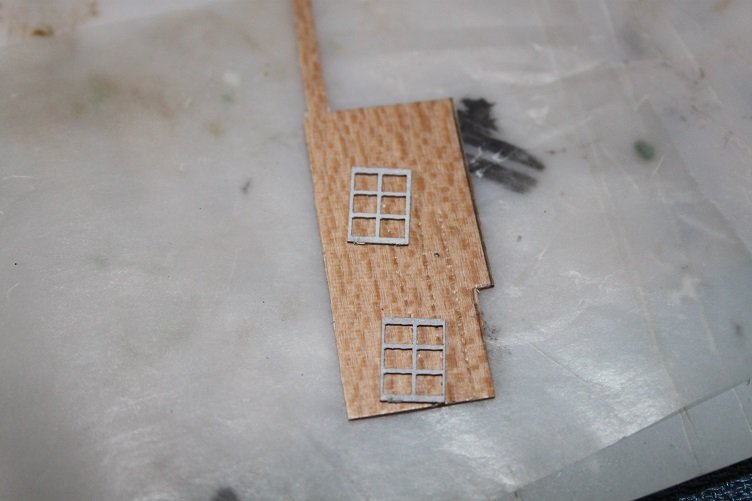
Thanks for all the likes,,,they are a little on the large side for this scale, but I'm thinking once painted and glazed it wont be that noticeable, plus all the skylights will be a consistent size and shape...should be more pleasing to the eye, least that's my thought...we will see, hopefully I'll get to them this weekend but the chores have staked up here what with all the chaos at work! The instructions warn against warpage so I plan to primer with a solvent base rather them acrylic prior to removing them from the frames...I'll be sure to post pics
- 258 replies
-
- 2
-
-
- harriet lane
- model shipways
- (and 1 more)