HOLIDAY DONATION DRIVE - SUPPORT MSW - DO YOUR PART TO KEEP THIS GREAT FORUM GOING! (Only 13 donations so far - C'mon guys!)
×


jct
-
Posts
1,519 -
Joined
-
Last visited
Content Type
Profiles
Forums
Gallery
Events
Everything posted by jct
-
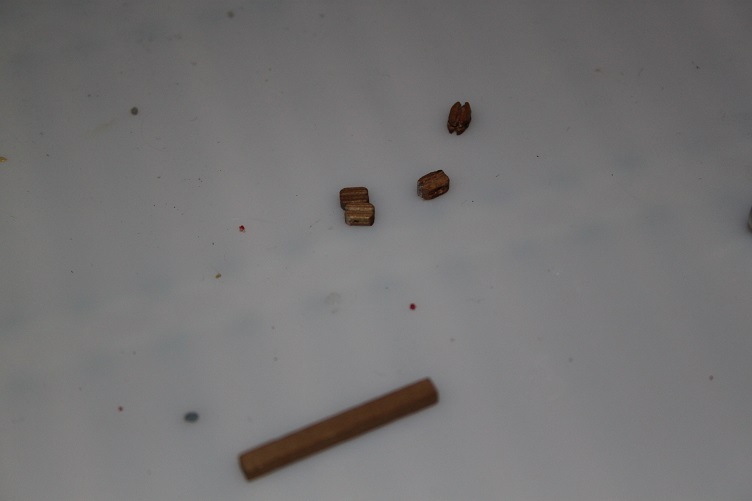
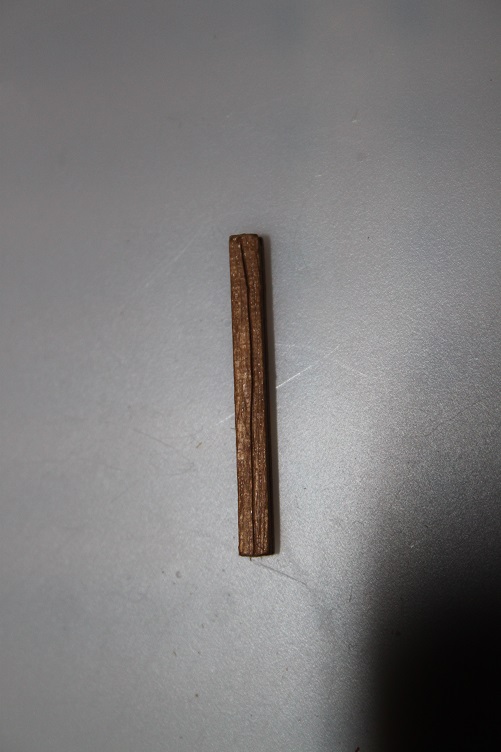
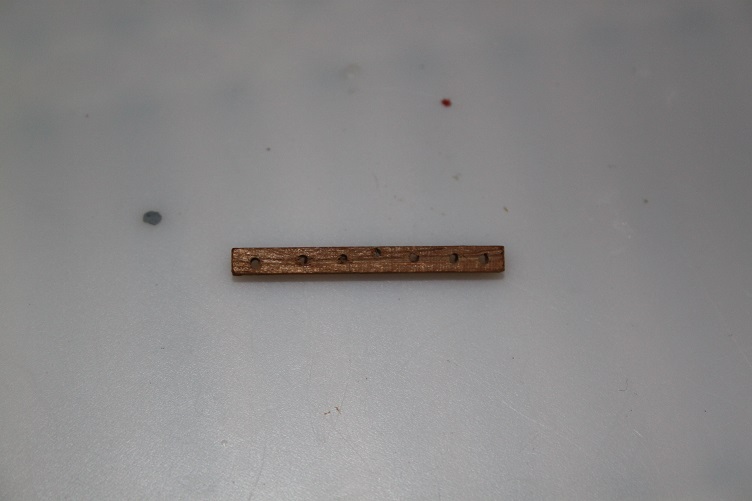
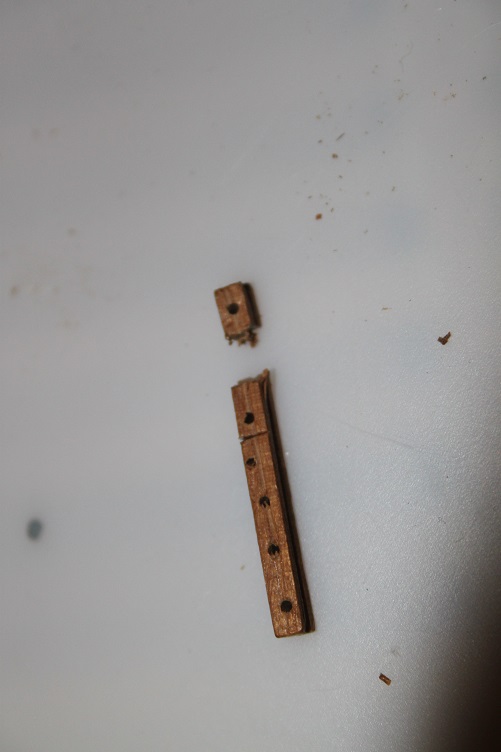
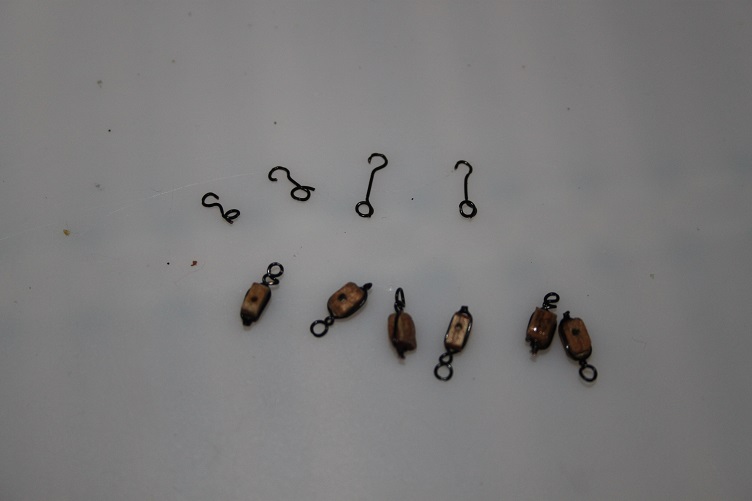
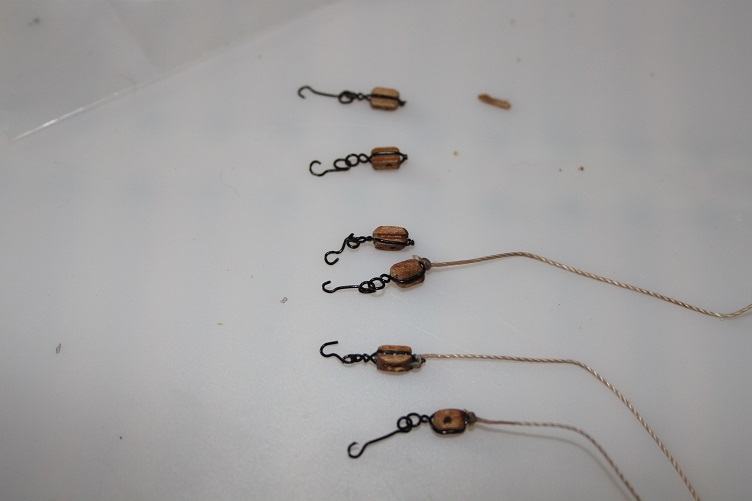
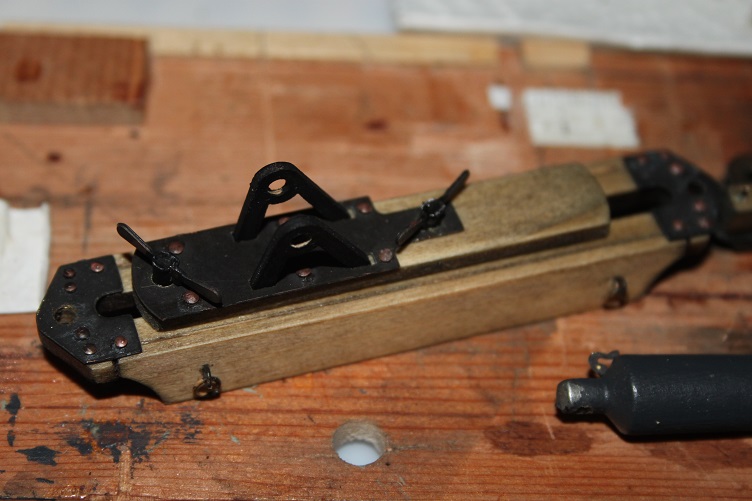
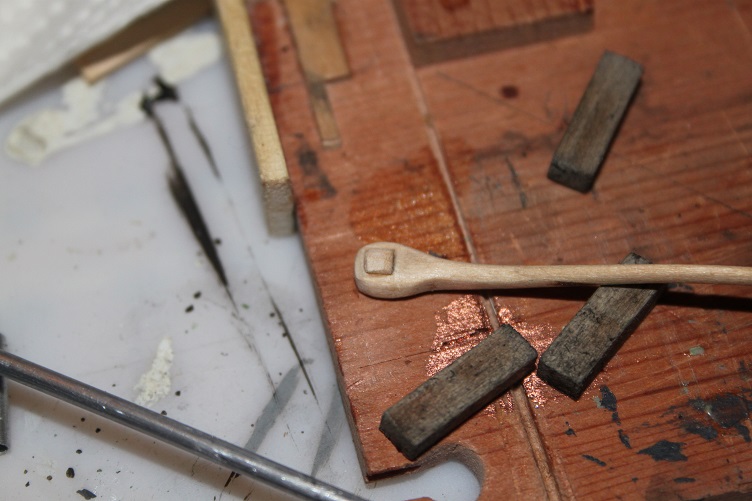
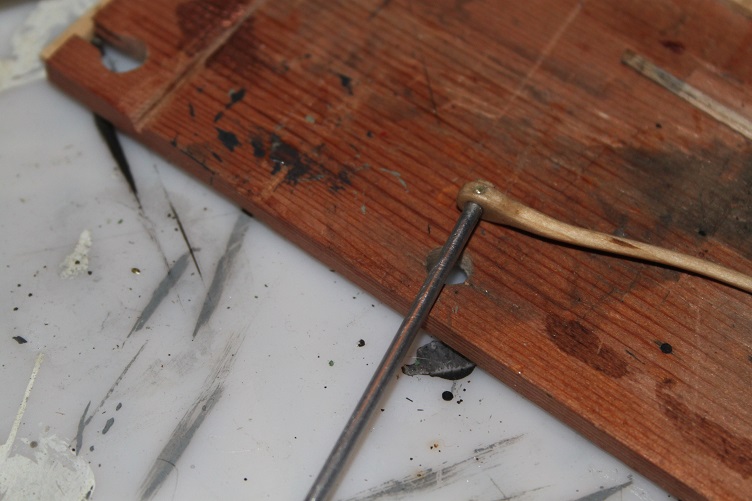
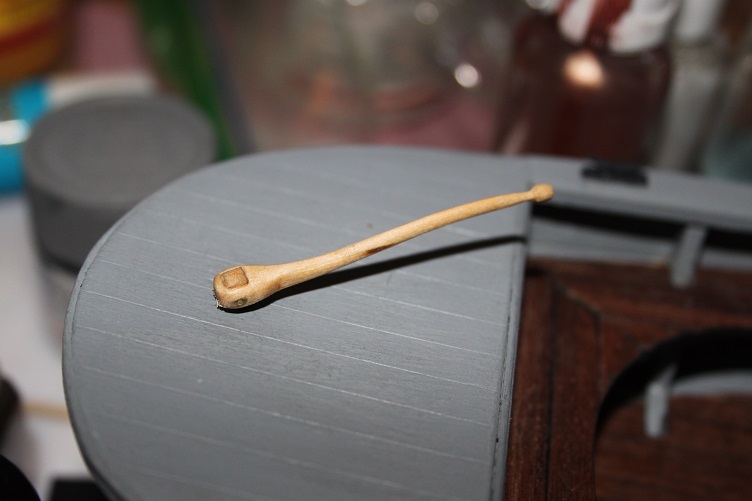
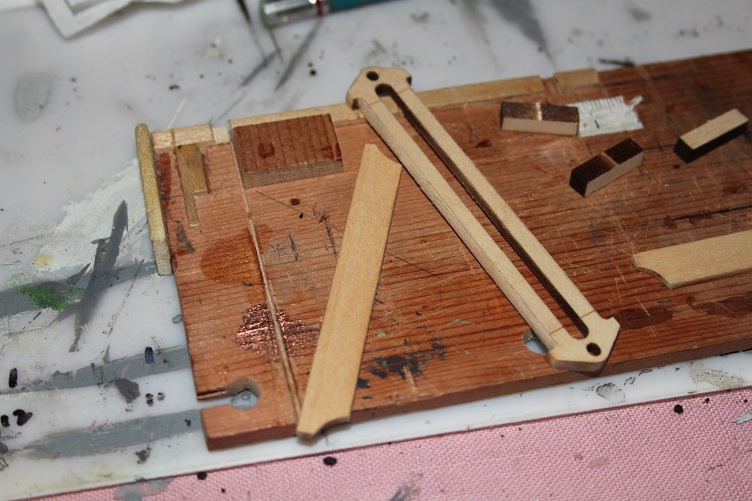
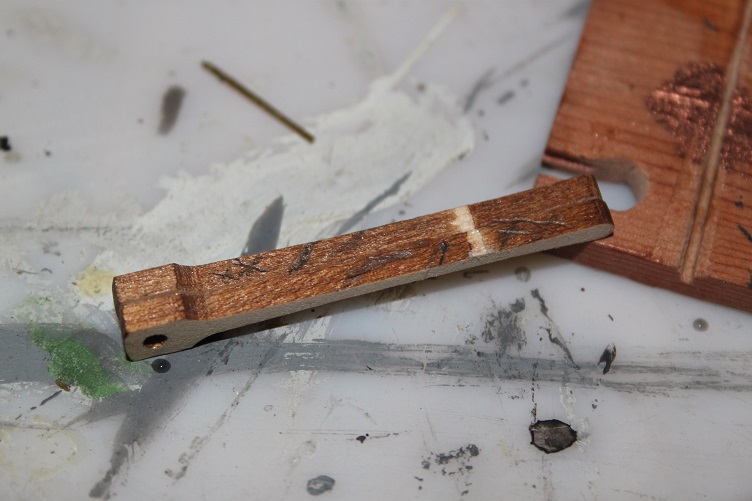
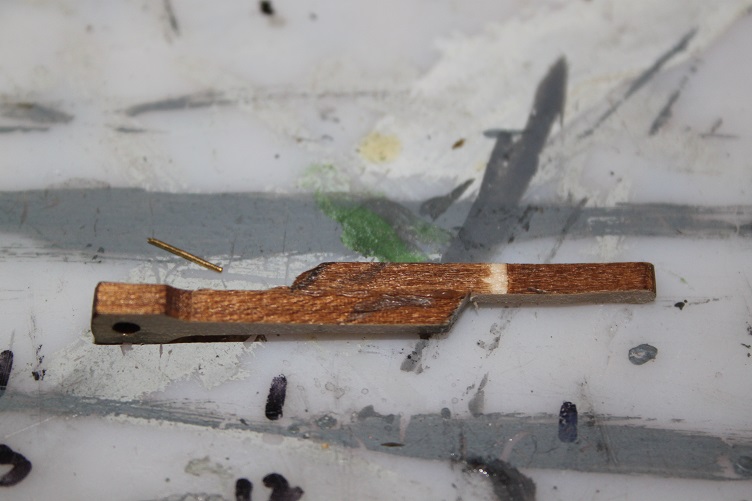
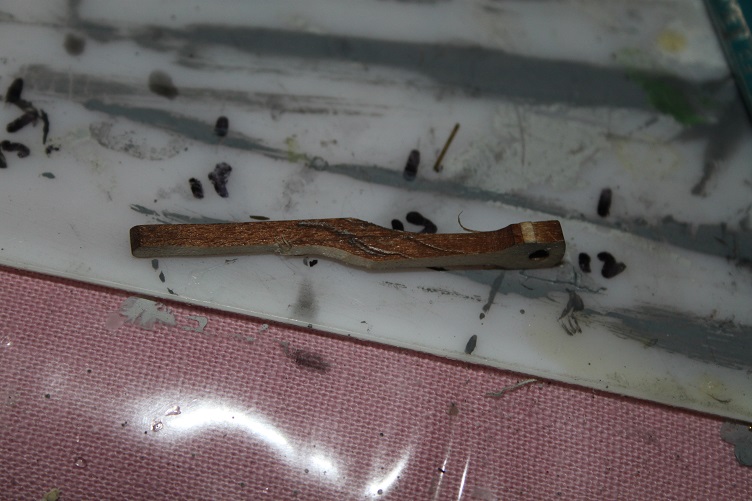
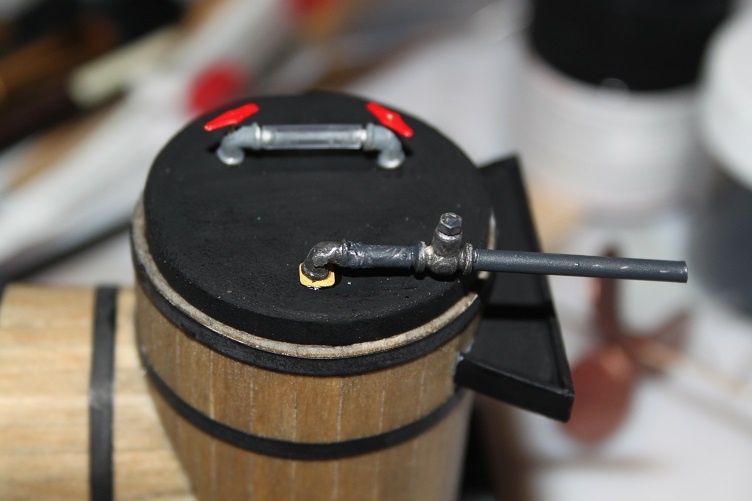
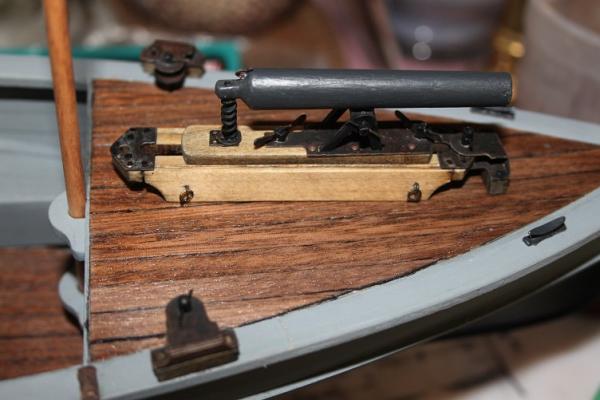
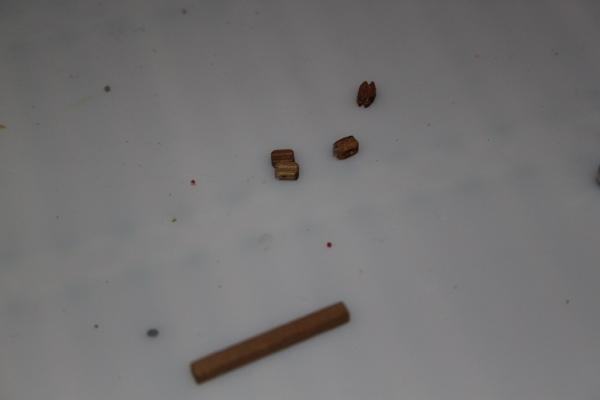
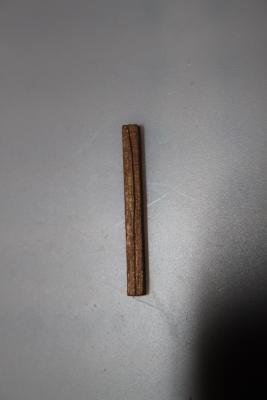
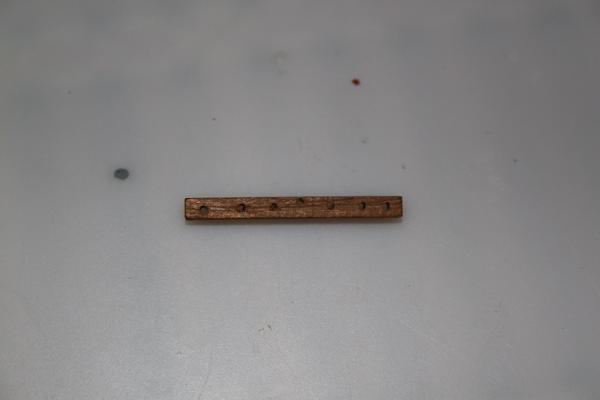
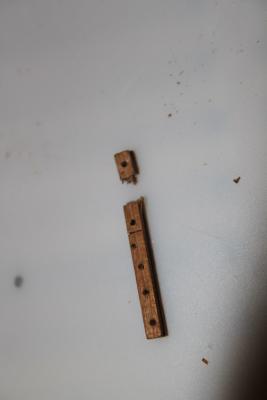
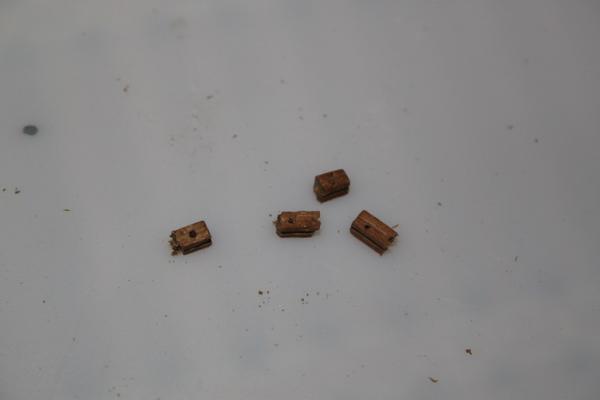
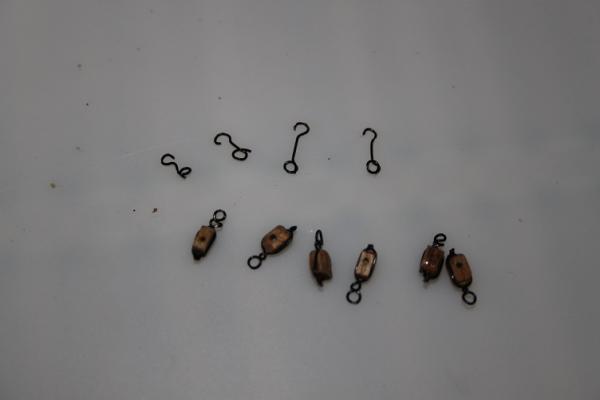
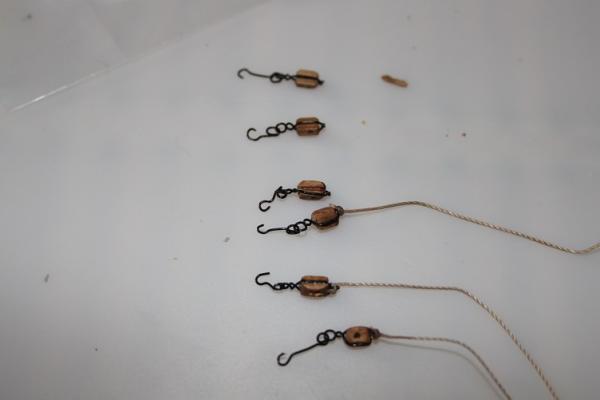
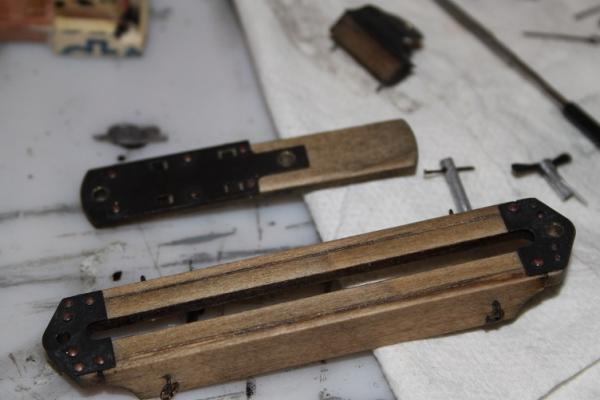
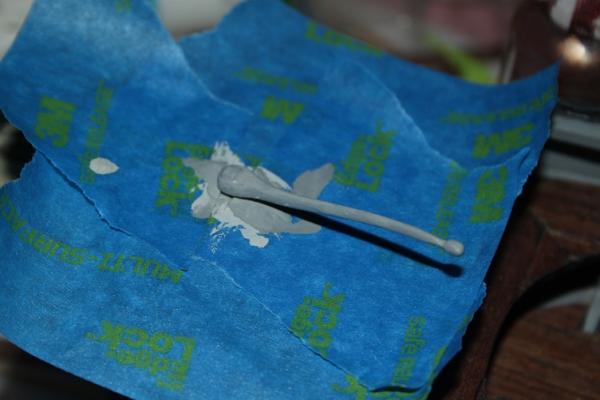
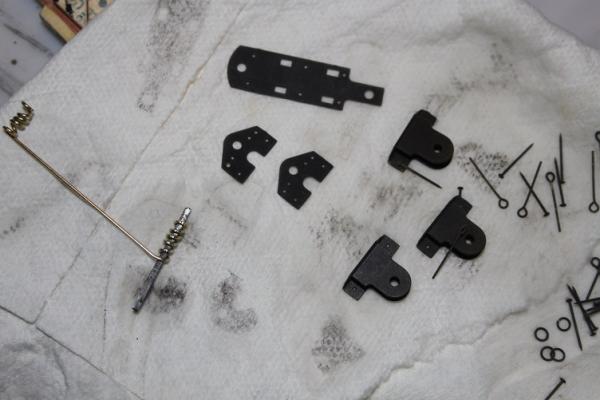
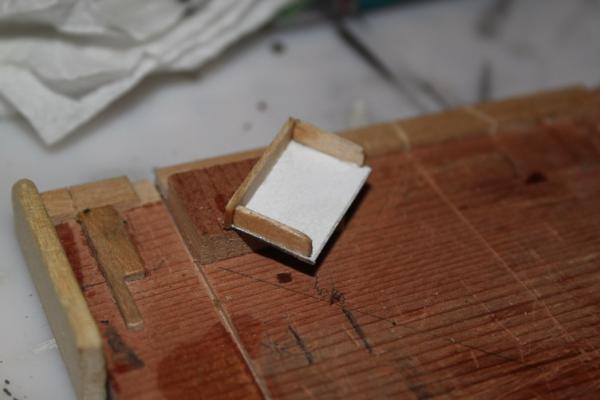
Hello everyone...finally got back to the Picket after the holiday week end...got the foredeck sanded down and refinished...there is the slightest difference in the finished shade...is what it is! From there the howitzer was remounted, fit much better this time around. The torpedo was mounted to the spar with CA and then sanded down and painted again. There were only two rigging blocks included with the kit and I figured I needed a minimum of 6, when I could find none the correct size in my spares box I thought I would try my hand at making some. The blocks started as a length of walnut the correct width and thickness, the center was scribed to make filing the stropping grove easier, once that was complete the length was flipped 90 degrees and holes drilled. They were then cut apart for sanding and shaping. The result is passable and will allow me to rig the gun sled. The hook eyes for the stack were installed and the stays rigged to the stack and the spar mounted to the holders...still needs to be rigged That's it for now thx for looking in. Pics follow:
- 105 replies
-
- 12
-

-
- picket boat
- model shipways
- (and 1 more)
-
the netting looks really good Sam...and your first mate seems to like it as well!
-
Thanks Sam,,,there were a few heck's and darns for sure, should be ok if I can match the finish, I don't anticipate much trouble there sine it hasn't weathered any... Thanks everyone for all the likes
- 105 replies
-
- 2
-
-
- picket boat
- model shipways
- (and 1 more)
-
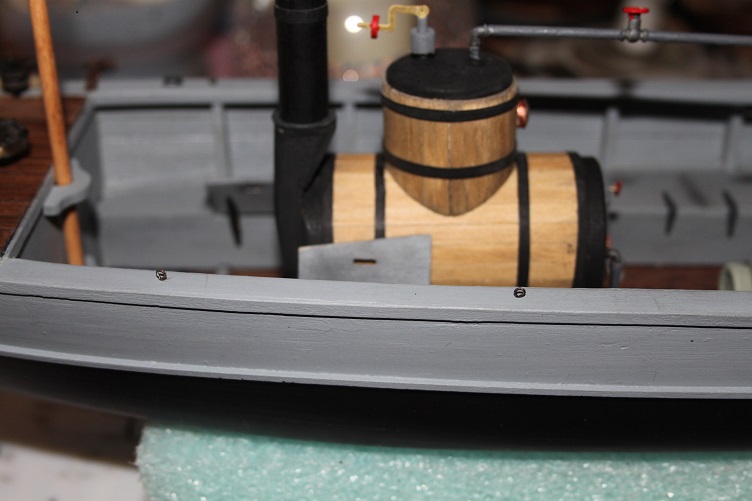
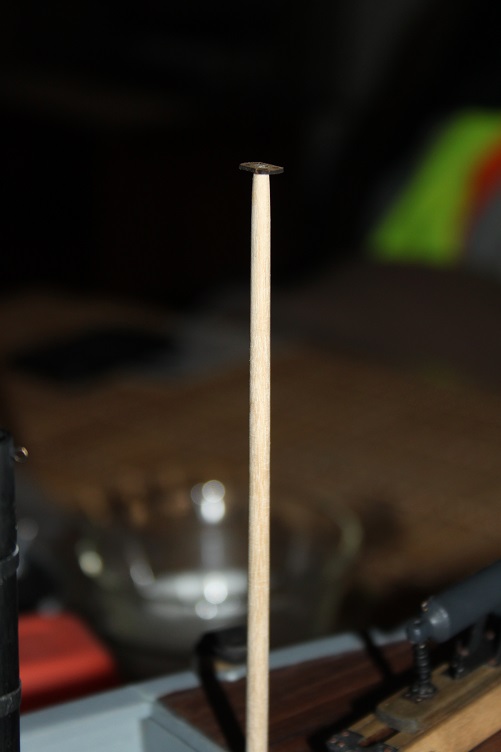
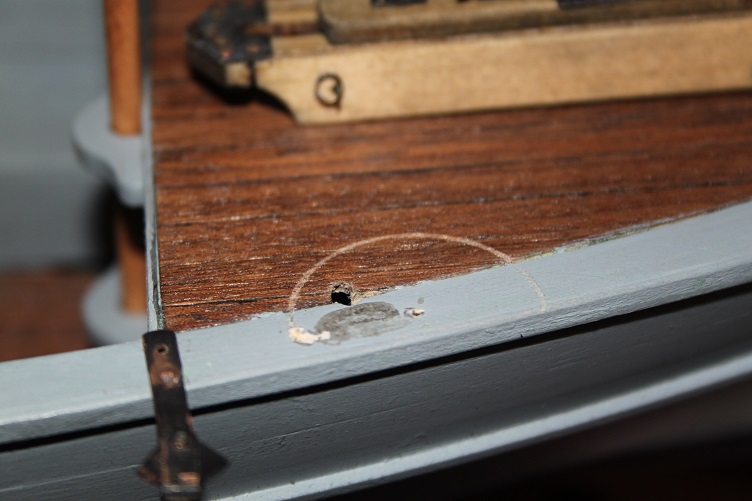
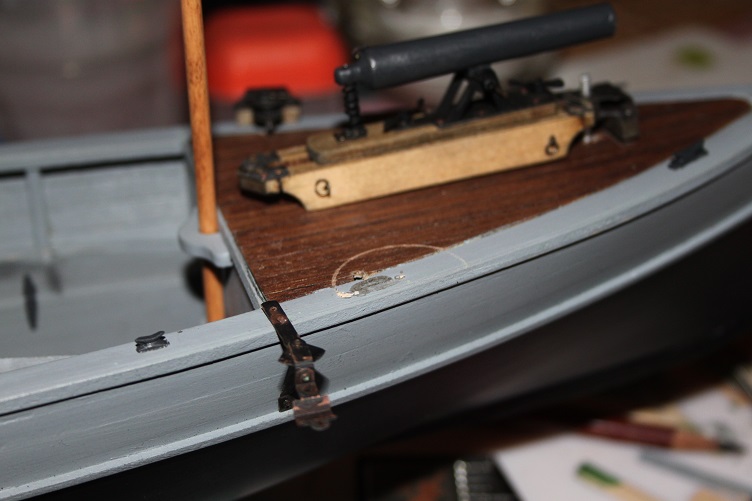
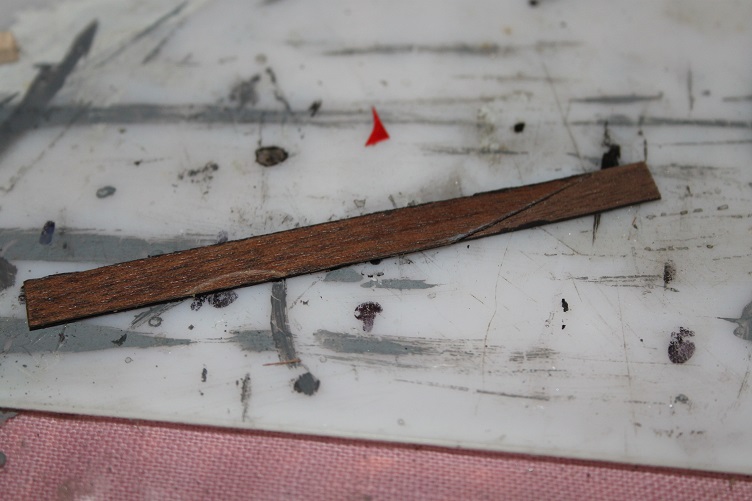
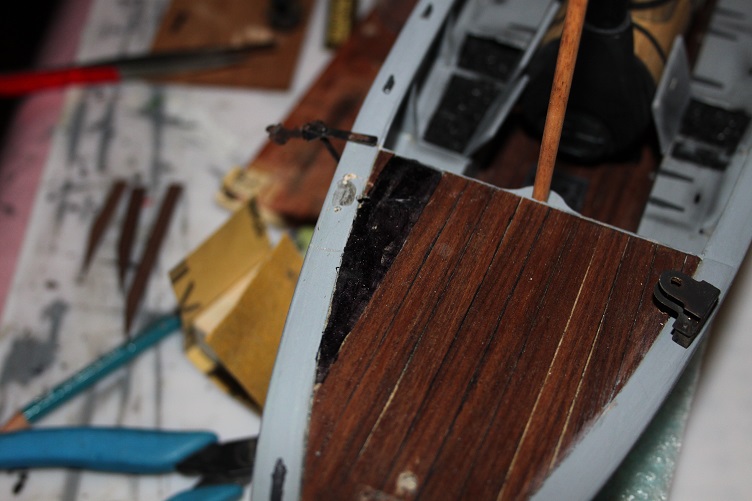
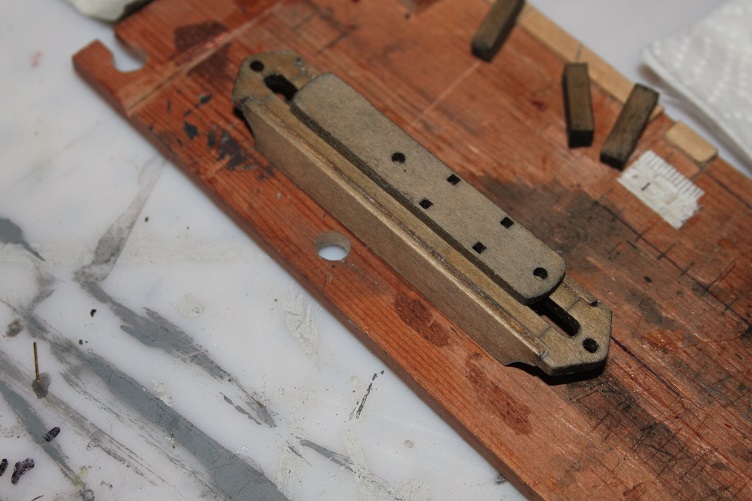
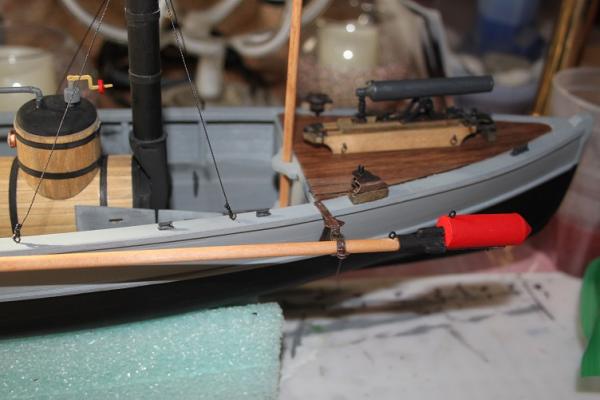
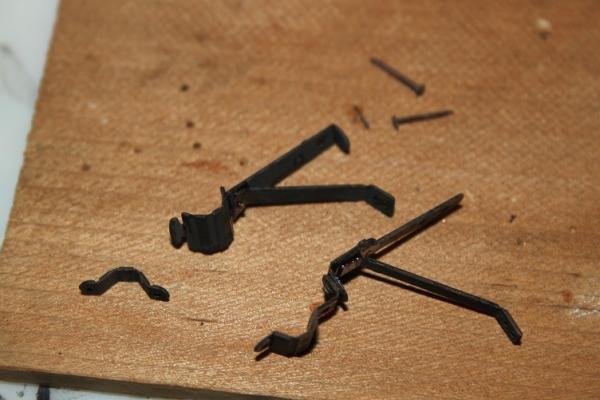
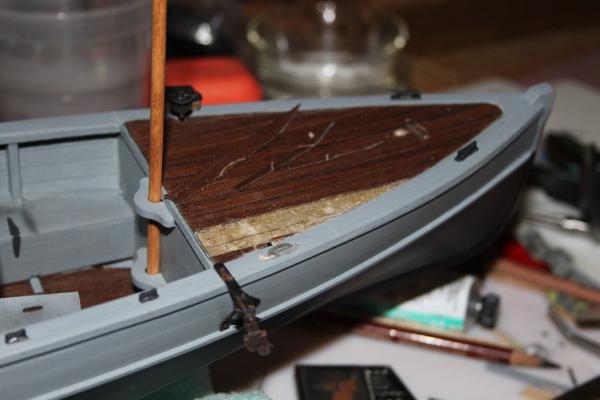
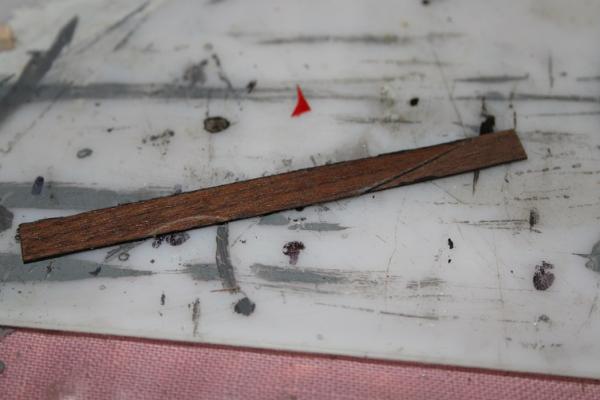
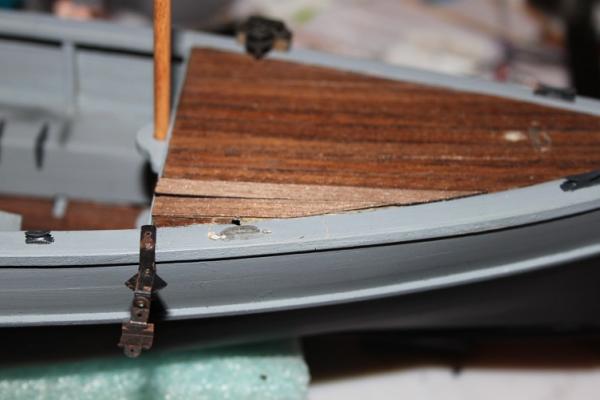
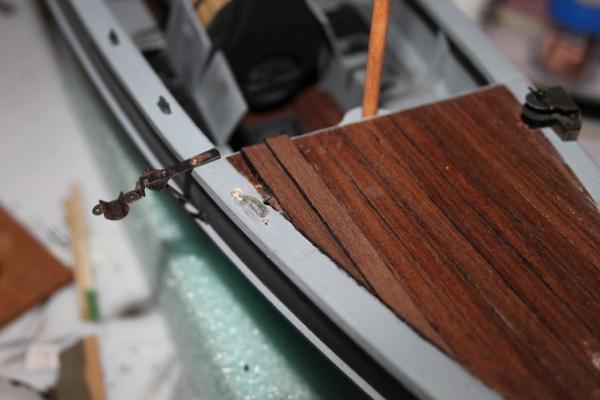
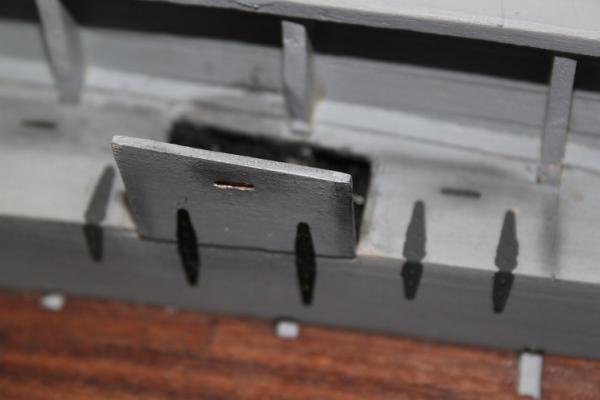
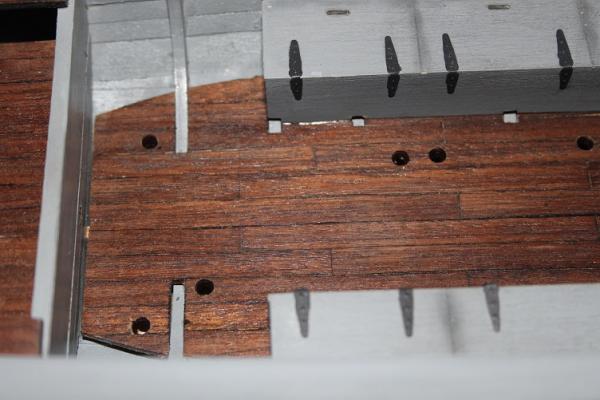
Hello all, Yet another small update...got the parts for the spar mount assembled and mounted, and tapered and finished the mast. When I was mounting the howitzer carriage I noticed that all of the pre-cut holes were the exact size of the tubing that the locking pins were made of. This caused a bit of a problem when trying to insert the pins, they simply would not go without a lot of force and by the time they were where they were supposed to be the finish have taken a real beating! So I figured to fix the issue it would be a simple matter of enlarging the holes...well a file would not fit because of the deck...so I resorted to the drill...bad chose! When I had installed the mounting blocks I pined them to the deck...the first two drilled out nicely, but the third broke loose and pivoted around with the drill bit, scoring a deep circle in my deck...the air was blue!!! To those of you who plan to build this kit I would strongly suggest enlarging all the hole prior to assembly. Luckily,back in the early part of the build when I was making the decking, I make extra. The old decking was pealed off and the damaged pieces used to scribe the shape one the new planks. Once complete these were glued down. You can see the difference in height compared to the finished planks. This will sit for a few days before sanding the new planks down to their finished thickness and the fore deck is refinished. I'll surface sand back to the mid point of the deck to feather in the finish...as always thanks for your time and attention...Pics follow the blackened mounts disaster!!! New deck


- 105 replies
-
- 10
-
-
- picket boat
- model shipways
- (and 1 more)
-
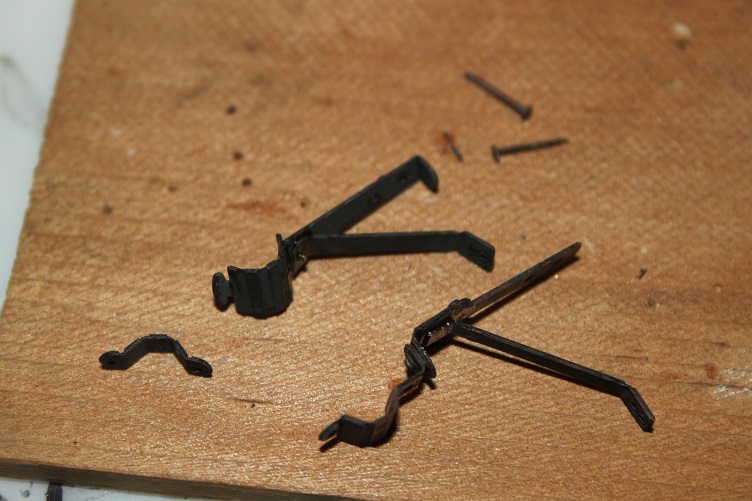
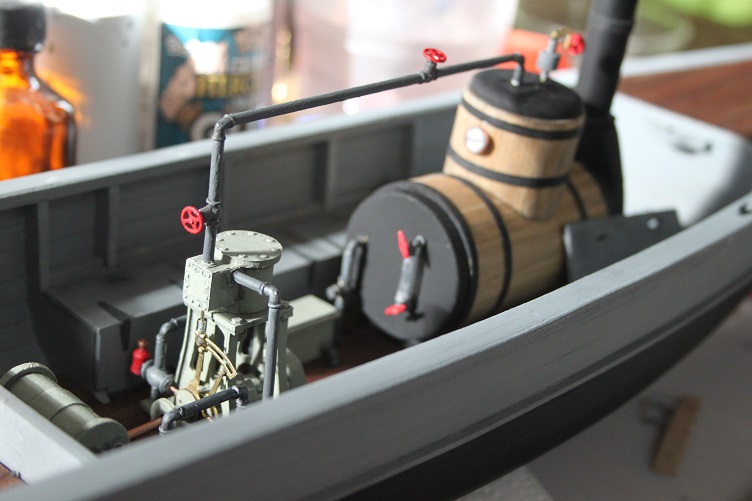
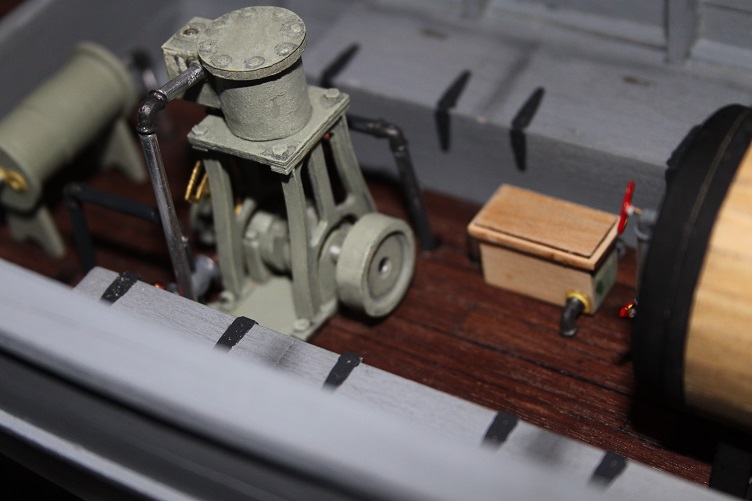
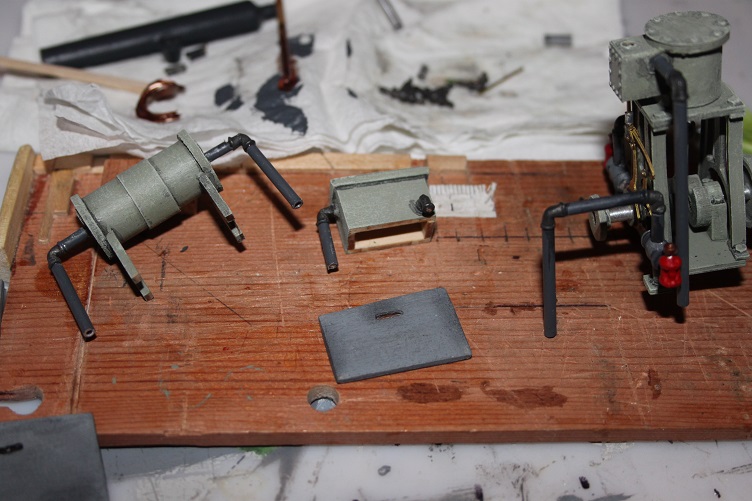
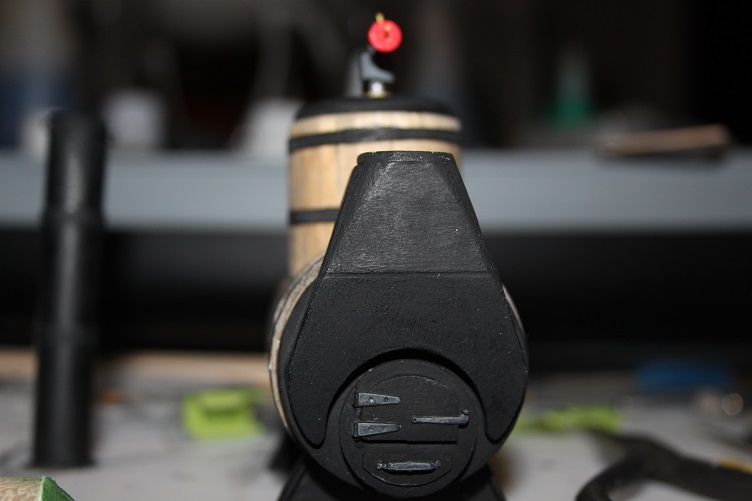
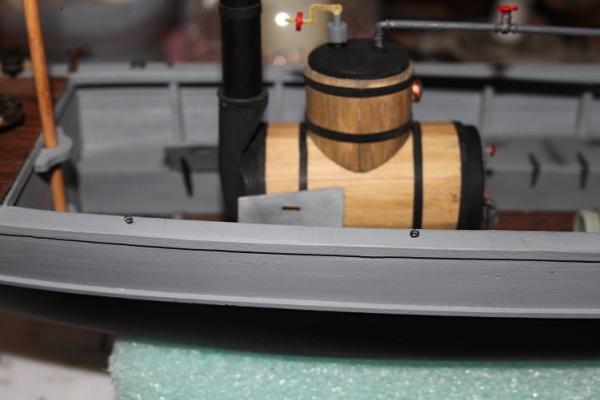
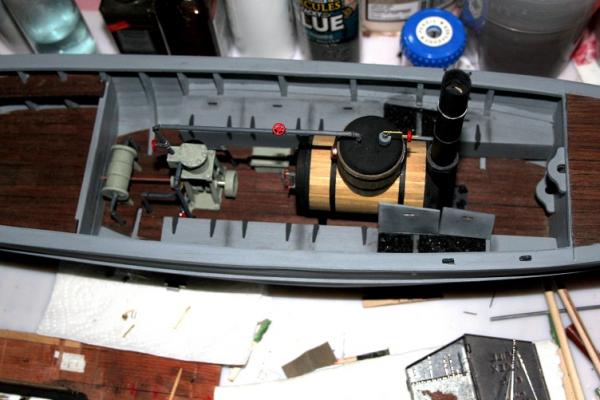
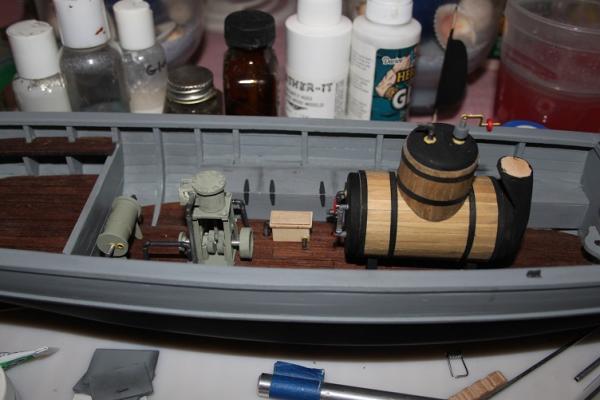
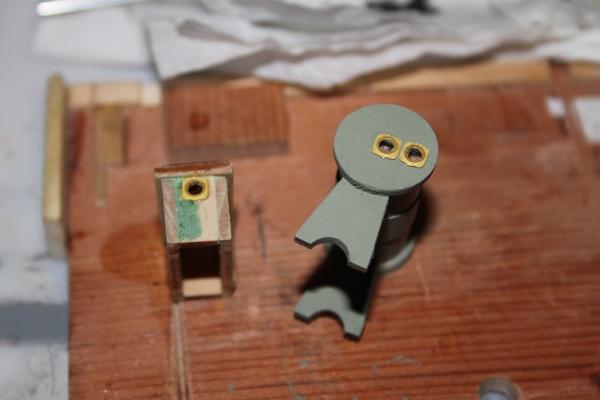
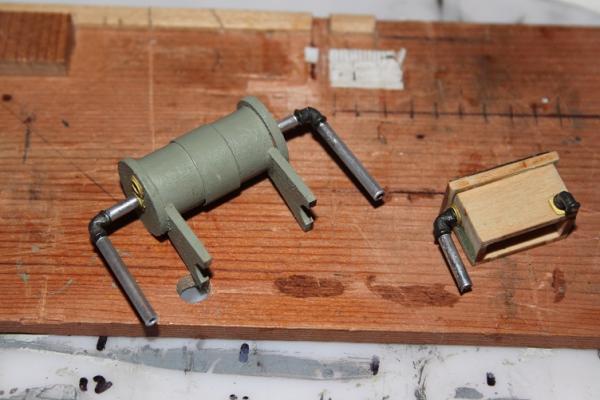
...continued working on the howitzer carriage, and got all the boiler plant sub-assemblies in place, pics follow Finished and mounted...a little touch up paint to do Power plant all installed and plumbed here's how the open coal bins look mounted up I decided to paint the tiller


- 105 replies
-
- 12
-
-
- picket boat
- model shipways
- (and 1 more)
-
I would suggest small ropes :P :P
-
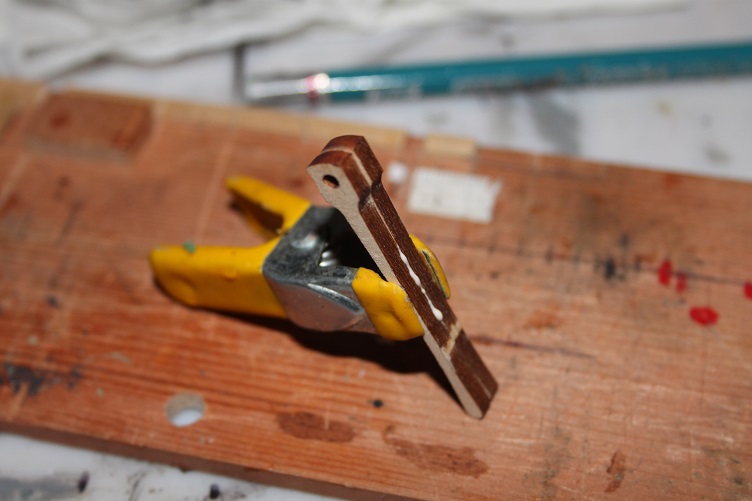
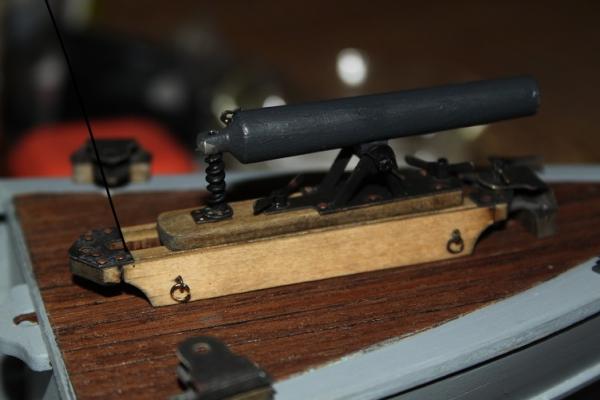
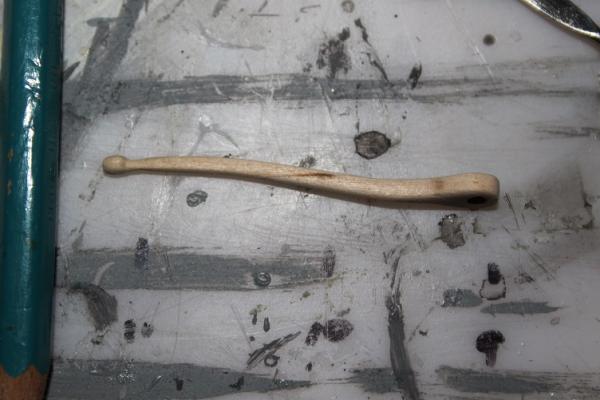
Hi everyone, still working on the little stuff, finished and mounted the tiller and started working on the gun mount...I decided to mount and shape a small piece of end grain on the tiller to simulate the rudder tenon, I think it turned out ok, the tiller may get painted...the light finish just doesn't look tight to me...we'll see...Pics follow: false tenon mounted tiller mounted on aluminum tube mounted to the stern Ditto...may get painted work on the gun carriage catching on to blacken-it


- 105 replies
-
- 13
-
-
- picket boat
- model shipways
- (and 1 more)
-
Thanks for all the likes! Josh, I almost did the same still cant figure way MS burned out two?? Sam, thanks much, but I believe your Enterprise is outstanding, it will be pinned, what I'm debating is how to finish the top of the mount...may cap it with a very thin piece...not sure Thanks again J
- 105 replies
-
- 2
-
-
- picket boat
- model shipways
- (and 1 more)
-
Looking good Pop...closing in on the big finish
-
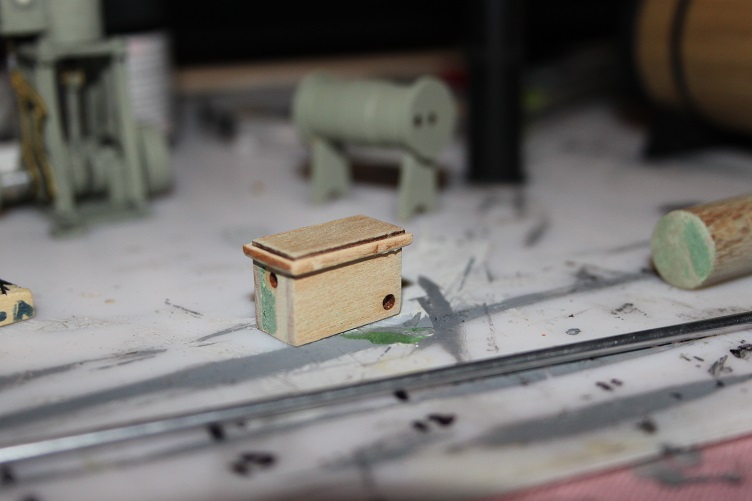
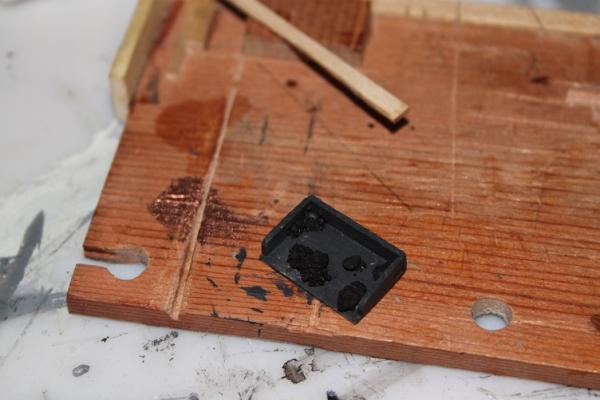
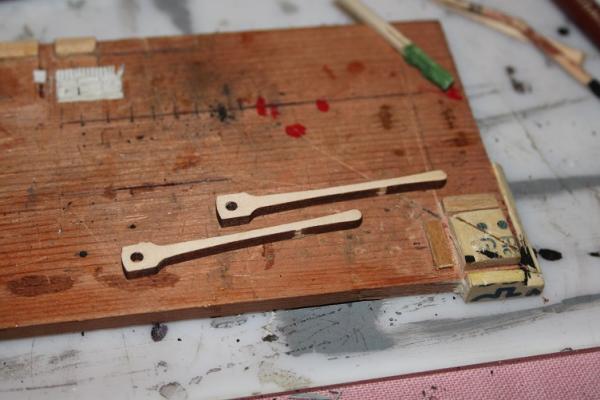
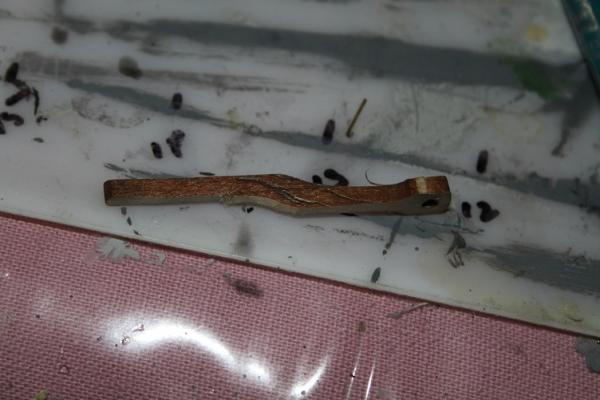
Hi all, A couple of small details, finished the ash bin and tiller. The ash bin was just painted and had a few pieces of Coal glued in...the tiller took a little more effort, I noticed the kit came with two, why, I'm not sure but I decided to use them both...I glued them together in the center only...then did some shaping to create as S shaped tiller instead of a straight one, pics follow: the finished ash bin two tillers only glue in the center Layout...X marks the cut-offs Shaping with xacto and sandpaper Final shaping with 320 grit...still needs some finish, probably just some natural stain and poly


- 105 replies
-
- 12
-
-
- picket boat
- model shipways
- (and 1 more)
-
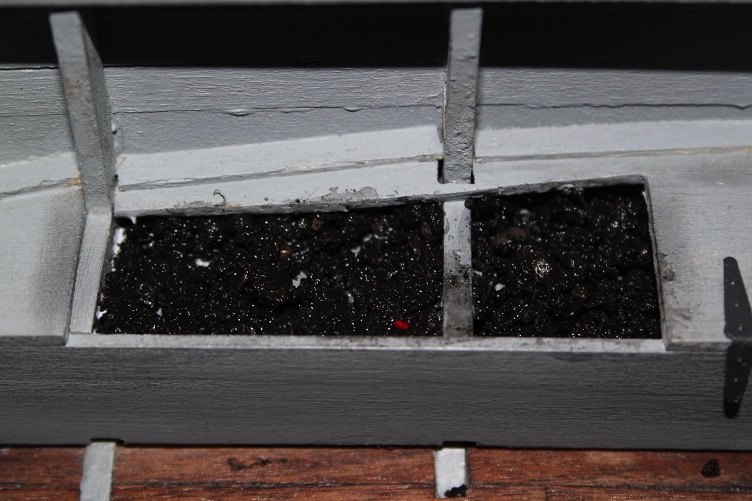
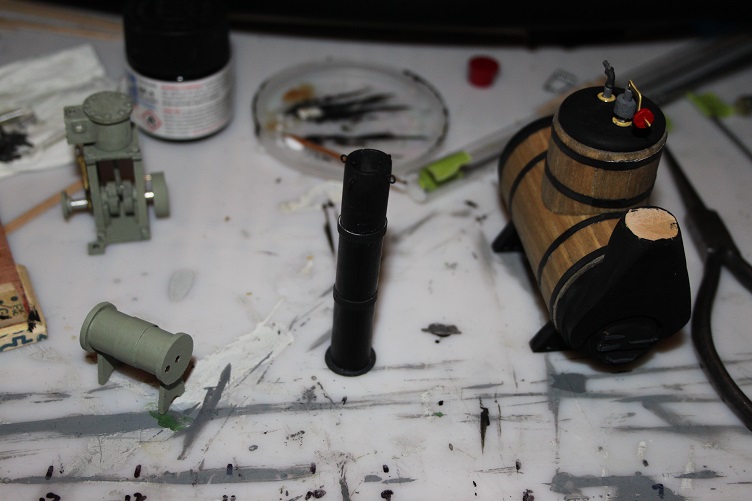
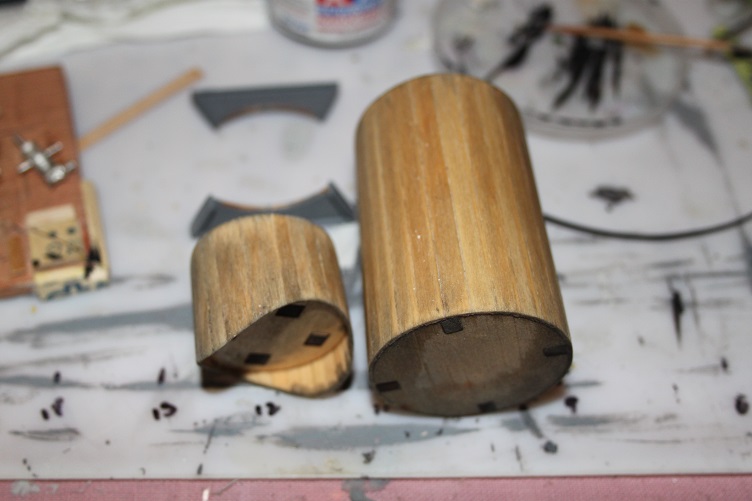
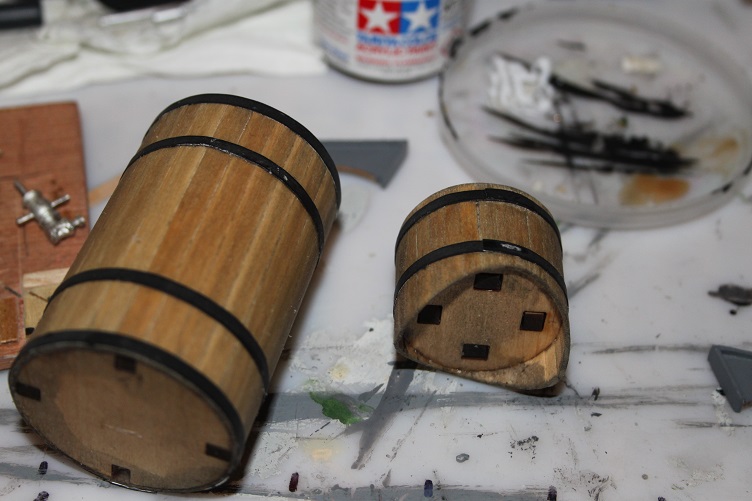
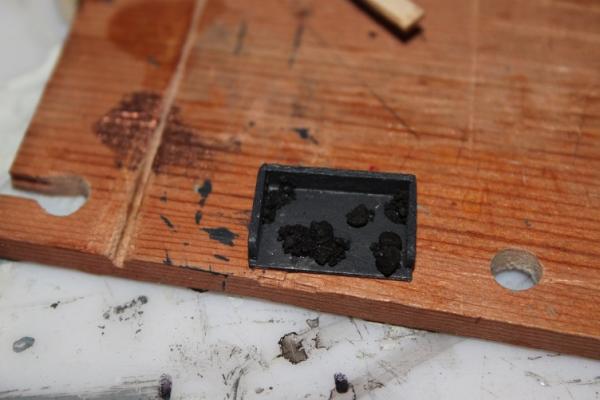
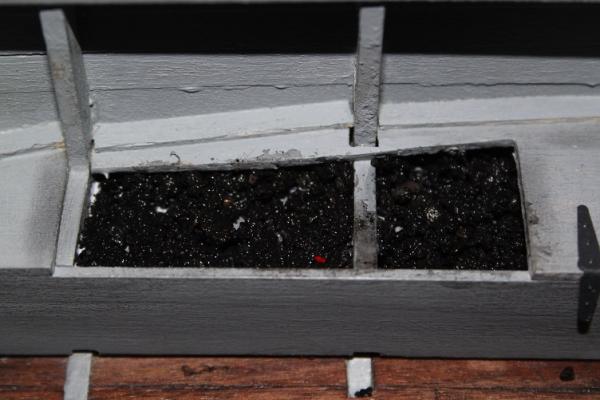
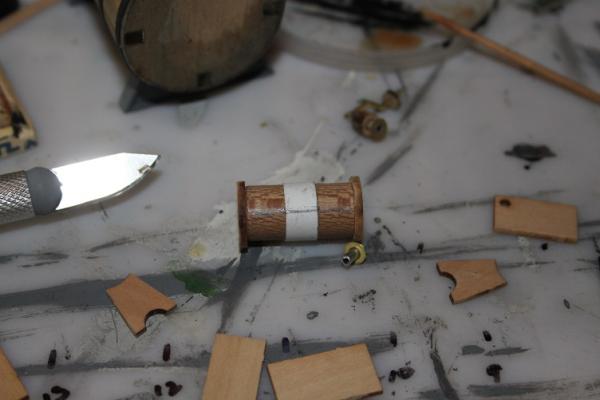
More little stuff: Test fitting all the subs Shot of the torpedo painted out All the subs painted and weathered(dry brushed) The coal, mixed some gloss black to airbrush consistency and stirred in the ground asphalt loaded bin start of the ash bin, idea from Tim I...thx Tim ready for paint That's all for now, thx for looking in


- 105 replies
-
- 15
-
-
- picket boat
- model shipways
- (and 1 more)
-
Thanks yo gentlemen...thx to all for all the likes :)
- 105 replies
-
- 1
-
-
- picket boat
- model shipways
- (and 1 more)
-
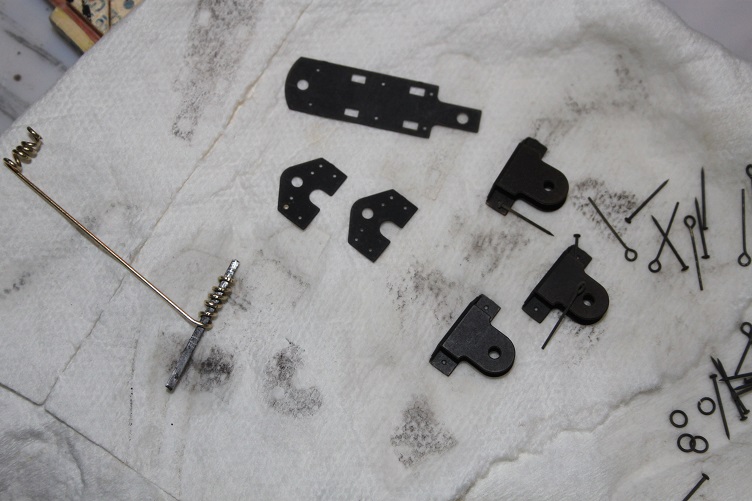
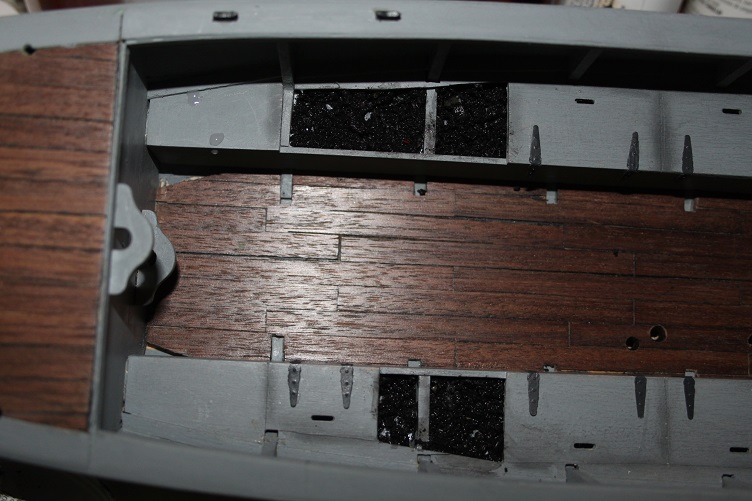
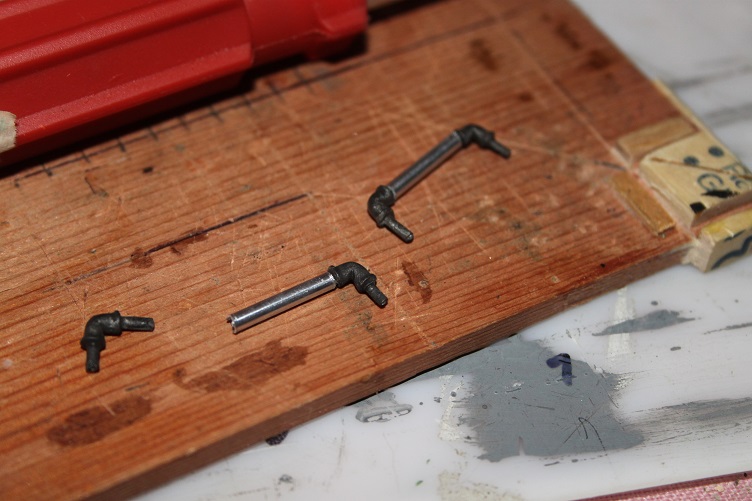
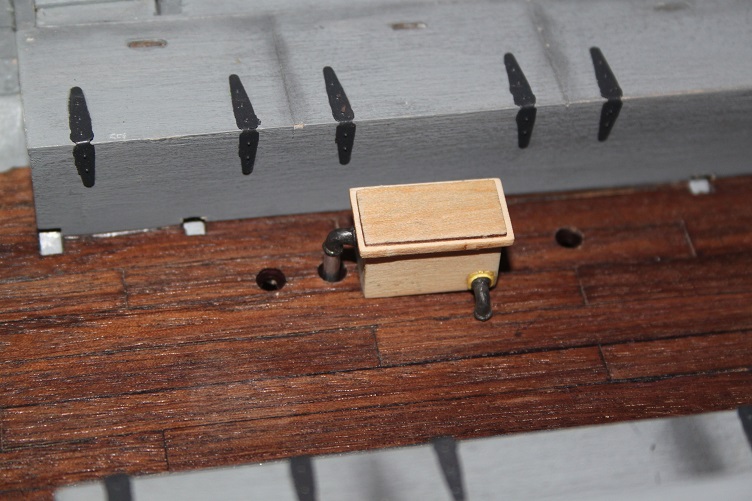
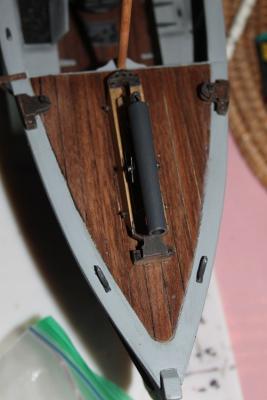
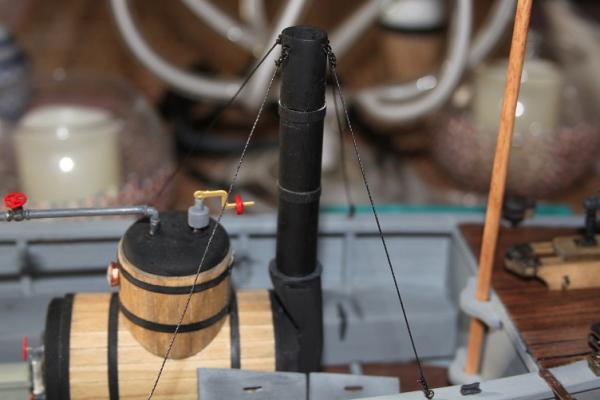
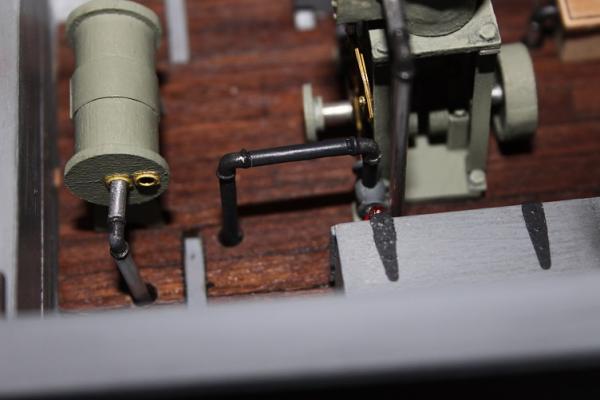
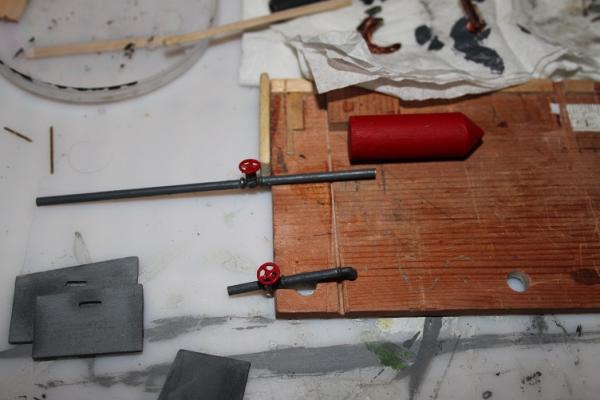
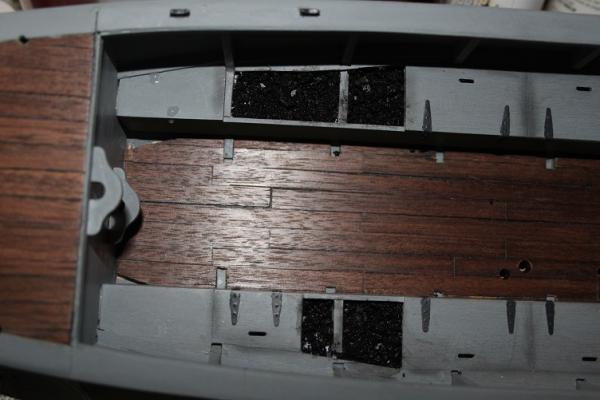
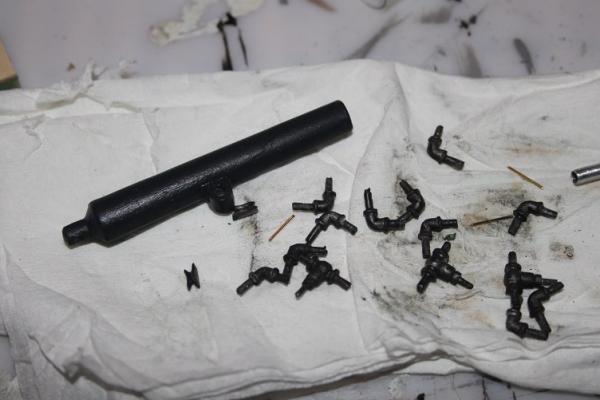
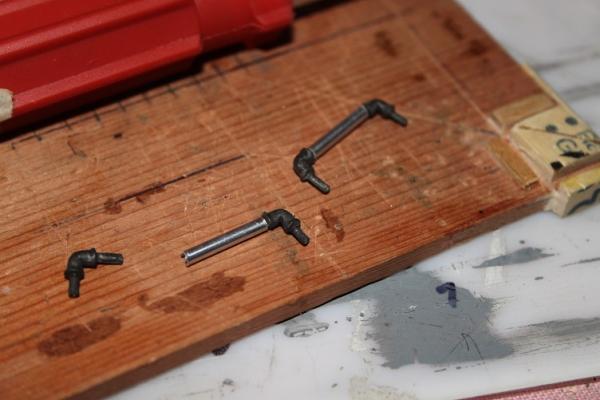
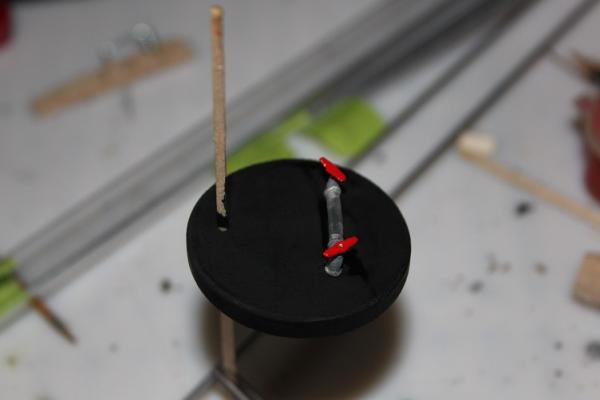
Small update...started to plumb the sub-assemblies, before I did that I practiced with Blacken-it and got the elbows done, you can see there is not much difference in them and the parts I painted, so the finishes will be a combination of the two. A lot of the steam and water lines are supposed to terminate at the deck, to simulate running under the deck boards. I kinda thought if the lines ran under the deck there should be holes for them to enter and exit and they would be a bit larger then the pipes themselves...so I proceeded to trial fit all the subs and mark where the lines should be, drilled the holes and painted the insides black. All the plumbing was left longer than required so the pipes disappear into the holes... That's it for now, thanks for all the likes and the time and attention, Pic's follow: Paint and Blacken-it, pretty close in color scale plumbing plumbing the boiler...note the extra length hot box and condenser plumbed holes in the deck This is the hot box test fit, you can see how the pipes will disappear "under" the deck boards


- 105 replies
-
- 11
-
-
- picket boat
- model shipways
- (and 1 more)
-
THX Popeye...this is really a different build, been enjoying it so far
-
THX All for the likes, Hi Sam...I click More Reply Options and use the advanced file loader and let it slam, you are adding them one at a time?? This one is a blast from the past, I see you can even add text under the pic this way...love it THX MUCH

- 105 replies
-
- 2
-
-
- picket boat
- model shipways
- (and 1 more)
-
Seems photos are mixing randomly when loaded???
-
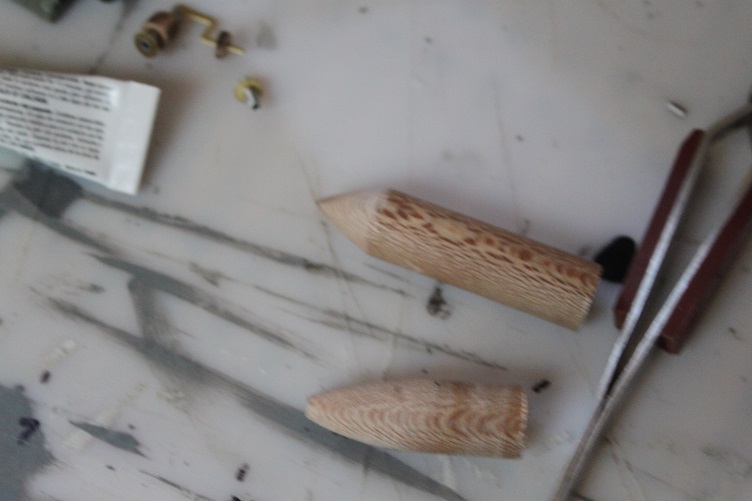
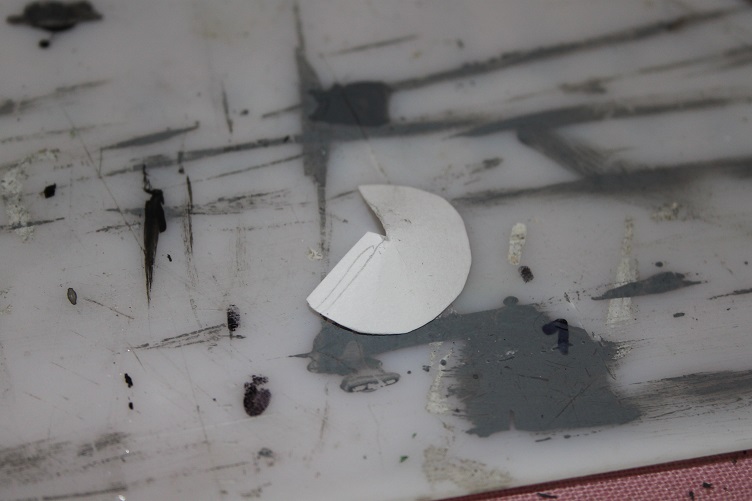
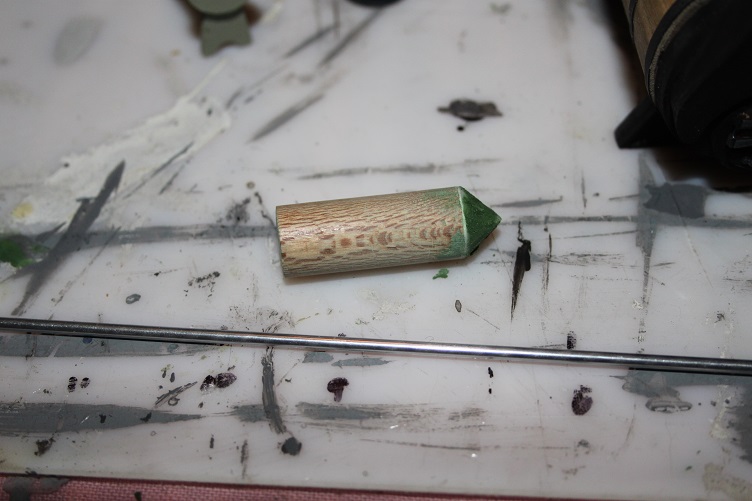
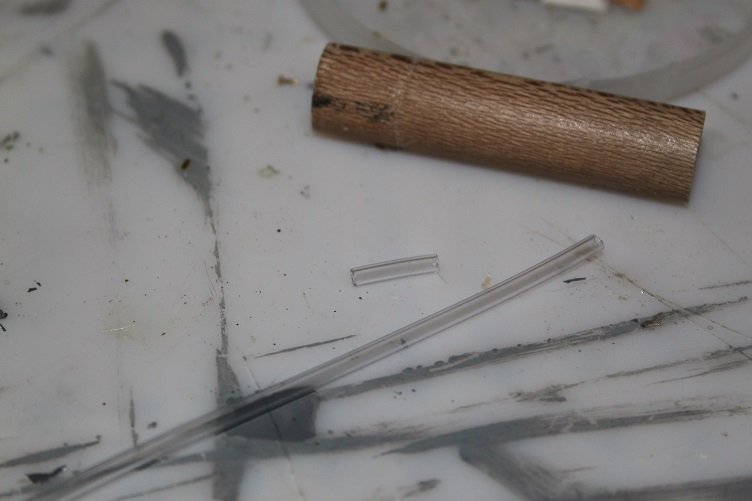
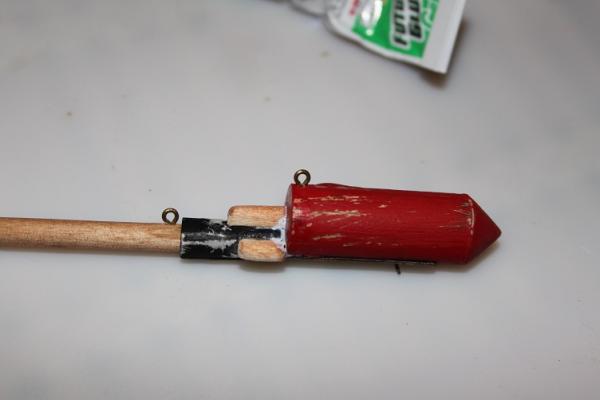
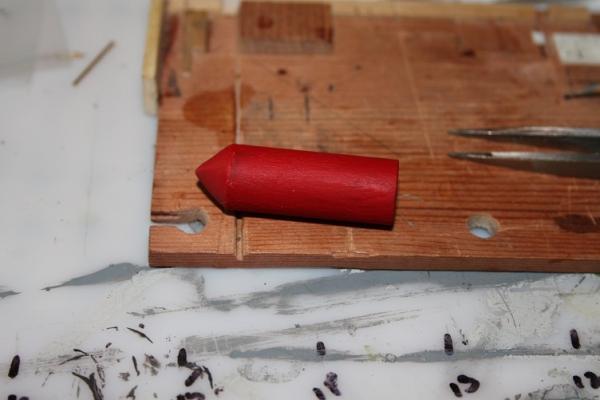
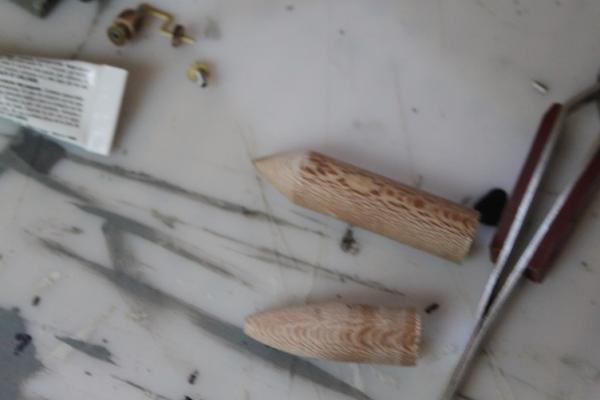
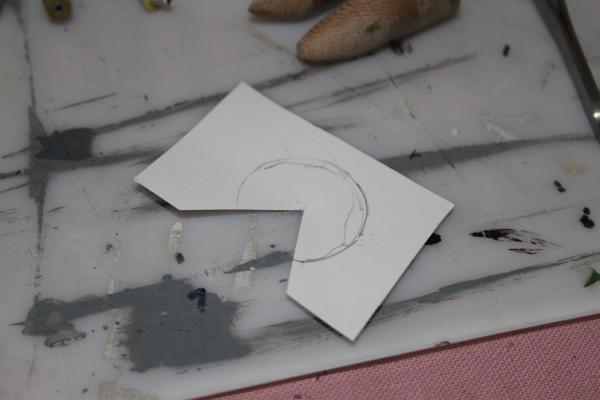
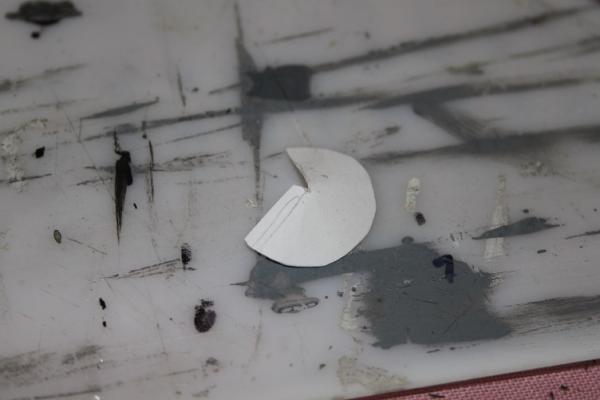
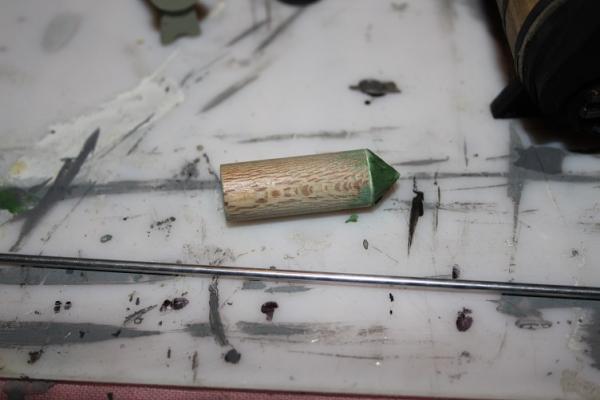
A small update...spent some time working on odds and ends...after a couple unsatisfactory attempts to sand the taper into the torpedo I decided to make it out of card stock. I marked out a circle with a small compass, then cut a pie shaped section out. It was then a matter of forming the cone and attaching it to the dowel. I then coated the cone with thin super glue to harden it. Once everything dried I stated filling and sanding...still a bit more to do, but overall I think it came out ok. I started on the condenser and hot box...these still need detailed and finish painting, also finished the boiler front Pics follow:


- 105 replies
-
- 11
-
-
- picket boat
- model shipways
- (and 1 more)
-
very much thx
-
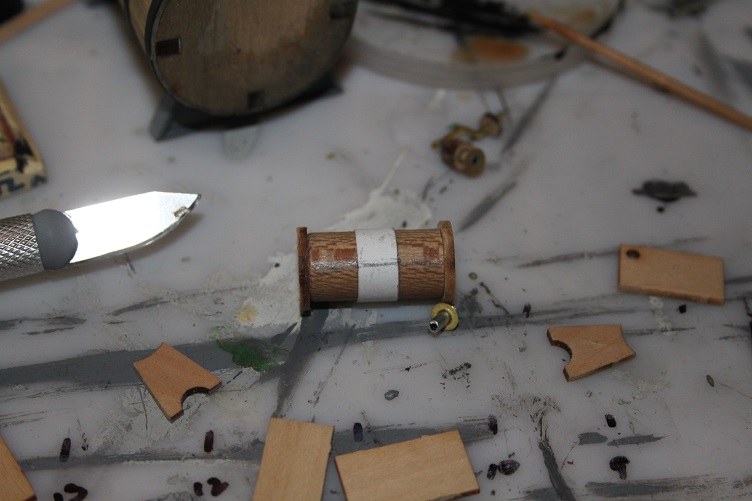
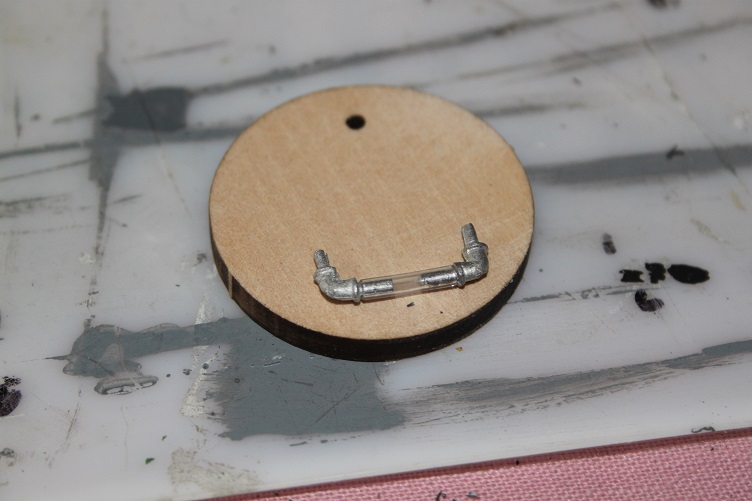
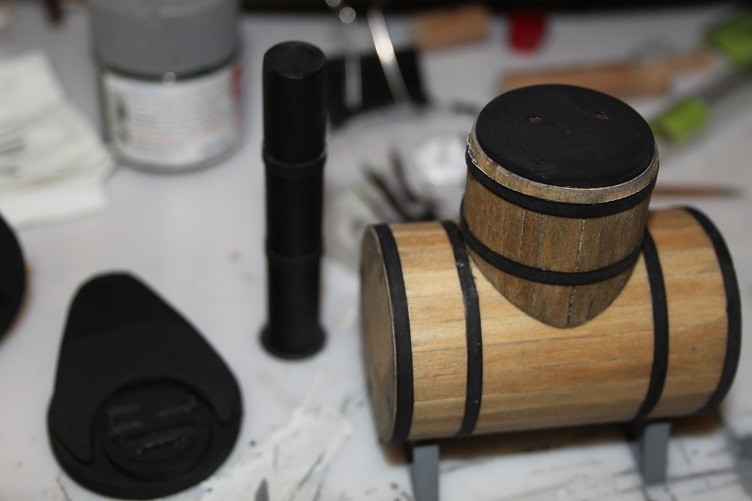
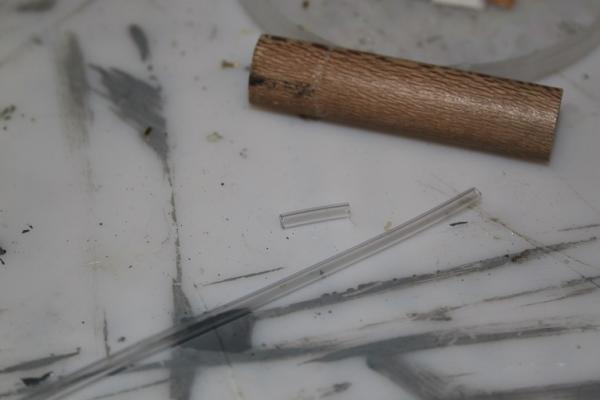
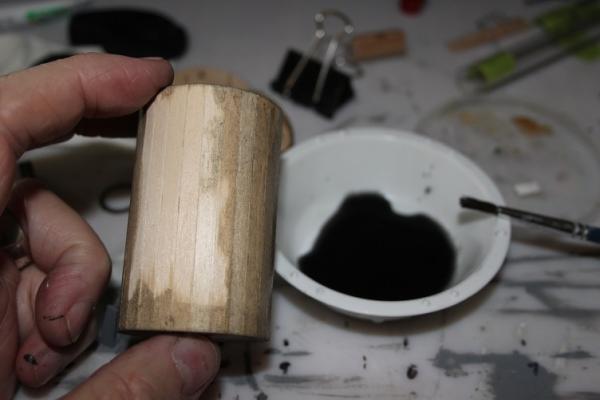
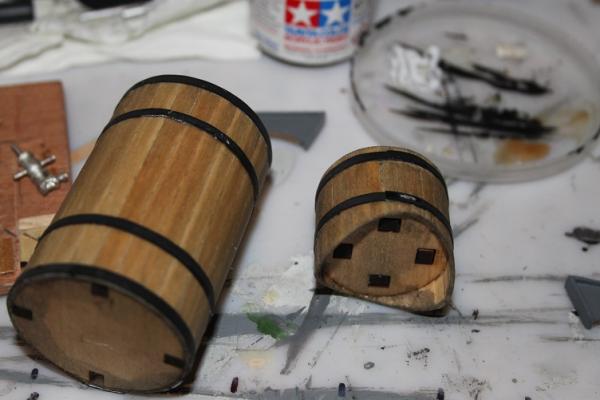
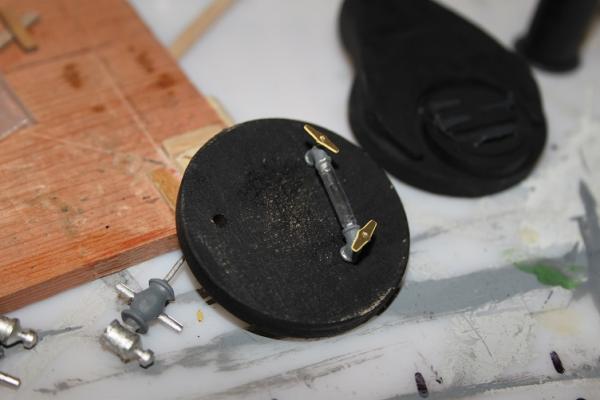
Hi all, A small update on the boiler construction...started off by applying the brass parts to the boiler doors, just pre-bent and attached with ca per the kit instructions, you'll notice them are still brass in the first pic...I've gone with a painted finish on most of the the metal parts. I tried Blacken-it but had no luck, I'm gonna have to practice with that stuff. Anyway, I decided to construct the sight tube from some clear tubing I have in the junk box, so a piece was cut to the appropriate length and test fit...the fittings will receive a trim later. The boiler itself was up next, I wanted to continue the theme of a lightly weathered look so I applied a dark wash to the boiler and steam dome sub-assemblies, these parts were then sealed with natural Min-wax stain and left to dry...then all was sanded with 220 grit to expose some lighter sections. Its a technique I've used before...(applique armor on WW2 Shermans) and works pretty well. The bands were added to the boiler subs and the steam dome top added, and the stand parts added. Still have some touch up painting and dry brushing to do, but that's all for today. Pics follow, as always thanks for your time and attention:


- 105 replies
-
- 13
-
-
- picket boat
- model shipways
- (and 1 more)
-
Hi Charlene, my best to Jerry, your Bounty is coming along nicely. I really like the blue accents, would you be able to share the brand and shade? She is really gonna pop once you apply your finish to the walnut, nice job. J
-
seems like you've figured it out
-
I would agree Tim, you learn quite a bit by recovering from mishaps