HOLIDAY DONATION DRIVE - SUPPORT MSW - DO YOUR PART TO KEEP THIS GREAT FORUM GOING! (Only 13 donations so far - C'mon guys!)
×


jdbondy
-
Posts
340 -
Joined
-
Last visited
Content Type
Profiles
Forums
Gallery
Events
Everything posted by jdbondy
-
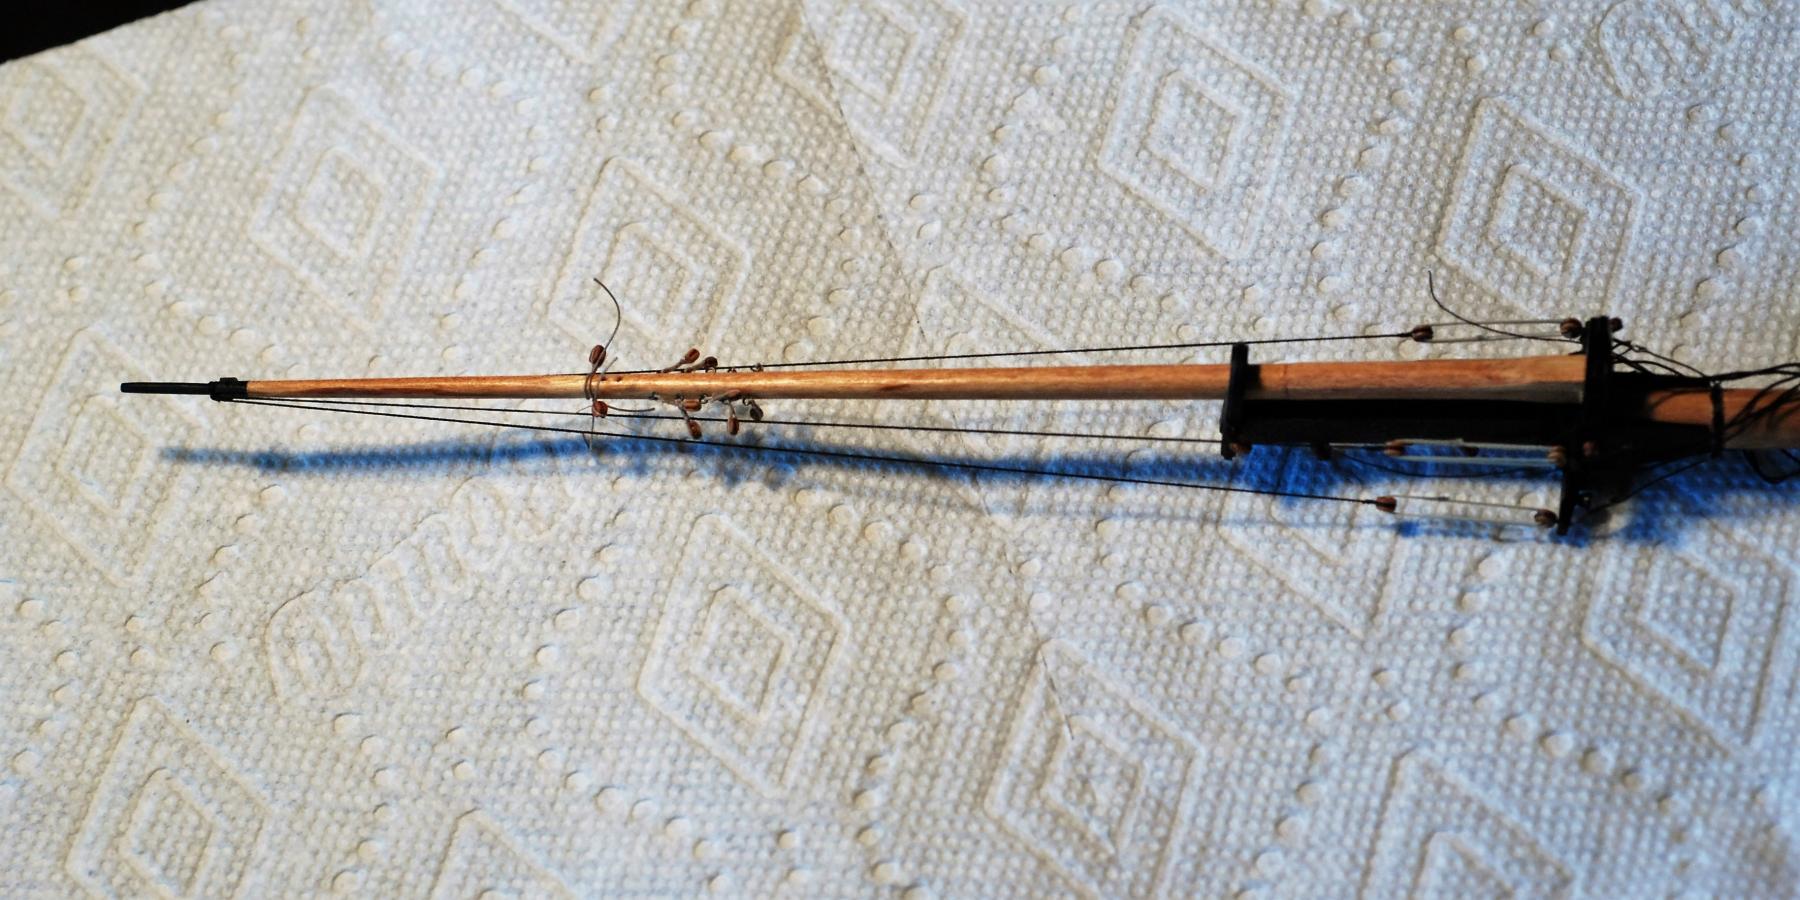
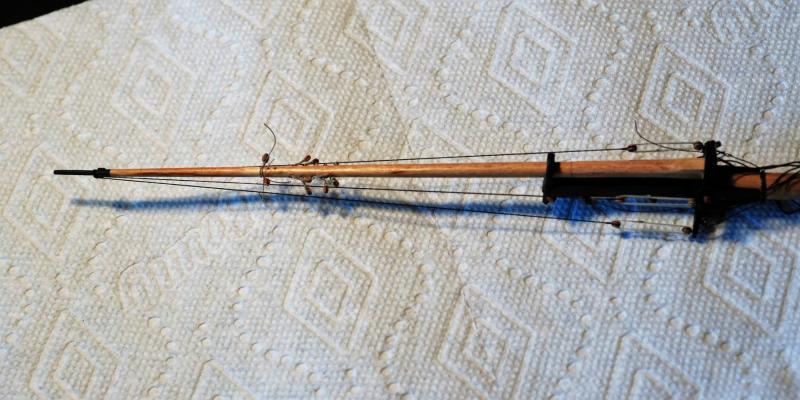
Help! I just realized that when I painstakingly installed the topmast shrouds, I took them way too far up the topmast. They need to end at the level of the uppermost pair of blocks that are installed on the topmast. (Picture is attached.) The shrouds are each seized to the topmast, and of course they each terminate at a deadeye at the crosstrees. I am afraid that when these were installed, I applied CA glue to the seizings (I have since stopped using CA on seizings). I am ok if we think I just need to cut them and start over, but before doing that, I wanted to see if anyone has any other ideas. If they were not glued with CA, I could just shorten each shroud at the deadeyes. But I haven't tried moving anything yet to see what happens. Once I'm done with that, I'll need to move those 5 pair of blocks off the topmast and seize them to the shrouds, like the plans said I should have done in the first place...
-

Turning brass thimbles
jdbondy replied to jdbondy's topic in Metal Work, Soldering and Metal Fittings
Hi Wefalck, The lathe is a Sherline 4400. I am using a collet on the tailstock of course; I guess you are suggesting another collet for the headstock. I used a file to cut the groove because I was just too lazy to go back to the bench grinder and create another cutting tool for making the groove! The file worked fine but I agree that another cutting tool with a pointed tip would be more optimal and reproducible. I received the K&S tube cutter recently but I can't get it to work on the relatively small size of the brass tubing I have (1/16"). I'll put it away for when I have larger tube that needs cutting. JD -
Turning brass thimbles
jdbondy replied to jdbondy's topic in Metal Work, Soldering and Metal Fittings
Thanks, everyone. Jud and mtaylor, I suspect that the error lies more with the tailstock, as it currently has a lot of play in it. I'm going to invite a machinist friend over to see what he thinks. I'll keep it in mind that we could true up the inside surfaces of the 3 jaw chuck. Jose and Duffer, I have just put in an order for a K&S tube cutter! We'll see how that goes; I think it's going to be hard to beat the quality of the turned thimbles. Hopefully I'll get around to creating an actual build log of my model... JD -
Turning brass thimbles
jdbondy replied to jdbondy's topic in Metal Work, Soldering and Metal Fittings
PS, I just can't quite figure out how to make my images appear smaller in my posts! I substantially reduced their size (25% of original size) using Paint but that didn't seem to do it. JD -
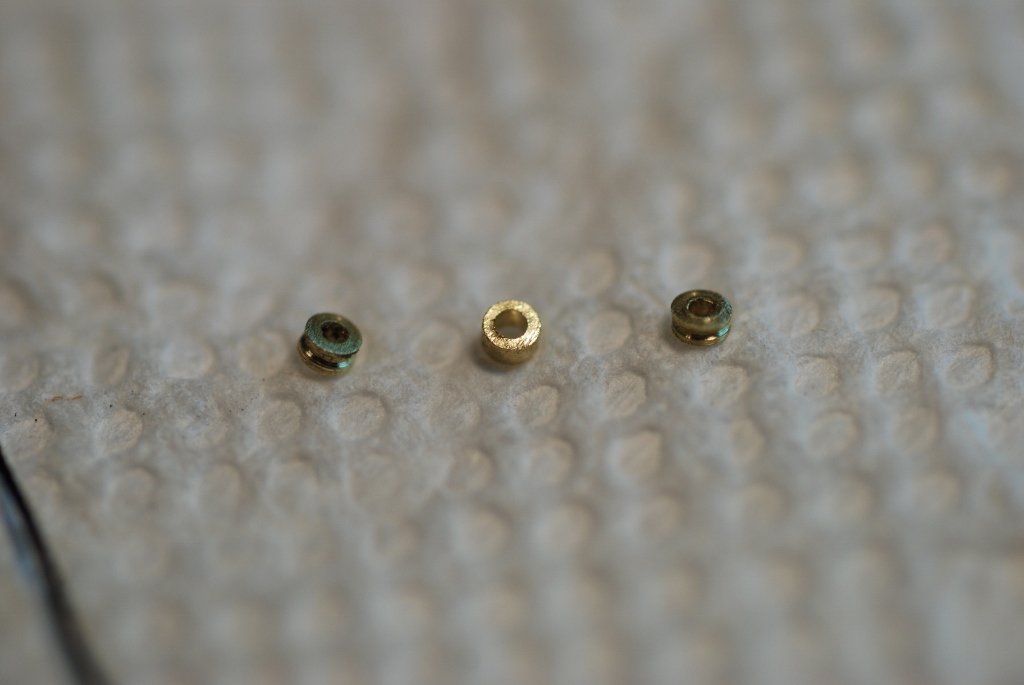
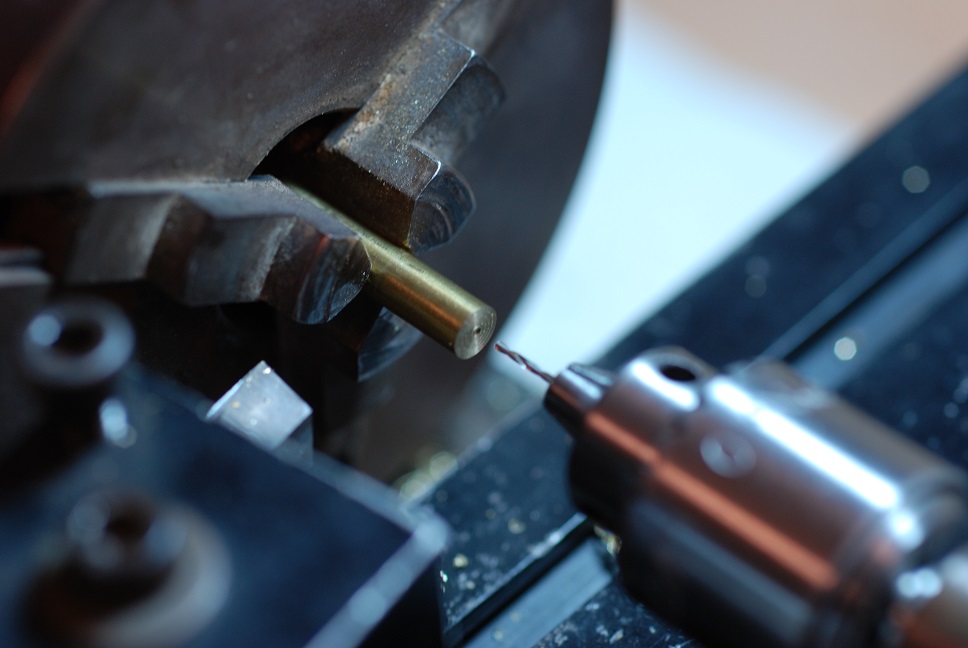
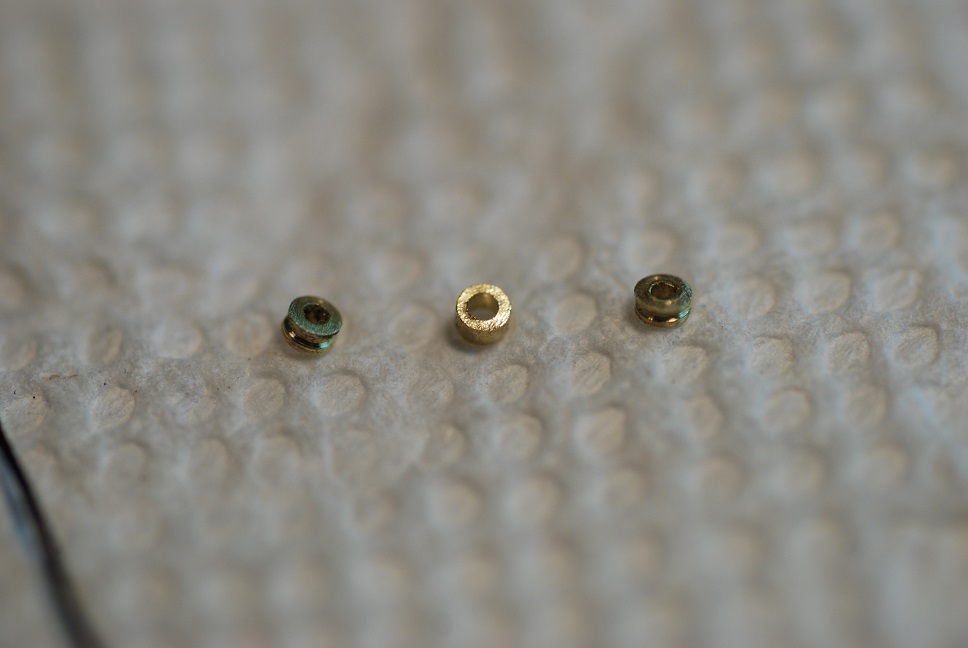
My model of Pride of Baltimore 2 requires some thimbles. The model is in 3/16" scale, so the thimbles would have to be pretty small. I tried cutting segments of 1/16" brass rod with a Dremel cutting wheel and peening them with a jeweler's punch, but the results were not consistent or satisfactory. I recently acquired a Sherline metalworkers lathe, used and at good cost. So I am finally having to learn how to properly use it for metal turning. To this point I have only used it to turn some wood pens. So the first step was to clean the sawdust out of all the crevices of the lathe... I purchased 3/16" brass rod stock and cut off a suitable length (about 2"), then faced the cut surface smooth. (Oh, to get to this point, I had to learn how to grind my own cutting tool, then mount it so it was at the appropriate height. A process in and of itself.) Then I used a center drill to just barely touch the surface and create a dimple so my smaller drill bit wouldn't wander when drilling a center hole. I used a 0.031" drill bit (which required purchasing the small collet that accommodates such small bits, yet another step...) to drill a depth of about 0.1". I turned the outer dimension to 0.050", then used a triangular file to carefully file a groove into the outer surface of the cylinder near its end. Then I parted off a thickness around 0.025-0.030". Getting to this point required extensive trial and error as I learned how to eliminate vibration of the parting tool so it wouldn't fracture the cylinder instead of parting off the final product, and also learned how to adequately sharpen the cutting and parting tools. But it was worth the effort to get such a consistent product. Three photos are attached, the final picture obtained after blackening with Birchwood Casey. Thanks for the tip, Dr. Toni Levine! JD

-
Thimble help needed
jdbondy replied to Senior ole salt's topic in Metal Work, Soldering and Metal Fittings
Sorry, didn't mean for that picture to be quite so big... JD -
Thimble help needed
jdbondy replied to Senior ole salt's topic in Metal Work, Soldering and Metal Fittings
I recently had great success turning some small thimbles, with an outer diameter of 0.050" and inner diameter of 0.031". I will try to do a fresh post later today describing the process. Above is a picture of the (unblackened) finished product.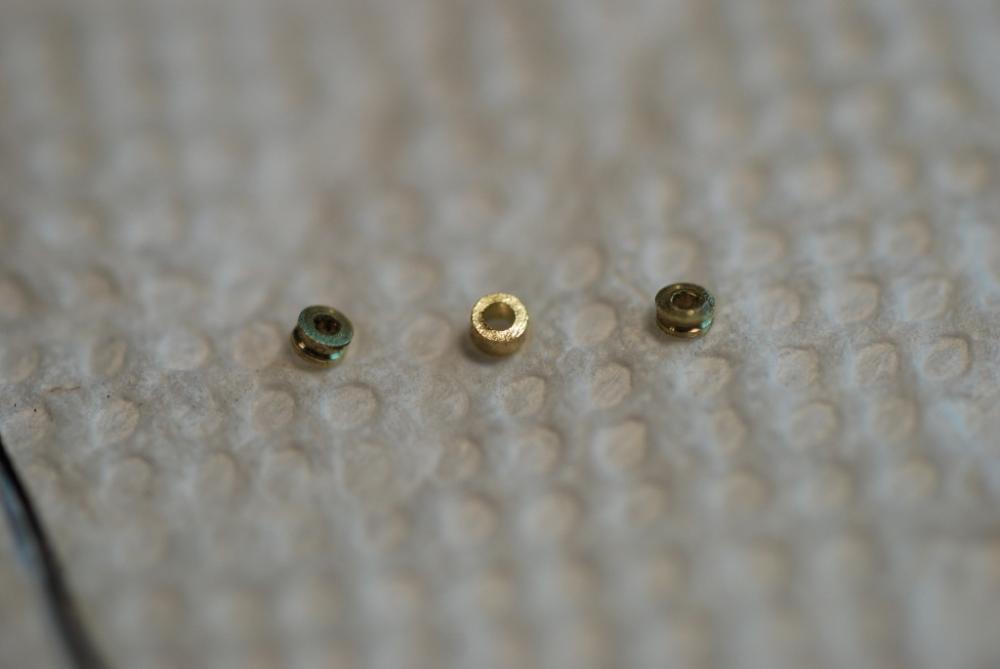
-
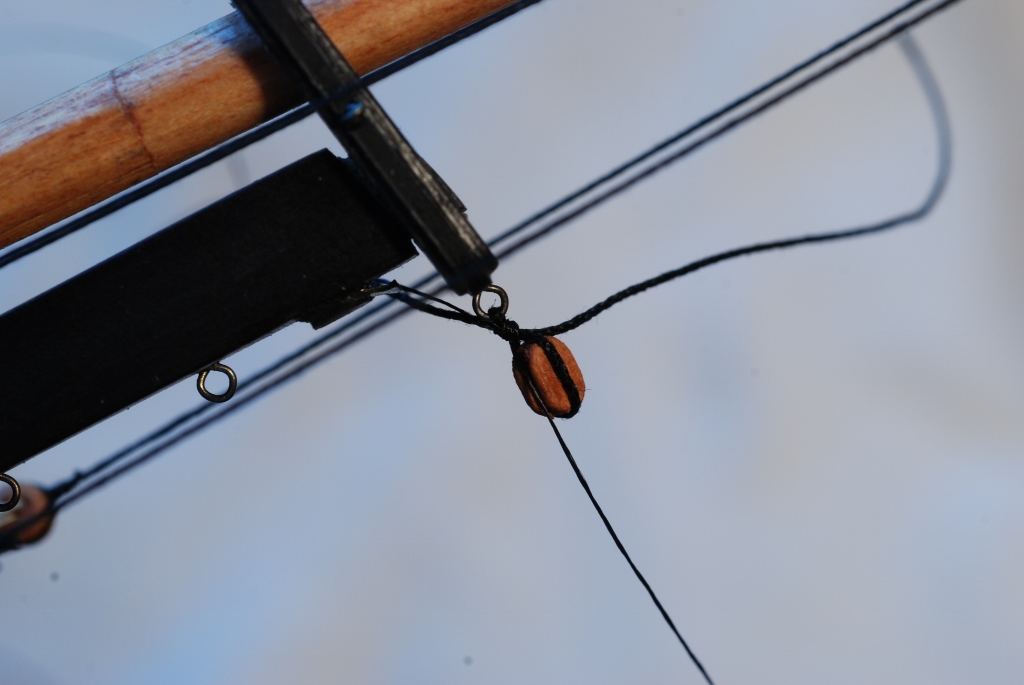
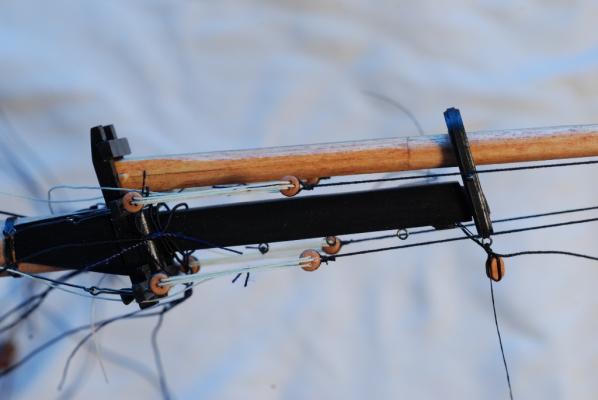
Here is a 1/8" block I stropped and attached to an eyebolt on the foremast for my Pride 2. The line is .008" line from Syren, and the seizing is done with fly tying line. The technique I used was the s-shaped technique shown on the video in the post above. I think it has turned out pretty well. I think the only way to improve on it is to use the technique of David Antscherl, where you create a small closed loop of line, then seize it to the block. The closed loop is big enough that it leaves a loop available on the other side of the seizing, where the eyebolt or spar would go. The second picture shows an overview of the area, where the foremast and the foretopmast meet.

-
Great build log! Since I just started following it, I have a question about an early entry. When you installed the floor timbers prior to beveling the frames to accept the keel (January 12th entry), how did you securely attach them to the ribs without the floor timbers becoming stuck to the molds? Were the molds masked with tape? It seems to me that there wouldn't be much available gluing surface between the edges of the ribs and the floor timbers.
-
Further testing suggests that flat topcoat may work as an alternative adhesive to CA. I have one bottle left of Floquil Model Railroad Flat Topcoat, so I guess I better make it last! It would seem to me that when using a synthetic thread like fly-tying line to tie a seizing around a cotton/linen line, using PVA type glues to secure those seizings will be less effective. Let me know if anyone can confirm that.
-
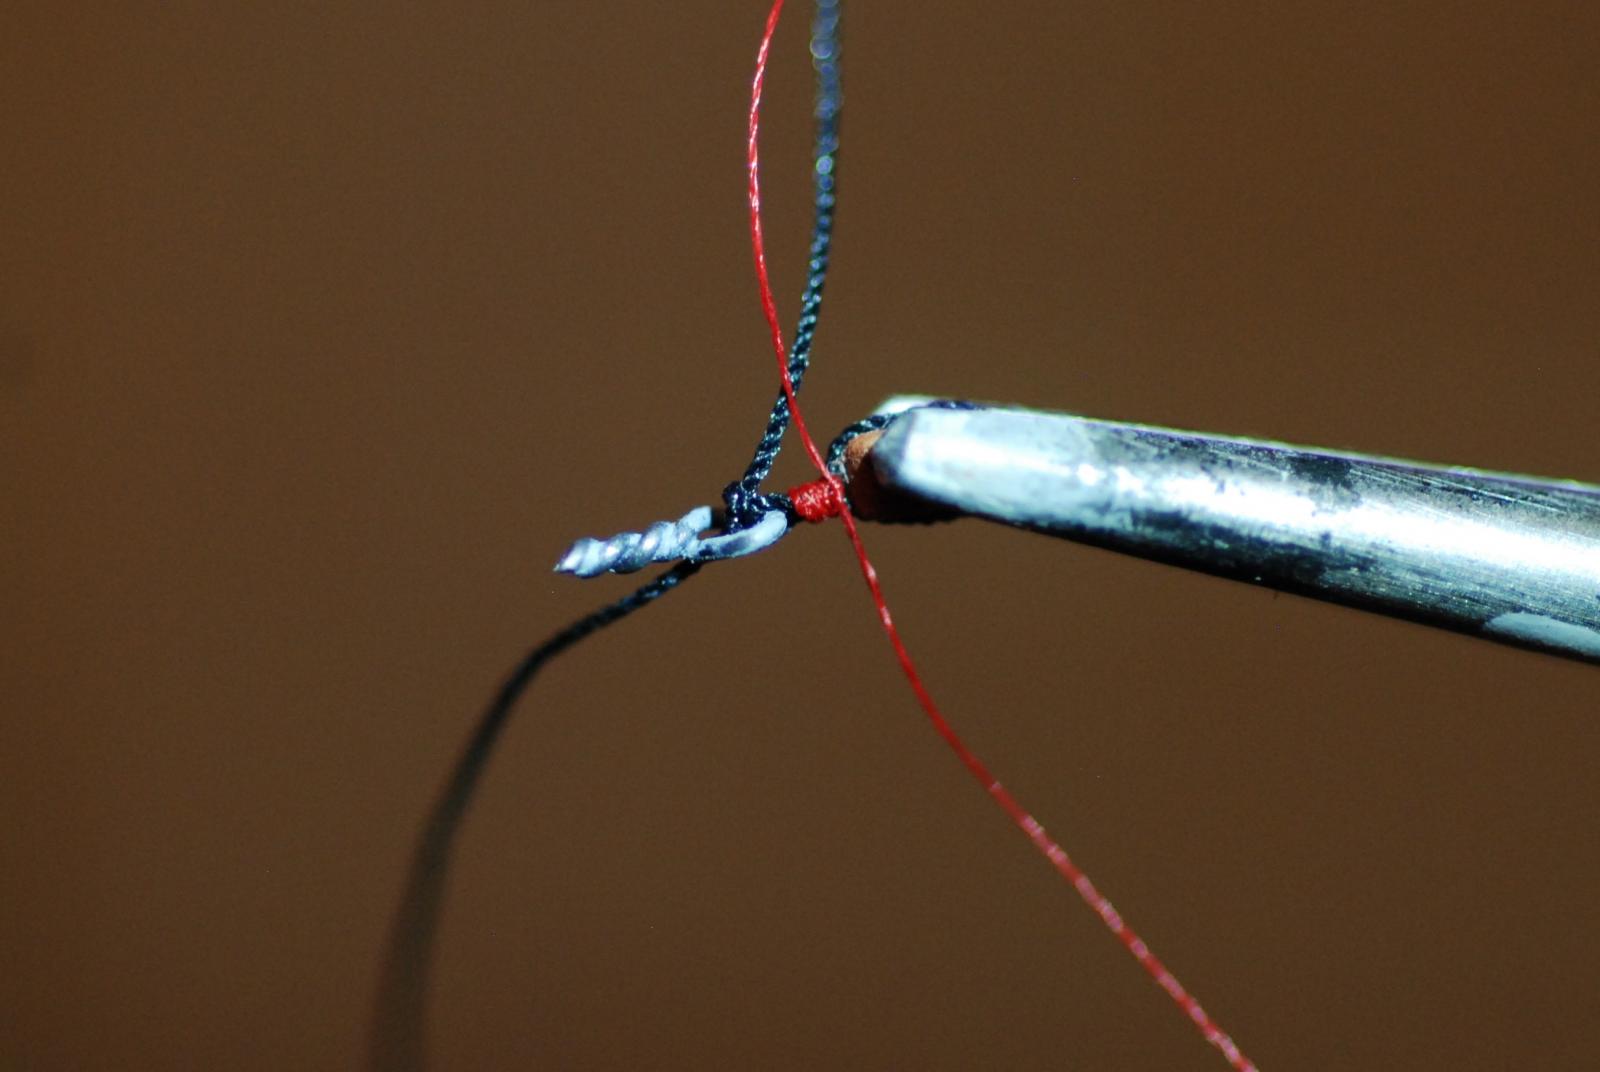
I recently realized that the technique I was using to strop a block to an eyebolt was sort of the opposite of the one you refer to, Jan (Dan Vadas' technique of tying an overhand knot around the backside of the block). Instead, I tie the overhand knot within the eyebolt, then apply glue to the overhand knot. The overhand knot is then hidden between the block and whatever the eyebolt is inserted into, whether that's the deck or a spar. My technique won't work if one is seizing a block directly to a spar, as the overhand knot would then be plainly visible. The only downside is that I am currently using CA to secure that overhand knot within the eyebolt, until I figure out a better adhesive. I like the sound of using art preservationist glue, as mentioned in the blog about CA, and will be doing some testing on that idea. In the meantime, here is a picture: The black line forms an overhand knot within the eyebolt. Since this was a practice run, I was using red fly-tying line to tie the seizing. JD

-
Congratulations on finishing the planking! It's a big step. The decision of whether or not to paint the hull is purely a question of what level of authenticity to the current ship you want to achieve. I painted my hull to match the vessel as she exists. And I must say it makes for a pretty hull.
-
I have found that pearwood with polyurethane on it does a very nice job of duplicating the mahogany pieces on the ship such as those transom knees. It has an imperceptible grain. I hope your build is going well! Mine has been put away for about a year due to other obligations, but I hope to resurrect it soon. Good luck!
-
Well, you are getting good photographic results in my opinion. I agree that it takes some work to figure out a good flash setup without causing tons of shadows. Fortunately, I'm able to use a macro lens on my Nikon D80, and with the tiny built in flash it adds enough light without shadowing. That also enables me to use an f-stop of 11. The flash attachment is way too powerful. JD
-
Toni, can you tell me about your photographic setup? A macro lens, I imagine. What kind of light source/flash are you using? You're getting great results. J.D.
-
Awesome, Toni. I found your build log and am looking it over from the beginning. Don't you say somewhere that you don't have a lot of spare time to work on this??!! JD
-
Hi Bill, glad to see there is someone else out there building the Pride 2. I am installing spars and standing rigging on my model. One general change I made to the model is that when it was time to build the deck pieces that appear bright finished, like the pin rails and windlass support, I used pearwood. When coated with polyurethane, it nicely mimics a bright finish, and of course the grain is very tight. Good luck and will try to keep an eye on how it is going! JD
-
Hi Dave, I am at the same point with my Pride of Baltimore 2 model, and having the same issue. Just starting to investigate how to secure the start of the gammoning, and then how to finish it snugly. The start would seem to be easier, as you could seize a loop of line to itself, then snug it up and hide it between the stem and bowsprit, then use CA to lock it down. I have not come up with any good ideas on finishing the gammoning. My next step will be to see if there is any information in Biddlecombe's Rigging book. Maybe someone will reply with more info... JD