


jdbondy
-
Posts
341 -
Joined
-
Last visited
Content Type
Profiles
Forums
Gallery
Events
Everything posted by jdbondy
-
My current model (Pride of Baltimore 2) is being rigged right now, with sails furled. At every possible opportunity, I have attached the sails to their yards/gaffs/mast before putting the spars in place on the hull. I imagine you are planning on rigging your model with sails fully deployed. I would still plan on attaching the sails as much as possible to their spars before attaching the spars to the model.
-
Welcome to MSW, from nearby Dallas Texas!
-
 Keith, can you give some detail about the knot you used to secure the foresail/mainsail to the mast hoops? I am at a similar point on my rigging. I think I see how you are doing it but want to be sure.
 -
Welcome Vincent! I am curious for more detail about what you were doing with the machinist blocks and parallels to square up the bulkheads back on Sept 4. Regarding the ships boat, feel free to look at my log also for details on my ships boat. Not a complete description, since I am doing my log retrospectively and only have pictures from certain steps along the way, but you may still find some helpful details.
-
Metal work resourcnes
jdbondy replied to Kurt Johnson's topic in Metal Work, Soldering and Metal Fittings
I am trolling along on this thread, adding things to my Amazon shopping cart as I scroll down the page! -
Pandora by marsalv - FINISHED - 1:52
jdbondy replied to marsalv's topic in - Build logs for subjects built 1751 - 1800
Sorry to make you back up, but how did you make the hammock netting? -
Swan class 3D model in progress
jdbondy replied to dvm27's topic in CAD and 3D Modelling/Drafting Plans with Software
Parting gift?? Where are you going??- 141 replies
-
- 5
-

-
- pof swan series
- swan
- (and 1 more)
-
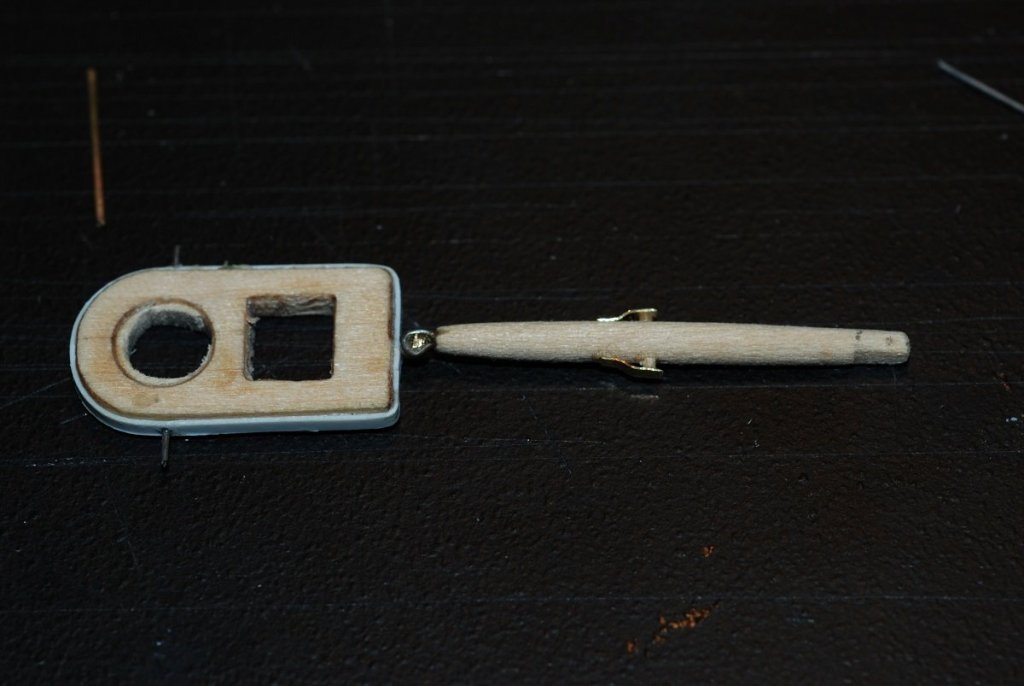
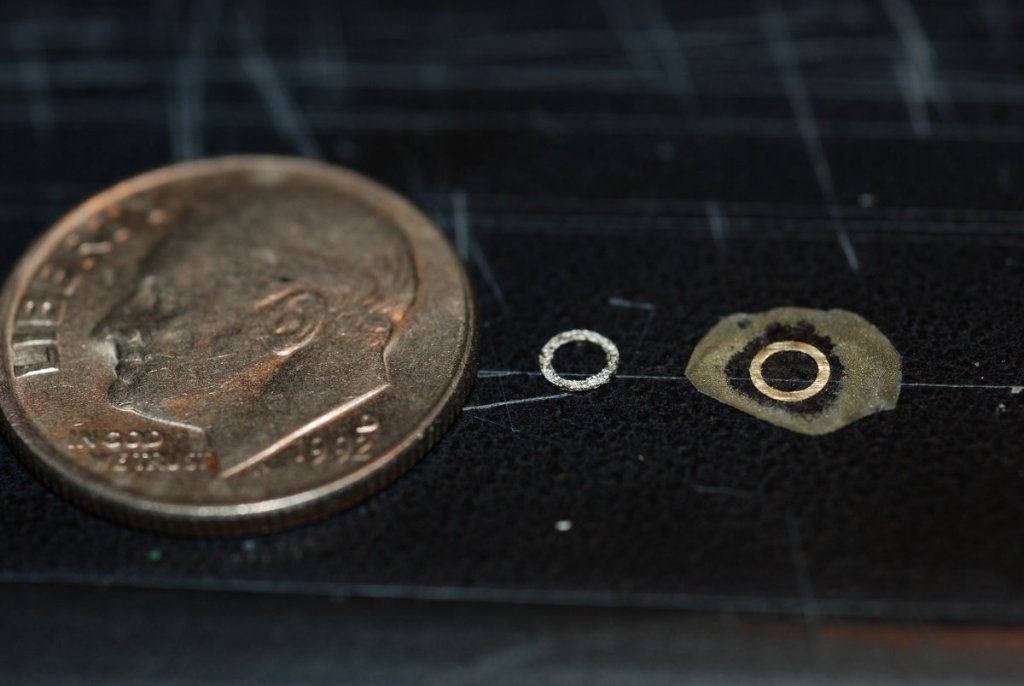
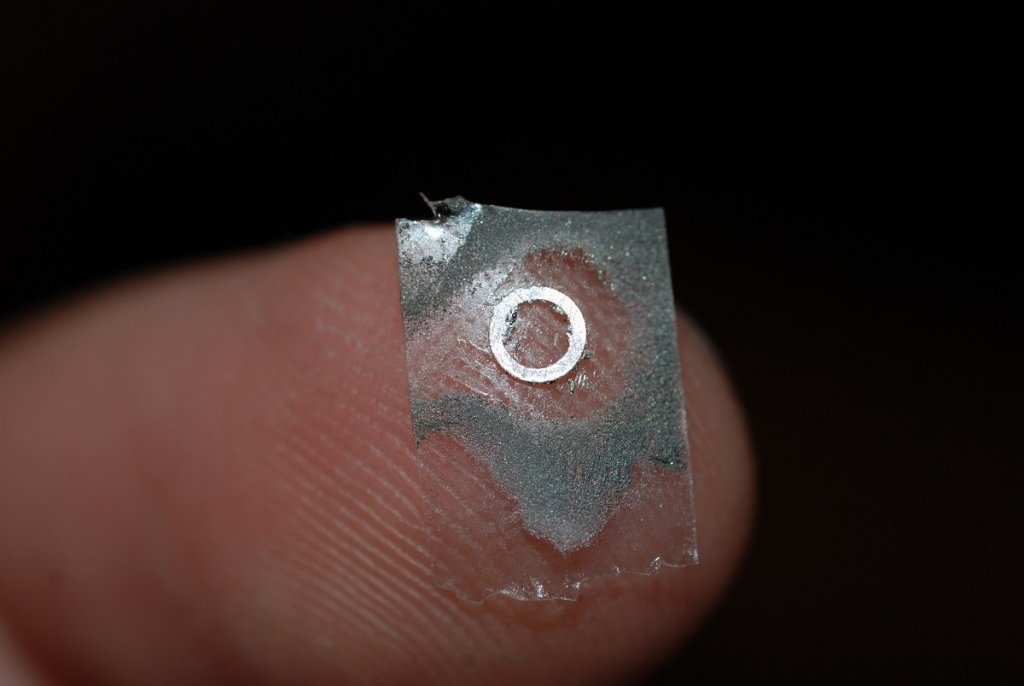
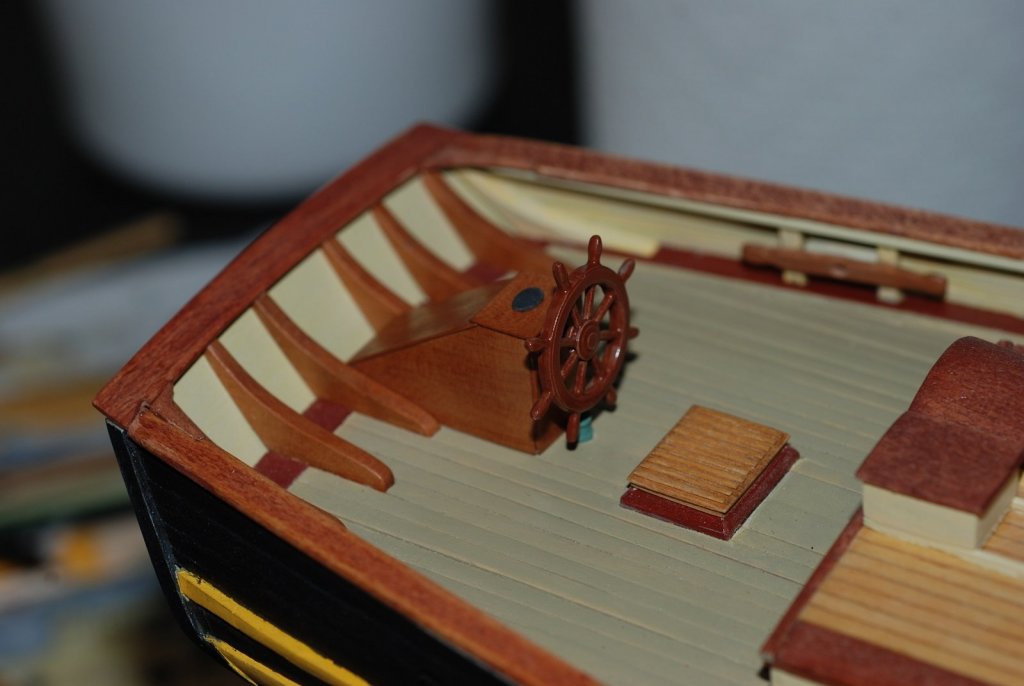
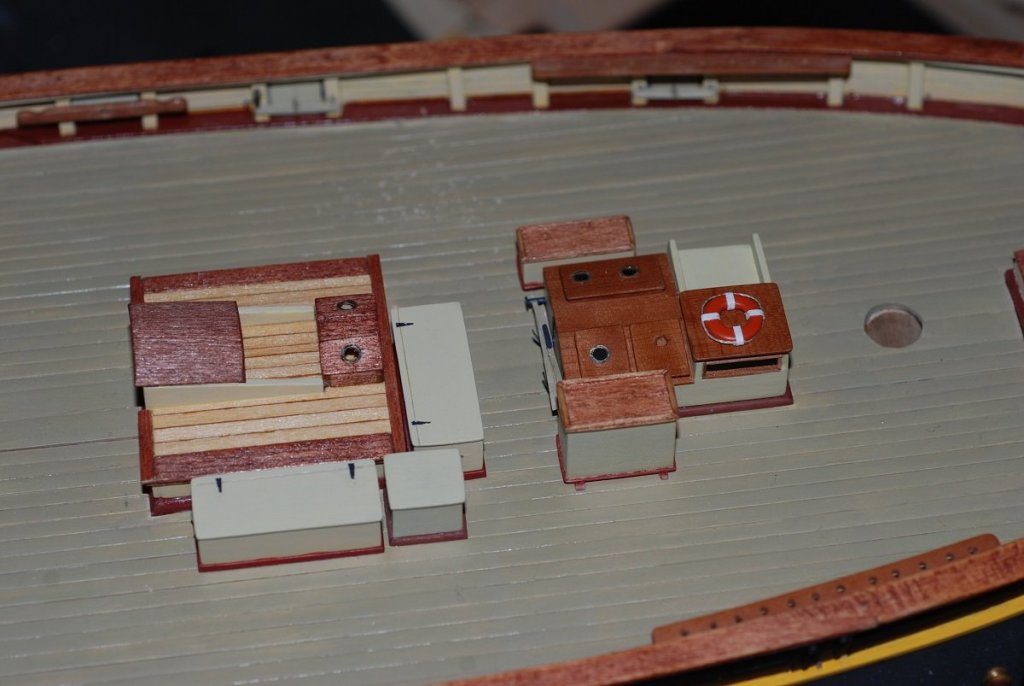
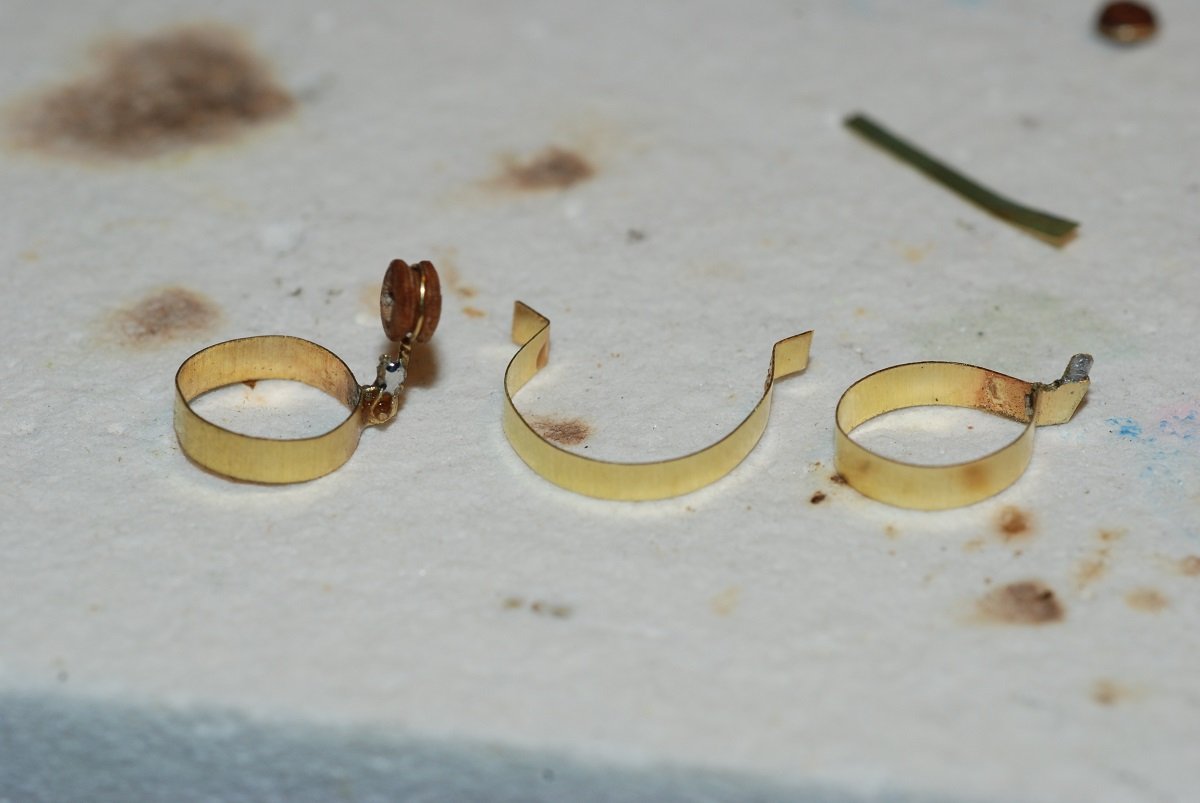
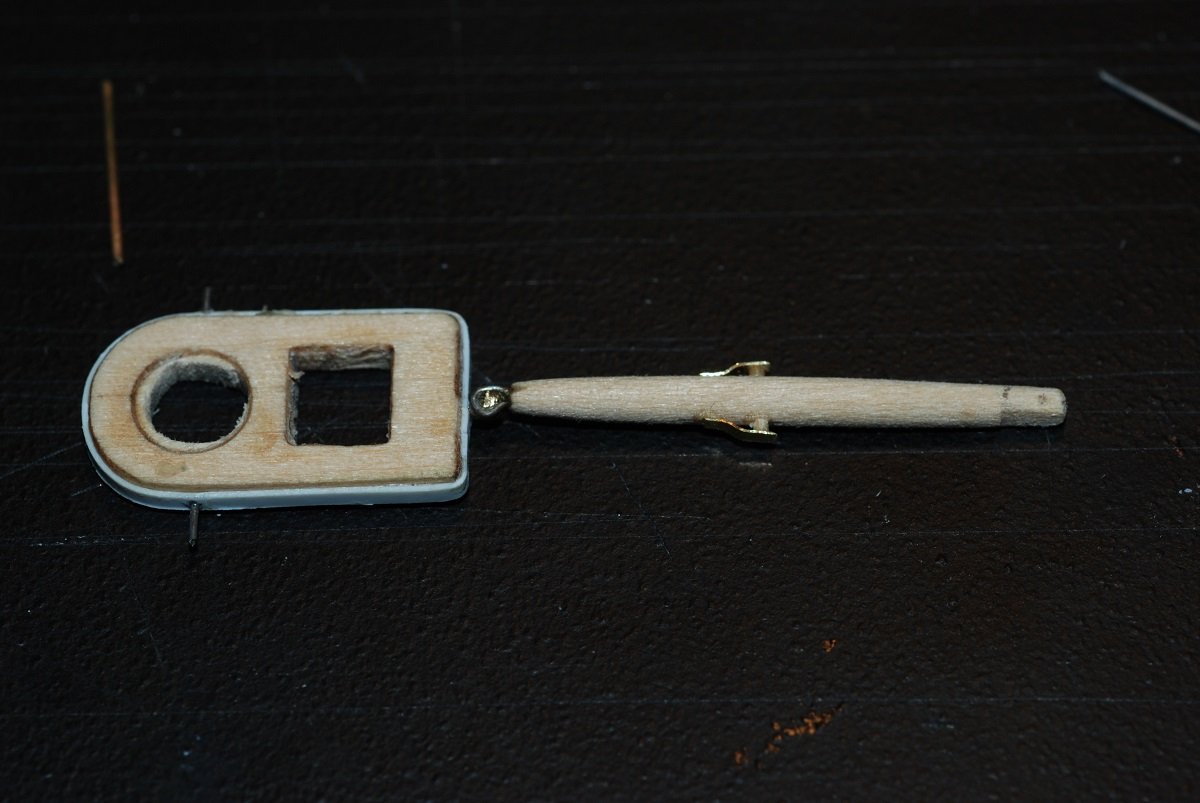
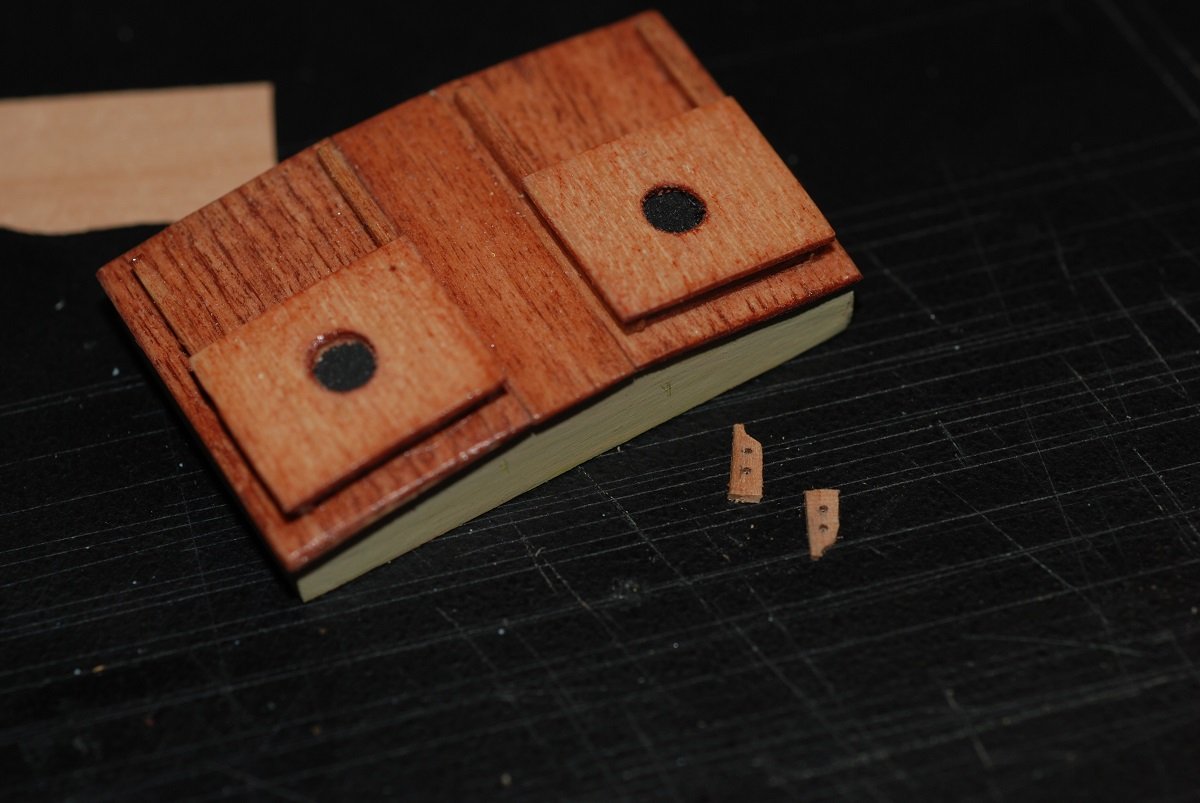
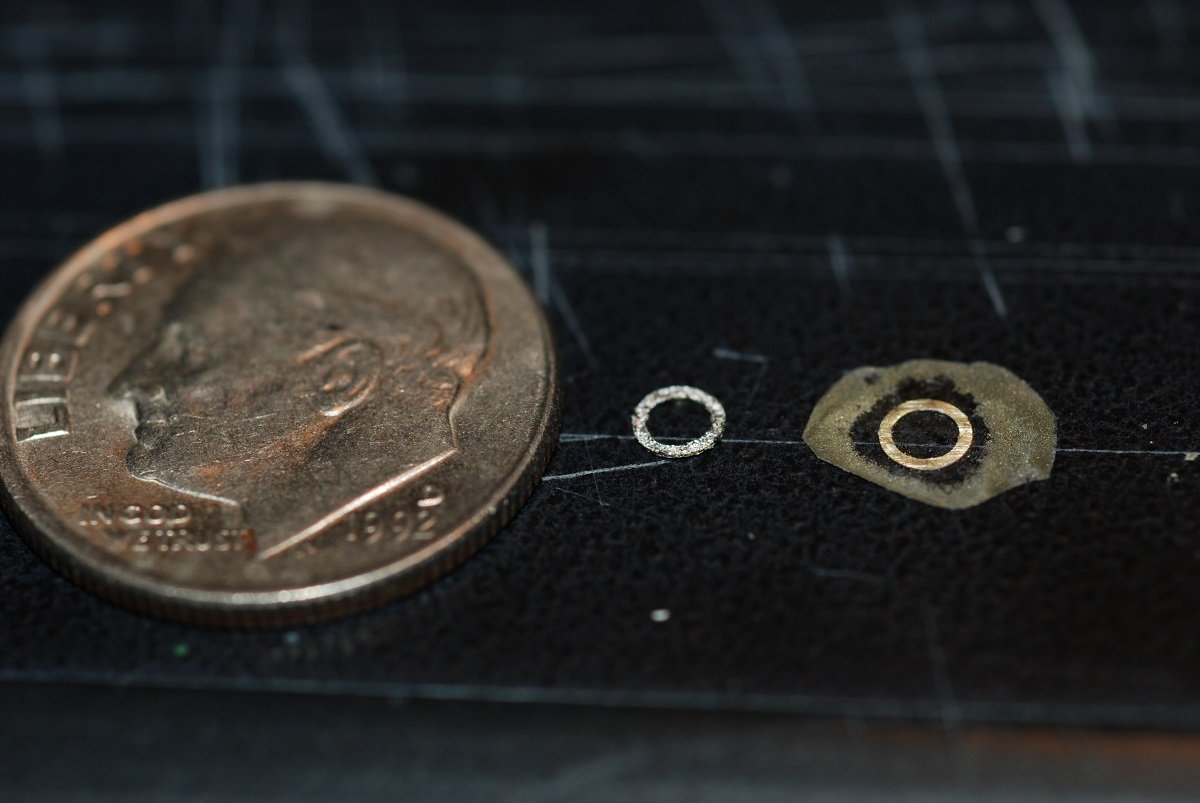
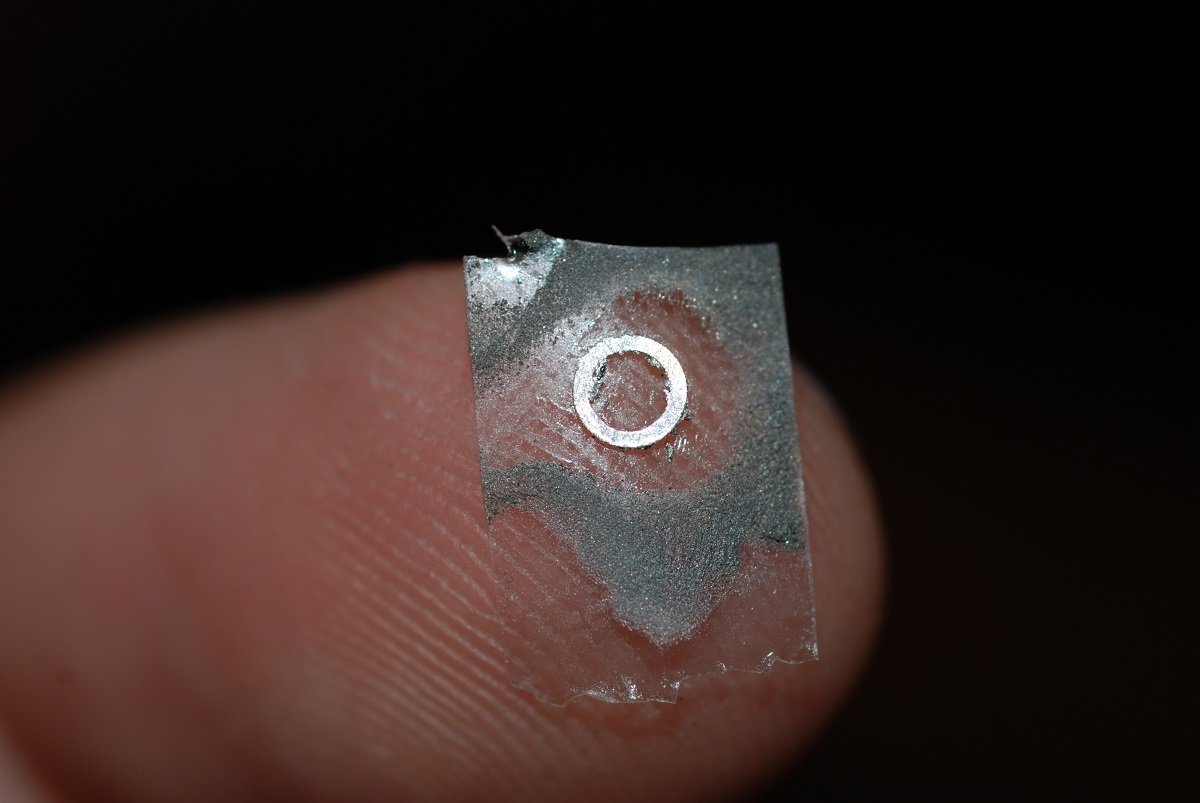
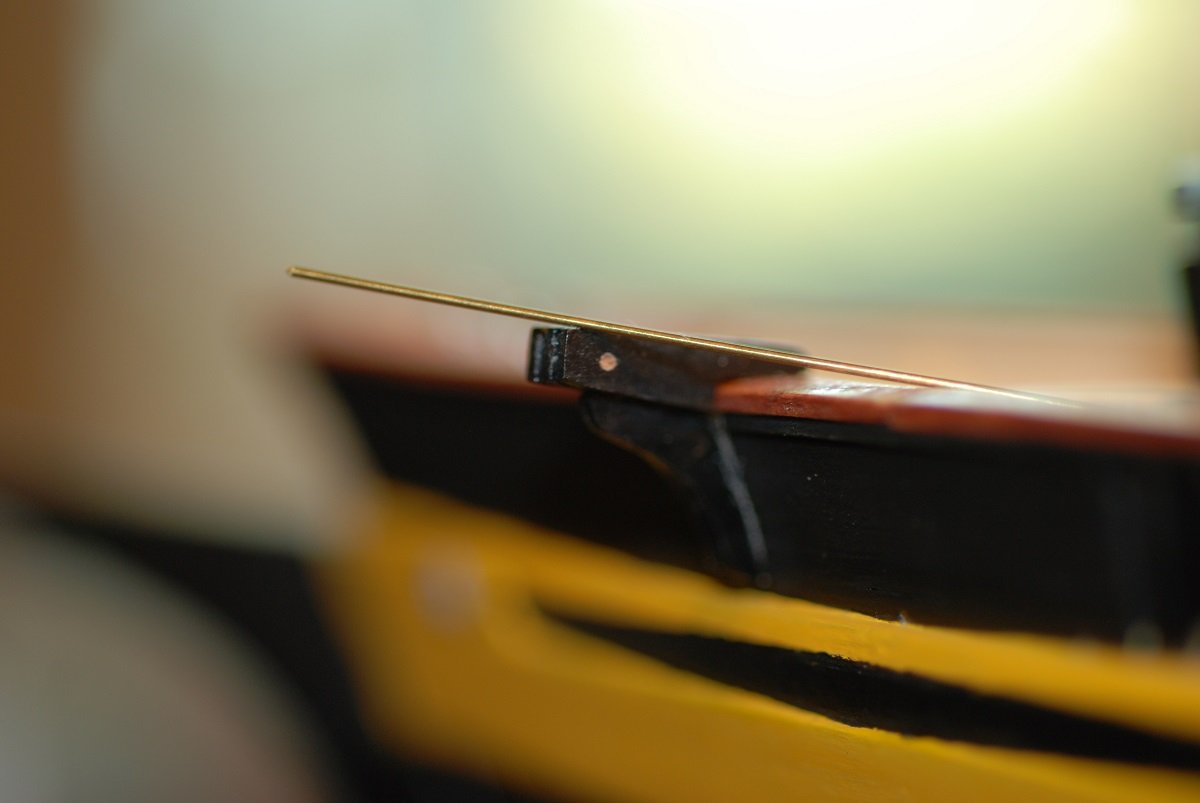
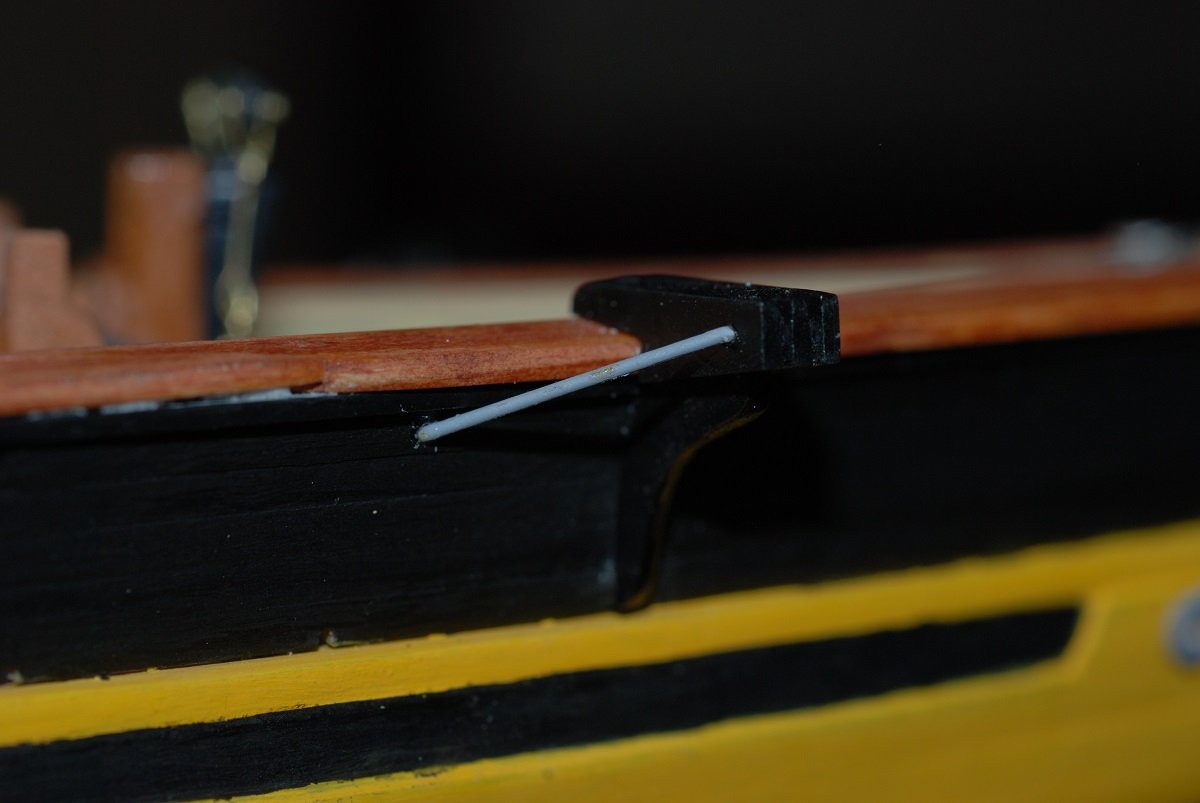
The next pictures in my archive of photos mainly has to do with bowsprit related items, but I will cover some other details in this segment too. The bowsprit has two iron bands, to which are fitted hearts. These serve as attachment points for the bobstay. I regret cheating on the hearts, which I created by cutting out the central wood from a deadeye, then filing the edge of the hole that was left behind. Not terribly pretty. My soldering skills are not great; I just don’t get enough practice. I was able to strop the hearts and solder the loops closed while also attaching the stropped hearts. Although not shown here, the metalwork was then painted black. The bowsprit cap came with the model kit already cut. It has an iron strap around it which was simulated with styrene strip. The dolphin striker was hand tapered, and an endhole was bored so an eyebolt could be inserted. An eyebolt was also inserted into the bowsprit cap, and the two were mated to brass rod and soldered in place. Small brass brackets had to be installed on the side of the dolphin striker to accommodate various rigging lines, as well as cleats near the tip of the striker that would also accommodate rigging lines. Finally, a tiny hole had to be drilled through the tip of the dolphin striker to accommodate a stay. These little pieces would become the brackets that retain the bars used for the windlasses at the base of the foremast and mainmast. I spent a few hours working on them and glued them into place. Then I told my father-in-law that I had just finished a major step on my model, and would he come appreciate it with me? He looked closely at the model as I used a fine pointer to point out these two small pieces of wood, then looked back at me as if to say I must be crazy… I needed to make various portholes on the deck furniture look more realistic. As you can see above, a hole drilled out of the wood with nothing around it does not look very convincing. Unfortunately, no one makes brass rings for portholes that are small enough for this model. So how to go about making my own small, thin brass rings that are essentially very thin washers with a large central hole? This is when it helps to have a friend who is a machinist. He showed me how I could take multiple thin sheets of brass that are rounded to roughly the outer diameter of the rings I wanted, and solder them in a stack to a solid brass rod. Then use a lathe to drill a central hole corresponding to the size of the porthole. Then turn the outside surface of the stack to the desired outer diameter. Then hit the stack with heat to free up the individual rings from the solid brass rod. That gives you a collection of very rough washers, which can be applied to double sided sticky tape. Then touch that to your finger and sand them smooth. Now that looks like a porthole! About 5 of them are evident on these two pieces of deck furniture. (Hey, didn't I show this image in the last post?) I had to remove the portion of the deck furniture where the portholes let into an open space where you can see the underlying decking, apply a thin sheet of wood that had been painted black, then reattach the furniture. The ship’s wheel that came with the kit was cleaned up with multiple grades of sandpaper. It was primed and painted entirely brown. Then it was attached to its cabinet, and this was in turn installed on the deck. Onward! More deck furniture will be installed in the next post.


- 60 replies
-
- 4
-
-
- pride of baltimore ii
- Model Shipways
- (and 1 more)
-
My model is 1:64, and I am using 0.006" thread (Morope) for the ratlines. The problem one would have with fly tying thread is its comparative stiffness for its size. It may be difficult to get it to hang in a curve, and synthetic fly tying thread would not absorb dilute glue well enough to get it to conform to the shape you want it to take. I love fly tying line for seizings and serving, but I don't think it would work well for ratlines.
-
Got it, thanks. Sure enough, I knew I had previously looked at this post! Your technique inspires me to give it a try myself.
-
Aha, found it! Page 11, in fact. Is there some reason why the pages might have gotten re-numbered?
-
Keith, I am looking for the first part of your block making tutorial, which you describe as on page 19. I am unable to find it. Can you clarify? Thanks.
-
Are these meant to be for wood? Since it's on the Otto Frei web page, I imagine they are more meant for metal, specifically jewelry and watch making.
-
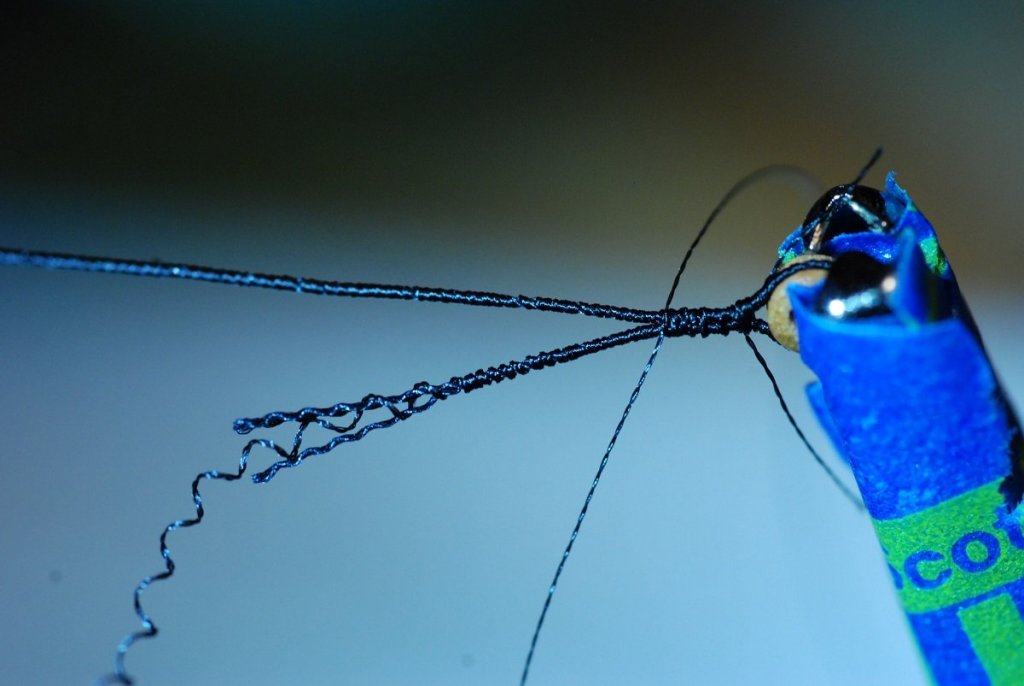
I am making extensive use of fly tying thread on my 3/16" scale model of the Pride of Baltimore 2. It's been most useful for 2 things: as serving line to give a natural fiber line an appearance more resembling of standing rigging, and for seizing blocks. So far I haven't used fly tying thread for the actual rigging itself, as its appeareance wouldn't be natural enough (plus I see the comment above about it being too stretchy, which I believe). But nothing beats it so far when it comes to seizing blocks or serving line. To secure seizings, I am currently using Flexament, also a fly tying product that seems to be doing a great job of securing the seizings to the underlying natural fiber line. I initially tried doing this with flat topcoat, but it did not provide a reliable bond. Attached is a picture showing a seizing of fly tying thread being tied around a line that has been previously served with fly tying line, exemplifying both of the things I use it for!
-
Corian for soldering jig. Ingenious. Beautiful work so far; I feel guilty for not having followed this build to this point!
-
I wouldn't have dared to bring the dremel in that close! Probably would have just slowly cut bits and bits out of the rail using a blade. Glad it worked out! Nice log! My first visit here.
- 648 replies
-
- 2
-
-
- niagara
- model shipways
- (and 1 more)
-
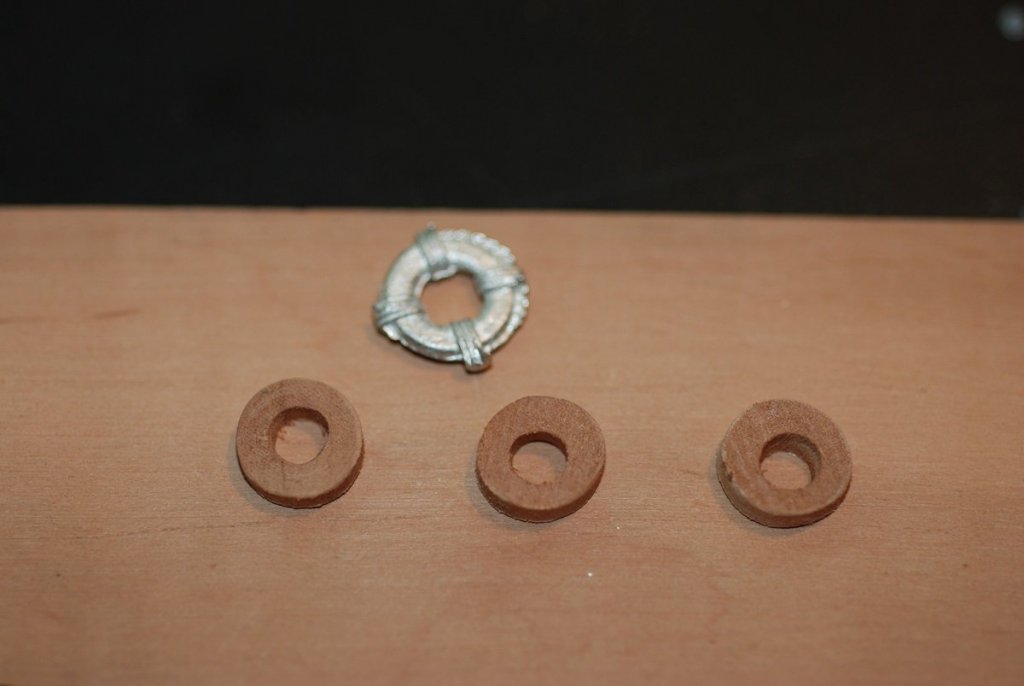
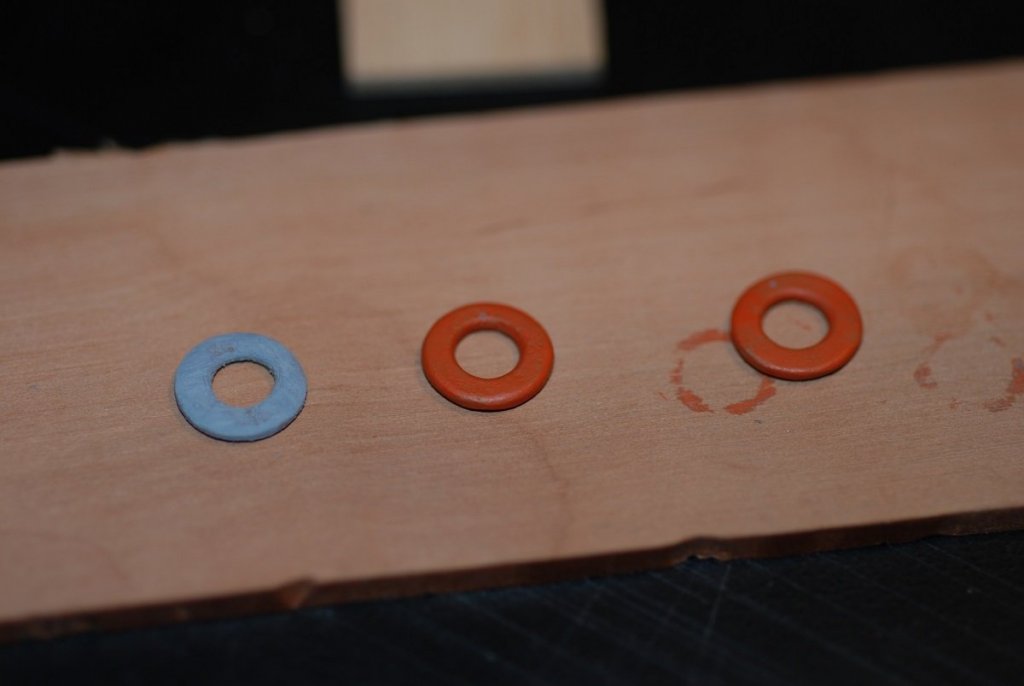
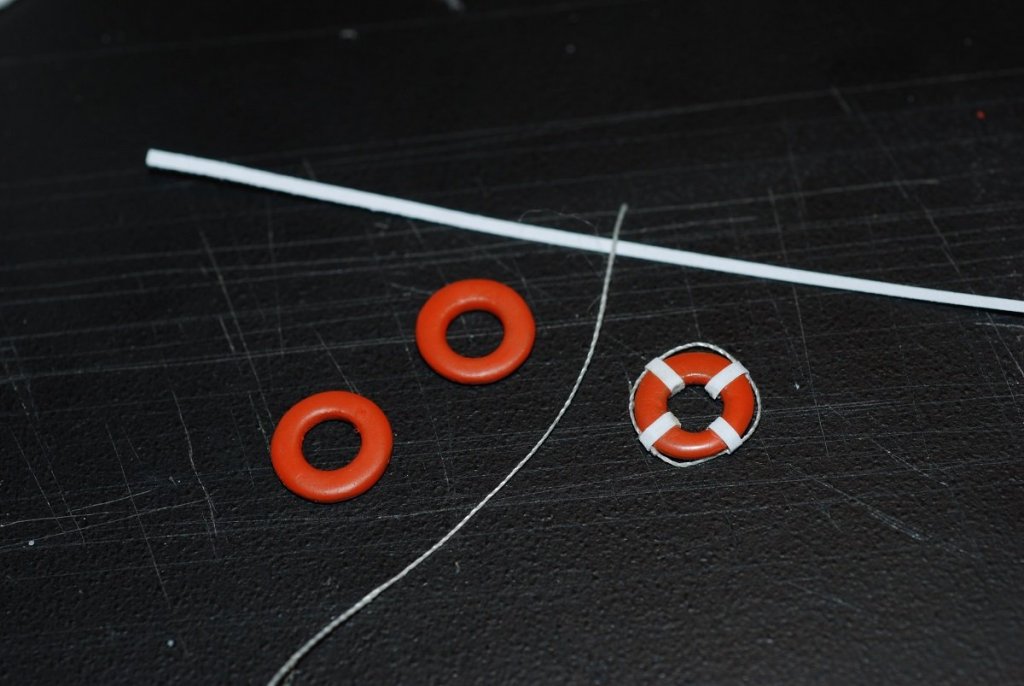
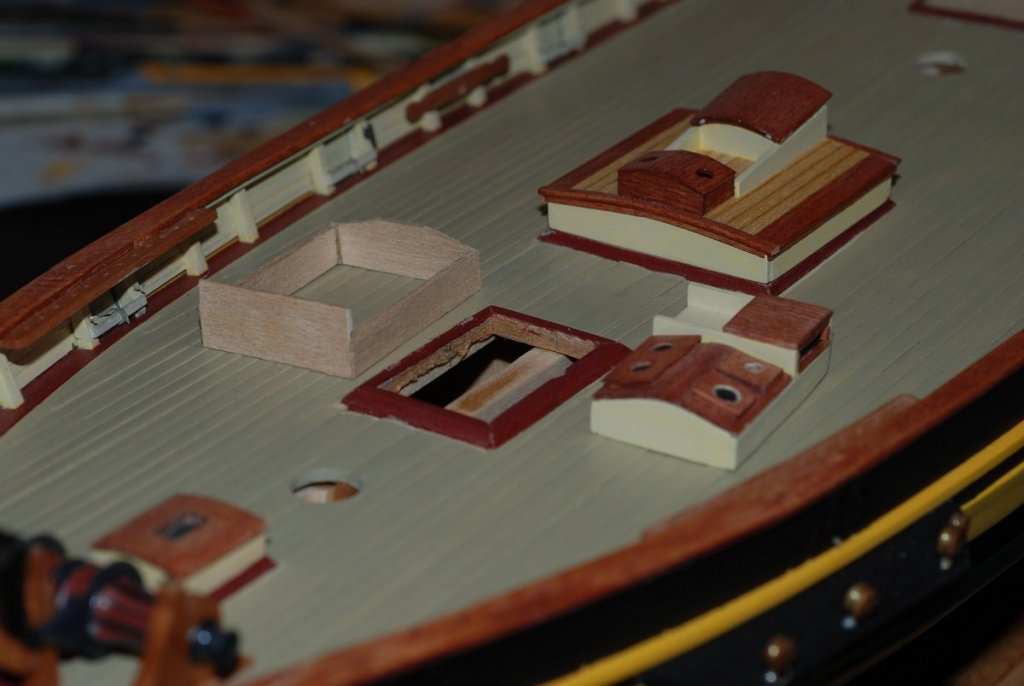
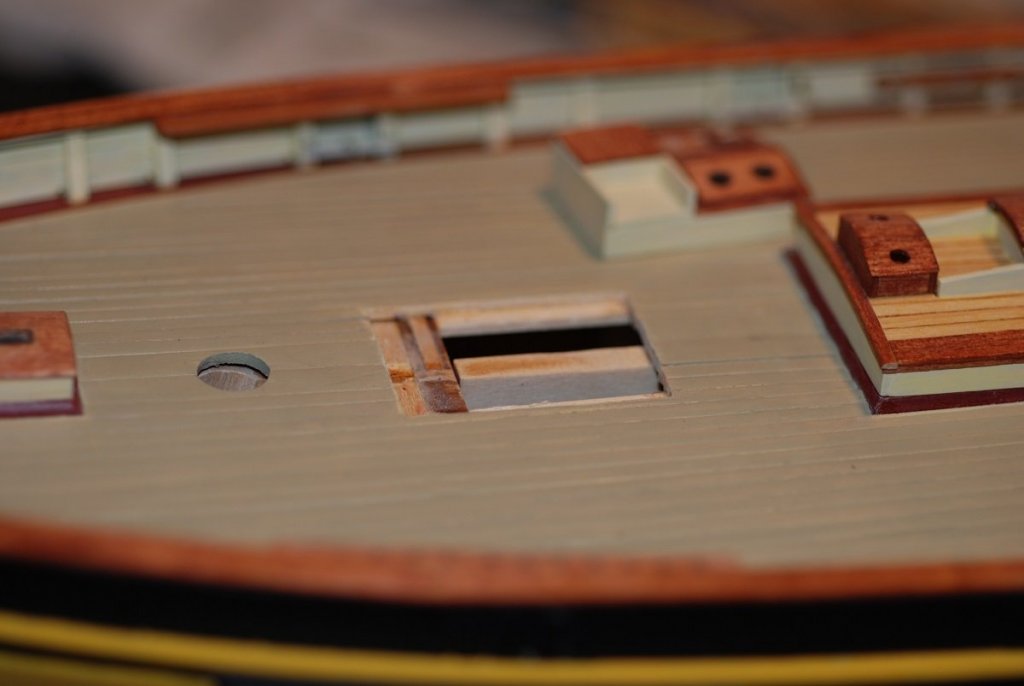
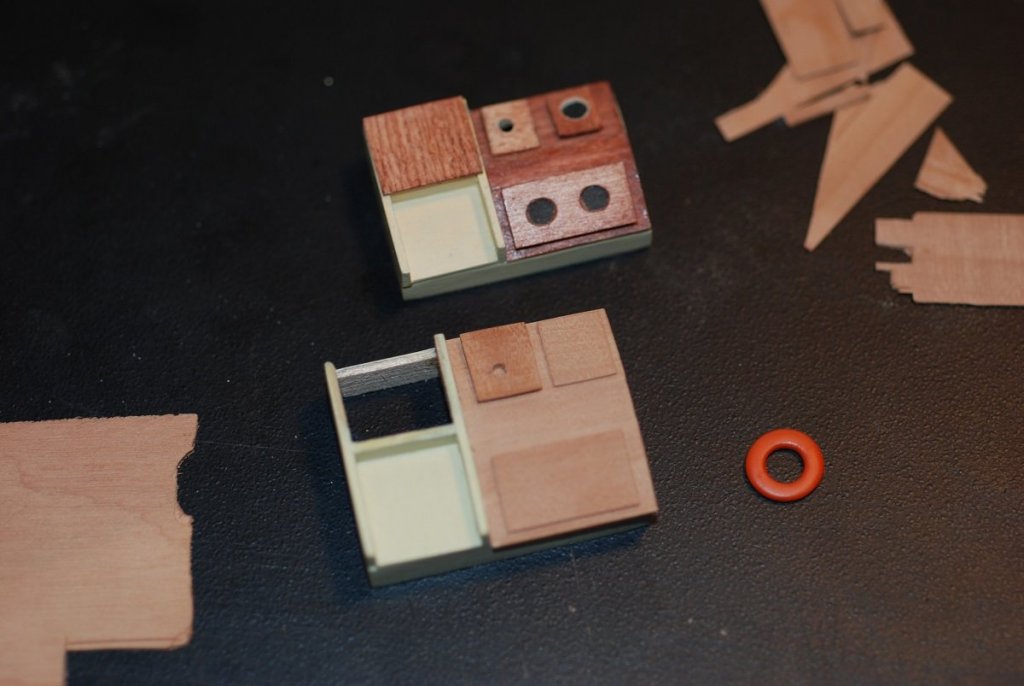
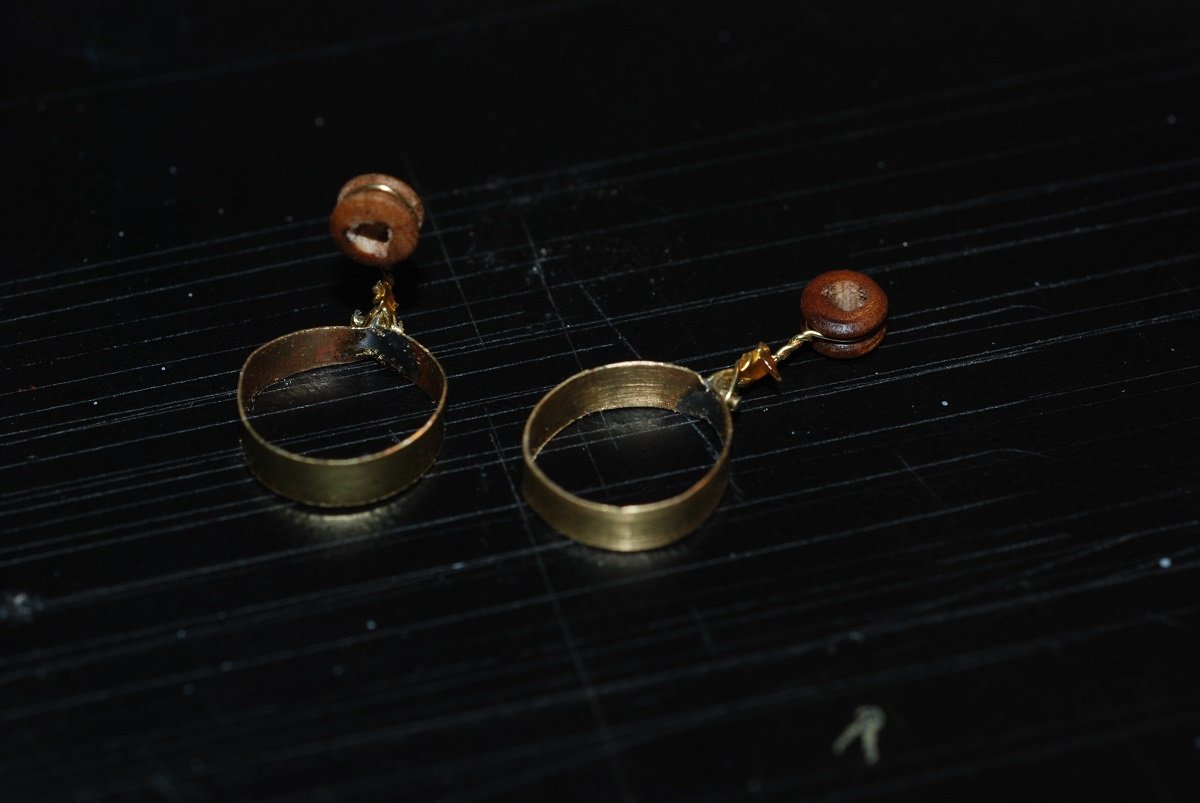
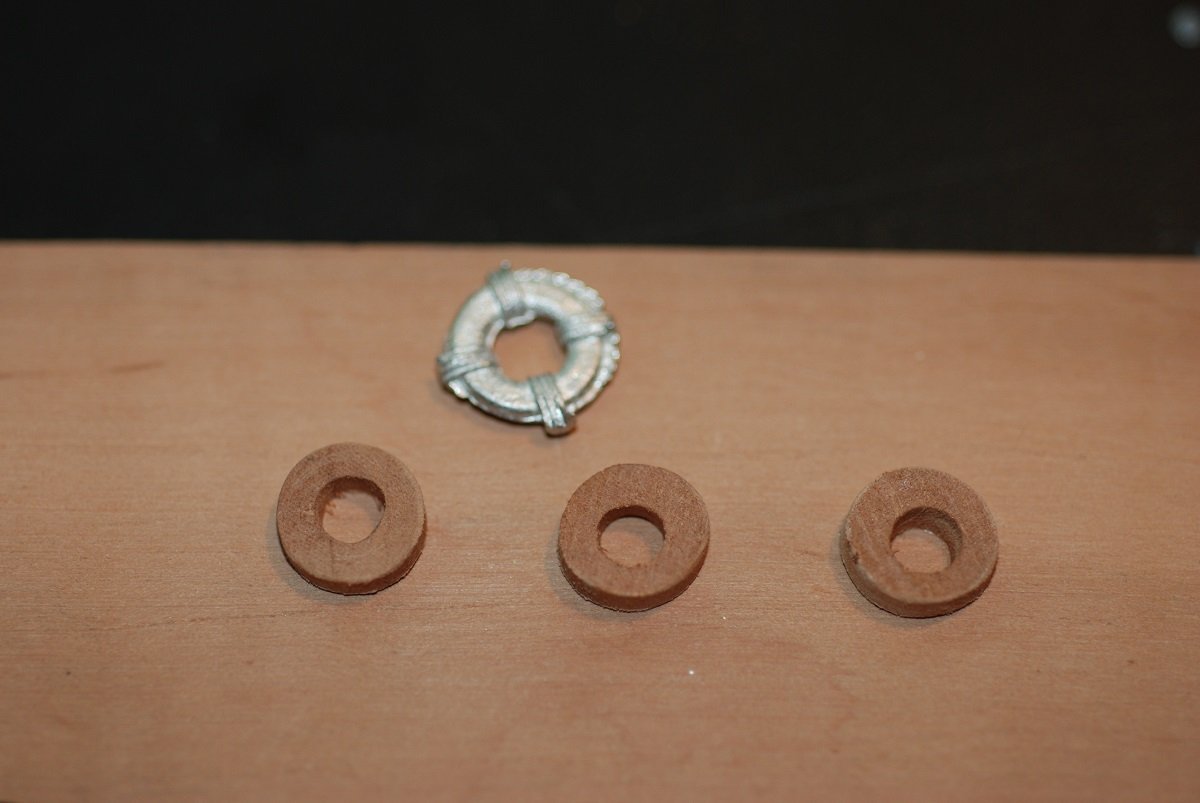
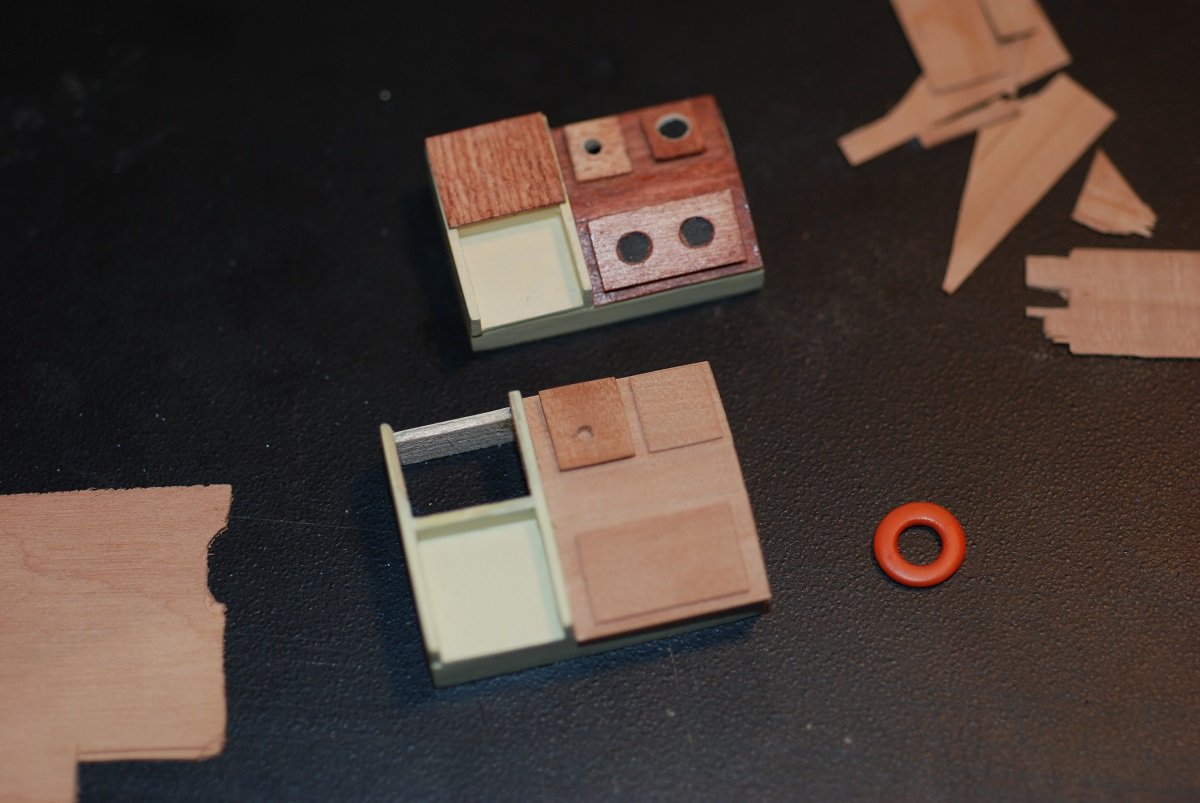
So here’s the problem with this after-the-fact blogging. I created replacement life rings to replace these horrible looking Britannia rings using pearwood, but since this was done in September 2012 and now it’s July 2017, I can’t really remember how I even got to this point! I don’t remember if I had purchased the Sherline lathe already, or if I just improvised with the Dremel. The inner edges of the donuts are clearly not concentric with the central holes. Obviously, the pieces had to be pared down in thickness as well as having the inner and outer edges beveled off. However I did it, here’s what it came to look like: The pieces are being primed and then painted with CN orange. They turned out very clean! The white bands were cut from index card stock, and enough of a space was left for white thread to be run within the white bands. A much better look than painting the Britannia fittings. Next problem: A long time ago, I fabricated the deck furniture associated with the hatch just aft of the foremast. I had built coamings into the deck to accommodate this piece of furniture. Problem was, as I examined the dimensions of the furniture on the plans, I realized that I had built the furniture piece to accommodate the shape and size of the coamings I had installed. And I had installed the coamings so that their OUTER edges corresponded to the size that the furniture needed to be. So when I built the furniture, it was significantly too small. That meant that not only did I need to build a new hatch, I needed to remove the old coamings and make them larger. The new furniture is taking shape on the left, and the old furniture is to the right of the coamings. The old coamings have been removed. Fortunately, this redo meant that I could use pearwood instead of stained basswood, improving the look of the grain of the stained surfaces of the hatch. Using flat topcoat, the pearwood surfaces are made to look very similar to the other stained surfaces of the adjacent lockers and hatch, but with much tighter grain that gives it a much more in-scale appearance. I have noticed that on other peoples’ build logs for the Pride 2, there has been discussion about what to do for hinges for the fire lockers. My solution was to essentially grave a line that simulates the seam between the hatch and the rest of the locker lid. For the hinges, I printed areas of black onto decal sheets, then cut very small triangles from the black decal sheet. These were then soaked and applied to give the impression of dark hinges. That's a good stopping point for now, I think...
- 60 replies
-
- 4
-
-
- pride of baltimore ii
- Model Shipways
- (and 1 more)
-
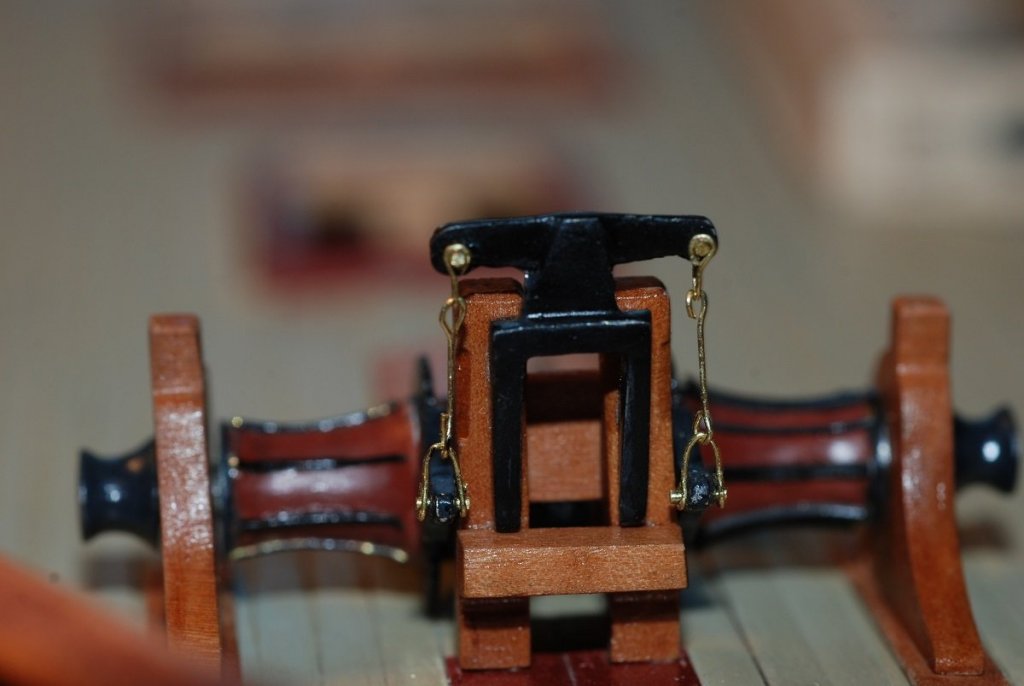
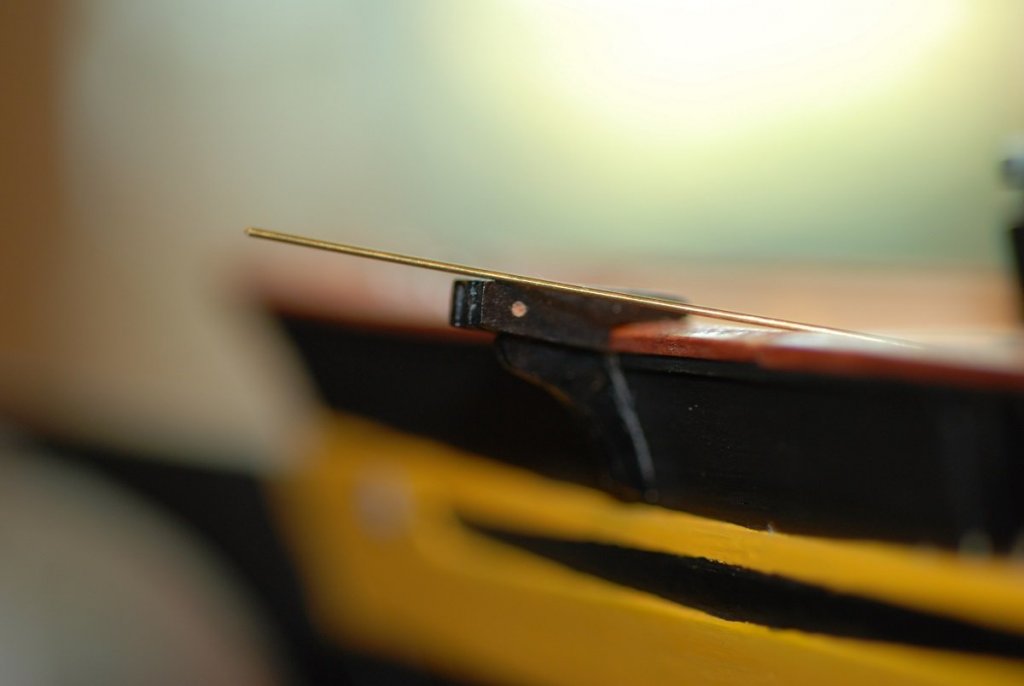
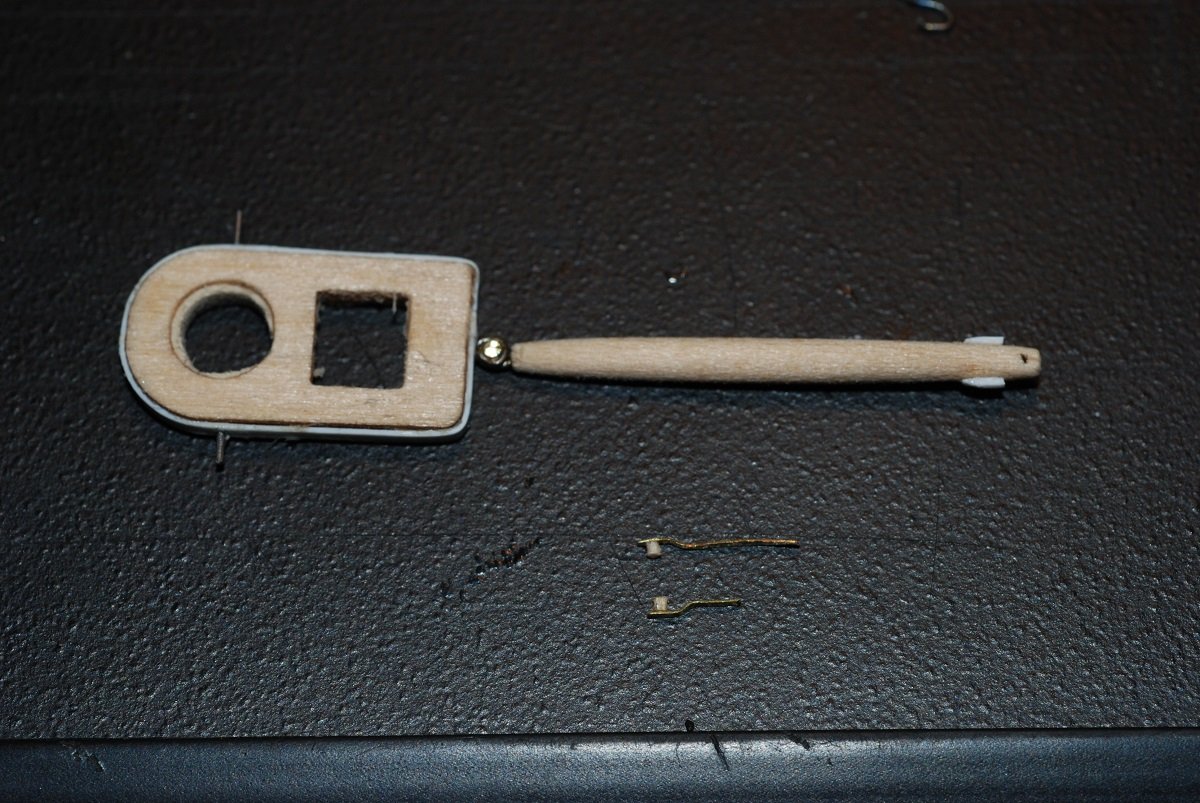
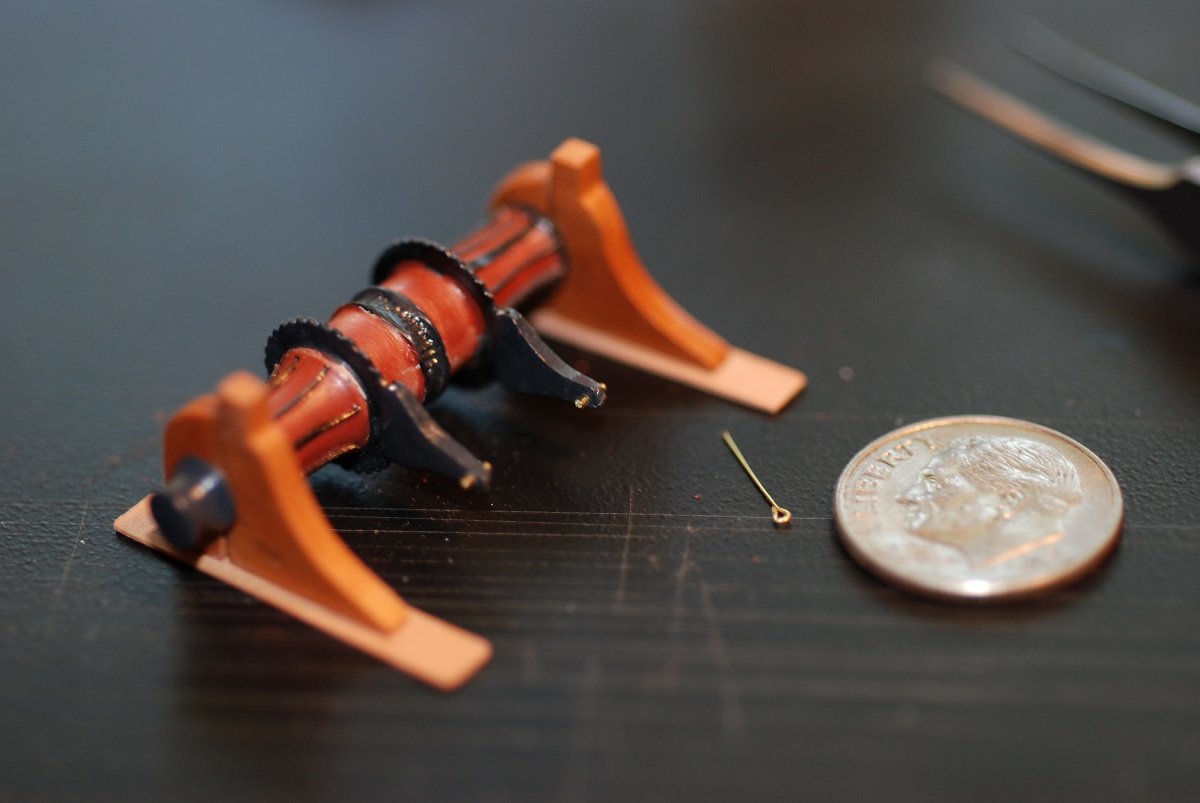
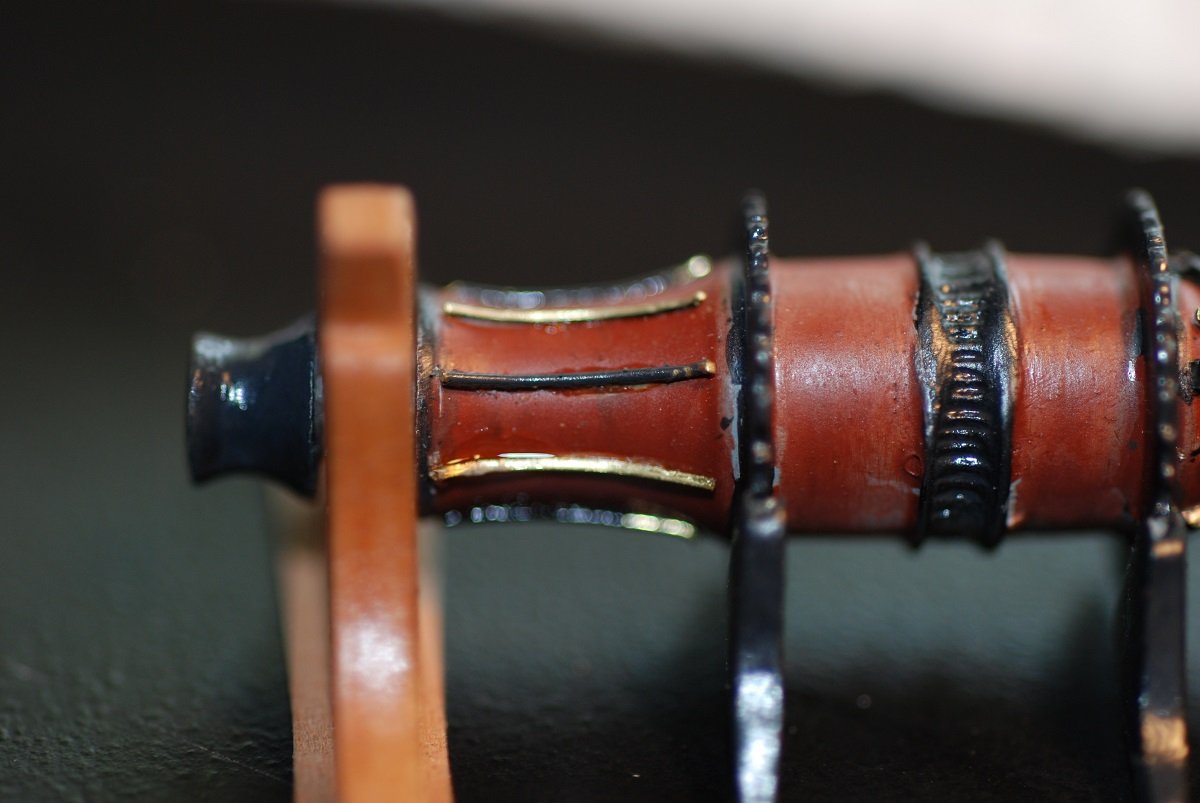
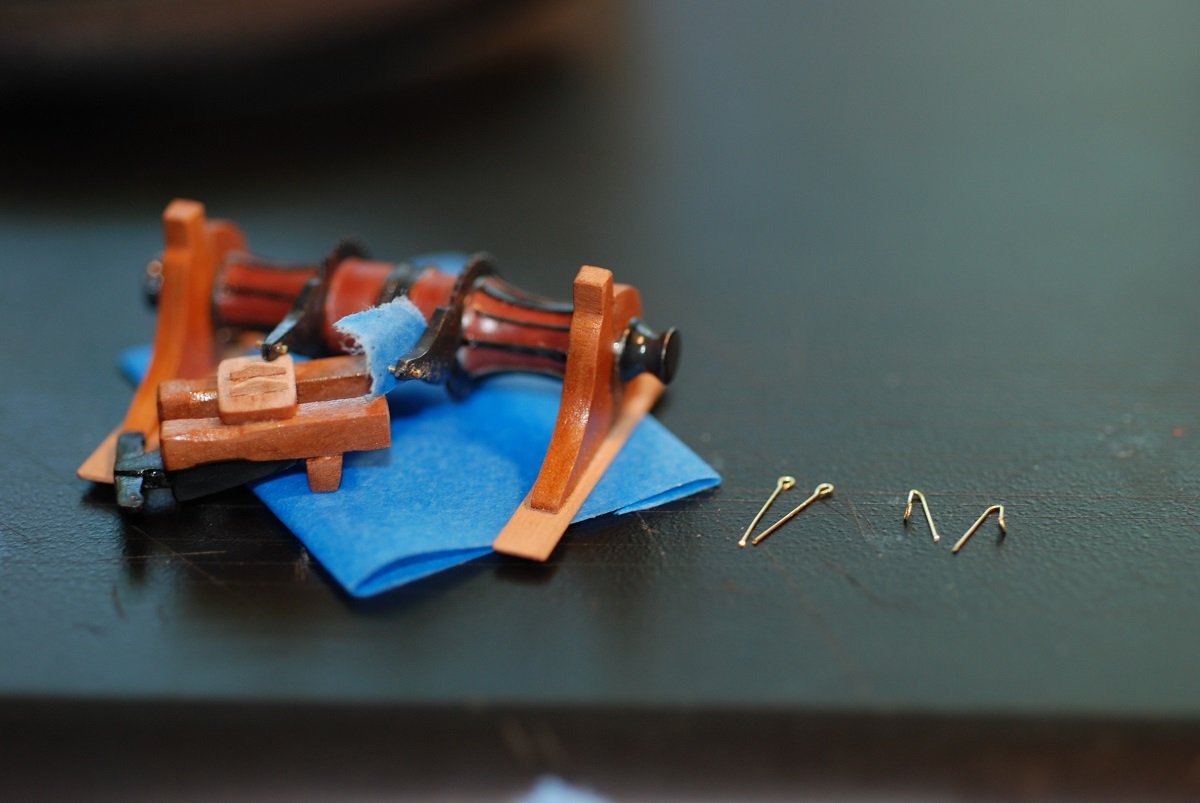
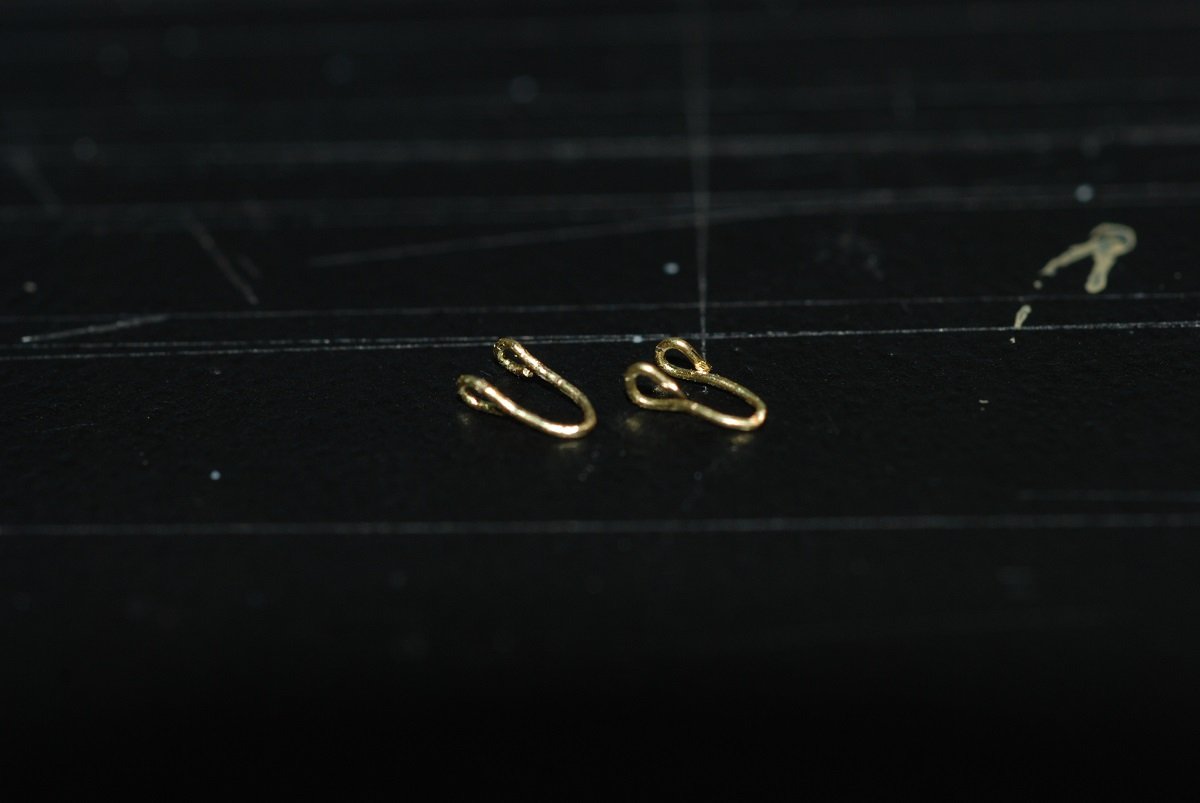
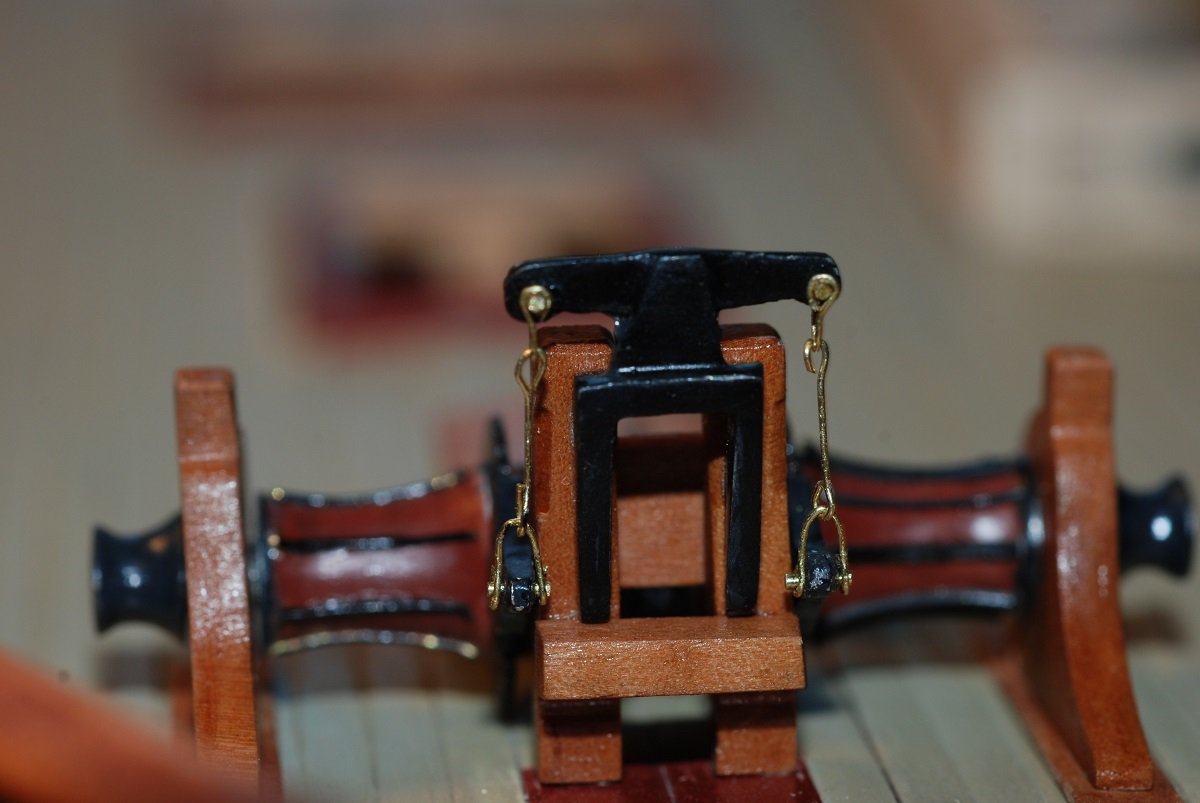
Time to make the deck look pretty with some furniture. The kit includes pre-cut basswood brackets to hold the windlass. These were lightly stained and coated with flat topcoat to give an appearance that nicely matched the thin wood strips that made up the “feet” of the windlass. Those I made out of thin pearwood that was also coated with topcoat. The windlass provided with the kit required extensive cleanup using files and sandpaper to get rid of ridges and to make the teeth more regular in appearance. Strips of metal wire also had to be applied to the drum of the windlass in order to simulate the whelps. The windlass was painted oxide red, with careful painting of the whelps and gears. The Samson post was built using strips of pearwood cut on the table saw, and the remainder of the windlass was attached to the Samson post. This black component came with the kit as a Britannia casting, and it also required extensive clean-up followed by fine sanding with sandpaper to smooth its surfaces. Then it was primed and painted black. Four U-shaped brackets and two linking rods had to be created to complete the connections of the windlass. For the U-shaped brackets, I created a jig involving a stiff brass wire taped to some clamps. The U was held in the clamps while the ends of the wire were bent around the stiff wire and trimmed to length. The U brackets were secured to the parts of the windlass around thick wire posts that were installed in the appropriate points. I remain very pleased with how this assembly has turned out. Next it was on to the catheads. Not exactly deck furniture but I figure I am going to try to keep things in the actual order that I did them. The cathead and its supporting bracket were cut from pearwood, primed, and painted. The assembly included notching the end of the cathead to accommodate the anchor’s restraining line (I’m sure there is a name for it…anchor painter?), and drilling a hole in the side of the cathead to accept a supporting rod that is also drilled into the bulwarks. This rod was of course painted black.


- 60 replies
-
- 3
-
-
- pride of baltimore ii
- Model Shipways
- (and 1 more)
-
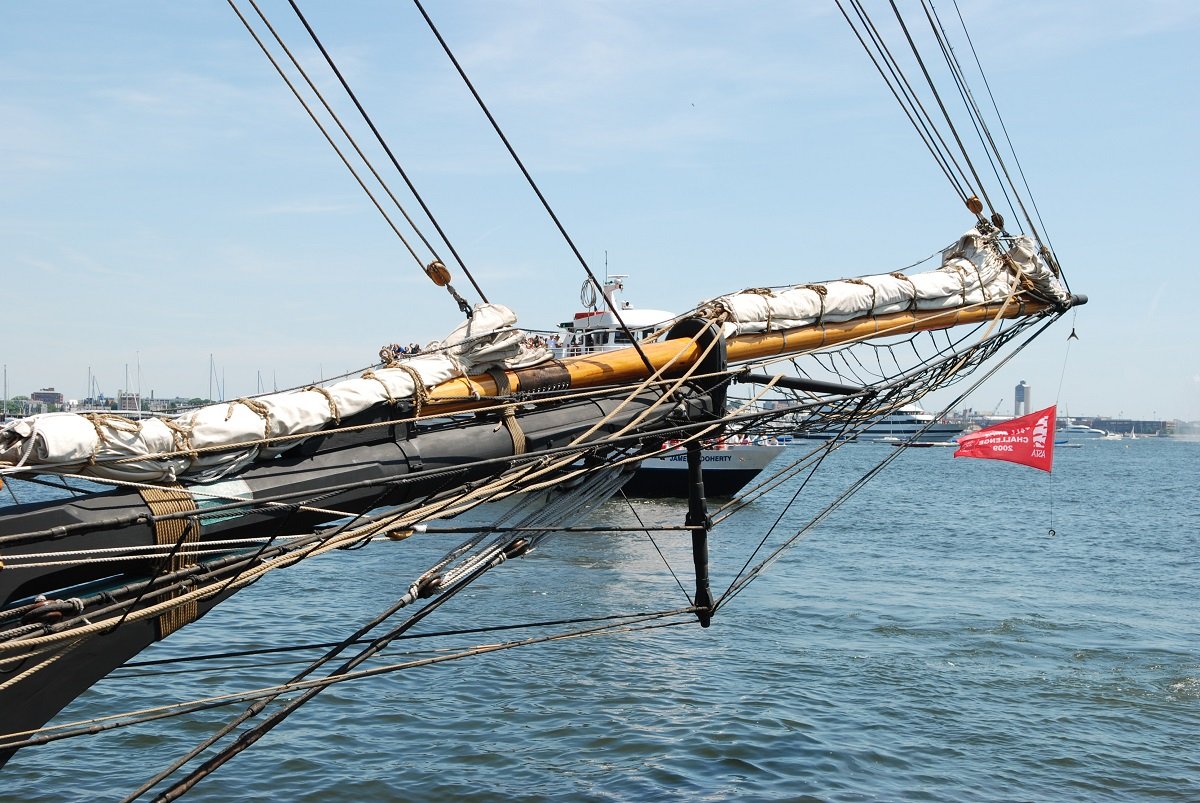
Frankie, I appreciated the description as well. It confirms what I was trying to do with my model's rendition of the furled headsails. I created a flaked sail, attached hanks, and threaded them onto the headstay. Then I wrapped the flaked sail with a separate piece of cloth to imitate the skin and secured that underneath the sail, between it and the jibboom. Then I tied everything down with furling lines. I was even able to simulate the reef knots.

-
Here is one for you:

-
Sorry if you have already addressed this earlier in the log. But can you tell me more about the cutting tool you are using on the lathe? That looks really small.
-
Or are you referring to Gilmer Wood Company?
-
Bob, I think (opinion) it would be difficult to finish the interior of this particular kit model since it is a plank on bulkhead model. I think if I had wanted to build out the interior, I would be doing a scratch build using plank on frame technique, building the hull up from a keel and frames. I suppose one could cut out portions of the bulkheads to create space for interior detail, but that could weaken the structure of the hull. Interesting idea, though... Jersey City Frankie, the CT article is not really online or available by link. But let me know if you would like me to message you a pdf of it. Better yet, become a subscriber to the Nautical Research Journal!
-
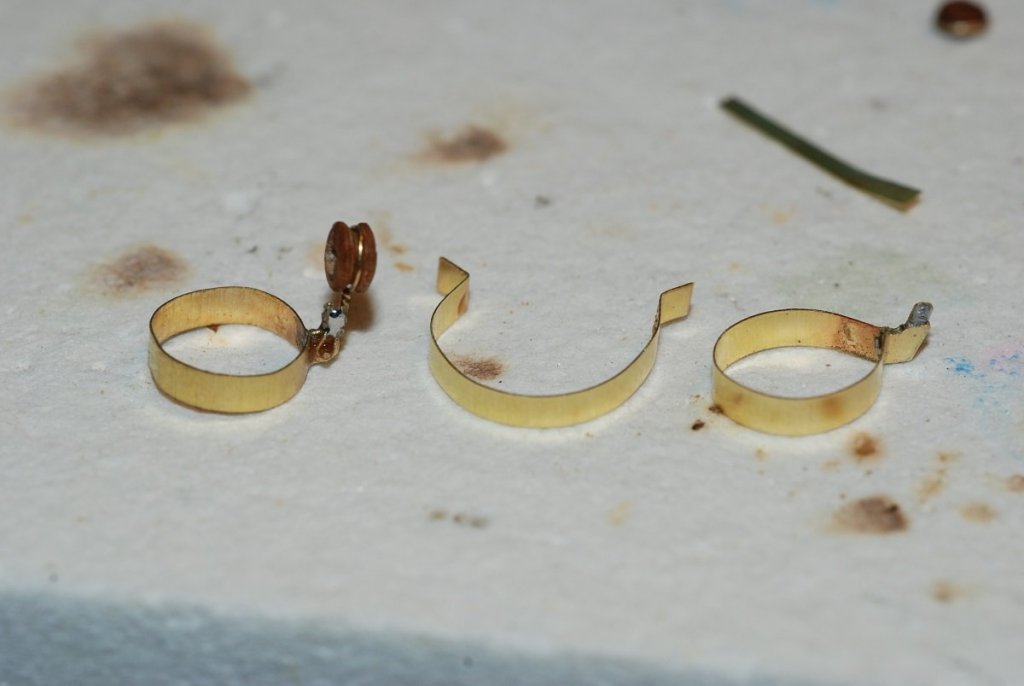
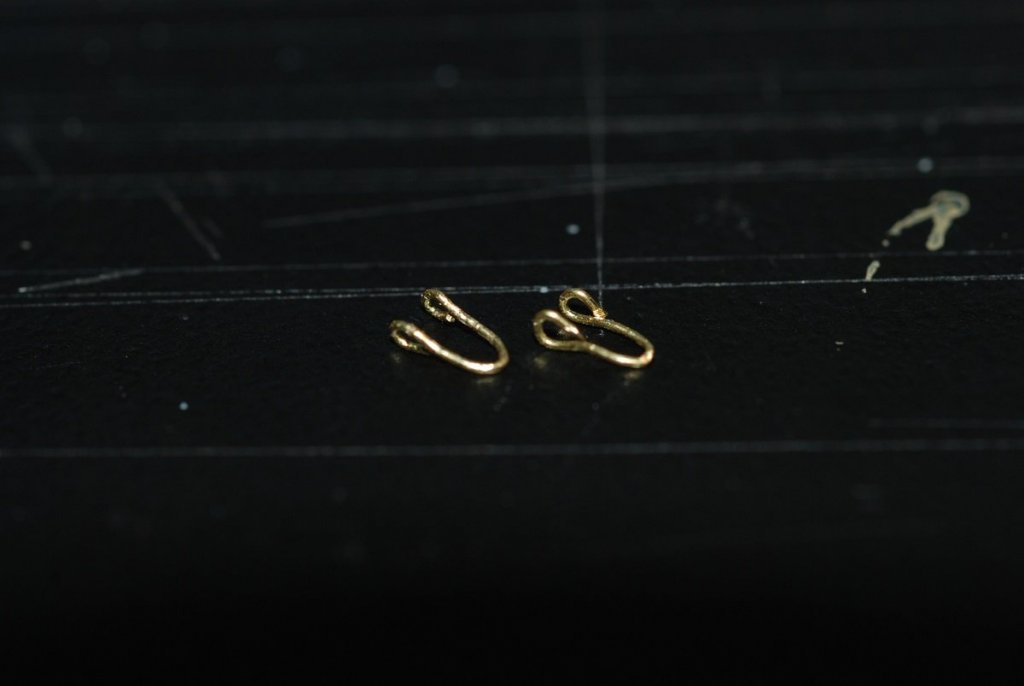
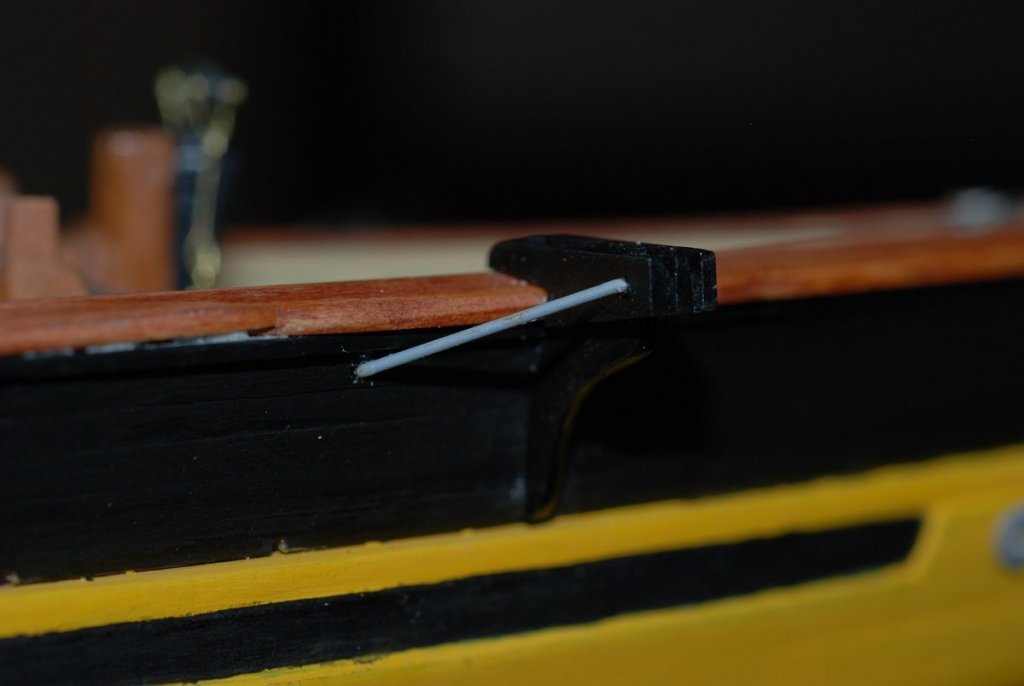
This one image from 2011 is worth some commentary. I reached the point when it is time to assemble the chainplates with their deadeyes. By this time I knew what these looked like in real life. So I was kind of disappointed in the instructions for the model, which said to strop the deadeye with wire, then twist the tails together, then solder them to a flat strip of brass that would form the chainplate. Really? We can’t do better than that? I wish I had pictures of all the trial and error steps I went through in attempting to fashion a chainplate that actually resembled the real thing. I can’t seem to find any. But looking at my photos of the real ship, I could tell that the chainplate itself is wrapped around a pin that is longer than the chainplate is wide. Then wire is stropped around the deadeye and around the ends of the pins that protrude from the chainplate. Fortunately, it was possible to use a certain thickness of brass strip that was pliable enough that it could be wrapped around a short length of small brass rod. The ends of the rod were flared with taps of a hammer so they would more securely hold the stropping wire. Then the wire had to be wrapped around one end of the rod and brought together securely before it was then wrapped around the deadeye and then wrapped around the other end of the rod. I learned that I could force the stropping wire to conform to the rod by wrapping a smaller wire around the stropping wire, then twisting it so that it forced the stropping wire to conform to the pin. I cannot even remember how I then did the other end, as the “bitter ends” of the stropping wire had to be brought together in the same way on the other side of the chainplate. I guess I wasn’t documenting things as thoroughly back then. Oh, and when I had all that figured out, the chainplate had to be bent to the proper shape to fit the chain wales, and holes had to be drilled in the bottom most tip of each chainplate so they could be pinned to the hull. In order to pin the plate to the hull, I had to figure out how to take a segment of wire of the right diameter and peen its end so it could be used as a sort of nail. Lots of trial and error, as I said. But the most memorable thing was that I was visiting with friends from the NRG about this moment of discovery. I was a pretty new member of the NRG at that point. His comment: “This is what we at the NRG are here for. At a certain point in a modeler’s career, he says, ‘I know I can do better than that.’” It seemed I had reached that point. The blue tape was put on the wale planking to keep from scuffing the yellow paint while I manipulated the chain wales. So here is what things look like as I put on one set of the chainplates and deadeyes. Other chainplates are on deck, waiting for their turn for installation. Next up: more deck furniture.
.thumb.jpg.46476987c471be312dd70a7addf716e2.jpg)
.thumb.jpg.90270e7812fffbaf17b7ce4c6fa1487d.jpg)
- 60 replies
-
- 5
-
-
- pride of baltimore ii
- Model Shipways
- (and 1 more)
-
The article is actually about the use of CT scanning for evaluating ship models. (An MRI would rip a historic ship model apart!) It's in the Nautical Research Journal, Volume 56 (2011), issue 4. Hope you enjoy!


.jpg.976f506b5e9ebf2cfc4b020ad1f942e8.jpg)
.jpg.0427d5a54a0c2a220b59afada02a4ab4.jpg)