HOLIDAY DONATION DRIVE - SUPPORT MSW - DO YOUR PART TO KEEP THIS GREAT FORUM GOING! (Only 44 donations so far out of 49,000 members - C'mon guys!)
×

Harvey Golden
-
Posts
457 -
Joined
-
Last visited
Content Type
Profiles
Forums
Gallery
Events
Everything posted by Harvey Golden
-
 To Jaager's list, I'd add these two volumes by Harry Sucher: "Simplified Boatbuilding: The Flat-Bottom Boat" (1973), and "Simplified Boatbuilding: The V-Bottom Boat" (1973 & 1974)-- both geared for chined craft, as their subtitles suggest. Each is a building manual with regional nuances highlighted (mostly U.S.) and each features numerous scale drawings of many types. Ed Monk's books are superb, and also Sam Rabl's "Boatbuilding in your own Backyard" (1947) would be helpful. (As an aside, I hope I'm not the only one who thinks a large bibliographical resource on boats, models, ships, etc. would be a nice thing to have here... I'd be willing to help with this.)
 -
This is an area of interest of mine, too. I've sort of backed into model building having come from a few full-size (albeit small) projects; Period books (and historical retrospects) covering full-size boat building may be the best source of information for craft of this period/genre. Books on models will certainly help with many aspects of scale, approach, fittings, etc., especially if you are building solid-hulls. Best, Harvey
-
As a veteran scratch builder, I have to admit many of my models have had this issue to some degree, and the advice above is all-round perfect!
-
Was Howard I. Chapelle Controversial
Harvey Golden replied to SaltyNinja's topic in Nautical/Naval History
Controversies are good to explore, but we might also ask what the historic record would look like without his contributions. I certainly have issues with some of his work, yet am glad he did the work. Harvey -
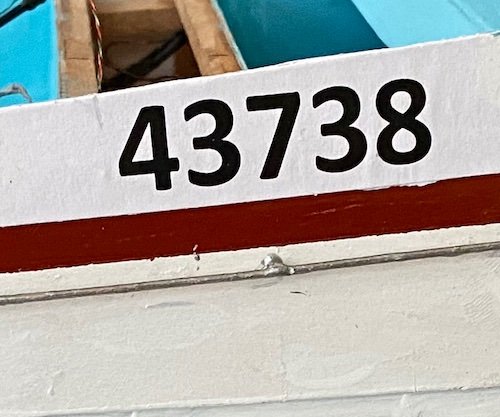
No expert on this, but I'd refer you to the trove of photographic resources at https://www.navsource.org . Briefly, most seem to have been greatly reduced in size and the 3-d effect was done away with (and brought back after the war). You'll also find that it seems to have varied greatly by type/time as to the size of the numbers. I don't believe they were obscured, based on what i've seen on Navsource, and the numbers (and letters when present) were white No doubt others here know much much more. Harvey
- 1 reply
-
- 2
-

-
Dear Clare, Thank you for posting the youtube videos of your models from Brooks' studies. They are very beautiful, and exceptionally well done. I had been thinking of making one from his book, but am over-extended with other projects. Someday! Best, Harvey
-
Not sure if this is of any help: (Sourced from https://www.shipcamouflage.com/usn_cve.htm) They also show the Gambier Bay's scheme. (The ocean gray on the model's color chart looks a little dark.)
- 126 replies
-
- 4
-
-
- Thetis Bay
- Finished
- (and 4 more)
-
Hello Ian, Yes, Cole's book is on the shelf here, thank you! I'm sort of new 'round these parts, but if you click on my name, it might lead to pics of my models. . . . they're a very random assortment(!) All the best, Harvey
-
Welcome! I'm a big fan of West Coast fish boats, and have scratch-modeled a few (mostly Columbia River types). Look forward to seeing your projects! Best, Harvey
-
Thank you Clare-- that explains it. Shall keep that place in mind for a future visit! I'm enjoying this project. H-
-
Hello Clare (and all)! Very interesting project, as always. What is the "Rope?" ... sounds interesting. Have the Nagoya Castle models been on exhibit long? I don't recall them from my visit (ca.2006). All the best, Harvey
-
I'd love to know more about this!
-
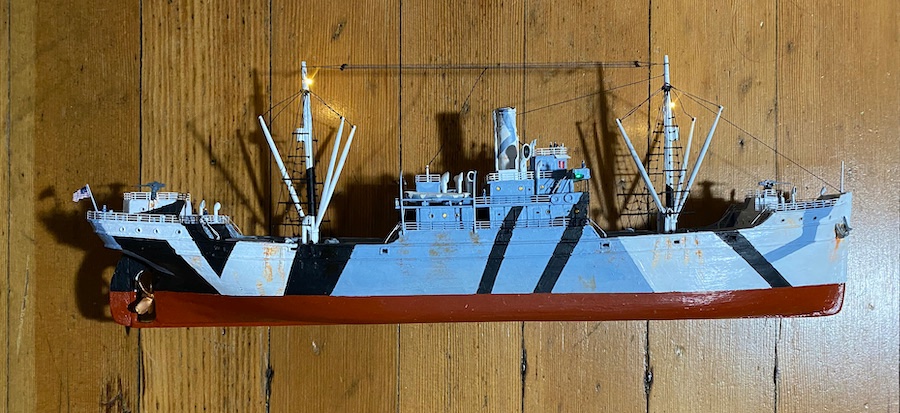
I've been wondering the same thing in recent days. Even if you match the color of the paper, the sheen, texture, precise shade is never exactly like the paint-- you learn quickly that there's a million forms of "white." In the photo, you can see the color difference between the white paper and the white paint adjacent the stripe. I have also been printing text and then going back with fine brushes to add the correct white, and then tidy up with the text color-- essentially using the printout as a pattern of sorts. I think the biggest issue might be paint wrinkling up the paper as it dries. Perhaps if you know where the text will be on the paper, just pre-paint that particular area, so you aren't working with a full page of painted paper-- I haven't tried it, but this could work. Wondering who will try it first(!) Best, Harvey
-
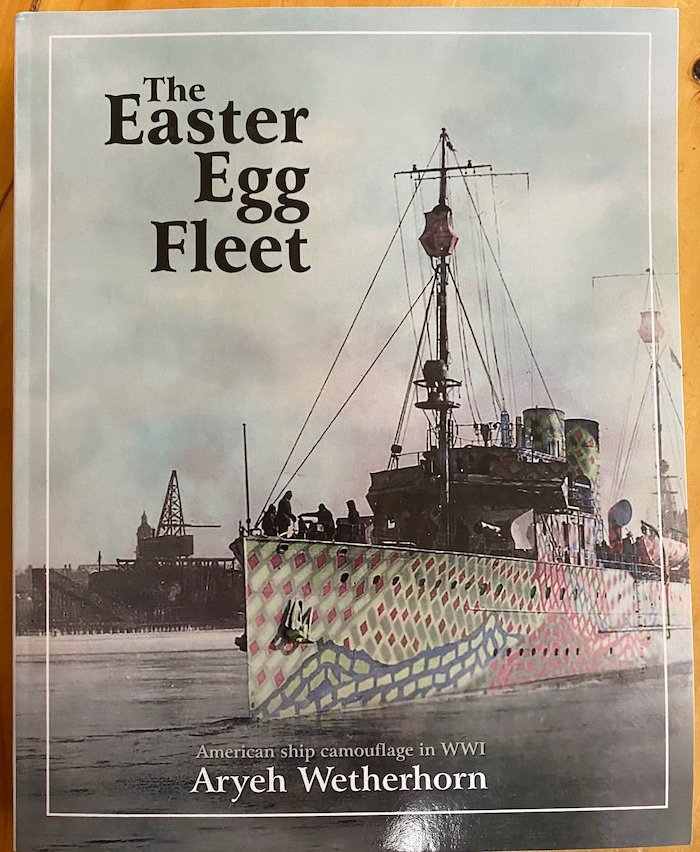
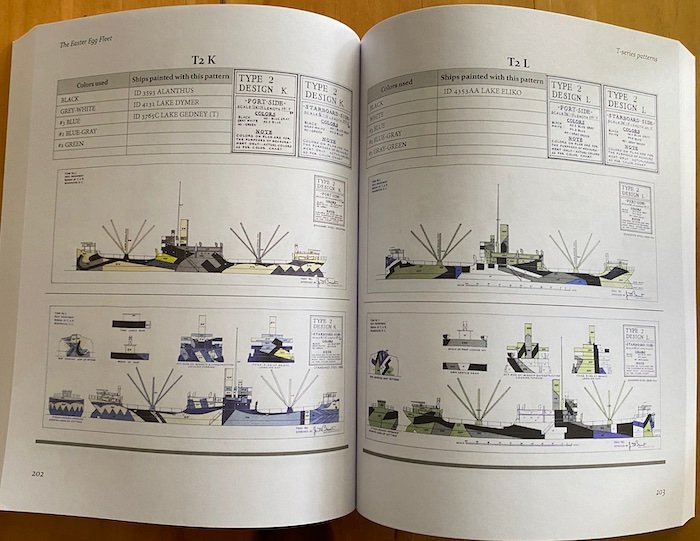
I just received Aryeh Wetherhorn's book, and I'll be repainting my model when I get a chance. It is quite a fine looking book extensively illustrated (in color) with good historical background. 341 pages. Here's a cover and inside shot:
-
Dear Aryeh, Thank you for the kind comments and direction towards a good source on camouflage for ships of this period- I've just ordered your book! Yes, I had a lot of trouble with the patterns and colors for reasons you mention. I don't recall my source on the particular shades, but I think period paintings of ships were helpful, though undoubtedly a little misleading. Looking forward to reading your book-- all the best, Harvey
-
"Sand Pebbles" motor Sampan from 1966 movie
Harvey Golden replied to JRB's topic in Nautical/Naval History
I haven't watched the film through, but I'd think you might find similar vessels (though not motorized) in Worcester's "The Junks and Sampans of the Yangtze." -
That makes very good sense, but there are still a good number of drawings he made from lines that he took that are not pointed consistently. I think if he had felt strongly about one direction or the other, he would've pointed them thus, even when basing a drawing off of a historic plan, but who knows? -Harvey
-
I was also thinking about drawings. . . Chapelle's lines-drawings are very inconsistent, which strikes me as a little odd. No doubt certain schools have their "ways," but others just followed their fancy. The thought of a boat (in model or lines drawing) traveling the direction one reads is interesting, but when I 'read' a boat, I go from bow to stern, so my inclination is to draw them pointing left. (My mentor told me not to draw them that way, BTW...) Harvey
-
She's looking better than she was in 1998. Good to see. Best, Harvey
- 13 replies
-
- 3
-
-
- HMS Unicorn
- preservation
- (and 2 more)
-
An easy fix-- thank you.
-
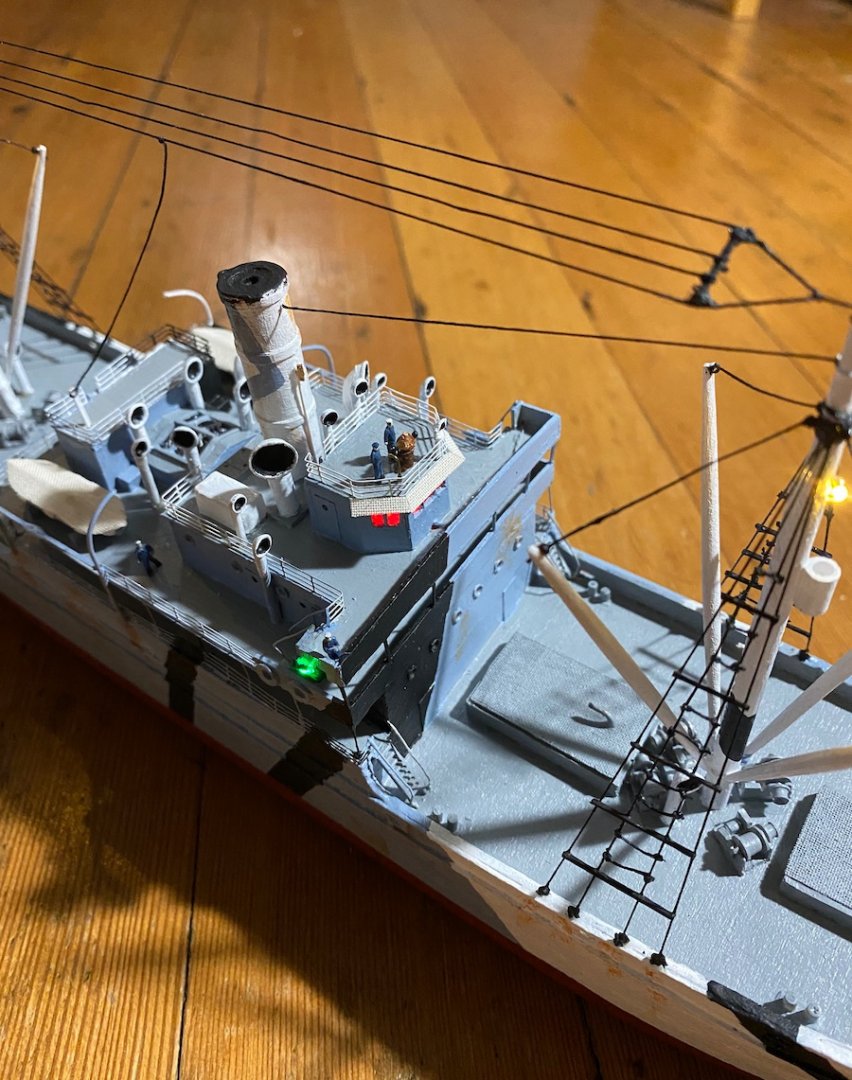
Dear John, It might not be period-correct-- I've not been able to determine this. Otherwise, not an uncommon color of lighting for nighttime navigation, at least since the 40s. The auto-exposure on my camera sure makes it brighter than it should be. Best, Harvey
-
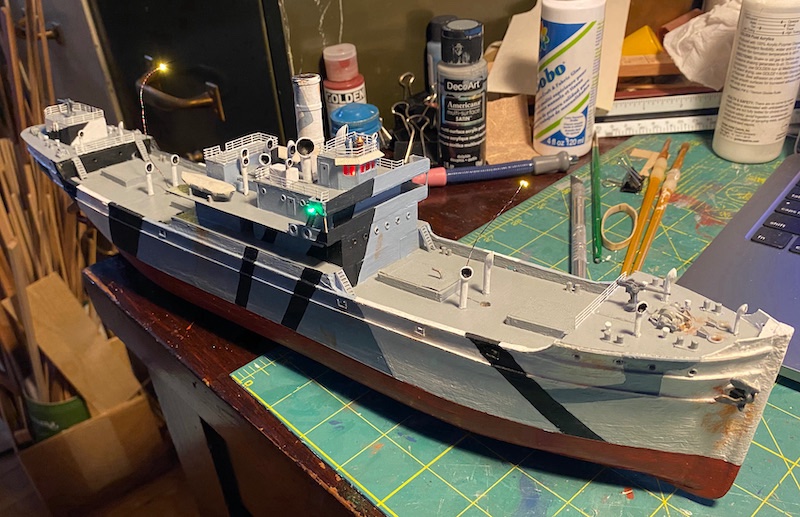
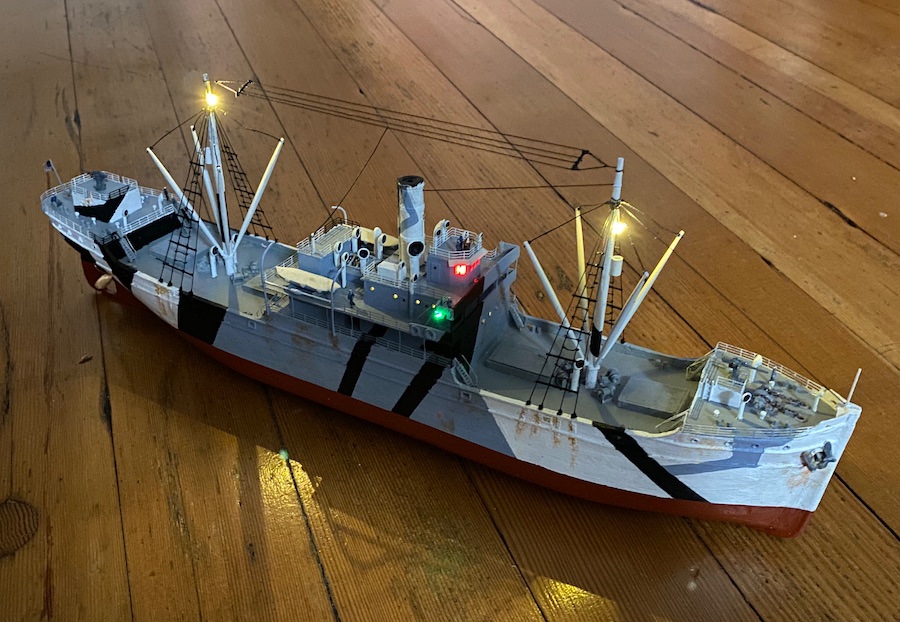
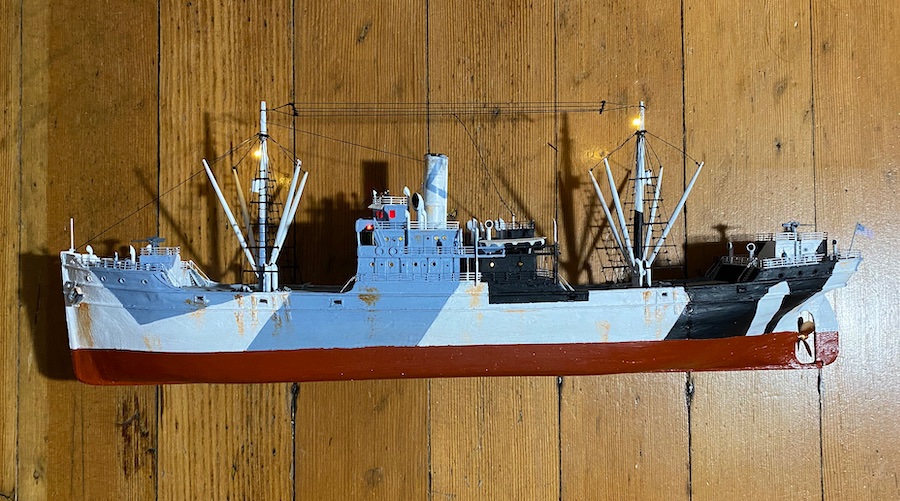
Oops. I finished. I think, anyways. First time building a ship with ratlines, though simple and mercifully few, as they were. Van Gaasbeek's book was a wonderful source, though when you really get into it, one is still left with many questions. Never mind reading the plans. . . I searched the internet for hours trying to find out what an "MF Vent" was before realizing it was just a bad imprint of "MR VENT" or Mushroom Vent. (I sure came up with what MF stood for on my own.) If anyone wants mirrored-sections (in a .docx file) or any other 'stuff' I drew up for the project, let me know. Below are photos; I'll probably post a few on-the-water pics in the Gallery next time I get down to the river. Thanks all for following along. Best, Harvey

-
Stays in place and ratlines in progress. Chainplates in place (made of paper with glue 'bolt-heads'). A couple errors fixed, such as the height of the forward rifle platform. Many more details ahead and clean-up here and there. I do believe I'll be making a rudder in the not-too-distant future. Oh-- a crew was scrounged up, as well! (Trumpeter 1/200).

-
"De Nederlandsche Scheeps Bouw Konst" (Van Yk, 1697) and "Scheeps-Bouw en Bestier" (Witsen, 1671) are in fine facsimile re-print in recent years.
-
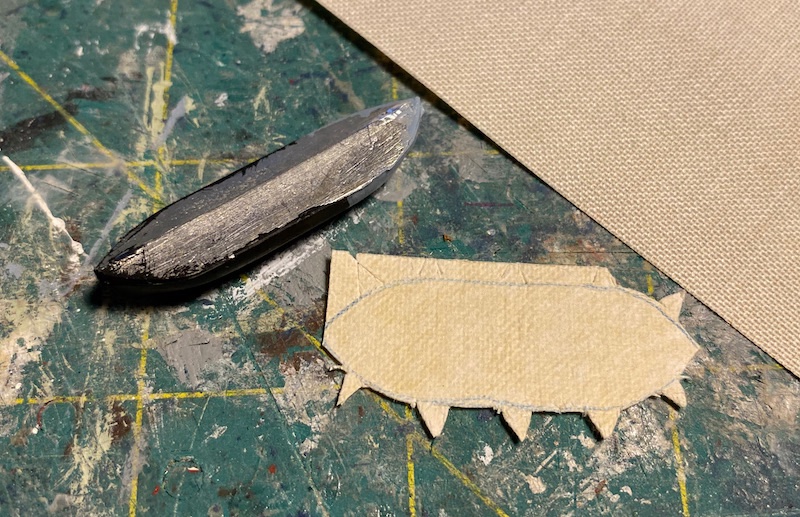
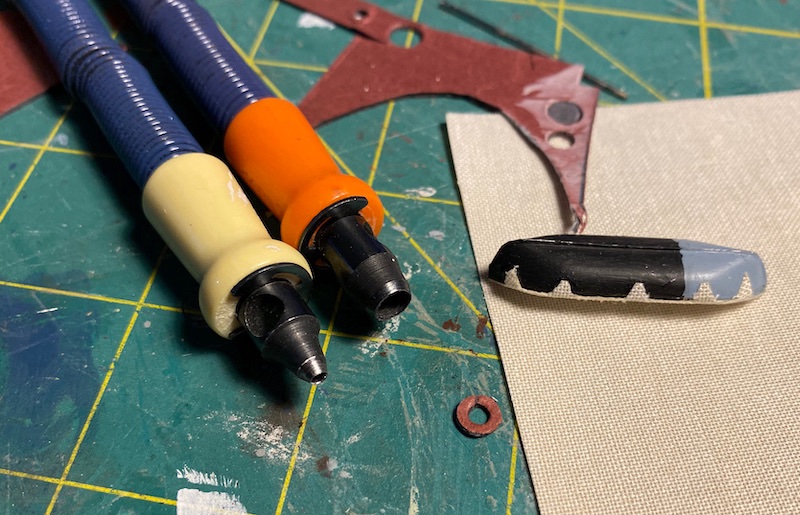
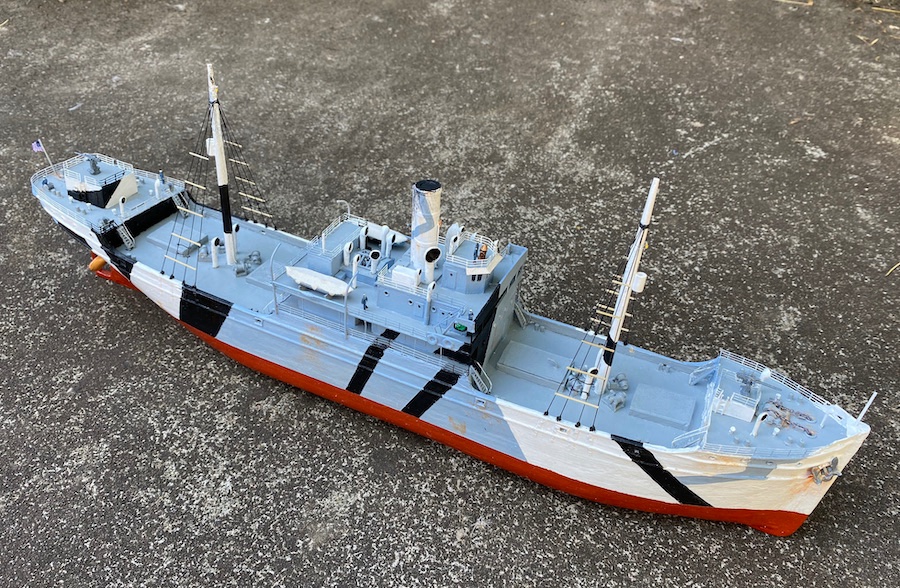
A bit more progress lately. Also, here's some little details that might be of interest . . . Book-cloth for lifeboat covers and grommet punches to make life rings. I've also used these punches to make portholes when using heavy paper for cabin walls-- they leave a nice raised ring on the opposite side (I used grommets and plywood for the walls on this model). 1918 was a very good year for cowl ventilator salesmen . . .