


Meriadoc Brandybuck
-
Posts
195 -
Joined
-
Last visited
Content Type
Profiles
Forums
Gallery
Events
Posts posted by Meriadoc Brandybuck
-
-
Hello, I believe earlier we had talked about silicon casting as a means of reproducing parts accurately. There is a better method, using blue stuff and epoxy resin; far cheaper and easier. I’ll link a video that shows how to do it. Hope you and others around here can benefit from it.
- Baker, mtaylor and flying_dutchman2
-
 3
3
-
-
Backer- thanks for the kind comments! Google translate seems to be working well for you. Don’t trust it for translating Japanese though!
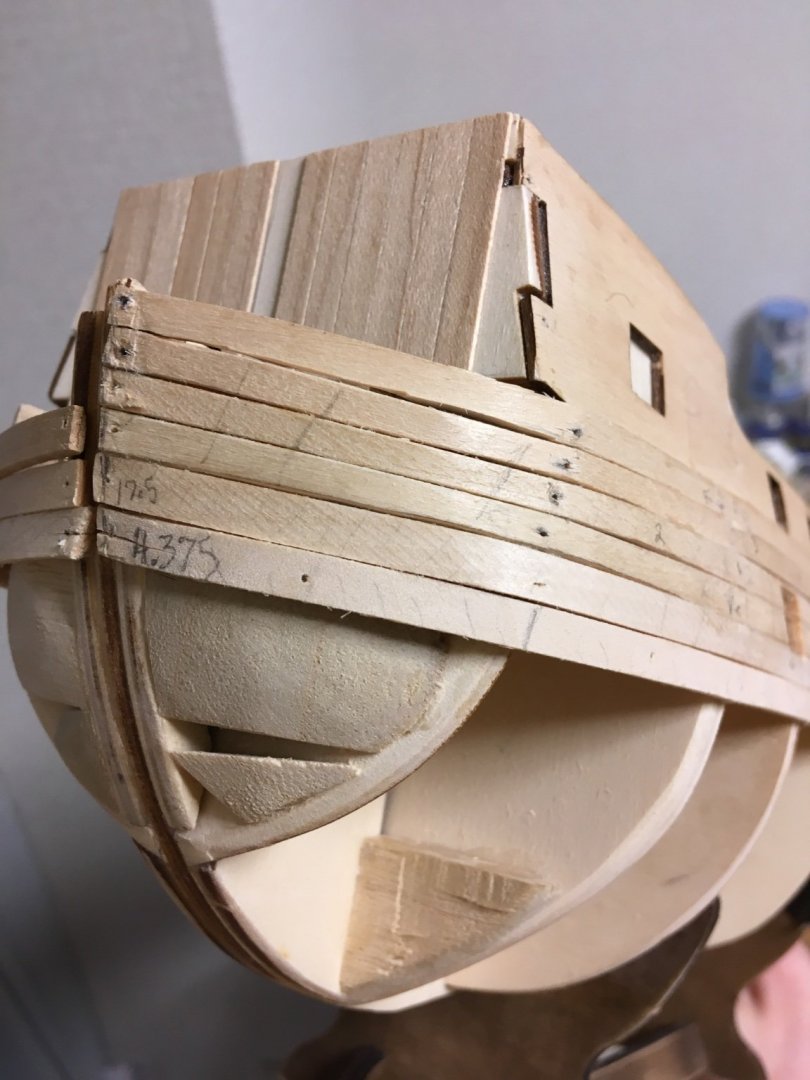
Heres my pinhole-putty issue:
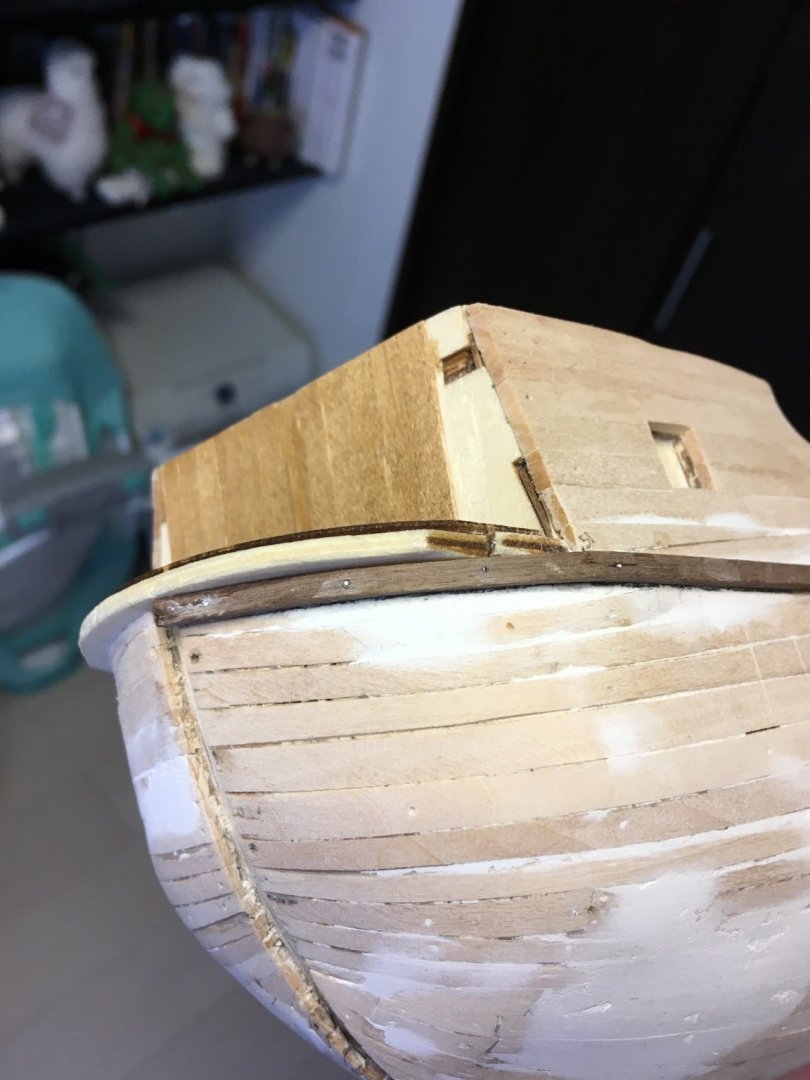
See how the white putty has seeped up through the holes in the wale.
About wale positioning- I’ll check some sources. This kit includes no actual plans, so I made some measurements and guessed.
Meriadoc
-
Thanks for all the likes!
A quick update. Slow progress, as a few other interests have had to be dealt with; see below.
Finished sanding and filling, and added the first wale. The “instructions” are now taken far less seriously. Then some other pursuits came up..

And got some attention..
A few more days left of finishing work on the Hornets, and I think I’ll put Dragon Quest and 1/700 waterline ships away for a long while and get back to my Elizabethan shipyard.
QUESTION: I am having filler seep up through pinholes in the wales when I try to get the holes to close with drops of water. Anyone know of a workaround for this?
Meriadoc
- Baker, Cirdan and GrandpaPhil
-
3
-
-
-
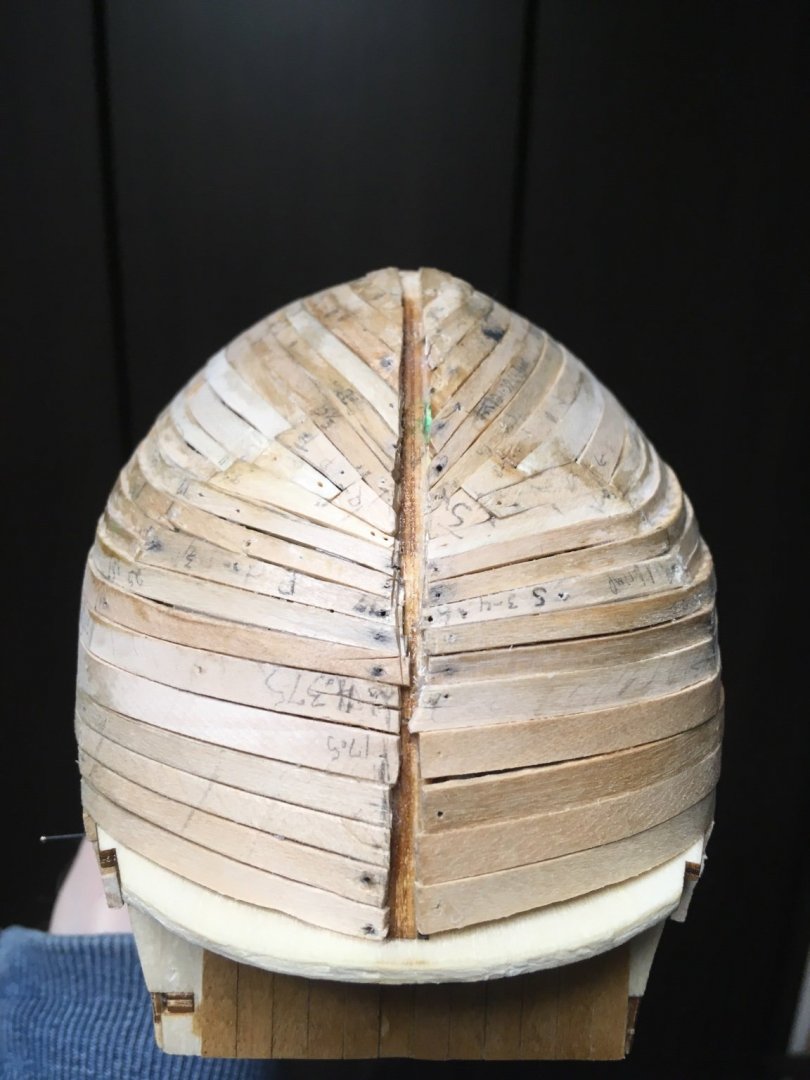
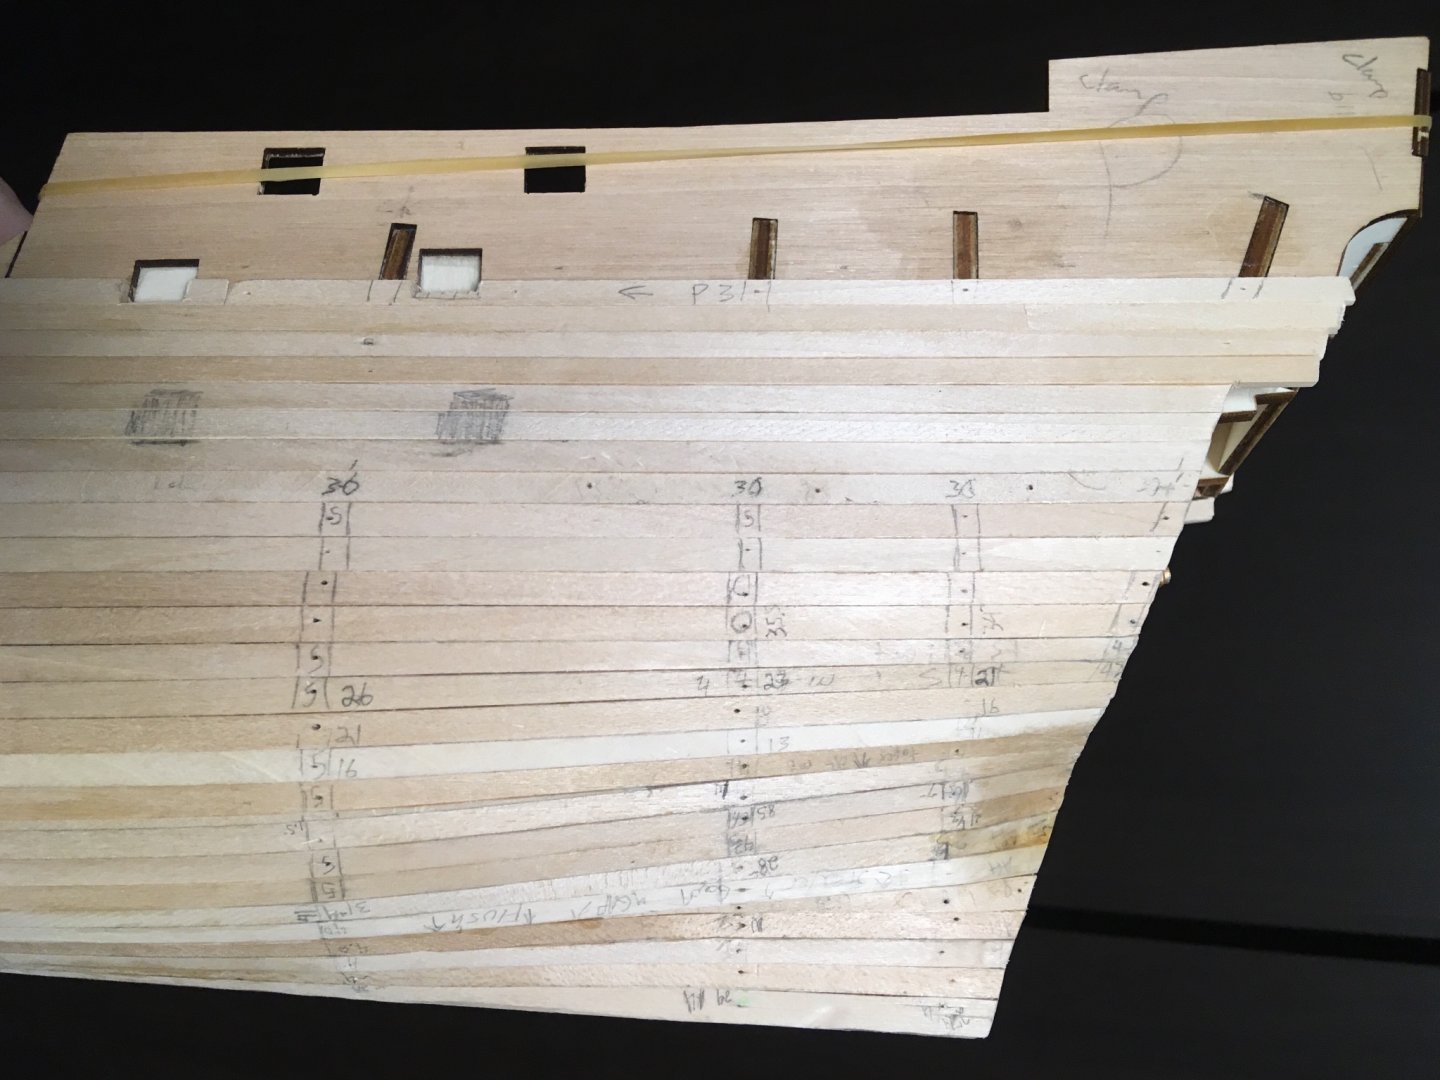
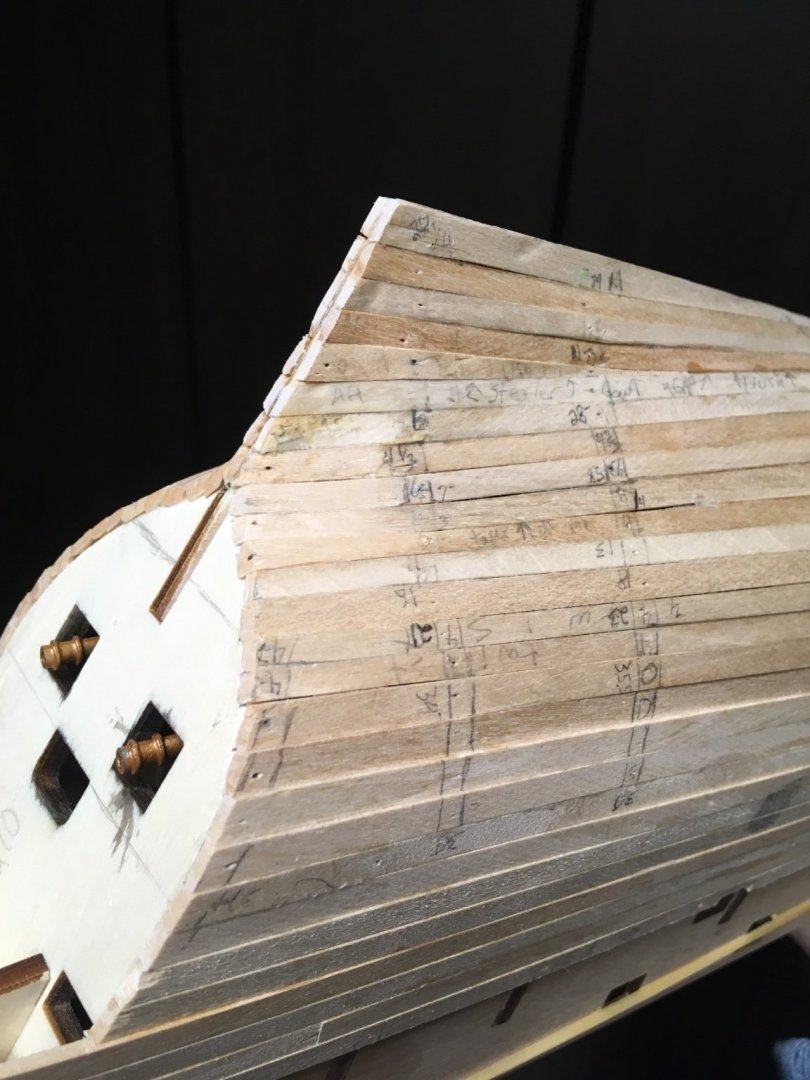
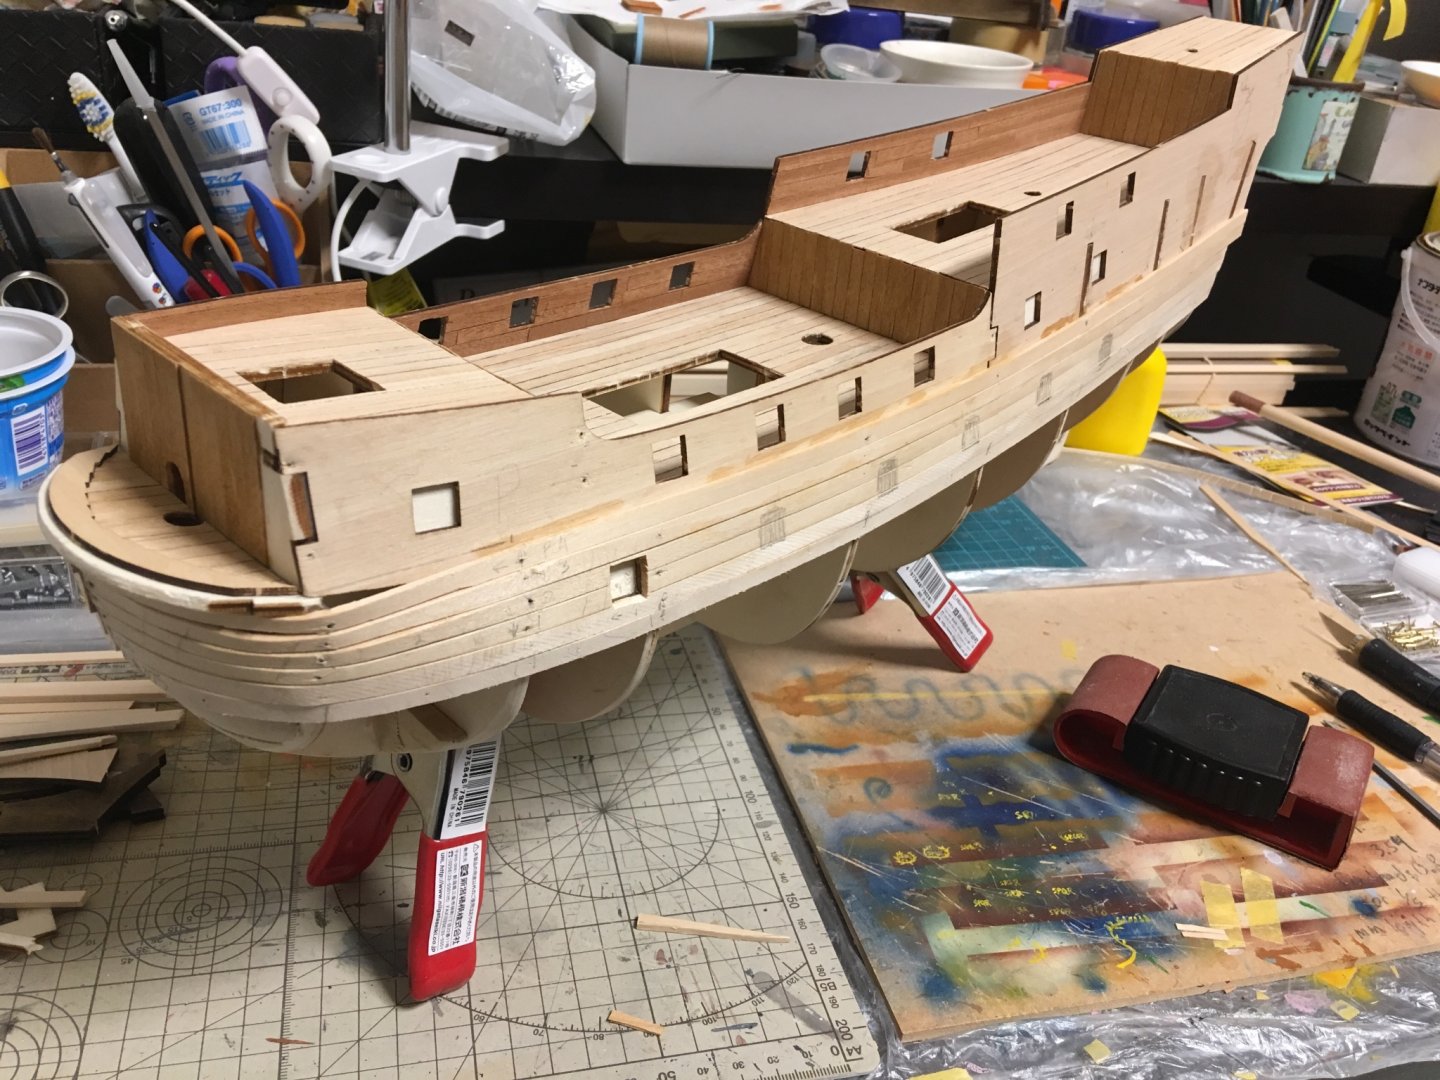
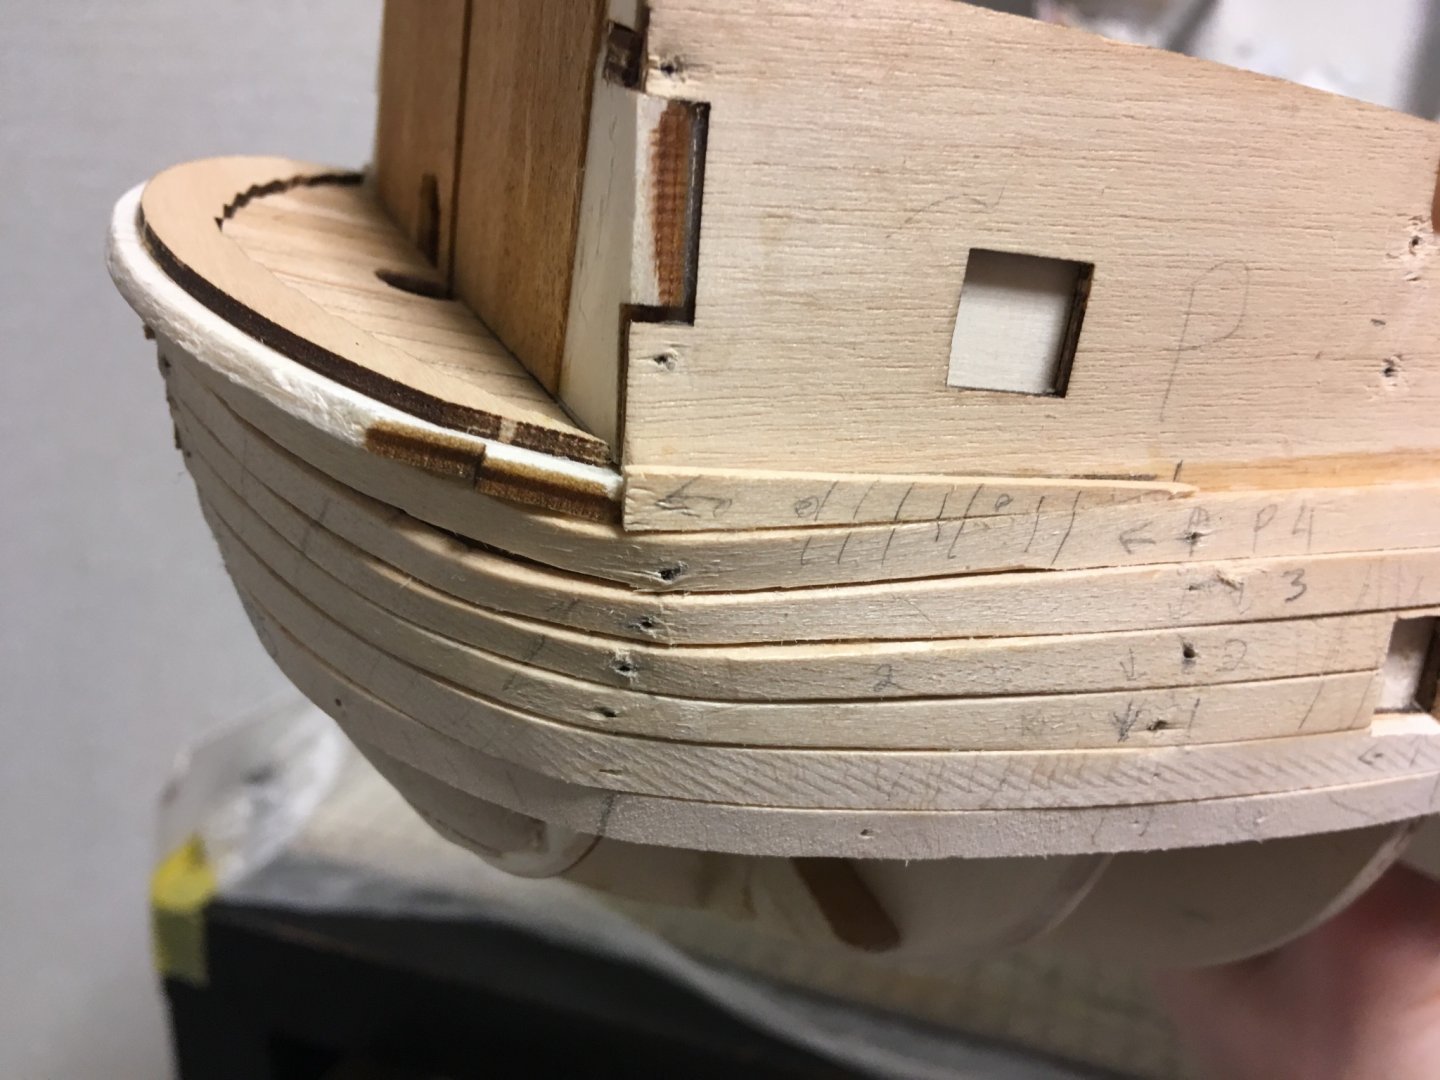
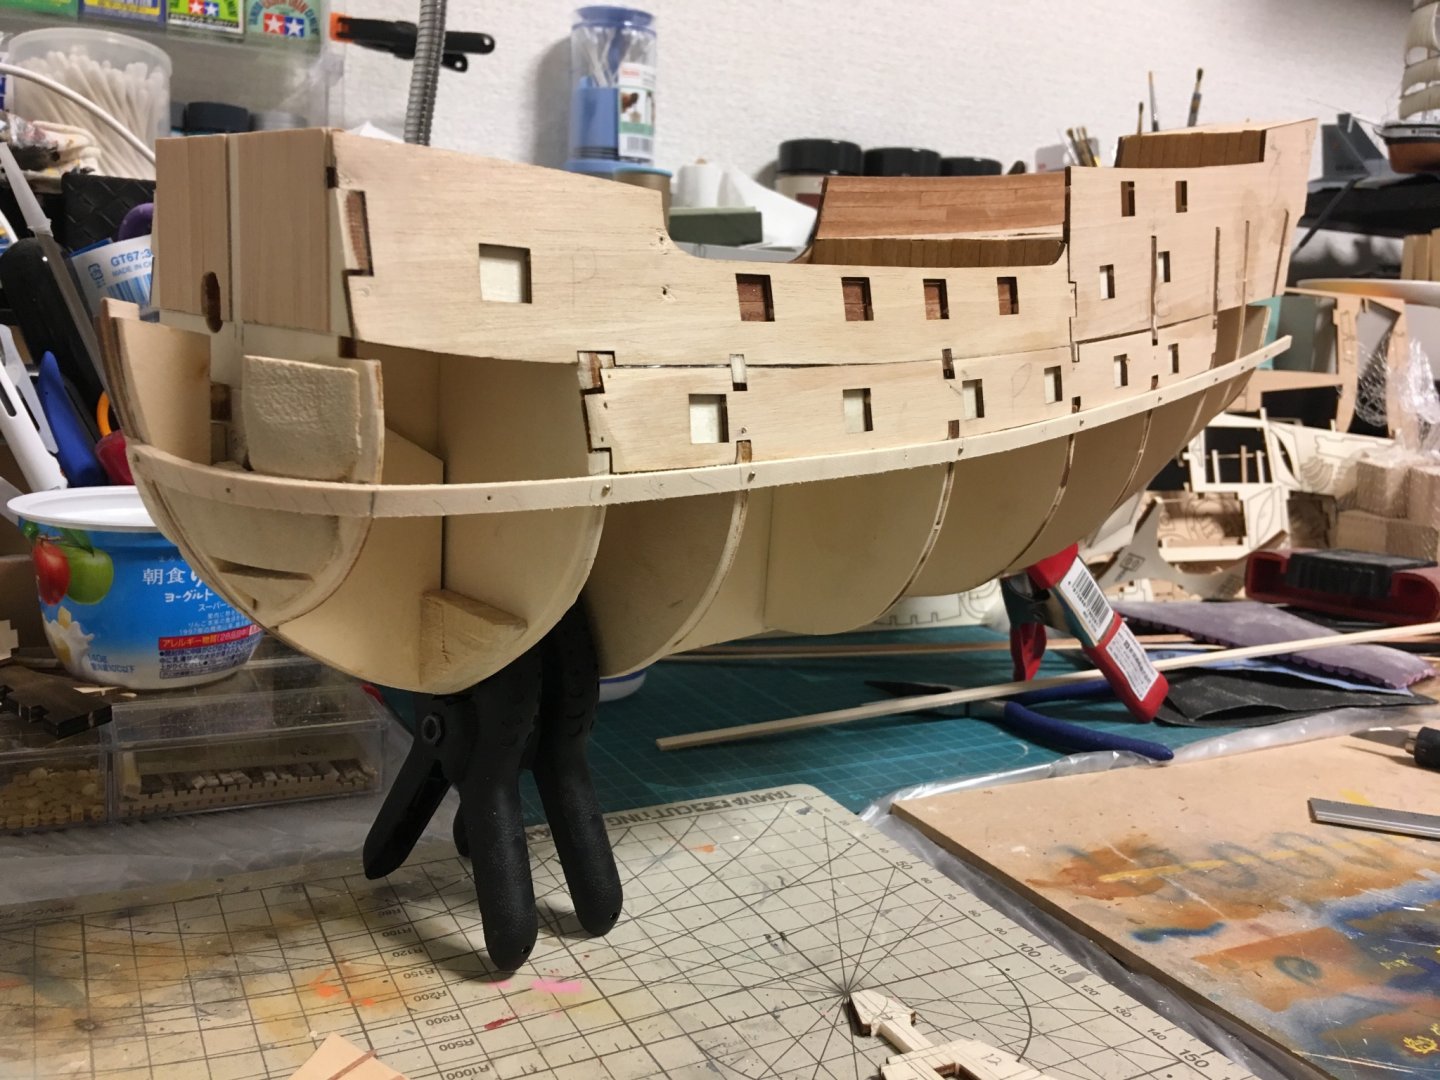
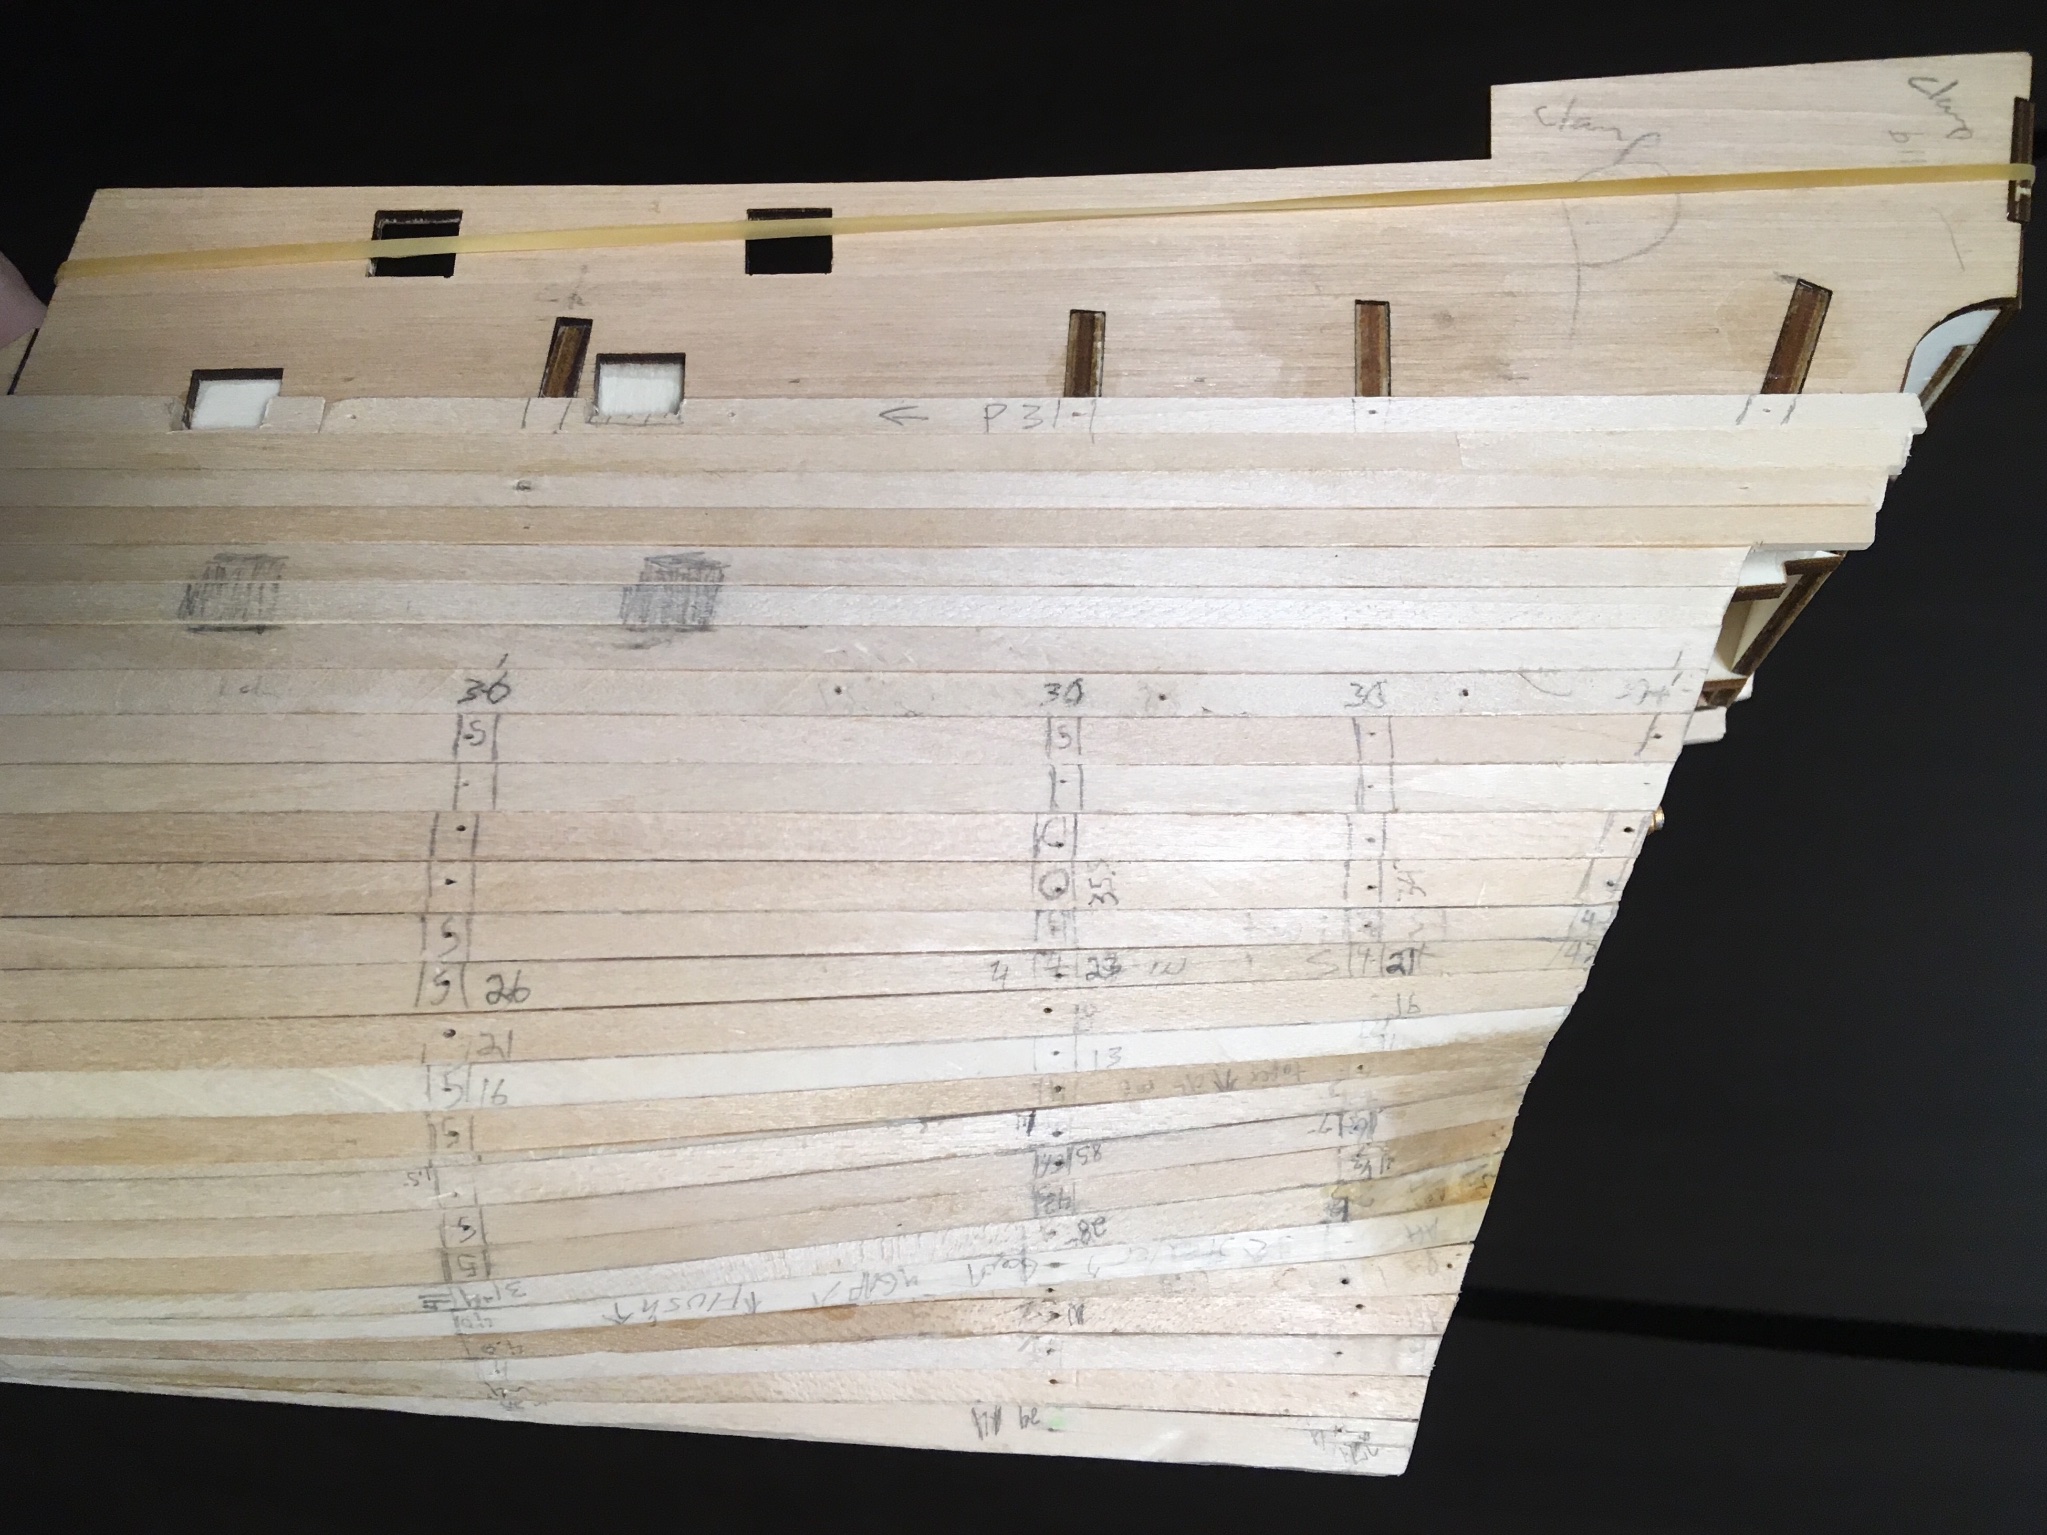
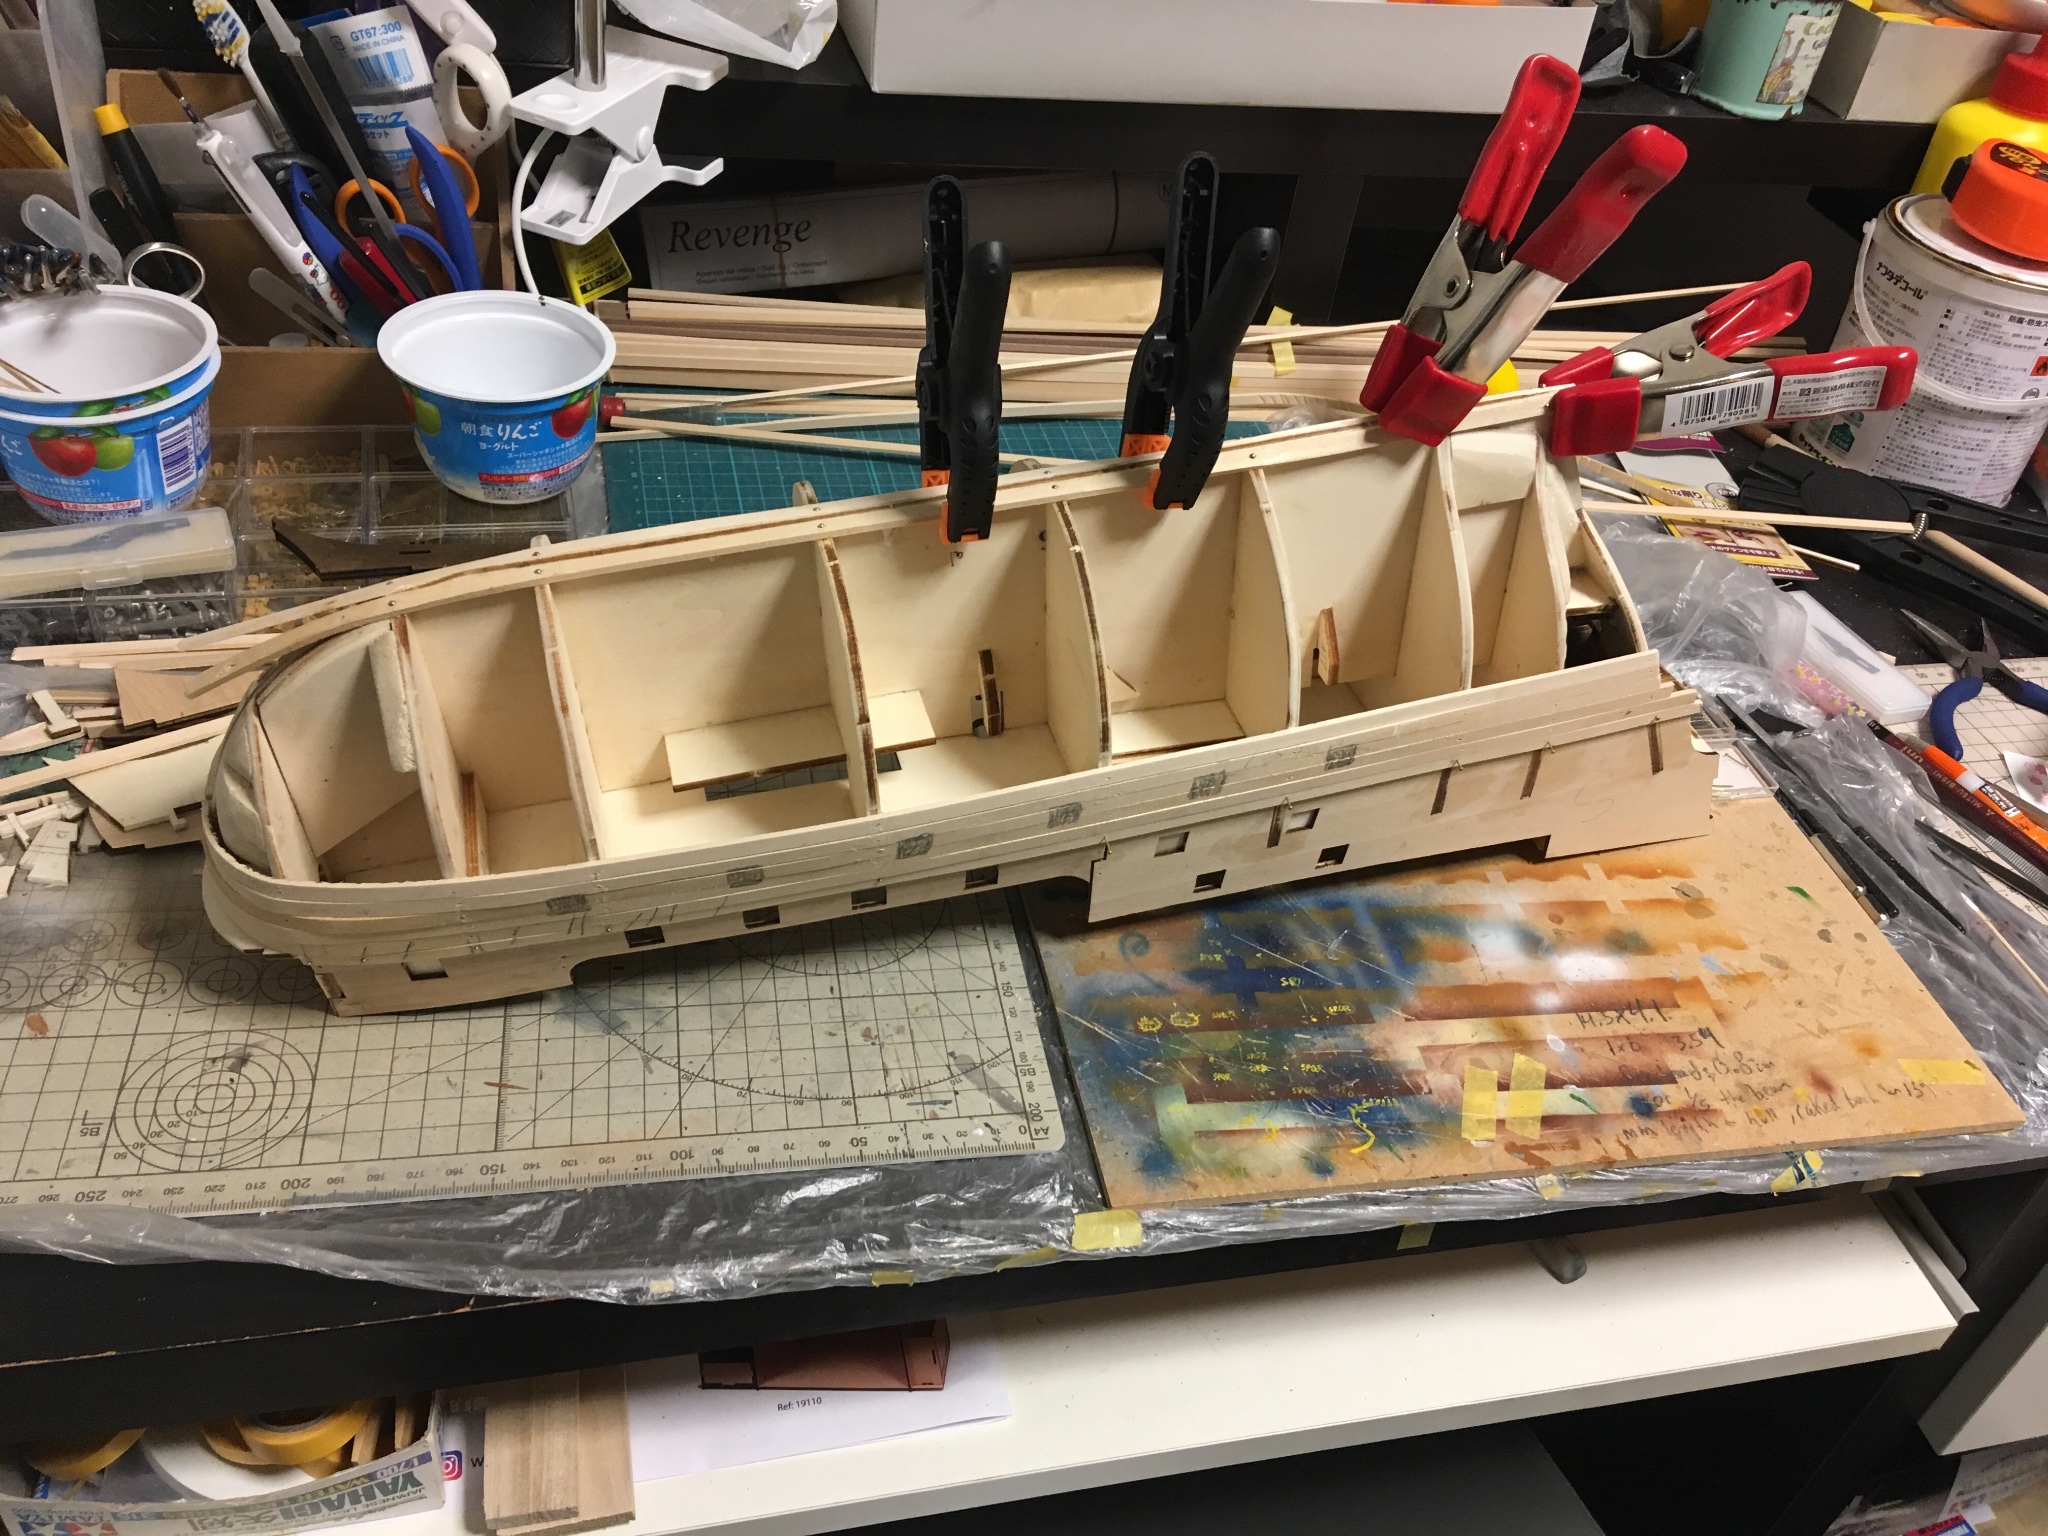
Lots of planking has happened.
I finished everything but the upper gunwales on the first layer. Learned a few things as I went.
I’m not sure if I should be happy with it or not, but I think it’s workable.
In particular, does anyone have any good information on how/where the garboard plank should terminate at the bow on the Revenge?
Photos below; I’d love to hear any ideas on what to do better next time.
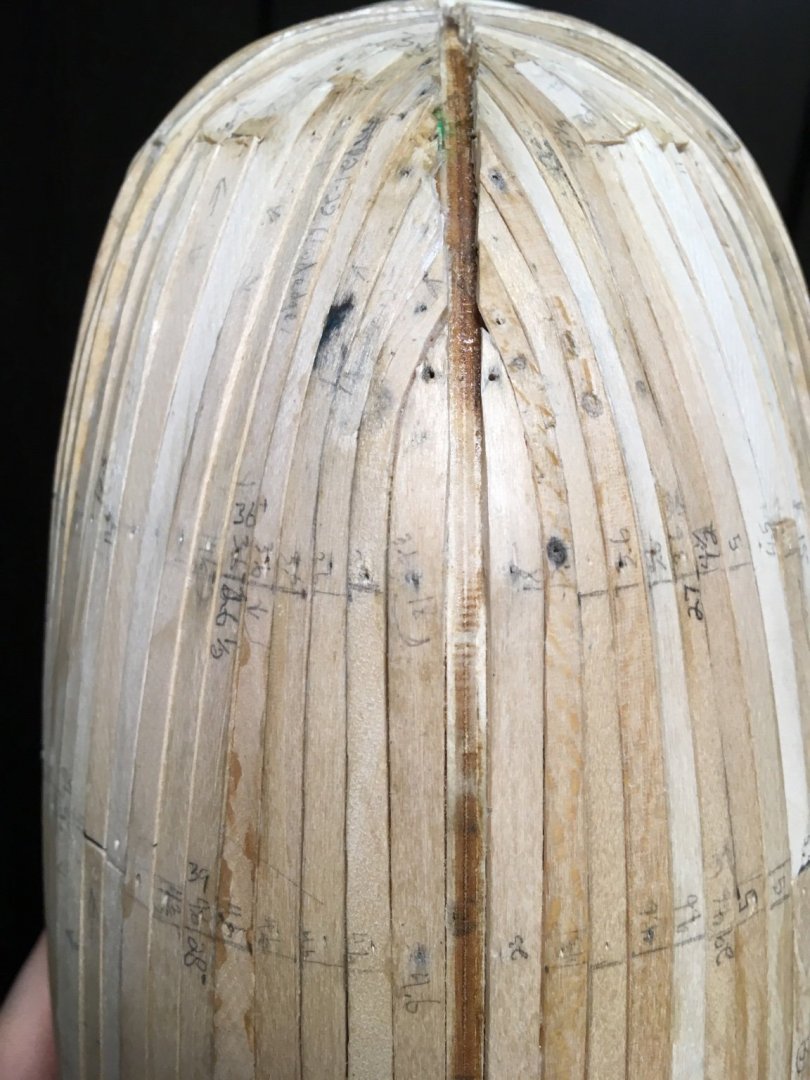
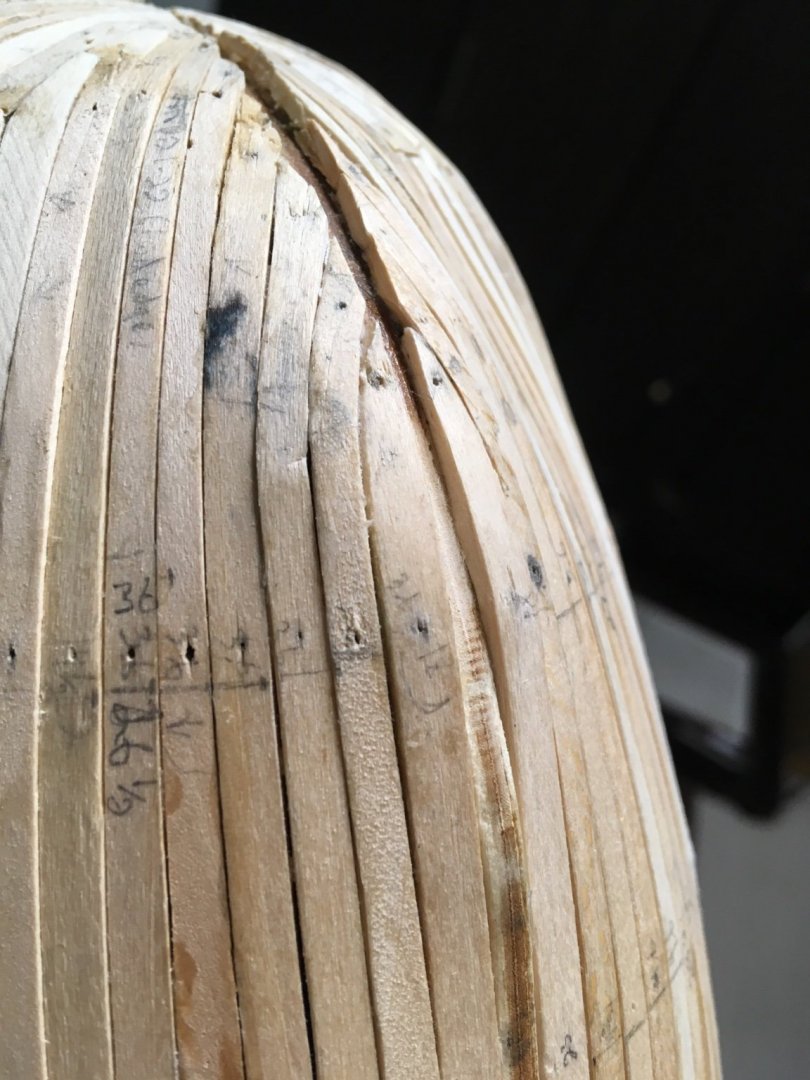
Trying to establish planking bands; a process I think was counterproductive in this case.
The first strakes at the bow. Should have tapered to minimum width ASAP. Did I let the garboard curve up too much?
First and only stealers needed here.
Getting closer.
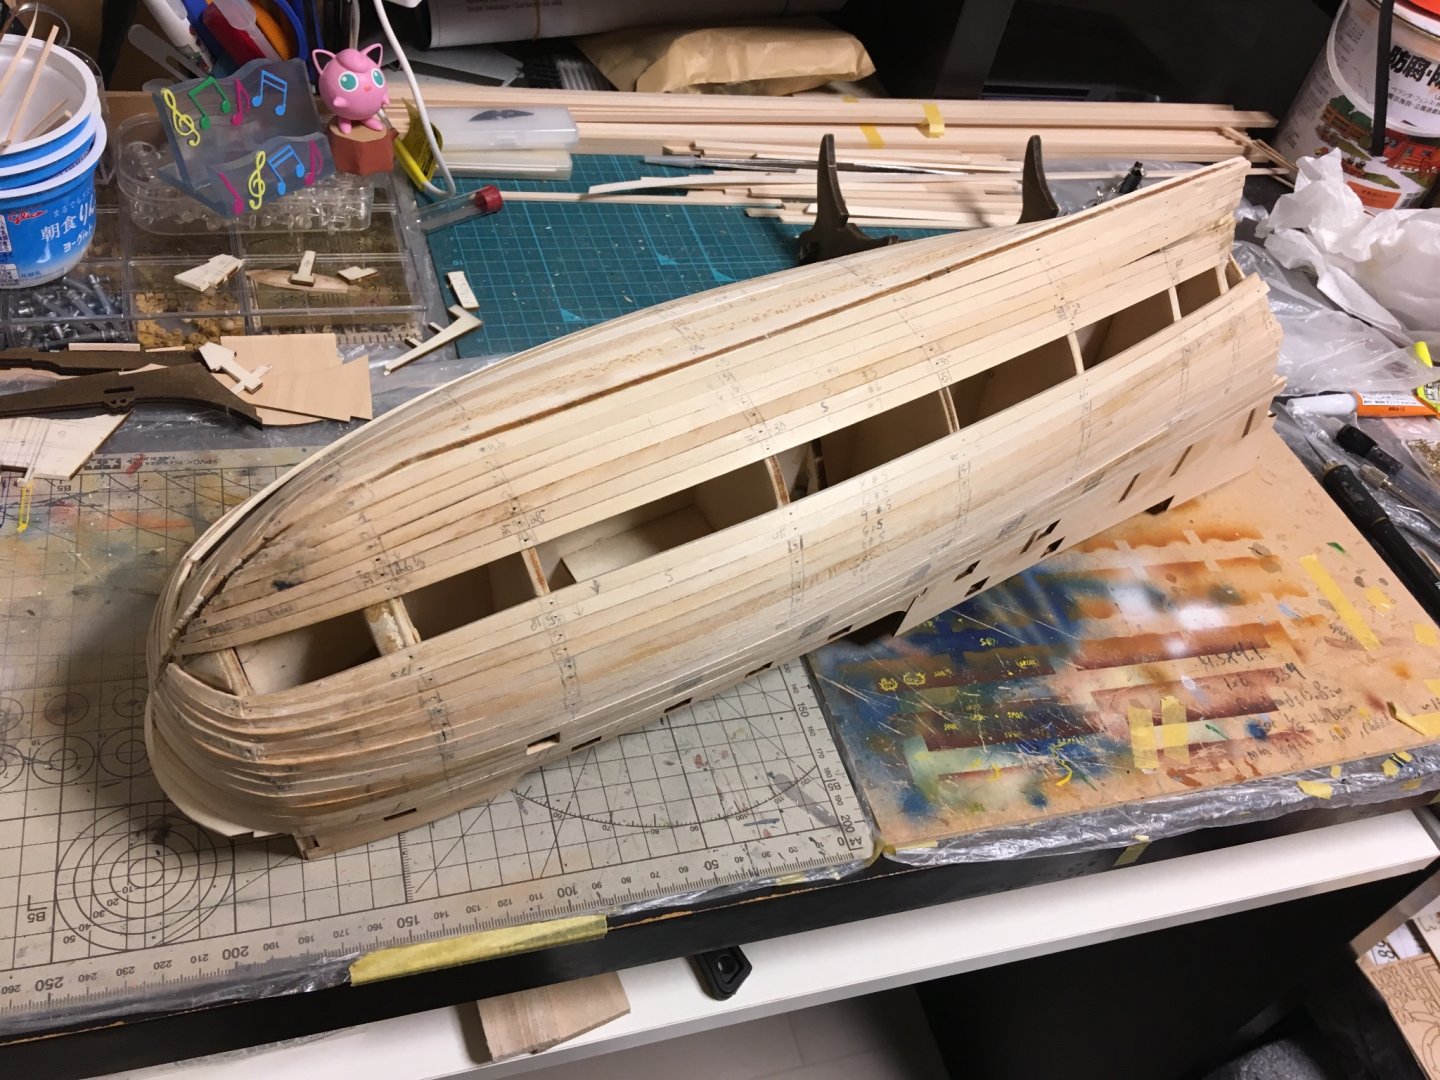
Almost.
Criticism welcome:
Thoughts?
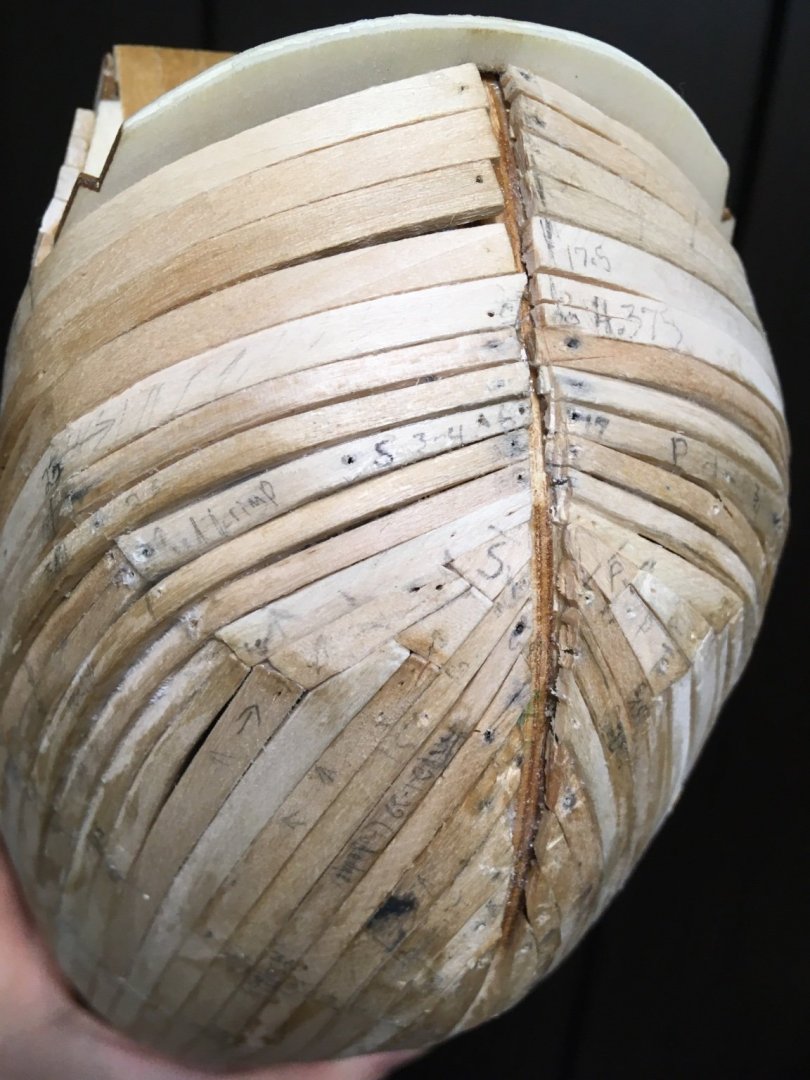
I attached several more photos to show the process but the above photos are the most relevant.
Hoping to wrap up loose ends and get it ready for the sapelli soon.
Meriadoc

- GrandpaPhil and Tomasz B
-
2
-
Silicon casting is kind of costly and troublesome but would allow you to duplicate small parts accurately.
- mtaylor and flying_dutchman2
-
1
-
 1
1
-
10 hours ago, flying_dutchman2 said:
Did some more Sculpey work. These two faces/heads need to be identical, but they are not. Will need to adjust this or leave it as is.
Can you silicon cast your sculpey work? Maybe not worth it in this case though.
- flying_dutchman2 and mtaylor
-
2
-
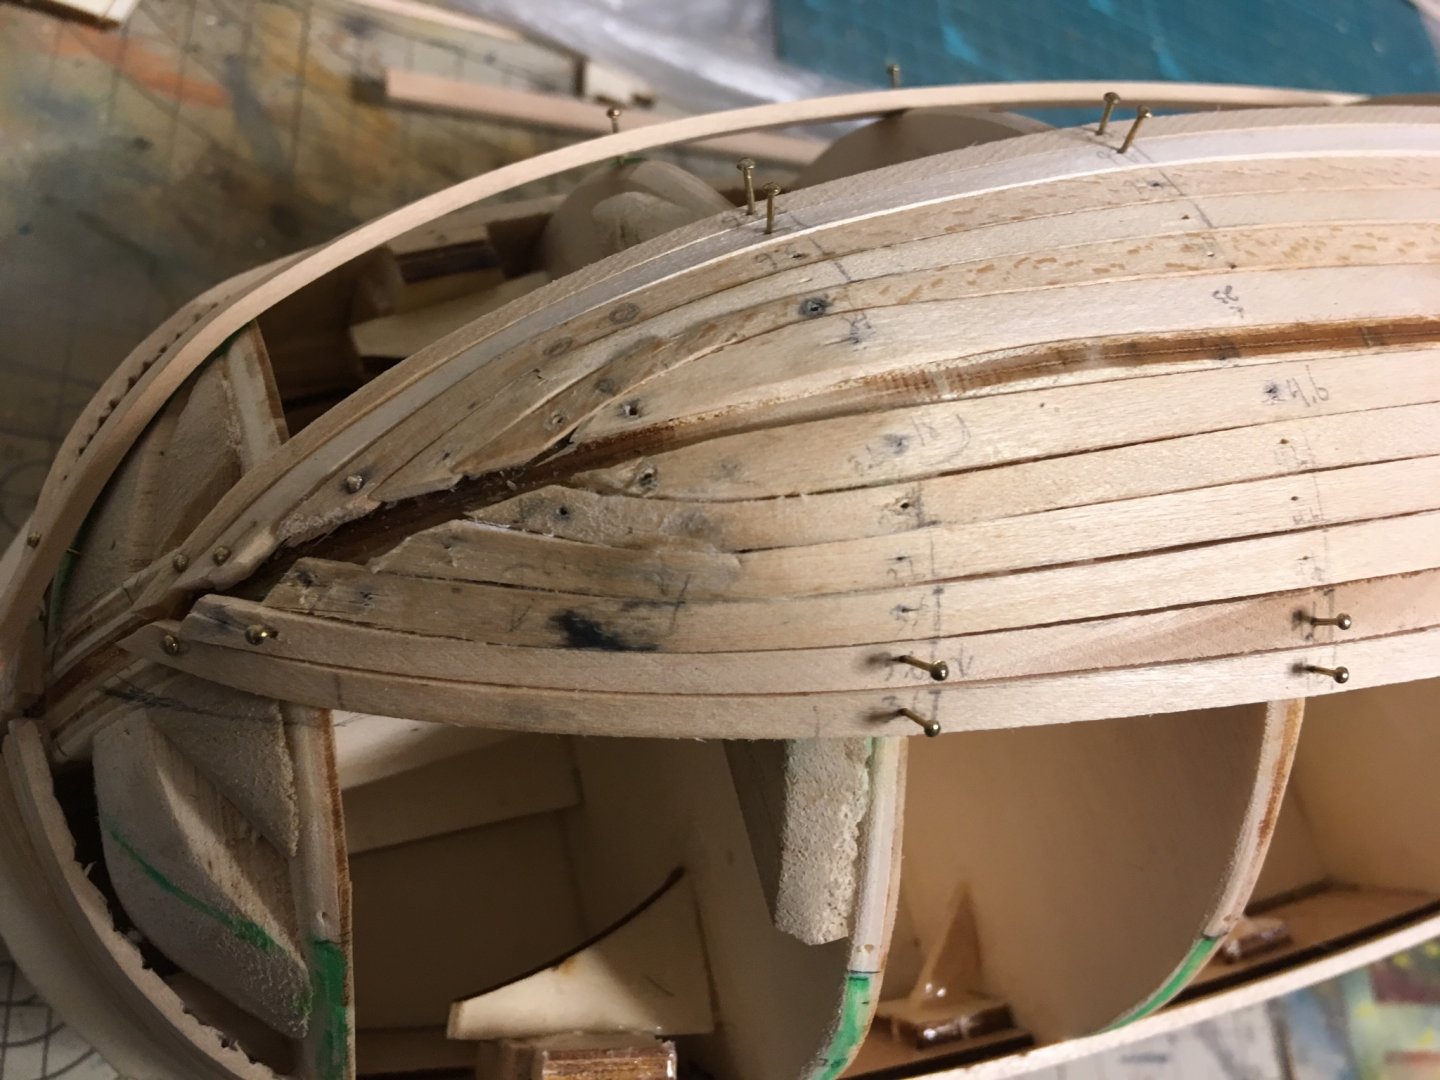
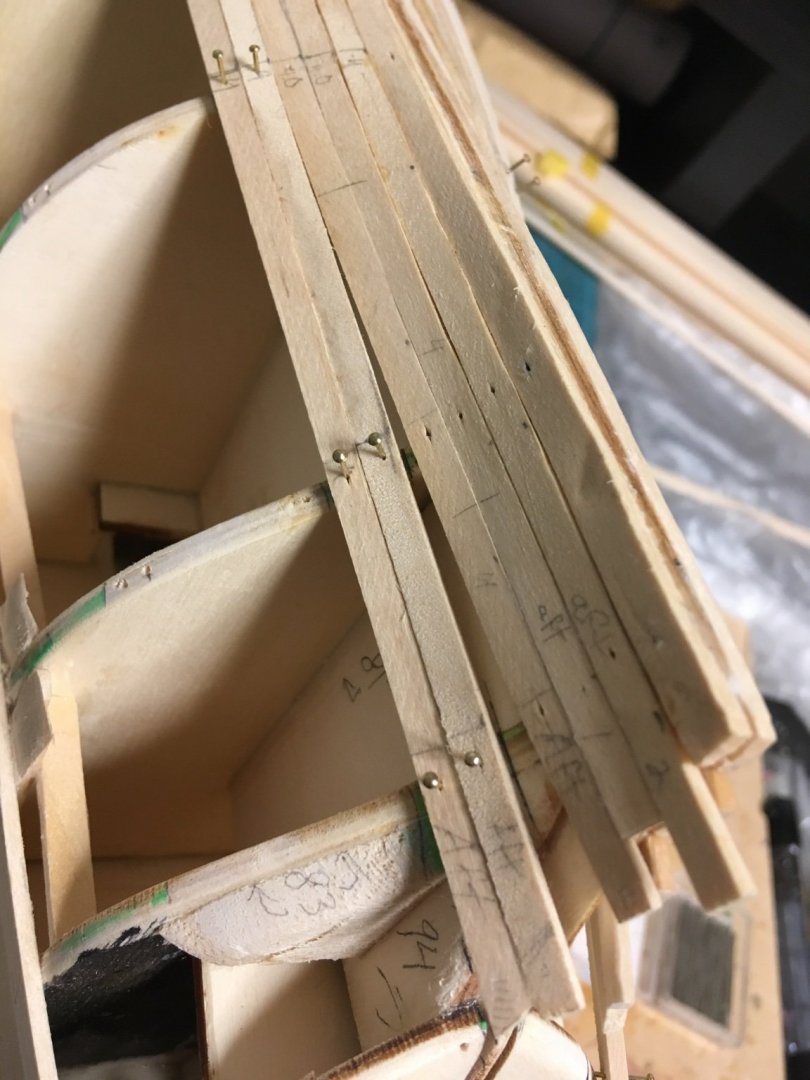
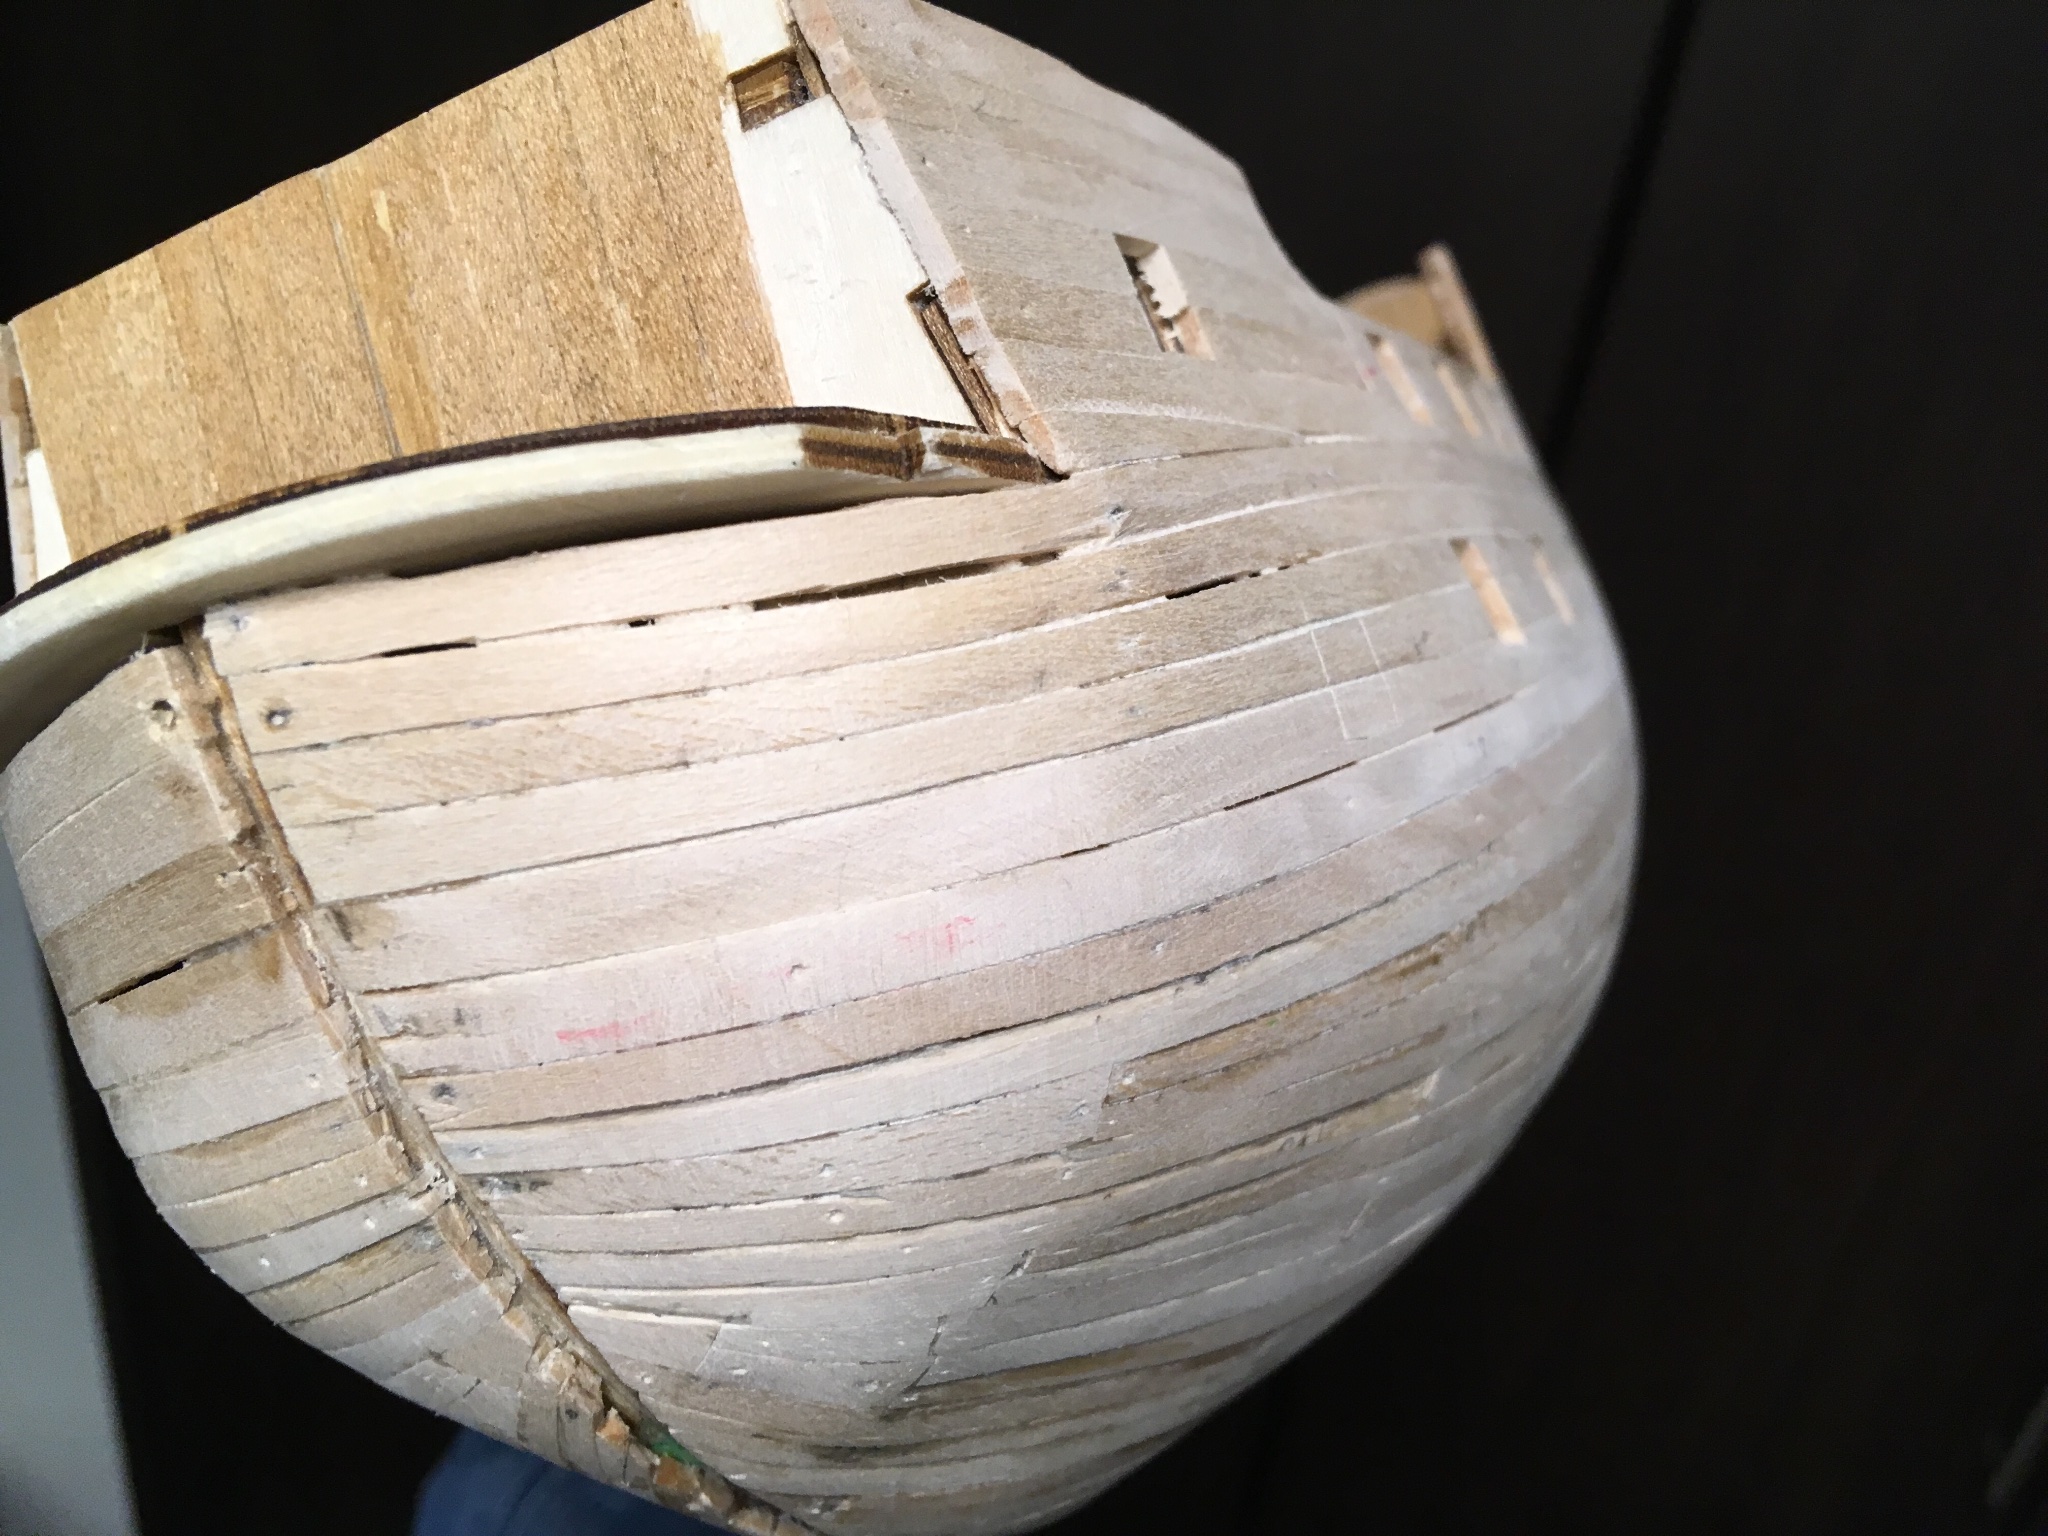
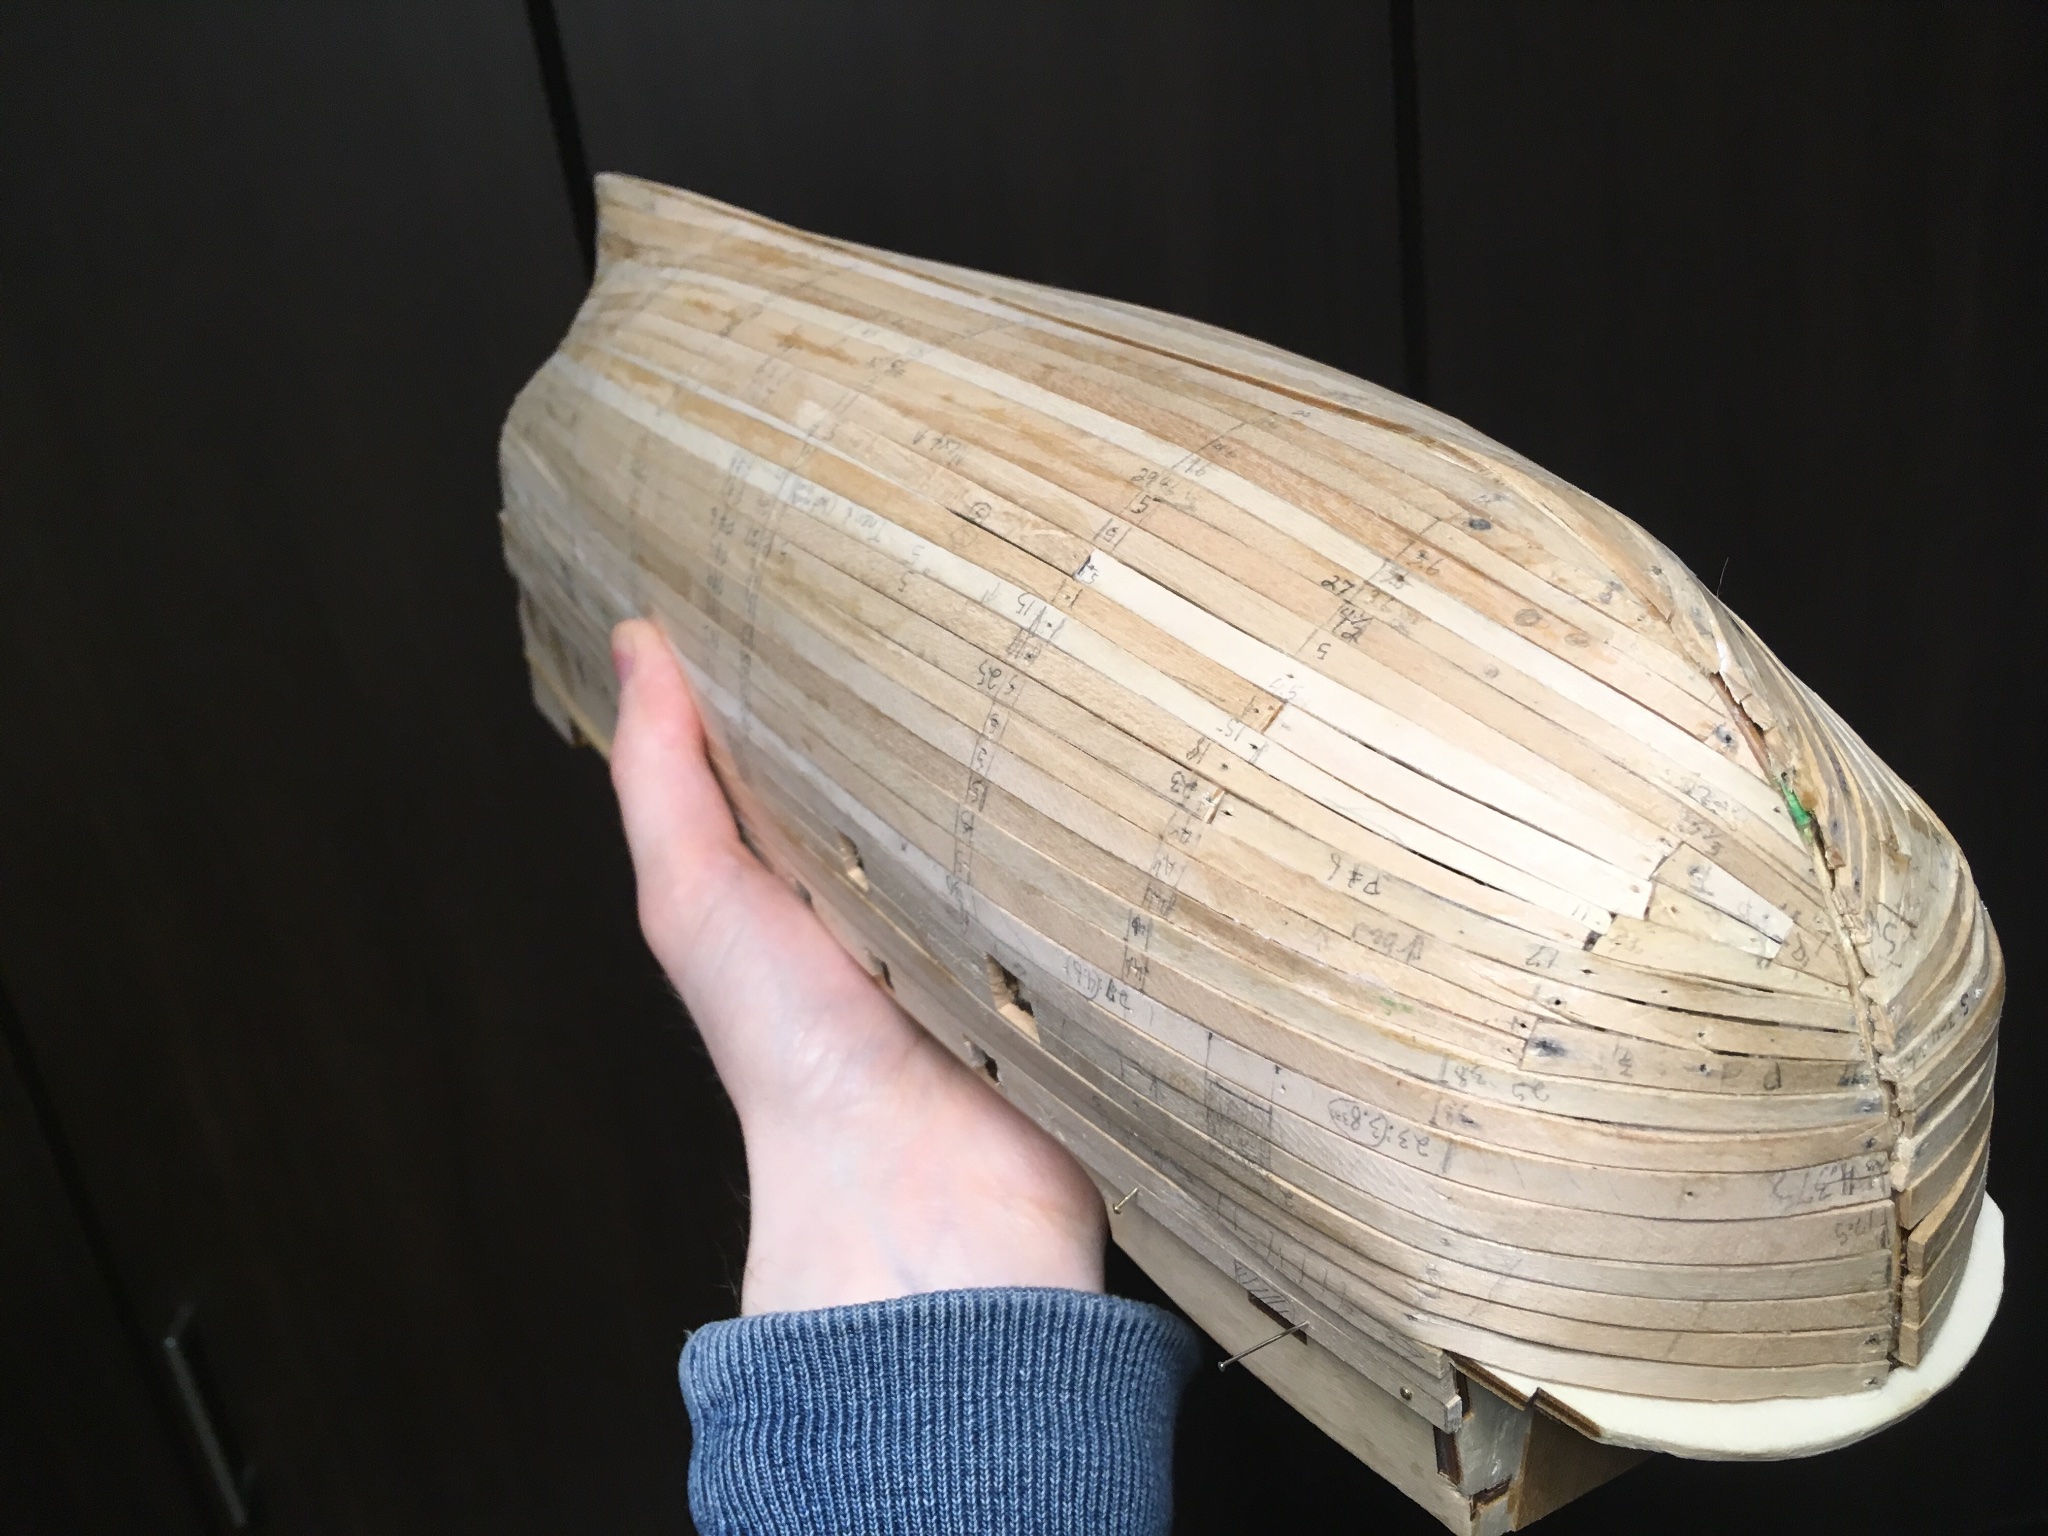
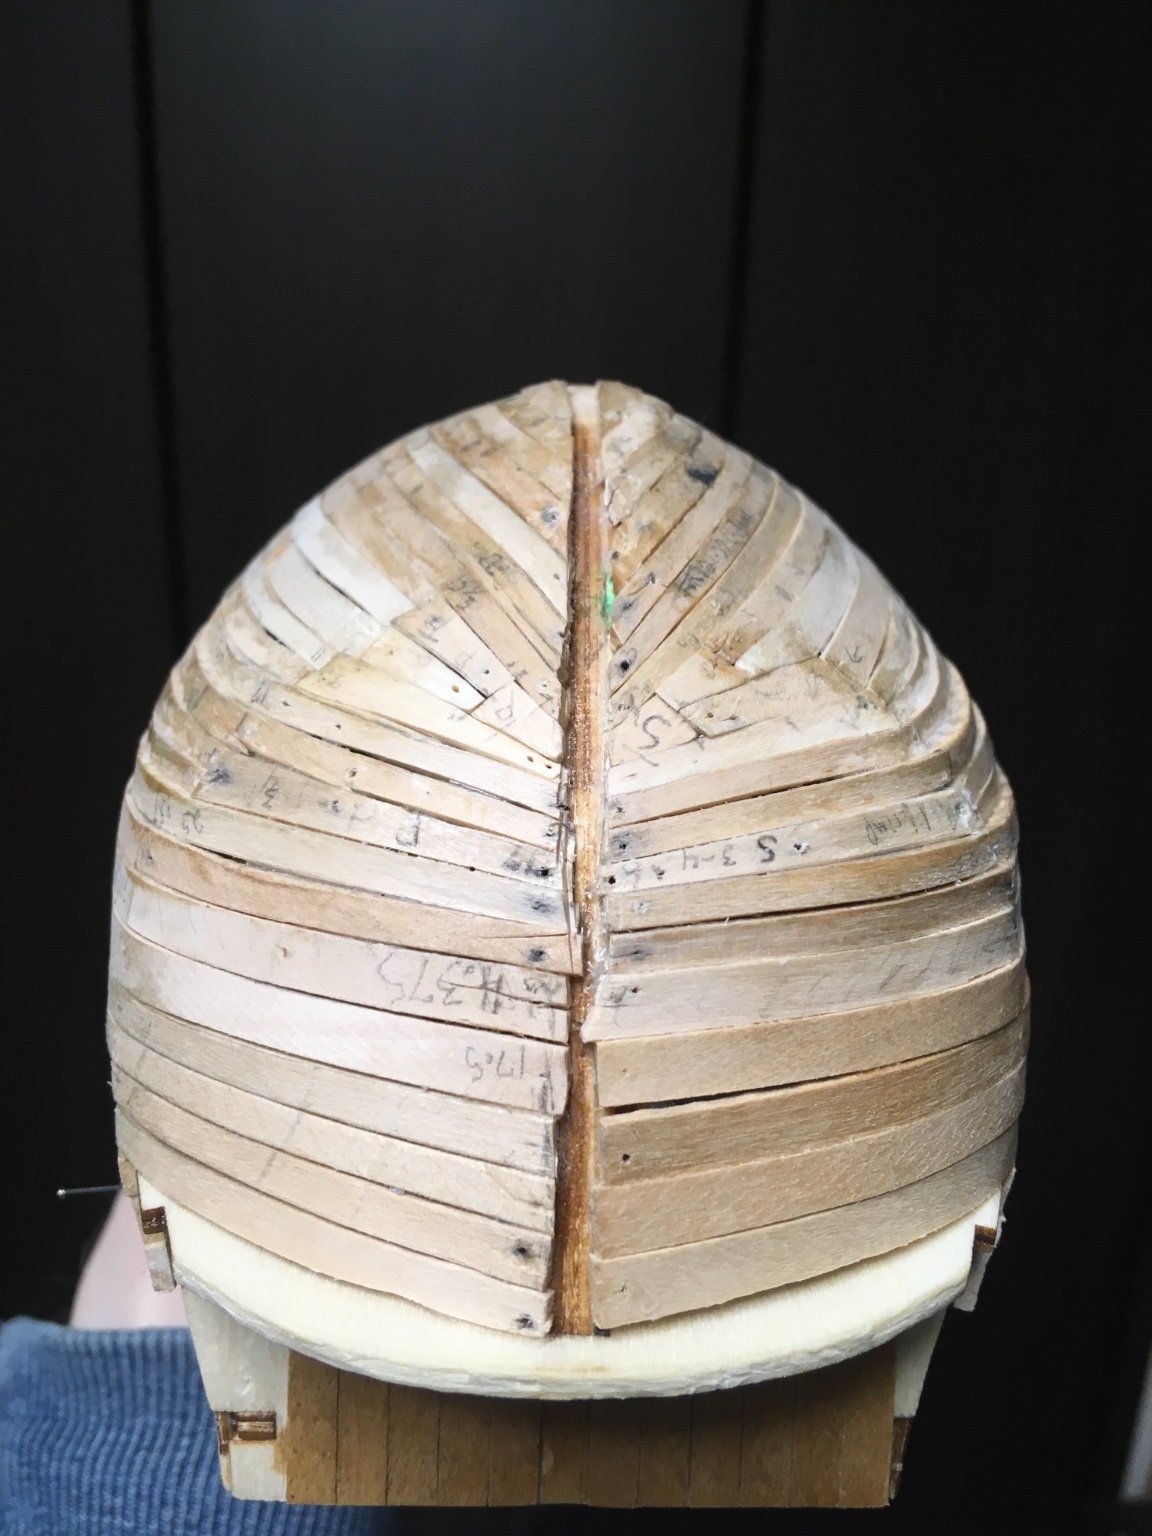
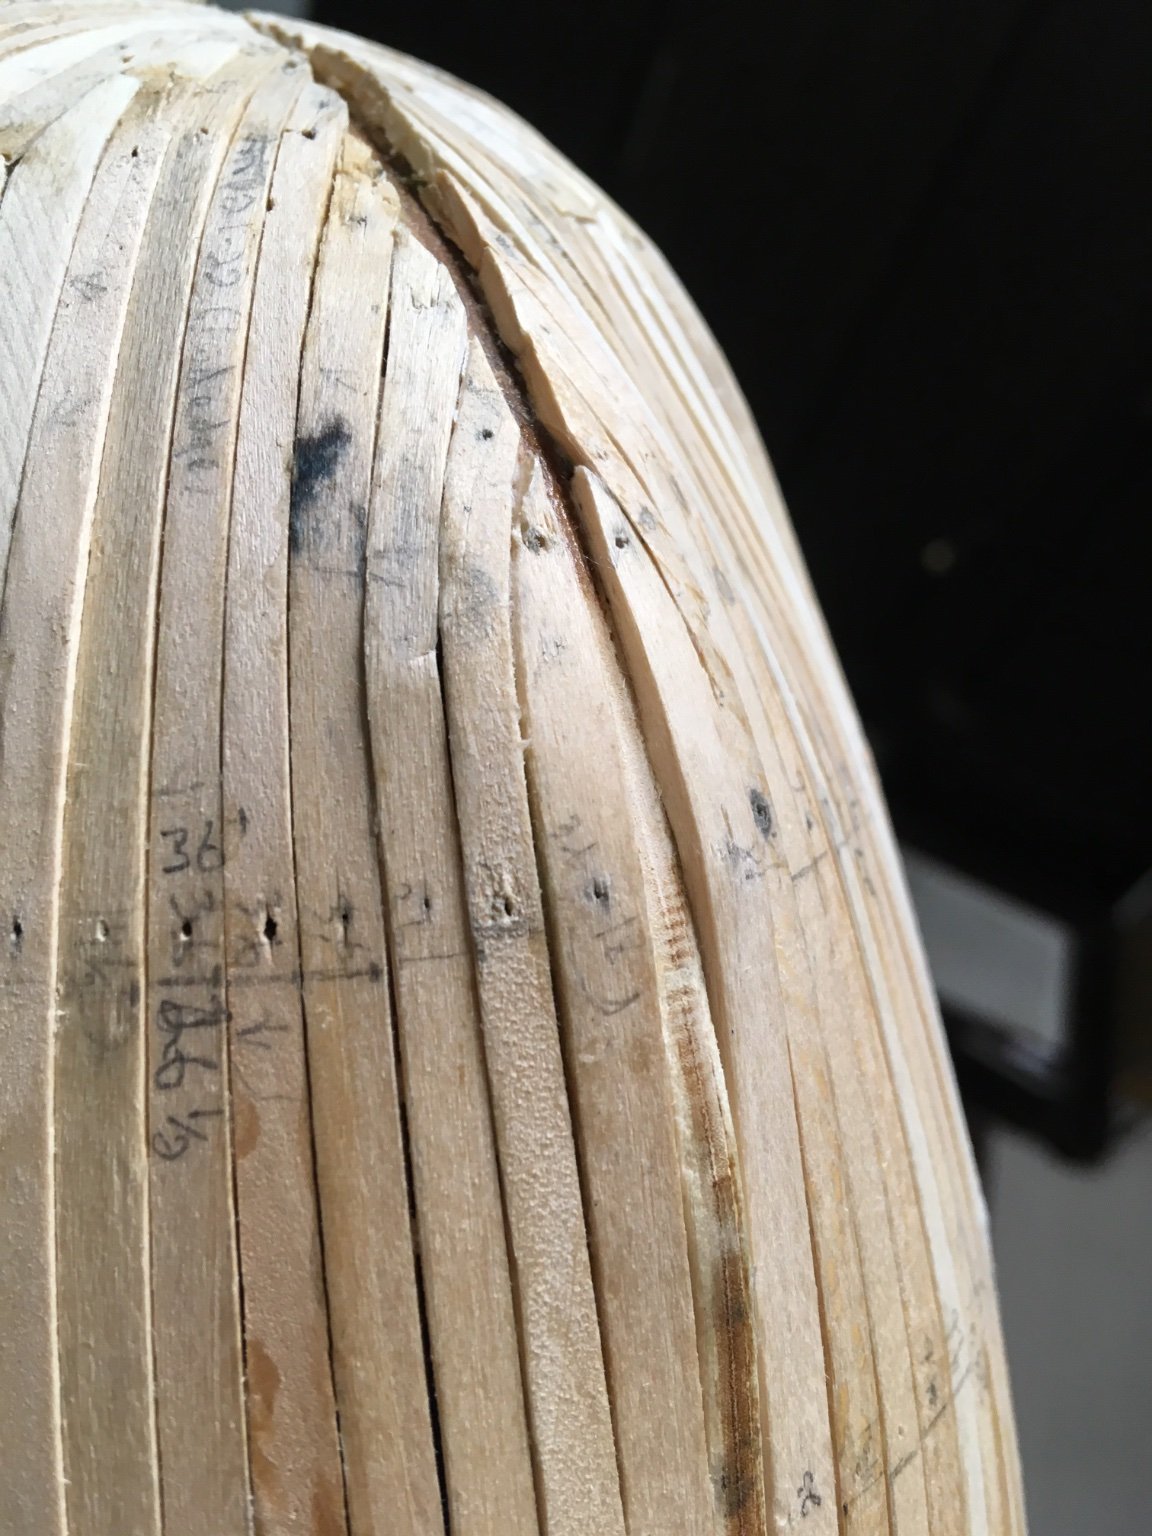
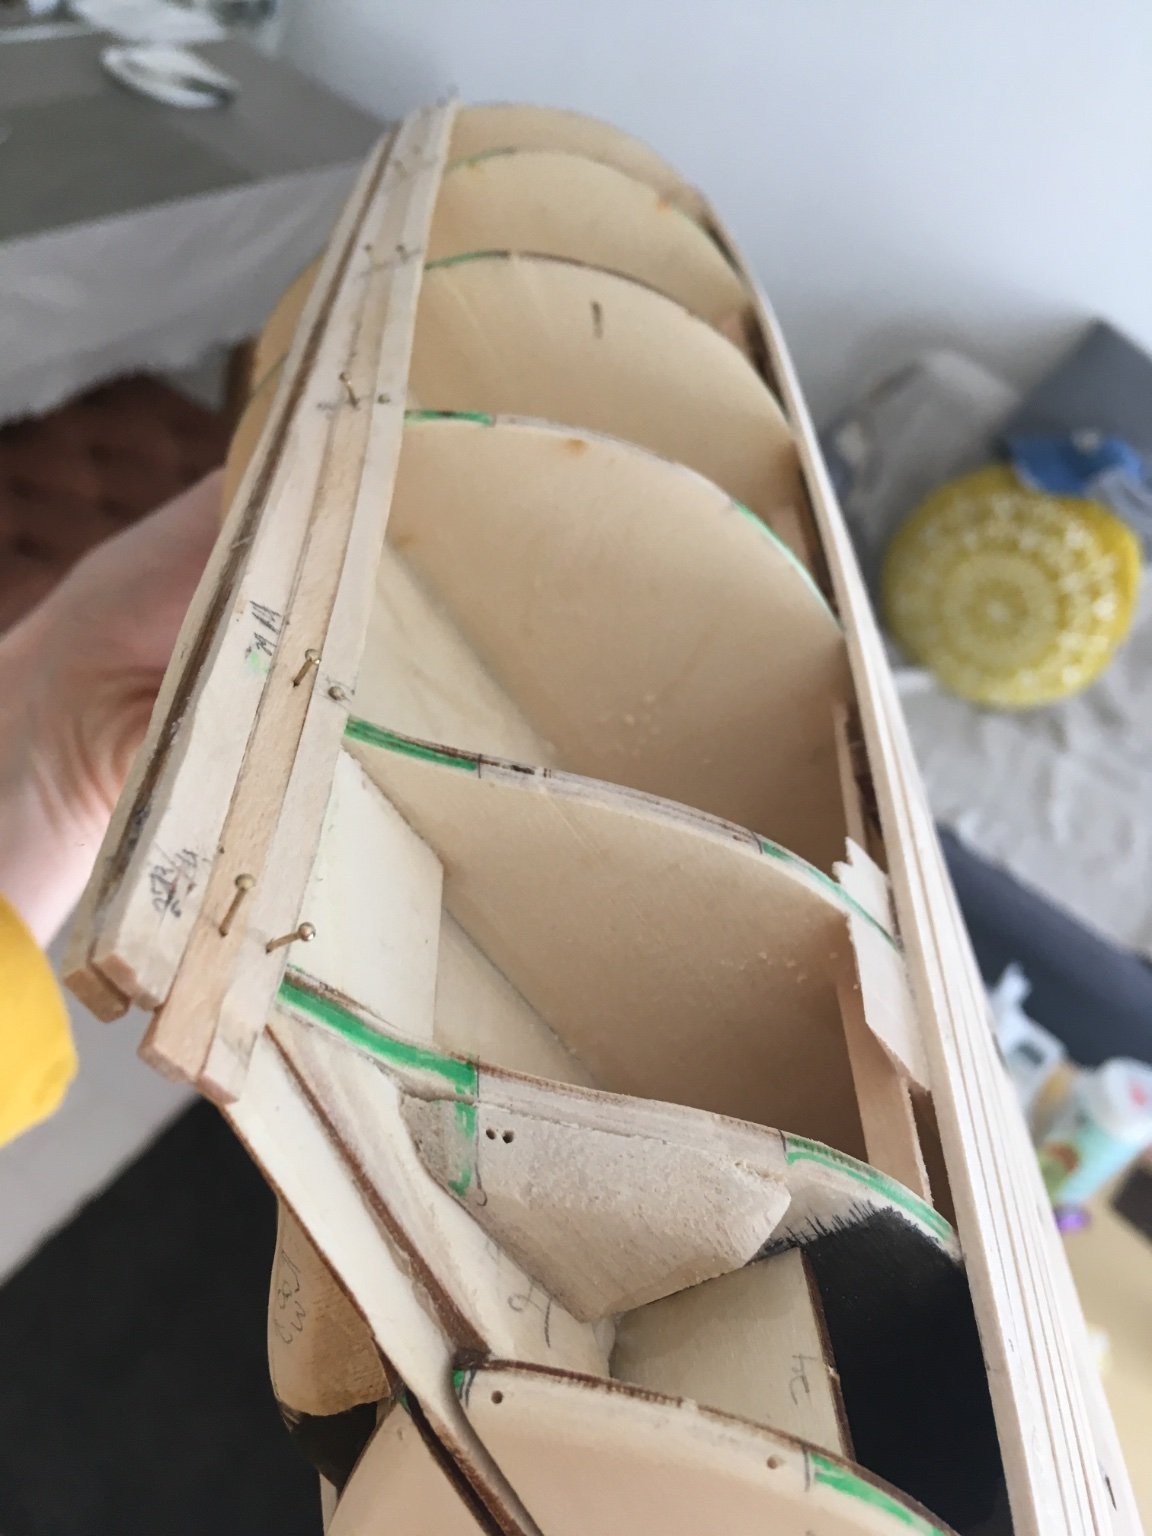
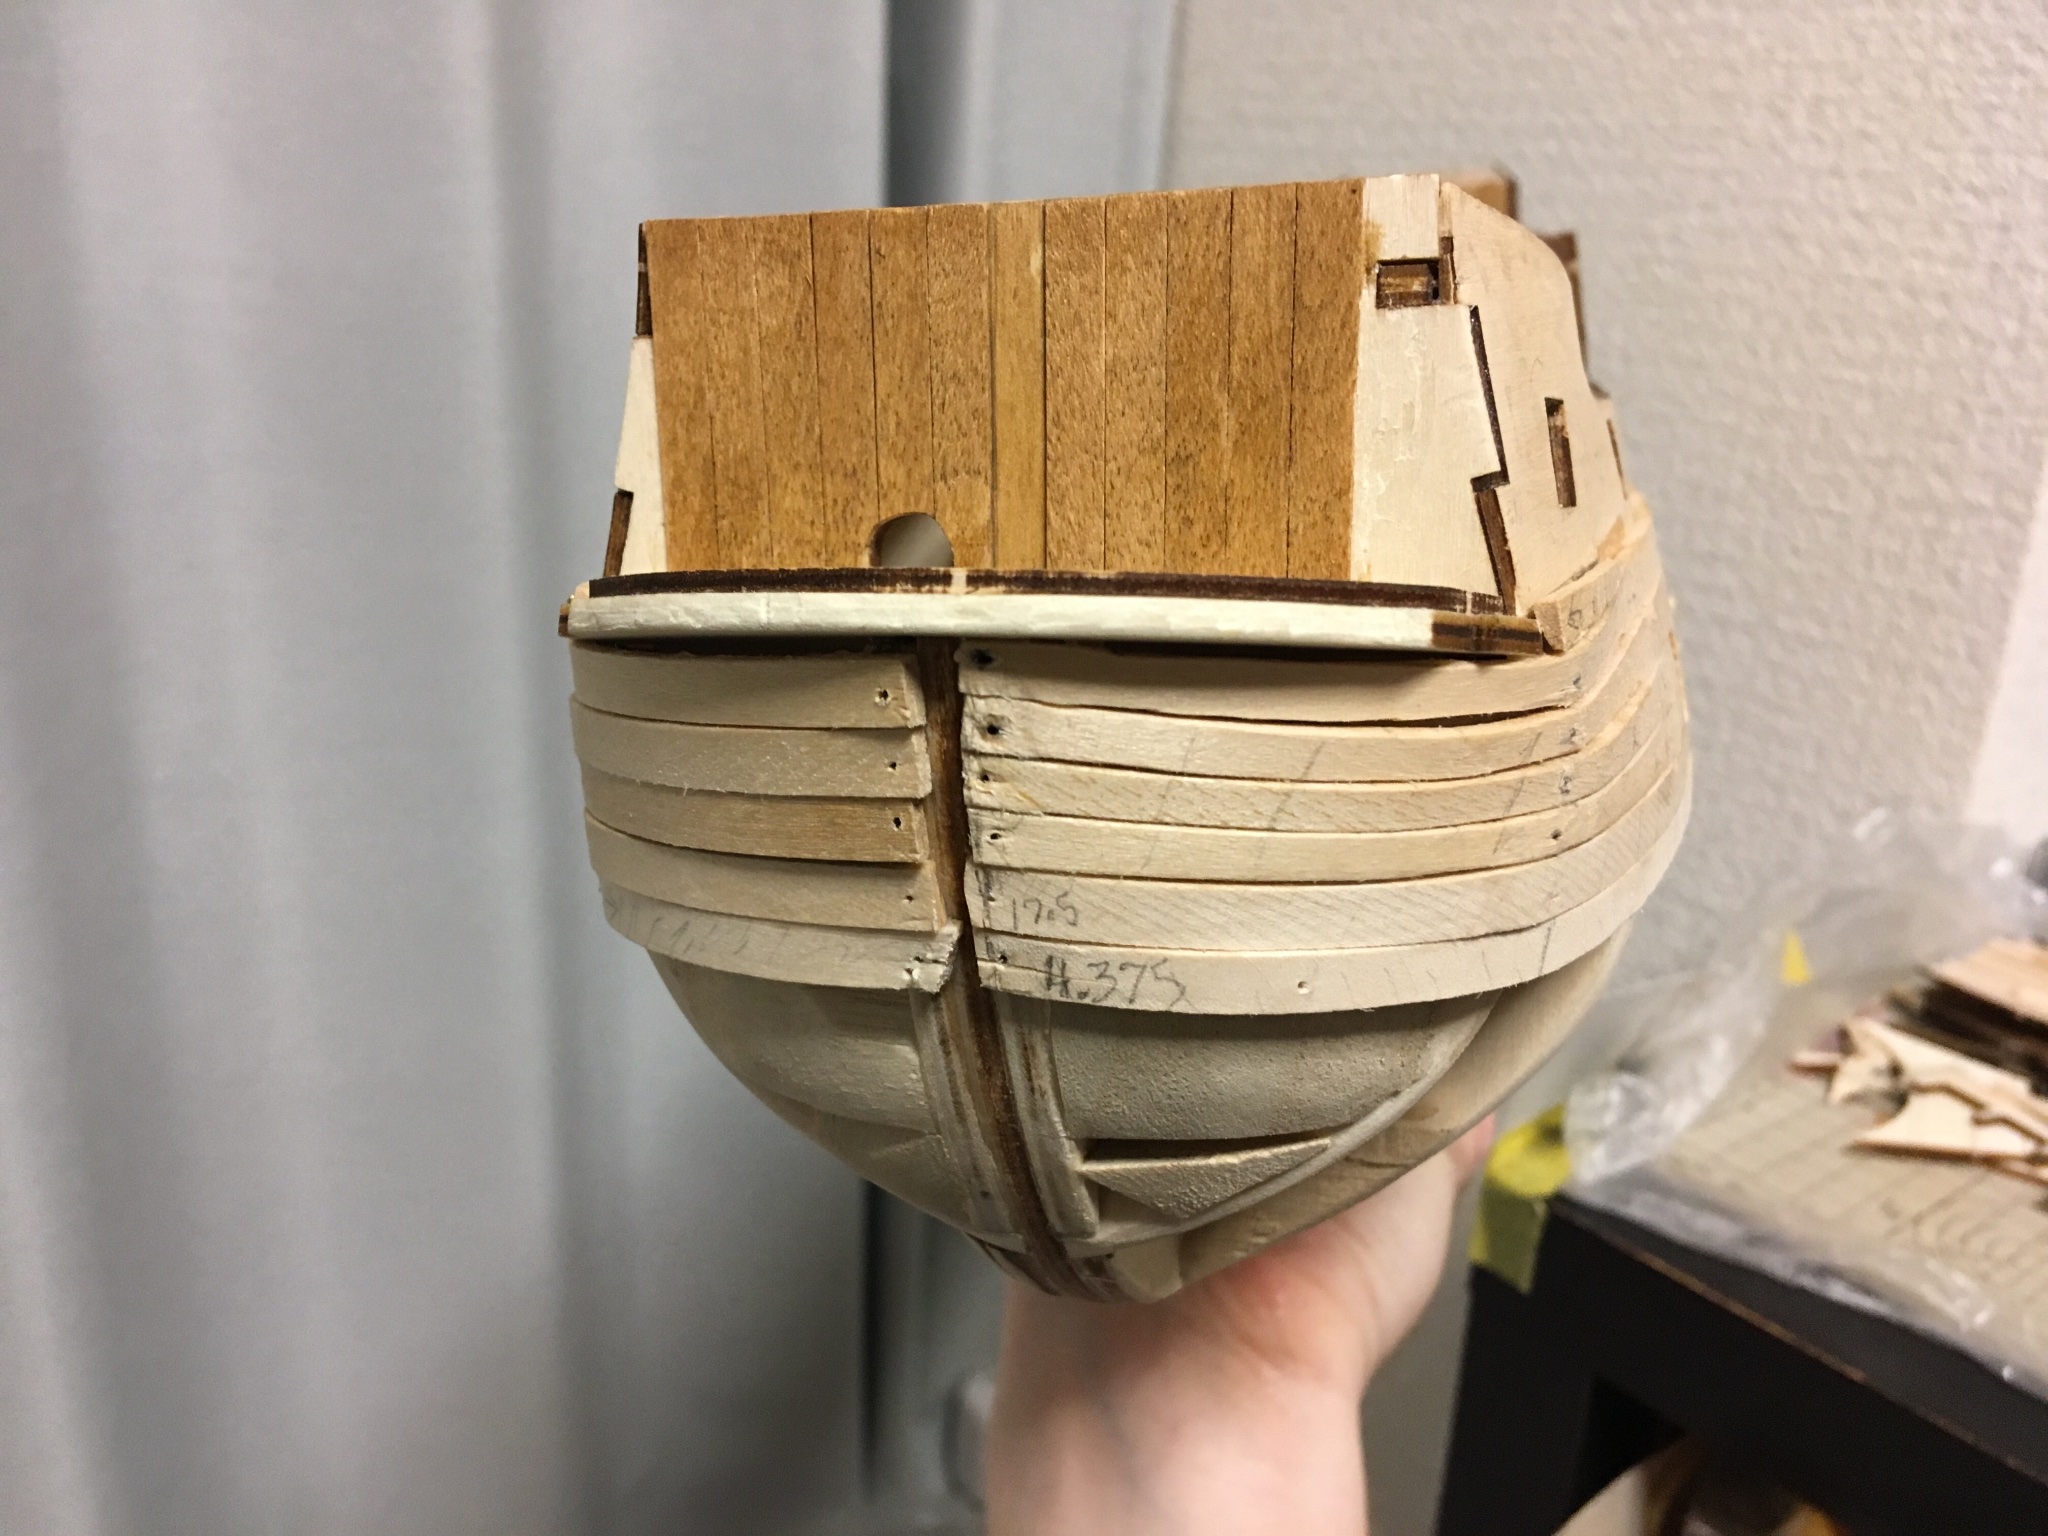
Planking adventures!
I did investigate a variety of opinions about this process, and amassed a collection of inexpensive equipment.
The Occre “instructions” tell one to start immediately below the plywood guides, and gives little other guidance. Their example seems to be planked wrong anyways, but I started at this point as I will need to fit some sort of backing for the dummy barrels I intend to add to the lower deck. First I plank the area, then when I still have acces from below I will glue in the backing.
I ended up planking myself into a bit of a pickle as the two sides were ever so slightly asymmetrical after two planks each, and I had to try to fit my planks evenly under the beakhead deck- one side wanting 3 planks (5mm each) and the other wanting four tapered planks.
I’ll let the photos do some of the explaining.
I started with this plank on each side, and added one above at full width. I used a crimper to bend, which was easy enough. At this point I thought it should all fit evenly under the deck that must go in at the bow.
Then I remeasured and decided that four tapered planks would be needed. I tried soaking and bending over an iron for these, as the taper was awkward, narrower at bulkhead #1 than the very bow. In retrospect a crimper would have been easier but I did get to practice a different technique. Not happy with how they came out but I learned something and it should be good enough for the bottom layer with some sanding and filling.
The curve around bulkhead #1 is quite severe, I broke one pre-tapered plank at this narrowest point trying to bend it over my iron. It was also difficult to get consistent curves. Better filler blocks would have been helpful, as well as tapering on the top instead of the bottom of the planks.

On the starboard side, the gap was smaller and i
deemed three planks would work far better than four and save all the fuss of tapering and breaking narrowed planks over an extreme curve. These were bent with a crimper with very little sweat and toil.
I was using CA though in an effort to get more than one or two planks installed in a day, and it froze some of my mistakes in place as you can see behind the first bulkhead on this third plank. Ought to sand out though.

Back to PVA. You can see how many planks I was able to get done despite my best efforts to achieve economy of time with CA. Really the elephant in the room here is the baby in our house that I must help take care of, so a best case scenario is a few planks per day plus maybe some peripheral progress on other loose ends.
Here there was a major gap between the plywood and the lay of the lower planks. Perhaps I missed something in my fairing process. I fixed the problem by inserting this little filler block to get the next plank to play ball with the plank below, above, and the front of the forecastle.
Got the plank in, so it’s even with the port side except for the bow. You can see how much learning I have to do before I take on single planked kits.

I needed to do something about the asymmetry of the top of the planks here under the forecastle on the port side as the planks were tapered unlike the starboard. I marked out a spot for a stealer.
And installed it with CA. Ought to be roughly symmetrical now.
There is a gap under the deck on the starboard side that should be addressed but I don’t think it would have been worth tapering four planks and hoping they don’t break around that bend at their narrowest point. If I had to do it over I think I’d properly filler block the whole bow and then one could work tapered planks with an iron easily enough.
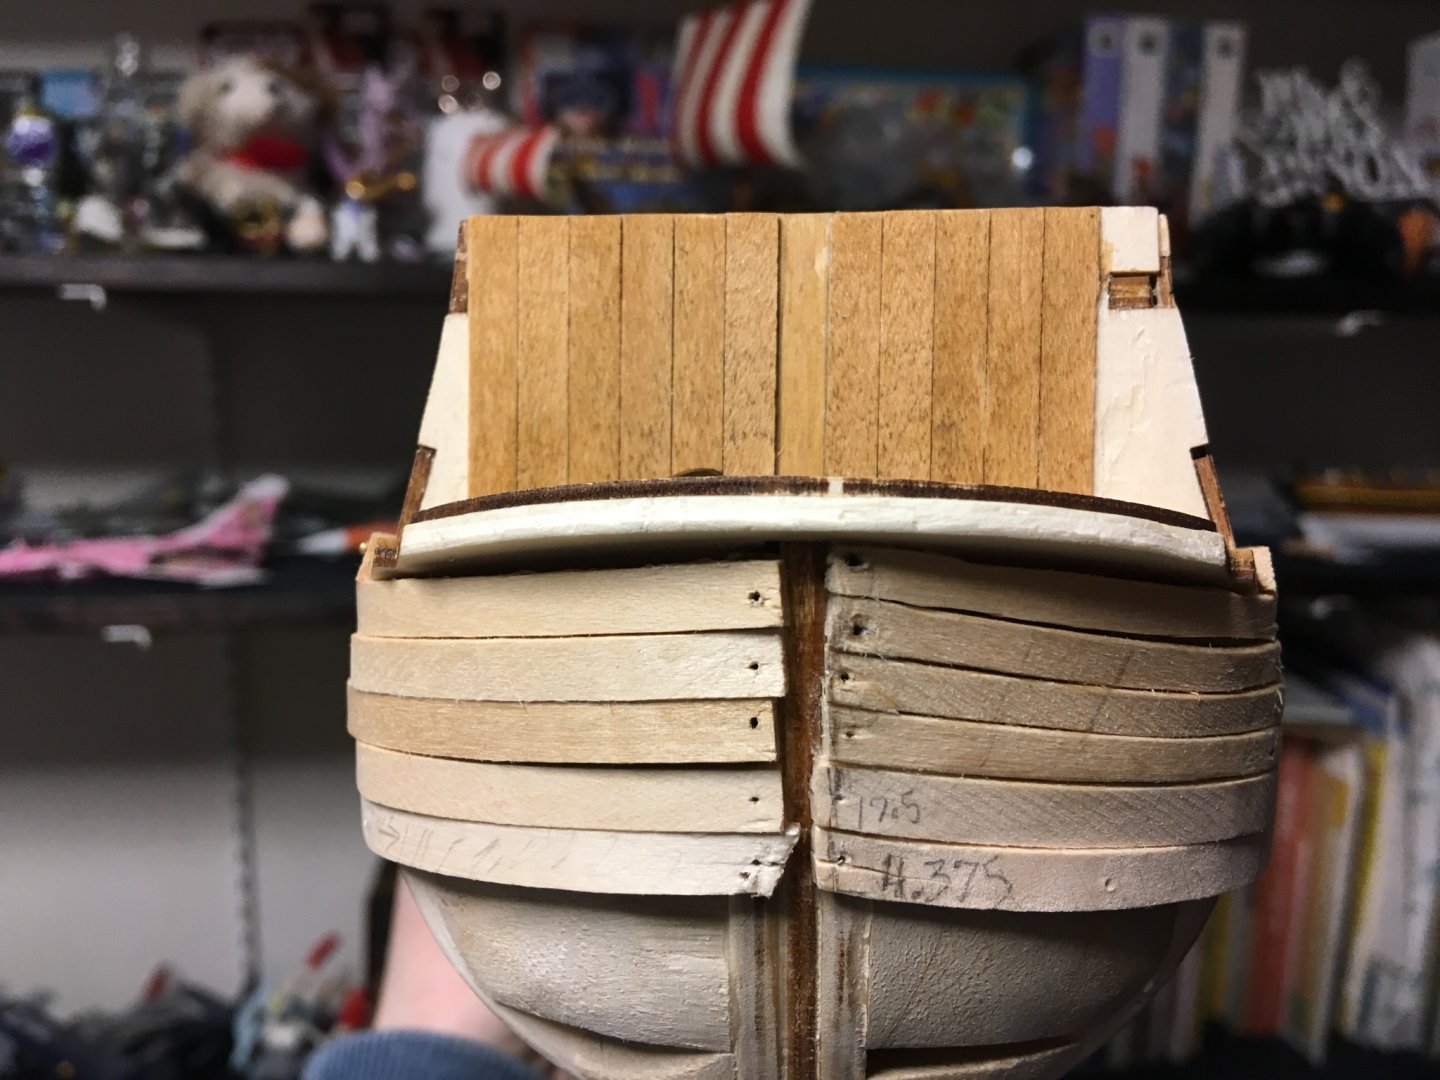
Just now, I installed the garboard planks but couldnt decide the cut at the bow. I think this is determined by the run of the next strake, for which I must calculate tapering first, so I left them hanging for now.

Now I have to remember to install my dummy gun backings before I plank the rest in.
Slowly but surely (or reasonably confidently)!
Meriadoc

-
15 hours ago, Louie da fly said:
Yes, hooped guns seem always to have been made of iron - basically, a bunch of iron "planks" put together edge to edge to make a cylinder and reinforced with hoops. Presumably the joints were forge-welded, though how you'd do that I have no idea. Bronze ones were cast. And there was another variety (which I still find hard to believe, but the evidence is incontrovertible) made of iron sheet rolled into a cylinder and welded at the join (!) Don't think I'd feel very confident using one of these - or even standing anywhere near it while it was being fired.
Steven
I'm sure they reinforced it around the area where the powder charge goes. Maybe they were for ships that didn't plan on using their guns much.
-
3 hours ago, Cirdan said:
I think this applies to the time before the Armada period. Indeed this variety of guns was found on the wreck of the Mary Rose. But the "Queens Ships" (the Royal Navy of the time) from about 1570 onwards tended to standardization. As far as I know the Revenge had cast bronze guns although guns could already be cast from iron in England at this time.
As I was putting these together I did have a thought in the back of my mind, that all the hooped "wrought" guns I could recall seeing were in fact iron ones.. Well they're rather planked in now; I'll contemplate the prospects of repainting them. Going to have to mix up some iron color anyhow.
-
9 hours ago, Cirdan said:
had wrought bronze guns. At this time (at about 30 - 40 years after the loss of the Mary Rose) I beg that only minor ships may have used them.
I was under the impression that ships of this period carried quite a variety of guns with very little in the way of standardization. Do you suggest that her guns were likely iron, or are wrought and cast bronze exclusive terms?
Seems you know a lot more than me about this period!
Meriadoc
-
12 hours ago, Louie da fly said:
I just recently re-read the Silmarillion.
What’s everyone’s favorite Silmarillion character?
I guess I’m a Felagund fan.
-
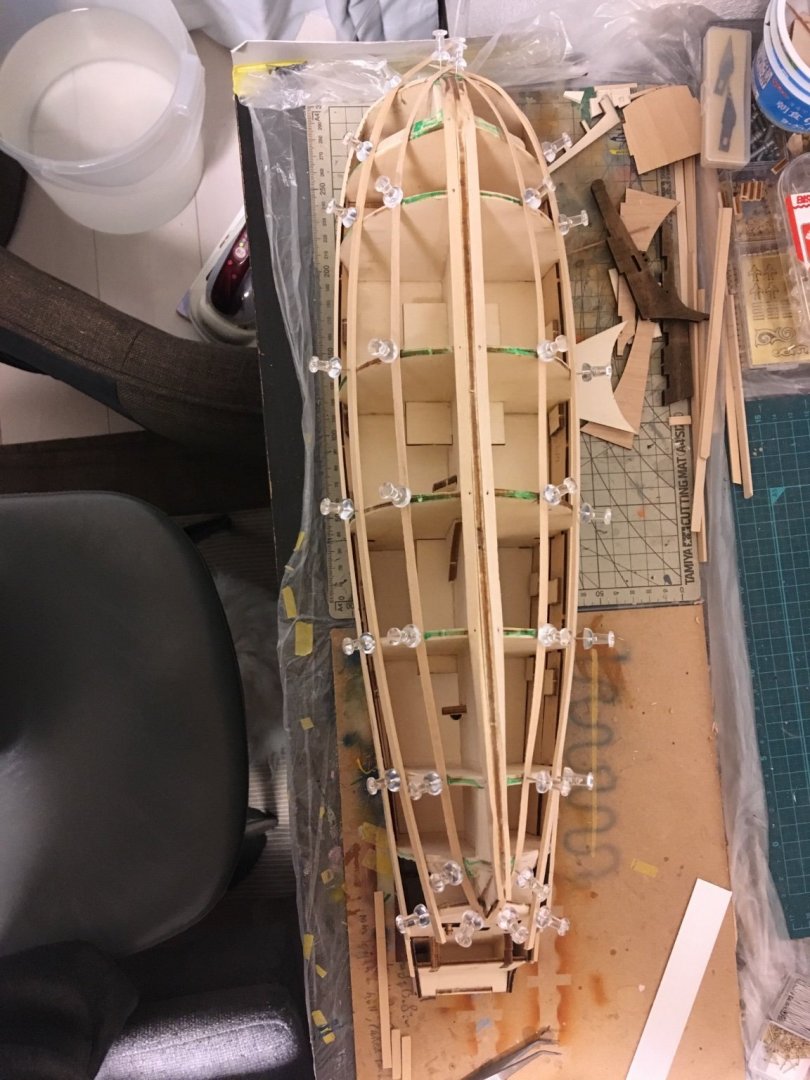
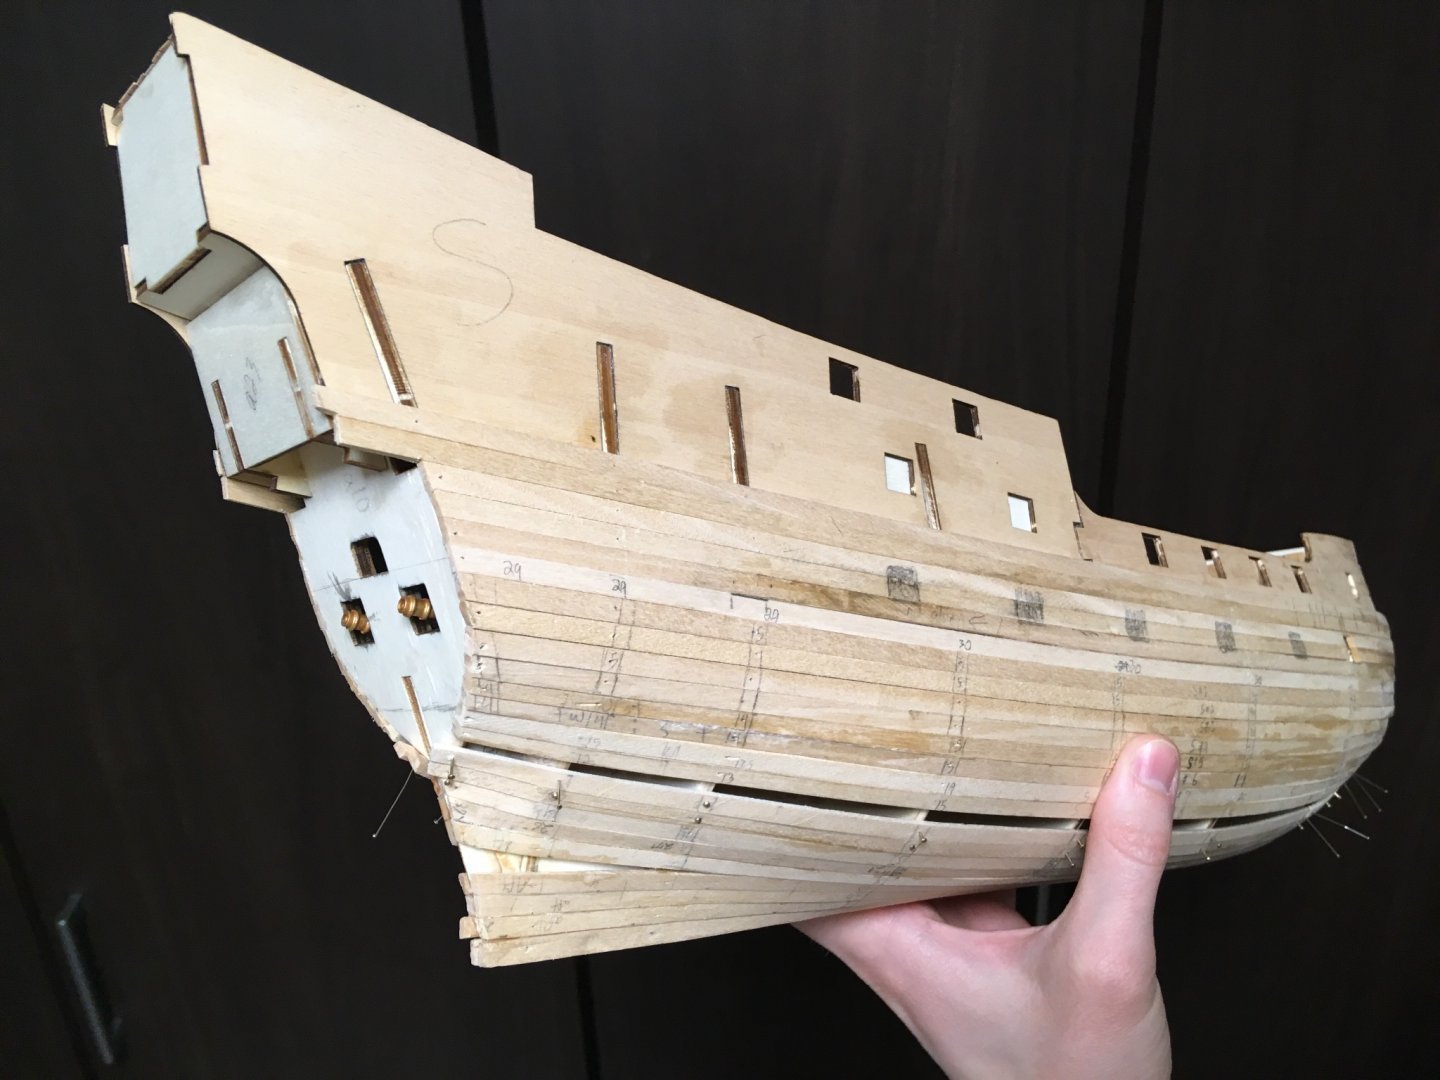
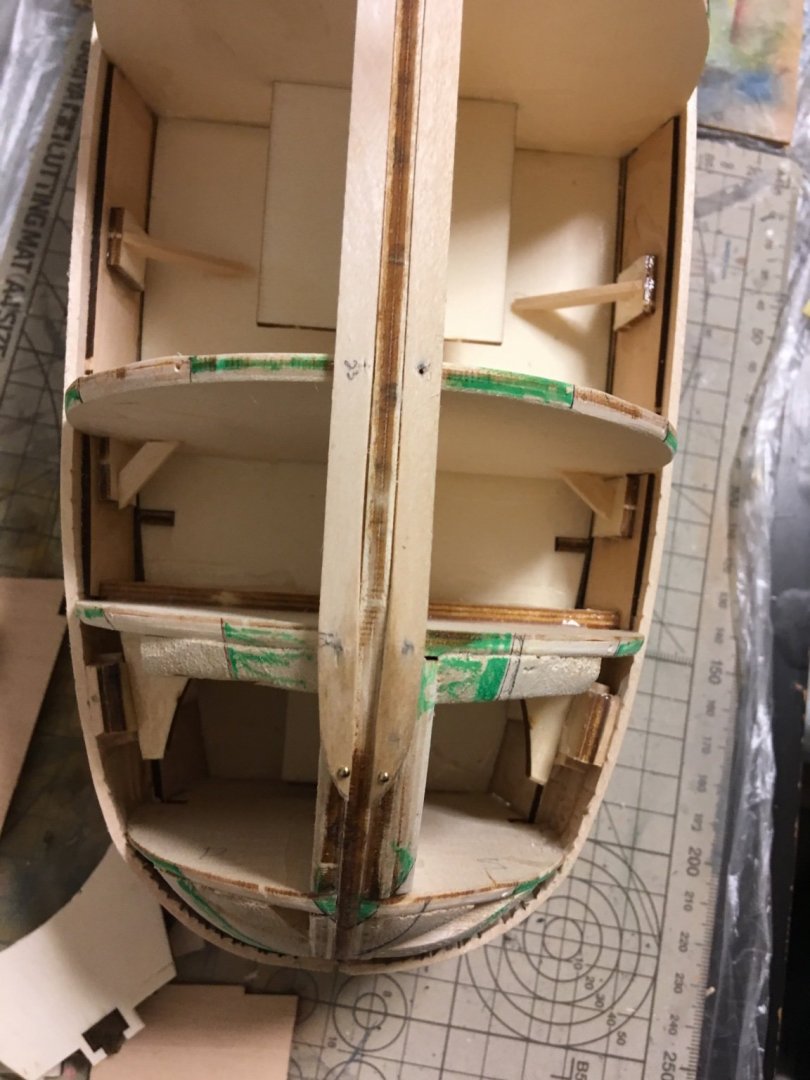
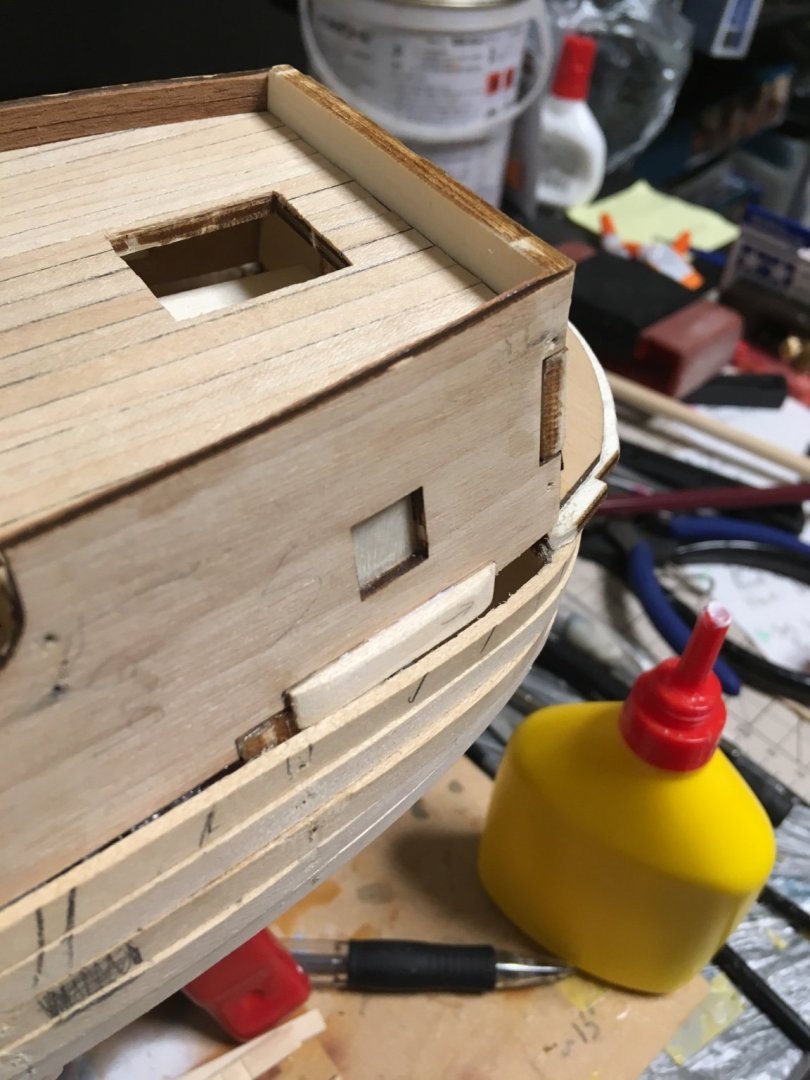
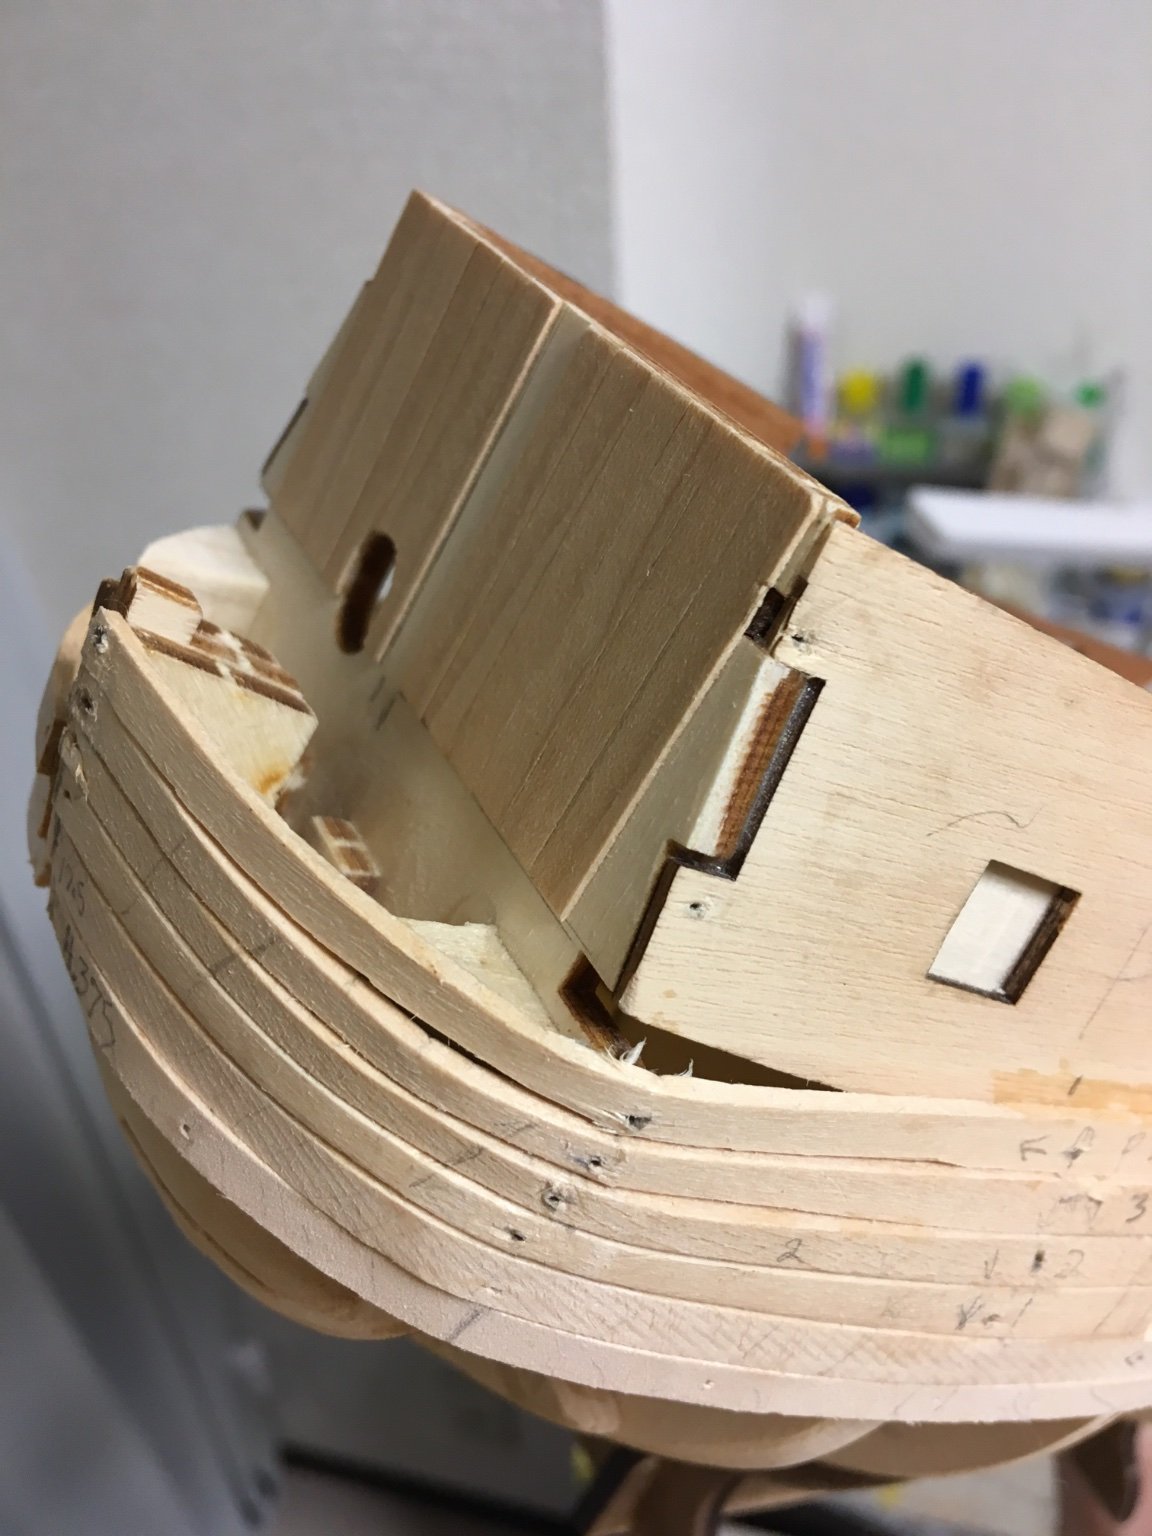
An update on progress~
Got the last piece in.
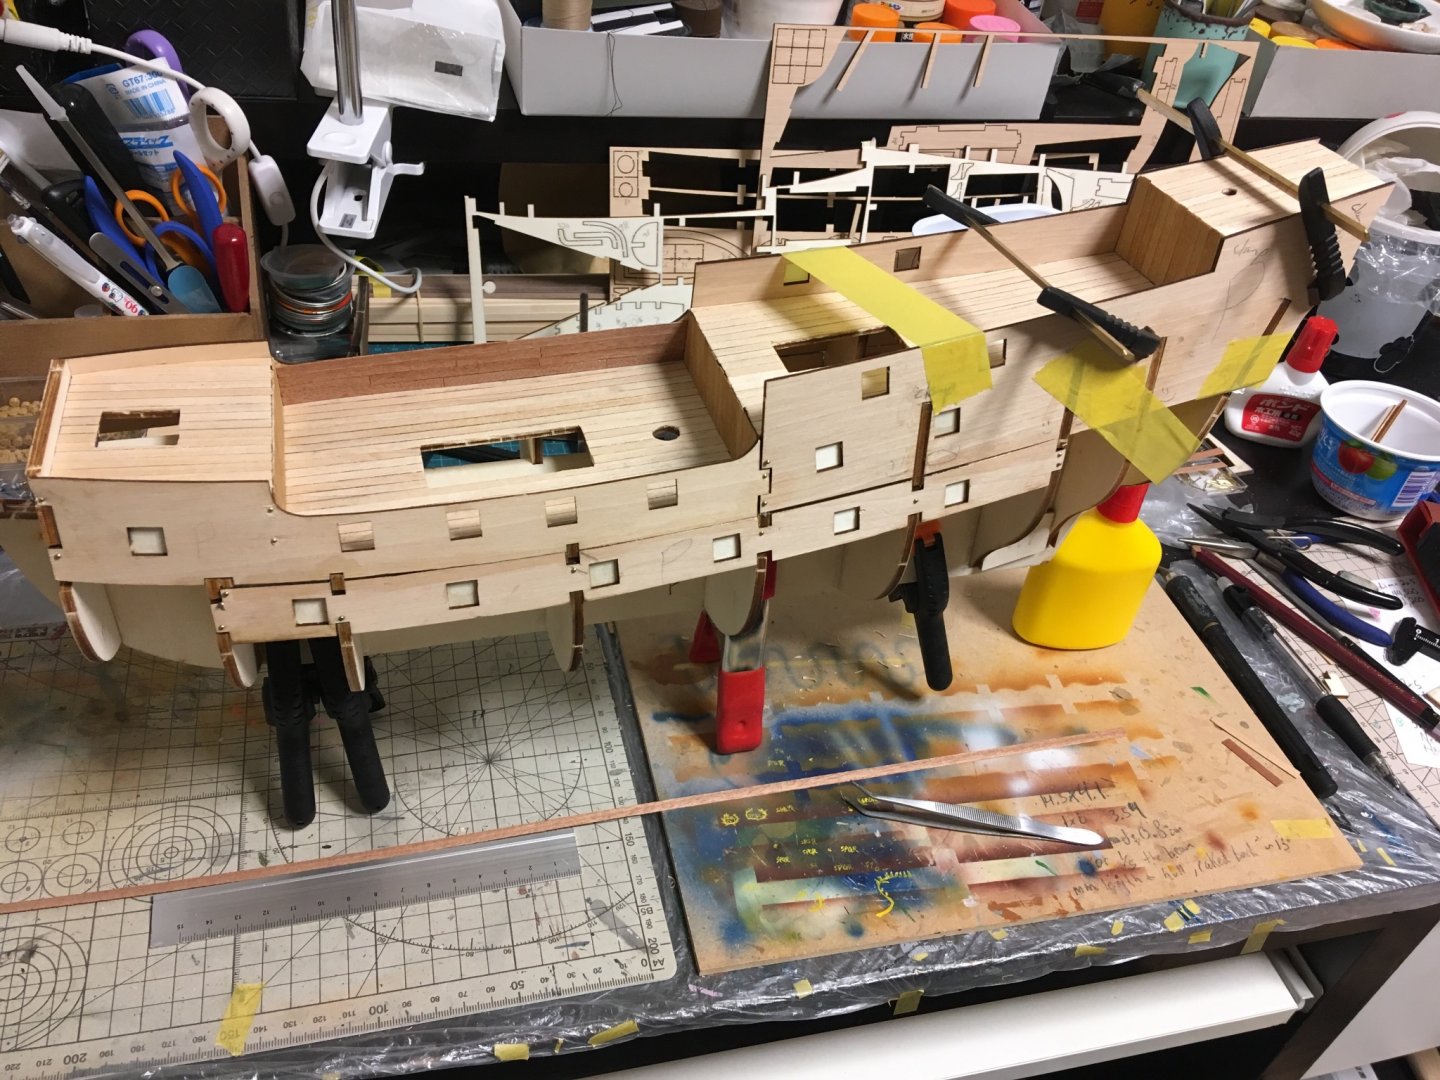
Planking all the gunwales in sapelli. Easy enough.

Faired bulkheads, and added a few filler blocks. These photos show the work in progress.

Can’t tell if I did a good job or not but the little spruce plank I used as a guinea pig seemed to fit well enough.
And fitted the first plank, bending with a mantua crimper
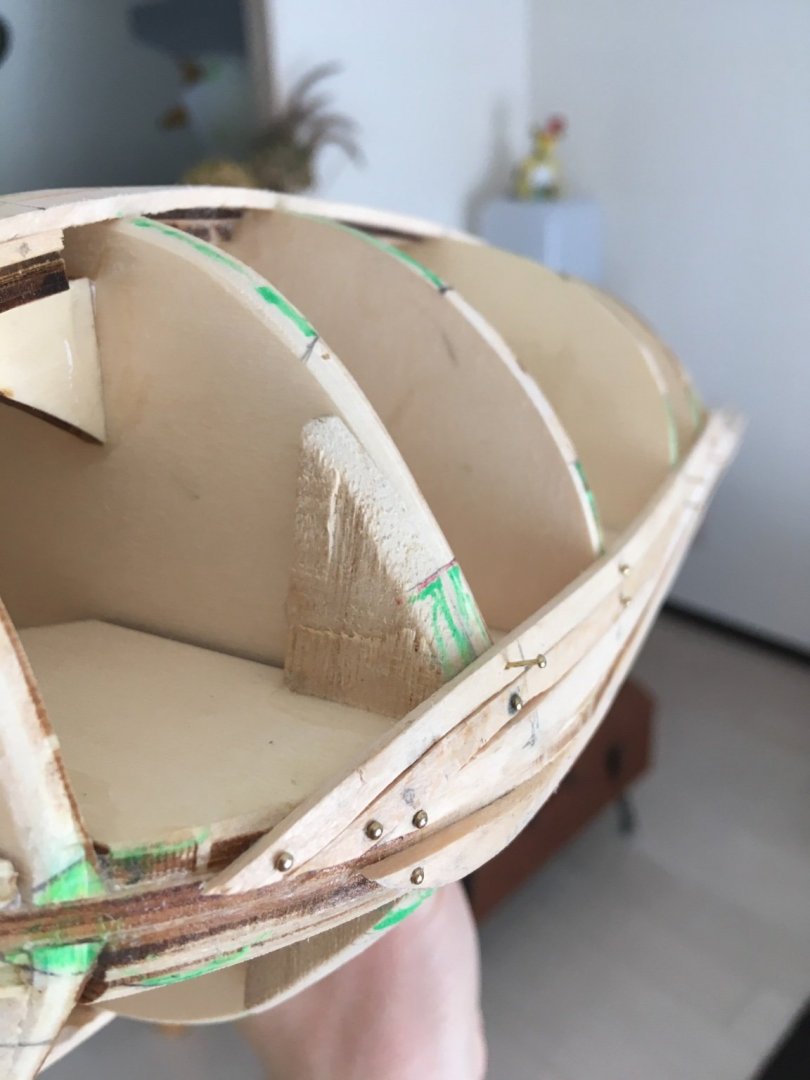
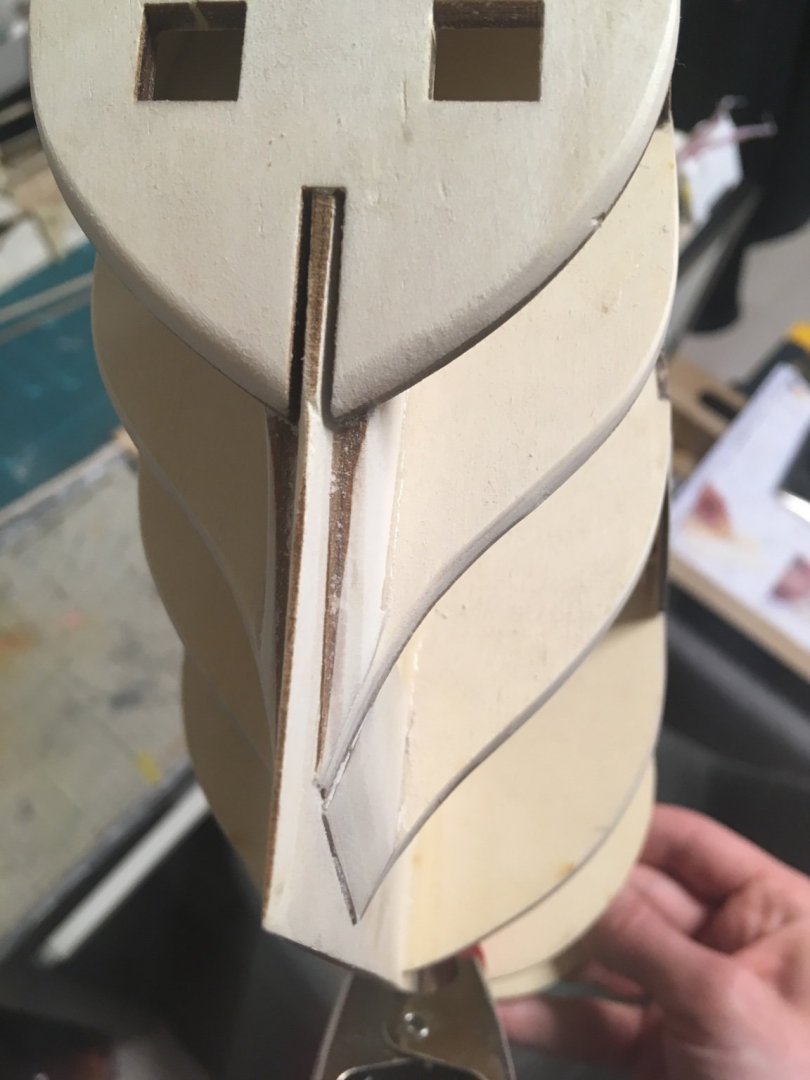
Started dissecting the head “grating” for modification.

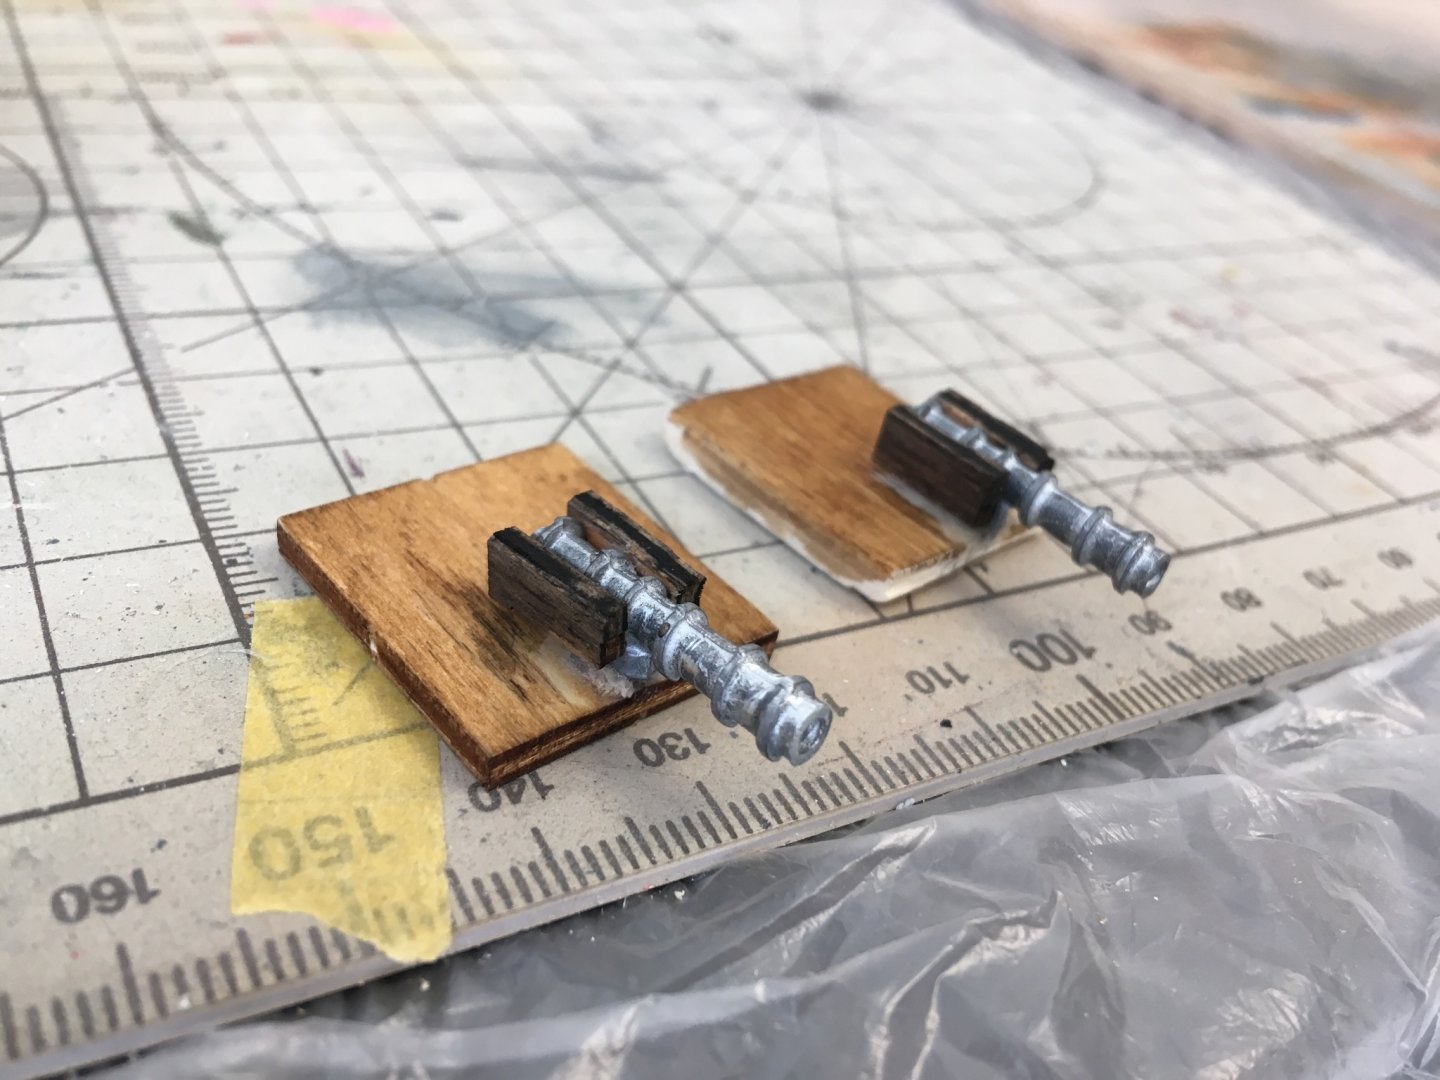
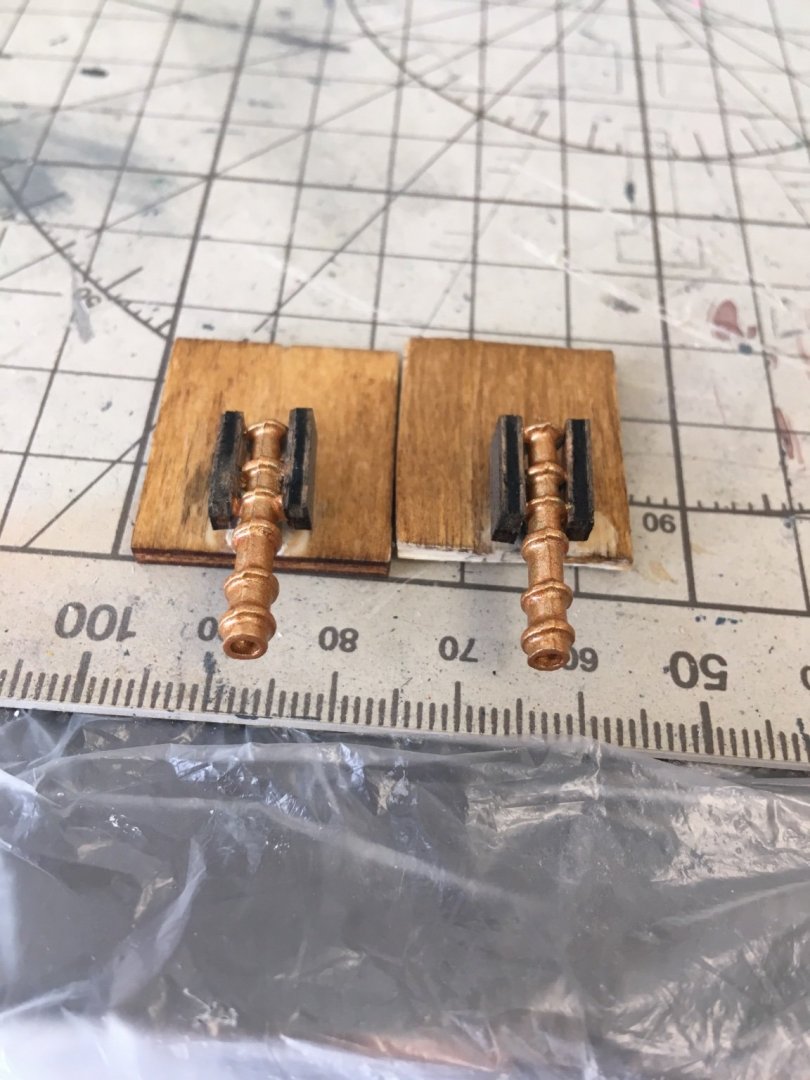
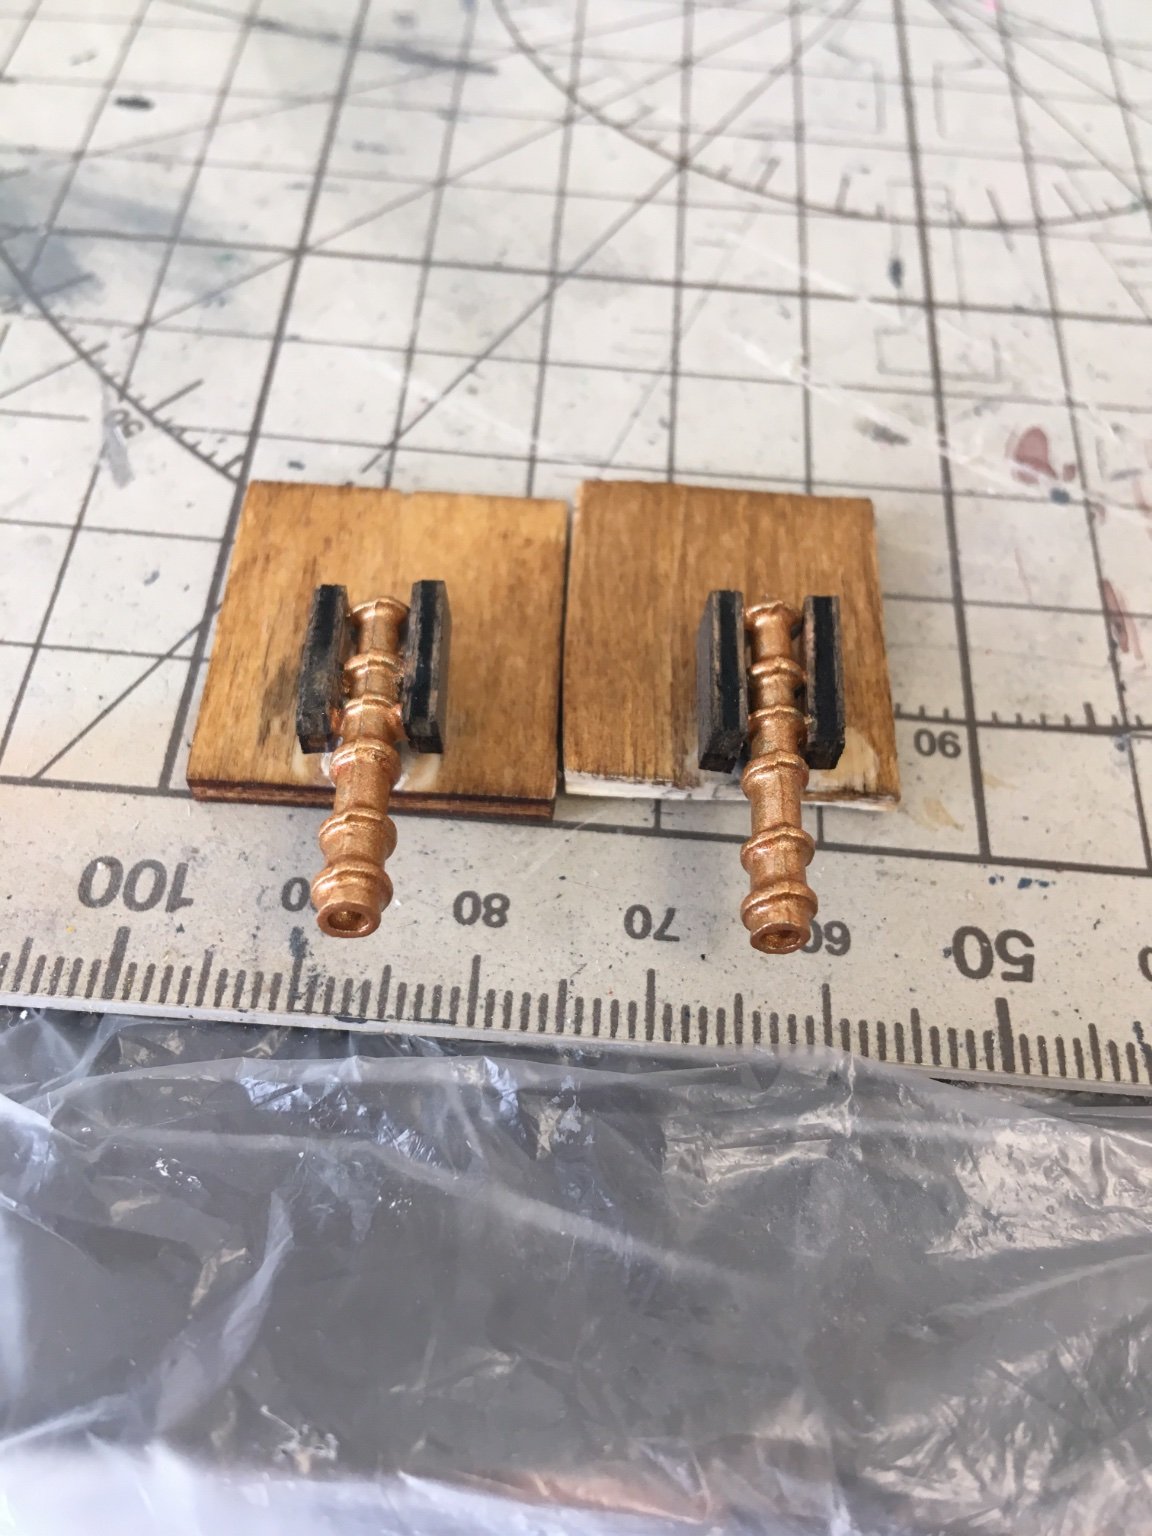
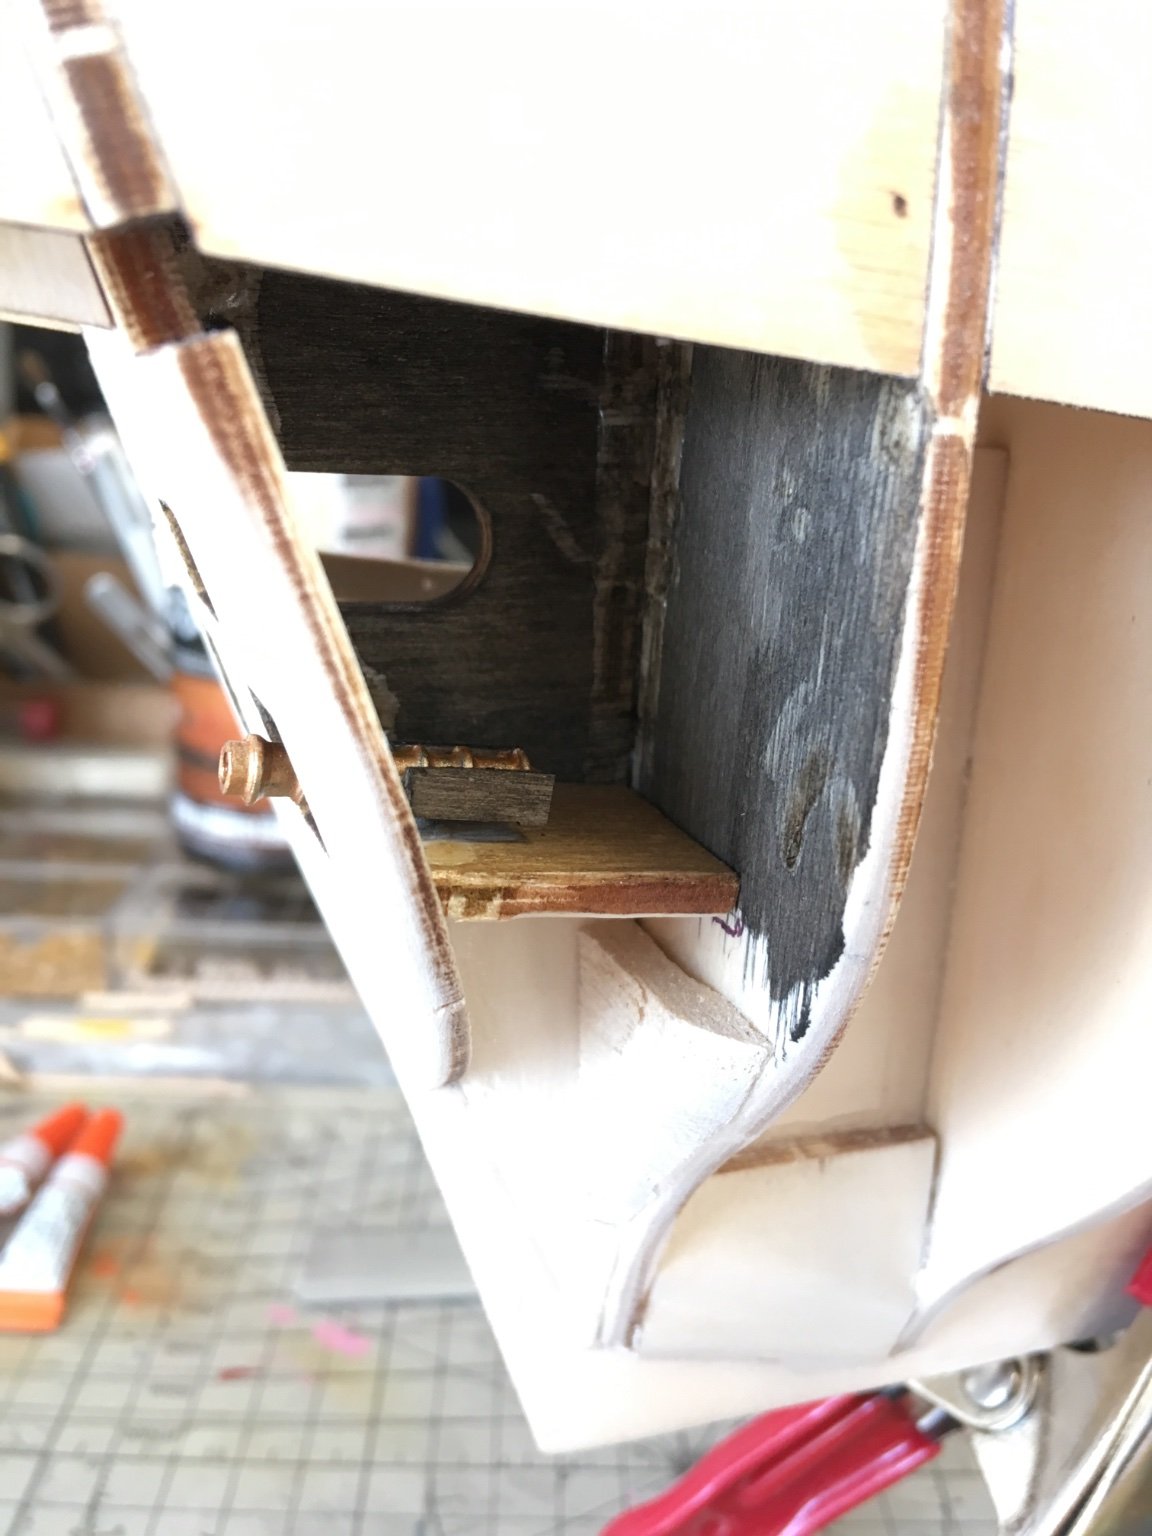
Thought of a good use for those oversized swivel guns:
Too much glue, but that part won’t be visible and I didn’t want it ever coming loose.
Just used scraps. Walnut stain on interior to keep it dark.
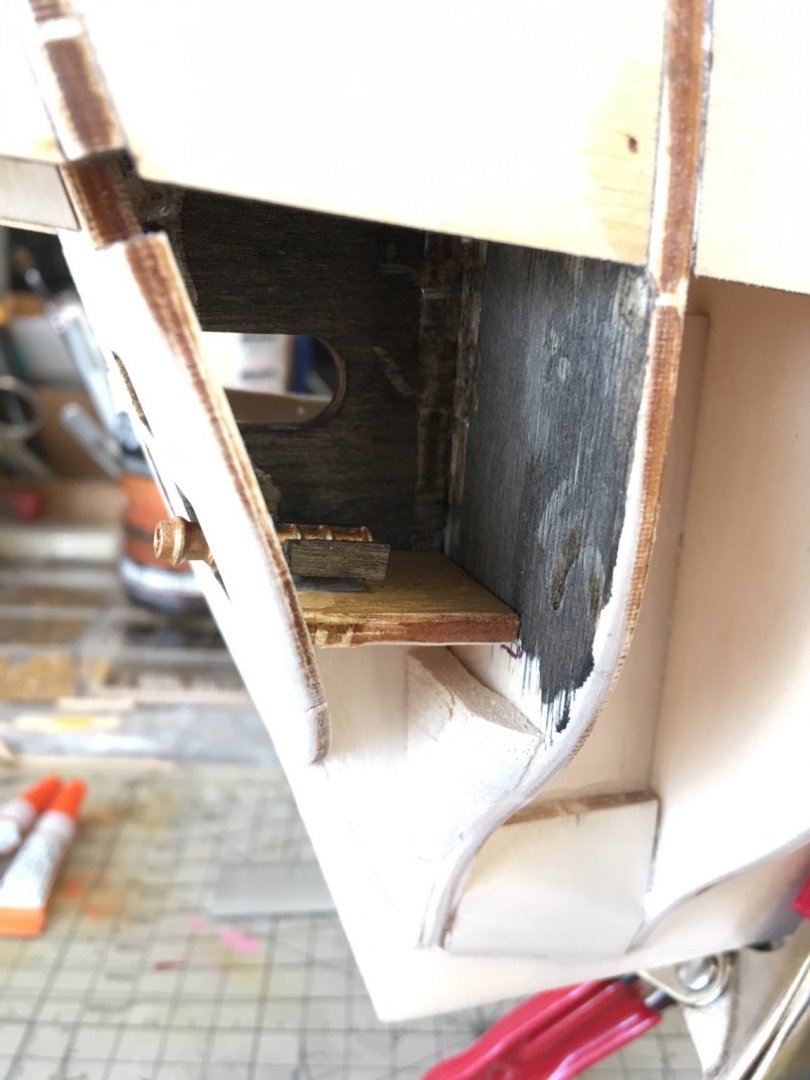
Gonna have to plank around it but should be fudgable.
Now she has stern chasers!

Next up: planking fun.
Meriadoc
- Cirdan and GrandpaPhil
-
2
-
14 hours ago, Cirdan said:
In fact there is a depiction of the Revenge, albeit a very rough one on the so called "smerwick map". You can find this map in Bryce Walkers book on the Armada ("The Seafarers" series) I think on page 18. Here is a section:

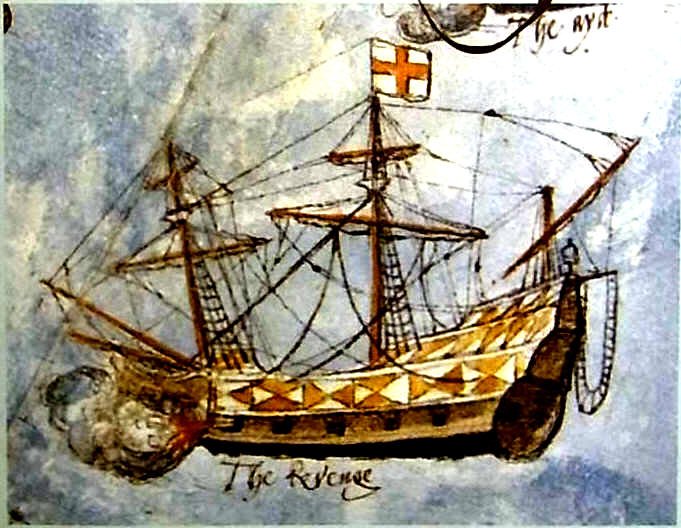
Of course the proportions are distorted as the ribbon of ornaments at the height of the rail was exaggrated very much. And the colour scheme of the ornaments is simplified: it is hard to believe that the only colours were red and white. The sketches can be seen as rough portraits of the real ships as they were inserted as part of an actual operation report (the Bombardement of Fort Smerwick in Ireland in 1580). The Revenge is depicted with only three masts (with the mizzen at a position very much near the stern).
A hint relating the colours of the ornaments is given in Oppenheims "A history of the administration of the Royal Navy" on p 130: for the Revenge the main colours were green and white.
Cirdan, thank you for this information. Very interesting to see what contemporary sources we do have for this ship. I've got some thinking to do about the decorations, but I'll have some time before I have to make any decisions as I learn how to plank.
You have a most appropriate username, I must say. I like to put on Tolkien audiobooks while I work. That or Bob Ross.
-
-
-
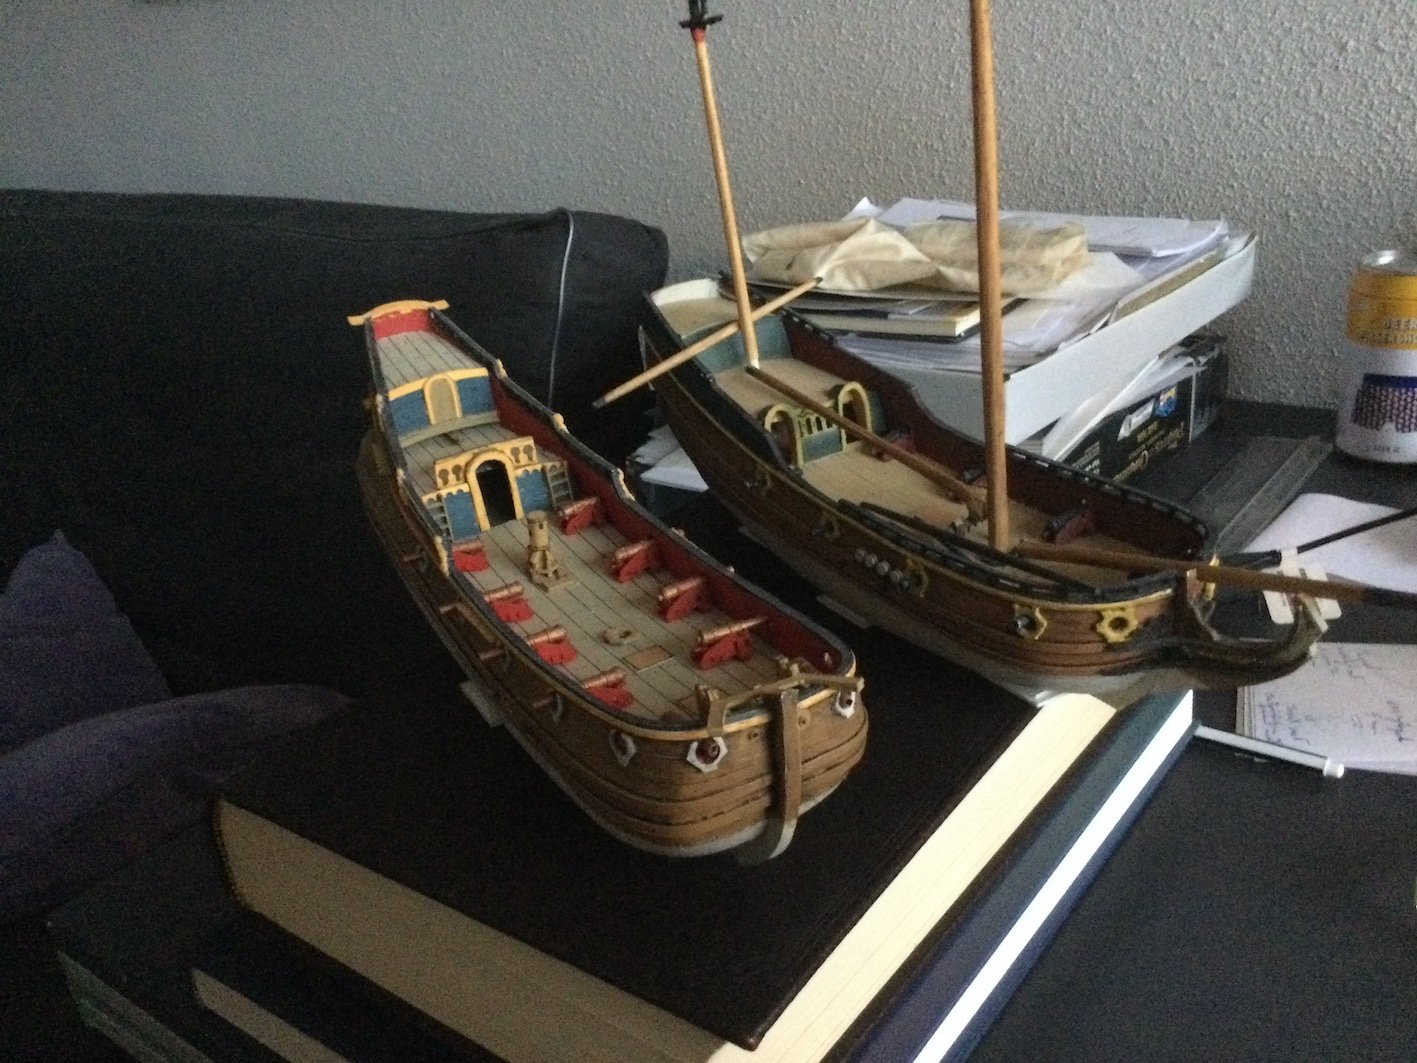
Ab, thank you for the images of your construction and the artwork.
In the last picture by Nooms, are both vessels wad-konvooiers, or just the one on the left?
Meriadoc
- mtaylor and FrankWouts
-
2
-
32 minutes ago, Ab Hoving said:
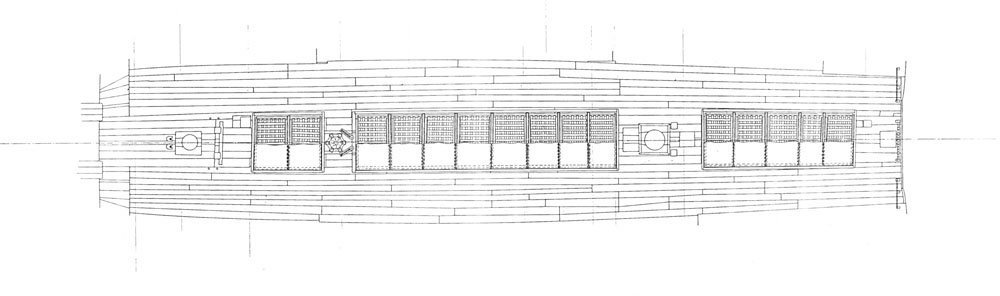
Here is the lines plan, I hope it works better for you than for me :-).
Ab, thank you for sharing the plans you made!
I've never scratch built a ship too large to fit inside a bottle, but I think your fish-hooker tutorial explains the process well enough. I imagine you had to reconstruct most of the details apart from overall dimensions from guesswork. I am not much of a perfectionist when it comes to inherently obscure subjects, so I'll probably seek to make it look pleasing and believable enough, and be happy with it. In any case, learning to scratch build from card will be quite valuable for cost effectiveness and the freedom to choose my scale.
Where could a person go to learn more about this type of ship, like when and how it was used? Are there any images of them under sail? Google doesn't seem to be much help on the matter. Sorry if I'm asking too many questions!
Meriadoc
-
Ab, thank you for your reply.
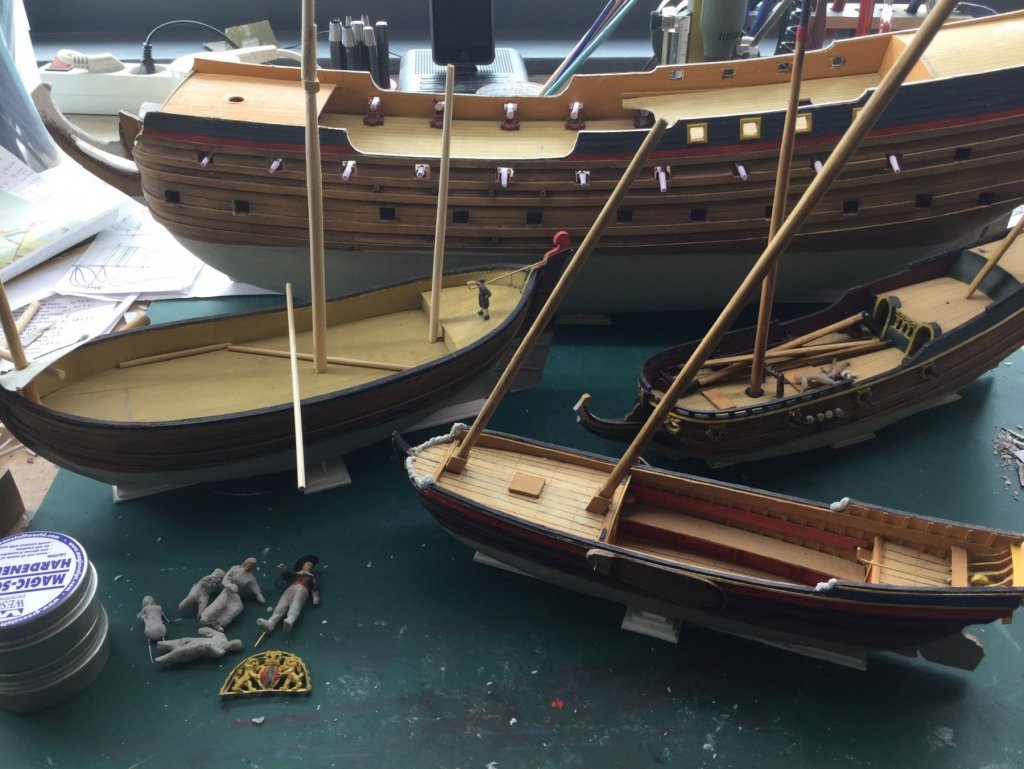
Both of these designs you showed are quite intriguing and illustrate that "wad-konvooier" refers to a role rather than a well-defined type. I imagine the differences in style may be due to varying local preferences, affordable hull availability, or even different time periods (for all I know!).
I quite like the one on the right, similar to a statenjacht with the elegant prow curving up from the waterline; that's the one I'd like to build, or try to build (I haven't worked with card yet). Did you build this one from plans or recreate it from contemporary artwork?
Appreciate you sharing your expertise on these things.
Meriadoc
- mtaylor, Archi and Ryland Craze
-
3
-
On 7/7/2019 at 10:53 PM, Ab Hoving said:
In the mean time work piles up on my work bench.
An old project, a 160 foot VOC East India man waits for a long time to get finished, a late 16th century vessel, a vlieboot, has temporarily run aground as a result of my ignorance how to install a gratings deck all over the hull, another project, a 'wad-konvooier' ( a small armed ship to escort unarmed freighters over the inland seas in the north) got stuck because of doubts about the decorations and finally the pleasure vessel, for which I am making decorations and crew at the moment. Very little speed in it all, which makes me impatient.
Hello Ab,
I'm a big fan of your models and the digital composite paintings your son creates with them.
I like this view of your shipyard. In particular, I was intrigued by the "wad-konvooier" on the right. It seems to be a relatively obscure type. Are there plans available for this craft anywhere? I I was thinking about trying your card method to build it. I'd love to learn more about it!
Meriadoc
-
-
Kirill4, thanks for all the resources! I'll have to dig into them a bit. I'm not going for hyper historical accuracy but I would like to make it look appropriate where possible. The garlands around the lower topmasts sound like an interesting detail..
Under the waterline, for example, I want to leave the wood grain but I do want to delineate it somehow. Perhaps I could airbrush a thin off-white stripe?
6 hours ago, kirill4 said:interesting fact, how real deck planking looks like on 17 th century vessel - Vasa deck as example
far from "ideal" lines of present day model's deck :)))
I think they must have used whatever cheap scrap wood they had on hand to plank the deck, perhaps planks that they found unsuitable for the hull planking. Unlike the sides it doesn't have to be symmetrical or pretty, just flat. Interesting fact!


Revenge by Meriadoc Brandybuck - OcCre - 1:85
in - Kit build logs for subjects built from 1501 - 1750
Posted
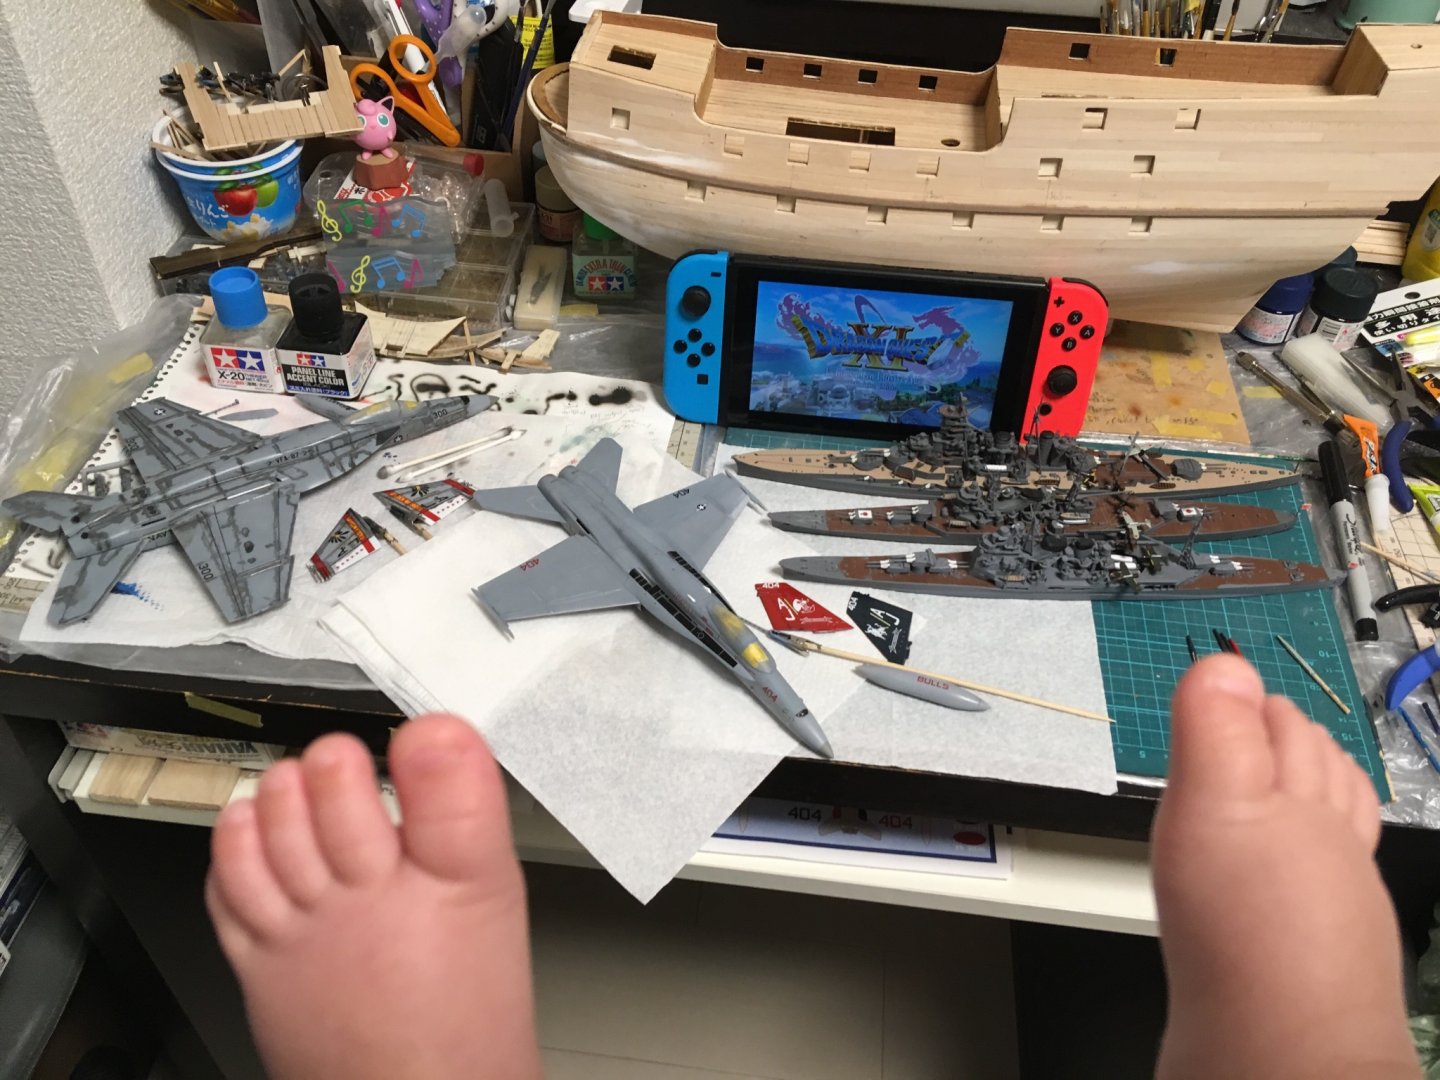
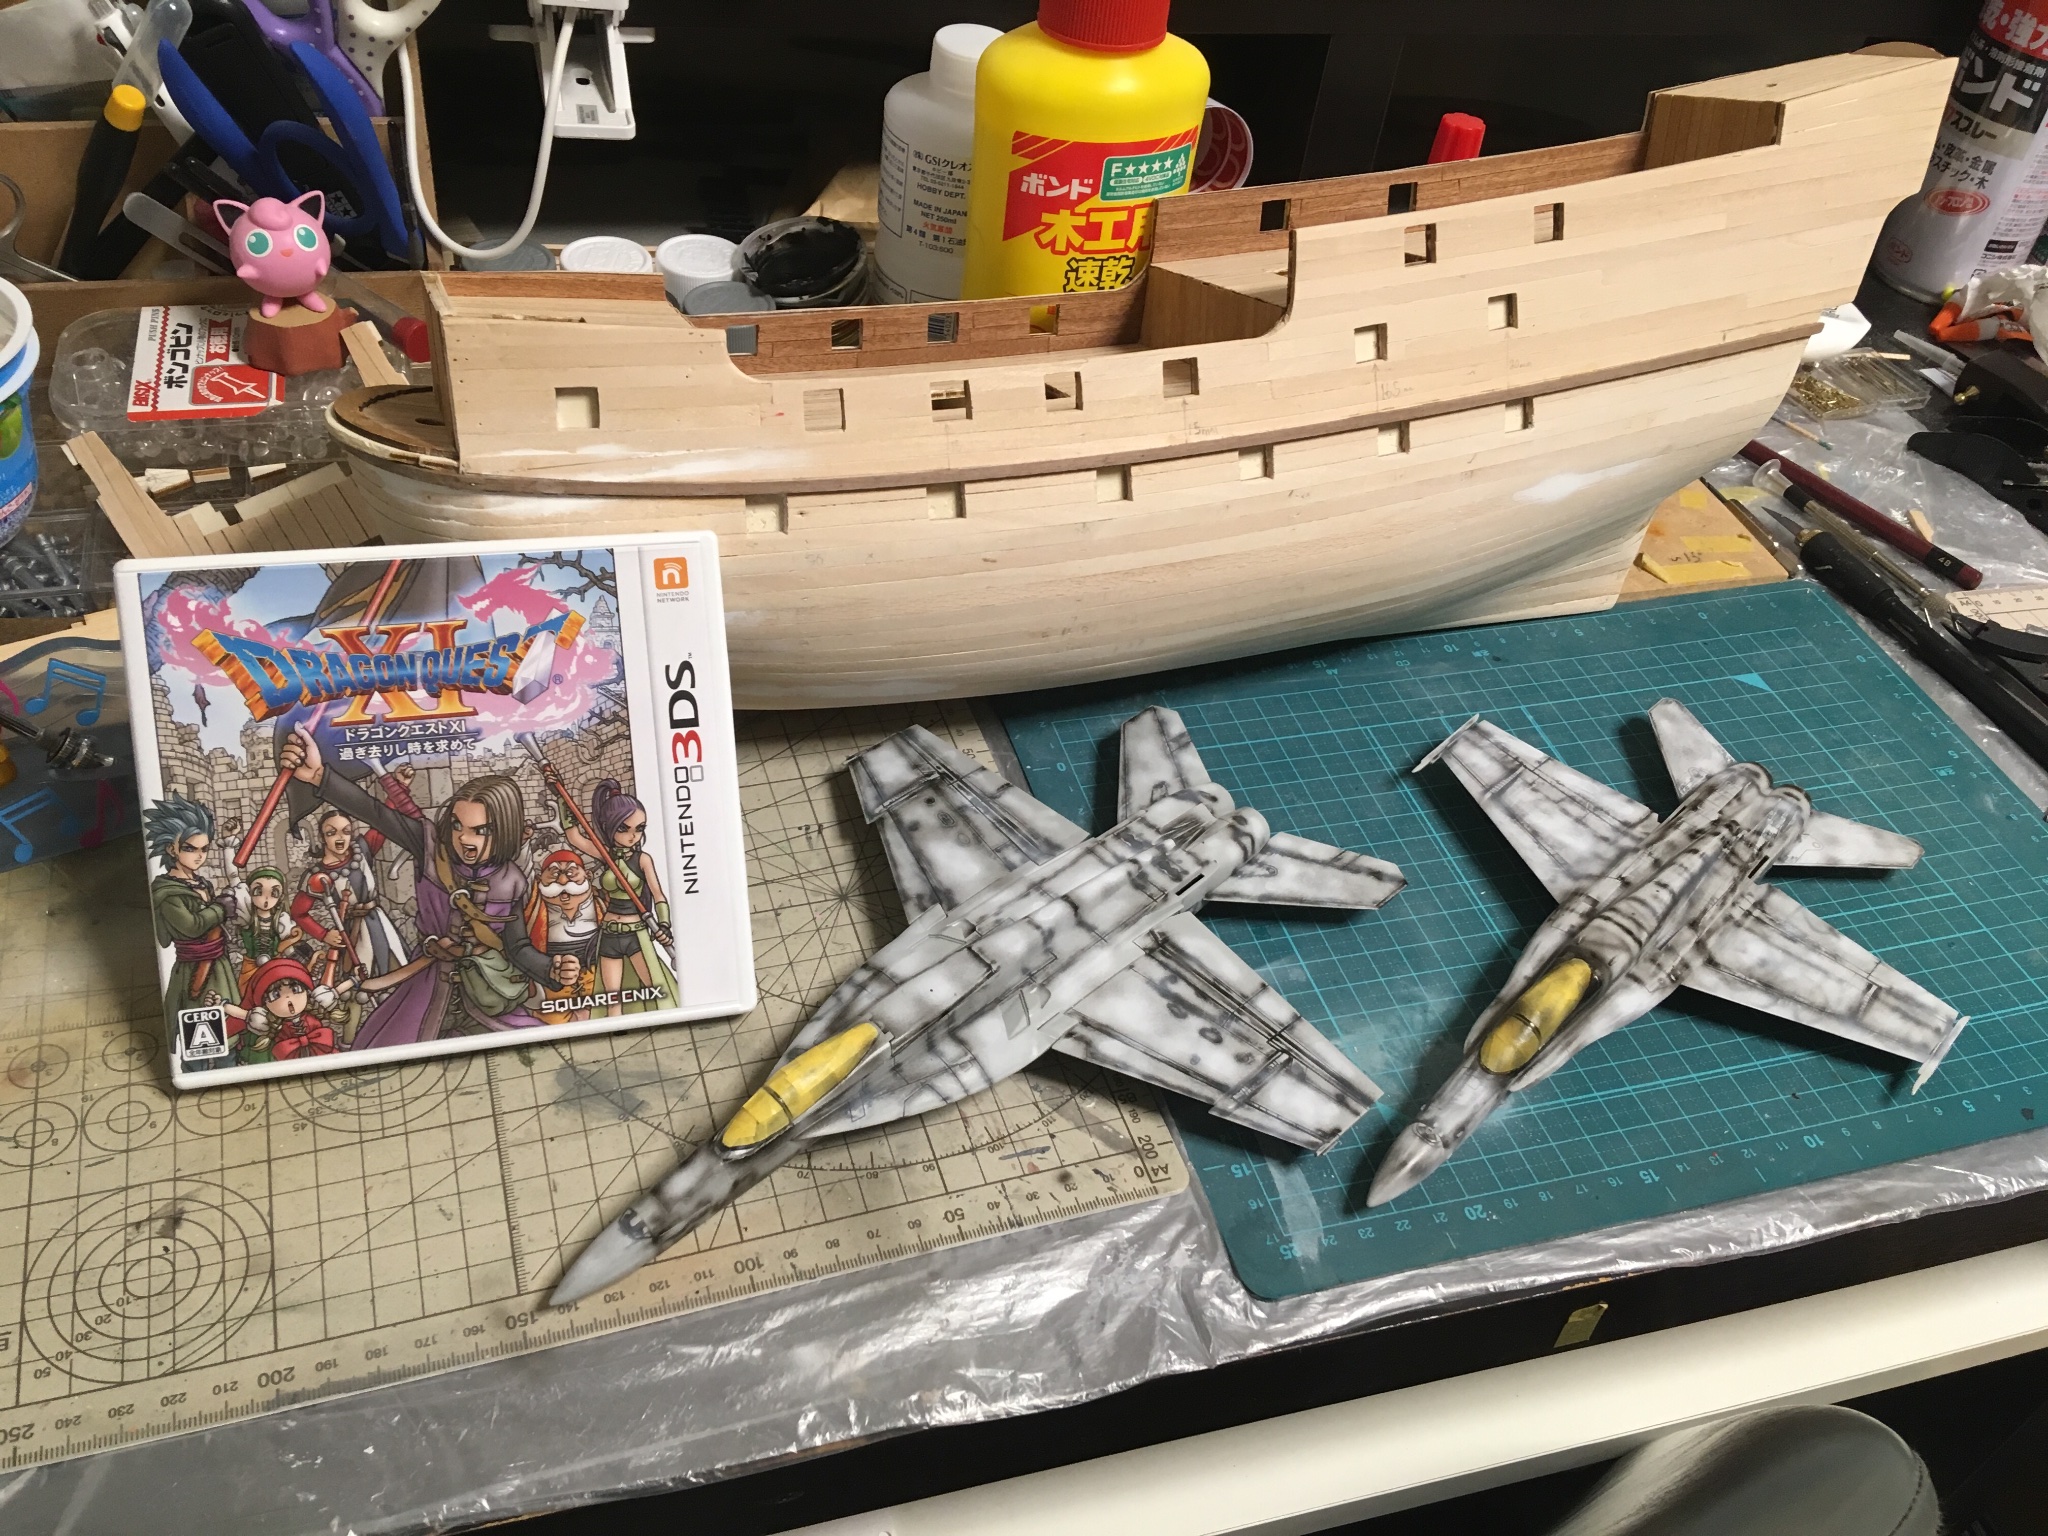
An update- spring and summer were spent building 1/72 airplanes and playing Dragon Quest, in addition to attending to a certain baby.
Now that it’s nice and autumn, it’s time for nautical hype and tall ships.
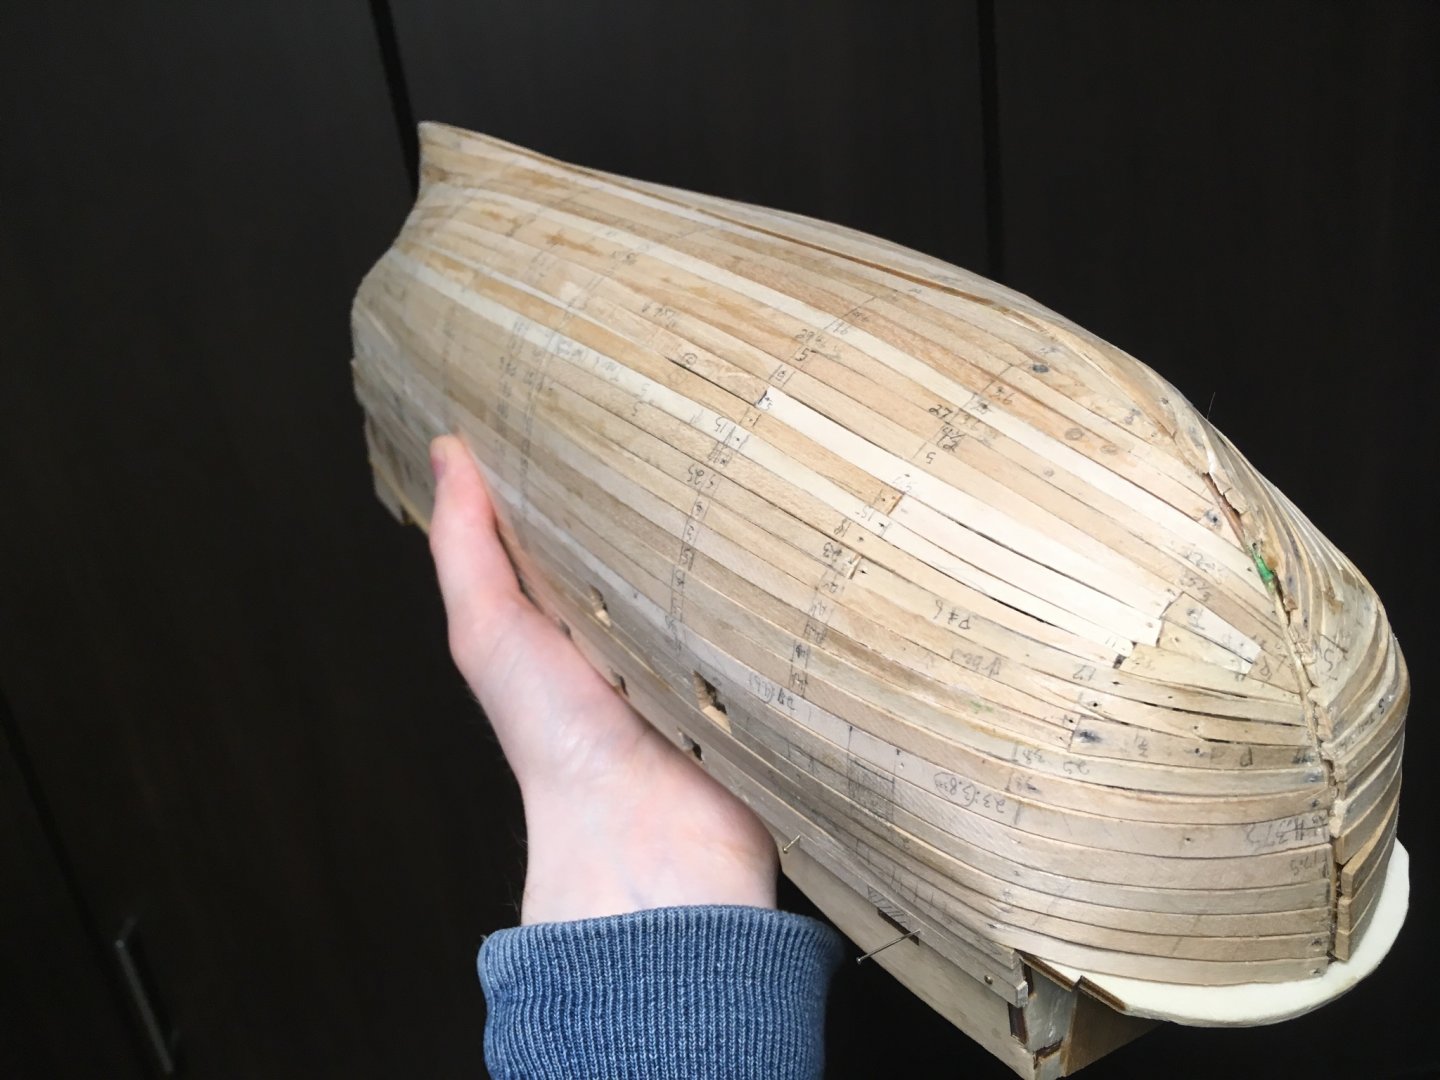
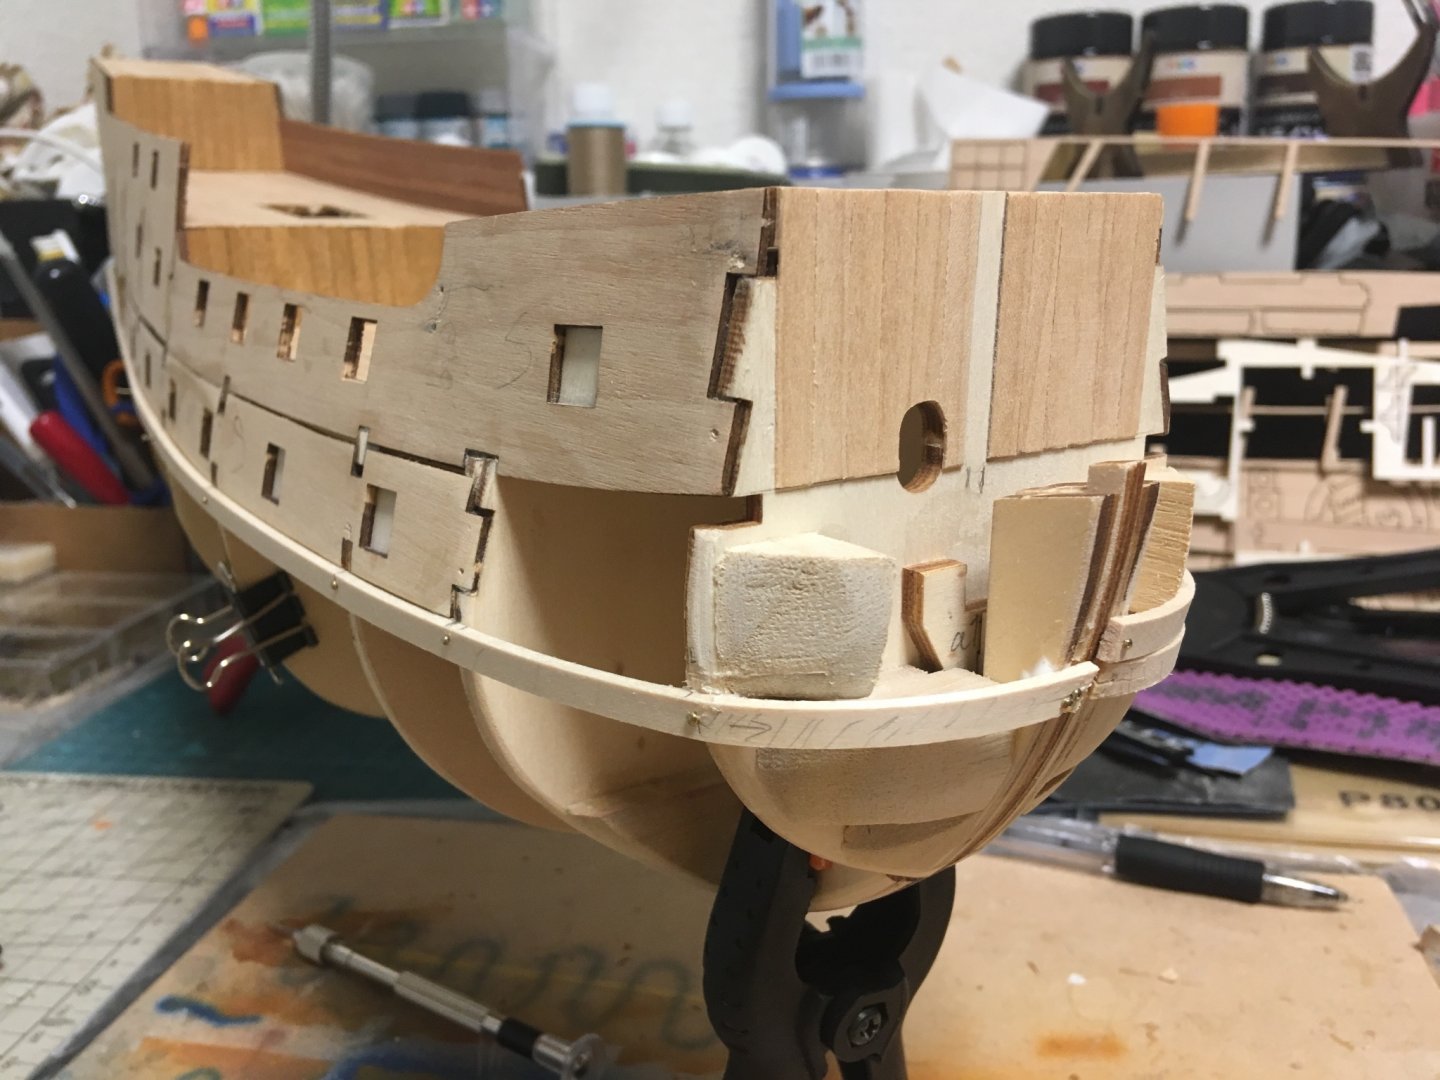
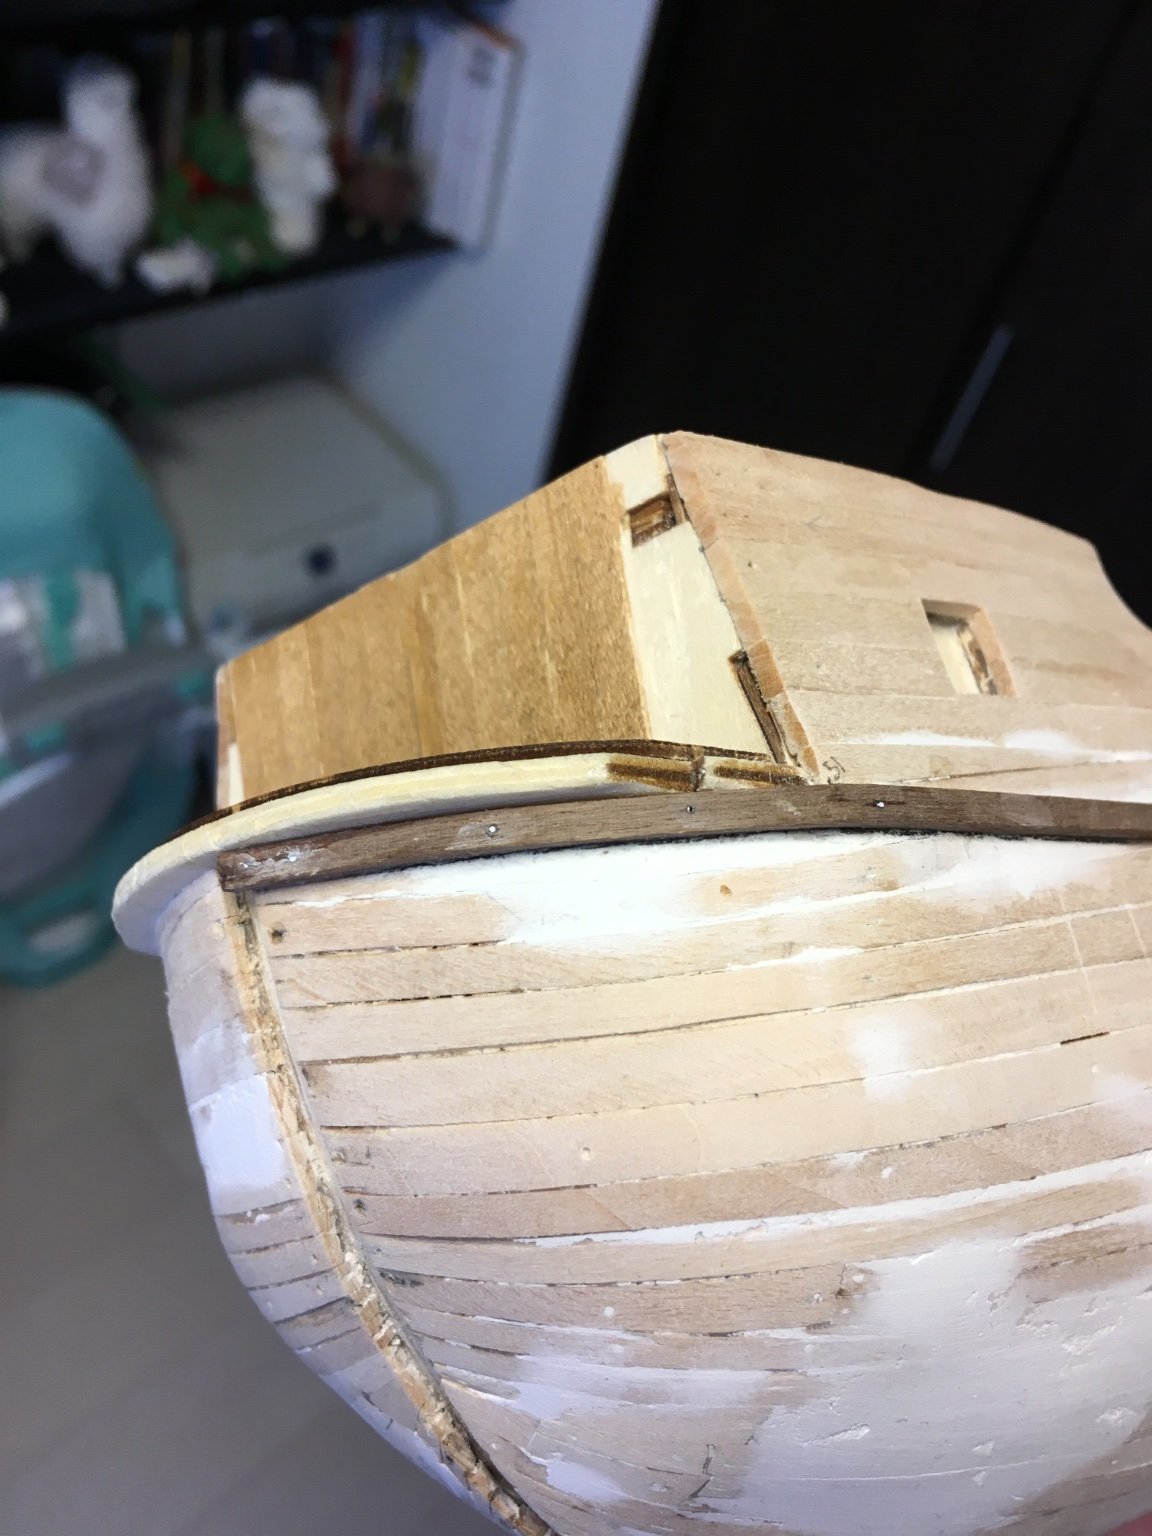
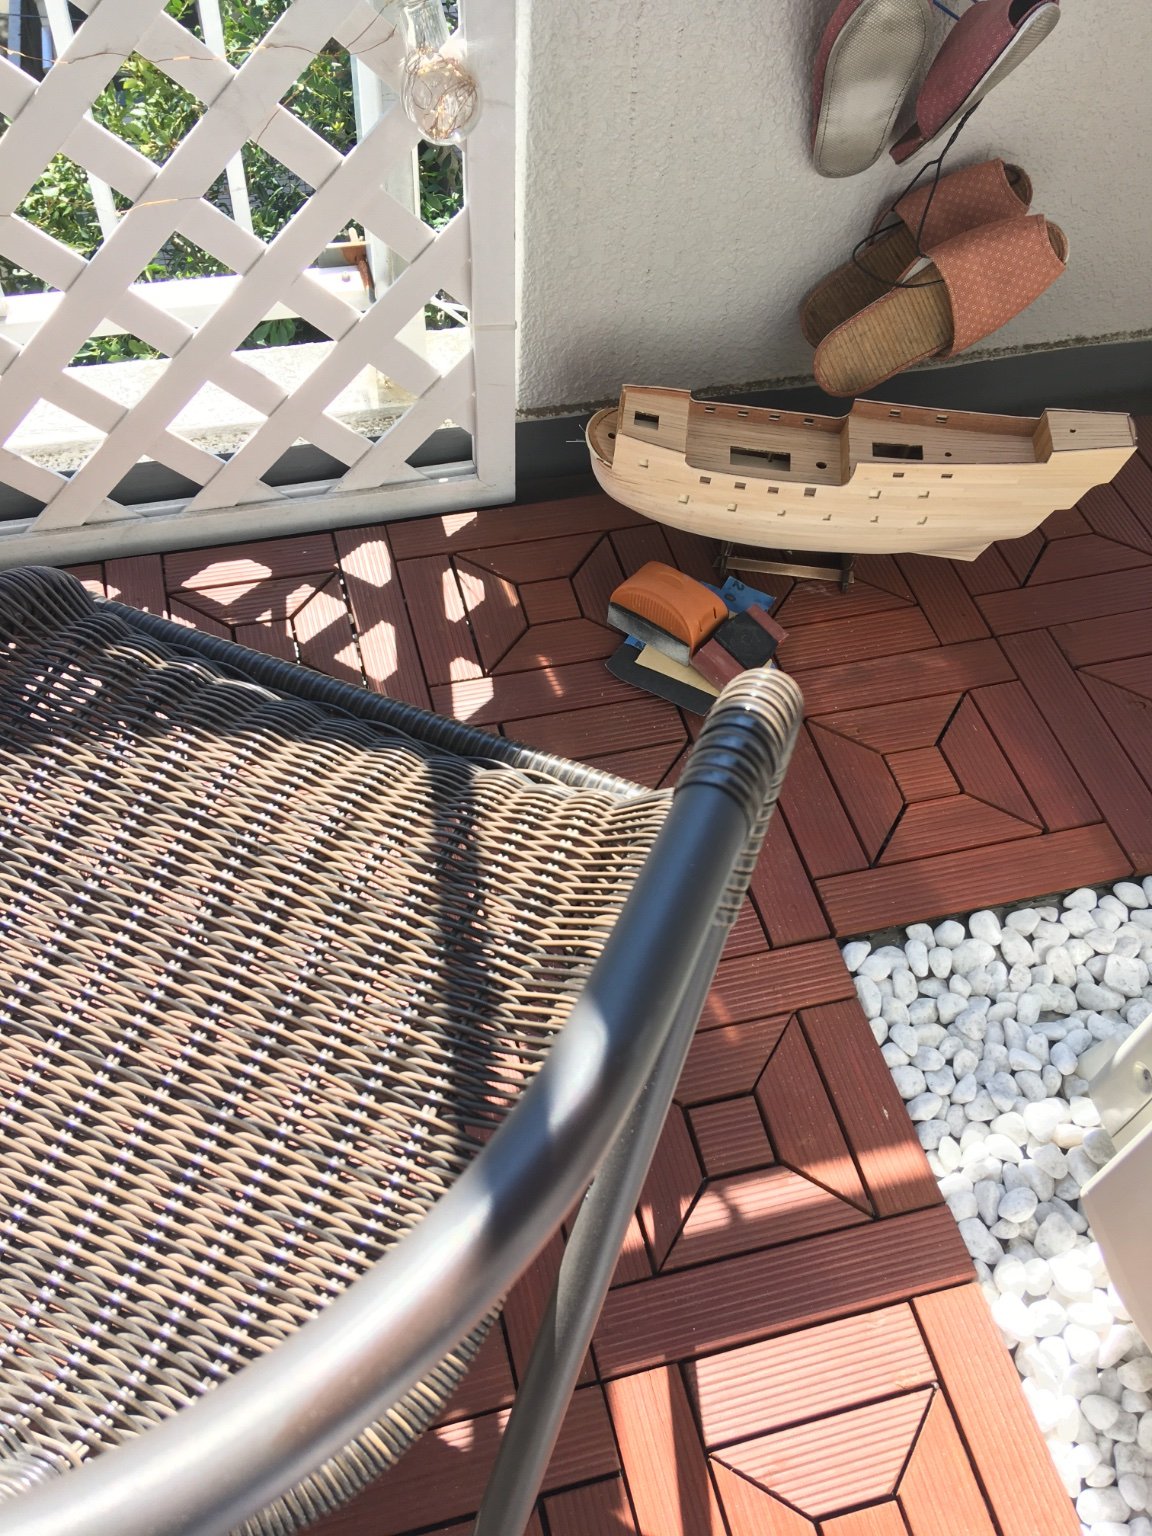
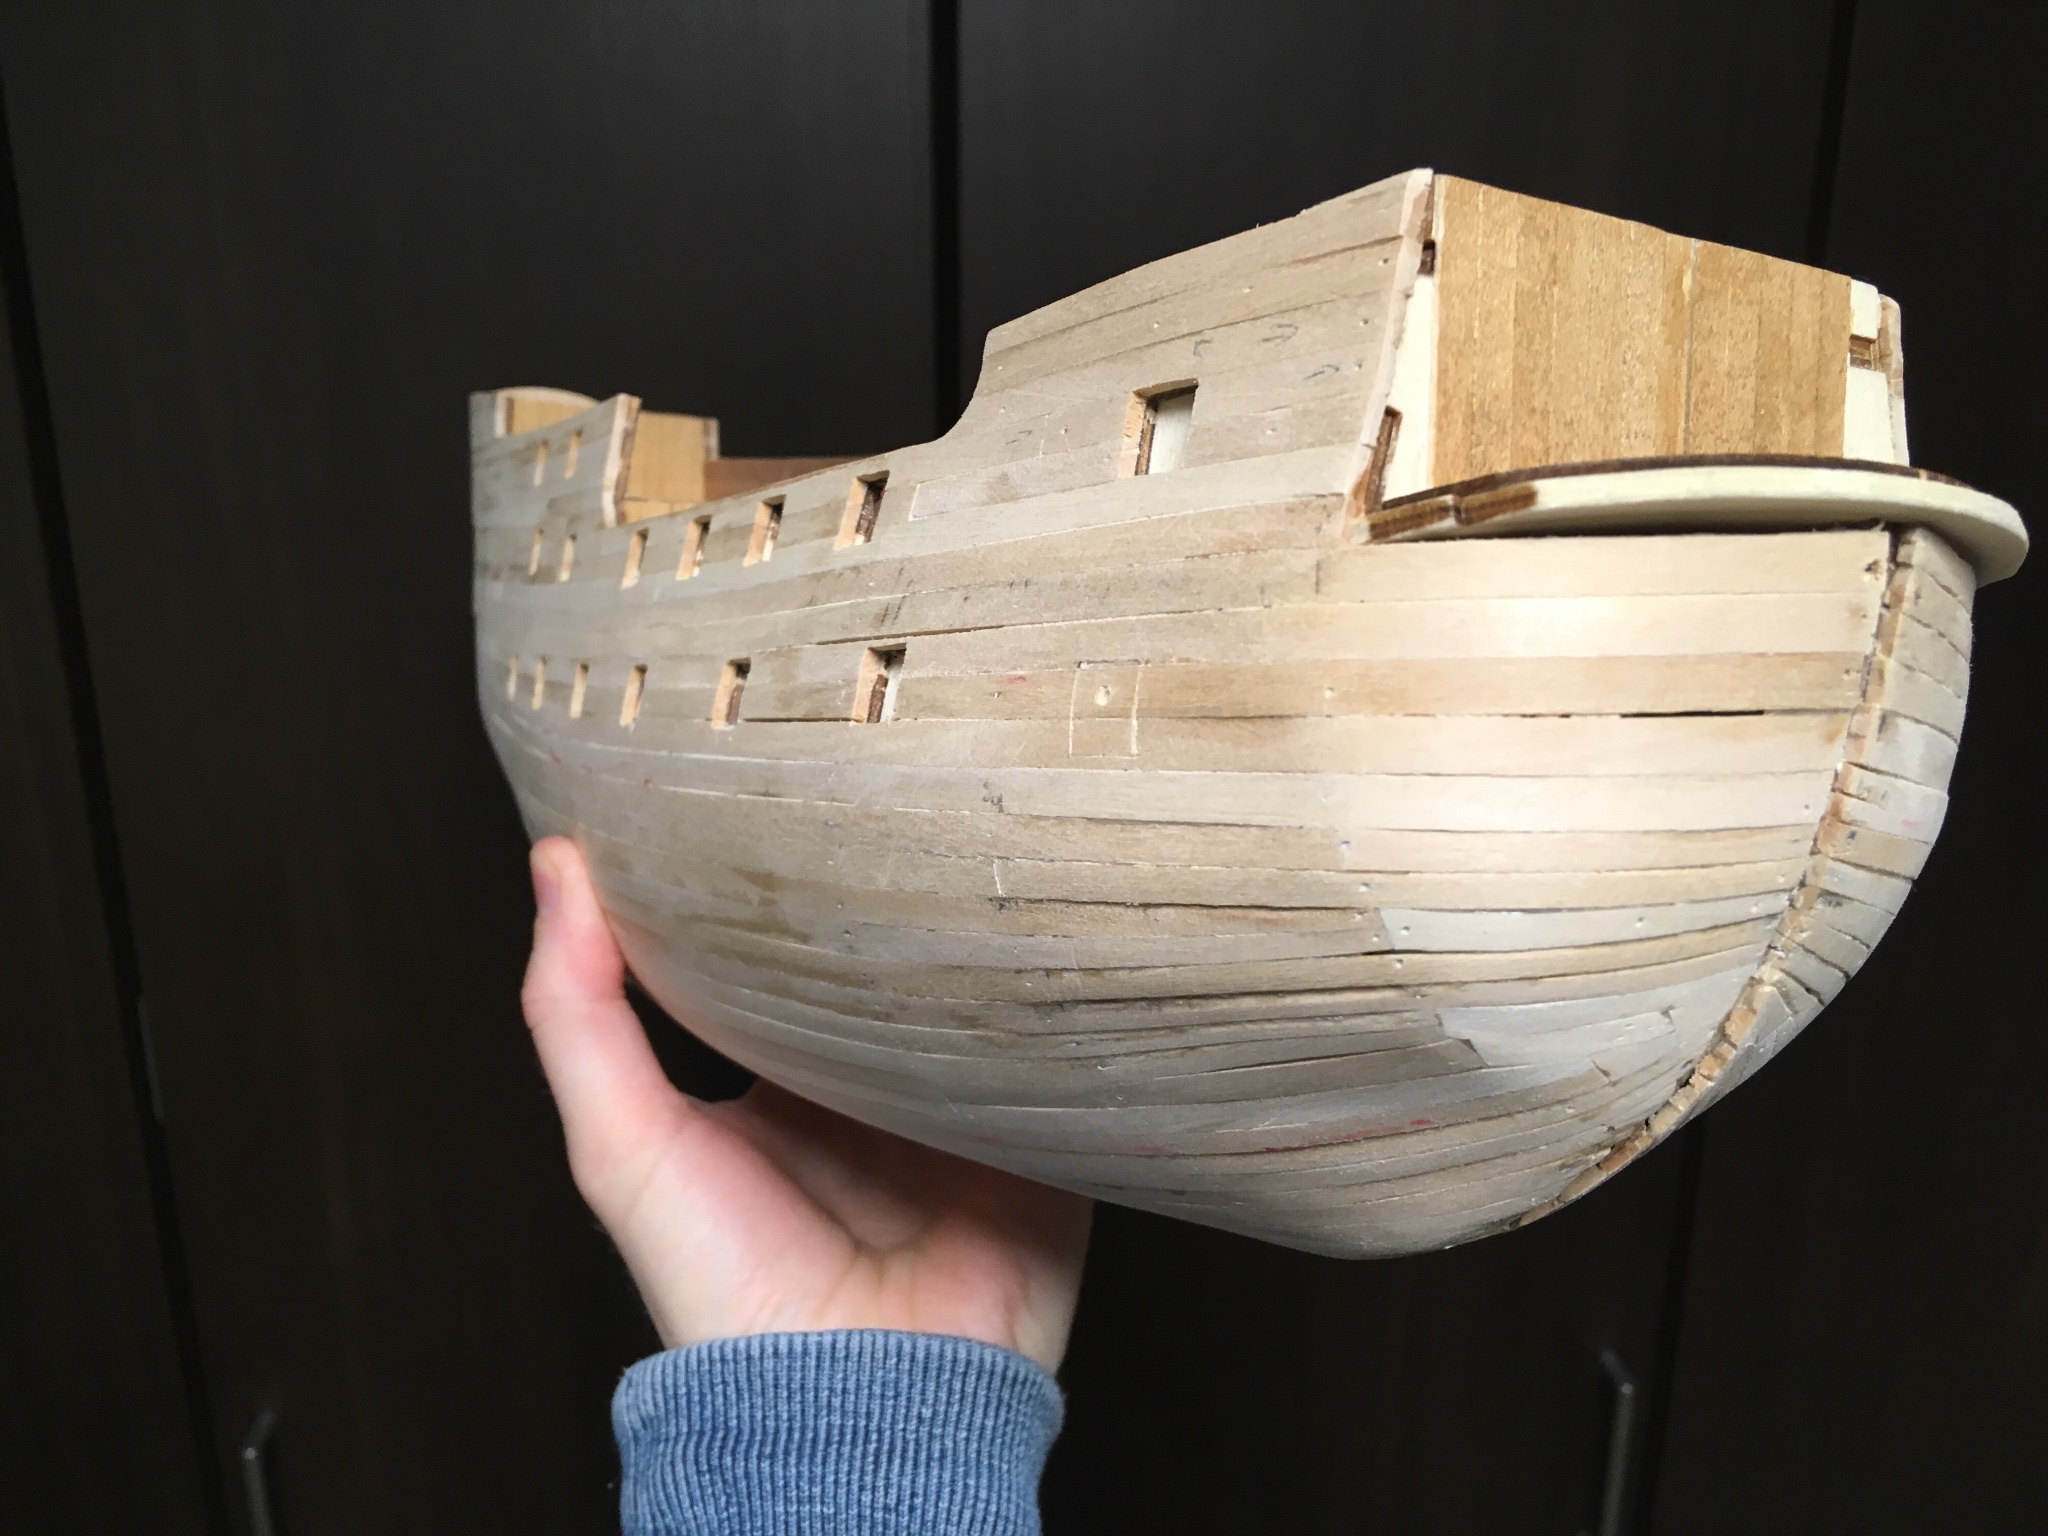
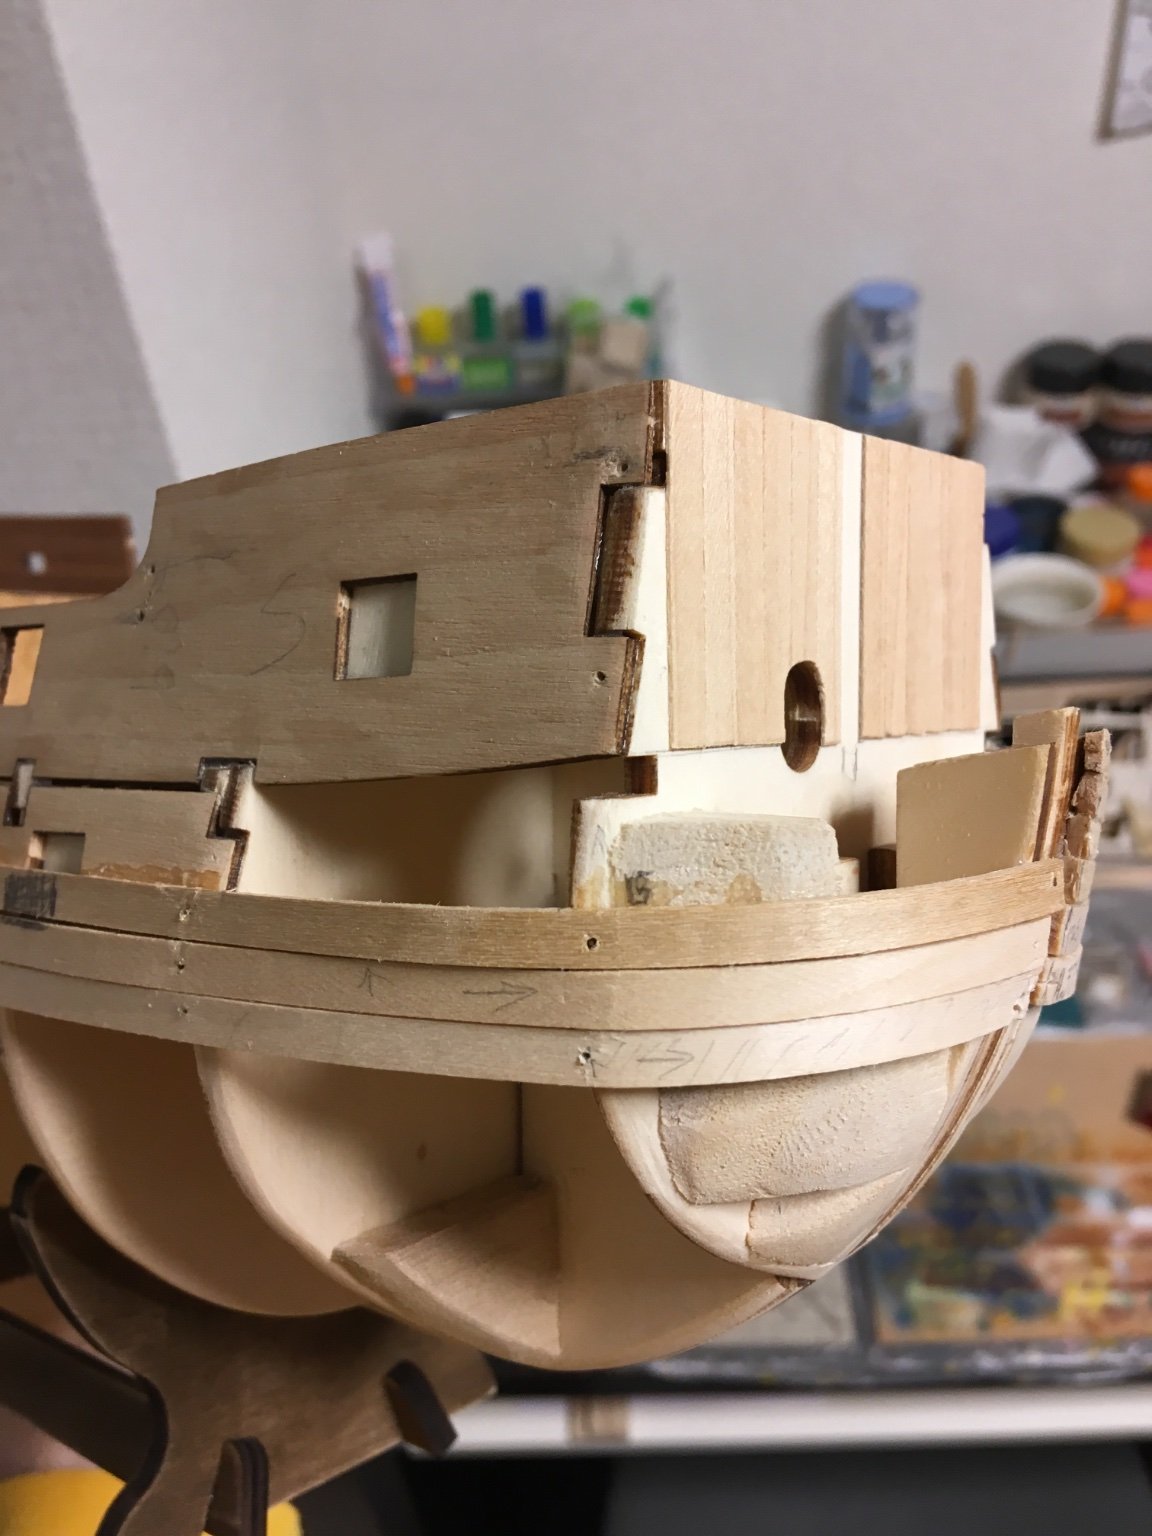
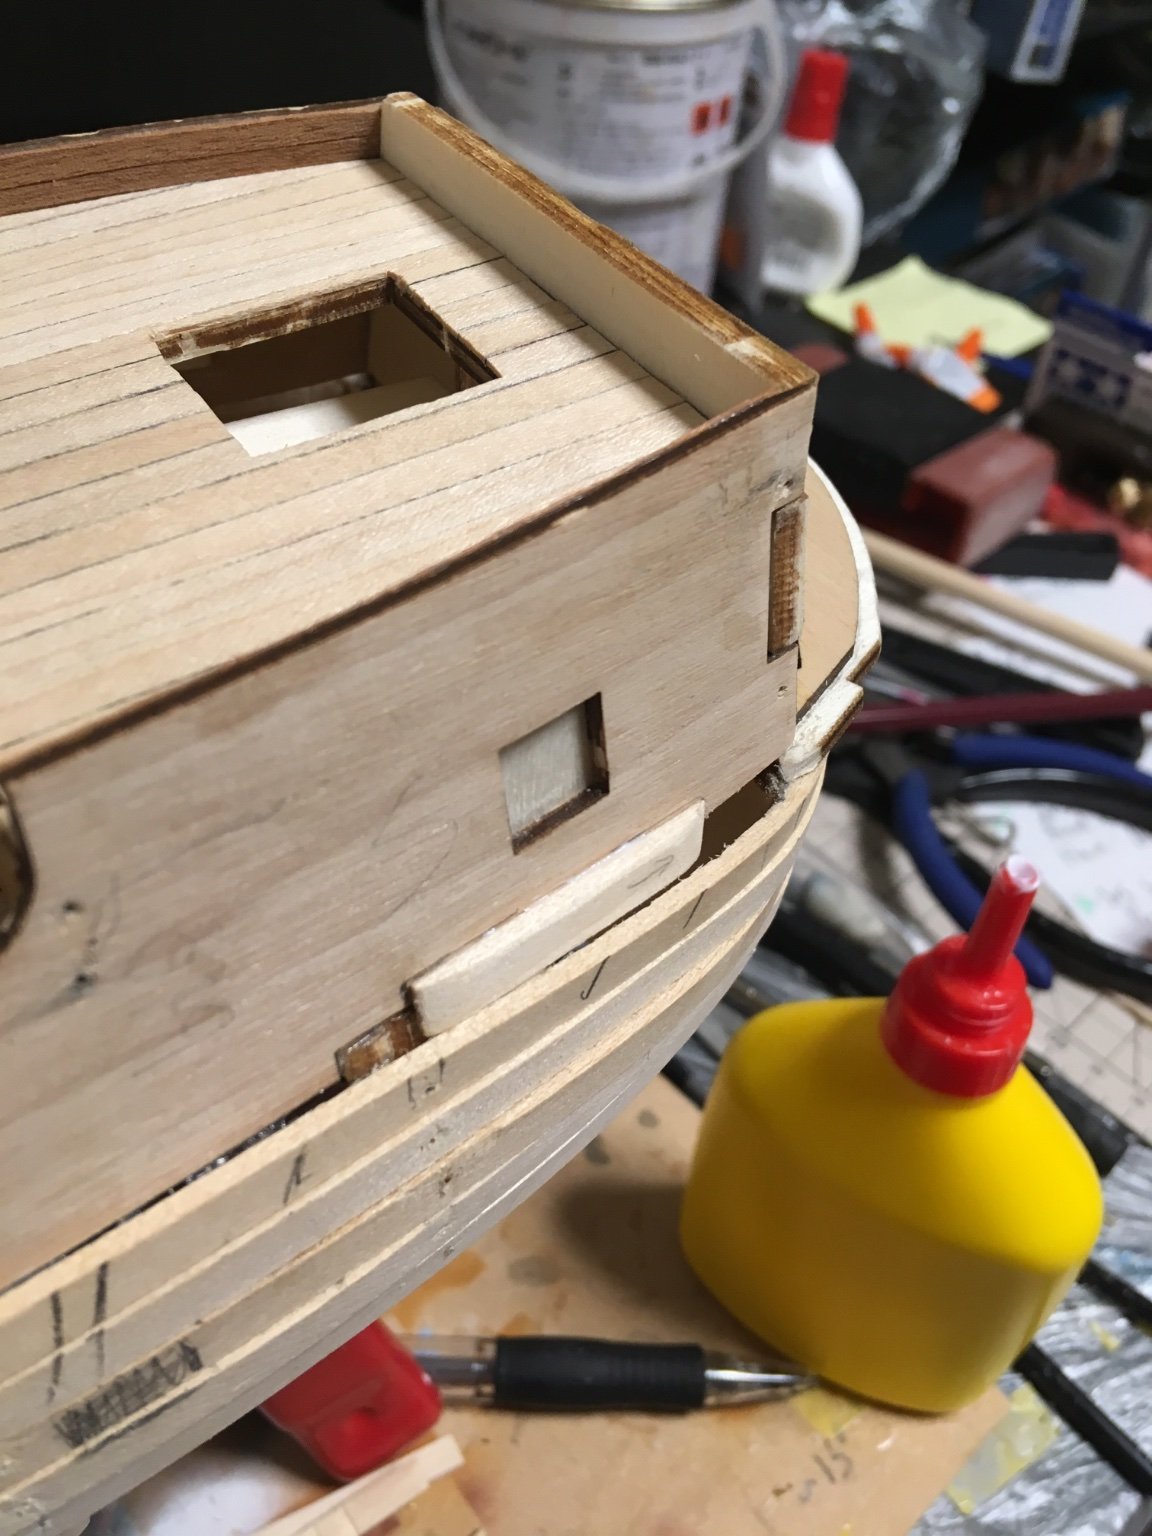
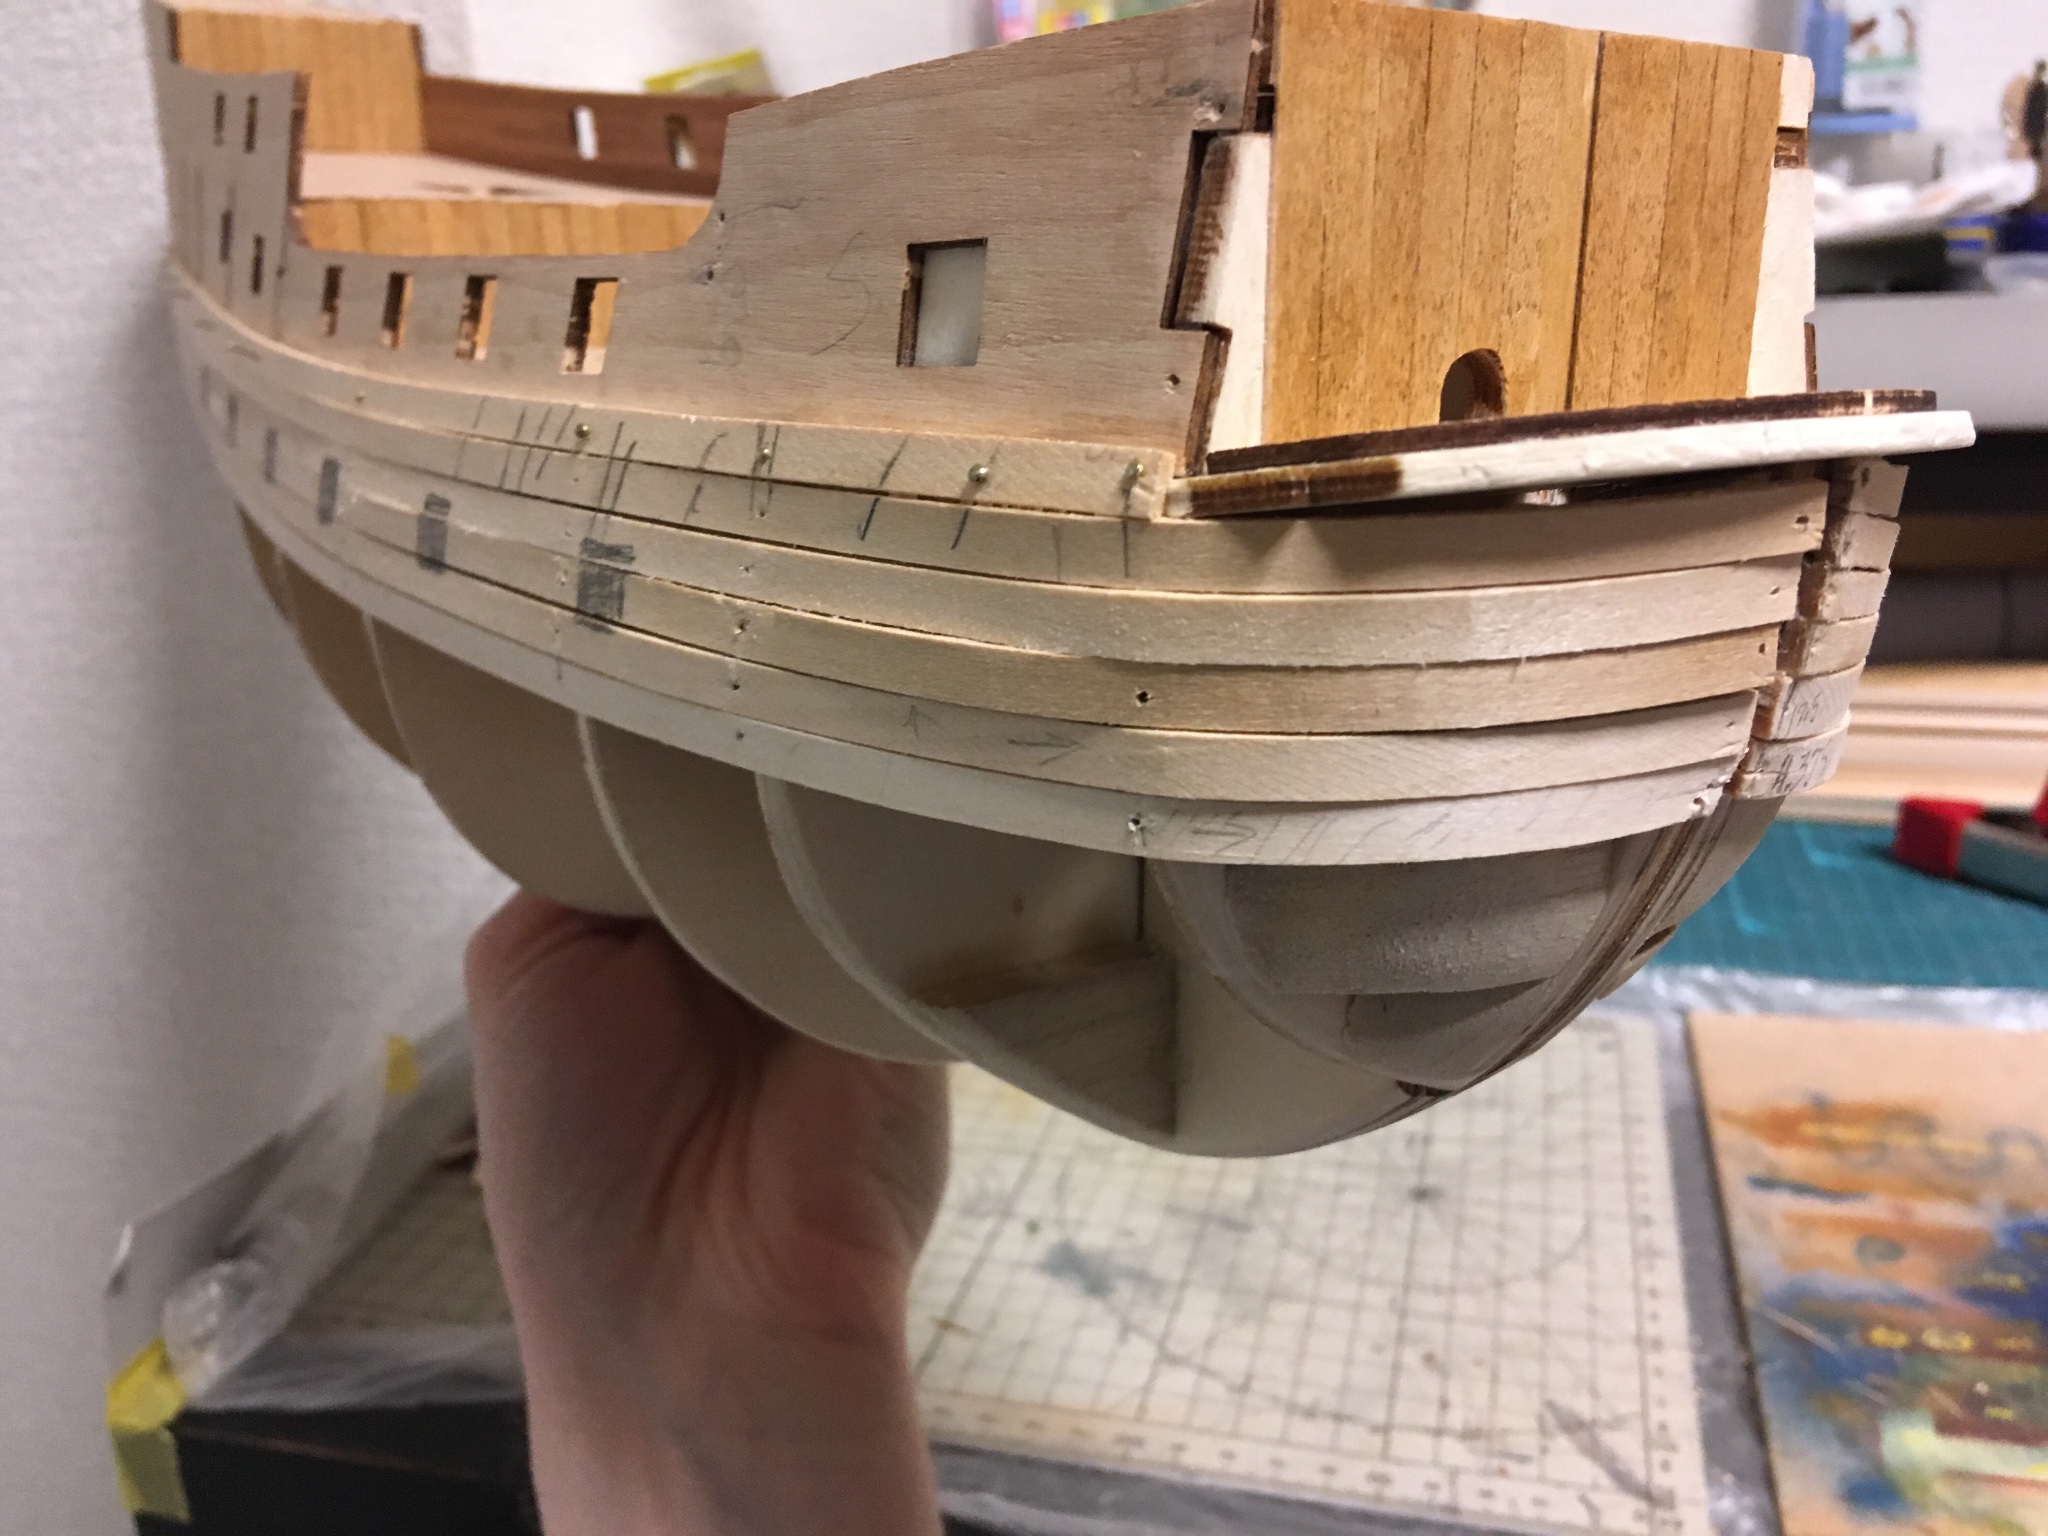
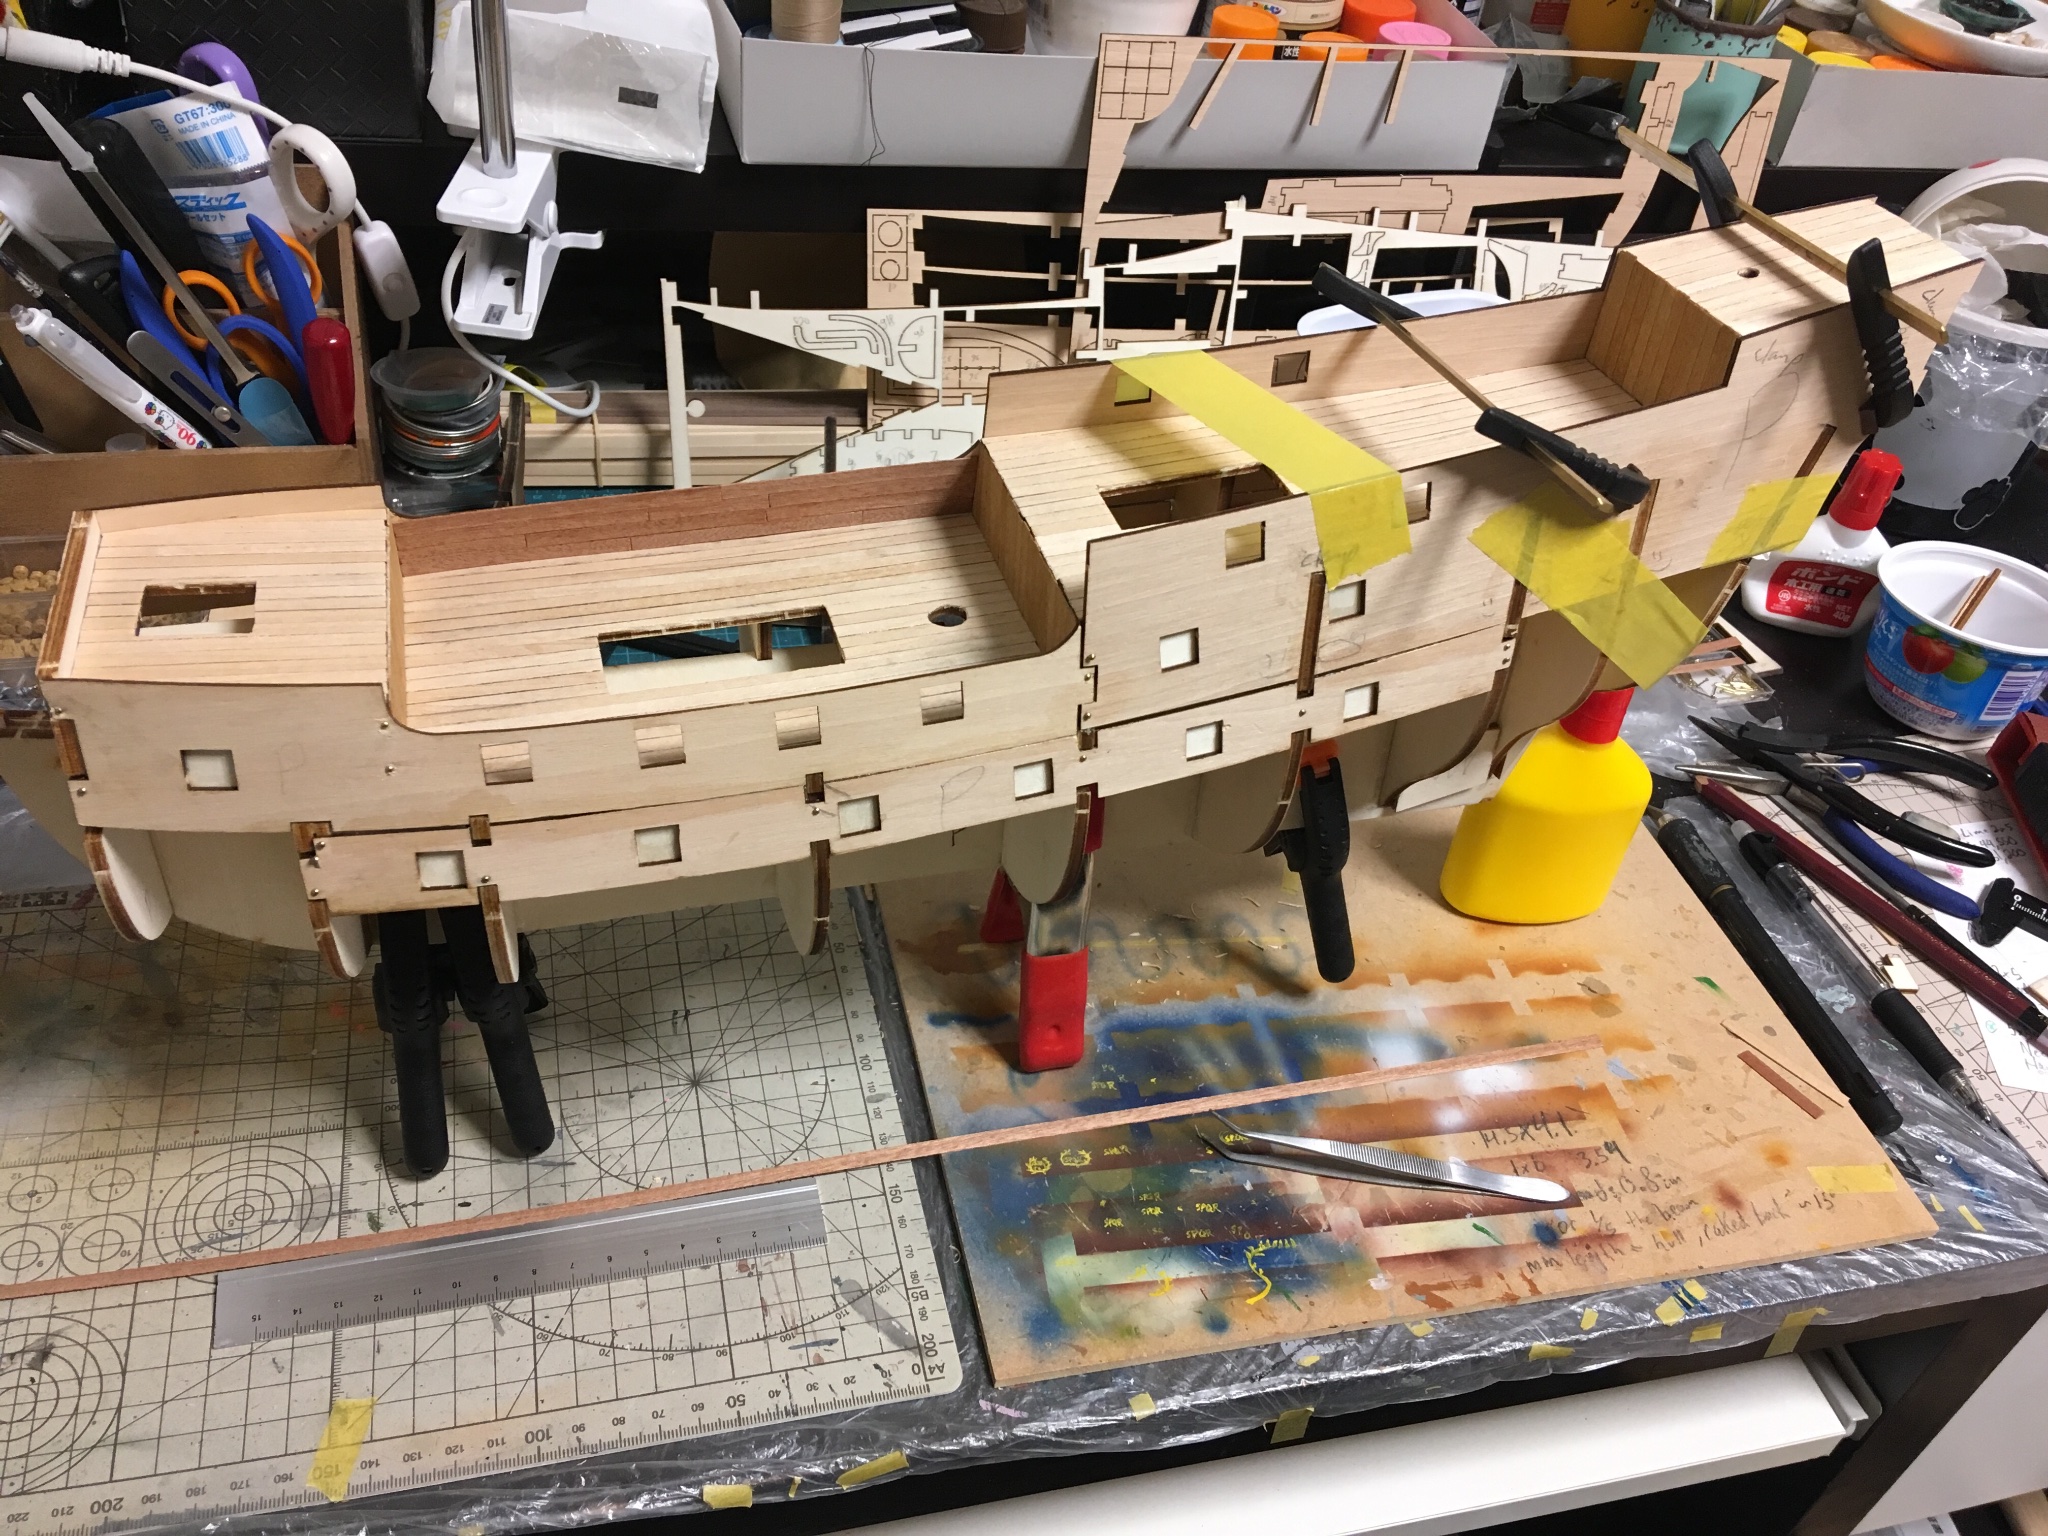
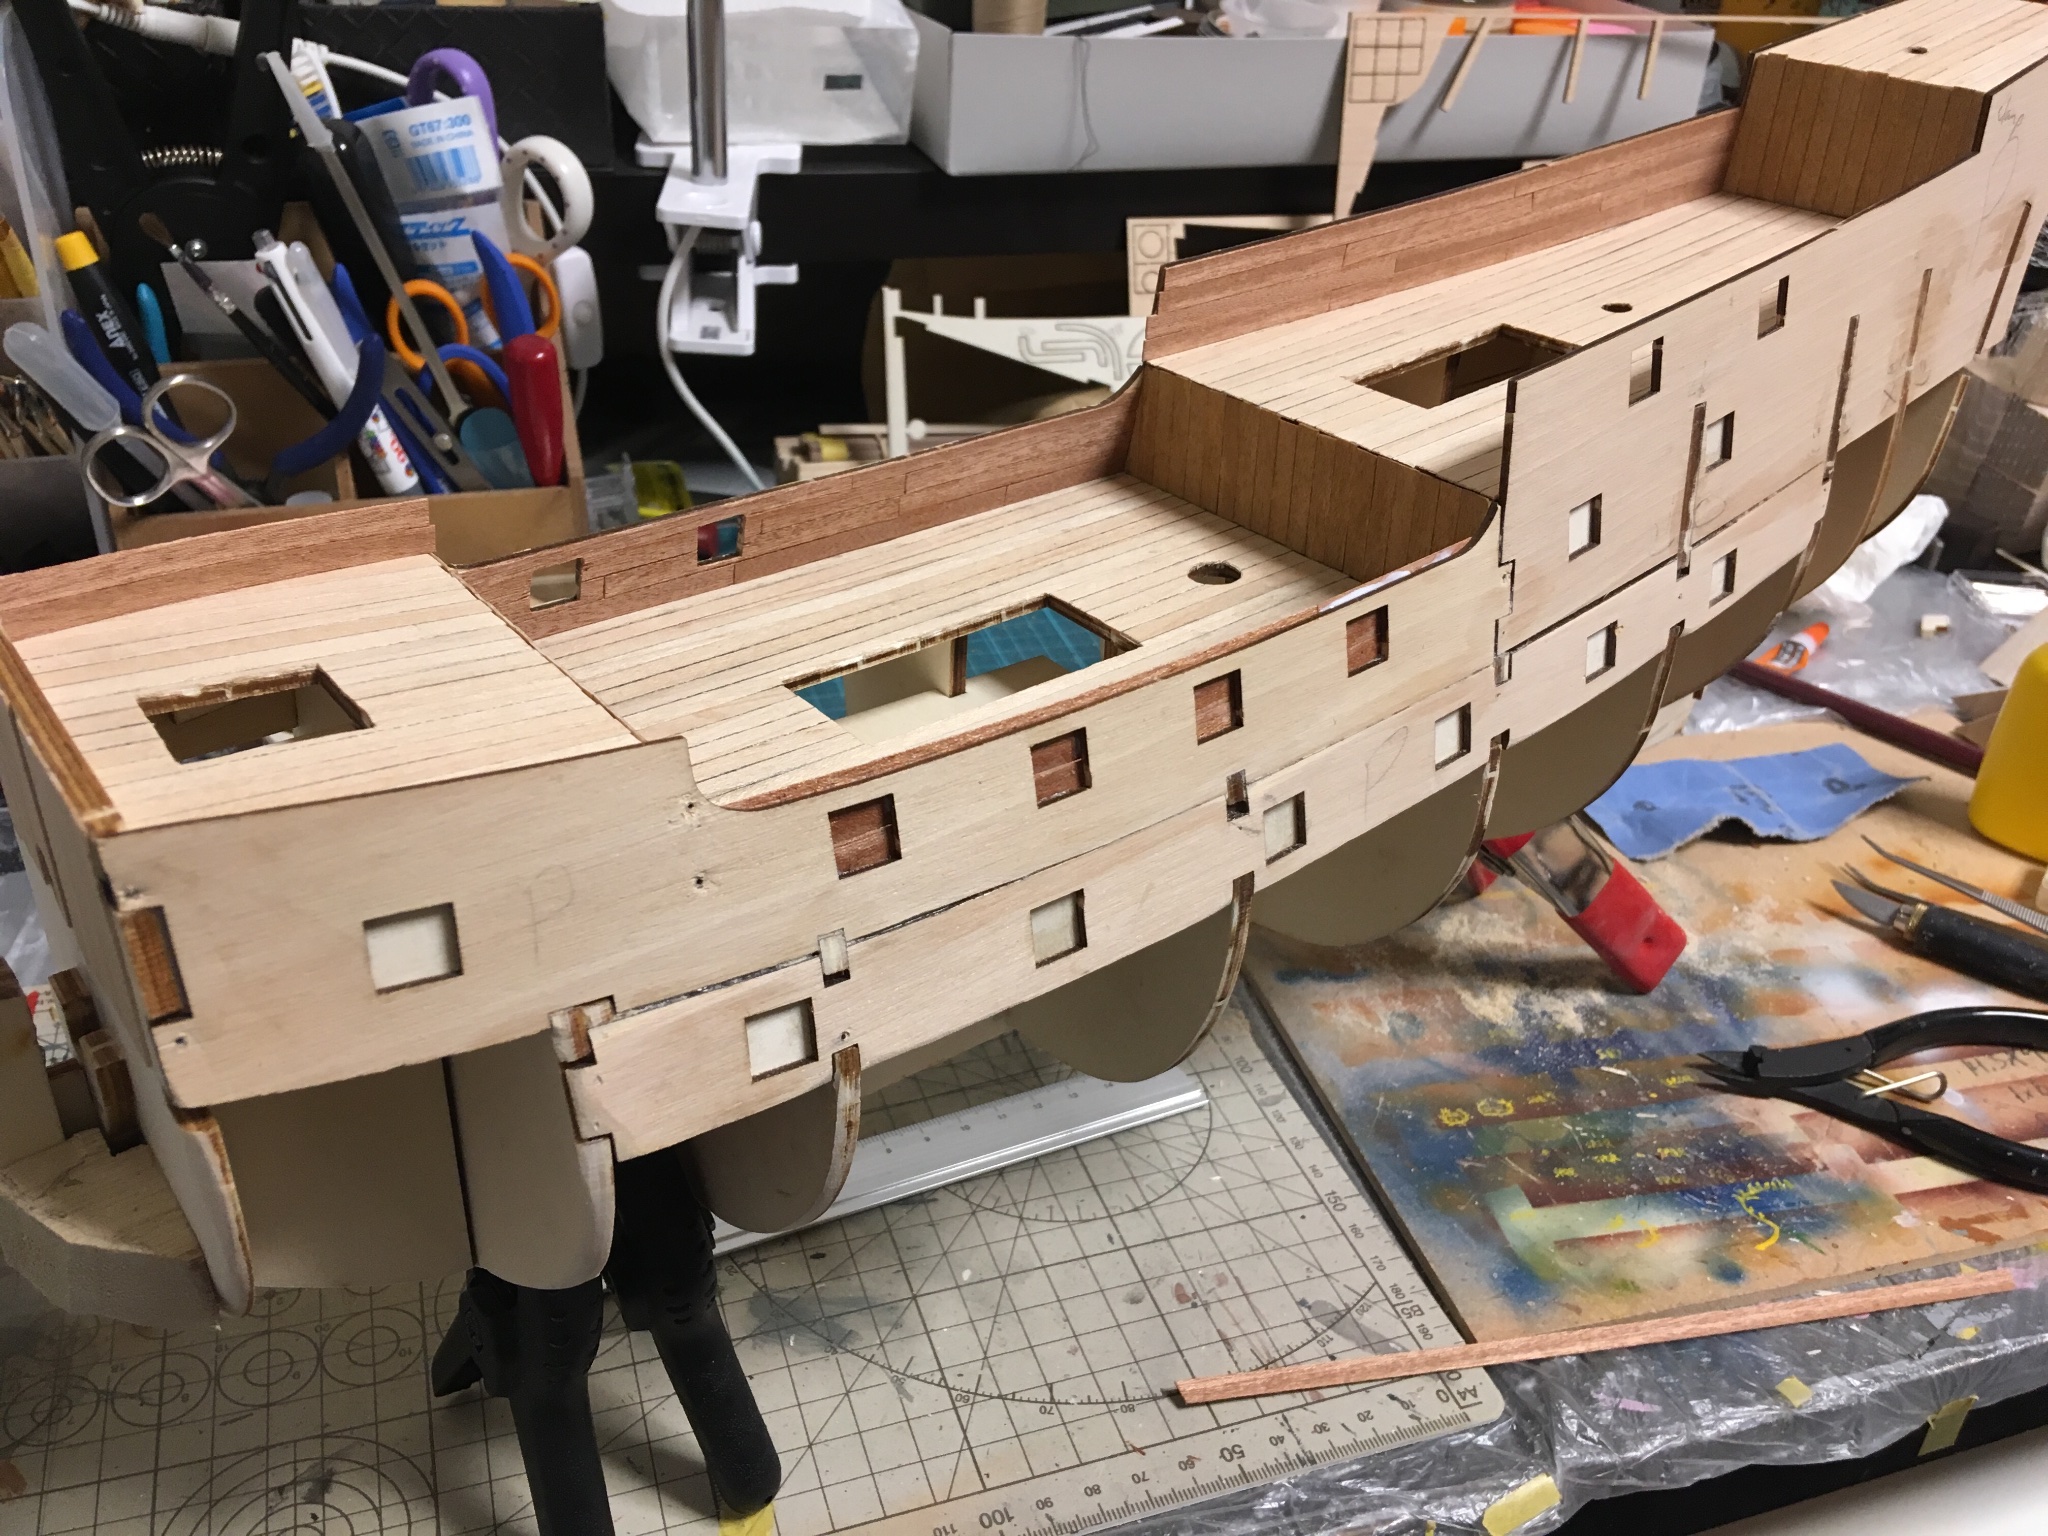
The Revenge: I decided the wale wasn’t satisfactory, and removed it with some difficulty. Sanding to follow, and I think I’ll plank the sapelli next.
Note that I stained the bulkheads to match the gunwales.. some side effects but it will work out better. I also sealed the dollar store putty with clear coat, and mean to stock some real putty soon.
Below is a good overview of what my 2021 hobby efforts have amounted to thus far.
-Meriadoc