DocBlake
-
Posts
1,811 -
Joined
-
Last visited
Content Type
Profiles
Forums
Gallery
Events
Everything posted by DocBlake
-
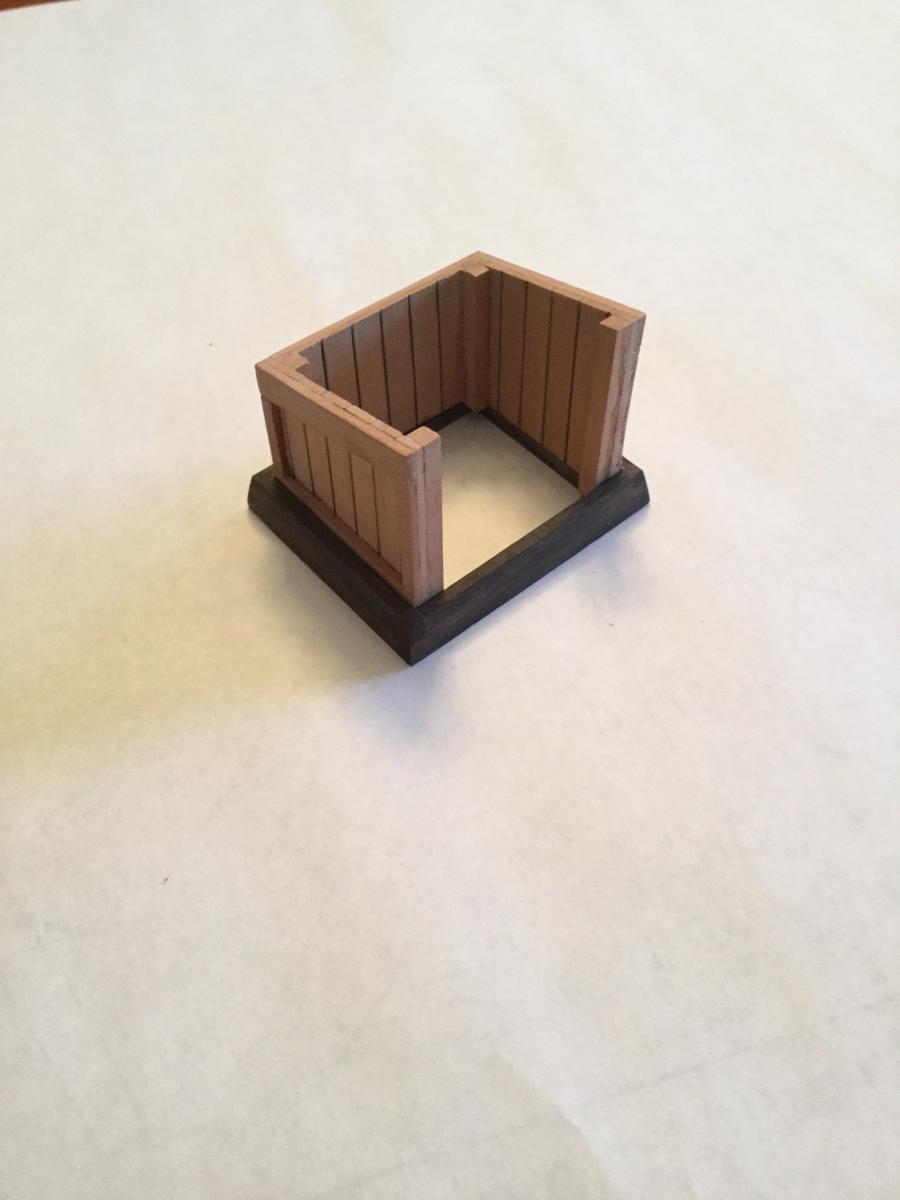
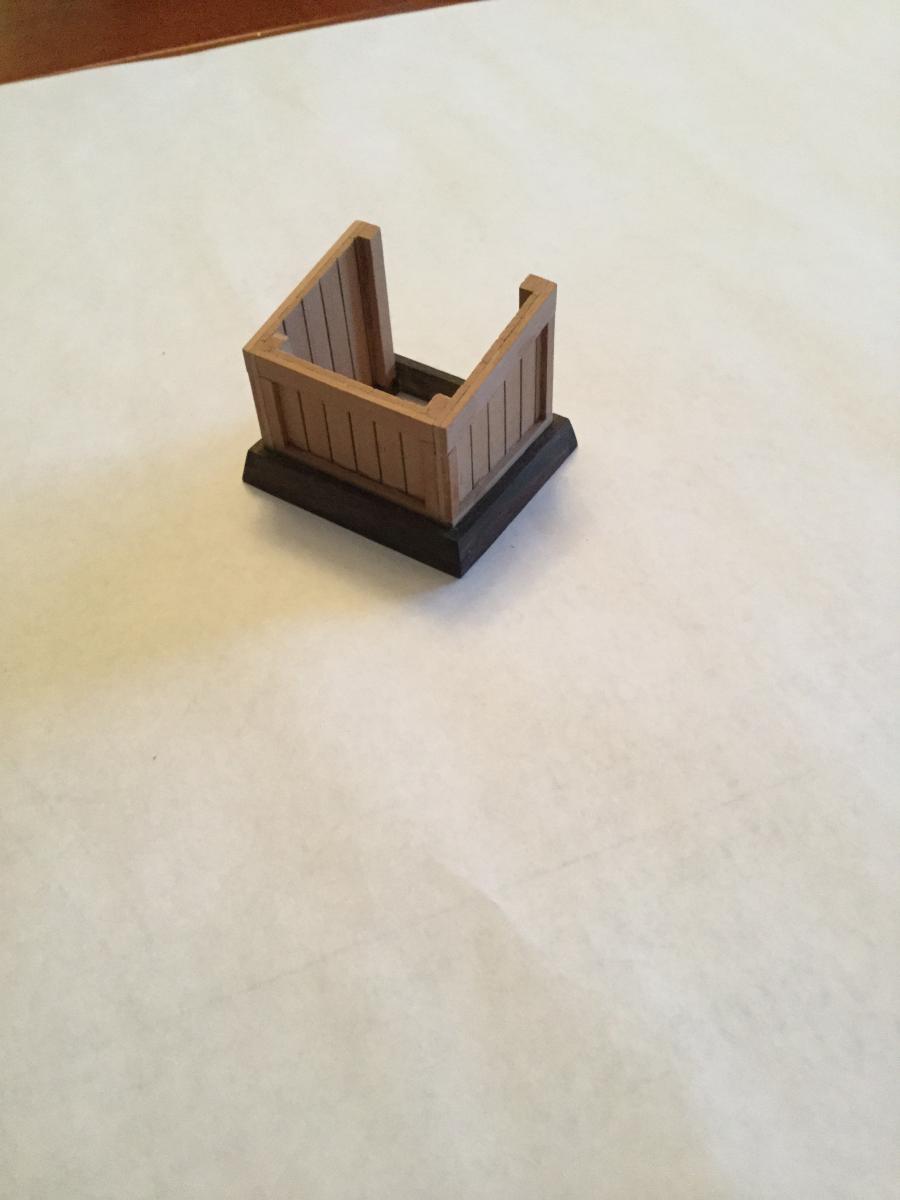
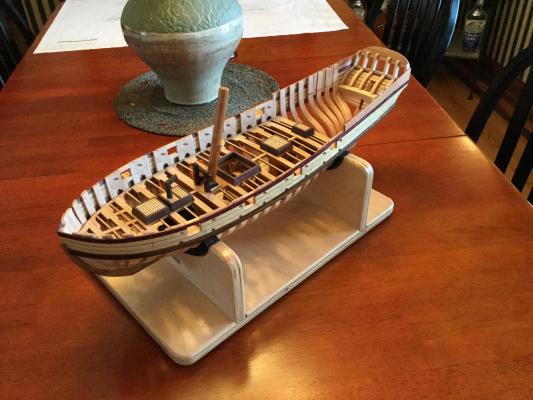
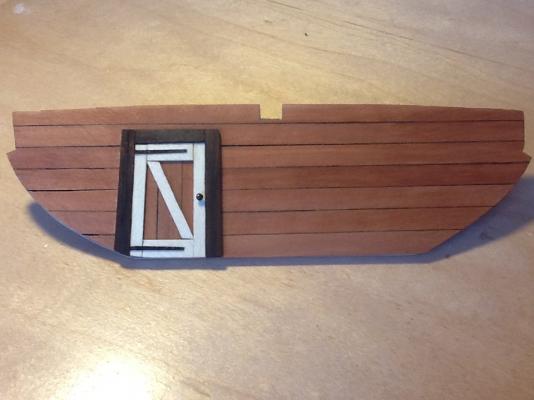
 I just finished the top with the hinged portion folded back. Next: the doors.
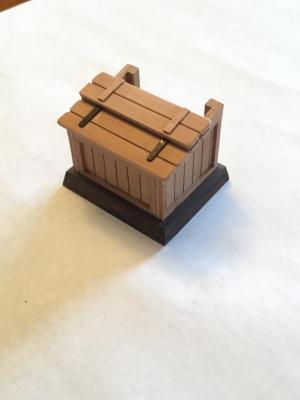

- 306 replies
-
- 10
-

-
- armed virginia sloop
- Patrick Henry
- (and 2 more)
-
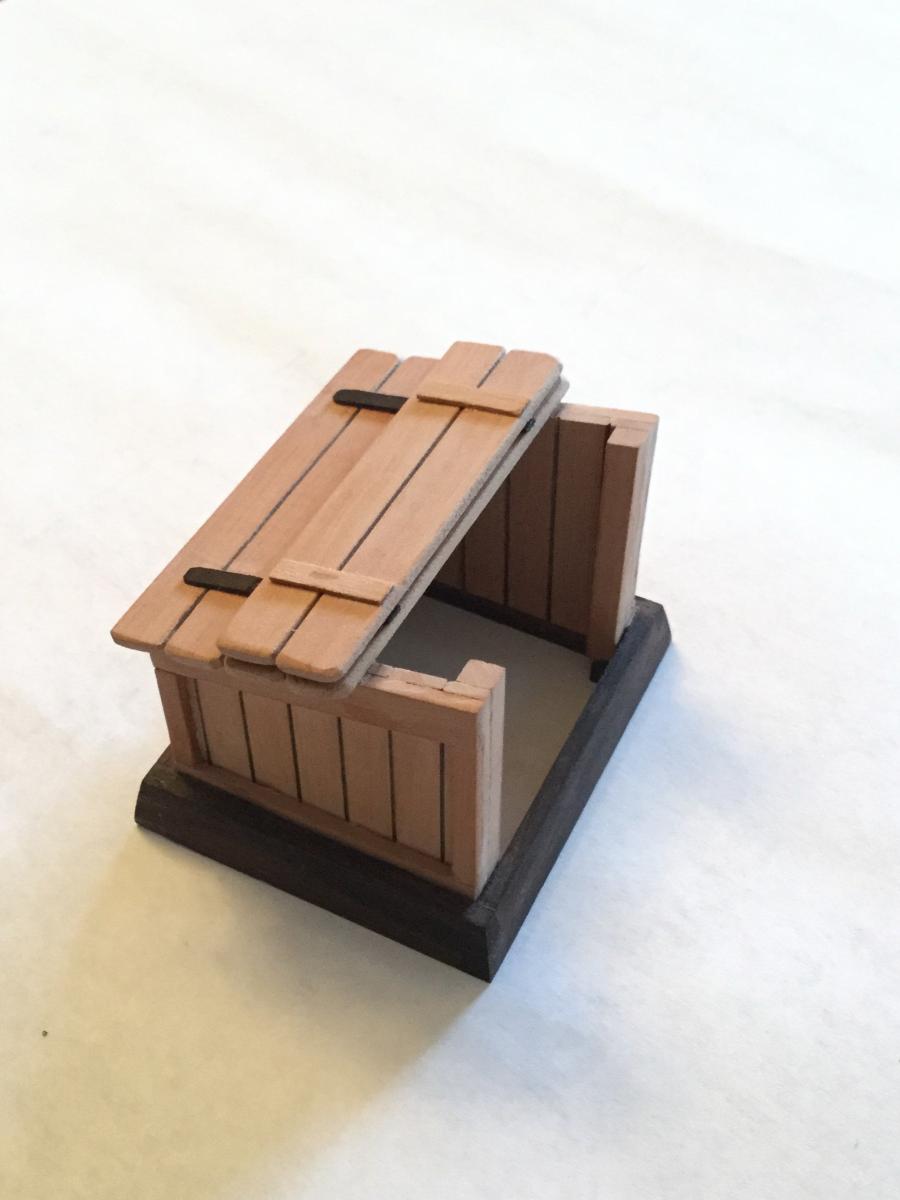
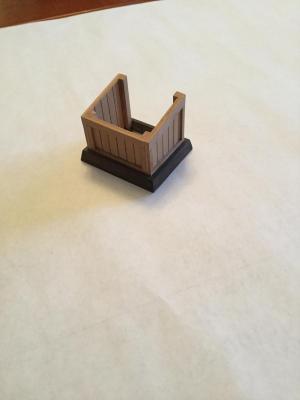
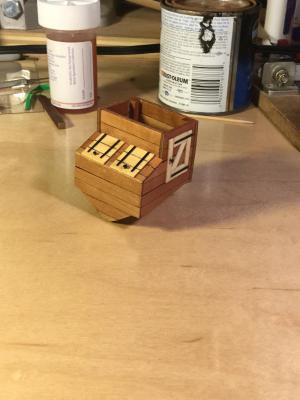
I'm trying to decide what to do about the main hatch. The plans call for a plain coaming and there are stairs leading below. Lots of water in the bilge if it rains! I made up a second coaming for the hatch and started construction of a companionway. The top will be planks with a hinged portion shown folded back as is typical for this style of deck furniture. It is a close fit, though because the hatch is right behind the main mast and I have to ensure clearance so that the hinged top can fold back without hitting the mast or the boom support. I plan to have the front doors mostly open so the ladder and cargo in the hold are visible, but I haven't figured out exactly how I'll handle that task.
- 306 replies
-
- 8
-
-
- armed virginia sloop
- Patrick Henry
- (and 2 more)
-
I'm looking at options for a building jig for the cross section. I came across this post: "Scott: Please have a look at this frame assembly jig I posted a while back. This will solve all the problems of assembly the frames and getting the pieces properly aligned. Please give this a try before you go much further. This is what I intended everyone to use. The only change I made from that photo was to add a section of keel in the notch where the frame will fit. I cut that keel piece off an extra long section of off cut from my keel so I know that it will be the exact same cross section as the keel. This ensures the keel mortise in the frames will fit perfectly on the real keel every time. Russ " It comes from a moderator's repost of the log "Scottacus Triton" on page 1 of that reposted log: http://modelshipworld.com/index.php/topic/1454-scottacus-triton-repost-by-mod/ Does the frame assembly jig mentioned, that was posted "a while back" still exist somewhere? Does anyone have access to the jig plans? My guess is that "Russ" could help me out, but I don't know who he is! Any help appreciated. Thanks Dave
-
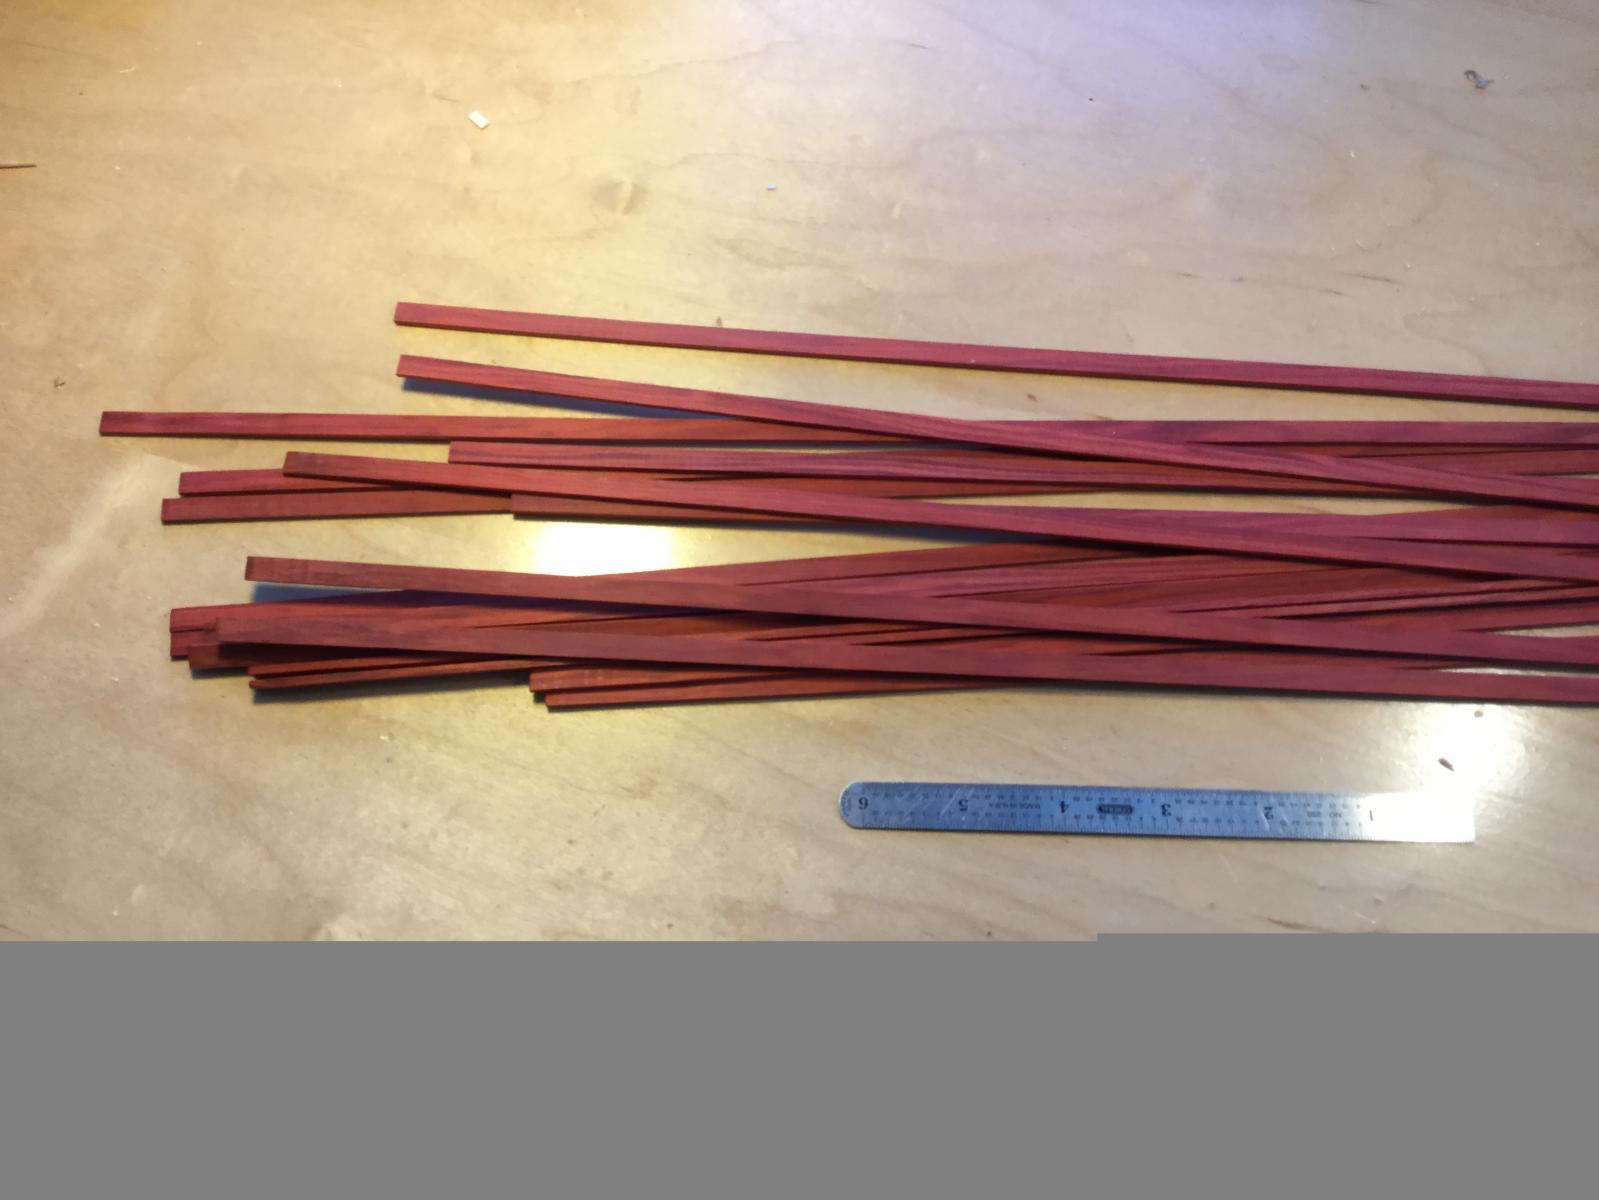
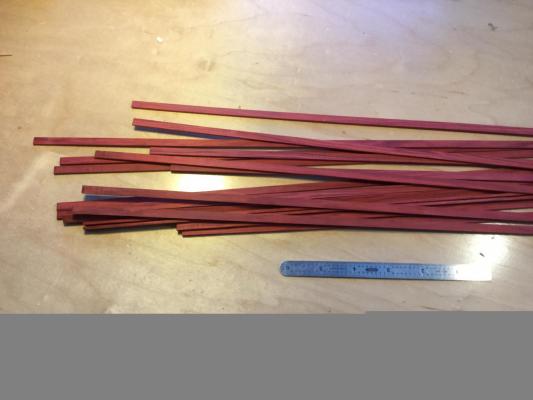
Thanks for the "likes" everyone. Don: The red heart is much nicer to work with than bloodwood. It's much less brittle and far less prone to splintering. It's relatively easy to work with an X-Acto, much like pear but it does have a bit of a grain, and will split along the grain if your not careful.
- 306 replies
-
- 2
-
-
- armed virginia sloop
- Patrick Henry
- (and 2 more)
-
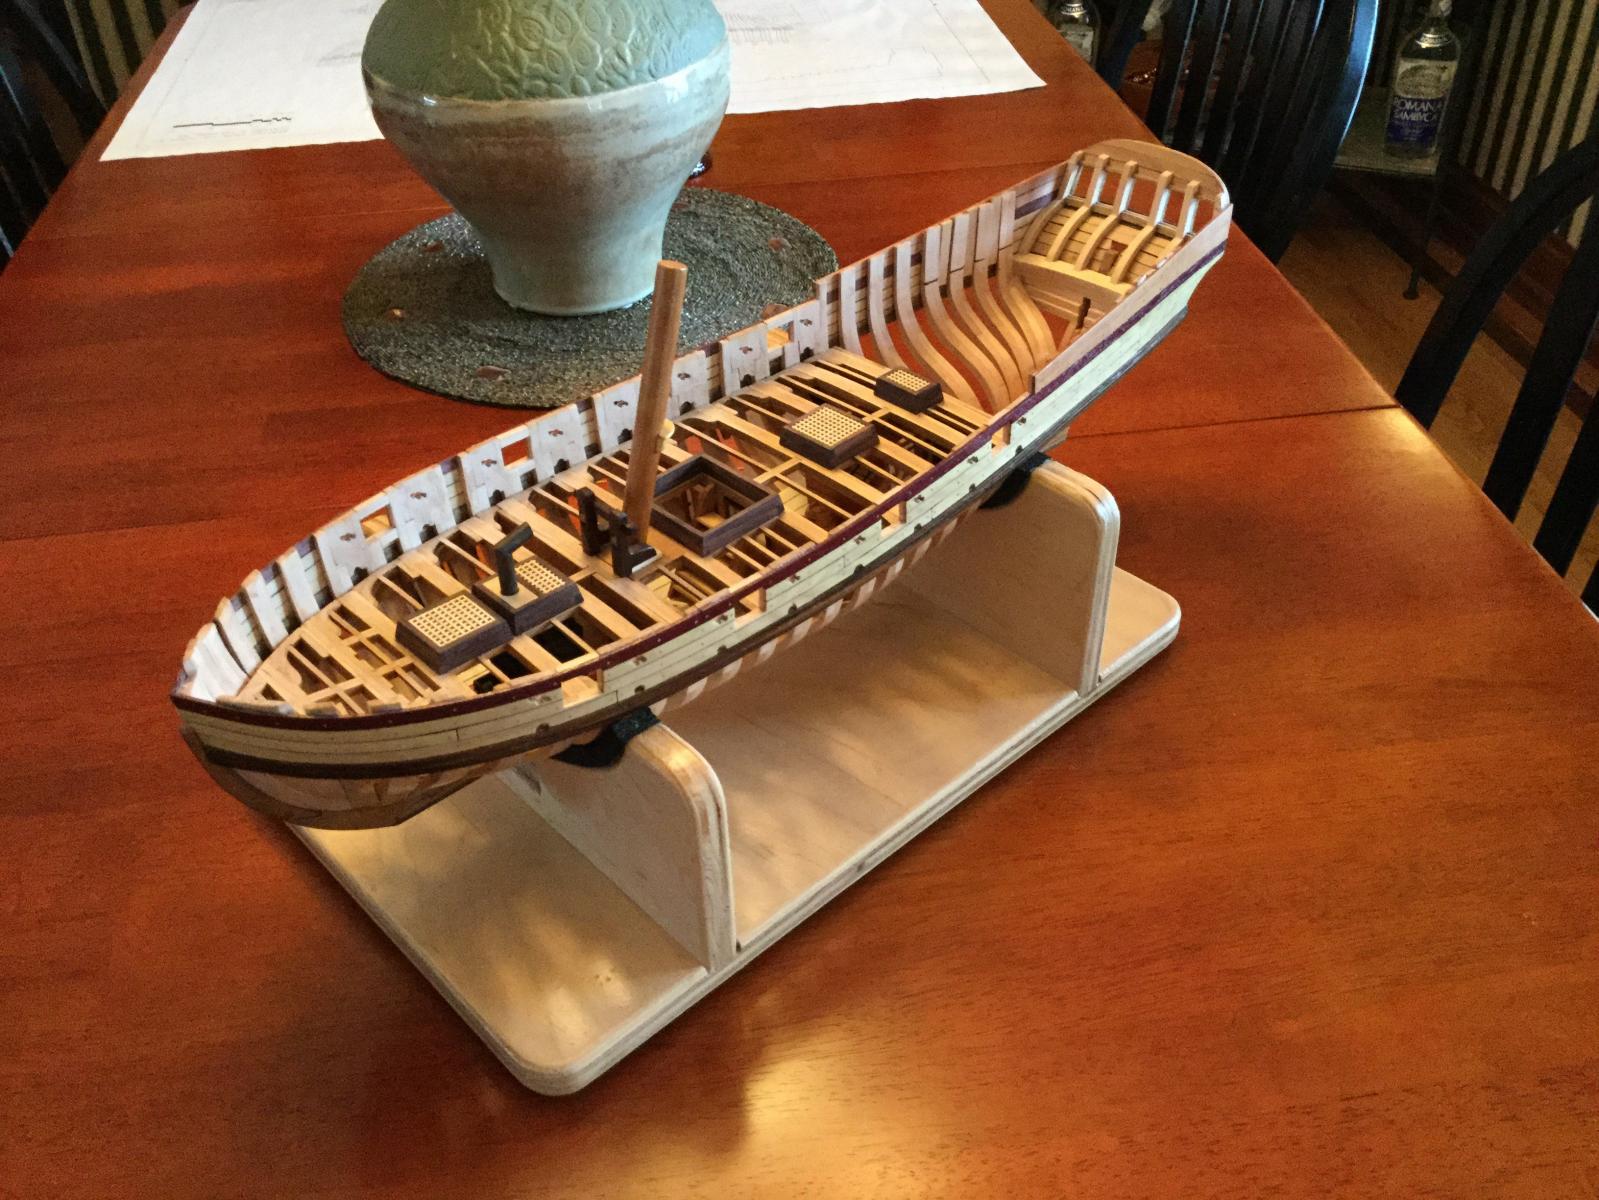
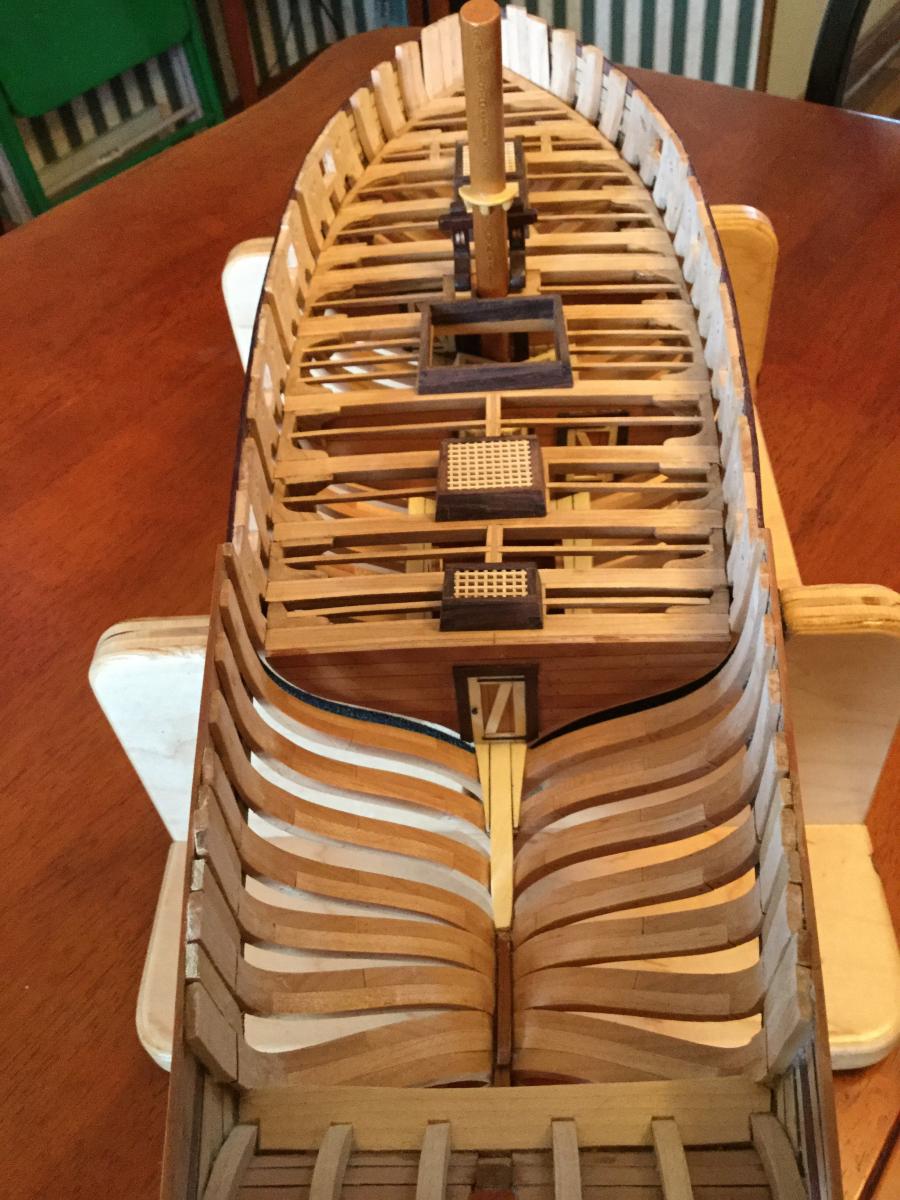
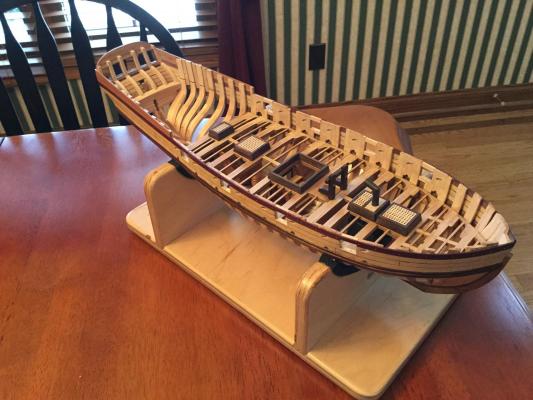
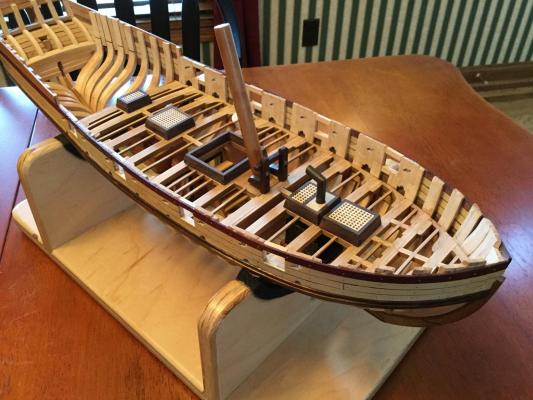
Another milestone! The main deck and quarterdeck are framed in. I'll need to give the deck framing a good sanding and then begin planking the inboard bulwarks. I milled my own redheart for the planking. I think the color contrast will look good.

- 306 replies
-
- 14
-
-
- armed virginia sloop
- Patrick Henry
- (and 2 more)
-
Hi Pete, and thanks! I do plan to add more details...it's the nice thing about the larger scale. Your Triton build is awesome, by the way!
-
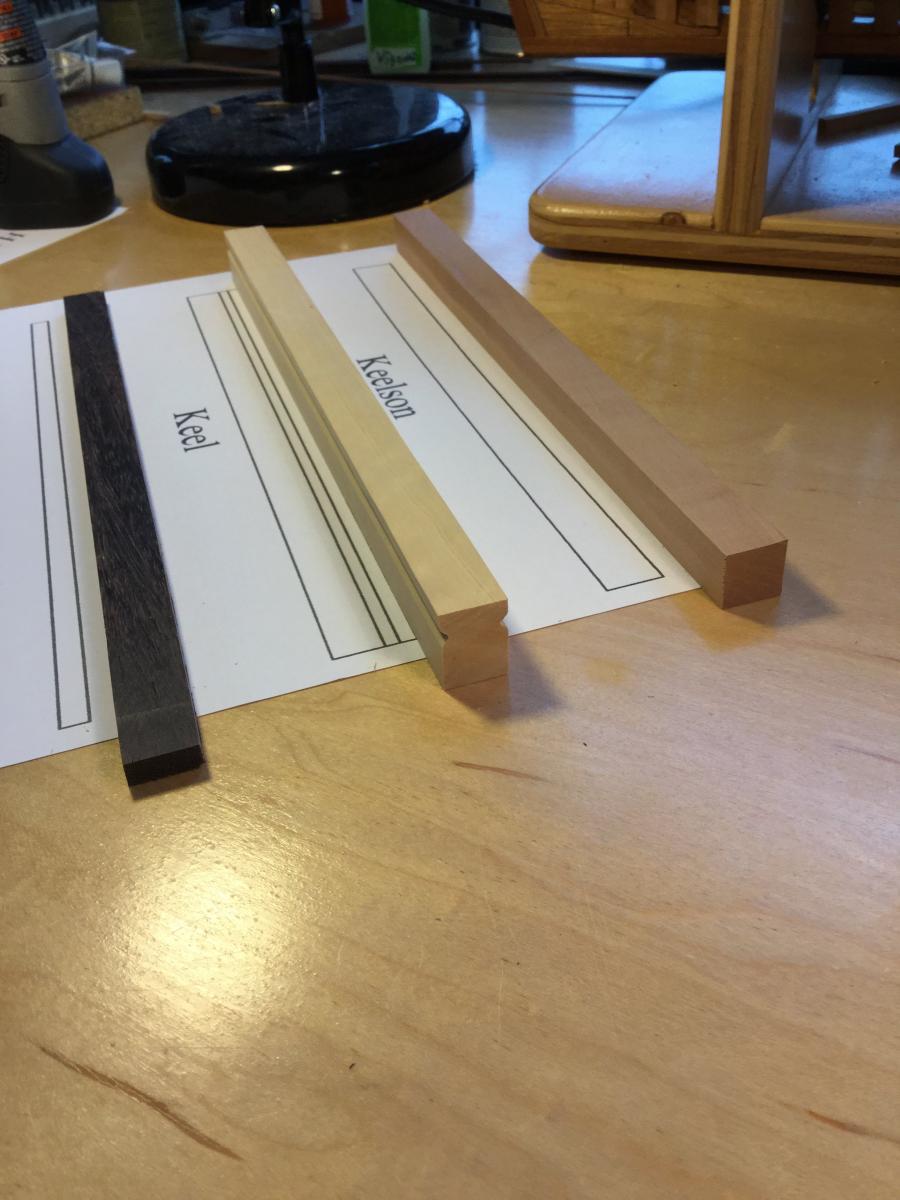
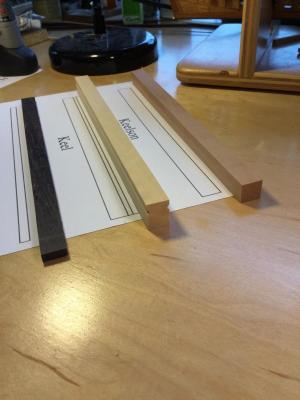
After completing my Battle Station model in 1/24 scale, I was anxious to do another project at that large scale. An entire ship at 1/24 would require an addition to our house, so I settled on a cross section. I have plans for the HMS Granado in 1/24, but decided to launch a Triton cross section instead. As soon as I enlarged the keel plans to 200% I realized a potential problem. The lines on the plans themselves are 1/32" wide at that size! I'm going to have to be very careful in sizing parts for this build. I started with a piece of boxwood , dimensioned it on my table saw and thickness sander and cut a shallow kerf on each side for the rabbet. I enlarged the kerf to a "V" groove with wood carving tools and square edged sanding blocks. I made the false keel out of rosewood, and the keelson out of swiss pear. I've posted some photos of my progress. I'm requesting access to the Triton download area so I can continue this build. Dave


-
Thanks all. Where is the cross section located on the full model? Obviously the boarding steps define the location. Does anyone have a sheer plan photo to help me locate it? The reason I ask is that there were several scarf joints in the keel and I want to see if including one is appropriate in the cross section. if I know where the section is on the sheer plan view, I can locate the scarf joints on the keel .pdf for the full Triton model. Thanks. My preliminary wood selections are boxwood for the keel, swiss pear for the keelson, rosewood for the false keel and cherry for the hull framing. Dave
-
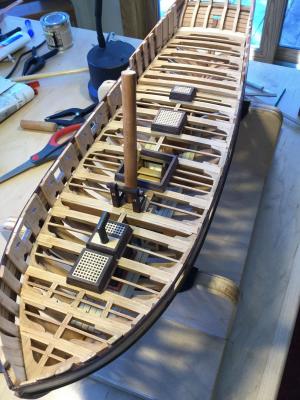
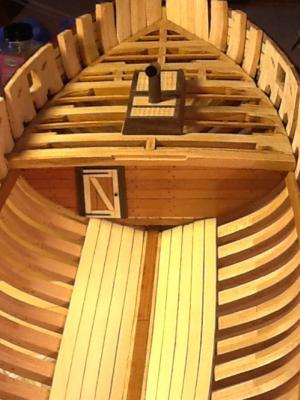
I completed the last bulkhead below deck and finished framing the main deck...a milestone! Next is framing the quarterdeck. The deck furniture is just set in place for the photos. I'm also considering a companionway with open doors for the main hatch so the ladder leading below remains visible.

- 306 replies
-
- 14
-
-
- armed virginia sloop
- Patrick Henry
- (and 2 more)
-
Thanks for the quick reply, Chuck! Is any one aware of a timbering list for the cross section in Imperial units (inches and feet) rather than metric? Dave
-
After a built my Battle Station in 1/24 scale I became interested in something a bit bigger and more complicated. I'm currently working on the POF Armed Virginia Sloop, but am nearing the end of that build. I'd like to consider doing the Triton in 1/24 scale. I'll need to enlarge the plans, though. How many pages constitute the plans in 1/48 scale, and are there any copyright considerations if I were to have the plans commercially enlarged? Enlarging 100 pages of plans at Fed Ex Office could cost a fortune! Dave
-
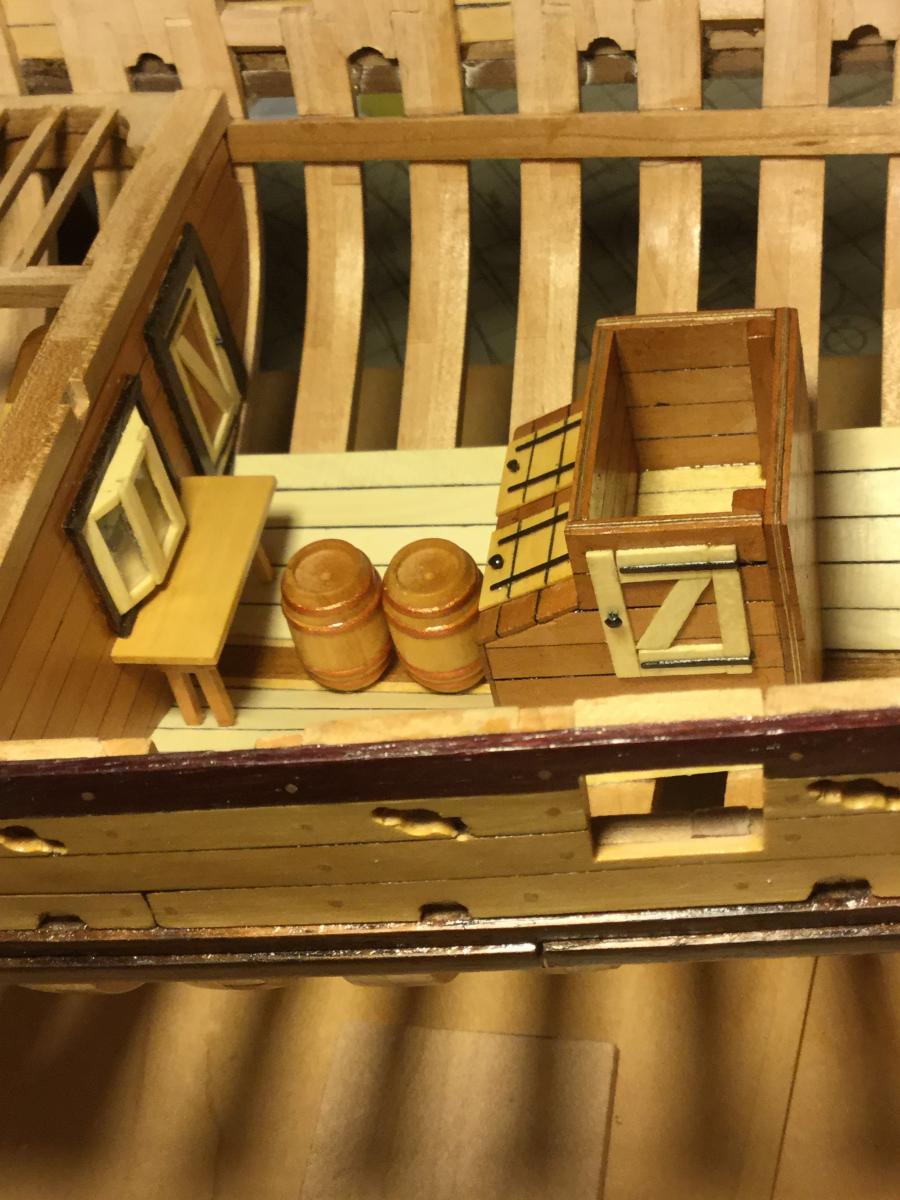
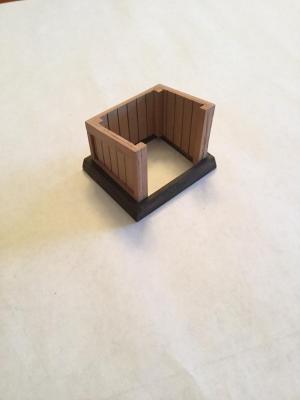
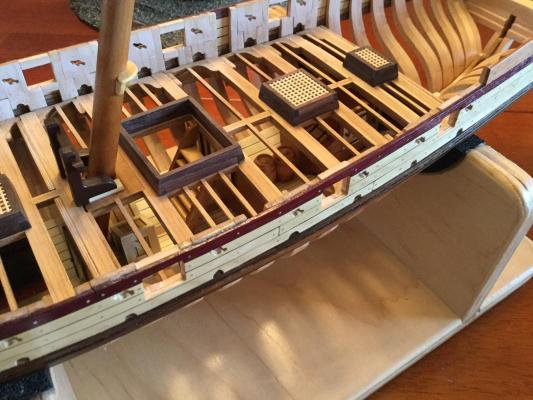
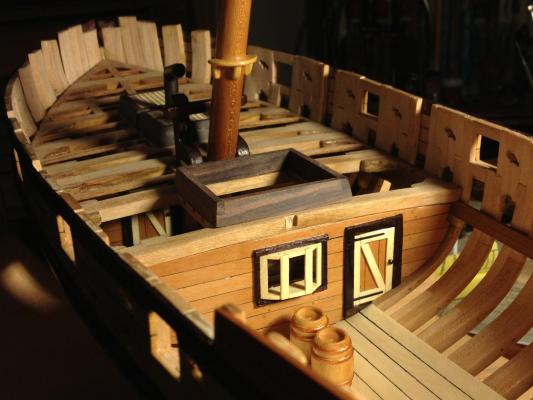
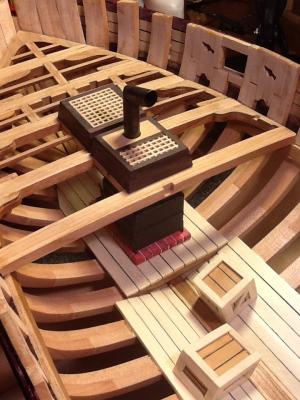
The shot locker/well took longer than I thought. Here is the completed structure and the final appearance of the magazine. You can see the work table and the powder kegs. I was going to leave one of the lids on the shot locker open to show the shot inside but took the easy way out! The well/shot locker design is from the Swan class of British sloops based on David Antscherl's drawings in his book.

- 306 replies
-
- 10
-
-
- armed virginia sloop
- Patrick Henry
- (and 2 more)
-
I built a work table for the magazine and glued it place underneath the light sash. Spent the day today researching and designing a pump well and shot locker, In order to accommodate the structure I'll have to eliminate bulkhead #3 and move the elm tree pump placement forward a couple of feet. It's OK, though. The bulkhead is not structural in any way and the pumps can be located anywhere in that general vicinity.\. Will post pictures when the well/shot locker is complete.
- 306 replies
-
- 4
-
-
- armed virginia sloop
- Patrick Henry
- (and 2 more)
-
Brig Eagle by robnbill - 1:48
DocBlake replied to robnbill's topic in - Build logs for subjects built 1801 - 1850
Looking forward to an update, Bill! Happy New Year! -
Nice progress. Your paint job turned out great. The tip about the pewter foil will be very useful. Thanks!
- 164 replies
-
- 3
-
-
- model shipways
- armed virginia sloop
- (and 2 more)
-
I've completed bulkhead #2 which separates the hold from the magazine. Before gluing it in place I'll add some clear plastic to simulate the glass in the light sash. There are two gunpowder kegs that will be glued in the magazine.
- 306 replies
-
- 11
-
-
- armed virginia sloop
- Patrick Henry
- (and 2 more)
-
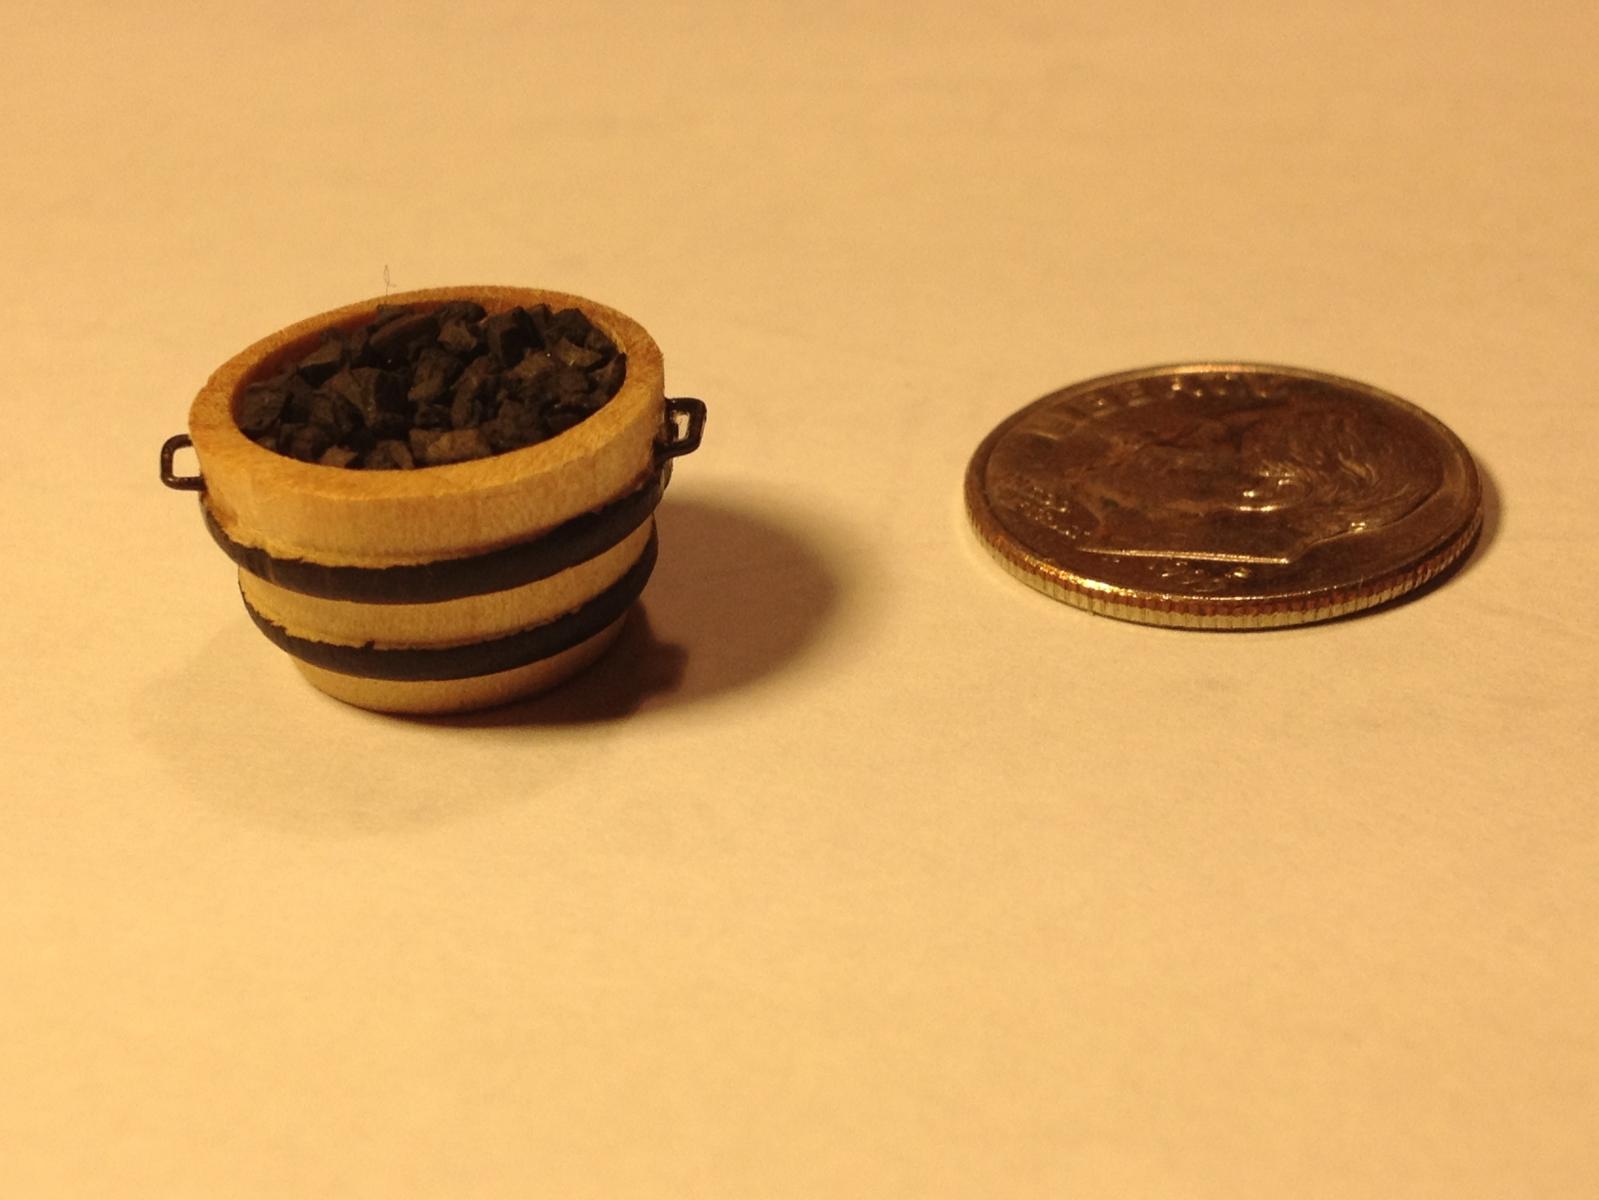
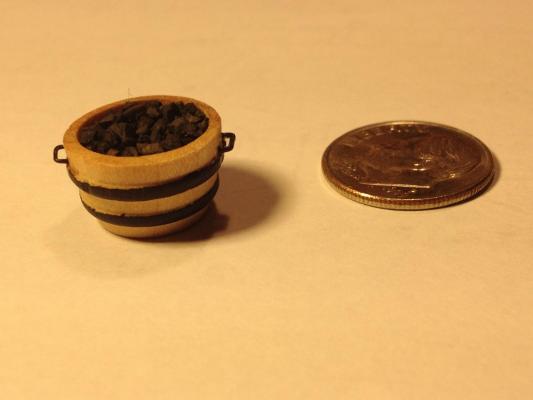
Having a little fun last night with details. I decided that the stove needed a source of fuel, so I built a little coal scuttle. I sawed one of my powder kegs in half, found the center point of the cut surface, and holding the barrel in the jaws of a pair of pliers to steady it, I used a Forstner bit to hollow out a shallow hole in the barrel's top. I spread some WeldBond glue in there and sprinkled in some coarse black model railroad ballast. The handles are 28 gauge annealed black steel wire. A couple of coats of poly and the coal scuttle was done. Elapsed time: about an hour. Merry Christmas and Happy New Year to everyone.
- 306 replies
-
- 12
-
-
- armed virginia sloop
- Patrick Henry
- (and 2 more)
-
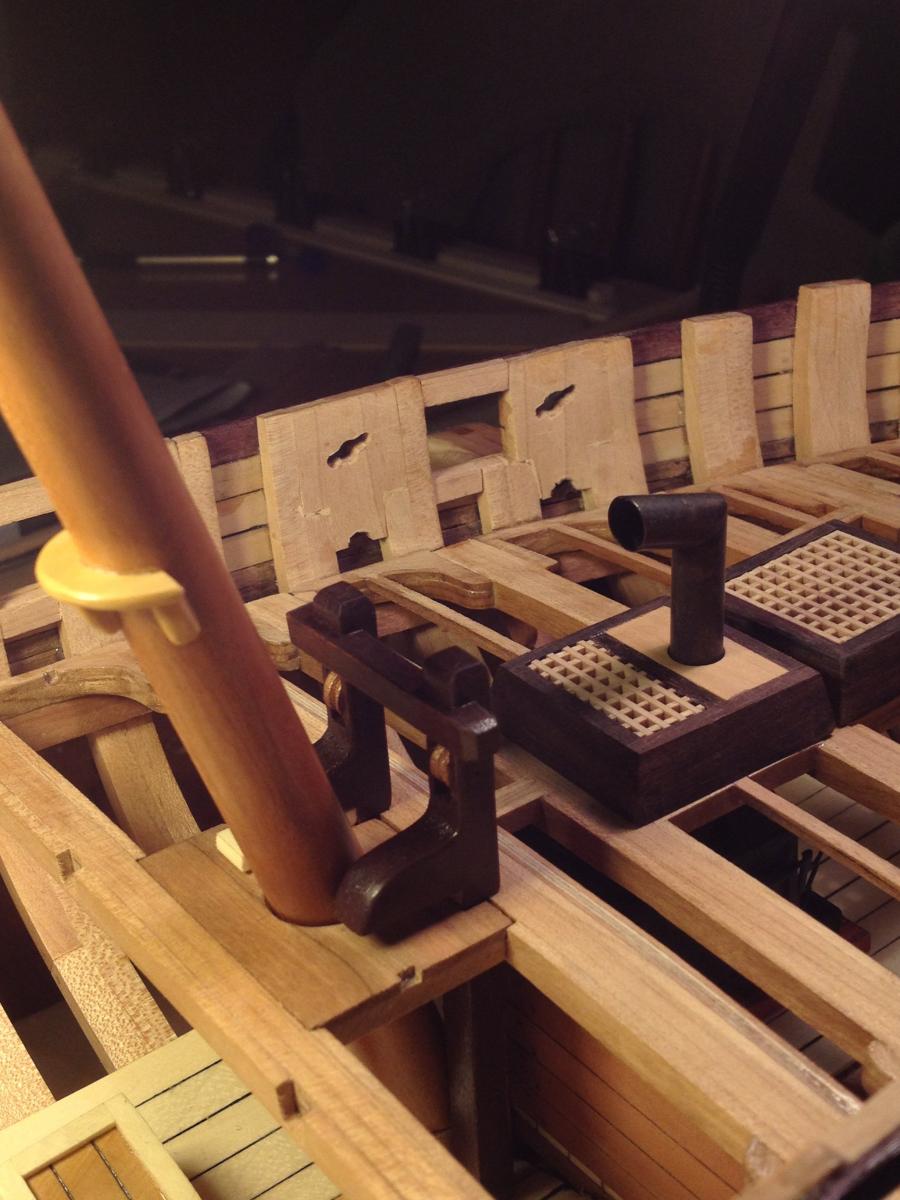
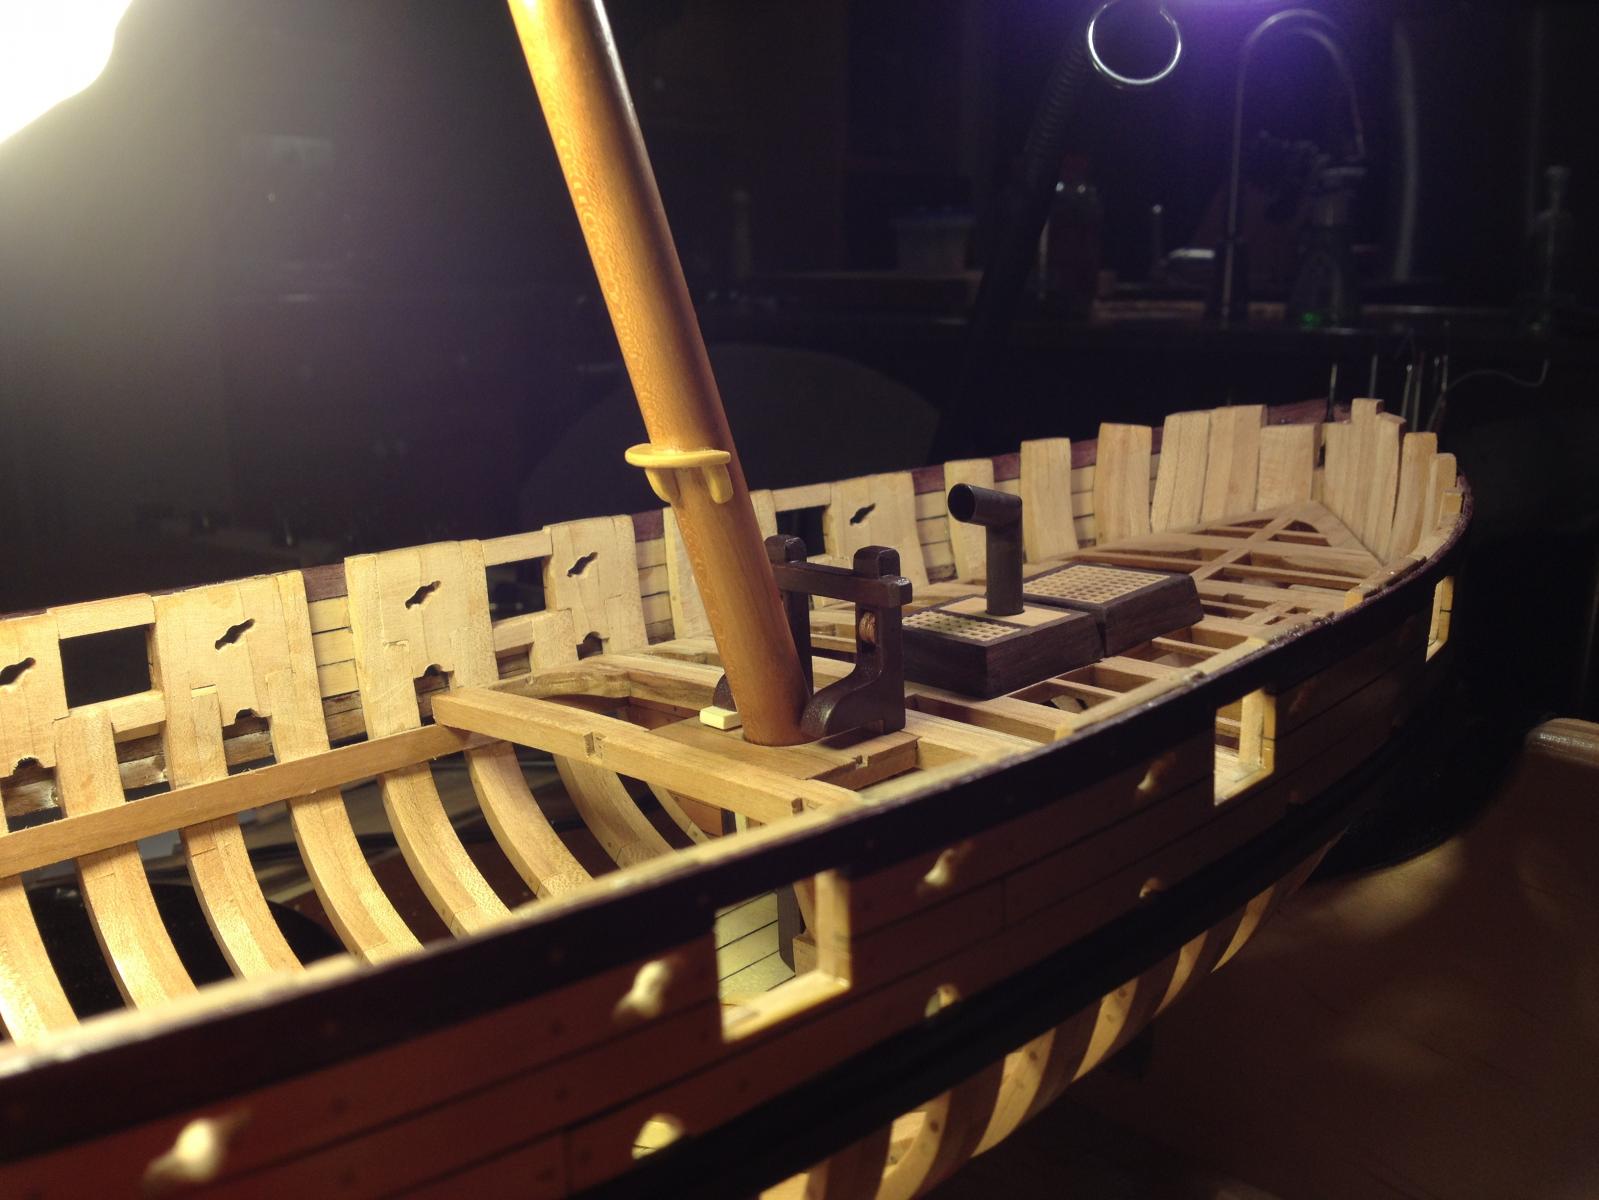
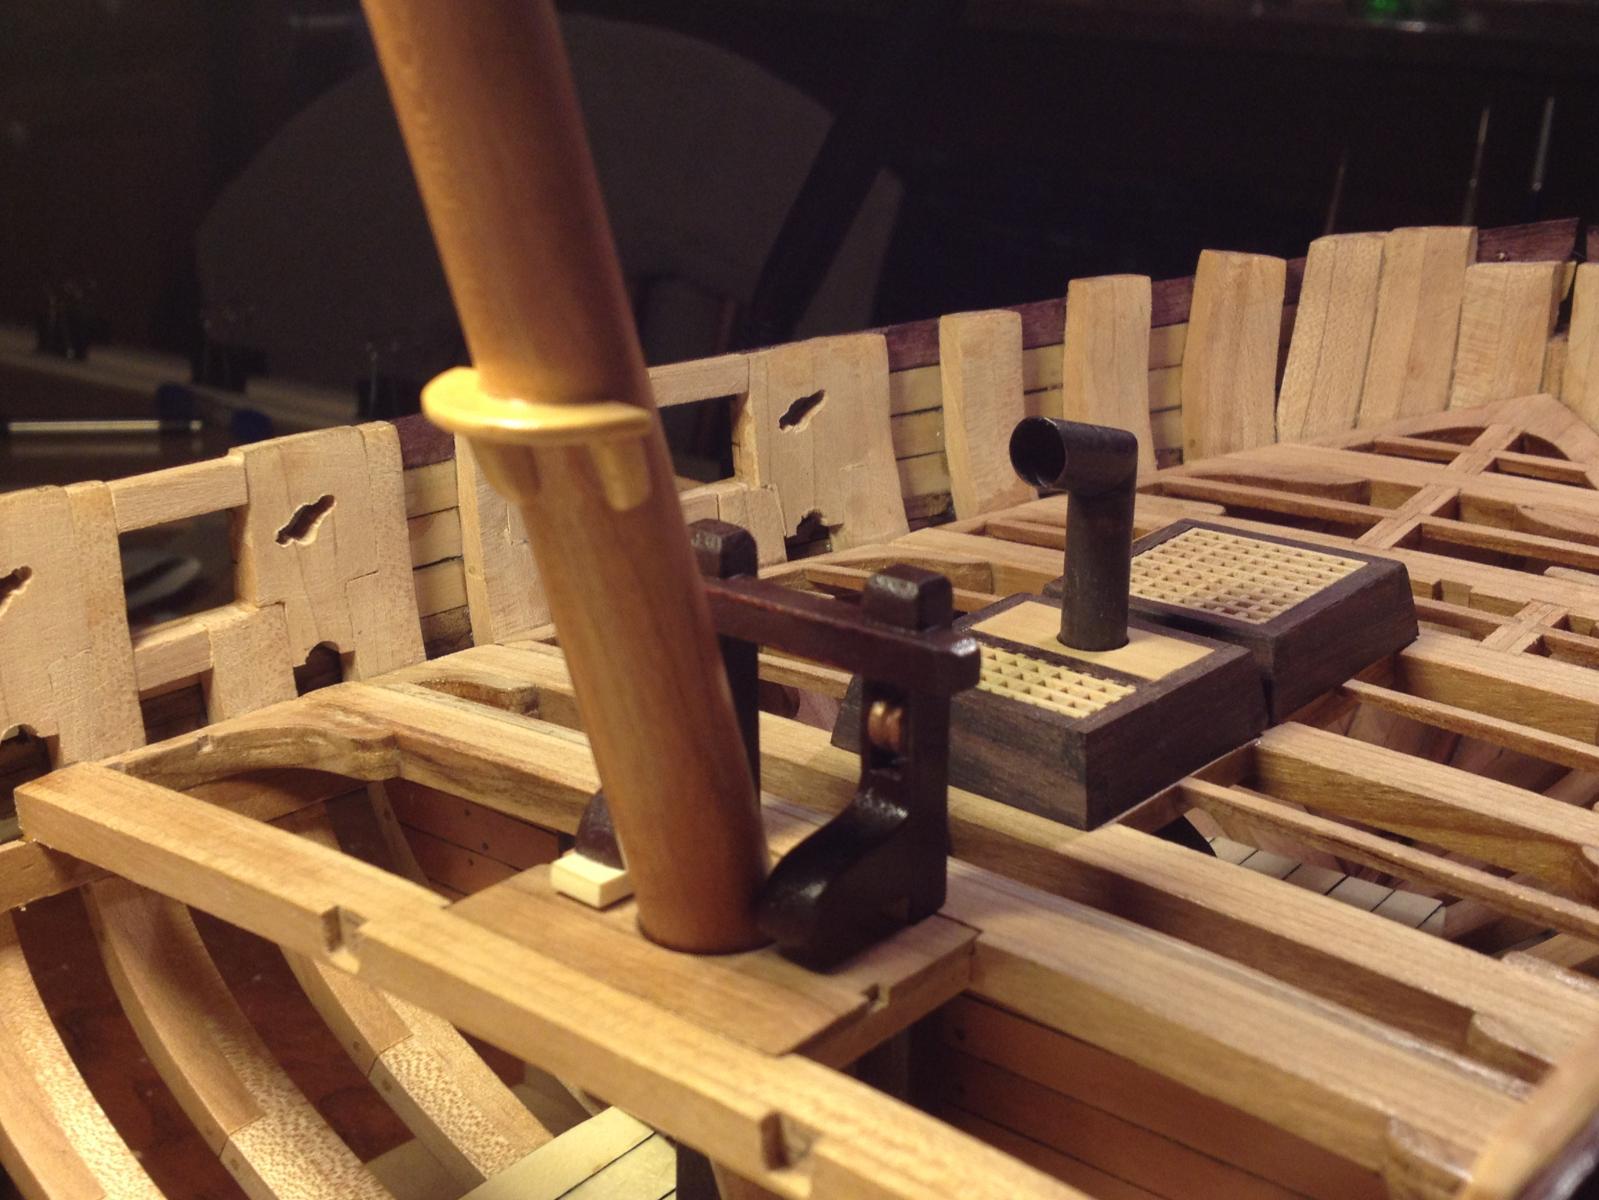
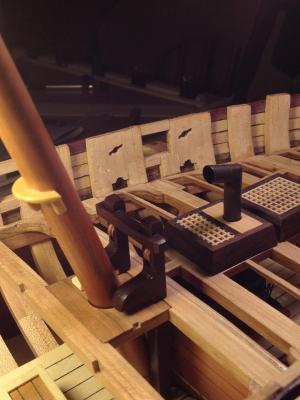
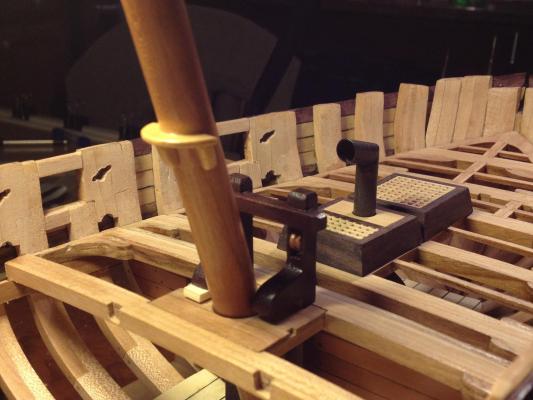
I spent a lot of time on the riding bitt. My first question was whether to leave it cherry, stock with the kit, or make a new one out of rosewood to match the hatch coamings. Believe it or not, the bitt is made up of 11 individual parts (in order to accommodate the sheaves), with some very thin portions that would be a real challenge to cut with a scroll saw. In the end I opted to use the cherry parts and built the bit and fit it to the model. Then I cheated. General Finishes actually makes a rosewood stain! I bought a can and stained and polyed the bitt. I made the mast stub out of cherry and added a boom support made of boxwood to add a little interest.

- 306 replies
-
- 10
-
-
- armed virginia sloop
- Patrick Henry
- (and 2 more)
-
Bulkhead #1 and beam 6 glued in place.
- 306 replies
-
- 7
-
-
- armed virginia sloop
- Patrick Henry
- (and 2 more)
-
Thanks for the "likes" everyone. Just finishing up bulkhead #1 which separates the galley from the hold. The wood is pear, holly and rosewood. The hinges are Syren's flat end gun port hinges dyed black.
- 306 replies
-
- 8
-
-
- armed virginia sloop
- Patrick Henry
- (and 2 more)
-
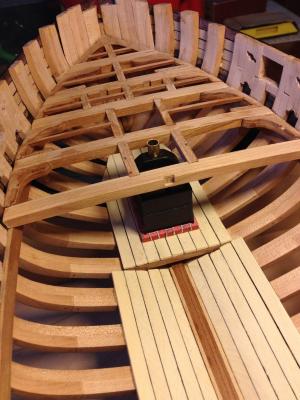
The stove has been permanently glued into place. The hatches are positioned in place, and beam #5 is ready to be glued in. I really like the contrast between the rosewood hatch coamings and the grating and beams. I'm thinking seriously about adding a companionway over the main hatch with the doors open to show the ladder leading below. Has anyone seen one or plans for one? I'll especially need to figure out how to secure the doors in an open position.
- 306 replies
-
- 11
-
-
- armed virginia sloop
- Patrick Henry
- (and 2 more)
-
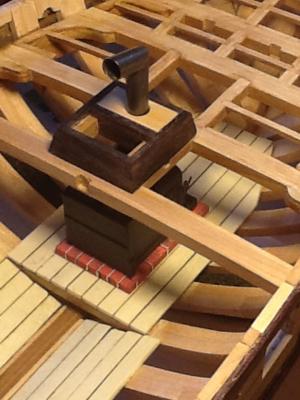
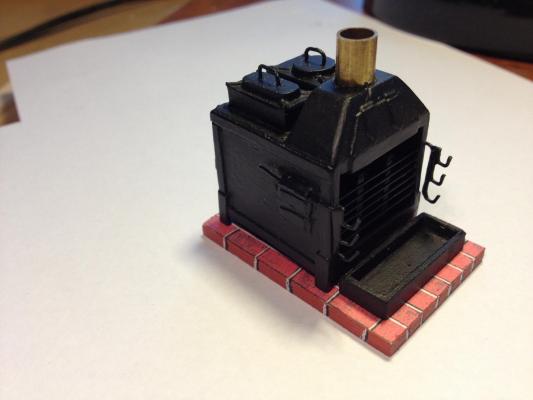
In order to I create a little more contrast on deck, I remade all the hatch coamings in rosewood. I will used boxwood grating in the hatches. I made the Charley Noble (stack) out of brass, blackened it and glued the stove and grease tray to the brick pad. I set the stove in place, along with the stack to test the fit. Perfect. Next is the glue up of the stove and beam 5.
- 306 replies
-
- 11
-
-
- armed virginia sloop
- Patrick Henry
- (and 2 more)
-
Slow progress. I've installed all the beams, carlings, knees and ledges up to frame 5. Frame 5 is just sitting in place. Because of the bulkhead that will soon be installed, I need to install the stove on it's brick pad next. It's a close fit, and I will likely first make the hatch with the hole for the Charley Noble so that I can glue the pad to the deck and the stove to the pad with epoxy once the alignment of the stack is right. While the long cure epoxy is curing, I'll install beam #5 with it's carlings and ledges, glue the hatch in place and make any final adjustments before the epoxy sets up.
- 306 replies
-
- 11
-
-
- armed virginia sloop
- Patrick Henry
- (and 2 more)