DocBlake
-
Posts
1,811 -
Joined
-
Last visited
Content Type
Profiles
Forums
Gallery
Events
Everything posted by DocBlake
-
 Keep up the great work! Carving a solid hull model isn't easy. Yours is coming along nicely.
- 701 replies
-
- 2
-

-
- phantom
- model shipways
- (and 1 more)
-
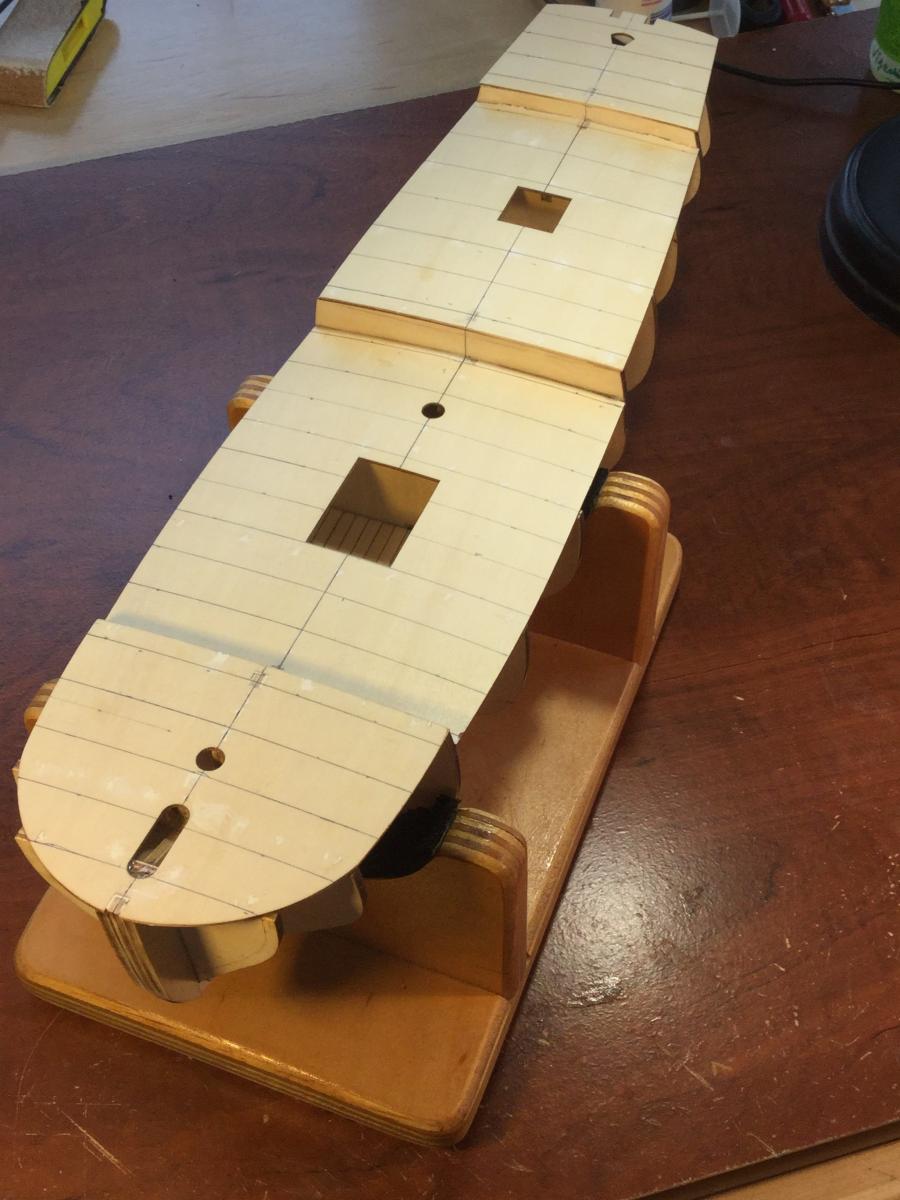
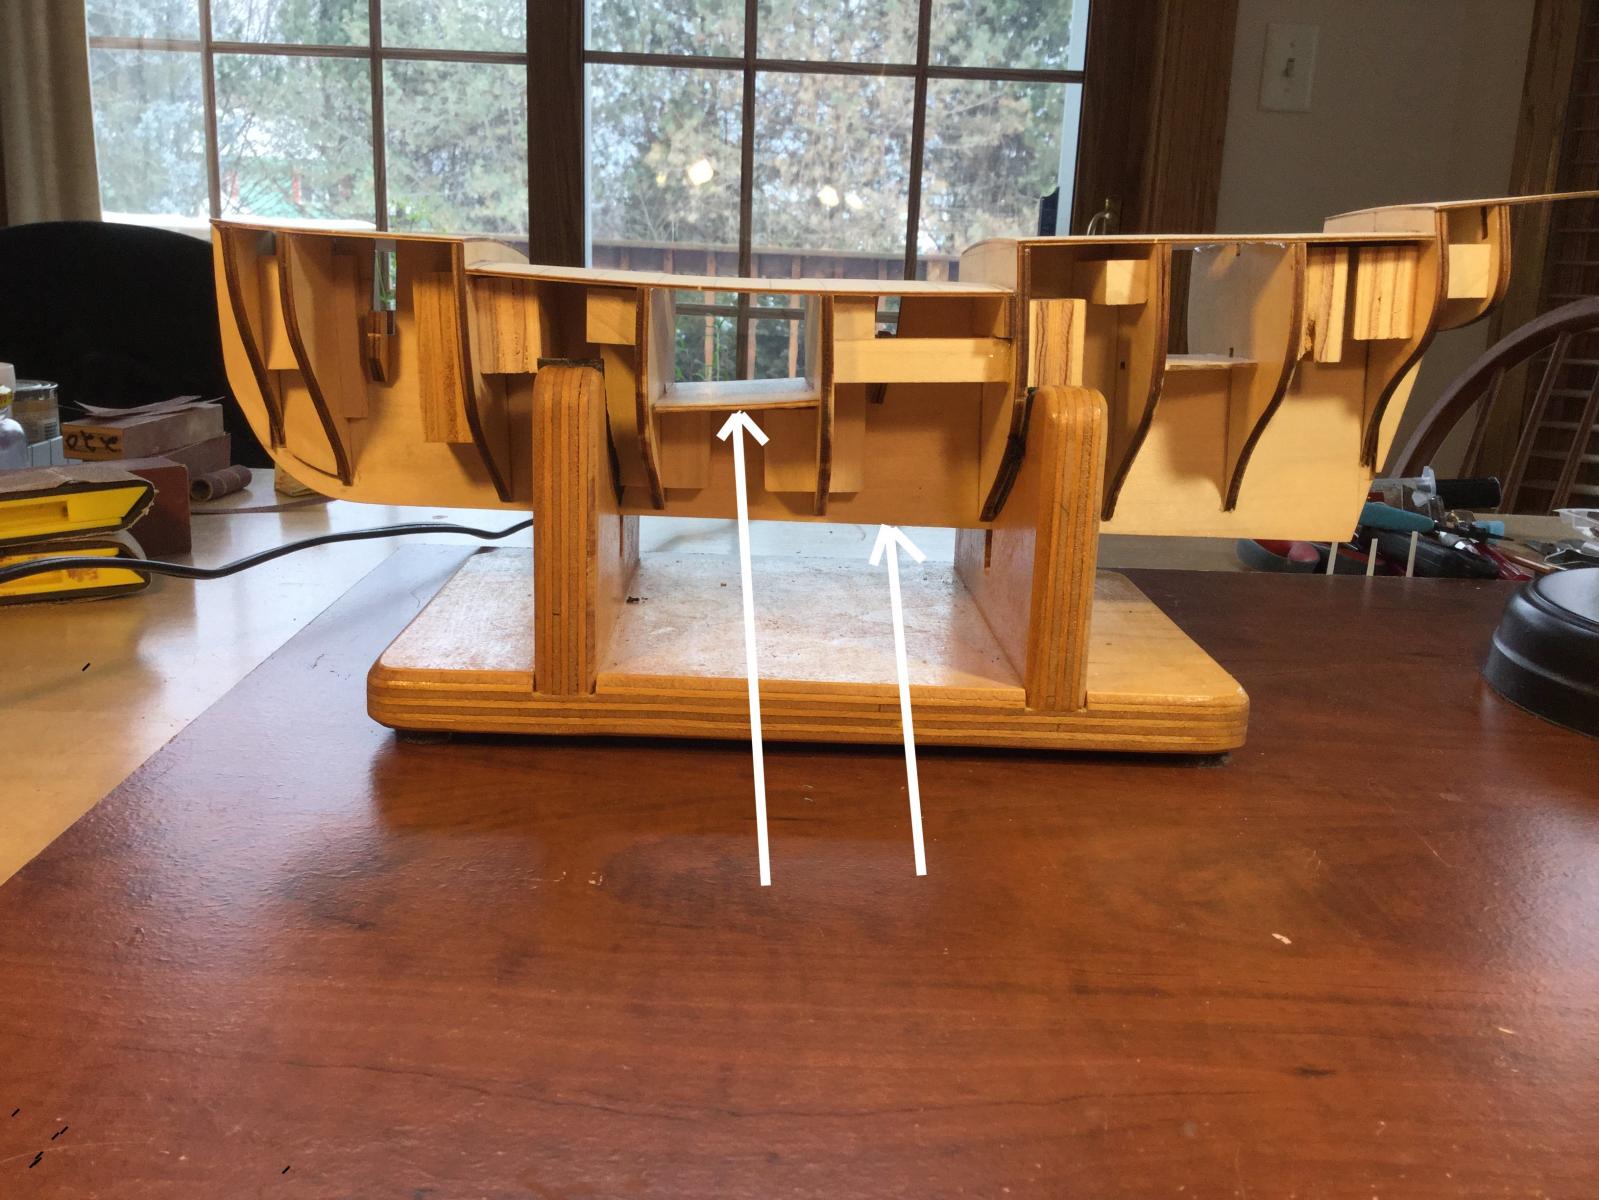
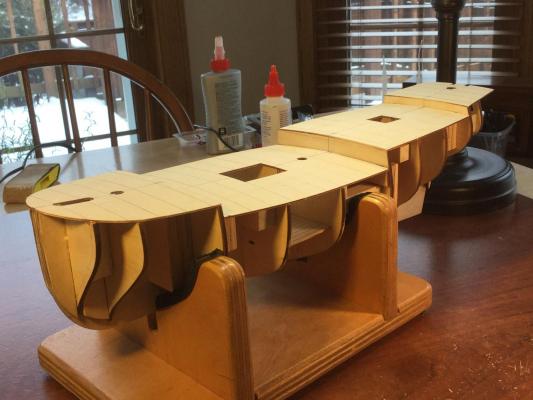
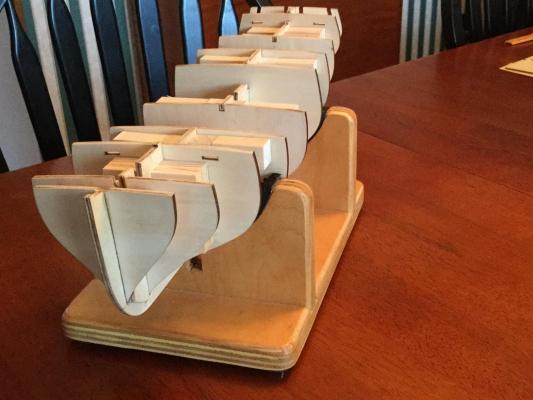
I glued the deck segments to the framework with one hour epoxy and used the famous little yellow nails to hold until dry. These were removed and any imperfections in the sub deck filled with Elmer's wood filler. I drew a centerline on the deck and then laid out where the deck beams would be to guide the treenailing. There is nothing scientific or historically accurate in the way the deck is laid out. I just went with what was pleasing to the eye. Next is planking the deck (that's the common build order for AL kits). I'm still up in the air about whether to plank in boxwood, holly or maple. The planking will be 1/32" thick. The last two photos show that the keel slopes downward moving aft, and is not parallel to the waterline. The lower decks in the holds ARE parallel to the waterline. It makes it appear as if the hold decks are installed at an angle, Note that the bulkheads are perpendiculal to the hold decks, but not the keel!


-
Thanks for all the nice comments and "likes" everyone!
- 306 replies
-
- 1
-
-
- armed virginia sloop
- Patrick Henry
- (and 2 more)
-
Back at it. I finished the treenails on the inboard bulwark planking. There were about 350 of them. I used bamboo toothpicks and I think they turned out OK - visible but not overpowering. Next comes the deck planking, I was able to find some acrylic paint that exactly matches the color of the red heart bulwark planking once it's finished with poly. Once the scuppers are cut on the inboard side, I'll paint the scuppers, sweep ports and inside of the gun ports and then seal them with some poly.
- 306 replies
-
- 9
-
-
- armed virginia sloop
- Patrick Henry
- (and 2 more)
-
I'm glad to see you continue your log here, David. I 've enjoyed watching your progress. You're doing a fabulous job. And by the way, there is nothing wrong with the gallery that I can see. Your solution for the name plate looks great!
- 117 replies
-
- 3
-
-
- constitution
- model shipways
- (and 1 more)
-
Jonathan: Beautiful work, as always! David: When you start your Rattler I may just bring mine out of mothballs and resume work on it!
-
Very interesting model, Don. Nice start. I'll be following with interest. Dave
- 653 replies
-
- 6
-
-
- trabakul
- marisstella
- (and 1 more)
-
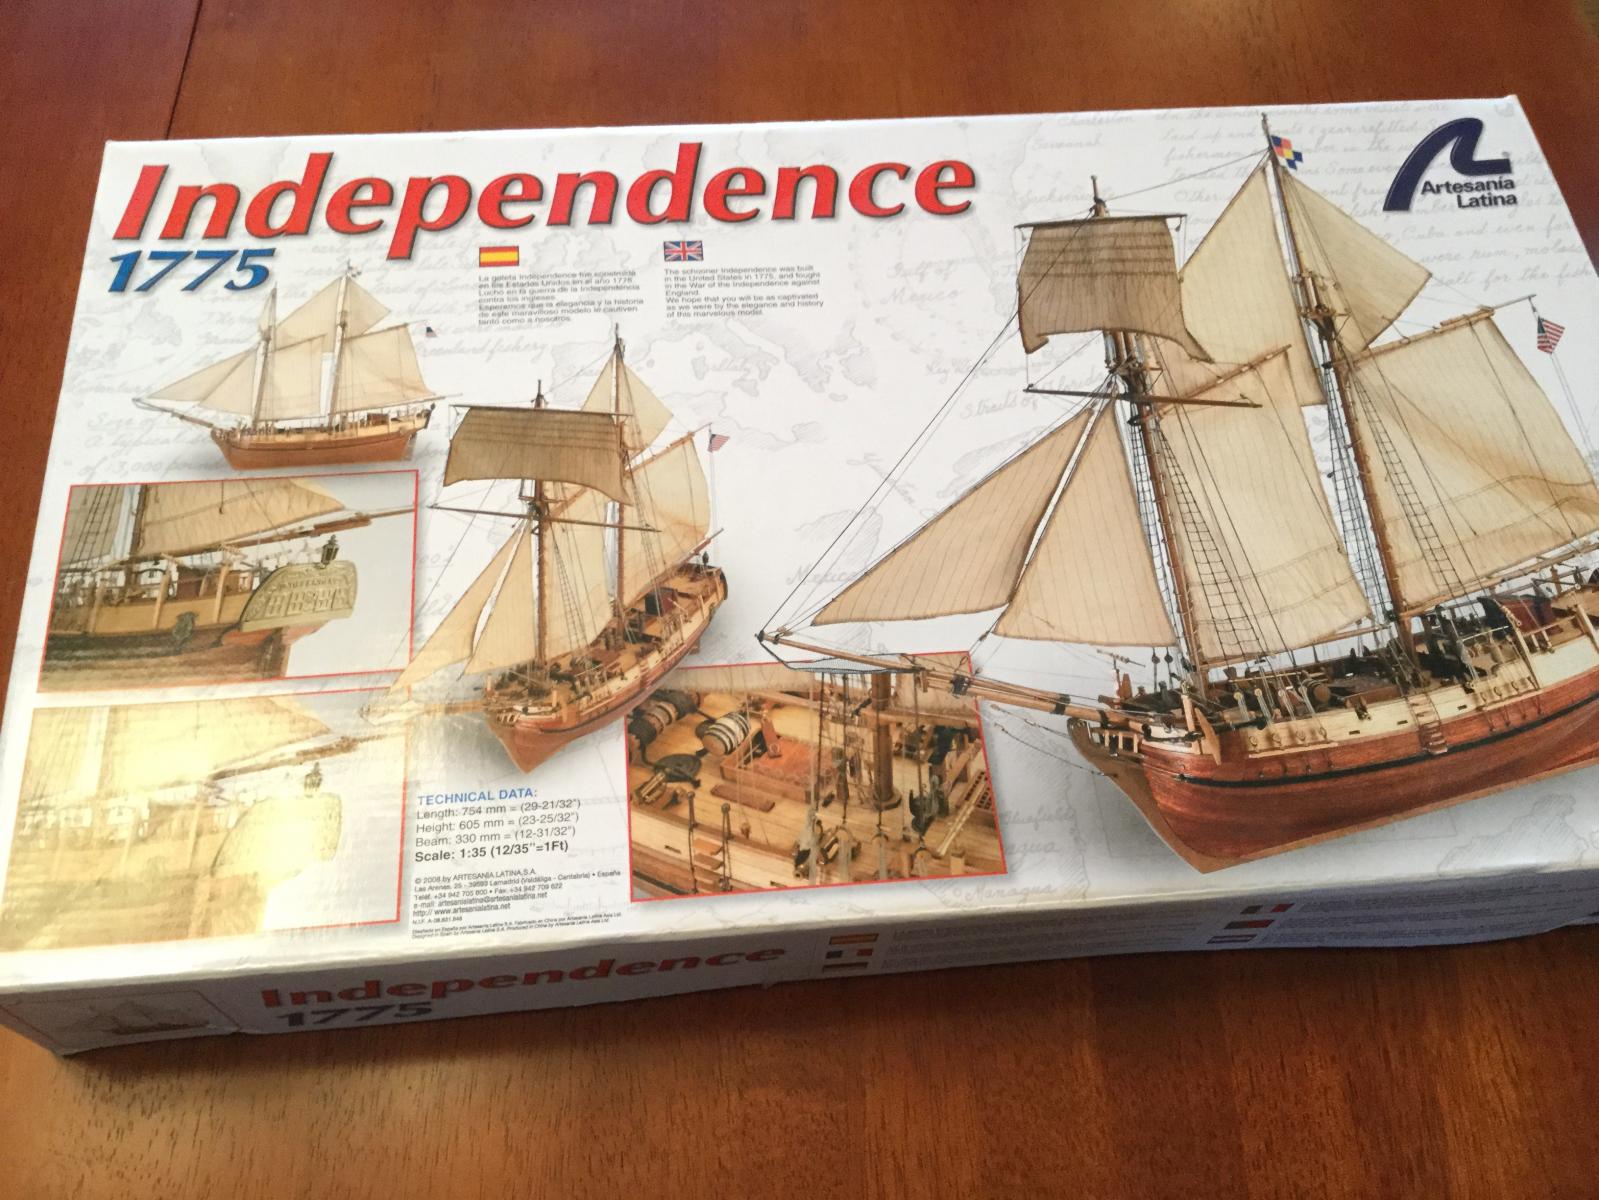
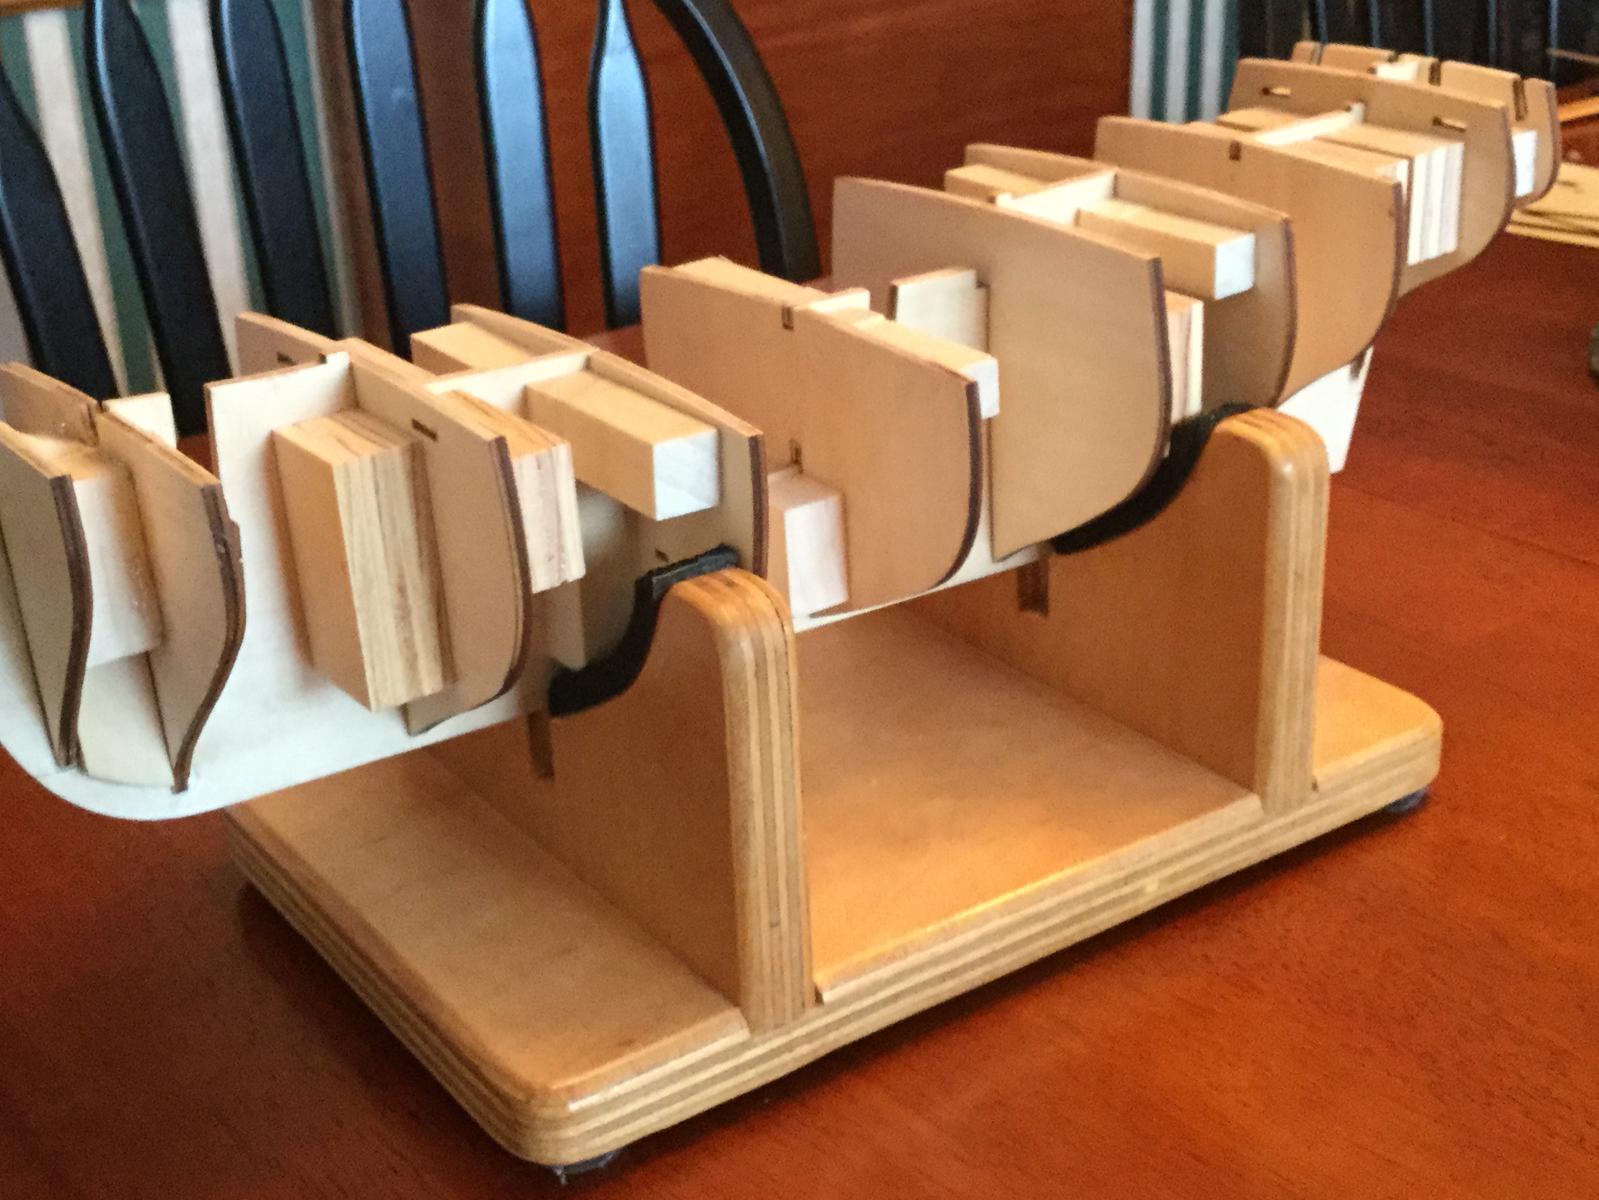
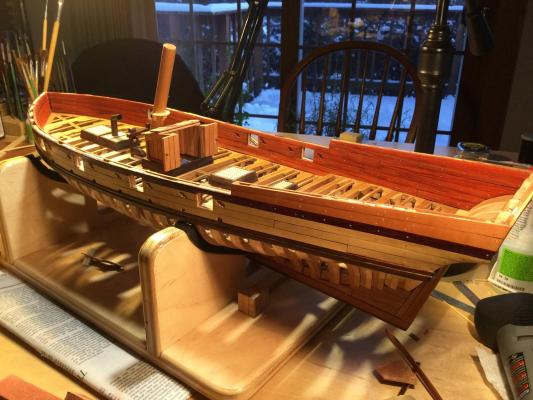
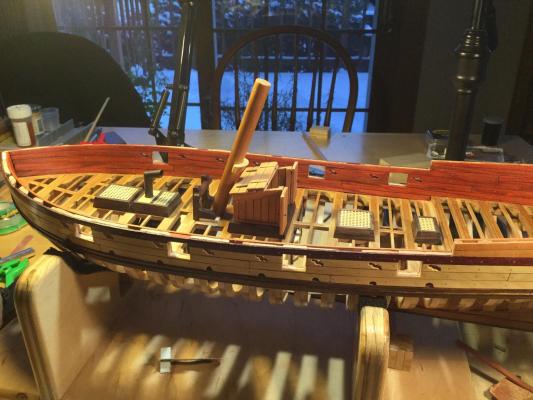
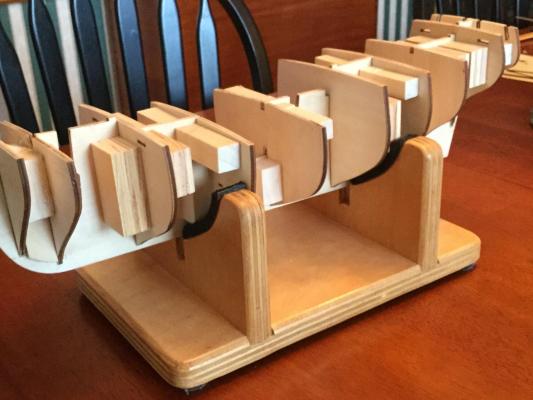
This will be my build log for AL's "Independence 1775". First let me say that this is an entirely fictional vessel, much like Al's Swift or Harvey. It is , however, representative of the colonial schooners built in America between 1763 and 1775. Harold Hahn covers these ships in his book "The Colonial Schooner - 1763 - 1775". I was drawn to the vessel because of her lines, and especially the bluff bow. But what convinced me to build this model was the excellent build log of Clare Hess: http://www.shipsofscale.com/phpBB3/viewtopic.php?f=52&t=539 Clare is building the model on commission and has seriously kit-bashed the build. The result is a beautiful , if fictional, colonial schooner circa 1775. The first problem with the kit is the scale. The box cover lists the model as 1:35 scale. At that large scale, the model would be very small...smaller in fact than "Sultana", the smallest schooner known to have been built. A vessel that tiny would never be able to be armed with 4 carriage-mounted cannons. What to do? Clare decided to build the model in 1:48 scale. I chose a different path. After researching both the "Halifax" and "Sultana" in Hahn's book, I discovered that if I built the kit in 5/16" scale, the model would be a little smaller than "Halifax" but larger than "Sultana". She should be able to carry 4 three-pounder cannons. The 5/16" scale is unusual, and it translates to 1:38.4! Convieniently this works out to 8 mm = 1 inch, a convenient ratio. So I'll be building "Independence" using metric measurements. I completed the hull framing and reinforced the framing with blocks. Probably overkill, but the bulkheads are plywood and very hard. Fairing the hull would put a lot of stress on them so I decided better safe than sorry. I plan to use the same wood scheme as Clare: boxwood decking, boxwood and swiss pear hull planking. I will used redheart for the inboard bulwark planking and the deck furniture ordinarily painted red.

-
Magnificent! A real beauty, Grant. I plan to build this model myself. If mine is half as good as yours I'll be a happy man.
- 456 replies
-
- 4
-
-
- finished
- bomb ketch
- (and 2 more)
-
I had a little warp too! Build slowly and make sure each bulkhead is square to the center keel. I glued small blocks between the bulkheads and keel to straighten any warp and reinforce this. Be alert as to the block placement. Don't glue them where something else (like the mast) must go!
- 194 replies
-
- 7
-
-
- armed virginia sloop
- model shipways
- (and 1 more)
-
Good luck. It's a fun build, and it taught me a lot about building model ships. I'll watch this log closely. Have fun!
- 194 replies
-
- 3
-
-
- armed virginia sloop
- model shipways
- (and 1 more)
-
One more week in paradise and the Admiral and I return home. I'll return to work on the AVS. In the meantime here is what we have to contend with:

- 306 replies
-
- 6
-
-
- armed virginia sloop
- Patrick Henry
- (and 2 more)
-
Beautiful job, Ken. You should be proud!
-
Thanks, Bob! I'm on vacation so I can't begin construction until late this month. Plus my AVS Patrick Henry is not yet complete. I'll continue to follow the build closely!
-
In building my POF Armed Virginia Sloop, I became concerned about gluing the planking to the frames. Since the frames are visible below the wales, and because the planking is thick at 1/32 scale, push pins weren't the answer. I also didn't want to wait hours for clamped PVA glue to set up. I didn't trust CA glue alone because of the slight surface irregularity of the planking lying on the frames. My solution was to use Weldbond as the primary glue, but also set a small drop of Zap-A-Gap CA at each joint. After a second or two the CA acts as a "liquid clamp" and holds the plank in place until the Weldbond is solid. When dry the joint is strong as steel! It saves tons of time waiting for glue to dry.
-
Bob: good work so far! You use the striping tape as a template and cut the rabbet with an X-Act knife, right? I've used a compass set to 1/32" to mark the rabbet but this seems much more accurate. I've also seen people glue a 1/16"wide strip (1/32" or 3/64" thick) to the false keel, then glue the keel directly to that strip. Creates a rabbet with no need to cut or trim it.
-
Very nice work!
-
Thanks for the wood list Bob! I'm watching your build with interest.
-
Hey Bob: Good start! I'm thinking of building the Pinnace out of pear also. but I may consider boxwood. I have a fully equipped woodworker's shop, a scroll saw, thickness sander and a Byrnes saw. I can mill my own wood. Do you still have the wood list of the pieces and dimensions that Jeff supplied you? Would you be willing to share it for those of us who want to "bash" this kit along with you? Thanks!
-
I've got a pinnace is the queue too! I'll be watching this build.
-
I spent the weekend planking the inboard bulwarks with redheart. The planks required a little tweaking at the stern to flow smoothly into the counter framing, but nothing too drastic. At the bow, I did have to taper a few planks to get them all to fit. Next is to add the treenails, clean up the gun ports and sand the bulwark smooth. All the carbon soot from the simulated caulking and the glue stains will be sanded away!

- 306 replies
-
- 9
-
-
- armed virginia sloop
- Patrick Henry
- (and 2 more)
-
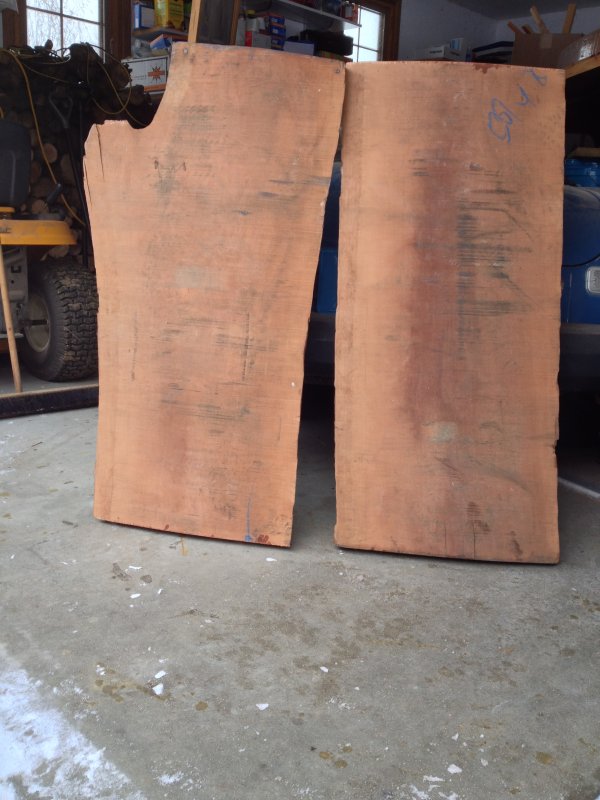
Yup, Don. Swiss pear and rosewood. I'm really becoming a fan of swiss pear because of it's ease of working and I also love the color. Unlike cherry there is virtually no grain. I was fortunate enough to score a big slab of pear wood about a year ago. It was 8 feet long so it had to be cut in half to ship. The resulting slabs are each about 20" wide, 4 feet long and 3-1/2" thick. A lifetime supply!

- 306 replies
-
- 7
-
-
- armed virginia sloop
- Patrick Henry
- (and 2 more)
-
Thanks for the link, Mark!