HOLIDAY DONATION DRIVE - SUPPORT MSW - DO YOUR PART TO KEEP THIS GREAT FORUM GOING! (Only 75 donations so far out of 49,000 members - C'mon guys!)
×


DocBlake
-
Posts
1,811 -
Joined
-
Last visited
Content Type
Profiles
Forums
Gallery
Events
Everything posted by DocBlake
-
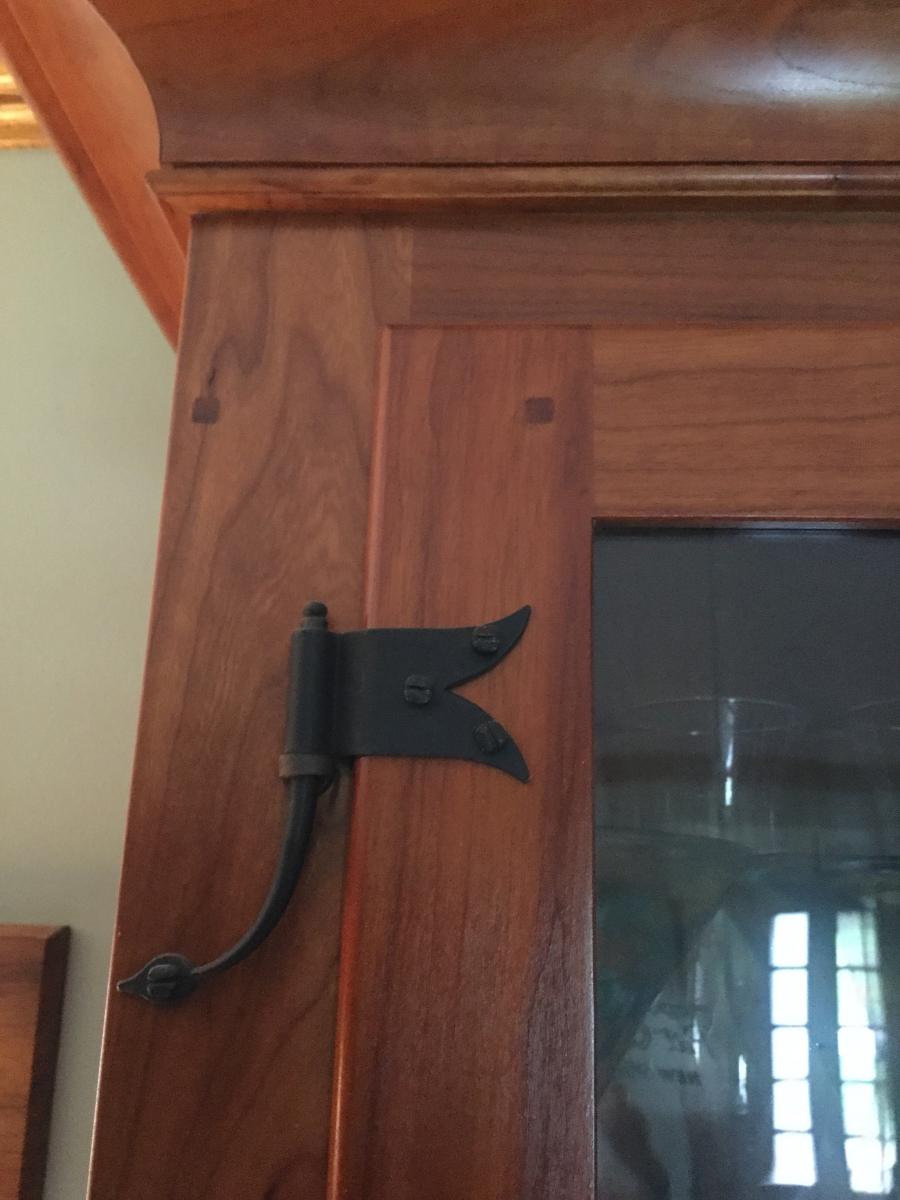
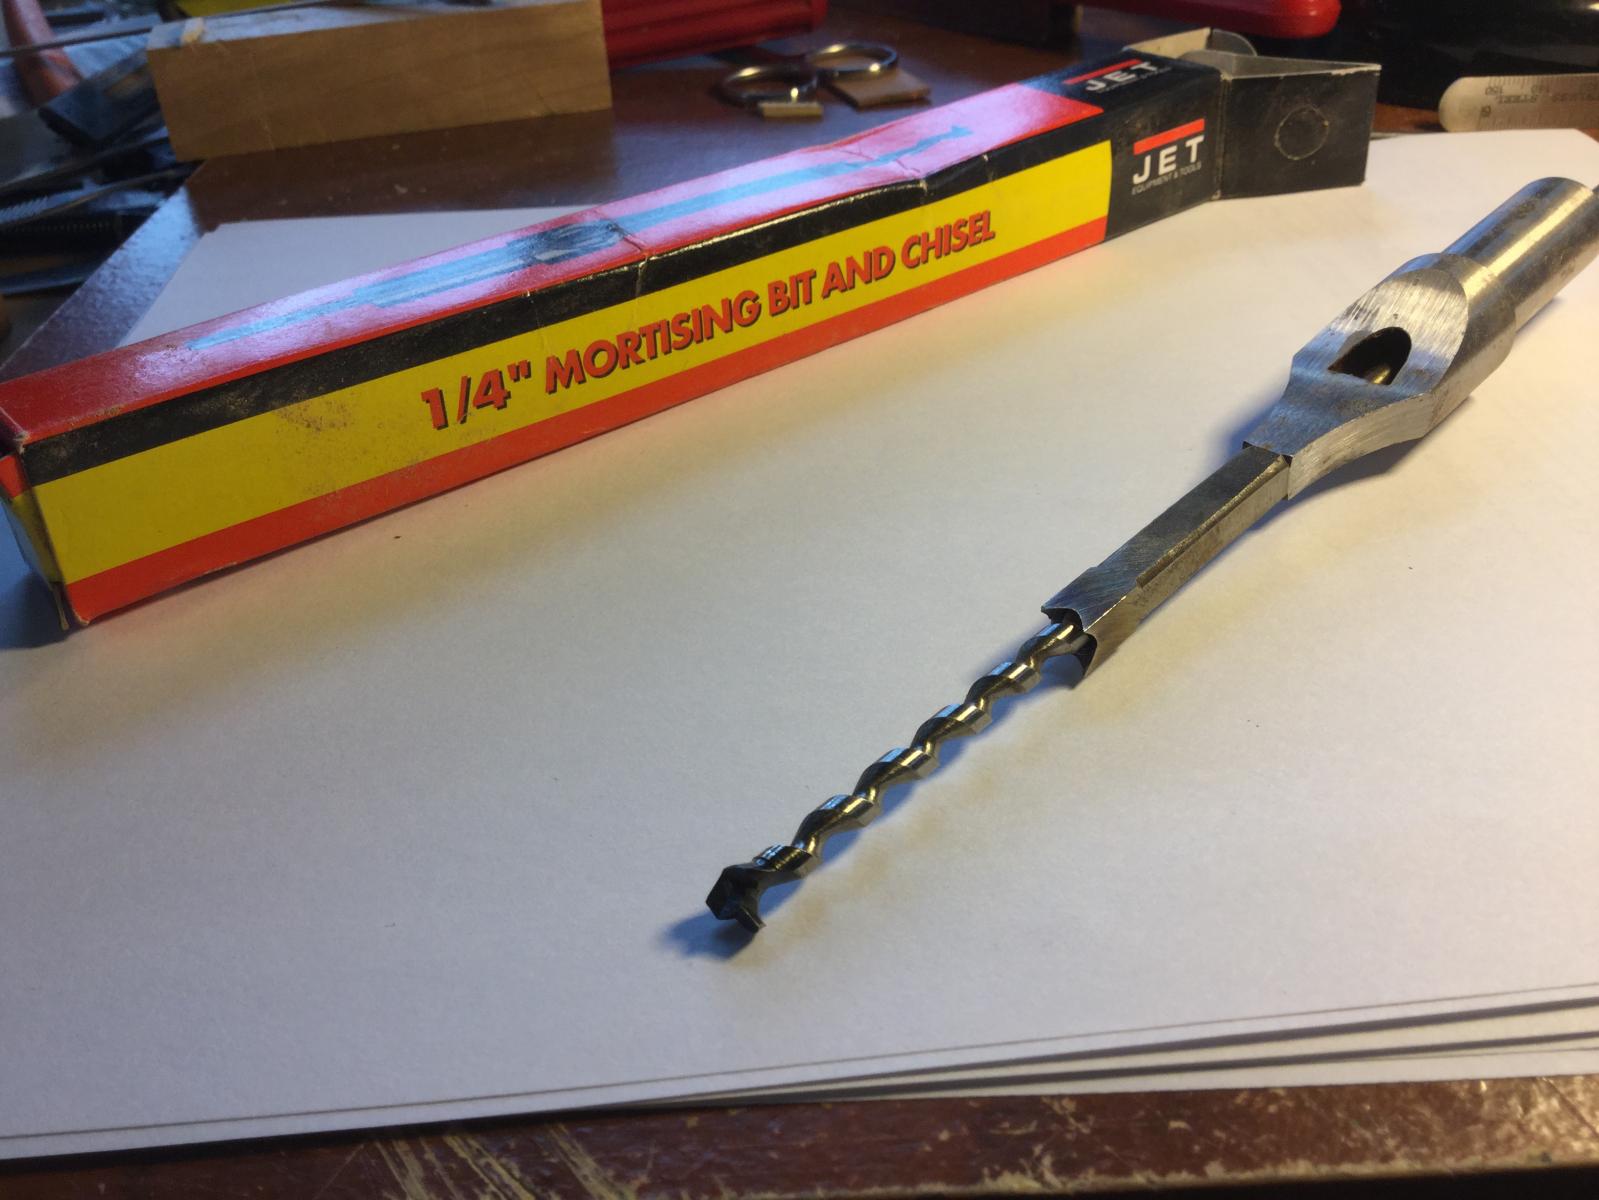
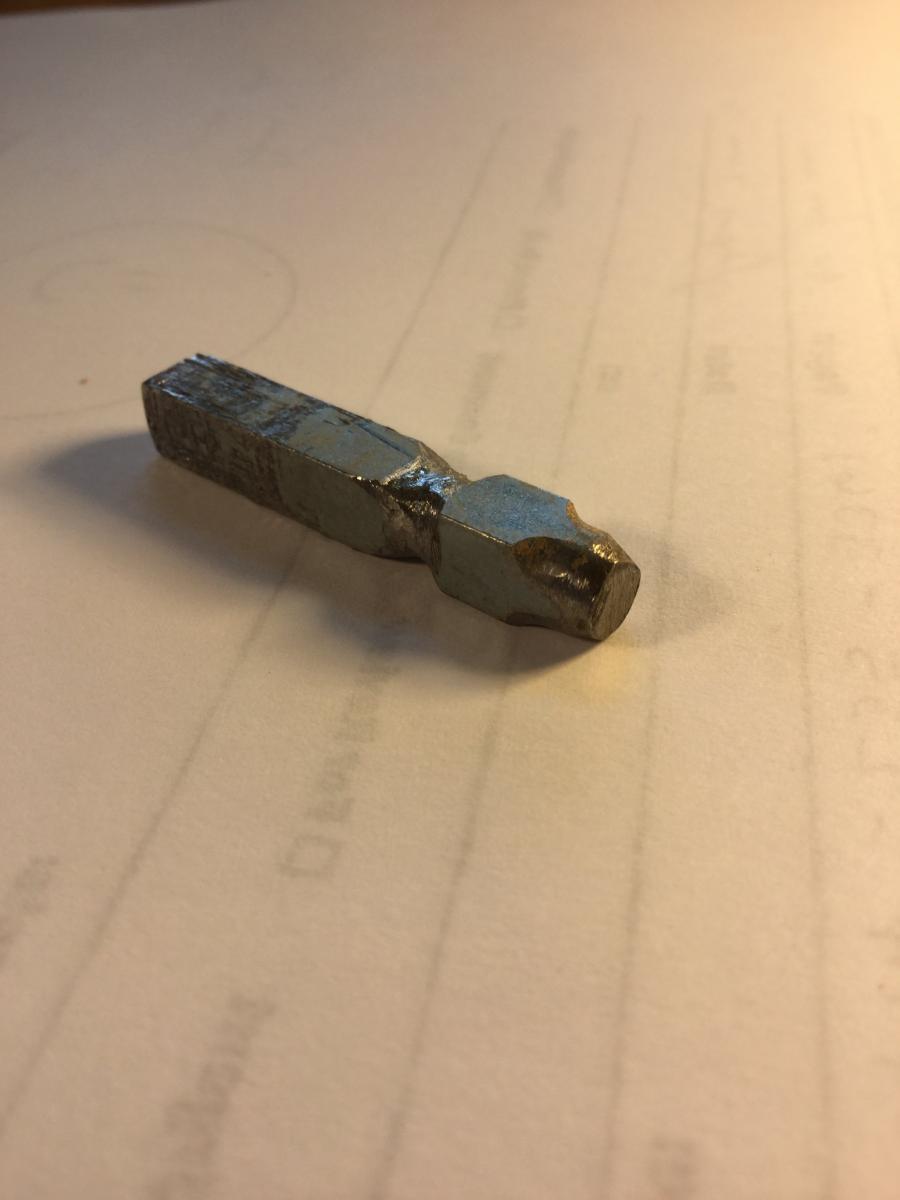
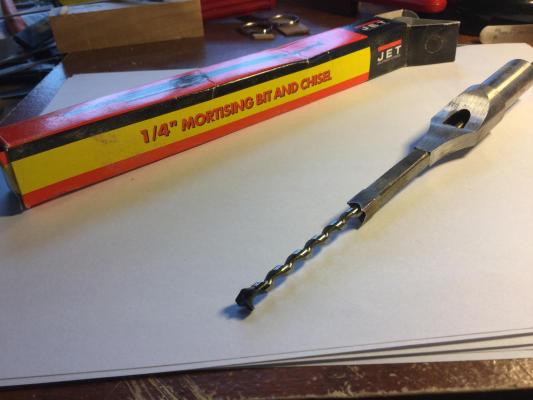
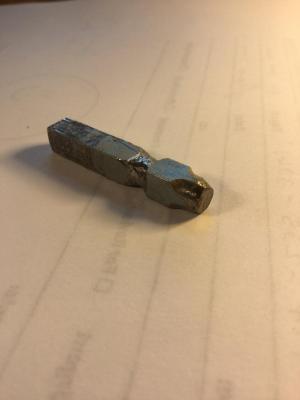
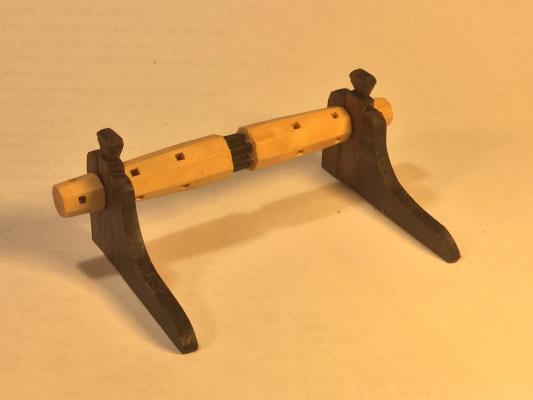
 There is always more than one way to skin a cat. I build period furniture as a hobby also. 18th century cabinetry often had "pegged" mortise and tenon joints to strengthen construction. They were also frequently square instead of round. How to easily fit a square peg into a round hole? You could use a mortising machine with a drill and square chisel, but since furniture parts can be very large, many times the part wouldn't fit on the mortiser's work surface. I came up with an easy solution. I took a 1/4" square piece of steel bar and grinded the bottom into a 1/4" diameter round. I left the bulk of the bar square. I drill a 1/4" hole where the peg will be and insert the rounded bottom into the hole. Than brings the squared "shoulders" of the bar right to the wood's surface. A couple of raps with a hammer and the round hole is now square. it has to be deep enough to hold a piece of peg material 1/4" square, so the steel bar is pretty deep into the wood and the fit is very tight. It takes a pair of pliers and some rapping with a hammer to free the bar. A 1/4" peg is glued into the hole and cut with a flush cutting saw when the glue dried. The result is a nice clean square peg in what was once a round hole. The pegs aren't really structural, but they look good. When I needed to make round holes square on the windlass, I used the same principle in miniature. I've actually adapted a few techniques I use building full size furniture to model work. The principles are the same; only the scale is different!
-
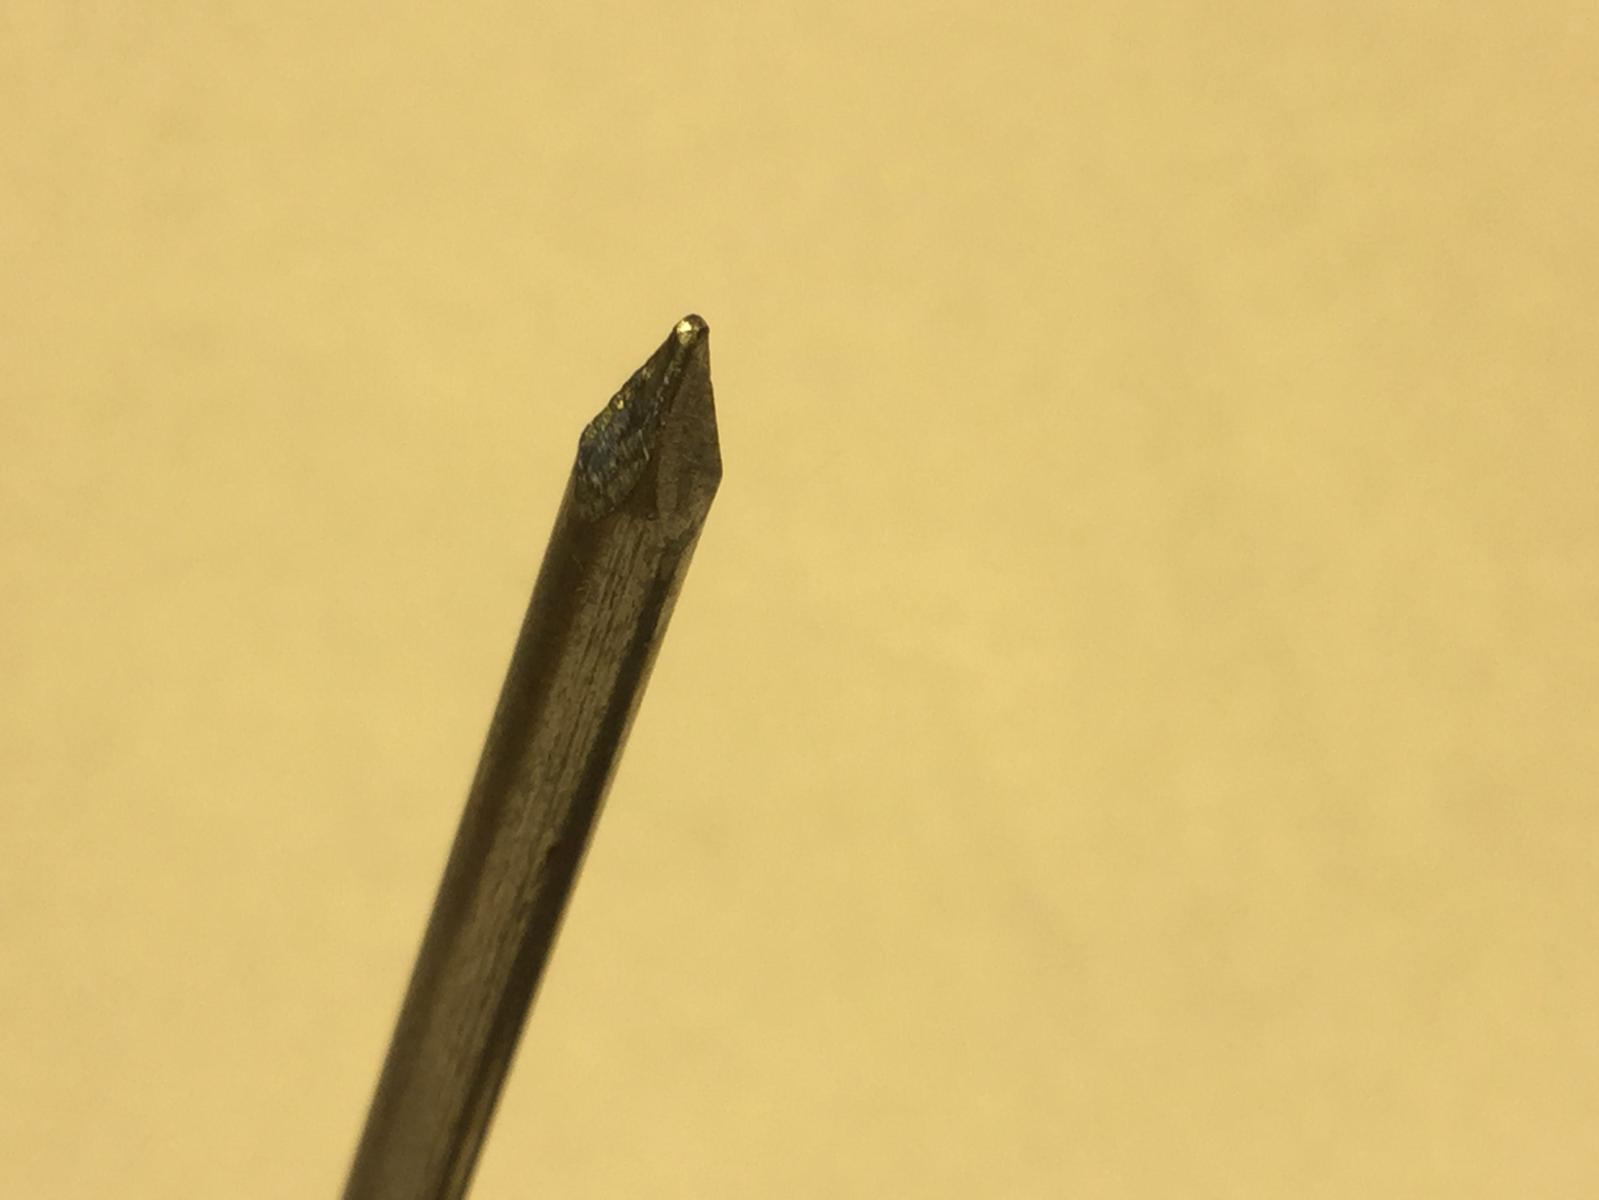
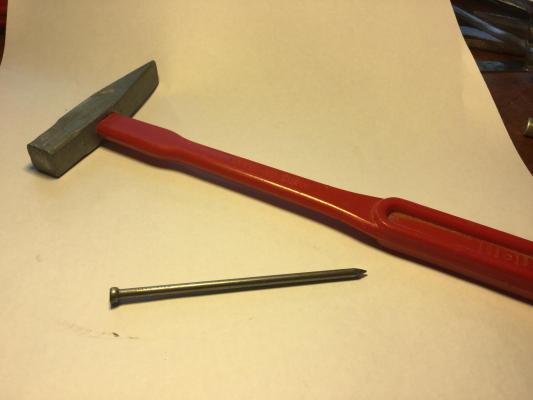
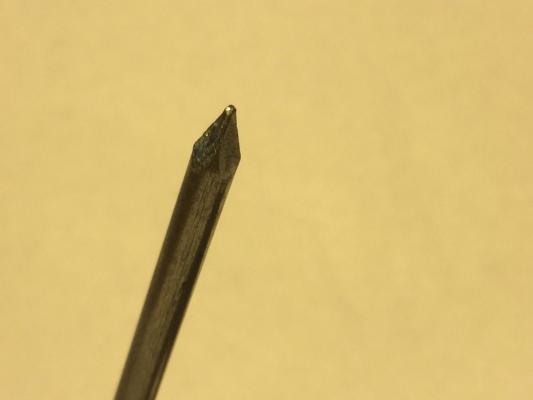
Great job on the long boat, Ryland! I've scratch built two windlasses, and I used this technique for both. My most recent, for the AVS , is in 1/32 scale. The holes in the windlass are drilled with a 1/16" bit. I then took a 10d finishing nail and filed the four sides of the tip flat and sharp. Insert the tip into the round holes, being careful to align the square tip properly. A couple of taps with a miniature hammer and the round hole is square. It works like a charm and takes just a couple of minutes to do all the holes.

-
Excellent job on the planking. This is going to be a beautiful model! Keep it up!
- 114 replies
-
- 3
-

-
- swift
- artesania latina
- (and 2 more)
-
Thanks, guys! John: I'm anxious to see you back at work on your PH as well posting further progress on Revenge. Mike: Your model was the trailblazer, and you built it straight out of the box. It's a great model! Don't sell it short. I learned a lot from your build. In fact, I am thinking of building the LSS Halifax straight from the box, also. There is great appeal in the more "monochromatic" look of these craftsman kits. Many of the timbering kits out there (current LSS products, Lumberyard for Model Shipwrights) are all of one species of wood, and original admiralty models were often that way also.
- 306 replies
-
- 4
-
-
- armed virginia sloop
- Patrick Henry
- (and 2 more)
-
Thanks, David! I decided to keep the stock ship's wheel. I played around with scratch building a wheel, but nearly every technique I found required a milling machine. The shipyard has a formal request for one submitted to the Admiralty, but so far no word! I painted the wheel "Milwaukee Road Boxcar Red" which is a pretty good approximation of varnished mahogany. I may stick with the stock transom lights also. Am I getting a little lazy, or just anxious to finish the model?

- 306 replies
-
- 14
-
-
- armed virginia sloop
- Patrick Henry
- (and 2 more)
-
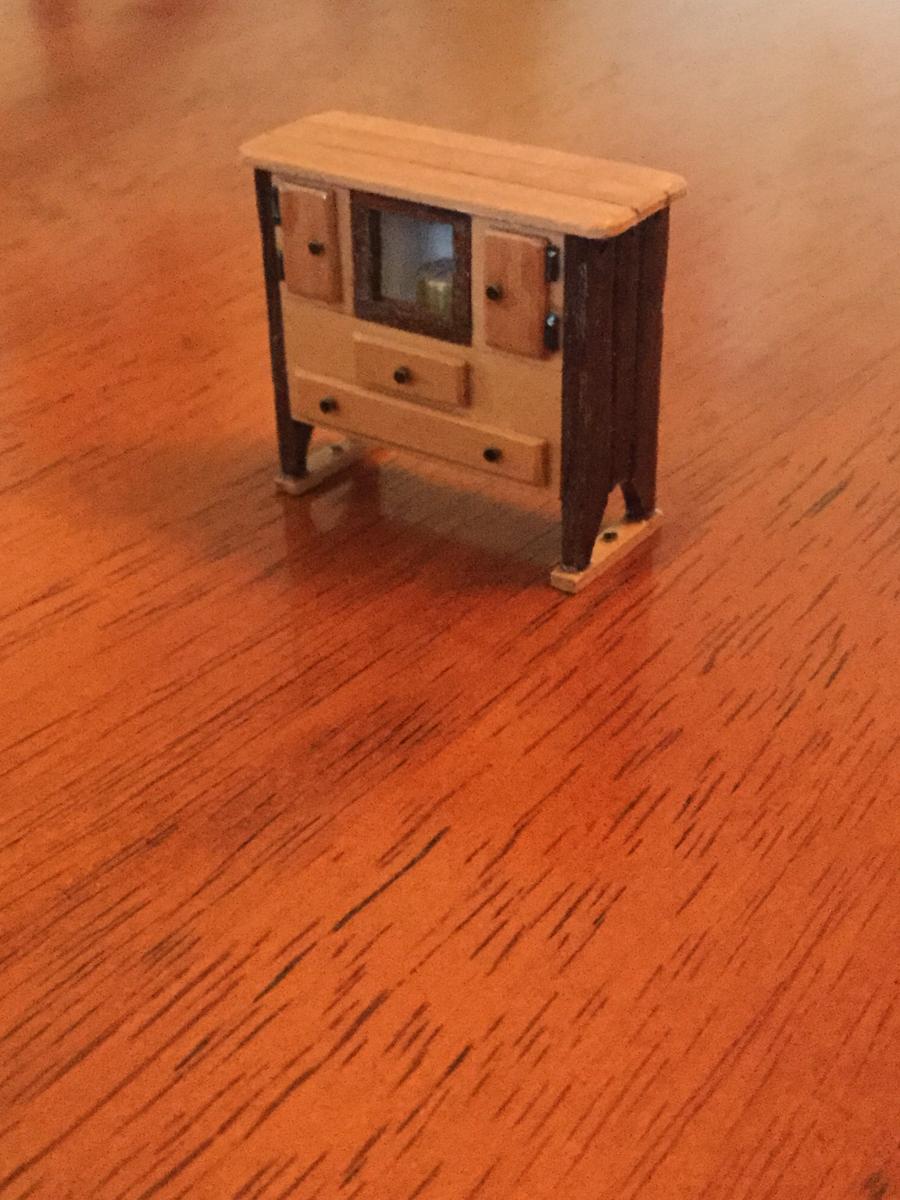
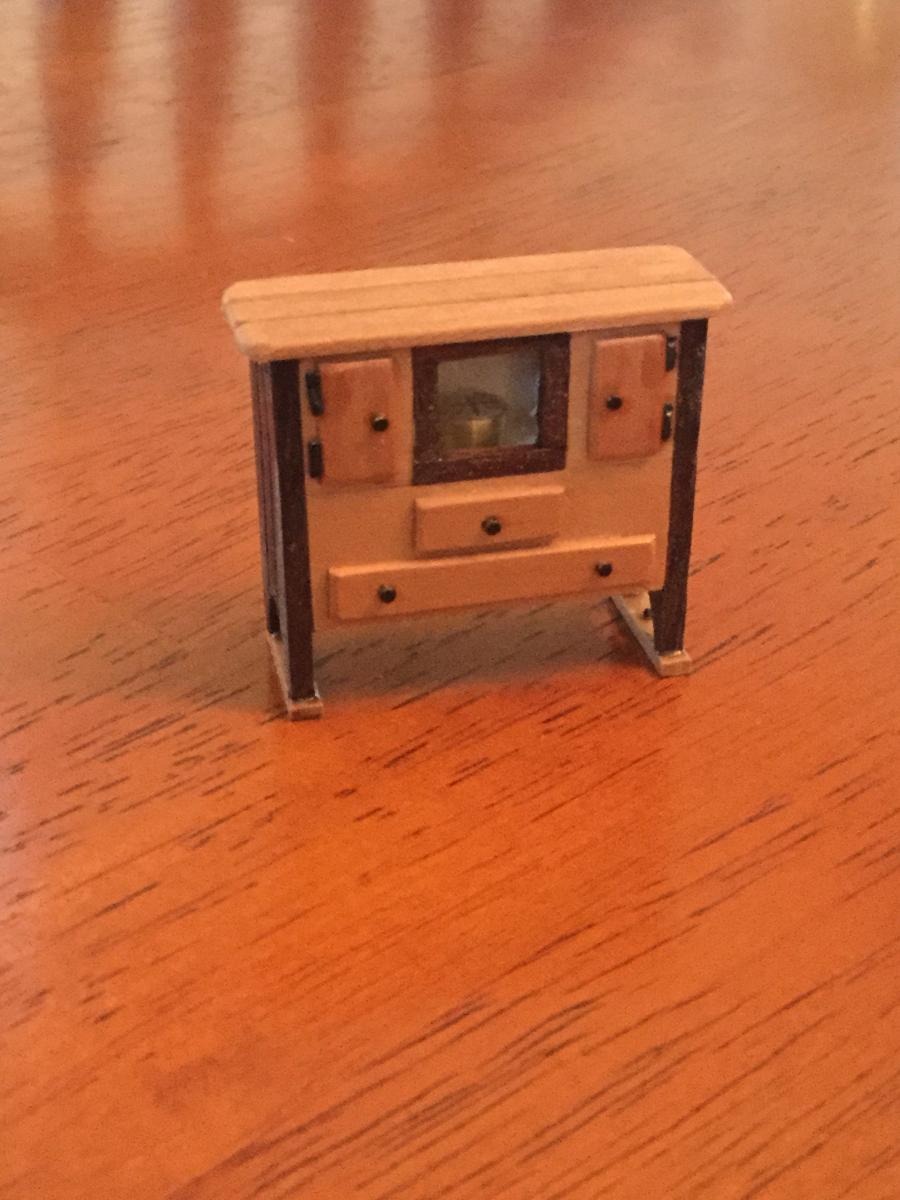
Thanks, Brian and all for the "likes" Here is the binnacle. This is similar to Dr. Feldman's original version as well as the MS version from their kit plans. the top needs 2 more coats of poly, and the hardware needs a coat of Testor's DullCote to knock off the shine.
- 306 replies
-
- 13
-
-
- armed virginia sloop
- Patrick Henry
- (and 2 more)
-
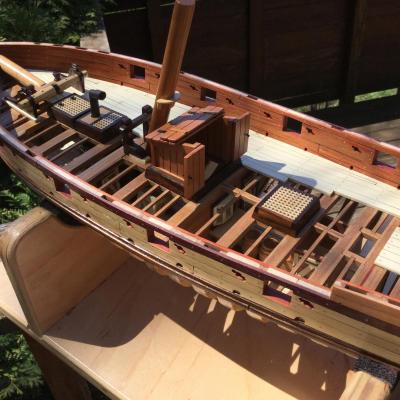
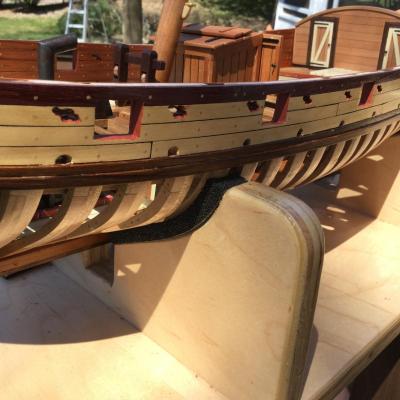
Back in the shipyard. I cut the scuppers into the inboard planking, then painted the inside of the sweep ports and gun ports with a sample of Benjamin Moore paint I had that matched the red heart fairly well. I did add some Dark Vintage Maple TransTint water soluble dye to darken it a little. The deck, planking and framing were given 3 coats of poly. I'm getting closer to the end. The binnacle is nearly done (pictures to come). Then all that's left are the rudder, the ship's wheel, the catheads and swivel gun supports, the guns themselves and the cabin roof framing and planking. Did I say "nearly done"?

- 306 replies
-
- 14
-
-
- armed virginia sloop
- Patrick Henry
- (and 2 more)
-
Brig Eagle by robnbill - 1:48
DocBlake replied to robnbill's topic in - Build logs for subjects built 1801 - 1850
OUTSTANDING! I love the anchor. Great job, Bill! -
Great work, David! I scaled back the rigging on my MS AVS because of the same problem: The blocks were way too big for rigging a 3 pounder cannon at 1/48 scale! As to the rope coils, they look great. On a real ship thy were only formally laid out like that for inspection or when a dignitary was on board. Obviously the coils couldn't be maintained during battle or even when the vessel was underway. You can see the same phenomenon at your local yacht club, where lines are neatly coiled on the pier next to the boat, only to be tossed on board, in less than formal fashion when under way. First rate work so far!
- 117 replies
-
- 2
-
-
- constitution
- model shipways
- (and 1 more)
-
Hi Don! I'm just catching up after a week kicking back in Florida. This kit continues to impress. The wood quality appears excellent, and you're doing a great job. Keep the progress reports coming.
- 653 replies
-
- 7
-
-
- trabakul
- marisstella
- (and 1 more)
-
The stern looks great and your planking is coming along nicely. The toughest parts are nearly done!
-
Bummer, John. I'm sure there is a fix, though. You've gotten around challenging problems before. It's hard for us to float ideas to possibly help without the kit in front of us, but there are some Revenge builders out there who've been down this road and should be able to help. Good luck!
-
Nice job on the hull, Elijah! She's going to be a fine model. Keep up the good work.
- 701 replies
-
- 2
-
-
- phantom
- model shipways
- (and 1 more)
-
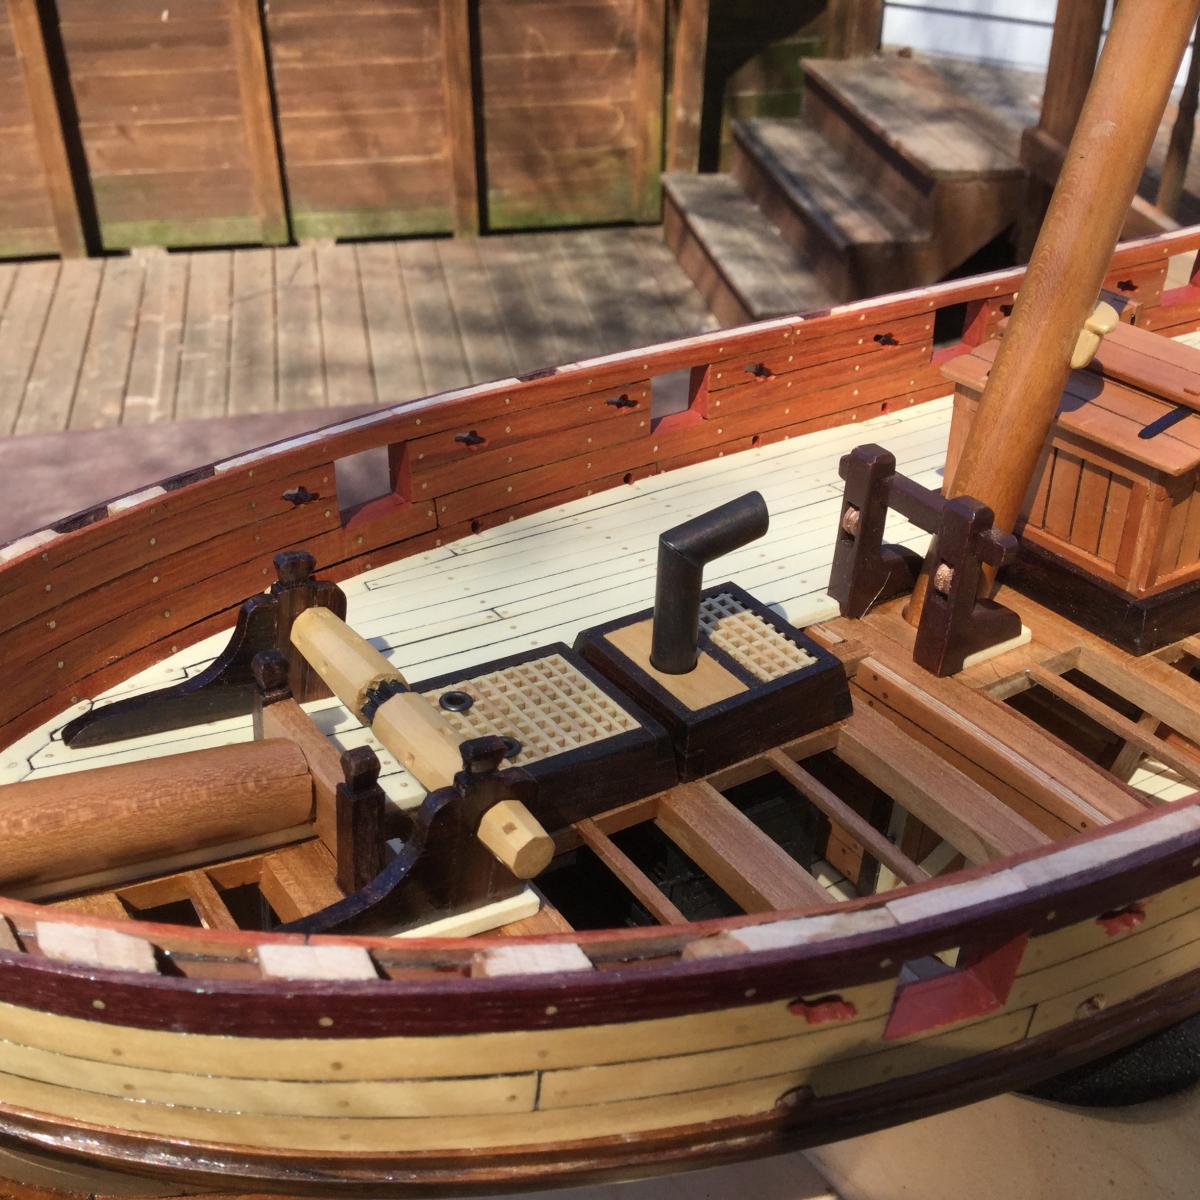
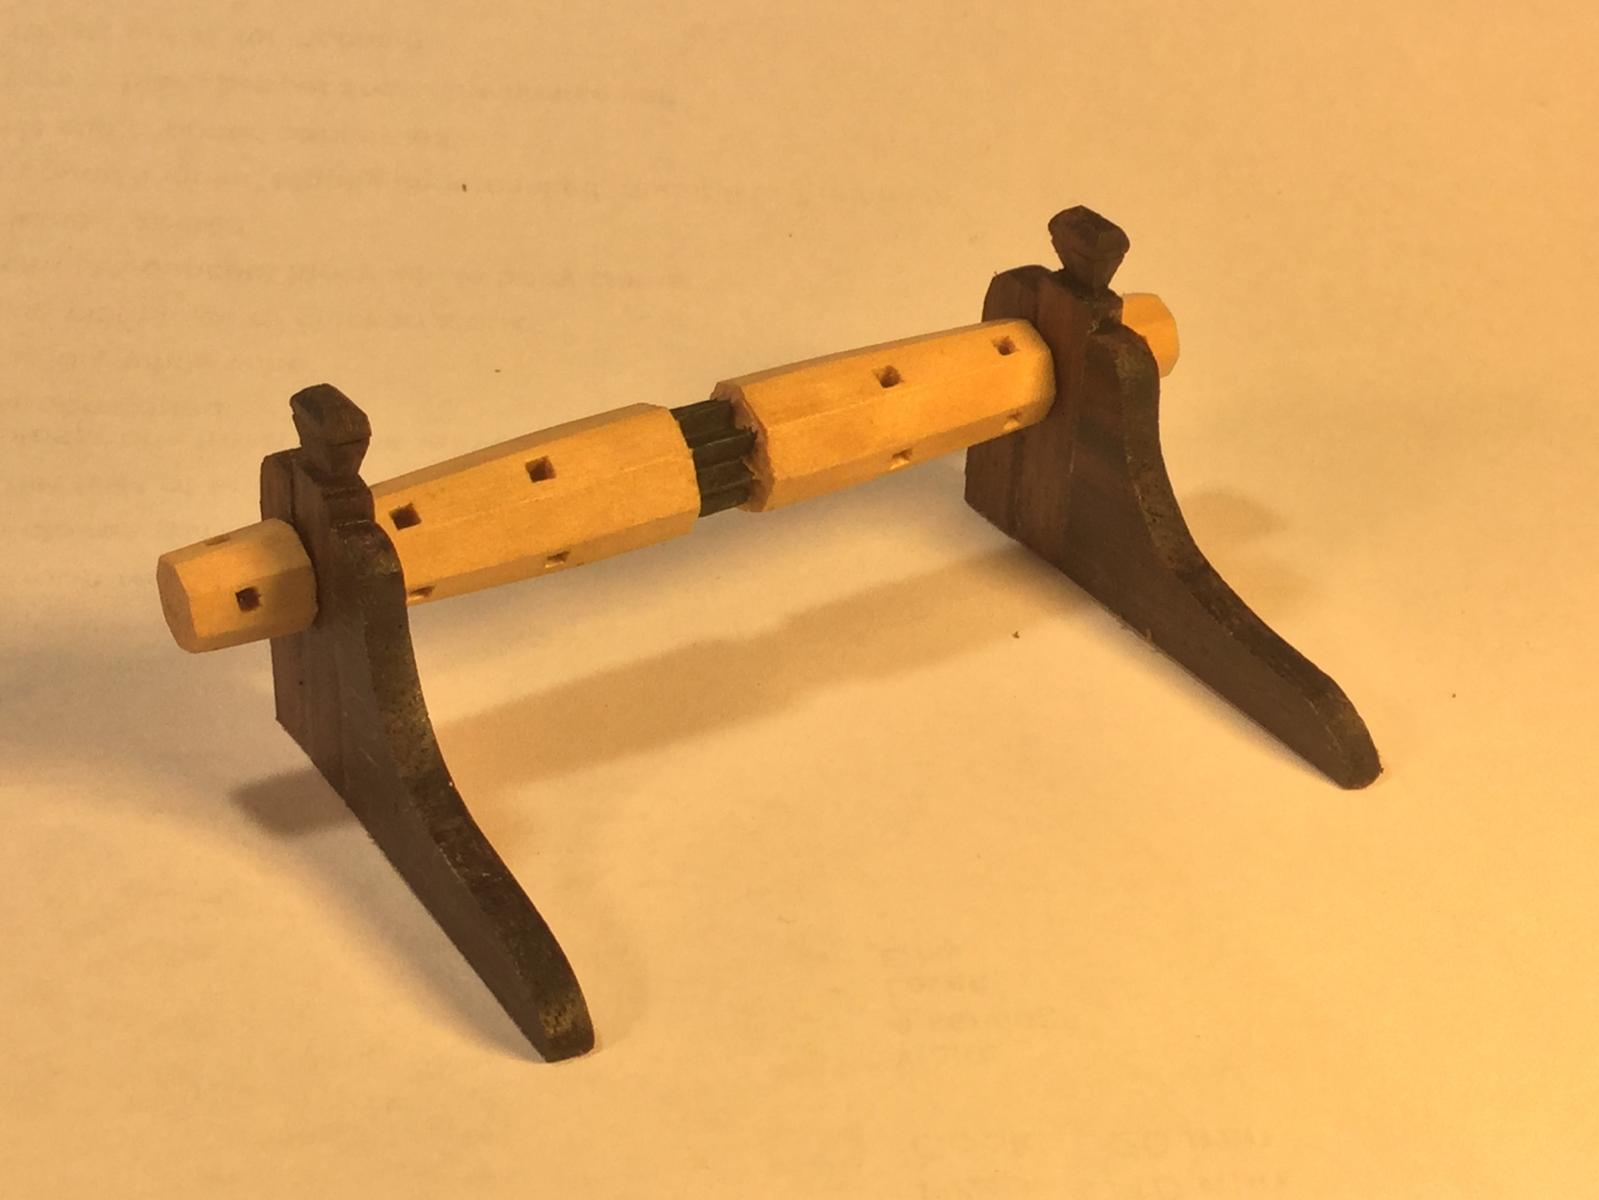
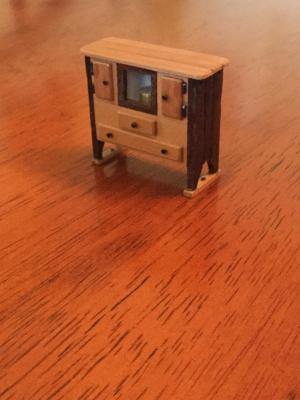
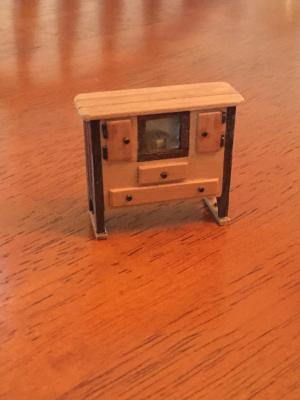
I didn't want to paint the 3-D printed windlass to look like wood, so I made my own out of boxwood and rosewood. I will keep the ship's wheel, though. I'll paint it to look like varnished mahogany.
- 306 replies
-
- 11
-
-
- armed virginia sloop
- Patrick Henry
- (and 2 more)
-
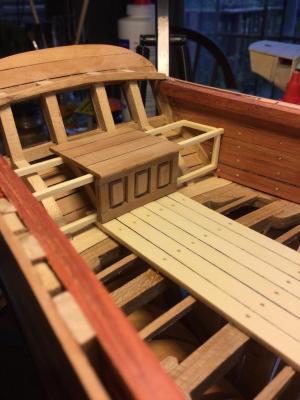
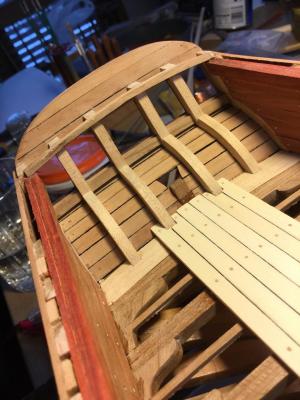
I framed in and partially paneled the window seat at the stern which covers the rudder head and tiller. It's just sitting there now. I won't permanently attach it until I complete the rigging that connects the tiller with the ship's wheel ( just in case I need to modify things to accommodate the rig.)
- 306 replies
-
- 12
-
-
- armed virginia sloop
- Patrick Henry
- (and 2 more)
-
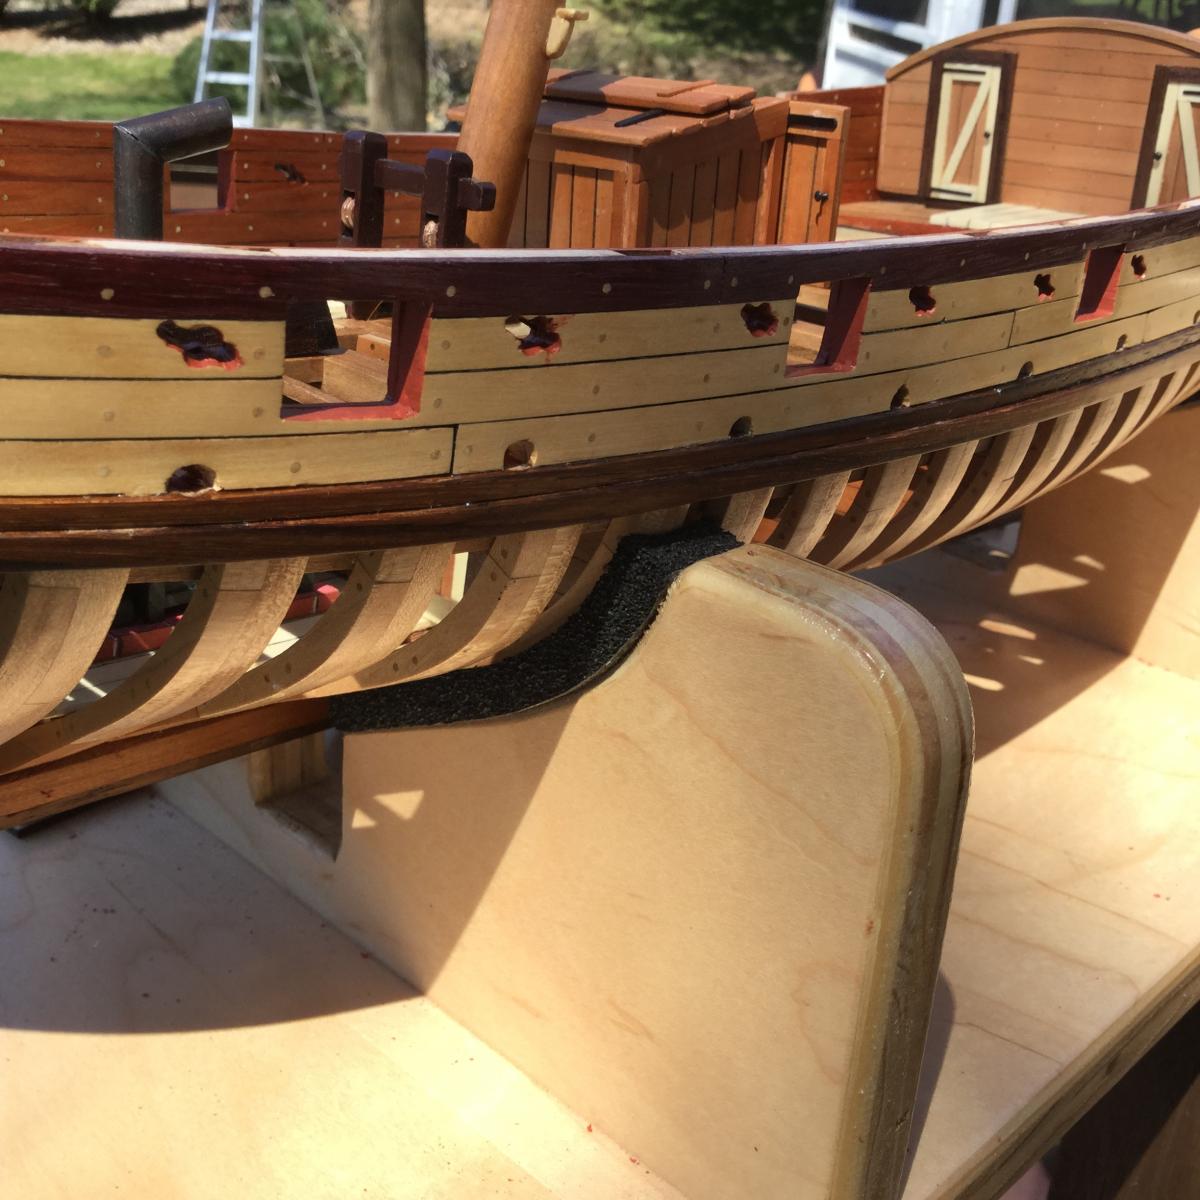
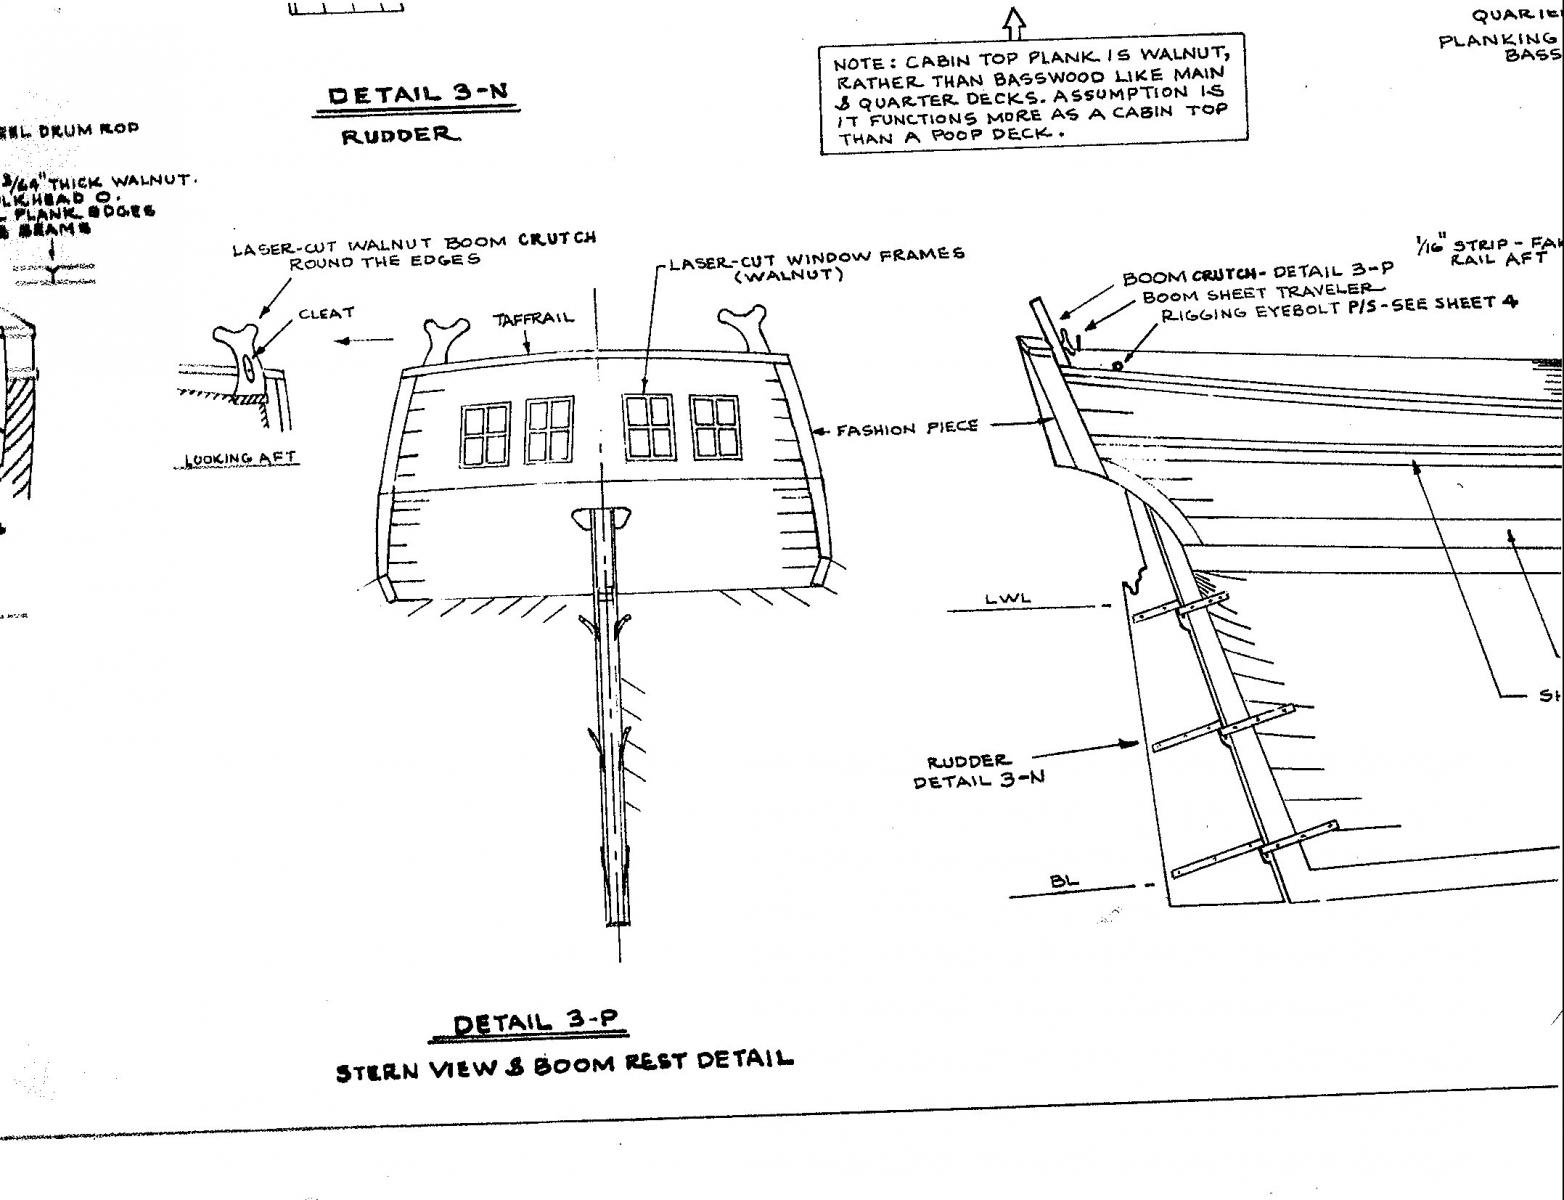
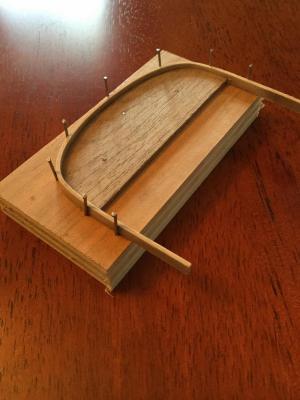
Because I totally rebuilt the transom in the kit, using a plywood base, planked with pear and overlayed with a boxwood trim, the upper edge of the transom is not particularly attractive. The kit doesn't provide a taff rail because the stock transom is solid cherry hardwood with no plywood involved. I decided to add a taff rail made of boxwood. I soaked the wood then bent it around a template of the top of the transom. Nails hold it in place. I'll let it dry for 48 hours, then dye it black with Fiebring"s black leather dye. It will be glued in place after the great cabin cap rails are fitted.
- 306 replies
-
- 9
-
-
- armed virginia sloop
- Patrick Henry
- (and 2 more)
-
Now your talking, Greg! Every model is a little different from every other model, so build to what you have. And you are correct - the AVS is fictional and taking some liberties with the plans is perfectly acceptable. In fact, Model shipways took significant liberties with Dr. Feldman"s original plans for the AVS. The photos show what the stern looks like in the MS plans, and what Dr. Feldman originally drew in his plans, which are the basis for the the MS kit. As you can see, the increased tumblehome on Feldman's plans is what you get when you plank right on the filler blocks, as opposed to the more boxy result on the MS plans, extending the transom planking. I think Dr. Feldman's looks better.


-
Hi David! They are great saws. I have two dozuki saws that I use a lot in building full sized furniture. They work especially well for hand-cutting dovetails.
- 306 replies
-
- 2
-
-
- armed virginia sloop
- Patrick Henry
- (and 2 more)
-
John: The frame trimming took about 15 minutes total. The saw is awesome, and it's size makes it perfect for model work. Here's a link to Clare Hess' site that explains the saw and where to get it. I ordered it from Japan and it arrived in about 2 weeks; https://shipmodeler.wordpress.com/2015/05/19/a-super-fine-cut-japanese-hobby-saw-hishika-industries/
- 306 replies
-
- 3
-
-
- armed virginia sloop
- Patrick Henry
- (and 2 more)
-
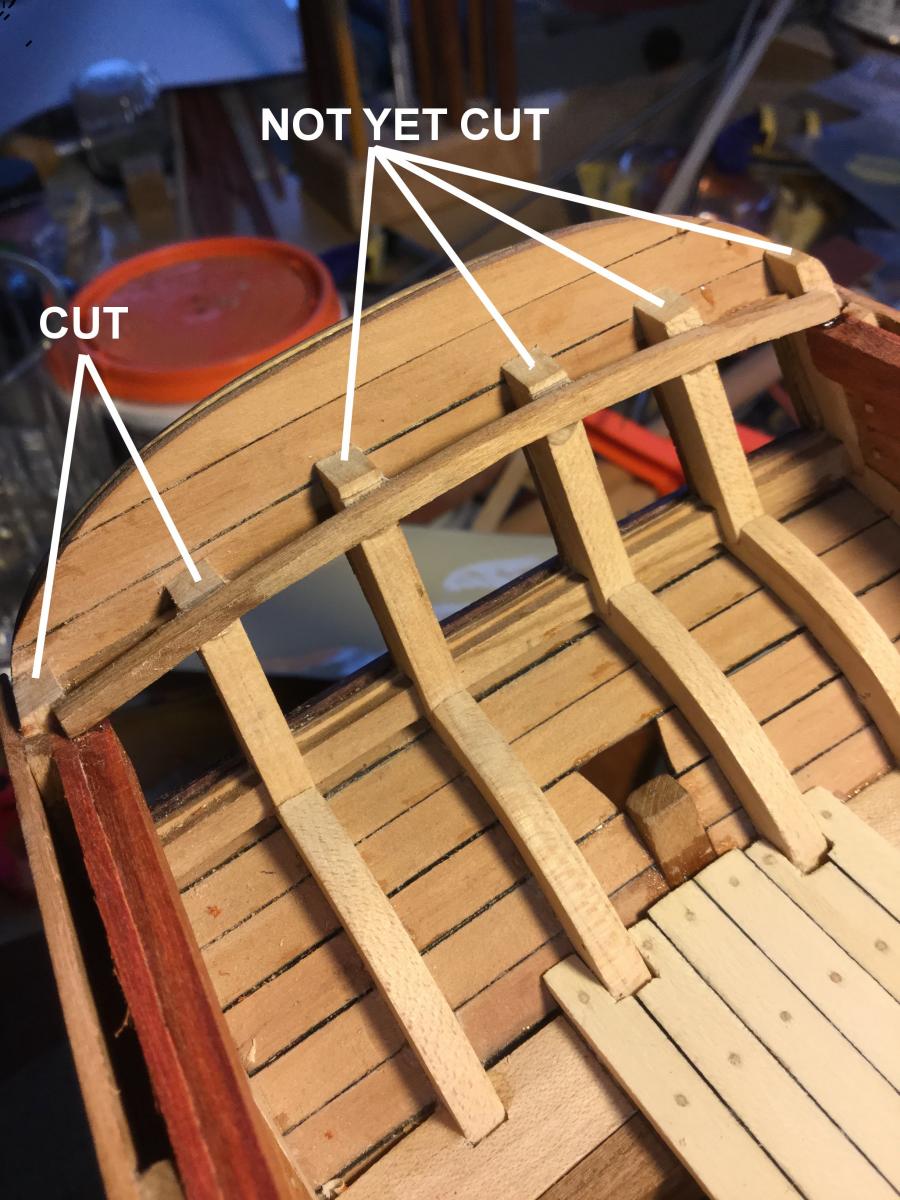
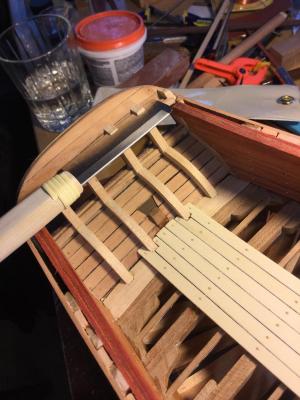
I'm starting to prepare the great cabin for framing. The roof deck clamps are in place and the aft-most roof beam has been glued to the transom framing. the problem is that the framing is too long and sticks up above the beam. I used my new Hishika saw to easily saw through the maple frames and remove them. I now need to fit each beam so that the roof (poop deck) sits flush on each and flows smoothly from the bulkhead of the great cabin to the stern. The first photo shows two frames cut, and the others too long. The second shows the Hishika saw cutting the framing, and the third is the final result.

- 306 replies
-
- 7
-
-
- armed virginia sloop
- Patrick Henry
- (and 2 more)
-
Outstanding job on the blocking, John. The Revenge has a rather rounded bow so they will help a lot in keeping the planking from "flattening" between bulkheads. If you still have access to the Lauck Street Forum (I've been banned!) check my build log for "Swift" to see what flattening looks like. In that build, the flattening was the result of bulkheads being far apart and the planking being wet when laid rather than because of a bluff bow.
-
Martin: Placing the buckets between the guns makes sense. Each cannon would have had a water bucket (to wet the sponge that cleans the gun's bore) and a matchtub, usually filled with sand, to provide a safe place to rest a burning slow match between firings of the cannon.
-
Hi Ken! Yep...a lot of blocking to stiffen the bulkheads which are plywood and very hard. I was concerned about damage when fairing because the stress of sanding would be significant. Also the plywood and basswood blocking allowed me to use less balsa wood. The balsa is confines to places where big changes in the hull lines occur like the wing transom area and the bow. The kit has no bow or stern blocks at all. Don: Yep, I did get an interesting email this morning! Stay tuned to the Lauck Street thread for a response a little later.
-
Great work, Ken. I'm enjoying this build log!