HOLIDAY DONATION DRIVE - SUPPORT MSW - DO YOUR PART TO KEEP THIS GREAT FORUM GOING! (Only 20 donations so far - C'mon guys!)
×


Glen McGuire
-
Posts
1,957 -
Joined
-
Last visited
Content Type
Profiles
Forums
Gallery
Events
Everything posted by Glen McGuire
-
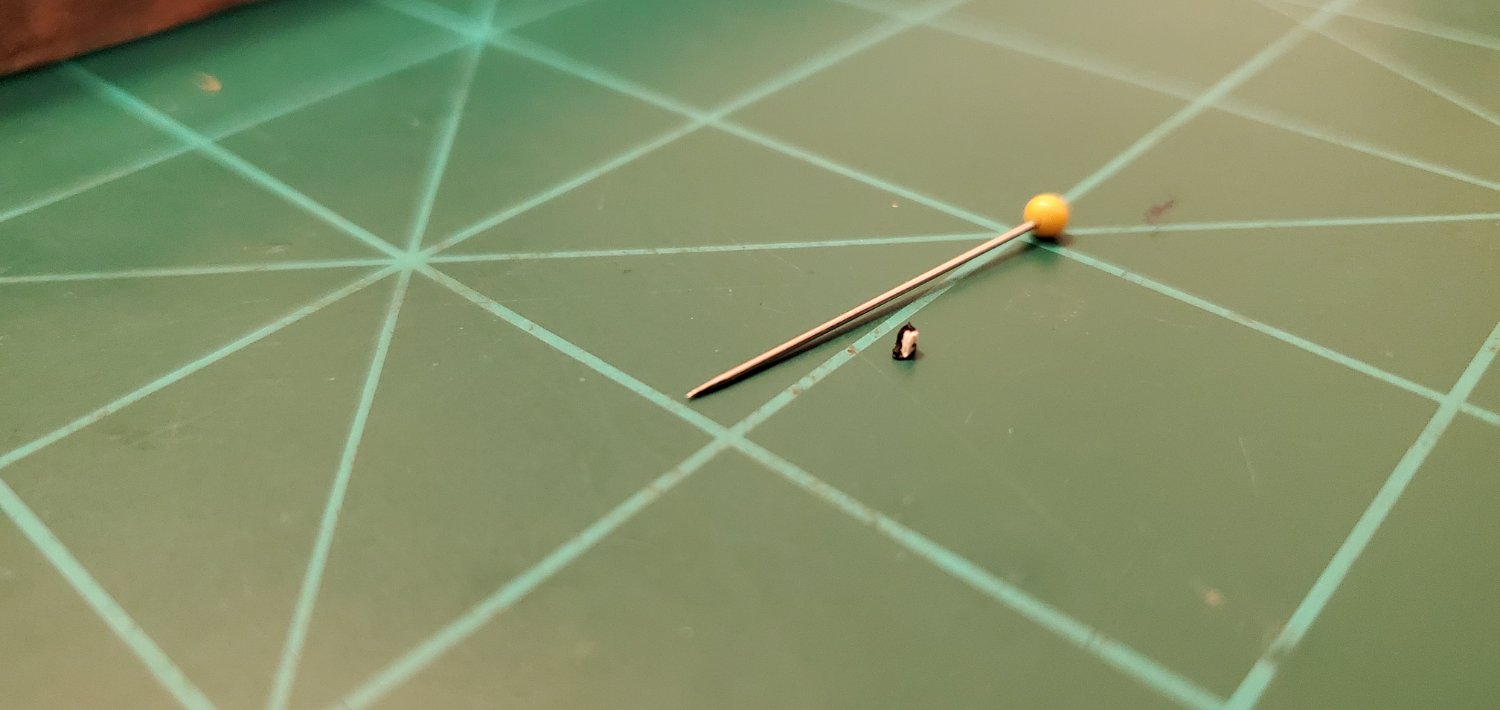
 While waiting on an Amazon delivery so I can complete the treasure fleet base, I decided to see if I could actually make something resembling a tiny penguin. Since the longhorn herd turned out pretty well, a penguin shouldn't be too hard, right? So here he is. He's 1/16" tall. That scales to about 1/750 based on a 4' tall emperor penguin, so it's definitely a reasonable size for one of my SIBs. I may open up the Aurora bottle and try to mount him on one of the broken ice floes. If that doesn't work, I'll save him and maybe do an Endurance down the road. Oh, and I named him Keith.
- 194 replies
-
- 7
-

-

-

-

-
- Bottle
- Treasure Fleet
- (and 3 more)
-
Welcome aboard, Steve! Looks like you've got a flair for western art as well based on other things in your work area!
-
Fascinating! Thanks for showing the detailed steps in your wood weathering process. I've got an idea floating around in my head for the next SIB project and this technique might be just what I need to pull it off. How's that for a teaser right back at ya!! 😁
-
Thanks, Grant. The base is a sword holder shown in one of the early posts. I've got a couple of things in mind to do to it to try and make the whole thing look better. We'll see how those turn out. Keith, you have now joined my son on the list of people no longer allowed to suggest new SIB projects! 🤐
- 194 replies
-
- 4
-
-
- Bottle
- Treasure Fleet
- (and 3 more)
-
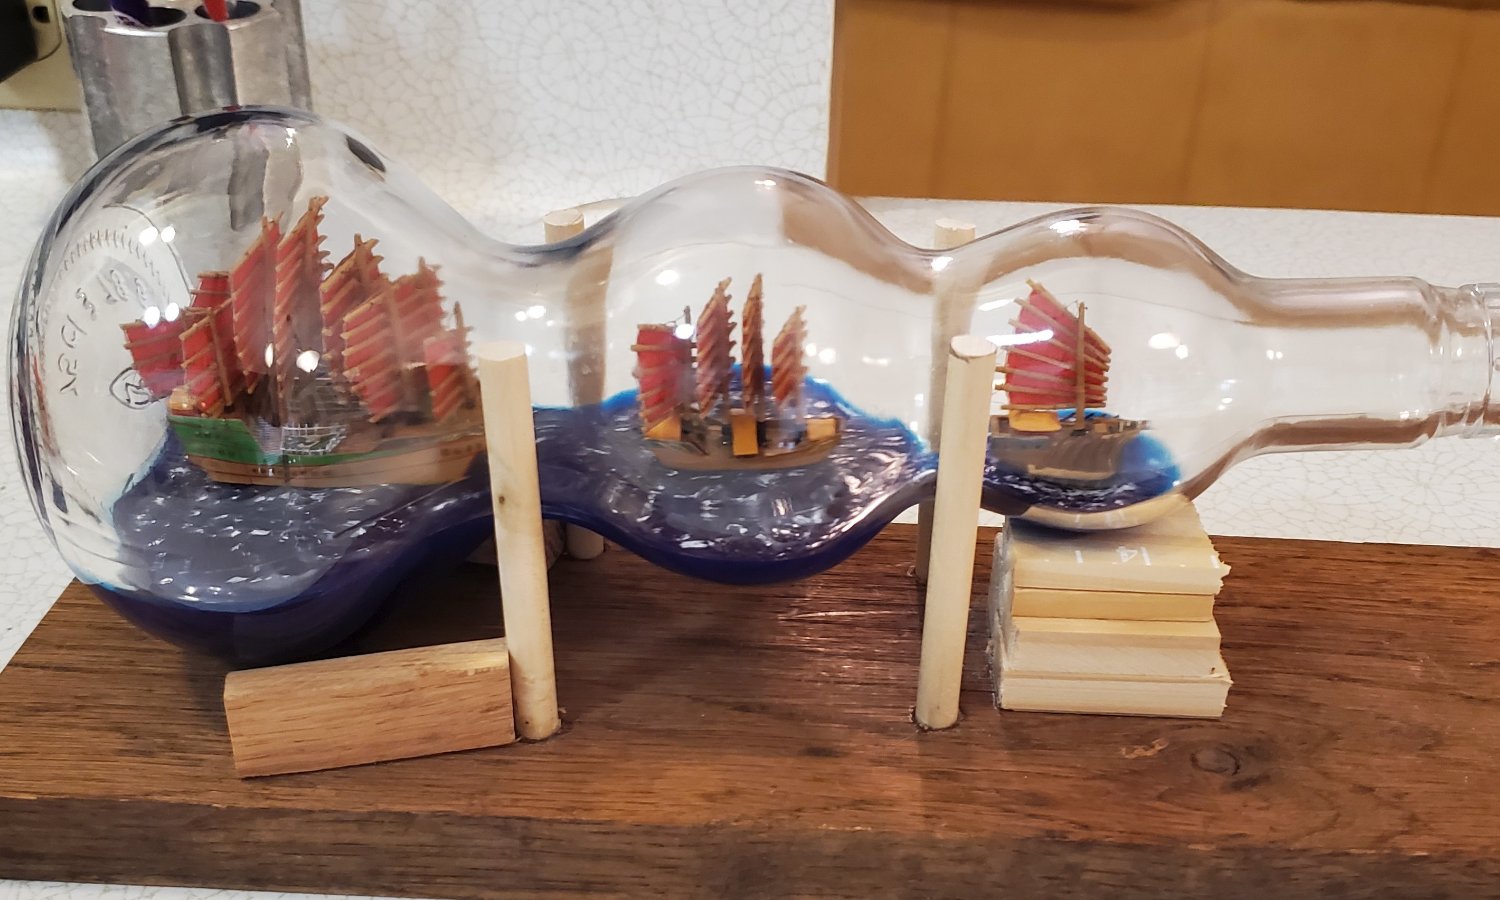
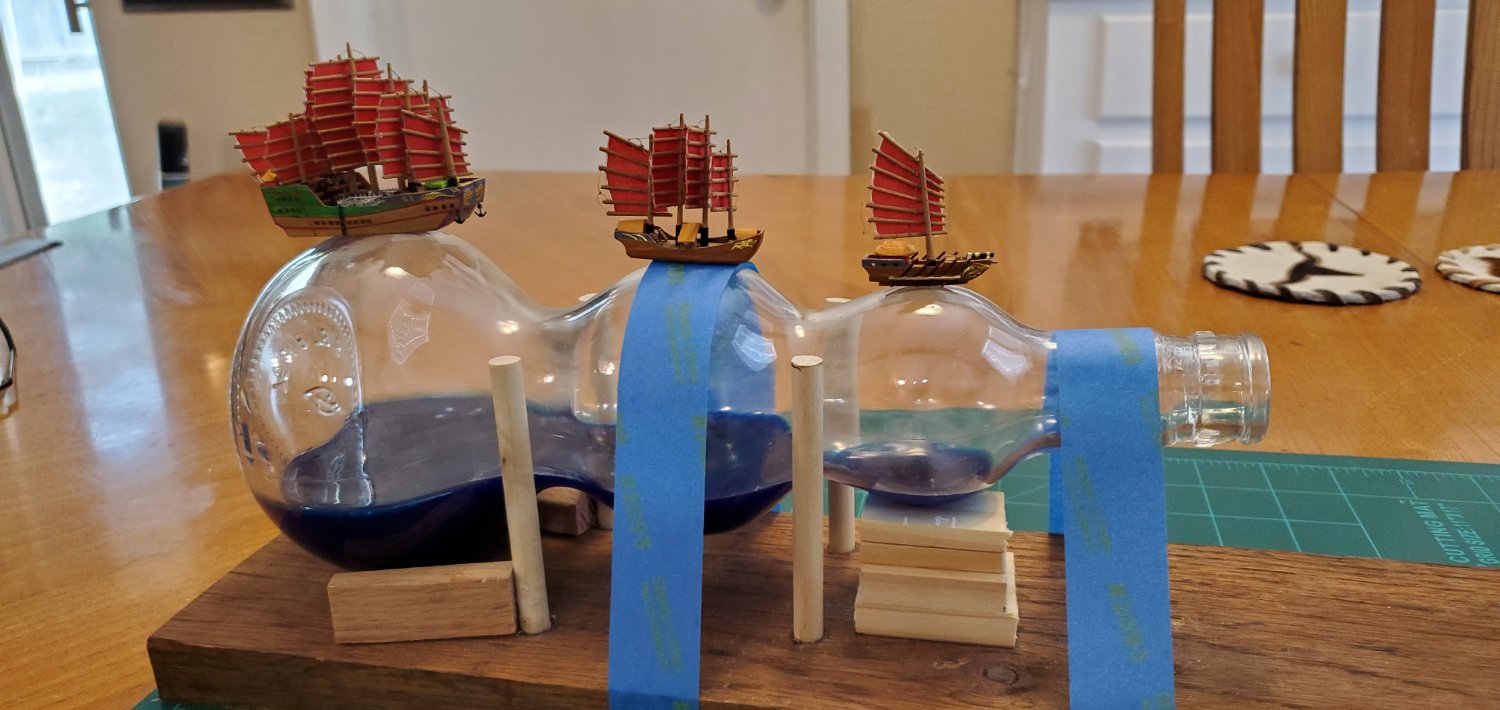
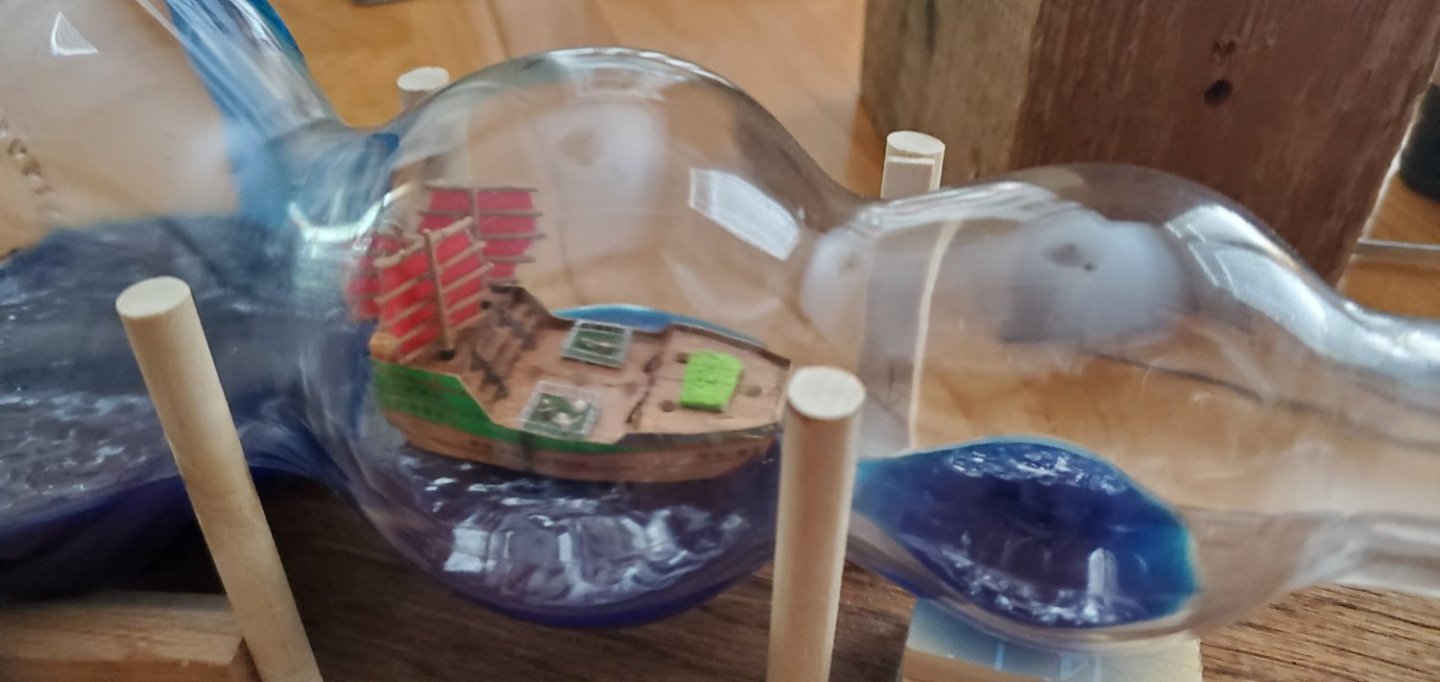
The third and last ship is in the bottle! The mini Treasure Fleet is afloat!! Now I've got some work to do on the base for the final presentation.

- 194 replies
-
- 13
-
-
-
- Bottle
- Treasure Fleet
- (and 3 more)
-
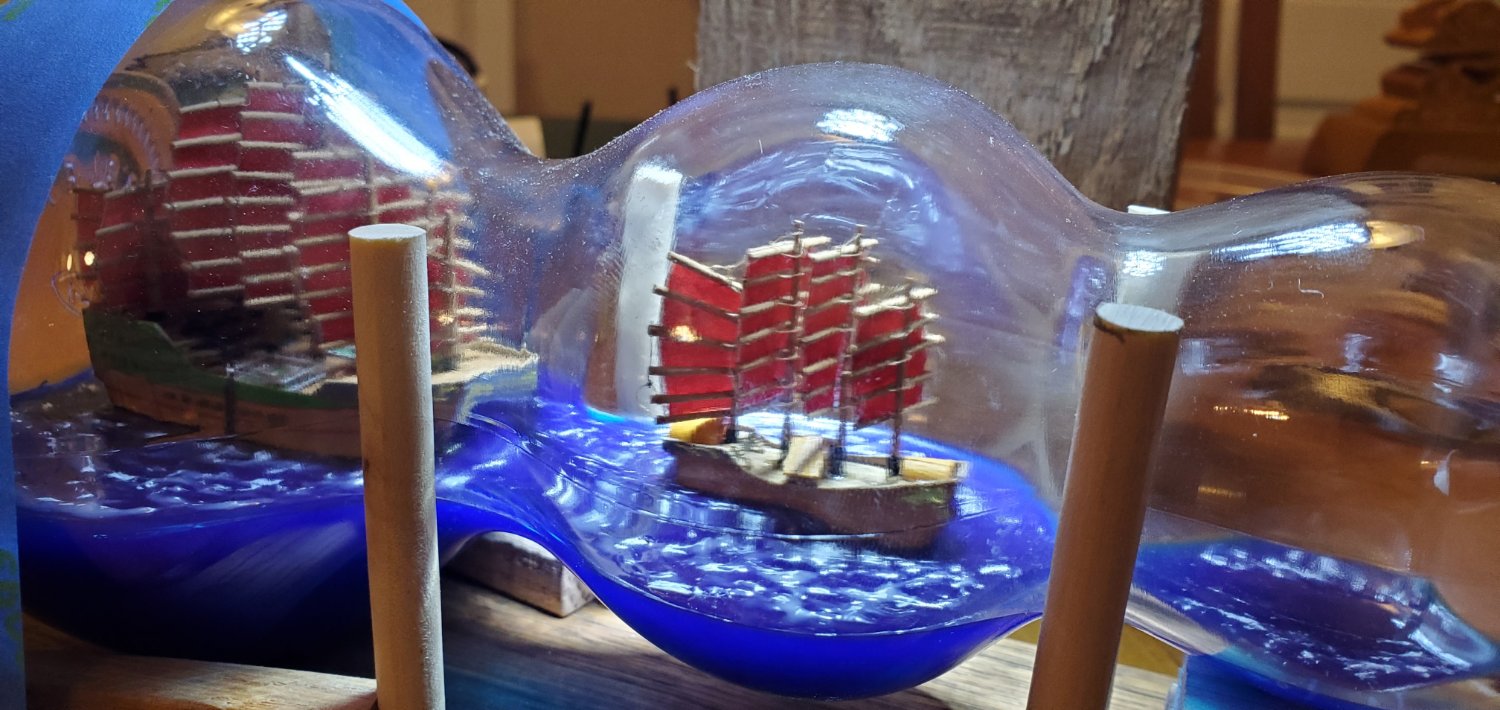
The middle ship is in the bottle and assembled in place. Two down, one to go!

- 194 replies
-
- 8
-
-
-
- Bottle
- Treasure Fleet
- (and 3 more)
-
Thank you, Keith, SH Johnny, Mark, Roger, and Grant! Yes, huge sigh of relief here!!! On the home stretch now. Hopefully I did not jinx myself as Keith alluded to earlier!
- 194 replies
-
- 3
-
-
- Bottle
- Treasure Fleet
- (and 3 more)
-
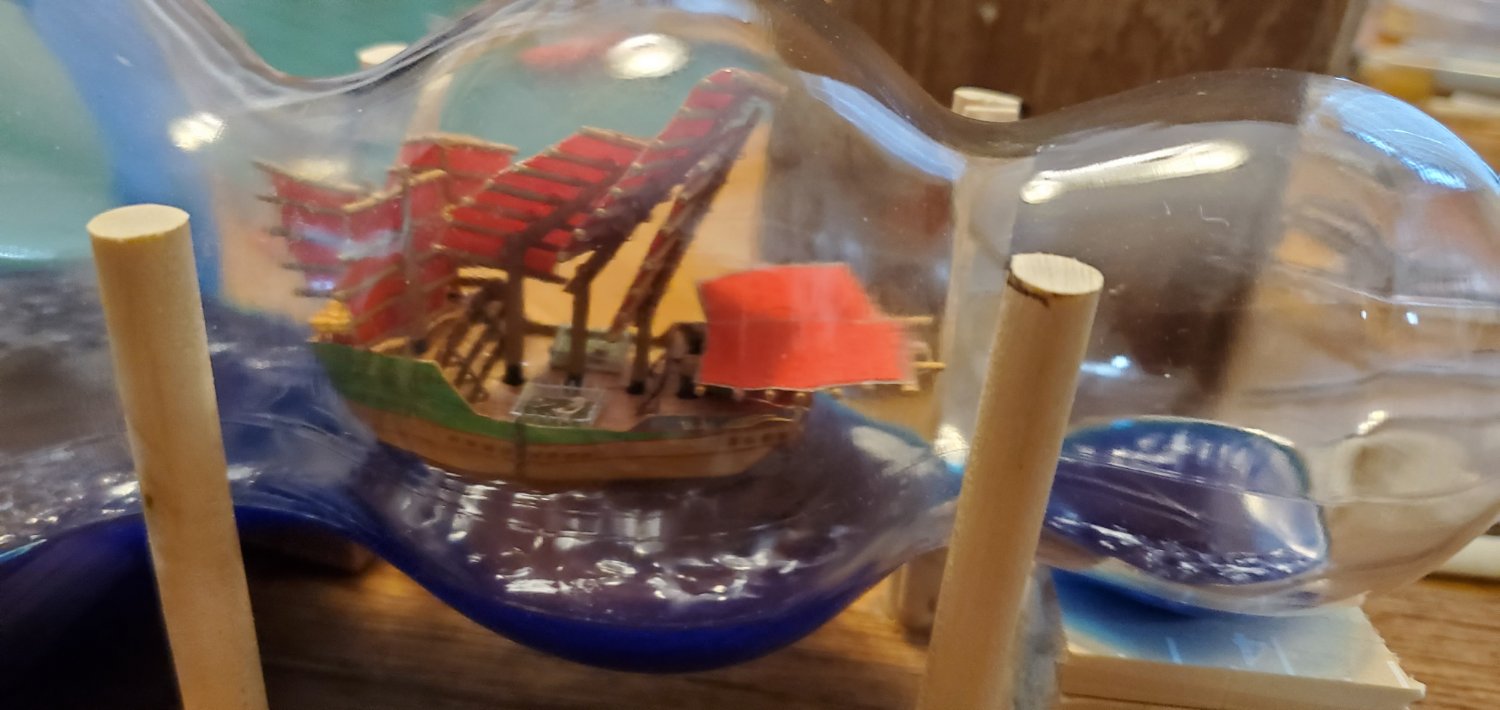
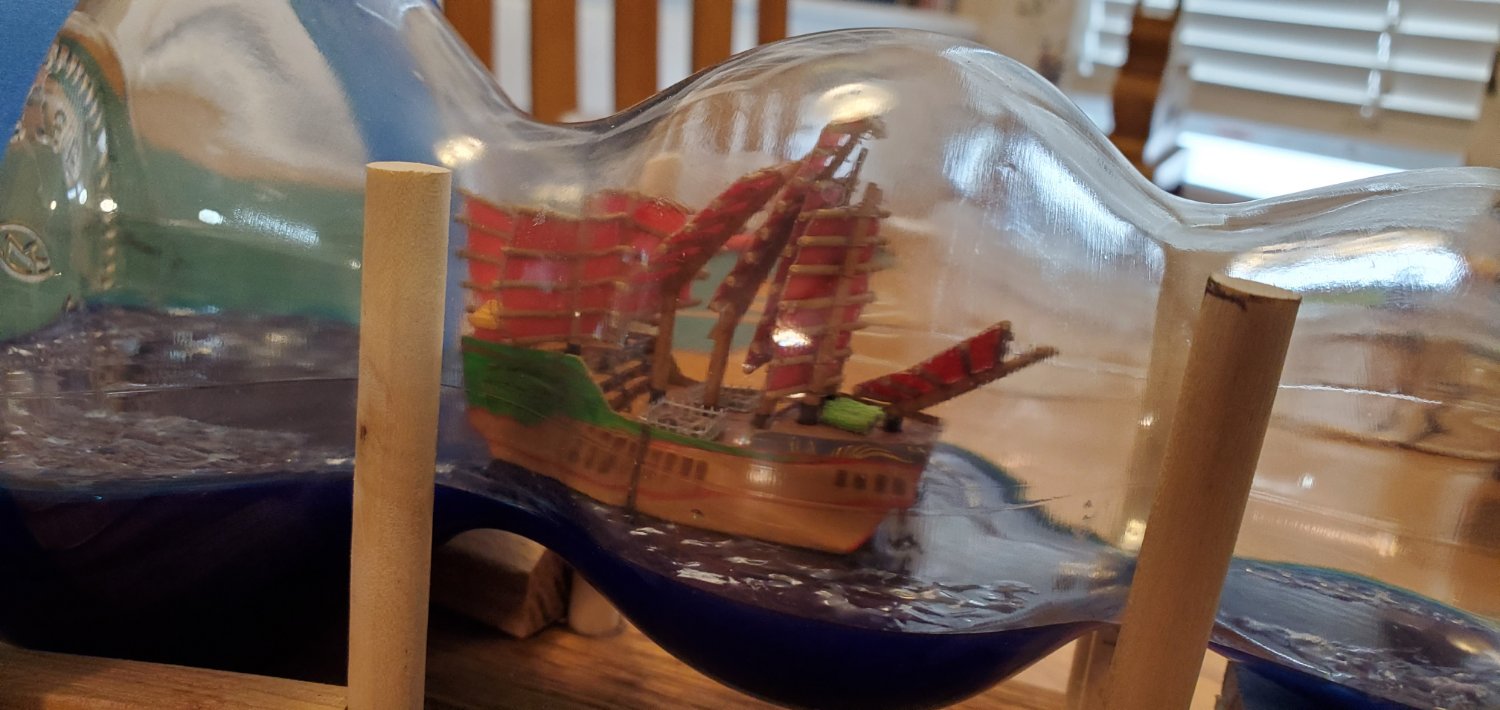
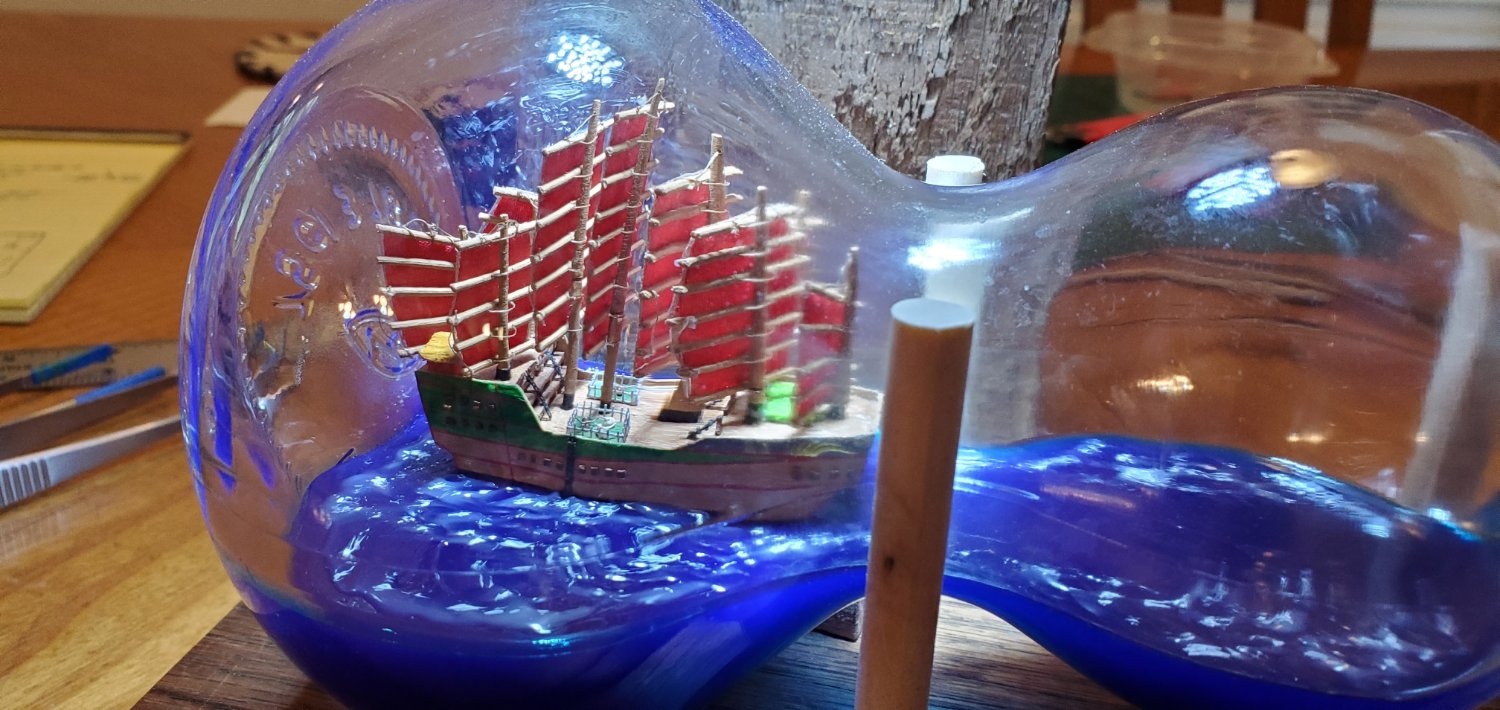
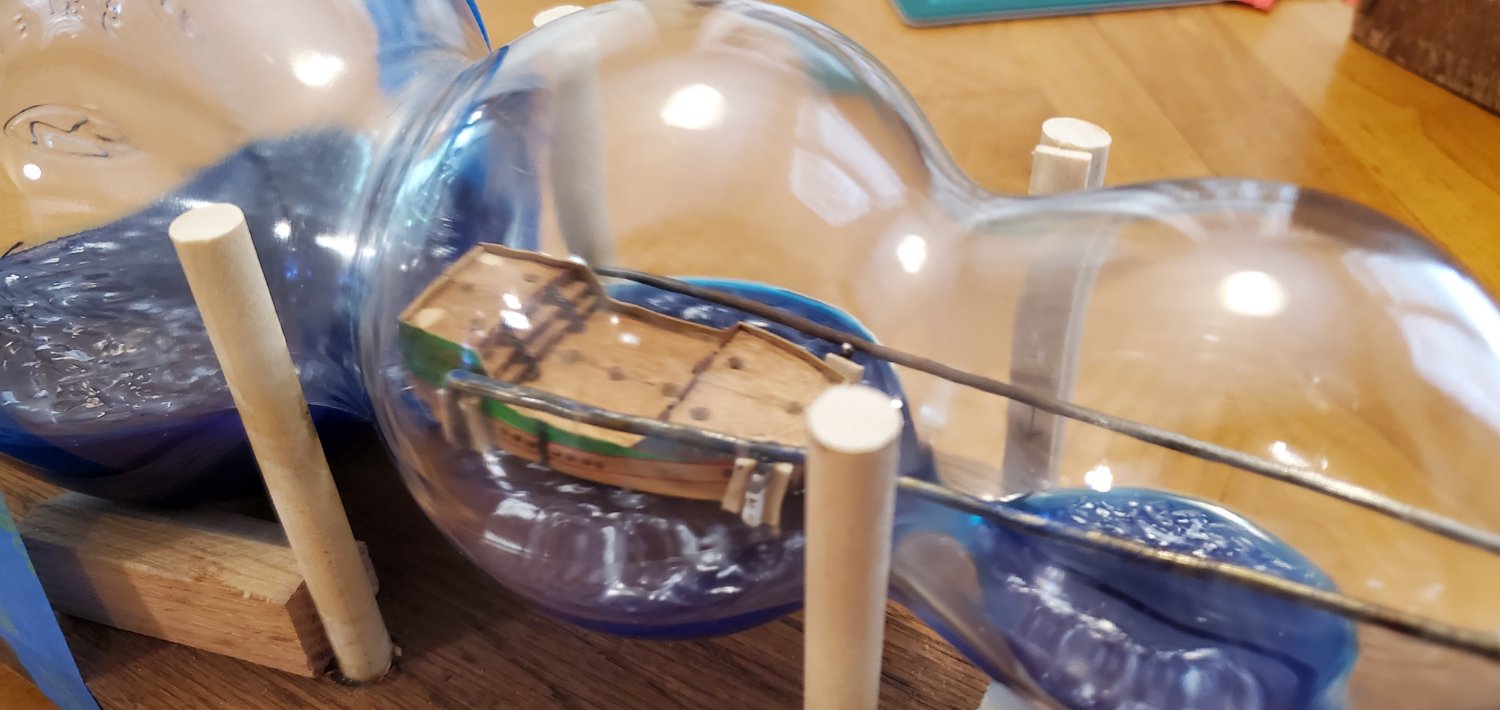
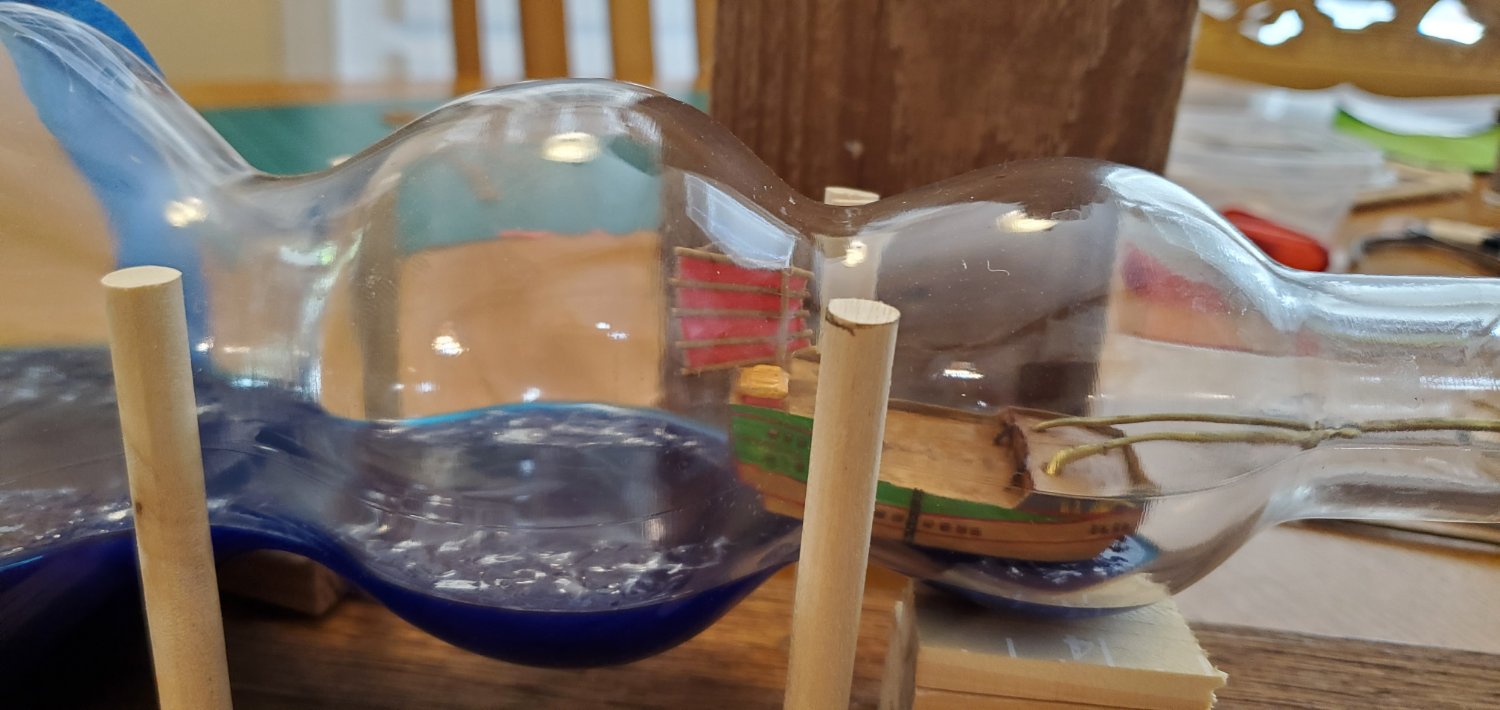
While working the masts/sails, it dawned on me what the best thing about these junk ships is - no ratlines!!! 😍 Anyway, it was a long but successful process Friday night and Saturday installing the 6 hinged masts with sails. I started with the ship resting in the middle bulb. Here was the process for each mast/sail: 1. Scrunch the sail up the mast, insert into the small bulb, and push it off to the side oriented where I could easily grab the mast with long tweezers. 1. Mix some 30 minute epoxy and start a timer (it's really only about 20 minutes before it becomes too gummy to work with). 2. Dab a bit of epoxy into the targeted mast hole. 3. Grab the mast with tweezers and work it a bit to get it hinged at a good angle for inserting into the mast hole. 4. Make a bunch of stabbing attempts until I finally hit the hole (trying to ignore the ticking timer). 5. Using another way-back tool, straighten the mast upright and maneuver it around until the whole thing looks like it rests at a 90 degree angle bow to stern and port to starboard. 6. Let it sit for 2-3 hours, then rinse and repeat. During the whole process I was really worried about the mast hinges. They were getting a lot of work as I was repeatedly having to push the sail up and down to make room for each successive mast/sail. But they held up quite well. I was terrified that one would stress and break which would have been a catastrophe. After all the masts/sails were firmly in place, I slid the ship into the back bulb, pushed it to the side as far as possible (maybe 1/2"), dabbed some epoxy on the water, and slid it back over the epoxy to lock the ship into its final resting place. Once that round of epoxy was dry, I carefully raised the folded part of each mast/sail till it was upright and straight. Then I dabbed a touch of epoxy onto the hinge to lock it and moved on to the next one. Distorted pictures follow...
- 194 replies
-
- 3
-
-
- Bottle
- Treasure Fleet
- (and 3 more)
-
The addition of grain is very noticeable and looks good. Did the instructions in the kit say to enhance the wood strips like this or did you decide that on your own?
-
You and me both! I am not a patient person so this is testing my limits!! If I can get the next 6 hinged masts in place and raised on the treasure ship I'm home free. The 2 smaller ships will be relatively easy.
- 194 replies
-
- 2
-
-
- Bottle
- Treasure Fleet
- (and 3 more)
-
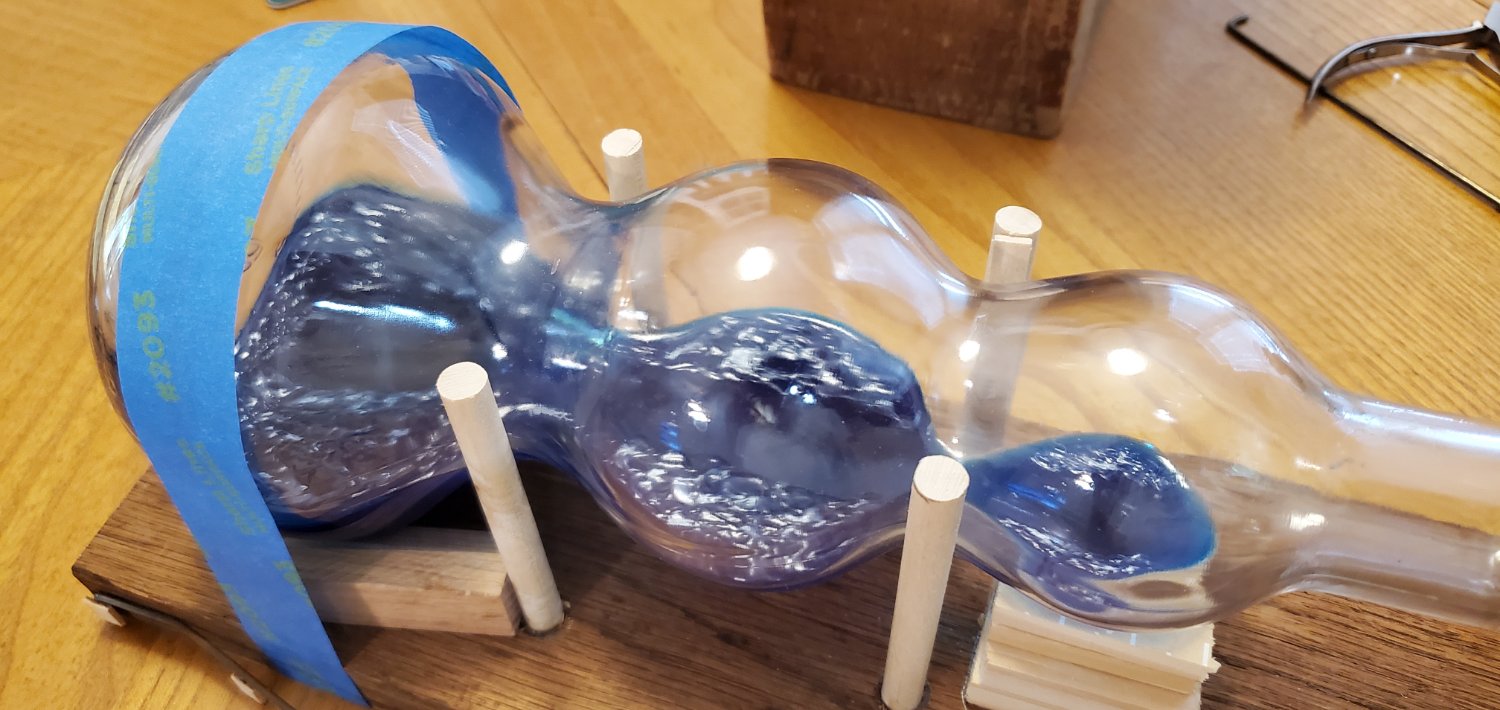
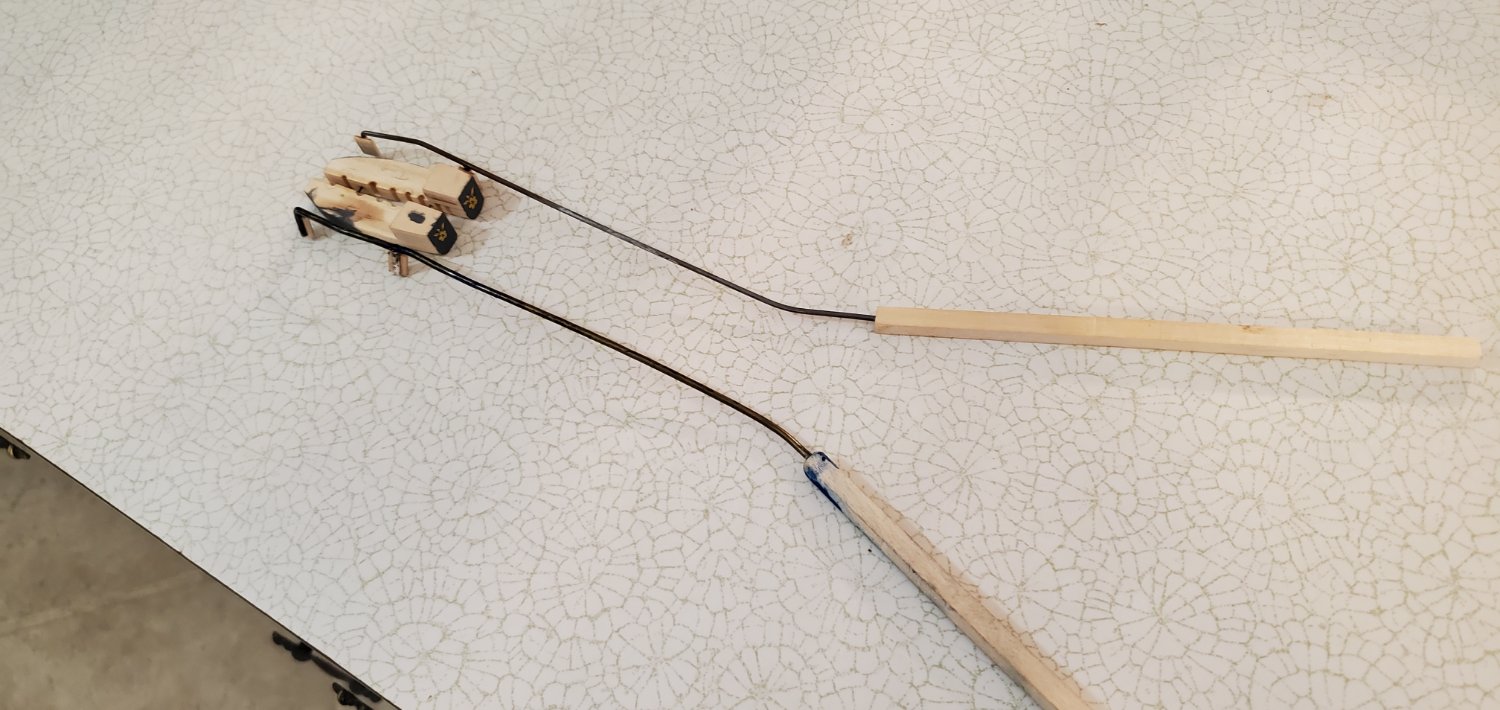
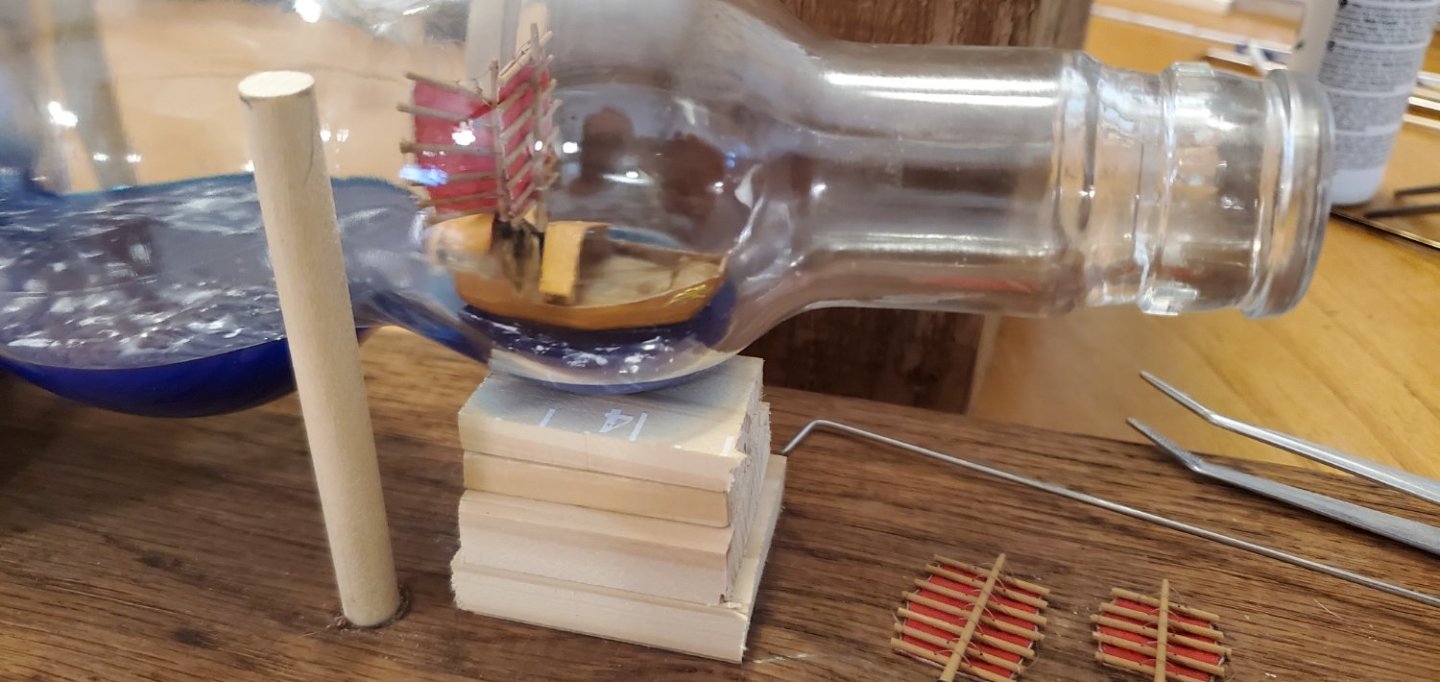
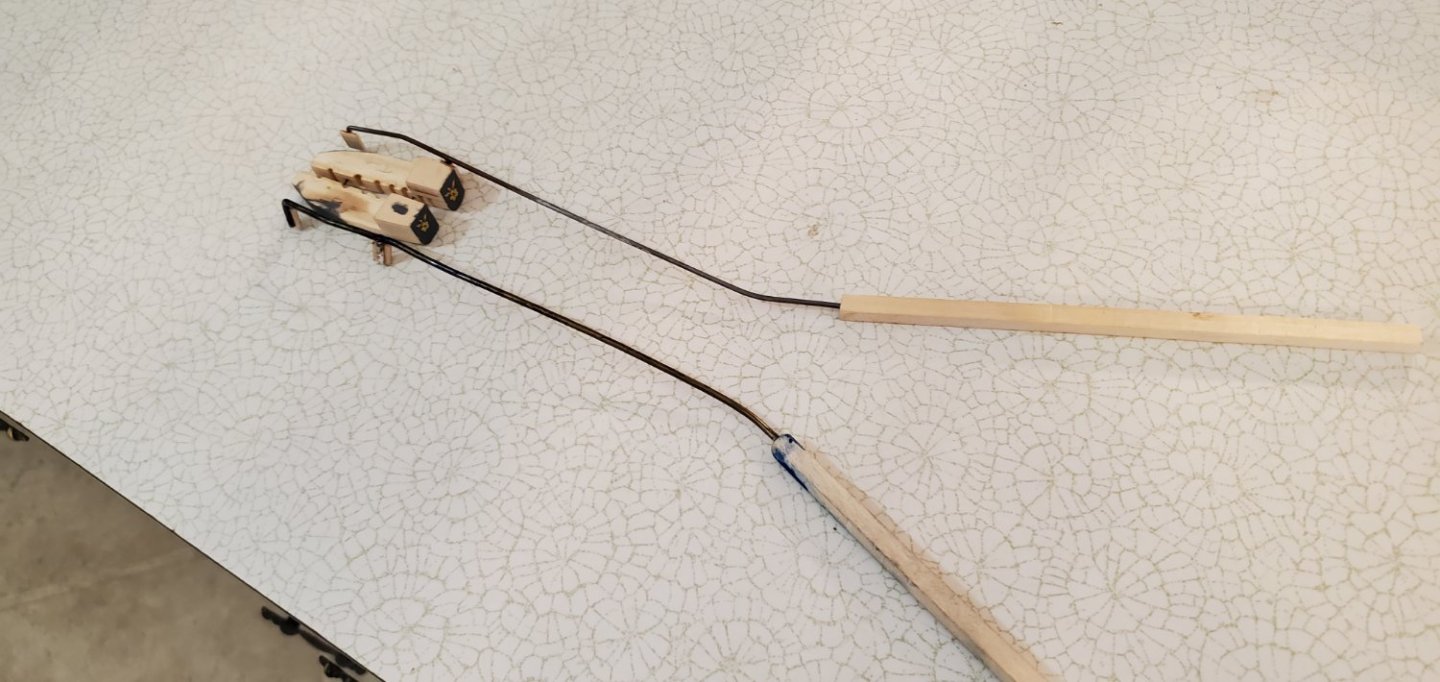
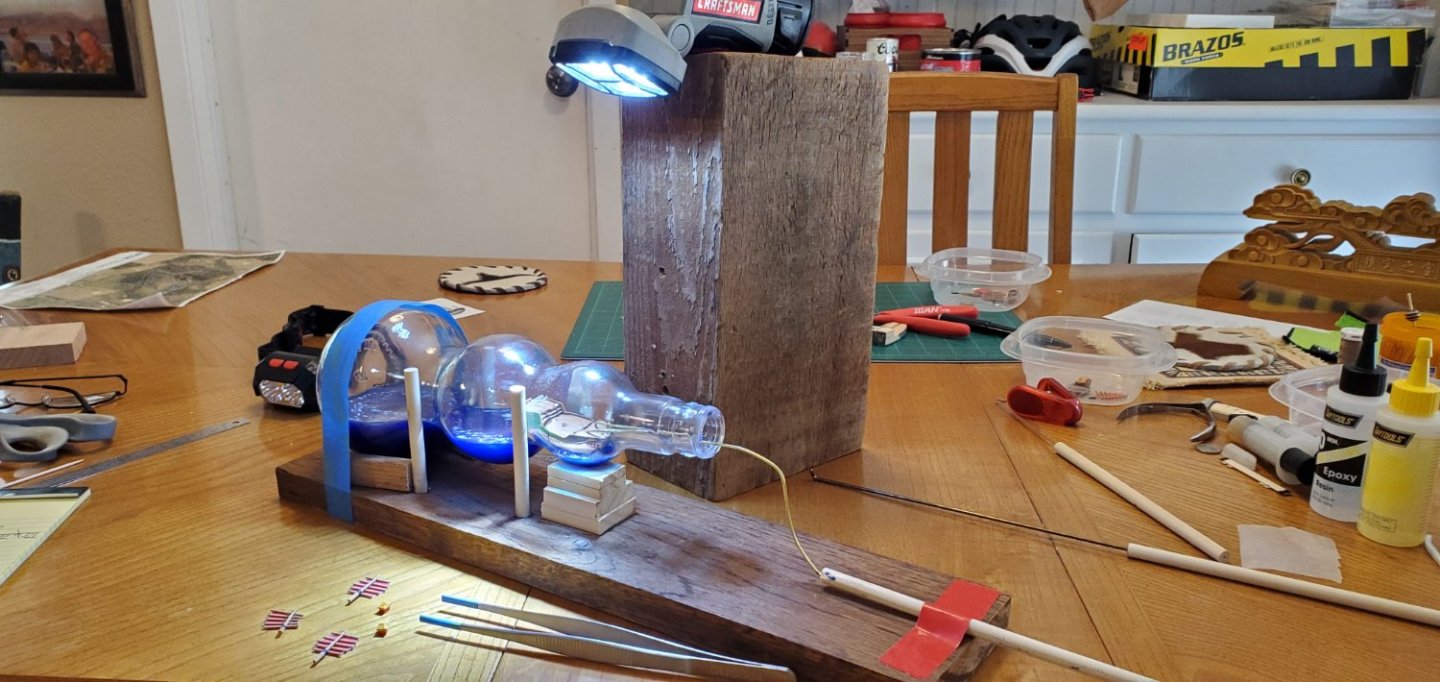
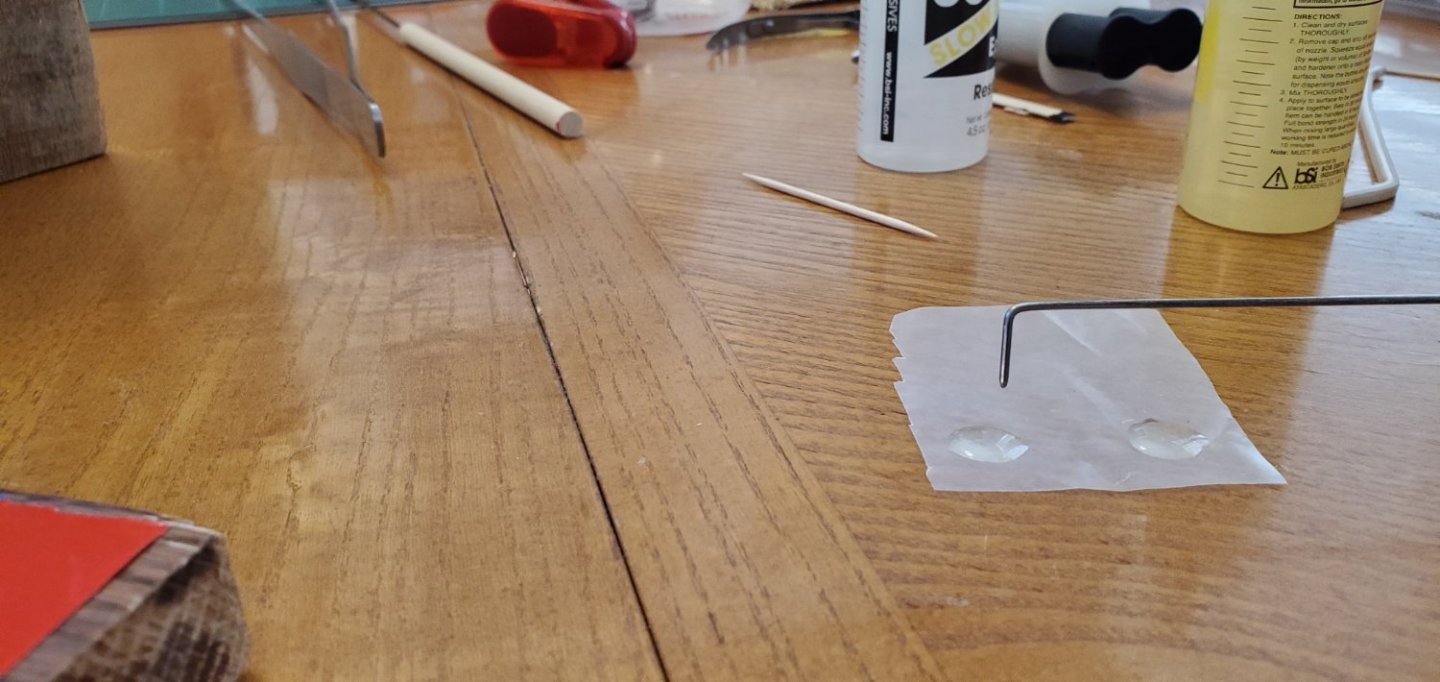
Game time!! Unlike my previous builds where getting the ship in the bottle was the moment of truth, this time that will be the easy part. The real challenge is assembling things inside the bottle. It’s going to be a slow process as I’m using 30-minute epoxy for each step (hopefully that’s sufficient time). So there will be long waits for the epoxy to set between each step. Here’s the starting point – with waves and whitecaps added to the water. I left a smooth channel down the middle so I can slide the ships as needed during the assembly process. When I get the furthest left ship glued in place, I’ll add some texture in the narrow water before I put the middle ship in place. Here’s the tool I made to push the 2 halves of the hull together and hold them in place till the epoxy dries. I got the 2 halves of the hull inside and glued together. No turning back now as the boat is not coming back out of the bottle!! After the hull epoxy set, I needed a way to hold the hull steady while I inserted the masts and added fittings to the deck. So here’s the tool I came up with. It’s a brass rod with two prongs that fit inside two mast holes on the forecastle. Secured of course with duct tape. For placement of epoxy to exact spots on the deck as well as inside the mast holes, I use a long, thin metal rod with the end filed to a point. The 2nd pic shows placement of two small shelters on the rear corners of the quarter deck. The 1st pic below shows successful installation of the first mast and sail in the rearmost hole on the quarterdeck. The 2nd pic shows successful installation of the other two quarterdeck masts/sails as well as the longhorn corrals and corn field. Next up is the real test - adding the hinged masts...


- 194 replies
-
- 8
-
-
-
- Bottle
- Treasure Fleet
- (and 3 more)
-
WOW! That is amazing stuff. Her work requires real artistic talent which automatically disqualifies me. For the most amazing miniaturist I've ever seen, check out my addition to MTaylor's post on Impressive Miniatures: https://modelshipworld.com/topic/32342-impressive-miniatures/#comment-929824
- 194 replies
-
- 2
-
-
- Bottle
- Treasure Fleet
- (and 3 more)
-
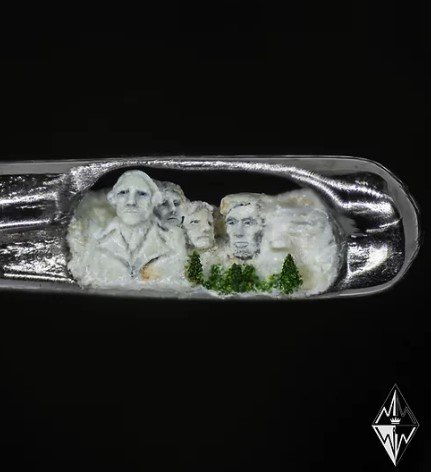
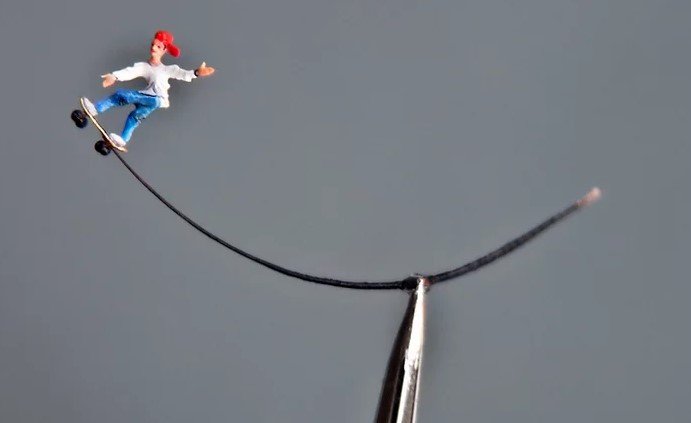
Speaking of impressive miniatures, have you seen this? It's the most amazing miniature art I've ever run across. The Mount Rushmore carving is inside the eye of a needle. The BMX rider carving is on the tip of a dog's hair. The skateboarder is on an eyelash. Yes, an eyelash!! https://www.willardwiganmbe.com/

-
Thanks for checking in, Mike! Yes, the pressure and suspense is mounting as I impatiently wait for the texture I added to the water to dry. I know you understand what it's all about!!! 😬 Regarding the Dimple products, looks like my local stores hear carry them so I will check them out.
- 194 replies
-
- 3
-
-
- Bottle
- Treasure Fleet
- (and 3 more)
-
I echo what Tom, Brian, and Mark say above. Your additional progress on the Tennessee is fantastic, but the best part is seeing you back and working on it.
-
HAHAHA!! Keith, I'm pretty sure there is professional help available for people with minds like yours!!!
- 194 replies
-
- 2
-
-
- Bottle
- Treasure Fleet
- (and 3 more)
-
Thanks, Grant! I checked out your diorama beginnings. What a cool project you have chosen. I'm on board to watch that one come to life.
- 194 replies
-
- 3
-
-
- Bottle
- Treasure Fleet
- (and 3 more)
-
WHOA!!! You weren't kidding when you said your next project would be something quite different! This is going to be a very interesting build to follow. How big is this going to be when it's complete?
- 333 replies
-
- 10
-
-
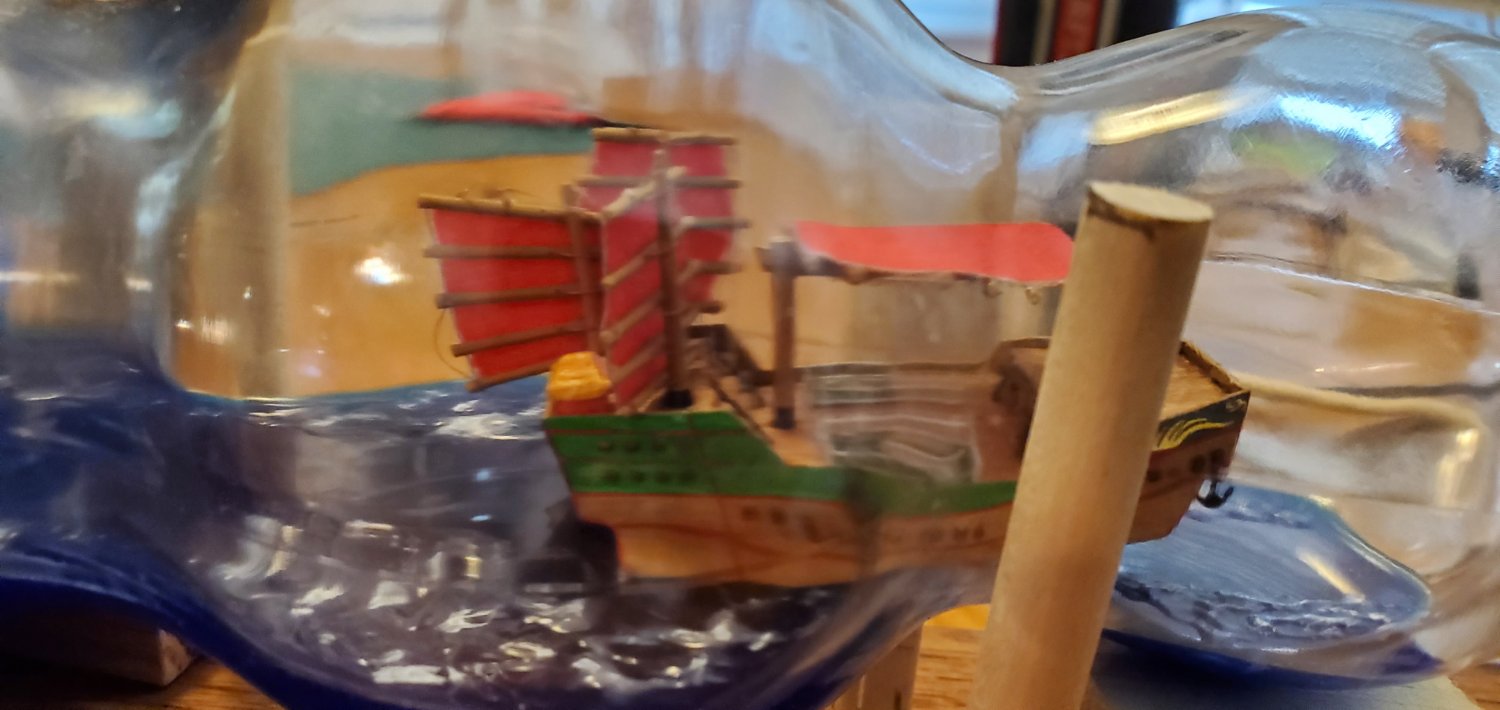
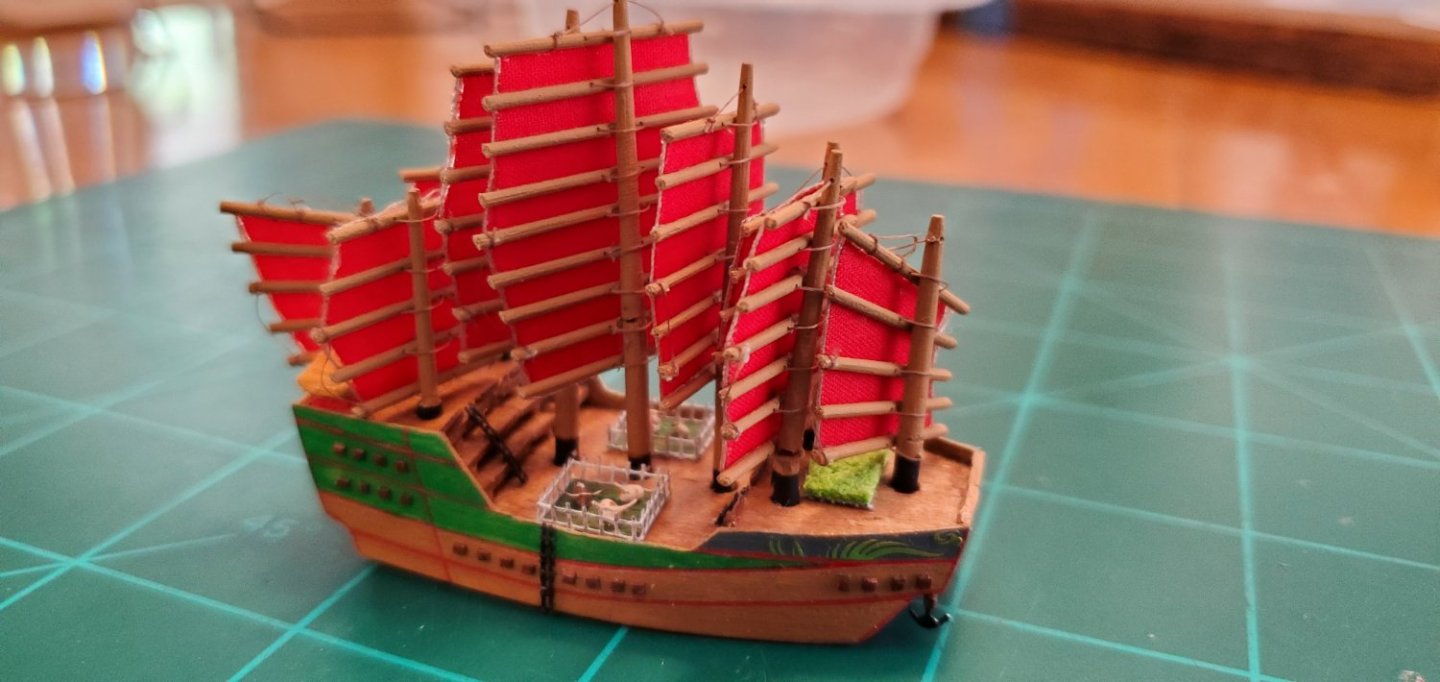
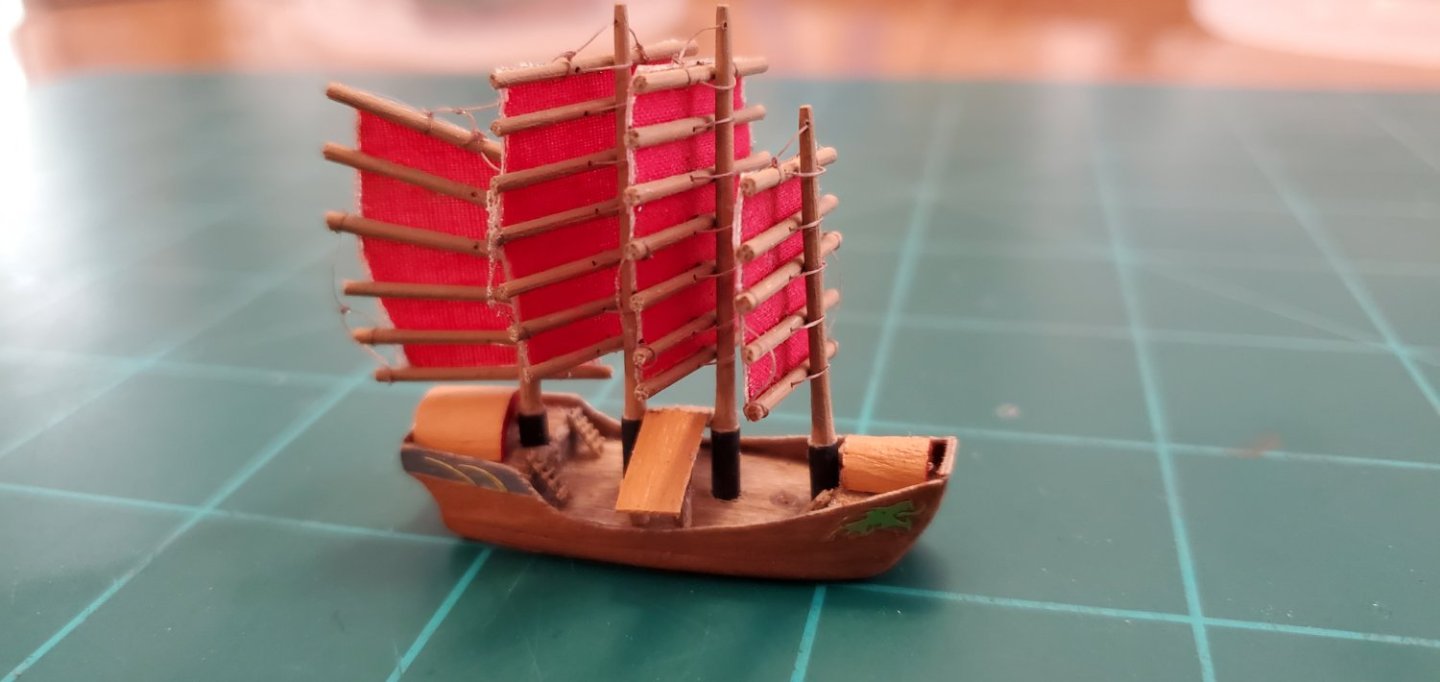
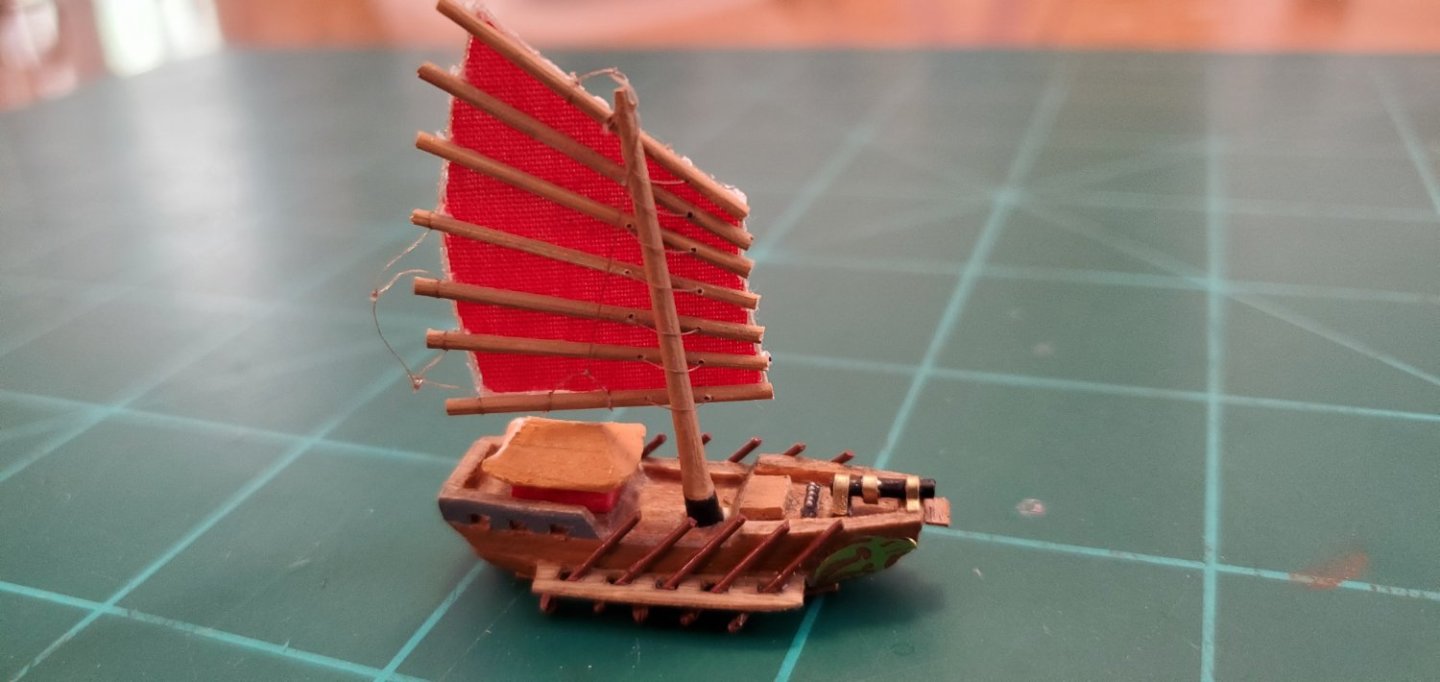
Here's closeups of each ship. In case things go south, at least I will have record of what they were supposed to look like! 😃
- 194 replies
-
- 9
-
-
-
-
- Bottle
- Treasure Fleet
- (and 3 more)
-
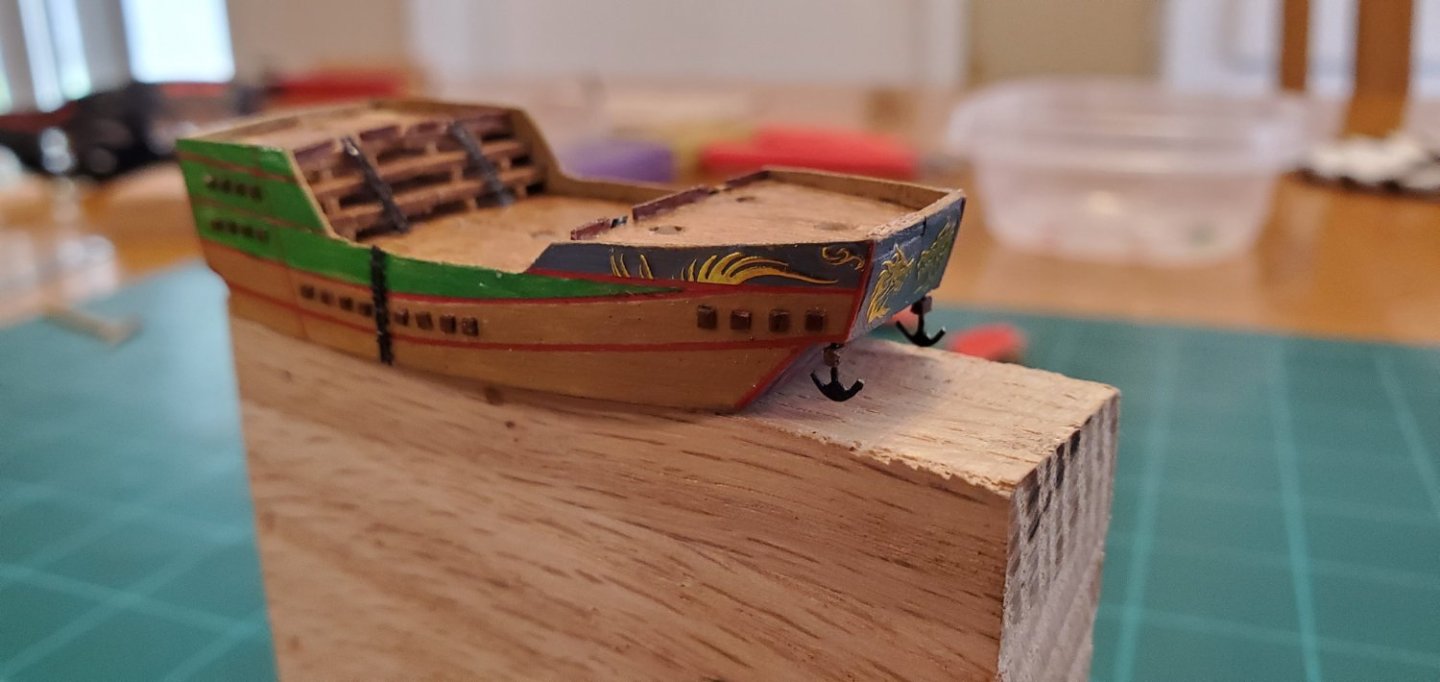
Well heck. I thought I was done with the ships, but when I posted the picture of the Model Shipways bow I noticed there were 2 hanging anchors that I never noticed before. So it was back to work to make a couple of small anchors and complete the treasure ship. Also, since I really liked how the fingernail decals turned out on the treasure ship, I went back and added some ornamentation to the first 2 ships. And with that, the ship construction is complete! I am going to go add a little bit of texture to the water inside the bottle. Once it dries then it's go time! Anxious moments await!!! The last picture is a bit of a preview.
.jpg.265a7cb011ed1d9a2056c8c18c087197.jpg)

- 194 replies
-
- 6
-
-
-
- Bottle
- Treasure Fleet
- (and 3 more)
-
I believe Mark is correct referring to the modeler as he. Based on the interview in the link below, Ebroin Song is a Korean sculptor/modeler. I watched his video on the battle of Midway-Akagi on Fire diorama and agree with everyone that his work is truly astounding! https://www.planetfigure.com/threads/interview-with-ebroin.241649/