
HOLIDAY DONATION DRIVE - SUPPORT MSW - DO YOUR PART TO KEEP THIS GREAT FORUM GOING! (89 donations so far out of 49,000 members - C'mon guys!)
×


Snug Harbor Johnny
-
Posts
1,485 -
Joined
-
Last visited
Content Type
Profiles
Forums
Gallery
Events
Everything posted by Snug Harbor Johnny
-
 ... 100% NH4 ? (Lab grade ammonia) That would be a powerful base and dangerous. Perhaps a 'full strength' household ammonia was used (a guess). In another build a triangular file was used to press a little into the back side of a plank to be bent to make a series of indents along the backside in the area to bend. (I can't locate the image right now.) I mean to experiment with this idea - and some water soak may assist.
- 165 replies
-
- 1
-

-
- Red Jacket
- Marine Model Company
- (and 2 more)
-
You've done a fine job on the Baltimore !! ... and every builder is aware of any mis-step, or 'could have done better' on their own build. I printed the kit on 8 1/2 x 14" legal paper by using Photoshop to enlarge the images enough so the large pieces fit somewhat within the 14" limit, and will yield almost a 25" model (about 1:160 scale) when built over a future winter when current projects are finished. Of course, that made the width of the image go beyond the 8.5" width - necessitating splitting the image into 2 cropped versions that manage to get all the pieces intact on either one or the other. I'm hoping that the larger version will make some of the fiddly bits easier to make. - And your build offers everyone valuable guidance. Perhaps filling the voids between the bulkheads of the paper 'skeleton' with balsa will add much needed strength, heft, (and when shaped and sealed) something to form the paper 'skin' to with more limited wrinkling - especially in the upper stern area. other items can then be pinned right into the balsa as convenient. Thank you again for sharing, mate !!
- 37 replies
-
- 1
-
-
- Baltimore
- heinkel models
- (and 2 more)
-
Of course there are images that entered into the public domain from the moment they were offered for public sale with no claim of copyright - I'm talking about late 19th and early 20th century postcards with photographs or illustrations on the front side. Sometimes all they will say is something like 'printed in Germany'. Yet some individuals or corporate entities simply claim 'ownership' regardless - and multiple entities may be claiming ownership of the same postcard image! The only explanation provided by a friend (a published author) with some knowledge of copyrights is that individual examples of a postcard in the public domain will have unique defects and damage sustained over the years (like stains, creases, tears, postmark, spots, etc.) that comprise a virtual 'fingerprint' of that particular copy, thus making it unique. Thus someone may want to claim exclusive ownership of their own copy, This argument is nebulous, nevertheless one can take any public domain postcard image (whether 'claimed or not' - or any mage from an early 20th century copyrighted book that has entered into the public domain), alter it digitally (in Photoshop or other software) to 'erase' spots, repair creases and tears, change the coloration ... and then add your own special details to make it uniquely your own. Then whether you want to copy protect your own version of the image is yours to make.
-
My Dad built this kit before I was born, and I remember it being in the basement for a long time ... but no one can say whatever happened to it. Most likely he gave it to someone as a gift.
- 44 replies
-
- 1
-
-
- Scientific
- Billings Boats
- (and 1 more)
-
The Billings kit will be a major work, but there are at least 2 builds on MSW that can expand on what many say are relatively sparse instructions that come with the kit. The journey of a hundred miles begins with with a single step.
-
Super detailed ... this is a good one can modify the Emden kit. It look to be a similar sort of ship as the U.S.S. Baltimore, another light cruiser.
- 81 replies
-
- 1
-
-
- Micromaster
- Eduard
- (and 4 more)
-
Gold solder for brass
Snug Harbor Johnny replied to Richard Braithwaite's topic in Metal Work, Soldering and Metal Fittings
One other thing ... Gold - even 8 carat gold (the kind used in jewelry for people who want to show a lot of "bling", yet get the most bang for their buck) - won't change color much over time, at least nowhere near the amount of change brass will get a brown patina. This means that the solder point might become more and more noticeable over time unless completely painted over. I'm making a few brass fittings for a special project now, and do everything possible to saw cut, drill, file, bend, twist, lethe turn ... and any combination of the above to make each piece needed either without soldering or with a press fit. -
'Been looking for an affordable (and still working) wringer ... and I now see how ordinary paper can look if lapped when glued. Yet I've found a very thin paper used in the Pyxis machines at our hospital (where I work per Diem as a Pharmacy Tech) ... that looks no more than .001" thick (I'll have to measure). It is extremely fine with no apparent fibers/texture, is dull on one side and semi-gloss on the other that is treated so that an impacter generates text without ink. I'll do a test with strips of this applied with glue (dull side down), and later scored at intervals with an X-Acto to create 'plates'. The top edge can be burnished slightly before gluing the next strip, and I don't think there will be any 'telltale' of the overlap. Then will come scoring of that next strip to make plates staggered with those below. When done, I think that a light spray painting of a Muntz metal color will work well on the glossy exposed surface.
-
Such a fine model deserves a case of some design. I've considered building a frame/box with a thin plywood back (having an ocean or harbor print affixed) and top, with a pieces of acrylic for the front and sides that just slide down from the top for easy access.
- 144 replies
-
- 3
-

-
-
- Harriet Lane
- Model Shipways
- (and 1 more)
-
'Nice cockpit ... her lines are beautiful. Your build is great so far, and worth reviewing !
-
Gold solder for brass
Snug Harbor Johnny replied to Richard Braithwaite's topic in Metal Work, Soldering and Metal Fittings
... sounds like expensive solder. -
Get well soon. I've been there - done that 4 times in the past ... twice with laser lithotripsy in each ureter (catheter required for recovery), and twice with ultrasound in the kidneys (required slant inversion to pass all the 'gravel'). Since mine were calcium stones, a potassium citrate pill twice a day (to increase solubility of calcium oxalate) , plenty of hydration (to maintain diluted urine) and limiting foods containing significant oxalic acid has kept stone formation at bay for 7 years so far.
-
Greetings from Sydney
Snug Harbor Johnny replied to Andreas Weber's topic in New member Introductions
G'day, mate ! -
A super job to be sure ... well done !
-
Hobby Laser Machine
Snug Harbor Johnny replied to kgstakes's topic in Modeling tools and Workshop Equipment
My Admiral has an ETSY shop that does generate income, but she started with a hobby many years ago. Then started making things for a few people here and there, then started selling at craft shows - all the time increasing her skill and expertise making historical costumes. The ETSY platform had a slow start, but clientele and reputation were successively built so that it h as become an effective 'side hustle'. See what happened with Syren products, and then with Ropes of Scale. Its all about finding a niche market and supplying it. Its what free enterprise is all about. Best of luck mate, at whatever you do ! Johnny -
To prevent a wire drill from 'skating around', mark the location with a mini prick punch - tapping the punch gently over a metal support (vise or even a thick piece of steel stock). The workpiece can be secured with whatever jury rig works, and the exact position of the punch mark (if done very lightly) can be 'walked' by angling the punch in the direction you want the mark to go. Then tap with a mini center punch to get the correct drill angle.
-
This is the best Gokstad model I've yet seen ... kudos !
-
Ahoy, mate - and welcome aboard. Your build looks good, and you can post progress pictures as you go. From what I've seen, there are various methods of treating copper tape - so it may be wise to experiment with some of them on a trial board to judge the effect. Left alone, the copper should gain a brown patina over time - and you are building for your family to enjoy far into the future.
-
Ahoy, mate - and welcome aboard. By chance, I've written a historical novella for teen readers that features a green parrot named Paco - so named by a Mexican boy who collected the chick from a nest and helped raise the bird (not knowing that the Amazon was female). 'Paco' received advice from El Loro and Pappagallo (two Cotorras kept as house pets) on how to deal with people, since she was destined for the U.S., where she'd learn how to sing and choose her own name - Diva.
-
Rob, it looks like the hood is fashioned to fill the entire gap between it and the cutwater - making for a solid assembly with no gap between (so stronger). This would be as opposed to just two angled pieces attached to both sides, having a gap behind. Perhaps a picture from directly below would illustrate your construction to advantage.
-
'Fairing' (sanding angles to) the bulkheads, especially in the fore and aft areas, will help - bending a springy wire over the frames will show both high and low spots needing fairing. Prying off what is there and re-planking is recommended at this stage, which is not too far gone. Using thinner planks to begin with (so the ones supplied can be cut in half lengthwise, if even by using a steel ruler and multiple cuts with an X-acto knife), as well as tapering the planks toward the ends will help greatly. Soaking the planks in warm water until soft will also help. Then before gluing, going over the plank with a warm to hot iron will increase flexibility and drive off excess water. Use wood glue (like Titebond), and the glue will penetrate the mating surface of the damp plank and not affect the bond.
-
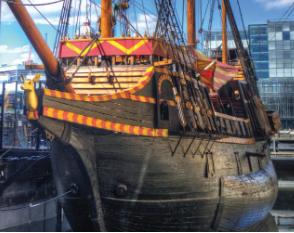
They had to do this very trick to the repro GH to make it seaworthy, as shown in the image below. After the modification, it sailed around the world.
-
Welcome aboard, mate !
