HOLIDAY DONATION DRIVE - SUPPORT MSW - DO YOUR PART TO KEEP THIS GREAT FORUM GOING! (89 donations so far out of 49,000 members - C'mon guys!)
×


Snug Harbor Johnny
-
Posts
1,485 -
Joined
-
Last visited
Content Type
Profiles
Forums
Gallery
Events
Everything posted by Snug Harbor Johnny
-
 'Just saw this idea that can neatly open the base end of a cylindrical bottle ... an easier way to insert a ship into a bottle, CA the glass back together and perhaps conceal the join with a turk's head knotting of scale rope around the bottle there. ... What I saw had sound, but the link is without sound. https://www.facebook.com/reel/1274656010633947
- 156 replies
-
- 3
-

-
- Queen Annes Revenge
- bottle
- (and 1 more)
-
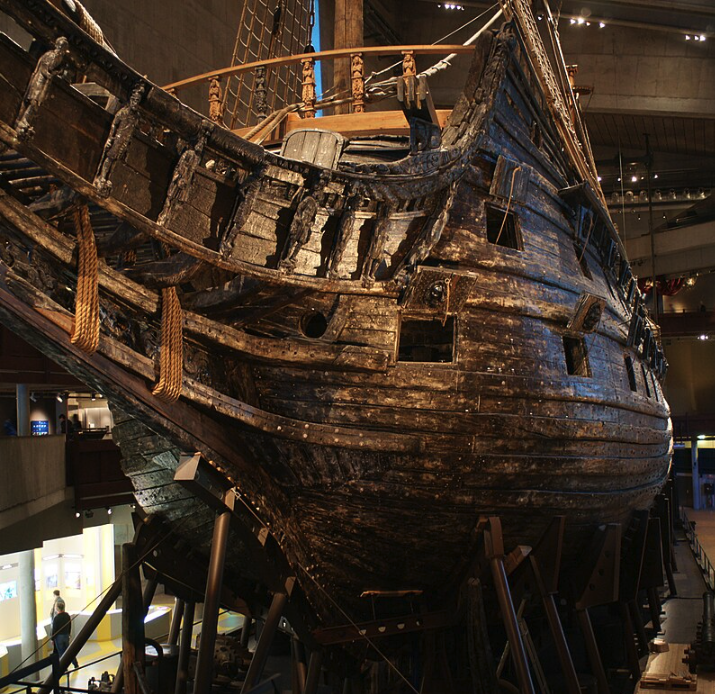
I like the warship directly under the wall painting on the right, where just the first mast sections are shown as if the ship is still under construction or otherwise in dry dock for a period of time. I'm probably going that way with my 1:100 Vasa due to the problems and compromises made in the old Billing kit (ca.1970) - and besides making the hull the focal point, I can wrap up the long-delayed project much sooner and get on with something else.
-
I'll throw my 'hat in the ring' with the following observations. Once can see on the model that the shrouds from the main top mast are still attached (although slipped) to the main topmast fallen backwards - there is no 'fourth mast'. Besides, the broadside photo of the Arizona shows the second of 4 masts situated in front of the funnels. The deck of the model is clearly seen to have no hole there for a mast, and the mast spacing (if there was one) would be way off from the photo of the Arizona (much too close). The Arizona bow goes almost straight down to the waterline, whereas the model has a definite curve (unfortunately cut-off so it does not go to the extreme bow, ergo does not show a bowsprit - which the Arizona does not have). The Peruvian has a distinctive wide white stripe on the funnels ... yeah the model has two, but perhaps was made by someone from memory. The Arizona has no stripes at all - and the wisp of steam discharged from a vertical pipe alongside the rear funnel is not a wide painted white stripe, which neither funnel has. And note that the Peruvian's thick steam vent pipe is located behind the aft funnel, as on the model. The Arizona has a thinner steam vent pipe ahead of the funnel. The Peruvian's funnels are nearly vertical (as on the model), while those on the Arizona have a significant rearward rake - as are the masts. The model's masts are only slightly raked, and that conforms to the photos of the Peruvian. Check out the complete Wikipedia coverage of the Arizona - she was 450 feet long (!) ... compared to the 373' of the Peruvian. The Arizona would look odd indeed if it didn't have a 4th mast for its remarkably long hull. The diminutive Peruvian would have only accommodated 3 masts, considering that it was originally 312' long. Its rebuilding to 373' after 10 years would account for the longer distance between the fore mast and main mast. There are more observations a keen eye can discern to support the arguments in favor of the Peruvian, but why beat a dead horse?
-
Occre Soleil Royal Model Ship
Snug Harbor Johnny replied to palmerit's topic in Wood ship model kits
The 1:65 deAgostini Vasa kit, with all its packages + shipping + tariffs will still undercut the Occre Soleil by $600, and may be a better kit. -
As on the Vasa of 1628, the bow guns were near the hawse hole, which on the Golden Hind would be the deck below the broadside armaments (as were the stern cannon). These two guns had longer barrels so their gun carriages could point nearly forward. Period artwork of galleons in general show relatively high angled bowsprits, so the yard with its square sail would be high above the water. This would block the view and the line of fire from any gun on or in the forecastle, but bow guns (like those of the Vasa) would fire under the sail on the bowsprit.
-
I've heard that 'Practice makes perfect, but only with perfect practice.' If you practice imperfectly, now and again you'll get it right or nearly right - whether a piece of music or just throwing darts at a dartboard. That instance of very good (if not quite 'perfect') practice increases the chance of 'getting it right' (or nearly so) in the future. Over time one will be ever closer to the mark most of the time. Lay off any endeavor long enough, and you'll get 'rusty'.
-
I'm rather taken by your 'simpler', darker version where there is no 'wrap around' of the so-called Captains Walk. This may be a misnomer, since the rear platform would come in handy for small arms fire and swivel guns to supplement the 2 cannon below that protect the most vulnerable part of the ship. The captain and officers would bunk in the deck above and I think that there would be at least a couple small windows for observation there. Above that is a sail/flag storage compartment. Below the officers' bunk/hammock level would likely be the officers' mess. The broadside does have 7 guns per side - in accordance to the accurate period report of the Portuguese navigator daSilva. The only ordnance missing would be 2 guns at the bow, facing forward on the deck below the main gun deck, where the crew would have hammocks and some stores. I also like the kevels on the gun deck ... we're not sure how early belaying pins were used (early 1600s?), but a few might have been found. You have made excellent models, and there is much to recommend them ! Johnny
-
Said my Dad, "You'll never succeed until you try." (Don Quixote, "To try, when your arms are to weary, to reach the unreachable star.")
-
My advise, mate, is not to hurt your Admiral's (wife's) feelings. After all, "Happy wife, happy life" ... or for MSW builders, "Happy Admiral, happy life". She did not know anything about the MSW banned supplier list. She wanted to surprise you because she loves you. So you can't reject the kit without perhaps causing hurt feelings - which are very important to the Admiral, nor can you do a build log on MSW. But you can still build it after you do the Hayling Hoy as a great exercise. You can say that the Unicorn is a fancier and more complex ship, and you want to build your skills first on the Hoy. Who says you have to do a build log on everything you make? BTW, did you mention that another kit is on the way (if it hasn't come already)? I've found that its always best to confer with the Admiral on things other than small purchases (supplies, small tools). Now after you build the Hoy, perhaps your skills might not be 'honed enough' to take on the Unicorn. Then, with the Hoy proudly displayed in a case or cabinet, you can choose another 'skill building' ship that you can do a build log on. If you put off building the Unicorn, she is unlikely to get you another kit. And eventually, you can build the Unicorn 'off line' ... Johnny
-
Welcome aboard, mate !
-
'Guess a 3D fireball (actually, there were two - port and starboard) will have to be something filamentary ... so it can catch and reflect light along its length emitted from LEDs mounted in the bow. There are also illuminating flames along the ship. I suppose tiny 'grain of wheat' bulbs used in HO train layouts might work for them. 'Should be awesome in a darkened room !
- 156 replies
-
- 4
-

-
- Queen Annes Revenge
- bottle
- (and 1 more)
-
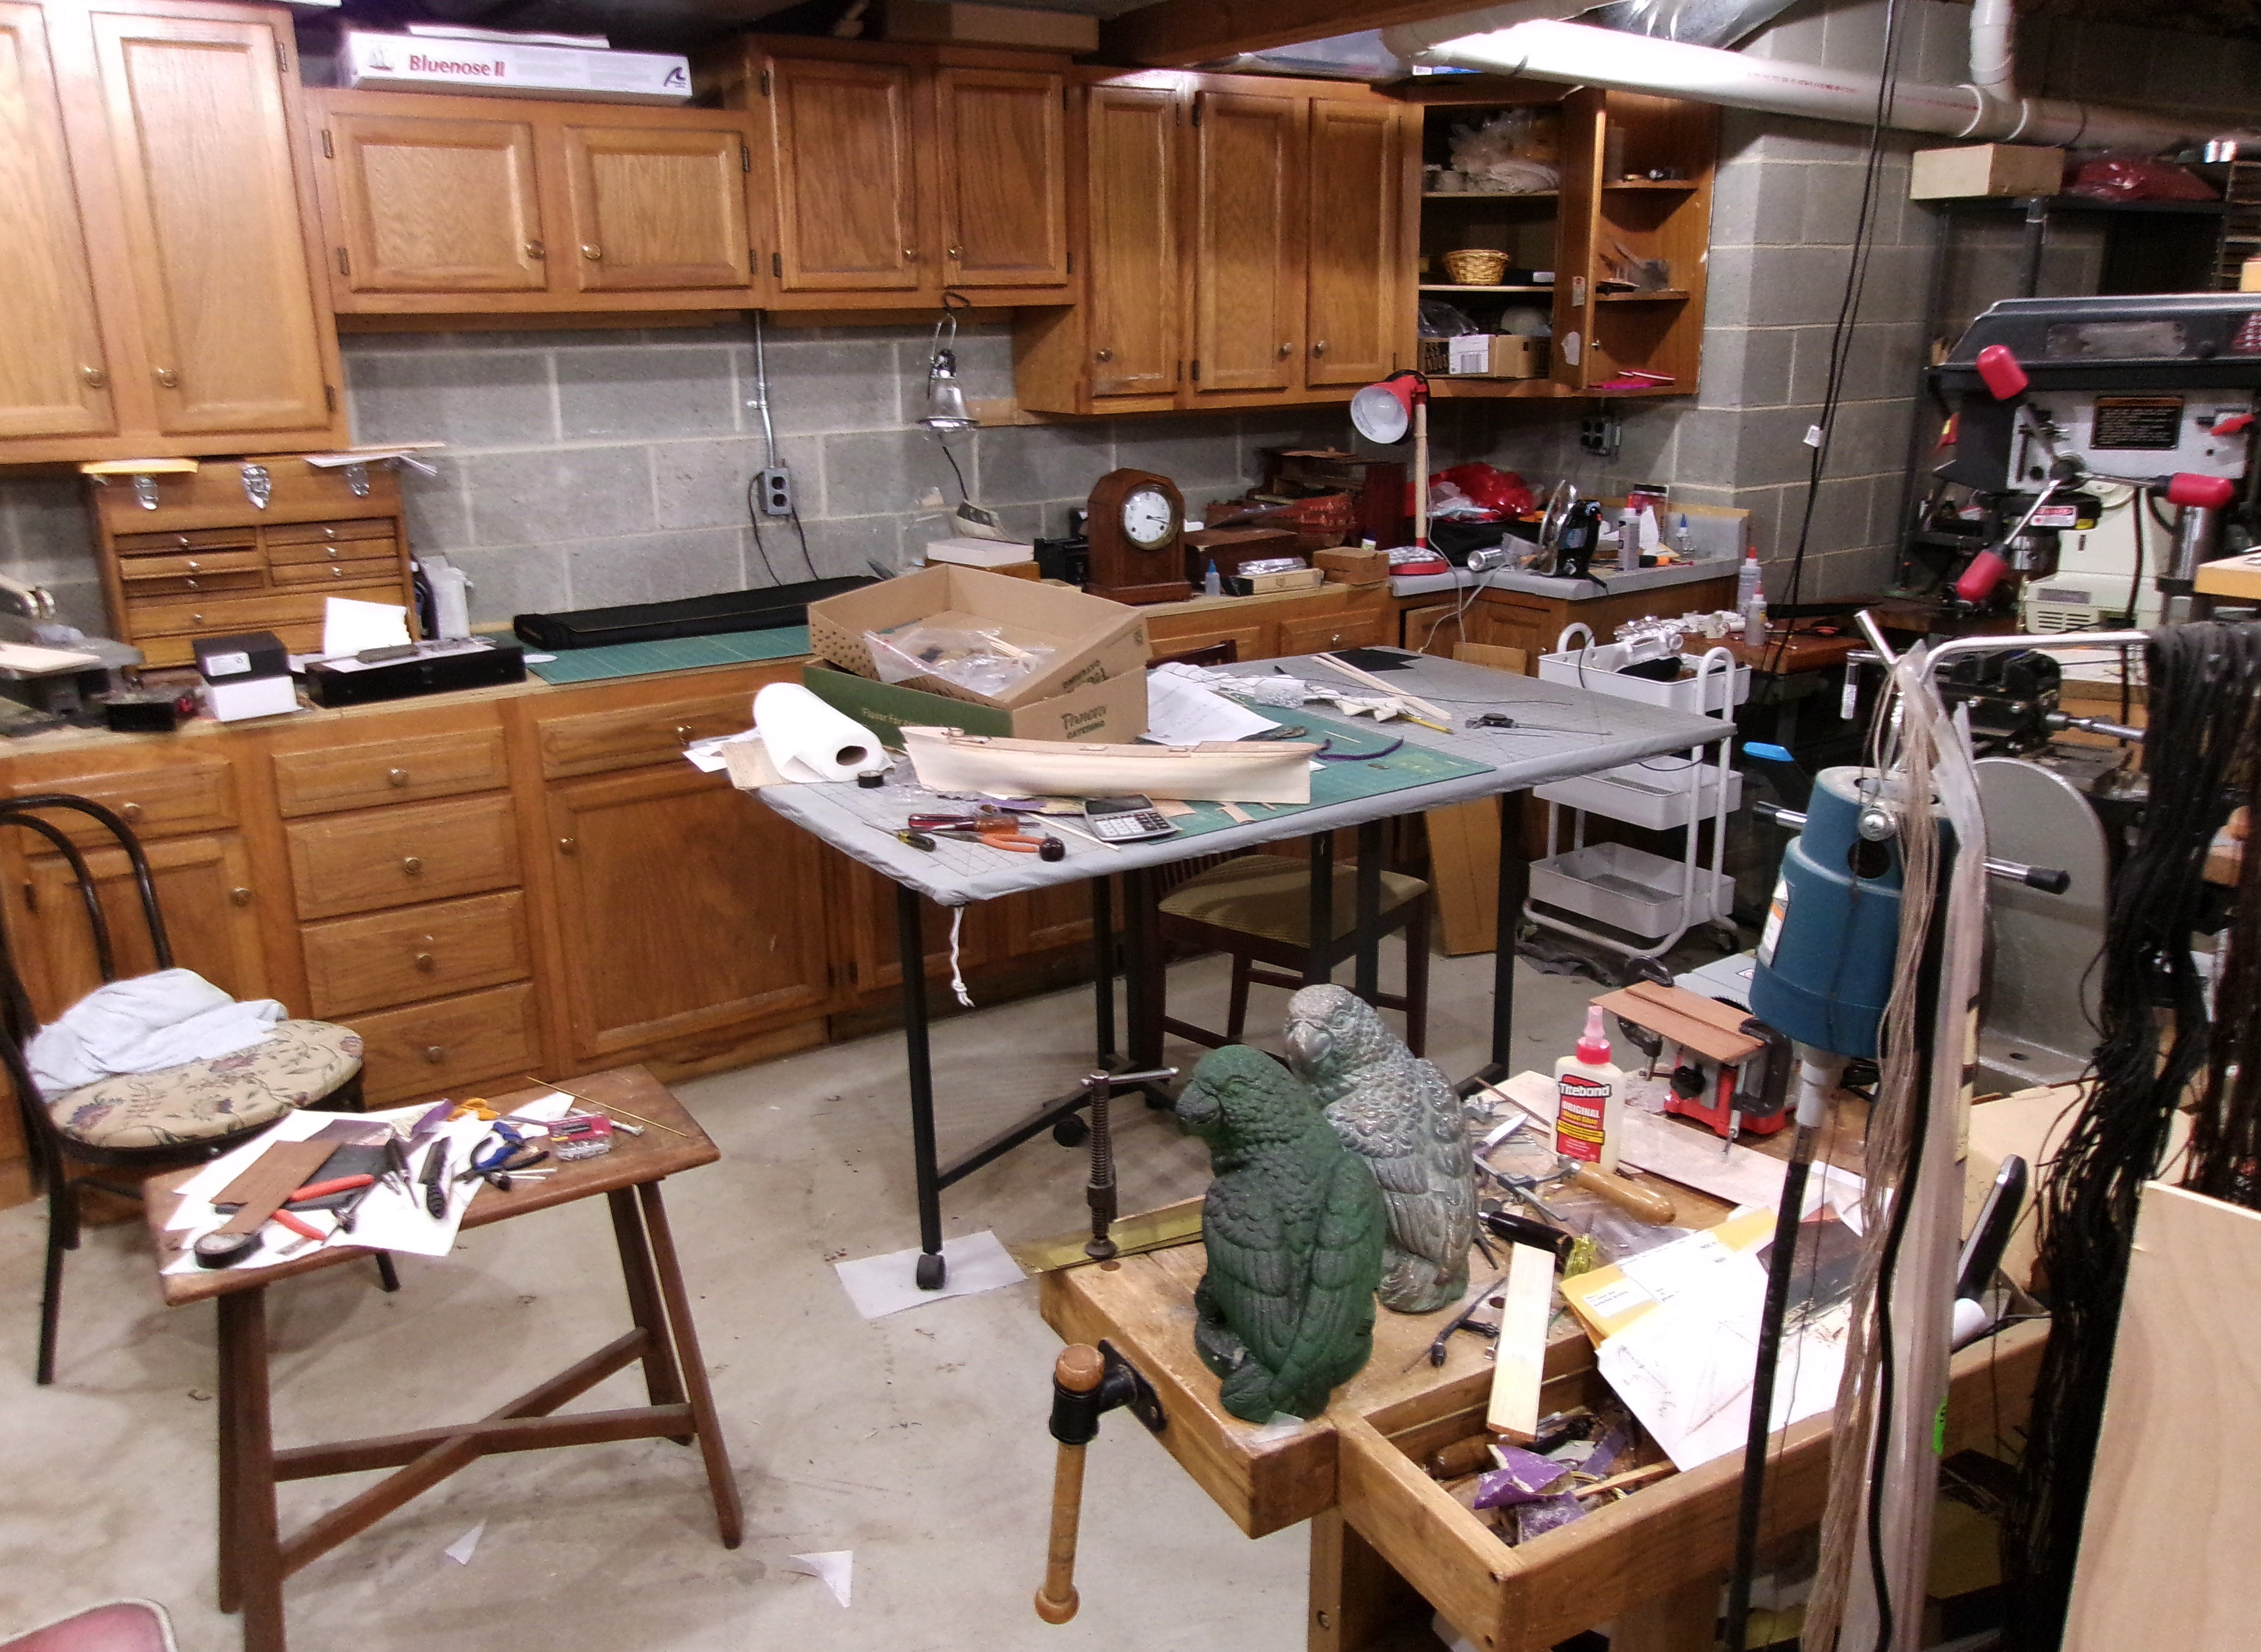
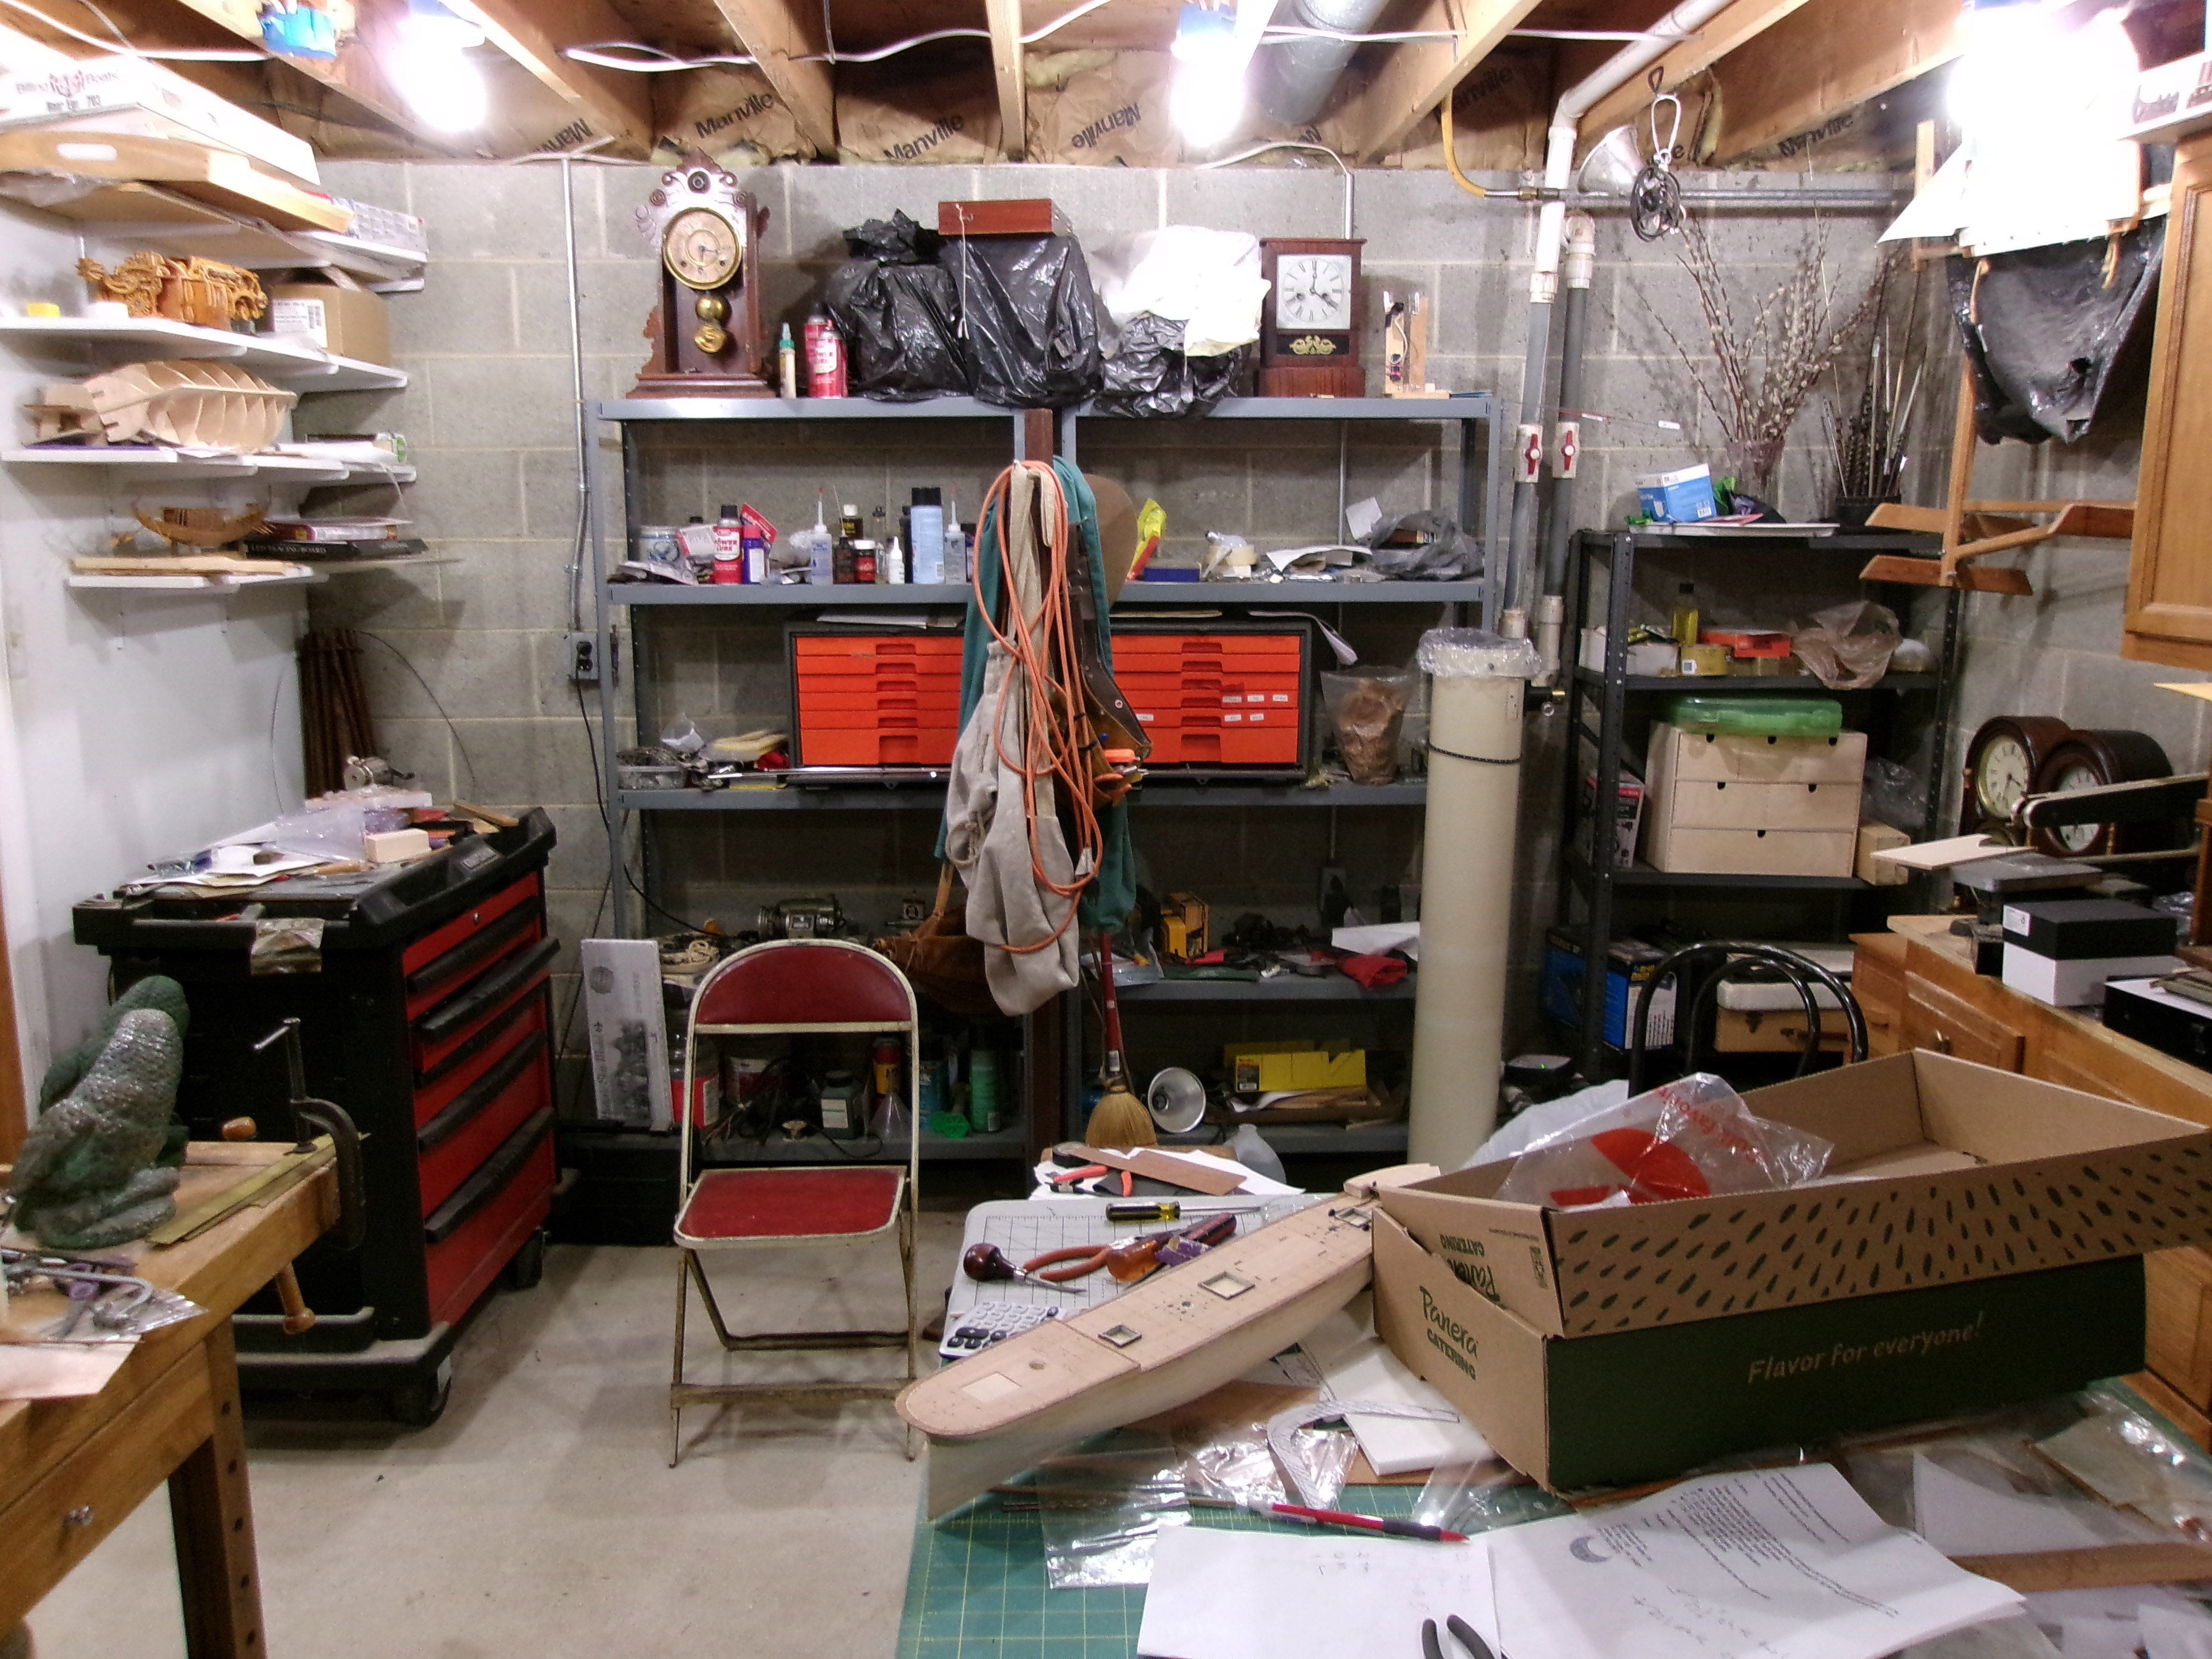
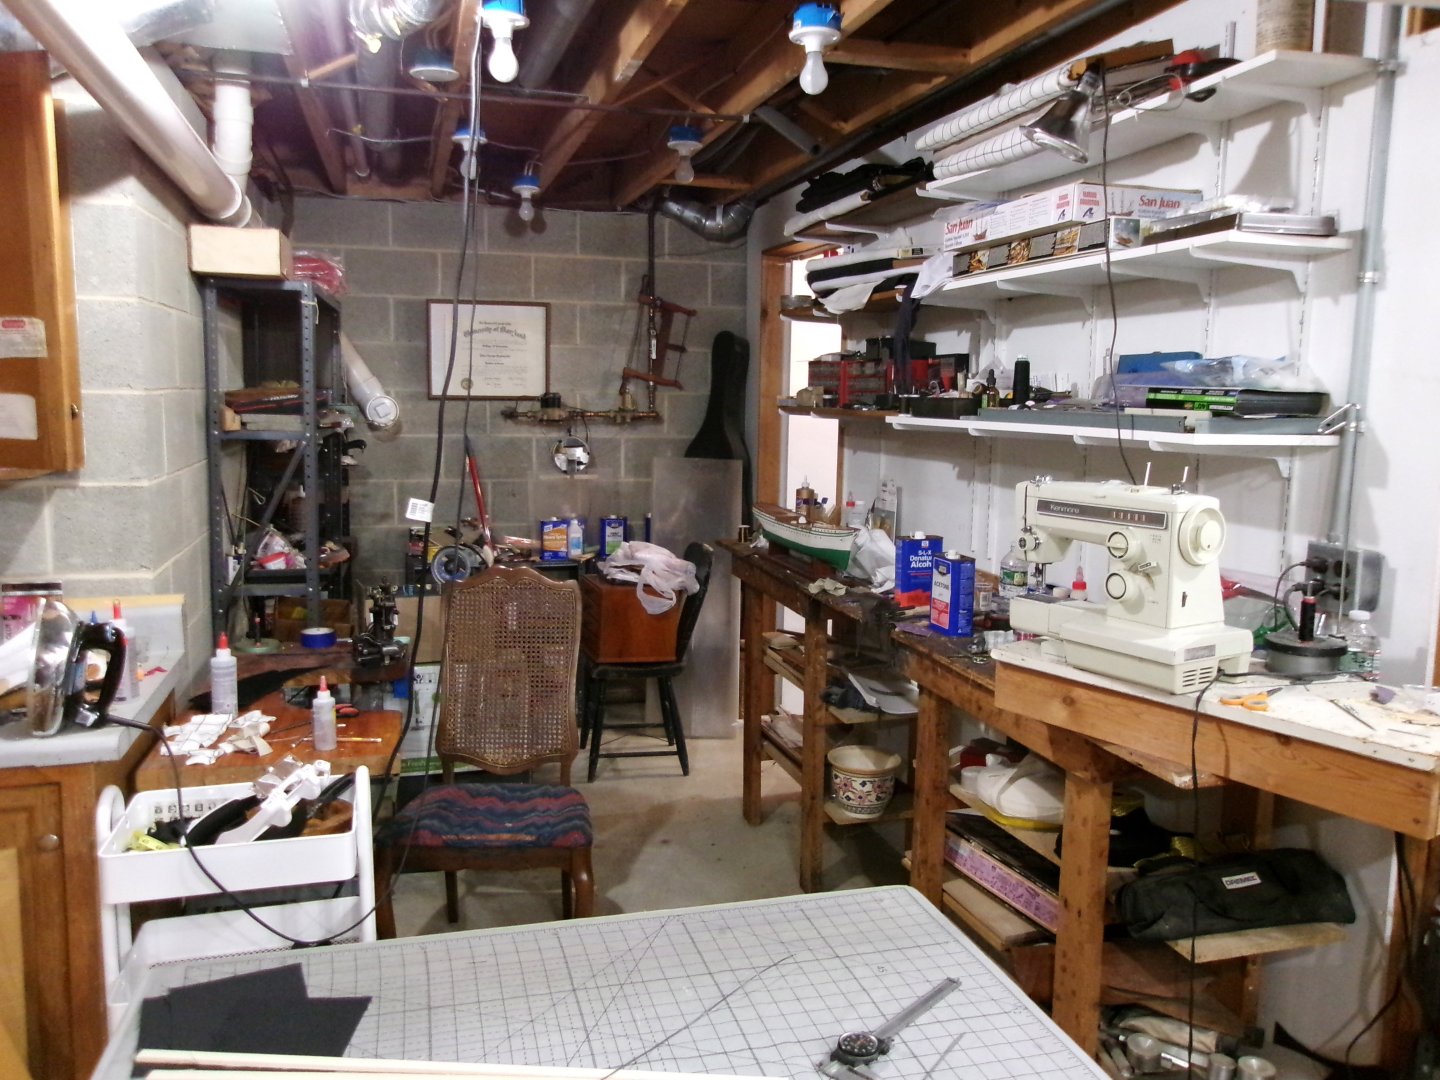
Work area pictures only
Snug Harbor Johnny replied to Johnny Mike's topic in Modeling tools and Workshop Equipment
My cave is narrow (1/3 of the basement), with old kitchen cabinets in a recessed portion. Messy now, until summer chores are done, as my building occurs over the winter. There's a Vasa hull hiding in the first picture.

- 52 replies
-
- 12
-
-
I have Donald McKay's book - and in the back is a table with McKay ships of all types built. His clippers of the 1850s (considered the 'Golden Age' of the clipper) with end-of life data had an average service of about 11 years (a group of 19 ships): with 7 burned by fire - crew presumably rescued 37%; 2 wrecked with crew or partial crew rescued 10%; 5 aground or abandoned - crew OK 26.5%; and 5 Lost with all hands 26.5% !! So if a man served for over 10 years on a clipper then, he'd have a 26% chance of being lost at sea, a 10% chance of surviving a wreck, and nearly a 2/3rds chance of seeing a ship aground, abandoned or burned by fire (but living to tell the tale). This was a risky life to be sure !
-
Hello! New to the forum, happy to be here :)
Snug Harbor Johnny replied to BuckyBoo's topic in New member Introductions
You have a great 1st ship to build, with fore-and-aft rigging. The easiest and best upgrades to make are scale rope and better blocks/deadeyes - see Syren ship models for these items. The MSW build logs are excellent guides, and a WORLD of information can be found in the book: Bluenose II - Saga of the Great Fishing Schooners by L.B. Jensen. It's mostly applicable to Bluenose I, and there are drawings of the old Bluenose pp.66-67 (and it's rigged the same). If there is ONE book to get for all things relevant to the building and operation of Bluenose in its time and contest, this is it! Johnny -
Perhaps the suggestion from Thanasis was misunderstood. There is a groove space, and the last plank has paper grout on either side - so at present it is a tad too wide for the groove. His suggestion was to cautiously sand the edges of the plank held at an angle, so the wear will not be seen from the top, but merely reduce the width at the bottom of either side of the plank - hence the "wedge" shape if you could see the plank in cross section. With a narrower bottom, the plank should start to go into the groove before getting tight halfway in. Several trial fits and further adjustment may be needed until the plank will drop in 2/3rds of the way into the groove. Then there are 2 alternatives: 1.) Put a small amount of glue into the bottom of the groove and press fit the 'wedged' plank so that it will compress its width only near the top. 2.) Use a 'riffler' file (one that has a bend in it - a handy tool for ship modelers to have) to cautiously work a little from either side of the groove near the top. Just a little will do, and the friction between the slightly wedge shaped plank and the reverse wedge of the groove will be reduced so the plank will need little compression.
-
Making Ship Model Sails
Snug Harbor Johnny replied to Pete Jaquith's topic in Masting, rigging and sails
Fine sails there ! -
I've seen builds where the sail material is sewn first on an oversized piece, pressed, and THEN cut to a pattern allowing for an edge folded over. I think real (lightweight) cloth sewn with the lightest thread your machine will sew looks better than silkspan ... well, it does look like some kind of paper - and the strip lines have to be pencilled on. Craft stores sell a light blue 'sort-of' marker that quilter use, and after sewing - a damp cloth dabbed on whatever of the blue is showing causes the color to disappear forever. So cloth for sails can be pre marked lightly with parallel lines, sewn with tiny stitches, then dabbed. 'Just a thought.
-
Footropes, Flemish Horses and Stirrups
Snug Harbor Johnny replied to hof00's topic in Masting, rigging and sails
Good point, so I googled sailor height in 1850 and got: Historical records of British military and merchant seamen provide the most detailed information on average height. British Royal Navy: In 1841, a naval surgeon suggested that recruits be of "middle stature" (between 5'4" and 5'8"), noting that excessively tall or short men were at a disadvantage. British merchant seamen: An analysis of merchant sailor records from the period shows the average height to be 5 feet 5.5 inches. Height requirements for entry into naval training programs were also enforced and adjusted, reinforcing that a "middle stature" was sought. With the above in mind, the foot ropes should not be more than 30" below the yard - at 1:100 scale that is about 9/32" (.281) - a little over 1/4". -
Footropes, Flemish Horses and Stirrups
Snug Harbor Johnny replied to hof00's topic in Masting, rigging and sails
Just be sure that your foot ropes don't hang too low, as seen on some models. Sailors standing on them still had to be able to bend over the yard to pull up sail. 'Guess about 3 feet below the yard would be about right, so at 1:100 scale the foot rope will be about .36" or 3/8th" to be generous. -
I inherited a similar old Husqvarna, and it is HEAVY ... being made of a lot of Swedish steel. Once lubed and adjusted for timing, it sews pretty good - although the buttonhole routine is still a little wonky.
-
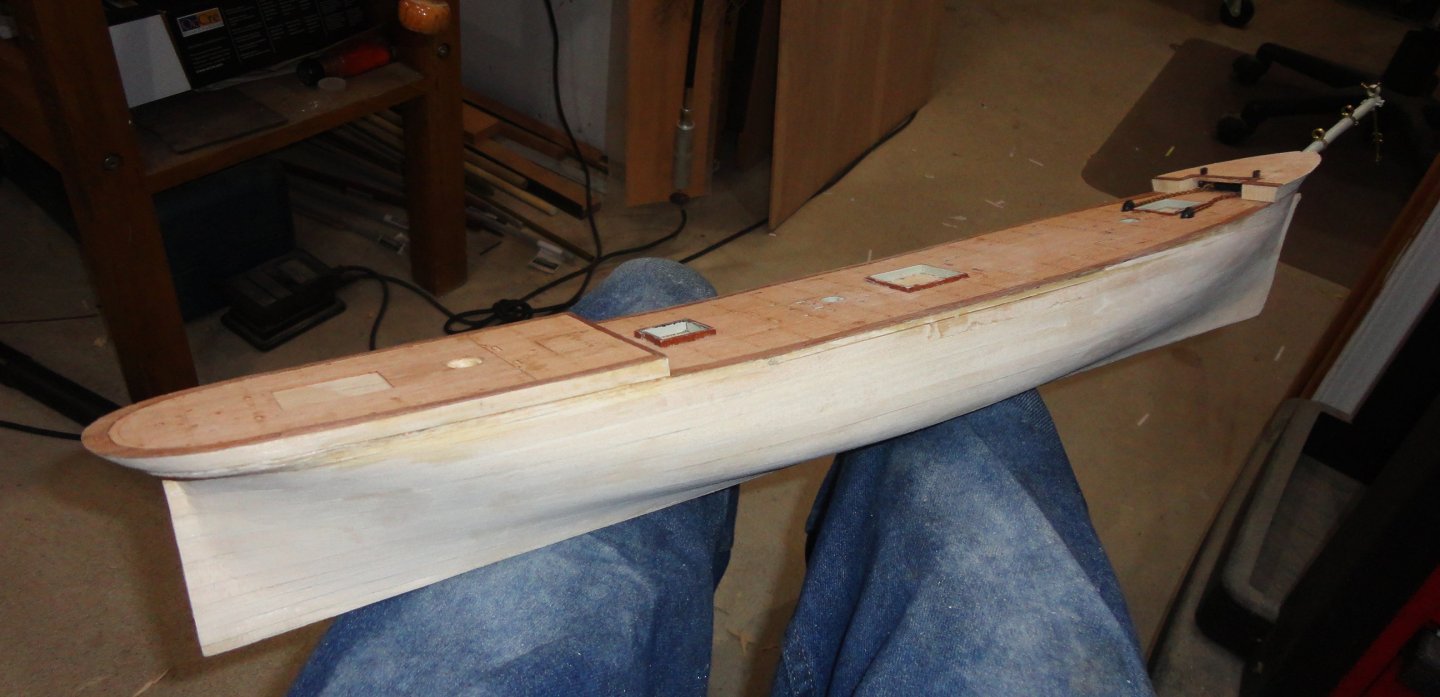
Its just a single entry in the "At a Glance" log, page 2, entry #59 ... unsure if there is any 'link' to a single entry, so I can paste below. I look at her often, and have taken some pictures as work is done to put into a log when finished (since I have a couple unfinished logs already - and there are enough of those). I was focused on authentic lines, and the vertical stack of varying thickness of basswood worked like a charm. All the grain was well oriented and I was amazed how quickly it went as far as I got. 1:110 means that I can use the Revell deck houses and deck equipment as they won't be too far off, as well as some of the stuff in the 1:124 scientific kit where convenient. Ahoy, mates! Old snug hasn't posted anything in a while since present builds are on hold while sideline work is being done on a pet project 'thought about' for years ... my own shot at a more accurate Thermopylae than can be had with any of the few kits ever offered 'out of the box'. The inspirations are the fine MSW clipper builds of late. Collected were the Revell 1:96 ca. 1959 - (H.I.S. laser deck ordered) and the aprox. 1:124 Scientific Thermie kits. The former requires far too much busting (and still would have compromises) and the latter has quirks of its own as well as being just too darn small for my skill level (less now with age and bumble fingers). The most important to me are the ship's lines (available on the internet) and hull outfitting (inspired by the detailed Cyril Hulme model in the Powerhouse Collection, Sydney Australia), but I want to represent her converted to Barque rig as pictured docked at San Fransisco before she was painted white. Below is only a single snapshot of the hull as-is now after 60 hours of work (over many weeks as time permitted), and only AFTER completion will a build be created ... no more unfinished builds. I bought various thicknesses of basswood sheet from Blick art supply to conform with the thicknesses of the accurate lines in elevation scaled to 1:110, transferred the 'top view' (plan view) of each layer with bilateral symmetry to the respective sheets, then glued-up the stack. Plastic cut-outs from the Revell deck were inlet where needed for masting and other deck items, covered by the laser deck (modified to fit the altered scale) - and the forecastle made from scratch. I found that the hull almost 'carved itself', as the corners of the layers were simply hogged off with a bent spoon gouge then sanded to the lines where the layers meet. It was as if there an infinite number of hull templates were already in situ - ∫ d(p), the sum of all possible profiles ( a 3D calculus exercise). A number of plastic and metal components from both kits will be used as convenient (great idea, Rob, to build the way of least resistance), as the 'in between' scale of 1:110 isn't too far out for many kit items. Others I'll just have to make. Sans sails (as in the San Fransisco photo), it will have standing rigging only. Thukydides, _SalD_, Thunder and 18 others 21 Quote
- 101 replies
-
- 2
-
-
- Cutty Sark
- Sergal
- (and 1 more)
-
This is sooooo like me (the lazy part). My side project - a Thermie hull at 1:110 scale scratch 'layer caked' from bass sheets, carved and sanded with trimmed-down HiS laser deck over inlet Revel deck pieces (a base to eventually mount plastic details on) was done in 60 hours the 1st 3 weeks of January ... and has been sitting there ever since while I decide how to finish it (a picture was put in the current projects log). Once the gardening season is over I have a few ideas on how to do that.
-
PVA craft glue is used in book binding where some flexibility is desired, e.g. the spine of the book. I tried it experimentally when 'layer caking' a solid basswood hull (from pieces pre-cut along plan view lines), and occasional glue-rich (yet cured) seams didn't sand as well as those glued with wood glue (aka Titebond - aliphatic resin, which dries hard). I've had good results from wood glue, quick set epoxy, and CA on wood-to-wood bonding or wood over filler. PVA can work when gluing wood decking over a plastic substrate, but this is a special application.