DONATION DRIVE - SUPPORT MSW - DO YOUR PART TO KEEP THIS GREAT FORUM GOING!
×

.jpg.9708615112ed2d61af5236b908f9e60e.jpg)
Freezing Parrot
-
Posts
119 -
Joined
-
Last visited
Content Type
Profiles
Forums
Gallery
Events
Everything posted by Freezing Parrot
-
.thumb.jpg.51663d40cf48bd5949e06628da9d07ad.jpg) Thanks for confirming that, even though it means more work for me. I'd rather spend the time needed to make it right, rather than using that amount of time regretting later.
Thanks for confirming that, even though it means more work for me. I'd rather spend the time needed to make it right, rather than using that amount of time regretting later.- 114 replies
-
- 1
-

-
- Lady Nelson
- amati
- (and 1 more)
-
Tim, I am loving your adaptation of the Swift. Your modifications are making me wish I hadn't built the Swift yet, so I could use your ideas. My version is the newer one, with lower deck areas for storage. I discovered at the "hoisting the sails" stage that the premade sails were too big, out of scale with the masts and booms. Unless the sailors crawl on their bellies, they'll get battered by the sails every time the wind changes. If I had known, I would have made the masts an inch or so taller, or had (*asked very nicely*) the resident admiral remake the sails a bit smaller. Just a heads up for you. I'm looking forward to watching the rest of your build!
- 44 replies
-
- 1
-
-
- first build
- Artesian Latina
- (and 1 more)
-
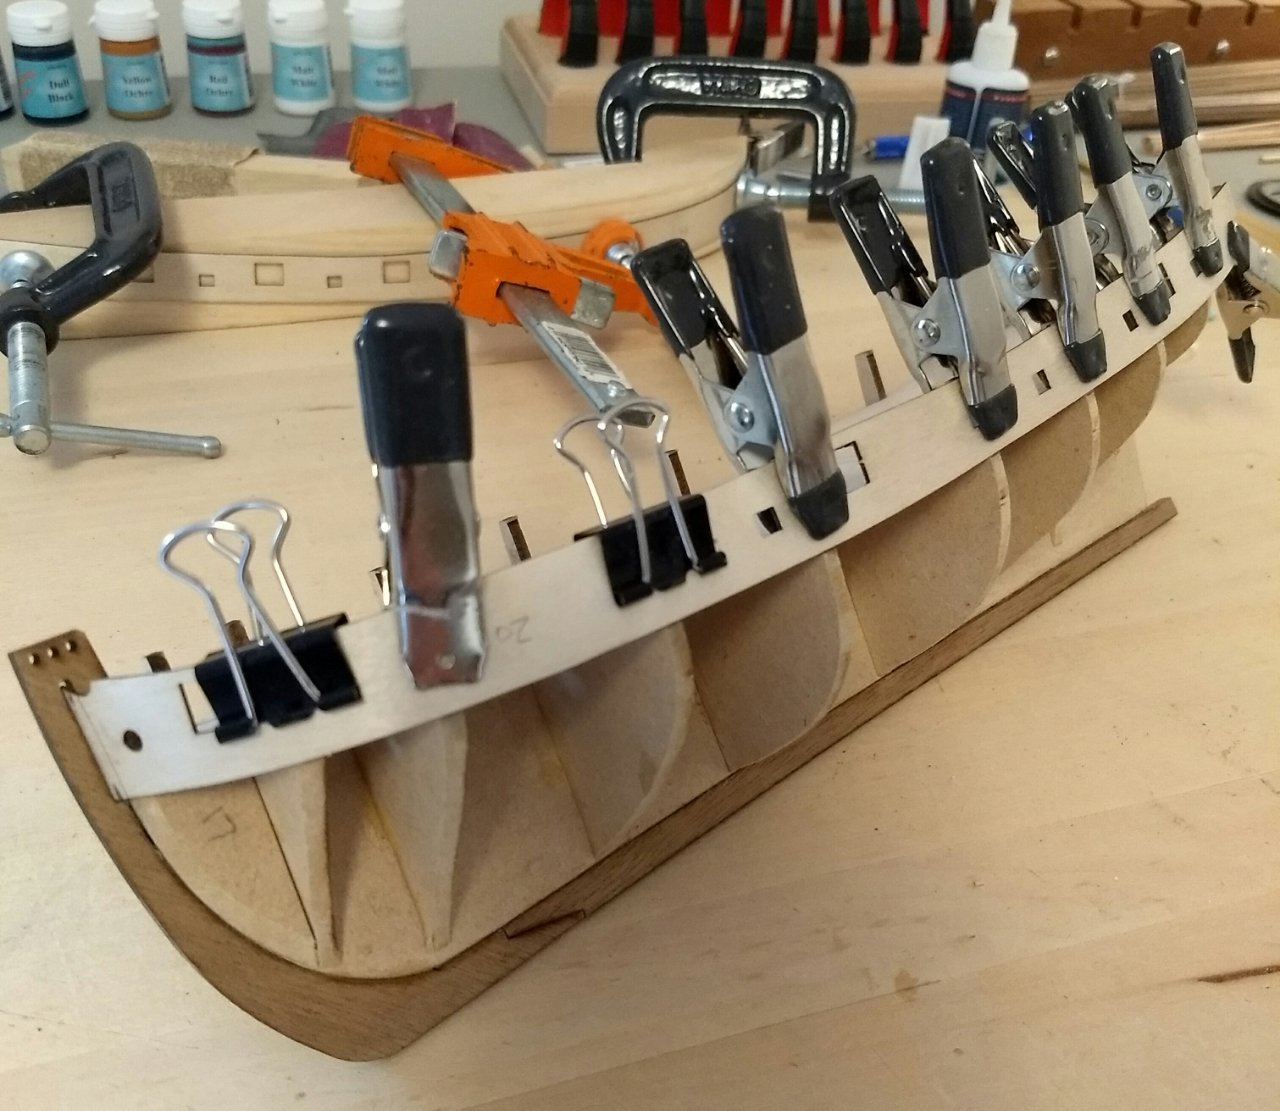
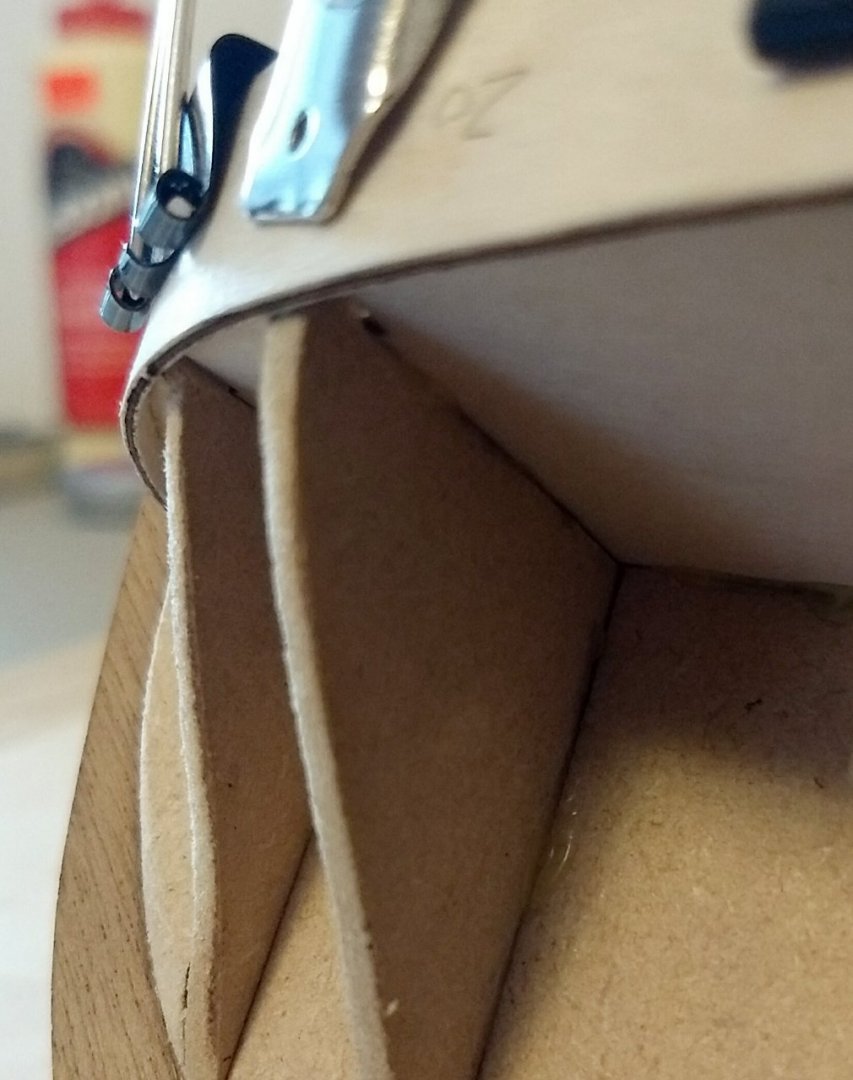
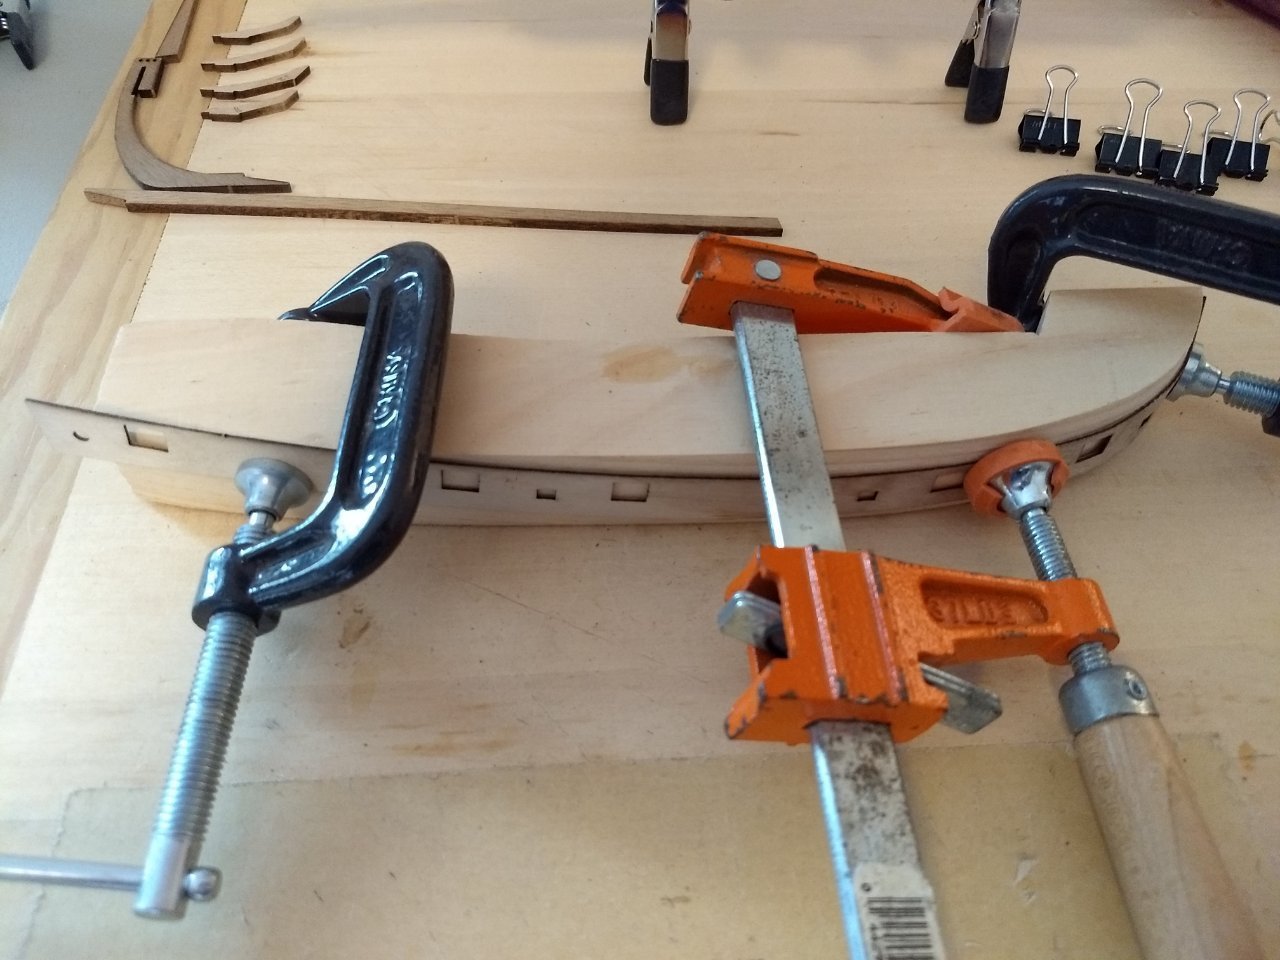
Back to the matter at hand. Port bulwark actually fit! I marked half the width of the prow on it, so I'd know how far into the slot to insert it, and just needed clamps to hold it in place, with just a couple areas needing slight pressure to get them tight to the deck edge. Question for the pros: Do I need to pad out the first two bulkheads to meet up with the back side of the bulwark? I must have been overzealous with the fairing, and removed too much material. I'm assuming I'll need to remedy that before planking.

- 114 replies
-
- 2
-
-
- Lady Nelson
- amati
- (and 1 more)
-
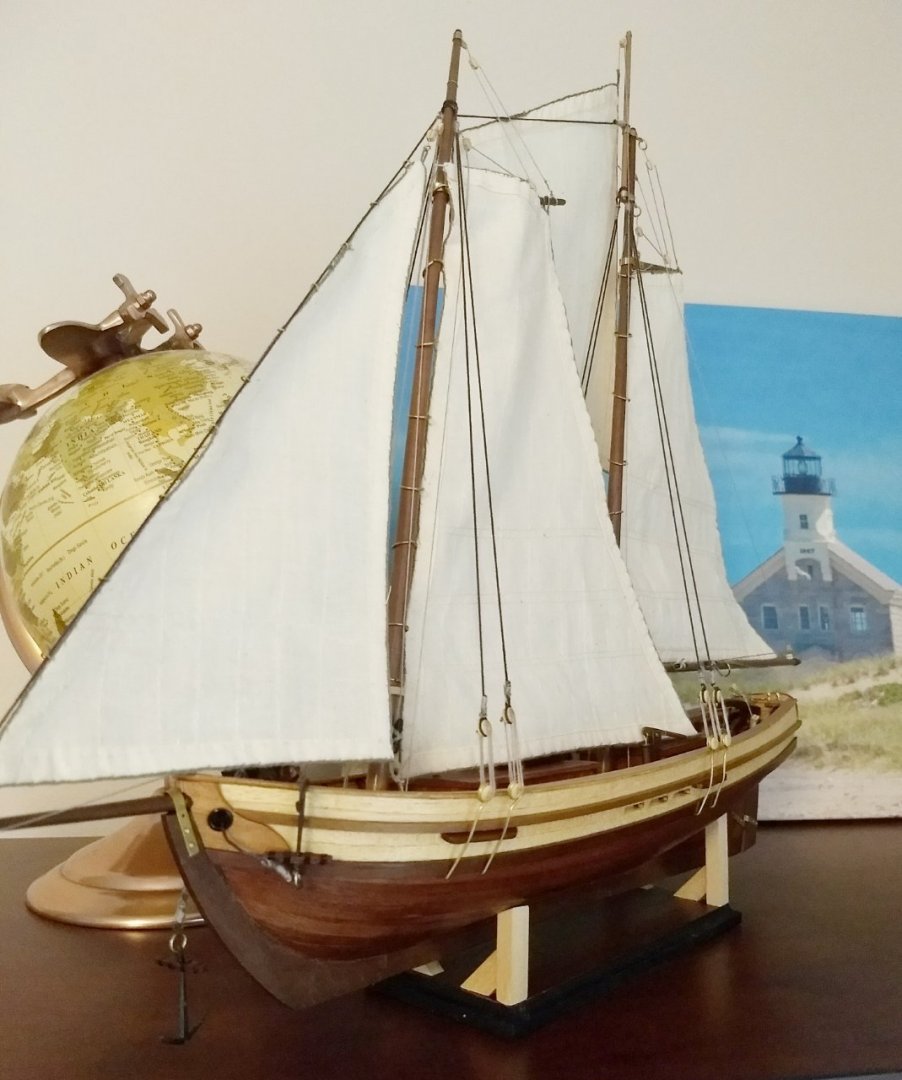
This is the VERY dumbed down version of the above, that I made for my Swift model. I was disappointed that the Swift's sails were way out of scale (too big), so I didn't go crazy with extra details. I'll participate in that madness with the Lady Nelson. 🤪
- 114 replies
-
- 1
-
-
- Lady Nelson
- amati
- (and 1 more)
-
I am enjoying your build log, and seeing your attention to detail. This is great!
-
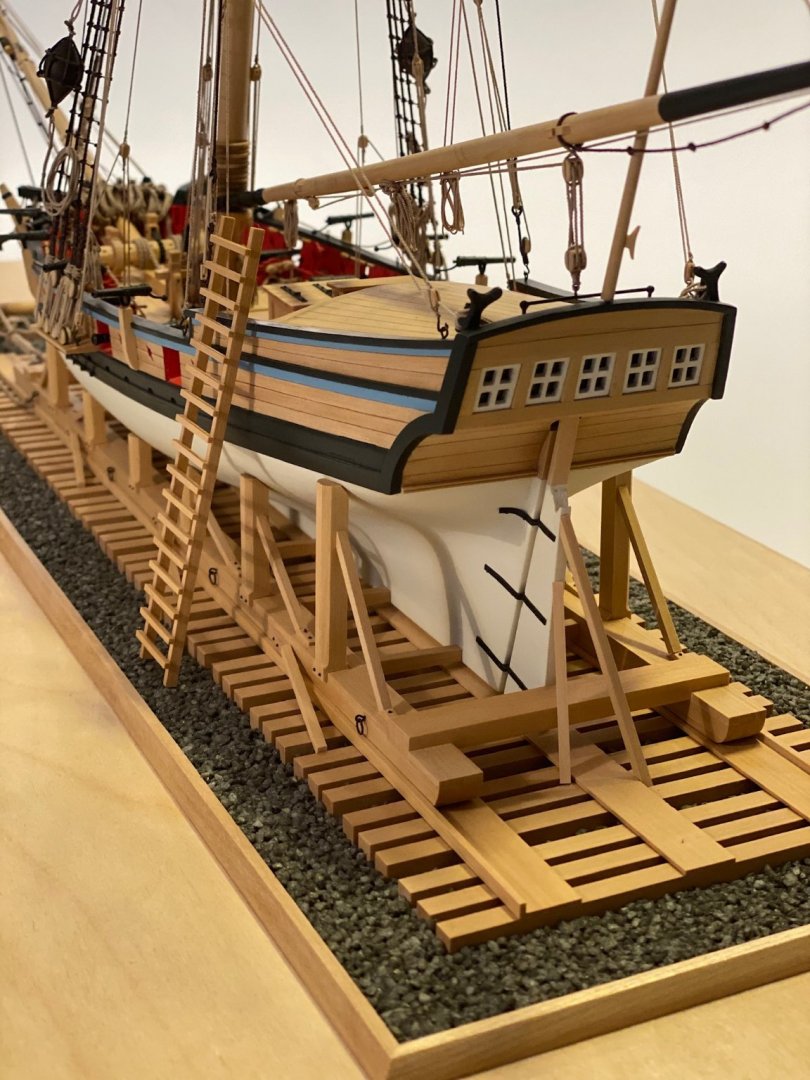
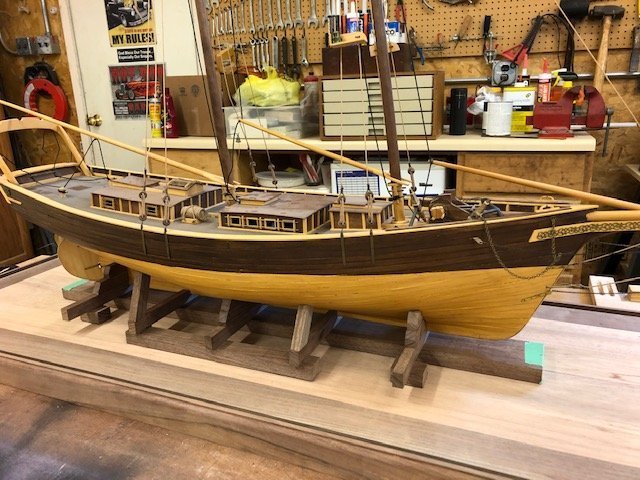
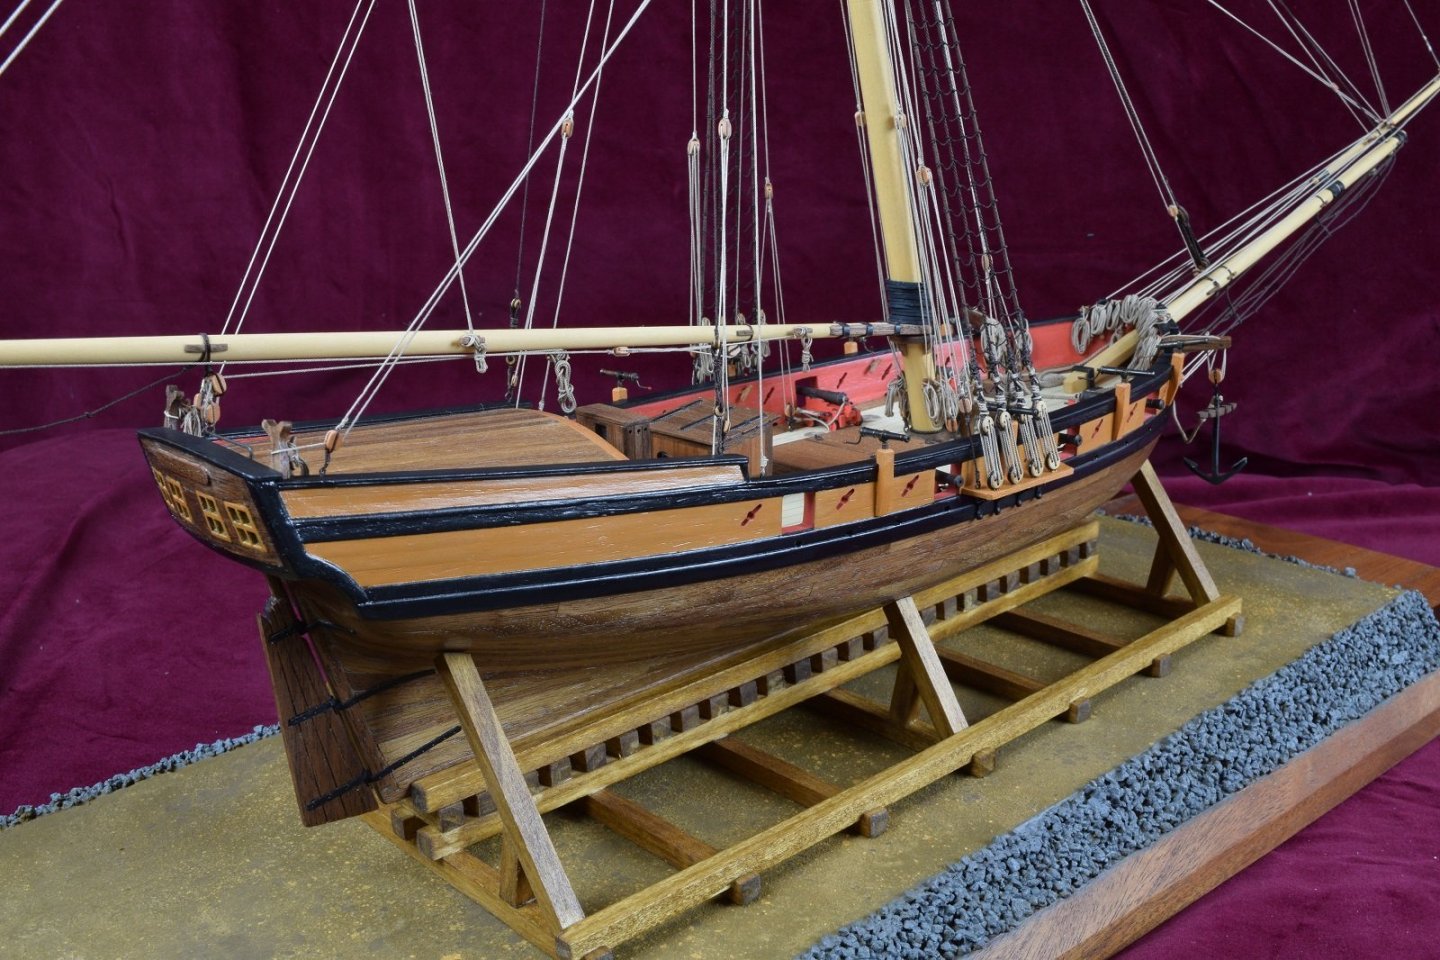
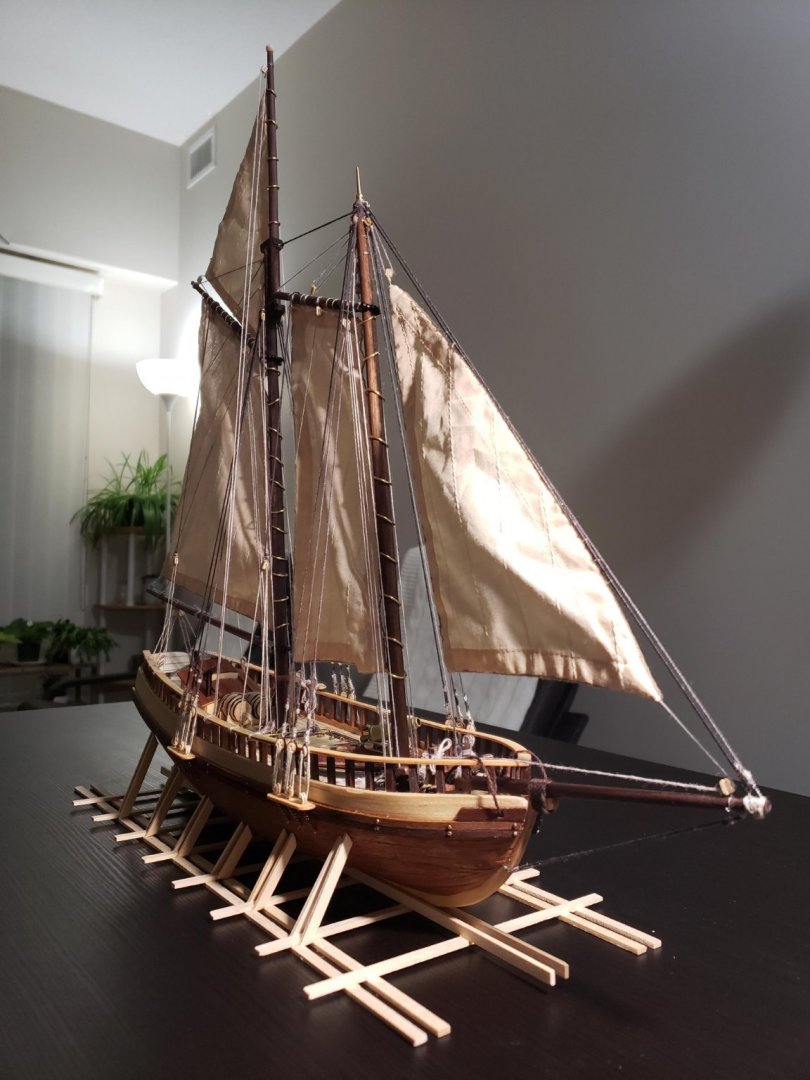
Thanks for the heads up, John! Neither these instructions nor the ones for the Swift seem to say anything about mounting to the included pedestals and base, which seems strange to me. Thanks for the link to a very helpful thread. My plan is to support this model on a variation of a drydock frame, drawing inspiration from the pics below. I'm very sorry that I don't remember whose builds these are from, so I can't give credit where it is definitely due. If you know the name behind the picture, please let me know and I'll credit them. I love these creative ideas! I aspire to the level of workmanship and creativity of these builders!
-
Hope your fence repairs are going well, looking forward to seeing your progress on the ship. It sounds like the planking was a real bear, but it seems to have turned out very well.
-
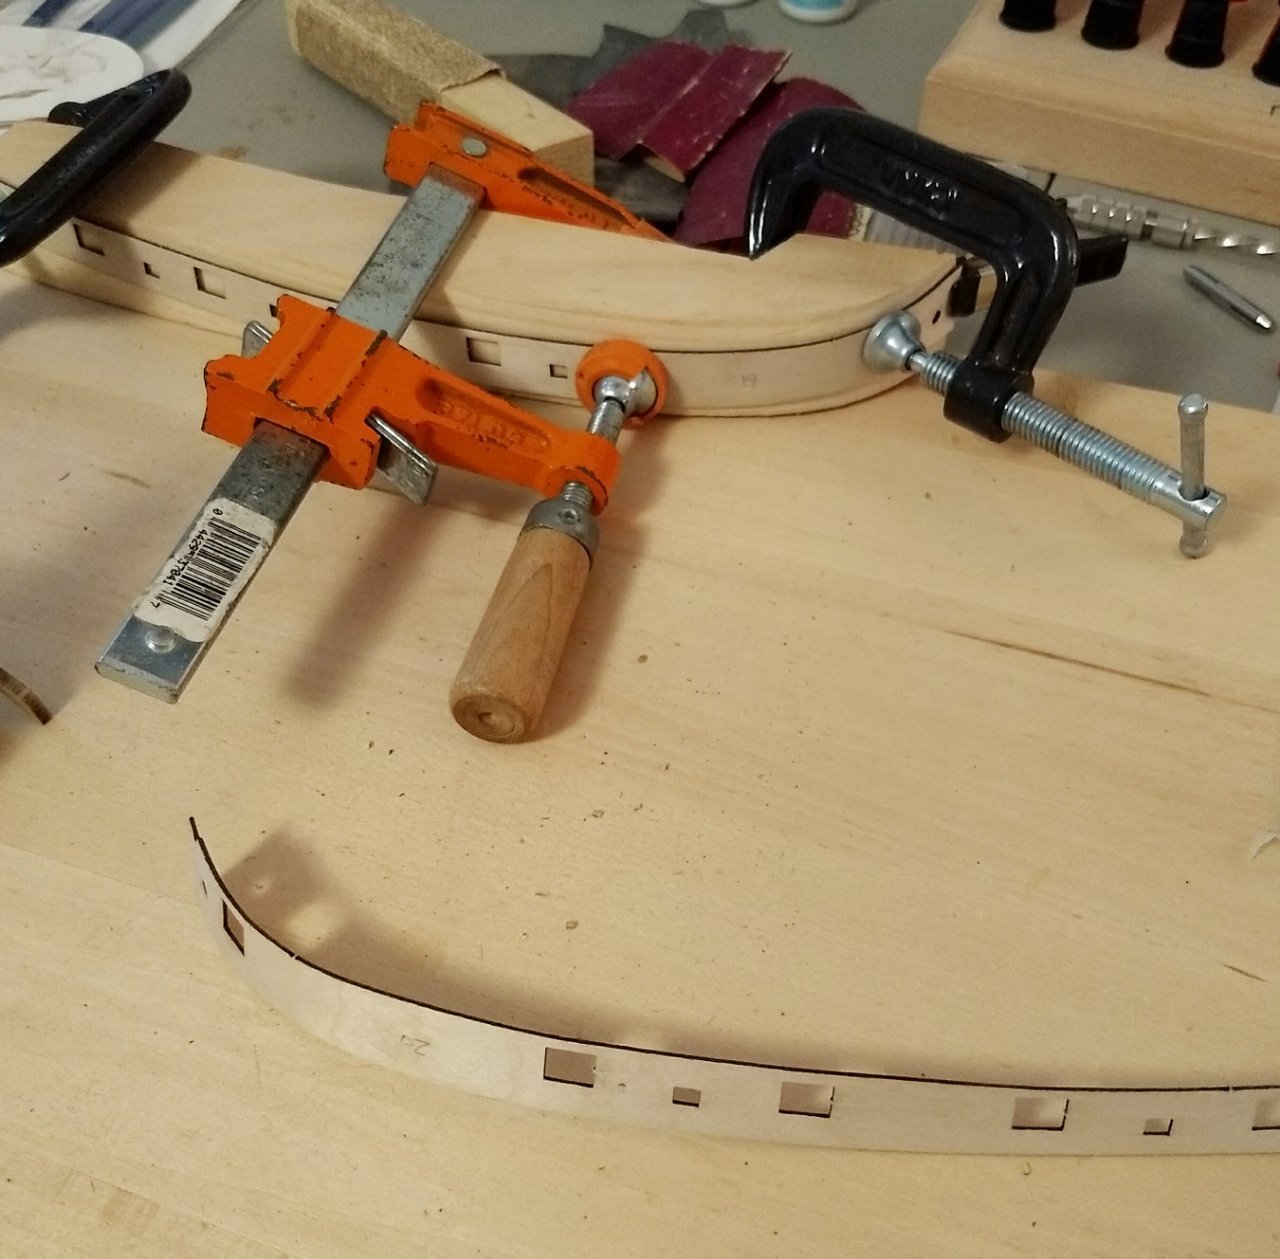
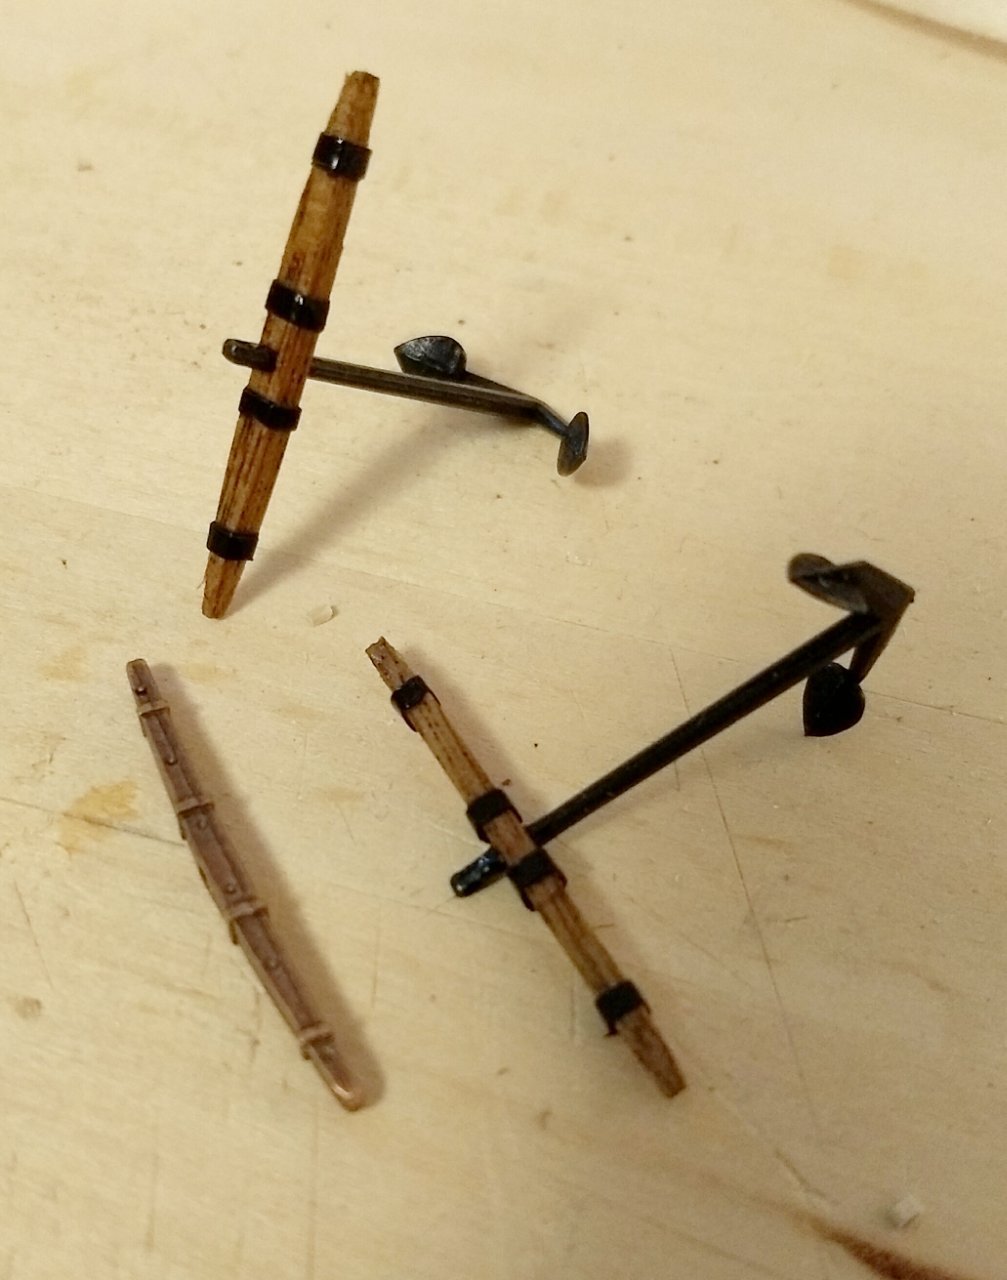
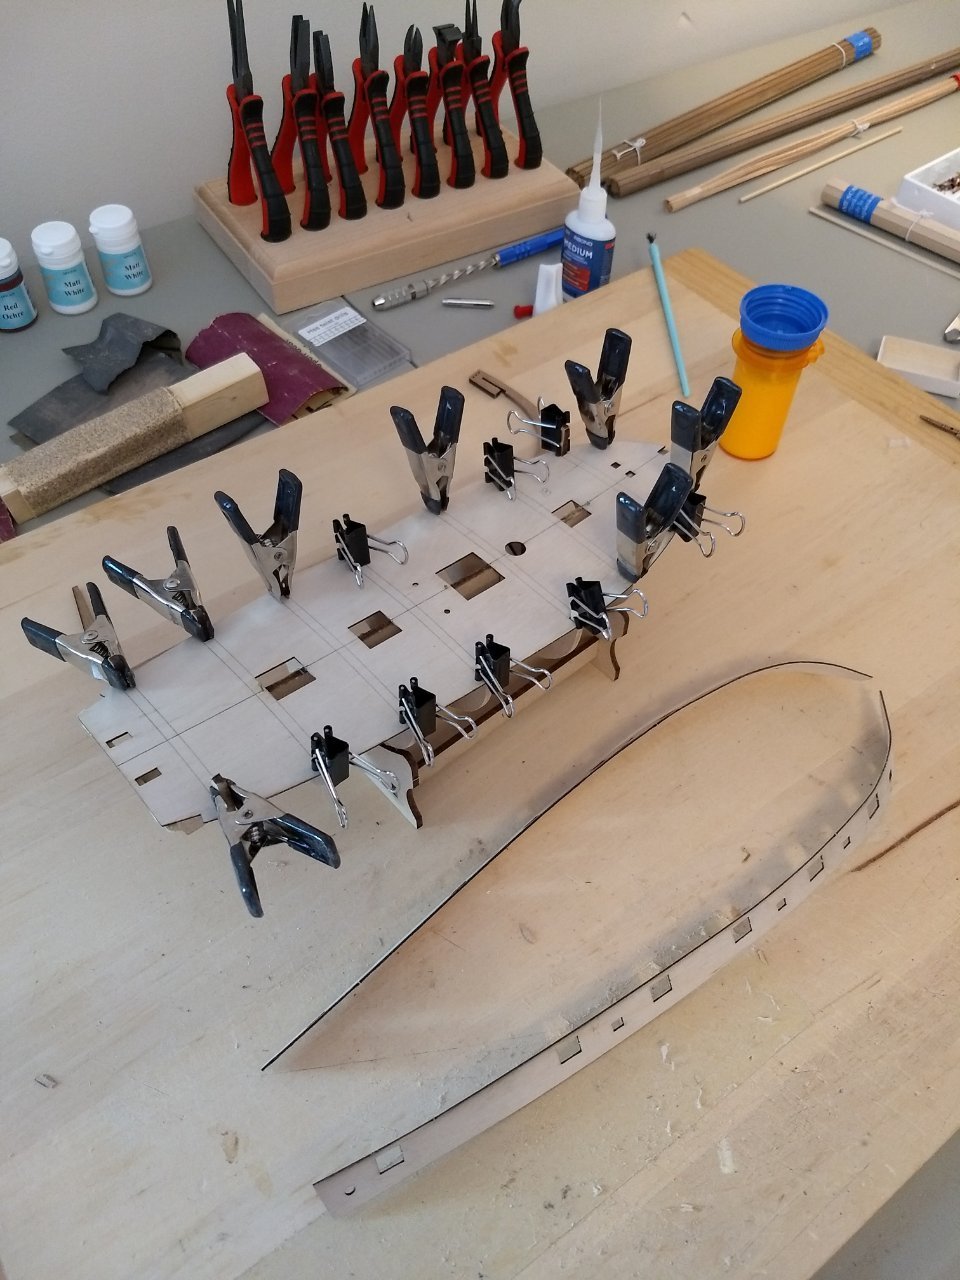
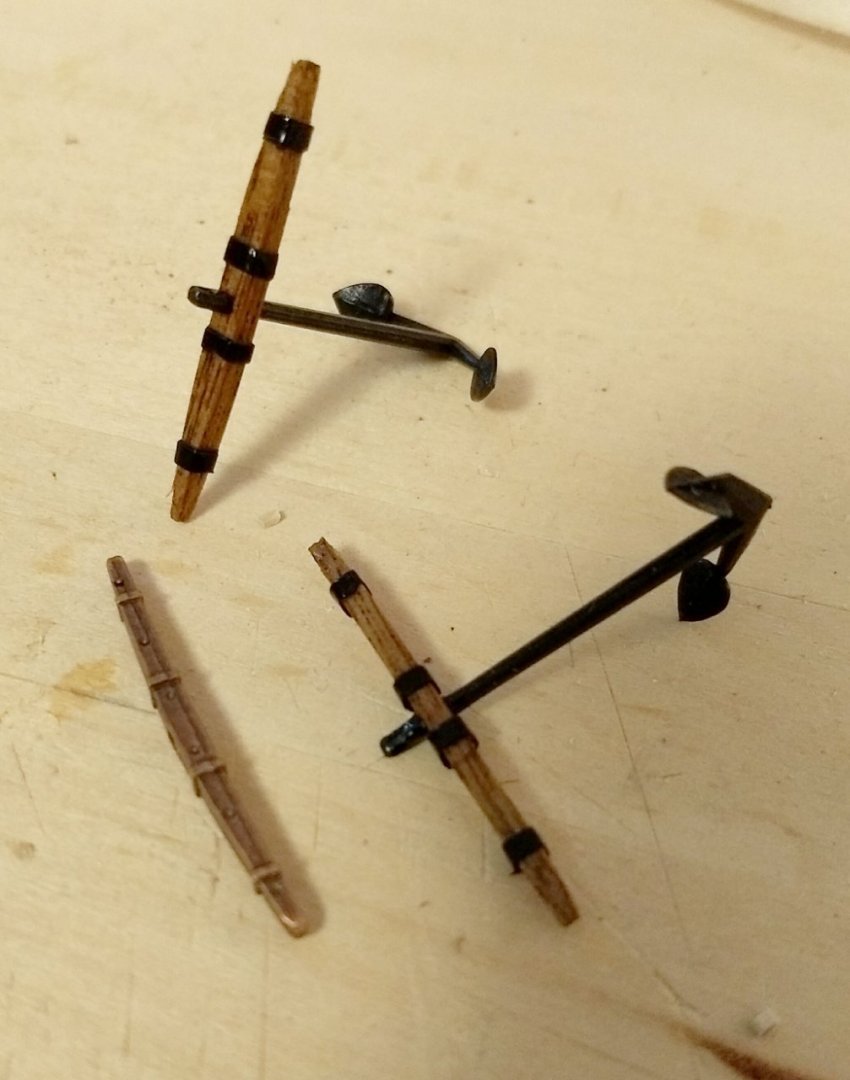
Okay, back on track. I rebent one bulwark, properly this time, and have the other one clamped. Dry fitting confirmed a good bend this time. While I was waiting around, I decided to make replacement crossbars for the anchors out of wood, instead of using the metal ones from the kit. A few wraps with black artist's tape and a coat of shellac, and I'm pleased with how they turned out. After a little touchup sanding on the bow curve of the false keel, I glued on the keel pieces, using Titebond. Based on the advice in other build logs, I'm leaving the sternpost off until the first planking is done. I'm also leaving off the middle two stern counters for now, to avoid breakage. I think I have the fairing and the bearding line right. I shaved the stern part of the false keel to a thin line along the keel, to allow for the two layers of planking. Does anyone notice areas that still need work?
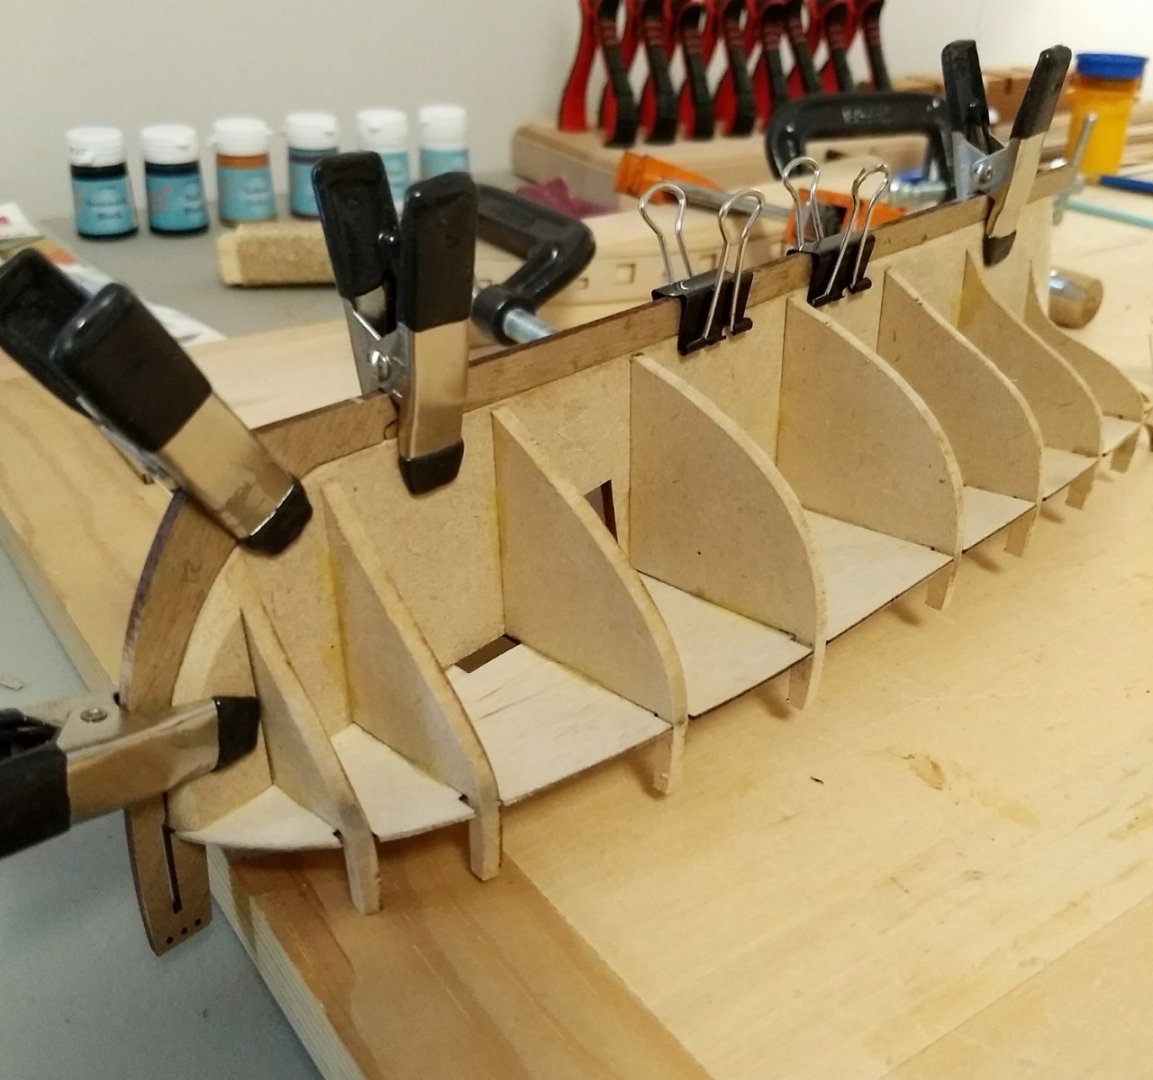

- 114 replies
-
- 2
-
-
- Lady Nelson
- amati
- (and 1 more)
-
Those are some nice flowing curves. This is looking great!
- 53 replies
-
- 1
-
-
- Supply
- Caldercraft
- (and 1 more)
-
That's definitely something to be proud of! I bow to your skill, sir! (Wait, am I supposed to doff my cap too, or something?)
-
Thanks, Richard. Hey, if you can't have fun, what's the point?
-
I like that a lot, Rick, especially the skylight. Nice use of "leftovers"!
-
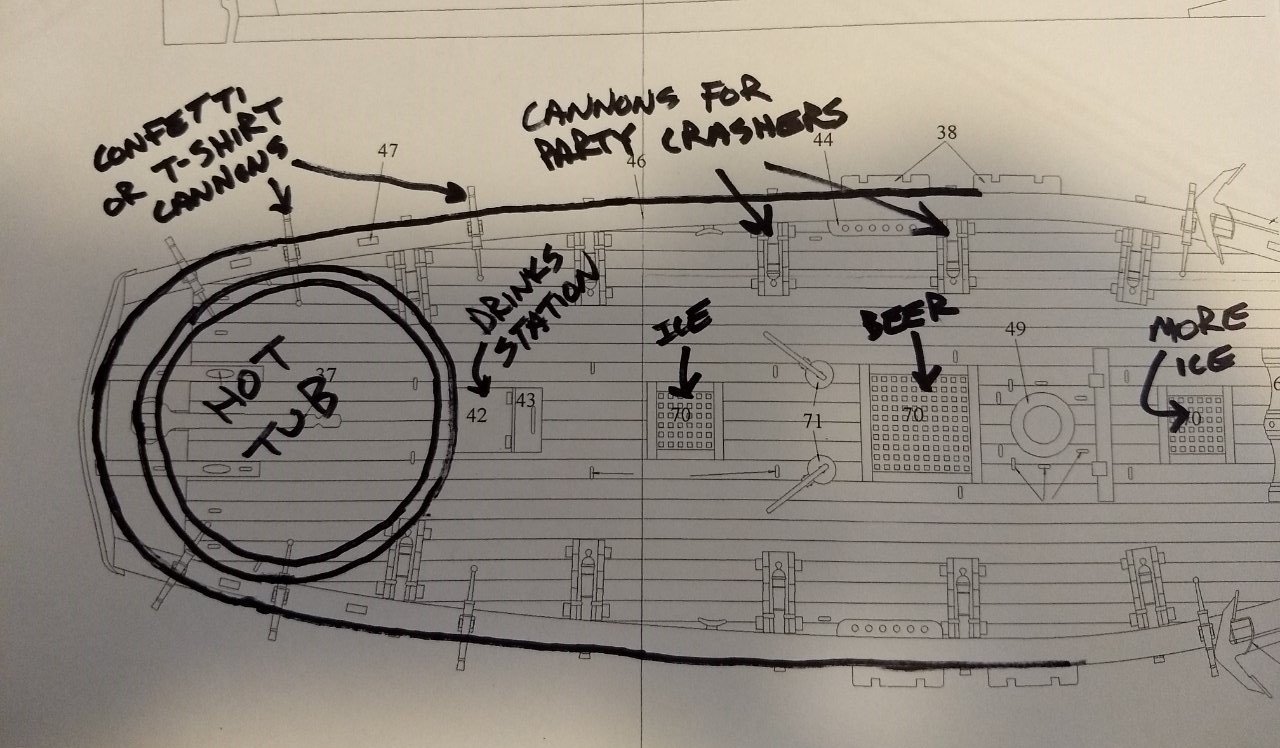
Maybe I should have left the bulwarks bent at the stern after all. Then I could modify the hull severely, and tweak a few other details to make the Lady Nelson II Party Ship. Initial deck plan as shown. Accepting investors to make this into a reality for the sailing public.
- 114 replies
-
- 4
-
-

-
- Lady Nelson
- amati
- (and 1 more)
-
Thanks for the suggestions! Straightening them back out ended up being easy. I soaked them for half an hour, laid them on my work table, and just put a chunk of wood on top of them. They were mostly straight when they came out of the water anyway. After dinner I'll make my second attempt, this time paying better attention. 🙂
-
So, um, yeah. I just went to dry fit the preformed bulwarks, and realized I had prebent the WRONG END! So now it's decision time. Do I straighten and then preform them correctly, or do I just make the stern circular? Hmmm. On the one hand, since it's not a replica of an actual, historic ship, I do have some leeway with the design. On the other hand, it would totally mess up the layout of the cannons. I guess I'll redo the bulwarks. 🙄
-
Hello from The Netherlands!
Freezing Parrot replied to Martijn Onderwater's topic in New member Introductions
Welcome aboard, Martin! It will be nice to have another experienced builder to help us newbies. 🙂 -
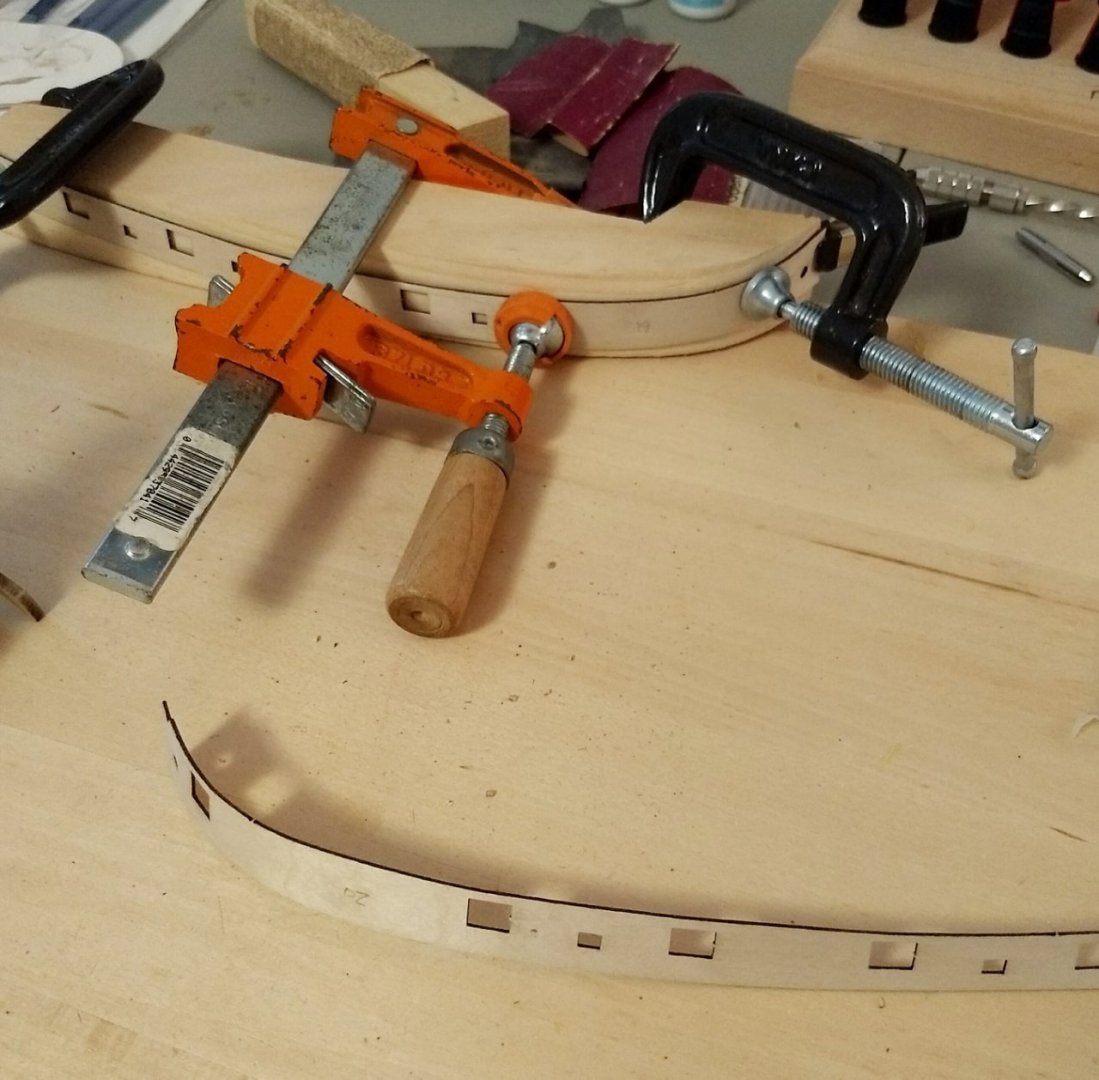
Update while waiting for glue to dry: Yesterday I cut out a bending form from 5/4 pine I had lying around, tracing the shape of half the false deck. I cut and notched the form to allow for clamping, but didn't get the front notch at quite the best angle. It still worked fairly well, but the very front tip of the curve may give me trouble later. I soaked the bulwark strips for half an hour in hot tap water, then clamped them to the form (one at a time). Hopefully the curve is close enough to make the installation of the bulwarks easier instead of the opposite. Today I worked on fairing the bulkheads, using 80 grit sandpaper wrapped around a small wood block and then around a piece of 1/2" copper pipe, which did a better job. It might have been easier to do the initial fairing of some pieces before installation, as the instructions suggest, but I don't think I would have got (gotten? gout?) the angles right anyway. I also sharpened a wood chisel and shaved down the stern area of the false keel so the planking won't make it too fat for the sternpost. That's the idea, at least. I decided to attach the false deck before I do a final touchup of the fairing, so that the bulkheads are in the proper locations and stay there. I used a few of the included tiny brass nails to pin the centerline of the deck along the centerline of the false keel, then clamped around the edges. Once the glue dries, I'll attack it again. More than one build log has stated that time spent fairing is well worth it, so I will try out this "patience" thing I've heard about. As a side note, any preference whether the pictures come before or after the description?
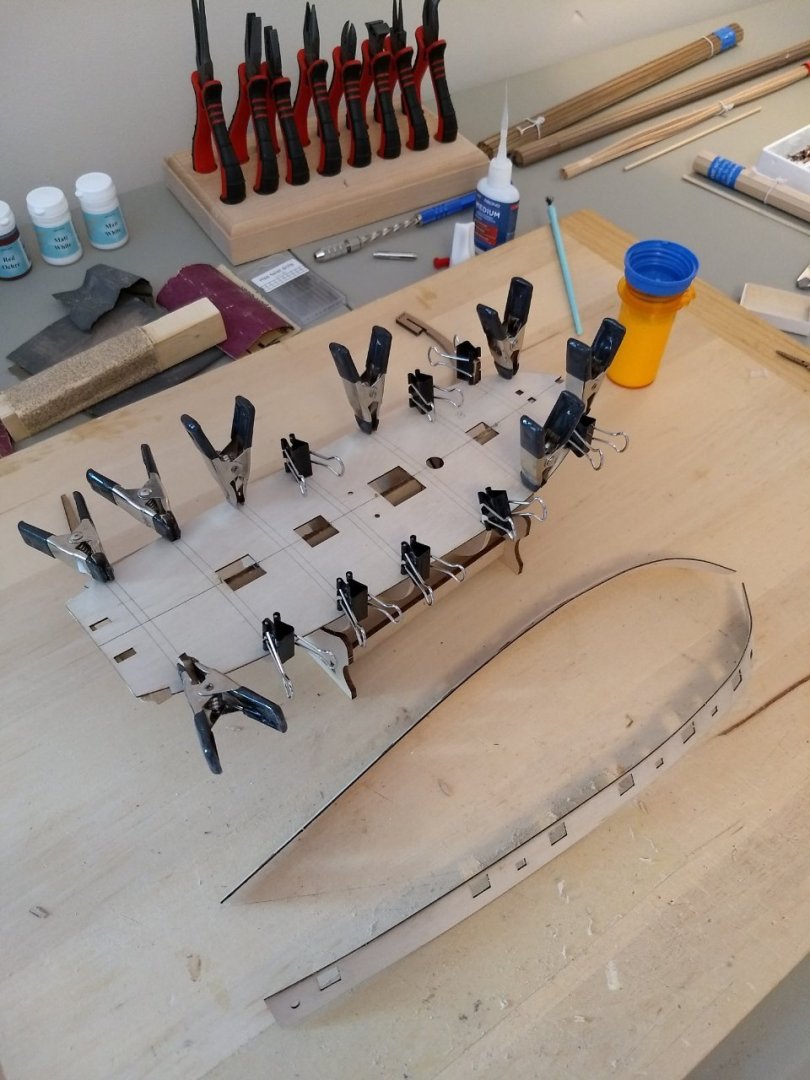
- 114 replies
-
- 3
-
-
- Lady Nelson
- amati
- (and 1 more)
-
I enjoyed his approach as well. It helped me get in the frame of mind to think of the build as more than "here's how to assemble your new Ikea furniture".
-
"It was supposed to be that way." If I say it with enough conviction, do you think I can convince myself? 😁
- 114 replies
-
- 1
-
-
- Lady Nelson
- amati
- (and 1 more)
-
That's coming along very nicely! The pictures of the finished planking look much better than I expected based on your description of the difficulties you described. I would say that you are definitely up to the challenge of this kit. I was going to tackle this as my second model, but got cold feet and opted for the Lady Nelson (one level, one mast, less rigging). The Supply will be my next build, so I'm eager to get a preview. I think you did a nice job with the fairly abrupt direction change of the planking at the stern, finding a nice balance between a 90 degree turn and a smooth curve. It couldn't have been easy, and it looks great. If you don't mind, I'll just perch here on the edge of the dock and watch you work. Mike
- 53 replies
-
- 2
-
-
- Supply
- Caldercraft
- (and 1 more)
-
Permission to board from the Finger Lakes
Freezing Parrot replied to Freezing Parrot's topic in New member Introductions
Thank you! If I stand in the crows nest on my tiptoes, I can almost see your house across the lake! -
Thank you for those resources, John! I also have your build log bookmarked. It's coming along very nicely! I like how you did the margin plank on the deck. I'm glad to see that edge bending will work for that, as I didn't really want to piece those together. I'm also going to use your idea of the spirketing plank.
-
Permission to board from the Finger Lakes
Freezing Parrot replied to Freezing Parrot's topic in New member Introductions
Thank you, John! -
Nice job! I just started the Lady Nelson myself, and I have your build log bookmarked for reference. Thanks for posting it!
- 28 replies
-
- 1
-
-
- Amati
- Lady Nelson
- (and 2 more)
-
Permission to board from the Finger Lakes
Freezing Parrot replied to Freezing Parrot's topic in New member Introductions
Thanks, Mark! Hope you have air conditioning. It seems like it's a bit warm out there.