Dan Vadas
-
Posts
3,261 -
Joined
-
Last visited
Content Type
Profiles
Forums
Gallery
Events
Everything posted by Dan Vadas
-
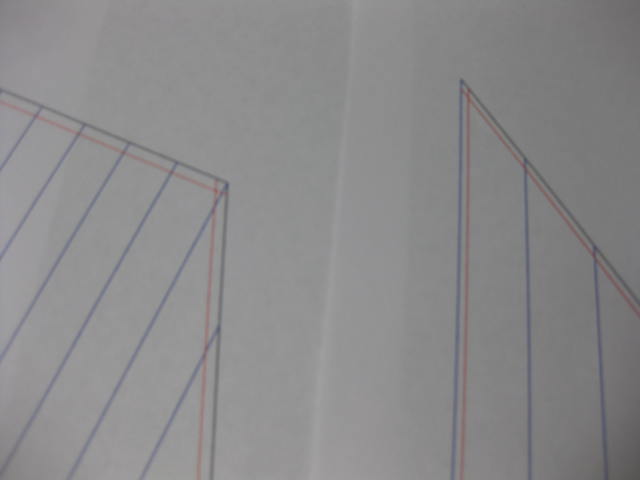
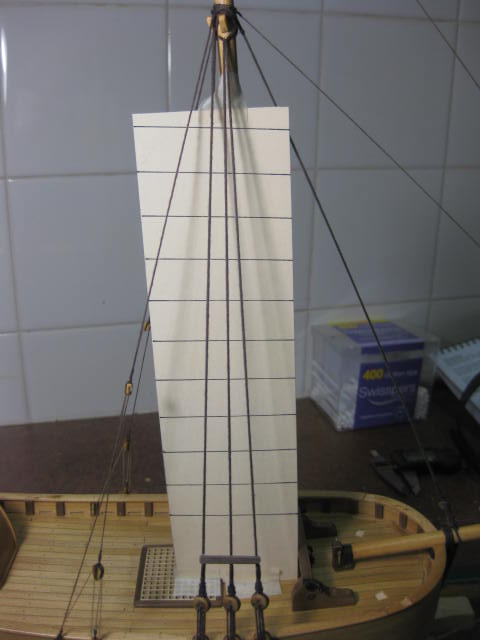
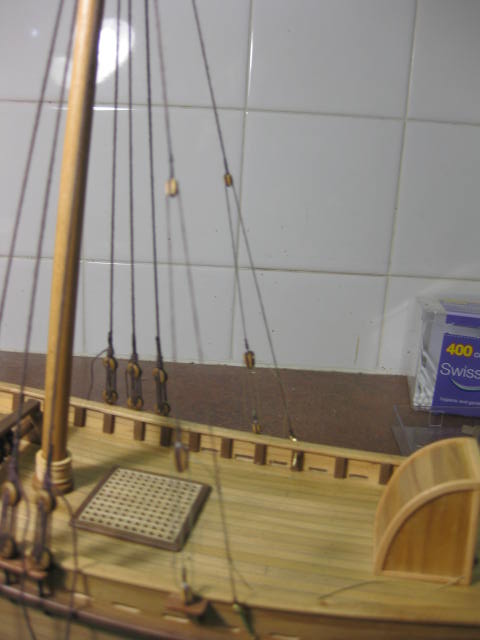
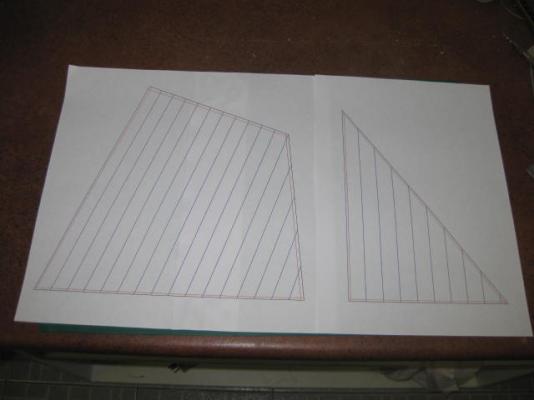
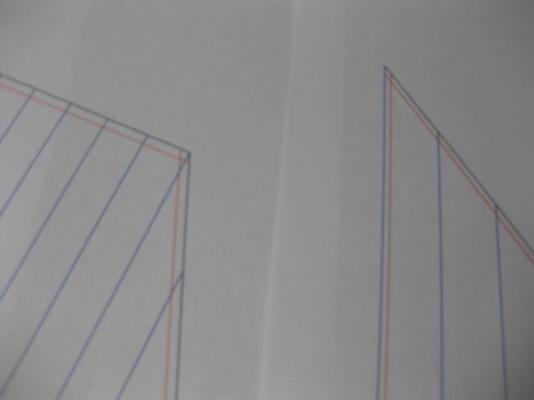
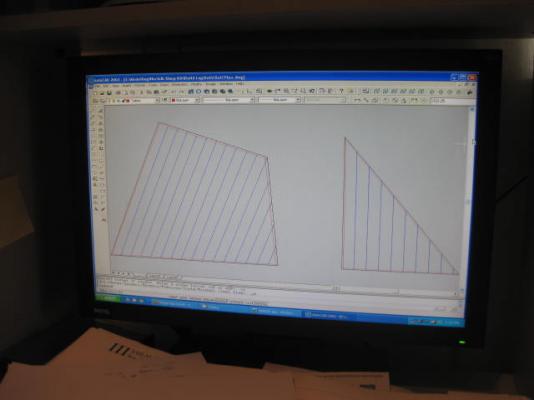
Time to bite the bullet and start on the Sails. I've drawn them up in AutoCAD on my computer, and printed them to full size. I have the Cloths at 24" apart, and drawn in the Tabling to see what I'll be in for when I sew them together - pretty tight. I made the Tabling for the Gaff a scale 3 1/2" for the Head, 3" for the Luff, 2 1/2" for the Leech and 2" for the Foot. 3" equals 2.1mm at this scale, 2" is only 1.4mm. The Jib has a 3" Stay, and 2" Leech and Foot. I'll put a single Reef Band in the Gaff, and reinforcements in the corners of both sails. Before I start anything I'll test fit the paper templates.
-
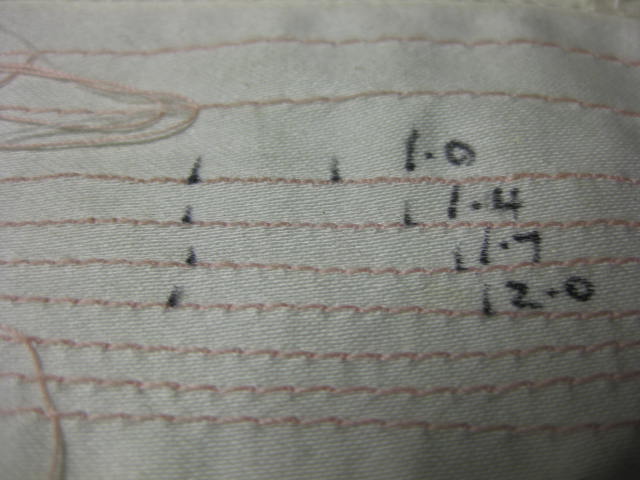
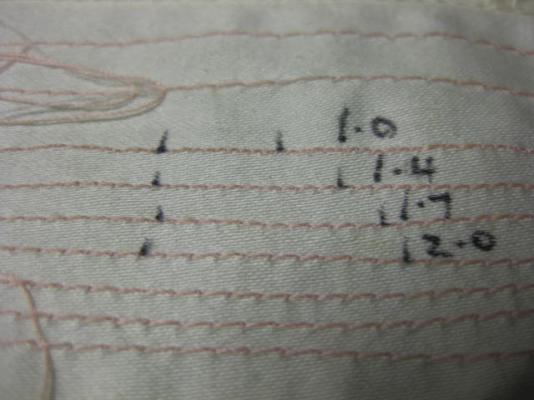
Sails I've been procrastinating a bit about the Sails, mainly because I haven't used a sewing machine in over 20 years. Today I got my mother-in-law to show me what her $4,000 machine could do (she makes and dresses Porcelain Dolls as a hobby - and she's VERY good at it too ). This sample was done with whatever she had in her machine at the time - she says it's not a particularly fine tread, and she has two smaller sizes ... AND it's PINK . The smallest stitch with this thread is 1mm - it looks TOO small to the eye. I'm more inclined to the 1.7mm. The material I've used for the sample is 1,000 Threads per Inch Egyptian Cotton. Probably a bit TOO fine at this scale. From "hopeful" : From "Jim Lad" : What can I say but - YAY ? All done by eye, and the right scale too - amazing .
-
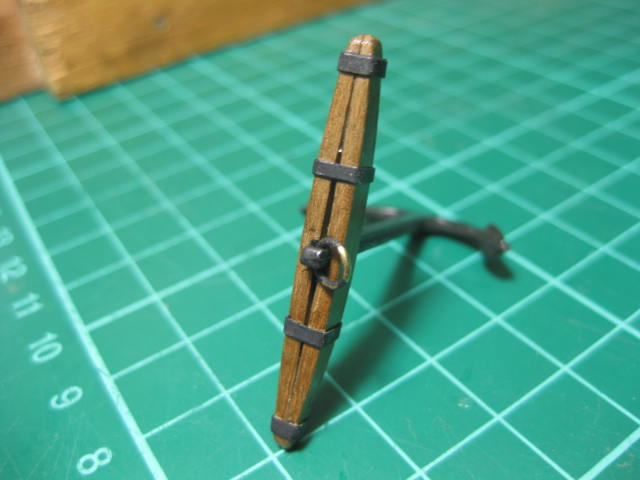
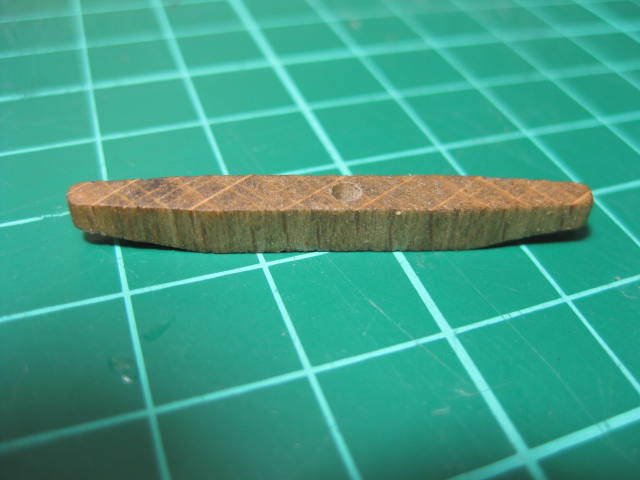
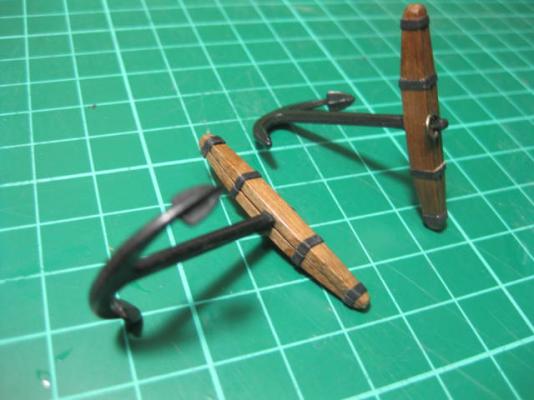
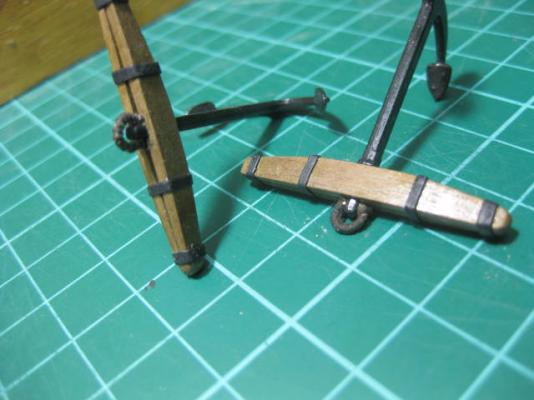
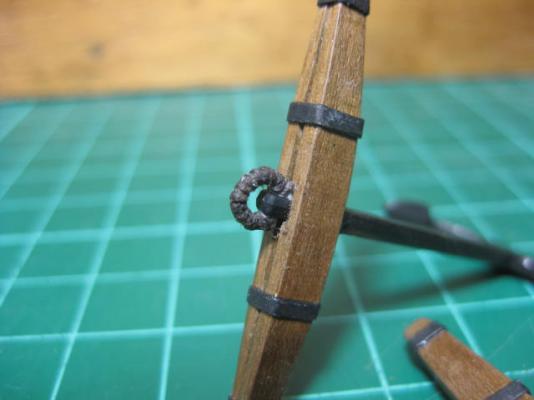
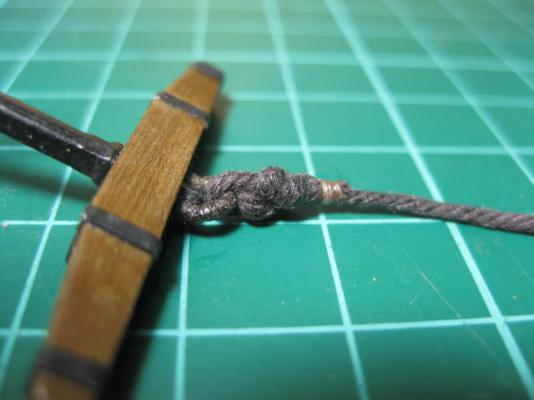
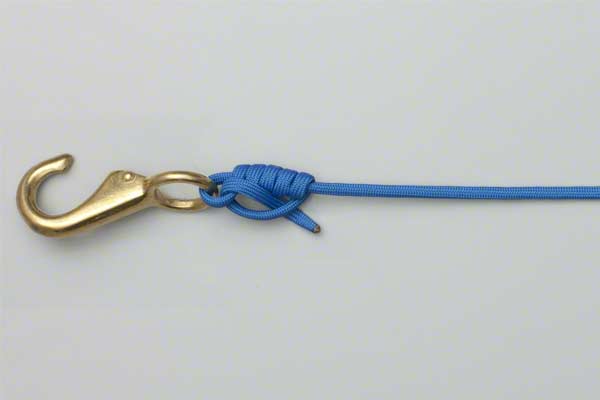
Anchors I've made the Anchors. I wasn't all that happy (to say the least) with the kit supplied Stocks. I've made the stocks from 4mm x 2mm walnut in two pieces as the originals were. The gap in the centre is to allow the bands to be tightened when needed. I made the bands from painted photo paper. The kit's brass bands were too large for the outer two and I had a lot of trouble trying to reduce one to size. I've also "Puddened" the Rings : I thought I may as well finish off the anchors (for now - they'll be fitted after the sails and rigging are completed) by tying the anchor cable to them. The knot used for this is called a Clinch Knot. That is the way described in Lees. The knot is finished with a seizing.


-
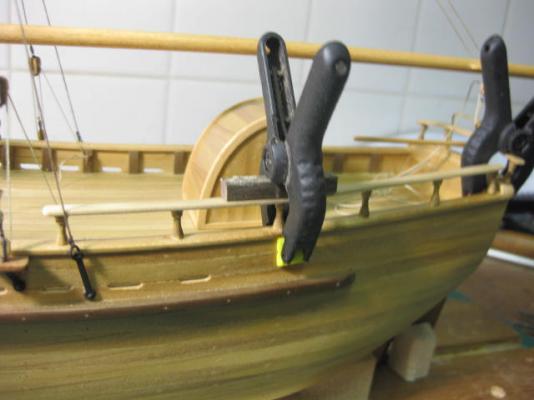
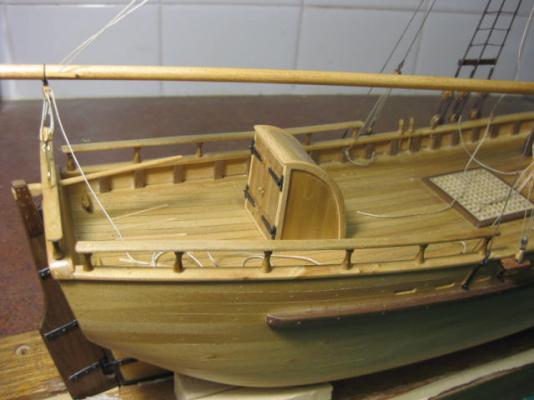
Railings I've made and fitted the side Railings. The same method was used for the Transom Railing. After laterally bending the rails (soaked with water and left to dry in a jig) I drilled the holes for the 0.5mm brass pins, then placed each rail on top of the bulwark rails and drilled through them as well. This ensured exact alignment with each other. Then I drilled the stanchions and fitted the pins. When dry I sanded the protruding parts flat and fitted the railings. Finally I gave them a couple of coats of semi-gloss clear. BTW - I don't remember if I mentioned it when I did the Transom Railings, but I've halved the kit supplied stanchions - the railings are now at elbow height instead of eyebrow height .


-
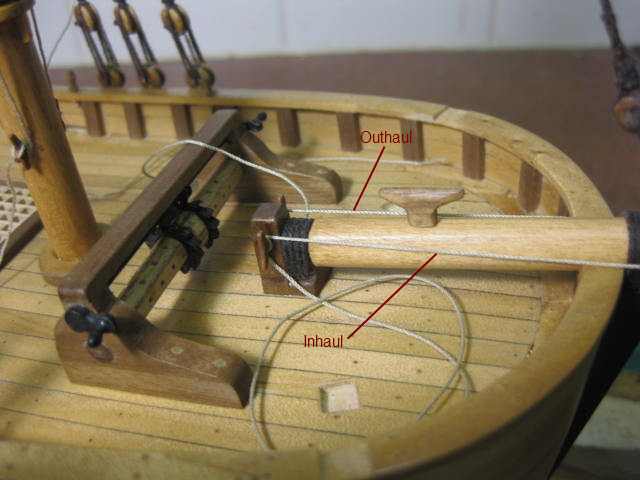
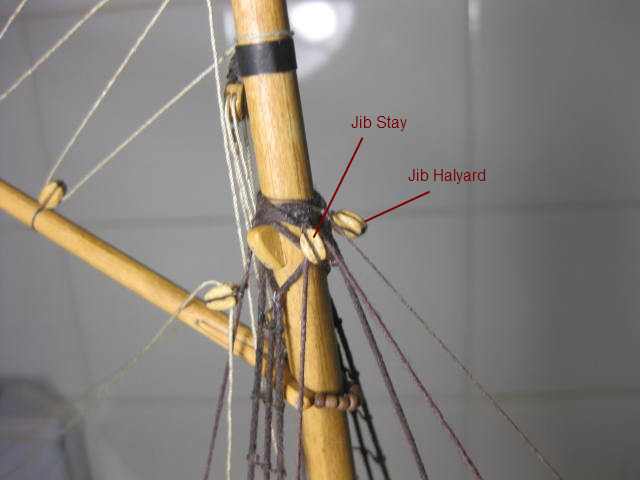
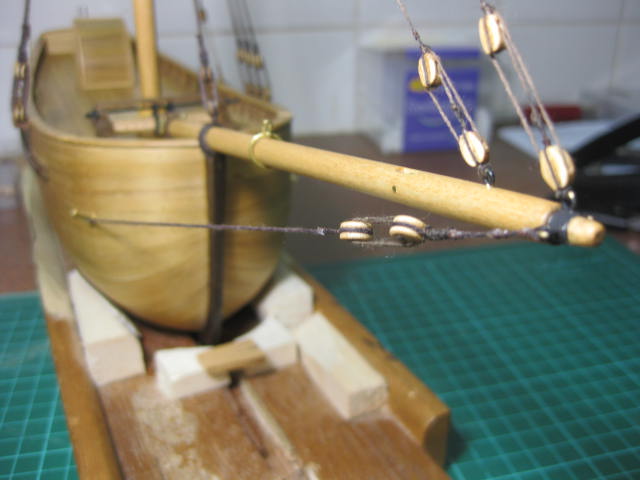
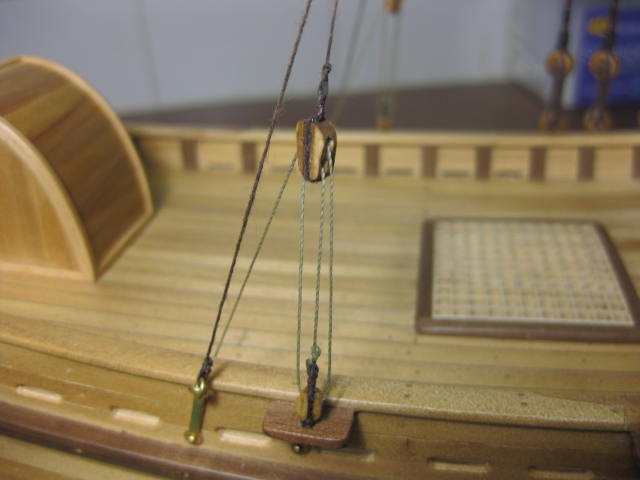
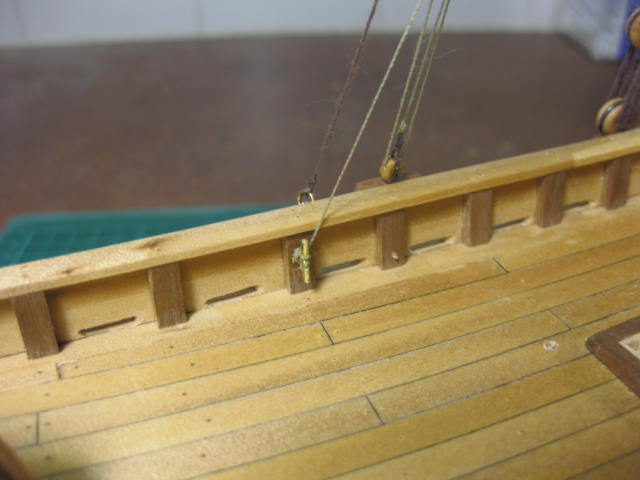
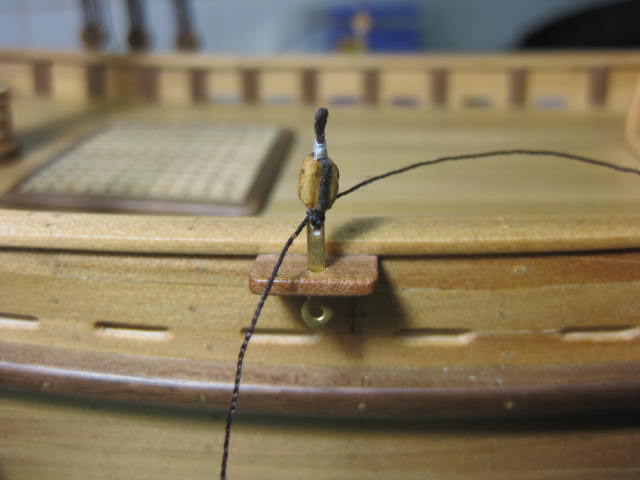
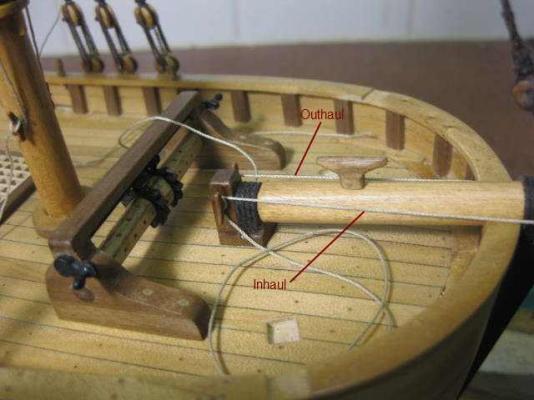
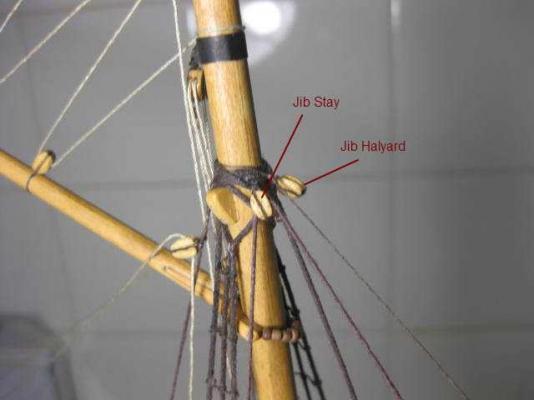
Jib Rigging I've fitted the Jib Rigging. I've done all this completely different to the kit, which I thought was WAY out. For starters I'm using a Jib Stay as does the Replica (I can't see how the jib would work without one). I've seized the standing part to the shackle in the jib traveller, and also fitted a block for the jib's Downhauler. The stay reeves through a block on the starboard side of the mast cleats above the top of the shrouds etc. The running end will belay to a pin in the top rail just forward of the shrouds. The jib halyard will reeve through the block on the port side, and belay to another pin on the port top rail. The ONE (the kit had two) Jib Inhaul is tied off to the bottom of the traveller. The running part goes to the Starboard cleat in the bowsprit block. The Outhaul in the kit is shown as having it's running part tied to an eyebolt in the stem under the bowsprit - it wouldn't have done ANYTHING down there. I've tied it to the hook in the traveller, rove through the sheave in the bowsprit and took the running part to the Port cleat in the bowsprit block.
-
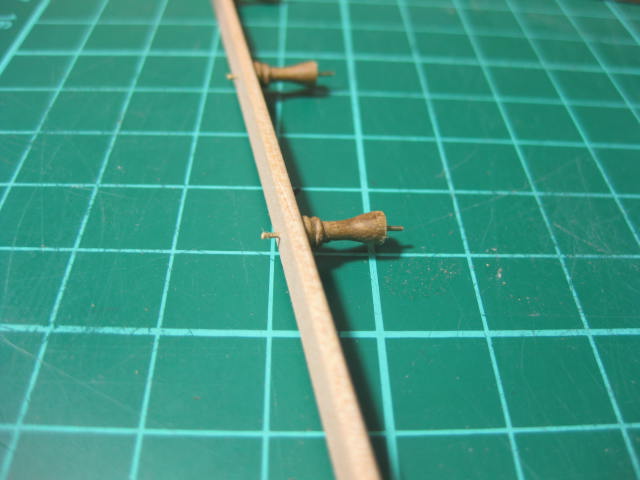
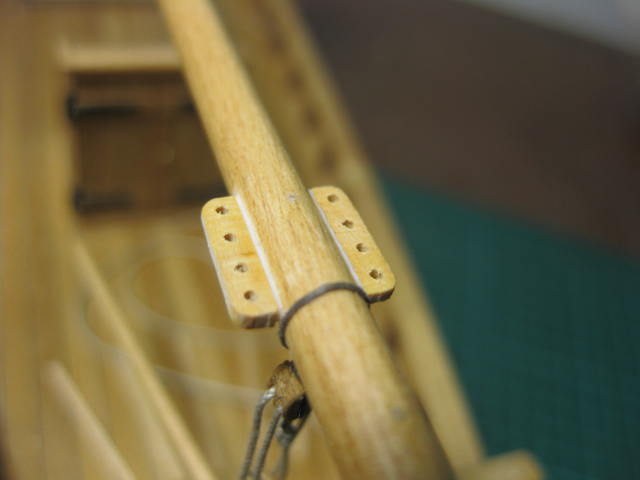
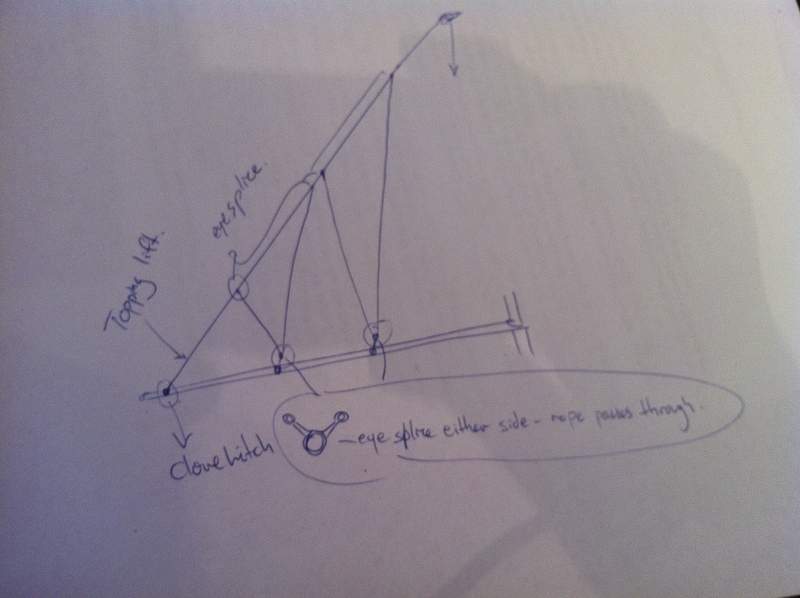
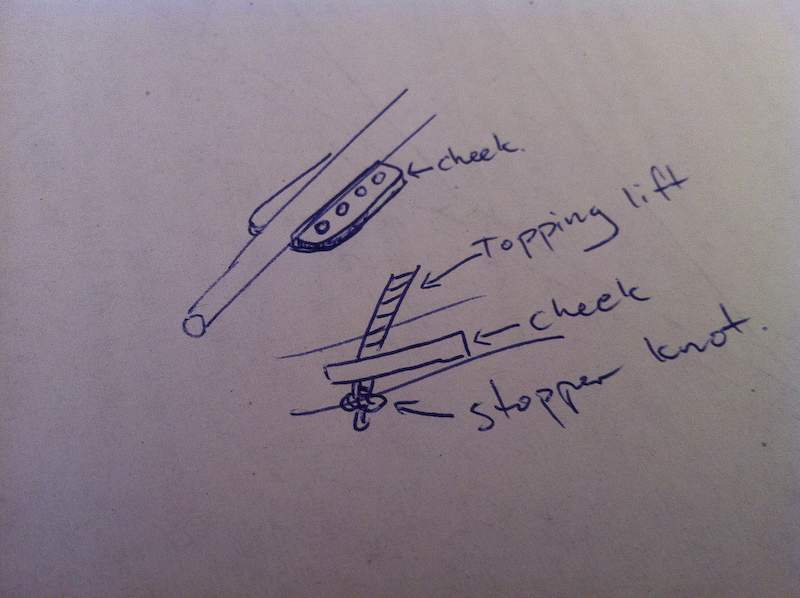
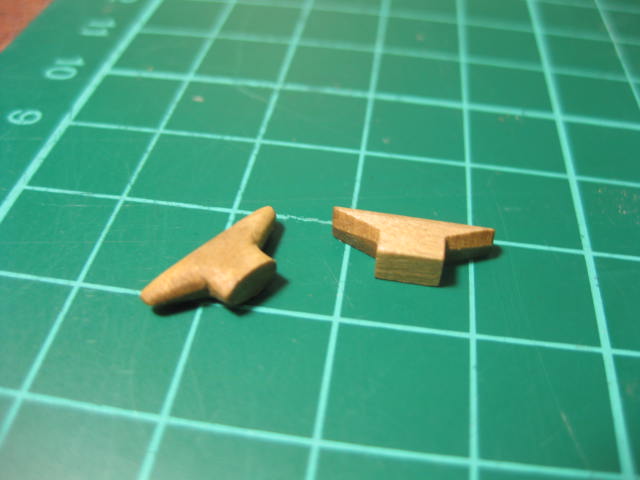
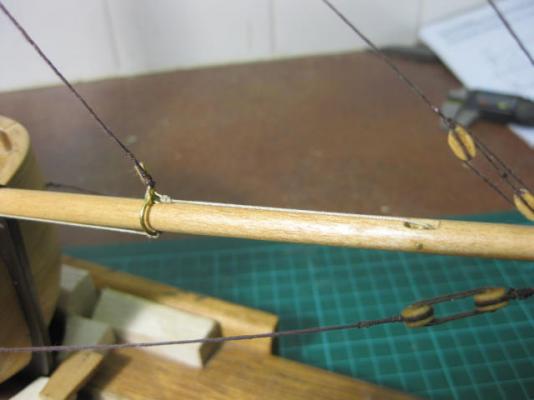
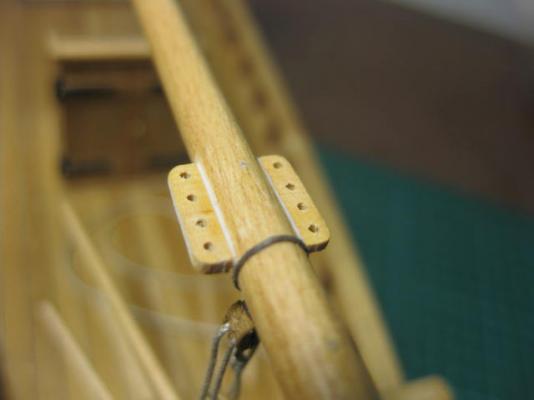
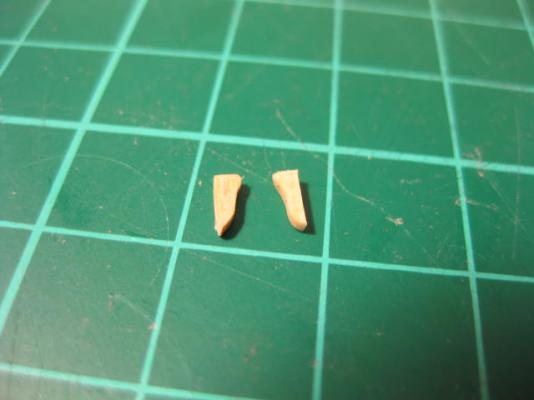
Boom Cheeks Here are Anton's Boom Cheeks. Made from boxwood. I thought I'd have a go at making Anton's Guide Line Strop, just to see if it was possible. Yep, and not all that hard to do either - only took me 20 minutes to make one - four more to go. I used two fishing line seizings instead of splices, which aren't all that easy to do on 0.15mm thread.

-
From "Anton" : I don't know how many times I've looked at that pic of the Replica under sail before and didn't see what you've just drawn - now it's all so obvious . Thanks for that, and I'll put the changes into effect.
-
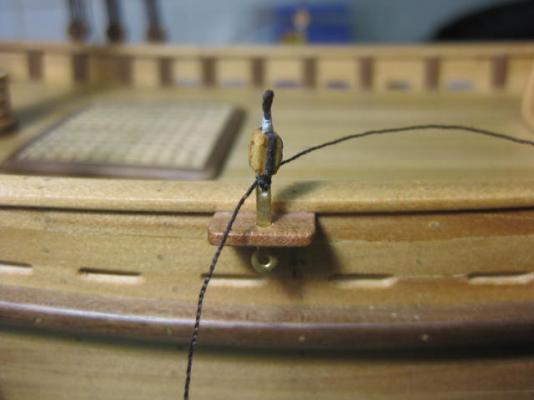
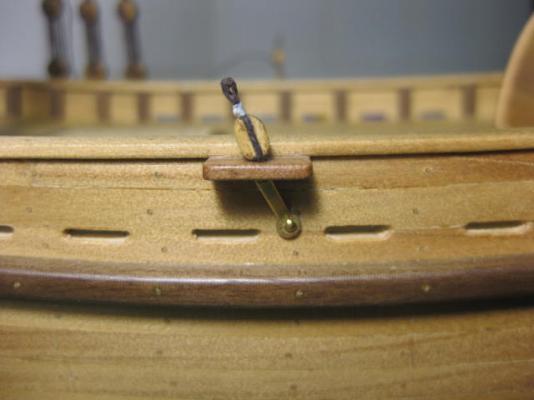
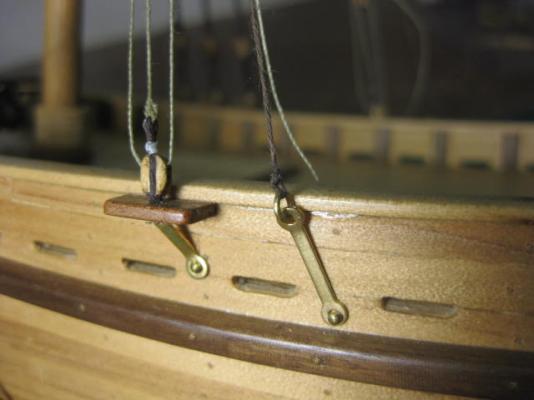
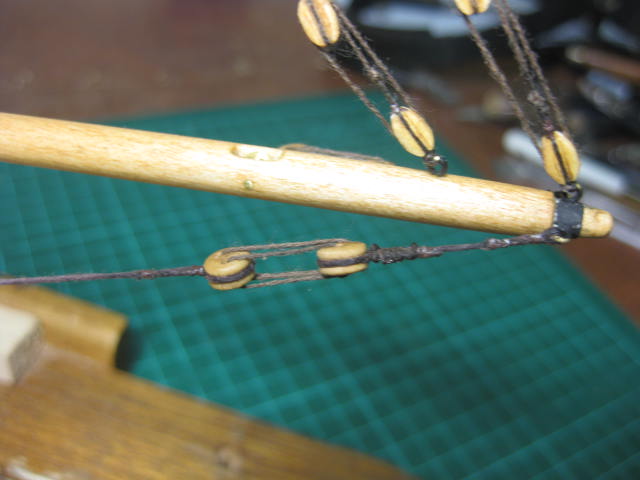
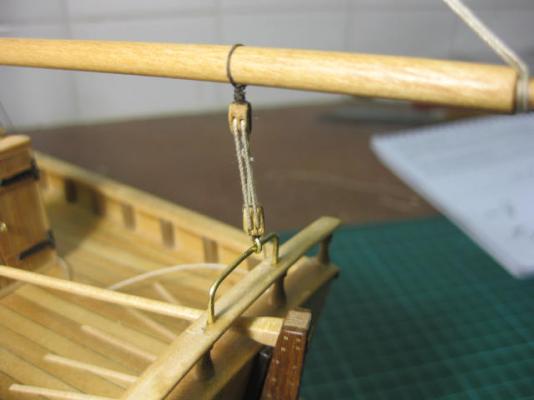
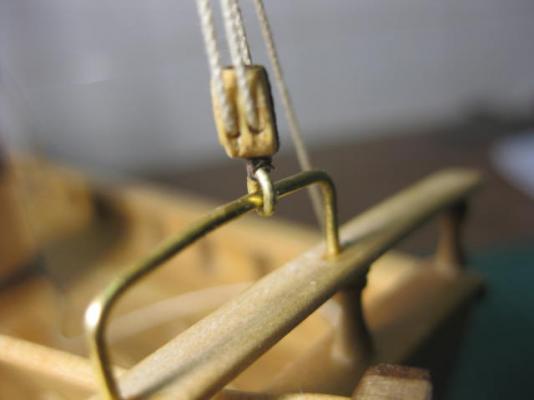
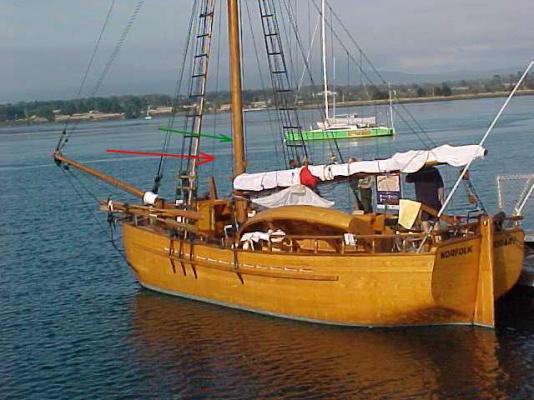
Boom Sheets Next thing to do is the Boom Sheets, I'll only do a single. On the Replica (pic 1 - sorry about the quality, it's as good as I can get it) they use what looks like a brass Traveller or ring to fit between the lower block and the horse to enable the sheet to slide from one end to the other - I've done something similar. EDIT - Following some advice given me by PM I've redone the Sheet Horse. The horse now goes THROUGH the top rail and into the cap rail and transom - a much sturdier method, and the way it was done on the Replica (but I didn't see it ).

-
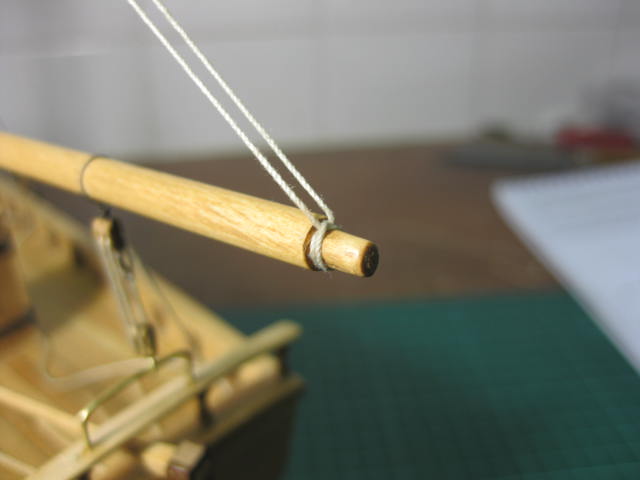
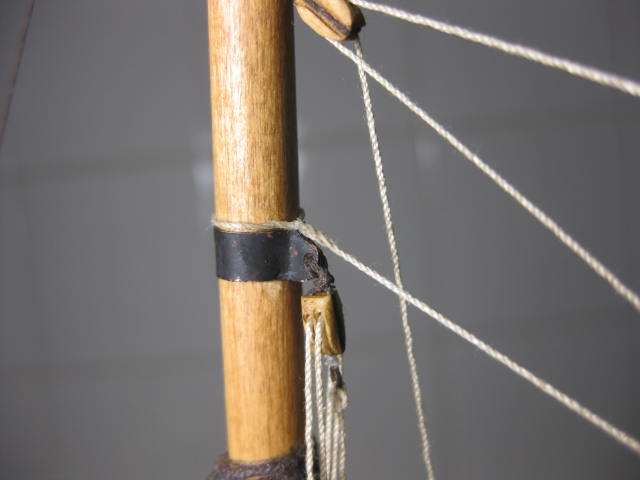
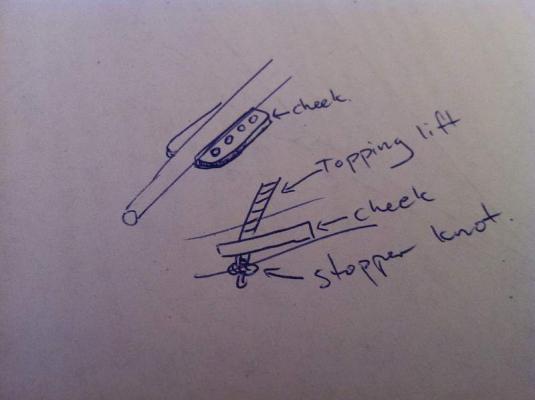
As per John's advice I've moved the gaff halyards in to the foot of the mast. I made and fitted two brass cleats, which I've since painted to look like wood. (Pics 1 and 2) I've attached the Boom Topping Lifts with a clove hitch around the end of the boom, but I may change this to a single block stropped to the same position.

-
From "Jim Lad" :
-
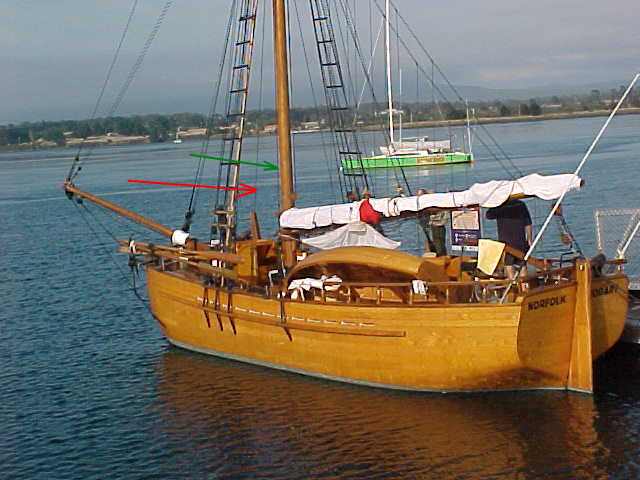
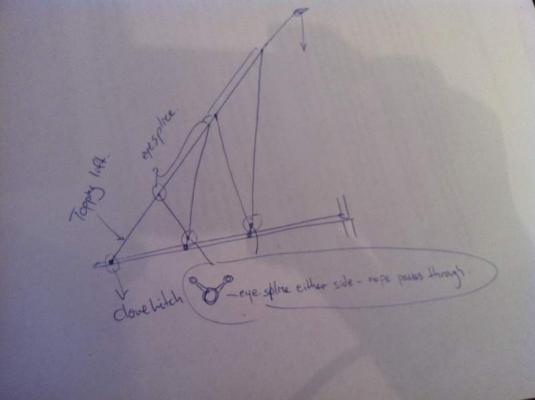
In the pic below I've used a red arrow for what I thought the Peak Halyard should have been, but now I'm more inclined to think it's the Port side Topping Lift for the boom. The green arrow looks like the Peak Halyard, with the Throat Halyard on the other side of the mast (or vice-versa). I can easily change them over if that's the way they should go.
-
From "Jim Lad" : Hi John, Thanks for the info. I fitted that "horse" to the boom as per kit instructions - I didn't think it a logical way of doing it either ... it's coming back off.
-
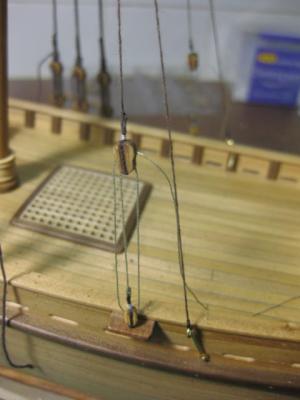
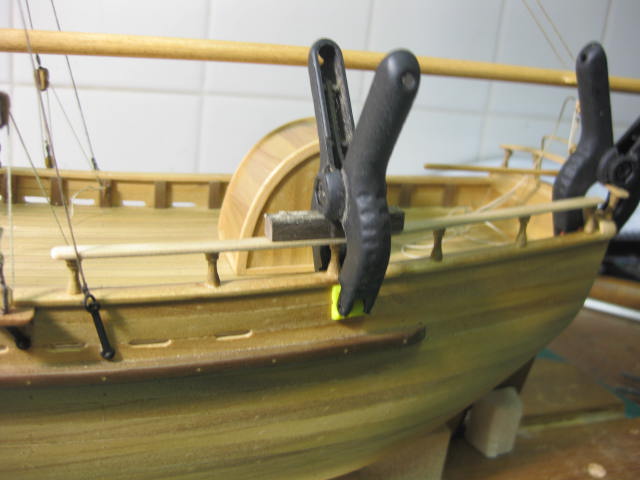
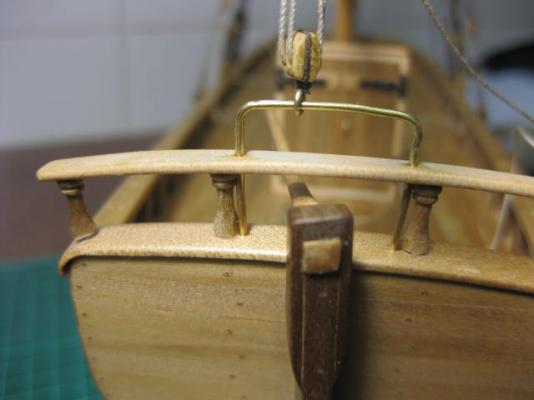
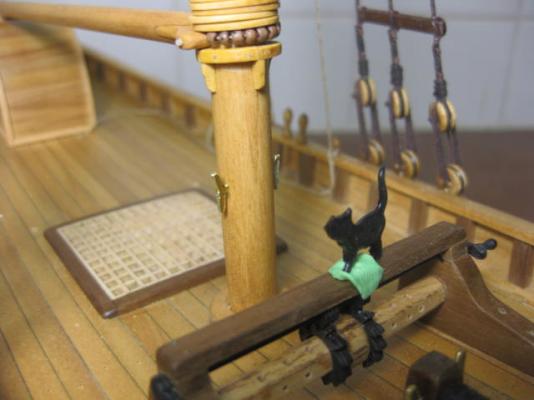
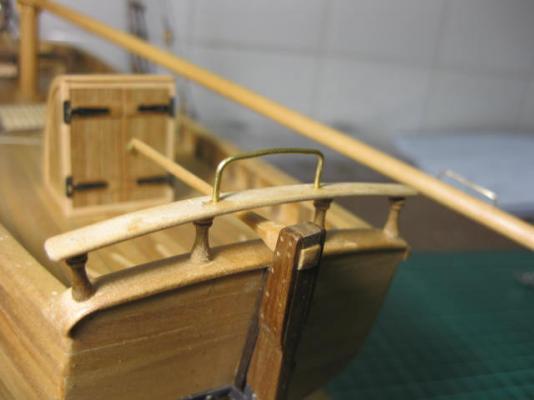
Sheet Horse I've fitted the transom railing which I made earlier, and also fitted a Horse for the Sheet on top of it. I've also fitted another Horse(?) to the Boom over the top of where the sheet will be attached to the boom. I don't have any real information on how the sheet works on the boom on this type of craft, or whether that boom horse was even used at all. Anyone got any ideas? I'm leaning toward a ring around the boom that can slide inside the boom horse (like a Traveller), or would it just be tied off and not move at all?

-
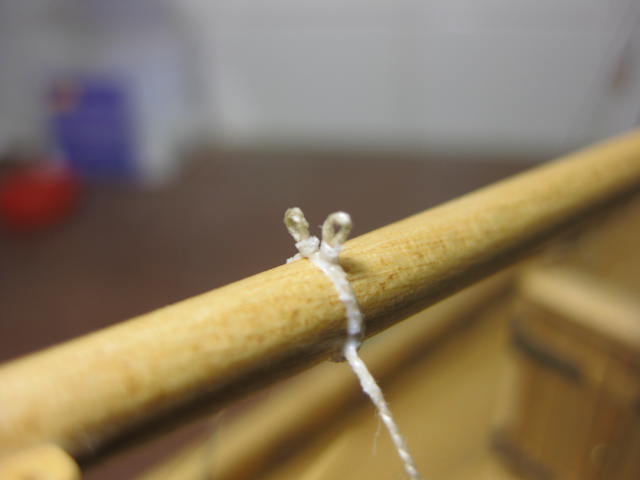
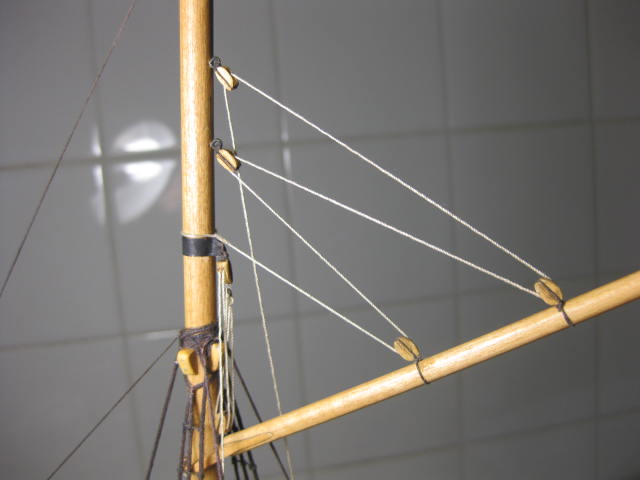
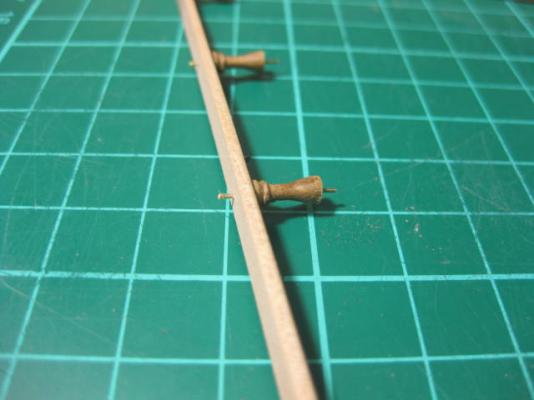
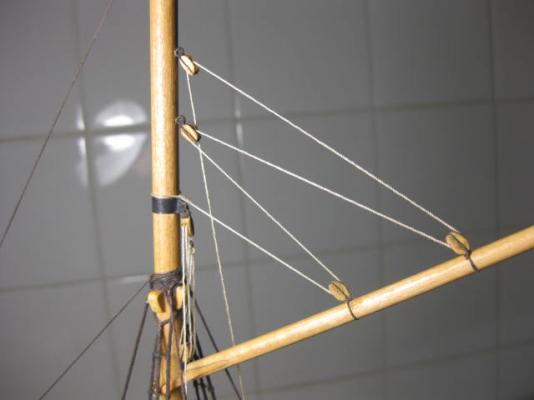
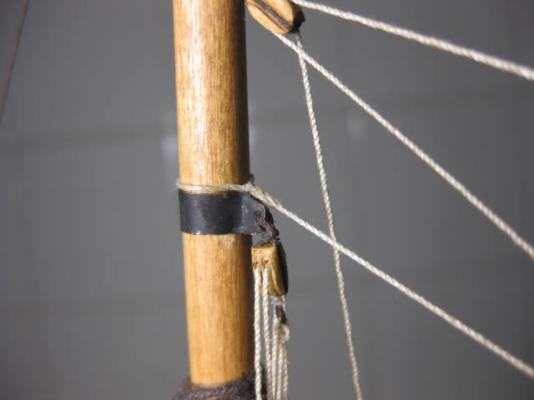
Throat and Peak Halyards I've rigged the Throat Halyard and Peak Halyard to the Gaff. A few differences to the kit instructions again : First was the way they had the peak halyards rigged - they have BOTH ends running down to eyebolts on the deck (why?), whereas I have SPLICED (pic 2) the standing end around the mast and then rove through the blocks with the running end belaying to a pin on the starboard top rail. This meant removing one of the eyebolts in the mast and plugging the resulting hole (I should have checked a bit more thoroughly earlier). Second was the belaying point for the throat halyard - again, they have it going to an eyebolt in the deck - no way ... I have used a belaying pin in the Port top rail. I've also installed the four very large "belaying pins" for the Sweeps. I didn't think these were all that accurate, but the Replica has exactly the same things so I'll go with them (apparently they must work OK ).

-
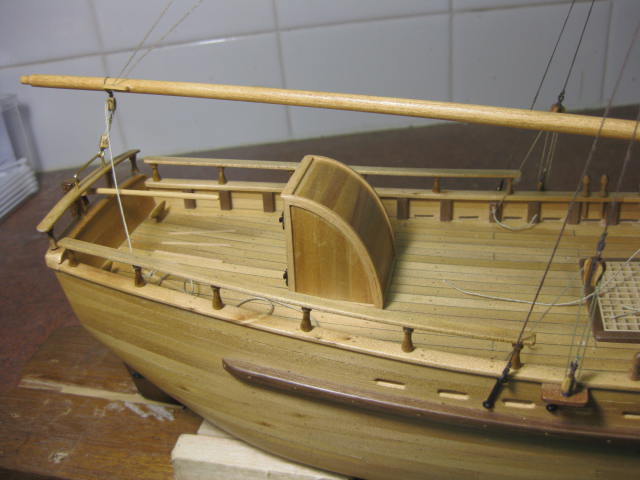
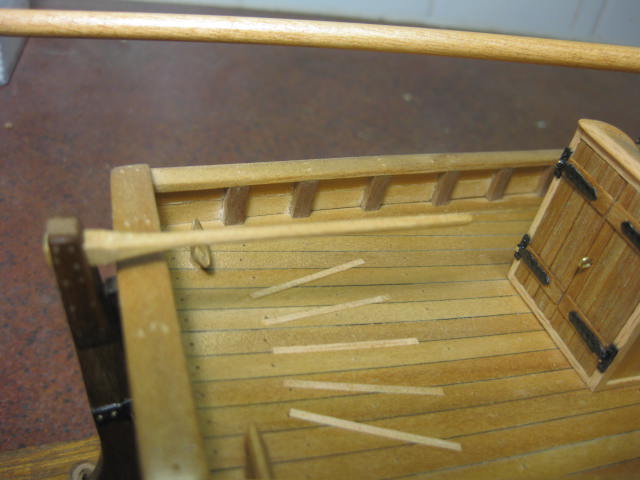
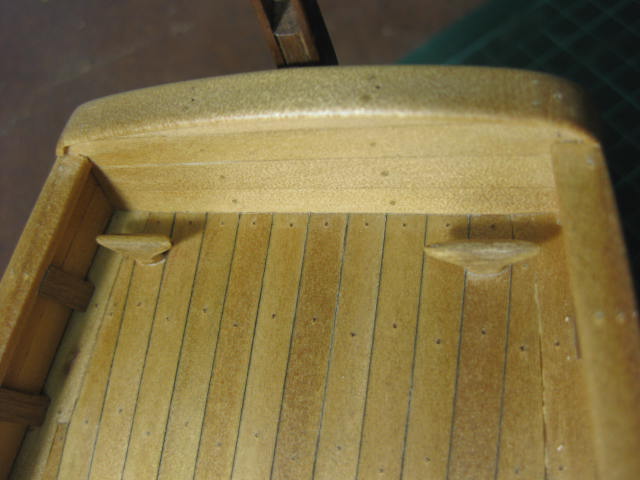
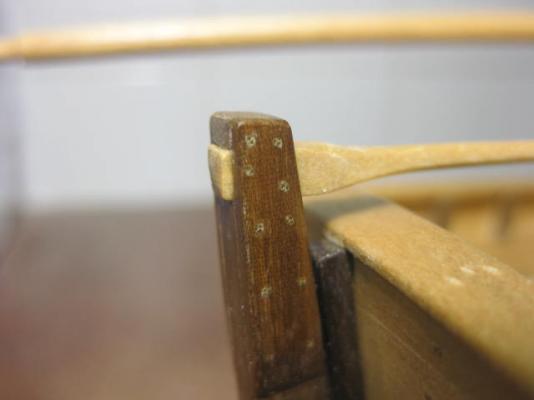
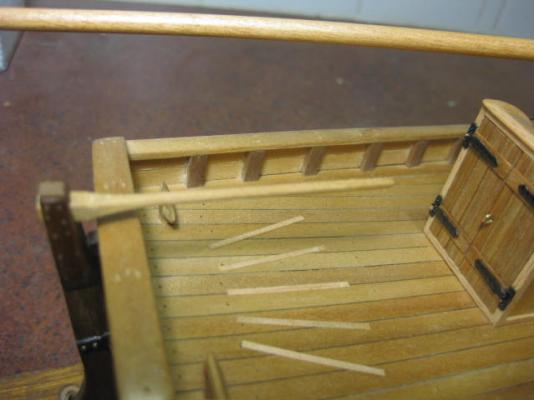
Tiller I've made the Tiller from a piece of 4mm x 4mm Norfolk Pine and fitted same. I haven't curved it like the kit's because I've raised the rudder to clear the extended transom - it works out as being around hip high (28mm from the deck) which is spot on. The rudder top has been trimmed, a filler piece has been added above it, and I've treenailed it all together. I've also fitted 5 footgrip strips made from 1mm x 0.25mm radiata pine.

-
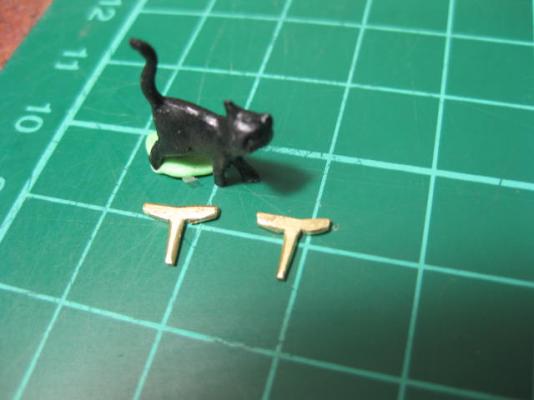
Sheet Cleats I've reshaped the supplied Sheet Cleats and fitted them.


-
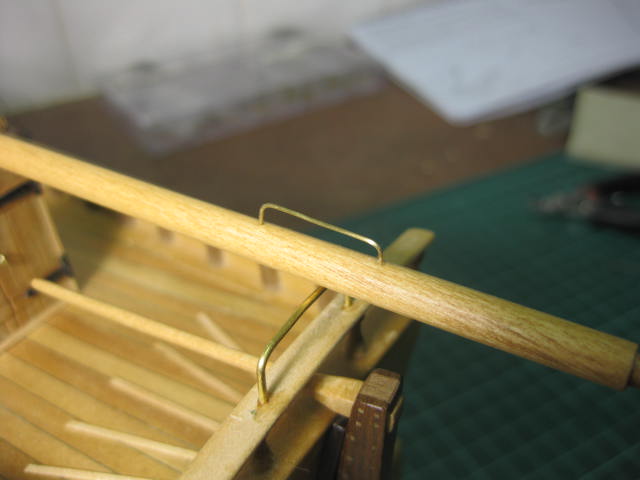
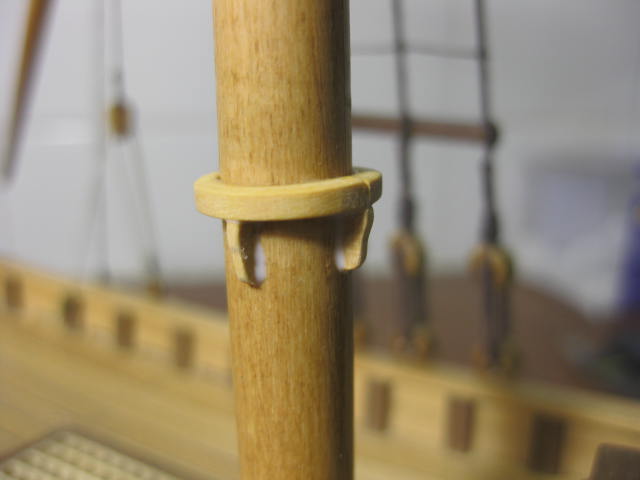
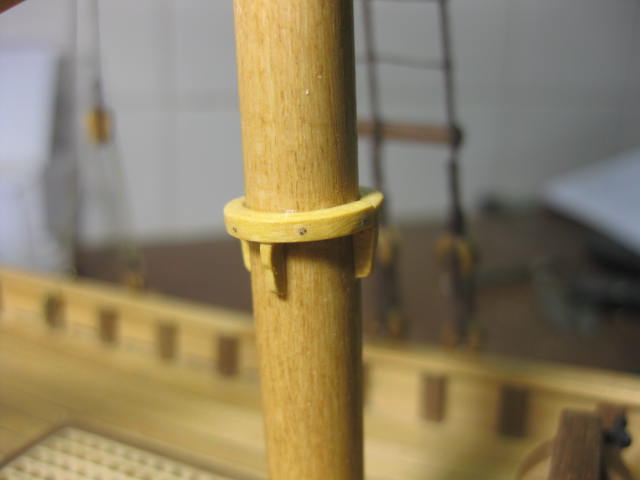
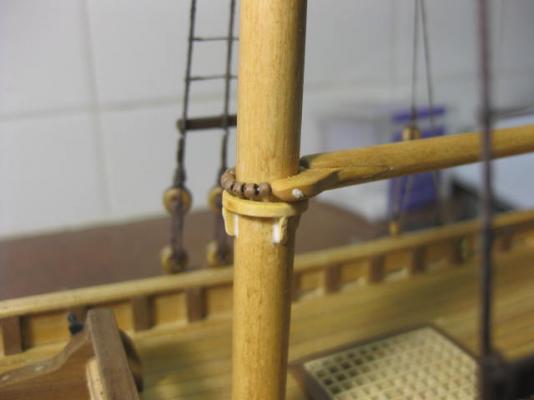
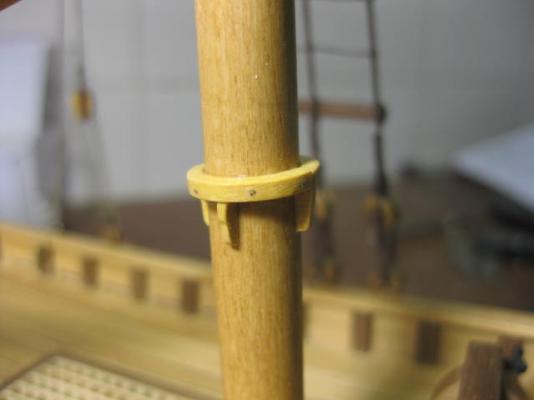
Boom Stop One thing I hadn't thought of before - and the kit doesn't mention it either - is a Boom Stop. Having no way of getting a full ring into position with the rigging in place, I made a ring up out of boxwood in similar fashion to the mast hoops and split it in half. I then glued the two halves back together around the mast. I also made four tiny knees for the stop and fitted them. I've treenailed the boom stop. More for strength than anything else.

-
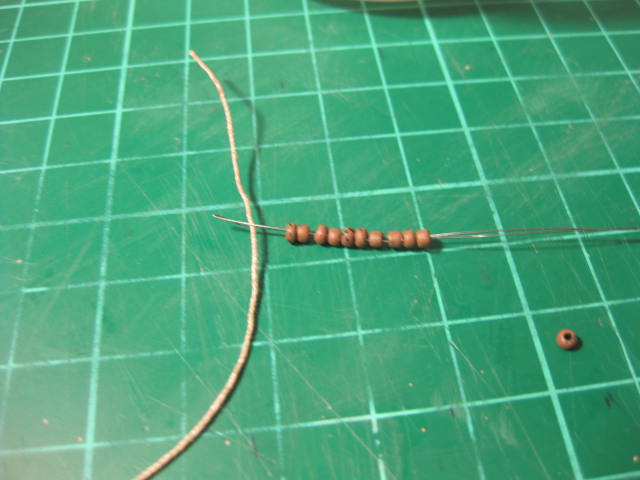
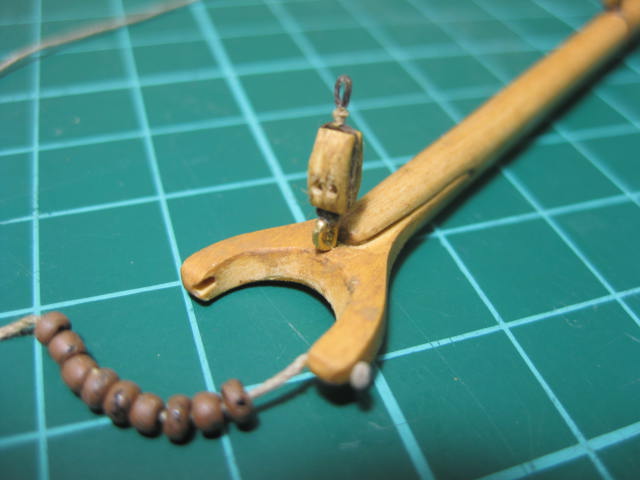
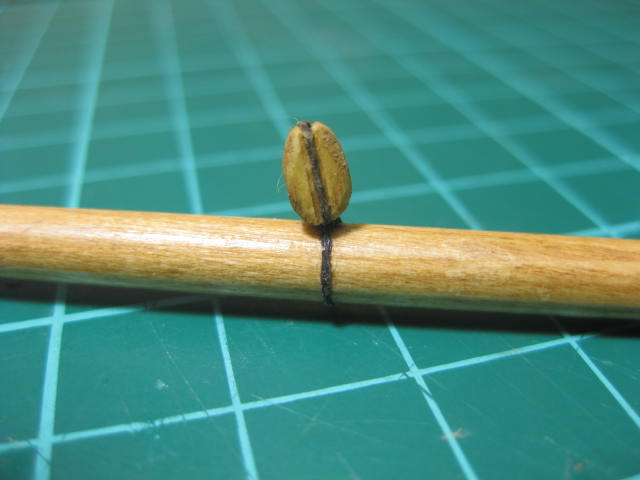
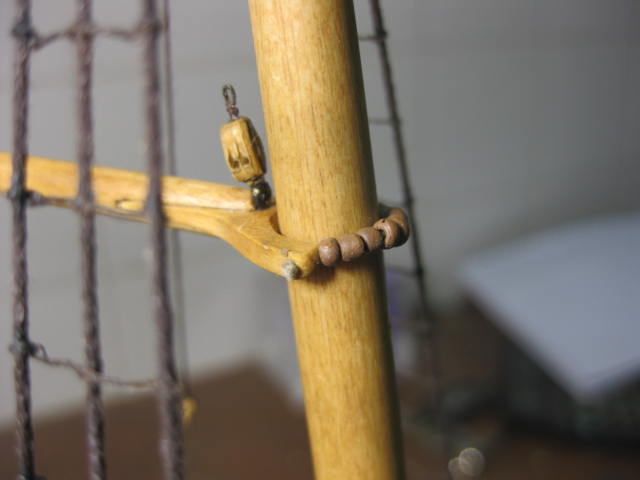
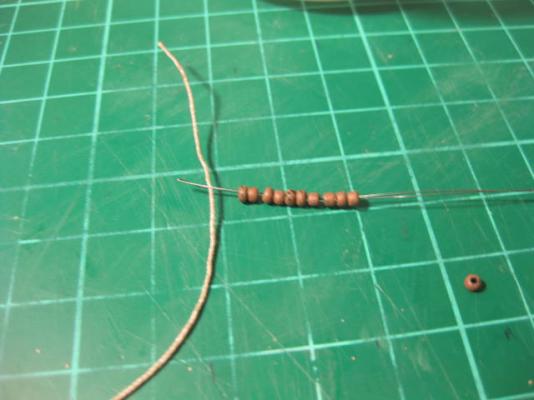
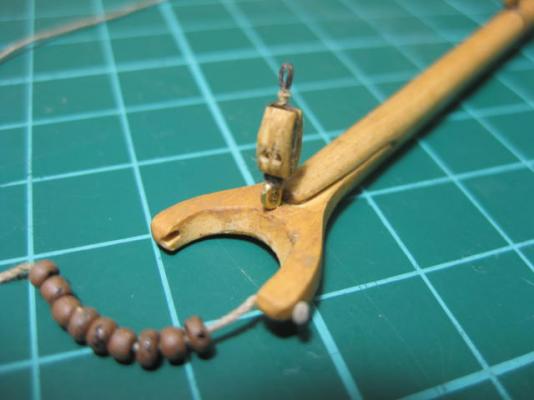
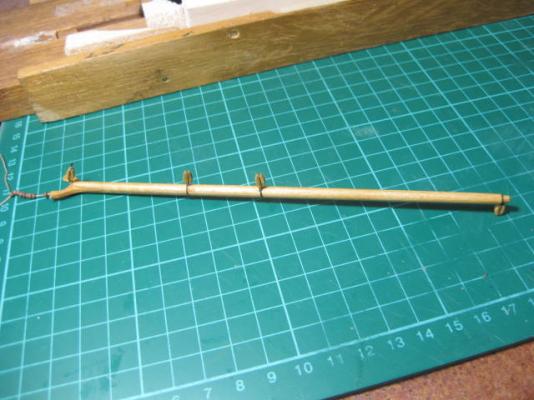
Fitting the Gaff I've made up the Gaff Parrel and fitted the gaff to the mast. The rigging of it is yet to come. The first pic shows a little trick I use to thread the tiny trucks on quickly and easily. I put them all onto a long-wire needle threader and fit the lot in one go . I've used 9 trucks for the gaff, and painted them brown to look more like wood. I detailed and fitted a 5mm single block to the end of the gaff for the ensign halyard, two more at 90mm and 120mm (no measurement on the plans) from the end for the gaff halyards and a 5mm double block on top of the jaw for the gaff lift. The parrel rope goes through the sides of the jaws correctly, unlike the way shown in the kit with the holes vertically. A large knot on the outside of each end holds the rope on.

-
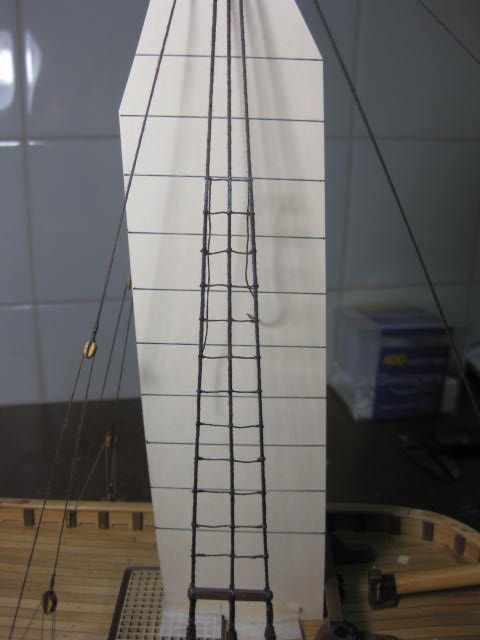
I've finished the Starboard ratlines - only twenty more to go on the Port side .

-
Thirteen ratlines done (there's one right up top holding them together) - seven to go for this side.

-
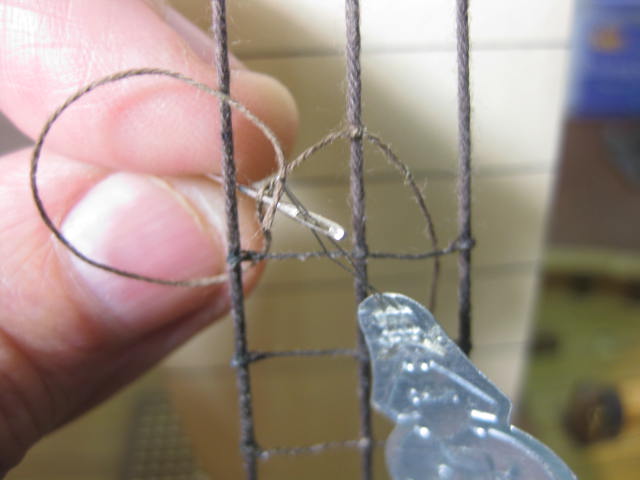
A couple of useful tips I just discovered. 1. As the needle only goes through one strand of the line it sometimes spreads it out a bit along the ratline leaving a gap that I had to play around with. I found that by twisting the ratline tighter before inserting the needle it virtually eliminated this problem. 2. A problem with doing ratlines this way as opposed to using knots in the outer shrouds is that they are dependent on the PVA to hold them together. This means you have to let the glue set before moving to the next ratline., which can take up to 1/2 an hour depending on the type of glue and the weather. To quicken the setting time I place my table lamp, which has an incandescent bulb, a couple of inches away from the ratline. It more than halves the time it takes to dry.
-
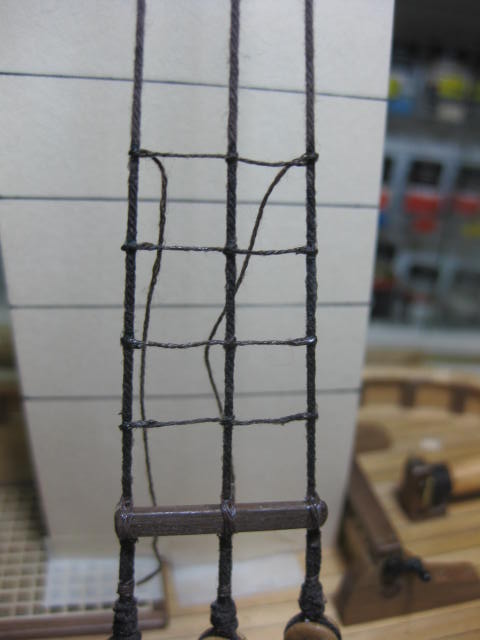
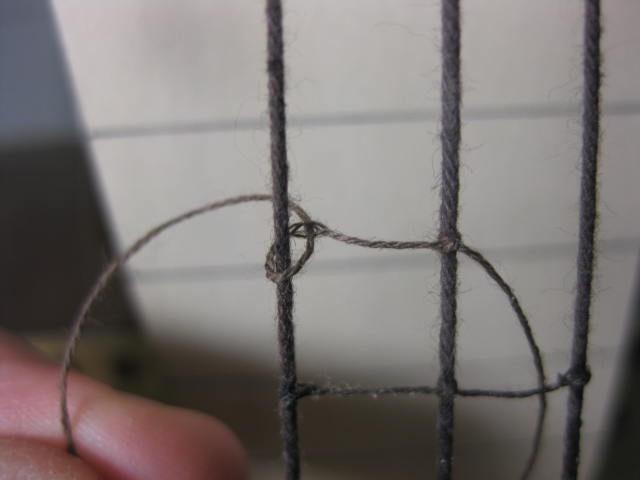
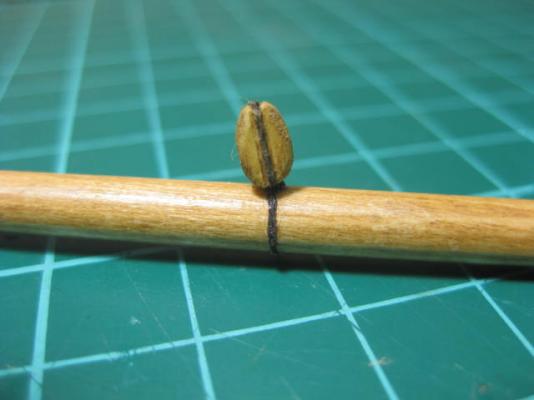
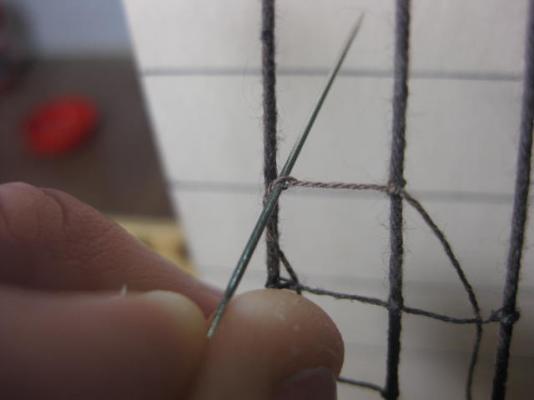
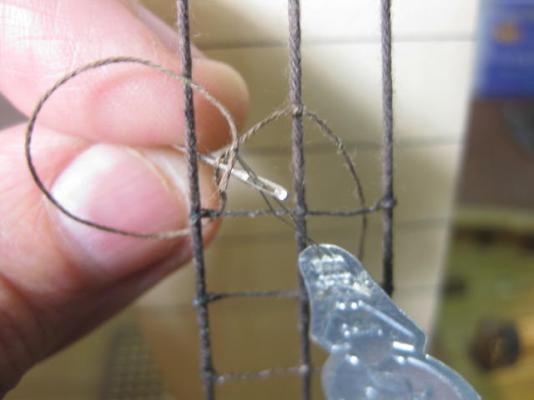
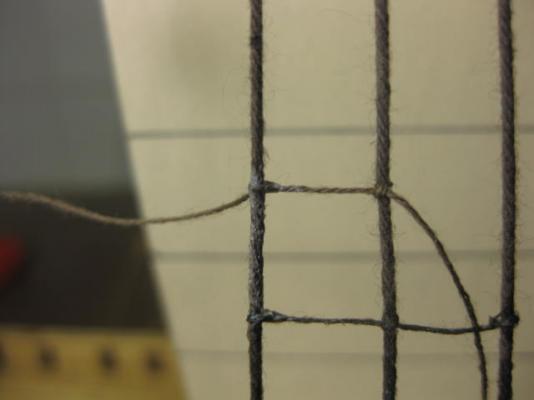
Ratlines I've made a start on the Ratlines. One hour to do four of them, but I was perfecting a new technique so the rest will go a bit quicker. Instead of tying a knot into the outer ones, I've simulated a Splice by using a needle to pull the end of the ratline through itself. The middle shroud has the usual clove hitch. A bit more on my technique : It's important to use a piece of line long enough to leave about 70mm to work with for each end - as there are only three shrouds I started with a piece 150mm long. I start by tying the clove hitch on the middle shroud. Next I place the end of the ratline BEHIND the end shroud, and pierce it with a needle exactly where it meets the inside of the shroud. If you don't get this bit right the ratline won't "hang" properly - too close and it will pull the outer shroud in, too far away and the ratline sags too much. Then I use my needle threader to .... THREAD THE NEEDLE (one of the rare occasions I use it for that purpose ), and pull the line through. I use a pair of pointed tweezers to manipulate the "splice" into a good looking shape and apply some PVA, also painting the shroud under it up to the previous ratline - that gives it a "tarred" sheen and removes all the "fuzzies" at the same time . I do the same thing to the other outer shroud end, wait until the glue sets and trim the tails off with very sharp nippers. That last one took me about 3 minutes from start to finish - it's taken me a lot longer so far to take the pictures and write up the technique .


-
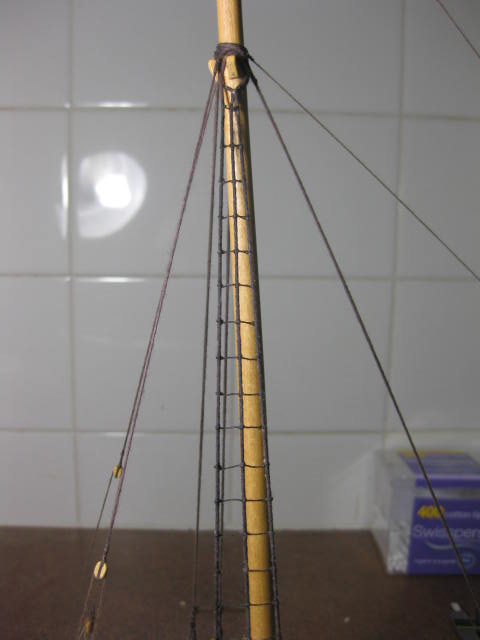
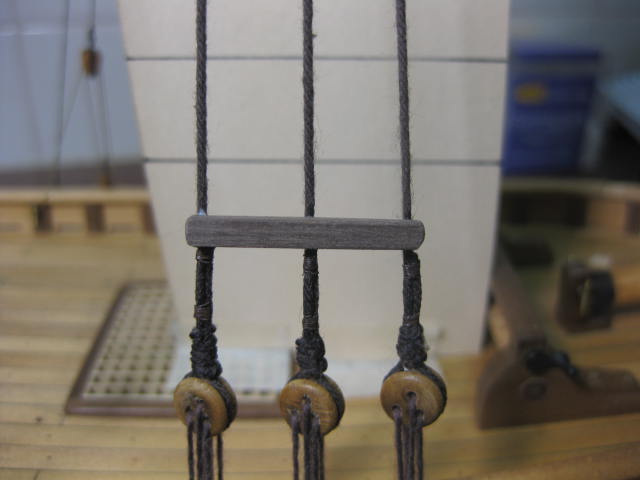
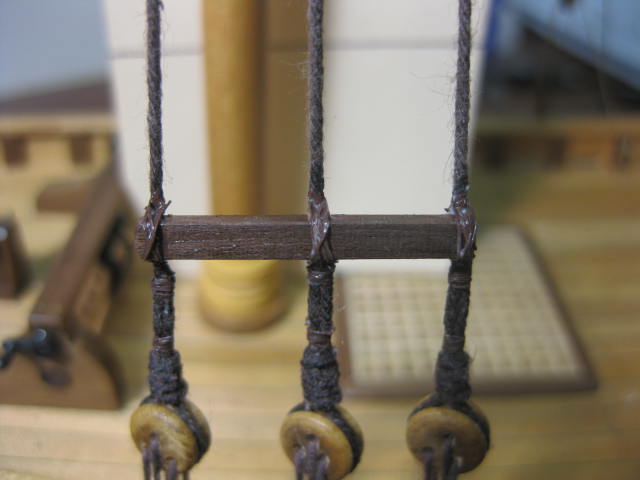
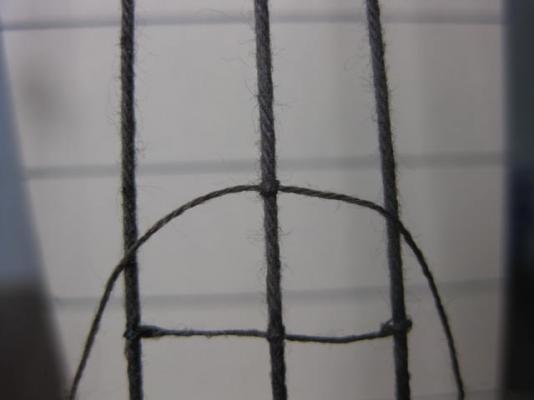
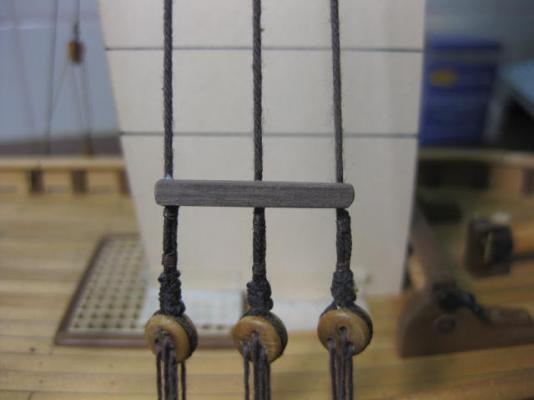
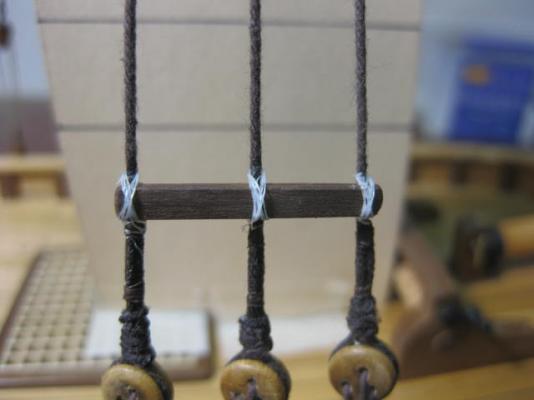
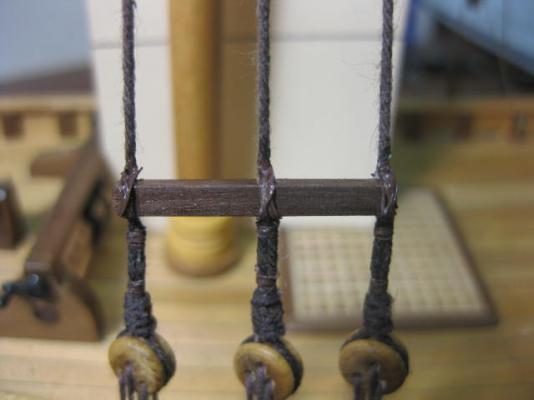
I've painted the brass straps for the backstays and bowsprit shrouds matt black - a very difficult job on the ship, I should have done them before fitting but I wasn't sure whether to leave them brass or not. I've fitted Staves to the shrouds - I glued them to the shrouds with PVA, let them dry and then did the lashings, which I've painted (all my seizing line only comes in white). Before starting the Ratlines I made a guide from a piece of Manilla Folder with parallel lines drawn on it to keep the ratlines level. I taped it to the mast top and the deck with masking tape. Note that the lines on the "guide" are not necessarily at the height of each ratline, just parallel with them - I mark the actual start of each ratline on the shroud itself. The "guide" gives me a good background to work to.


-
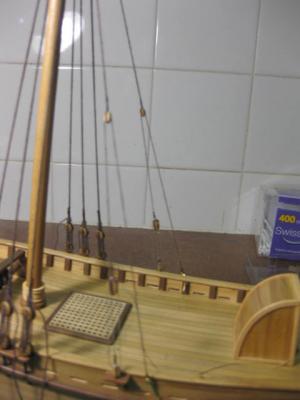
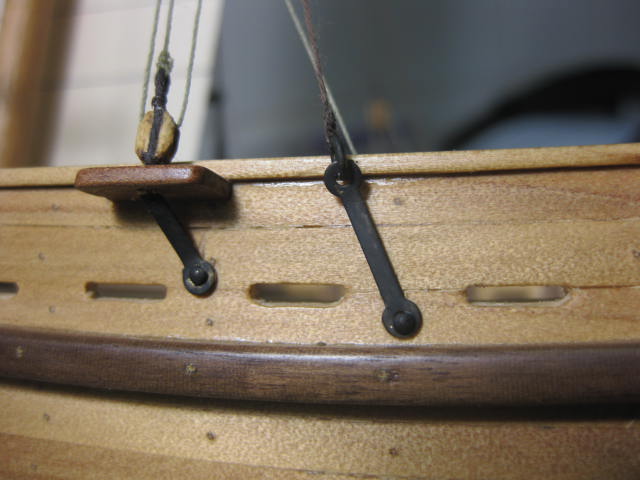
Bowsprit Shrouds The Bowsprit Shrouds are fitted. The kit calls them Guys. Pics 4 and 5 are of the backstay lower rigging. I scratchbuilt the cleats - the kit had the running ends finishing in eyebolts in the deck, but I doubt that's a great idea. All the Standing Rigging has been tensioned and squared away. Next job is the Ratlines - YAY .


-
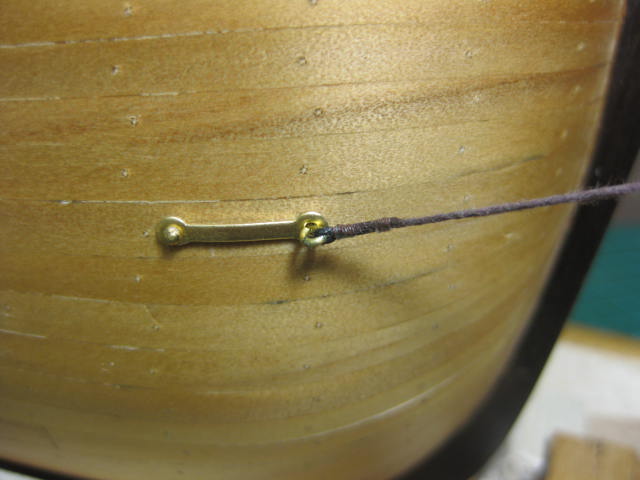
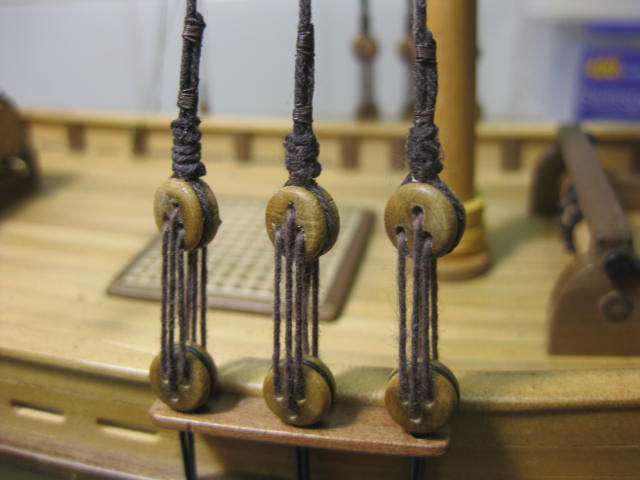
Backstays I've rigged the Backstays. I haven't done this as per kit instructions, instead like the Replica with a small Channel. I used the supplied straps as chainplates. I had to shorten and re-drill the forward one. Pics 1 and 2 show the method I used to attach the block to them. EDIT - It's best to leave the fitting of the drops and lanyards until AFTER the Ratlines have been tied, as I found out later on .... they get in the way a fair bit. Tensioning them carefully shouldn't affect anything else in the rigging. Also, if you want to paint the straps do so before fitting them - it's very difficult to do so later (as I found out again). A bit of touching up may be required, but that's easier than painting the whole unit.