Dan Vadas
-
Posts
3,261 -
Joined
-
Last visited
Content Type
Profiles
Forums
Gallery
Events
Everything posted by Dan Vadas
-
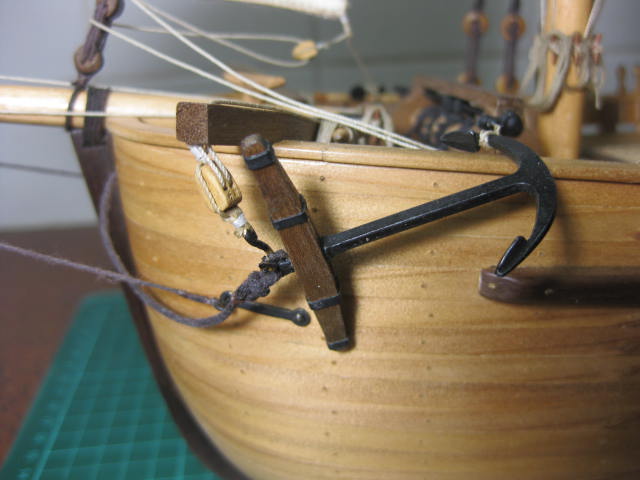
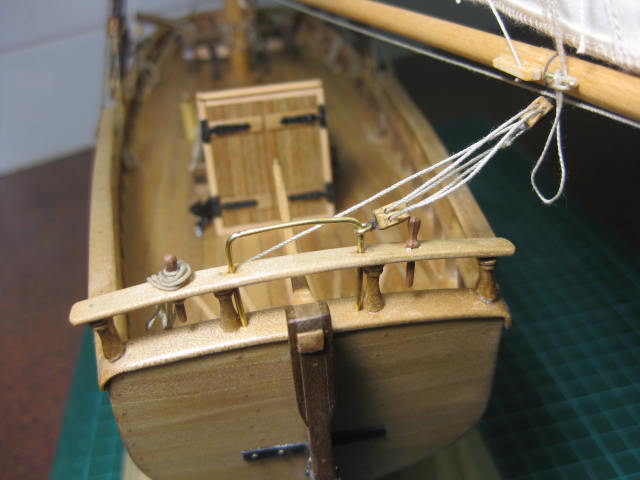
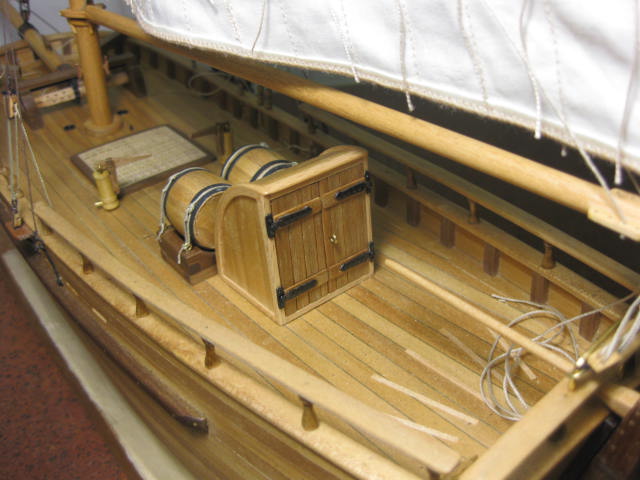
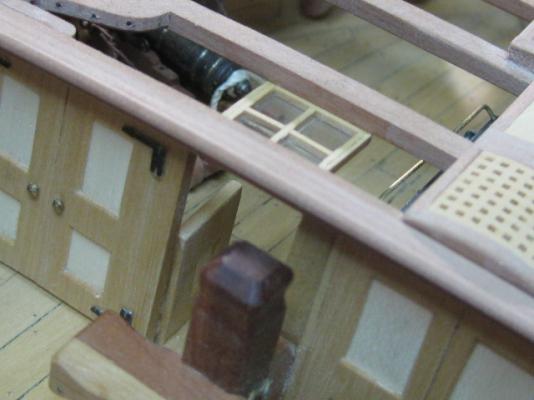
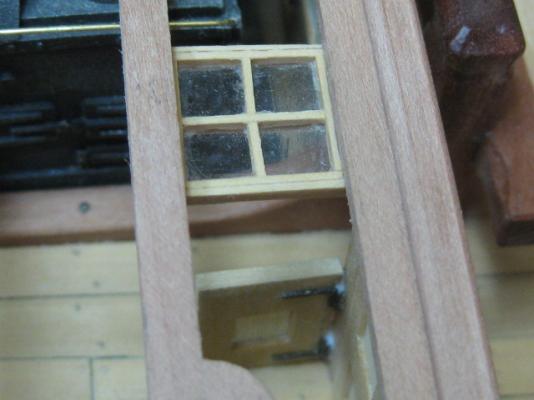
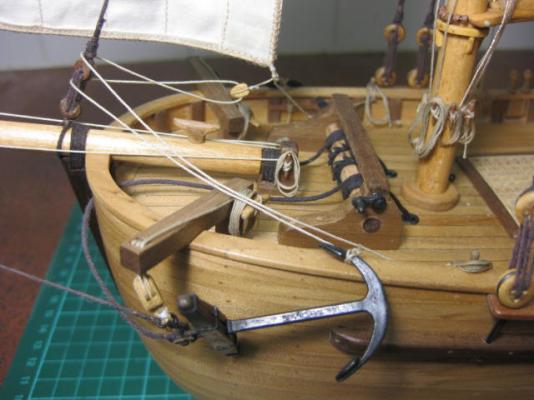
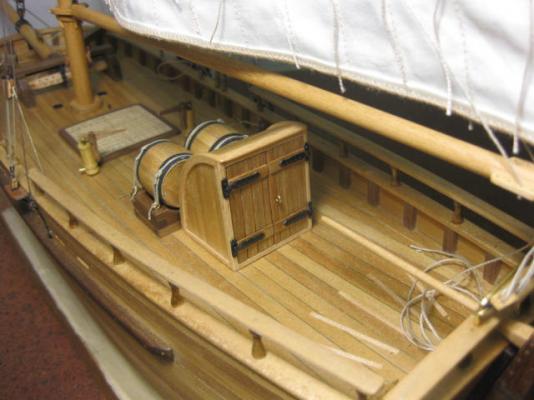
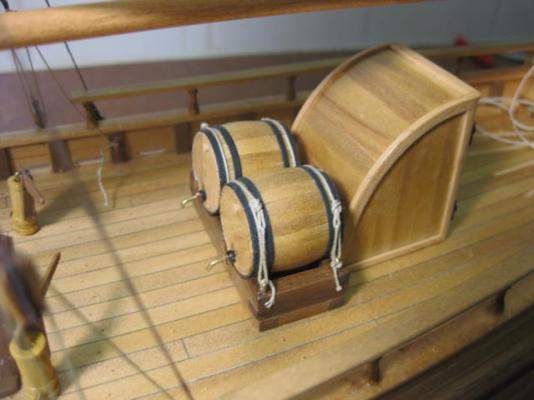
Thanks John. It wouldn't have swung toward the stove - too close for comfort. If it swung the other way it would interfere with the door alongside, so the only way I could see it swinging was upward. That way it could be left open for ventilation without getting in the way of anything else. The lower part of the door would only have needed to be open when the anchor was being raised or lowered. Danny
-
Thanks again Joe, Brian, mhegazi, Sonofagun, Steve, Guy, Popeye and John - it's nice to have this kind of support . Hi all, Not much progress to report on Vulture lately. I've been busy for the last couple of weeks - I reconstructed my Build Log of the "Norfolk Sloop" which was lost in the Great Crash (there's a link to it in my signature below for those of you who didn't see it first time around). Only thing to report is the fitting of a half-door and light in the forecastle bulkhead. These are conjectural on my part, as there aren't any details of them on any of the NMM plans or in TFFM either. I've made the light swing upward for ventilation alongside the galley stove. The lower part of the door swings away from the stove to allow the anchor hawse to pass through the bulkhead when being winched in or out. Danny
-
Thanks very much Brian, Frank and Mobbsie - I'm glad you like the rebuild of my Log. It took a lot of work over the past two weeks to get it all completed. Now, back to "Vulture" . Danny
-
Welcome home Grant . Danny
-
History of the Norfolk Sloop The sloop Norfolk name was from Governor Hunter's simple description on her arrival at Sydney Cove on 15 June 1798. She was a sloop, and was from Norfolk Island, having been built there, on a decked Longboat pattern using mostly the native Norfolk Island Pine along with some timbers and other pieces salvaged from the wreck of HMS Sirius, which ran aground on the island several years earlier. Built on Commandant John Townson's orders - but contrary to Governor Hunter's orders - she was promptly confiscated on her arrival in Sydney Cove. Governor Hunter ordered her fitted out from June to October for Lt Matthew Flinders and George Bass to explore south to prove whether Van Diemen's Land (Tasmania) was an island separated from the mainland by a strait. Flinders (captain), Peter Hibbs (master), and George Bass with their eight crew and twelve weeks provisions departed Sydney on 7 October 1798 and sailed south. They were the first to circumnavigate Van Diemen's Land - the strait they discovered was named after Bass on Flinders' request. They returned to Sydney Cove on 12th January 1799. Norfolk departed Sydney, again under the command of Flinders, and sailed as far north as Hervey Bay (Queensland) charting the coast as they went. They arrived back in Sydney on 22 August 1799. Flinders then sailed her "home" to Norfolk Island, and then back to Sydney. She next made a supply voyage to the Hawkesbury in January 1800 in company with the "Francis", both returning to Sydney with cargoes of timber. On a subsequent voyage to the Hawkesbury in October to pick up a cargo of grain for Sydney she was seized by 15 convicts in Broken Bay at the mouth of the Hawkesbury River, with the intention of sailing her to the Moluccas. Running into a storm, they attempted to shelter in Coal River (Hunter River) only to succeed in wrecking her in November 1800 at what is now Stockton - a point officially named Pirate Point - and gained the dubious distinction of becoming Newcastle's first shipwreck. Six of the escaped convicts fled into the bush and were never heard from again. The others took a small boat and went to sea, but were soon recaptured. Two were hanged, and the rest sent to Norfolk Island. The sloop Norfolk had a short 2 1/2 year life, but an eventful one for the Colony at a critical time, providing superior service.
-
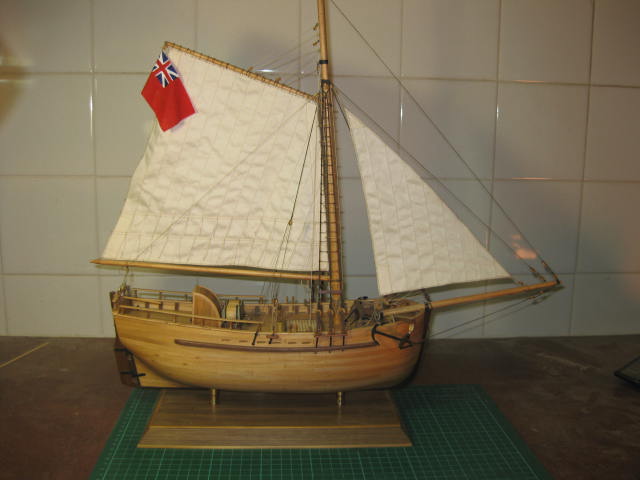
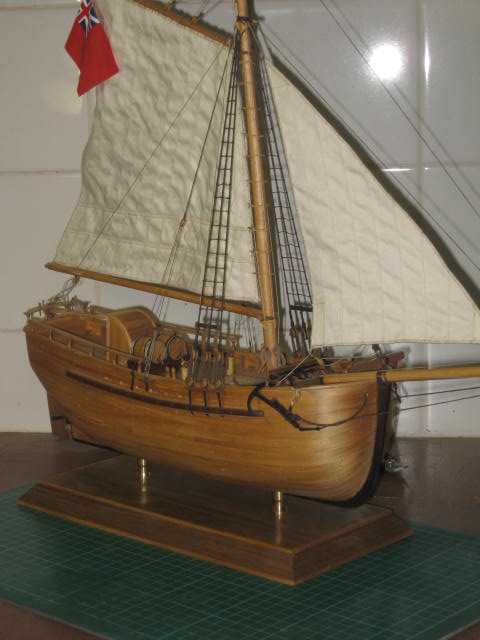
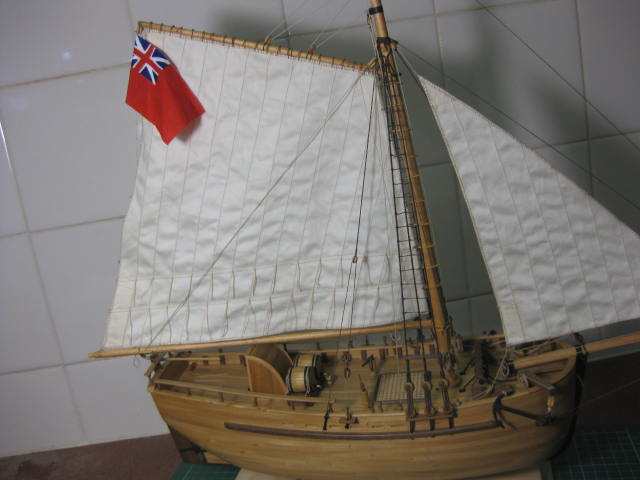
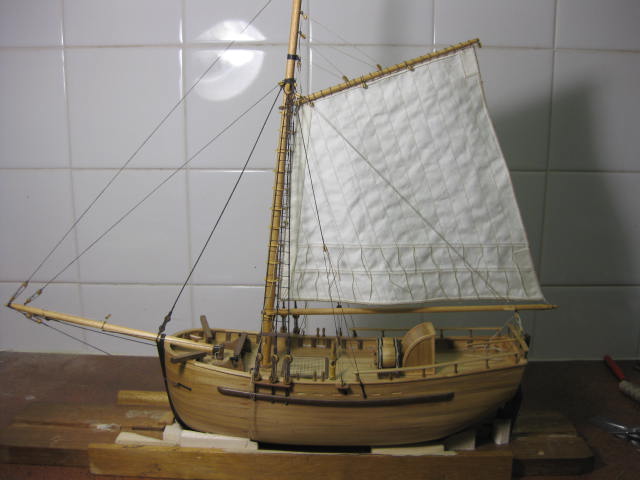
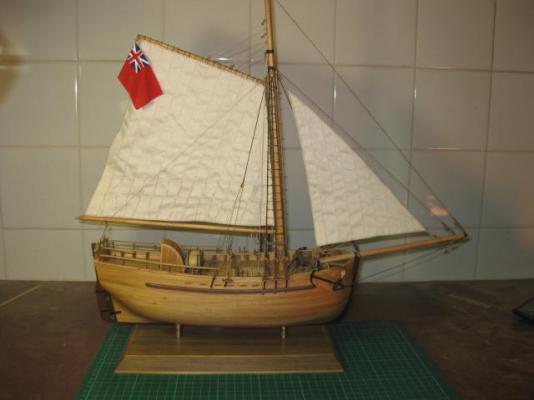
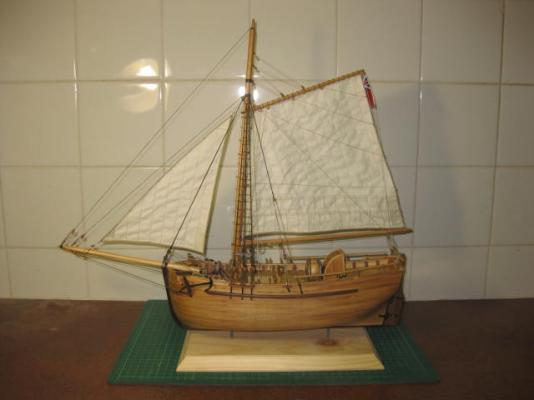
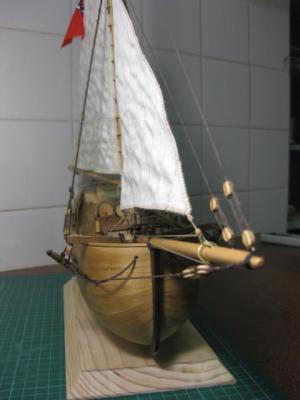
The model completed and on it's stand. I donated this model to the Maritime Museum in Newcastle (Australia). Quite appropriate, as the original's "bones" lie only a few hundred metres from the museum itself . She was Newcastle's first shipwreck.

- 147 replies
-
- 8
-

-
- norfolk
- modellers shipyard
- (and 1 more)
-
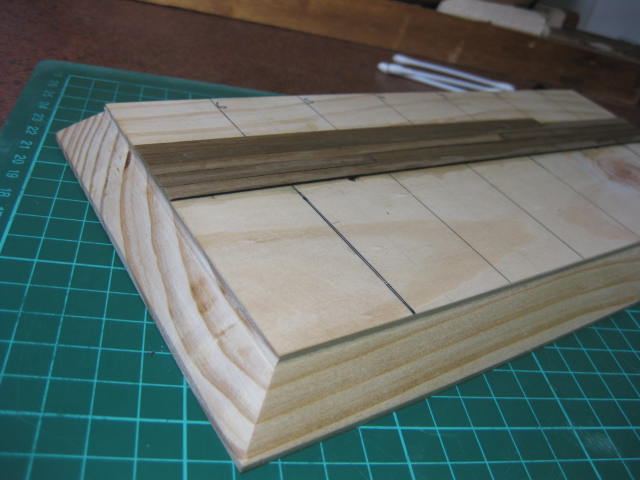
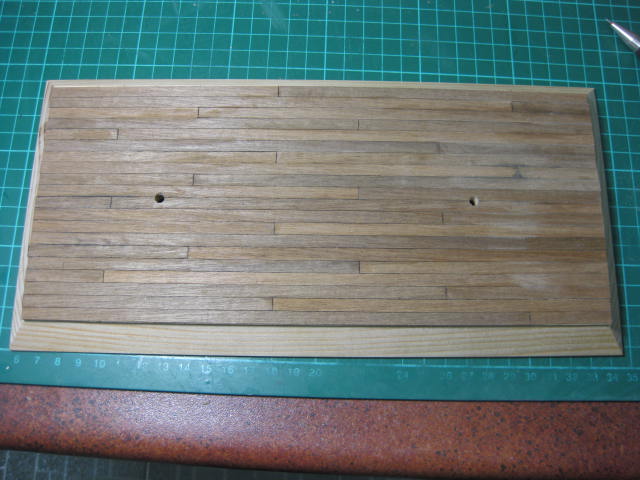
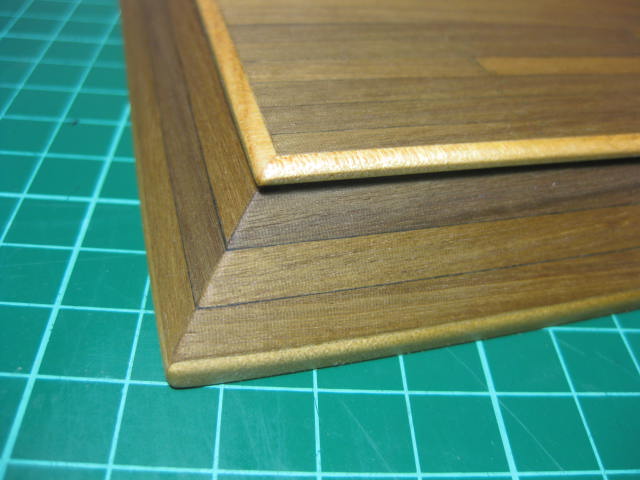
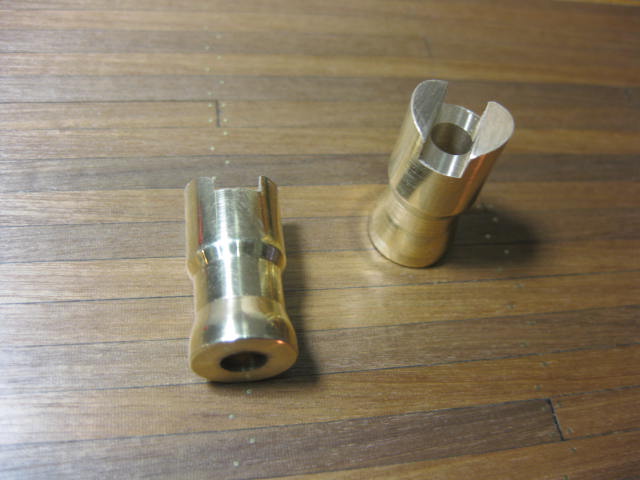
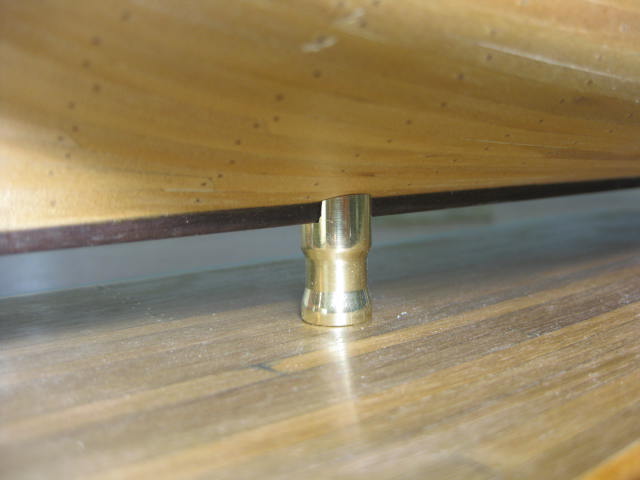
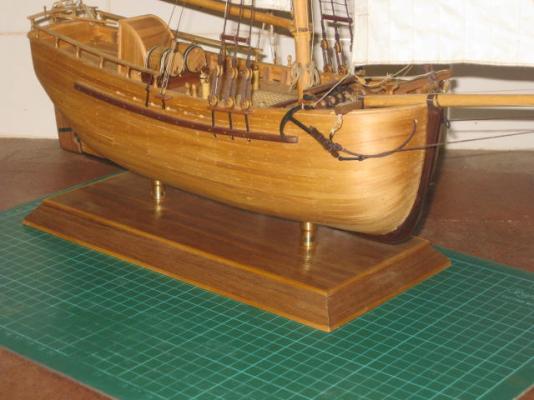
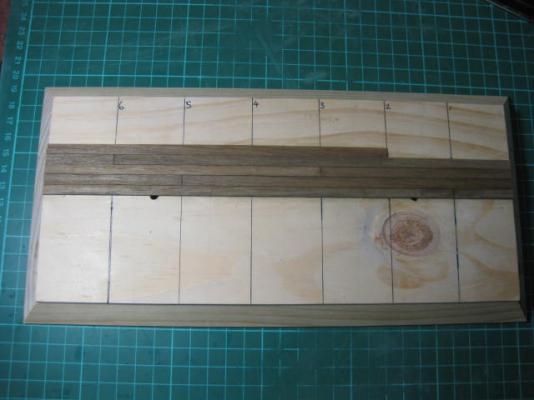
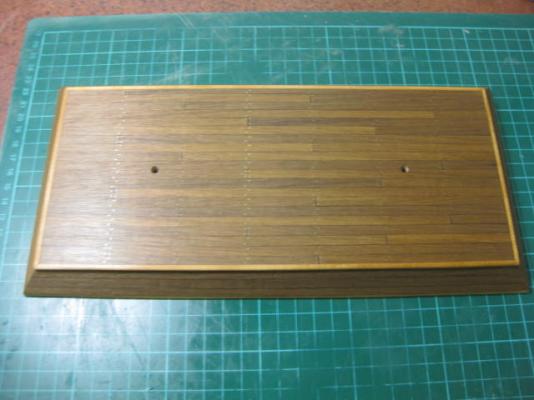
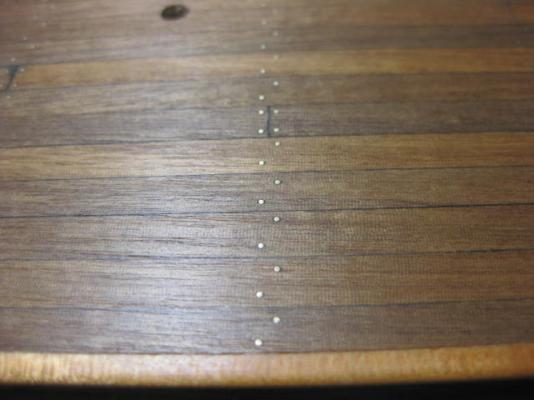
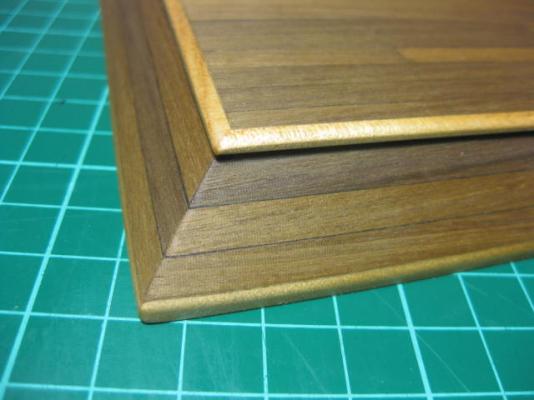
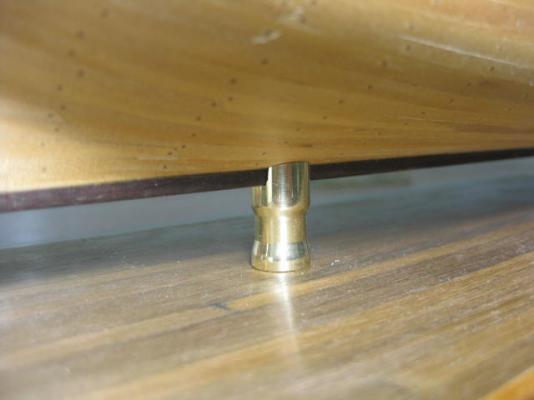
The Stand I'm not going to use the laser-cut ply stand they supplied - I'm scratchbuilding my own from a piece of Radiata Pine which I've routed a stepped and chamfered edge to. I'm going to plank the whole piece with Walnut - I had a whole pack of it left over which was meant for the hull planking, for which I substituted Norfolk Pine. I wanted a dark colour for the base to contrast with the boat itself. I'll put a lighter coloured border around the top and bottom. It will be finished with Danish Oil. I'm doing a 5 Butt Shift on the top, and before anyone asks - YES I'll be treenailing it with 0.5mm brass wire just for effect. I've finished planking the top of the Base (it's only glued down so far, it'll get a lot better when I sand it). Tomorrow I'll treenail it, then move on to planking the sides. Below are a couple of pics of the completed Base. Now to turn up a couple of brass pedestals. The final touches - a couple of pedestals I turned from some scrap brass .... I had to mill the slots out a couple of times - somehow I measured them incorrectly the first time and the mounting screws that go through them into the hull weren't quite long enough.


- 147 replies
-
- 2
-
-
- norfolk
- modellers shipyard
- (and 1 more)
-
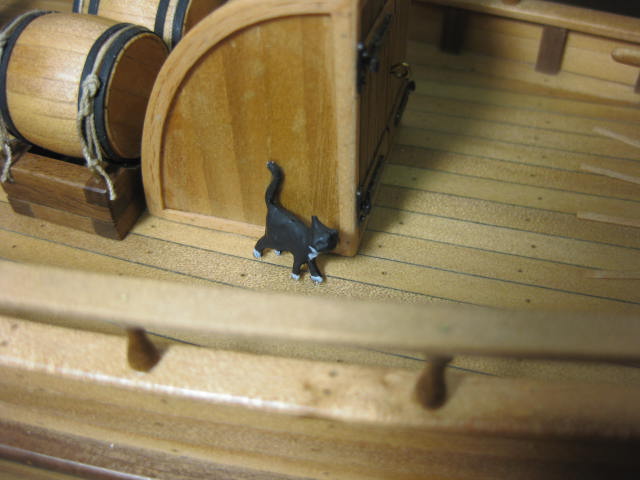
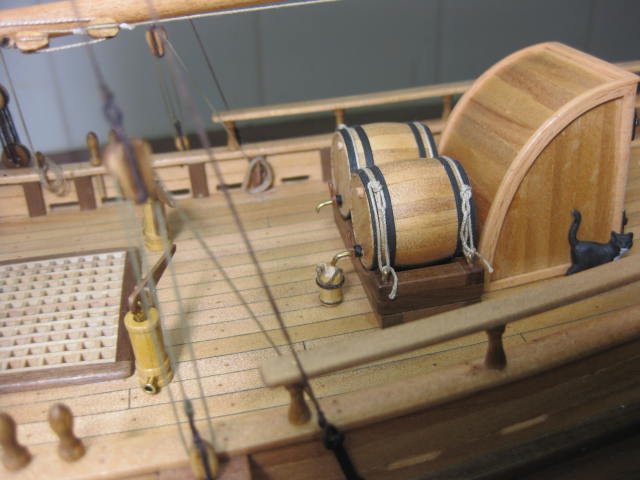
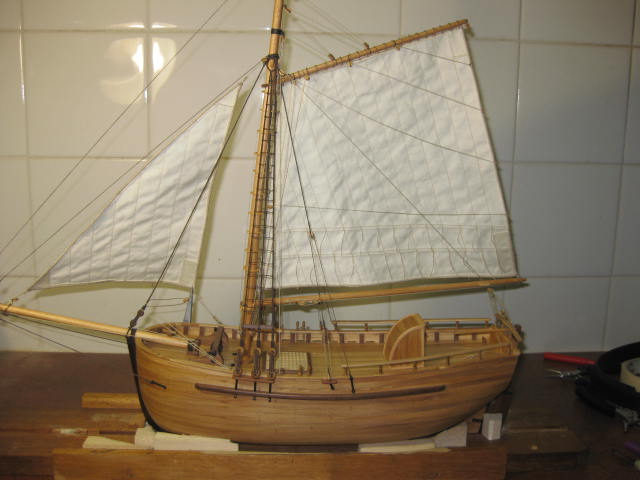
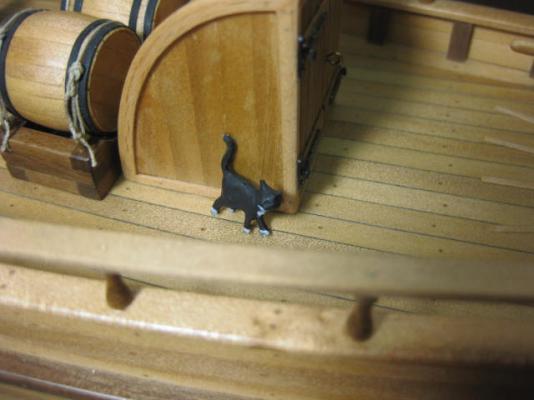
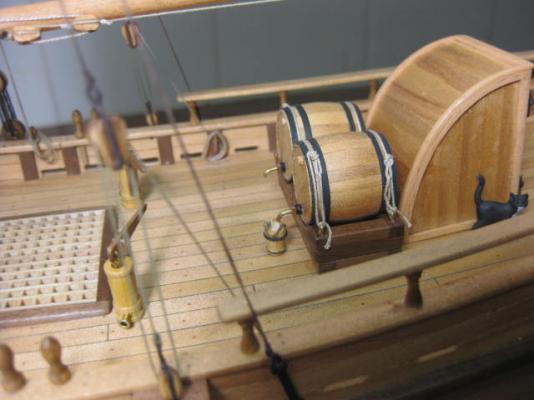
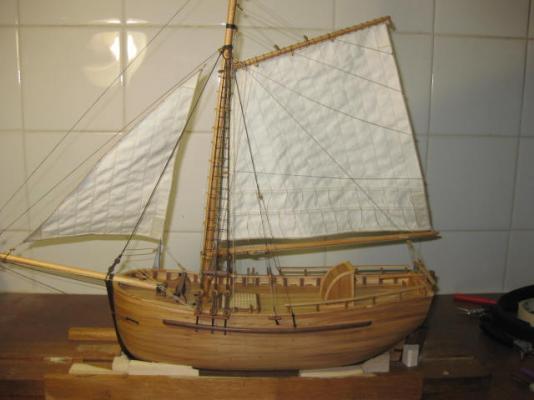
Finished Well I'm finally finished the "Norfolk" - I only have the stand left to do. I'm rather pleased with the way she's turned out, especially the sails which were my first attempt at scratchbuilding them. Special thanks to David ("hopeful") for his tips from making his own, also Russ, Jim Lad and Anton for some of the technical details. Last "part" to be fitted was "Trim", the ship's cat .


- 147 replies
-
- 2
-
-
- norfolk
- modellers shipyard
- (and 1 more)
-
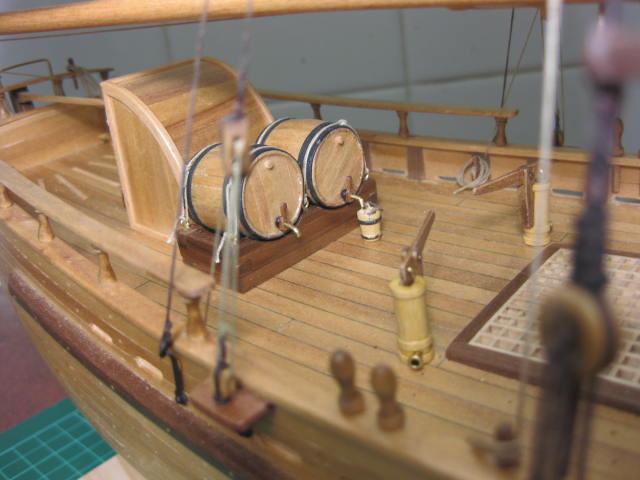
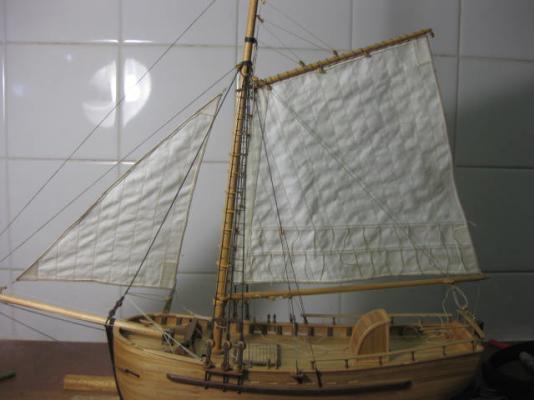
Some progress pics - just a bit of tidying up left to do :


-
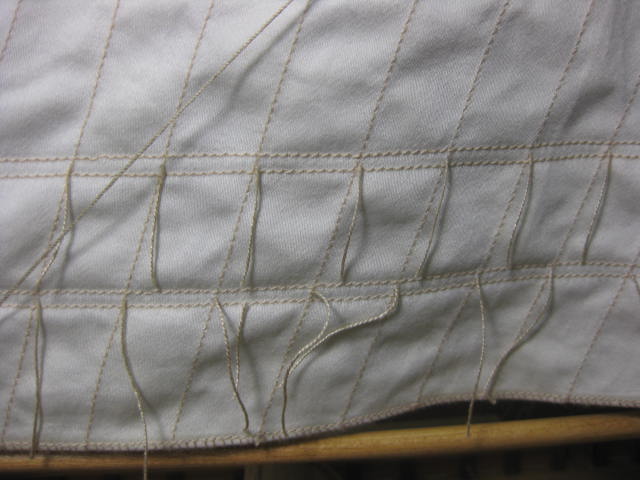
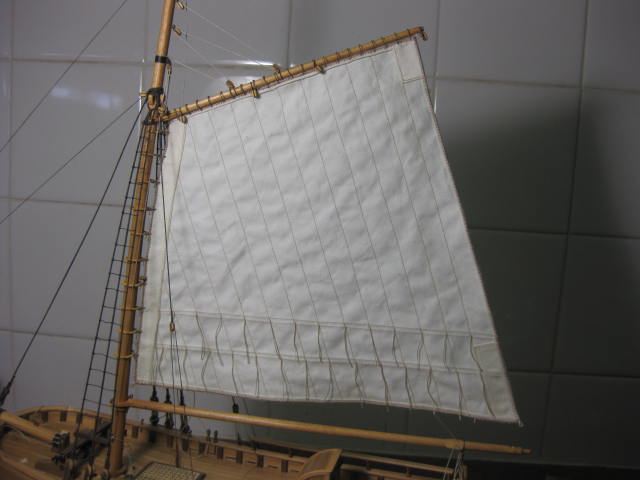
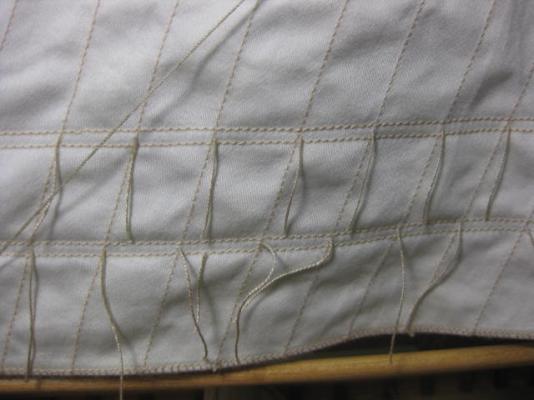
I'm doing some tidying up at the moment. I've worked out a couple of good tricks to get Reef points to sit more naturally. My reef points are merely threaded through the sail and held there with PVA (I tried knotting them either side as they should be, but the knots looked way too big). I glued the reef points on a few days ago, so the PVA was well and truly set. I hold the end of the reef point with tweezers and apply a spot of diluted PVA where it exits the sail to slightly soften the original glue. Using a wet cotton tip I run it the length of the rope and hold it fairly tight for a few seconds - gravity then does the rest . Next I trim the points to length, and finish them off by applying a small dab of PVA to the ends to stop them from fraying. In the pic below the top row are done, also a few on the left of the bottom row. The rest of the bottom row is how they looked before I started tidying them up.
- 147 replies
-
- 1
-
-
- norfolk
- modellers shipyard
- (and 1 more)
-
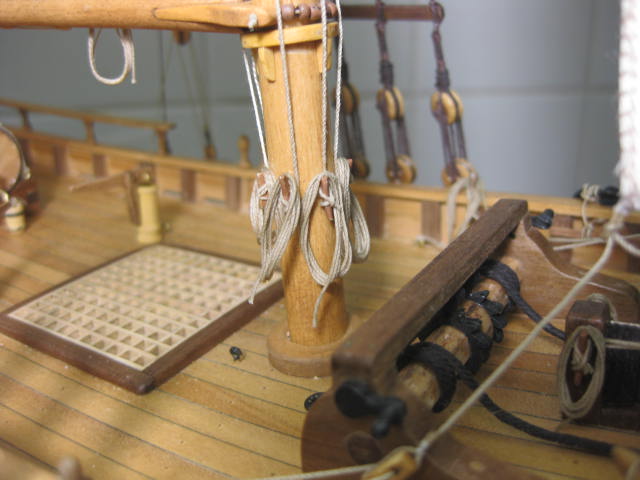
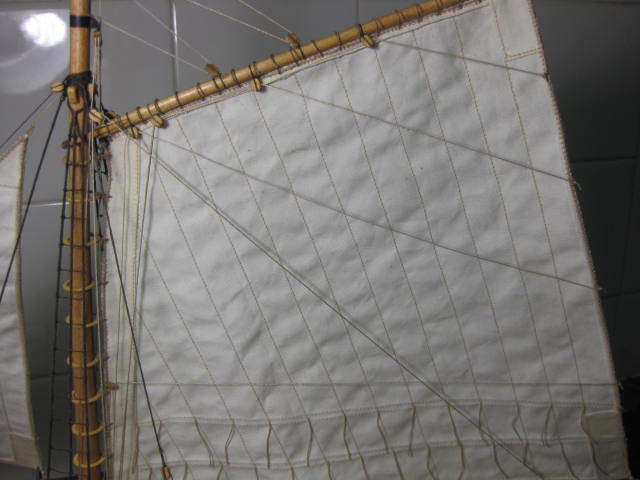
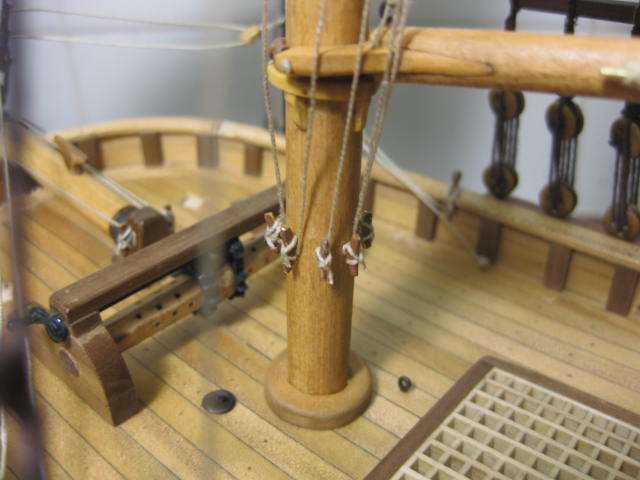
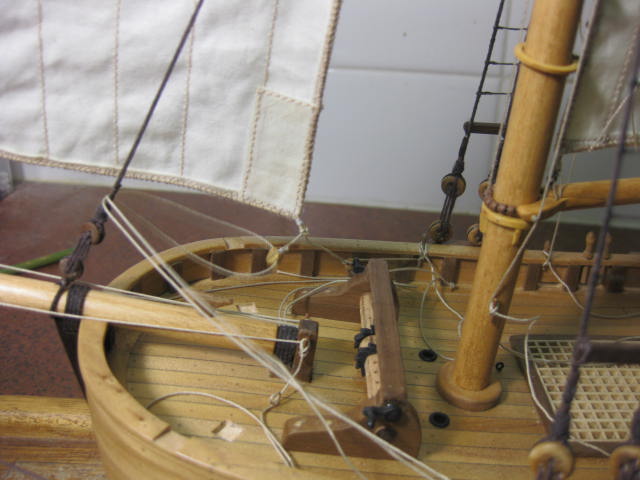
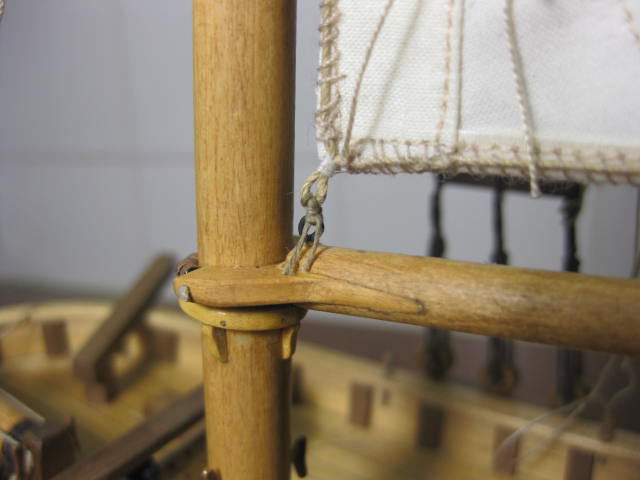
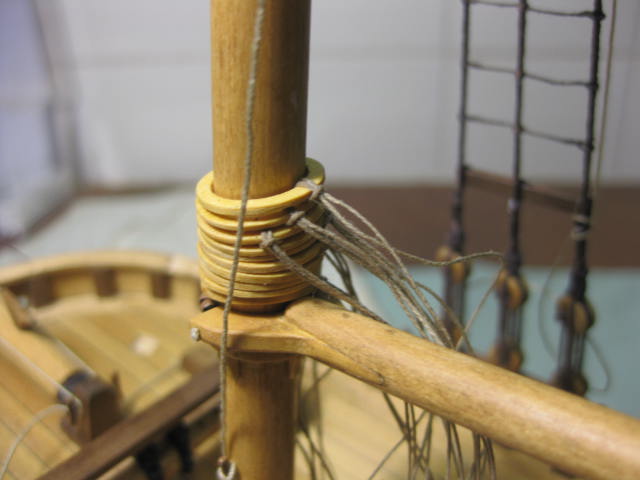
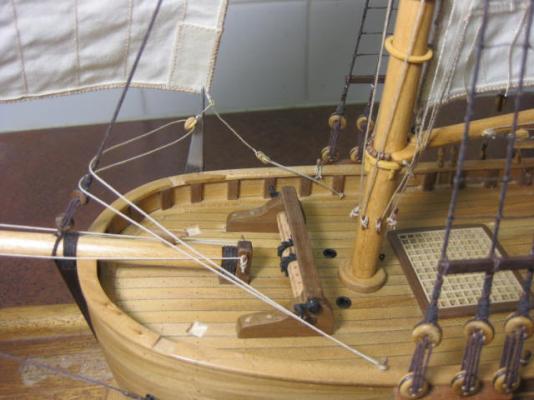
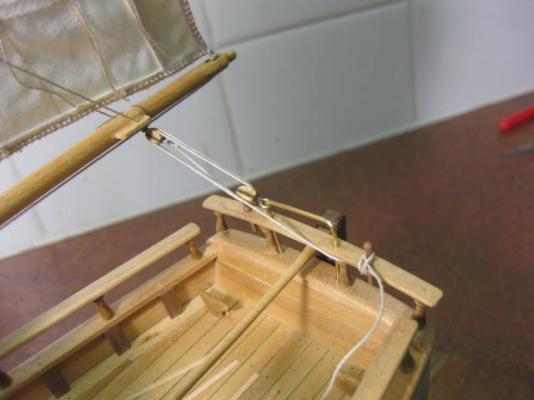
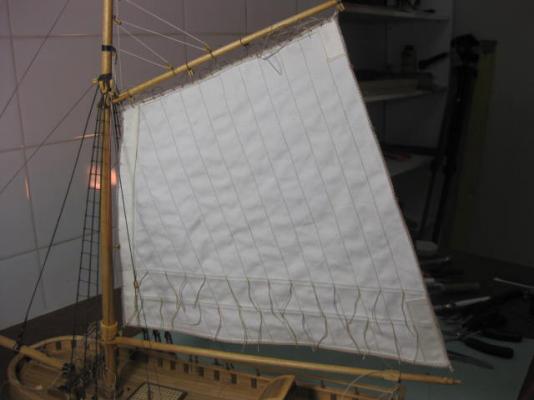
I've tied the four Brails, and finished them off to four cleats around the mast. The Boom Sheet has been fitted. So have the Jib Sheets. Fitting the sails has been completed .

- 147 replies
-
- 1
-
-
- norfolk
- modellers shipyard
- (and 1 more)
-
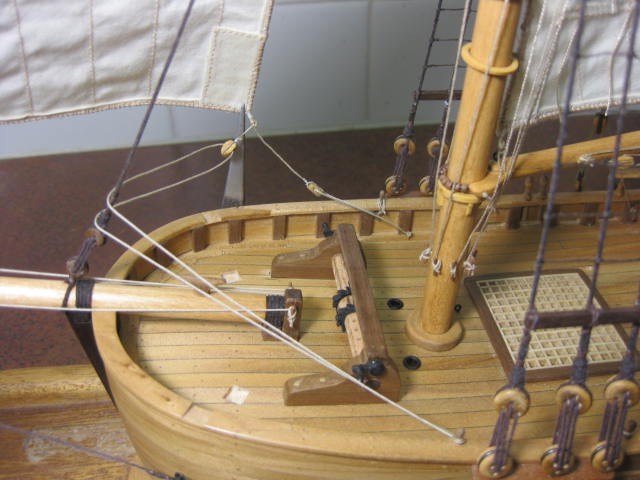
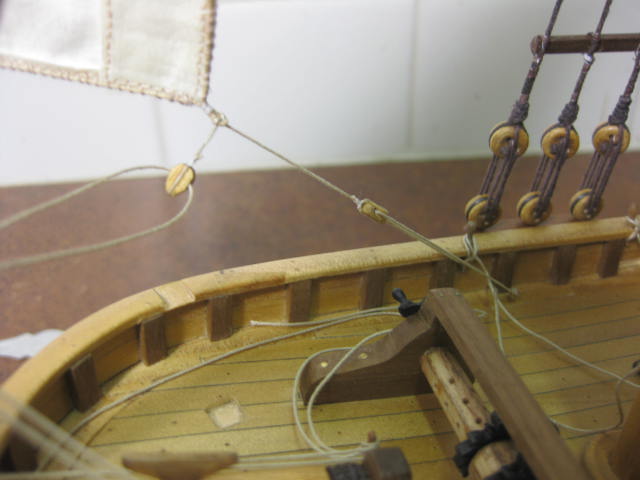
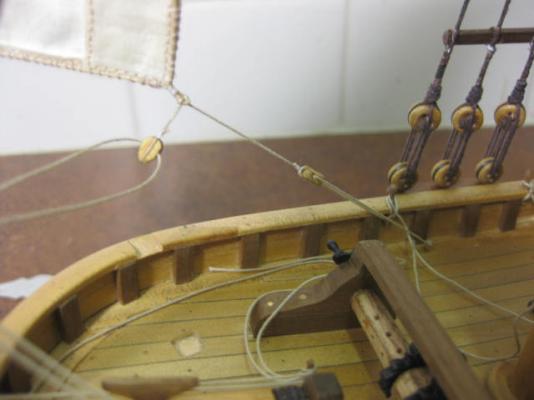
Jib Fitting I've rigged the Jib. Now all that remains are the Main Brails and the Ensign. Then I can start tidying up all the loose ropes and make hanks of them.

- 147 replies
-
- 1
-
-
- norfolk
- modellers shipyard
- (and 1 more)
-
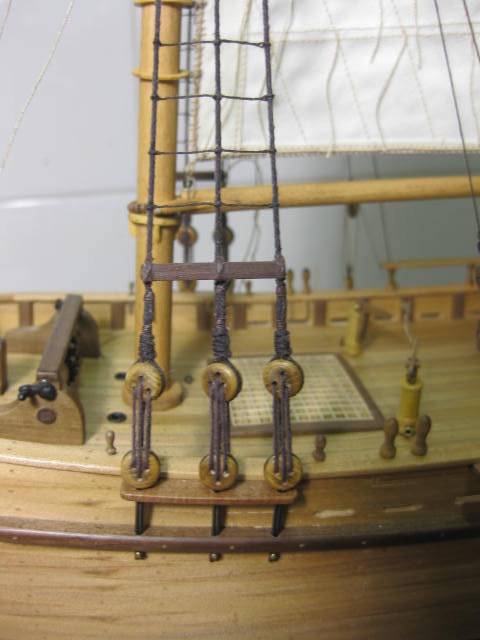
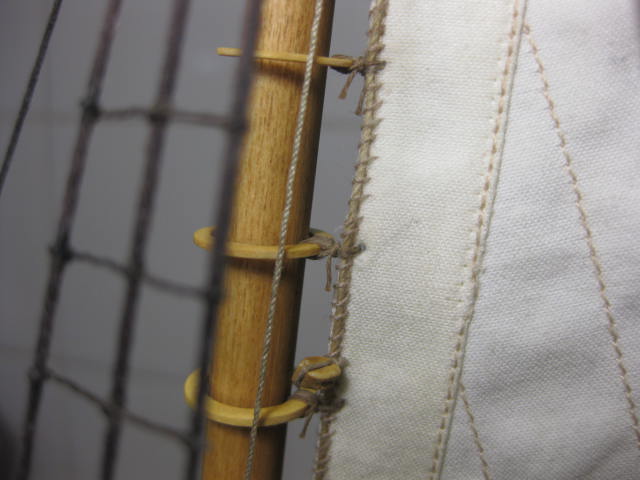
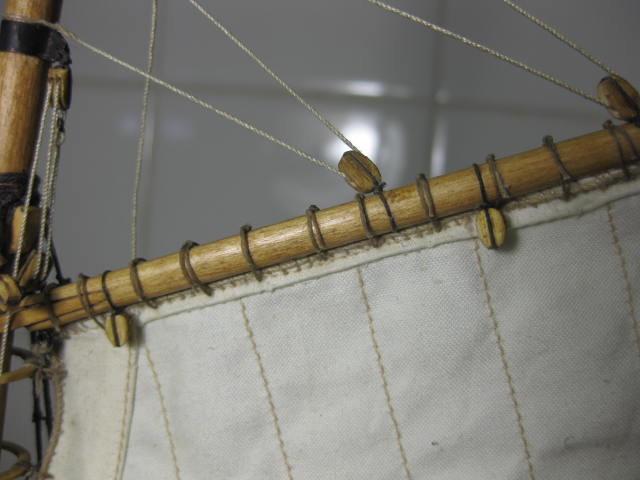
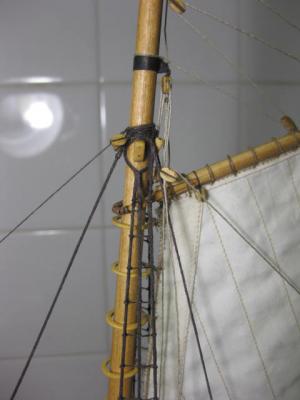
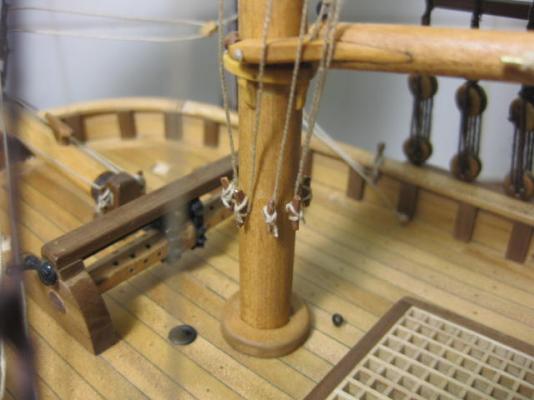
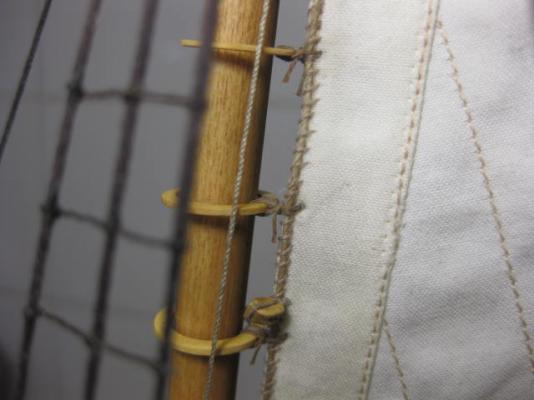
I've finished all the Robands (as per Lees with a Reef Knot on top of the Gaff), and the Hoop seizings. I've added a tackle to the Main Sheet, along with a cleat. I have it well forward so the main can be Brailed up.


- 147 replies
-
- 1
-
-
- norfolk
- modellers shipyard
- (and 1 more)
-
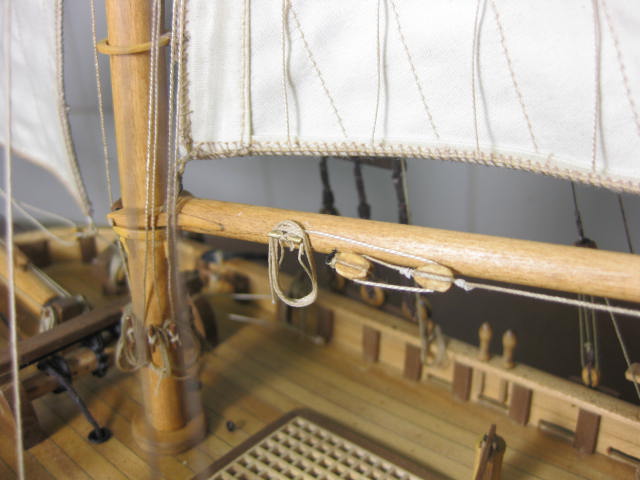
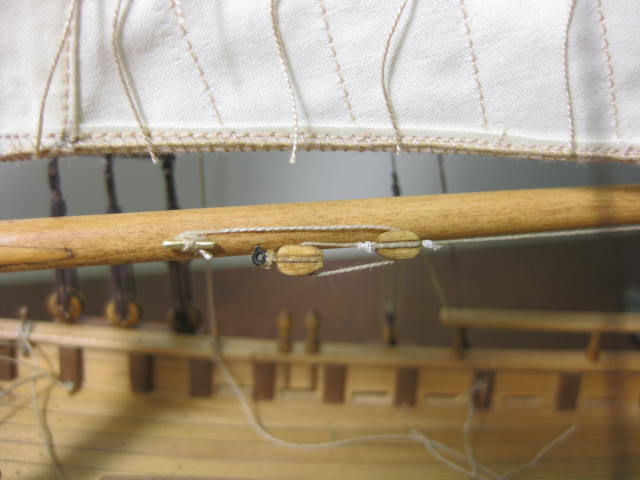
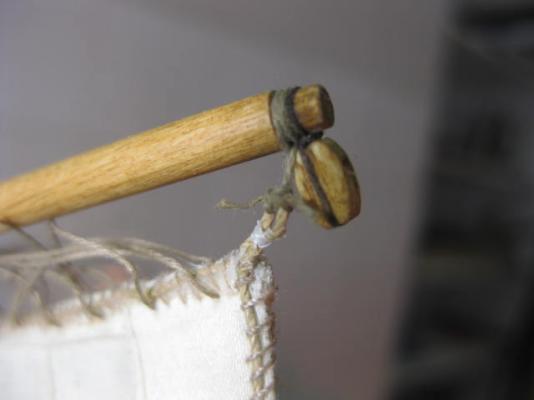
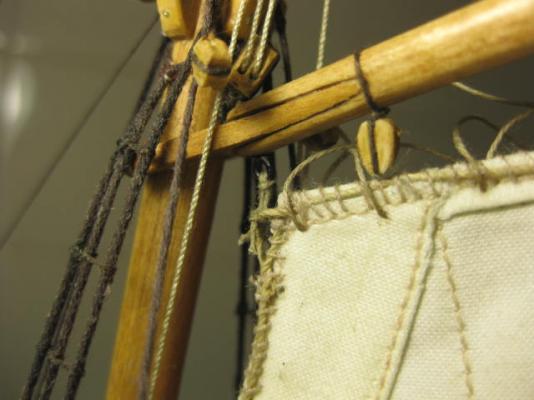
Fitting Gaff In preparation for fitting the Gaff Sail I've tied all the seizings to the mast hoops. I've also fitted a sheave to the end of the boom for the Sheet. That would have been a little easier before I fitted the boom, but it went in OK. I've rigged the Peak and Throat with Earings, now I'll start tying the Robands and Hoop Seizings.


-
The Cringles are on - this completes the sail suit. Now to fit them to the boat.
- 147 replies
-
- 1
-
-
- norfolk
- modellers shipyard
- (and 1 more)
-
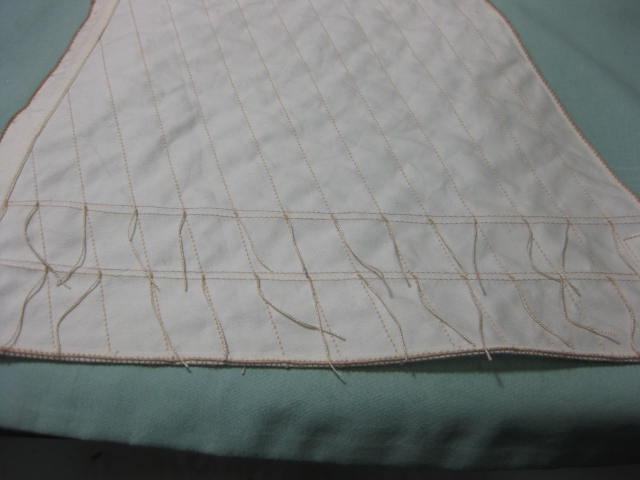
Robands and Reef Points I've fitted the Robands which tie around the Gaff. They look like an ungodly mess at the moment . I've done two per cloth as described in Lees, and given each a spot of PVA to stop them pulling out while I tie them. I've also added another Reef Band. And I've fitted the Reef Points. I've put a spot of PVA on each to hold it in position. They'll get tided up after the sail is fitted.
-
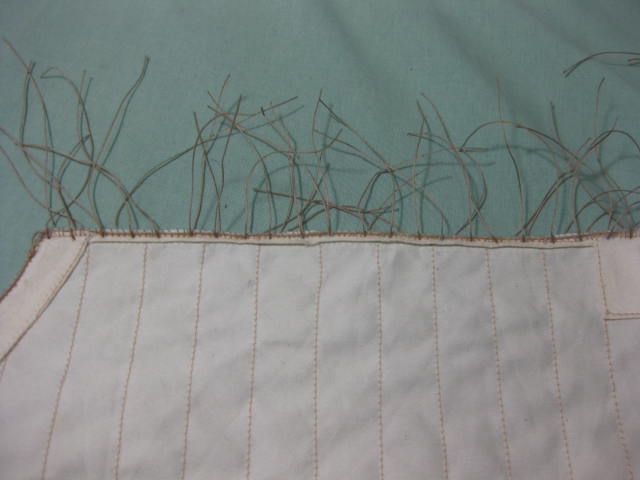
The bolt ropes are finally finished . They are about as much fun to do as Ratlines or Treenails - luckily I like doing them as well .
-
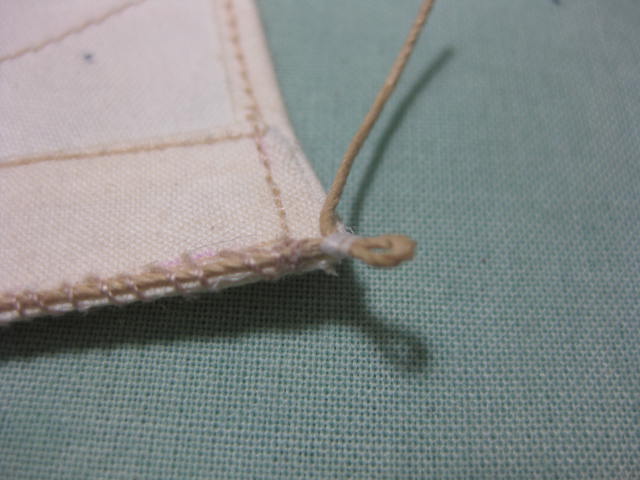
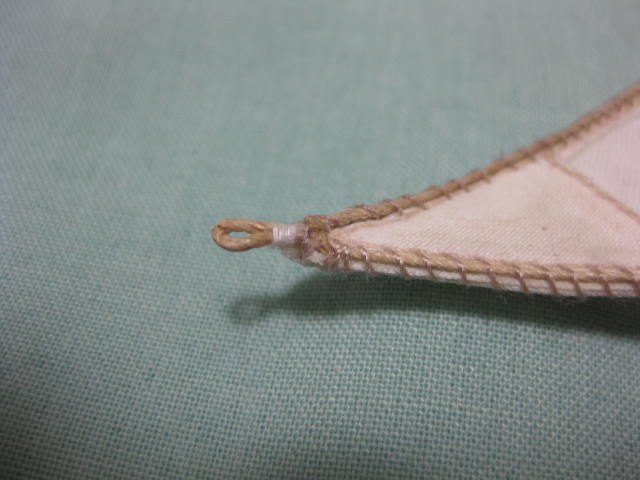
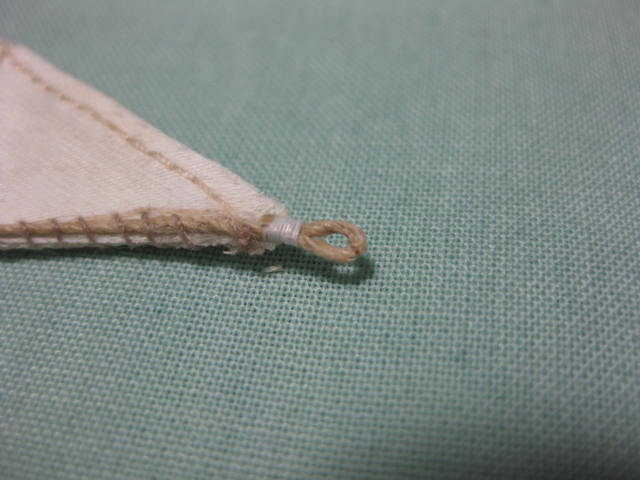
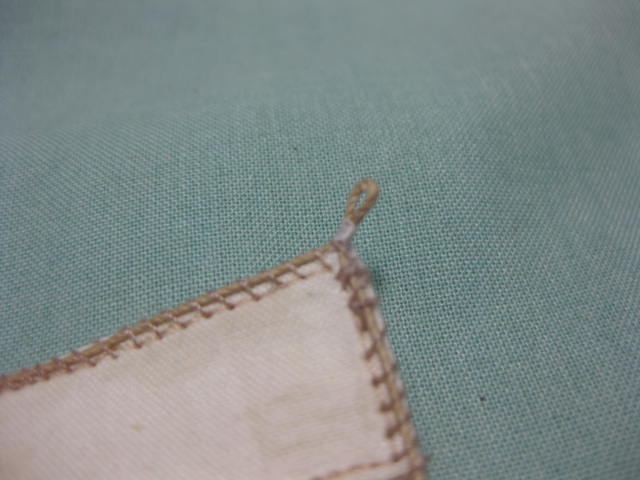
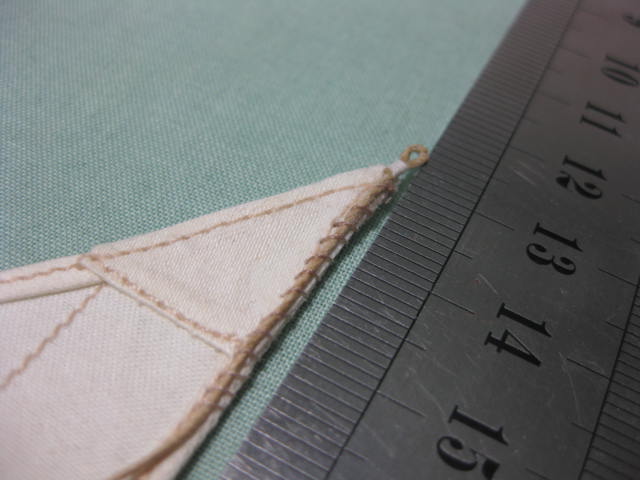
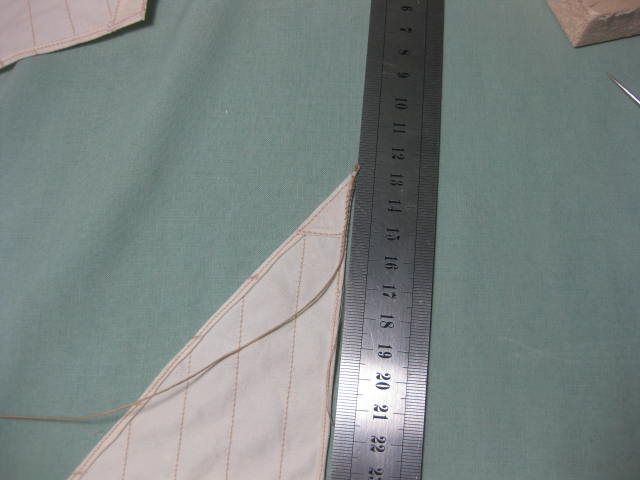
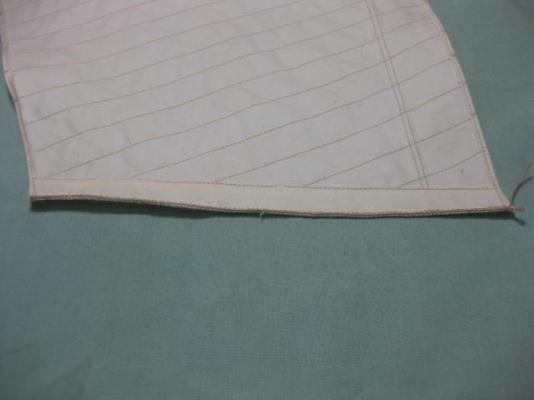
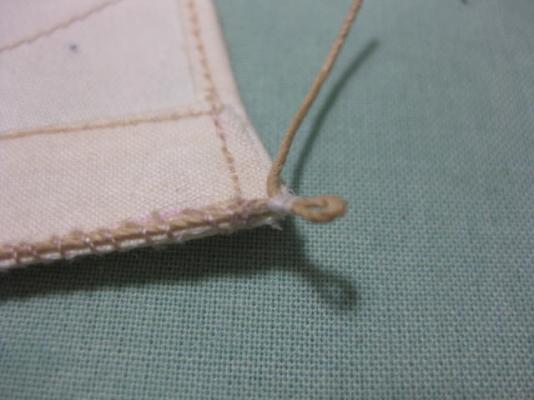
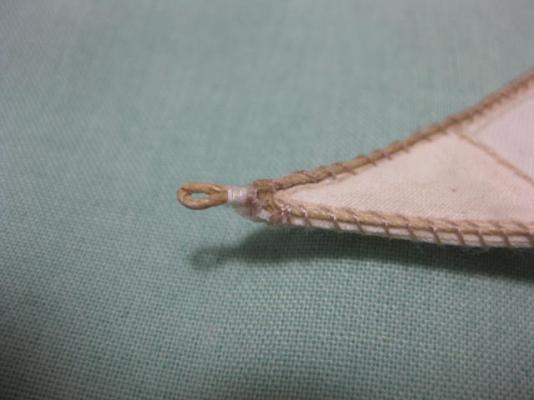
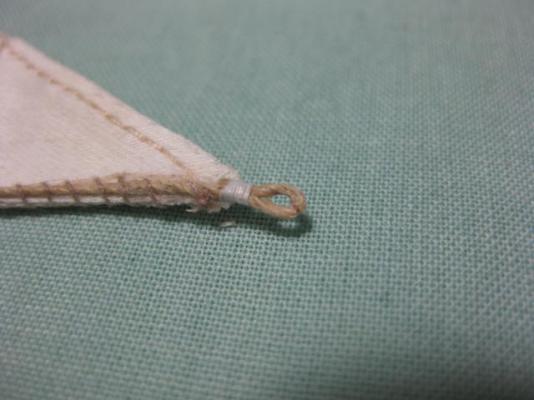
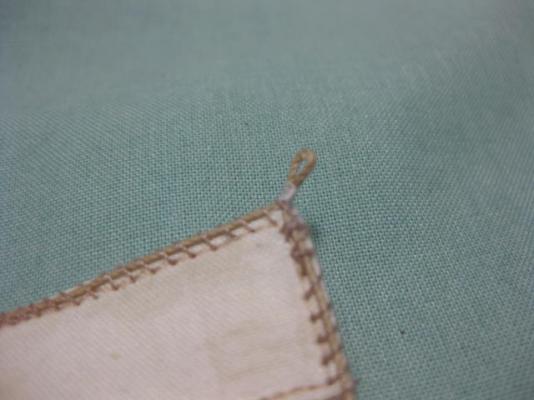
The Luff of the Gaff sail only took me 50 minutes - and that was all through at least 4 layers. I'm getting the hang of it now . I've left a short tail at the first loop to splice the return rope through. The Leech, which is the longest on the Gaff sail (260mm) only took me 42 minutes. The Head was only 170mm and took me the same amount of time. Only the Foot left to go.
-
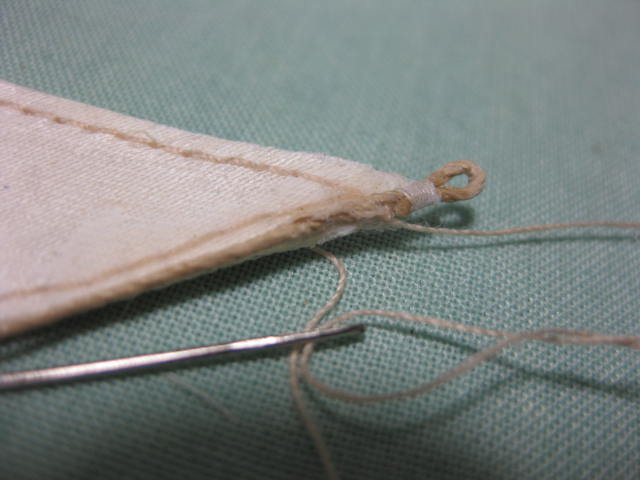
The first 1/3 took me 3 1/2 hours, the last 2/3 only took 2 1/2 hours. One of the major reasons for my increase in speed was a change of needle. I broke the last of the small ones I had at 5:00am this morning and thought that was the end of play until I could buy some more later in the day. Then my brother-in-law, who lives two doors down, called in five minutes later to check on my progress - we're both early risers . He said he had a heap of small needles from years ago when he did leather-work (he's an ex-bikie) so I tried one of them. What a difference . These needles are very small, but extremely strong. The eye in them doesn't flare out either, so they are very easy to pull through multiple layers. I've finished the Bolt Ropes on the Jib sail - a total of 6 hours work. The Gaff shouldn't take me much longer, now that I've got my technique and needle sorted out.
-
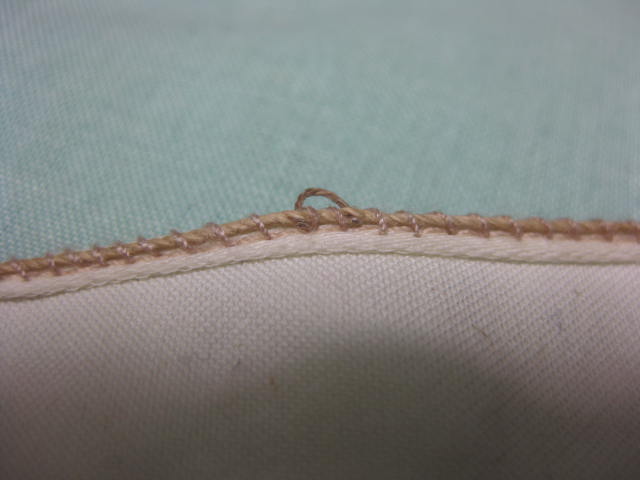
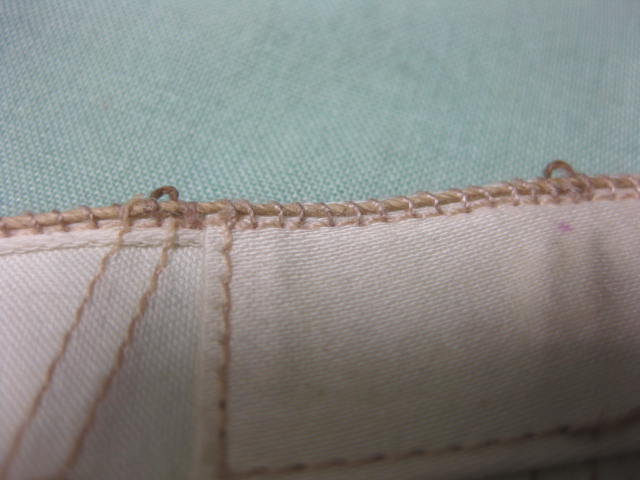
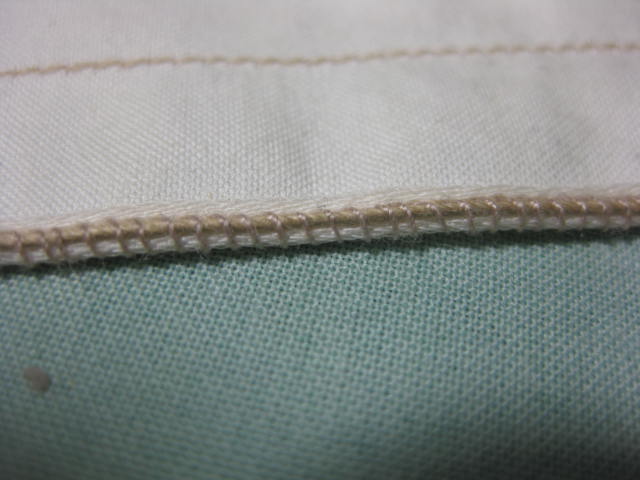
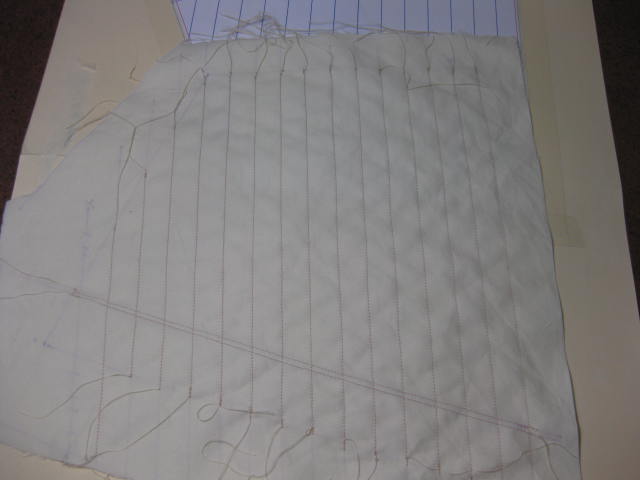
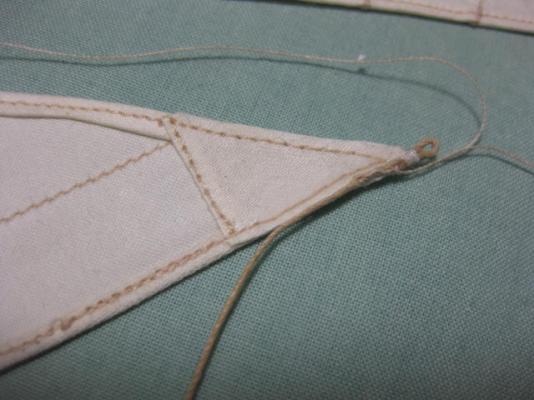
Since my last post I've done another 80 stitches (one every 1.8mm) - about 2/3 of the way down one side in a bit under 2 hours. It's taken me about 3 hours to sew the bolt rope down one side of the Jib. I've seized the Sheet loop into it.
-
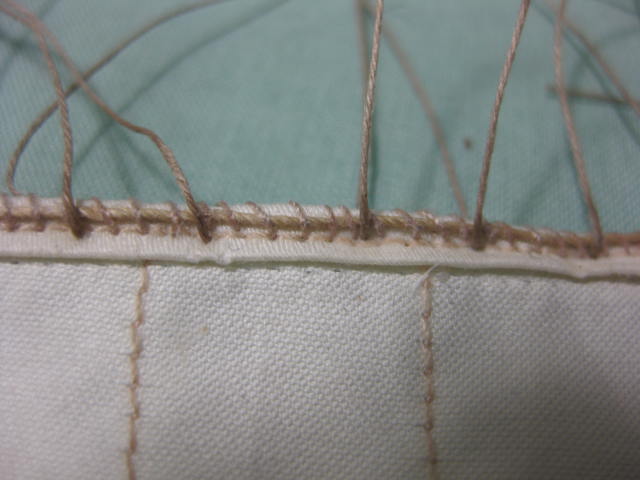
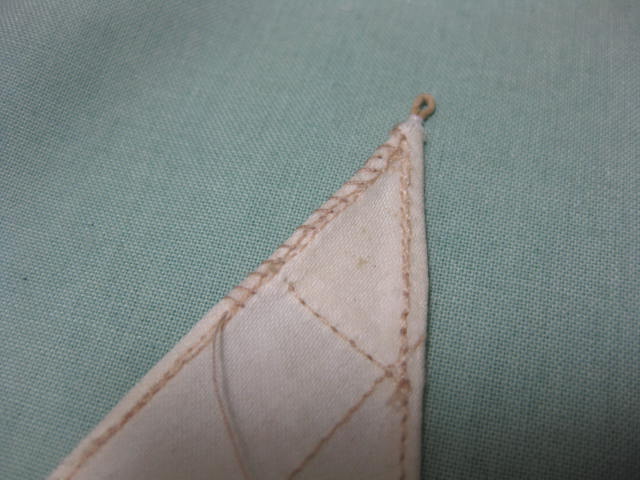
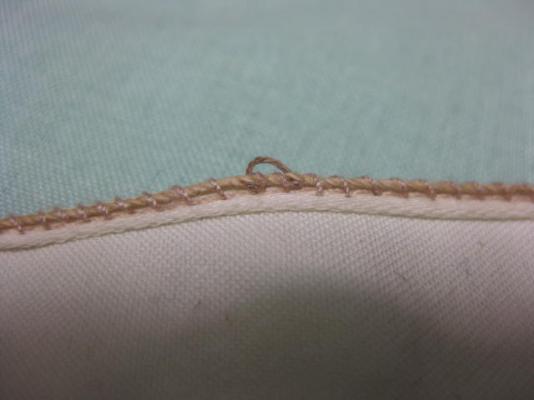
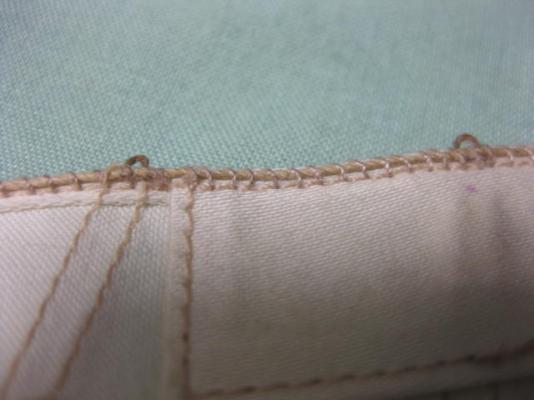
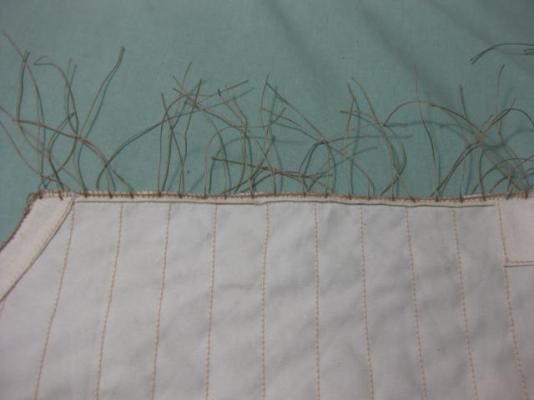
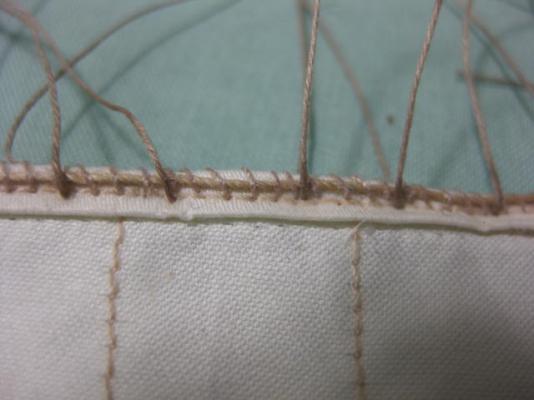
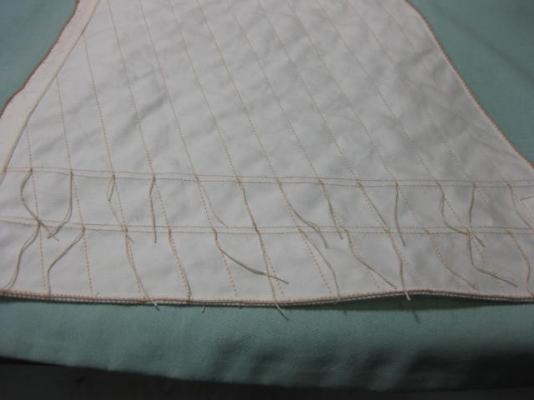
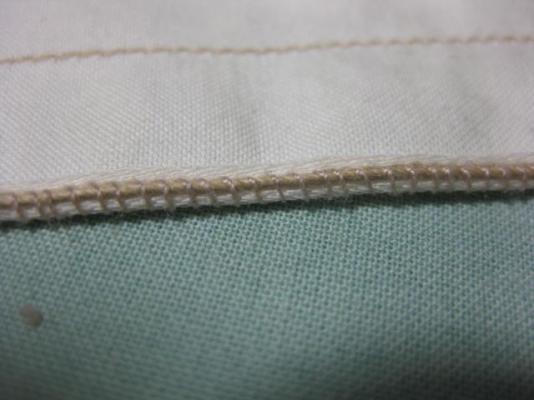
Bolt Ropes Hand-stitching them through the rope. This might take a while .


-
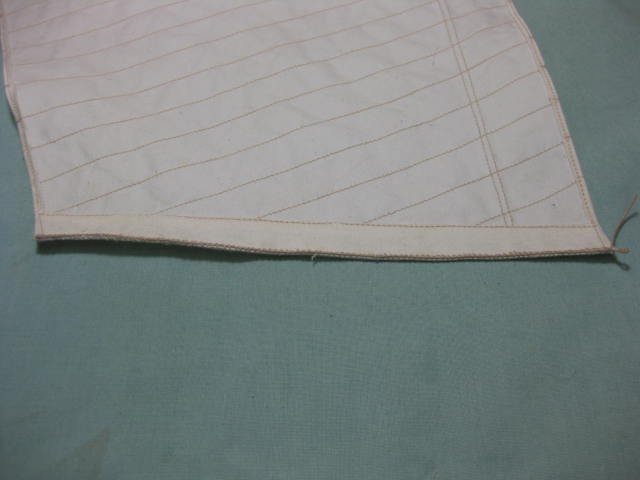
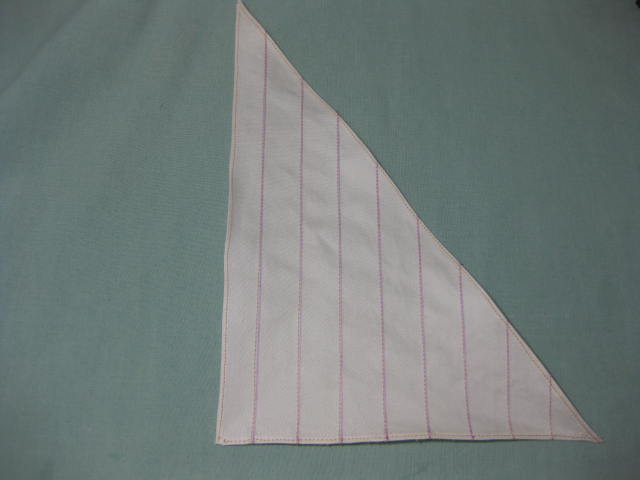
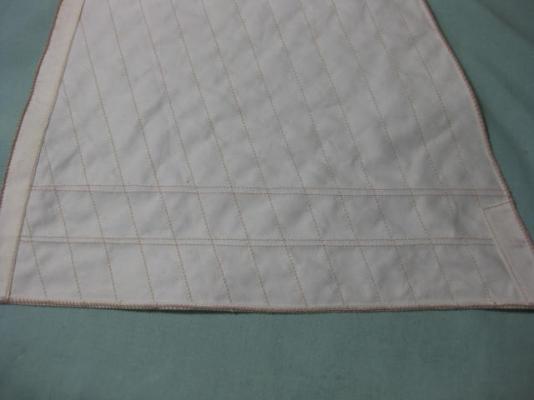
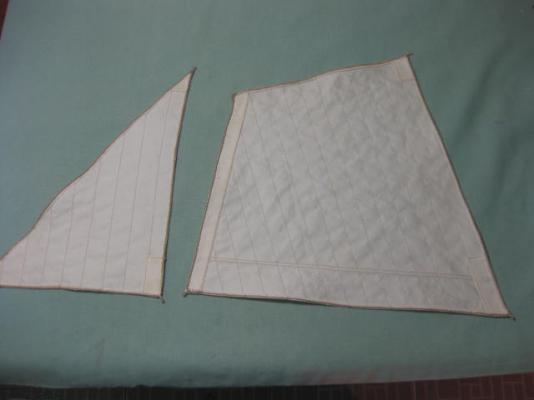
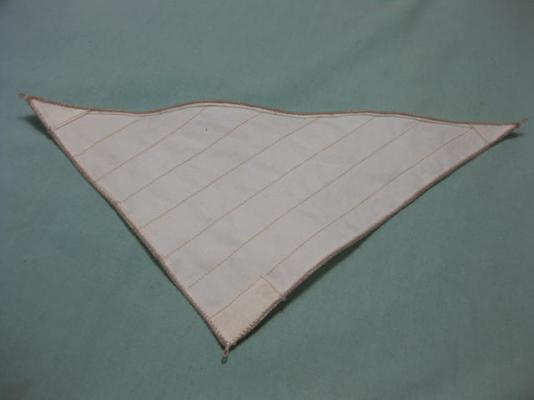
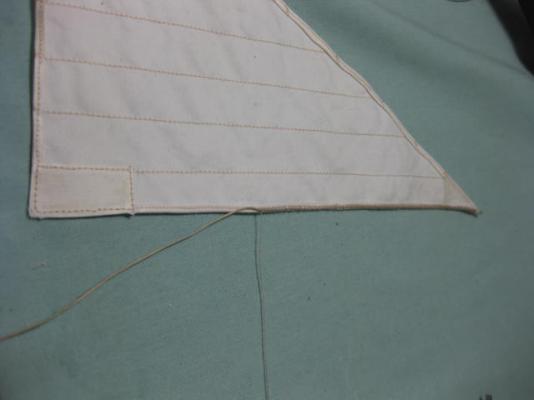
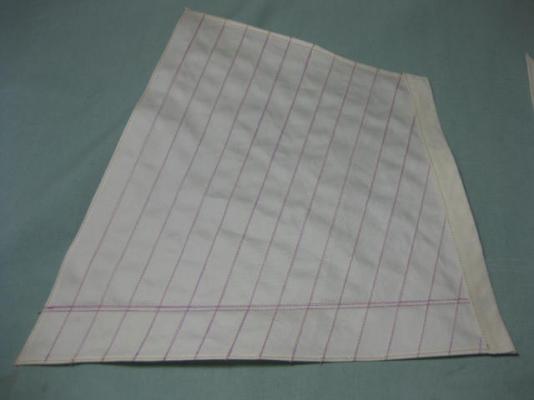
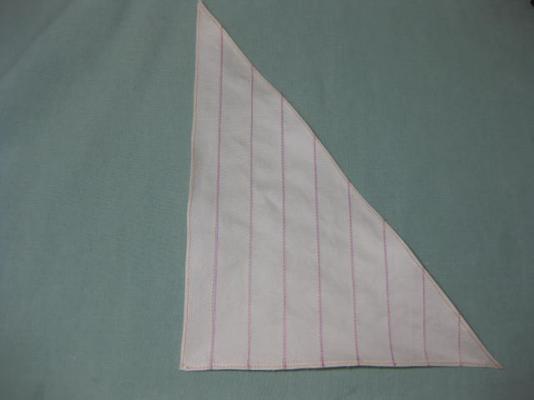
Two pics of both the sails to the stage I've done them so far. I washed the glue and marker pen off them after taking these pics - no problems at all with getting either of them off. The Gaff has the wide reinforcing on the Luff already. EDIT - Lees is a bit hard to follow sometimes as he jumps around a bit - I didn't find the right way to fit the Tabling for the Gaff and Jib until I read back several pages (in the middle of the square sails) where he mentions that the tabling and re-inforcements are done on the Port side ONLY. I'd wrapped the Luff tabling AROUND the sail and had it on BOTH sides. I've since corrected it.
-
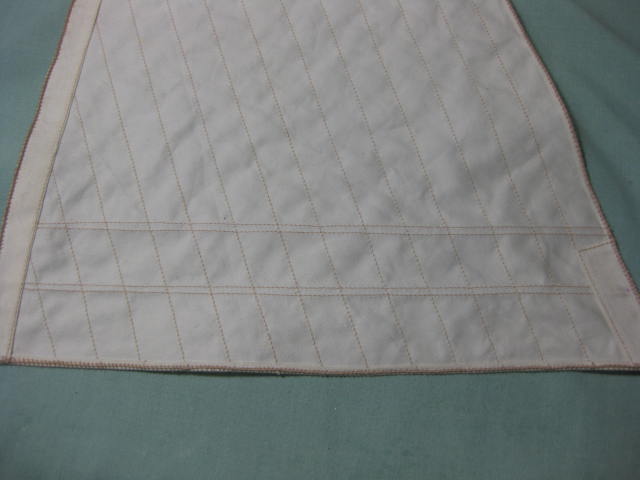
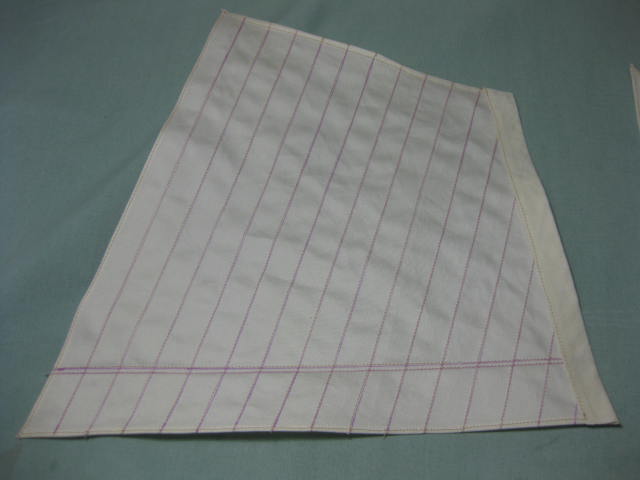
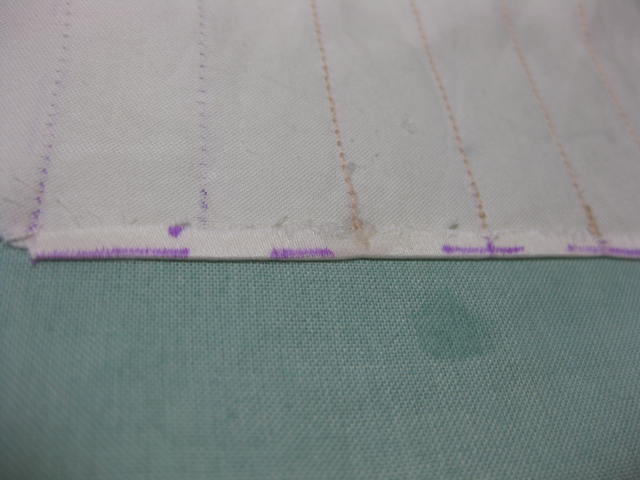
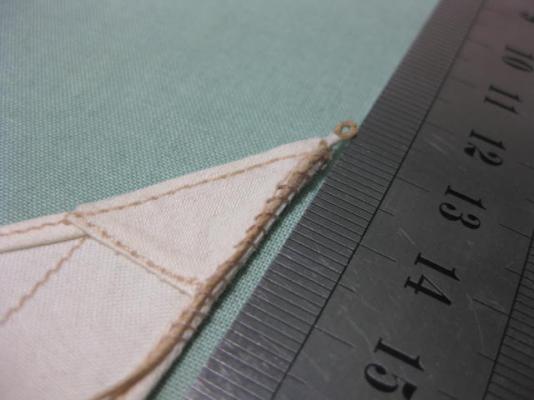
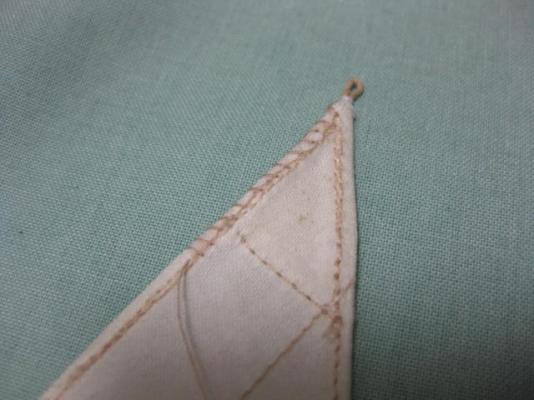
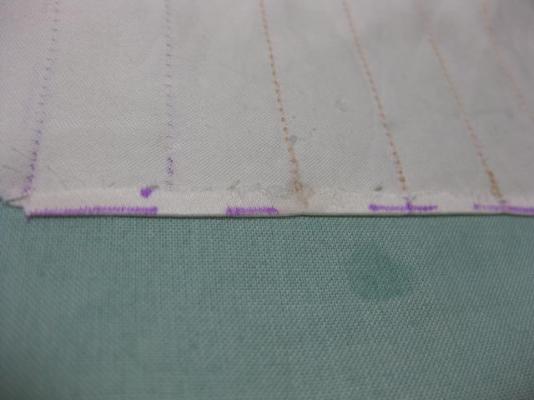
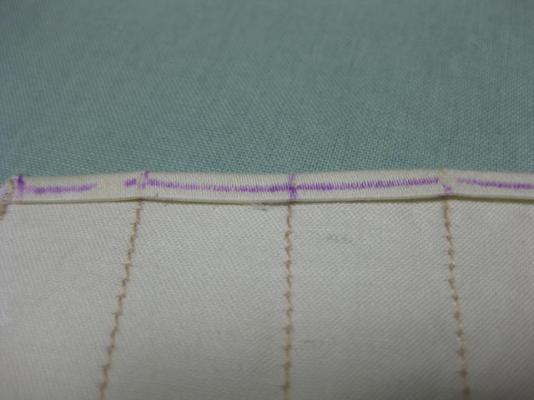
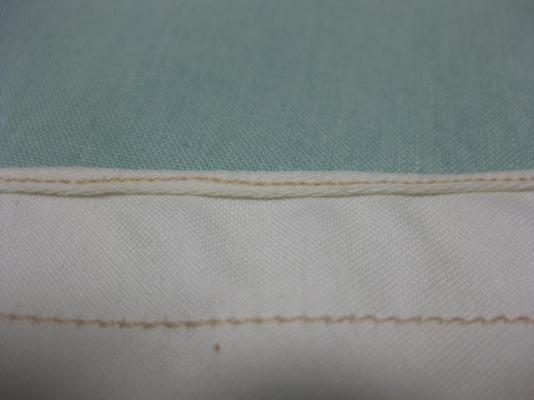
I've decided to get my dear old mother-in-law to do the machine sewing on the sails - she can do a hem in 5 seconds flat whereas I was struggling to do one in 1/2 an hour . We started by doing the "seams" for the cloths. Next I used the Fabric Stabilizer to glue down the "inside" hem of the first Tabling. To speed the drying process I used the point of an iron. Then I folded the hem over itself and re-applied the glue, ironing it flat again. M-I-L then sewed it down (pic 5).

-
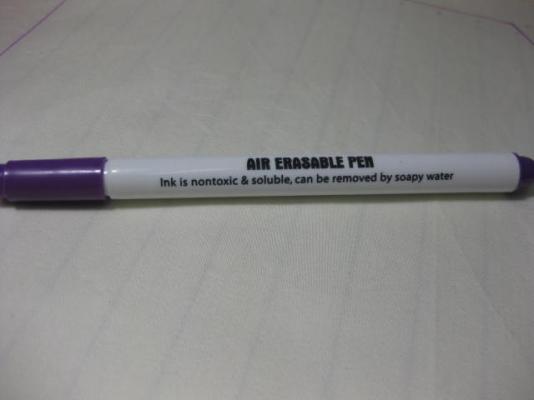
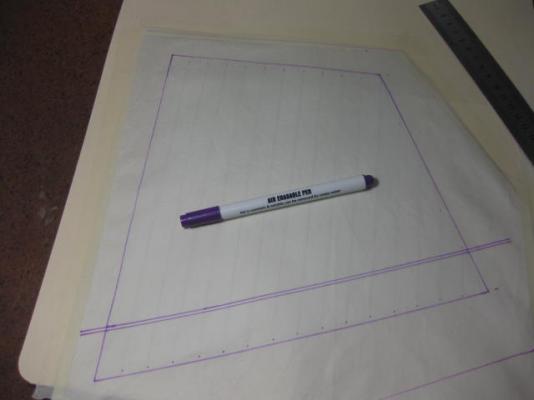
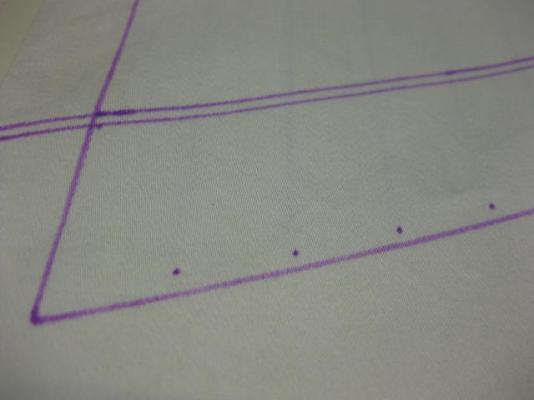
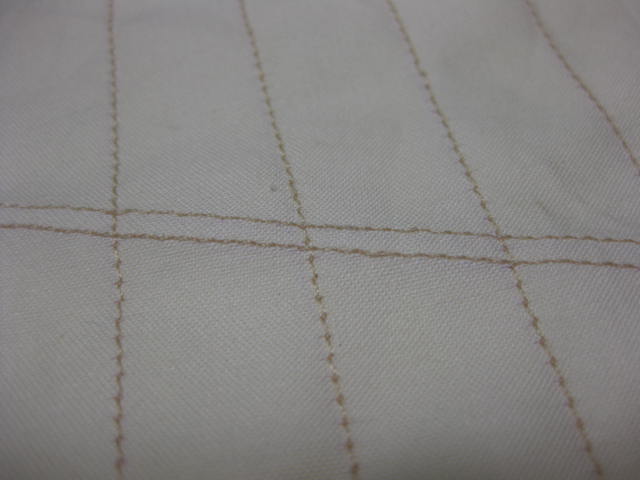
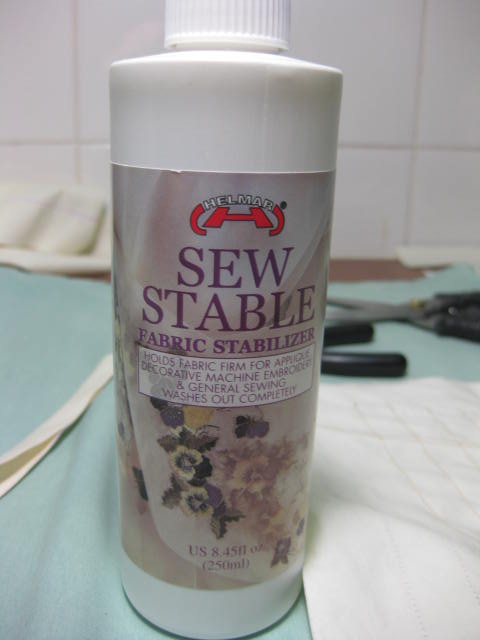
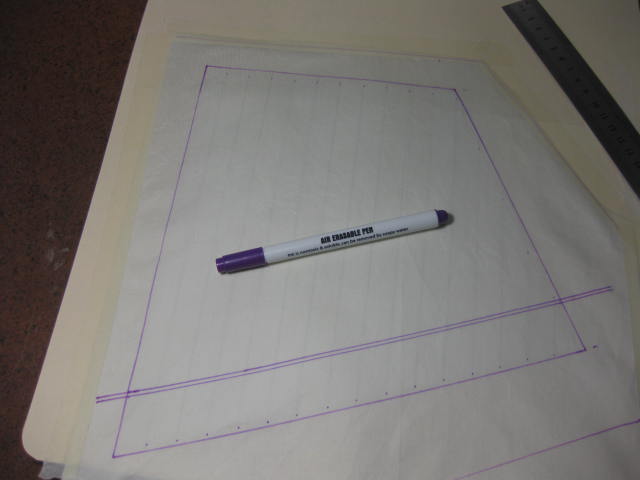
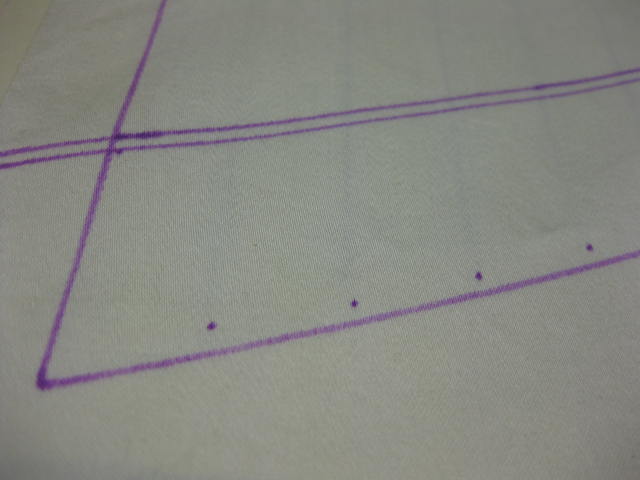
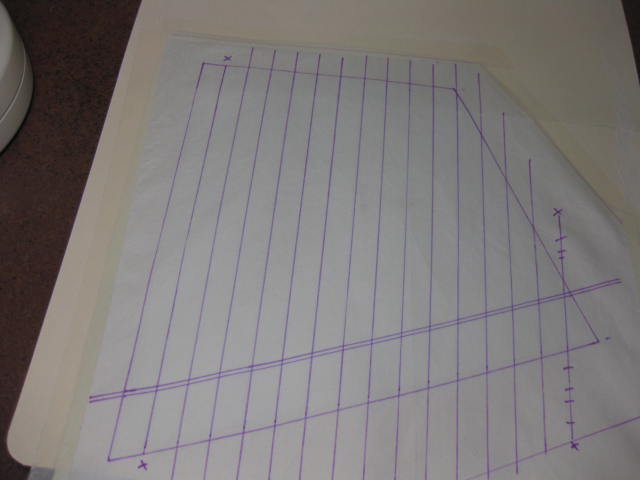
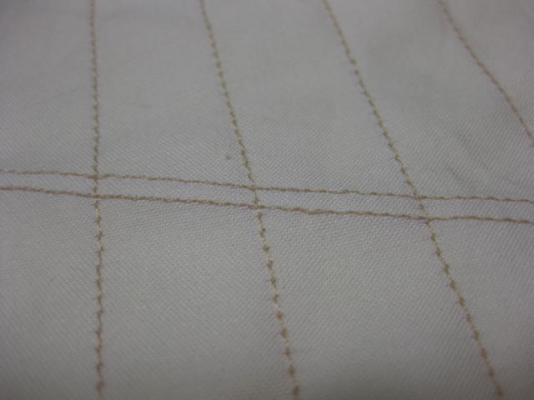
The saga of making the sails begins here. First thing I did was buy a "Disappearing Ink" Pen - it's water soluble, but "air-erases" in a day or two anyway. I also bought a bottle of "Fabric Stabilizer", which is a water-based fabric "glue" for holding the Tabling in position prior to sewing it. These came from a sewing supplies store. I laid my sail cloth - 1,000 thread-per-inch Egyptian Cotton - over my templates, which I taped to a piece of Manilla Folder. You can JUST see the template through the cloth (pics 3 and 4) and marked them out (pic 5).