Dan Vadas
-
Posts
3,261 -
Joined
-
Last visited
Content Type
Profiles
Forums
Gallery
Events
Everything posted by Dan Vadas
-
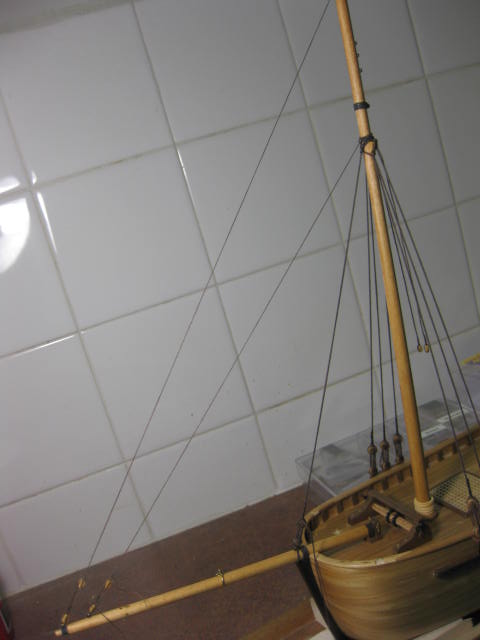
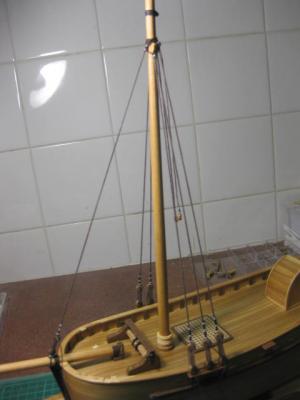
Topmast Stay I've had a pretty good day - the Topmast Stay and Foremast Preventer Stay (is there such a thing?) have also been fitted. I've continued with my detailing on the blocks, this time with strops as well.

-
Forestay I've fitted the Forestay. The kit was short two 5mm Deadeyes - not happy . Luckily I had a couple of spares.

-
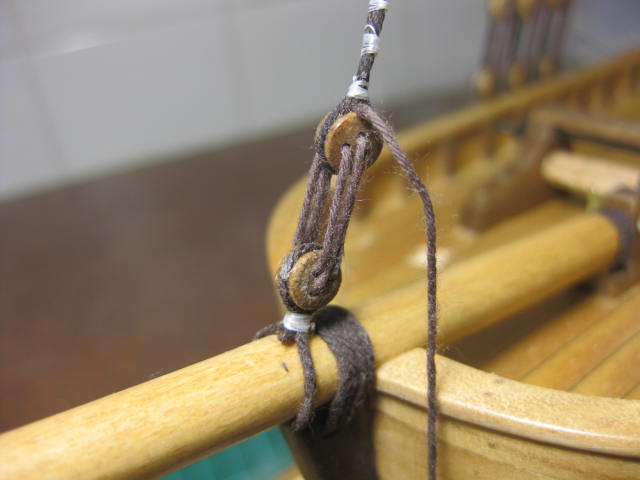
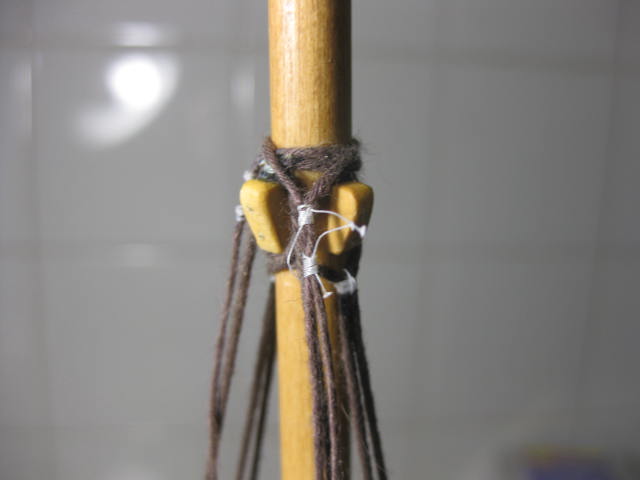
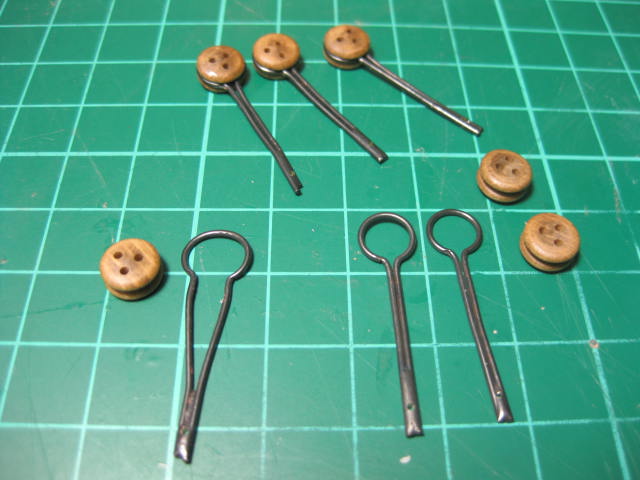
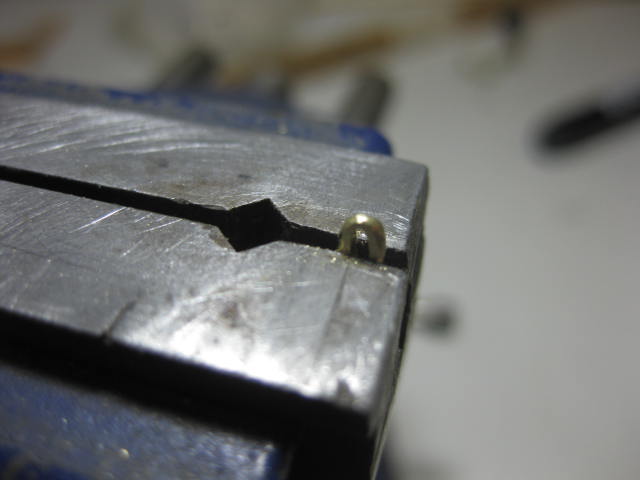
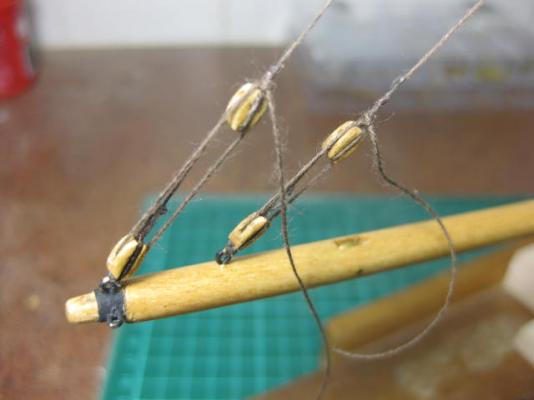
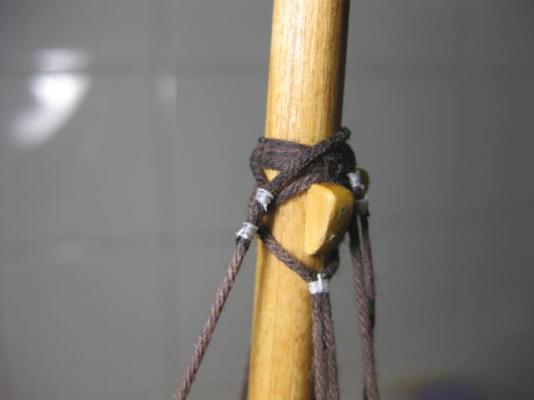
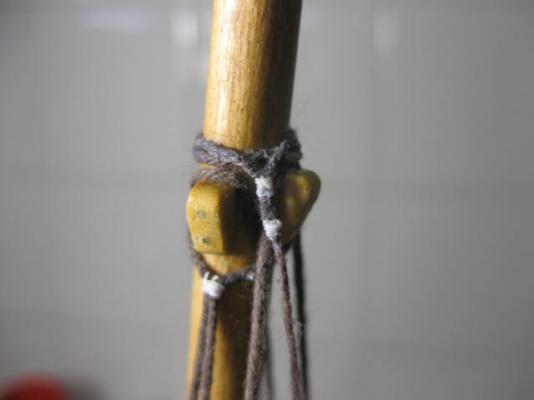
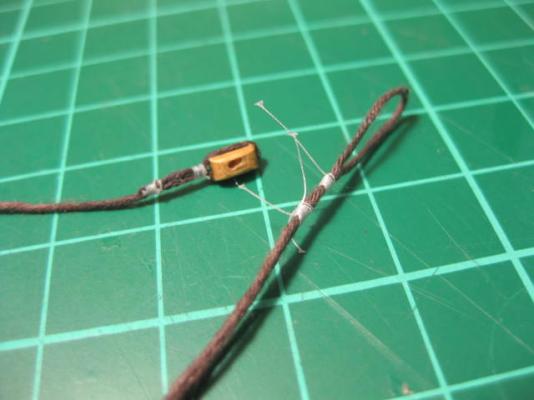
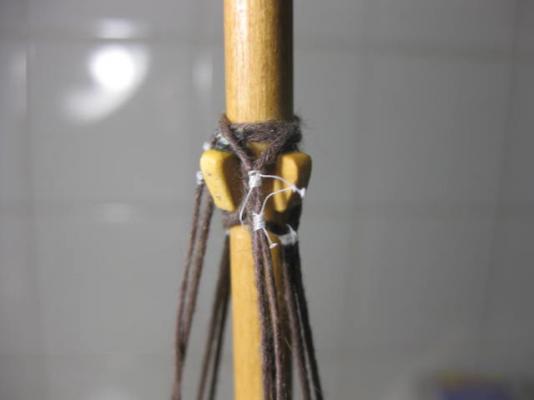
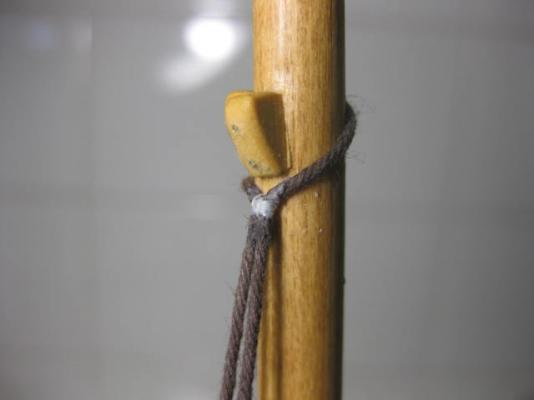
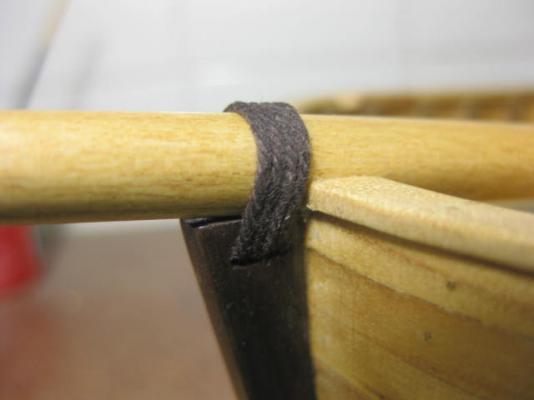
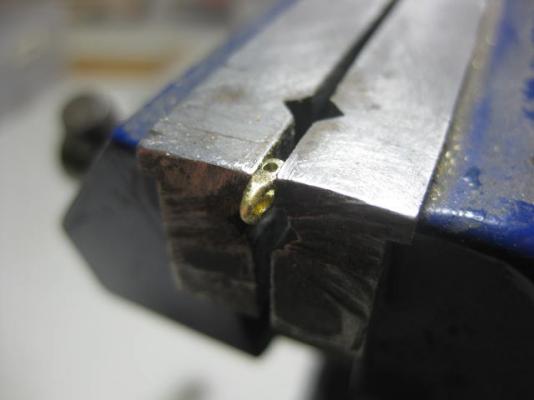
Backstays Departing from the kit instructions again I've fitted the upper parts of the Backstays, which go over the mast BEFORE the Forestay. I mentioned earlier that I'm not at all happy with the kit supplied Blocks - there are virtually none that I would use . Luckily I have enough leftovers from previous builds to get by, although I've detailed them a bit as well. Pic 1 shows my modified blocks at the bottom, compared to one (top right) before modifying, and a kit block at top left (yuck!) I've used a Double Racking Seizing to secure the block to the backstay, and a similar one to hold the loop that goes around the mast. I left the loop large enough to clear the bracket already fitted to the mast, and tightened both seizings up with tweezers when I had the line in position.

-
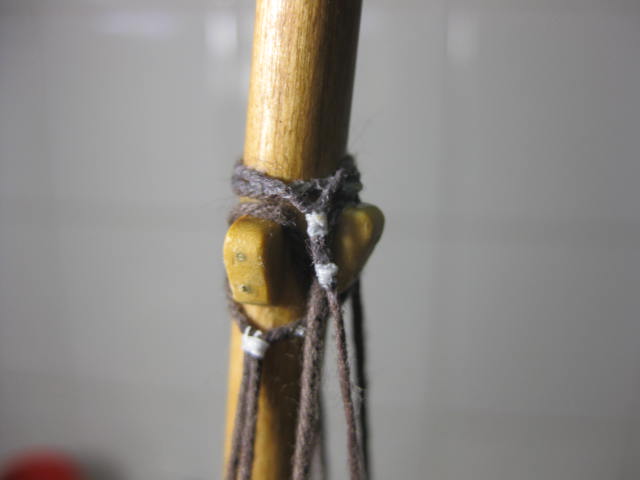
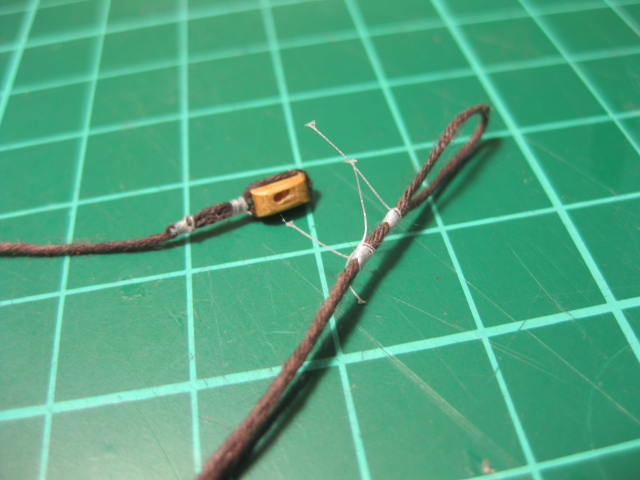
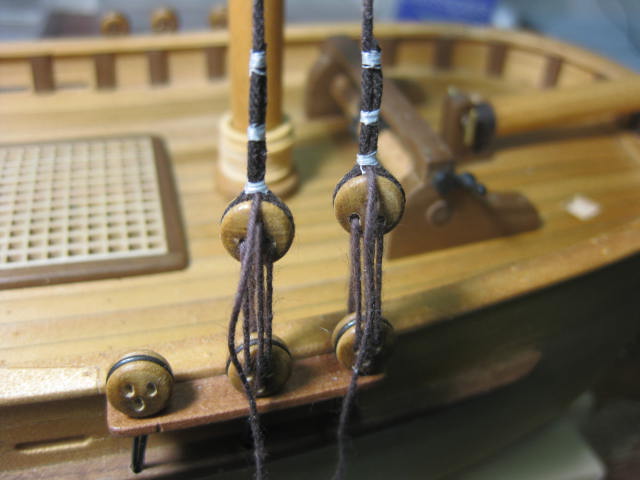
Shrouds The Shrouds are all rigged with deadeyes, now it's time to fit them to the mast and lower deadeyes. The starboard forward pair are fitted first, followed by the port forward pair and finally the two single shrouds. I start by using a piece of bent brass wire in the middle holes of one of the deadeyes to get the lanyard lengths equal, loop the shroud around the mast cleats and back down to the next deadeye (pic 1). Note that the "tails" of the shrouds are to the right of the deadeyes on both port and starboard - to aft on the port side and forward on the starboard side. The lanyard starts with a large knot in the aft hole if the upper deadeye, through the aft hole of the lower deadeye and so on until it exits from the forward lower hole. A needle threader makes easy work of it . The lanyard finishes off by passing between the lower end of the shroud and the deadeye. I use an awl to open a hole large enough to pull the lanyard through with the needle threader. I leave the tails of the lanyards as they are for now - they will need re-adjusting when all are fitted. One more pic from on-board. Finally I seize the shrouds together under the mast cleat.


-
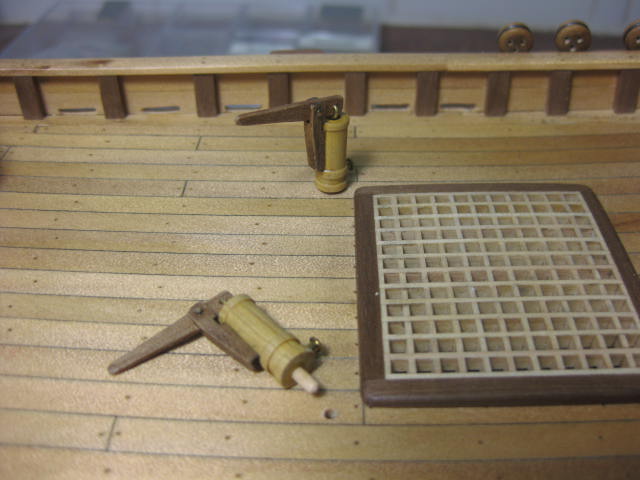
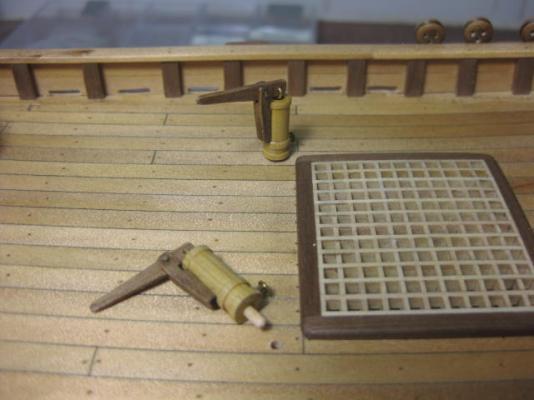
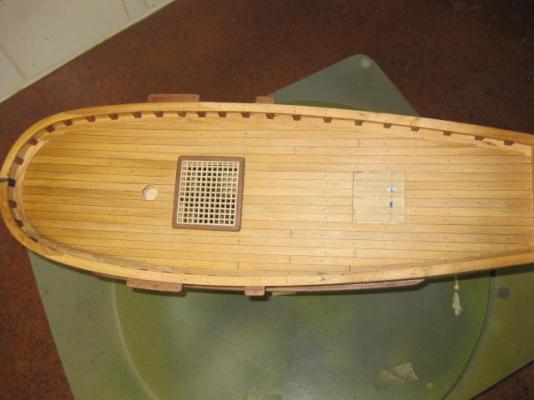
I've fitted the windlass to the deck, also the companionway. I've also drilled two holes in the deck for the pumps, to which I've fitted a couple of pegs made from a toothpick for extra strength. I won't fit the pumps until the rigging is finished. The rigging is started - I've seized a deadeye to the end of each shroud pair.


-
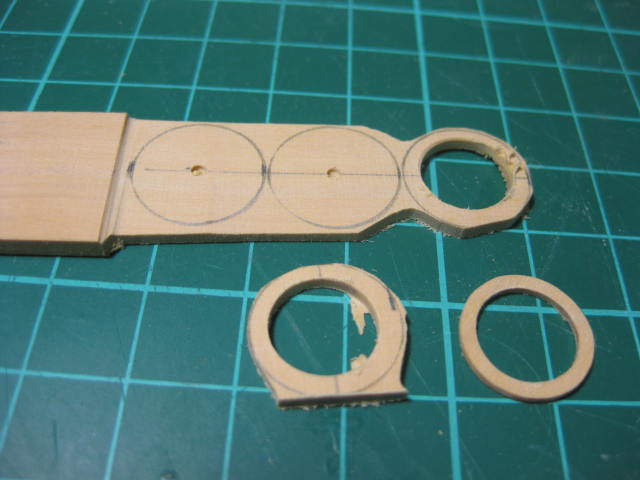
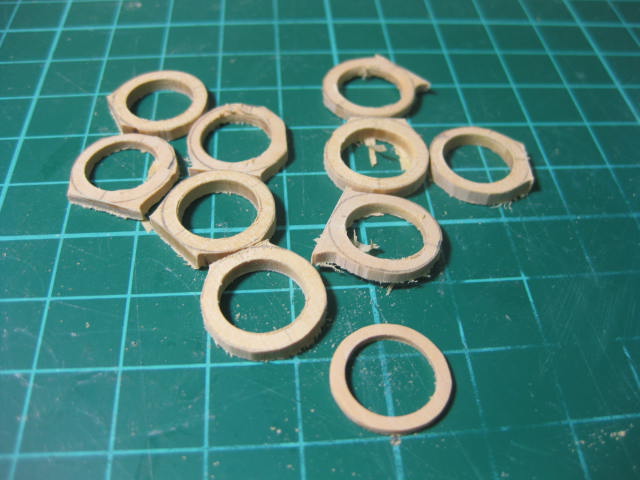
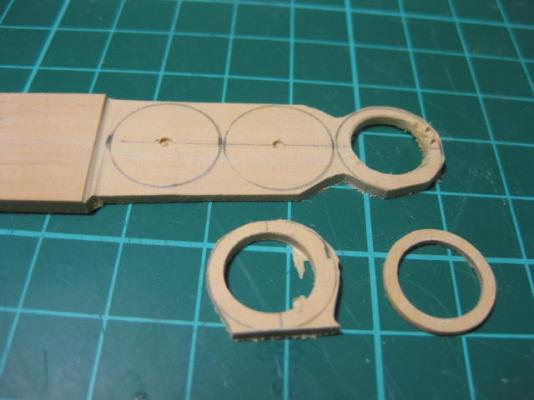
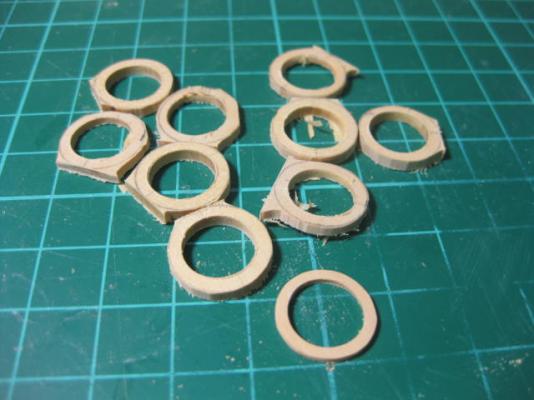
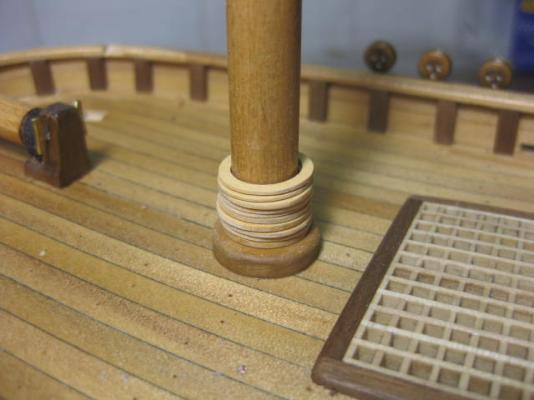
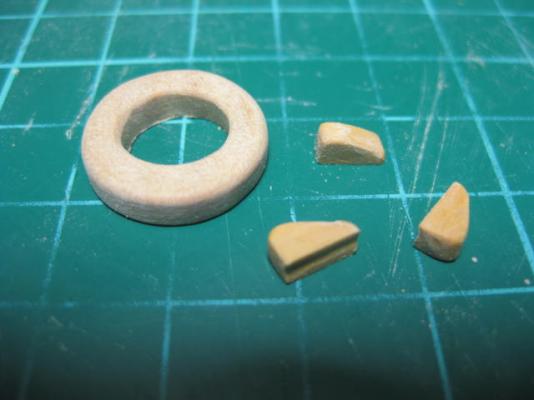
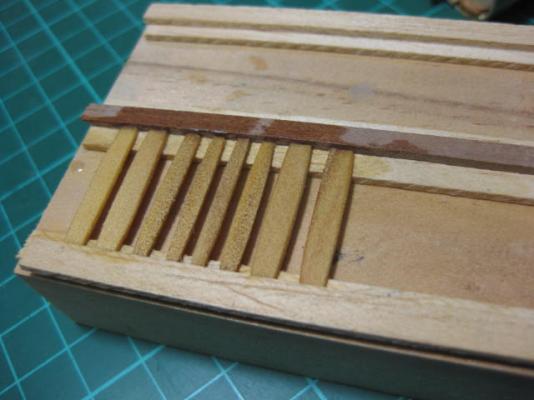
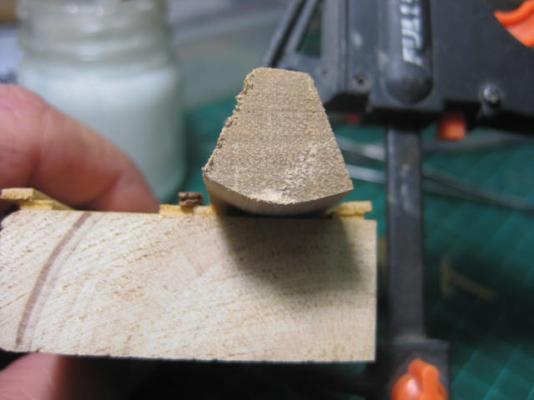
Mast Hoops EDIT - look at THIS LINK before commencing this step. I've made up ten Hoops for the Driver sail. I made these from Boxwood salvaged from an old folding carpenter's rule. I drilled the 10.5mm hole for each first in my drill press, and sanded the outside roughly to shape with my belt sander (pic 1). The rule was 4.5mm thick, and the only way to thin it down to 1mm was by sanding it - rather wasteful of good timber but no choice in the matter (it took 150mm of the rule to make up all ten). I sanded it to about 2mm thick before drilling it .... any less than that I was worried about splitting the timber. Next I made a simple jig to hold the ring from a piece of scrap ply and a leftover of the mast dowel, which I sanded to 1mm from the surface of the ply. I placed each ring over the dowel and sanded them to thickness using a cork block. That's a lot easier than trying to hold them by hand - I didn't lose any skin . Then I sanded the outer edge with the same cork block to get it to the required width, and put the rings back into the jig to polish them up with 1500 grit foam-backed paper. The rings measure 14mm in outside diameter, they are 1.5mm wide and 1.0mm thick. The rings on the mast - my success rate was 100% with these .

-
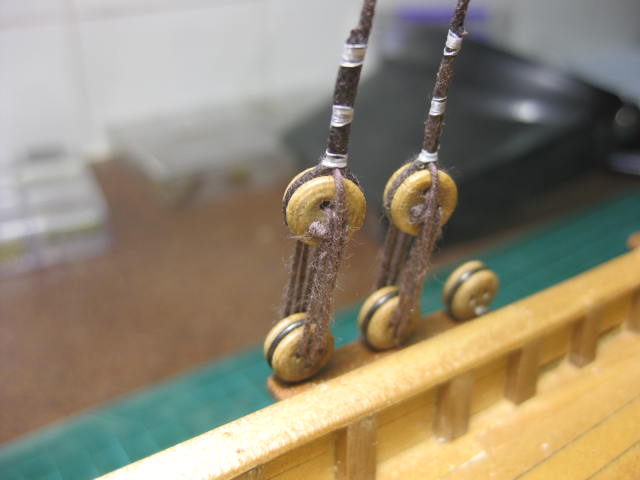
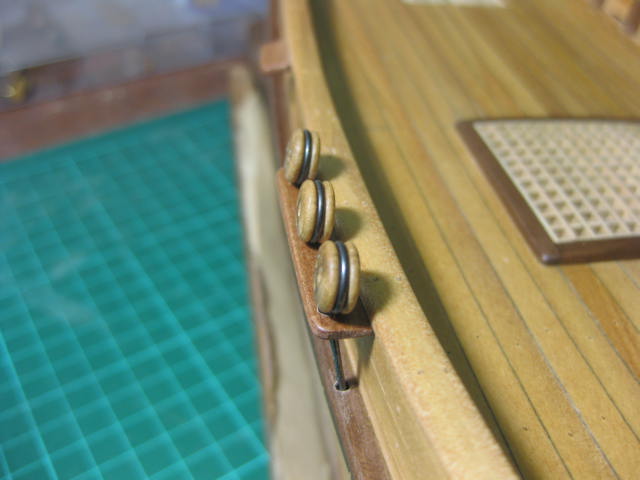
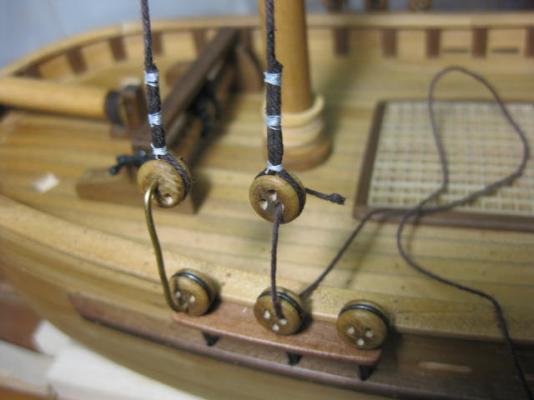
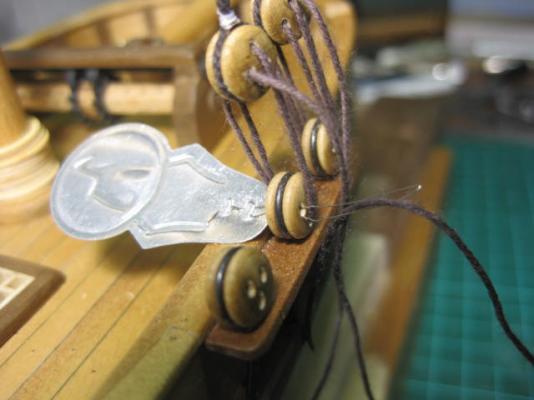
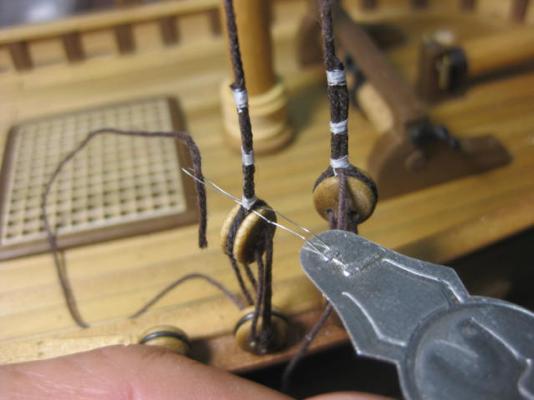
Deadeyes and Chainplates I've installed the Deadeyes to the Channels. The kit supplies some pretty good silver soldered and blackened wire Chainplates, and the deadeyes were really good as well. I couldn't have done any better myself so I used them, after filing out a small notch at the top of each hole in the deadeyes to get the lanyards to seat properly. Spreading the wires to take the deadeyes was a delicate operation - just enough to slip them in without distorting anything too much, or worse breaking the solder joint. No problems though (pic 1). Before drilling any holes I tied a piece of rigging line to the mast at the cleats and ran it past the channels and gunwales to mark the positions relative to the angle of each shroud. I drilled 1.6mm holes through both, and enlarged them slightly with a tiny round needle file to accept the chainplates. Then I pinned them to the hull with brass nails brushed with a drop of PVA.

-
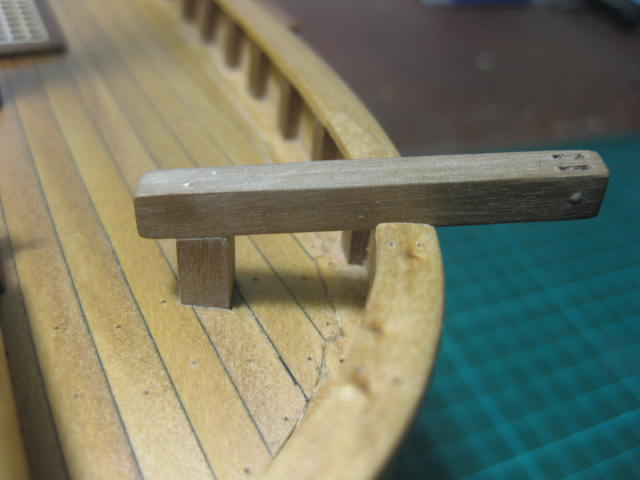
I've dry fitted the Catheads. I notched them into the top rail and also into the deck for extra strength. I've also done the Gammoning for the bowsprit. I had a think about the kit supplied rigging. While it's of good quality, I'm rather a fan of dark brown standing rigging as opposed to black - I just think it creates a warmer tone to the model. I'm going to use OcCre rigging thread for the standing rigging, and the kit supplied Fawn for the running rigging, although I doubt there will be enough of it. Doesn't matter, I'll just buy some more.

-
Timbers used on this model So far I've used seven different types of wood that are visible (I'm not counting the kit supplied ply etc for the hull framing) : 1. Norfolk Pine (which I cut from a large slab) for the hull and deck planking, also the companionway and railings. 2. A very hard and dark Walnut (not kit supplied) for the keel, stempost and sternpost. 3. A lighter coloured and softer Walnut (kit supplied) for the rudder, gunwales, catheads and windlass supports. 4. Beech (kit supplied) for the companionway trim and windlass barrel - this is not very good stuff, and I won't use it again. The grain is way too coarse, but the colour looks OK. 5. What looks like Limewood (kit supplied) for the masts and yards. I stained this with Baltic Pine, as the timber colour is nearly white. It takes stain readily, which brings out a very slight grain (just enough for masts) and is very easy to sand. 6. Boxwood for the mast cleats (and the kit supplied pumps) - I'll be making my own blocks from this very hard, dense and easily carved timber. I got my supply of it from an old wooden folding carpenter's rule. 7. Cherry Ballart - (I got this from one of your neighbours in Geelong "bernie", who will shortly be making a come-back to MSW). This is a beautiful wood to use in modelling - as easy to shape into tiny pieces as boxwood, but with a colour that varies from light walnut to dark mahogany depending on which part of his tree Bernie cut it from. I've used some of the red for the barrel tap handles, and some of the lighter stuff for the Channels.
-
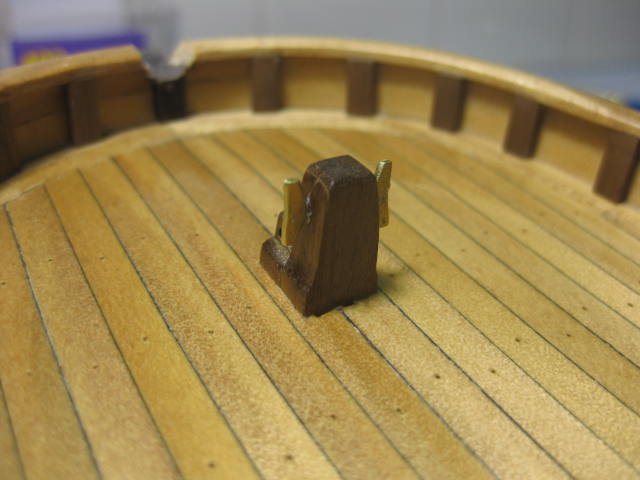
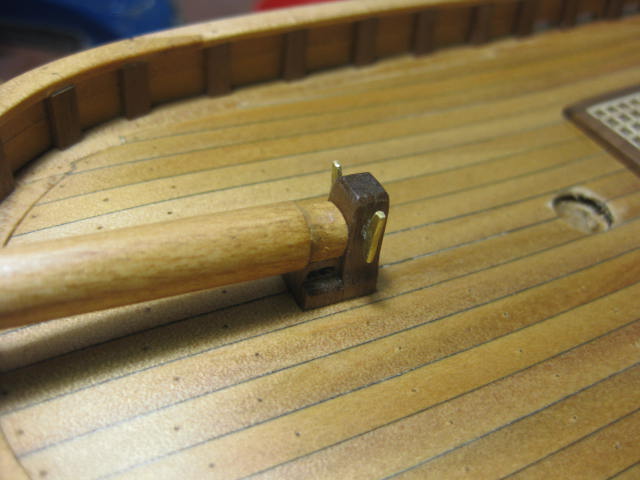
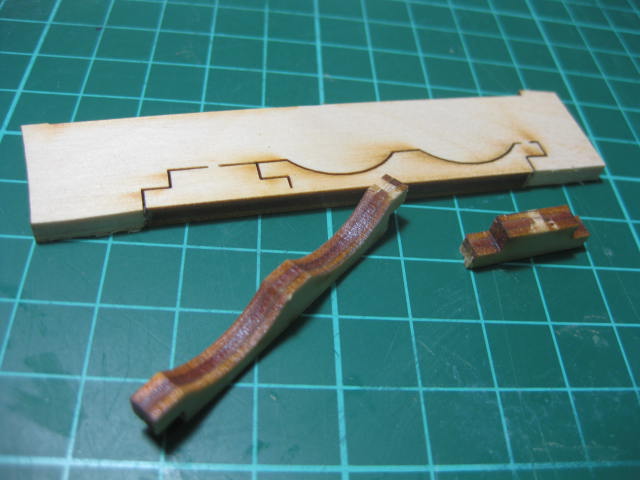
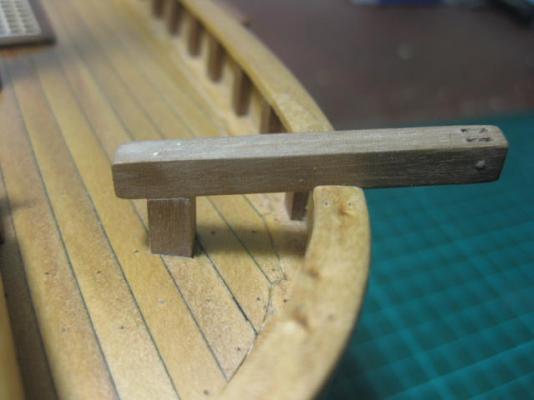
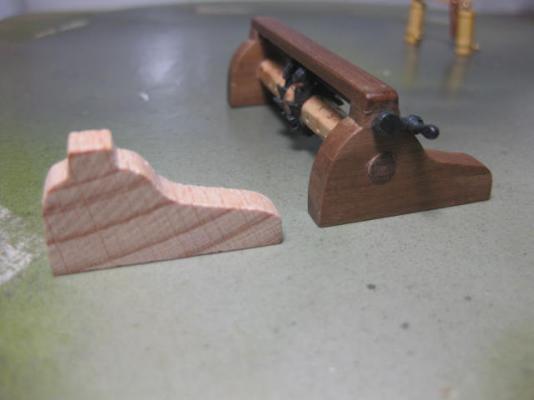
Fitting Bowsprit I've fitted the Bowsprit. I needed to make a "Heel Block" first, this is my second attempt. I decided in the interests of maximum strength to cut the block into the deck - I miscalculated my cuts by about 0.5mm, which doesn't sound significant, however translated over the length of the bowsprit the tip was about 4mm out of alignment .... WAY too much to ignore . Instead of removing the deck plank (which would have had a gap in it) I decided to add a couple of cheeks to the sides of the block to fill the gap. I re-cut the hole to one side to align it properly. I had to make a new heel block, as I totally destroyed the first one in attempting to remove it. At least I know that it won't come loose . I also made two cleats from brass strip for the Jib Inhaul and Outhaul - the kit simply had a piece of brass wire going through the block.


-
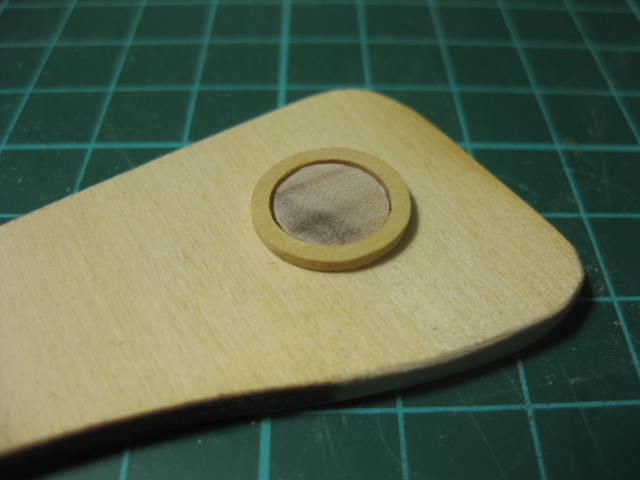
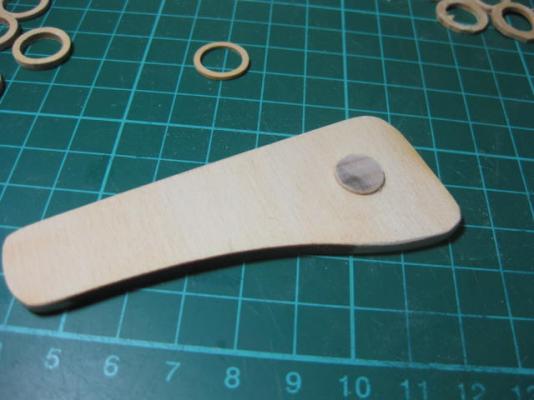
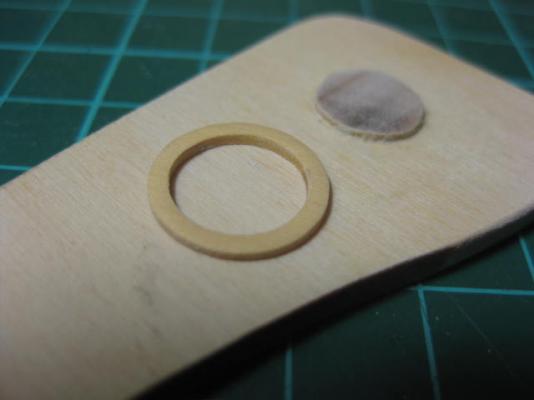
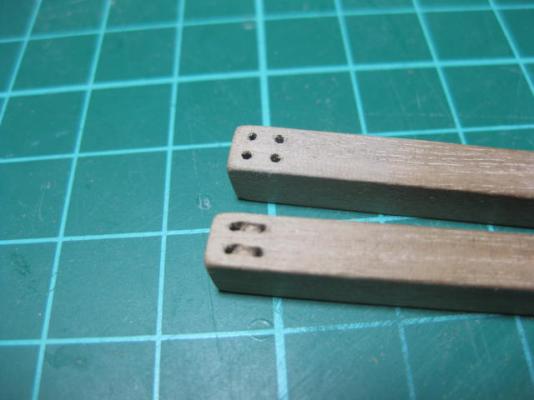
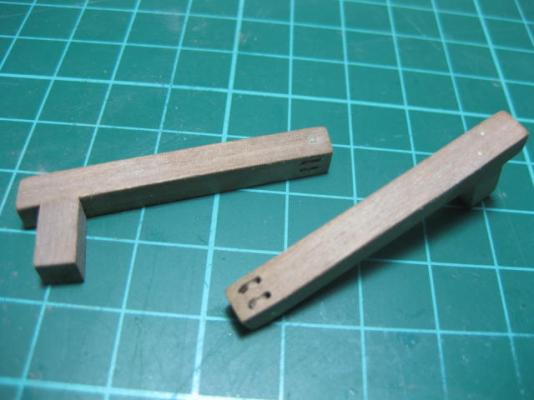
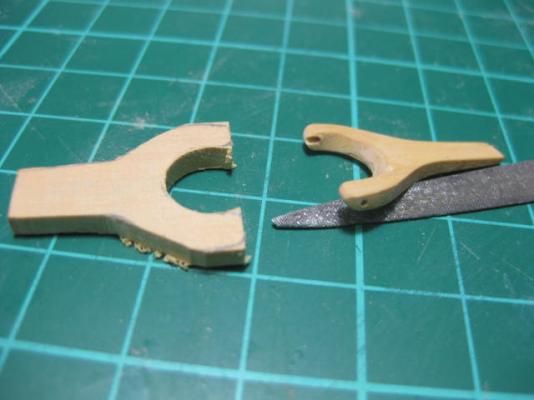
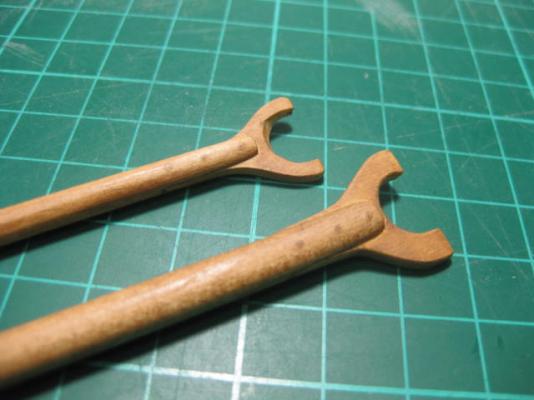
Catheads I've made up the Catheads. I pinned the "legs" to them using 0.5mm brass wire and added a pin for the sheaves. Below I've shown a detail of the way I drilled the holes for the sheaves. I realise that none of this is seen, but the 3rd pic shows why I did it - the rope sits much more realistically than in the one with straight drilled holes. I do the same thing with my blocks. It's a simple matter of using the pin vice at an angle to elongate the holes - it takes about 30 seconds more per hole .

-
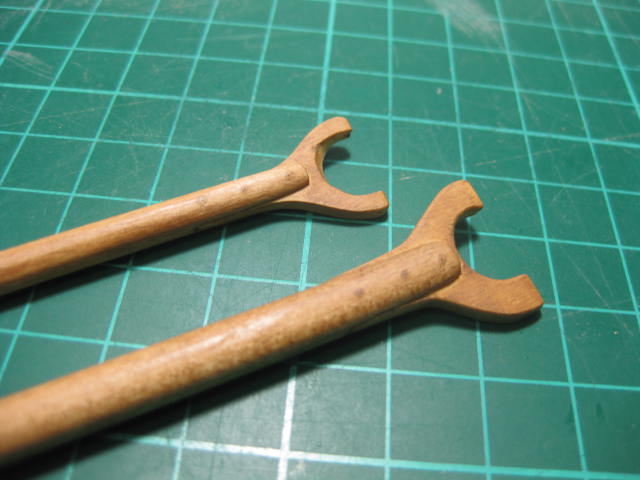
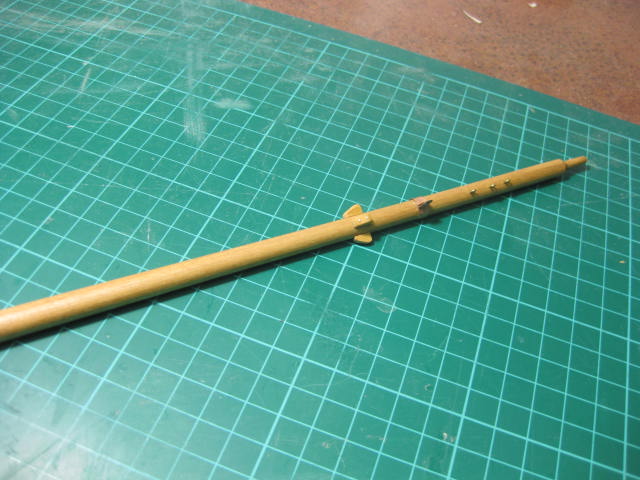
Gaff and Boom The Gaff and Boom - the only thing worth mentioning with these is the Jaws, which I made from Boxwood to replace the kit's ply. The rest was the same as the previous mast and bowsprit as regards the type of dowel, tapering and staining. I've also treenailed them on with bamboo.
-
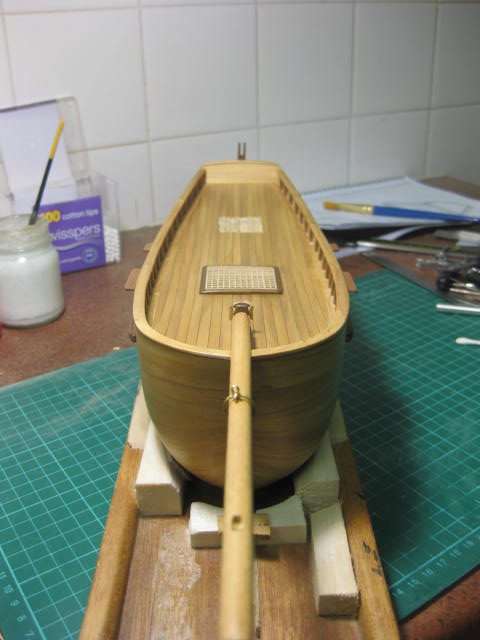
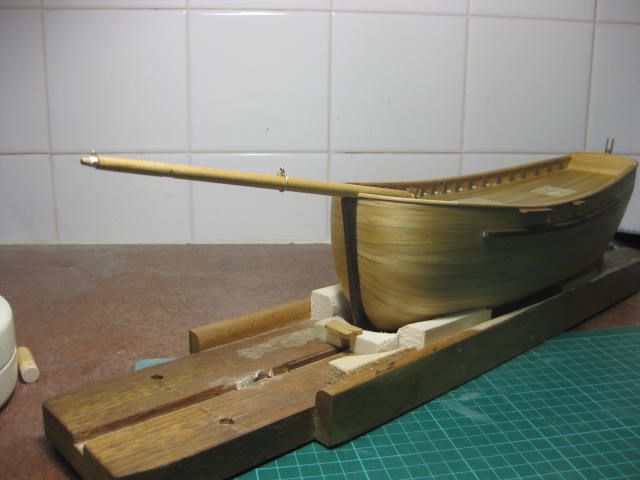
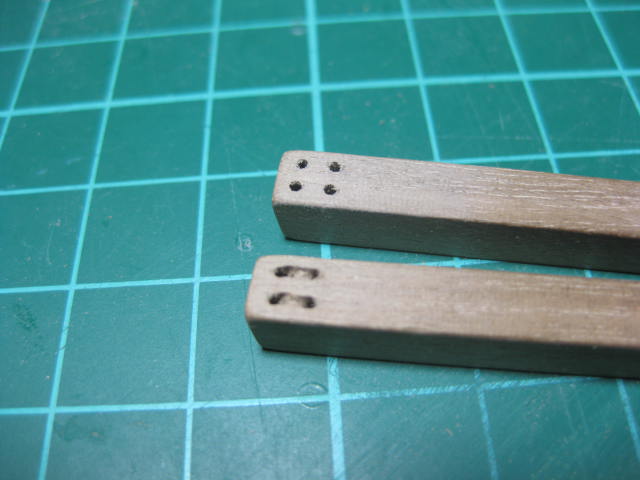
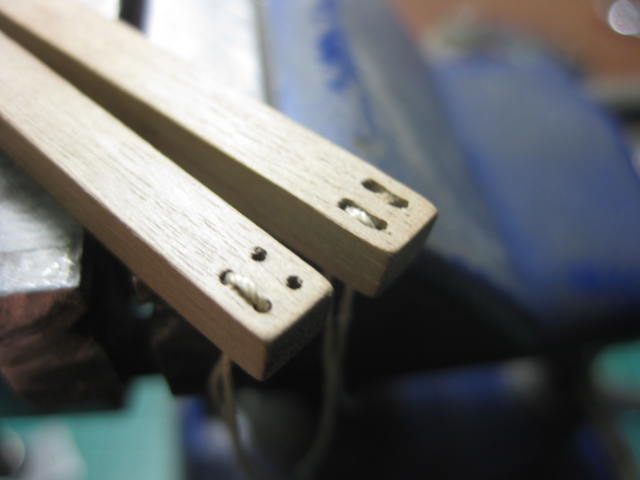
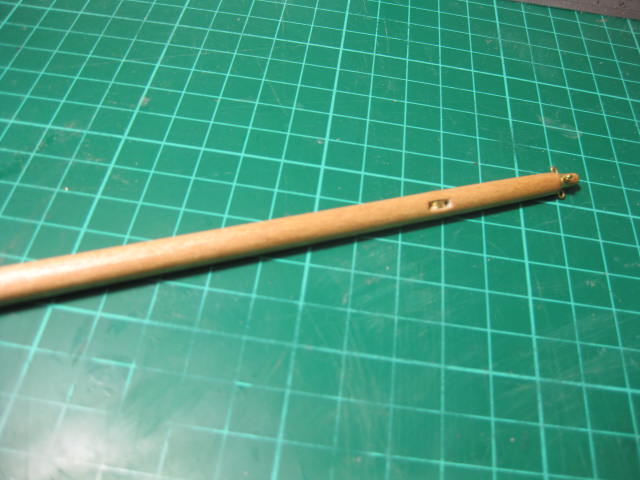
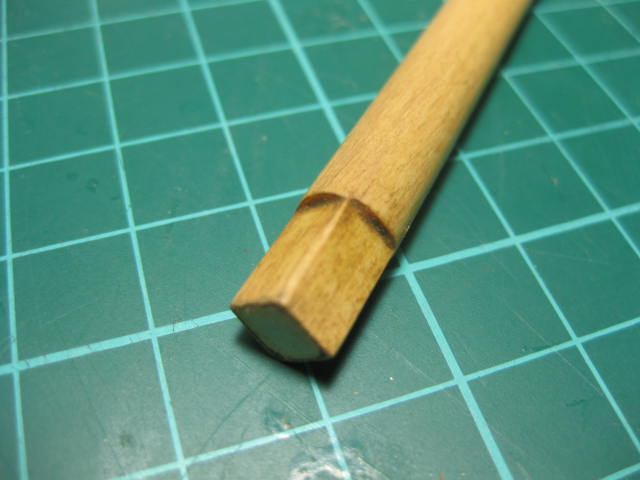
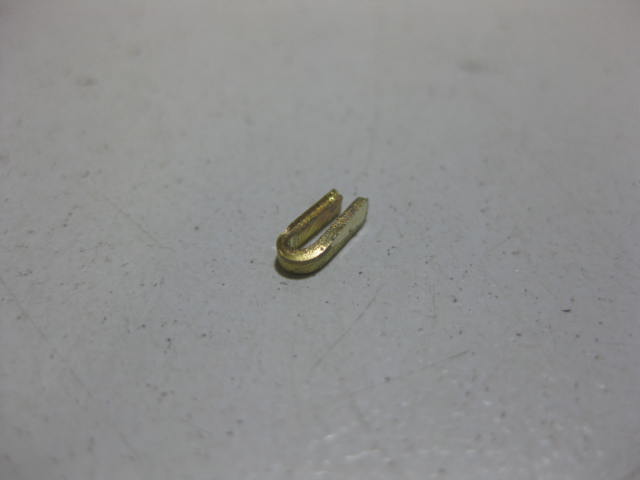
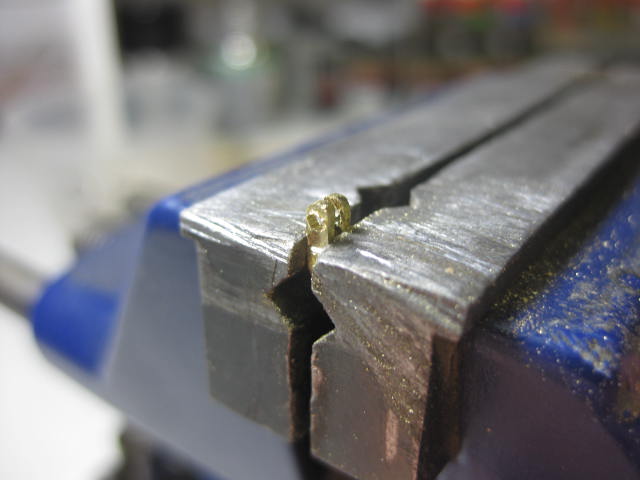
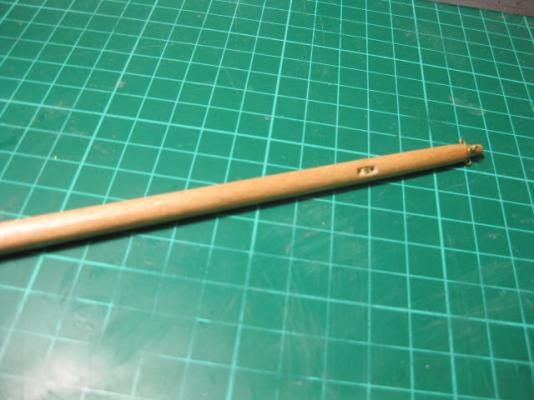
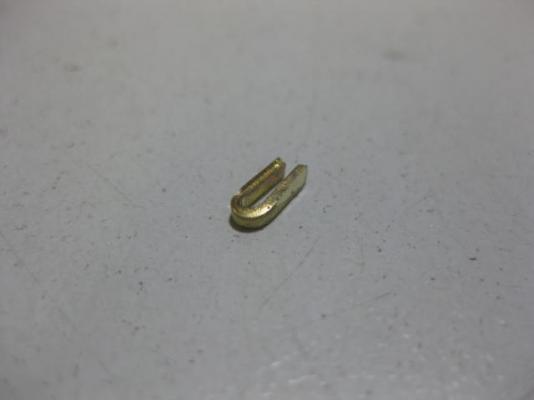
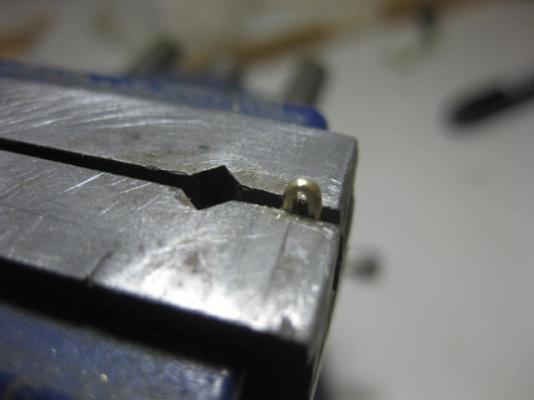
Bowsprit I've made up the Bowsprit - not quite to the kit instructions . Same kind of dowel as the mast, same procedure to shape and stain it. I cut a 6mm square into the end that goes between the bitts, and filed a step into the "pointy" end for the stays to sit against. I added three eyebolts and a collar, which wasn't in the instructions but I felt was necessary (so far so good). Then my OCD hit me again - instead of merely drilling a 1mm hole for the Jib Traveller Outhauler I turned up a 5mm dia sheave and fitted it. Not content to kick back and admire my Outhauler sheave, I made up the Traveller. I used the 1mm brass ring supplied (a touch overscale but acceptable) and made a "D" shackle from some brass strip. Also a small hook from 0.5mm wire. I had to epoxy this unit together, as my silver soldering torch is playing up. It worked out OK, and I'll be painting all the brass pieces matt black in any case.


-
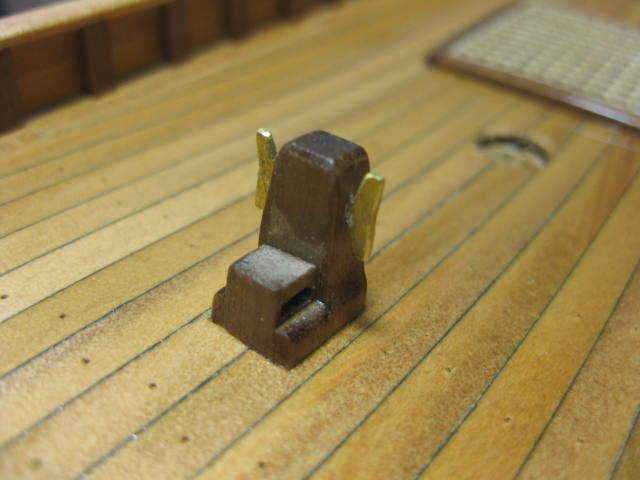
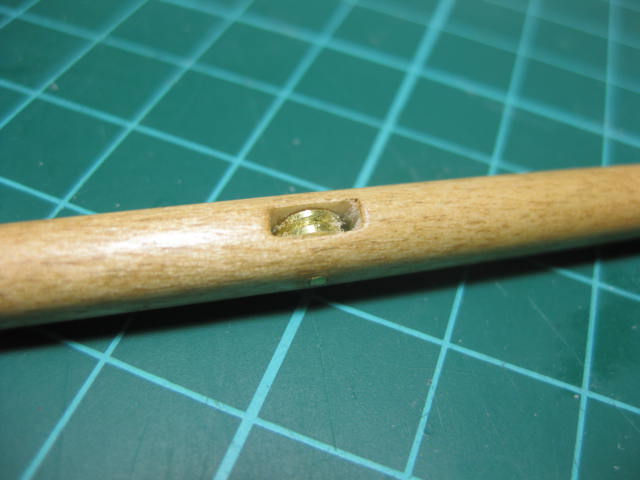
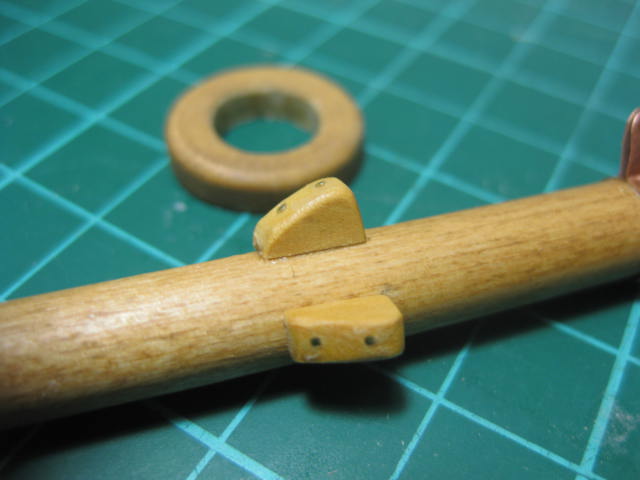
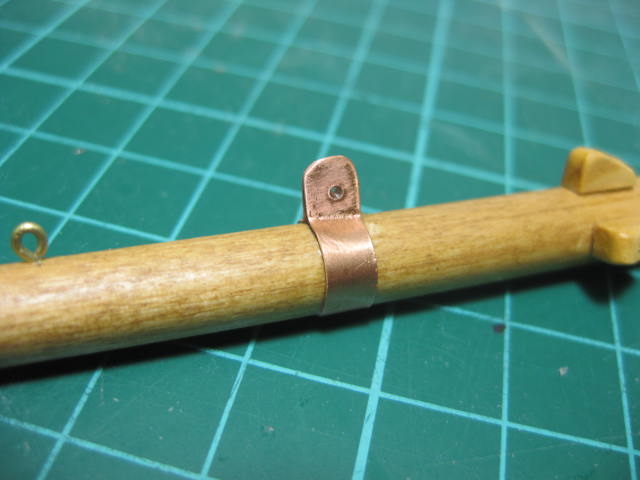
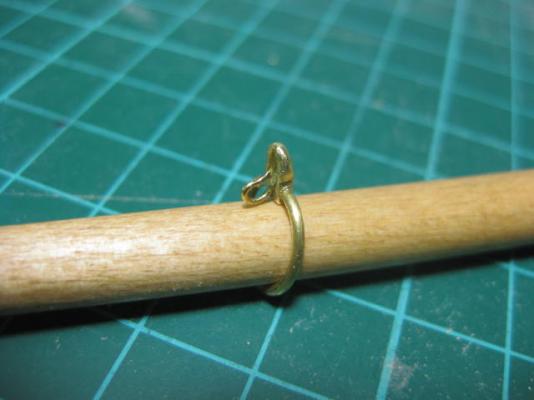
Mast I've tapered and shaped the Mast and stained it with Baltic Pine. The kit supplied dowels for the mast, bowsprit, boom and gaff are made of something similar to Limewood and are very soft. But the mast dowel (as also the rest) was a good straight piece that was very easy to plane and sand into a taper. The colour was very bland however, and the kit instructions actually advise to stain it. I've also made a Mast Collar from a piece of Norfolk Pine to replace the kit's ply one. I stained it with Baltic Pine as well, which makes it come up a bit darker than the mast - they look very good together . The kit instructions say to make the three Shroud Cleats from ply . I made mine from Boxwood, and pinned them to the mast with 0.5mm brass wire. There is also a copper collar to make from 3mm strip (supplied as 6mm) which takes the block for the gaff throat halyard, and three eyebolts for the gaff topping lift blocks.


-
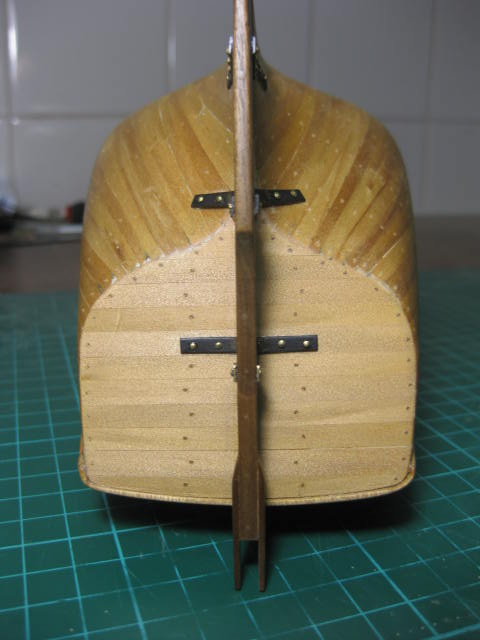
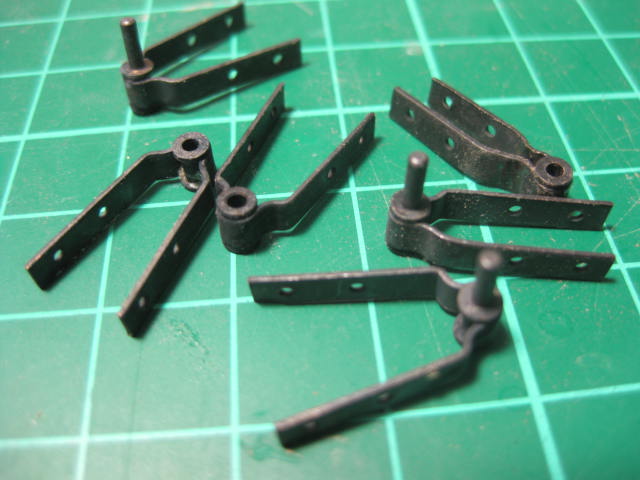
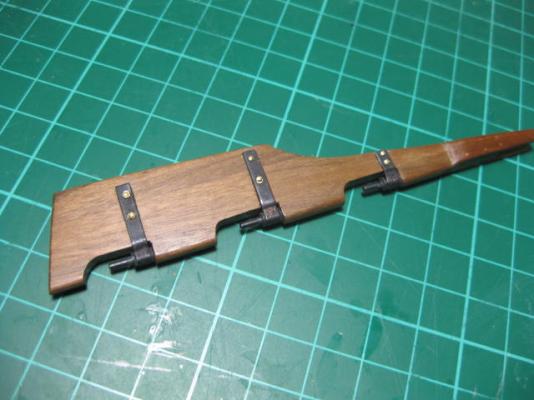
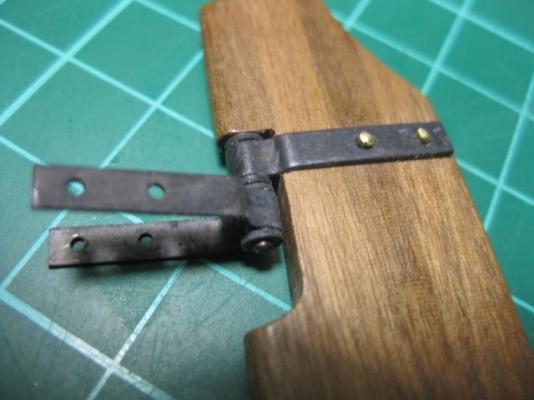
The rudder is now fitted to the hull. All that's left to do is touch up a few areas where I took the blackening off the hinges with my pliers and paint the "bolts" matt black - I left them unpainted for the pics so they would stand out a bit more.
-
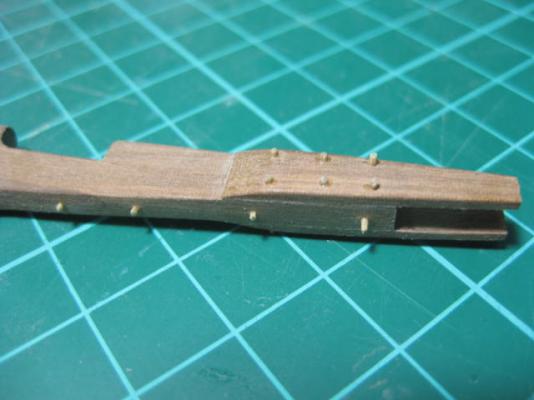
Rudder I've made up the Rudder. The kit supplied a piece of laser-cut ply which they suggested to plank with walnut, but I laminated 5 pieces of 4mm x 4mm walnut together to make a solid one : The kit also supplied some very nice gudgeons and pintles, with a fitted pin in a solid sleeve. These are much better than anything I've seen in a kit so far : The Norfolk Replica has a pair of cheeks either side of the rudder top to hold the tiller, so I've copied that idea. I'll trim the tops to size after the rudder and tiller are mounted, and add a small chock. I've also treenailed the cheeks and the aft edge of the rudder : The pintles attached to the rudder. I epoxied them on one at a time and let that dry before going to the next. Then I drilled and "bolted" them to the rudder.
-
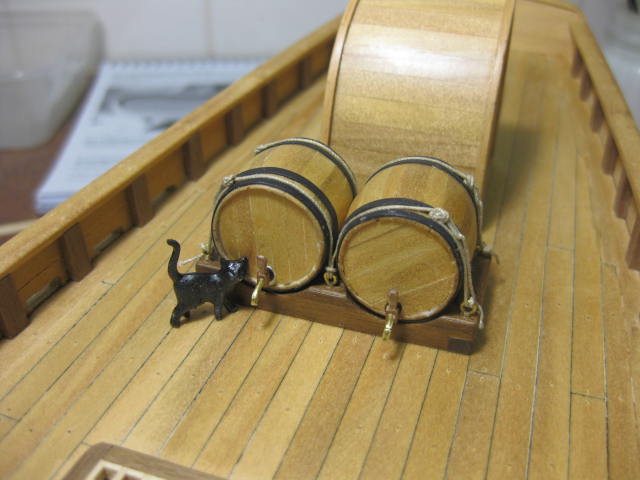
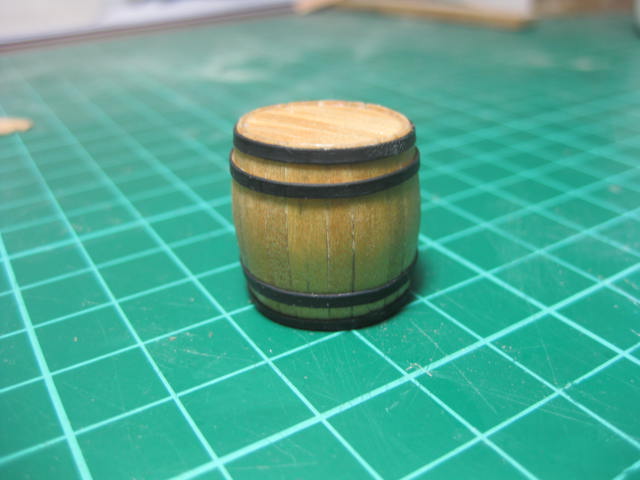
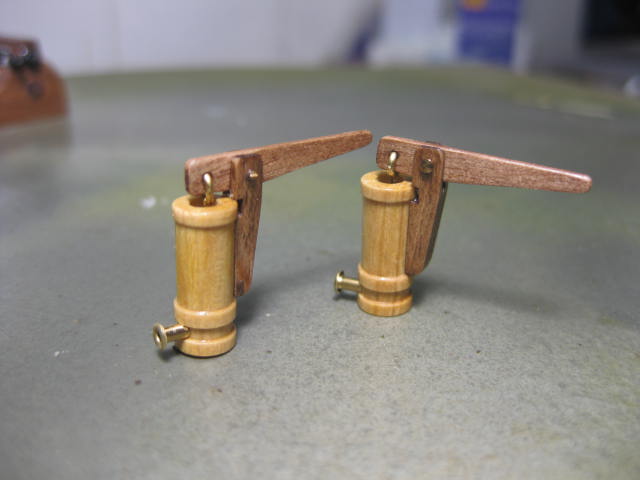
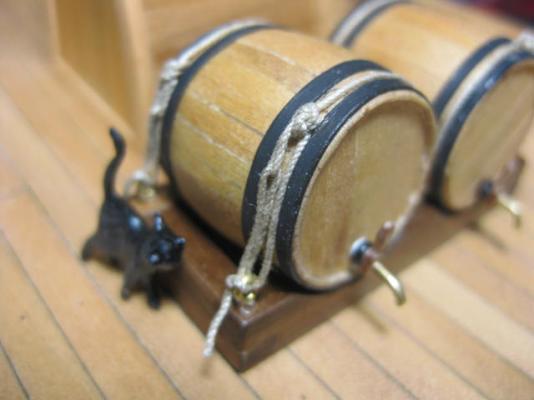
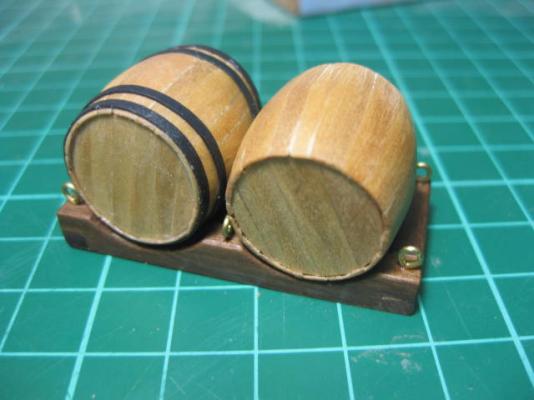
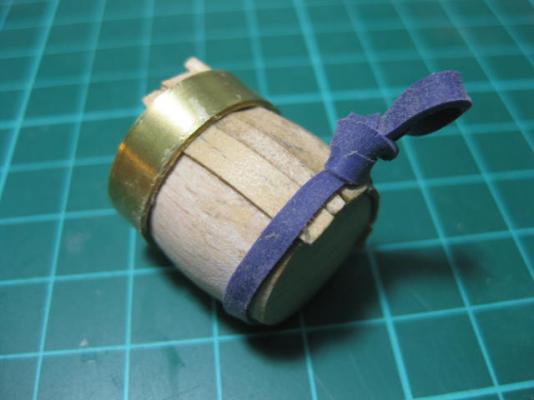
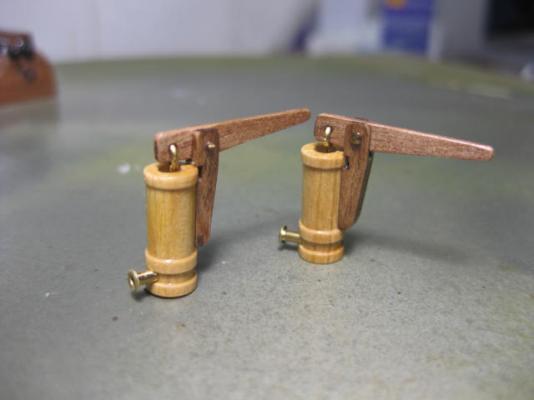
Both barrels are finally finished - I've lashed them down and made two taps, using a piece of 1mm brass tubing, a leftover parrel truck, and a hand-filed Cherry Ballart handle on each. And a pair of cork Bungs :


-
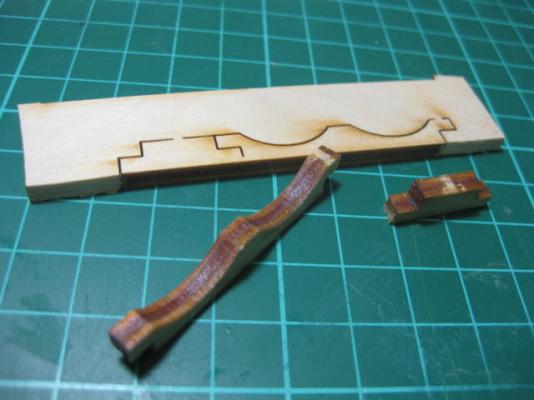
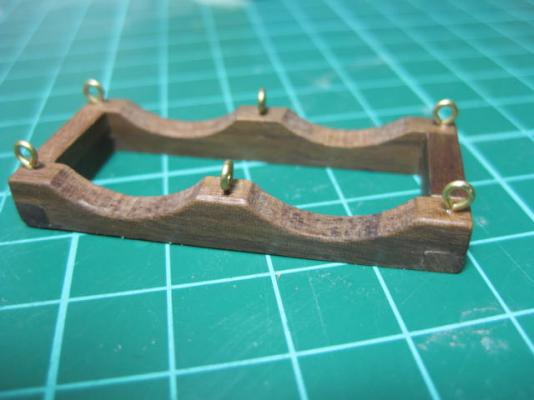
I don't want to put Modeller's Shipyard down any further, but the following part is a case in point of the recent posts - the barrel base. They supply four pieces of laser-cut PLY. For chrissake - this is a major DECK FITTING . Ply belongs inside the hull where it can't be seen. Naturally enough I scratchbuilt a replacement from 4mm x 4mm walnut strip. I glued two pieces together to get the required height. I've also finished planking my 2nd barrel - just the hoops to go.
-
Kit "Bashing" I'm finding a few "issues" with my kit - nothing real serious, but a bit annoying. MS could have lashed out a little bit on some better quality timber for some of the pieces - I don't like that Beech at all ... way too large a grain. And WHY would they use laser-cut PLY for some of the deck fittings ? My other disappointment is the plans - NOT TO SCALE, and quite a few things left out as well. Nothing I can't handle, but a "newbie" who doesn't have the benefit of a site like MSW to guide him might have a problem or two. I don't mind forking out the bucks, but I also like to get value for money (mine was only about $270). A few more dollars spent by MS, or even just a little more thought, in the 1st place would have gone a long way. Mine's a fairly good kit, but it could have been better.
-
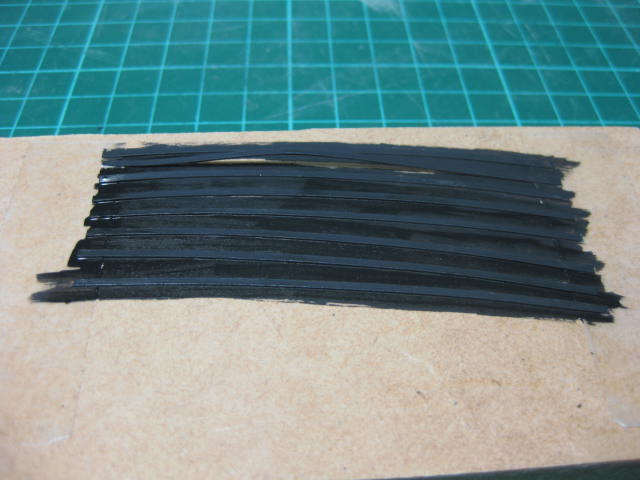
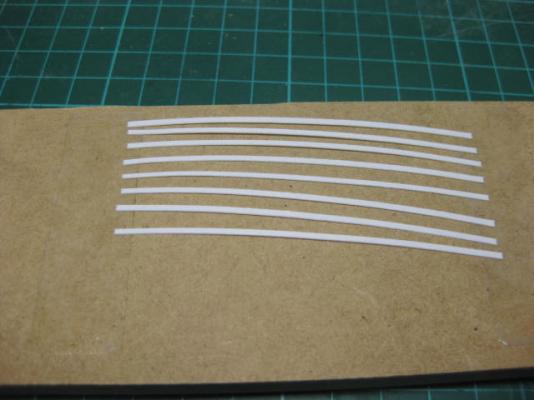
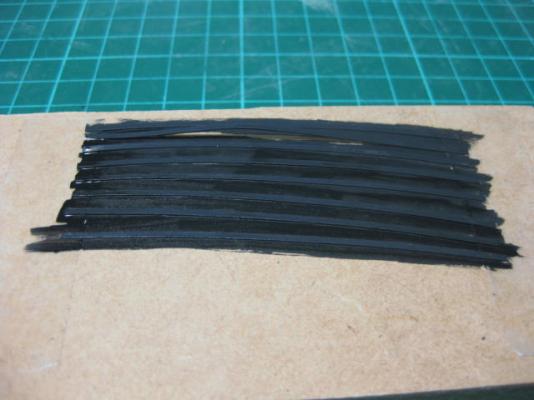
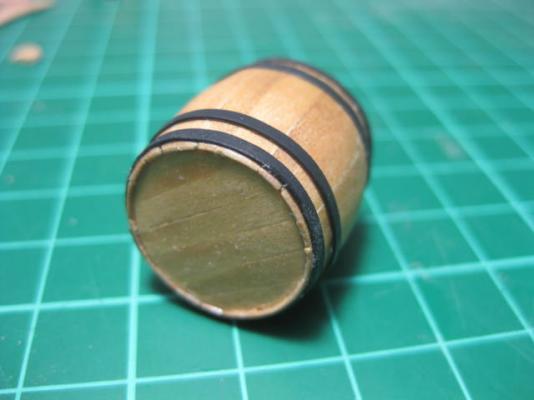
Finishing off the first barrel. I made the hoops from glossy photo copy paper. I used a French Curve to cut eight 1mm wide strips with my Xacto knife. I only took a guess as to their radius, but it turned out to be a good one (yet again ). I used double-sided tape to hold the strips down to a piece of board and painted them with acrylic matt black, being careful to do the edges as well. I used a drop of PVA to glue one end down and let that dry thoroughly. When dry I brushed a thin film of PVA to the underside of the paper and rolled it around the barrel, cleaning any residue off immediately with a cotton tip.


-
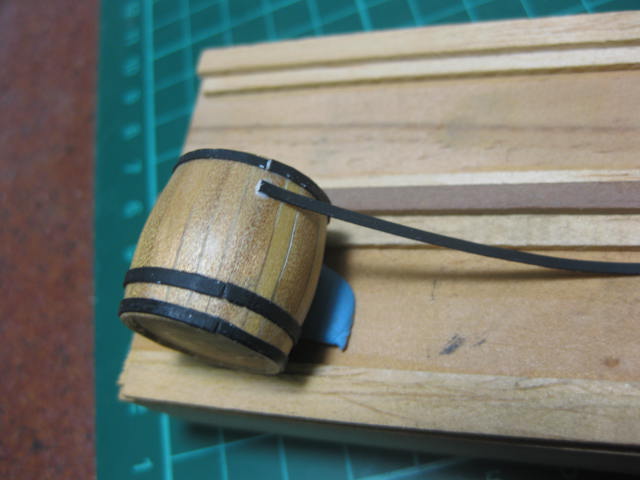
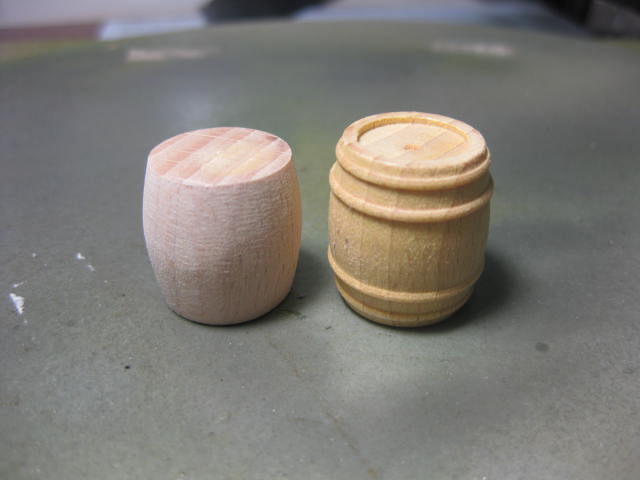
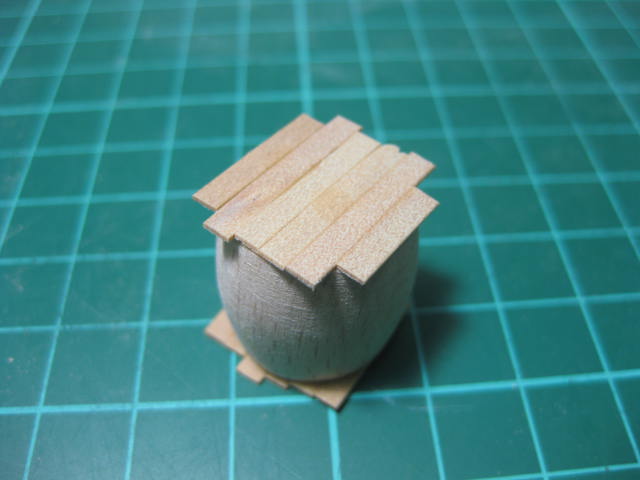
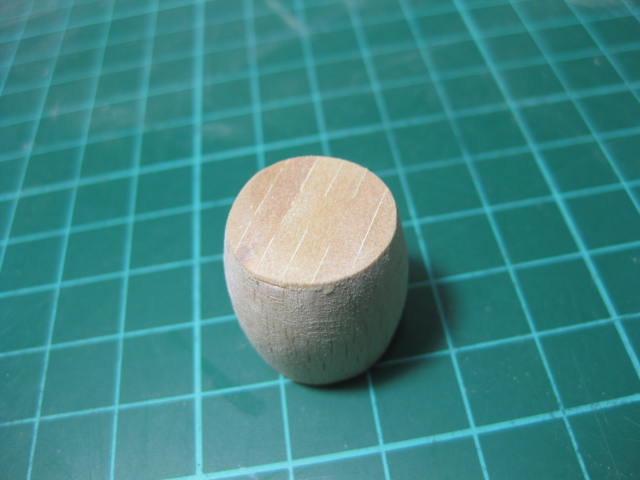
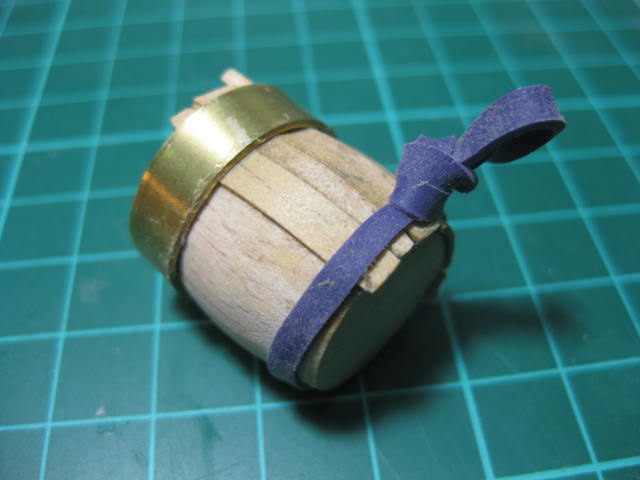
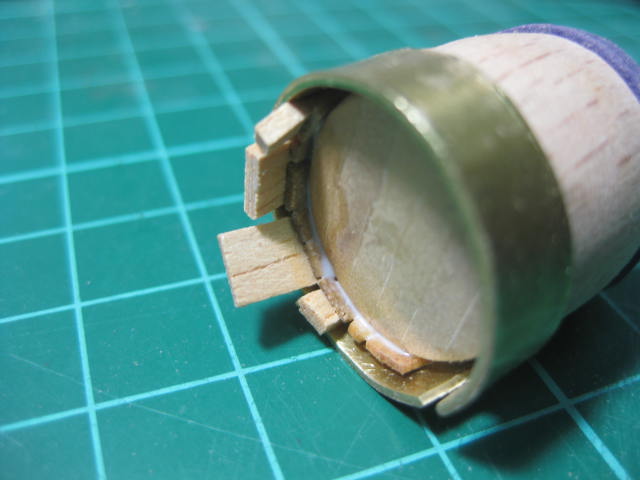
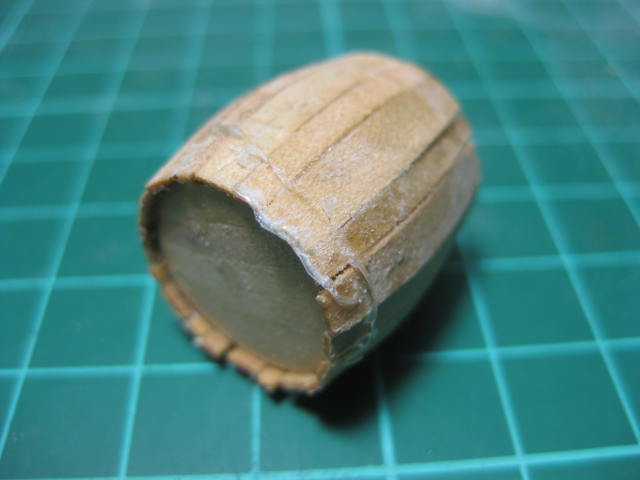
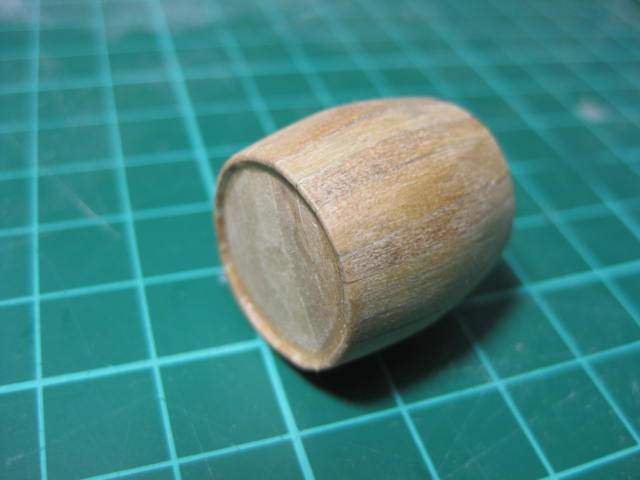
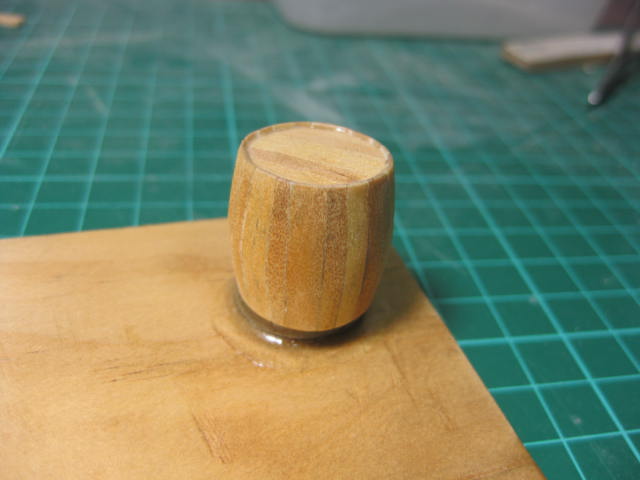
Barrels Something I'd been contemplating doing with for quite a while now - planking barrels to make them look more realistic than simply lathe-turned ones. I sanded one of the kit supplied barrels to remove the hoops and flatten down the ends of the staves. I planked top and bottom with 4mm x 0.5mm Norfolk Pine and sanded them to shape. I cut, tapered and beveled 20 staves. I deliberately made them in varying widths. I soaked them for a few minutes and clamped them into a jig to get the bend right. I made a band from 6mm x 0.8mm brass strip to hold one end of the staves whilst assembling, and used a rubber band at the other end of the barrel. I needed a wedge or two at times to hold the staves tight. How the barrel looked when I removed it from the bands - pretty YUCK . After sanding .... quite an improvement . After a coat of lacquer. Now to make the hoops.


-
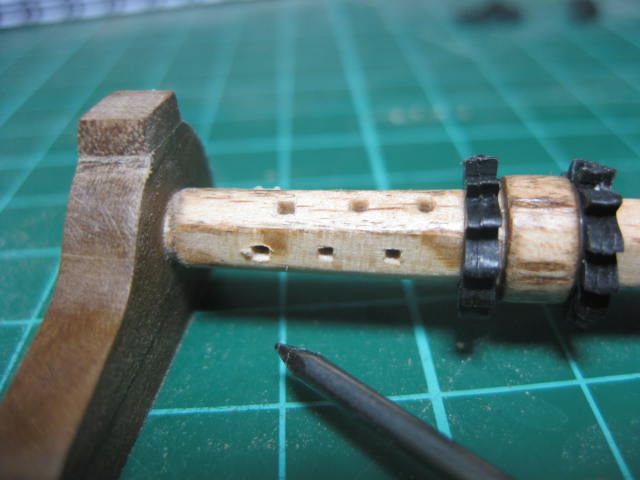
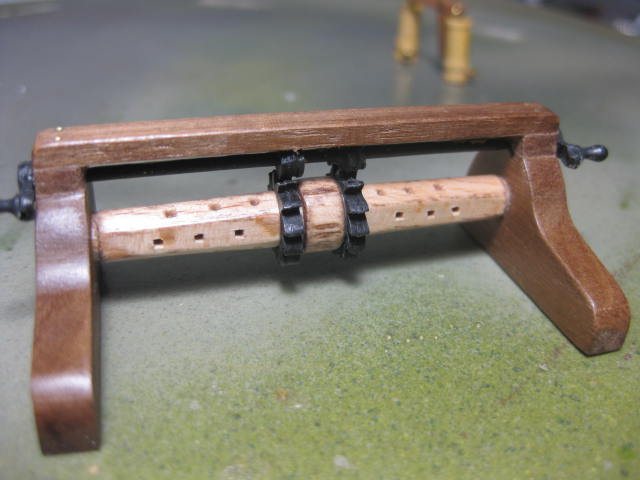
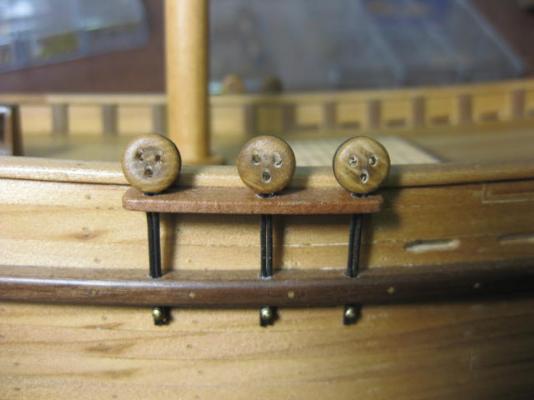
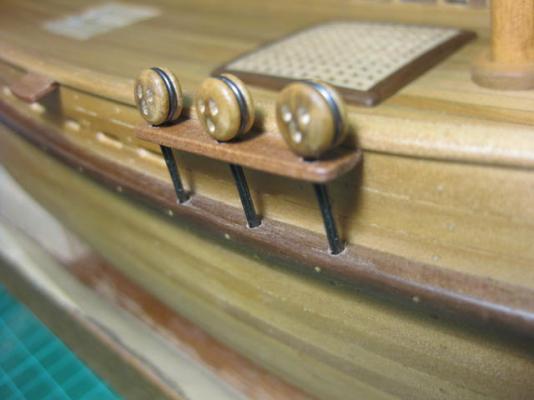
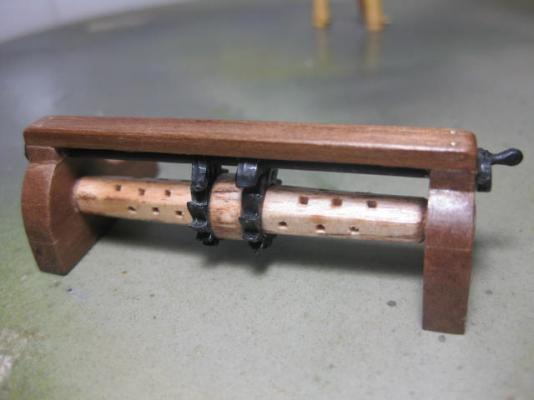
Elm Tree Pumps and Windlass I've made up the Elm Tree pumps - apart from rounding off a few corners and giving them a sand they are straight from the kit. I've also made the Windlass, but this time I DID do some scratchbuilding. I wasn't overly fussed on the pre-cut supports, so I replaced them with 5mm x 5mm Walnut that I laminated in four pieces for each end. I also reshaped the barrel into a hexagon, and drilled holes for the staves which I "squared" using a nail held in a Pinvice. I used a piece of Walnut for the top brace as well.


-
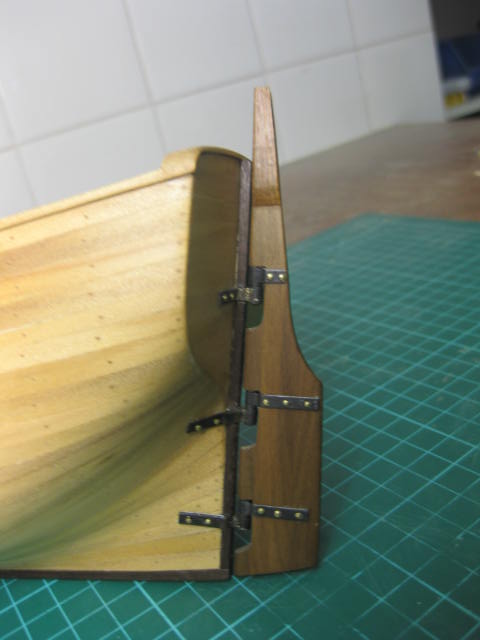
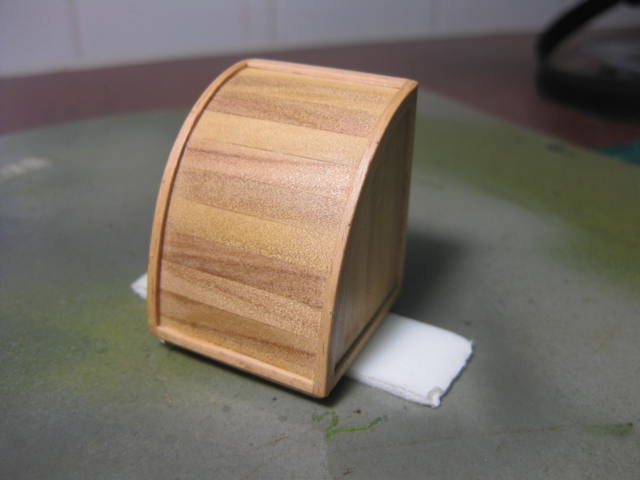
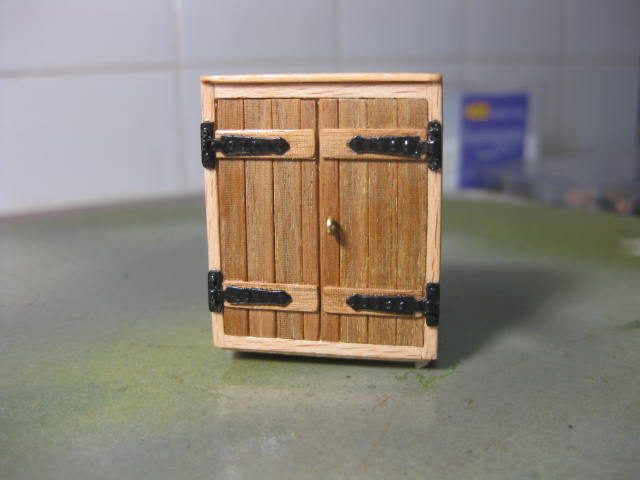
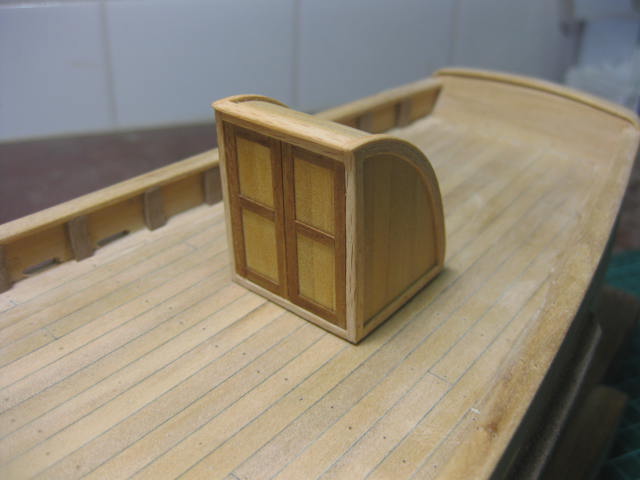
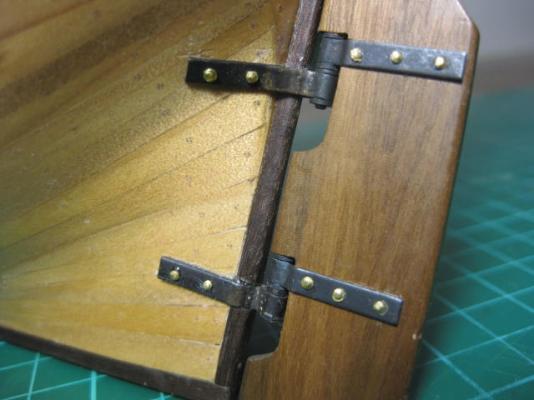
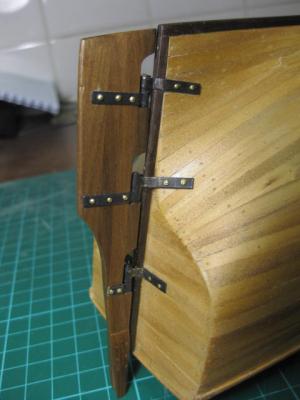
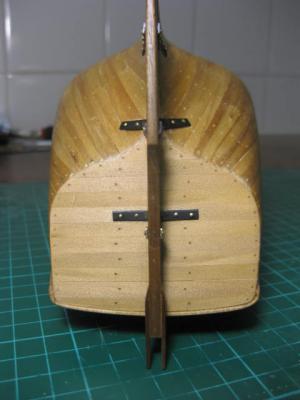
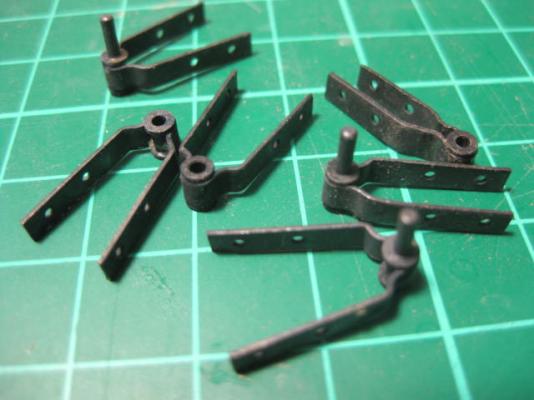
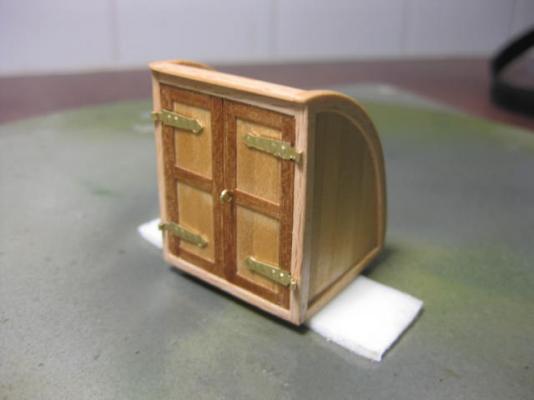
I've fitted the hinges (modified kit parts) and a simple door latch to the companionway. I may paint these matt black yet - I don't know that I like the brass that much. Previous to that I sanded the 1st coat of lacquer and applied the final one. The Matt Black hinges look a fair bit better in my opinion. I've also made up the other parts of the hinges that bolt to the frames - the kit didn't have any so I used some brass strip, drilled two holes in each and glued in some 0.8mm wire to simulate the bolt heads.


-
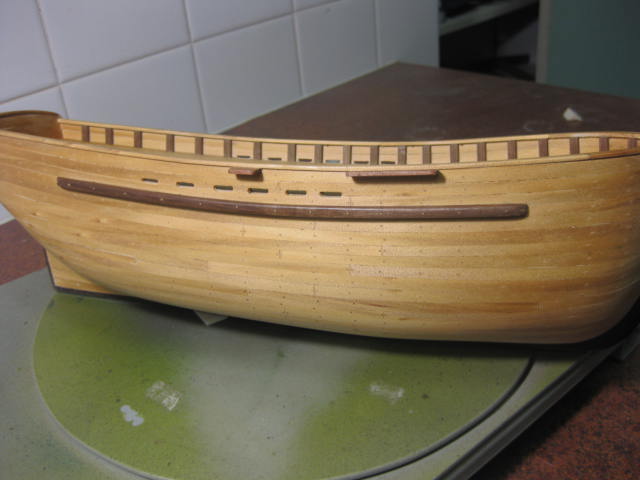
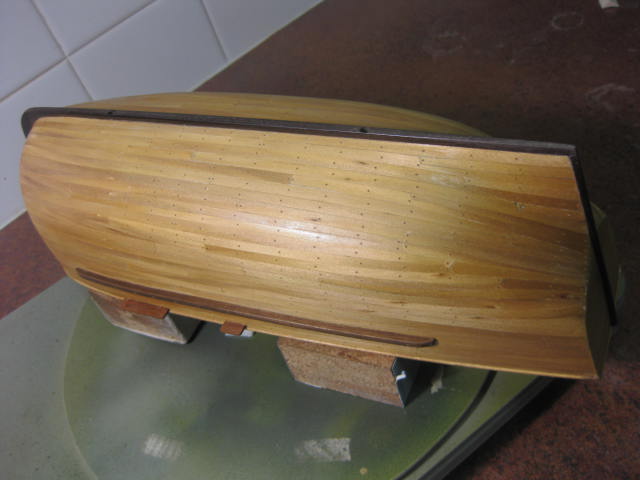
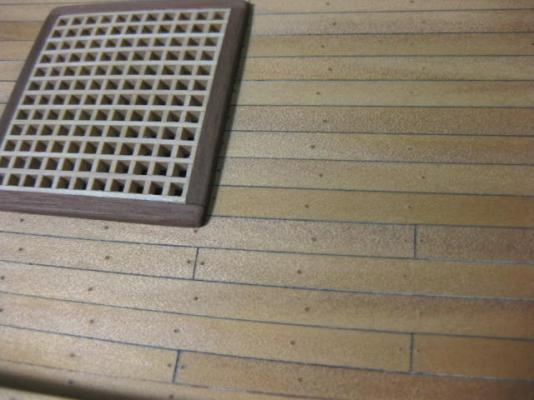
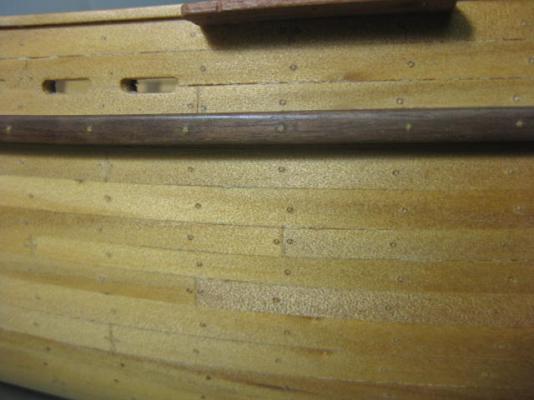
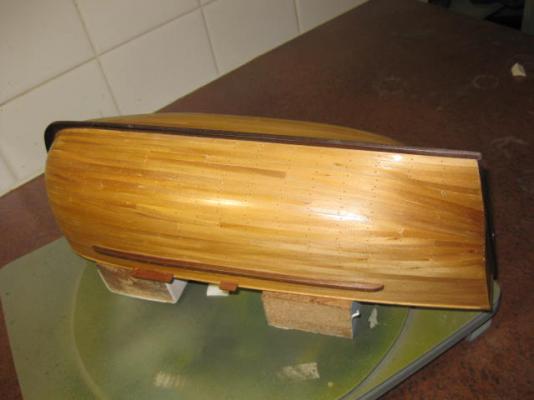
Hull Lacquered After 3 hours of sanding - foam backed 240 grit and 1000 grit paper - I've given her the first coat of lacquer. I'm rather pleased with the result . Even the treenails have come up to expectations. A couple more. I took these straight after spraying the bottom of the hull, so it's all still a bit glossy. The first pic was taken using flash - the colour of the timber looks closer to "real life" in the second one.


-
I've just given the companionway it's first coat of lacquer - I'm using Tamiya spray from a can. It seems like a cross between Matt and Satin - quite a nice effect in real life (the camera doesn't capture it all that well). There are some very marked contrasts in the colours of the Norfolk Pine - that's about how it looks in real life, although on a larger scale. The treenails are a bit of a disappointment - only visible if you look REAL hard.


- 147 replies
-
- 1
-

-
- norfolk
- modellers shipyard
- (and 1 more)