HOLIDAY DONATION DRIVE - SUPPORT MSW - DO YOUR PART TO KEEP THIS GREAT FORUM GOING! (Only 53 donations so far out of 49,000 members - C'mon guys!)
×


Dan Vadas
-
Posts
3,261 -
Joined
-
Last visited
Content Type
Profiles
Forums
Gallery
Events
Everything posted by Dan Vadas
-
I'd think horizontally Toni. Danny
-
Beats me John - maybe they decided there was a better way to use the very limited space under the forecastle after they'd built the first dozen or so "Swans". Note that there are also two extra doors in the forecastle bulkhead (behind the Bitts) to give outside access to the firebox. Danny
-
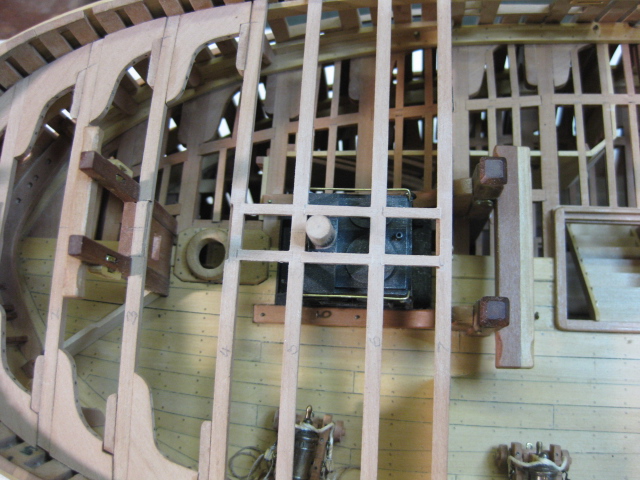
Thanks Aldo, Kevin and Toni . Steam Grating Coamings There are two Steam Gratings and a Cowl Cover over the galley stove. These are shown in a different configuration to most of the other Swans, as Vulture's stove is facing the opposite way to them. I constructed the coamings the same way I did all the previous ones, so there is no point showing that again. The only thing of note is the much larger "roundup" on the athwartships head ledges : Danny

-
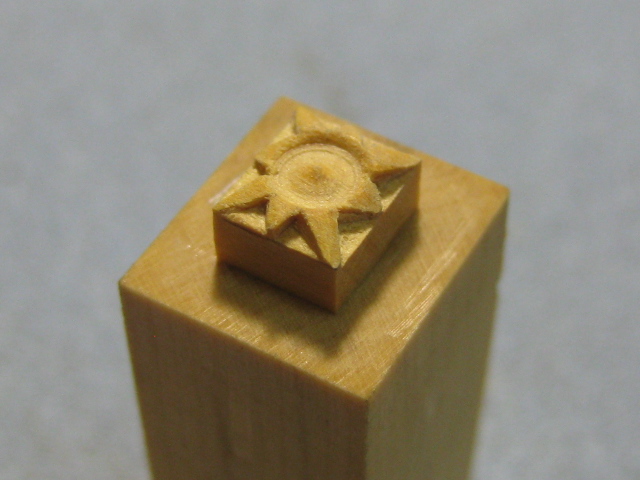
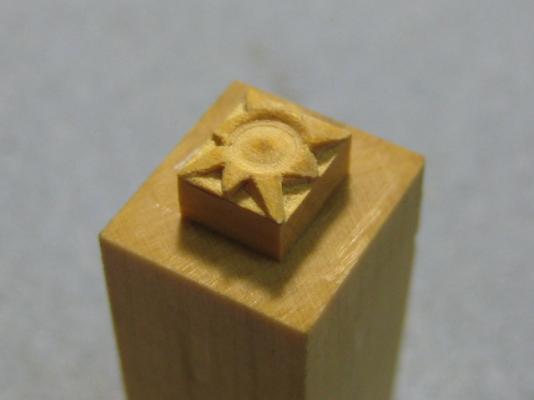
No John - Vulture has the "simple" Star design on the Cathead Caps. Thank God . Danny
-
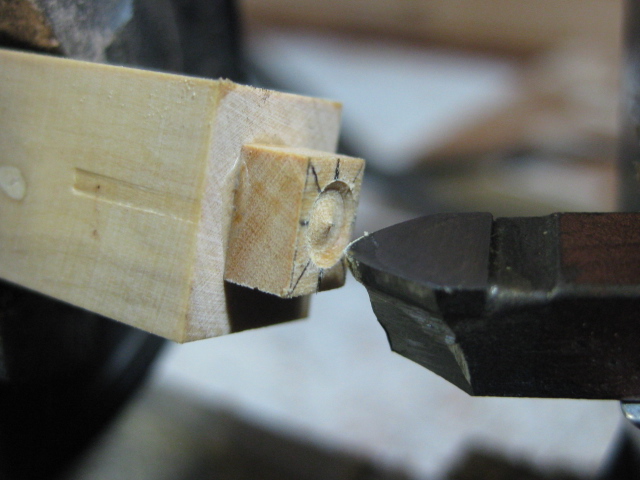
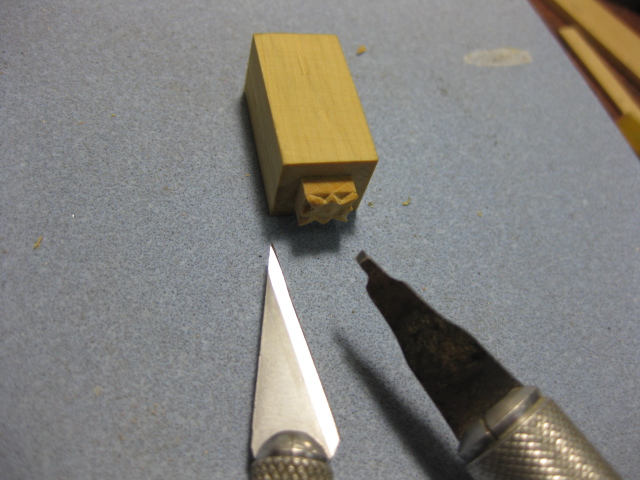
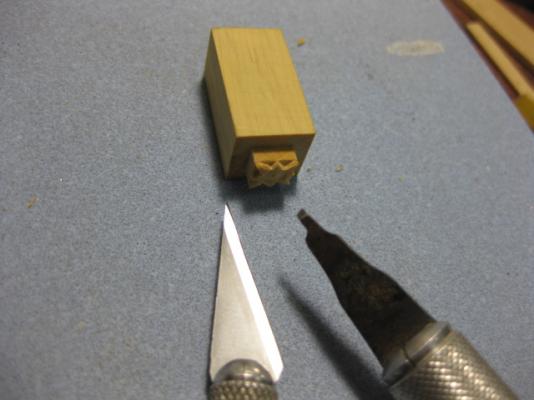
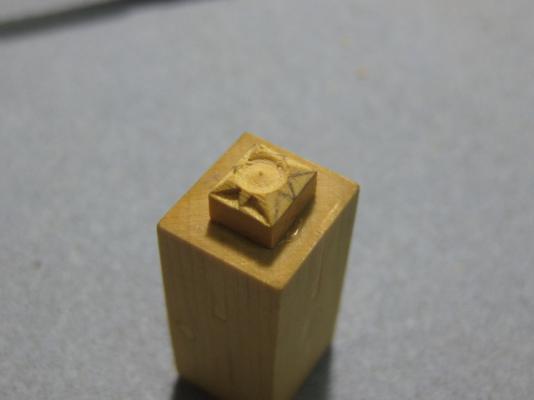
John, you're forgiven - if I was building at 1:96 scale as well I'd have faked them too . Thank you Brian, Aldo, Sjors, David, Pat and Grant . Cathead Caps I mentioned the Cathead Caps a couple of posts ago - here's how I made them, which is a bit different to the method described in TFFM. First I cut the two pieces for the caps from English Box. I glued these two pieces to a block of scrap to make handling/turning/carving a lot easier. I turned the central boss into each piece : Next I sanded the four edges to an angle to taper the "rays" and marked them out : I carved out the sections between each ray with an Xacto and my favorite modified Chiselpoint : Last jobs were to cut the cap off the "holder" with the table saw, glue the cap to the end of the cathead and sand the edges at the appropriate angles. The catheads are now glued into the ship. Note that the cap is slightly larger than the cathead. Please excuse the poor quality of this pic - I had four attempts at taking it and this was the best I could do (bad lighting at that angle) : Danny

-
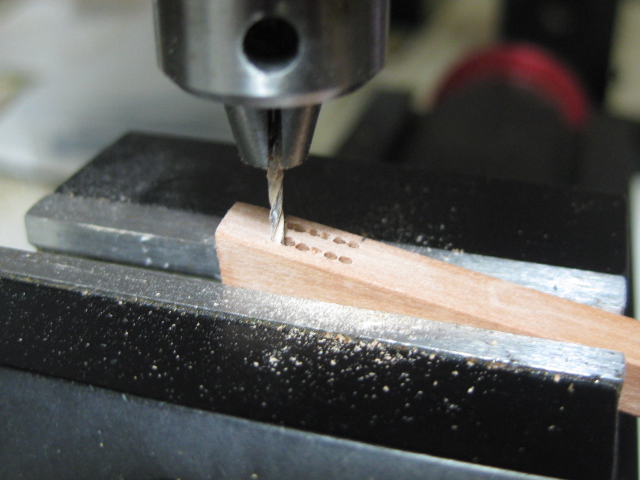
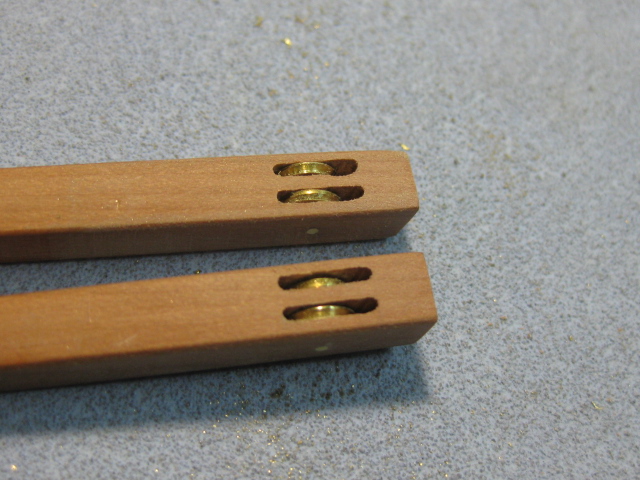
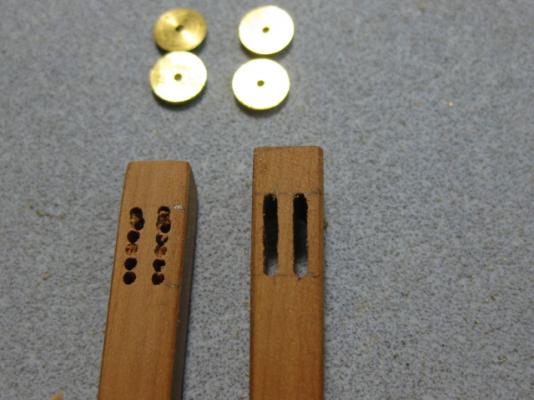
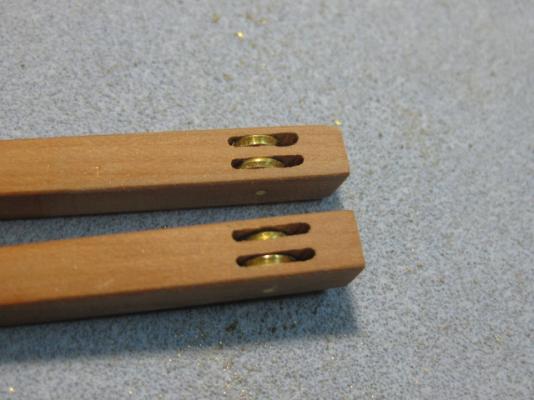
Thanks Joe, Aldo and John. I turned the 4.5mm x 0.8mm sheaves on the lathe. To cut the slots for the sheaves into the catheads I first drilled a series of 0.9mm holes on the mill. The slots are drilled in a vertical plane, not at right angles to the arms of the catheads so they were set up to the same angles as on the ship : After drilling the holes I used the mill to "join the dots". This needed a lot of careful passes for each slot - I went deeper in 0.5mm increments - to avoid breaking the drill. The results were pretty good : The sheaves fitted up. A drop of CA holds the pins, and the sheaves move freely : Danny

-
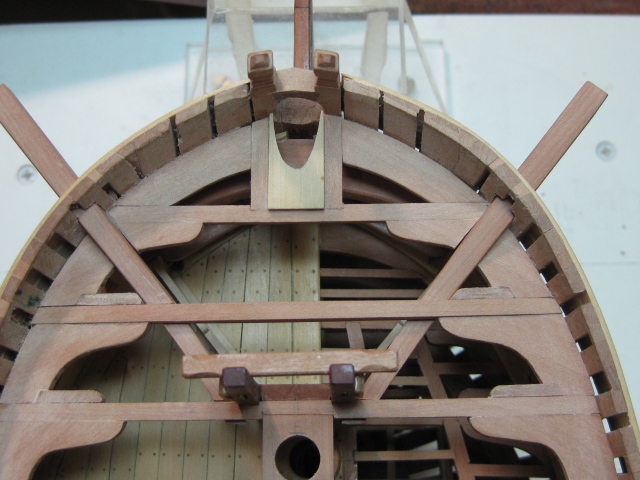
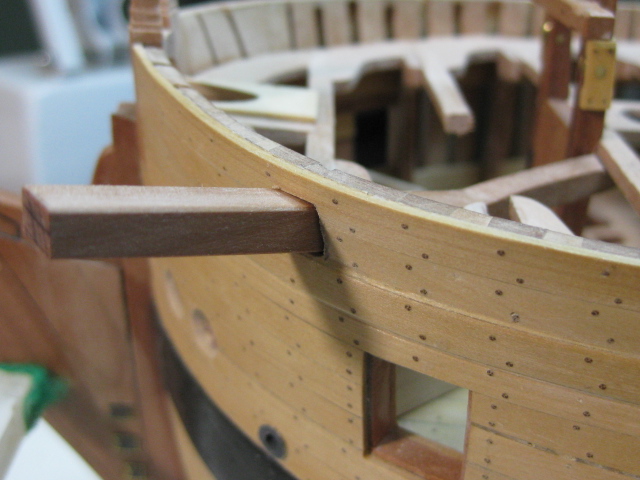
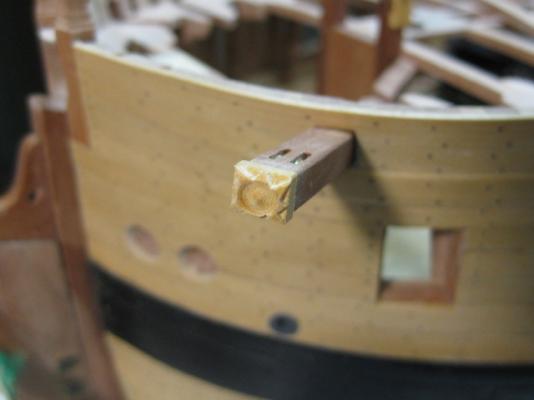
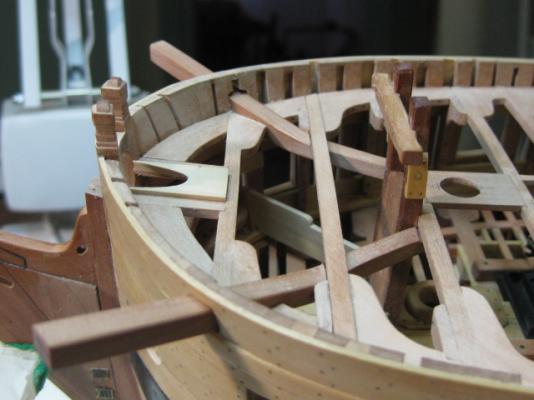
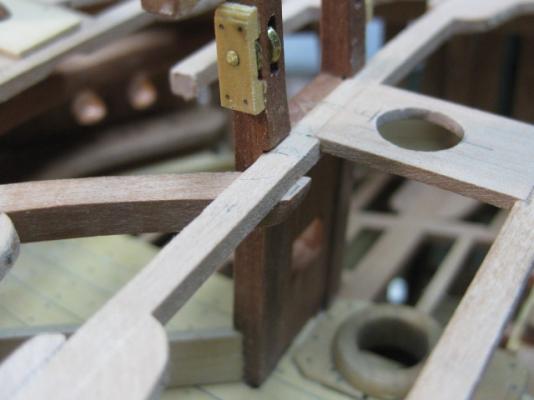
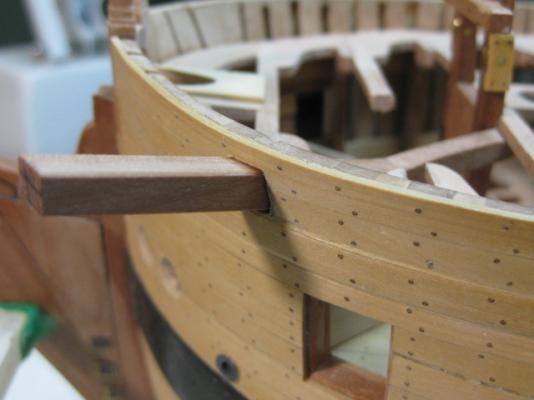
Catheads Fitted Both Catheads have now been fitted - only "dry" for the moment. I will cut the sheave holes and fit the sheaves off the ship before gluing them in. I also need to make the Cathead Caps, more about them shortly. I surprised myself with how accurately they finished up - not even a fraction of a millimetre difference from the centre line or the baseboard : The notch for beam #2, and the beam dry-fitted : Danny


-
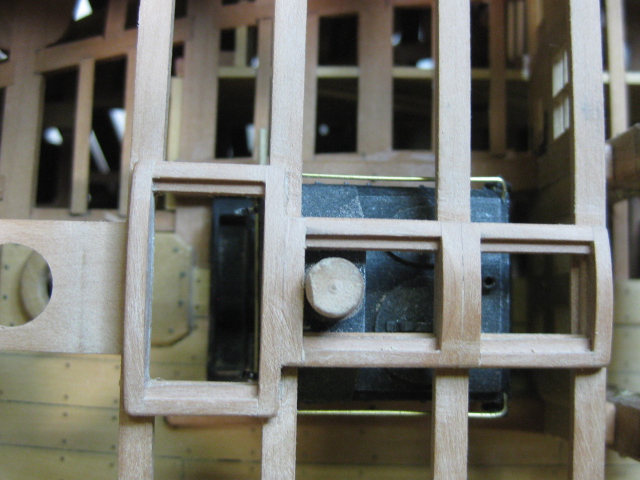
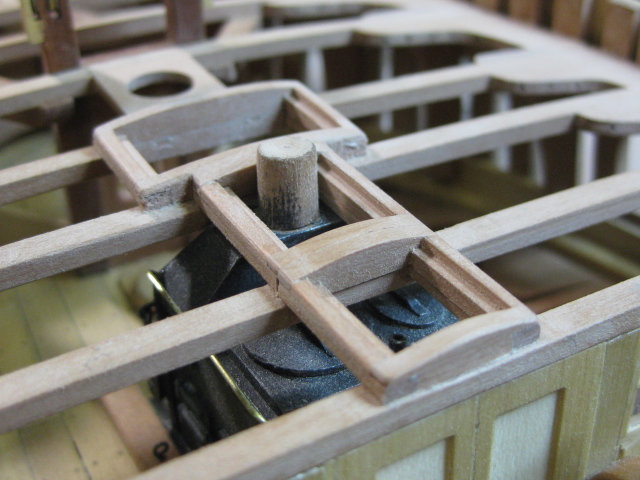
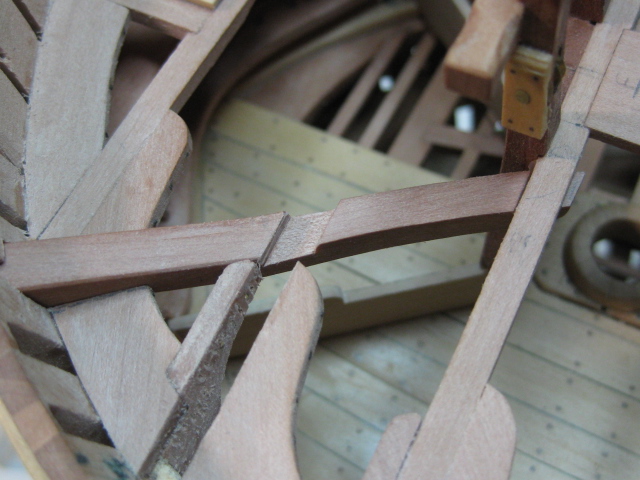
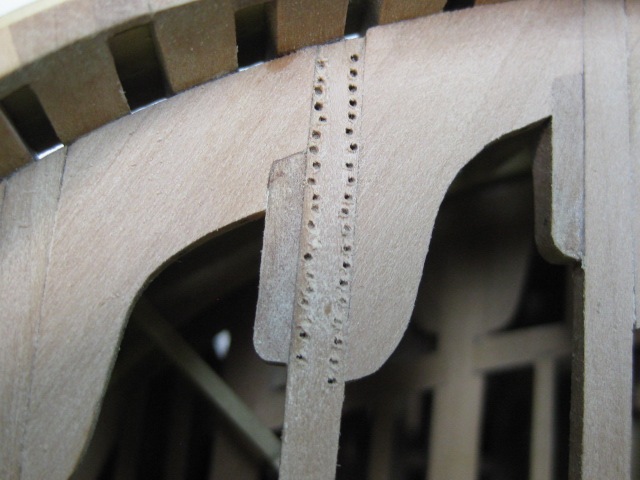
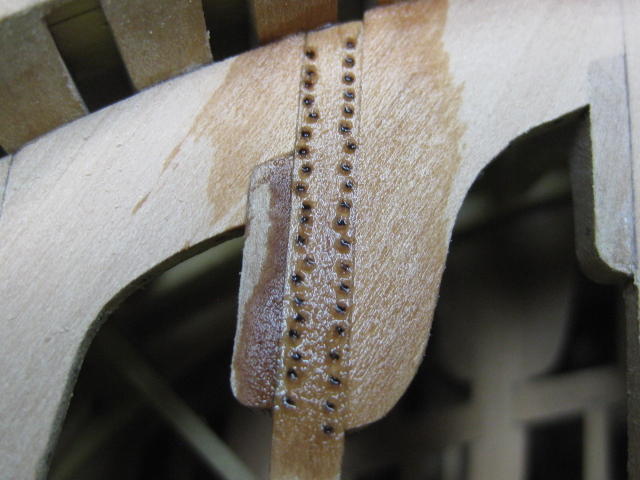
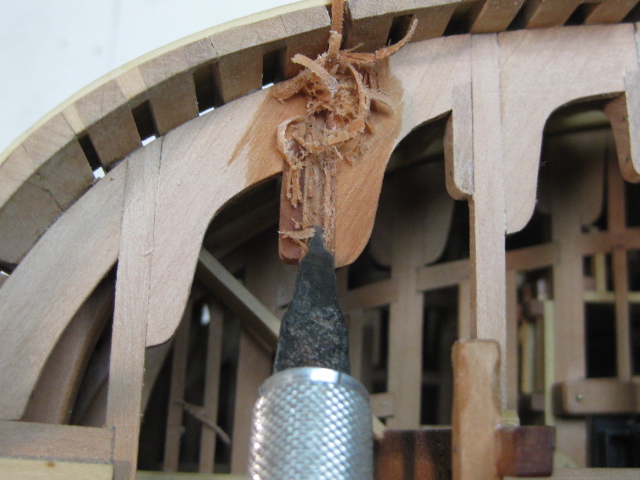
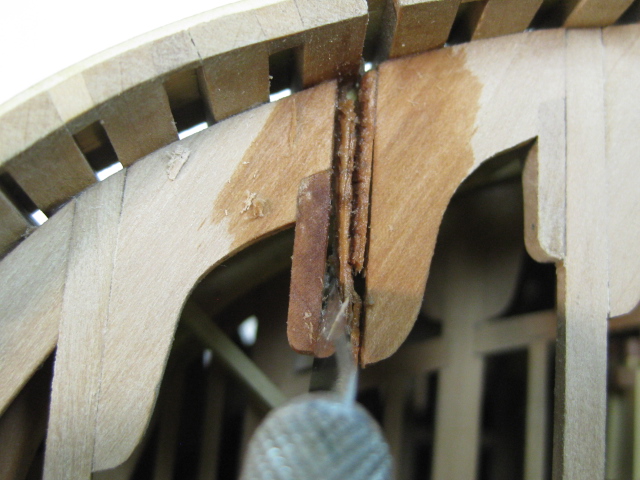
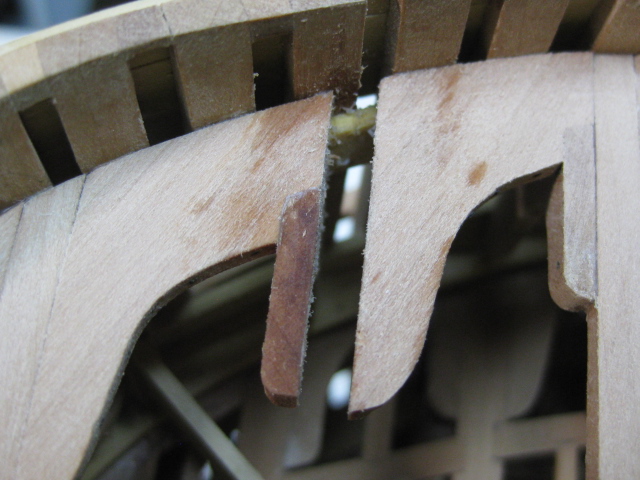
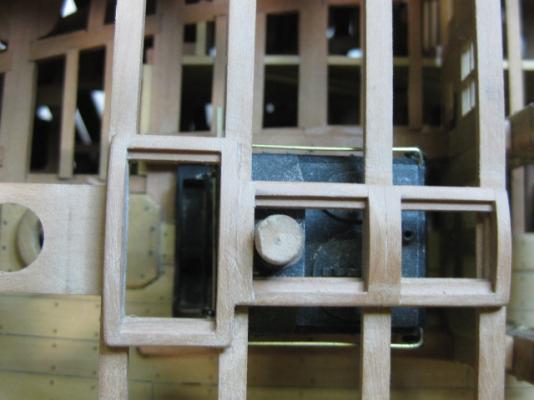
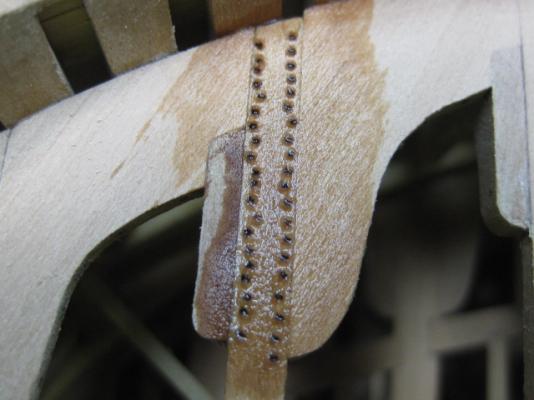
Removing a Beam Just a small "tutorial" on how I safely removed the beam. This method can be applied in quite a variety of situations - I did a similar thing when I snapped off the Knee of the Head a while ago (see HERE). Step 1. I cut the beam in half so that I could work on each end independently. Step 2. I drilled a series of holes close to the edge of the beam on both sides. This helps the Isopropyl Alcohol to penetrate into the glued joints more efficiently : Step 3. Using a narrowed Xacto chisel pointed blade I removed most of the material from the middle of the beam : Step 4. A #11 Xacto blade was used to cut along the glue joint. Plenty of Isopropyl was applied before and during this step to completely soften the glue. The pieces just about fall out by themselves with a minimum of cutting. The knife blade is used more as a lever than a cutting instrument : The result after a bit of cleaning up with a blade. A final sanding can be done after about 1/2 an hour when the Isopropyl has completely dried out : Danny


-
Thanks for the compliments and the votes of confidence in my ability Sherry, Ben, John, Adam, Dave, Aldo, Grant, Druxey and Brian . Yeah John - just a minor annoyance. There wasn't any warning in TFFM Vol 2, and I notice that Greg didn't even fit the catheads on his model so there weren't any progress pics in Vol 3 to alert me either . A razor saw, Xacto knife and square needle file Brian. Danny
-
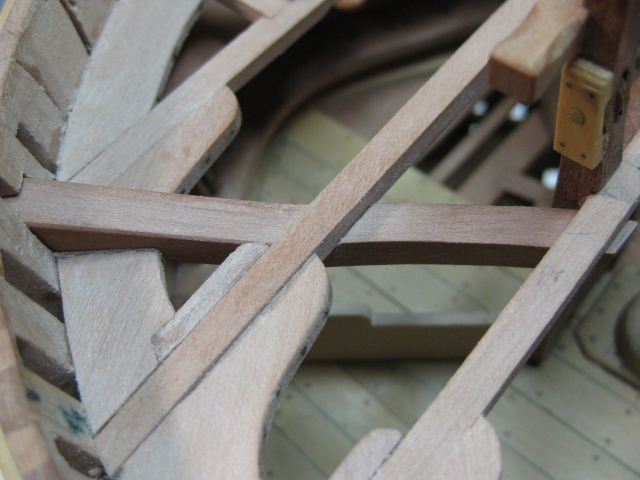
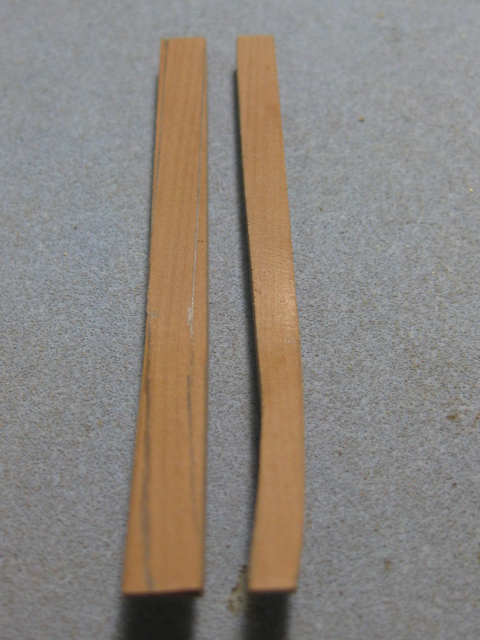
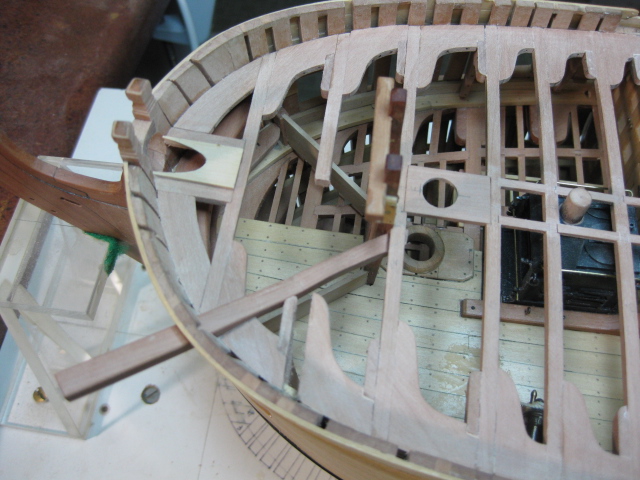
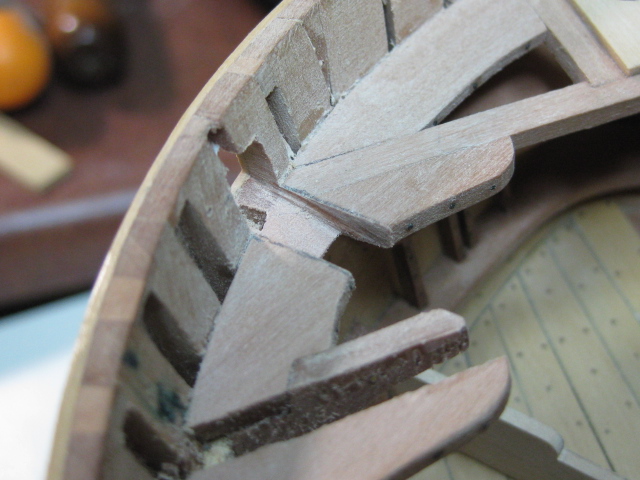
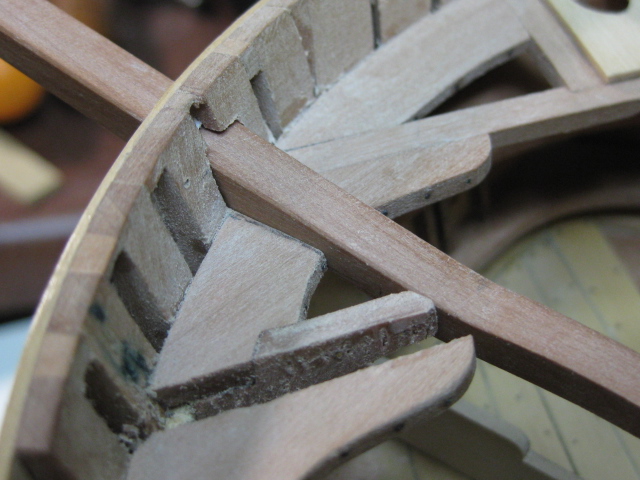
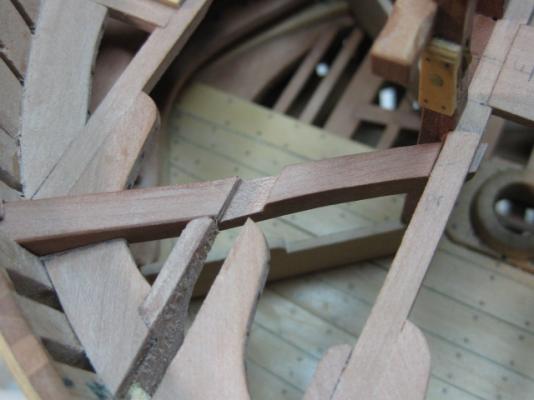
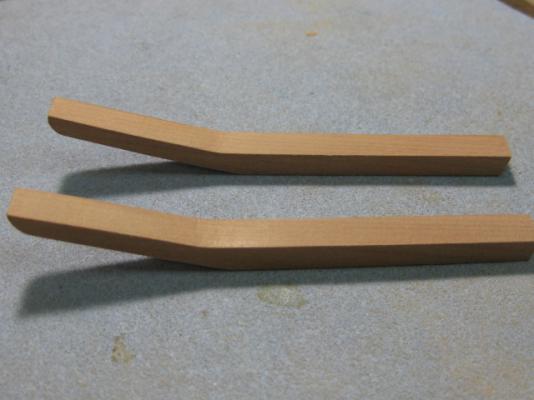
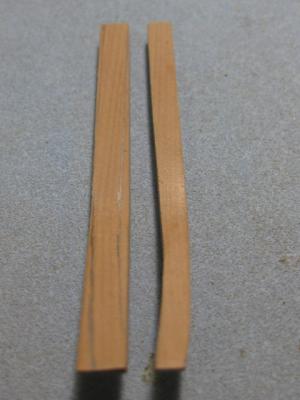
Thank you John, Corkbottle and Randy. Catheads The Catheads are a piece of work to make and fit. I used some 12" (scale) thick Swiss Pear to shape the curvature beneath the deck into them: A word of warning to others building one of these ships. DO NOT install Forecastle Beam #2 before fitting the Catheads - it's impossible to get the catheads underneath the beam when it has been glued in. I had to remove the beam, which meant totally destroying it. I will fit a new beam when all is completed : A lot of careful marking, cutting and filing was needed to get the cathead through the bulwark. The first Lodging Knee also needs cutting/filing through on an angle : The Cat Tail is notched beneath Beams 2 and 3 : Danny


-
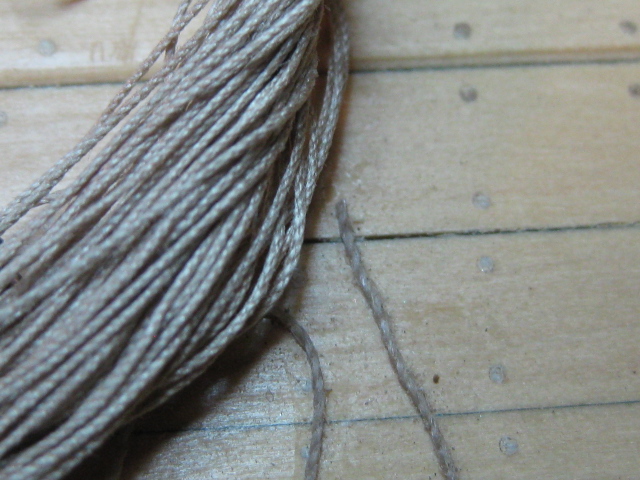
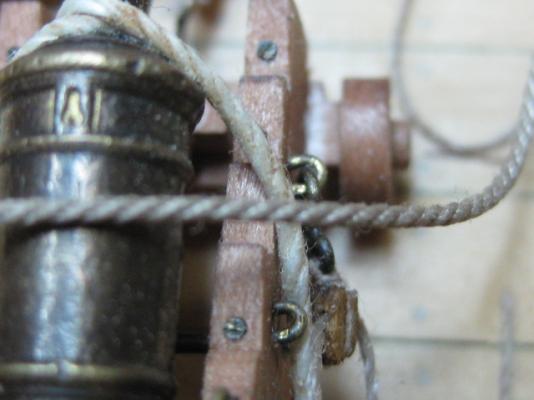
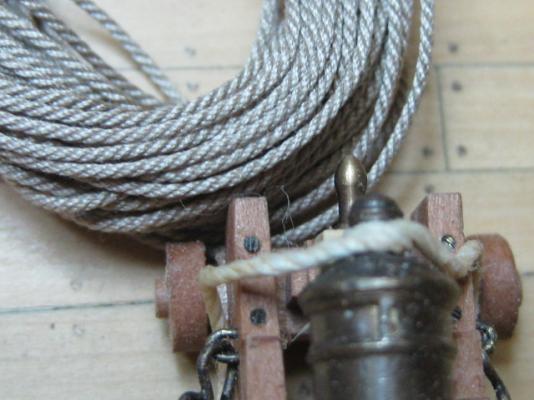
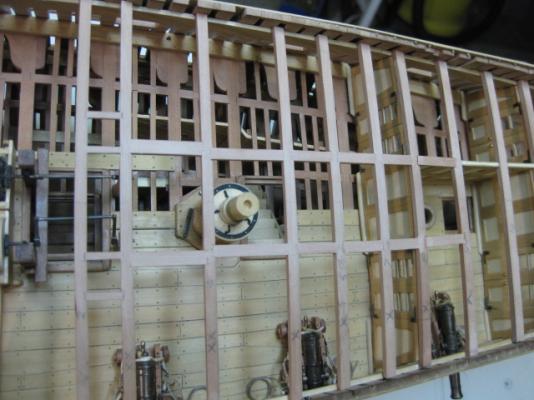
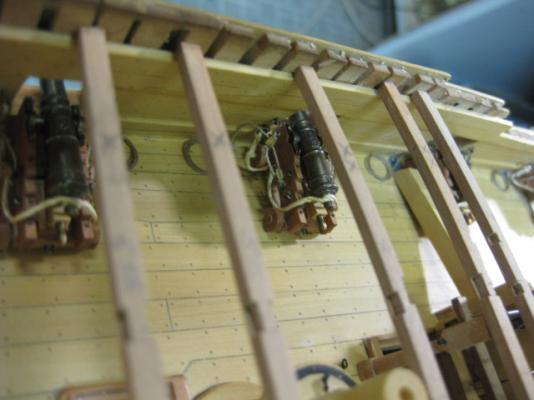
And thanks go to Borge, Brian, Sjors, David, John and Aldo. Also all those that used the "Like" button - much appreciated. It's not as difficult as it looks Aldo. Thin card templates to get the shape approximately right, and then a little finessing with a sanding stick and/or Xacto knife. On another note, the Rigging Line I ordered from Chuck a bit over a week ago arrived today - WOW, great stuff. I thought the line I'd used on my guns was reasonably good, but it's not even in the same ball-park . This is Chuck's (three-strand) 0.2mm line for the Tackles compared to 2-strand Guterman thread : And 0.63mm for the Breeching : Needless to say, the guns will be re-rigged. Danny

-
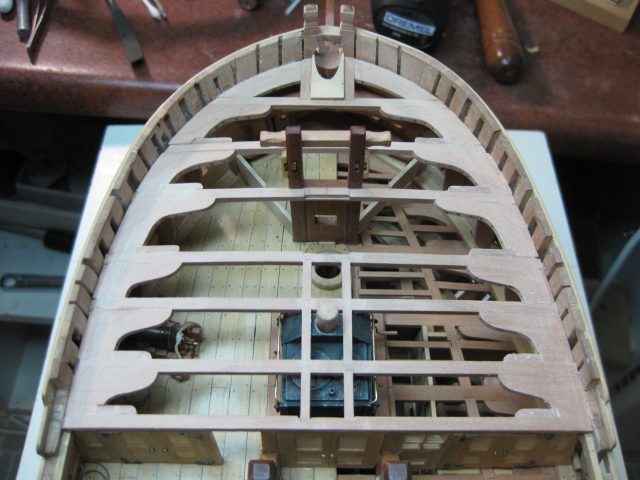
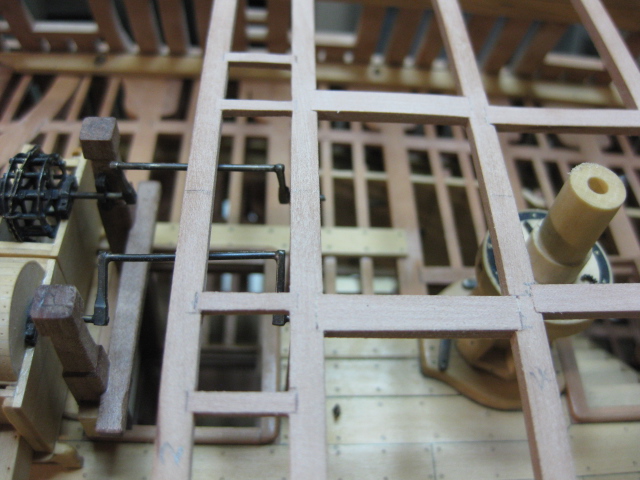
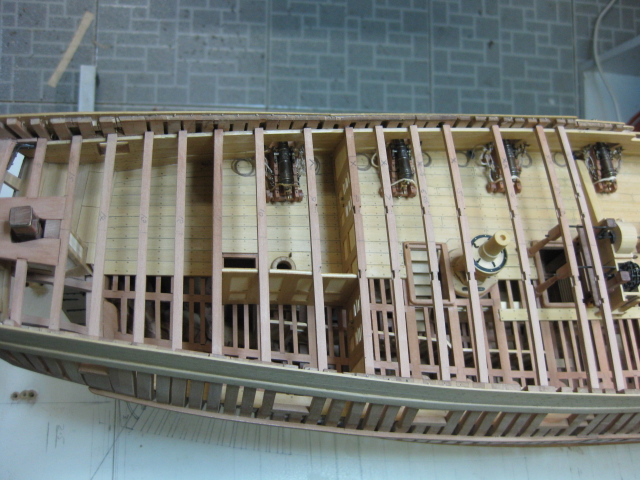
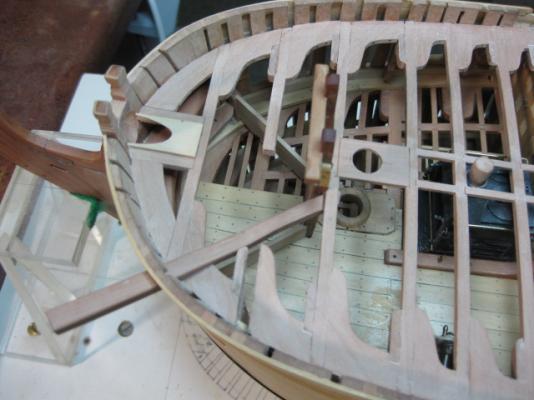
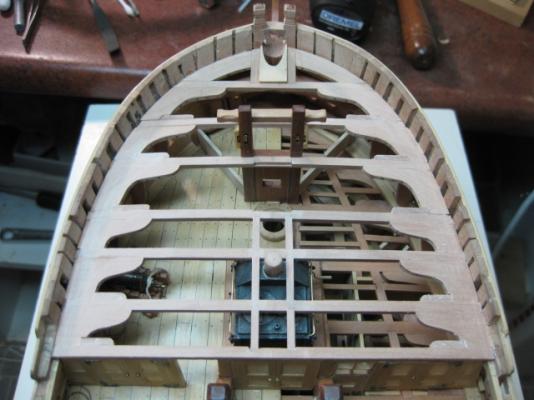
Forecastle Knees I haven't managed to do a great deal lately - too much "bill-paying work" getting in the way . I've fitted all the Forecastle deck knees, both Hanging and Lodging. Note that there is no hanging knee on beam #5 as it is directly above the first gunport. I only need to make the Foremast Partner and the forecastle will be ready for planking : Danny
-
Thanks very much Allan, John, Aldo, Bryan, Alex, Nils and Duffer. Yep, YEARS Allan . Bryan - thank you and you're most welcome . Alex - yes they are your gun barrels, and they turned out just as good as I expected they would . Perhaps just one or two sails Nils - I don't want to detract TOO much from the woodwork and rigging. Welcome to my Log Duffer, and I'm looking forward to following yours when you get started on your Vulture. At the moment I have three other ships (two Victorys and a Mississippi Riverboat) to finish off for a couple of families who have lost their ship builder fathers - that will take a while. Danny
-
I didn't realize sanity was a prerequisite for naming a ship . Danny
-
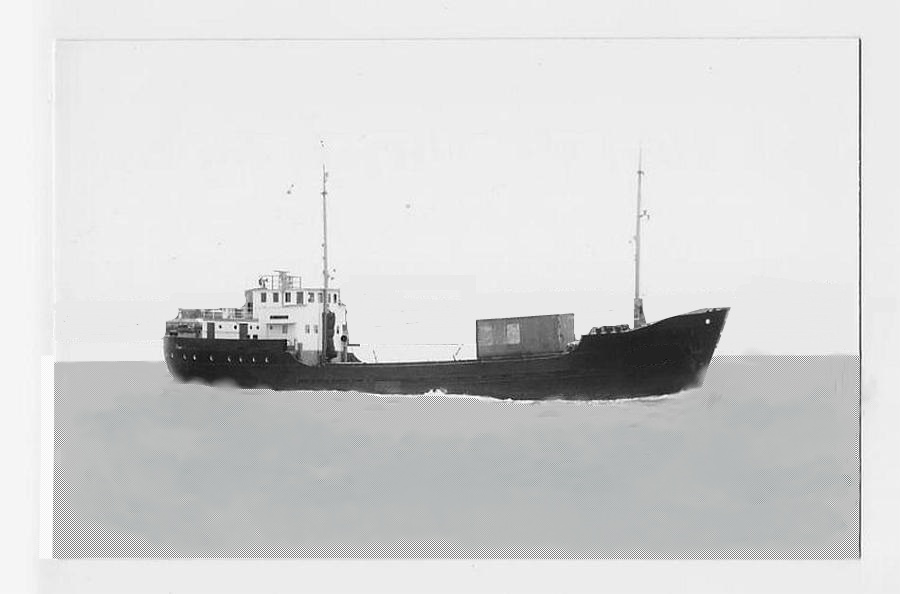
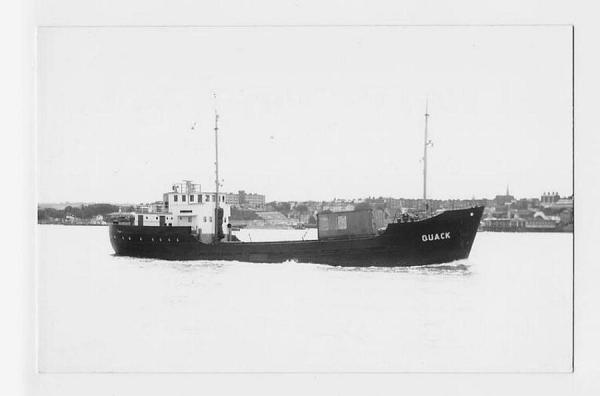
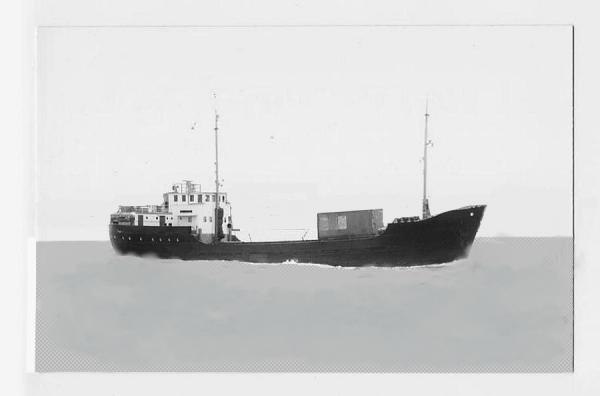
Good work David - she is the "Quack". I couldn't pass up a name like that . Here's the original I found : Danny
-
More clues : Built by Vos in 1956 at Groningen Yard. 350 tons. Danny
-
No takers yet? A clue - Sounds like Duck. Danny
-
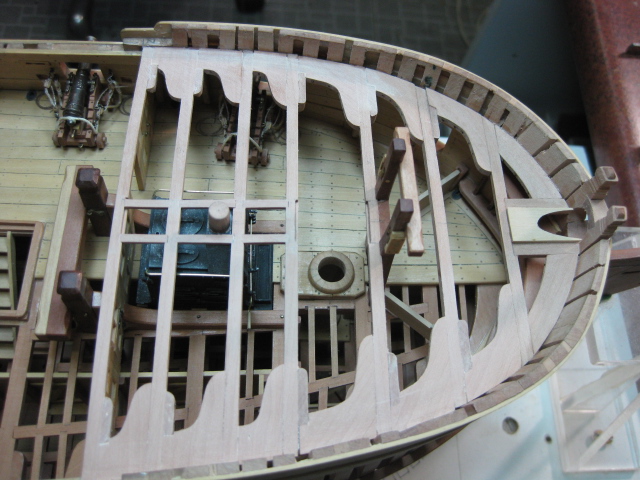
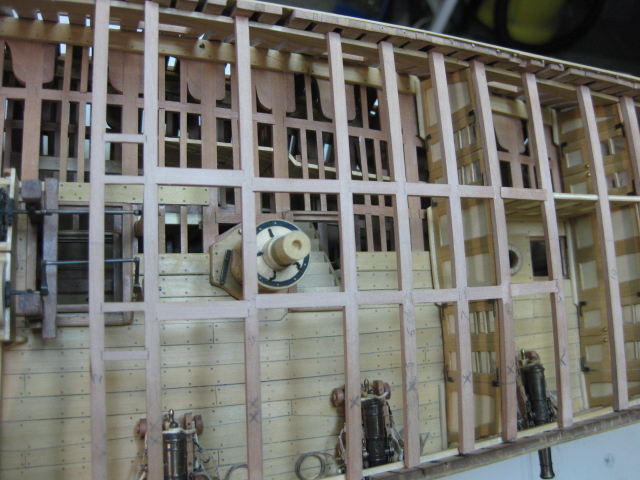
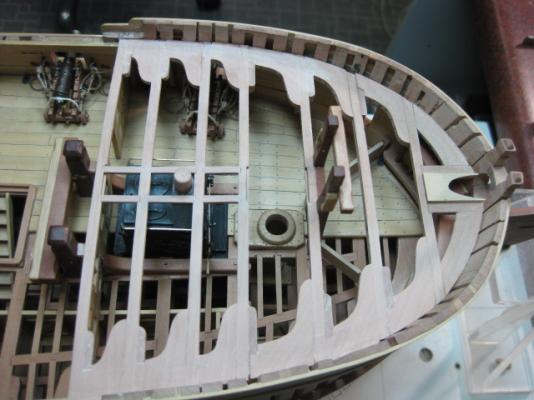
Forecastle and Quarterdeck Carlings There are only a few Carlings on both the Forecastle and Quarterdeck, unlike the lower decks. These mainly support such things as Steam Gratings on the Forecastle and the upper Capstan Step, a Companion and a few Scuttles on the Quarterdeck. Danny


-
Thanks for looking in John, Mark, Sjors and Grant. I had a great time at the Port Macquarie Model Show (pics HERE) and also at my "hometown" show at Newcastle last weekend (pics were taken by Janos ). Laman, thanks for the advice but I was intending to do just as you suggested . The guns can still be retracted enough to clear the port lids, I have only spot-glued them in position for the two shows mentioned above. In fact I am going to re-rig the four in the waist (at least) as I wasn't all that happy about the line I used. I've ordered some very nice line from Chuck's "Syren Models" site which should arrive in the next day or so. Danny
-
Thanks David. Here's the one I Googled - Dresden , the only sister ship of the Emden. Next from me, lots of luck : Danny
-
SMS Dresden? Danny
-
That looks a LOT better Sjors - well done . Good tip from Grant about tying every 5th one first as well. Danny
-
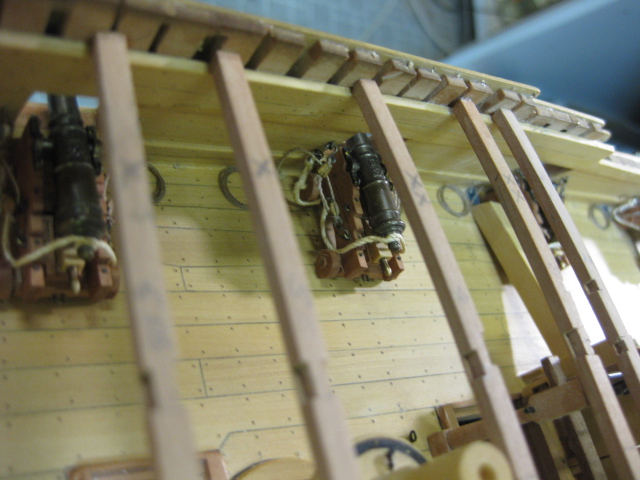
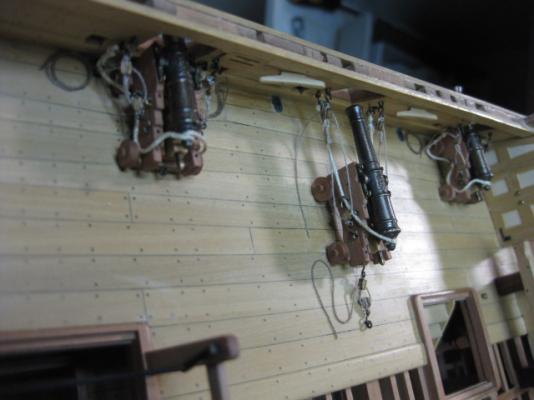
Thanks very much Sjors, Brian, Pat, Frank, John, Adeline, Adam, Kevin and Patrick - your comments are always appreciated. Sjors, any time you're "down under' you can certainly drop in . Welcome home (again) John . Adeline - you can order the barrels, but the rest is up to you . Some pics of the eight completed guns with their rigging. I've also glued in the remaining deck beams : This weekend I'm taking Vulture to a model show at Port Macquarie - I took her up there twelve months ago and have made considerable progress since then. Danny

-
Hi Sjors, It looks like you've pulled the extra ratlines a bit too tight - the aft shroud has distorted quite a lot. The shrouds should be VERY tight before you tie the ratlines, or it will always happen. Can you still adjust the shrouds tighter? Danny