Dan Vadas
-
Posts
3,261 -
Joined
-
Last visited
Content Type
Profiles
Forums
Gallery
Events
Everything posted by Dan Vadas
-
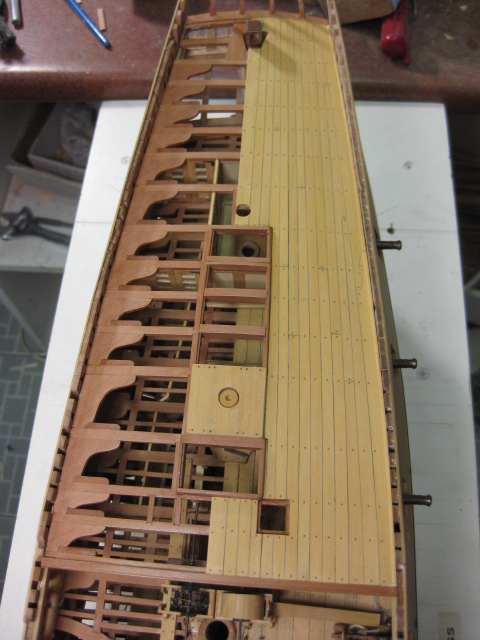
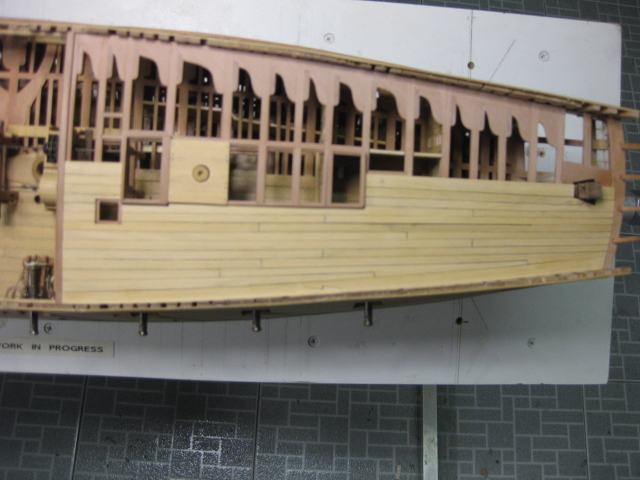
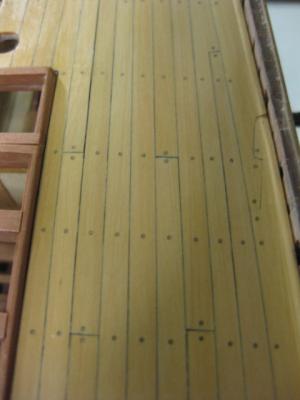
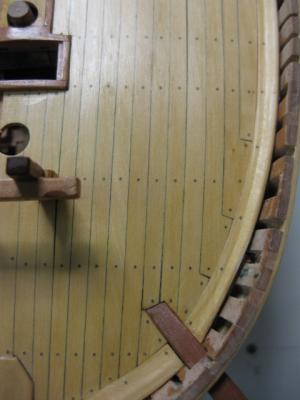
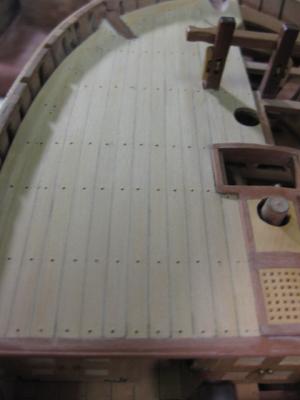
Thanks again Michael and E&T. The Treenailing is all finished as far as the decks are concerned. I've filed all the "nails" down with a Riffler File and sanded both decks with 600 grit paper. They have received their first coat of Minwax Wipe-on Poly : Next will come the Timberheads and Swivel Gun Mounts, along with the Caprails and Bulwark Planking. These will add a much more "finished" look to the upper hull. Danny

-
Thank you Brian, Grant, Rowan, Jan, Pat, Jeff, Duffer, Ben, Joe, Adrieke and E&T . As Druxey pointed out the maximum width for most planks for this period was 10". There were a few exceptions such as the King Planks which could be 12" - 13". The Top and Butt Shifted planks for the Upper (Gun) Deck were of course wider than the "normal" planks at their widest point (up to 12"). The Forecastle and Quarterdeck on this ship didn't carry a lot of weight (no guns) and used narrower (and thinner) planks than the lower decks. It sounds feasible that "heavy duty" vessels like those that were intended for Polar Exploration would have been double-fastened for narrower width planks, but I'm no authority on that point. Danny
-
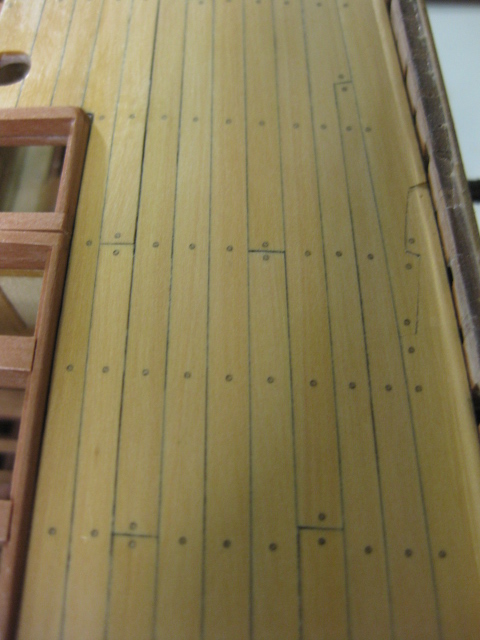
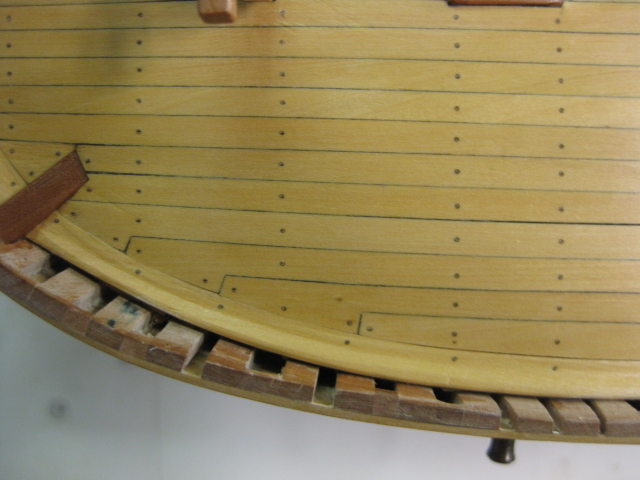
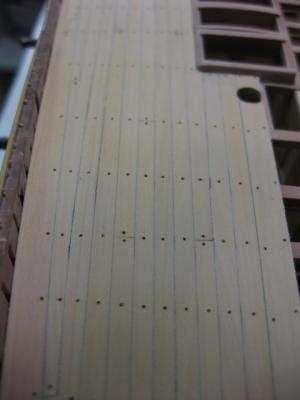
Thanks for the kind words Sherry, John, John and Popeye . I've marked and drilled the holes for the treenails on both decks. As most of the planks (apart from the Kingplank) are no wider than 8" they only get one treenail. Danny
-
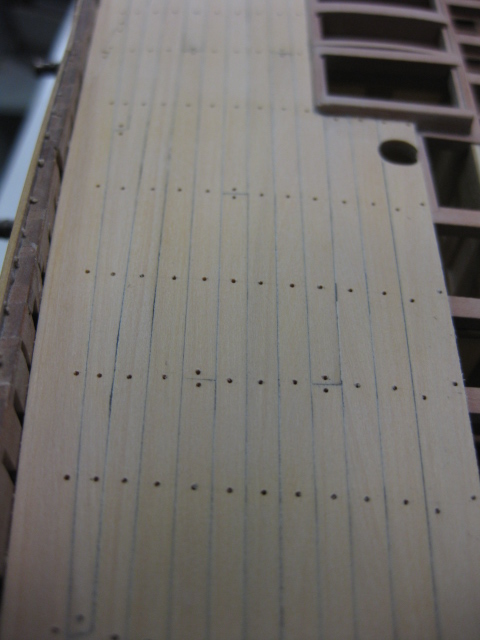
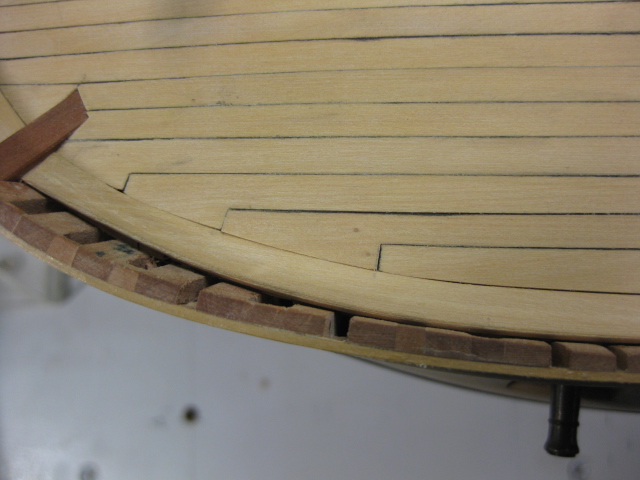
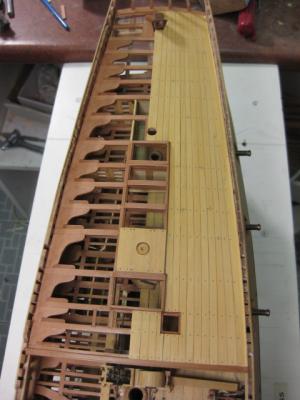
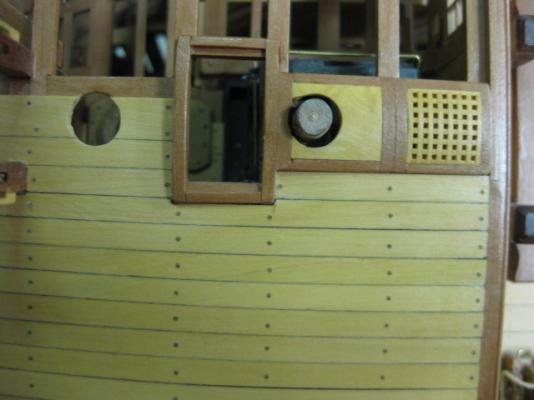
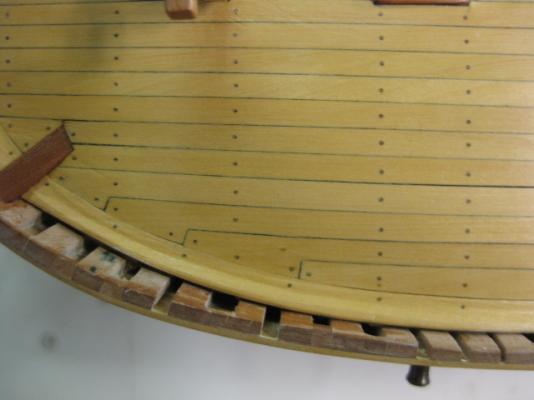
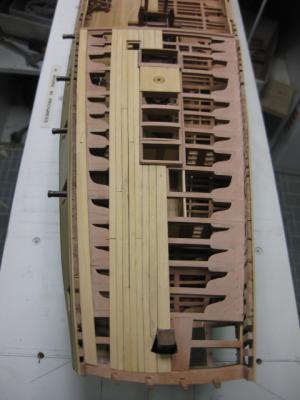
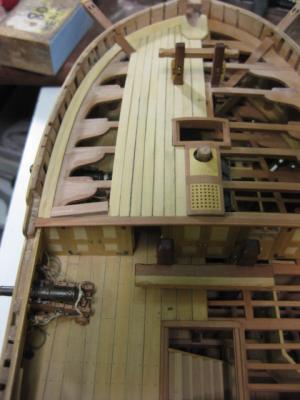
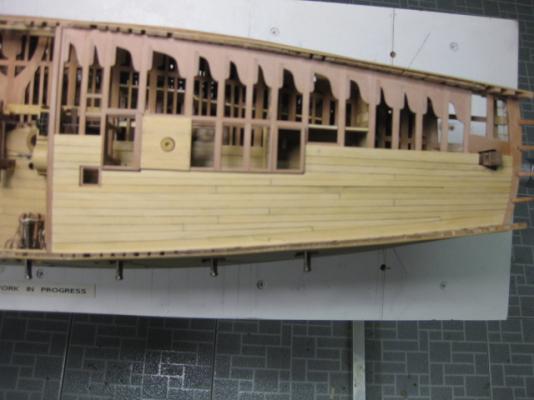
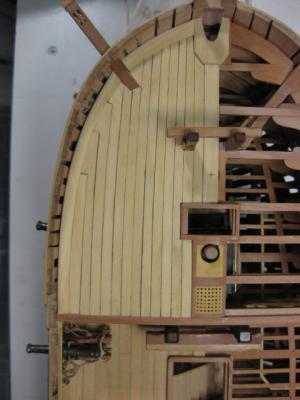
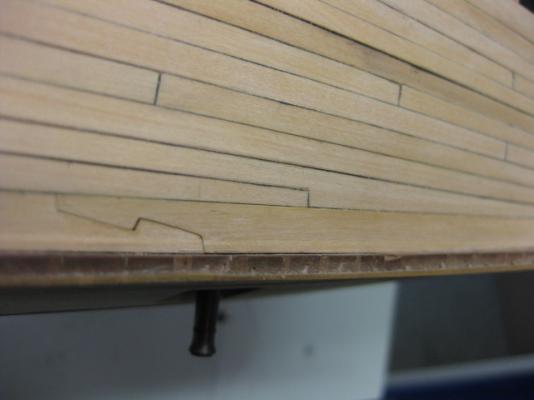
Thanks for that link to the LoS Grant, I'll get some from them. Forecastle and Quarterdeck Planking The Forecastle and Quarterdeck have been planked. Both decks have tapered planks as well as a couple of Dropped planks each. Here are some progress pics : At this stage none of the planks have been sanded - these pics were taken just after the last two were glued in. The "caulking" smudges will all sand out evenly. There are one or two very small gaps which will be filled with a sawdust/glue mixture. Treenailing is next. Danny

-
Sirius Model at the Powerhouse Museum
Dan Vadas replied to Jim Lad's topic in Nautical/Naval History
Thank you John - I have no idea what the two ships in the foyer were, just thought it may have been Ingleton's models of Sirius and Supply "on loan". Demonborger - have a look at this link - there may be hope for a revival of Old Sydney Town yet. I hope so - I'll be one of the first visitors if it goes ahead . Danny -
Sirius Model at the Powerhouse Museum
Dan Vadas replied to Jim Lad's topic in Nautical/Naval History
No John, Demonborger was right - I DID mean "Old Sydney Town" the (now closed) theme park at Kariong . Danny -
Thanks Pete, Geoff and Julio. Julio, I've saved a copy of the "Supply" Build Log but I don't know if and when I'll repost it - that will be a LOT of work . Danny
-
Thank you John, Janos and Wes. Janos - read the text above the 2nd pic - SCRAPING . Wes - You can't use the Birchwood-Casey Brass Black after a piece has been inserted in close proximity to wood (such as a nail). It WILL stain the wood, so all blackening must be done prior to fitting. I push the nail/bolt home with a plastic tool to minimize removing the blackening, with varying degrees of success . If you use Copper instead of Brass, you CAN blacken it with "Liver of Sulfur" without staining the timber. It's not something I've tried personally, as I have found it rather difficult to get any LoS in Australia. Builders like EdT and Remco have had very good success using it however. It's readily available in the USA. Danny
-
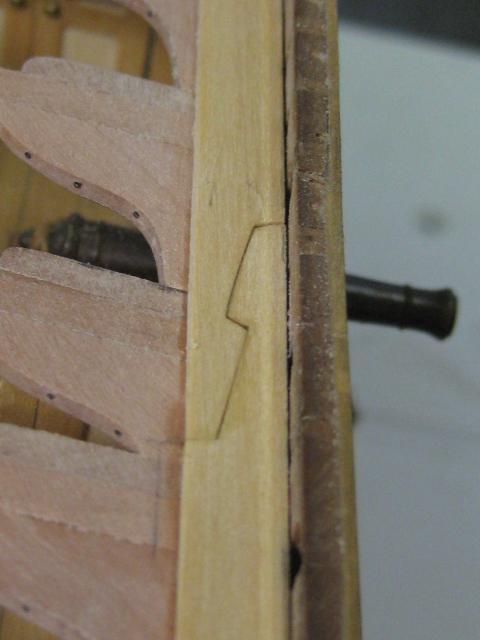
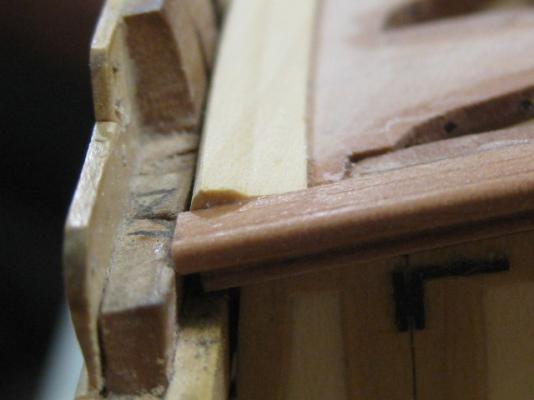
Druxey, thanks for chiming in on Spyglass's query - I had no idea what he was talking about . Now I do (I think ) . John - :D . Forecastle and Quarterdeck Waterways I've made and fitted the 12" wide Forecastle and Quarterdeck Waterways. These are the first steps in planking a deck (or two ). I used card templates to determine the outer shapes, then transferred those to the inner edges, and cut them all from sheet stock : The same Scraper used for the previous decks' waterways was employed to shape these. There will be a little more work done to the ends of both later on : I've also fitted the King Planks to both decks using a string down the centre line - the same method was used for the previous decks. The King Planks are 6.4mm (12") wide - a measurement and calculation for the remaining 13 deck strakes came up with the figure of 4.3mm maximum width for the Forecastle and 4.45mm for the Quarterdeck. Both decks have tapered planks, and also two Dropped planks each - more about these soon. A closeup of the scarf joint in the quarterdeck waterway : Danny

-
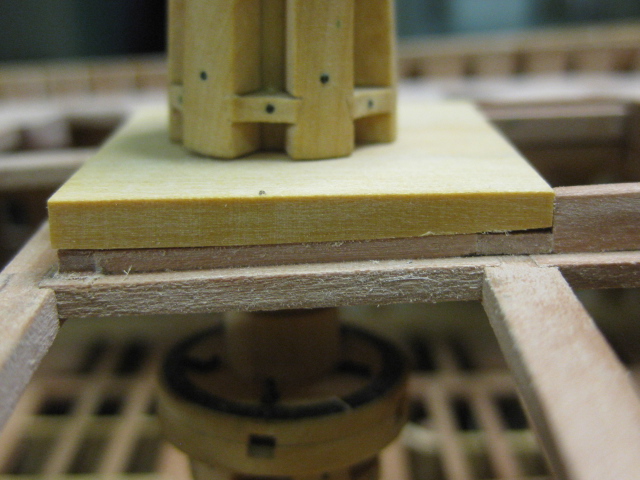
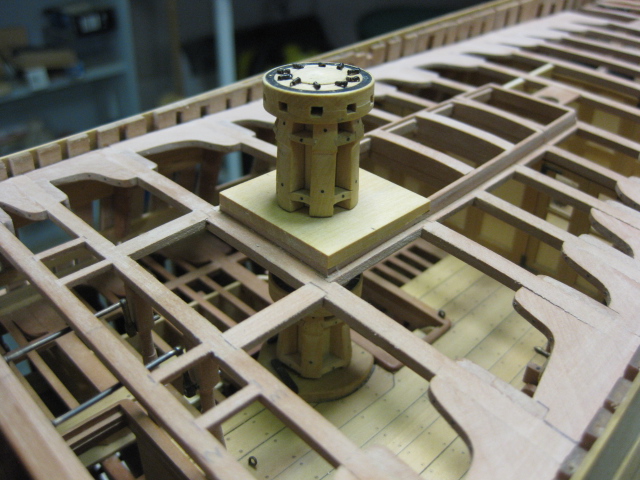
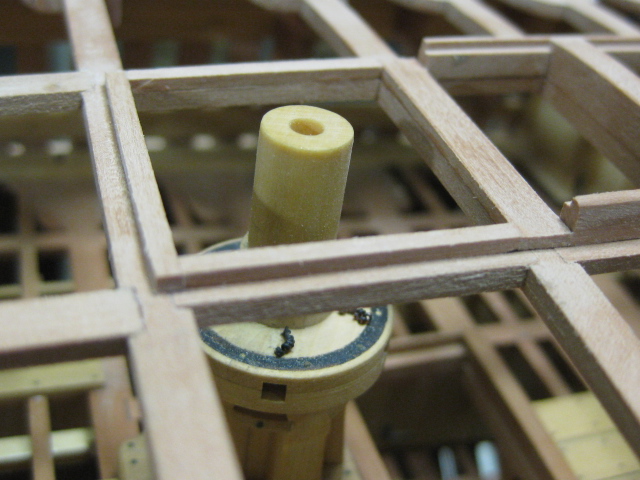
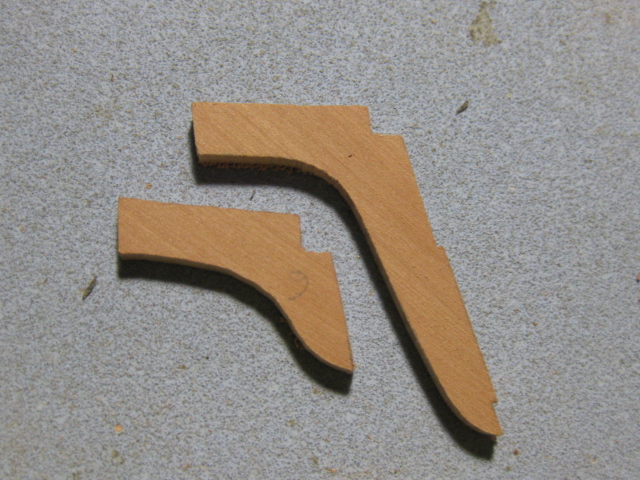
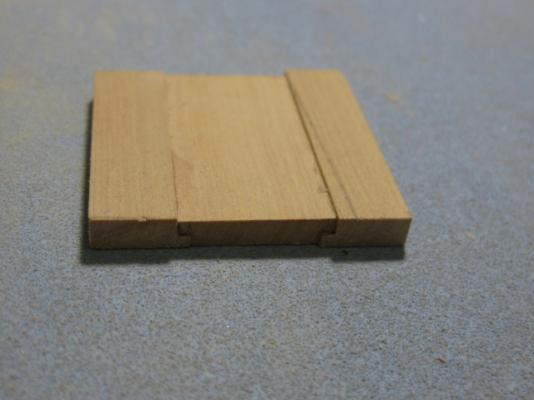
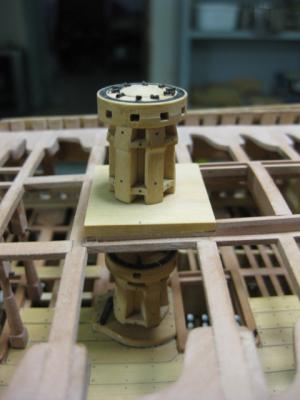
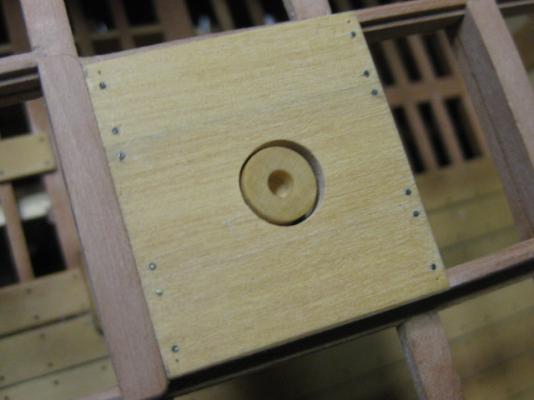
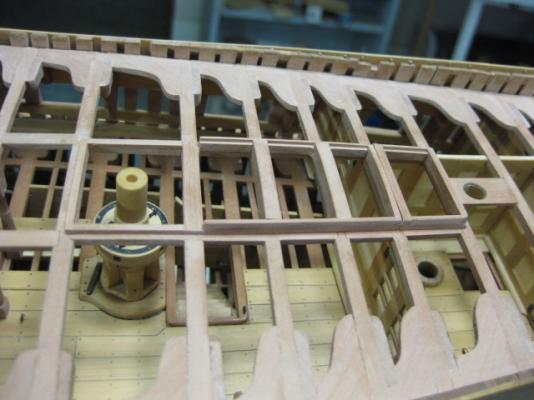
Thank you John and Raphael - in answer to your question I use "Birchwood-Casey Brass Black". Capstan Step The upper Capstan Step is made in similar fashion to it's lower counterpart. Three pieces of Boxwood were jointed together using rebates : The step was then sanded down into a wedge shape to allow for the sheer of the quarterdeck. This is necessary to ensure the axis of both capstans align vertically : The hole for the capstan shaft was also drilled, slightly oversize to allow for alignment. Blackened brass bolts were also added : Two views of the fitted step and capstans. Some tidying work is still needed : Danny


-
I'll pull up a chair with the rest of the mob - "Down in Front" :D . You do realize though John, that at the enormous scale (for you) of 1:48, you will have to make all the rigging FUNCTIONAL (i.e. working D-shackles etc ). Danny
- 745 replies
-
- 3
-

-
- francis pritt
- mission ship
- (and 1 more)
-
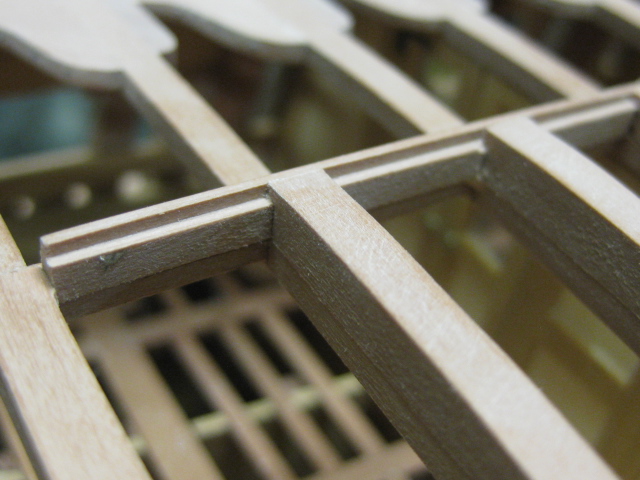
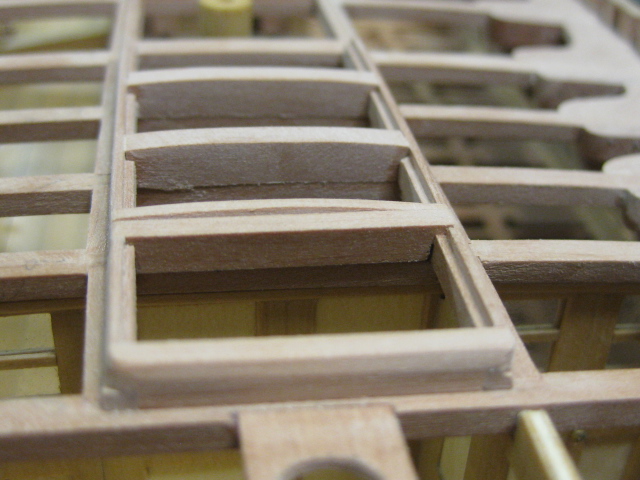
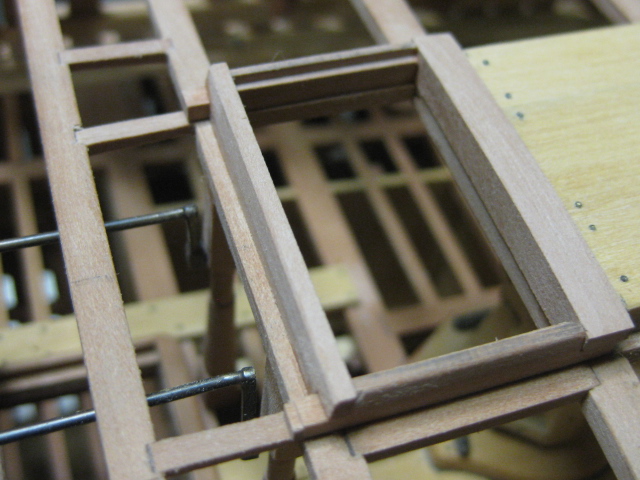
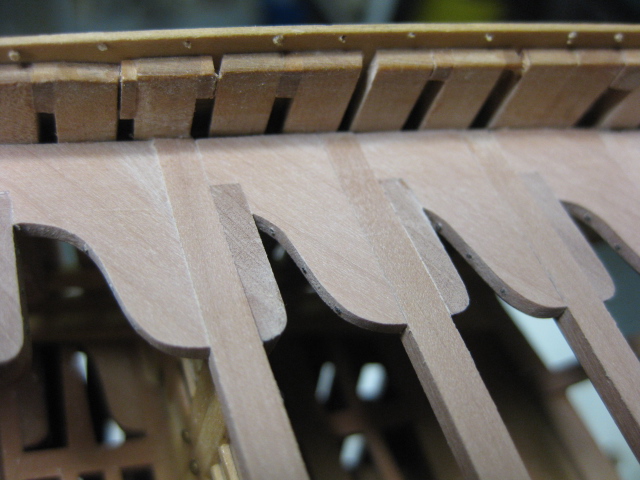
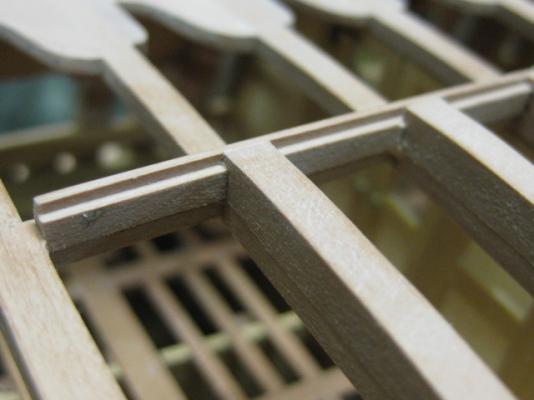
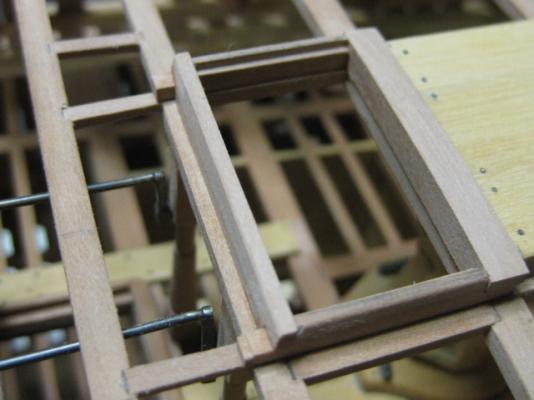
Thanks for the input Druxey and John. Point noted about the small amount of weight the beam would have carried. The problem I could see was how they would have bolted the Lodging Knees to the beam. Maybe I went with "overkill", but that's the way I would have done it if I were building the ship . Quarterdeck Hatch Coamings I've made and fitted the Coamings for the quarterdeck hatches and companions, along with the "packers" for the Capstan Step (pic 2 below). The hatches taper slightly in width from fore to aft. All the coamings have a 2" roundup except the aftmost one. This one will have a clerestory light fitted above it and is therefore straight on top, although the bottom has a roundup to match the beam (as they all do). The foremost coaming hasn't been finished yet - I took the pic now to show my method of ensuring a perfect fit in the corners. Each lapped joint has been cut slightly oversize, the pieces glued in, and then trimmed to align with the sides of the head ledges and coamings. This coaming is slightly wider than the others. Danny


-
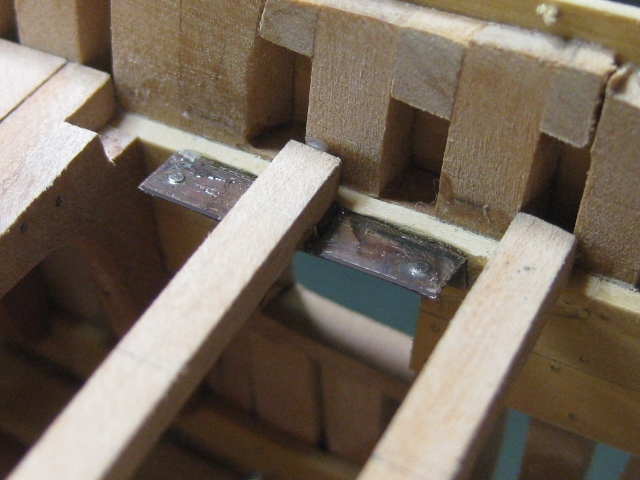
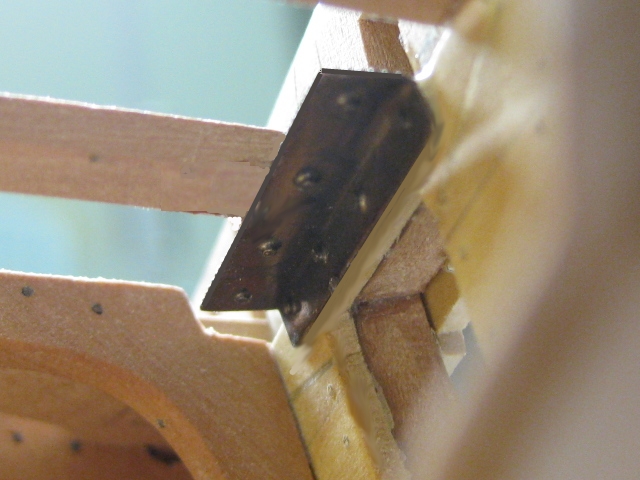
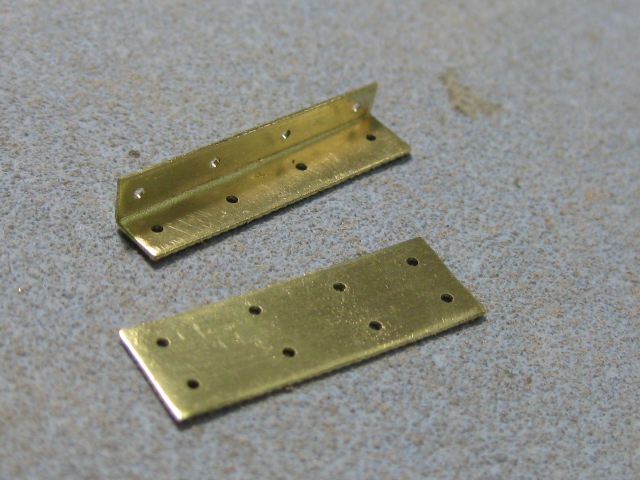
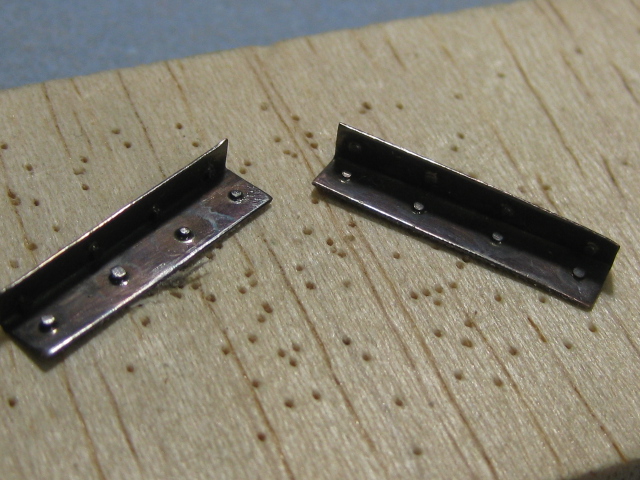
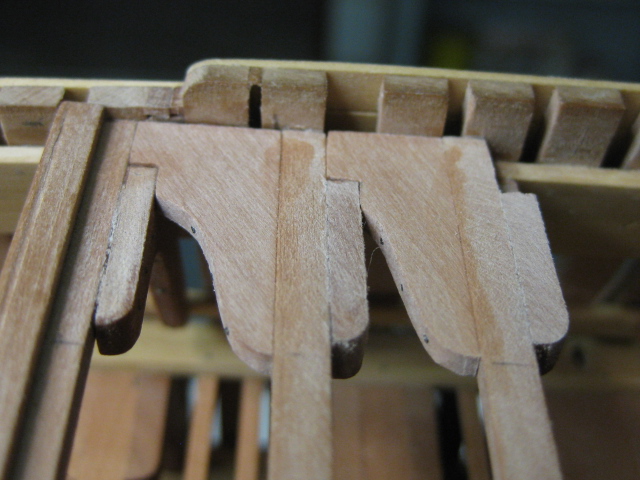
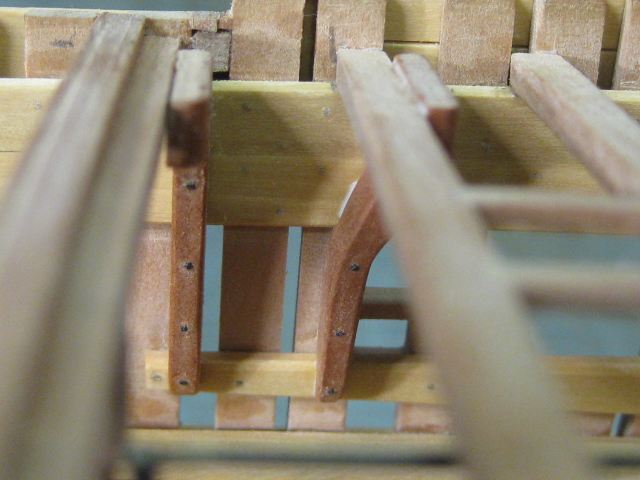
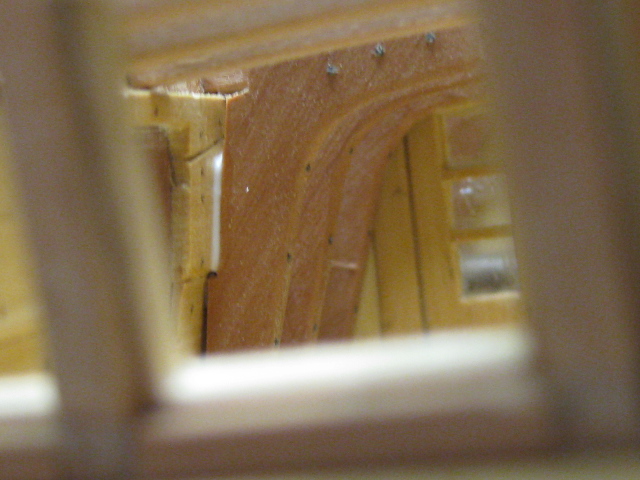
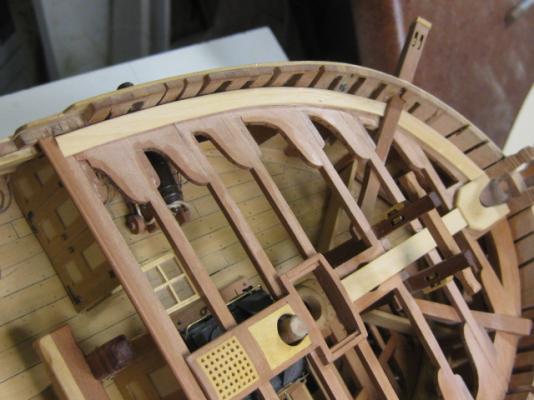
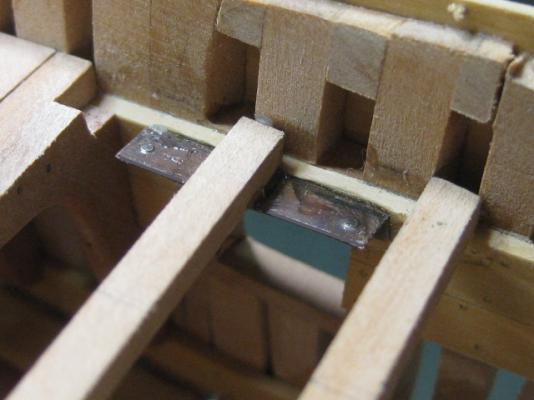
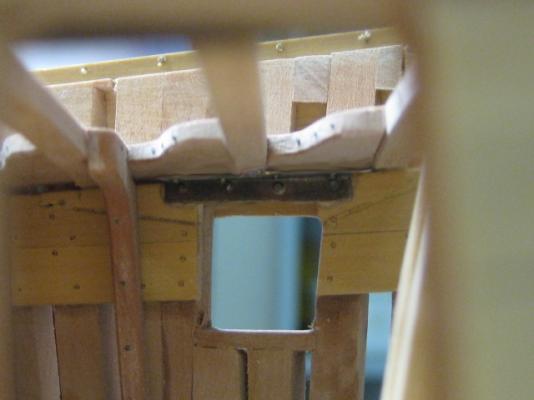
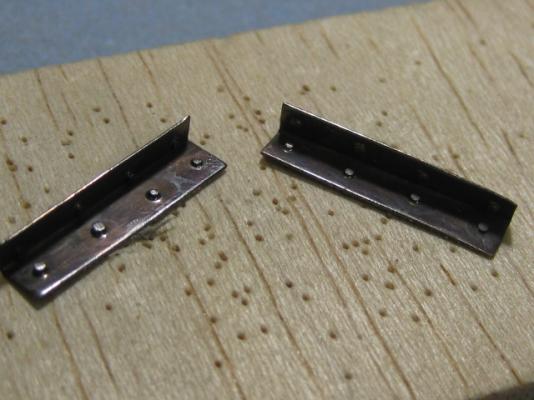
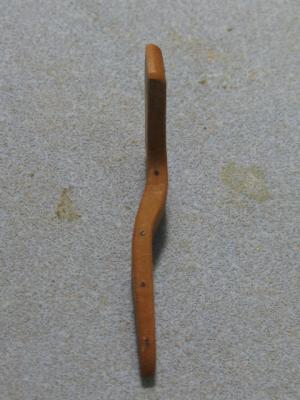
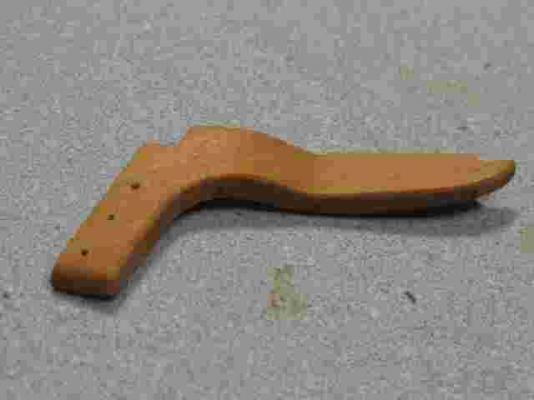
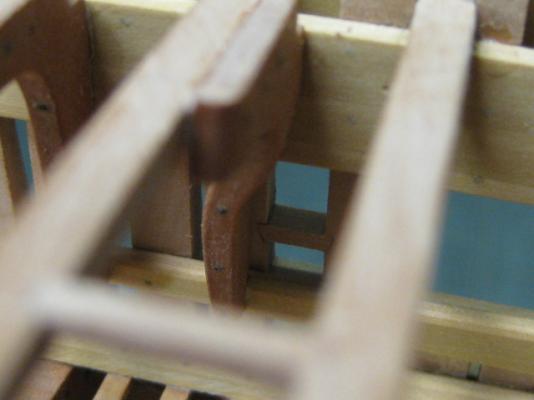
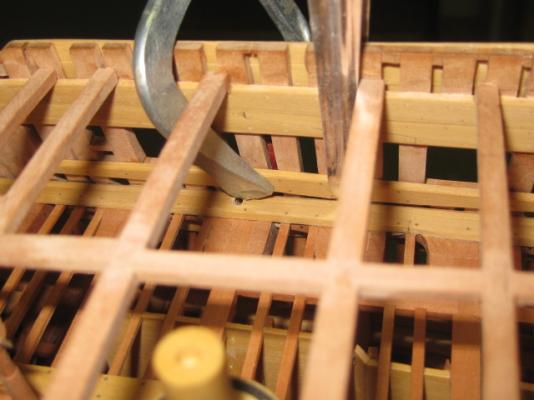
And thanks again to John, Mark and Pygothian . All the quarterdeck lodging knees are now completed. As Beam #14 couldn't be supported by a Hanging Knee due to being only 5 (scale) inches above the quarterlight opening, I came up with an alternative solution. I've made a 5" x 7" Angle Bracket which bolts through the frames and into the lodging knees either side of the beam. I used two pieces of 0.040" brass to which I soldered 8 "bolt heads". These were then blackened and epoxied in : Danny


-
Kimberley, the majority of (wooden) ships on this site either have very little paint or none at all. It depends on what effect the builder wanted. The model is considered "completed" when YOU say it is . Danny
-
Robin - it stands for "The Fully Framed Model" series of books written by David Antscherl and Greg Herbert. They detail every piece in the construction of a "Swan Class" Sloop, and are the books that Toni and I (among others) are using to build our current models. Danny
-
Thanks Spyglass :D . Lodging Knees Work has started on the quarterdeck Lodging Knees. I've made these using the same techniques as earlier lodging knees, using card templates to get their shapes : Danny

-
Thanks again John and Russell. Hi pianomanpj, and welcome to my build log . The hanging knee can't be placed on the opposite side of a beam as it would interfere with the Lodging Knee - you'll see what I mean shortly when I start fitting those. Danny
-
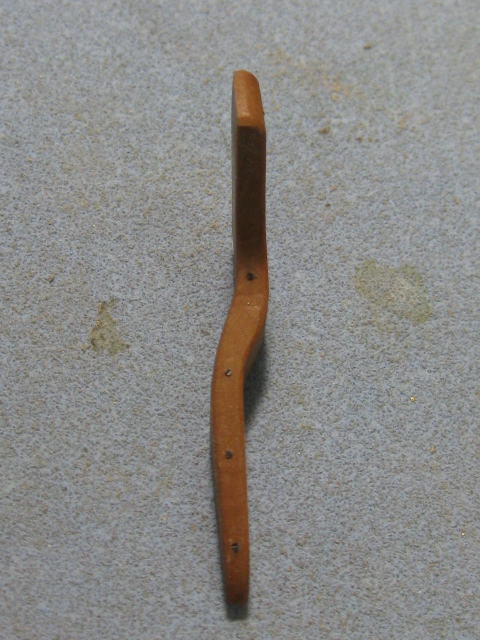
Thank you Grant, Adam, John and Maury. Cast Knee There is a knee alongside the aftmost sweep port that needs a bit of shifting to clear the port. This is achieved in a similar manner to the much earlier "Casting" of some of the Frames : Danny

-
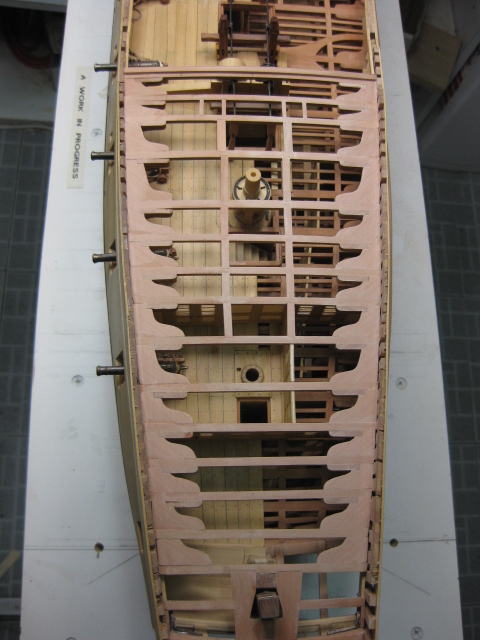
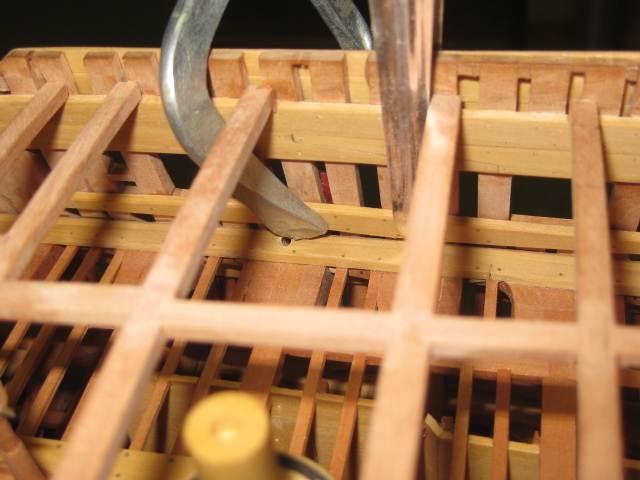
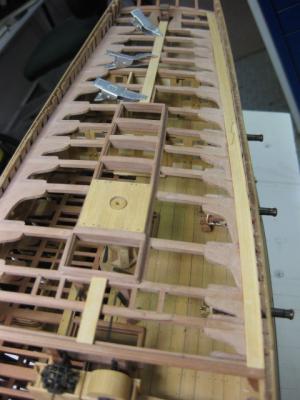
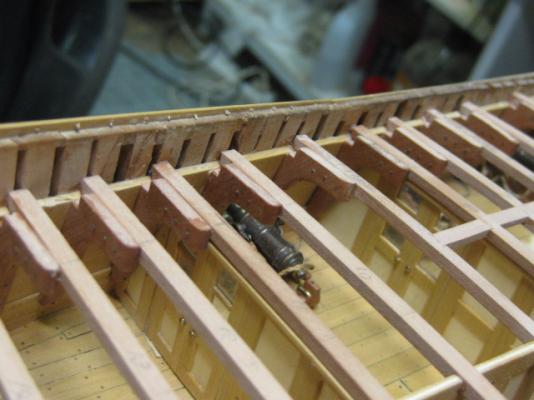
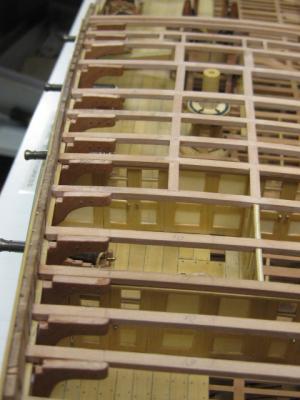
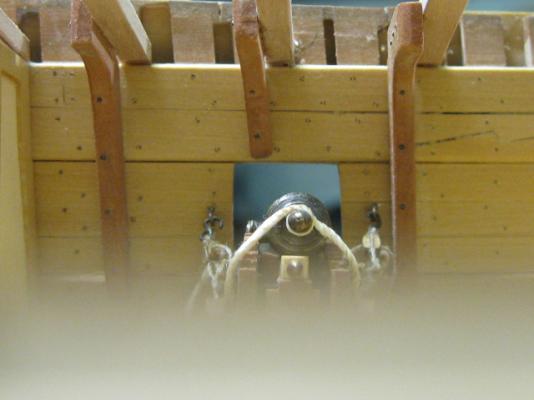
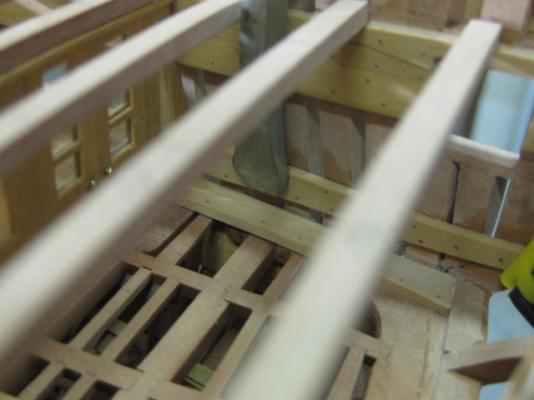
Thanks Popeye, John, Kevin, Grant, Aldo and Tony. Not as hard as it looks John and Popeye - the strakes could be inserted from each end (they meet behind a bulkhead ). Been like that almost since "Day 1" Grant . But I'm not complaining . I've finished and fitted all the port side hanging knees. A few need their tops sanded slightly to match the tops of the beams. Most of them will be almost invisible when the deck planking goes on, but I'm not sure which ones can be caught a glimpse of so I detailed them all. The three in the middle of the pic will DEFINITELY be invisible, but hey ..... we all know they're in there : A view through the port side stern light. The glue is still wet on the last one I fitted : From the waist : And through a starboard gunport : Danny

-
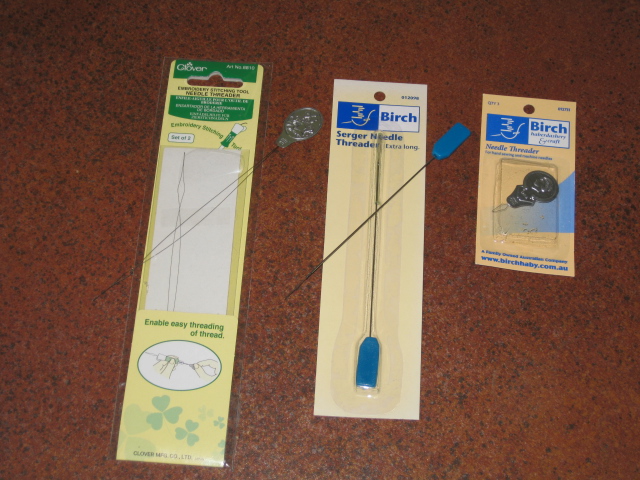
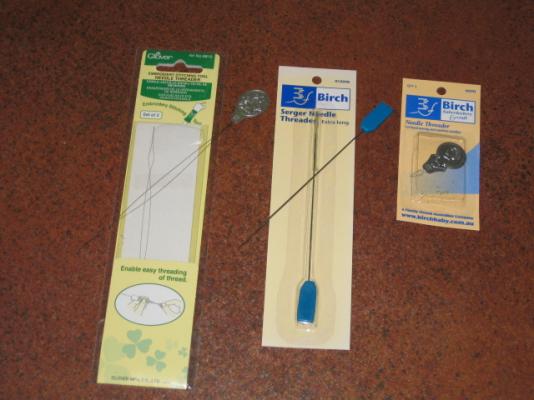
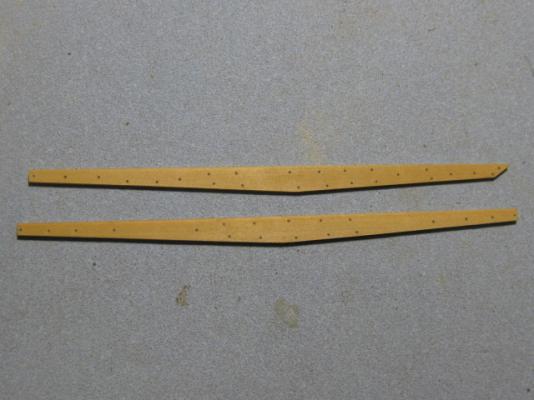
There are several very useful types of Needle Threader available commercially from good sewing supply stores. The Long Wire ones are very handy when doing work around the bottom of a mast when all the Standing Rigging has been completed and getting in the way : Danny
-
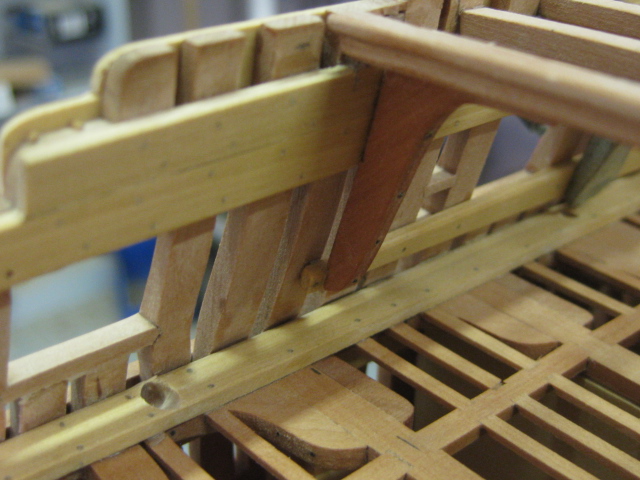
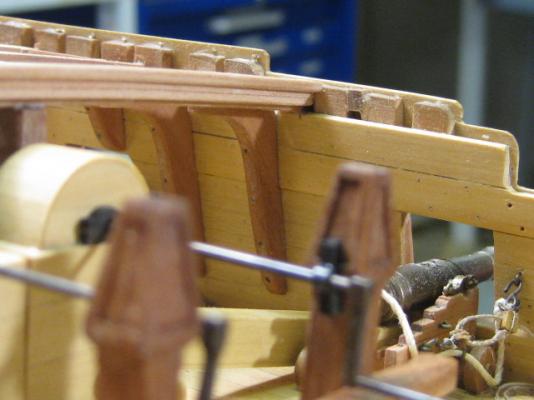
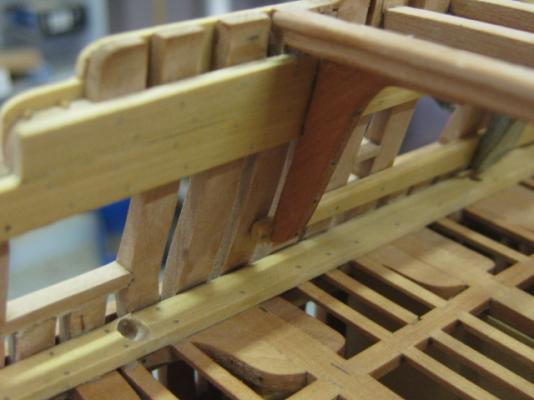
Thank you John and Aldo . My girlfriend brought up a pertinent question today - "Why do they call them Knees when they have two Arms. Shouldn't they be called Elbows?" Continuing on ...... Somewhere down the track I'd forgotten all about fitting a strake for the lower part of the quarterdeck hanging knees to sit on the starboard side. I decided on the upper of the two rows of Spirketting. Fitting them was a little more difficult than it should have been if I'd done so before gluing in all the quarterdeck beams, but it wasn't too hard. First I made up the two pieces of Top and Butt Shifted planking, complete with treenails which would have been impossible to fit after the strakes were in position : Some pics of the strakes being fitted : And with the foremost knee glued in place : Danny
-
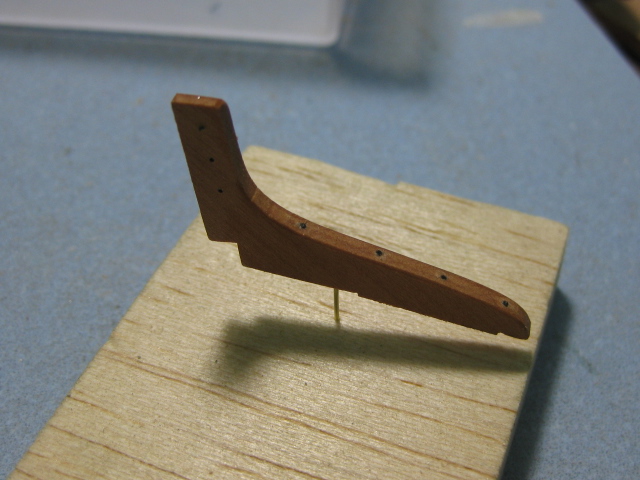
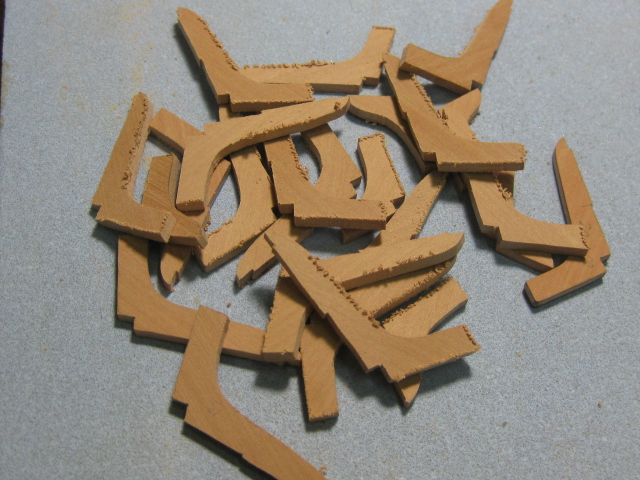
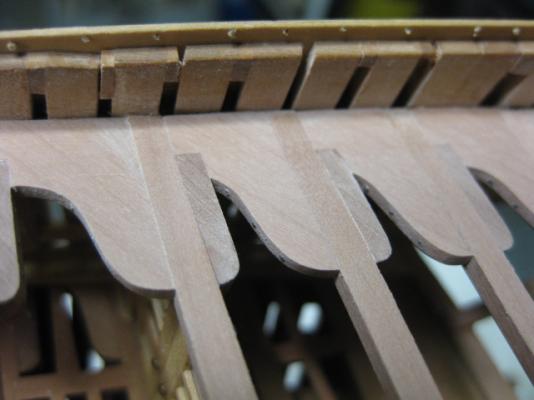
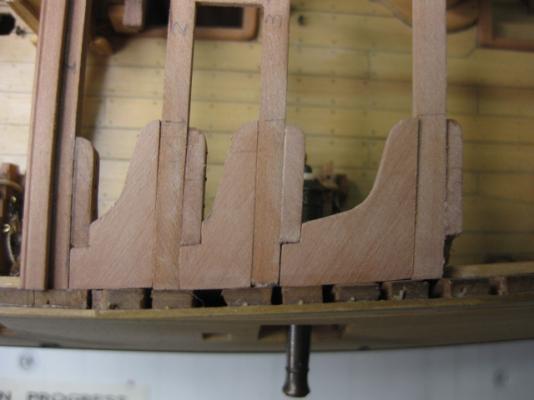
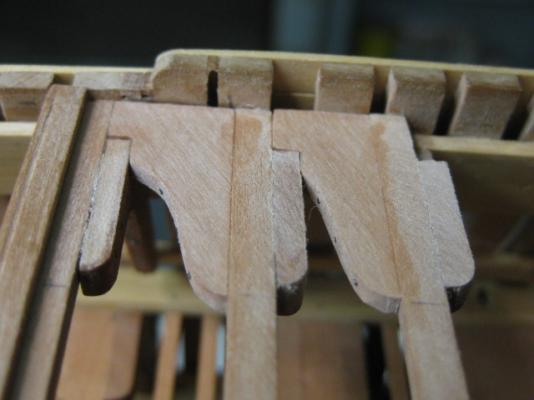
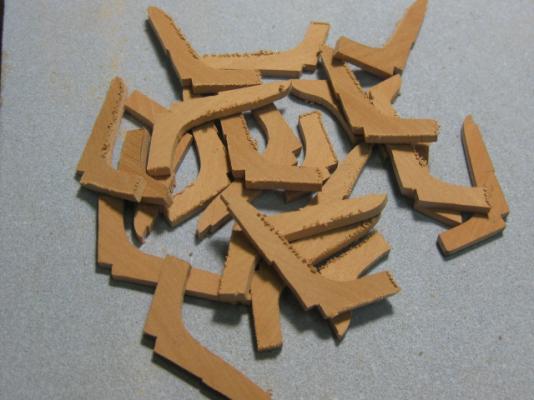
Thank you Aldo, John, Aitch, Pygothian and Michael, and welcome to the two "newcomers" to my Build Log, and a special welcome to an old friend . Quarterdeck Hanging Knees TFFM show a total of 14 pairs of Hanging Knees for the Quarterdeck on the plan view. This is (I hope) a mistake, as the ones above the Quarter Light on Beam 14 would only be a couple of (real) inches high . I will be omitting these. There are three hanging knees on beams 3, 6 and 9 which are above gunports - I've made a shortened version for these : All the knees are that close to the same size and shape that I could mass produce them - what a bonus . There are only minute variations in the side bevels, which will be sanded in as they are fitted. These are all straight from the scroll saw, and still require a fair bit of work to finish them : Here's the first one I made, all completed with "bolts" and lacquer. I used it as a template for the rest, after first checking it on various locations :


-
Here's a Test : nautical-terms-for-the-model-ship-builder.pdf Thanks Wayne. I didn't know it was that easy either . Danny
-
Thanks Rowan, and welcome to MSW. I believe the later version of the Norfolk Sloop kit has quite a few improvements on the one that I built . Danny