Dan Vadas
-
Posts
3,261 -
Joined
-
Last visited
Content Type
Profiles
Forums
Gallery
Events
Everything posted by Dan Vadas
-
That's good advice from Brian. I'd also add that you should fit the planks one at a time ON EACH SIDE, as this will minimize any undue stress on the framing and avoid any twisting of the hull. Danny
-
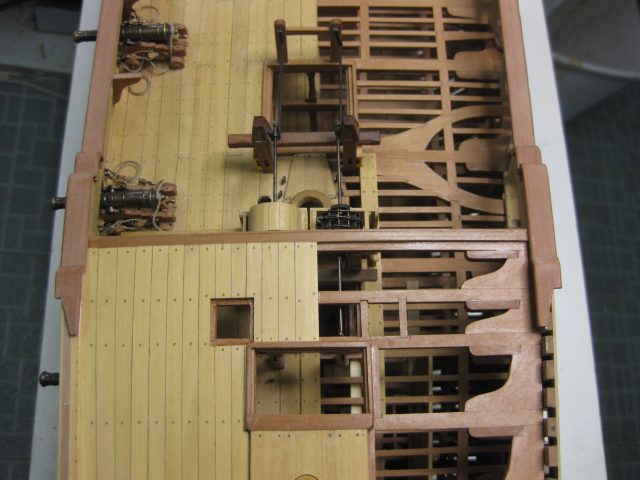
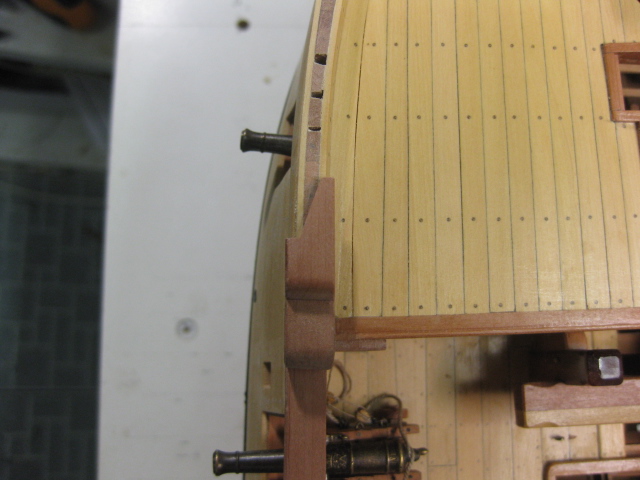
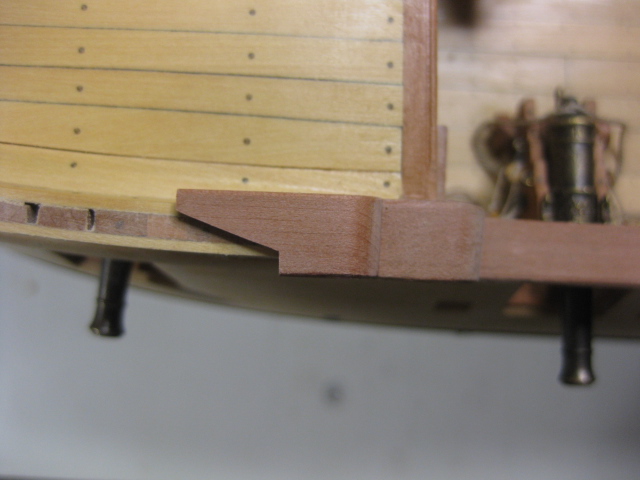
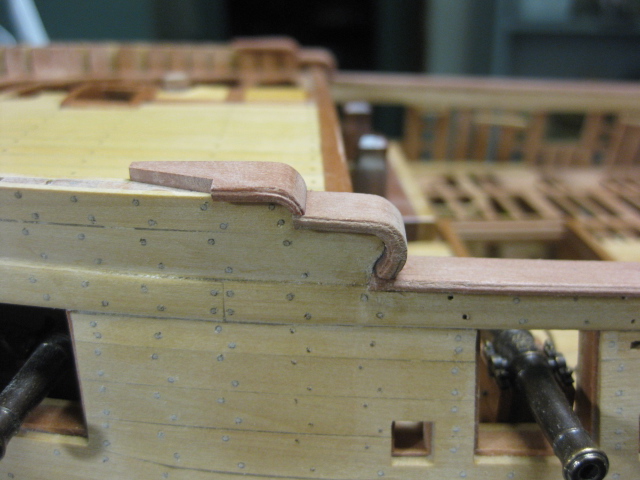
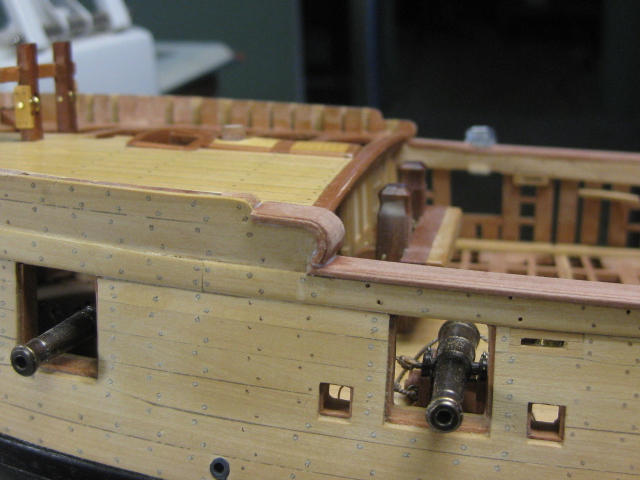
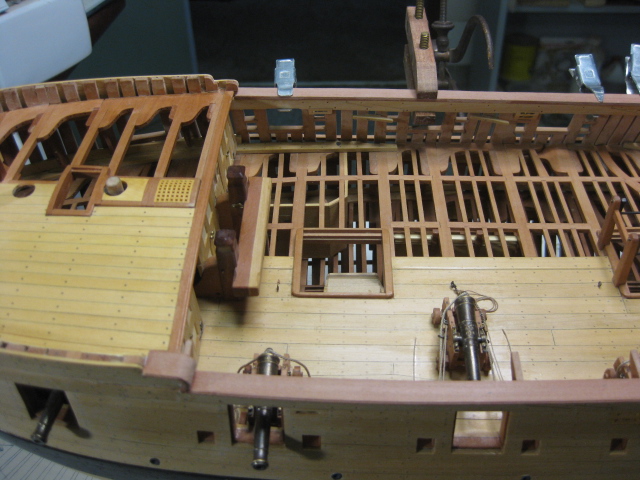
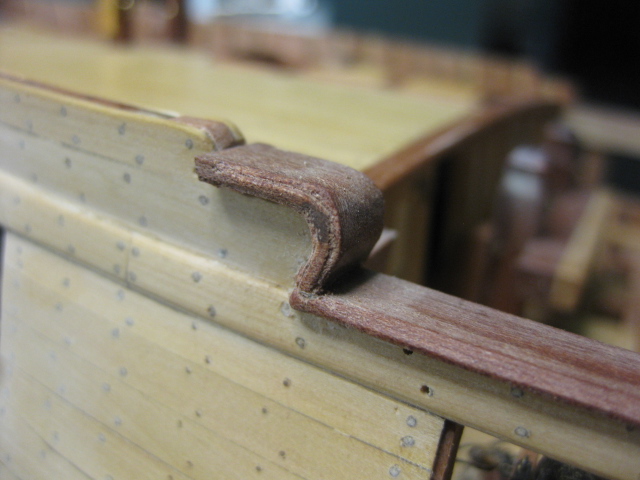
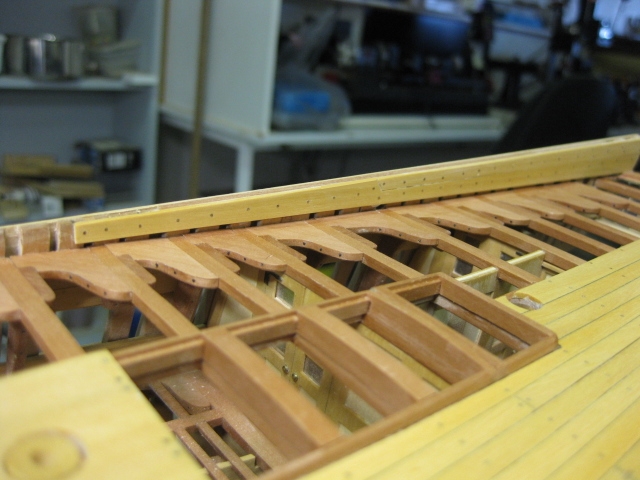
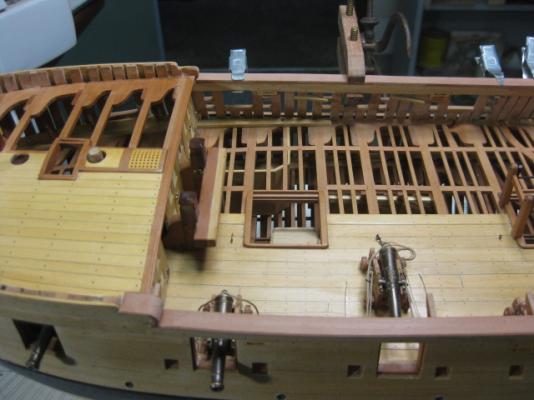
Thank you Mark, Grant, TJ, Tony, Bill and Elmer . I've made all 10 Hances. I've used a simplified design eliminating the fancier rolled scrolls on most of them - they were hard enough to carve out the way I've done them . The upper ones on the forecastle and quarterdeck have been scarfed out to fit to the planksheers : Danny


-
G'day Candice, and welcome to MSW. You've received a rather complex model as a present, and it's good to see that you're pressing on with Bounty instead of going for something easier first. Building a complicated model is really no harder than building an easy one - there are a lot more parts and pieces, and it takes a lot longer, but the general principles are the same on both. You've already been given the good advice to "Treat each step as a model in itself" (or words to that effect) - eventually all the individual steps come together . Here's a tip. I'm guessing you have used PVA Wood Glue to glue the hull bulkheads together (a good choice ). If you'd have used either Epoxy or CA ("Superglue") I doubt the joint would have come apart so easily. To soften PVA glue you can use Isopropyl Alcohol (commonly known as Rubbing Alcohol and available at Pharmacists or Drugstores or whatever the term is in South Africa). This stuff should be in every wooden model builder's tool kit - it makes a "re-do" much easier, as you can usually pull out a piece without damaging it or the surrounding timber. Apply the alcohol with a small paintbrush to every reachable edge of the piece you want to remove. Several applications will be necessary, as the alcohol evaporates fairly quickly. Slide a thin blade (Xacto or similar) under the end of the plank (or whatever) and gently lever it up slightly. Apply more alcohol whilst keeping gentle pressure on the blade, and it will gradually come off. This may take from 1 to 15 minutes, depending on the piece itself and also how long it's been since the piece was glued in. The only drawback with using alcohol is the gluggy mess it makes of the glue. This will all need to be scraped and sanded off thoroughly before work can recommence. Here's an example of a rather more complex piece I had to repair some time ago using Isopropyl - Click this LINK Danny
-
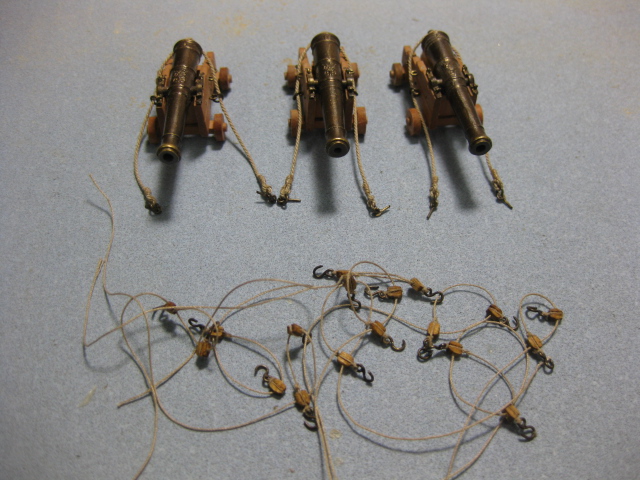
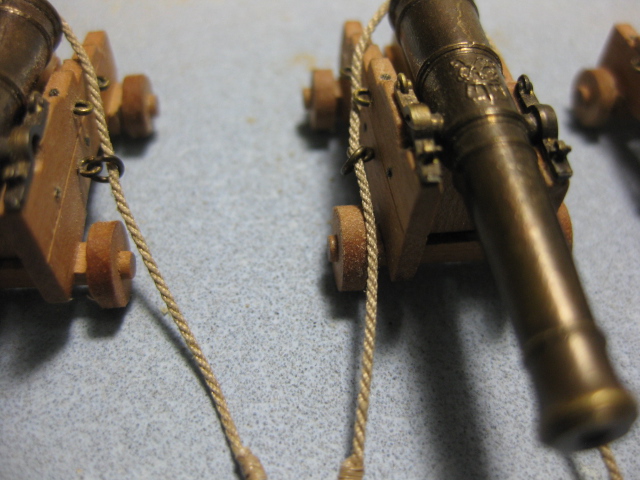
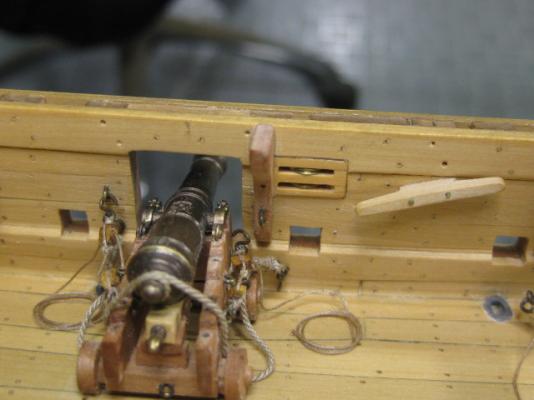
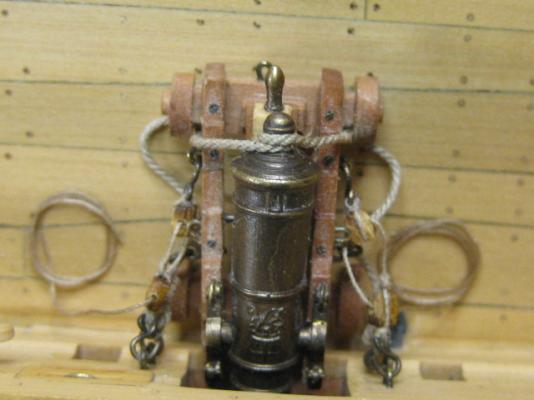
Hi Remco, Beautiful work on the guns and carriages - those Admiralty Models barrels are every bit as good as the ones I got for Vulture, only I didn't have to spend much time on detailing mine as the Royal Cypher and Touchole were already cast into them . A word about the way you've rigged the guns (excellent seizings etc BTW) - a gun that is "run out" wouldn't have the side tackles frapped, rather coiled beside the gun ready to fire. The frapped tackles are used when it's in the Stowed position. Danny
- 1,215 replies
-
- 3
-

-
- sloop
- kingfisher
- (and 1 more)
-
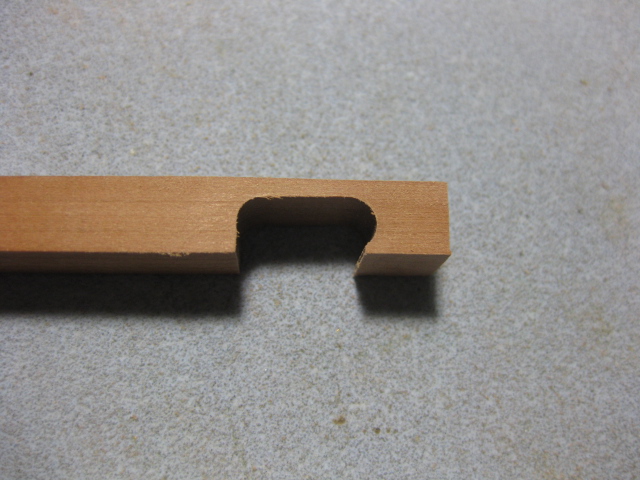
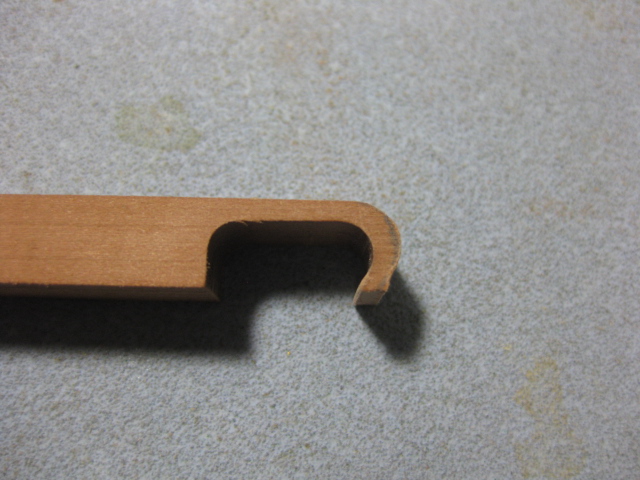
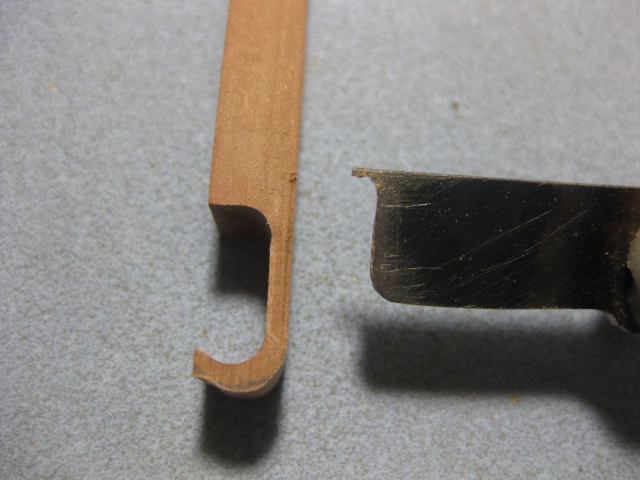
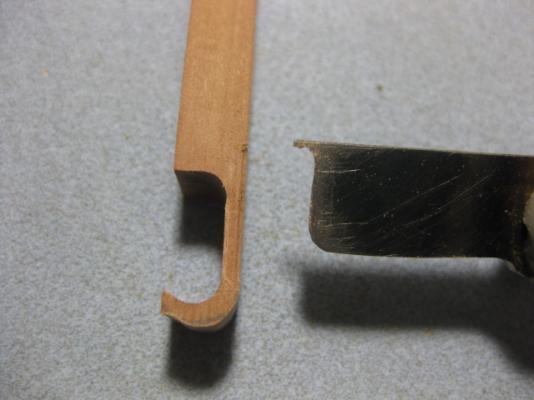
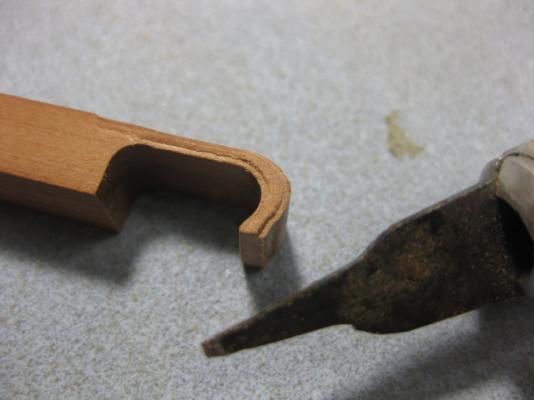
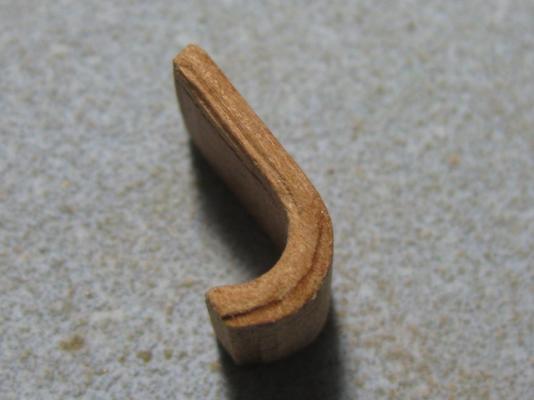
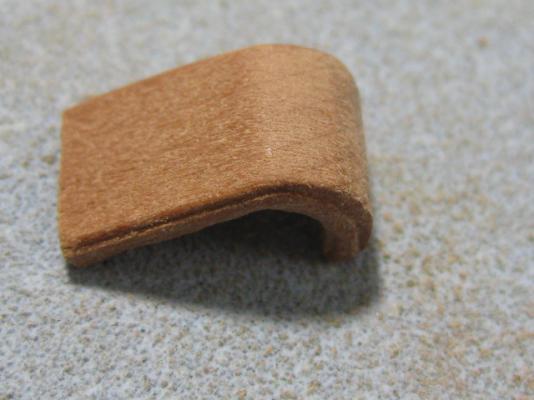
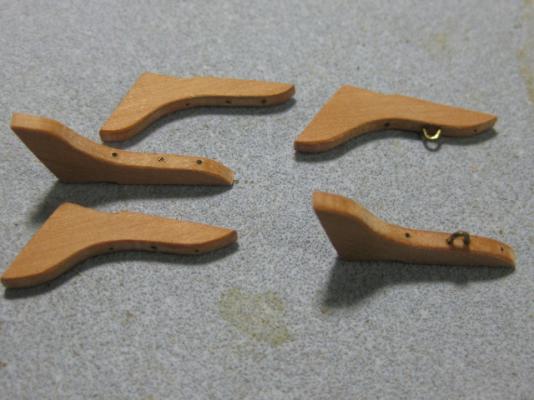
Thank you John - I like it now . A small "Tutorial" on how I made the Hances. One trick I learned long ago is to make small pieces that are awkward to hold on the end of a long piece of stock which can be used as a handle for more control. First I Milled the inside curve. These will all come out the same for the four of this type - the planking is finessed to fit the radius : Next the outer curve is sanded down to follow the shape of the inner one. I started off with the Byrnes disc sander and finished with a sanding stick : I could only use the molding scraper for the straight grained section : The curved sections were cut with a very narrow Xacto chisel : The piece will be cut off the longer stock when it's all cleaned up. Danny


-
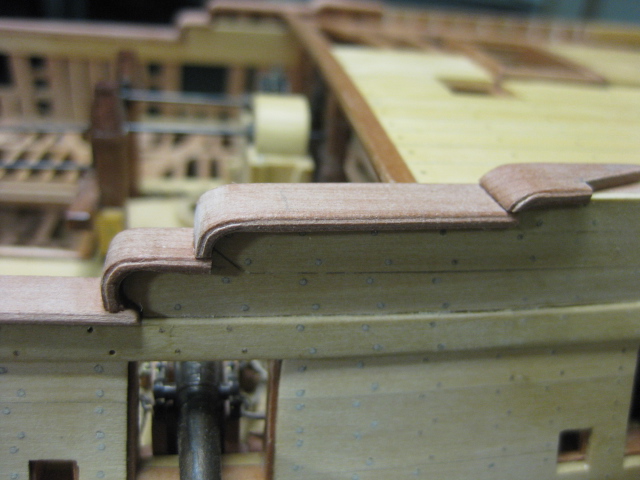
OK, here you go Ben and the others who commented on my Hances v1.0 - I've remade the Planksheers and the first Hance using a dark shade of Swiss Pear. I'm much happier about the result - crisper definition and far less chipping out. There are minor irregularities which you can see under high magnification, but to the eye they look pretty good if I say so myself . They will look even better when a finish has been applied. Danny


-
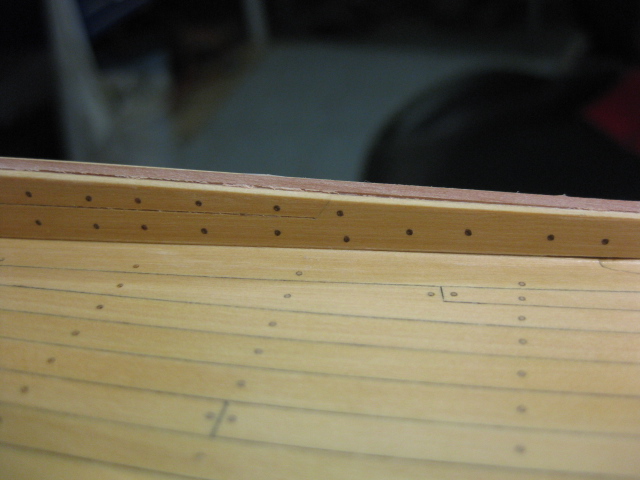
Thanks for looking in Jeff, John, Grant and Jan - much appreciated . Jeff, I draw a line down the centre of the frame or beam and just do the rest by eye. No Jan, they didn't. There are bolts in every 3rd frame in the waist. I won't be fitting them until I'm ready for clear coat, as there may be a bit of touching up to do (as in sanding) before then. John, Jan and Grant - the redo is about to happen . Danny
-
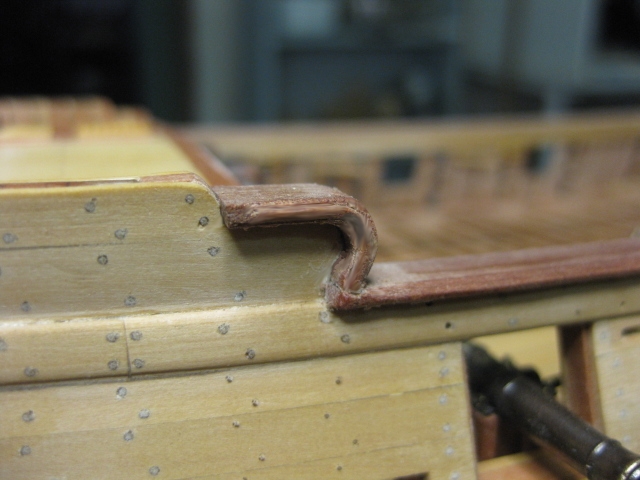
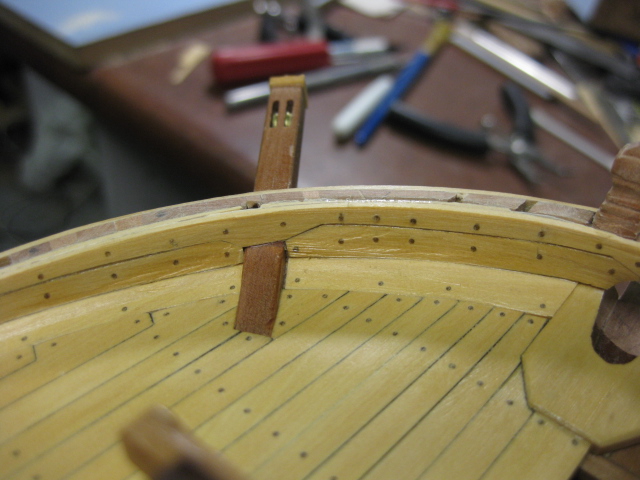
Thanks John. Yes and no - it's a lot better than some and has nice coloring, but it also has a fairly chunky grain, depending on the piece you select. This makes scraping a molding into it rather difficult at times. Hances I've started with the port forecastle hance. First I milled the underside to shape and finessed it to fit the planking, then I used the disc sander and a needle file to get the upper side to follow in a parallel curve. I cut the molding in with a shaped scraper and an Xacto blade. I'm not sure yet whether I'll continue with the Cherry Ballart or rip the lot out and use dark Swiss Pear. I'm not all that happy with the definition of the molding. Danny


-
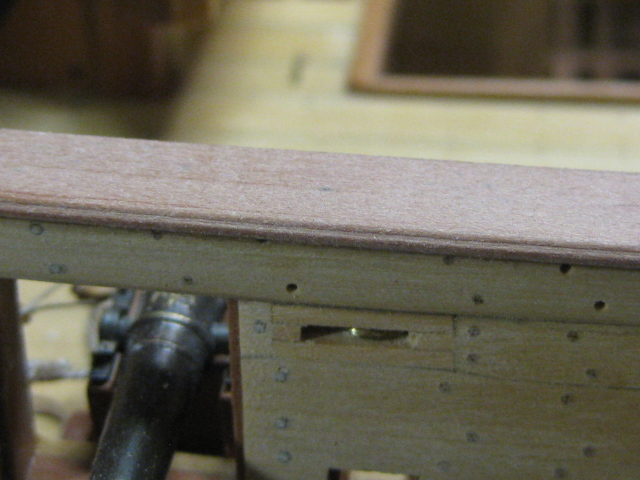
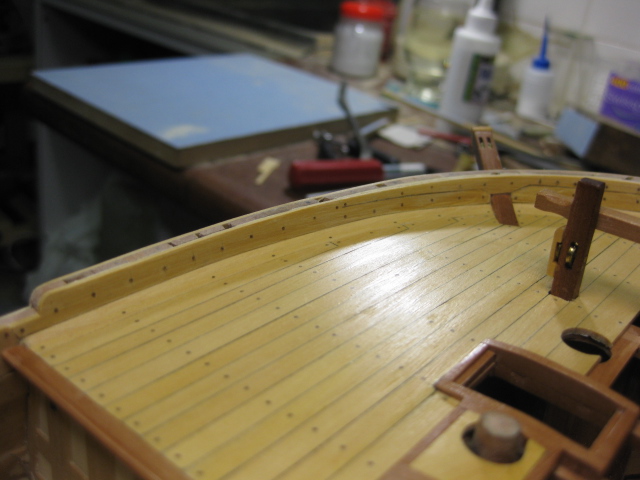
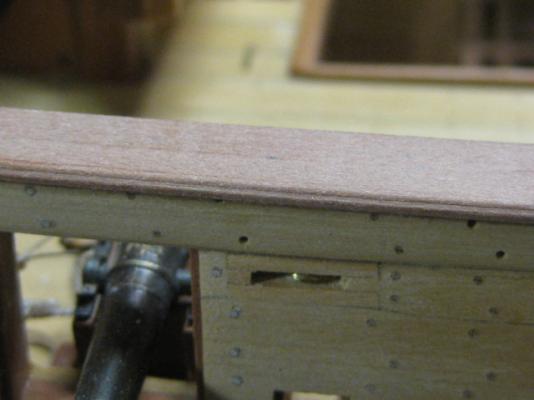
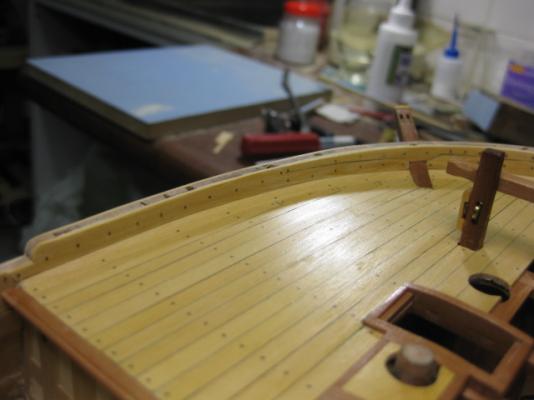
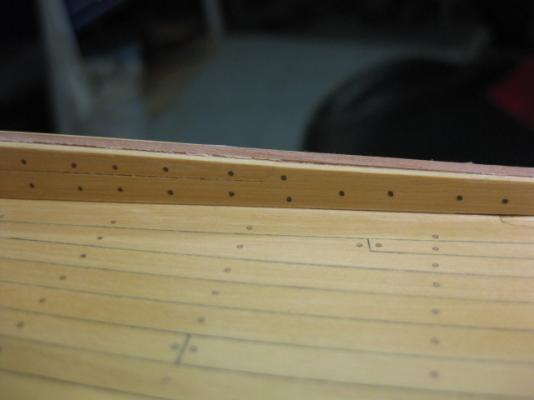
Thanks John and Popeye. Planksheers in the Waist I've started on the Planksheers, sometimes called Cap Rails or Covering Boards. I made these from Australian Cherry Ballart, which is not related to Cherry but rather refers to the red coloring. It's not visible in the pics, and is almost invisible to the eye, but the outer edges of them have a slight molding scraped into them. Danny


-
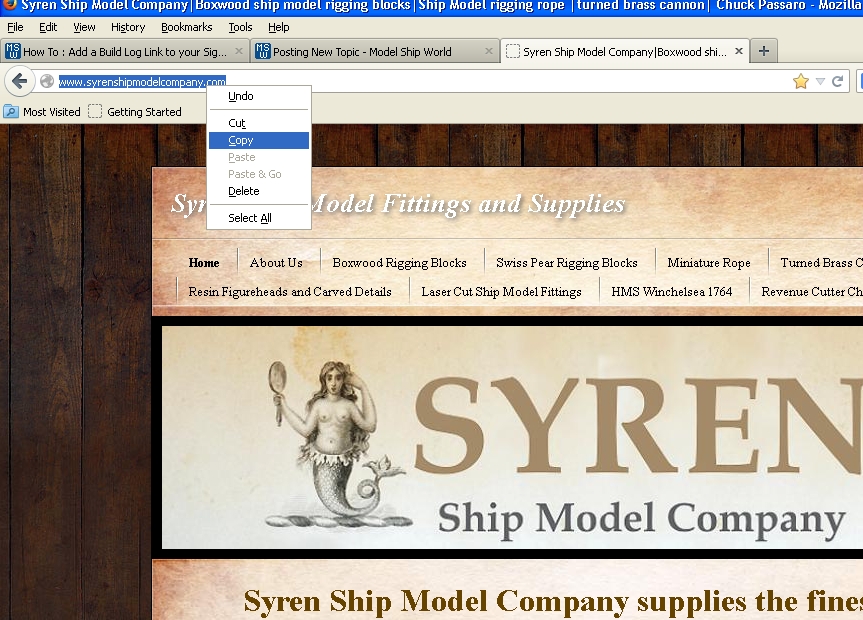
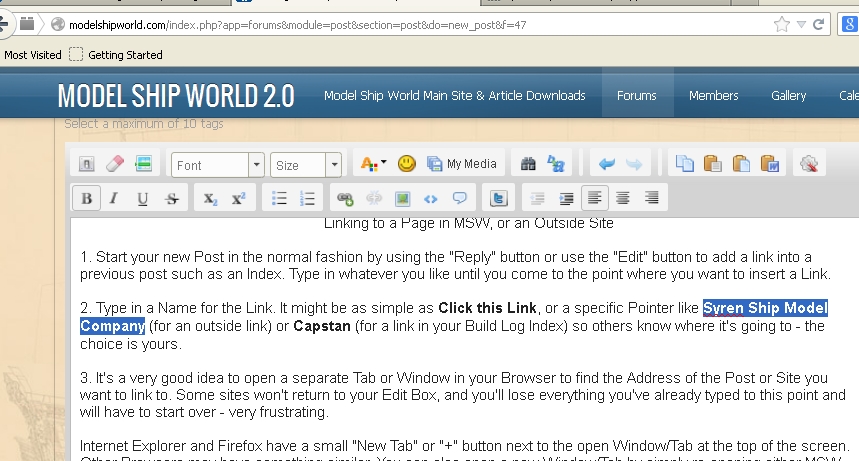
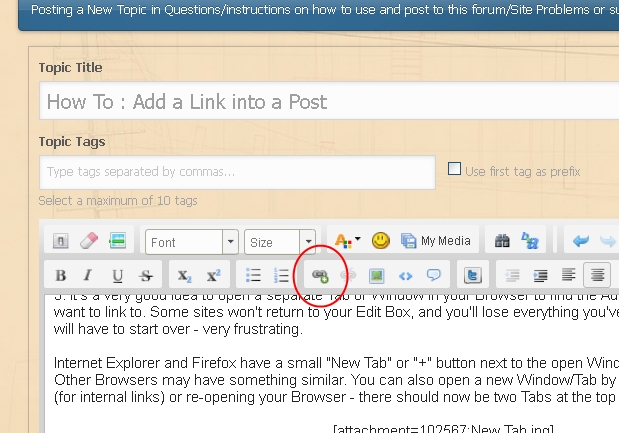
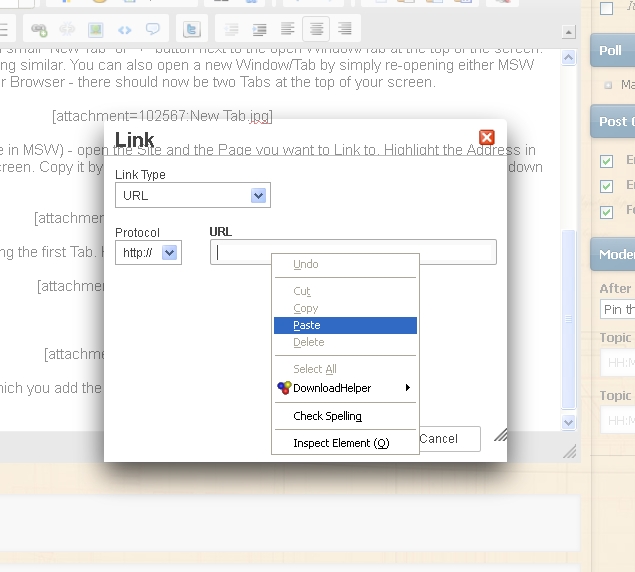
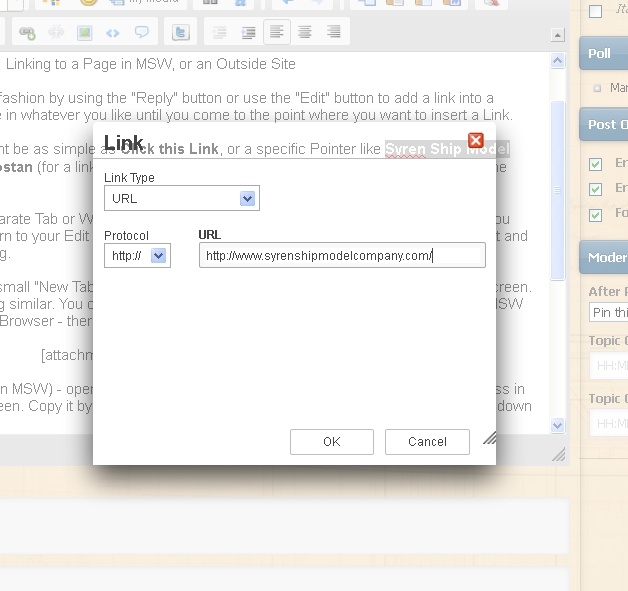
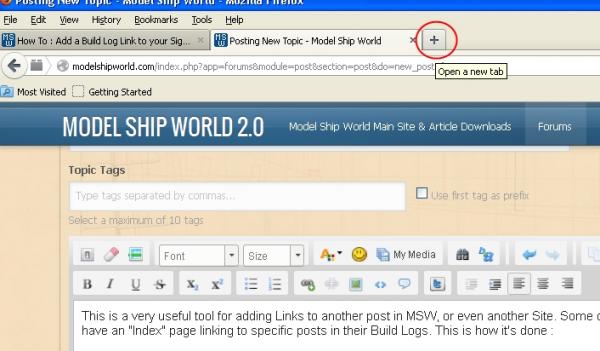
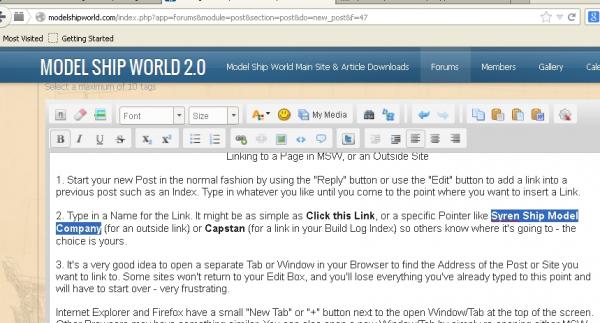
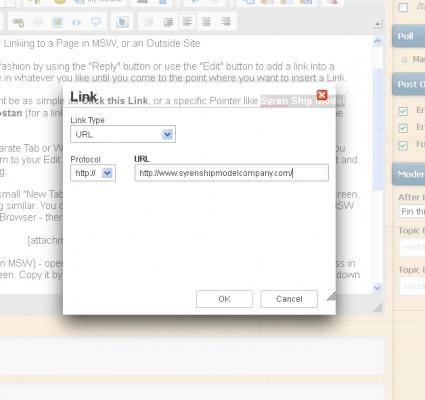
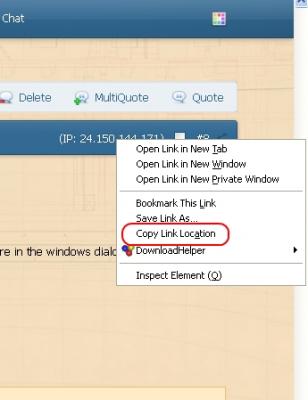
This is a very useful tool for adding Links to another post in MSW, or even another Site. Some of the members on MSW have an "Index" page linking to specific posts in their Build Logs. This is how it's done : Linking to a Page in MSW, or an Outside Site 1. Start your new Post in the normal fashion by using the "Reply" button or use the "Edit" button to add a link into a previous post such as an Index. Type in whatever you like until you come to the point where you want to insert a Link. 2. Type in a Name for the Link. It might be as simple as Click this Link, or a specific Pointer like Syren Ship Model Company (for an outside link) or Capstan (for example a link in your Build Log Index) so others know where it's going to - the choice is yours. 3. It's a very good idea to open a separate Tab or Window in your Browser to find the Address of the Post or Site you want to link to. Some sites won't return to your Edit Box, and you'll lose everything you've already typed to this point and will have to start over - very frustrating. Internet Explorer and Firefox have a small "New Tab" or "+" button next to the open Window/Tab at the top of the screen. Other Browsers may have something similar. You can also open a new Window/Tab by simply re-opening either MSW (for internal links) or re-opening your Browser - there should now be two Tabs at the top of your screen. If you have trouble reading the pictures, click on them to enlarge. 4. Open the Site and the Page you want to Link to. Highlight the Address in the Address Bar at the top of the screen. Copy it by RIGHT-clicking your mouse and selecting Copy from the drop-down menu. 5. Return to the Edit Page by opening the first Tab. Highlight the Link Name you previously typed in. 6. Left-click on the Link Button. 7. This opens a small window to which you add the link. 8. Paste the Address into the bar by placing the cursor inside it and RIGHT-clicking your mouse. A drop-down window appears. Select Paste, then OK. 9. The Name Text is now a Link. Click the OK button. You may Format the text in any way you choose (if you wish to) - Font, Size, Bold, Italic, Color etc using the menu buttons at the top of the Edit Box. _______________________________________________________________________________________________________________ Linking to a SPECIFIC POST in MSW This feature is excellent for those members who want to construct a Build Log Index, and those who want to link to a specific post instead of just the page. 1. Follow Steps 1 to 3 above. 2. Open the Page the Post is in. Scroll down to the actual post. 3. In the top-right corner of the post you will see this button which is actually the Post Number for the Topic : 4. RIGHT-click on the Post Number and a drop-down box appears. Select "Copy Link Location". 5. Follow steps 5 to 9 above.


-
Hi Gil, I saw the little bit about "I may need some help with the links .... " in your first post, and thought I may as well do it myself - took about 20 minutes (the slowest part was finding the actual posts - my Internet connection is having it's "time of the month" due to excessive downloading and is running as slow as a wet week for another day or so ). No worries - I was waiting for glue to dry anyway . BTW - I've just added a new Topic in "Questions/Instructions on how to use this Forum" - How to Add a Link into a Post . It will come in useful for you as your Build Log progresses. Danny
- 755 replies
-
- 3
-
-
- finished
- caldercraft
- (and 1 more)
-
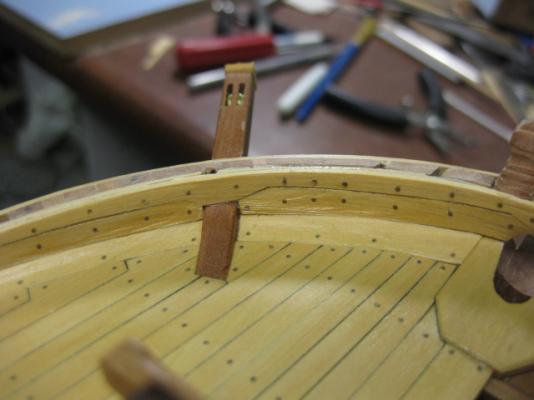
Gangboard Knees I've made and fitted five of the six port side Gangboard Knees. This required a slight re-do of four of the gun tackles, as the two forward ones on gun #4 and the two aft ones on gun #3 are both attached to the knees, not the spirketting. An oversight on my part . Danny

-
Thanks all for dropping in again . John, Mark and Joe - the "Sew Stable" Fabric Stabilizer I used seems to have done the trick nicely. It's set like PVA, but doesn't look like it's been glued down. Just the slightest amount of darkening of the thread, but after painting the whole line it's not at all noticeable . Spyglass - I'd already "notched" the blocks (I do that with all of them). These ones are only 2.7mm, so it probably doesn't show as much as larger ones do. I gave the lines a bit more of a soak after the main part of the coil had dried and worked the lines a little bit more realistically. They look better to the naked eye than the pics may show. Bill - I'm glad you like the "color scheme" . I've used seven types of timber so far - Swiss Pear (a light and a dark shade), Castello Boxwood, English Boxwood, Ebony, Holly and Australian Cherry Ballart. The only paint used on the model is some Lead Grey for the Magazine floor and the Scuppers and Matt Black for the Galley Stove. The only other paint that will be used is Matt Black or Umber for the Seizings on the Standing Rigging, and a mixture I've made up that matches the Running Rigging lines for their seizings - the tiny fishing line I use for them only comes in white. Danny
-
What Knots on ratlines? (edited by admin)
Dan Vadas replied to jd99's topic in Masting, rigging and sails
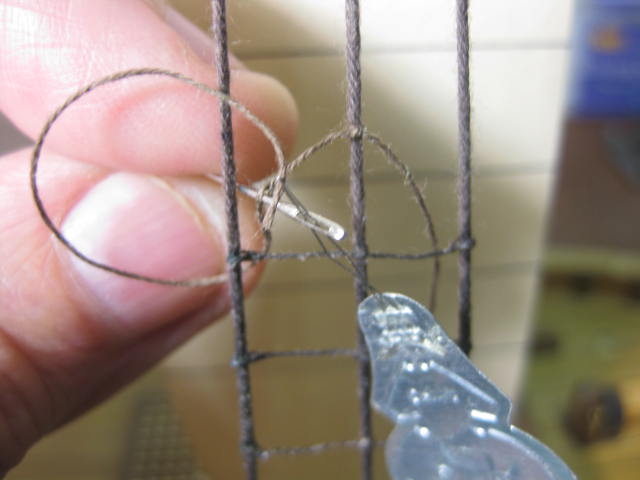
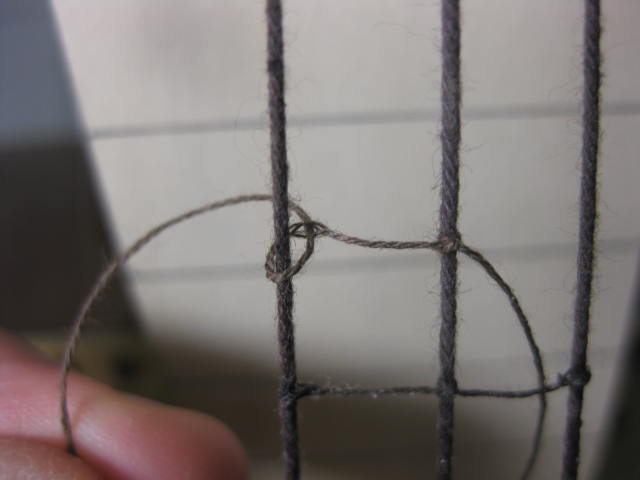
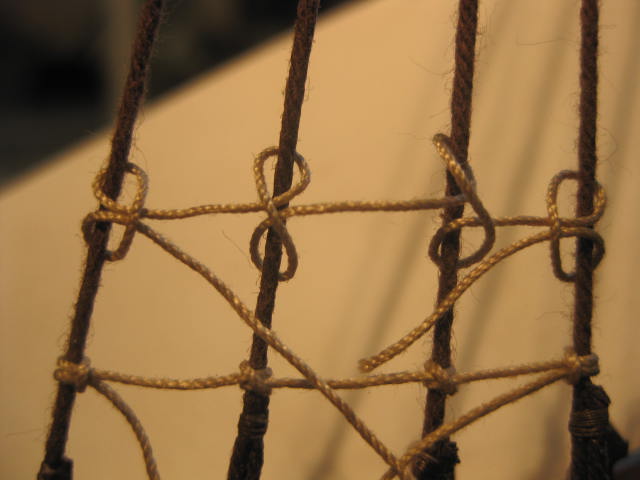
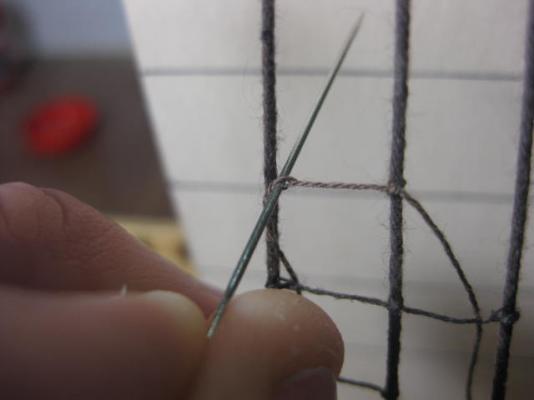
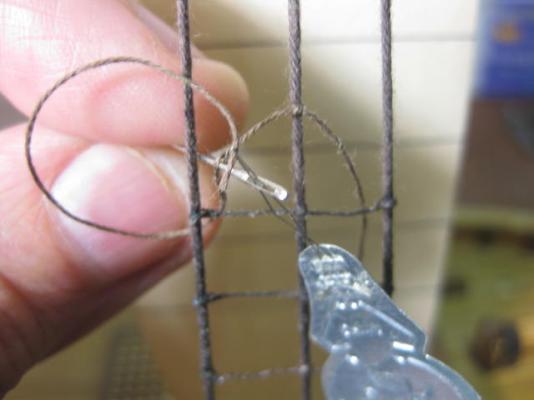
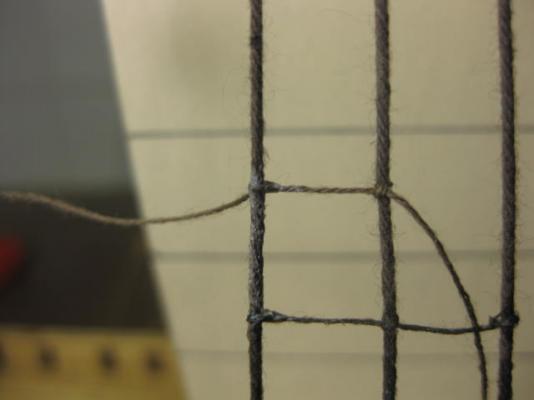
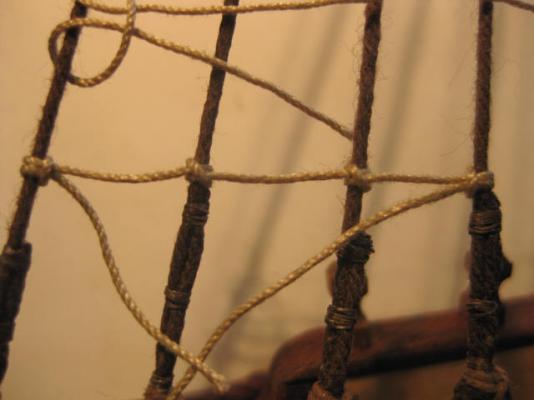
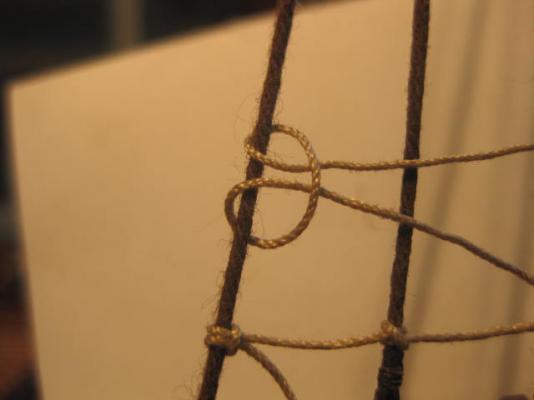
Actually, the CORRECT way to tie a Ratline is to EYE SPLICE the two outer ones, and use Clove Hitches for the inner shrouds. The pics below show how I did them on my Norfolk Sloop : The "Cow Hitch" (I can't remember if that's the correct name for this knot) is an alternative that looks much neater than a Clove Hitch for the two outer ones, as Janos mentioned. Here's how to tie them : Note the tails of the Cow Hitches are both on the lower part of each knot, meaning that the two knots are mirrors of each other. Danny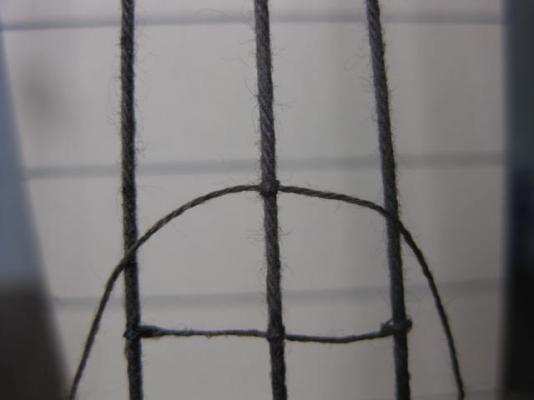


-
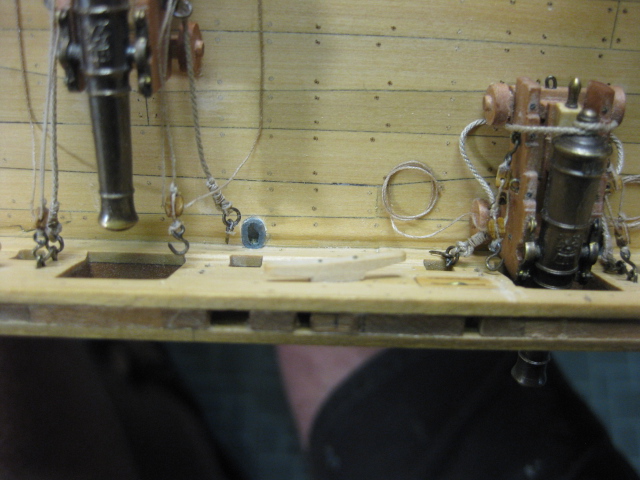
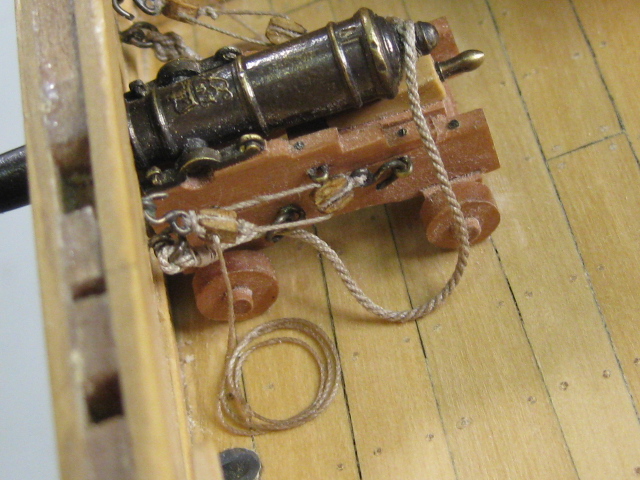
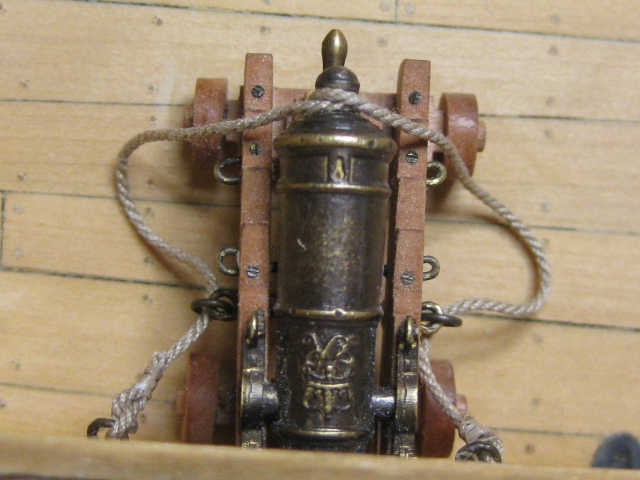
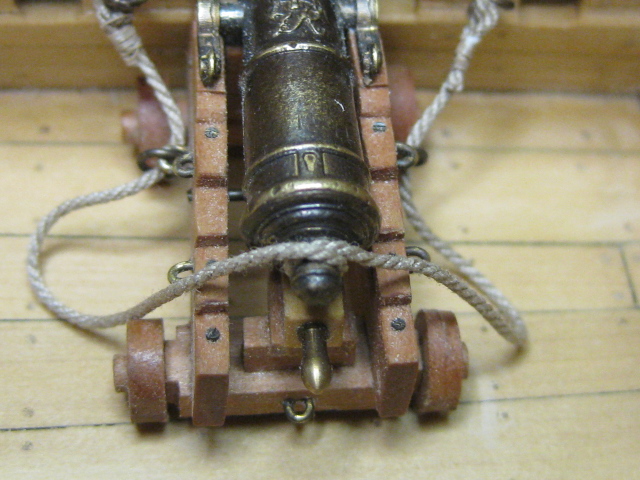
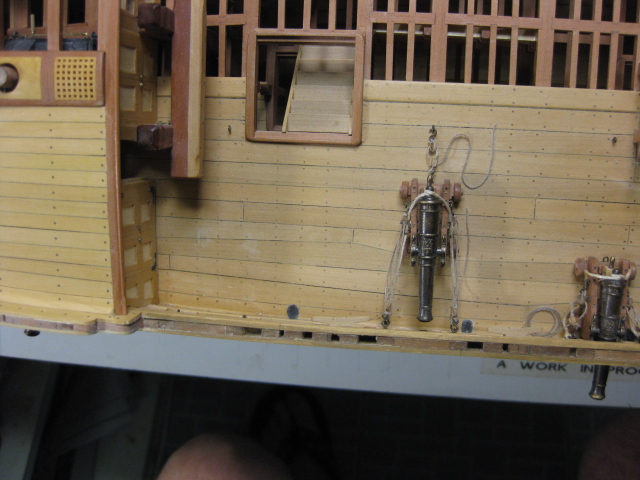
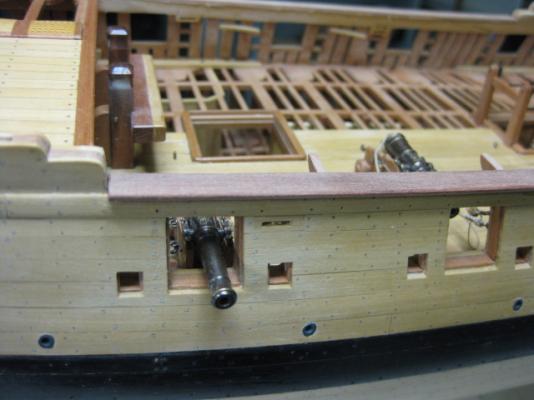
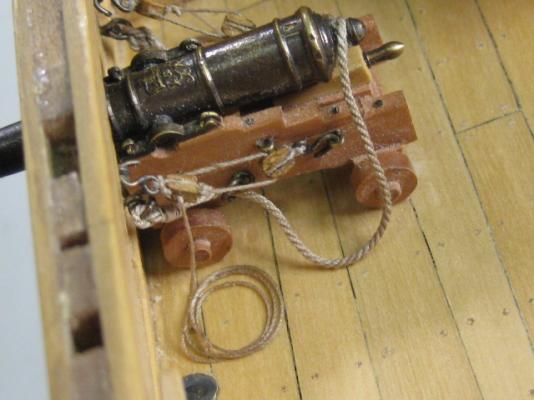
Thank you Frank, John, Pat, Ben and Mark . Pat, the fourth pic in my previous post is as close to the "real" colour of Chuck's rope as I can get it. The others ARE a little paler due to different lighting angles. I've finished Re-Rigging all the guns. To hold the rope coils in place I used a Fabric Setting gel used by seamstresses etc to glue down hems before sewing them. I can't vouch for the longevity of the product for this application, as it washes out with water. I may have to use some dilute PVA at a later stage if it looks like the coils will come undone. The coils are still damp in these pics, and will take a more natural colour when the setting gel dries. Danny

-
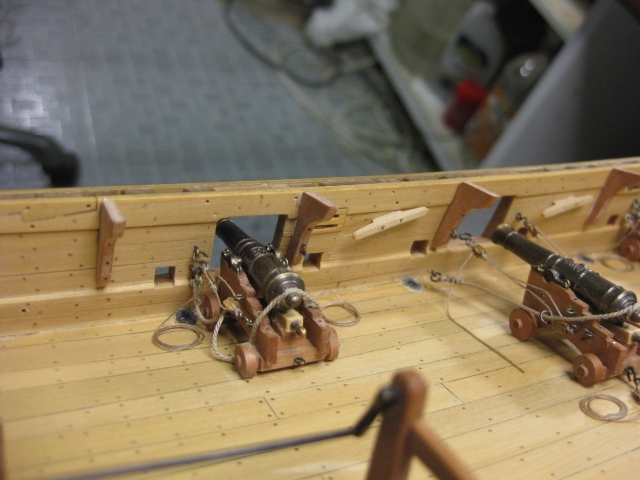
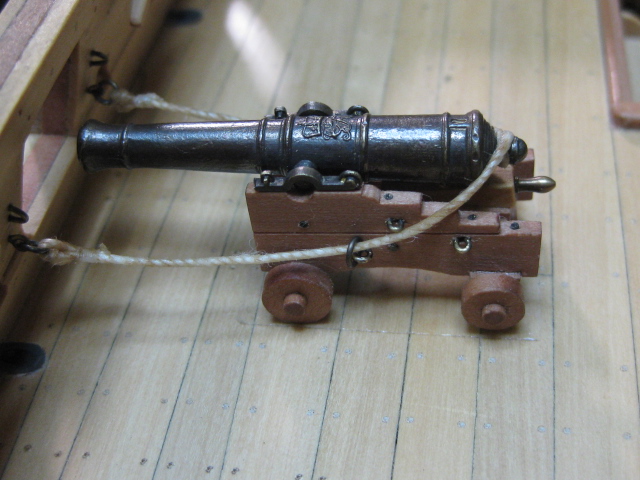
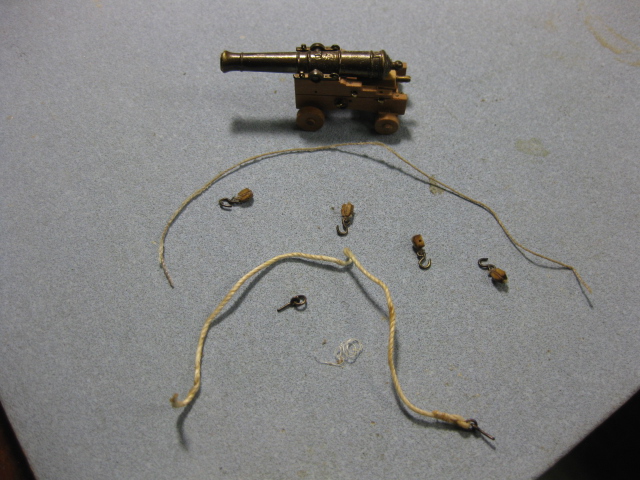
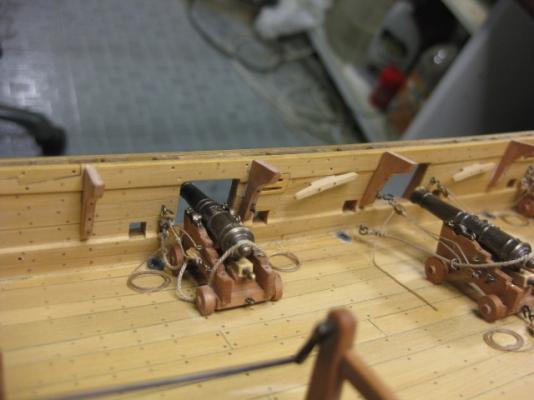
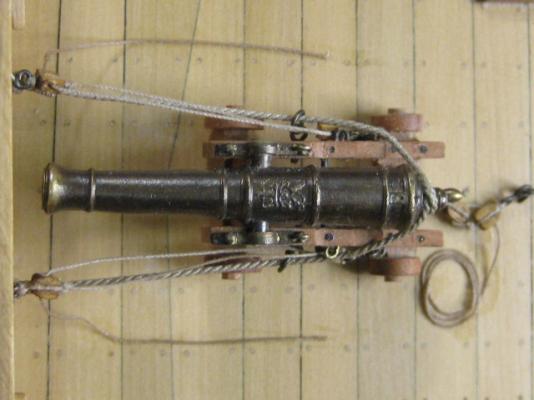
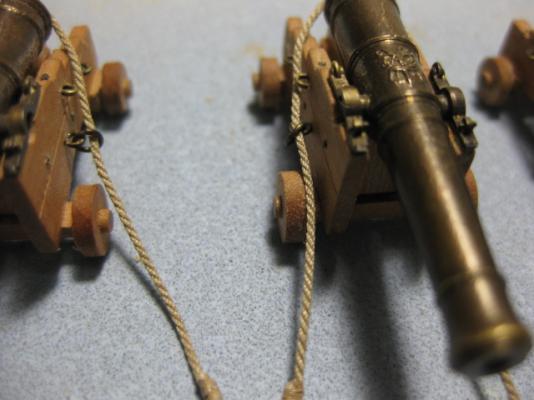
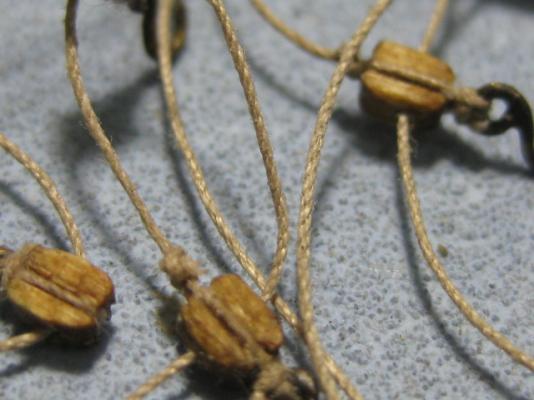
I've re-made all the rigging for the four guns, and re-fitted the first one. I'll have to fit the side tackles in a couple of days, as I'm about to head off to work. The quality of Chuck's line is very apparent in the pics, especially when compared to the line I'd used previously (lower pic is the old one - obviously ) : Even the 0.2mm line for the side tackles is just as good. Great definition, not even a hint of "fluffies", and very easy to work with : I'll definitely be getting the rest of my line from Chuck . Danny


-
Thanks again John, Adrieke, Popeye and Ron. Popeye, the deck cleaned up without any problems. The Isopropyl doesn't soften the Minwax finish. The scuff marks you can see is where I'd previously scraped off the Minwax to get good adhesion - the guns will be glued over those spots again. Ron, I used a needle file to round the blocks. Danny
-
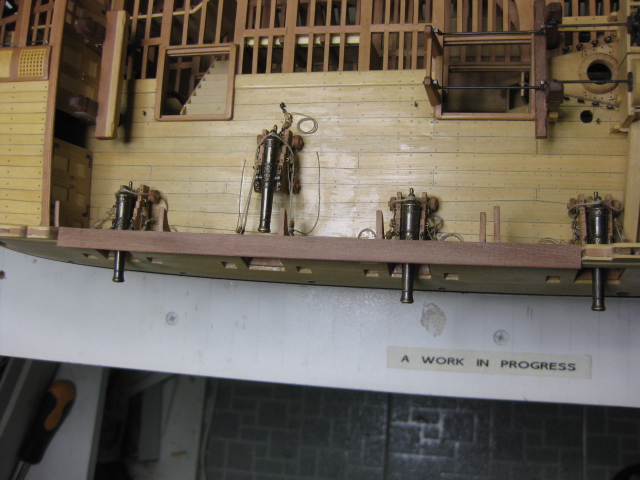
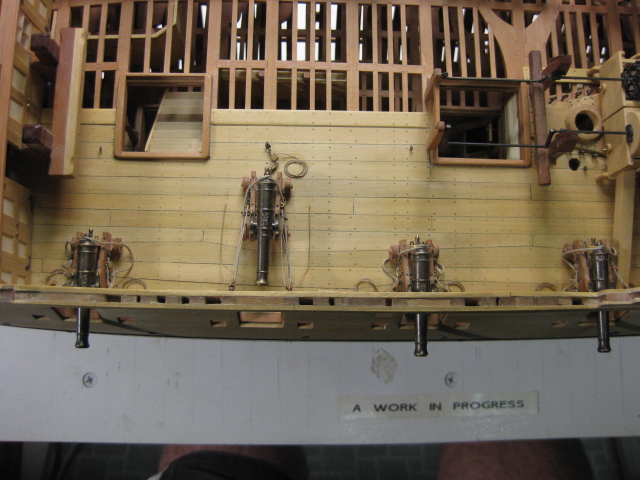
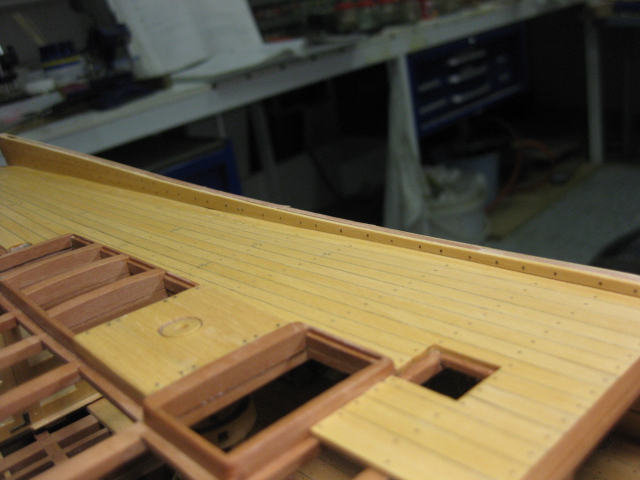
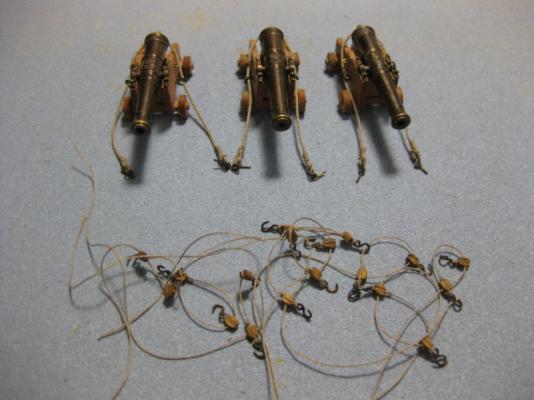
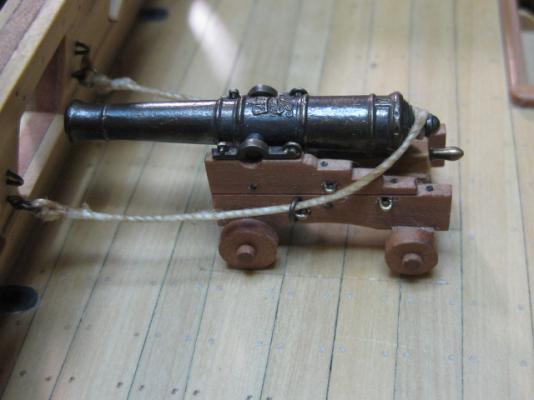
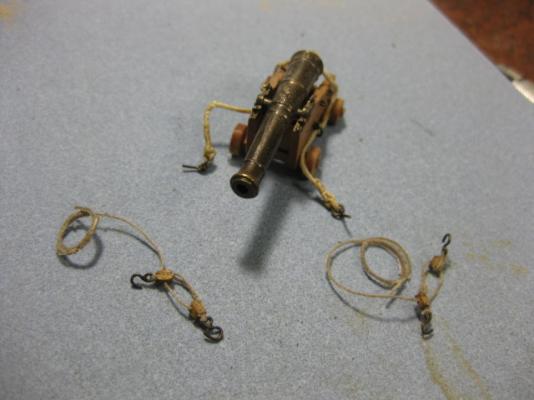
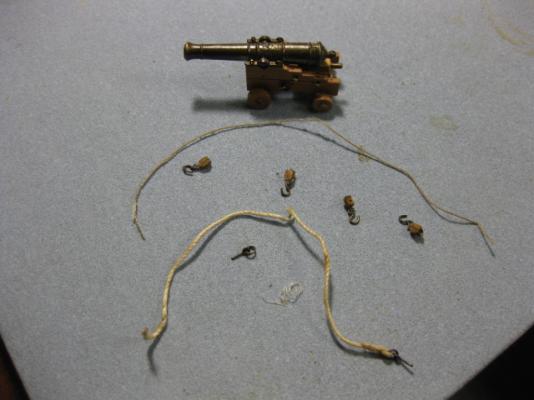
Thank you Brian and Wayne, and all those who hit the "Like" Button . The majority of the hull and deck planking is now completed. It was a lot of fun, and I got better at it as I went, but it was also very tedious work at times and I'm glad that stage is over with. Now come the more "interesting" parts of the build . Gun Rigging Redo Before going any further I figured it was about time I re-did the Rigging on the four guns in the waist that are completely visible. You may recall that I mentioned earlier that I wasn't 100% satisfied with the ropes that I'd used at the time. Now that I have the excellent rigging line from Chuck (Syren Ship Models) I'm going ahead with it. I won't attempt to do the four guns under the forecastle and quarterdeck, as the rigging is barely visible and it would be extremely difficult to do them anyway. What can be seen of the rigging on these guns is quite acceptable to me. I started by brushing Isopropyl Alcohol on the glue holding the trucks to the deck, and also the eyebolts for the breeching line. All pieces came off the ship easily. Then I did the same for the seizings on both breeching lines and side tackles. I wanted one piece of each intact to use for measurements. Again, everything came apart easily : Danny

-
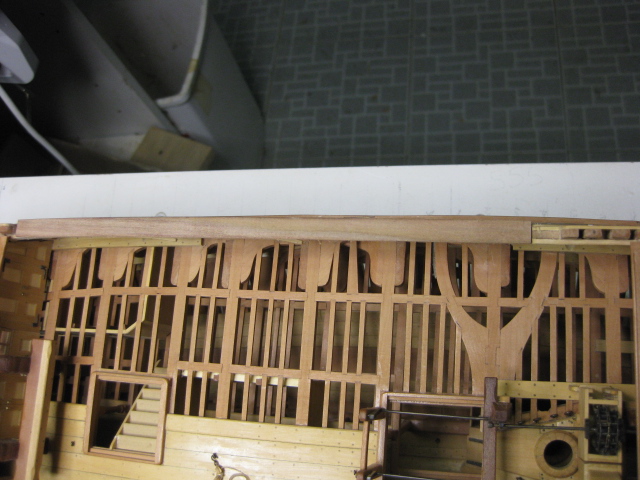
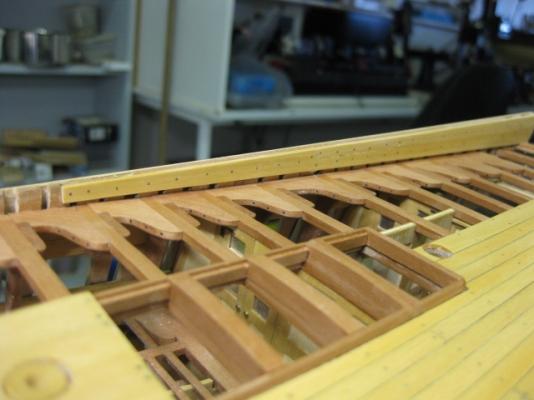
Thanks for looking in, and the kind words John, Michael, Grant, Joe, Nils, Randy, Jeff, Gerty, Ron and Ben - much appreciated . Bulwark Spirketting I've fitted all the Bulwark Spirketting that I intend to do. The Port side is completely covered, and I've fitted half of them to the Starboard side Quarterdeck to cover an error I made very early in the build - about eight of the frame Toptimbers were a couple of millimetres short. I didn't discover this until WELL after the time had passed to correct them . The piece above the Cathead was rather interesting to make : Danny

-
Hmmm .... strange that you got away with pics that big Adrieke. Maybe the limit has been upped (and no-one told me ). Danny
-
Yes. Don't forget, there's also a 10 pic limit per post. Danny
-
Rick, check out this reply I just made to the question you asked in Site Problems. Danny
-
Hi Rick, I just had a look in your Build Log and I think Mark has nailed the problem - your pics are too big to fit more than a couple in each post. Once you go over the Megabyte limit the post won't load. Try down-sizing the picture size and/or resolution, or limit each post to fewer pics. Danny
-
Hi Bill and Sateash, and a (belated) warm welcome to MSW to you both. Great to see a couple that are so motivated in this hobby together . I don't know if you've done a Search for all the other Confederacy Build Logs on this site, but there are quite a few, both in Kit Builds and Scratchbuilds. There will no doubt be a few tips you can pick up from them. Happy Modelling. Danny