ECK
-
Posts
646 -
Joined
-
Last visited
Content Type
Profiles
Forums
Gallery
Events
Everything posted by ECK
-
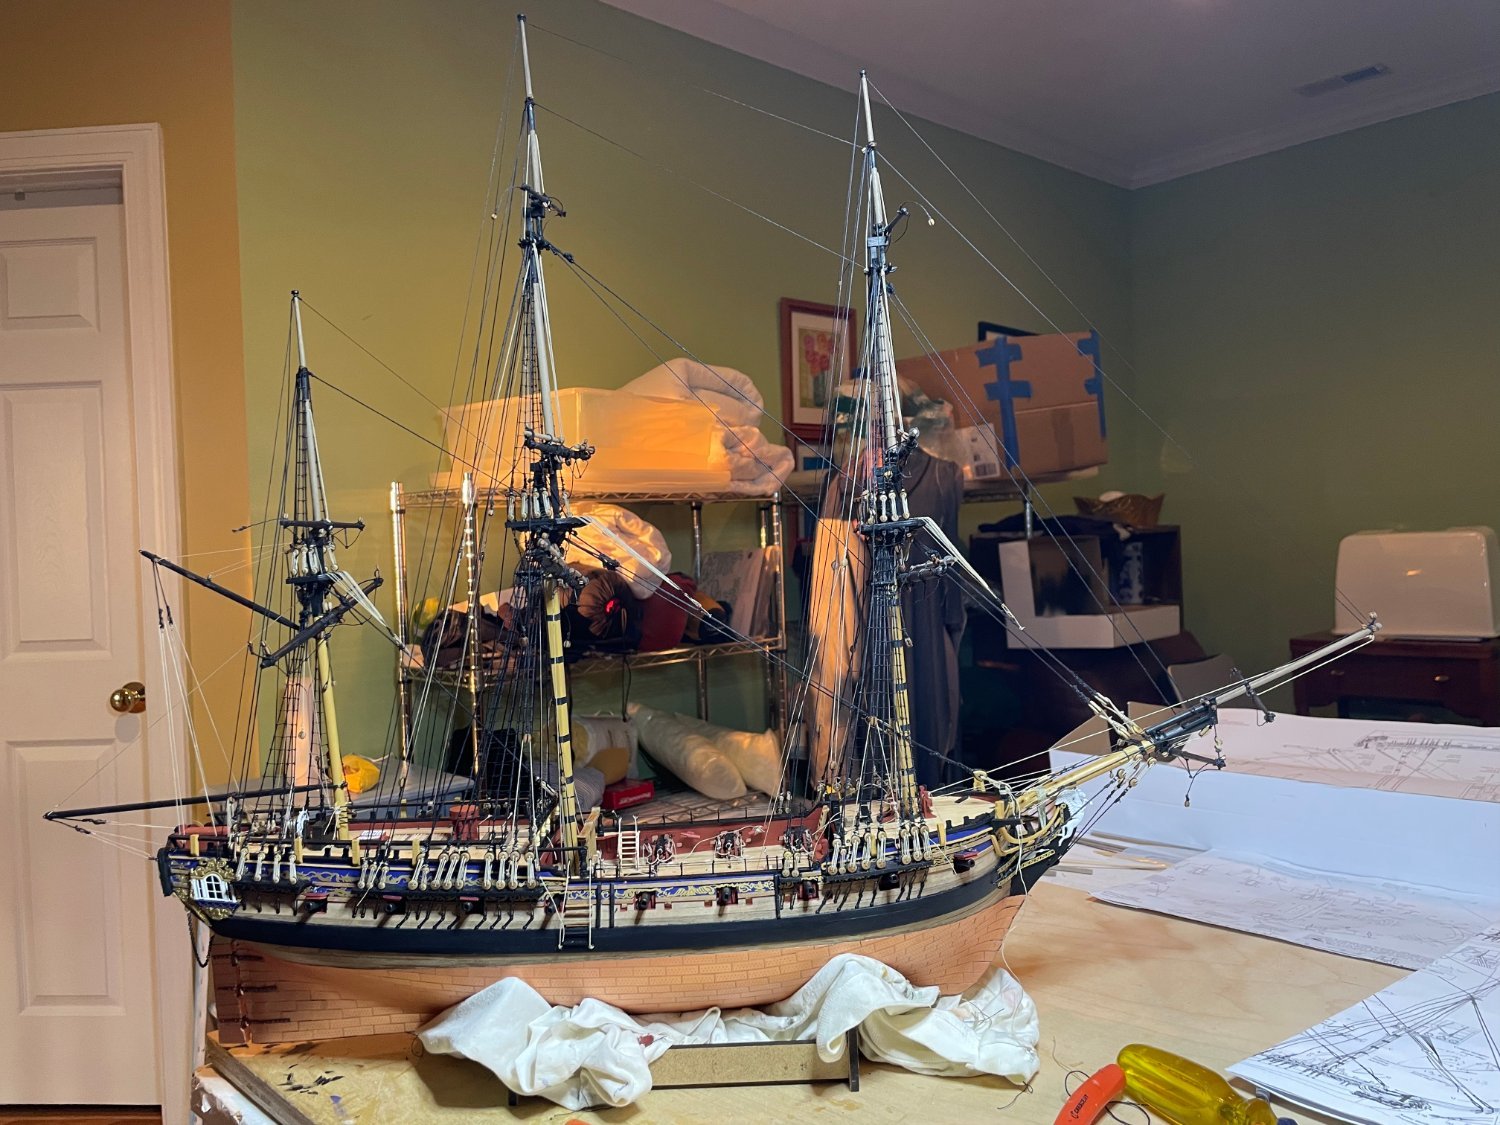
So first part done, now time to plank the main part of the hull. IMG_6736.heic


- 233 replies
-
- 8
-

-
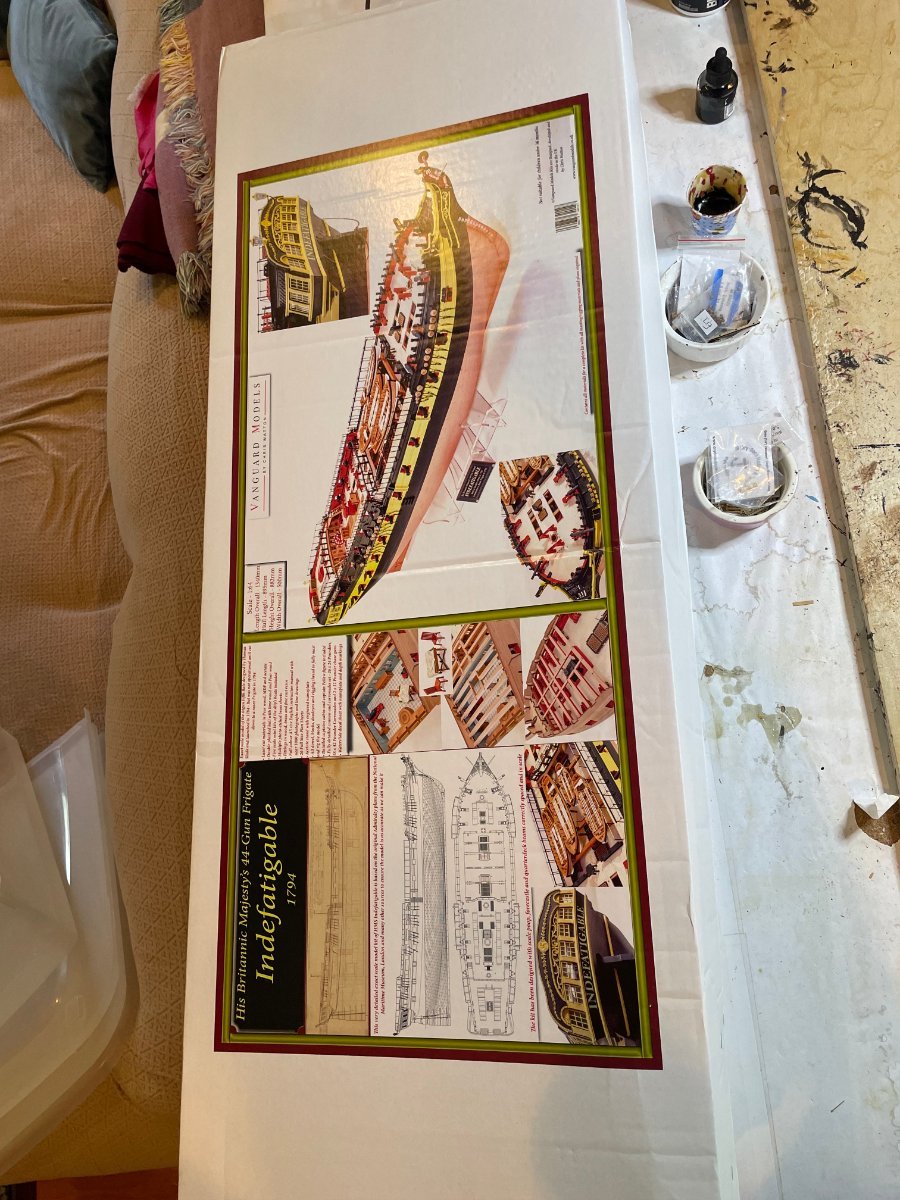
- Indefatigable
- Vanguard Models
- (and 1 more)
-
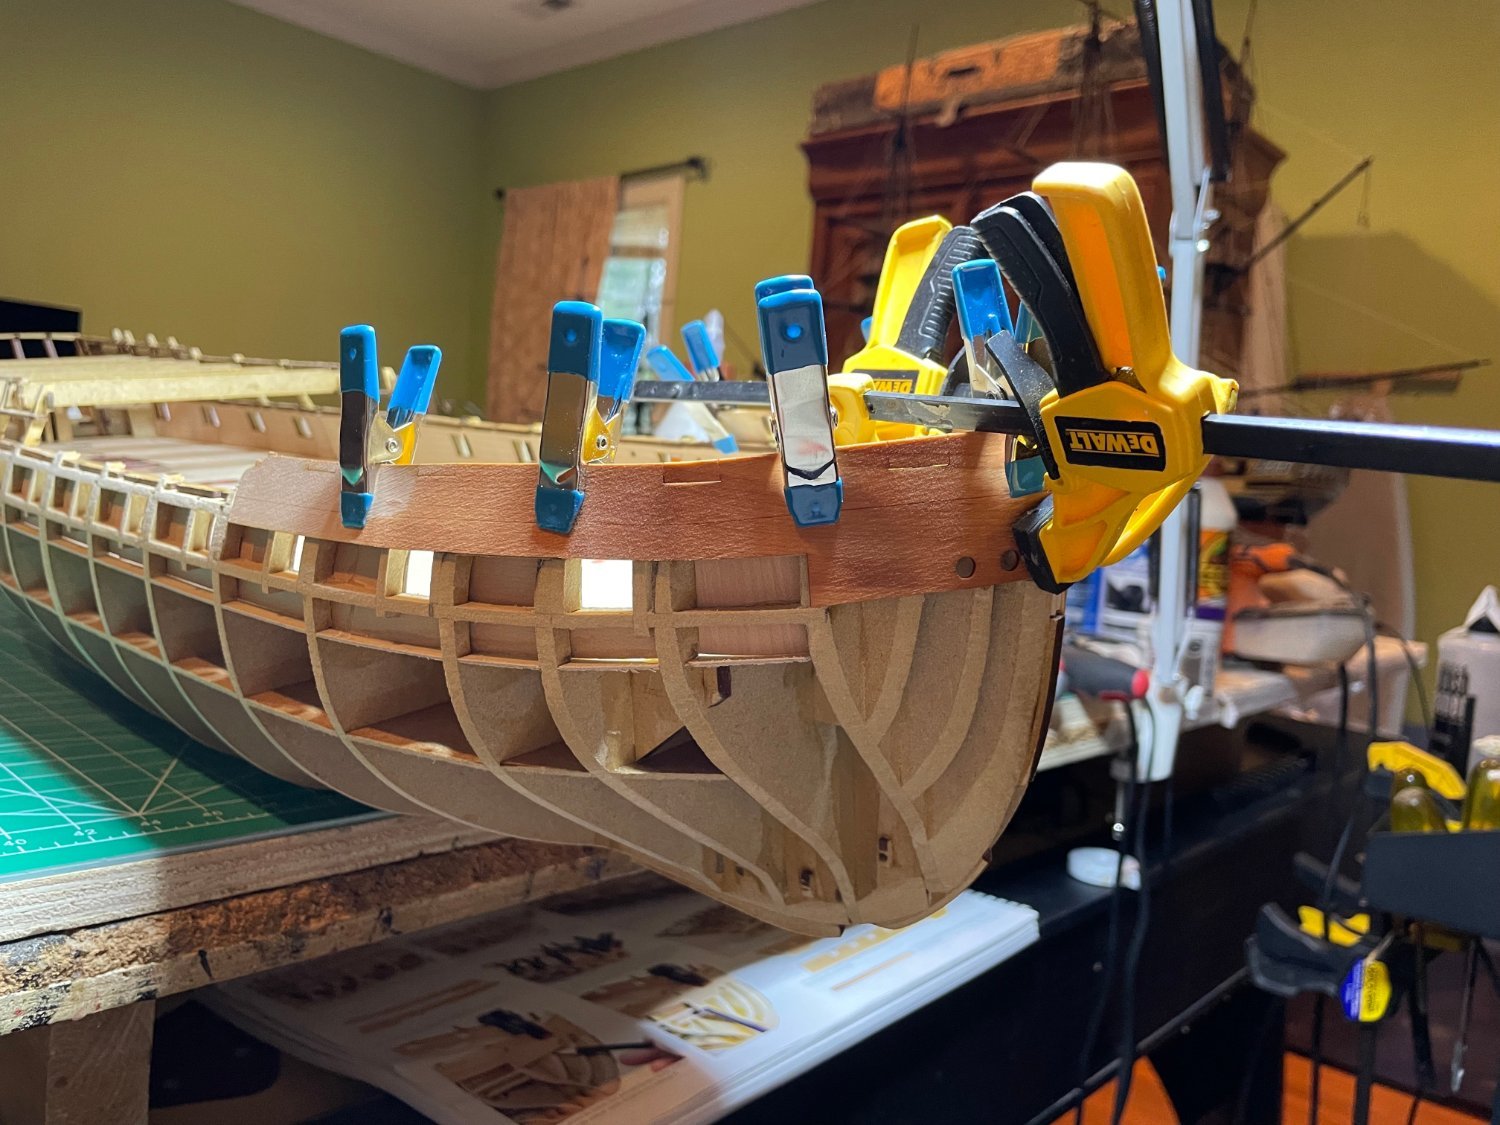
So trying to keep up with Kevin's great work. First plank on, good feeling Took awhile to line things up, again lots of clamps. Sta Starting the in between planks


- 233 replies
-
- 10
-
-
- Indefatigable
- Vanguard Models
- (and 1 more)
-
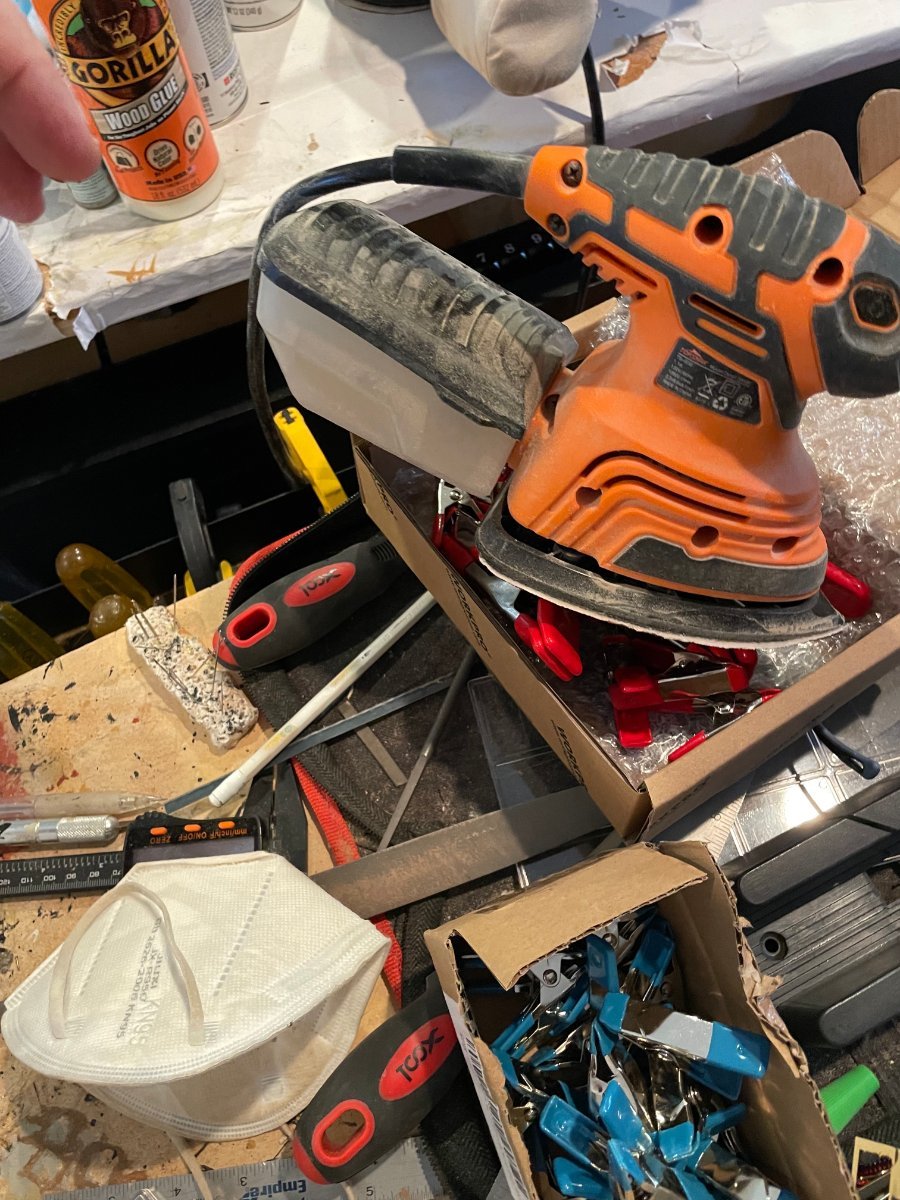
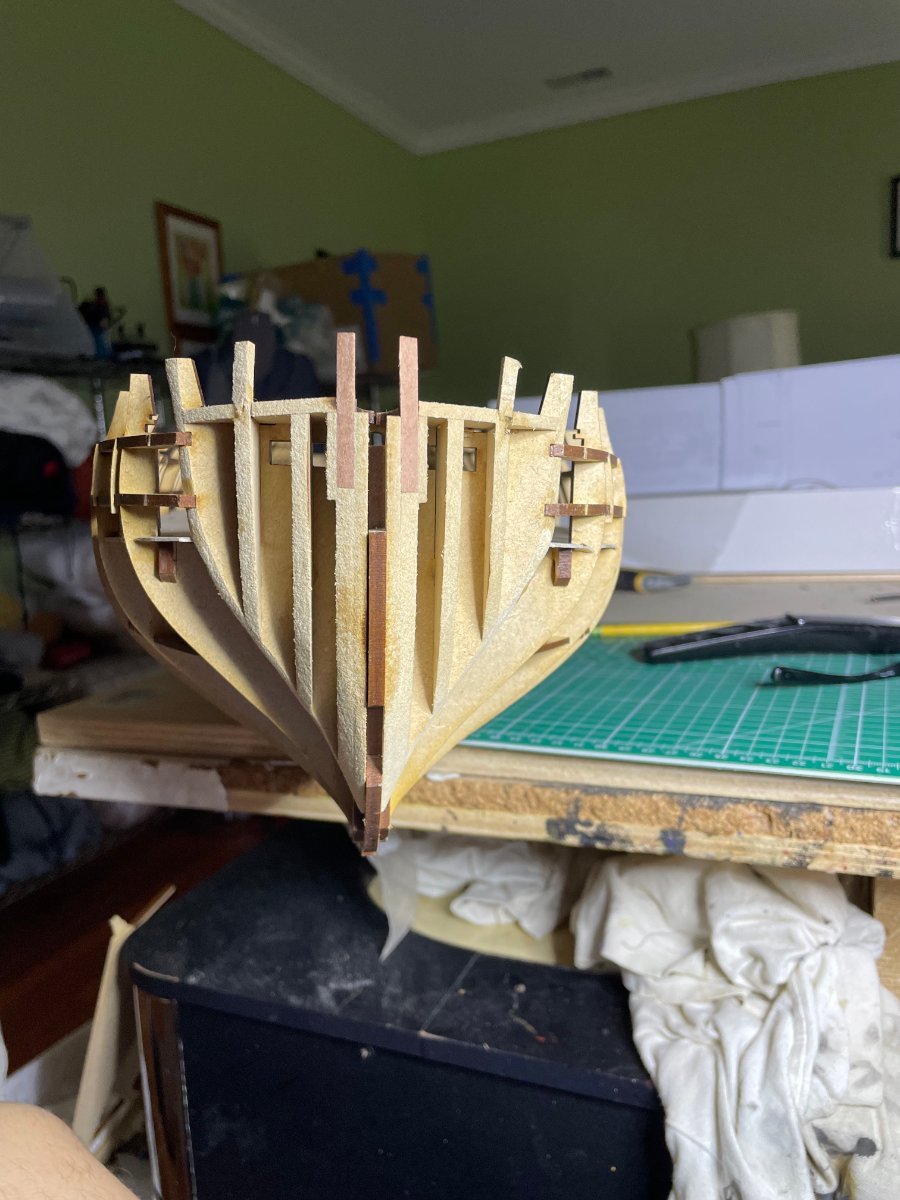
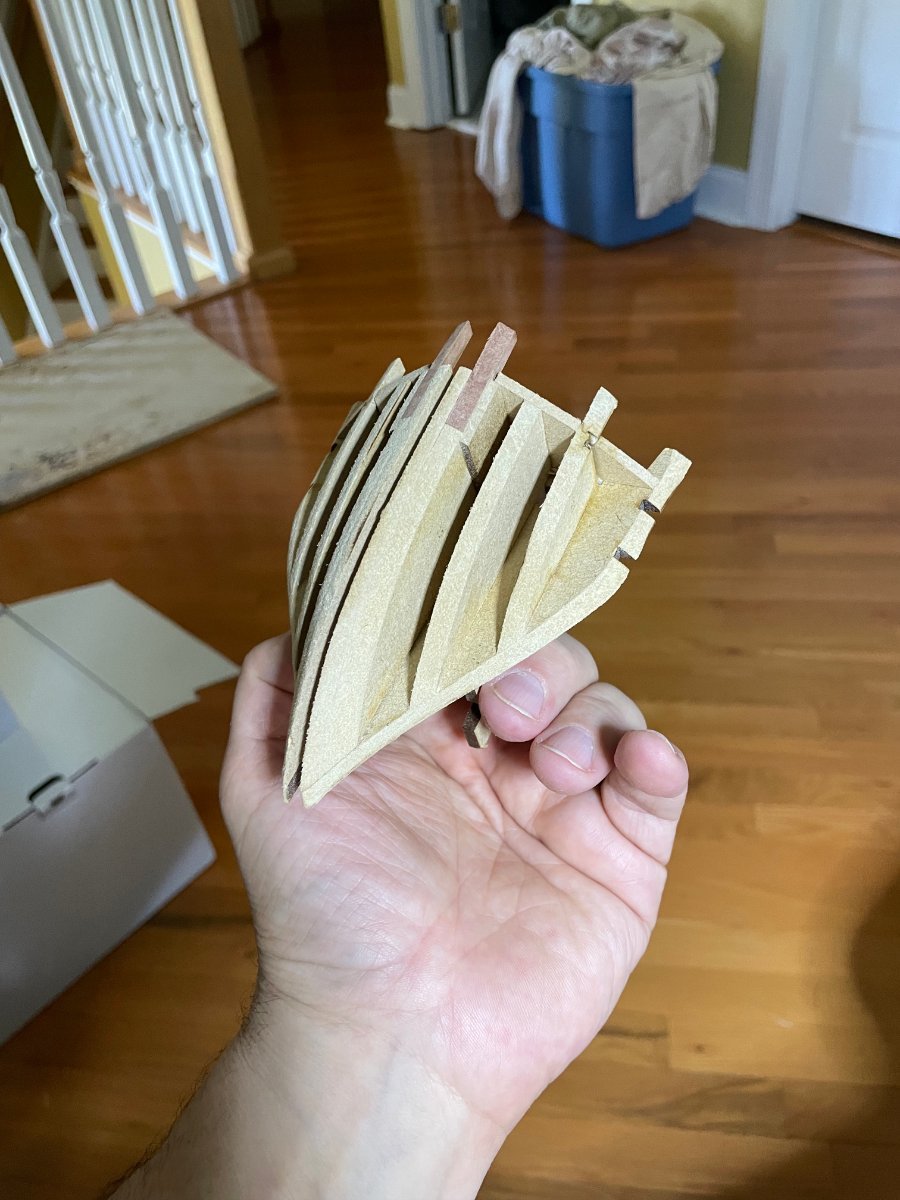
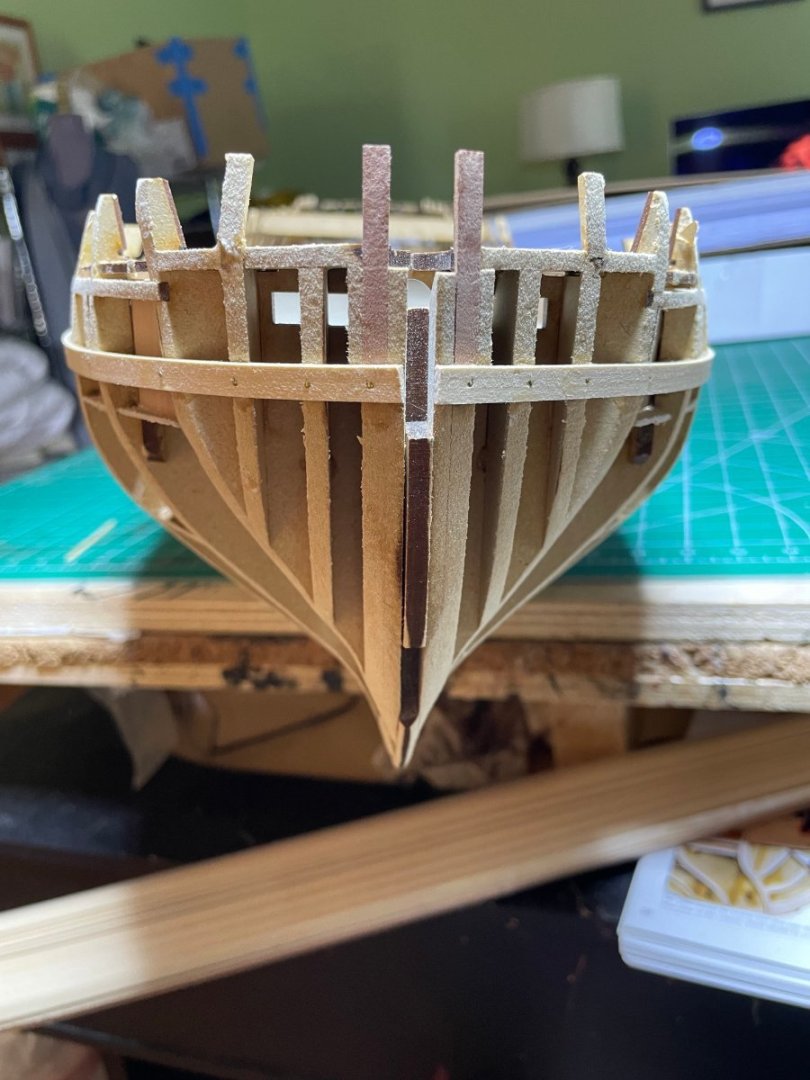
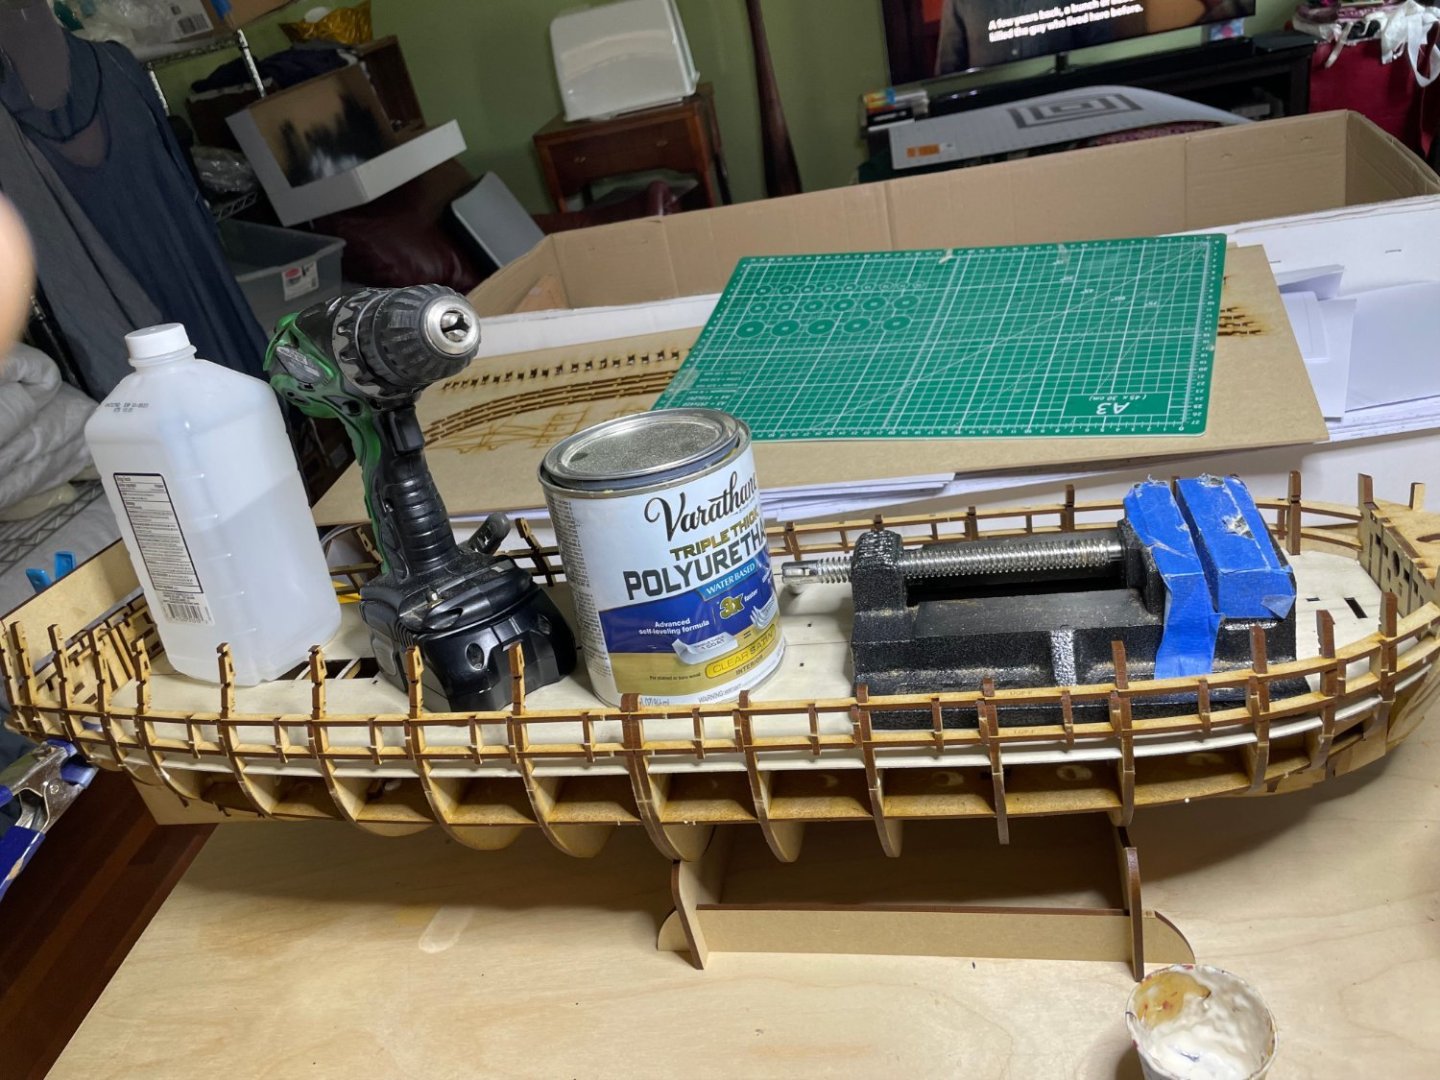
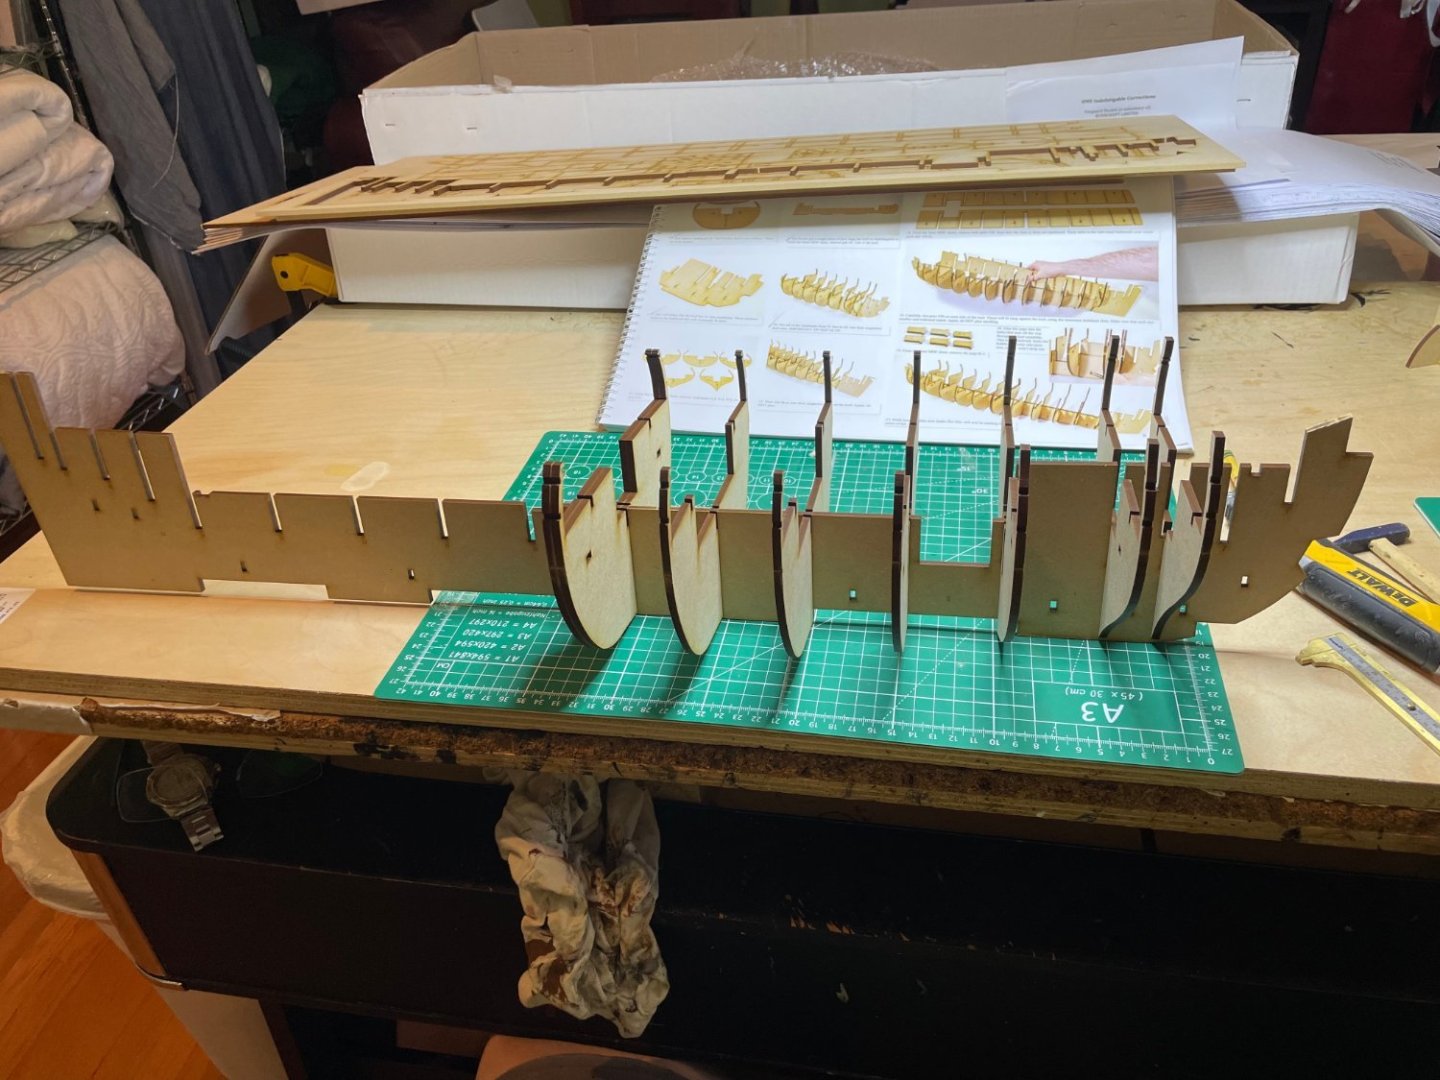
So meet my little friendVer Makes sanding the hull much easier. Took awhile. There was some battle damage but nothing glue and clamps could not fix The finished product. I don't mind comments before I put the first plank, likely tomorrow. Main planking will be over the weekend. la Last thing today is that I soaked the bow pieces and clamped. Once dried tomorrow I will place the appropriate markings. Soaking the pear definitely makes it swell a lot. The change in width between wet and dry part of the straight area was 2mm!


- 233 replies
-
- 8
-
-
- Indefatigable
- Vanguard Models
- (and 1 more)
-
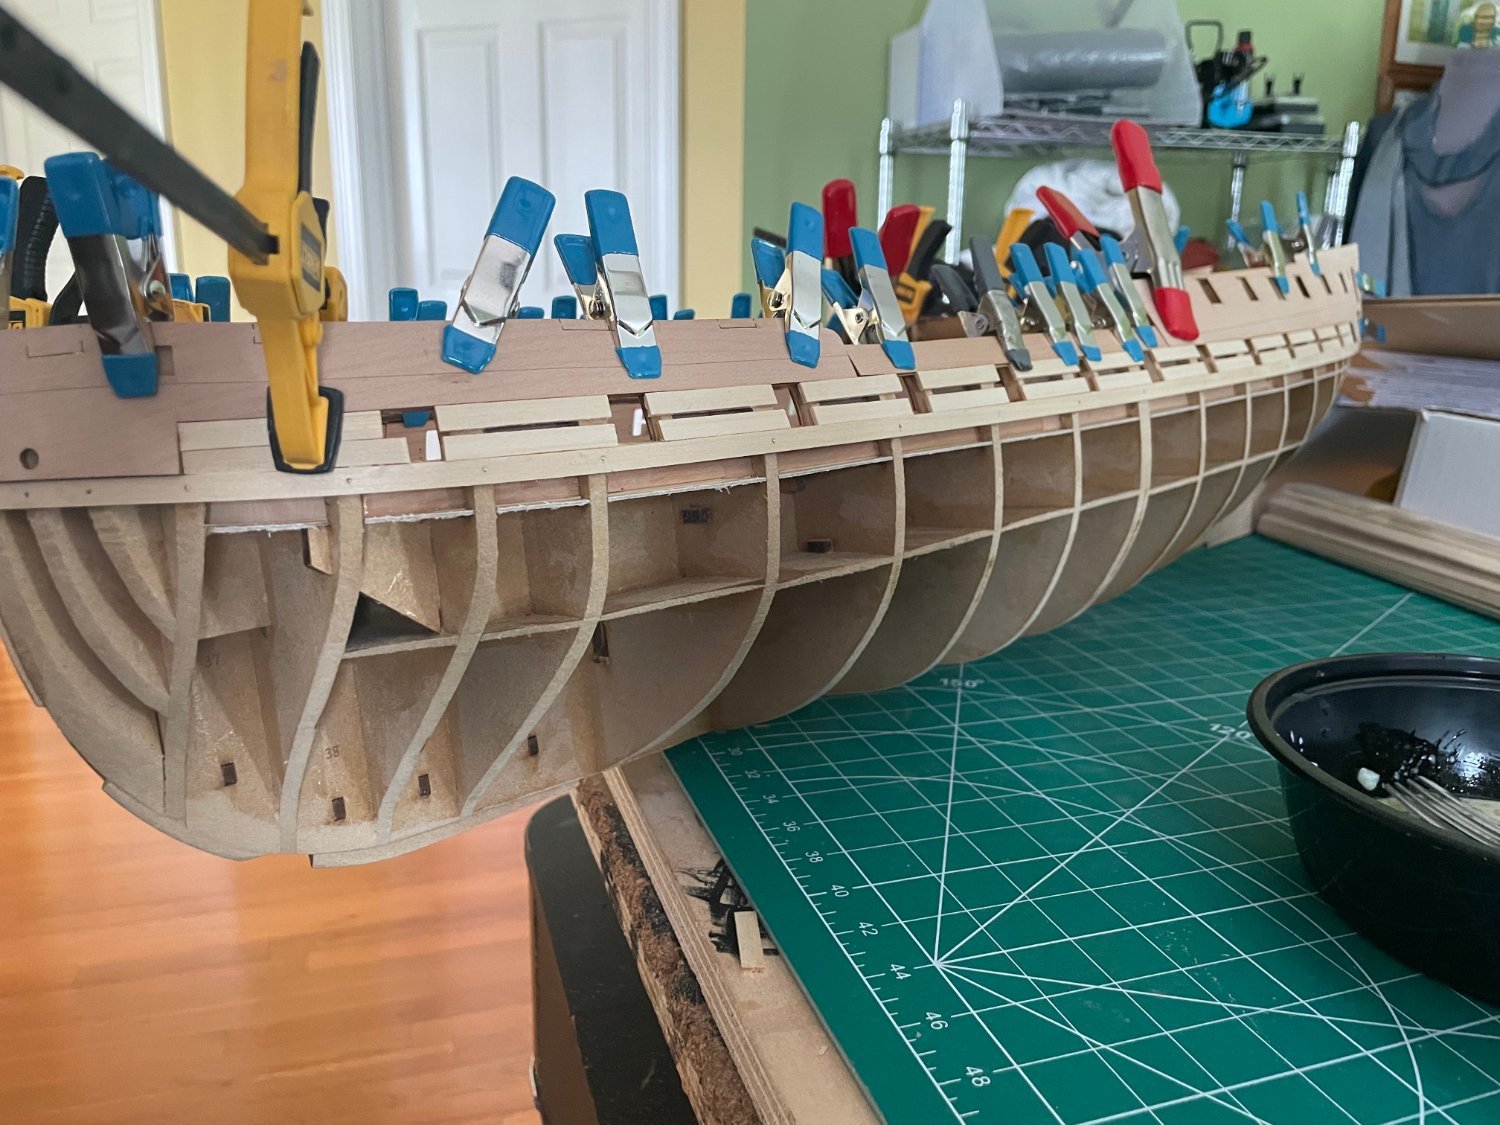
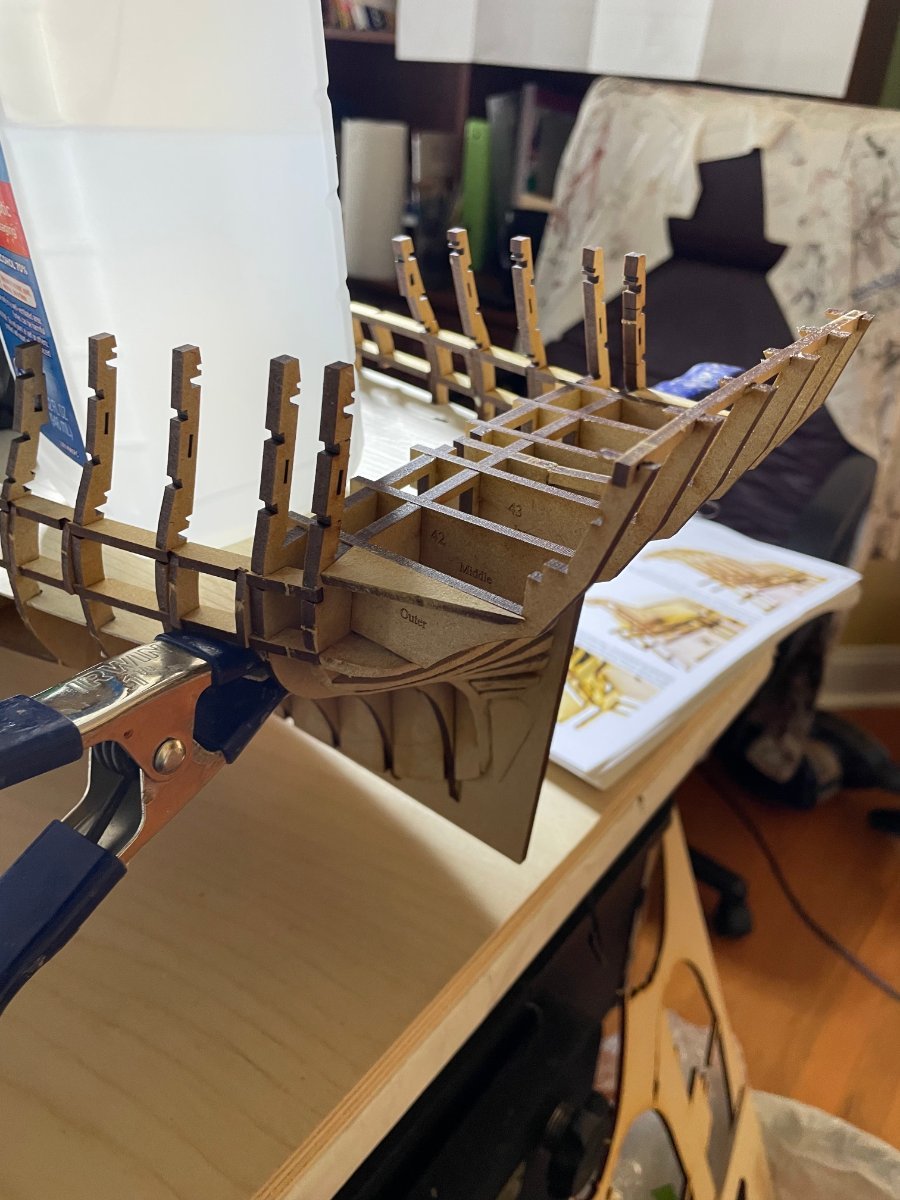
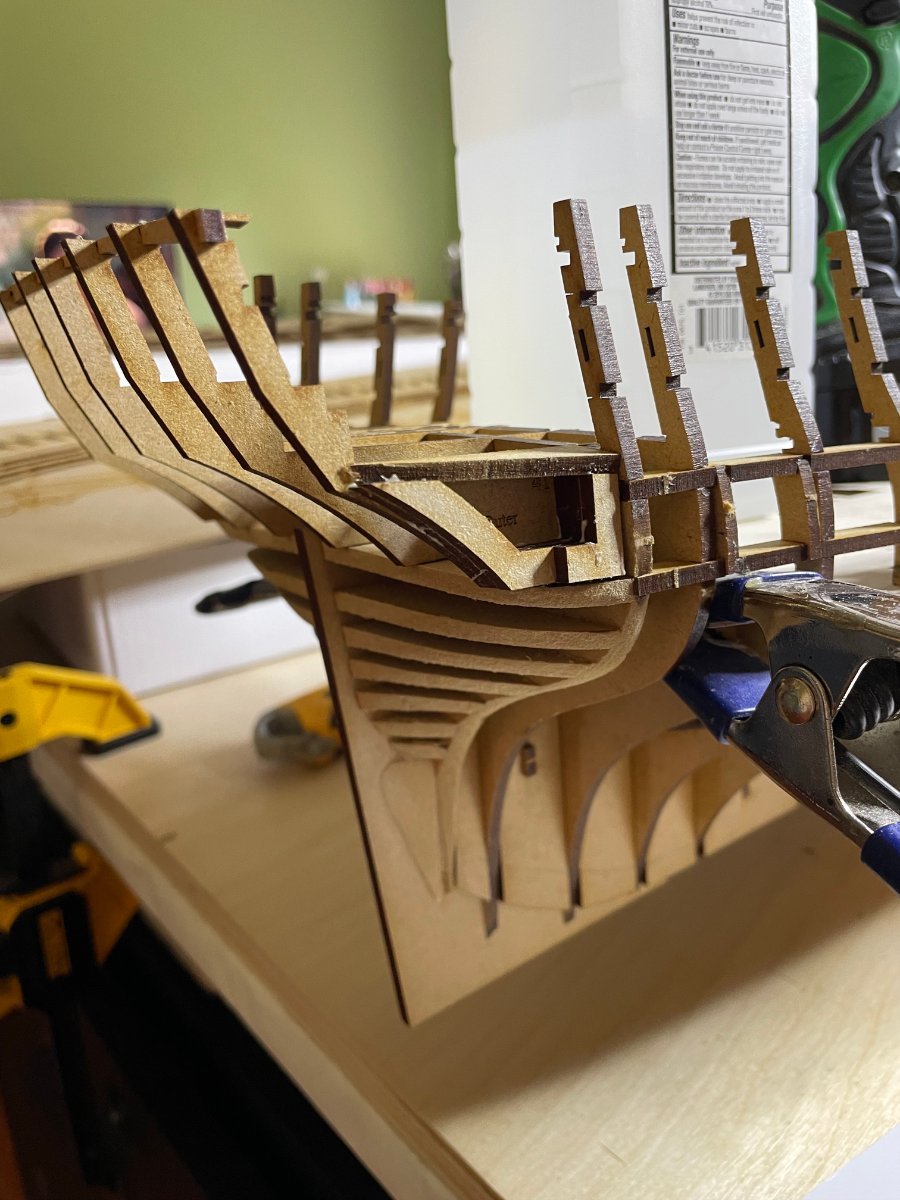
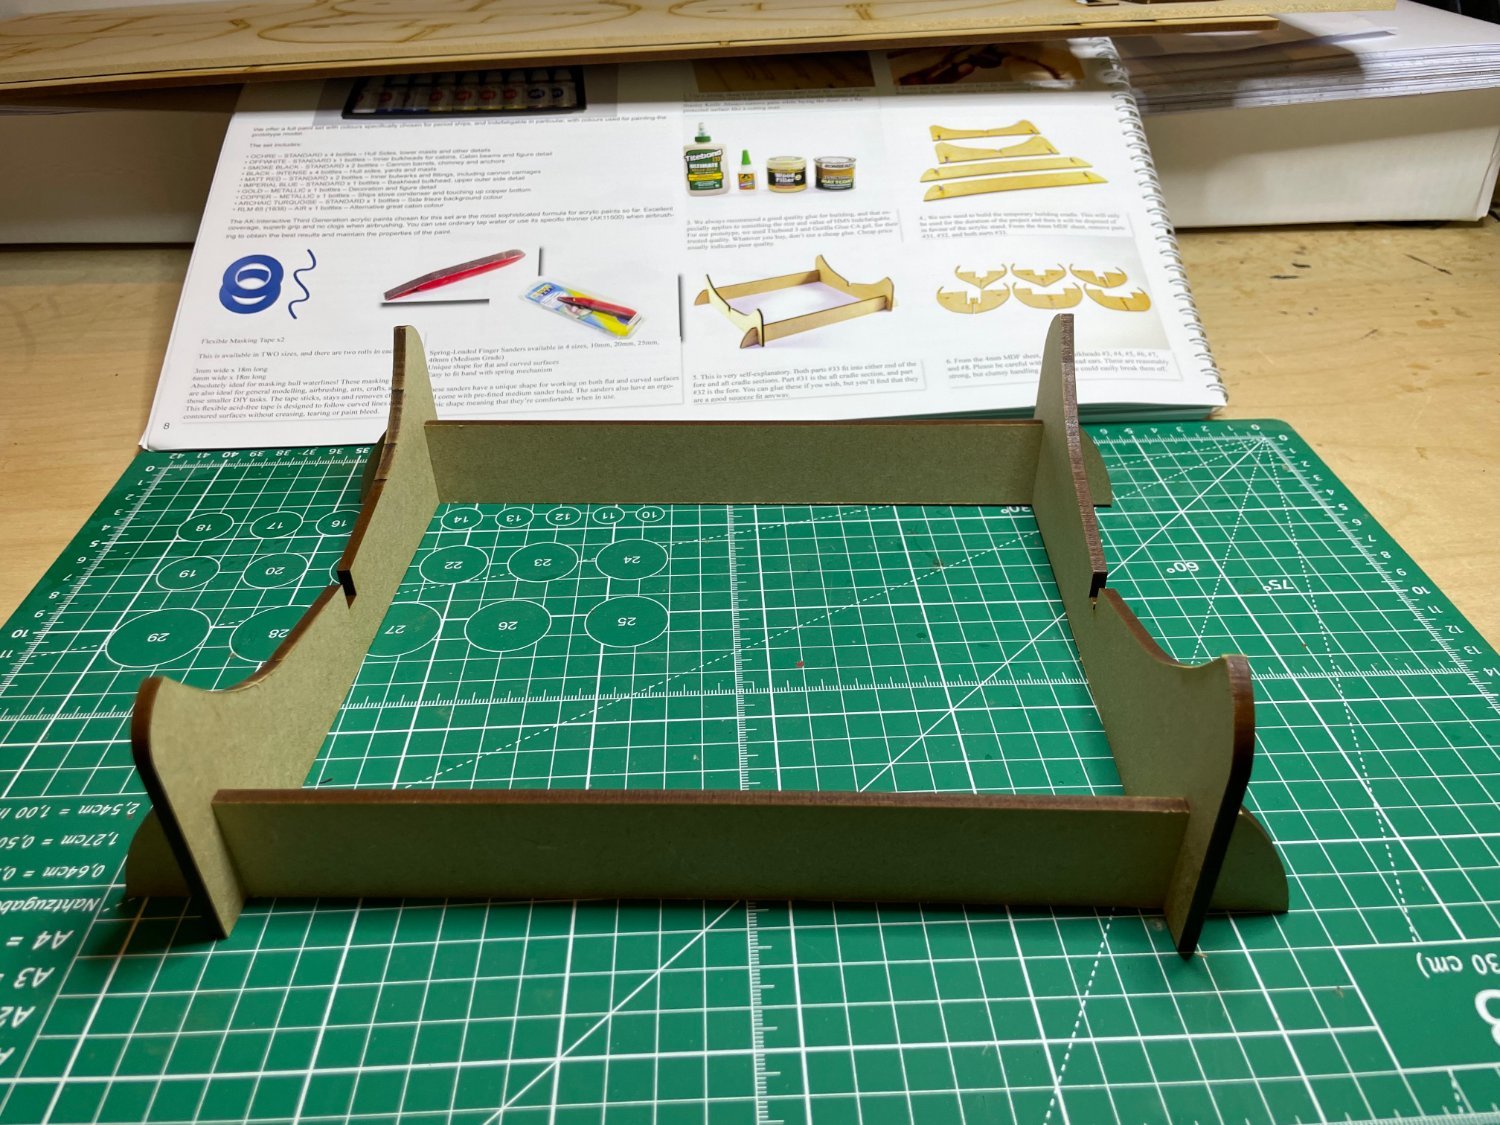
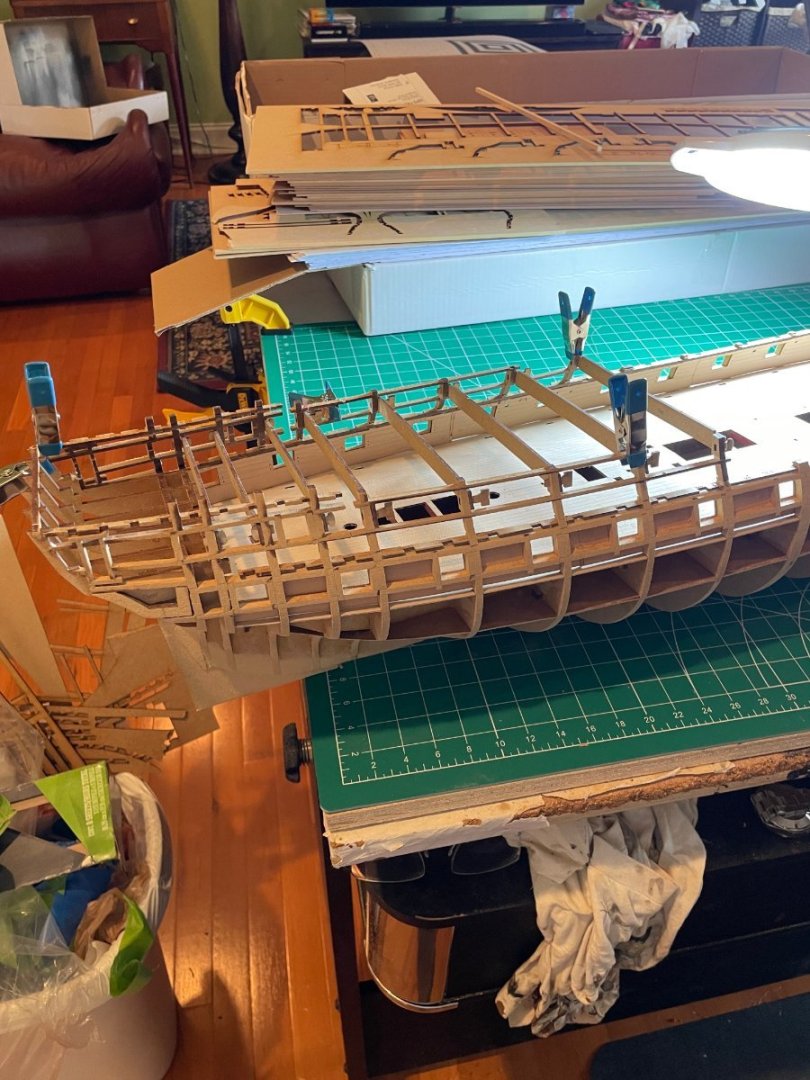
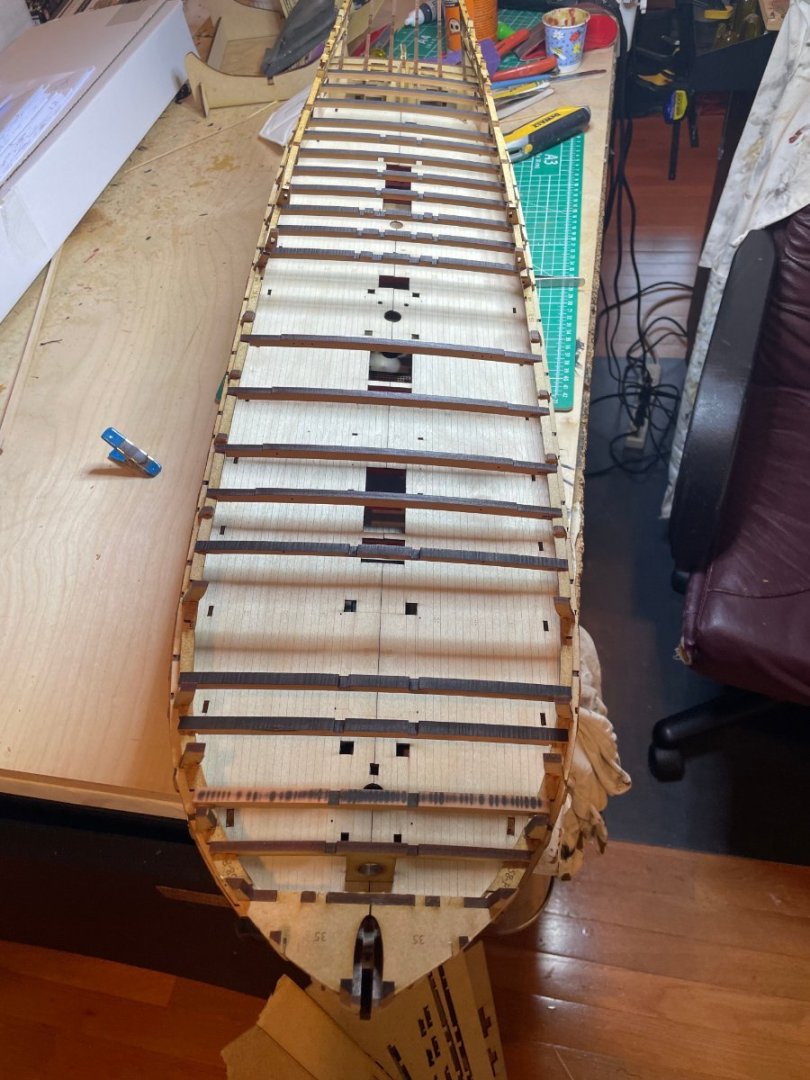
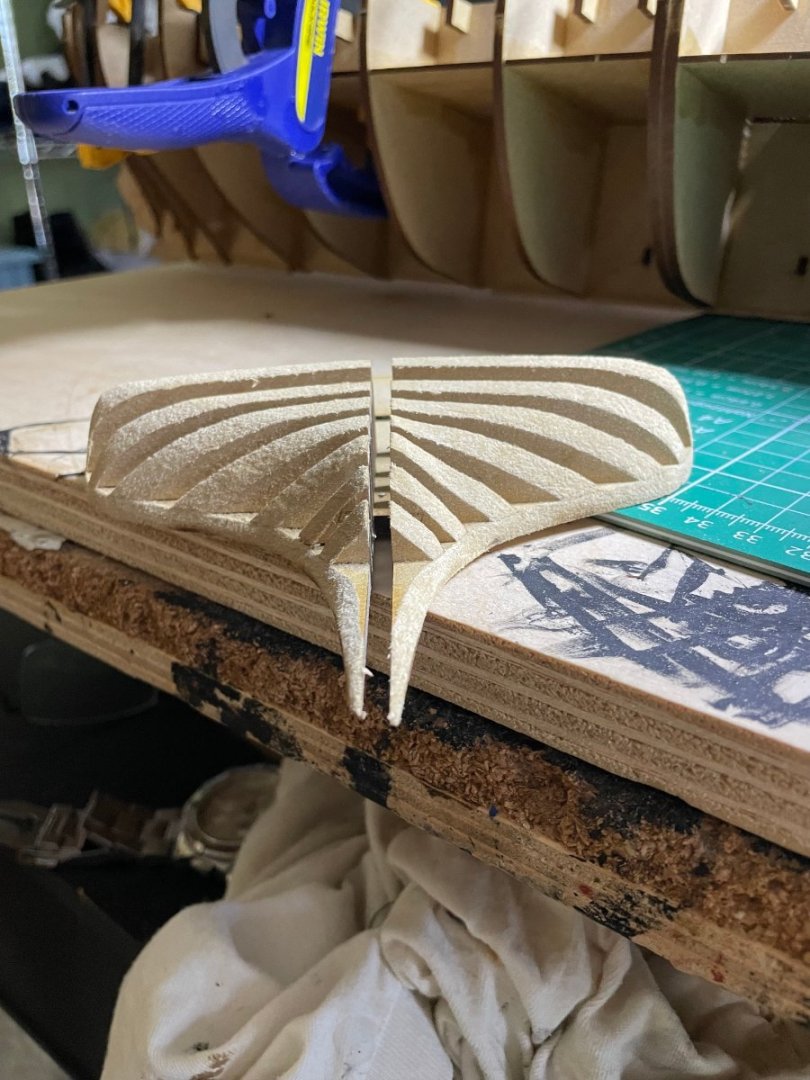
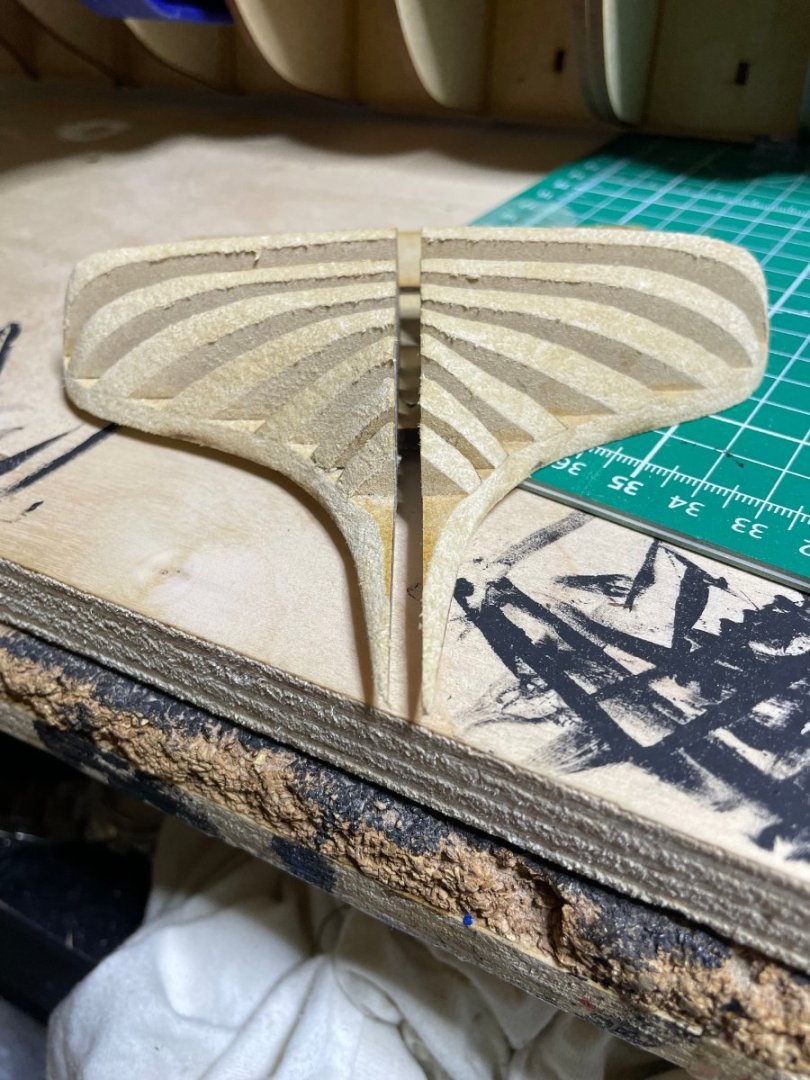
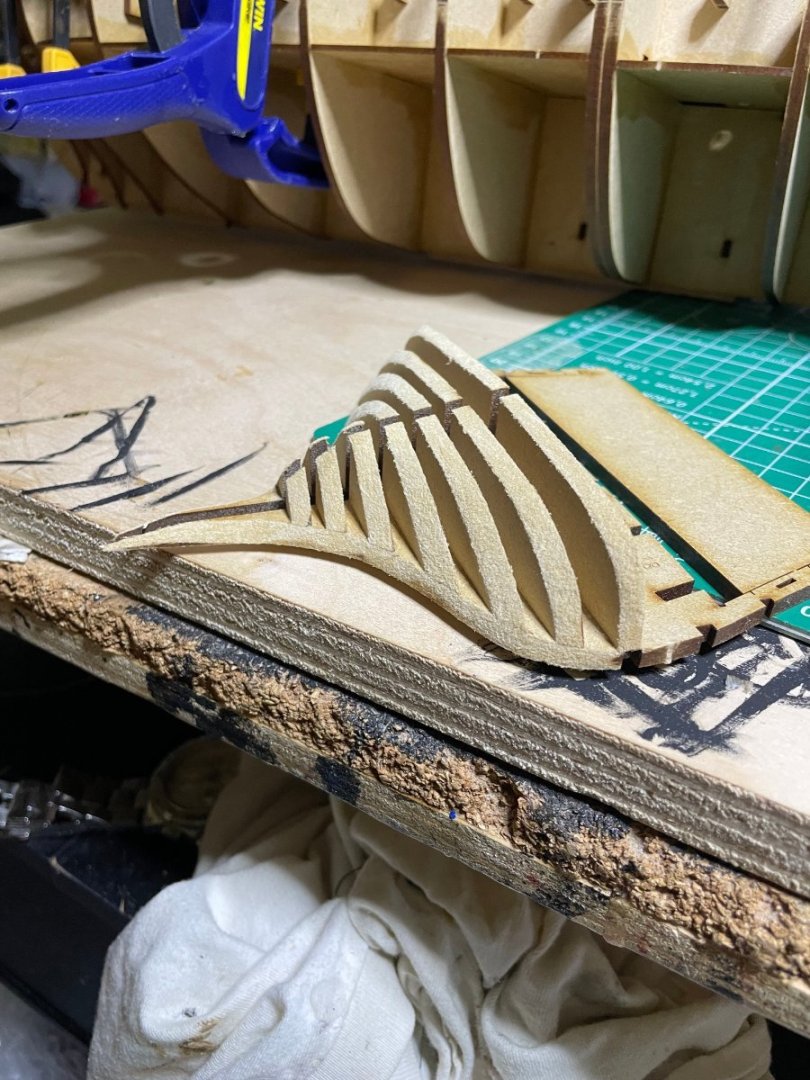
Beams fit perfectly. Once the guides dry, will remove the beams, place the stabilizers then somewhere in the next few days shape the hull, the most nerve racking part of the build.
- 233 replies
-
- 10
-
-
- Indefatigable
- Vanguard Models
- (and 1 more)
-
Well live and learn. I just leveled the ends a bit to make a tight fit (few light touches with paper but when aligning the gunports , that is where the problem occurred. It likely was just me as I did not have trouble with Sphinx and Duchess.
- 233 replies
-
- 2
-
-
- Indefatigable
- Vanguard Models
- (and 1 more)
-
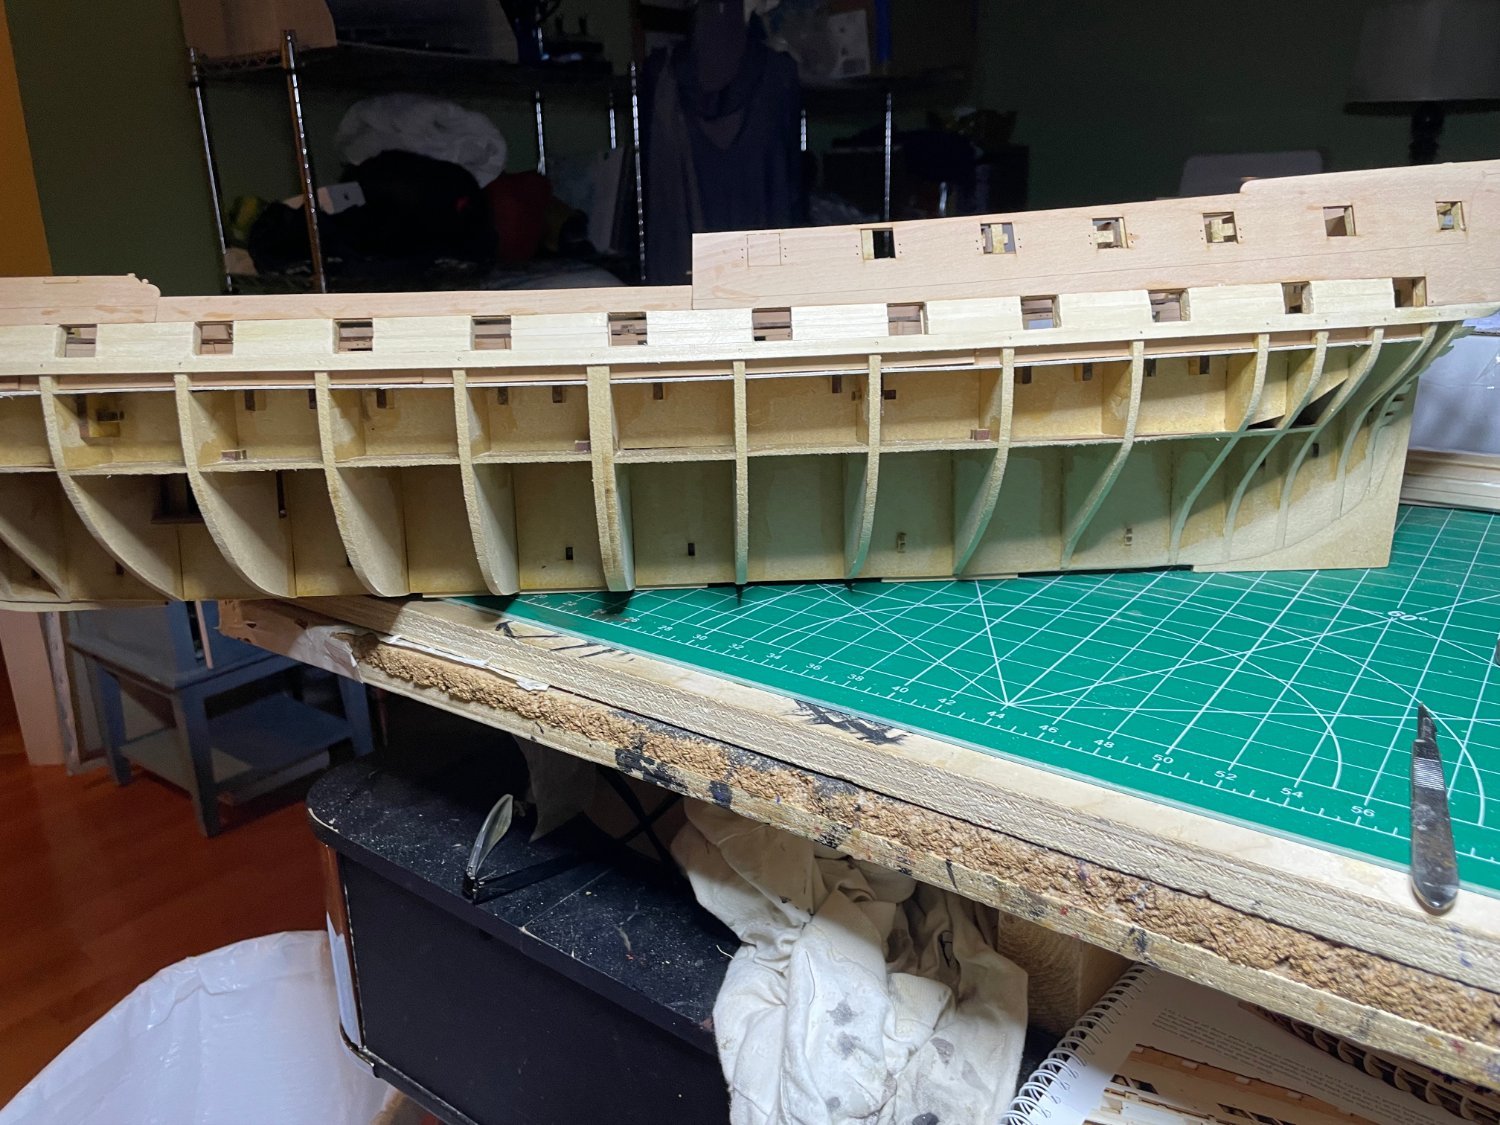
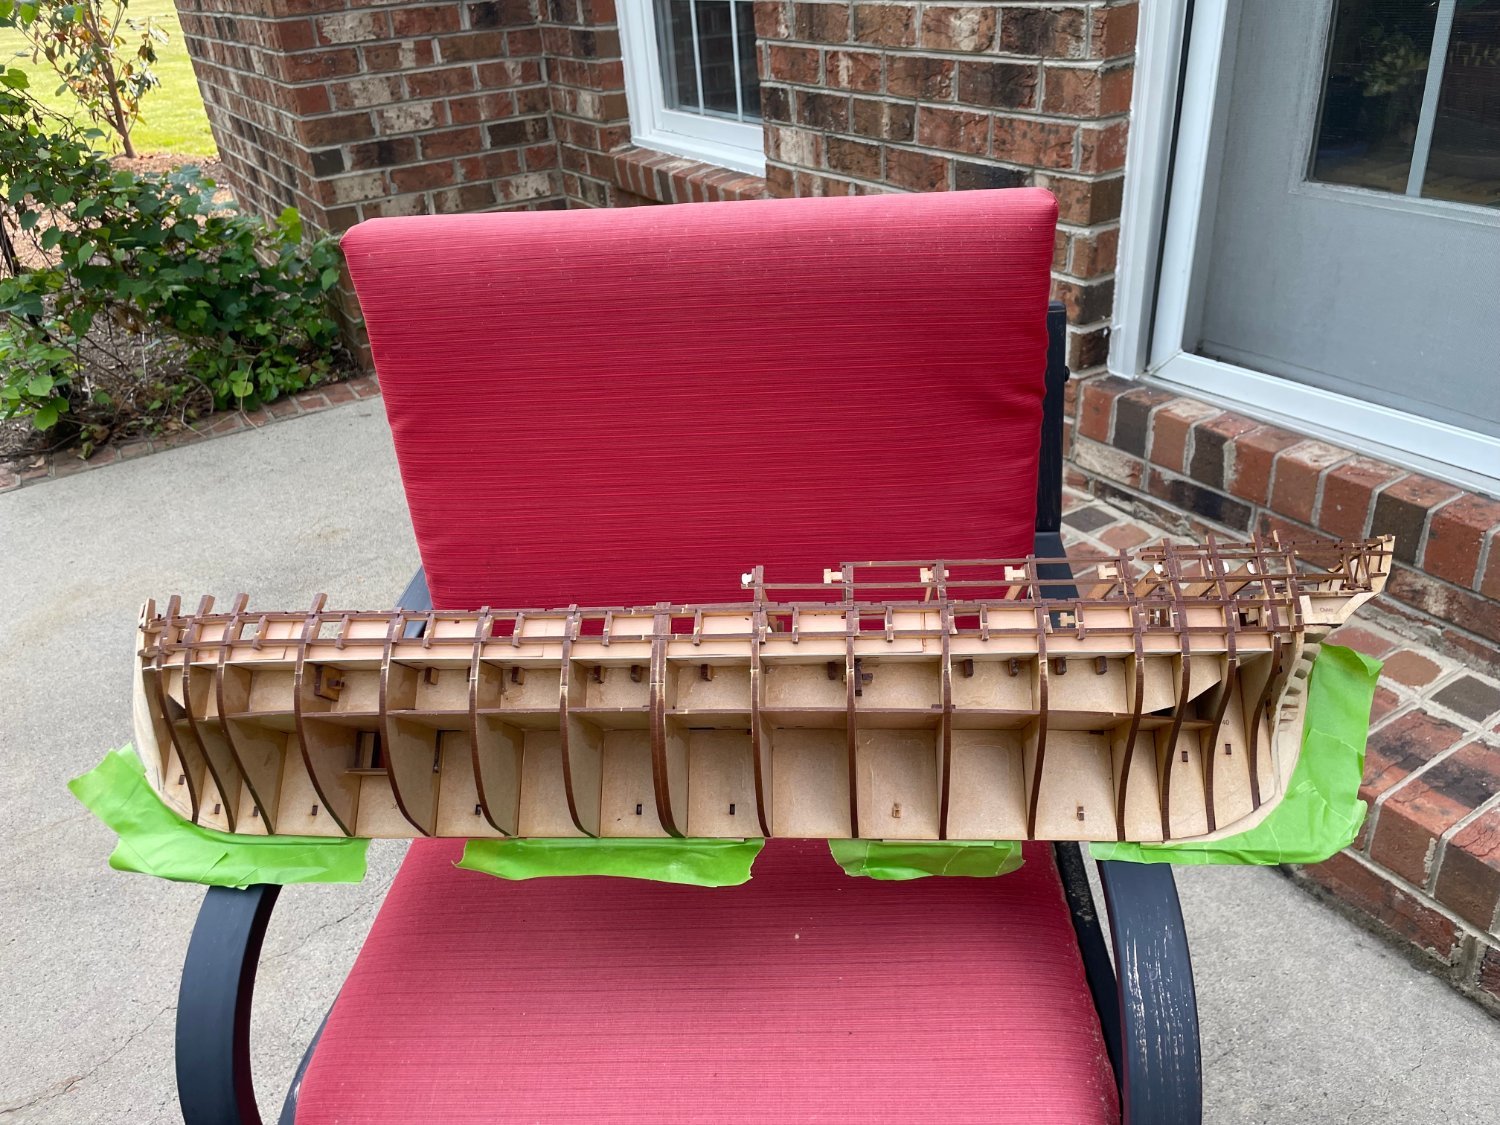
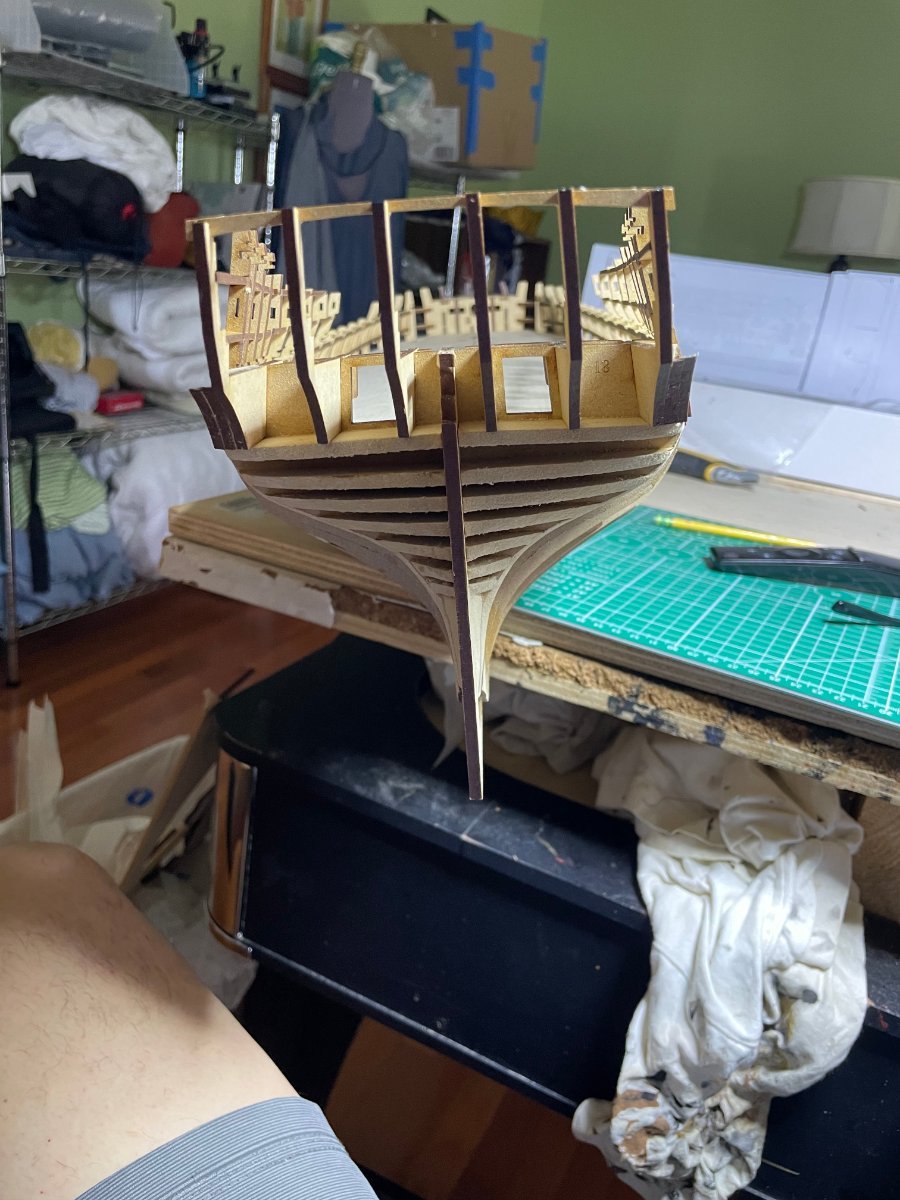
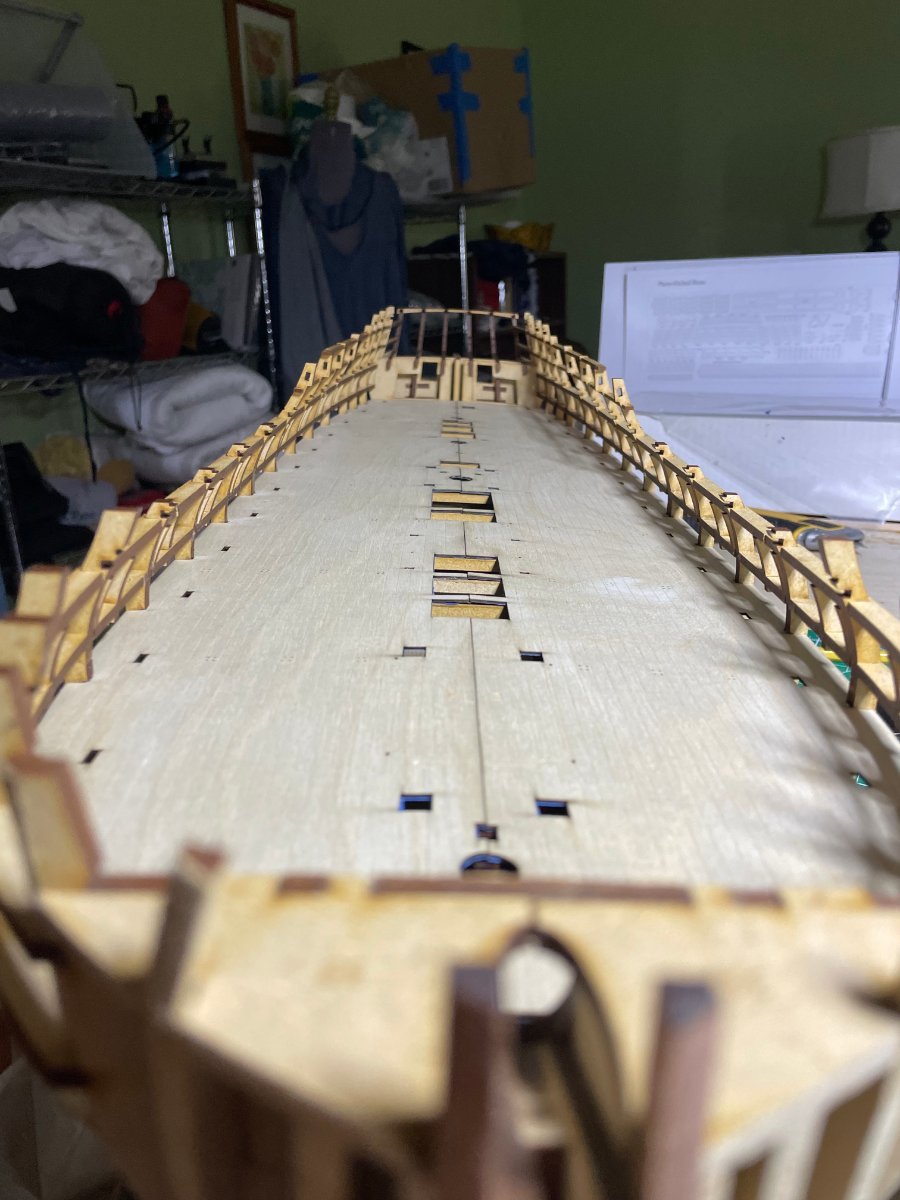
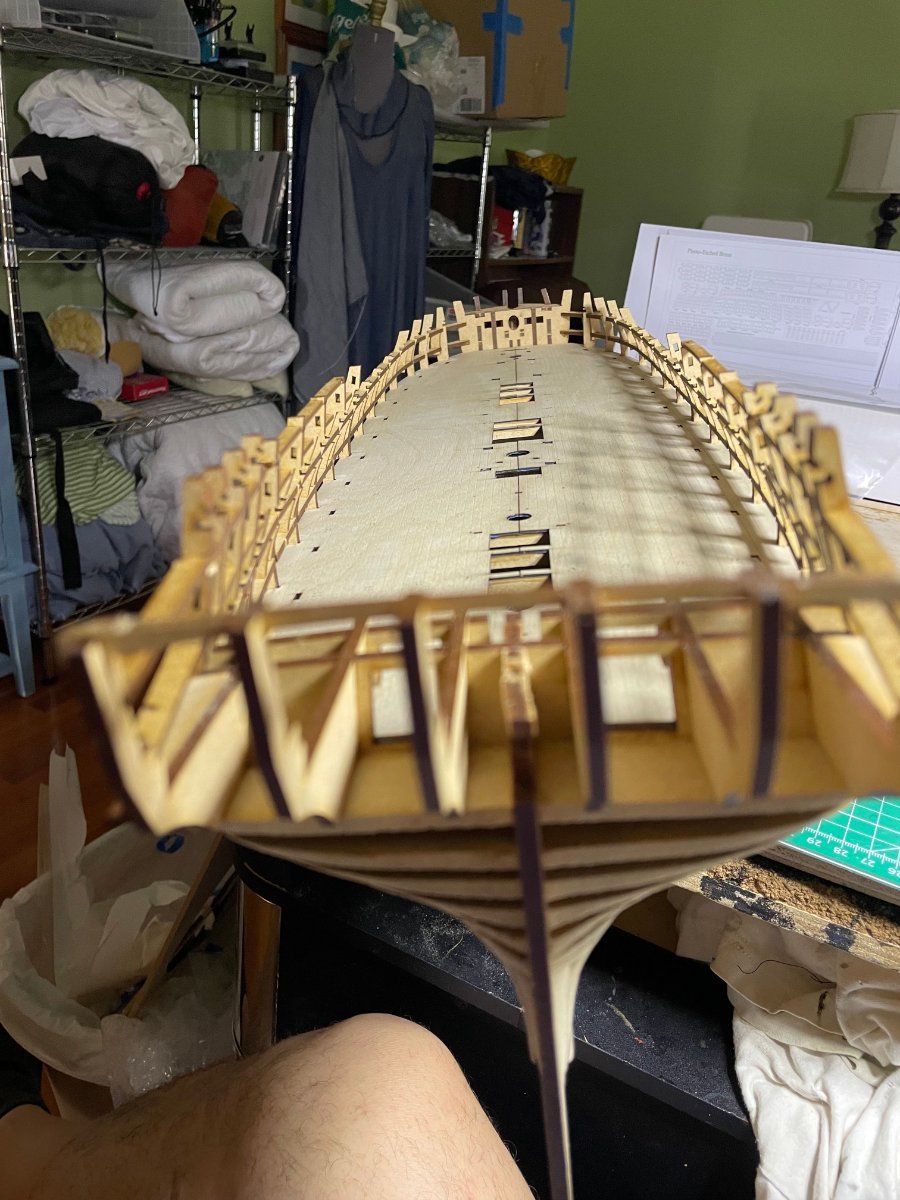
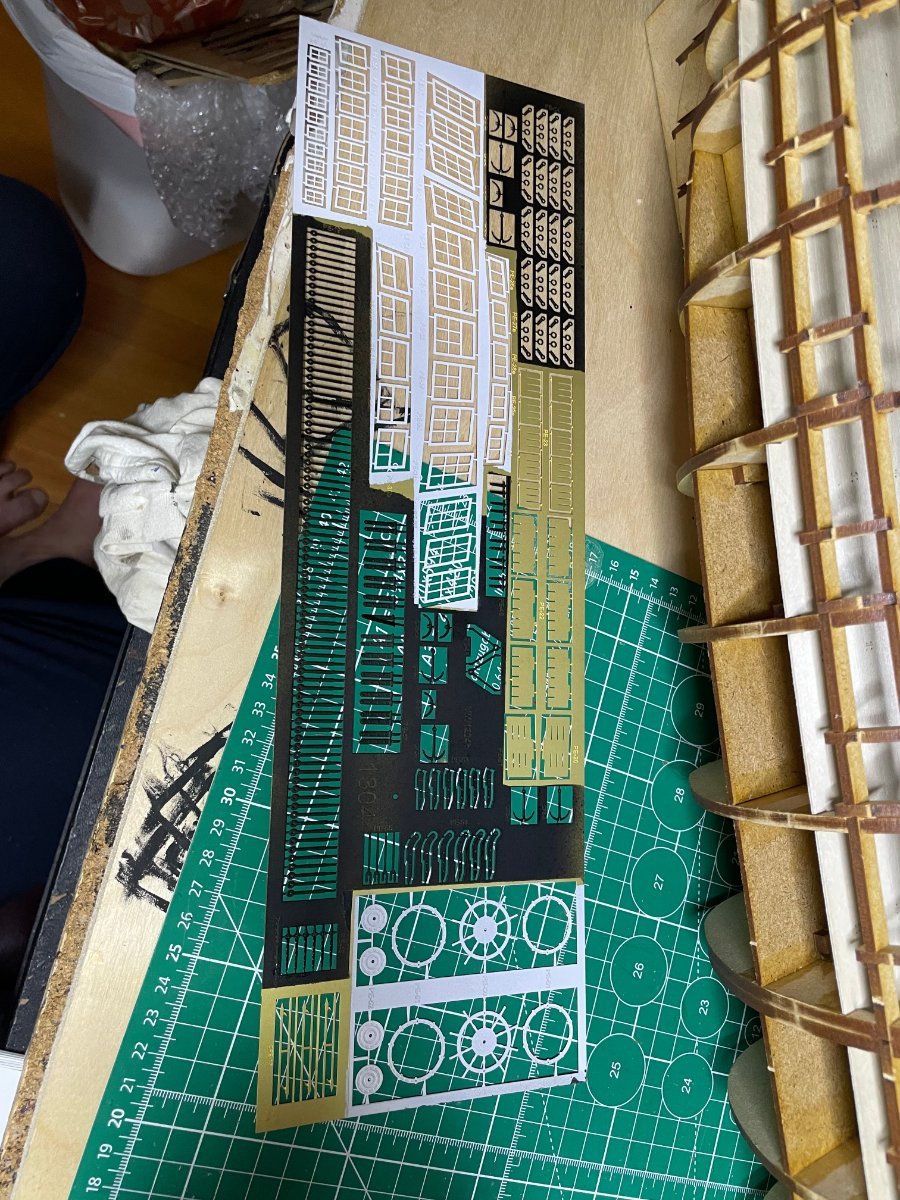
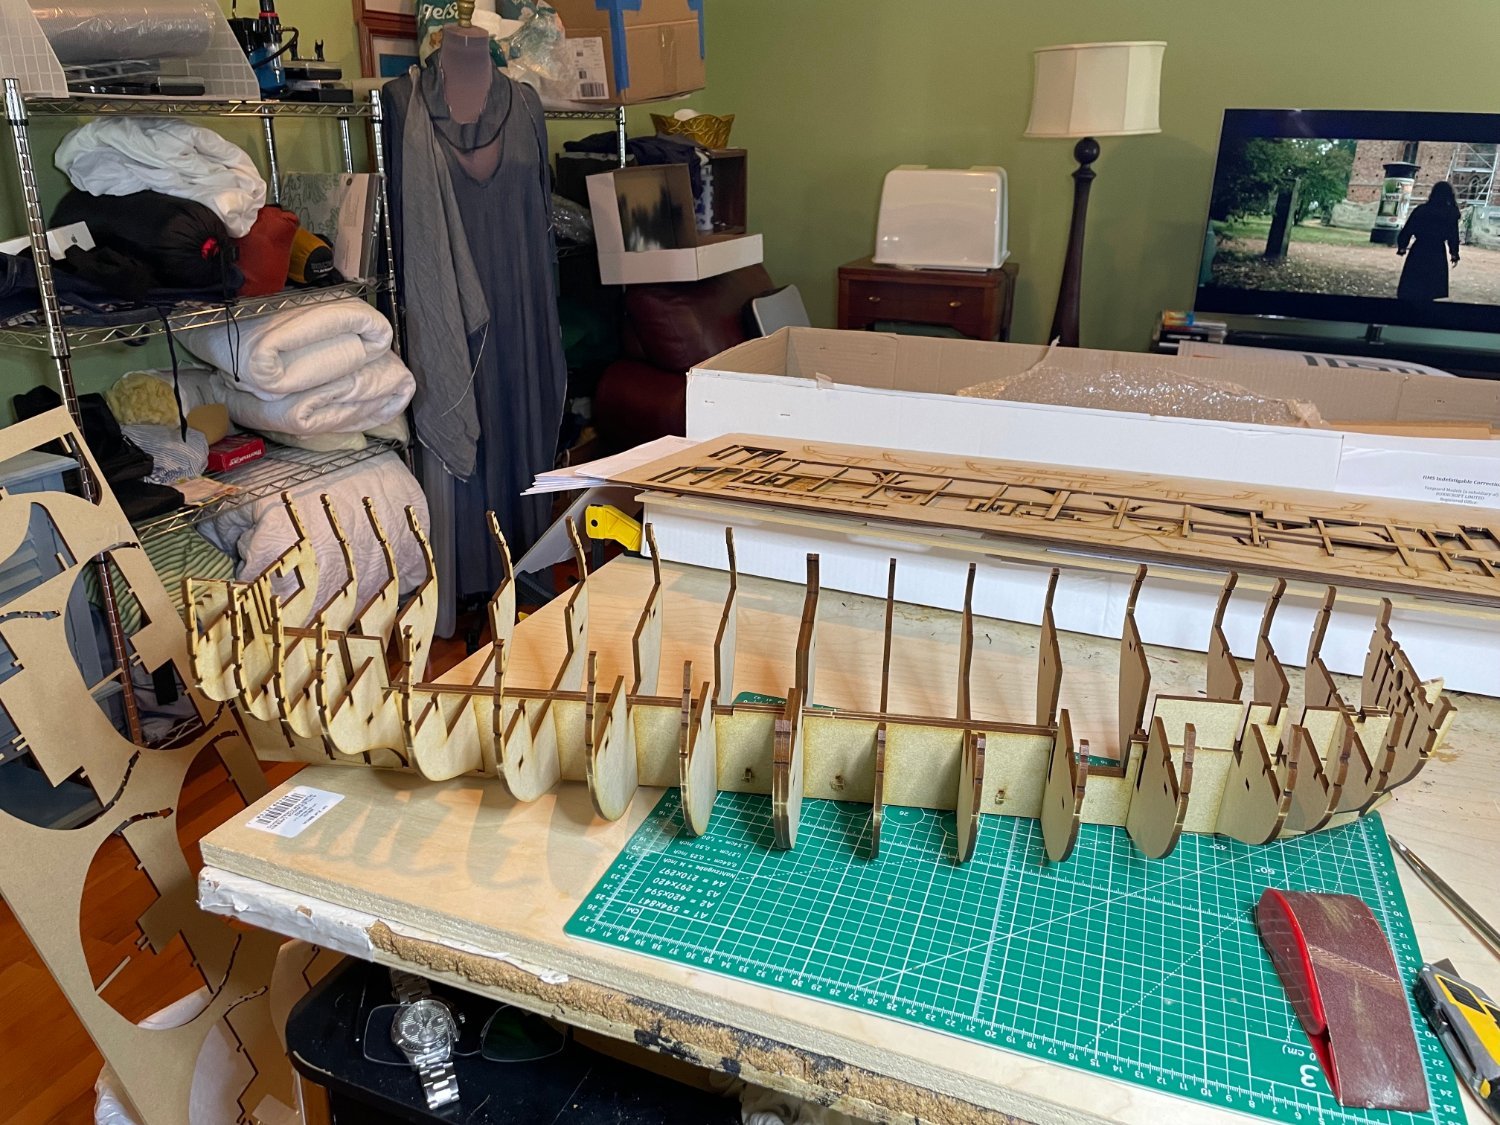
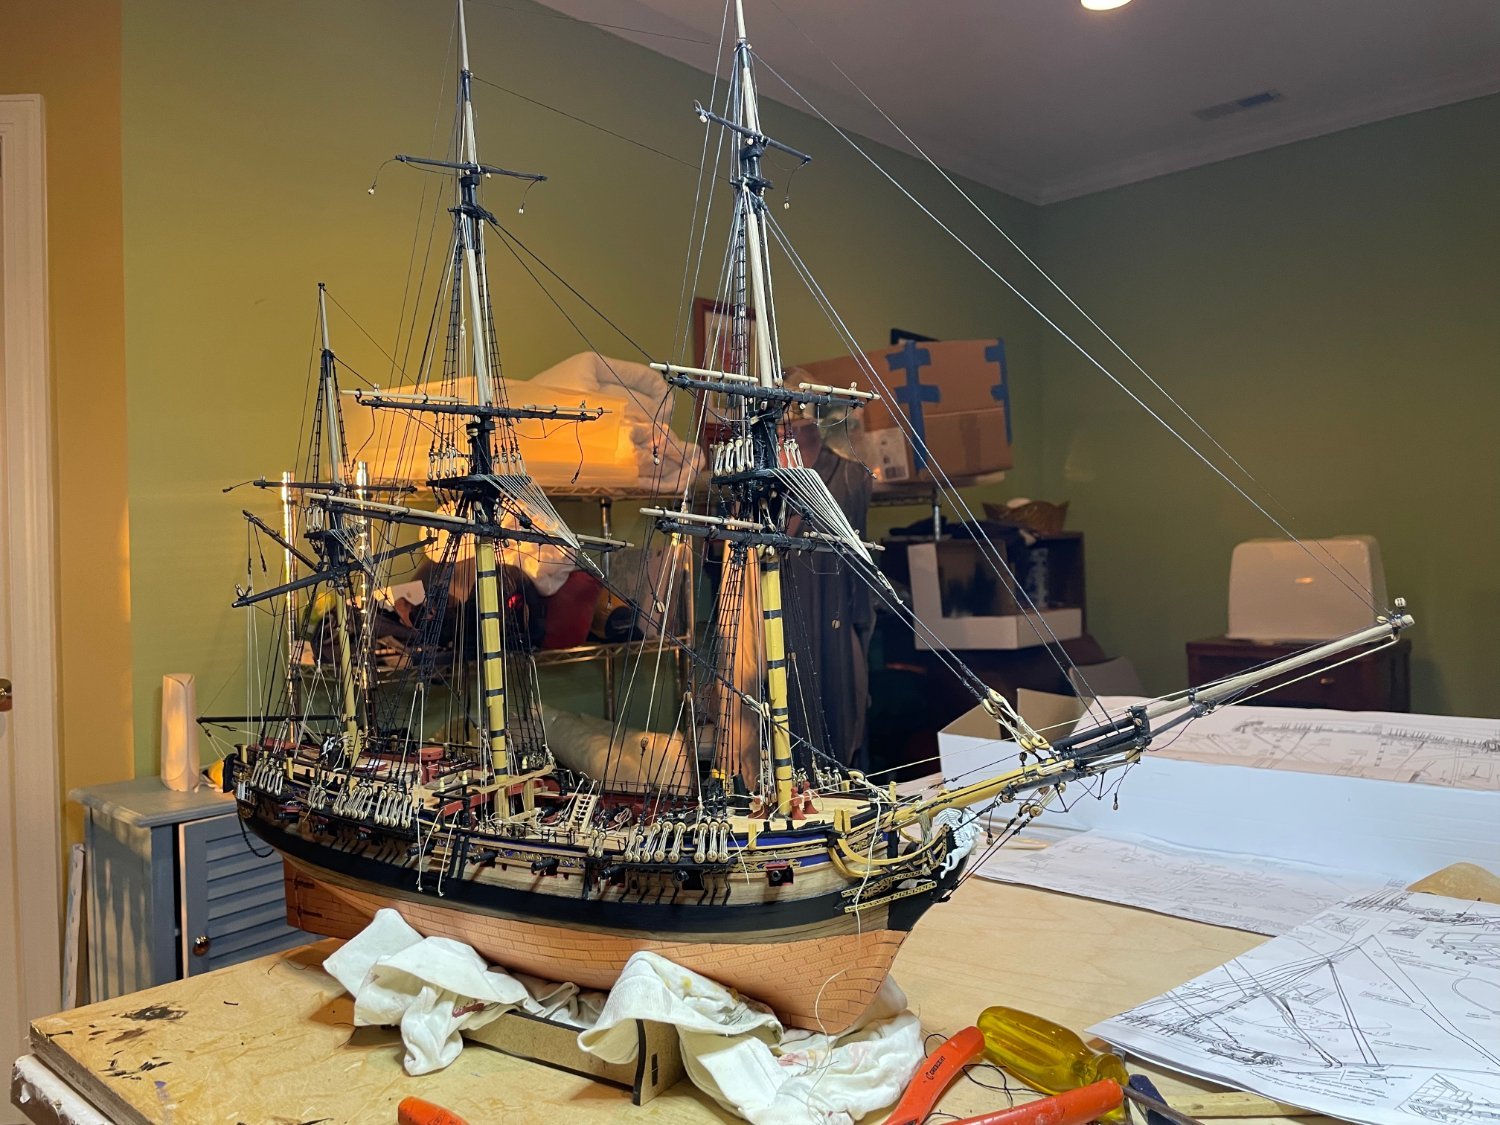
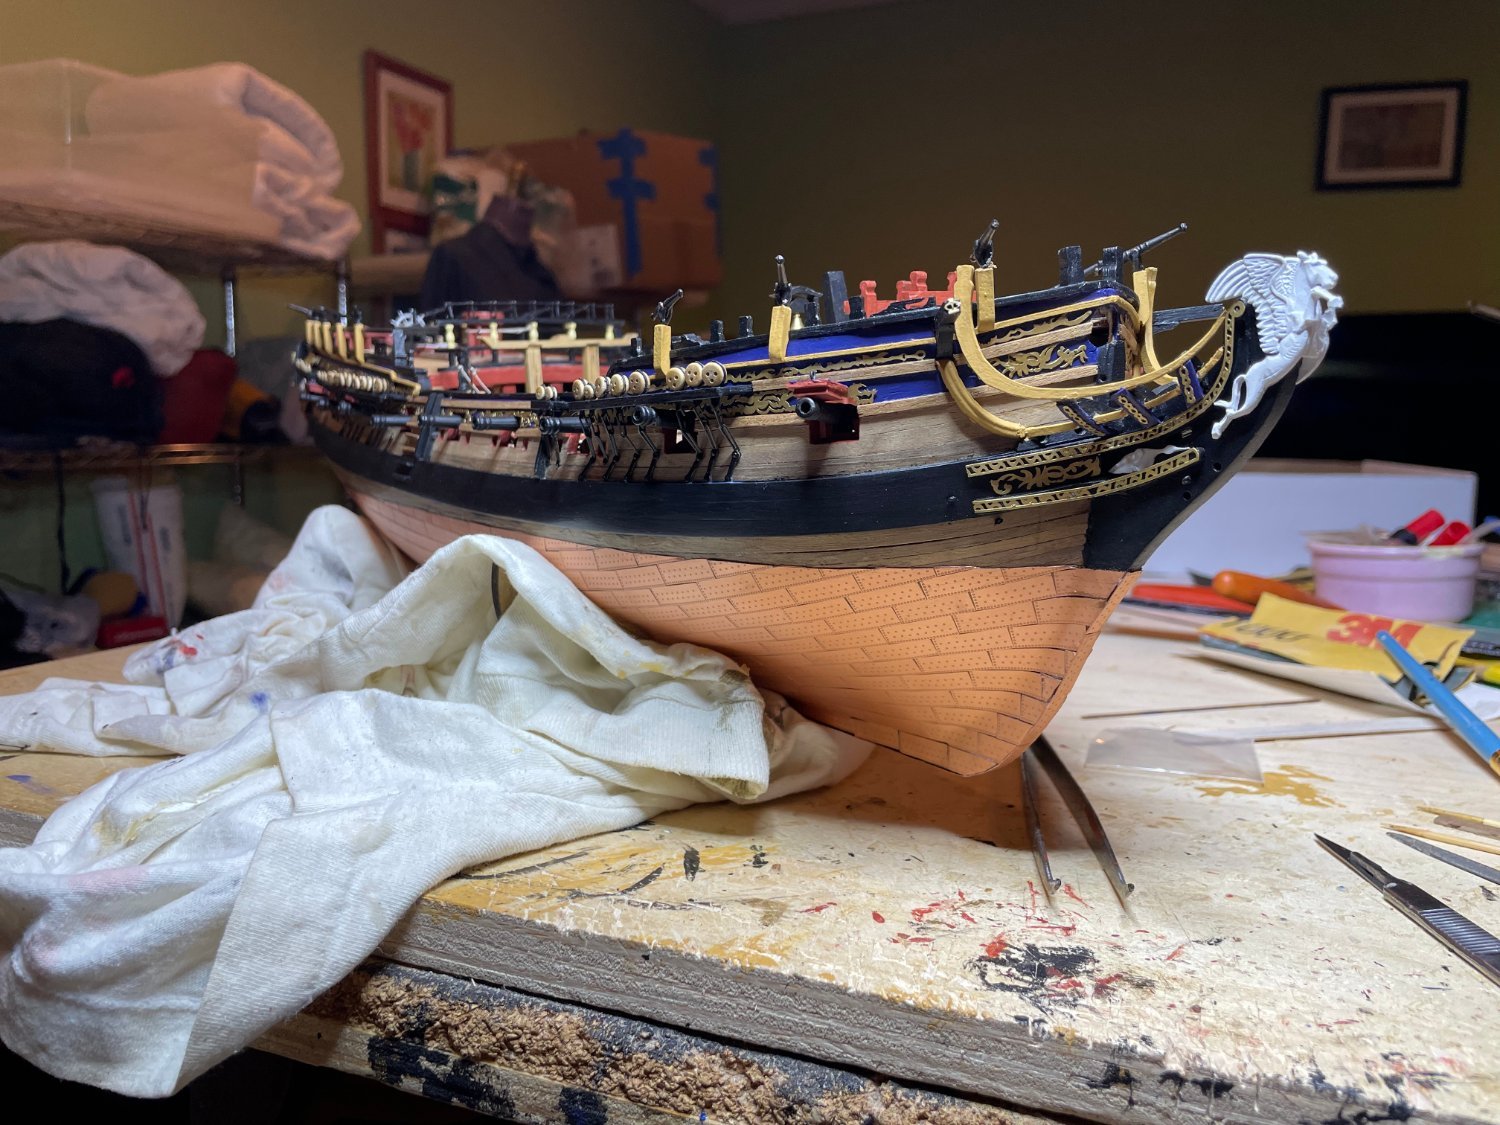
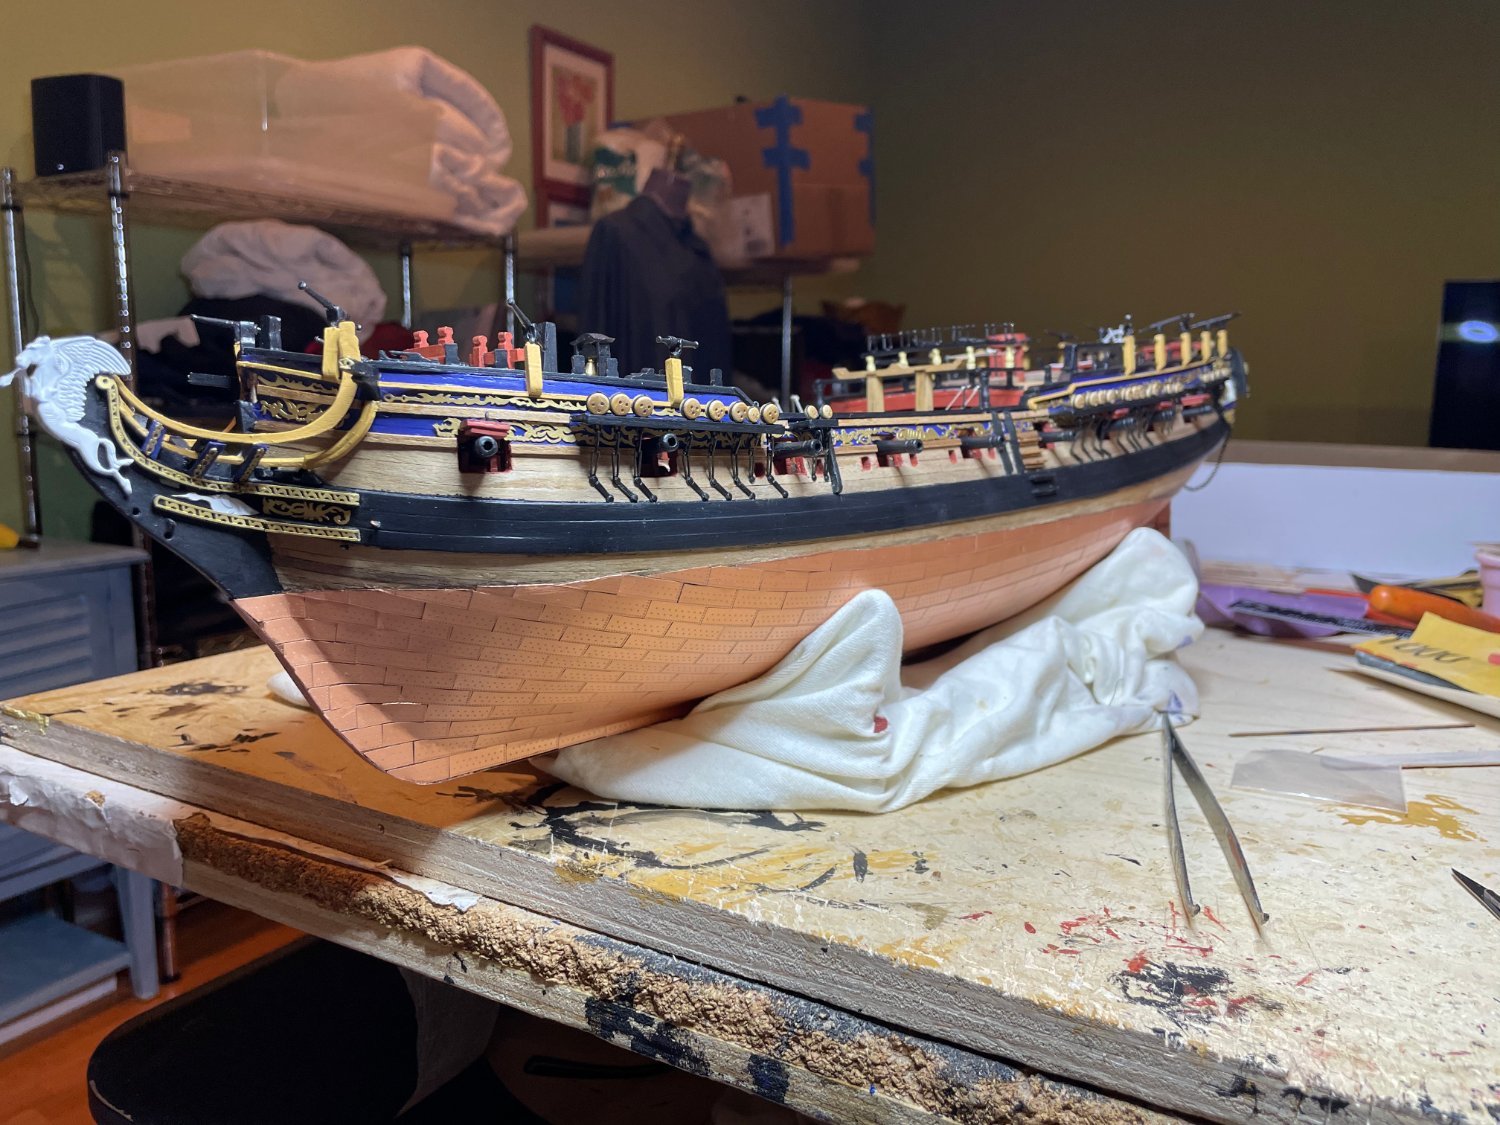
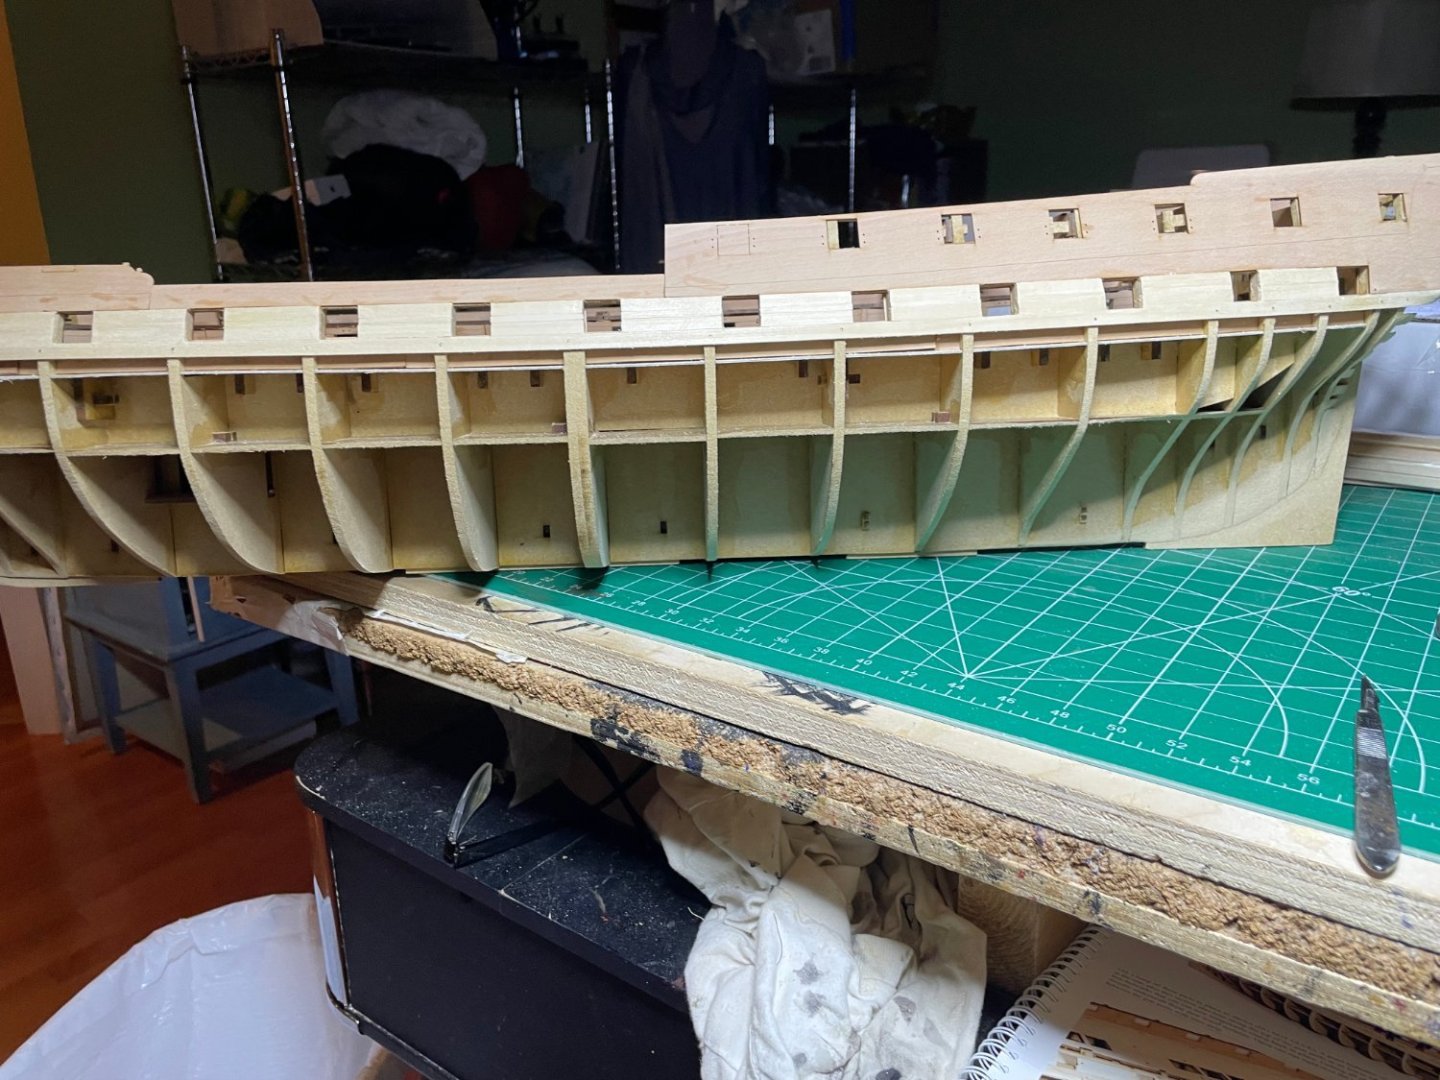
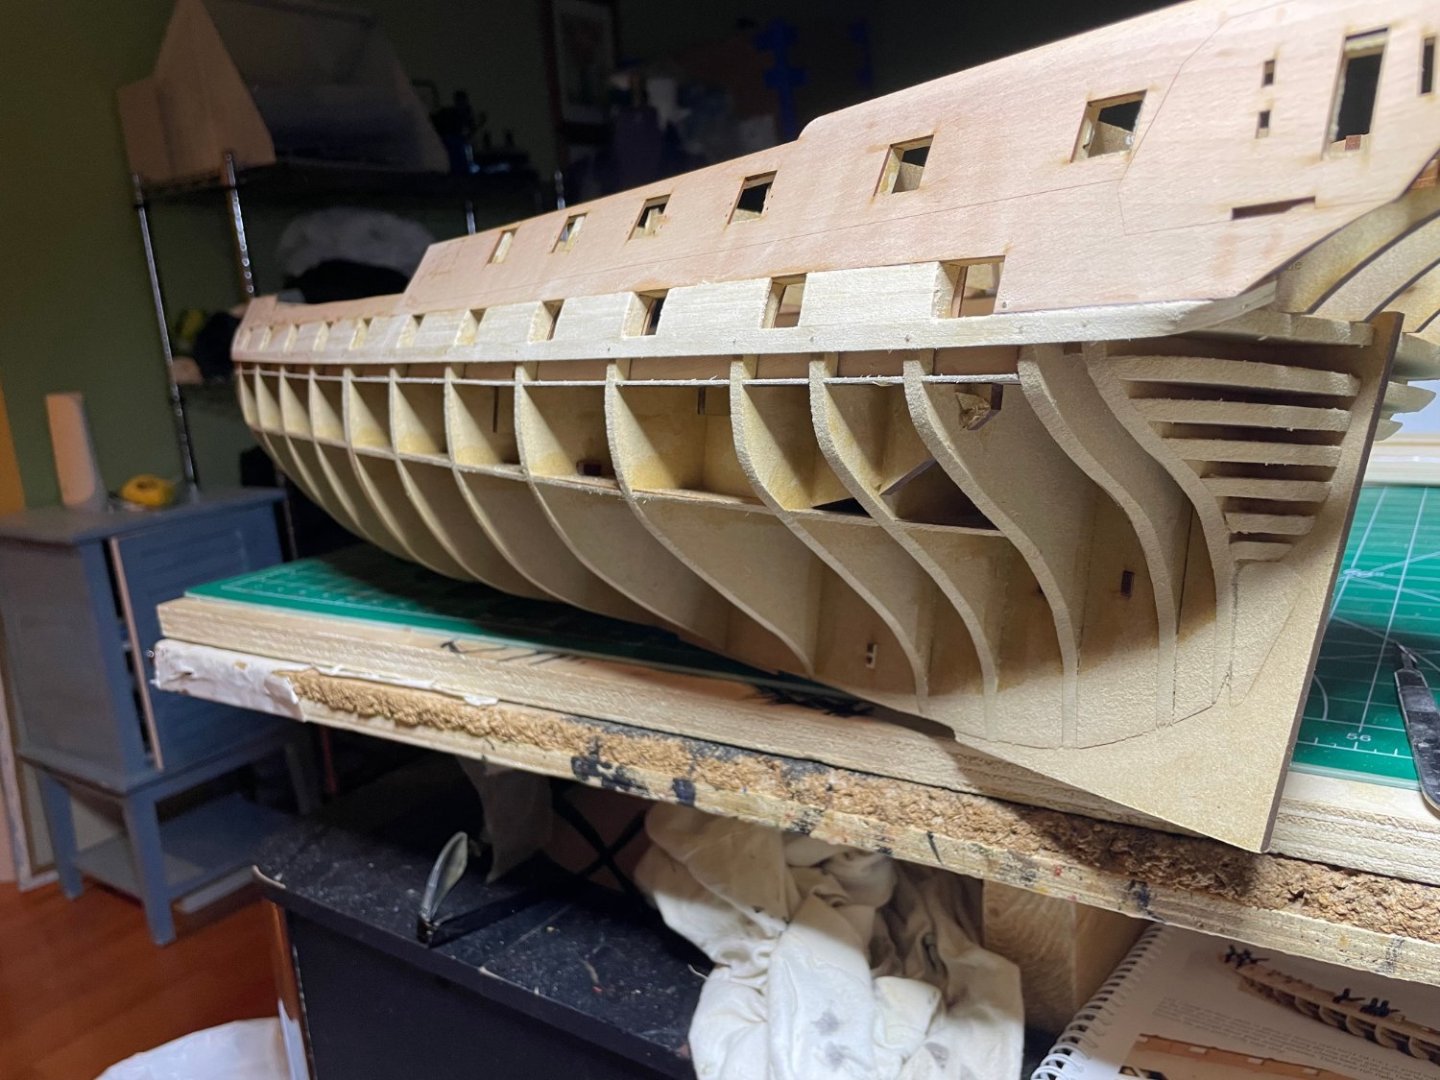
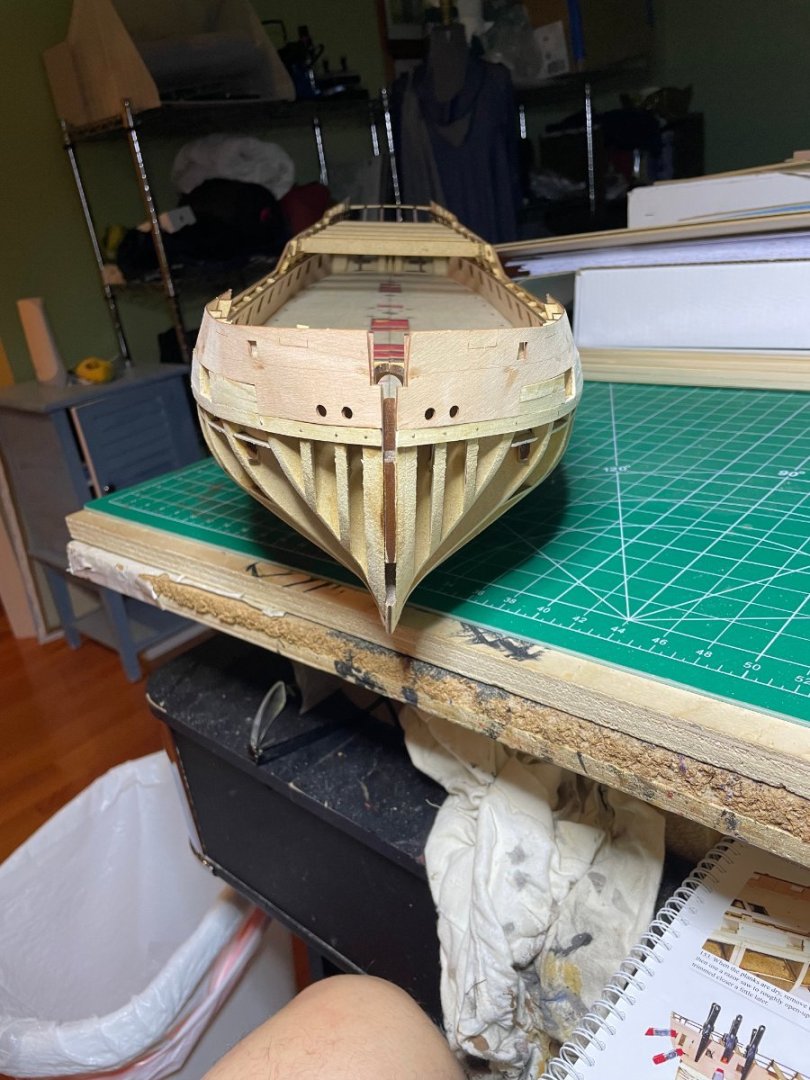
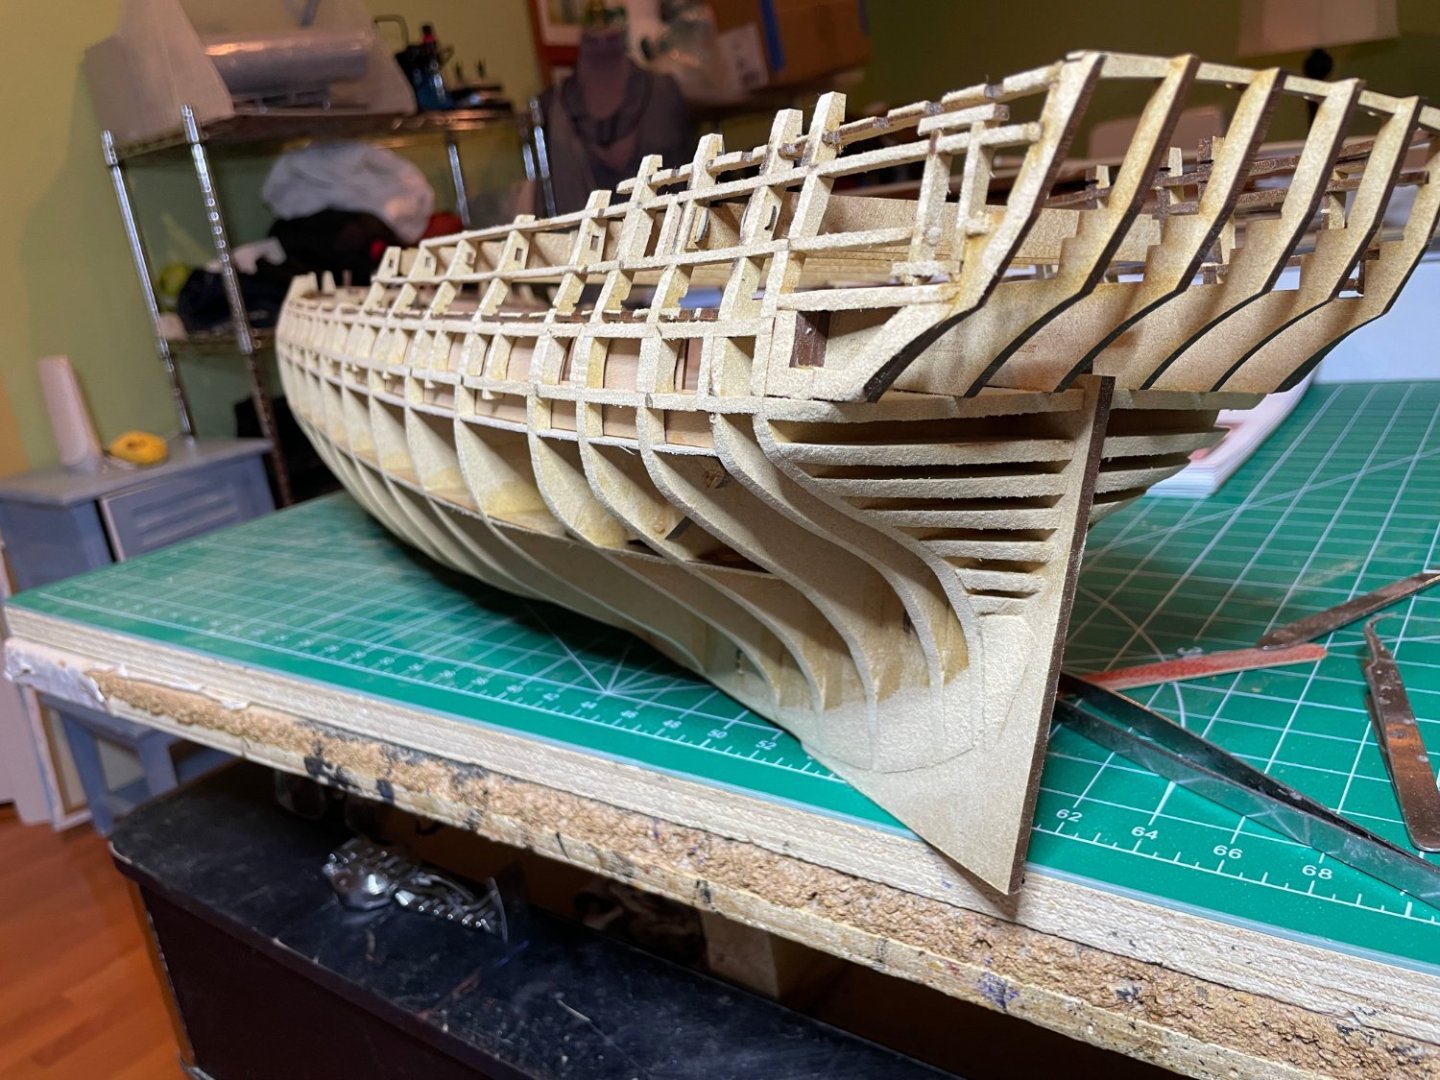
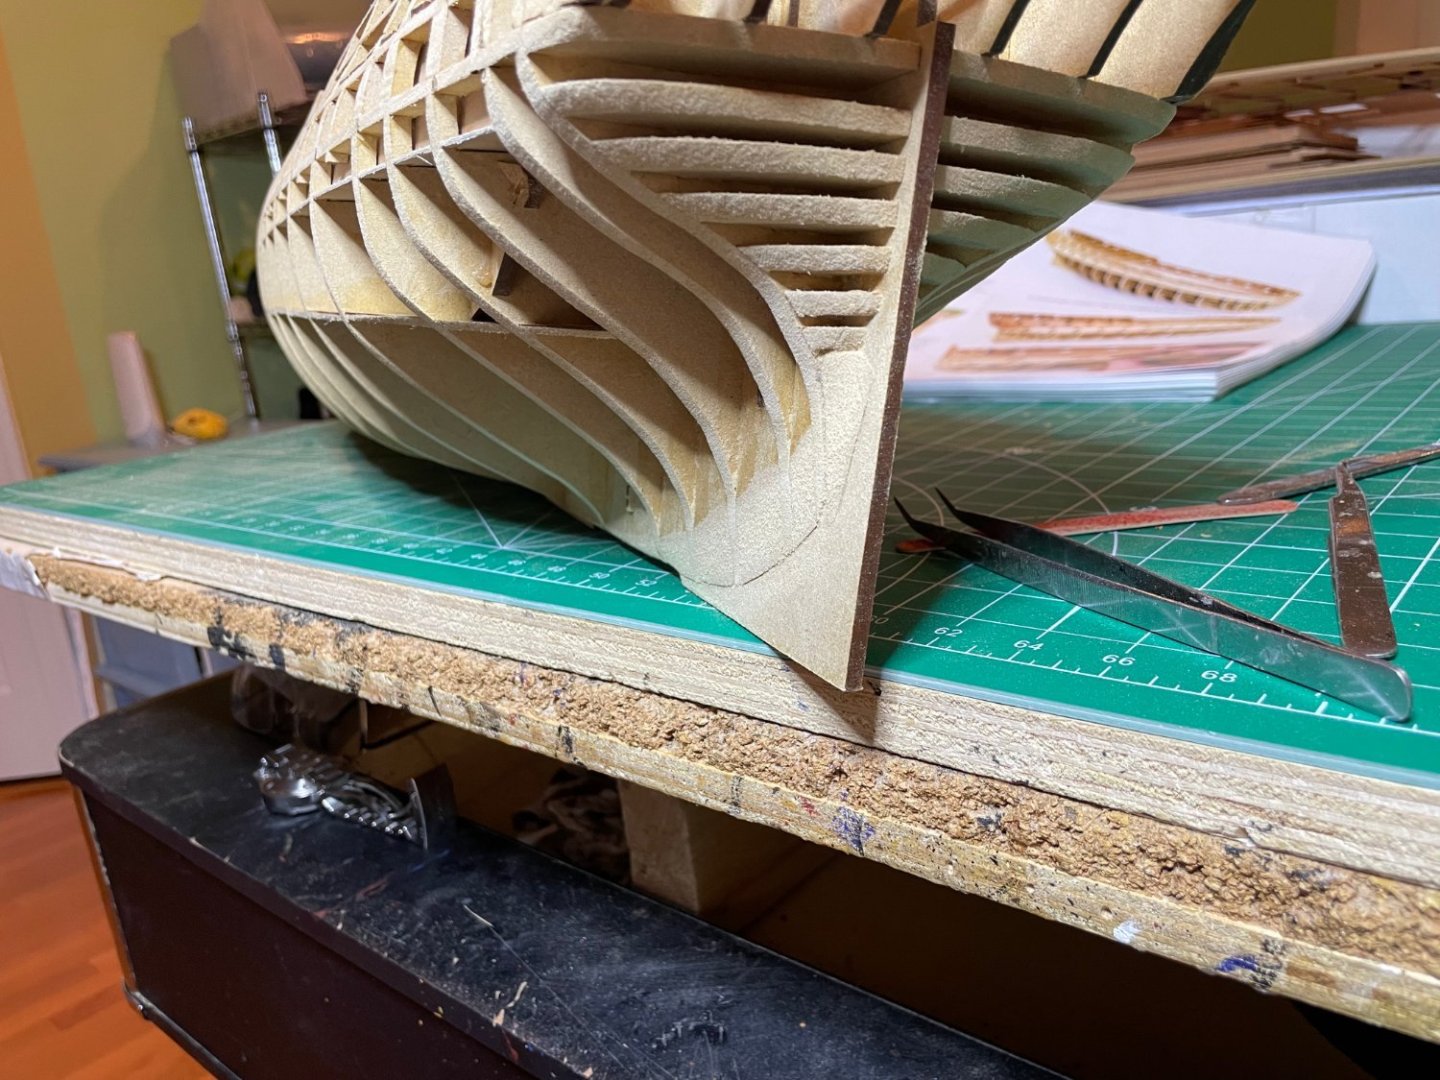
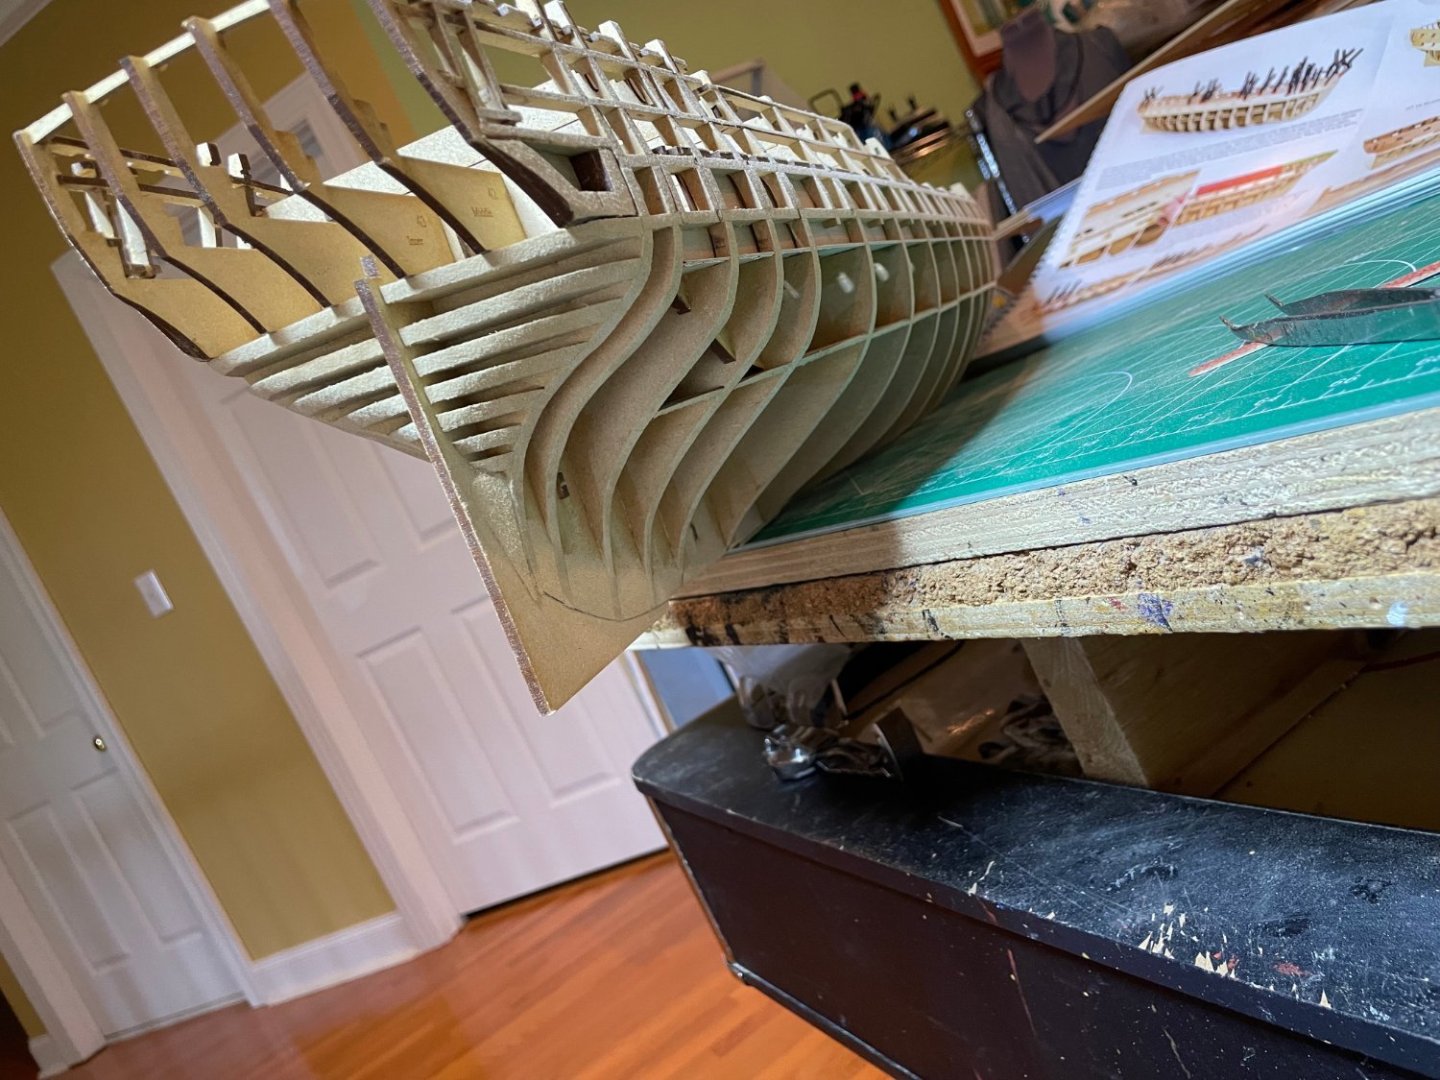
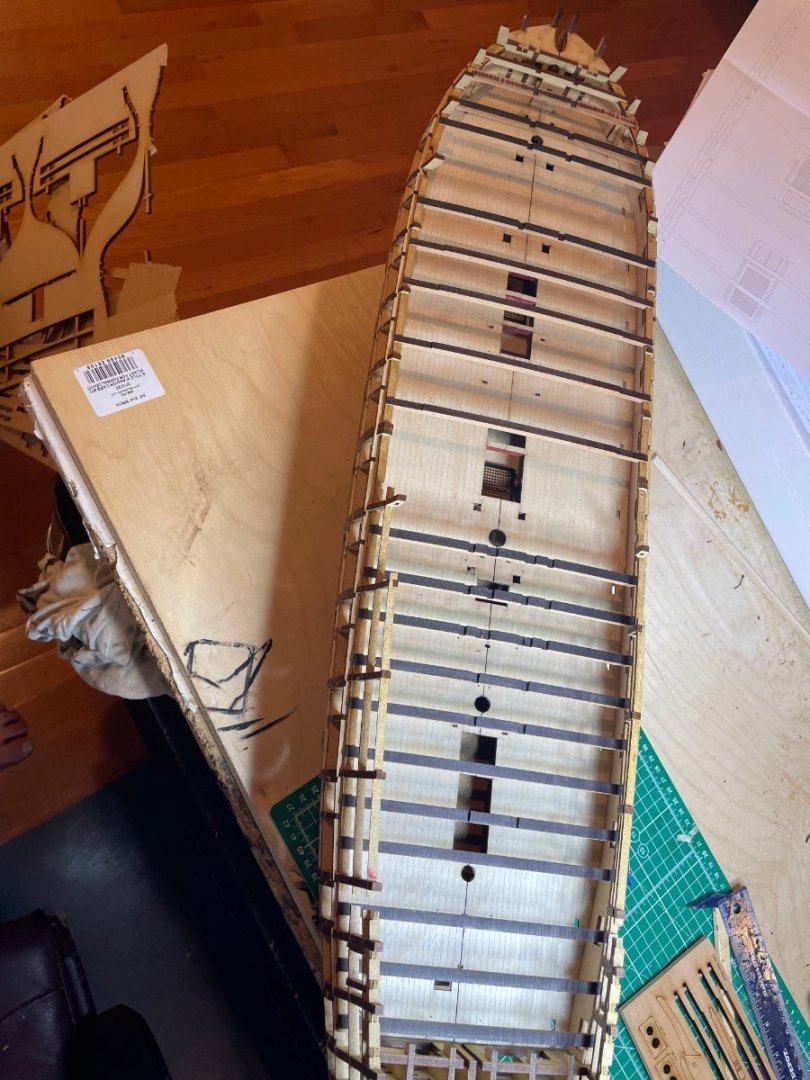
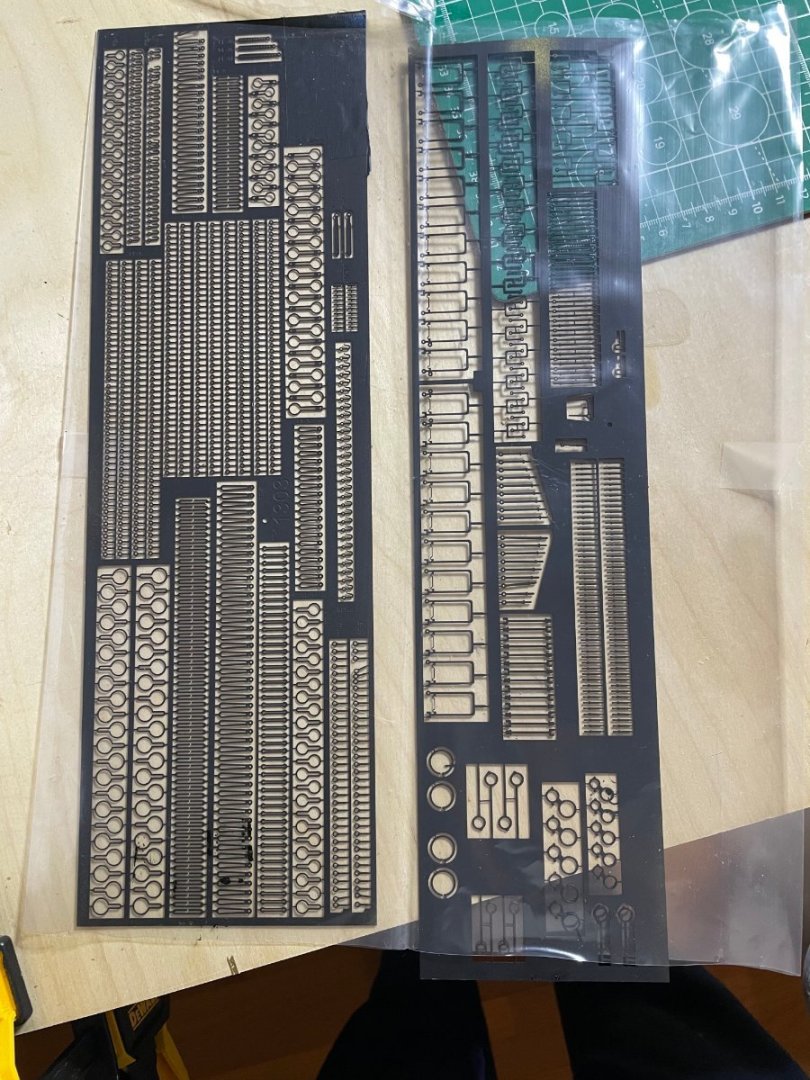
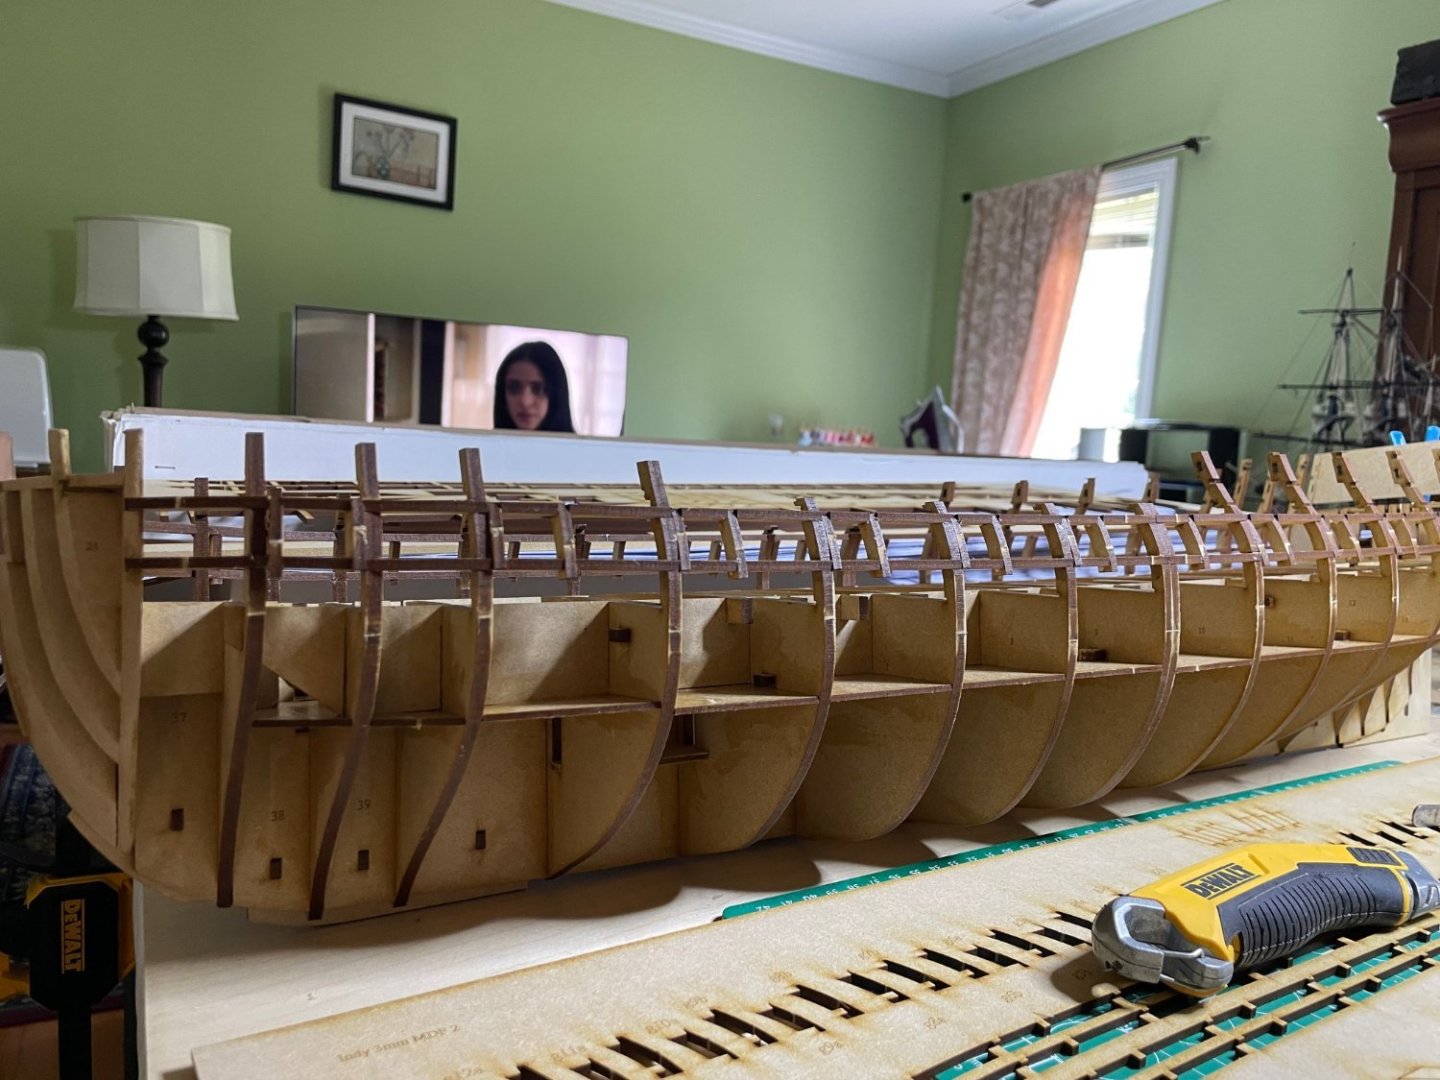
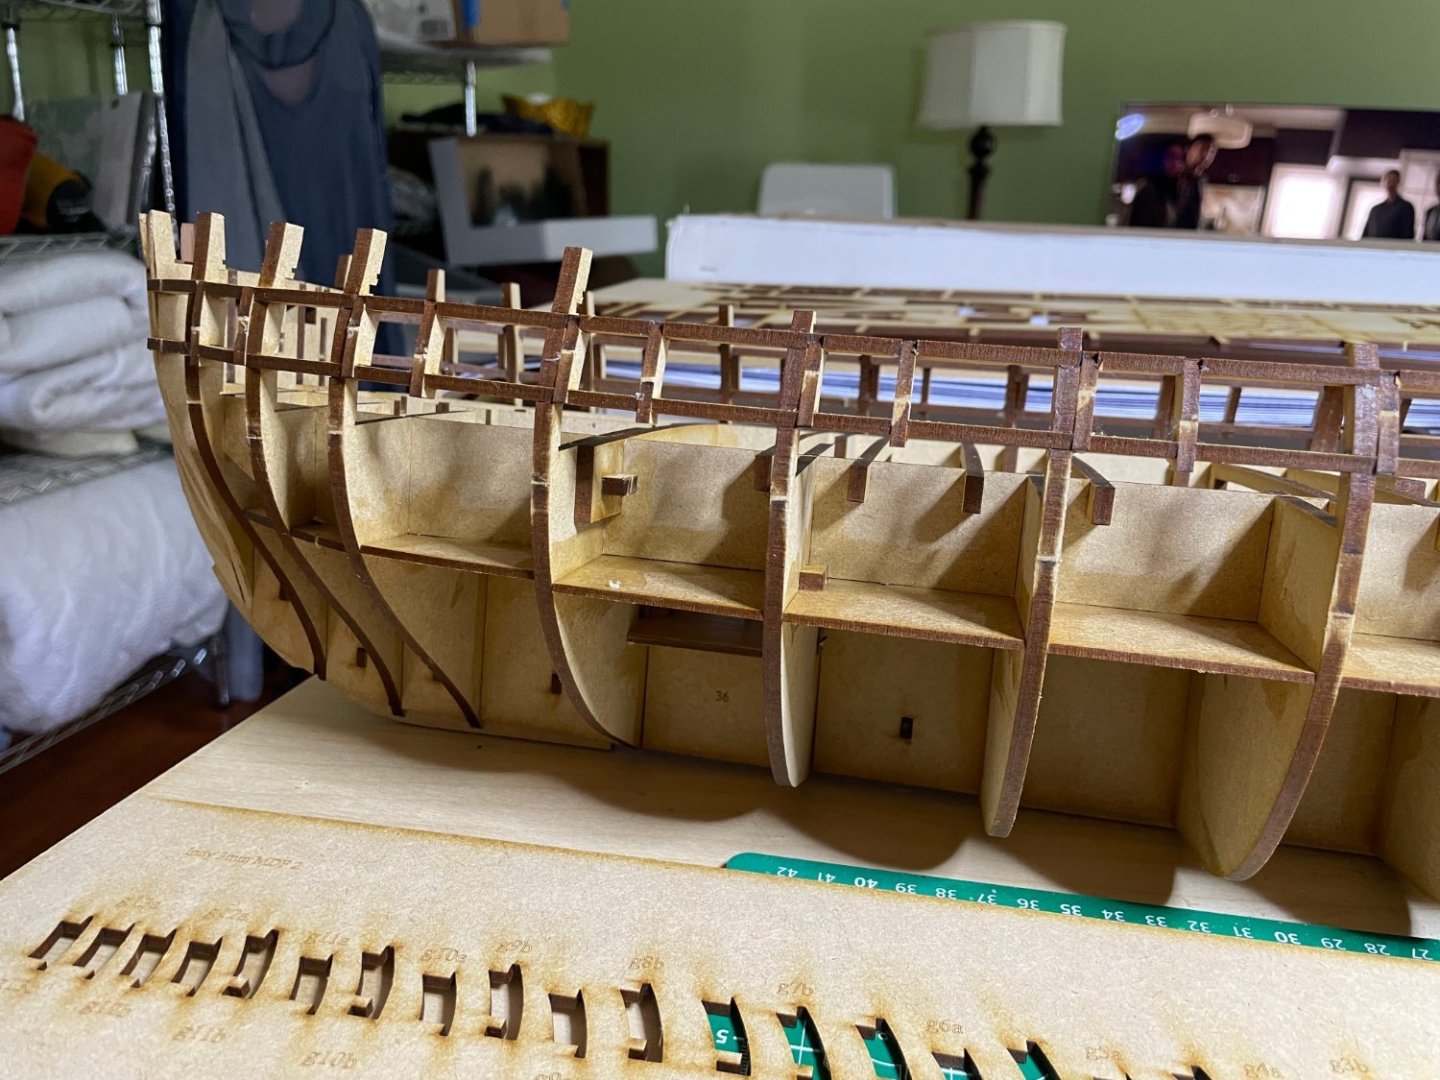
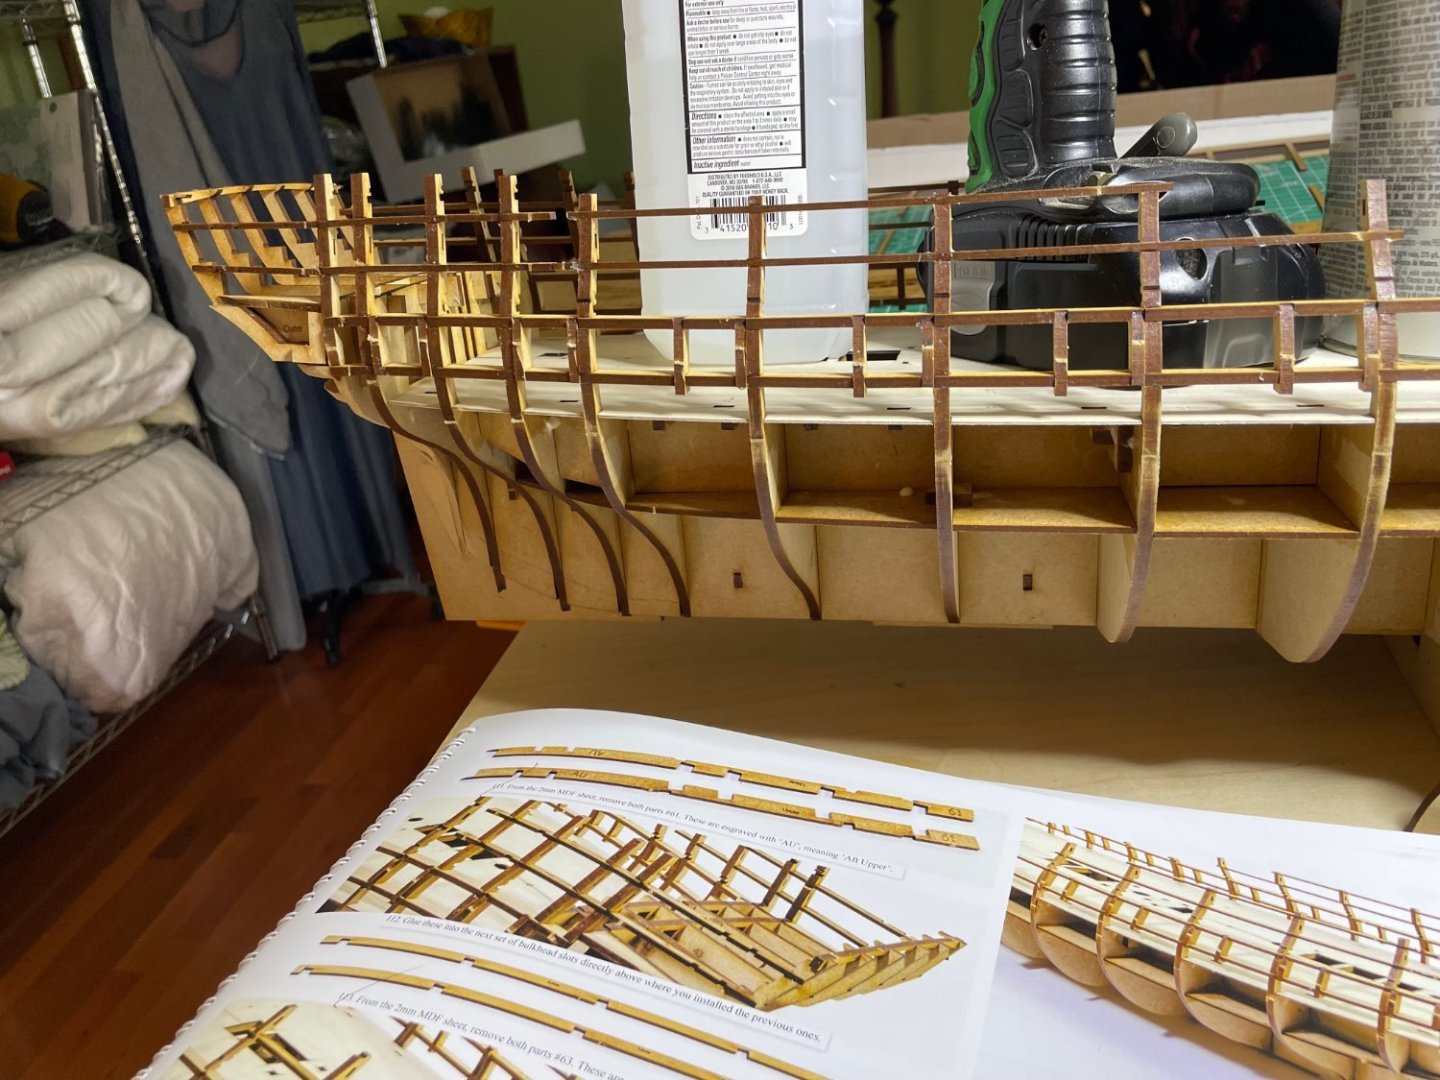
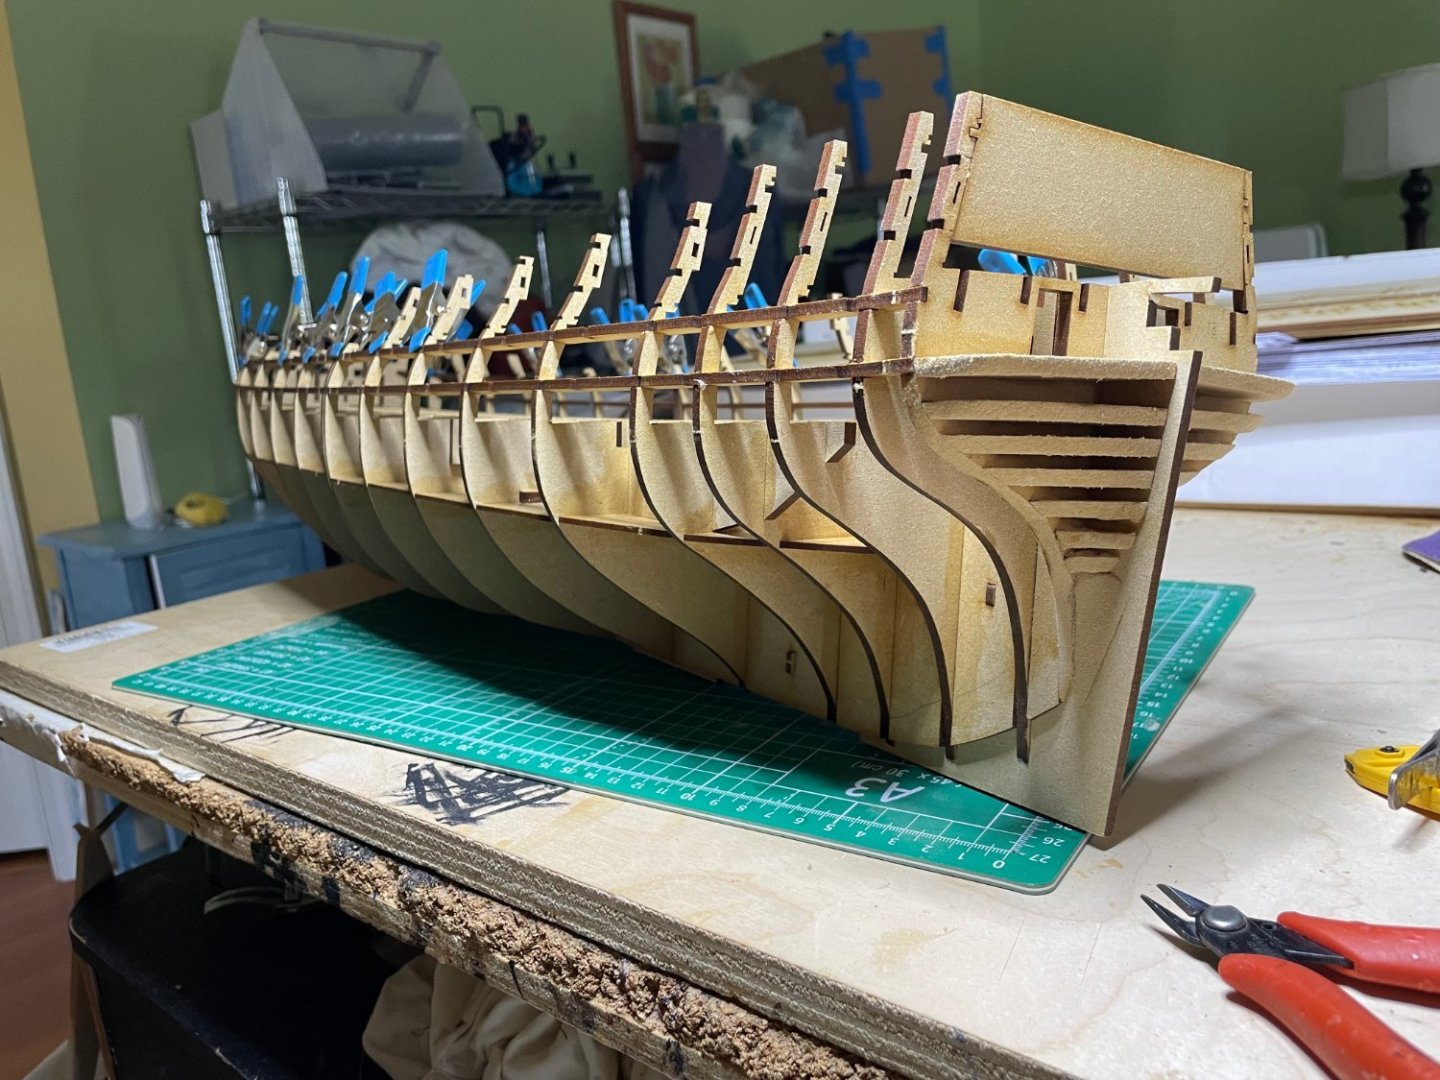
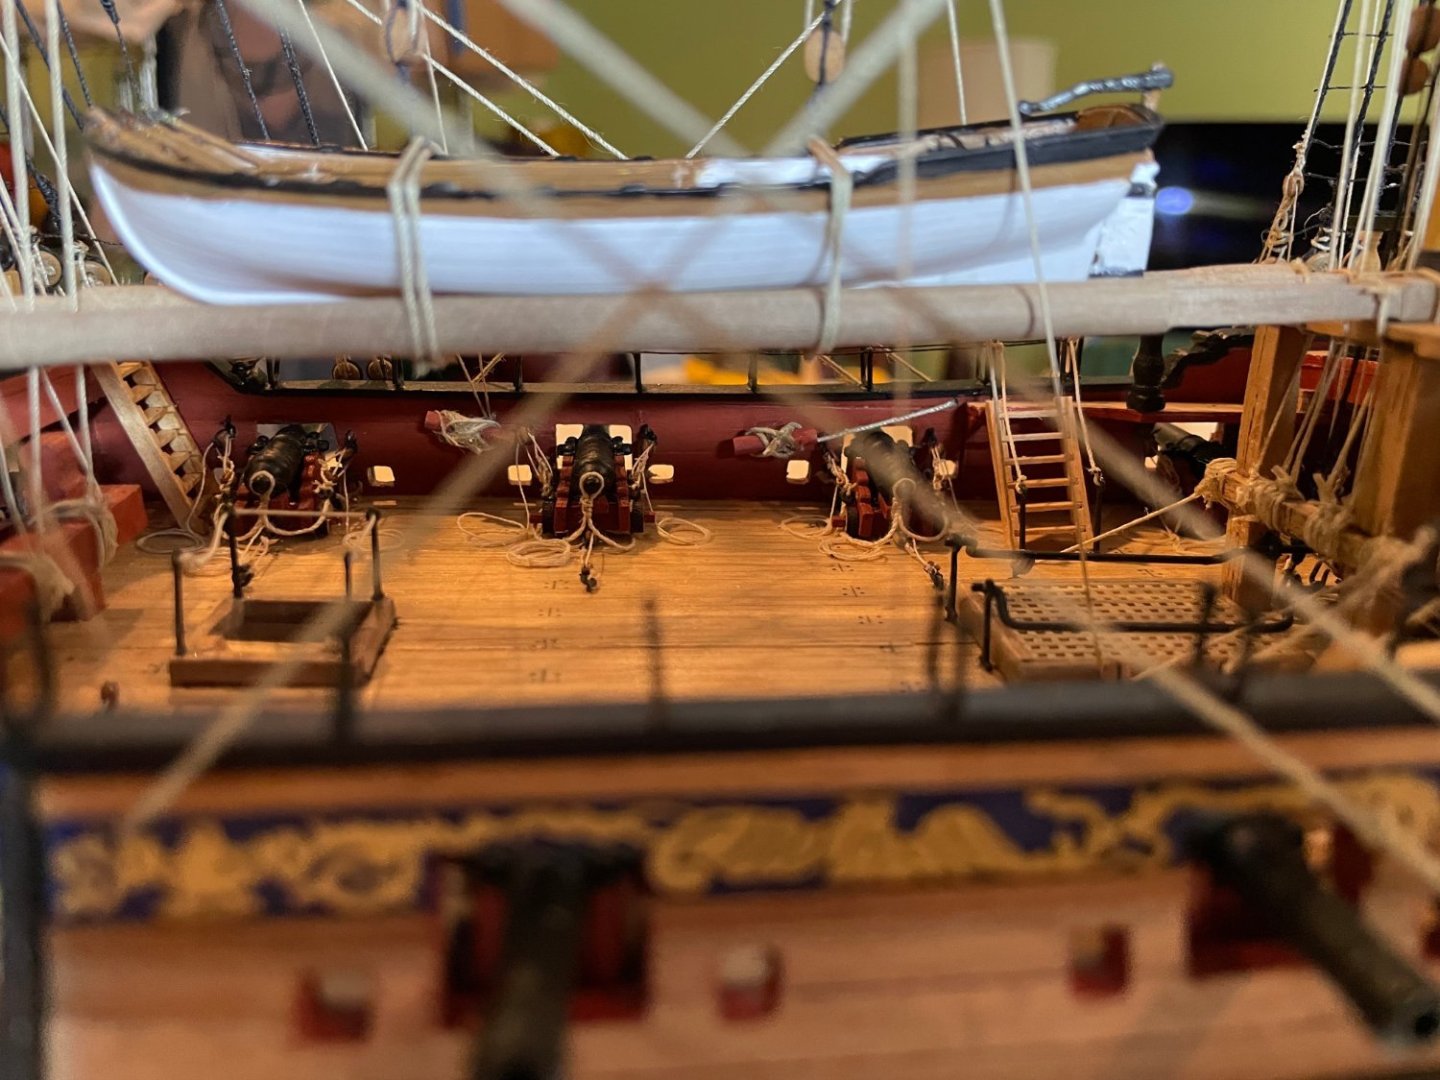
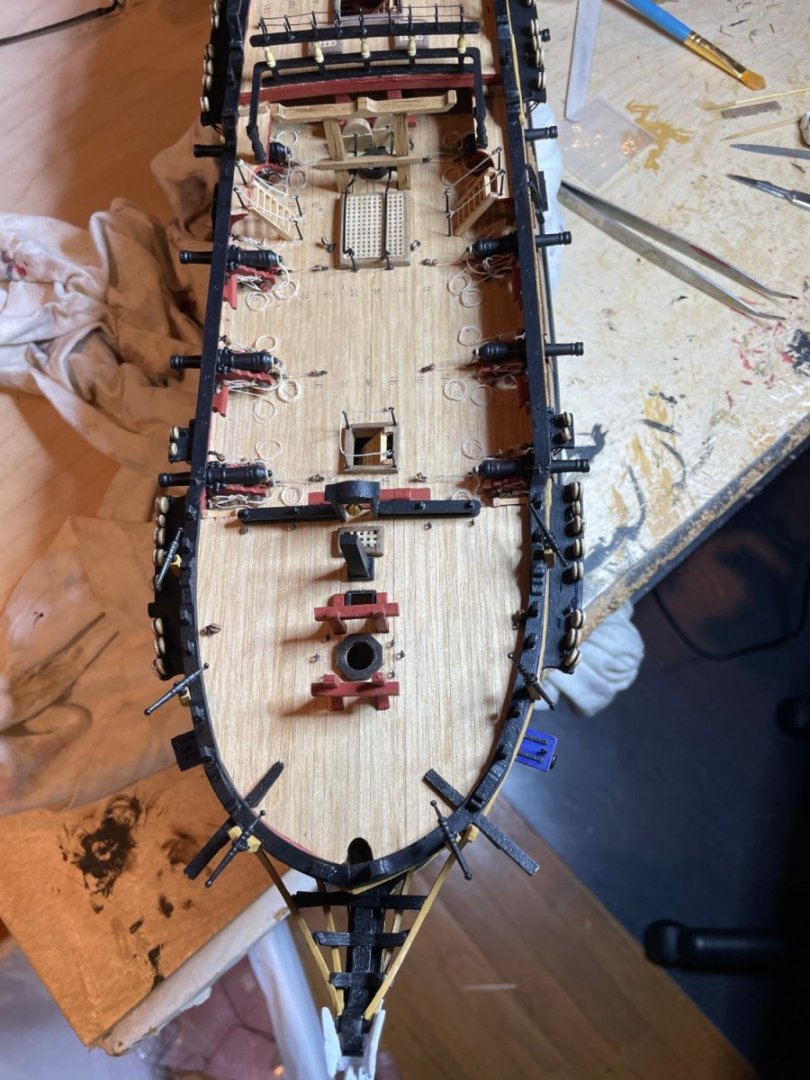
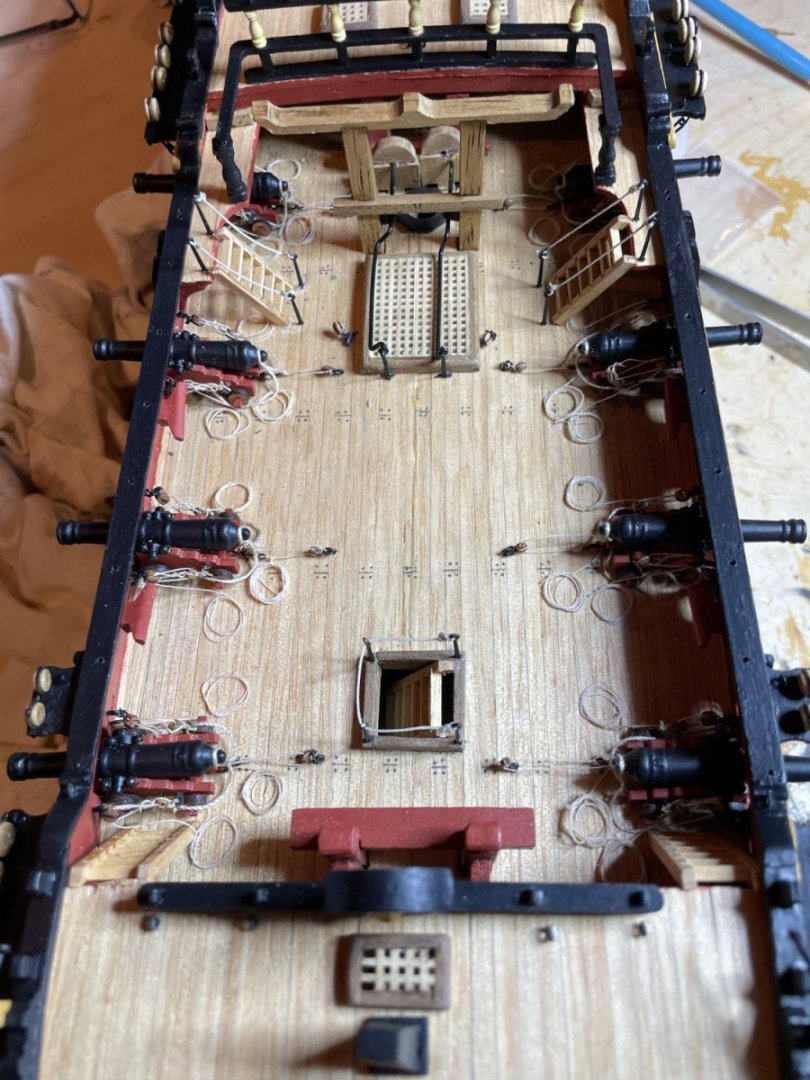
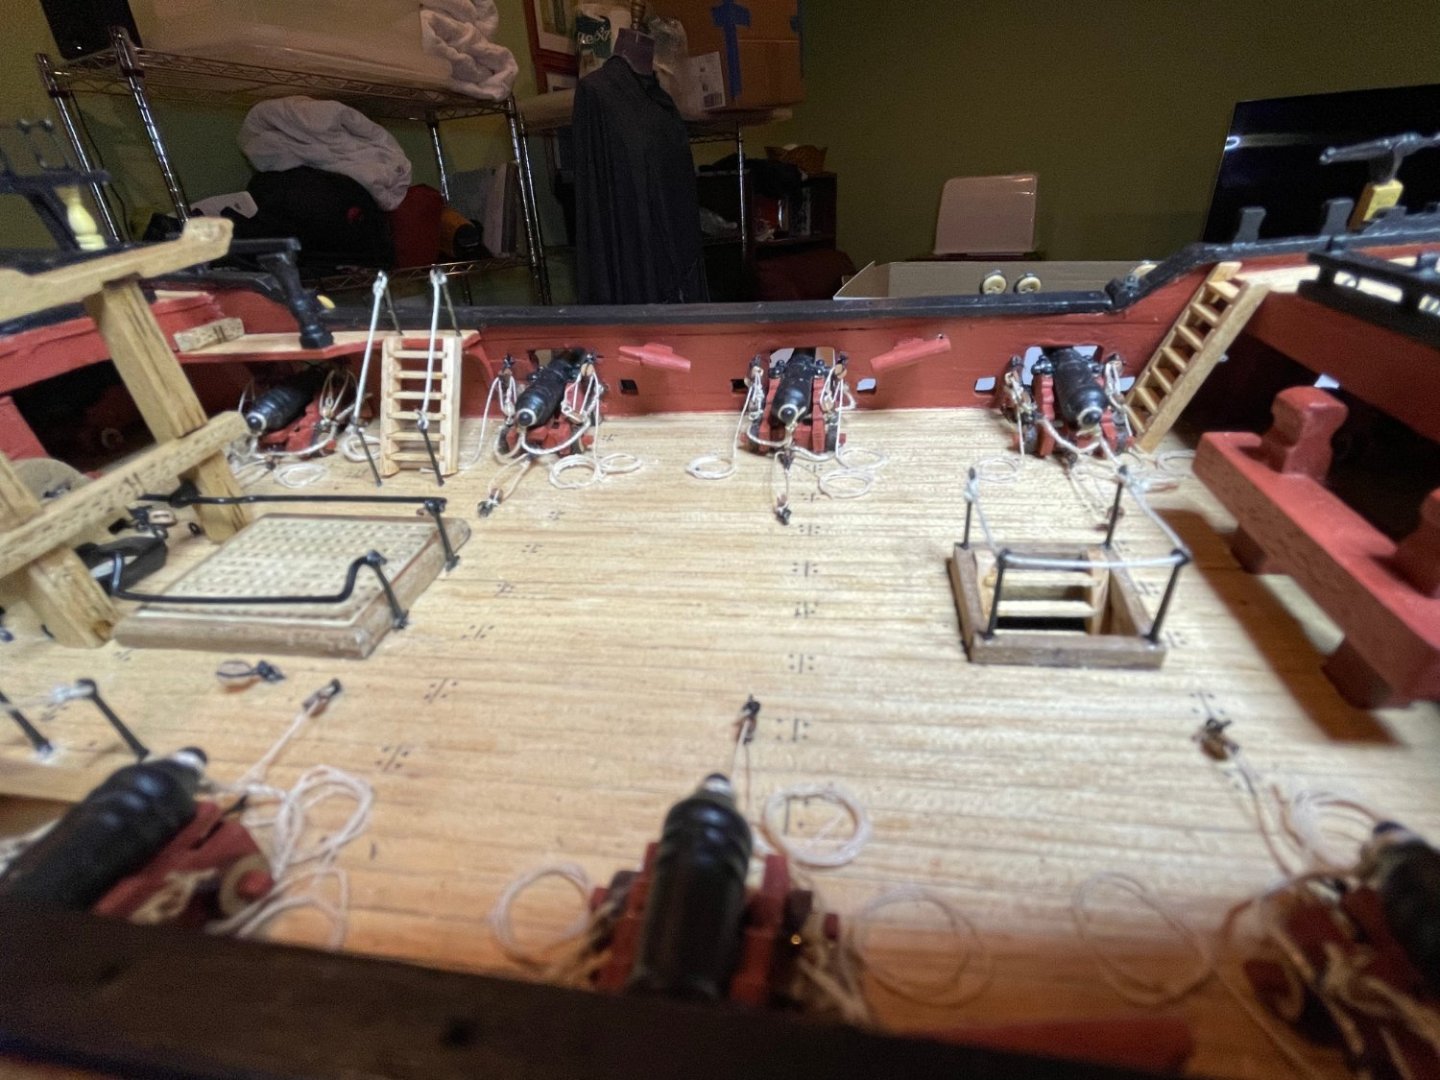
Work continues. I think these views show how long is thew gundeck Next to her sister ship Agamemnon Did a bit of spray painting of the etched parts for later So sanded the inner bulkheads. Ran into my first snag of the build. Parts do not line up next to each other completely. There is a 2-3 mm gap between the last 2 pieces (happened on both sides). Filled the gap and as will not be visible and is painted, will nto be noticed. Still impressive


- 233 replies
-
- 10
-
-
- Indefatigable
- Vanguard Models
- (and 1 more)
-
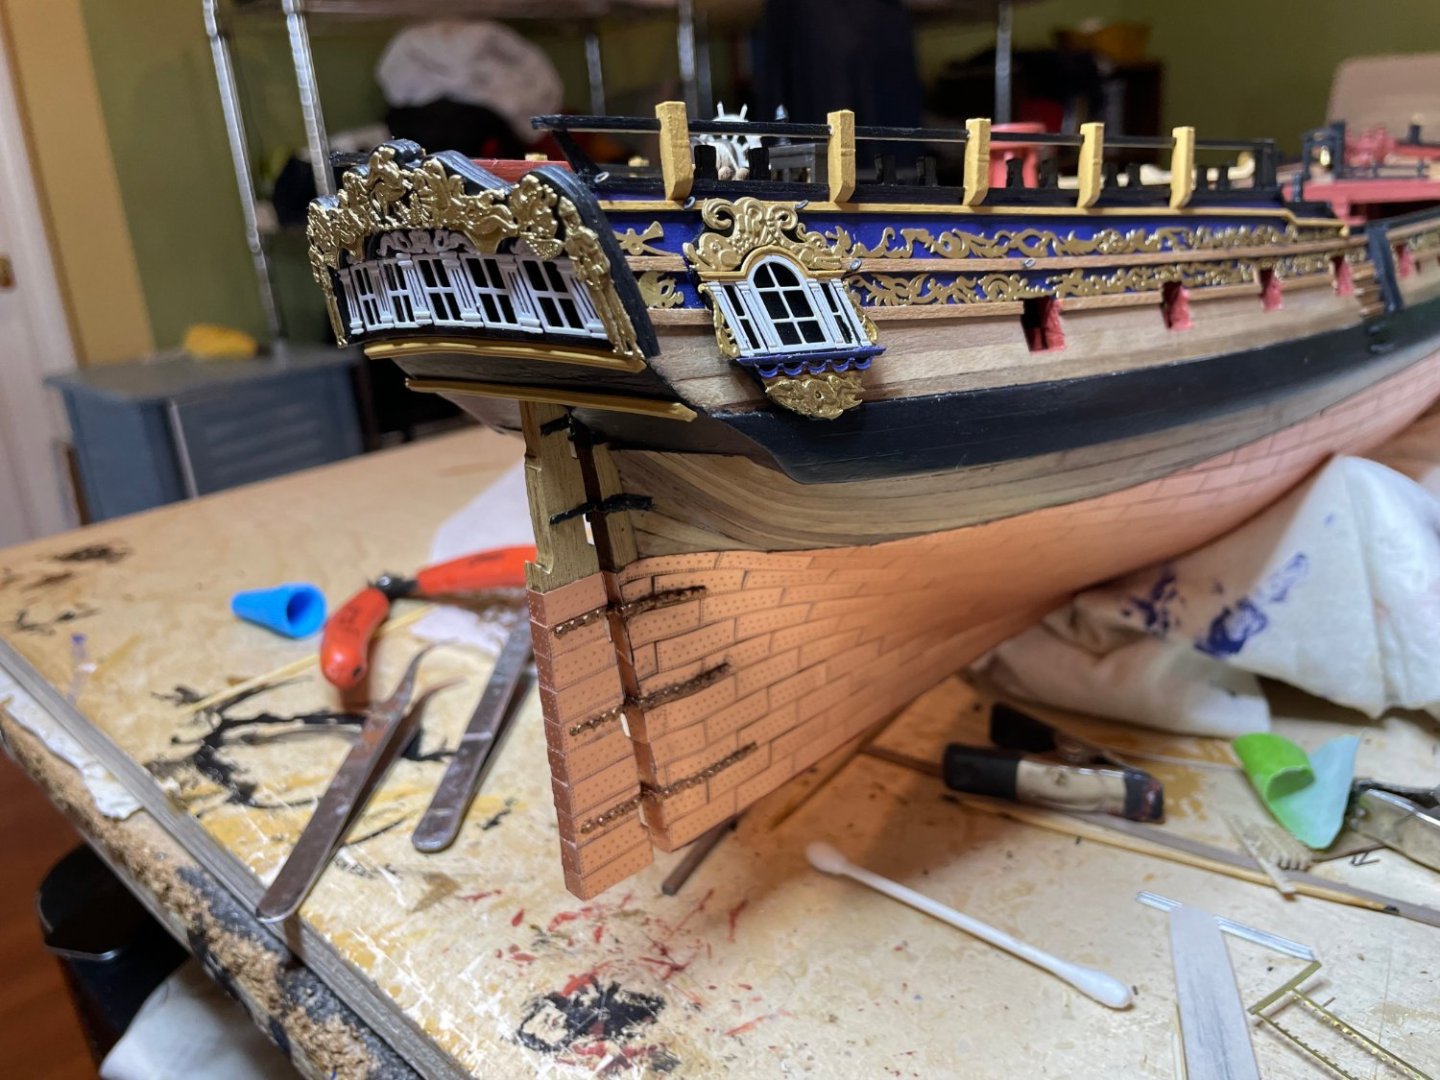
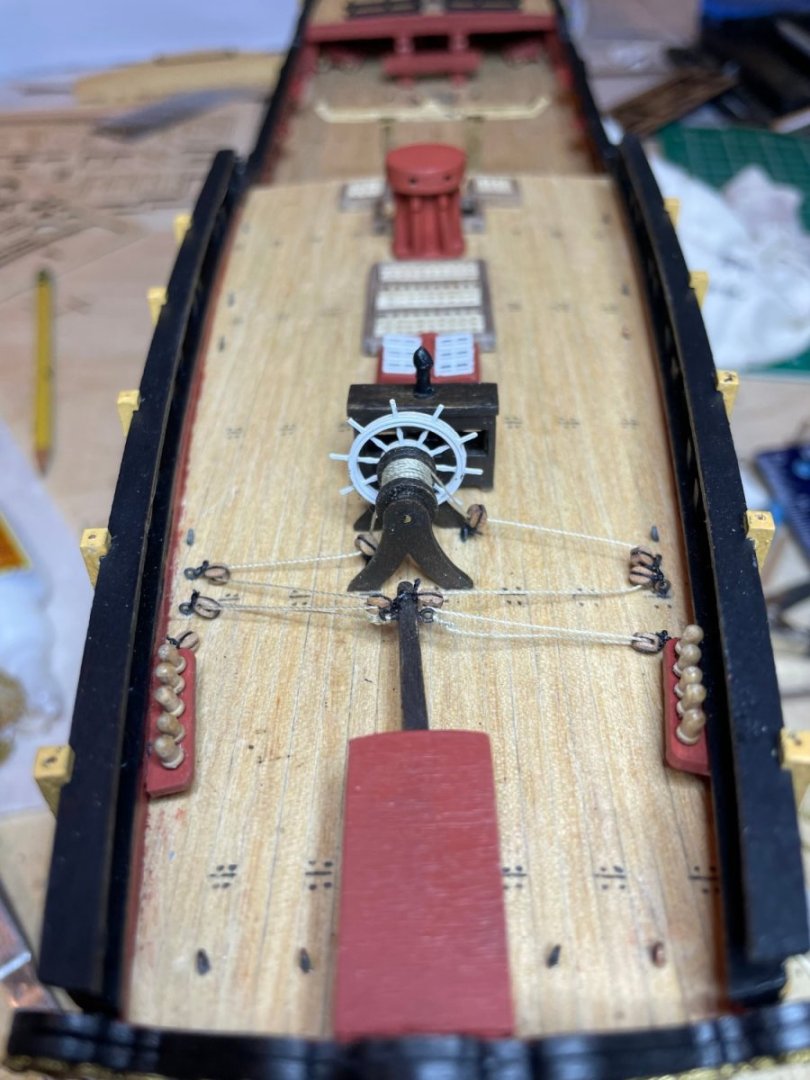
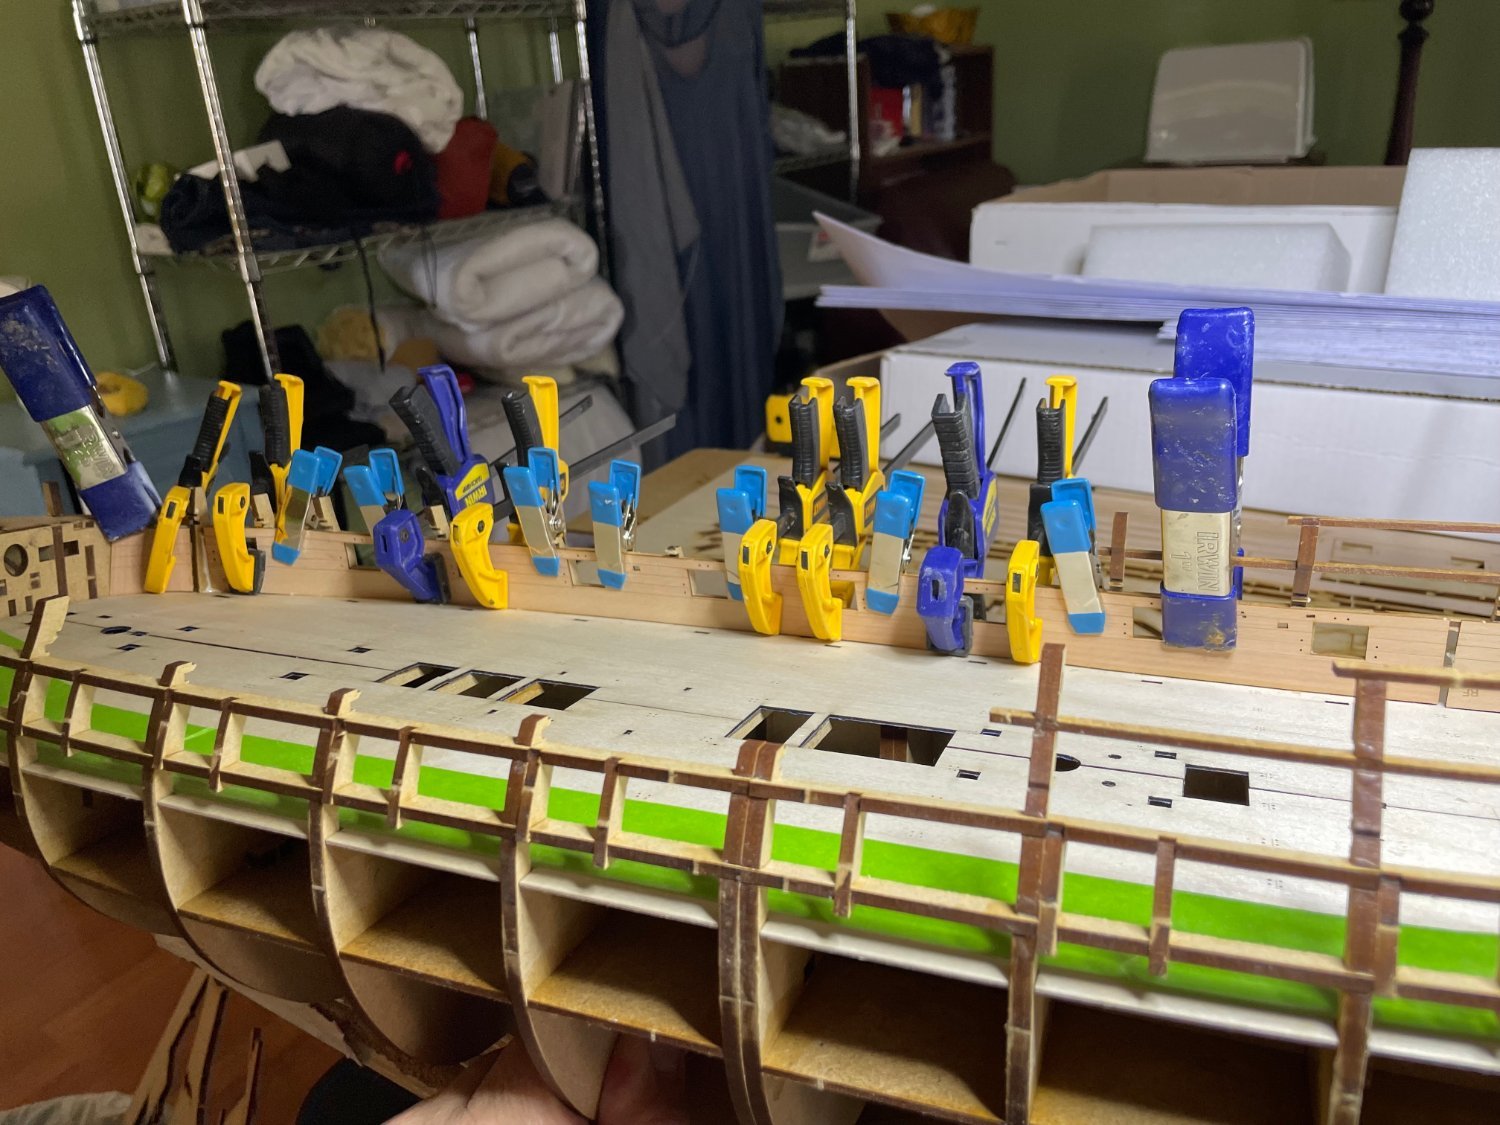
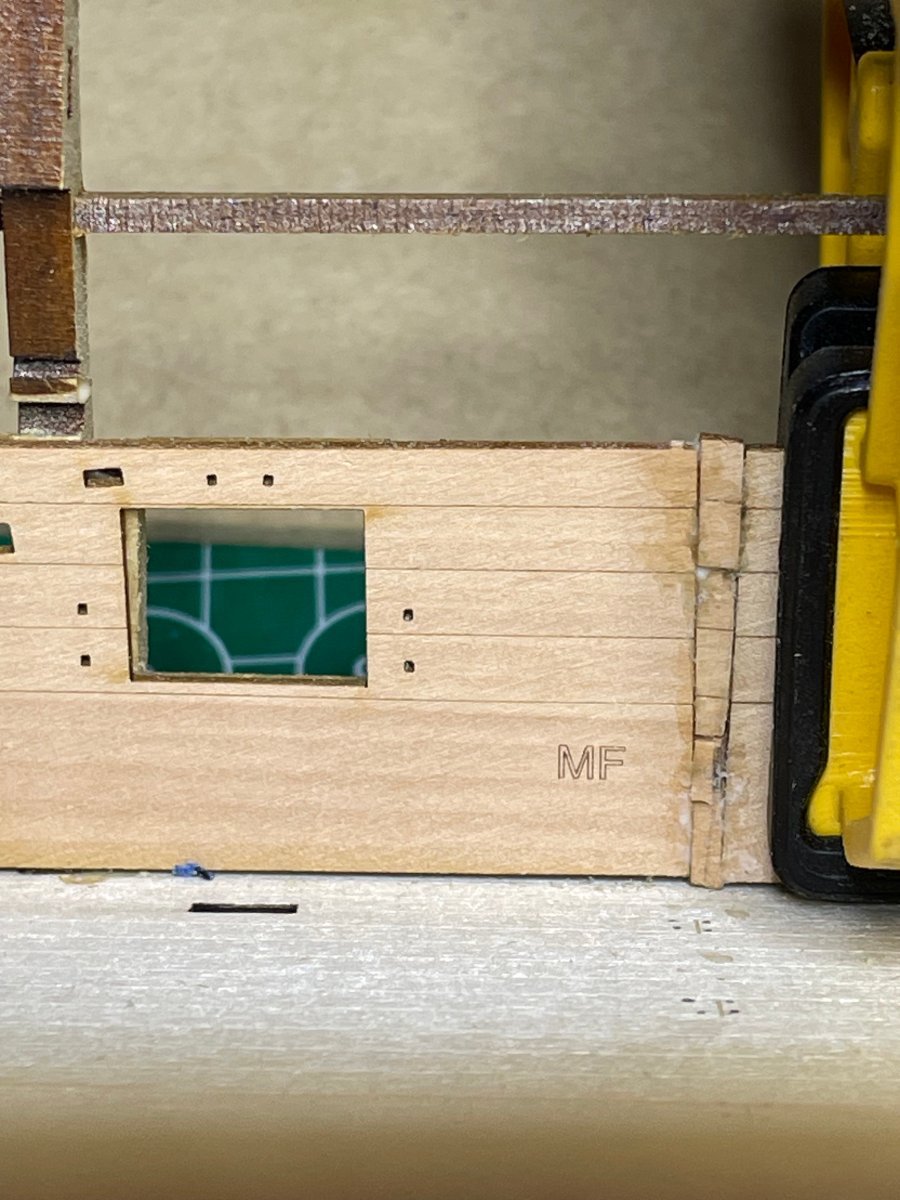
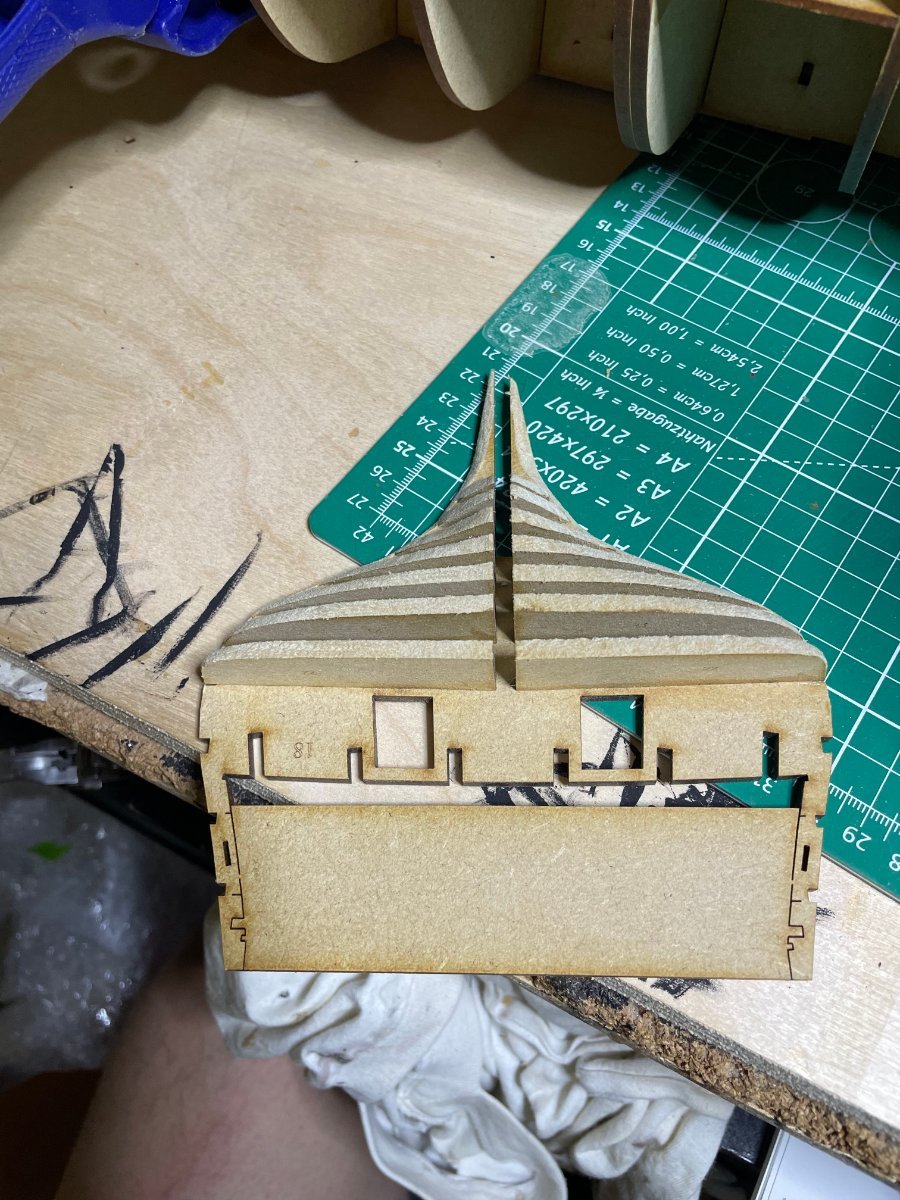
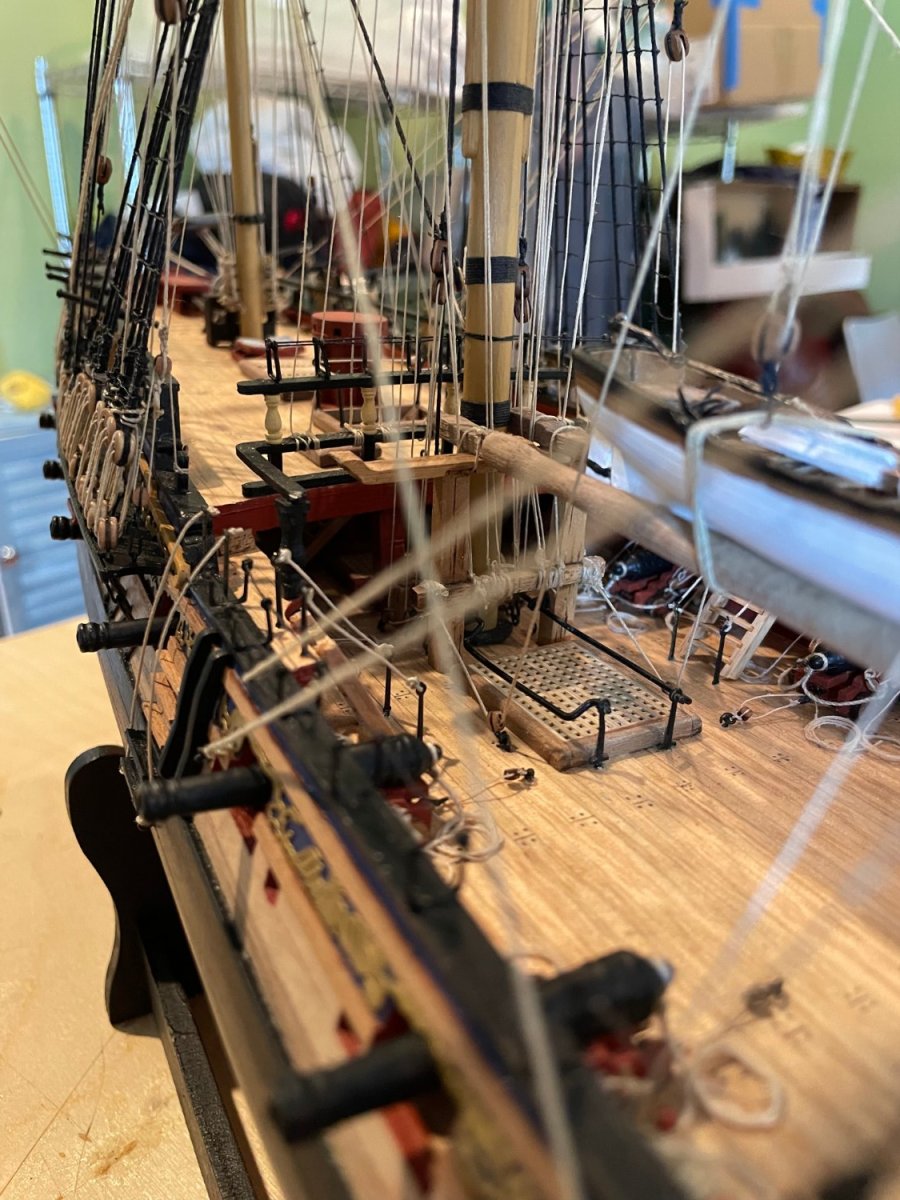
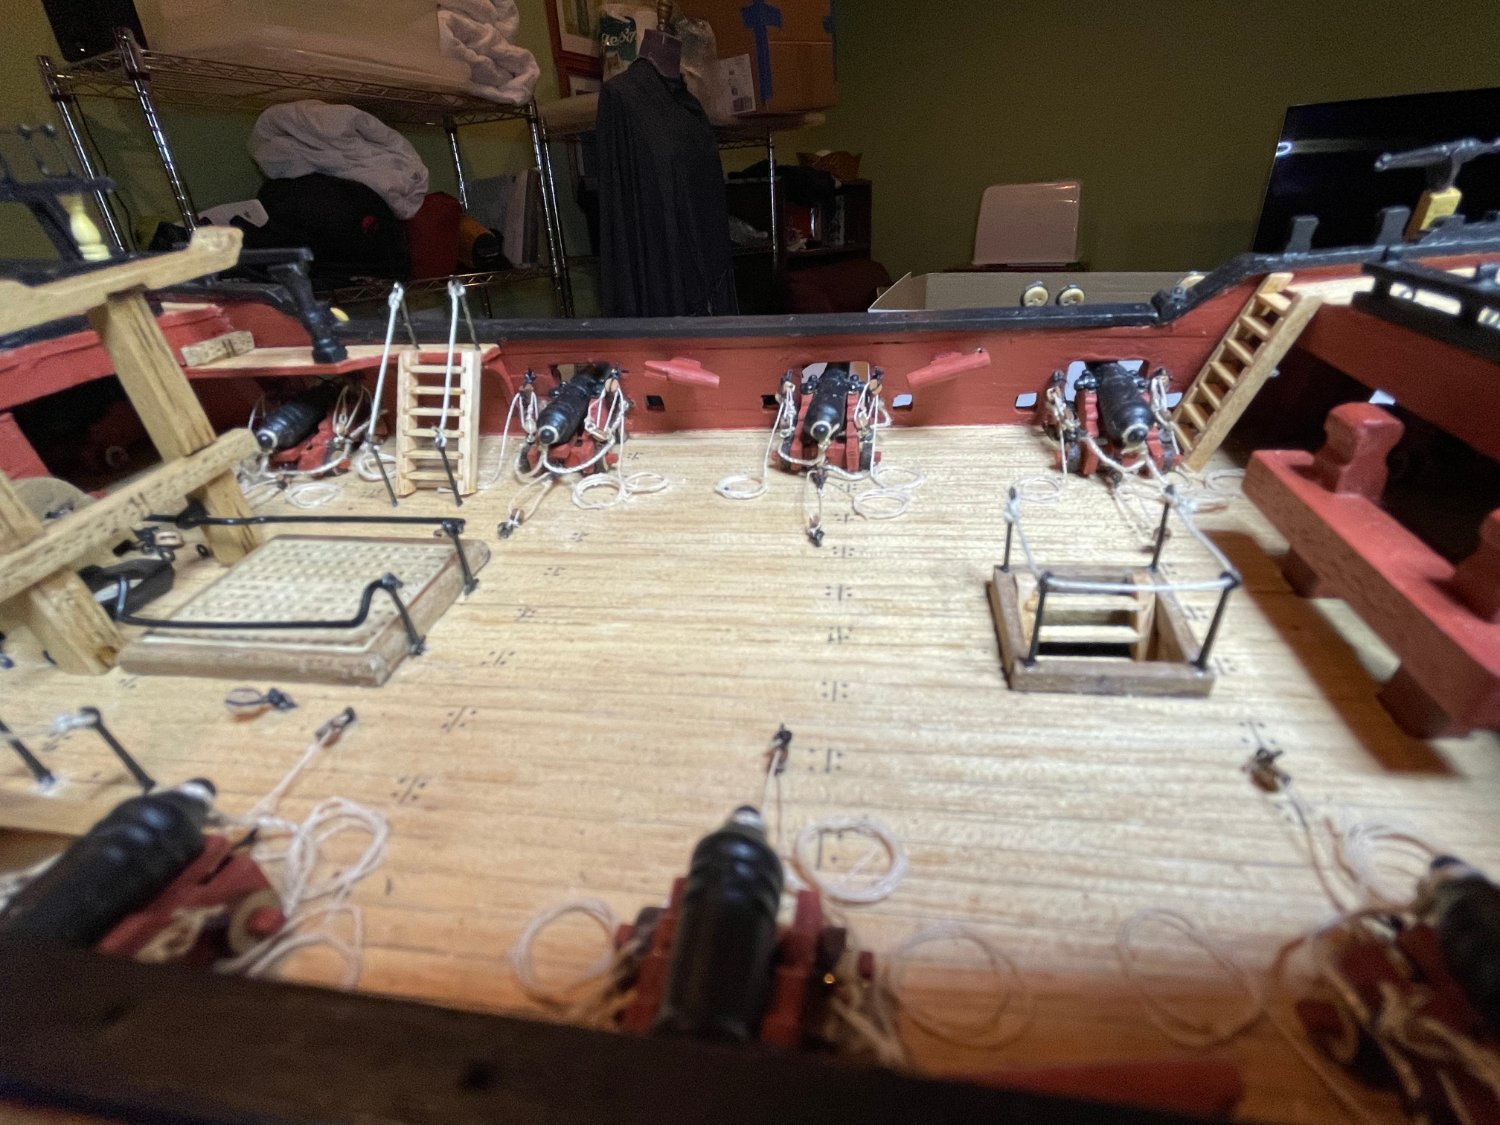
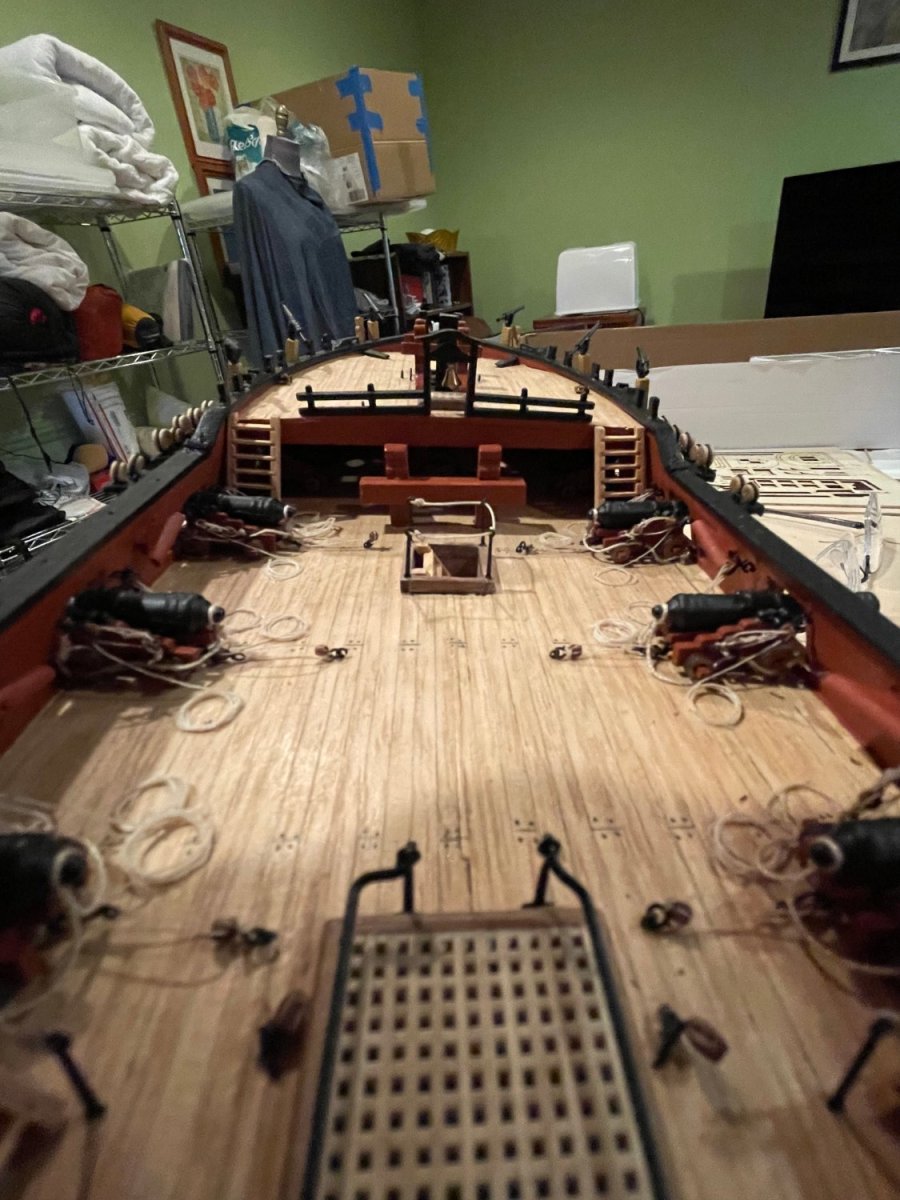
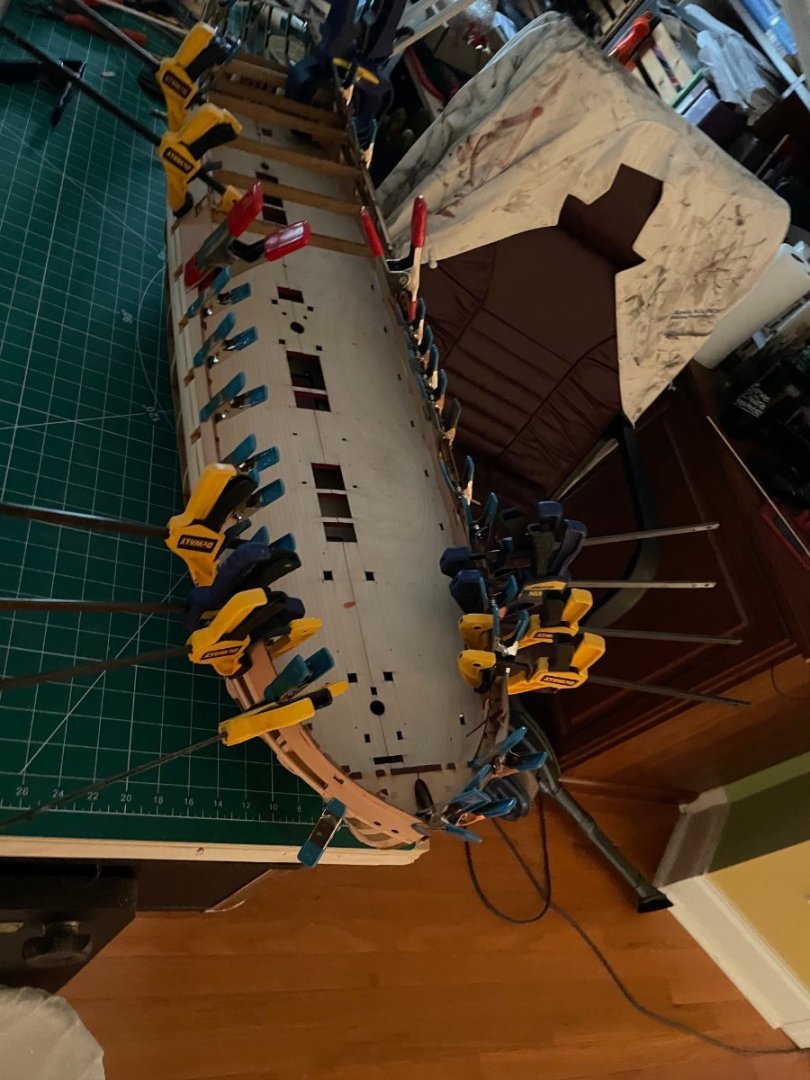
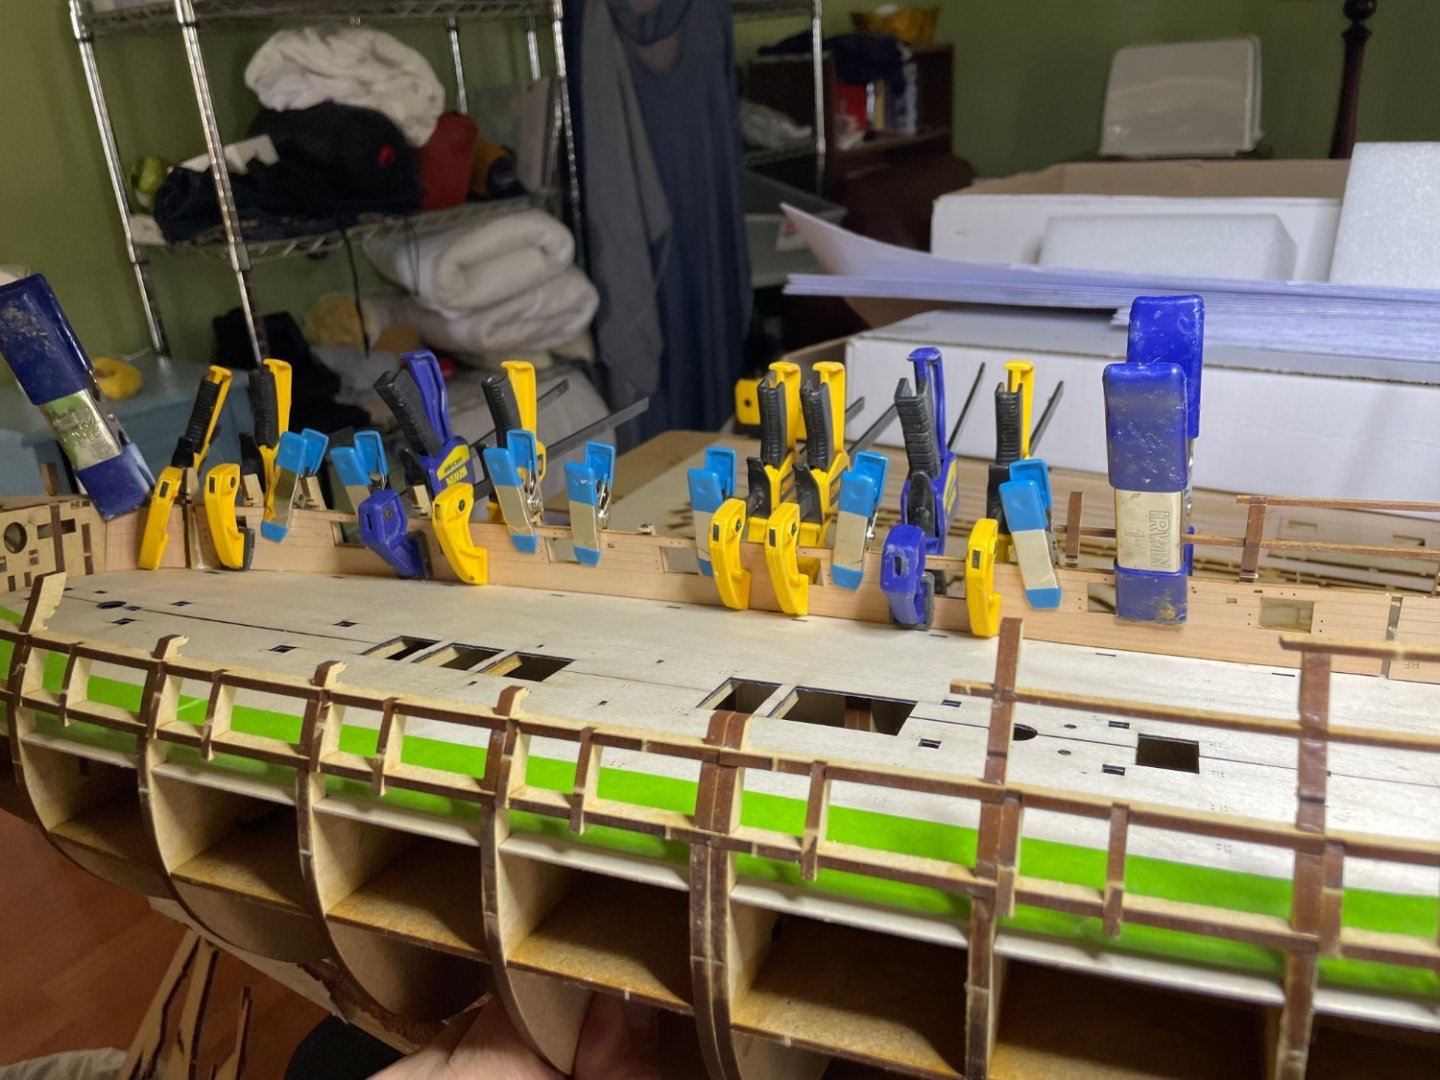
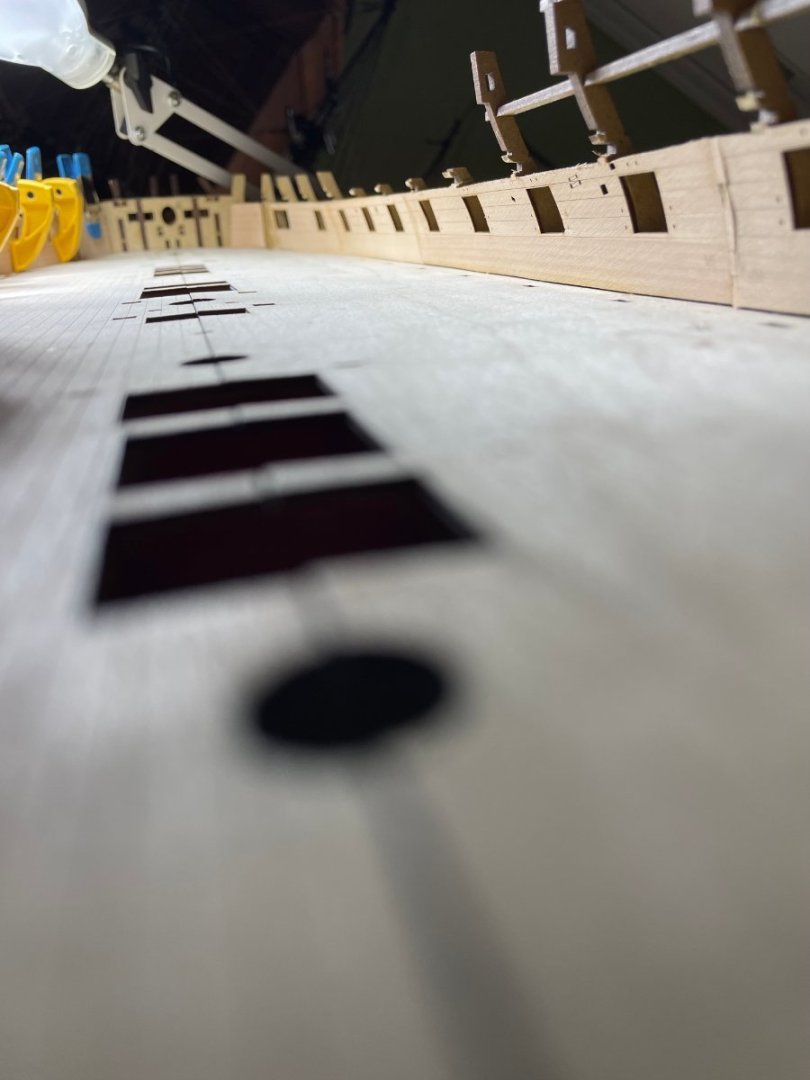
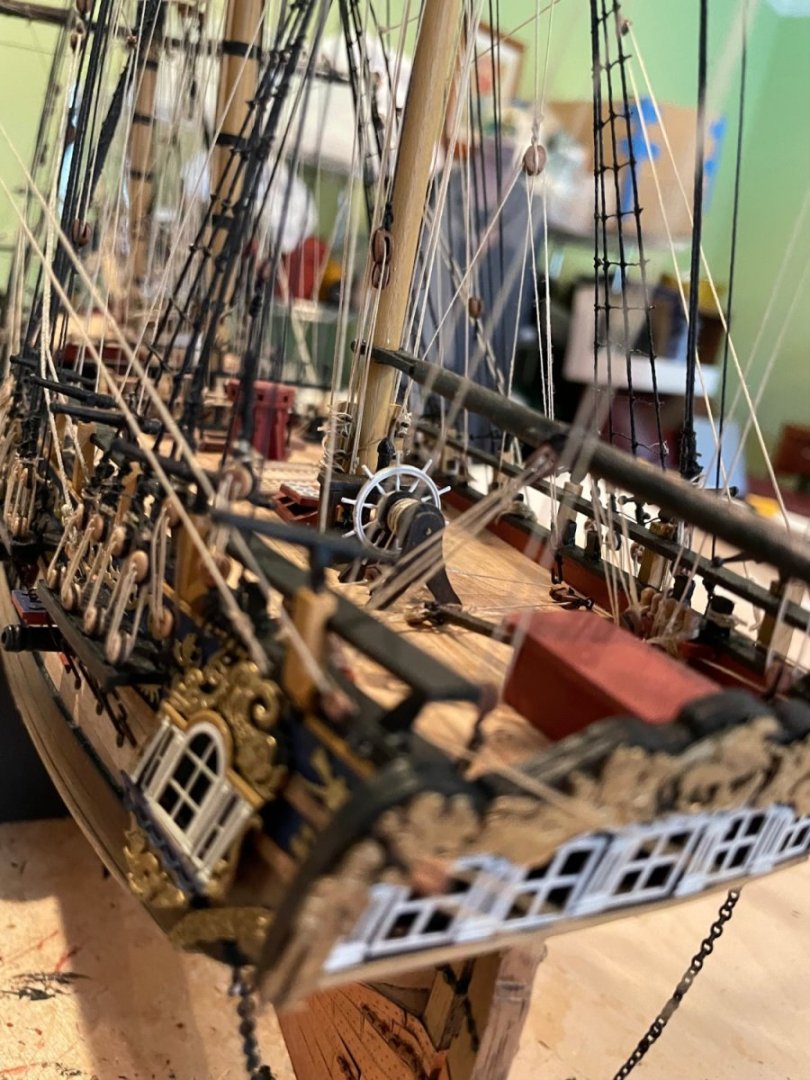
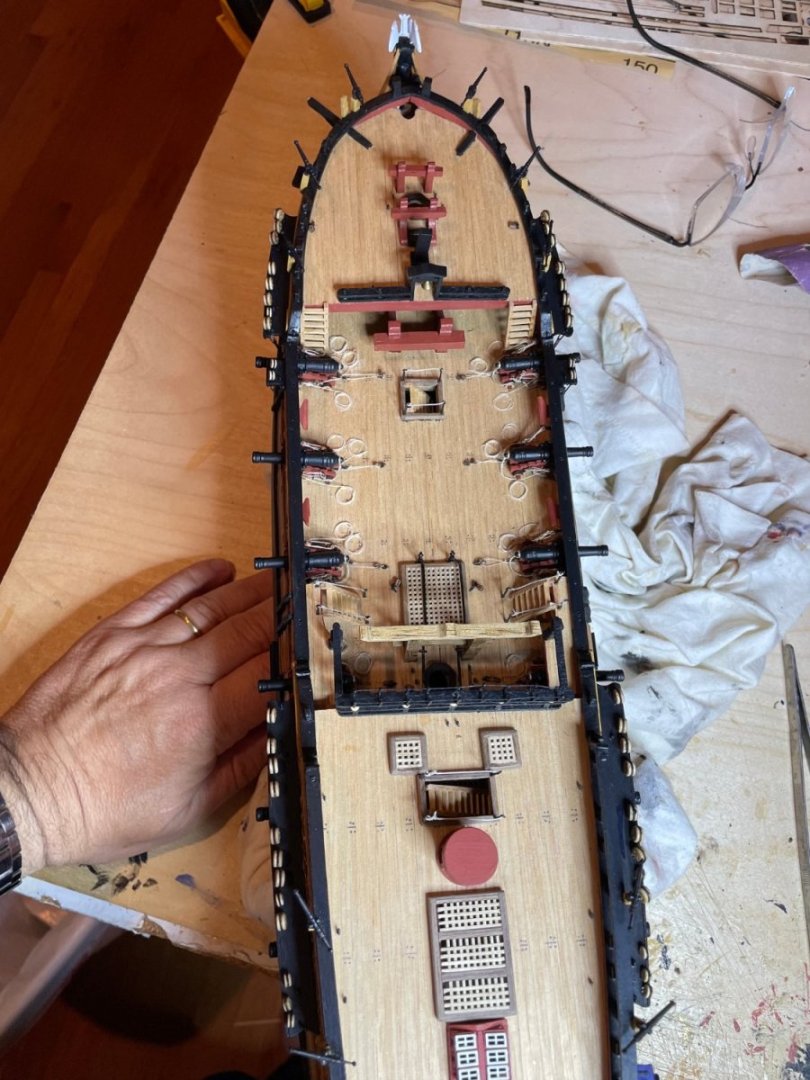
Thanks for the encouragement and comments are welcome. Work done for the day as lots of glue needs drying. Hull supports quite a bit of weight that I placed on the gundeck to dry. Also finished the day by adding the stern supports. Gunports Wei Weighted deck Stern


- 233 replies
-
- 11
-
-
- Indefatigable
- Vanguard Models
- (and 1 more)
-
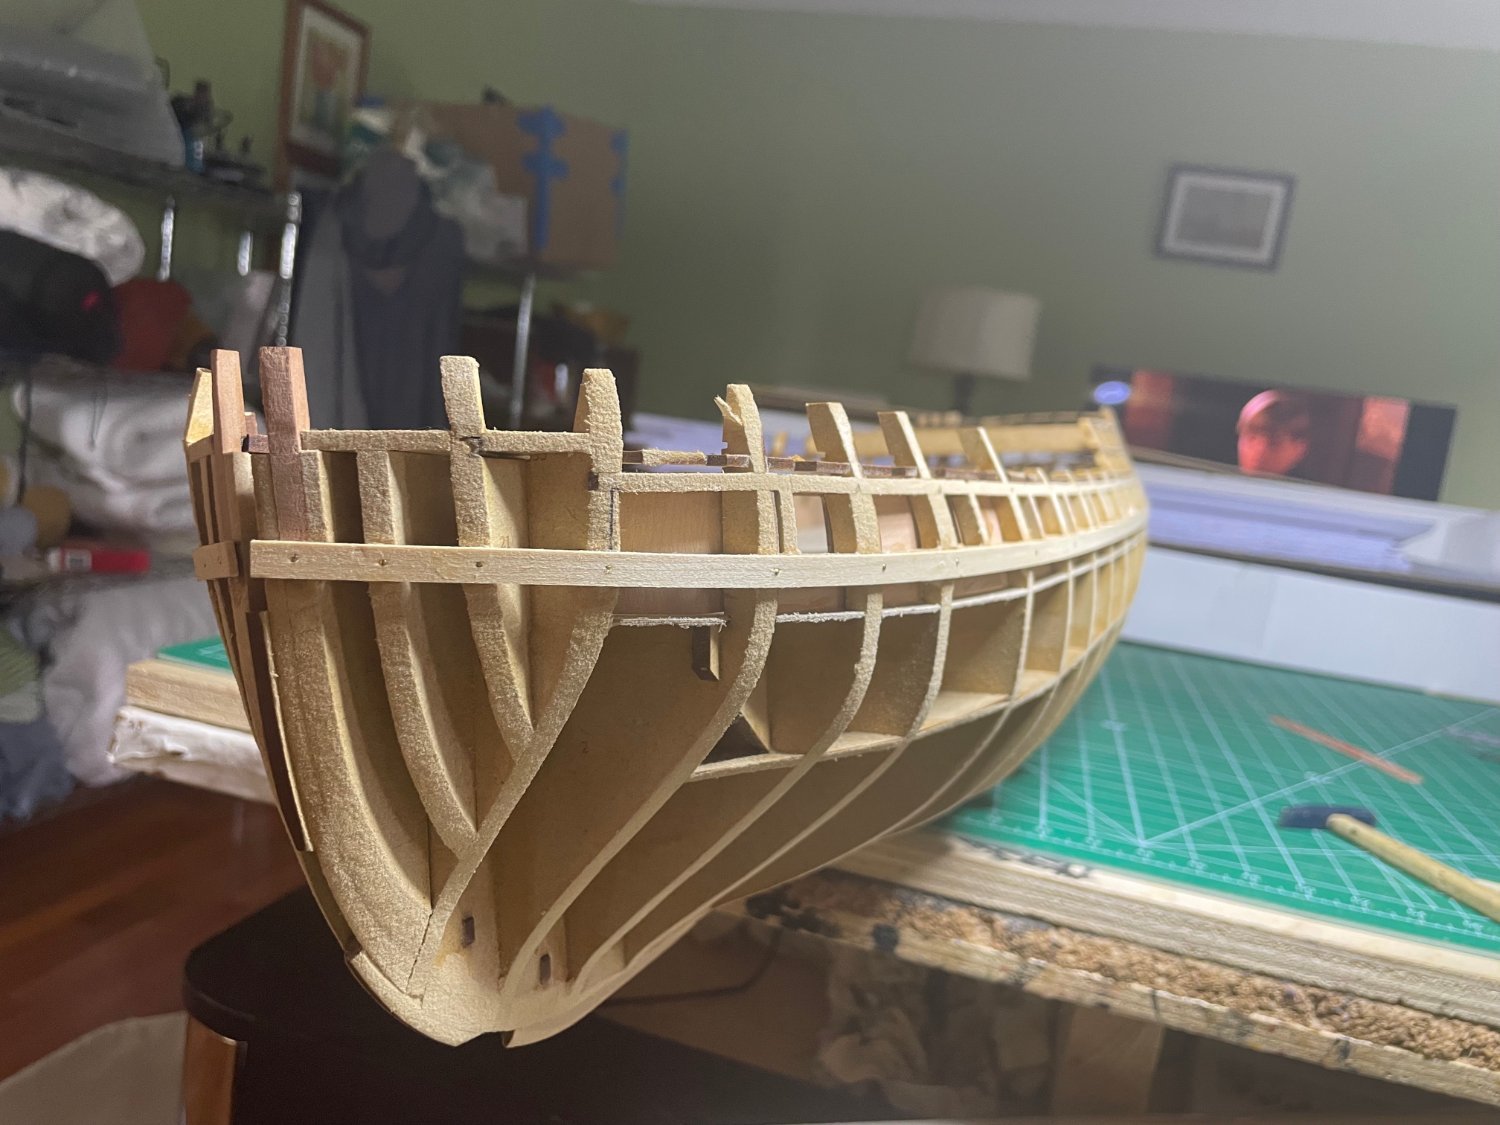
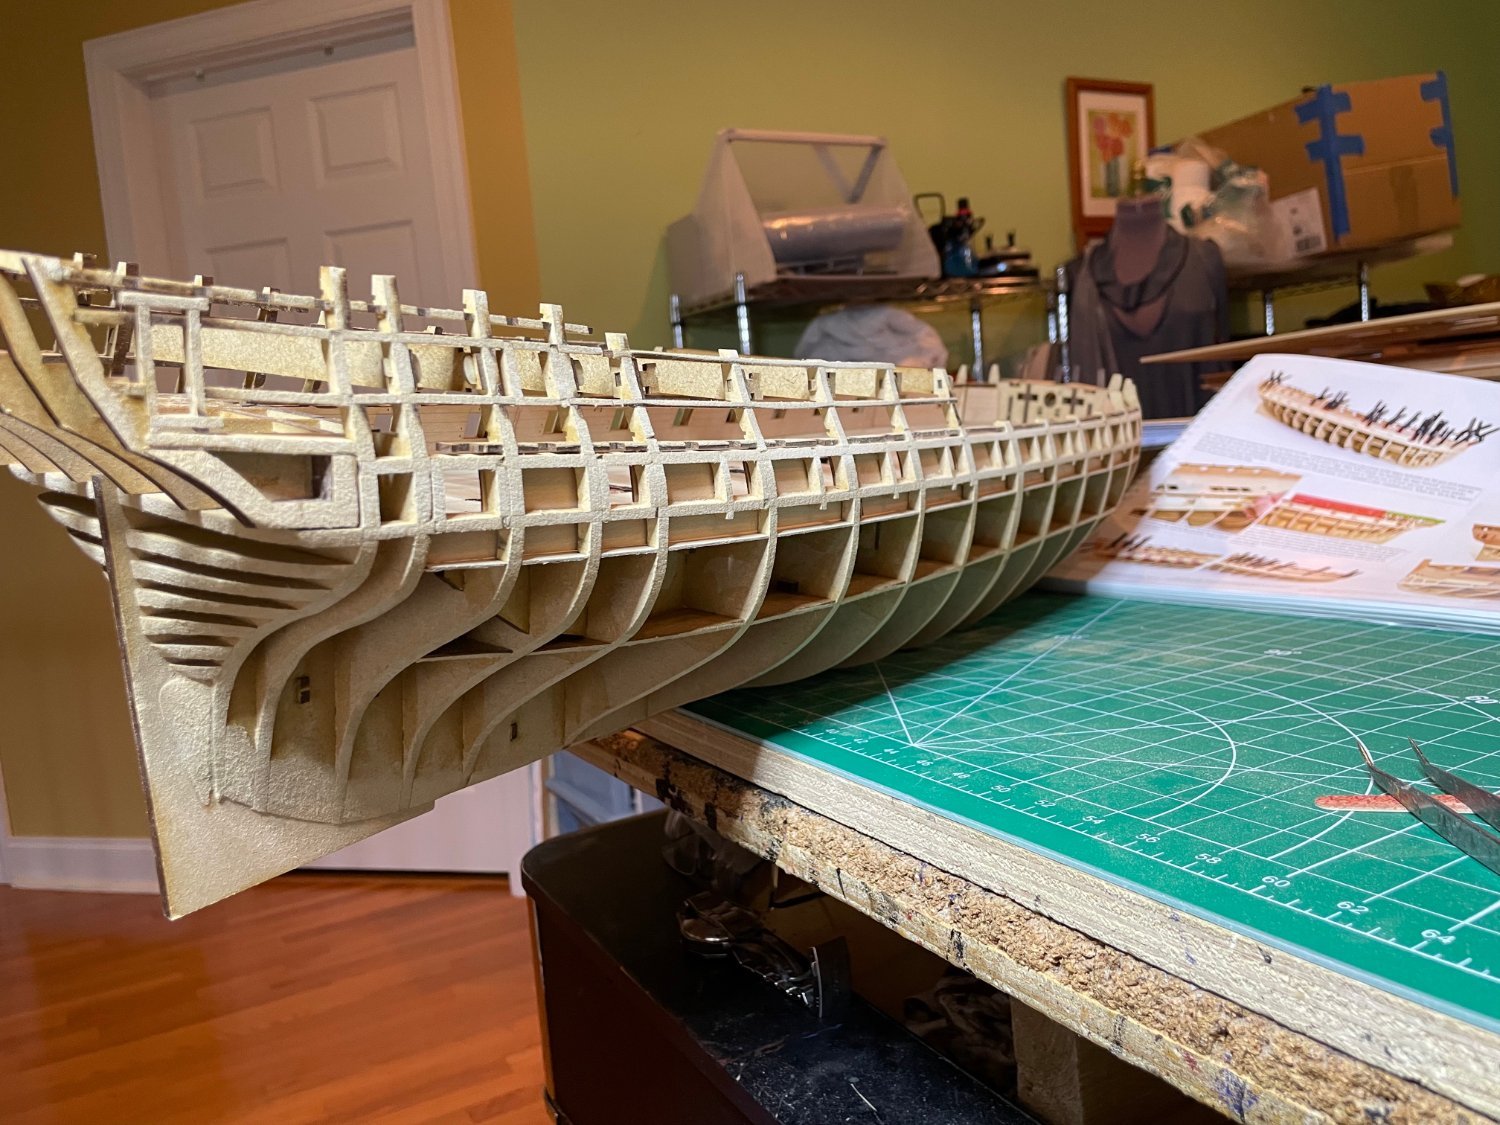
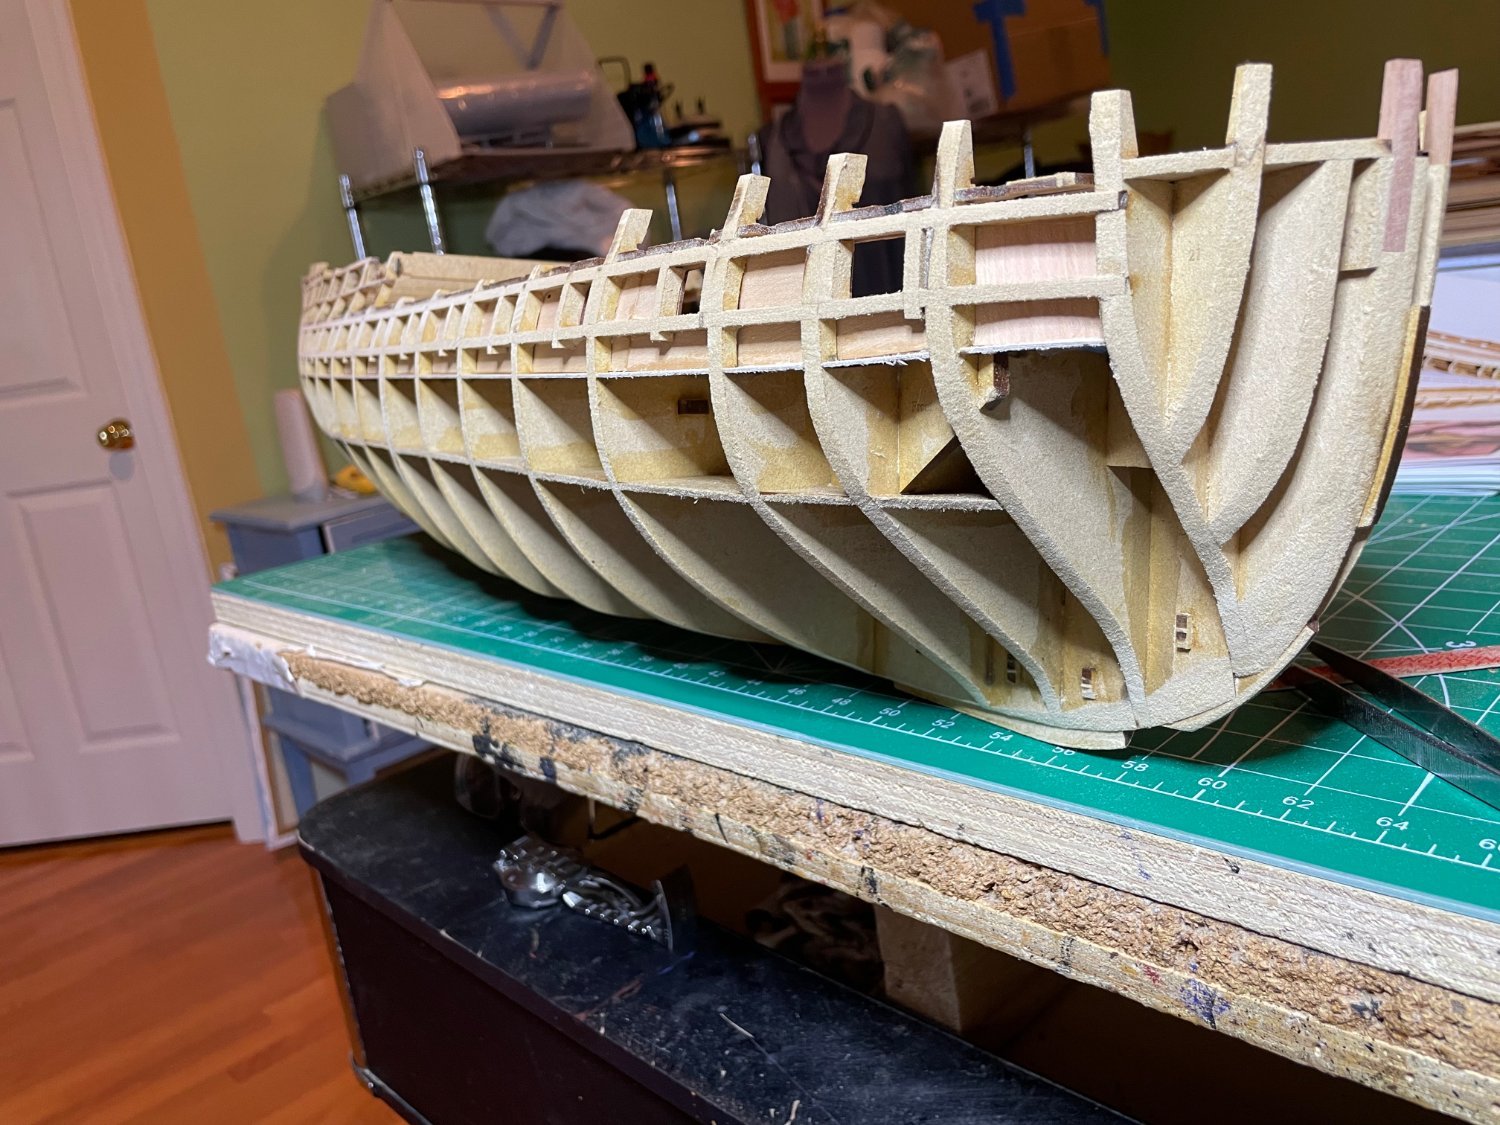
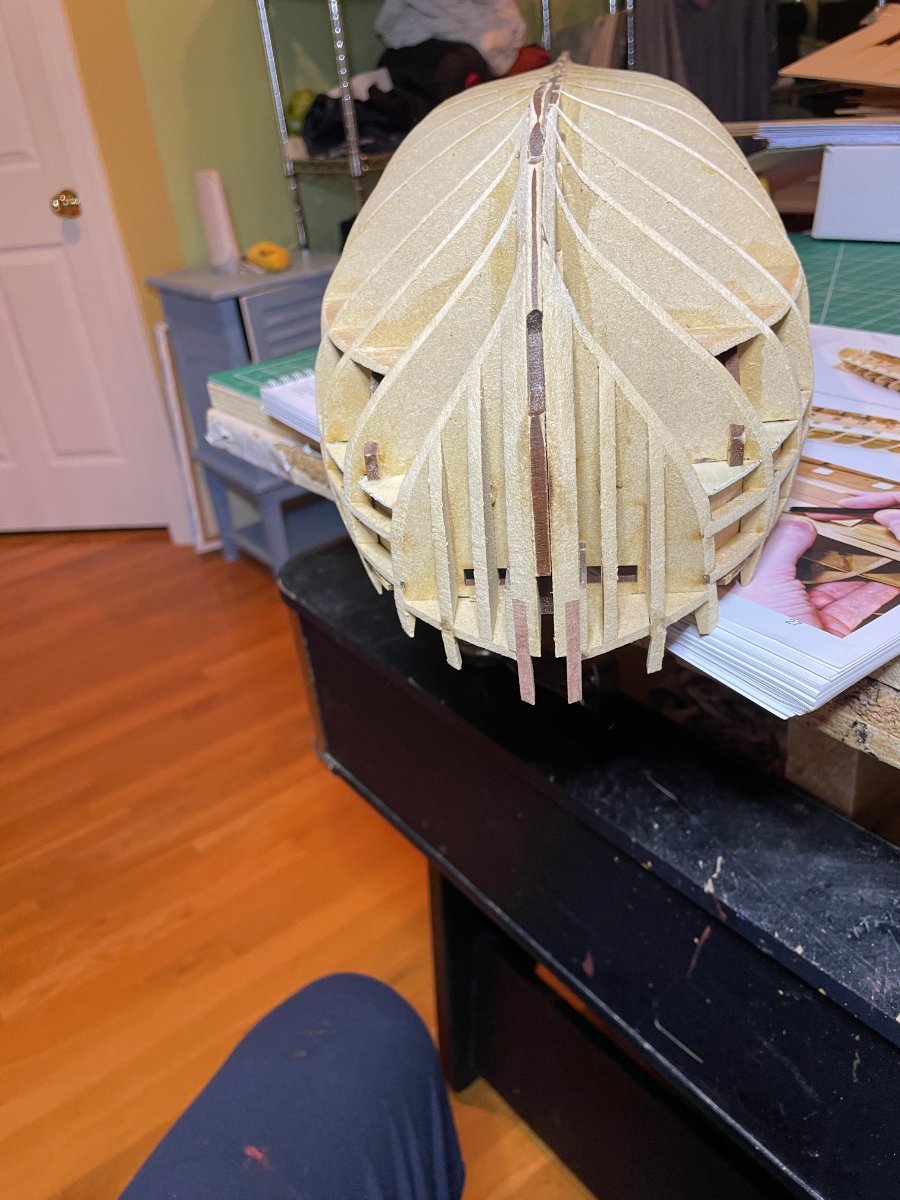
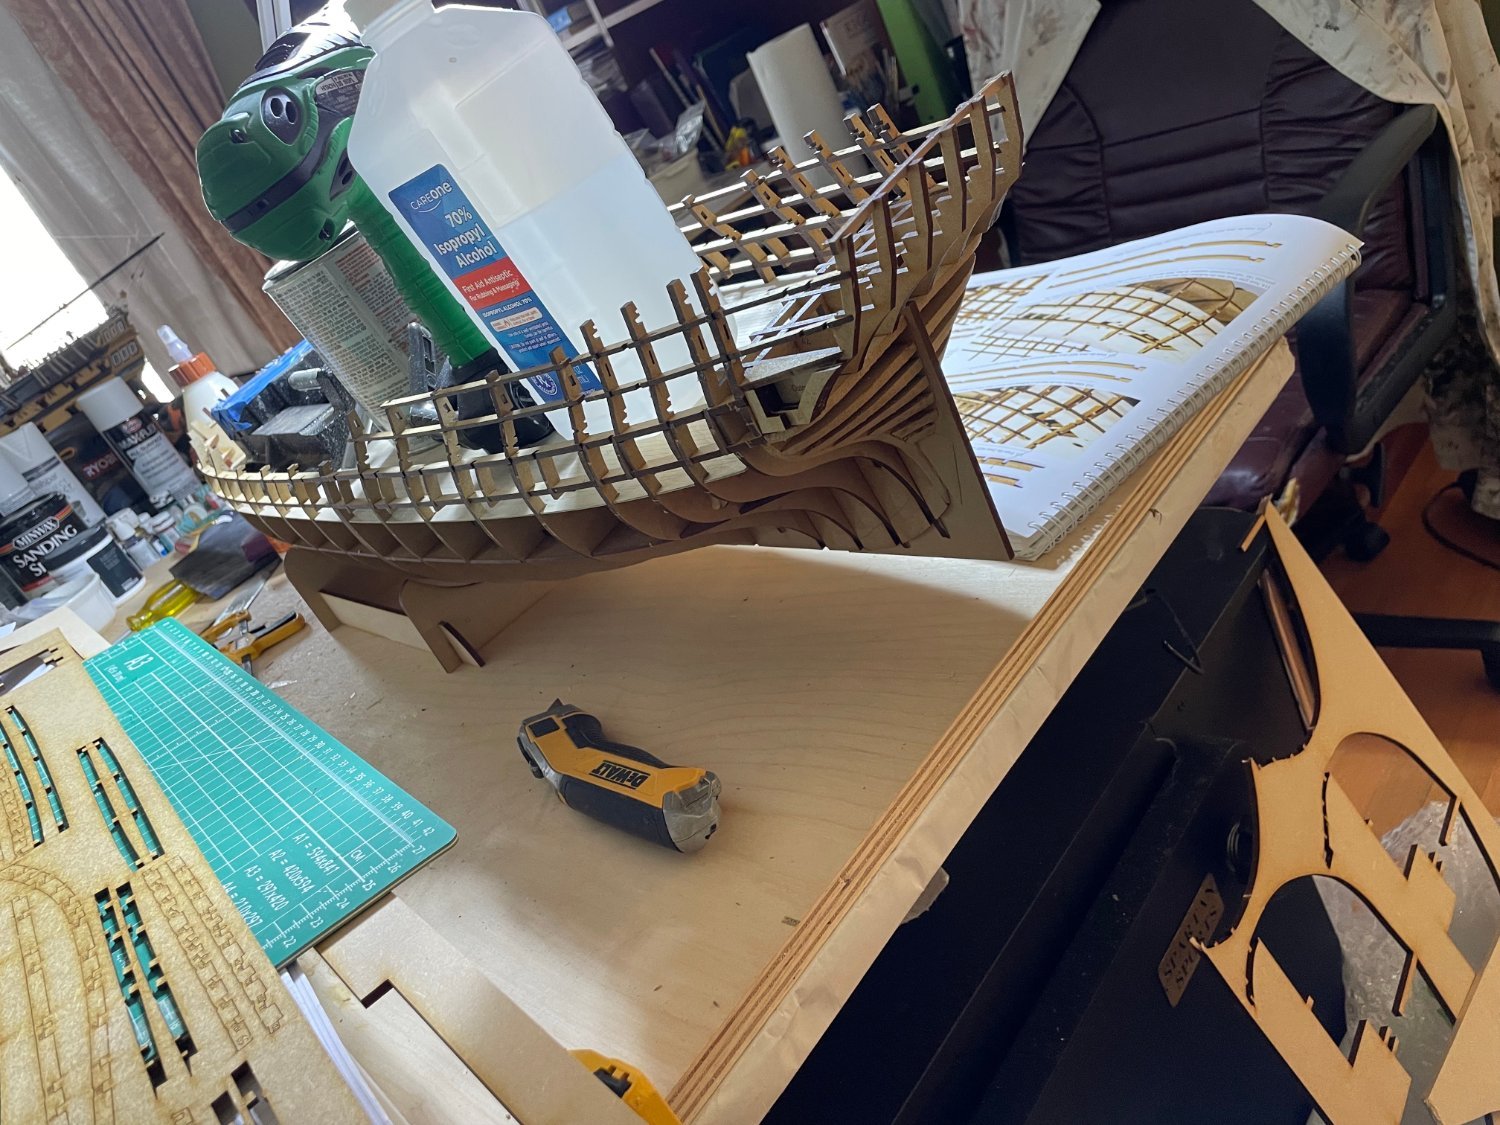
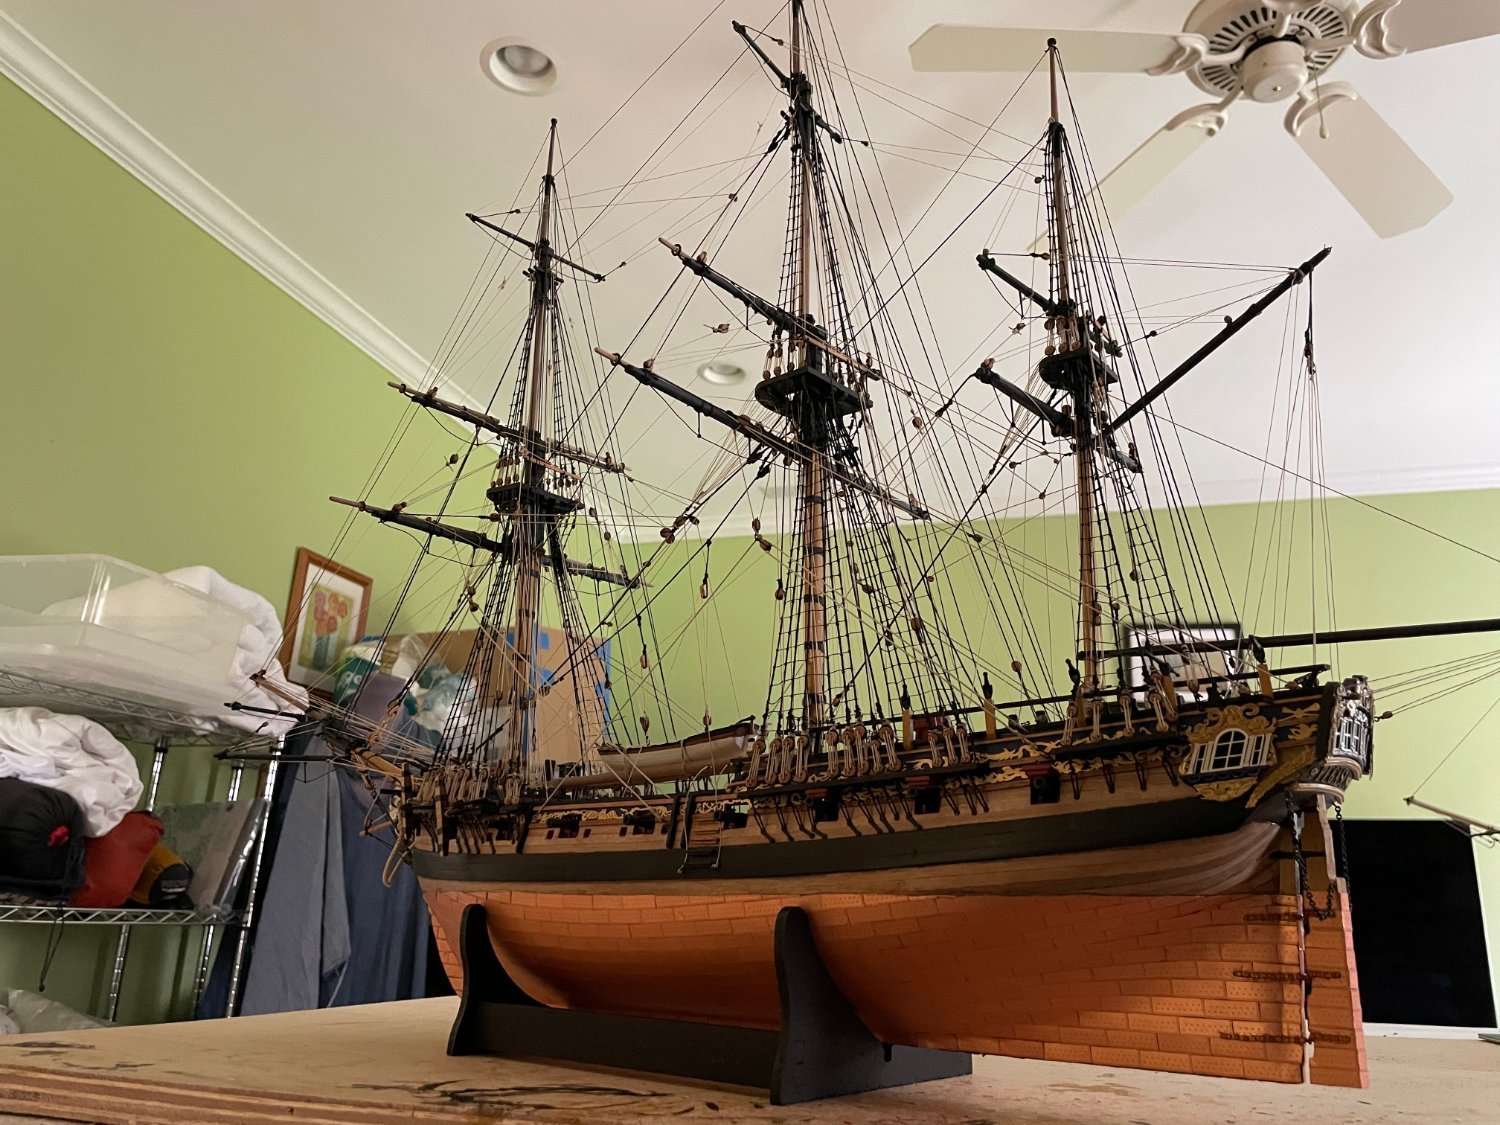
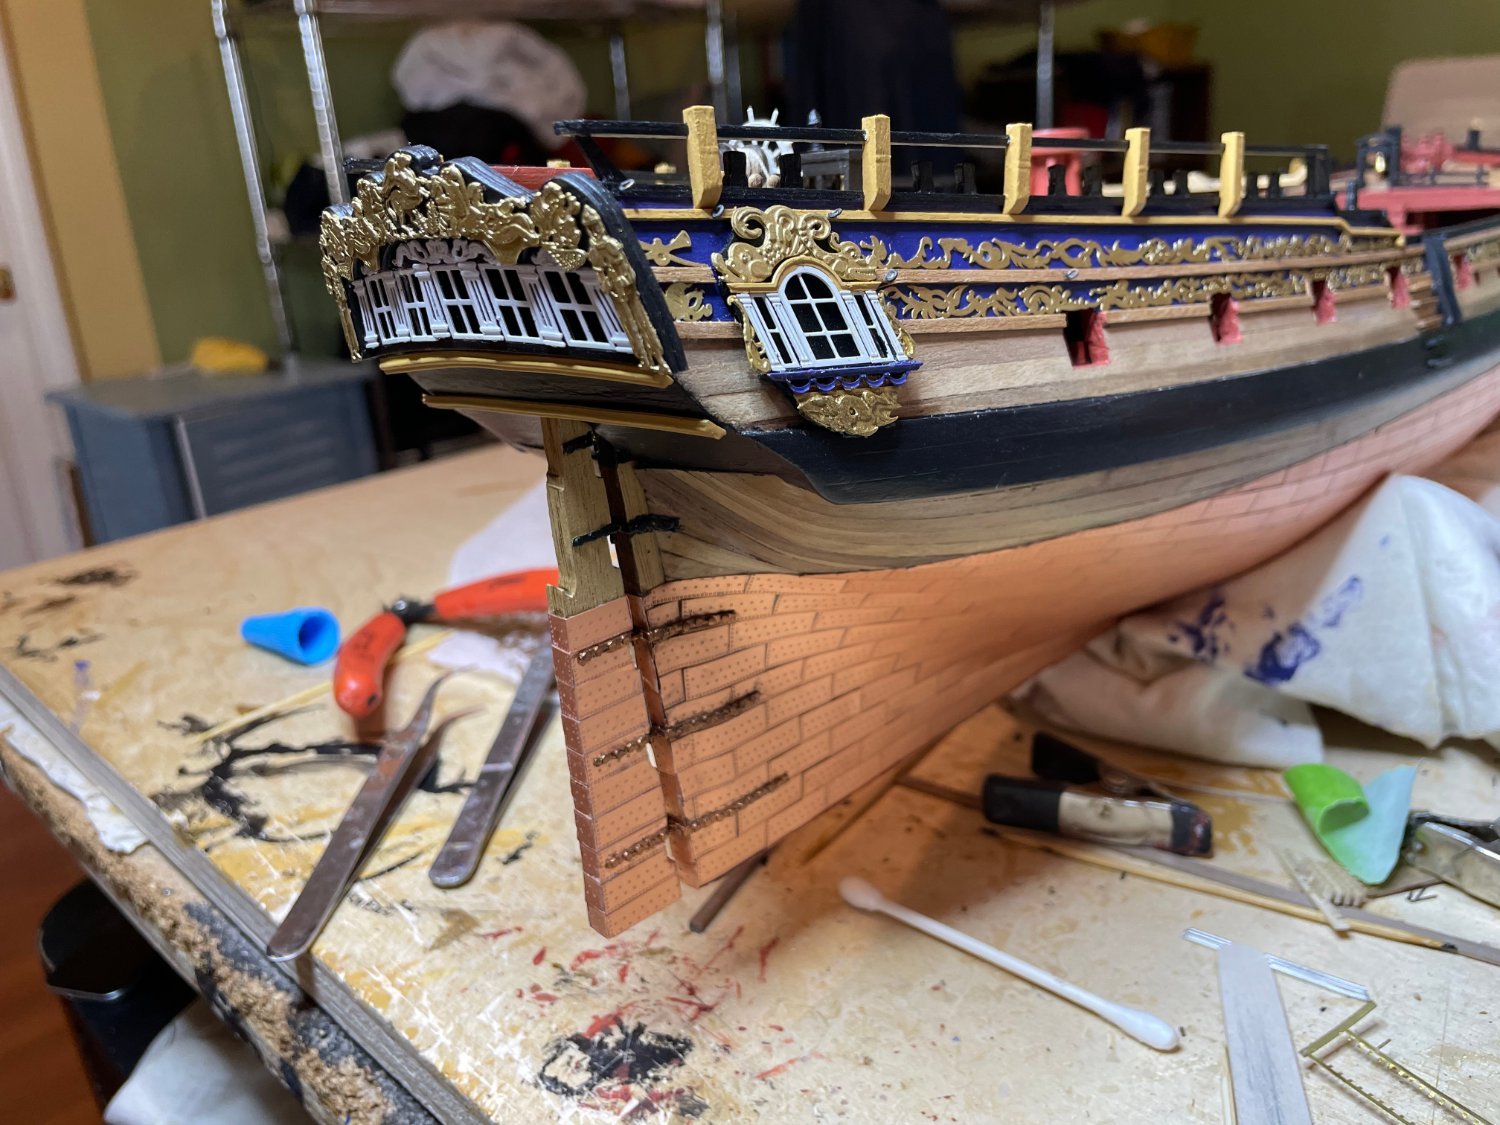
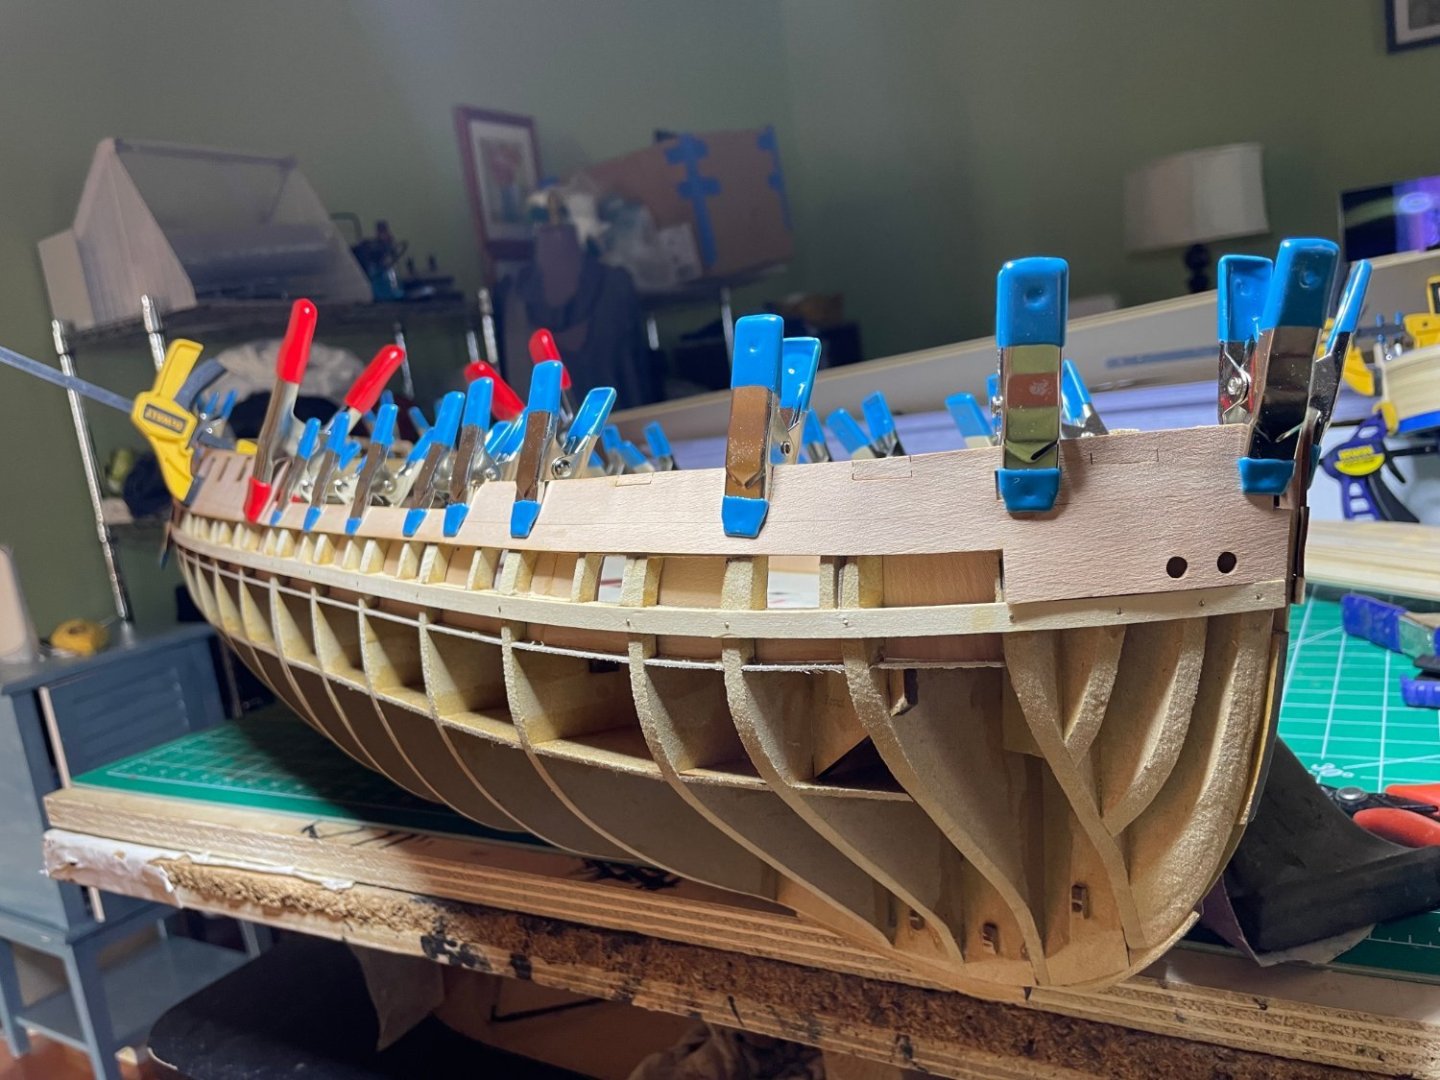
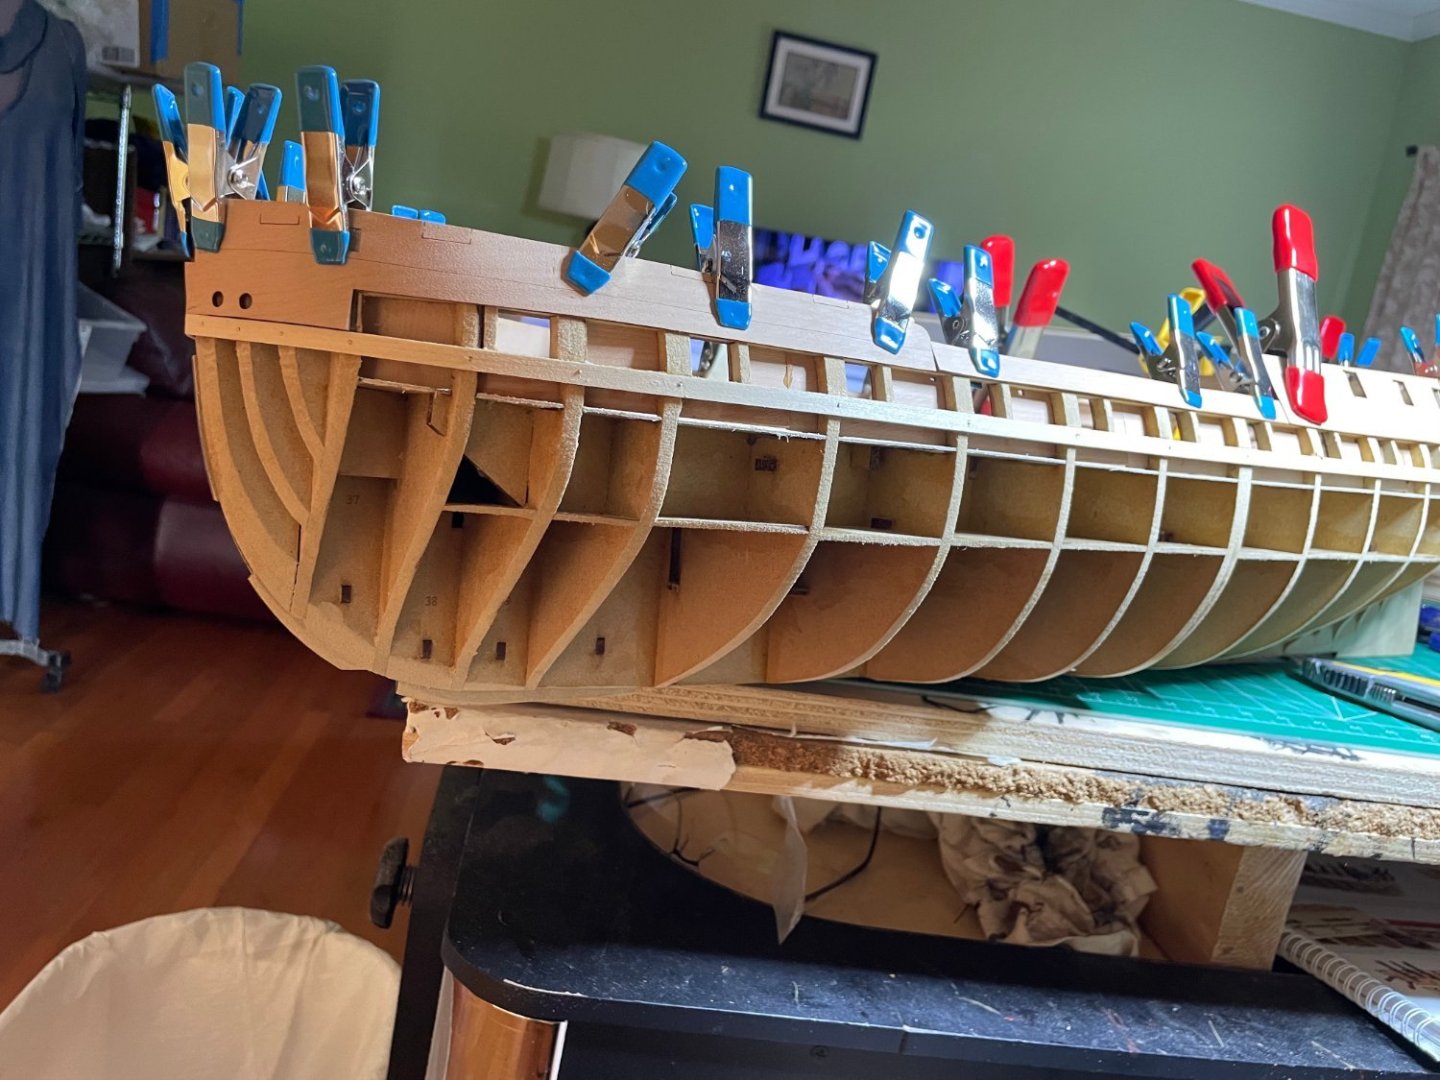
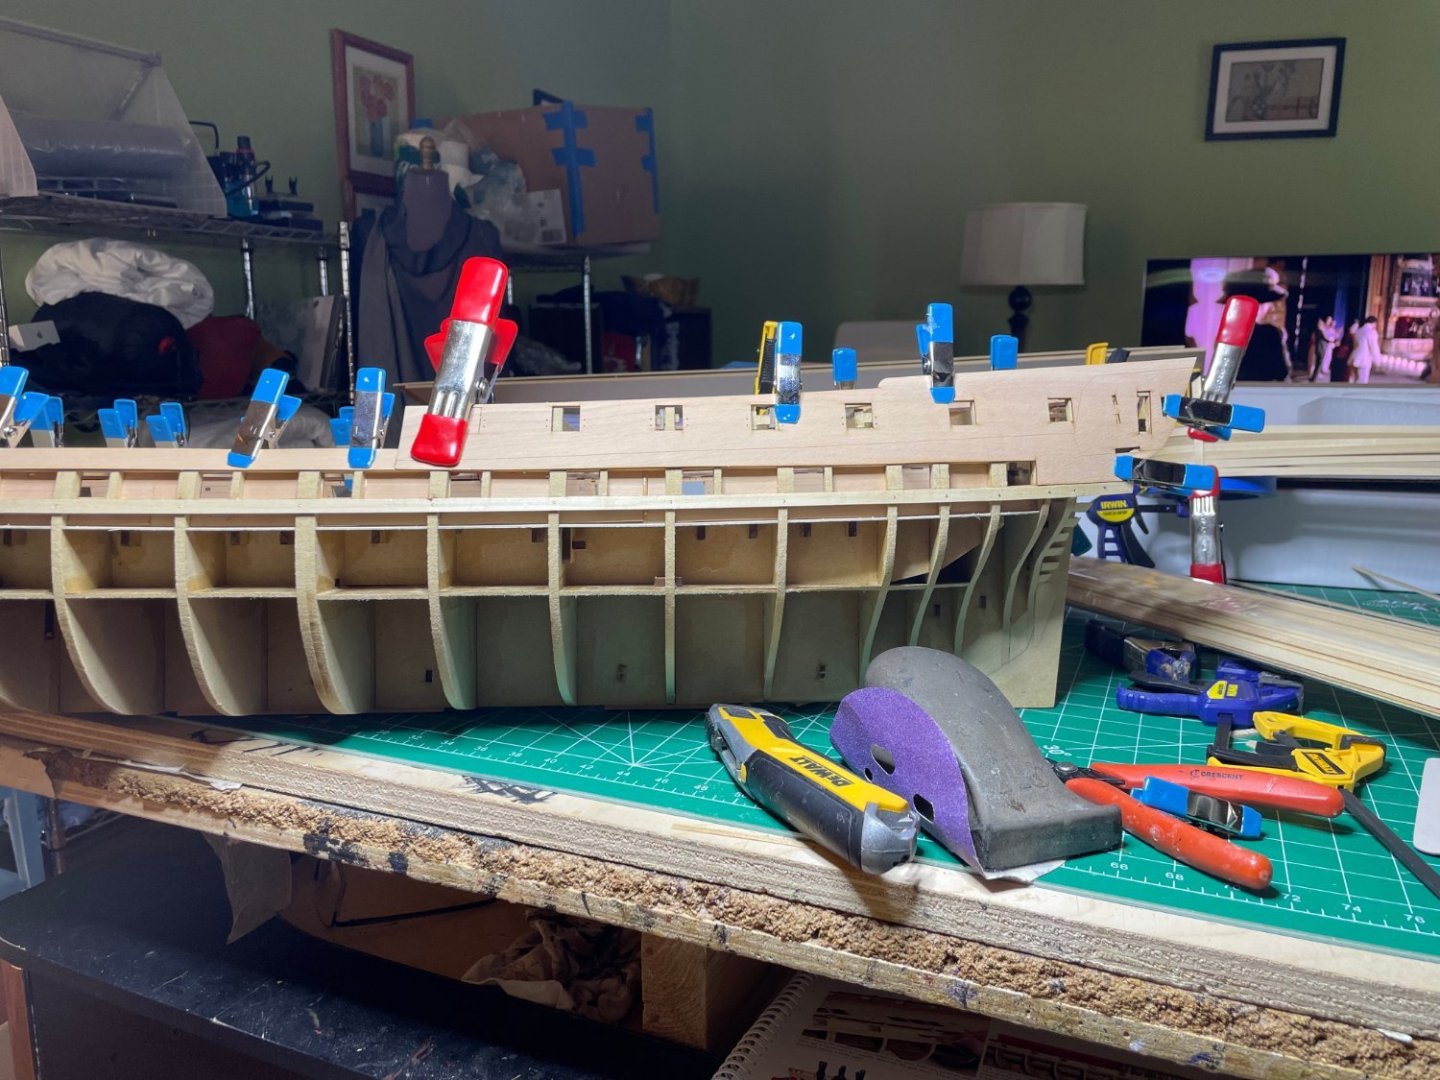
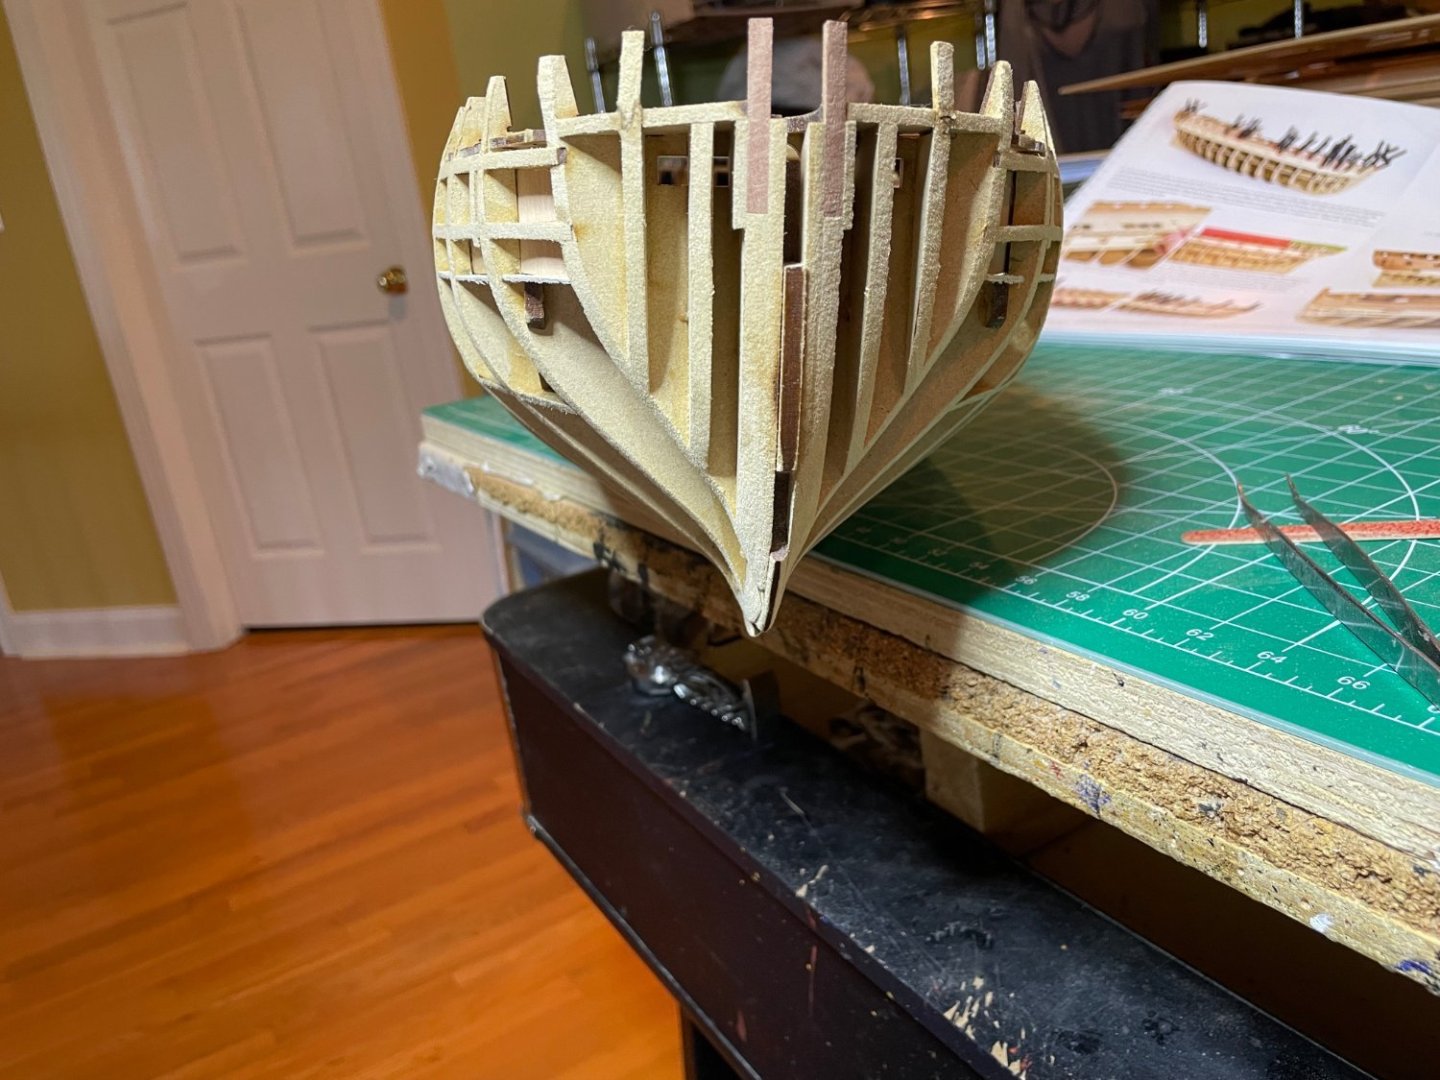
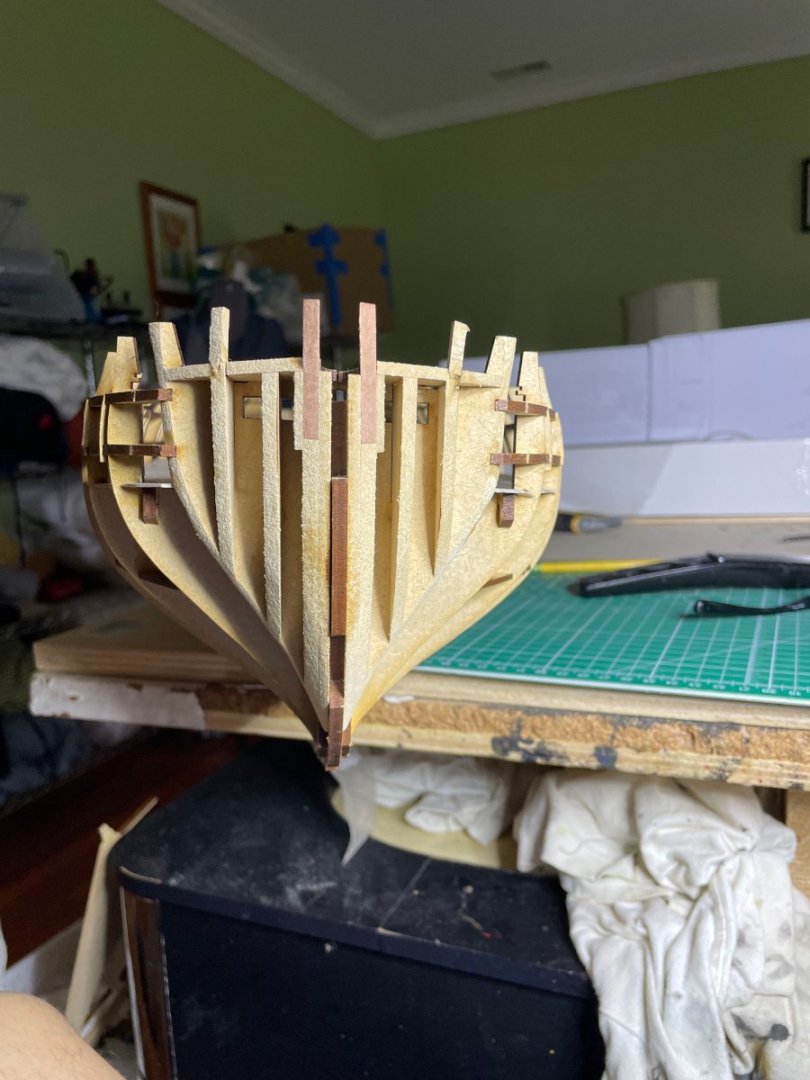
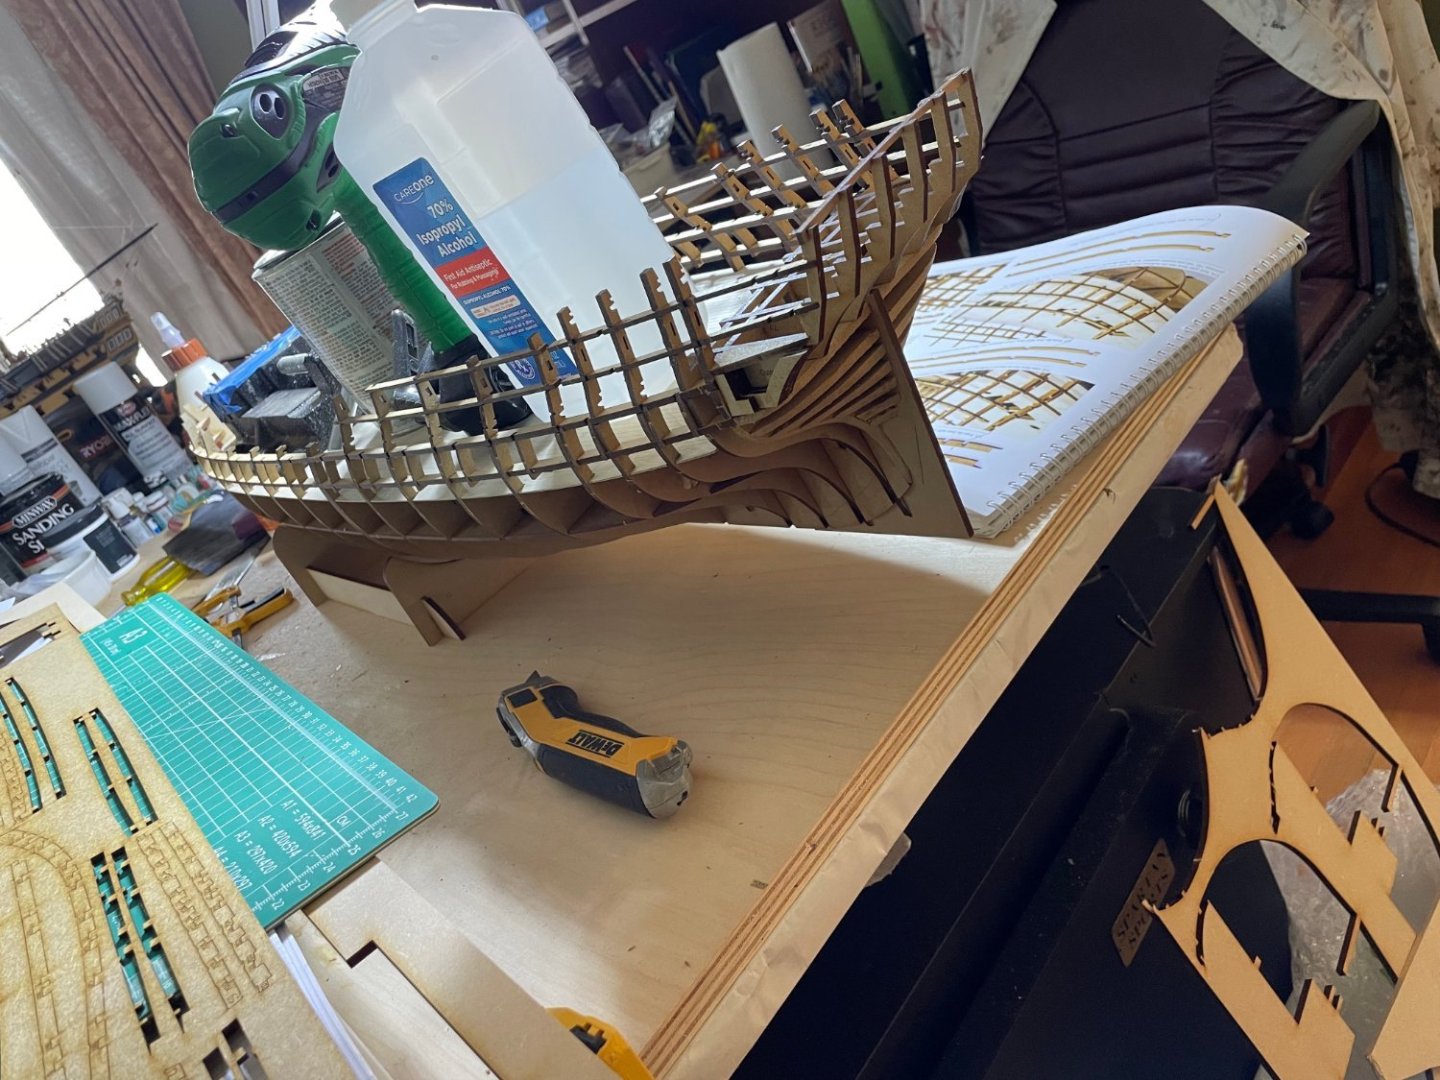
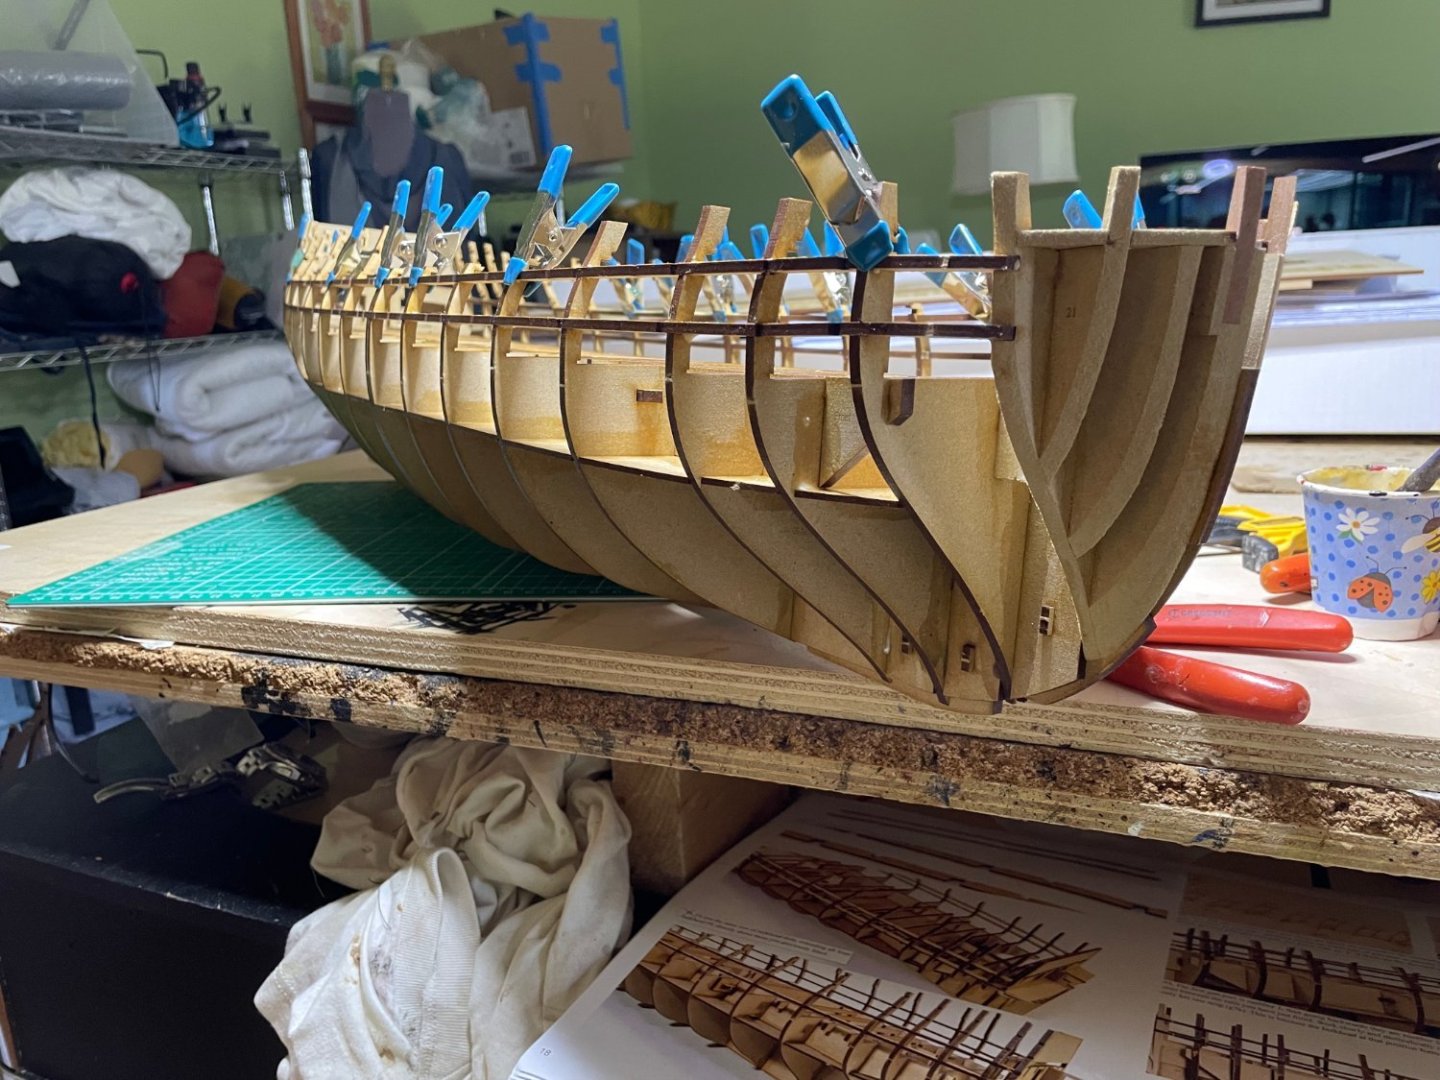
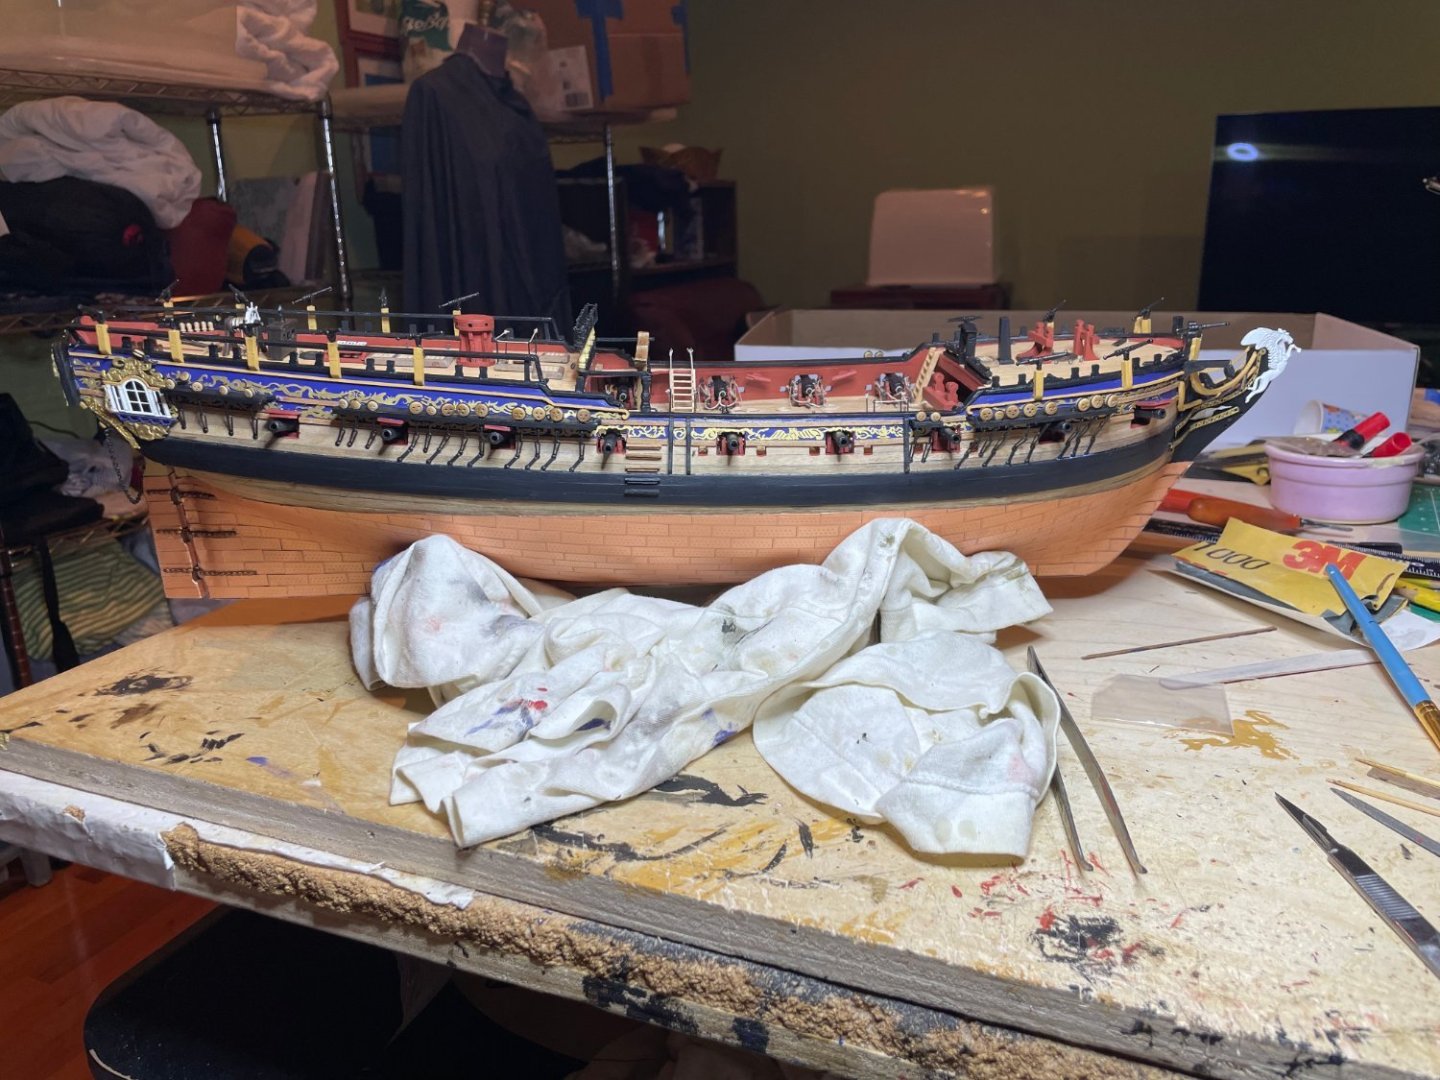
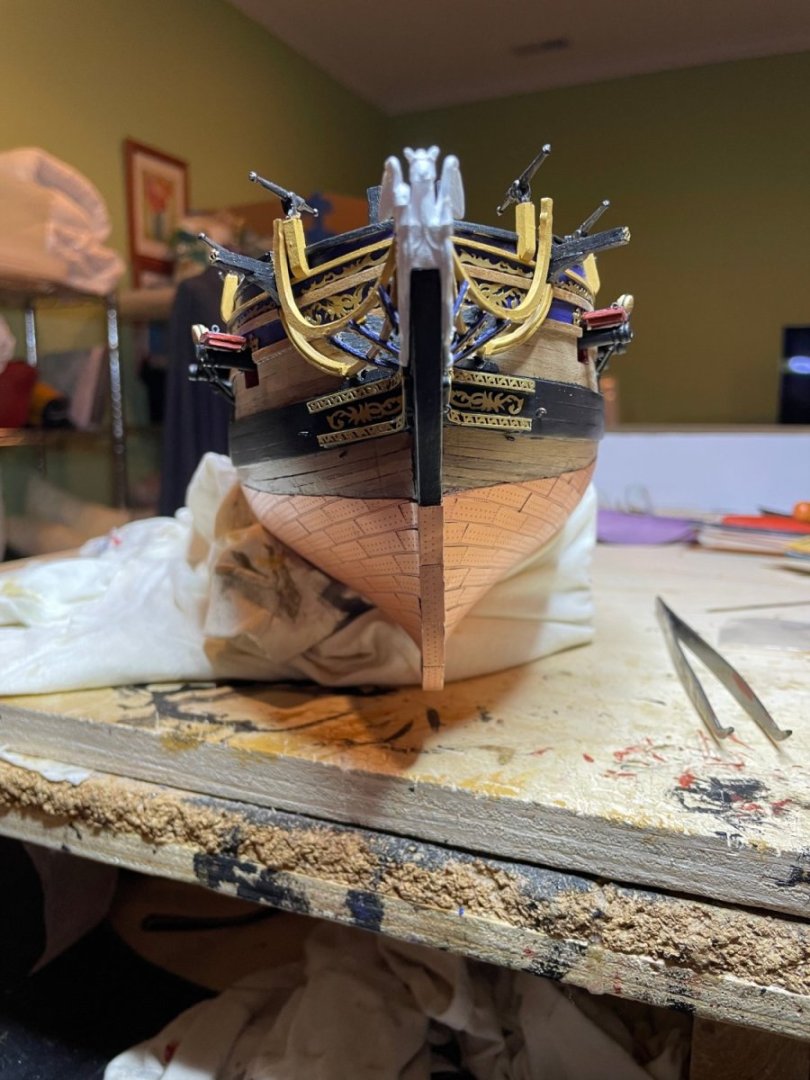
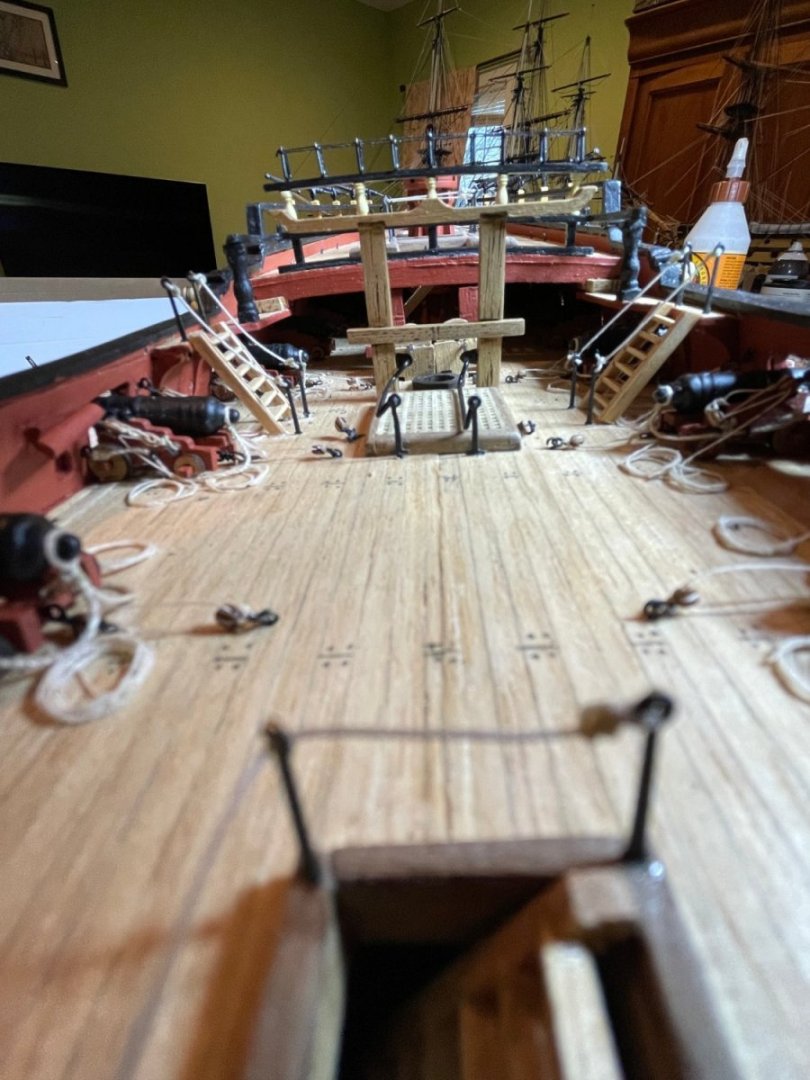
Work continues this weekend. A palm sander made fairing the bow and stern pretty easy The stern came out pretty well.The The hull continues to fit together smoothly but really have to be careful with some of the parts. Already sustained some battle damage but easily fixed. Can never ave to many clamps.


- 233 replies
-
- 13
-
-
- Indefatigable
- Vanguard Models
- (and 1 more)
-
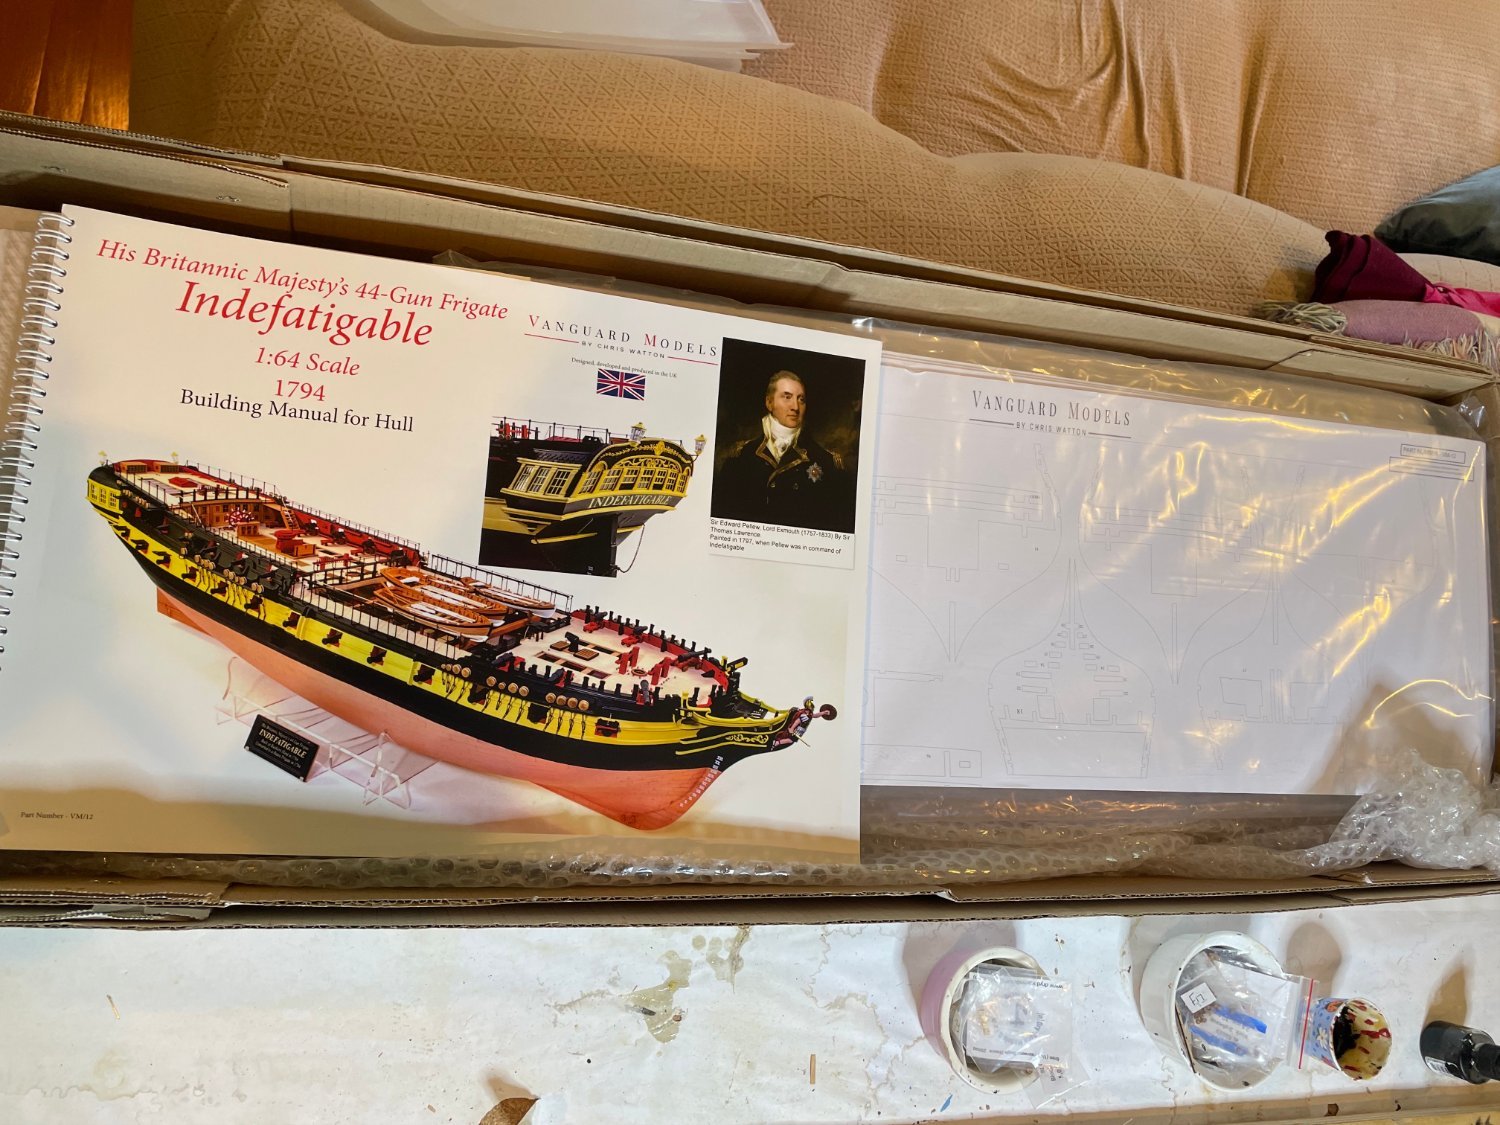
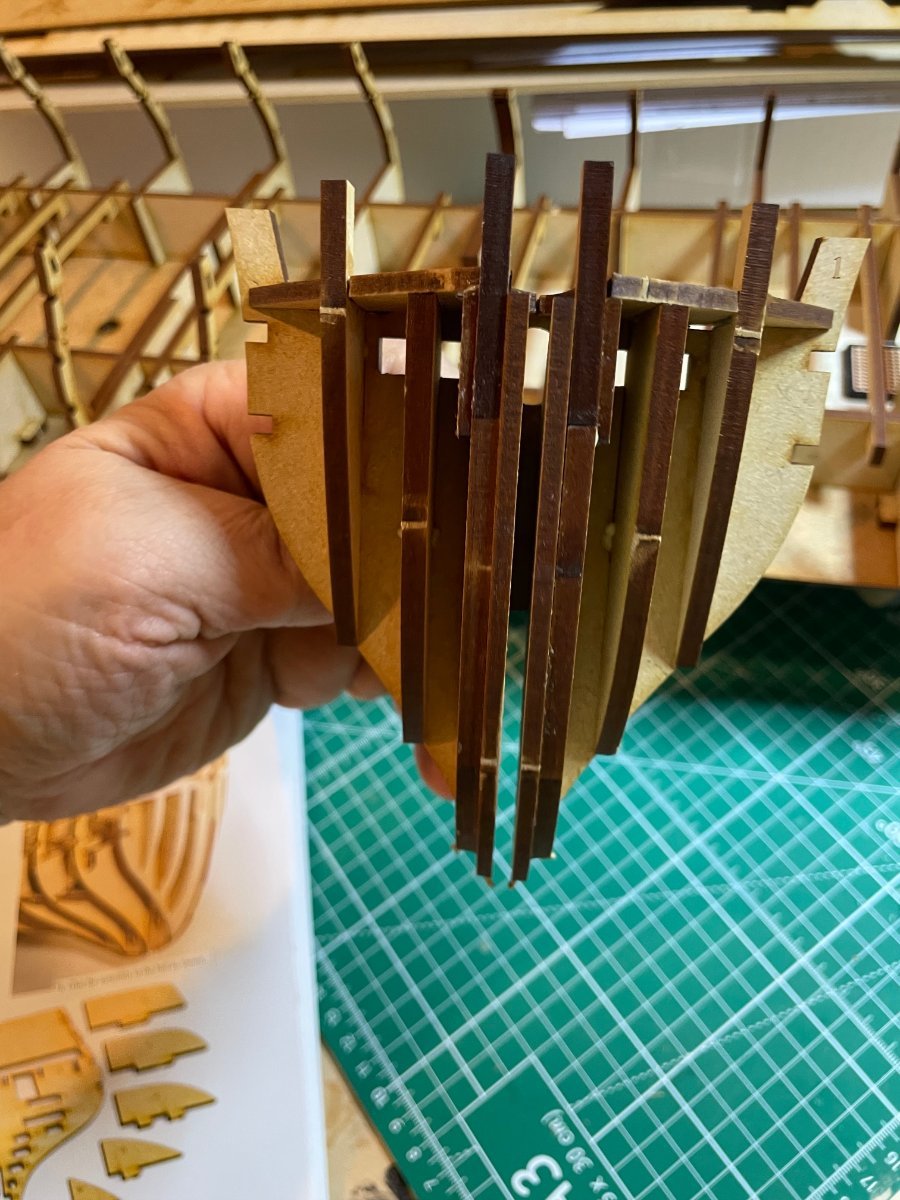
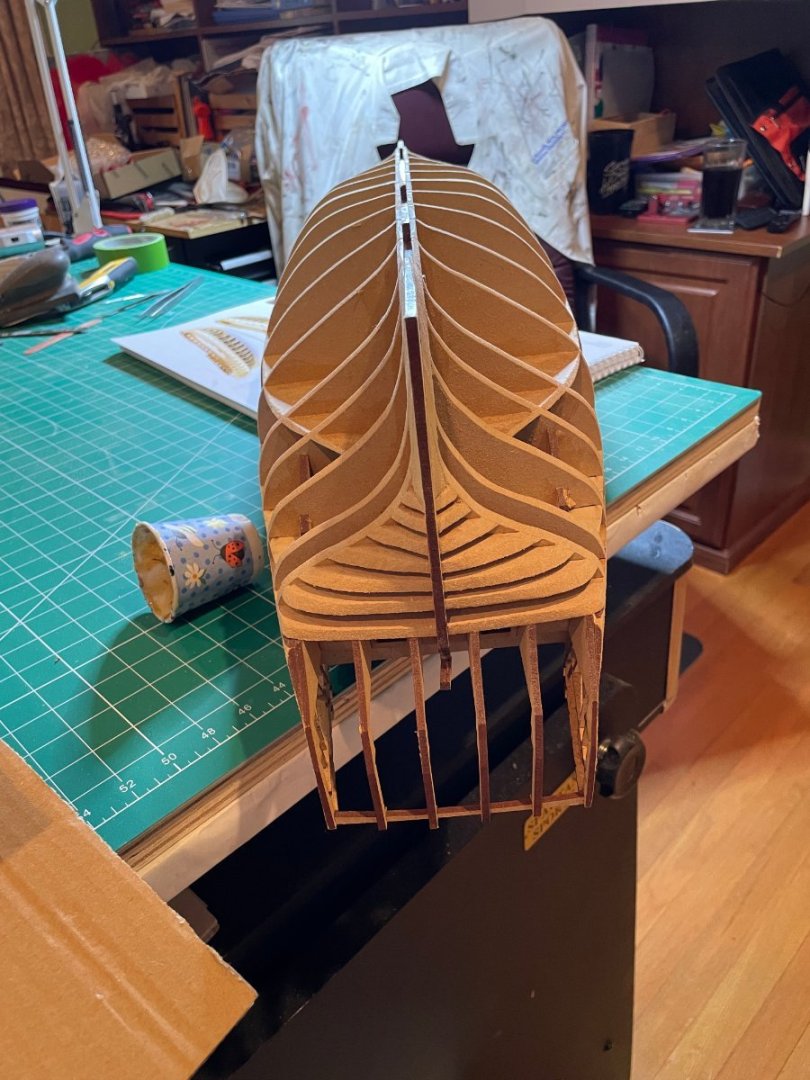
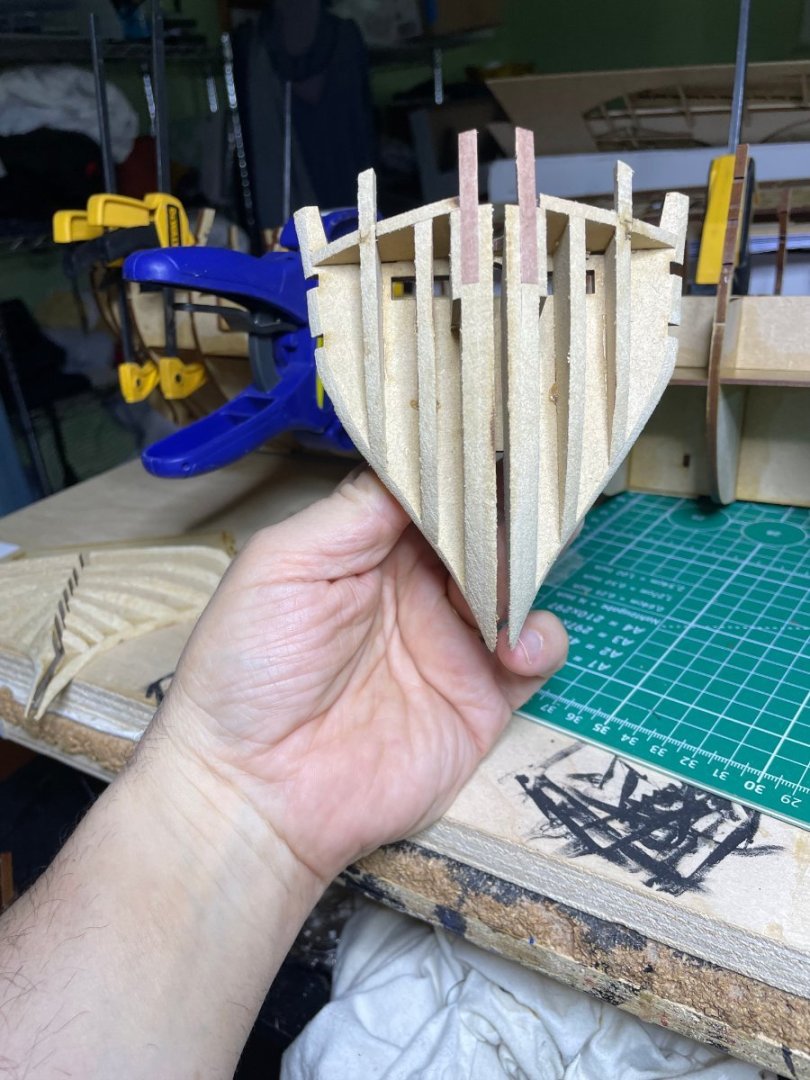
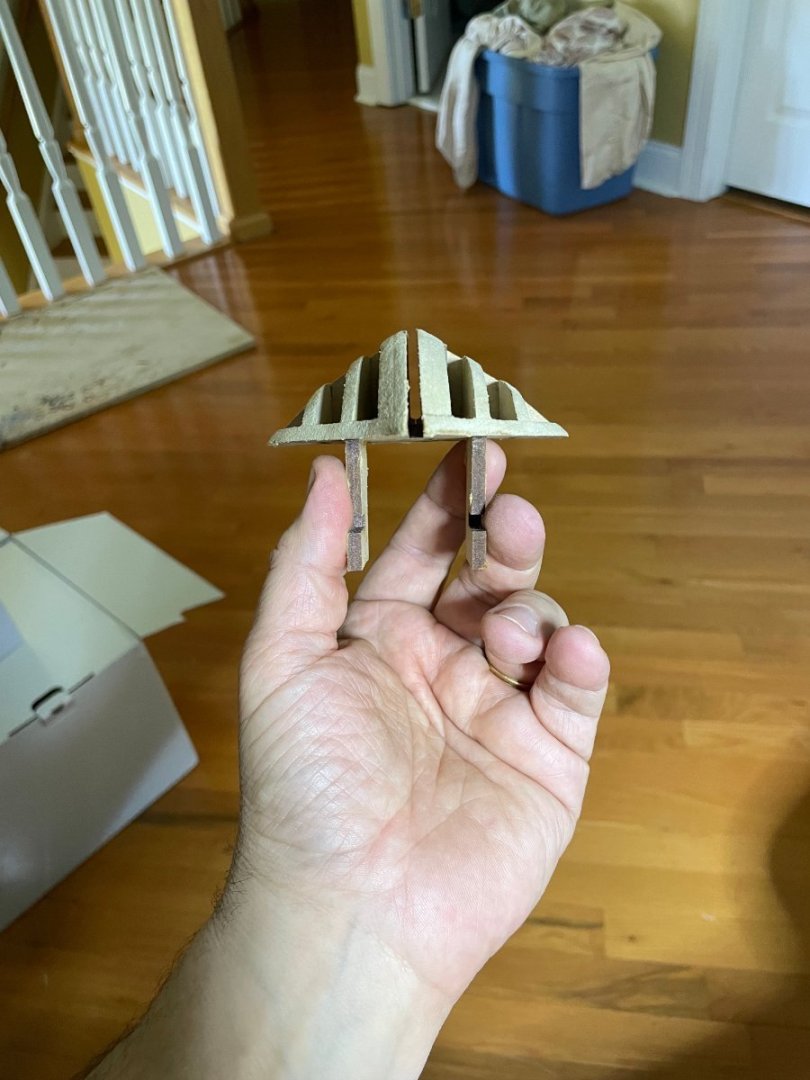
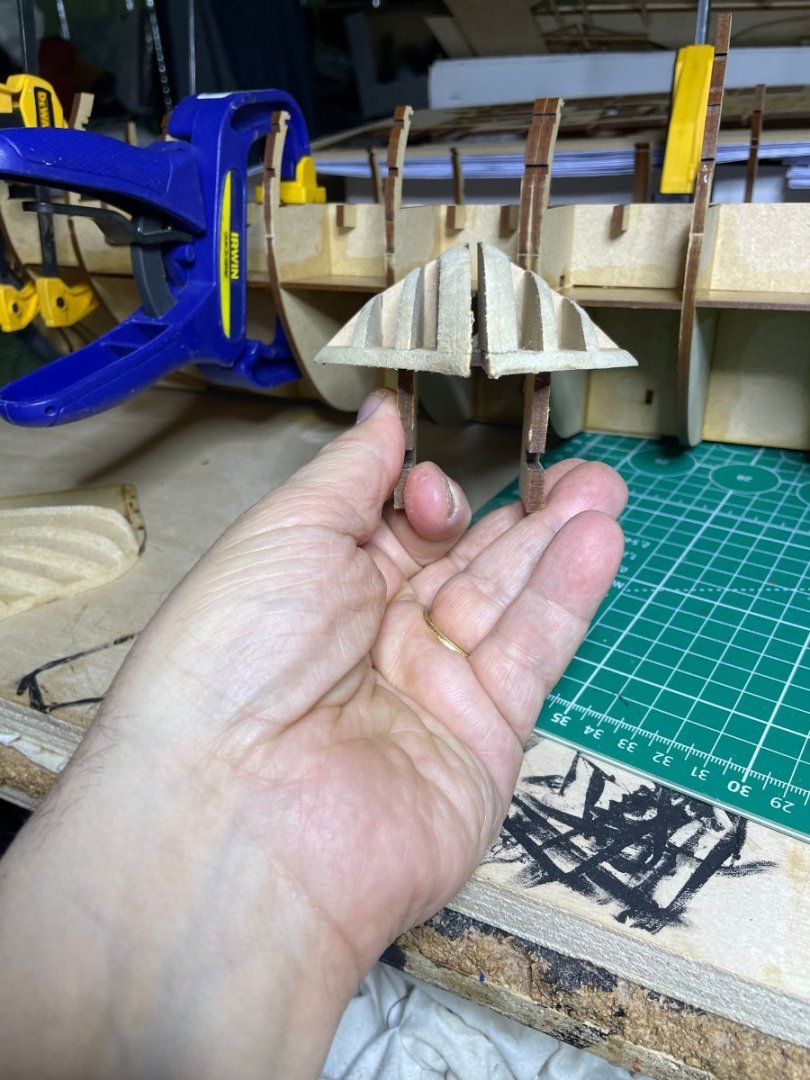
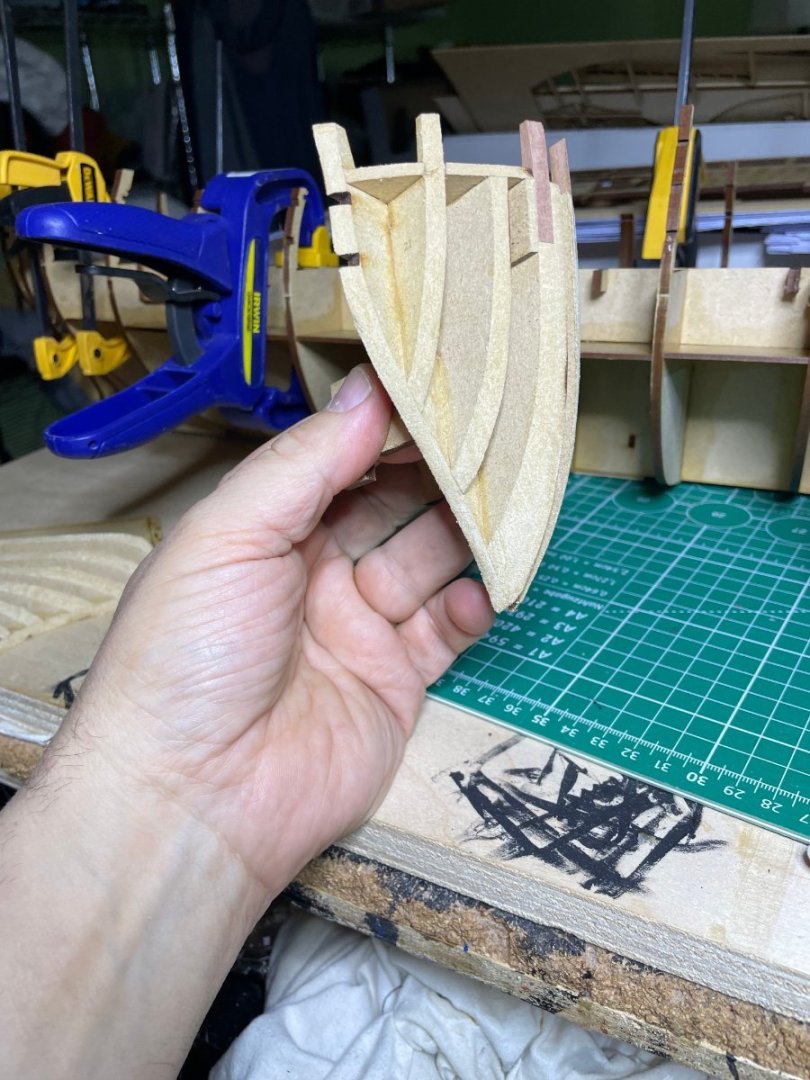
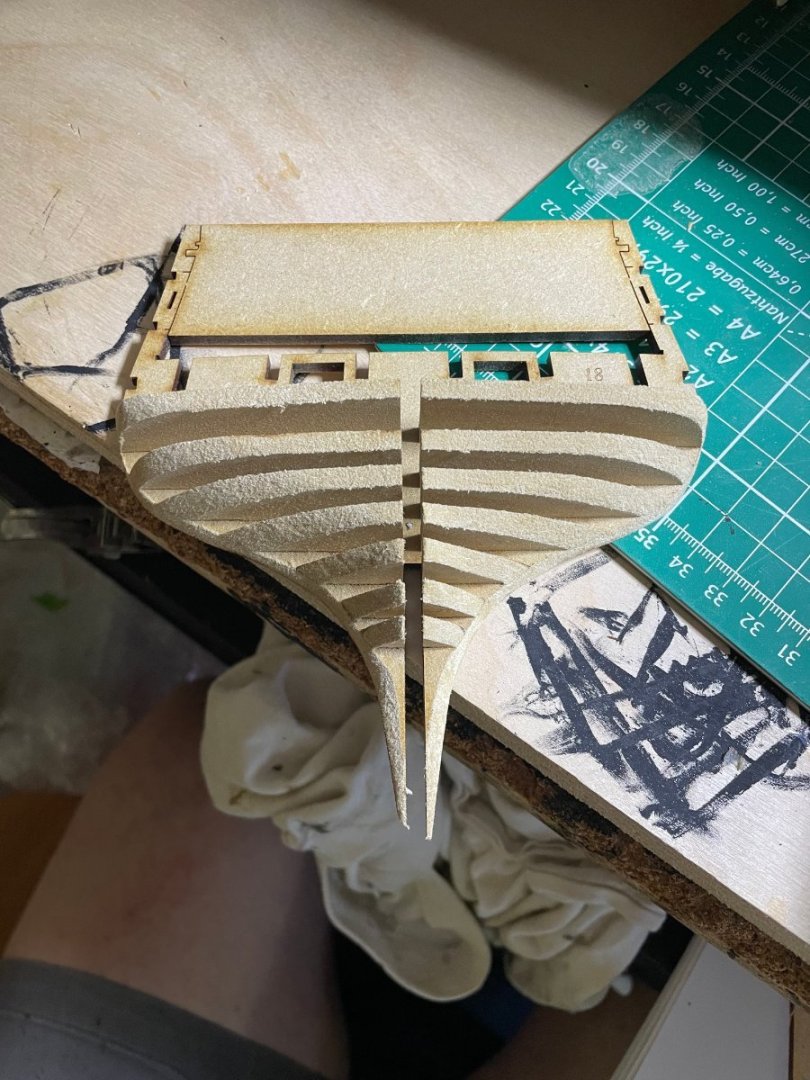
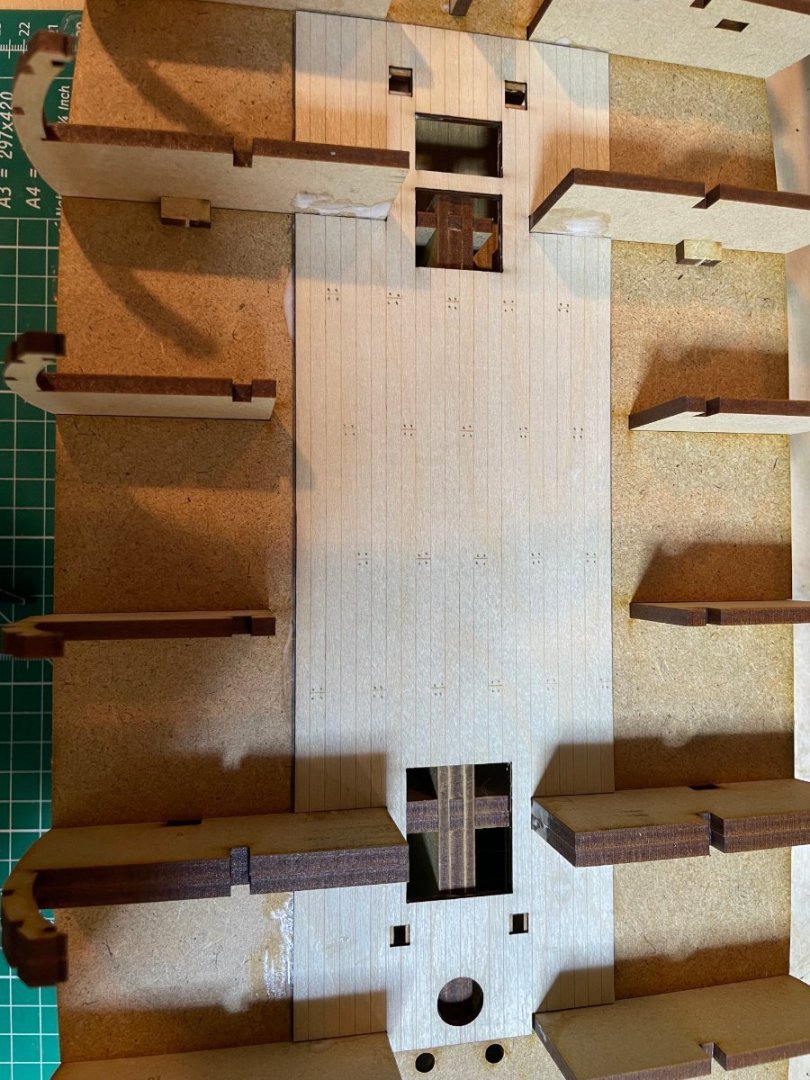
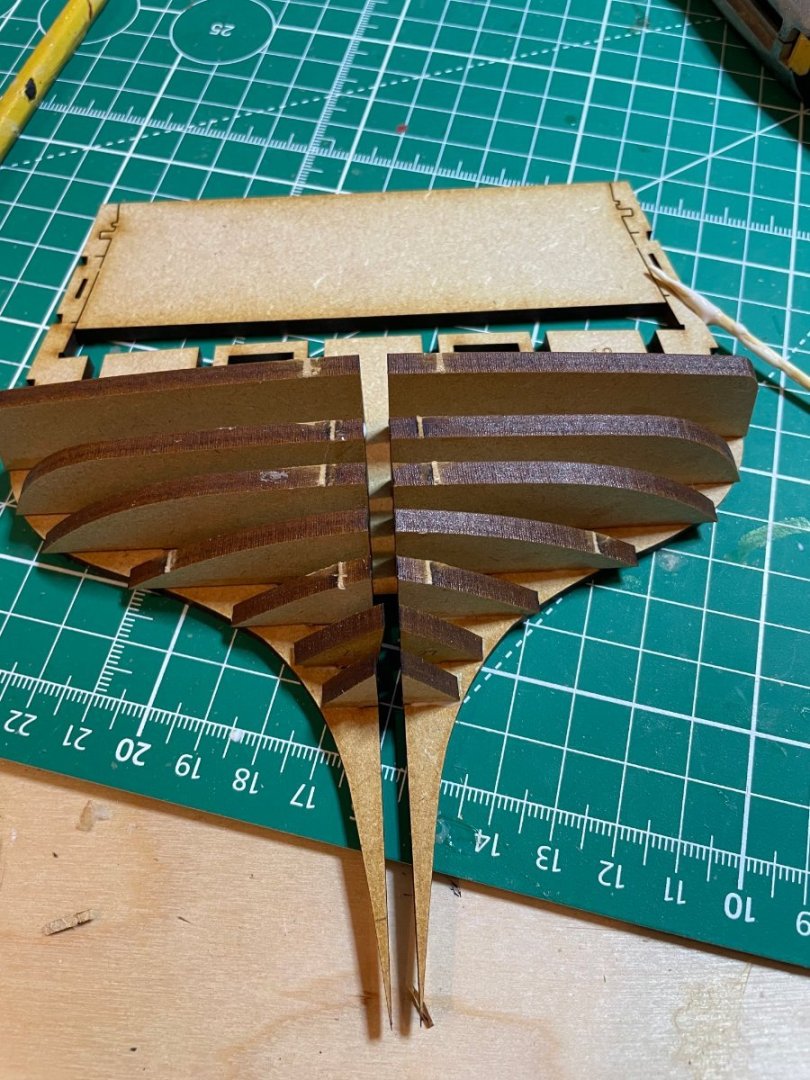
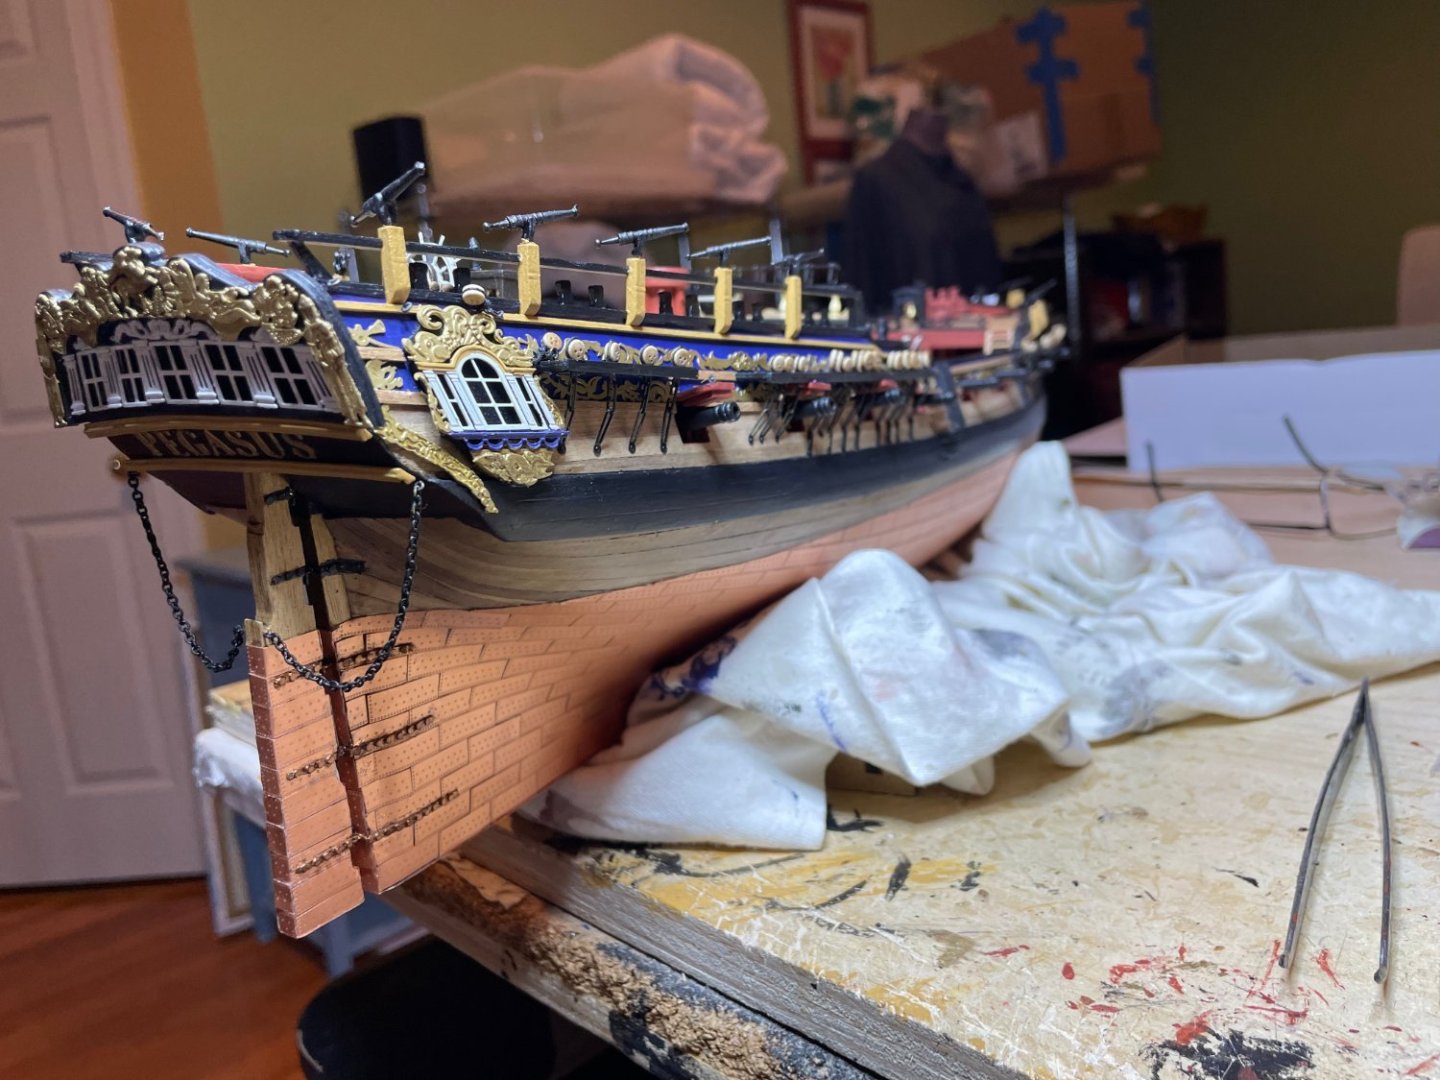
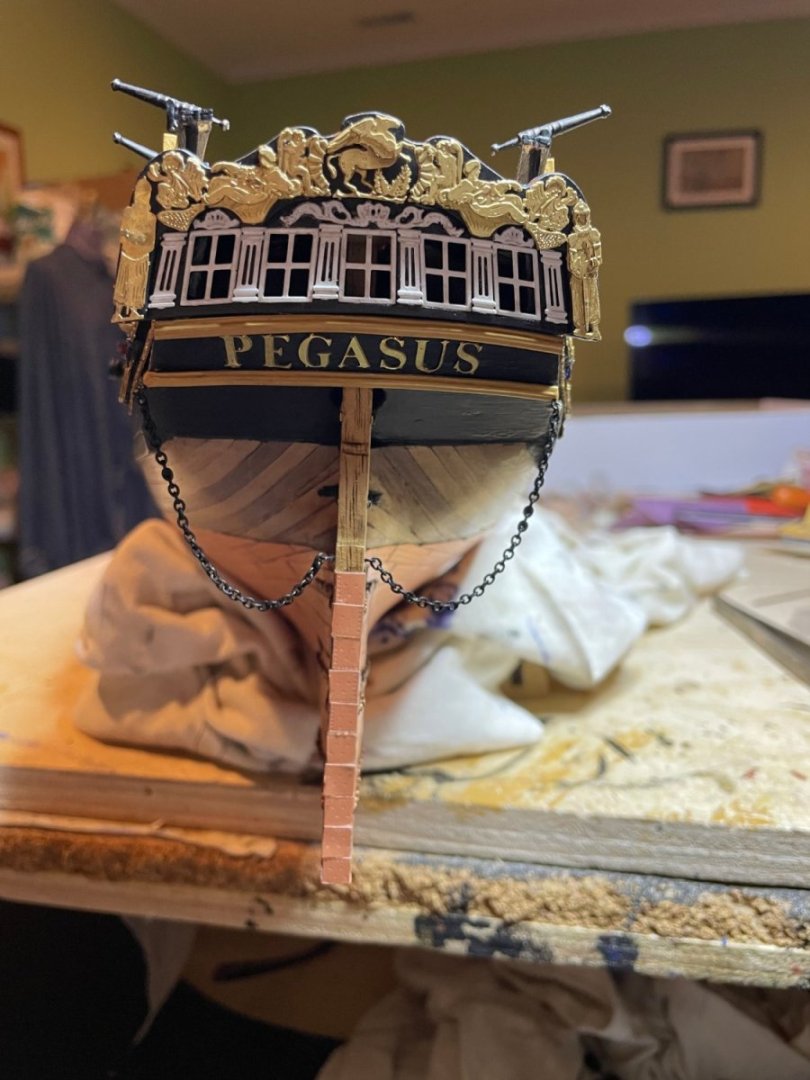
Having finished HMS Pegasus earlier in the week I took a few days to tidy up and as I had the day off today, i could not wait anymore and started my Indy project. First the easiest thing As the layers go on you can feel it getting stronger and definitely heavier. Although you can't really see it, I did plank the orlop. Added peg markings and painted the hatches A Tomorrow will be a sanding day once things dry overnight.


- 233 replies
-
- 15
-
-
- Indefatigable
- Vanguard Models
- (and 1 more)
-
Thanks for all the kind comments !
-
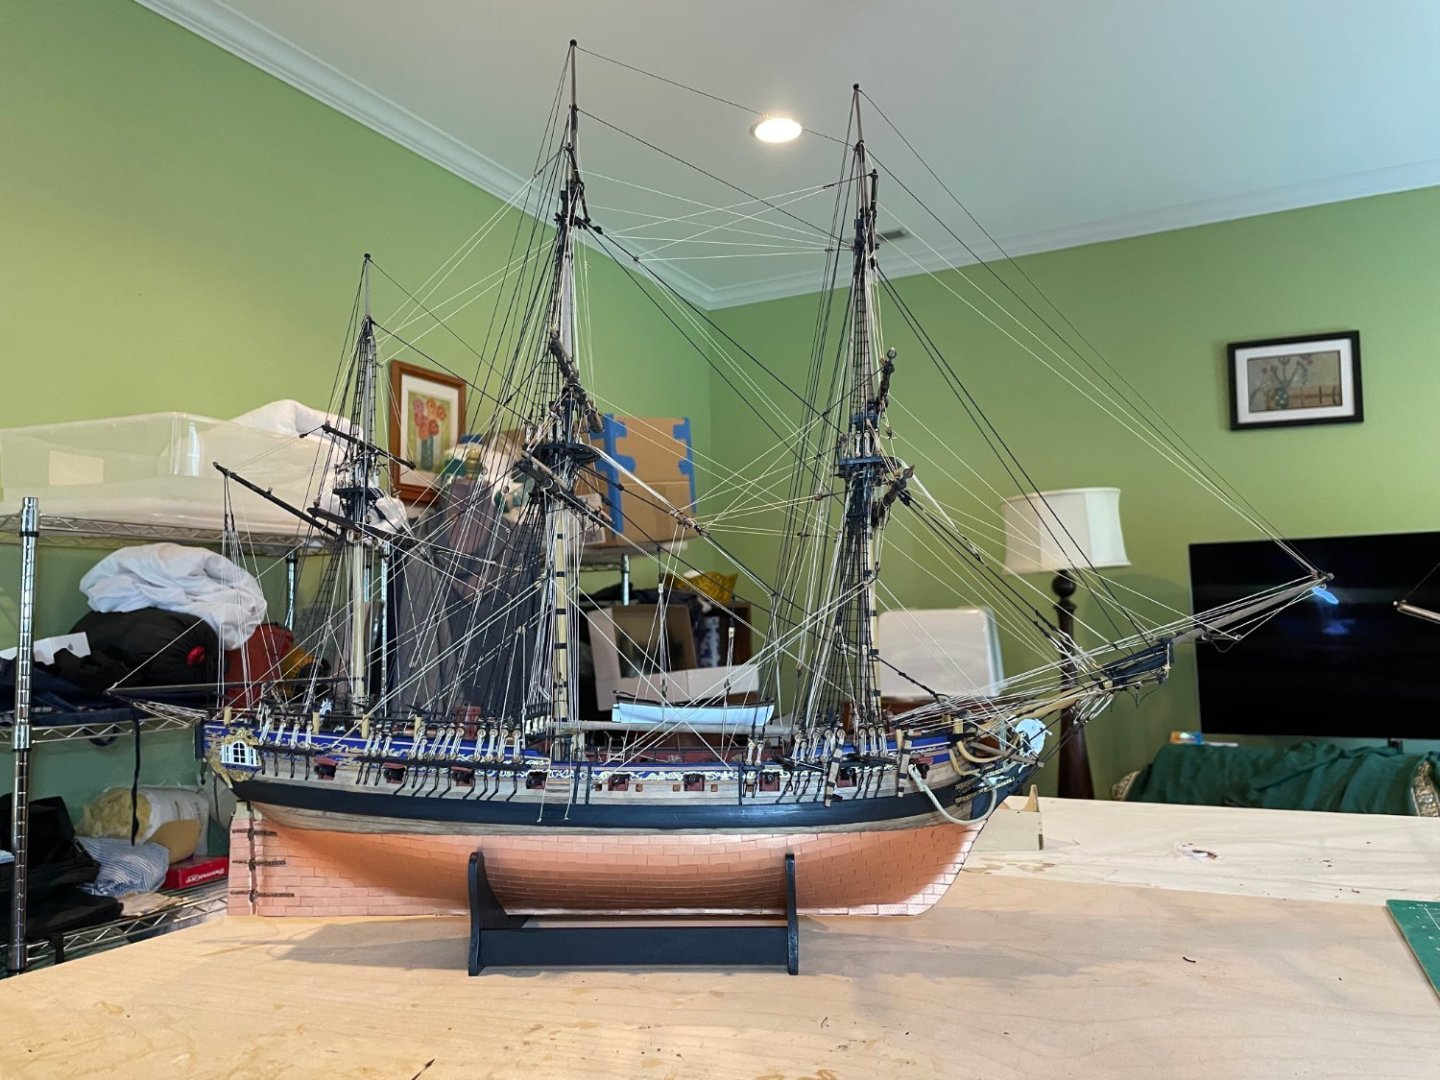
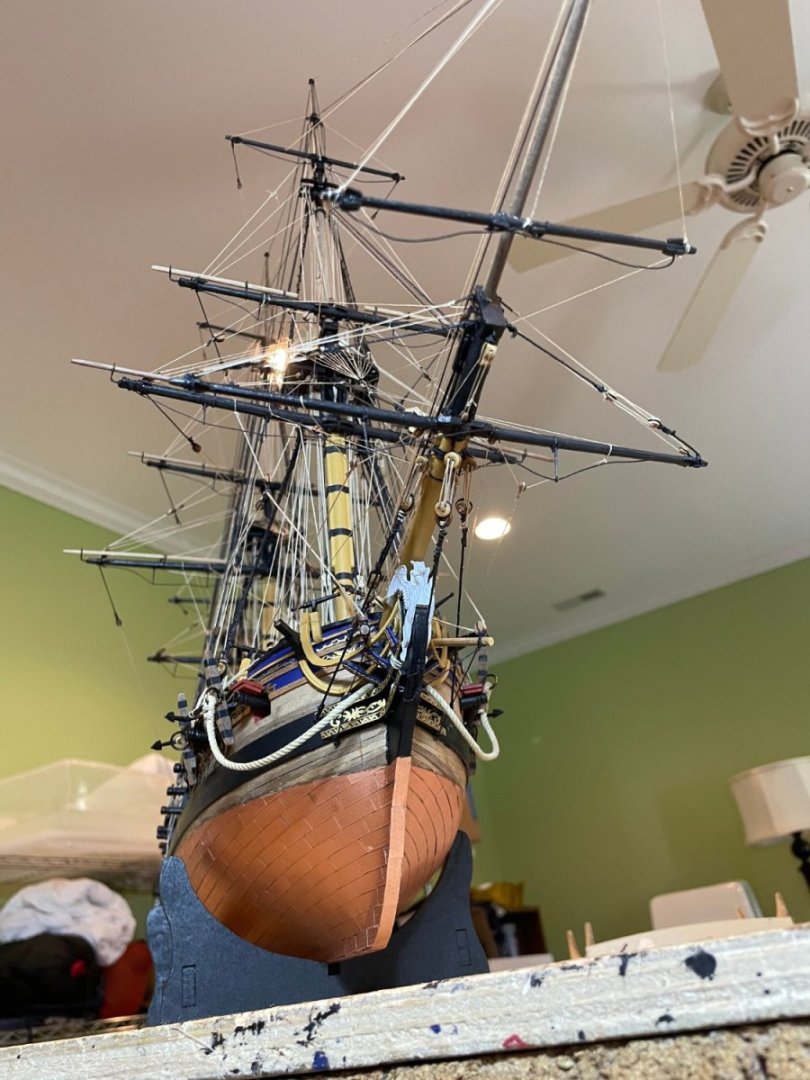
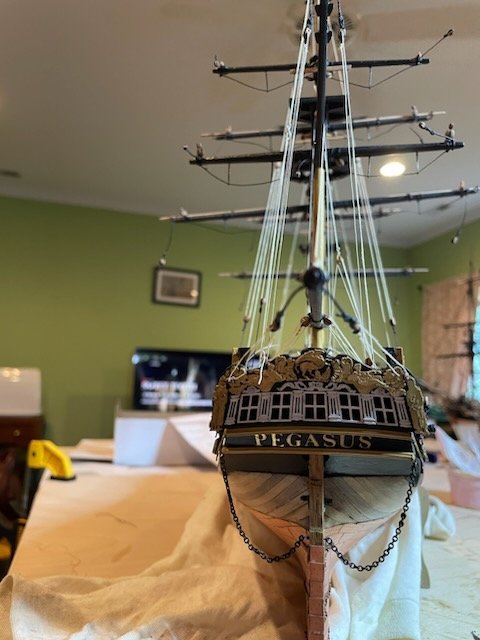
So finally finished today. I think this coming weekend I will start the Indy project. Have been staring at the box since I got it at the end of Feb and following with interest the builds of Kevin and Glenn (hope your back is getting better so you can get back to your project)


- 46 replies
-
- 11
-
-
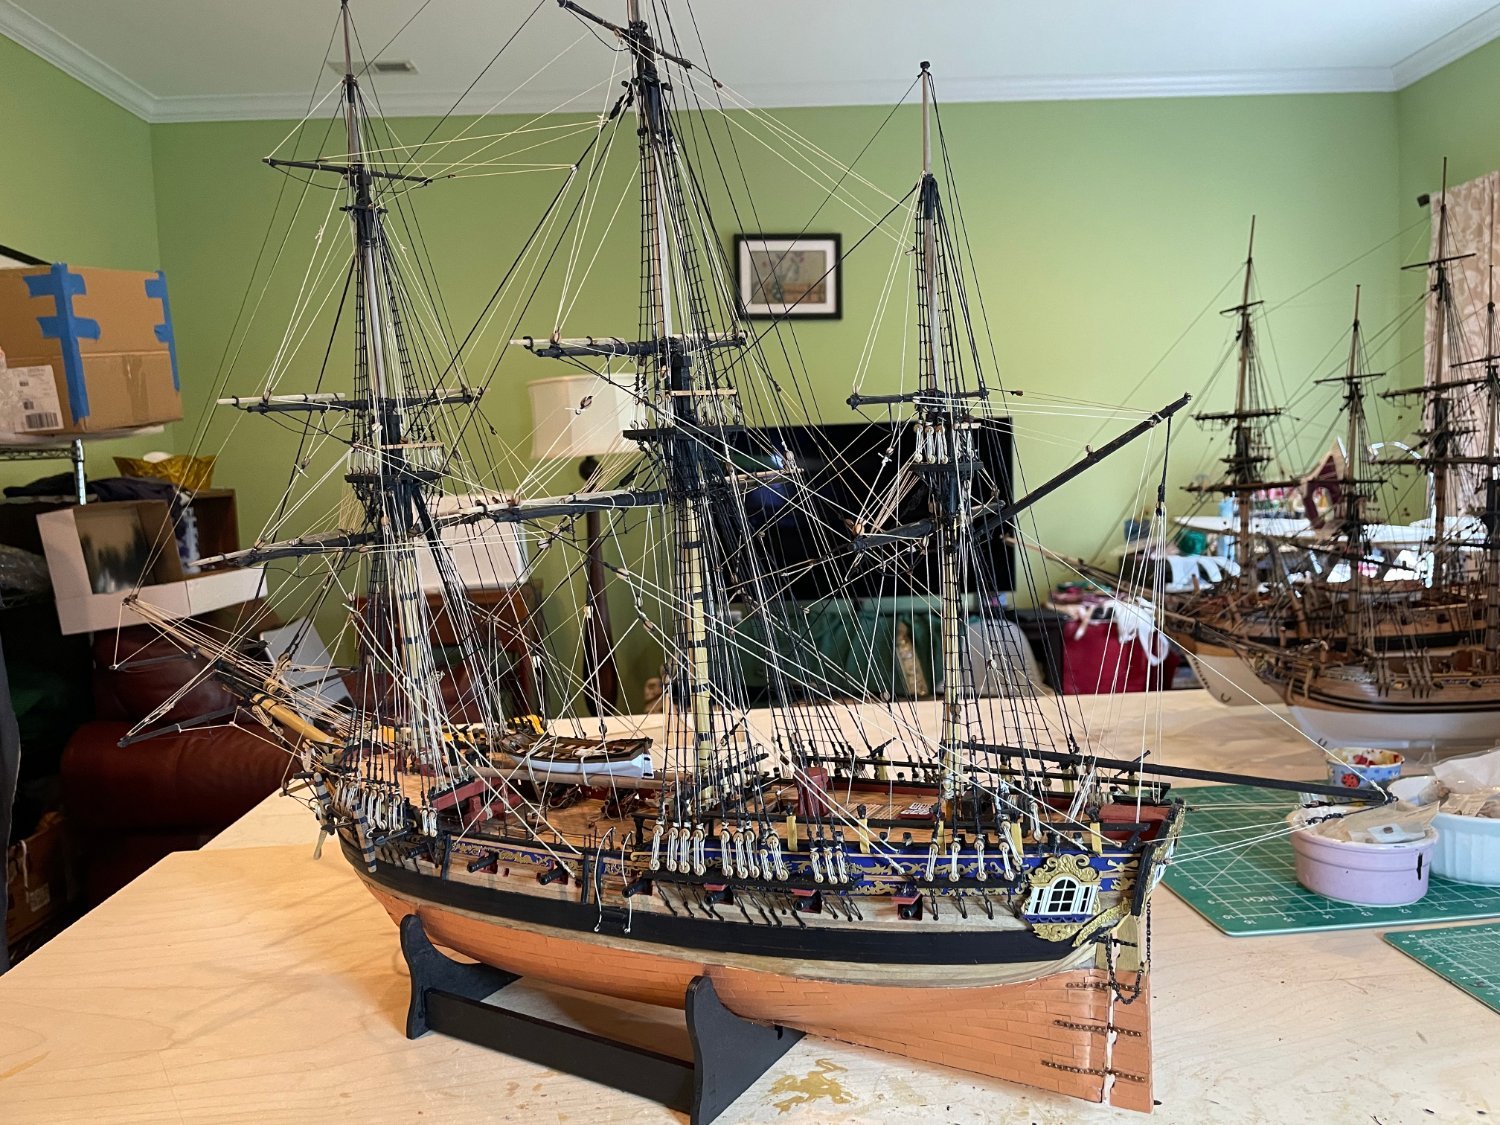
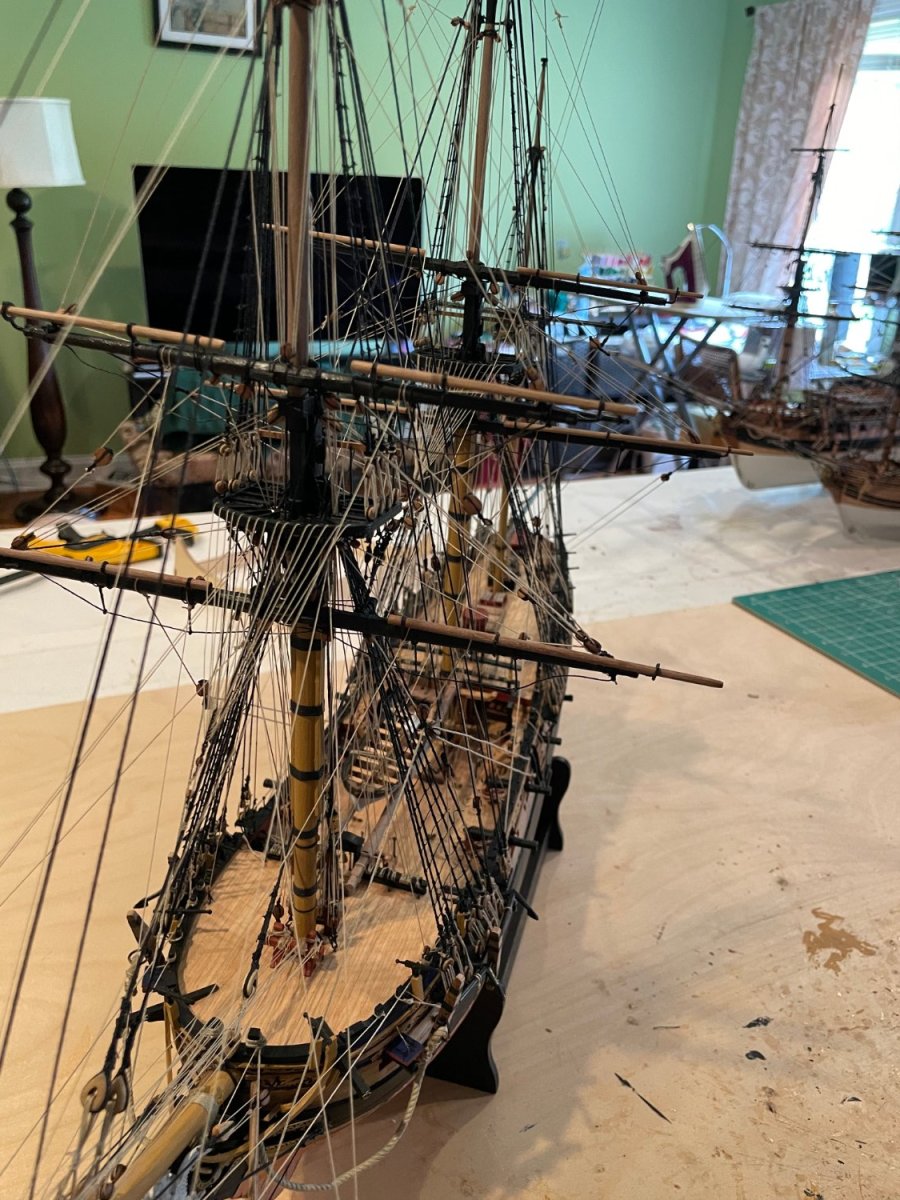
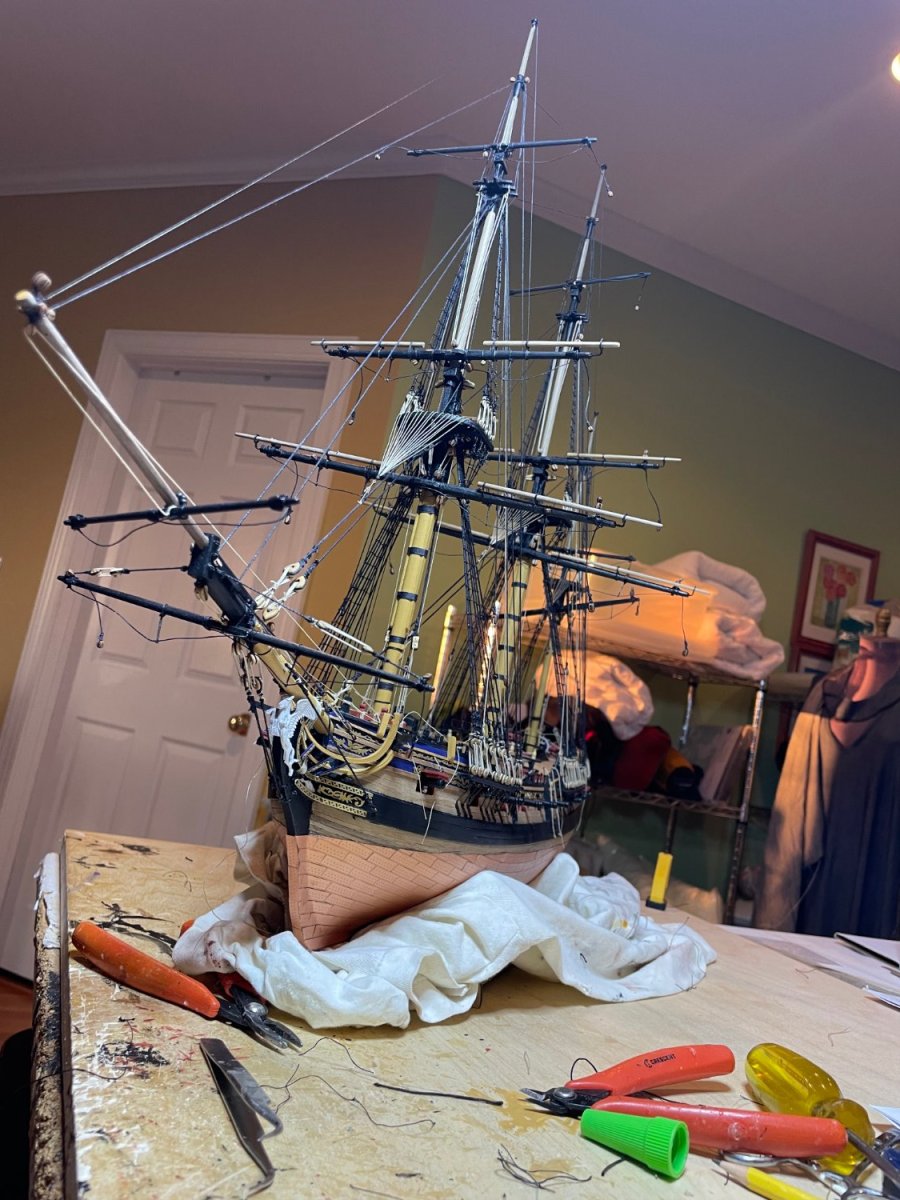
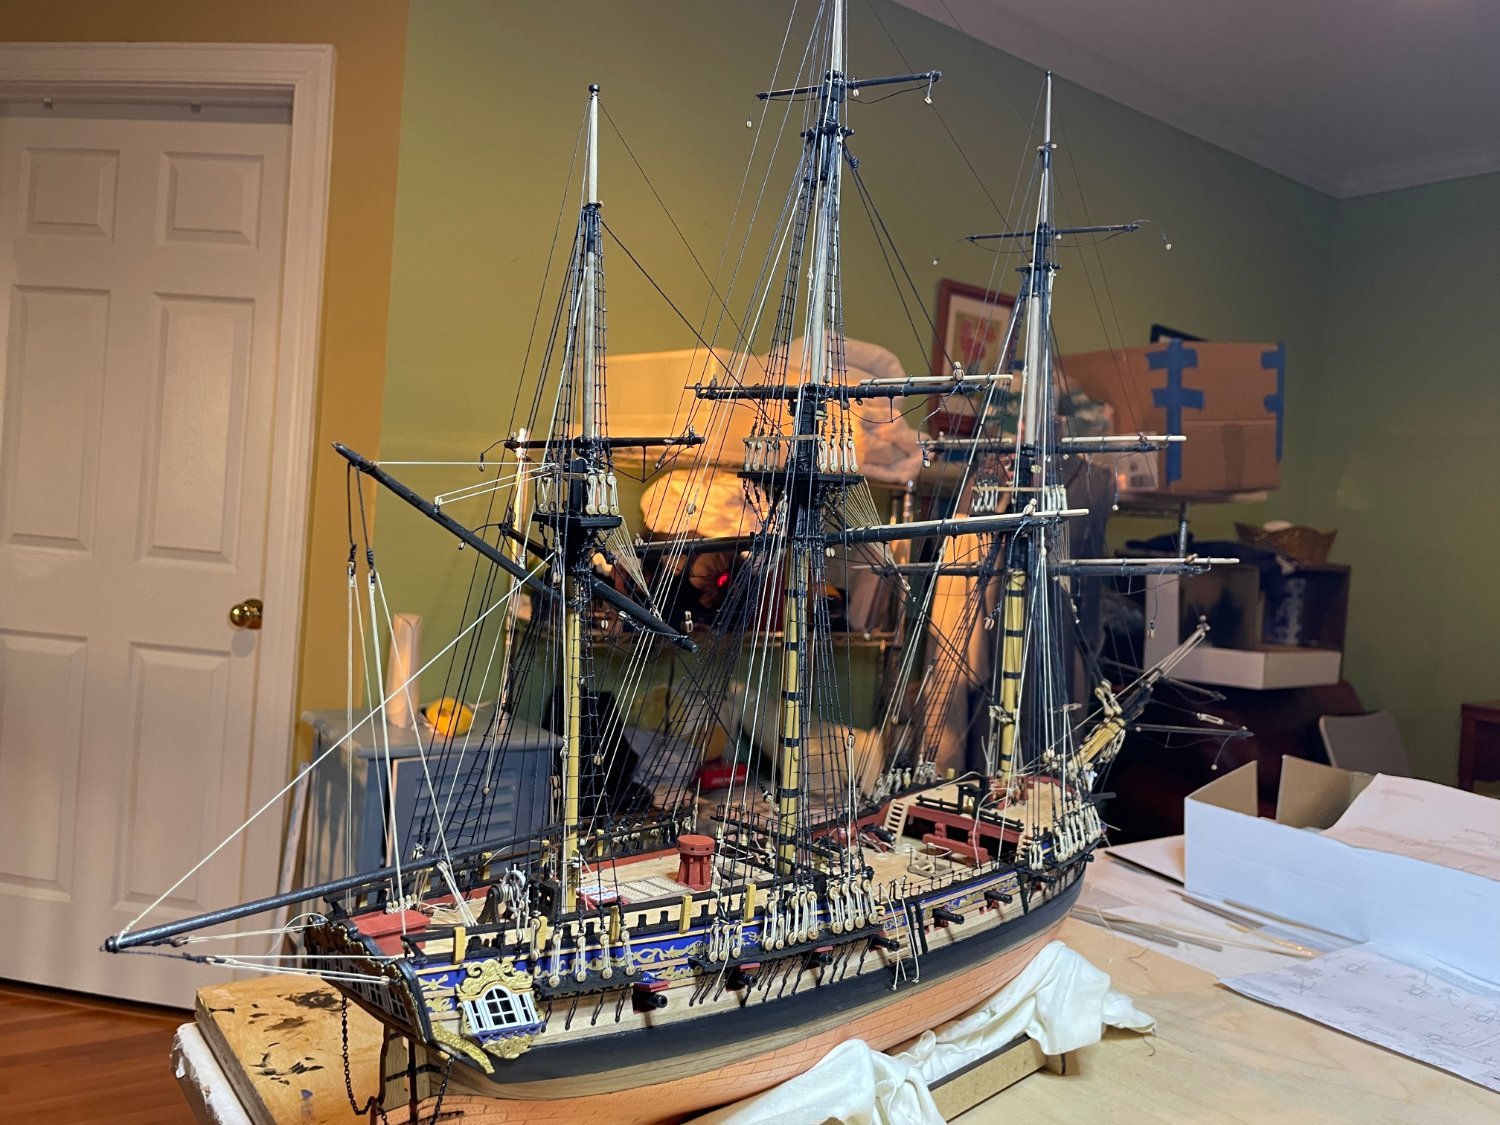
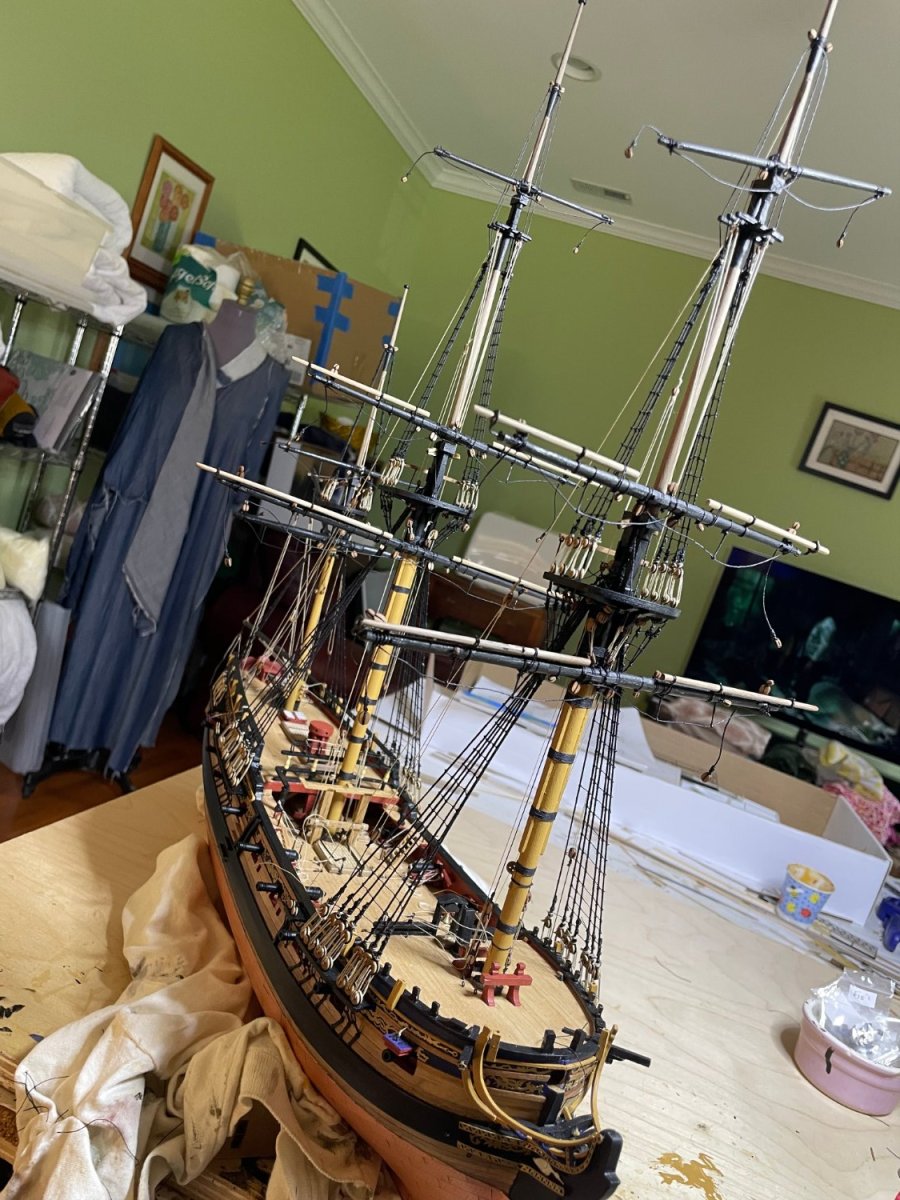
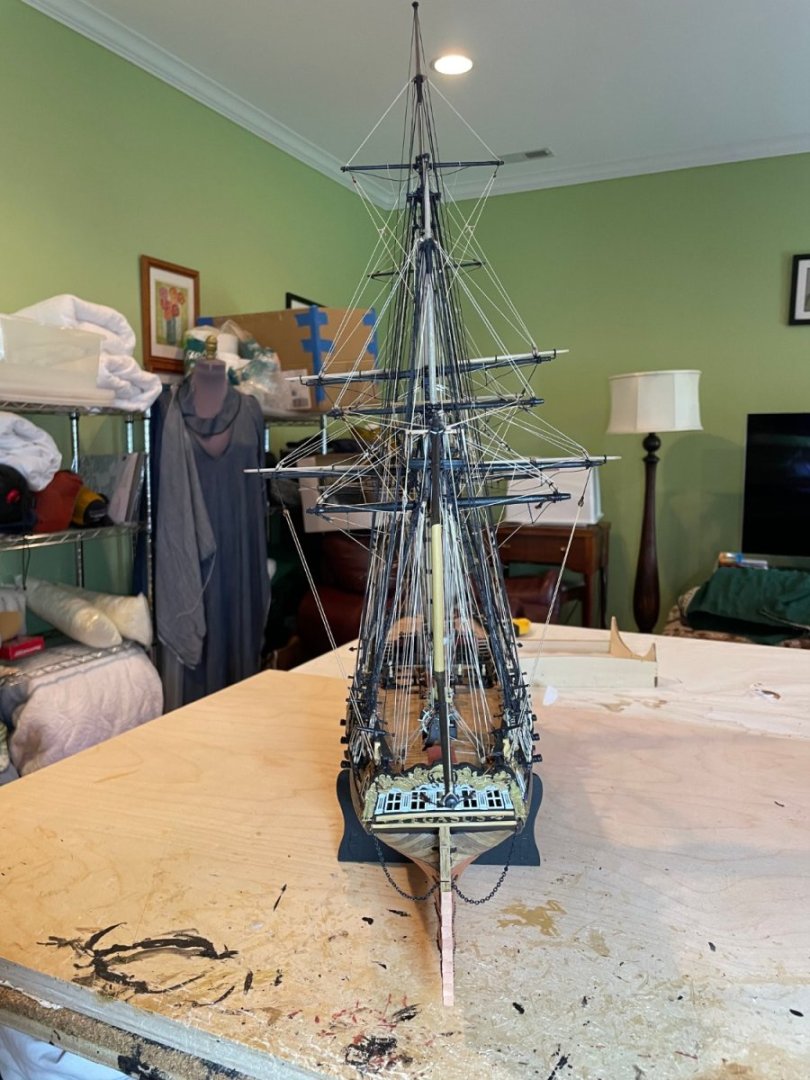
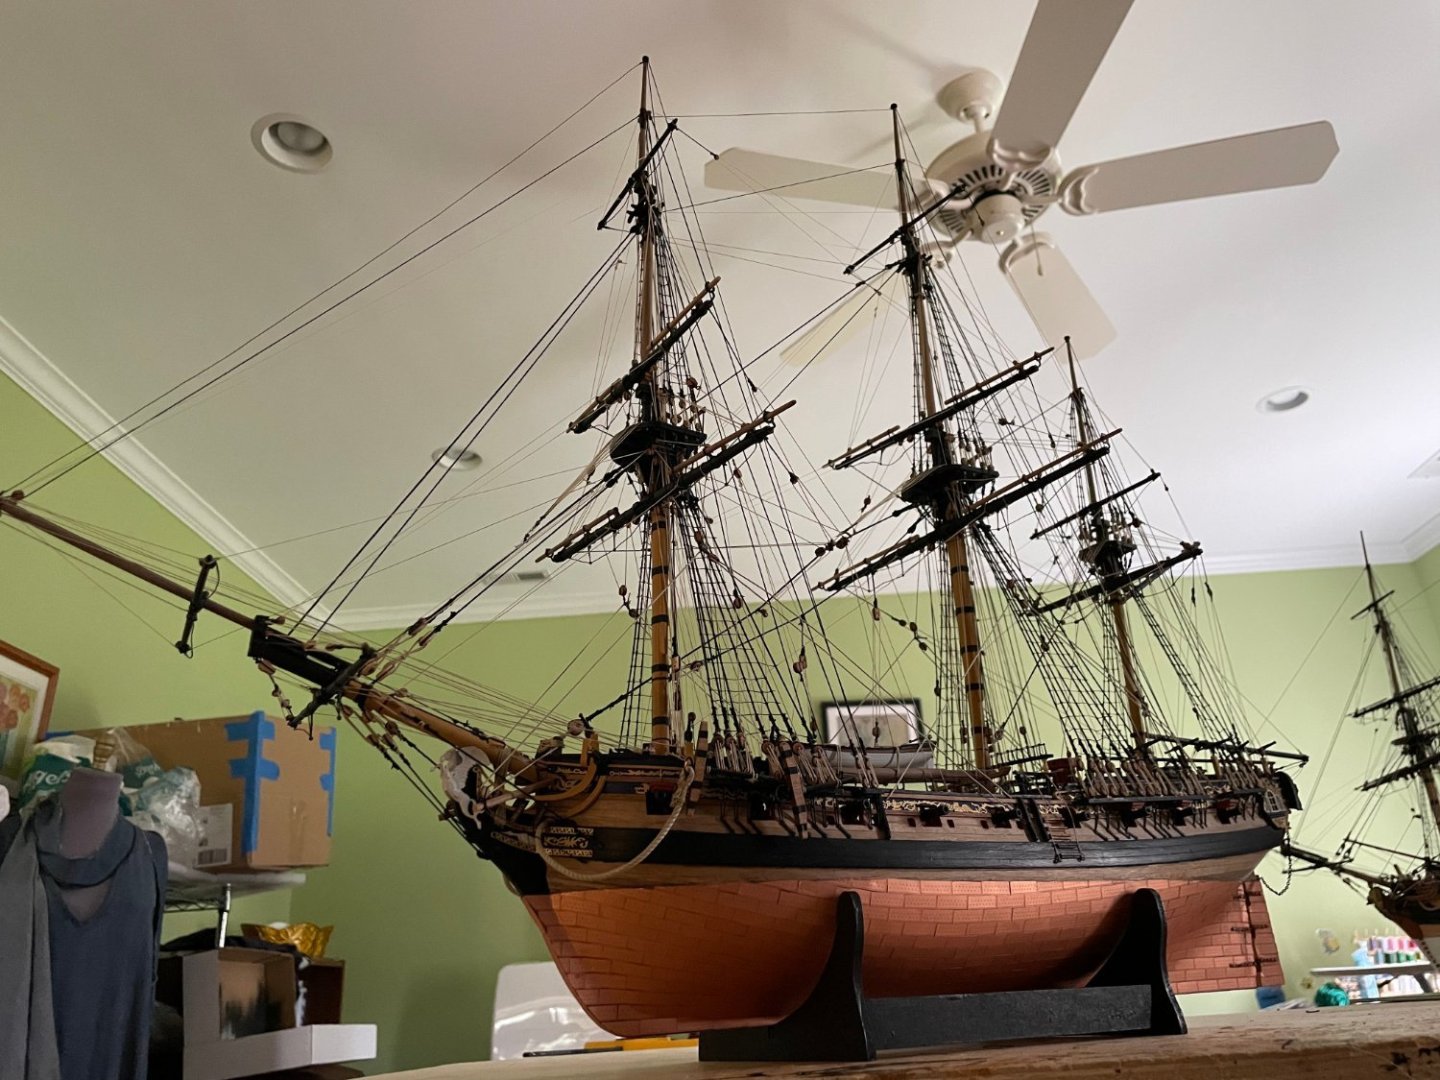
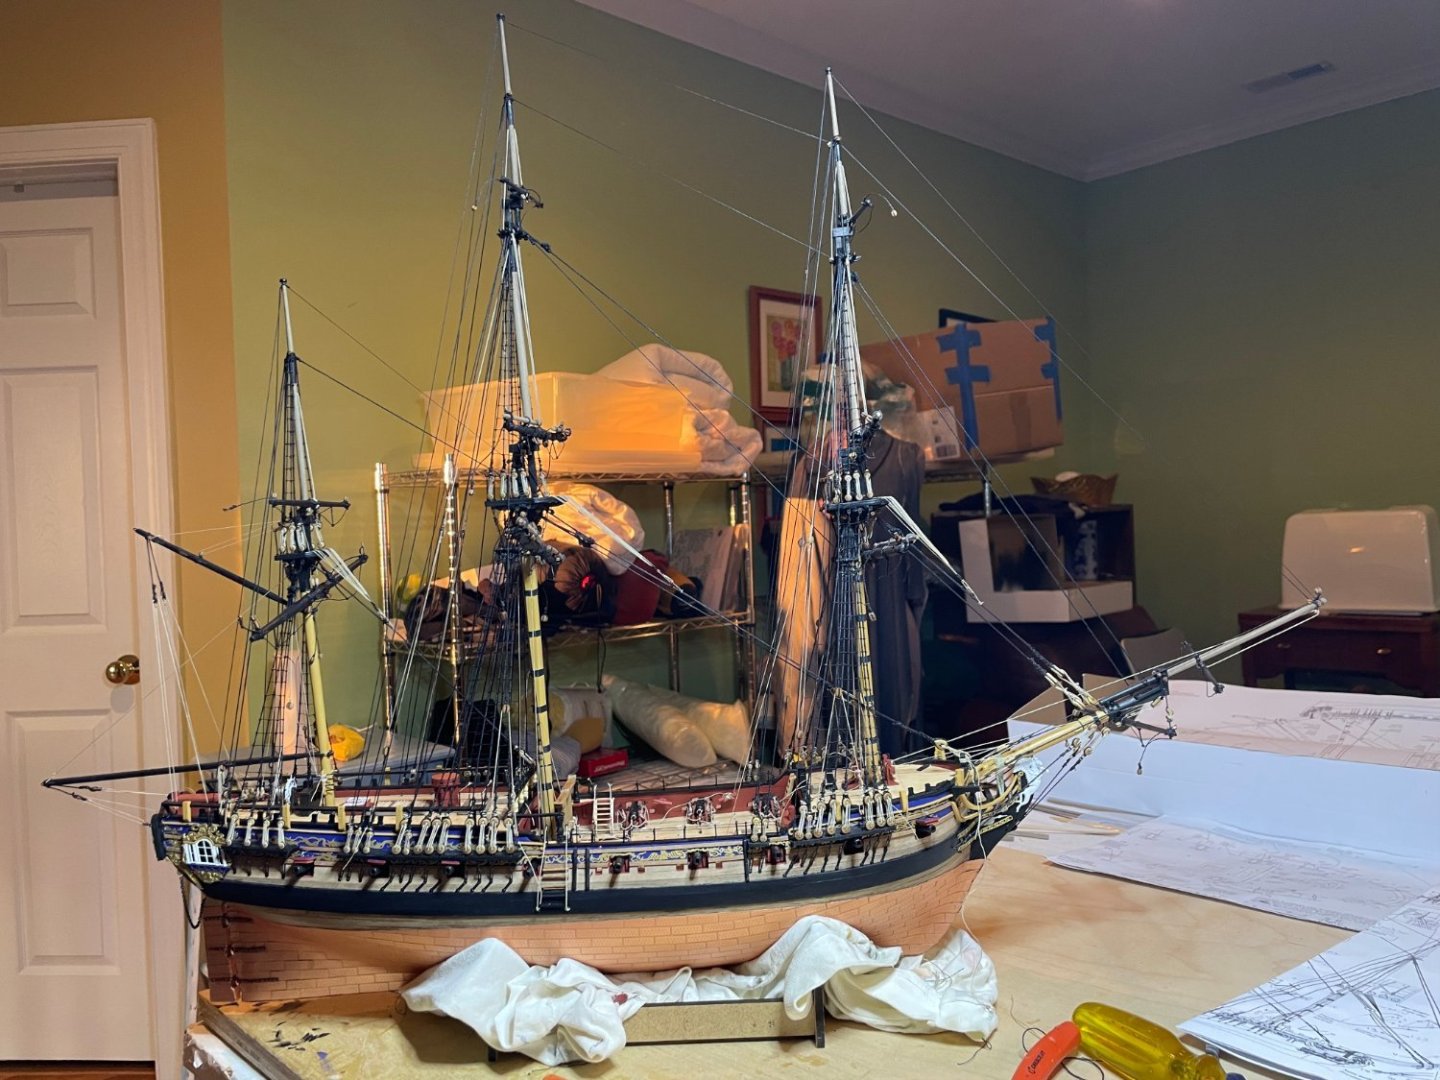
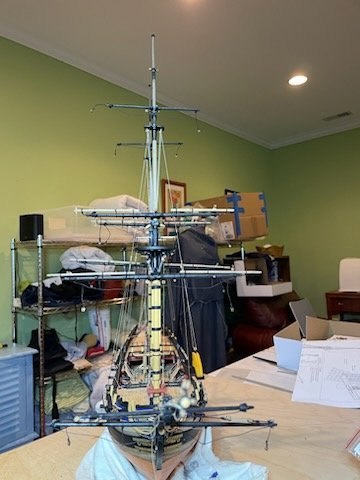
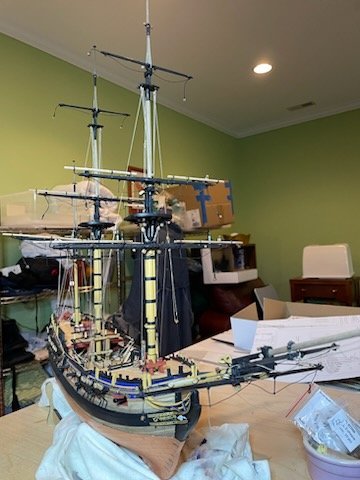
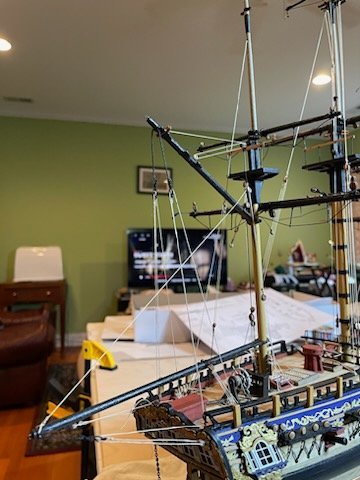
1 week later standing rigging done. All stays in place. Running rigging this coming week


-
Agree the white bottom looks good and certainly saves a lot of time and swearing when the plates fall off or do not cut correctly. I will still use the full copper plates when I do the Indy. I coppered the Agamemnon and it took quite awhile. Will be interesting when I put the two side by side in the future. Hope to finish Pegasus sometime in June.
-
Interesting. I coppered it as it was what the plan directed. I was wondering as I did the Sphinx and Duchess from same period and their bottoms were painted. I guess we need to ask Chris Watton as he was the designer of the Pegasus kit.
-
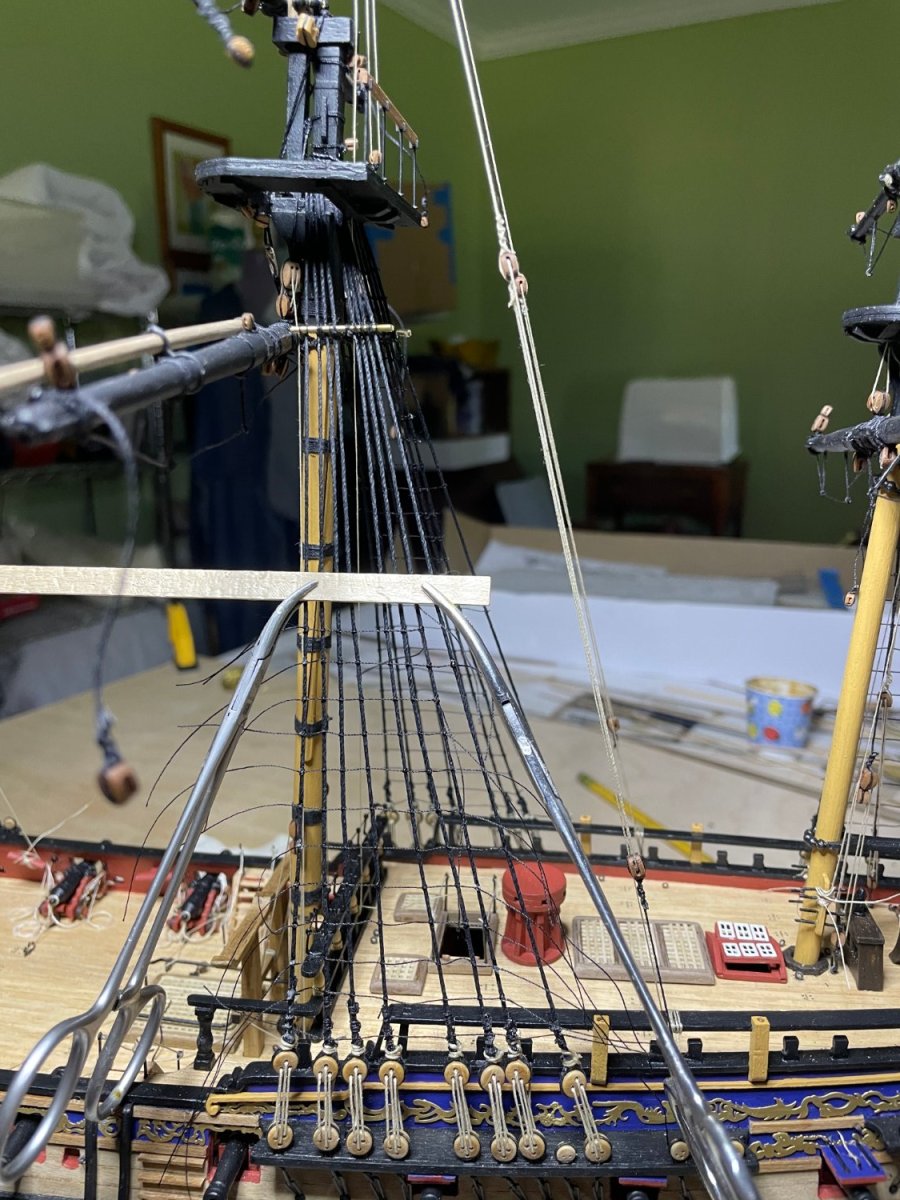
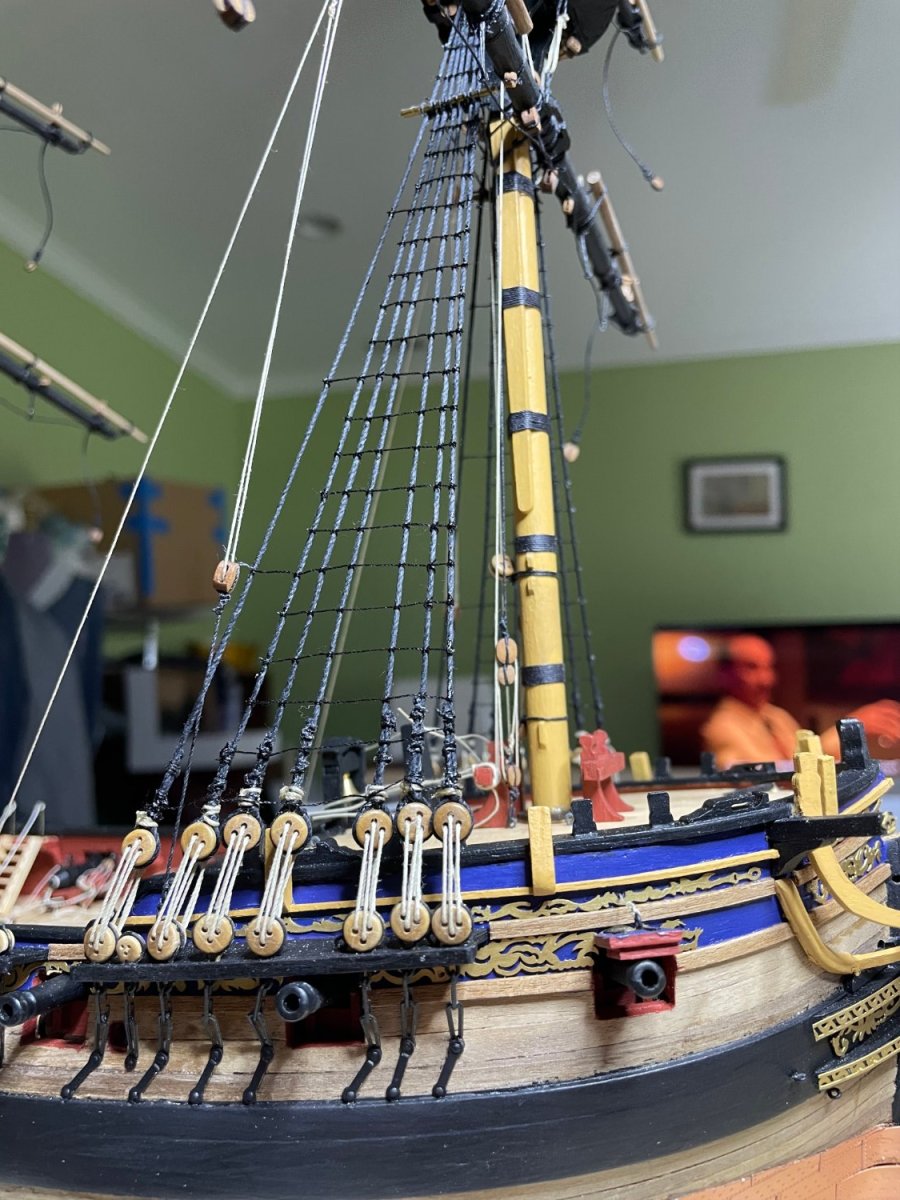
Lower shrouds done. My technique for ratlines is 2 hemostats and a 6 mm plank for spacing.


-
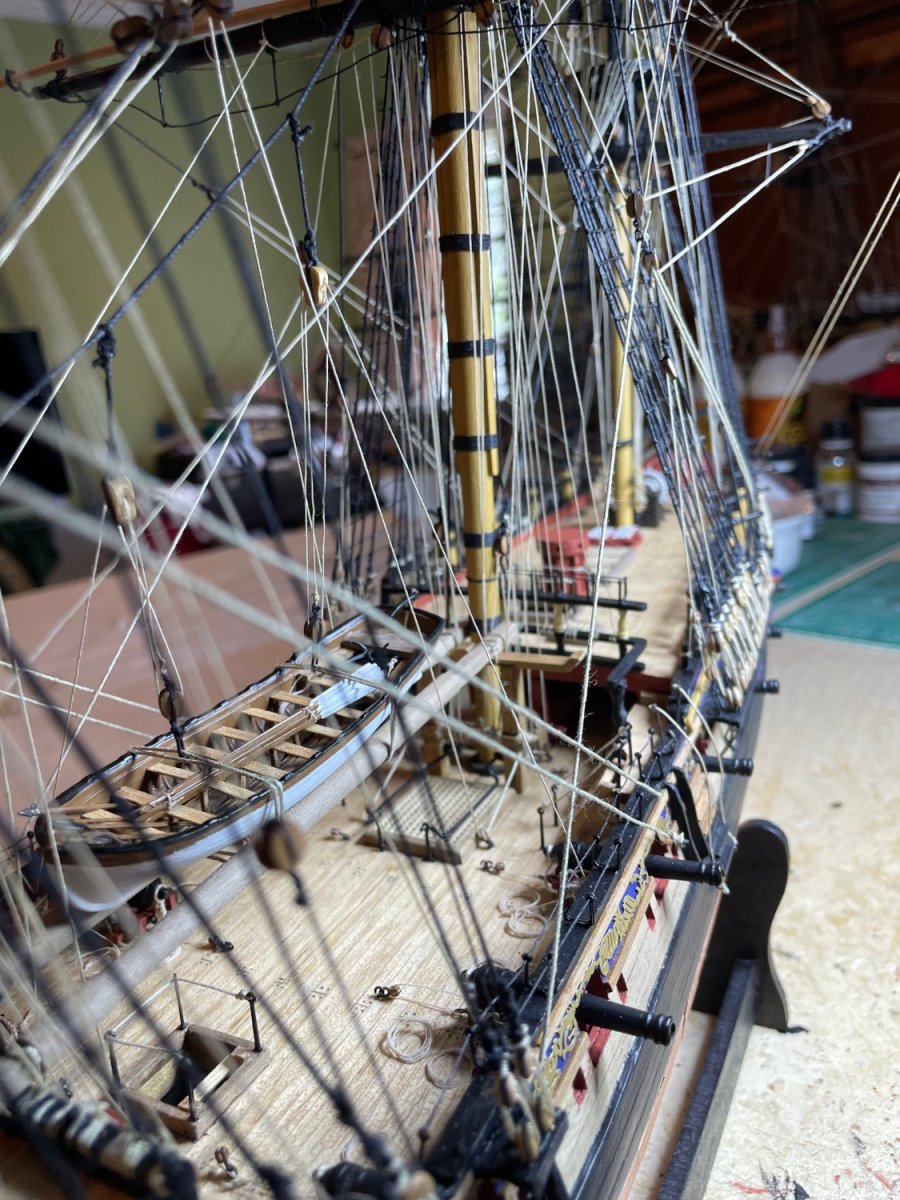
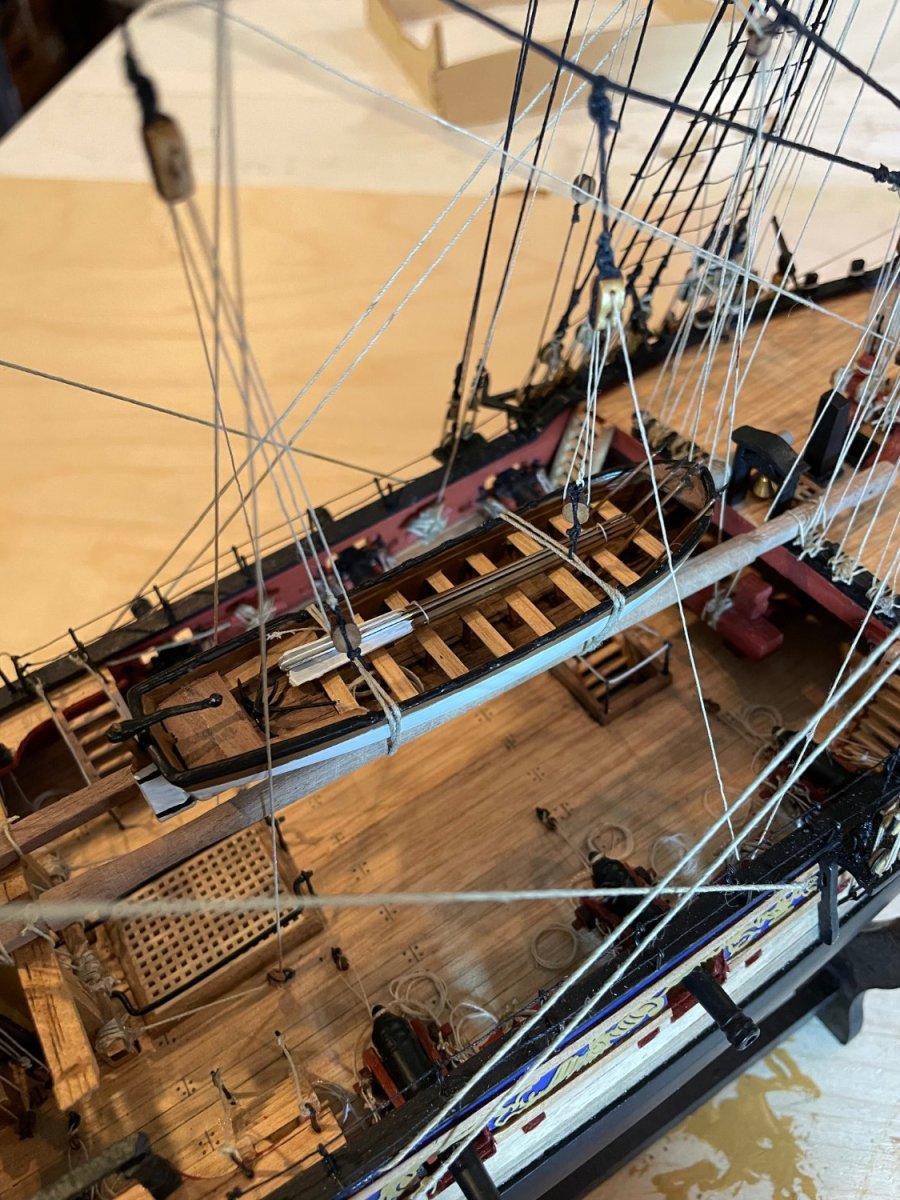
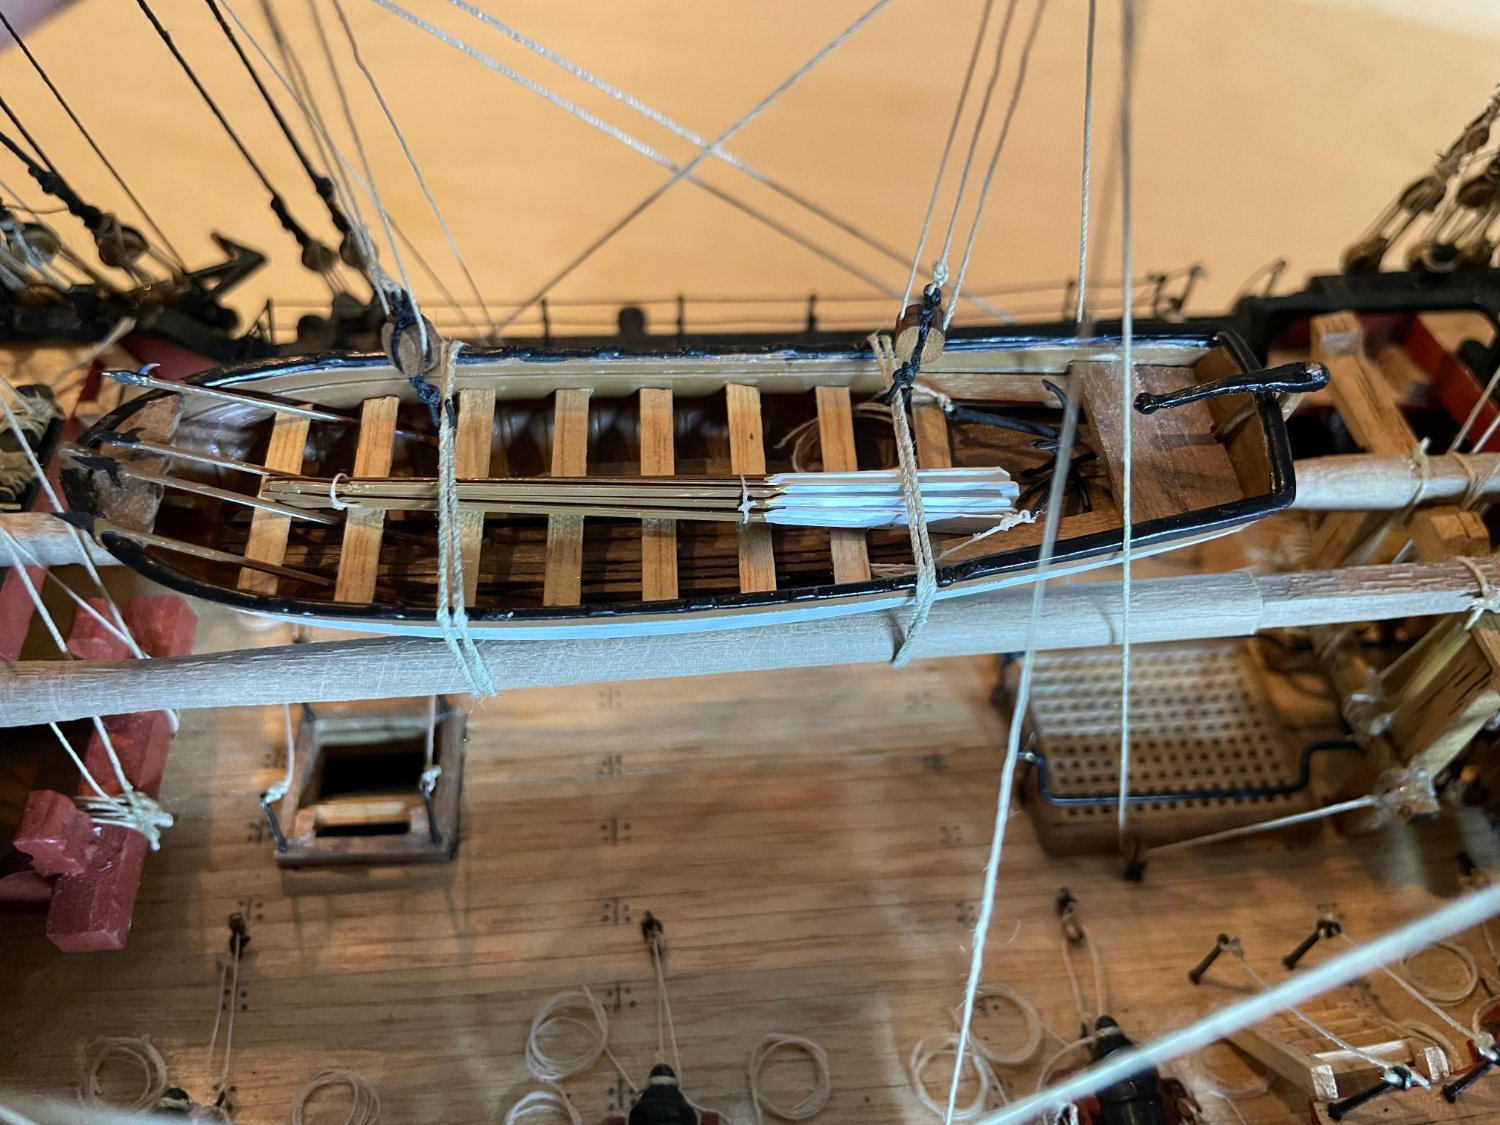
You may notice I substituted pear blocks for more realism to the usual ones. After building Duchess and Sphinx from Vanguard, I was spoiled and will likely always use them. Driving me crazy watching the two Indy builds and not being able to start mine yet. I like to finish a project before starting a new one.
-
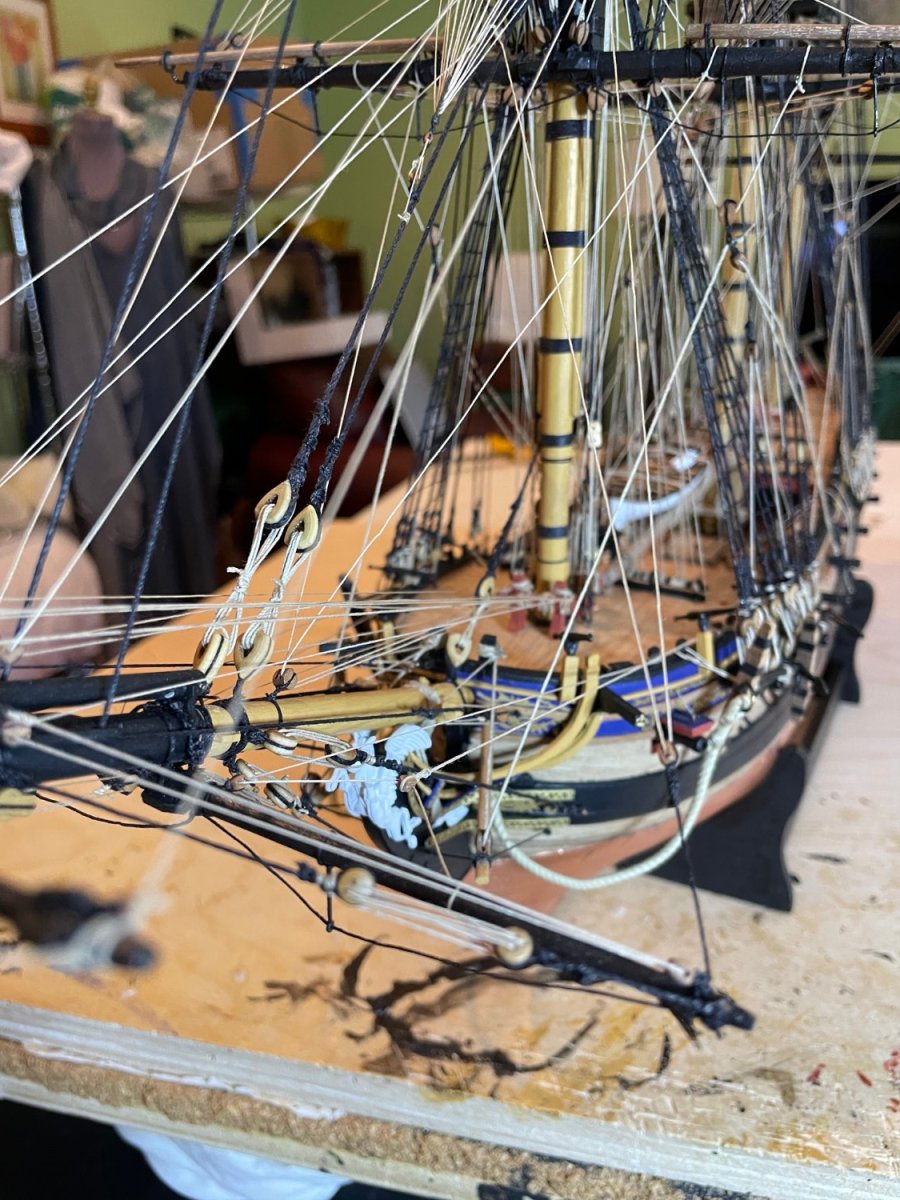
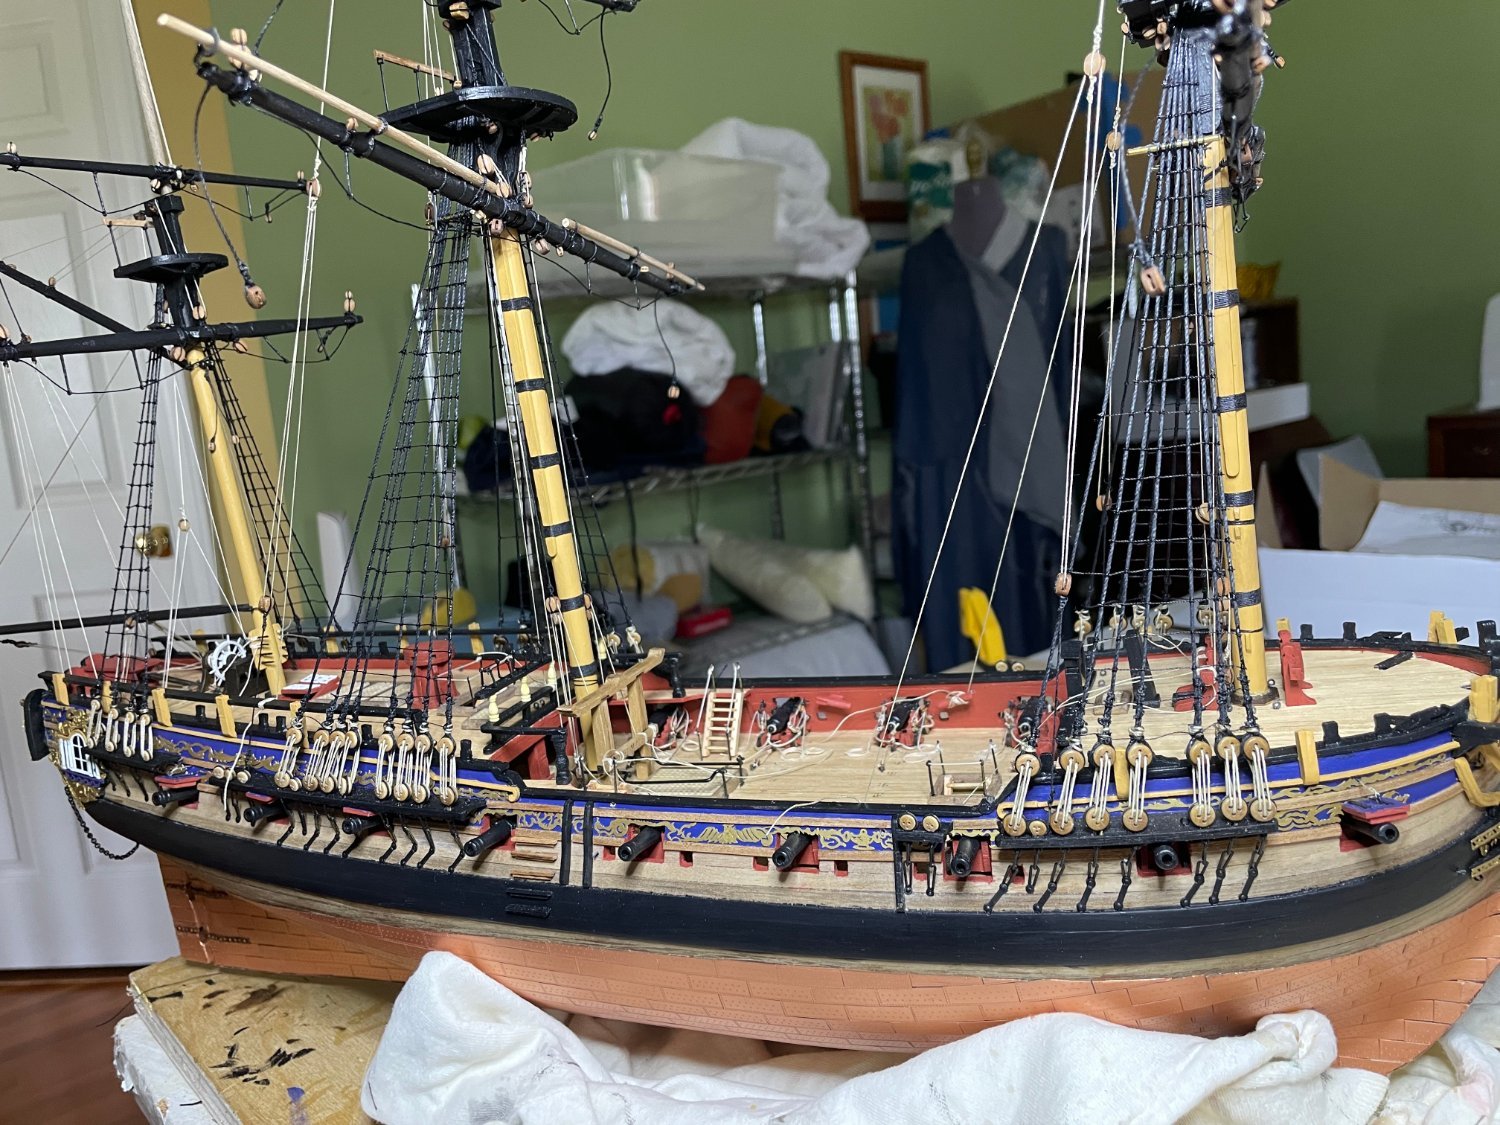
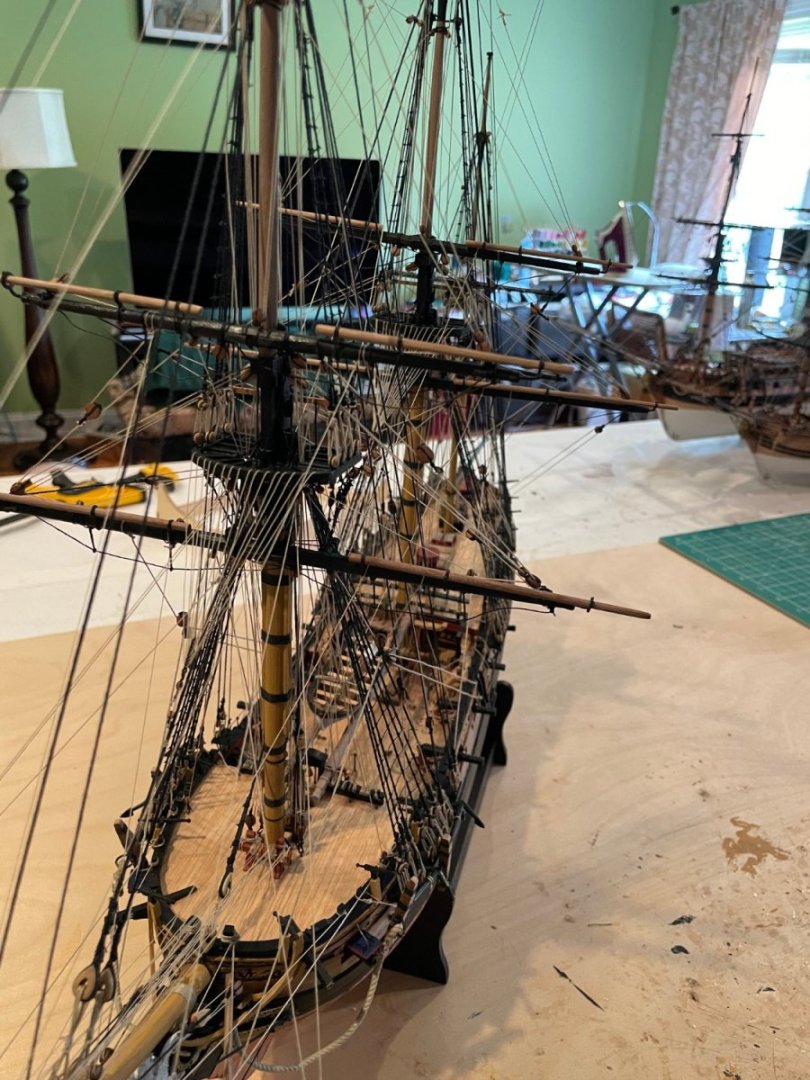
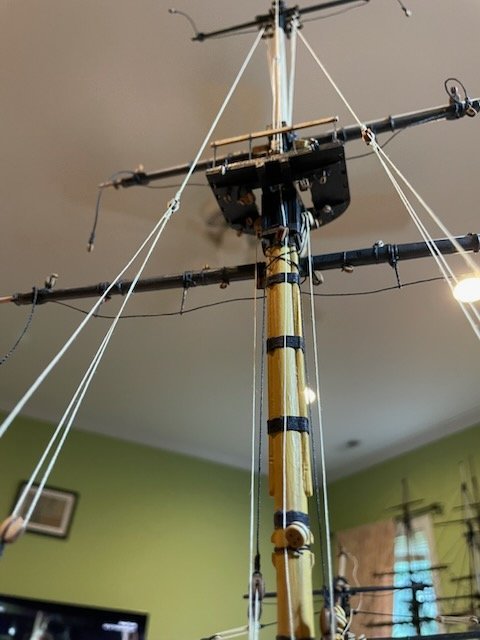
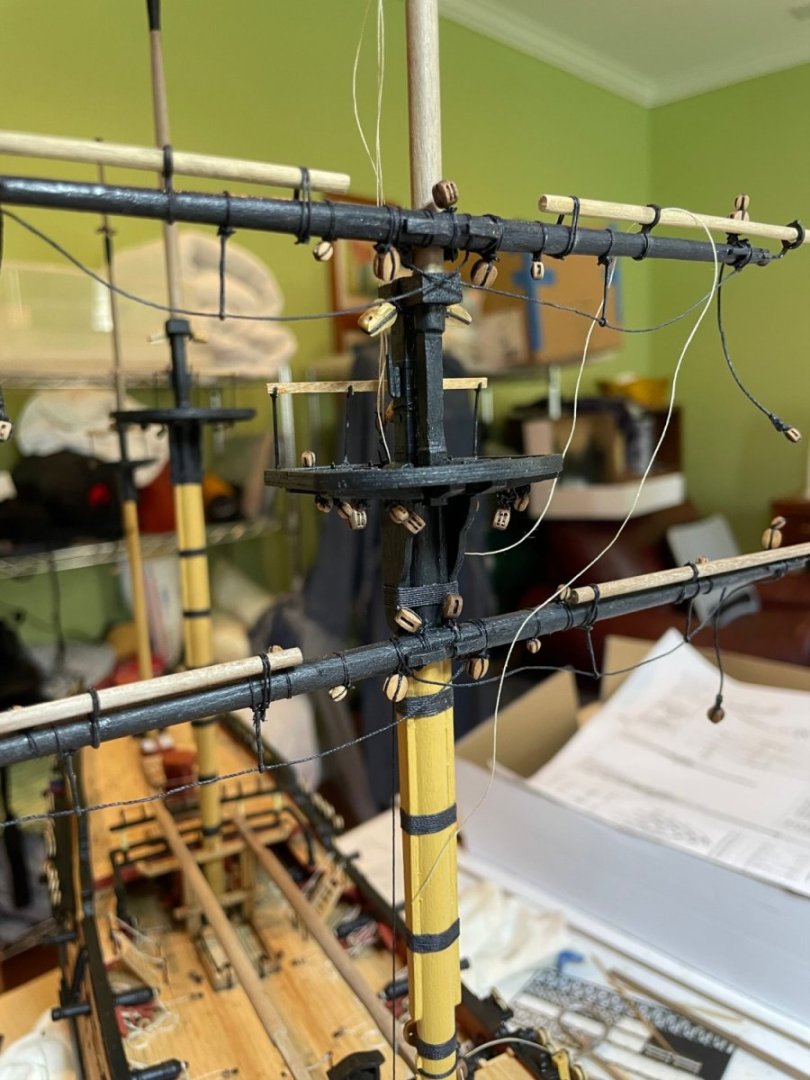
Work was busy but finally completes at the yards and rigged some parts of them. It is out of order but it is easier to get at areas before the shrouds go in and the rigging does not interfere with putting in the shrouds.
-
Things a bit slow lately as my day job got a bit busy. The foremast is rigged with the yards now. Although not specific in the plans, I tied the main yard as on other ships I have done form our favorite designer Chris. I have jealously been following the 2 Indy build. I hope to start in June. Should finish yards this month and rigging in May. Once the tedious shrouds get done the rest of the rigging goes quickly leaving the anchors and ships boat for last.


-
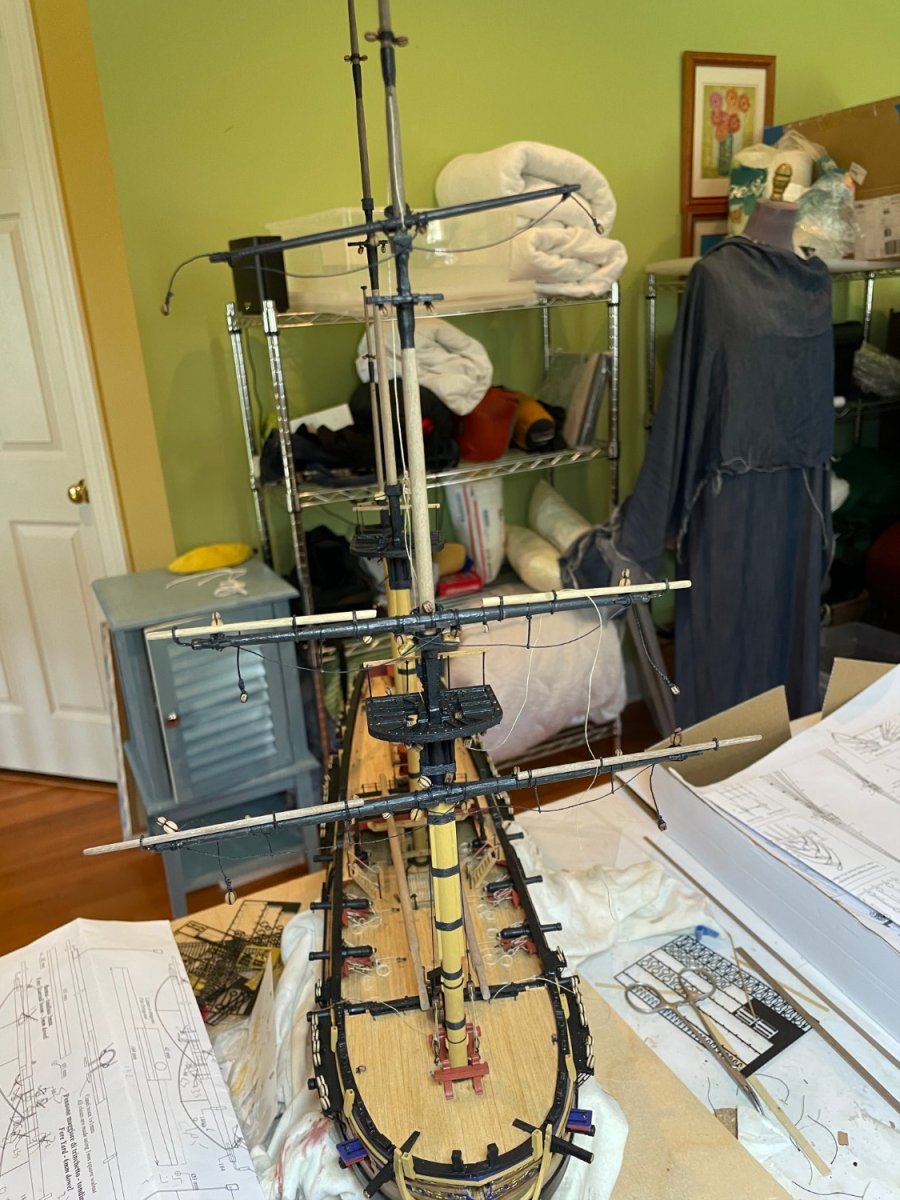
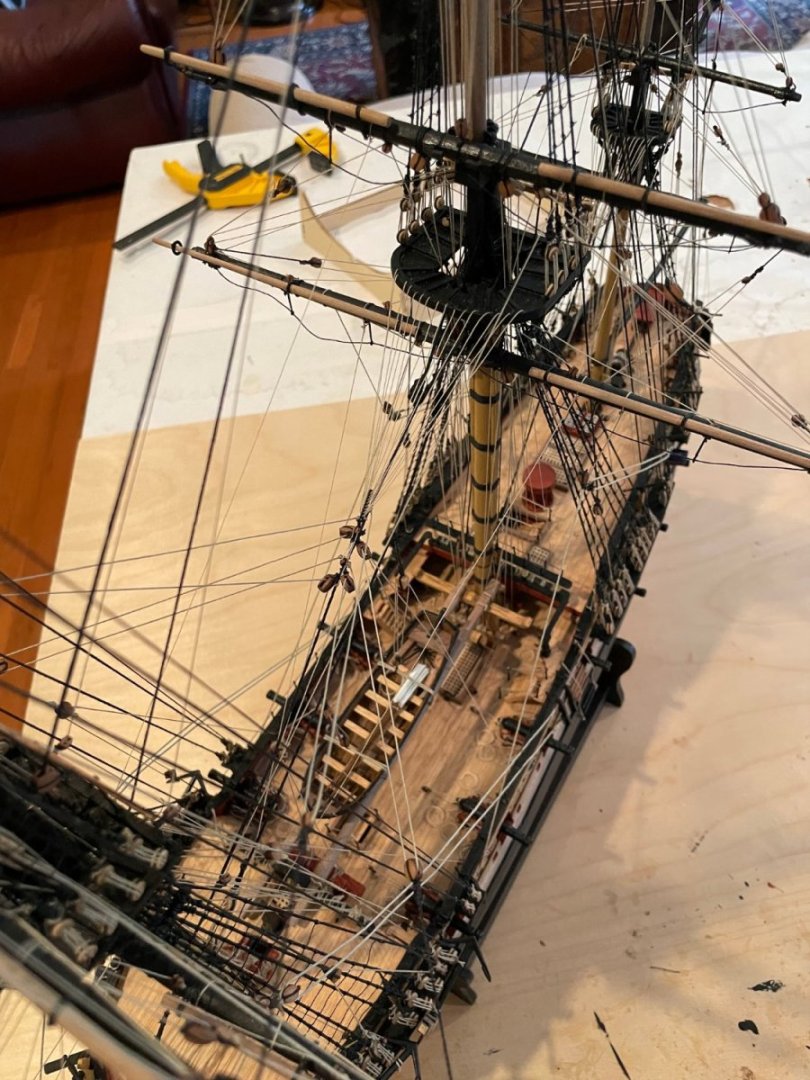
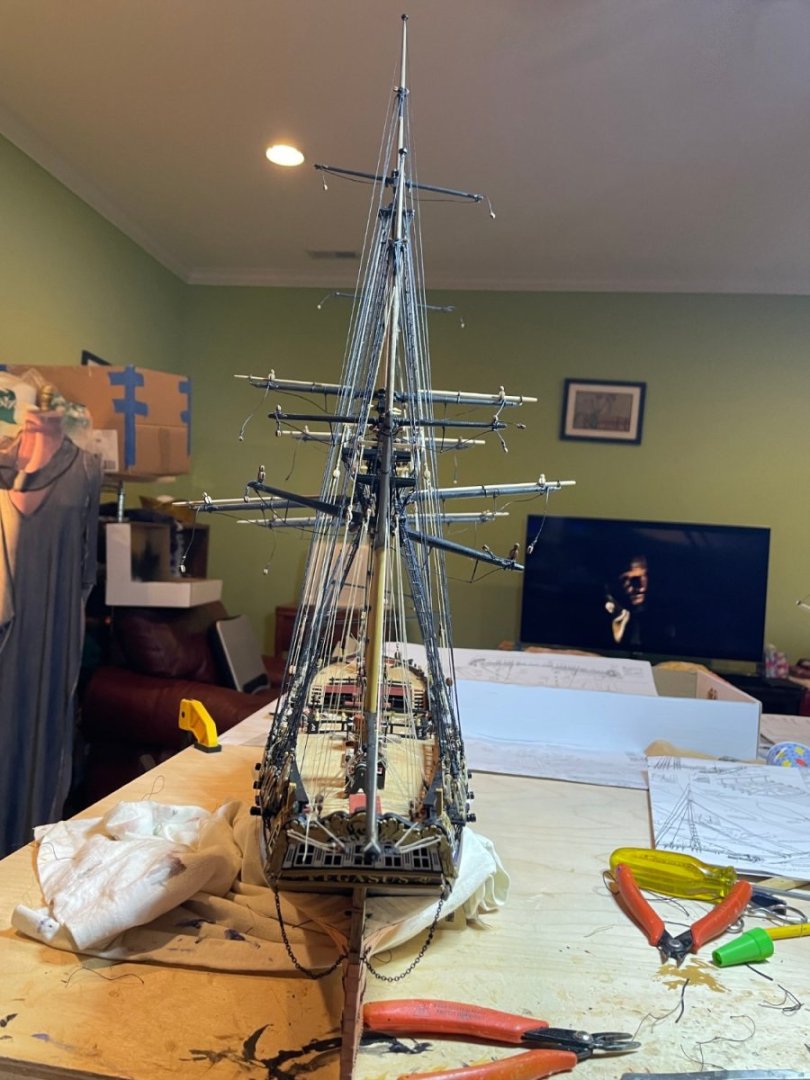
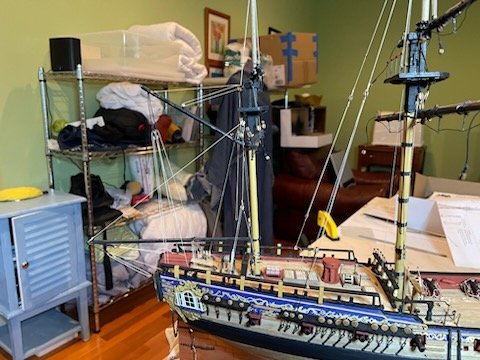
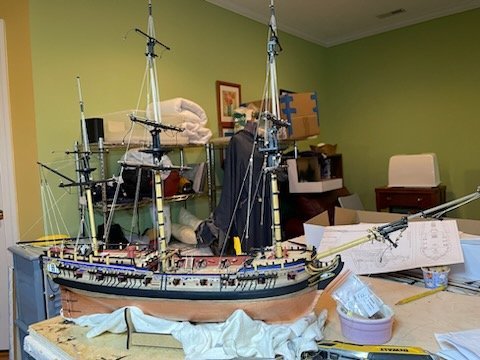
After a week or so the masts and bowsprit are done. Next rig the masts then make and rig the yards

-
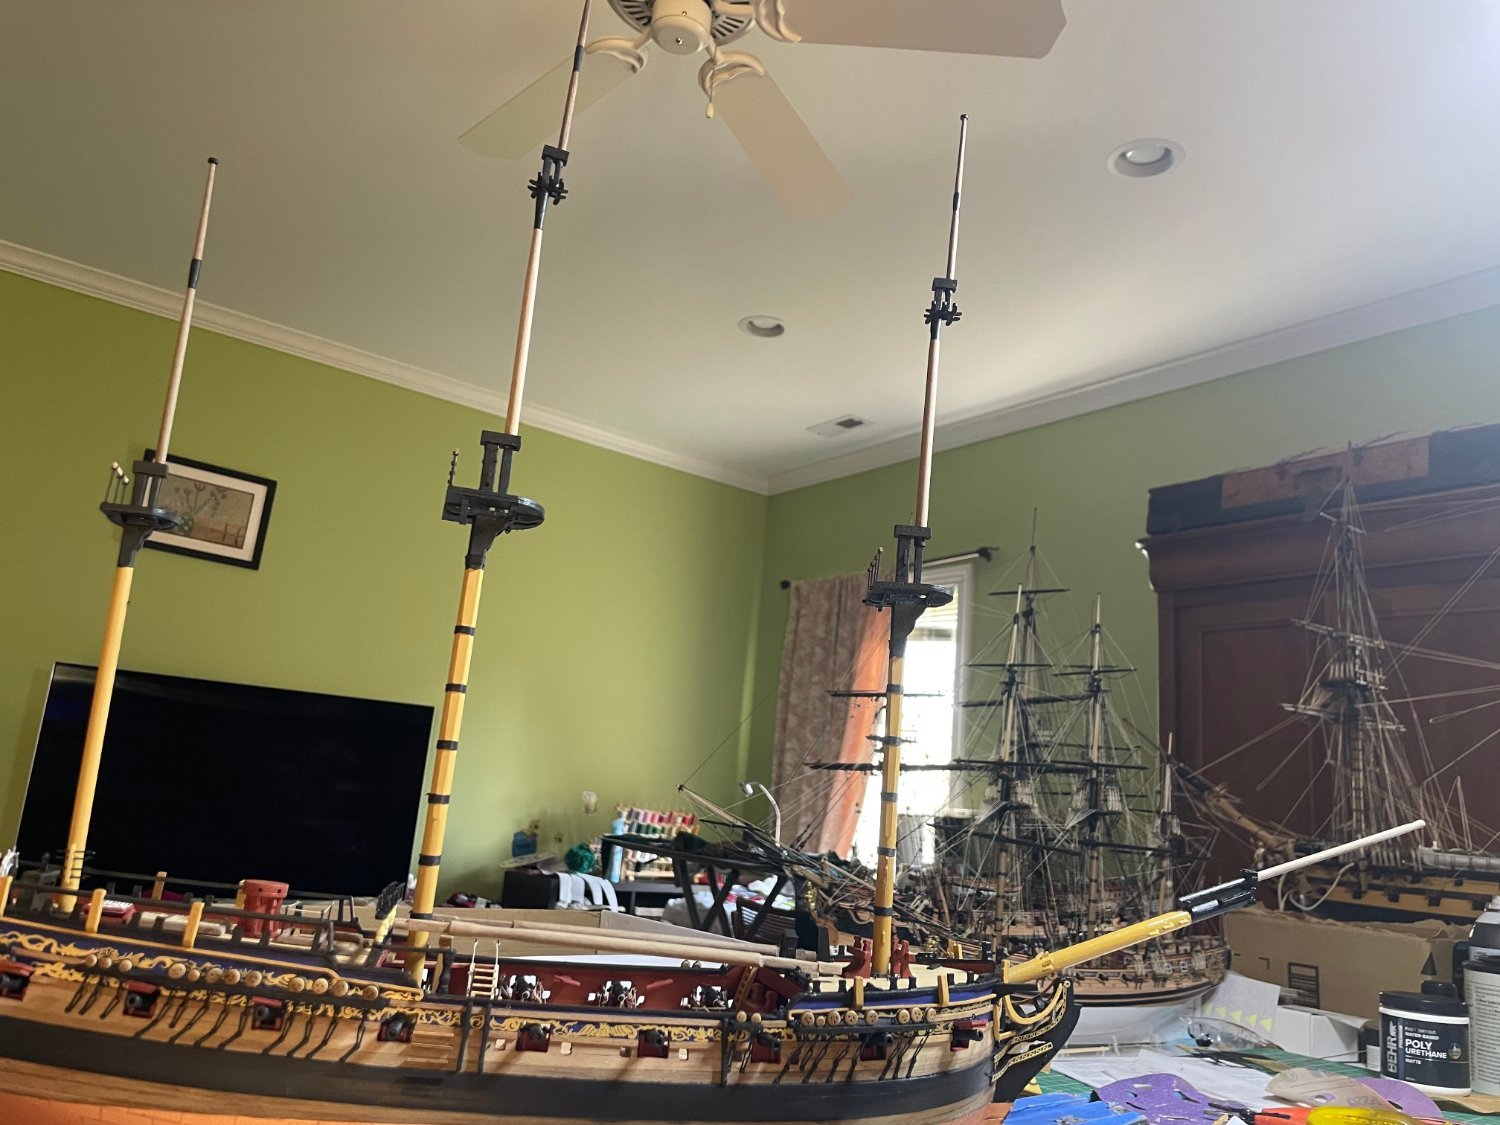
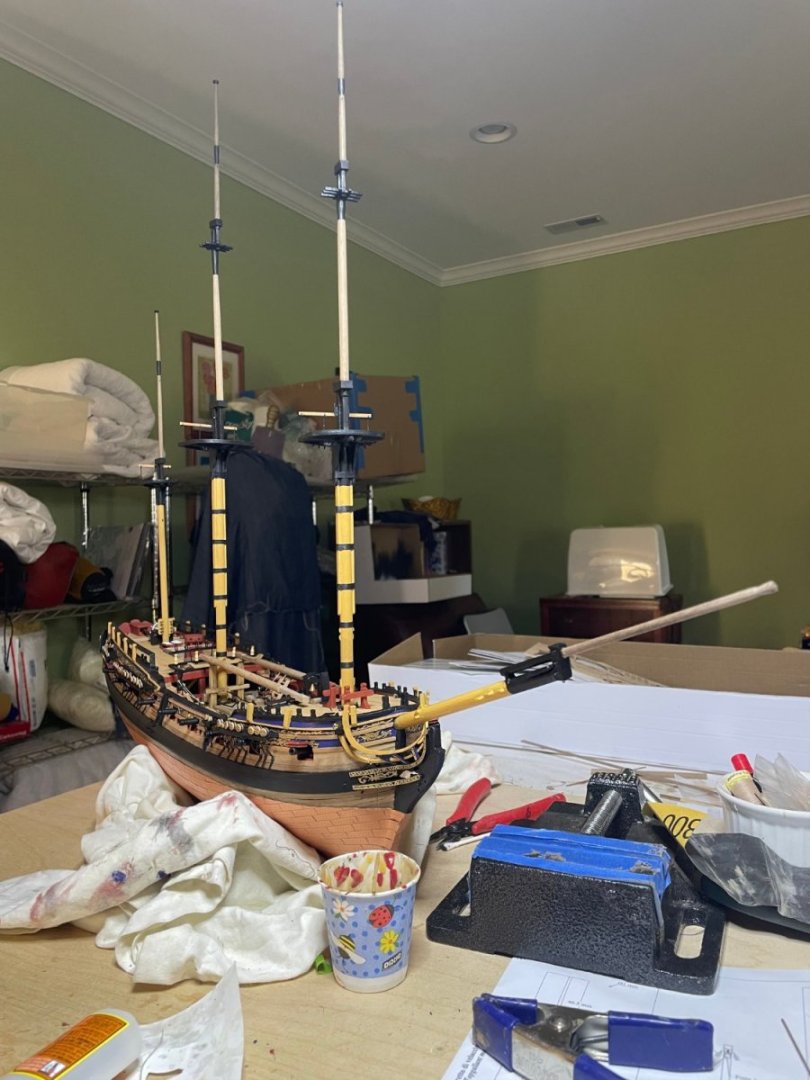
Well, the hull is finally done except for 2 things I add at the end as I always otherwise break them. Another 6-8 weeks to finish. I am getting jealous of the 2 Indefatigable builds and can't wait to join them.


-
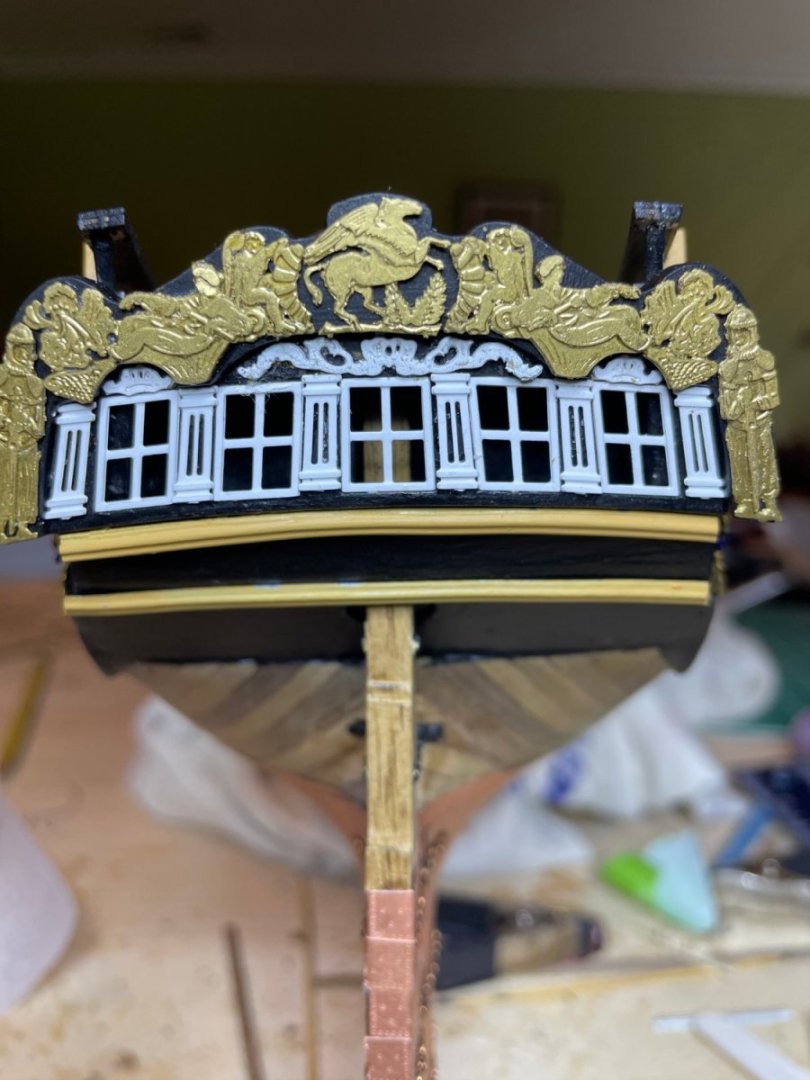
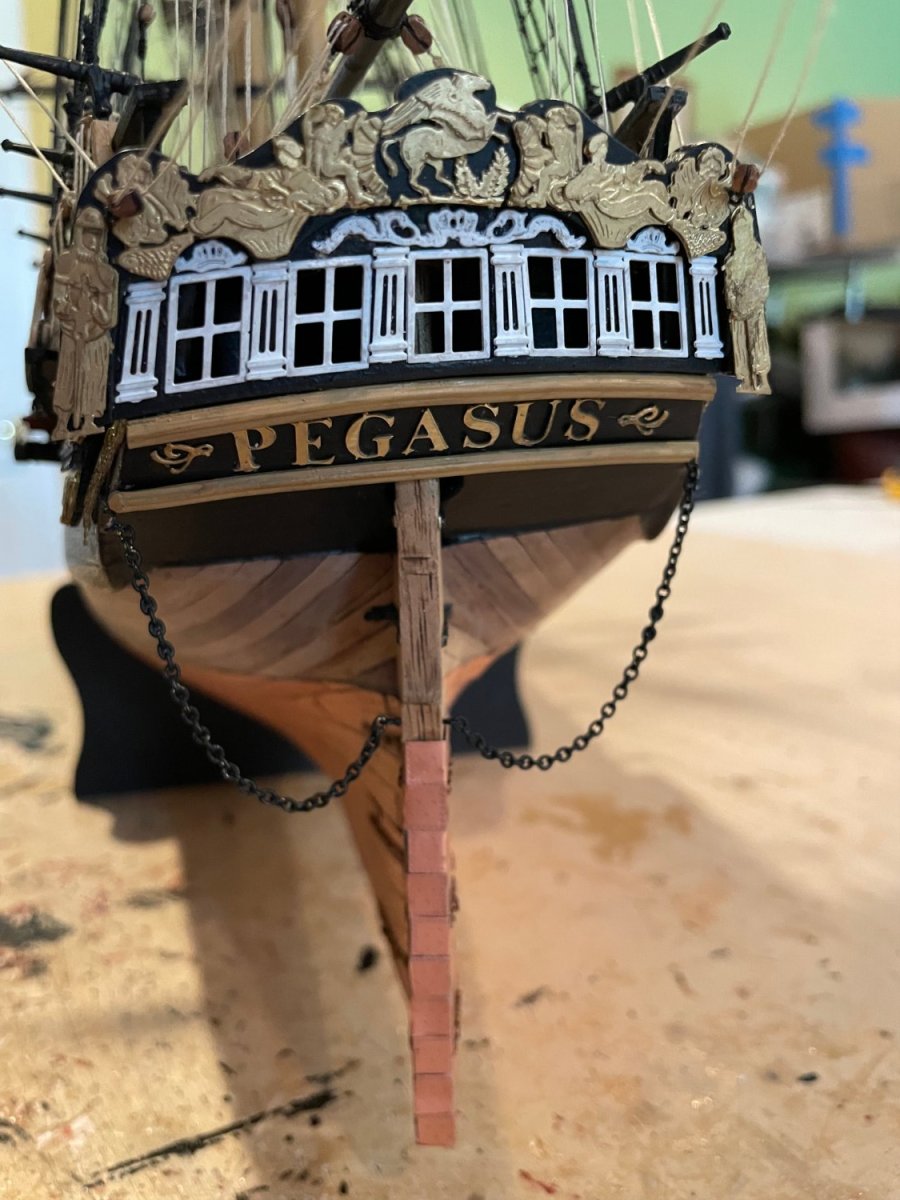
Stern done and quarter deck. Name will wit s I lost one of the letter and ordered replacement. Soemthings will go on t the very end as I have a bad habit of snagging and breaking hammock nettings and the like.