HOLIDAY DONATION DRIVE - SUPPORT MSW - DO YOUR PART TO KEEP THIS GREAT FORUM GOING! (Only 20 donations so far - C'mon guys!)
×


ECK
-
Posts
635 -
Joined
-
Last visited
Content Type
Profiles
Forums
Gallery
Events
Everything posted by ECK
-
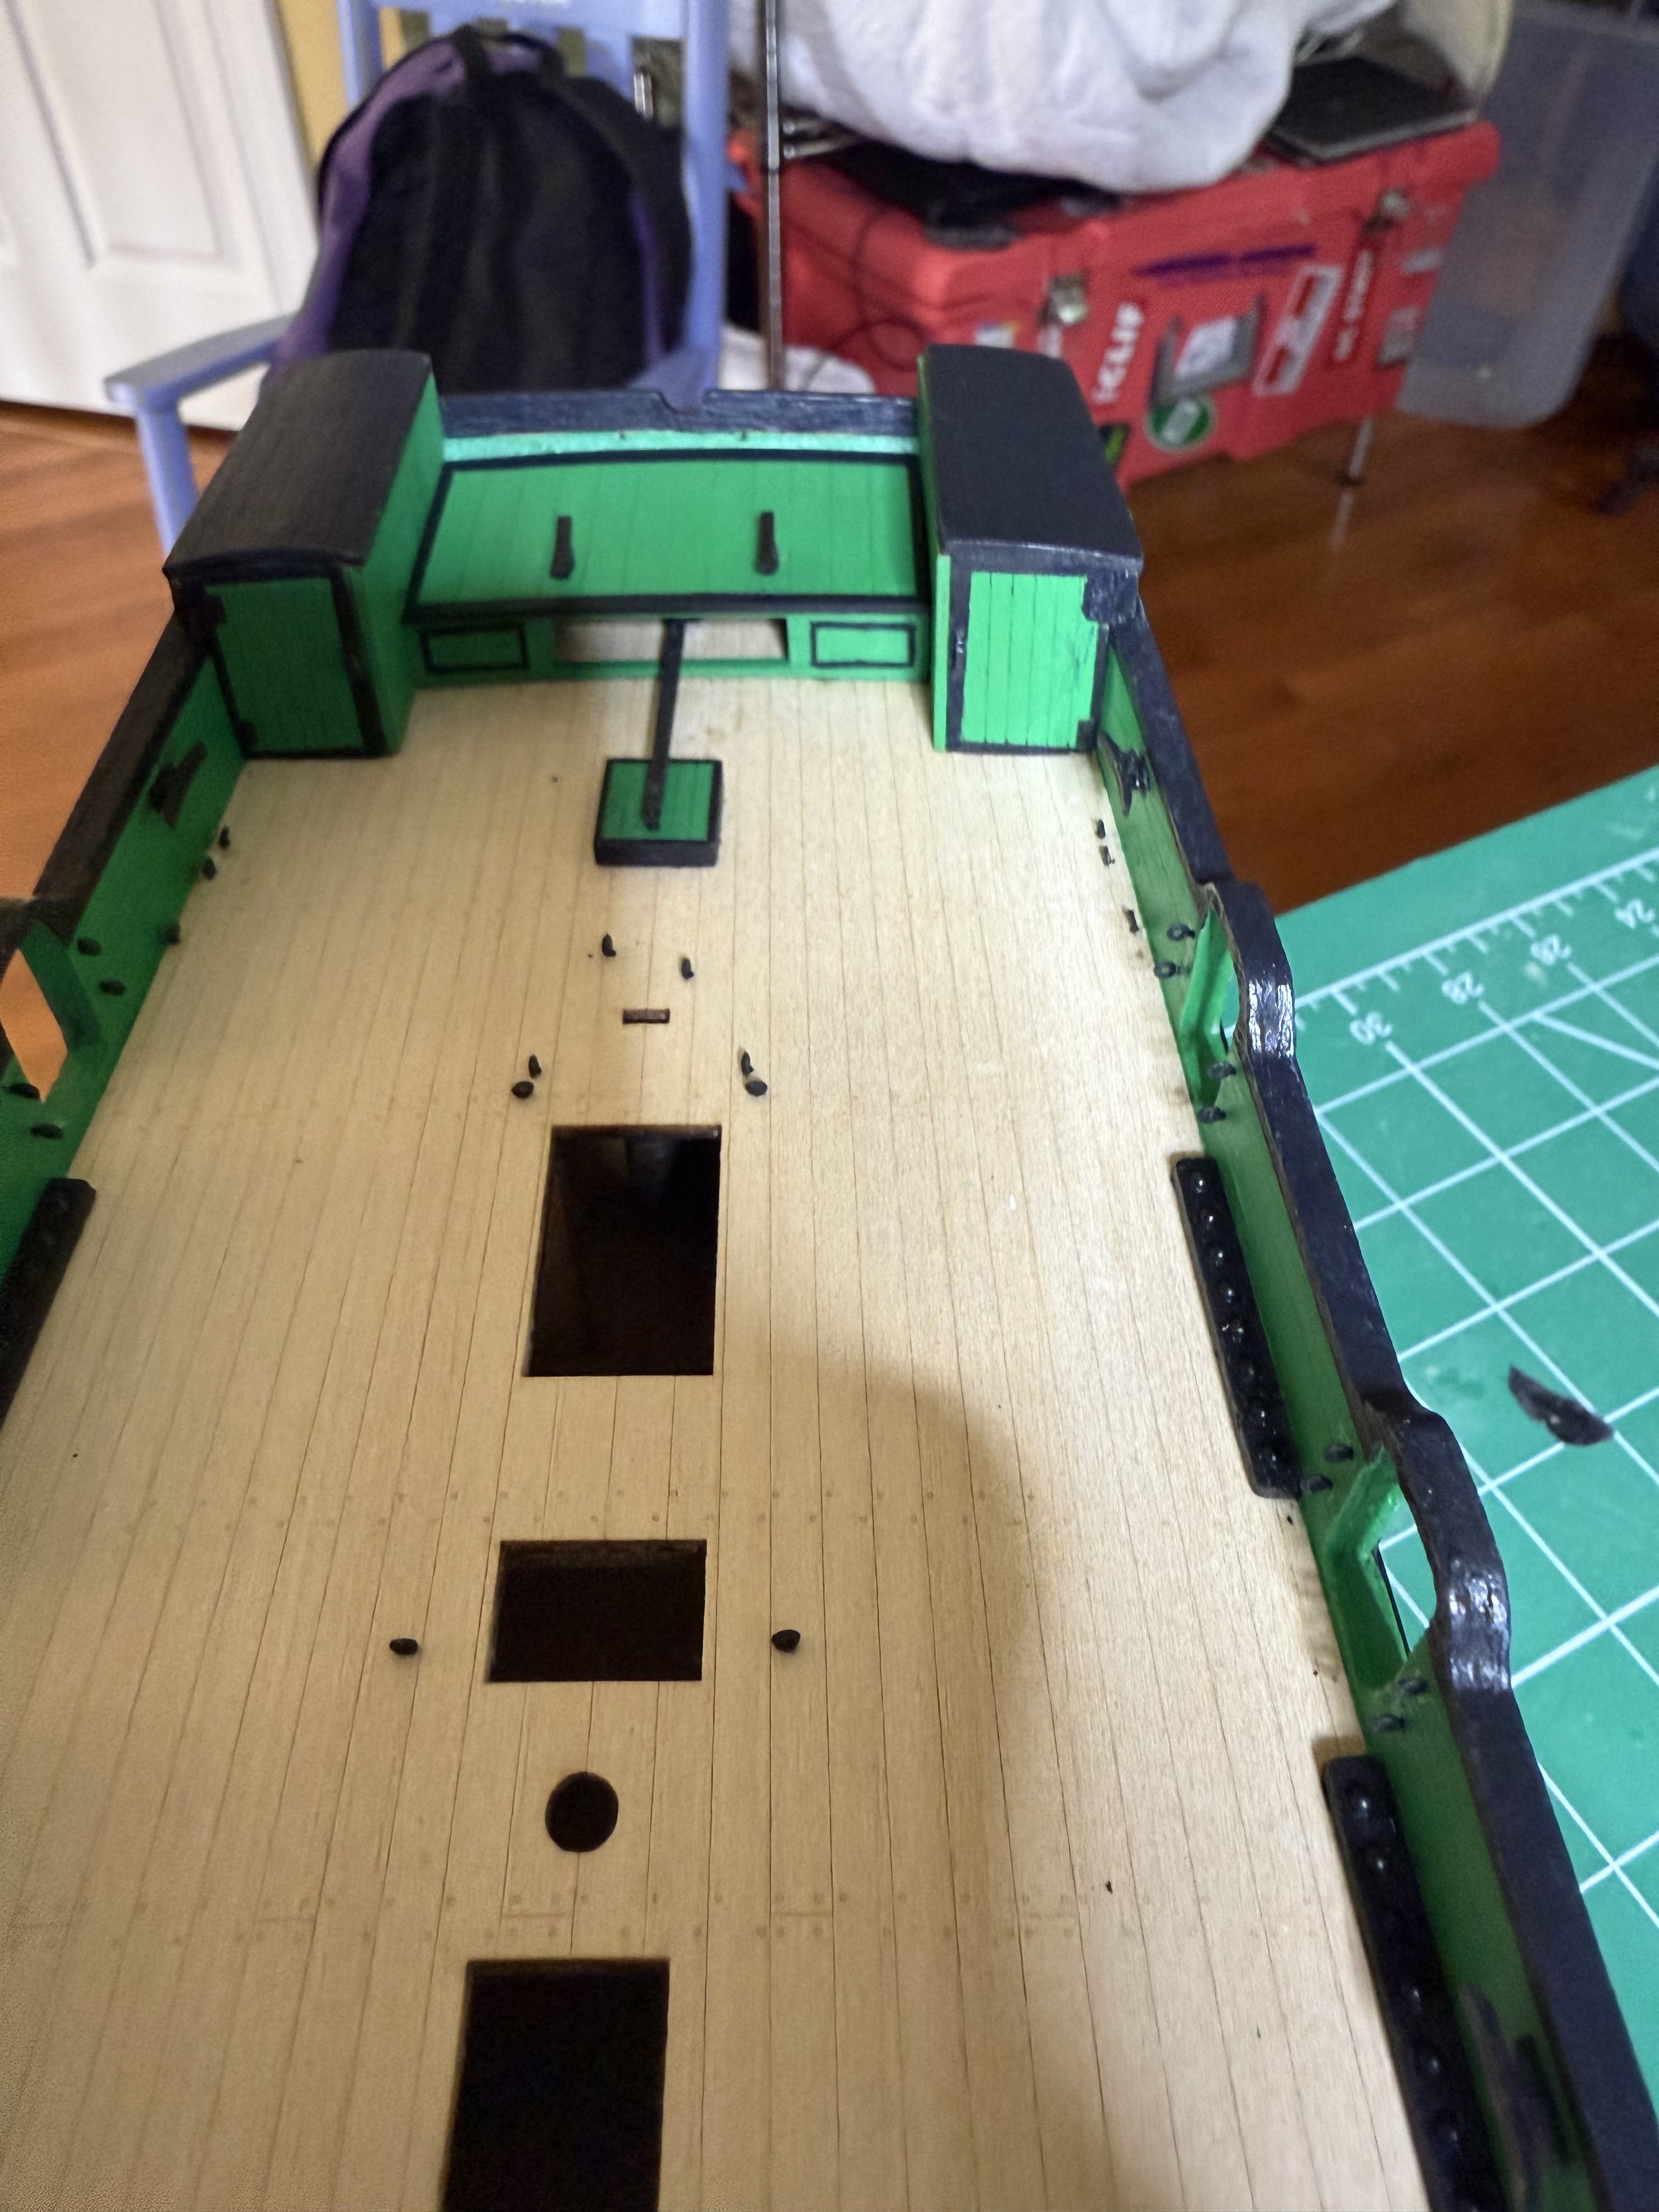
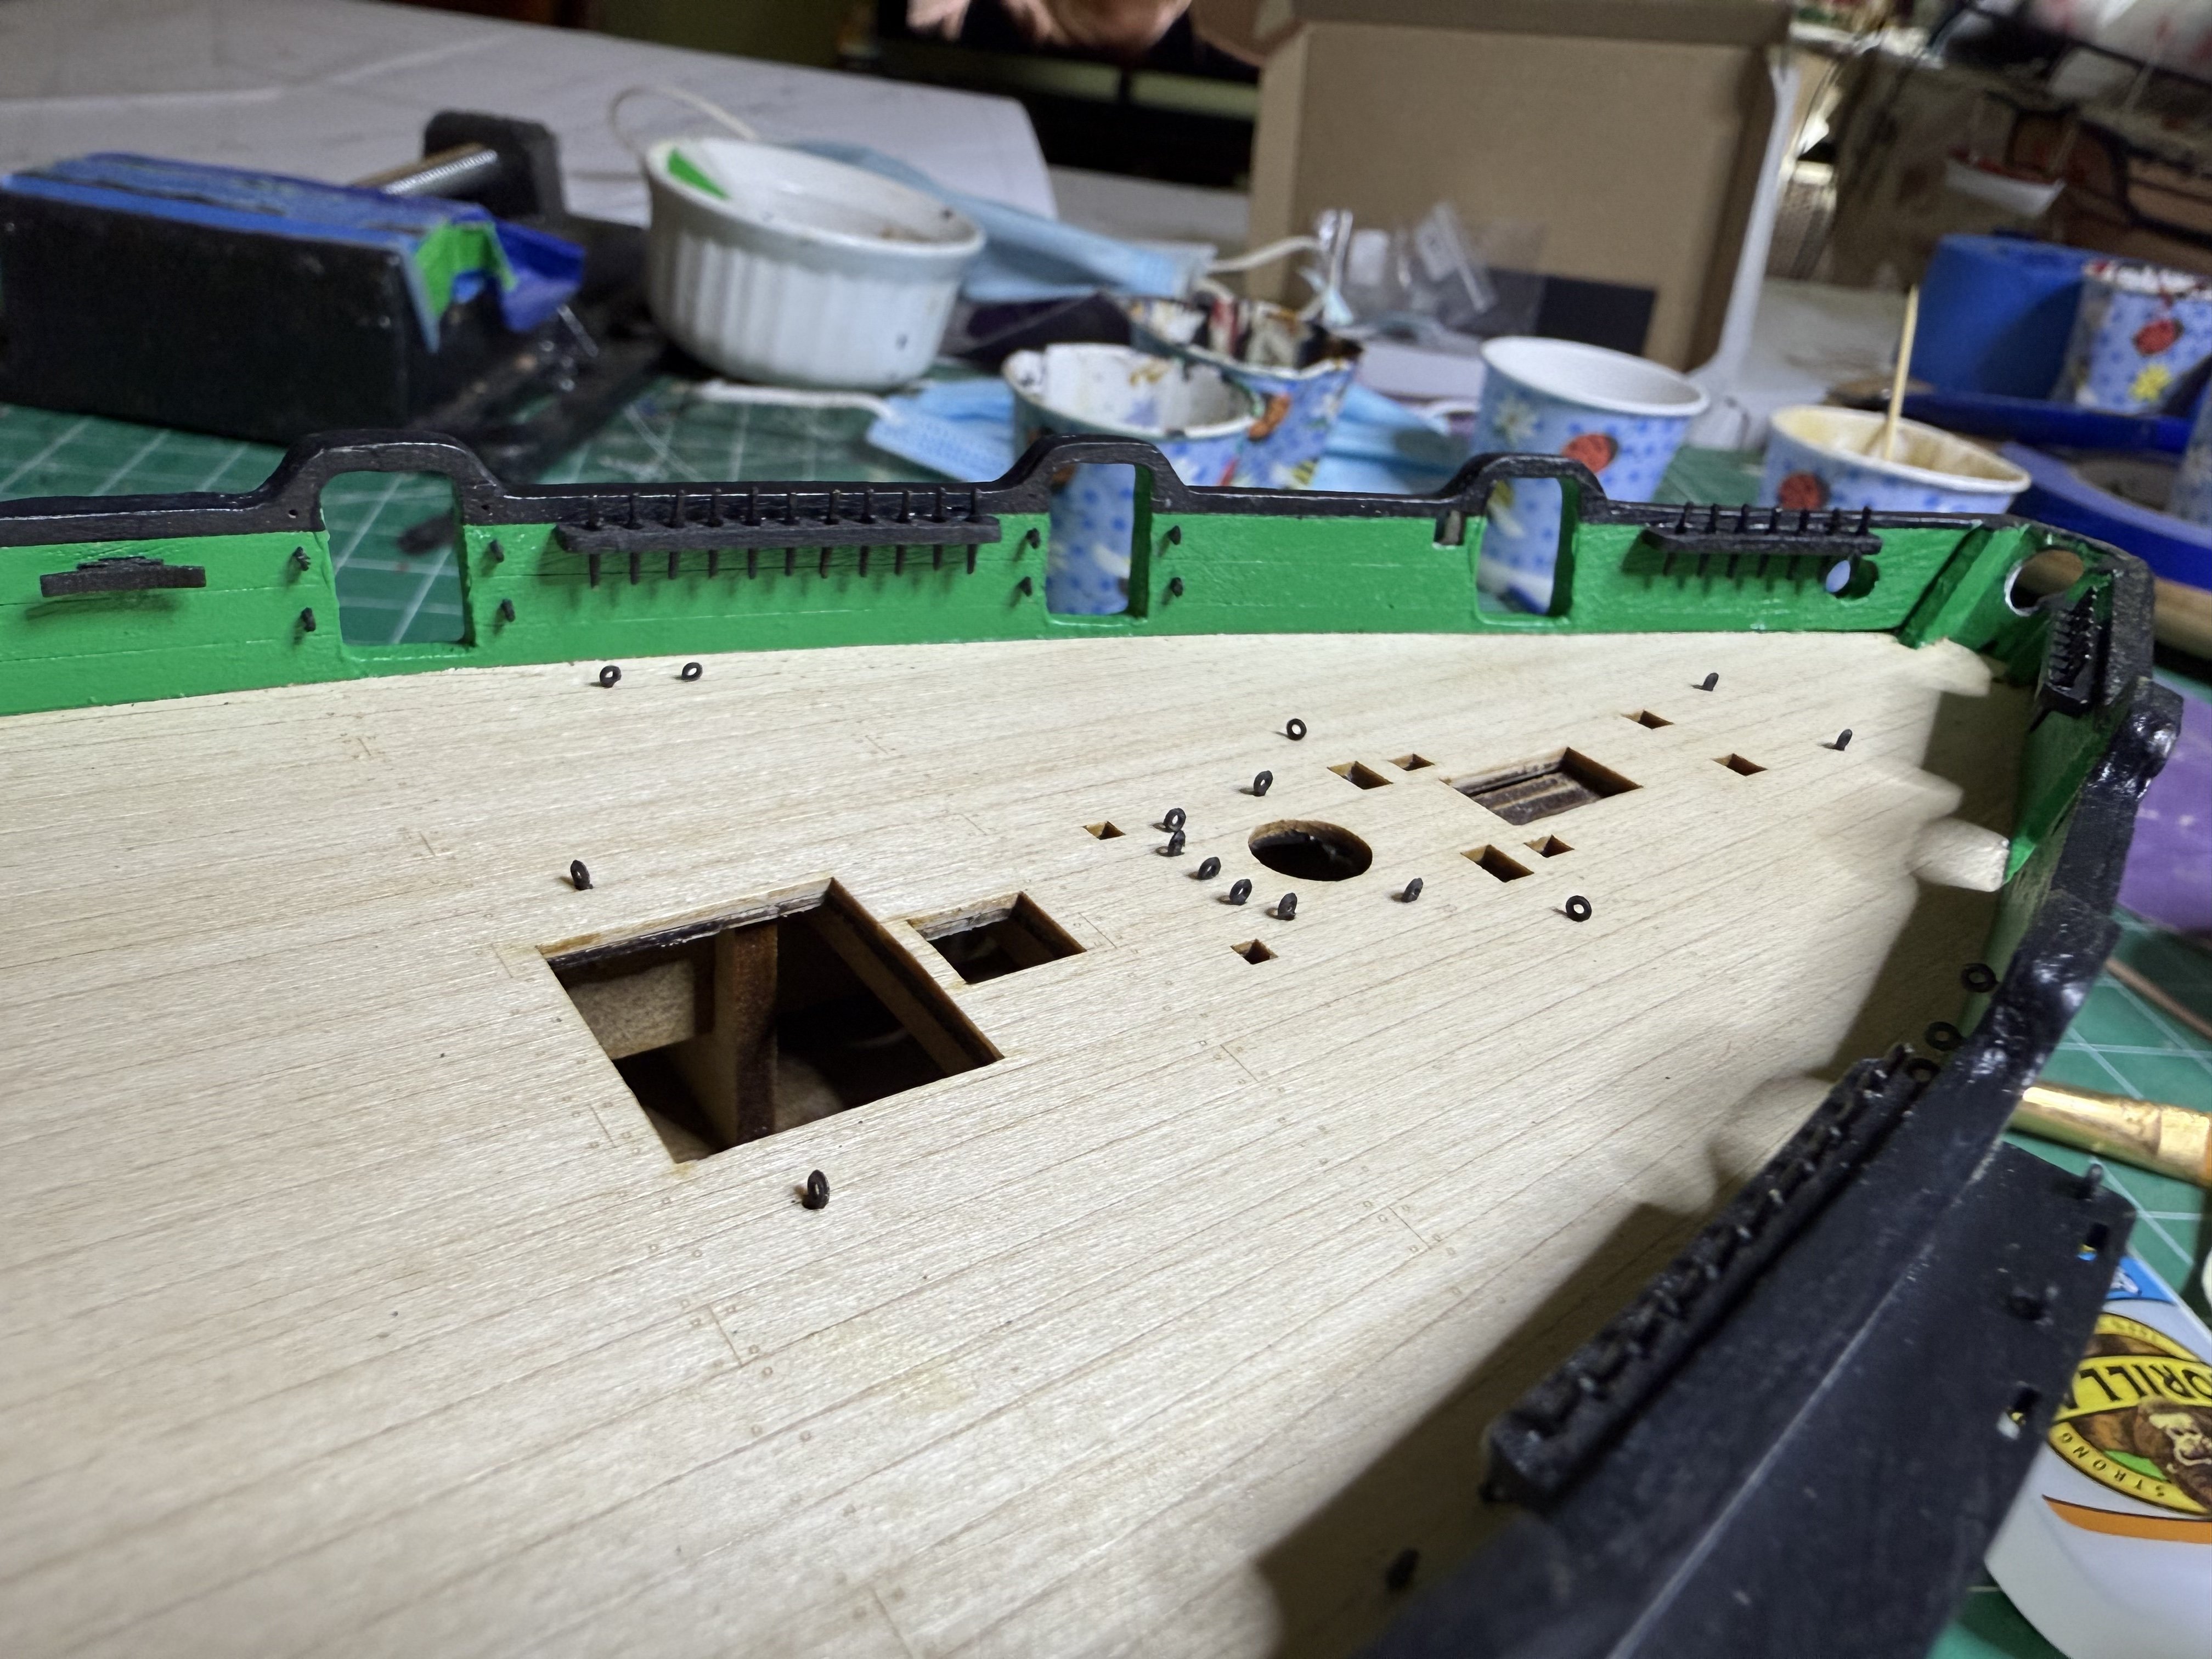
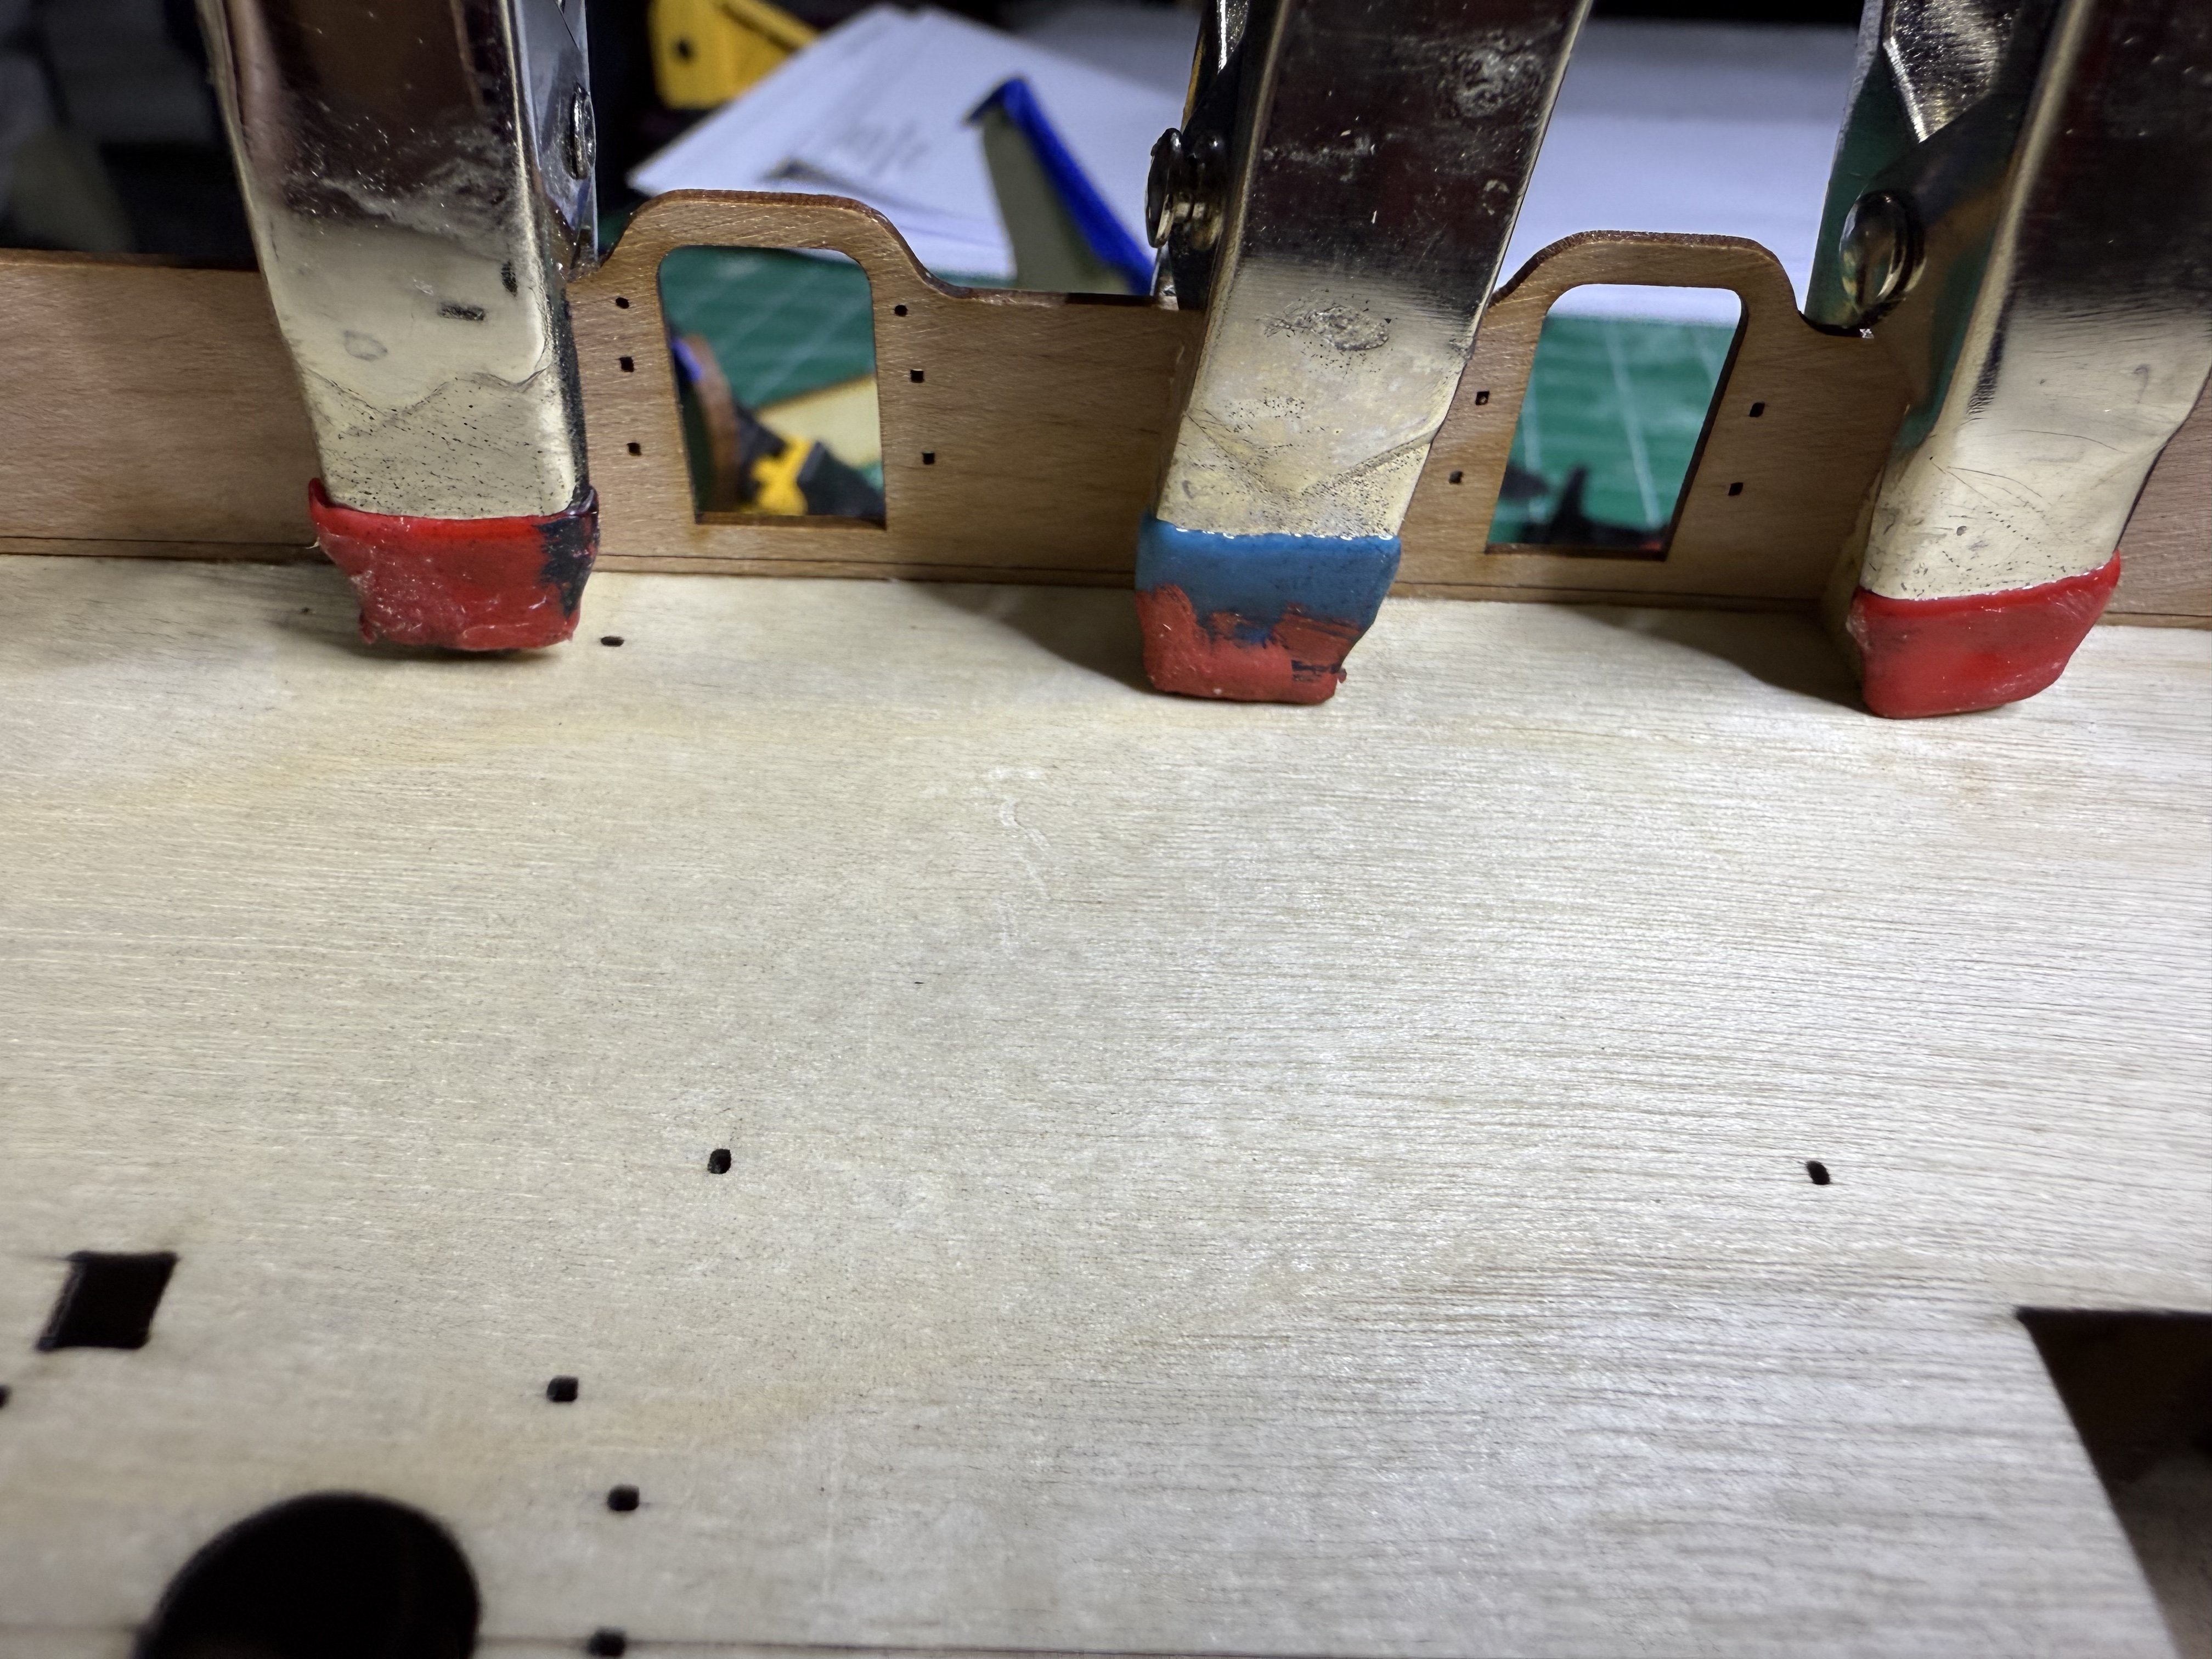
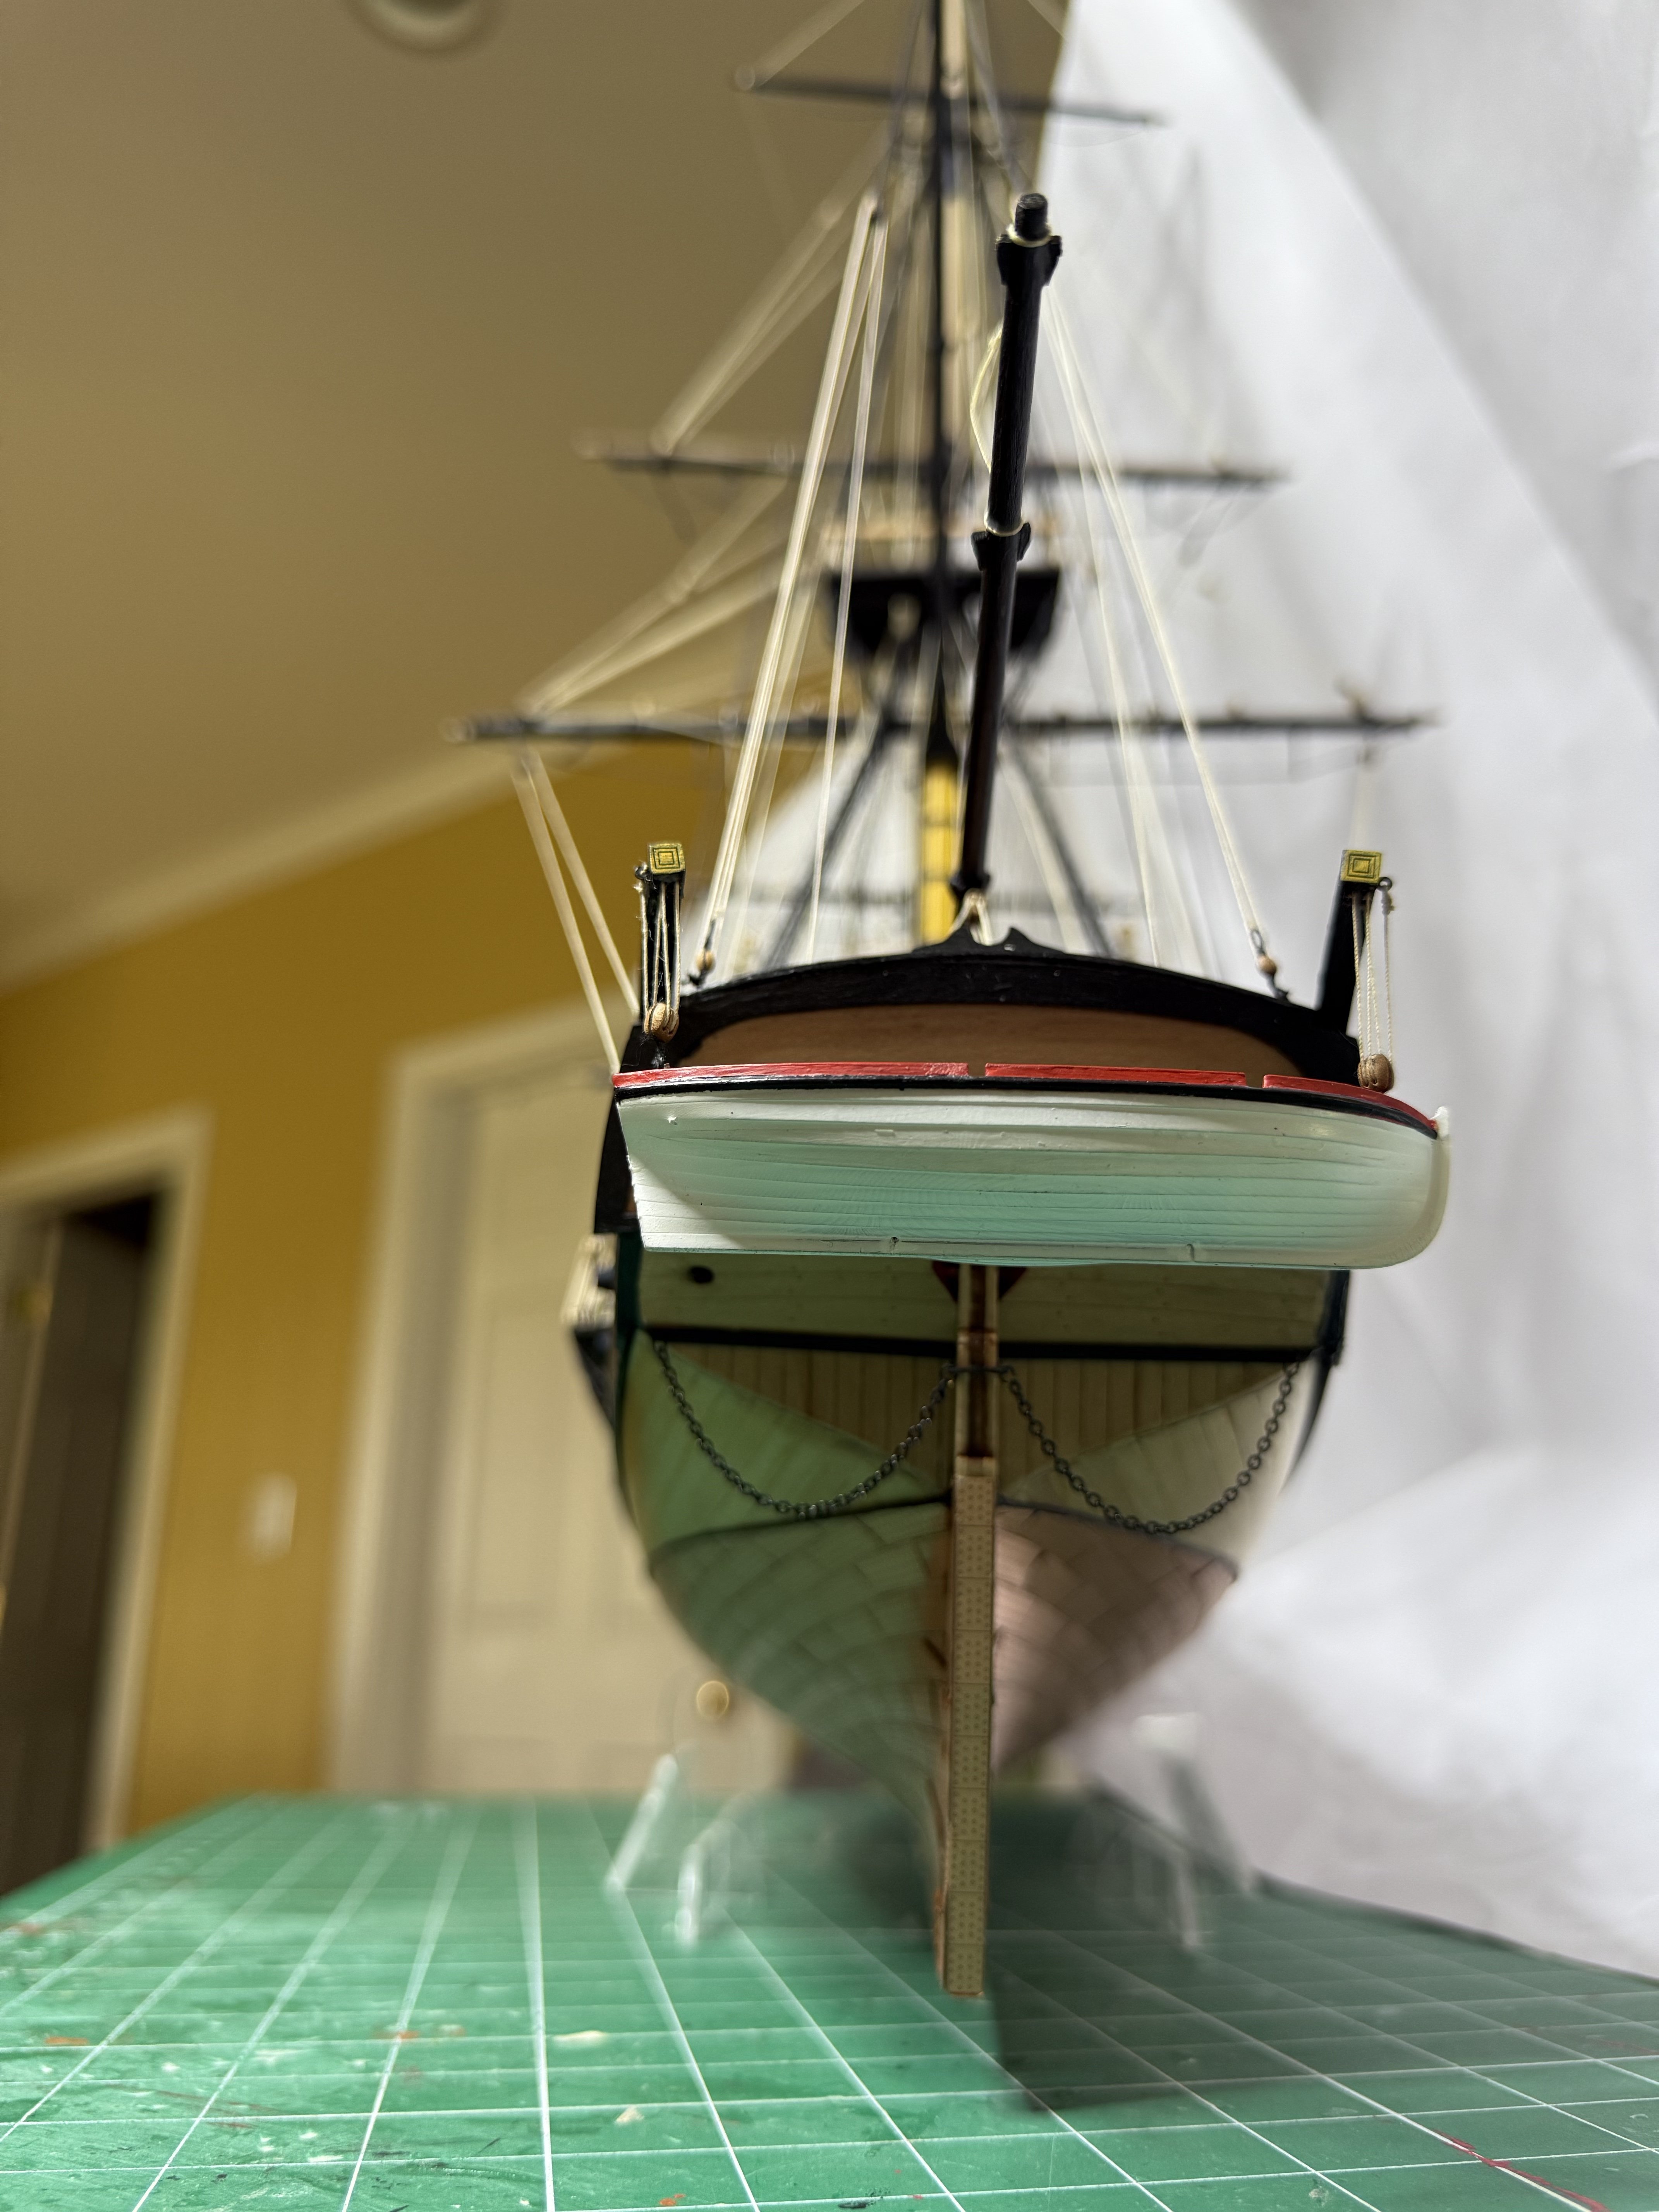
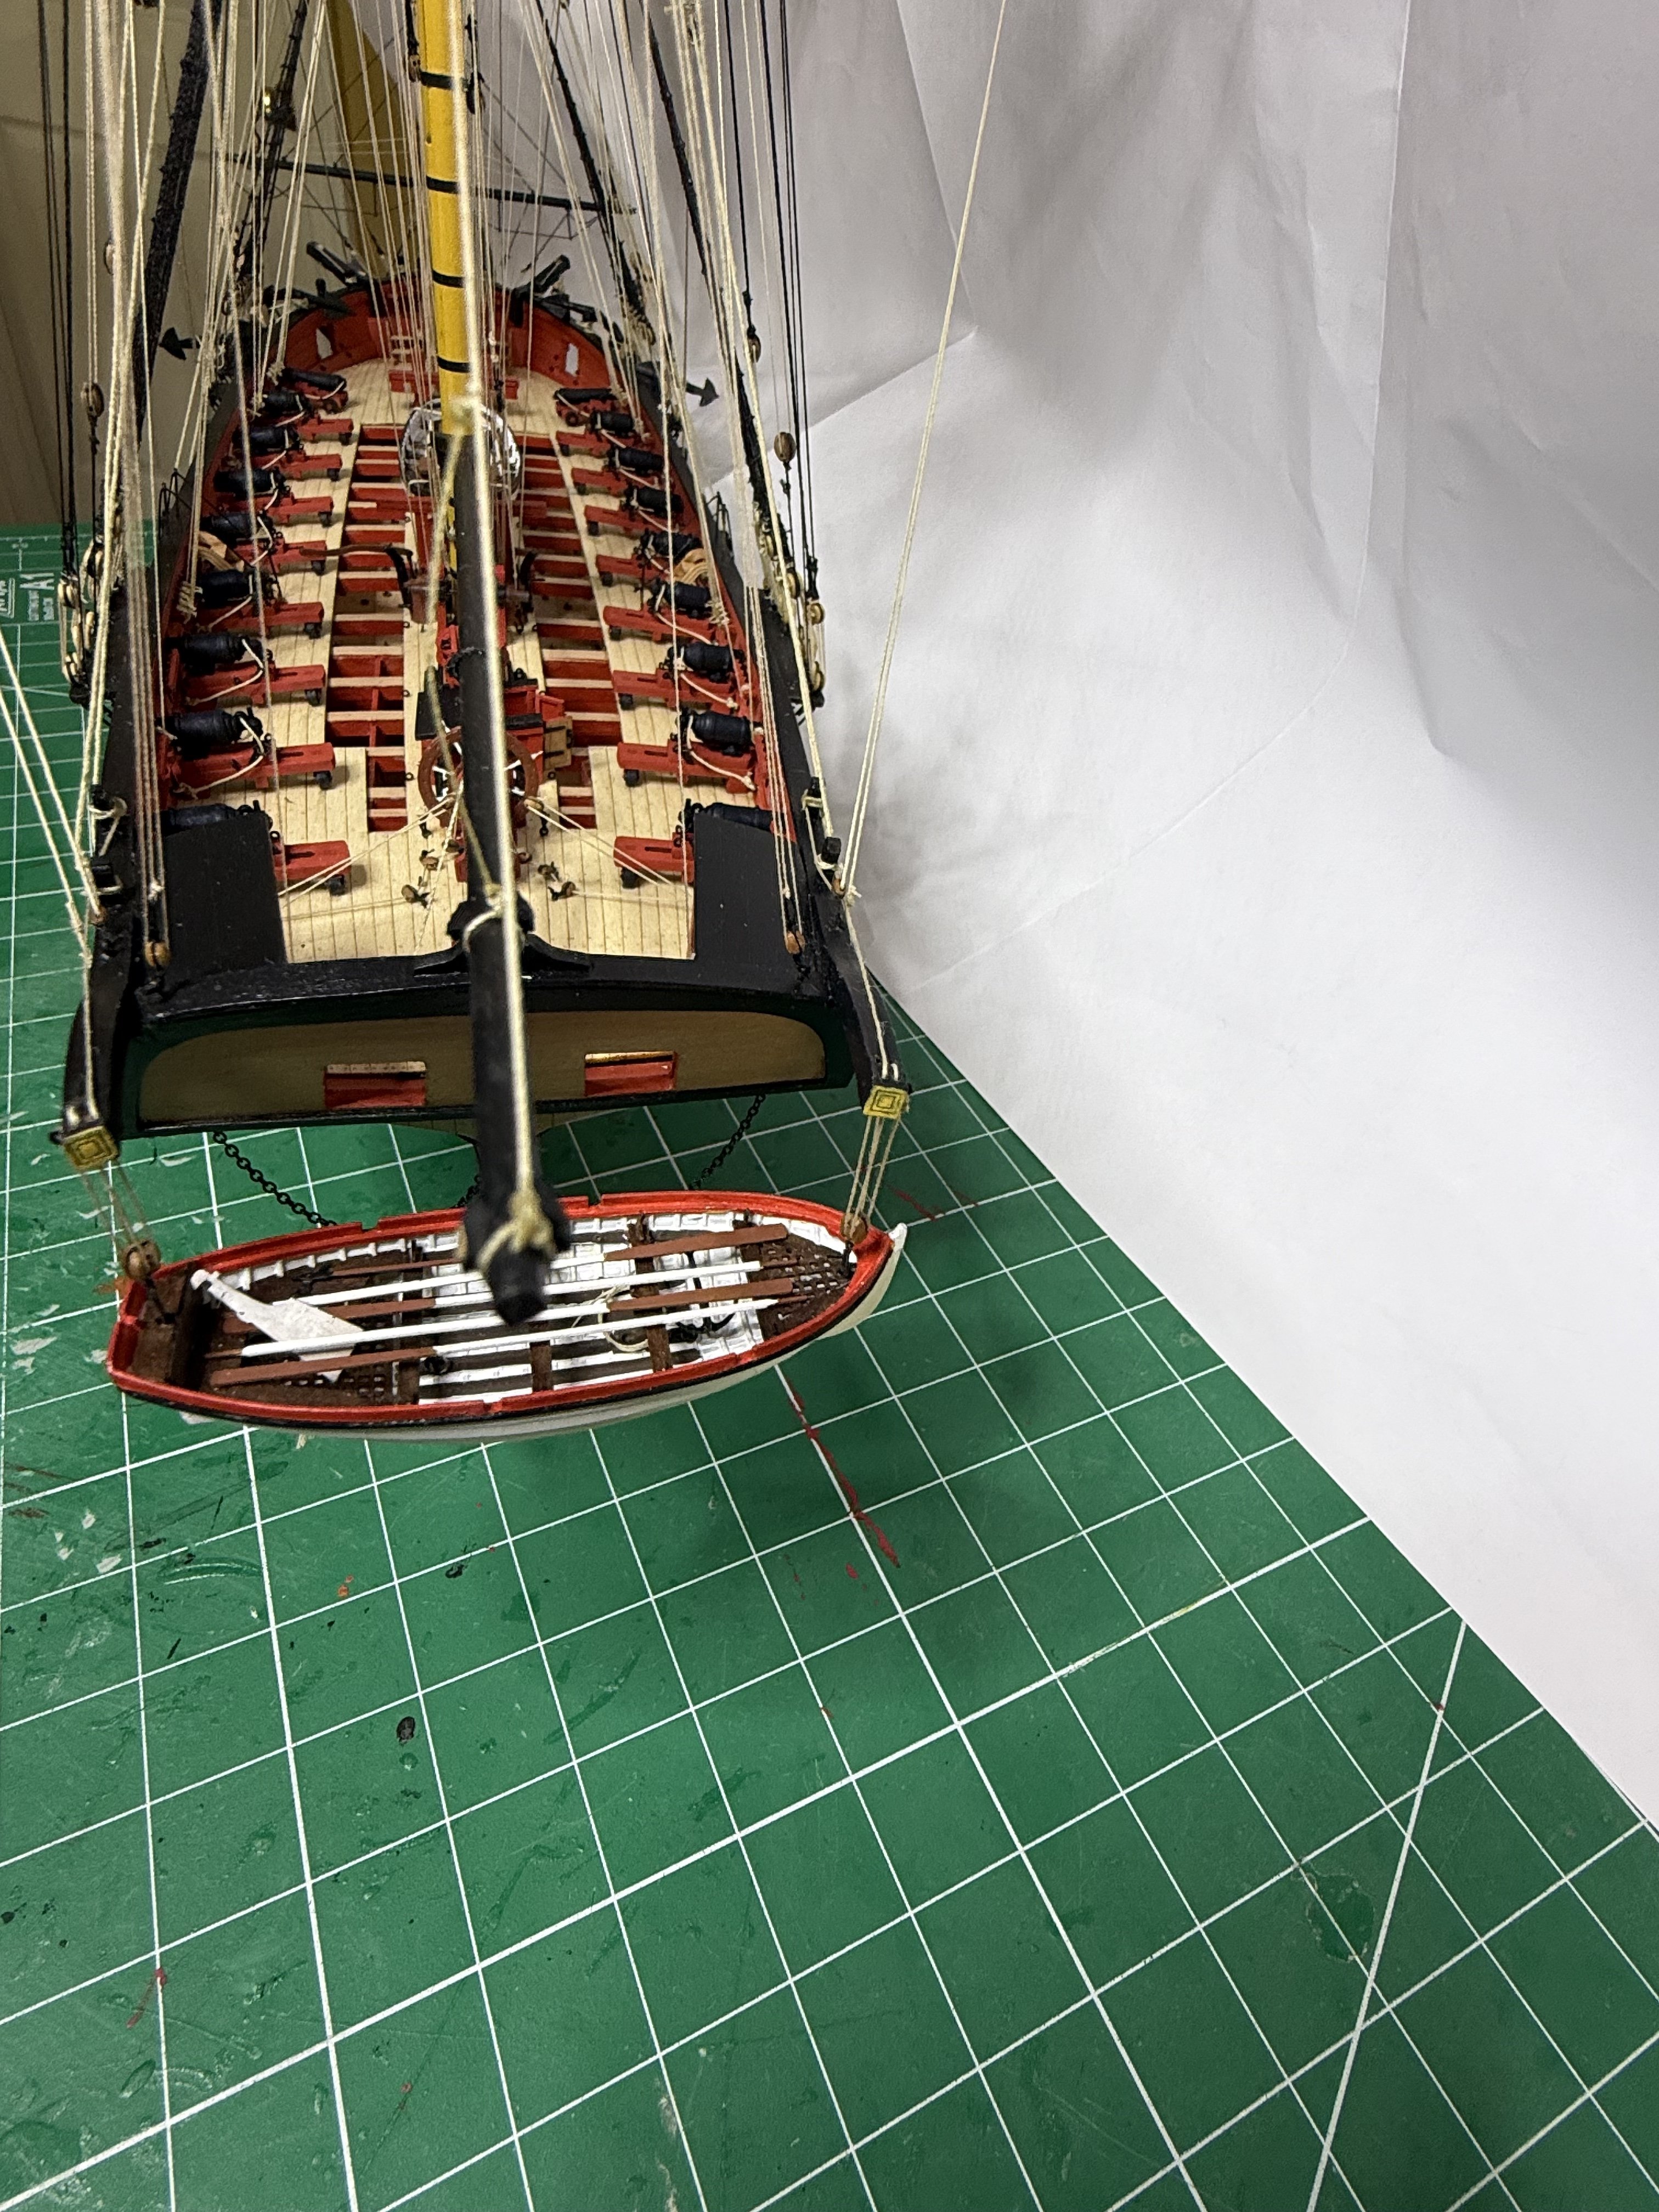
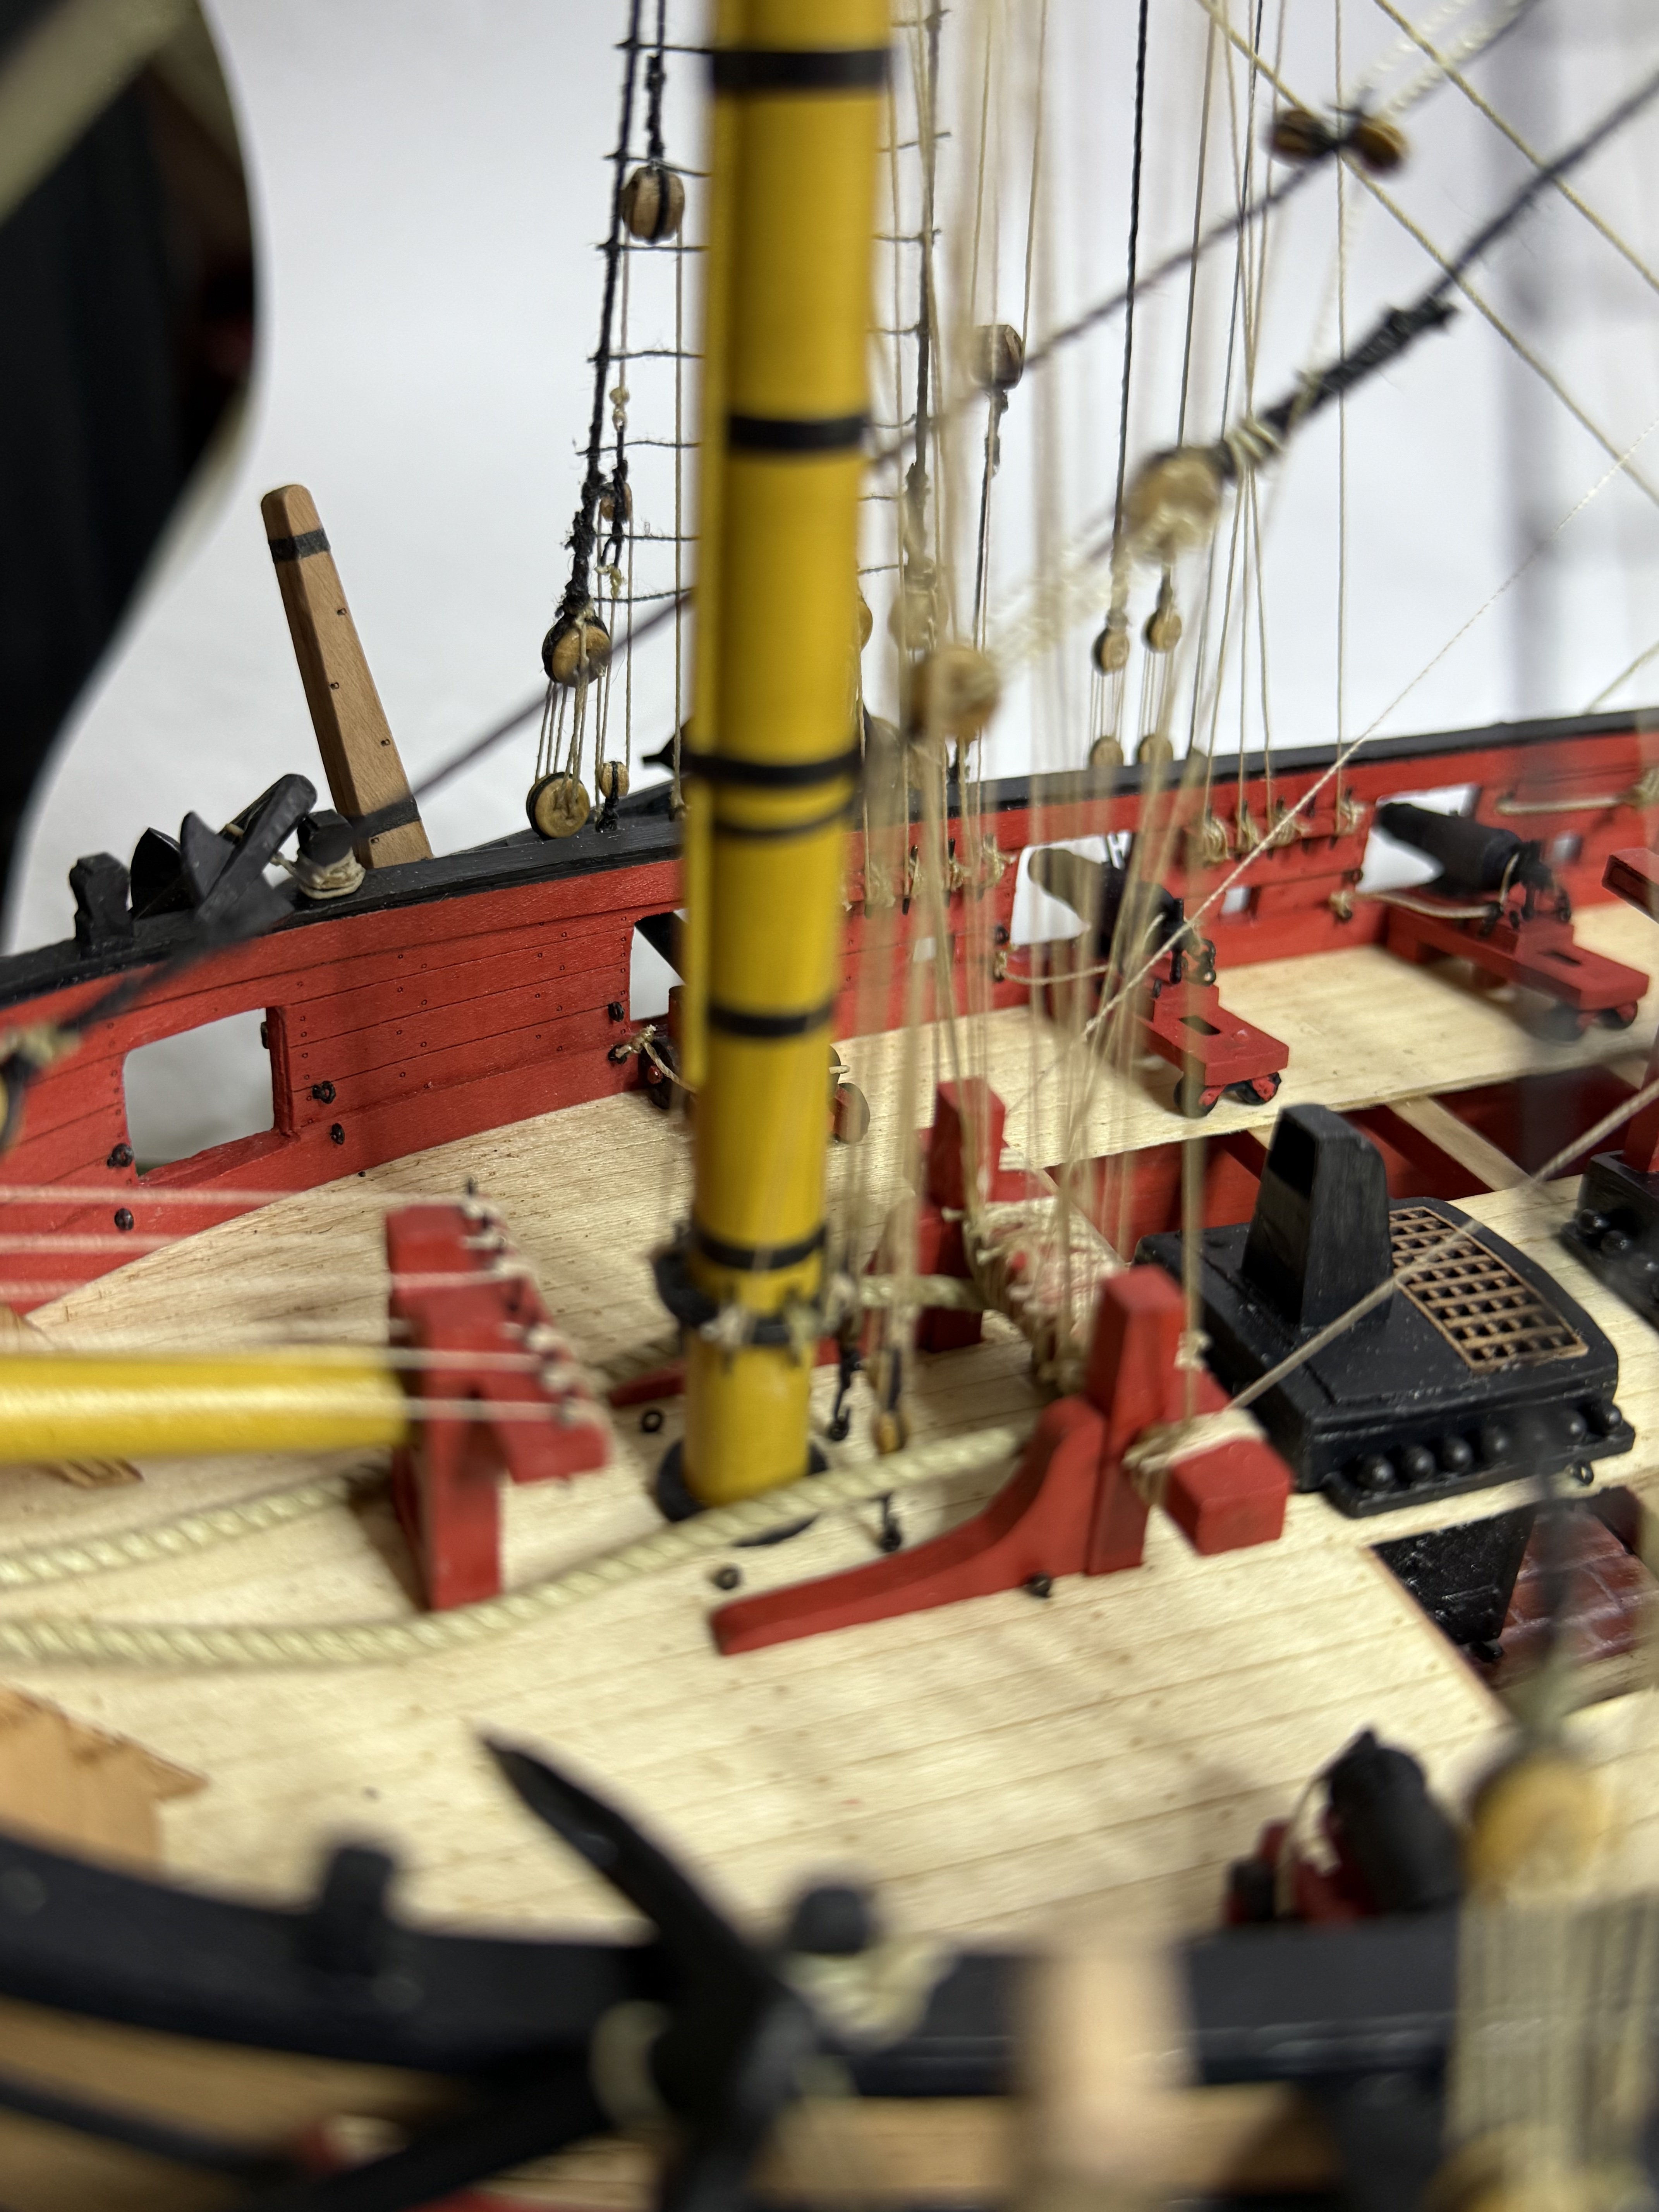
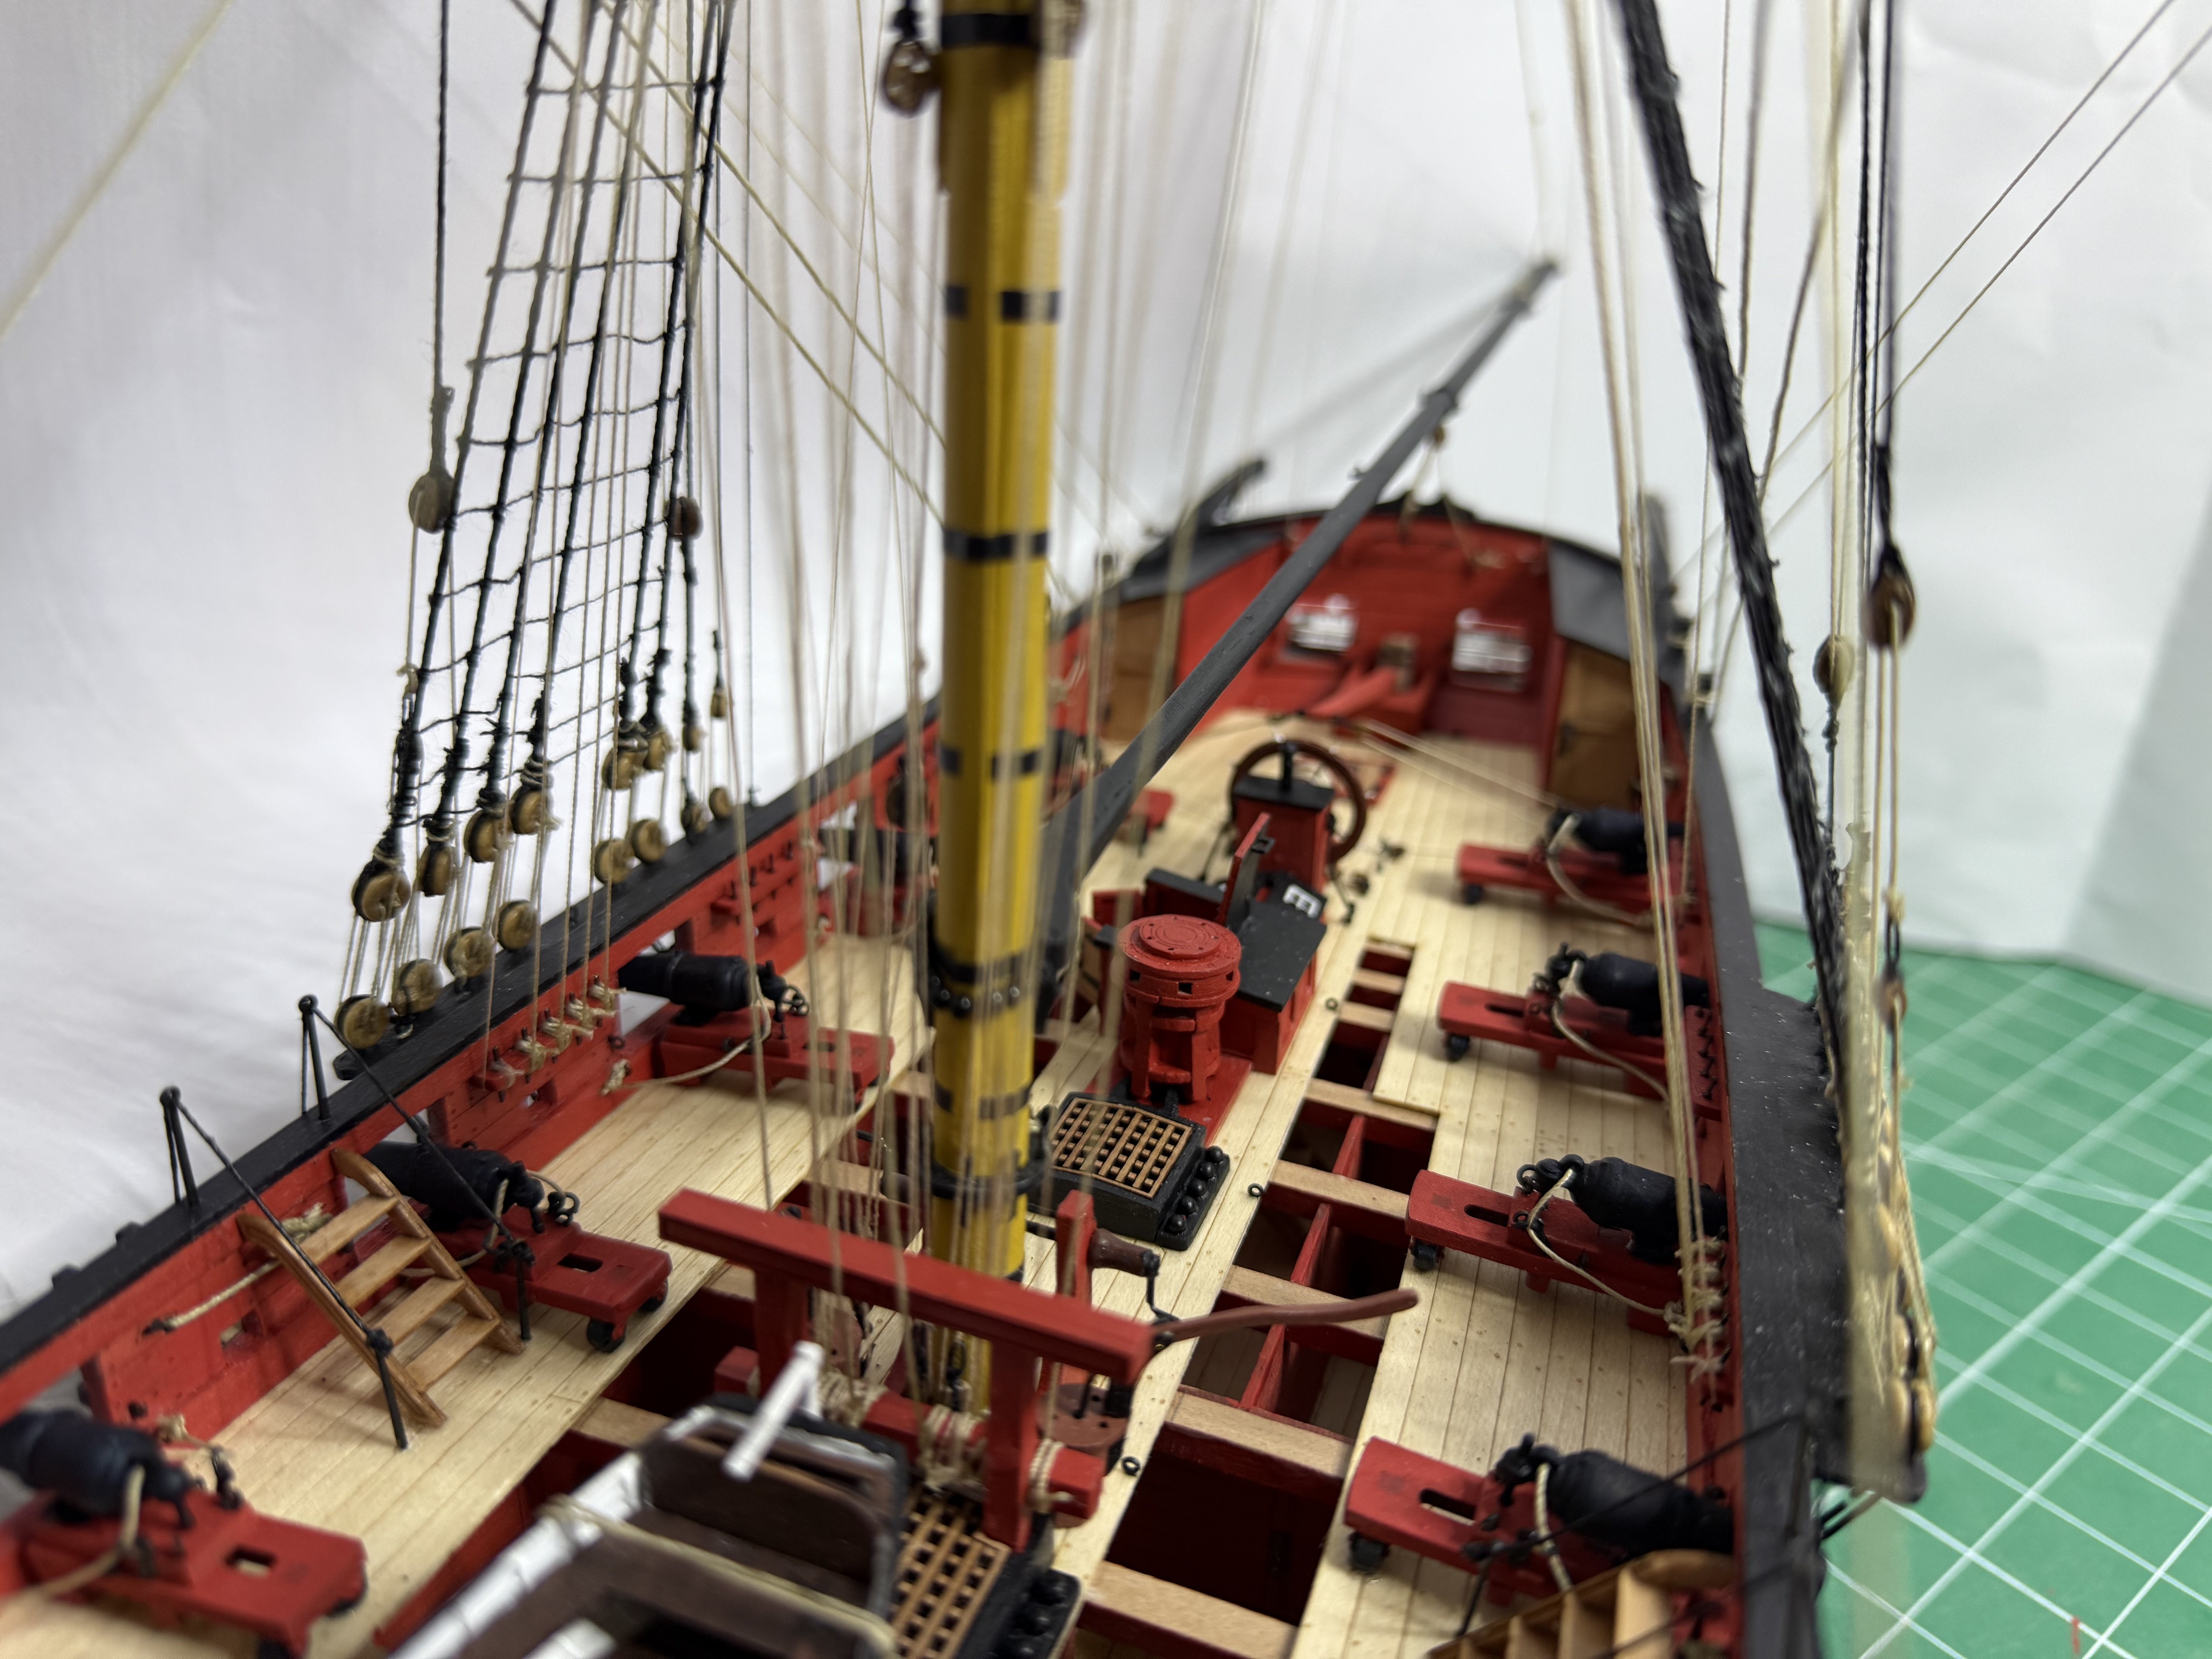
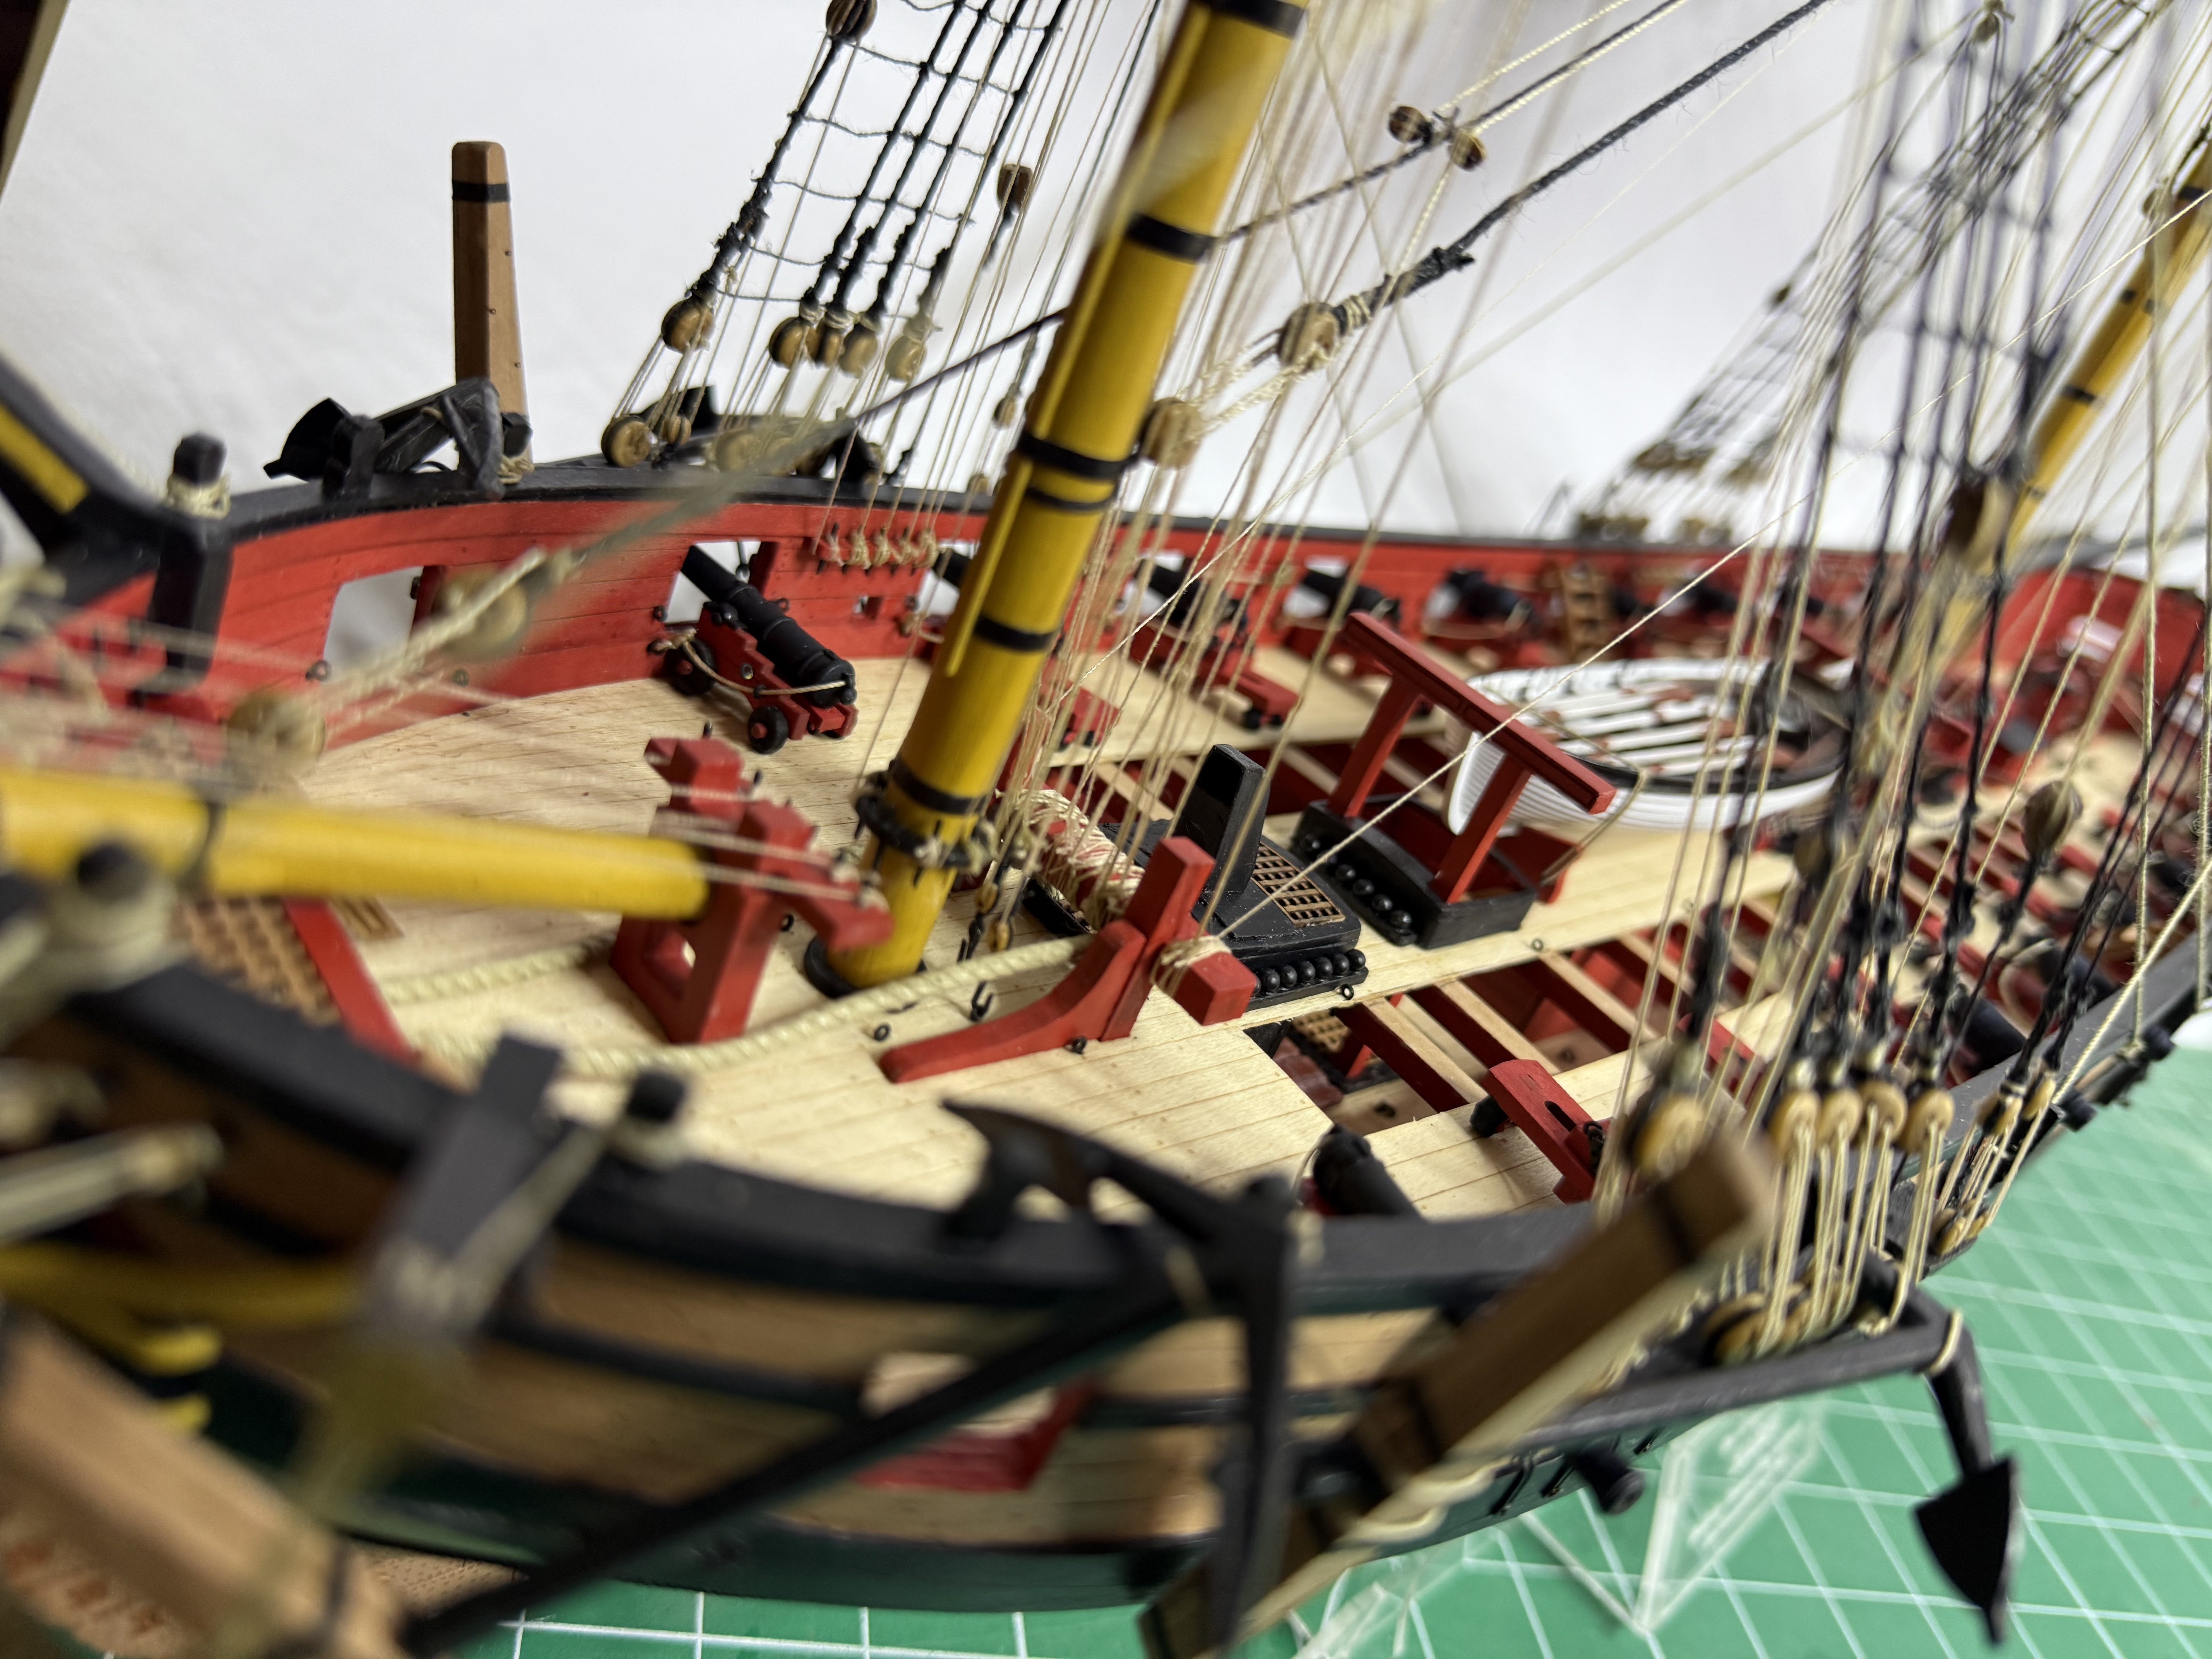
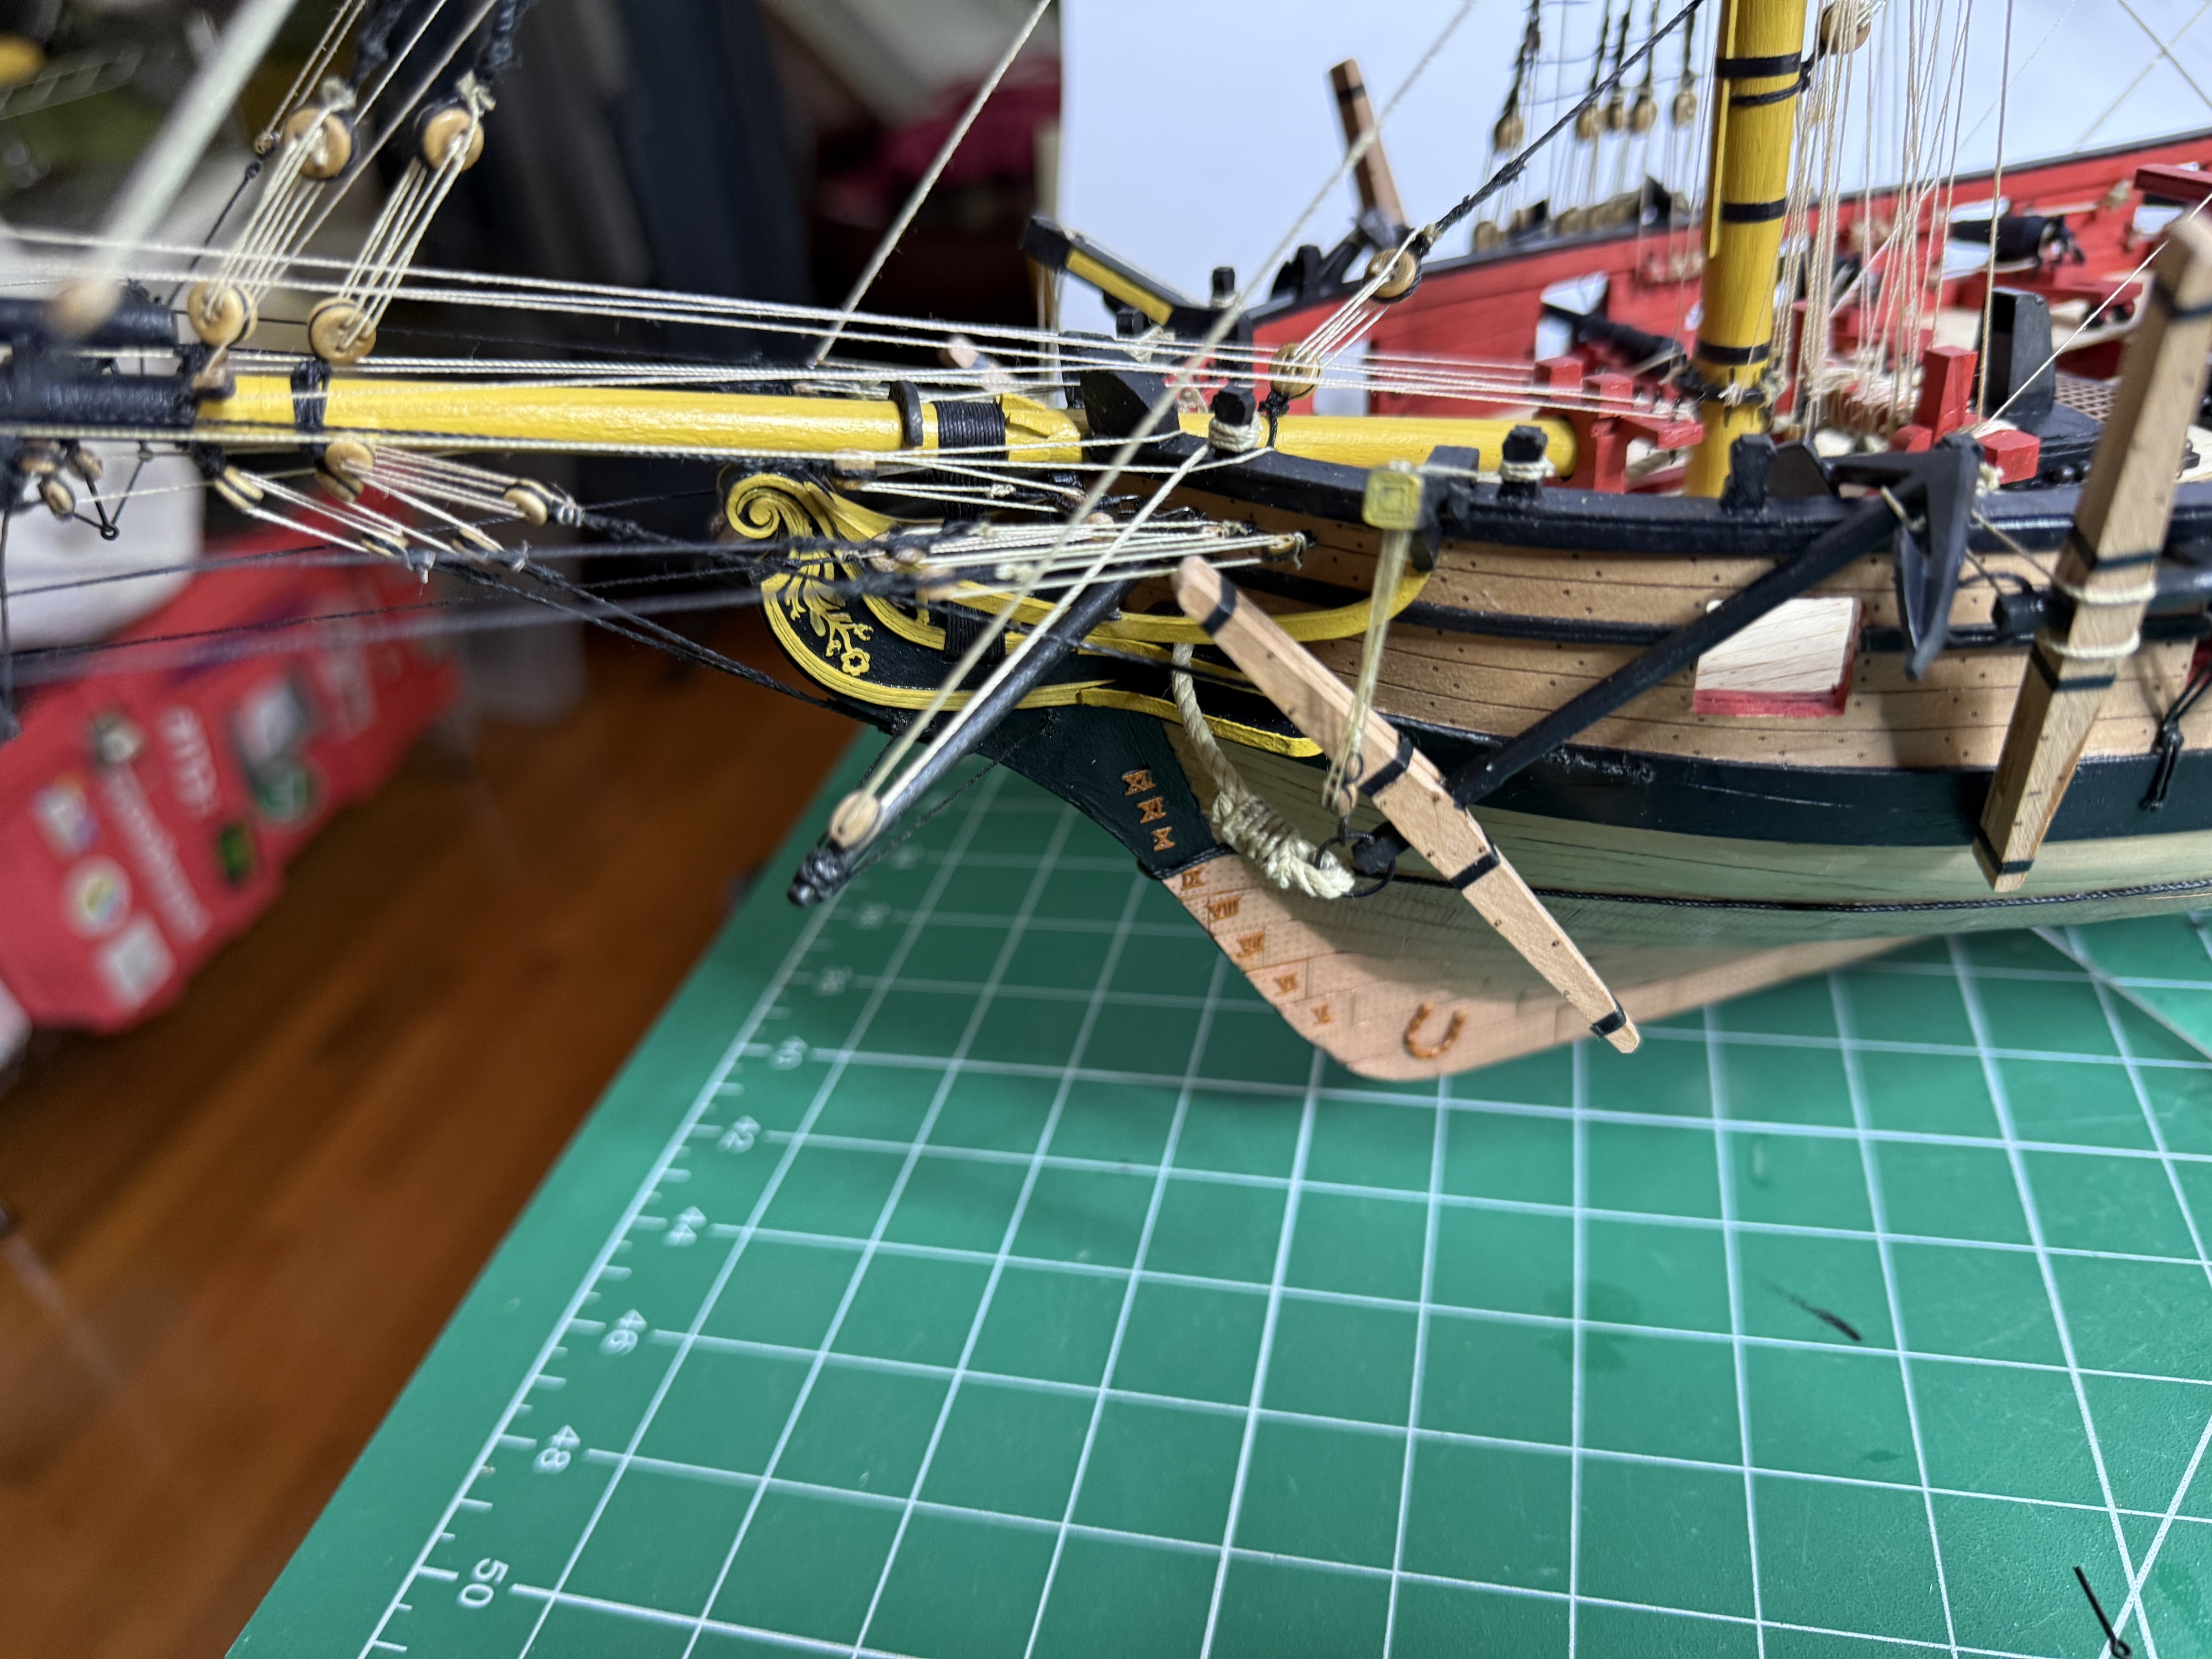
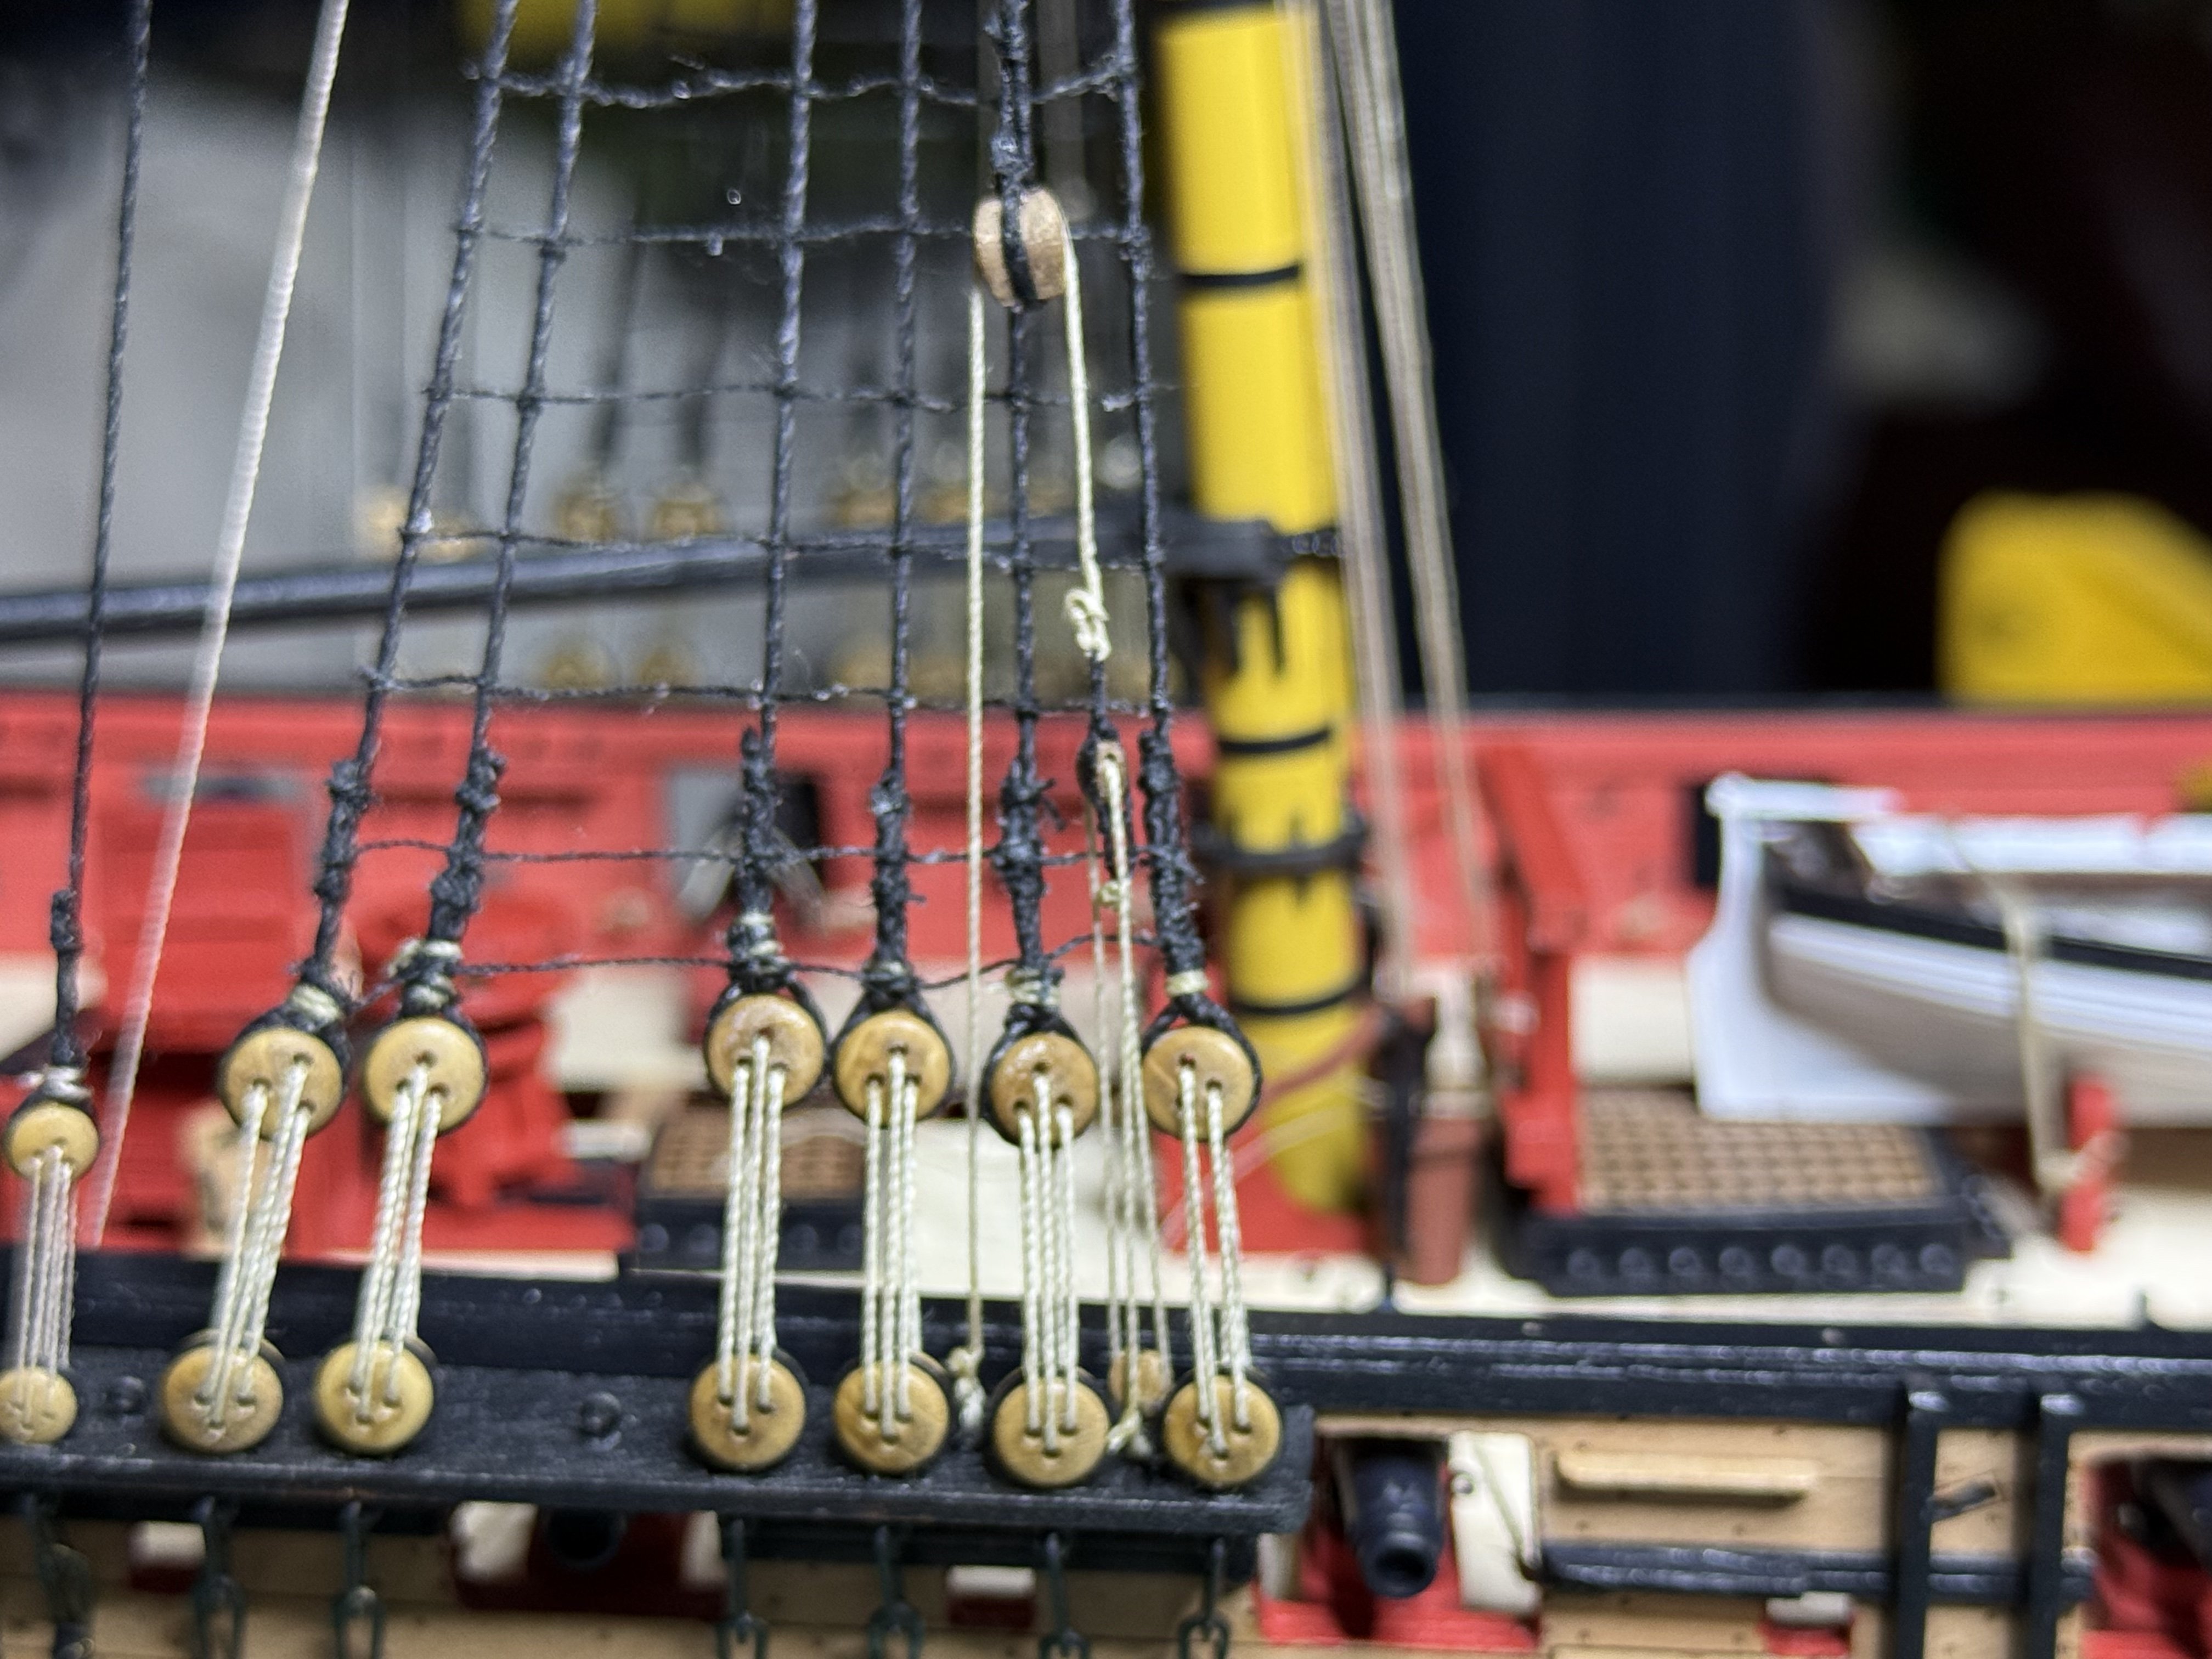
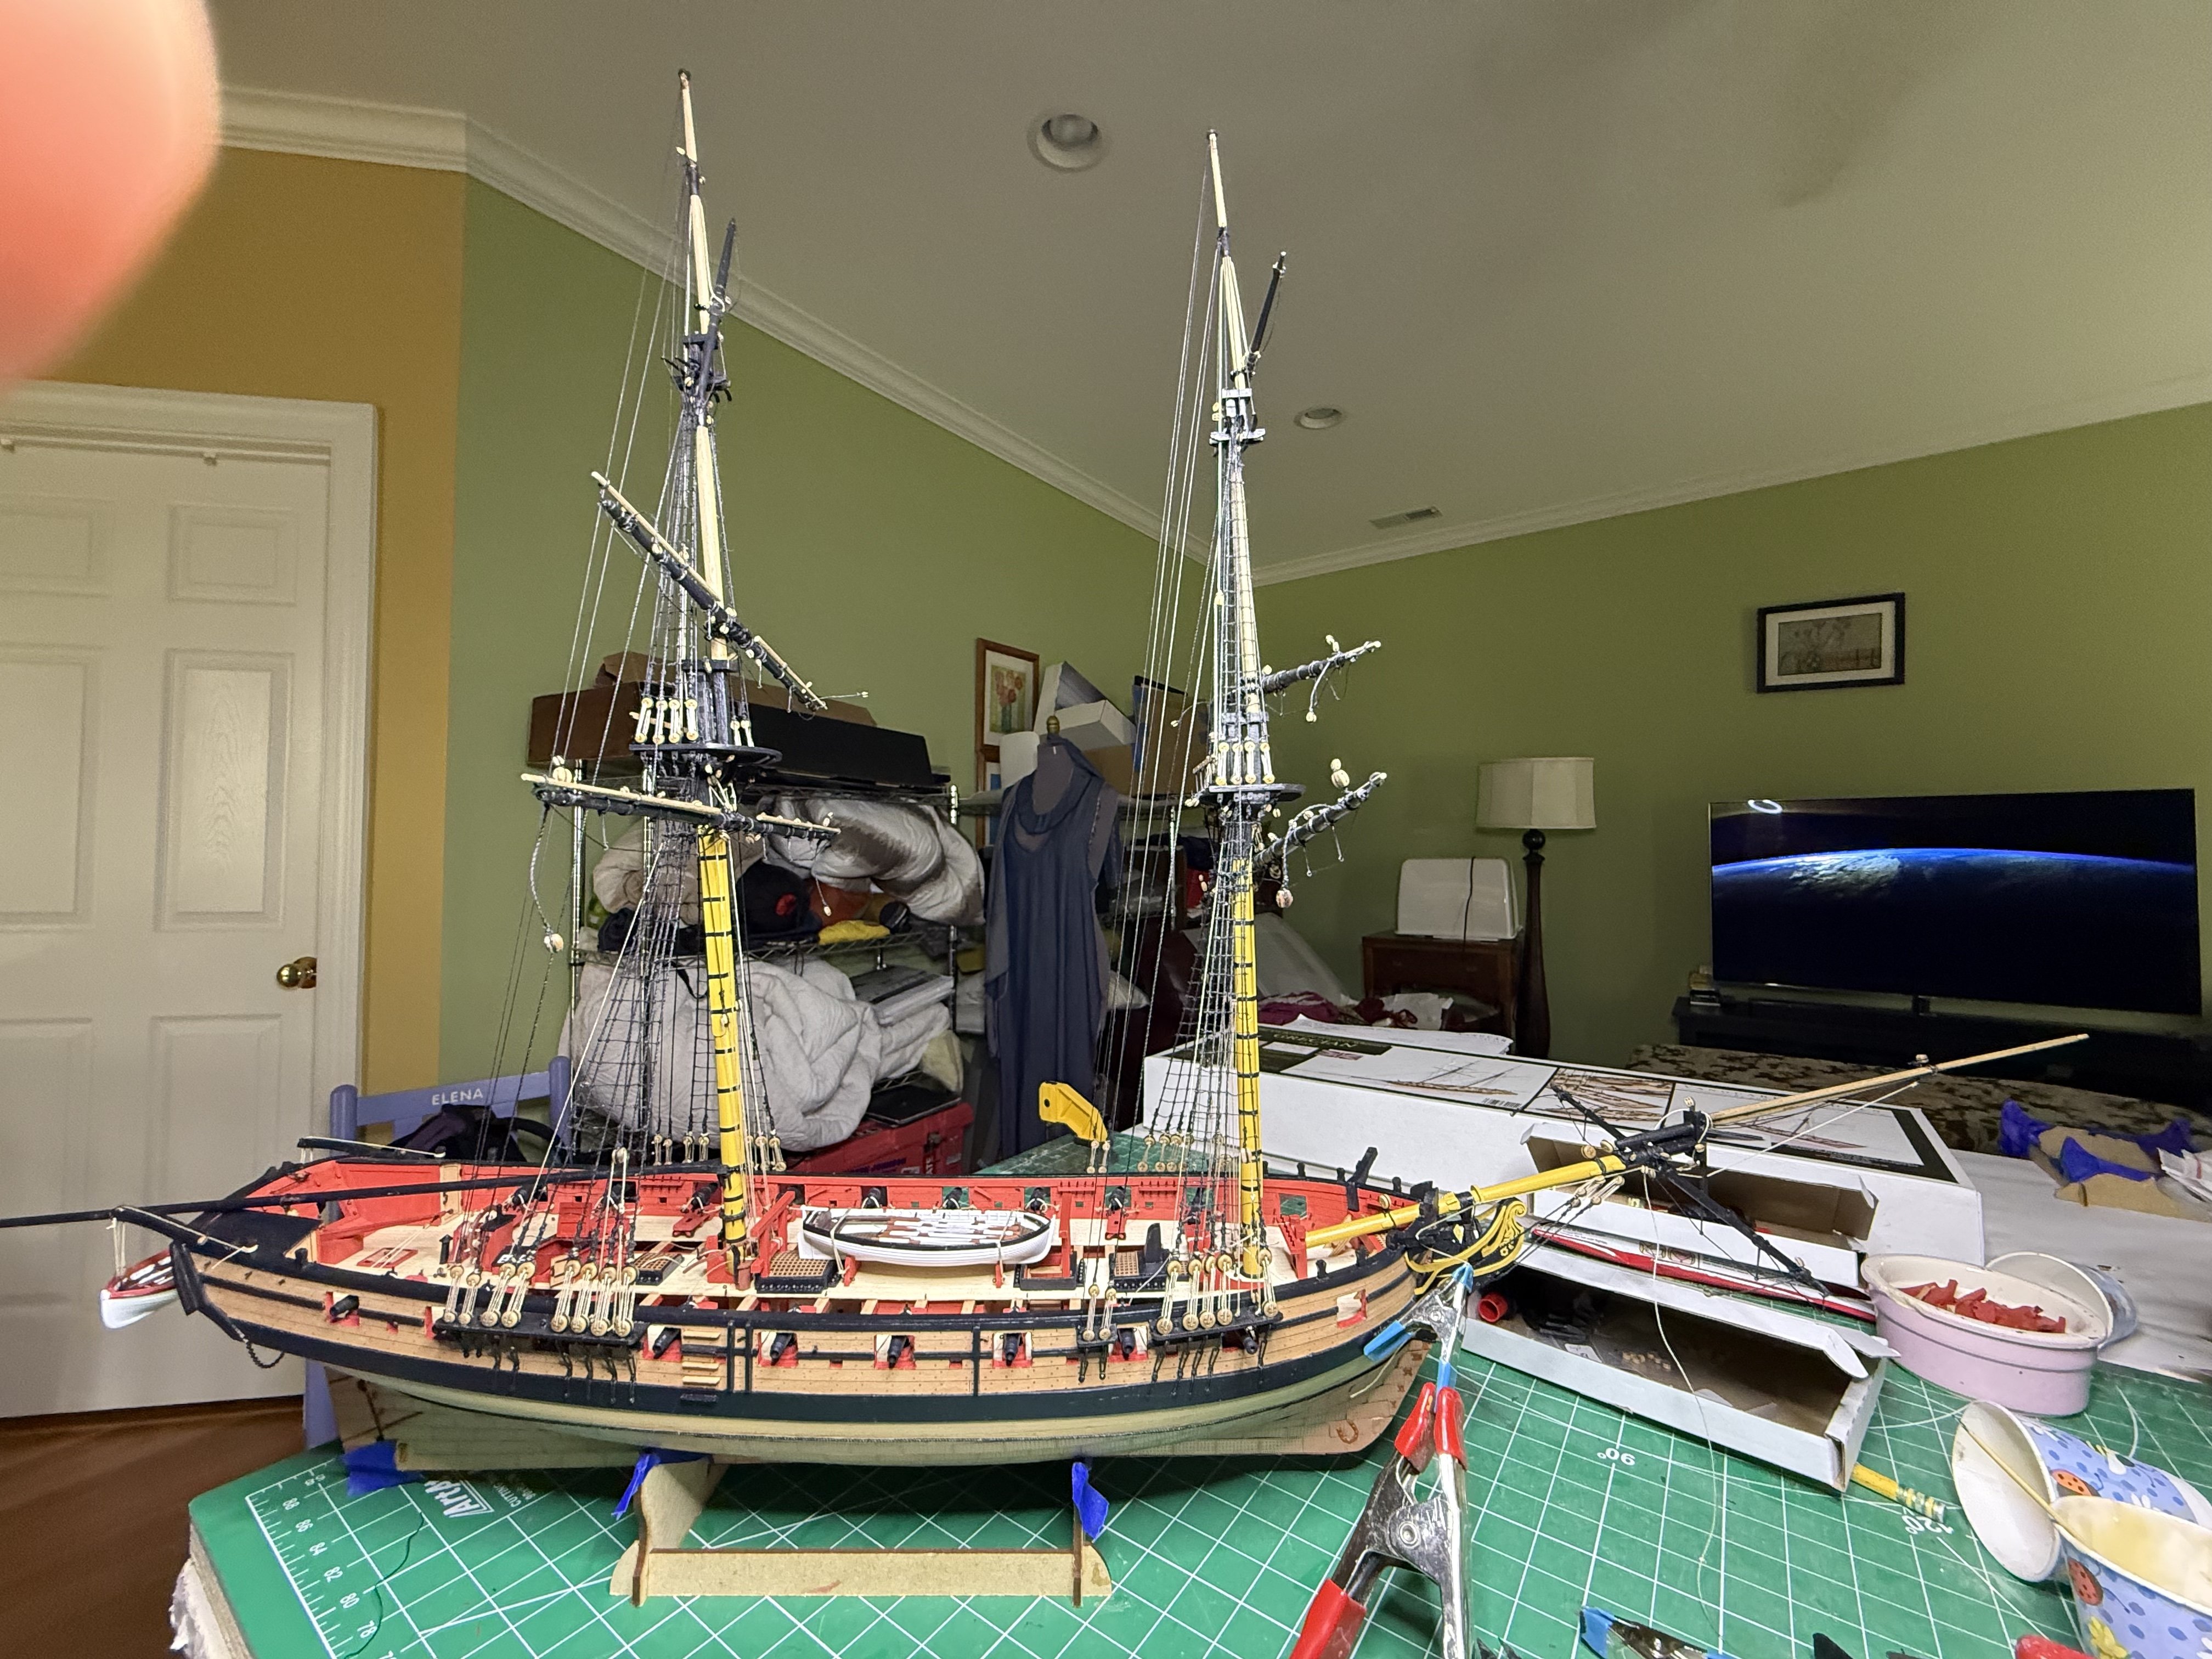
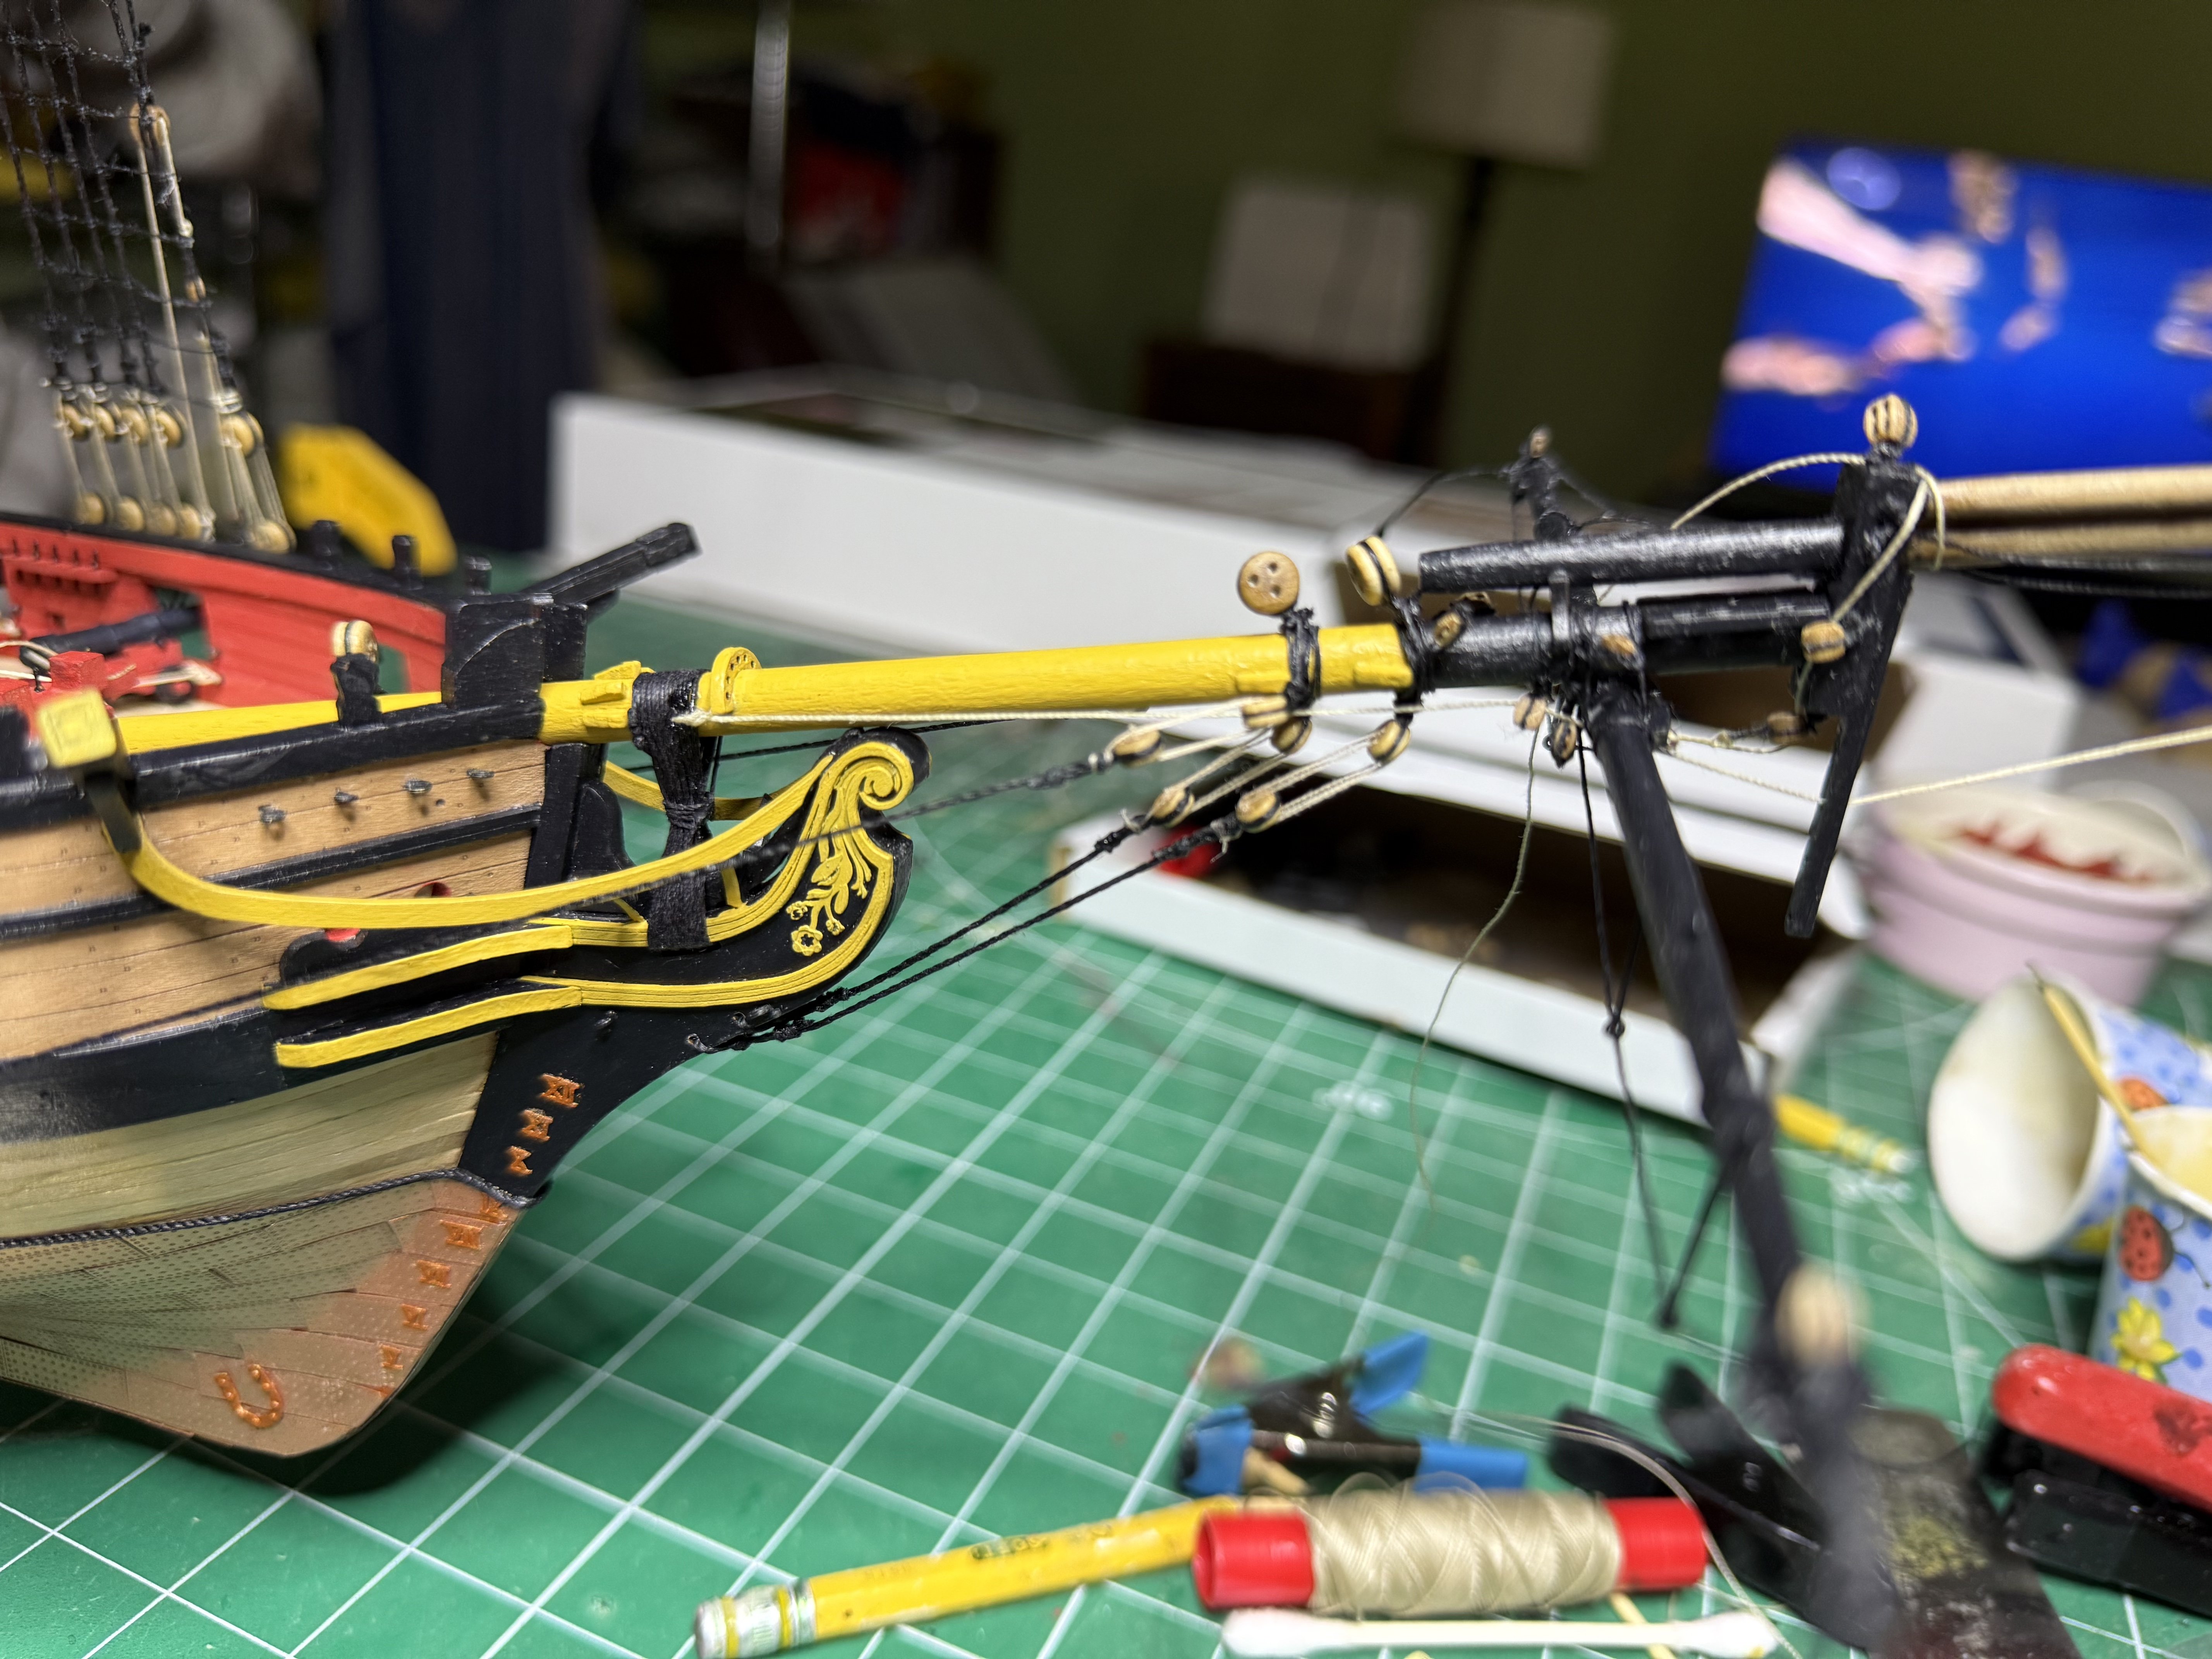
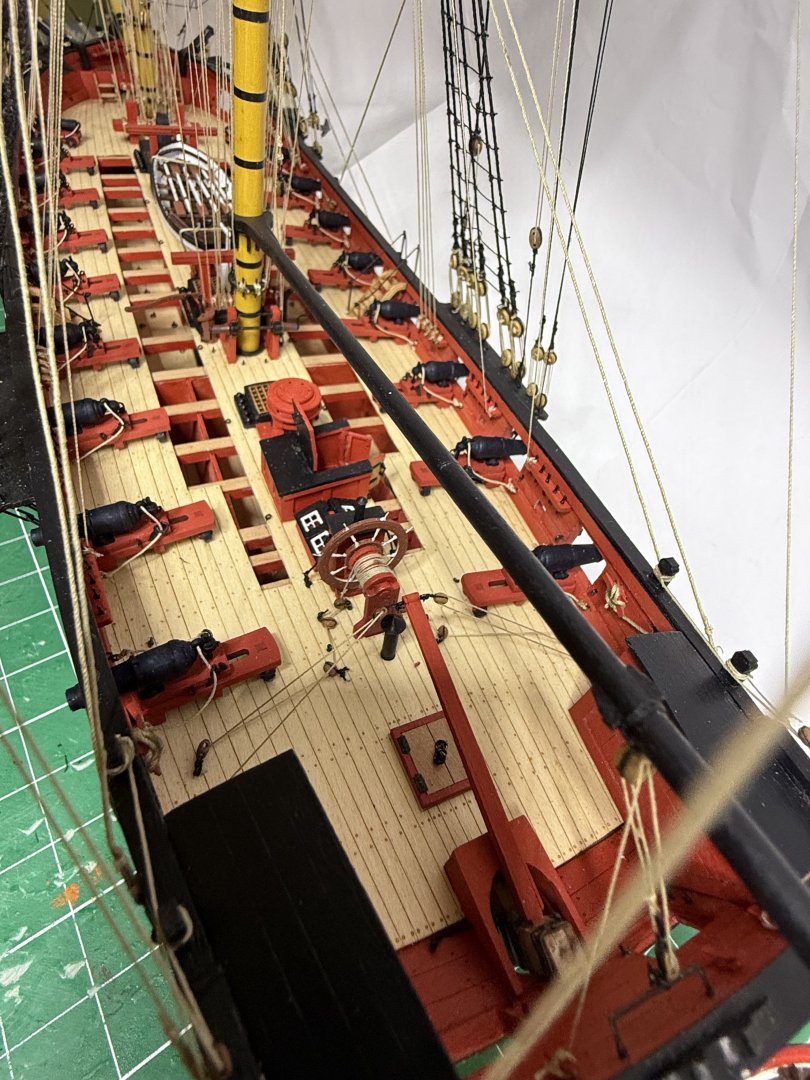
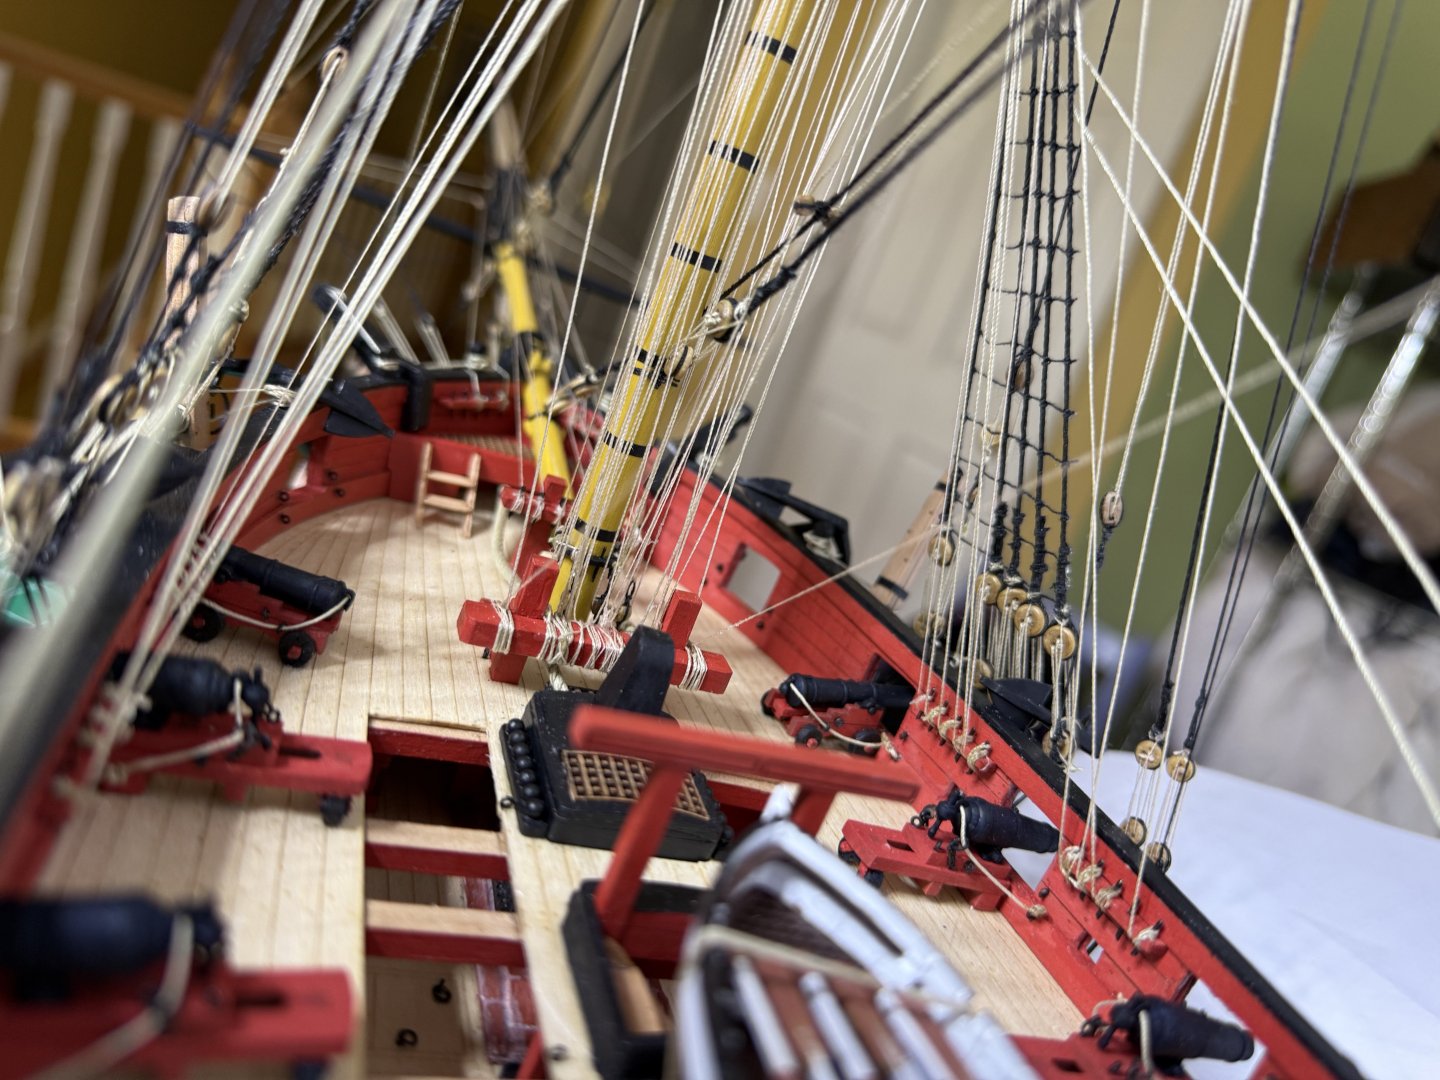
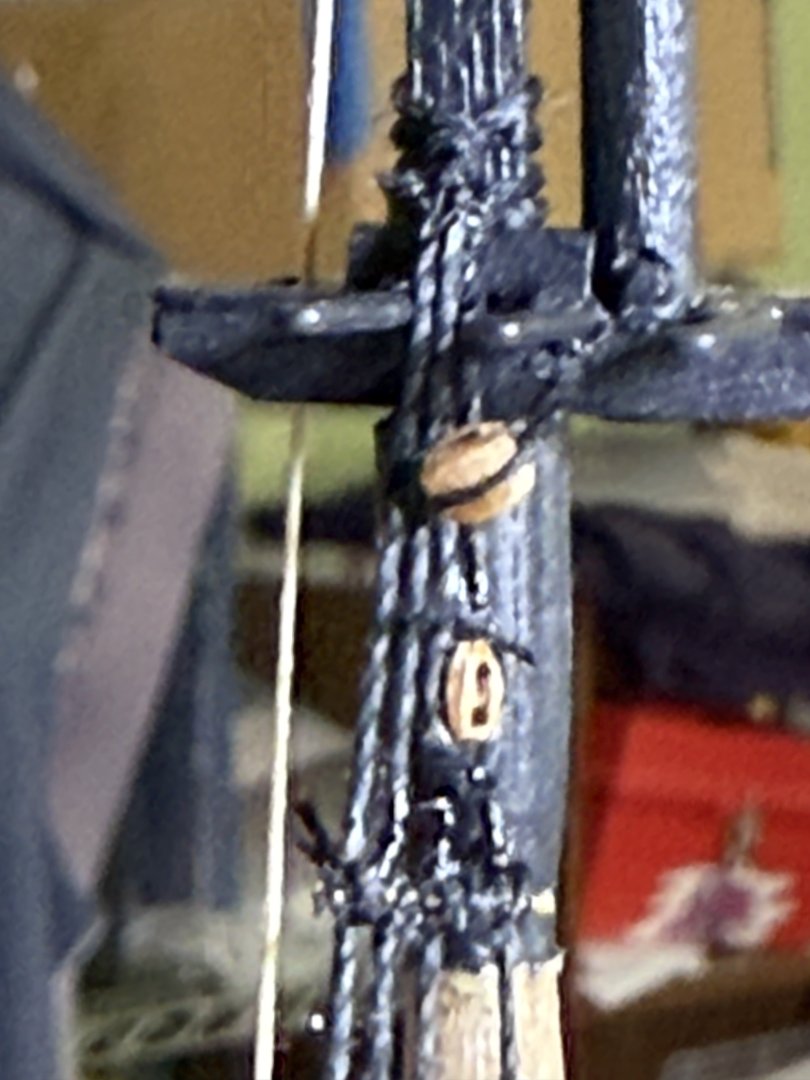
Spent the day placing in numerous eyebolts then the shot garlands, cleats and belaying pins/racks


- 52 replies
-
- 8
-

-
- Grecian
- Vanguard Models
- (and 1 more)
-
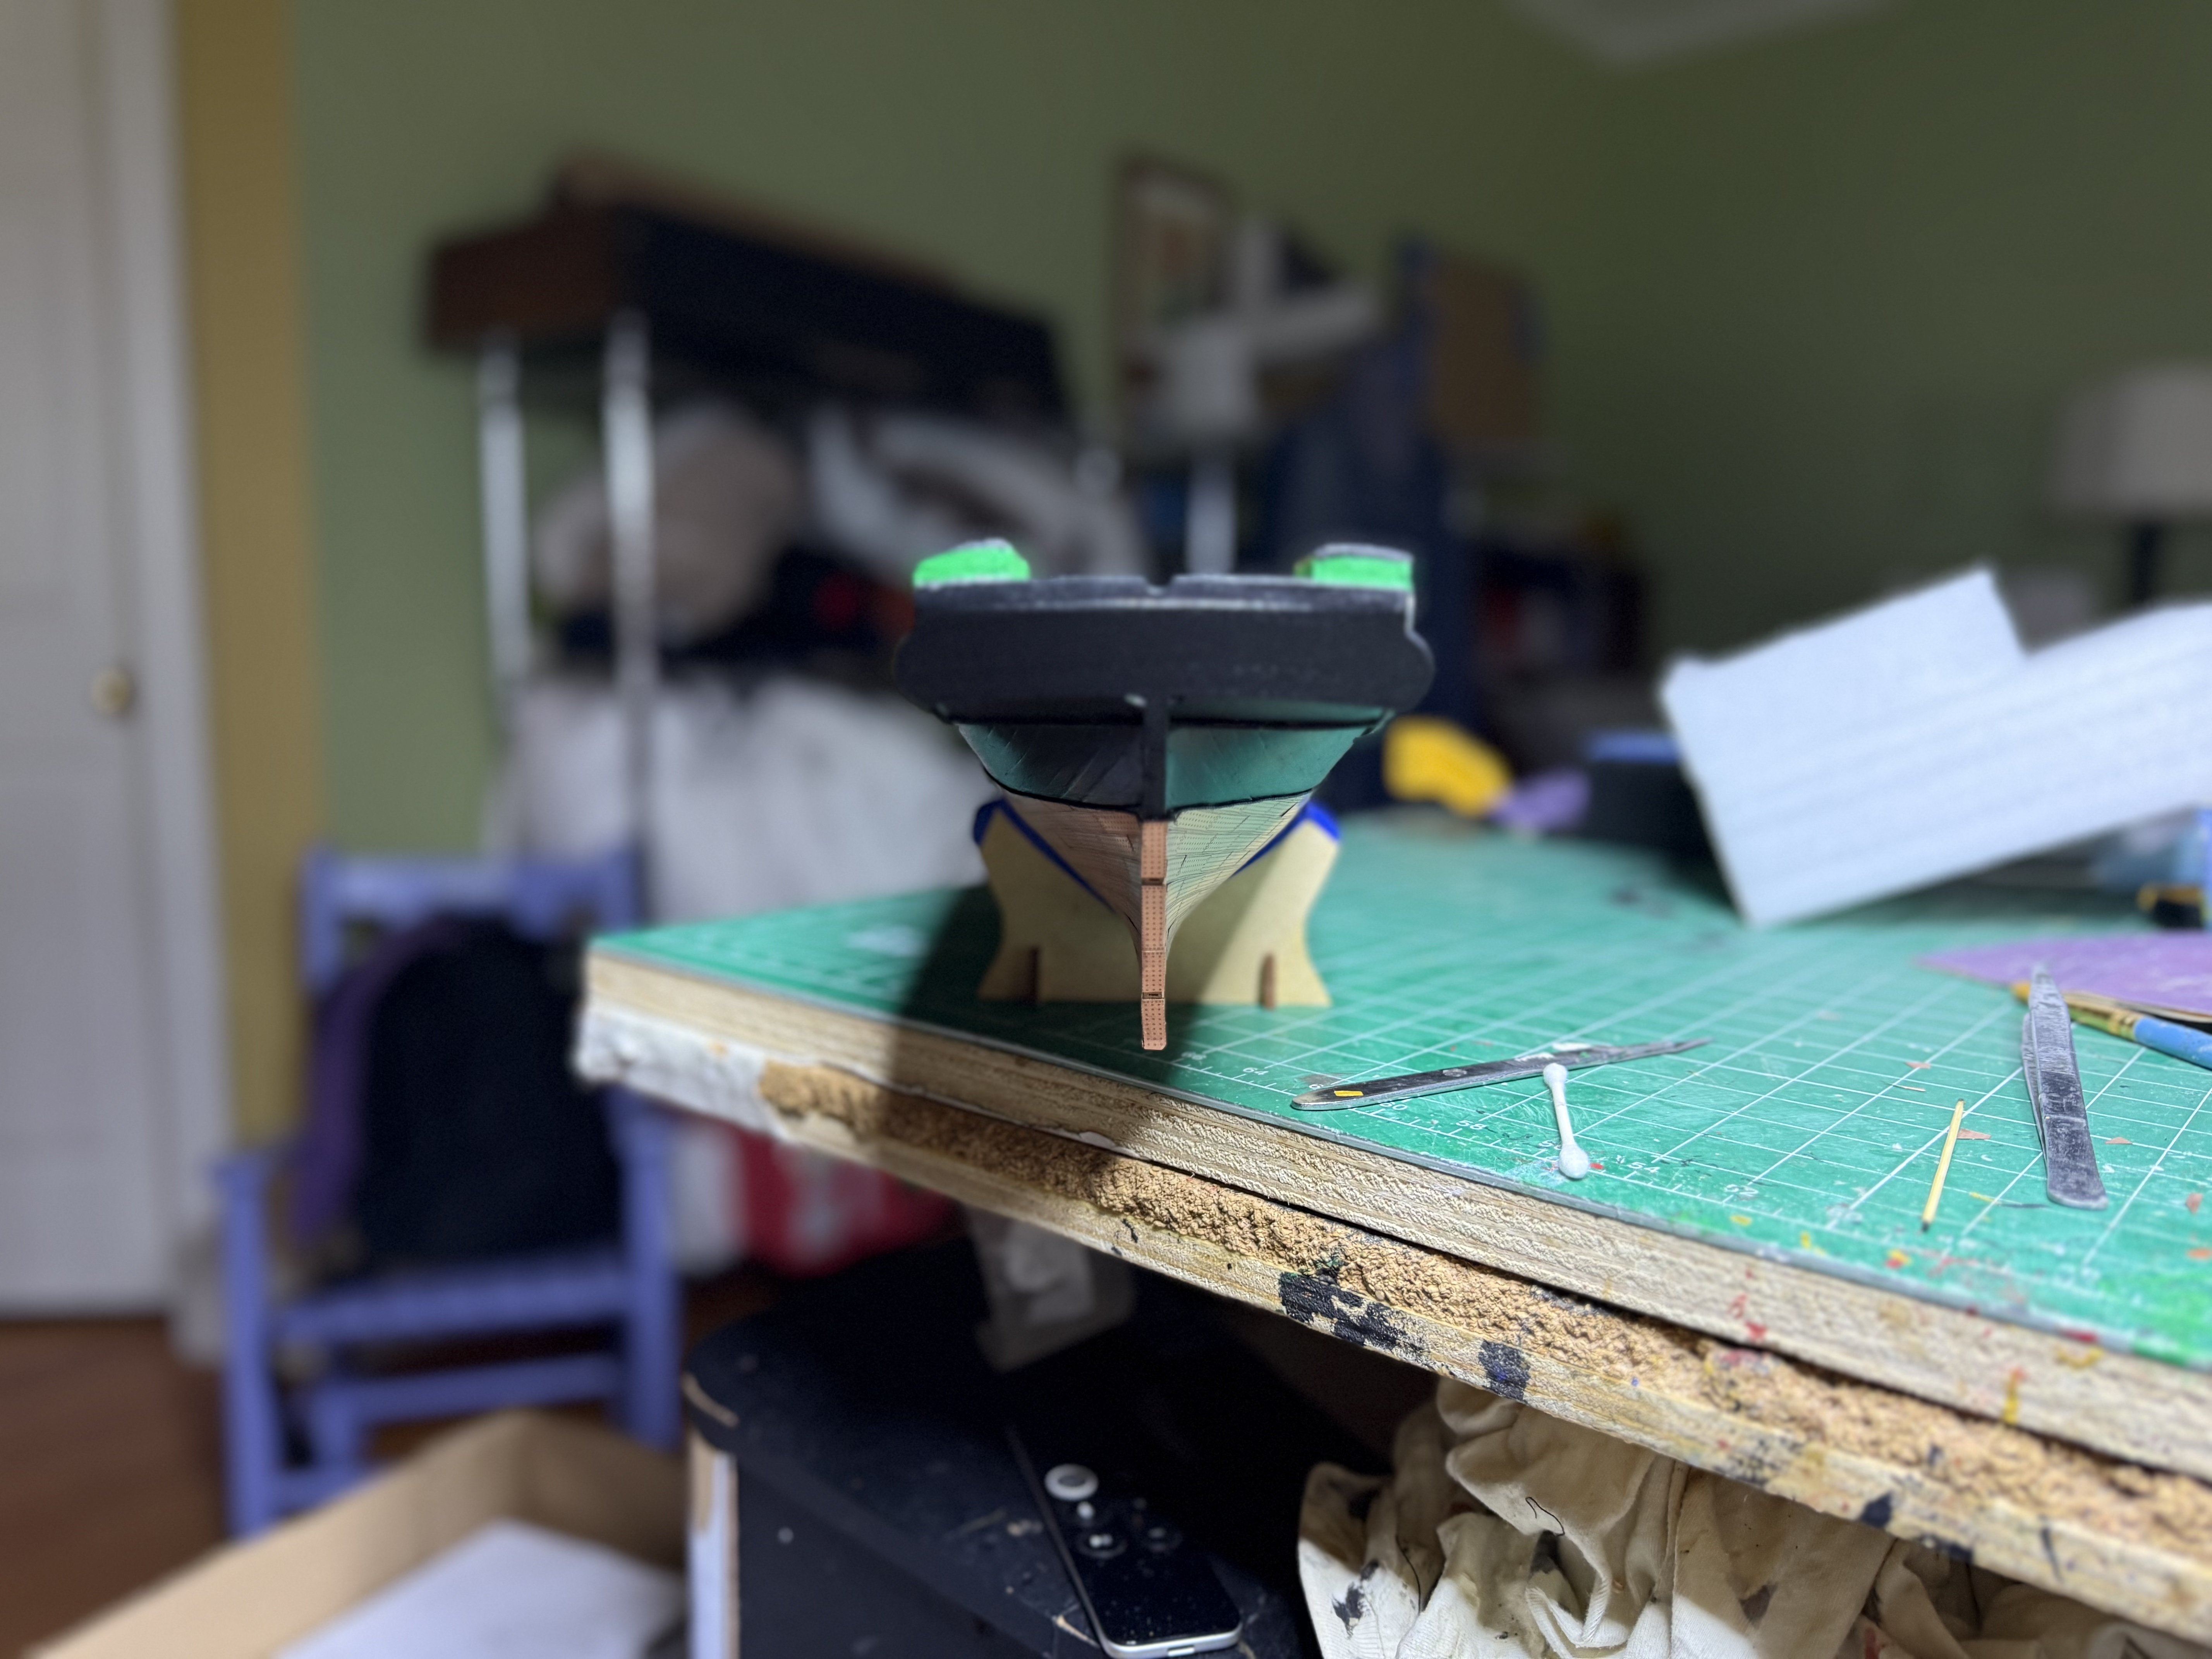
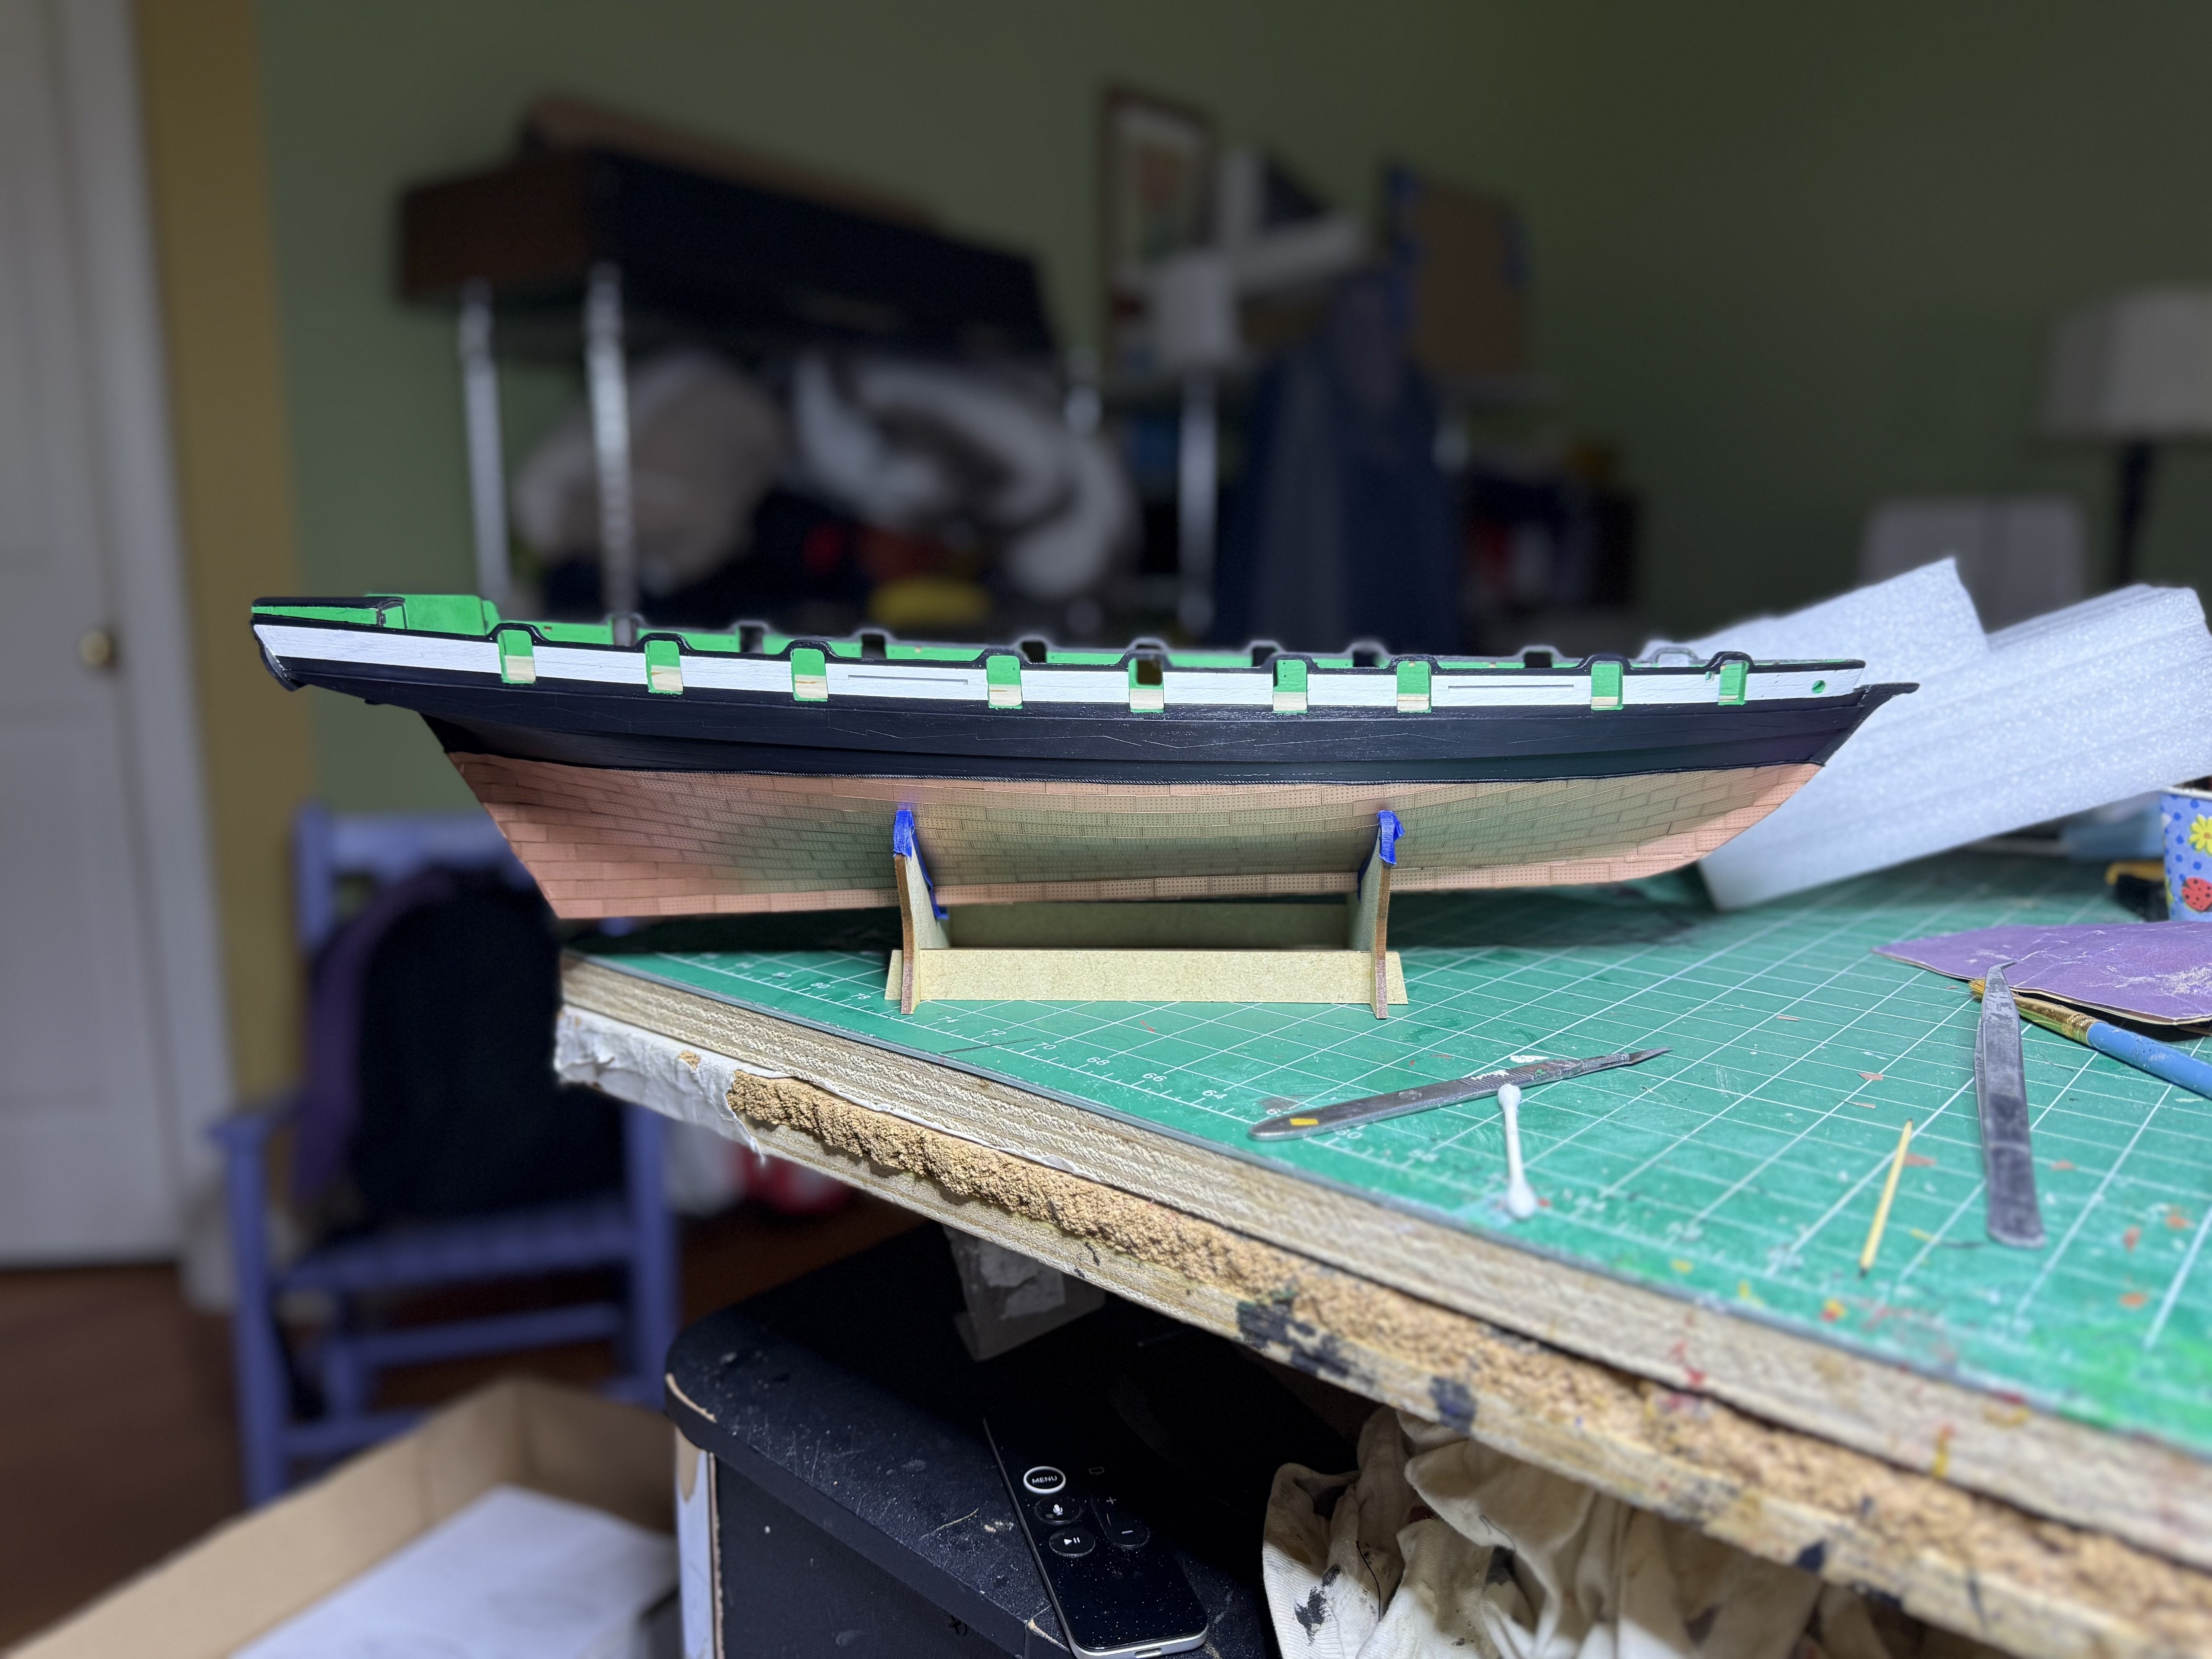
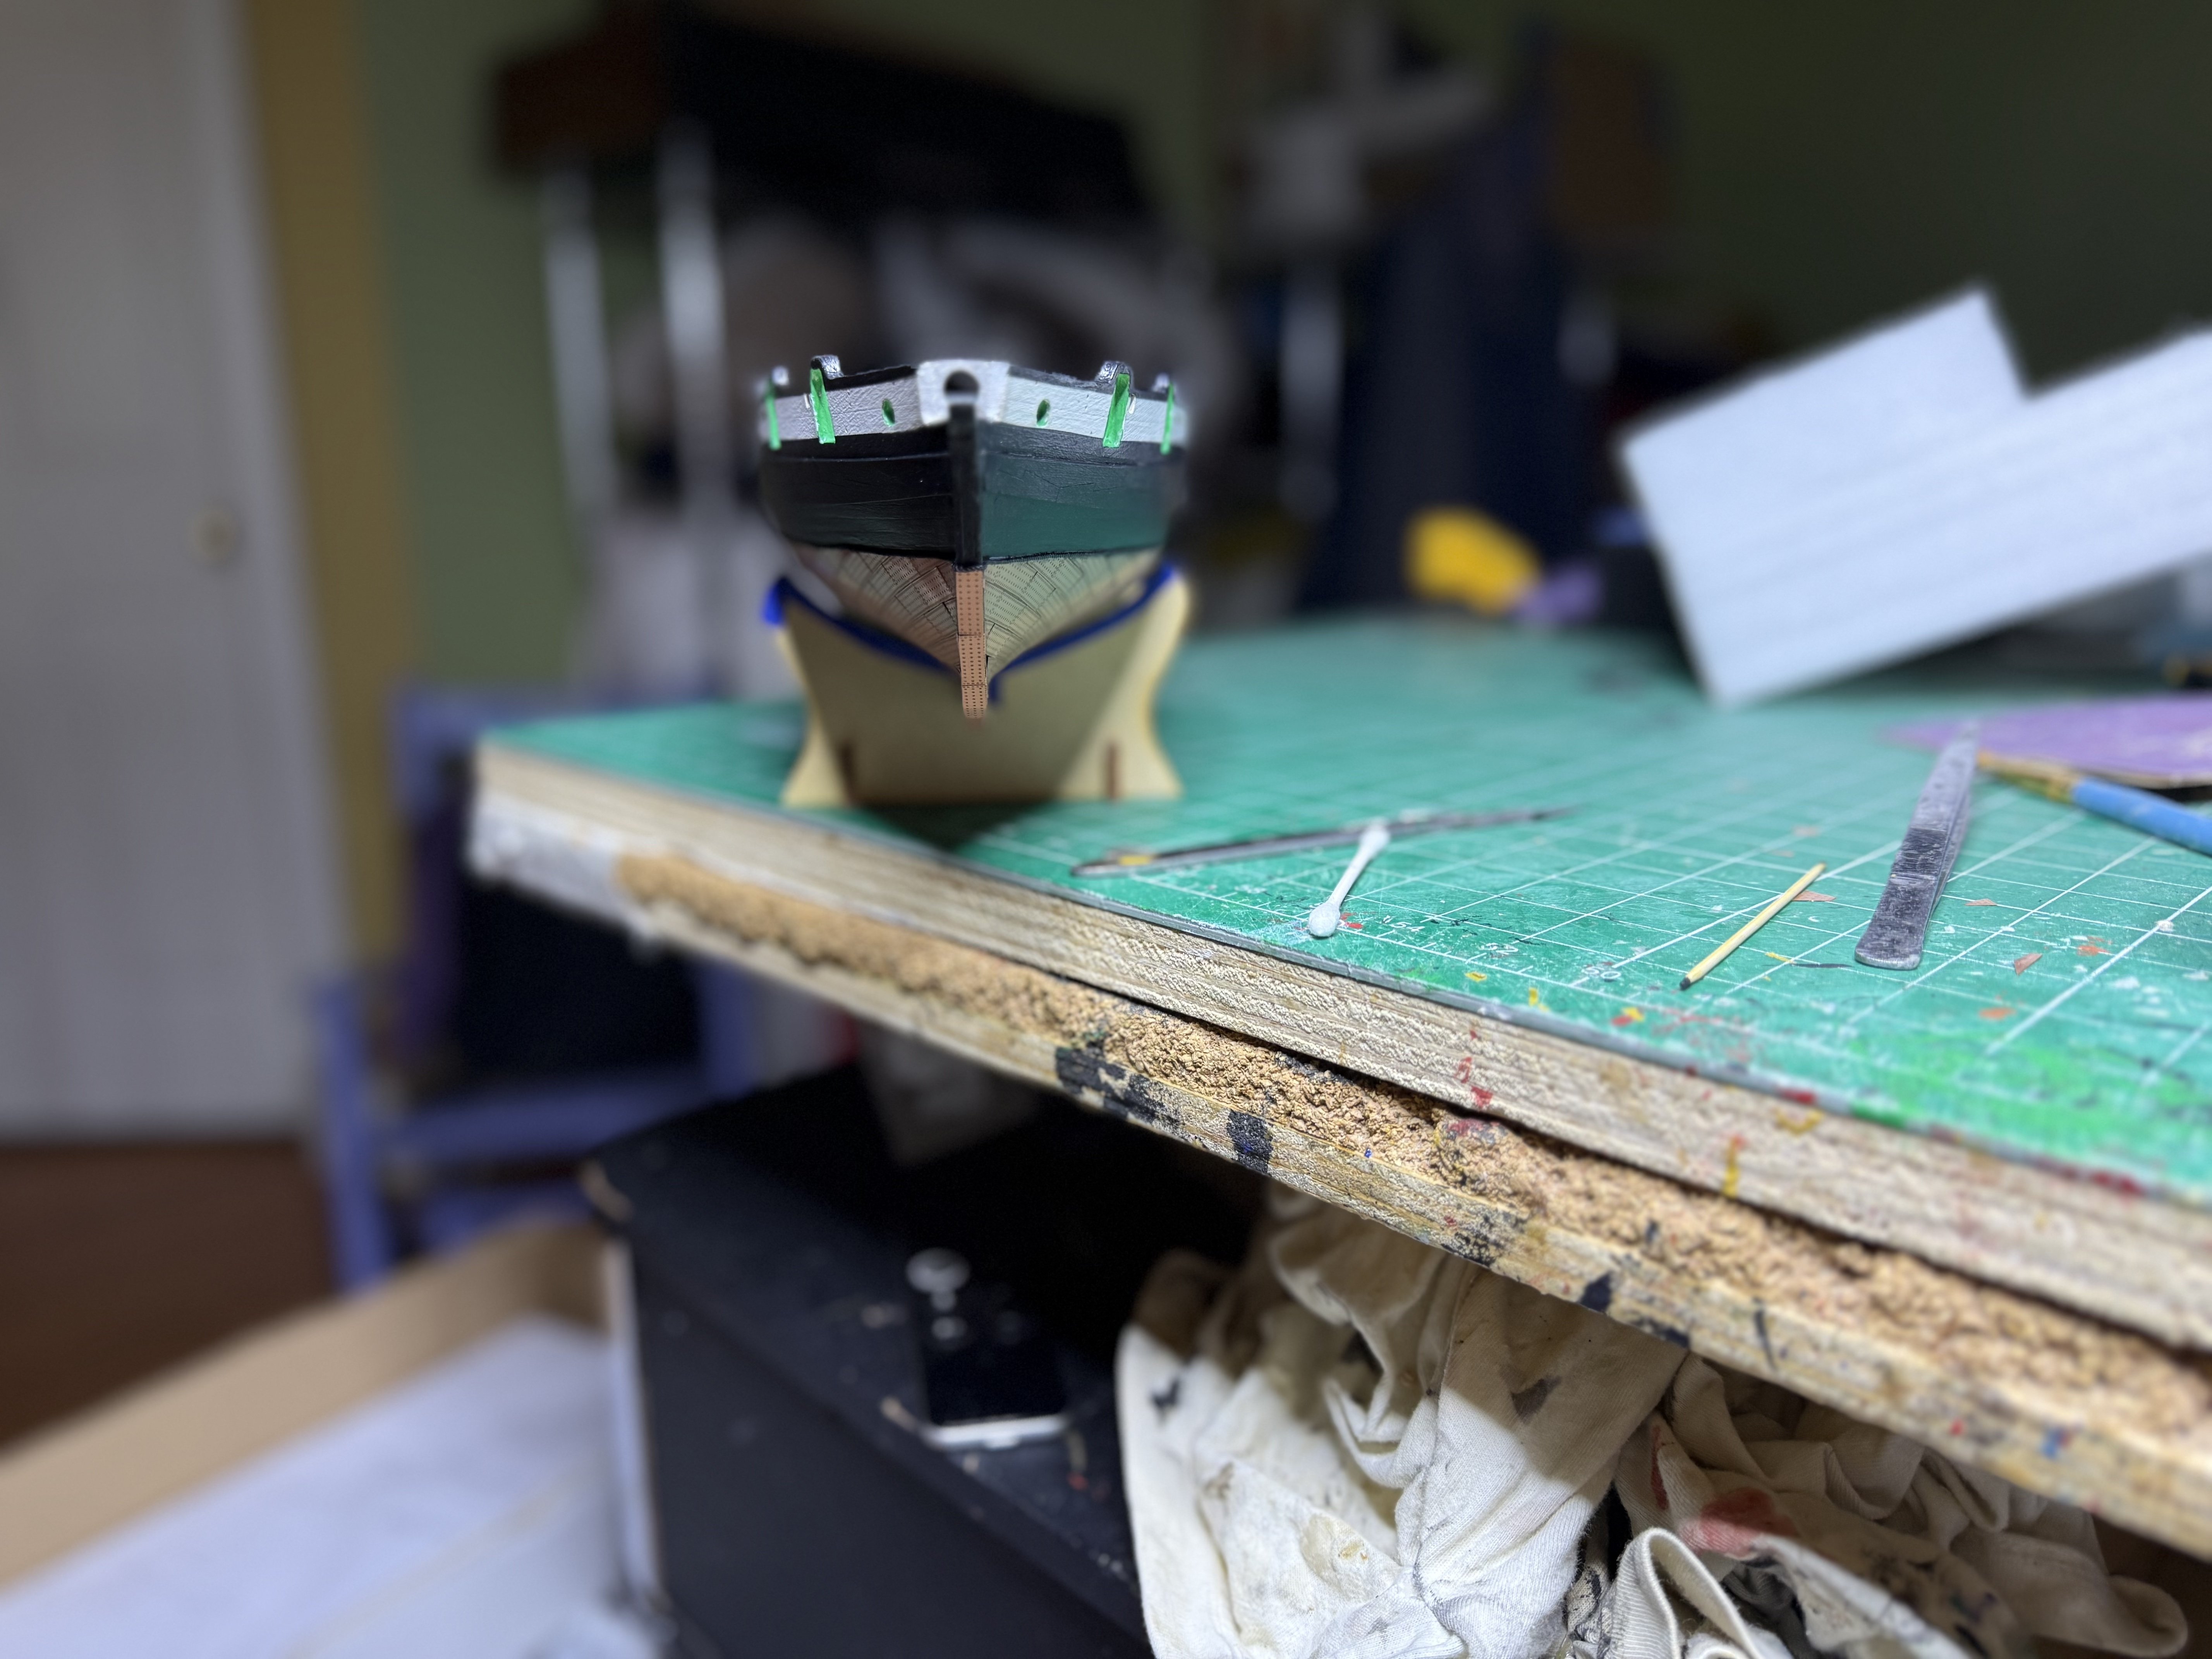
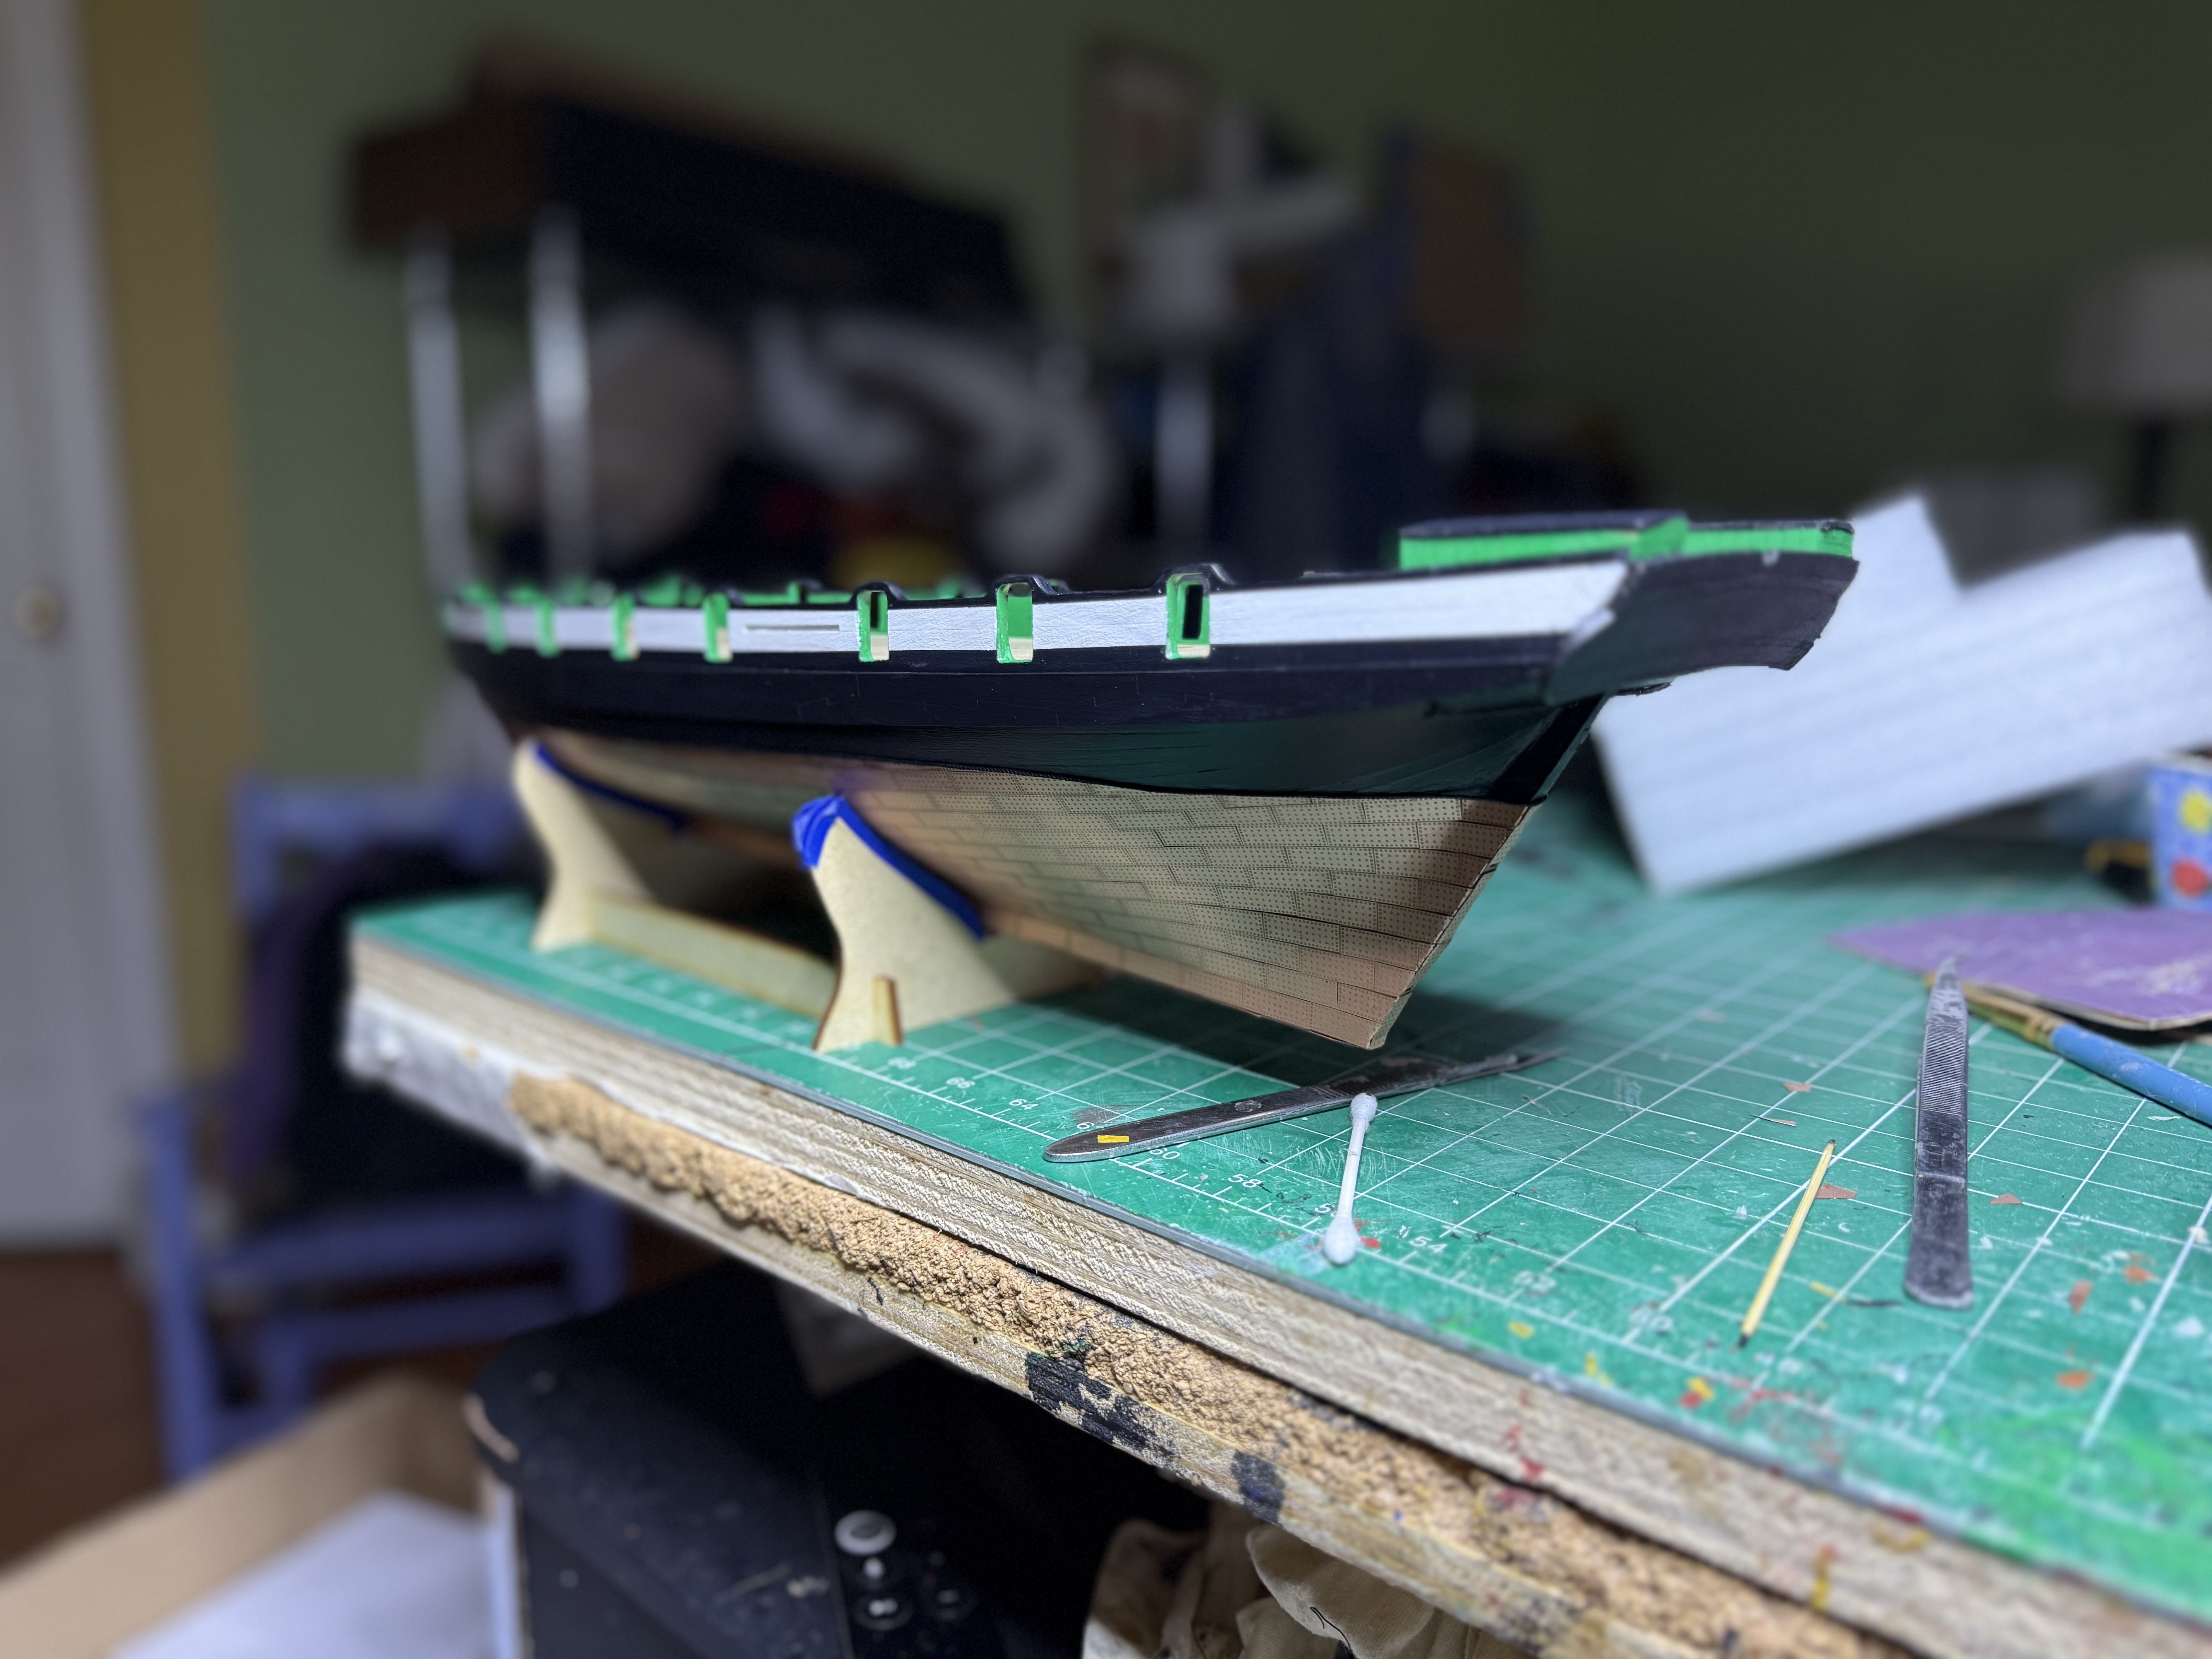
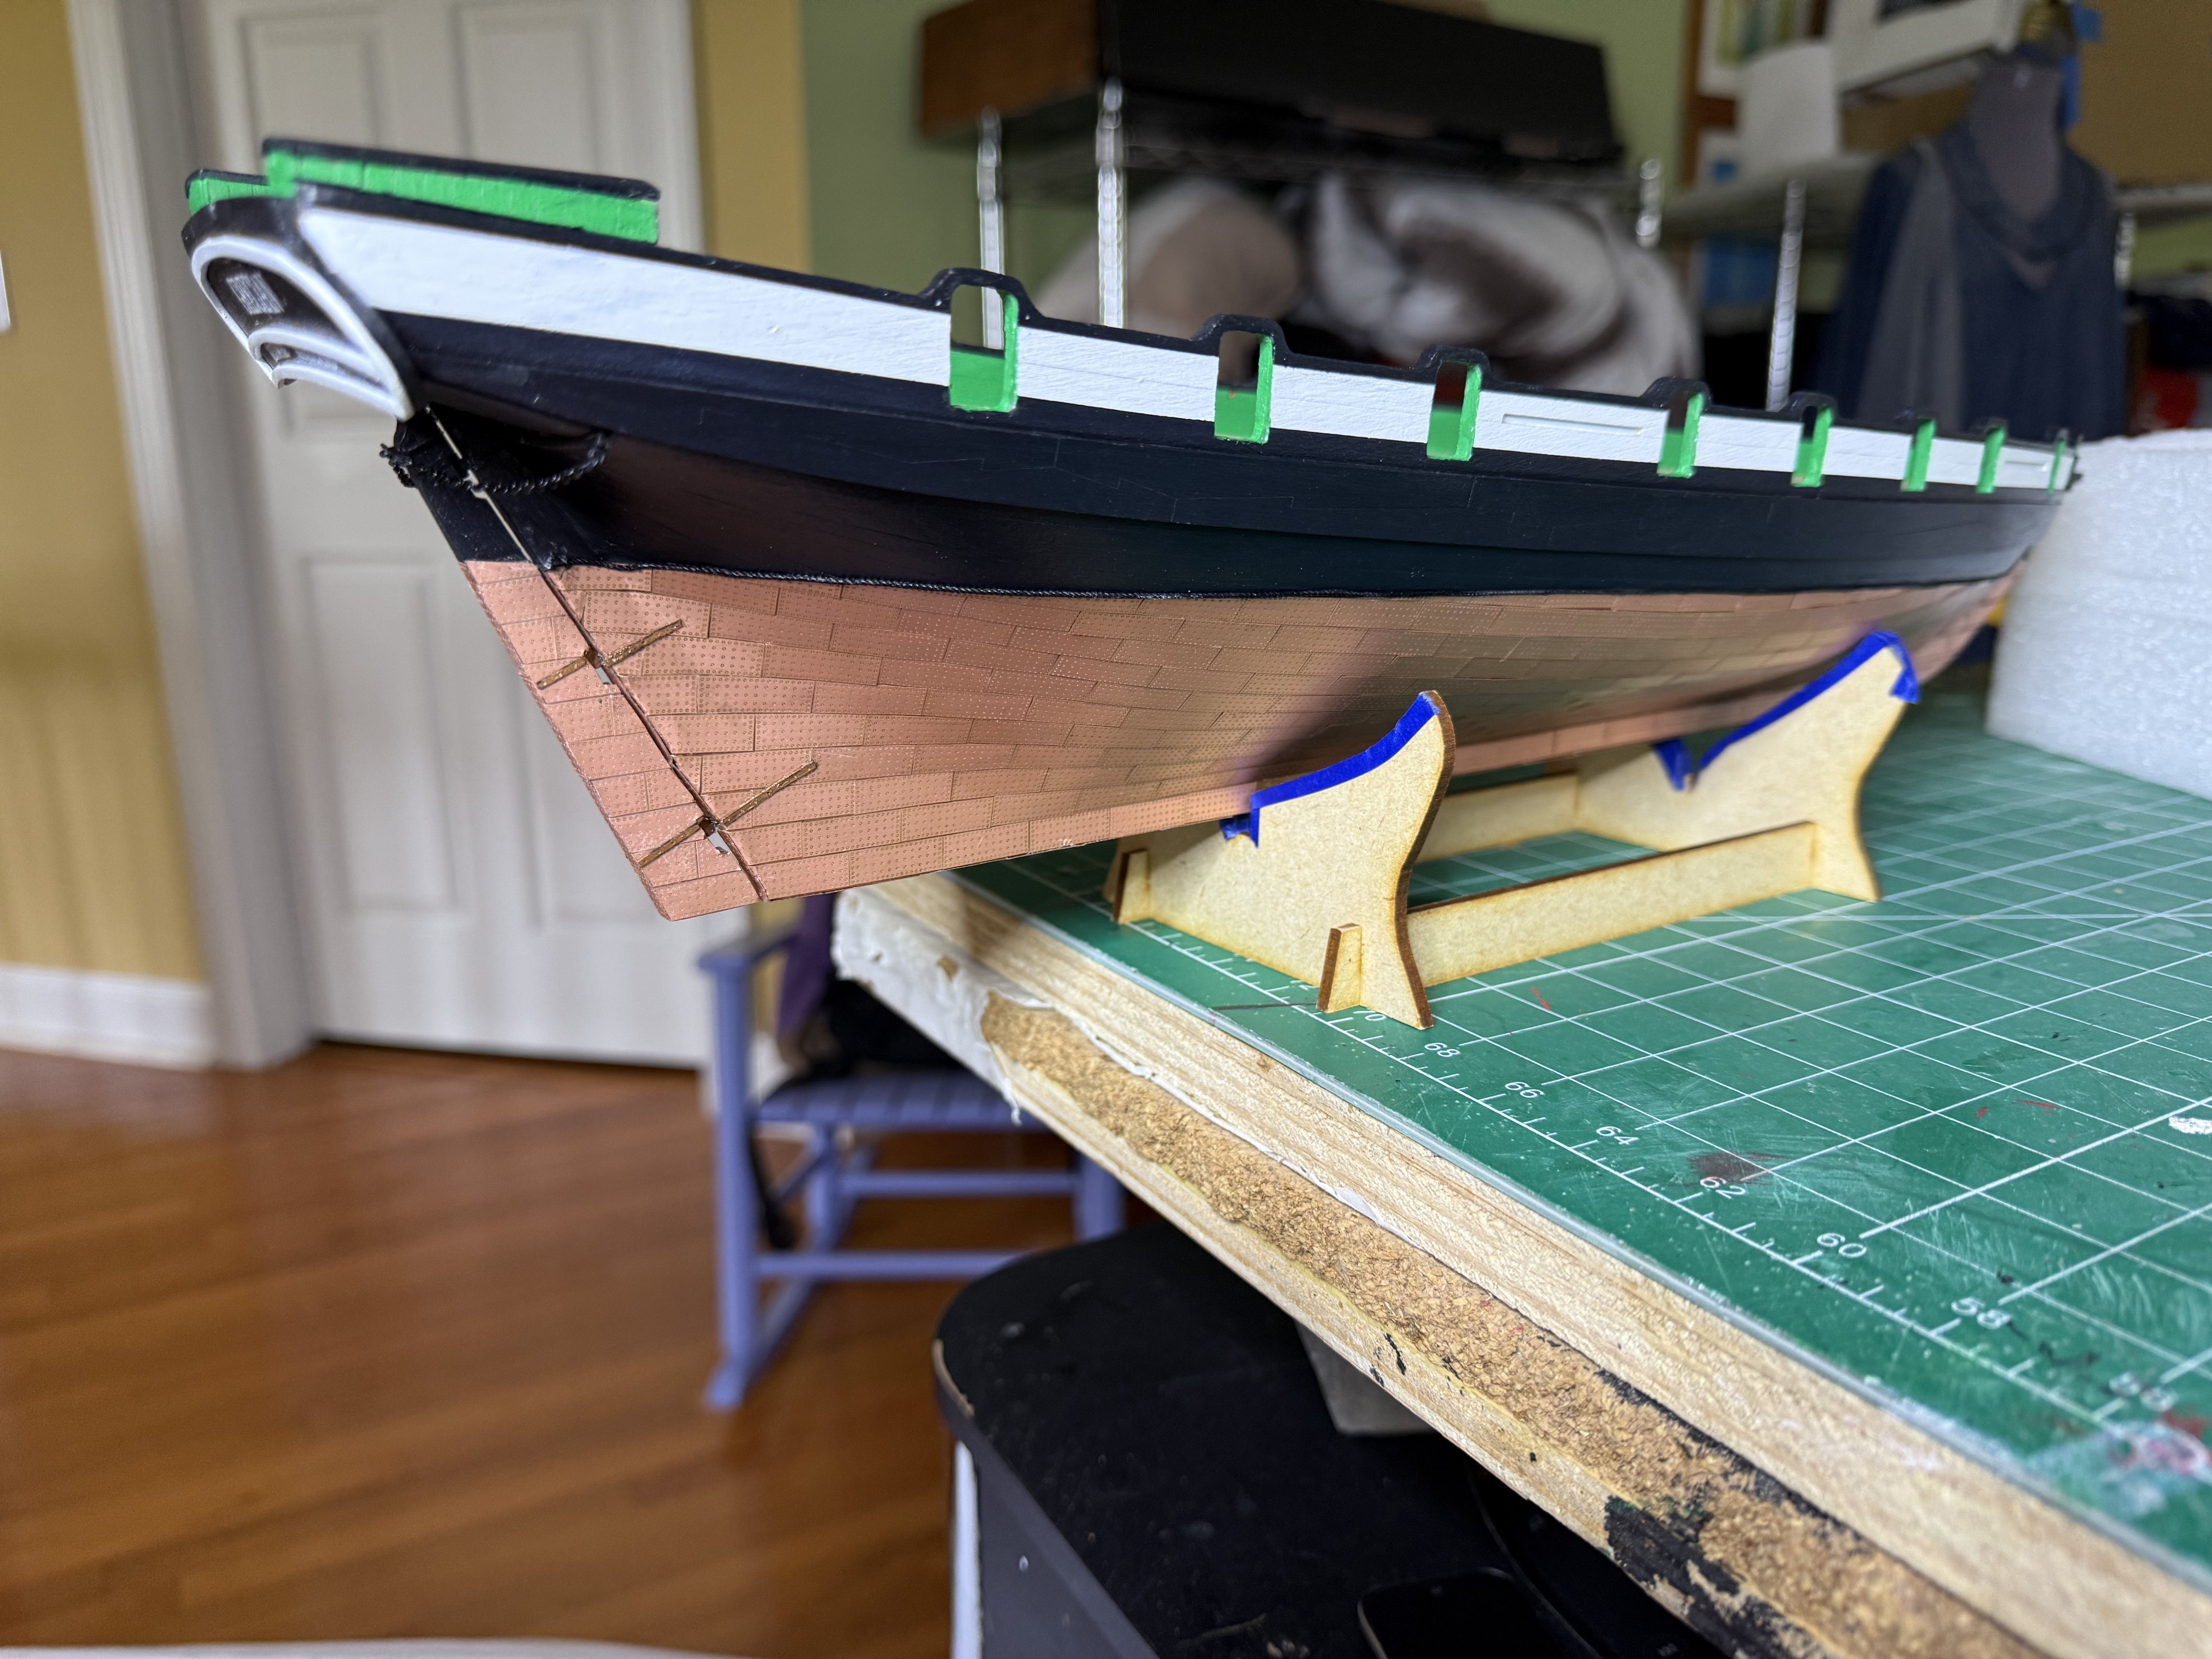
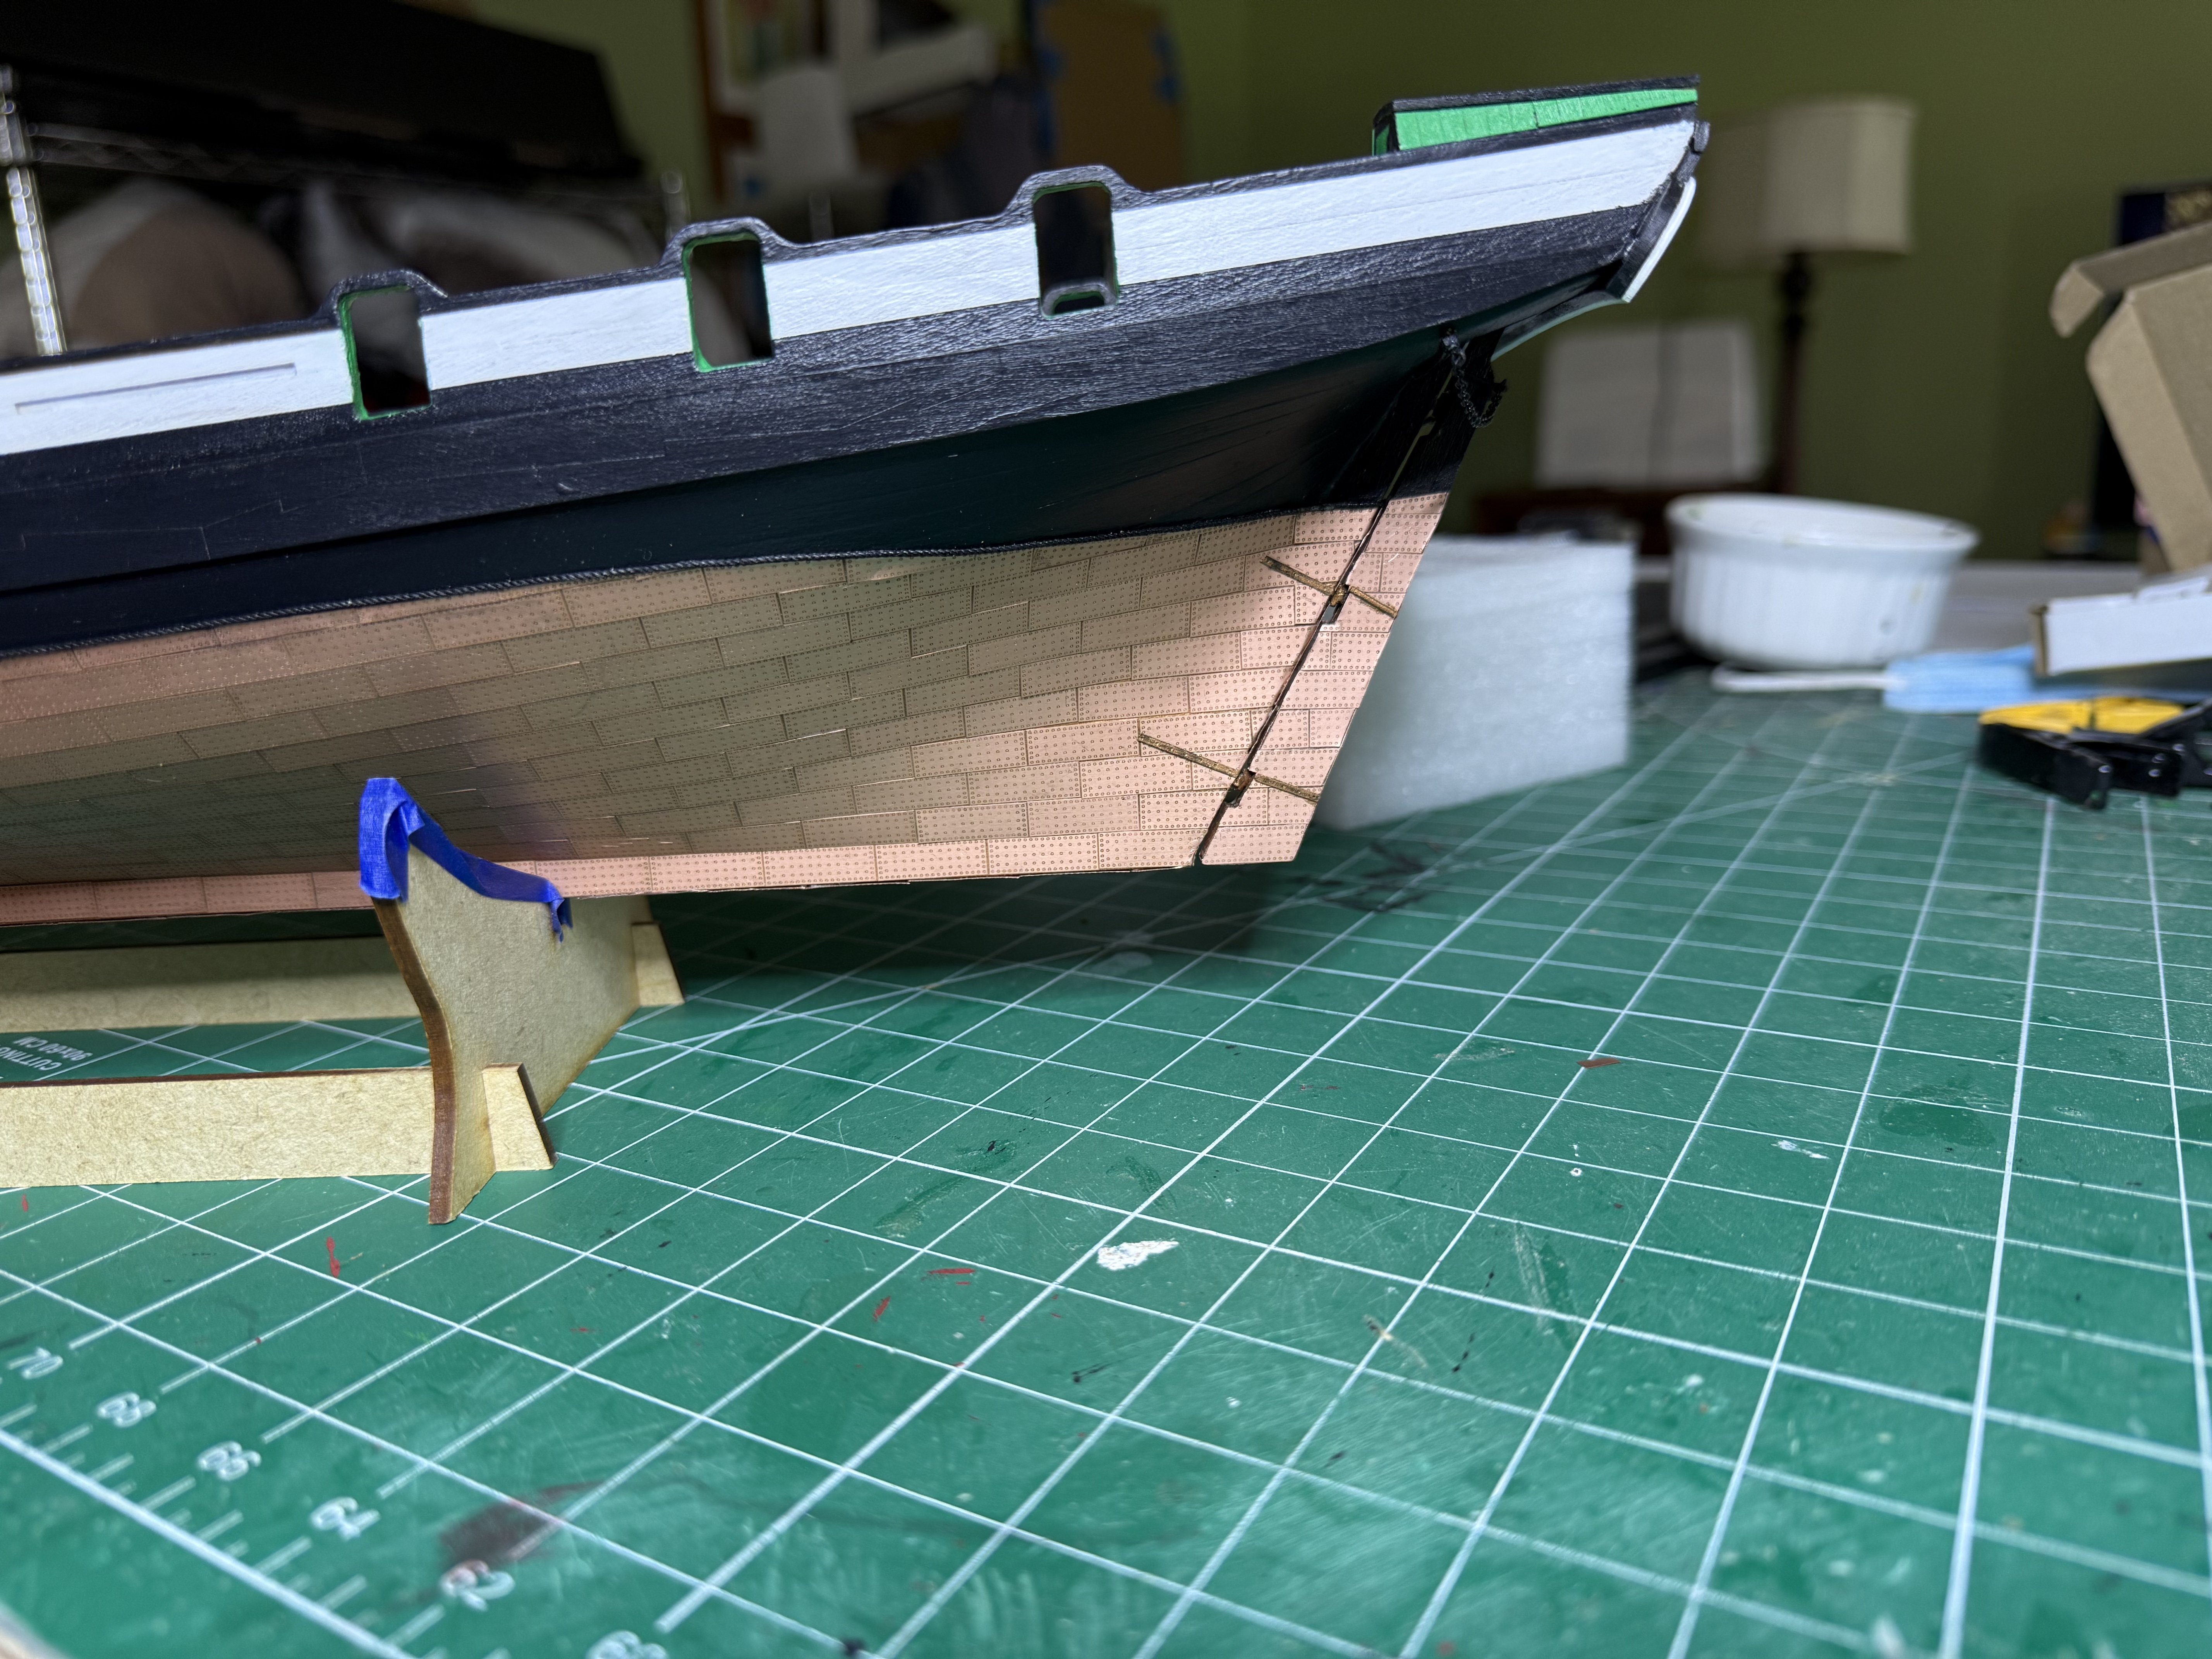
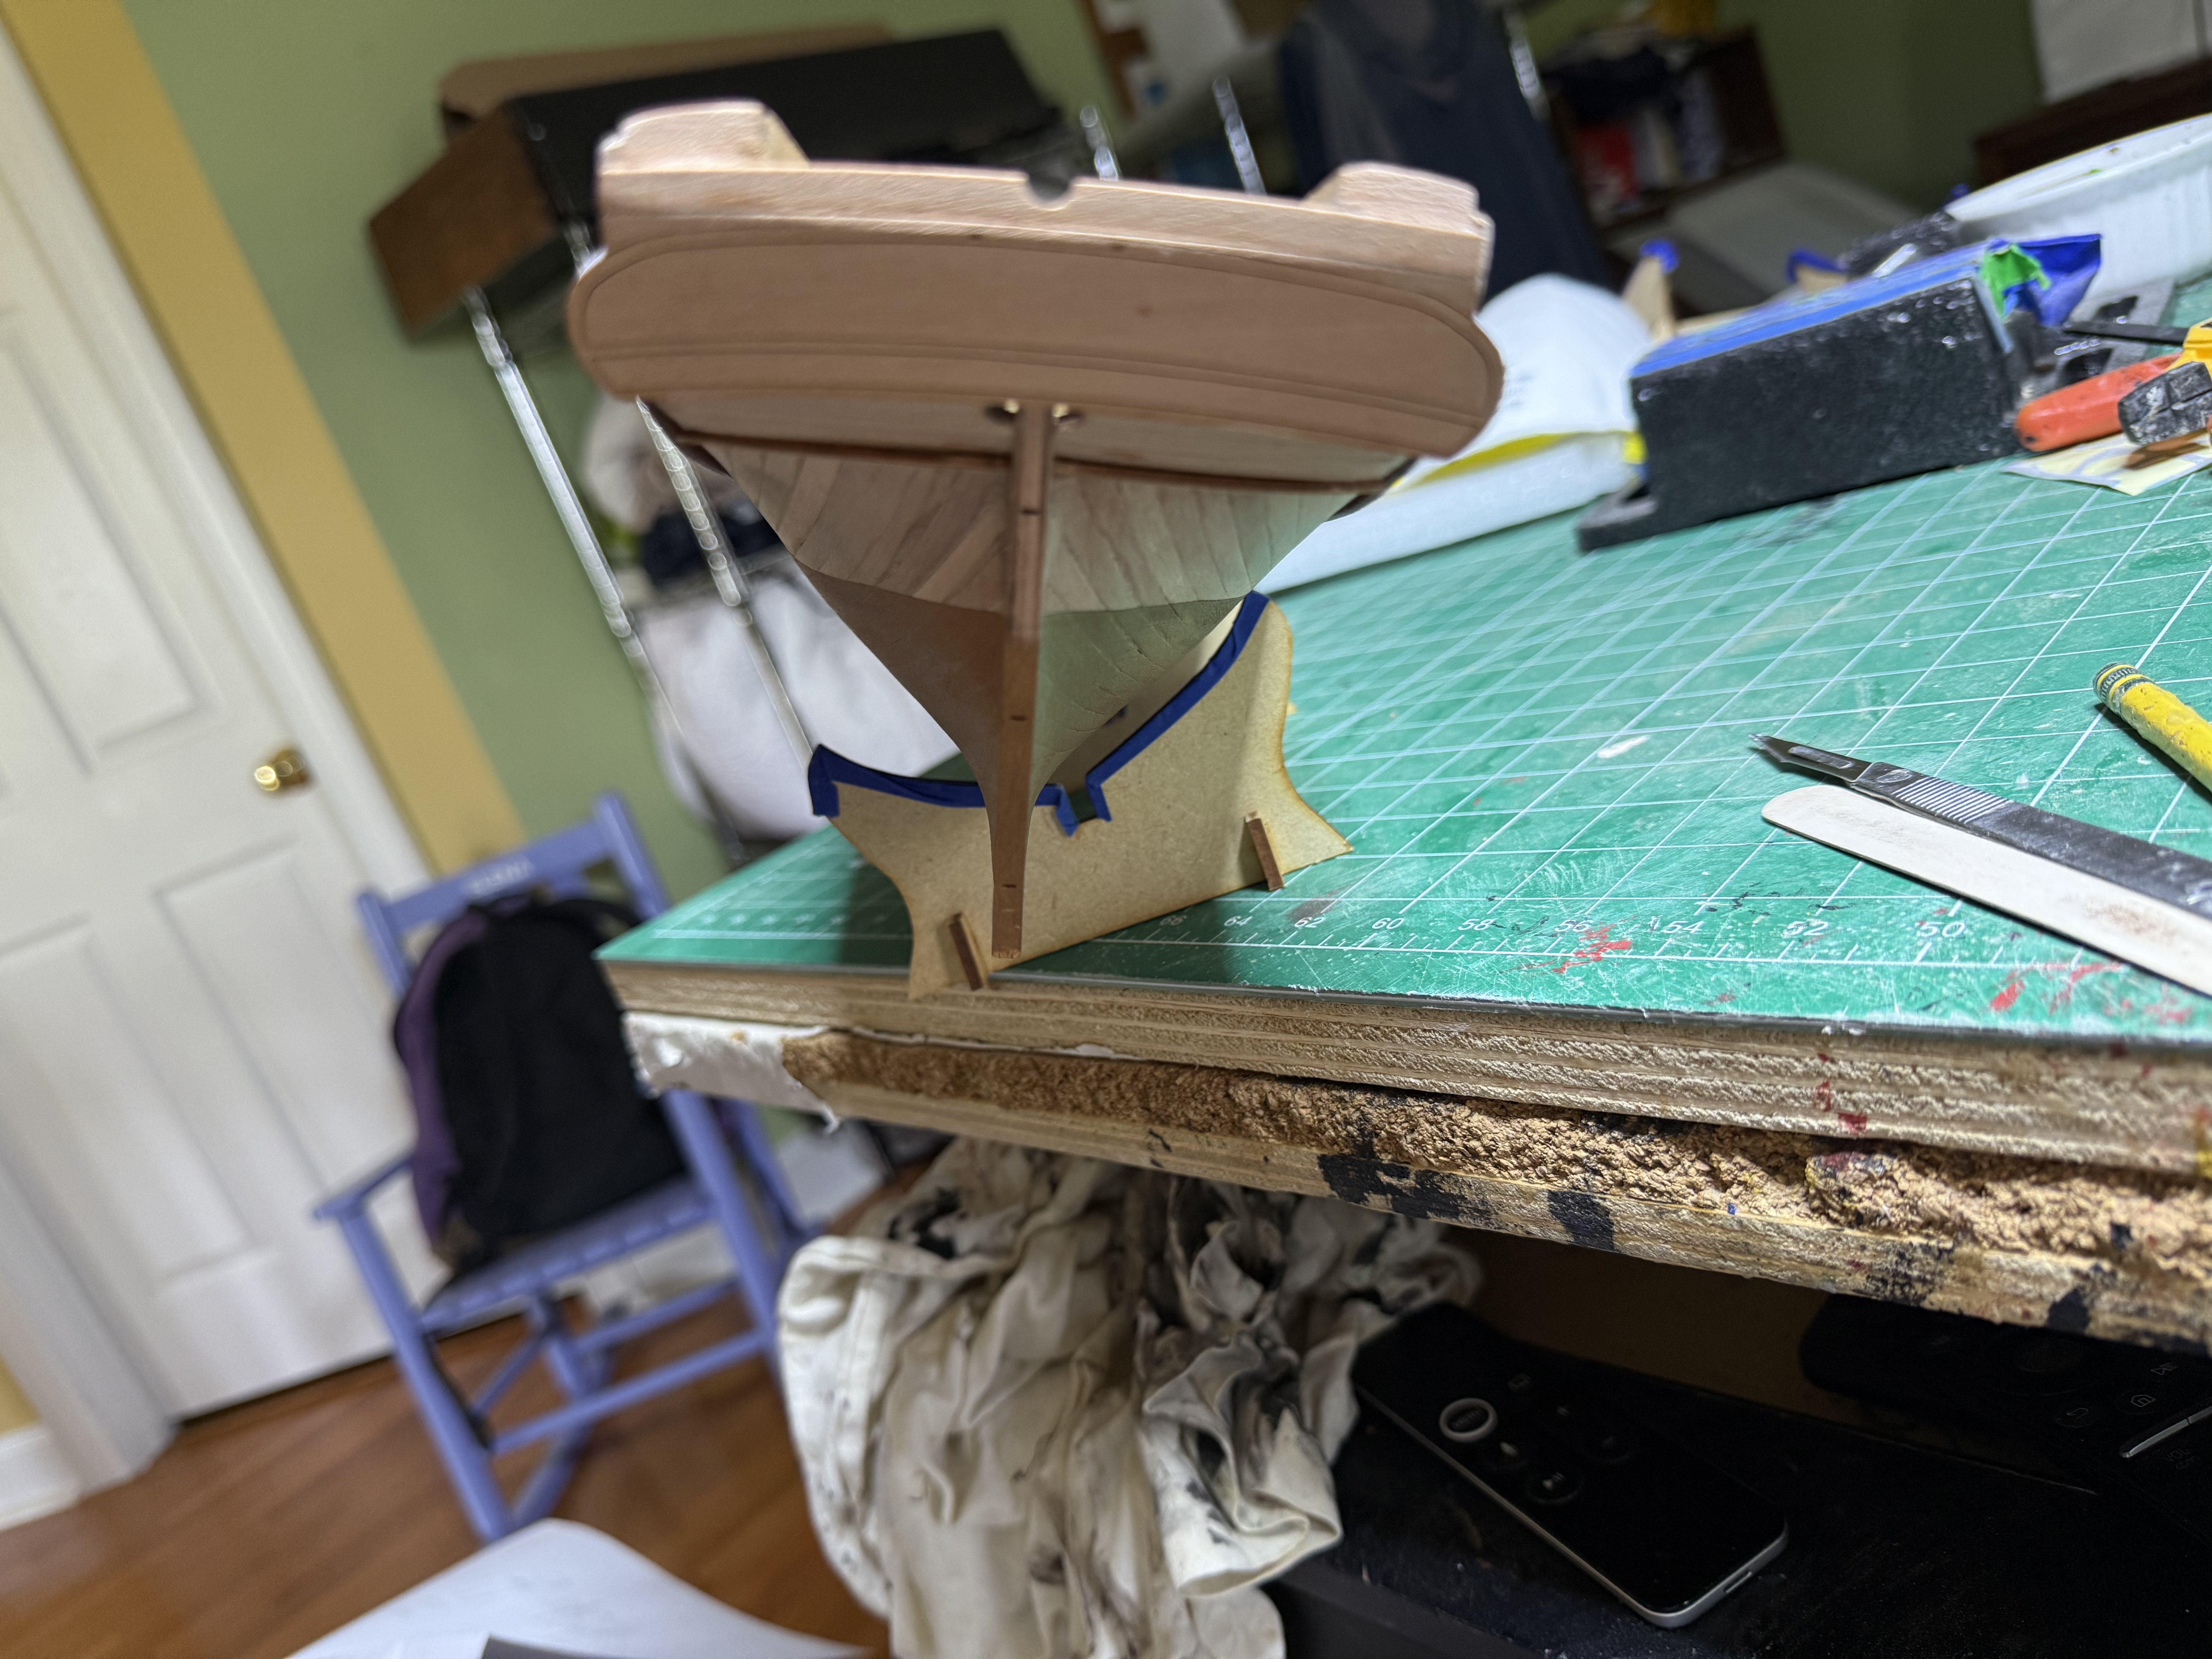
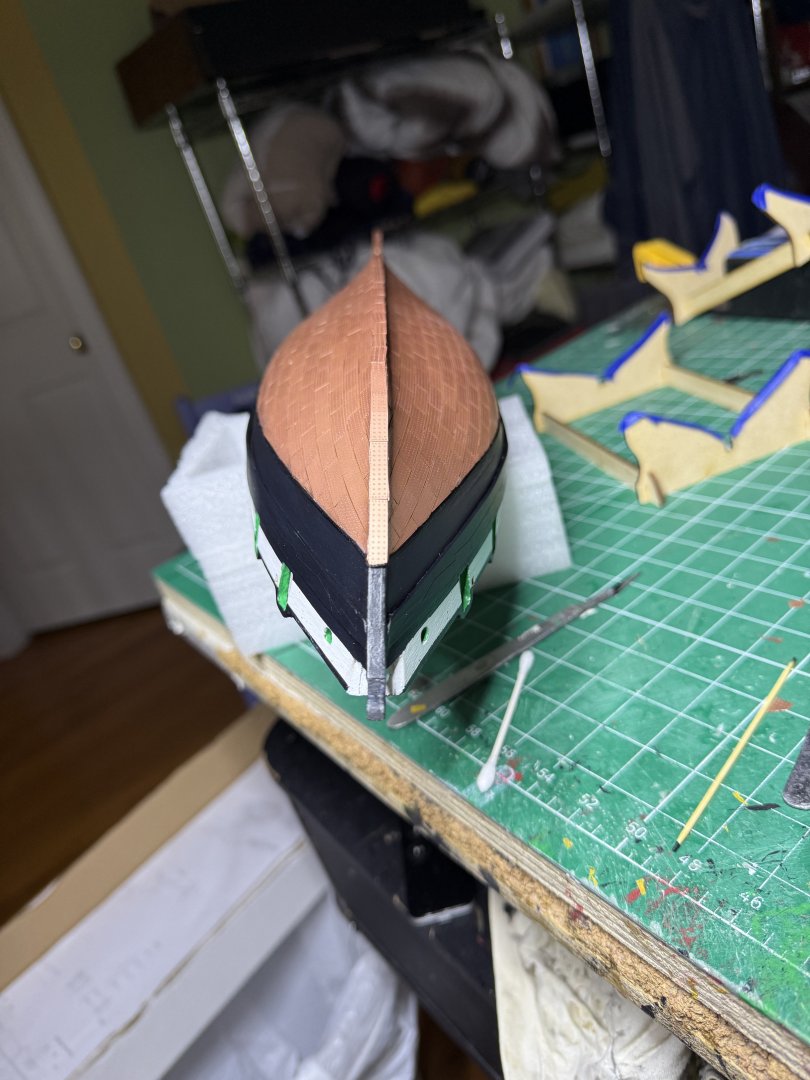
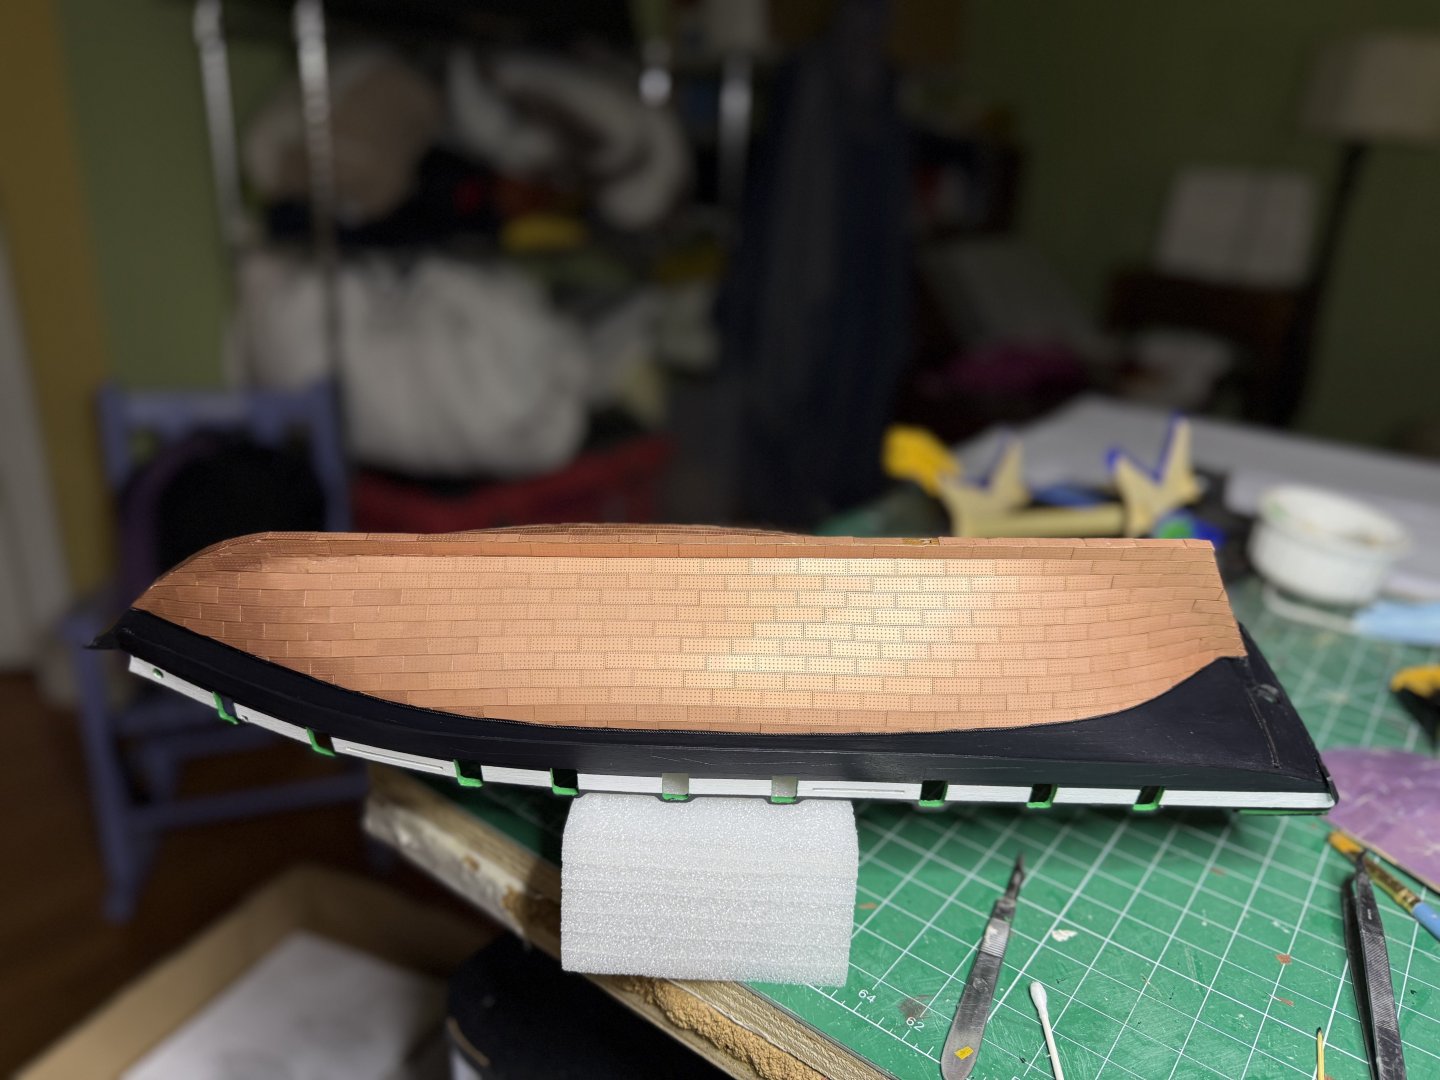
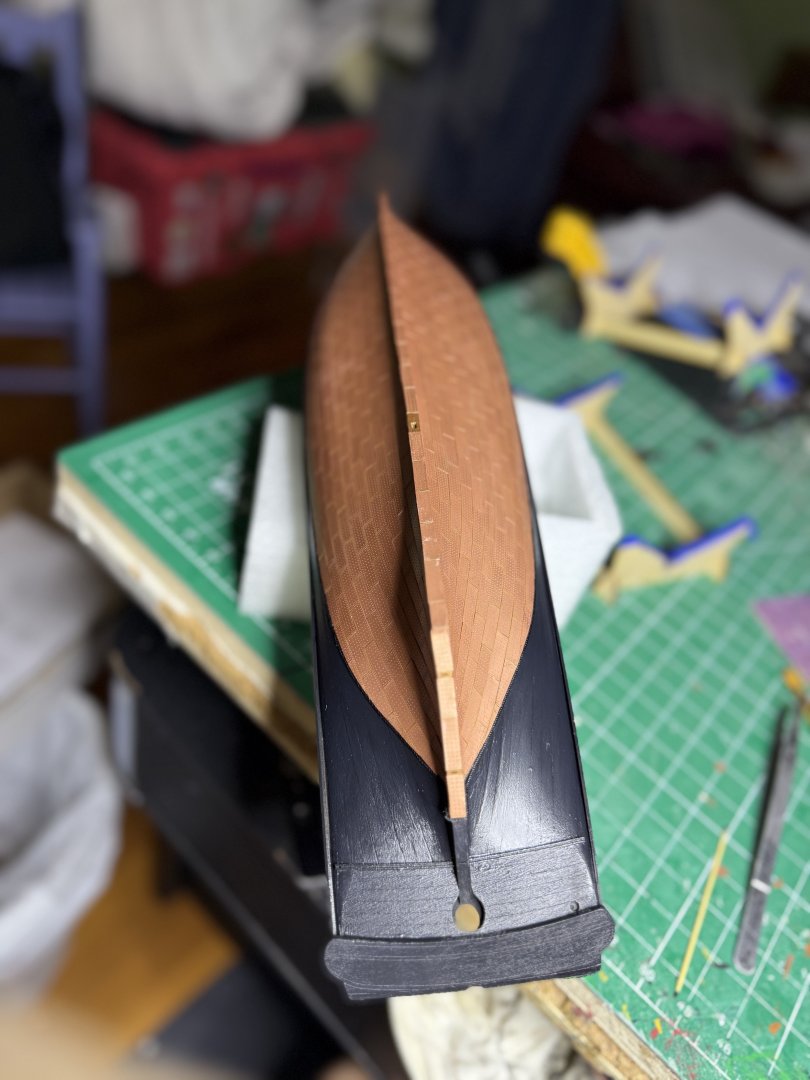
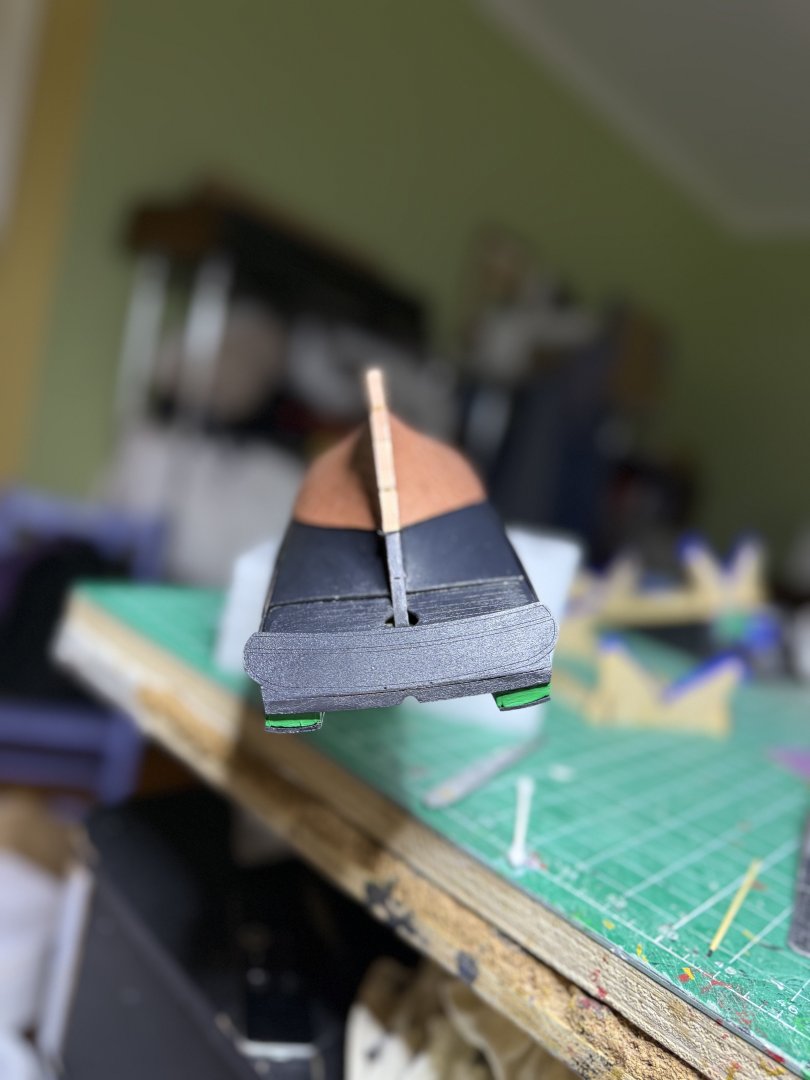
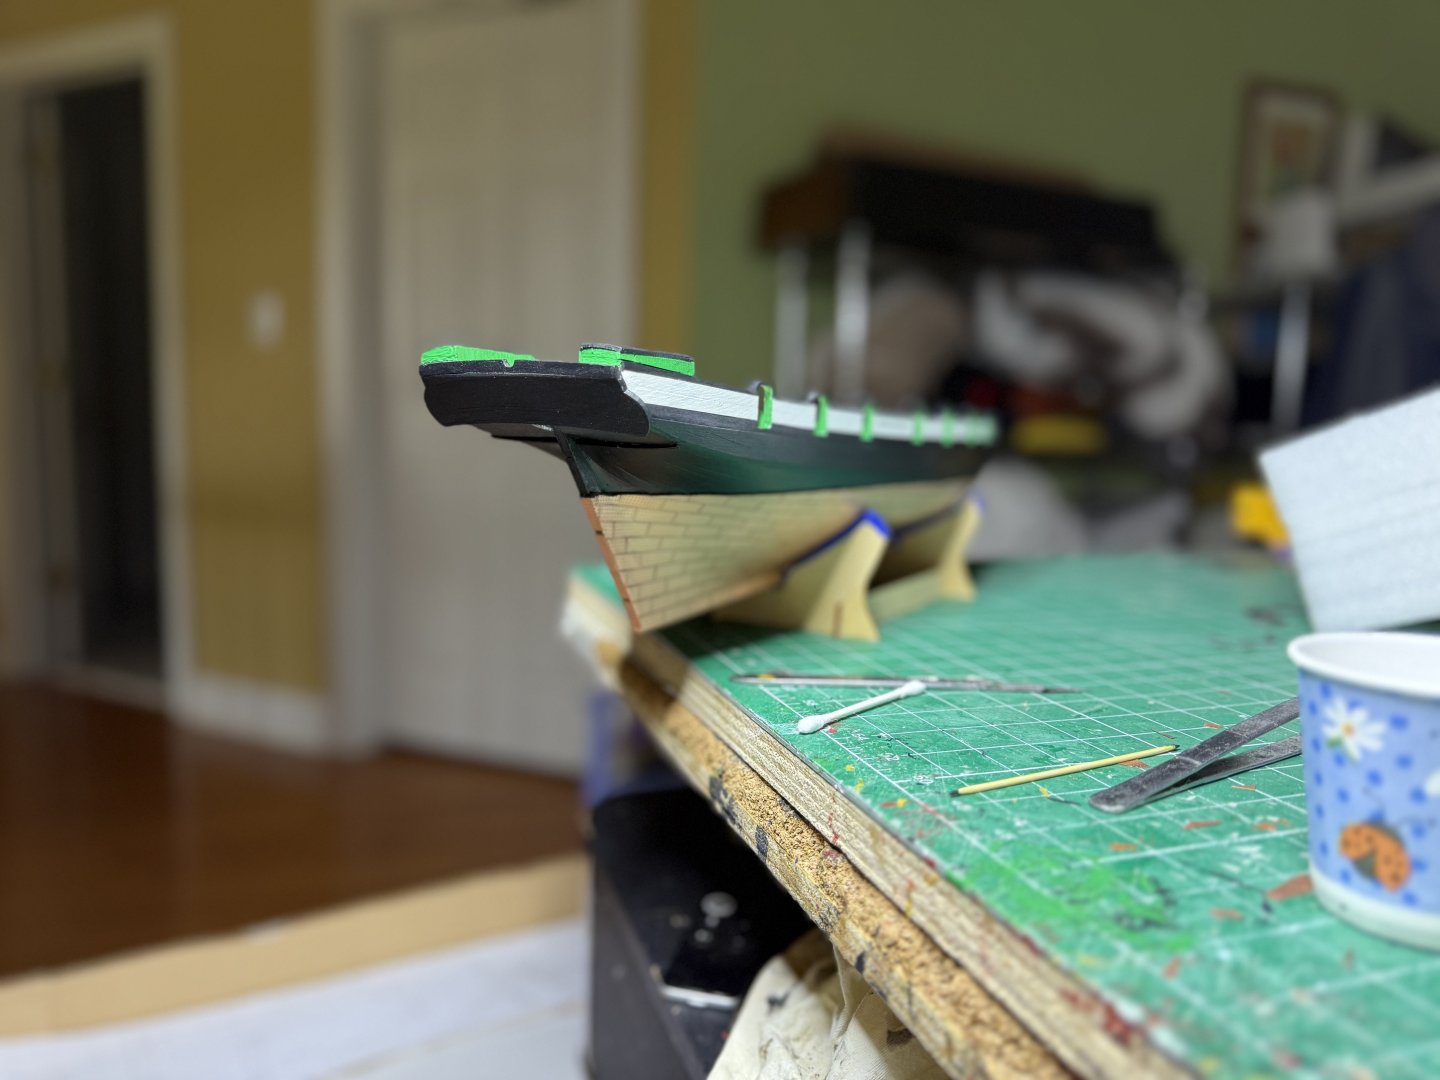
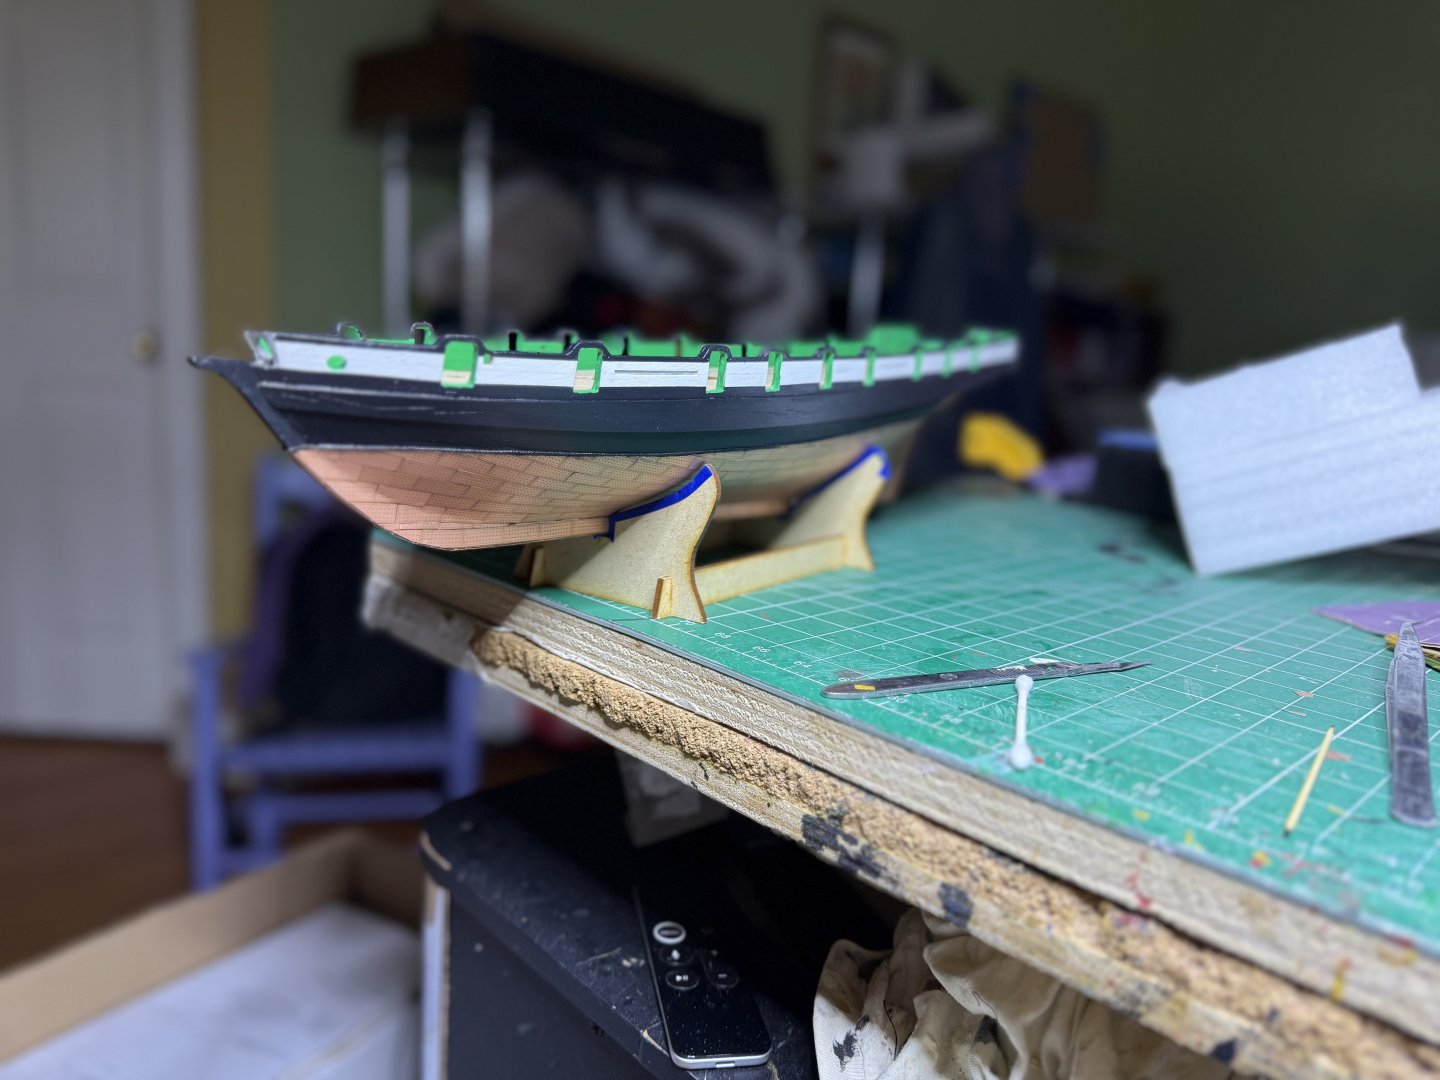
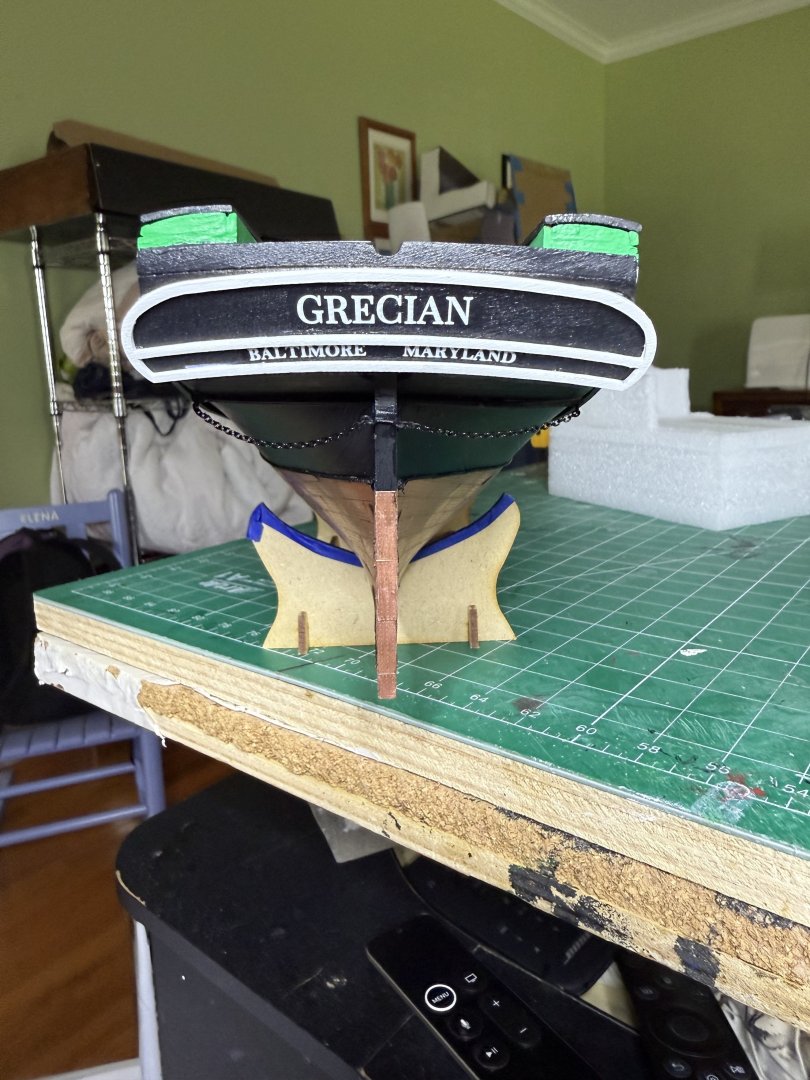
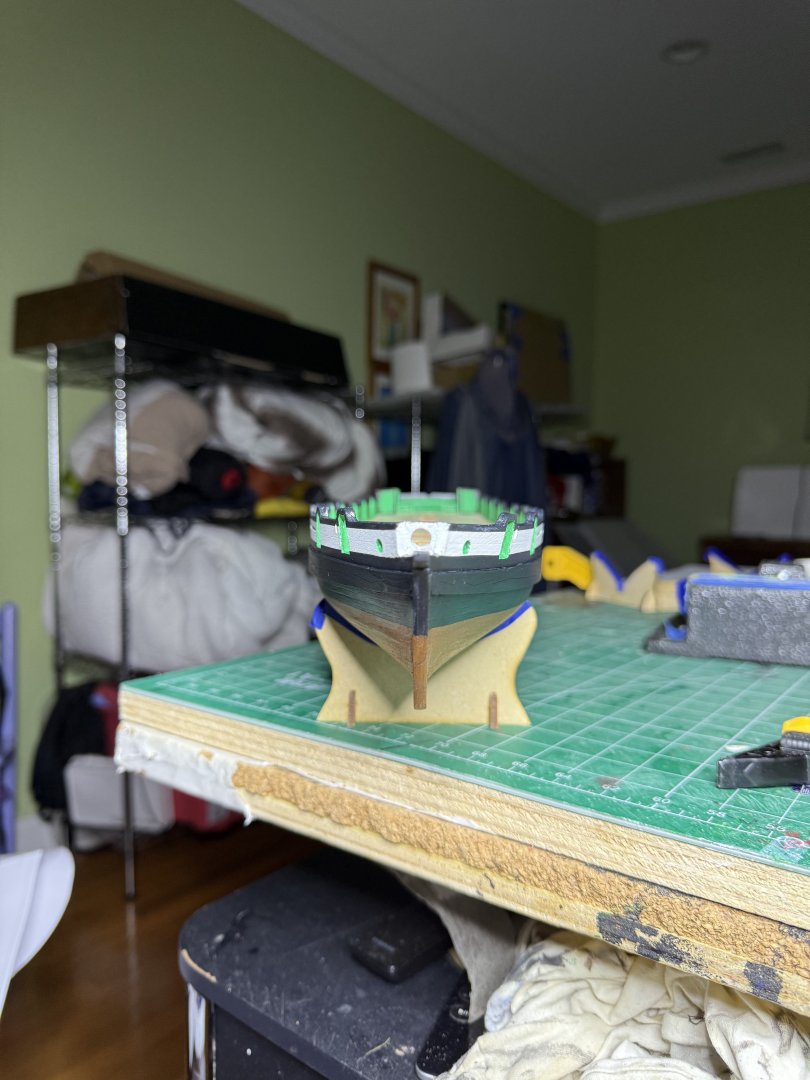
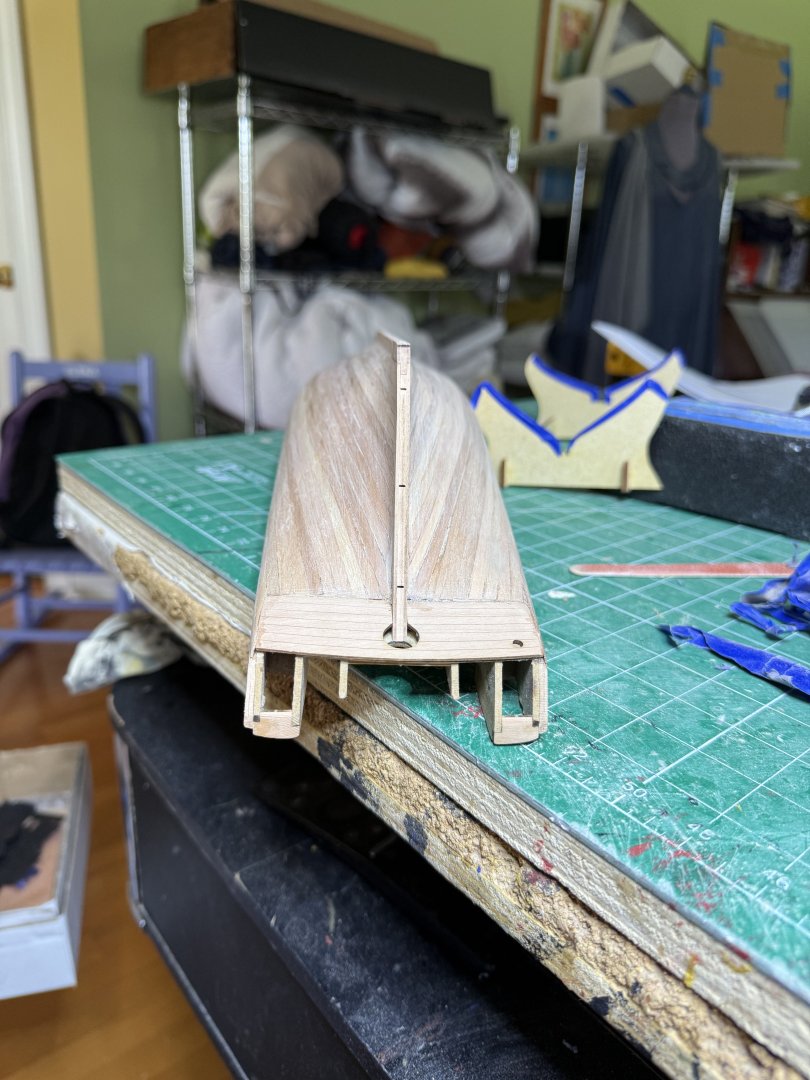
Several days of work and the coppering is done. t Took a morning to copper the rudder and mount it. The pintles are photo etched and much sturdier than the laser printed ones I used in Harpy. Also finished the stern.


- 52 replies
-
- 9
-
-
- Grecian
- Vanguard Models
- (and 1 more)
-
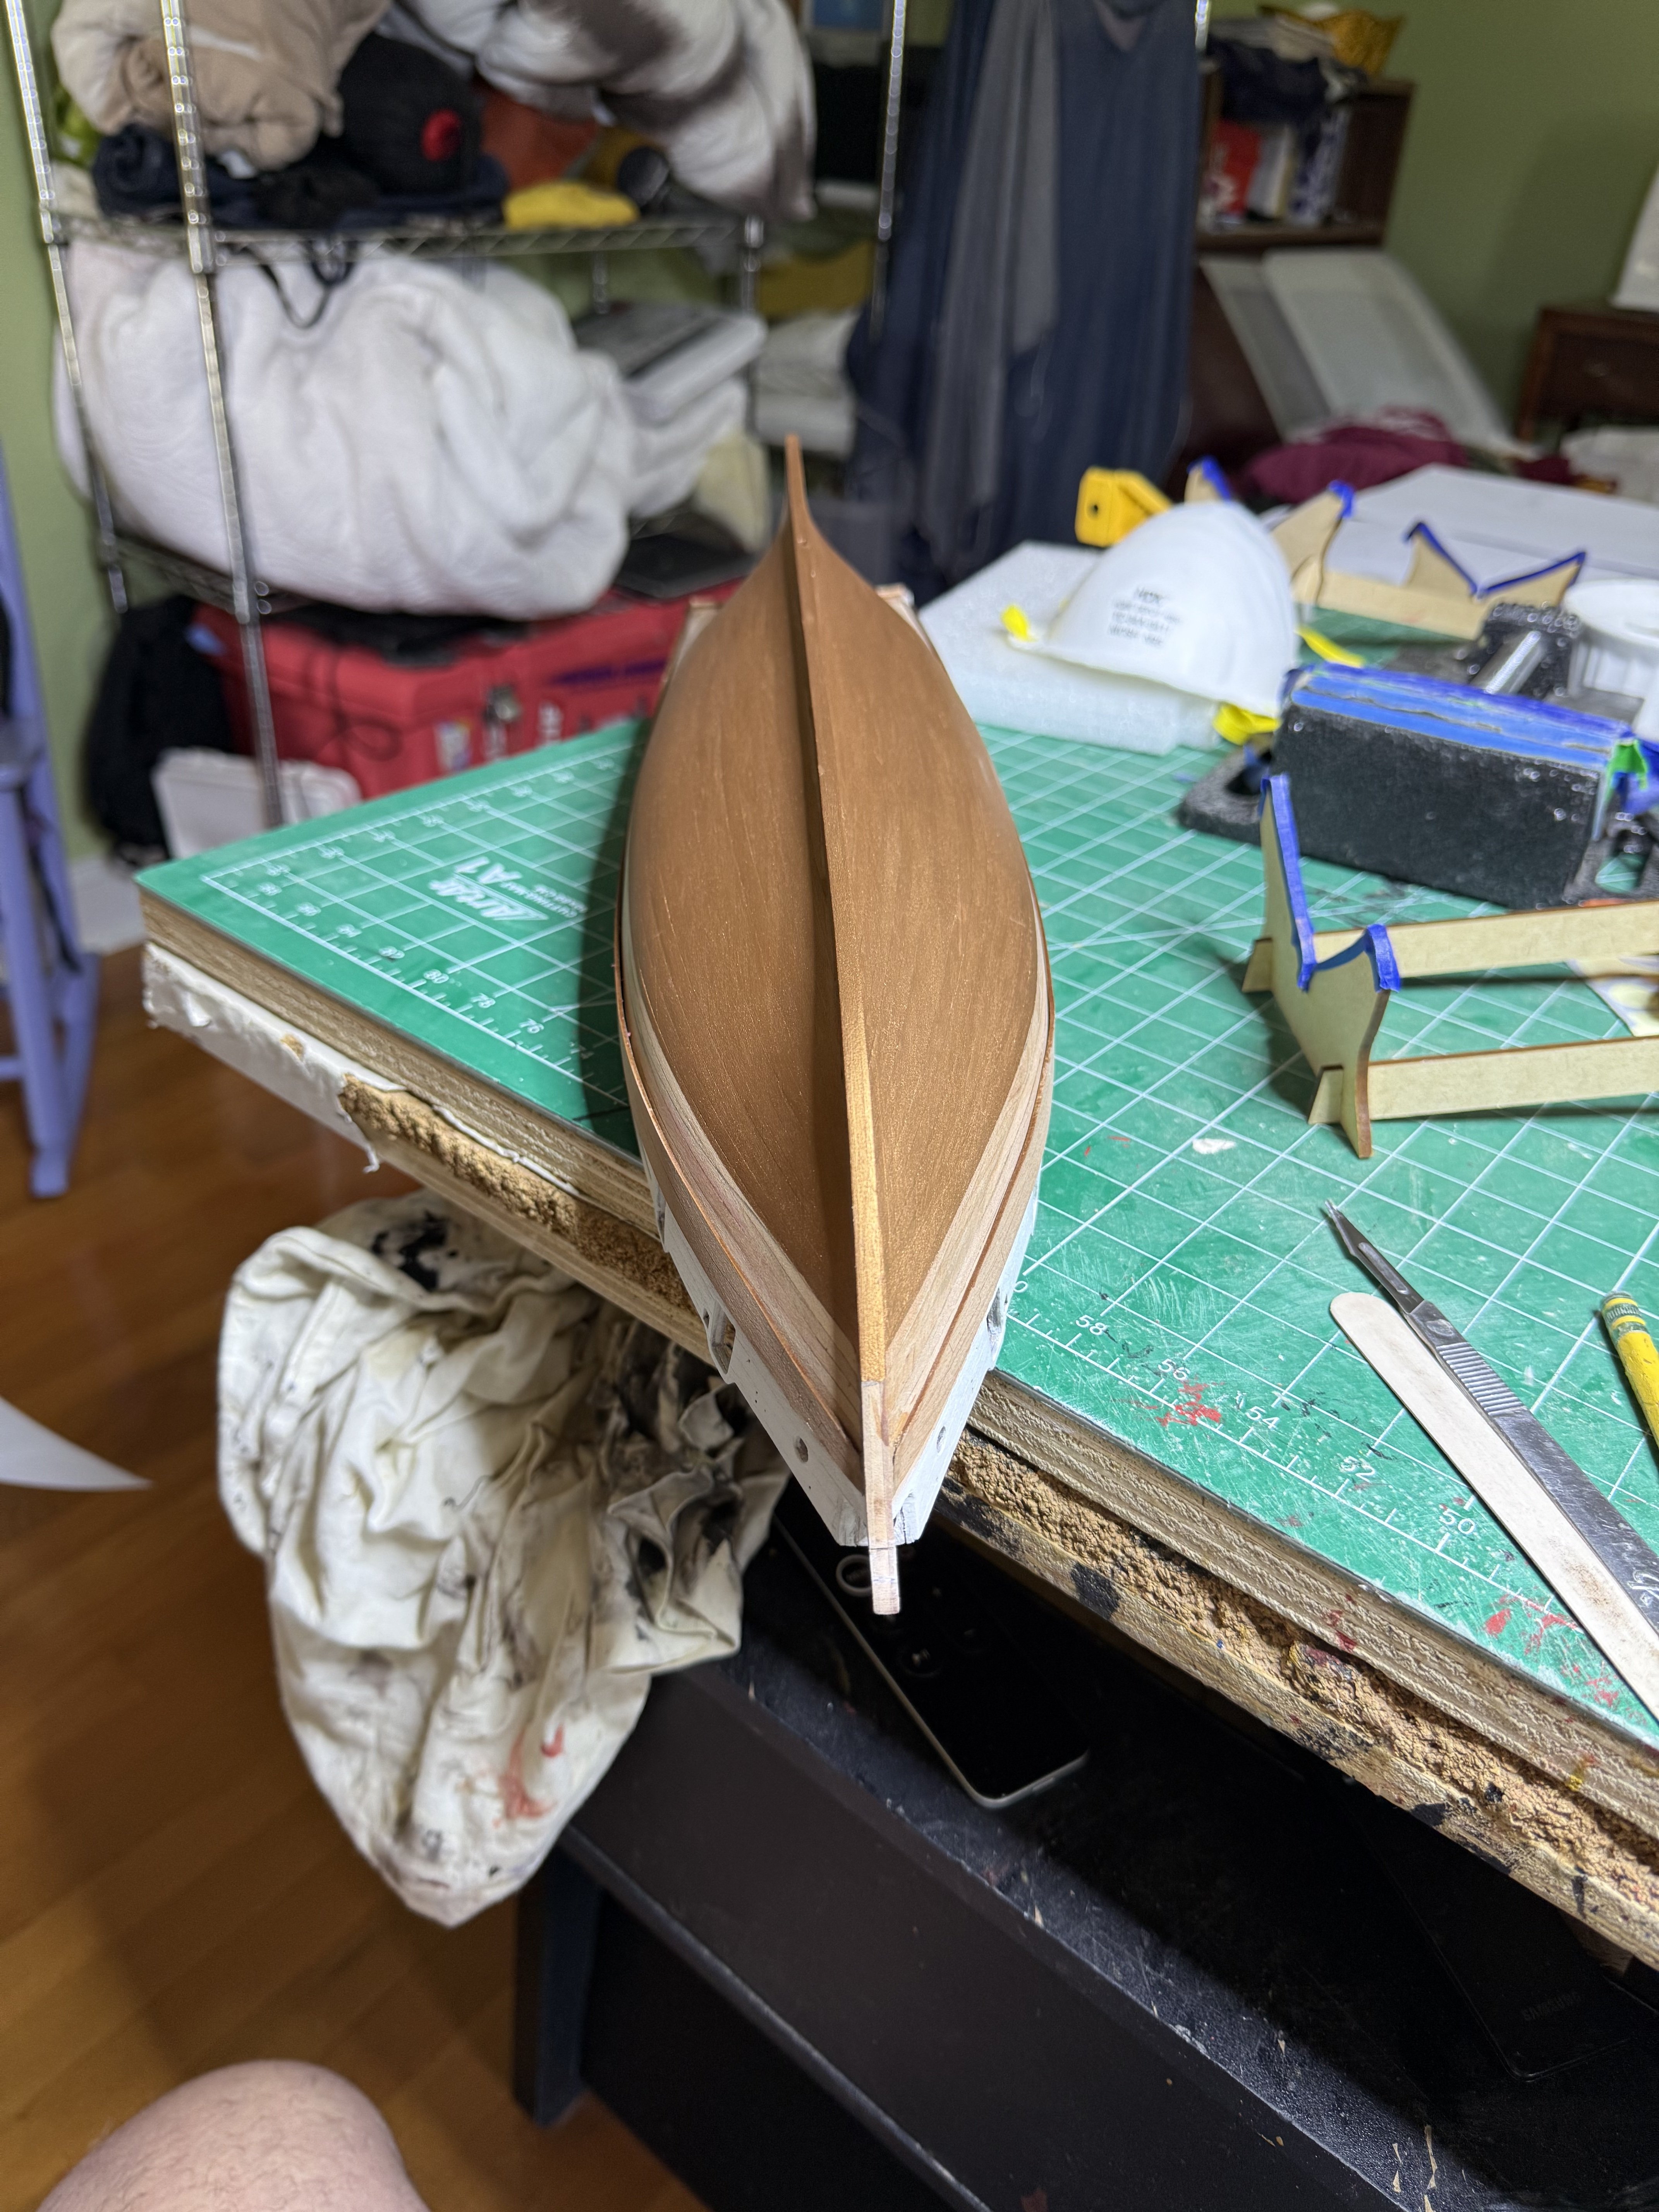
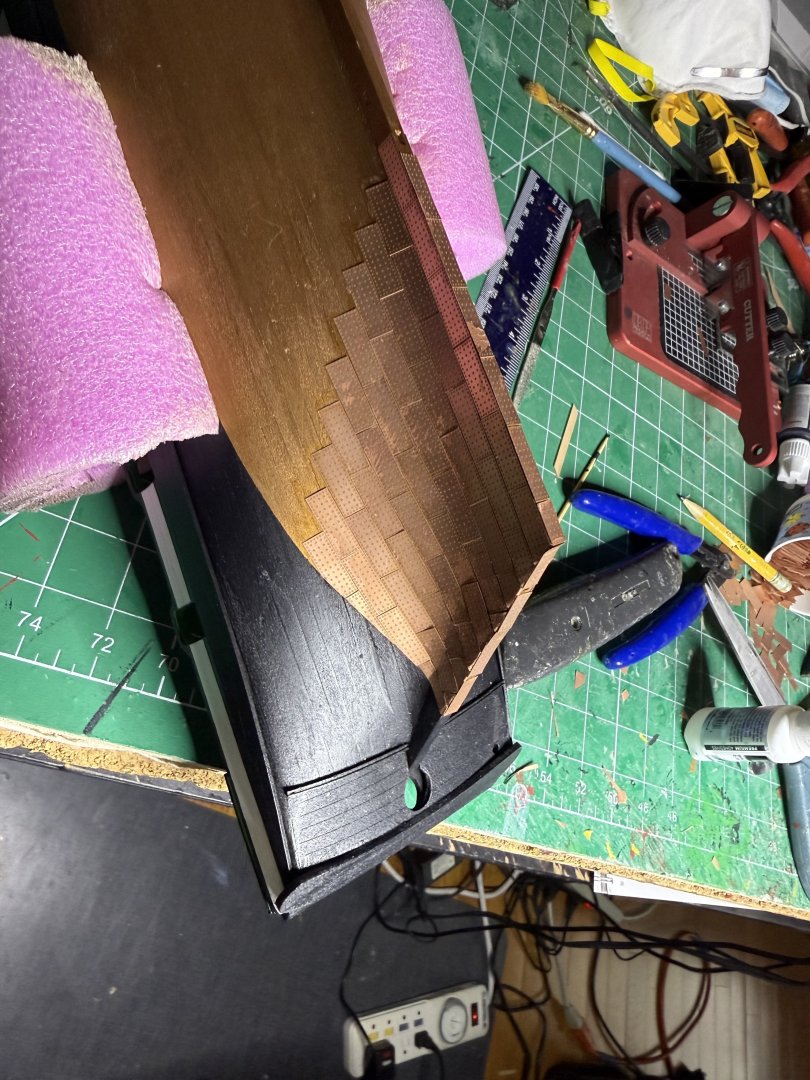
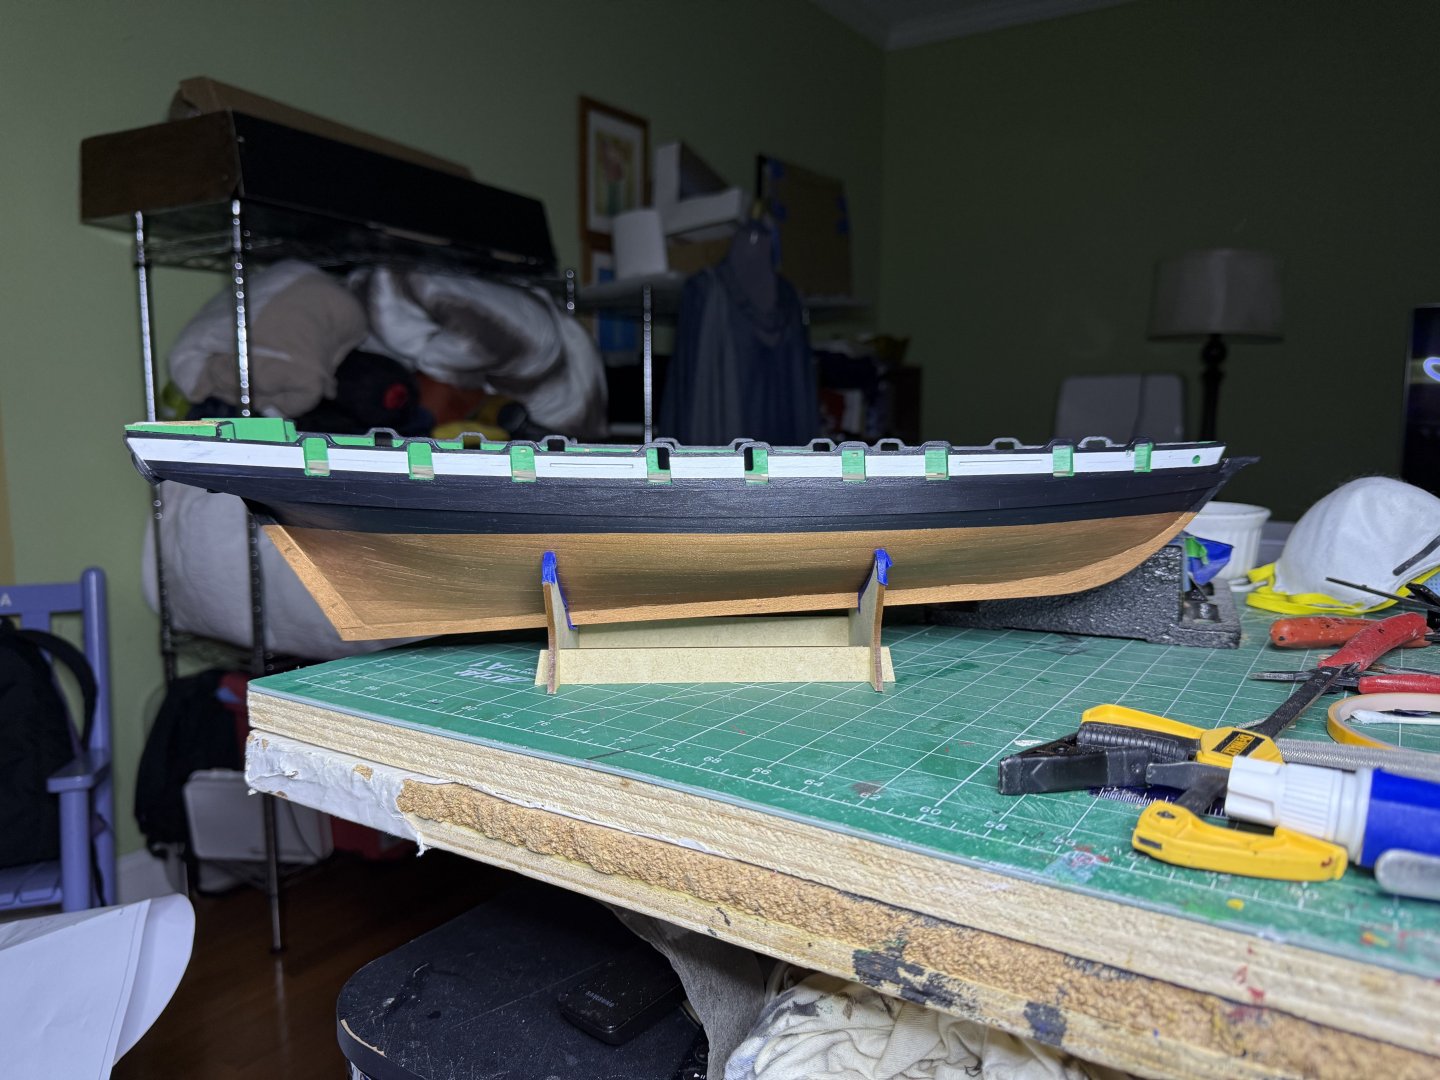
Coppering has begun. Using plates rather than the provided copper tape.


- 52 replies
-
- 4
-
-
- Grecian
- Vanguard Models
- (and 1 more)
-
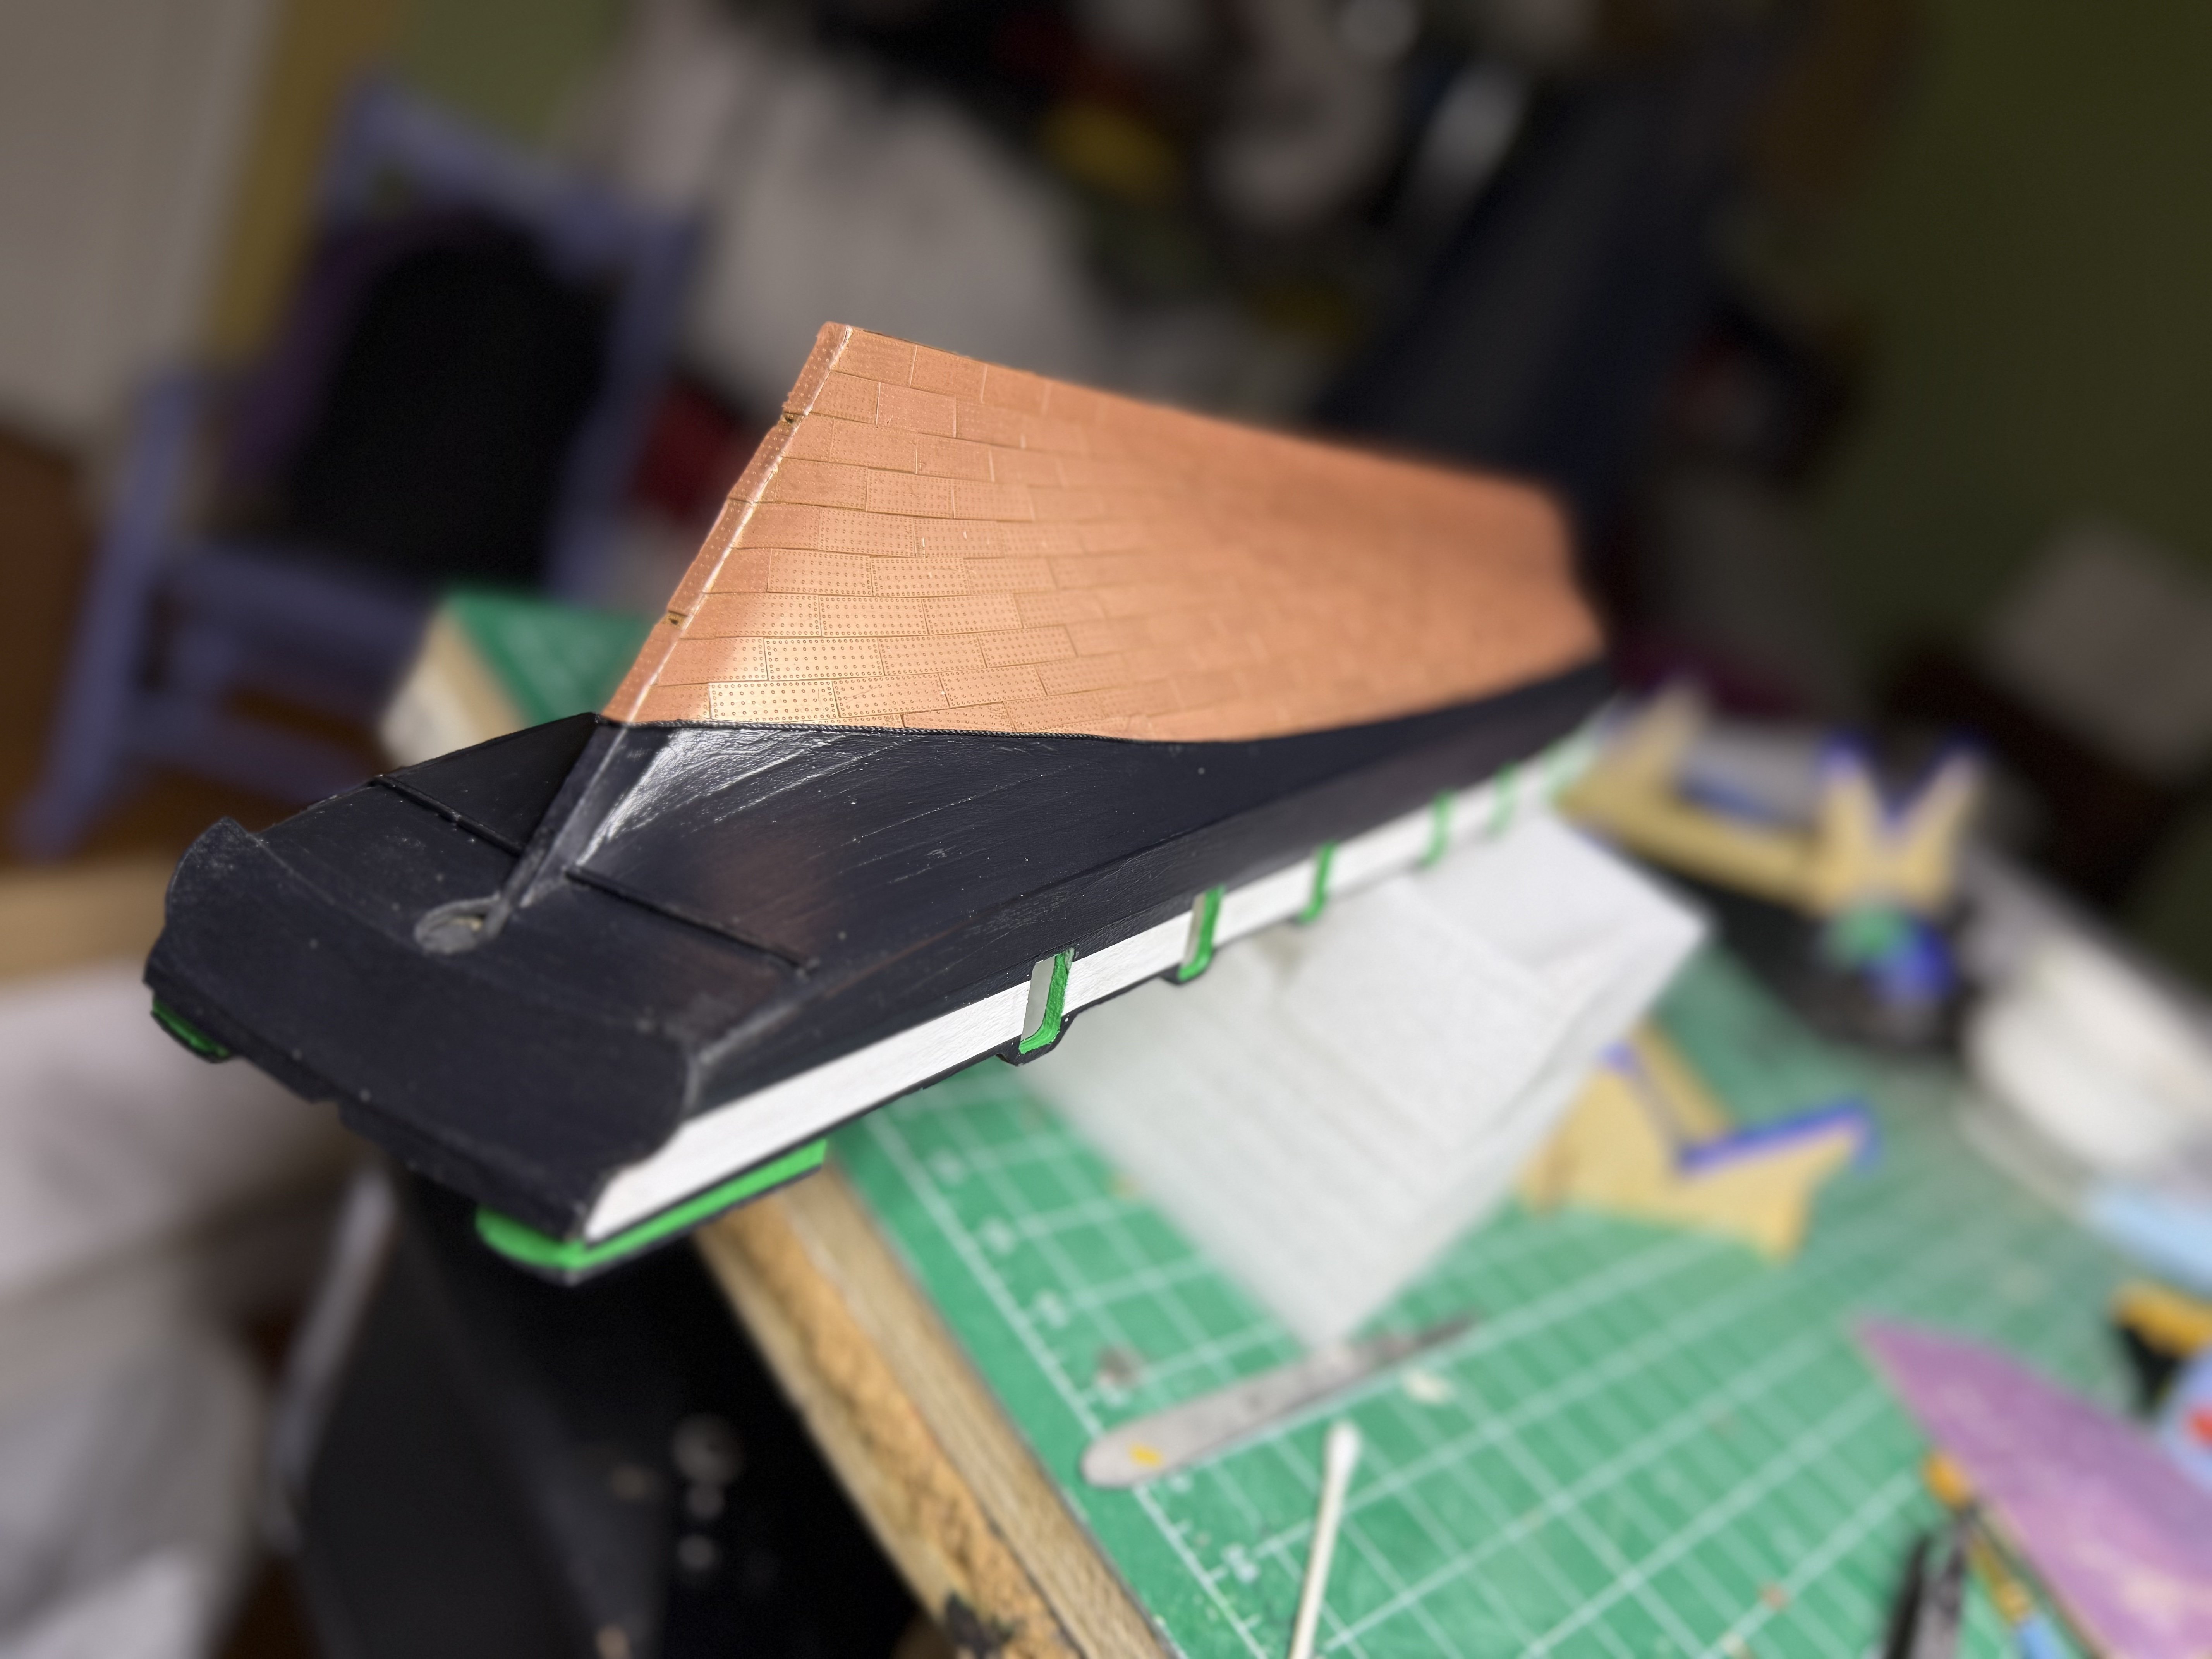
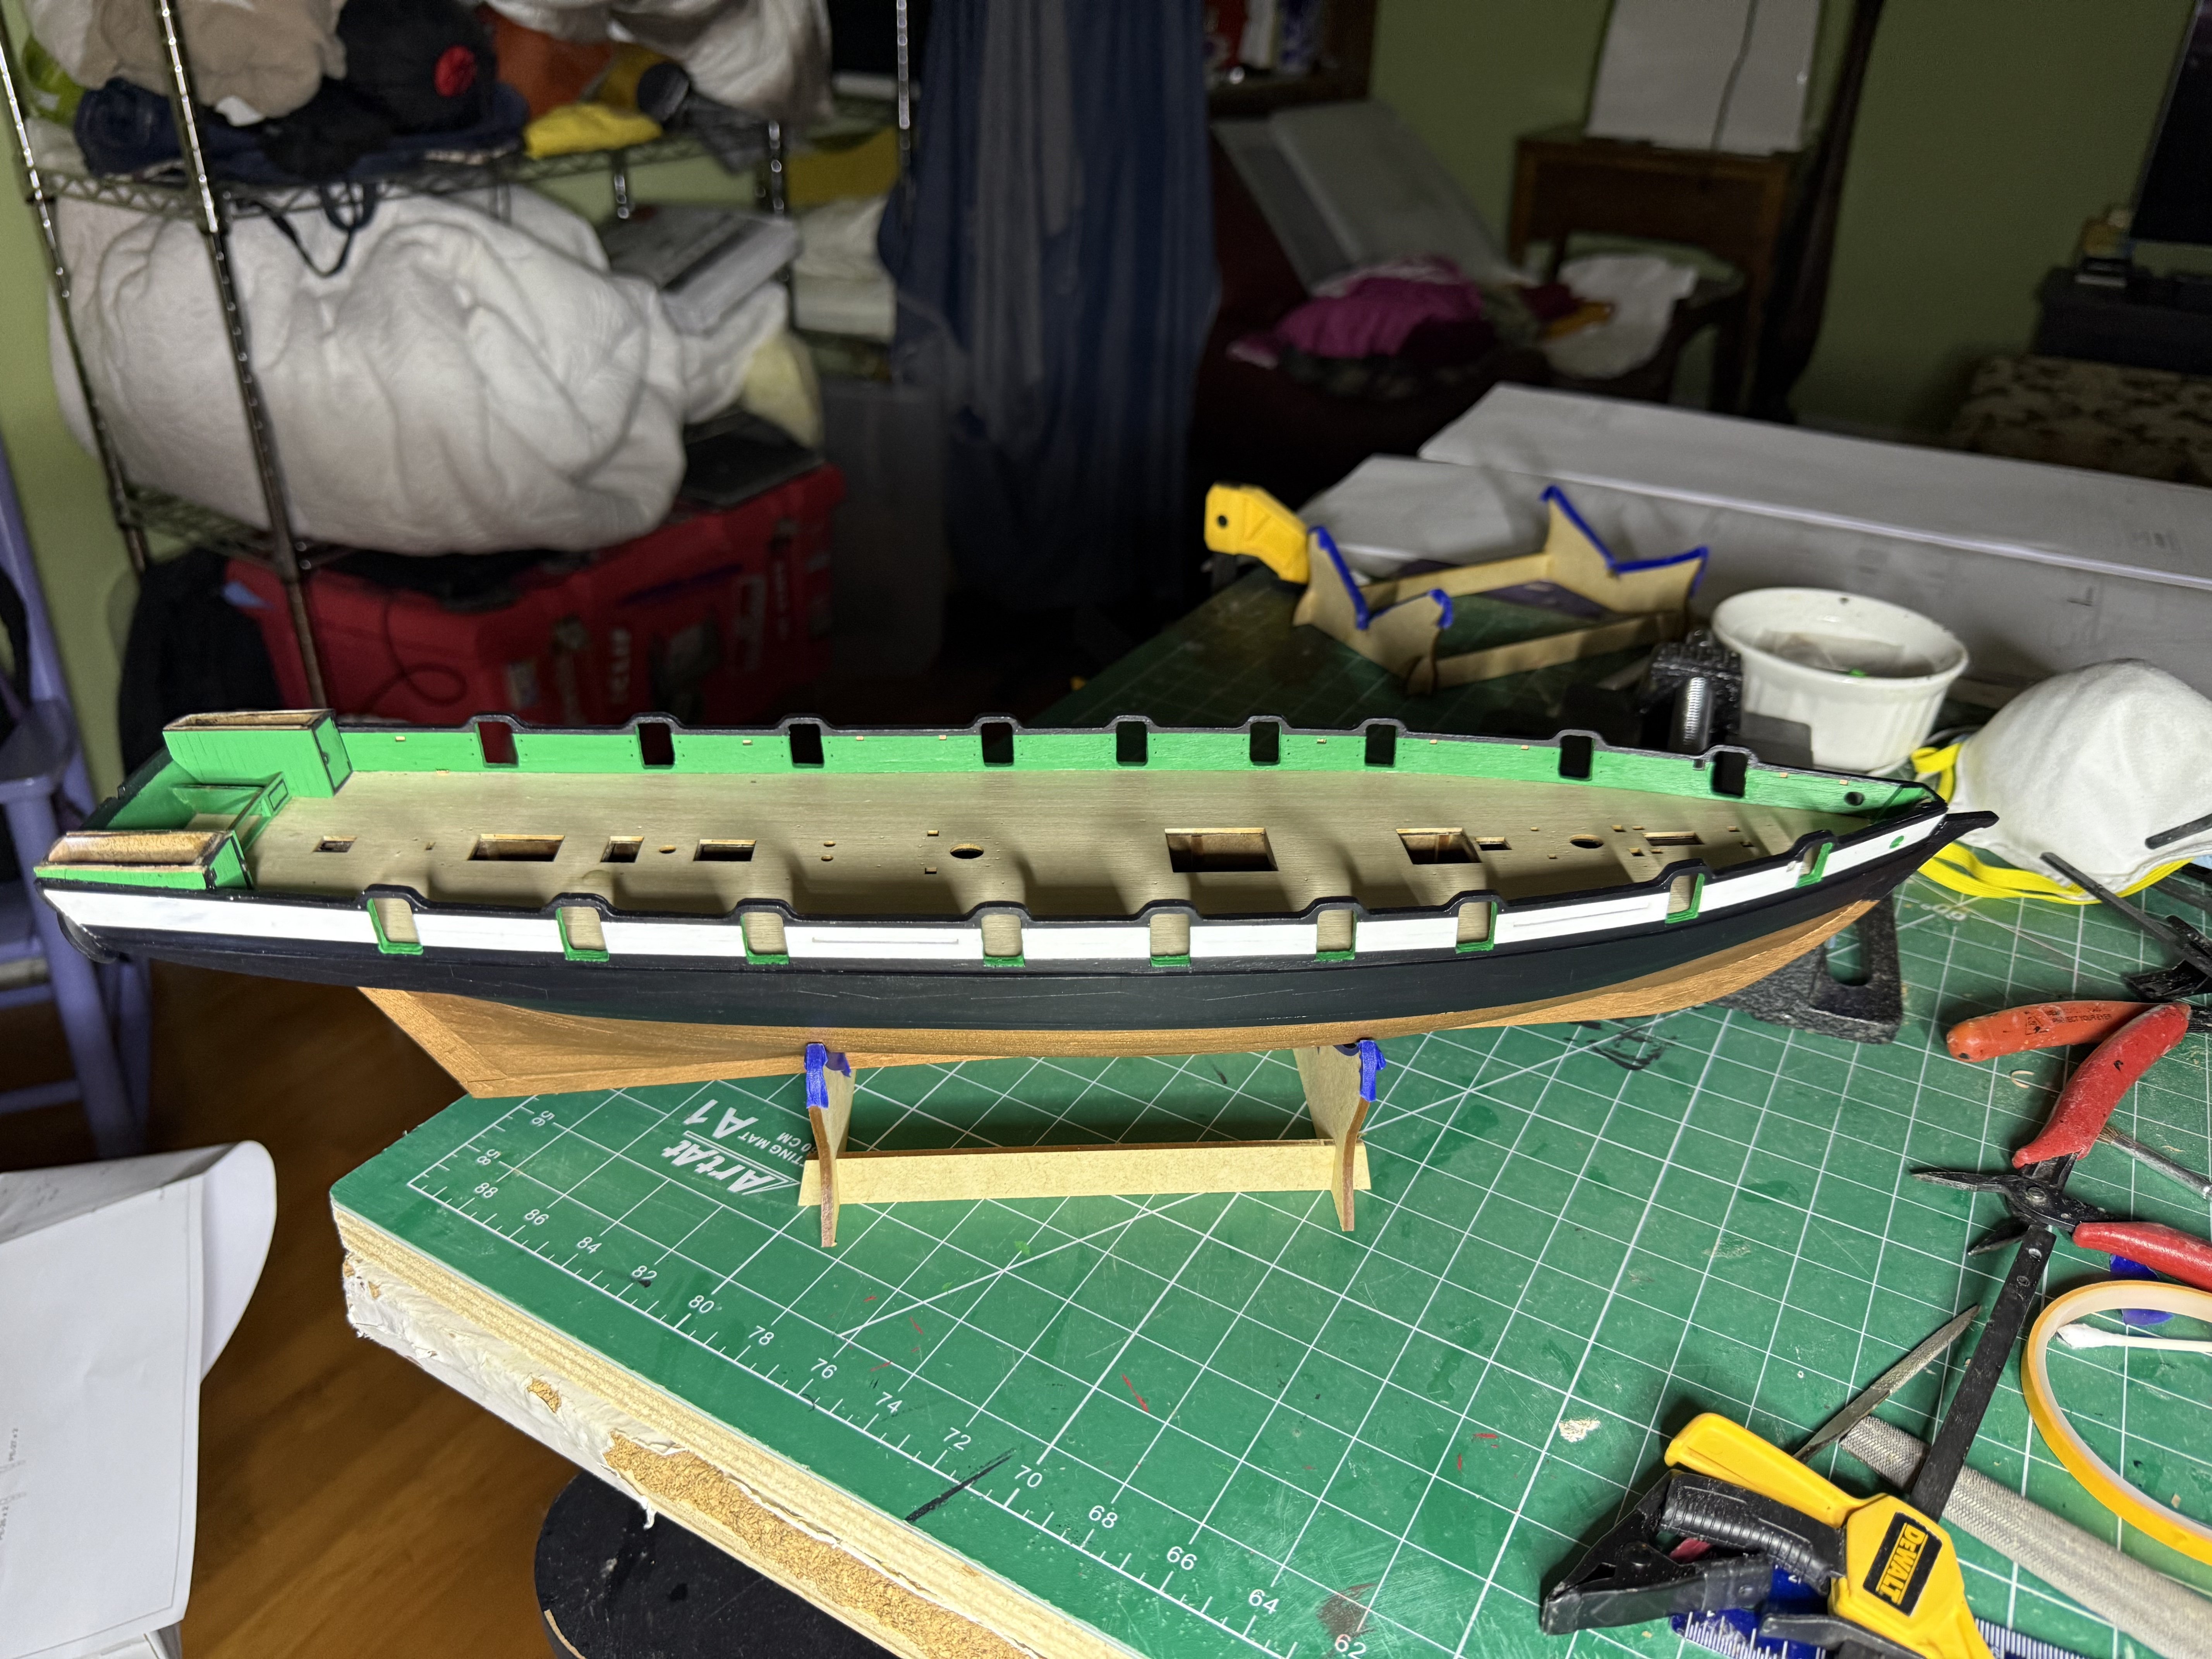
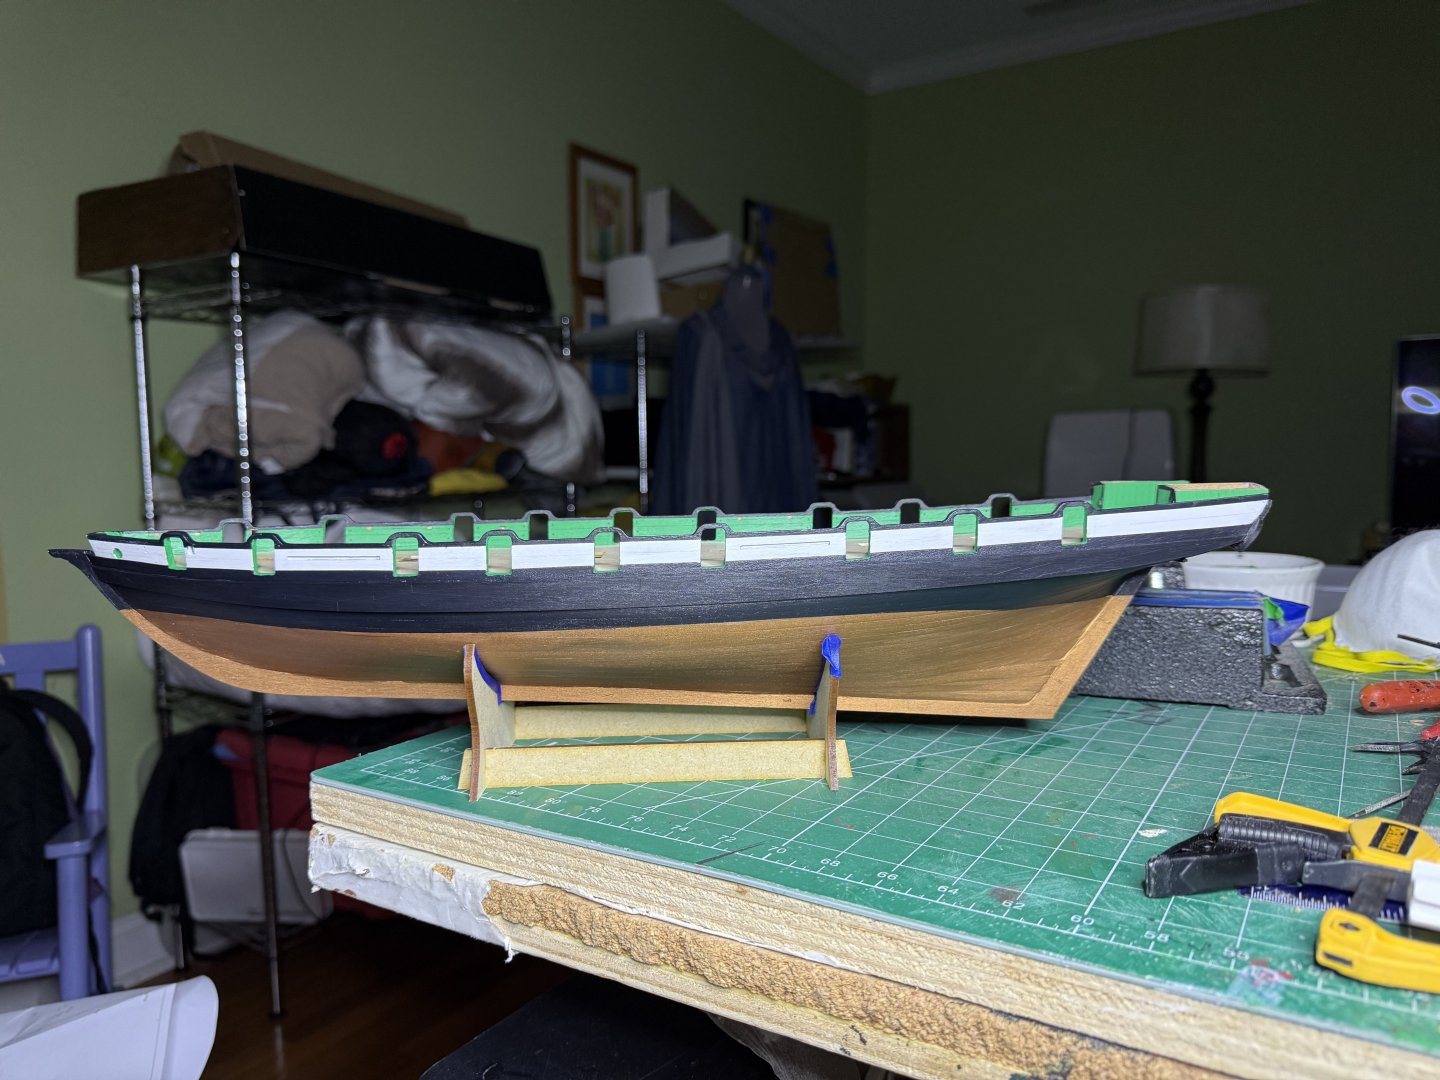
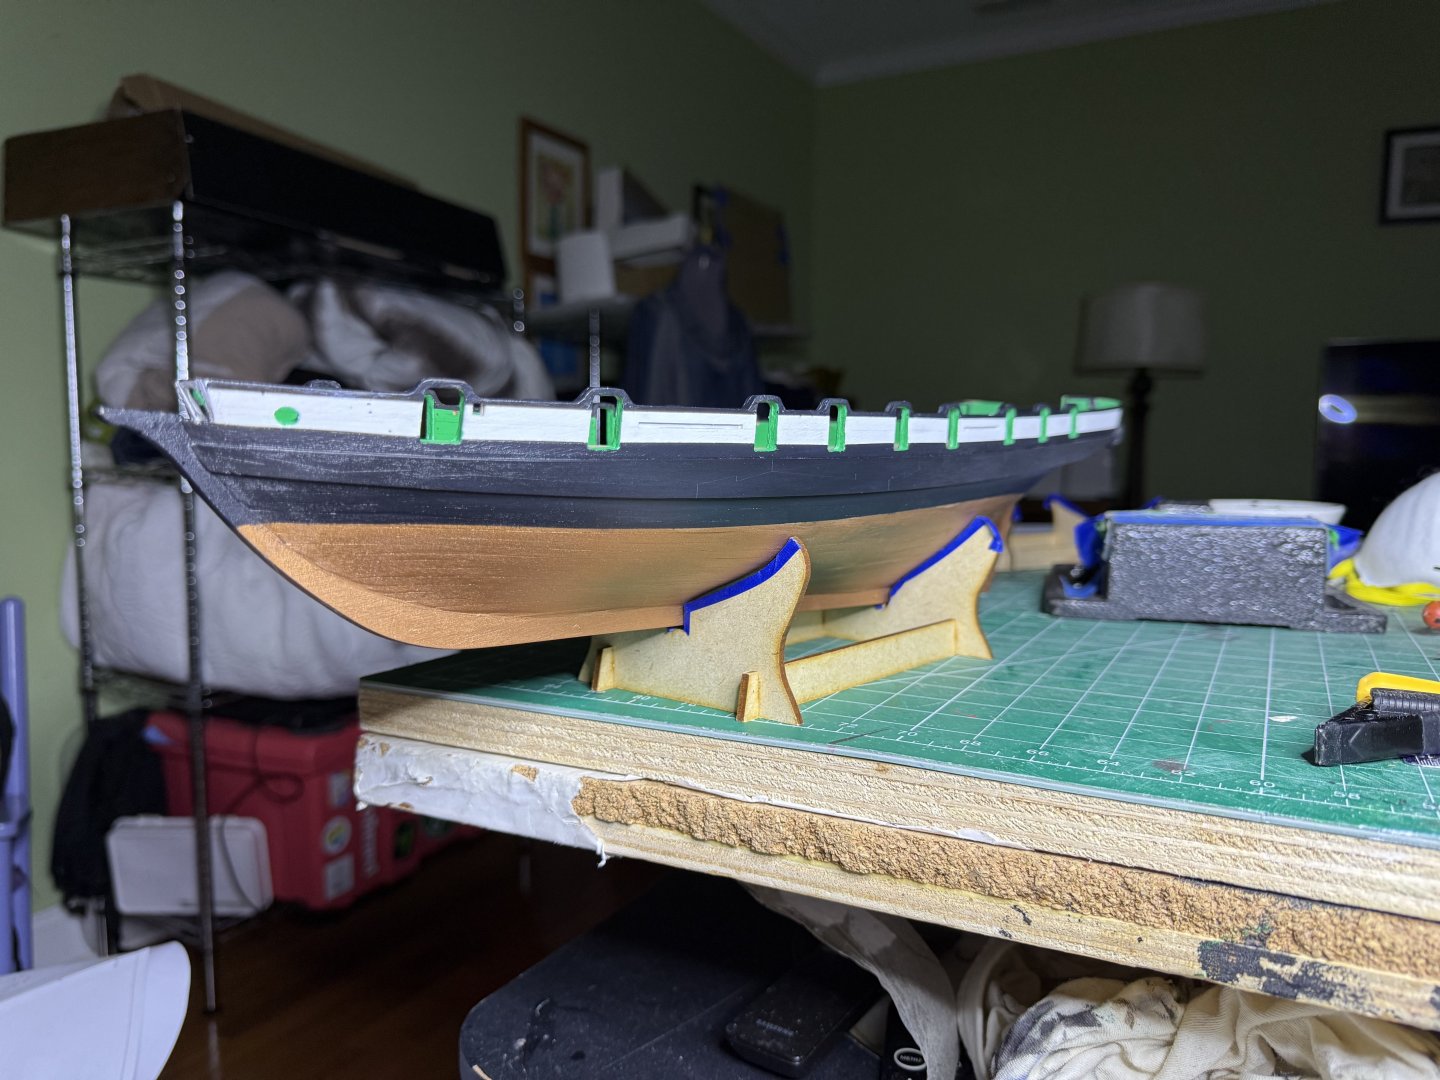
Spent the day finishing the painting and adding the stern cabin doors. I used door latches I had left from Harpy. The roofs are drying after soaking them to get the curve set overnight. The copper paint looks pretty good to me but I likely be starting coppering proper later this week.


- 52 replies
-
- 5
-
-
- Grecian
- Vanguard Models
- (and 1 more)
-
Thanks, I raaied it about 2 mm.
-
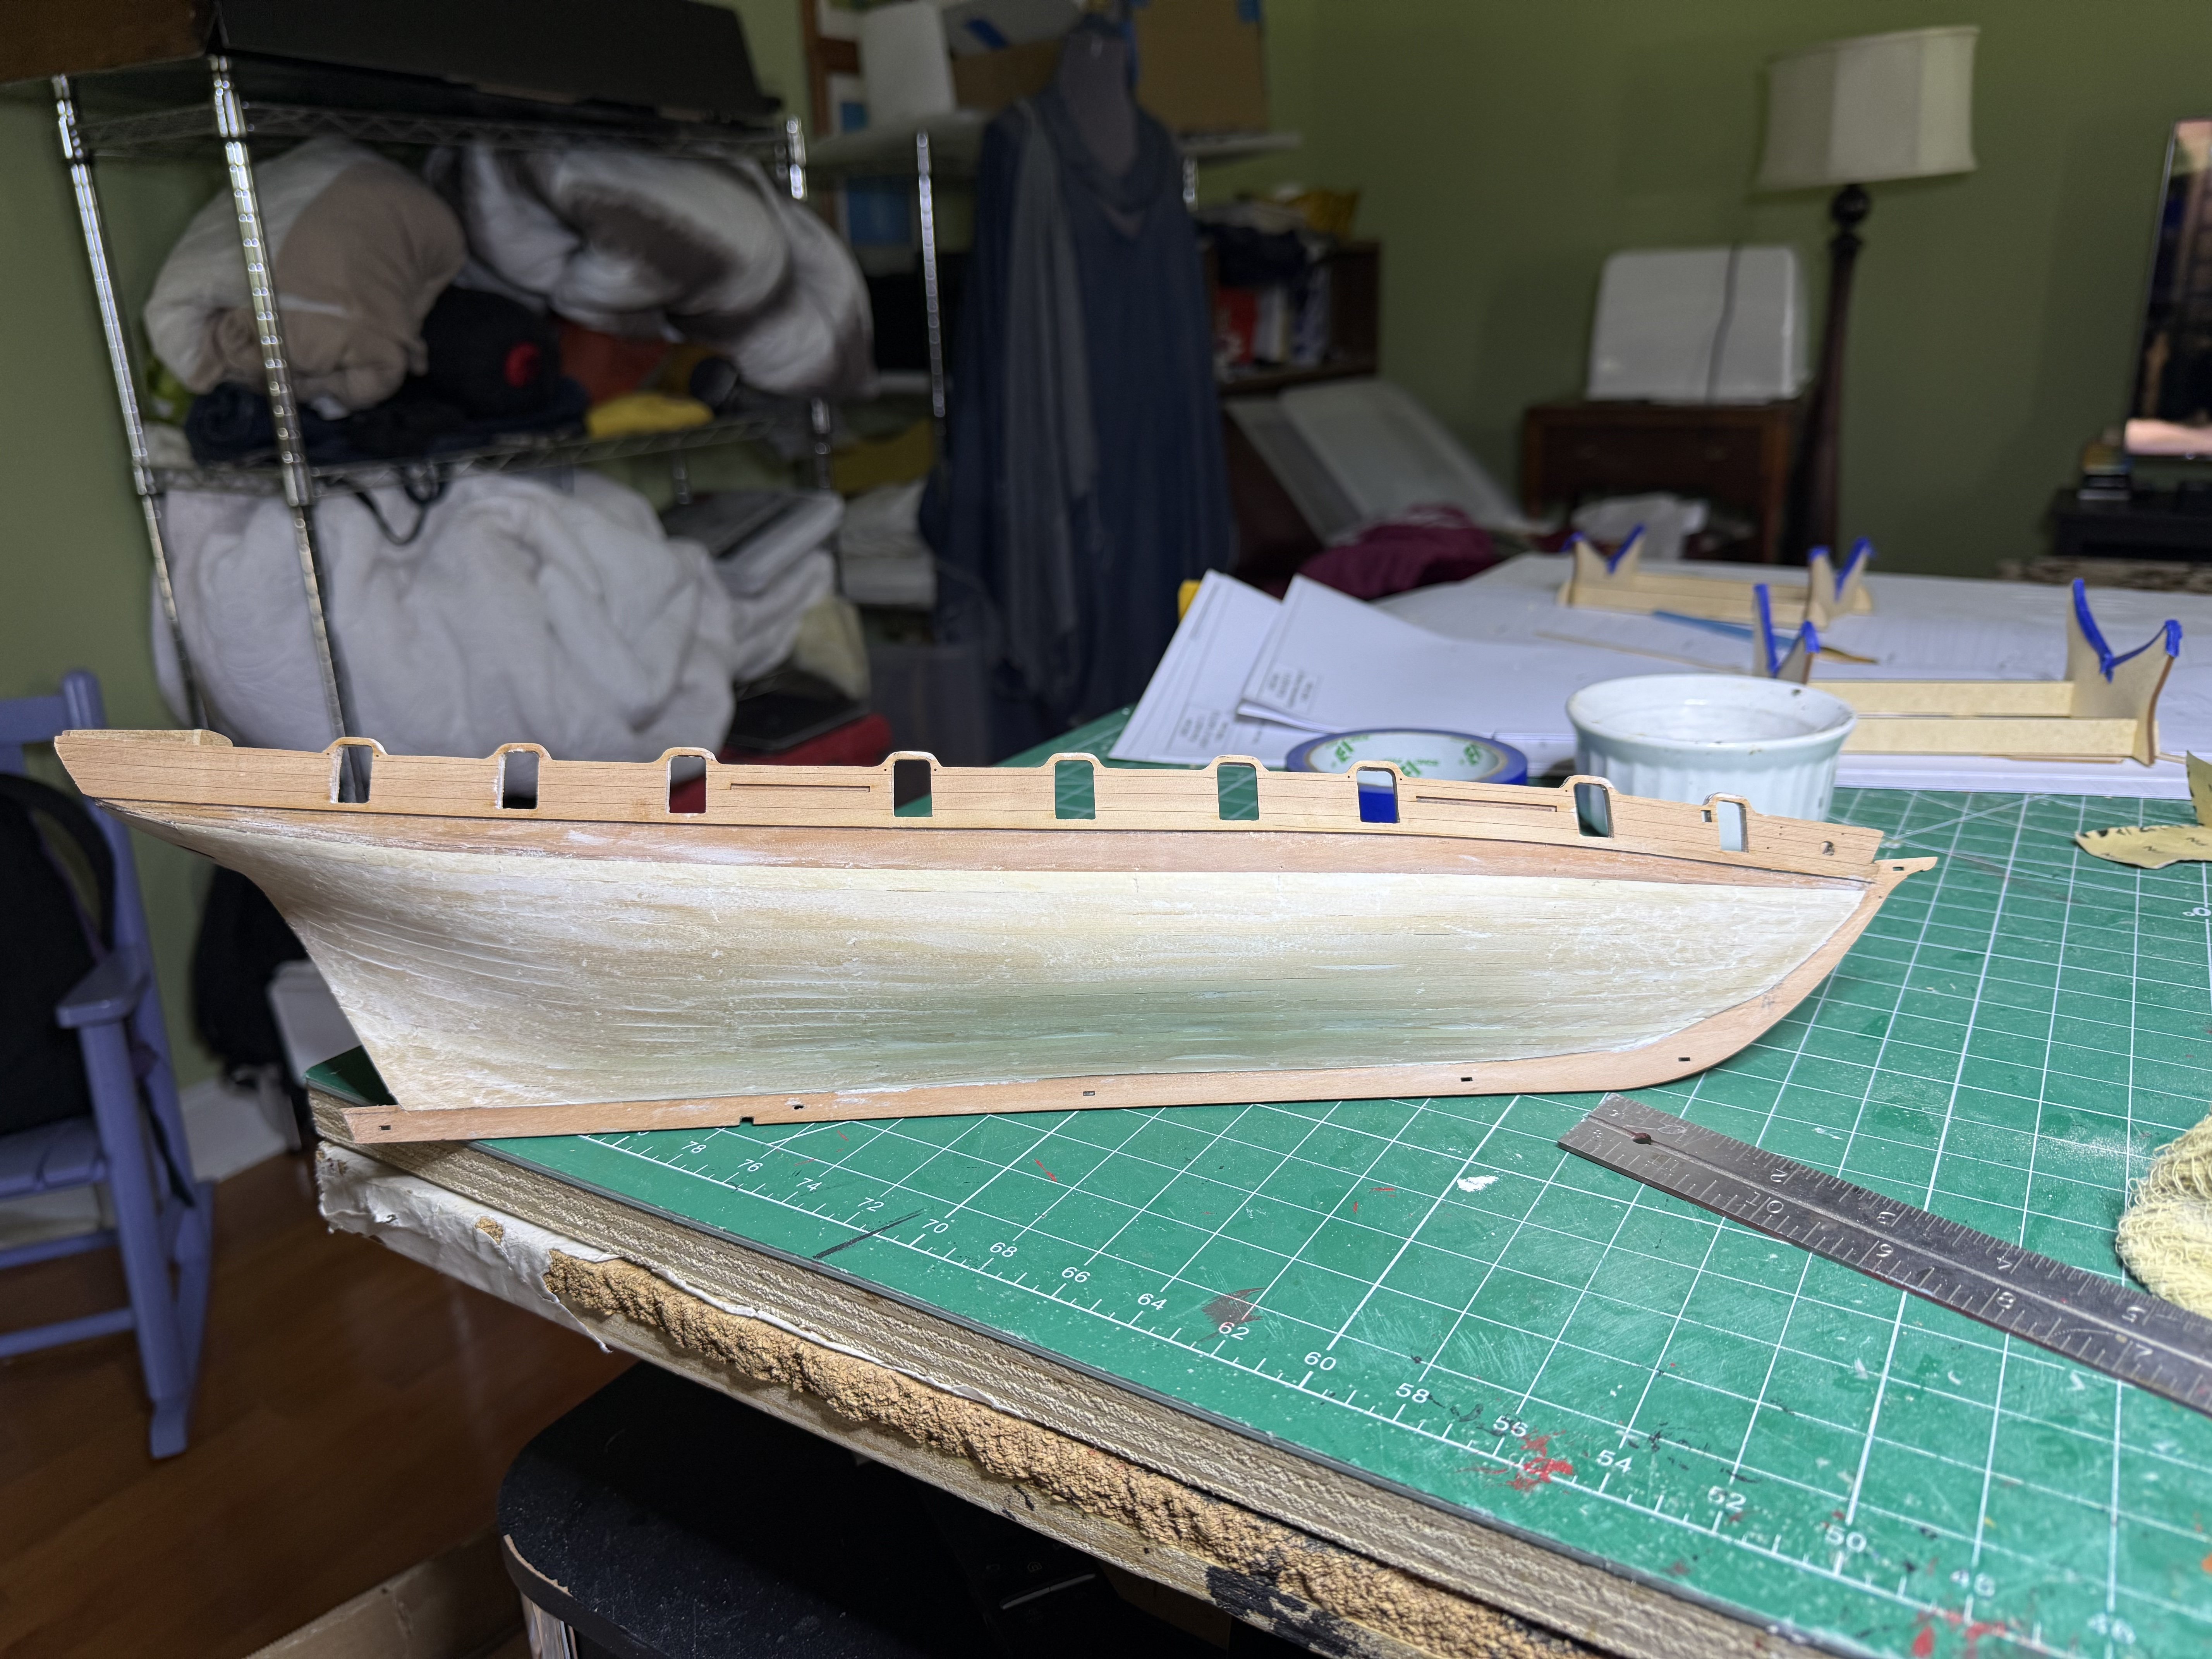
Started painting today. Lots of tape being used. I also drew the water line and painted the area below copper so when I do copper, any gaps will not be glaring. Have not added the cabin doors and siding yet although I did pre-fit them , sanding/filing so they fit.

- 52 replies
-
- 7
-
-
- Grecian
- Vanguard Models
- (and 1 more)
-
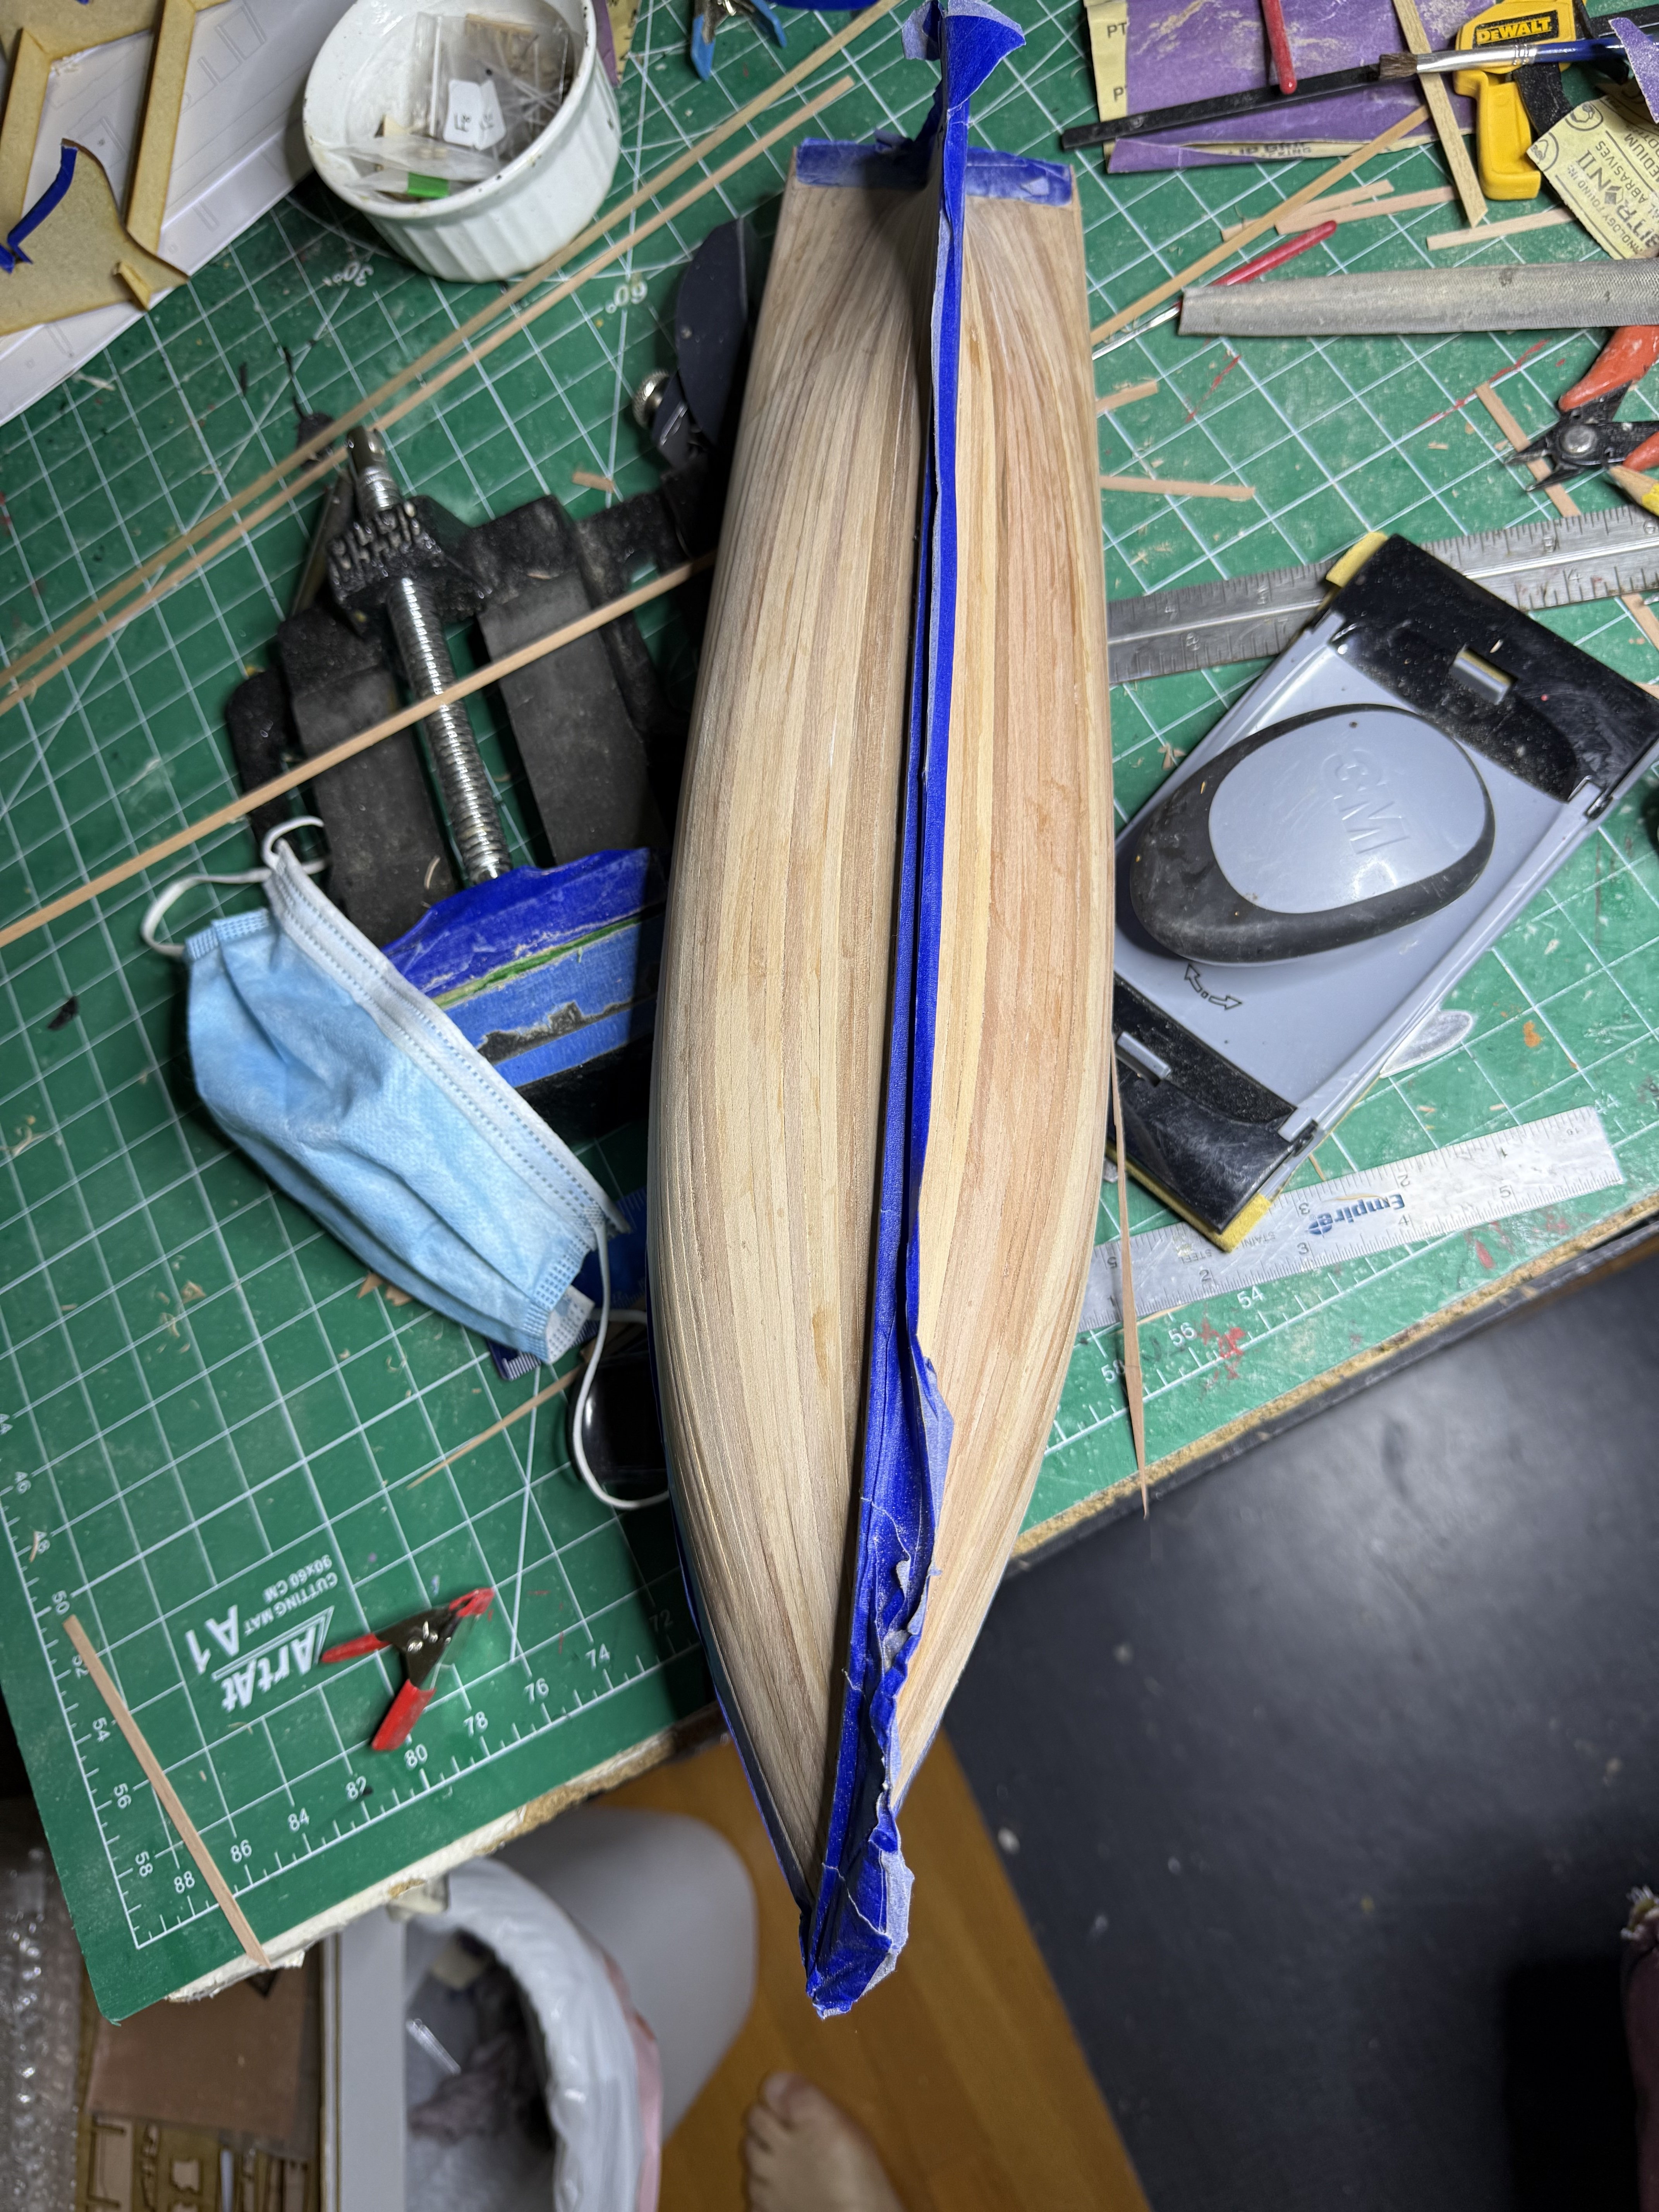
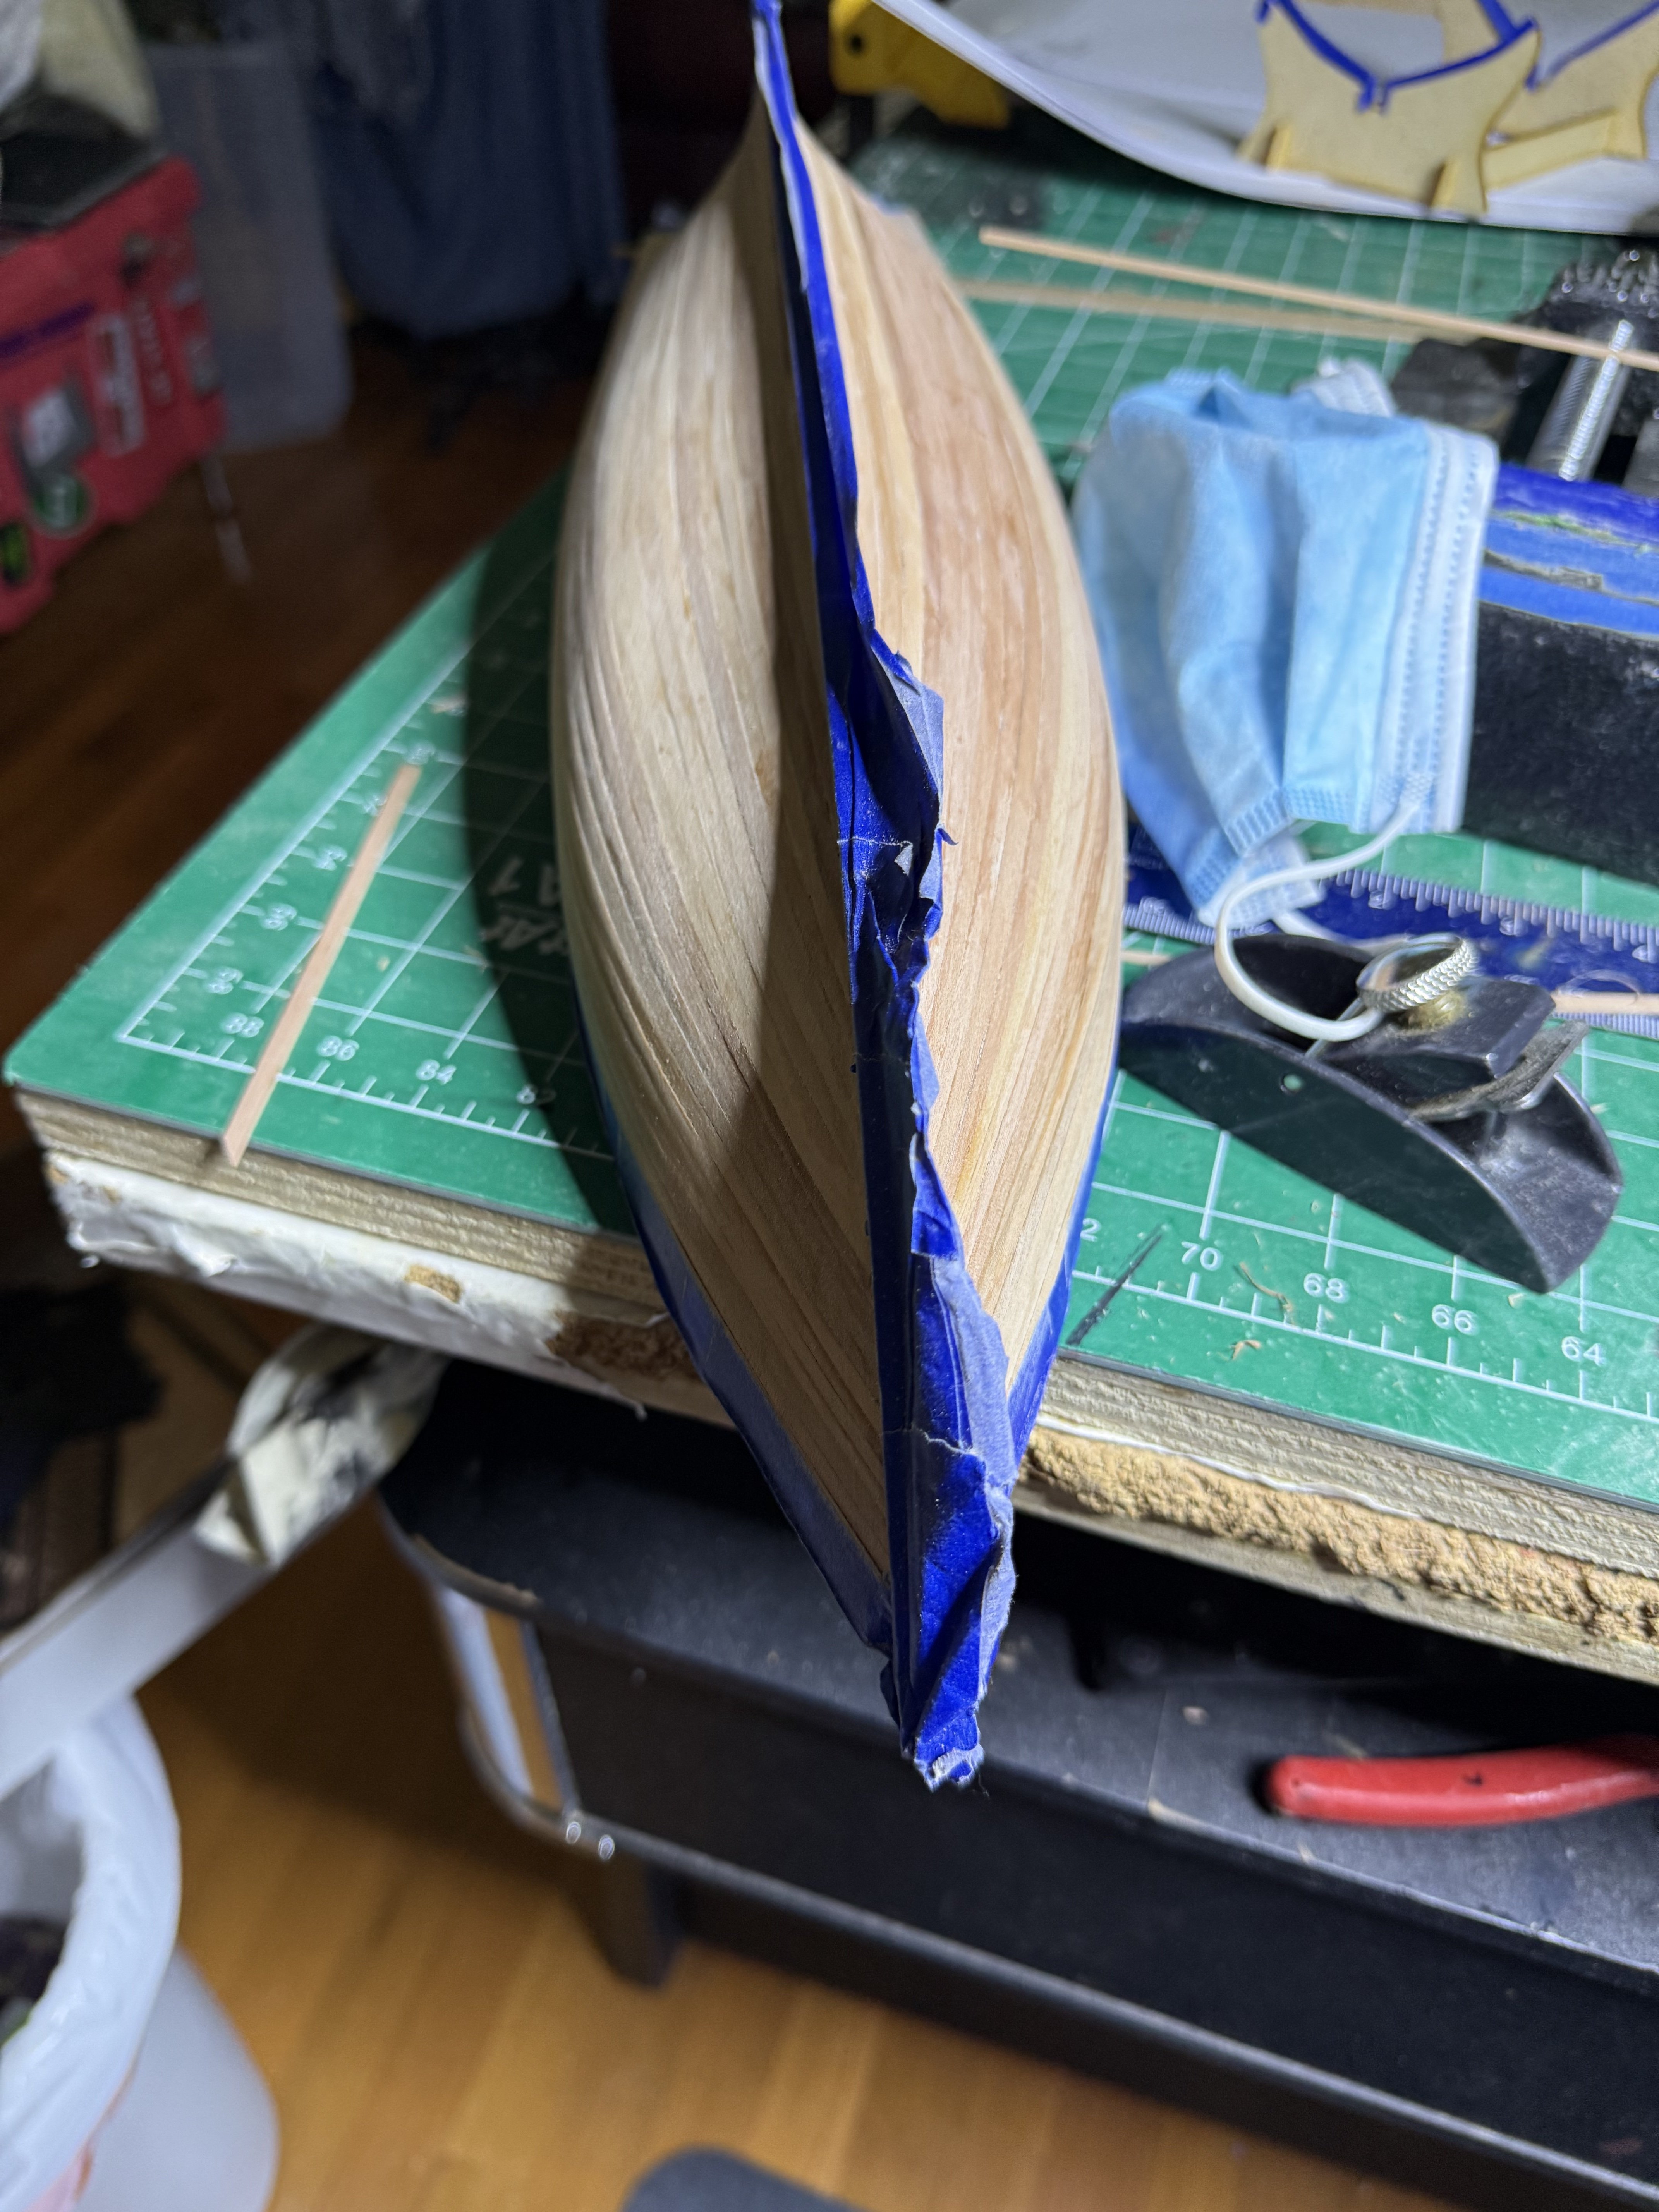
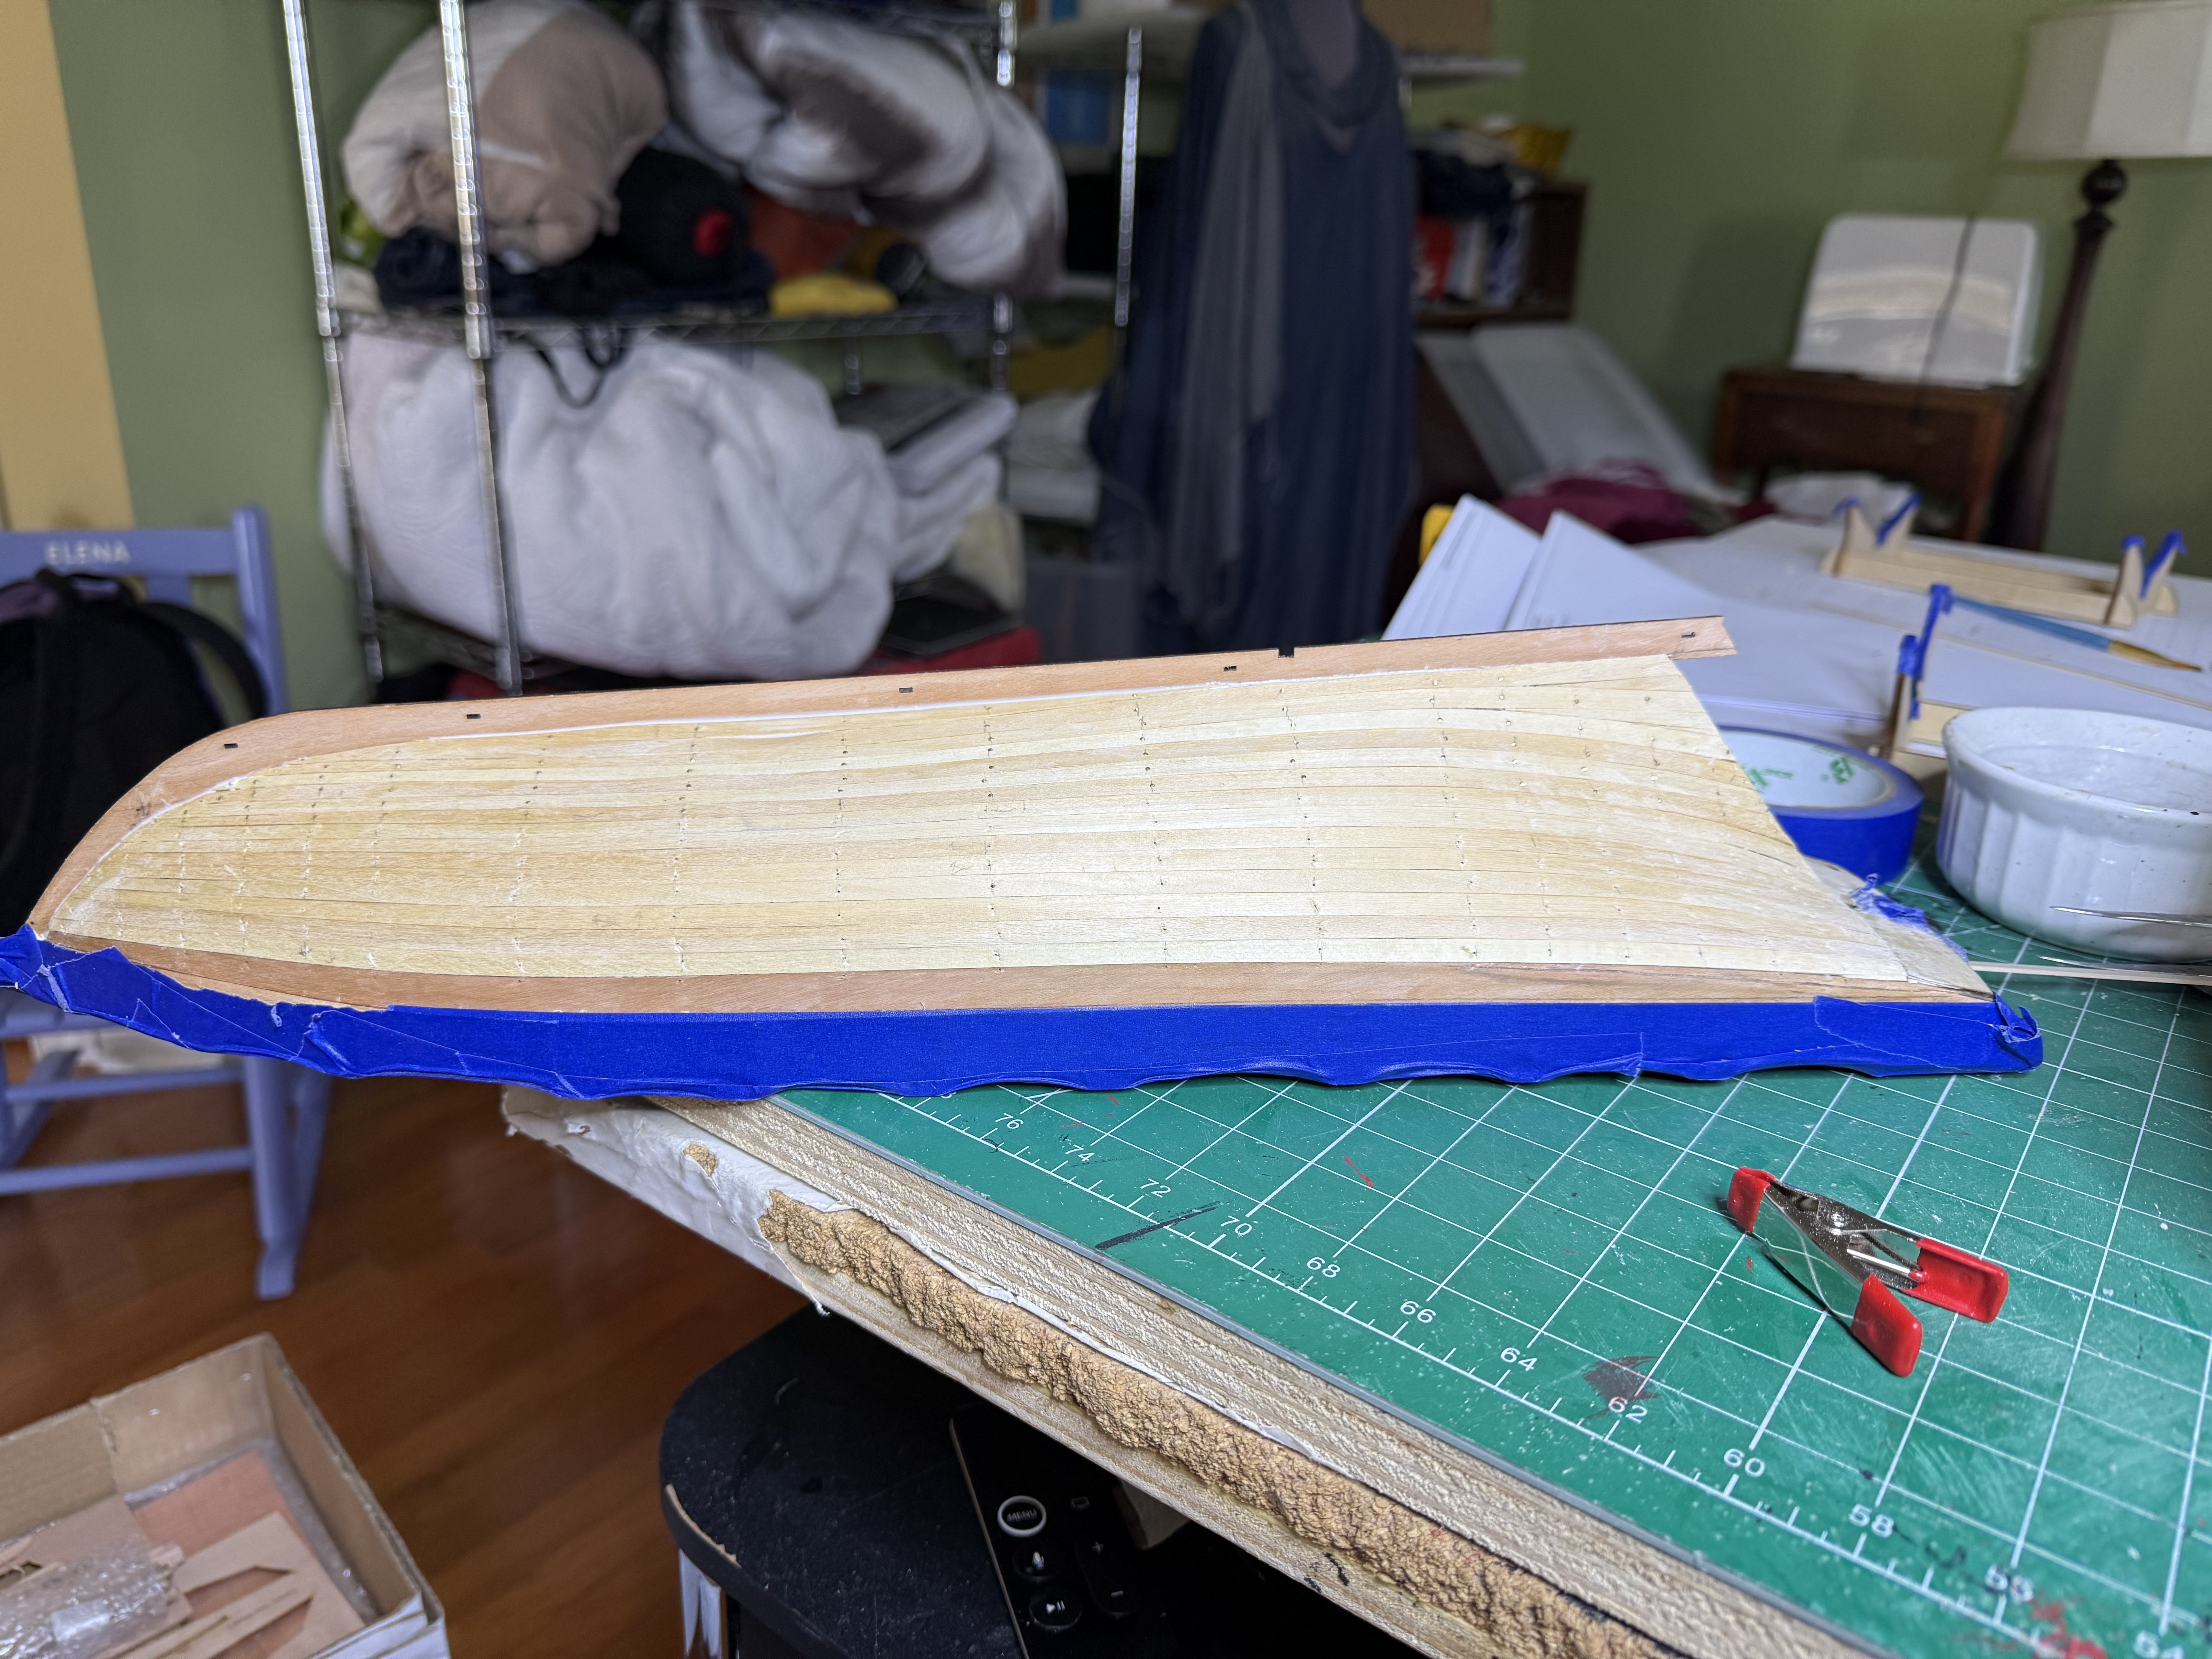
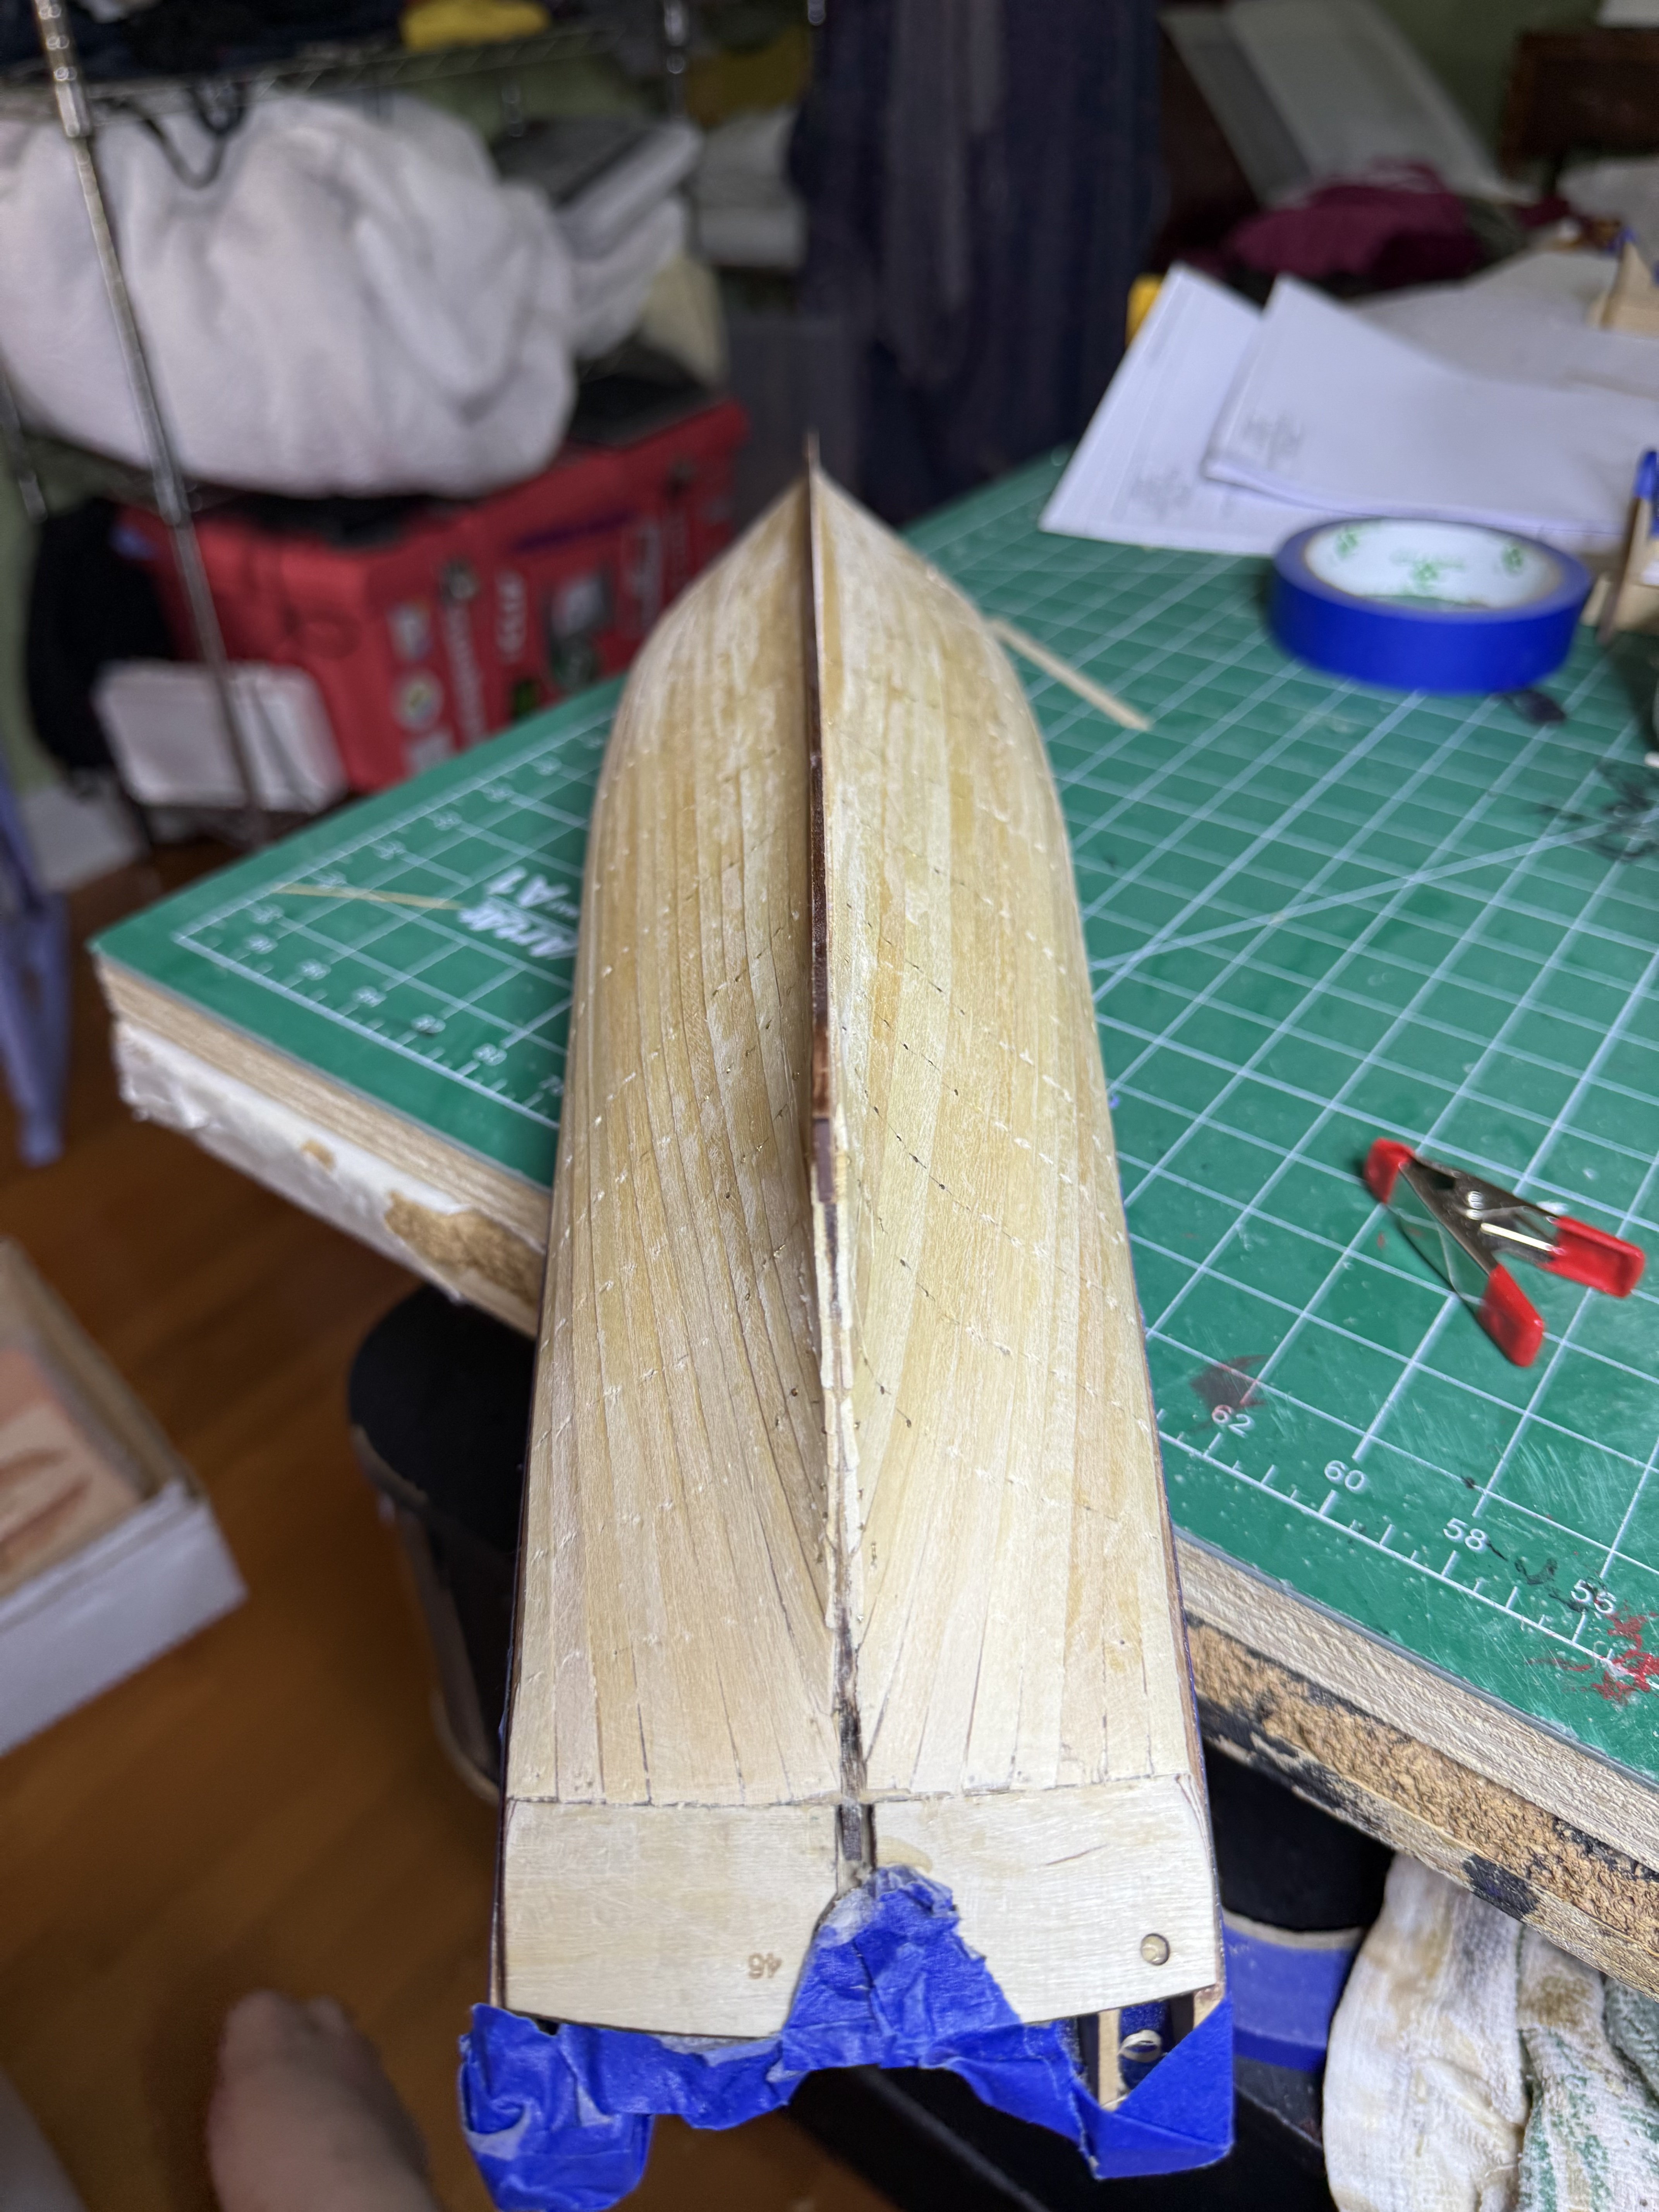
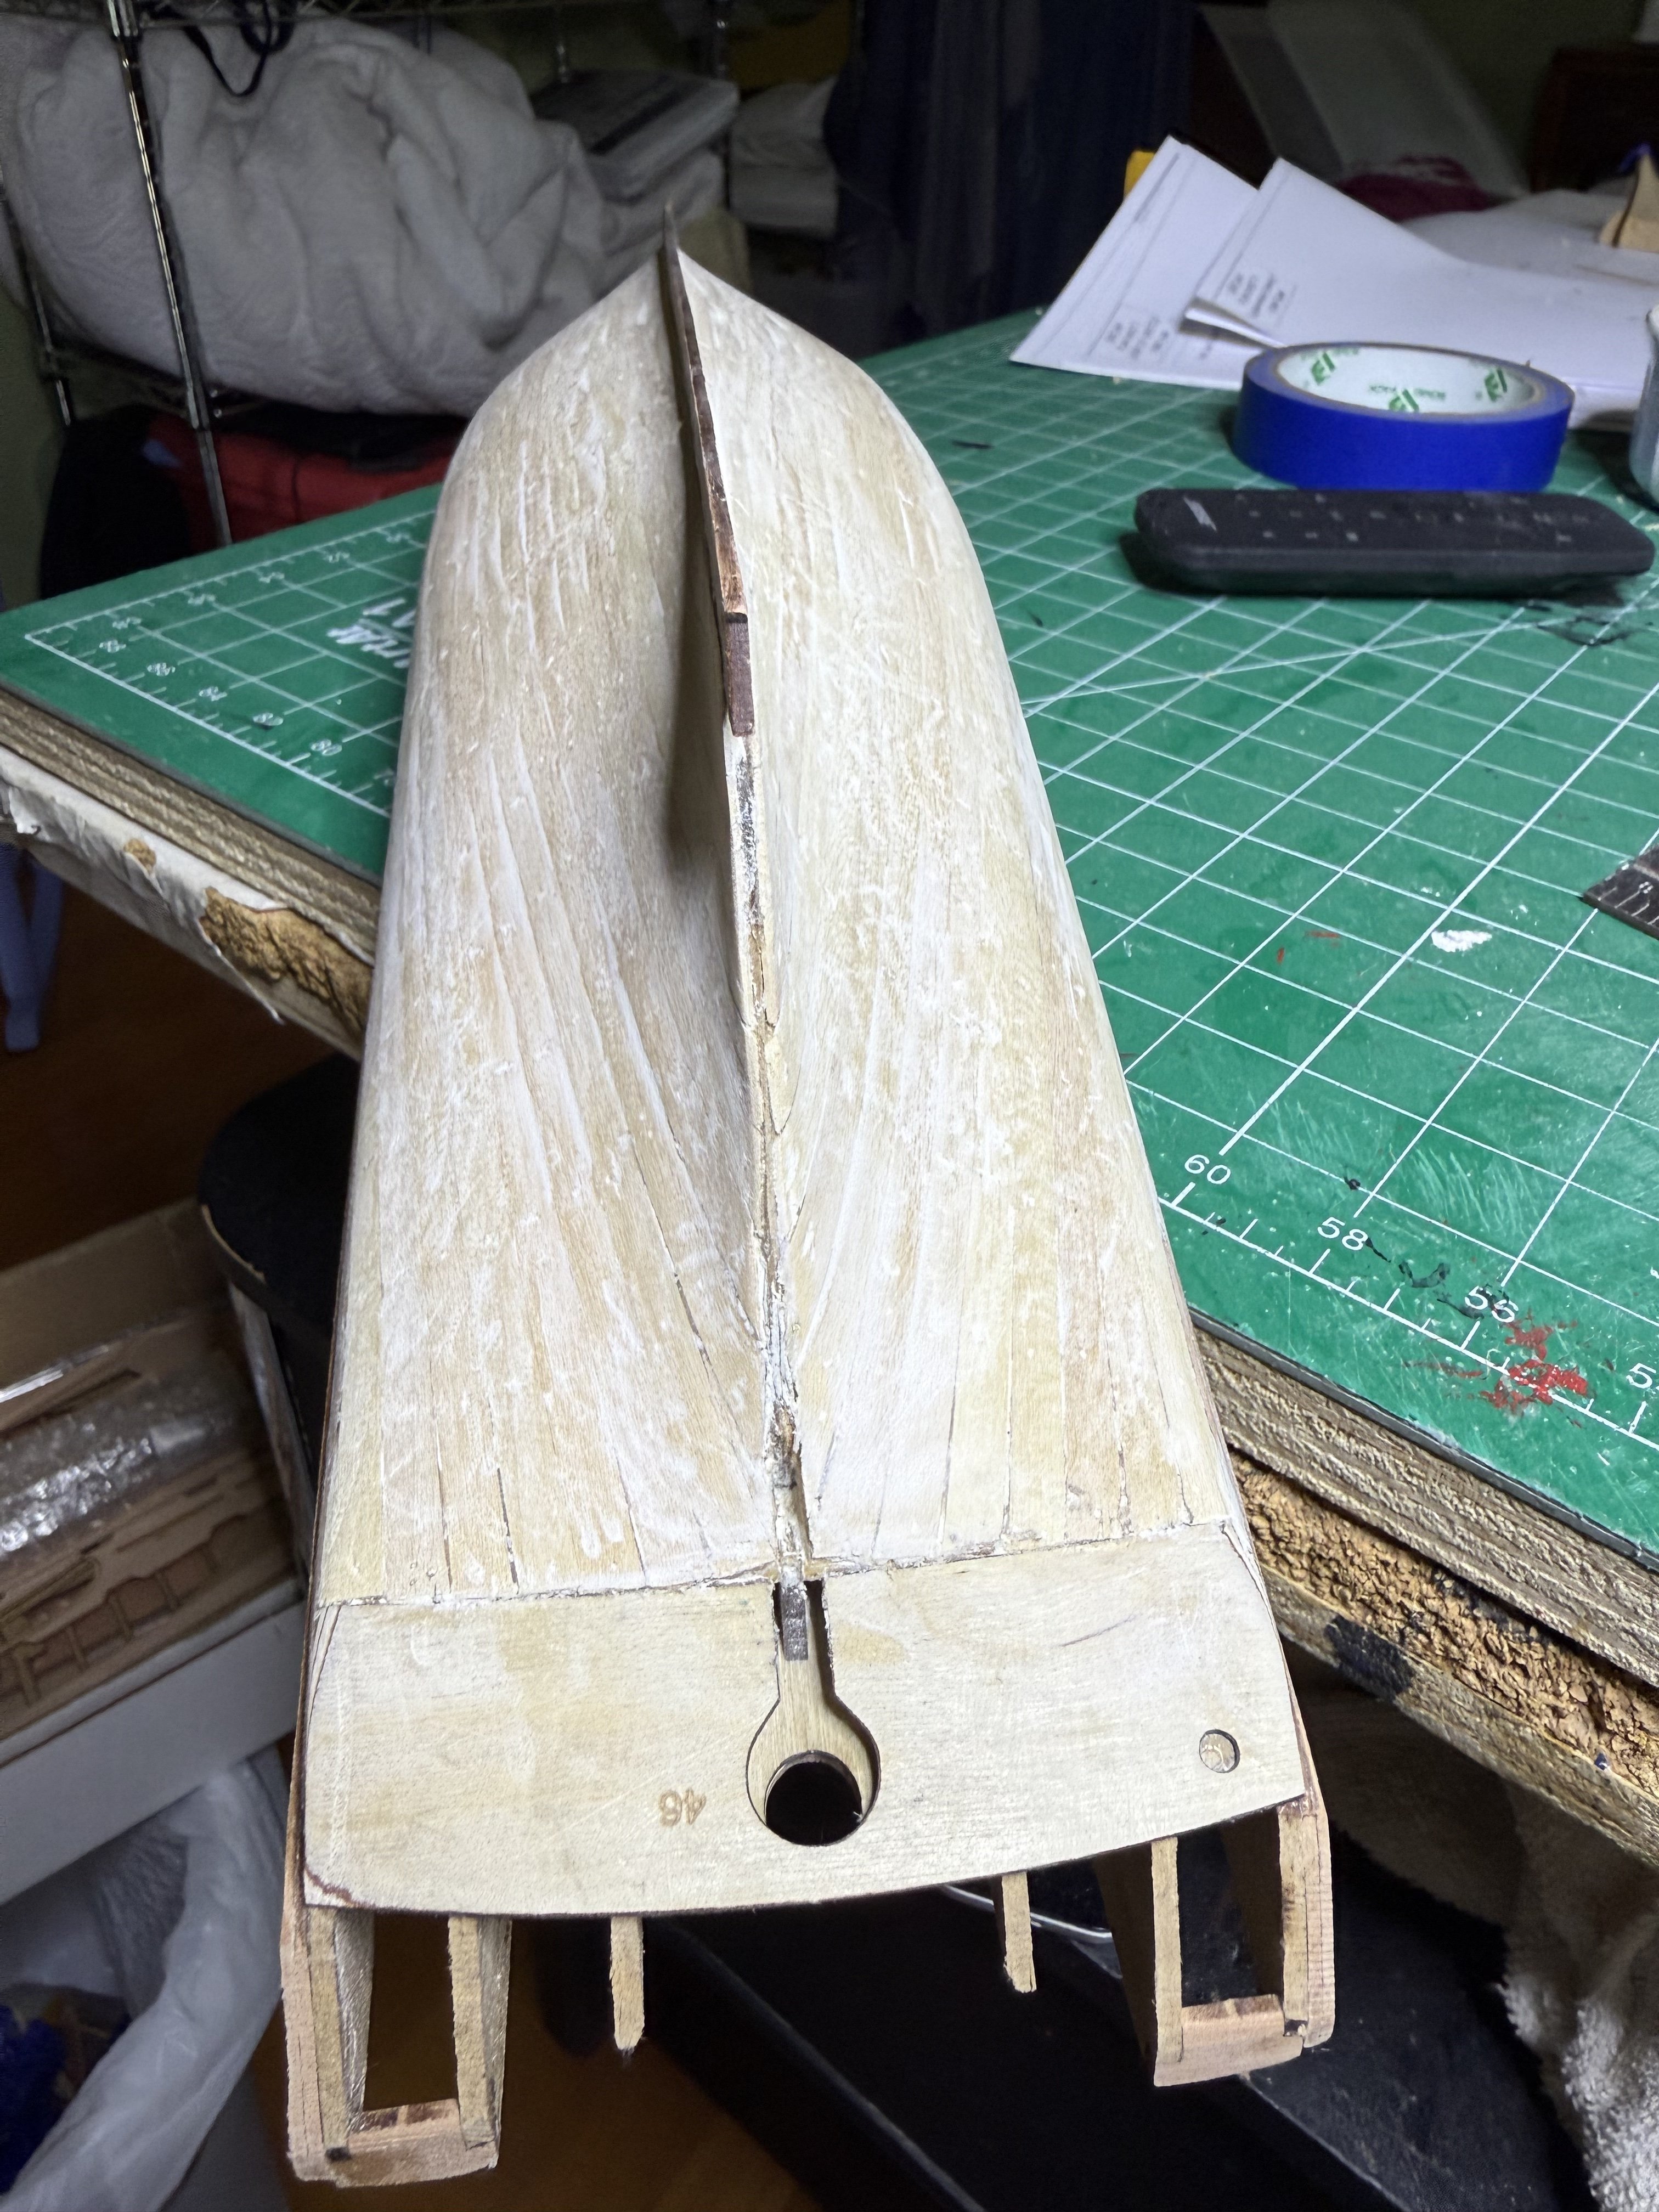
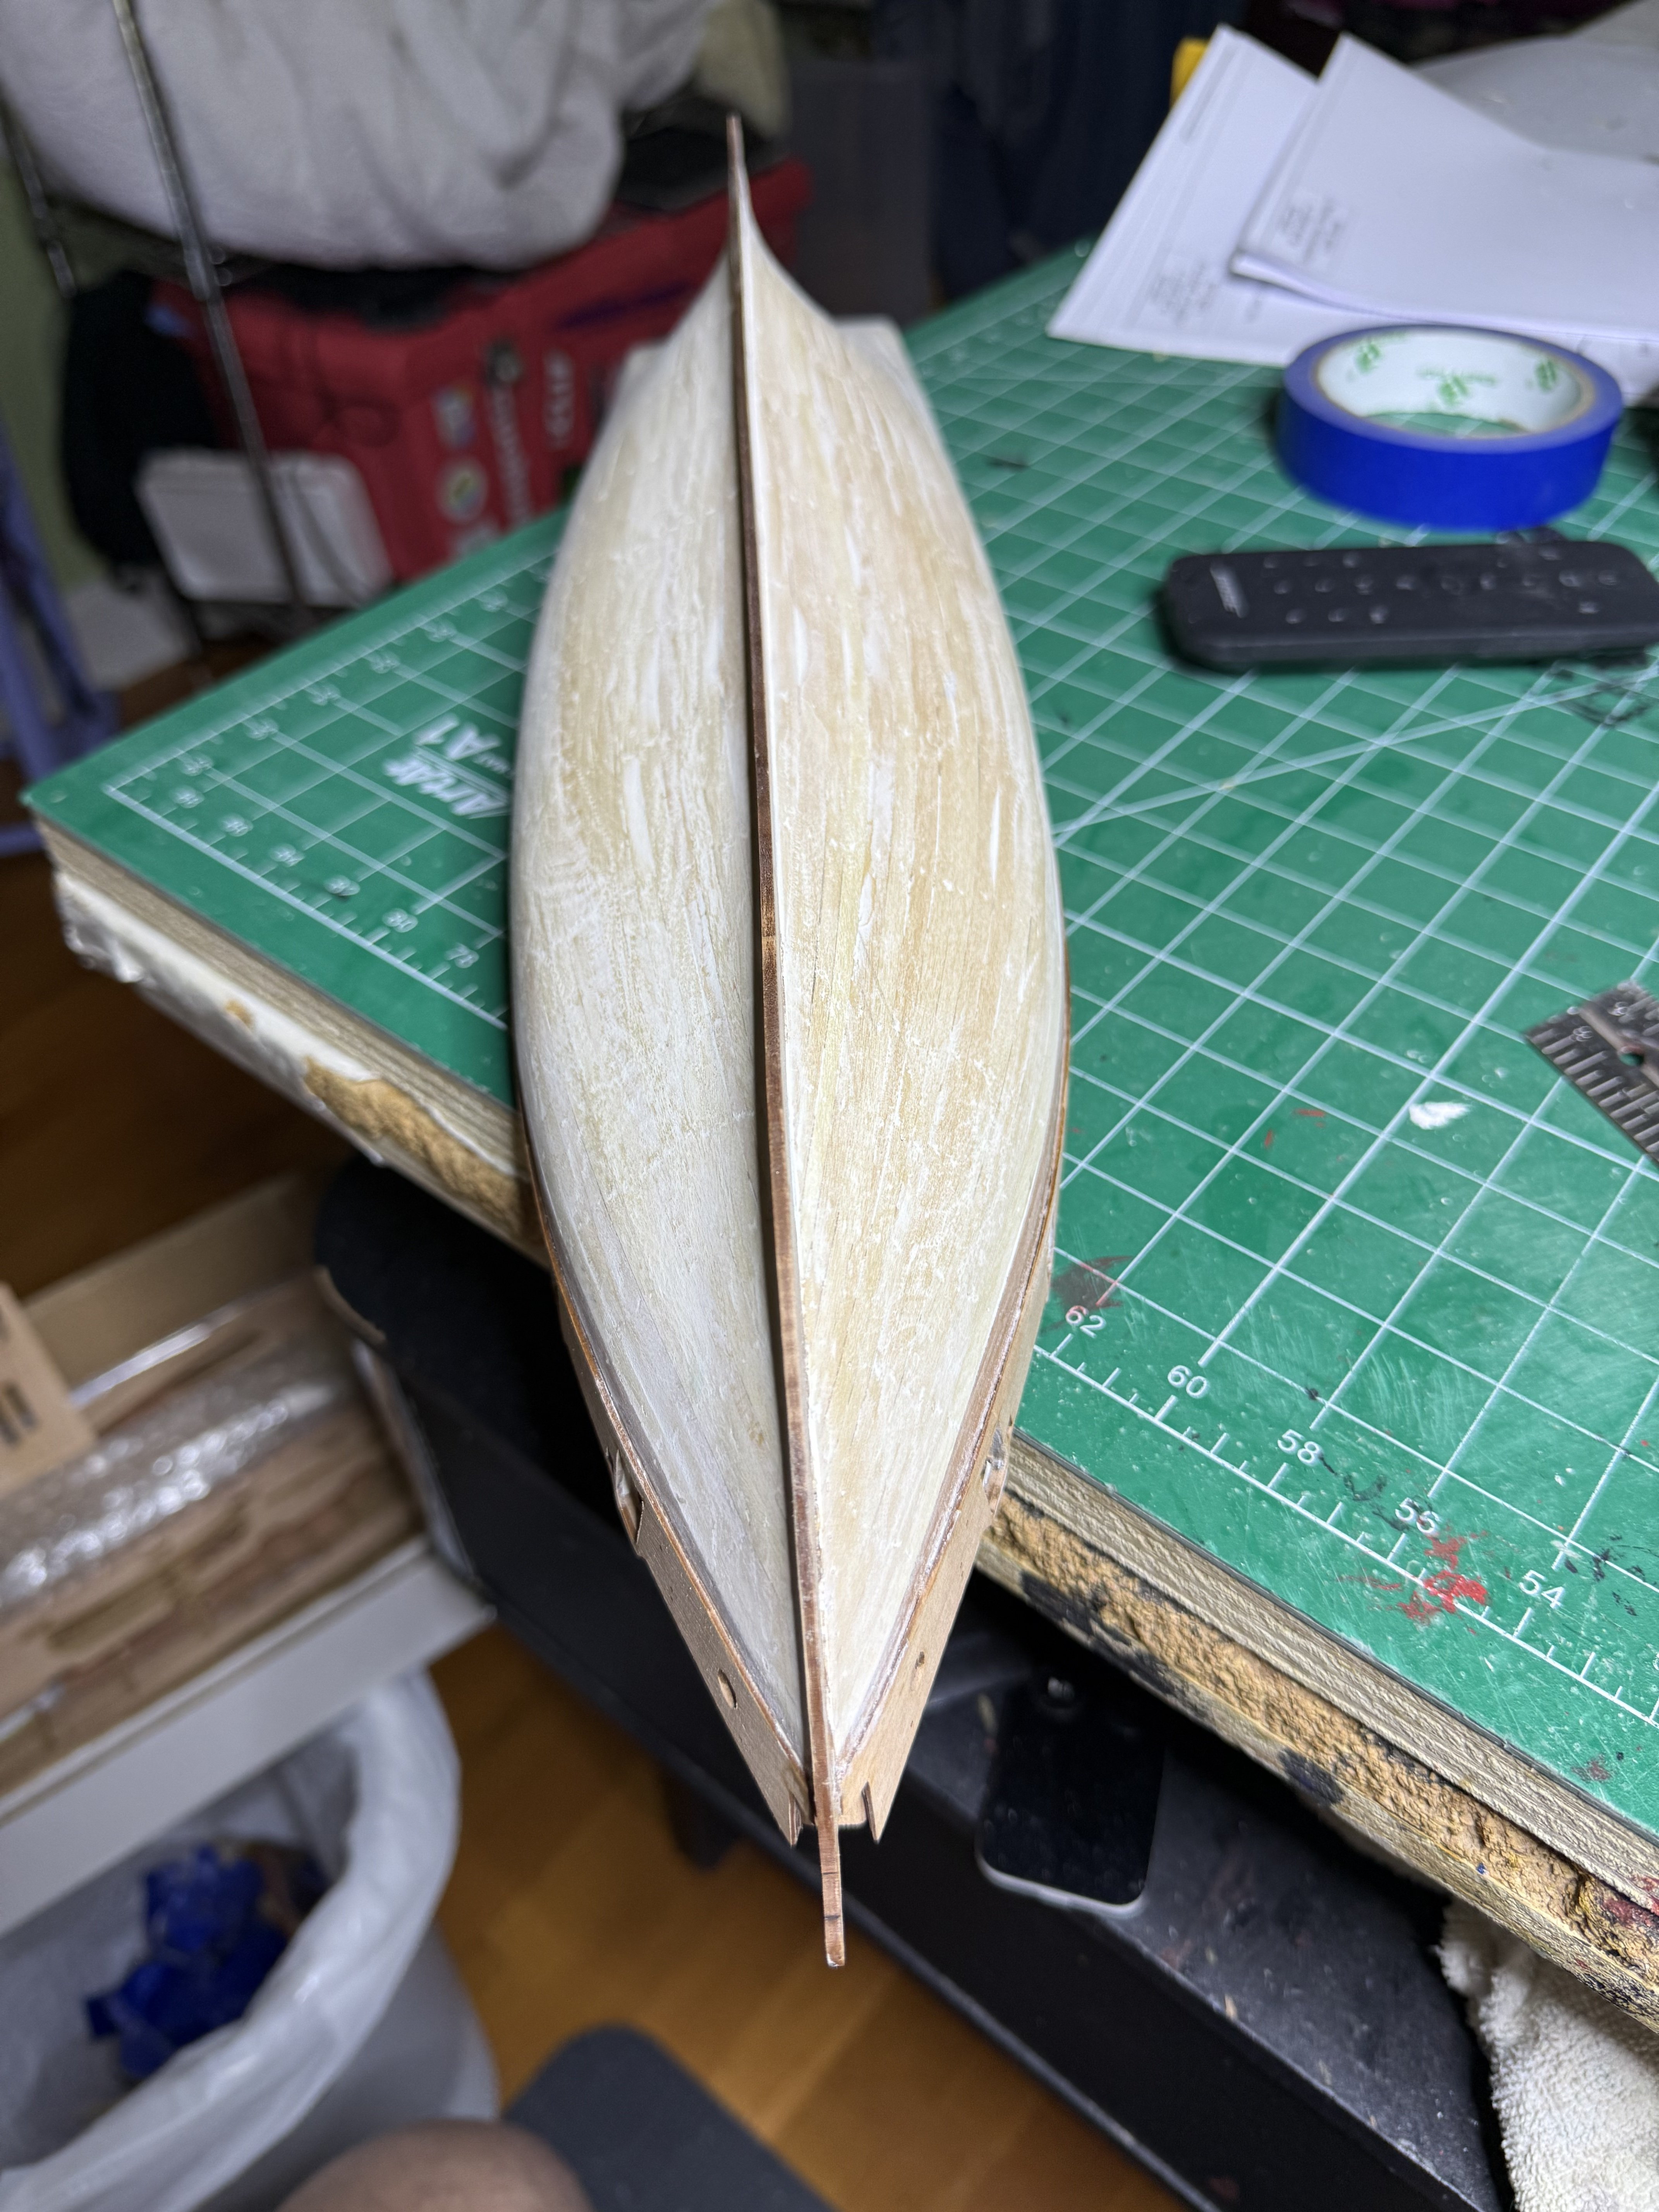
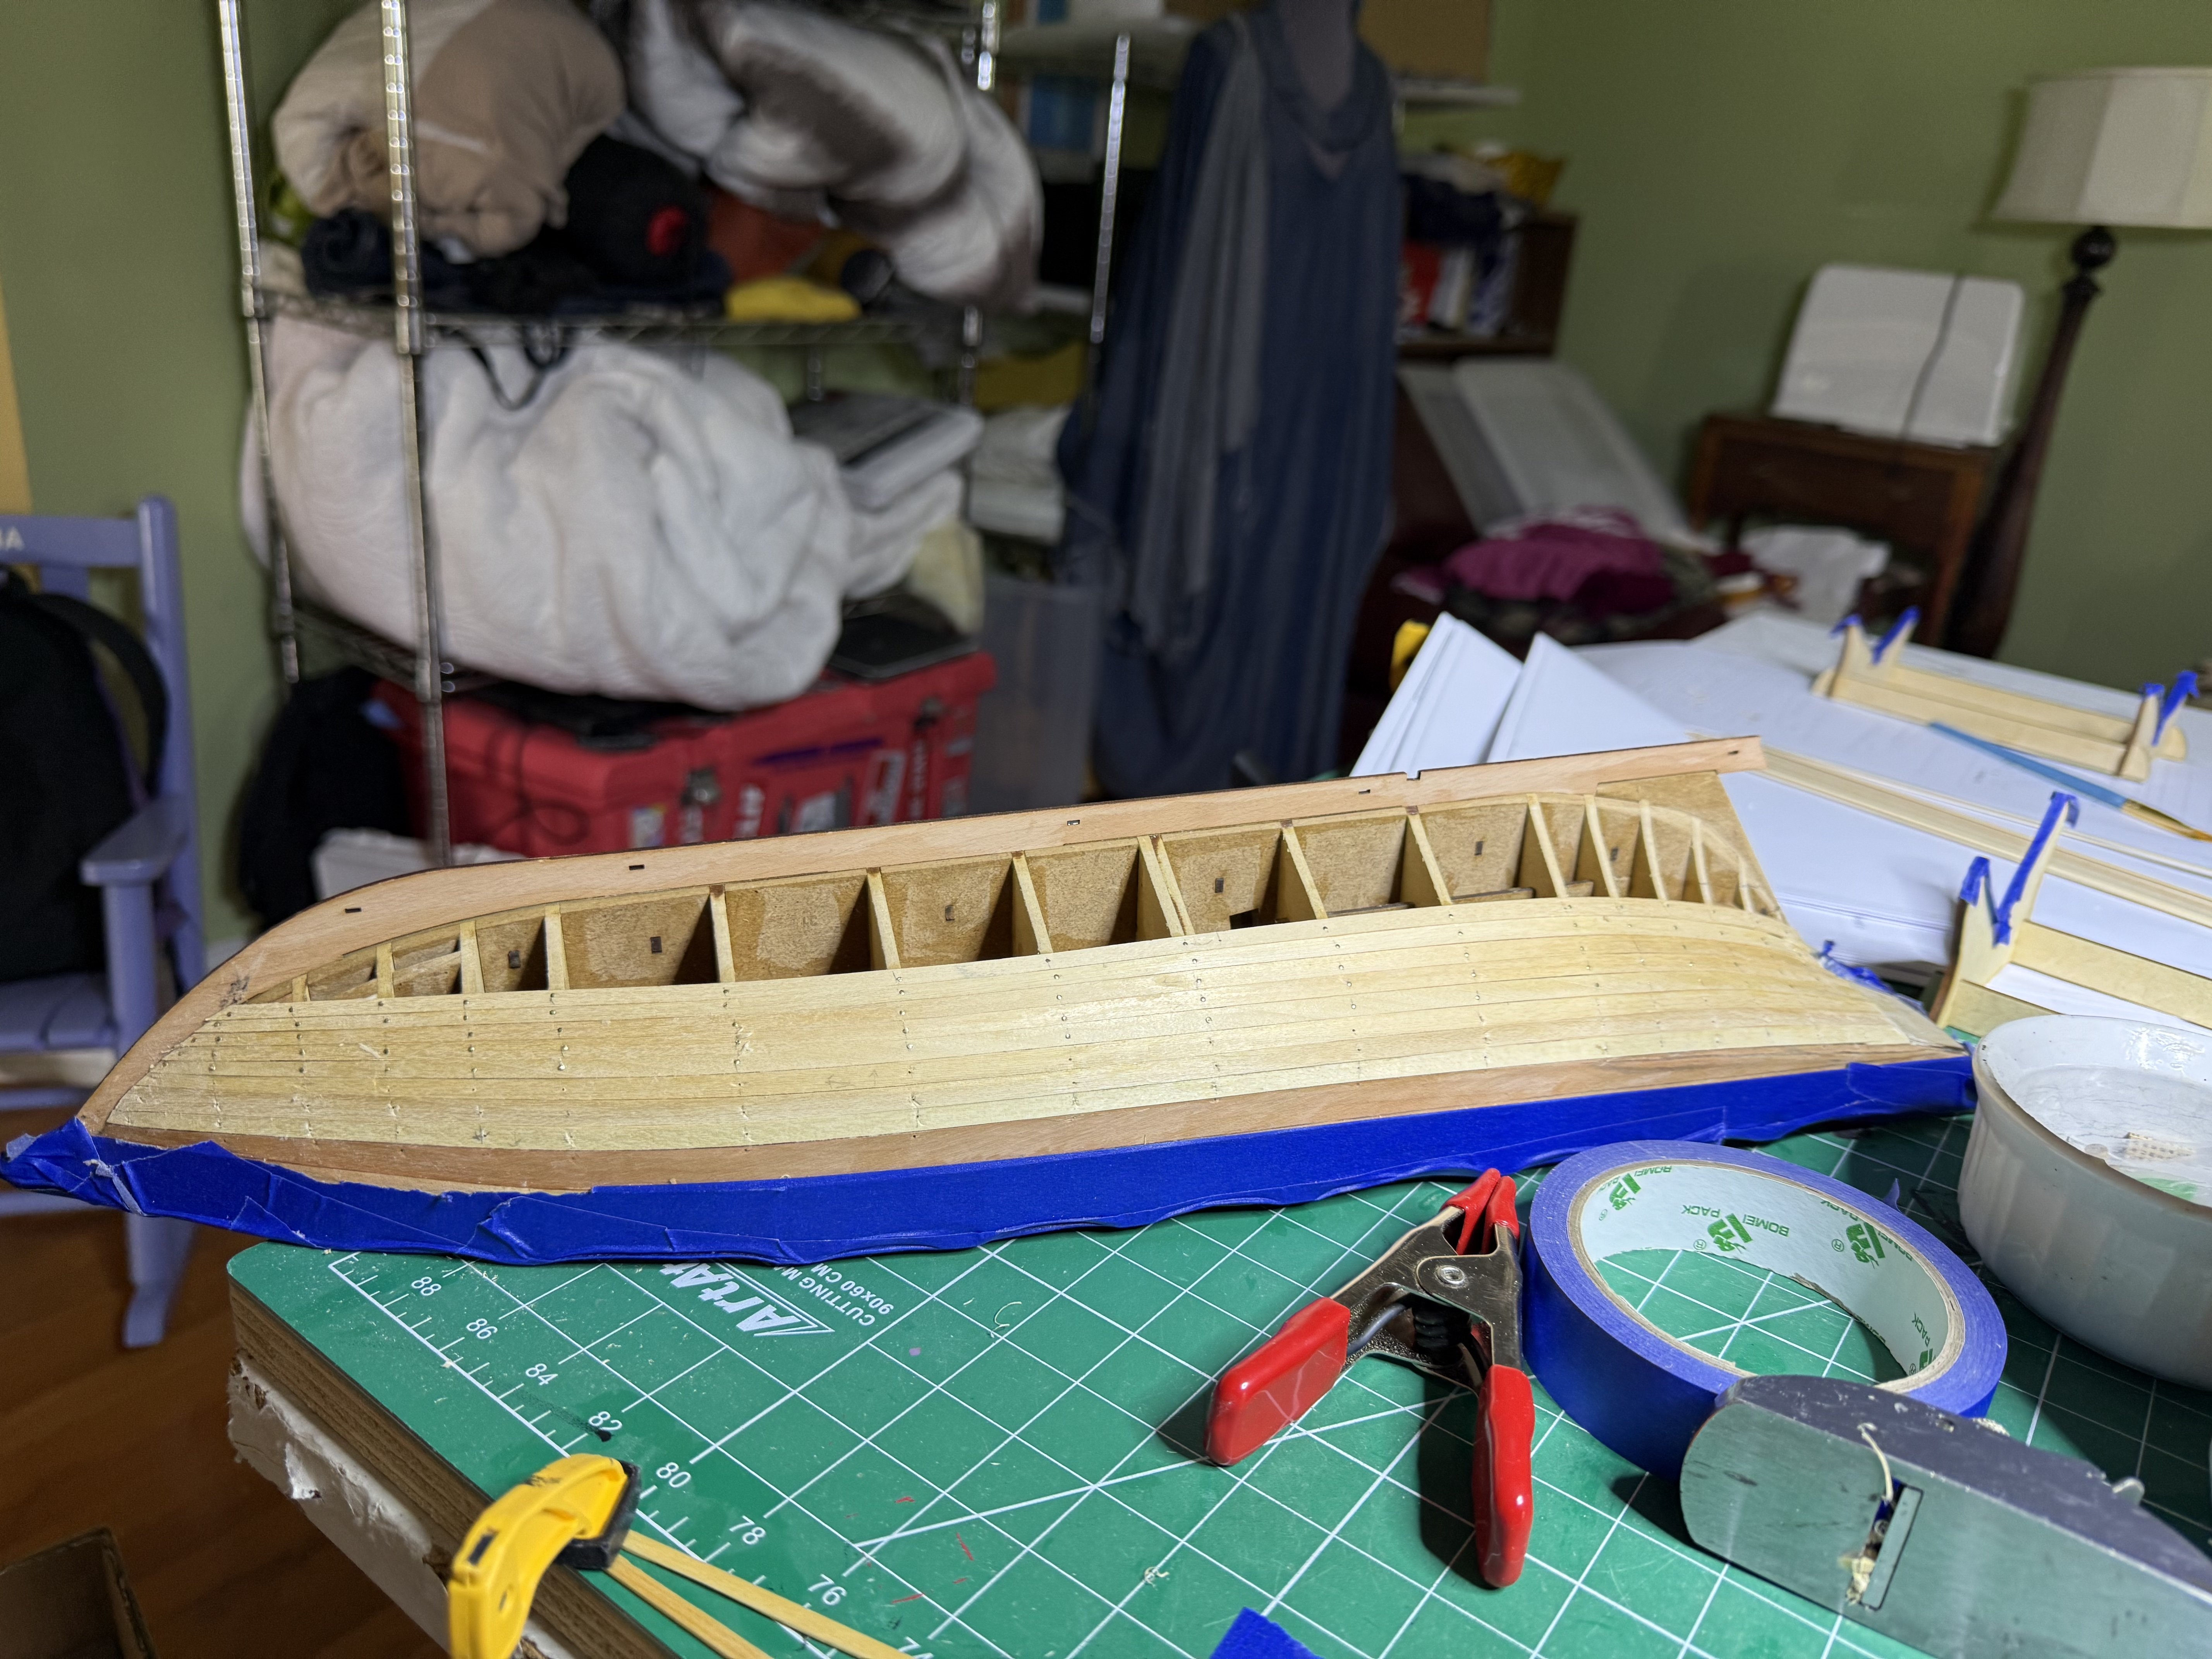
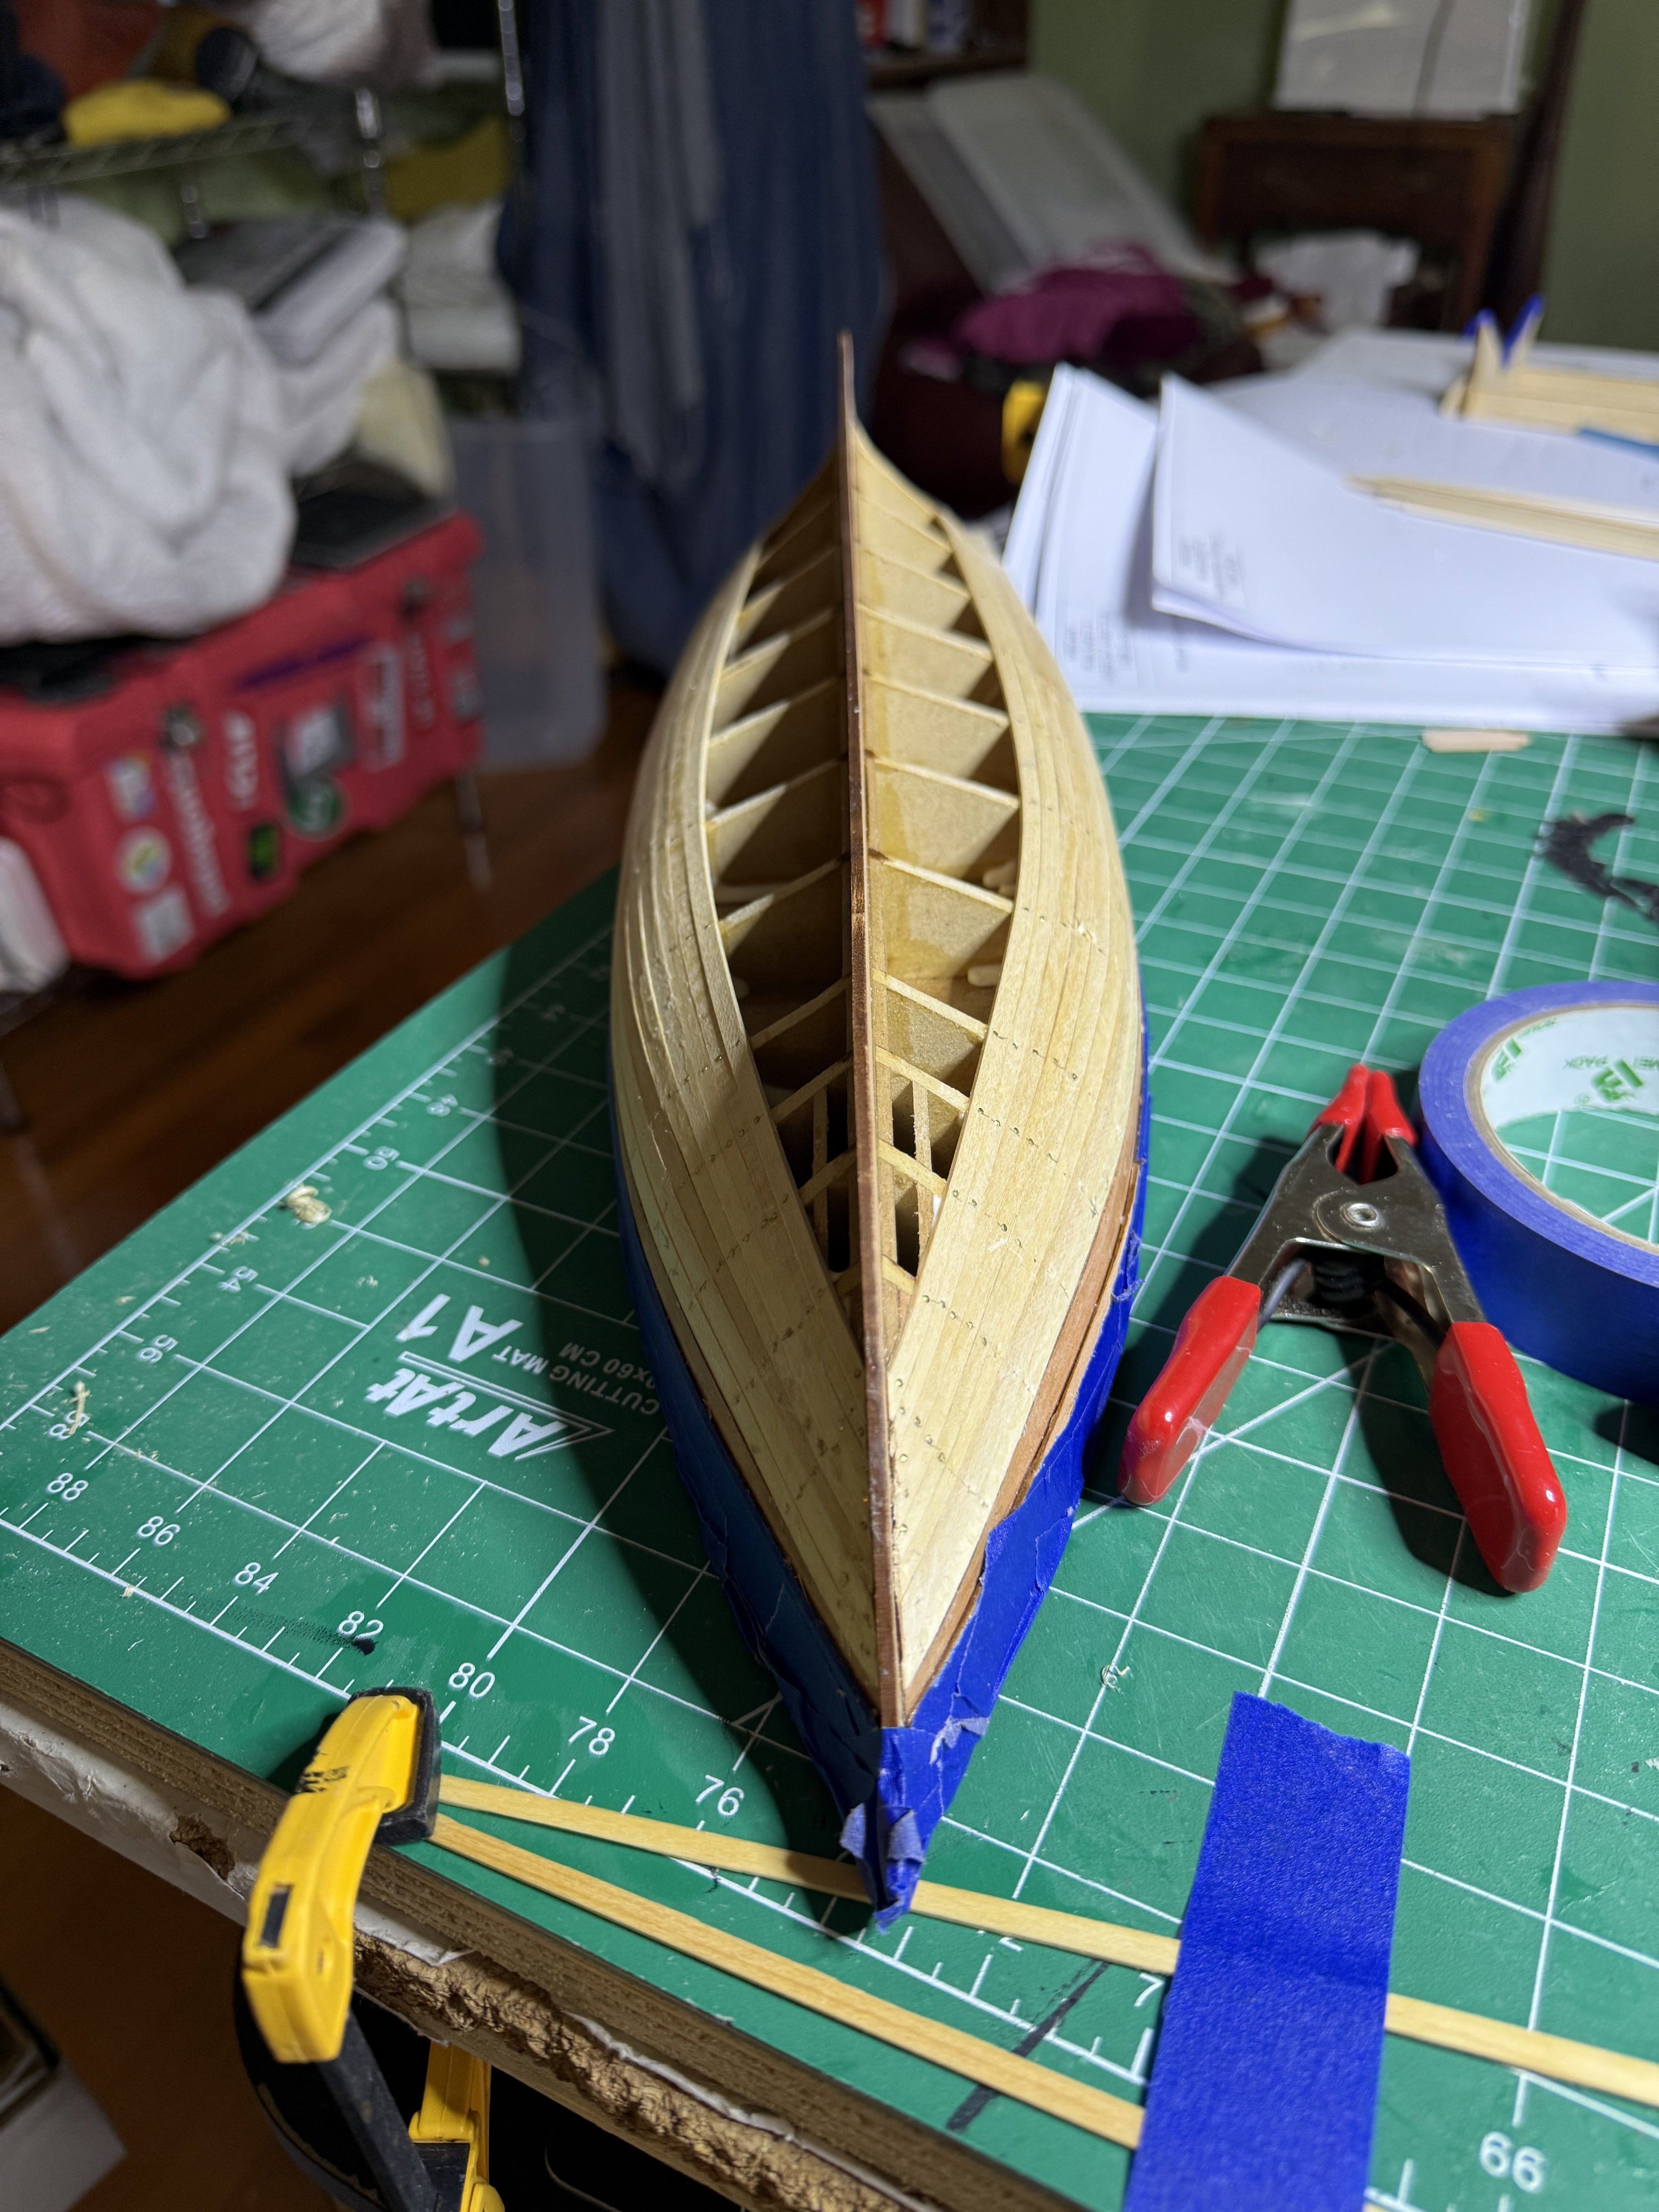
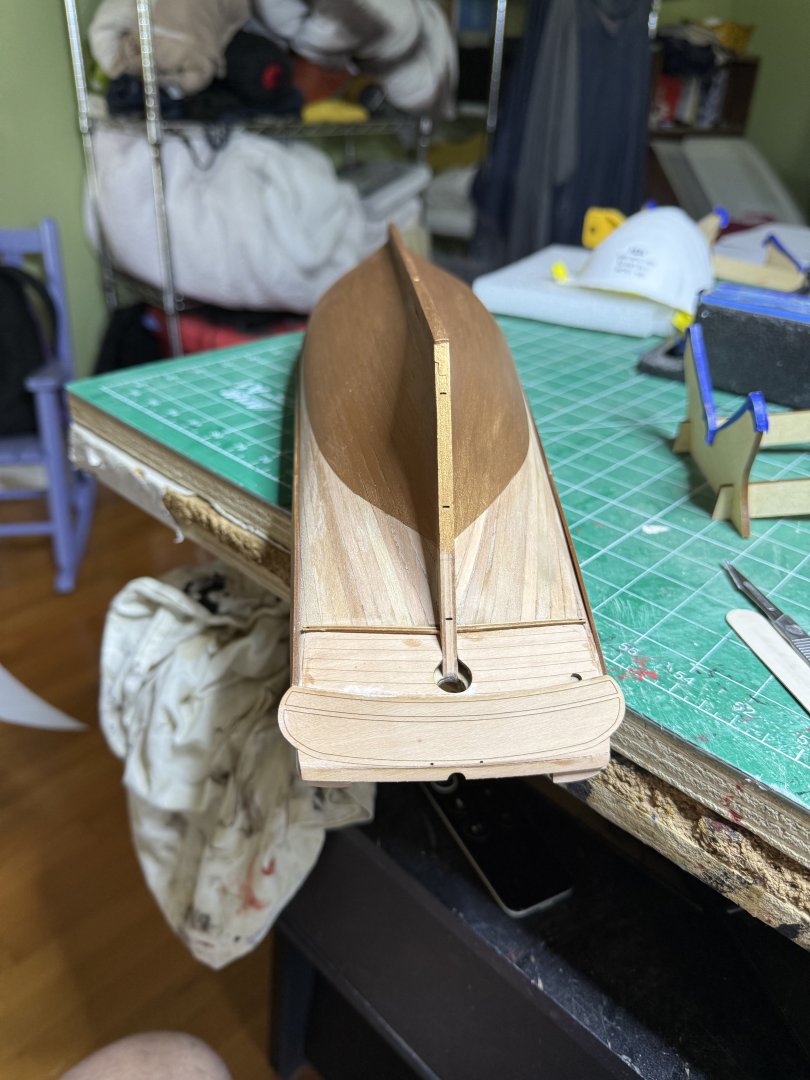
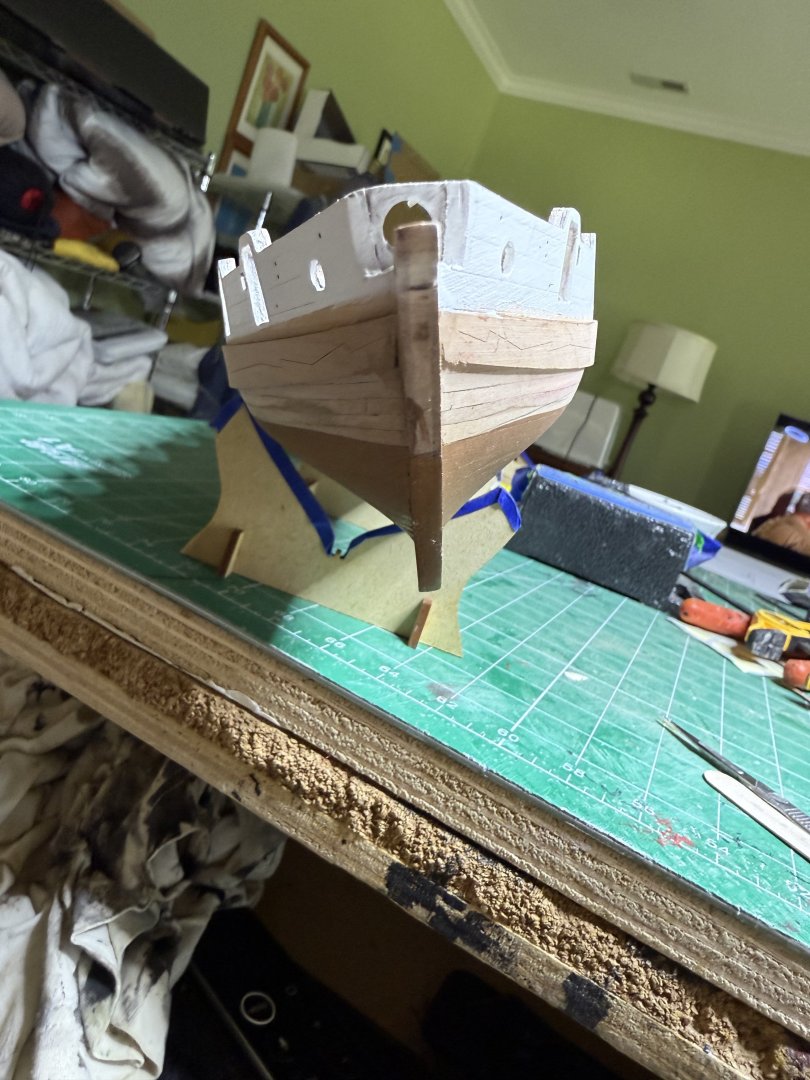
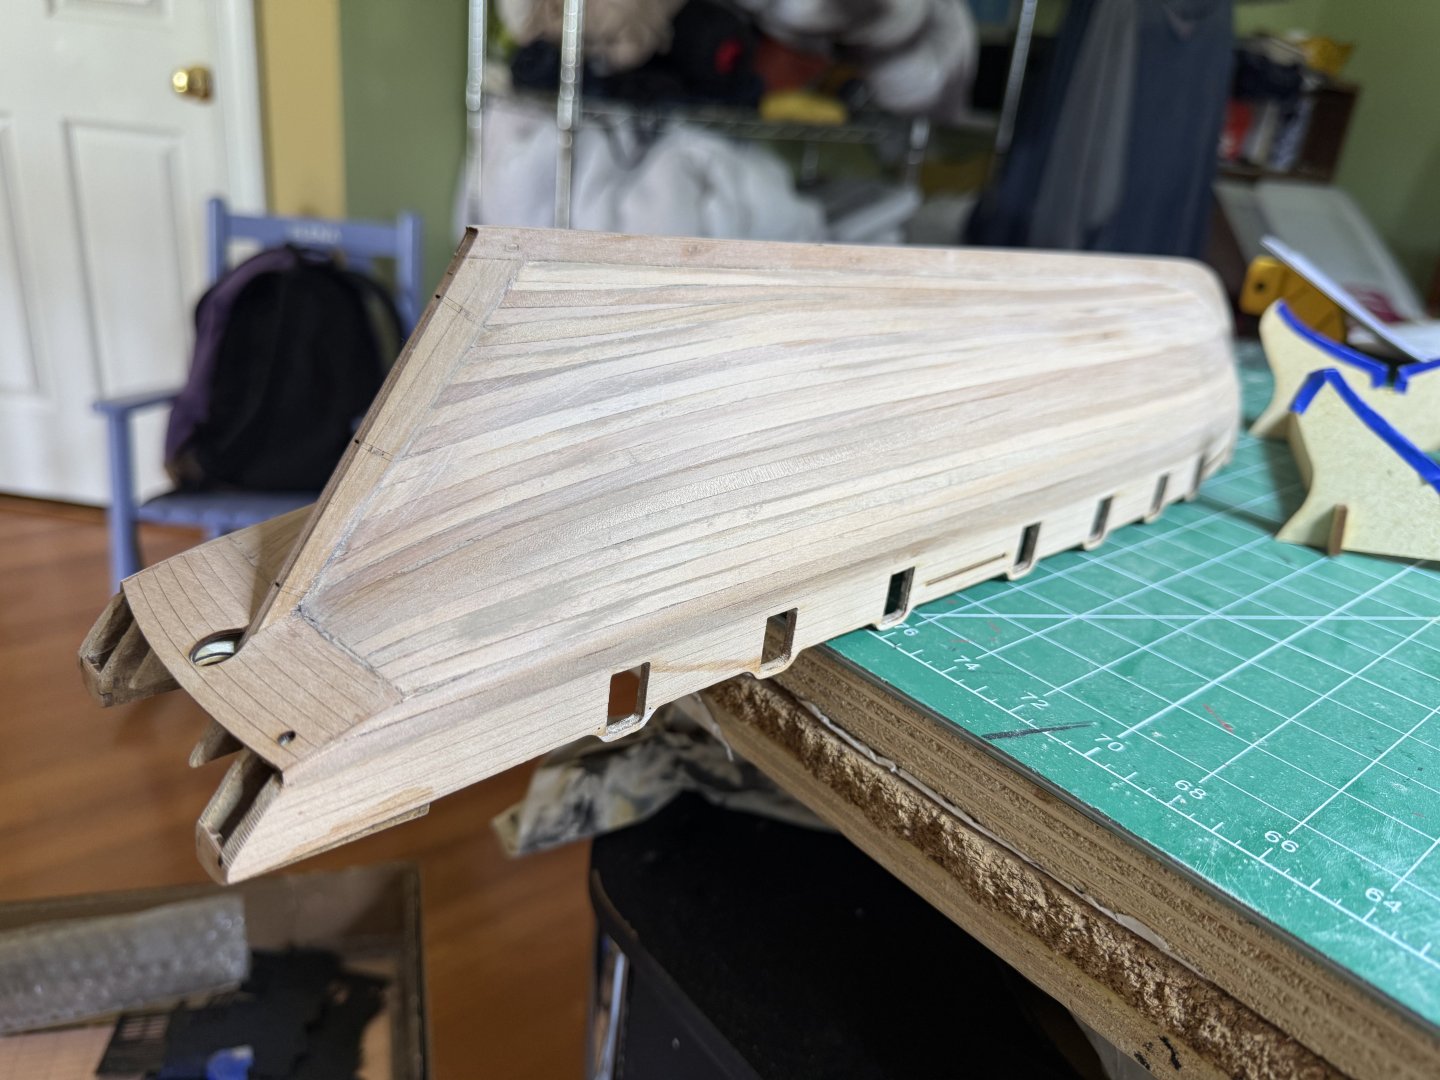
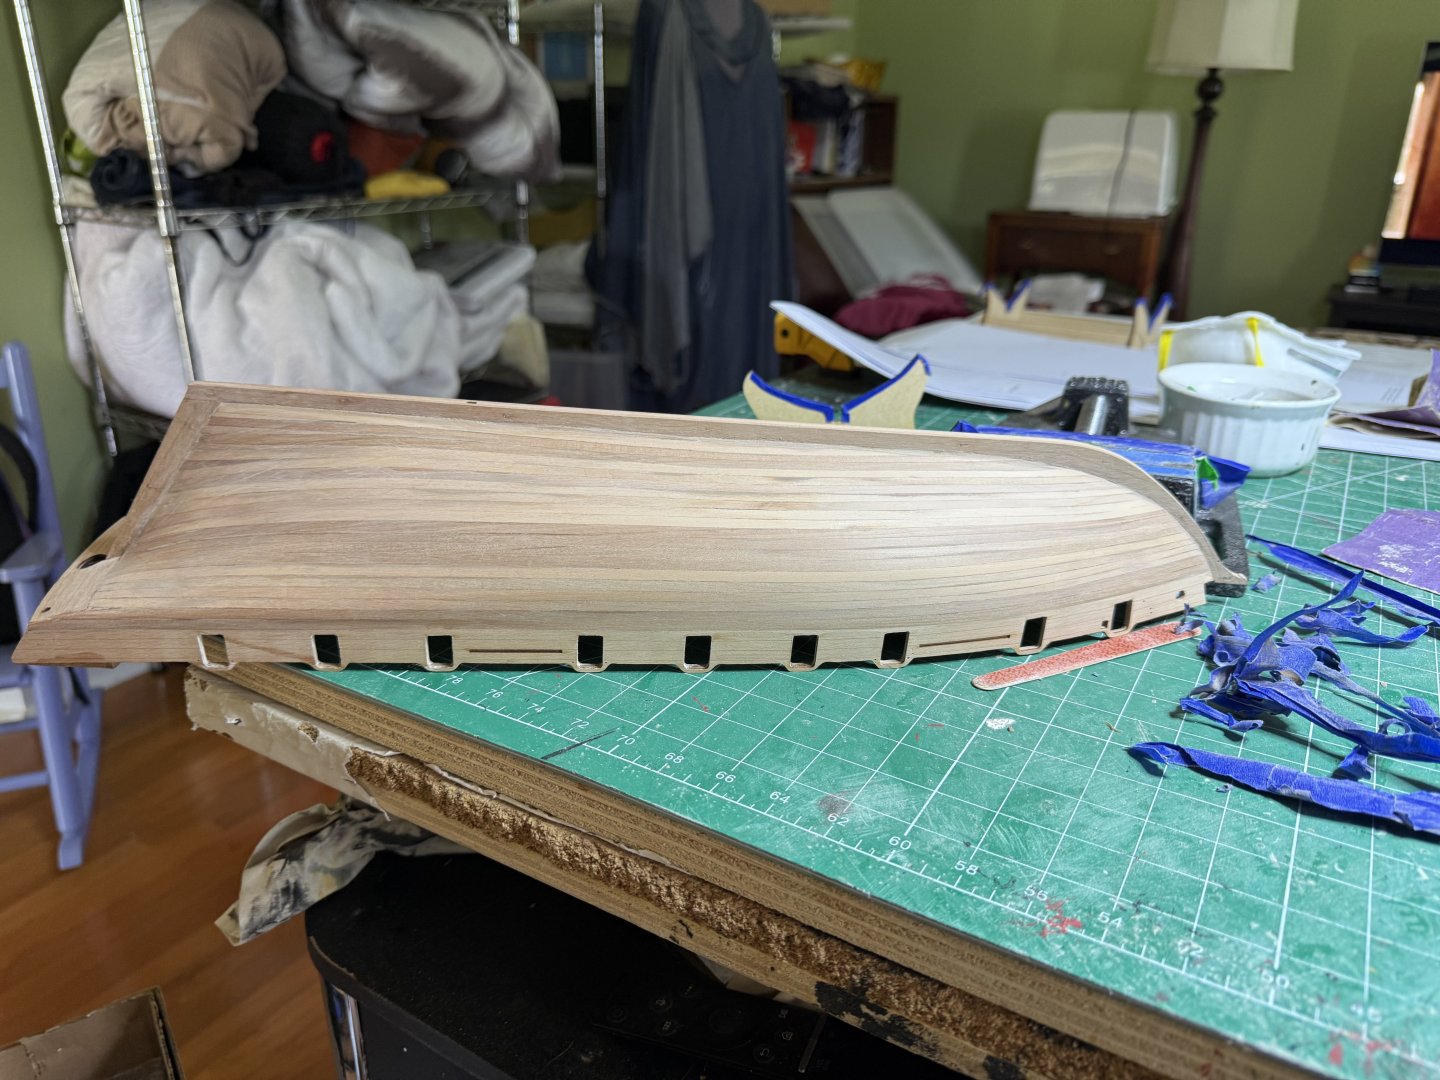
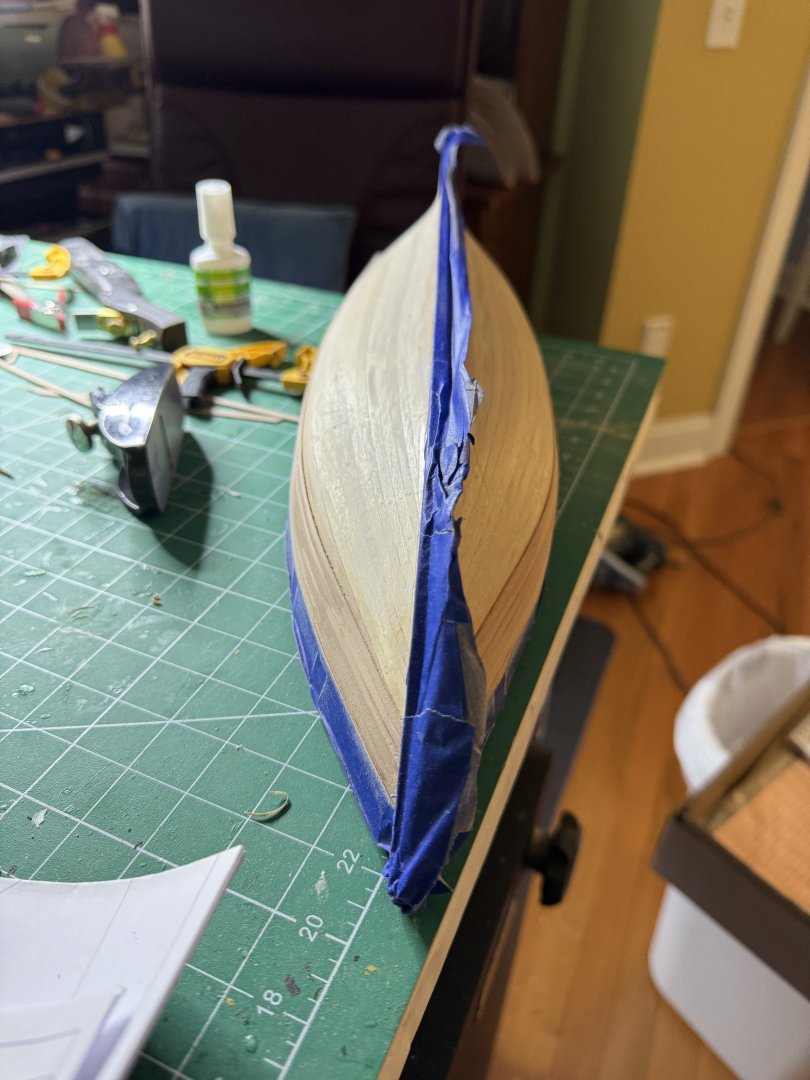
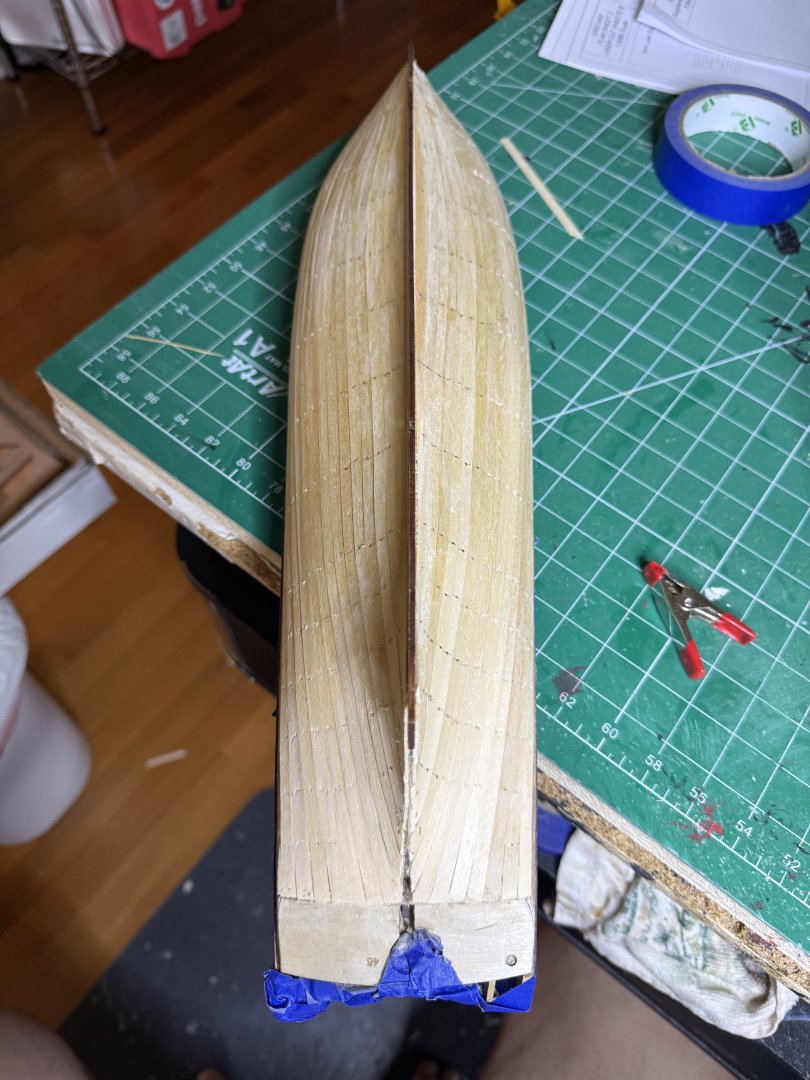
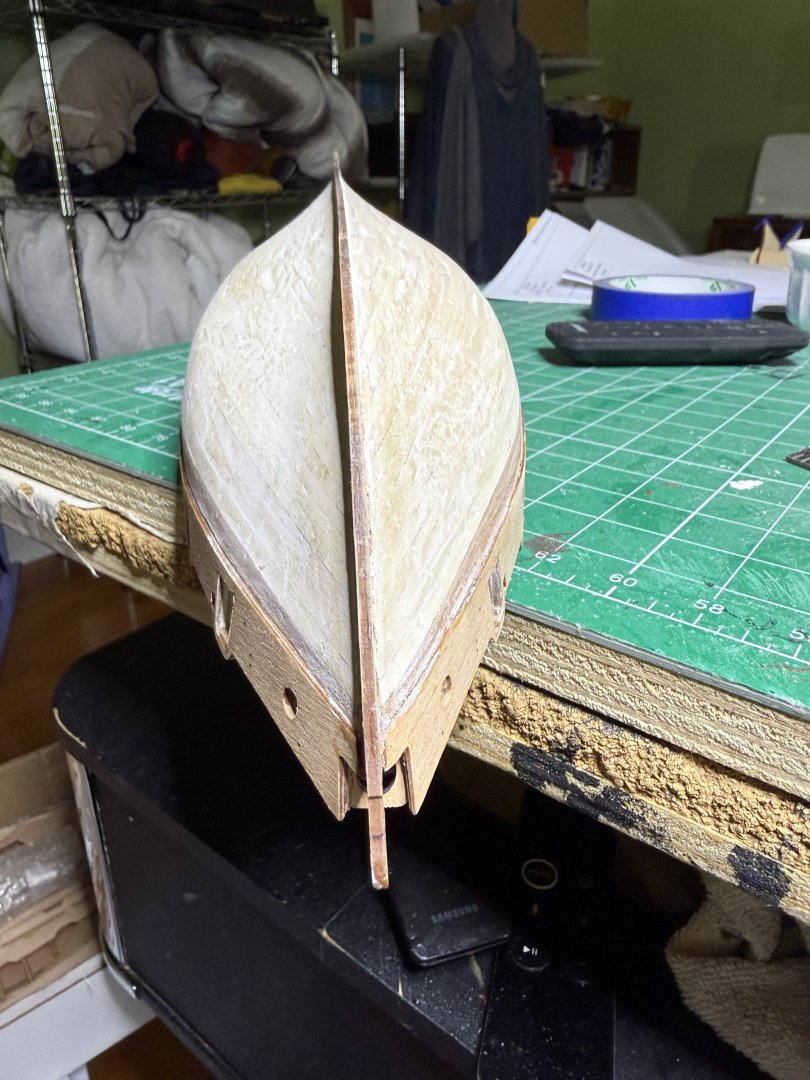
Second planking done. Here she is pre-sanding Now post sanding/filling/sanding again


- 52 replies
-
- 11
-
-
- Grecian
- Vanguard Models
- (and 1 more)
-
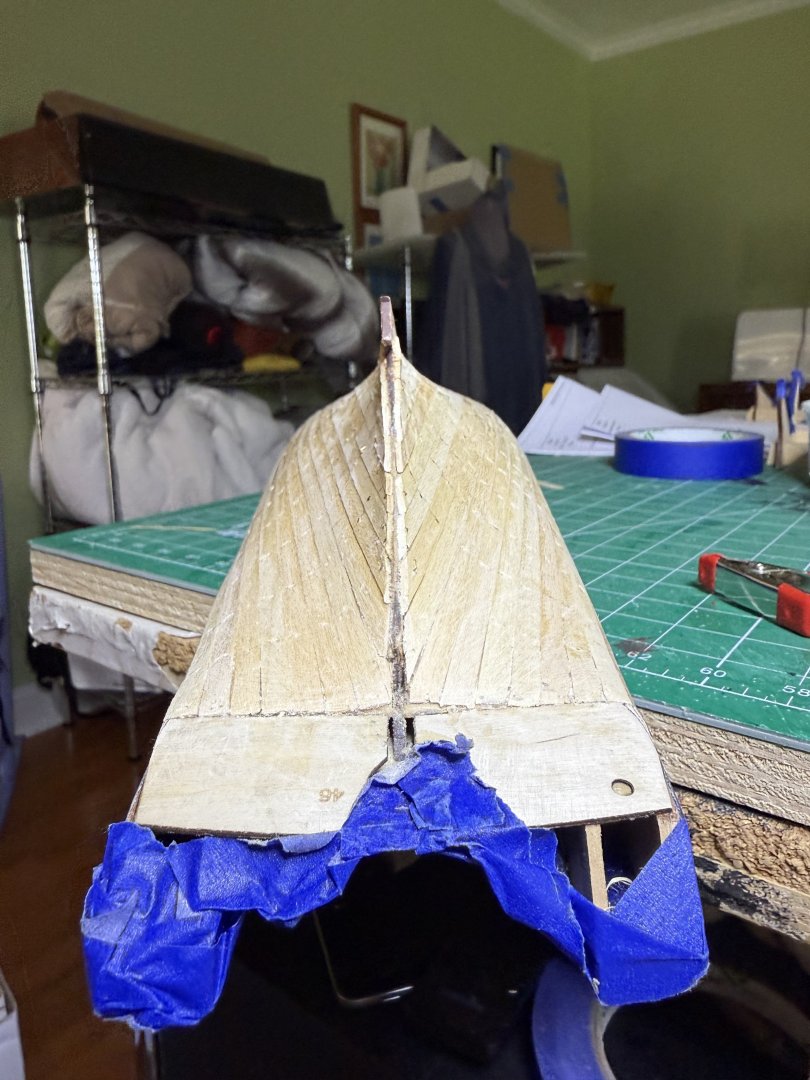
So far easier as the curve of the prow is minimal compared to the square rigged ships and so less twisting of the planks
- 52 replies
-
- 1
-
-
- Grecian
- Vanguard Models
- (and 1 more)
-
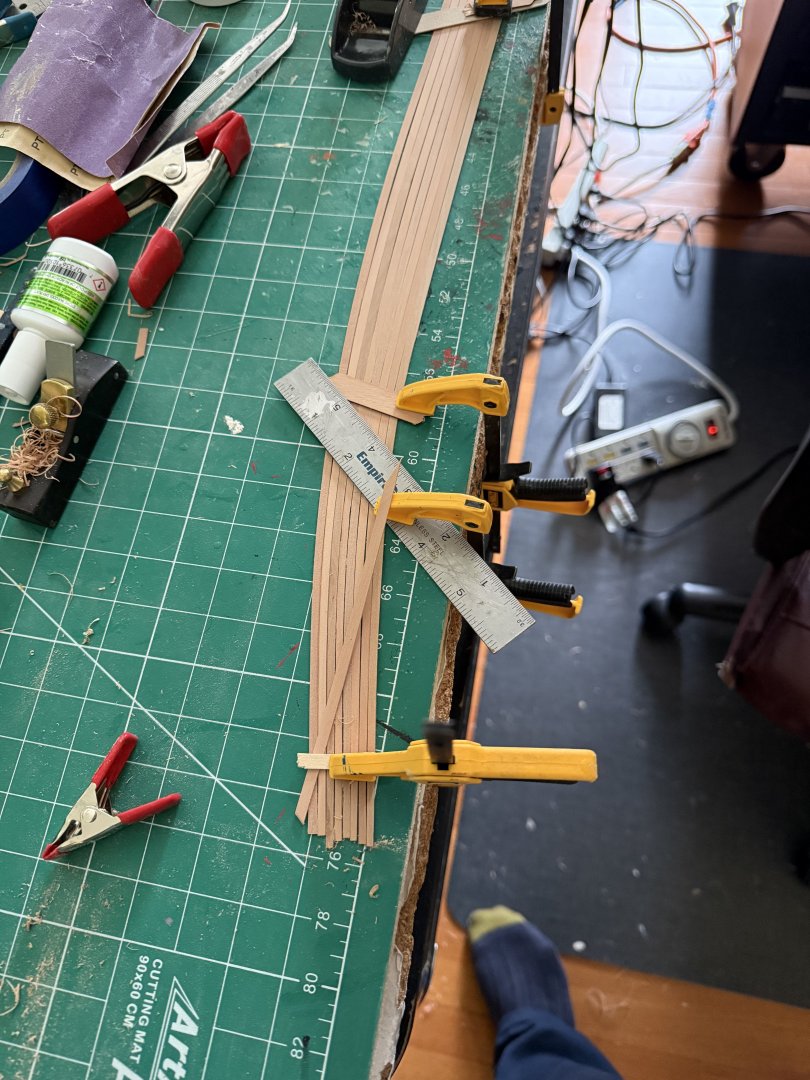
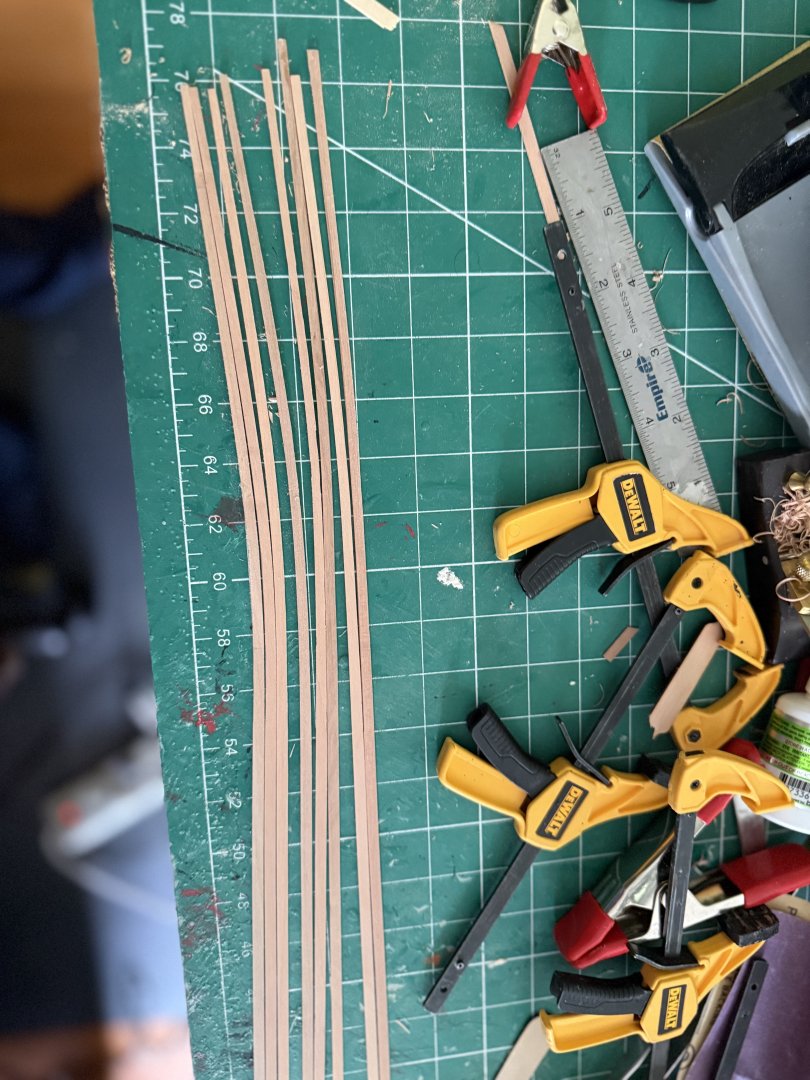
TO start the second planking I first soaked then tapered then laterally bent the planks Now 5 rows into it, I do sand some after each row. I have taped up the veneers and gunports to prevent damage

- 52 replies
-
- 7
-
-
- Grecian
- Vanguard Models
- (and 1 more)
-
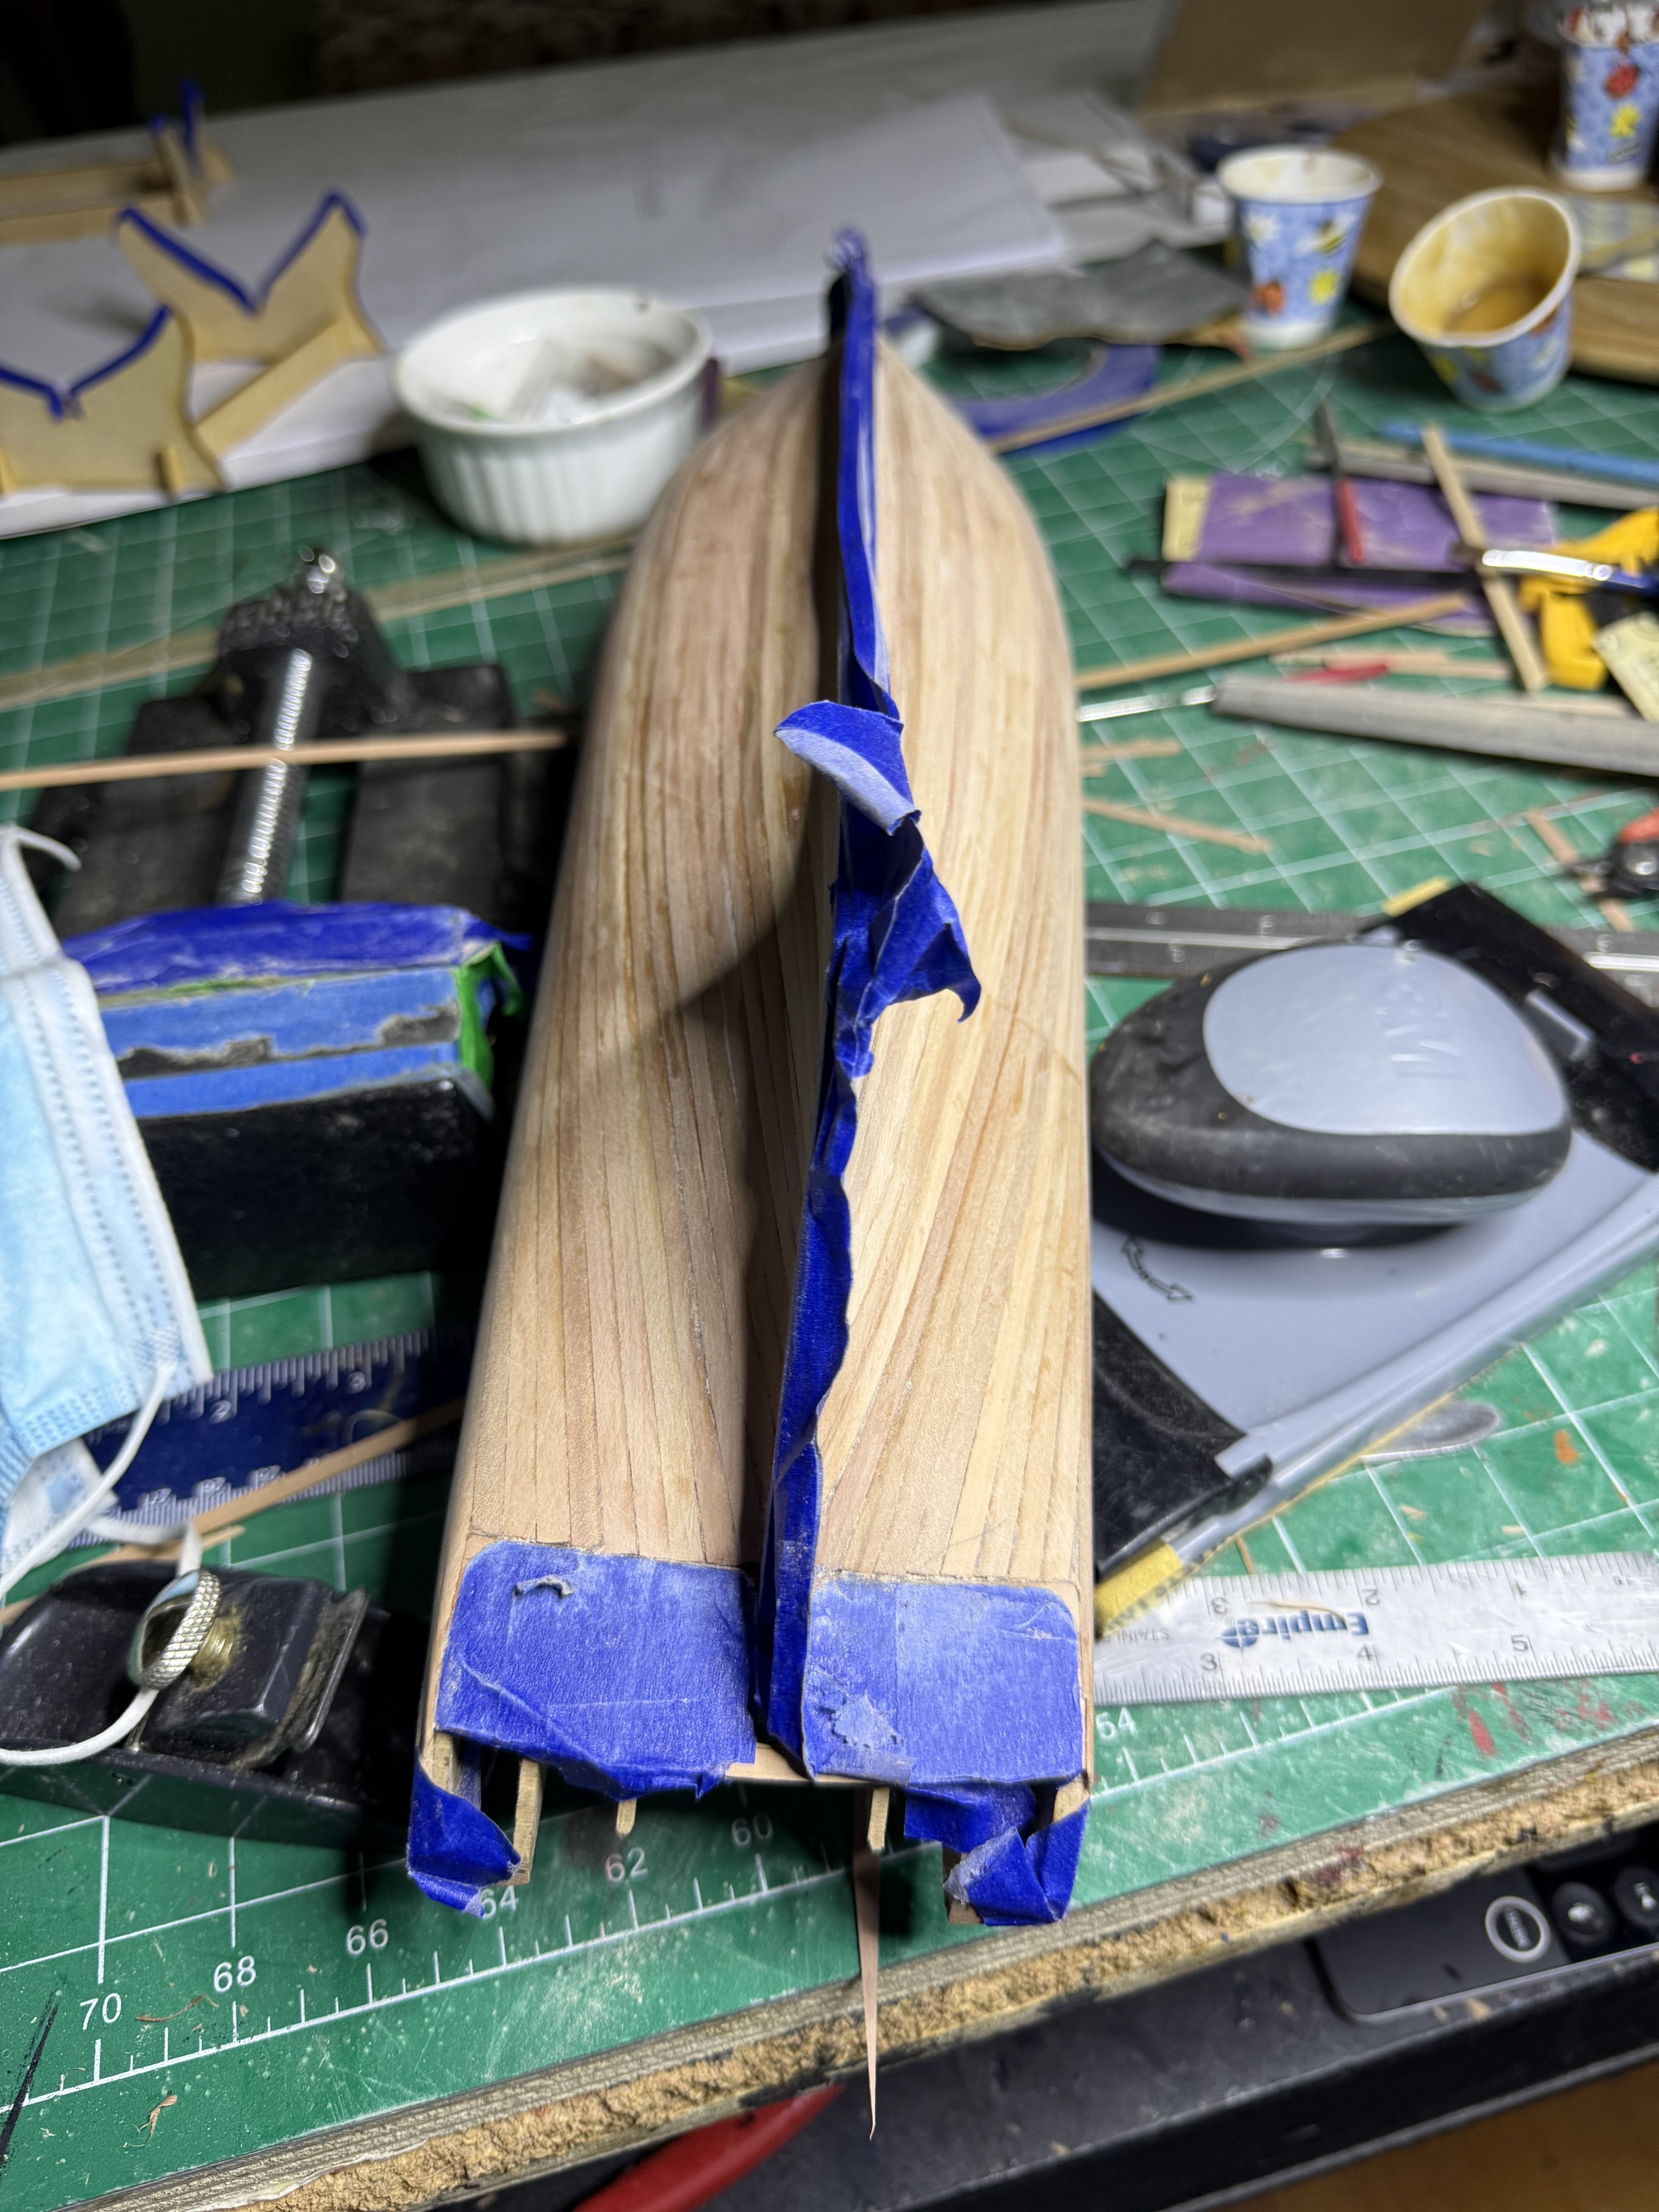
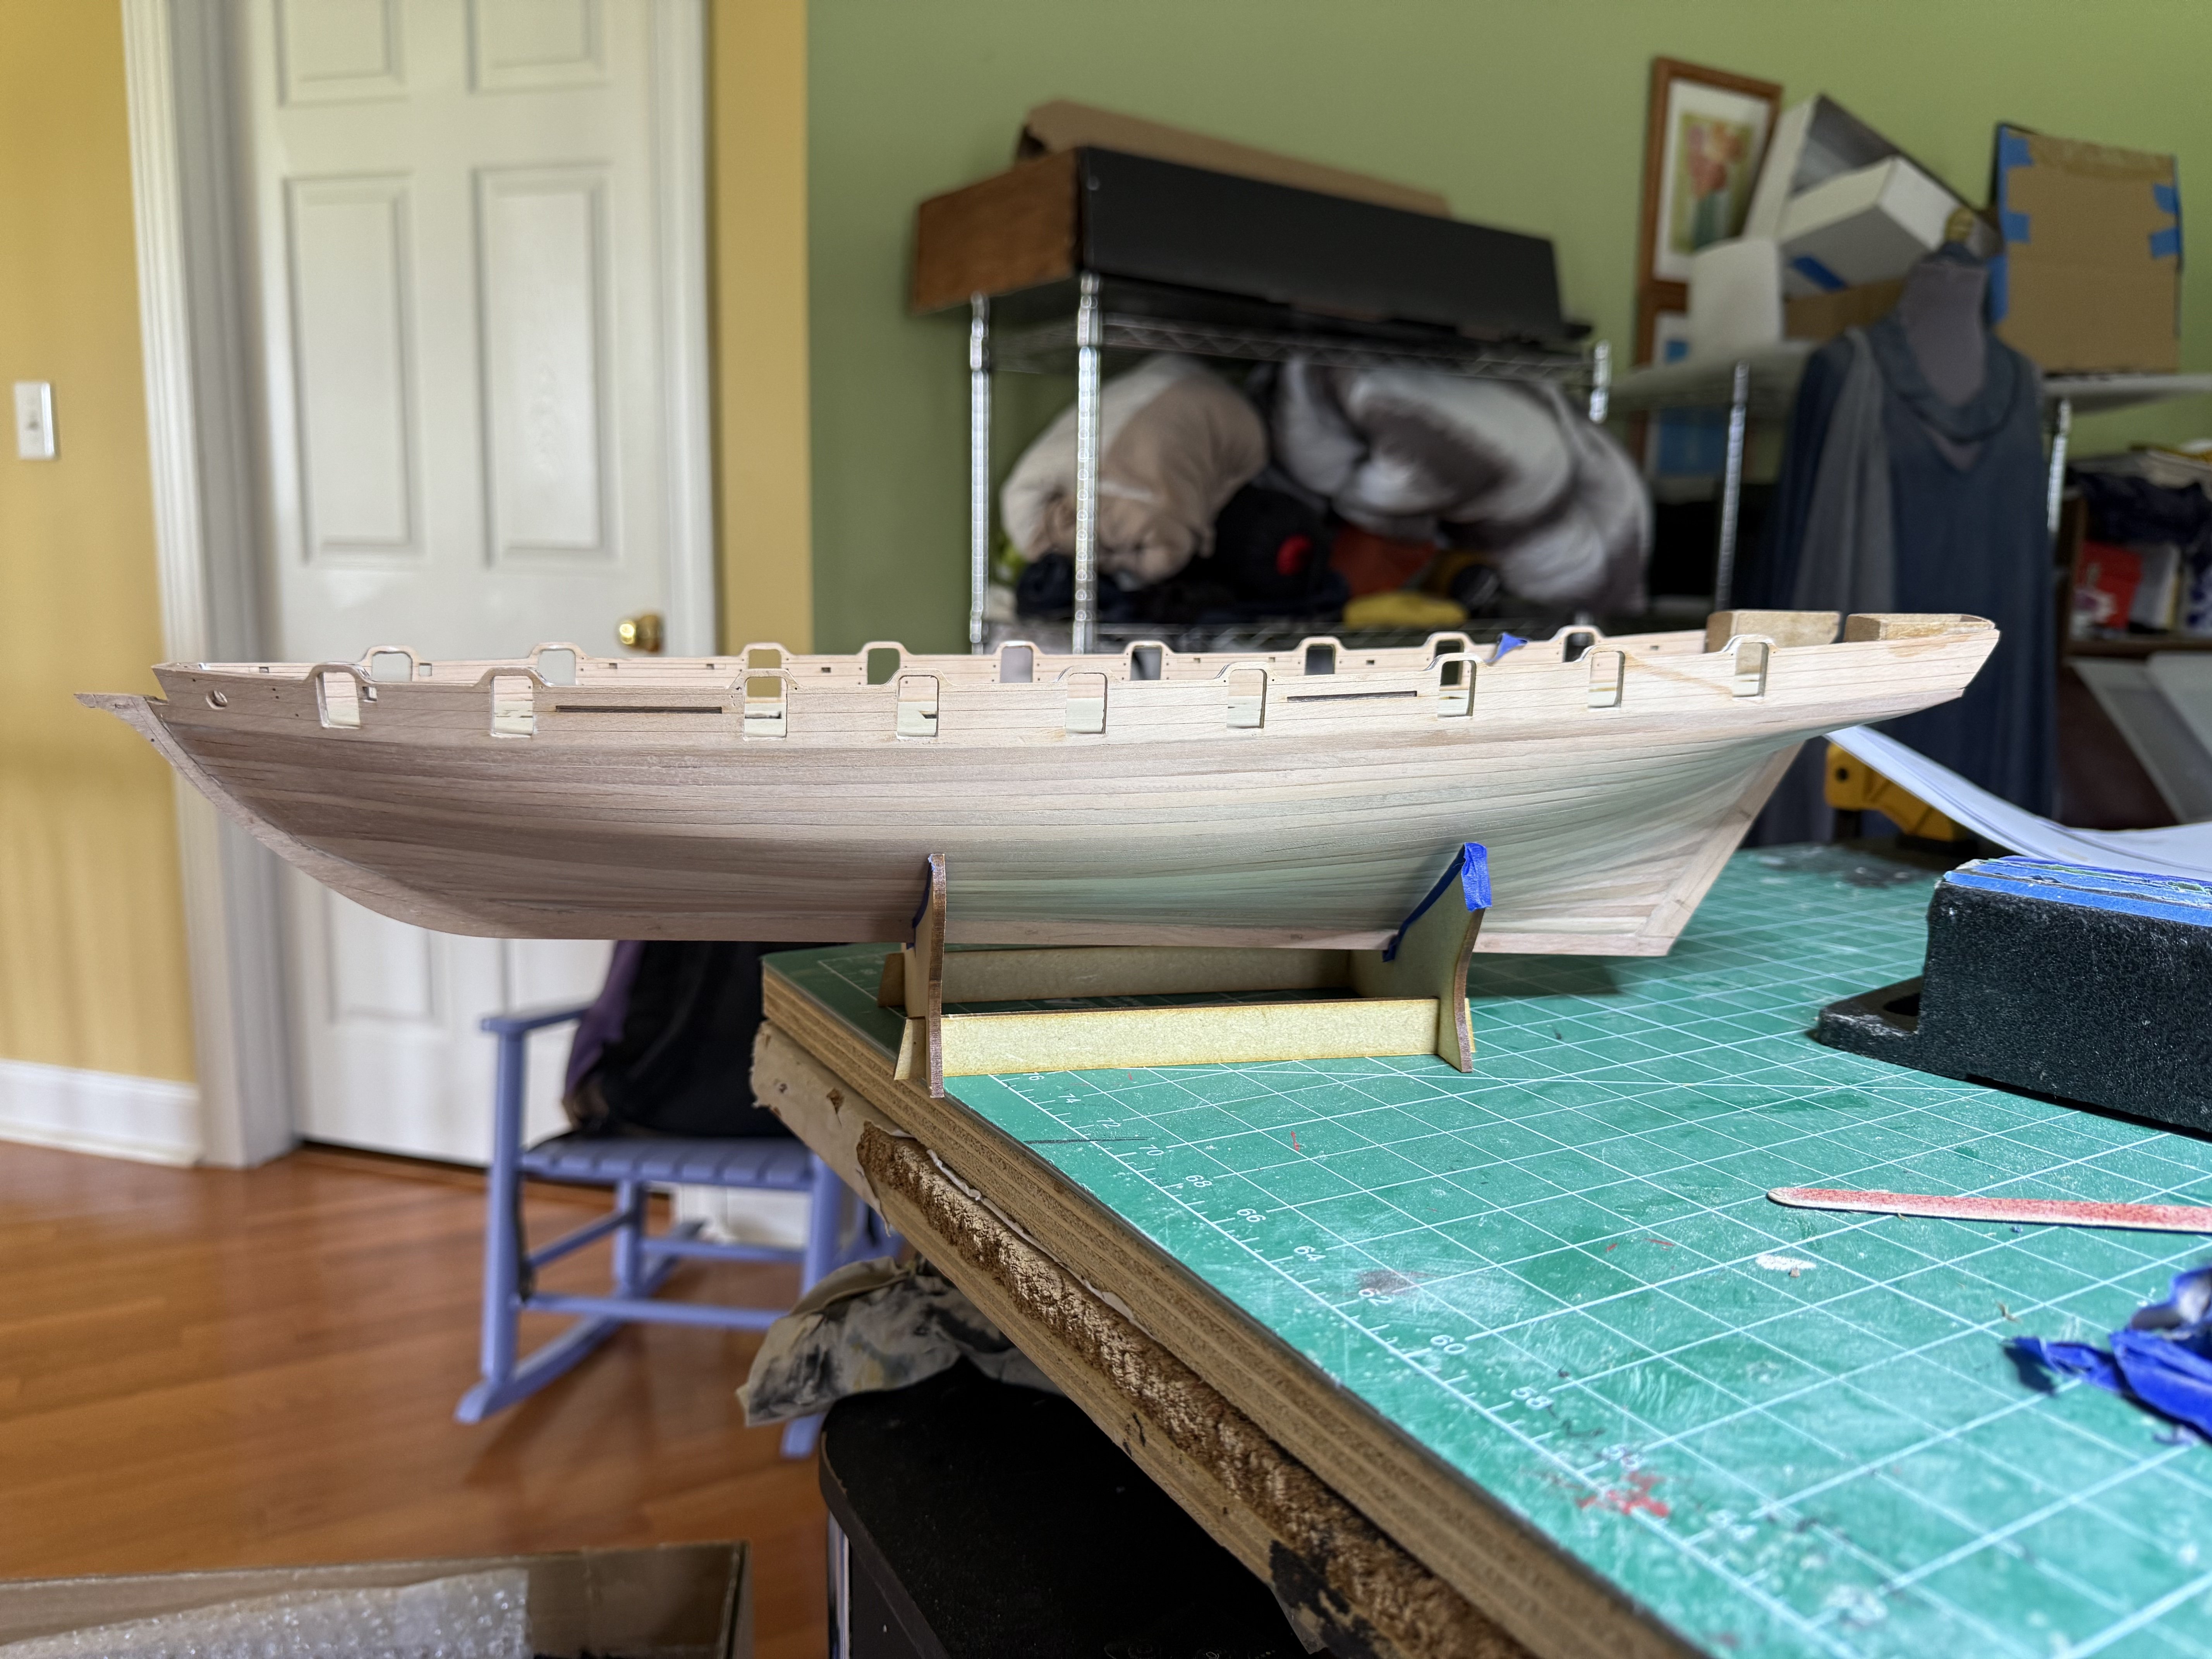
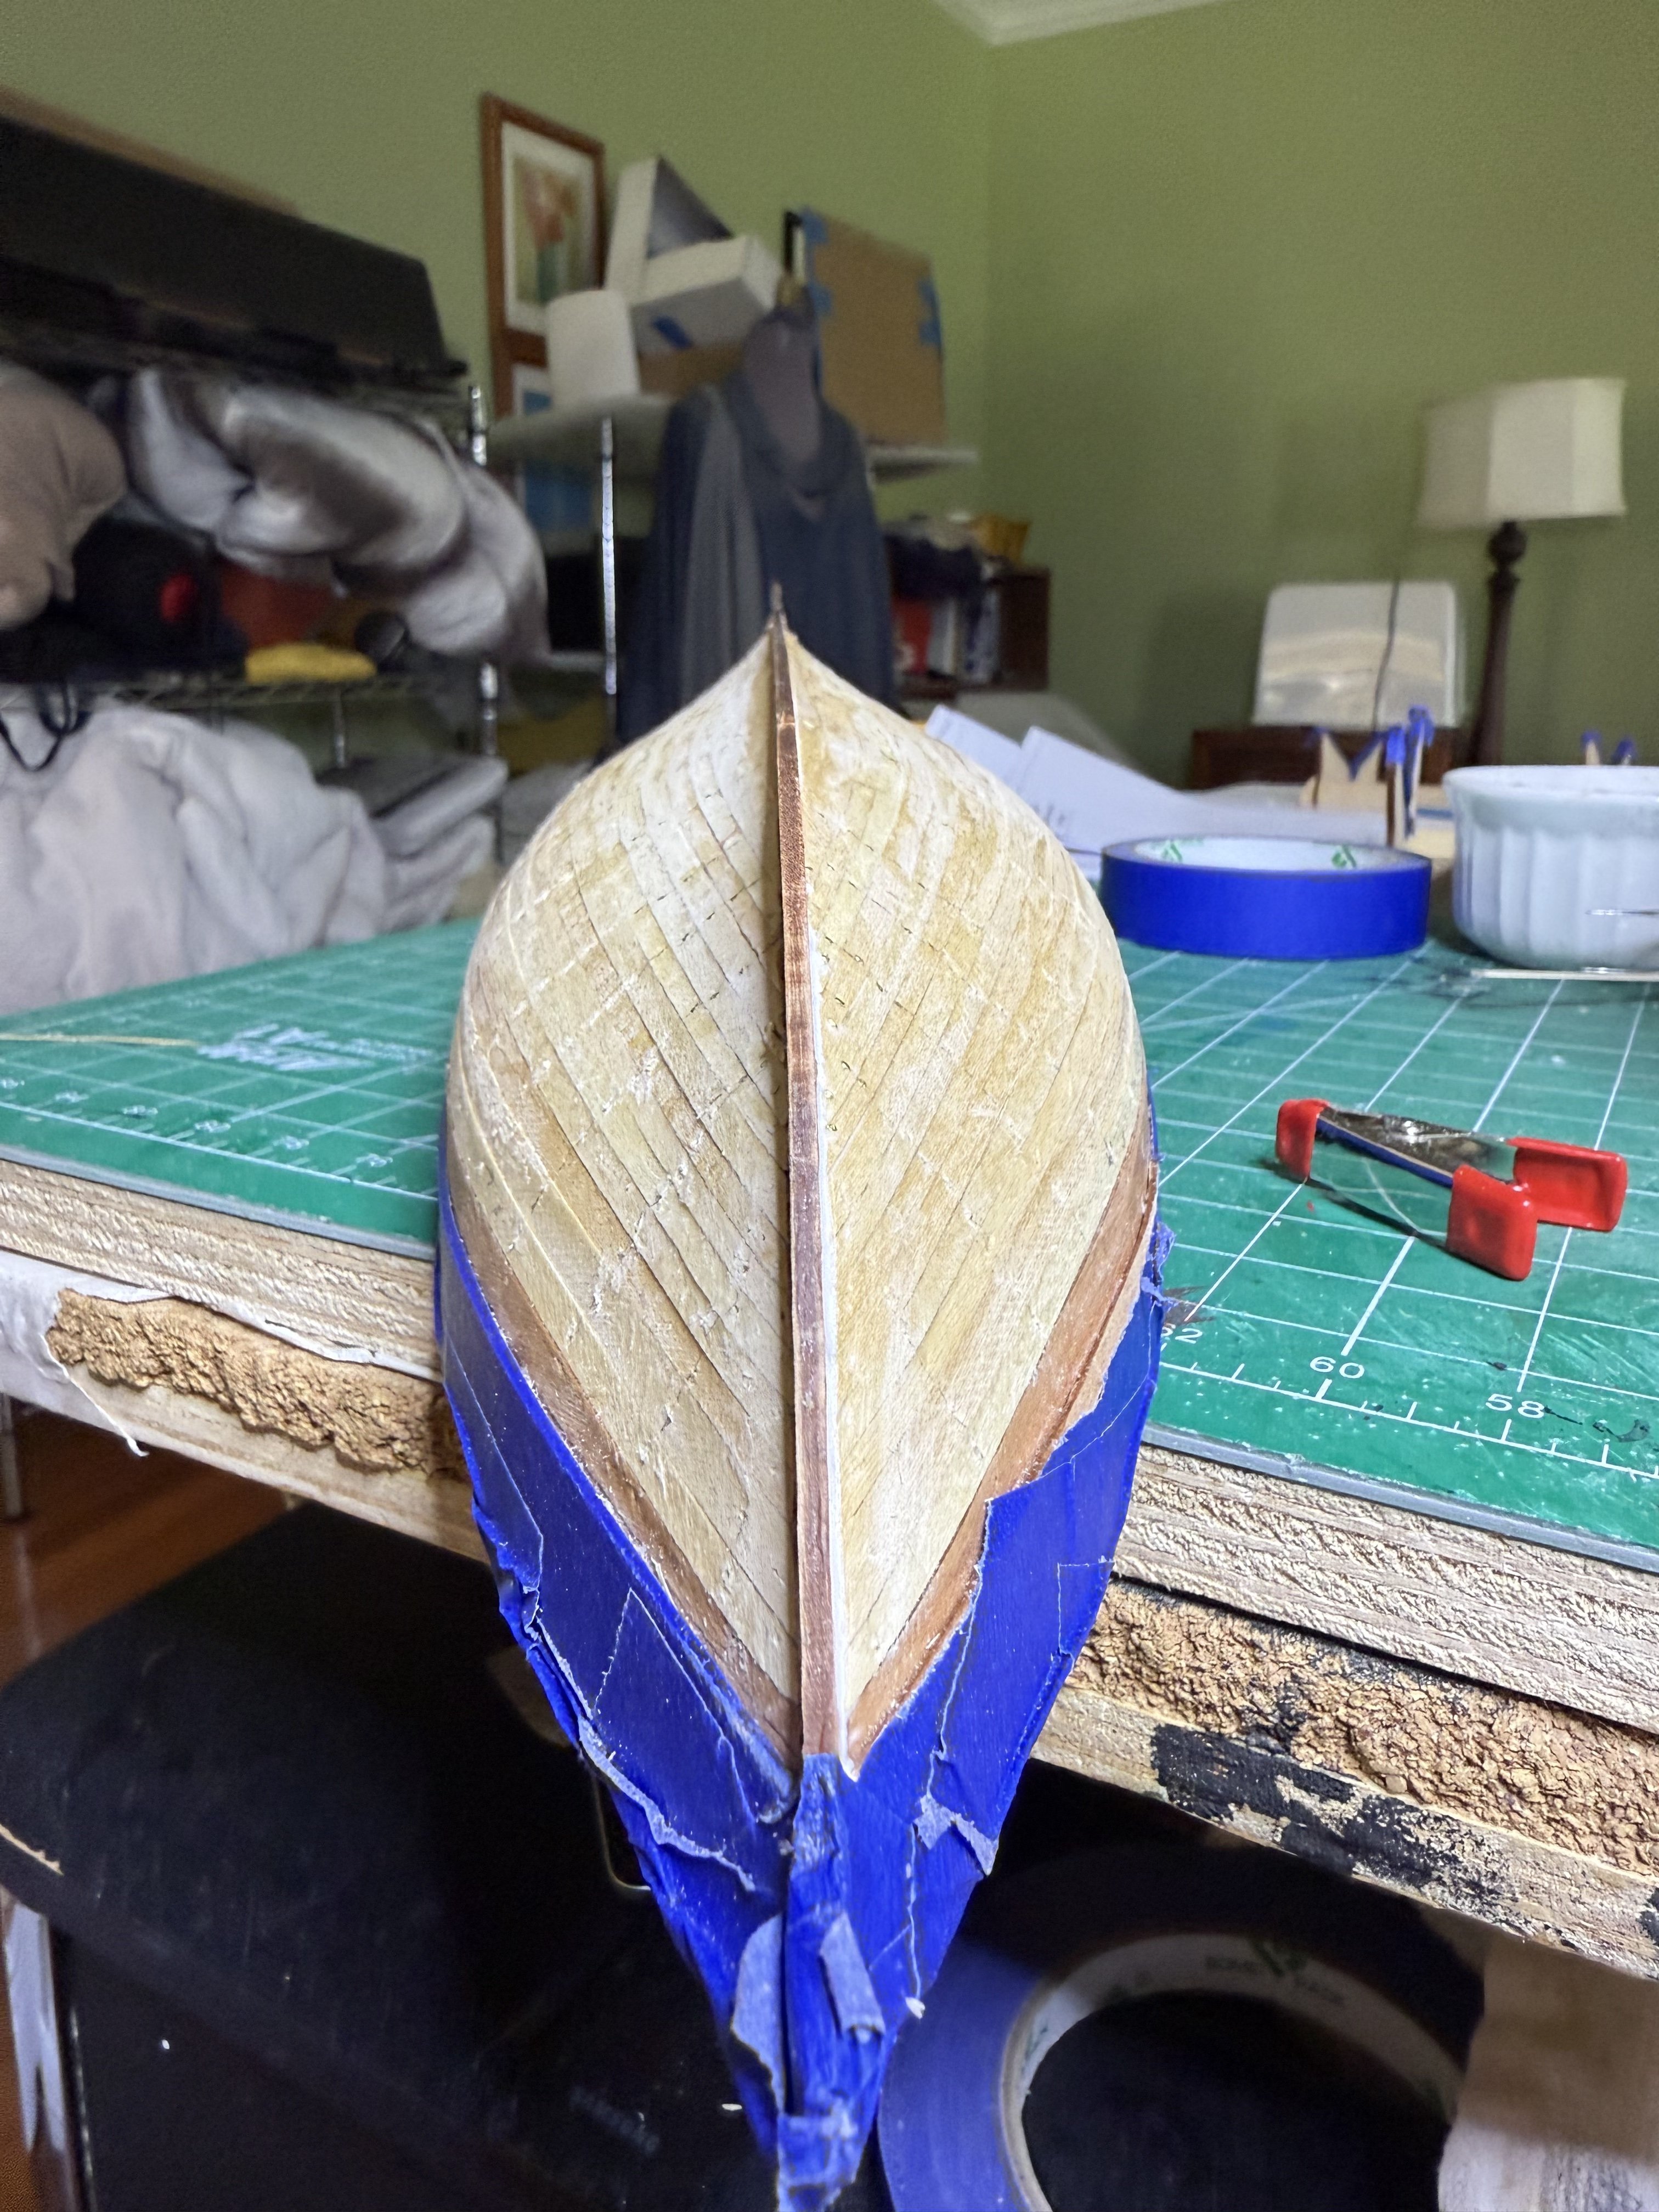
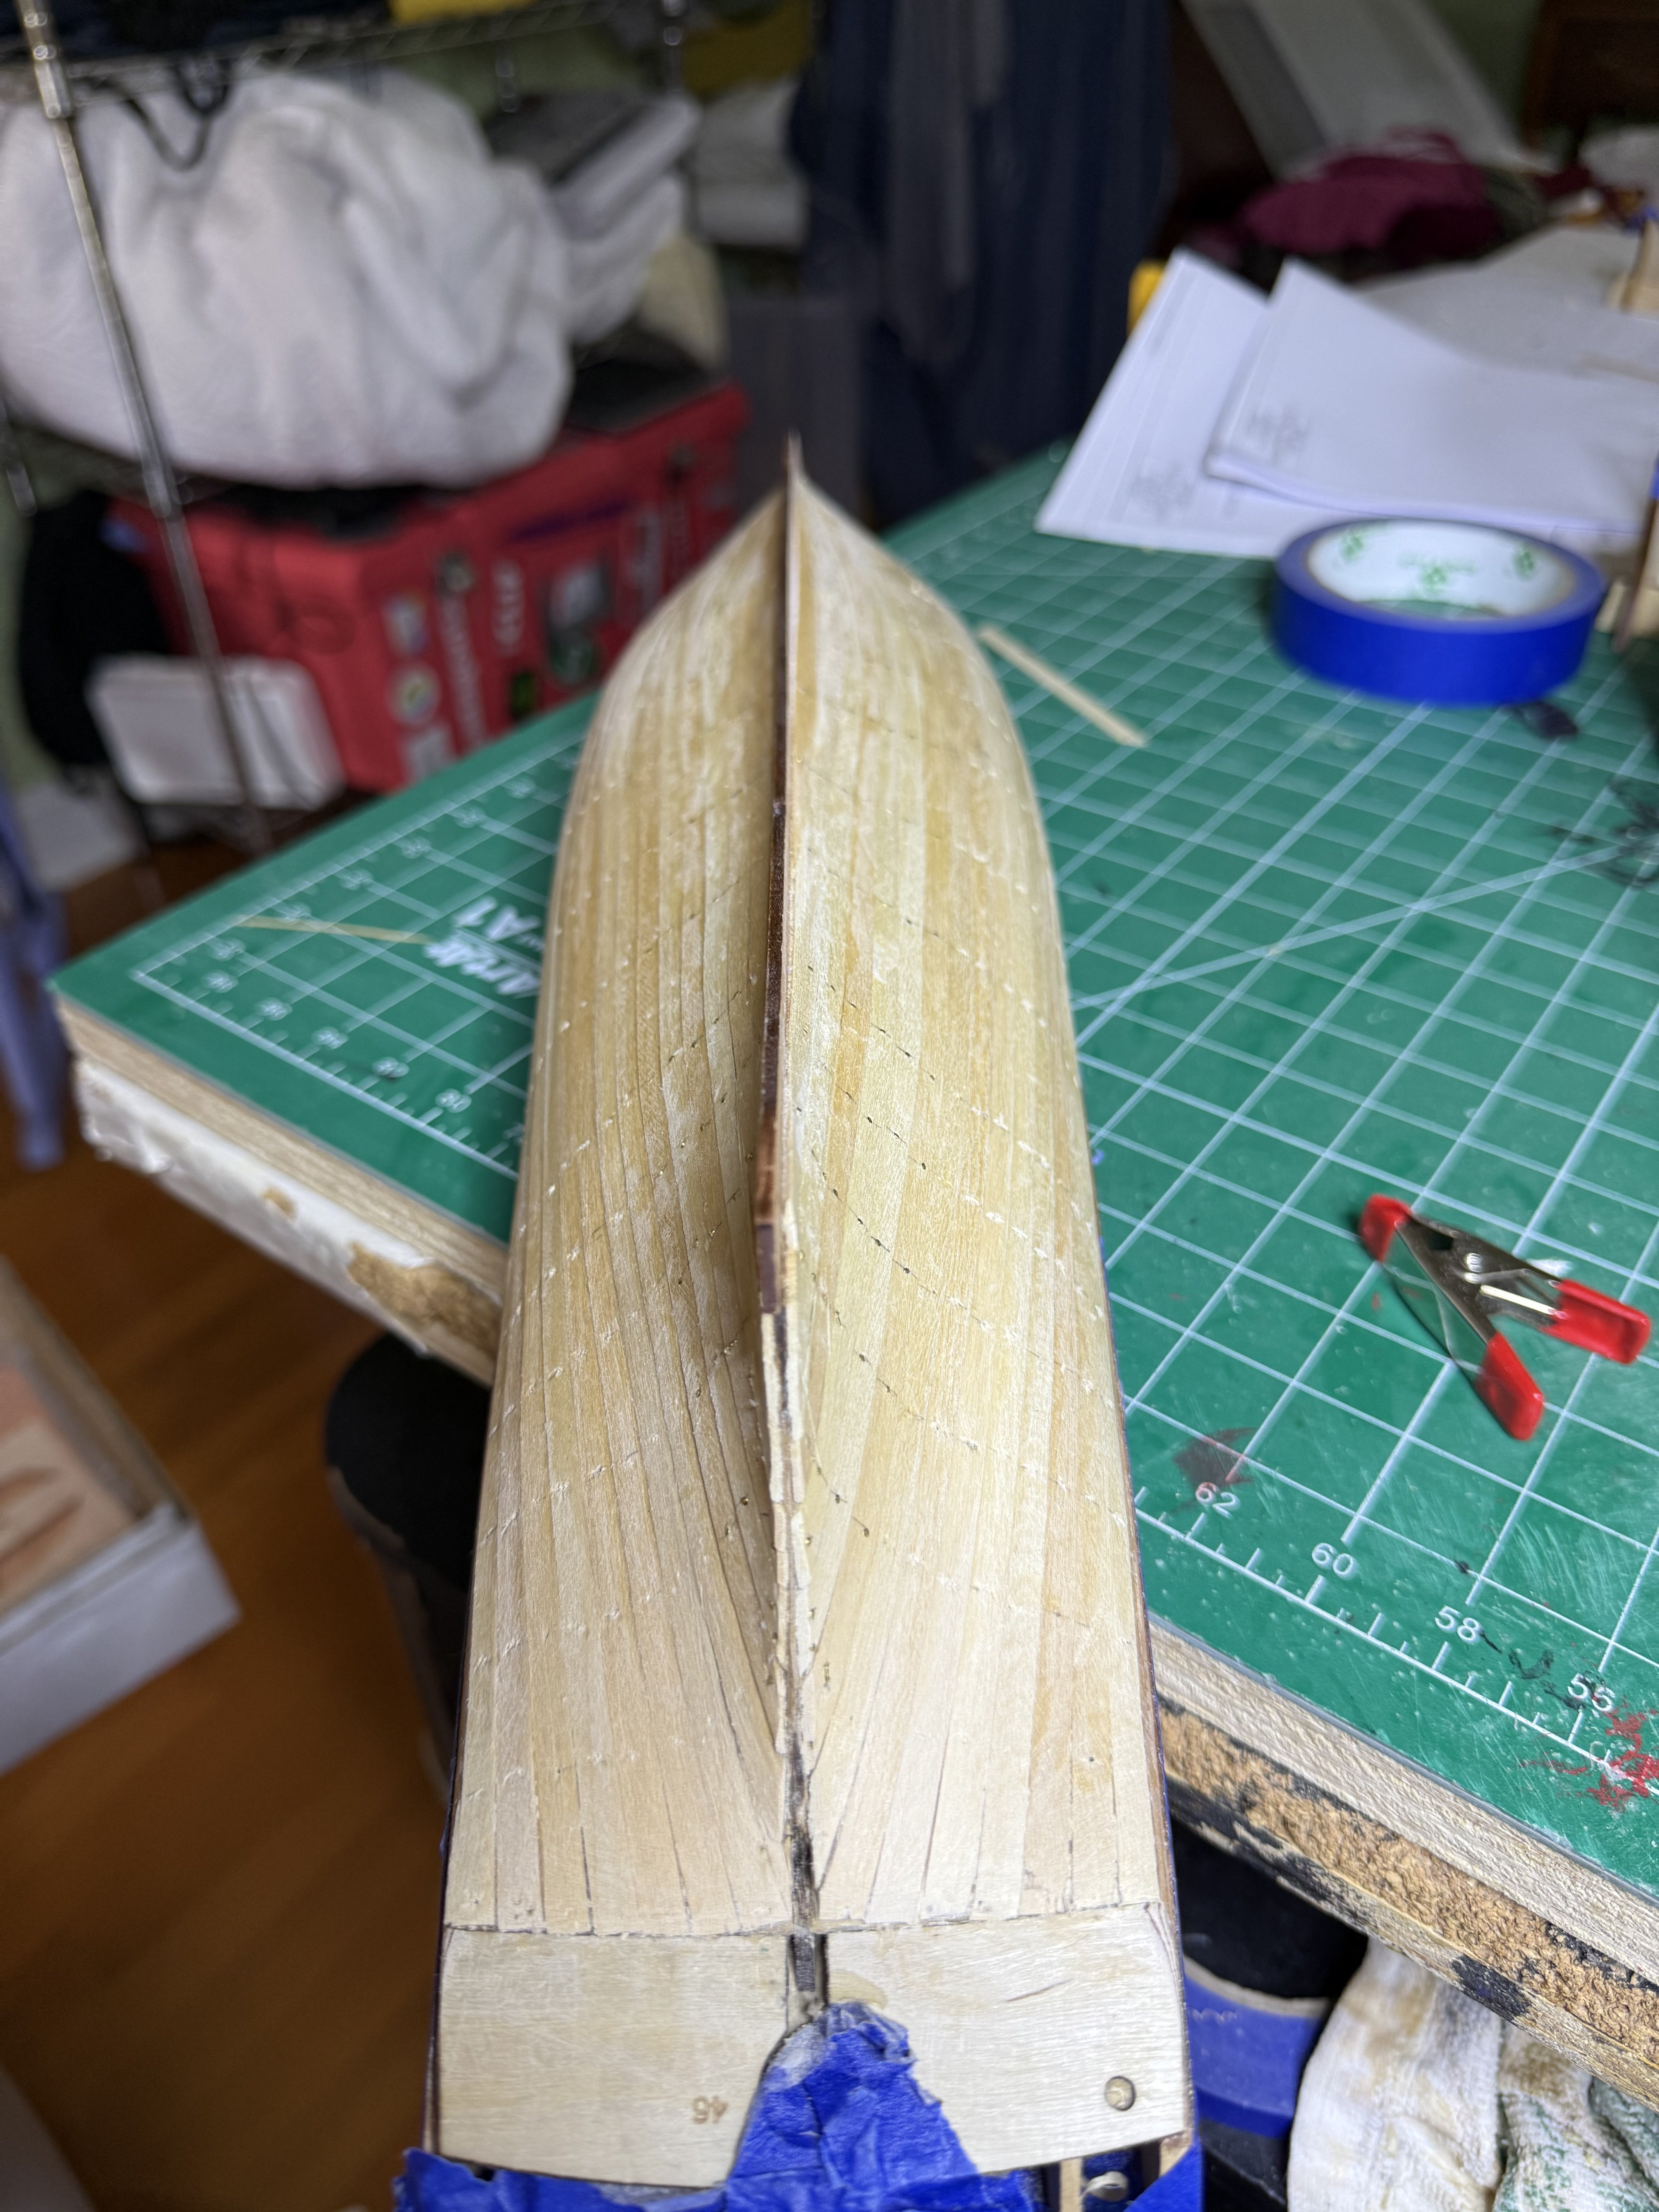
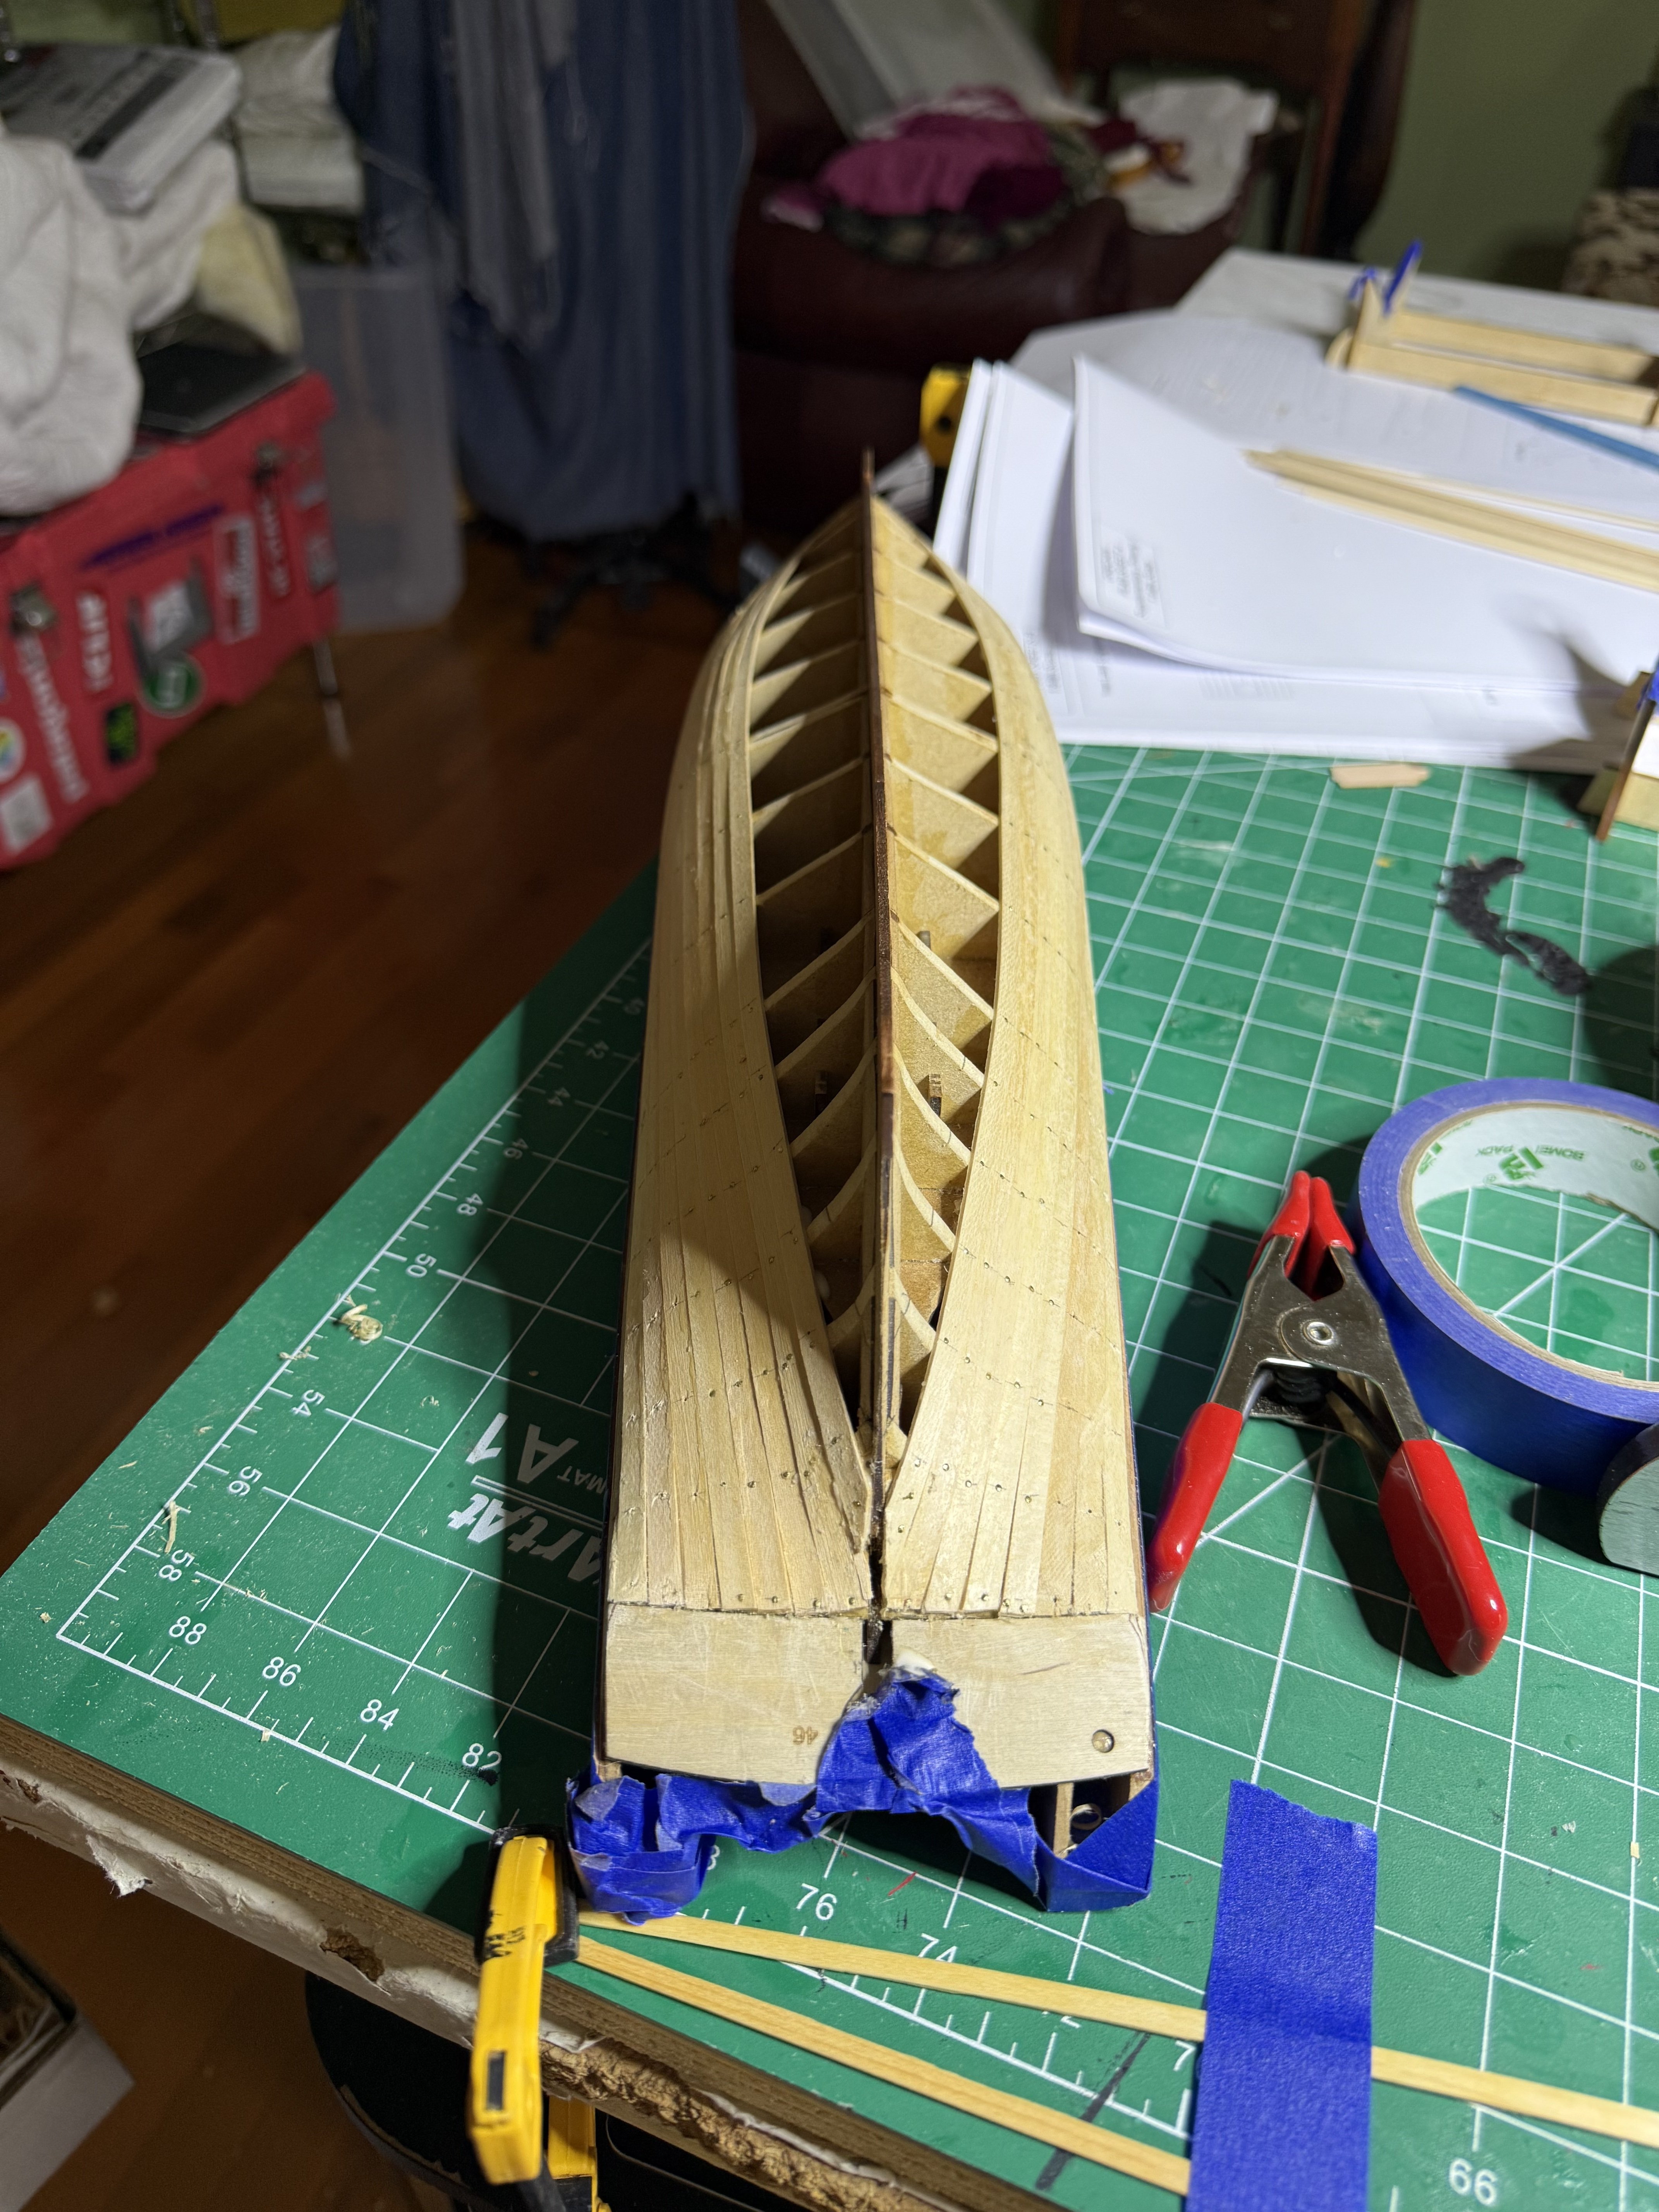
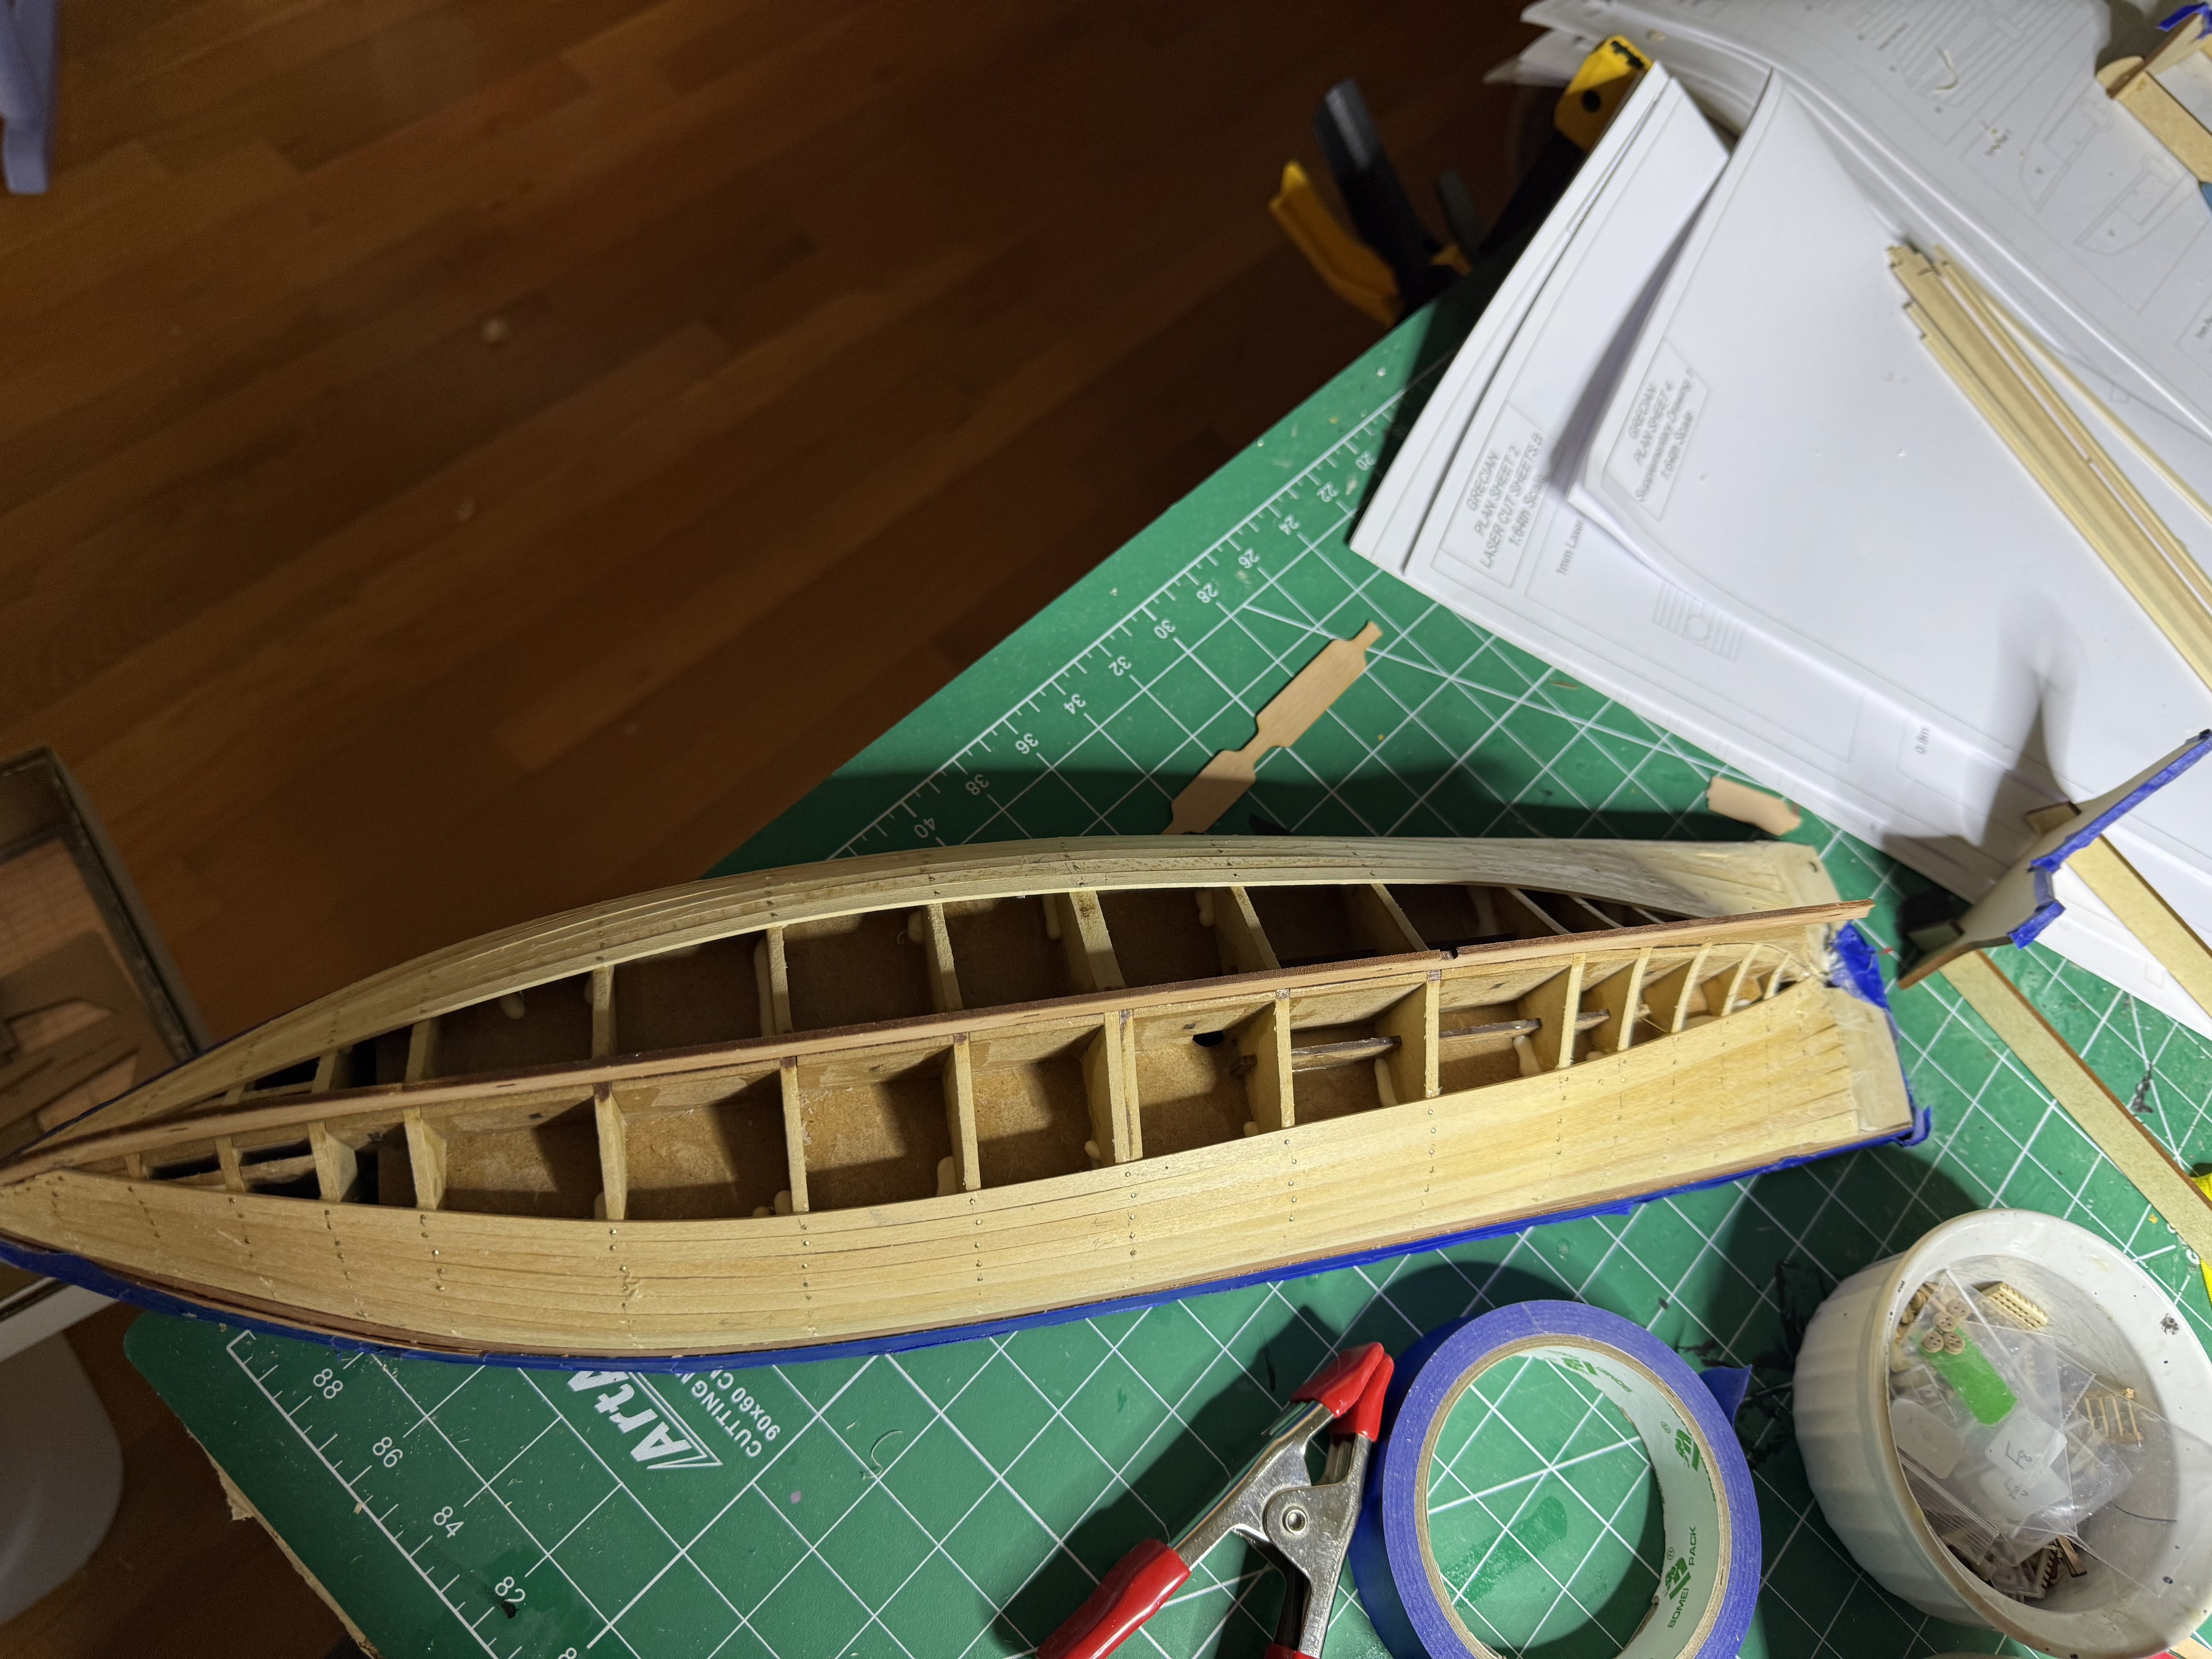
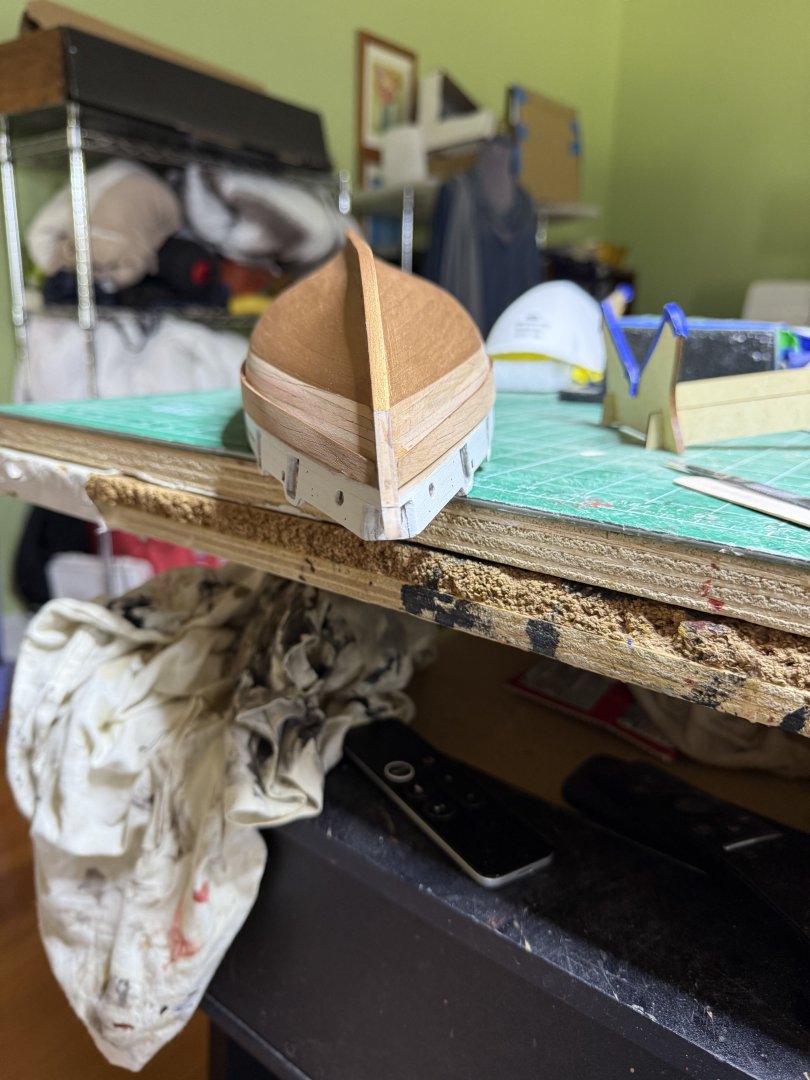
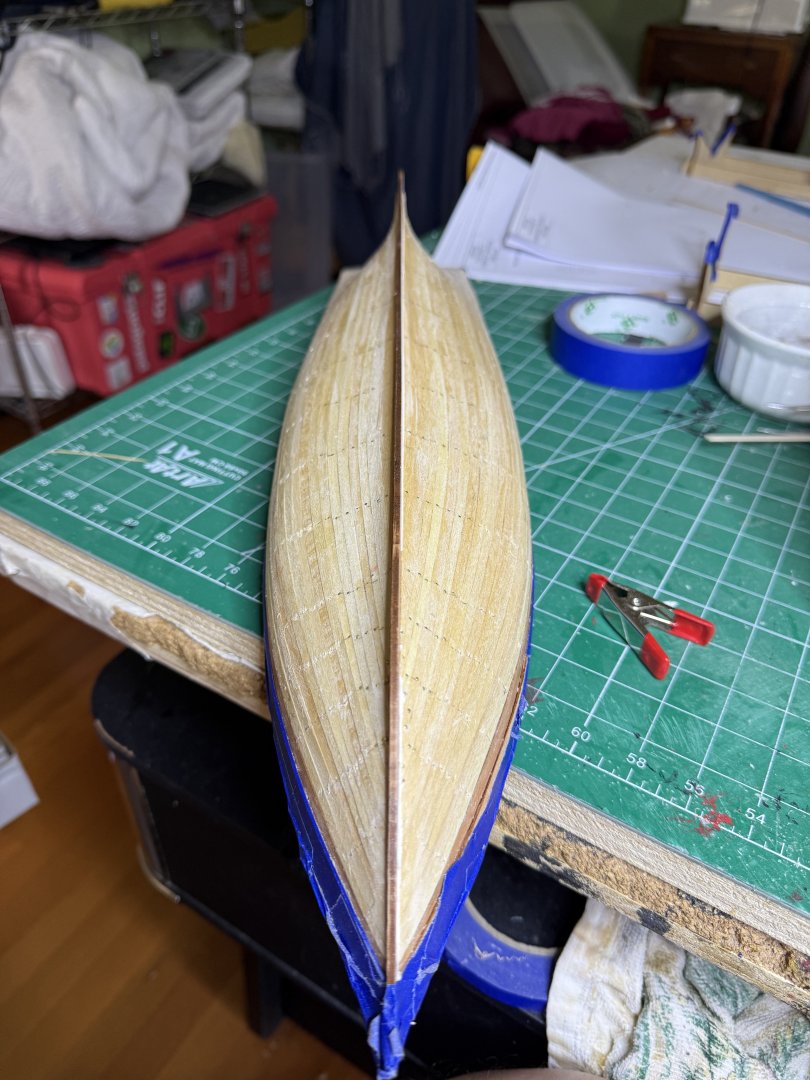
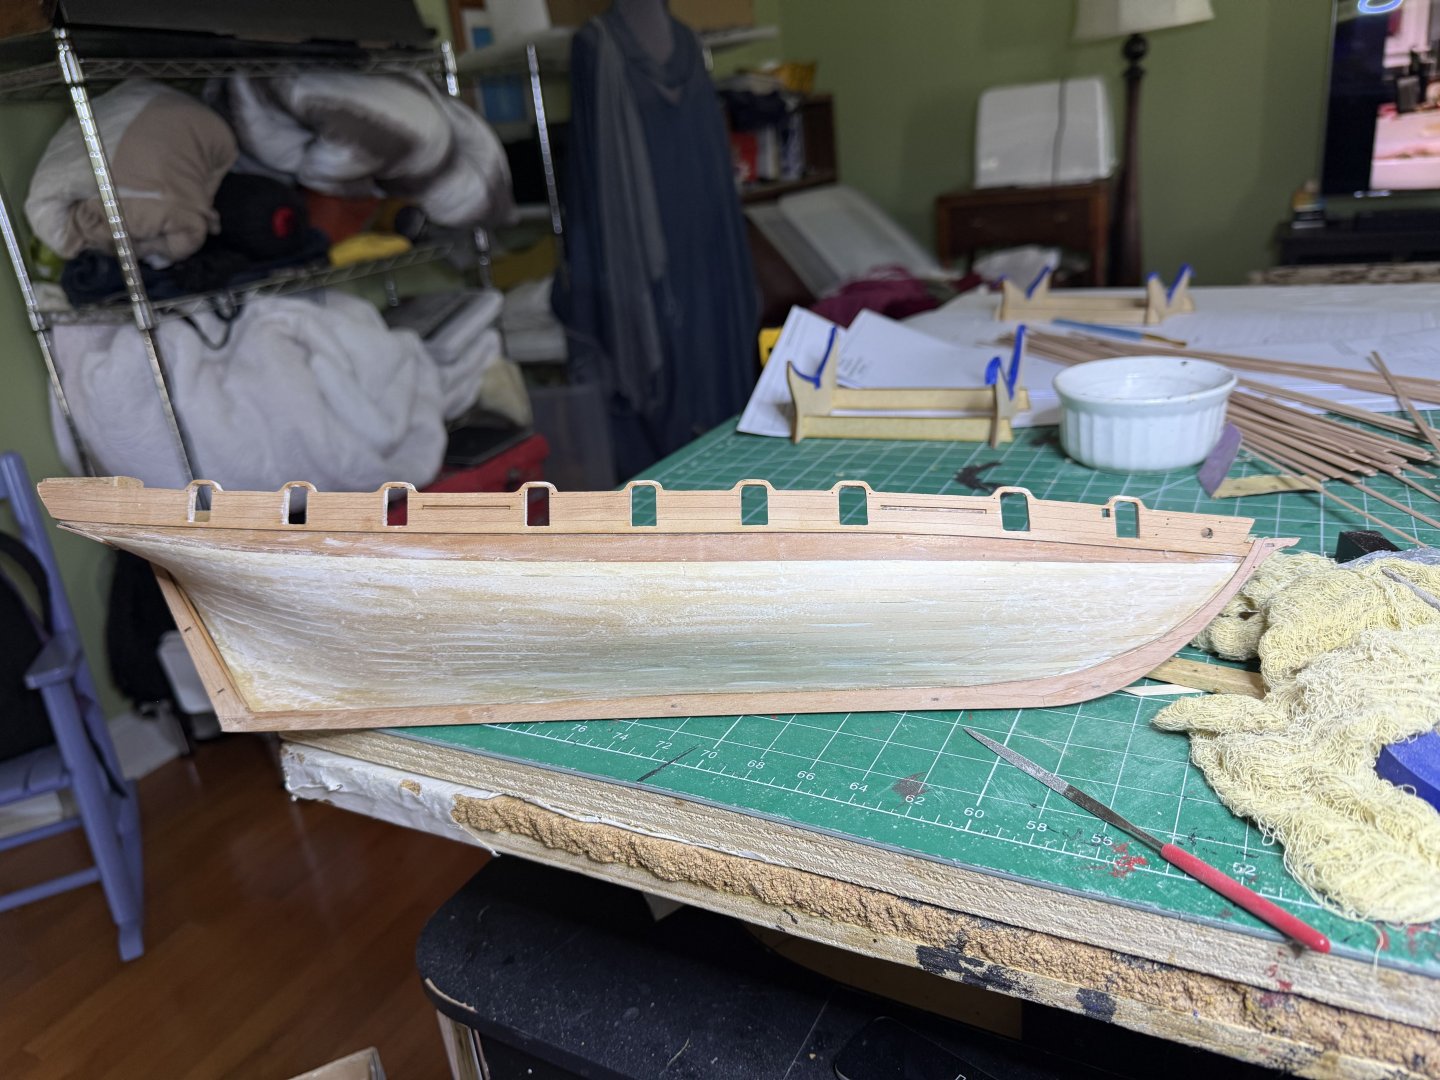
No first planking done, here pre-sanding/filling. Had 2 stealers in the stern Now post sanding, filling and sanding Next gluing on the veneers Now ready for second planking


- 52 replies
-
- 7
-
-
- Grecian
- Vanguard Models
- (and 1 more)
-
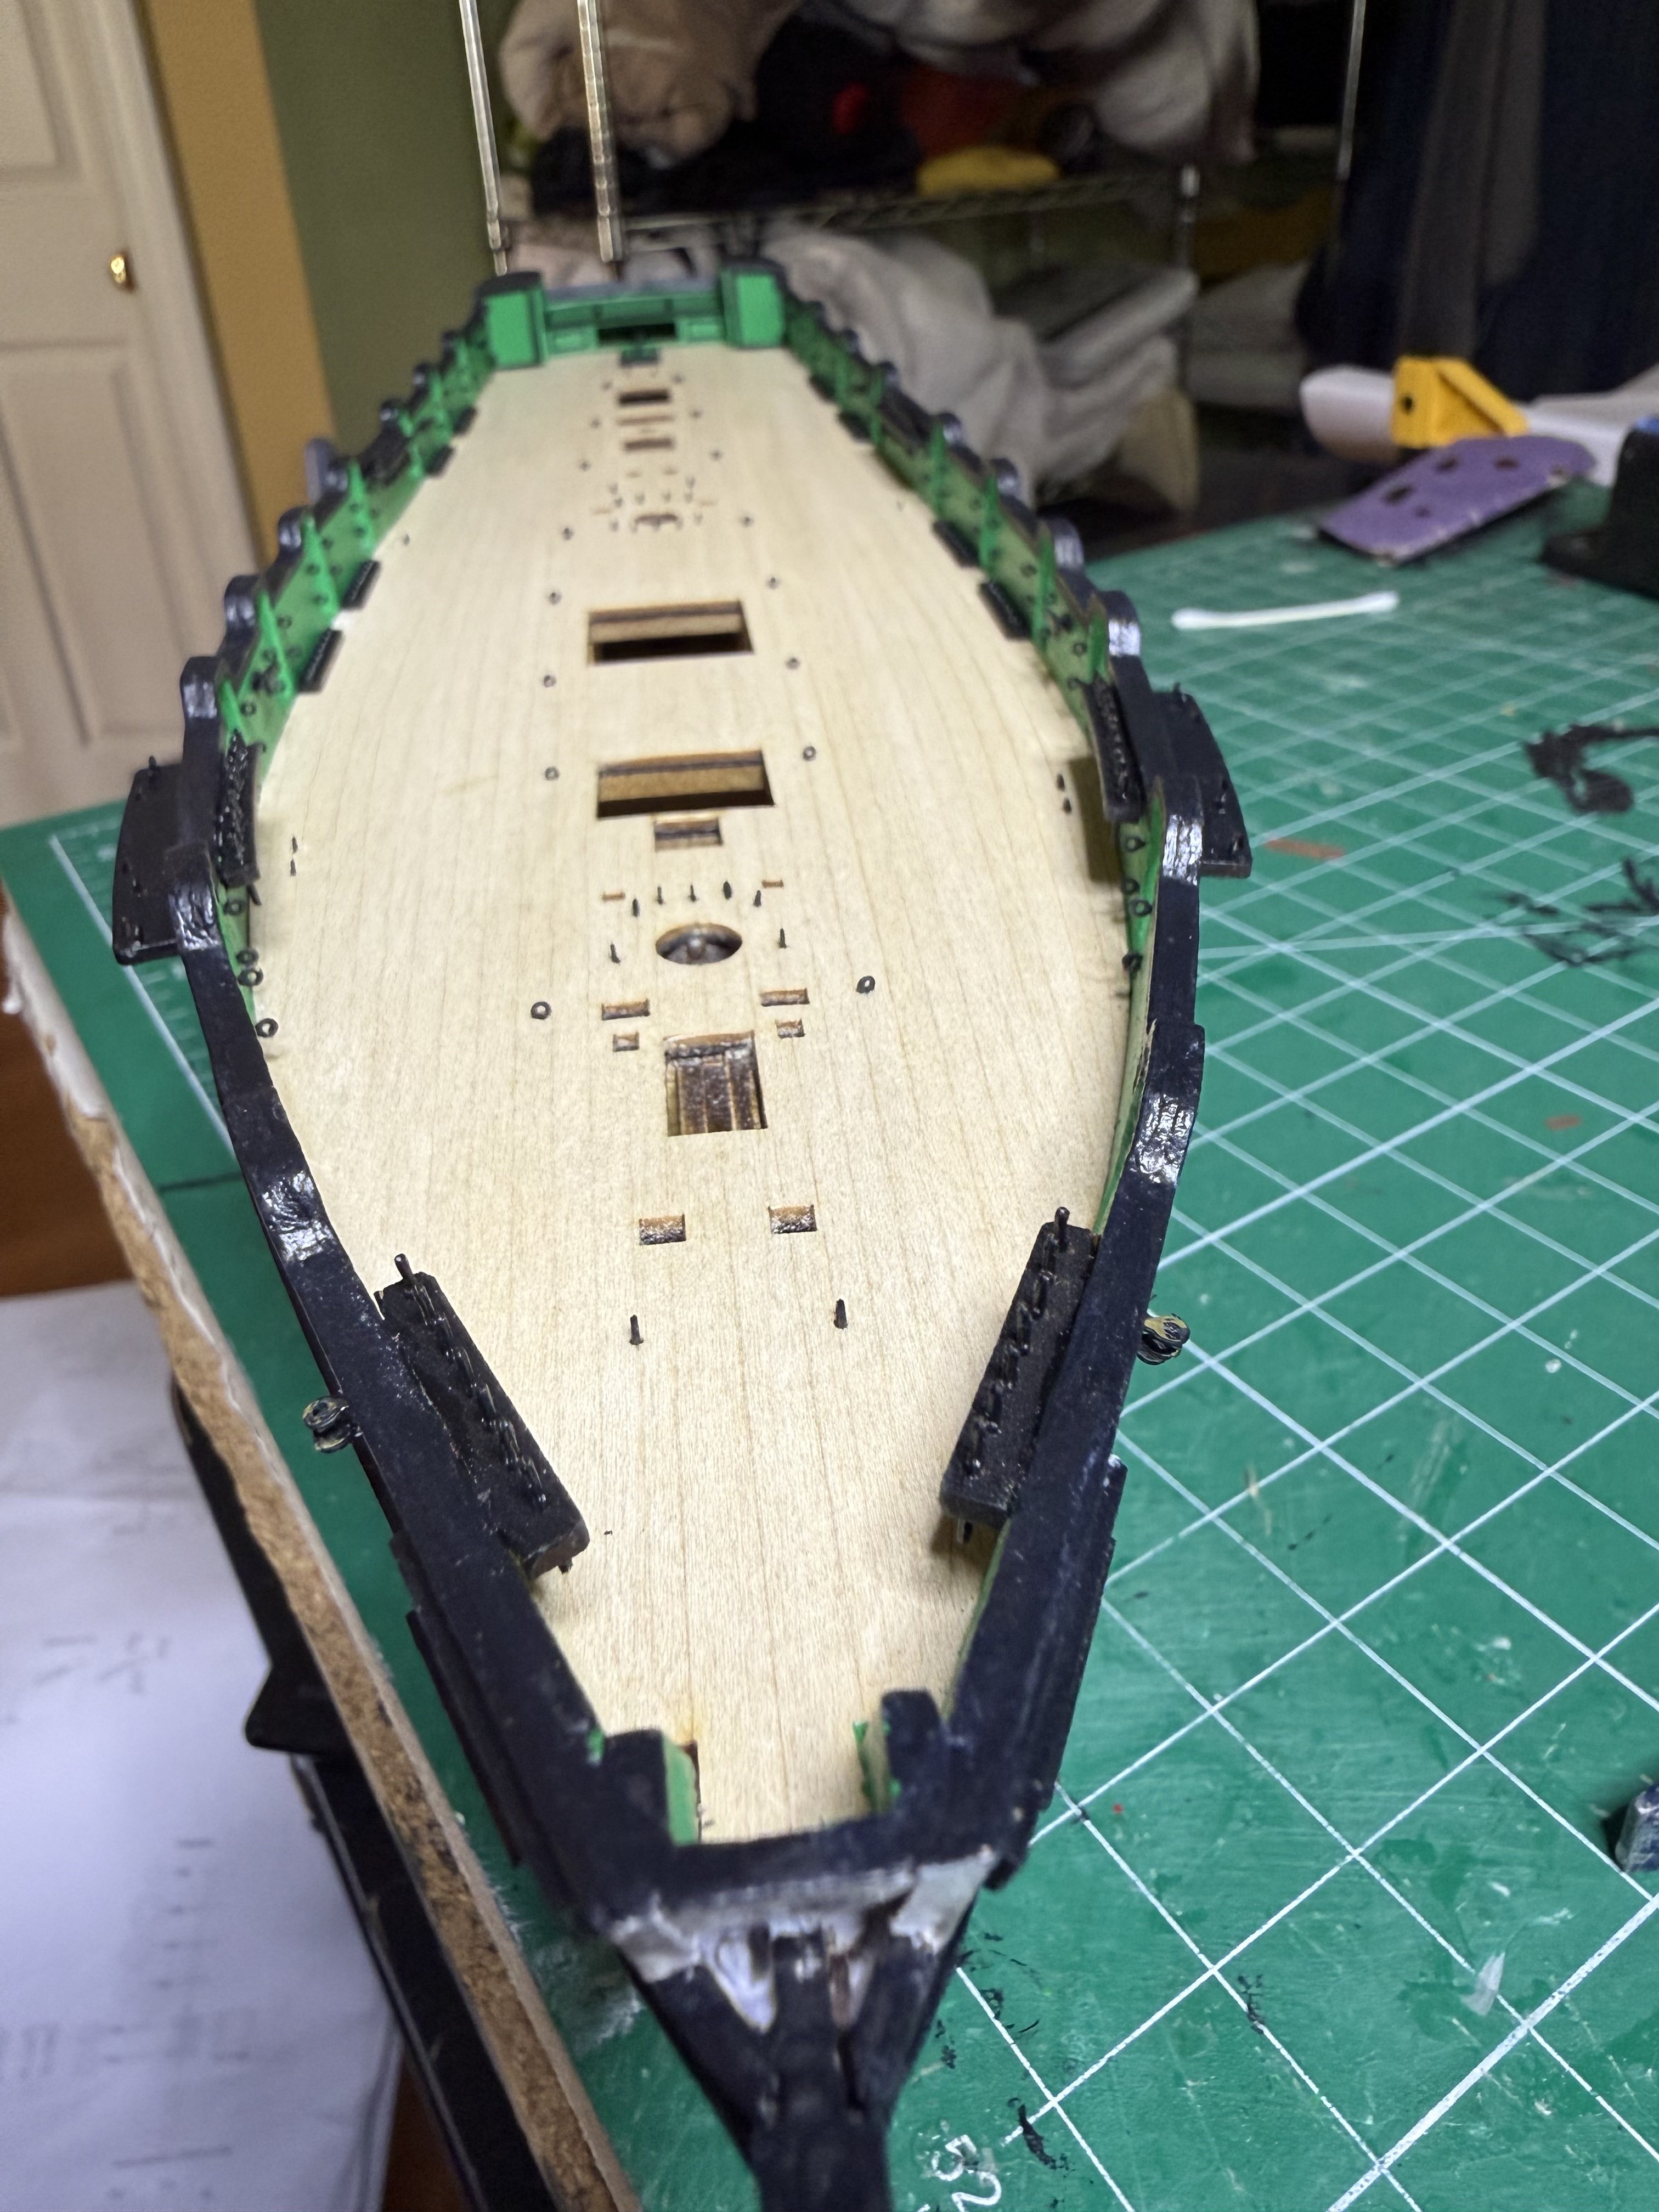
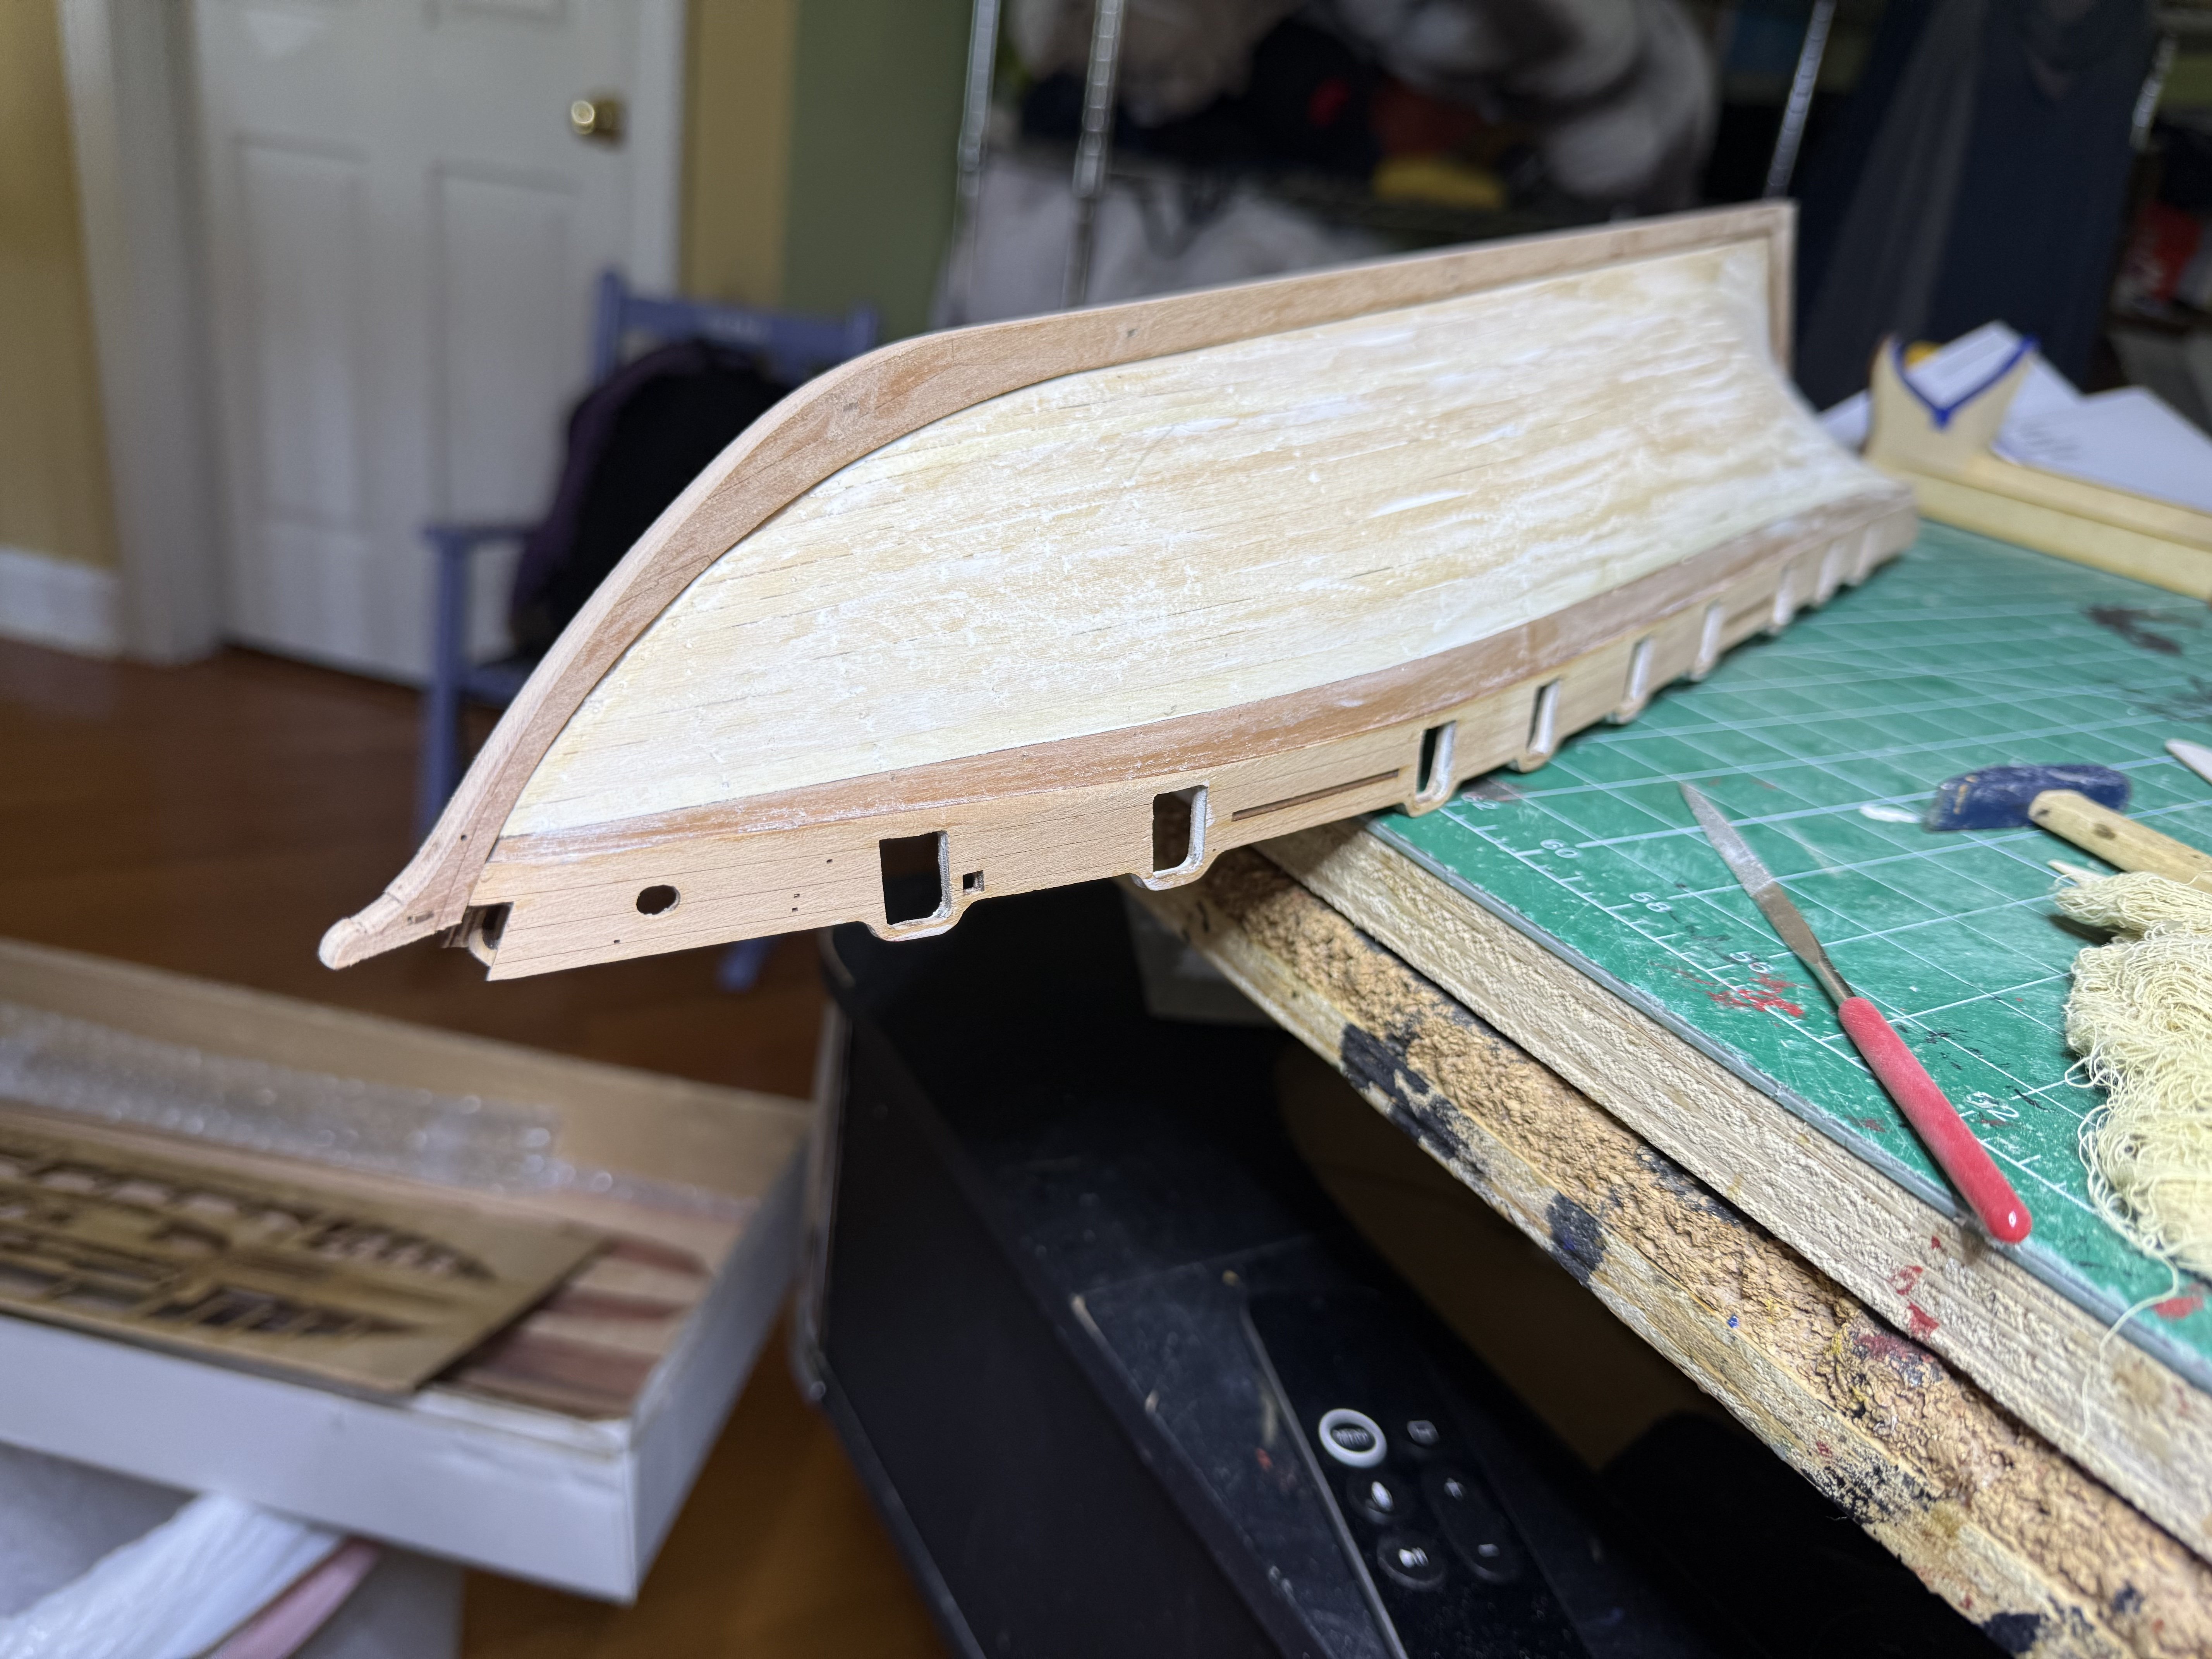
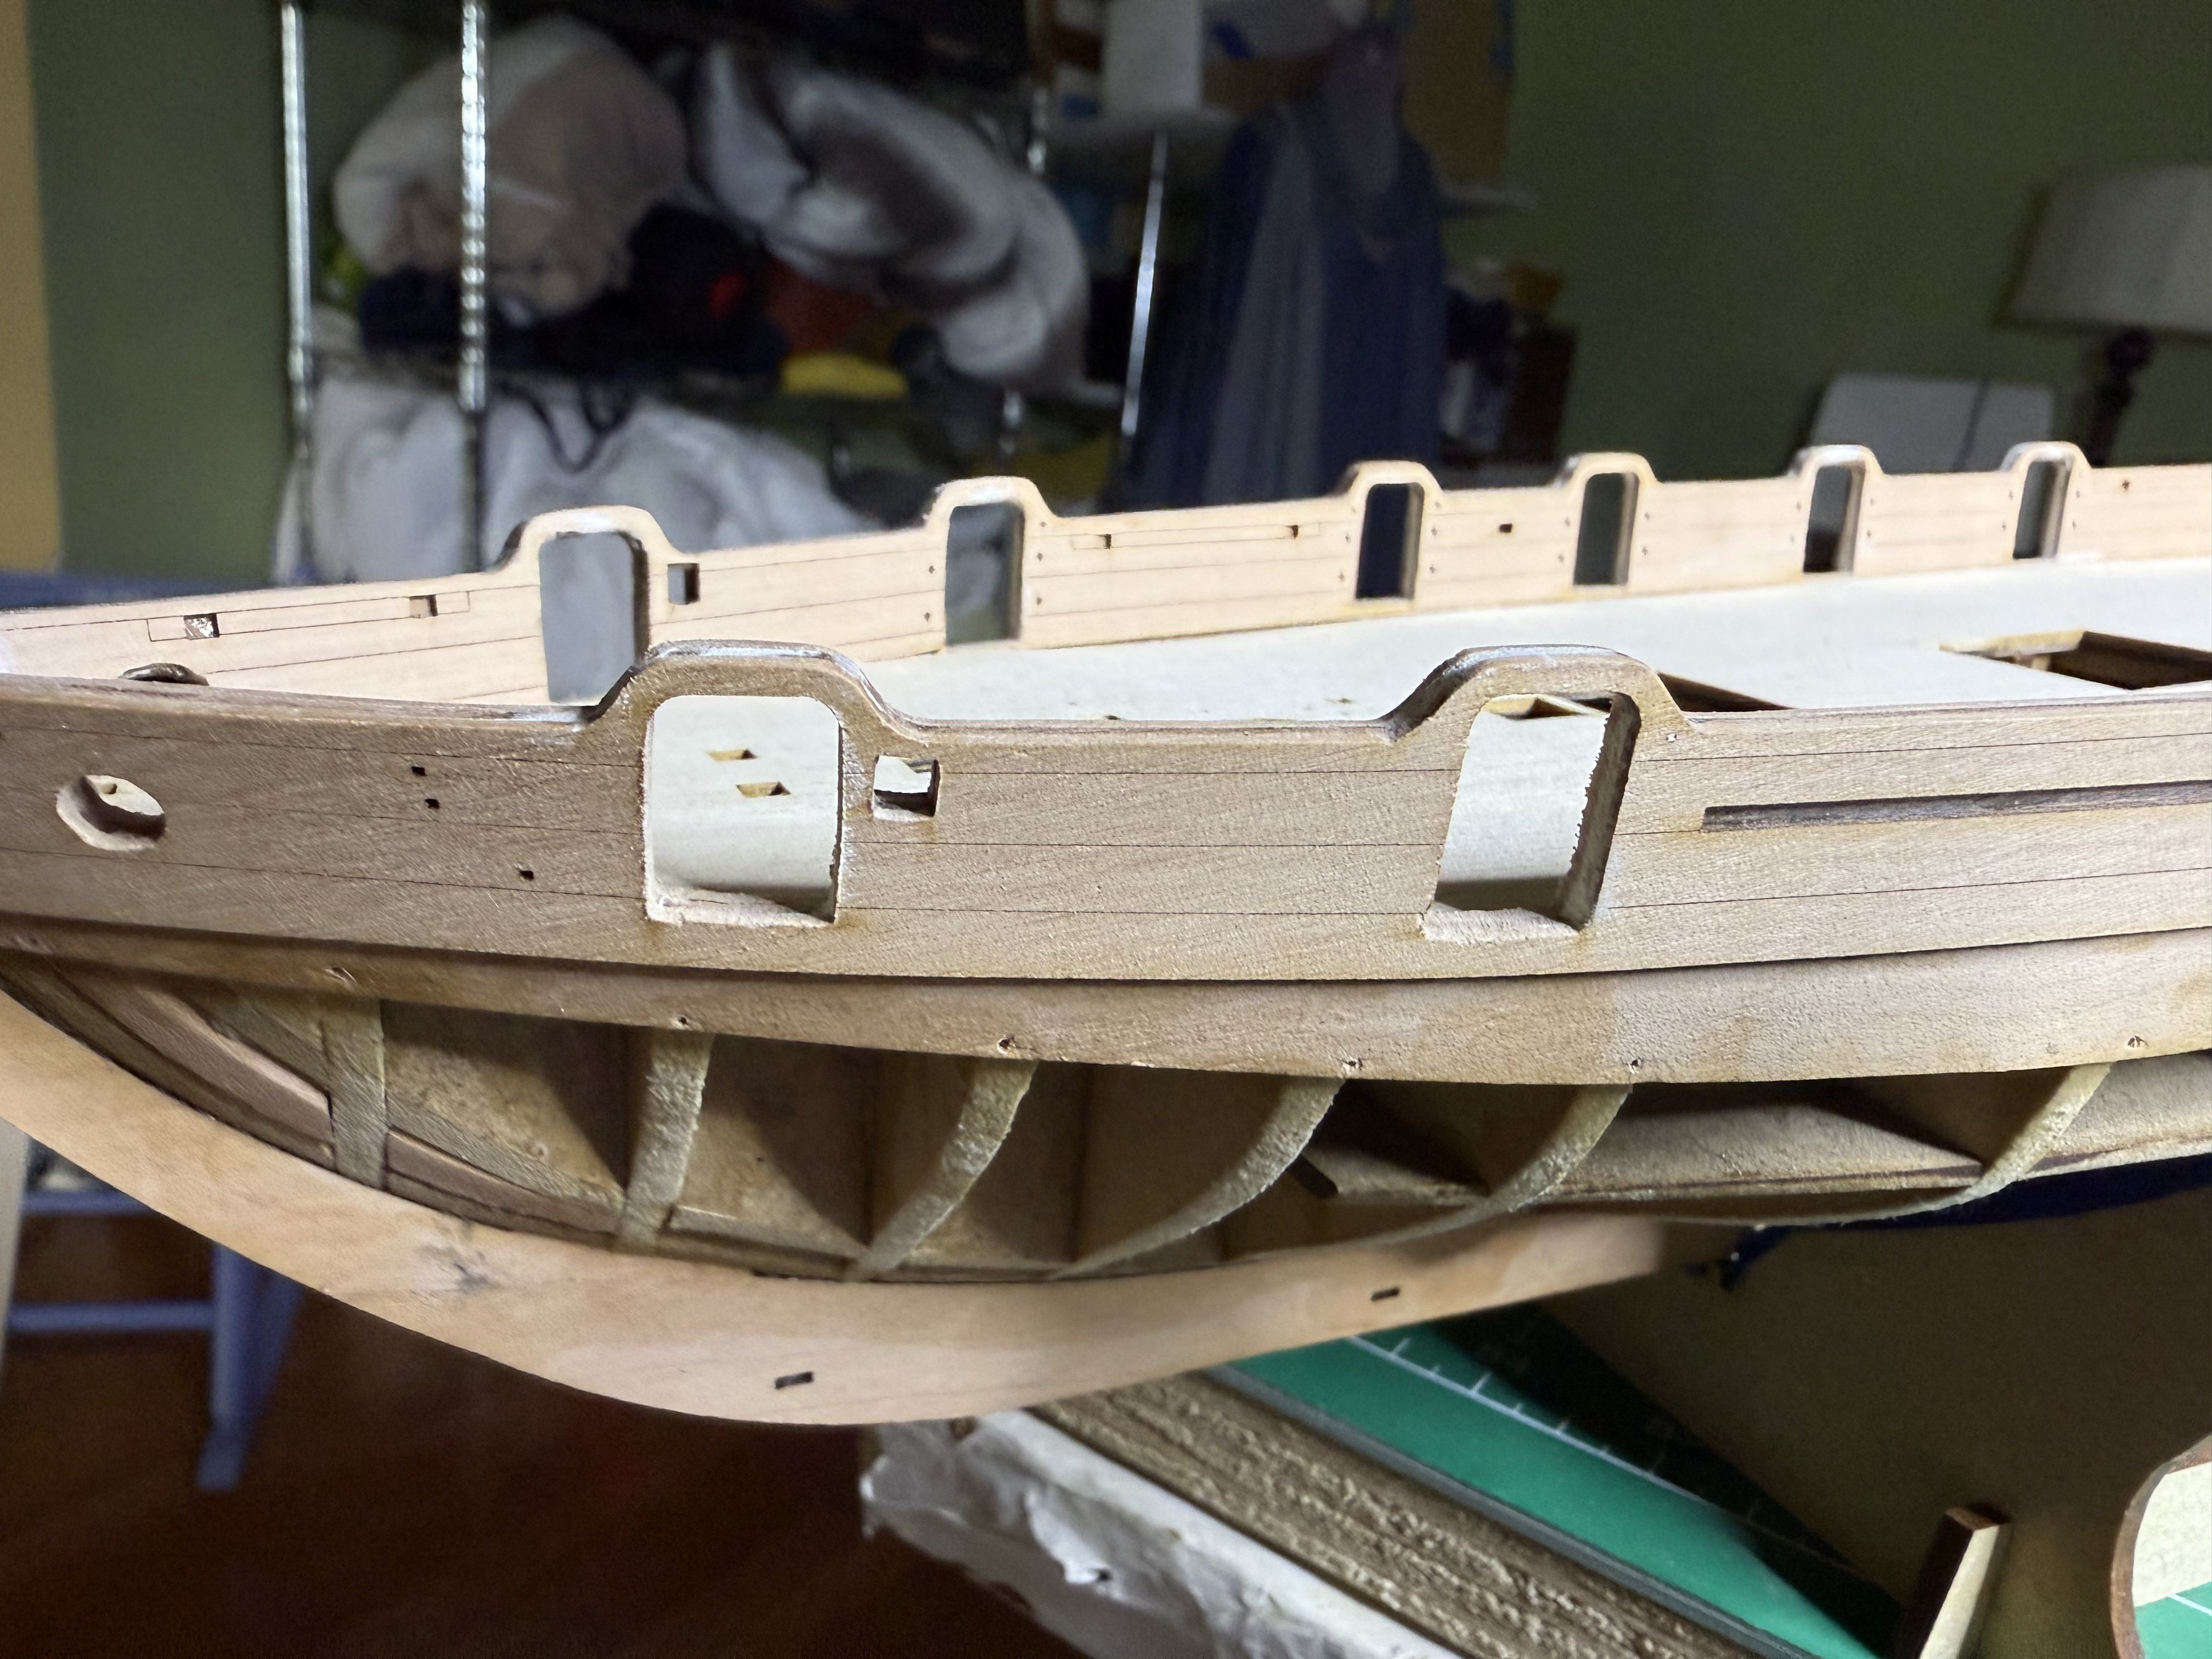
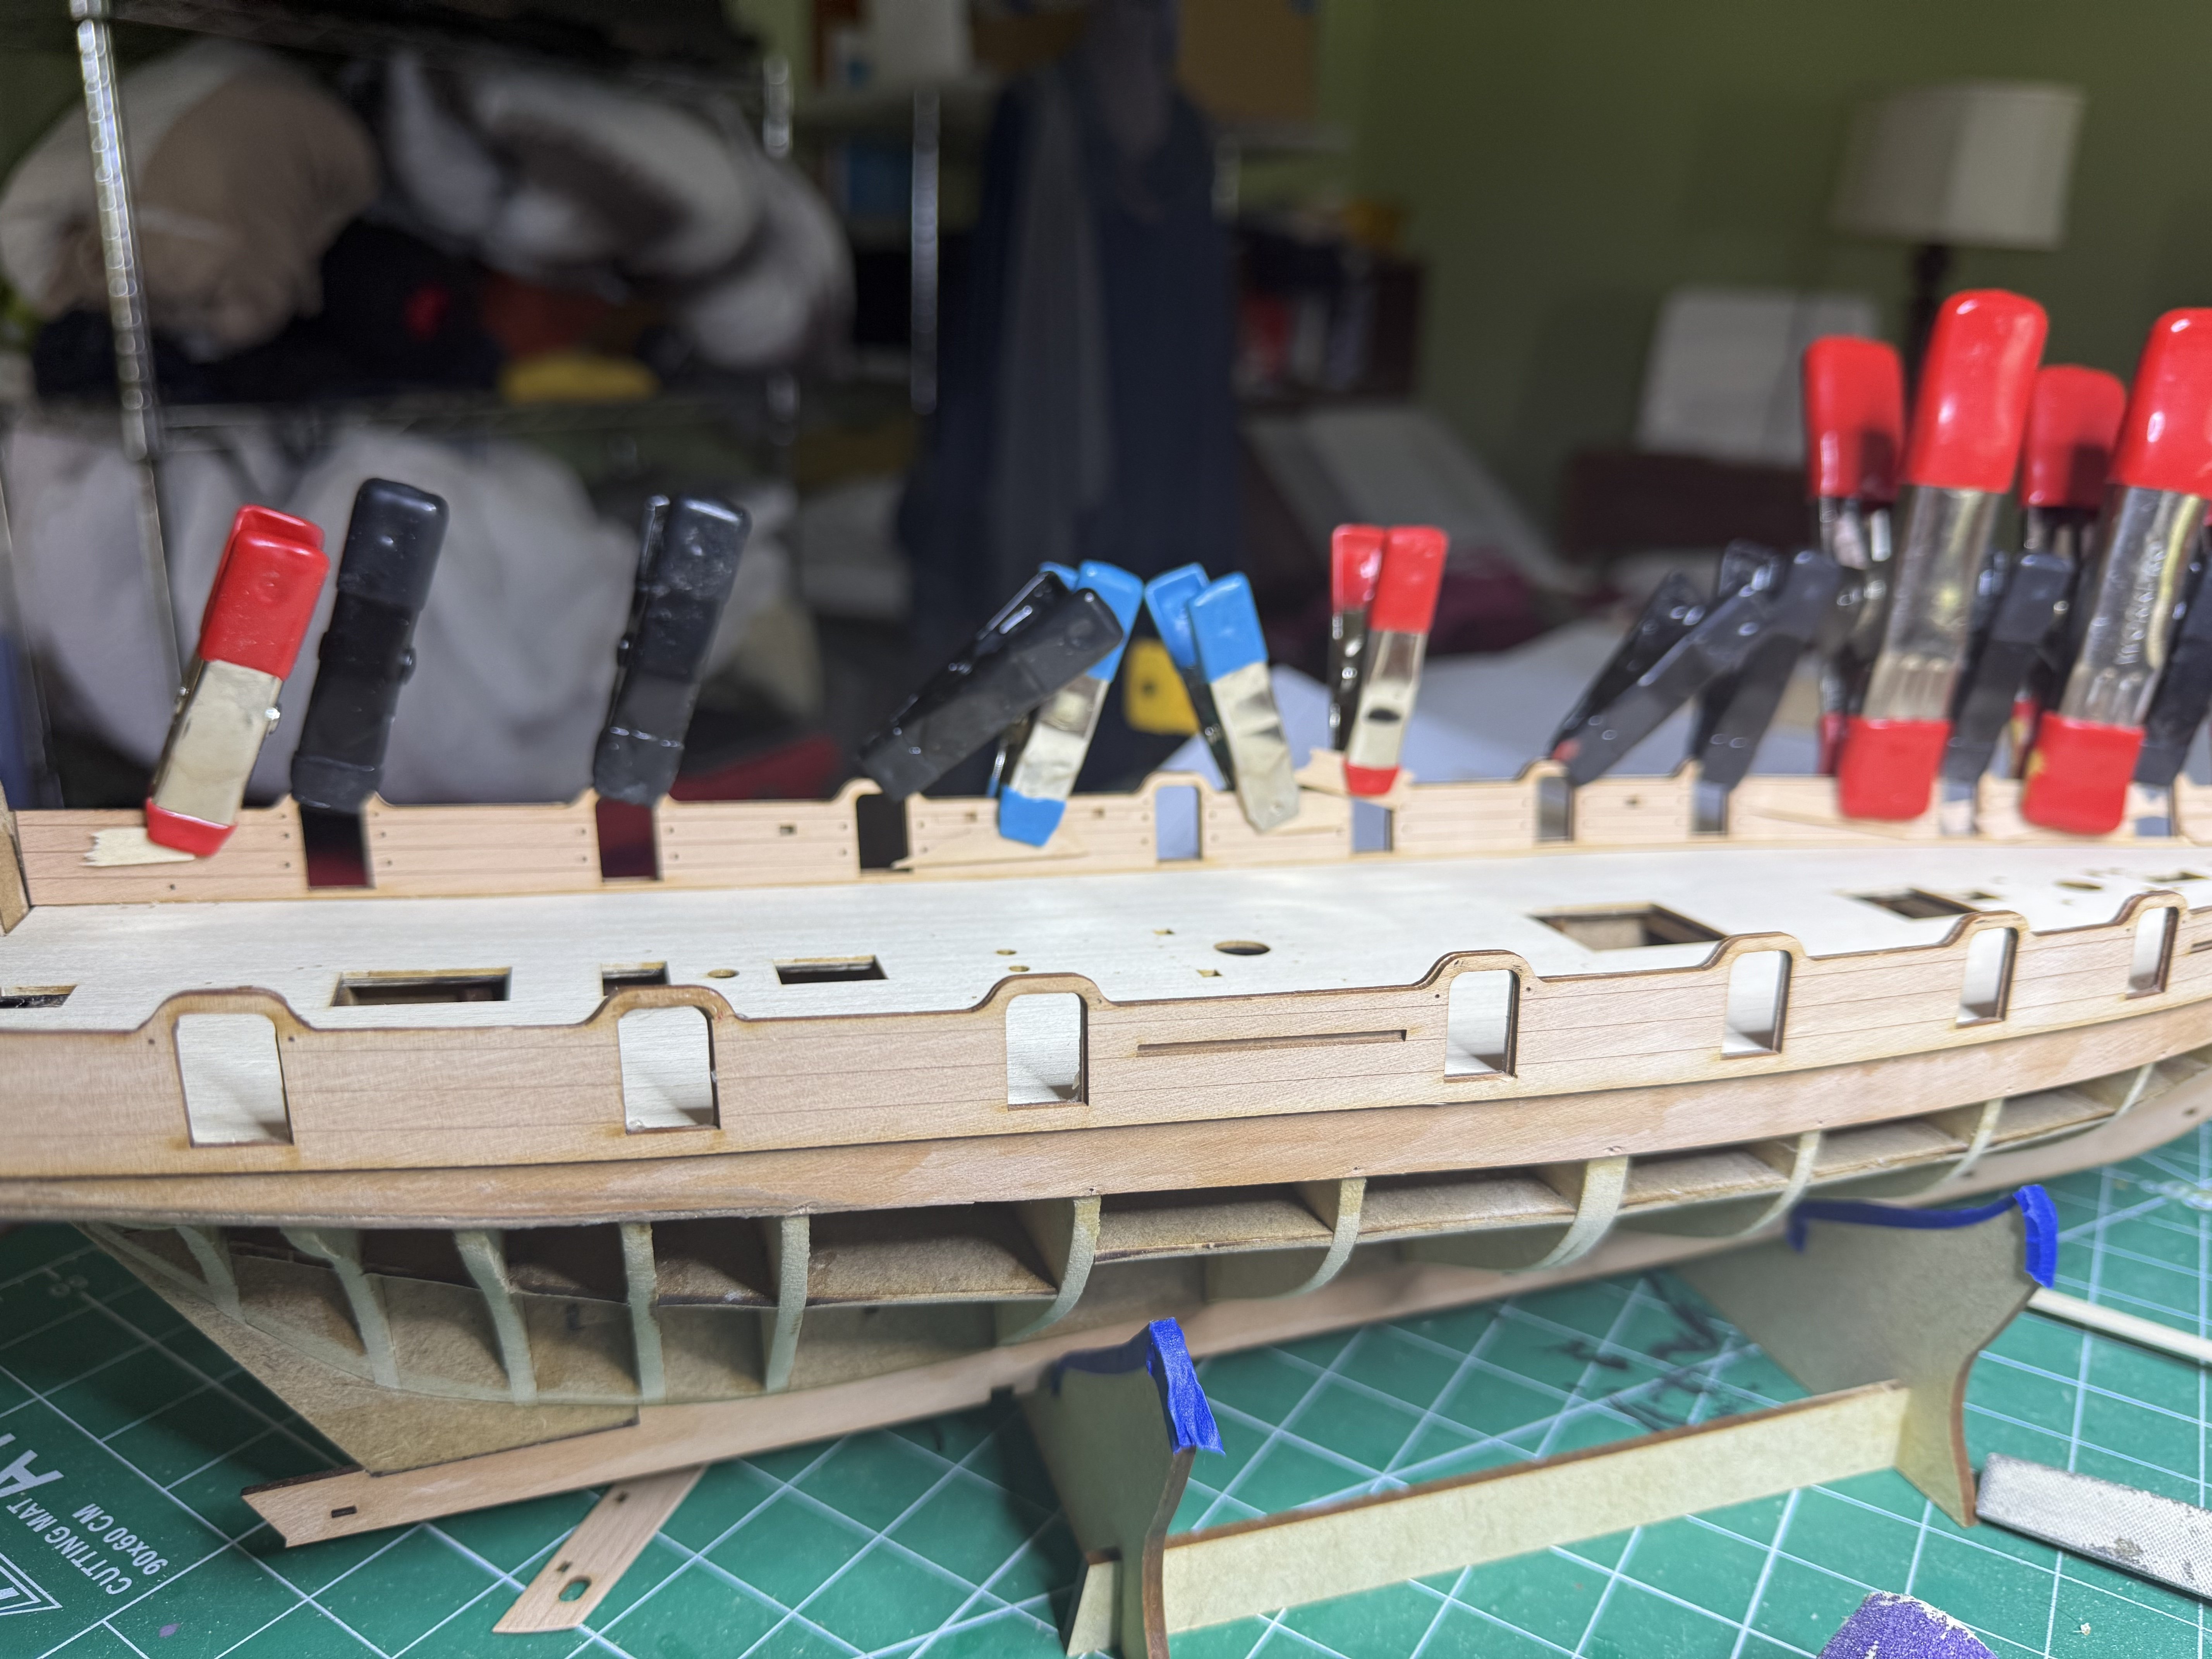
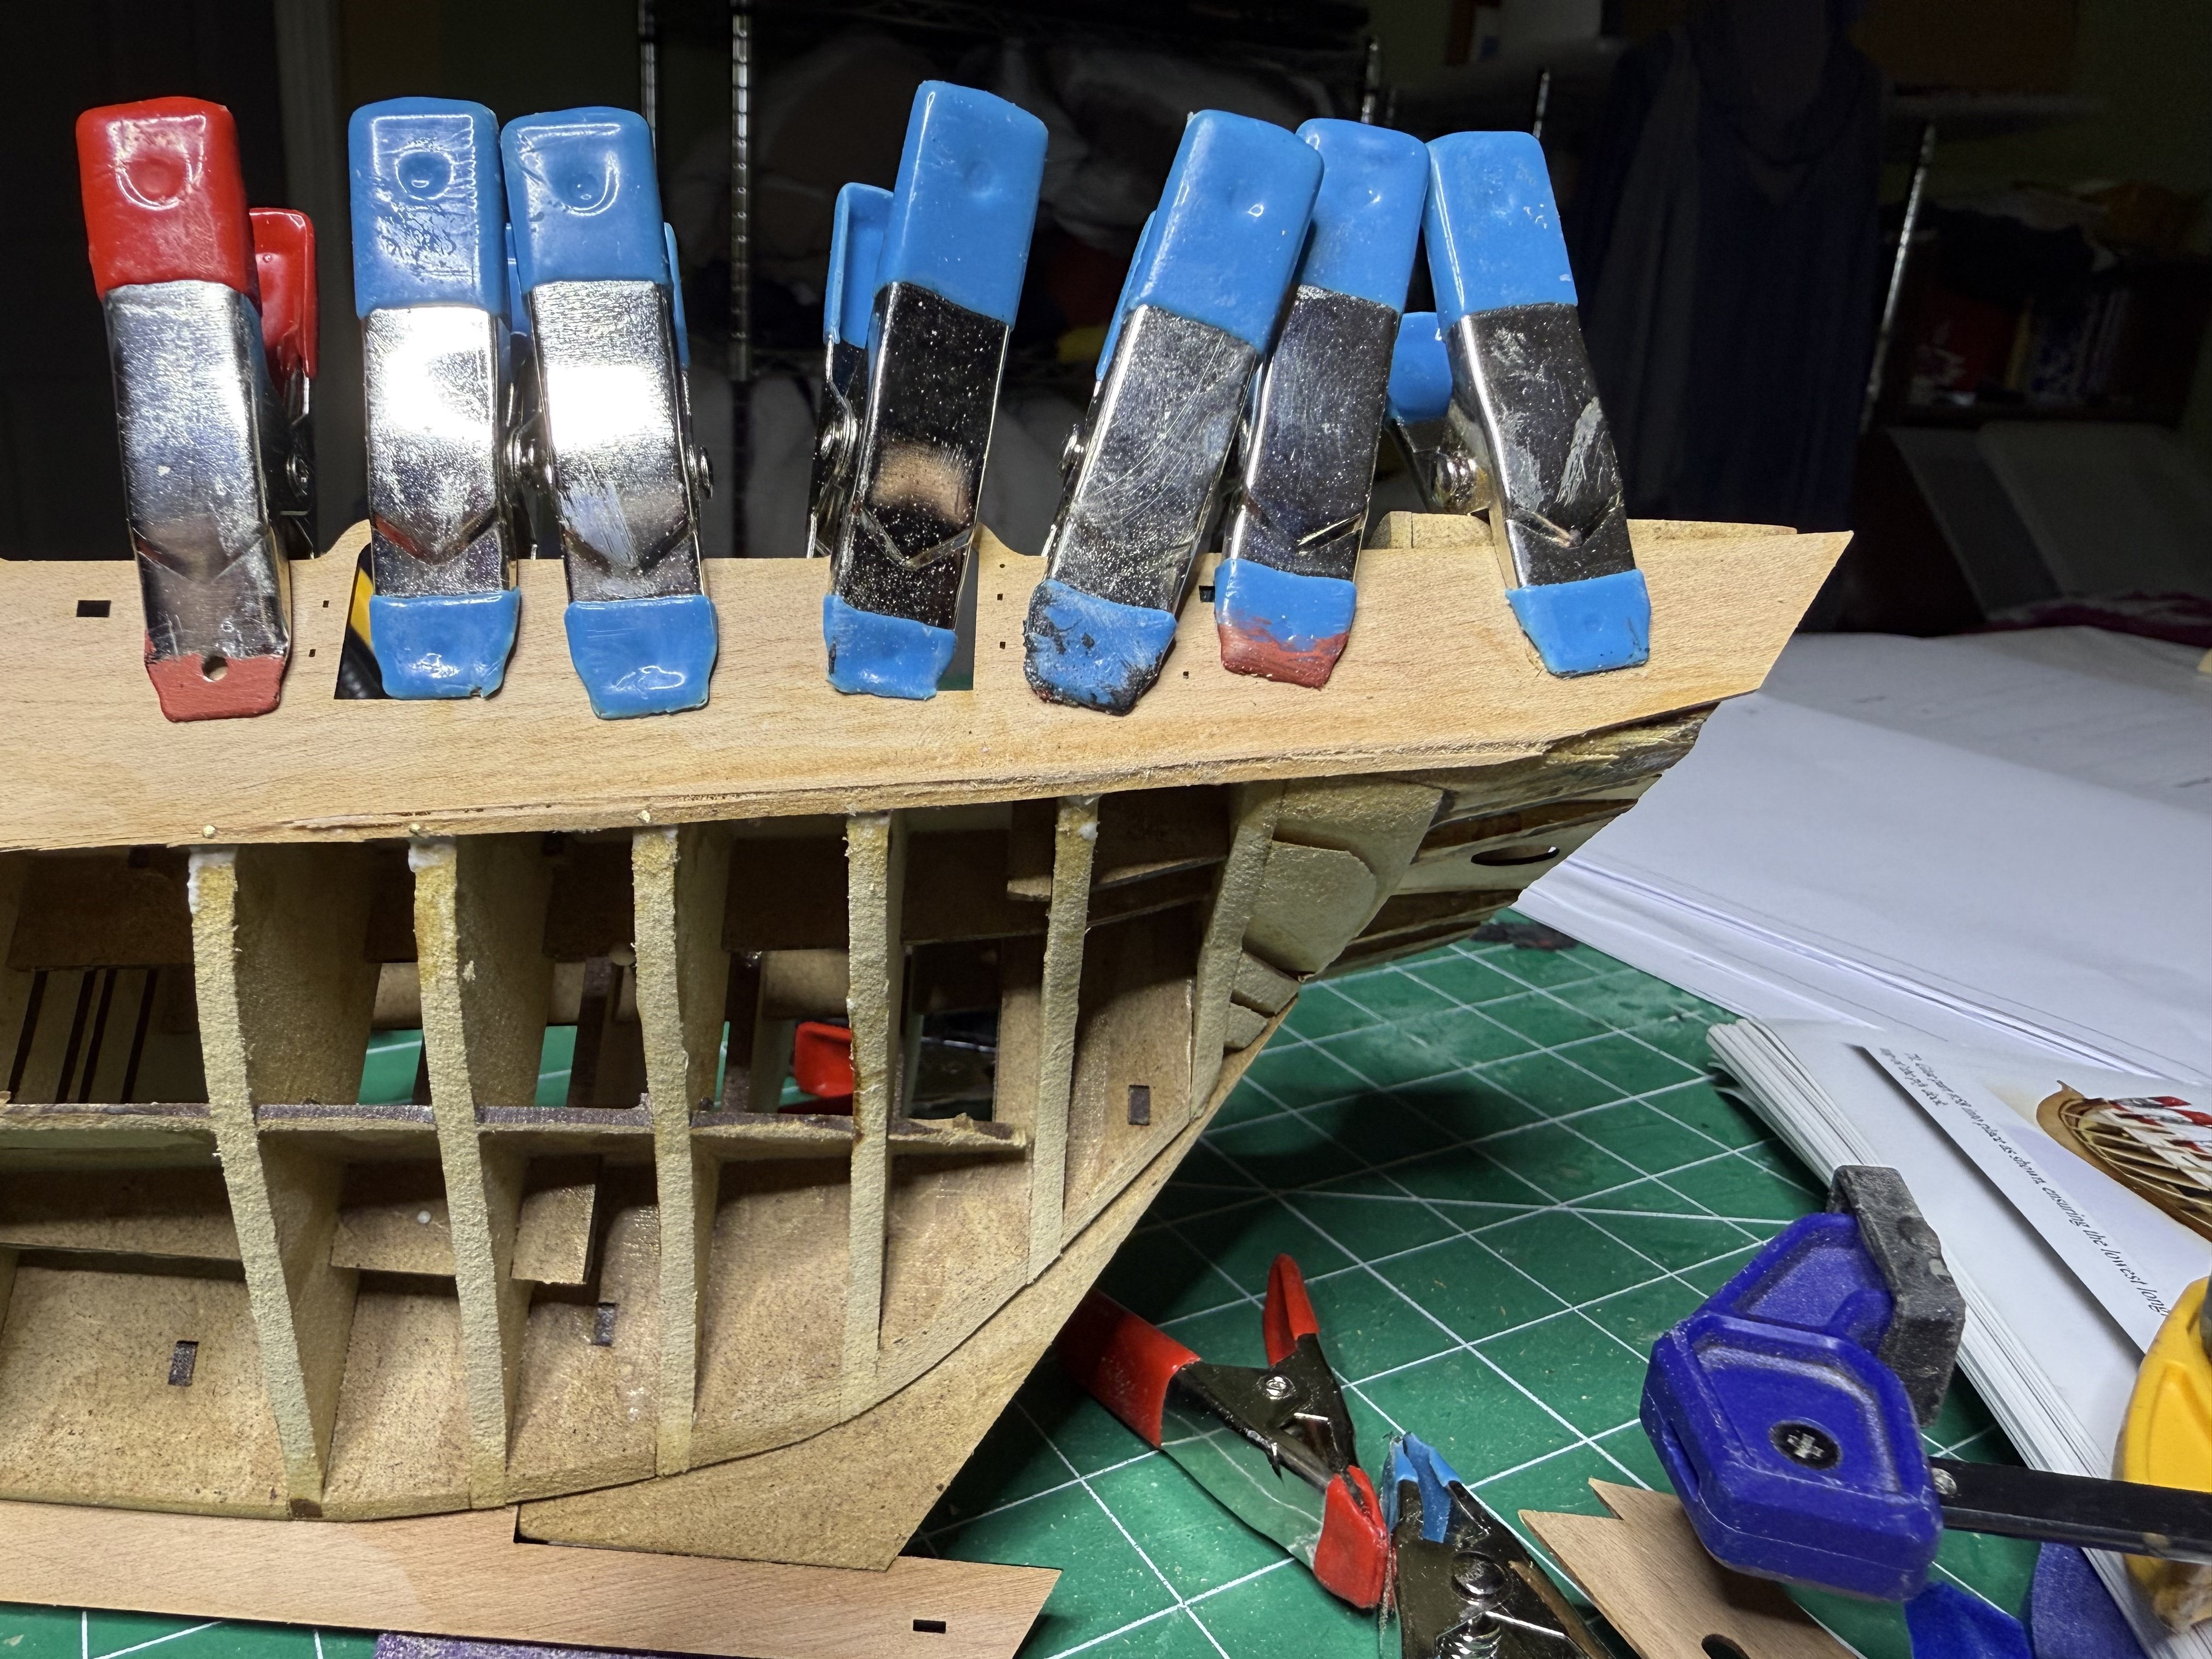
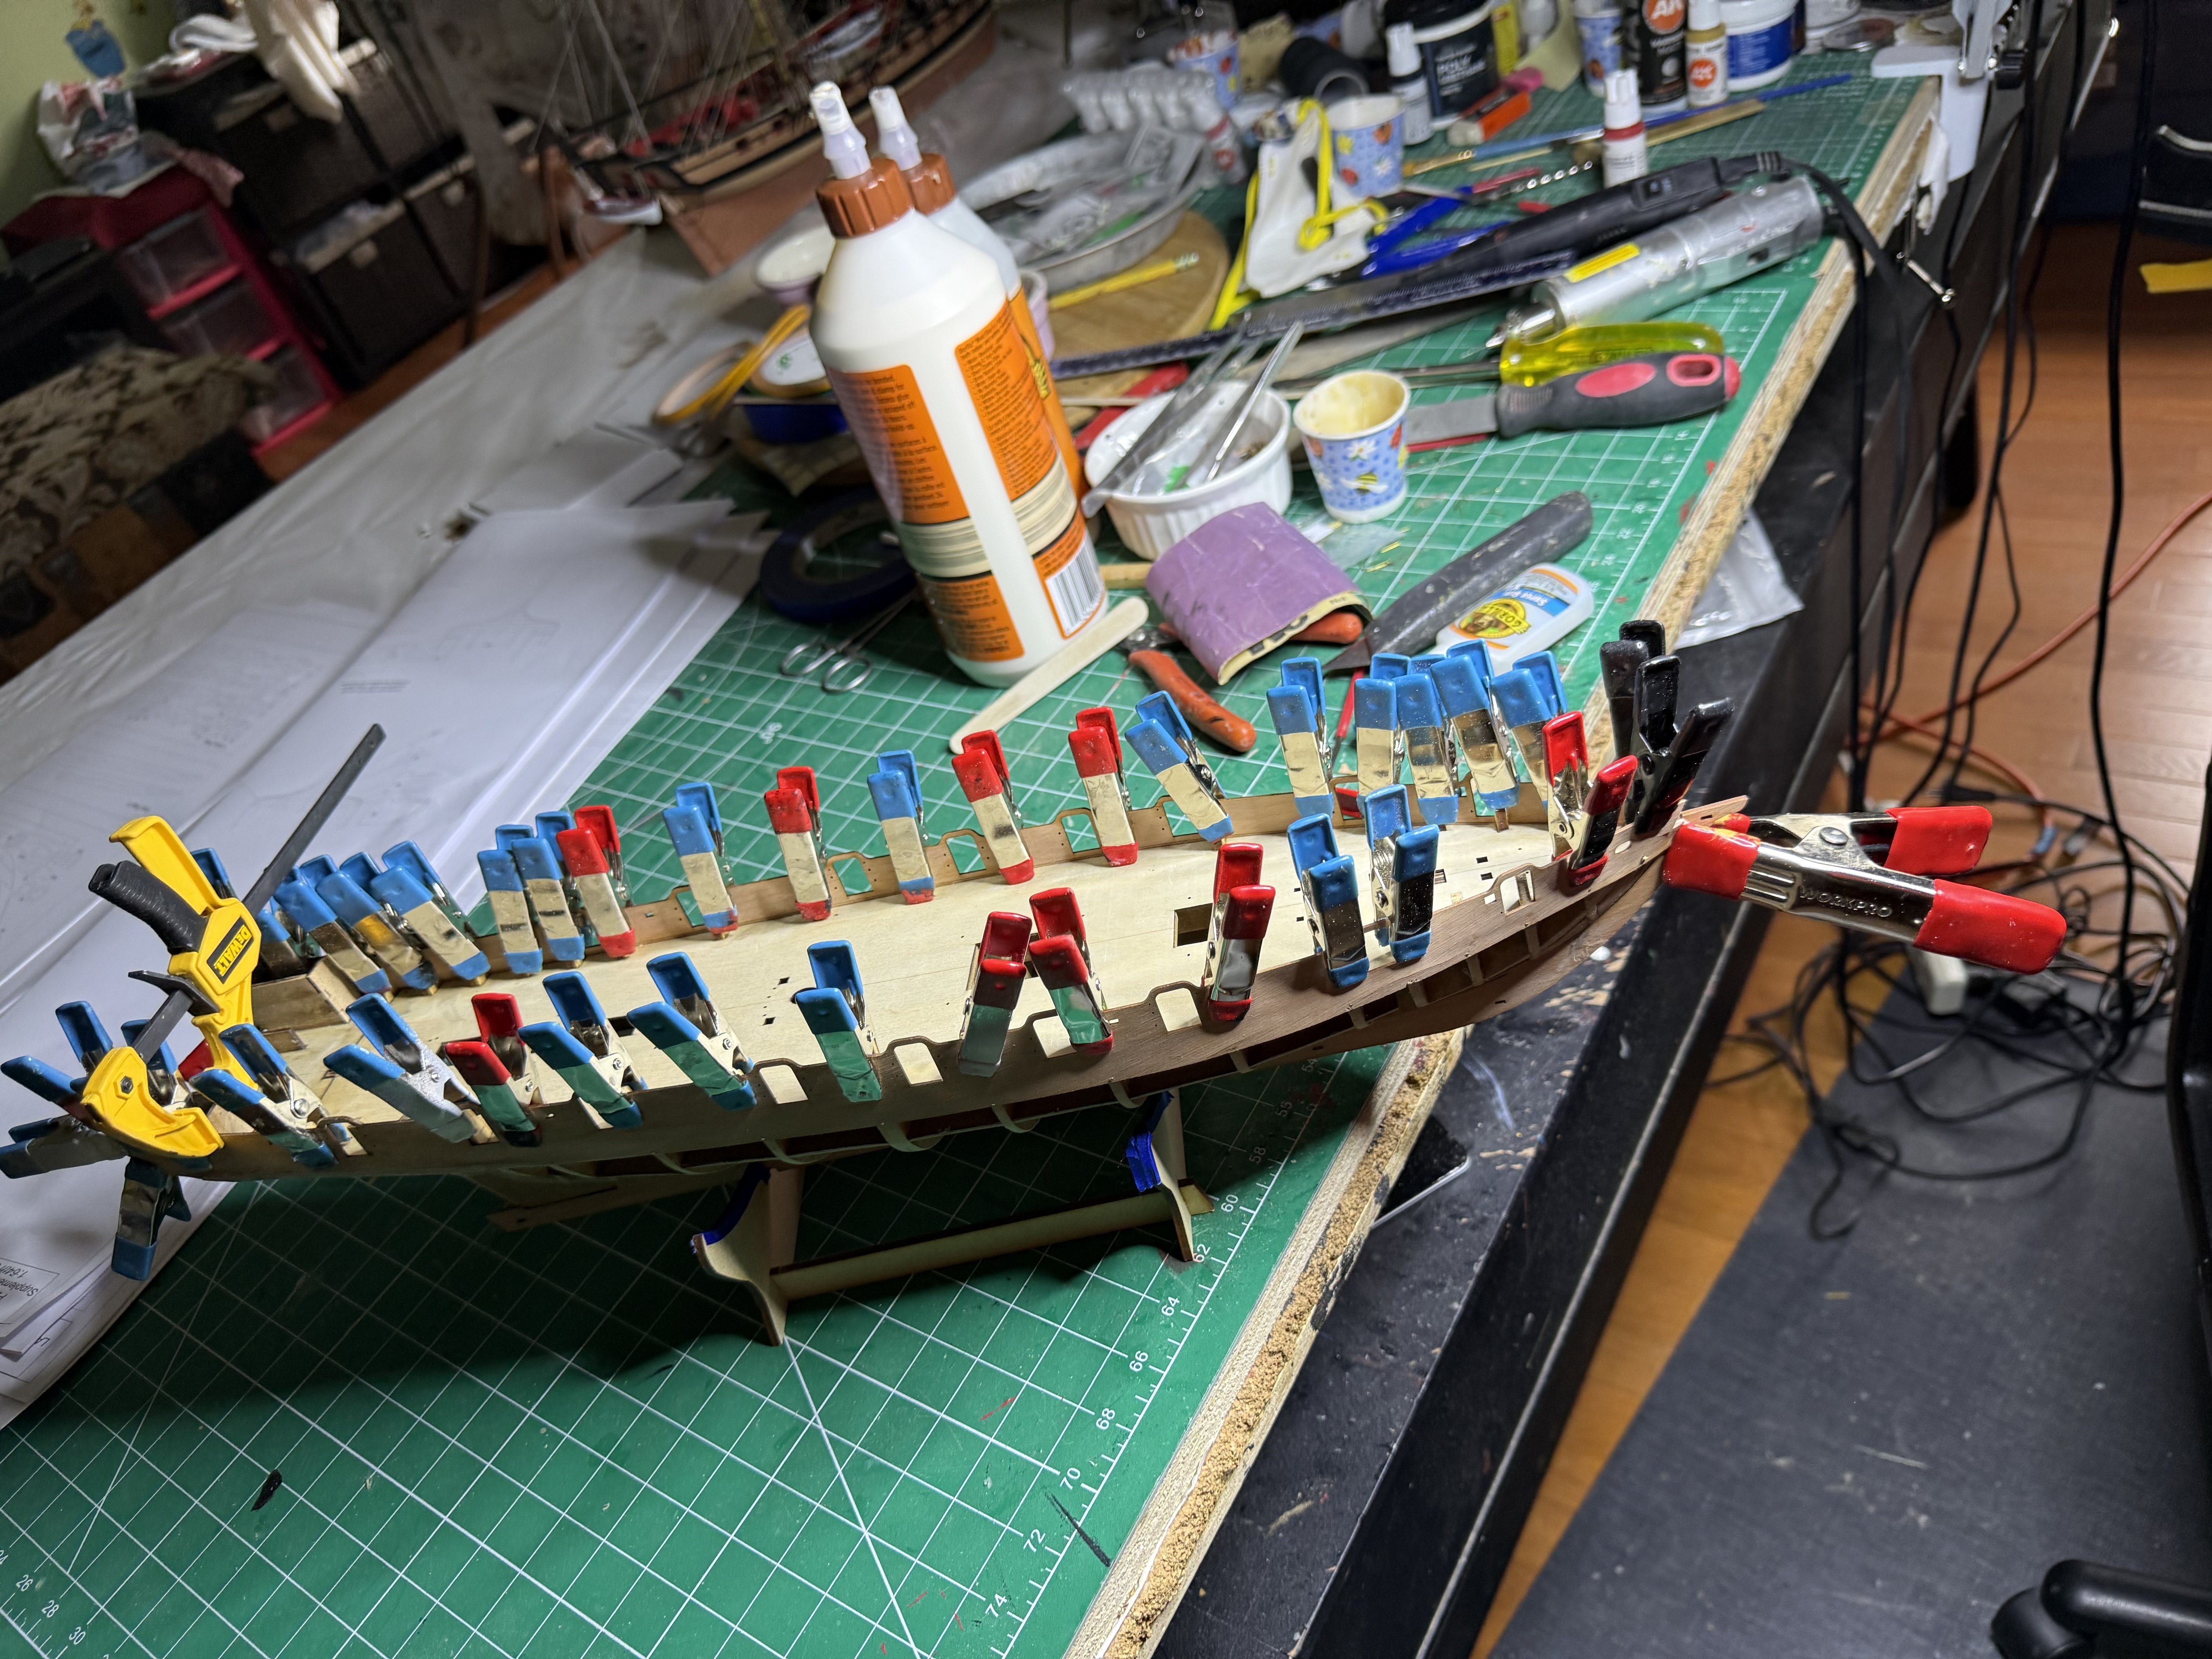
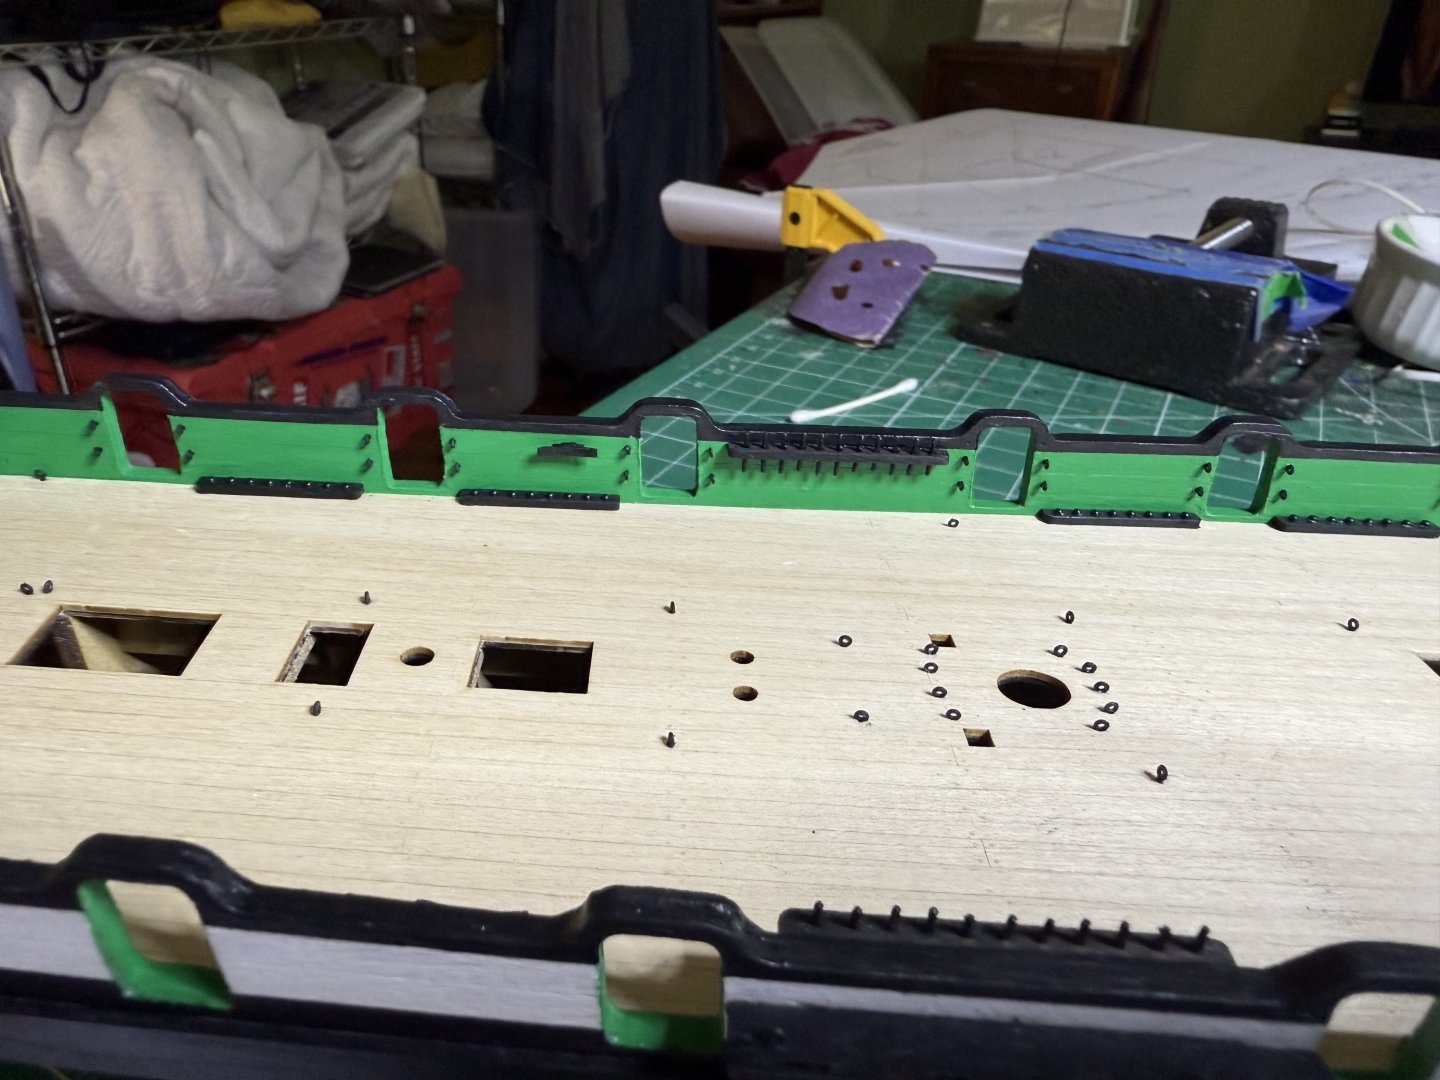
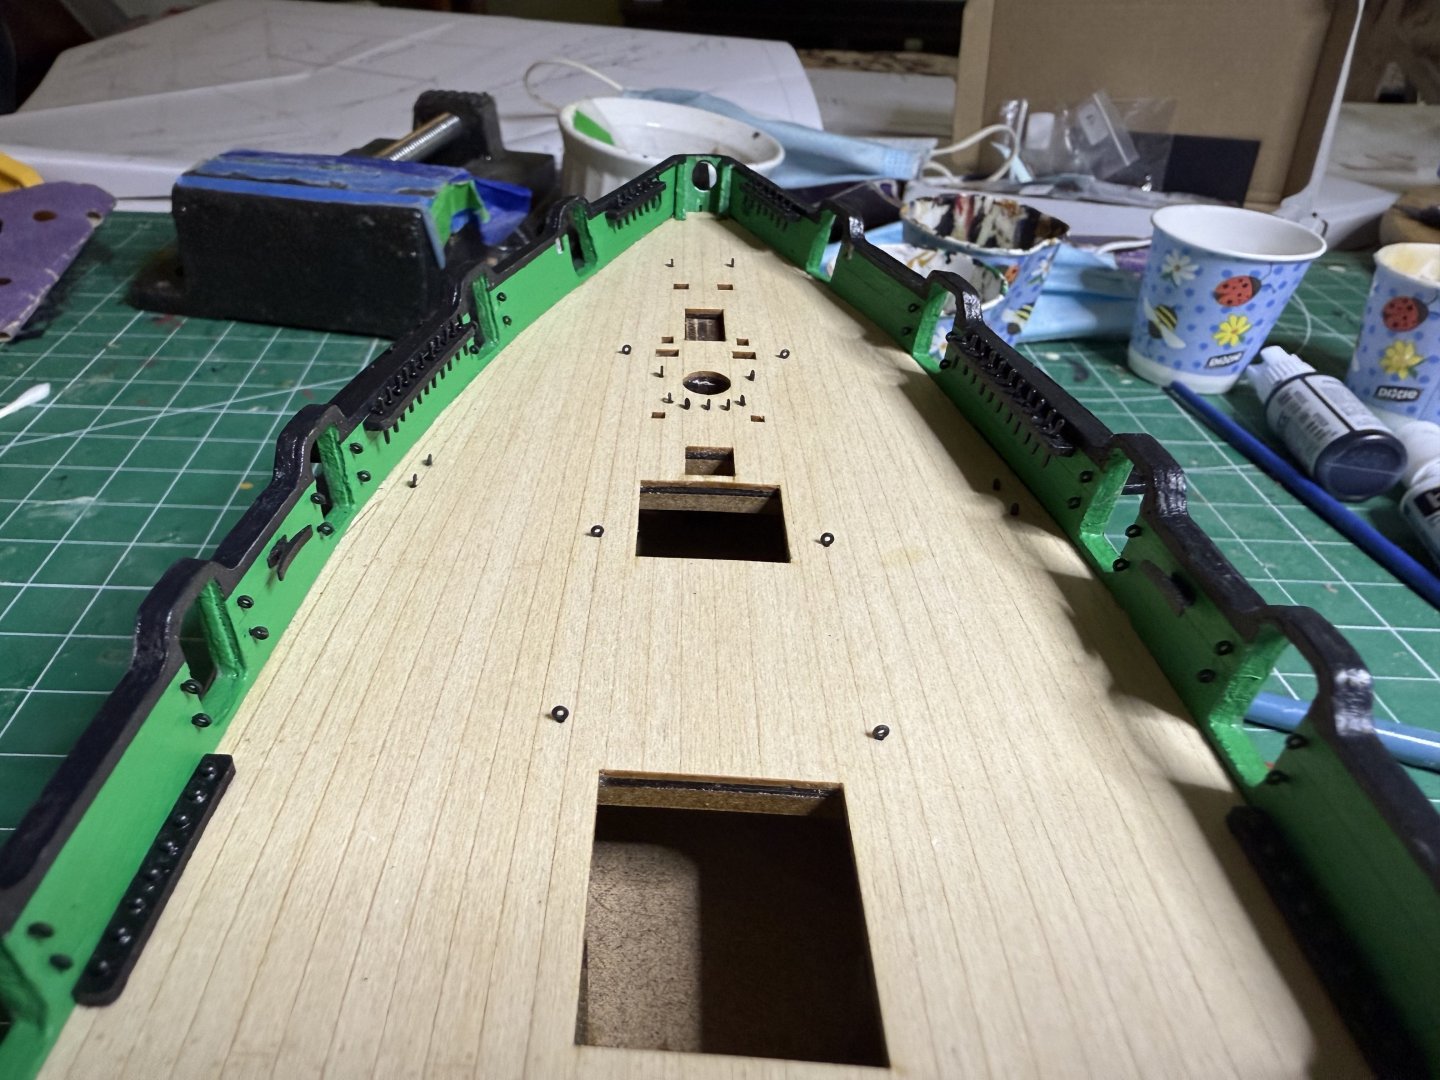
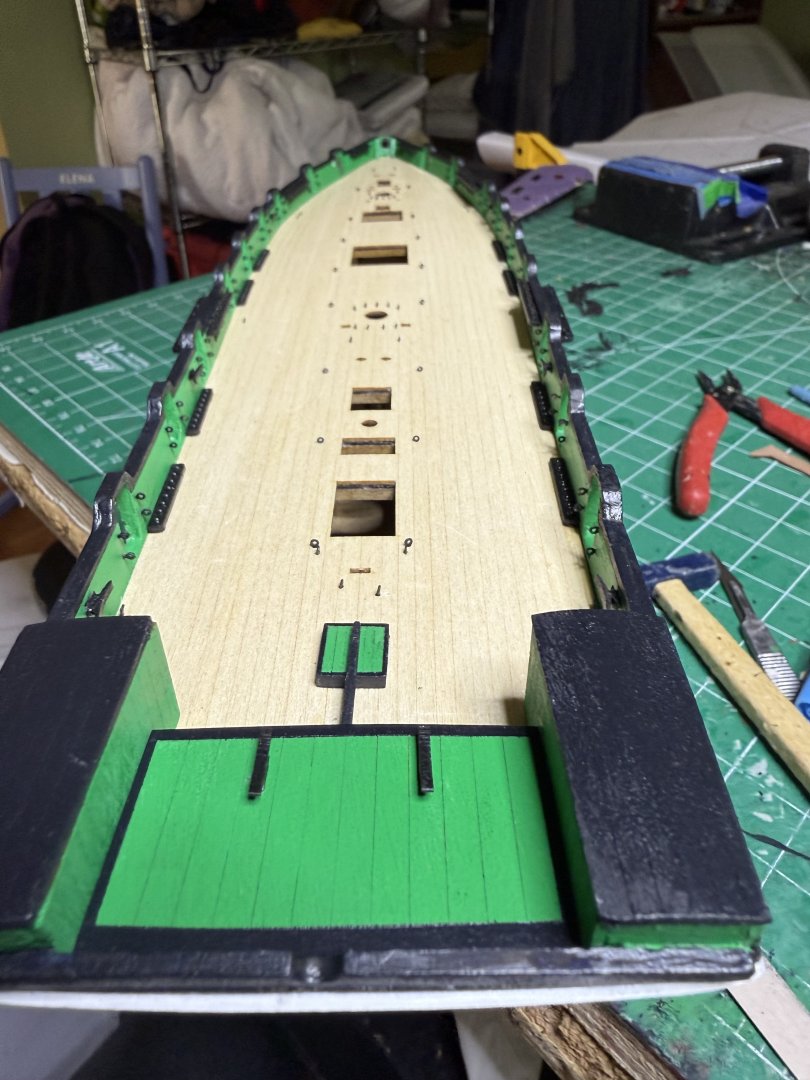
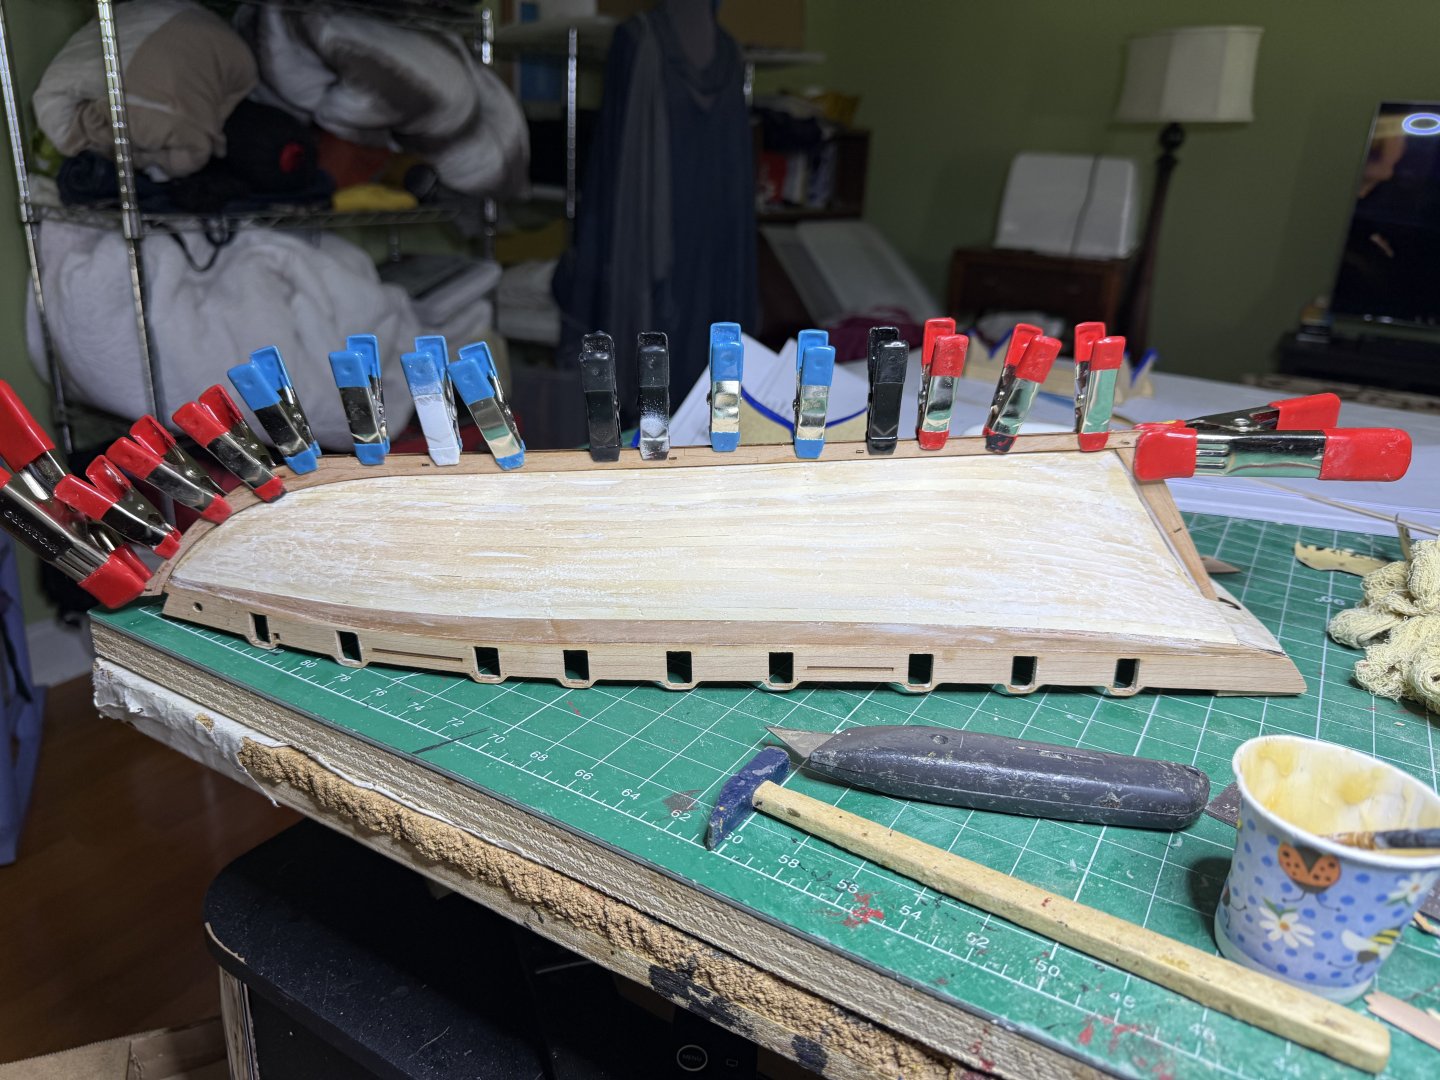
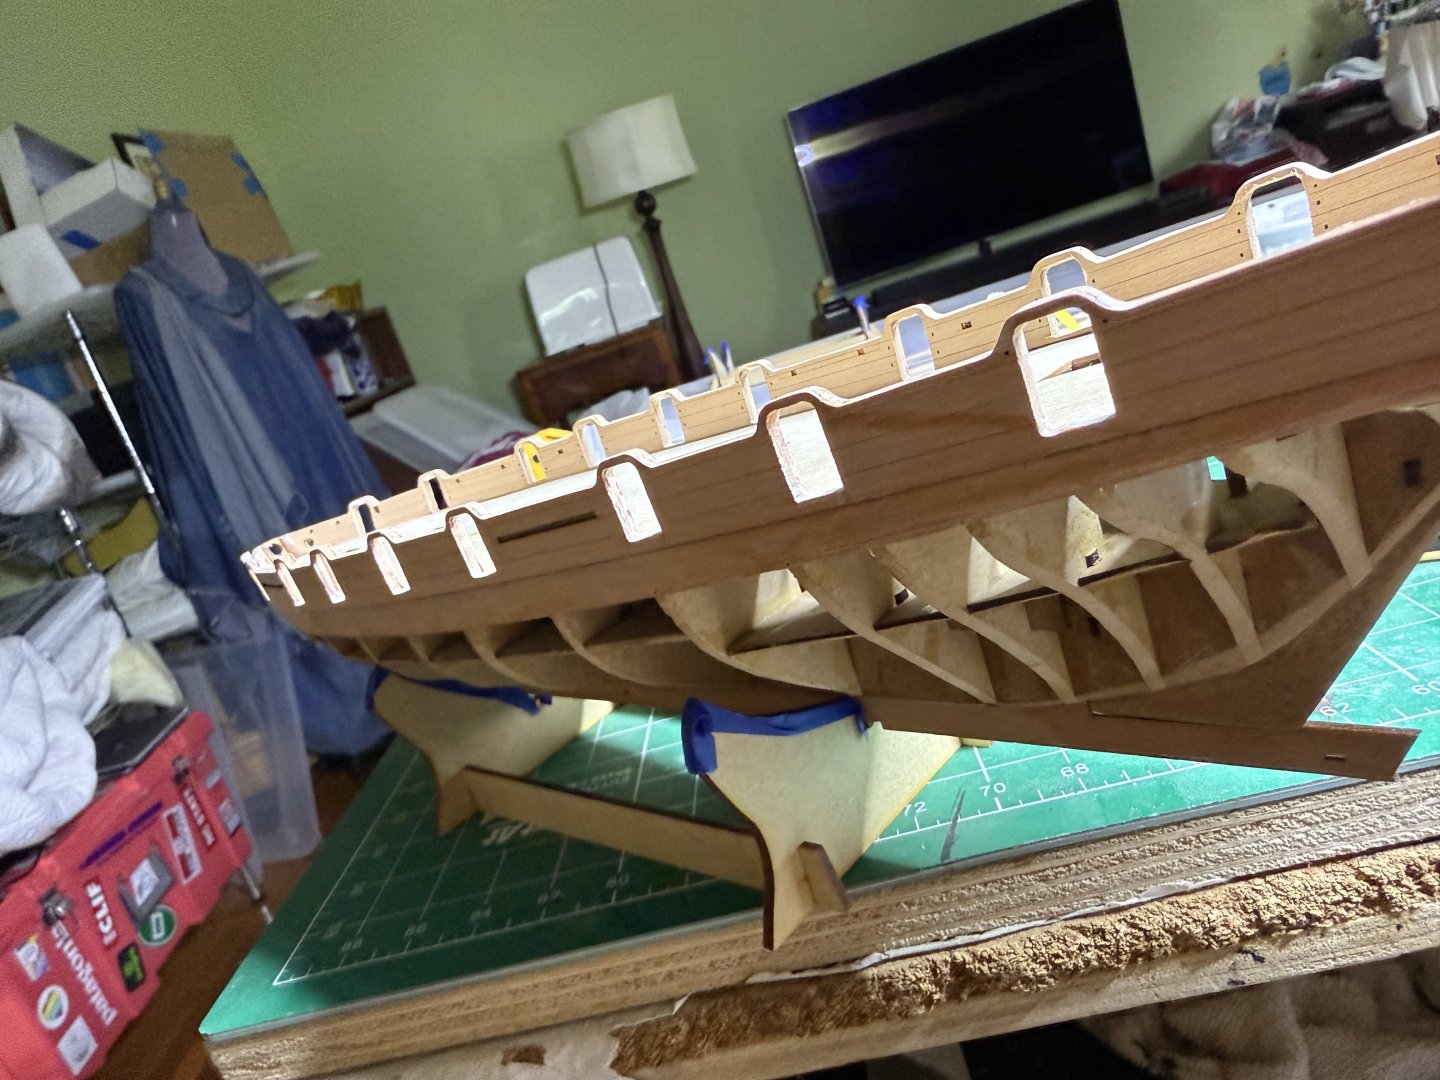
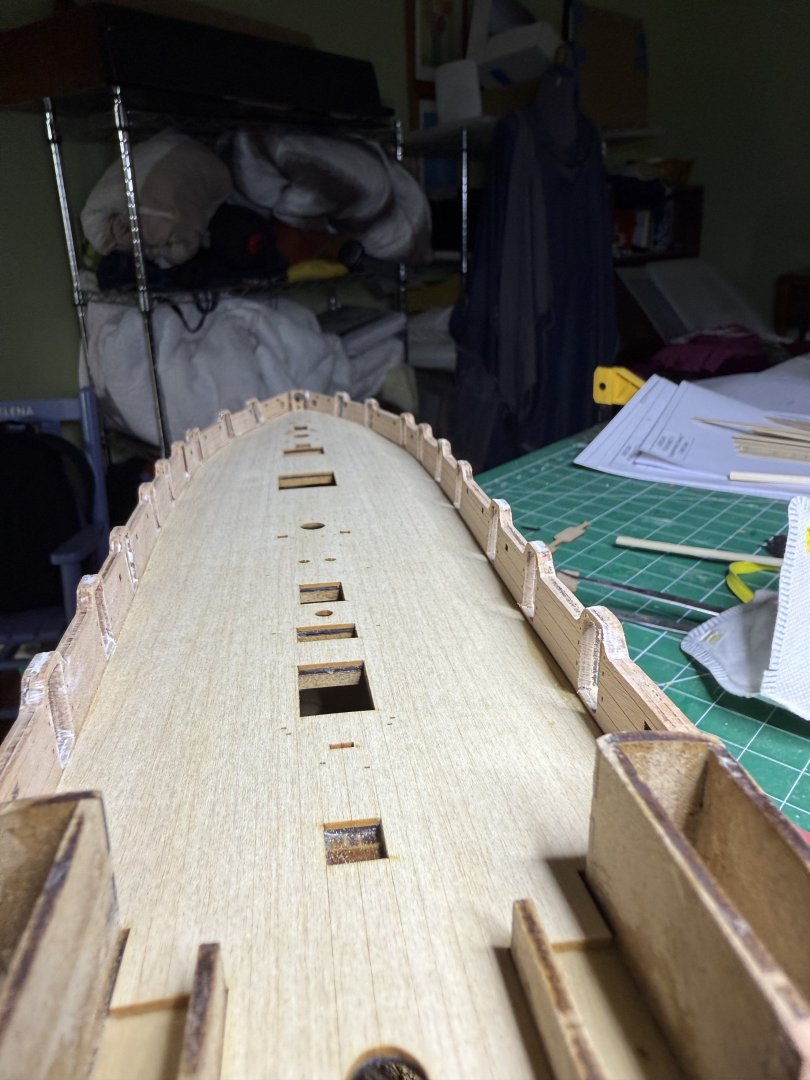
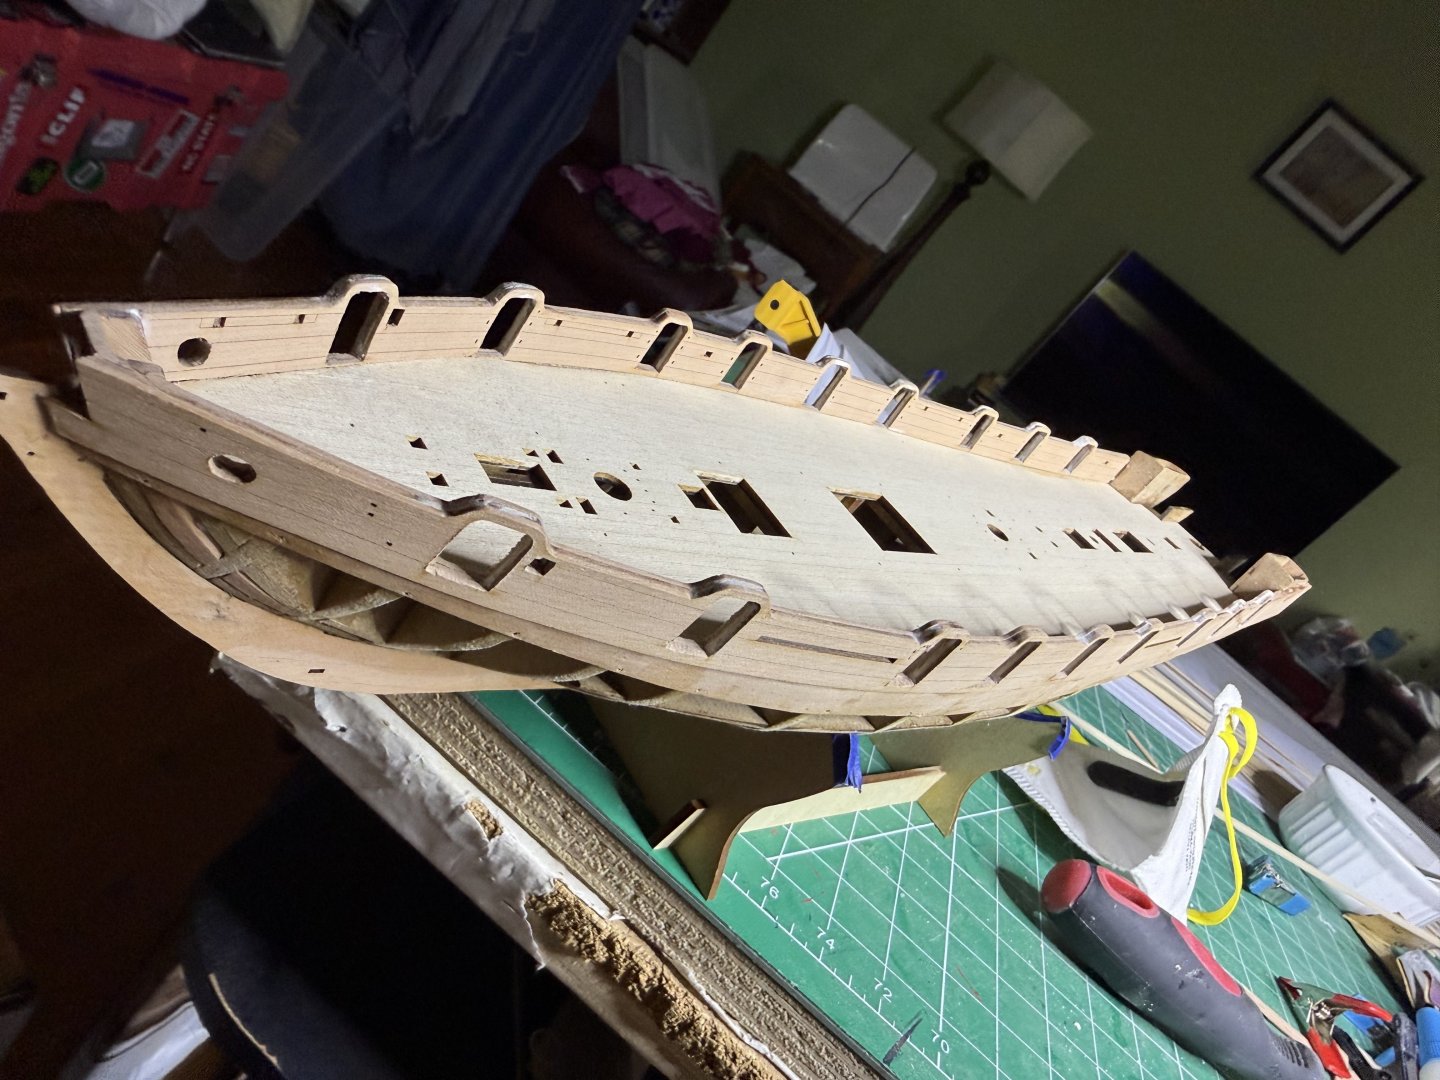
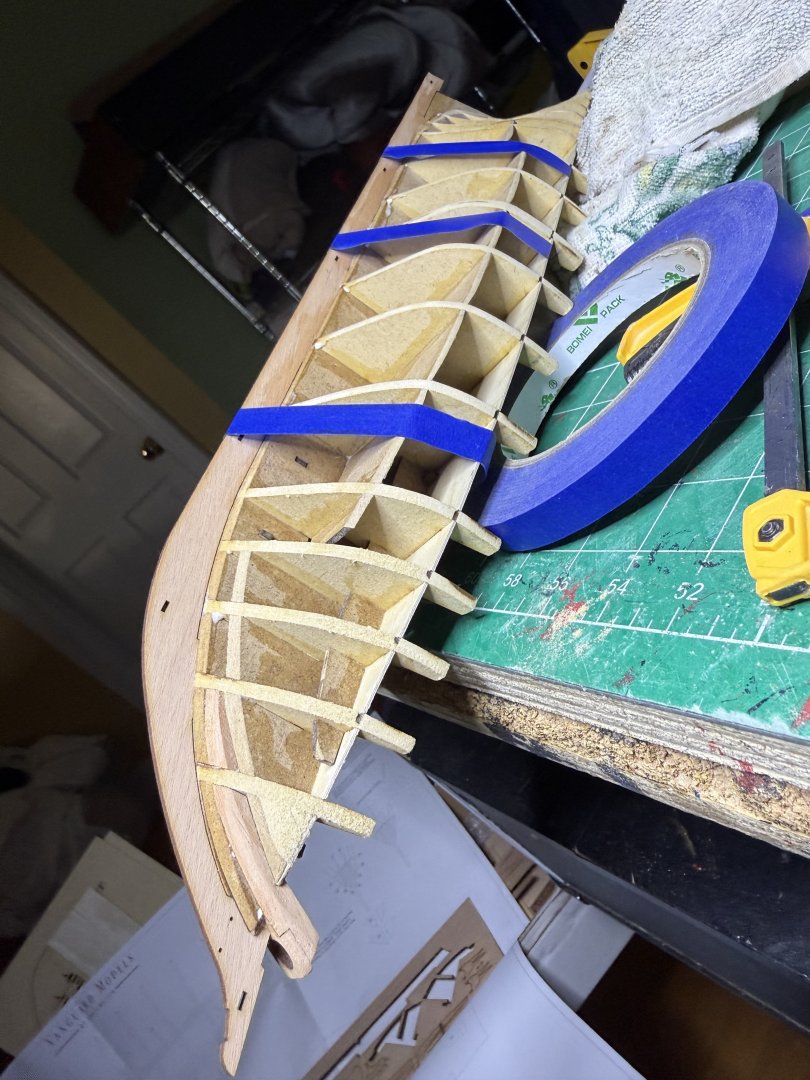
Finished gluing outer and inner bulwarks. Then sanded/filled/sanded the tops of the bulwarks and the gunports. Those arches are a real pain, quite a few breaks.


- 52 replies
-
- 7
-
-
- Grecian
- Vanguard Models
- (and 1 more)
-
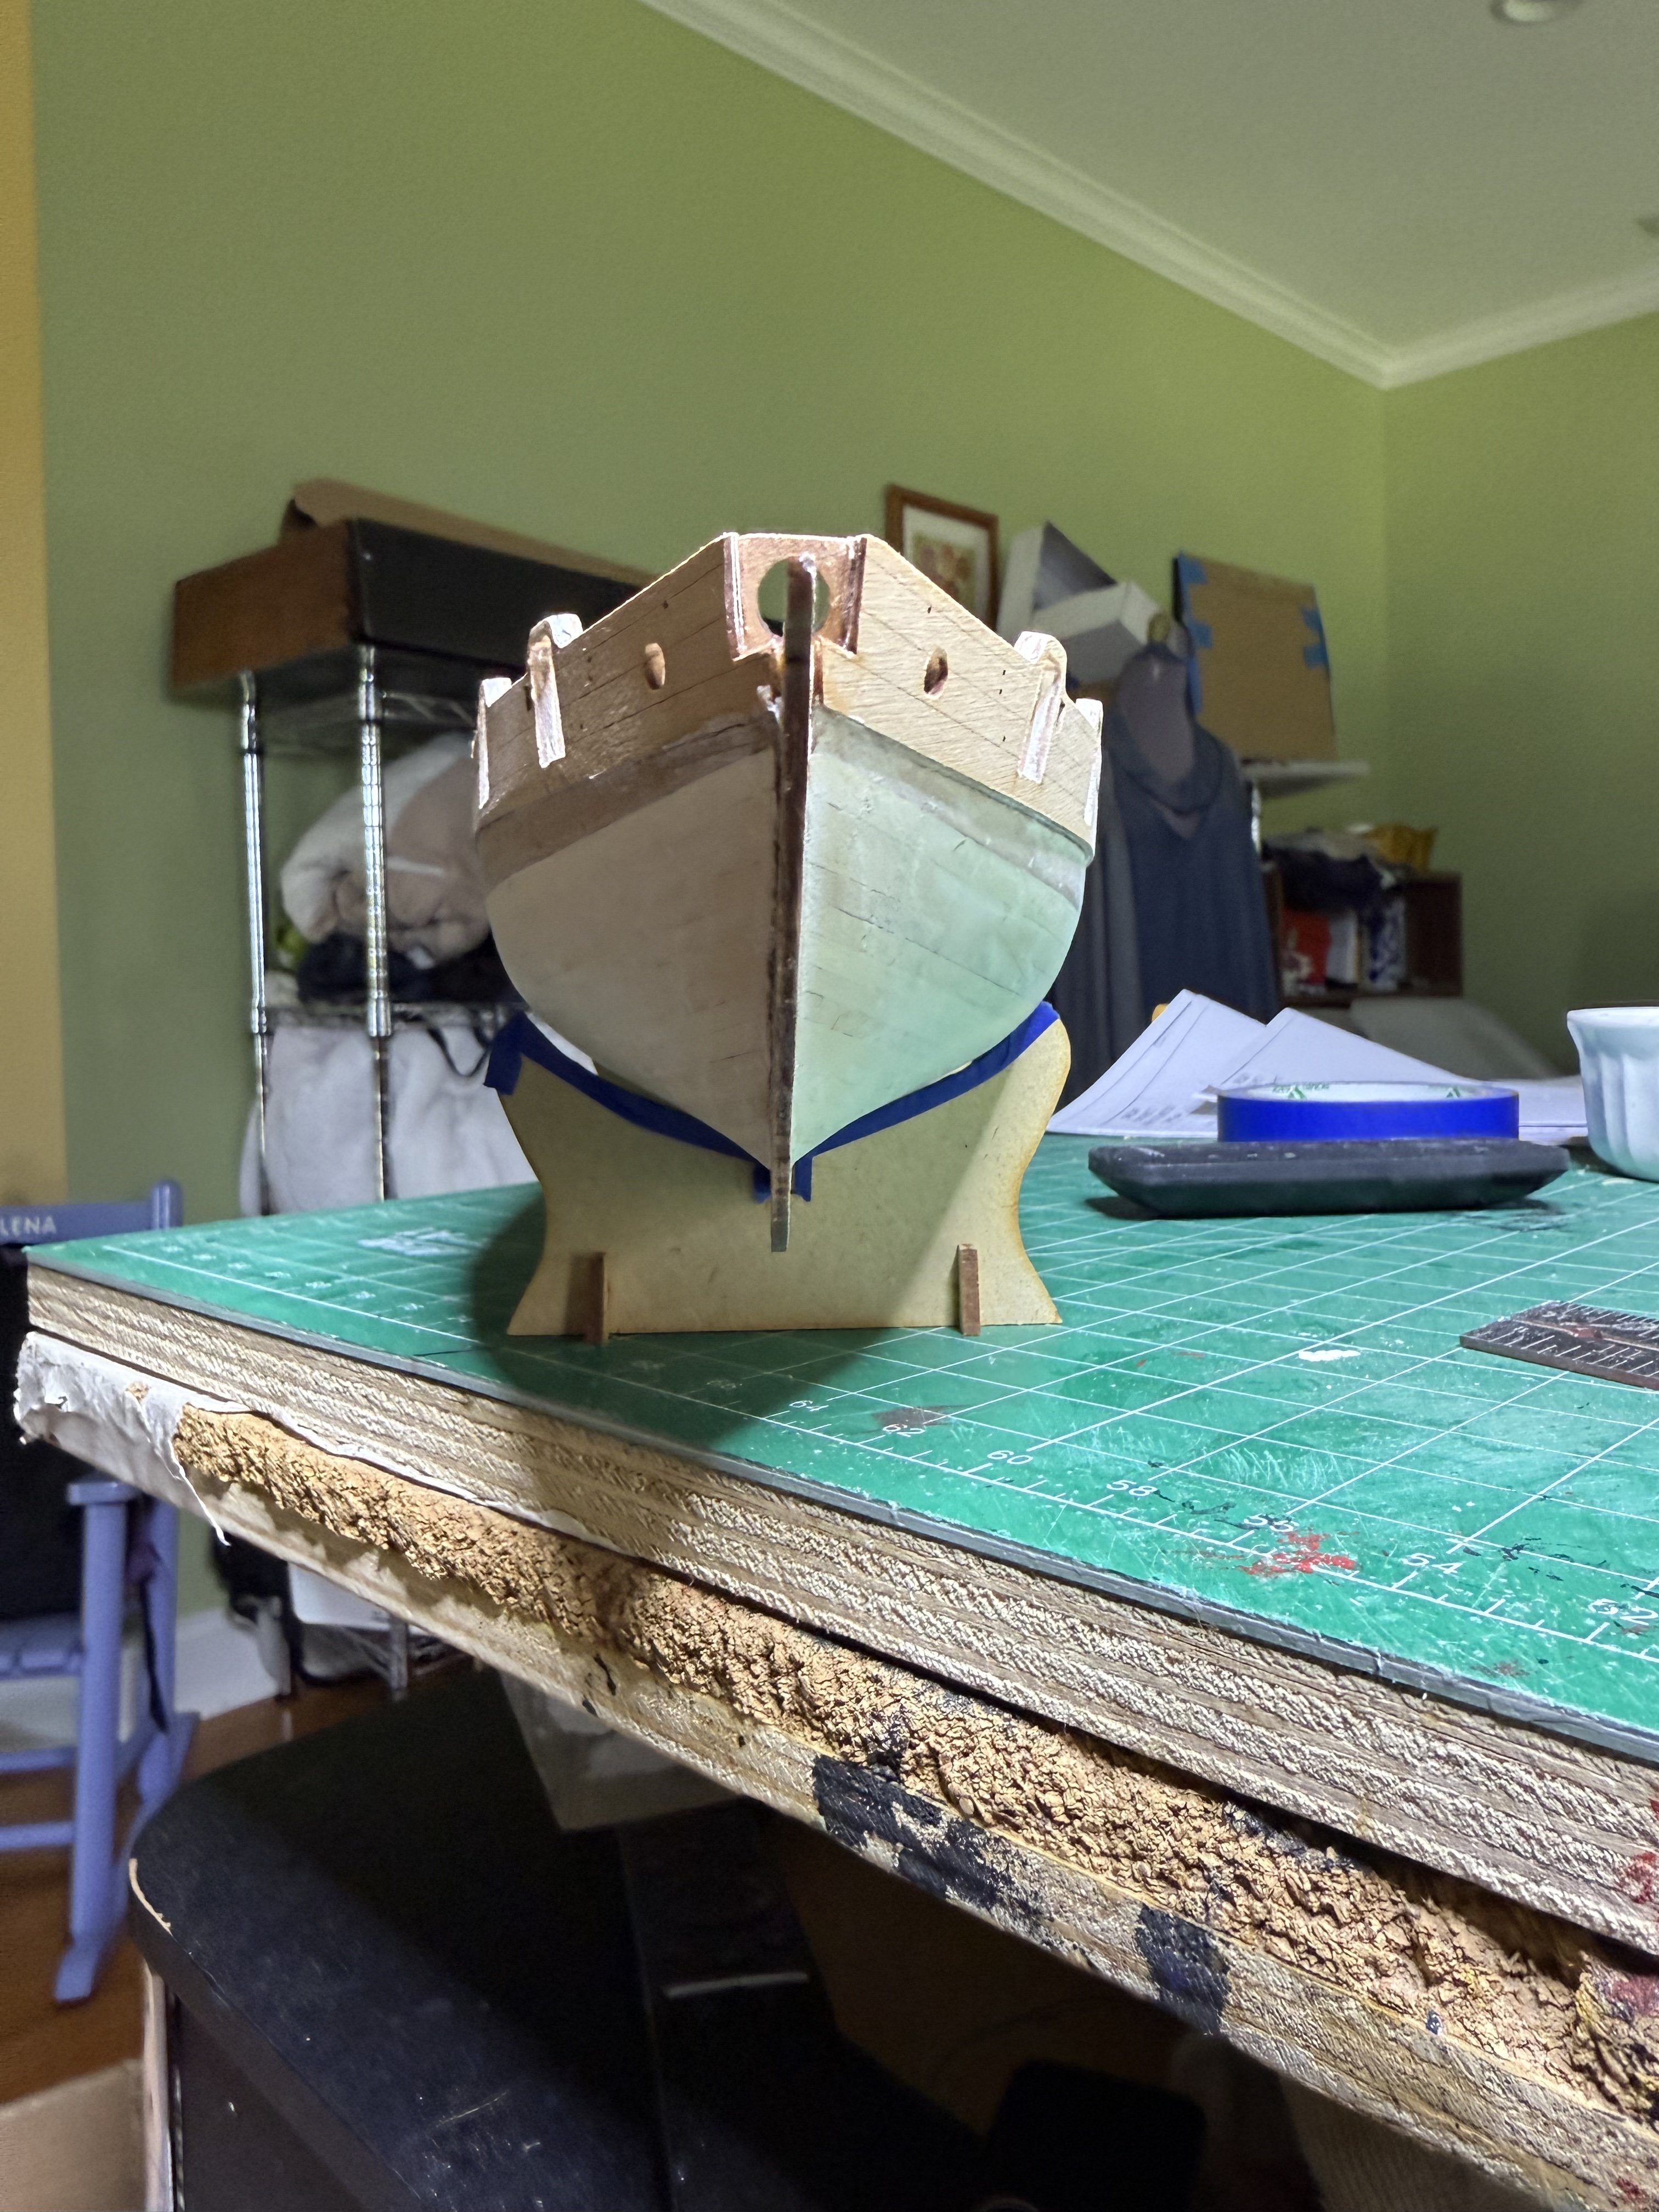
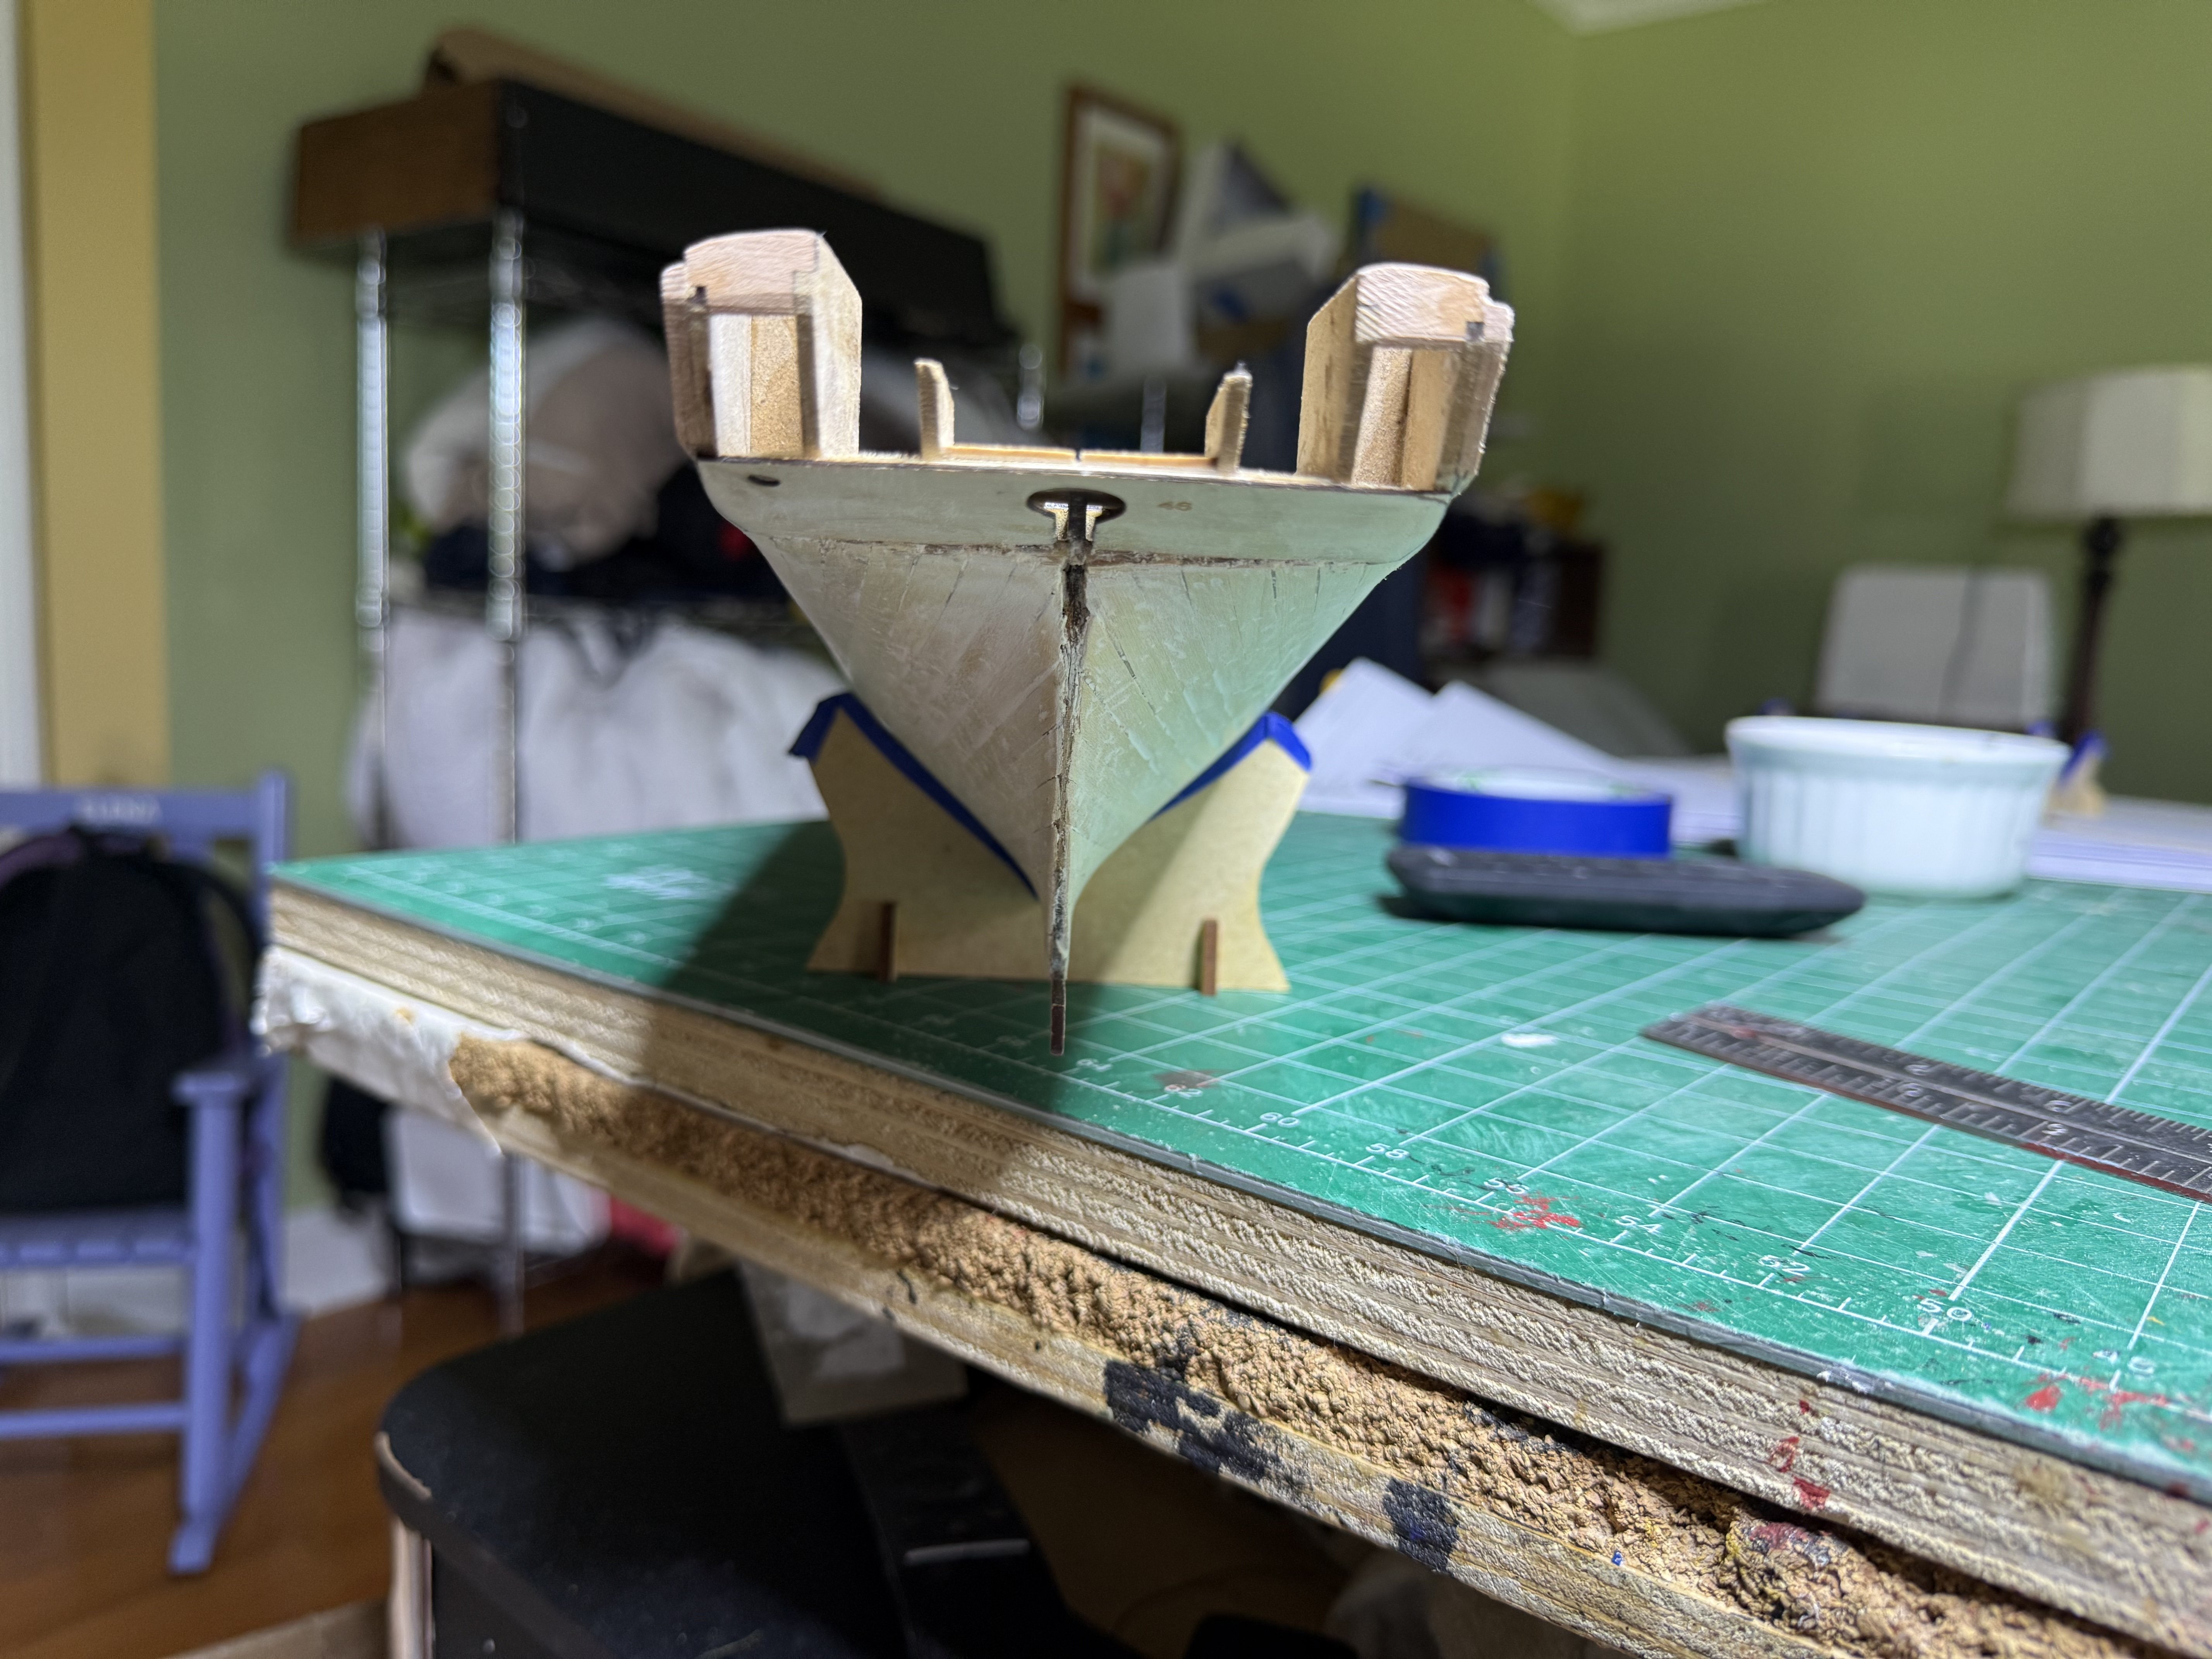
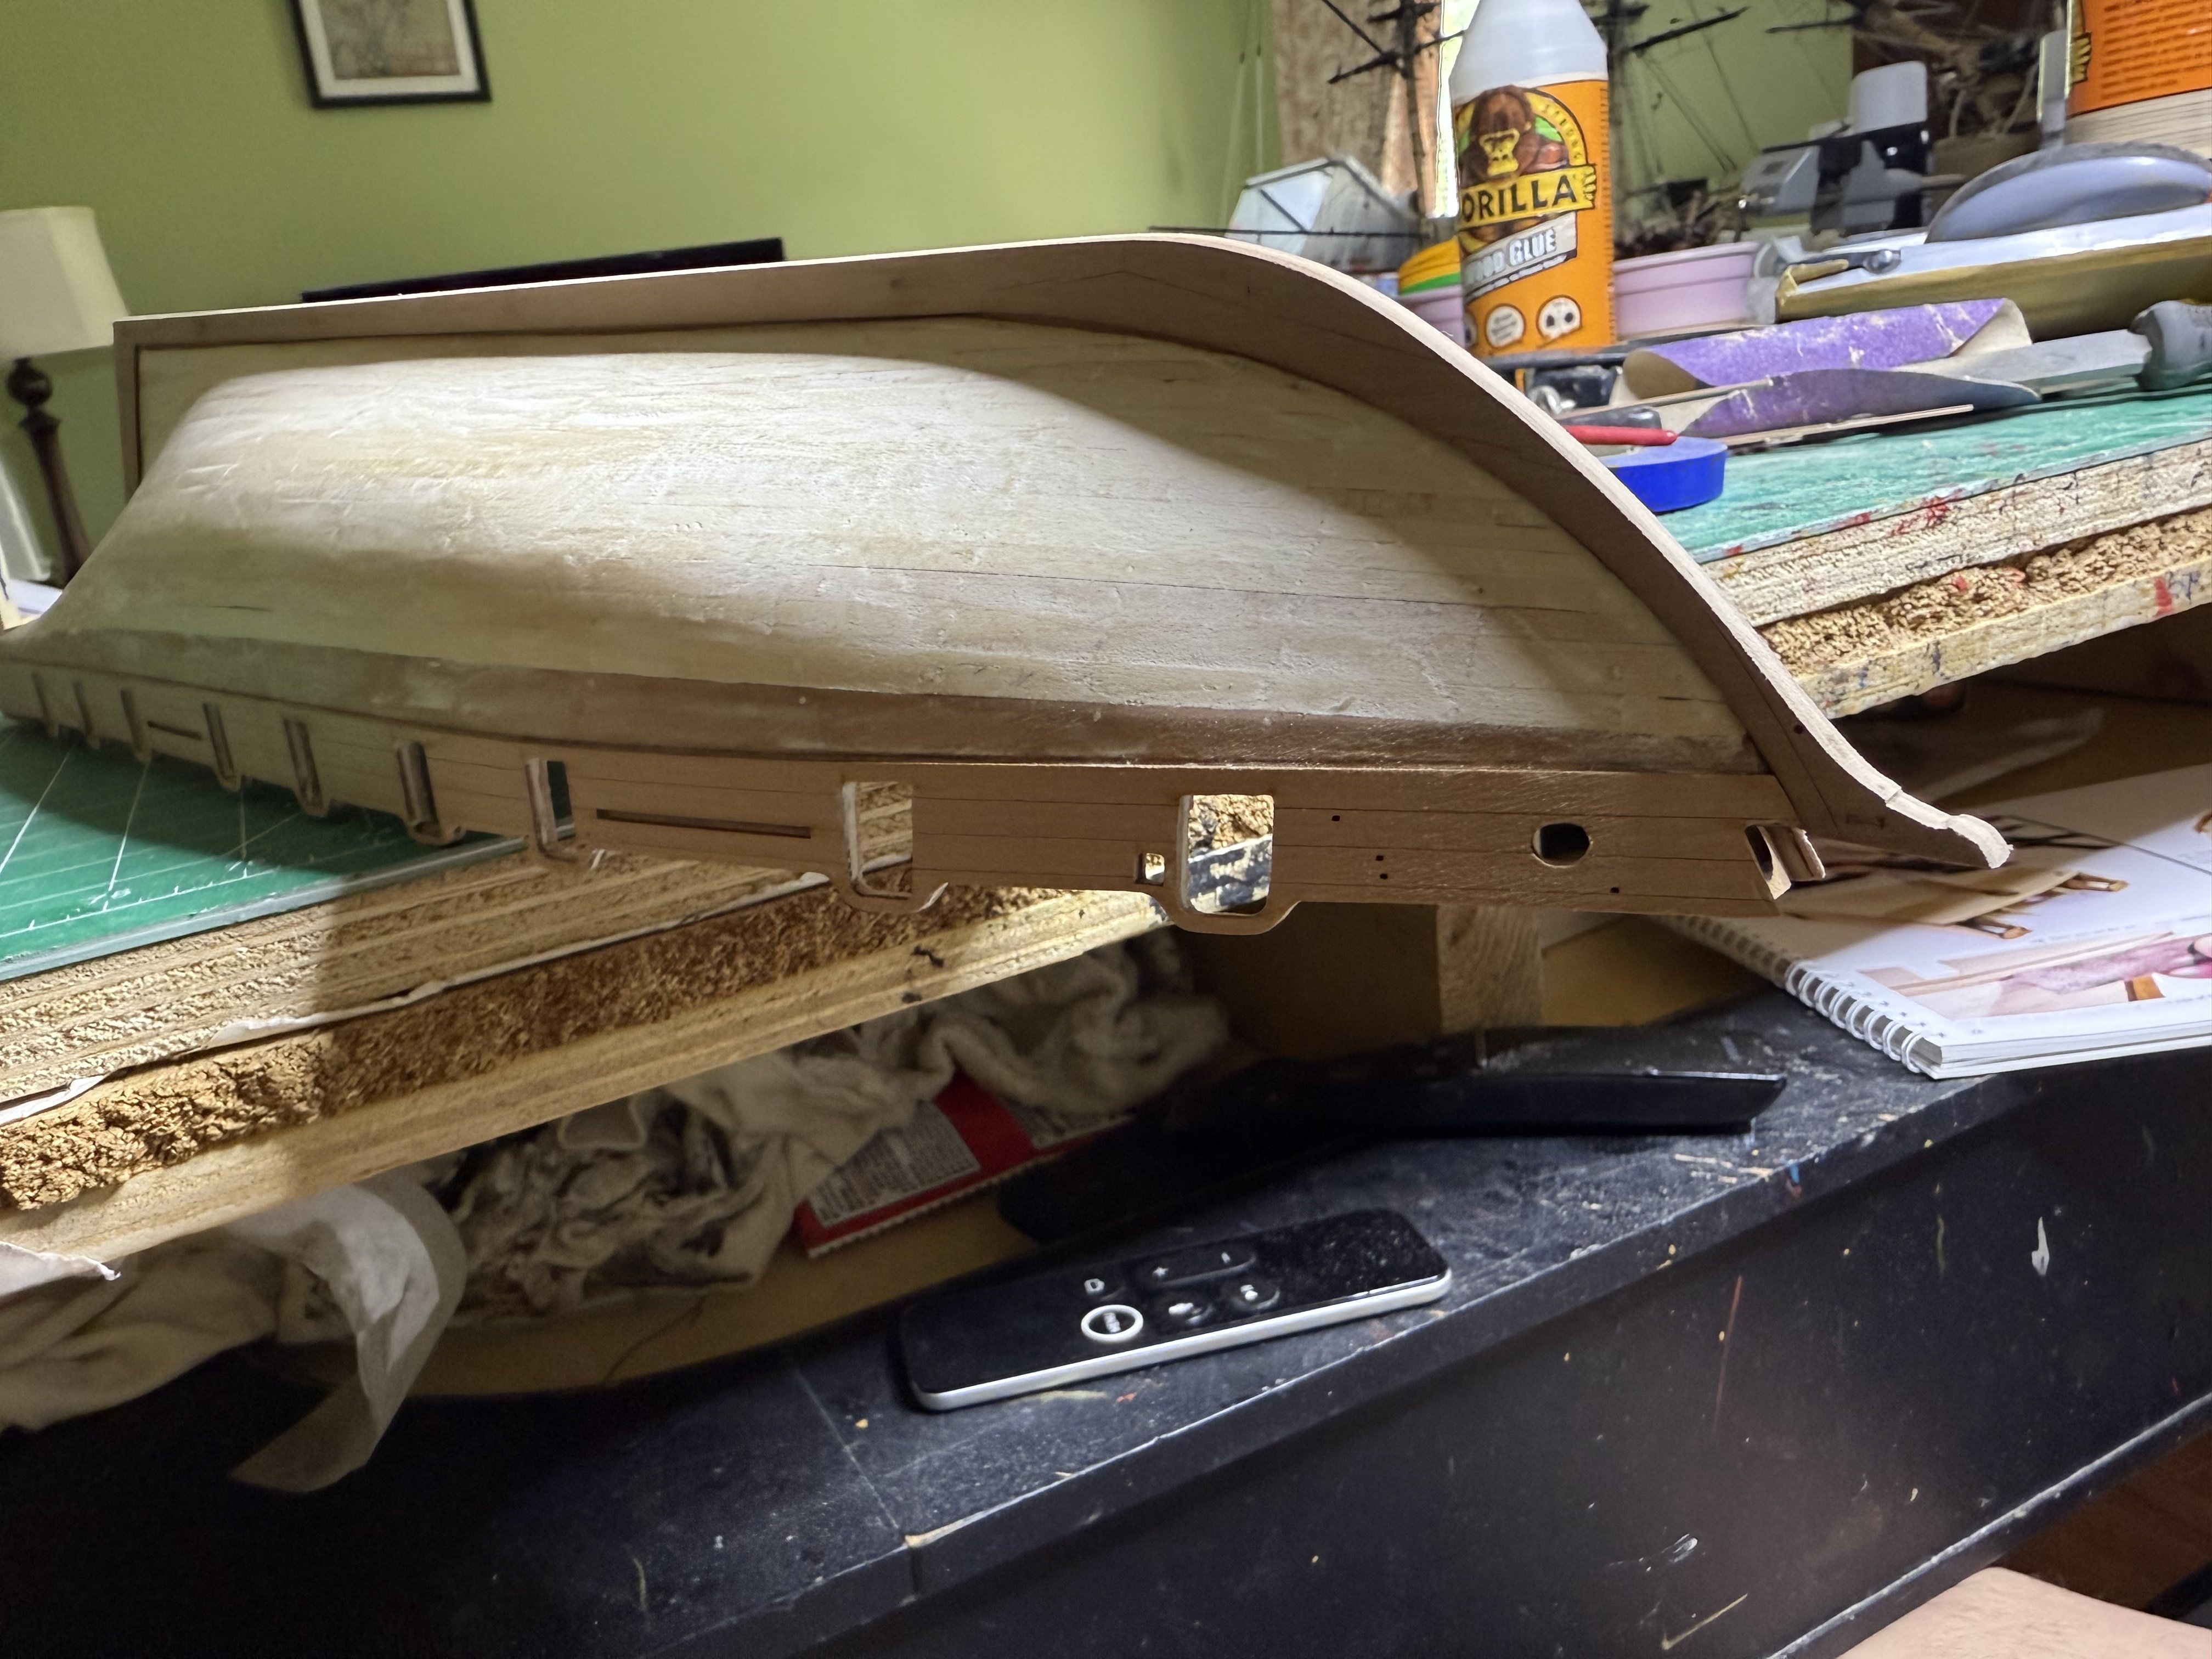
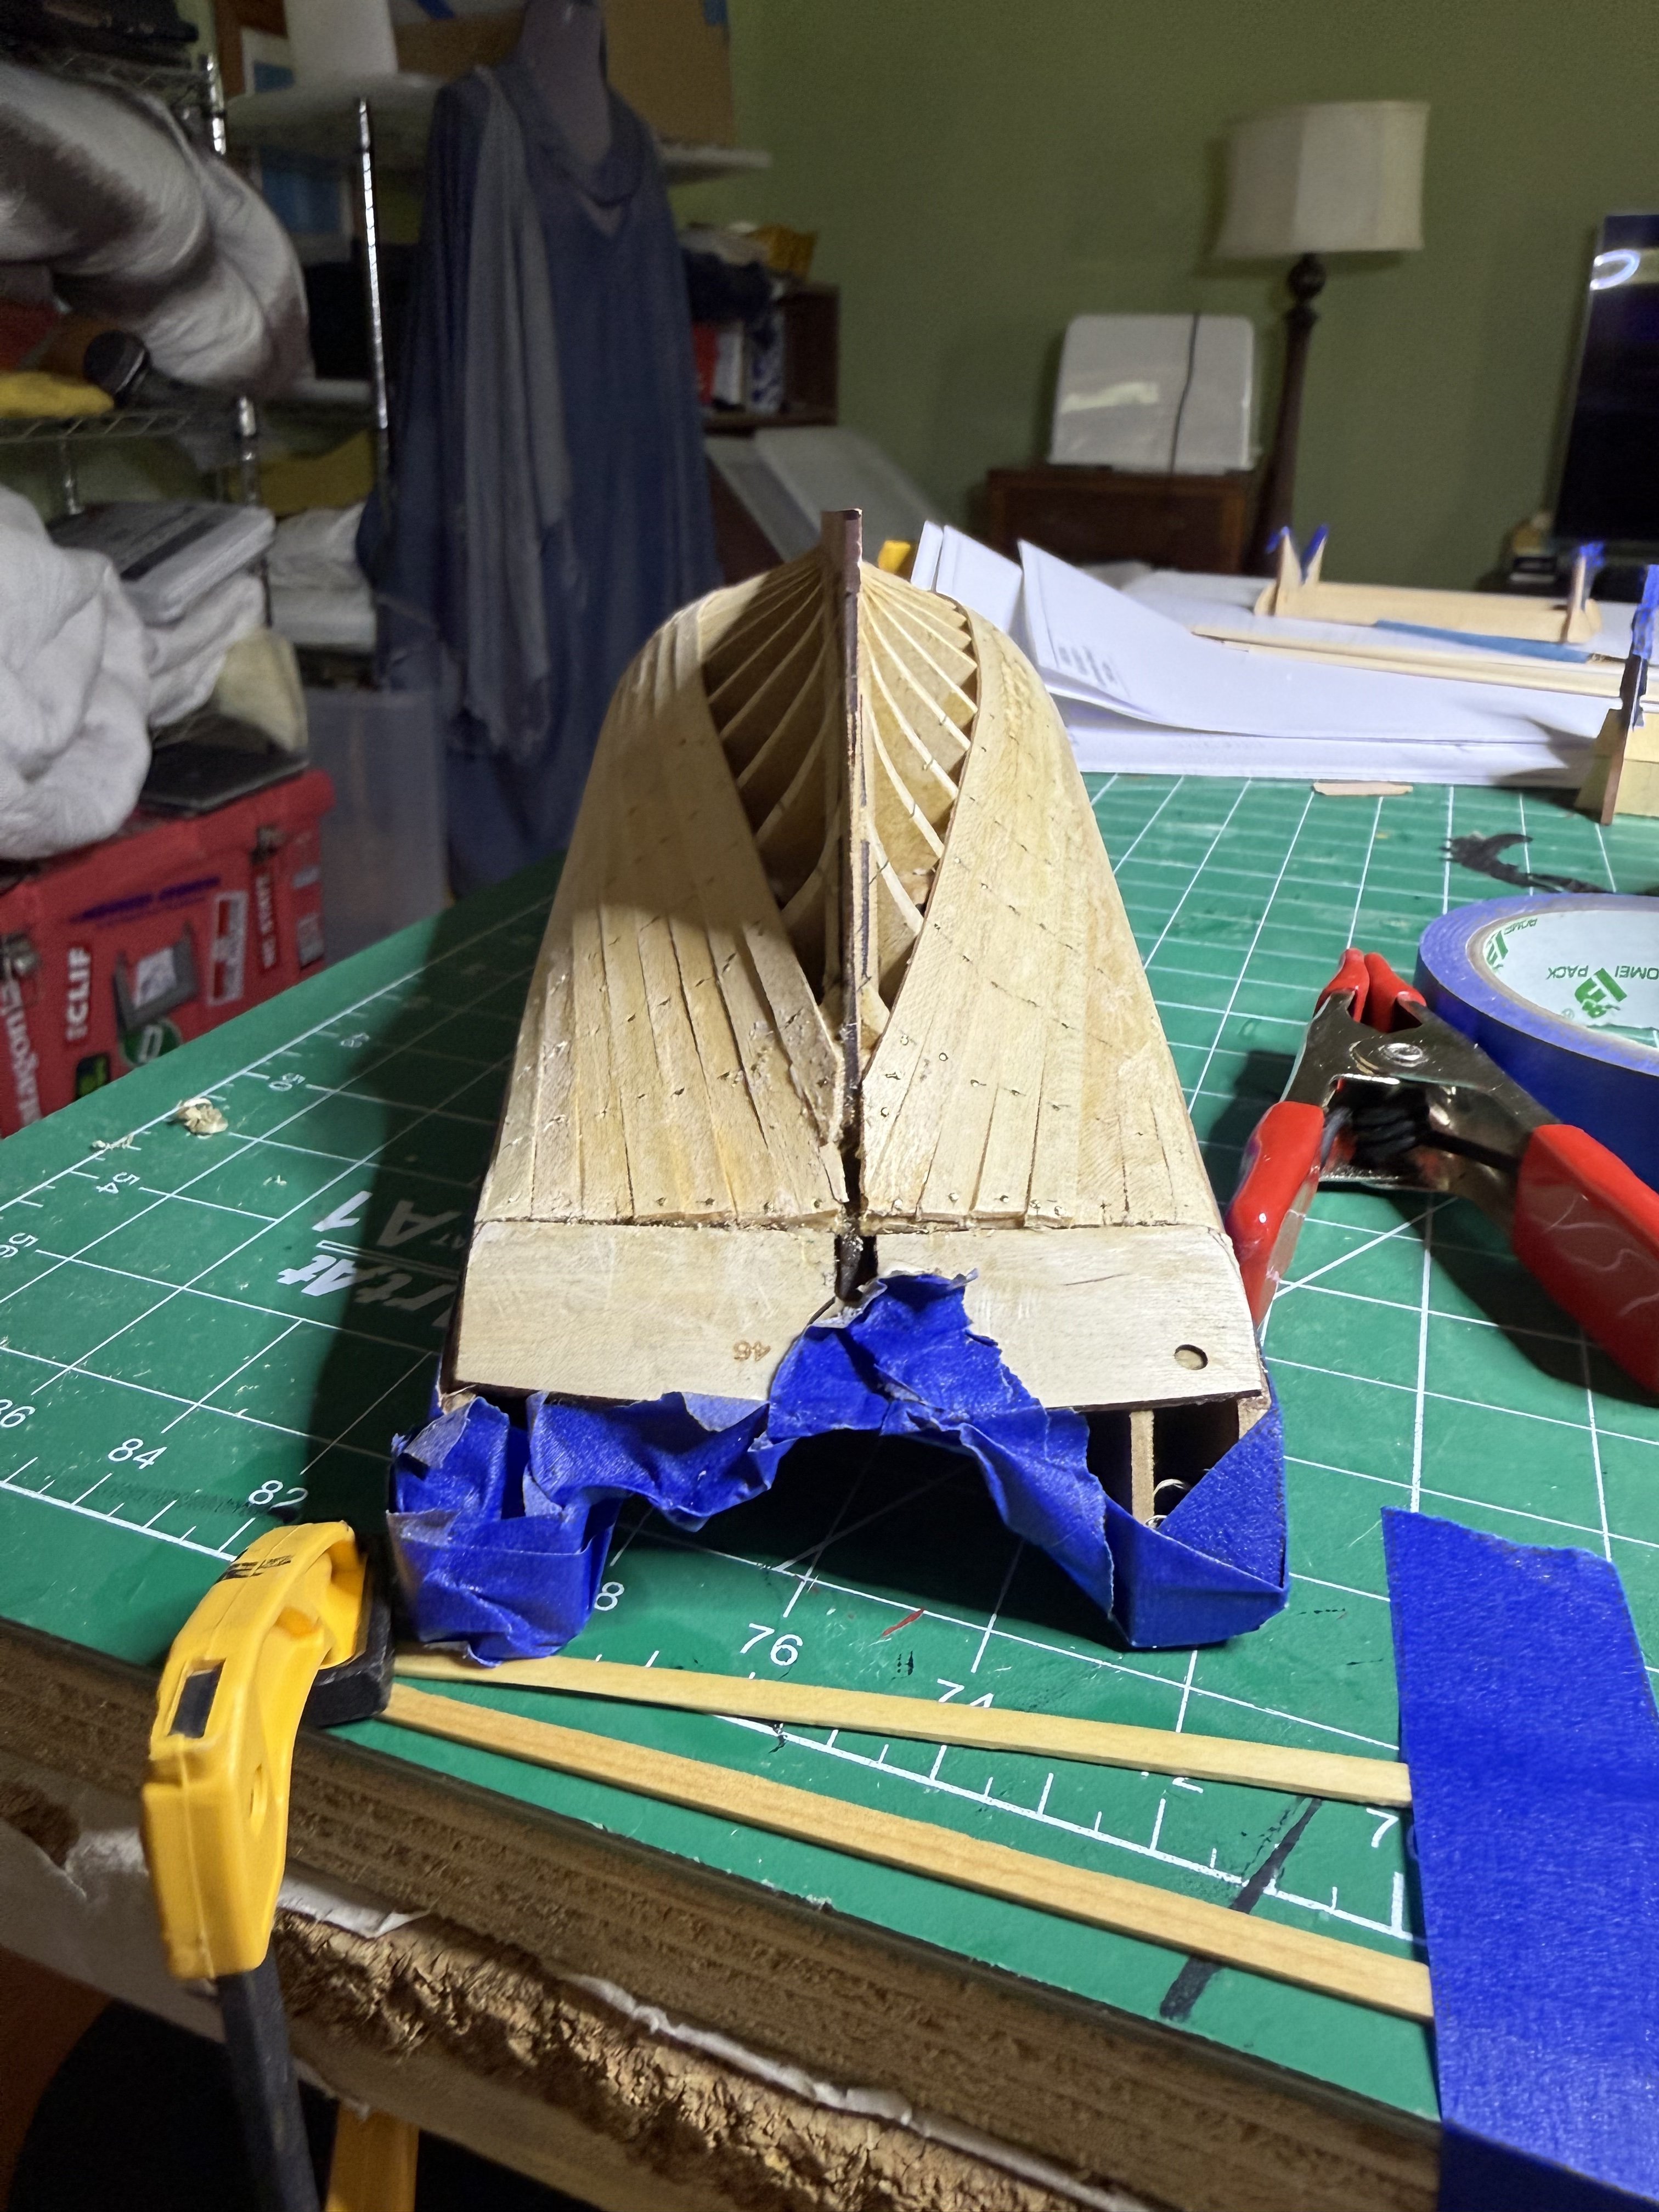
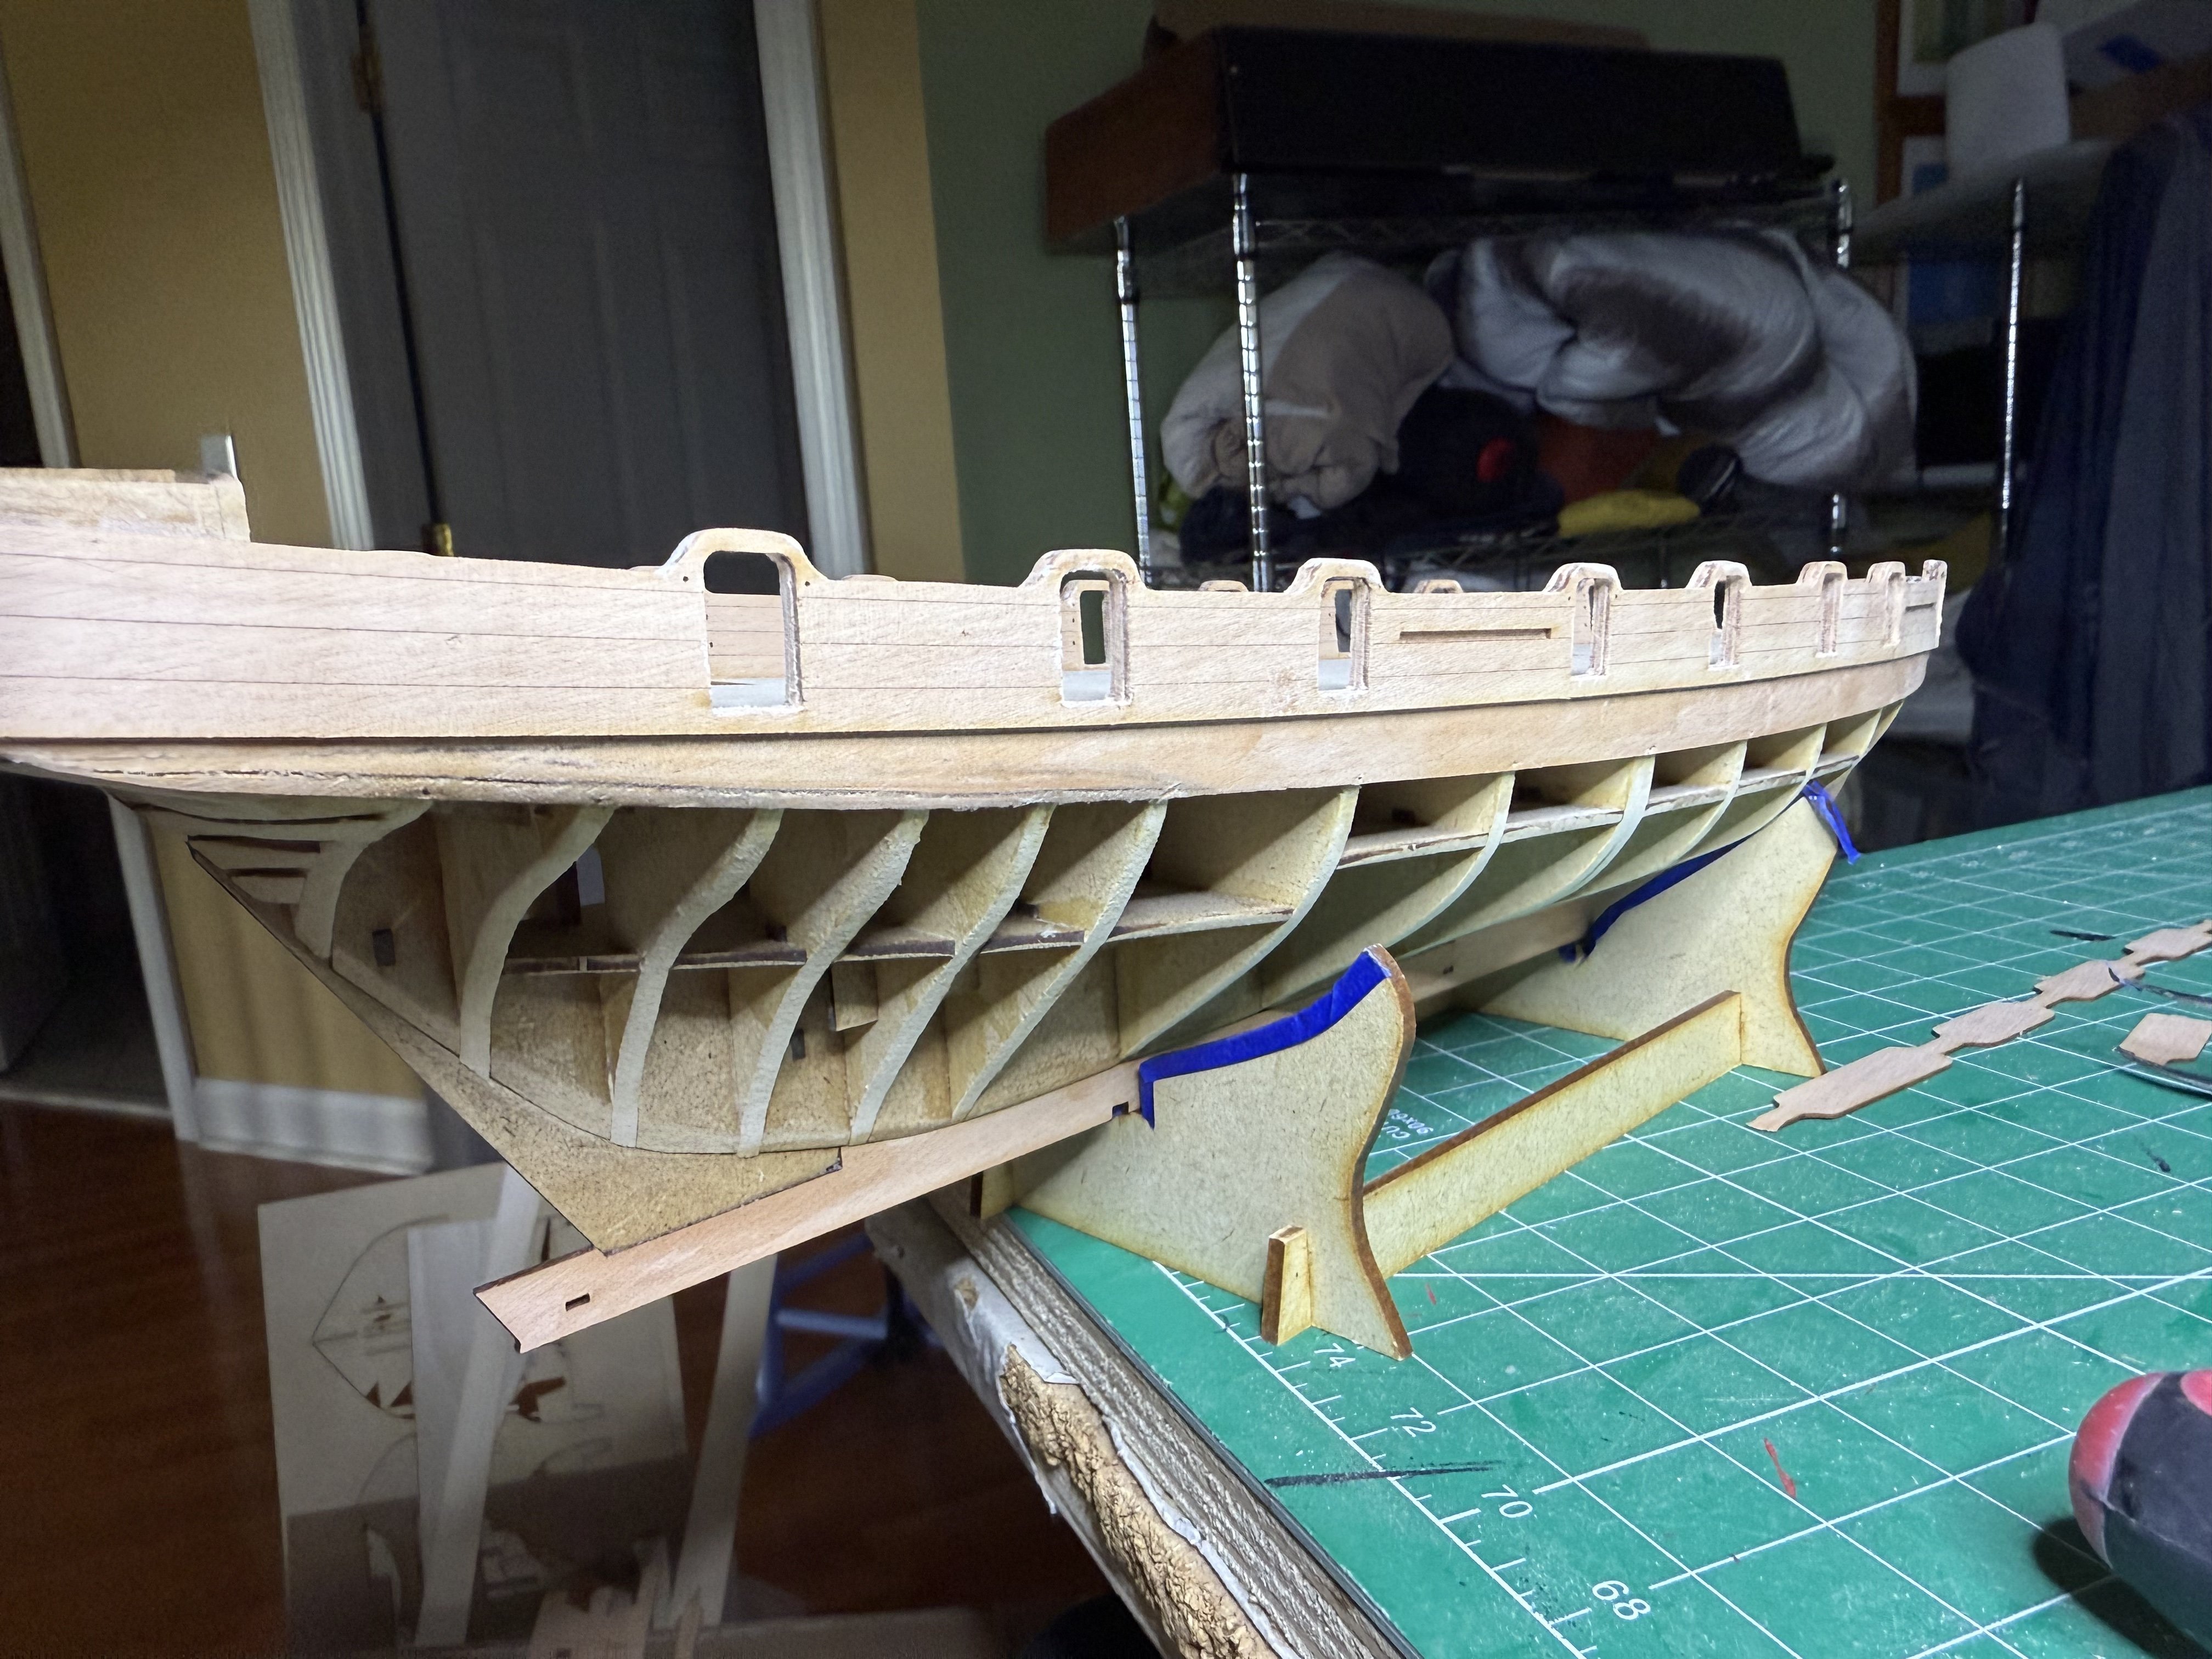
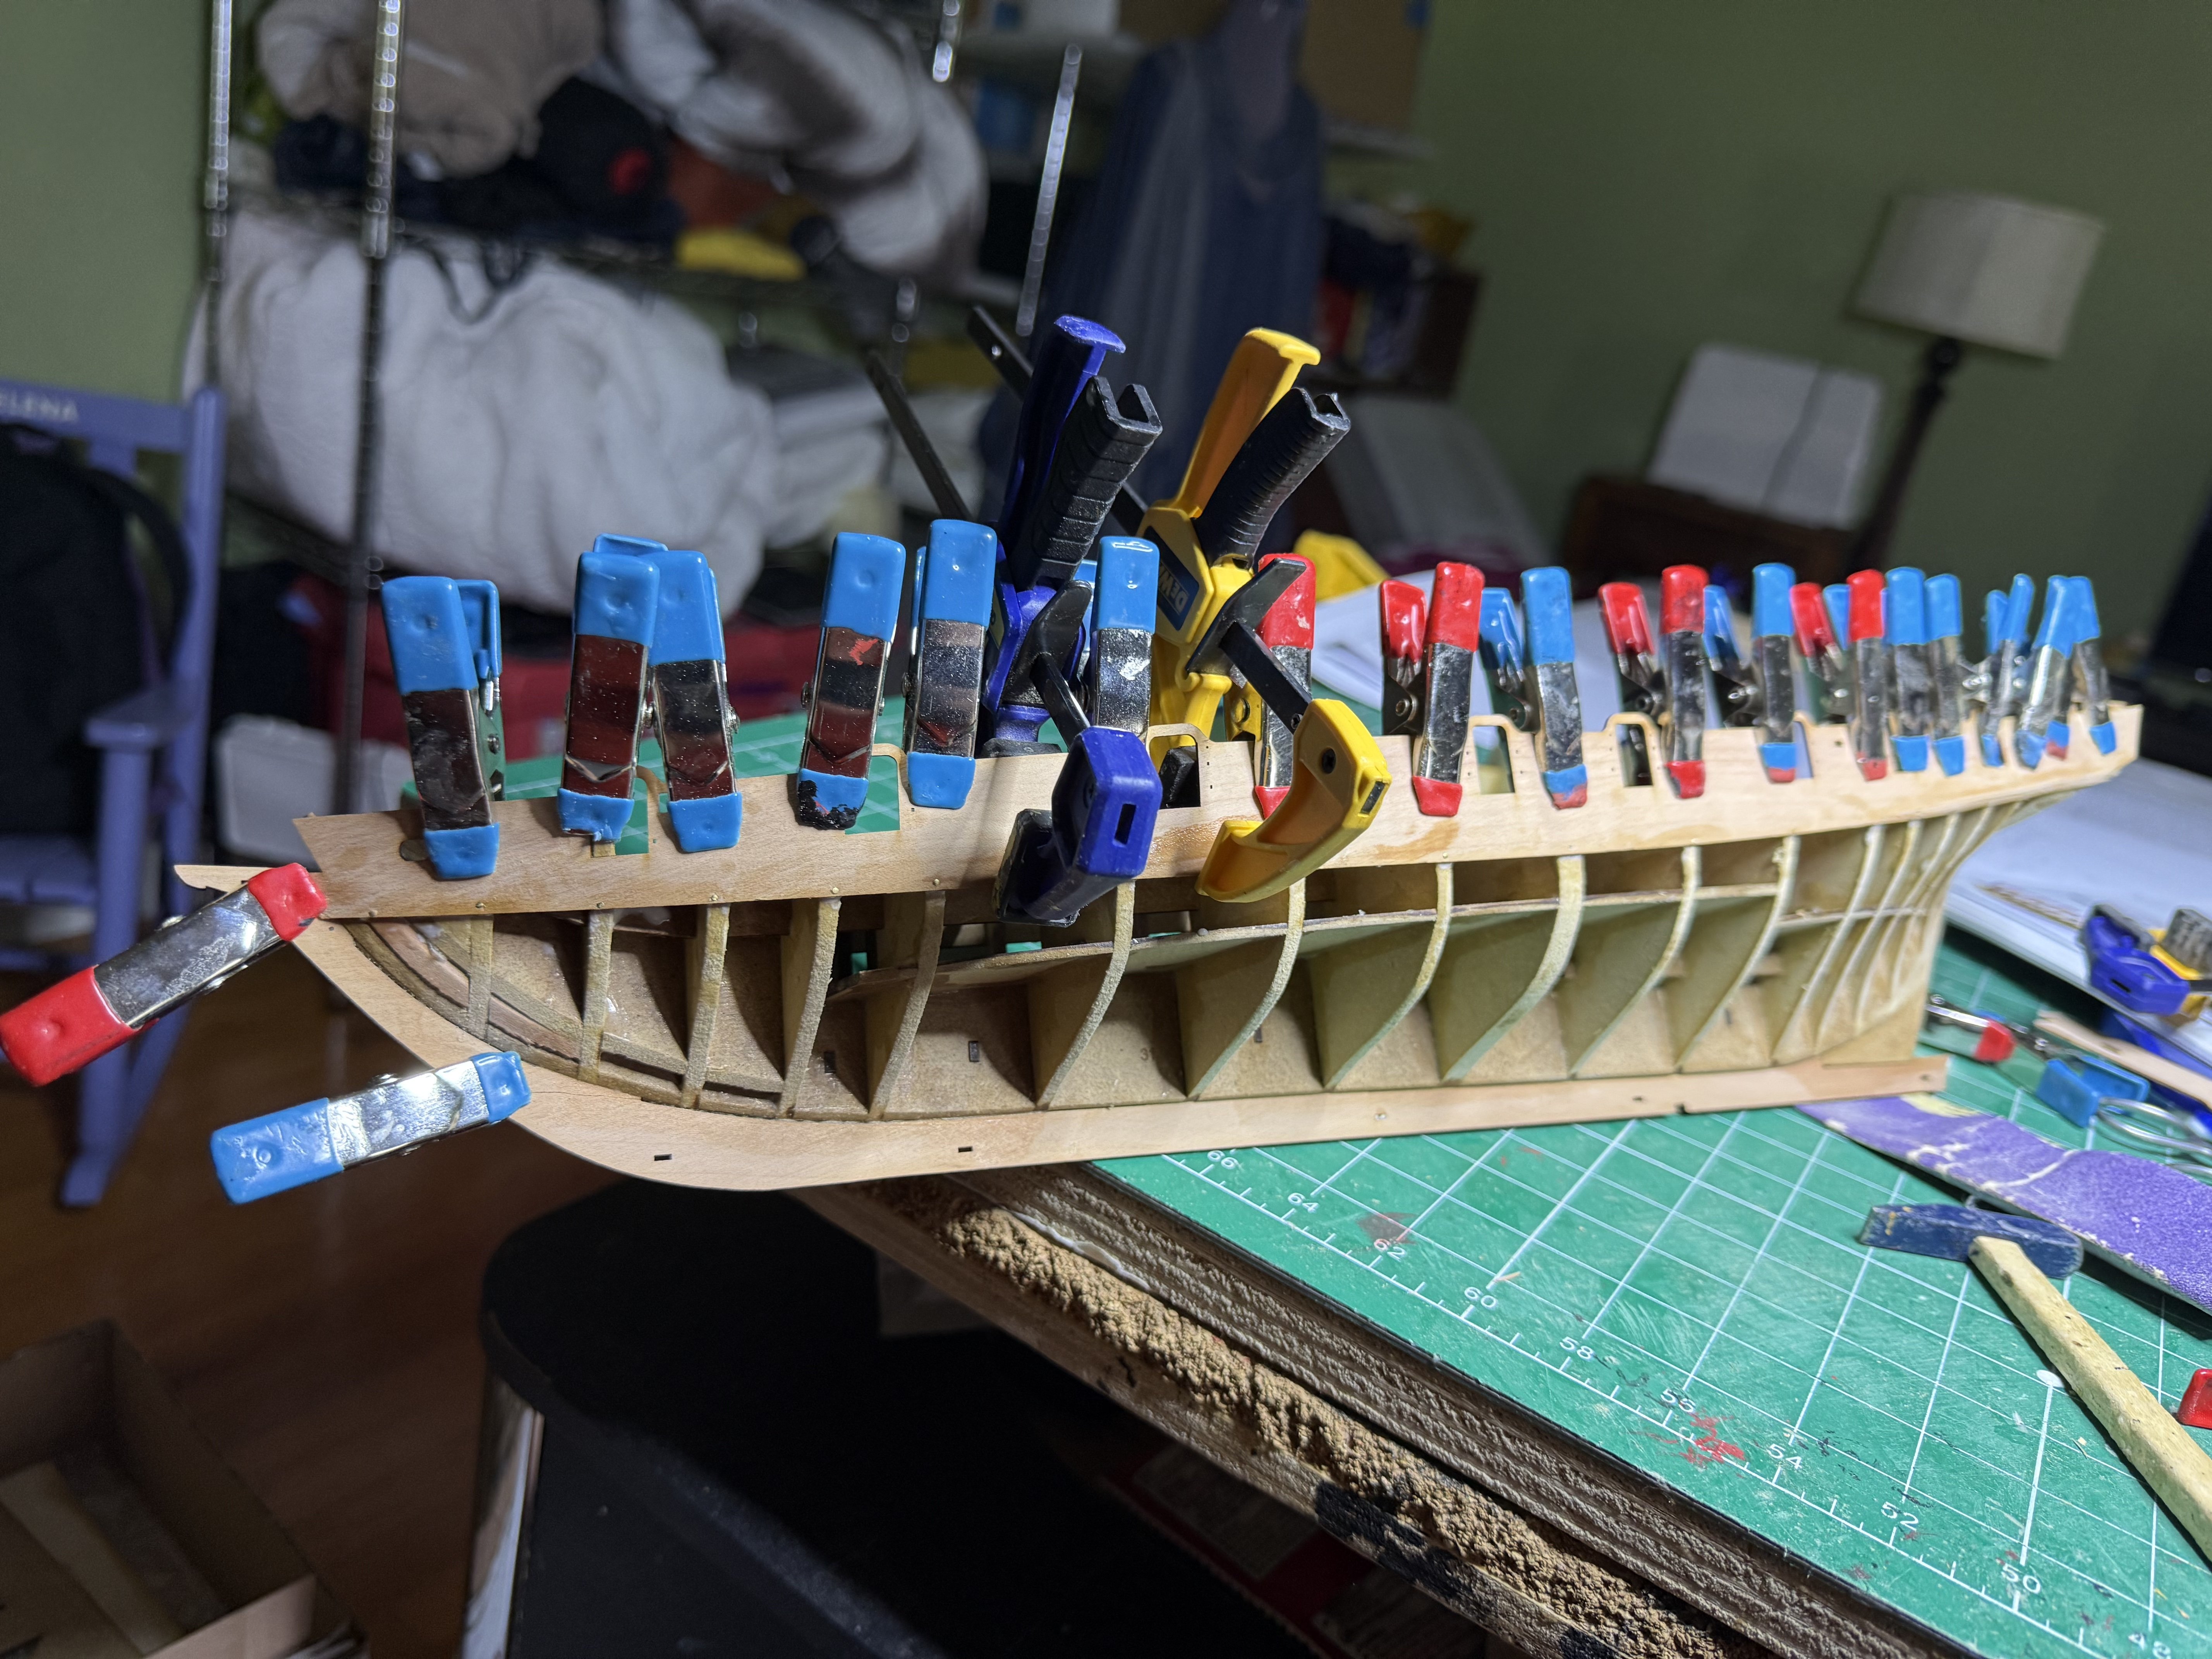
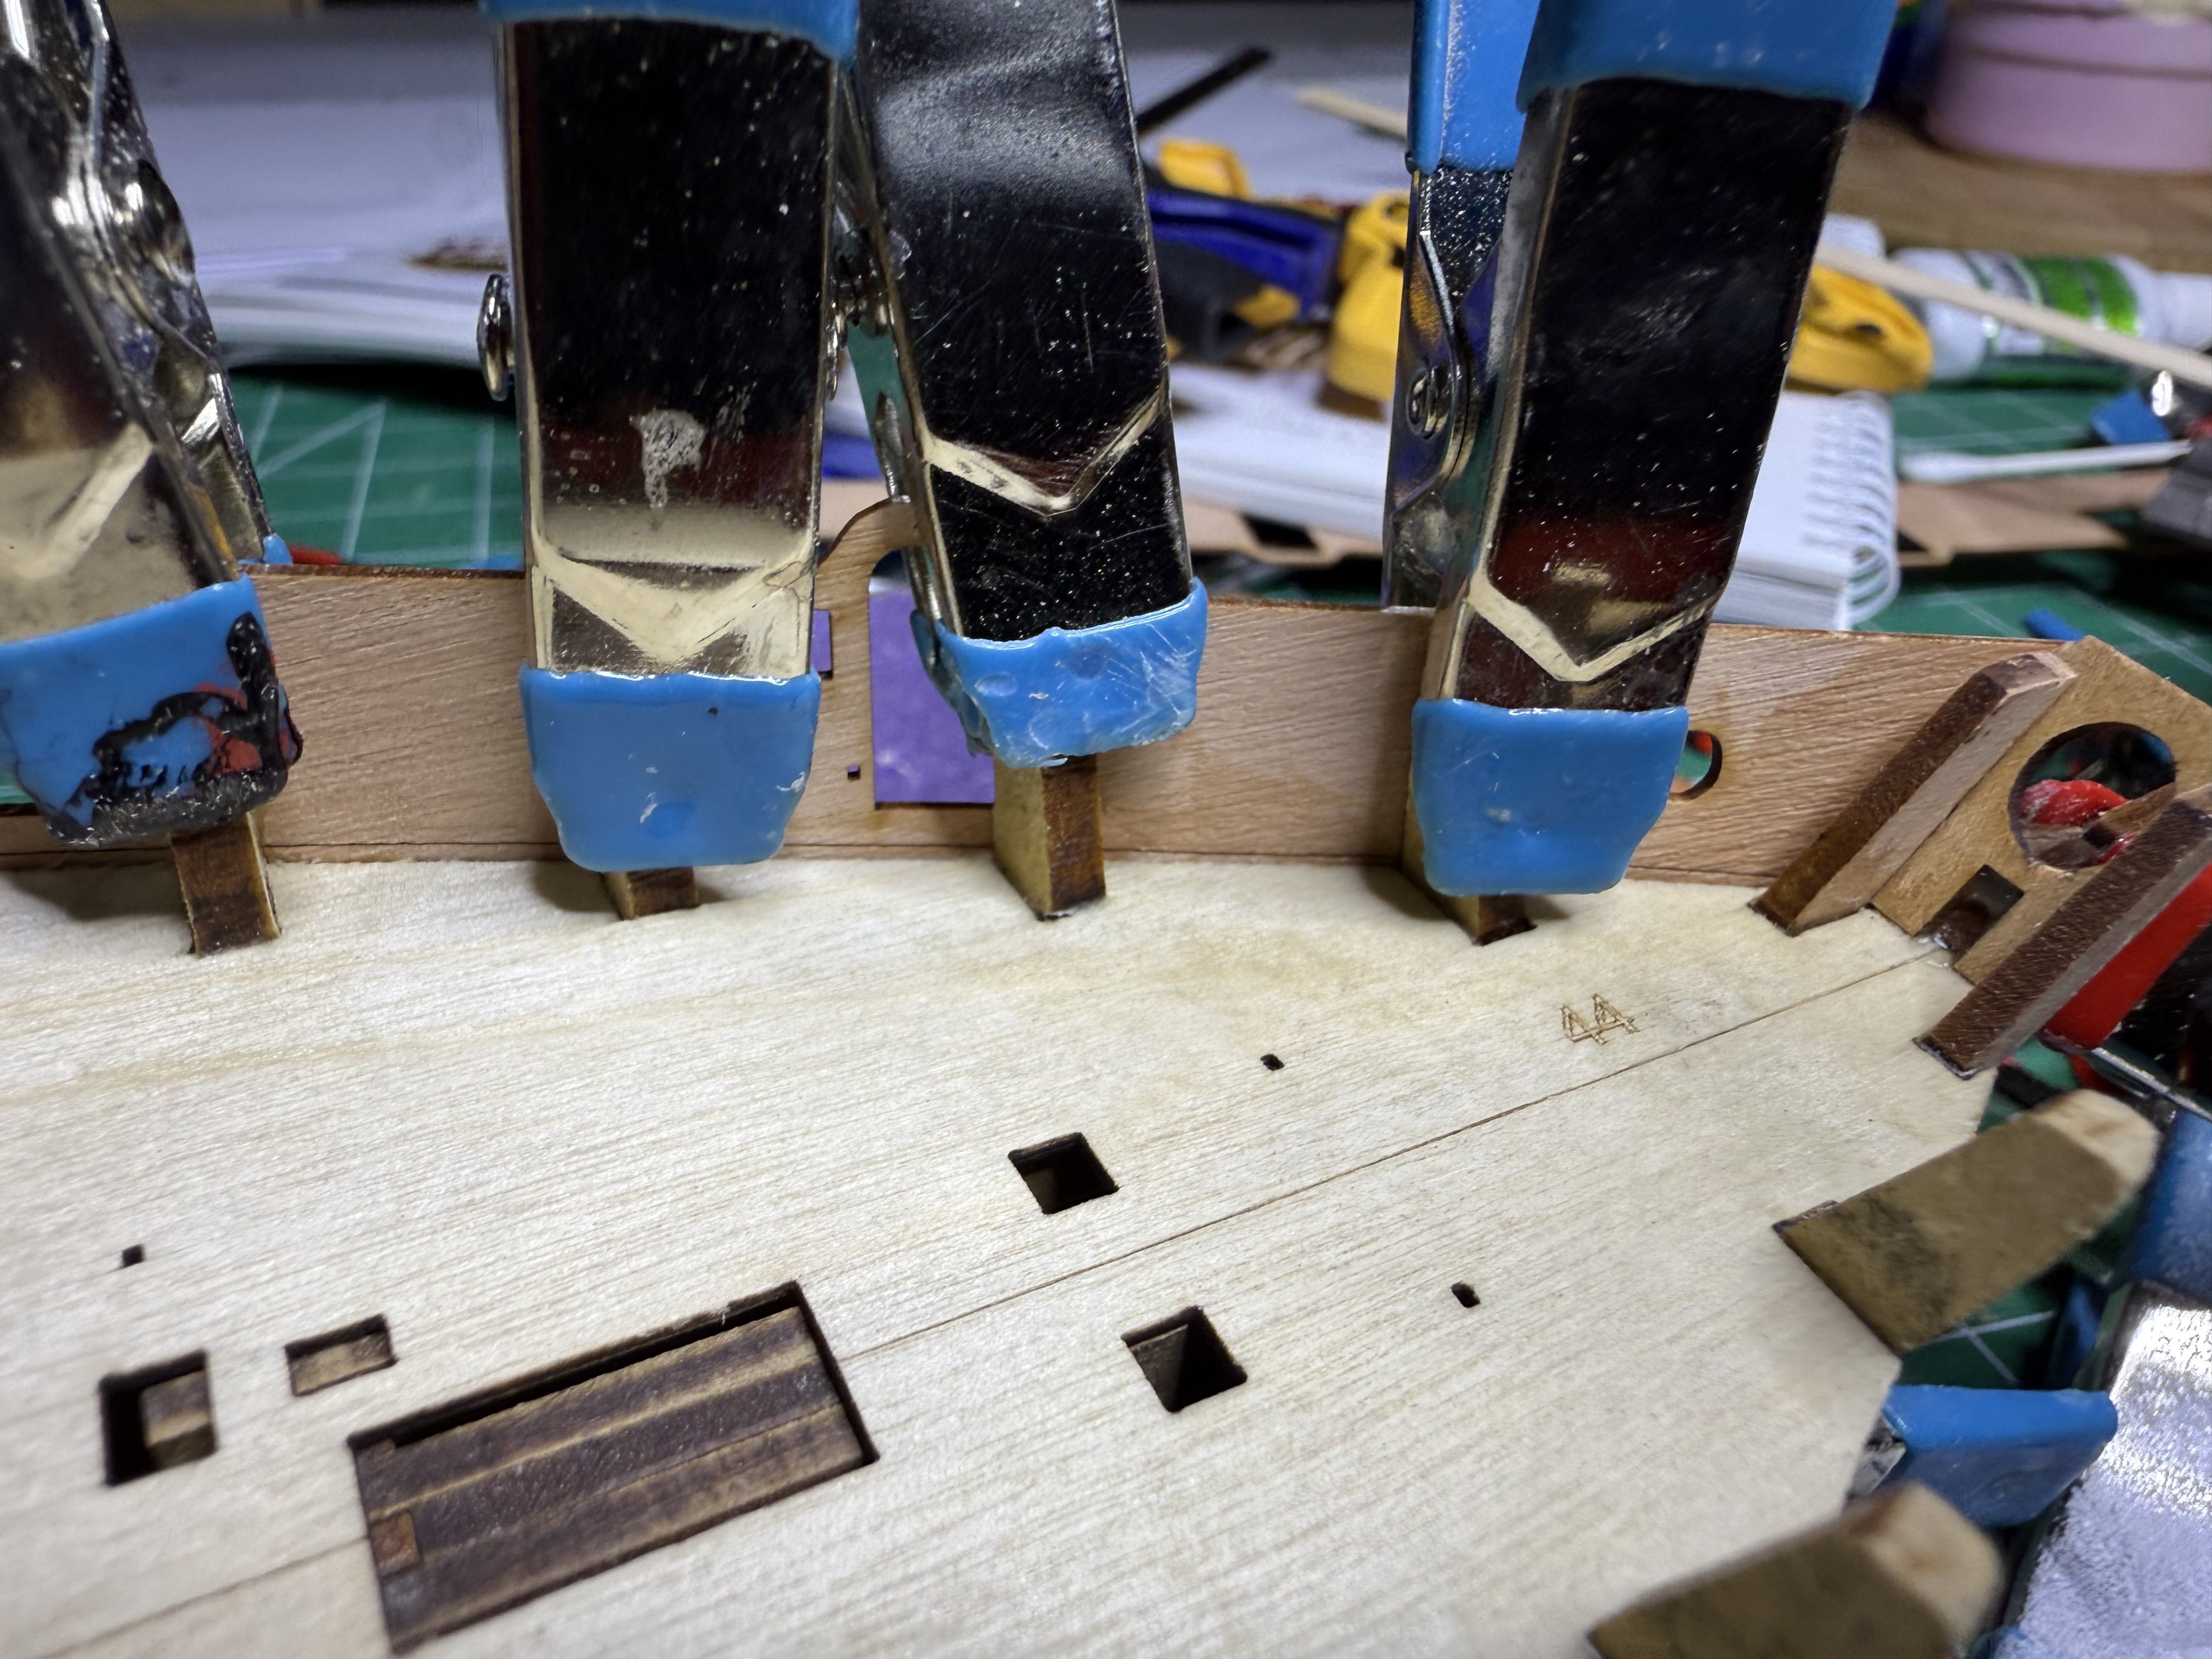
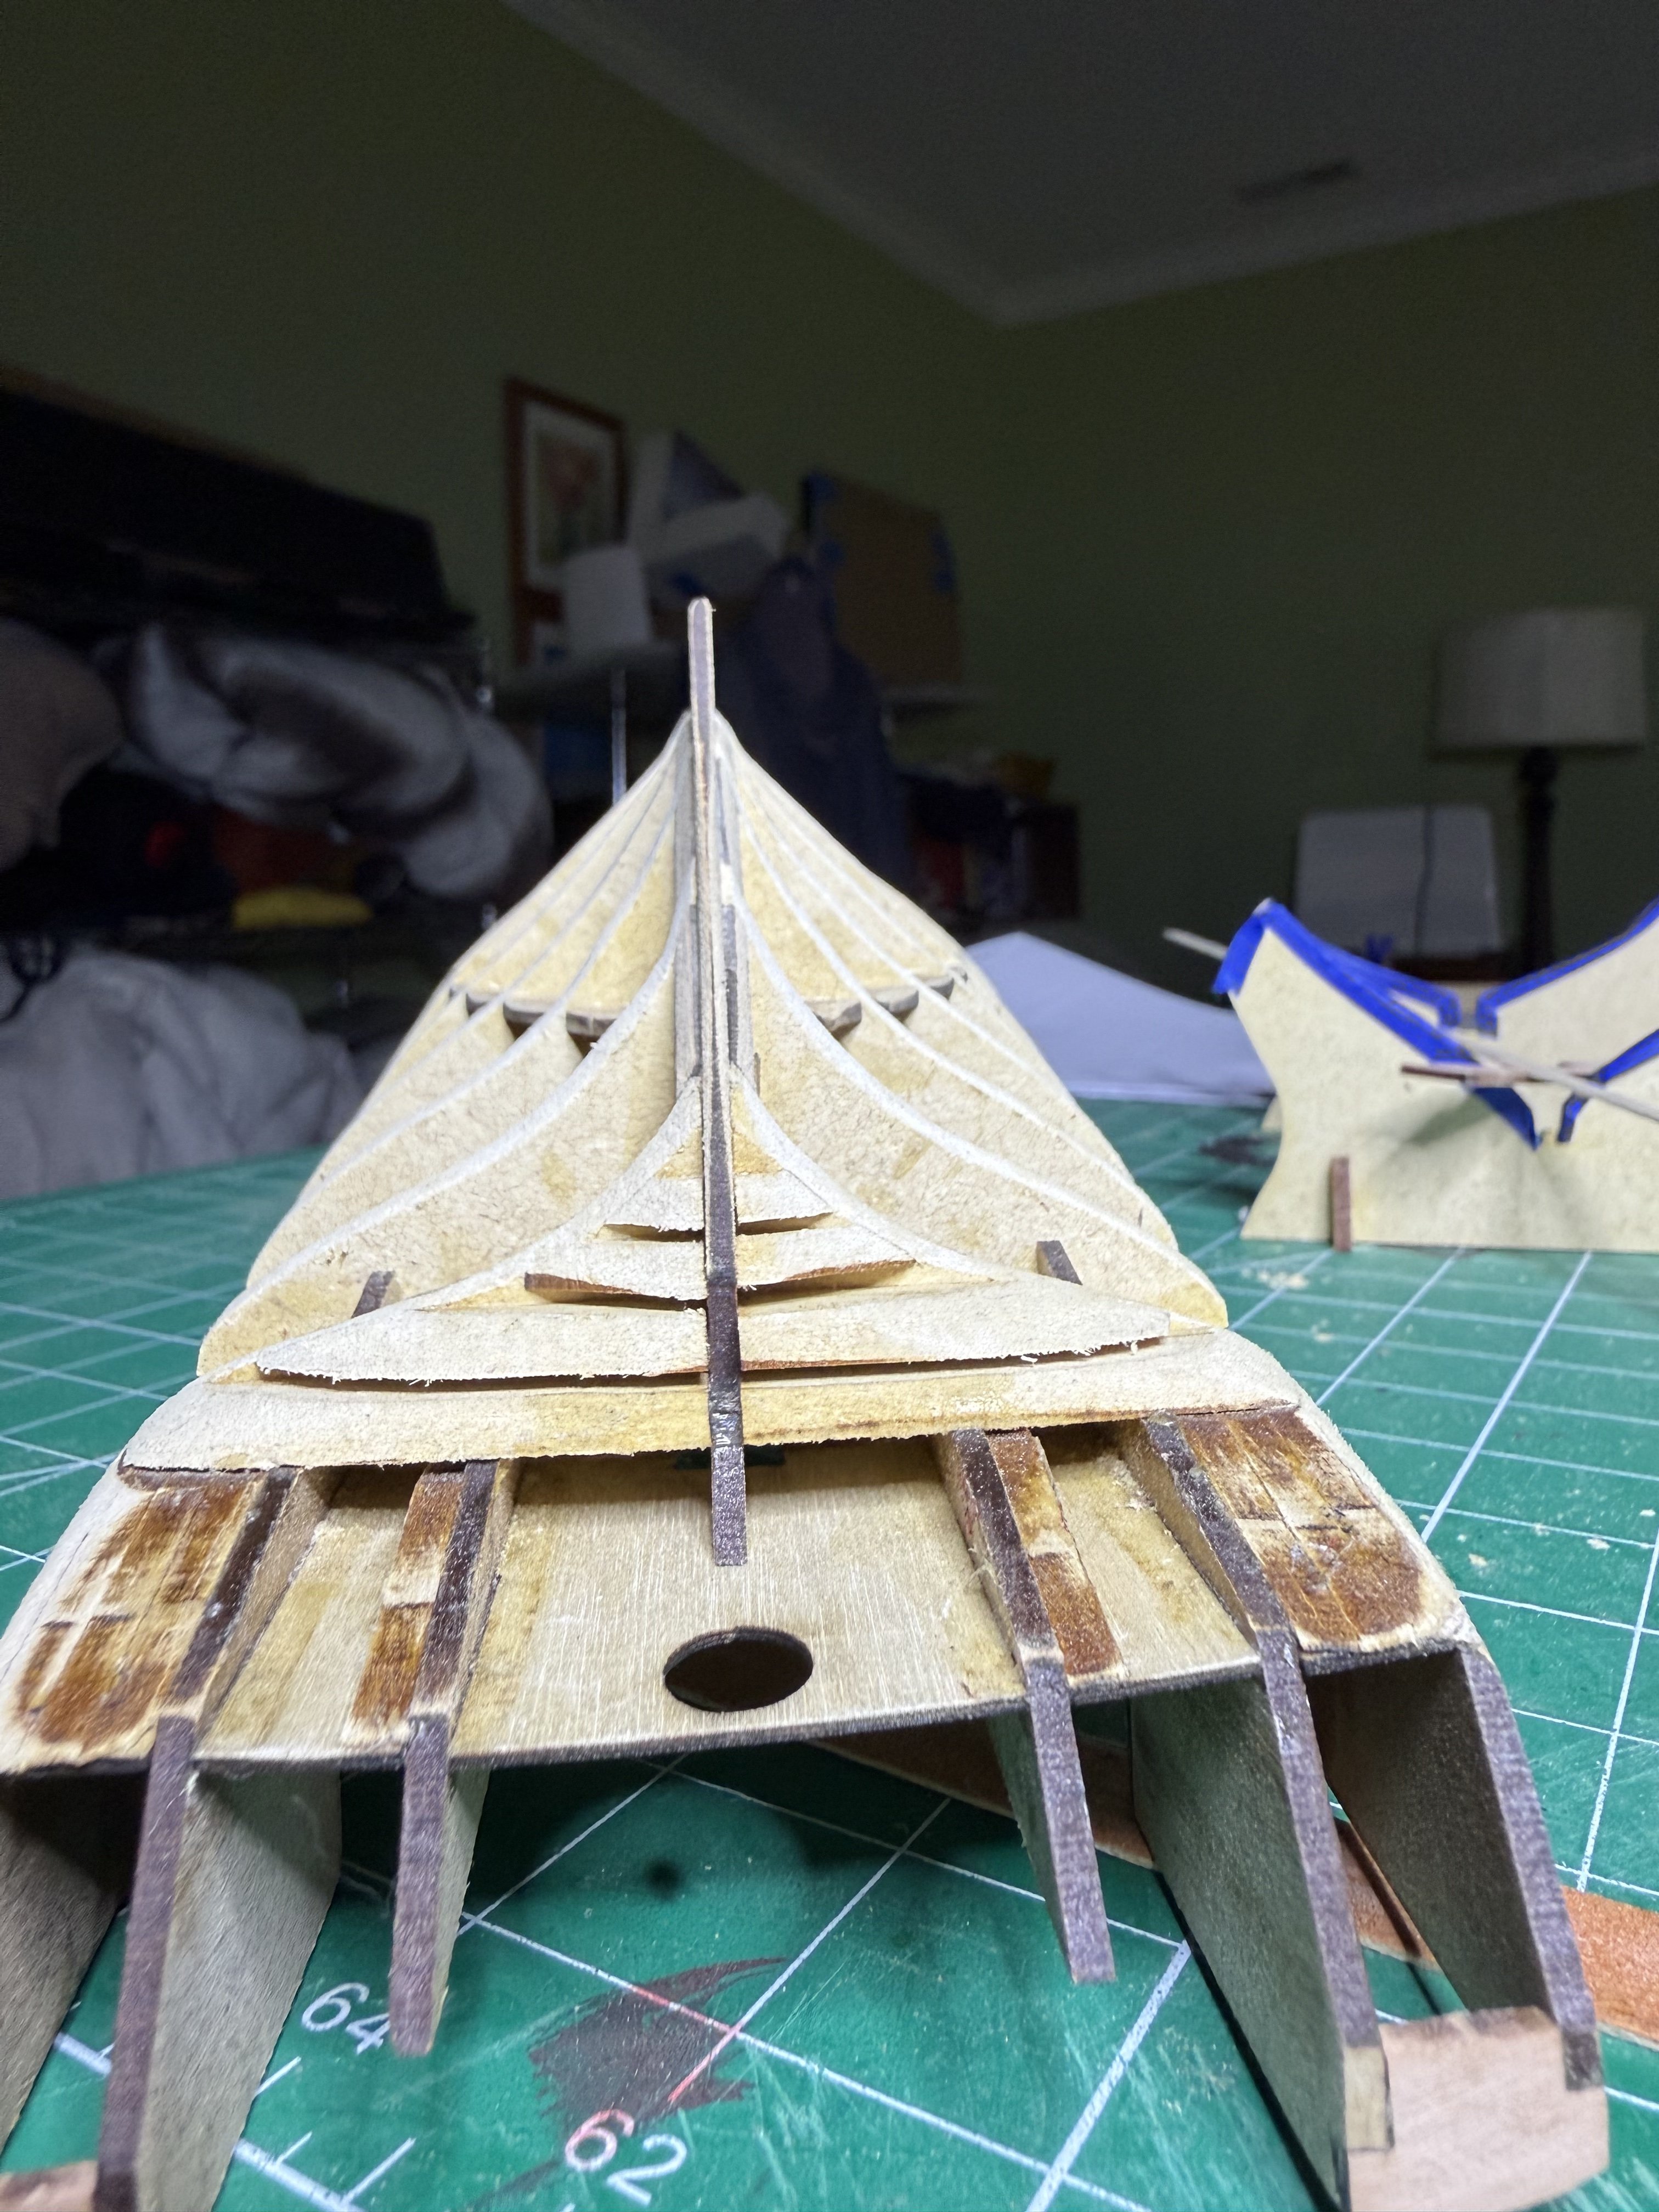
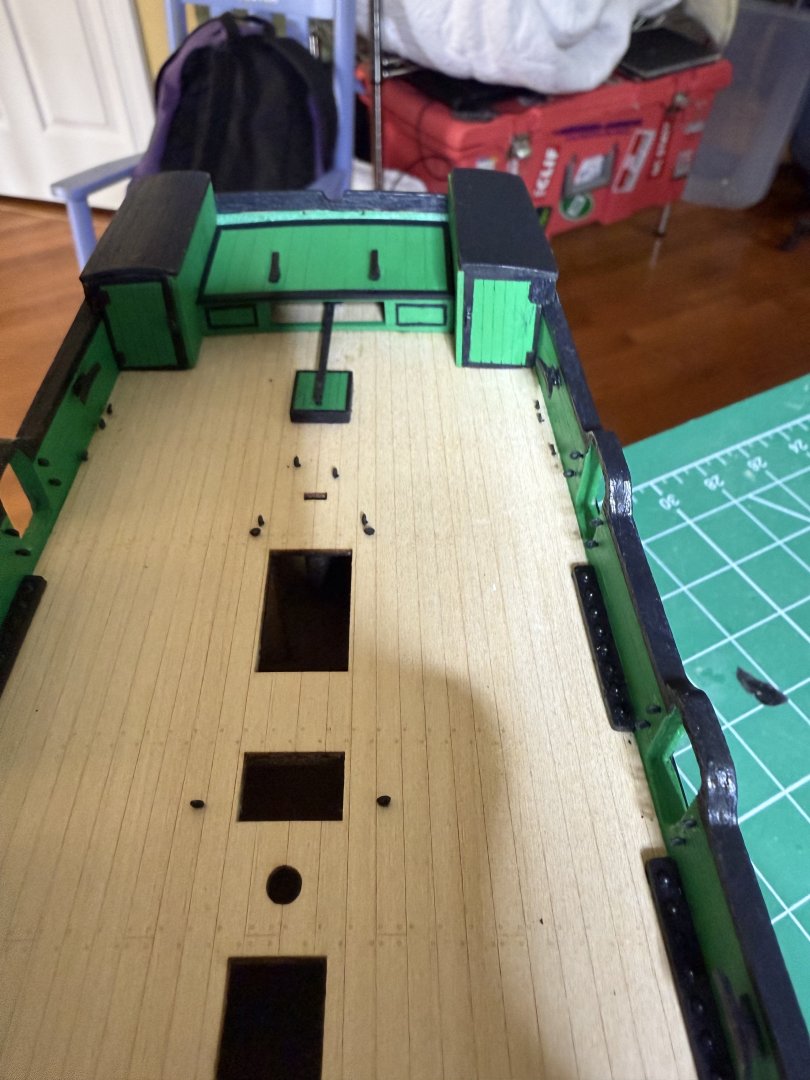
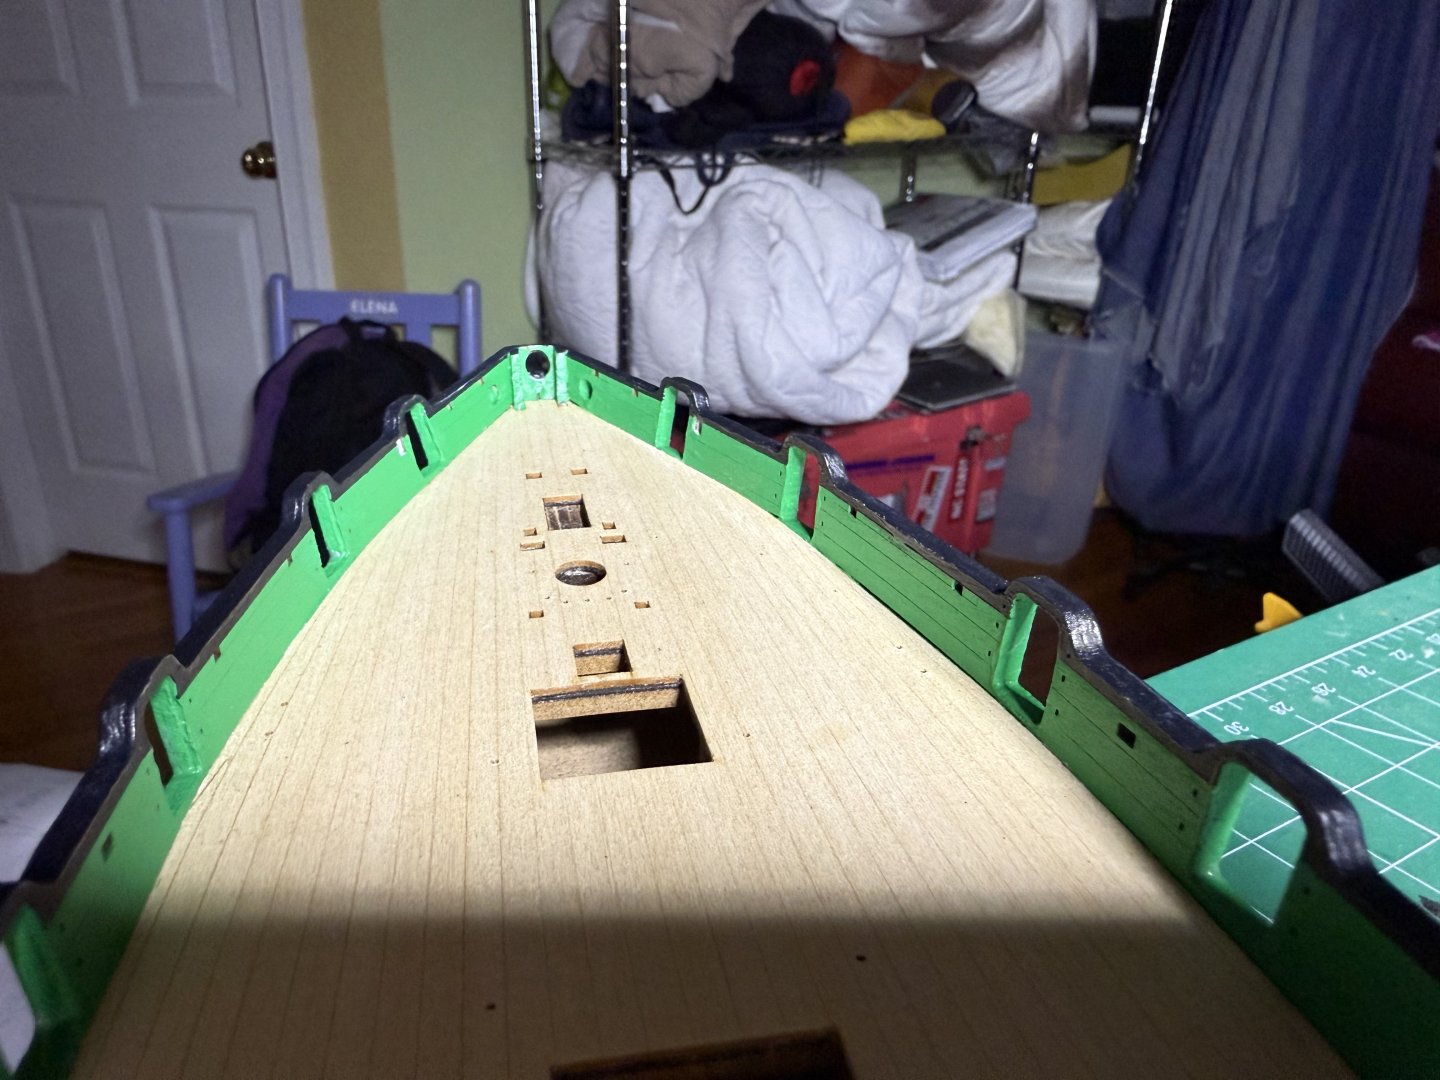
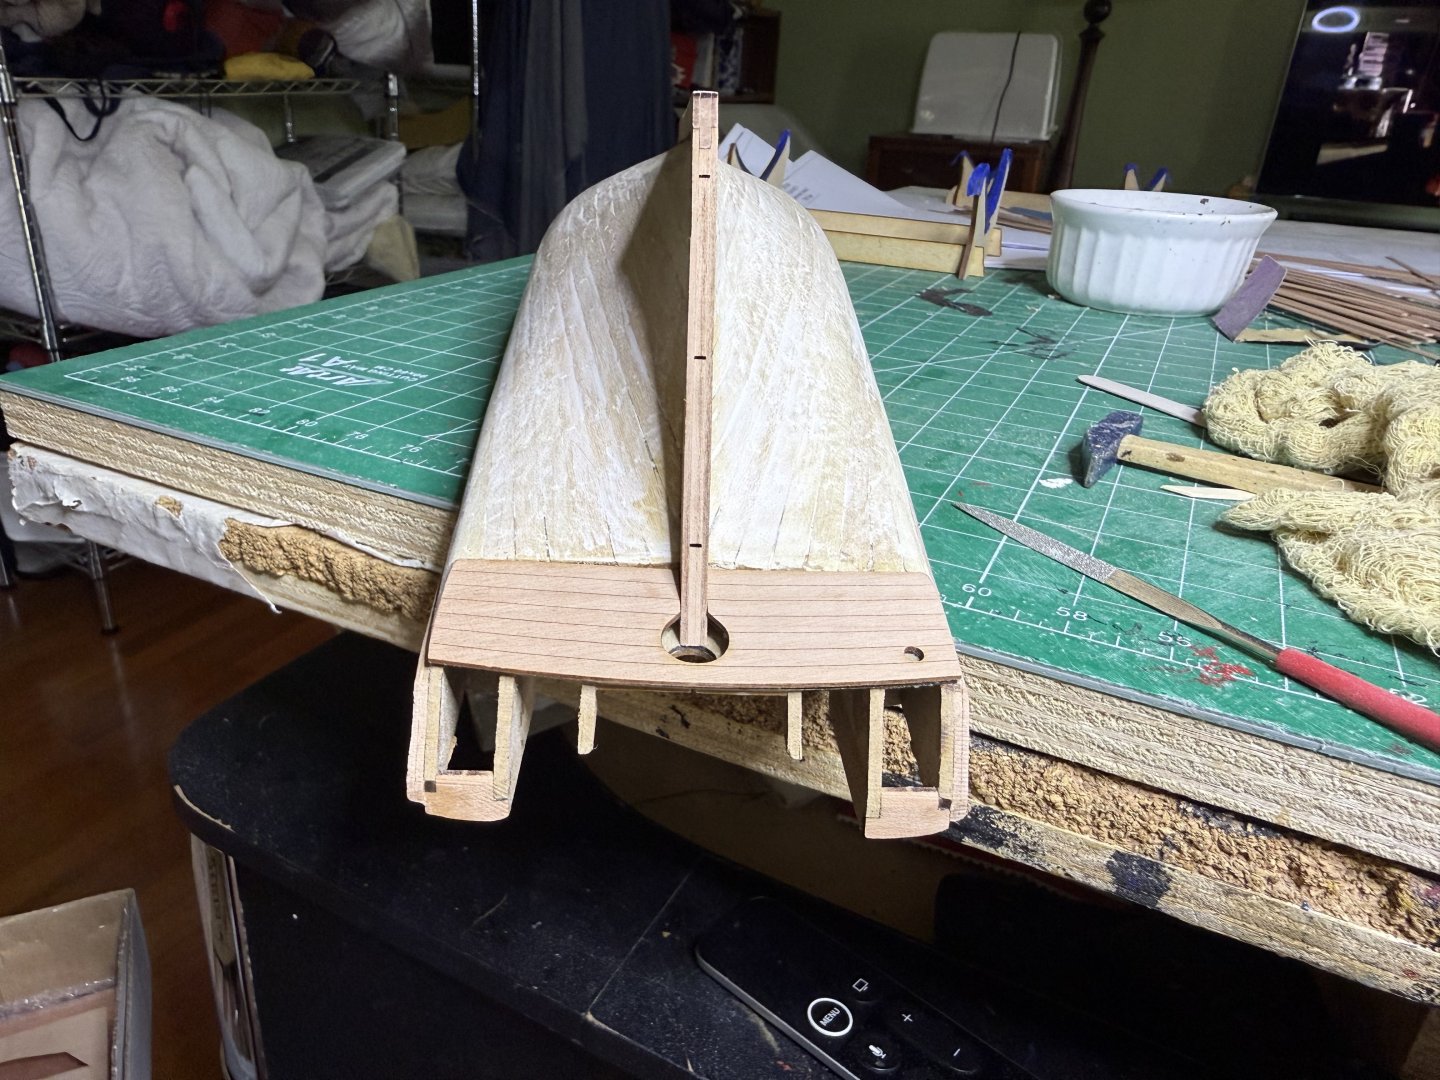
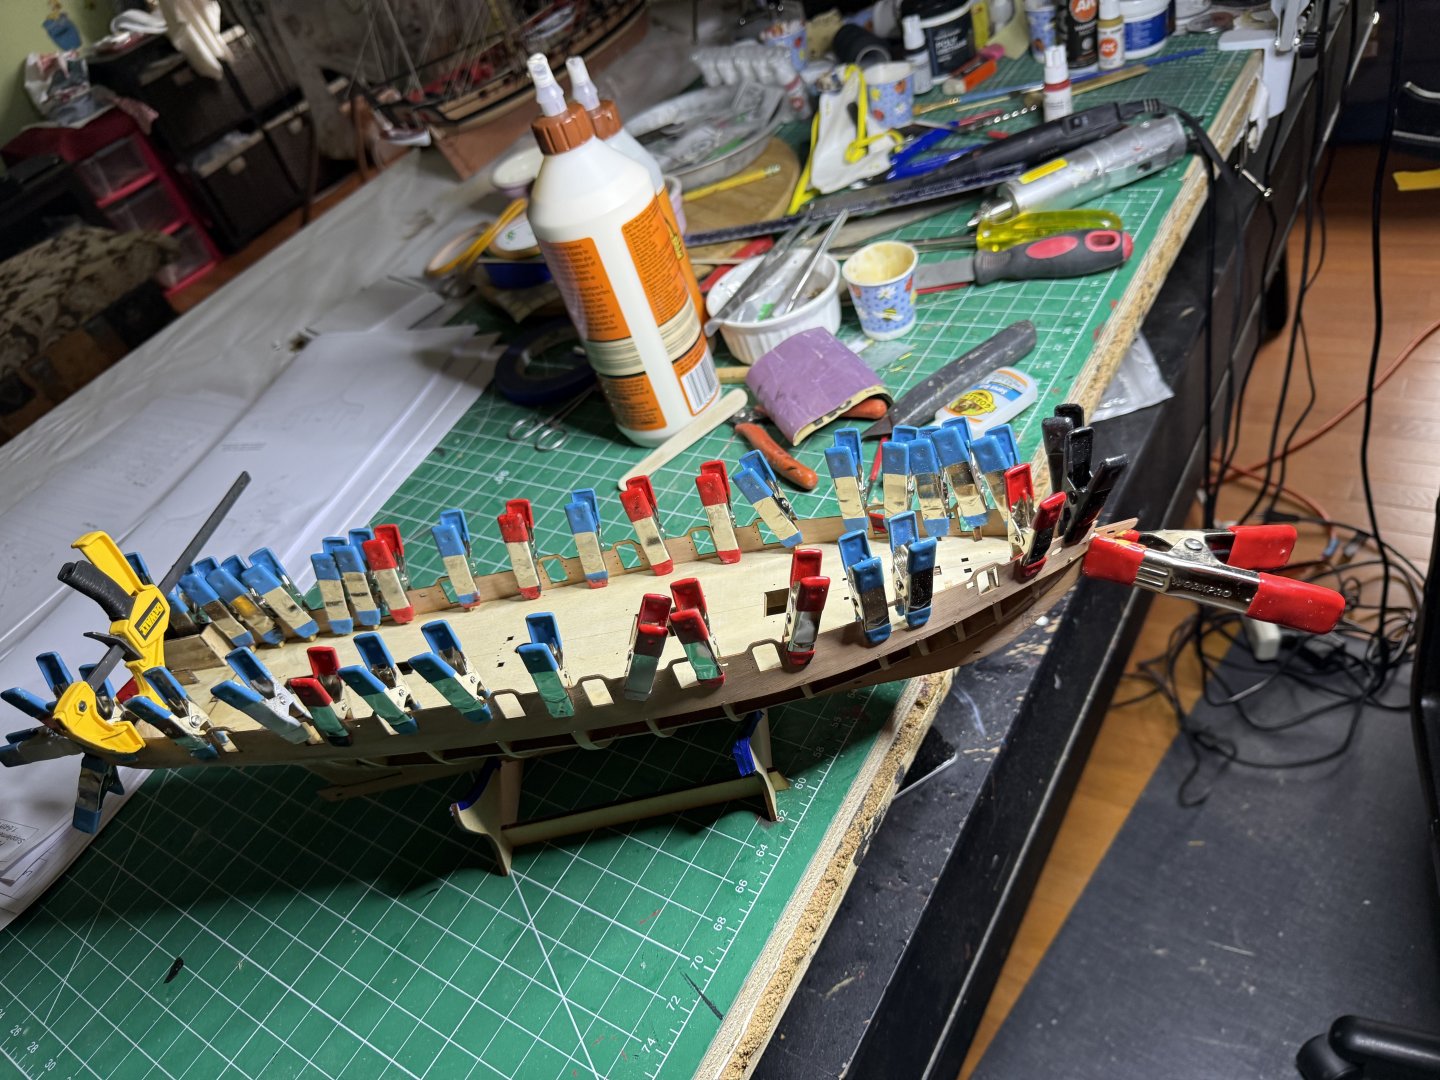
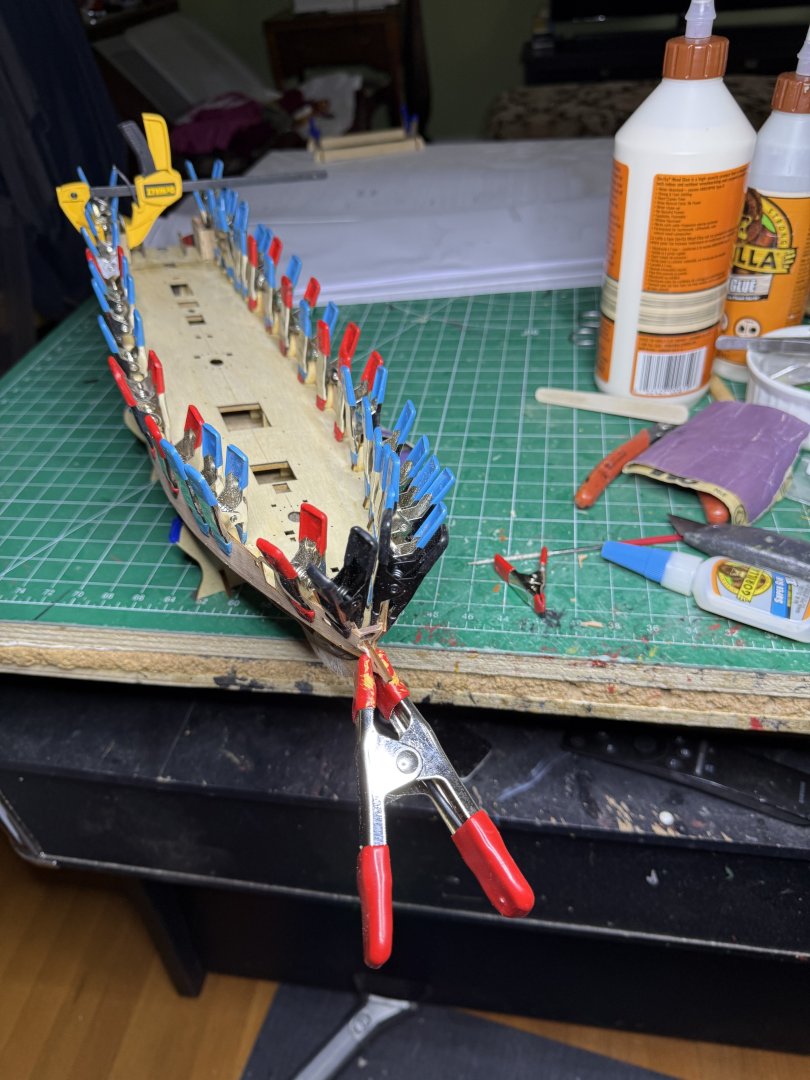
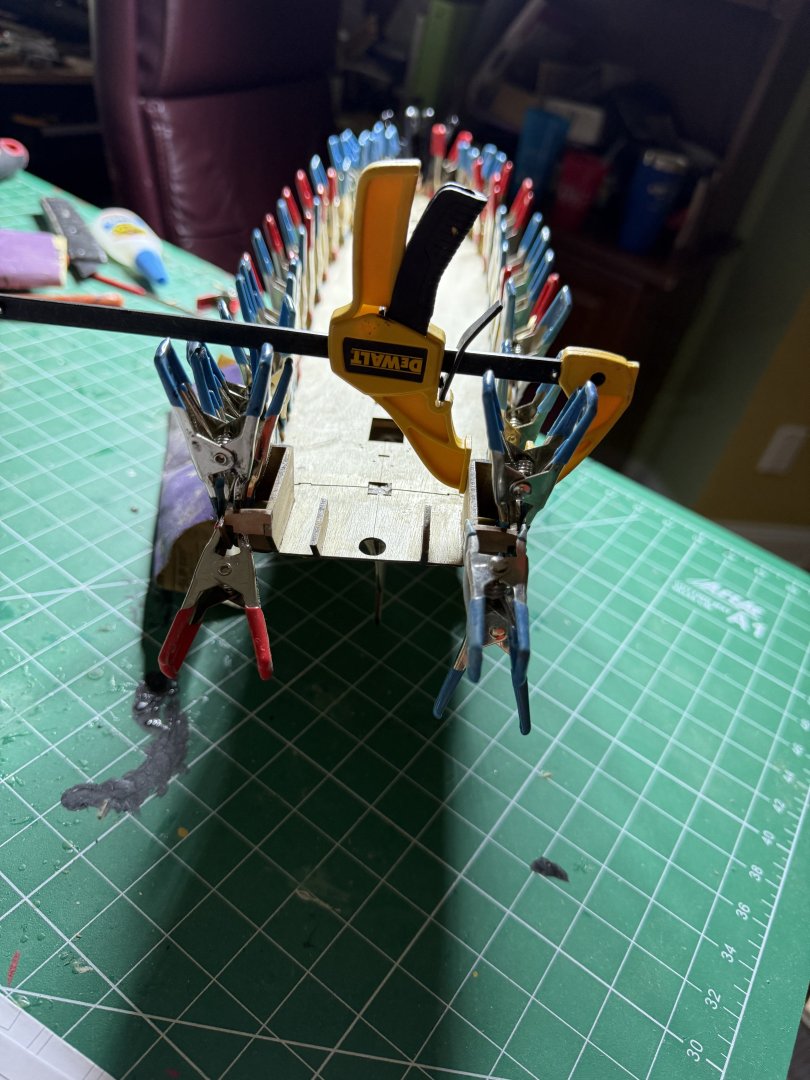
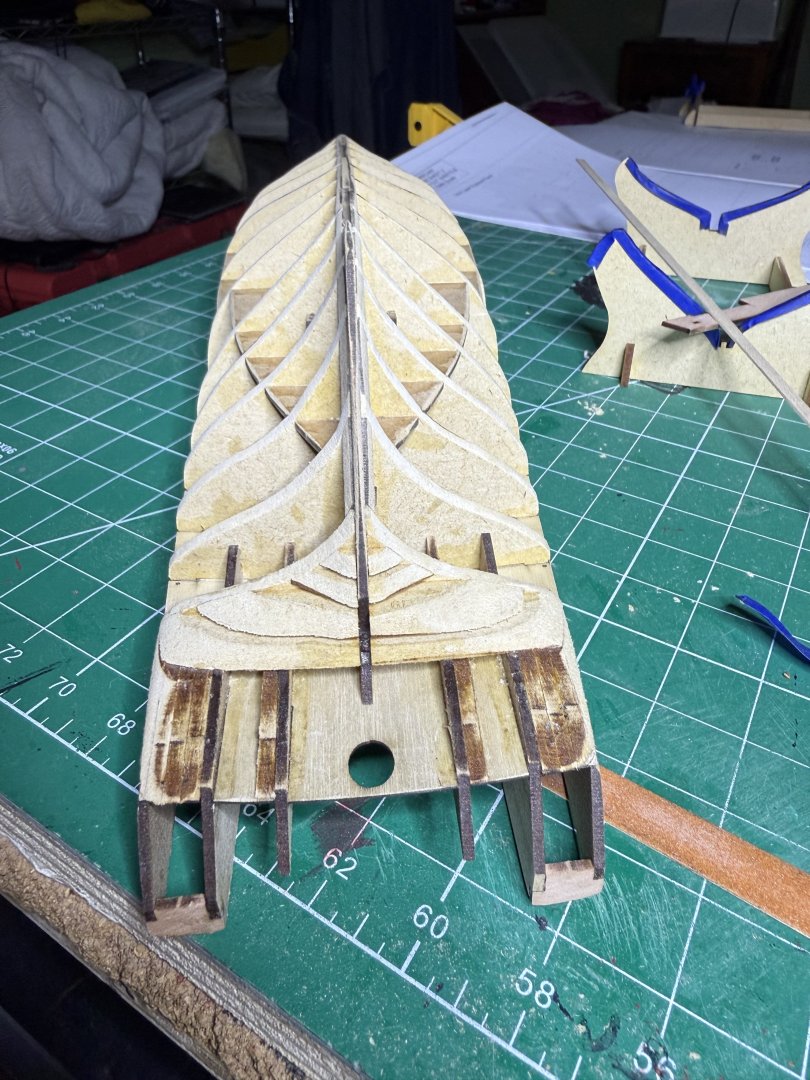
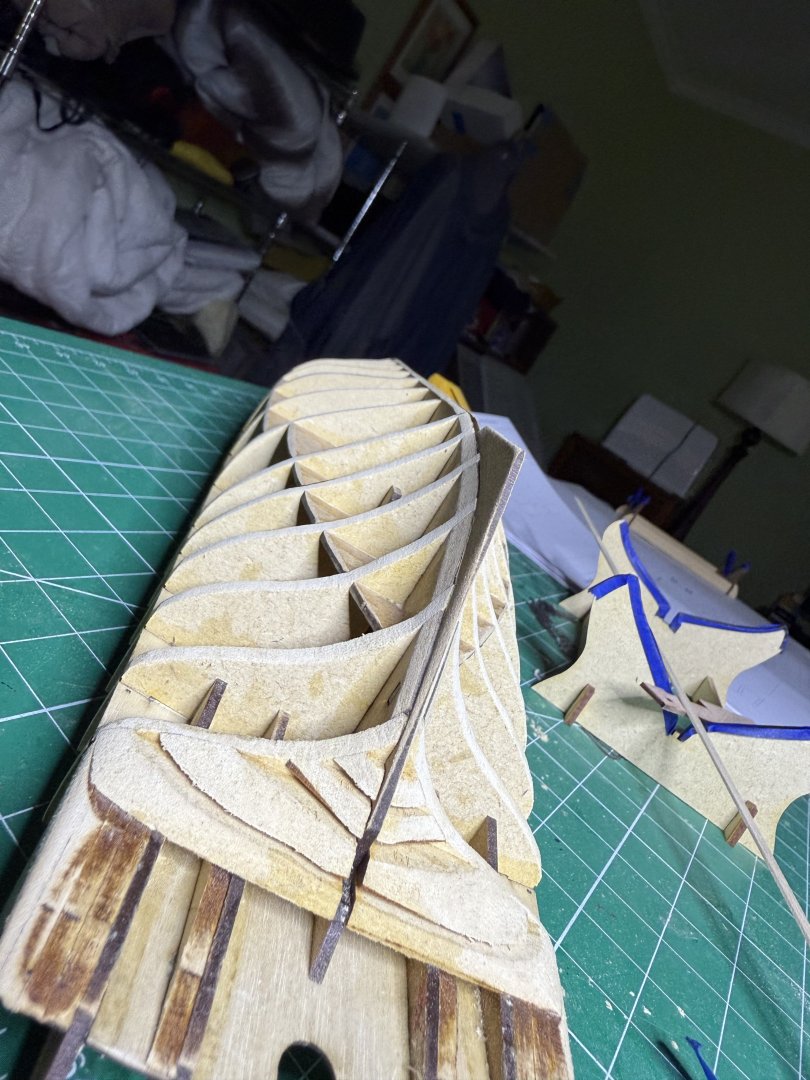
Next step is attaching the bulwark. The outer and inner sides will be covered with engraved pieces so this is the backbone so to speak. It is important to glue keeping the edge of the deck along the lower of the two interior engraved lines. Can never have to many clamps. You will also notice I temporarily pinned the lower edges to ensure a tight fit so the first plank will abut without gaps. If you look closely at the instruction manual you can see James also used pinholes. The lower stern edge needs to be turnedinward. I scored it as the manual suggests. Later with filler and sanding it will be nice and rounded. Lastly, it is important to make sure the end of the bulwark sits at the same height above the deckhouse at the stern.


- 52 replies
-
- 4
-
-
- Grecian
- Vanguard Models
- (and 1 more)
-
Indeed she looks quite the thoroughbred.
-
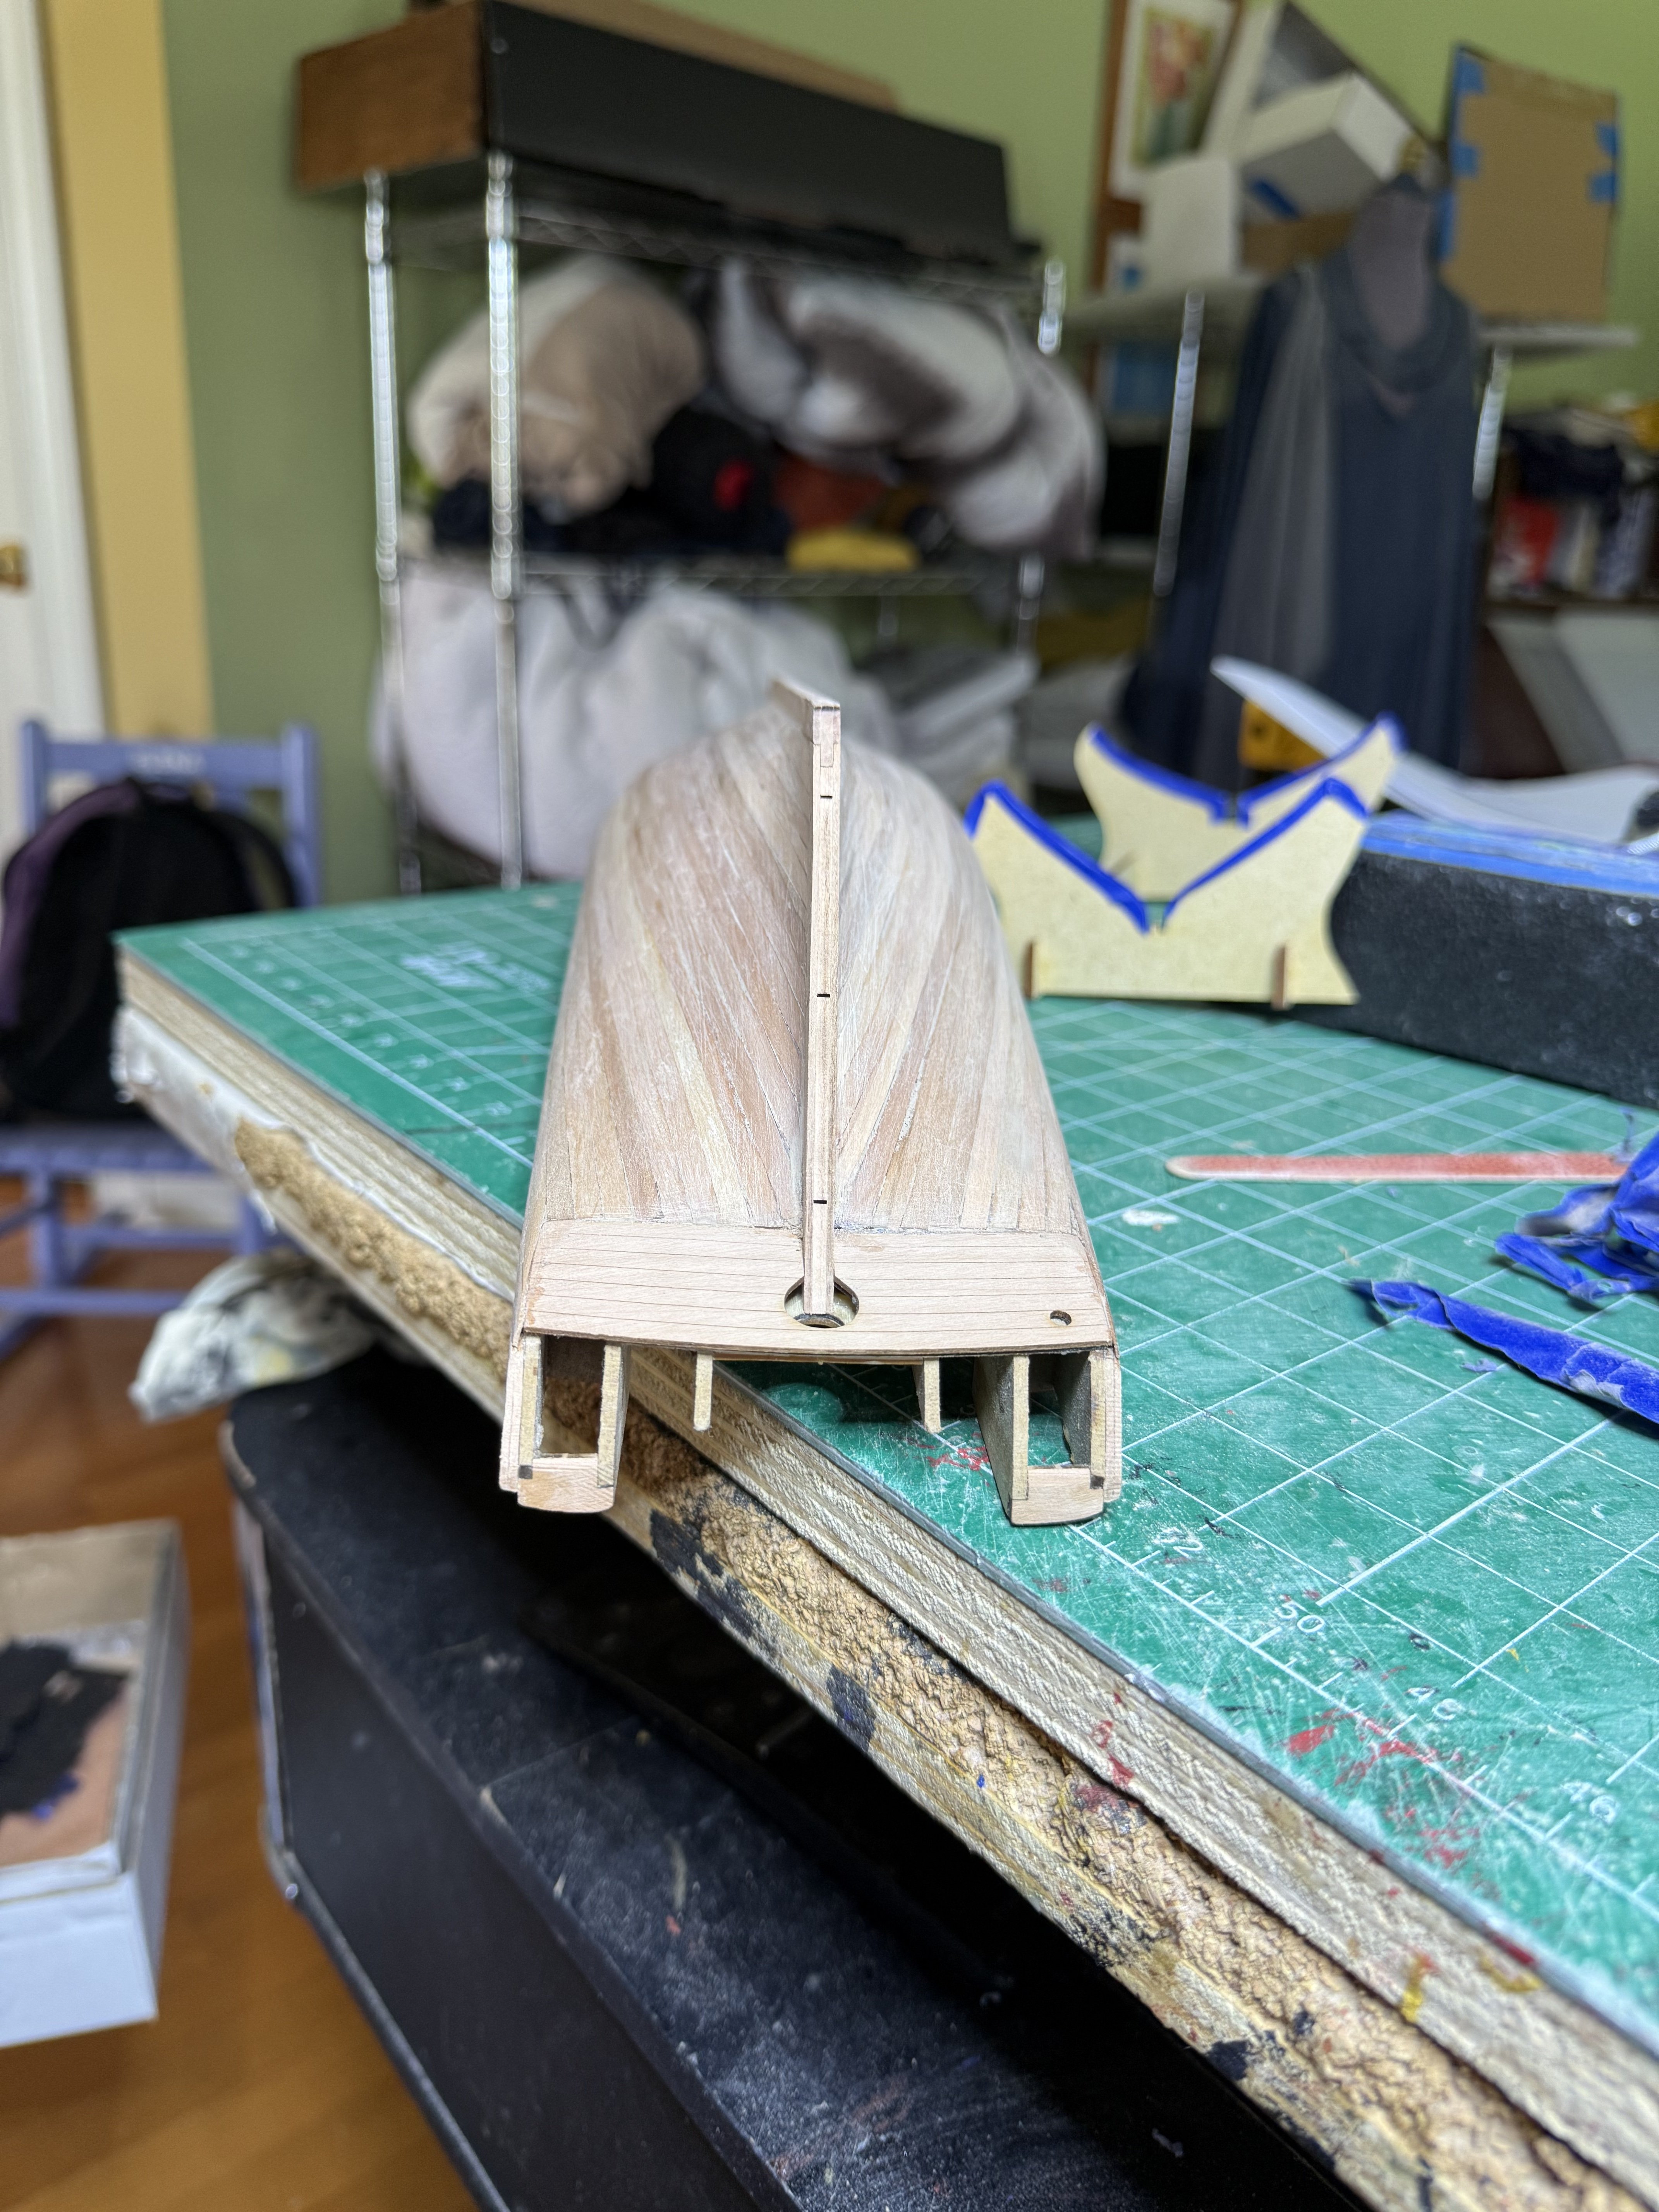
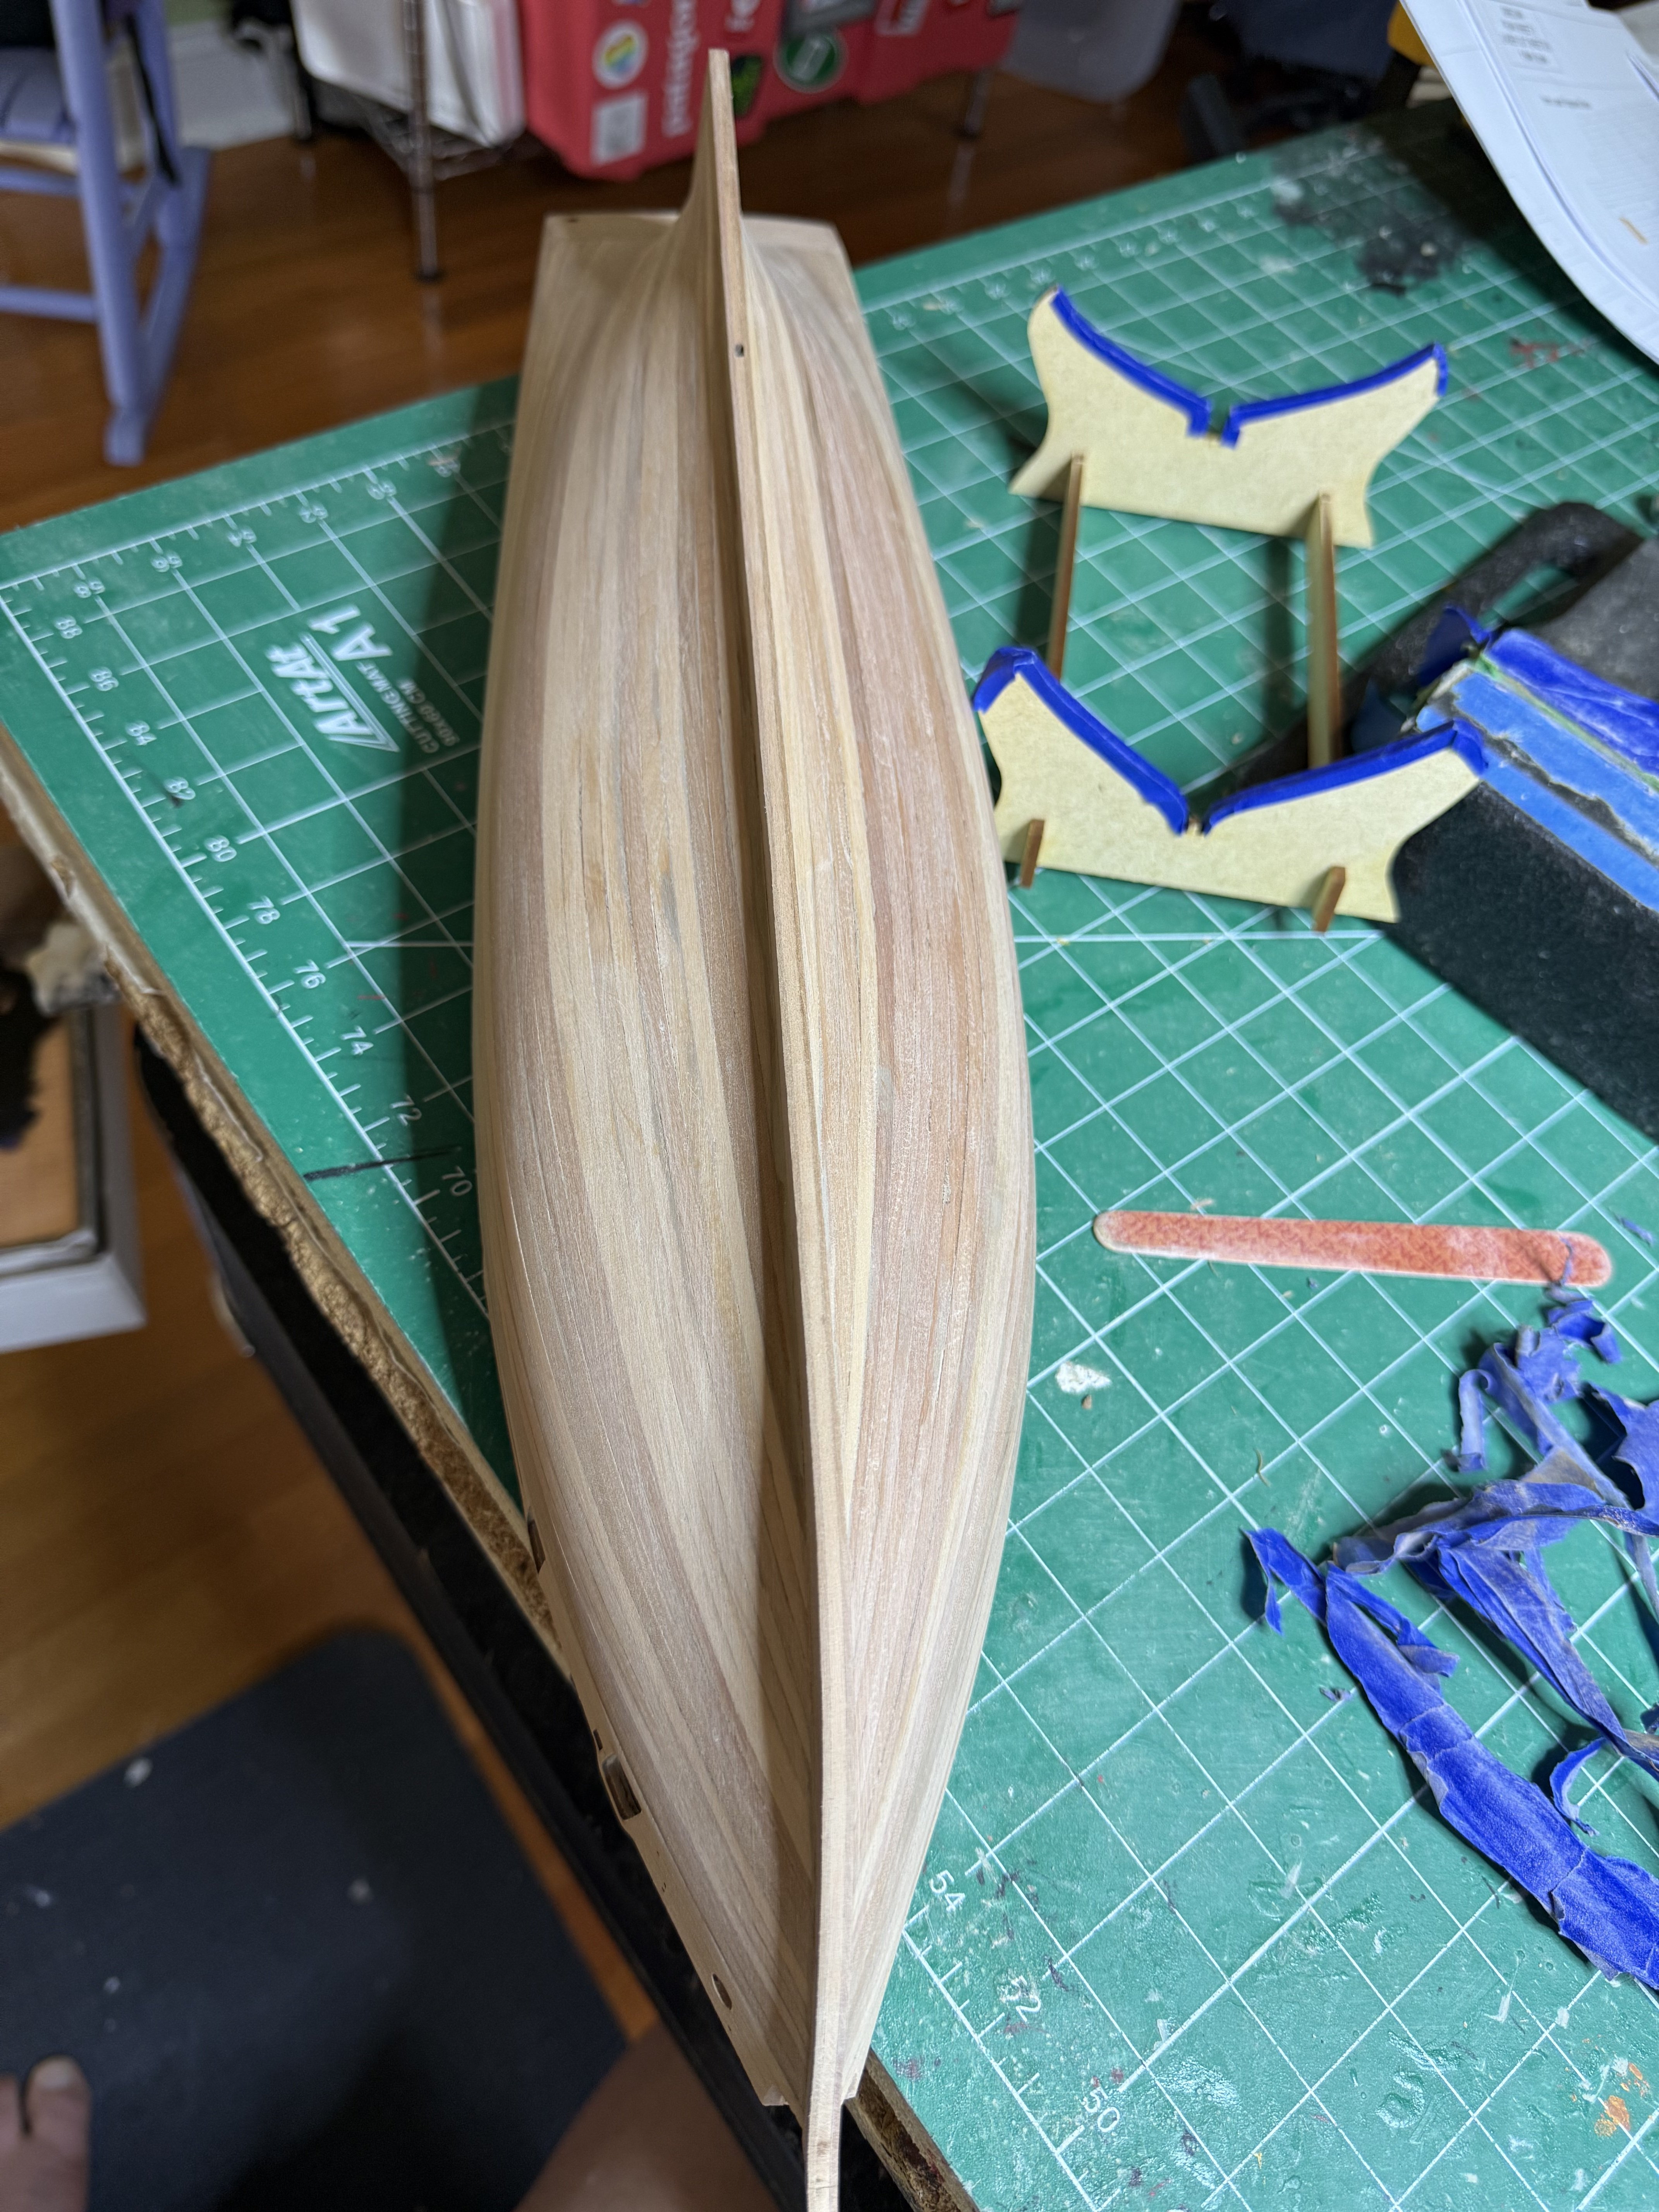
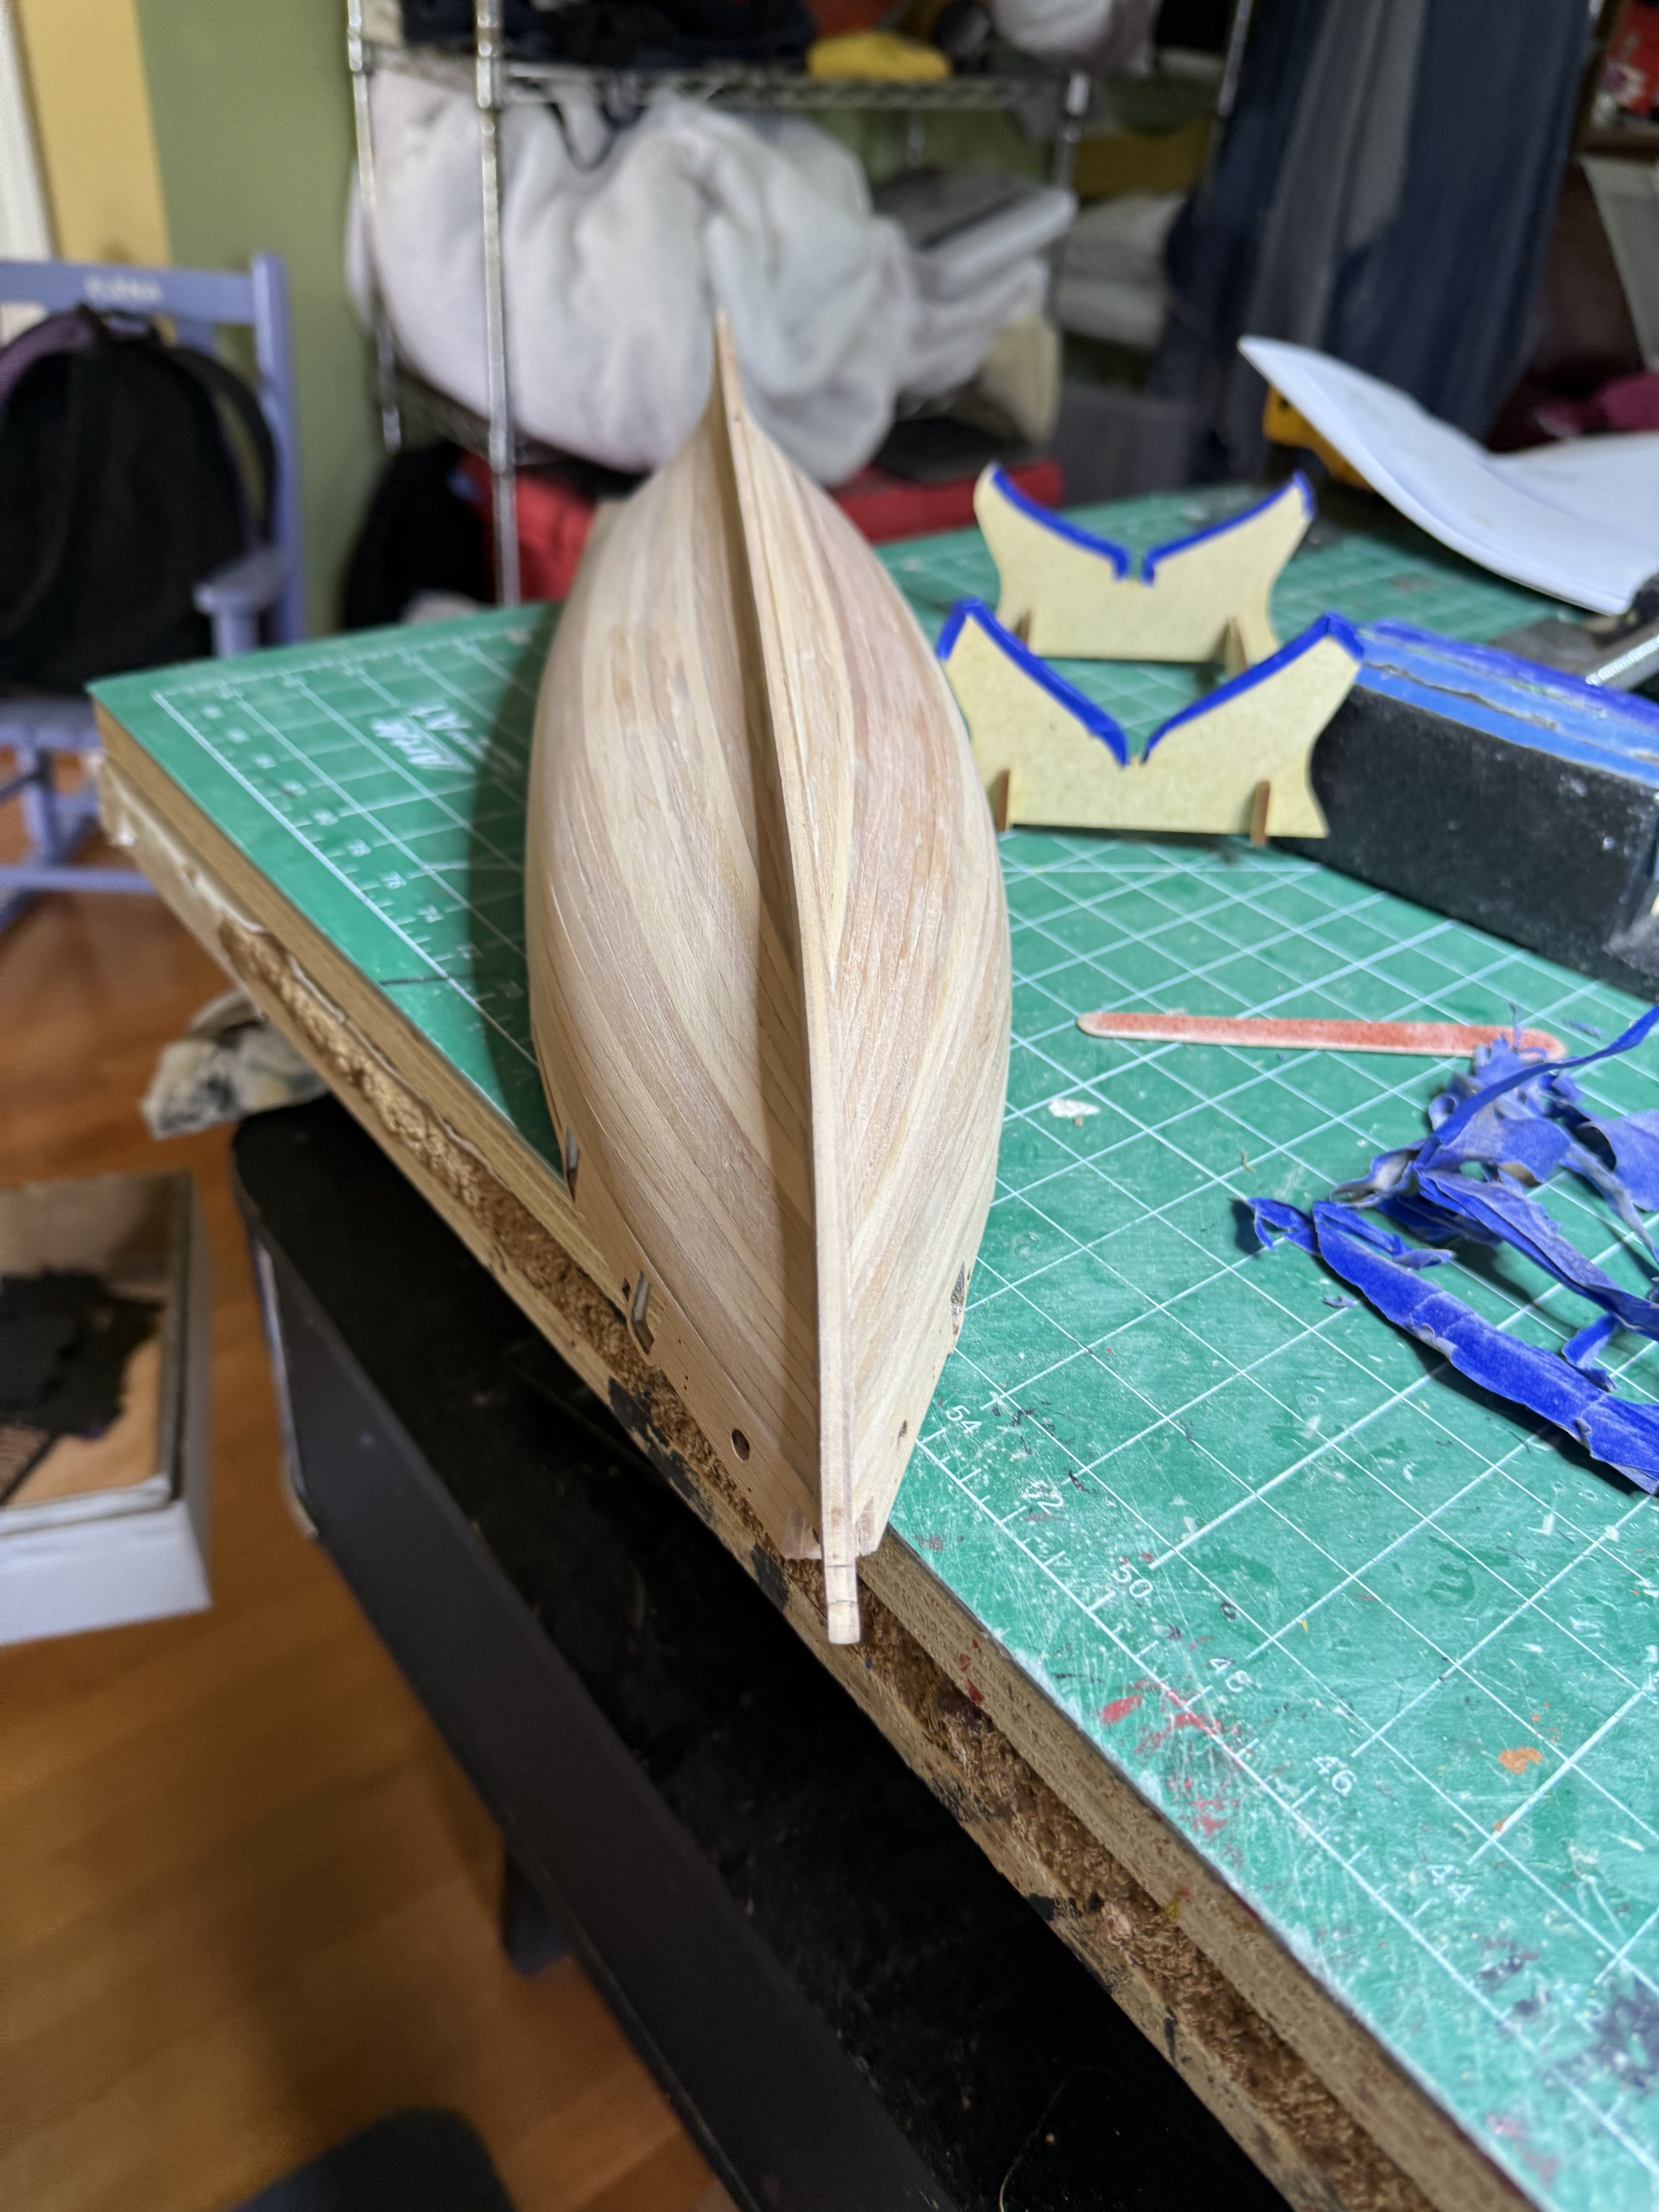
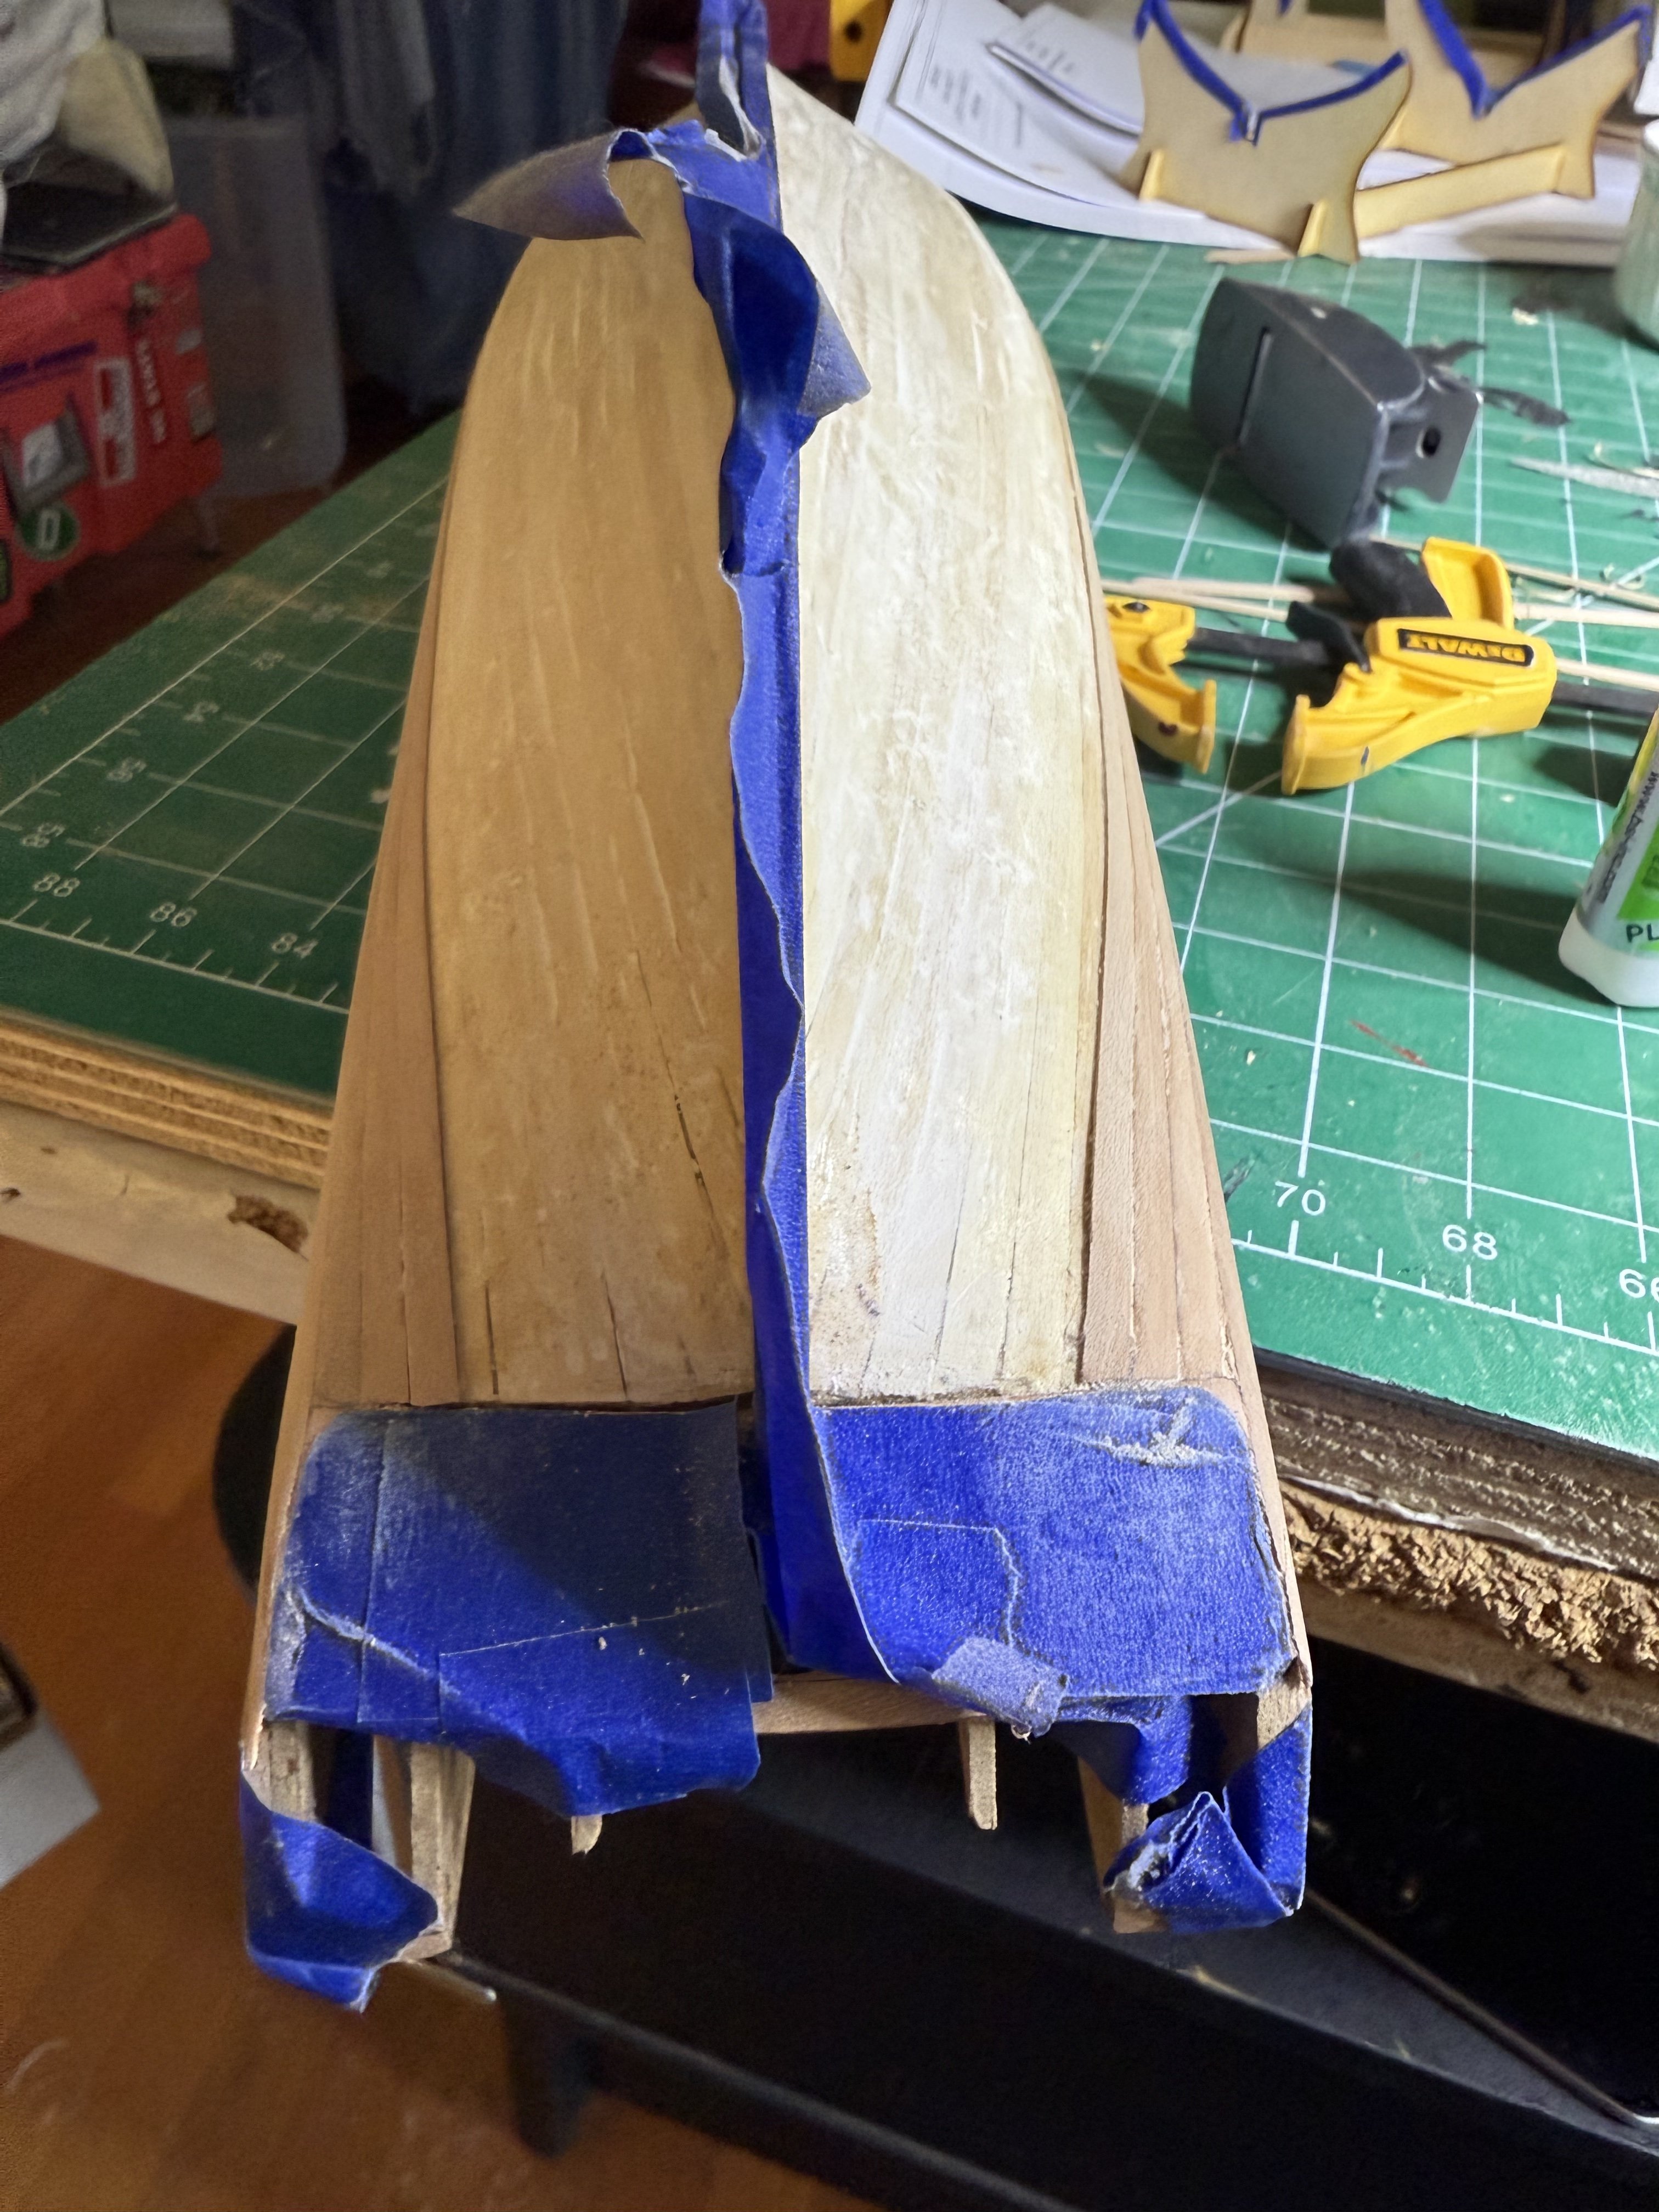
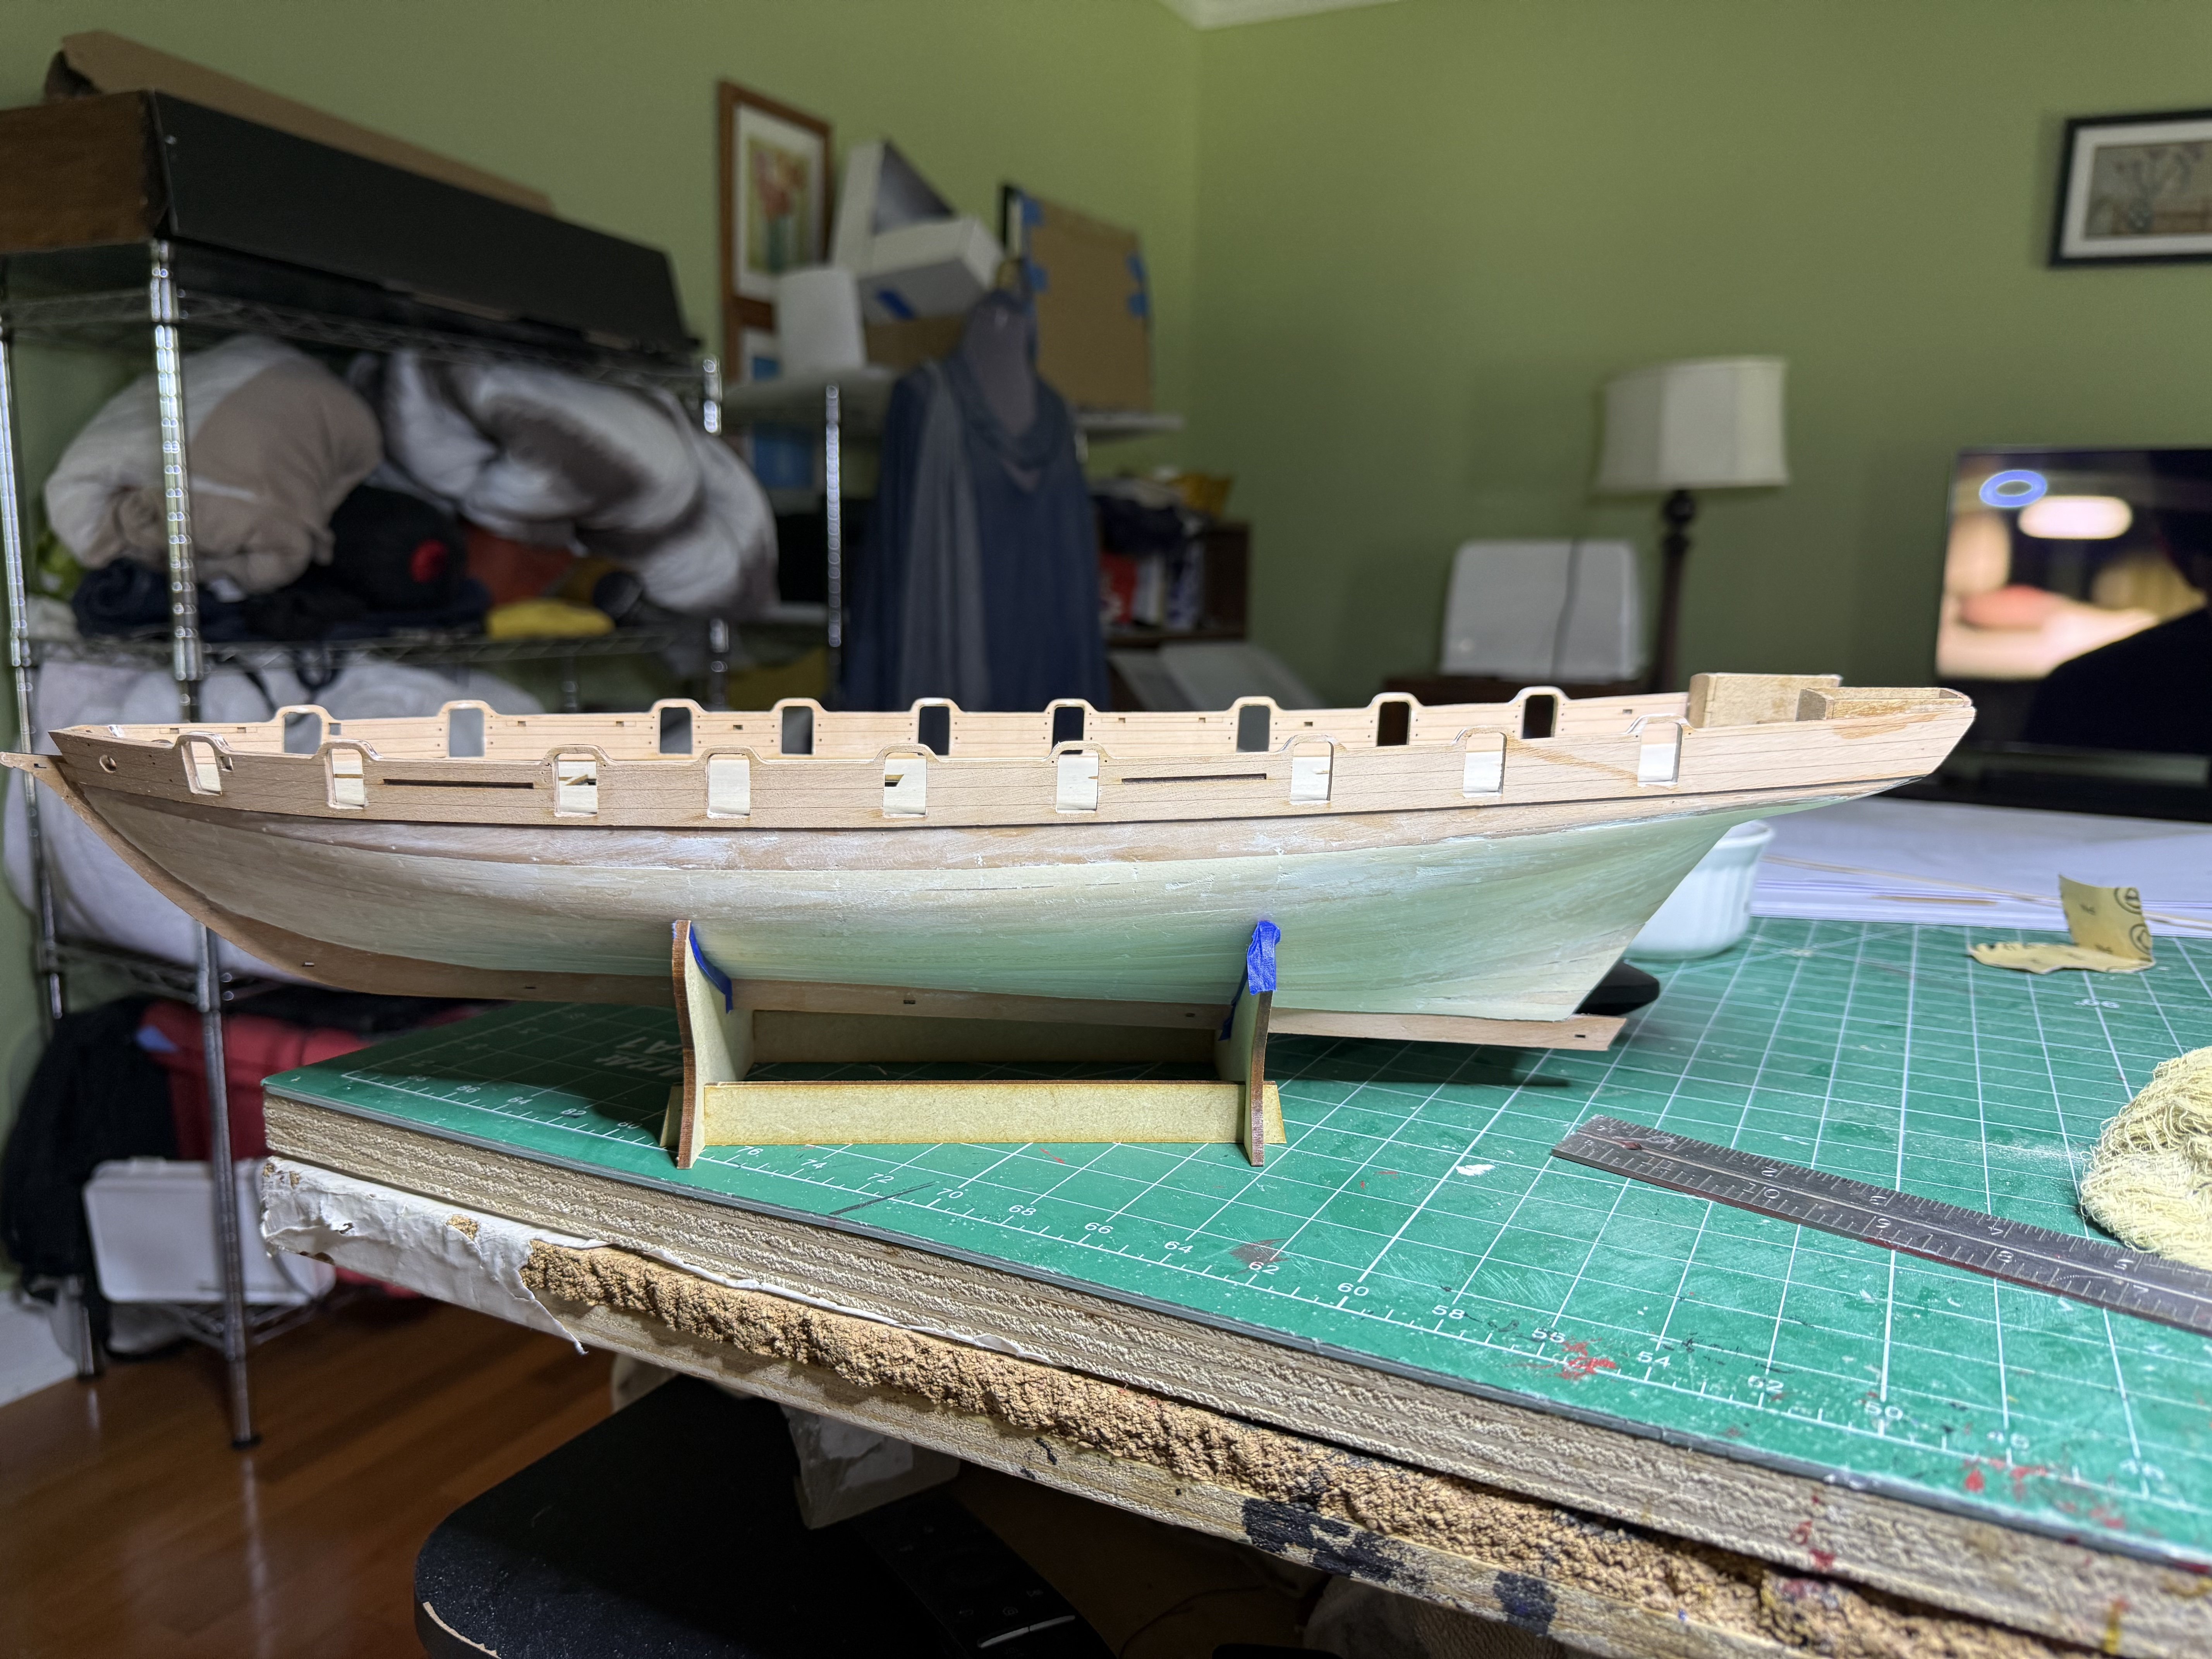
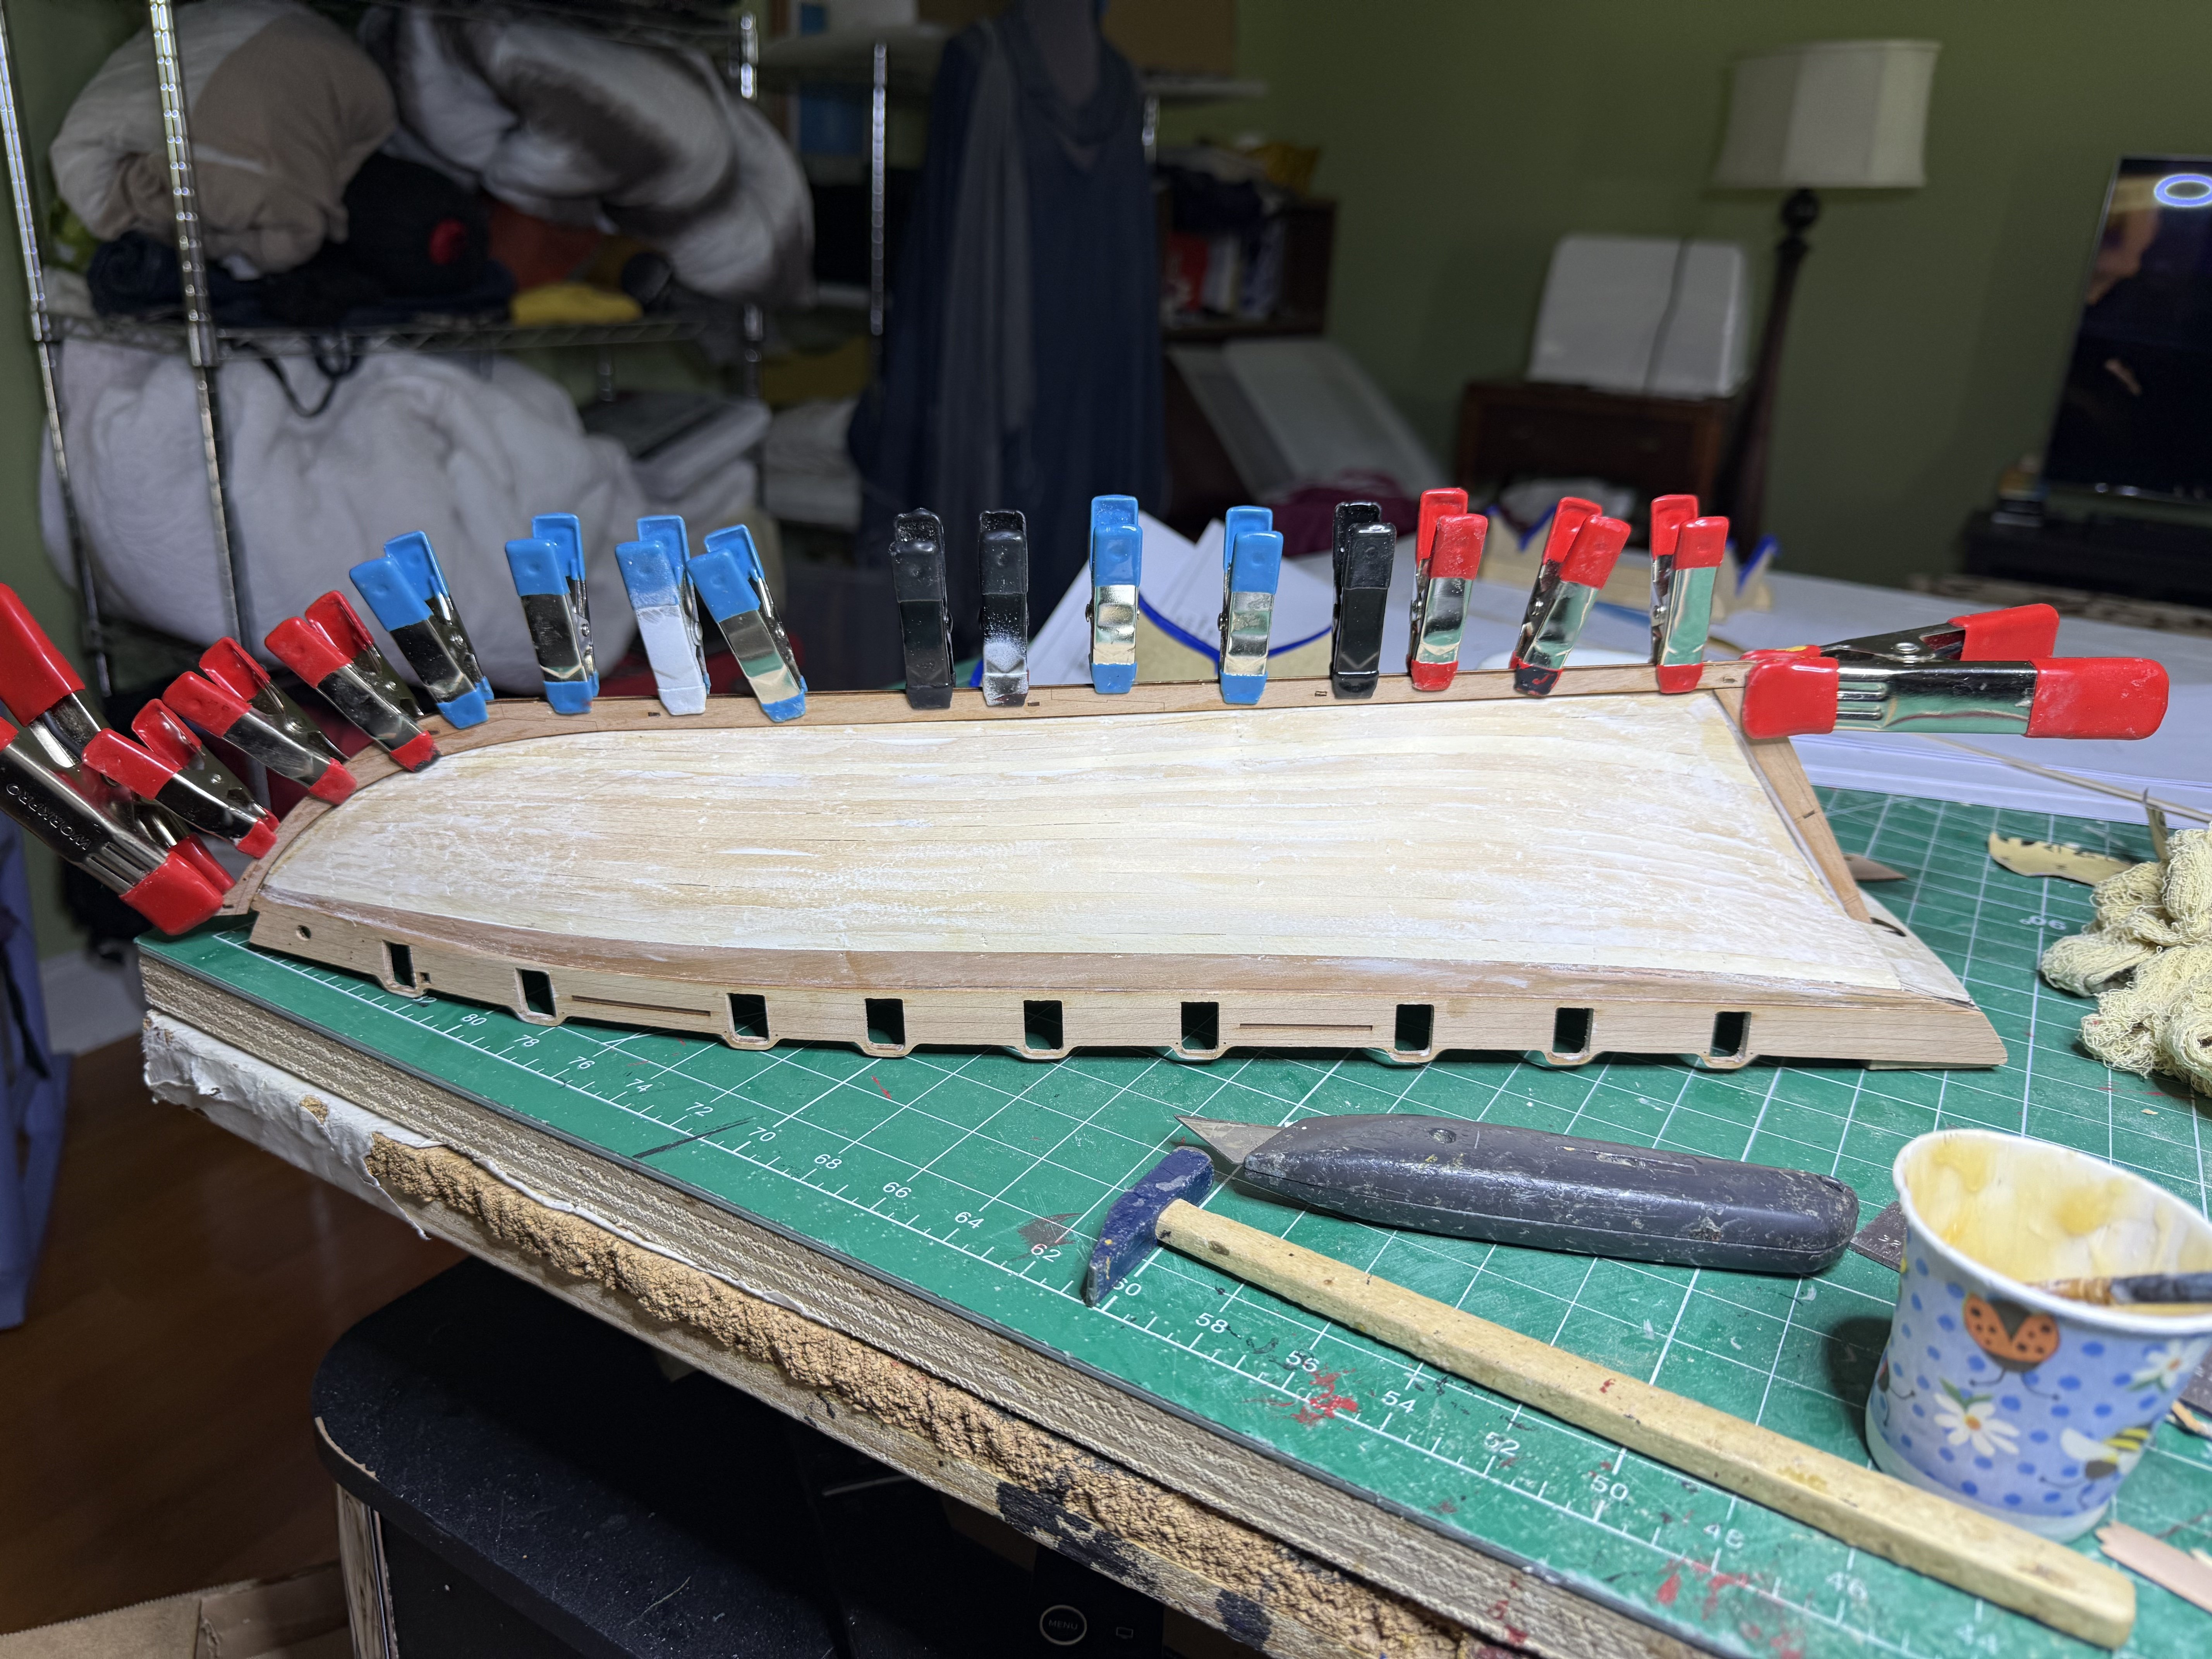
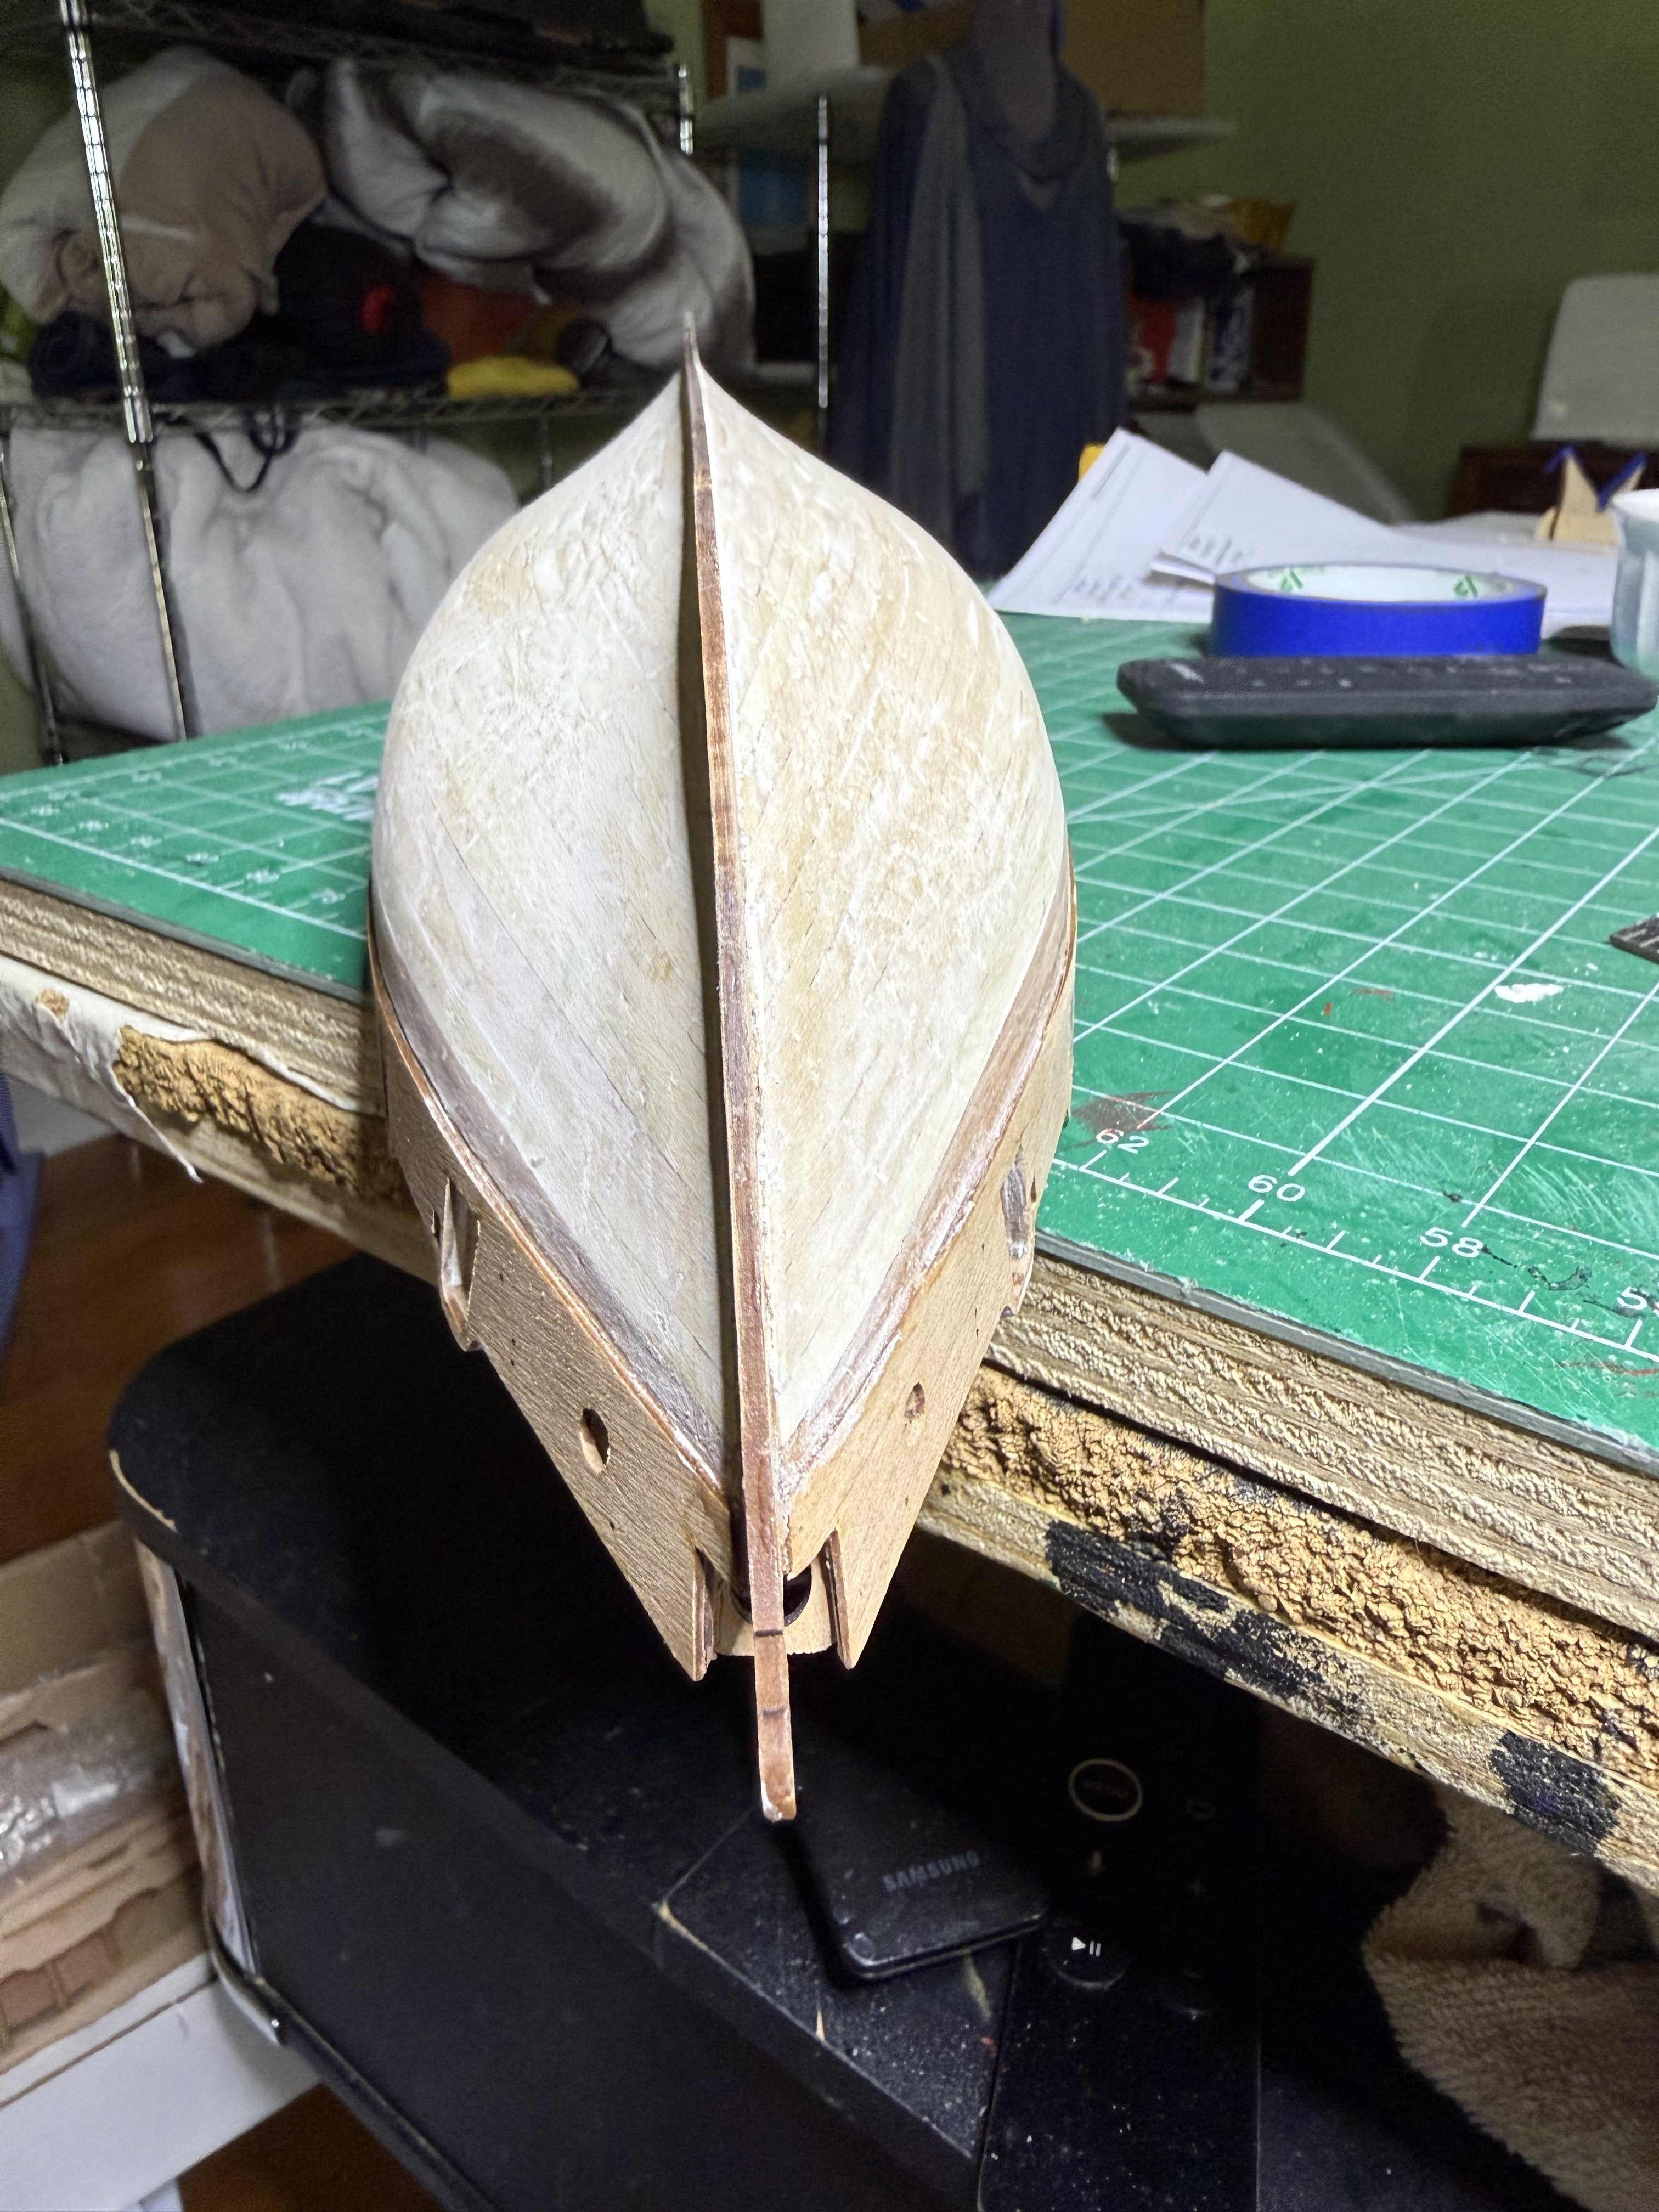
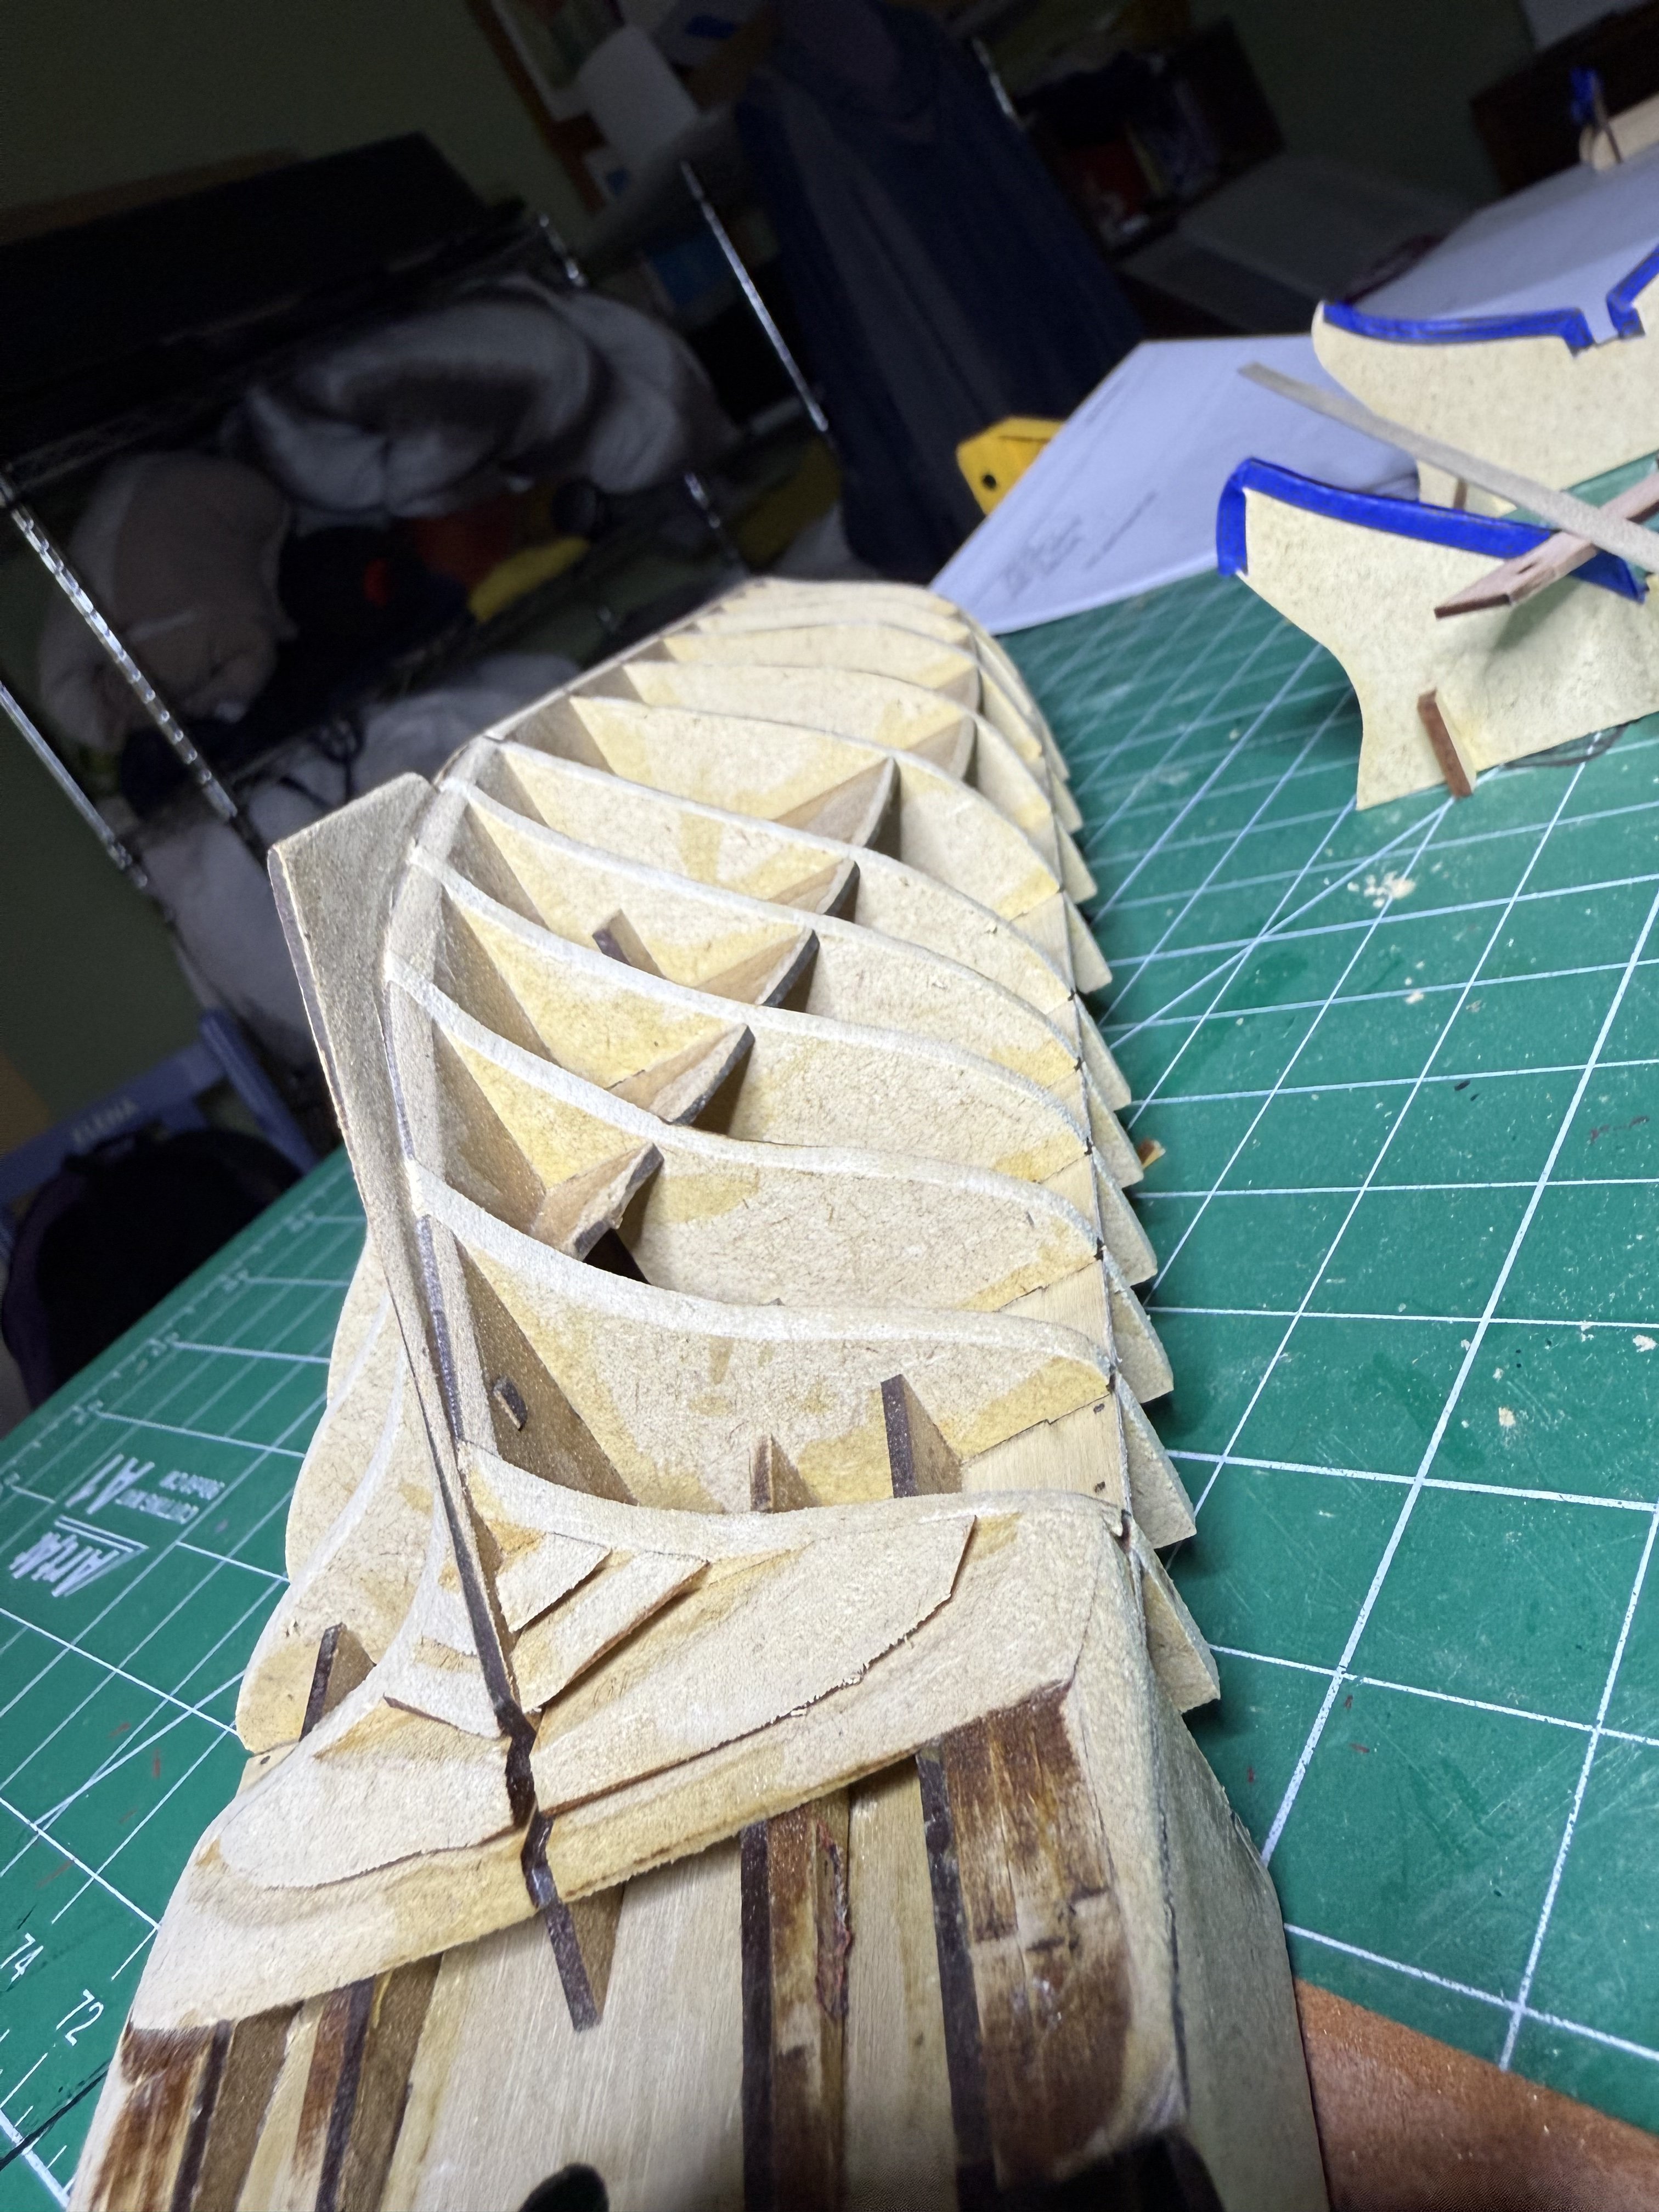
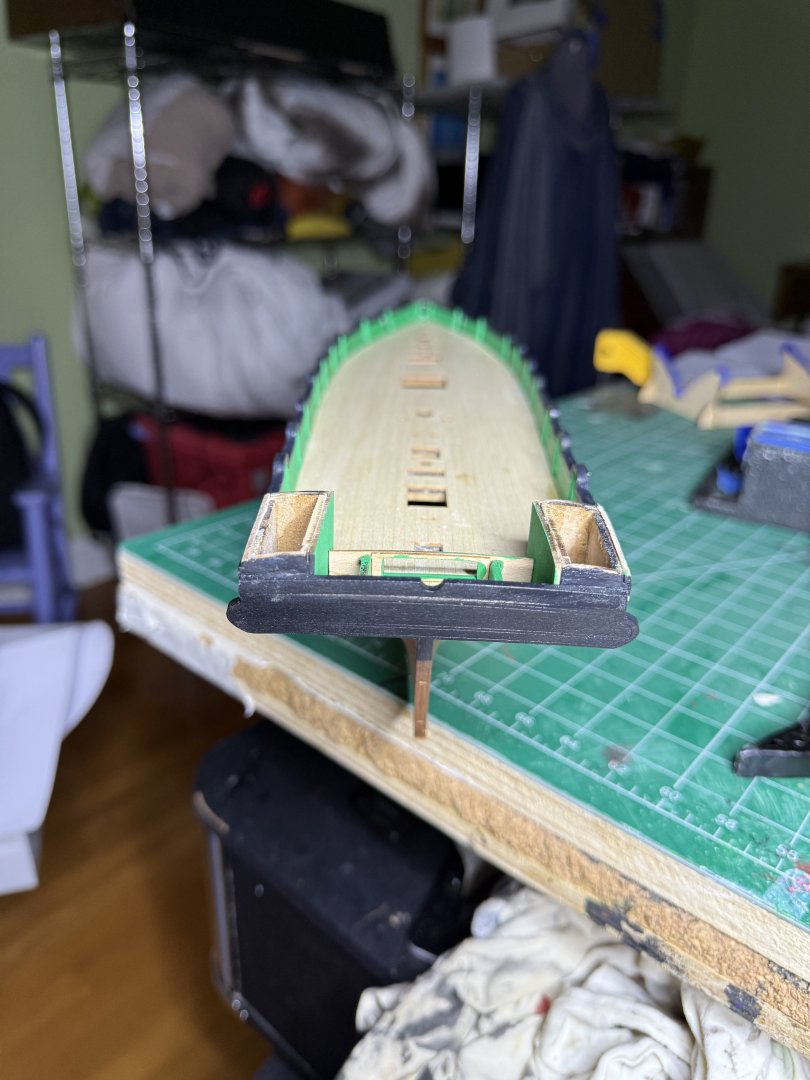
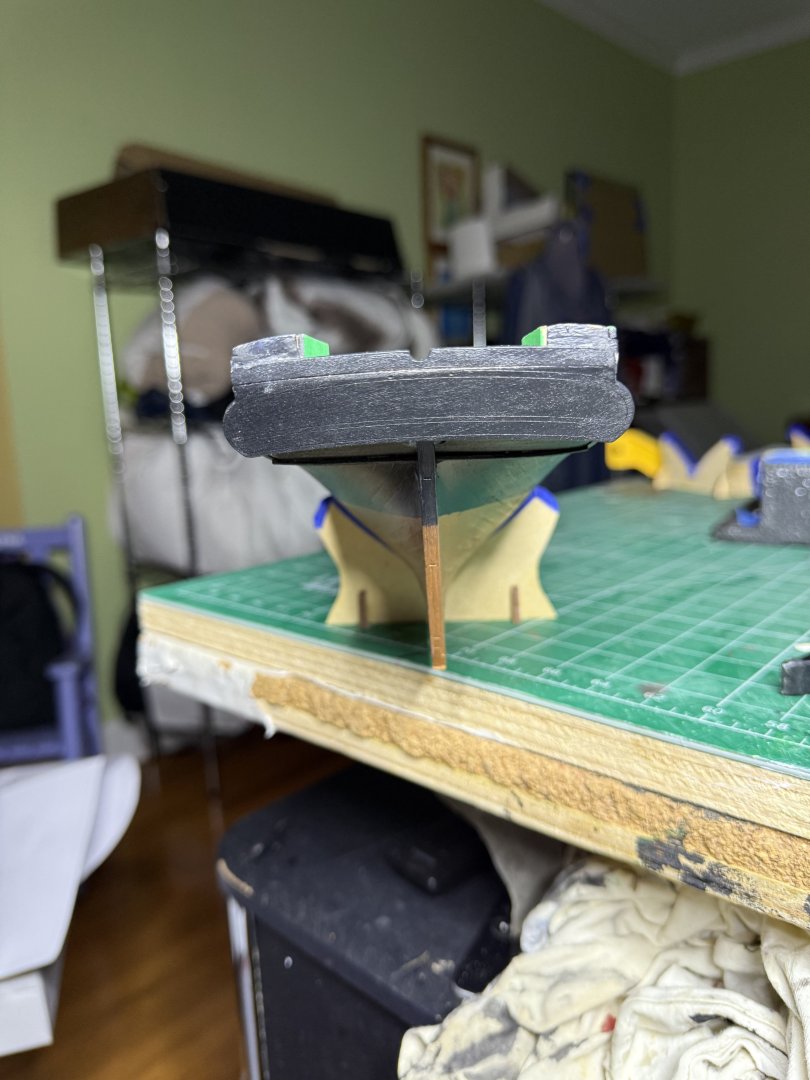
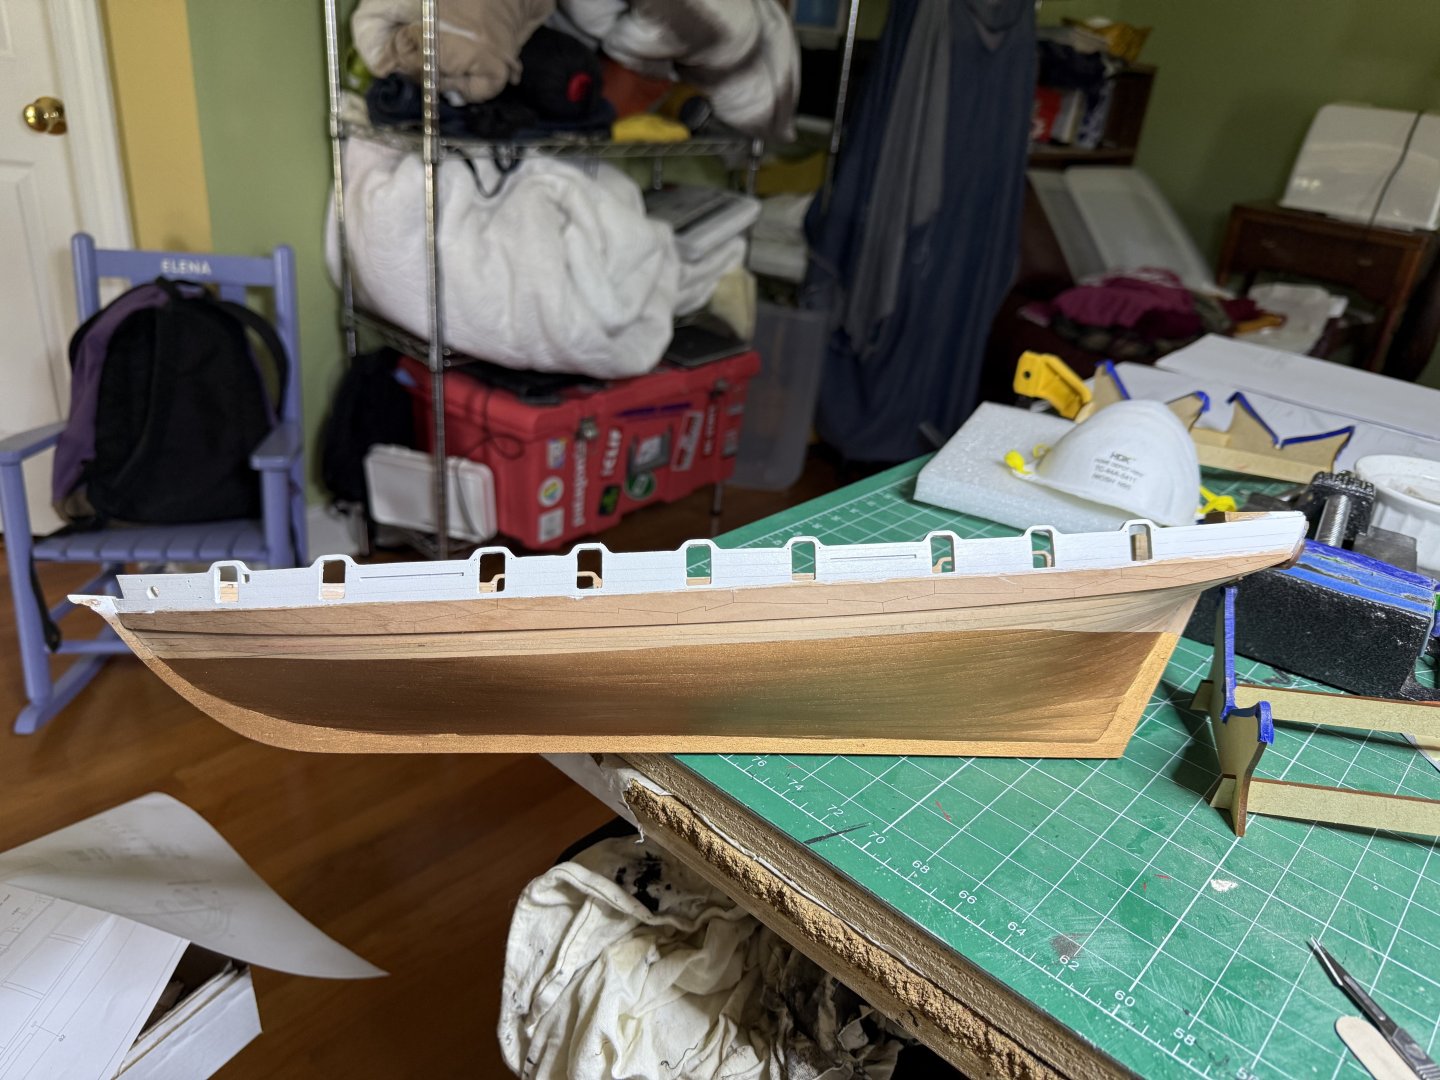
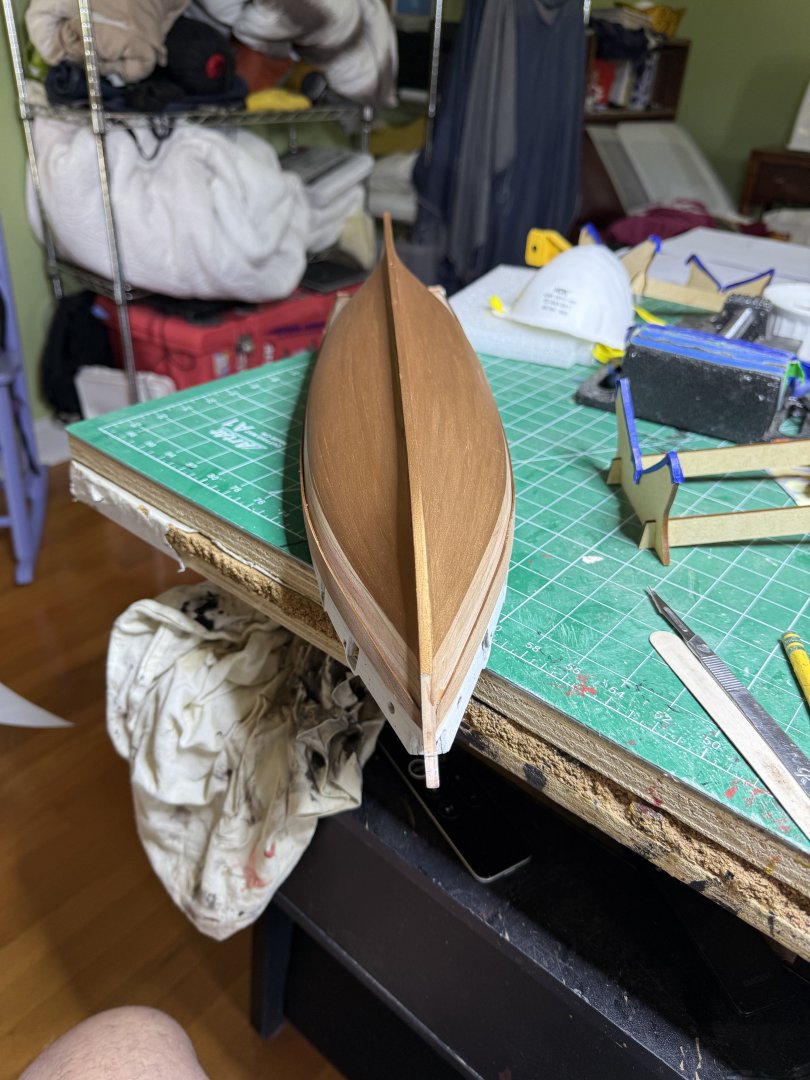
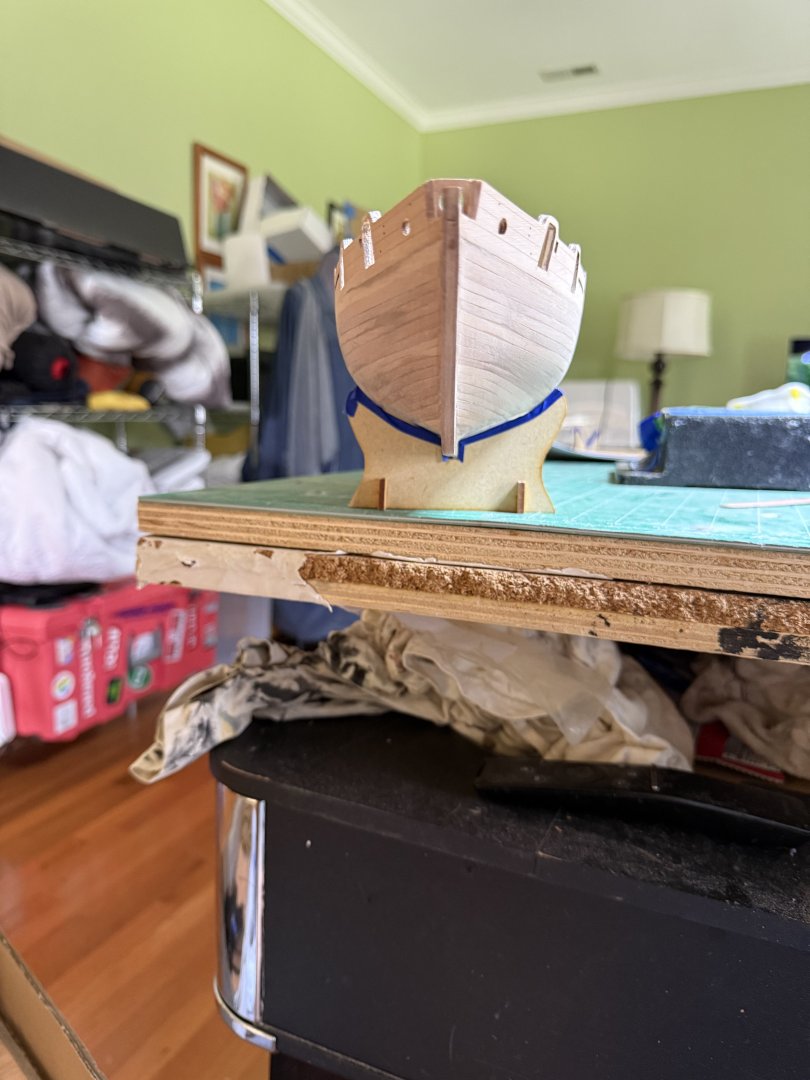
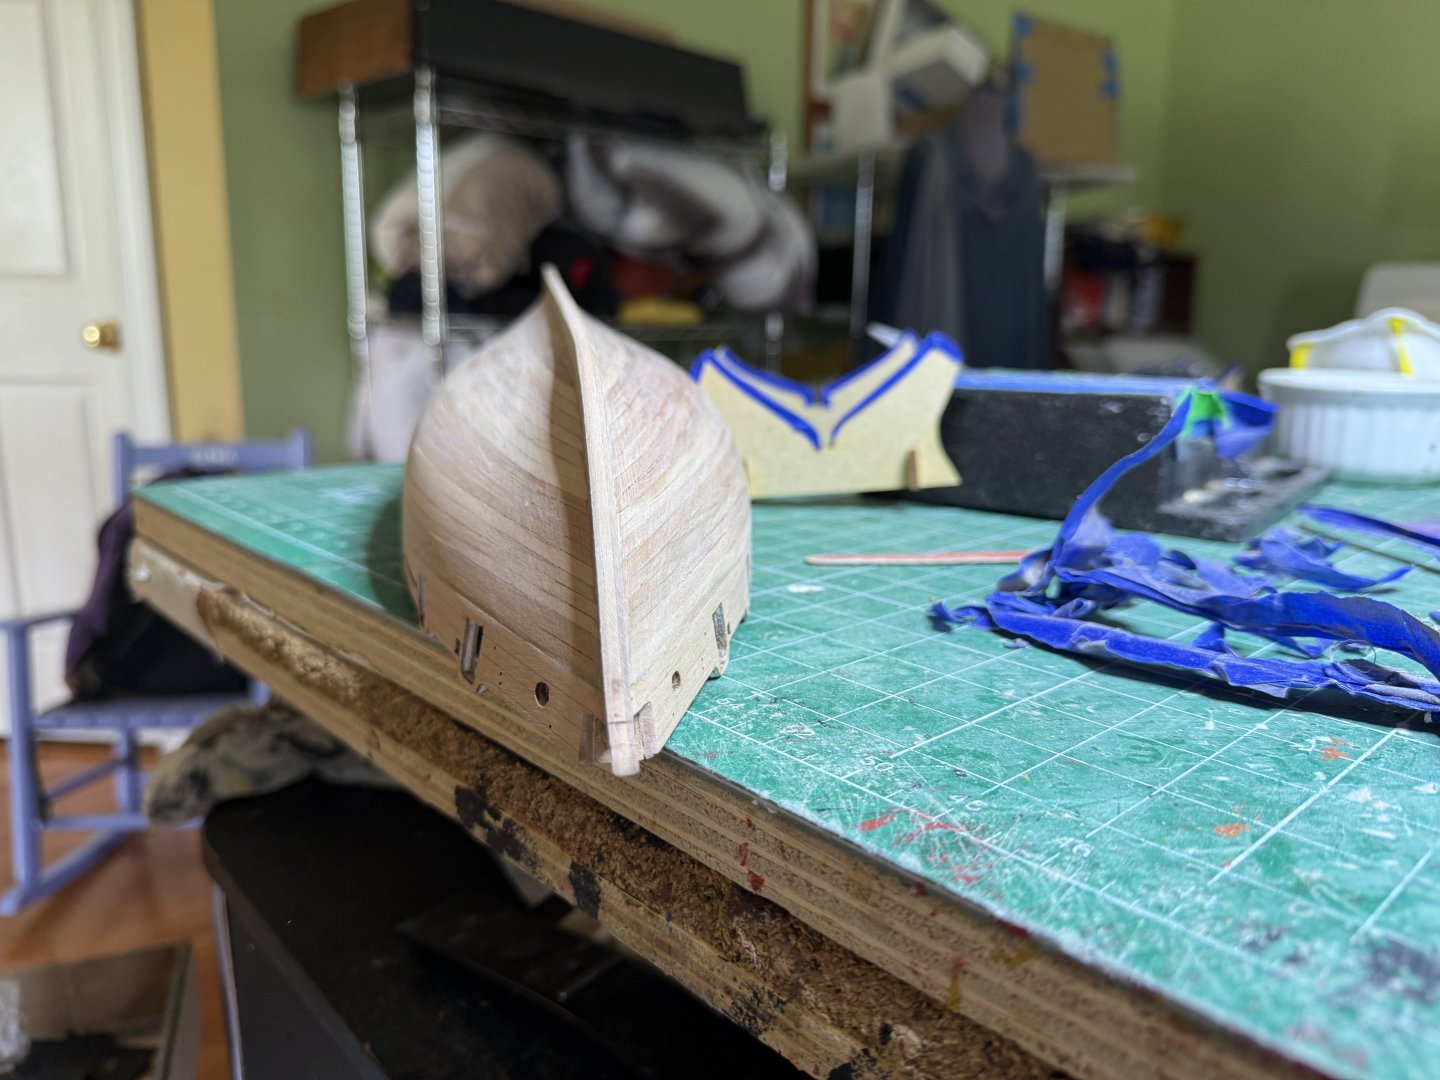
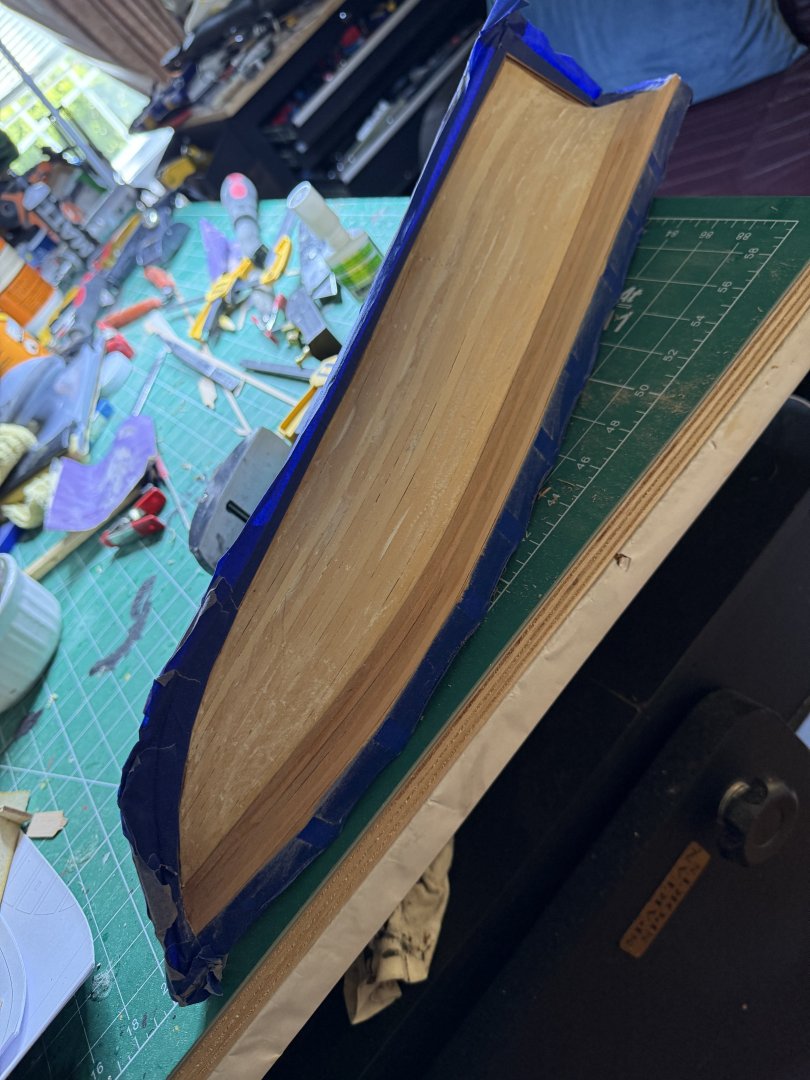
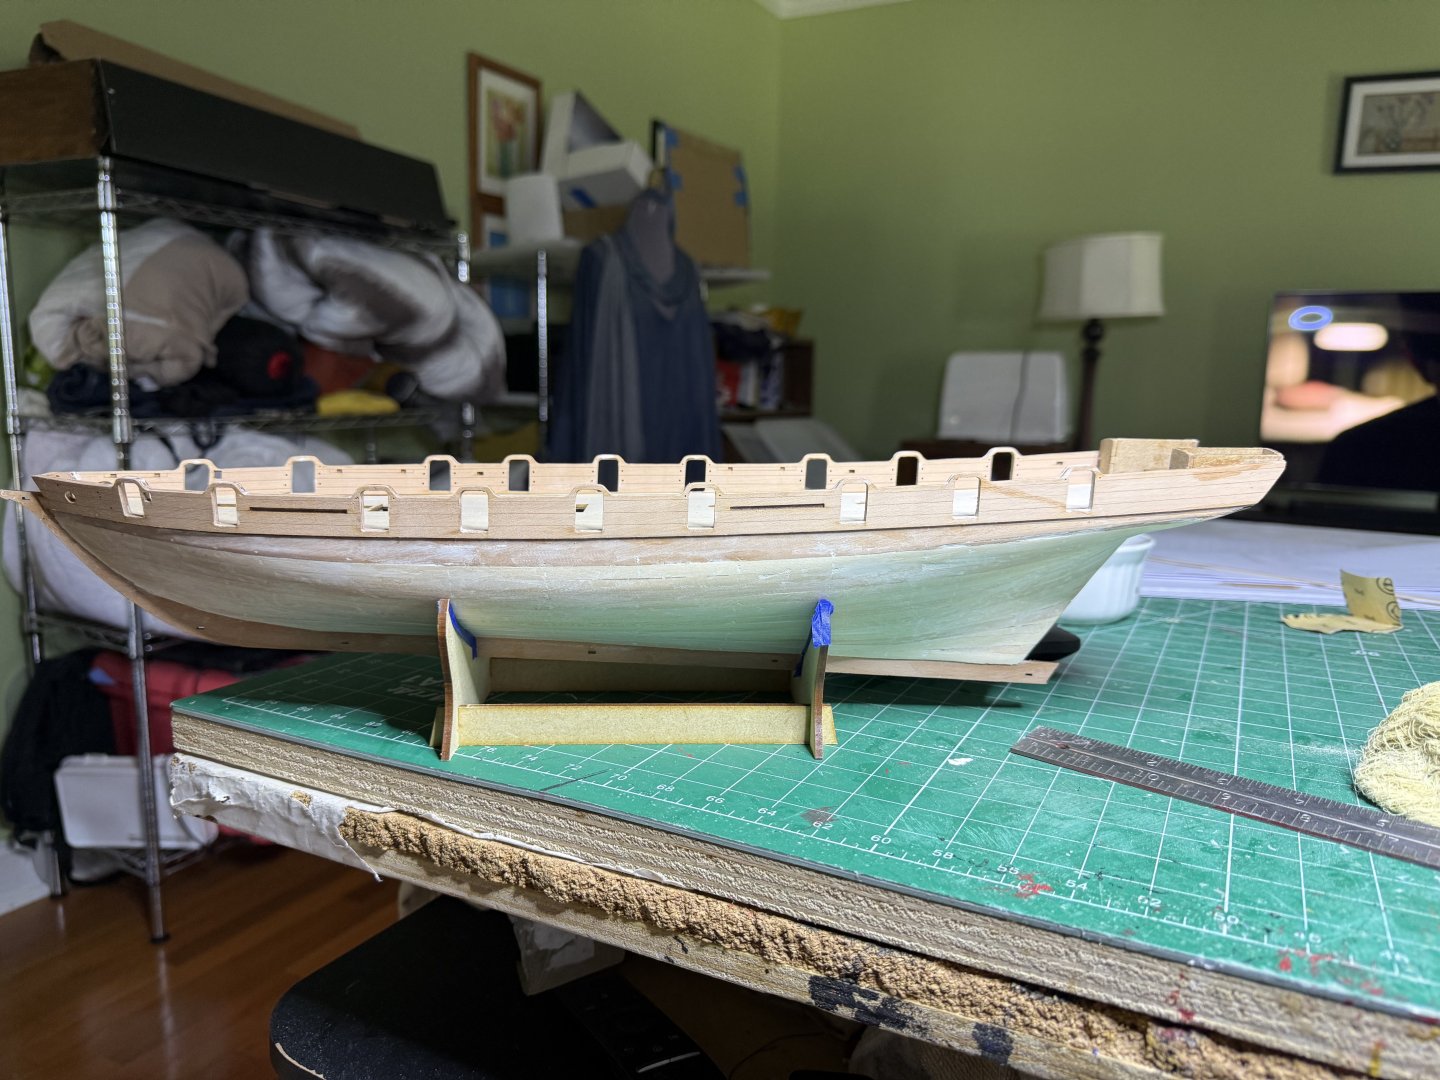
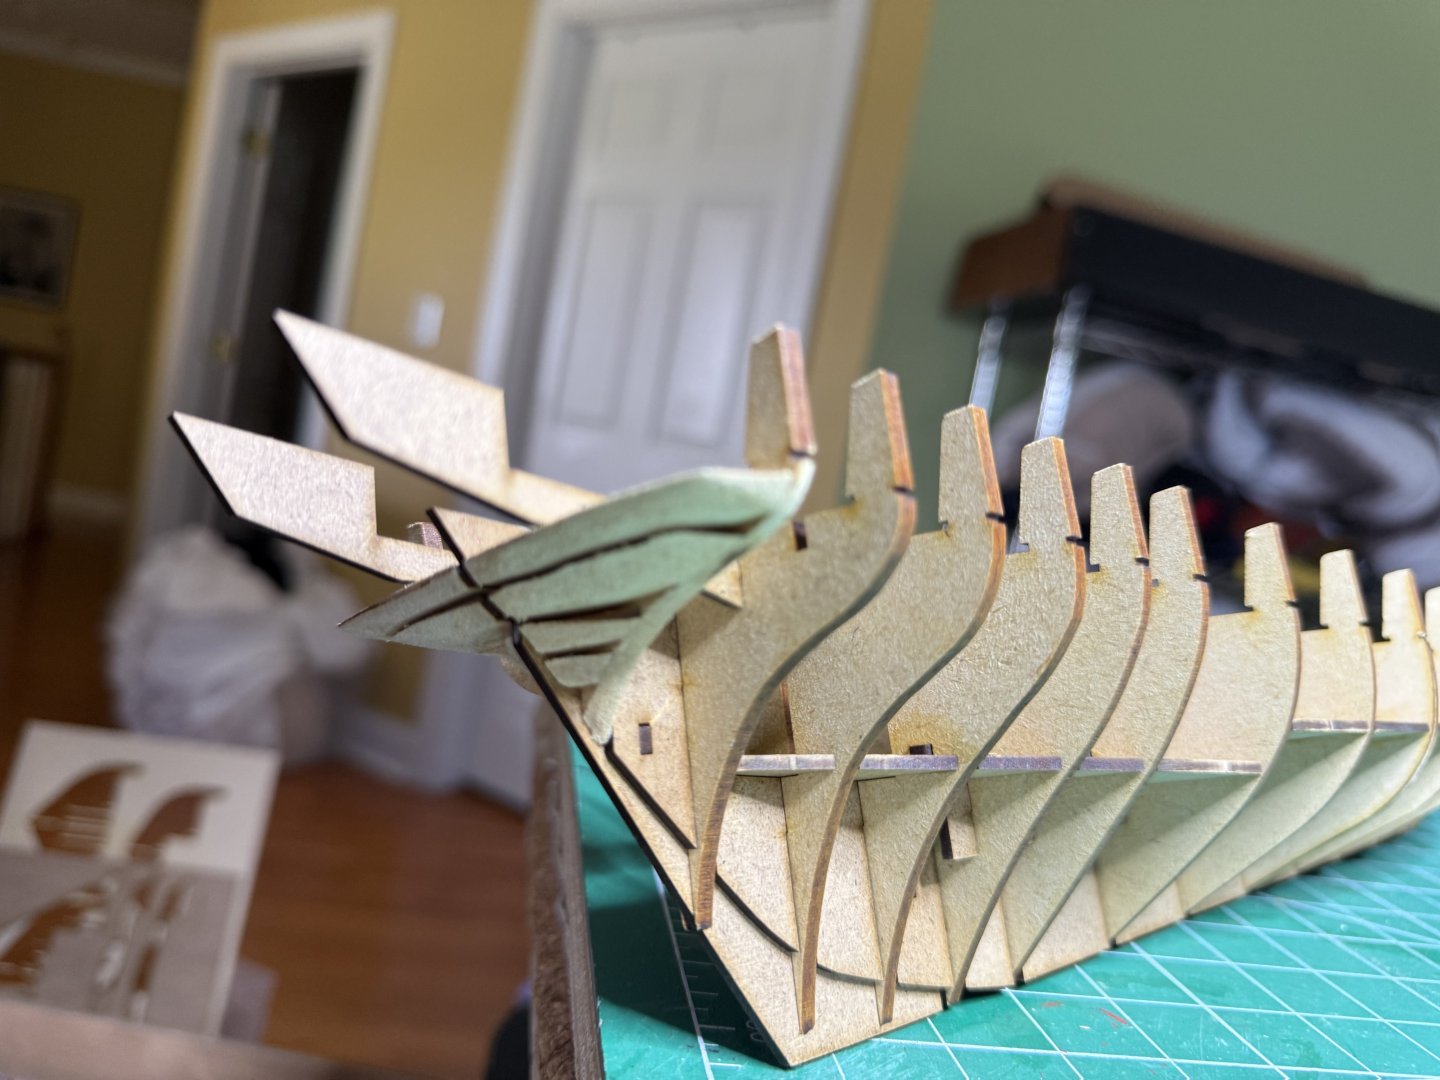
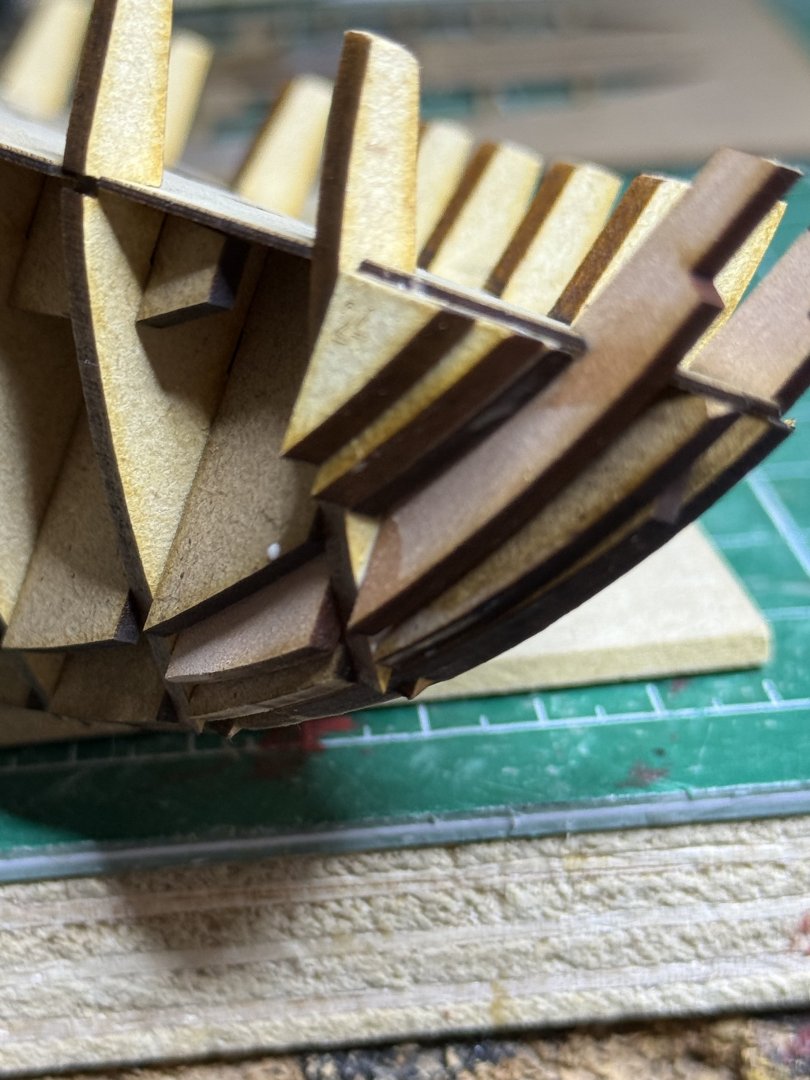
So today I had at it with a hand sander, sand paper and file to fair the hull. Below is one side done compared to the other. You can see the bow requires a lot of work Now after both sides done Lastly, the false keel added


- 52 replies
-
- 8
-
-
- Grecian
- Vanguard Models
- (and 1 more)
-
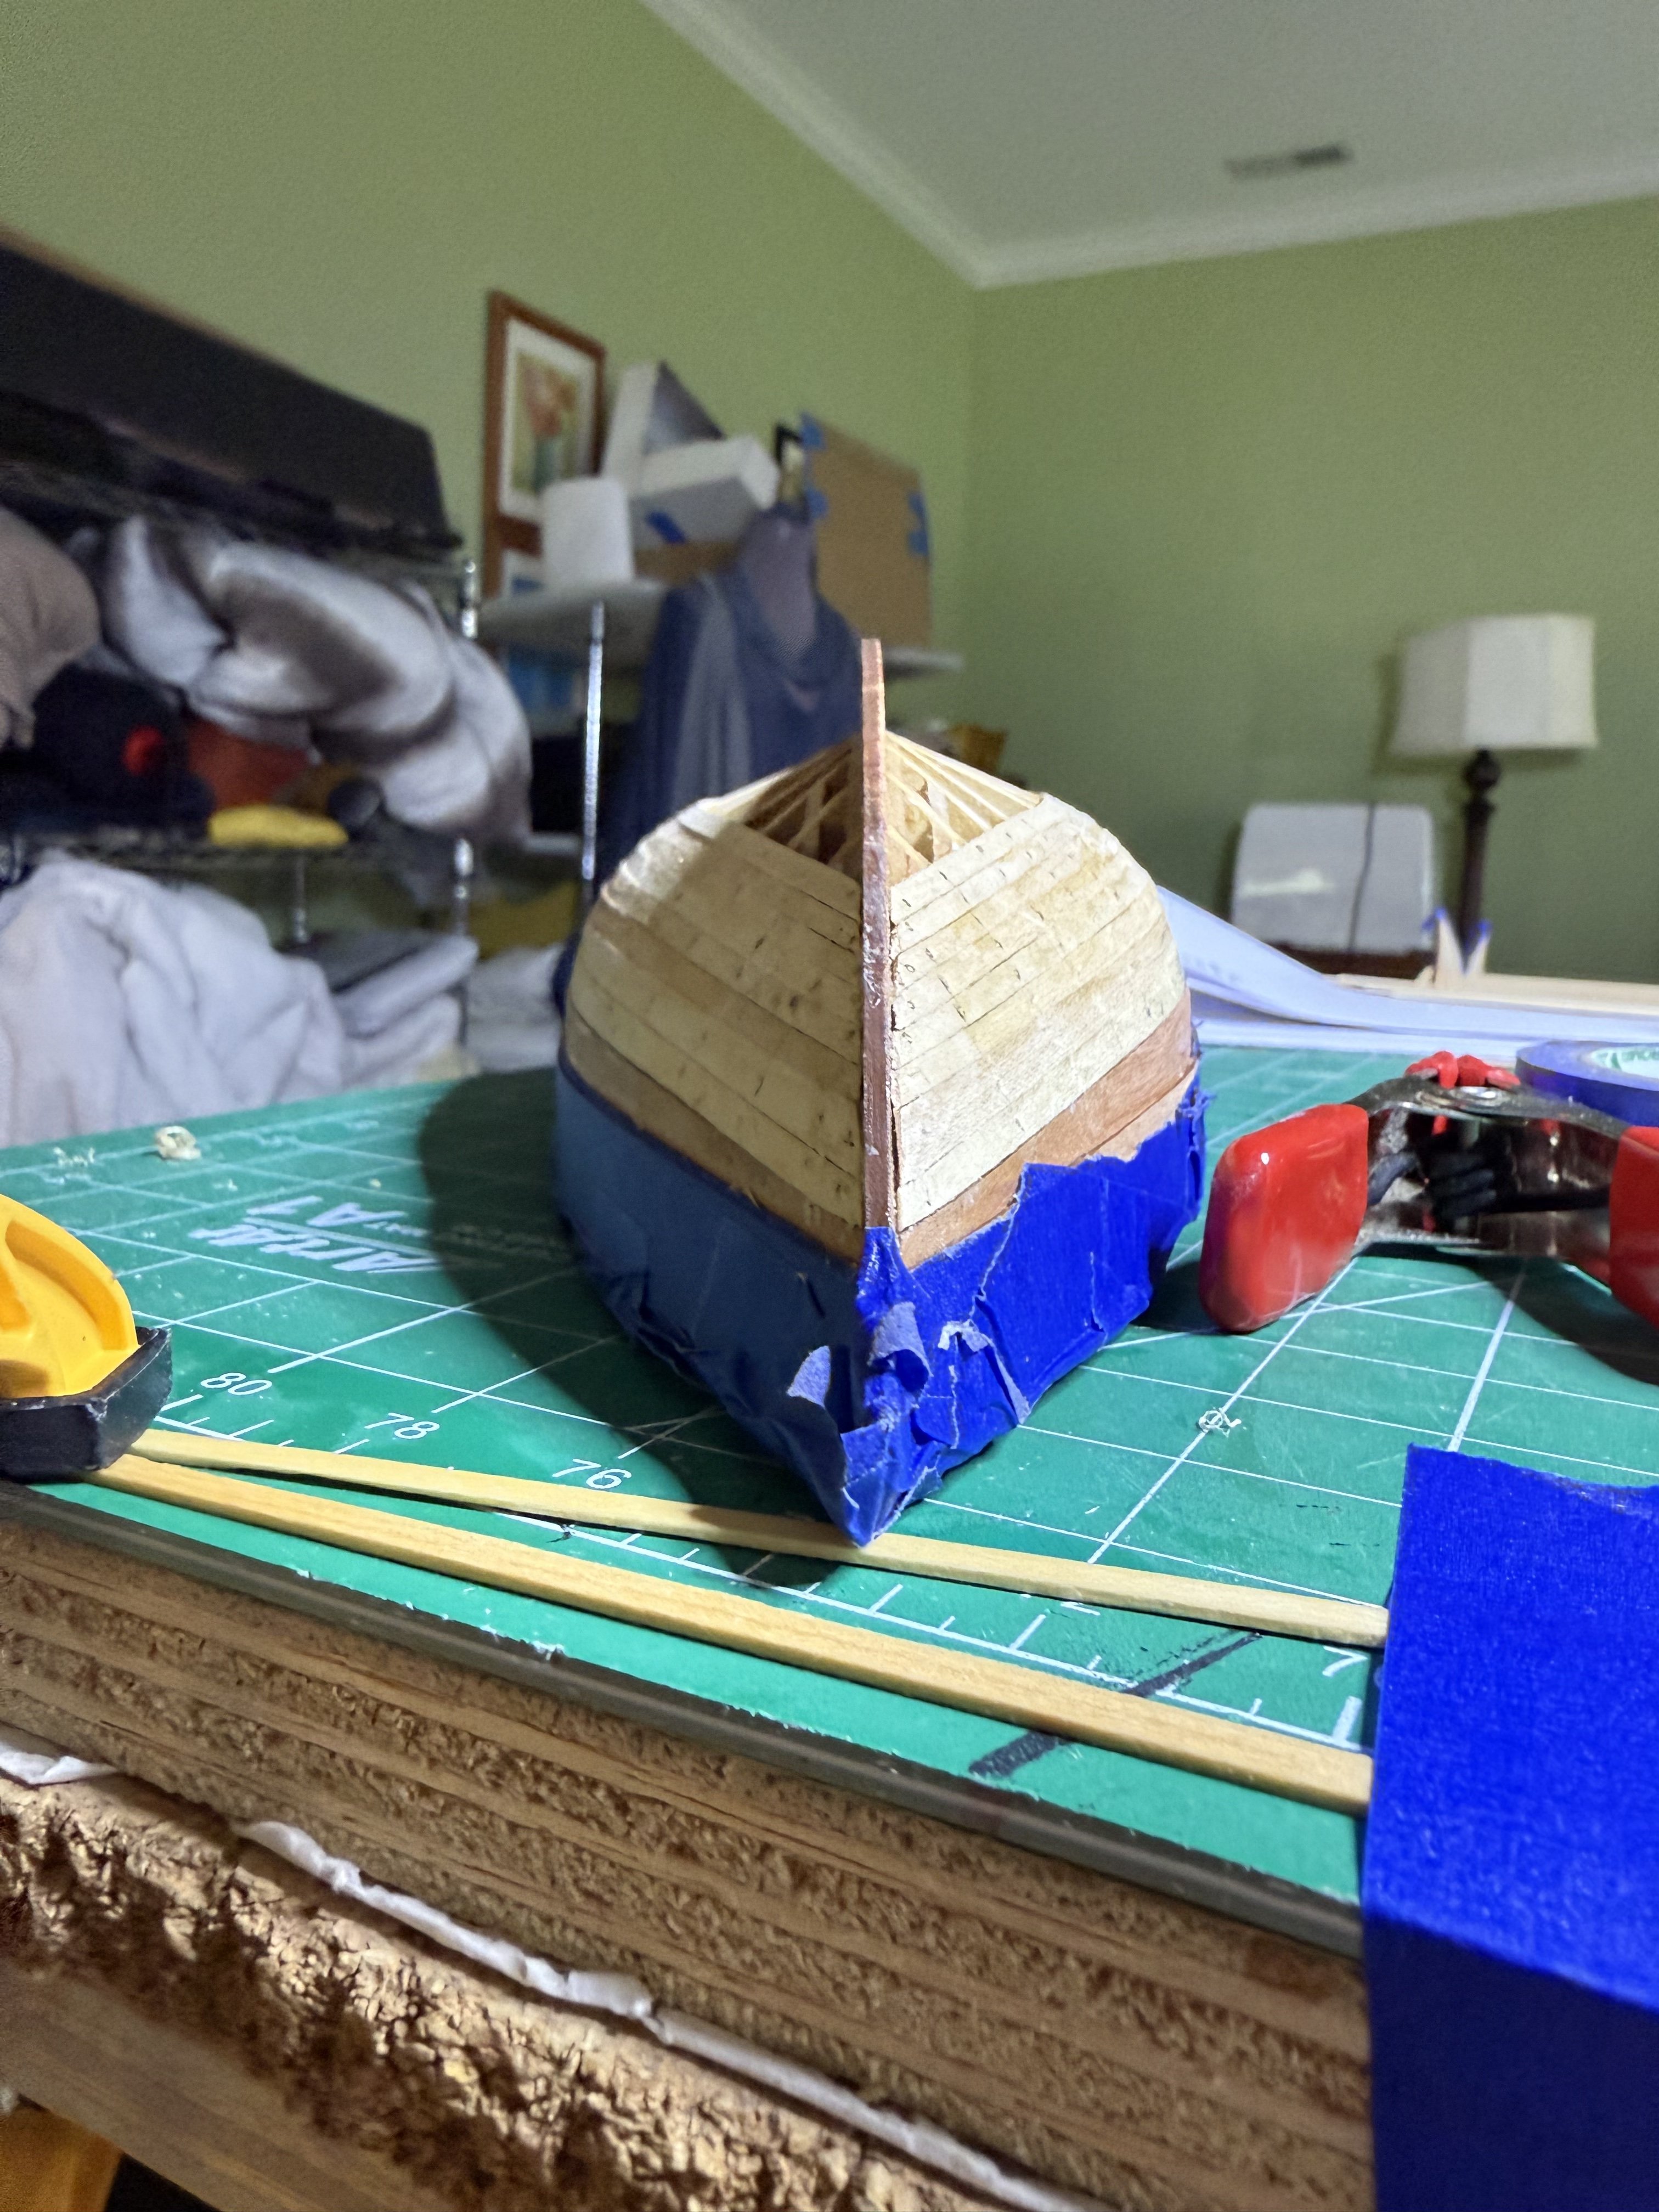
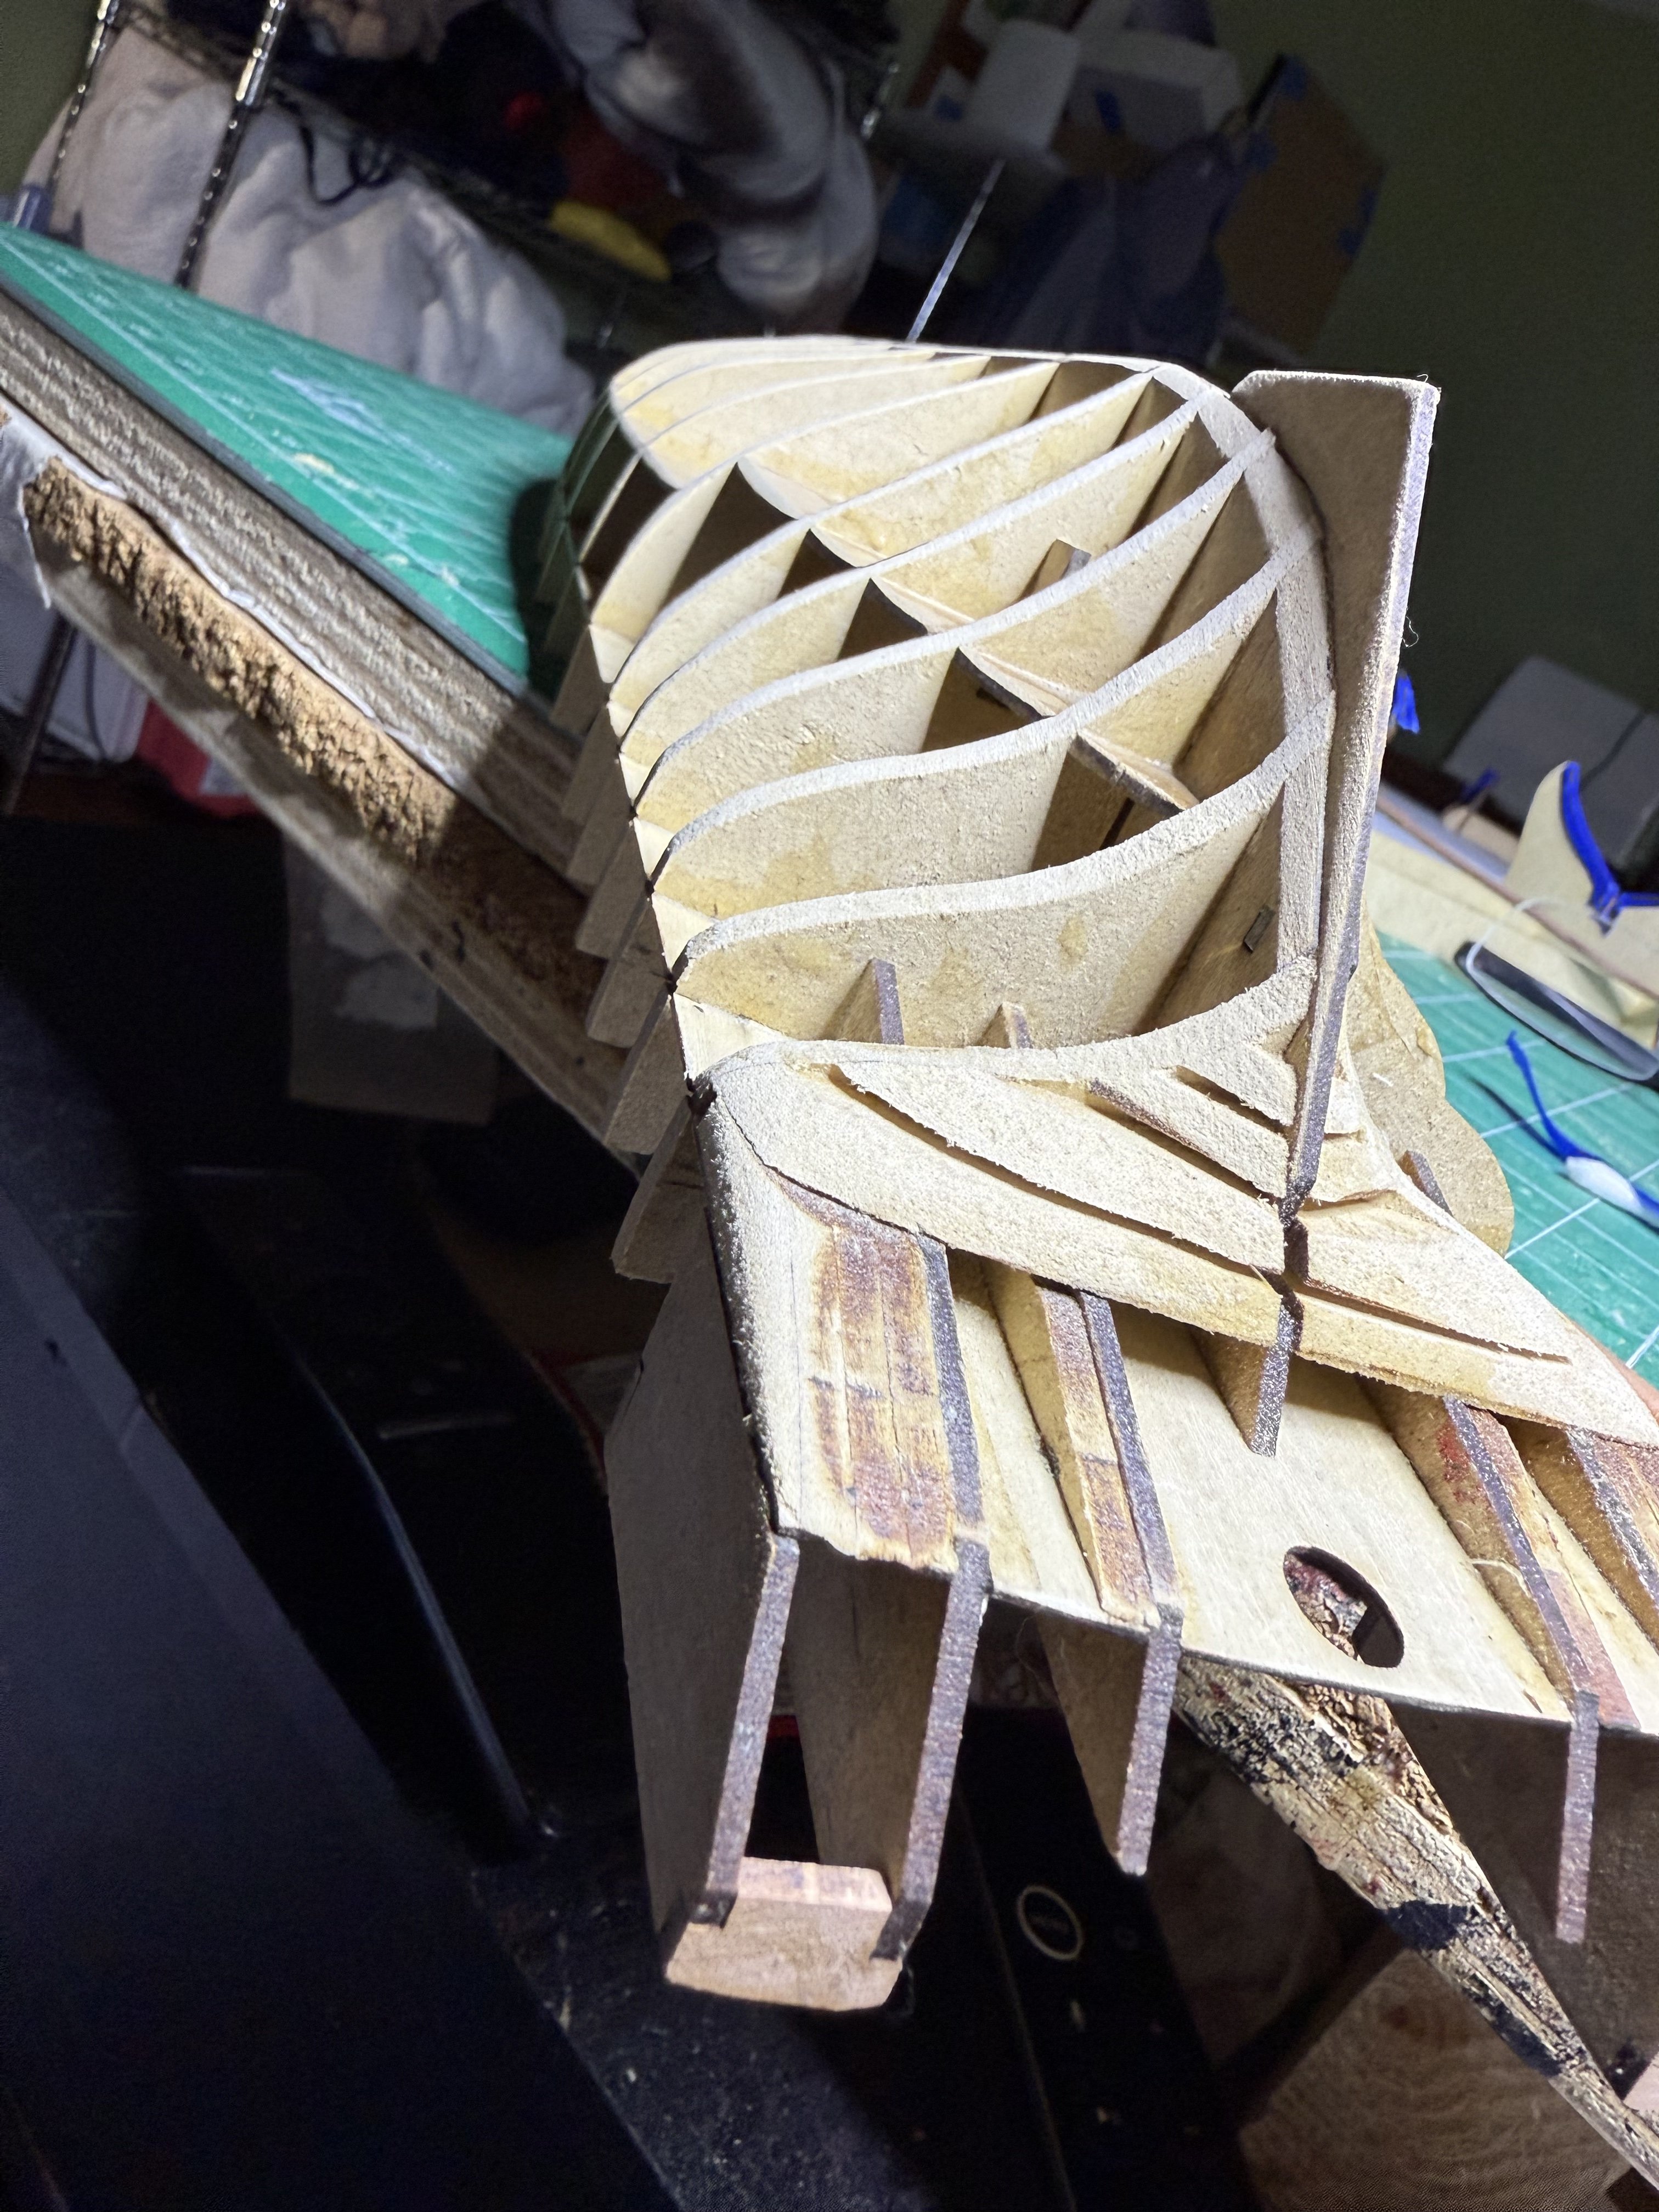
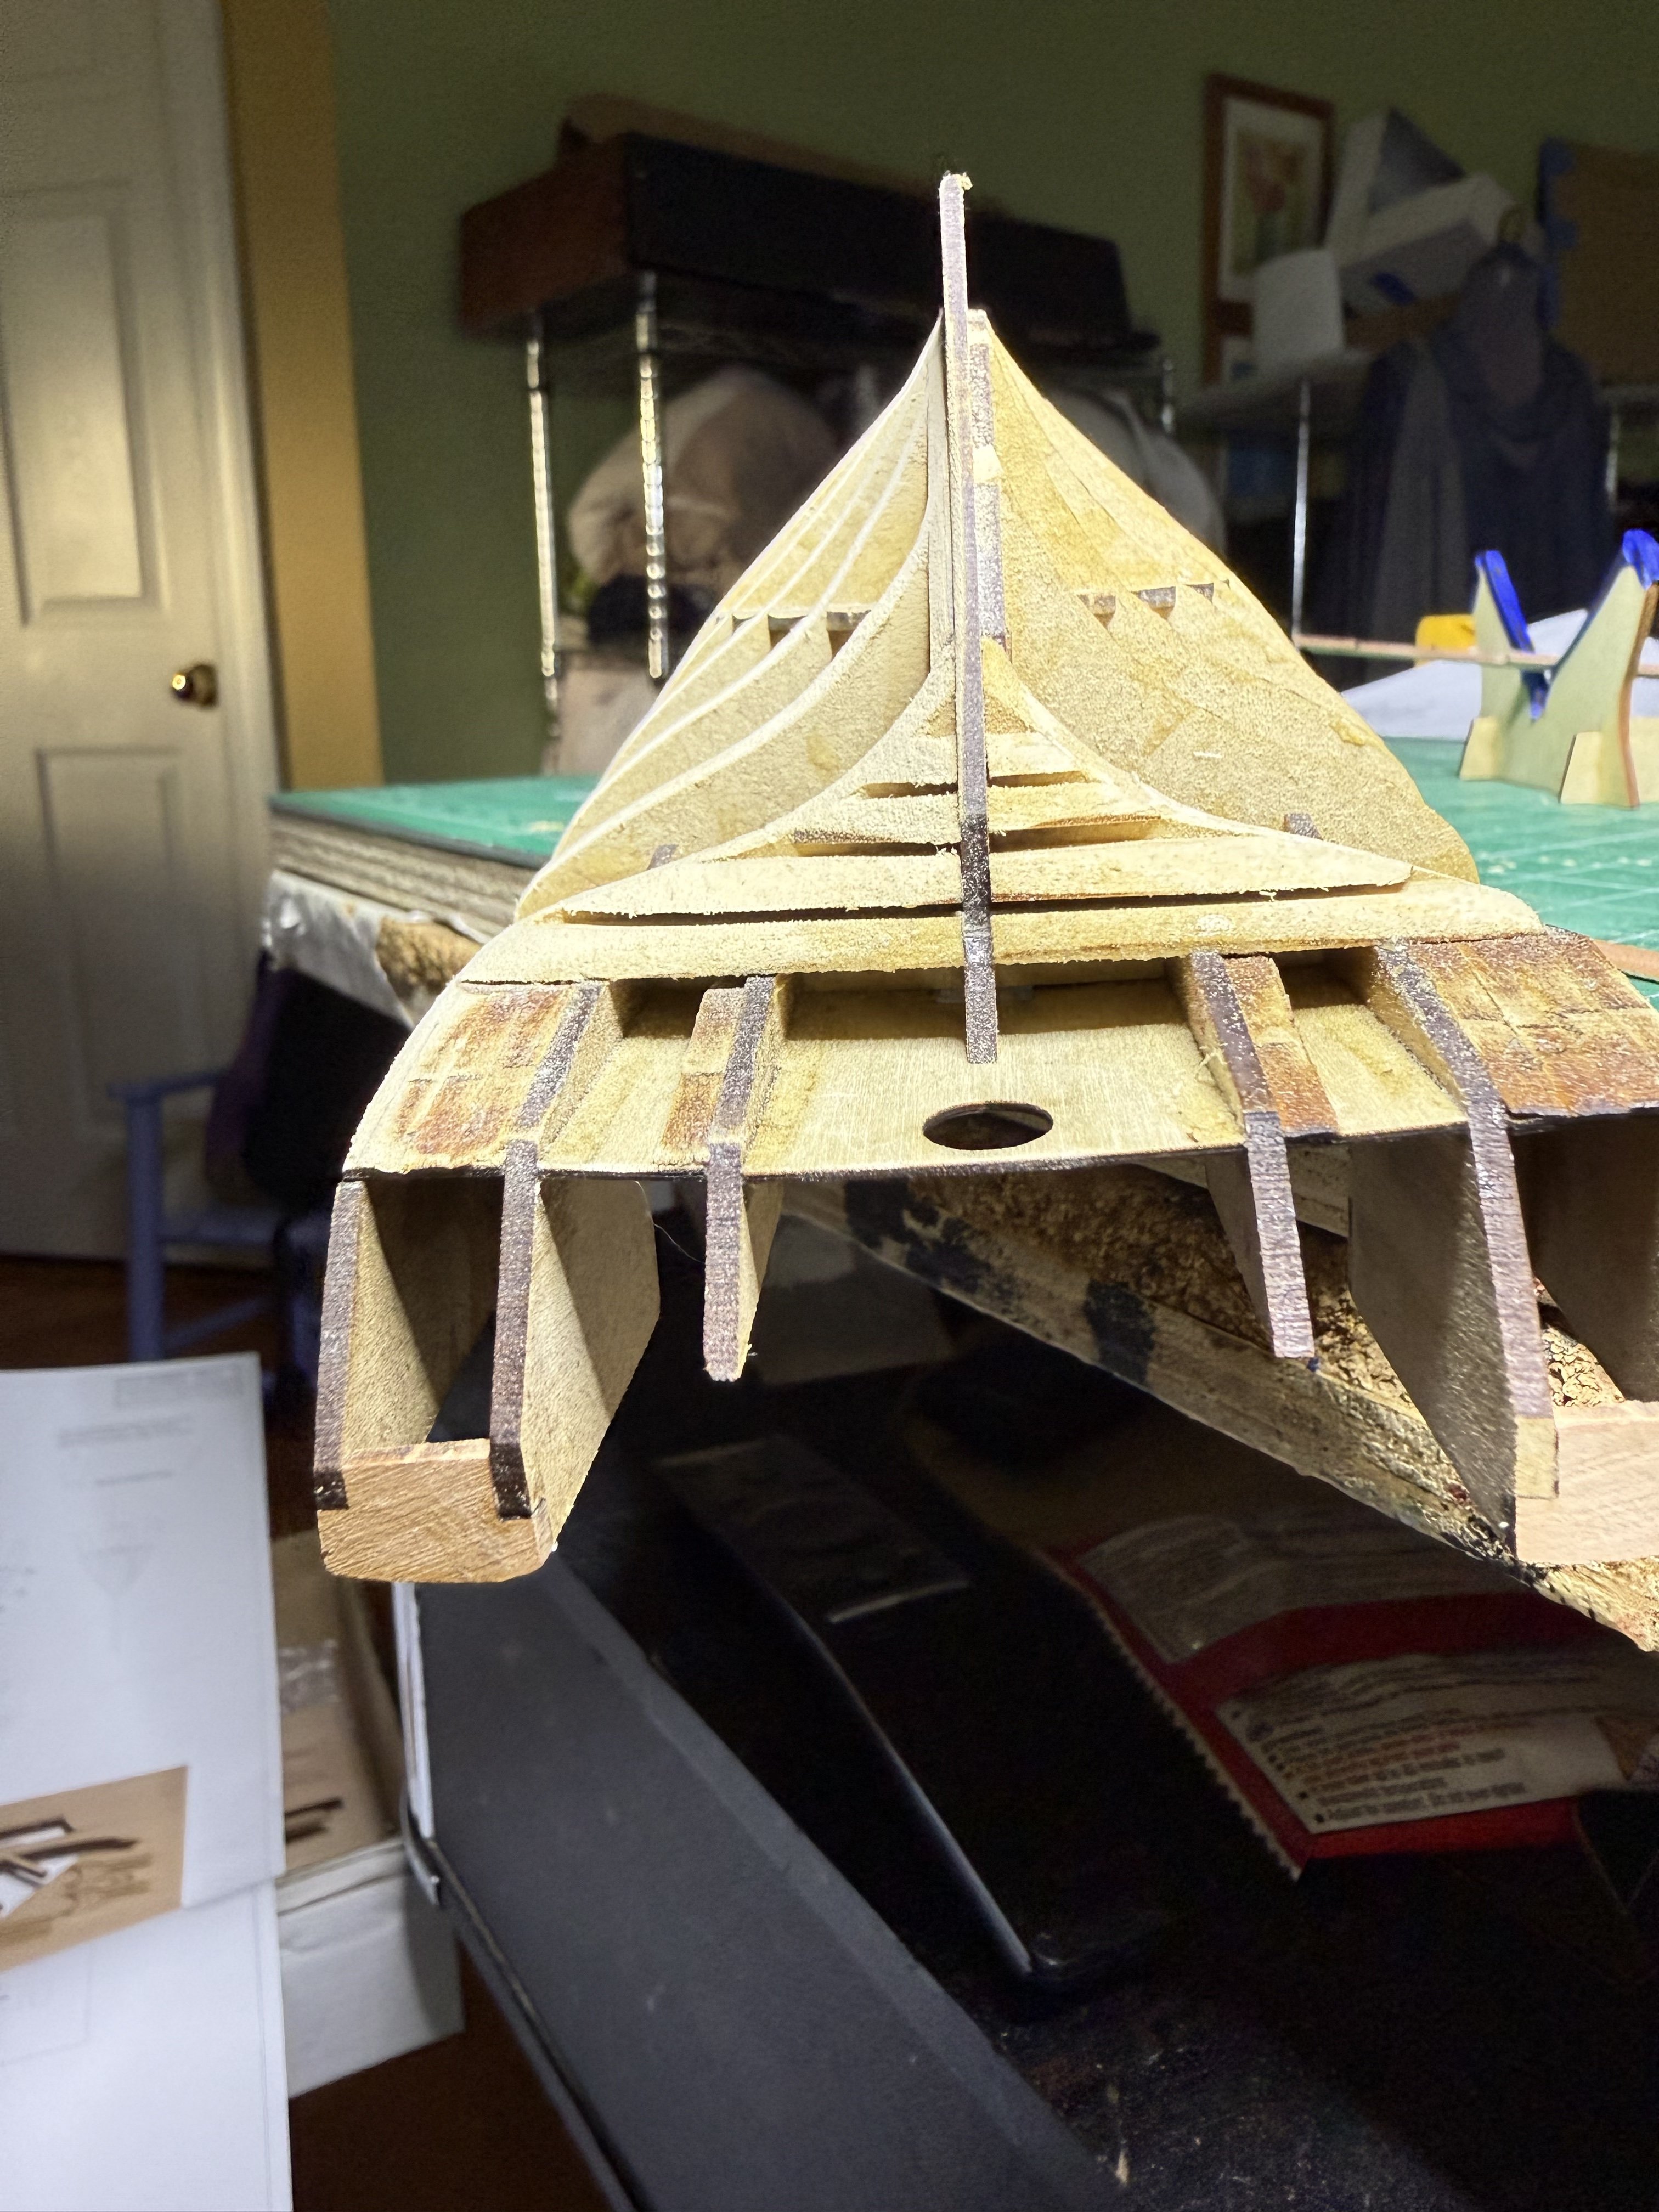
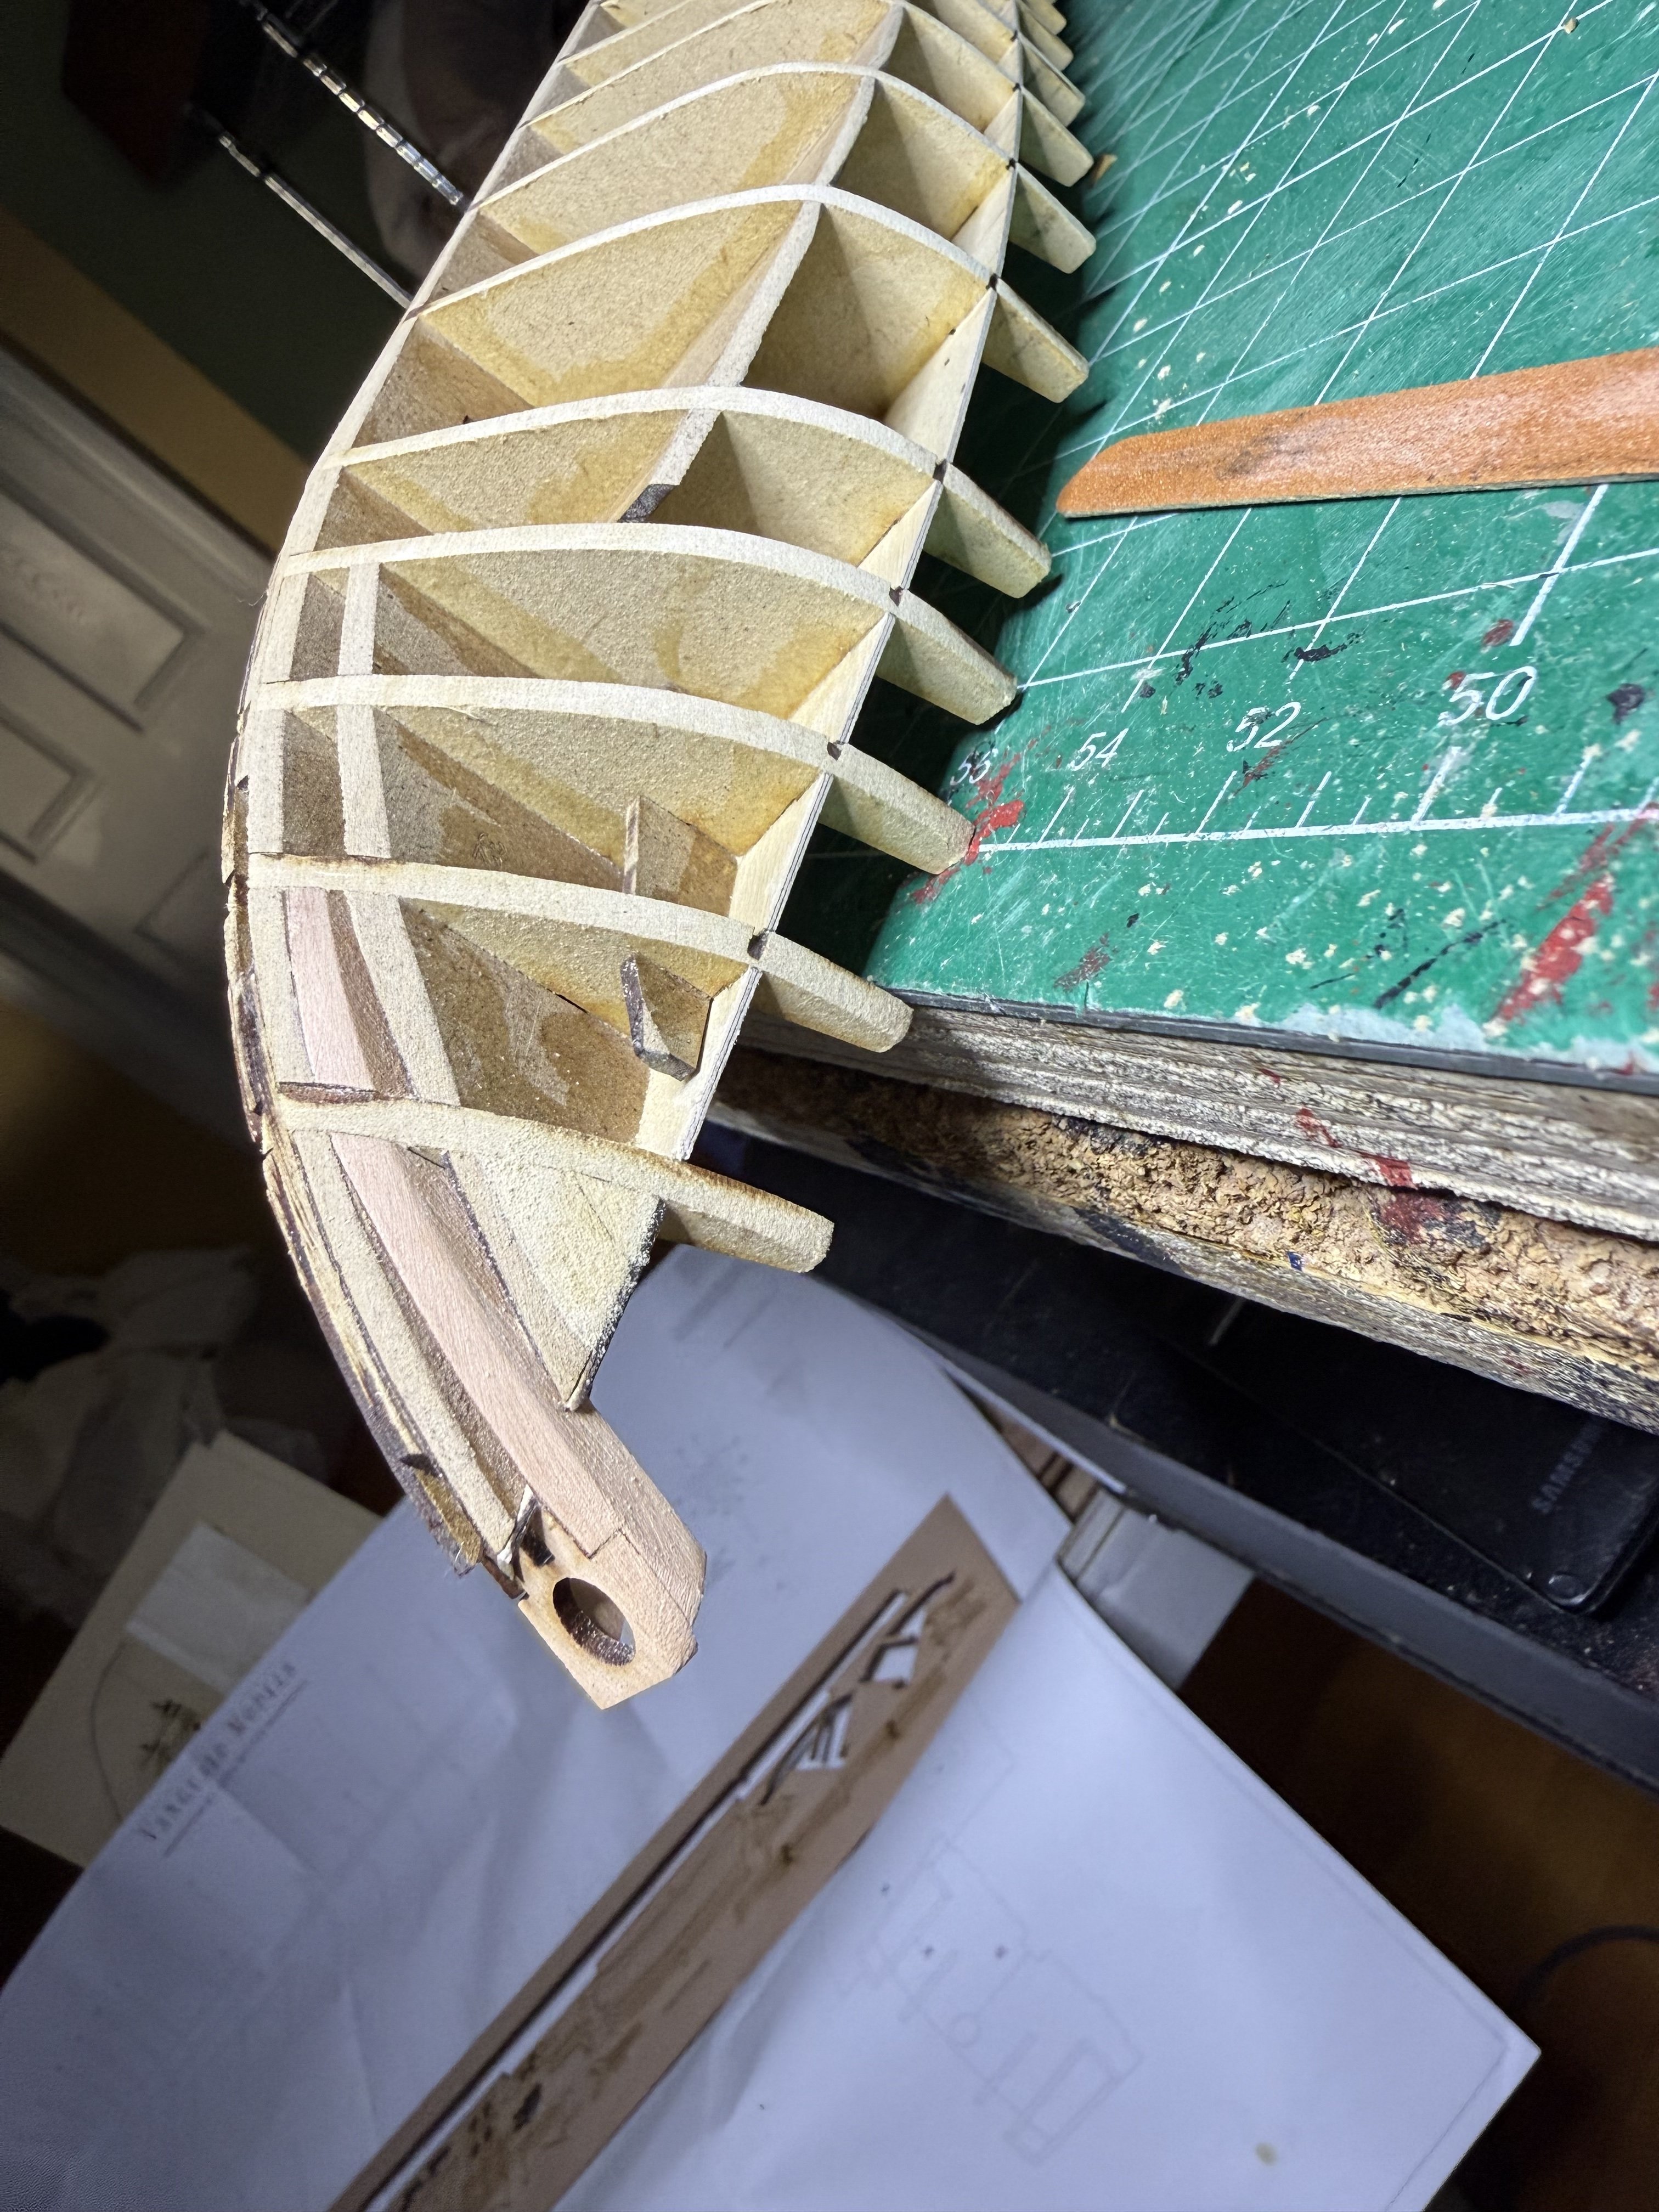
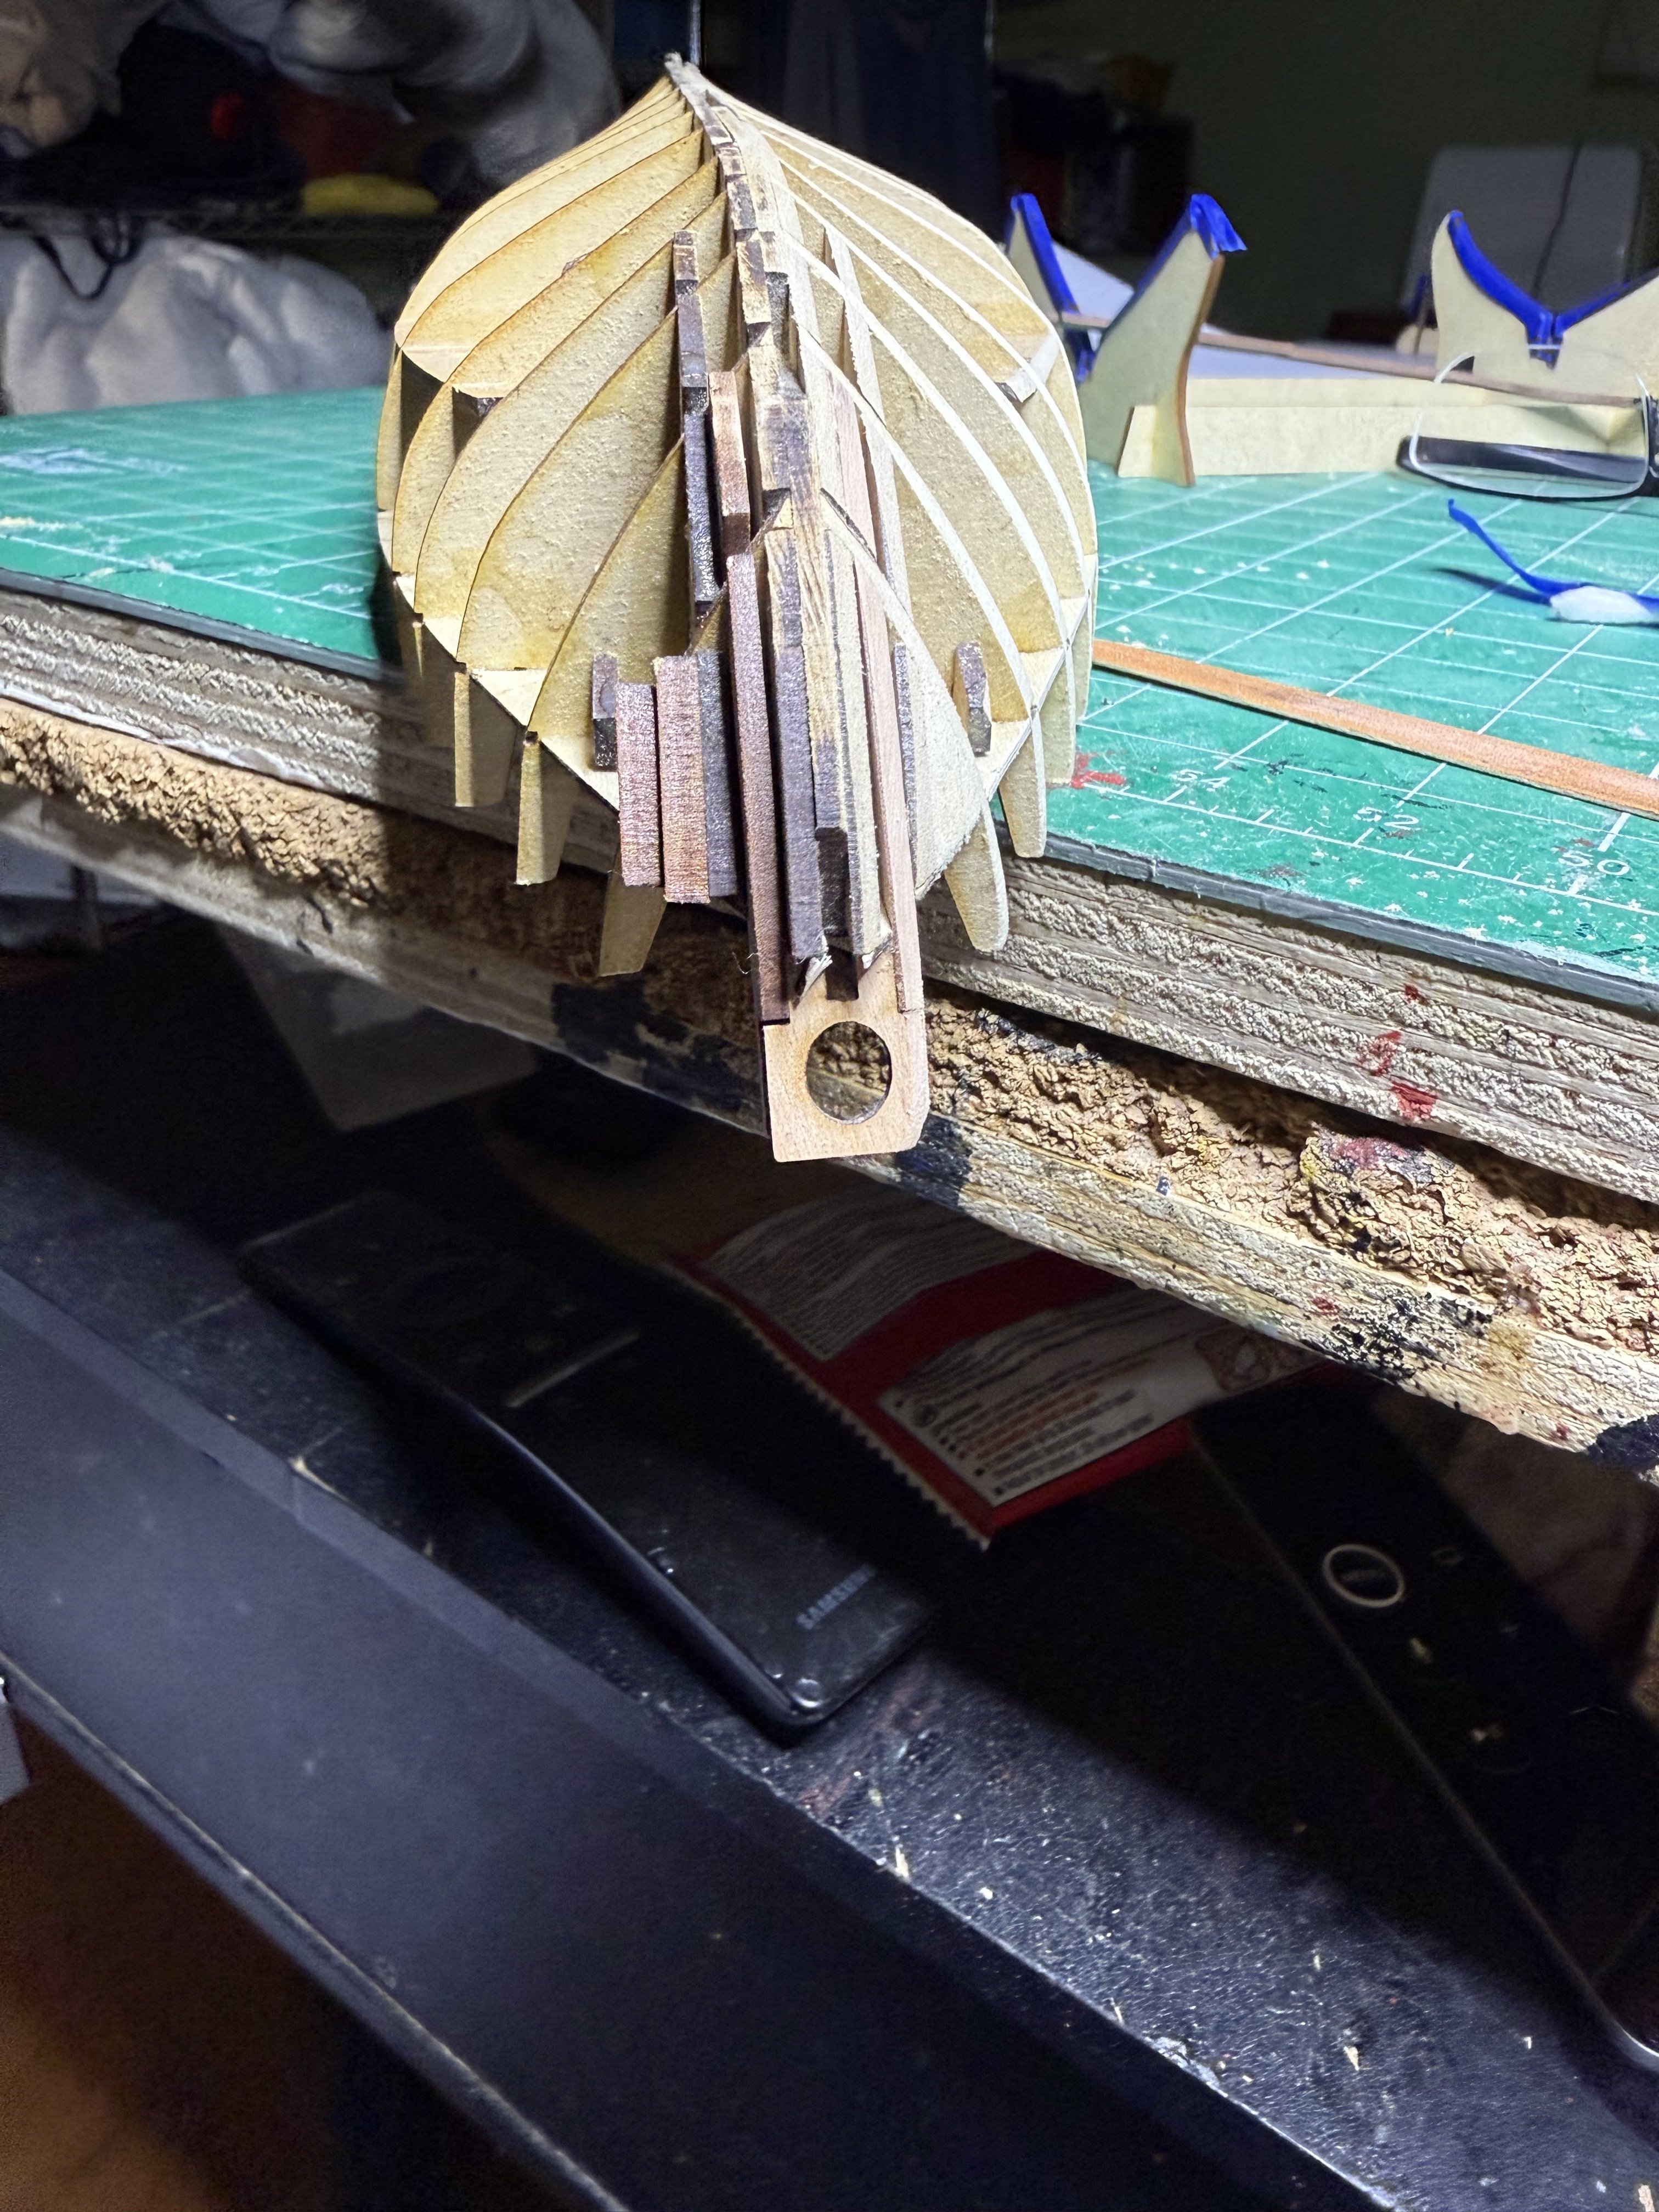
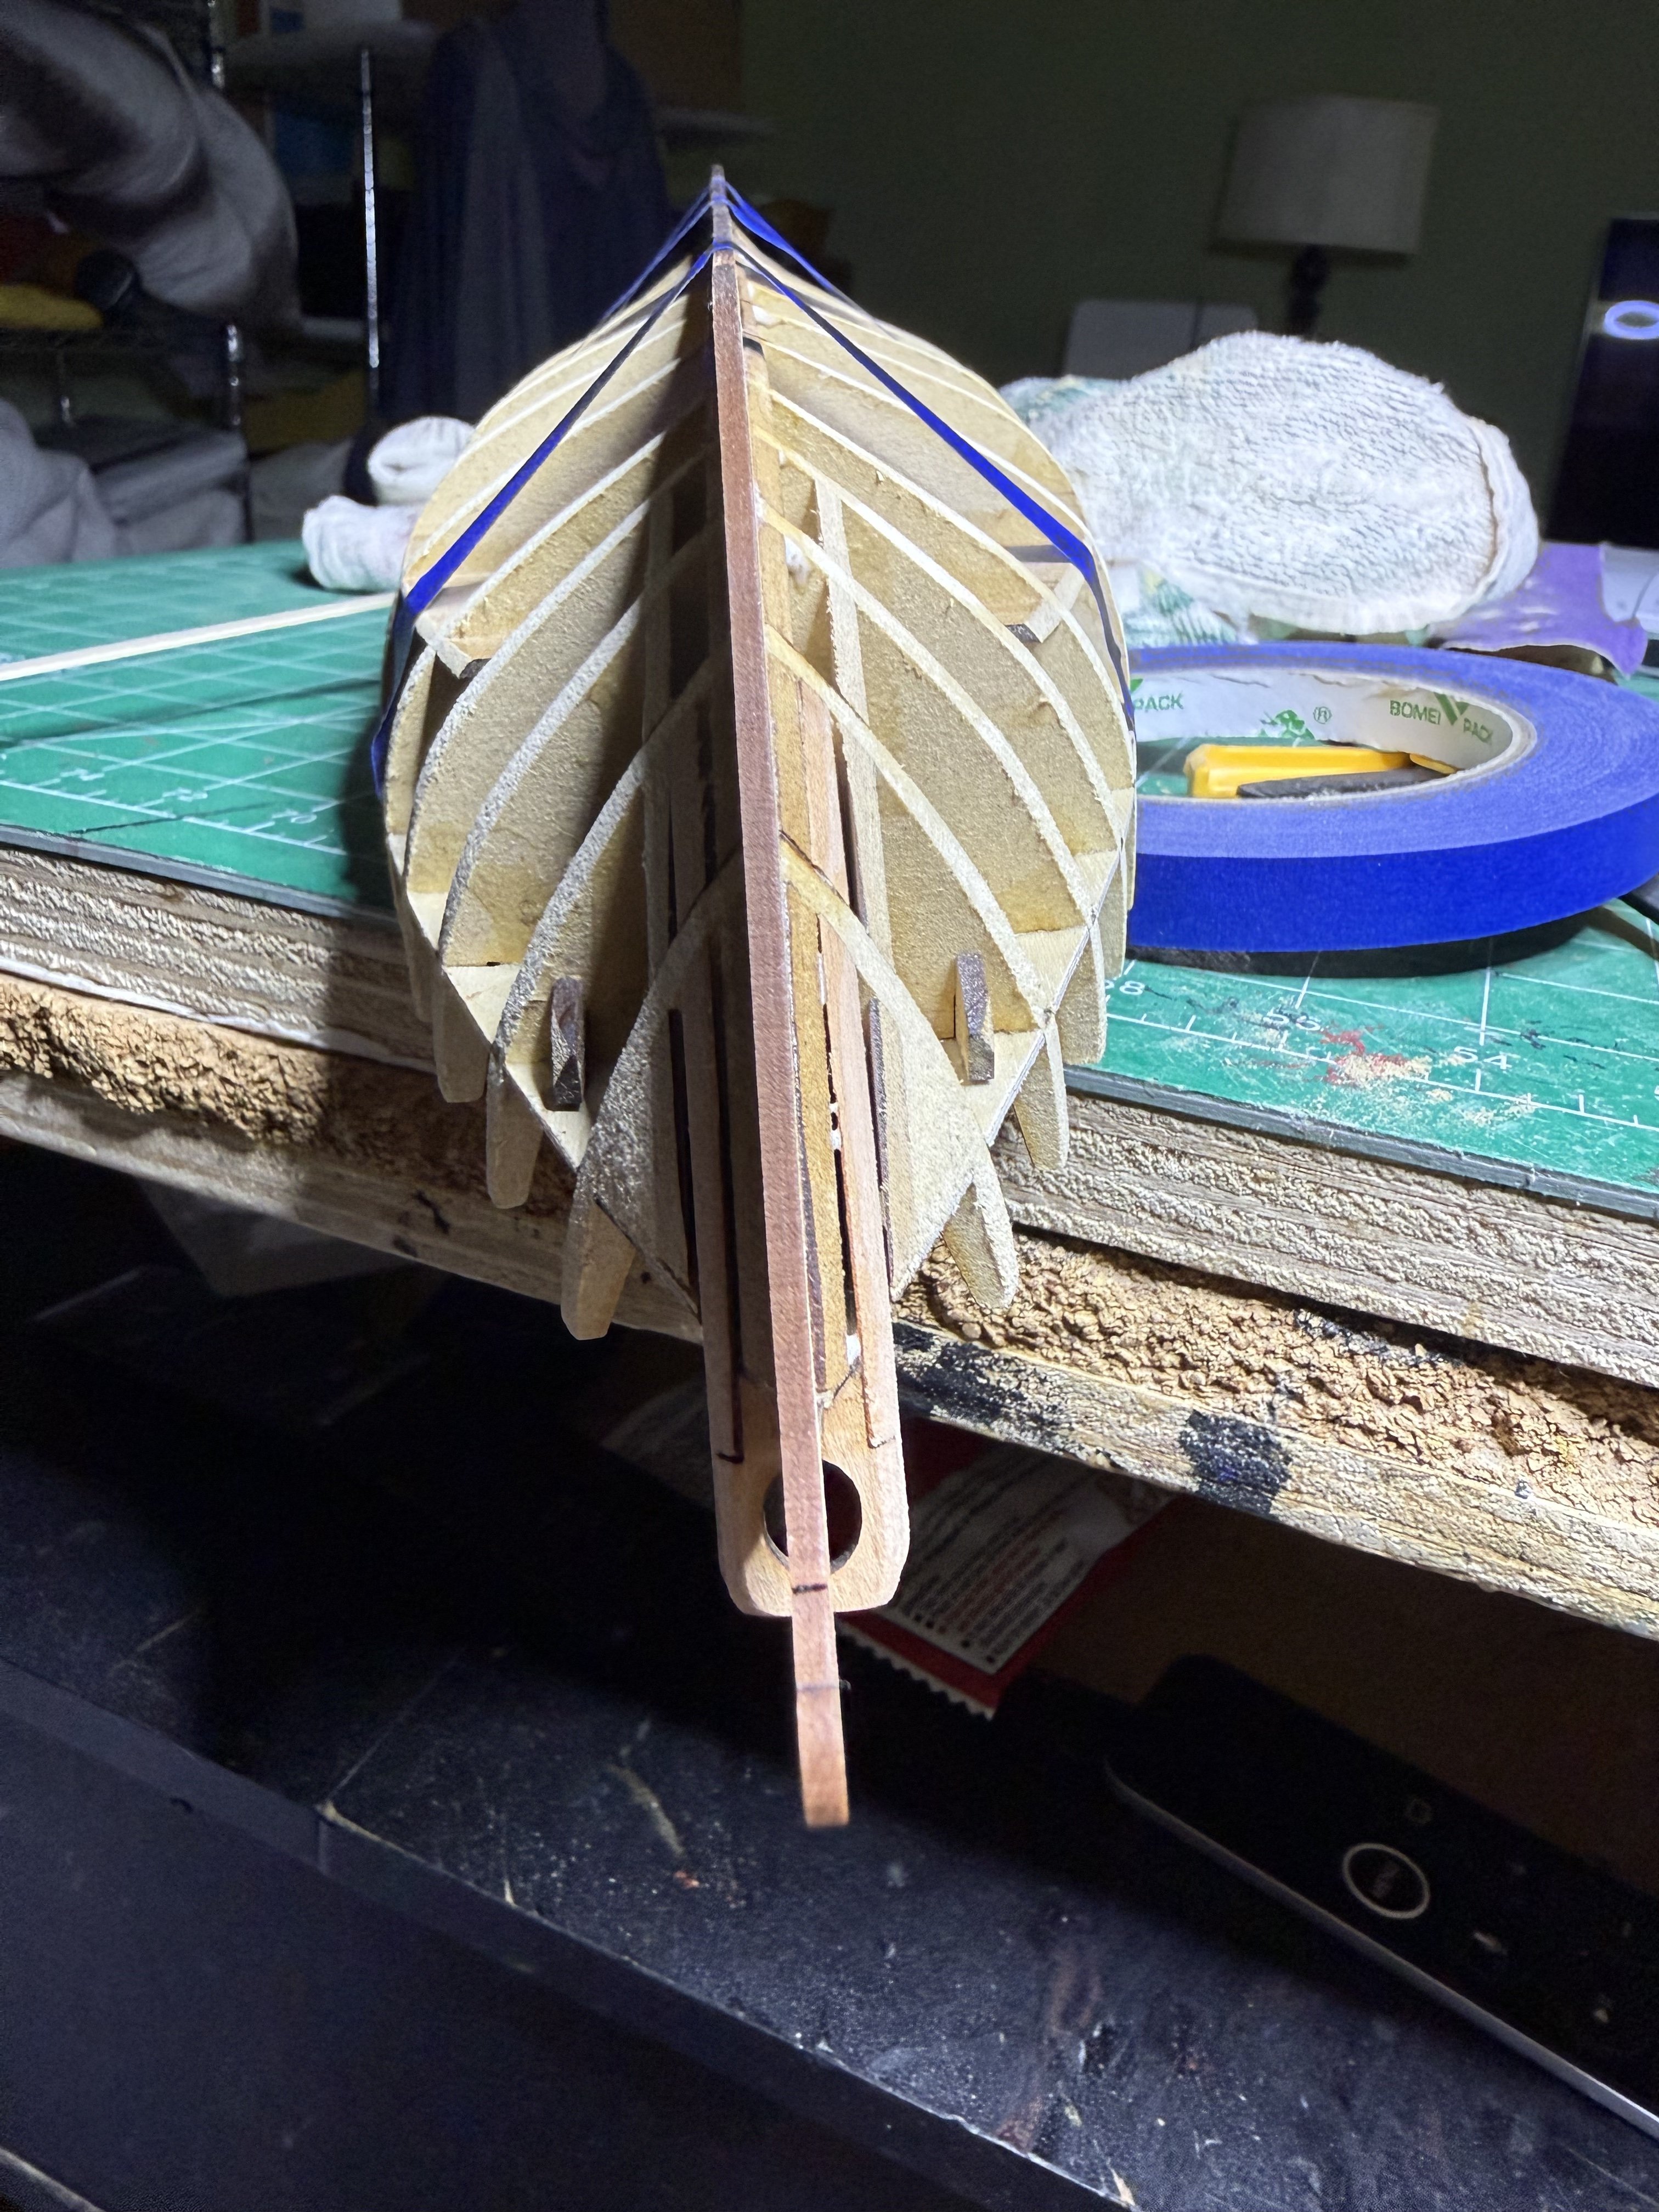
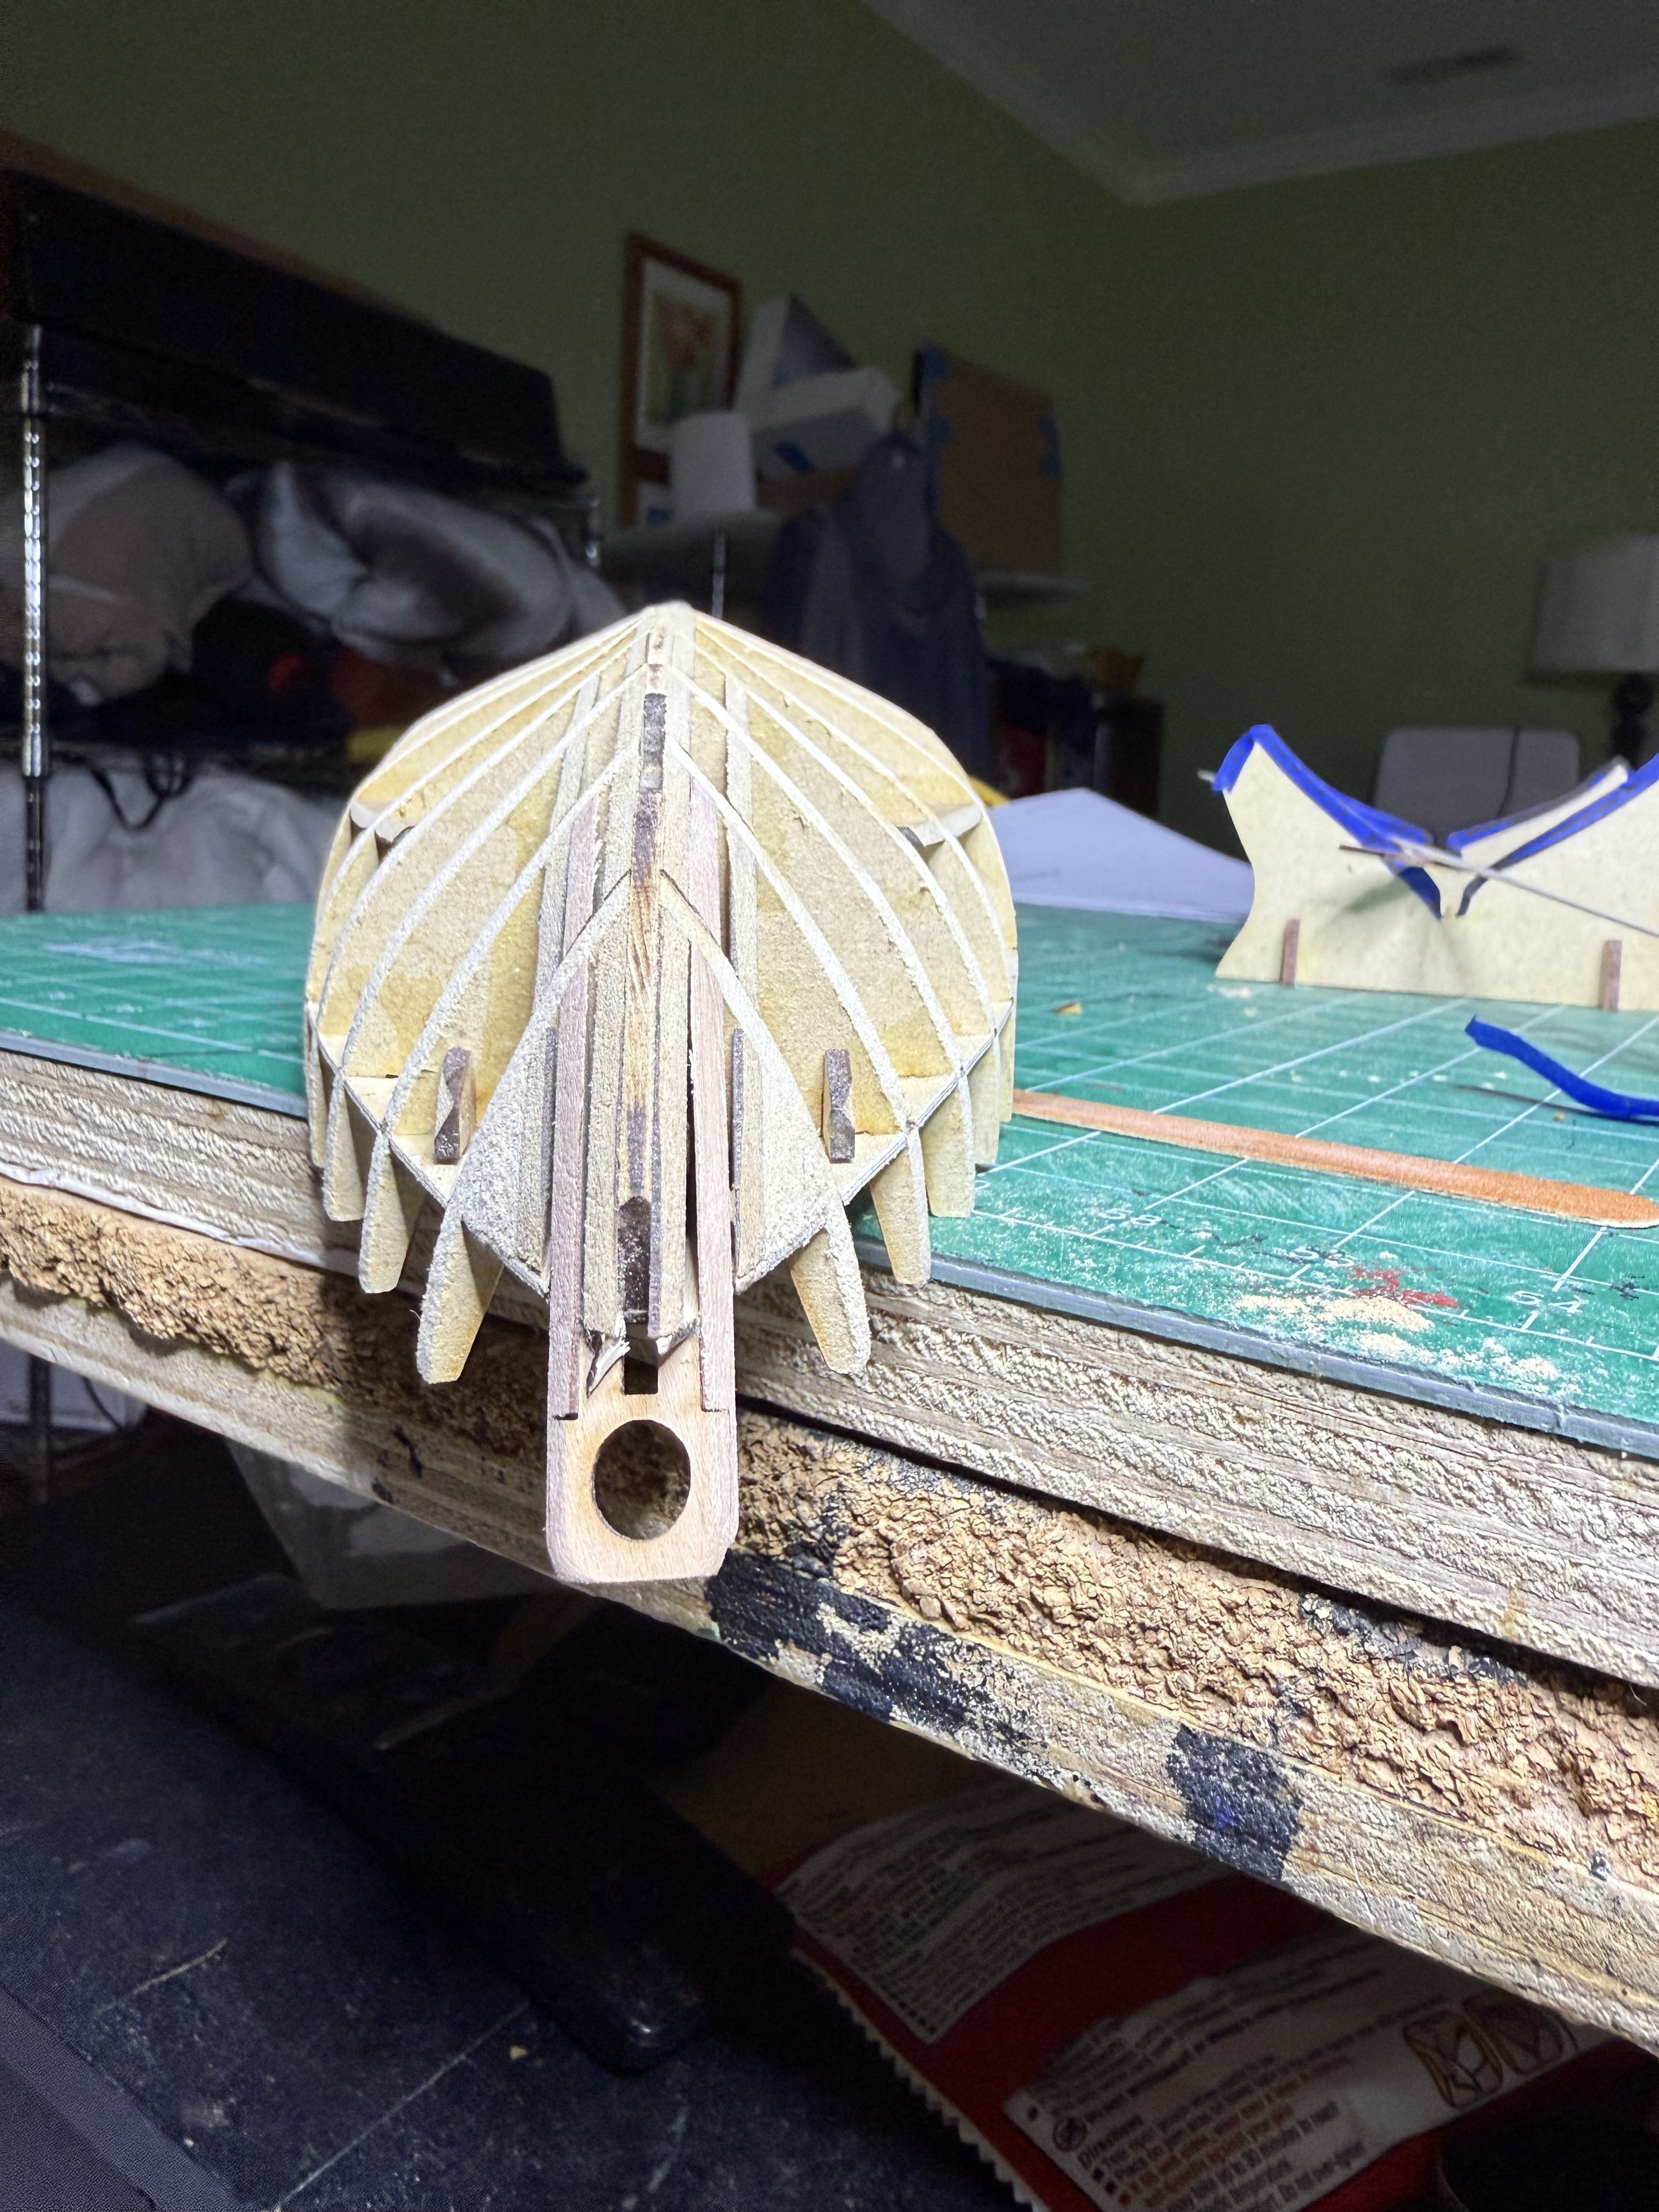
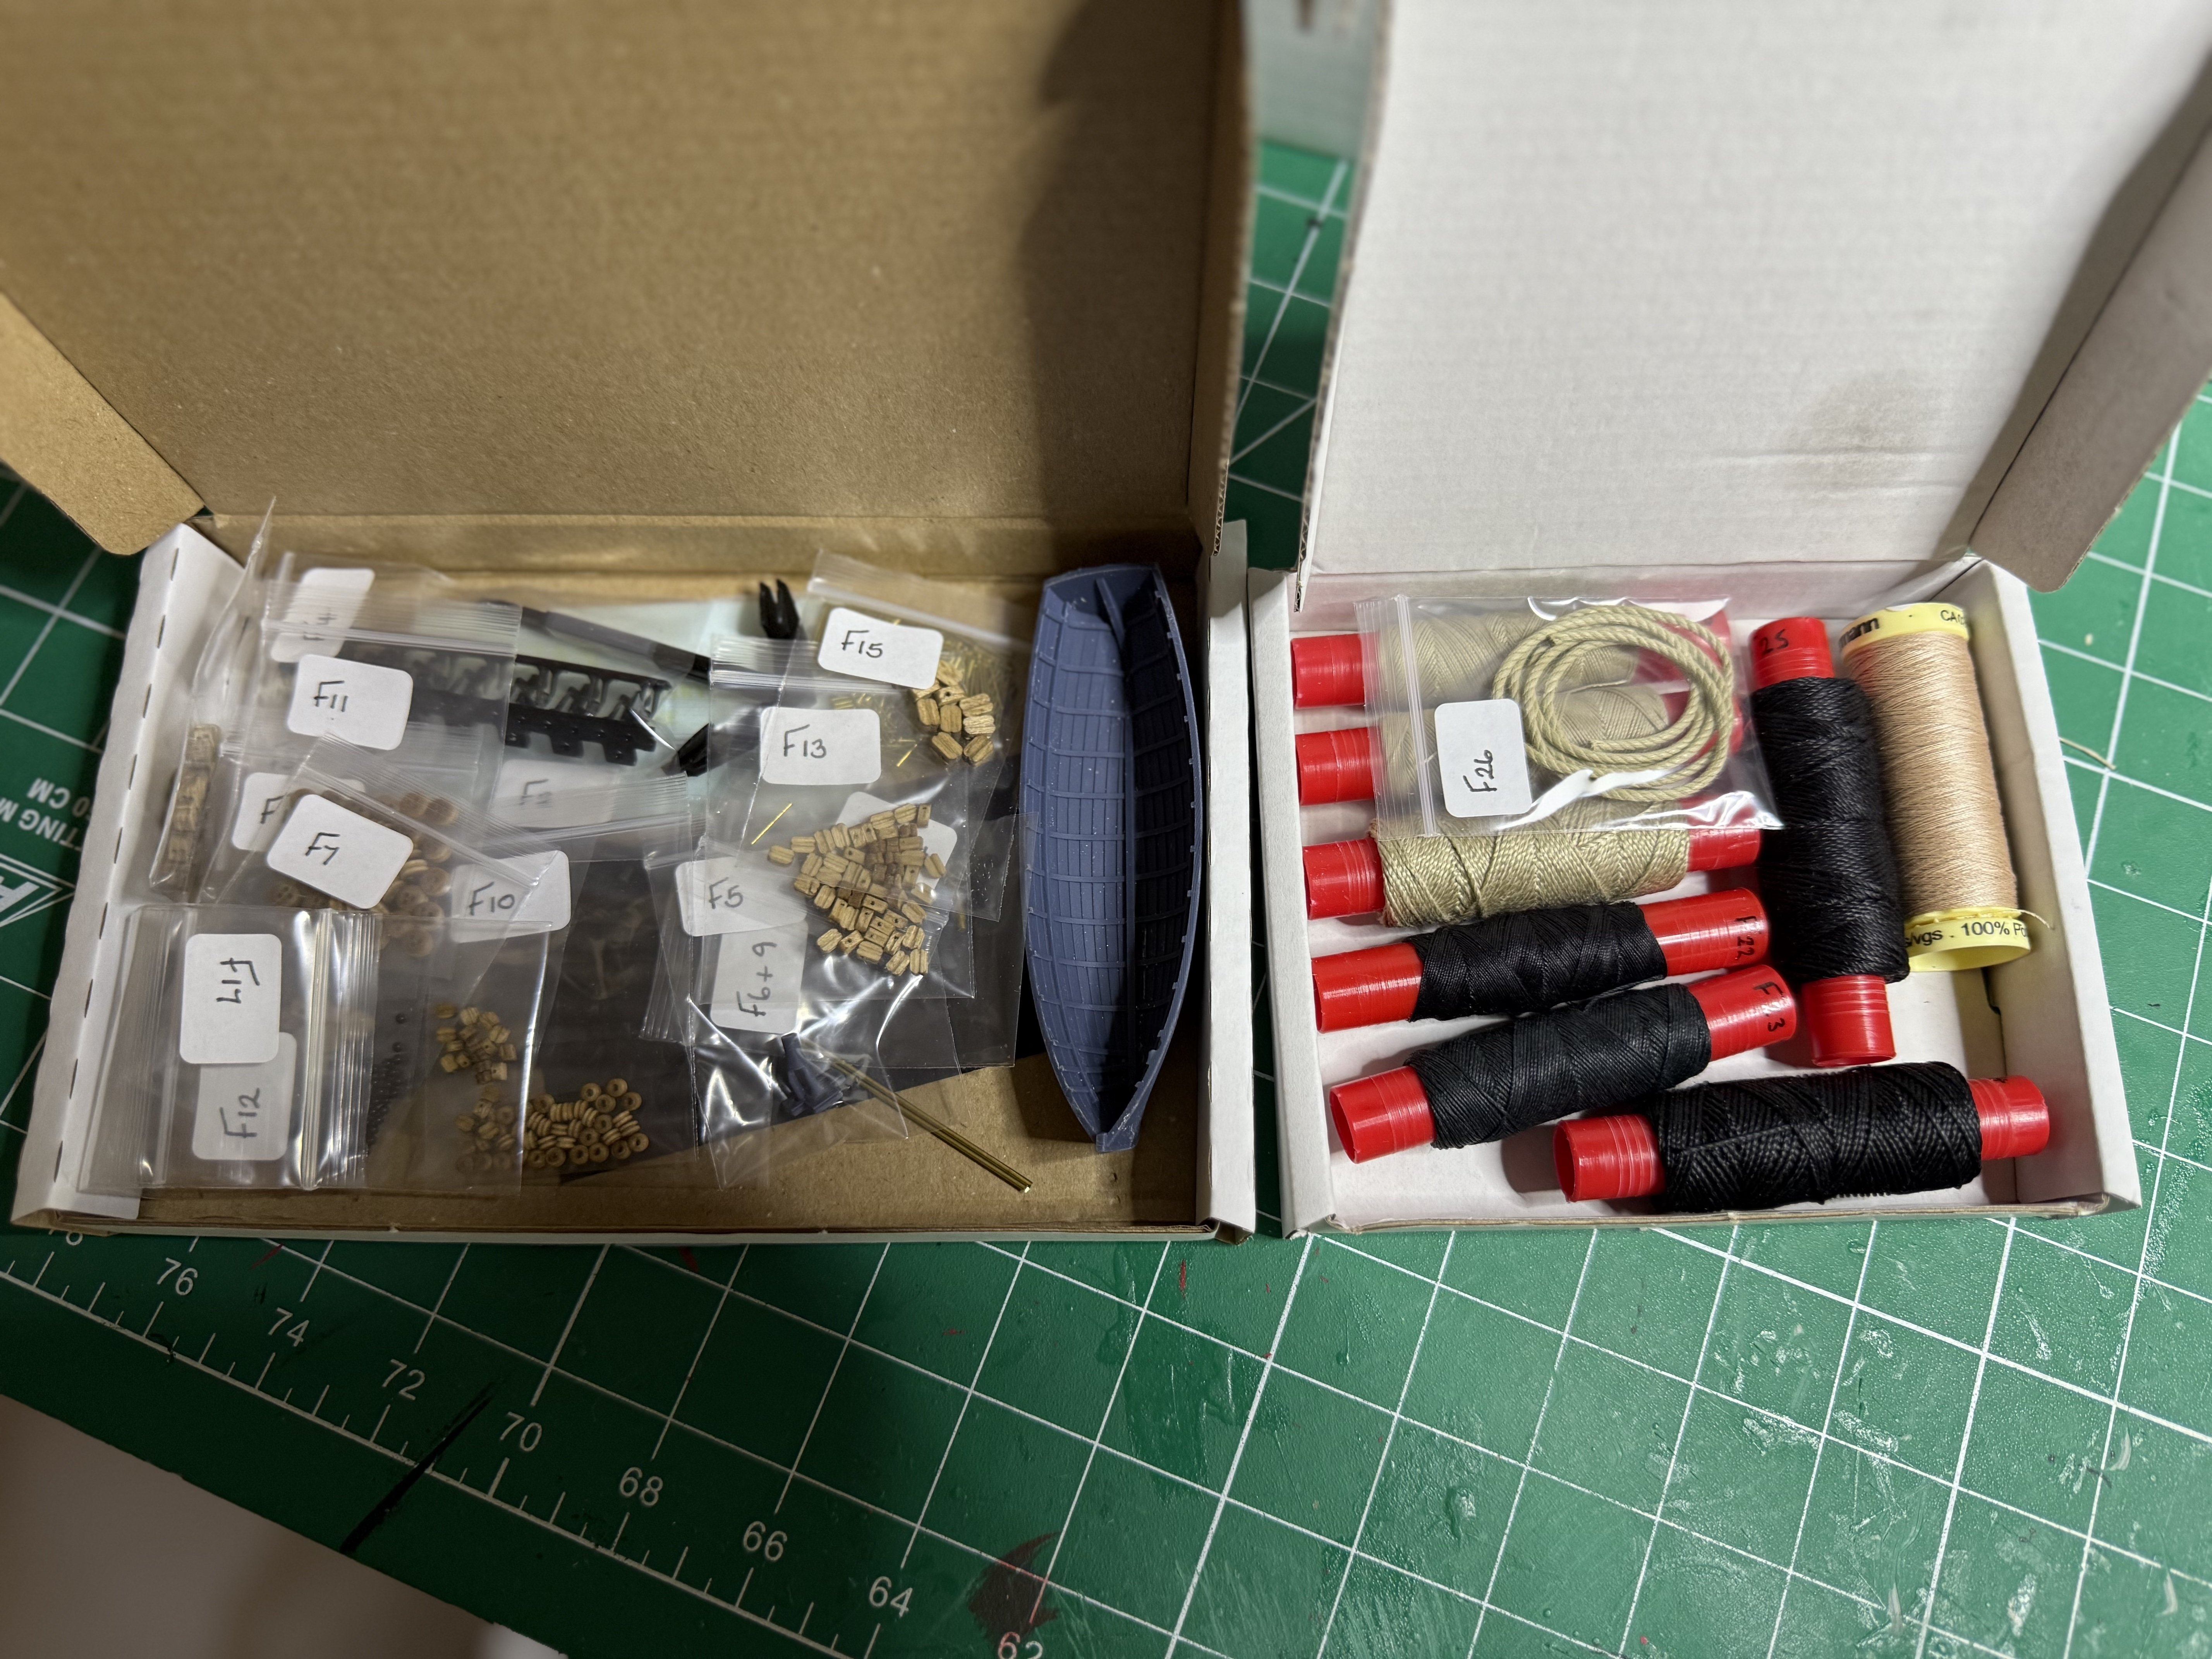
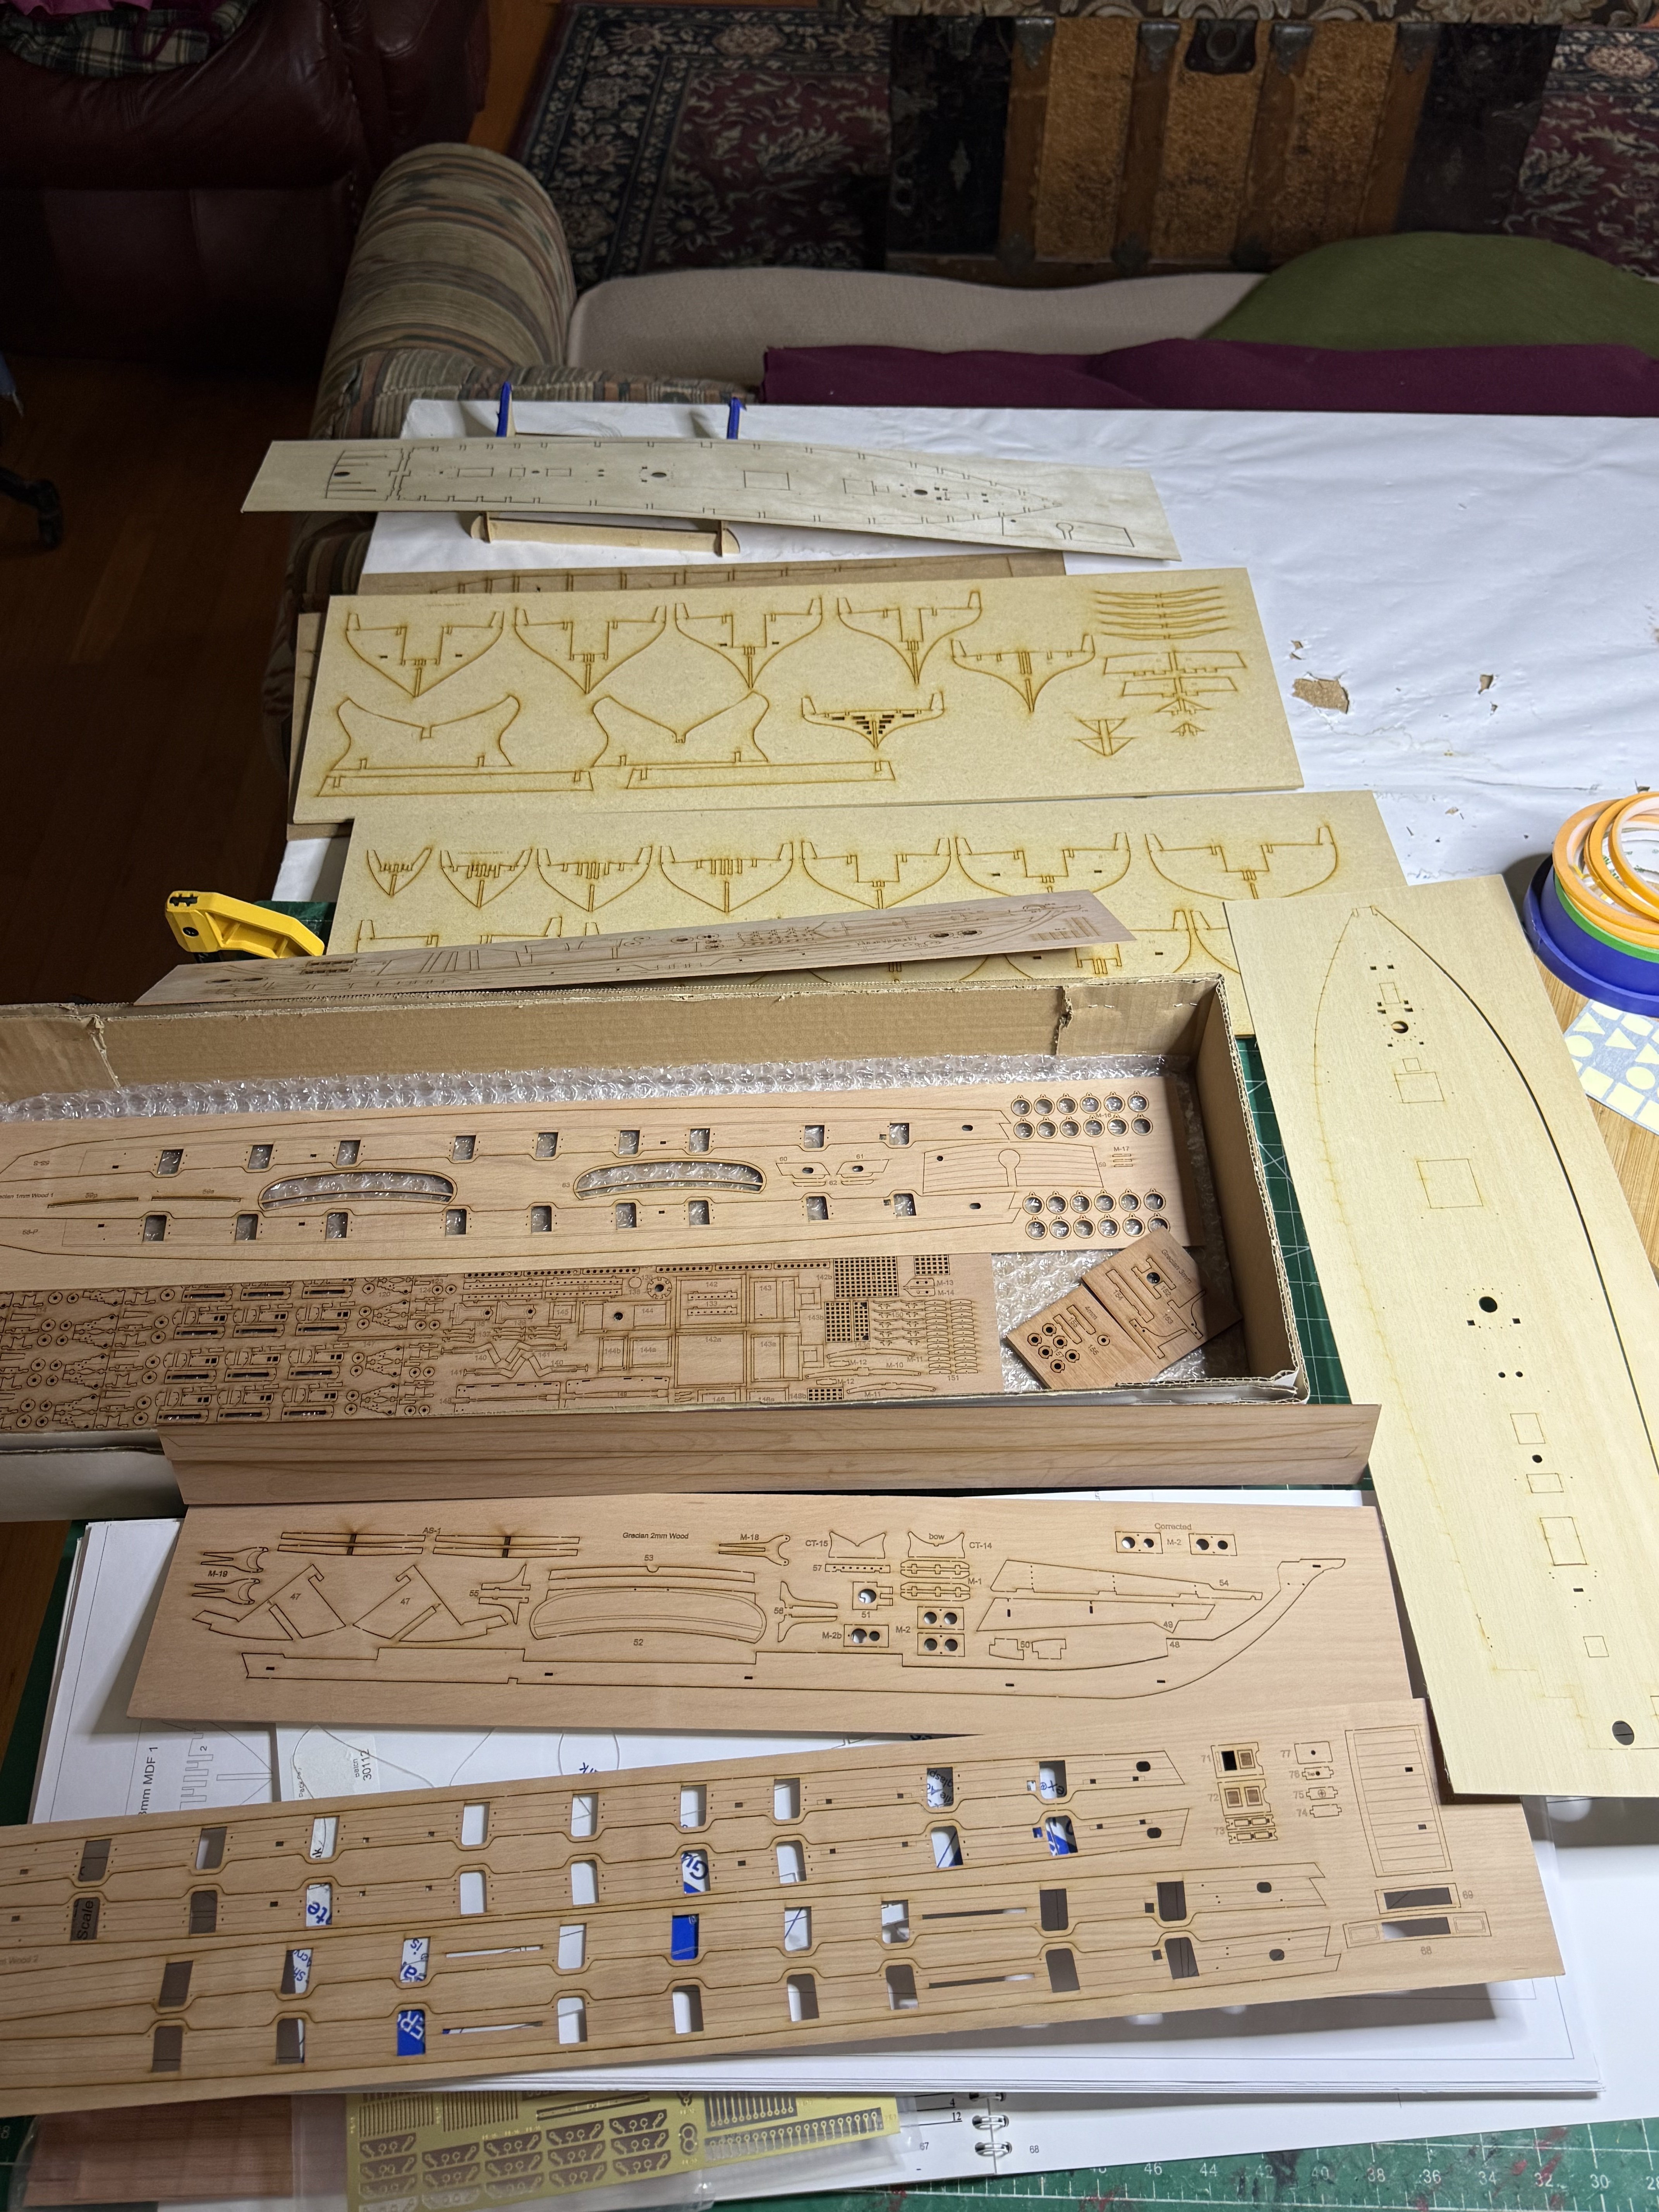
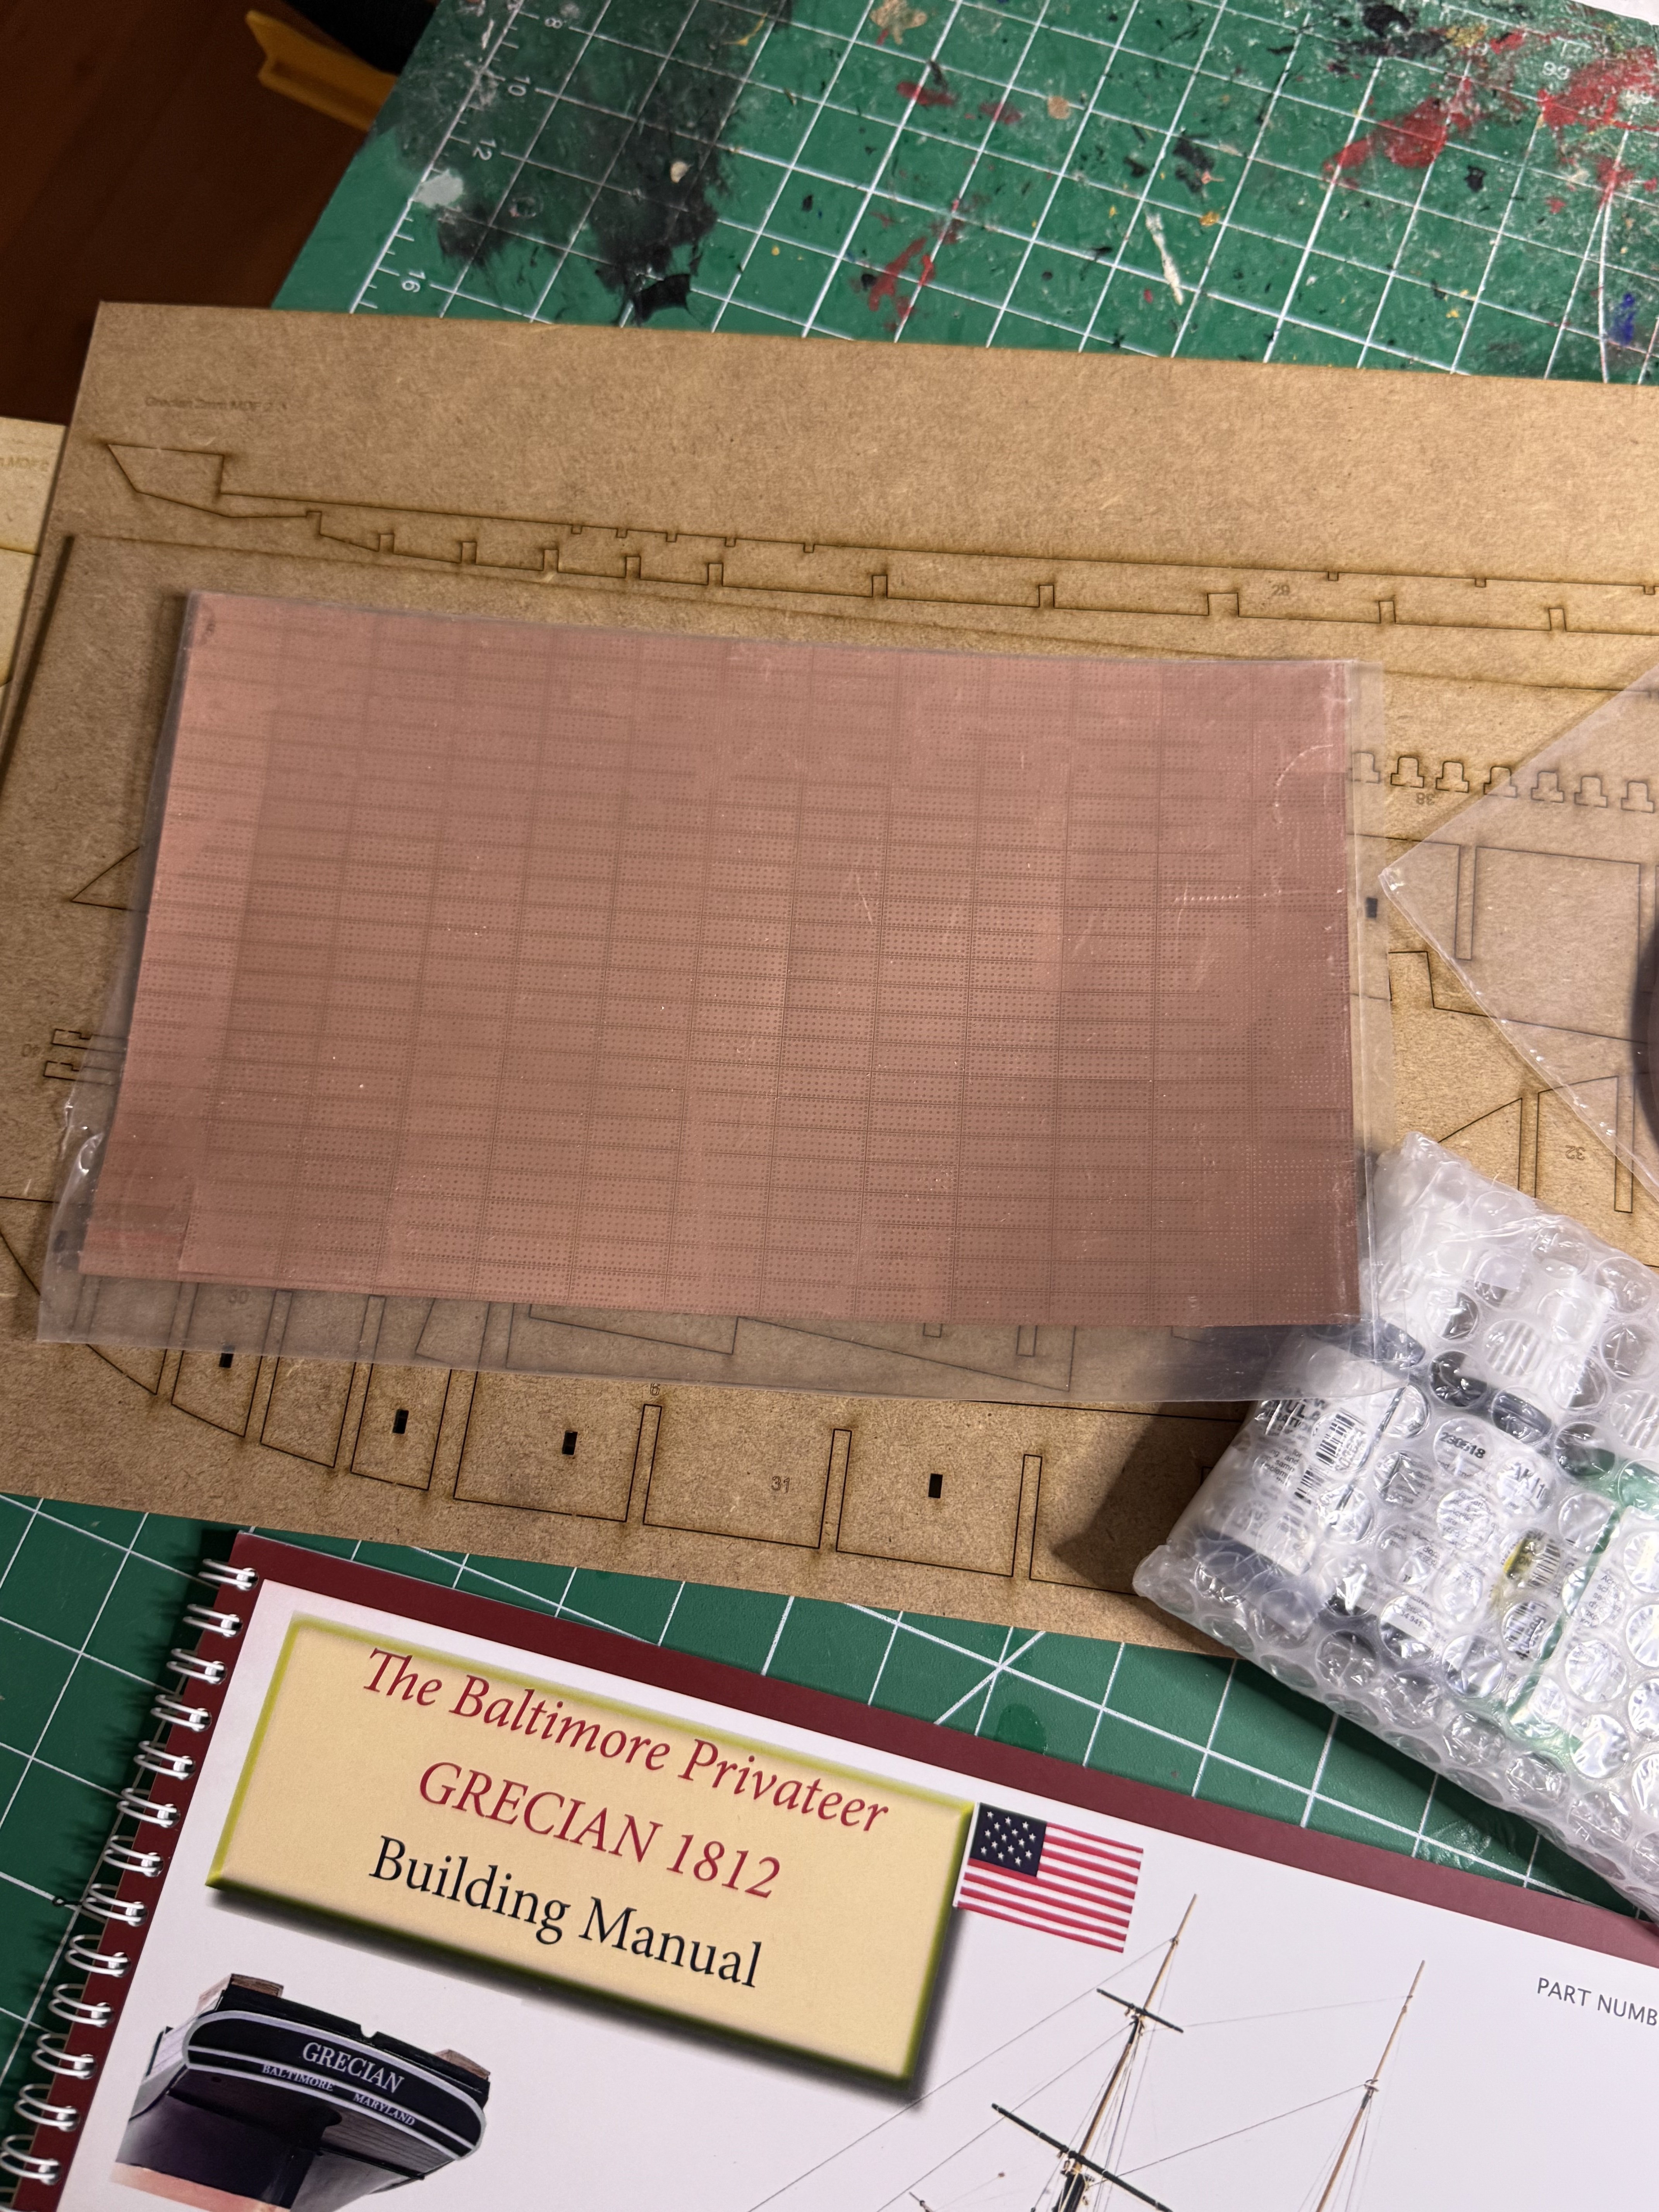
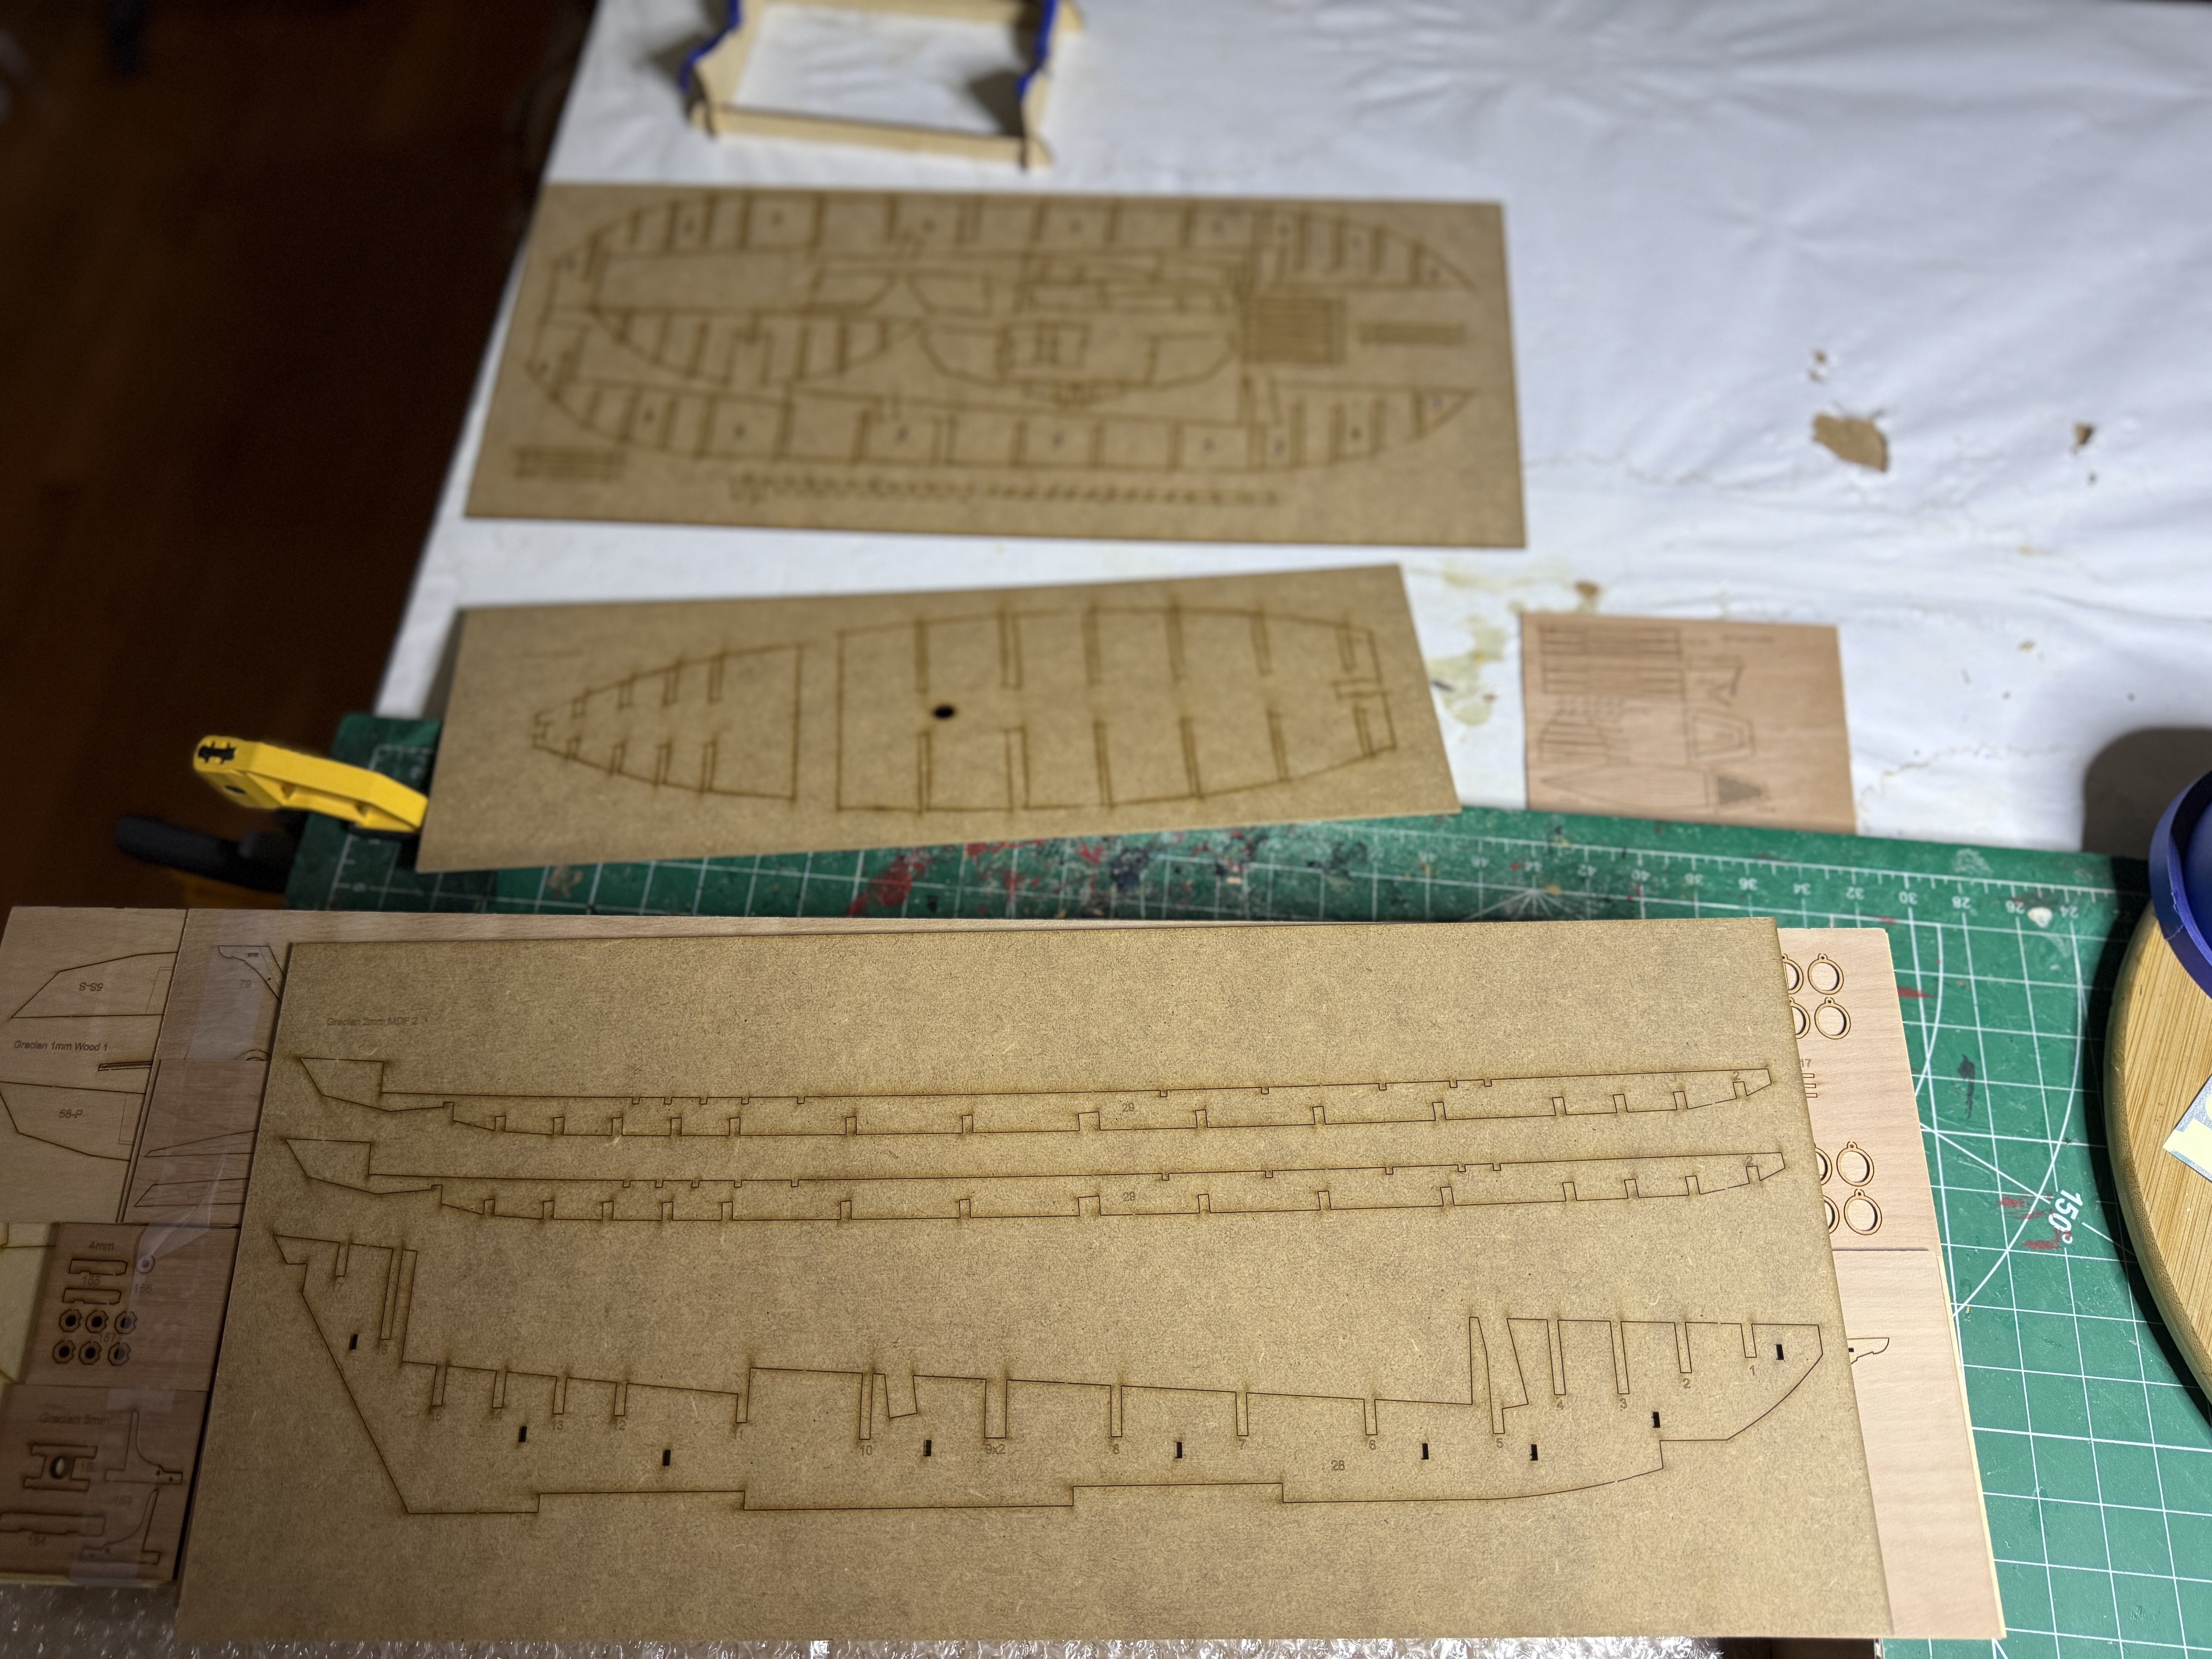
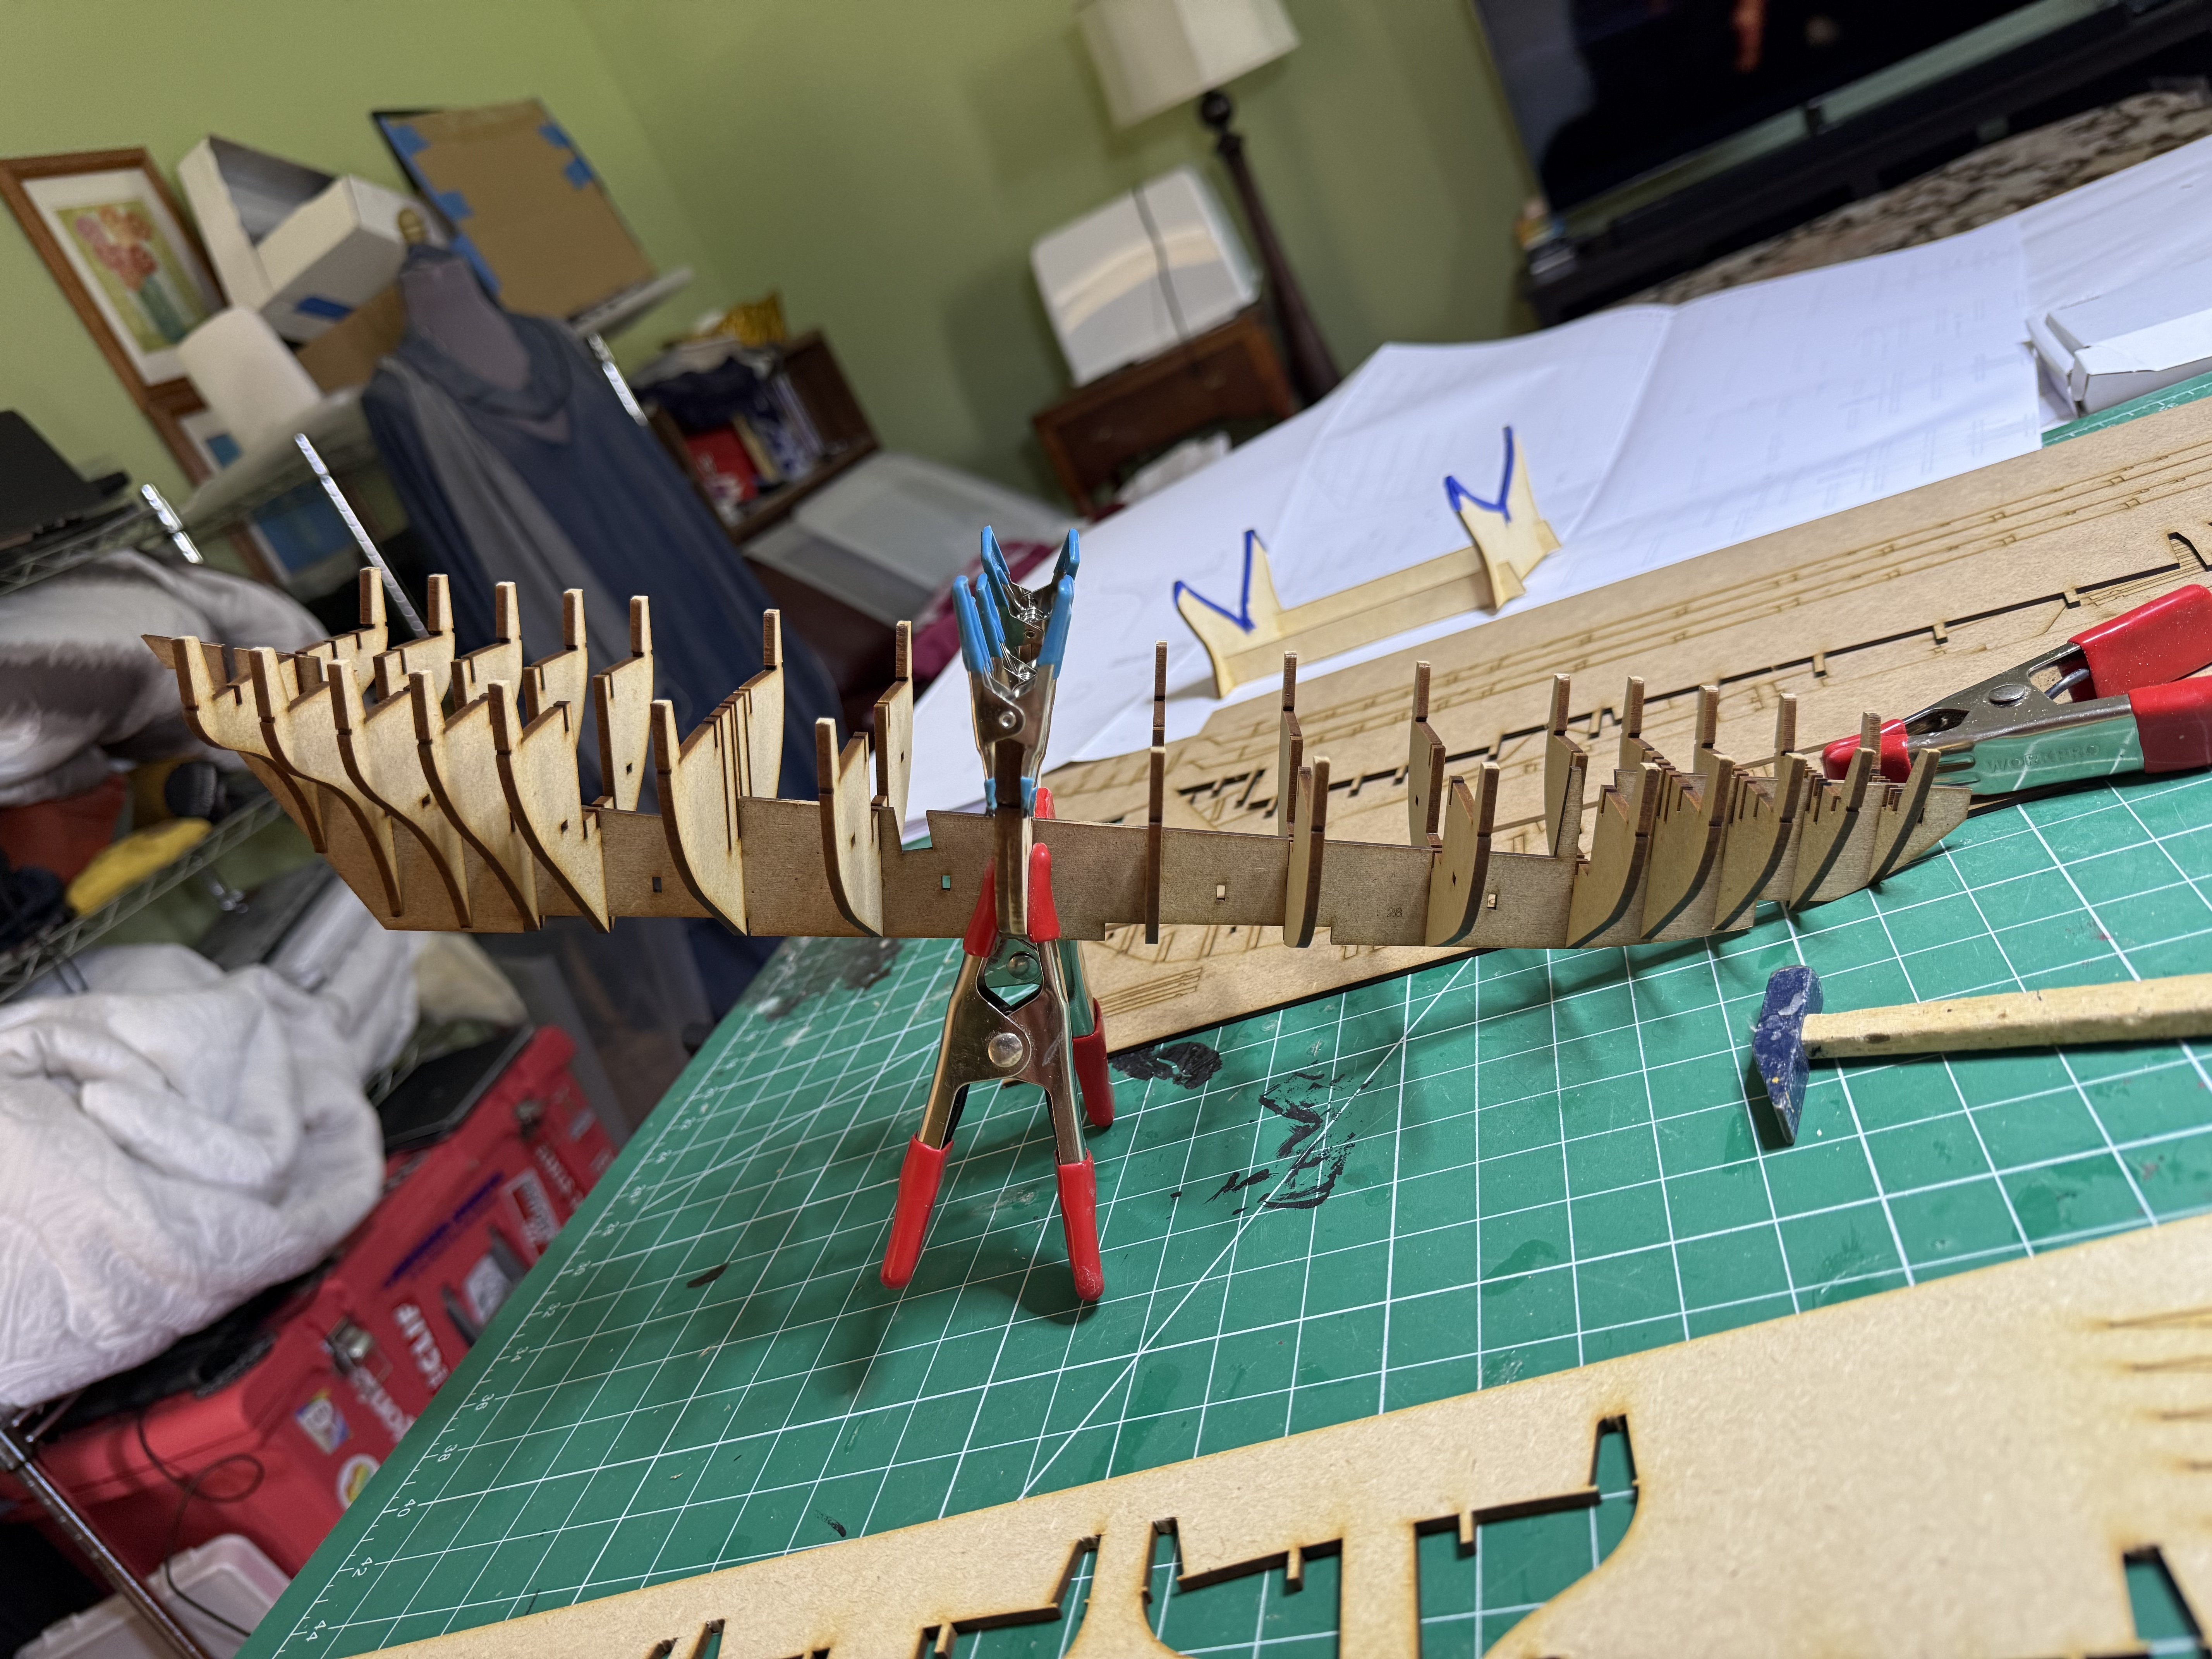
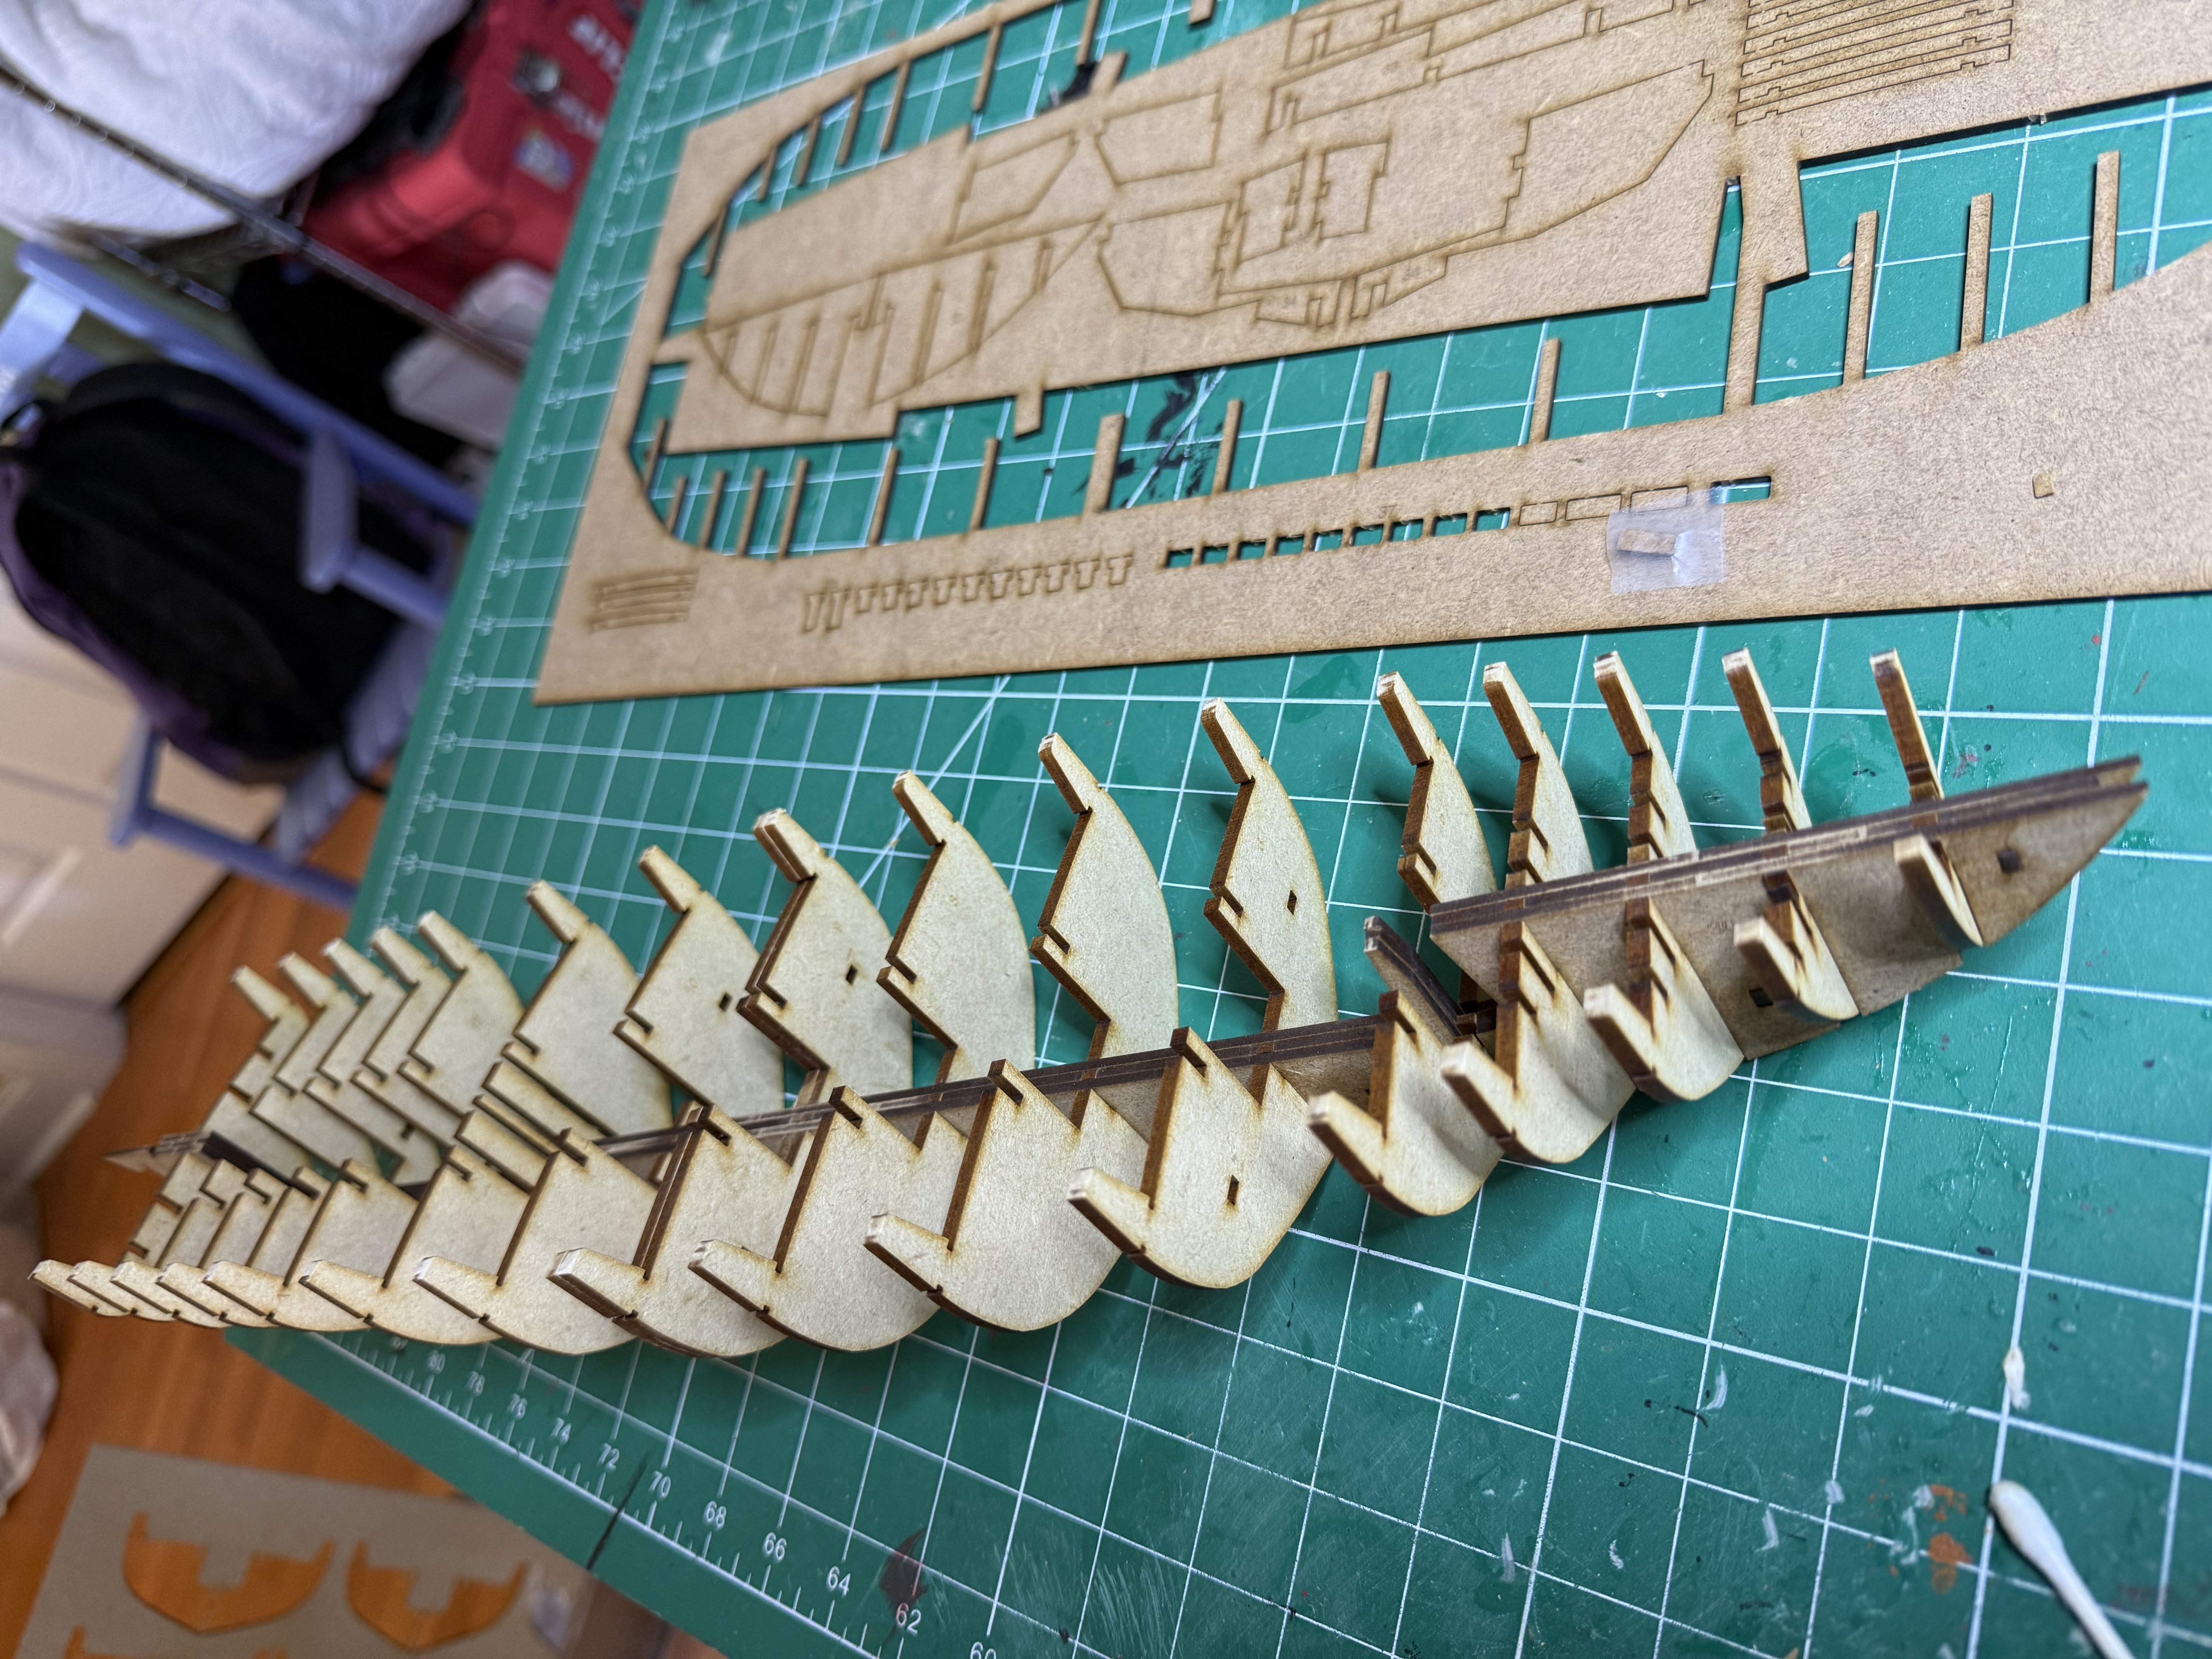
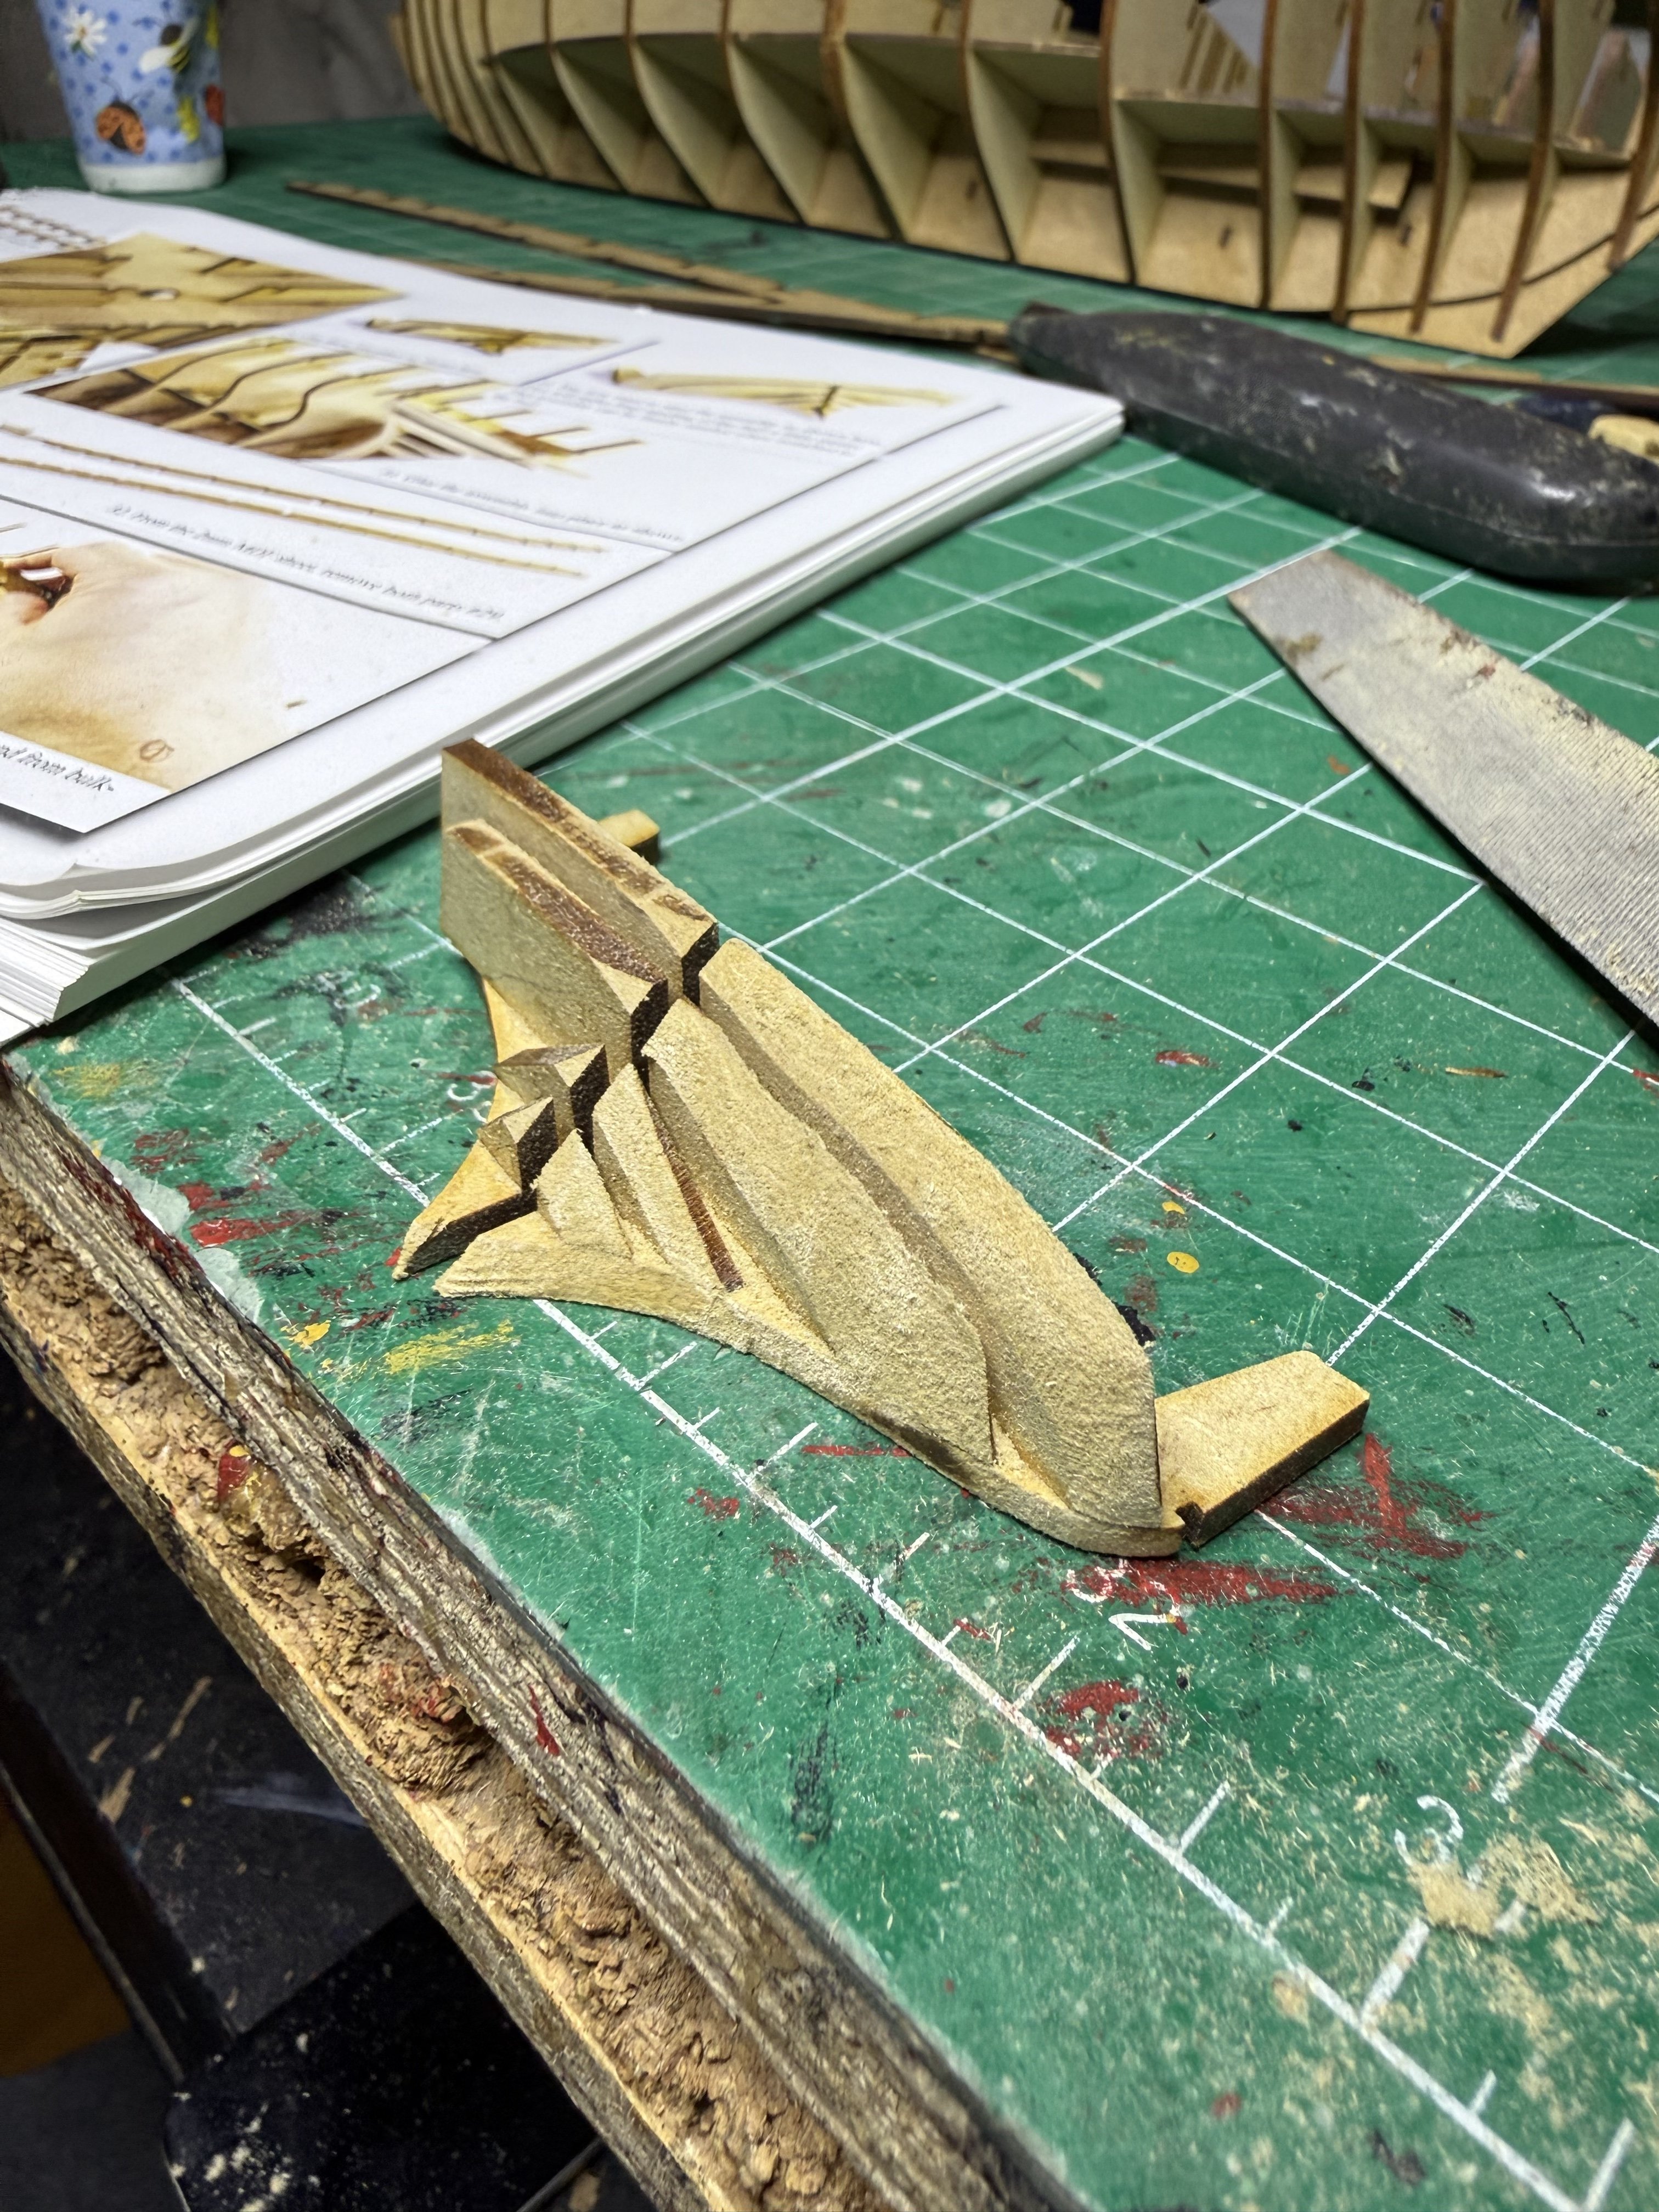
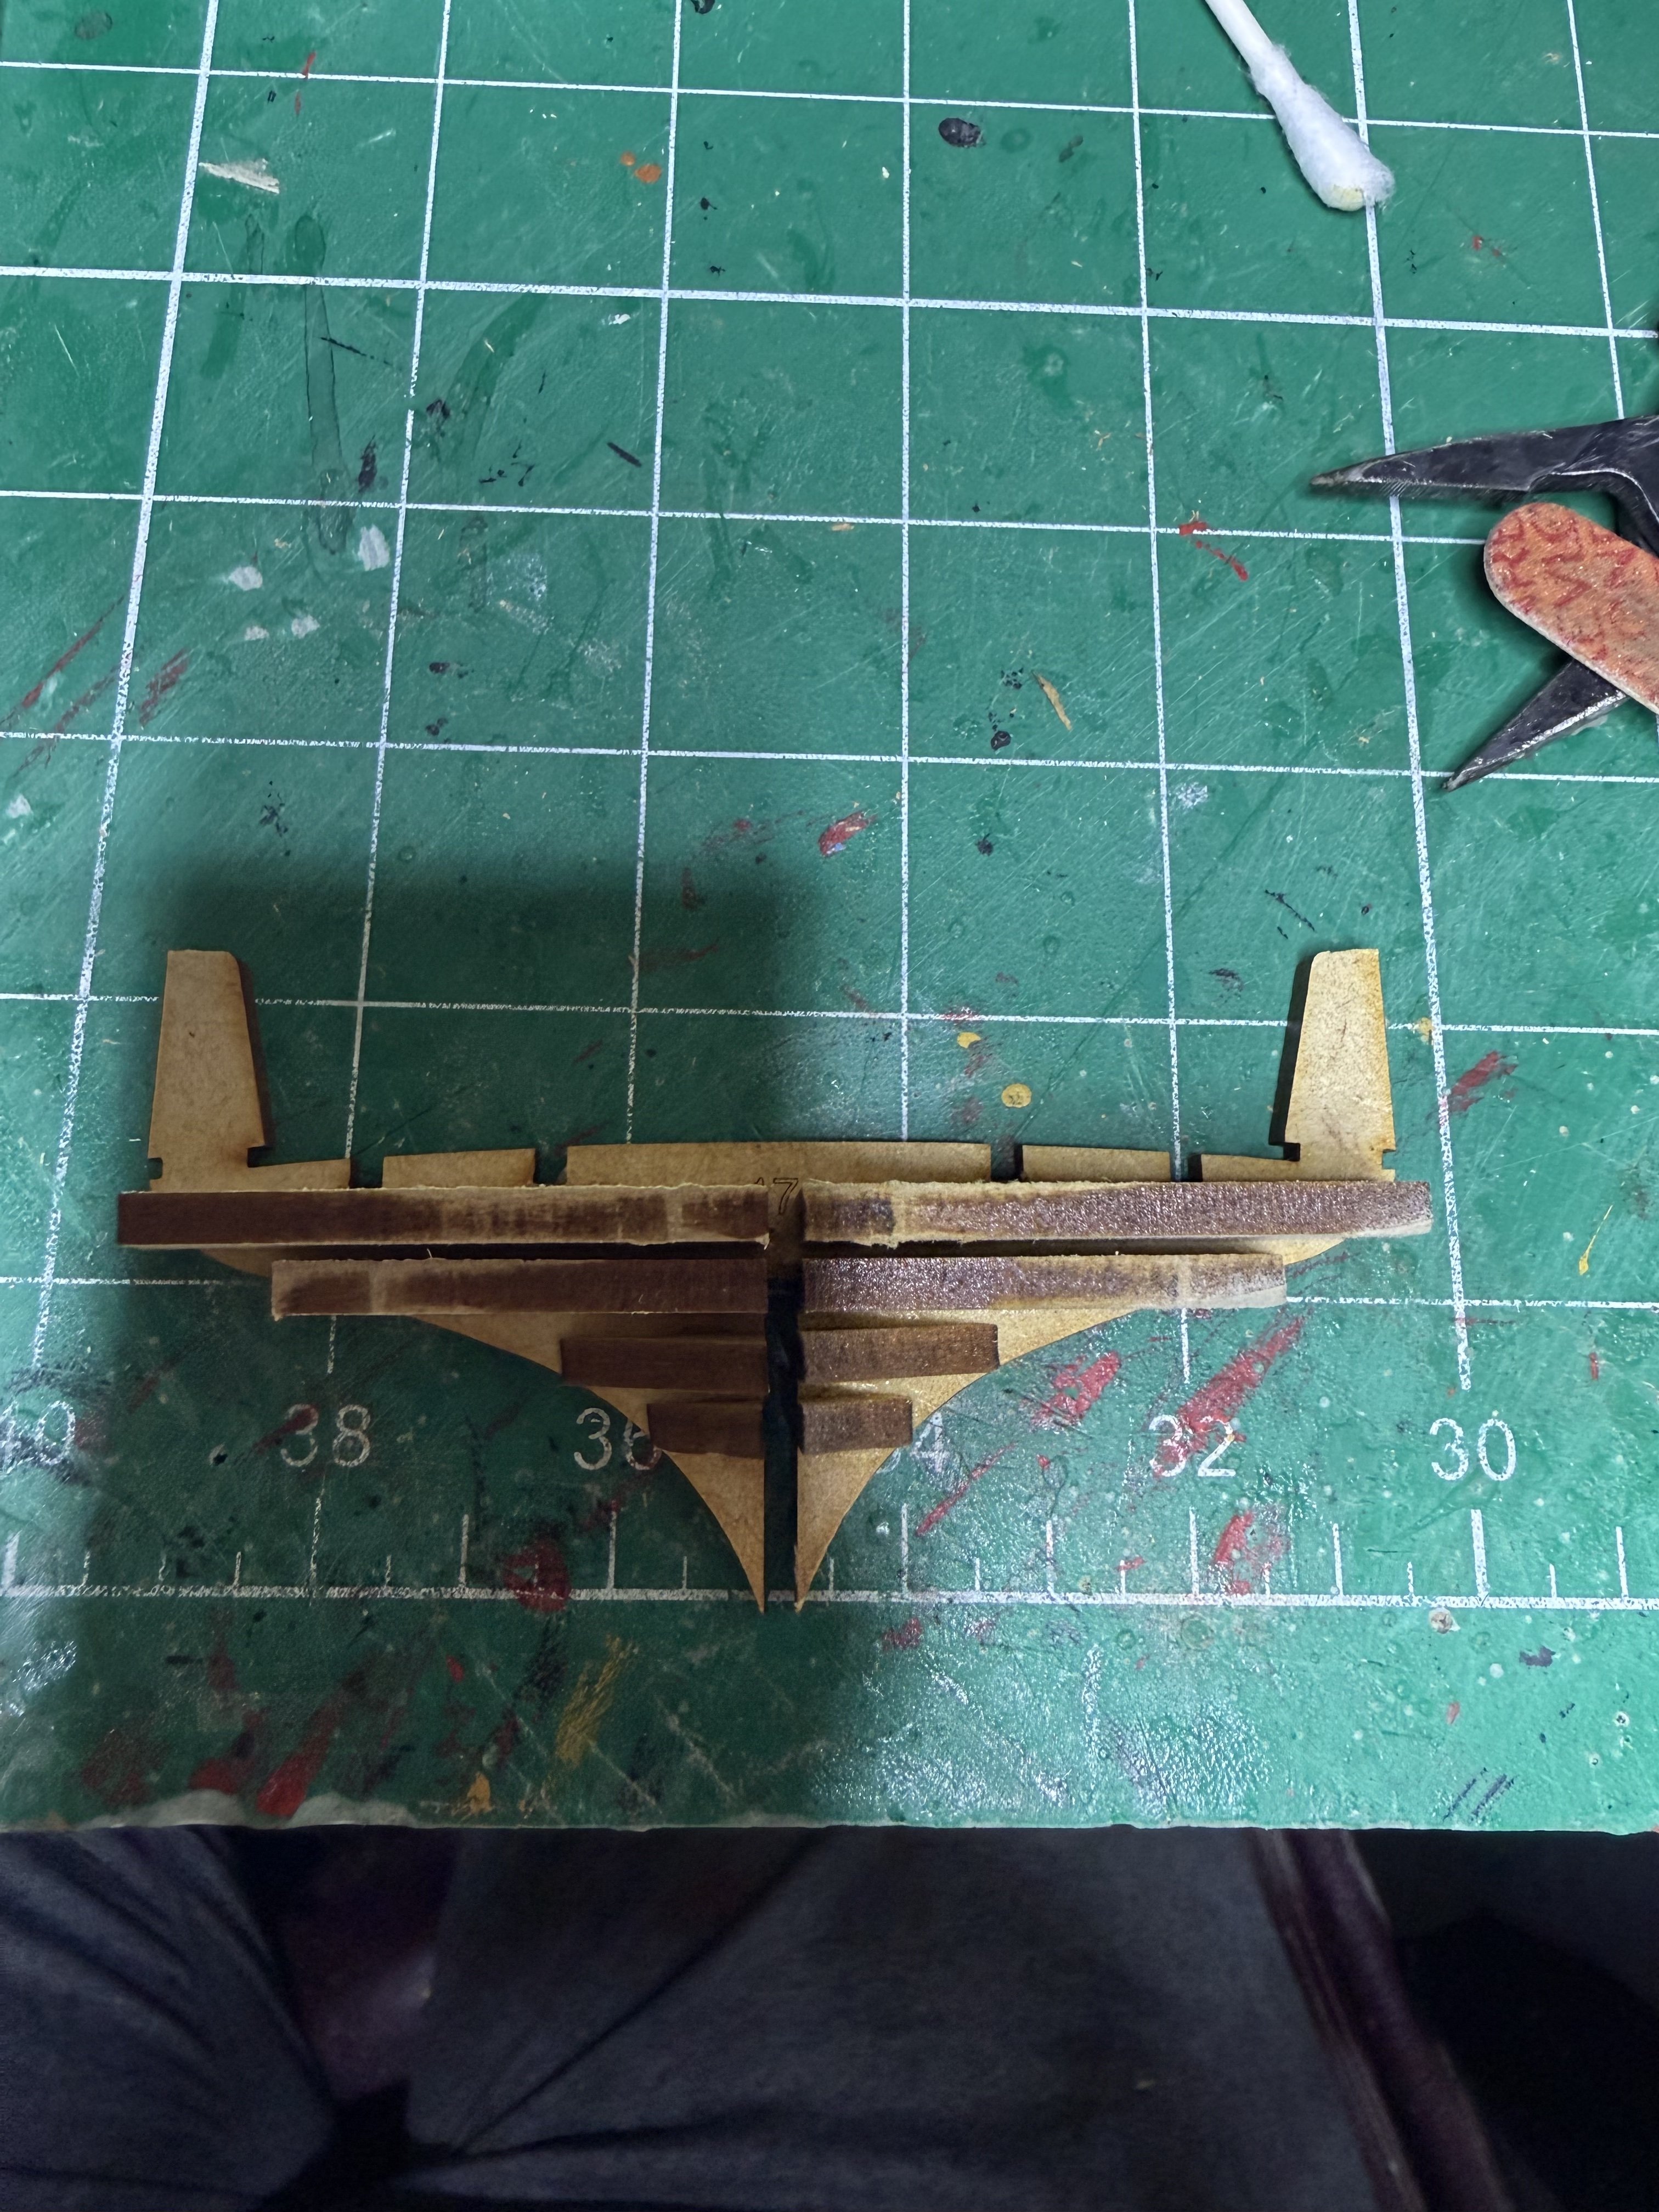
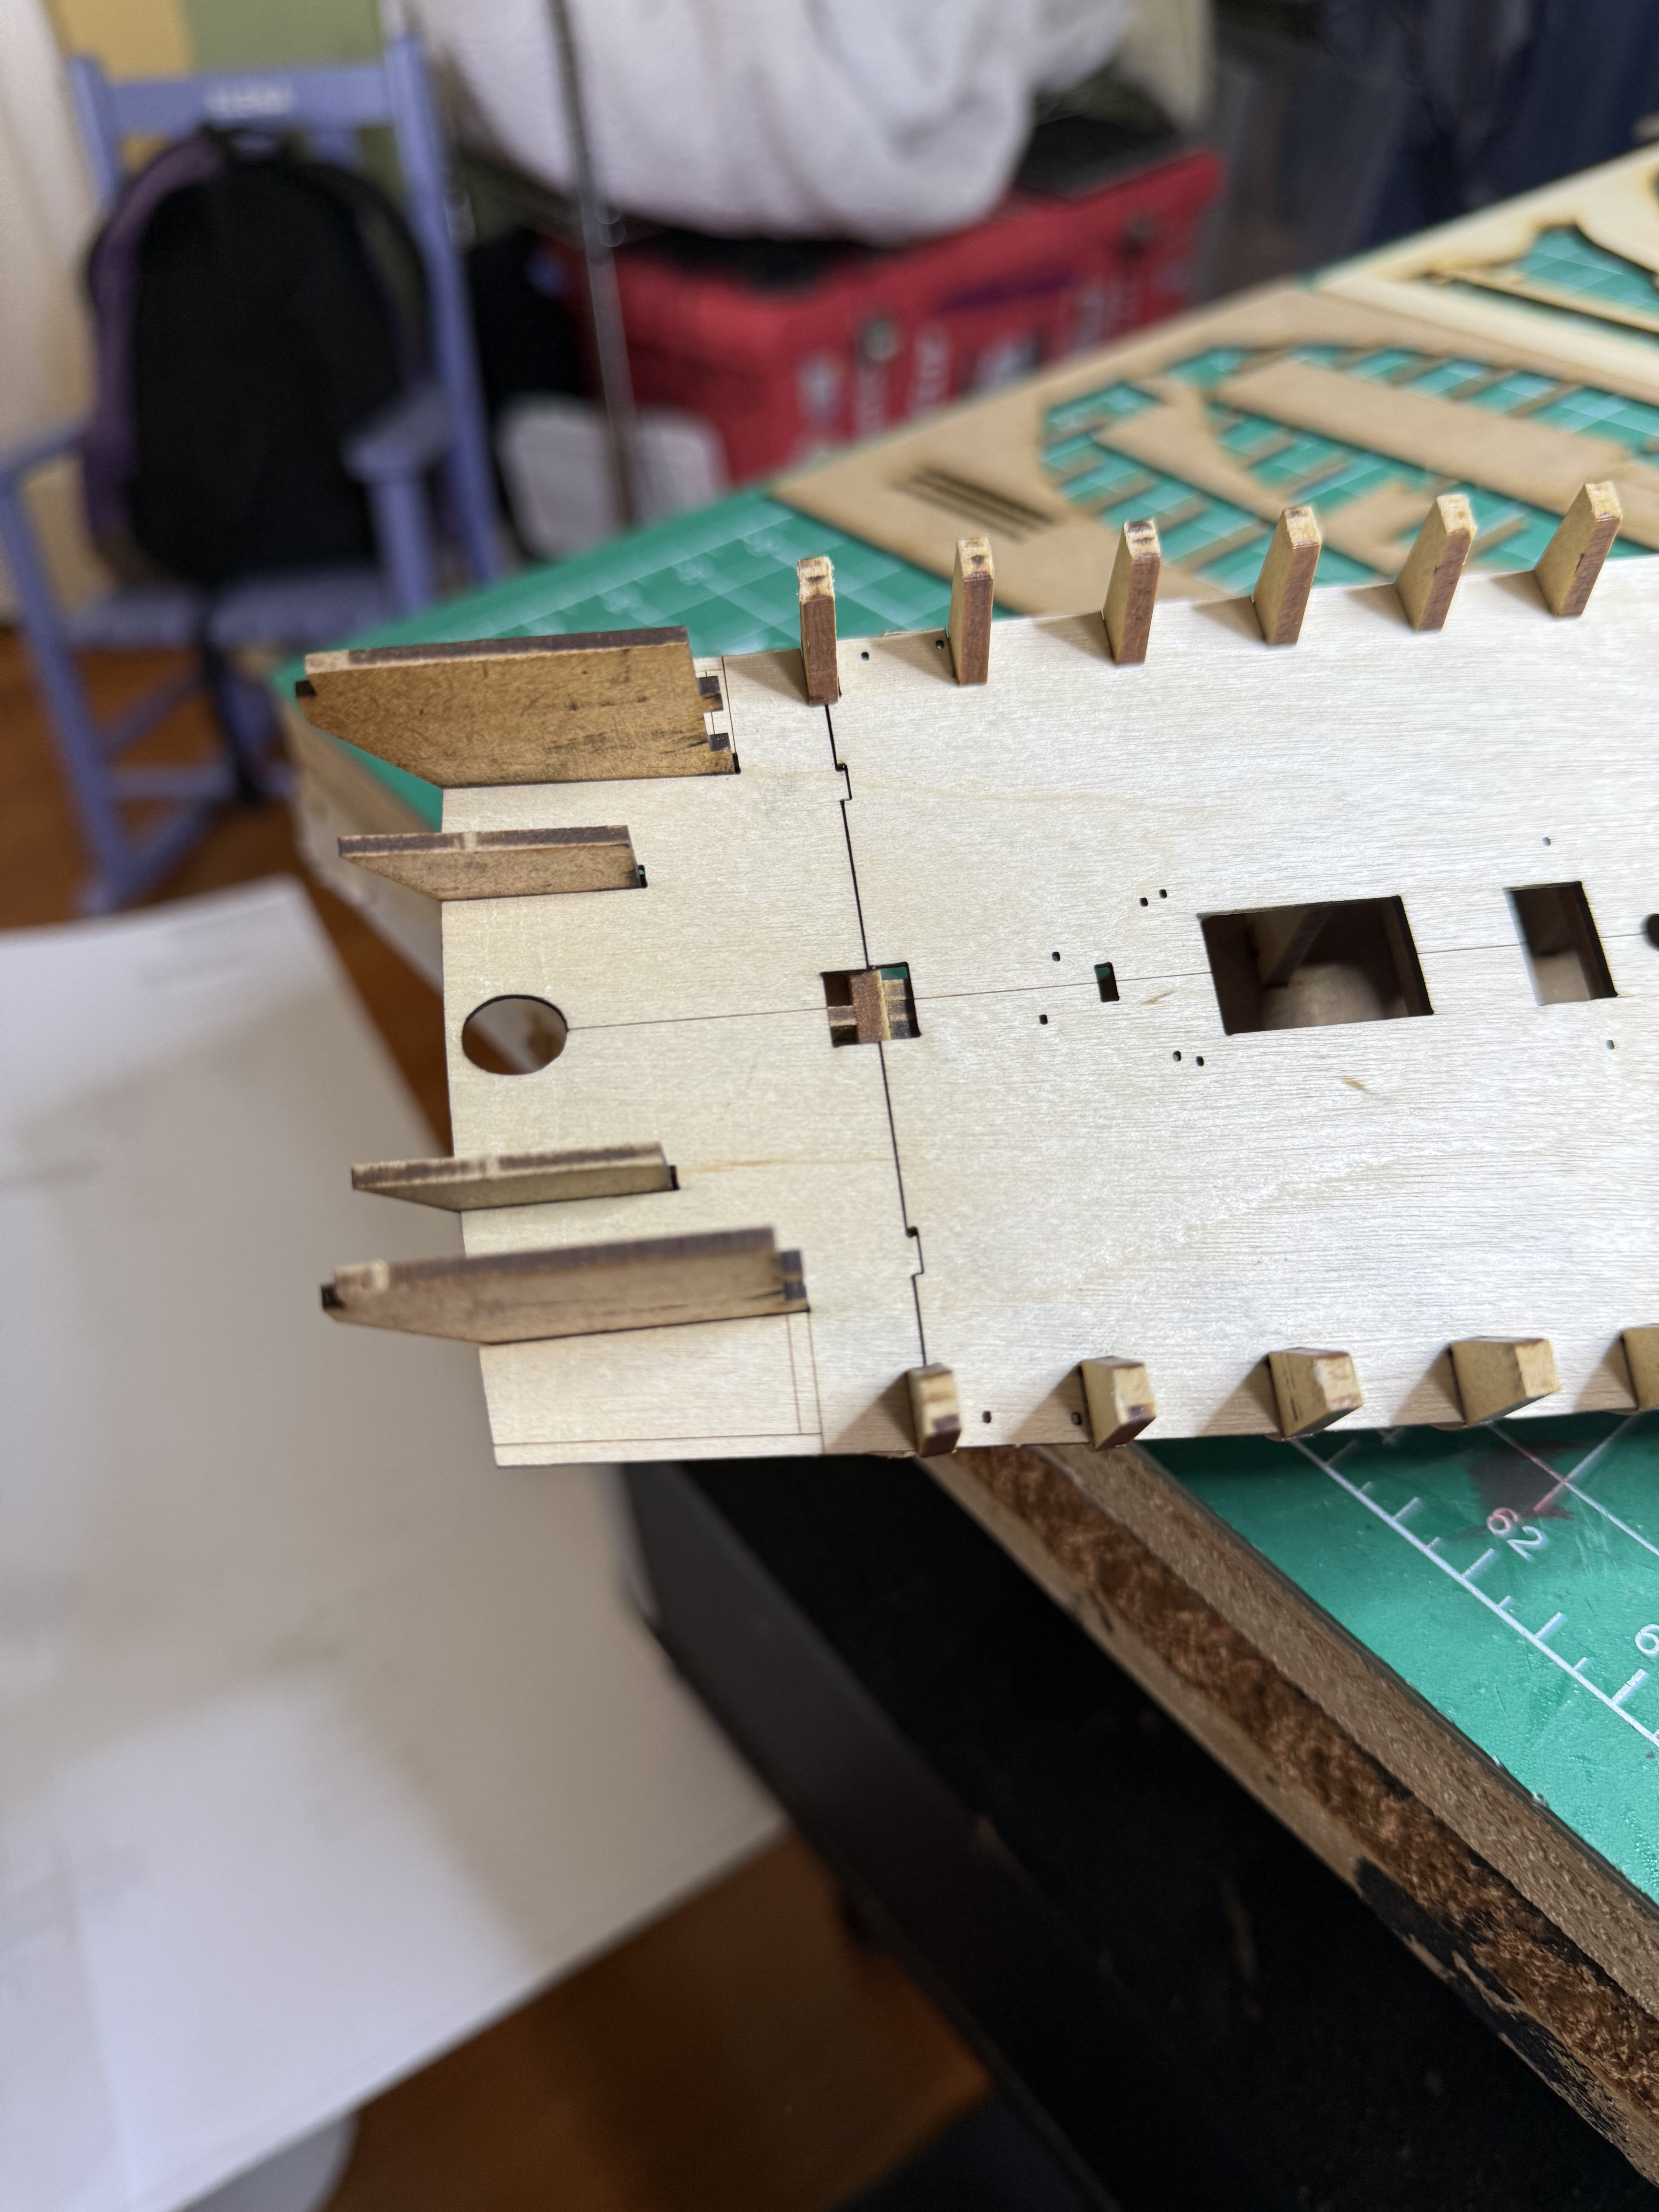
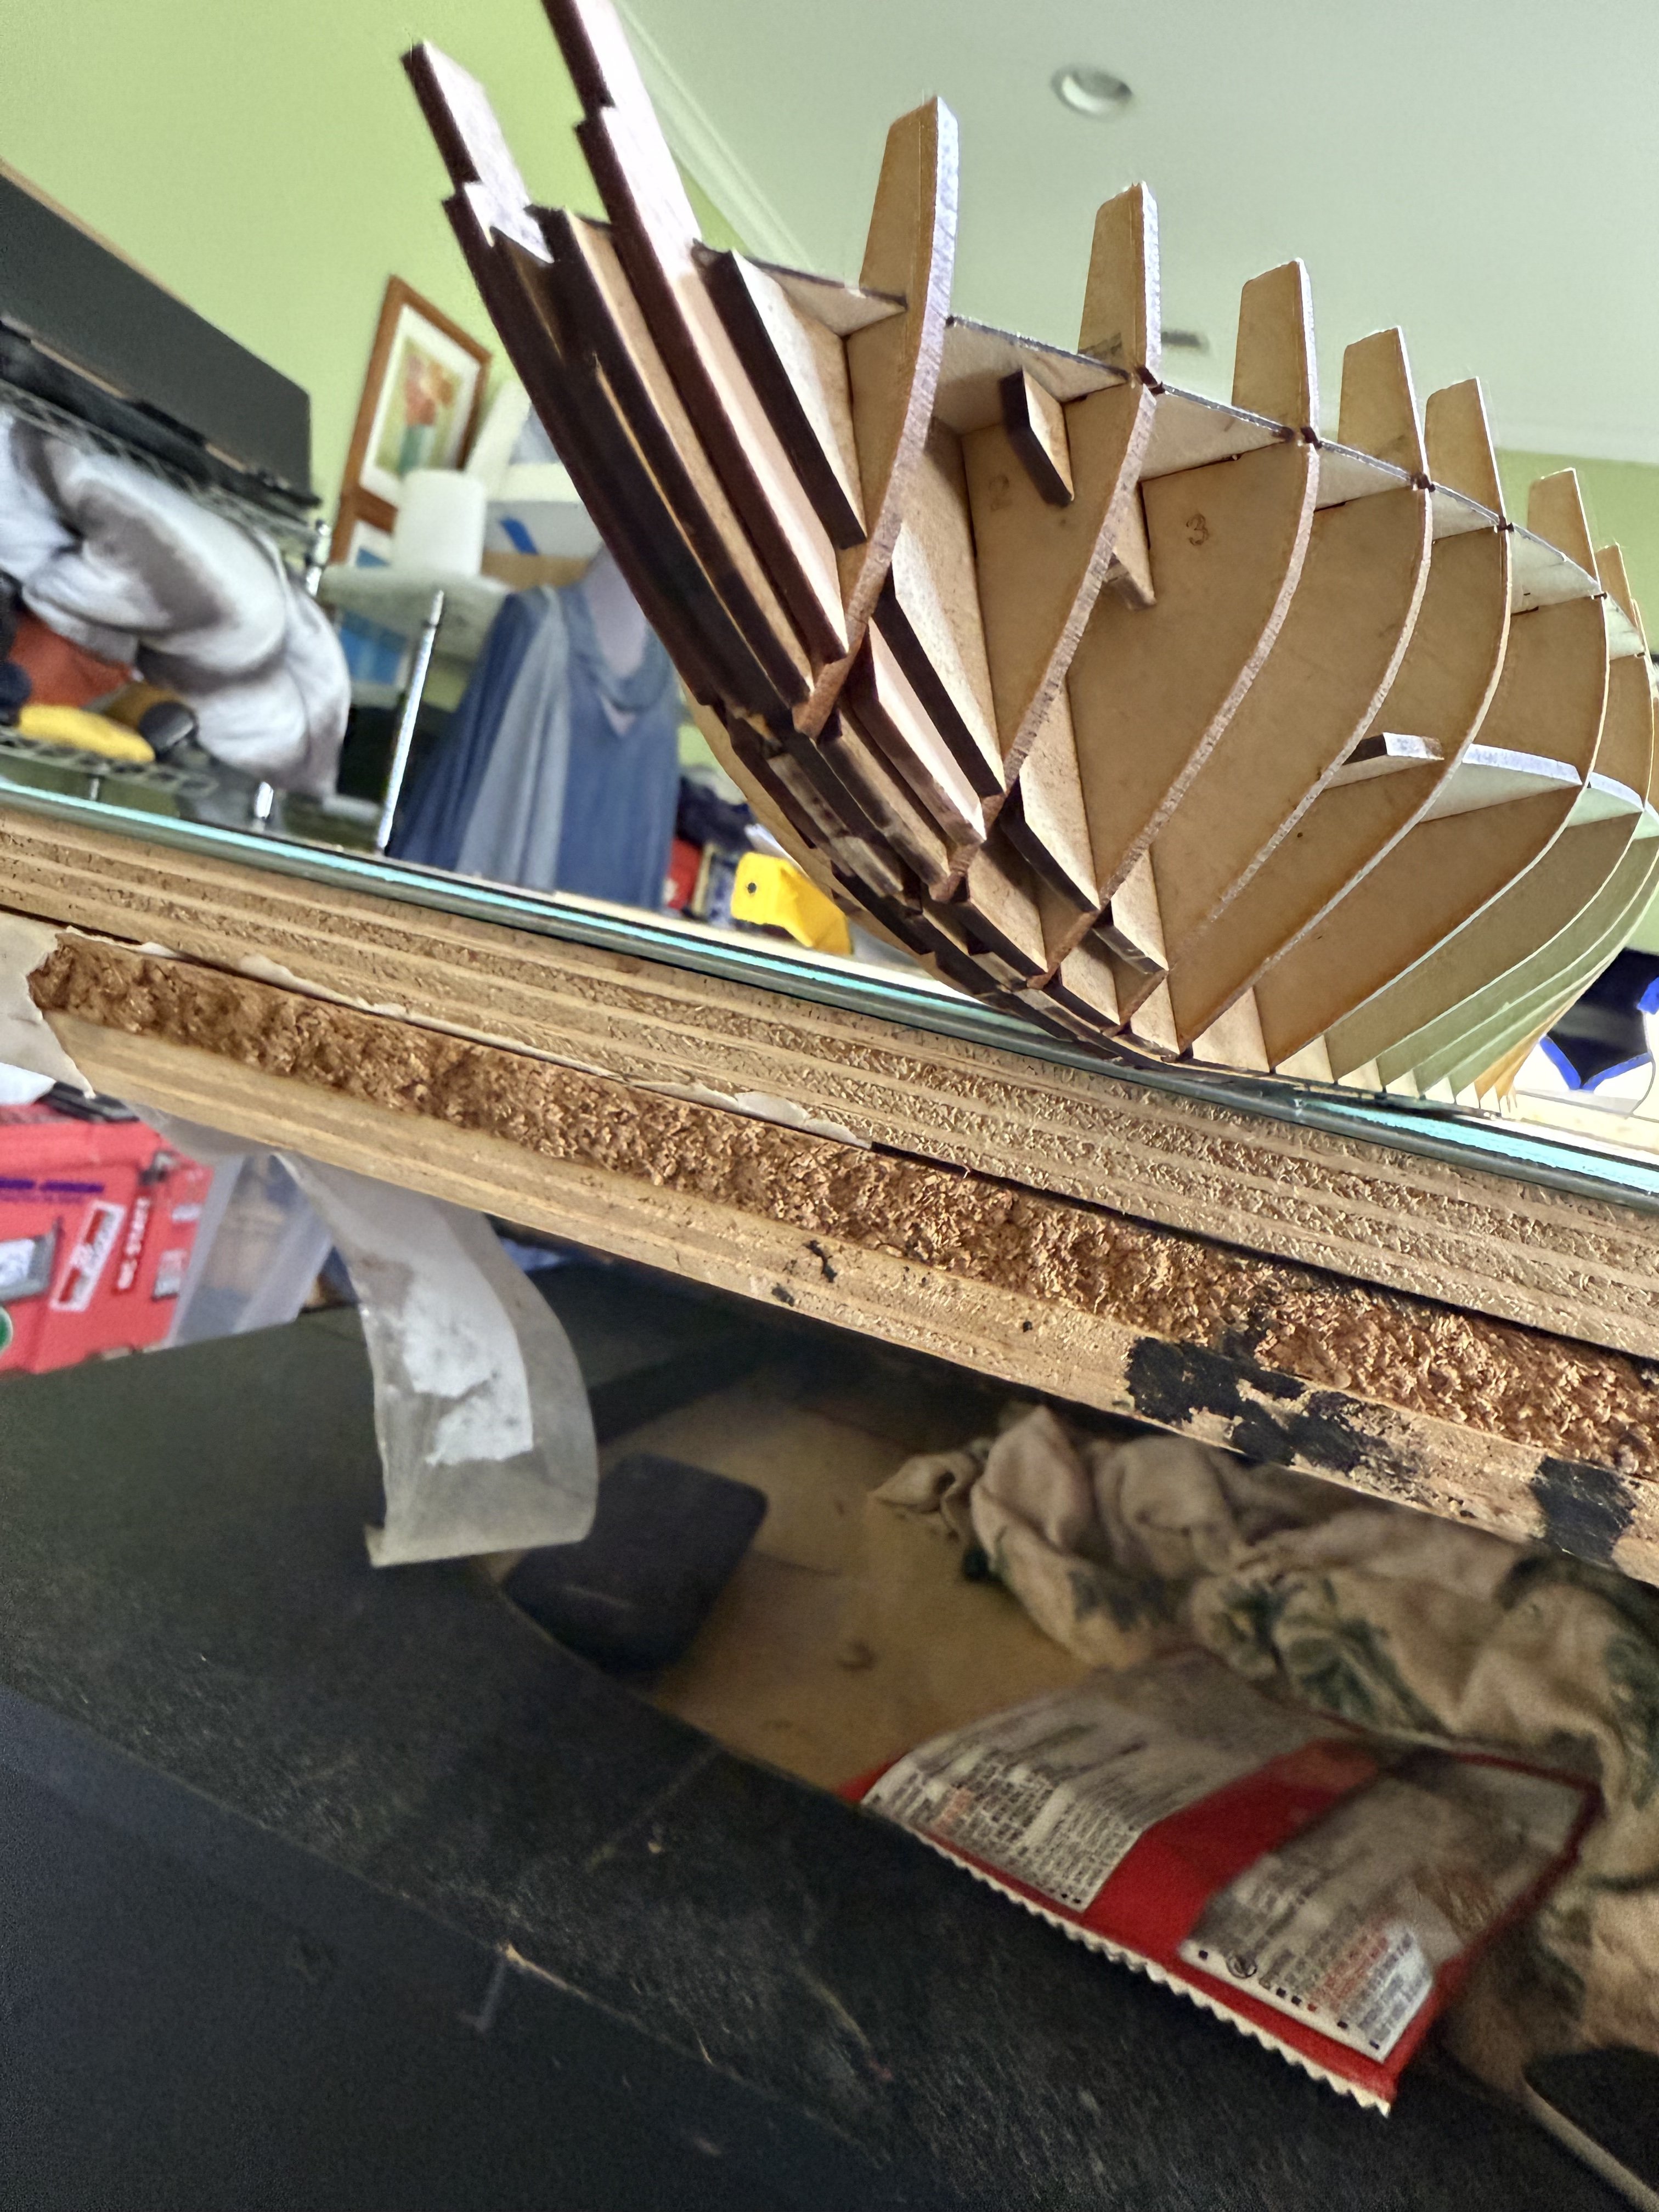
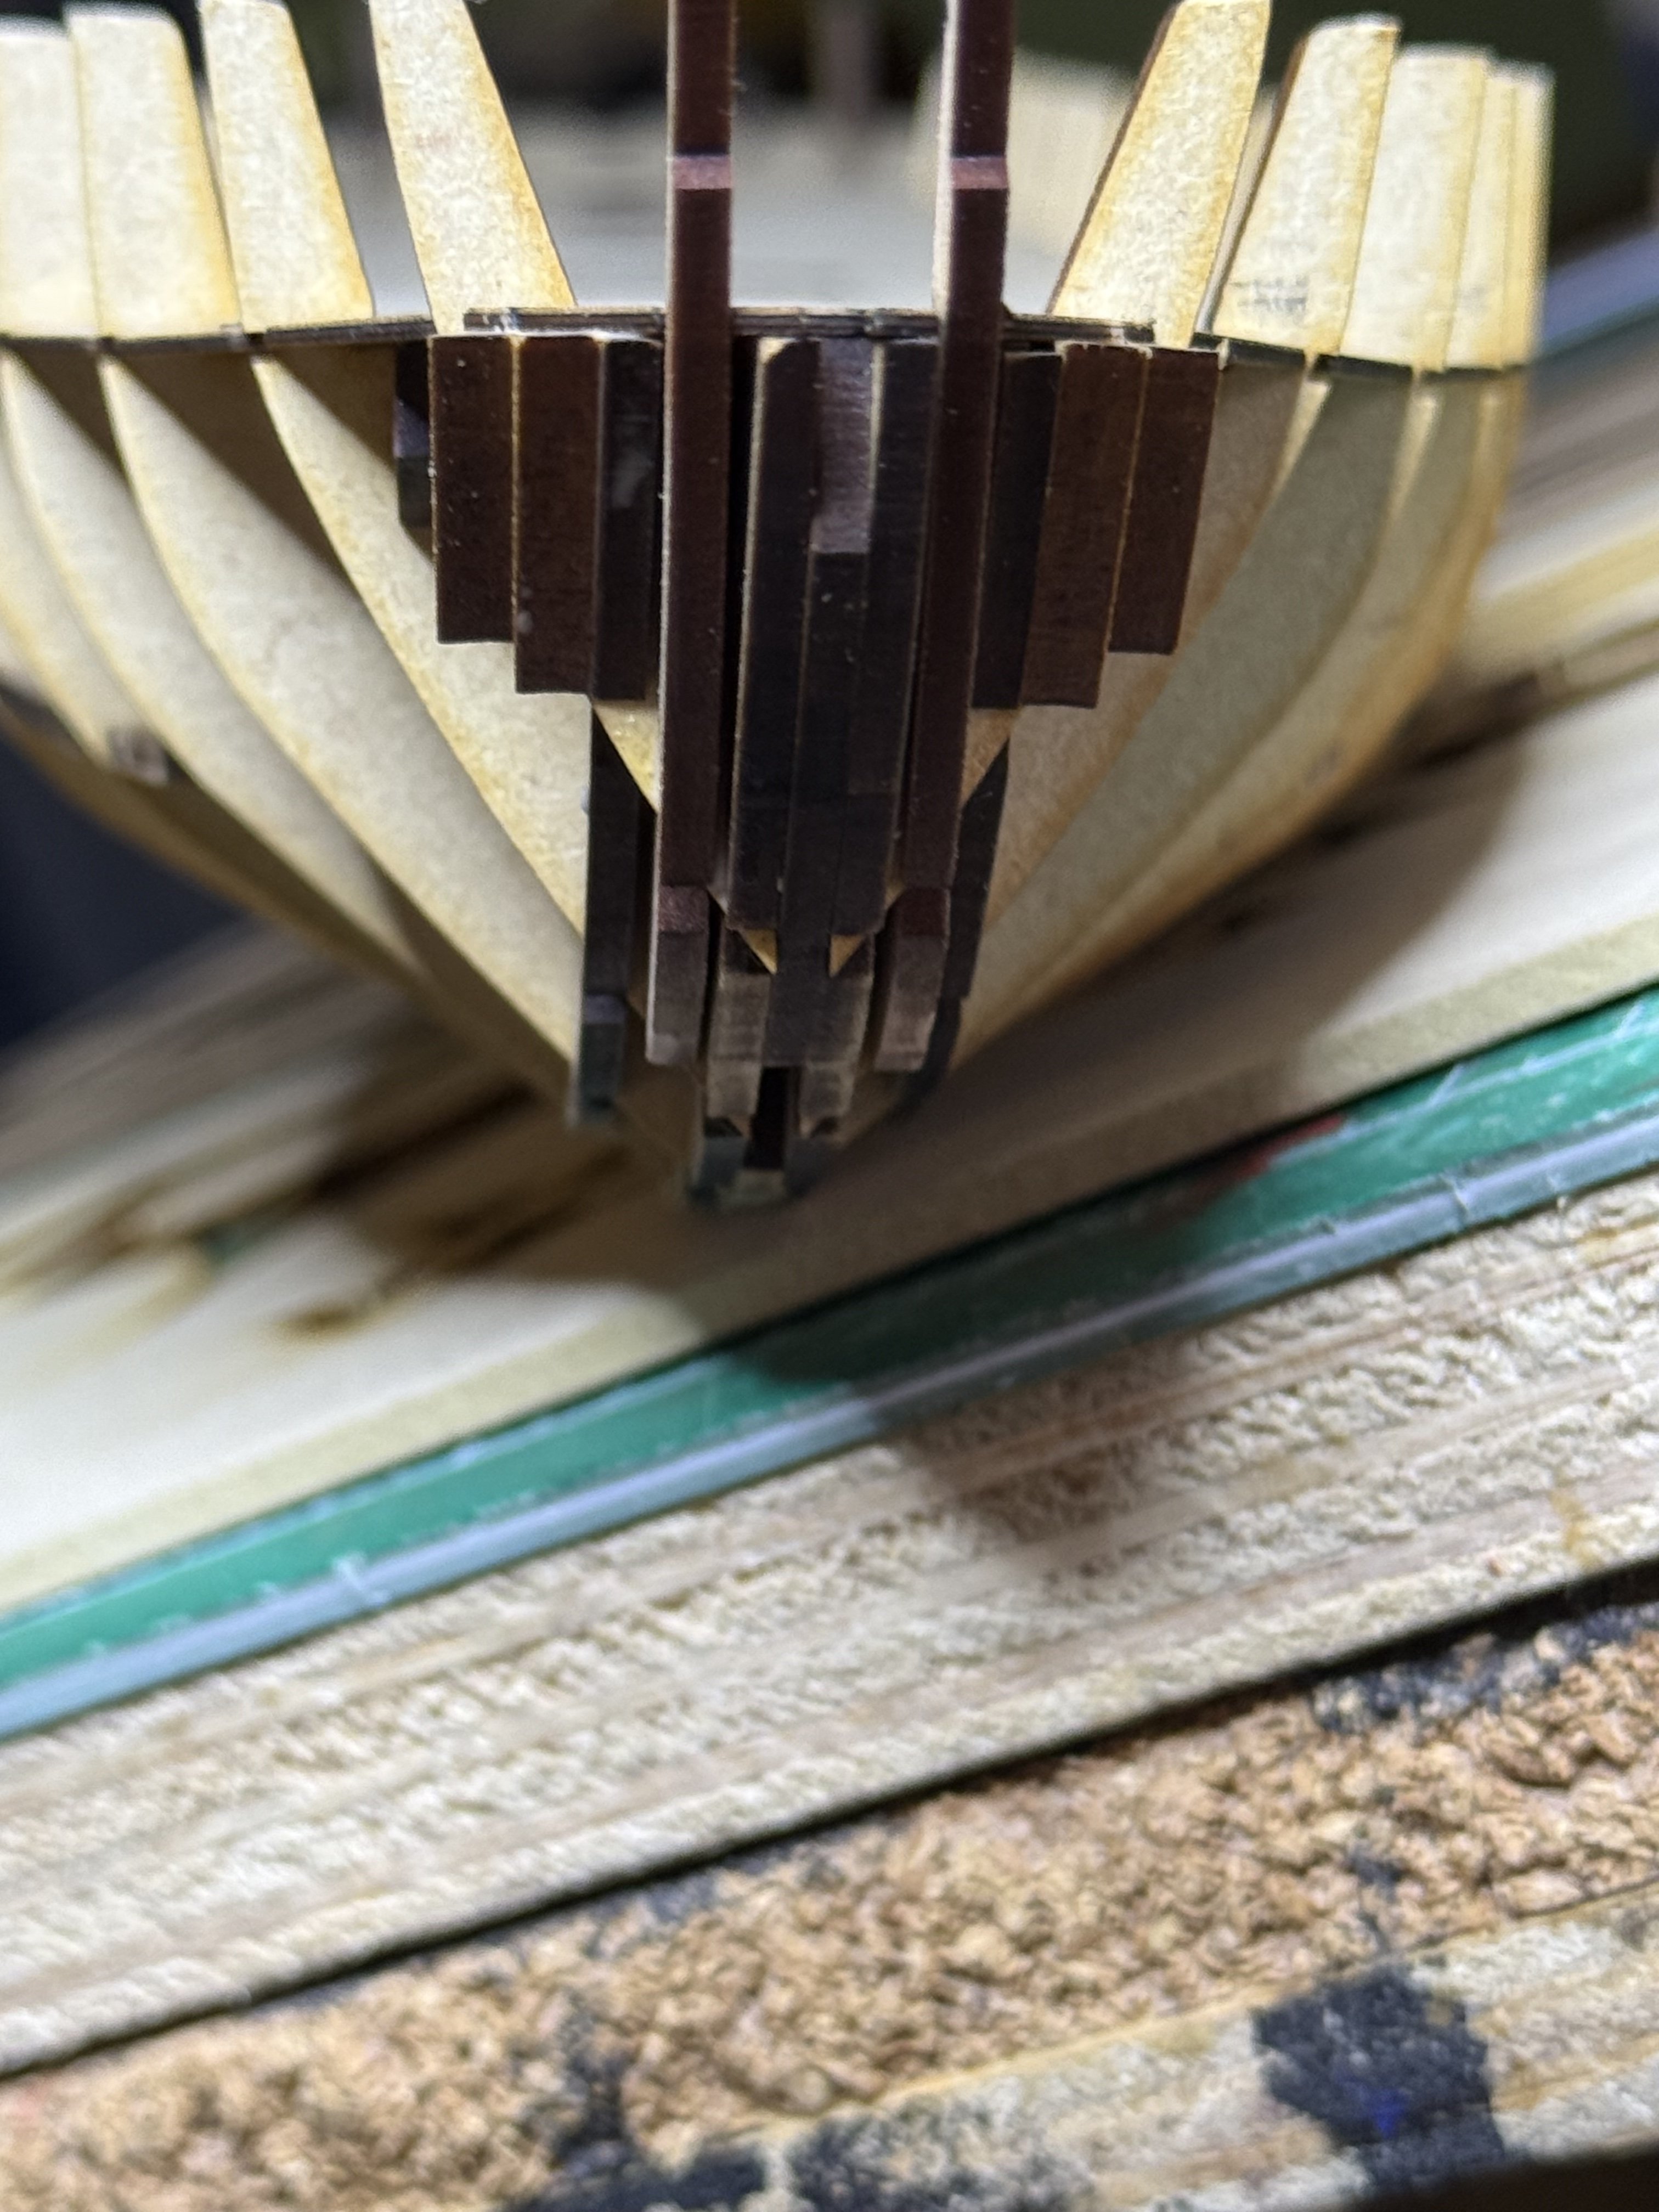
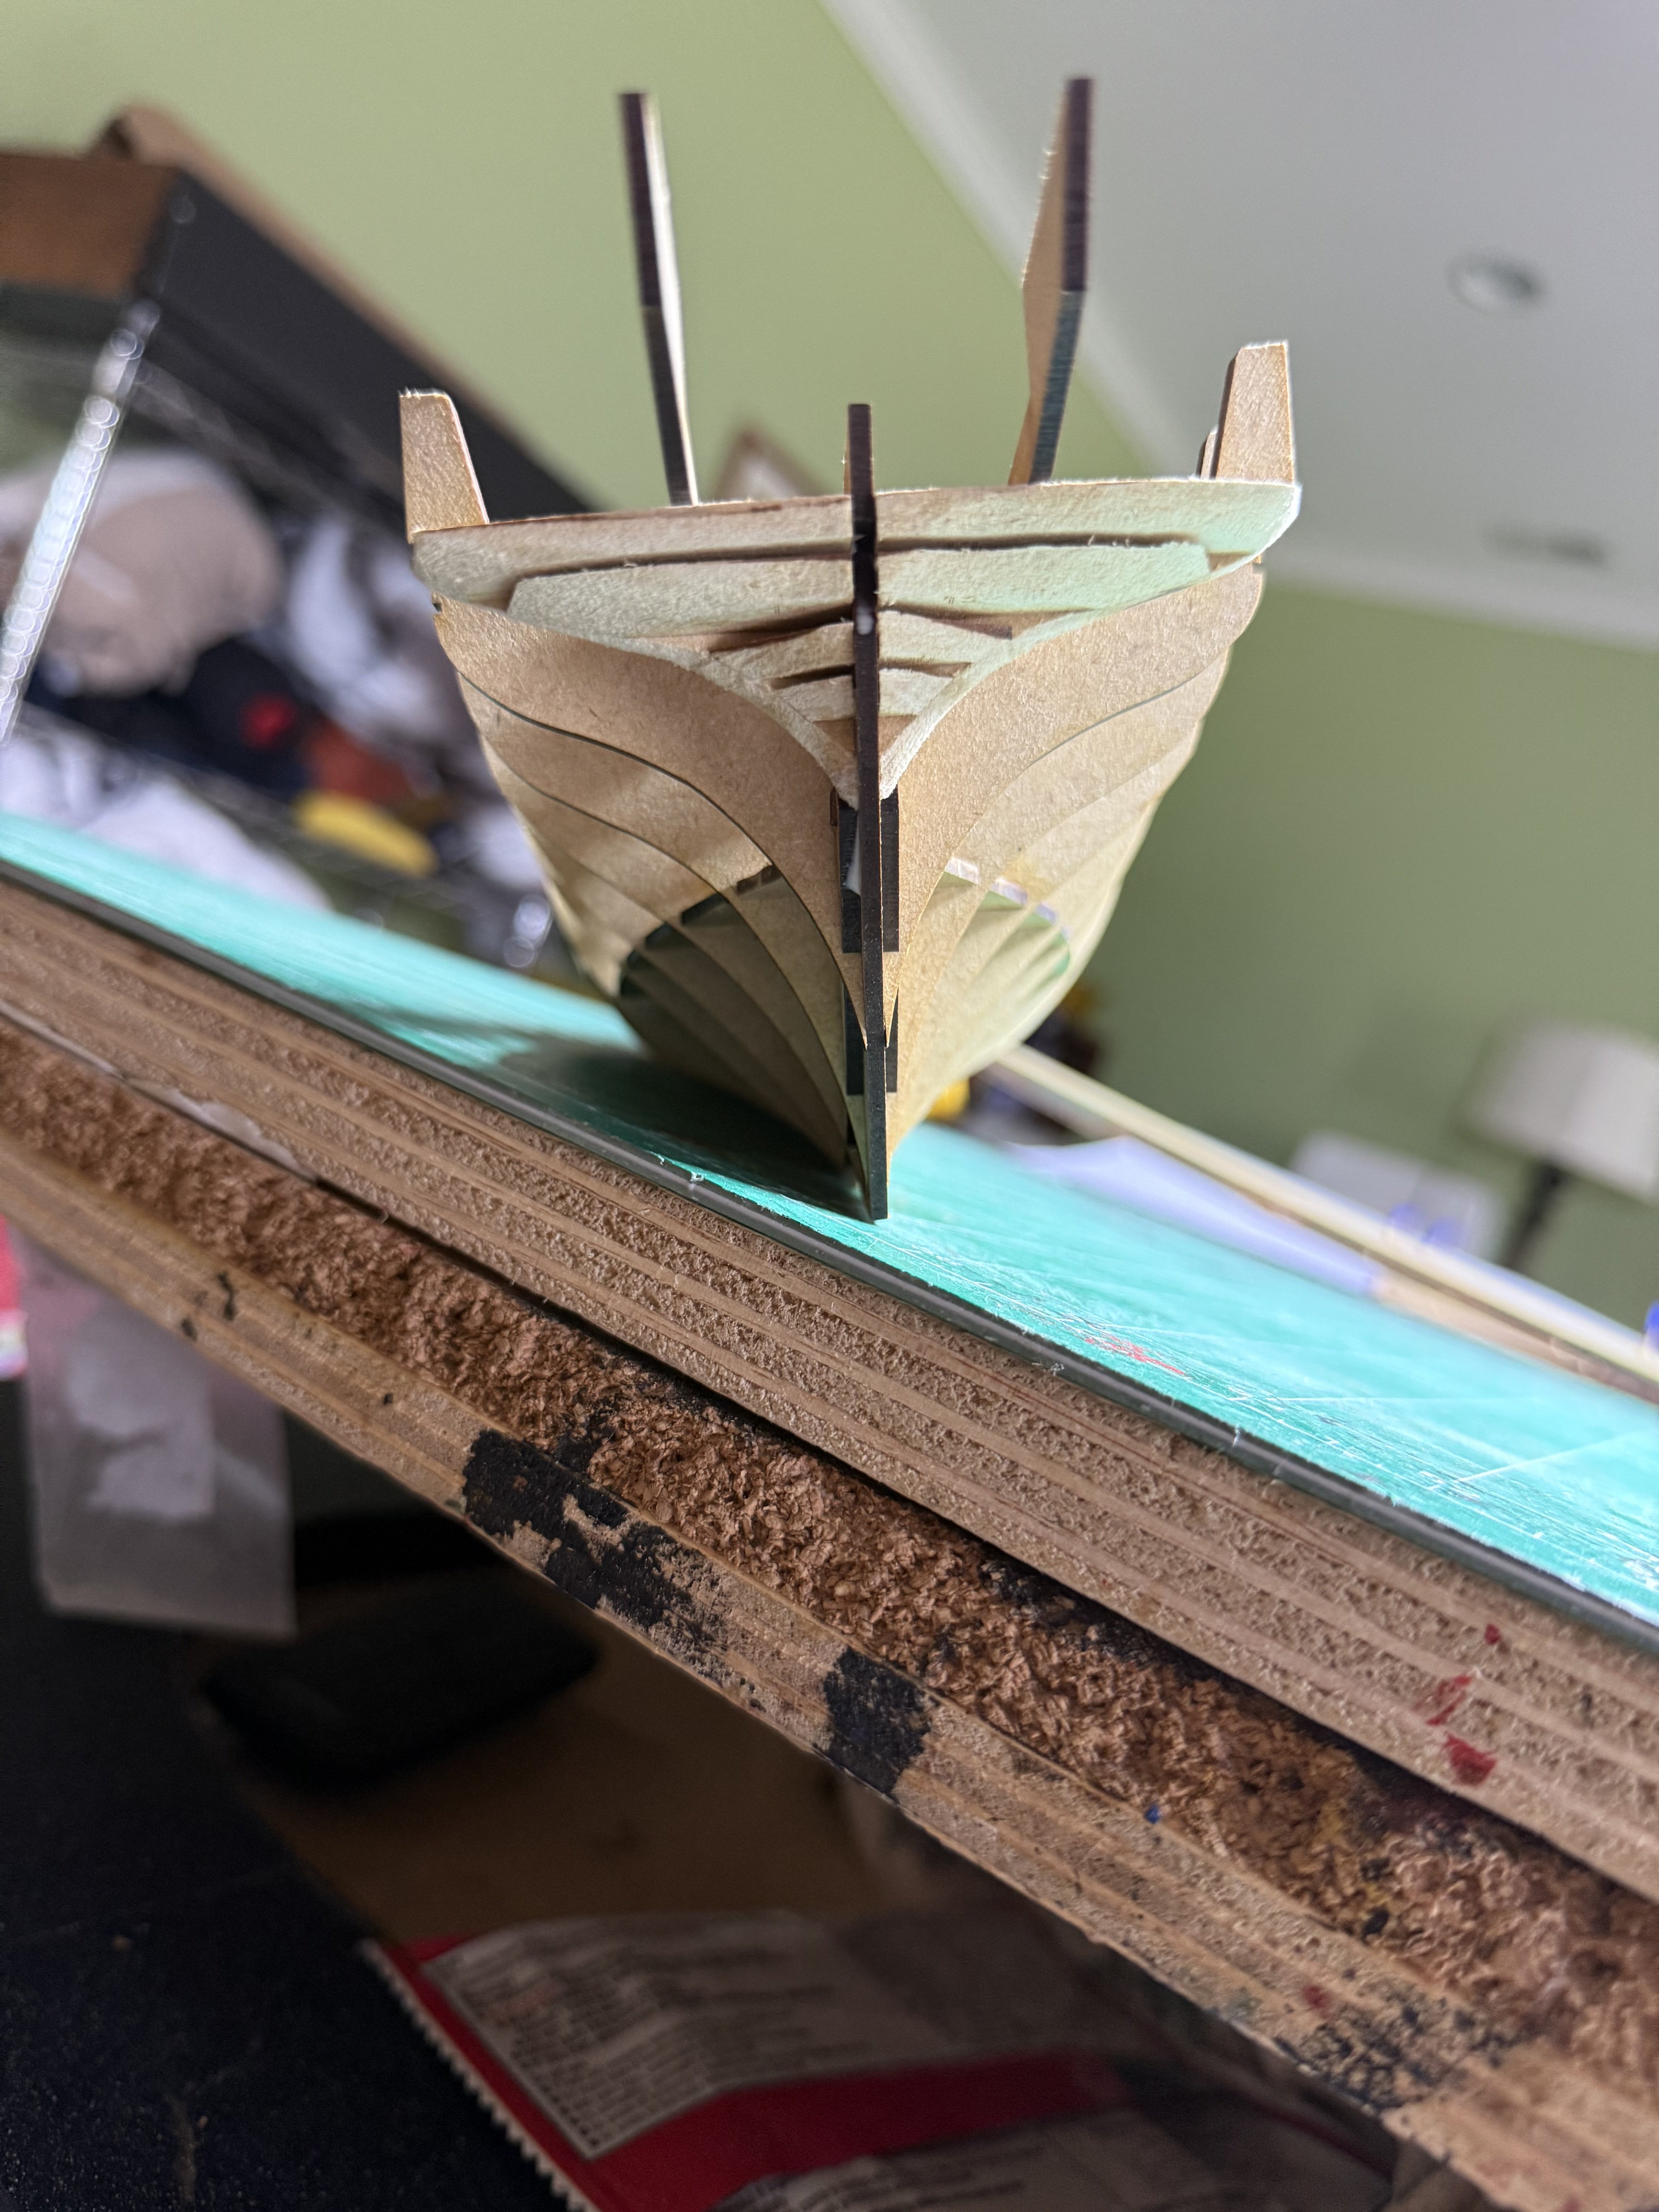
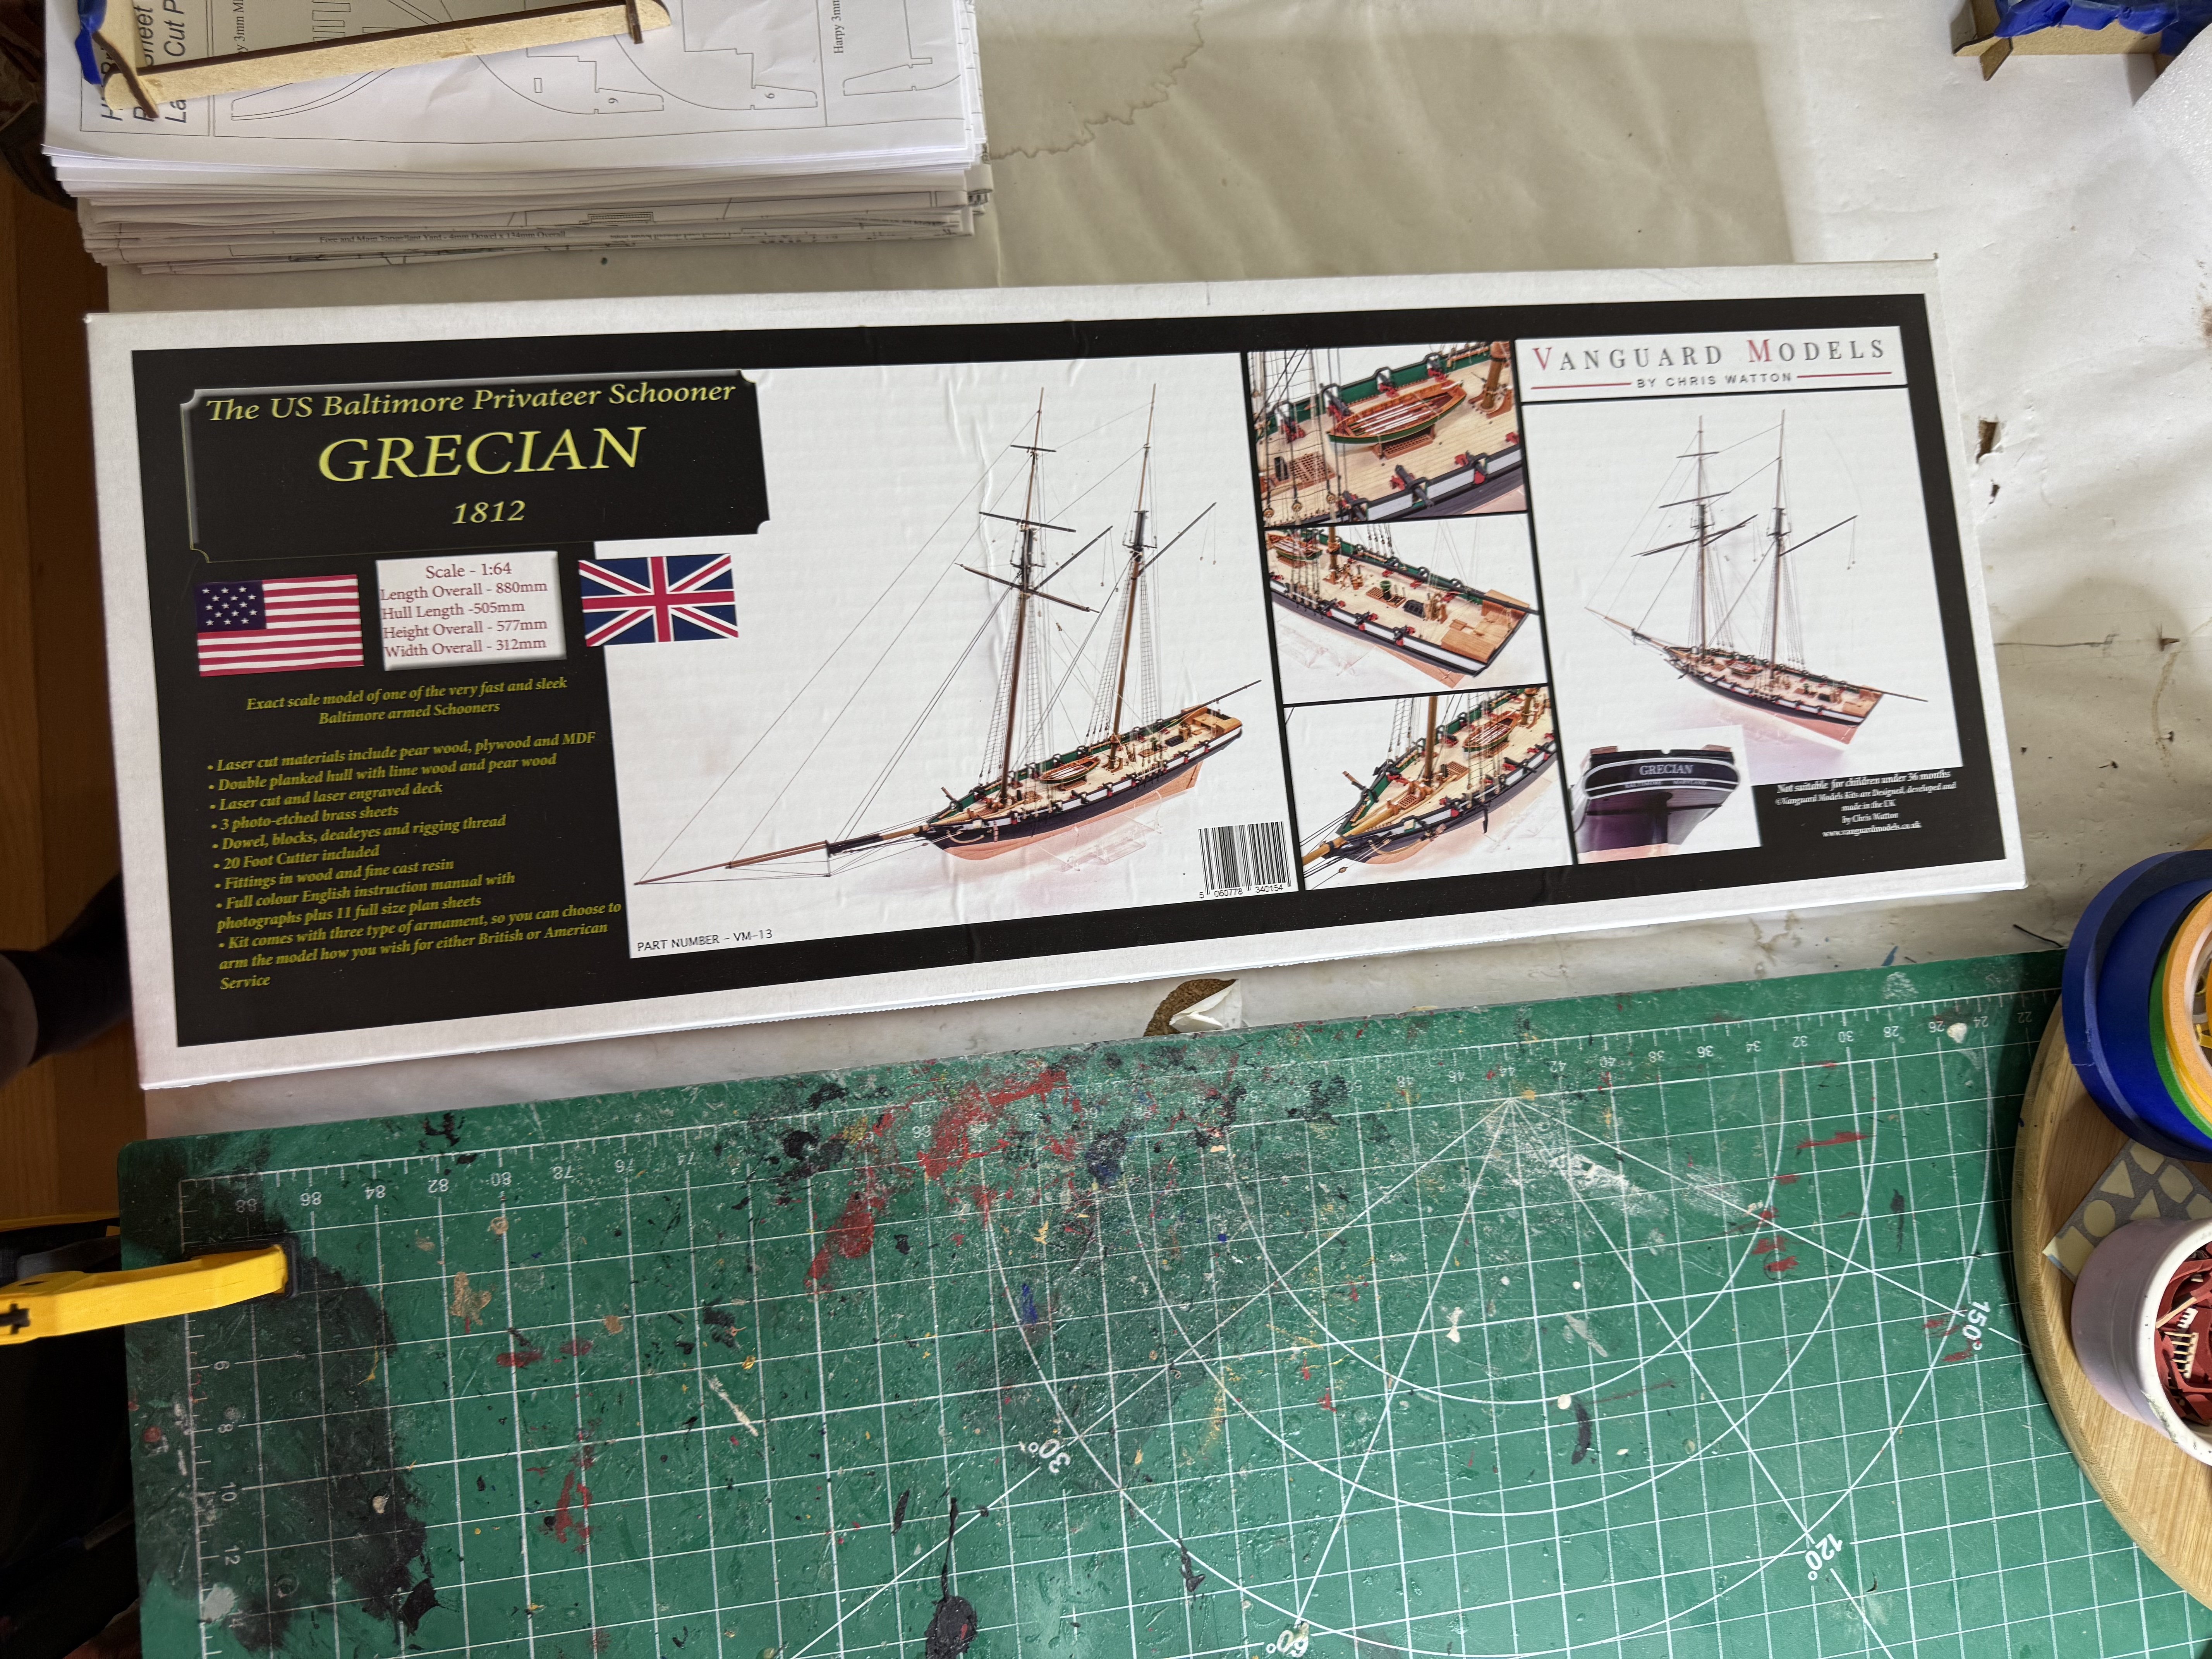
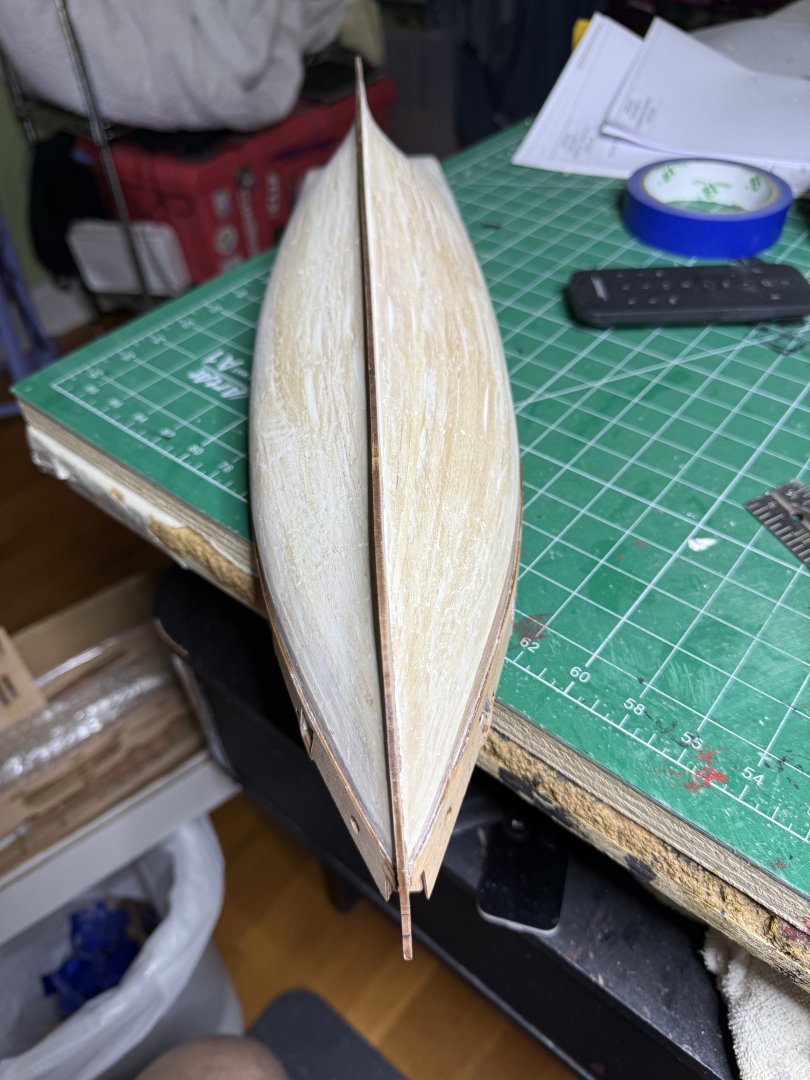
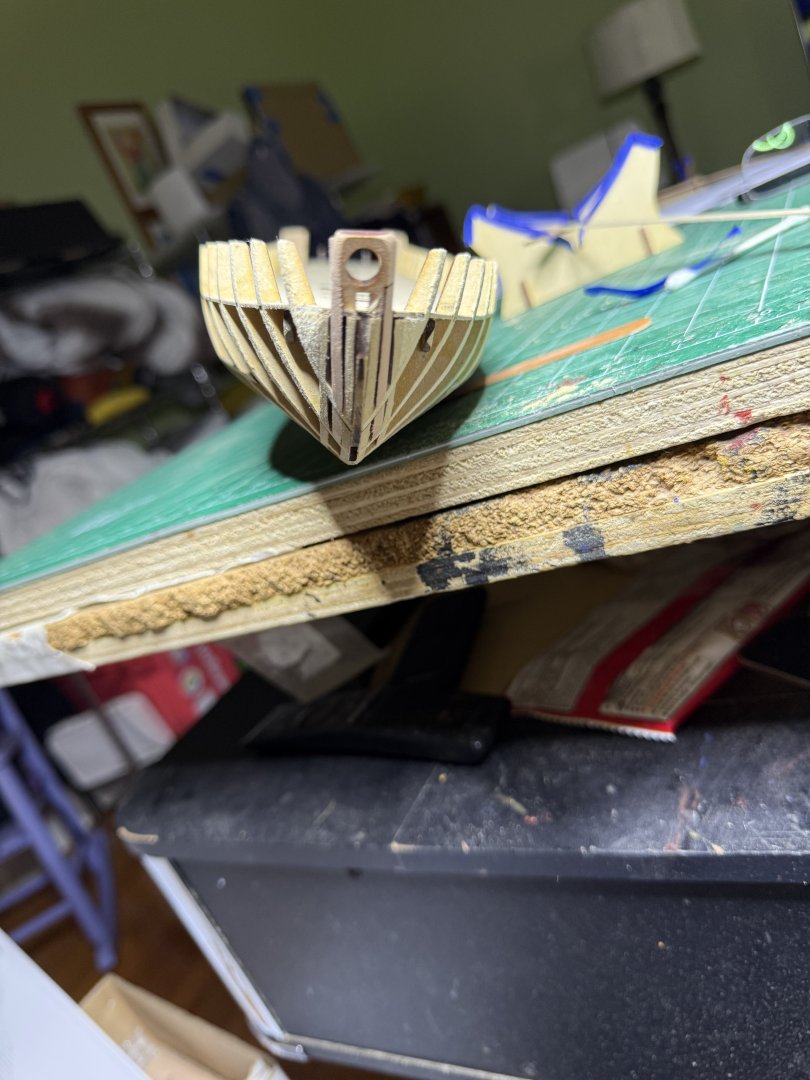
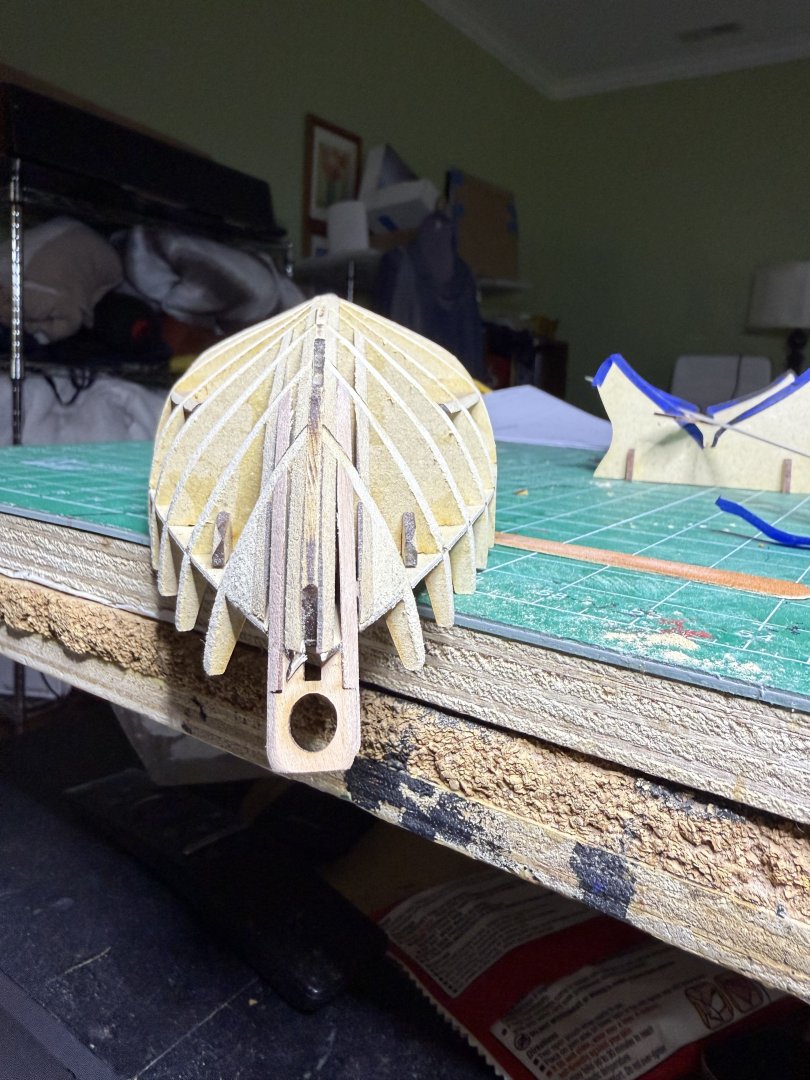
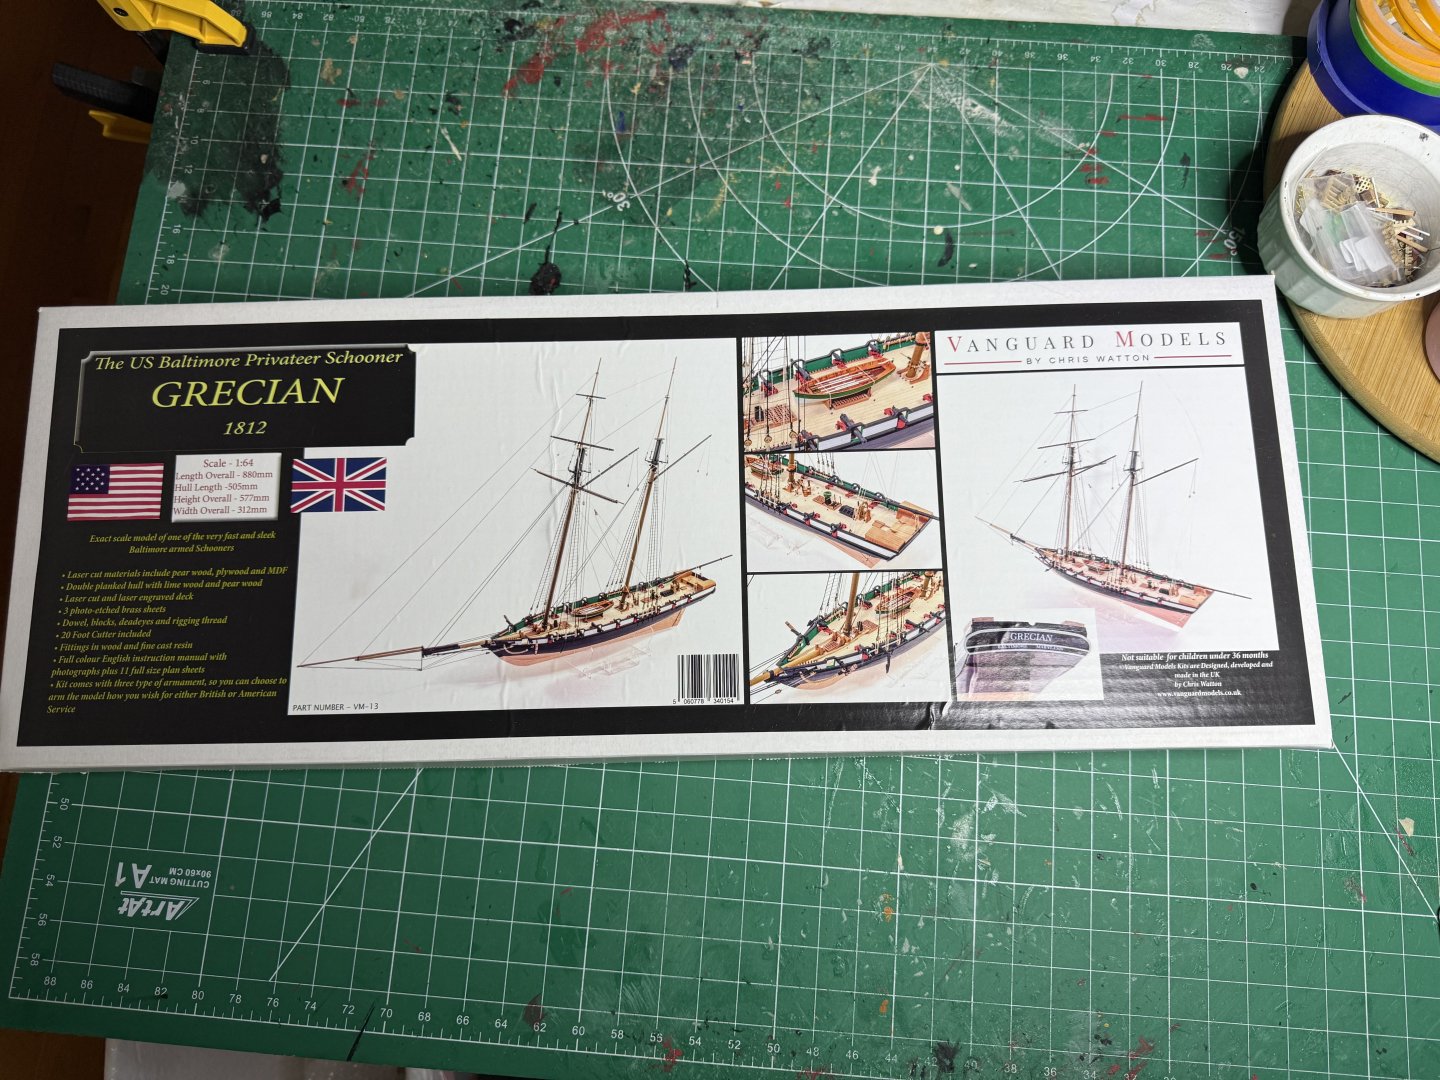
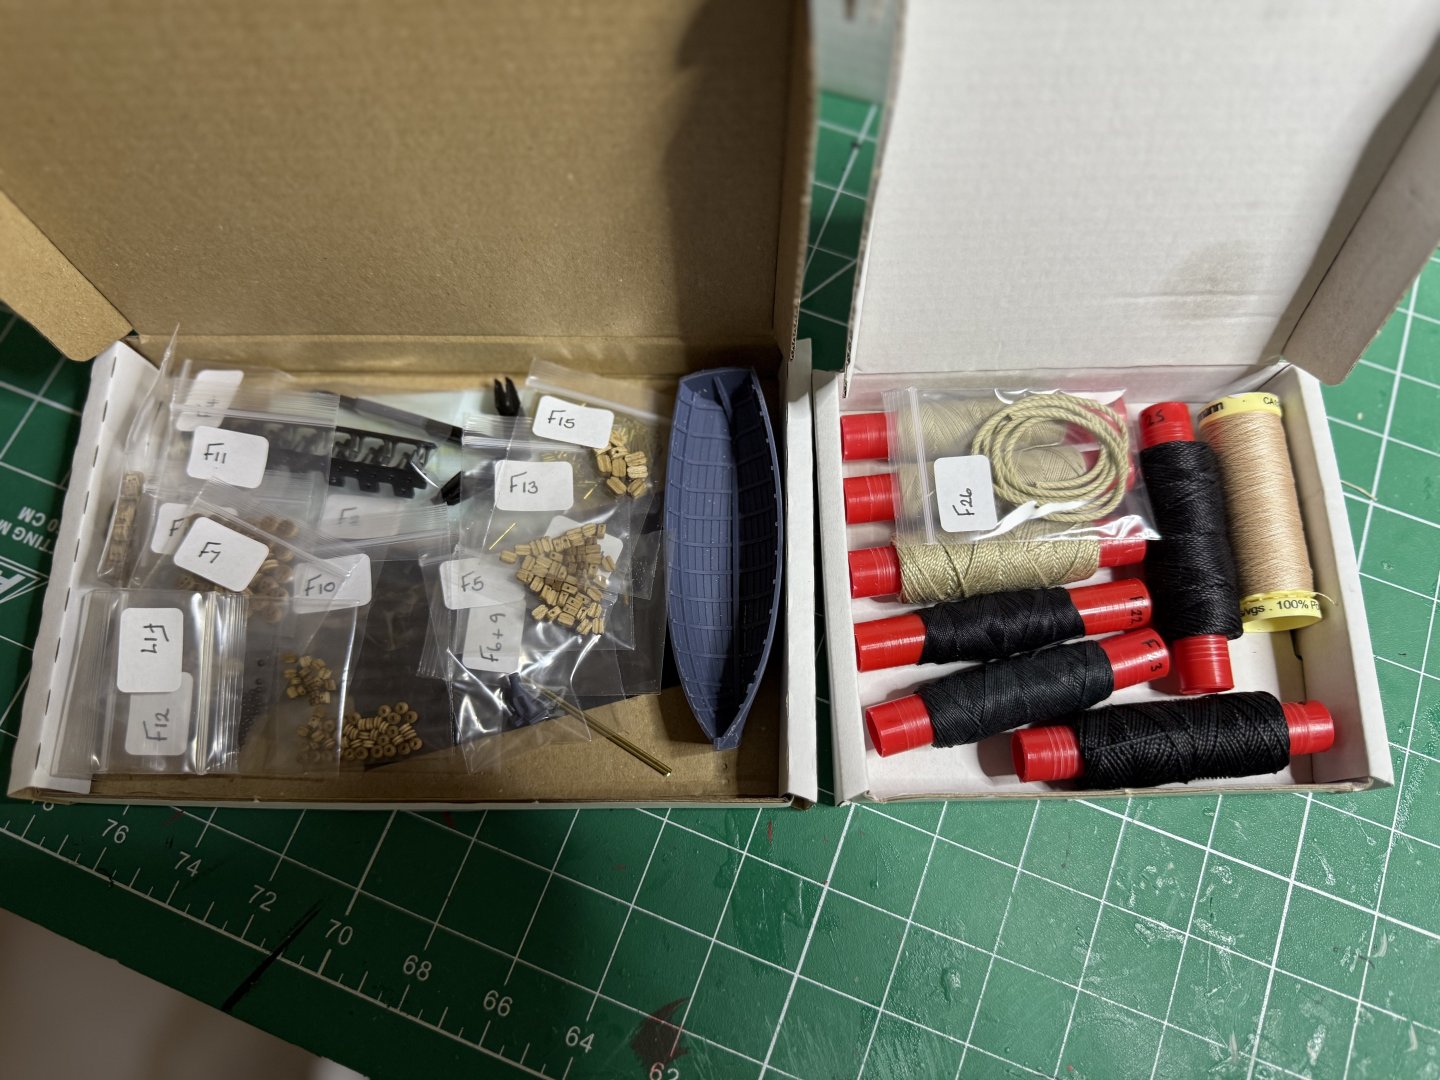
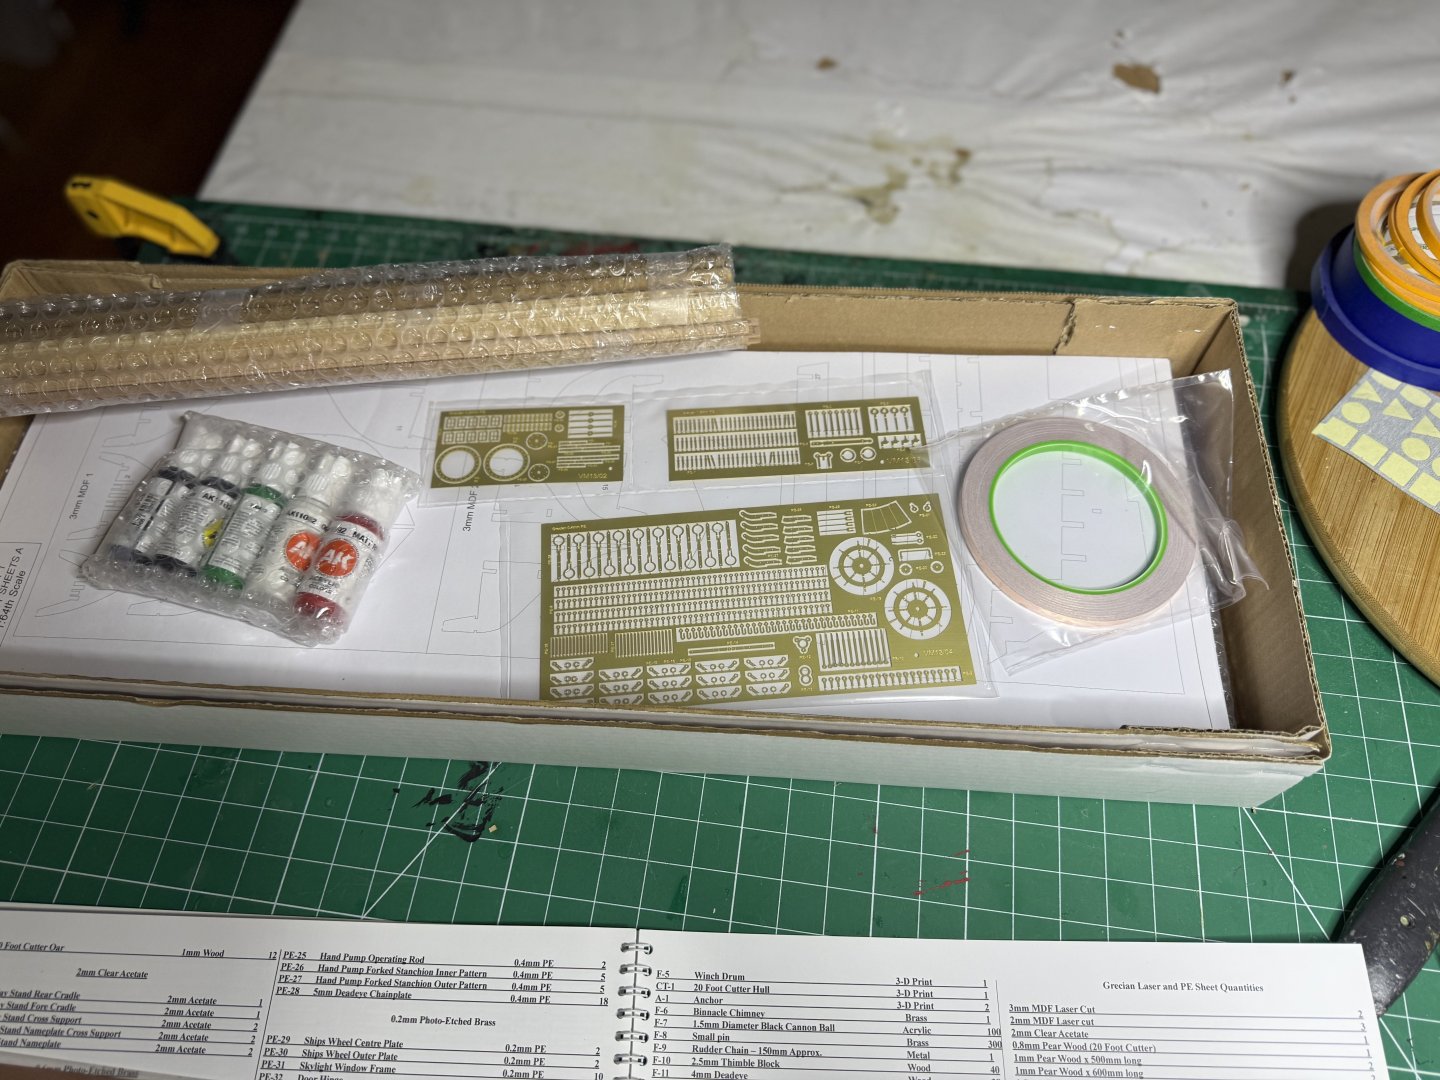
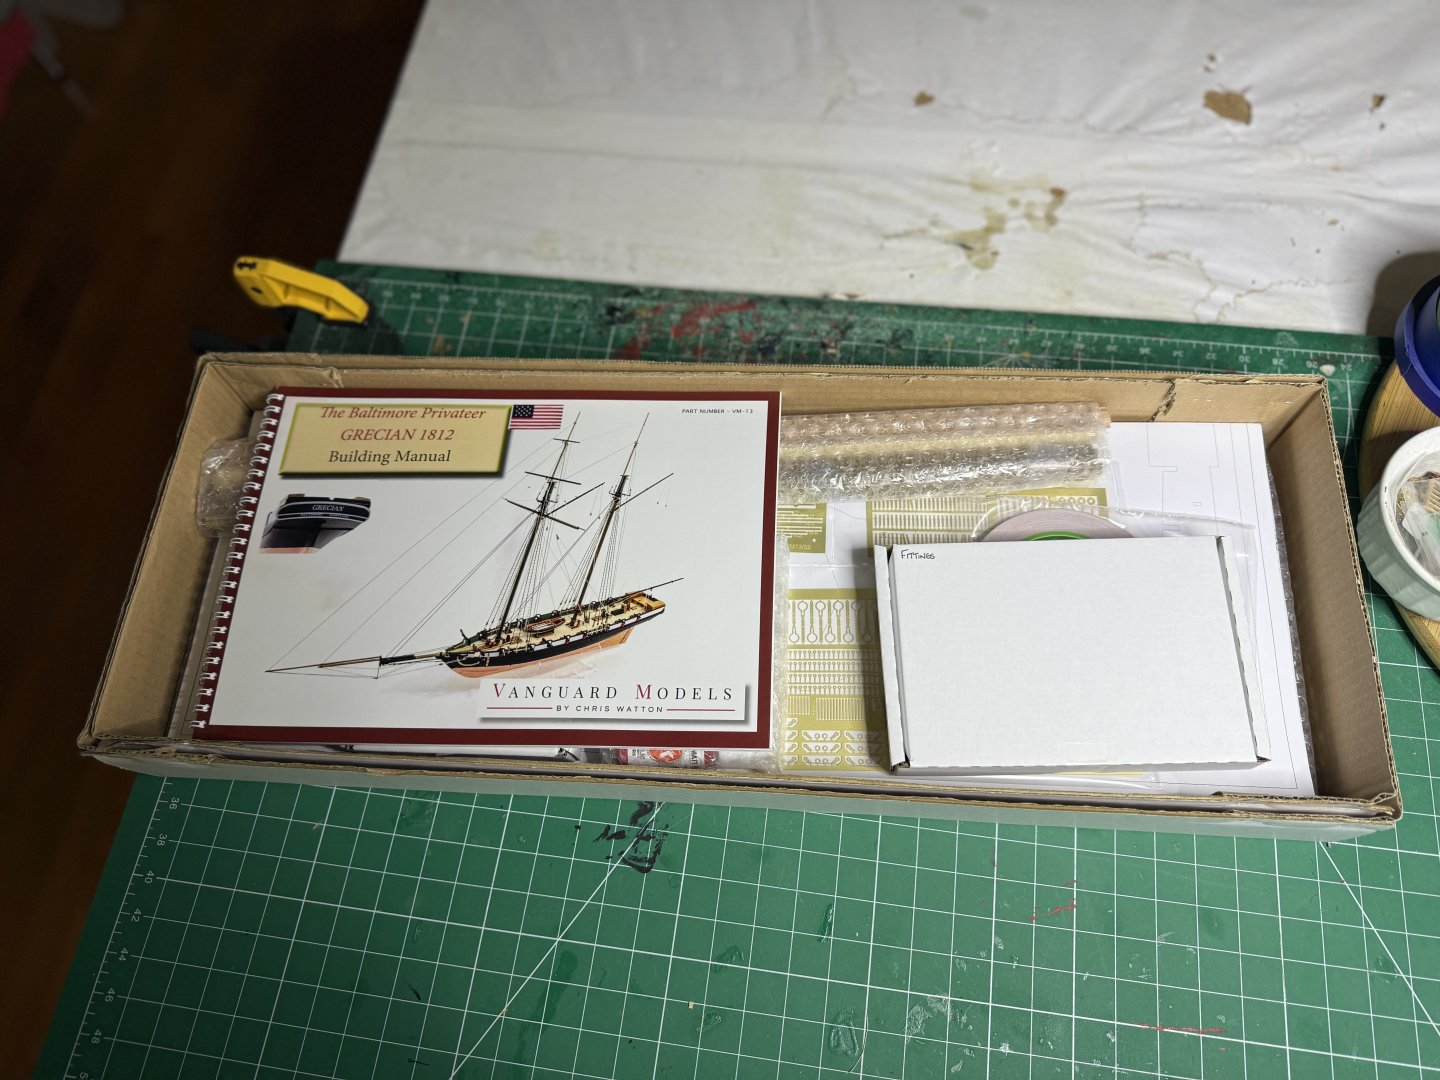
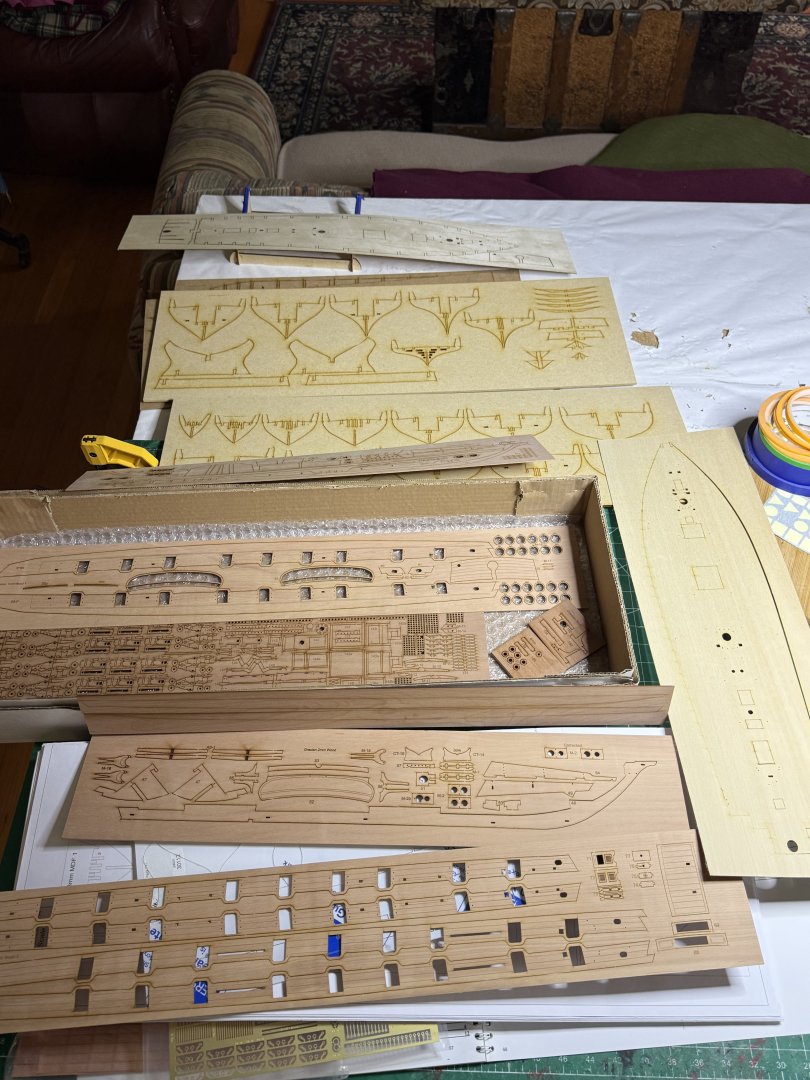
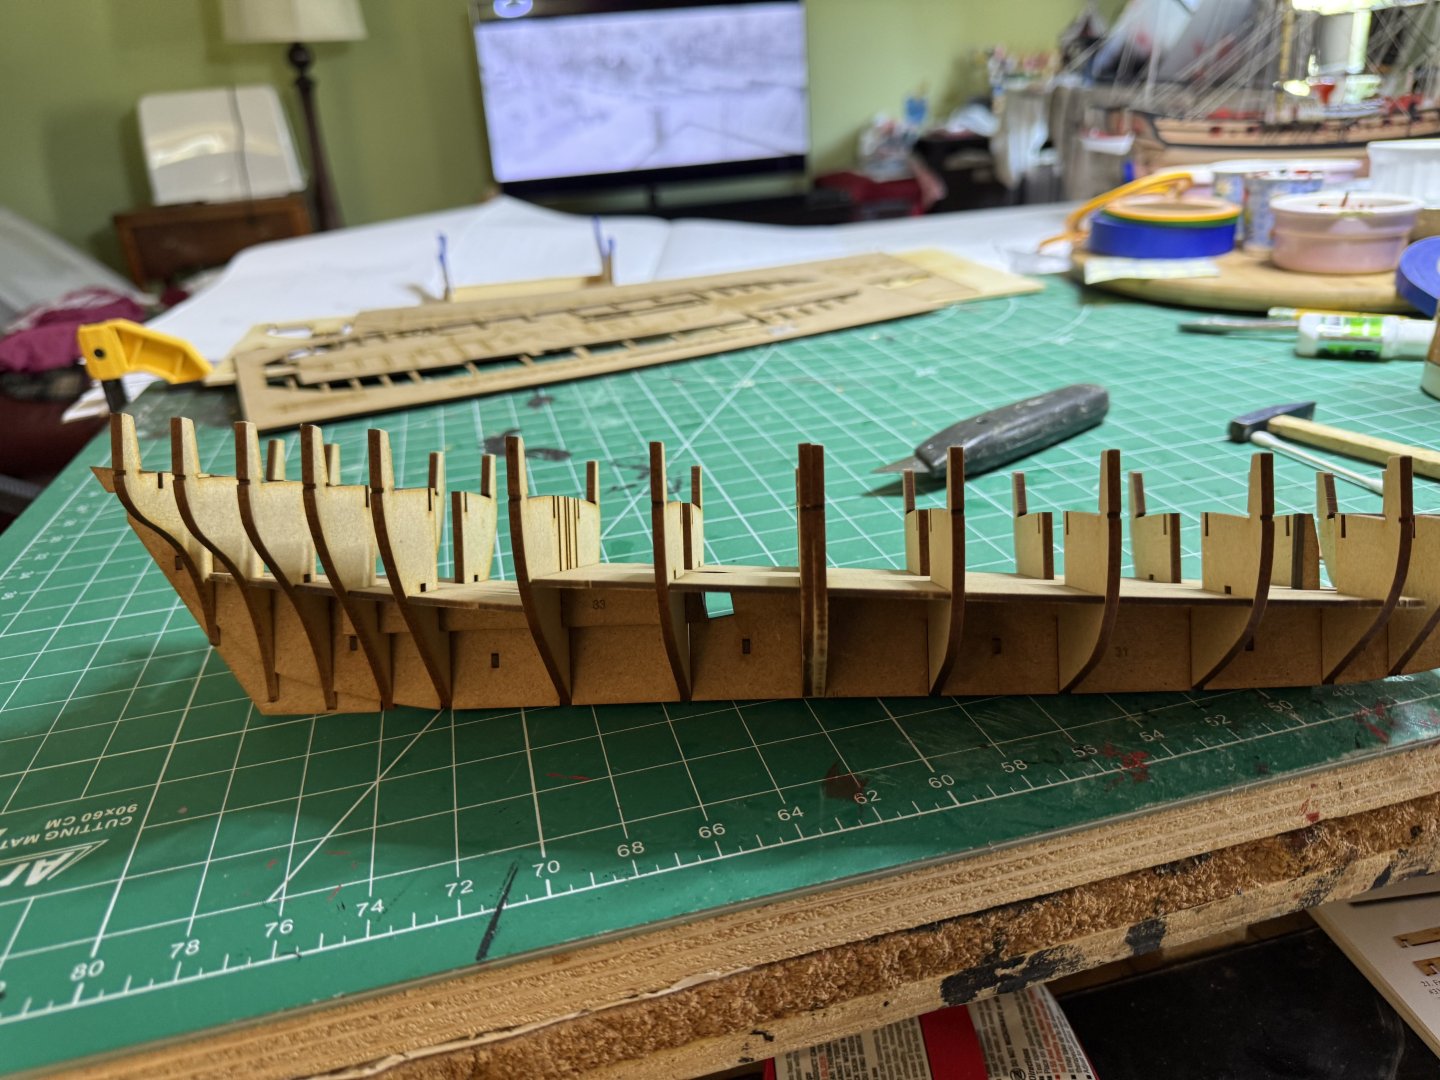
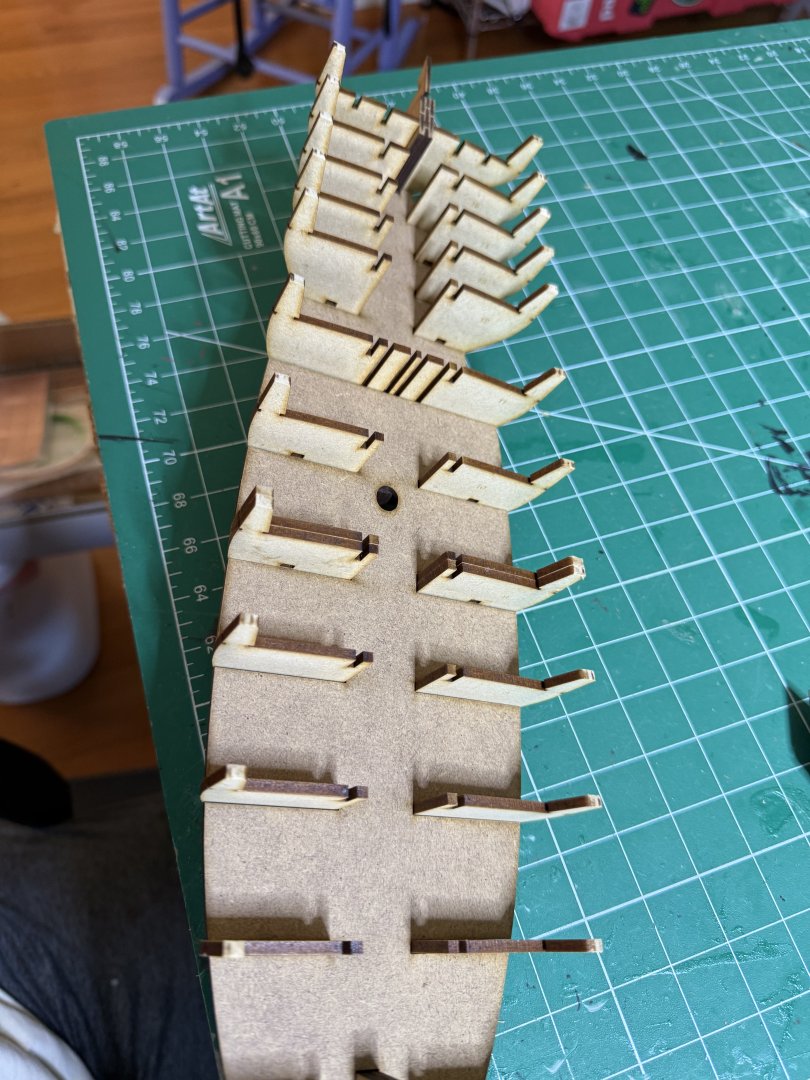
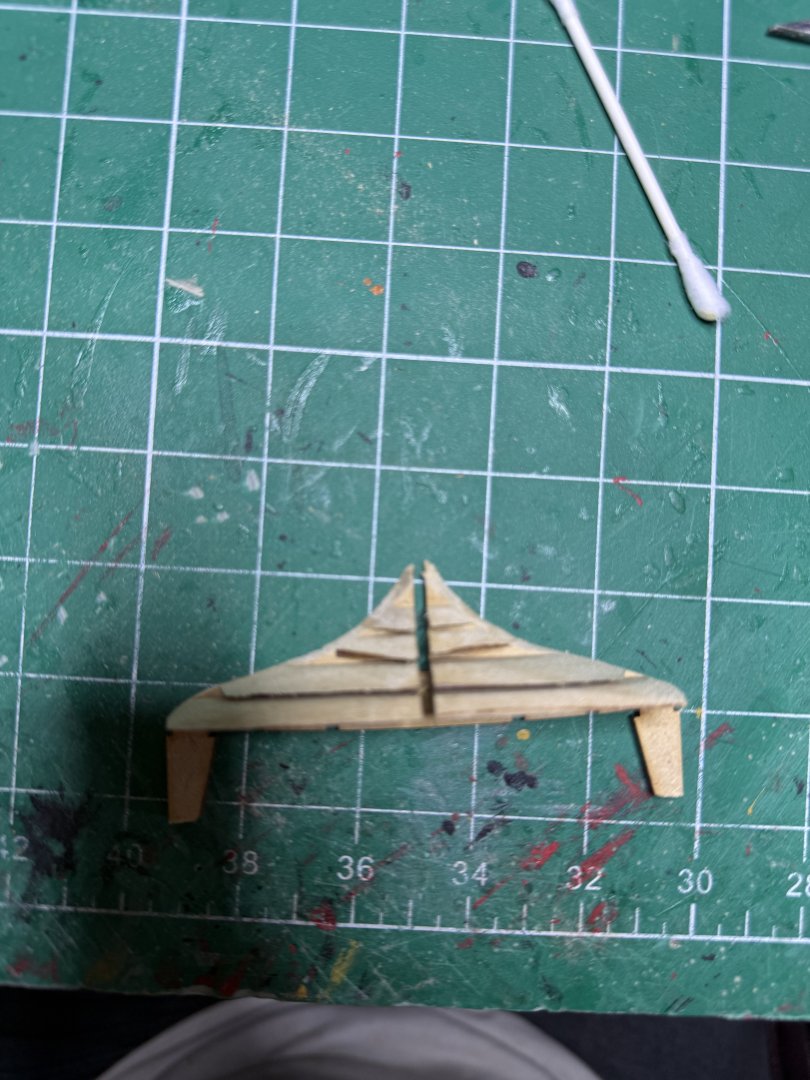
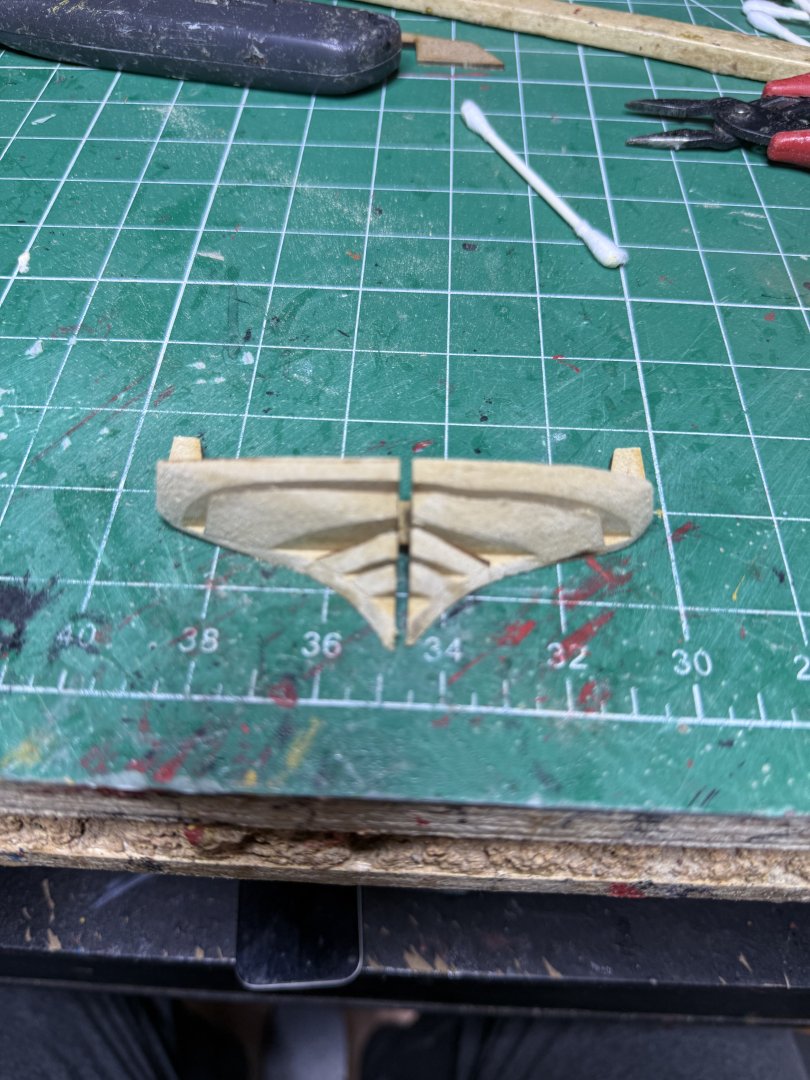
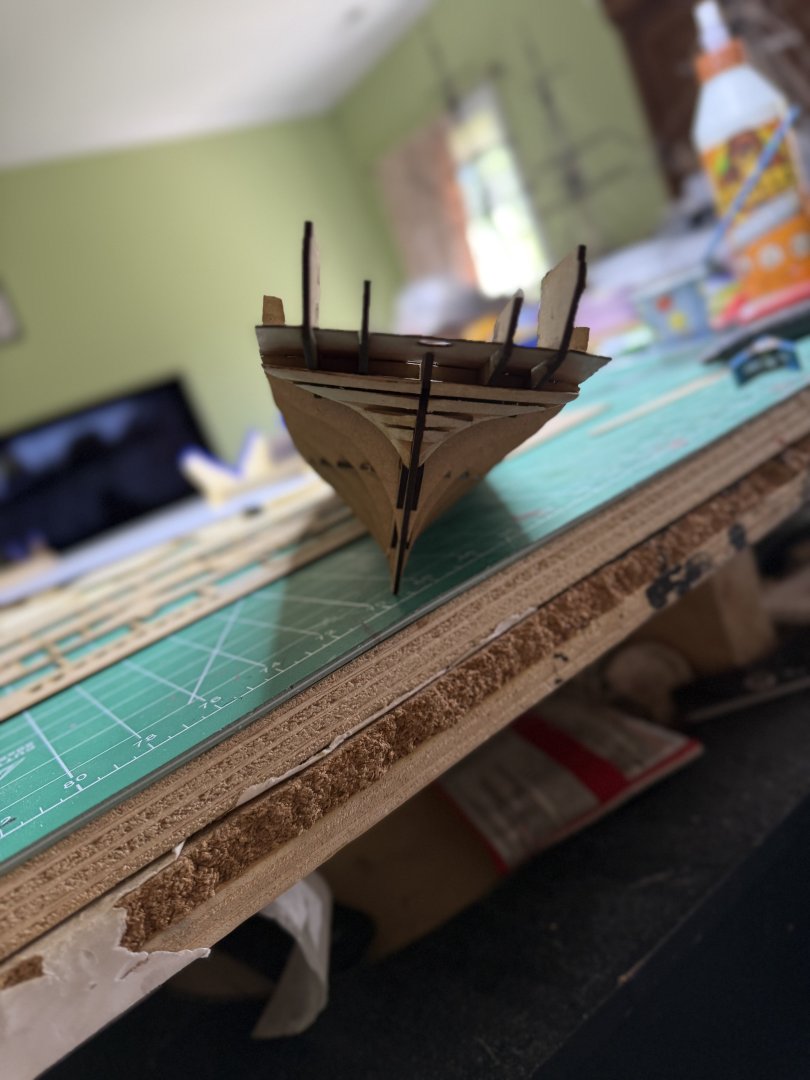
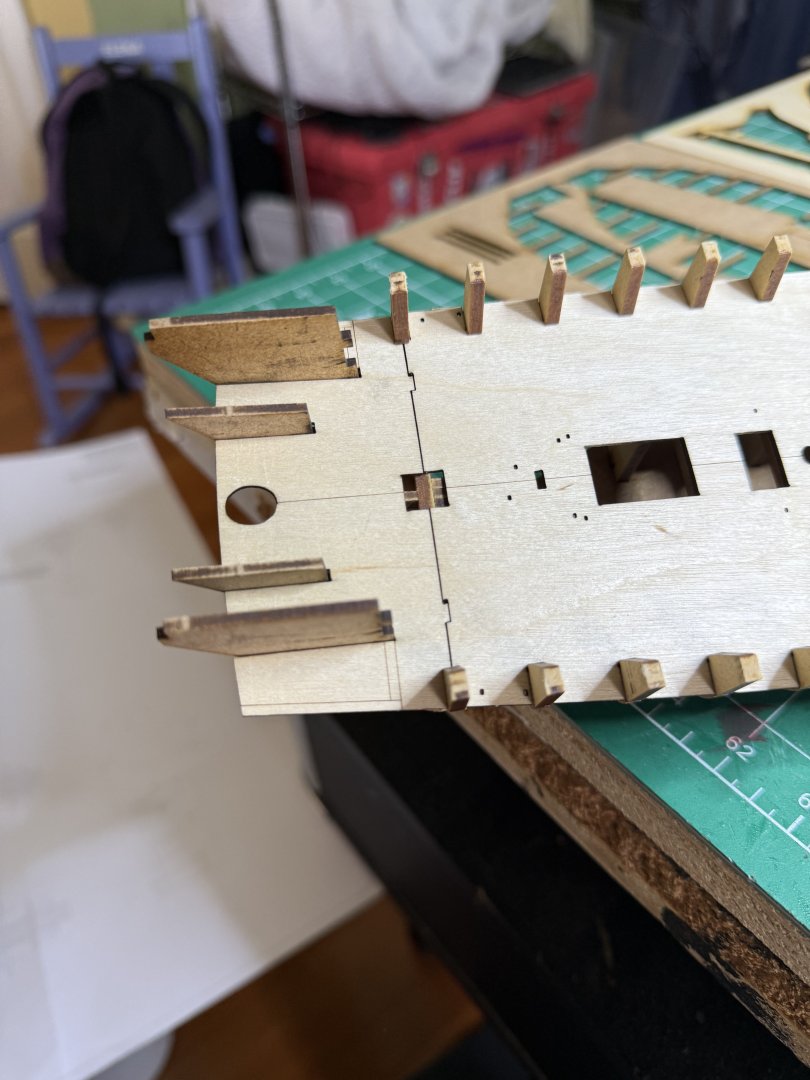
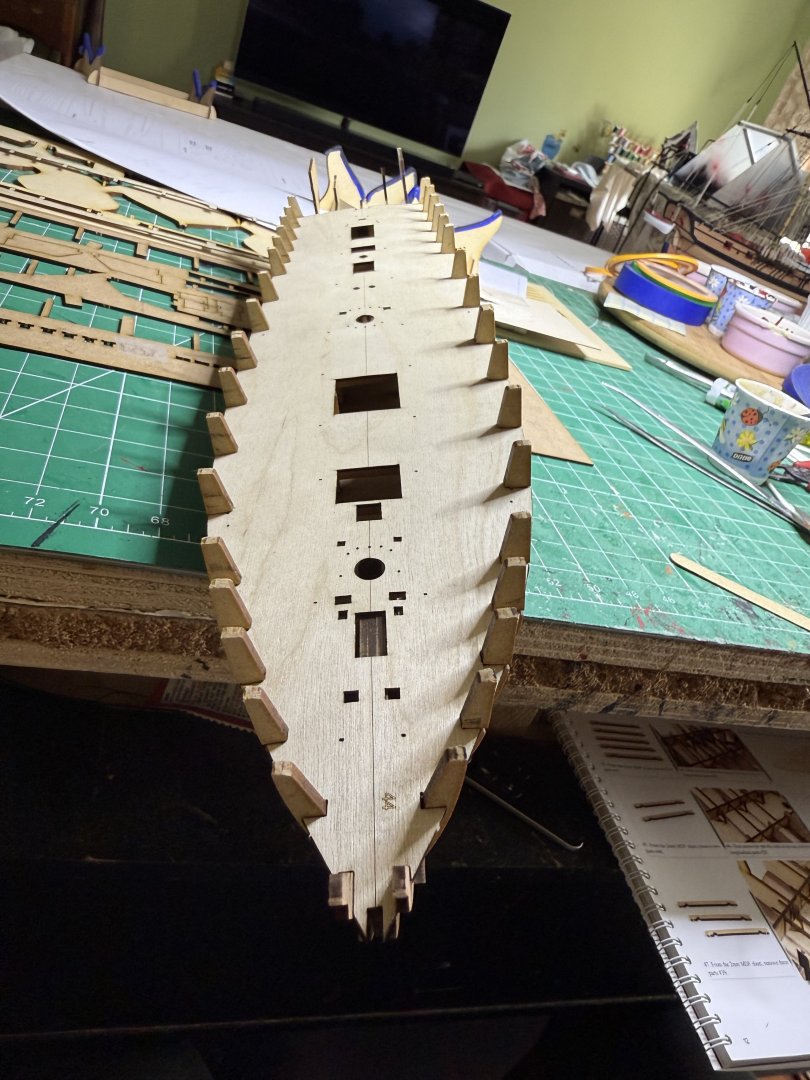
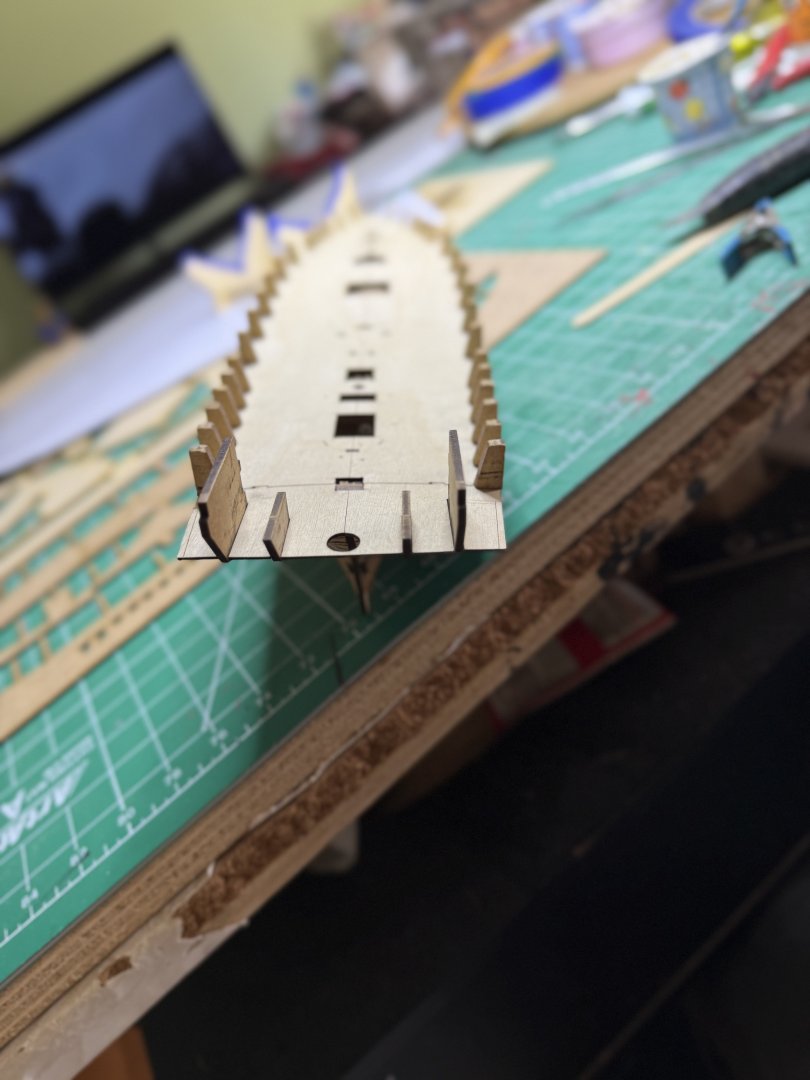
Having just finished a fun build with HMS Harpy, my next build will be another Vanguard offering, HMS Grecian although it is a dual citizen and could be USS Grecian. So first the unwrapping: I also bought the paint with the kit. It also uses copper tape I think I have enough copper tiles (2 sheets) left over from Harpy and I think it should cover so will use them Like all vanguard kits, things slot together quickly and then wedges glued to keep together. Final gluing of all the seams occurs later. Stern area requires a bit of faring Then slotted into place Next finishing adding the various bow pieces and then sub-deck snaps into place followed finally with gluing the seams


- 52 replies
-
- 6
-
-
- Grecian
- Vanguard Models
- (and 1 more)
-
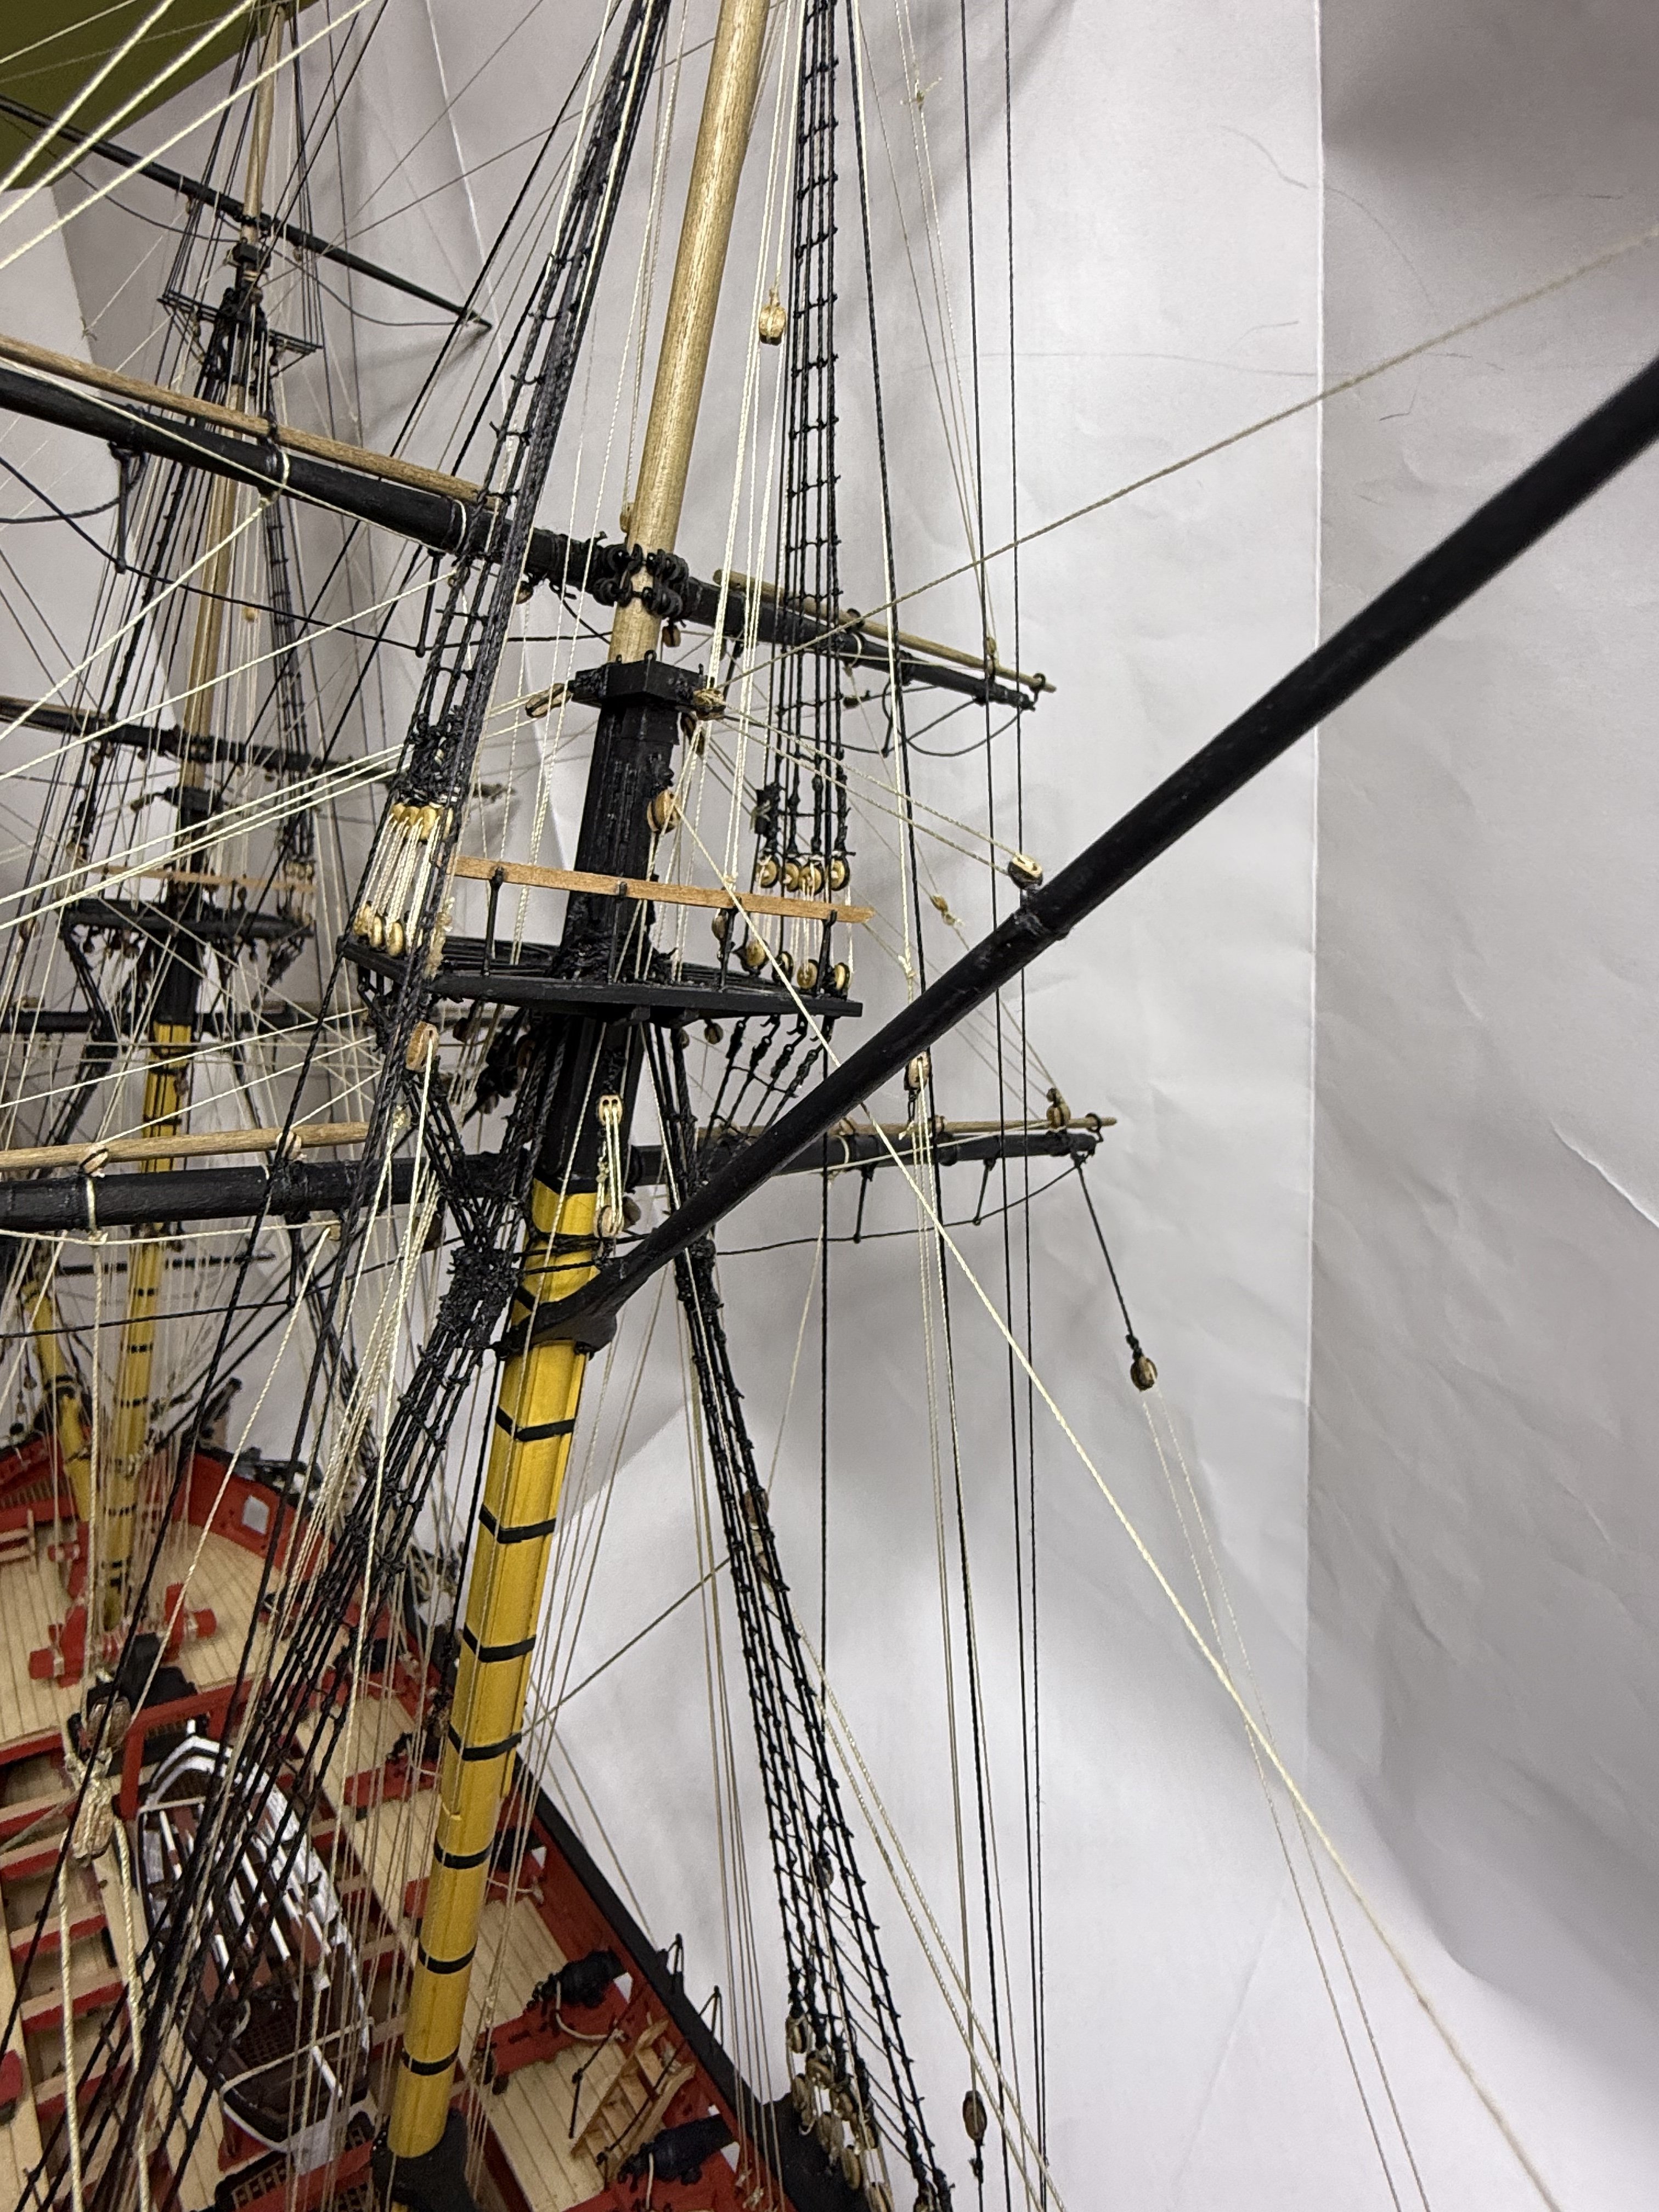
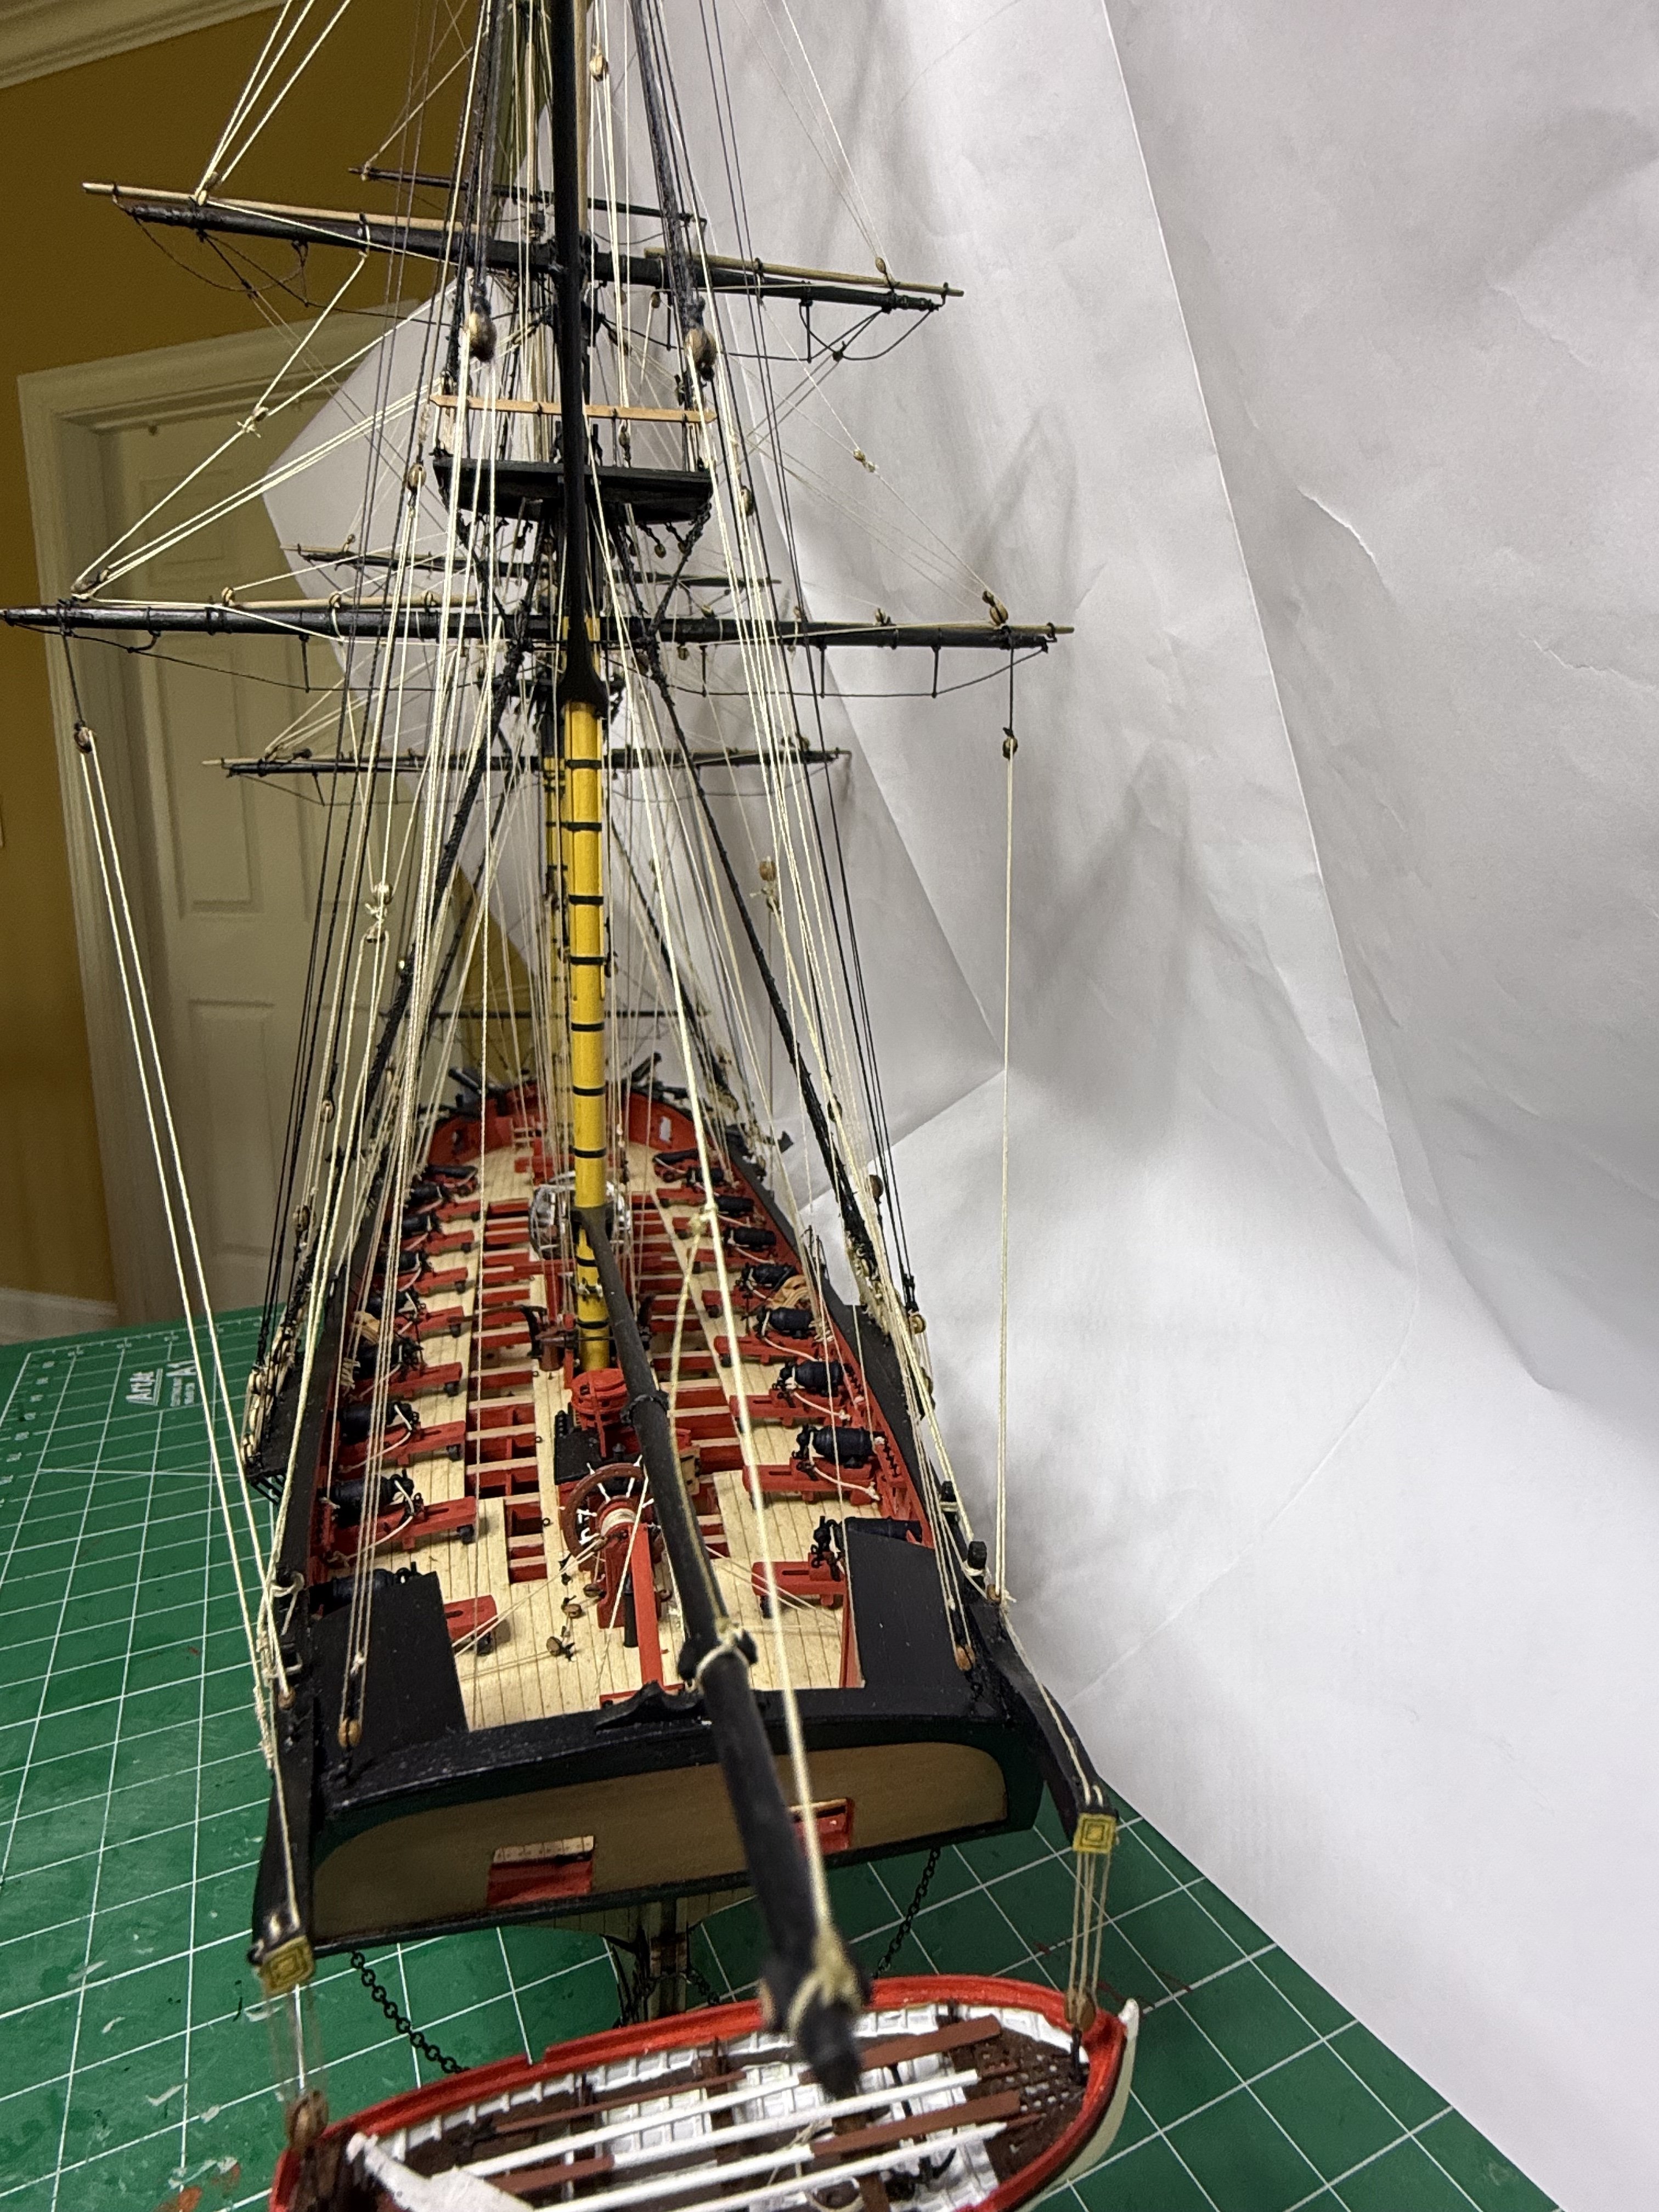
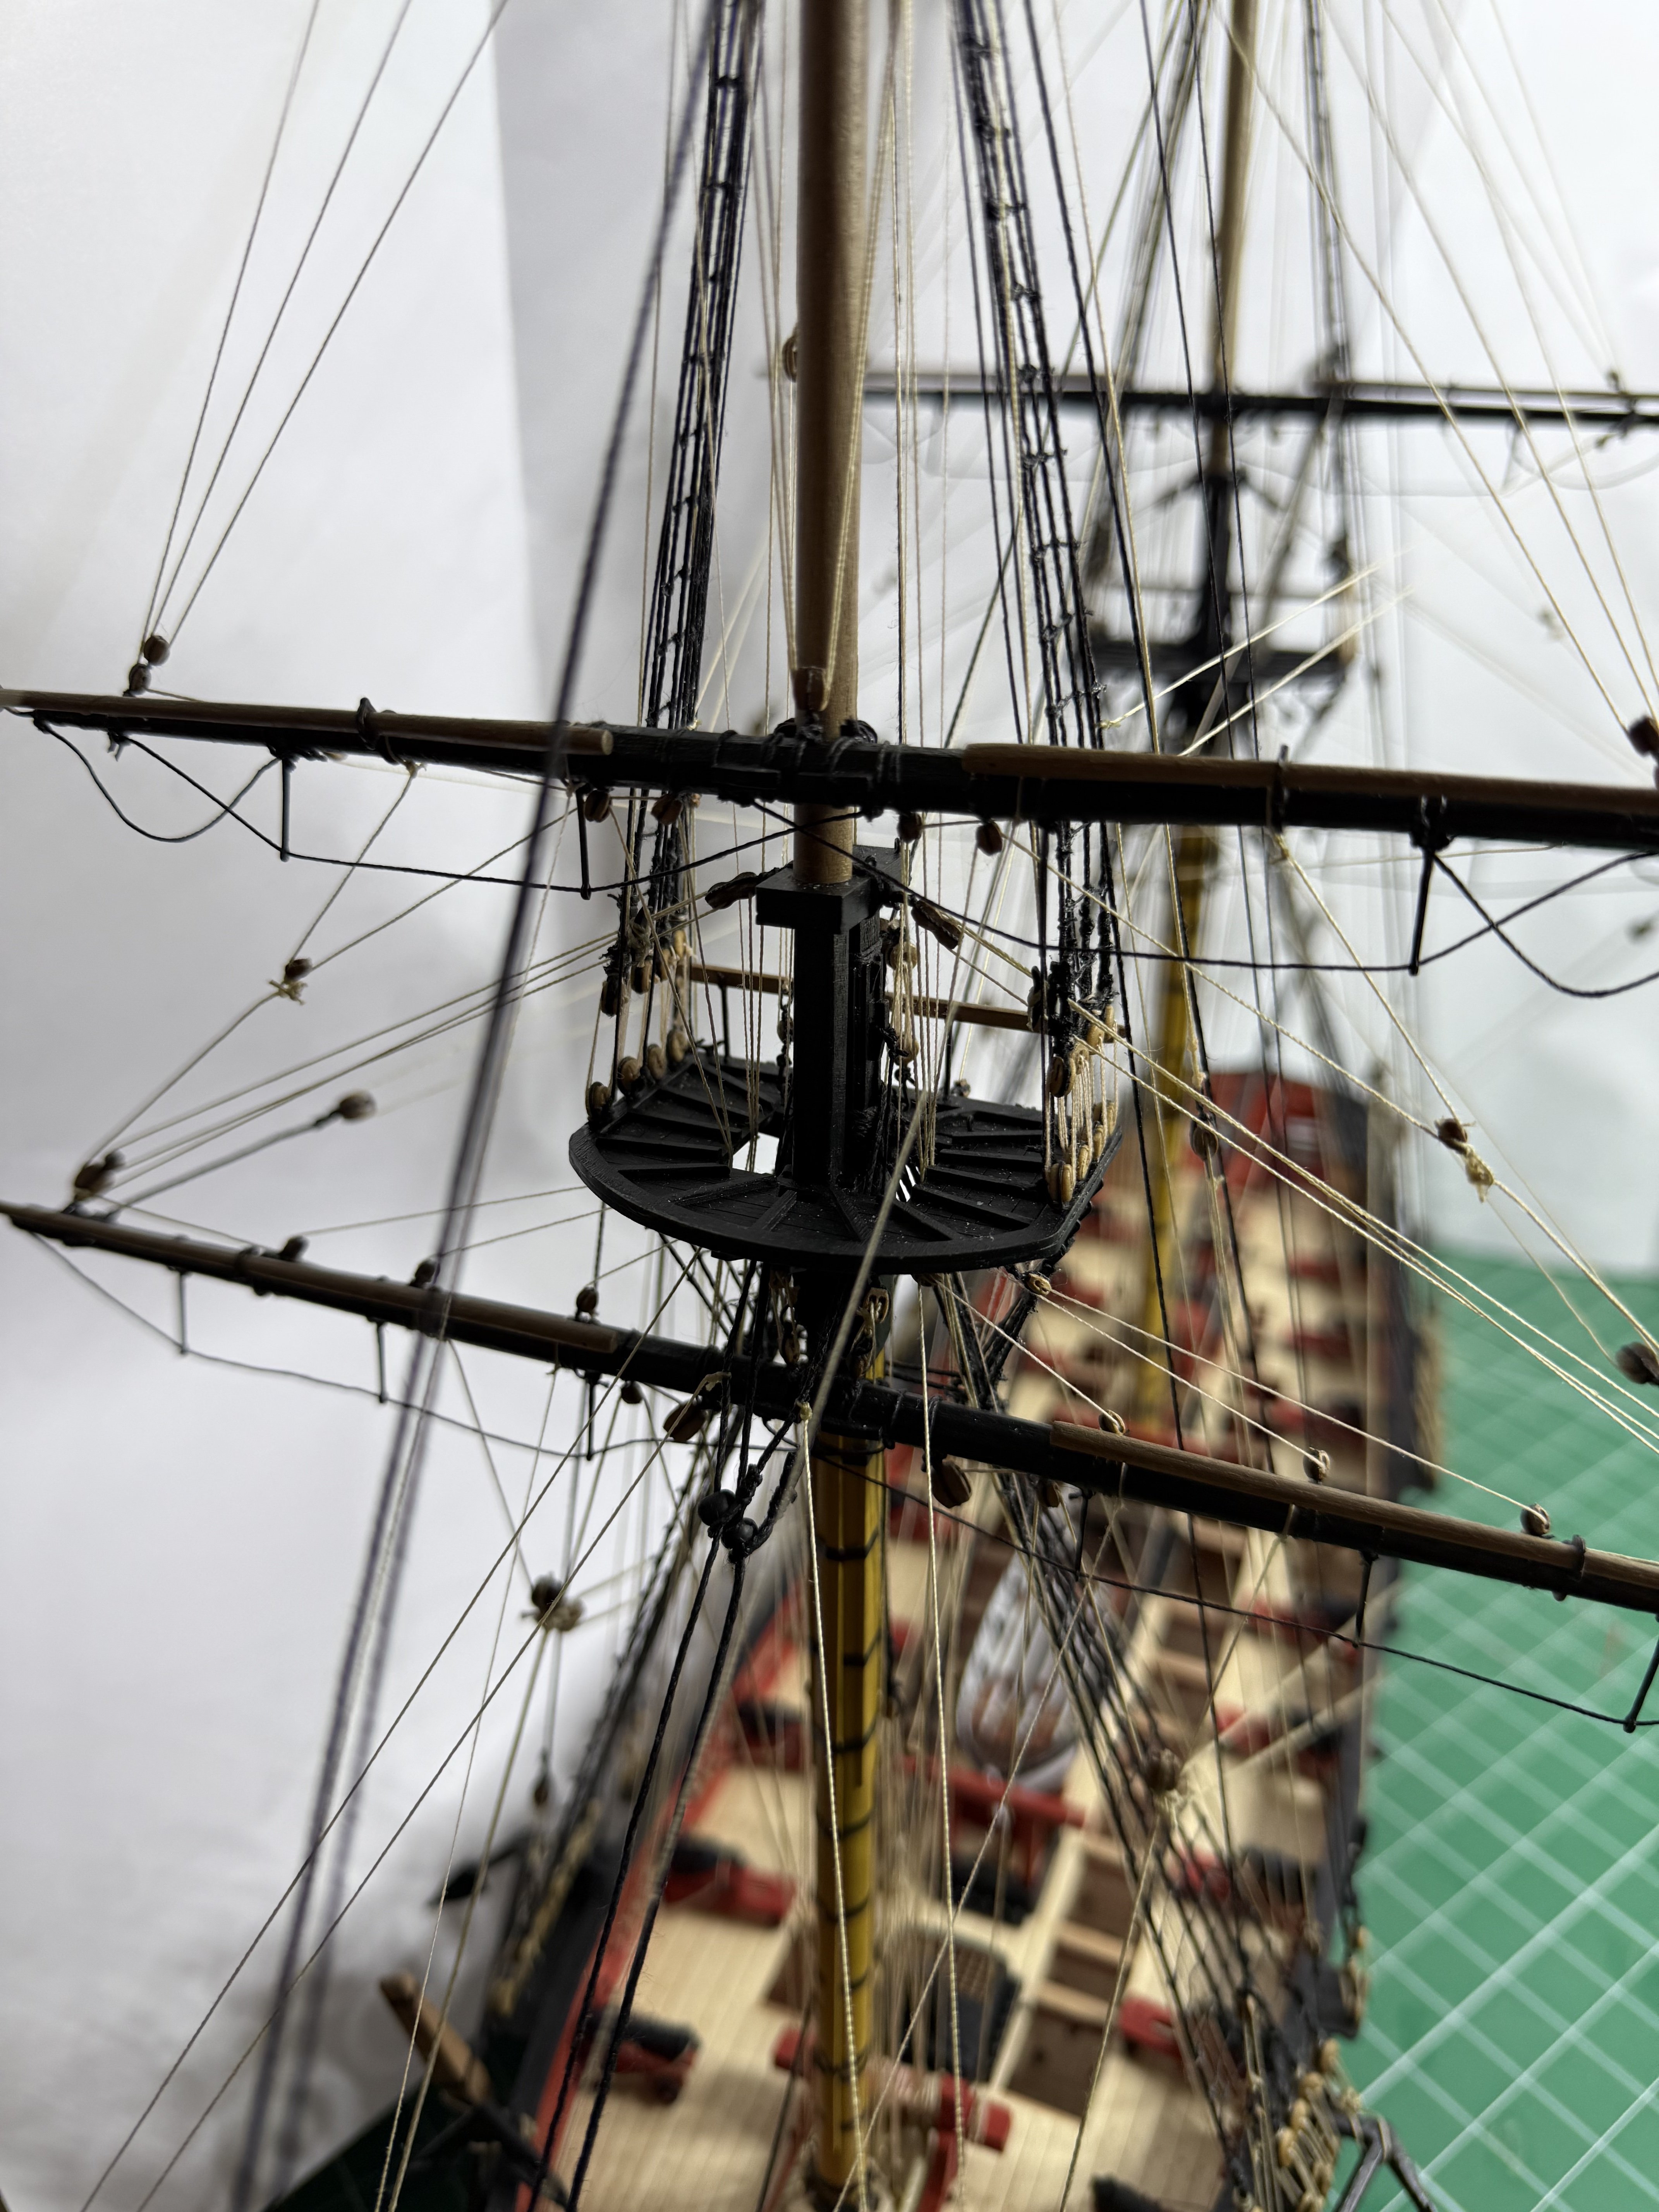
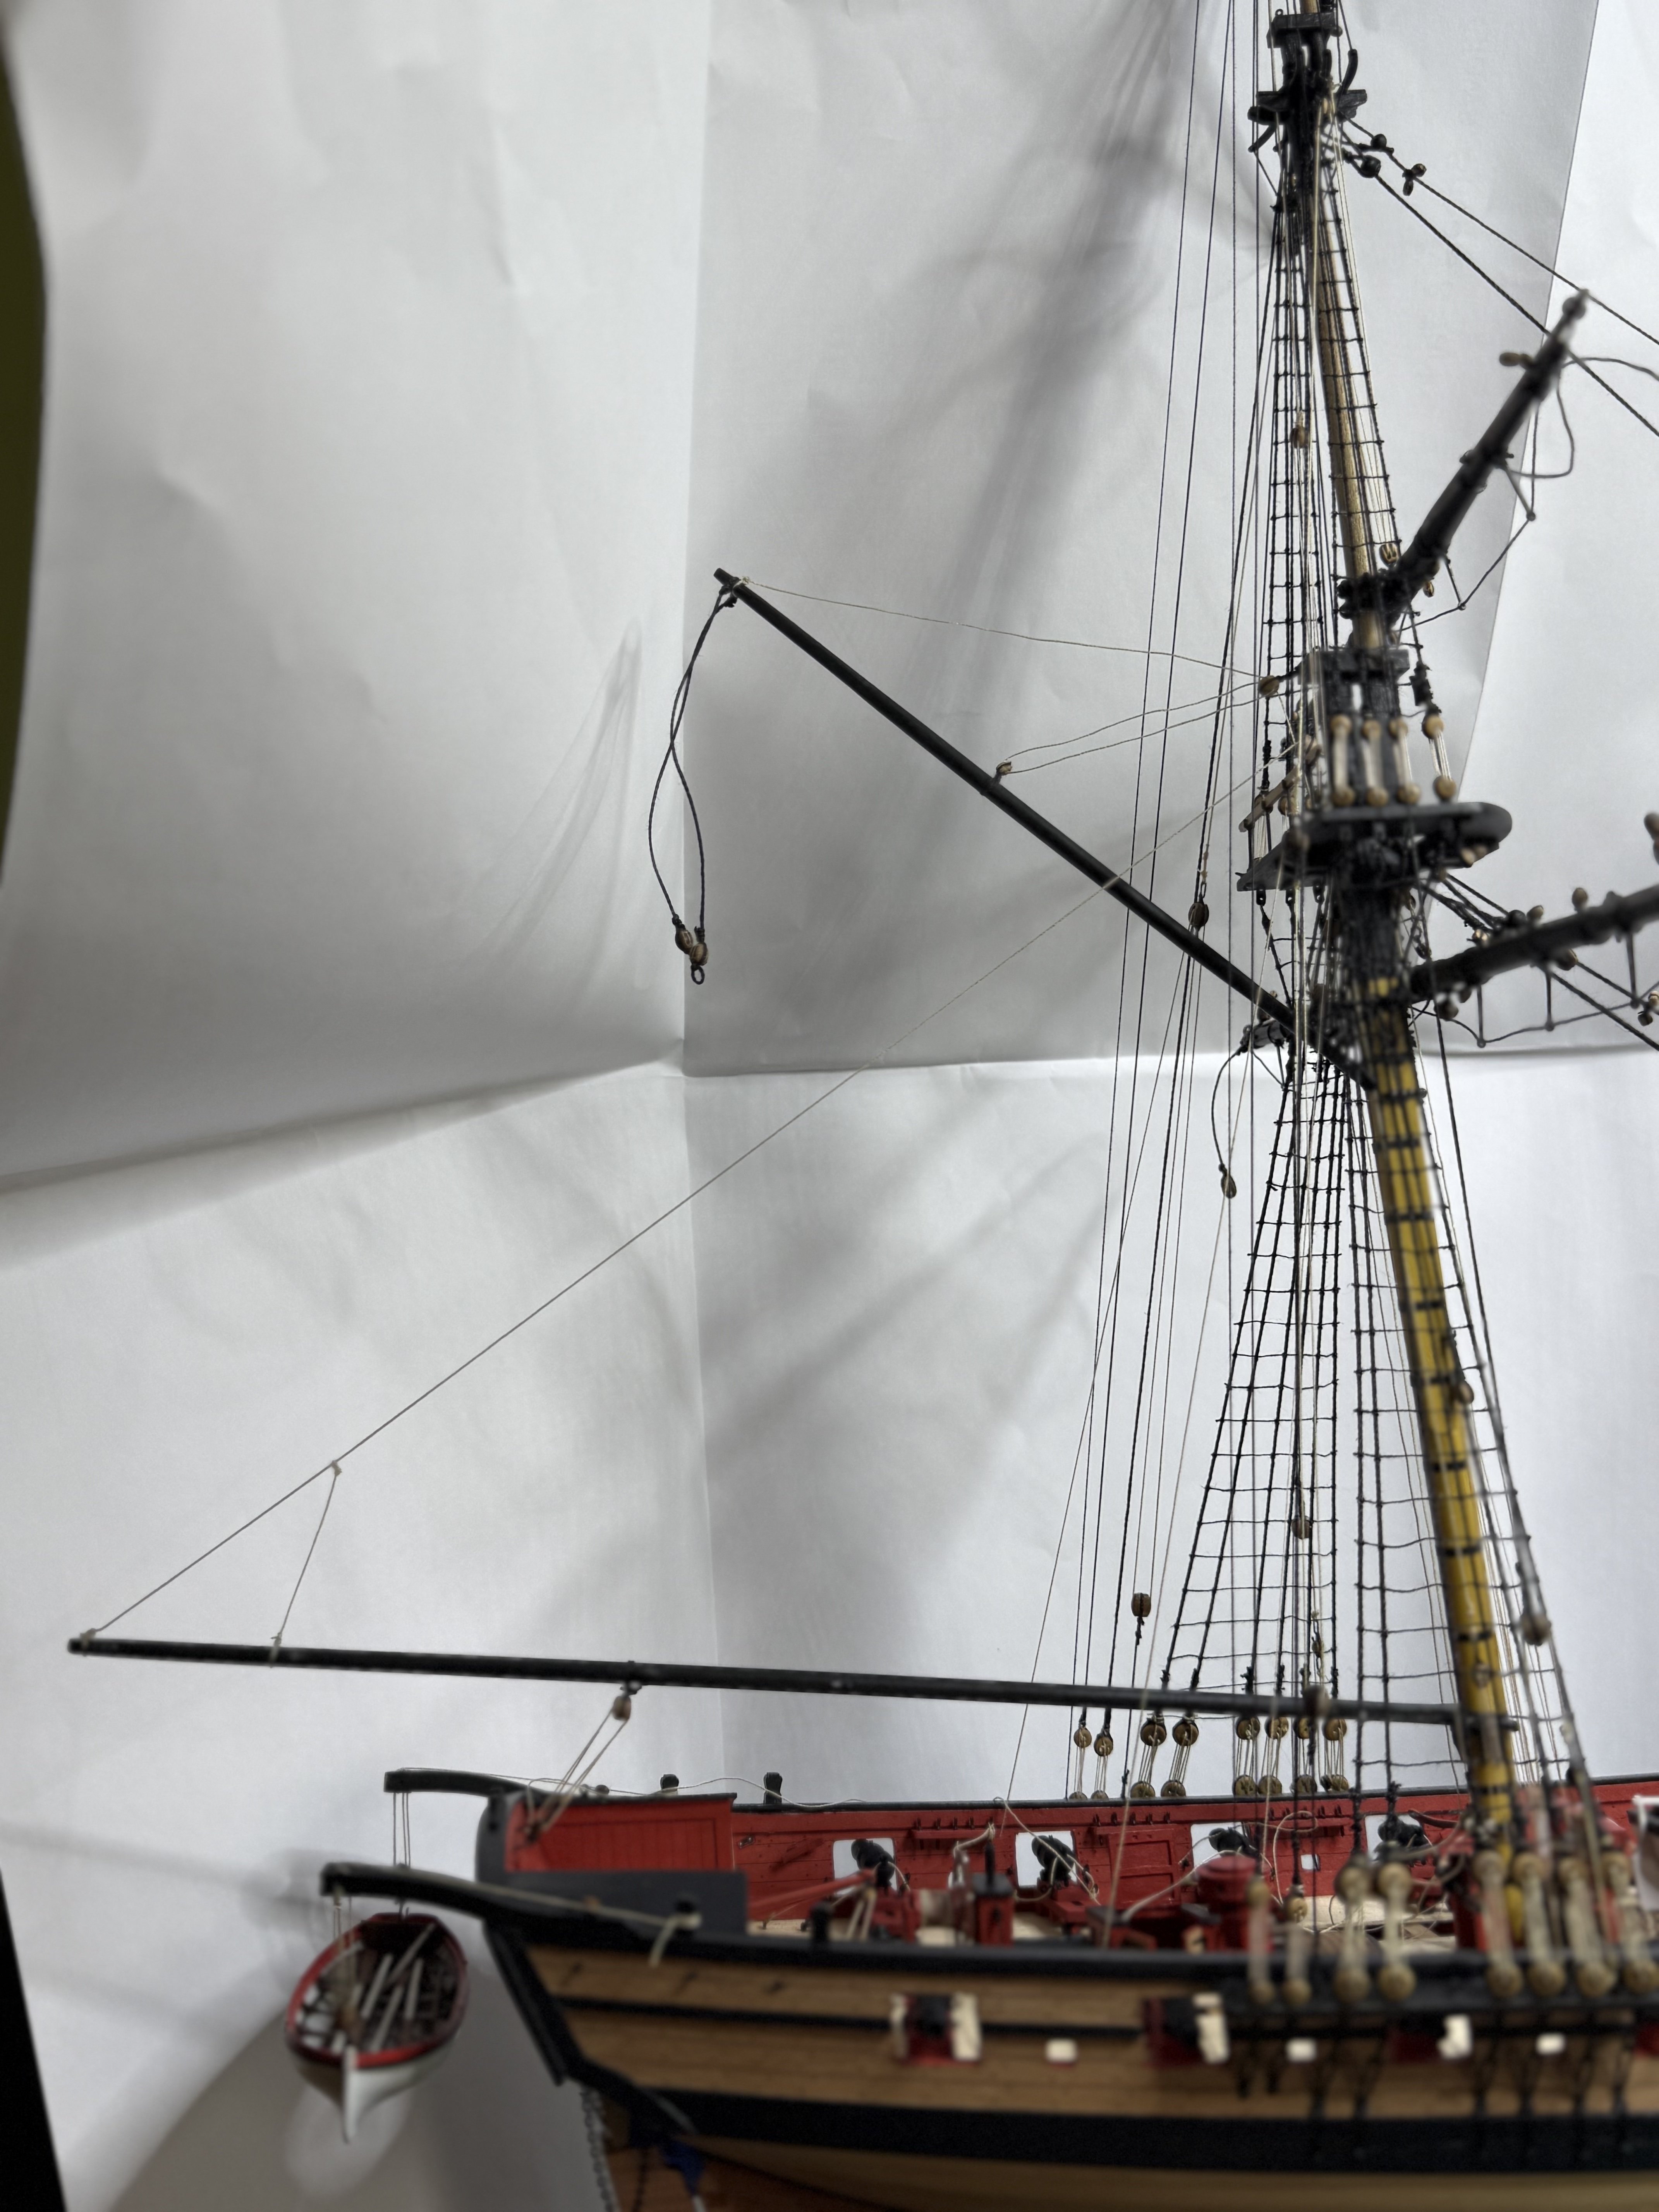
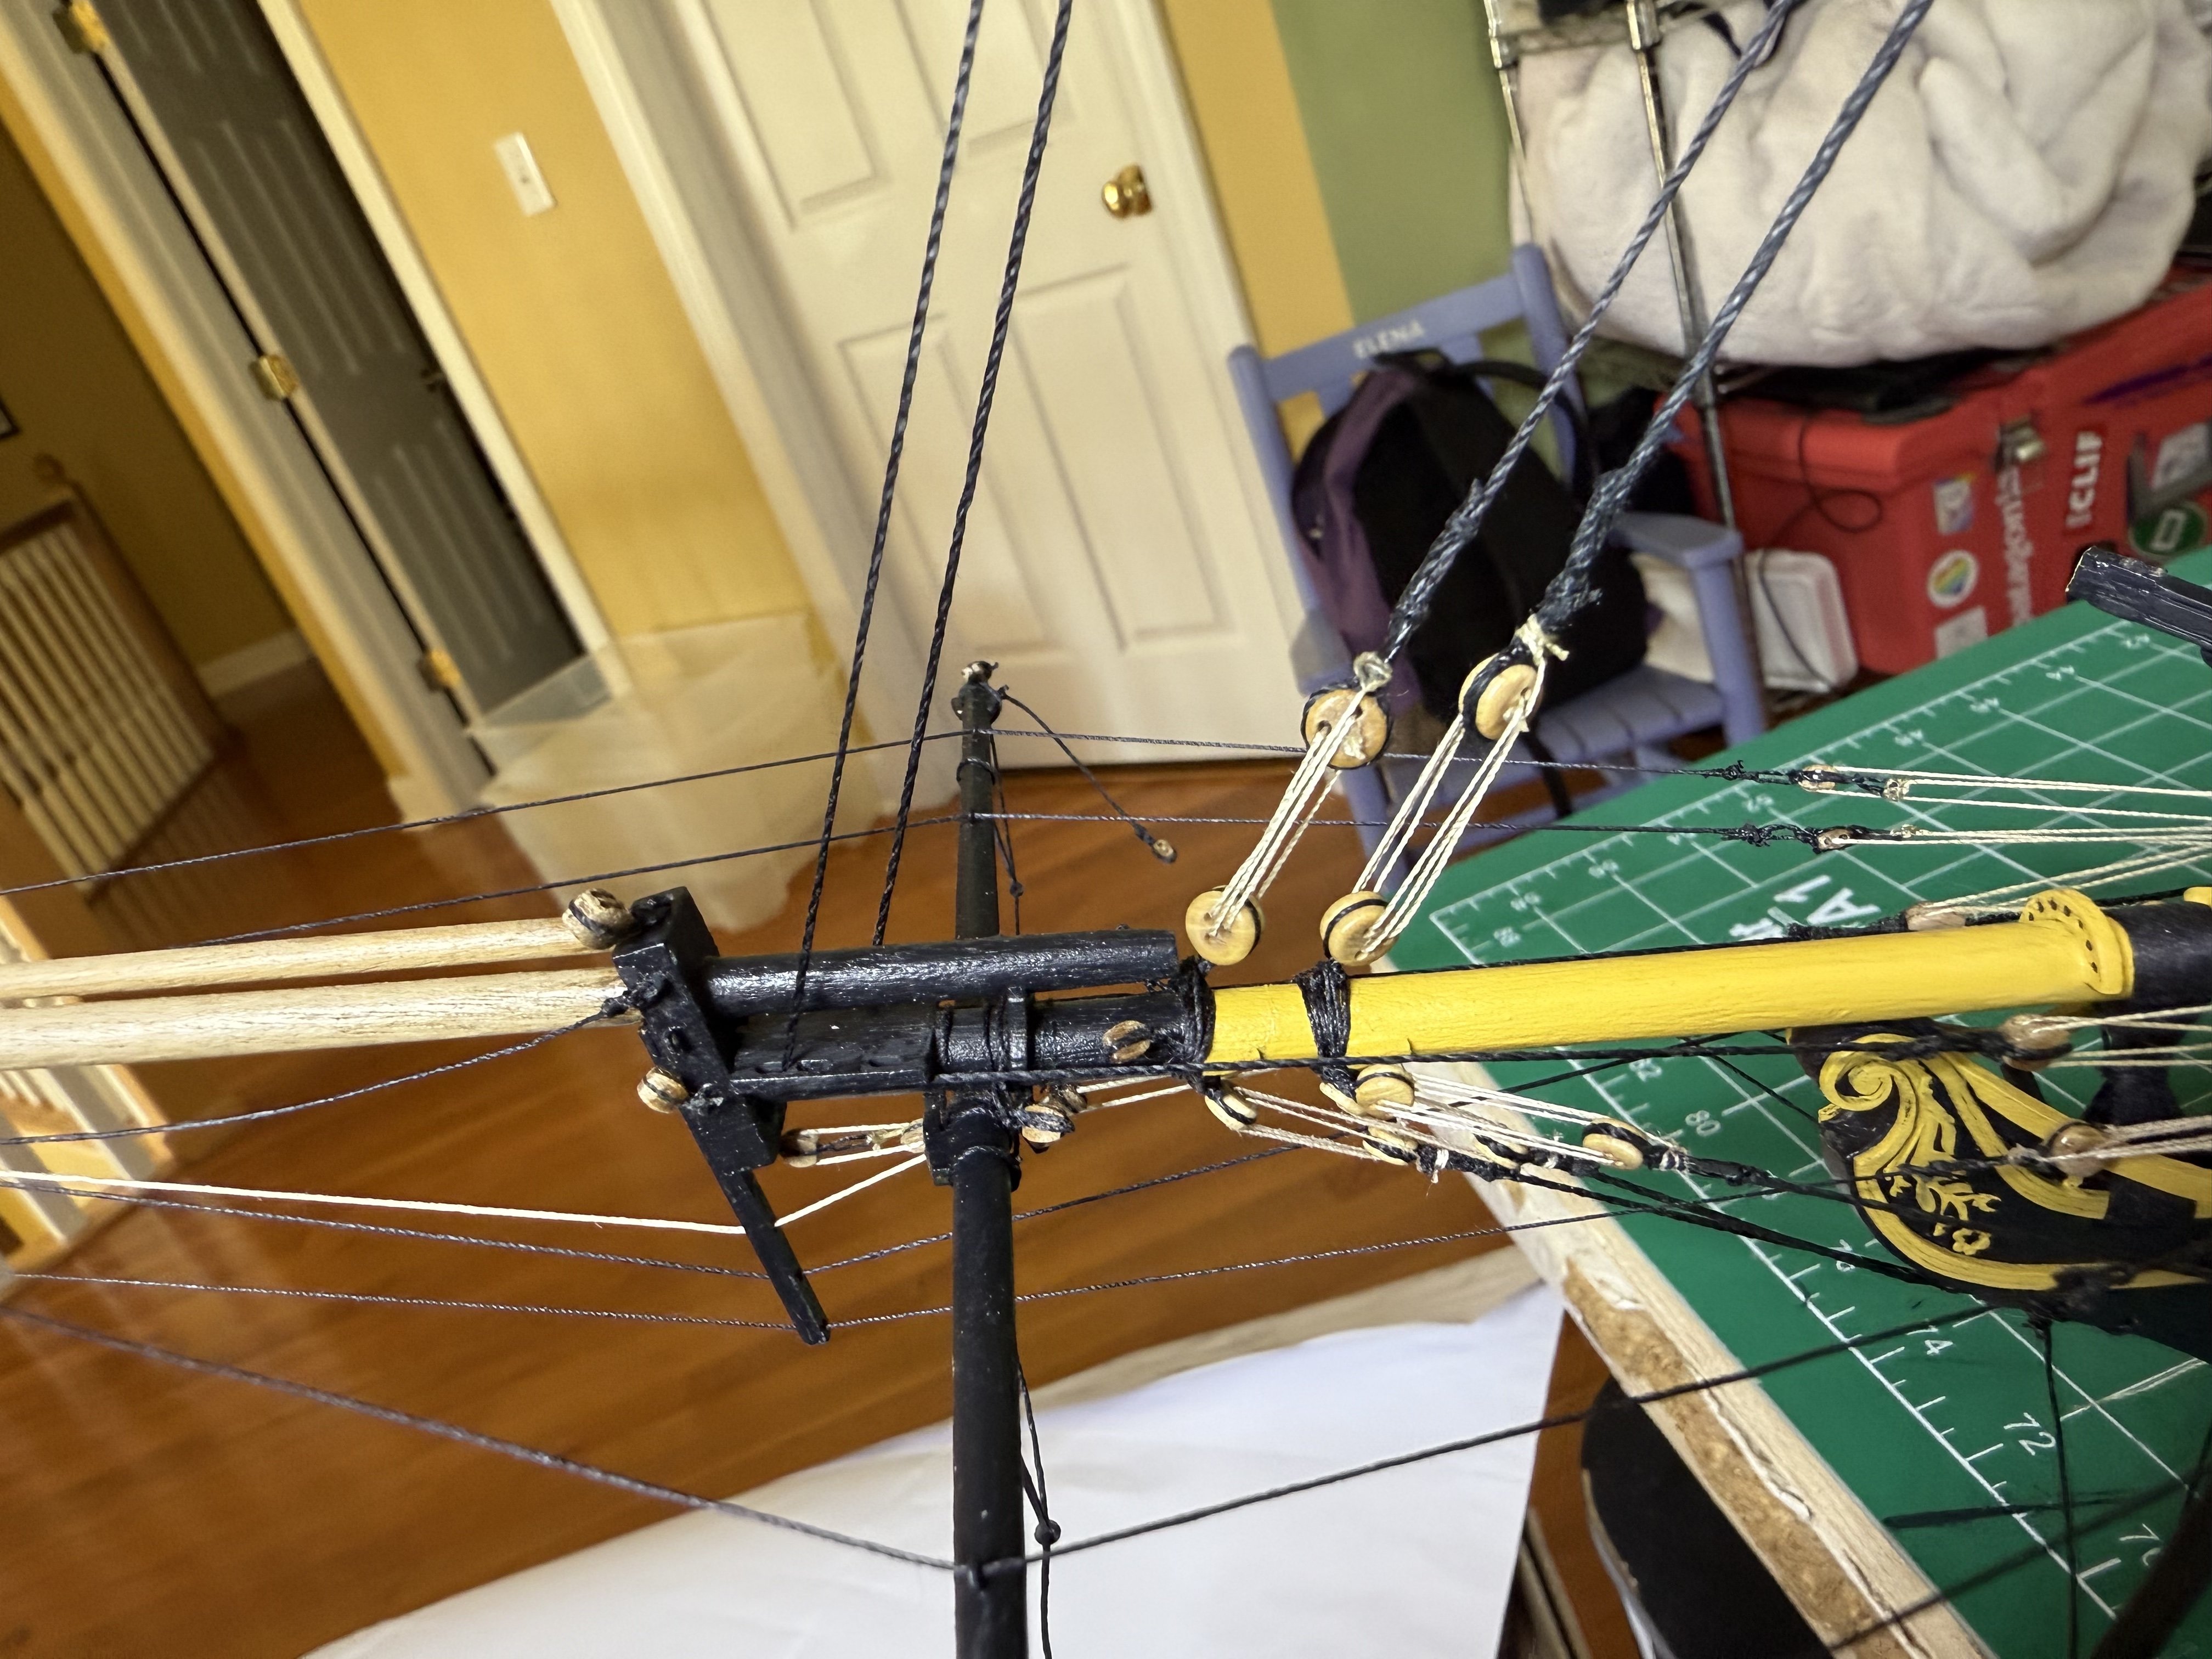
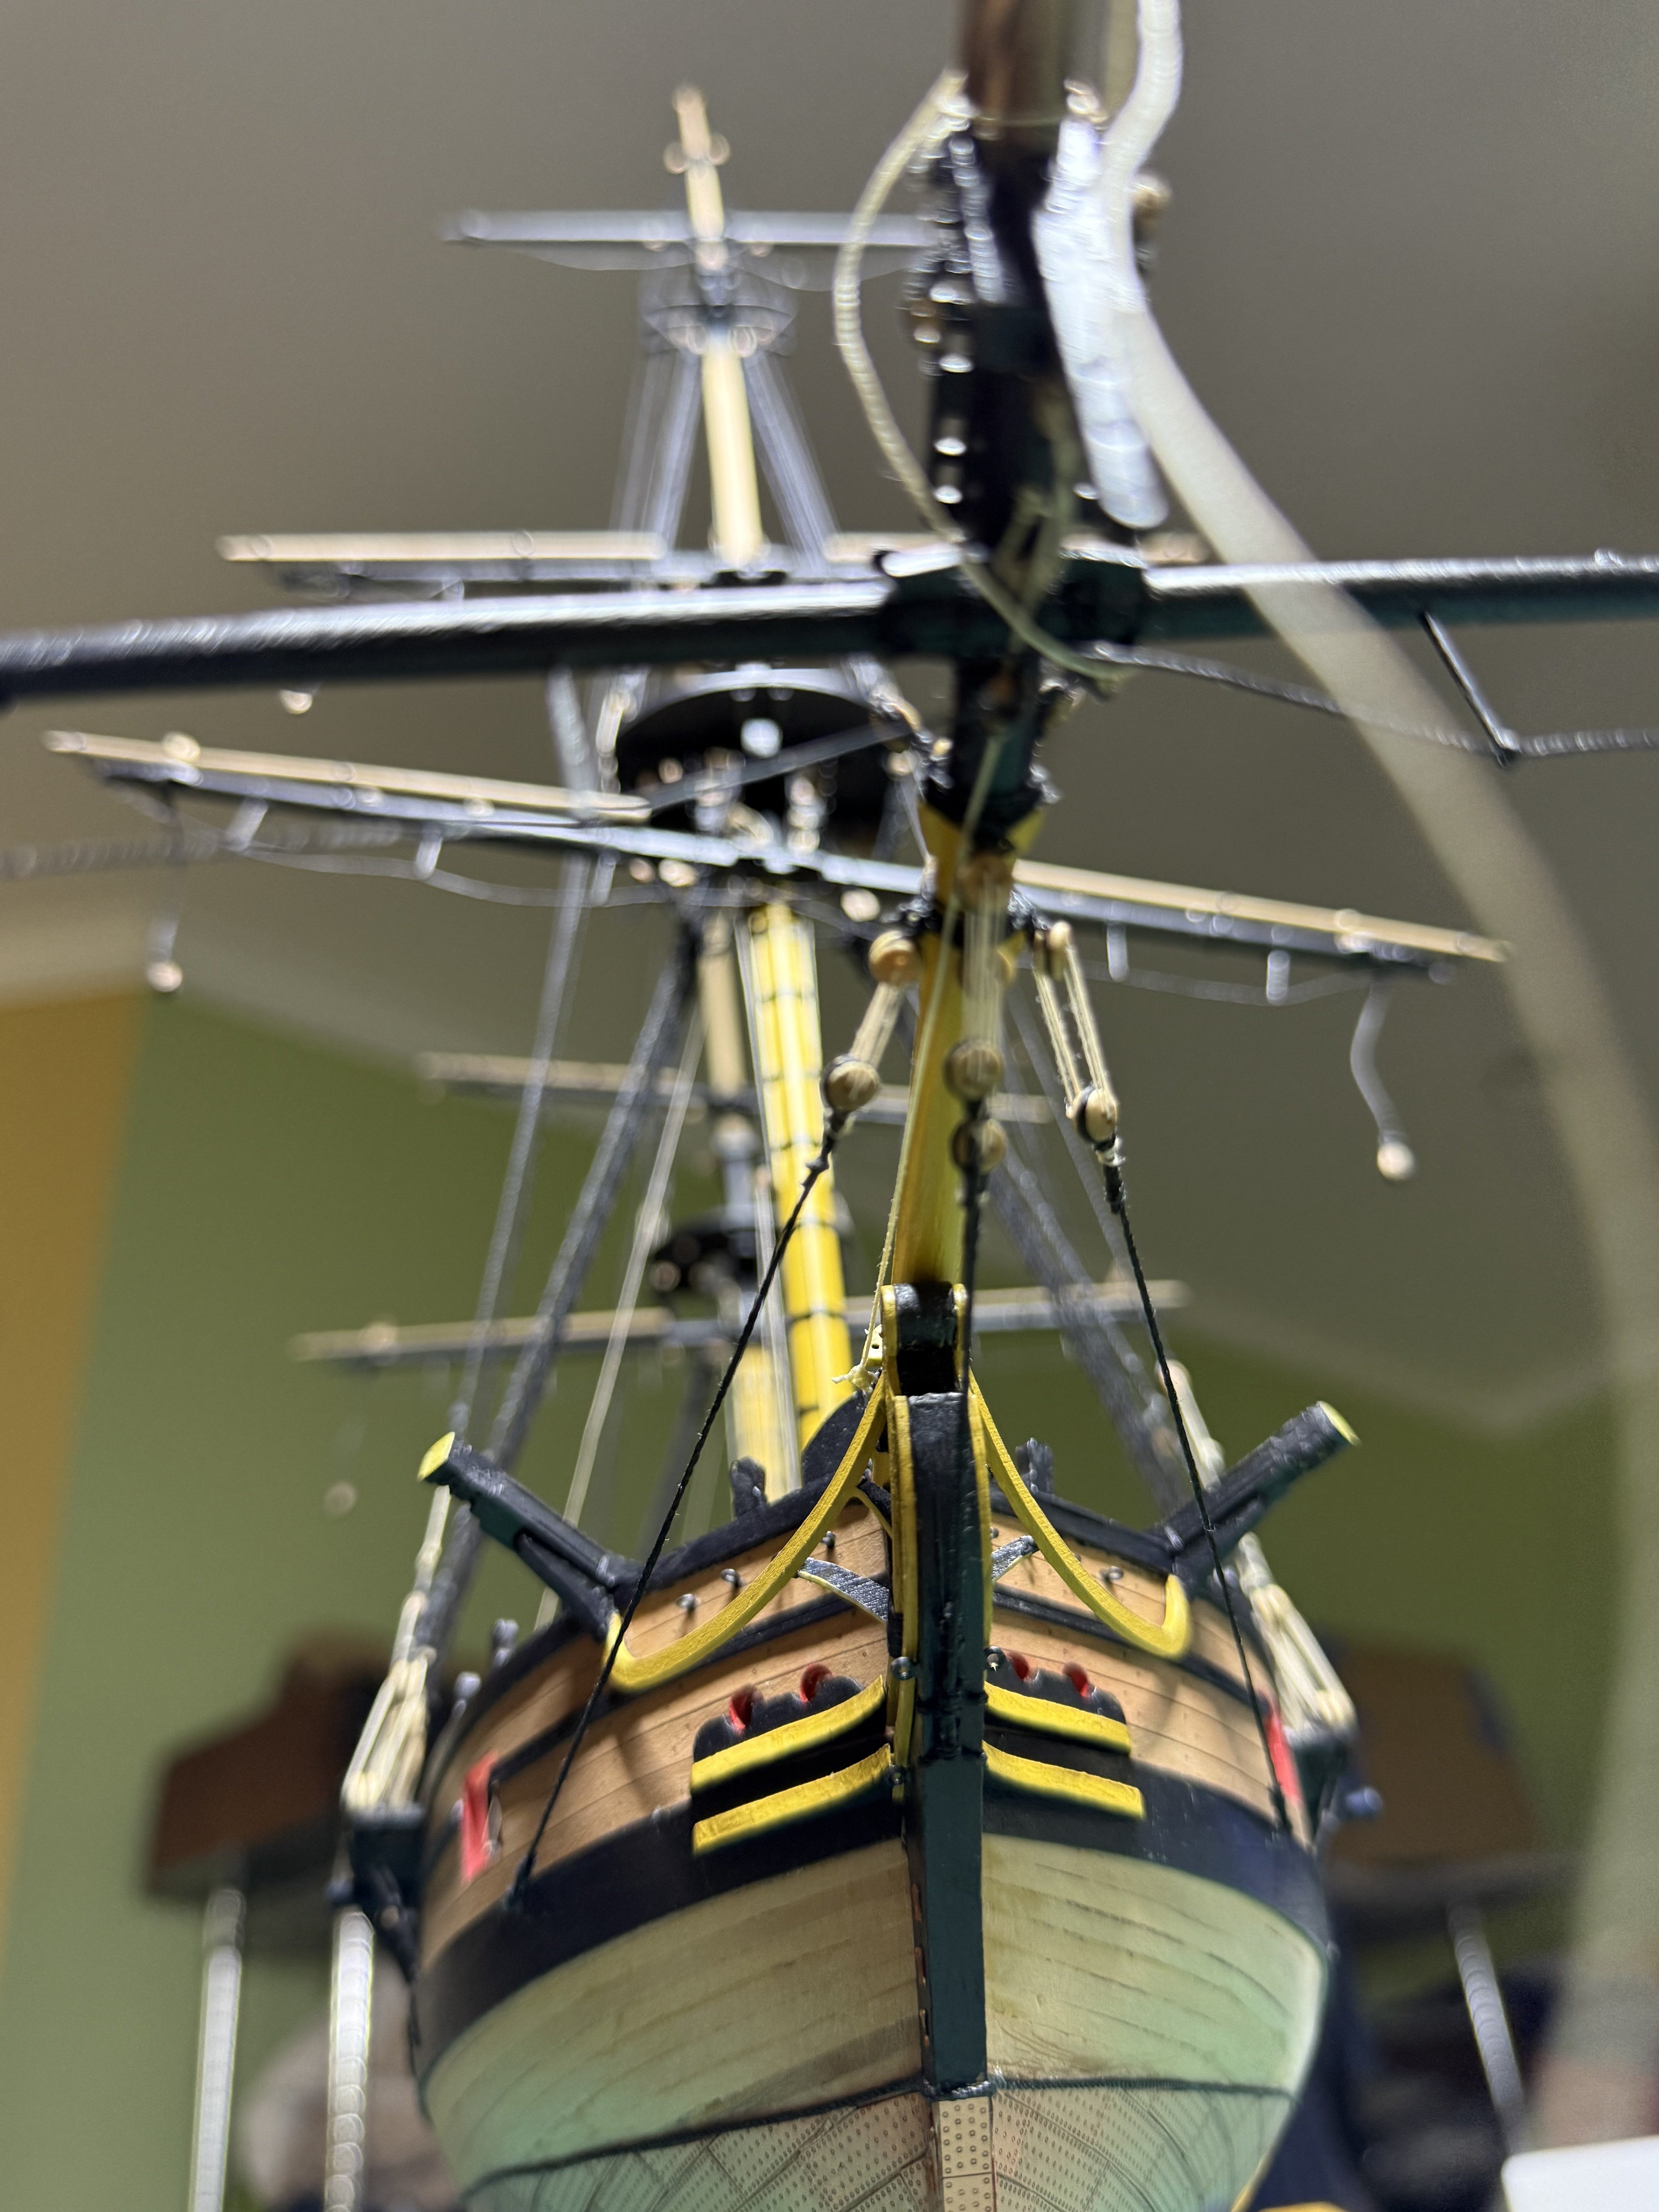
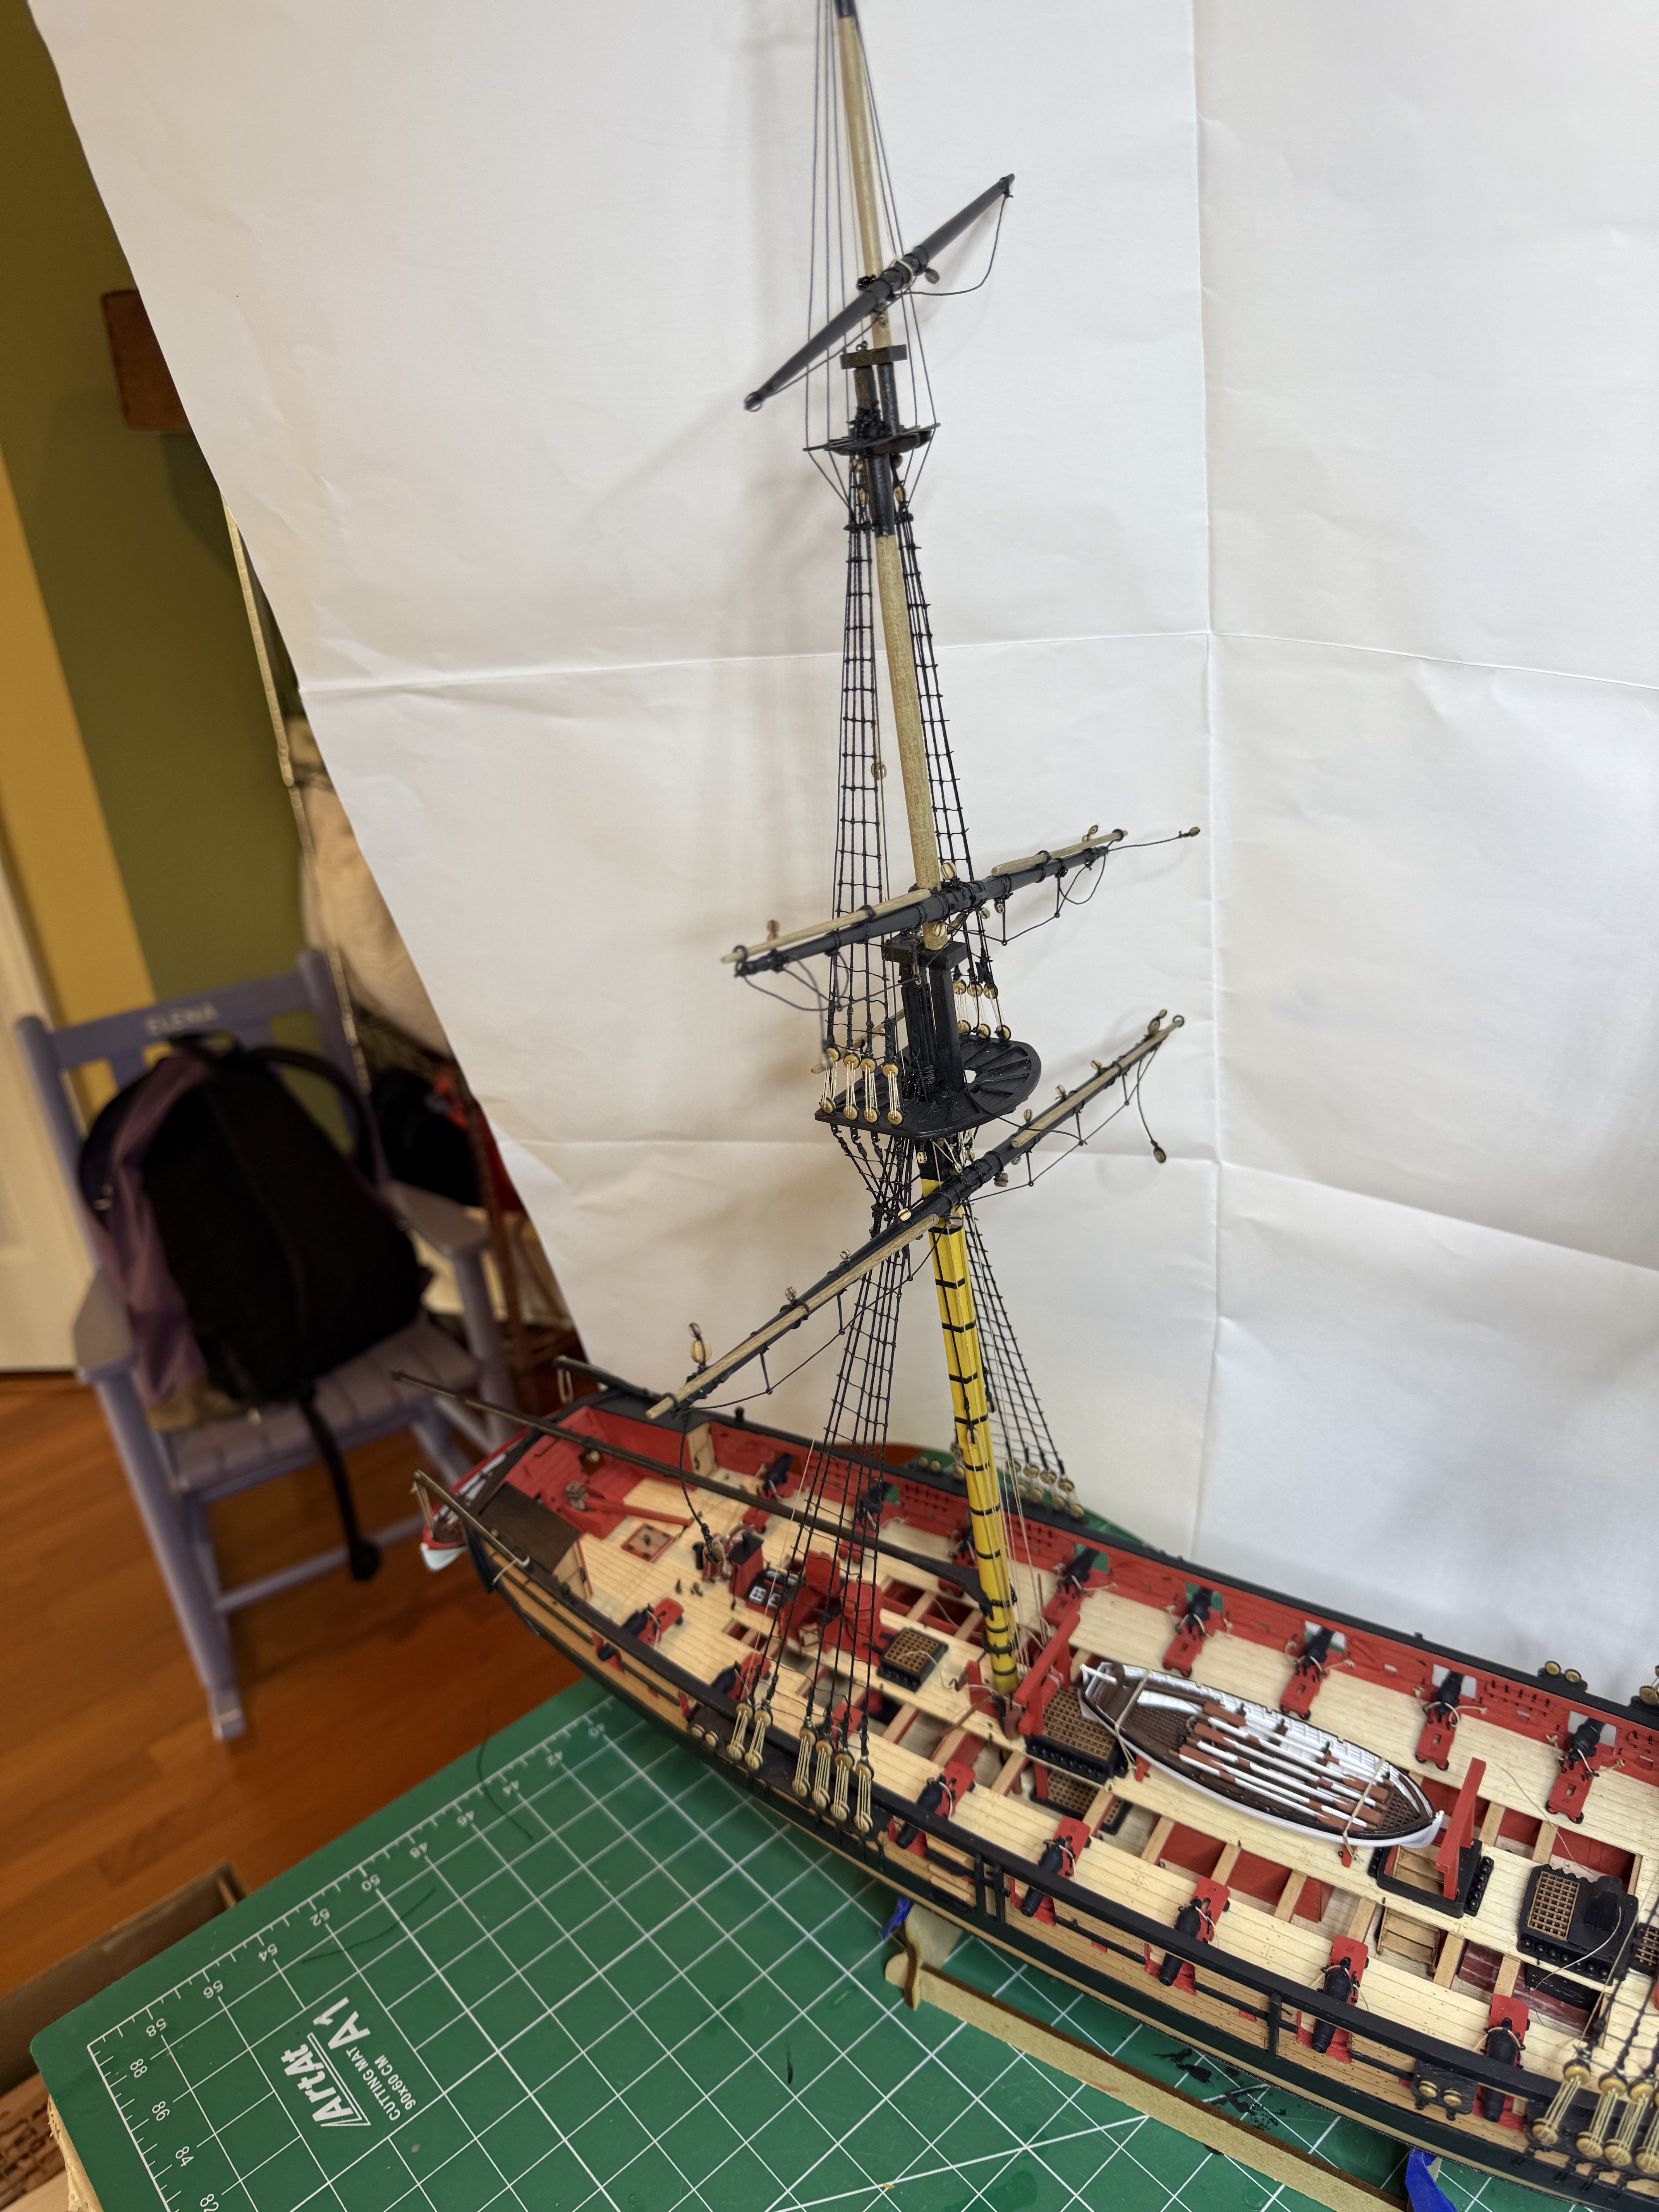
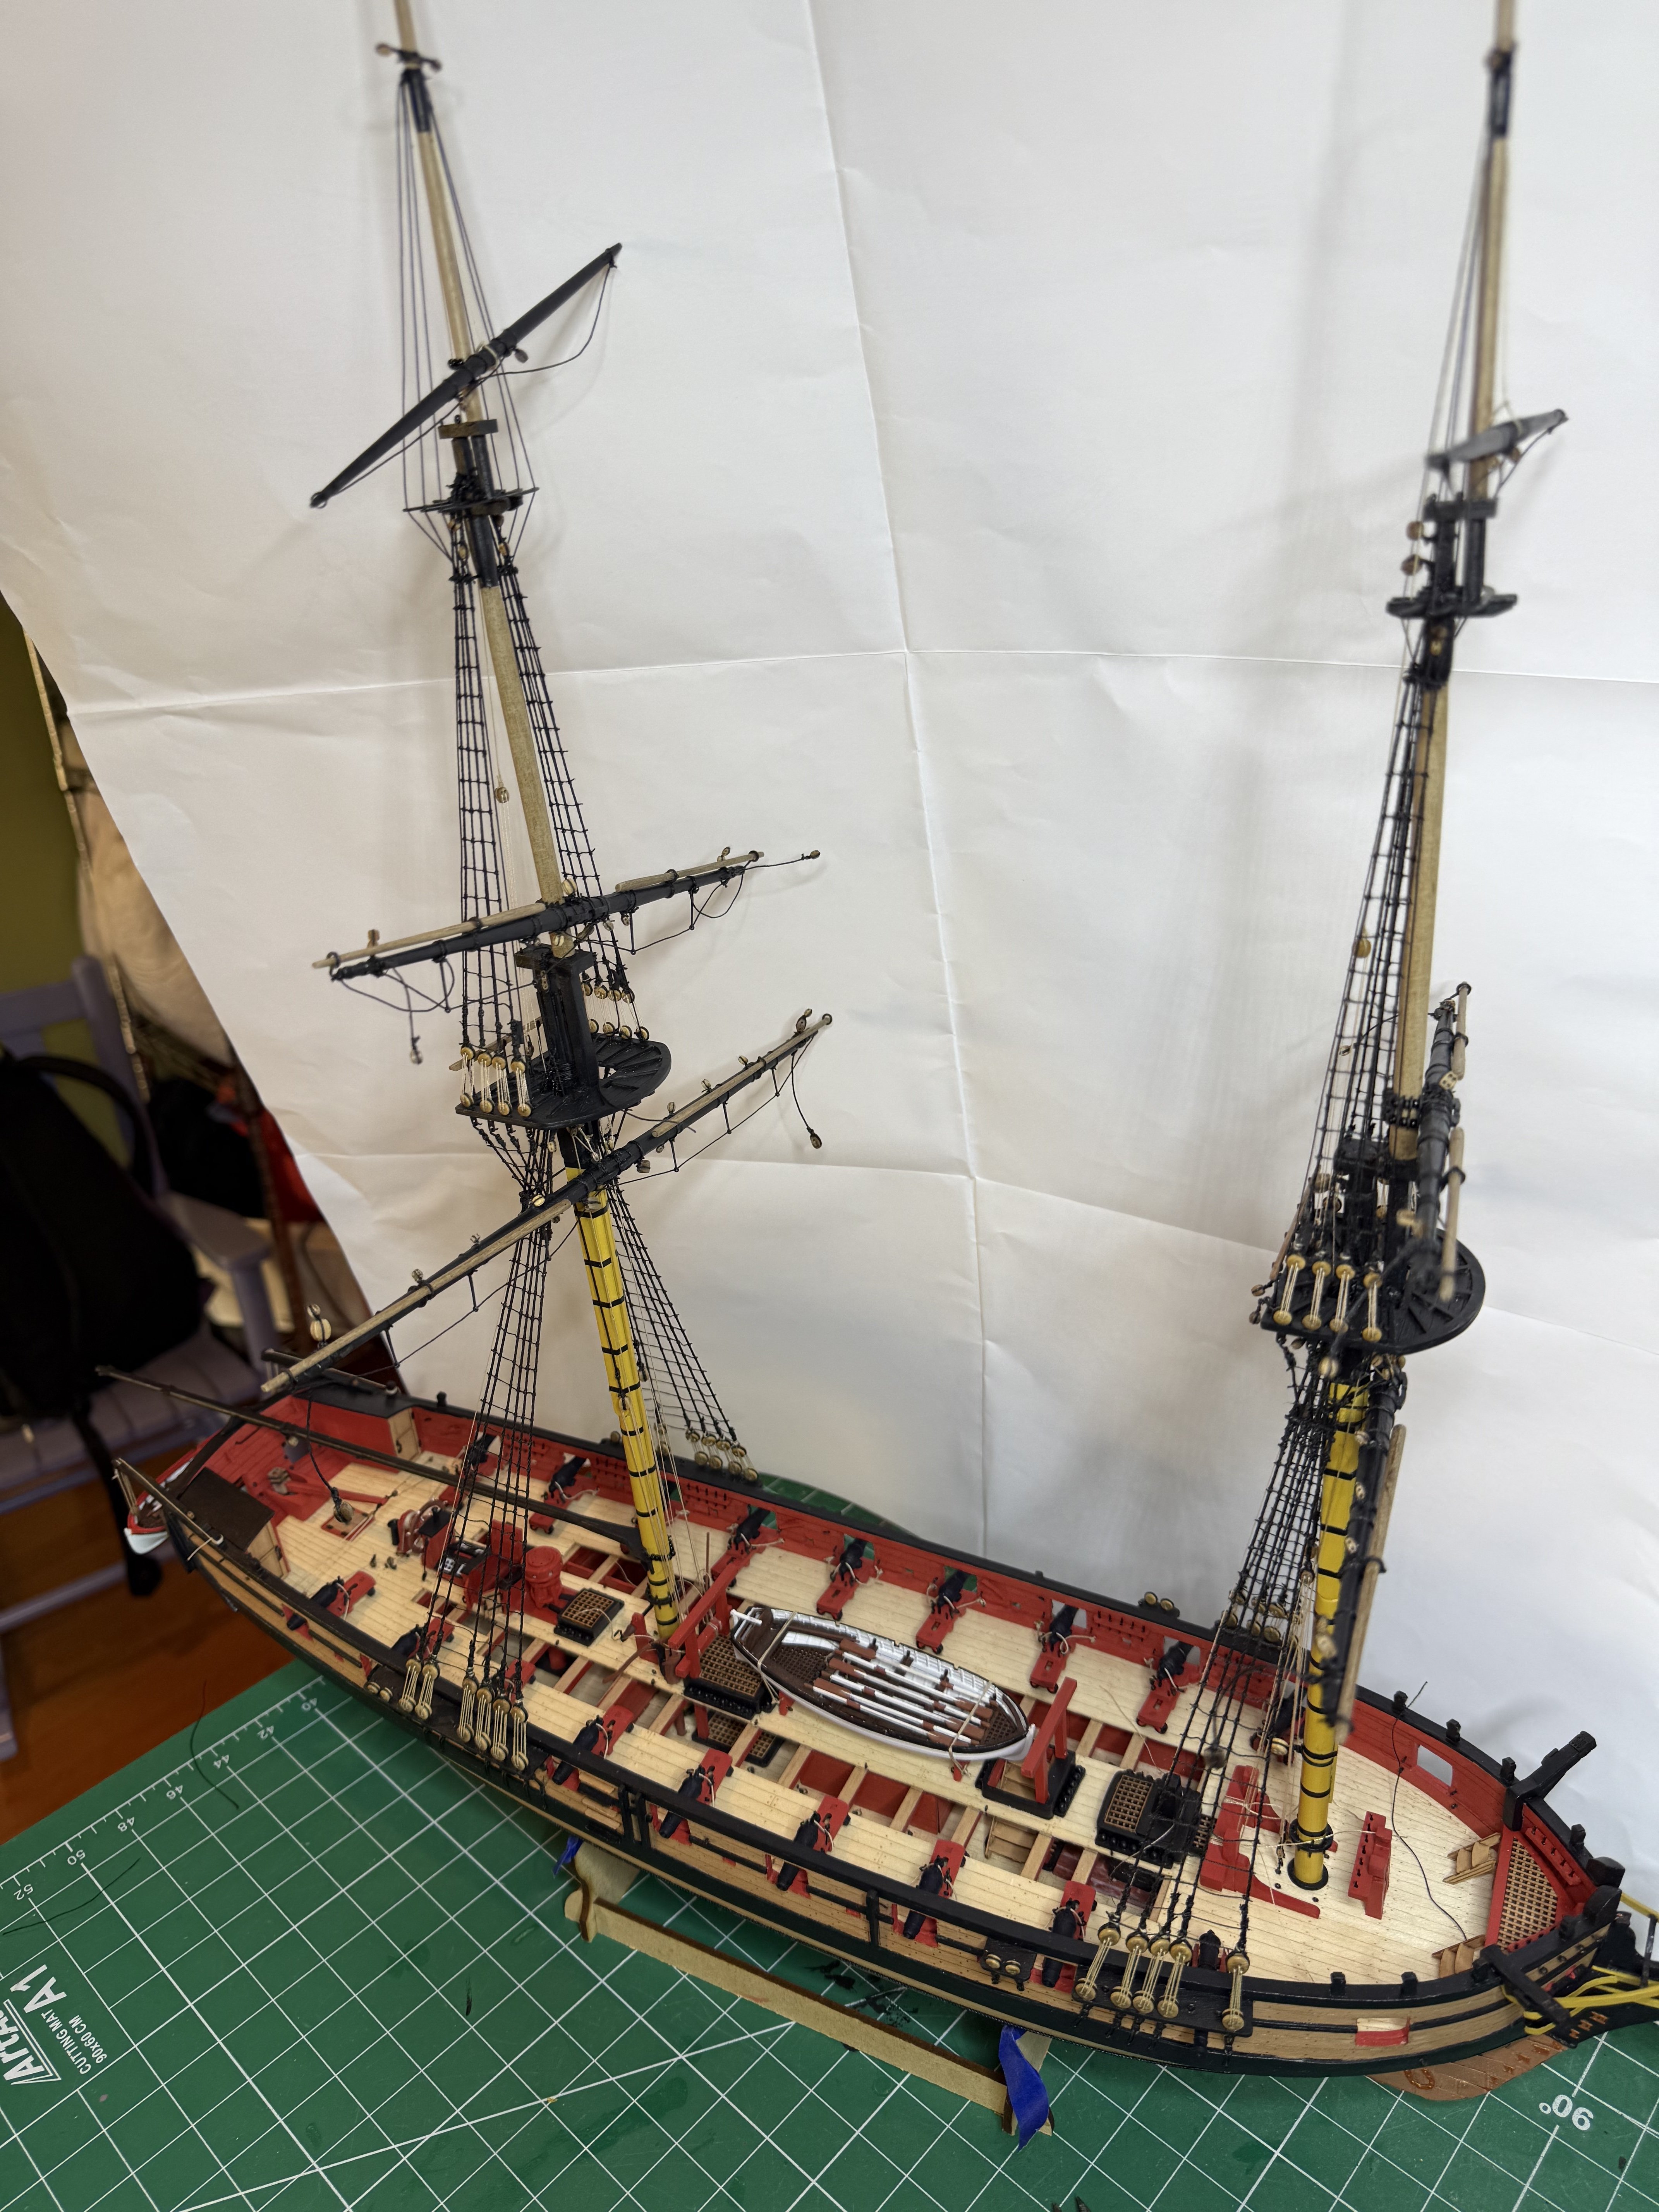
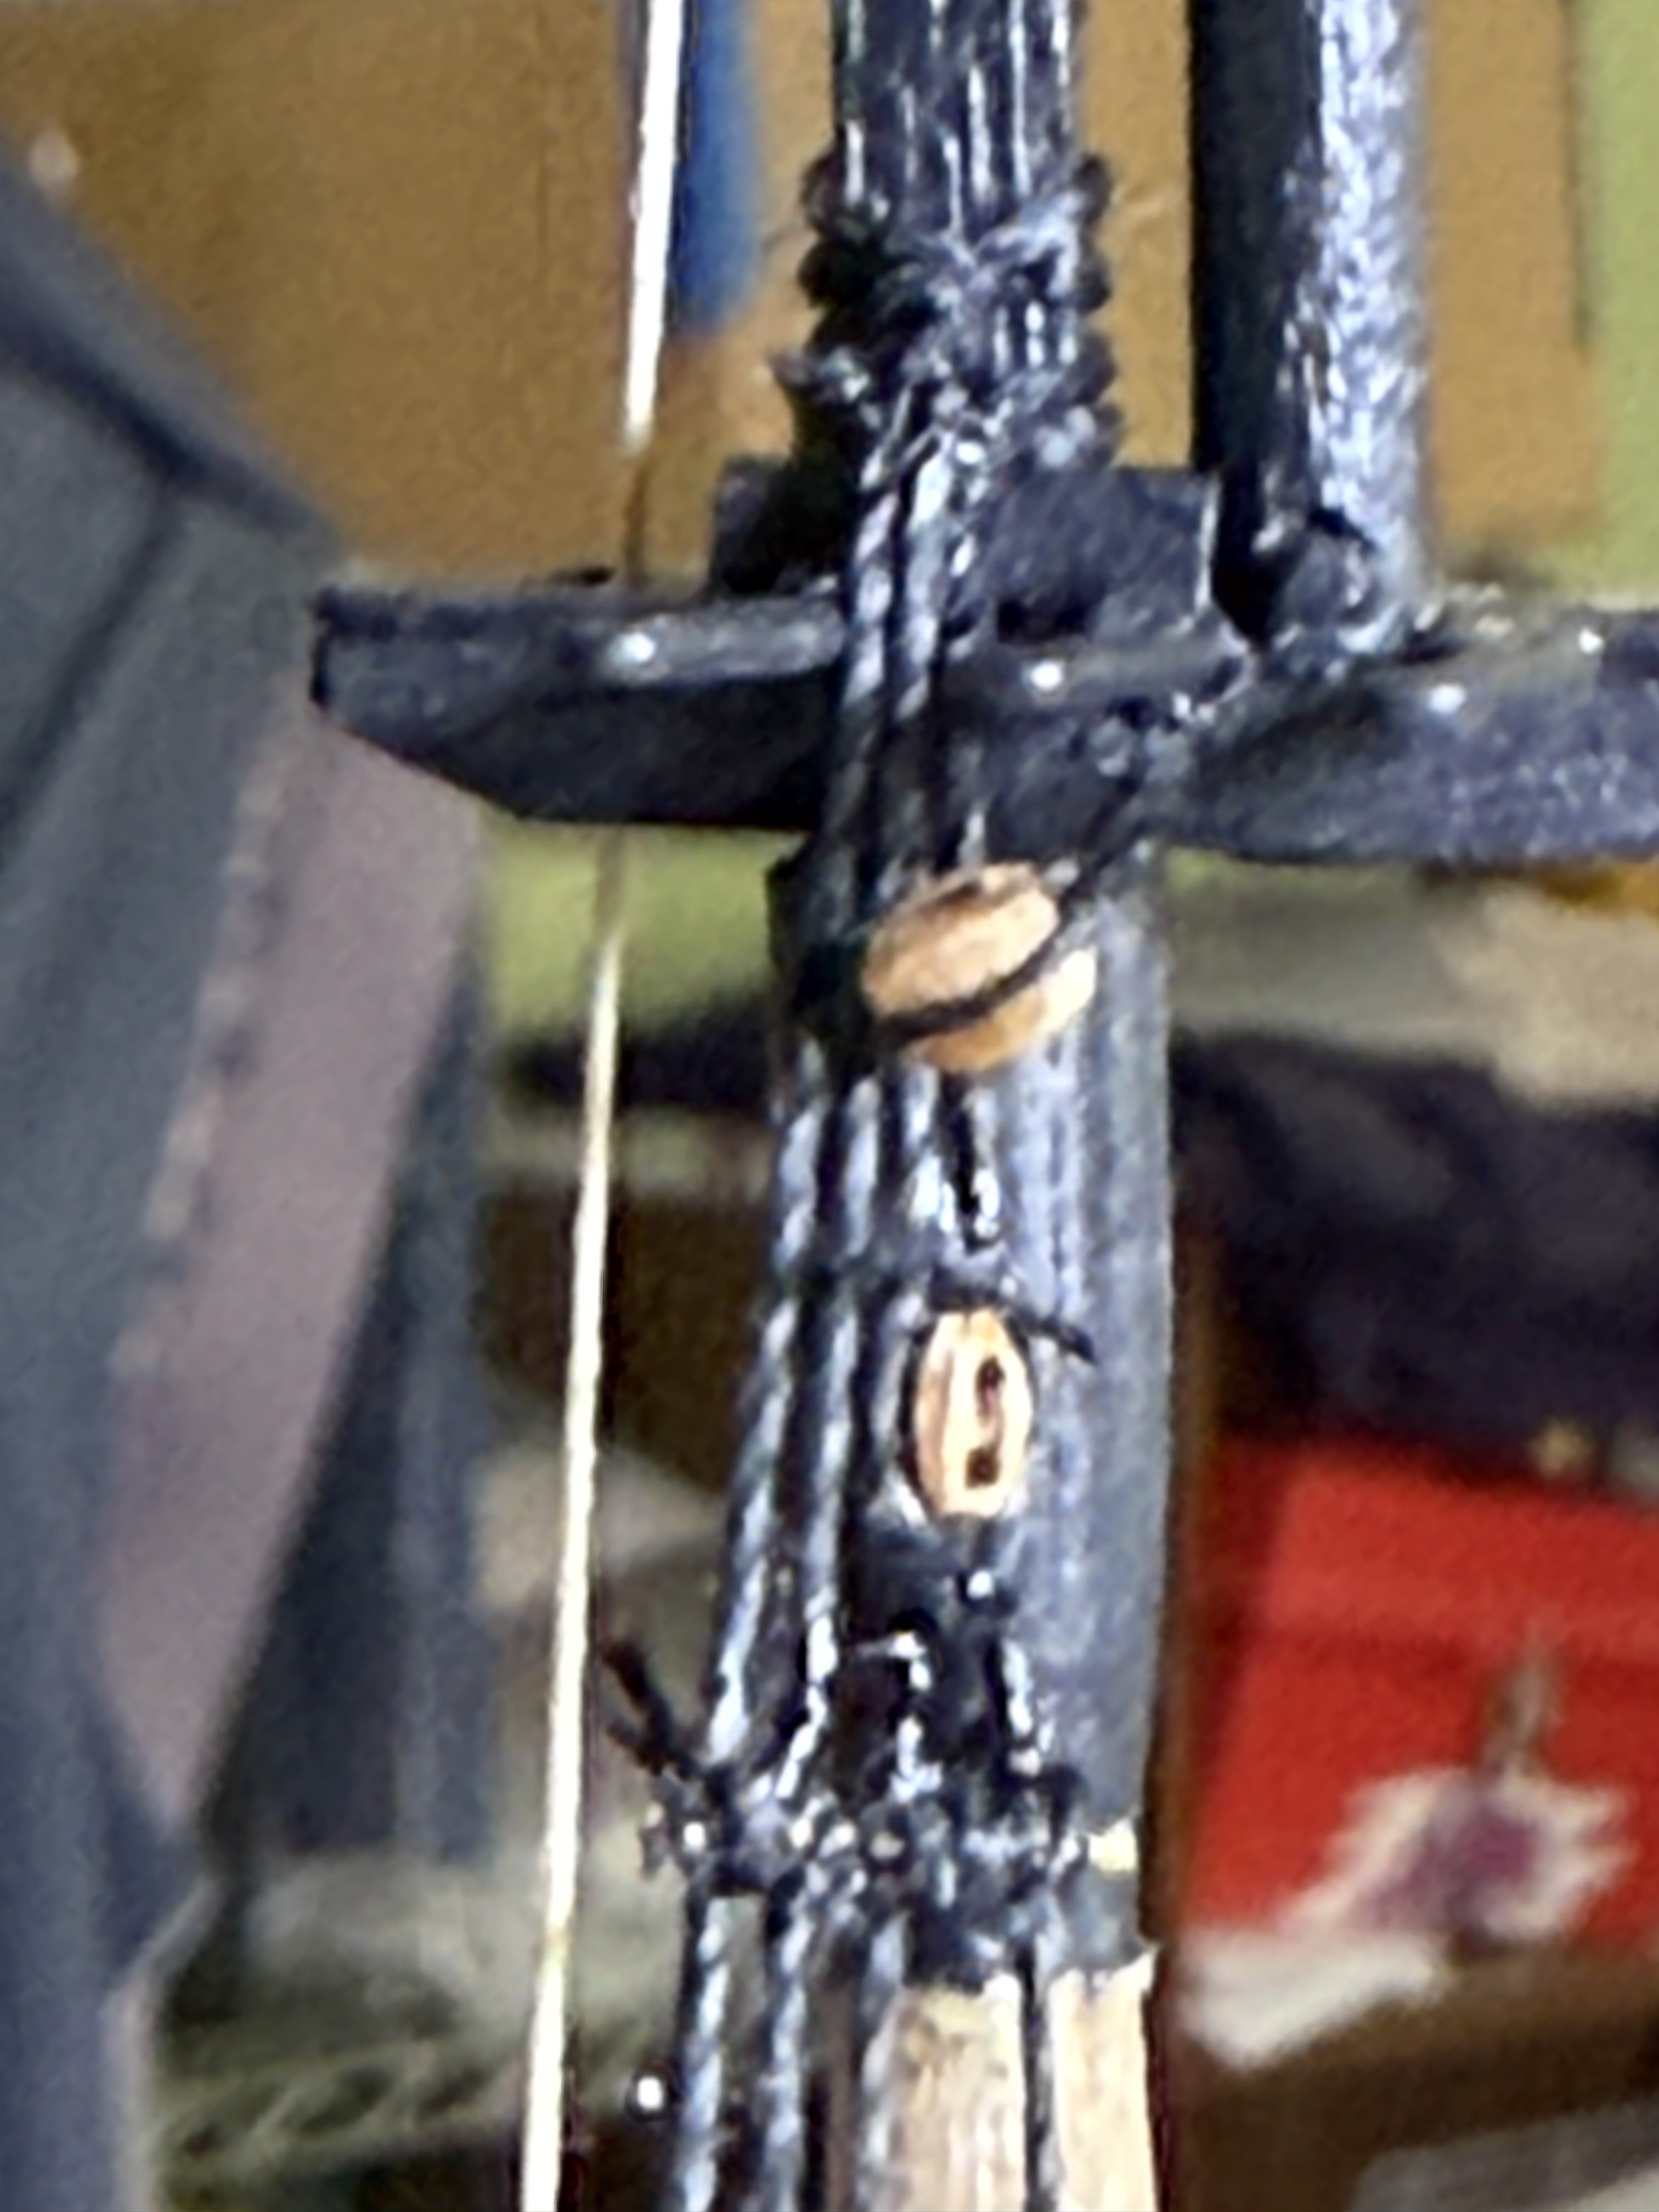
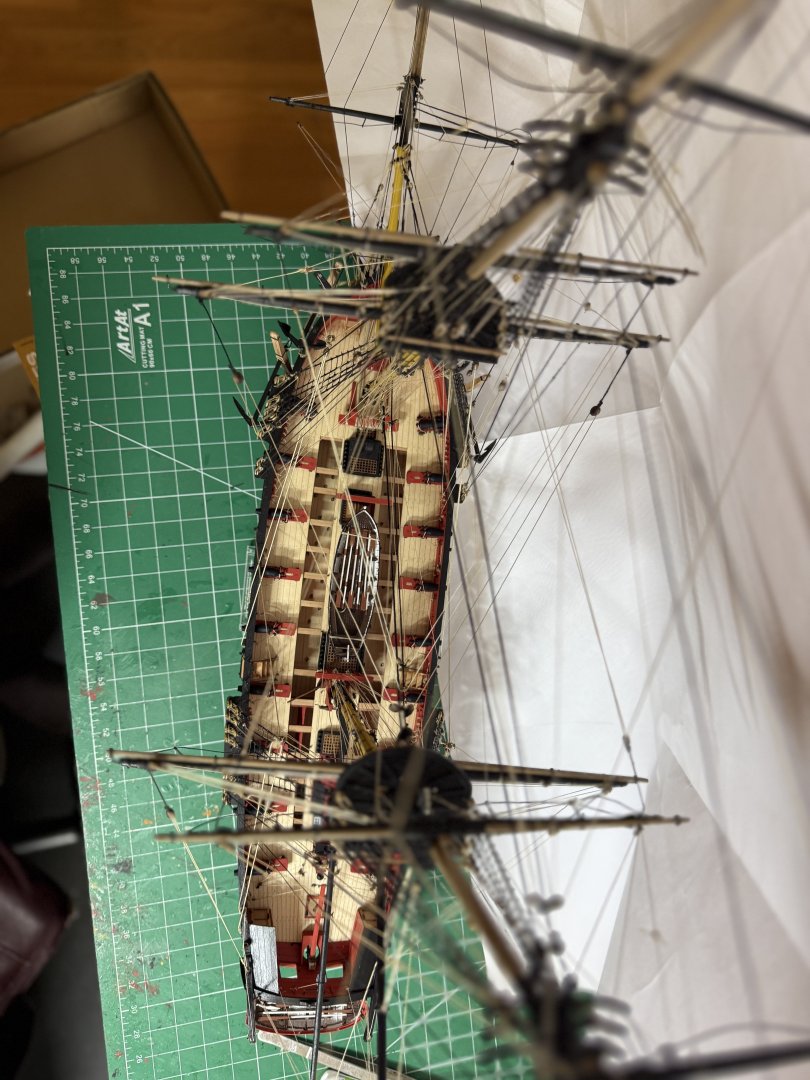
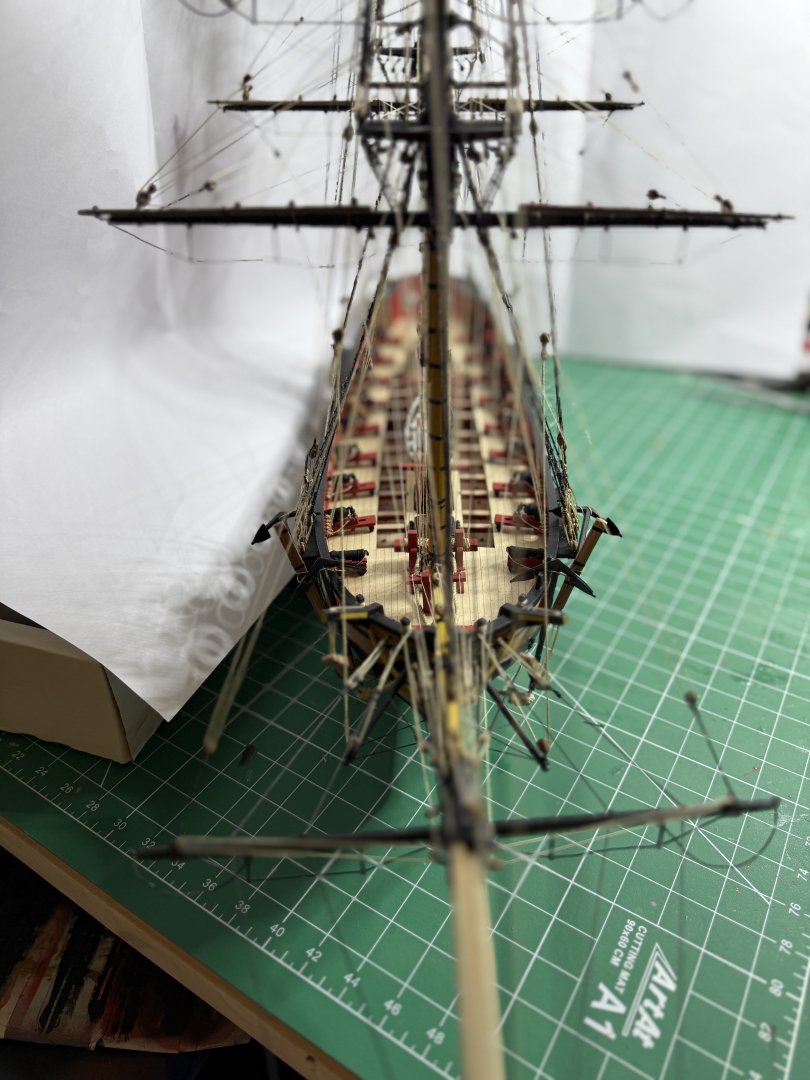
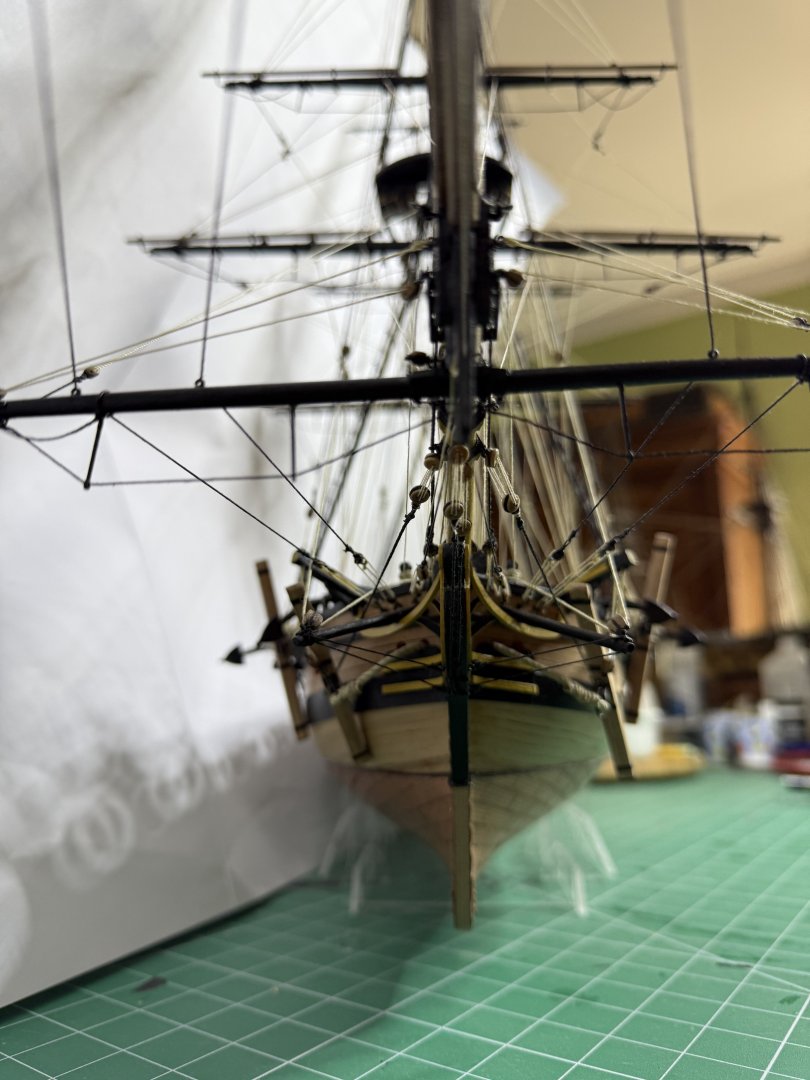
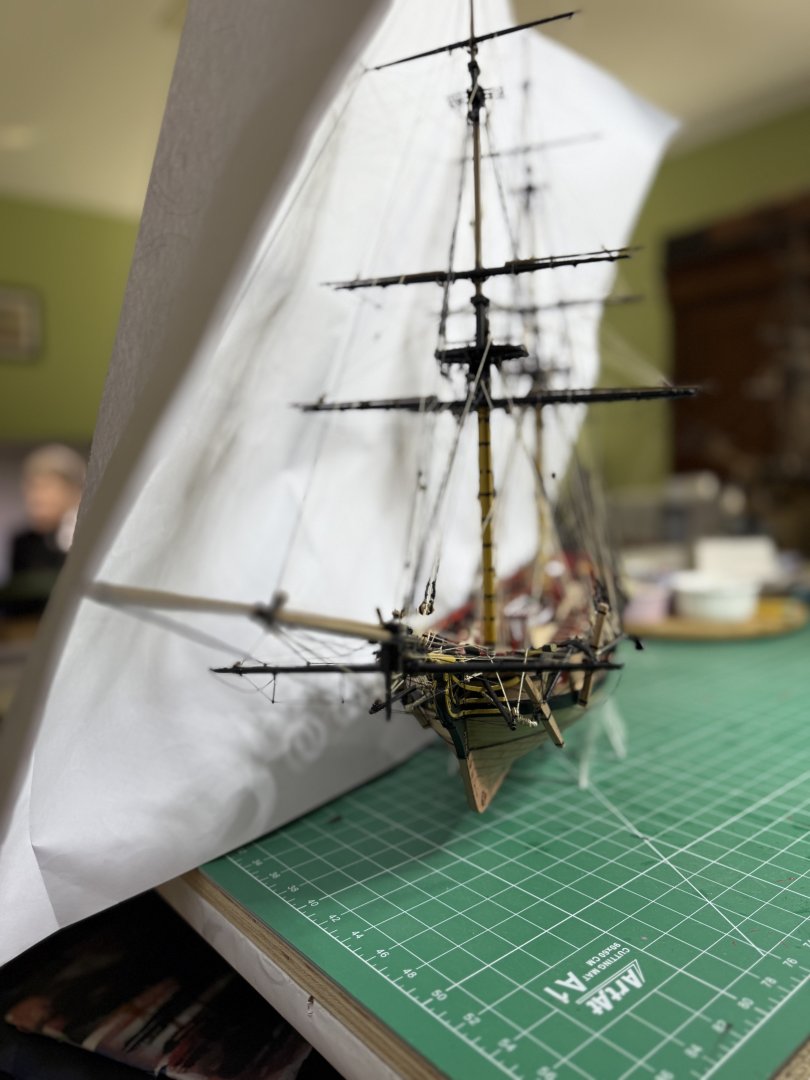
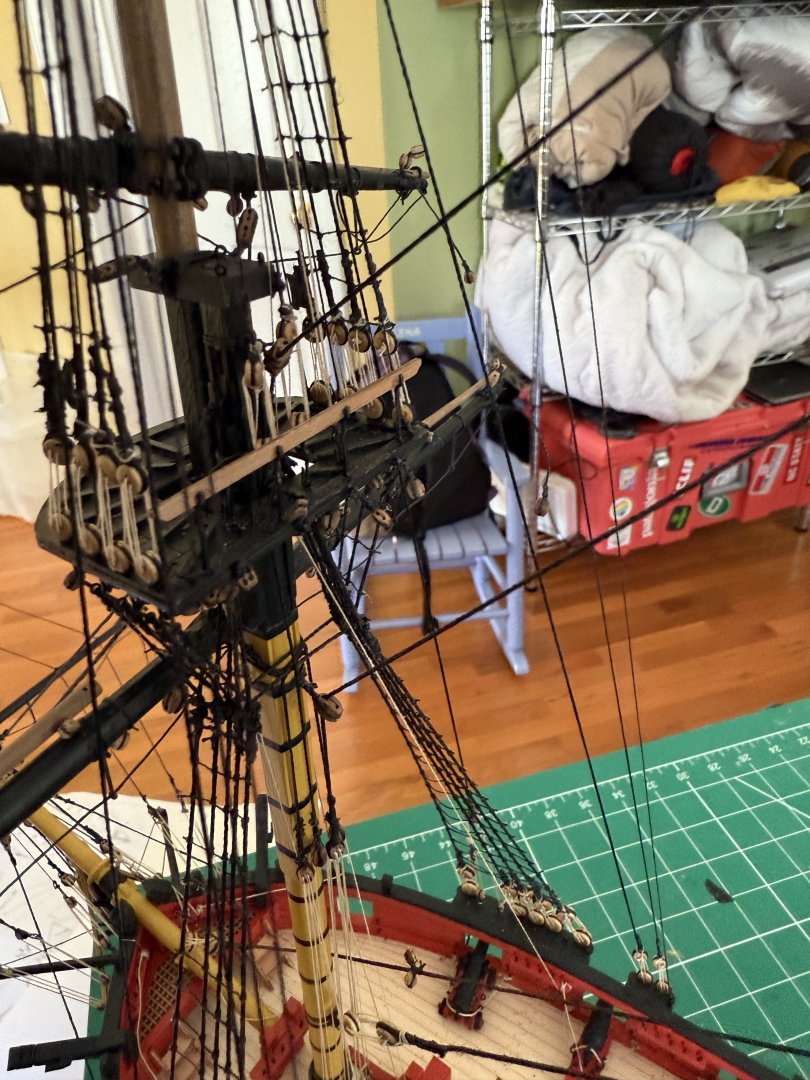
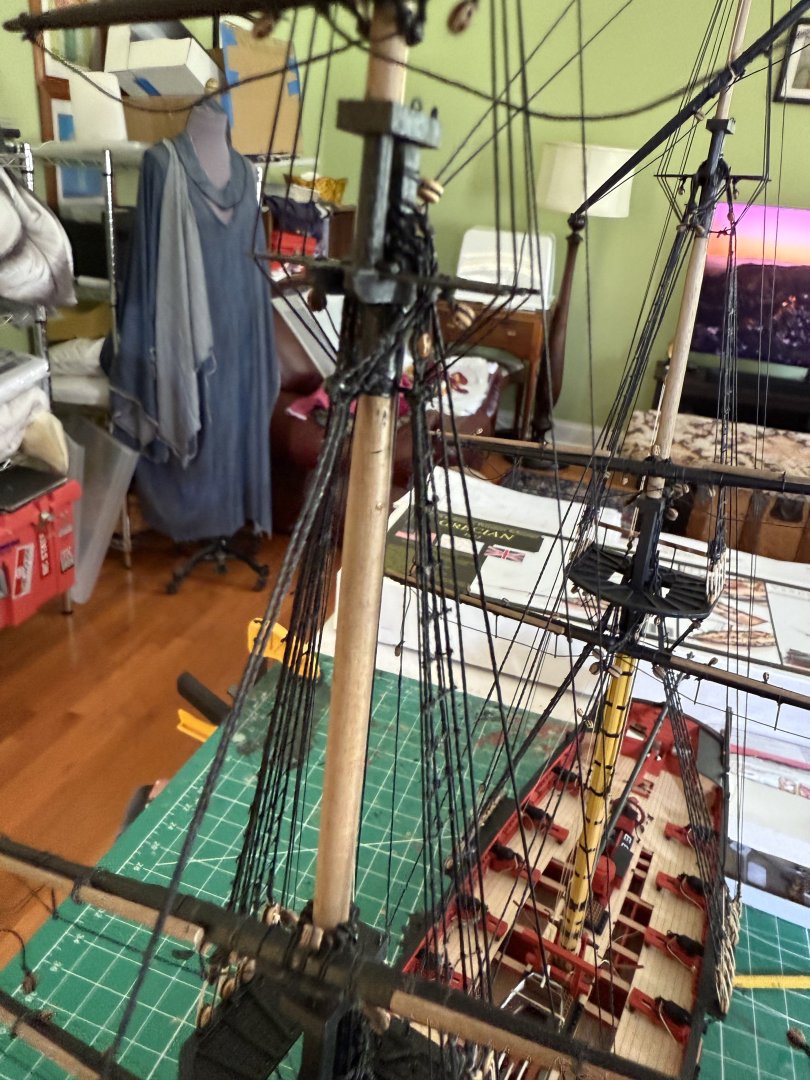
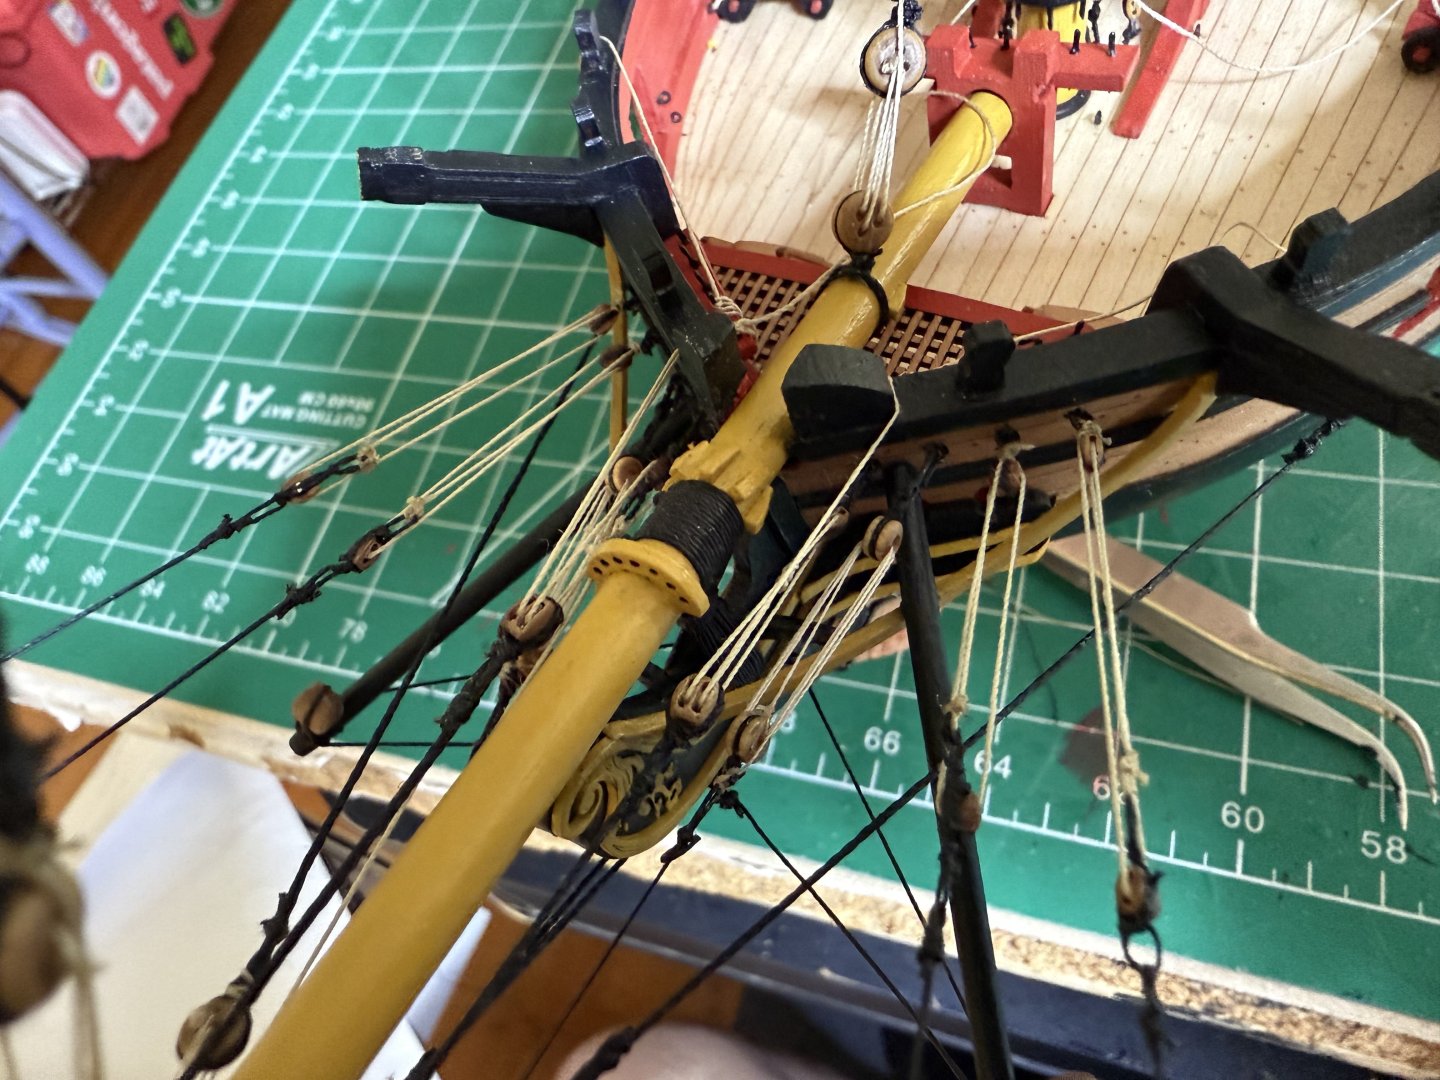
I like the rigging process which, once the shrouds are done, does not take a lot of time but some patience fiddling the lines onto the belaying pins in the cramped spaces
- 73 replies
-
- 1
-
-
- Harpy
- Vanguard Models
- (and 1 more)
-
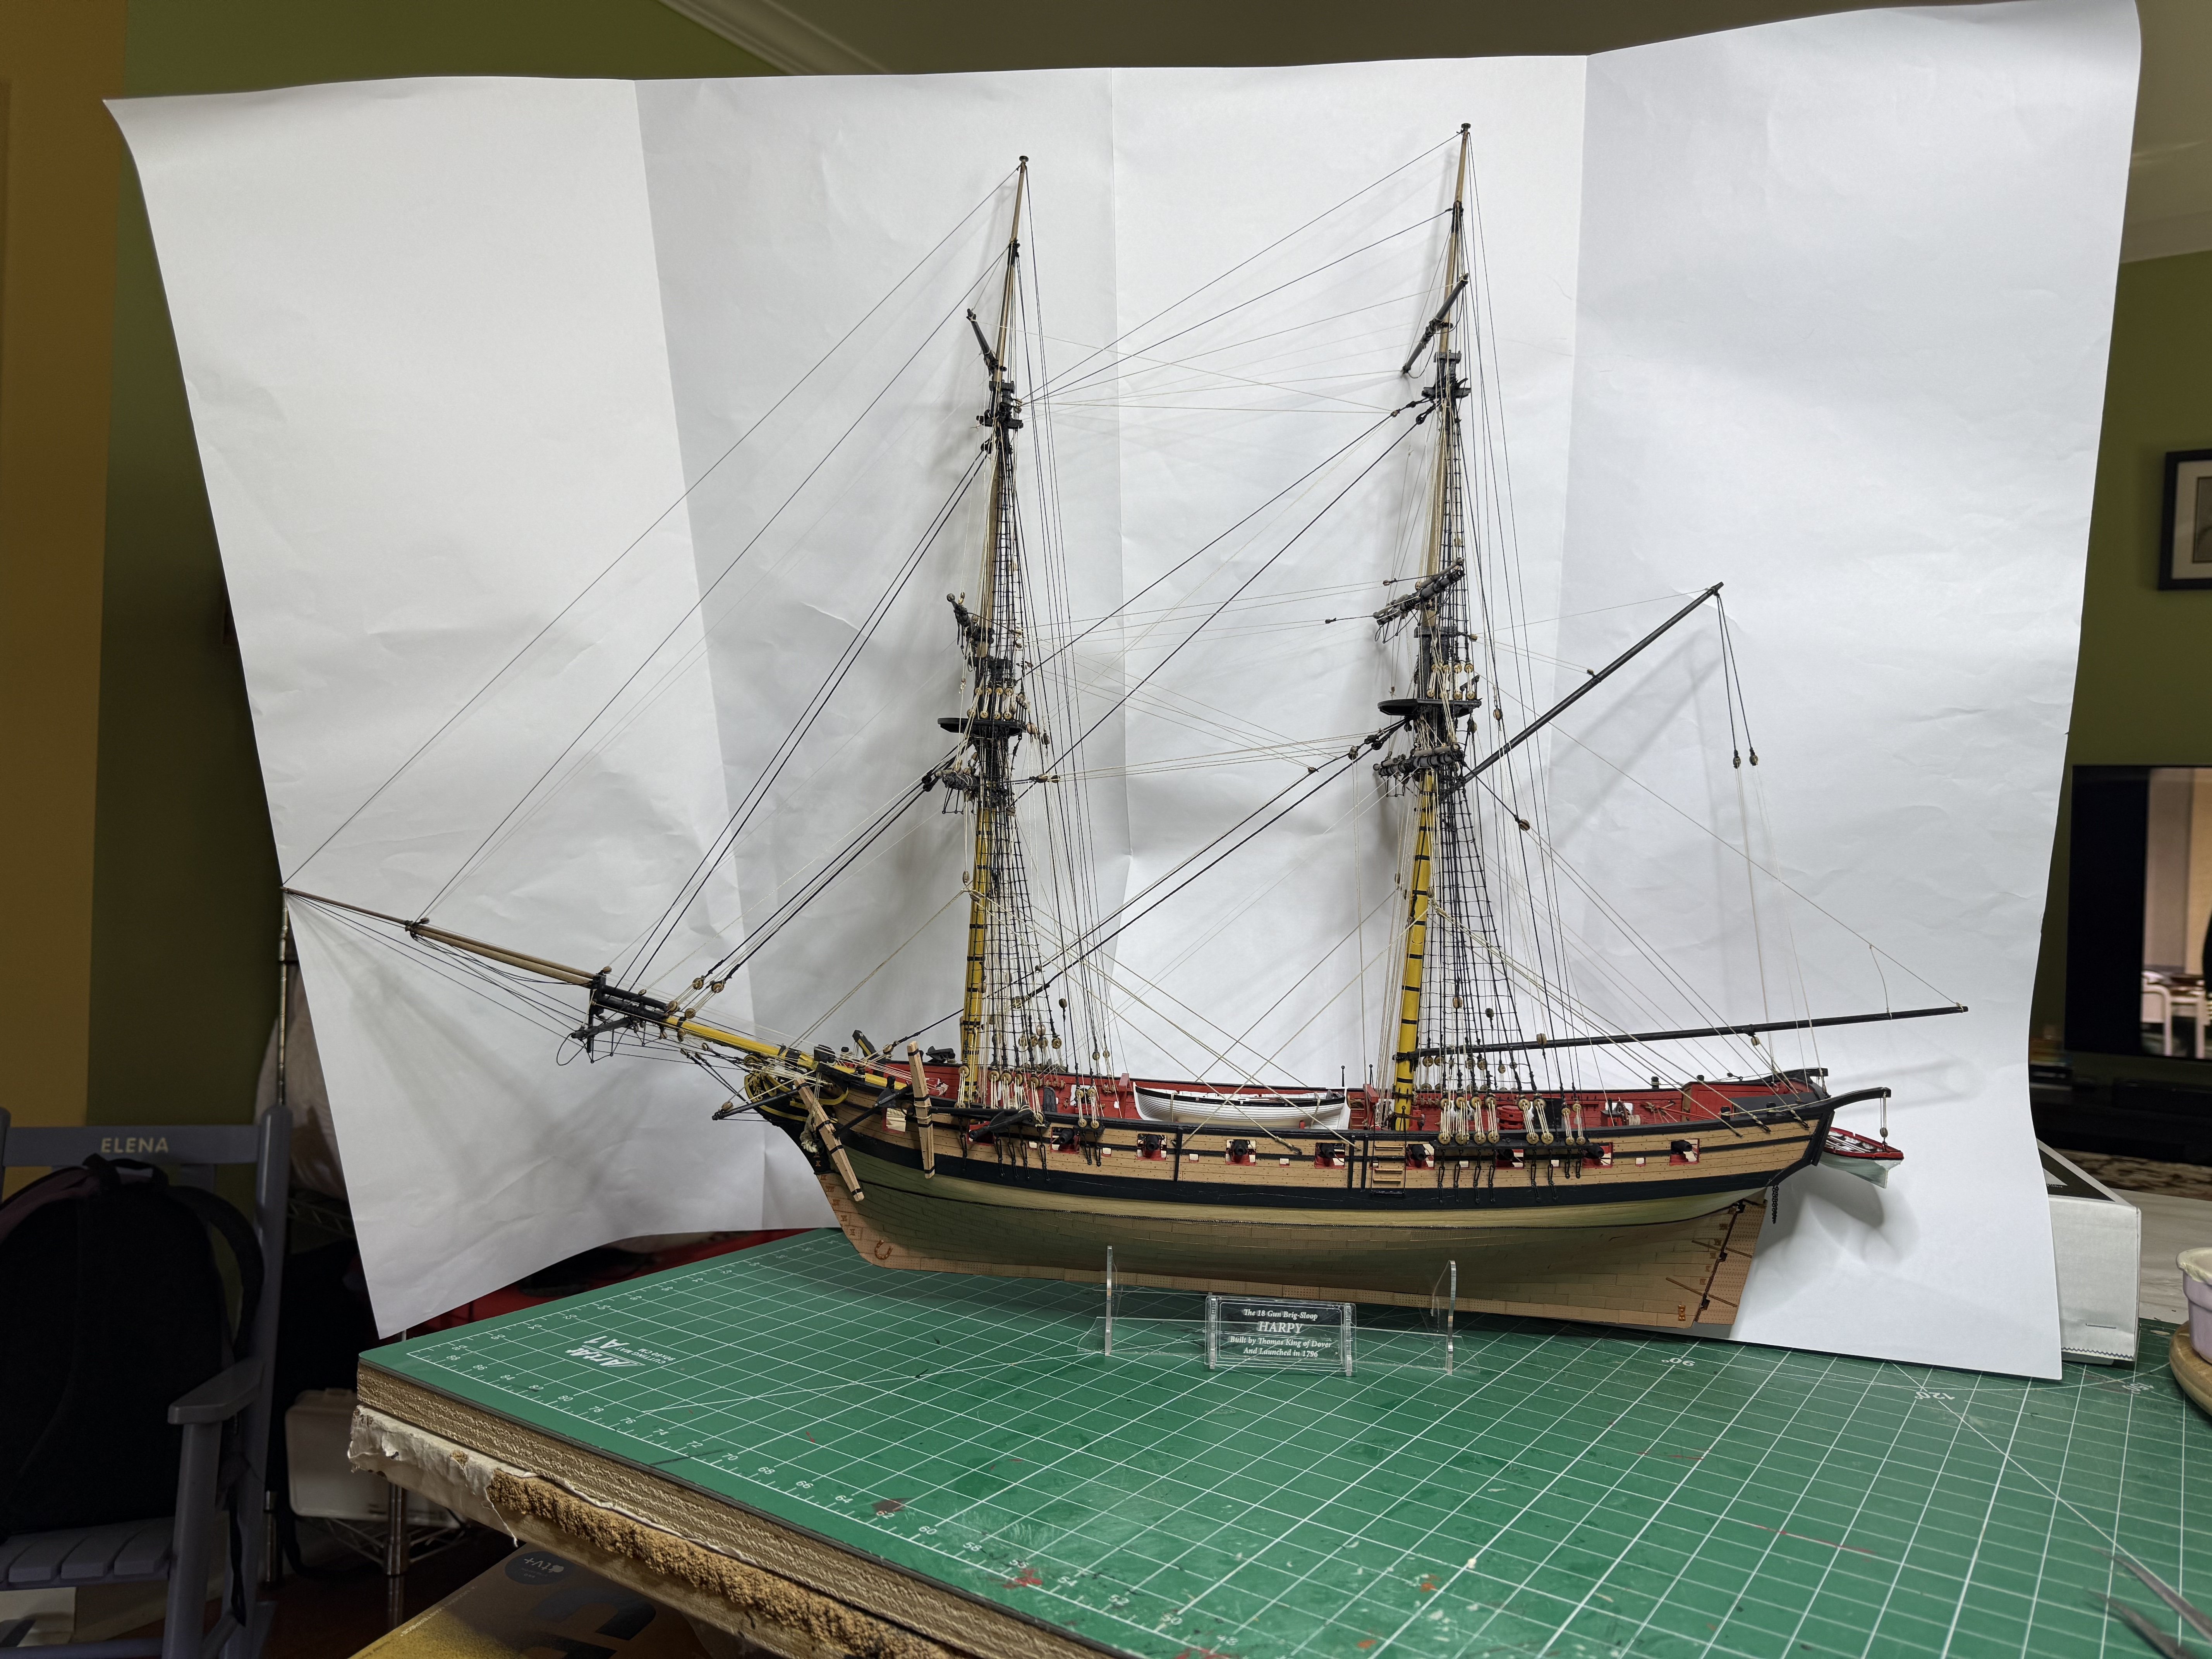
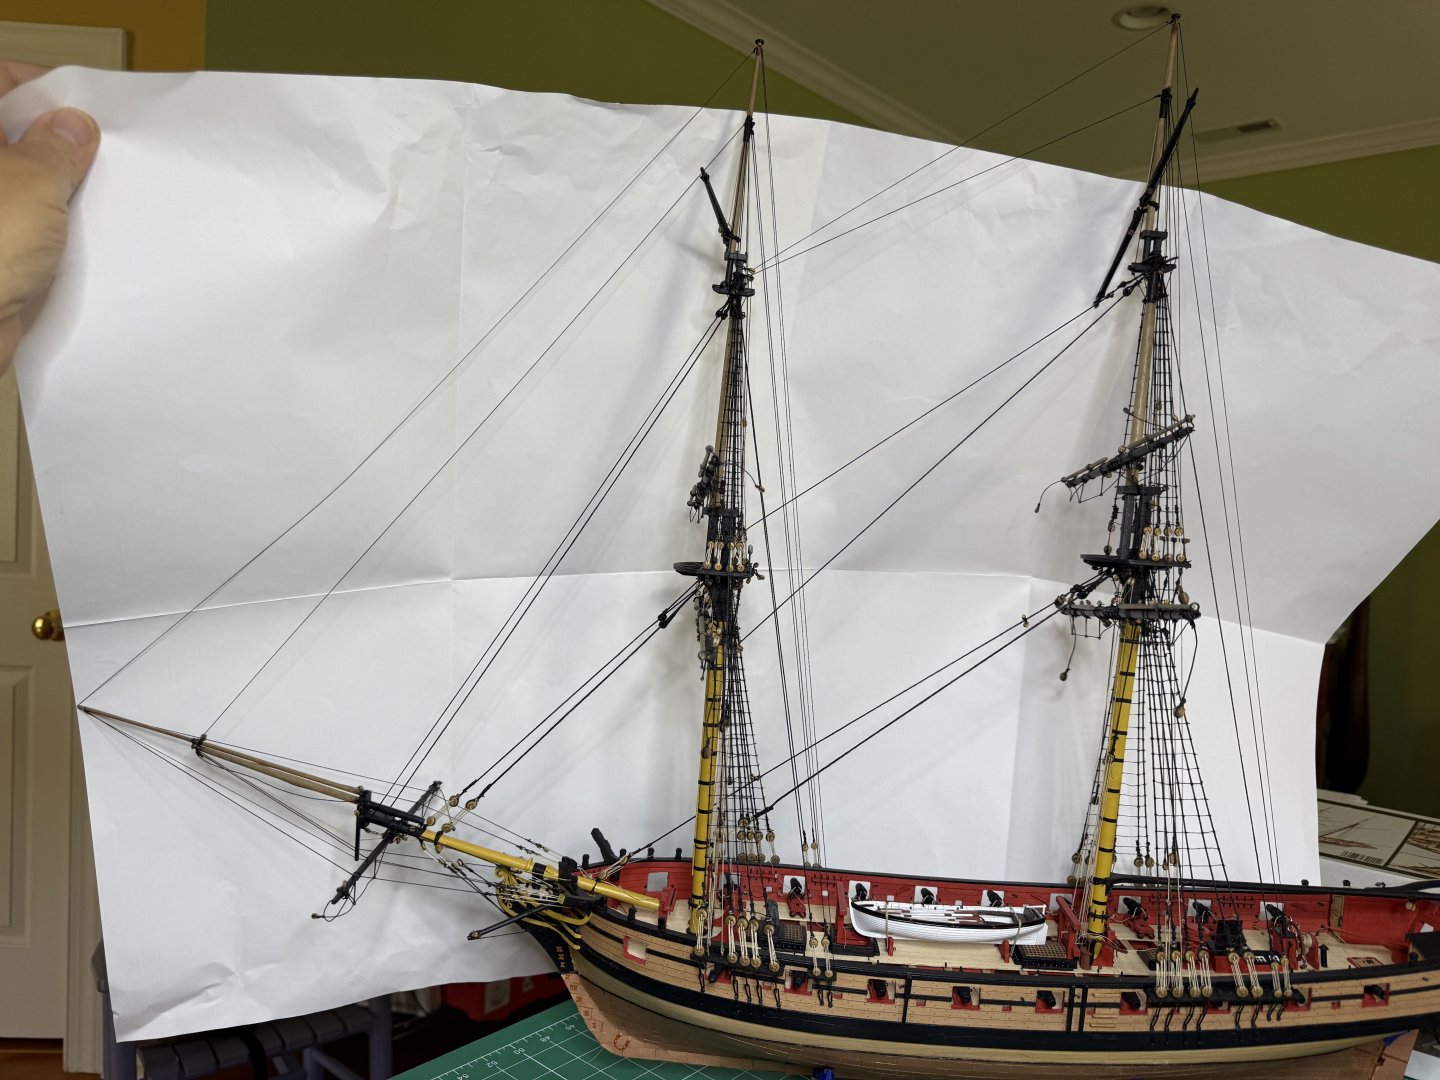
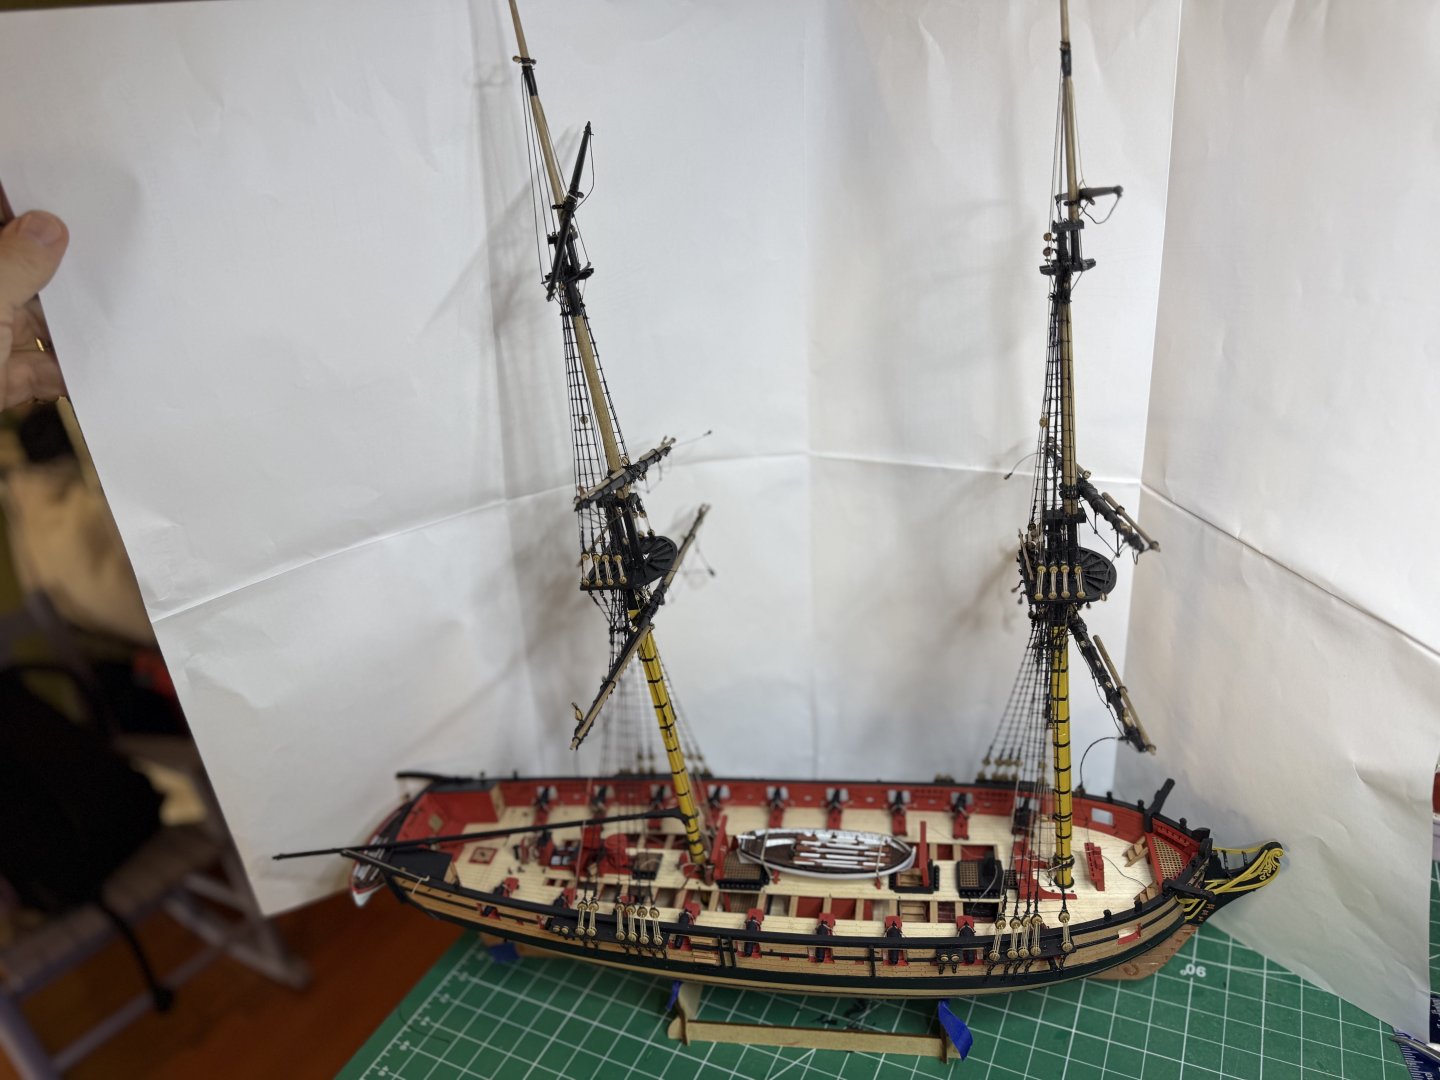
Well, finally finished today. Catheaded the anchors, added a few things here and there. A most enjoyable build. And for my next project, another lovely Vanguard offering I hope next year's Vanguard new offerings will have something sizable, like a 2 or 3 decker


- 73 replies
-
- 20
-
-

-
- Harpy
- Vanguard Models
- (and 1 more)
-
Nice work. I do not plan to install the bulwark ladders until the end as there is a cleat that will be hard to reach right underneath during rigging. Also careful with those pump handles. They are in the way for some off the rigging and I have broken the starboard one twice now.
- 332 replies
-
- 3
-
-
- Harpy
- Vanguard Models
- (and 1 more)
-
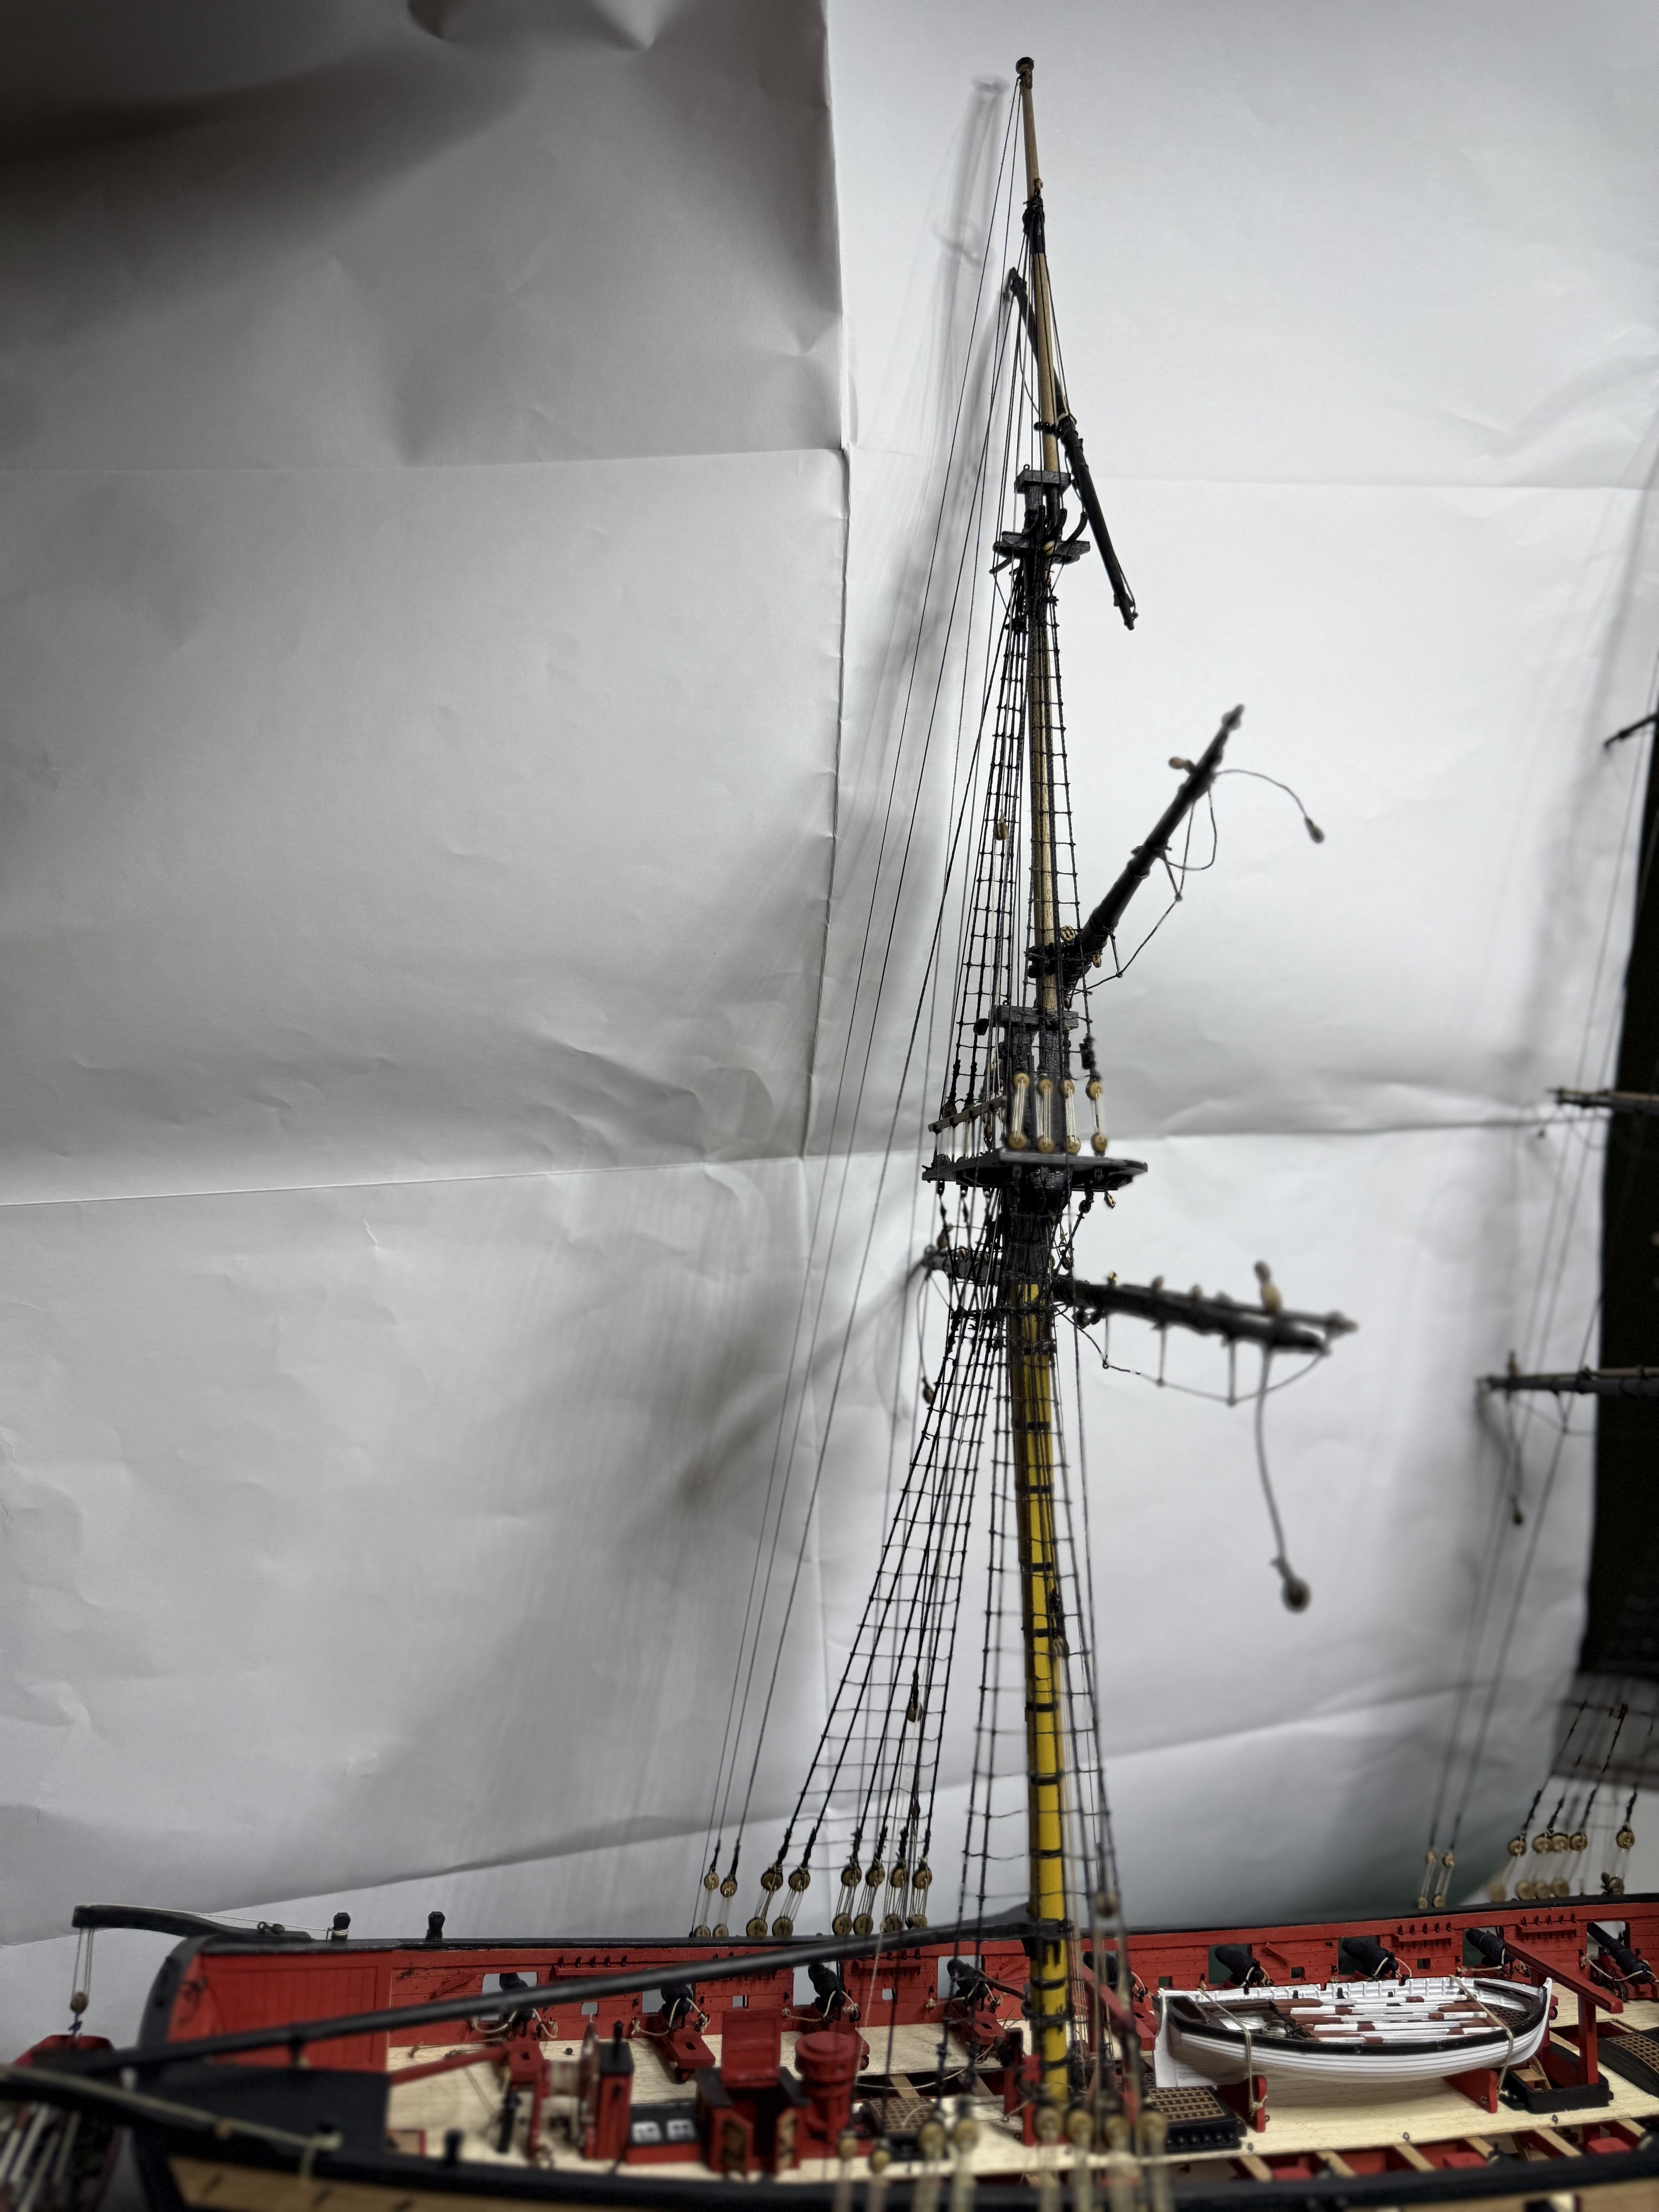
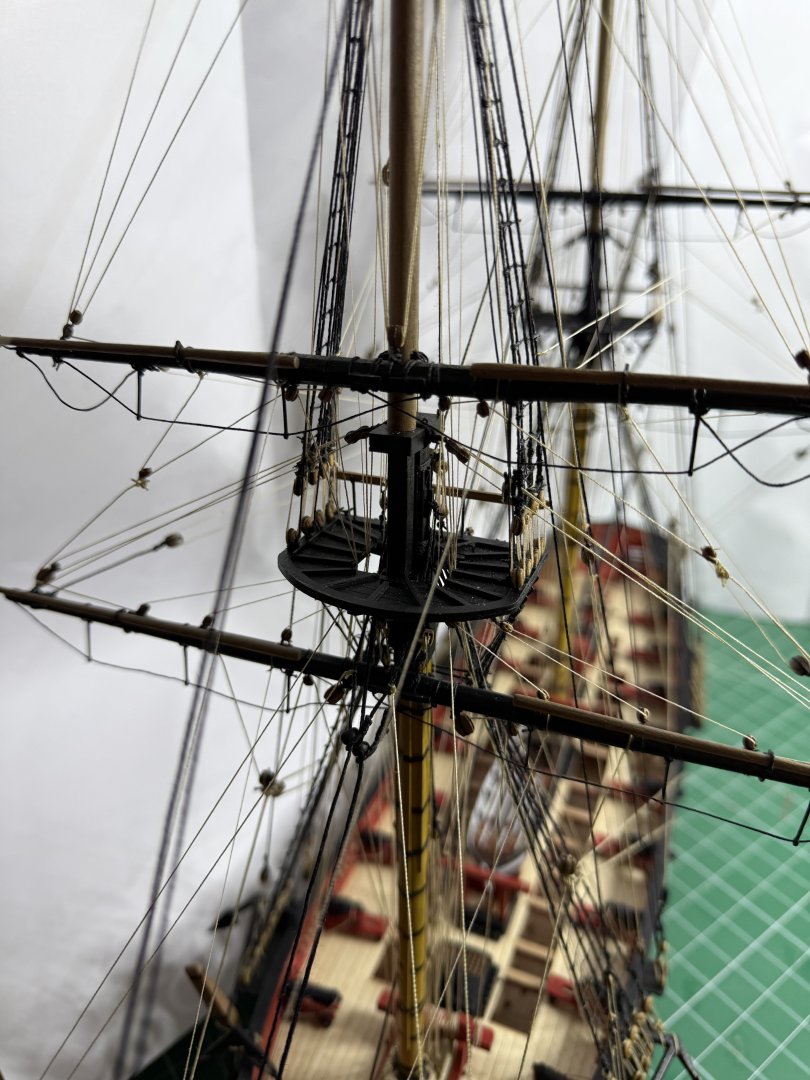
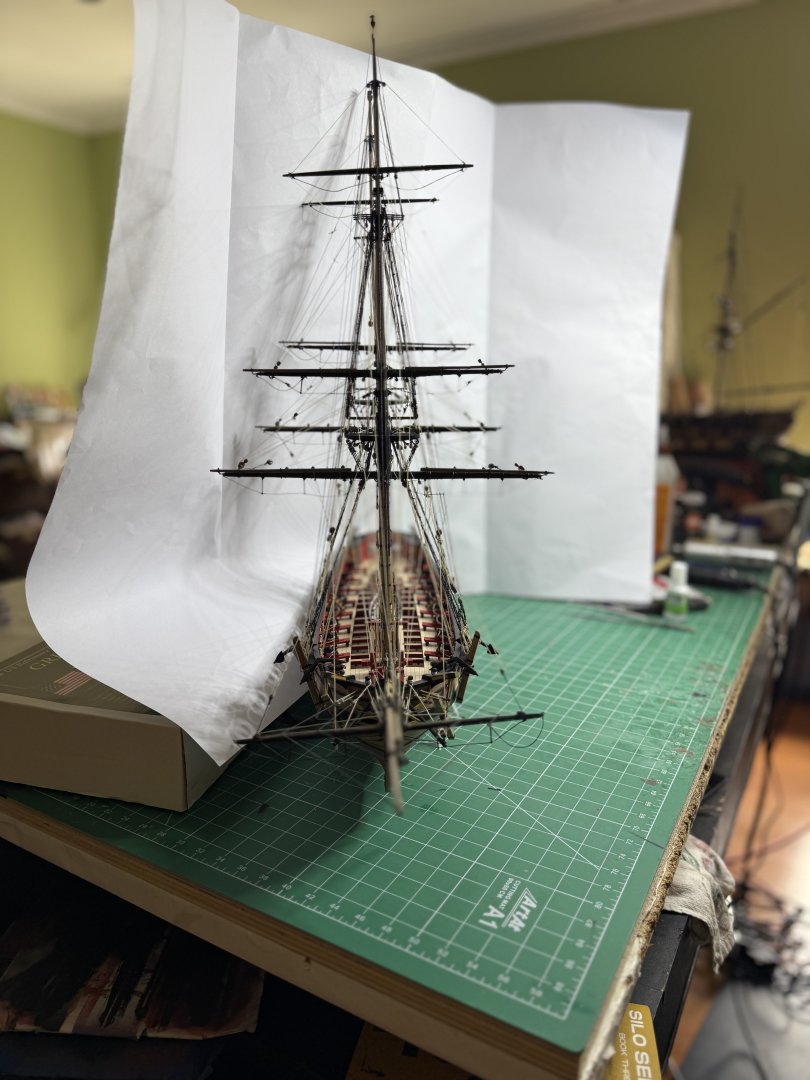
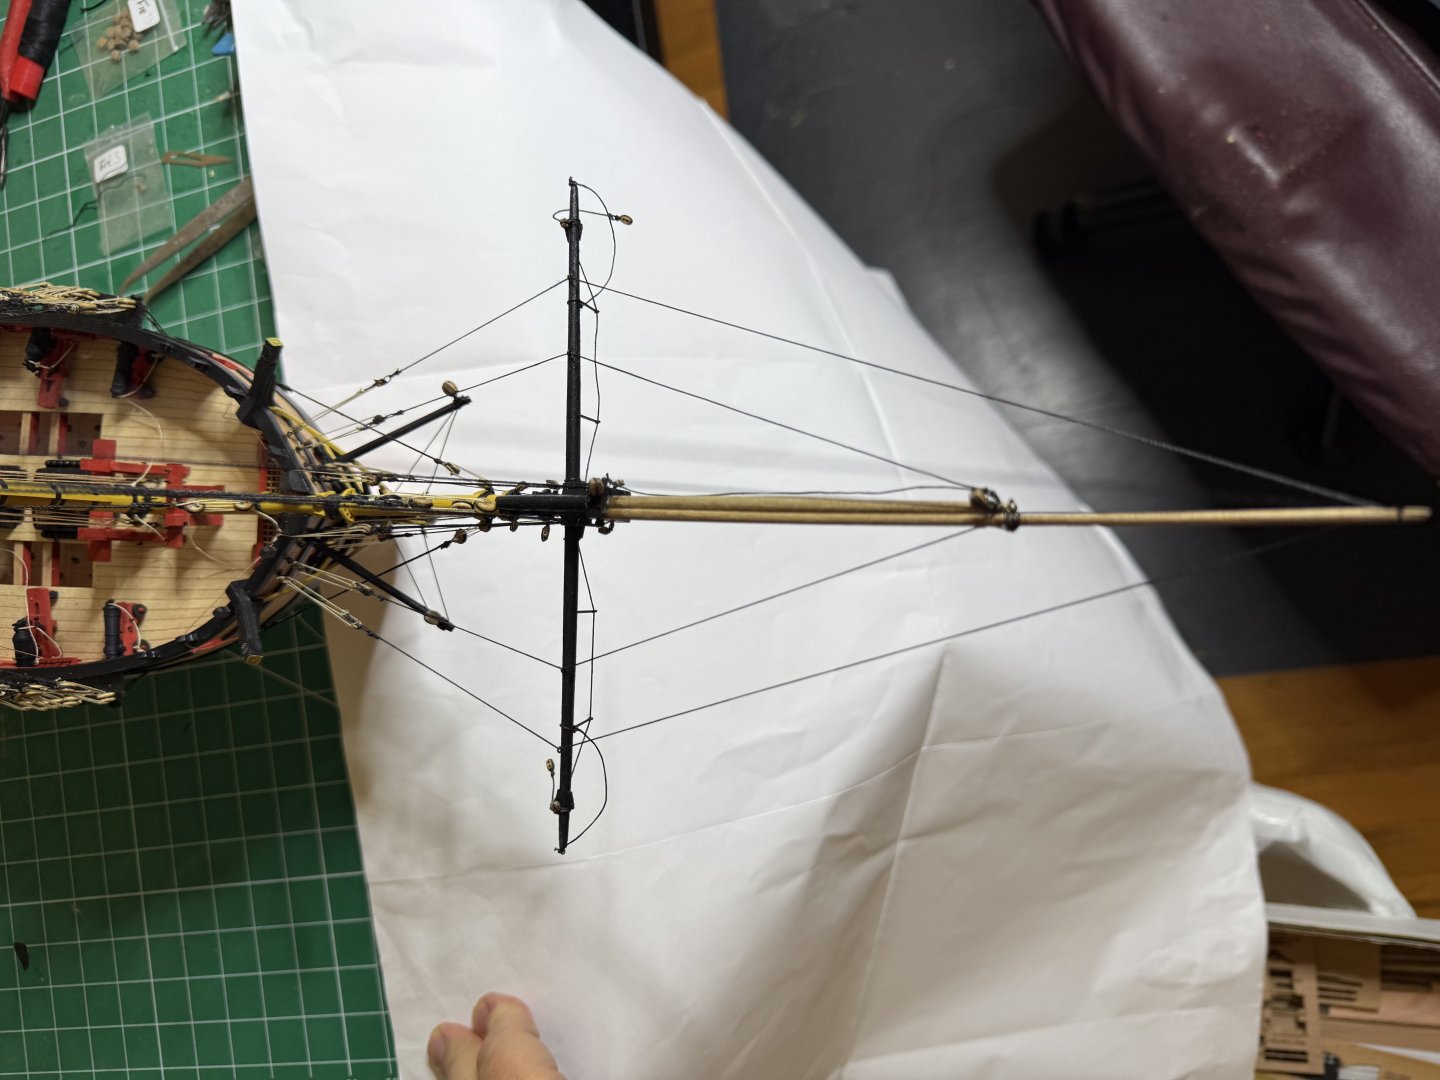
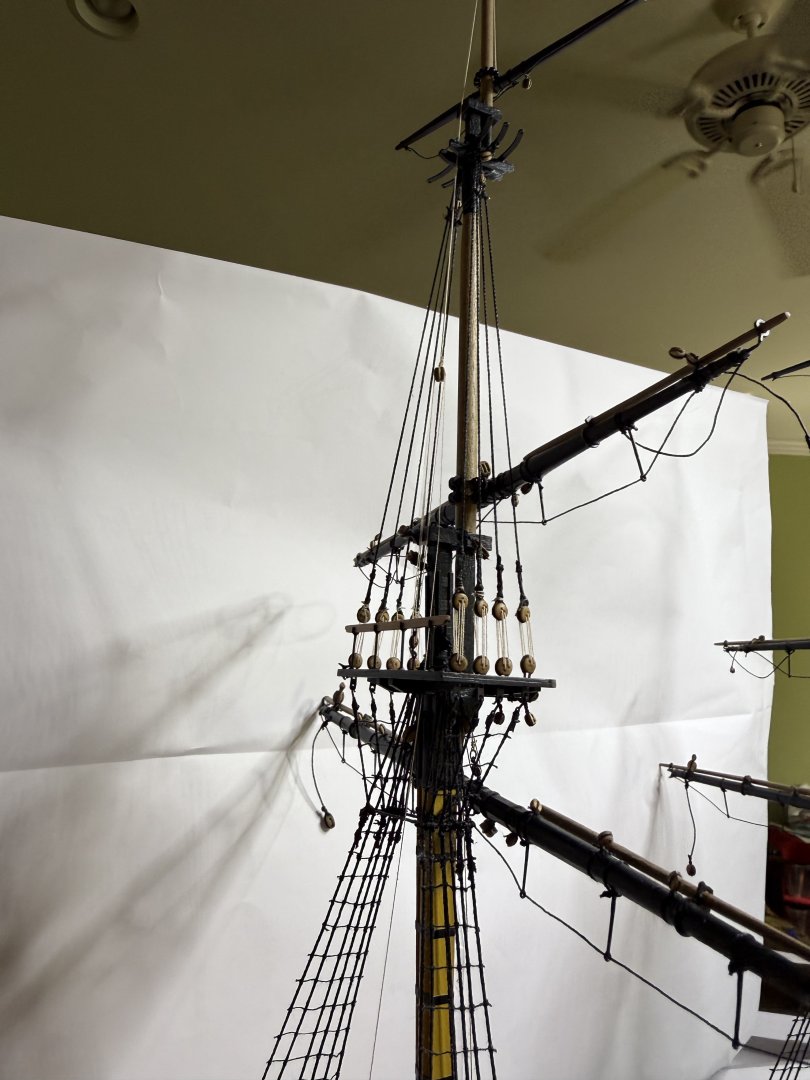
Took a break for a few days to see a couple of great operas at the Met. Today completed stays. Next will be the lifts, clews, tacks, sheets, braces and bow lines


- 73 replies
-
- 9
-
-
- Harpy
- Vanguard Models
- (and 1 more)
-
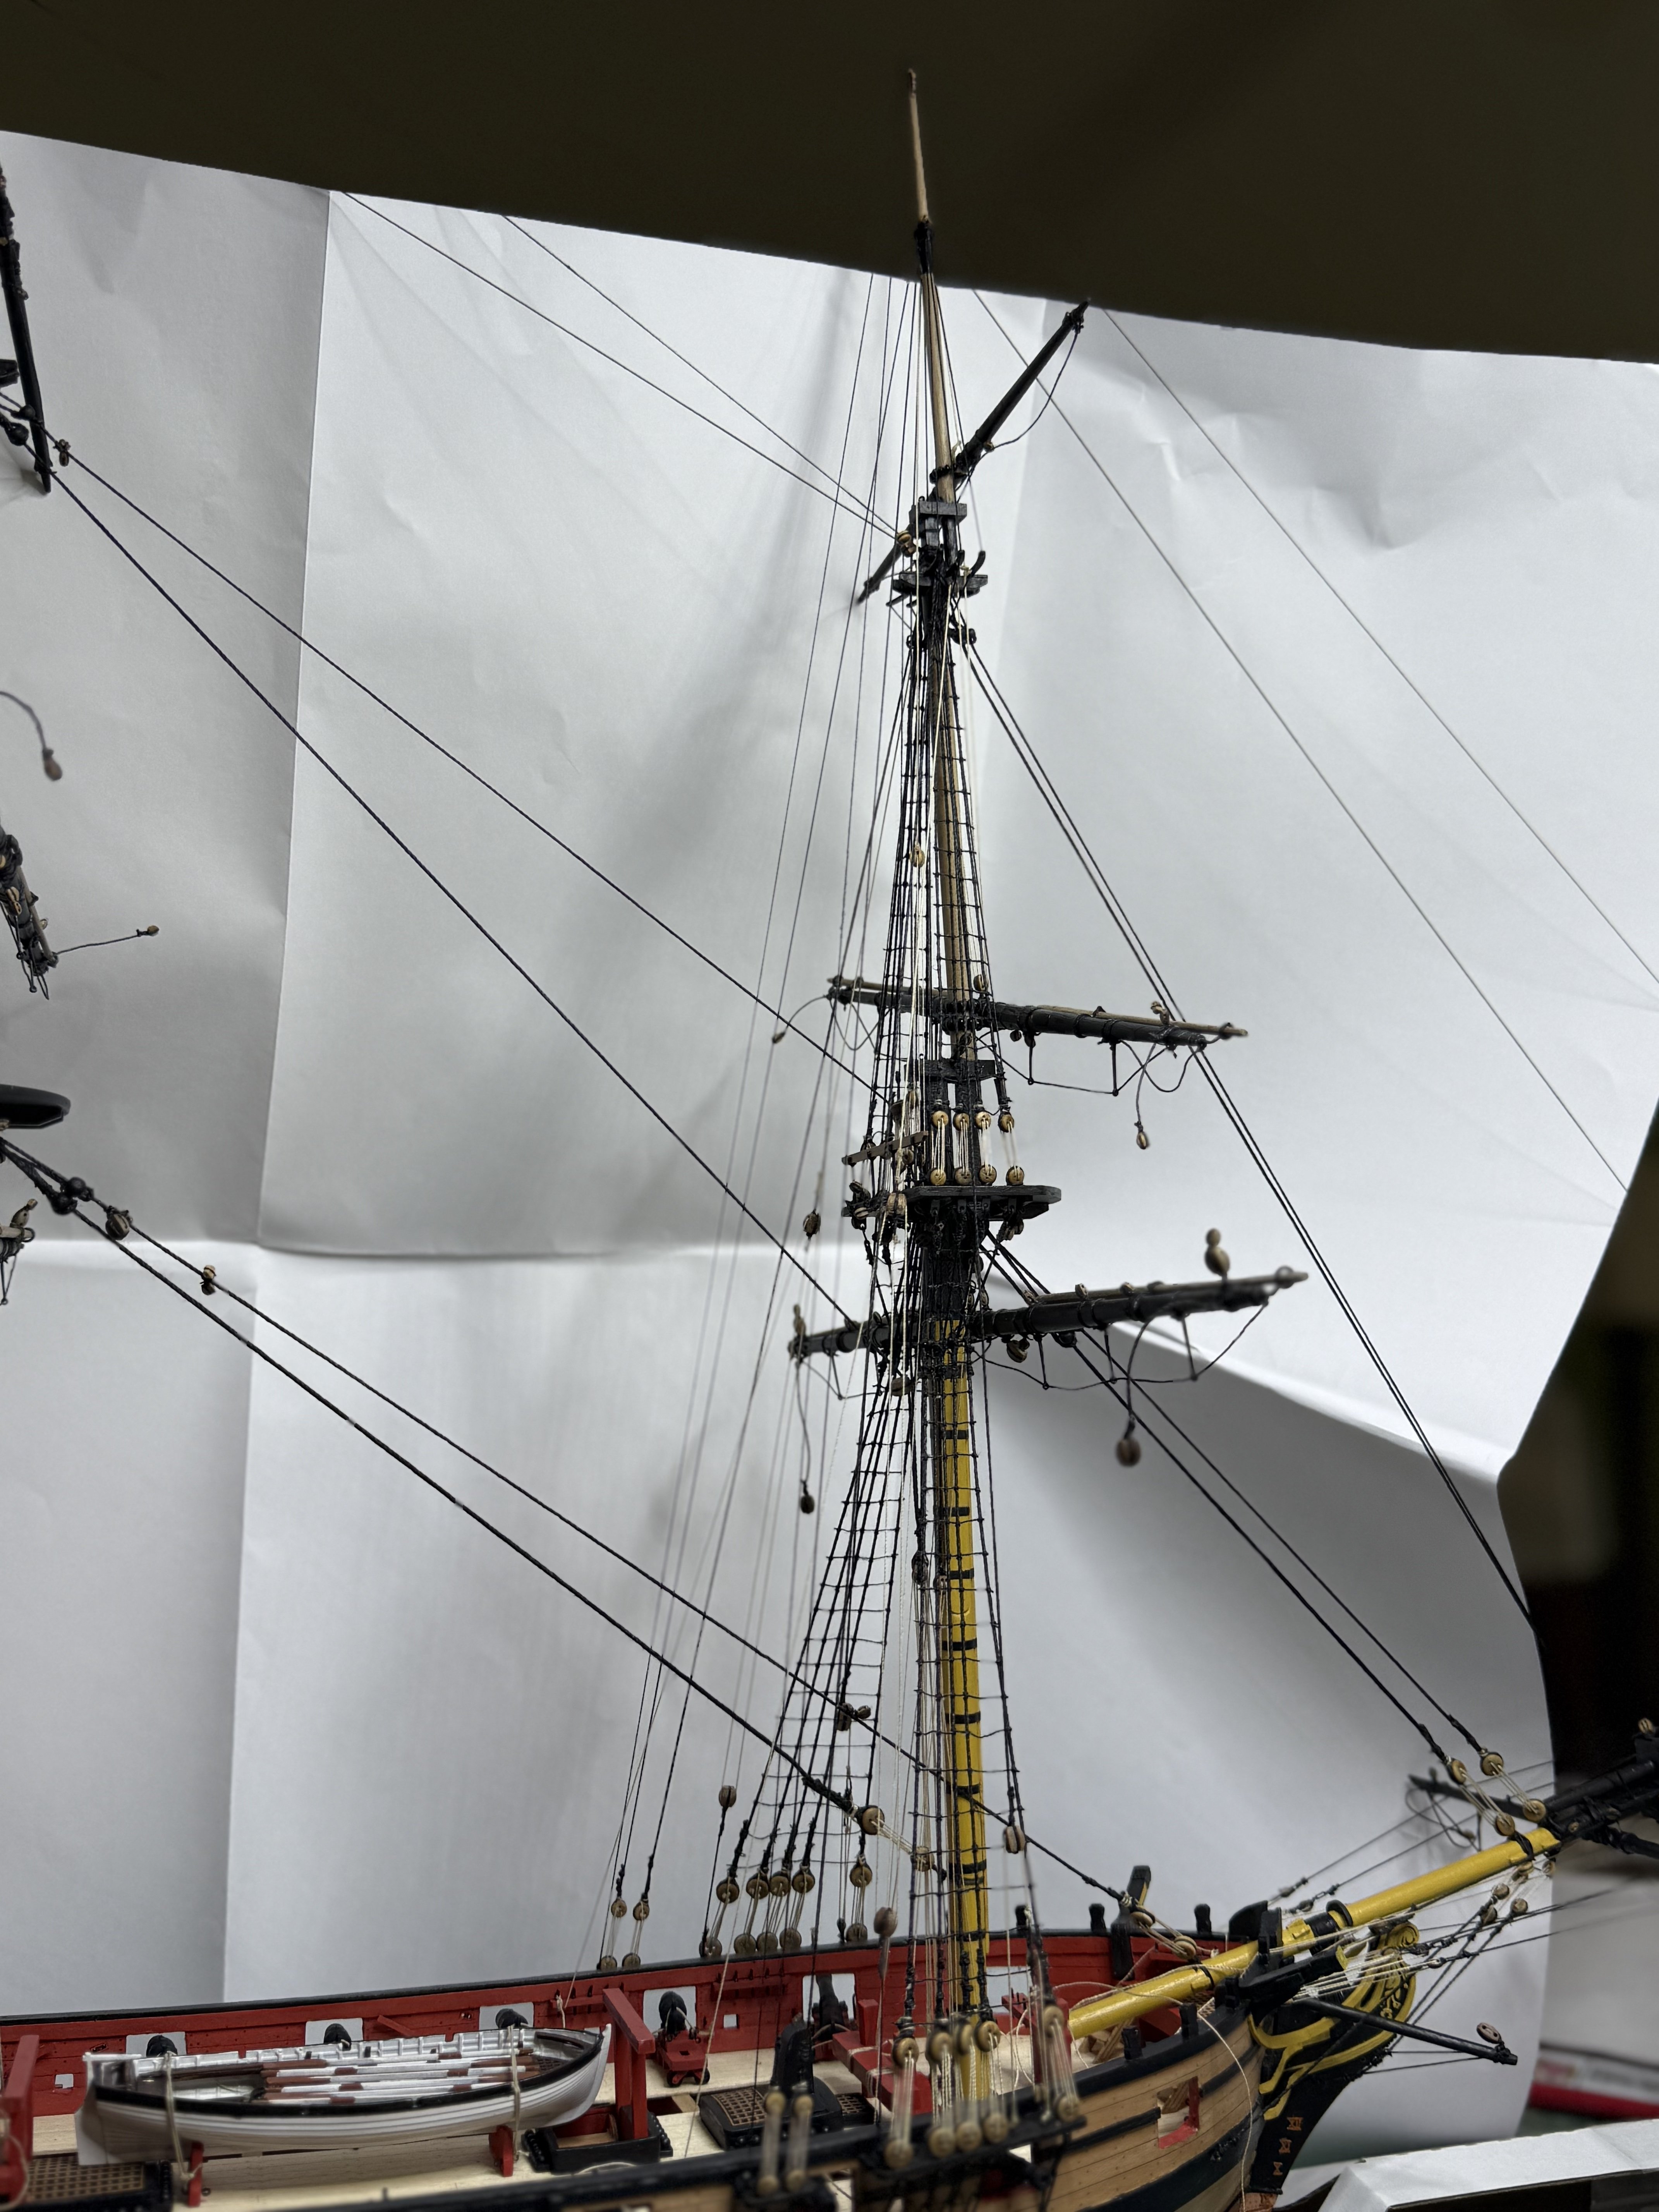
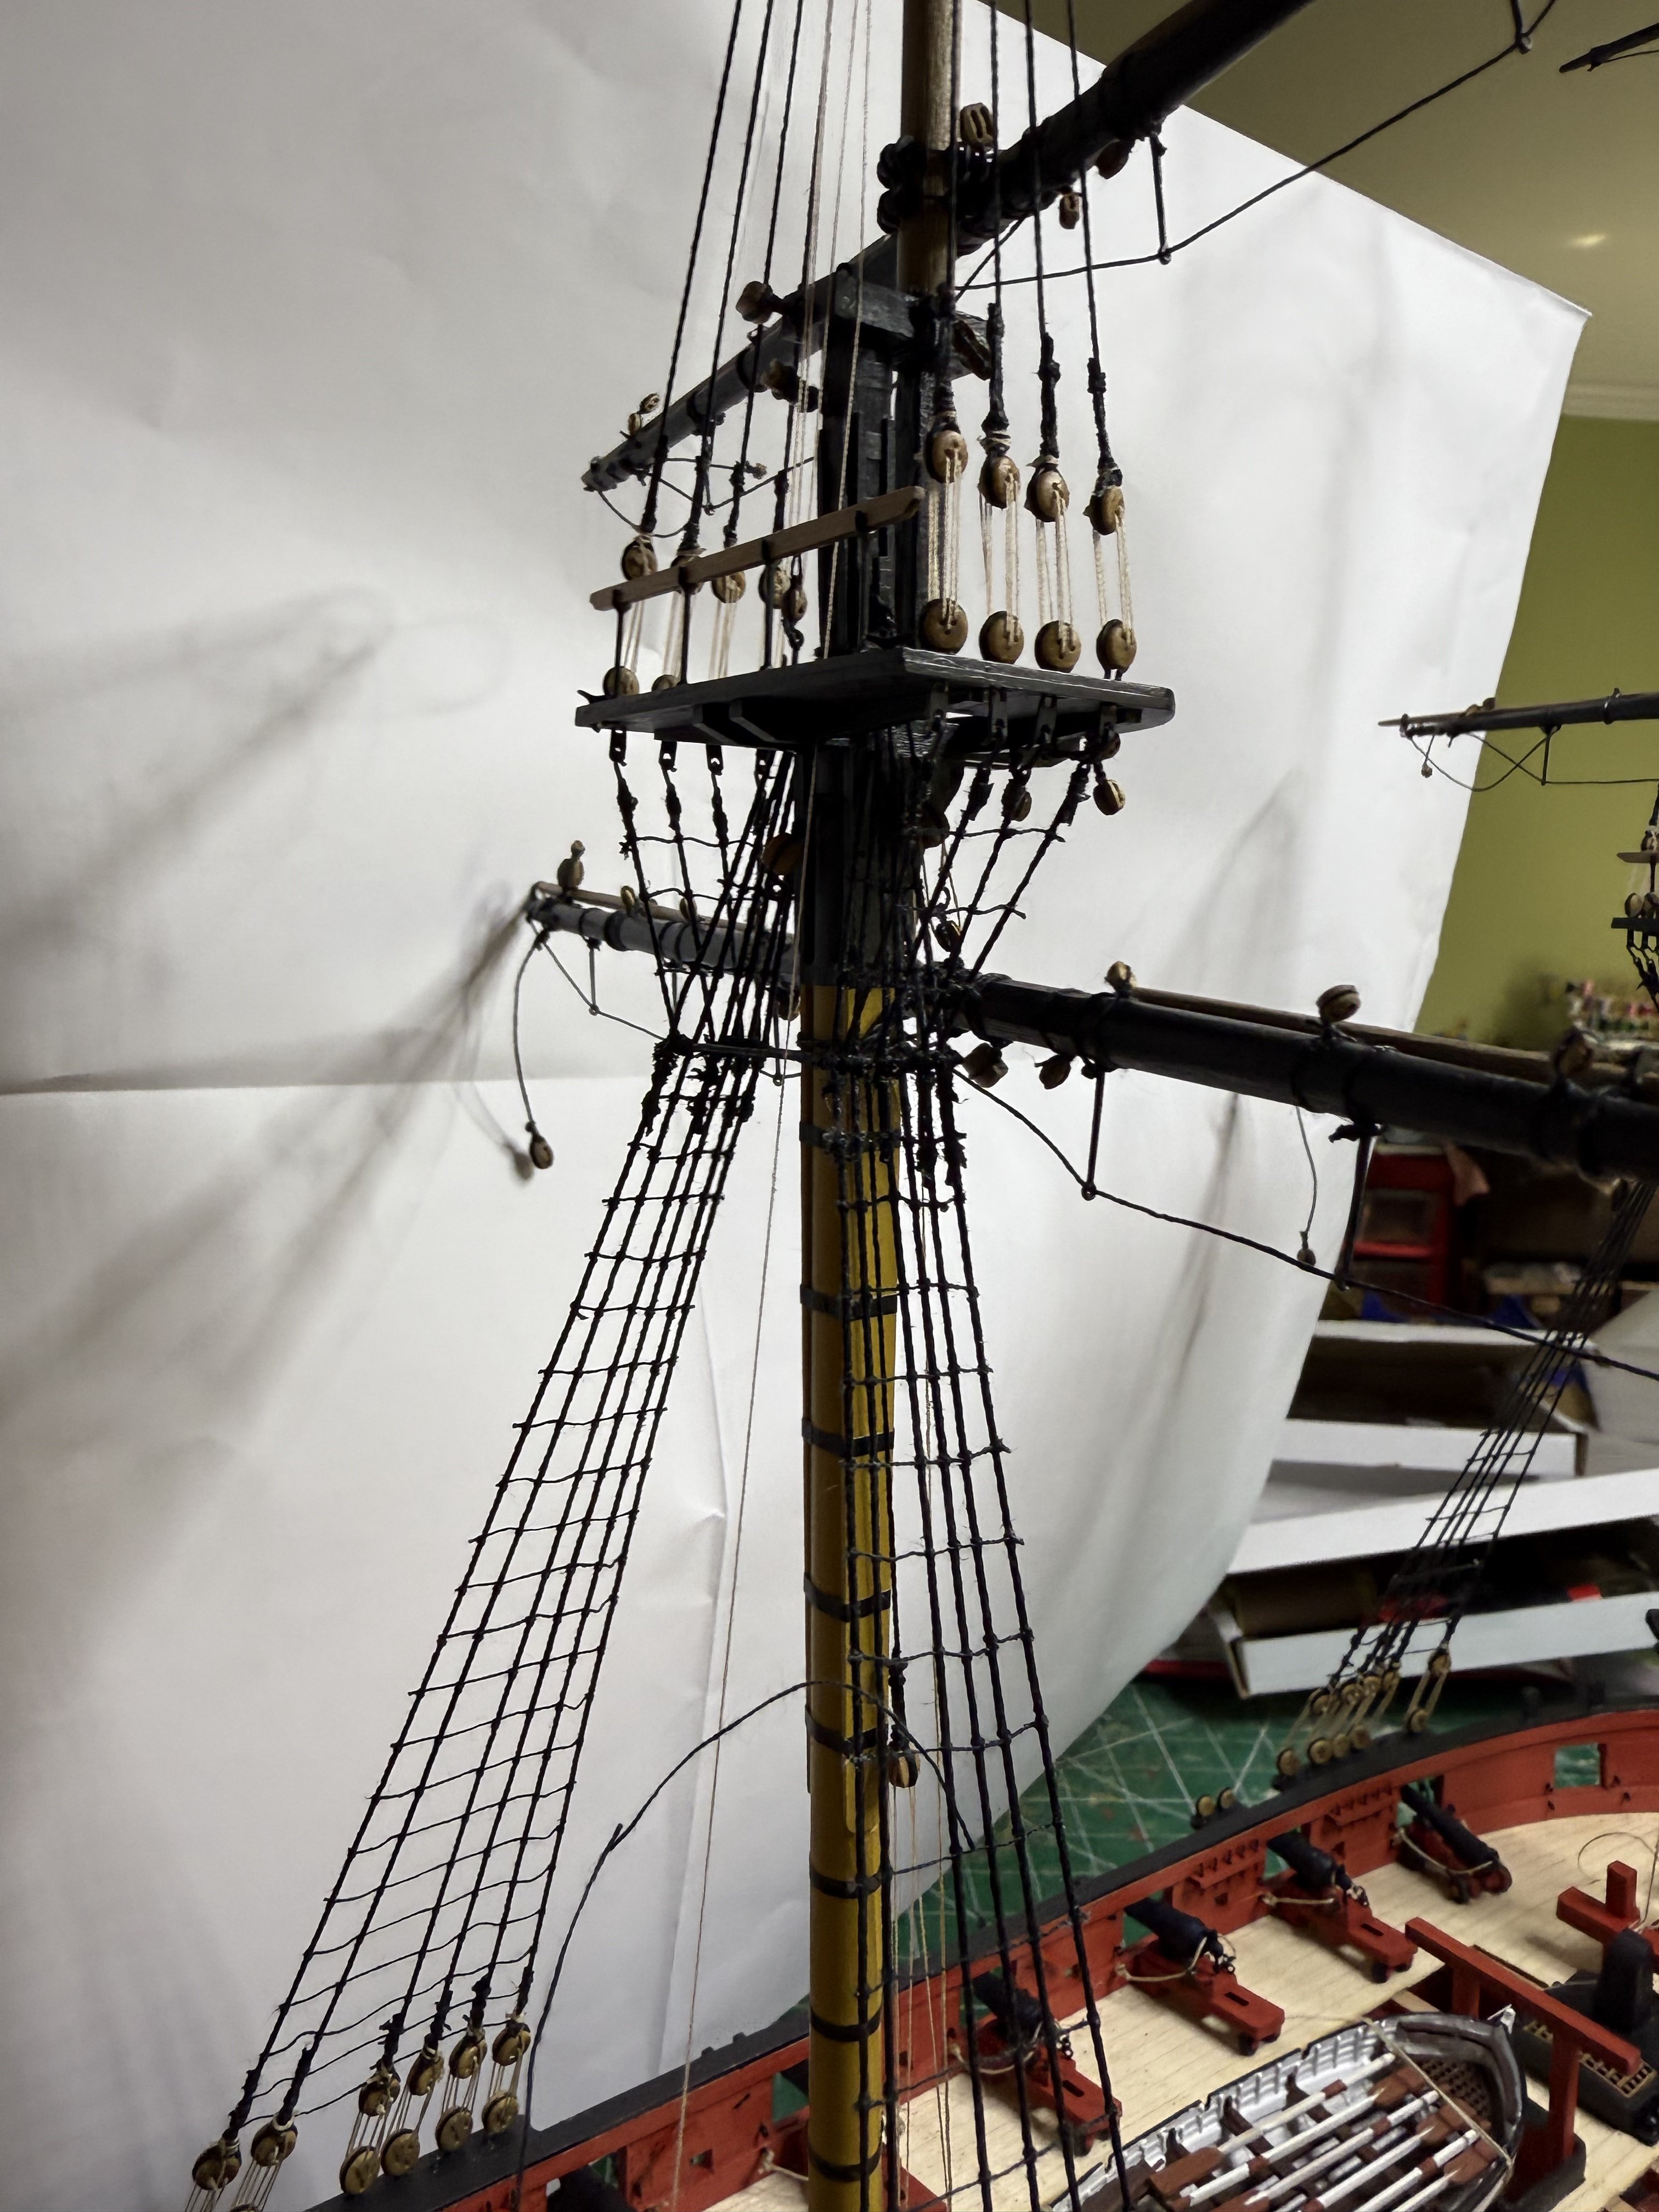
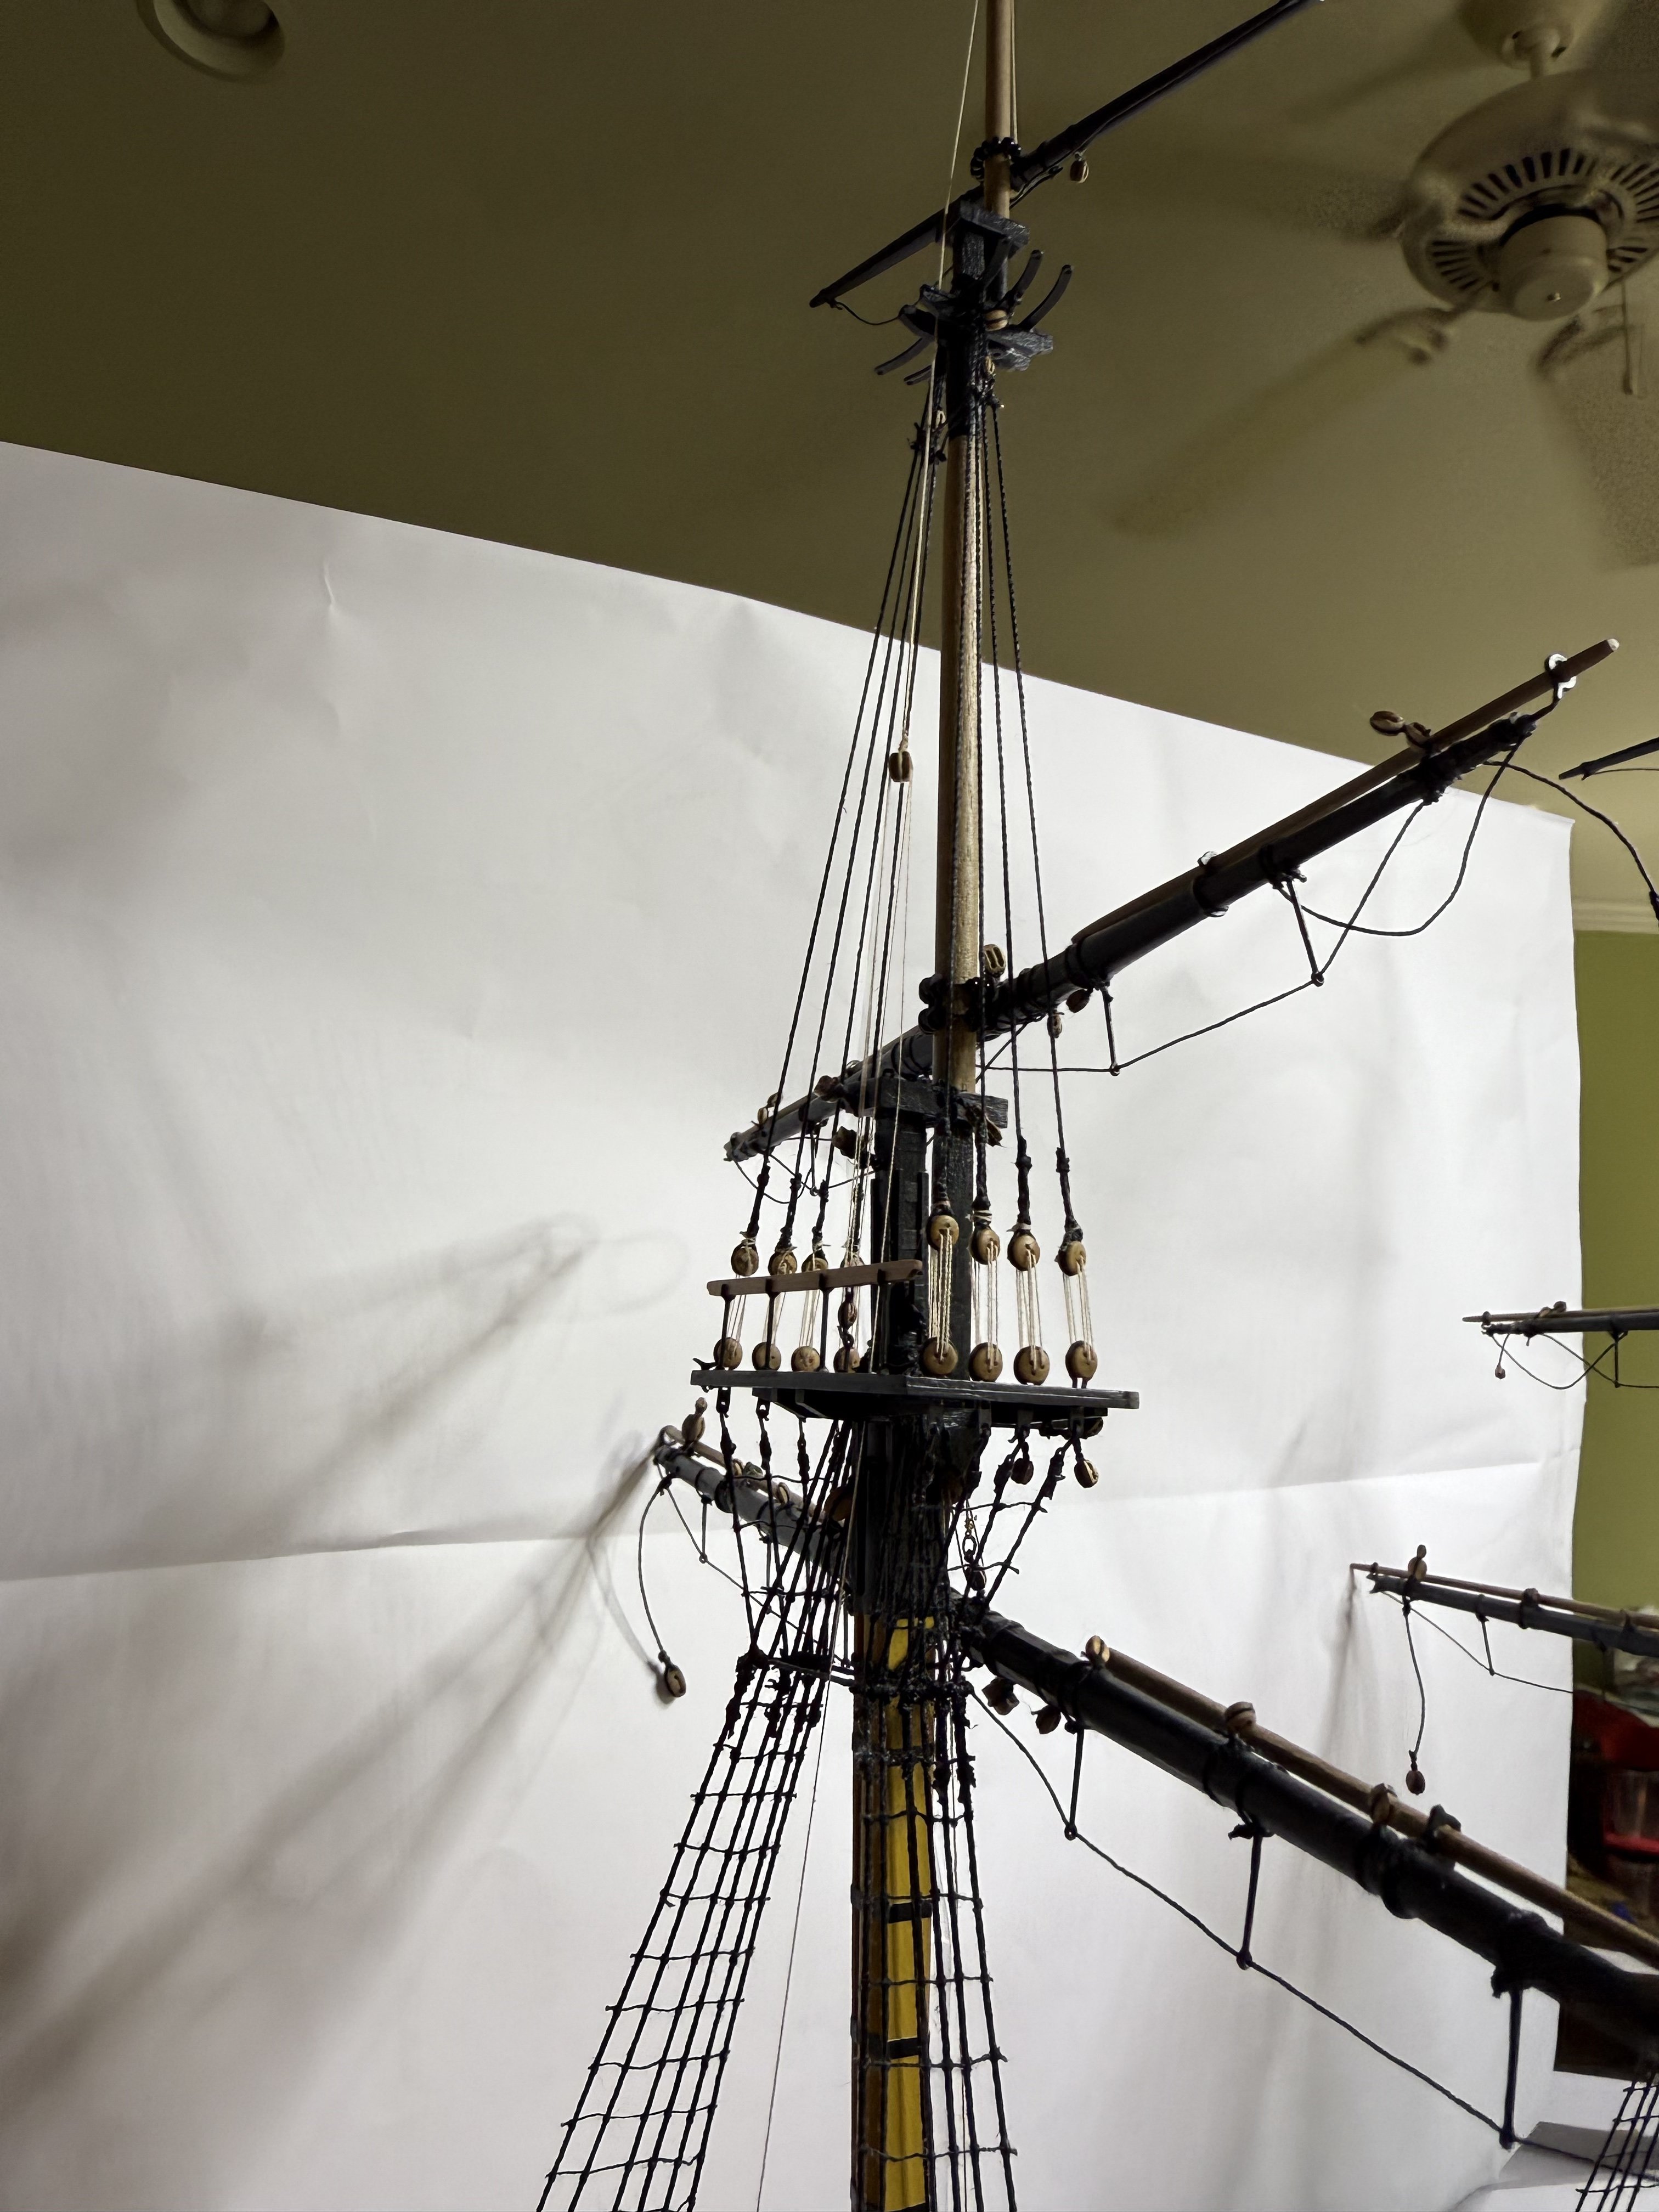
Finished all the fore stays and previously the back stays. Next will be completing the remaining yard tyes and spanker.

- 73 replies
-
- 14
-
-
- Harpy
- Vanguard Models
- (and 1 more)
-
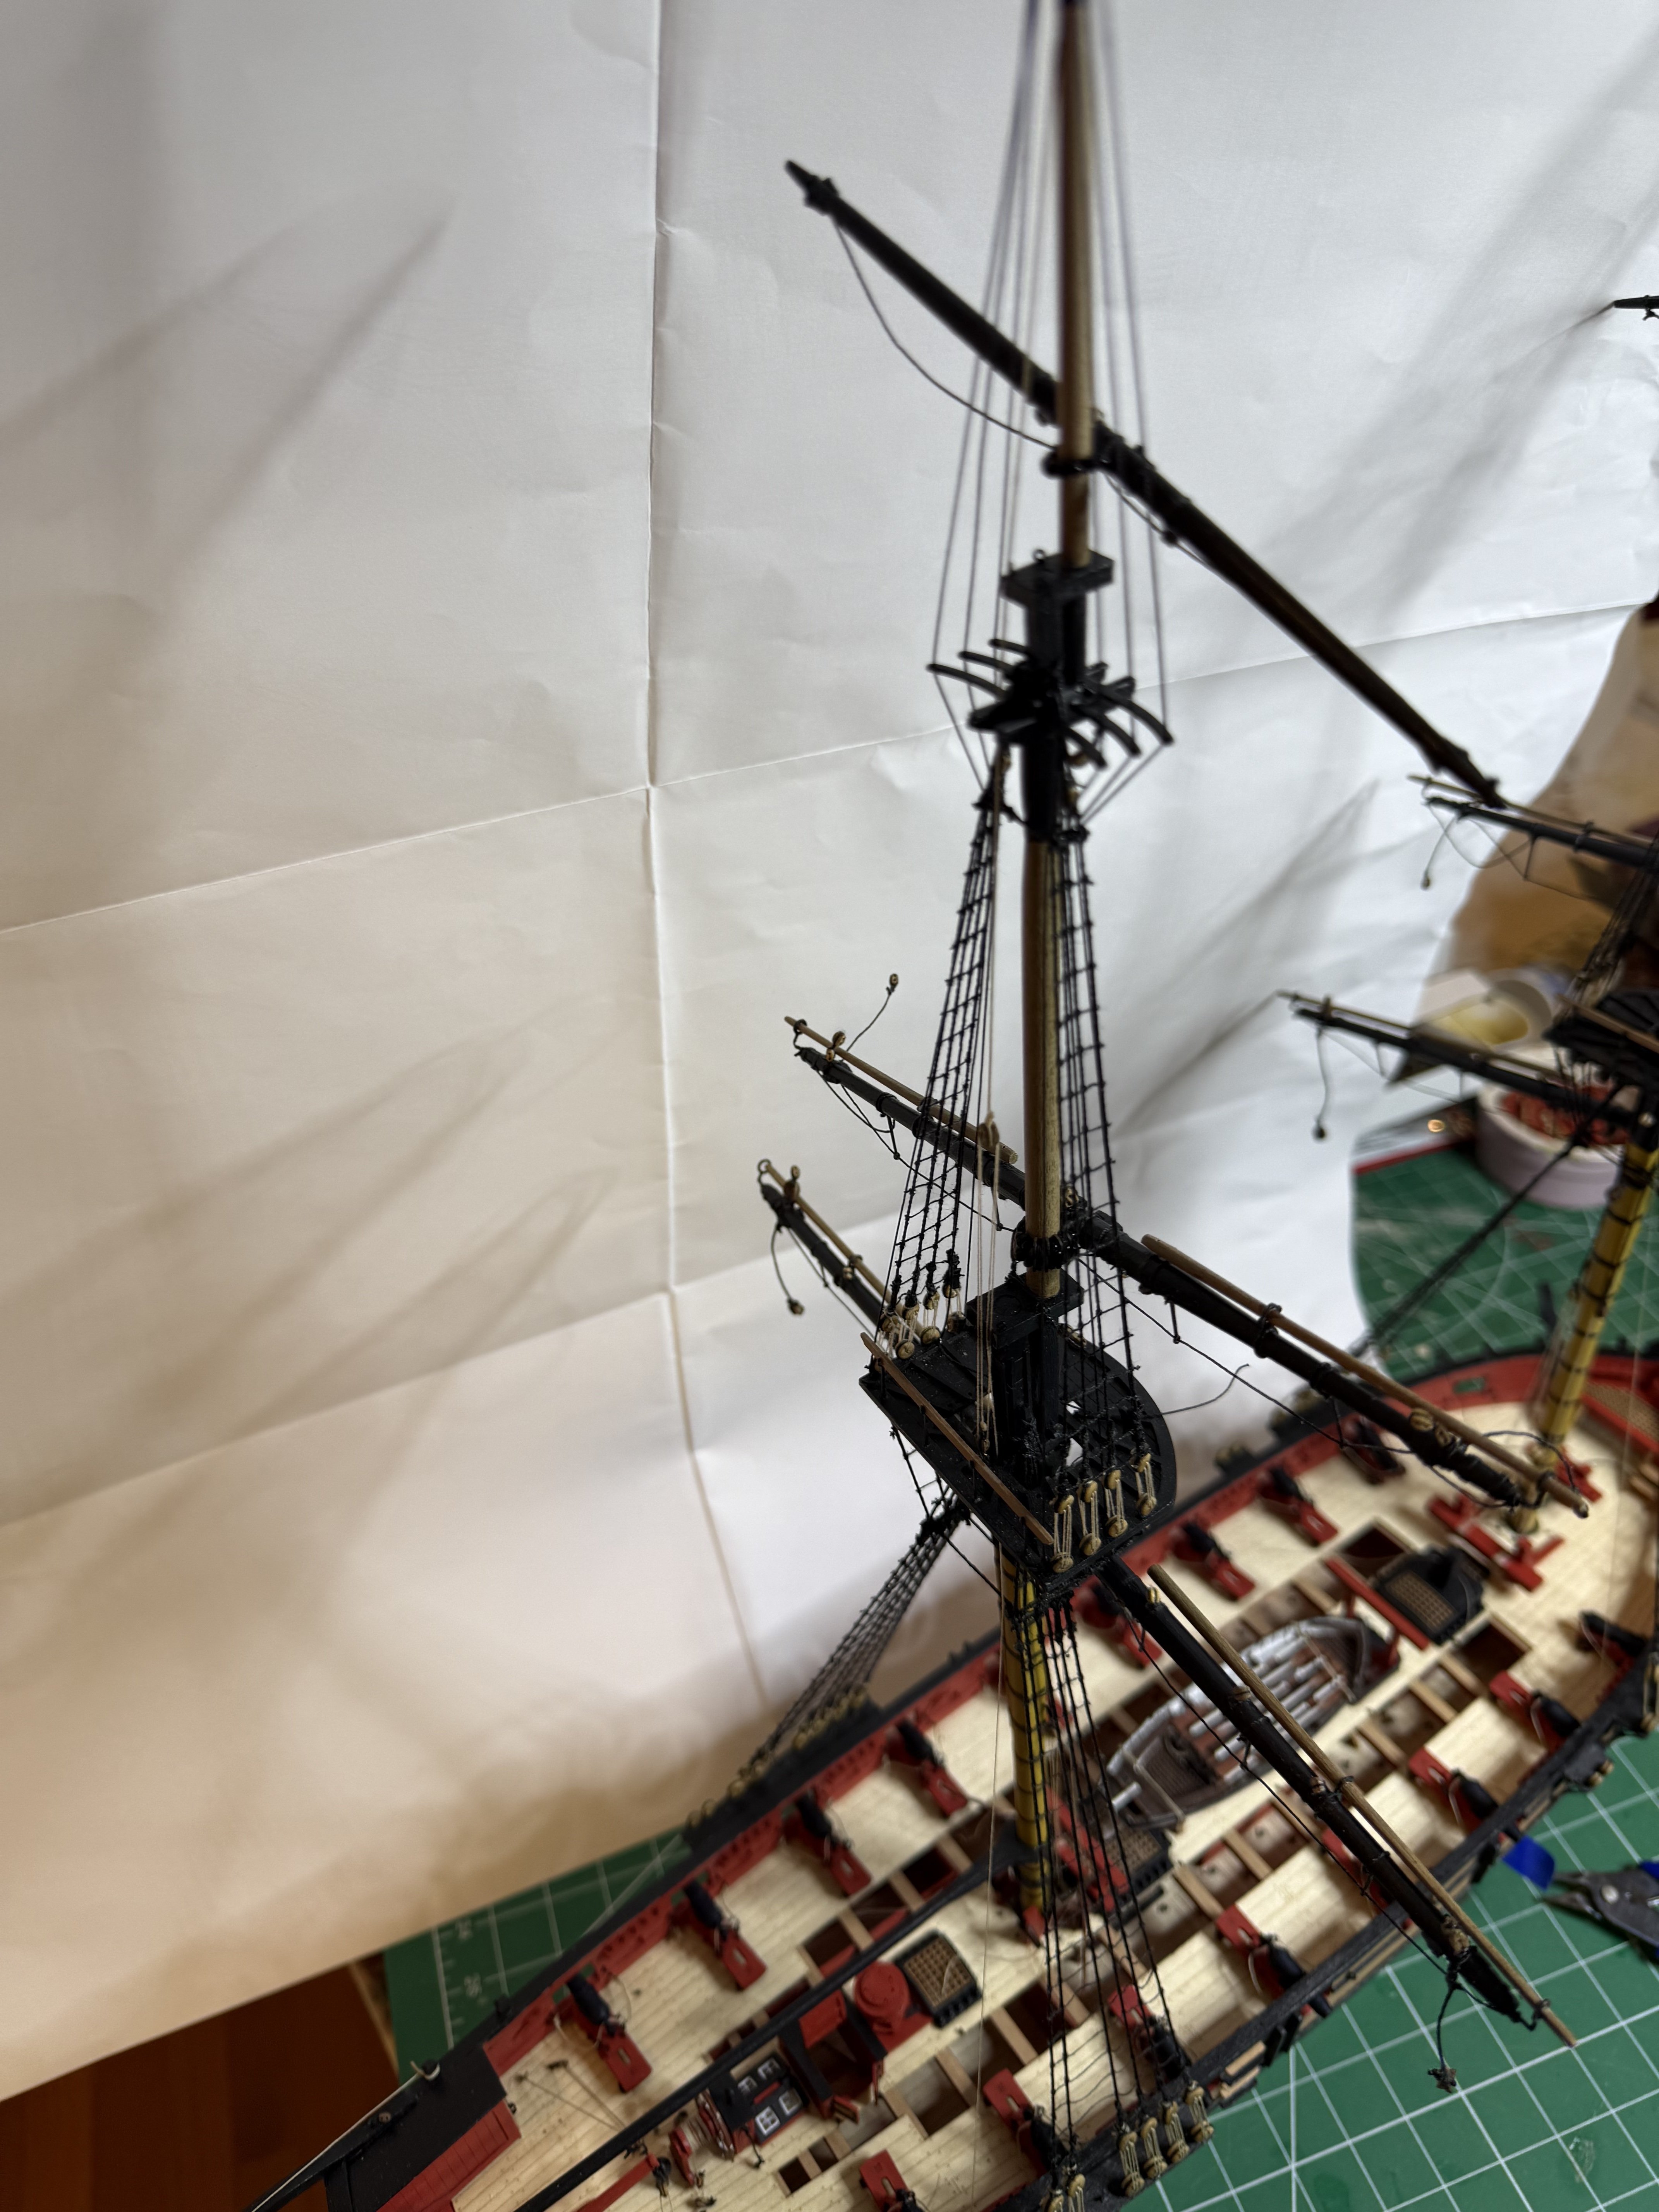
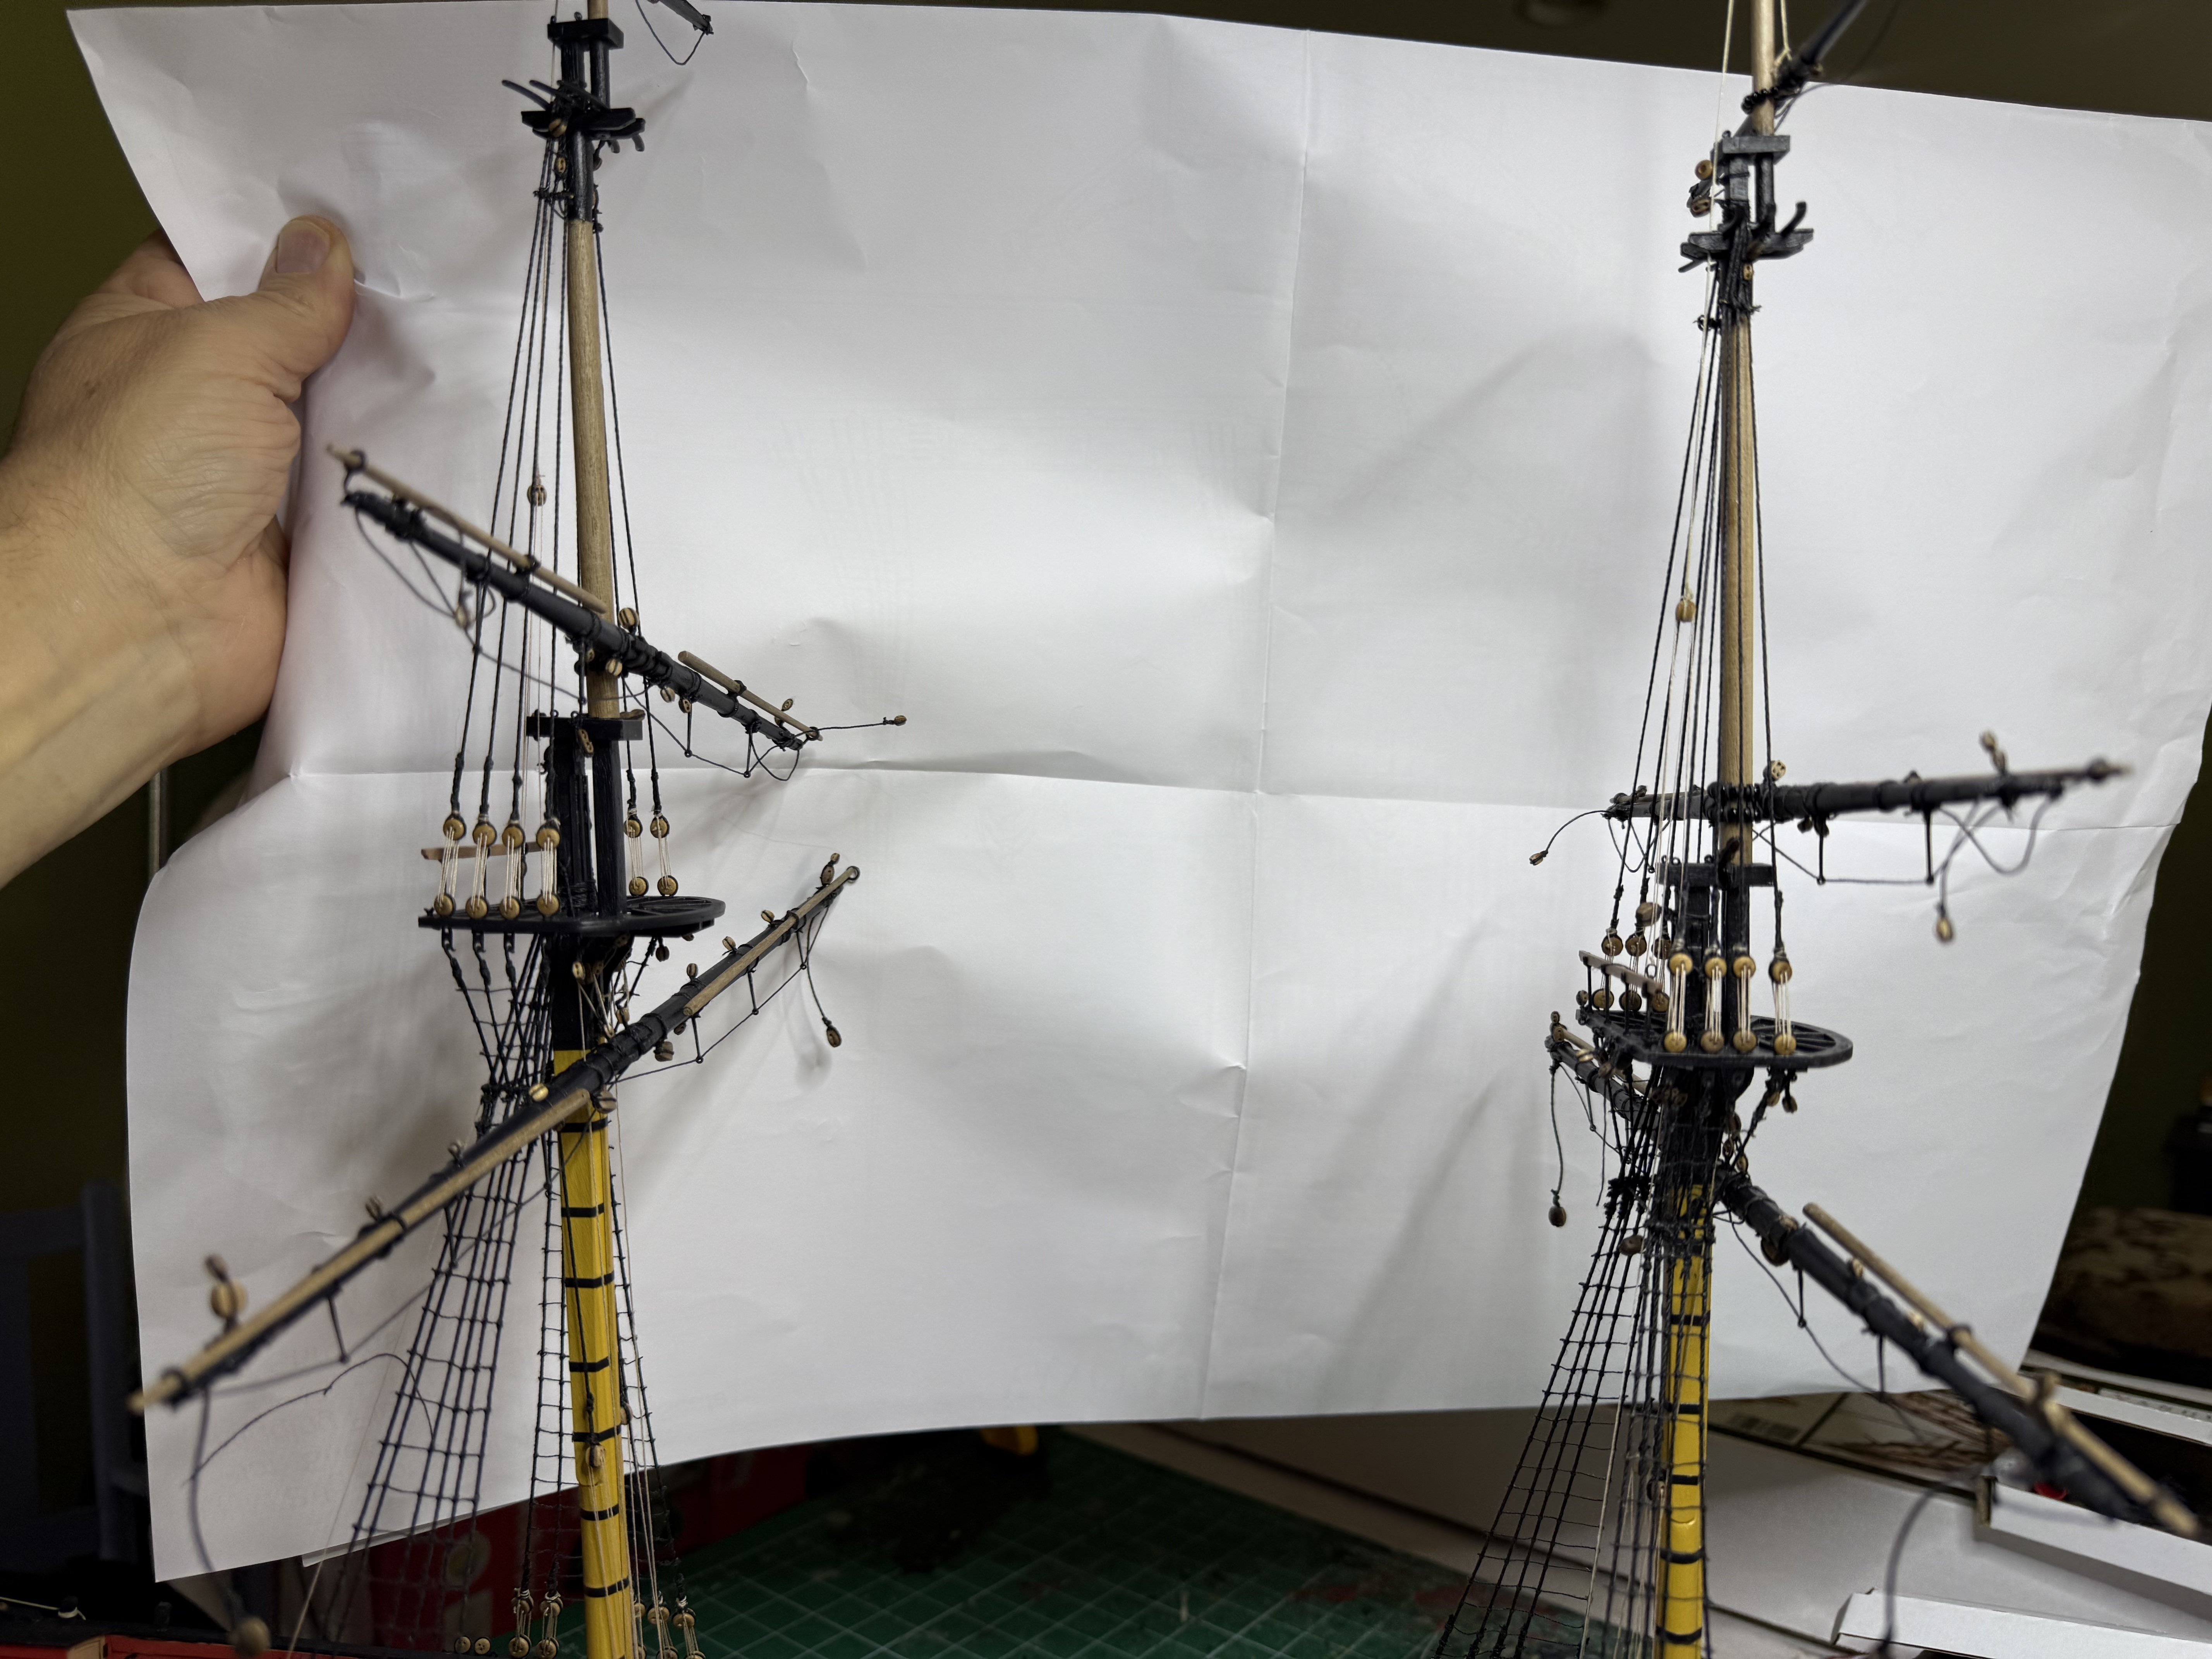
All the shrouds and ratlines done. Next step are the back stays.


- 73 replies
-
- 9
-
-
- Harpy
- Vanguard Models
- (and 1 more)
-
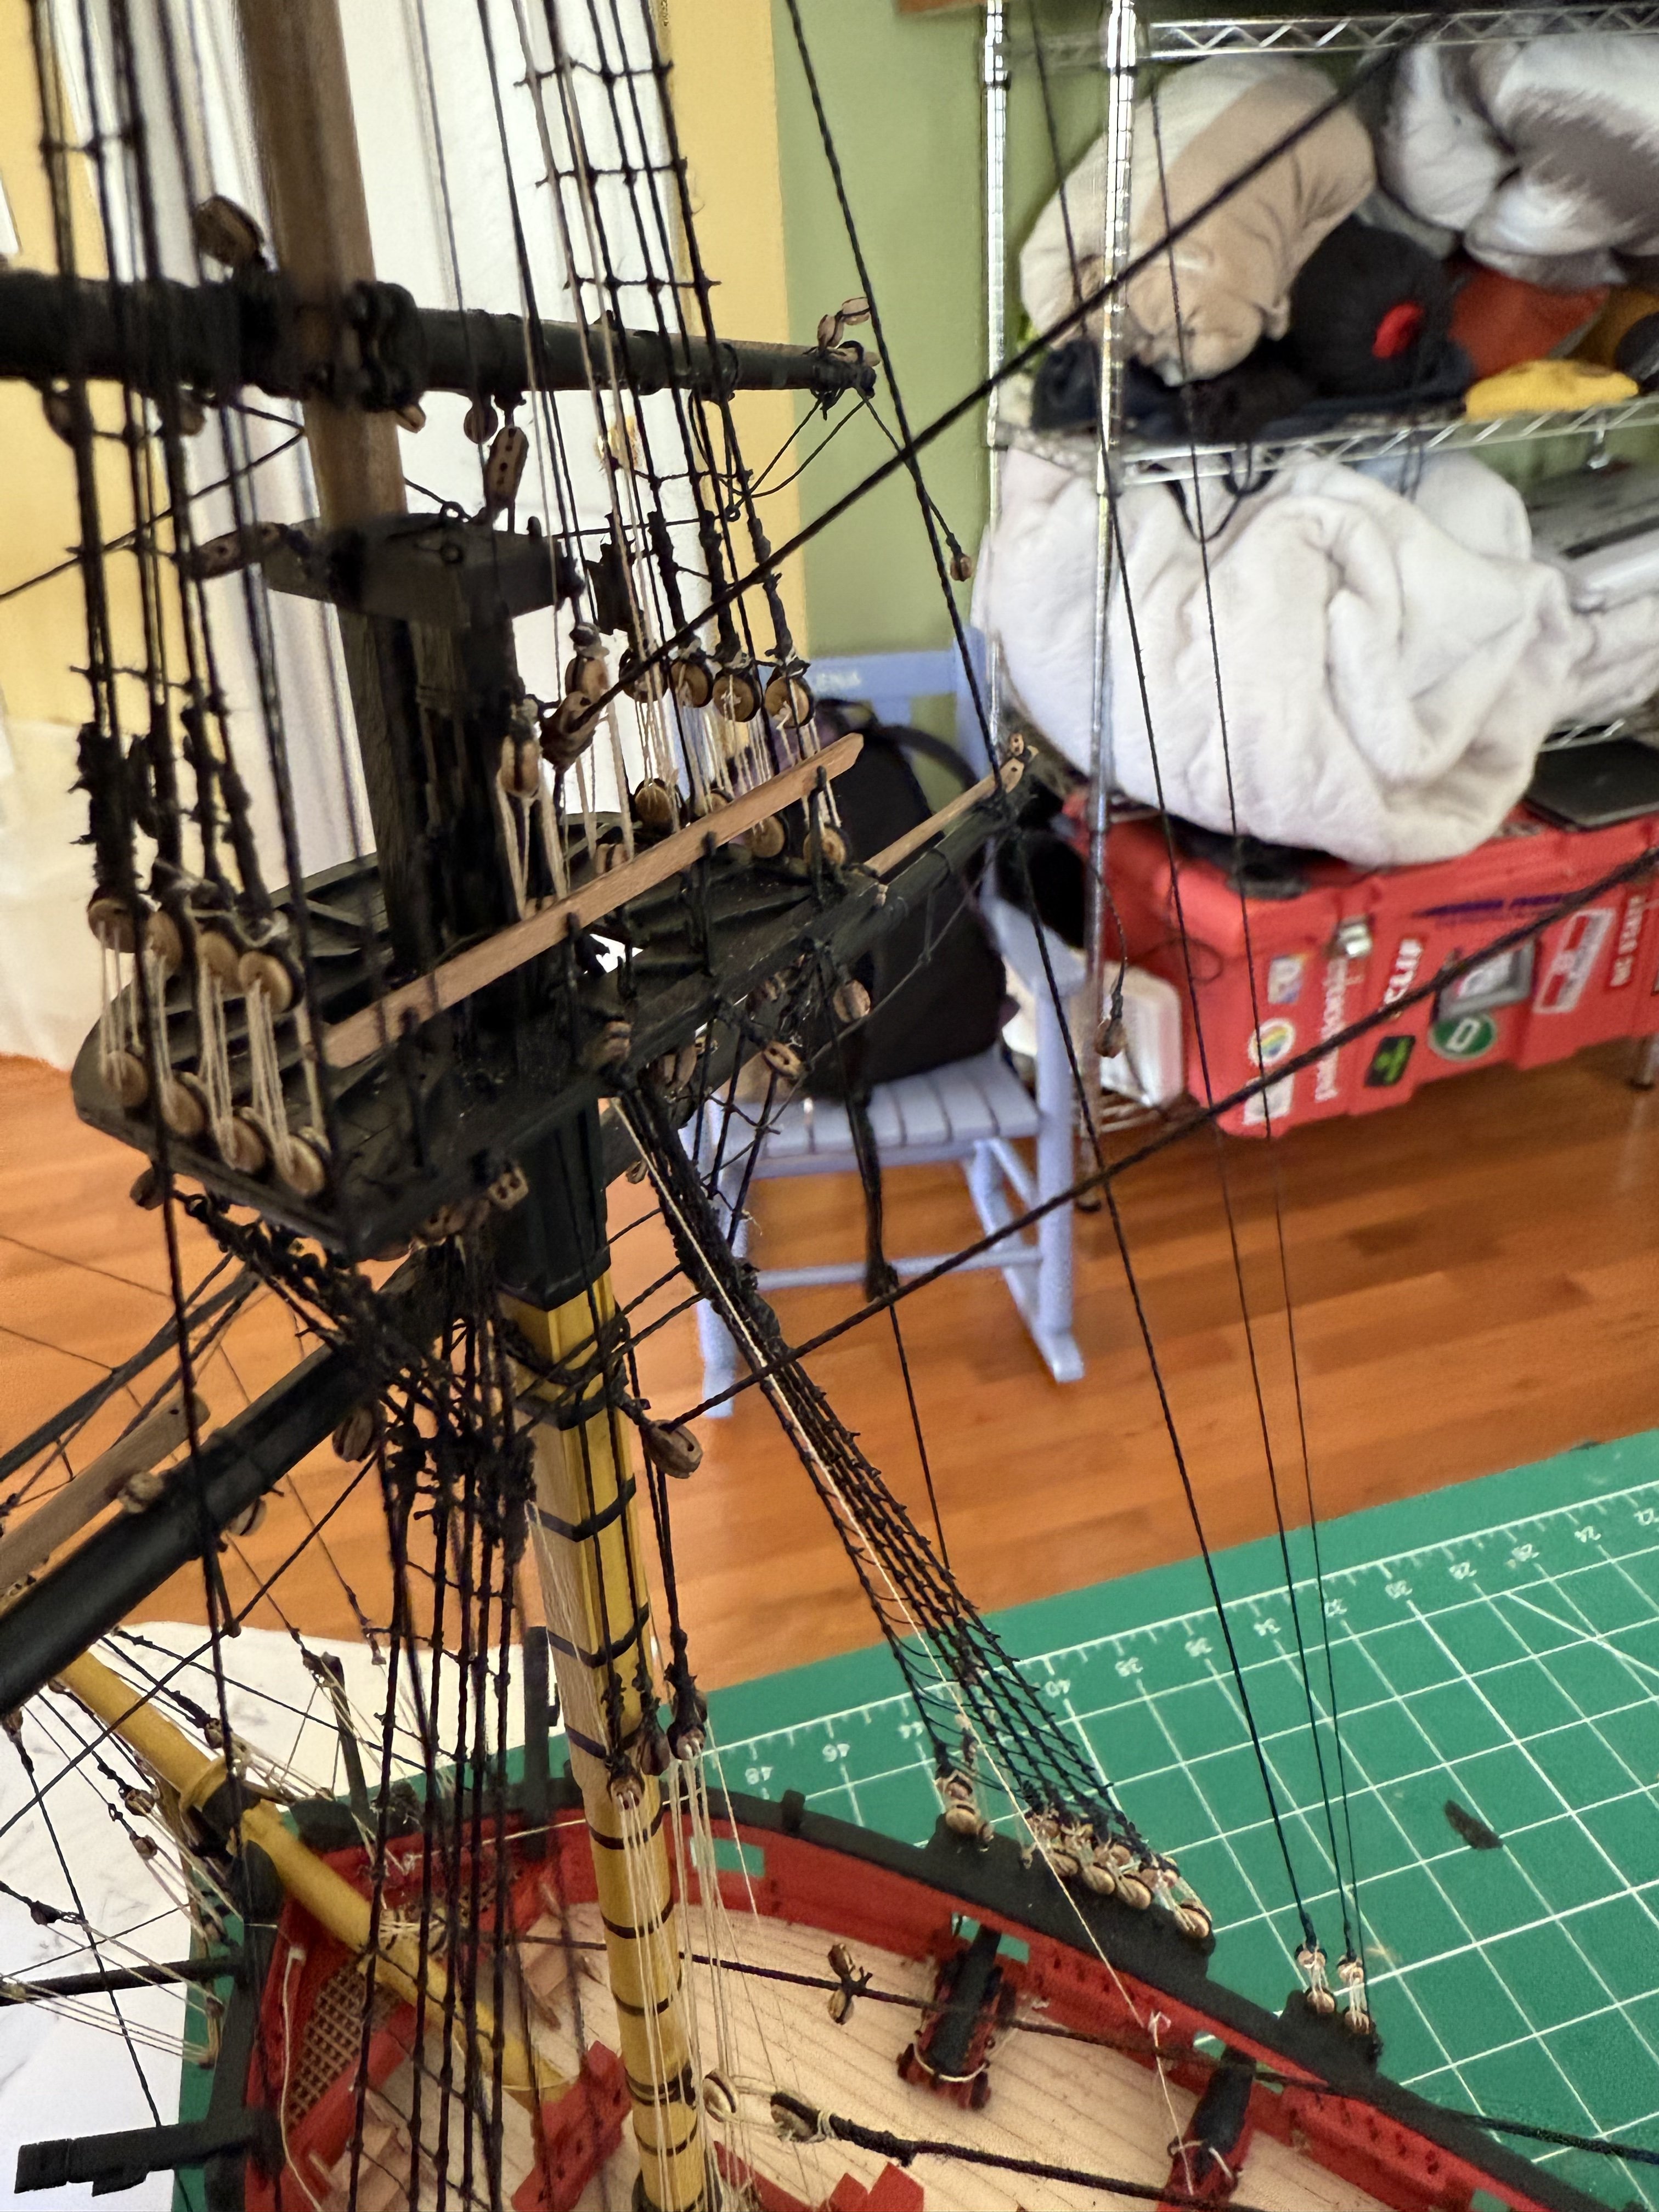
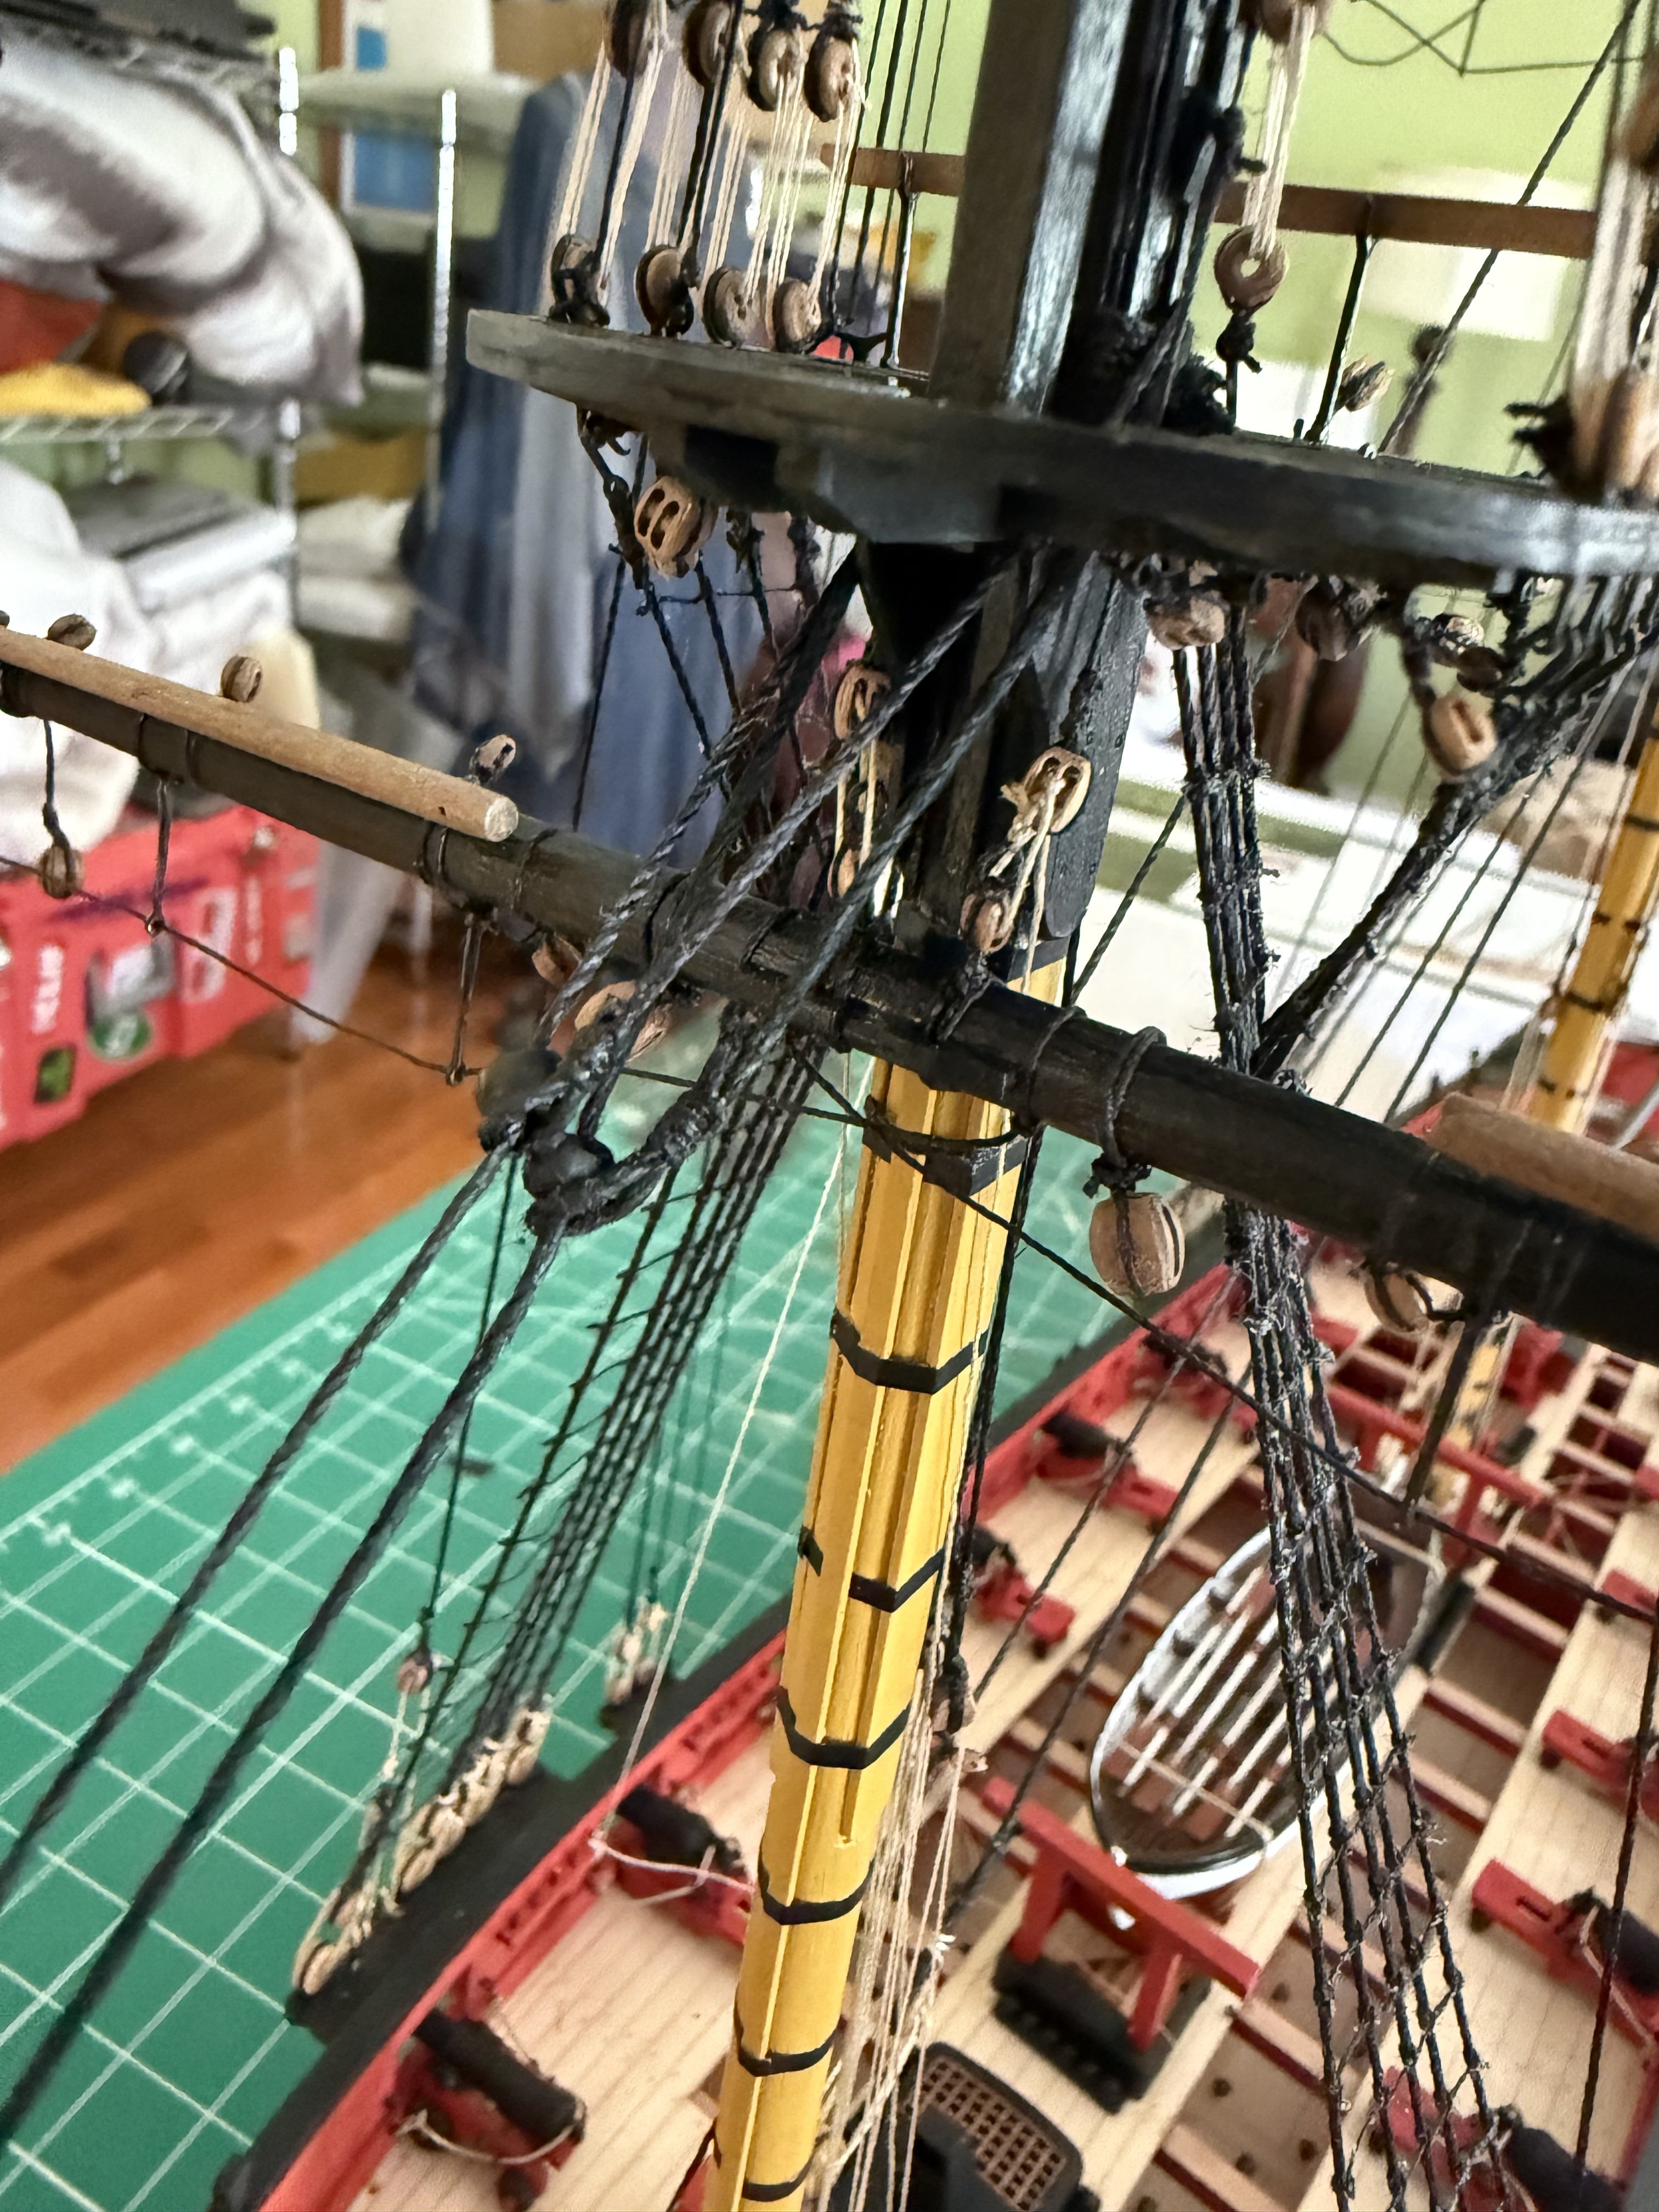
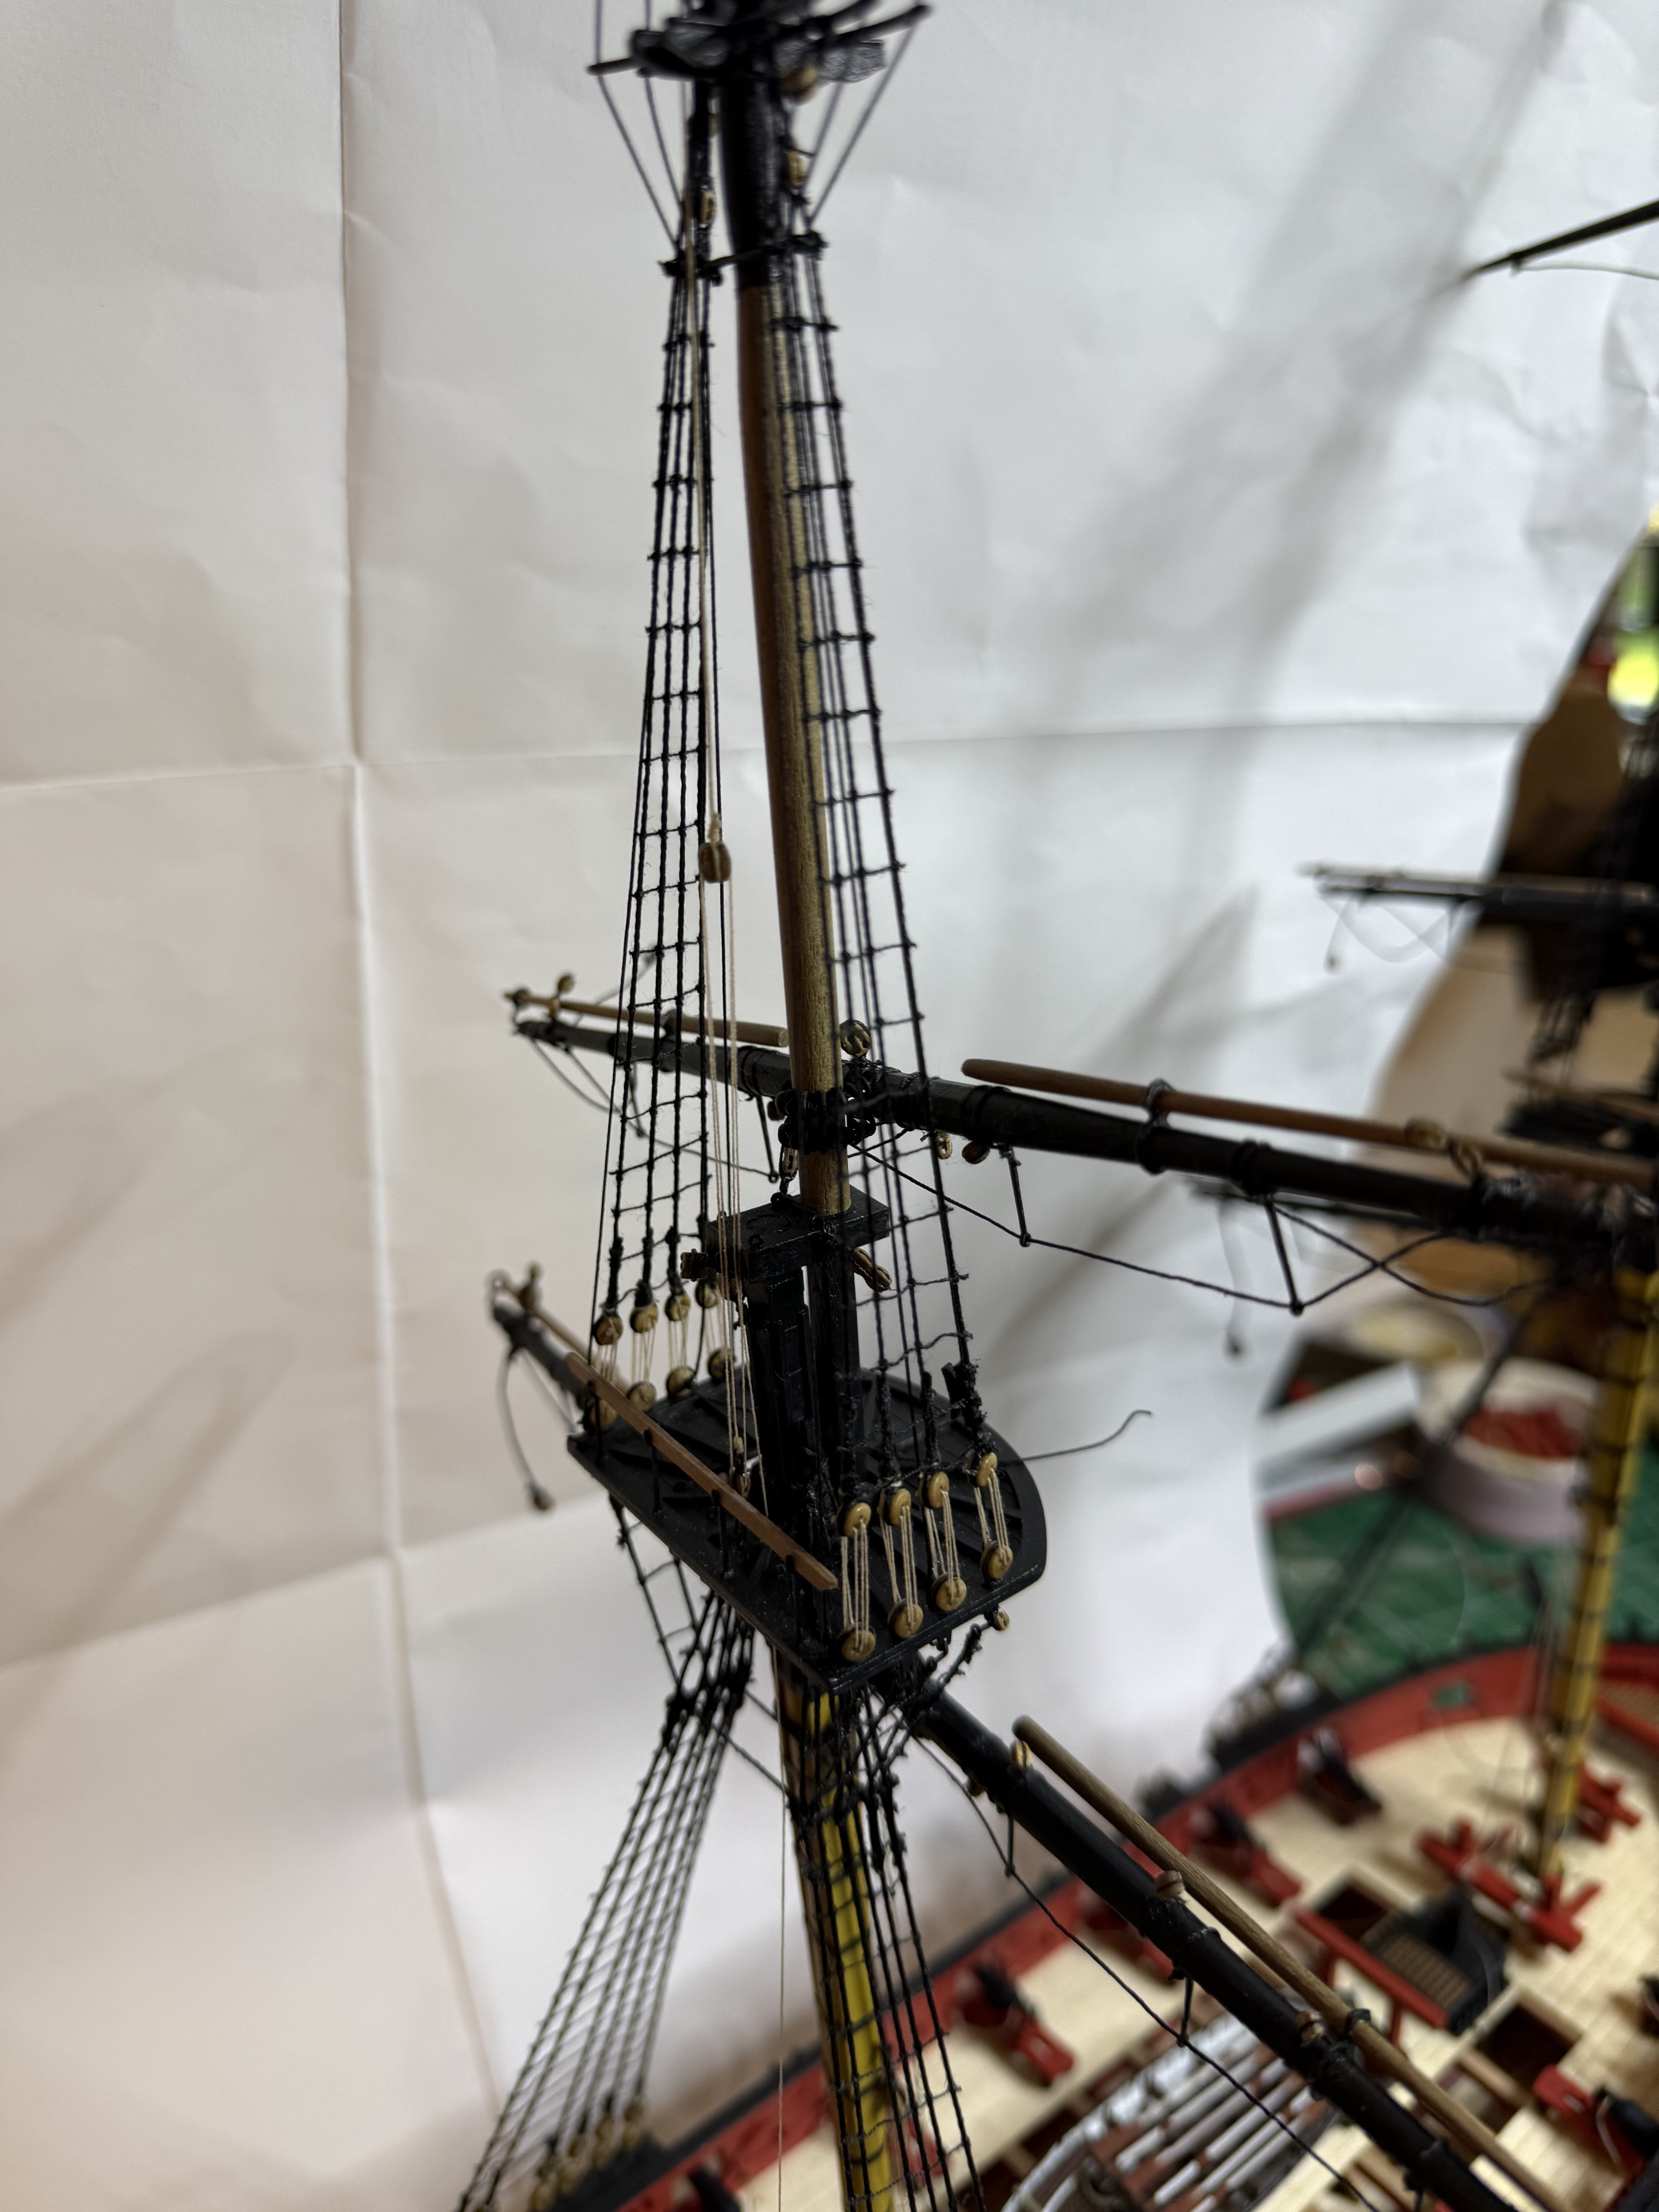
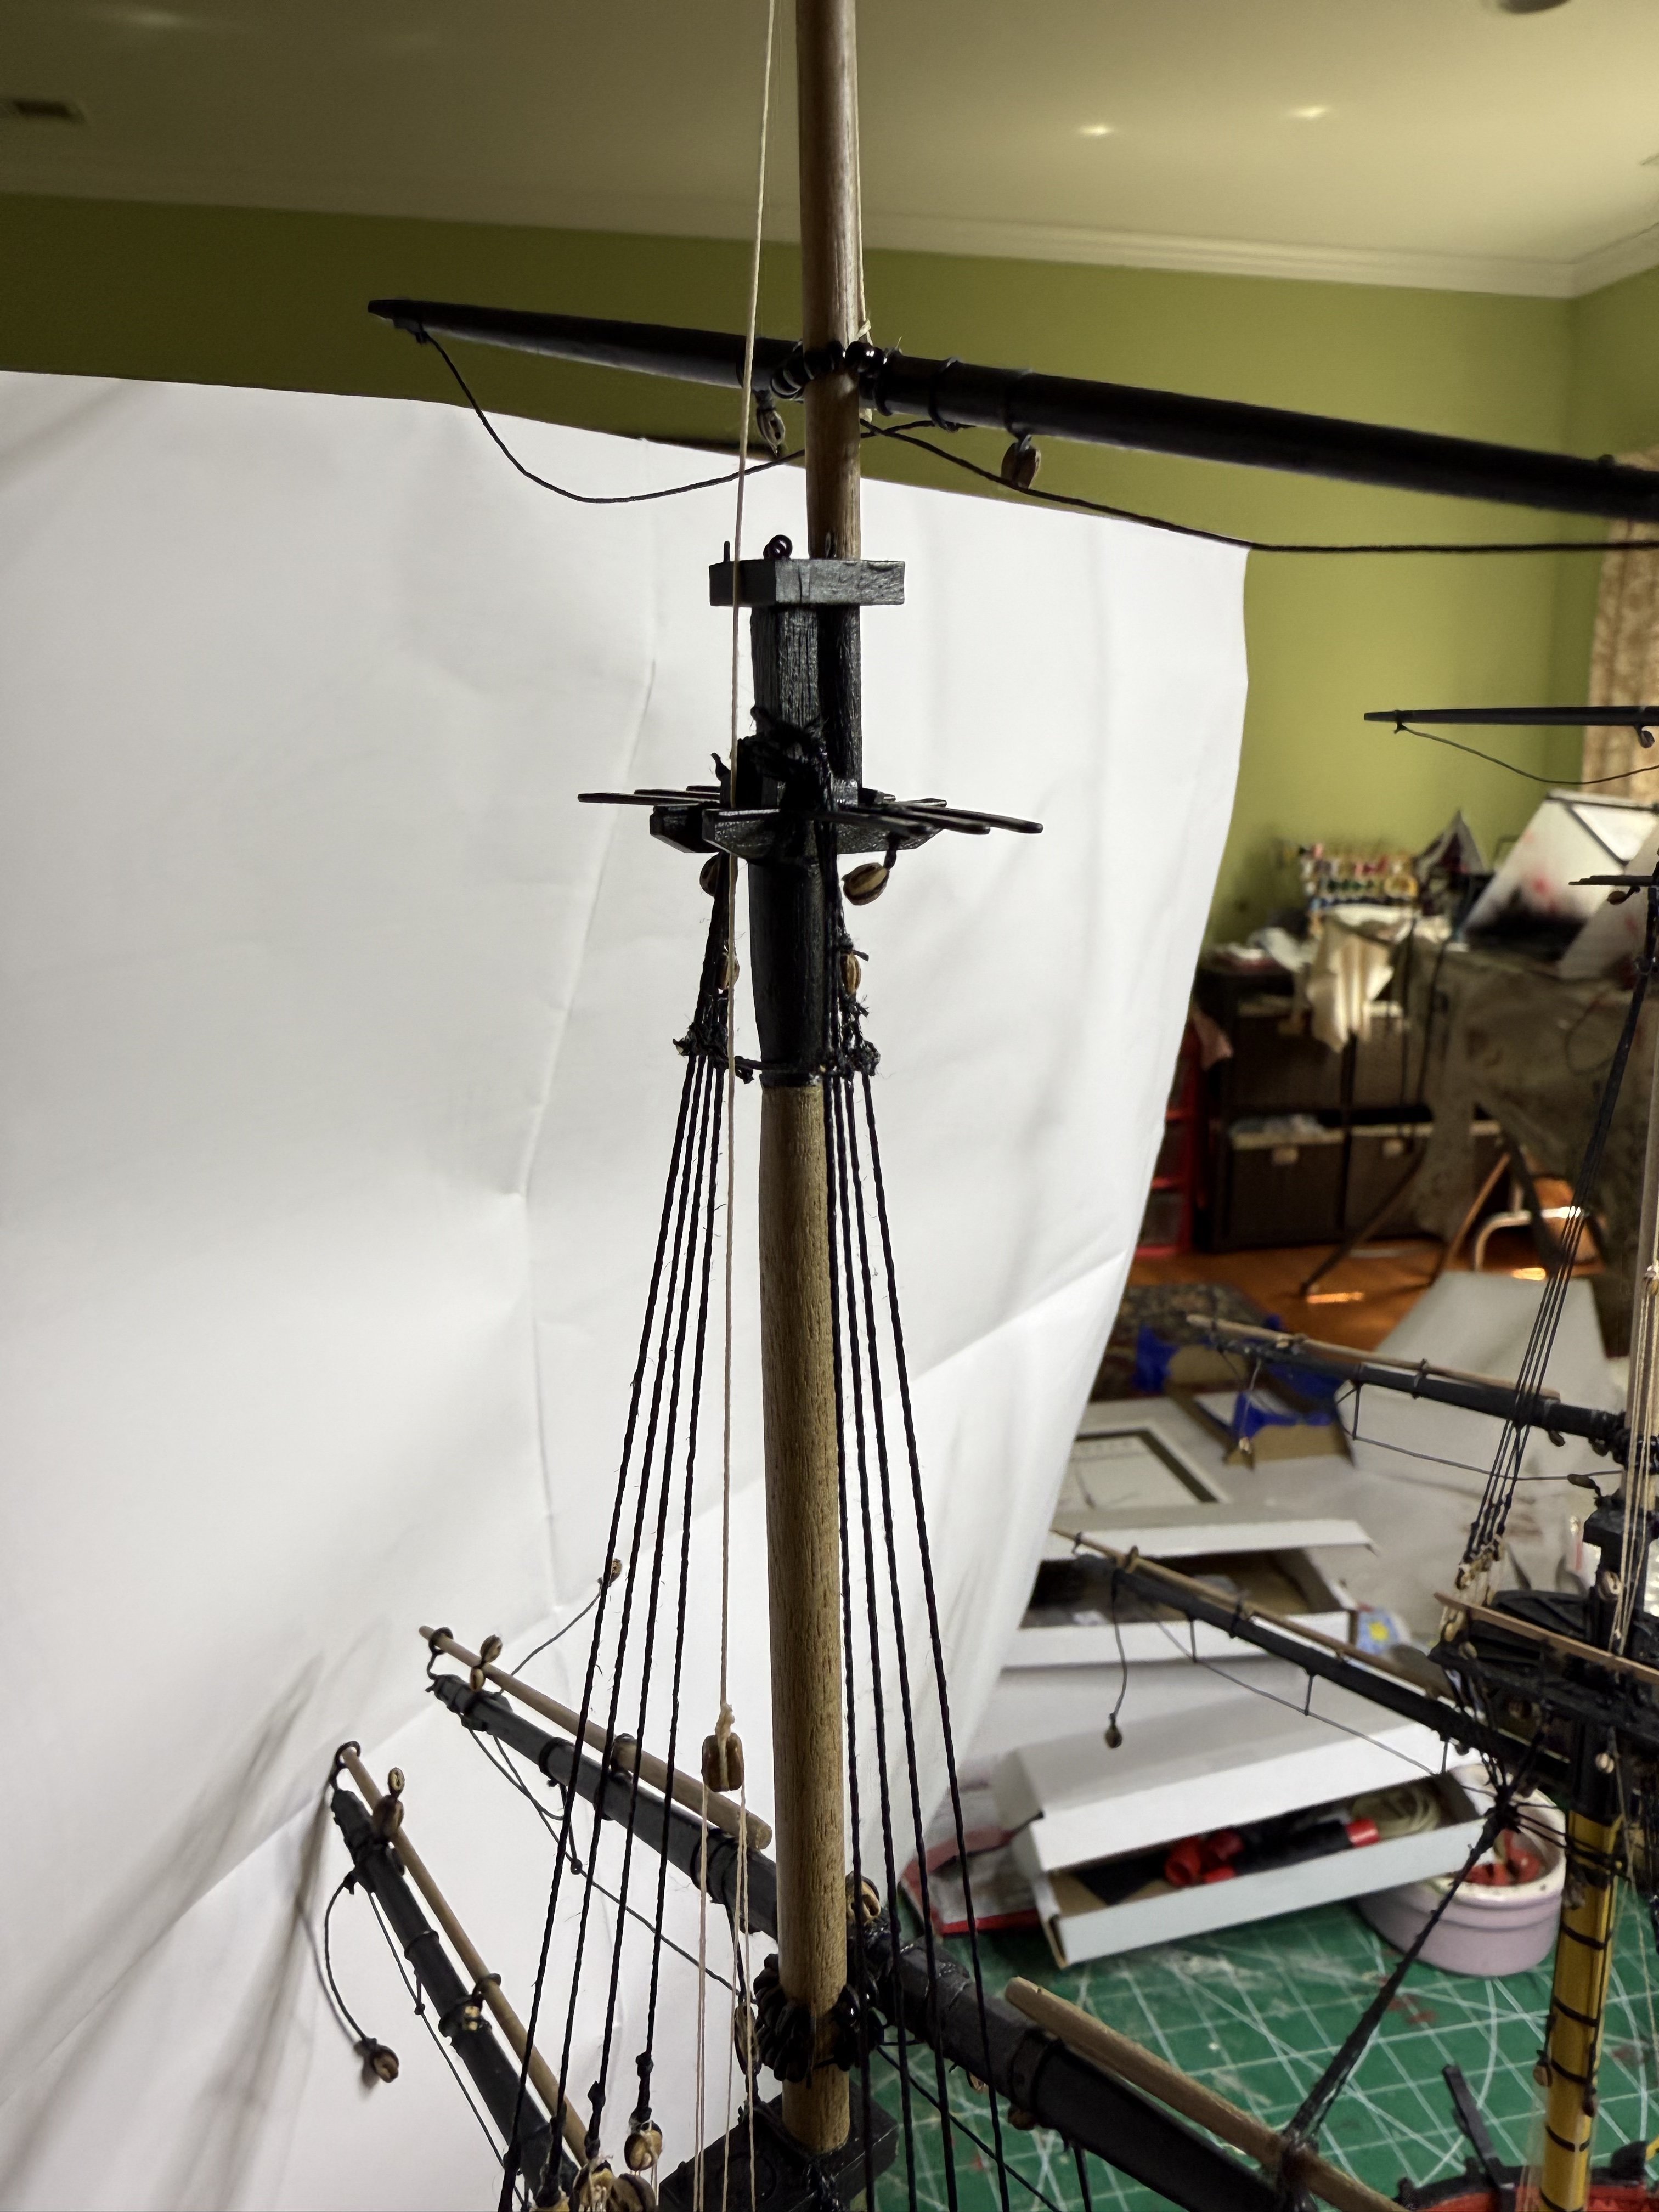
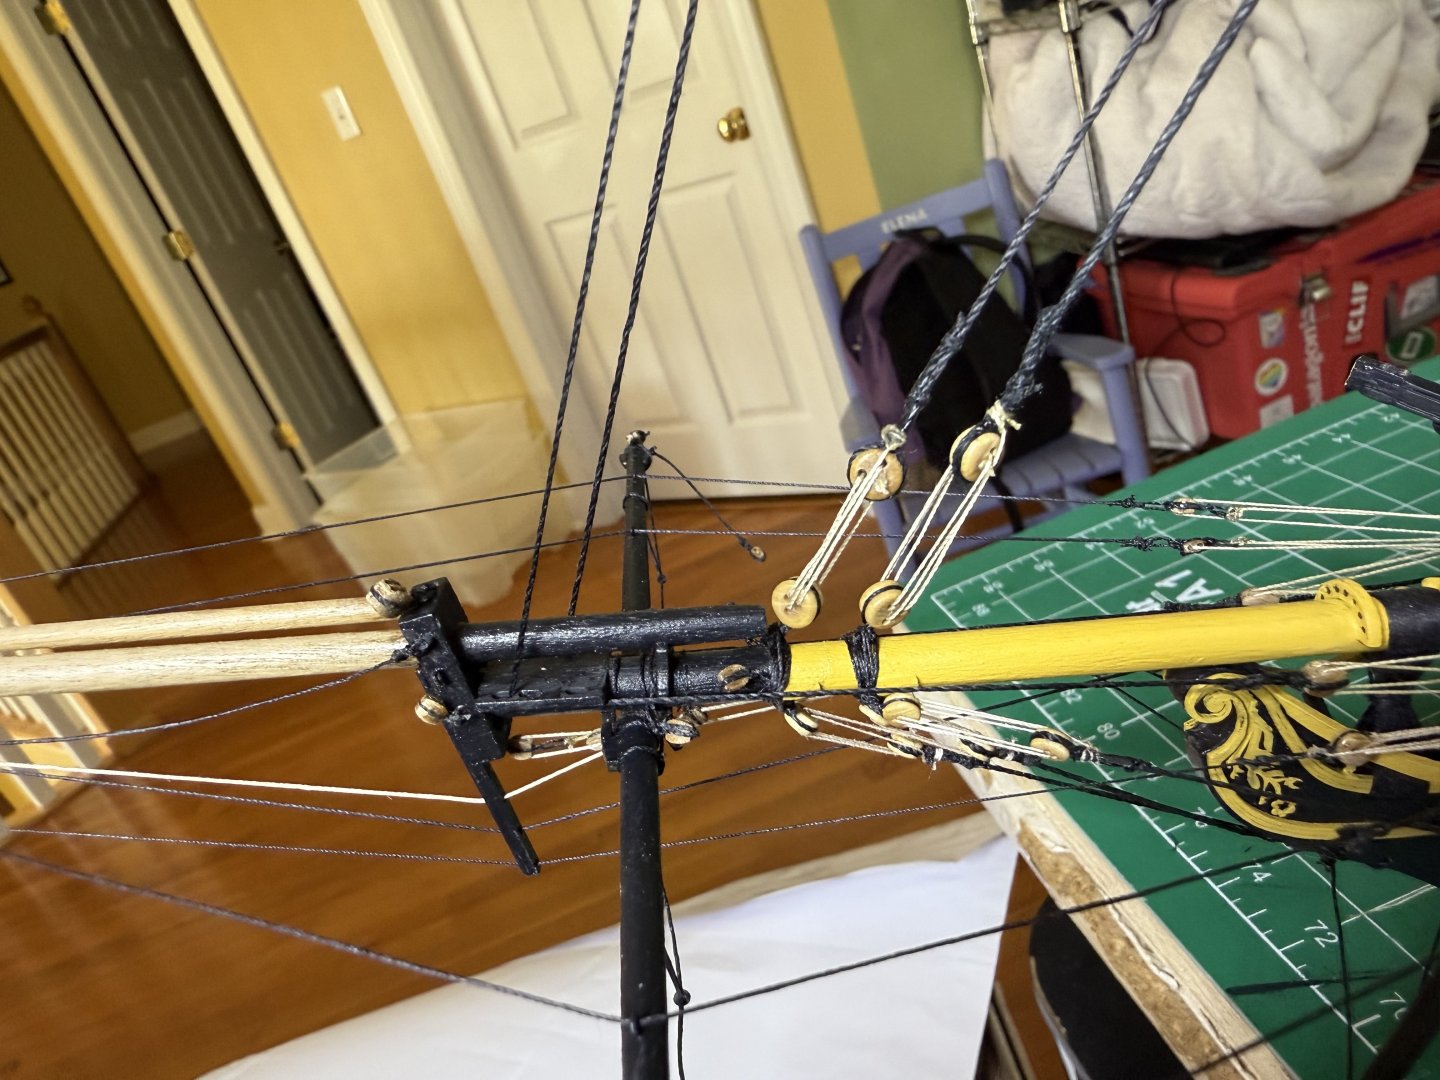
Futtock shrouds and upper shrouds done. Also placed 3mm block in upper shrouds


- 73 replies
-
- 14
-
-
- Harpy
- Vanguard Models
- (and 1 more)