

CapnJack43
-
Posts
28 -
Joined
-
Last visited
Content Type
Profiles
Forums
Gallery
Events
Posts posted by CapnJack43
-
-
-
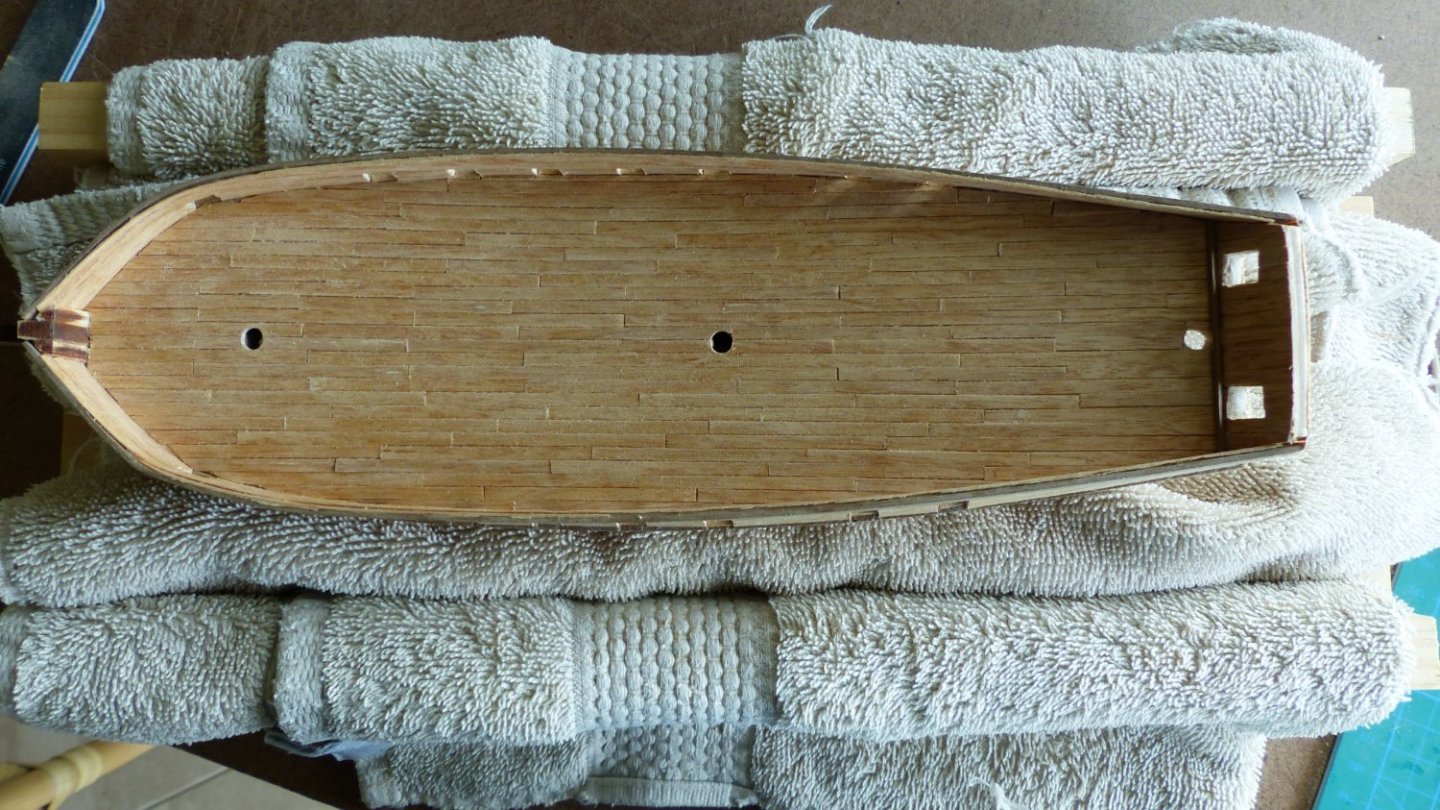
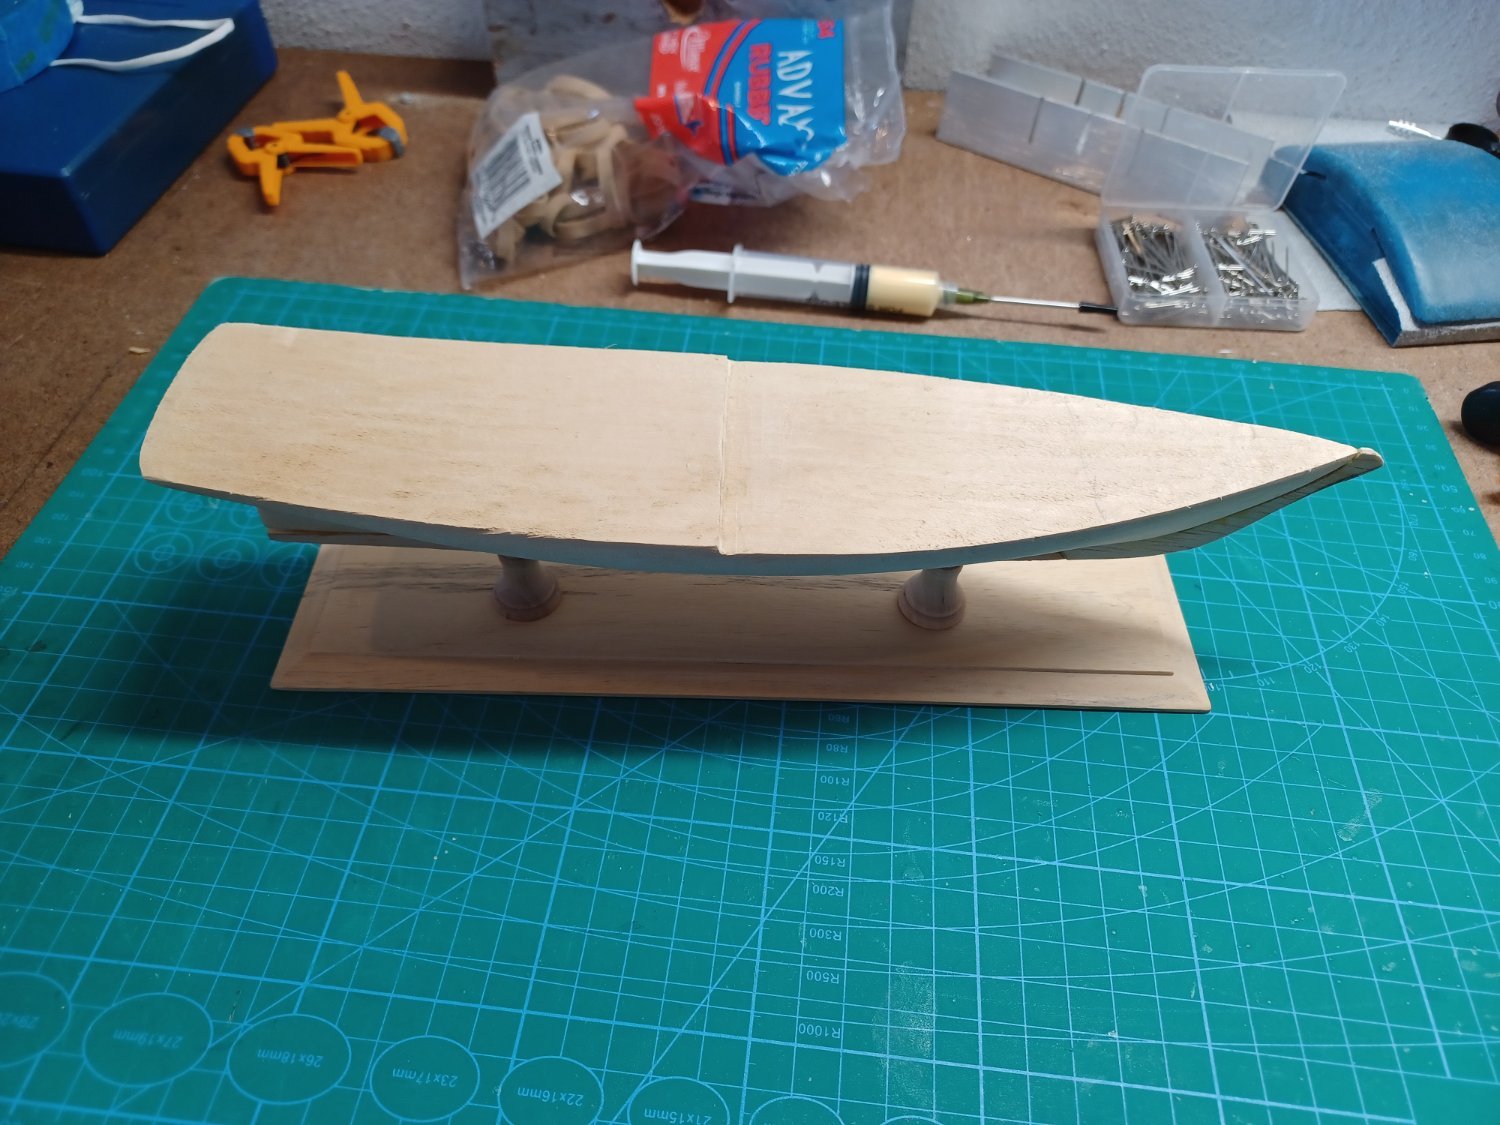
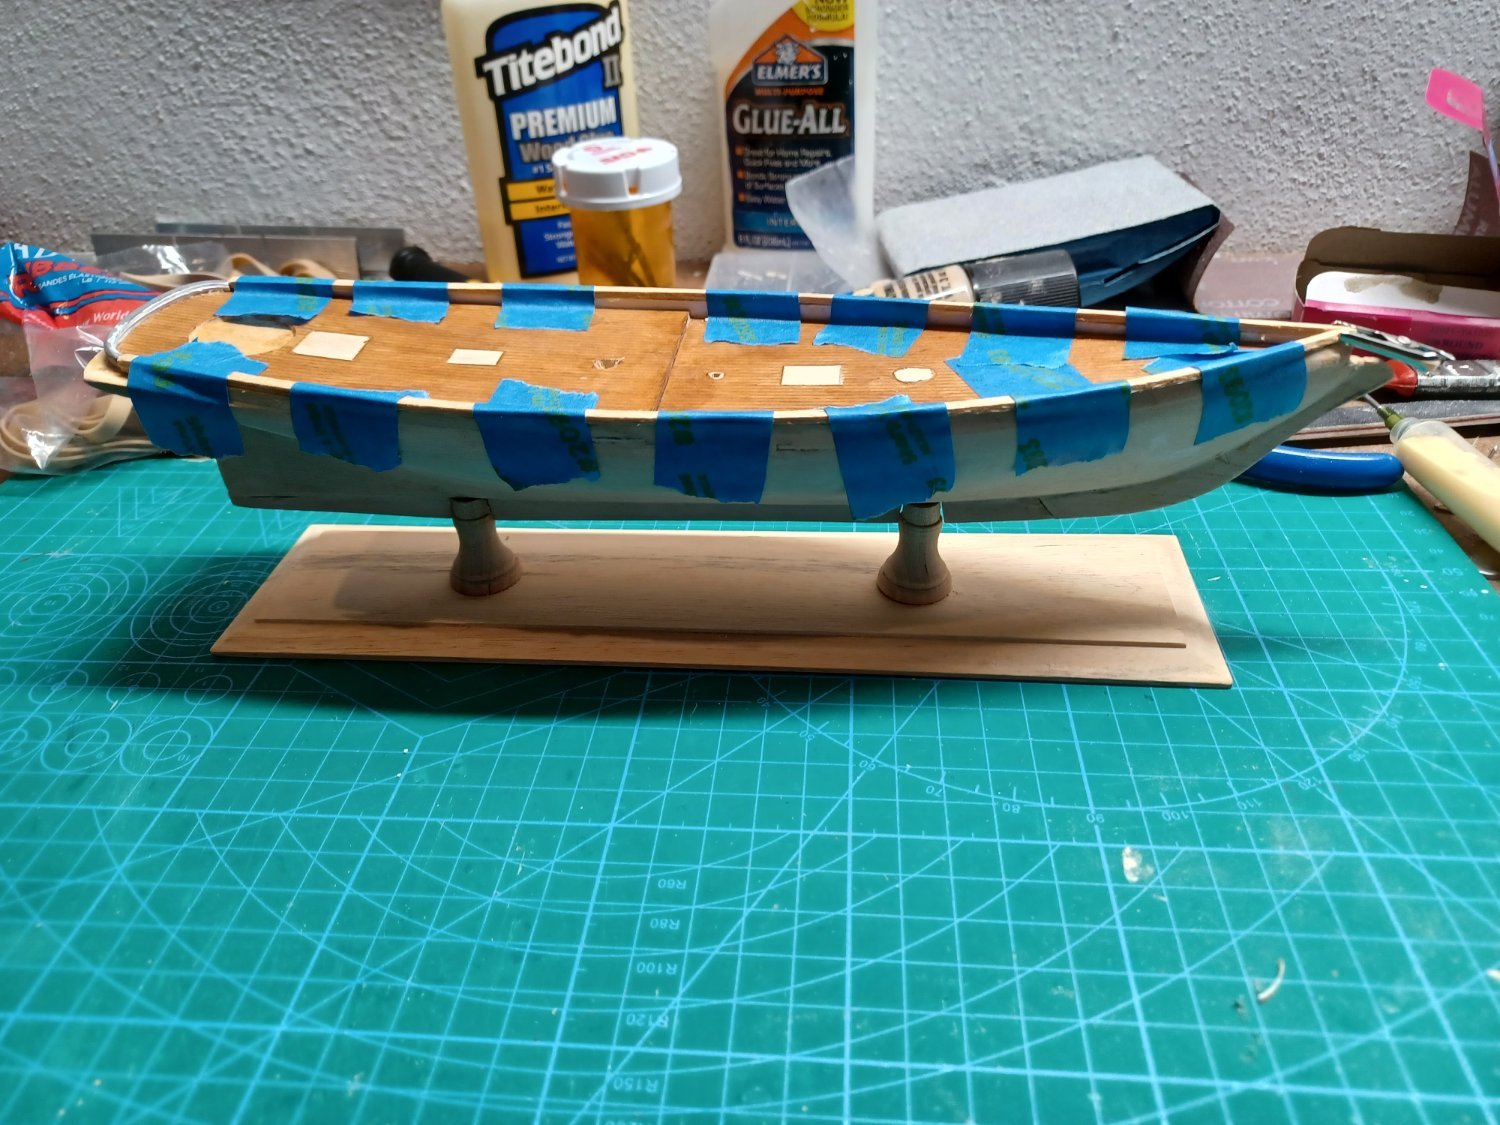
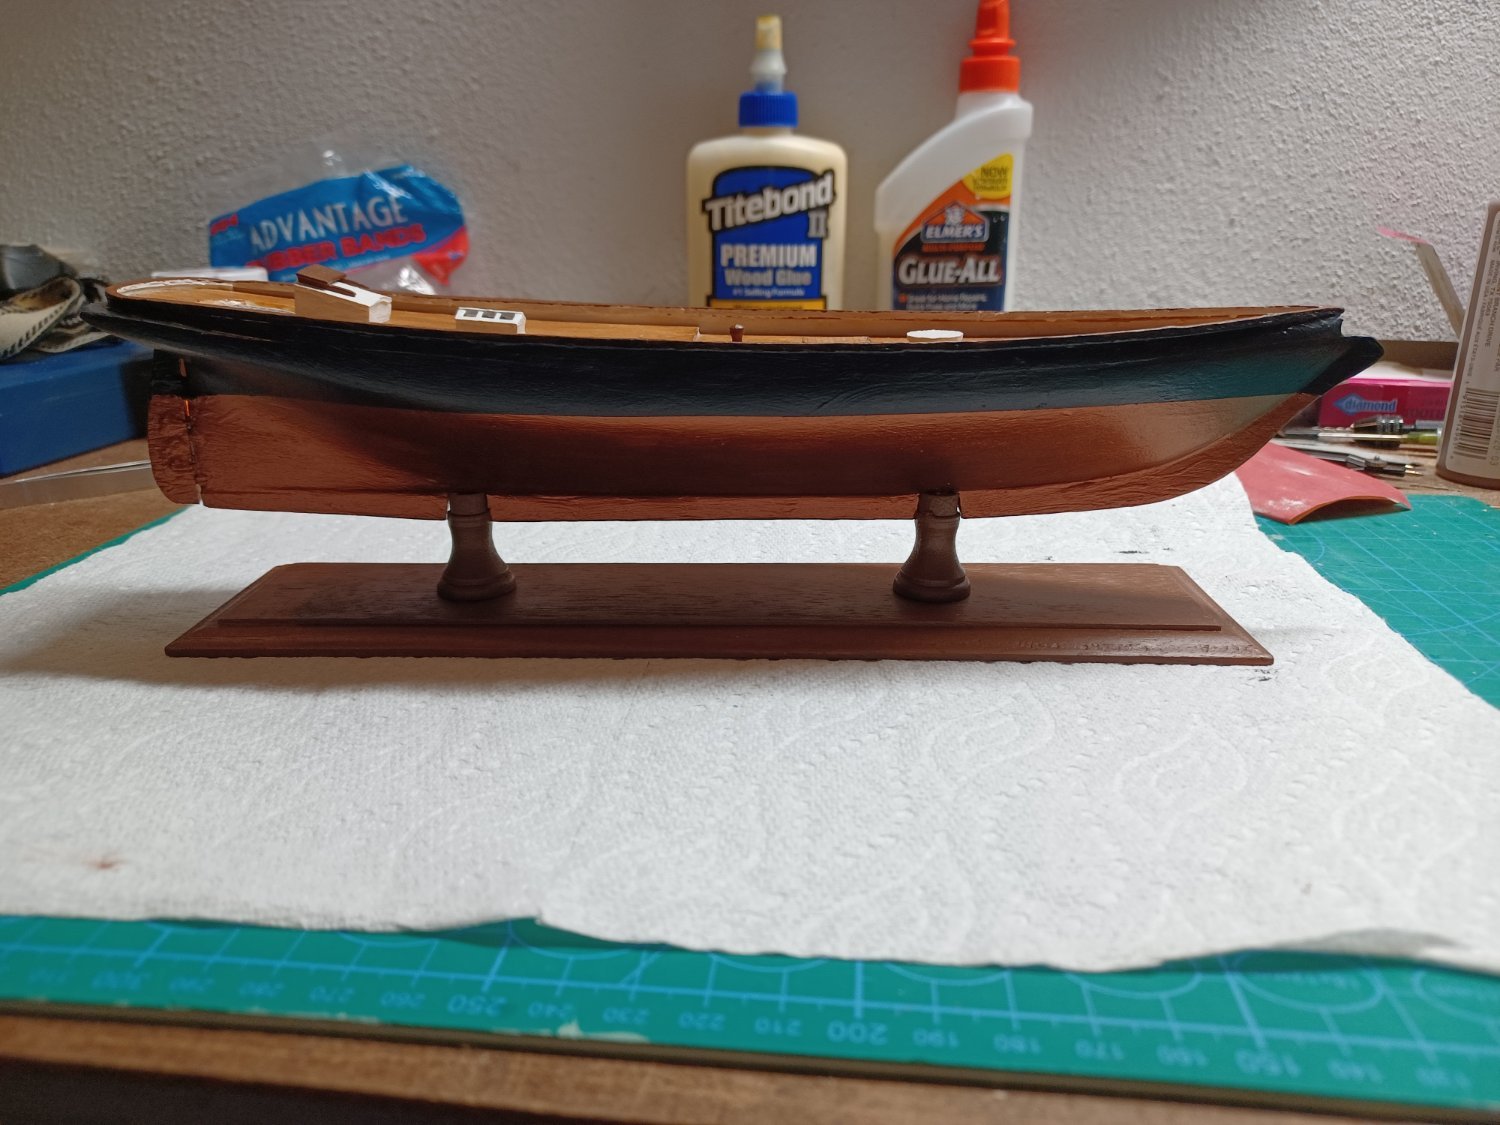
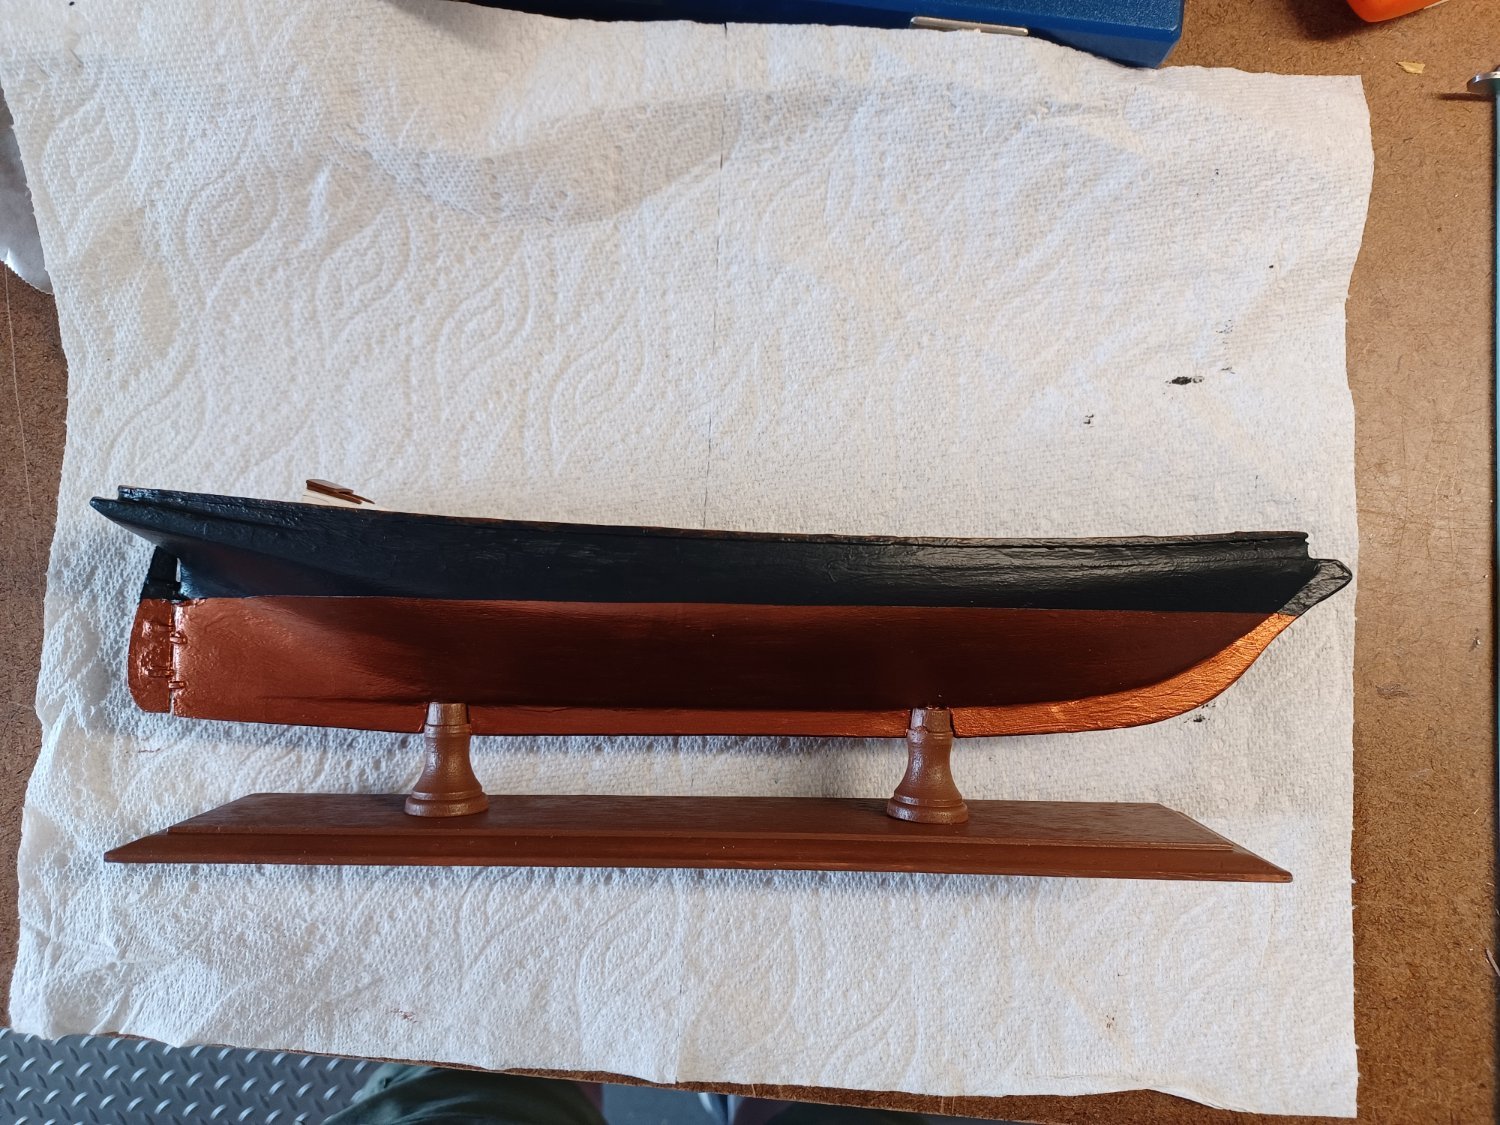
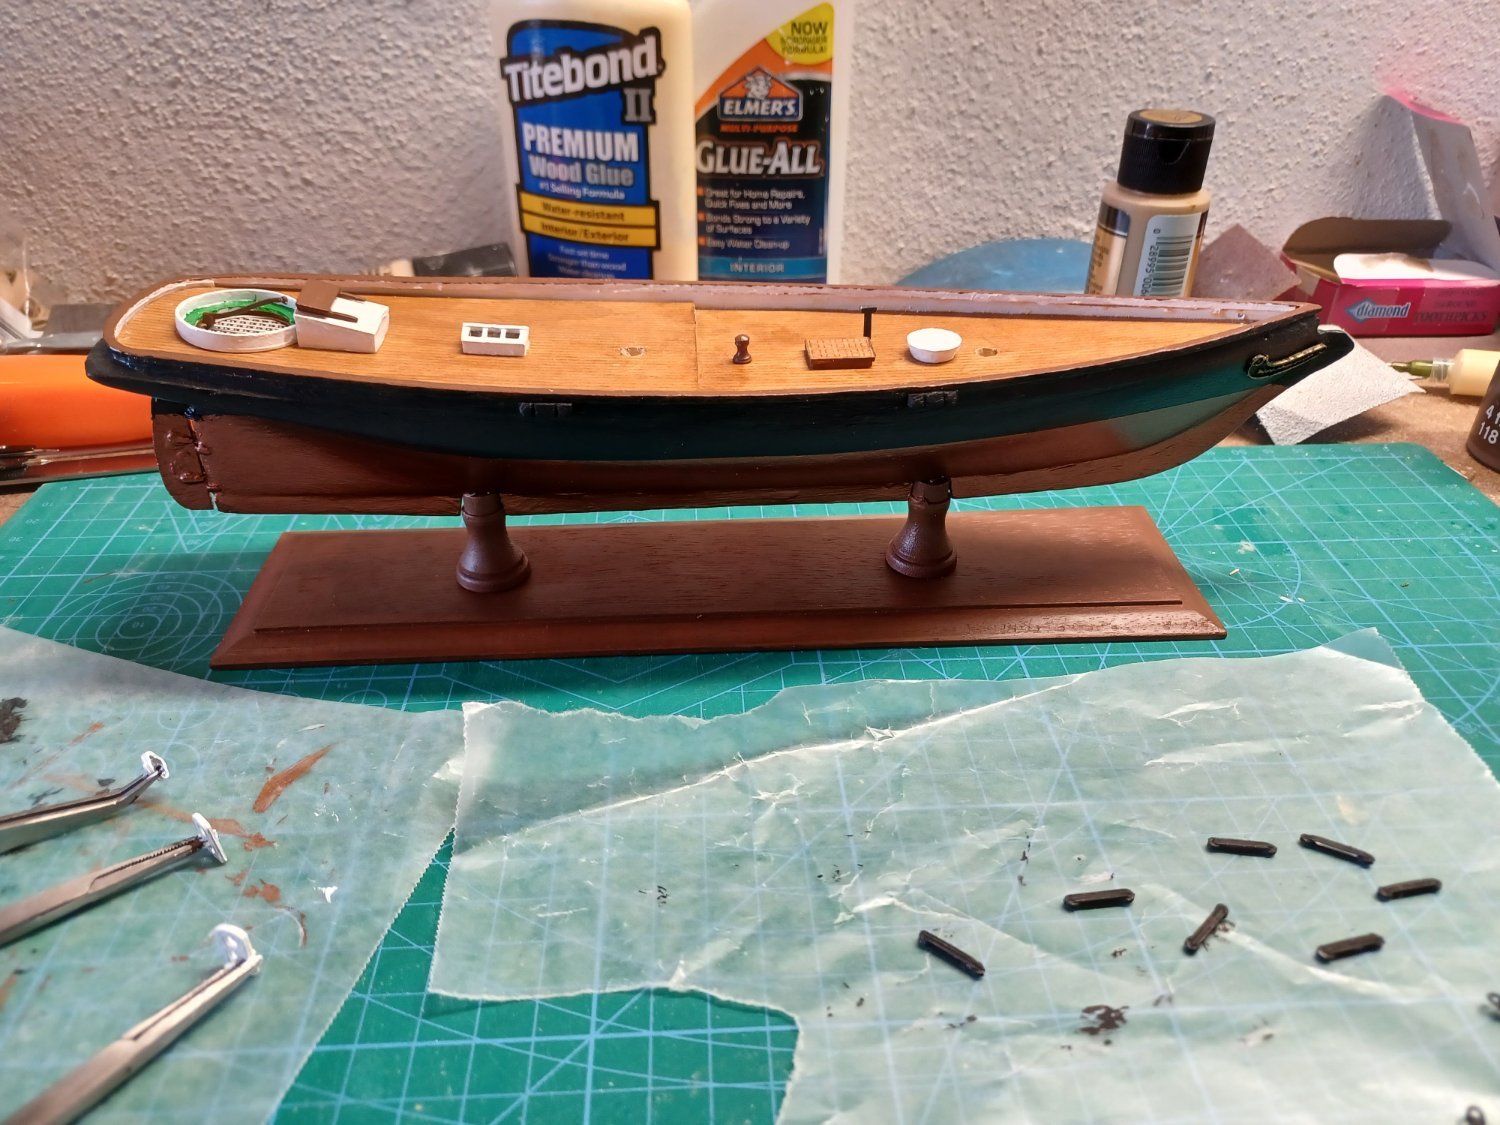
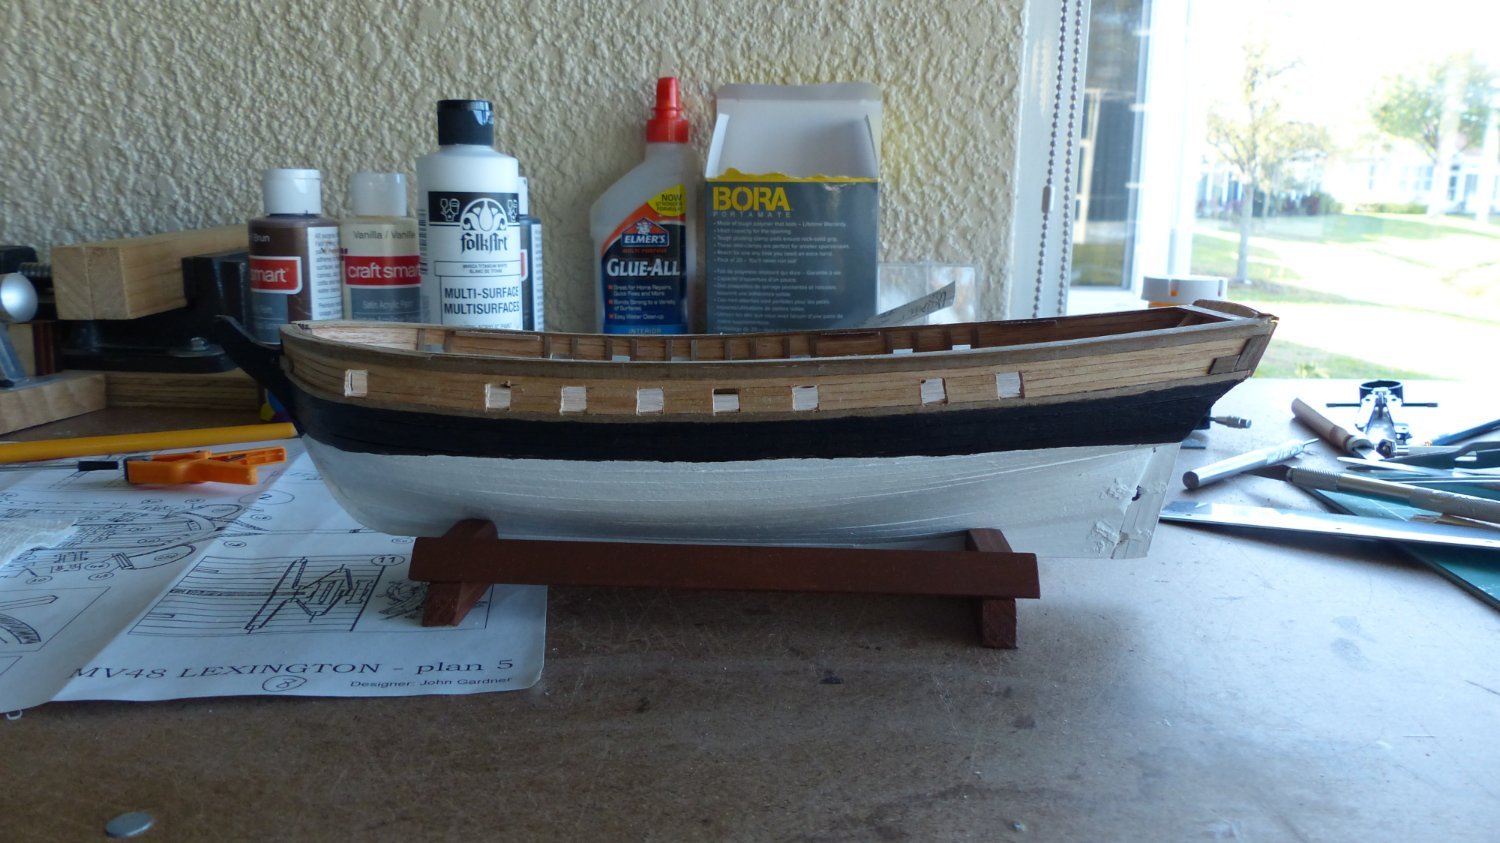
Made a base out of 5/8 inch stock contoured it to the hull and fastened it with wood glue and screws


- Dave_E and JacquesCousteau
-
 2
2
-
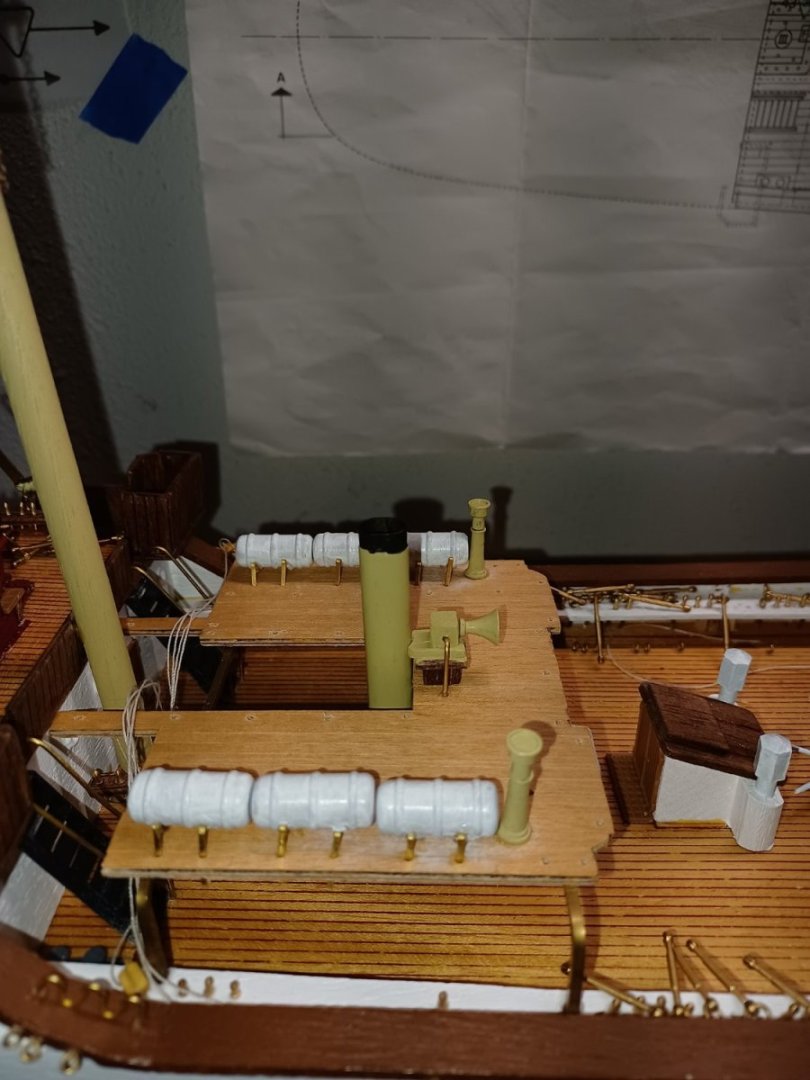
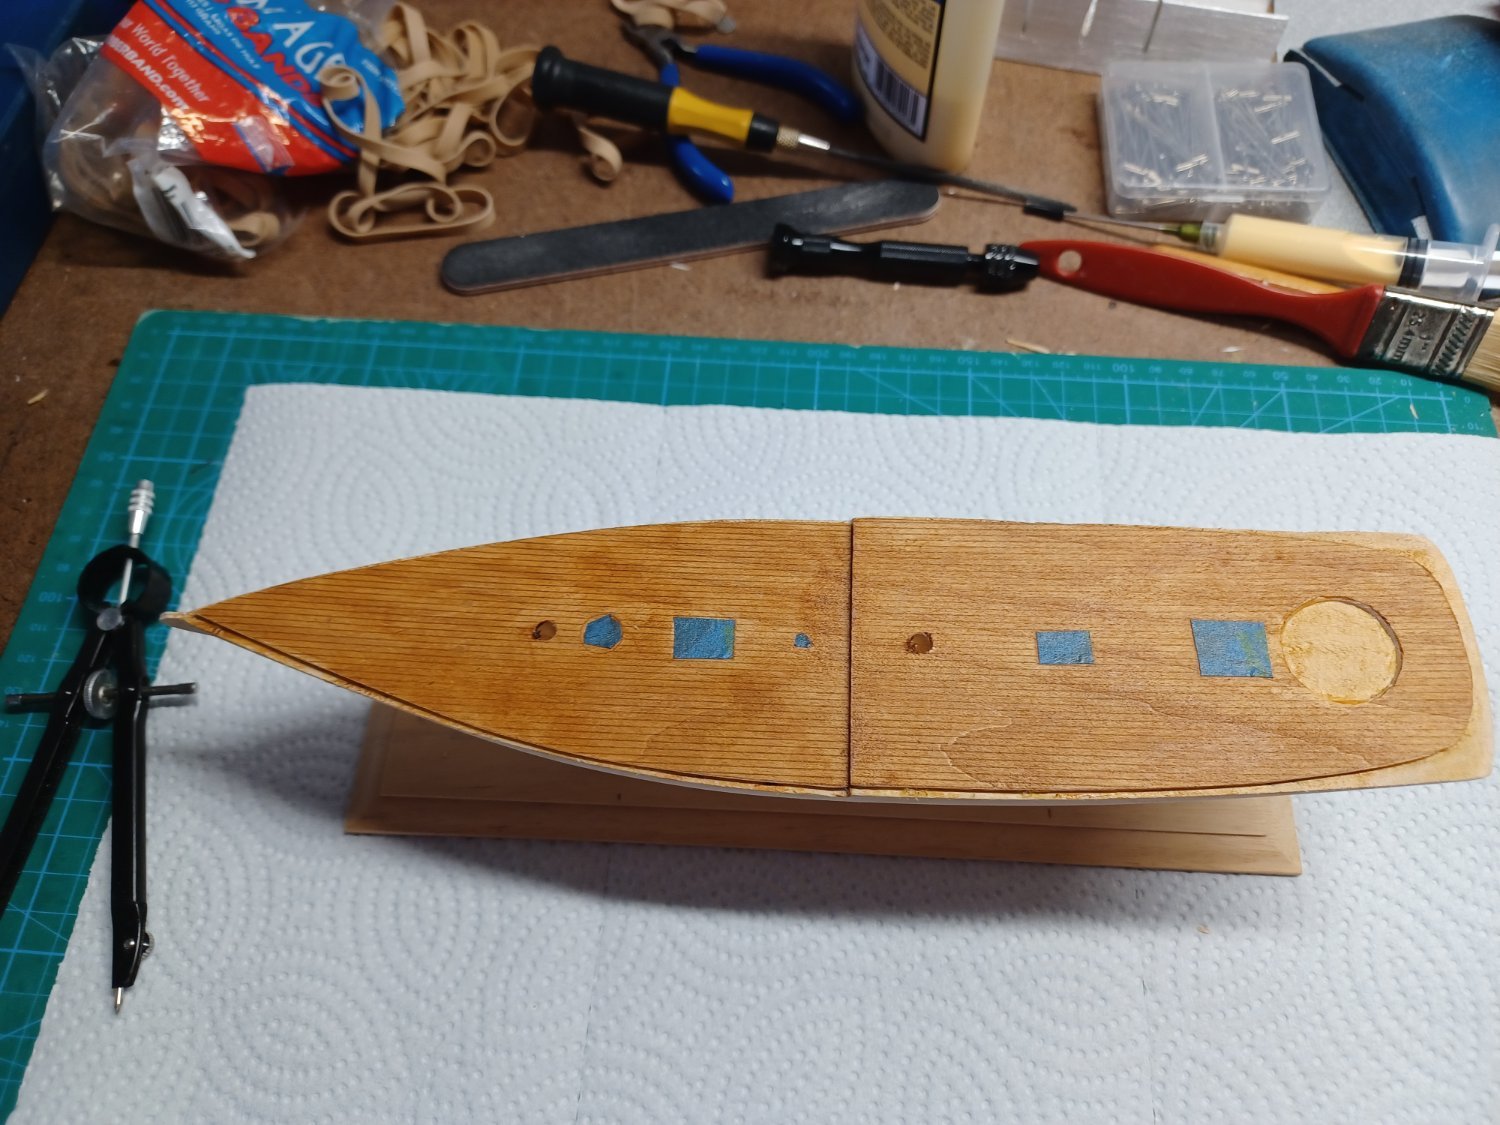
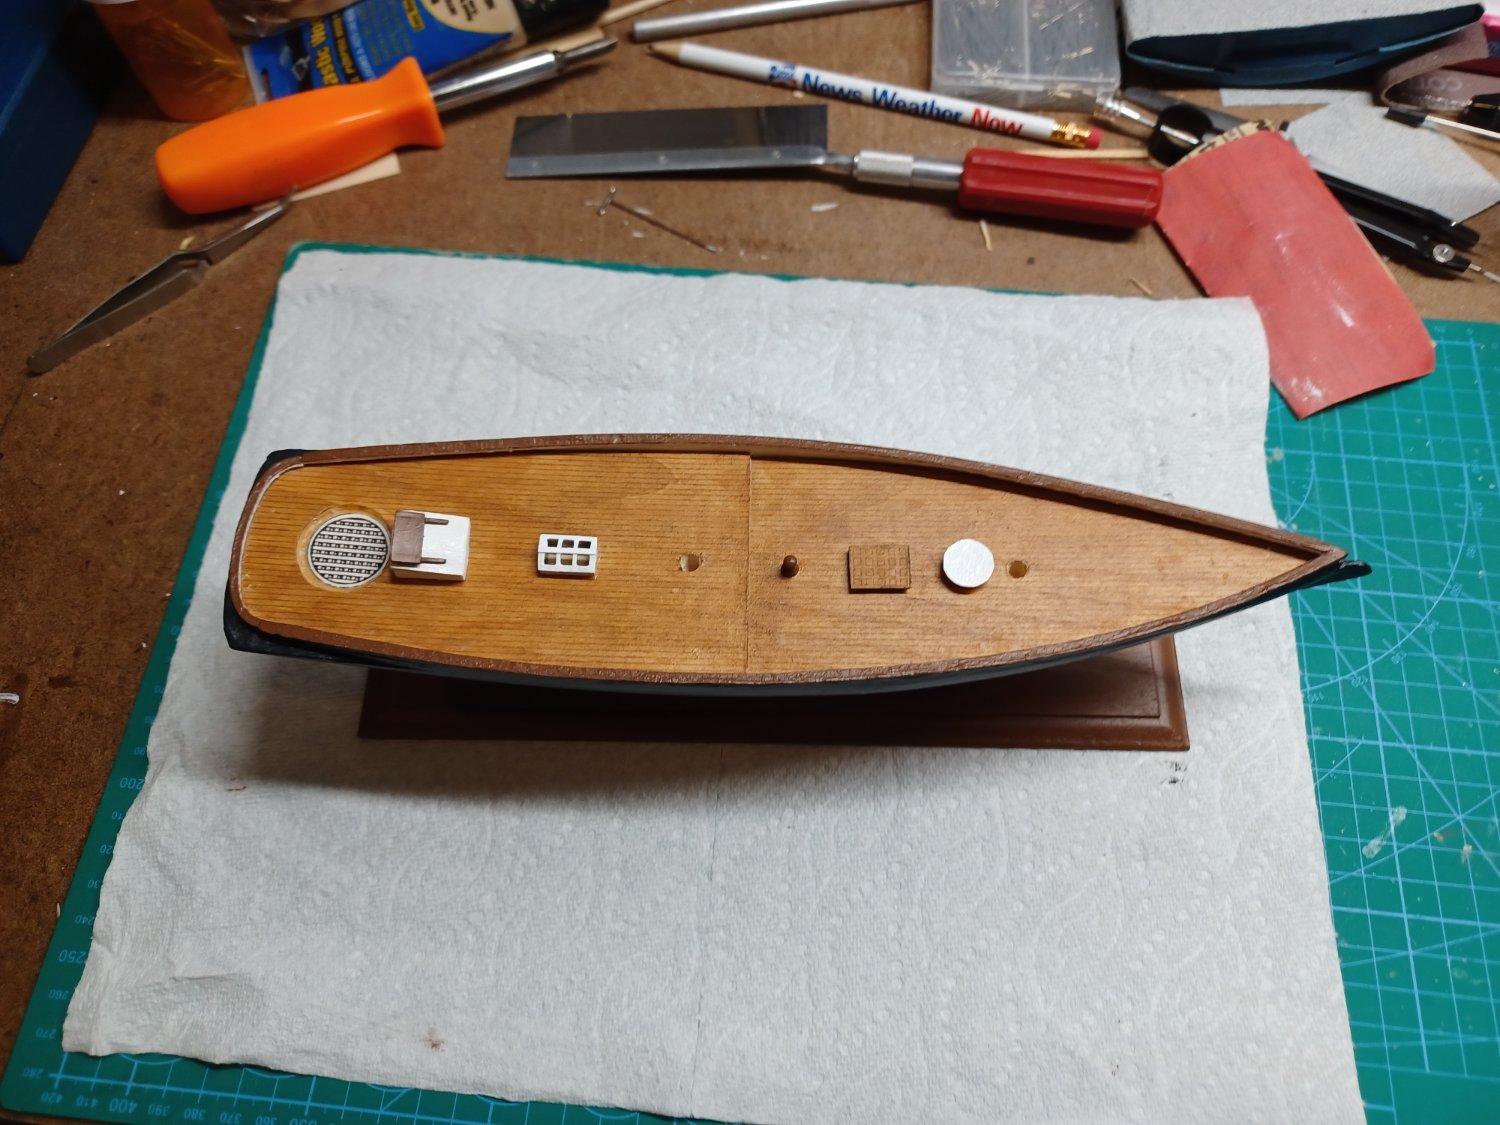
Tinted clear water based acrylic with some brown acrylic paint to darken the deck a bit
- Dave_E and JacquesCousteau
-
2
-
-
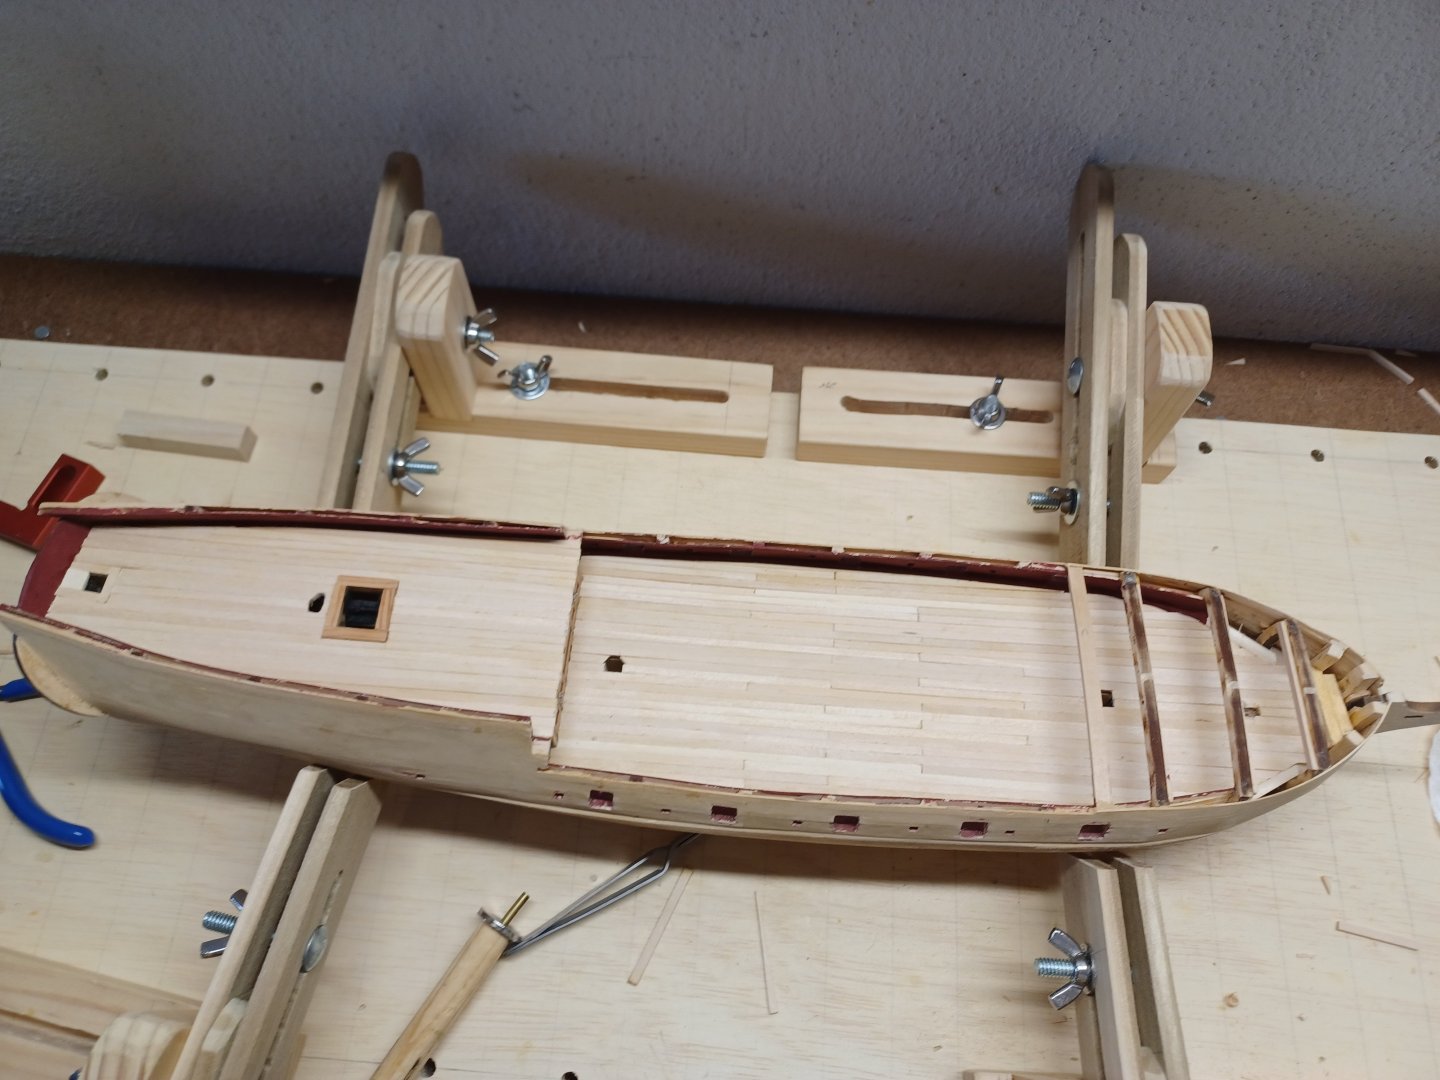
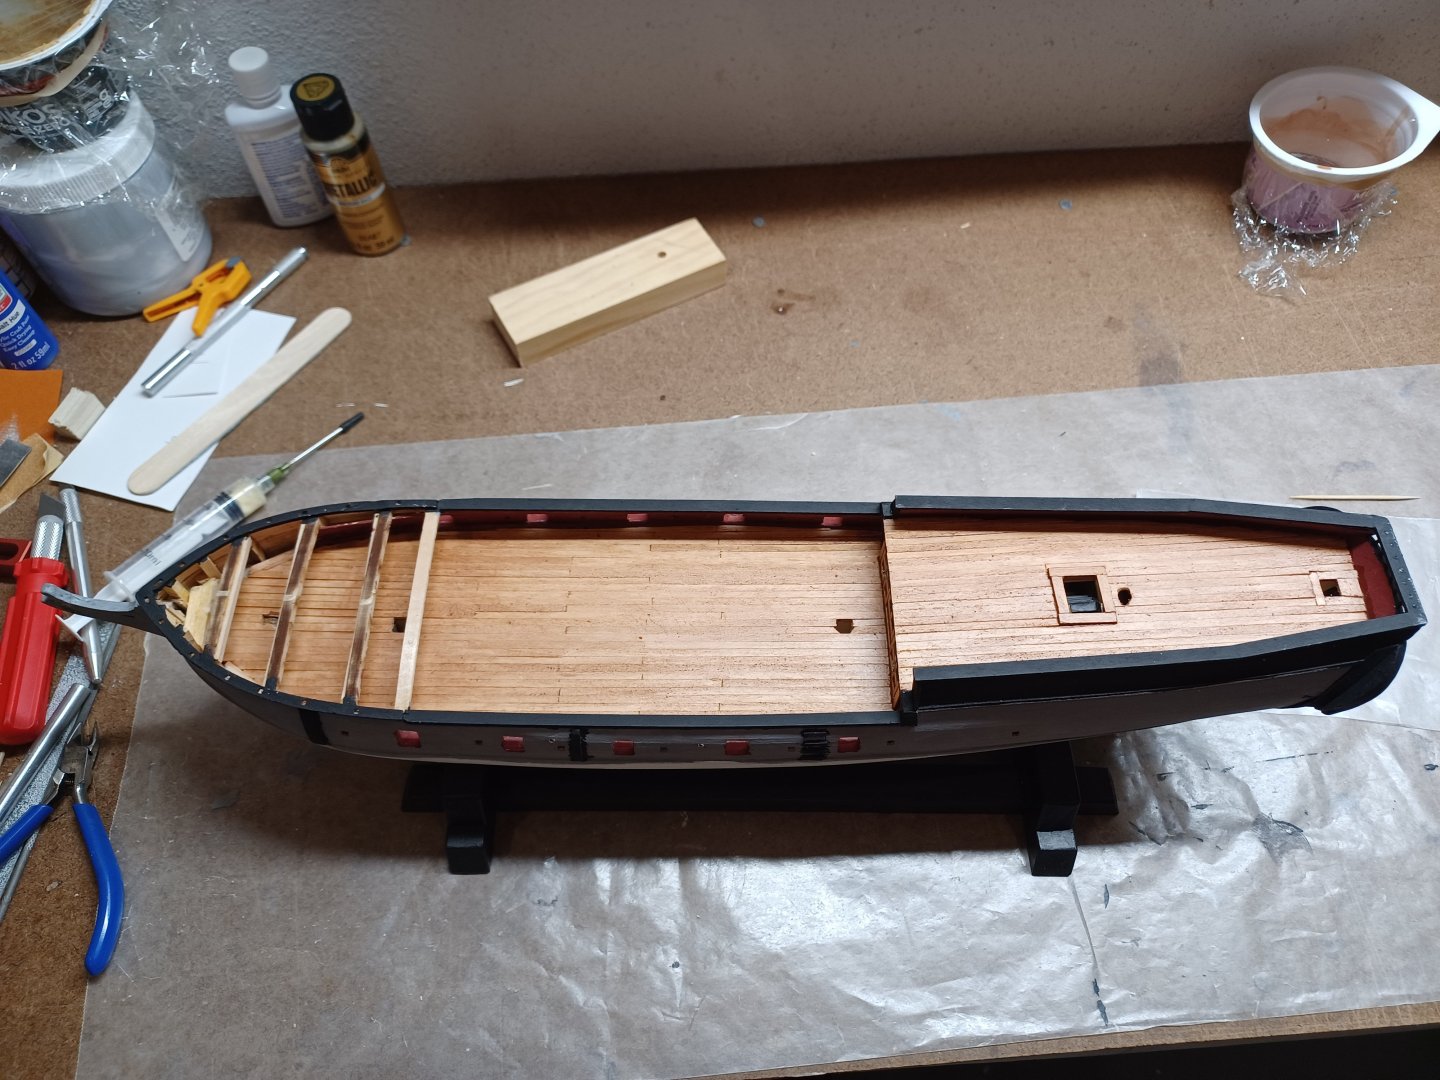
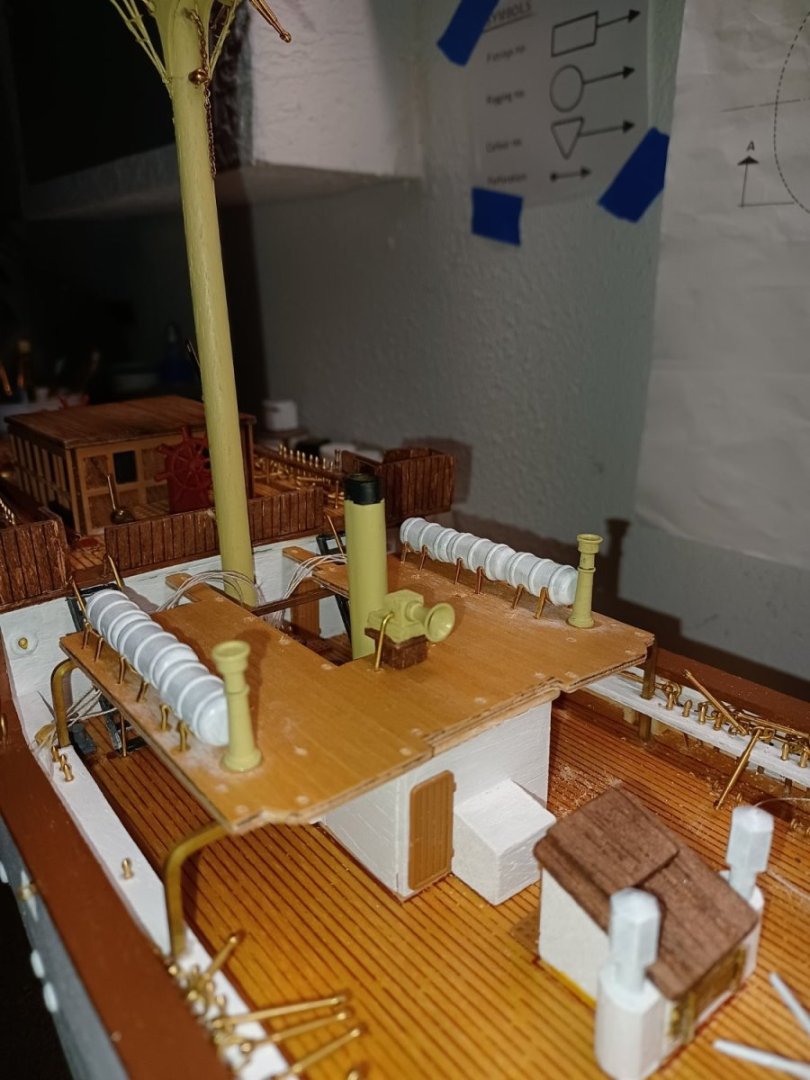
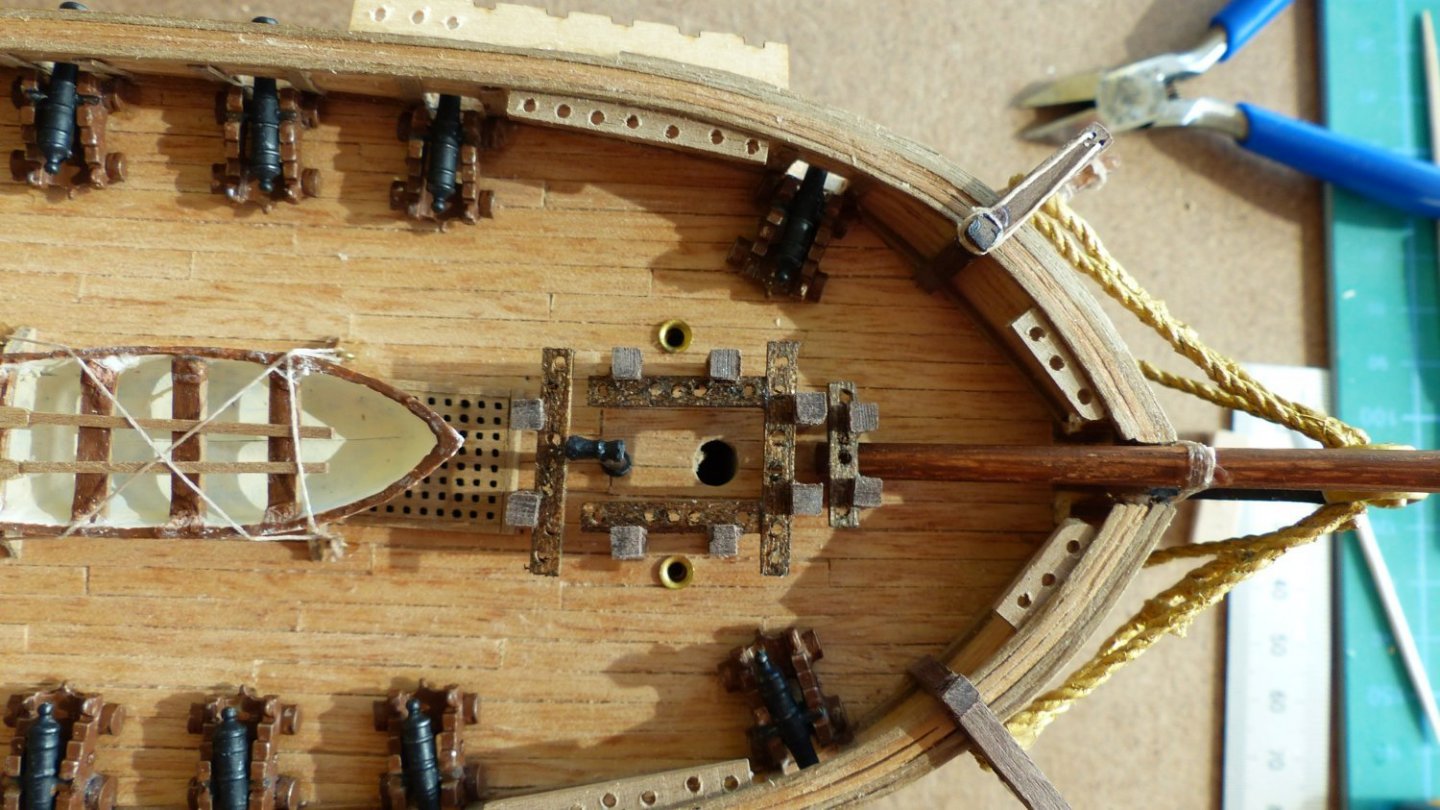
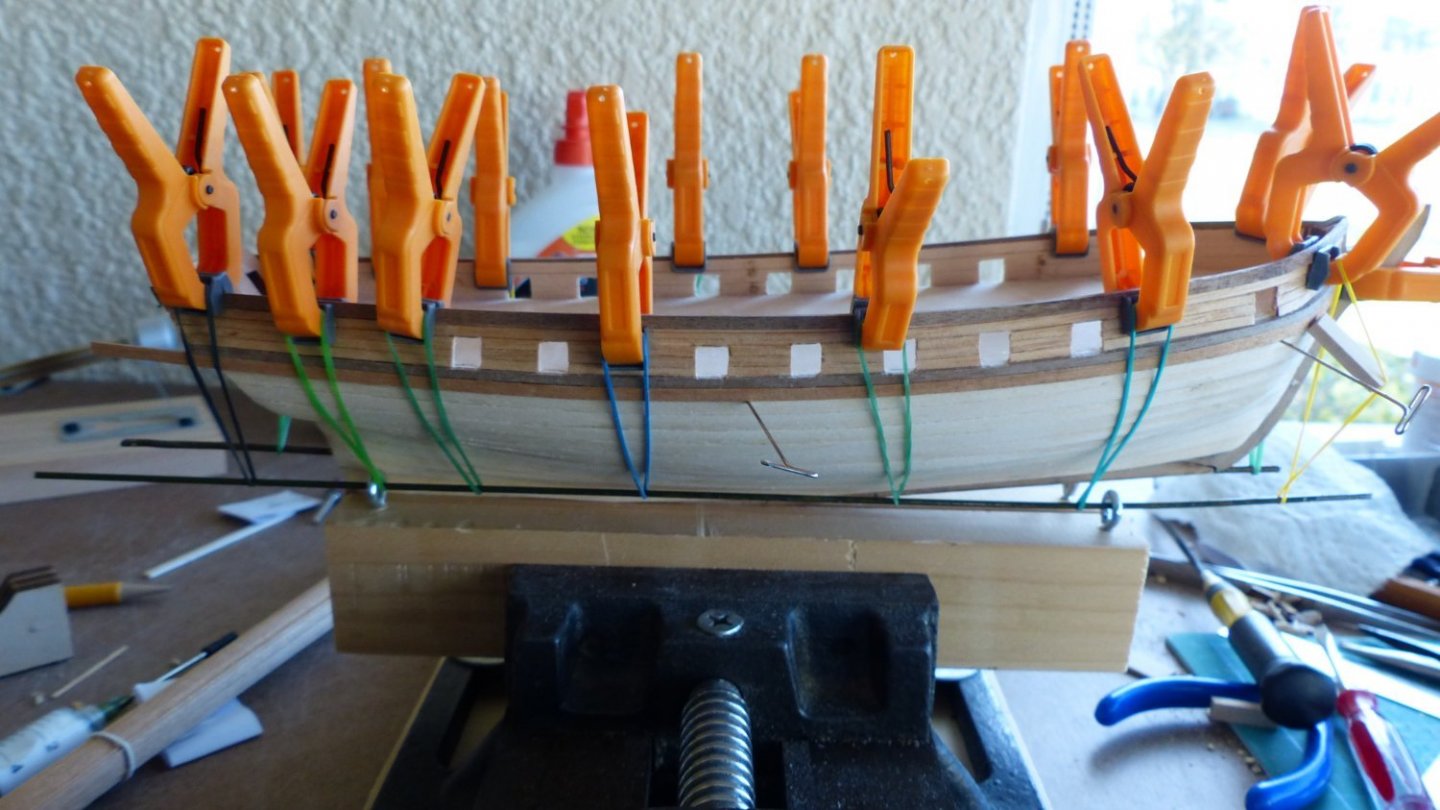
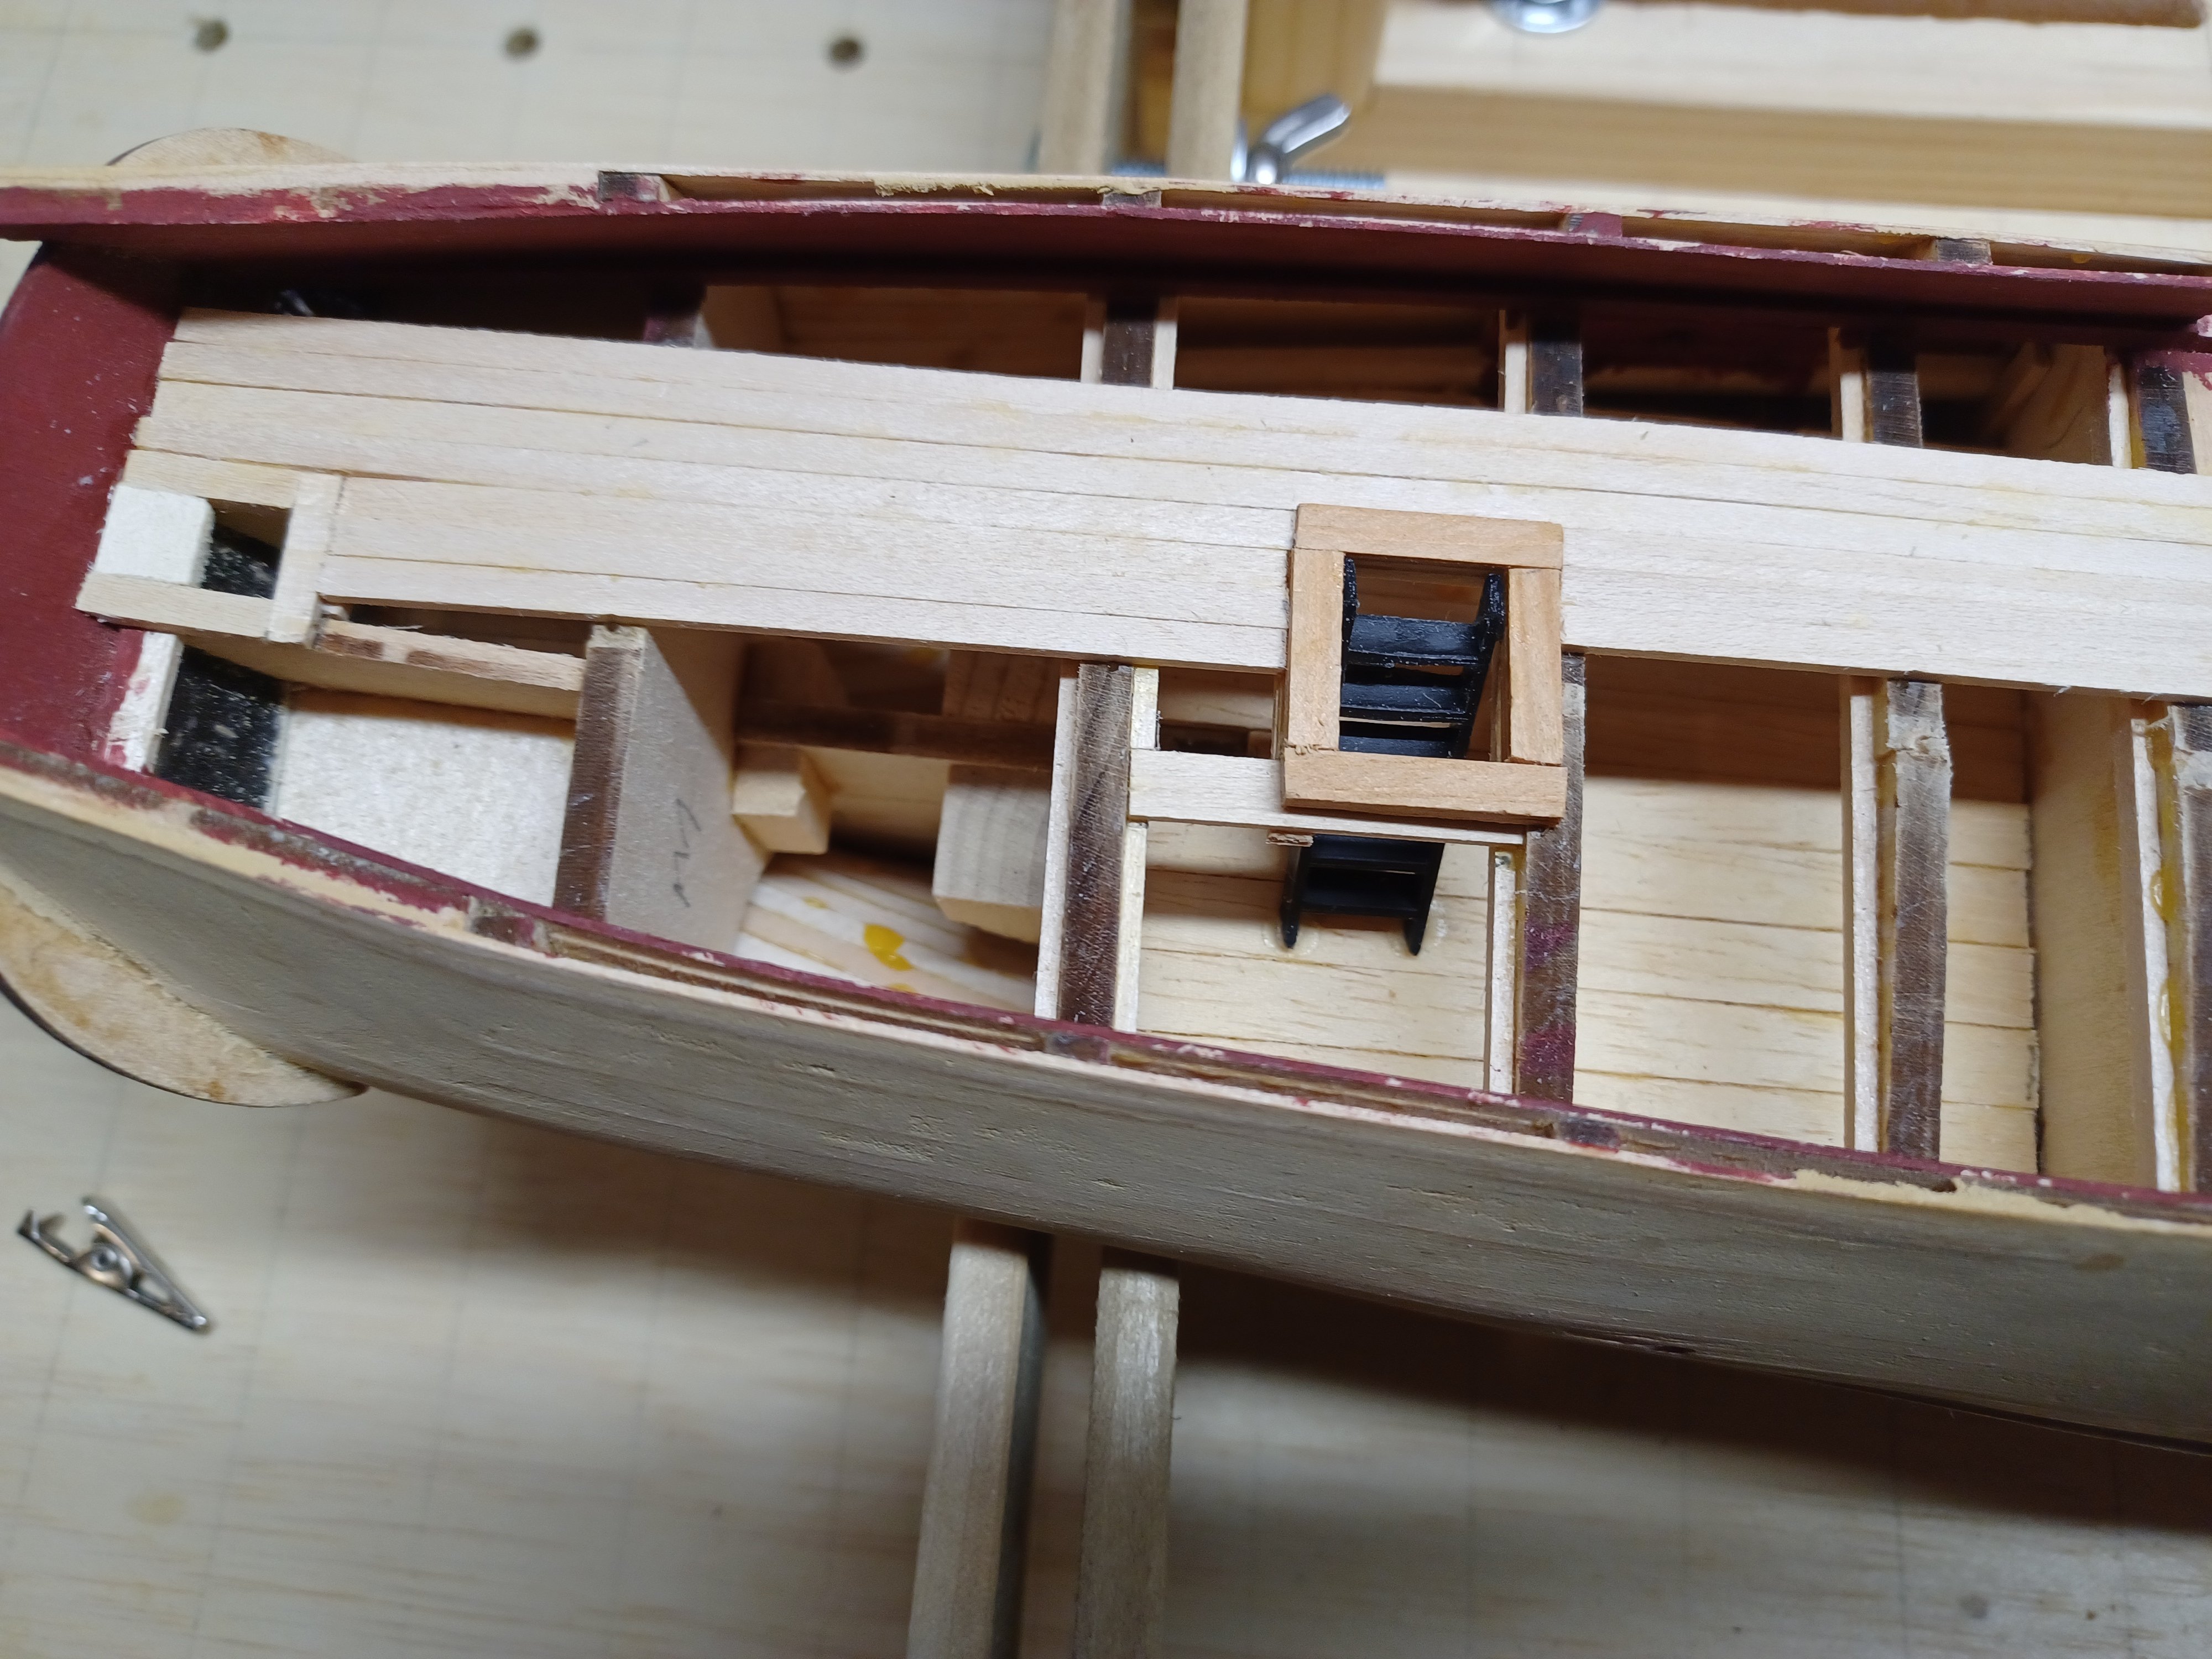
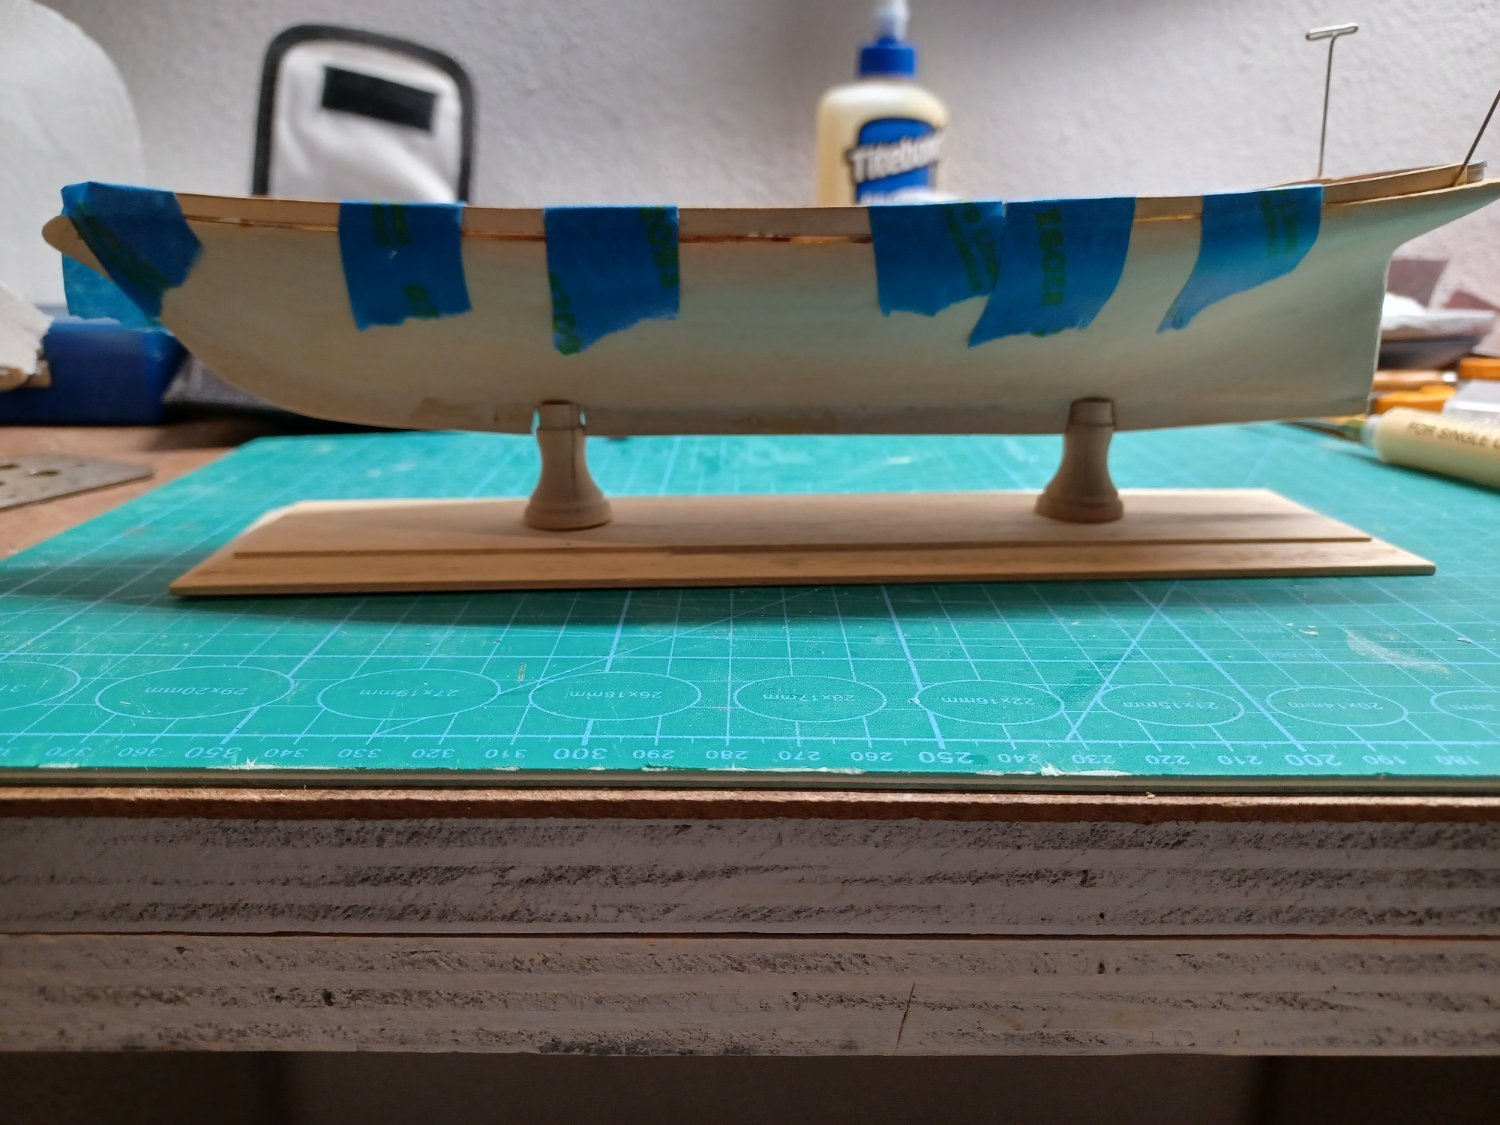
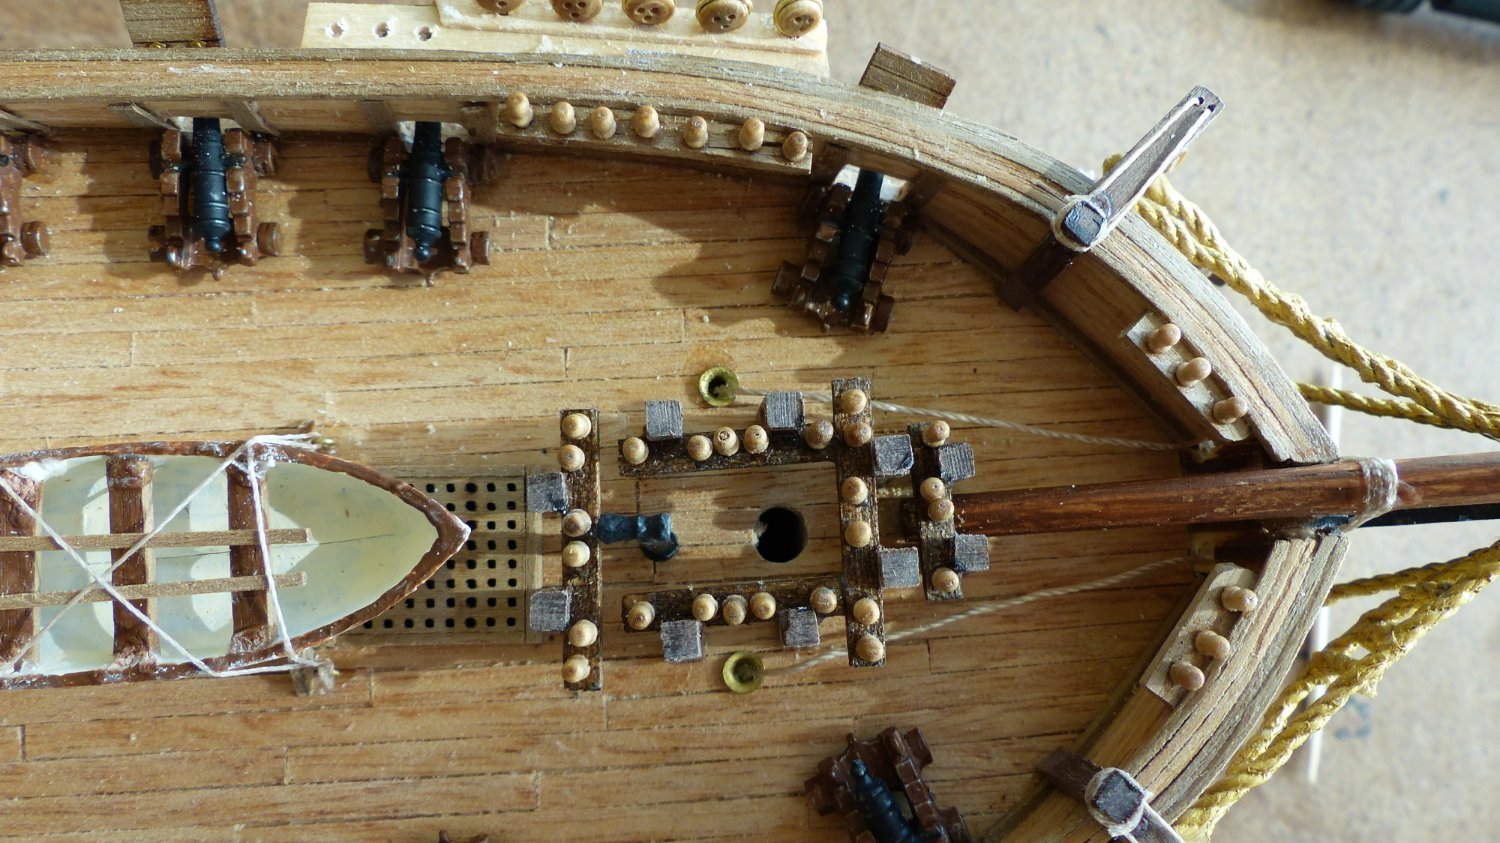
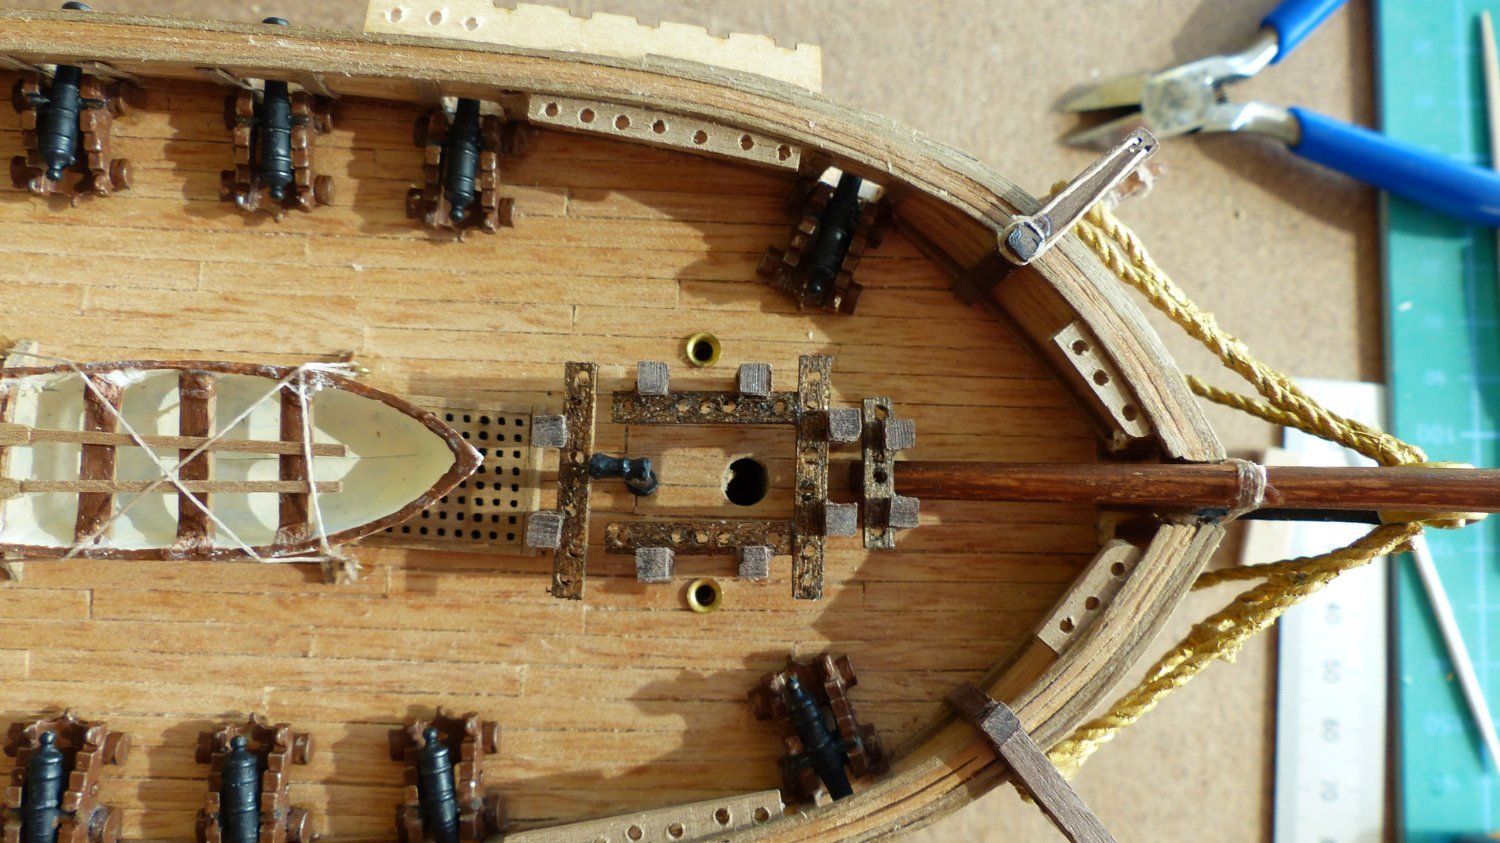
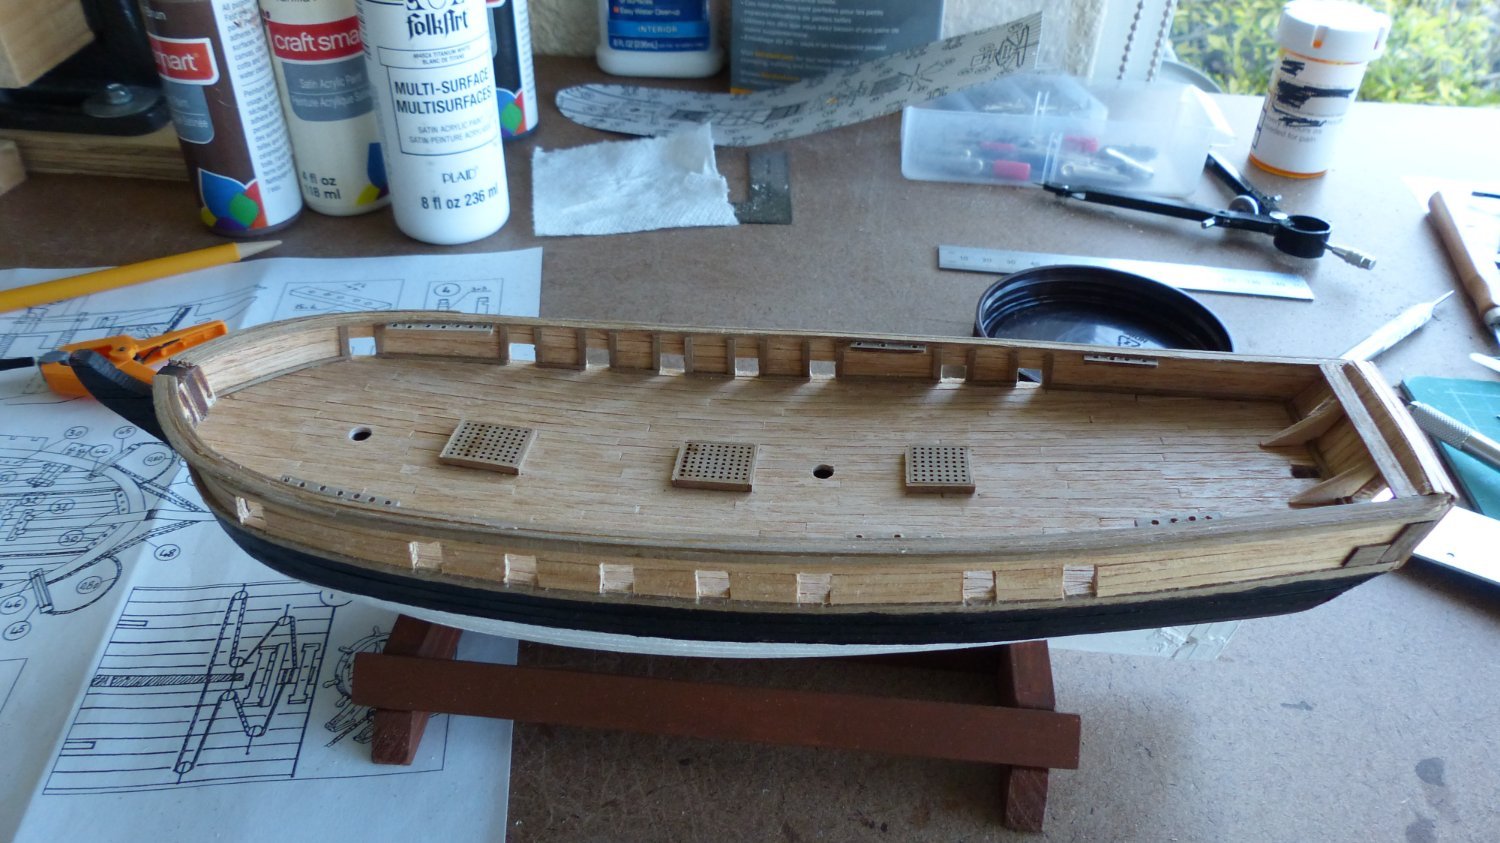
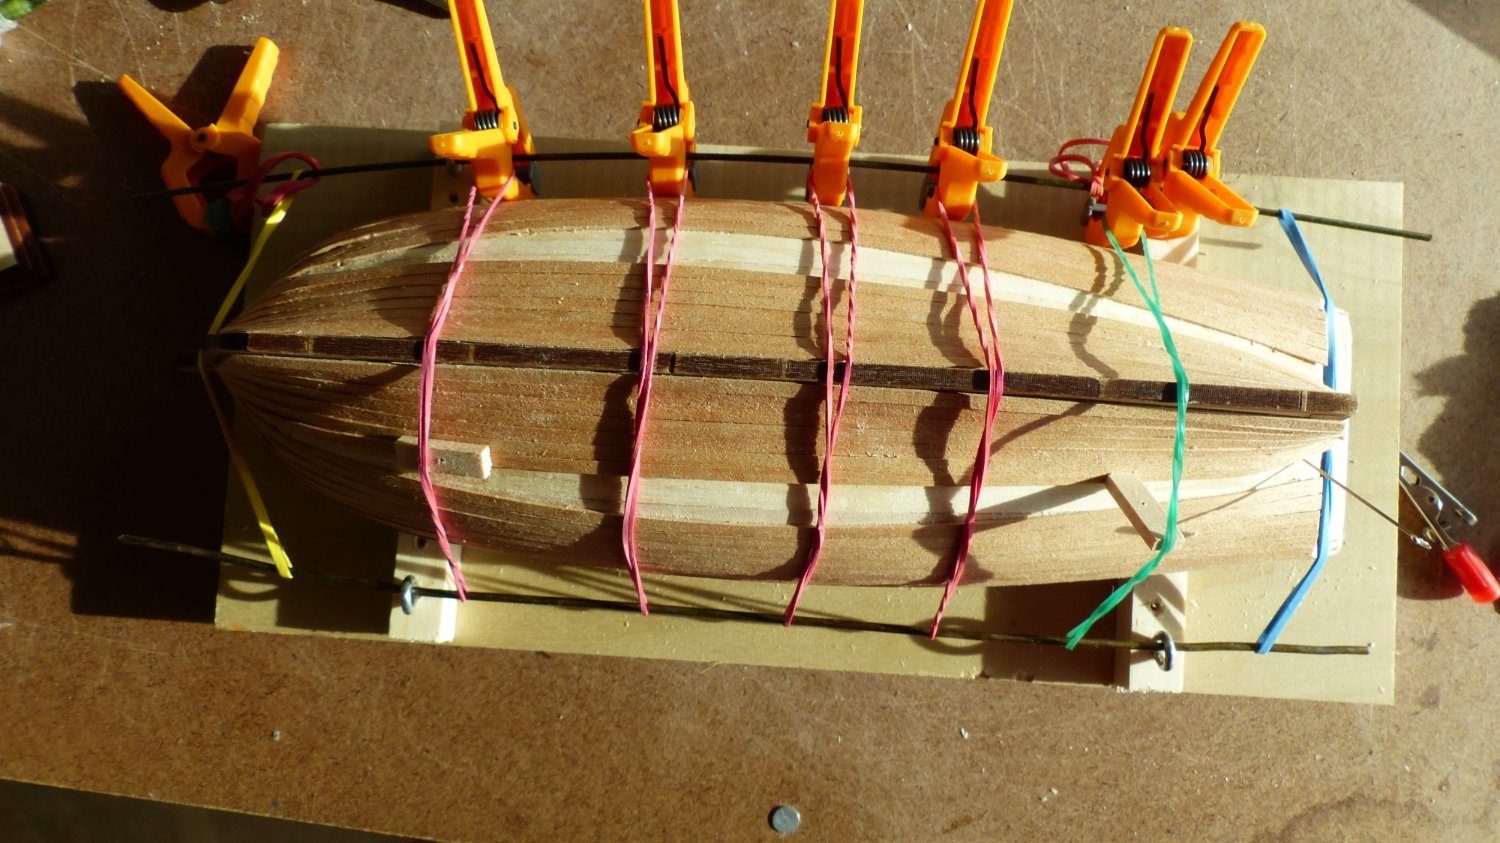
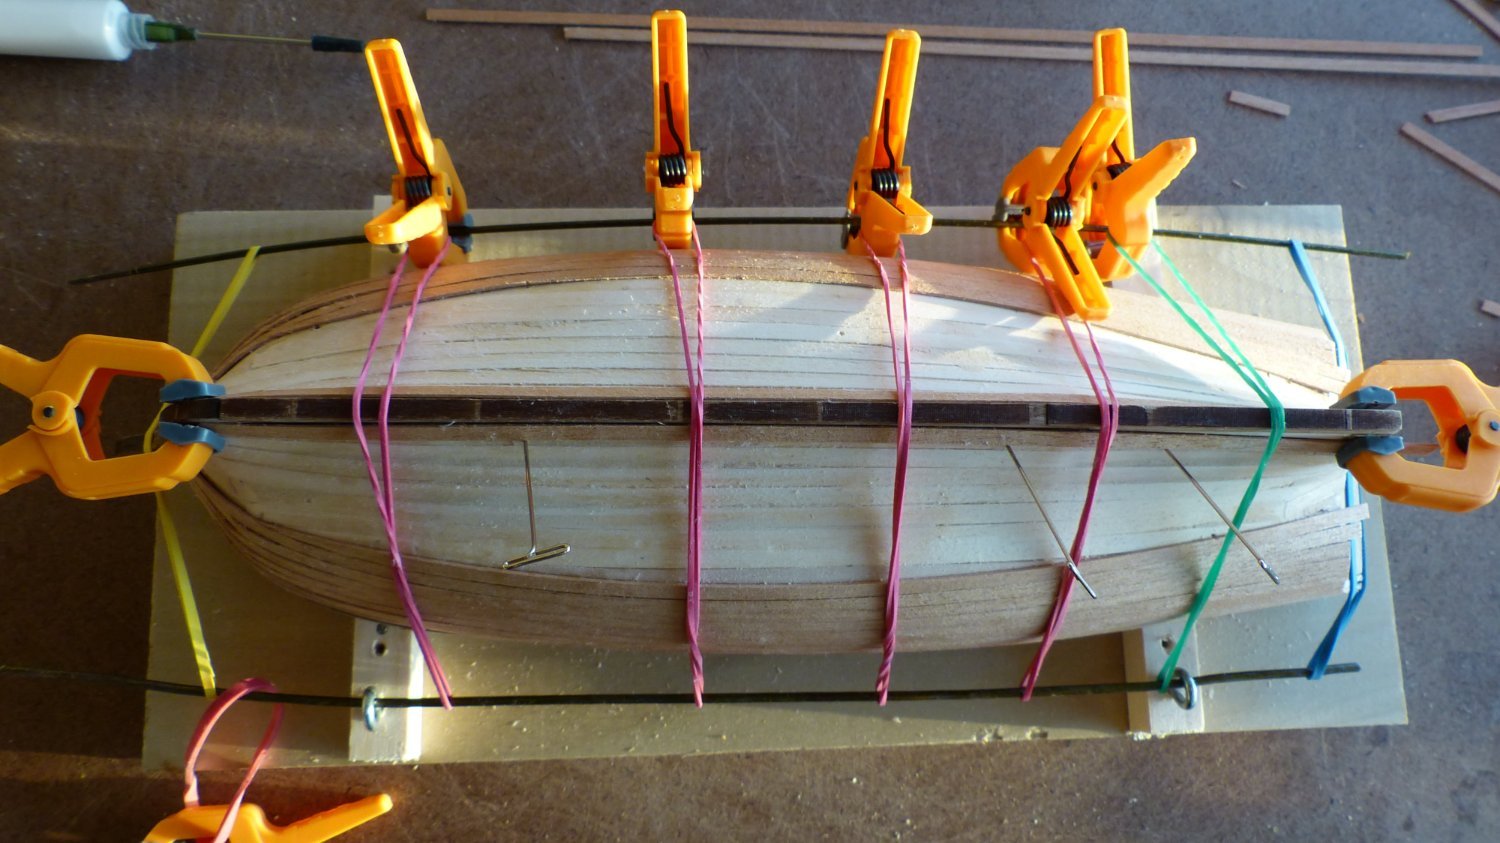
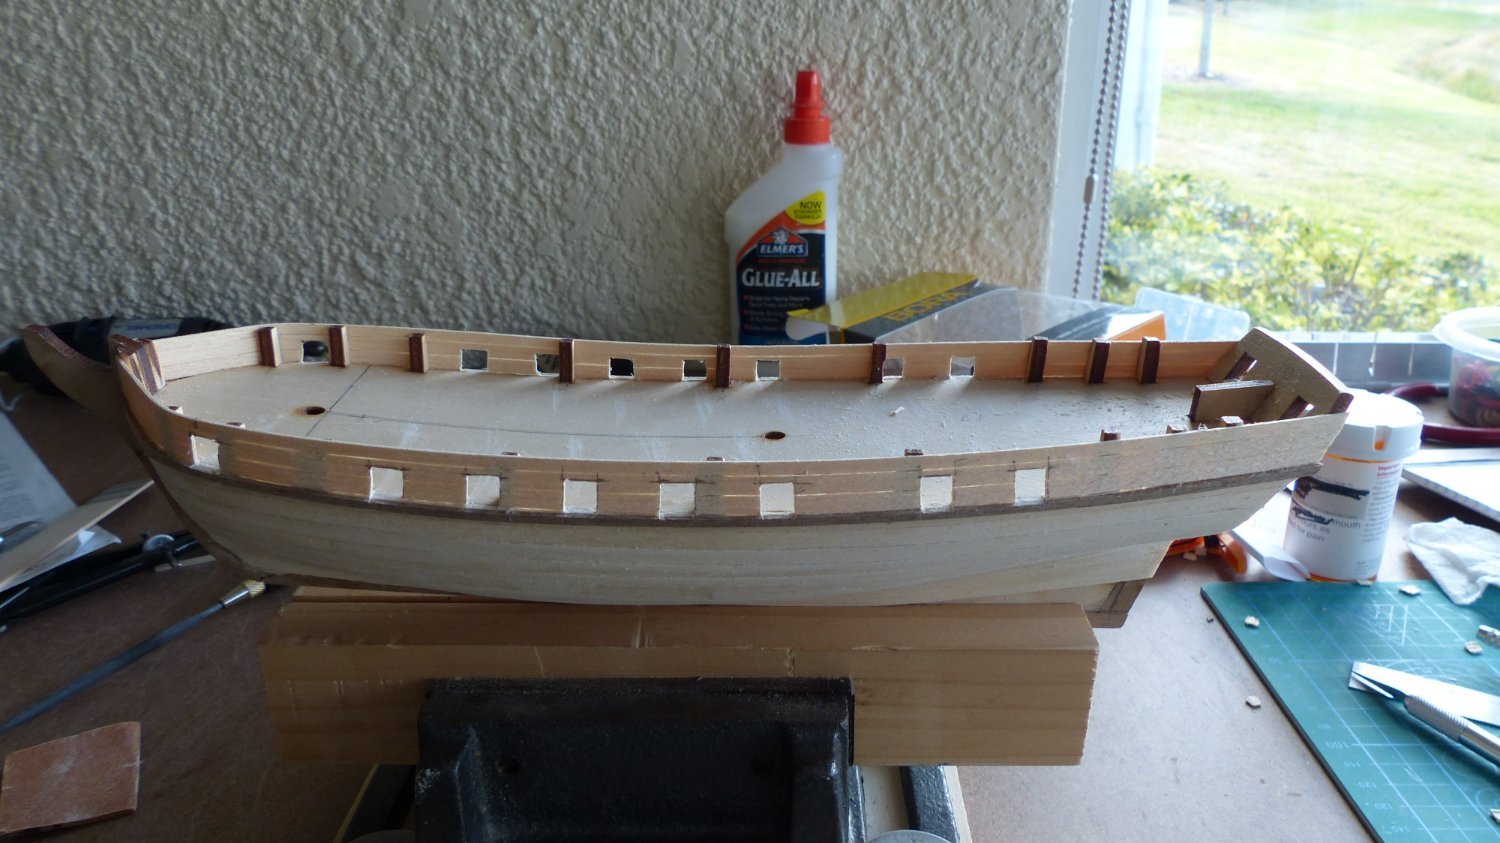
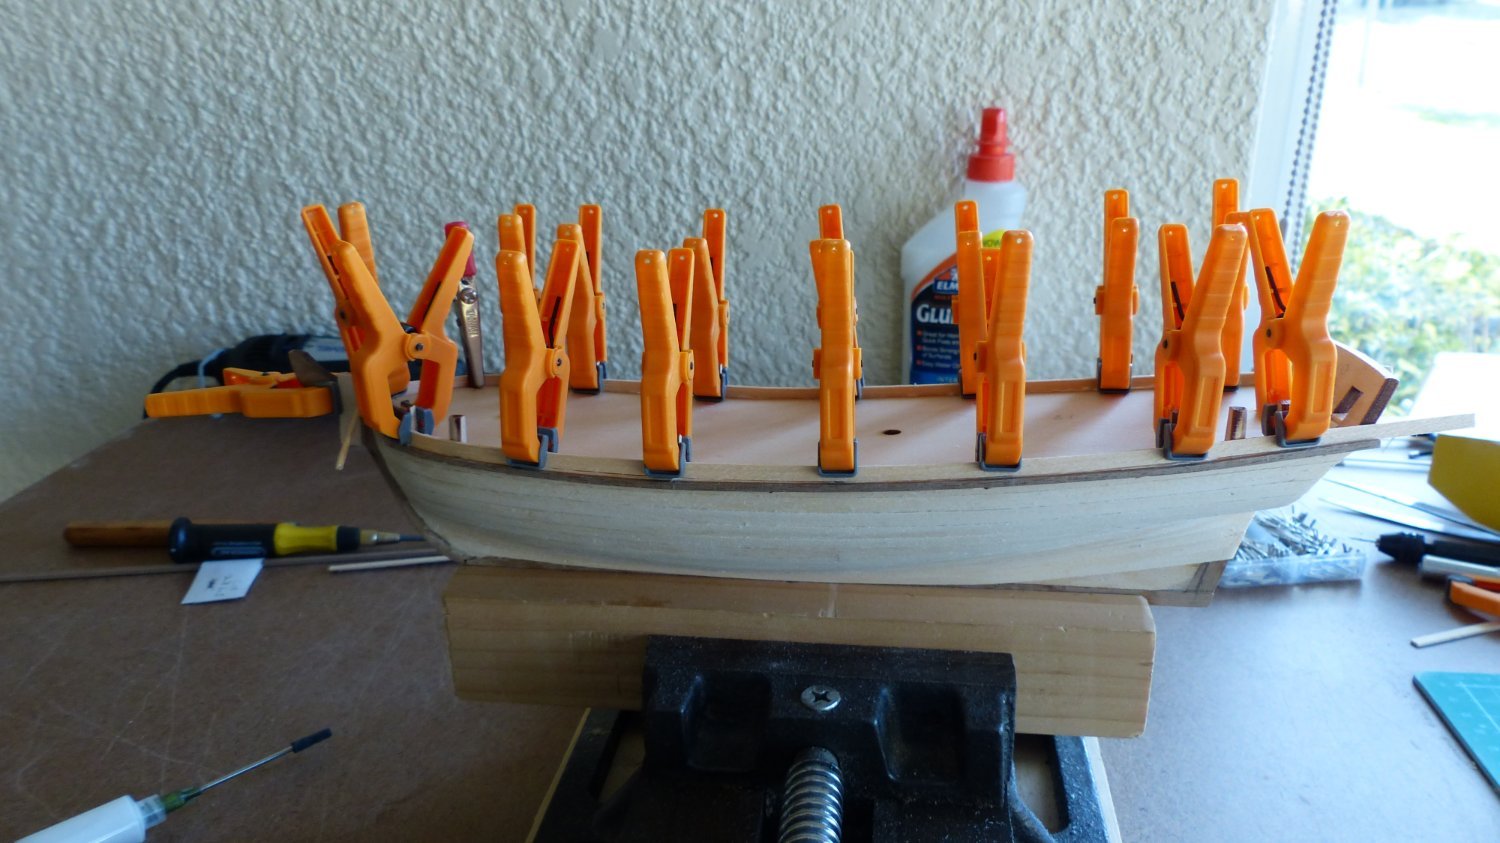
Two decks are all closed in - making collars out of thin plywood to go around masts to cover up where I screwed up the openings
- flutlo6180 and Dave_E
-
2
-
-
-
-
-
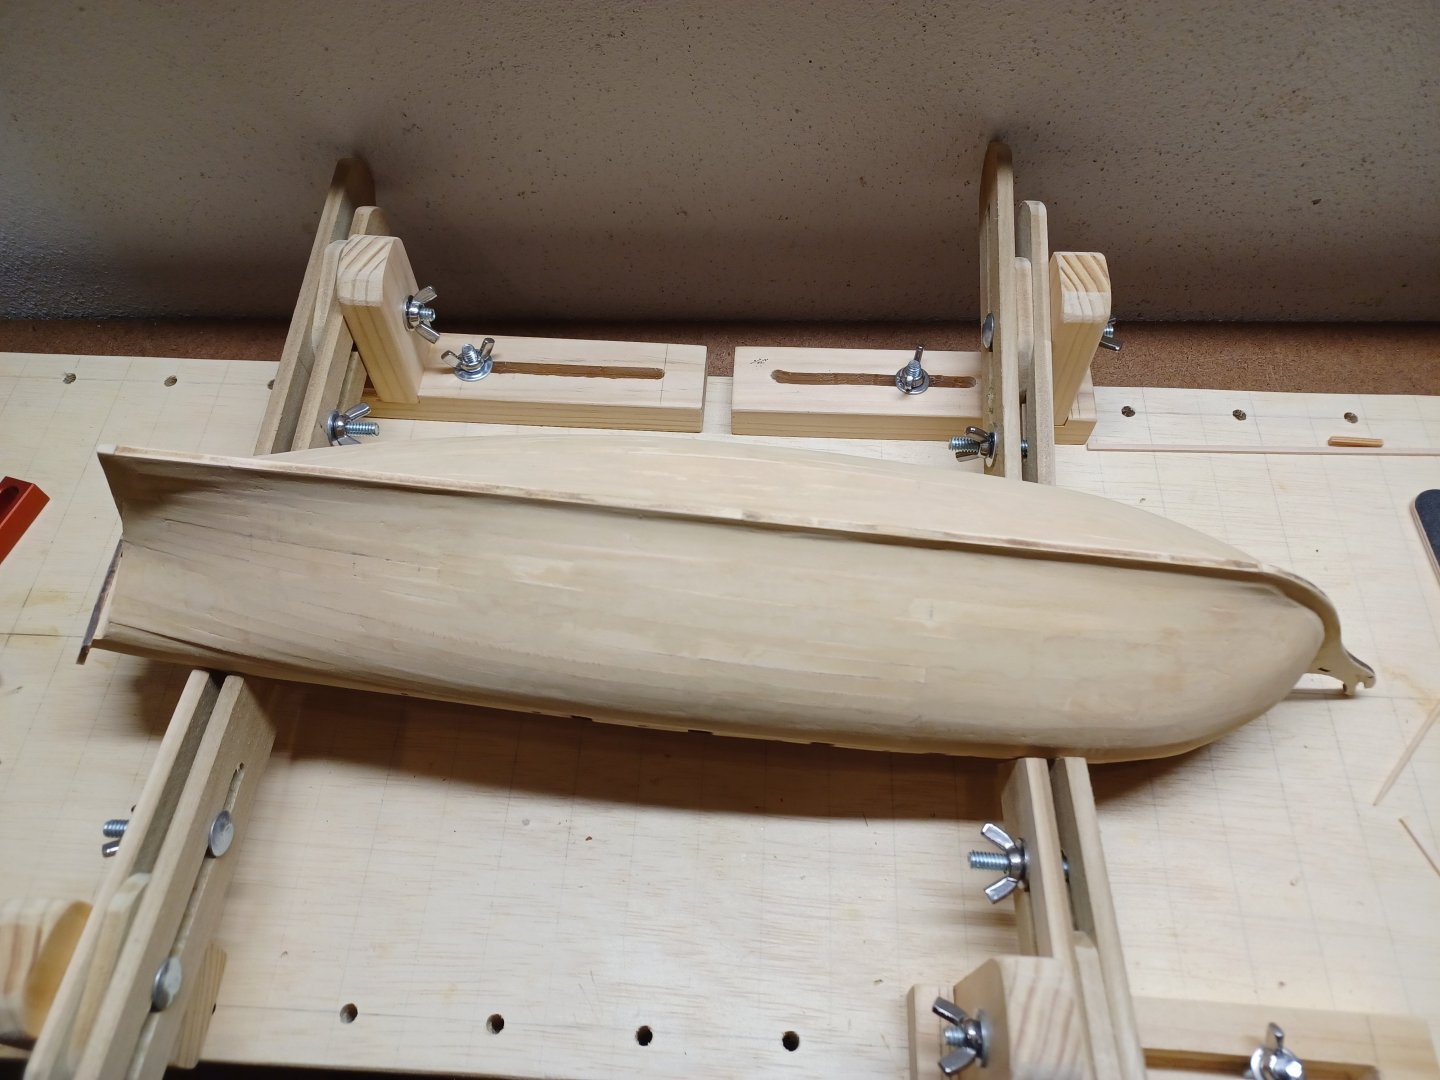
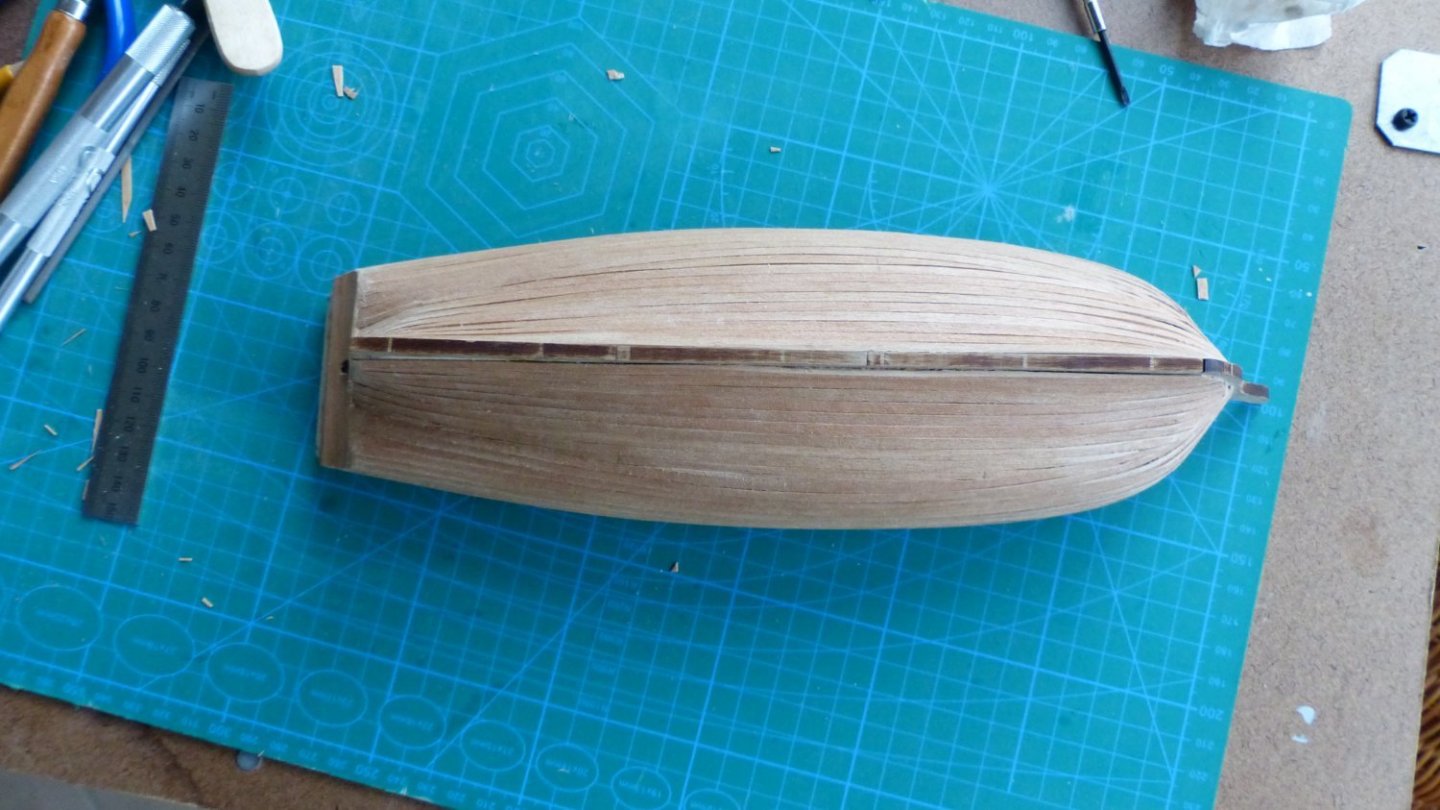
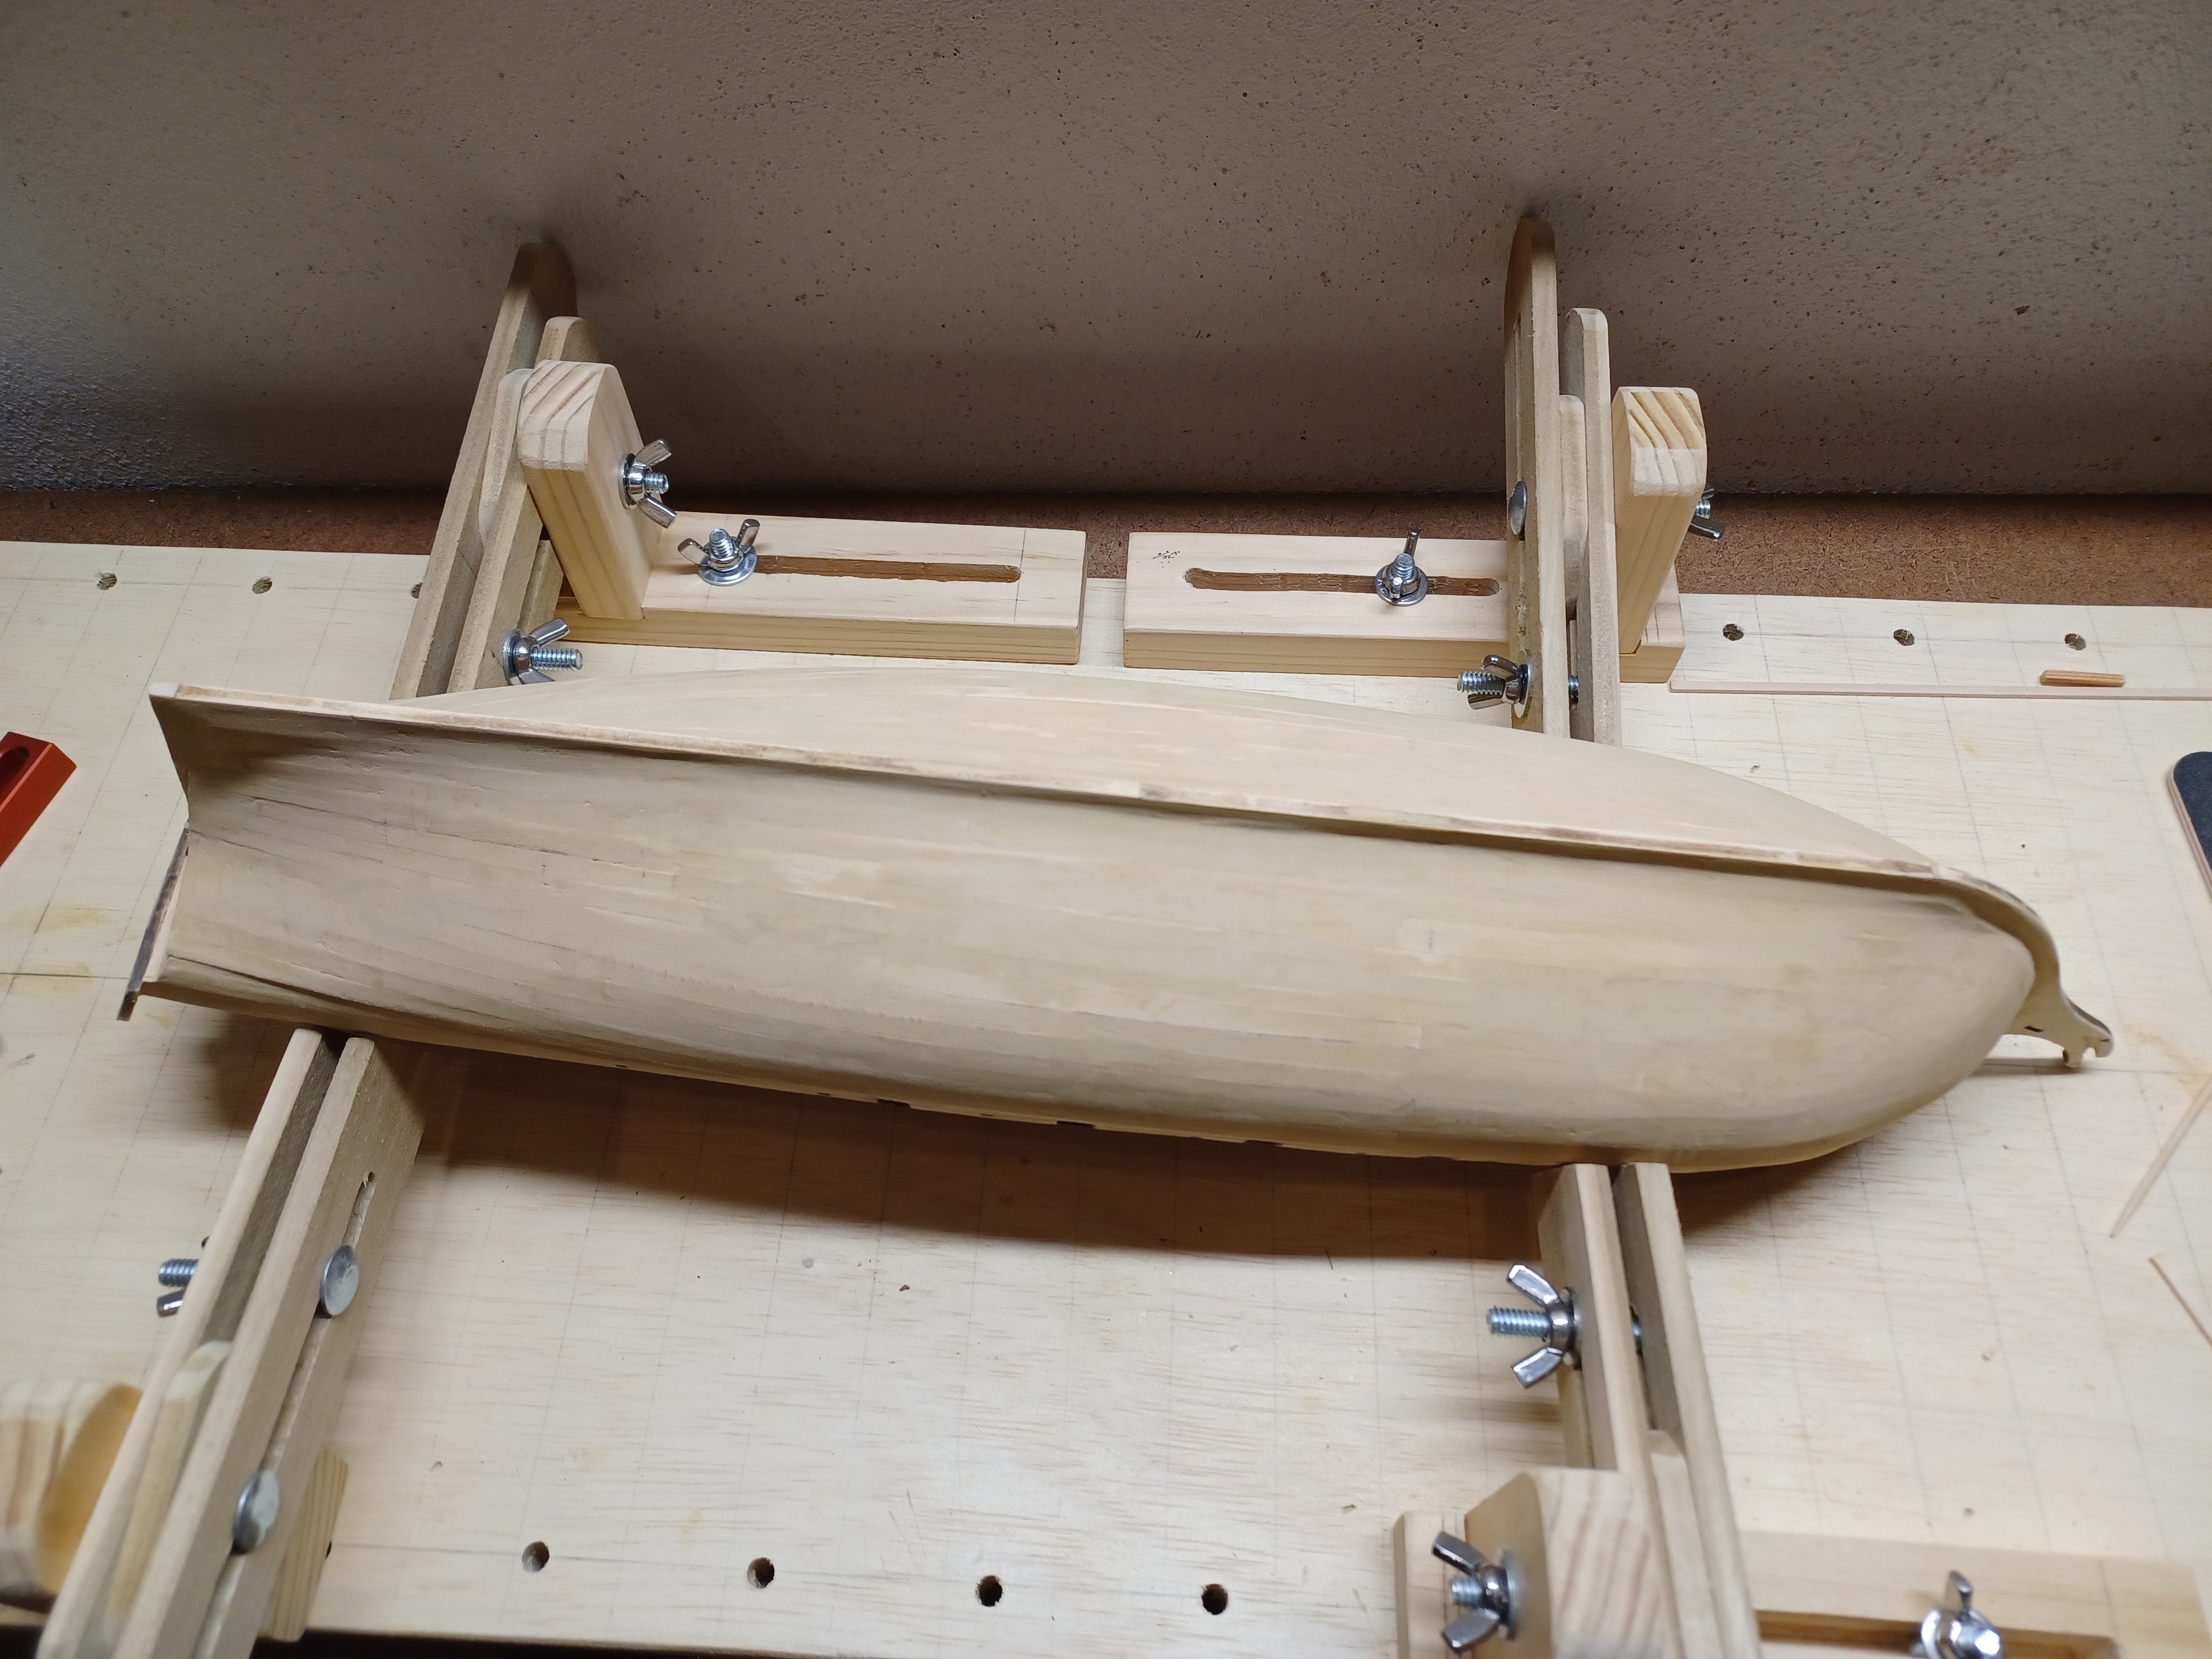
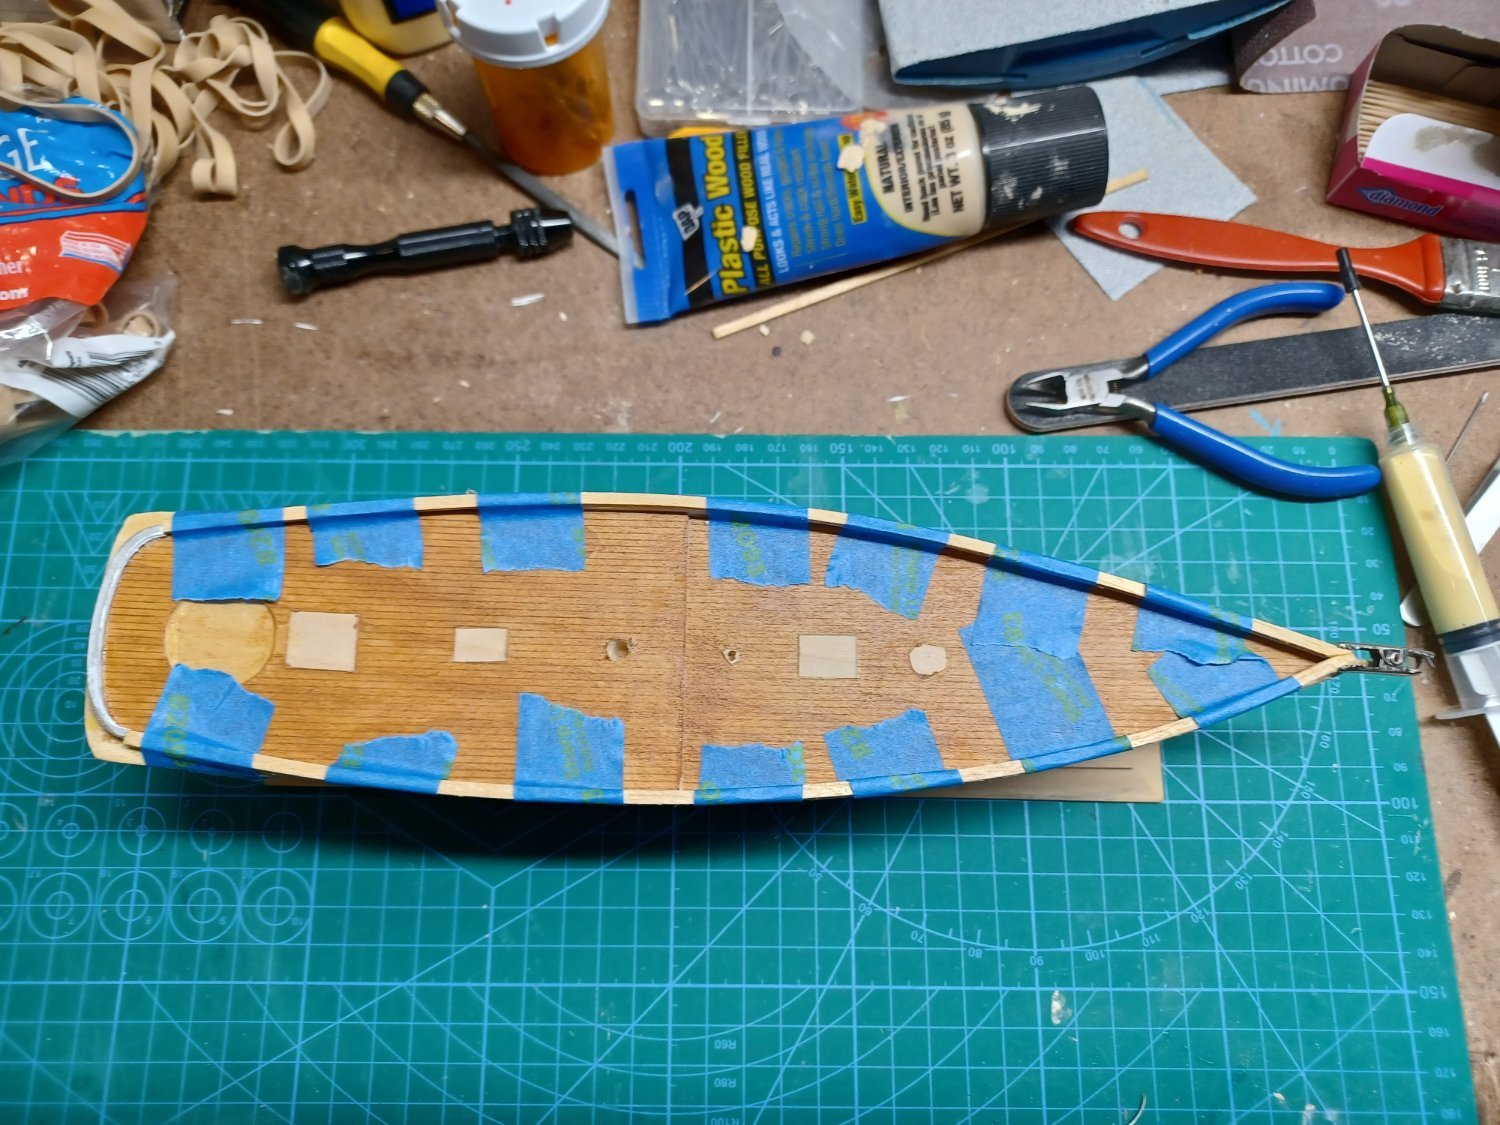
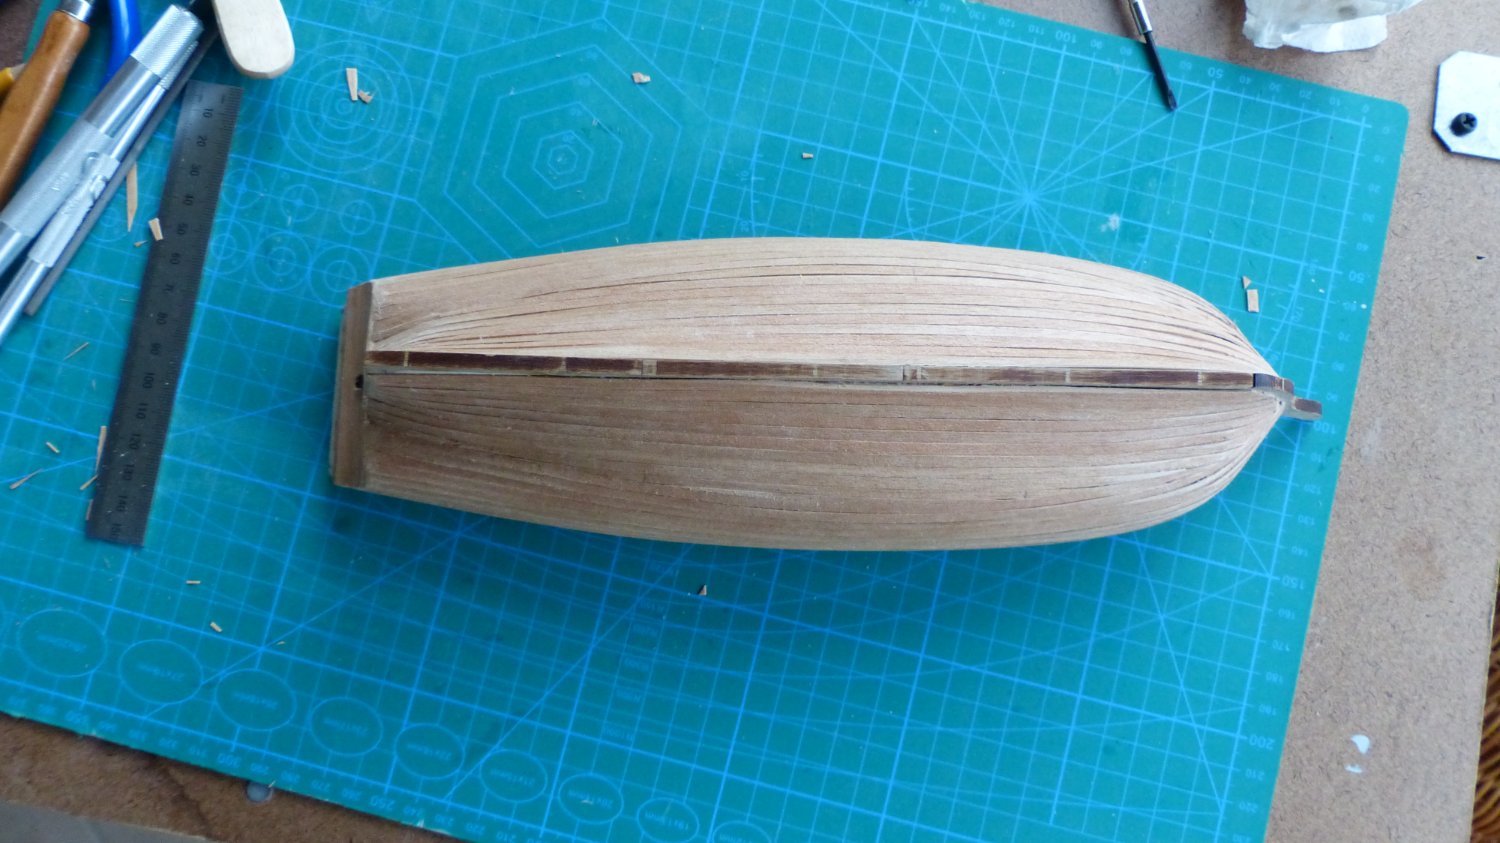
Wood filler and sanding on hull is shaping up
- flutlo6180 and Dave_E
-
2
-
-
-
-
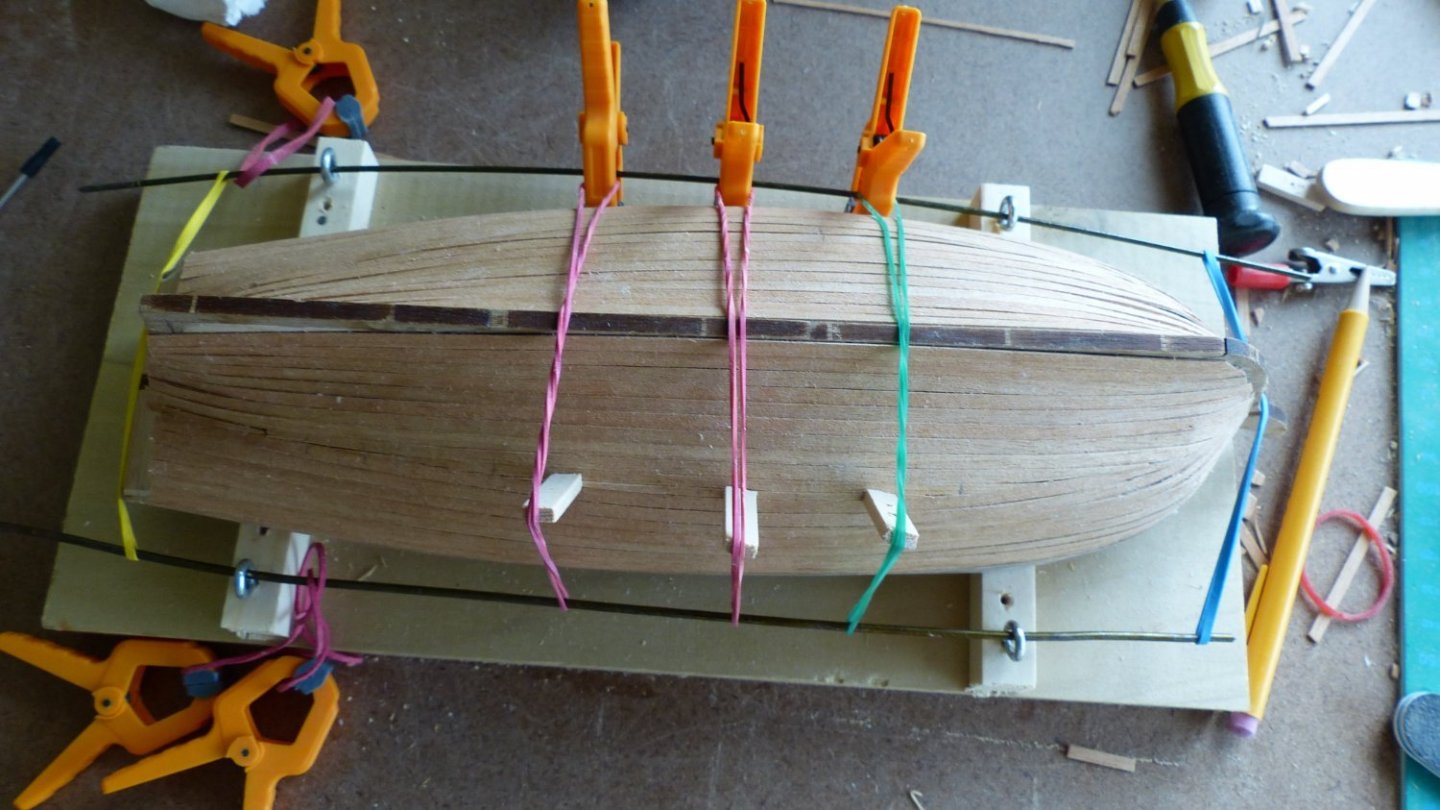
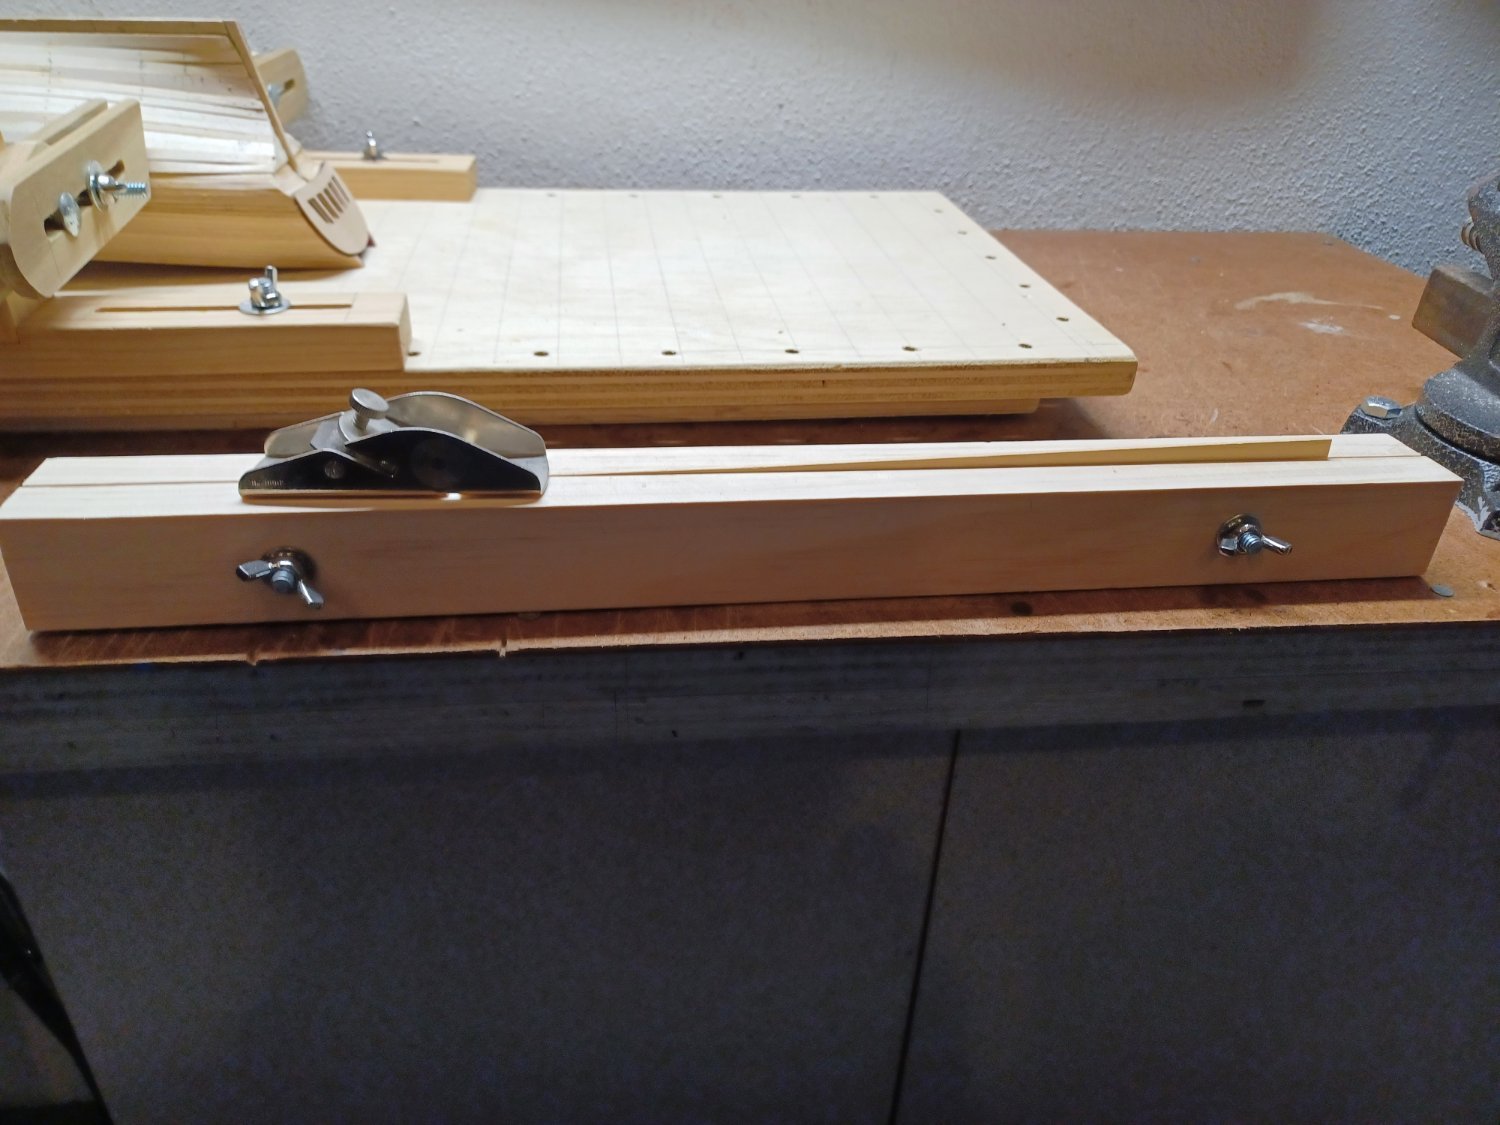
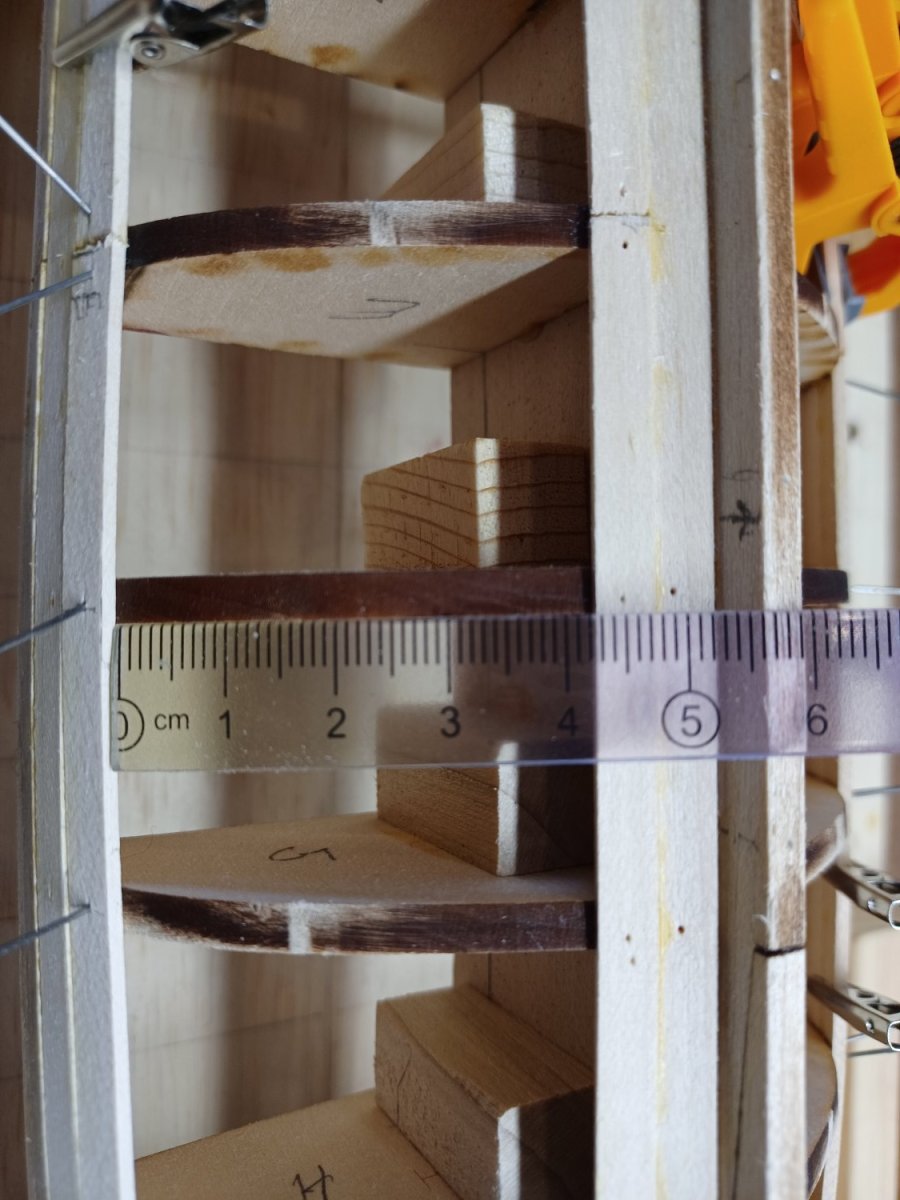
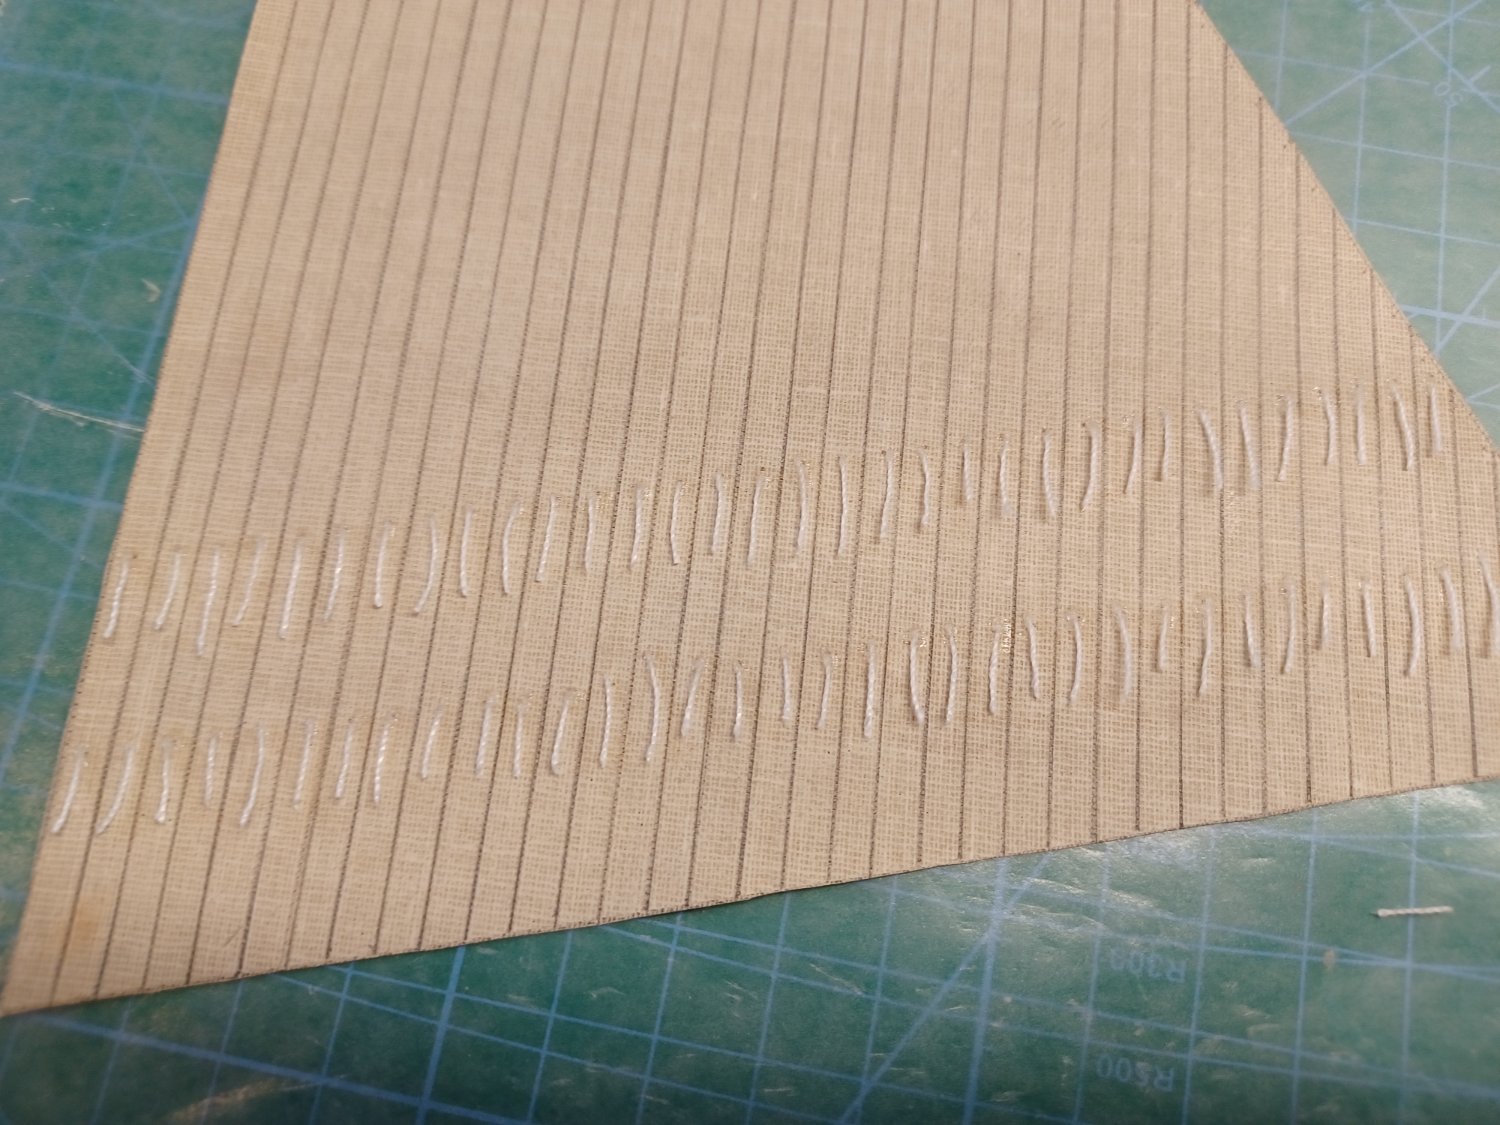
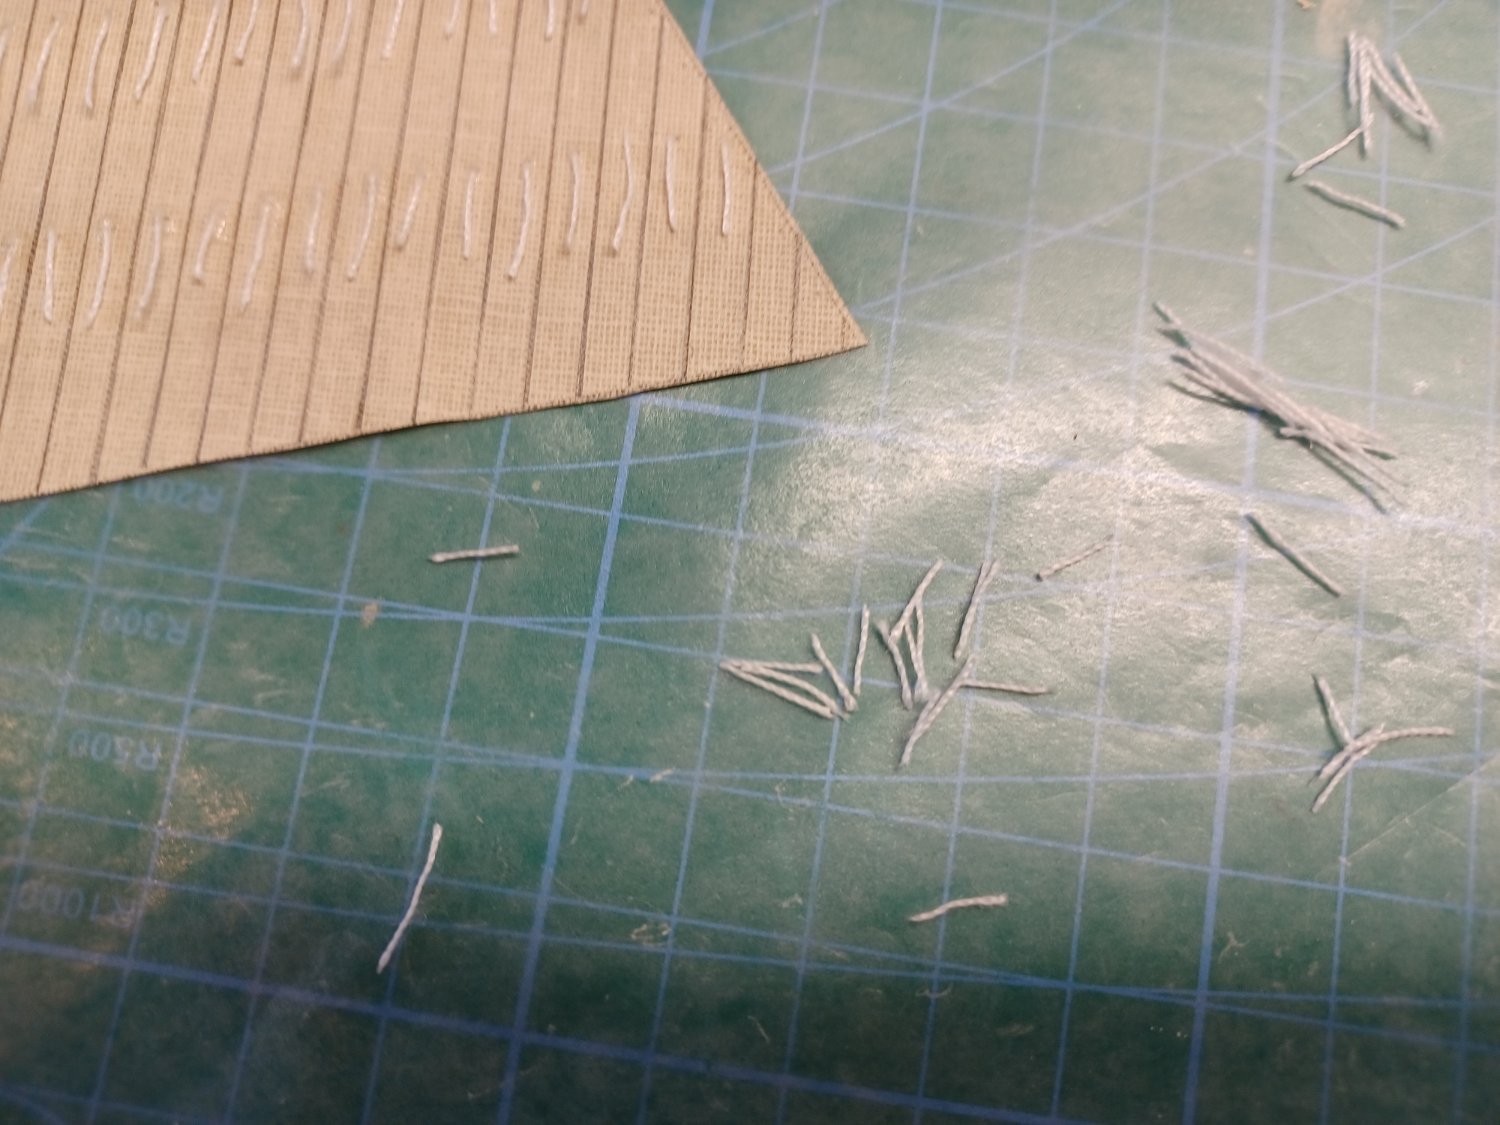
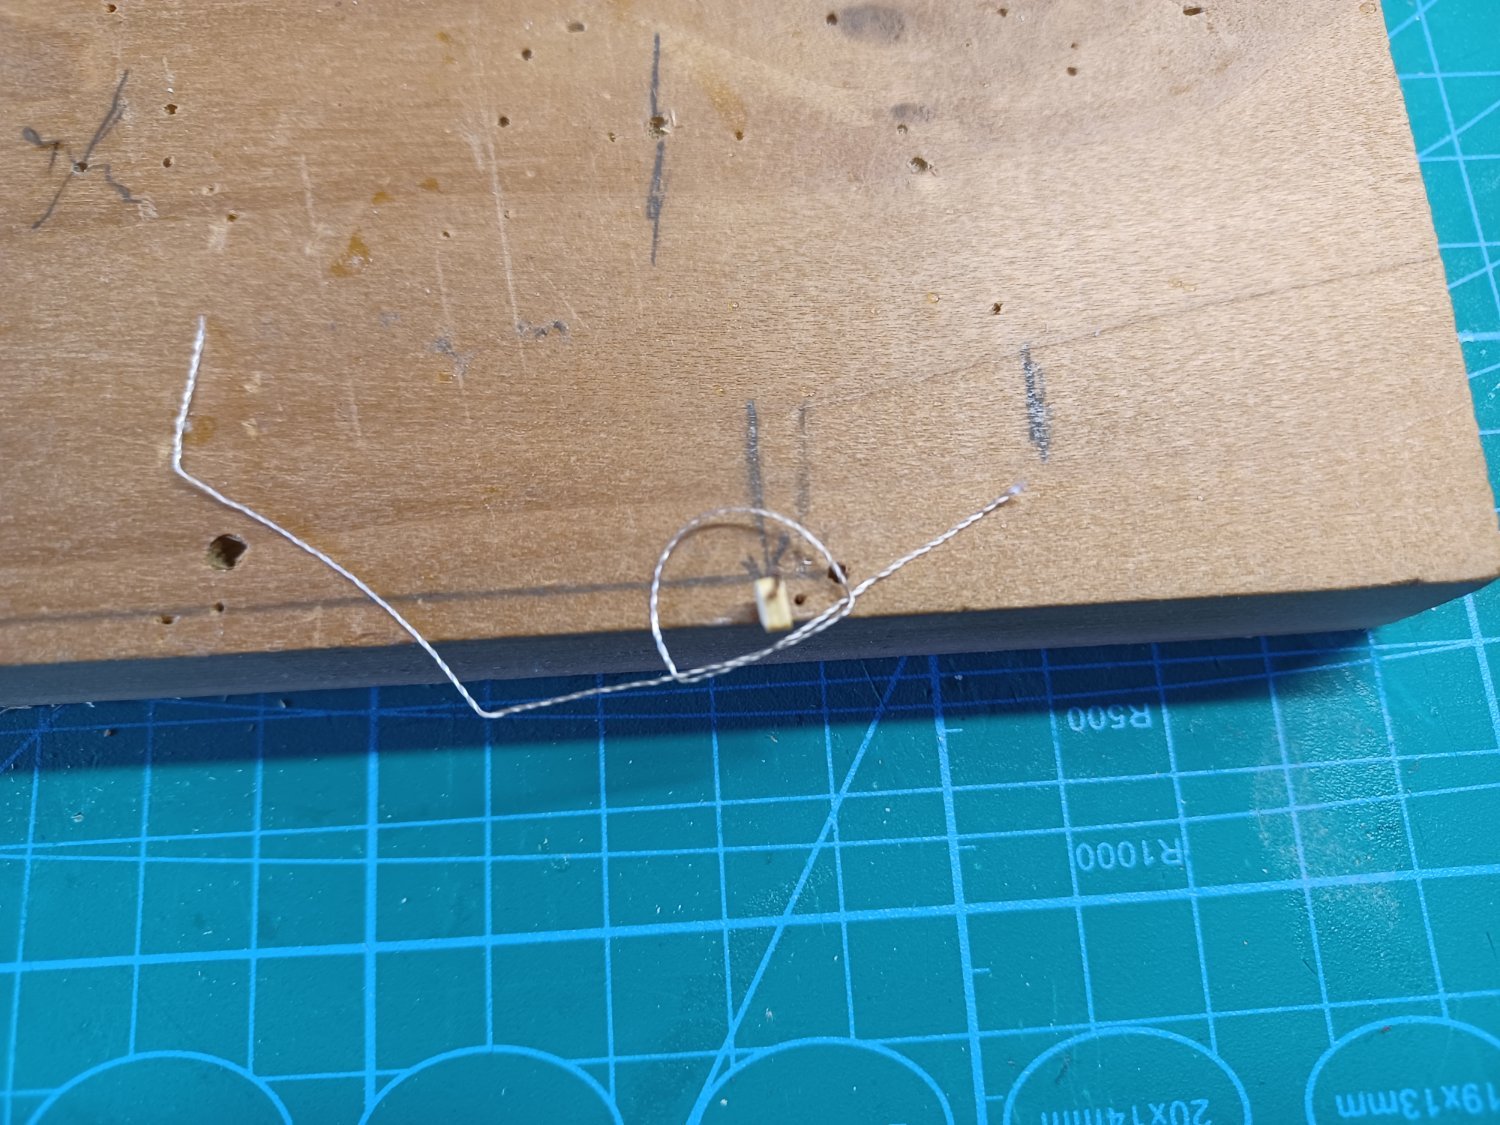
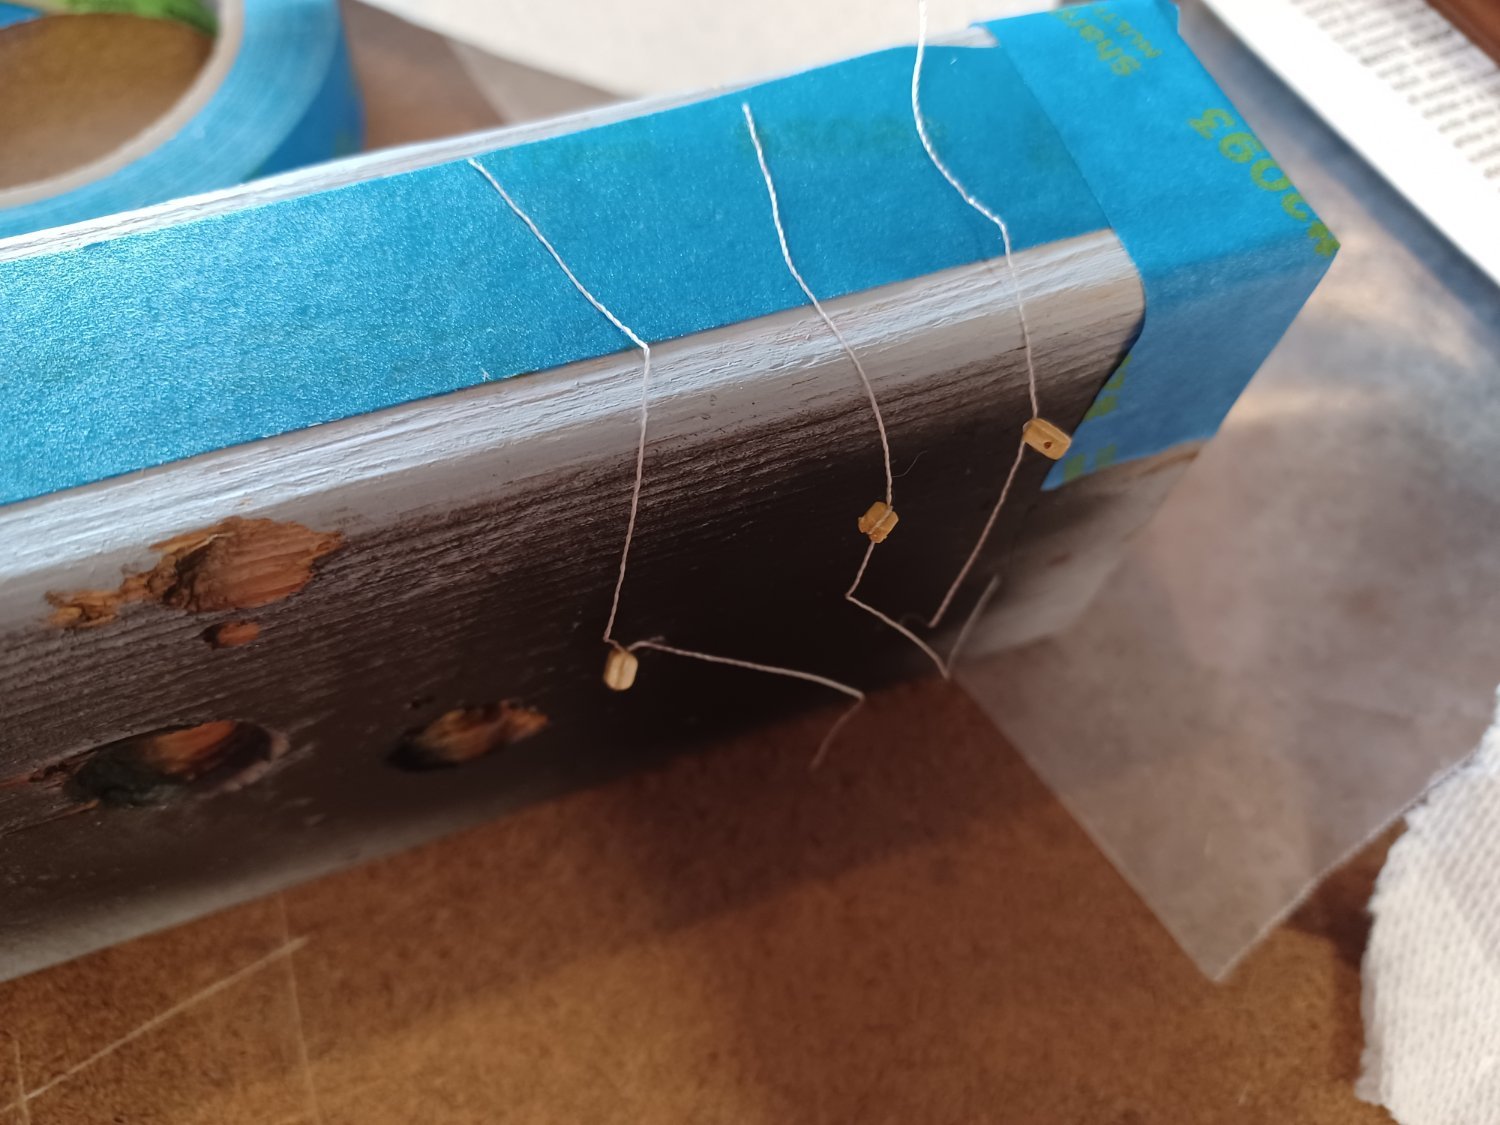
Flexible metric ruler really helped in measuring plank widths

-
-
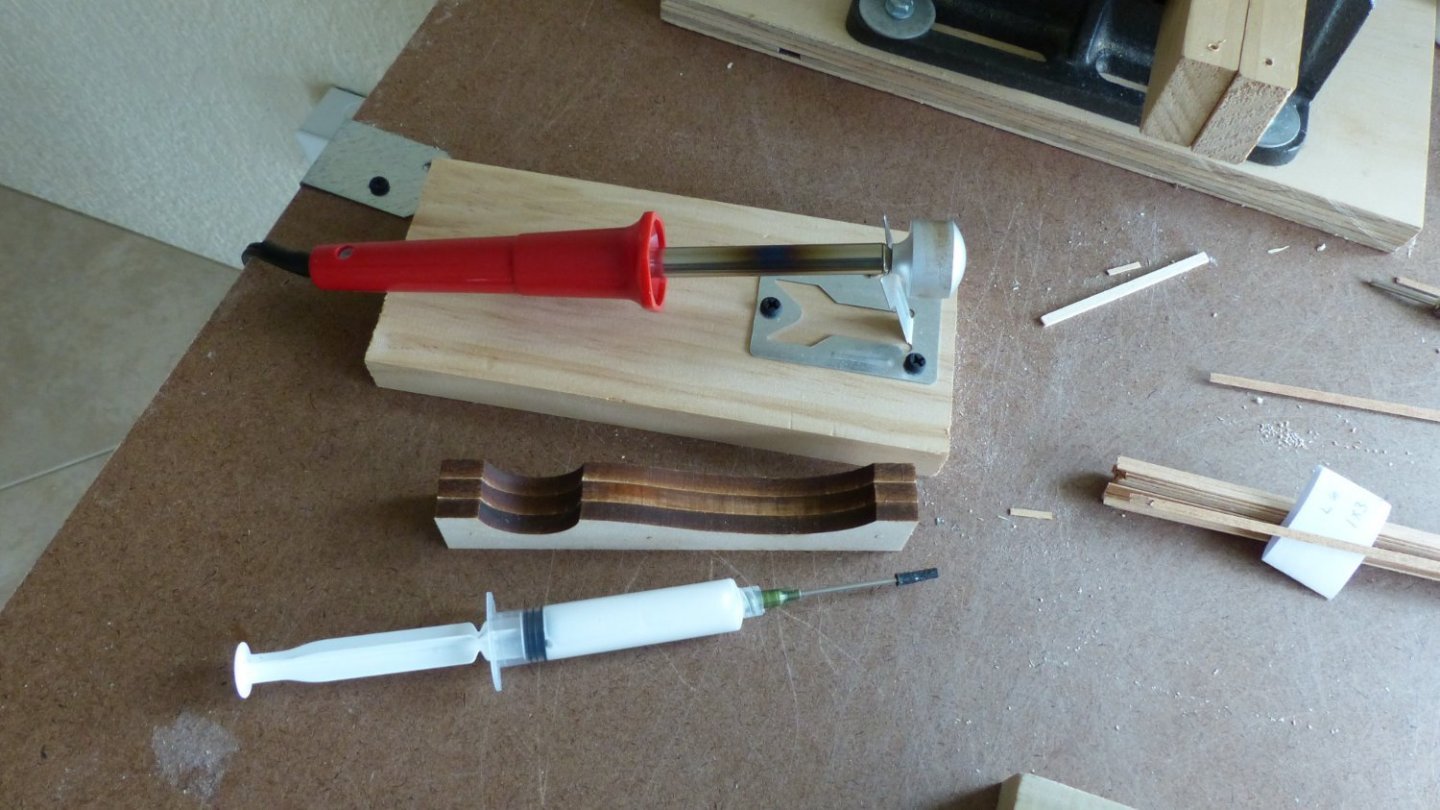
Plank bending iron really helped a lot
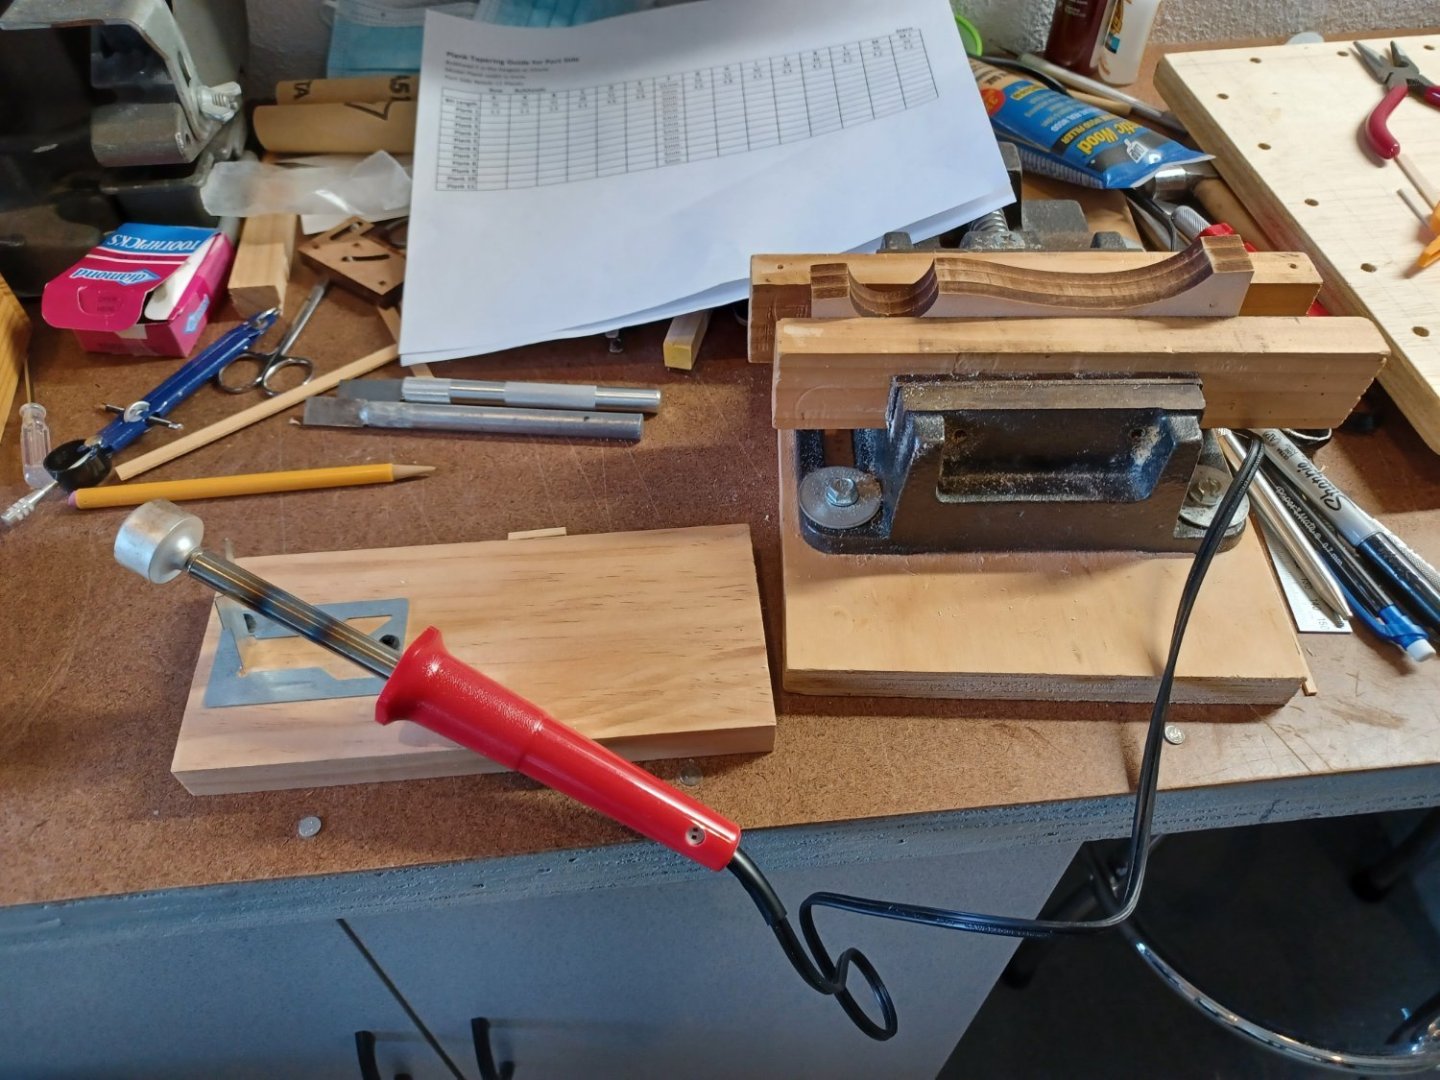
-
-
Hey Guys thanks for checking in, referring to your build logs has helped a lot to add more details to what is show in the plans.
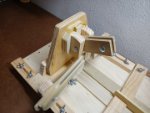
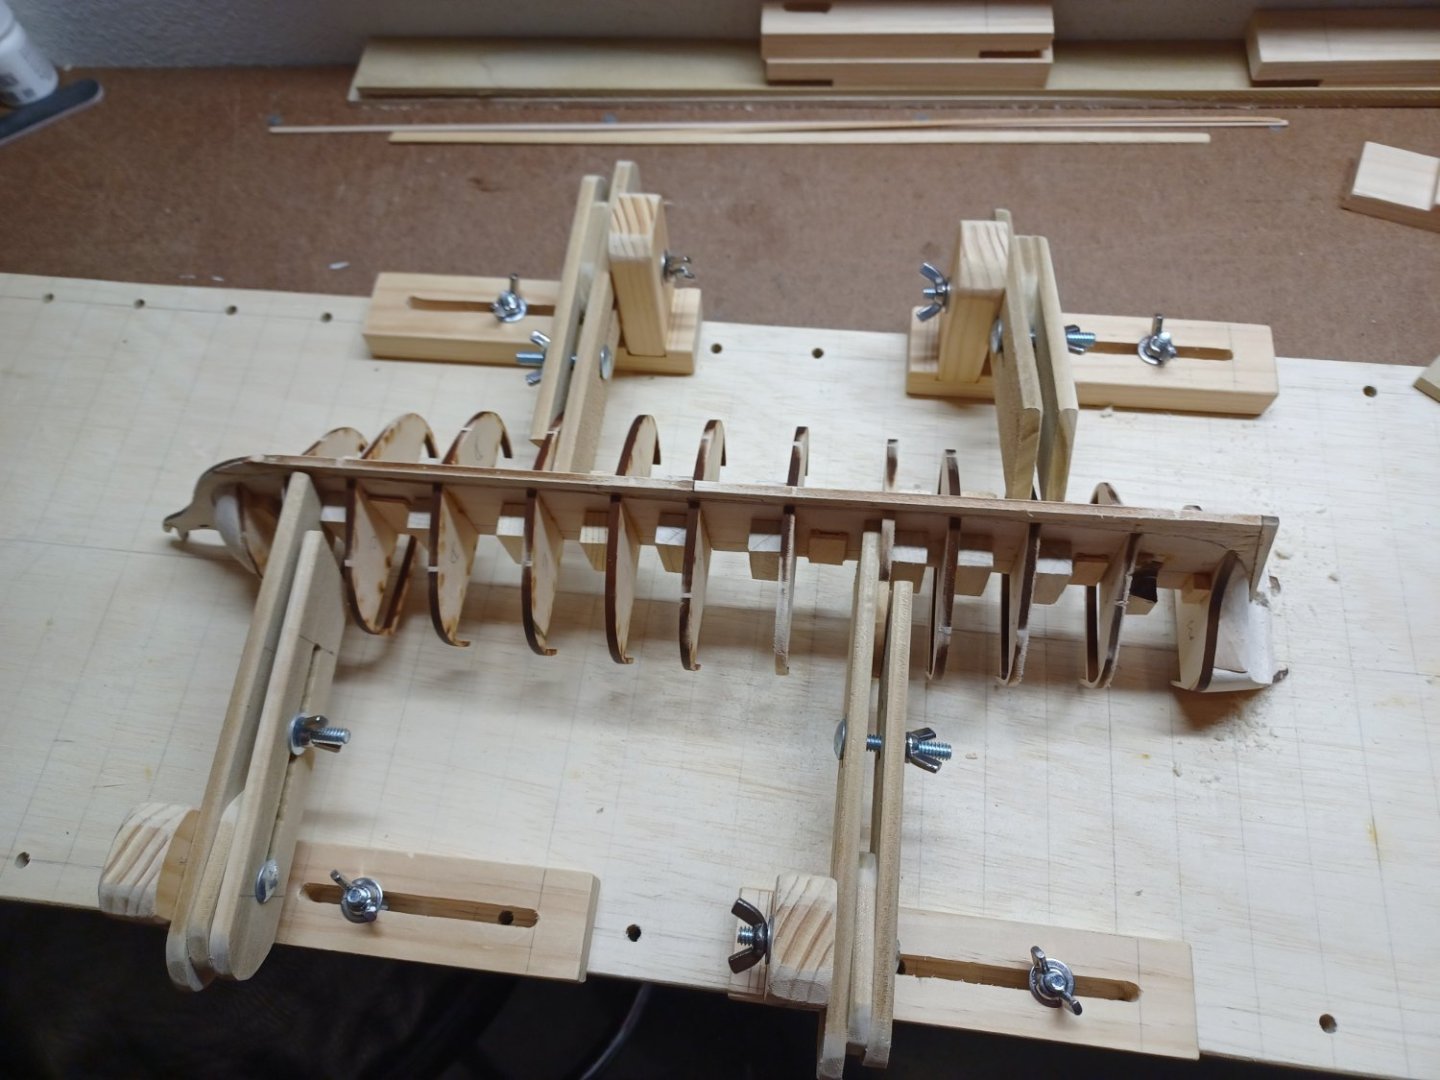
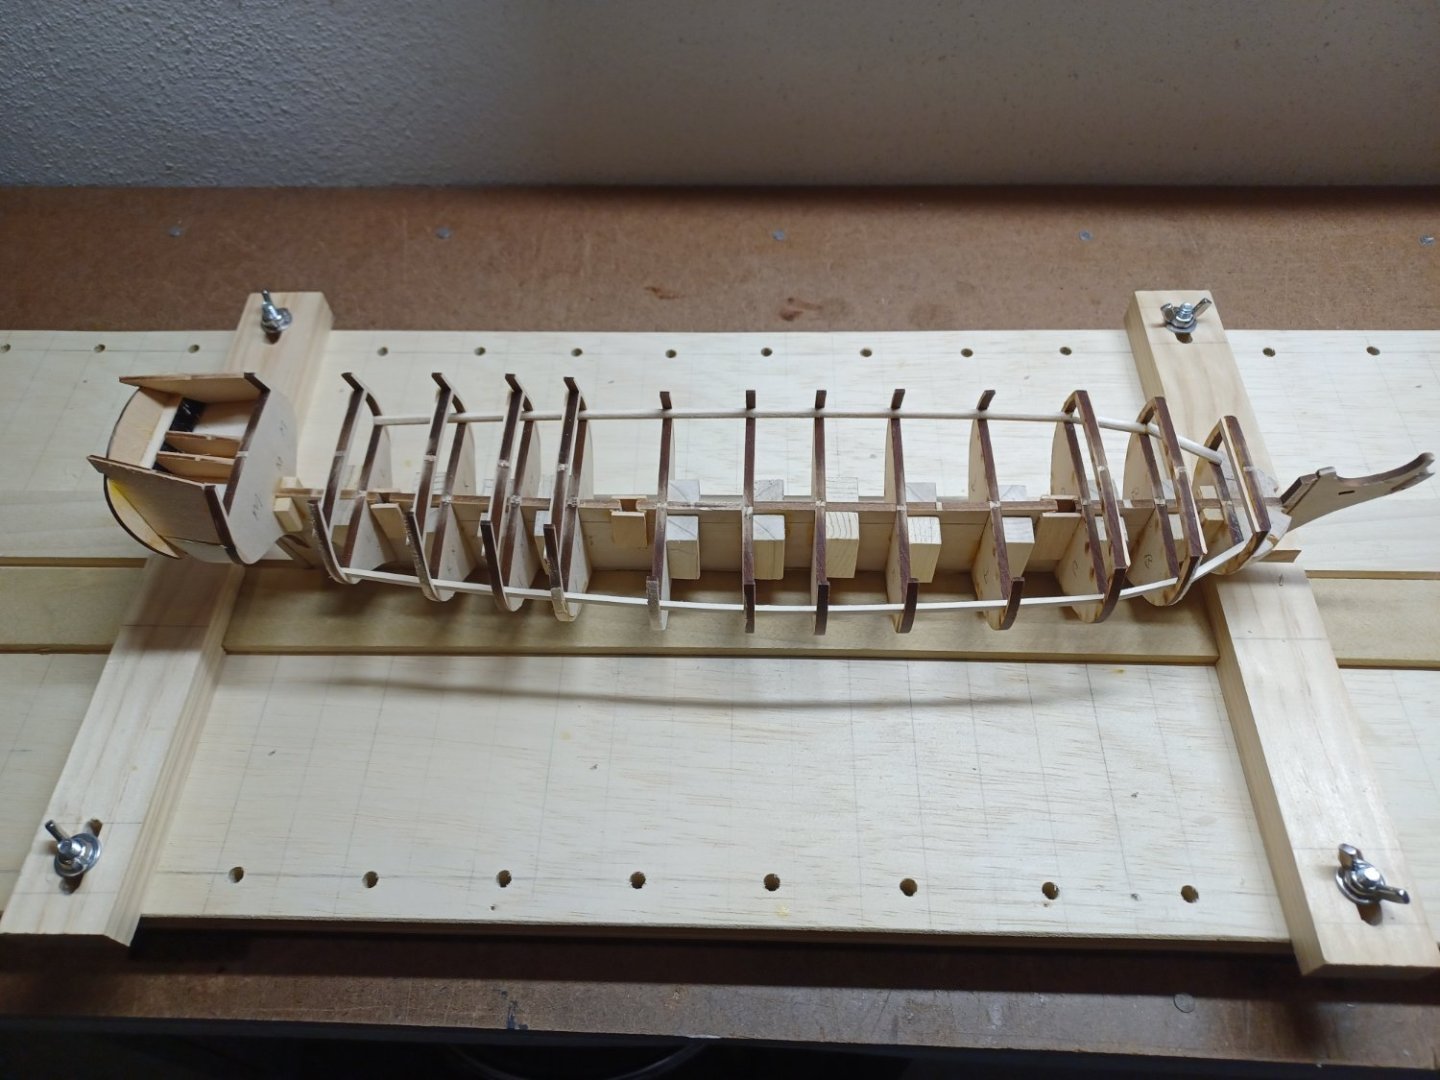
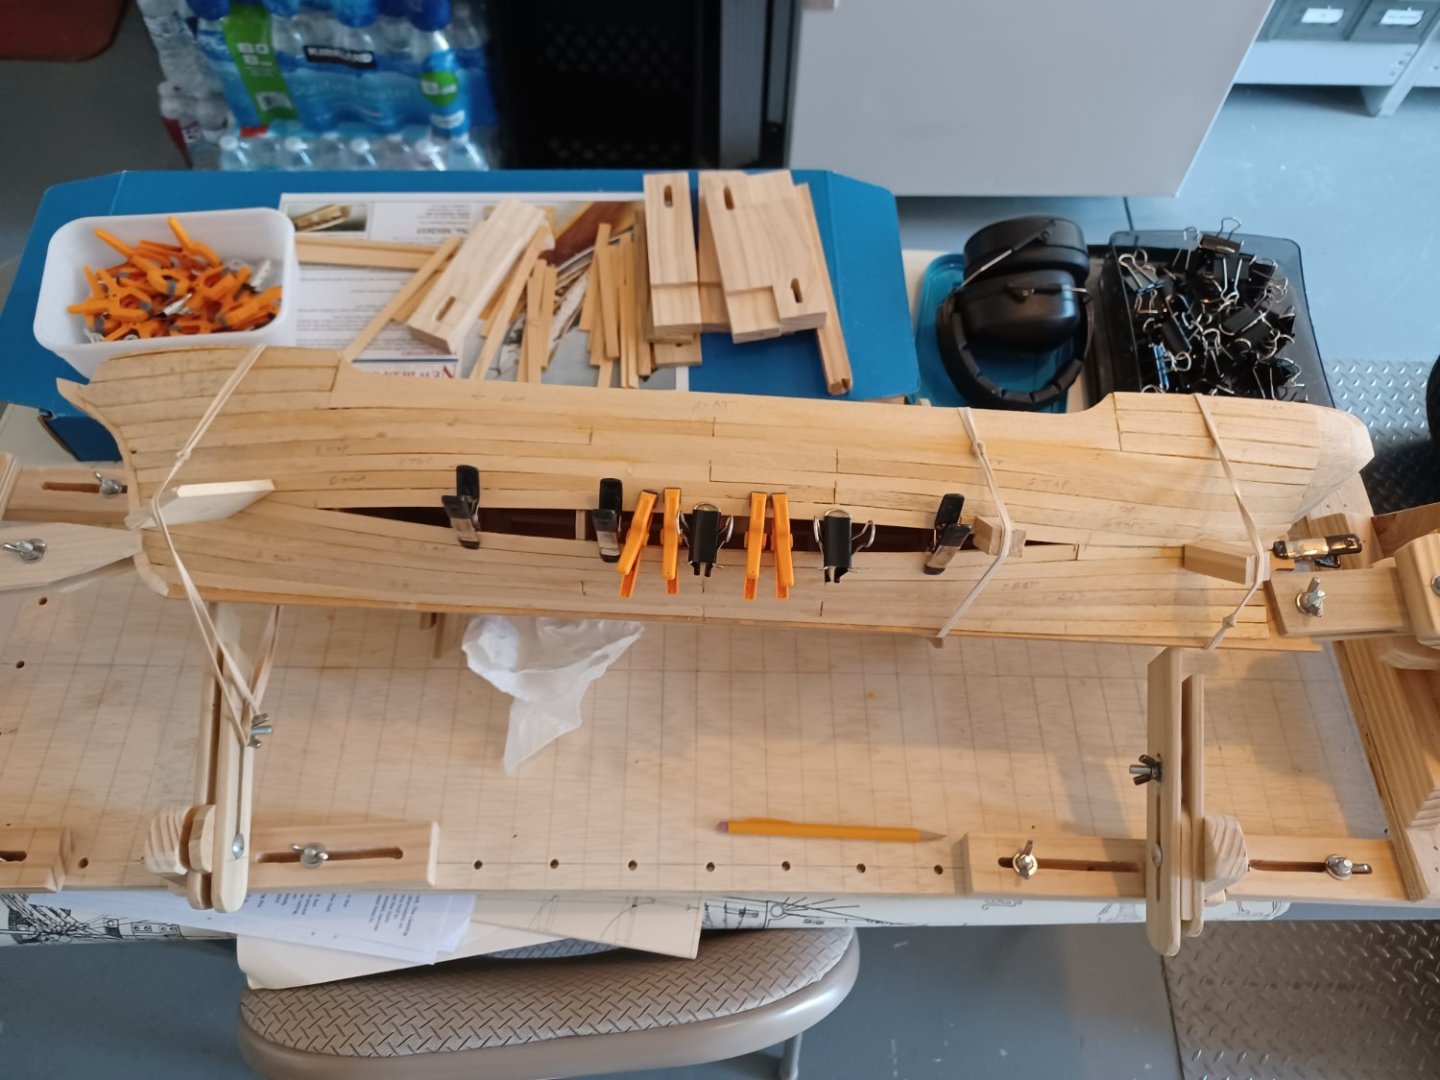
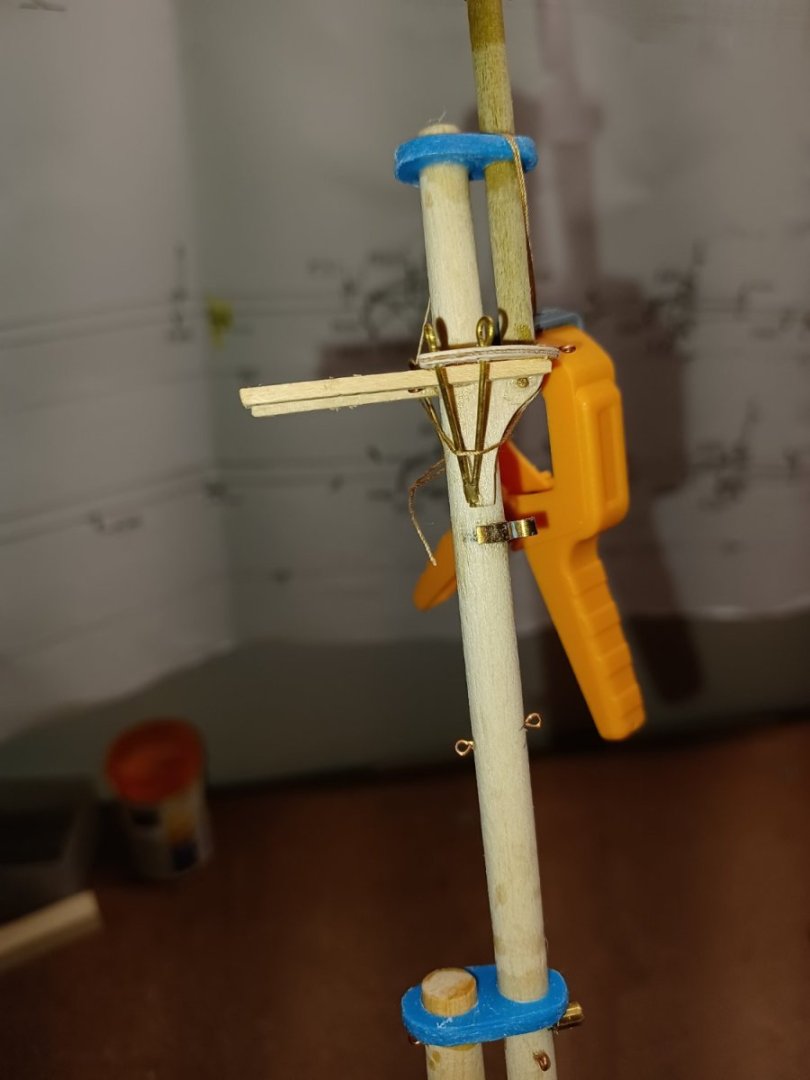
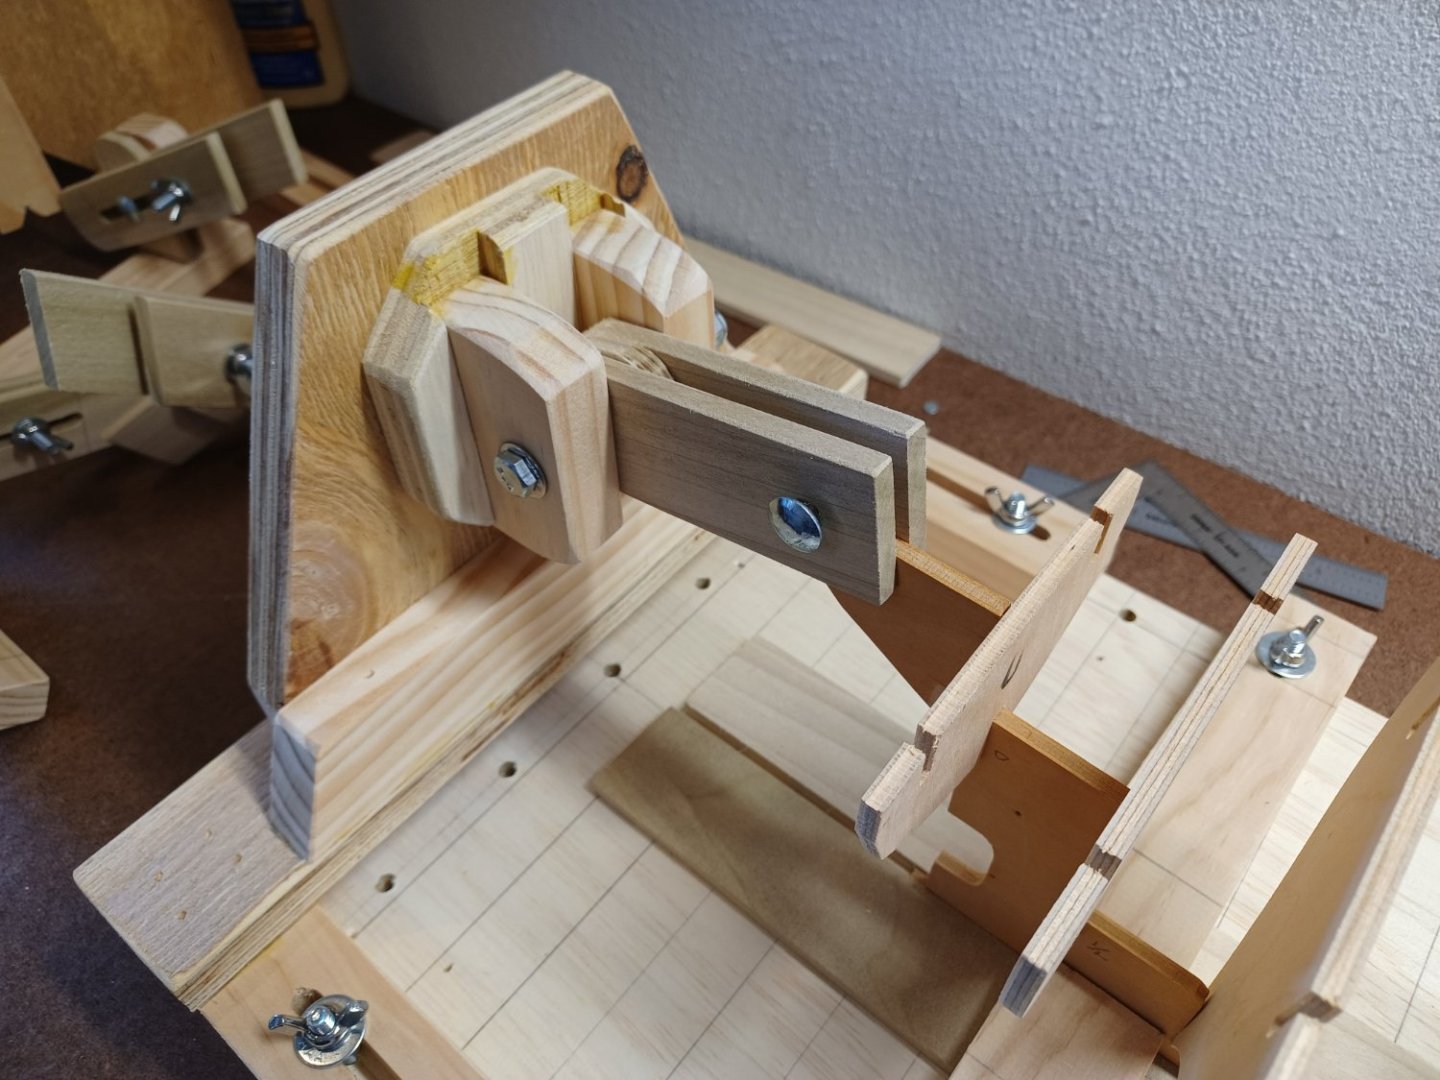
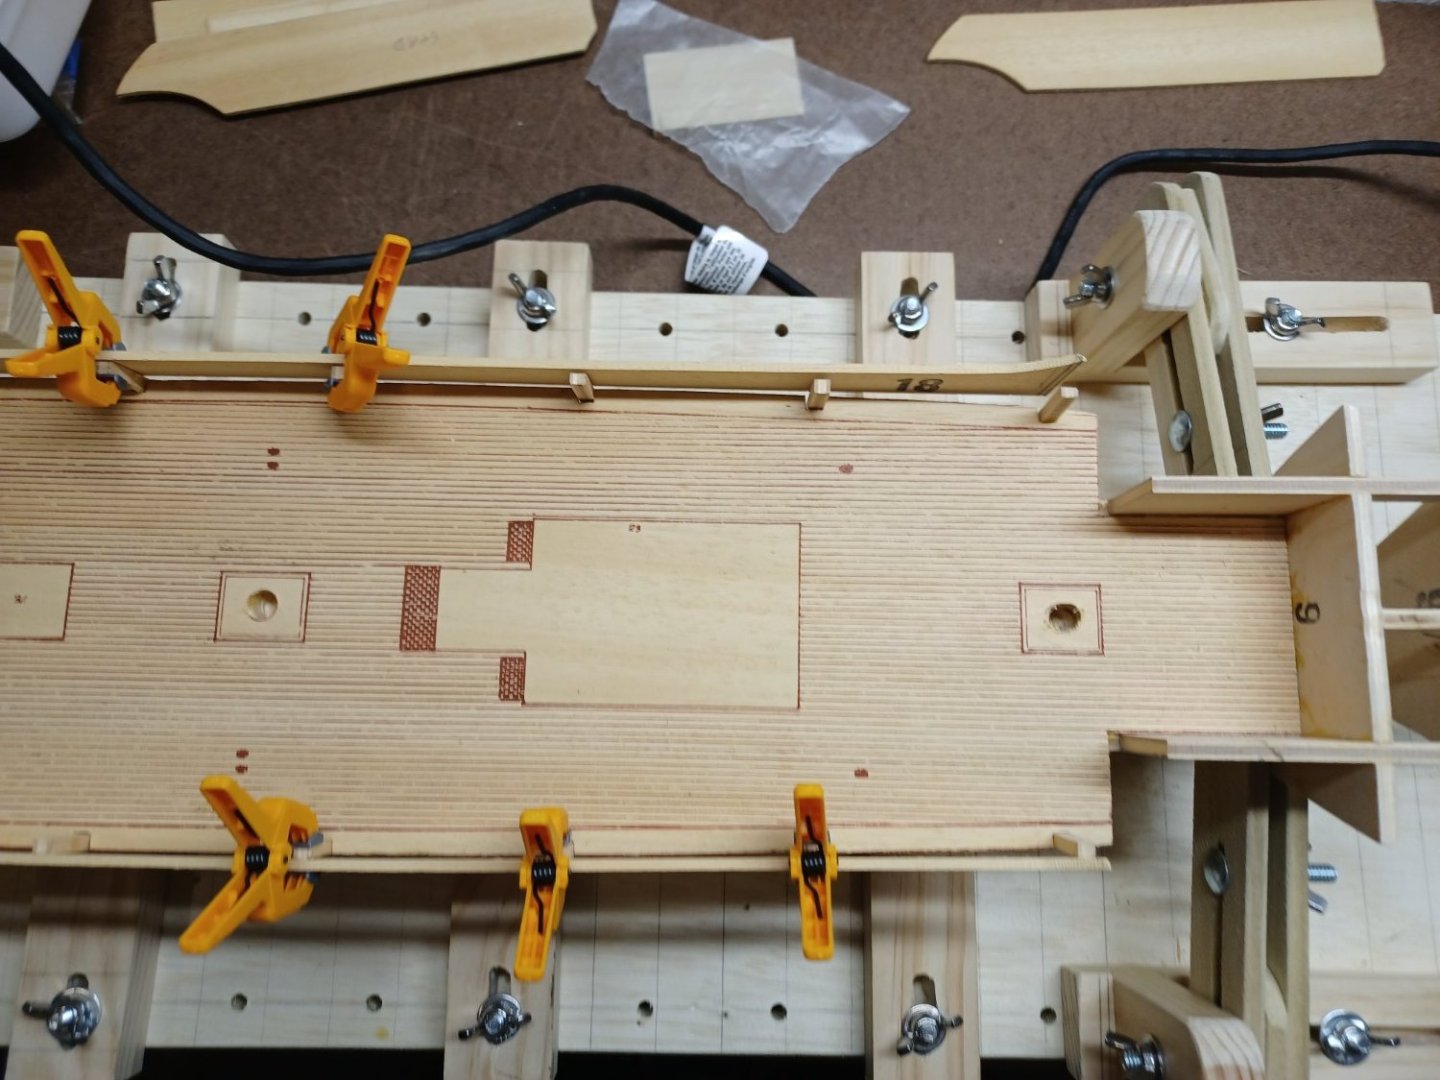
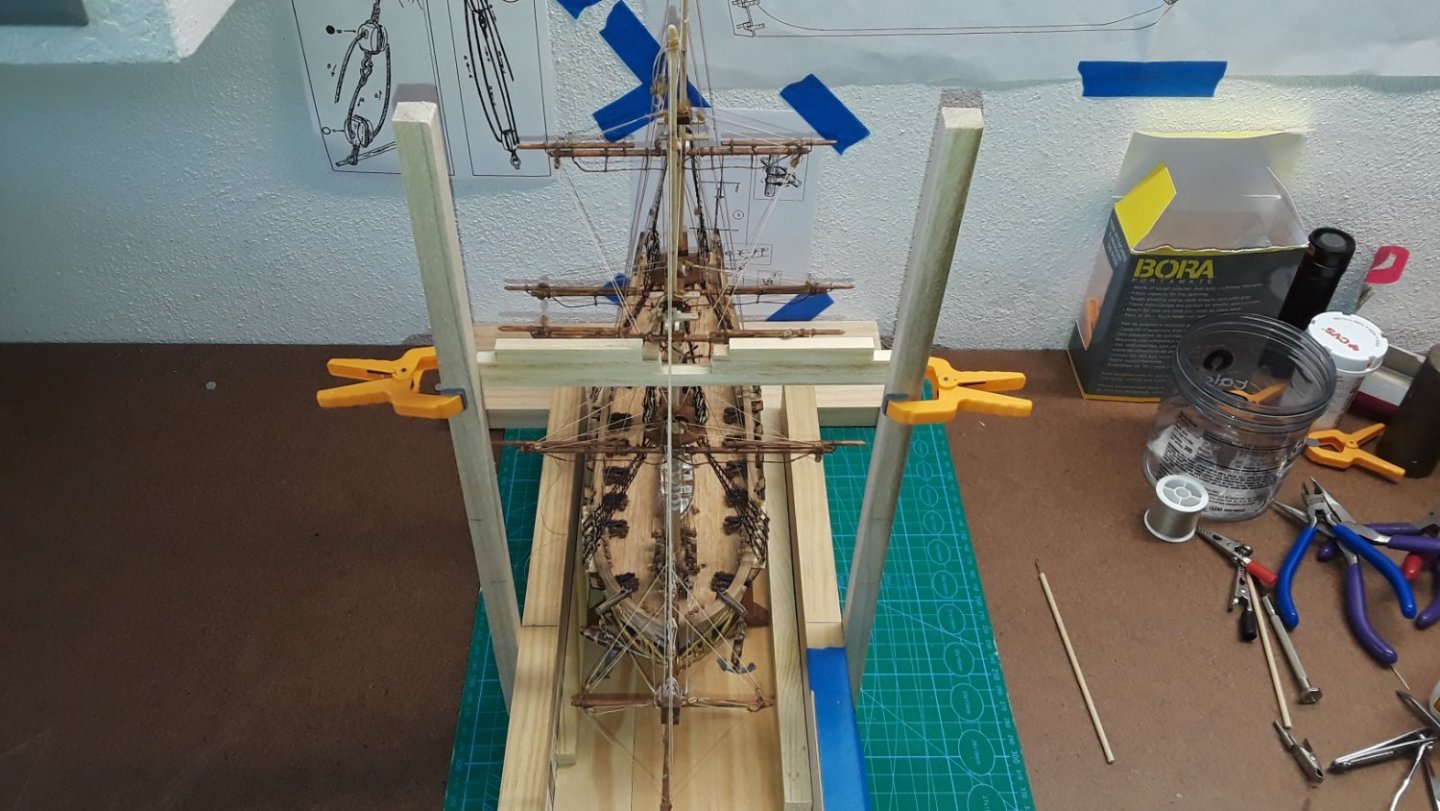
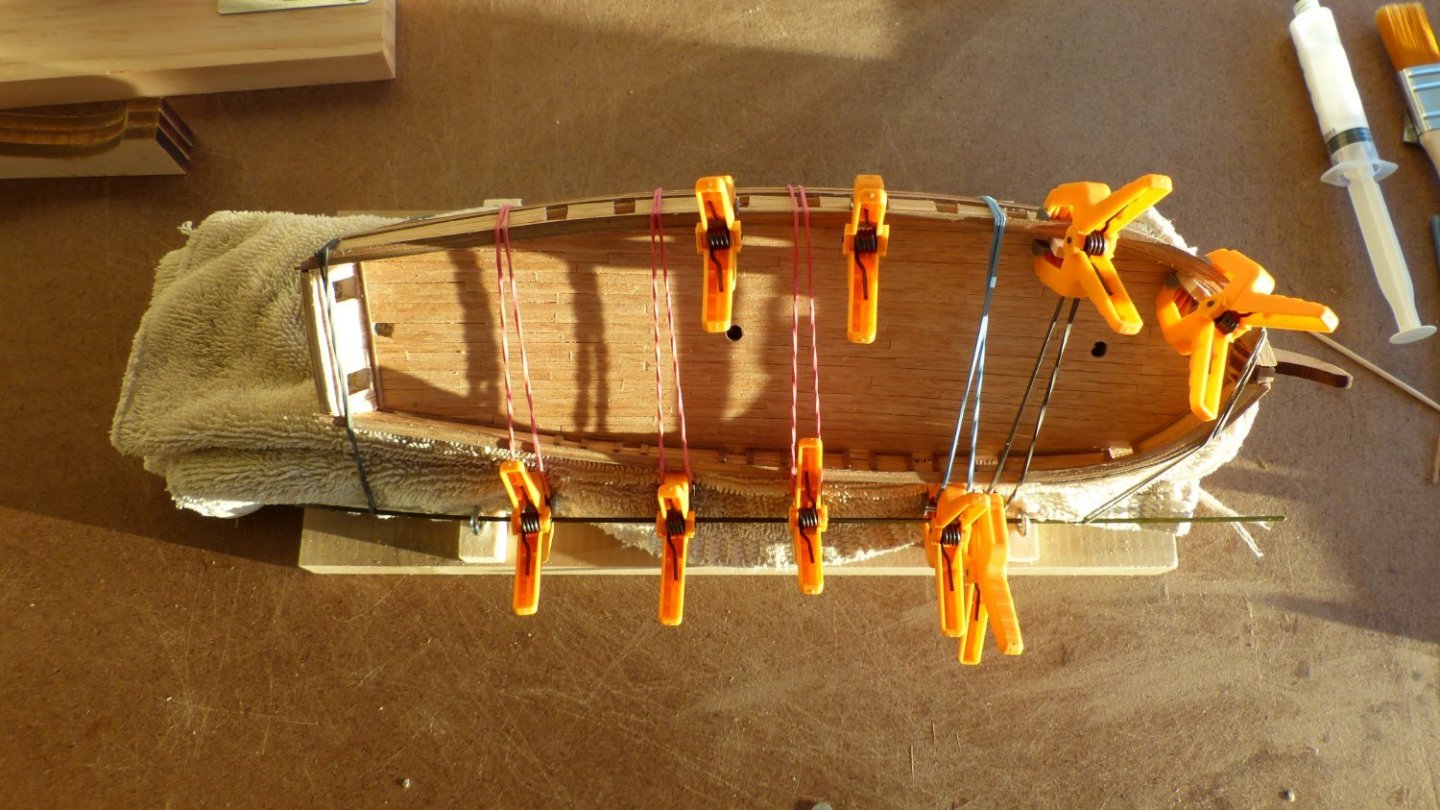
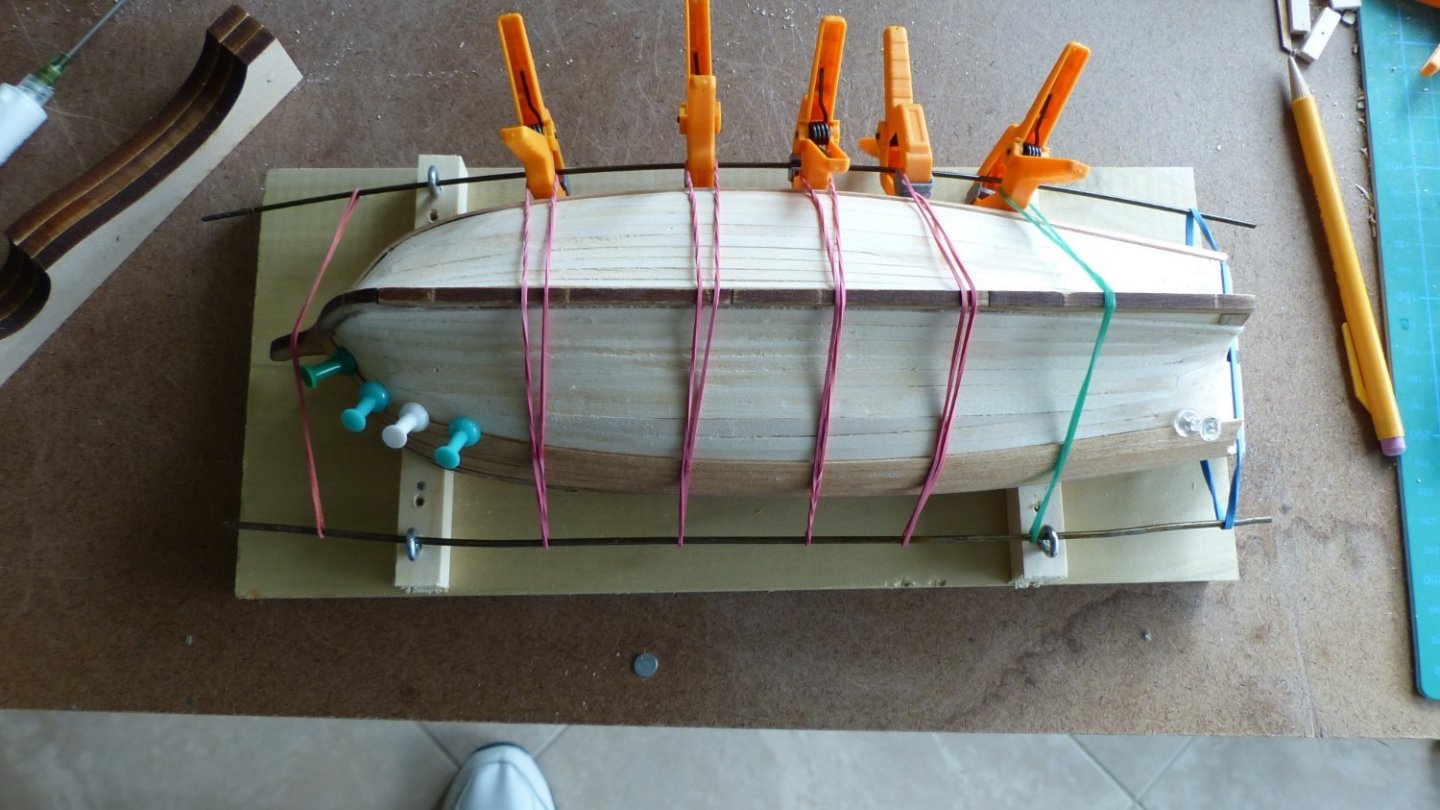
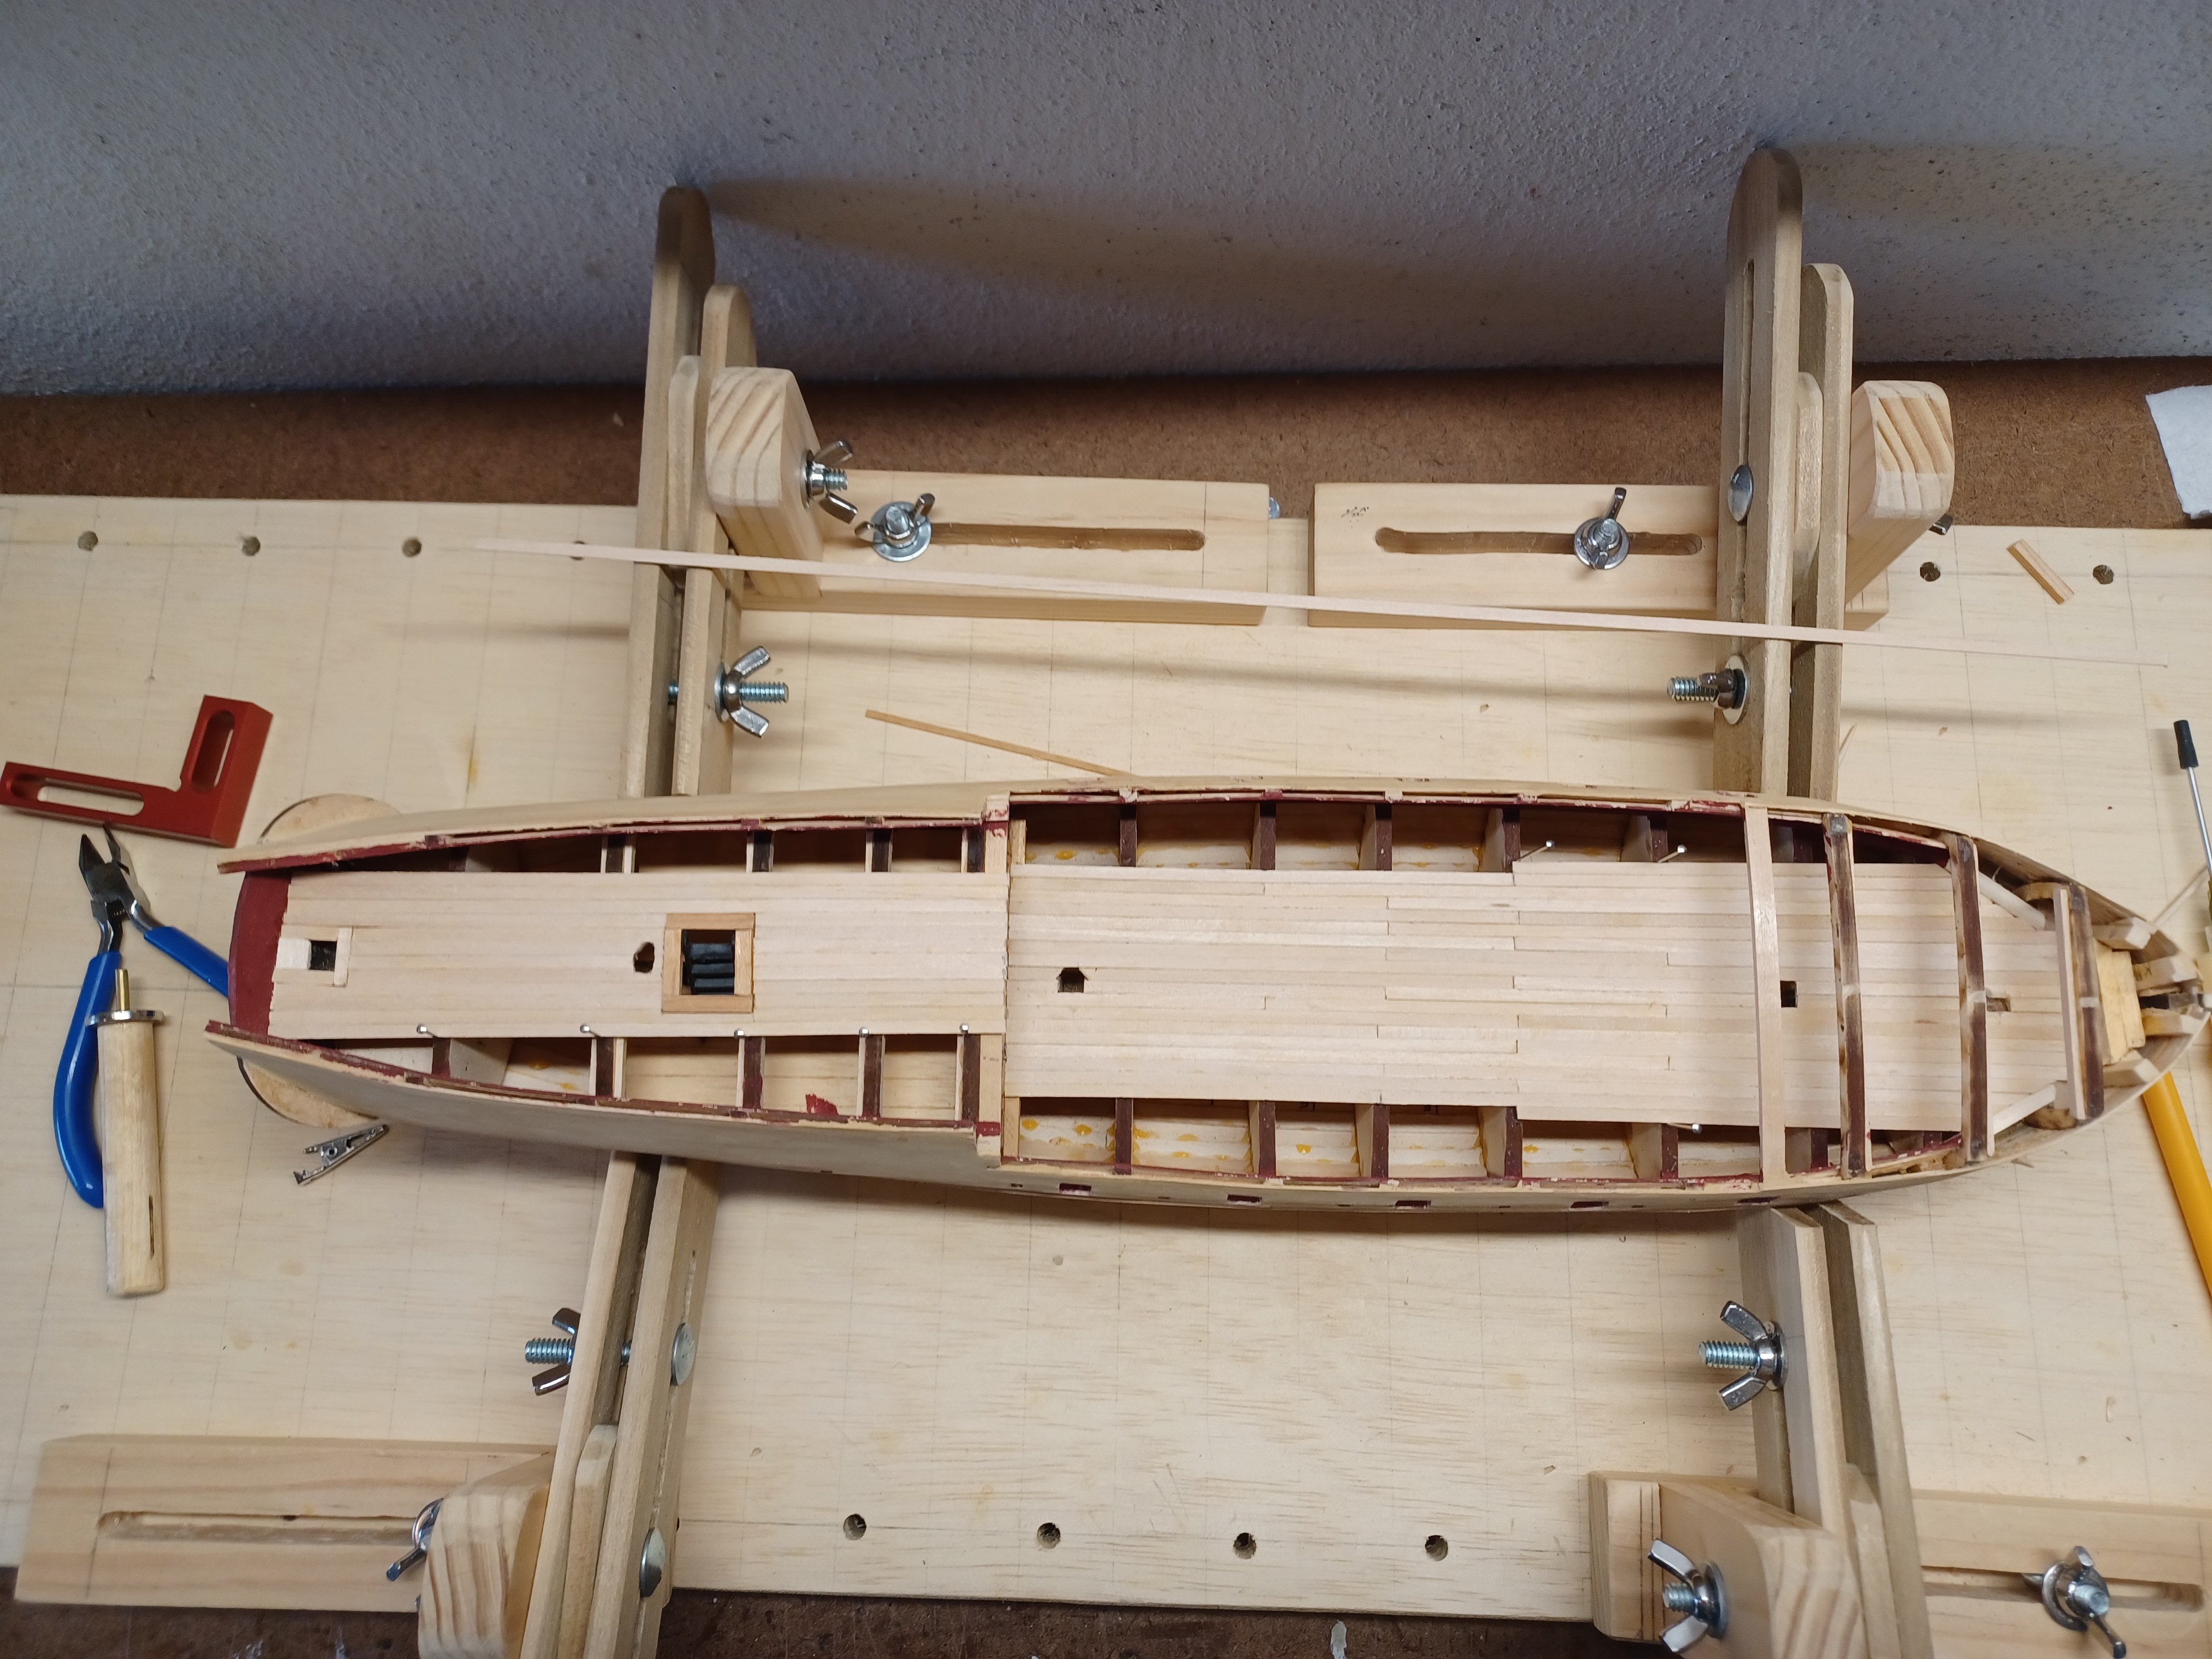
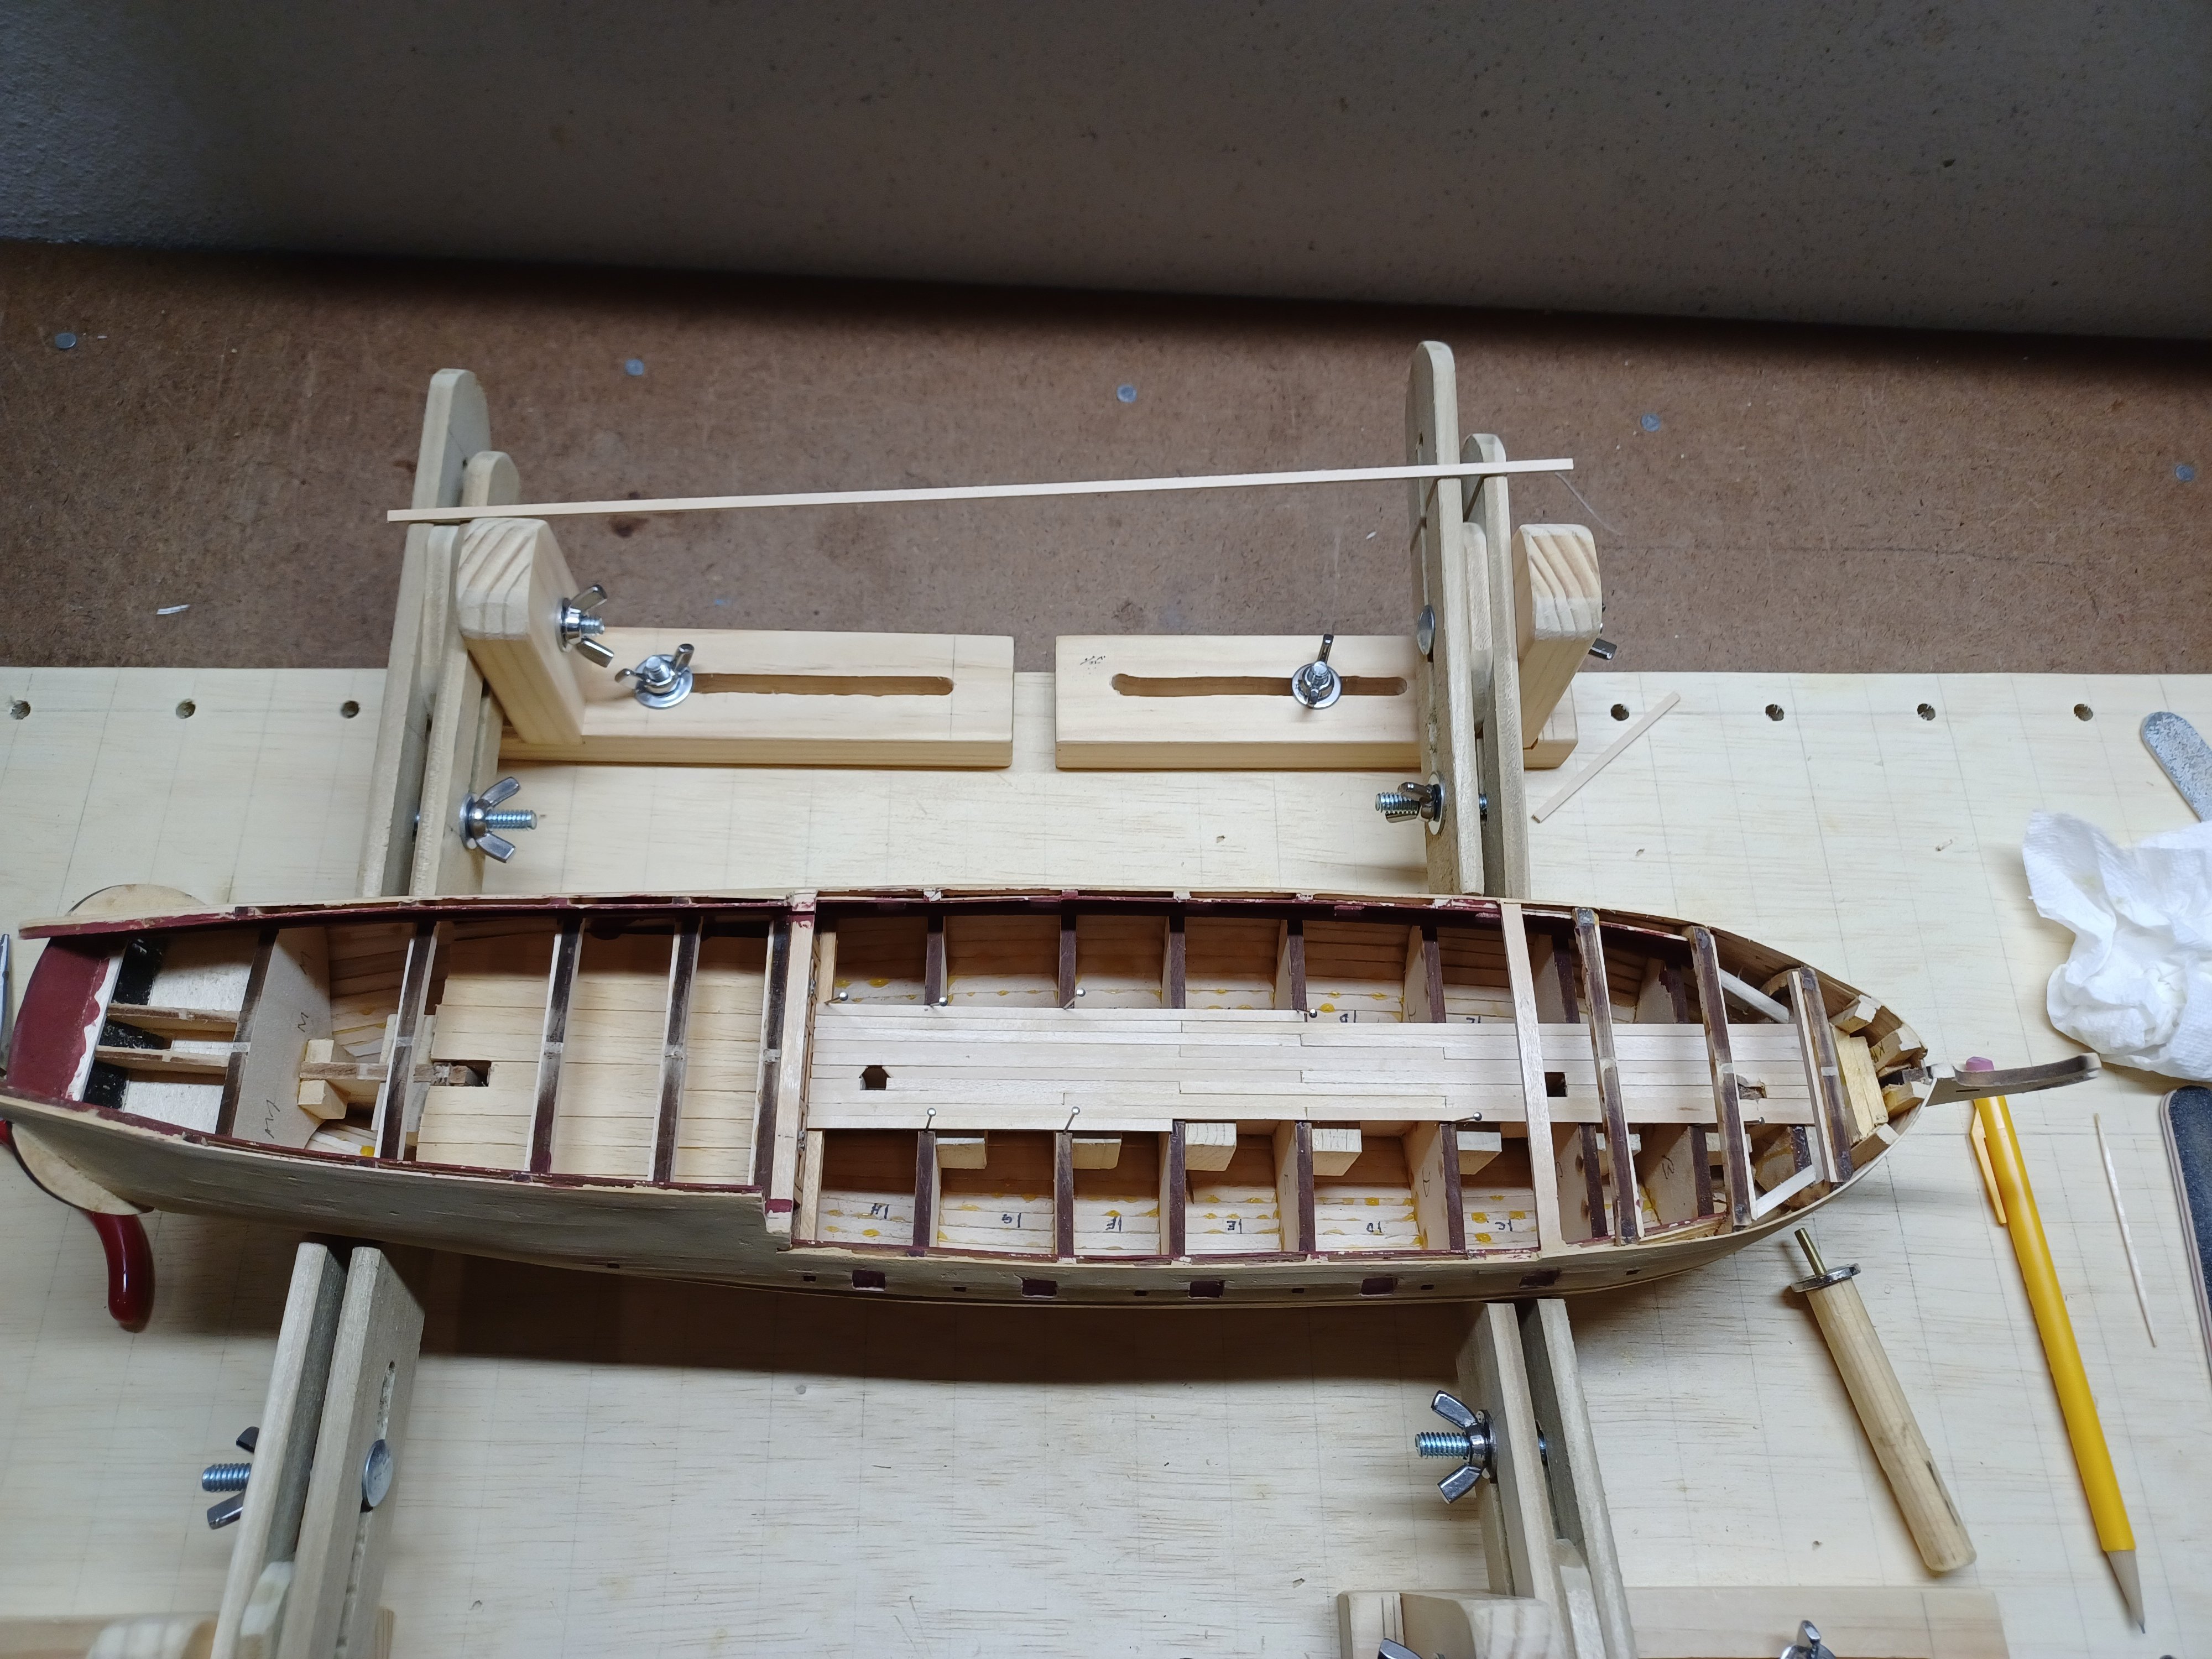
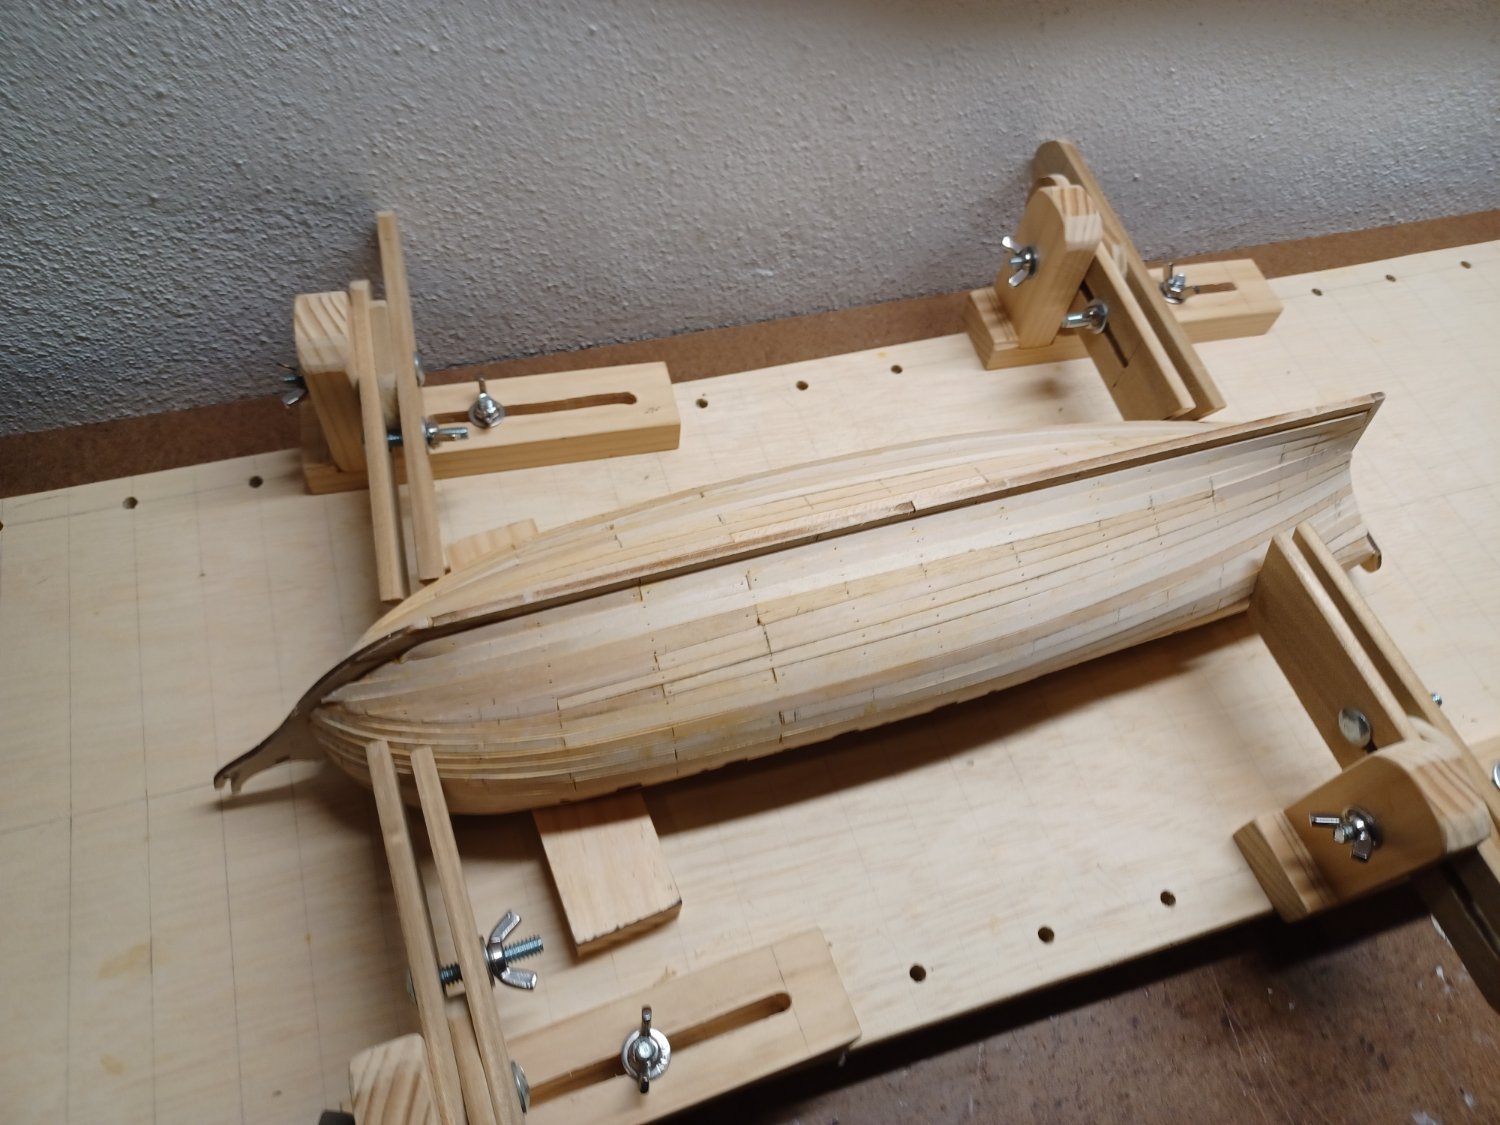
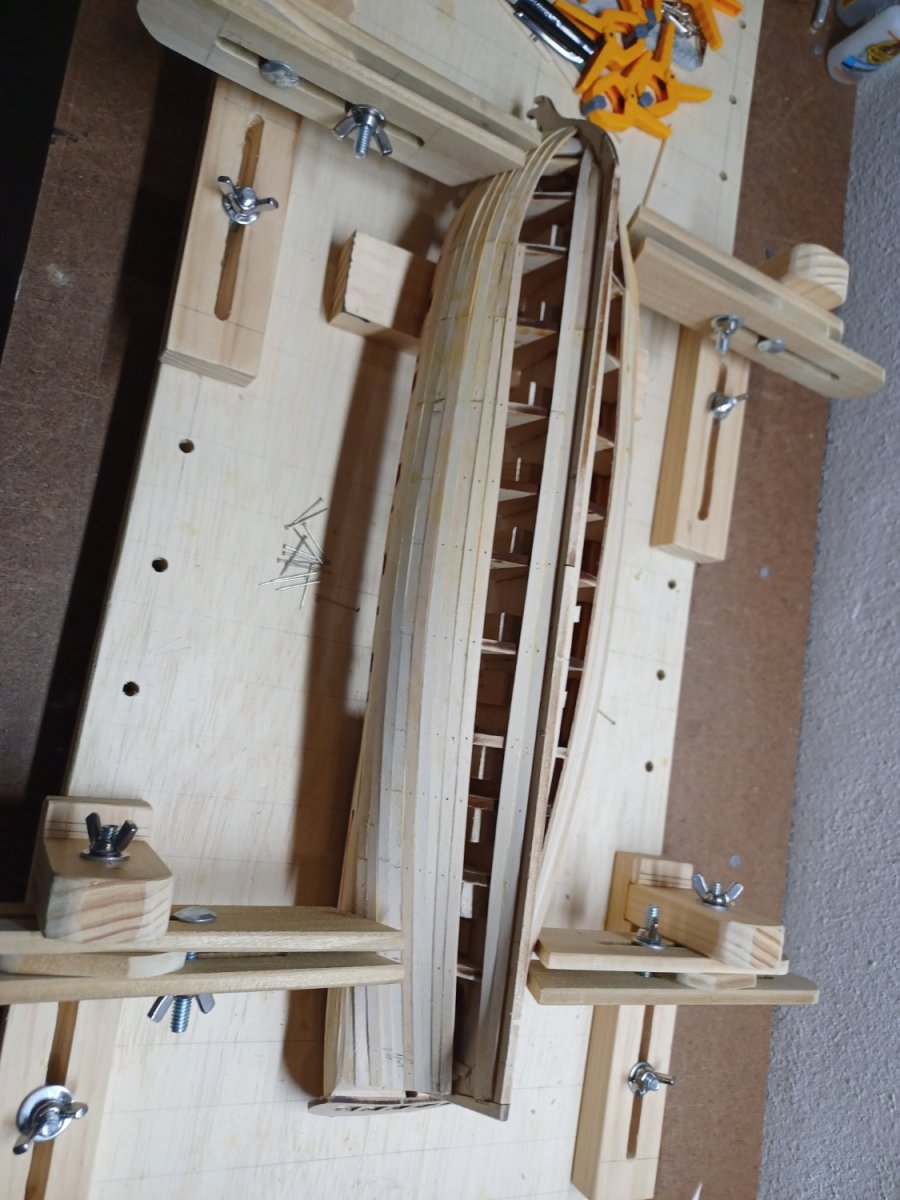
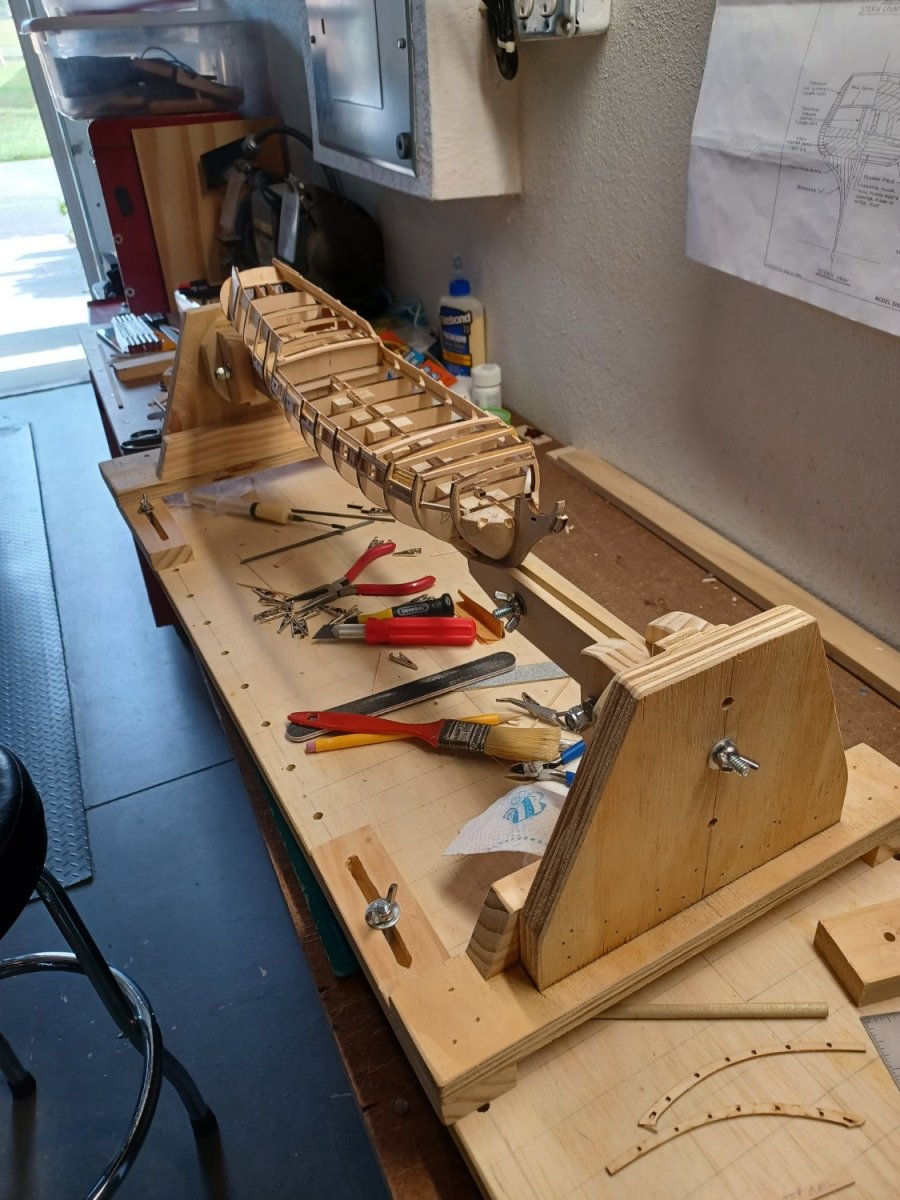
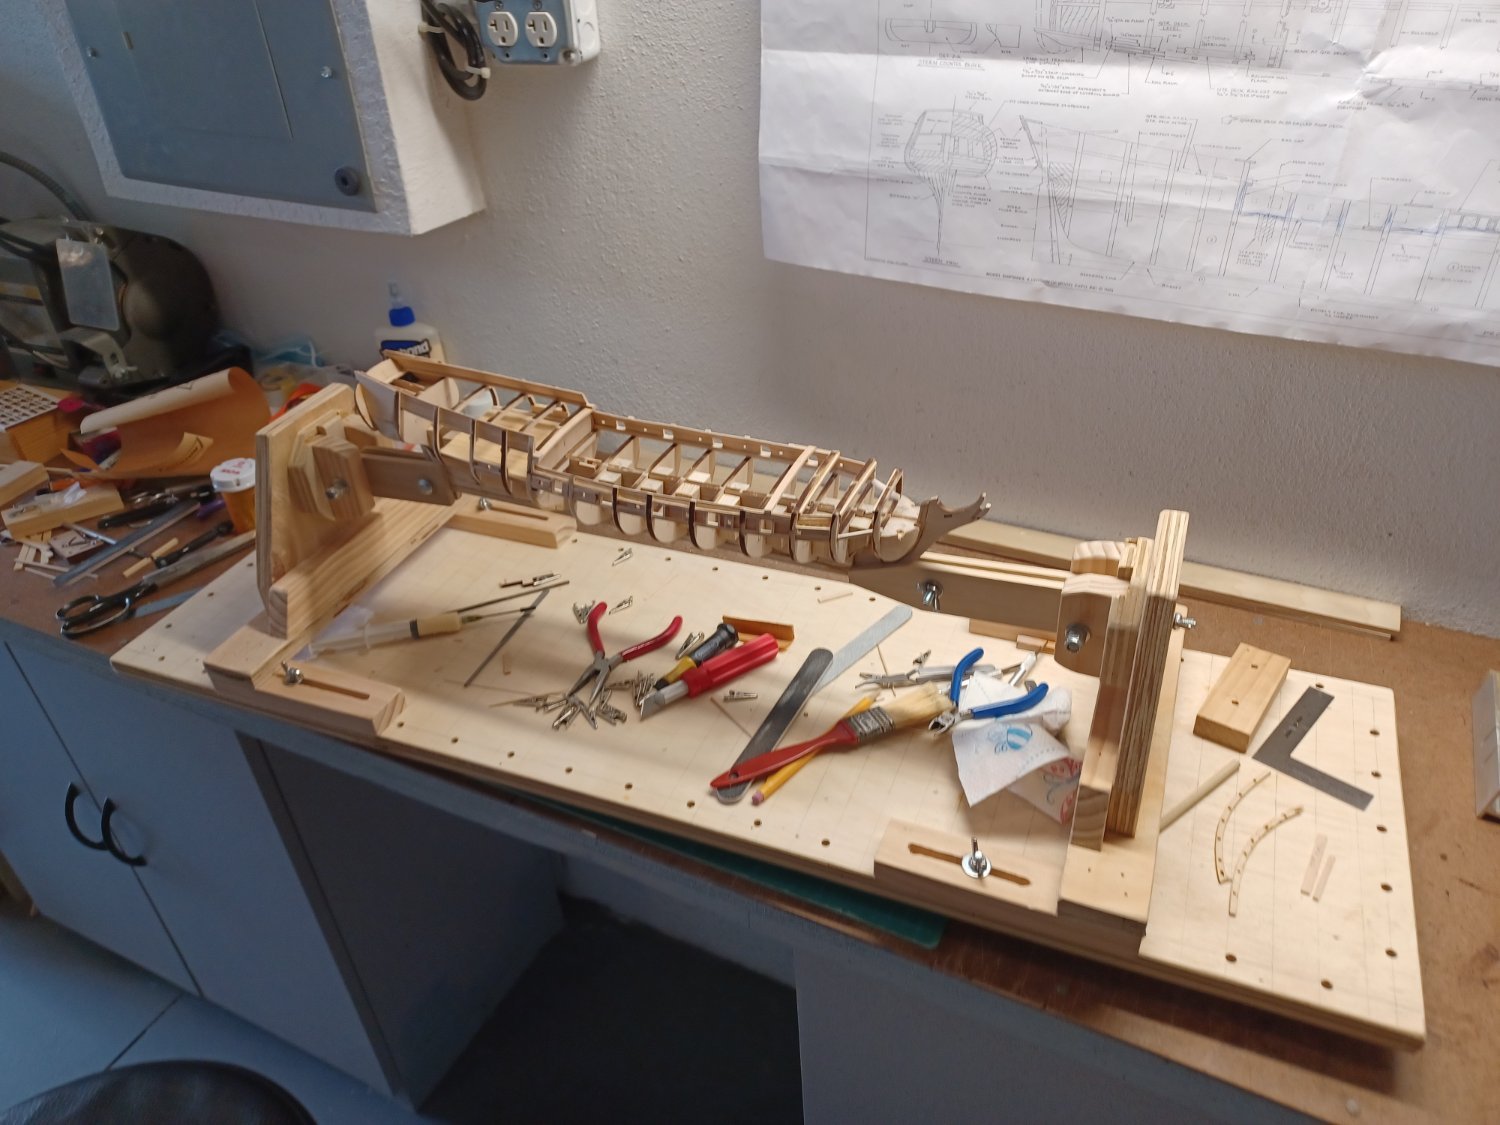
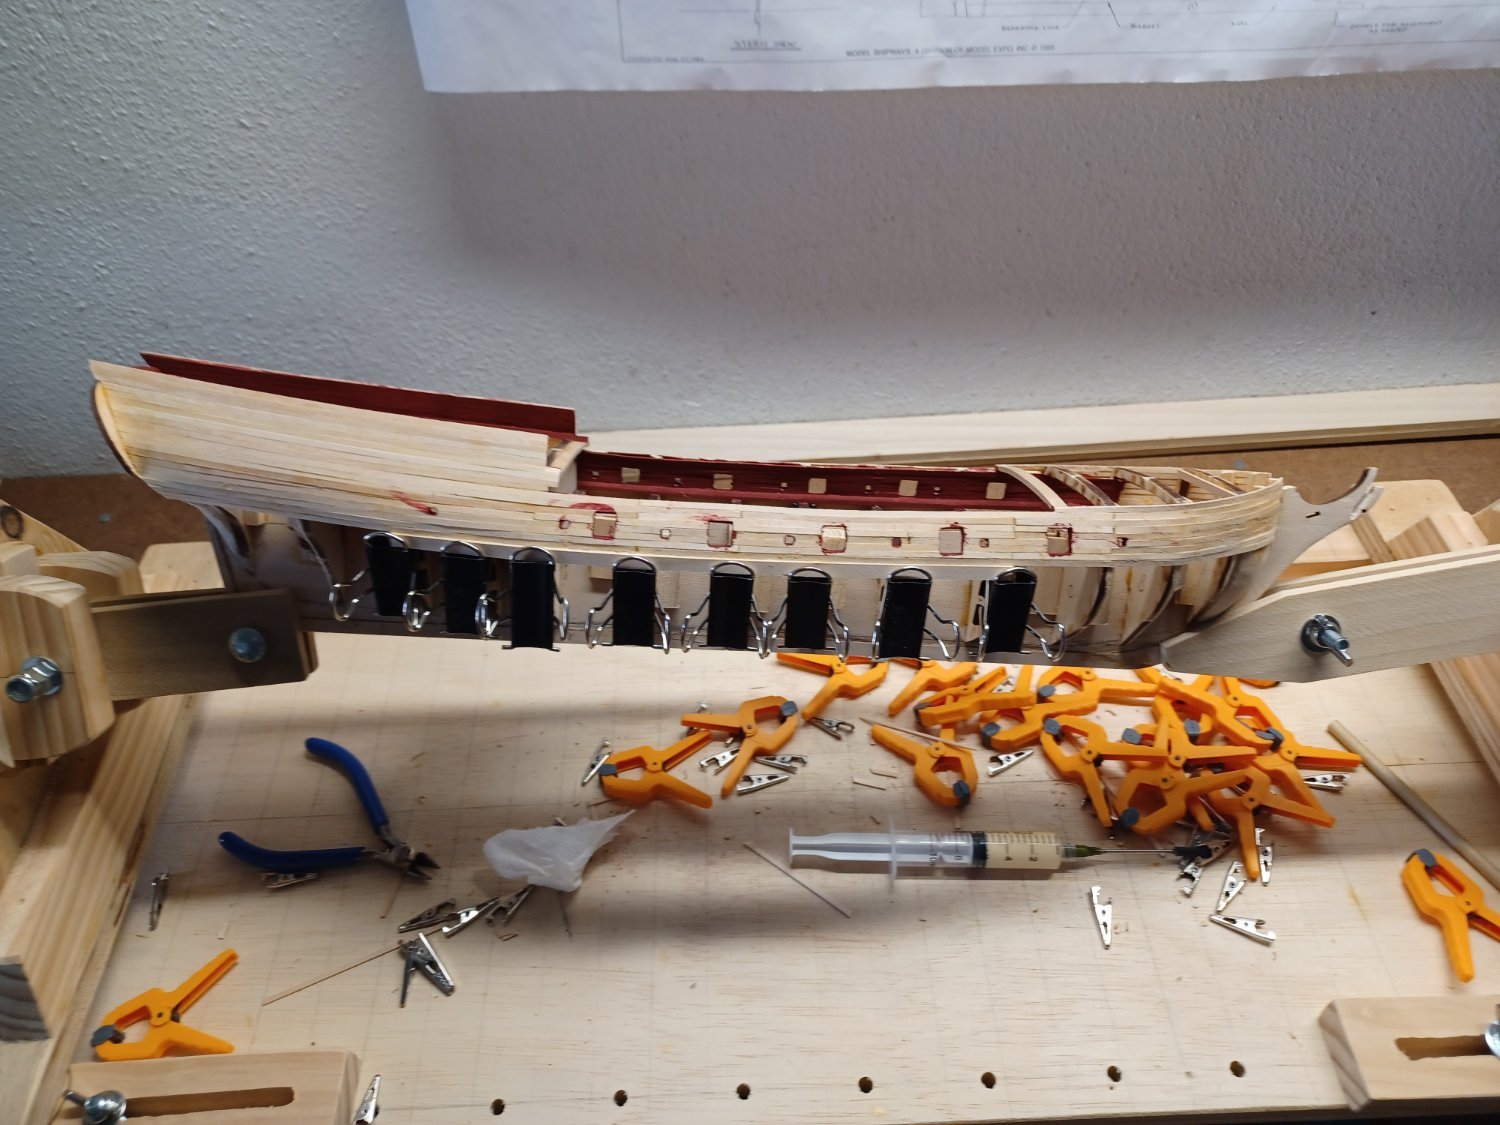
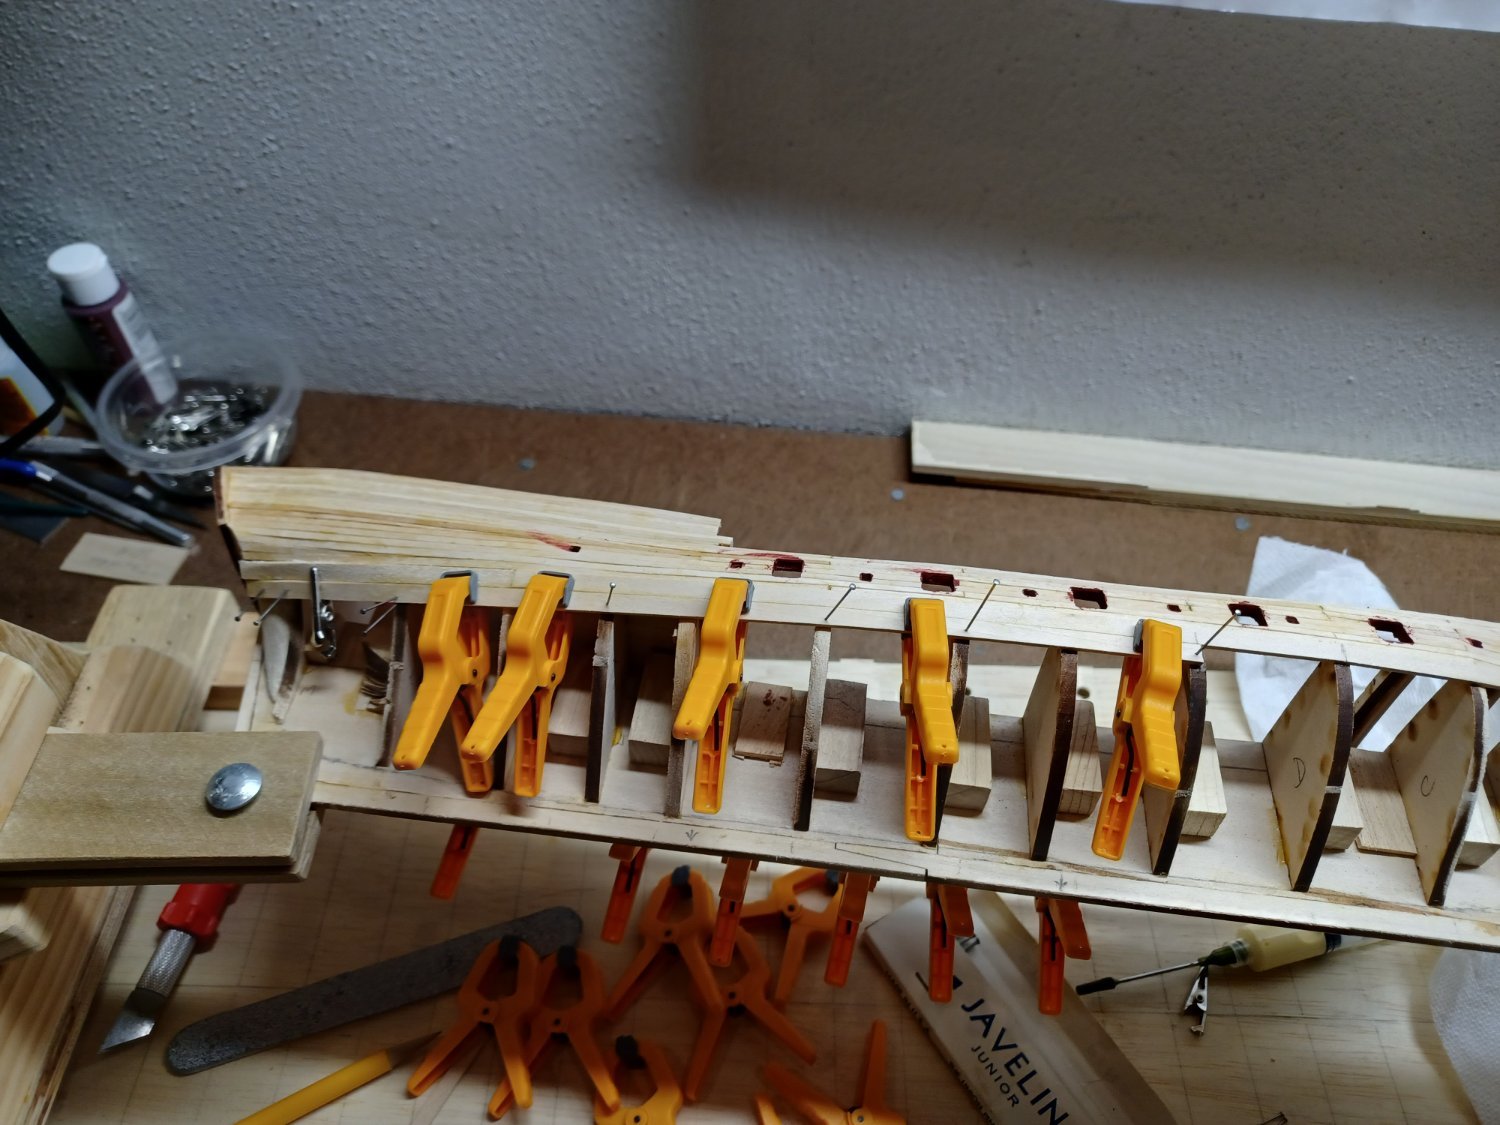
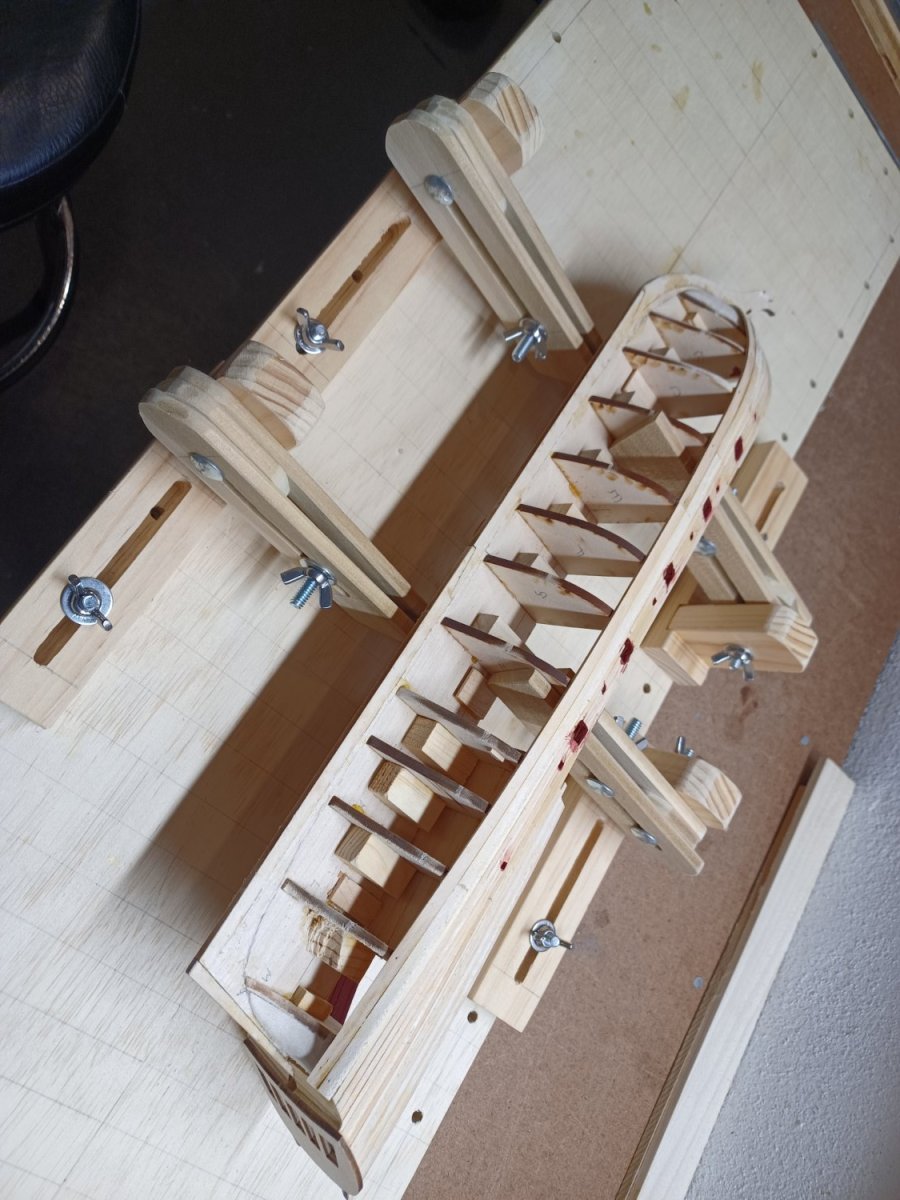
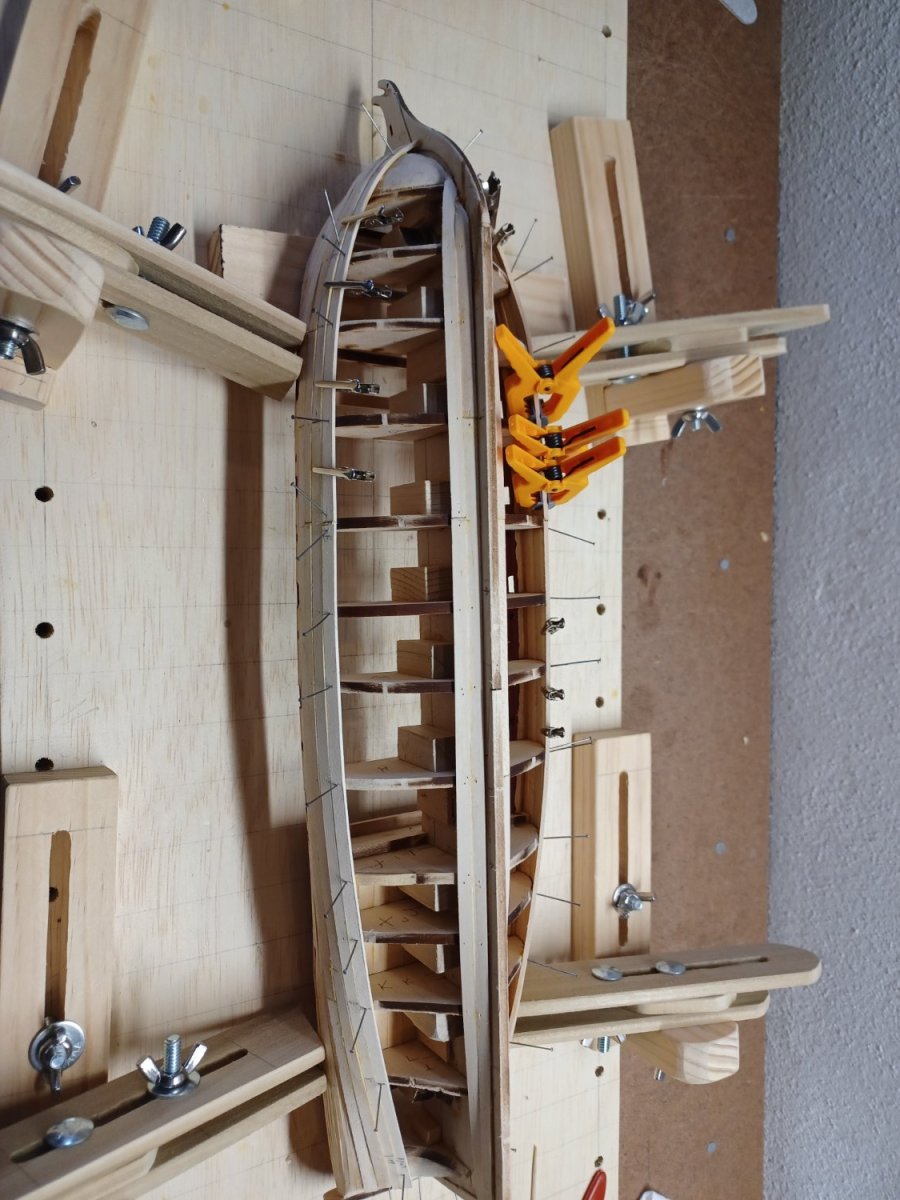
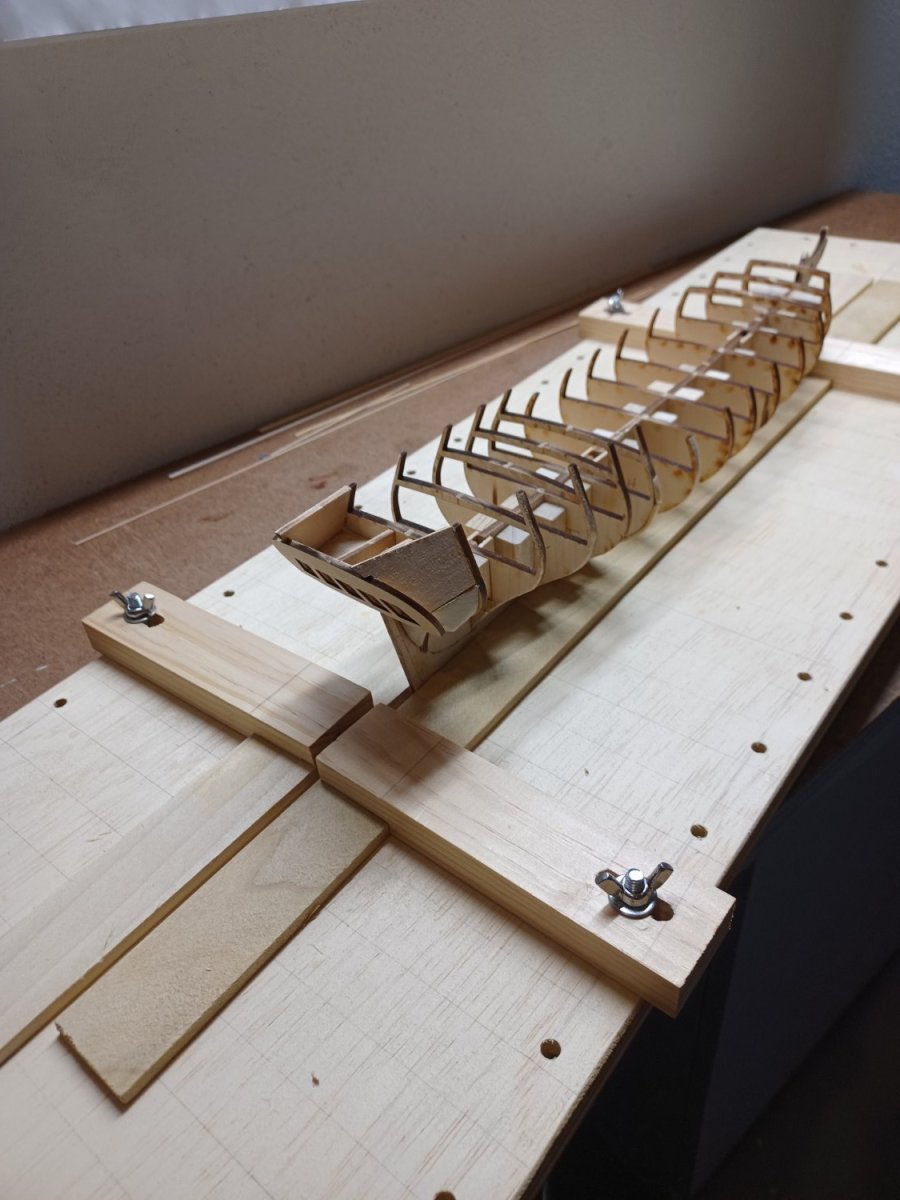
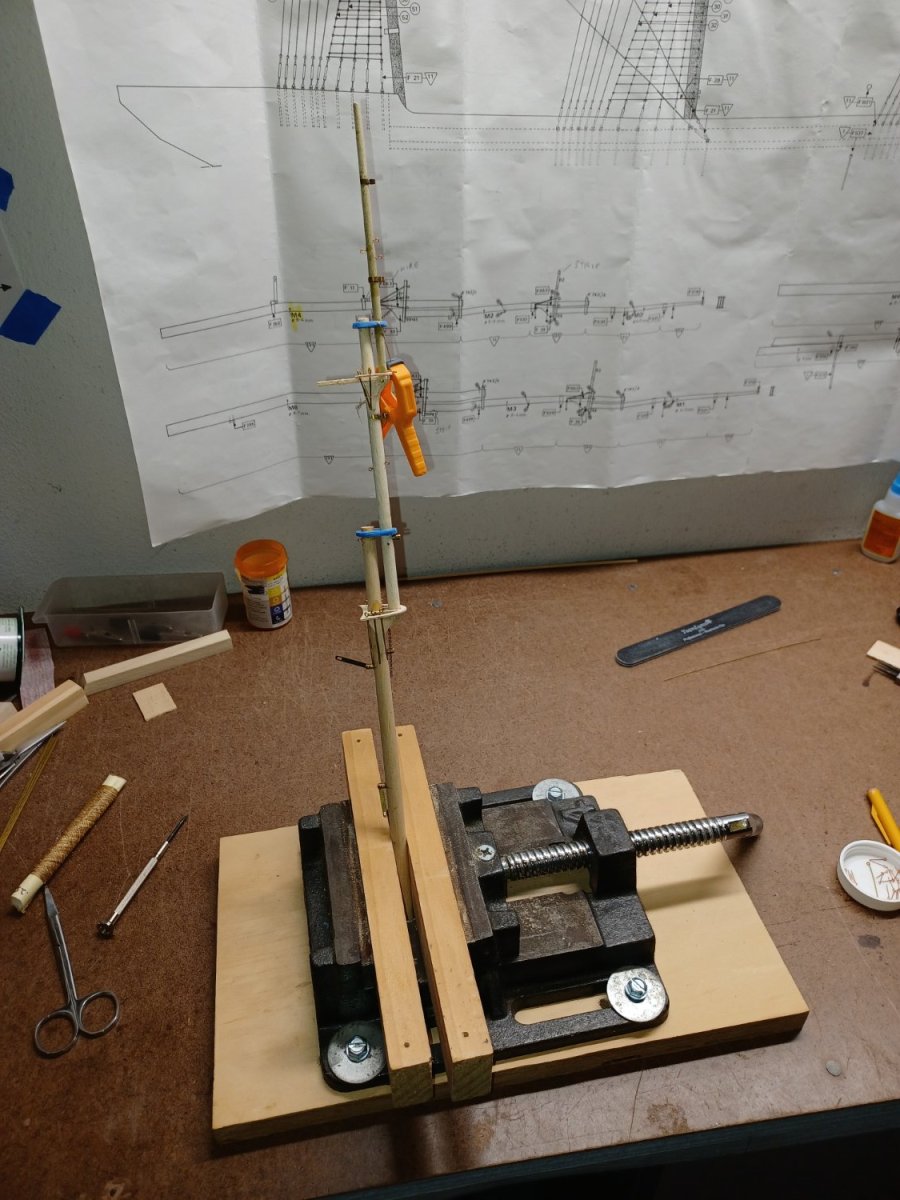
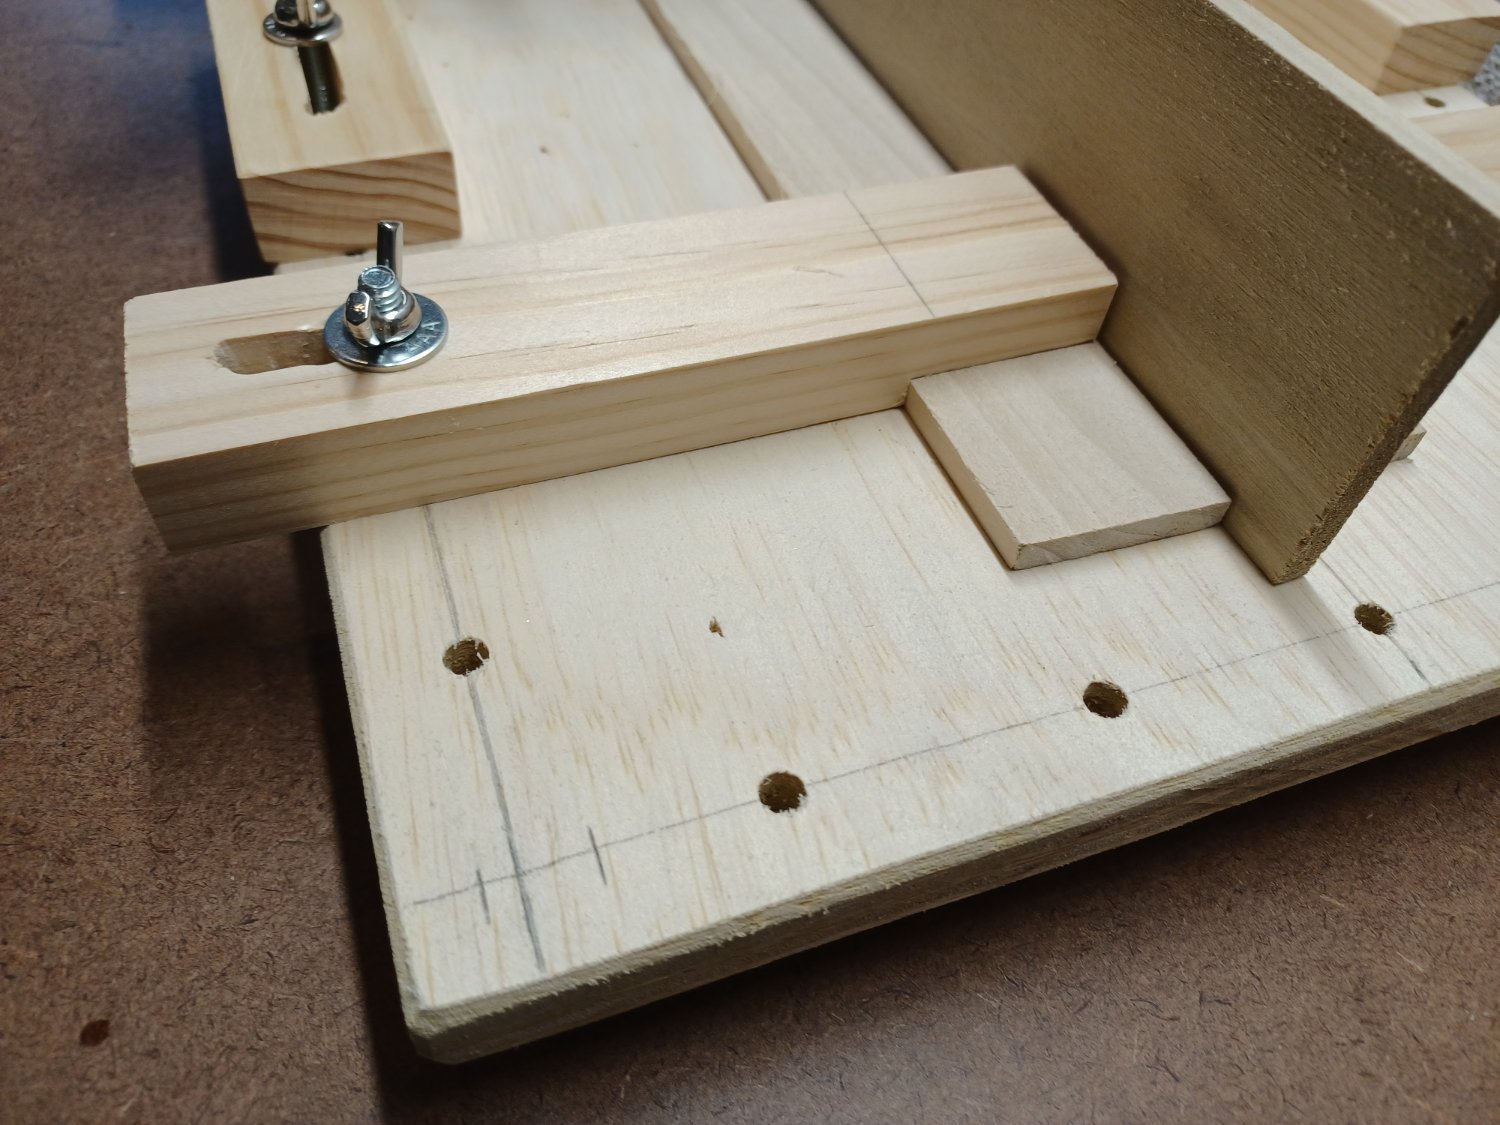
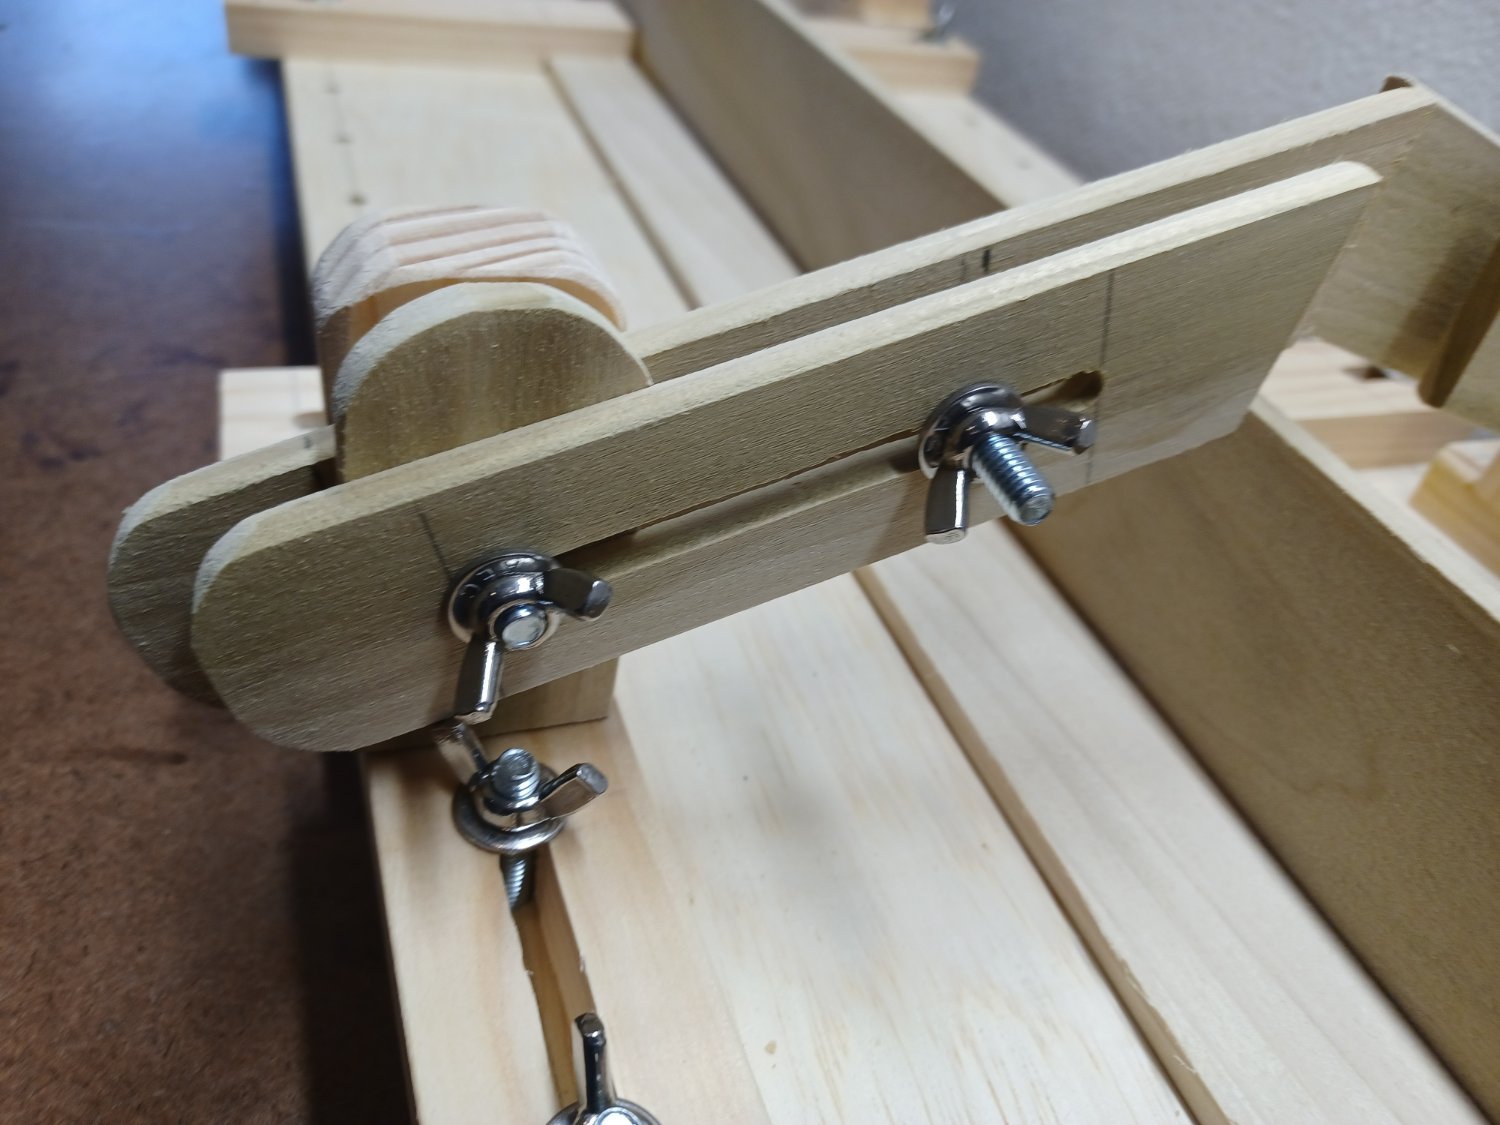
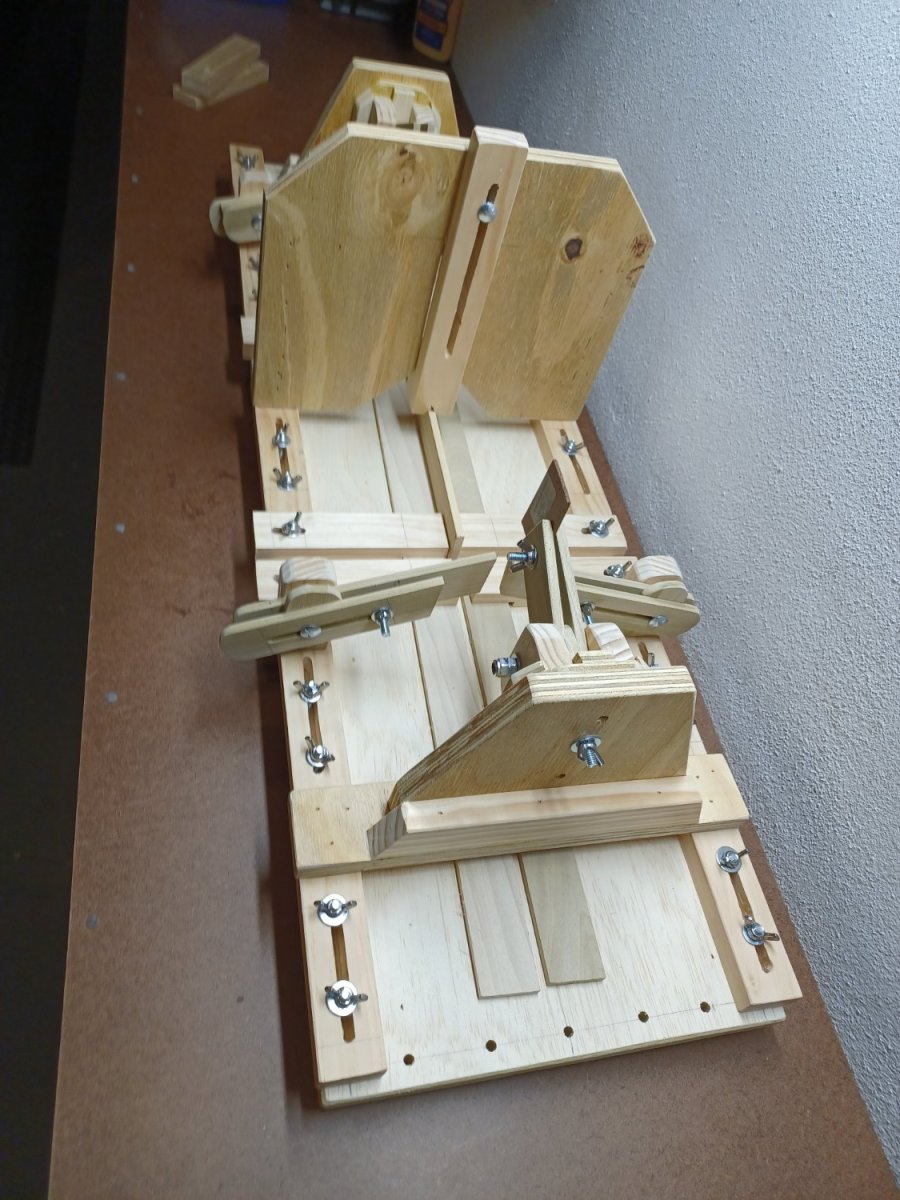
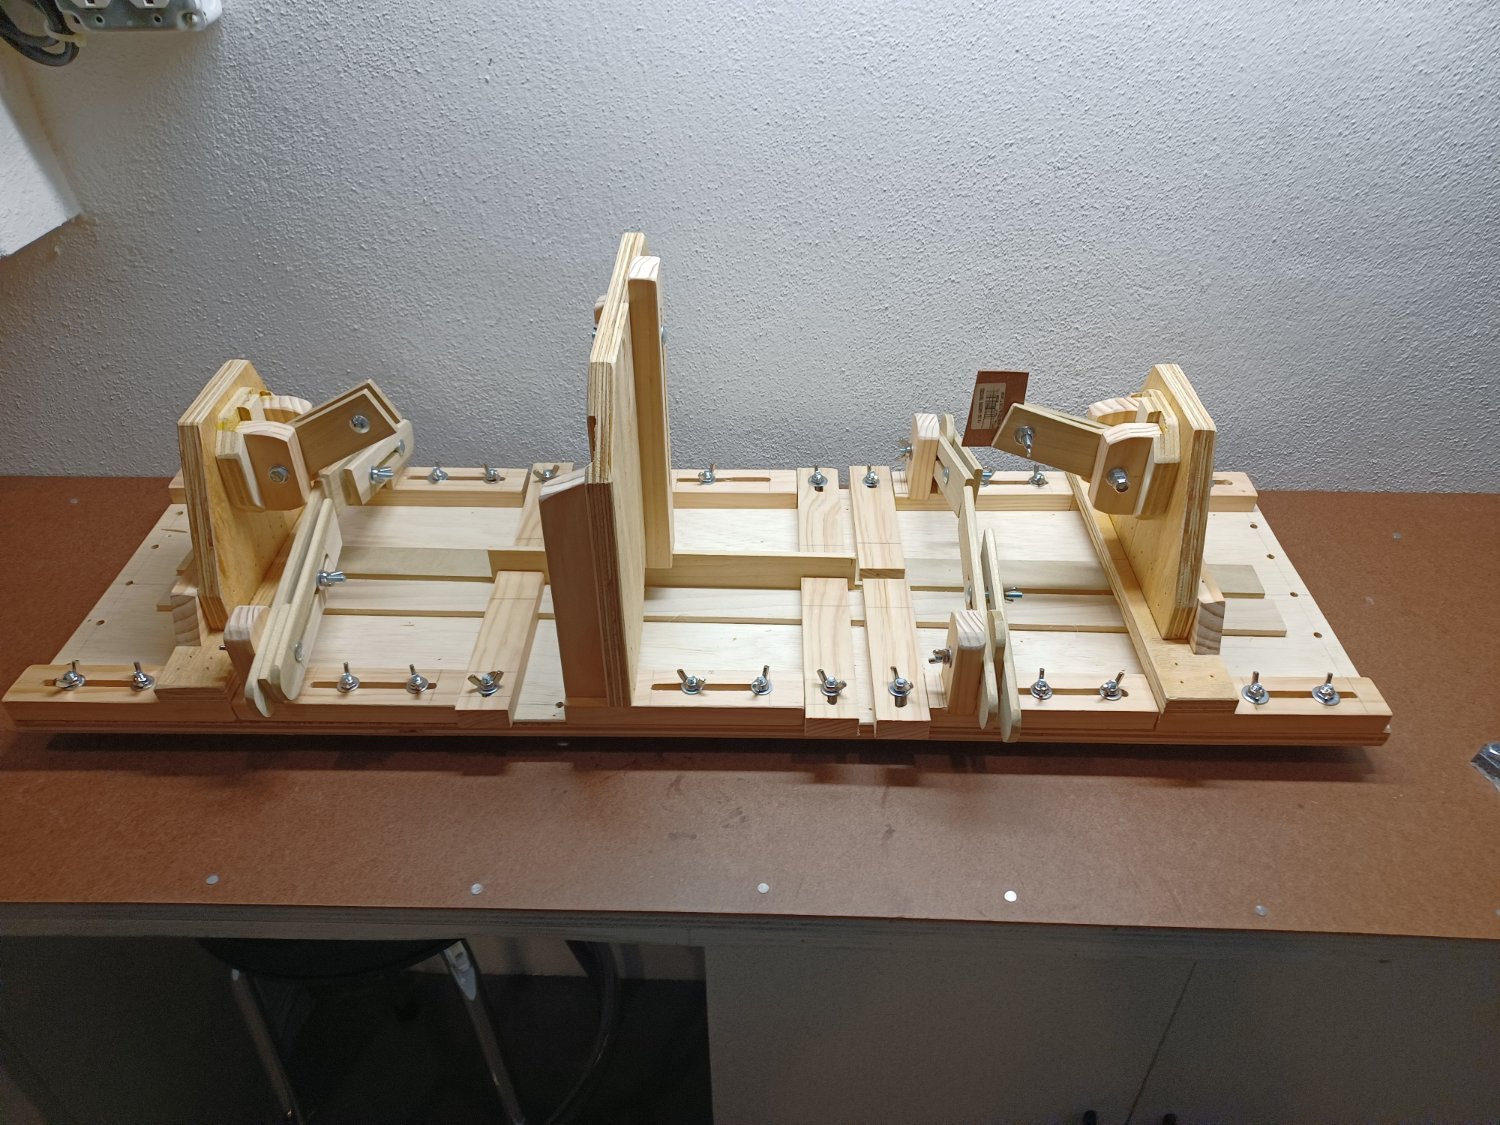
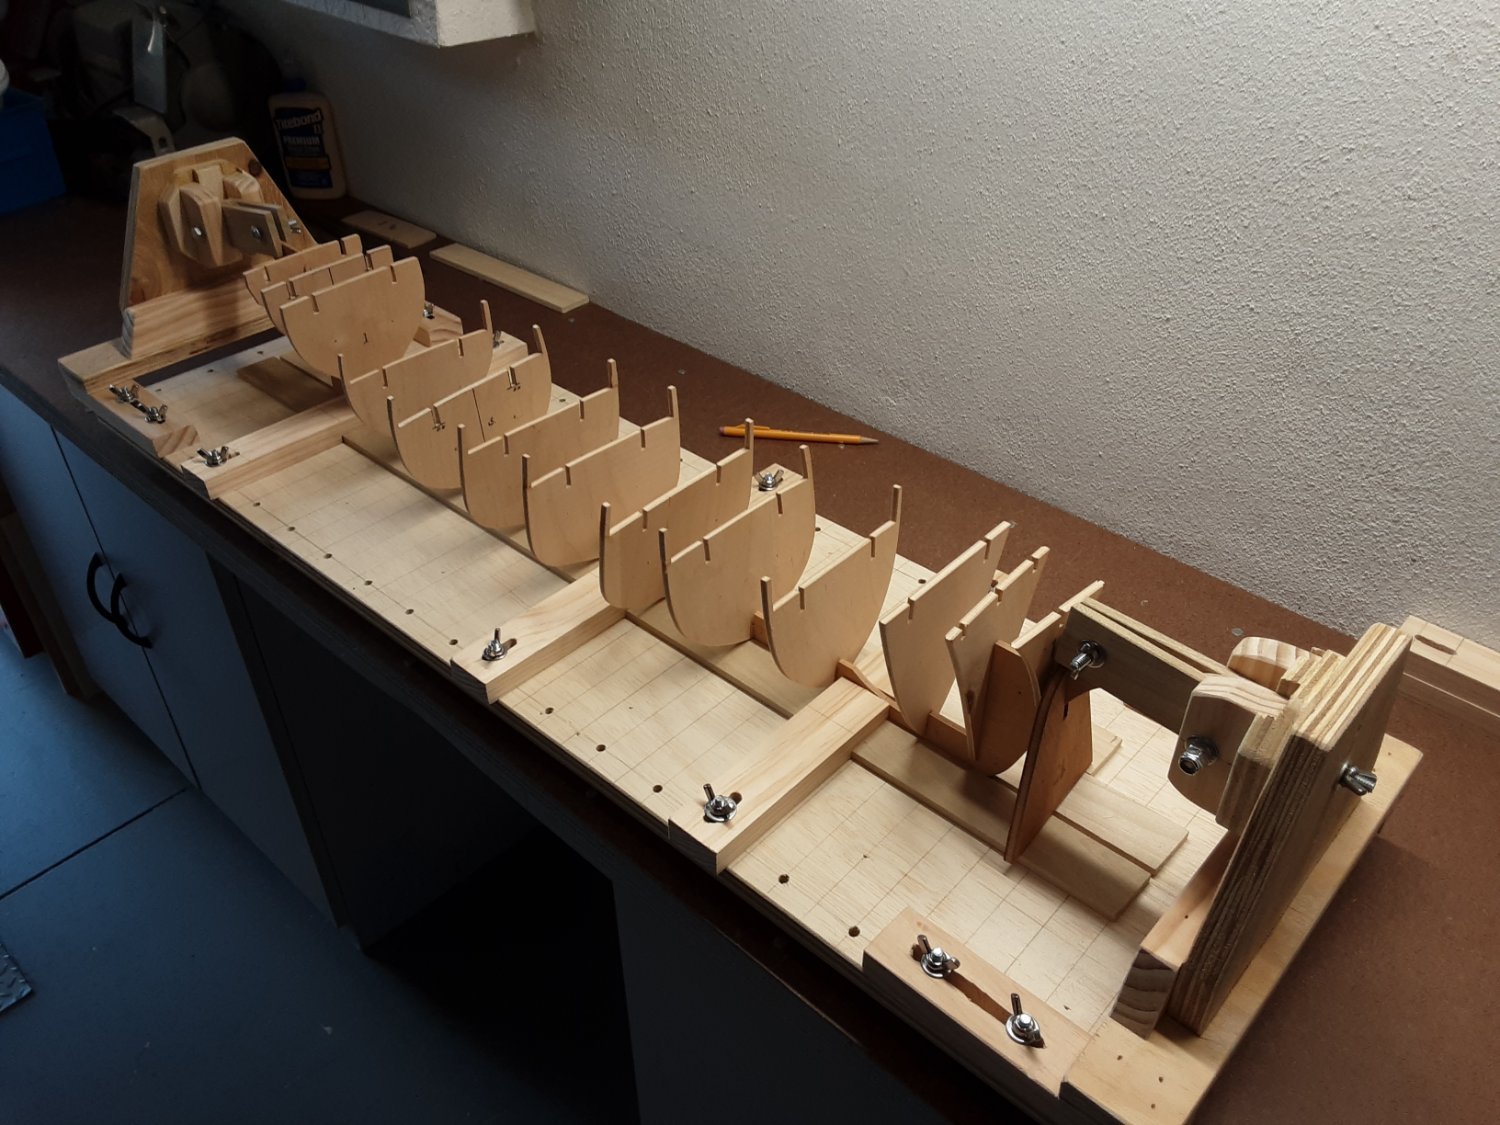
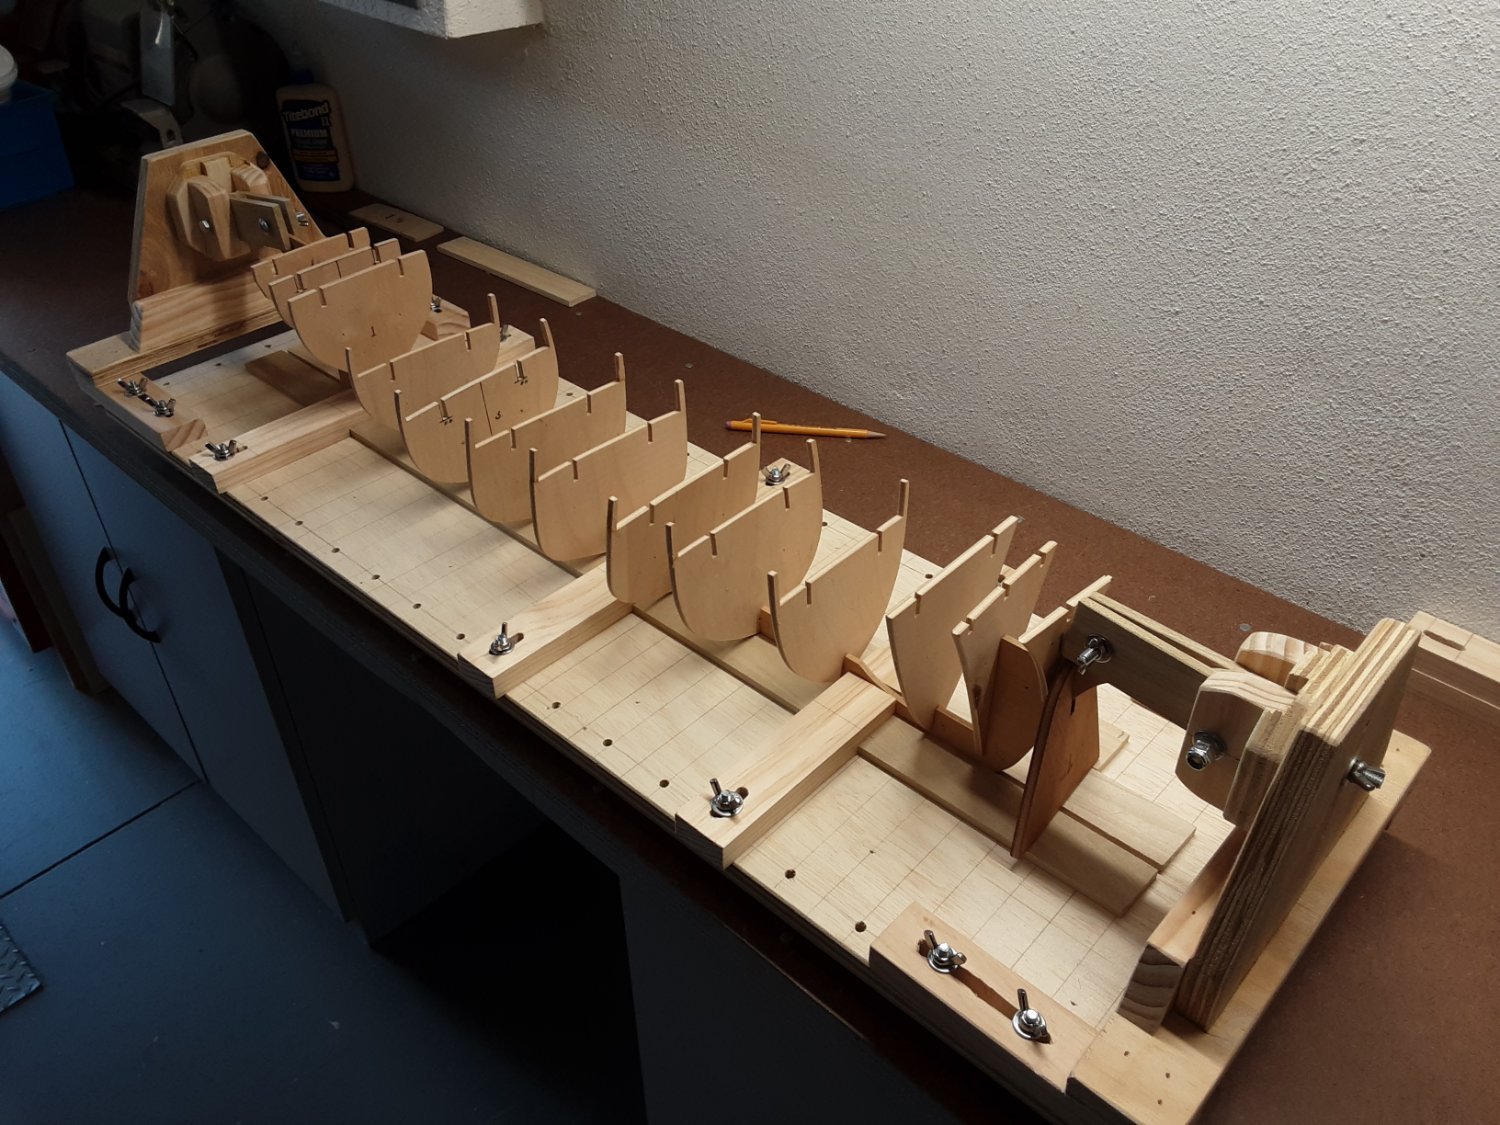
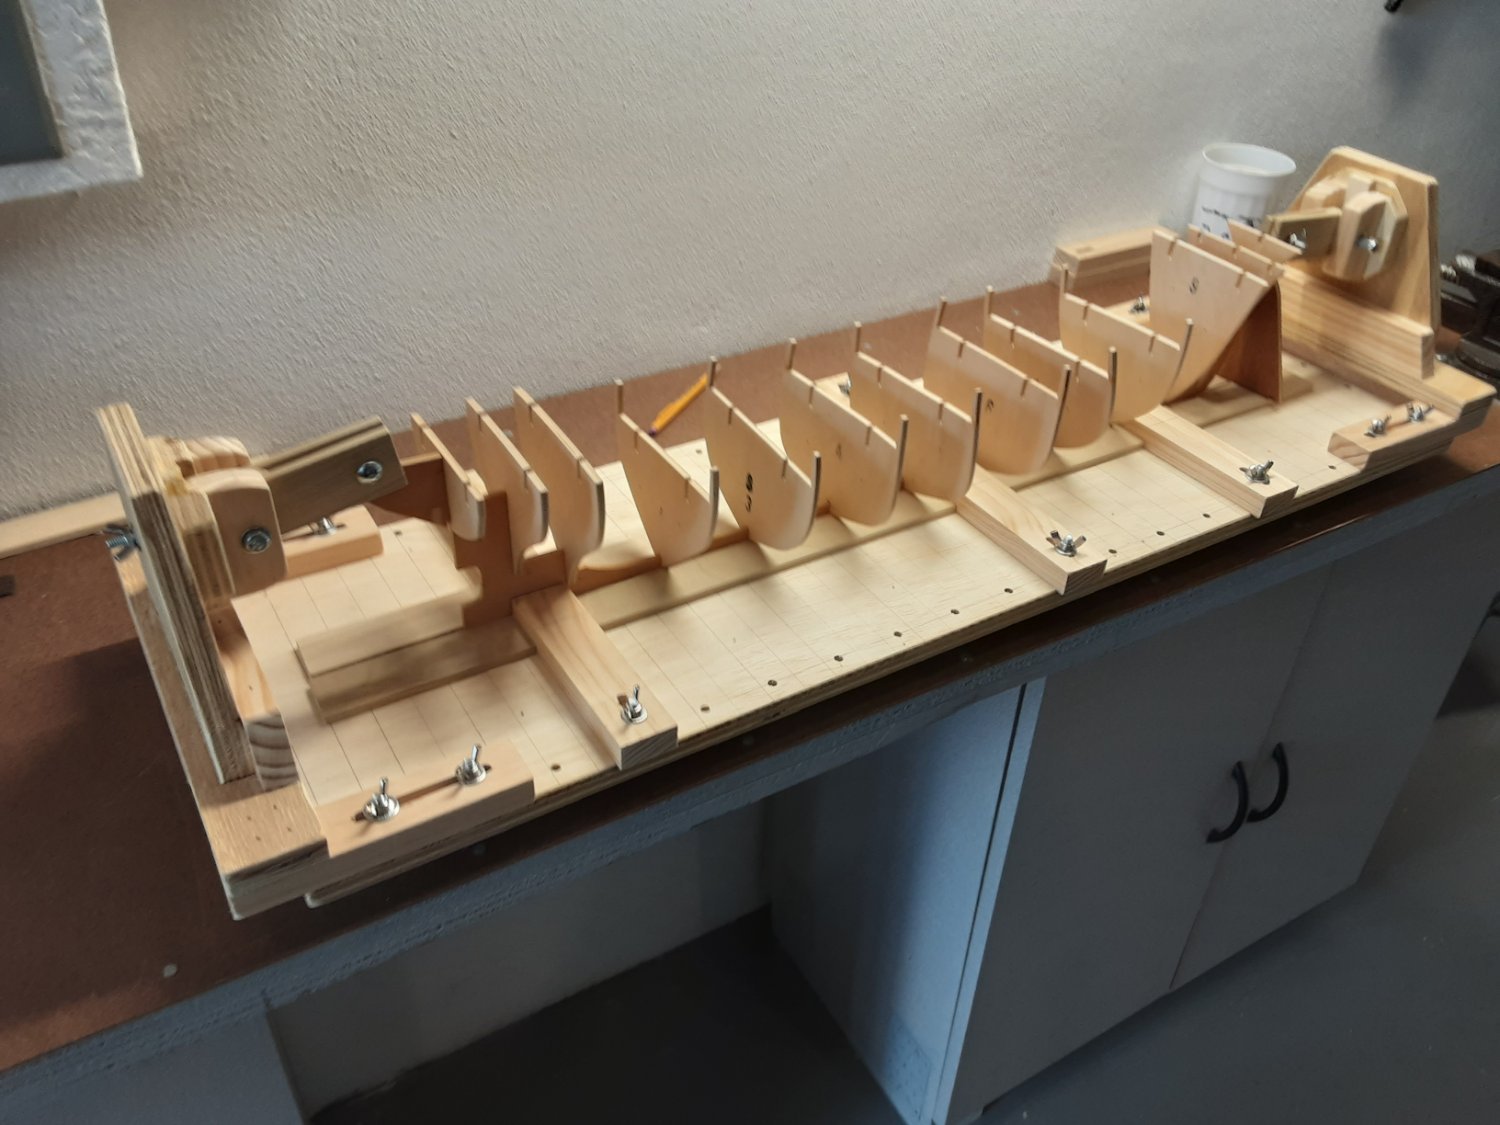
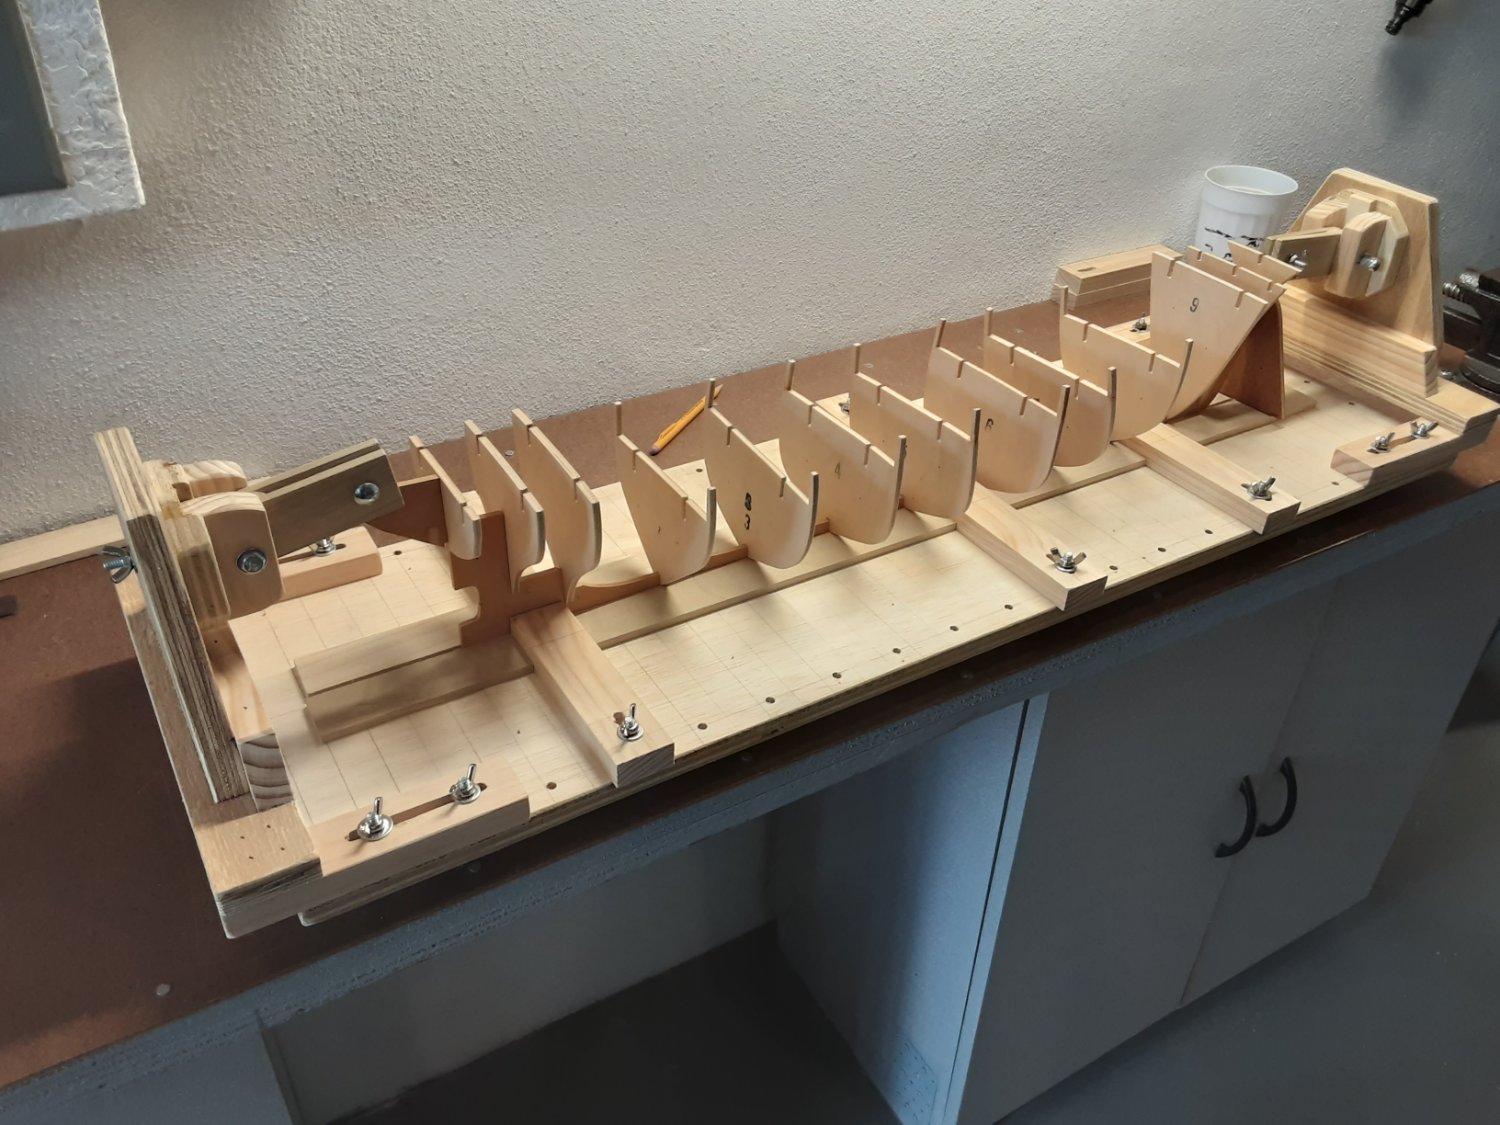
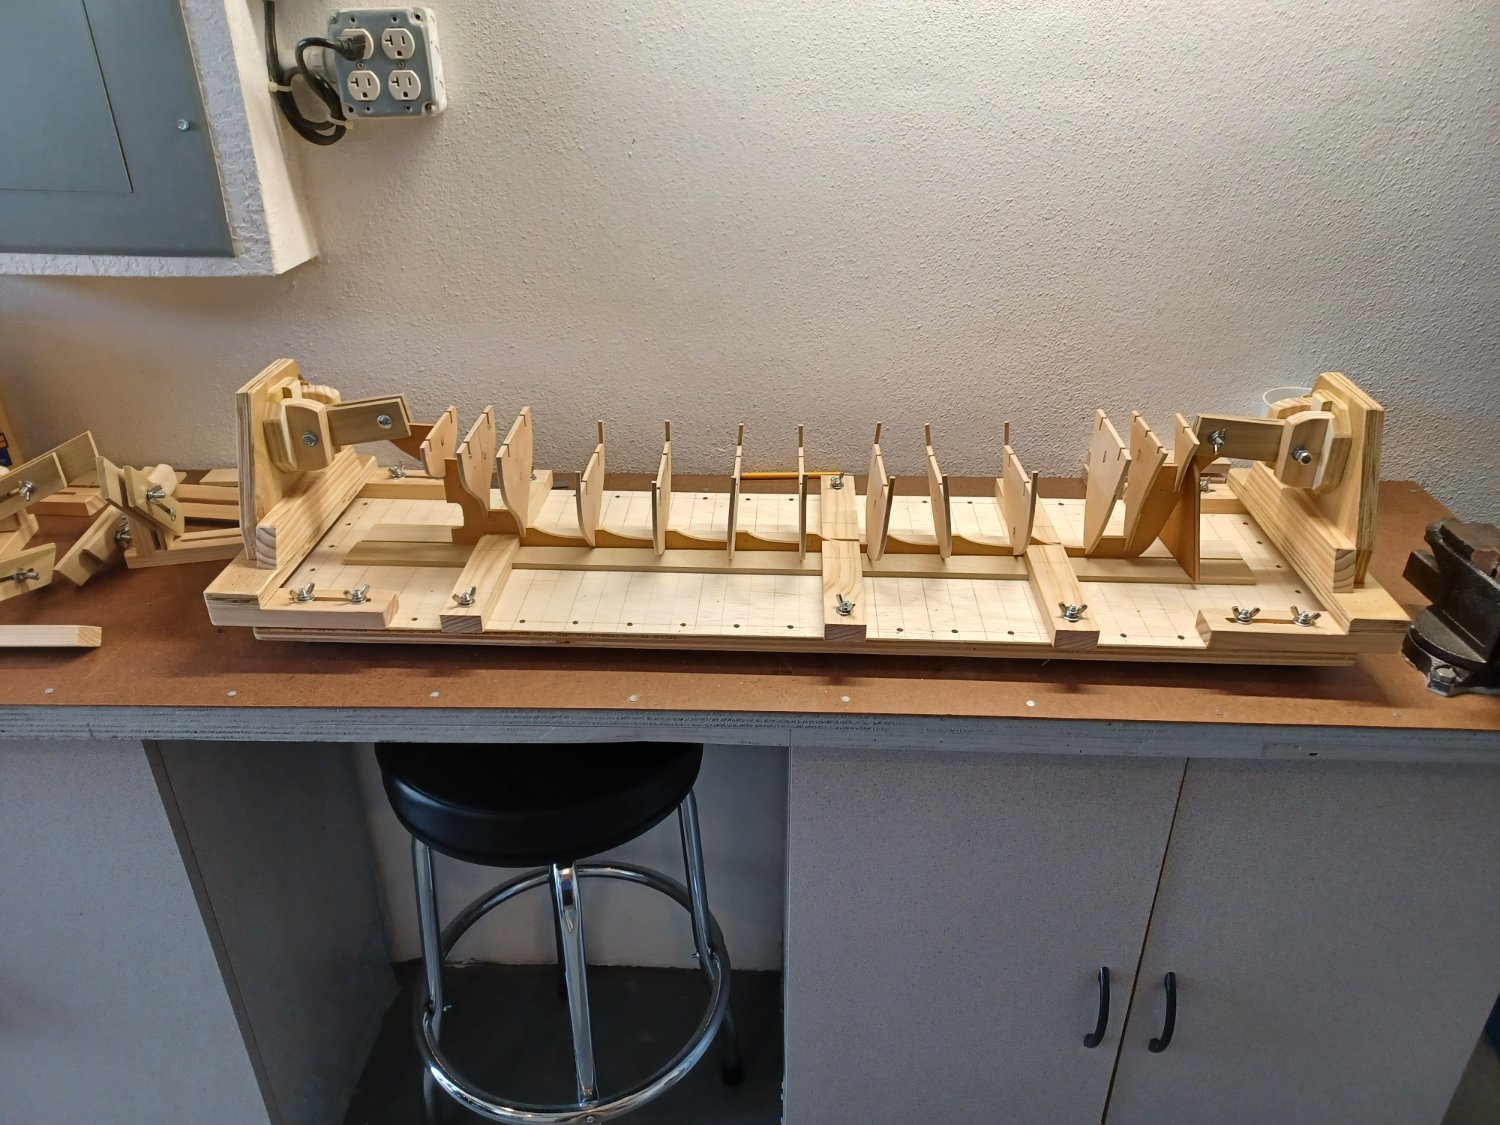
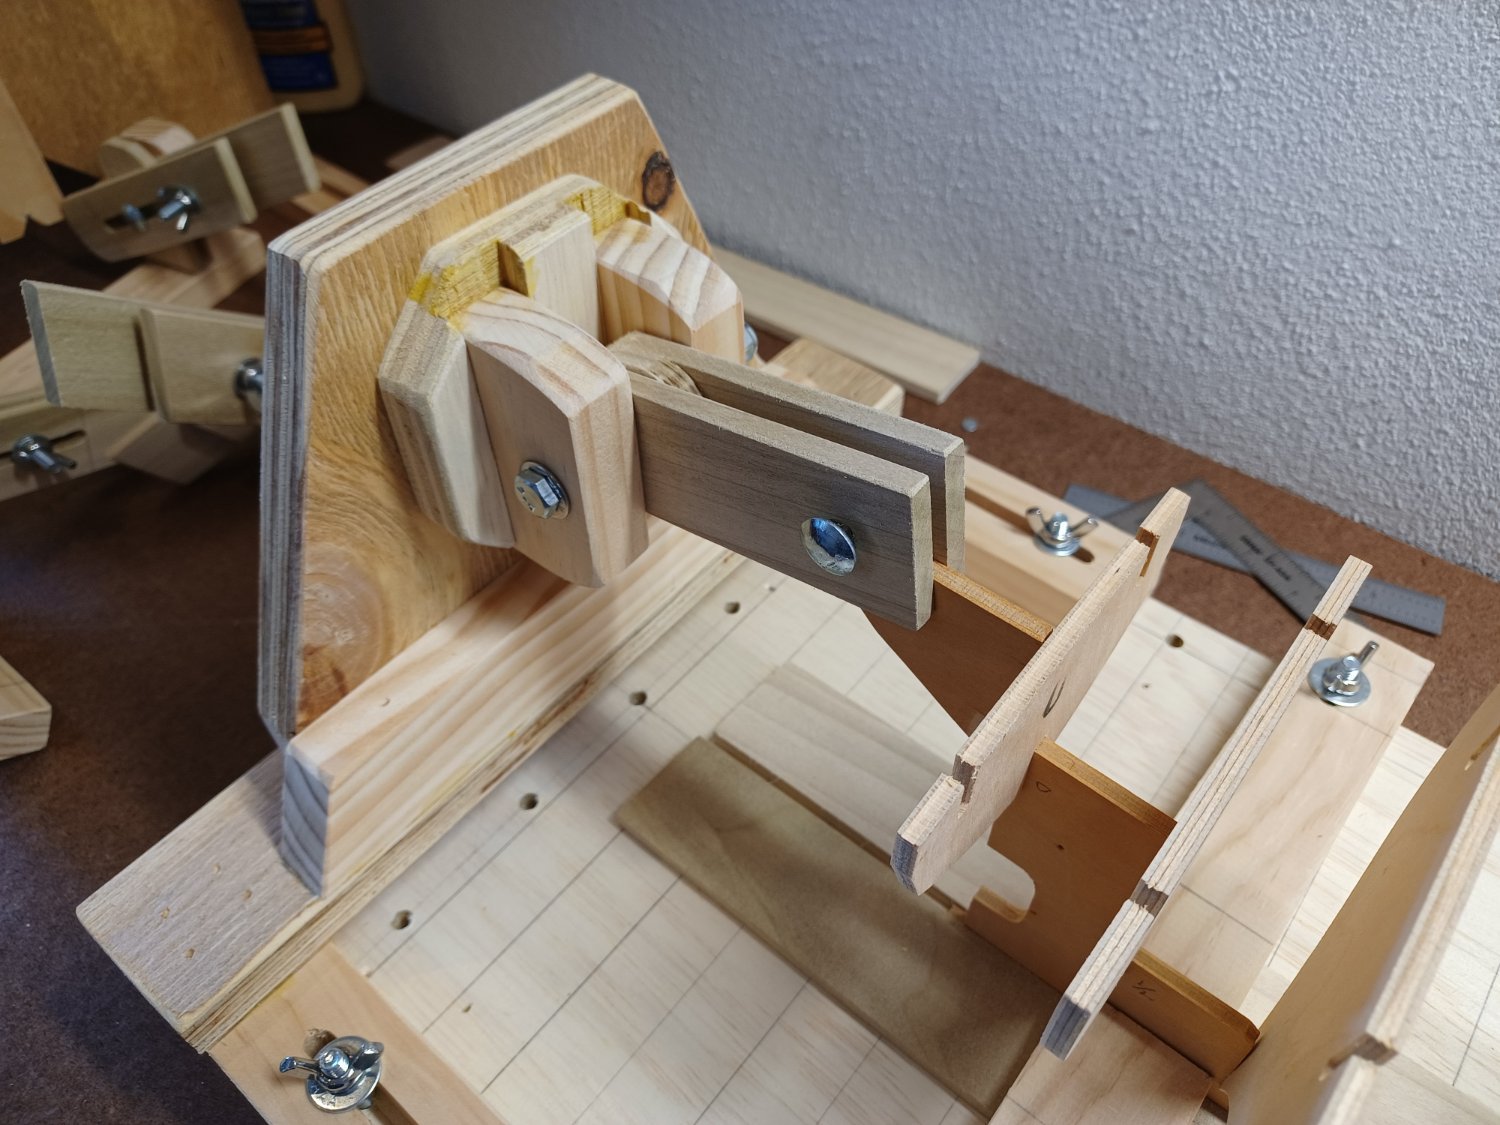
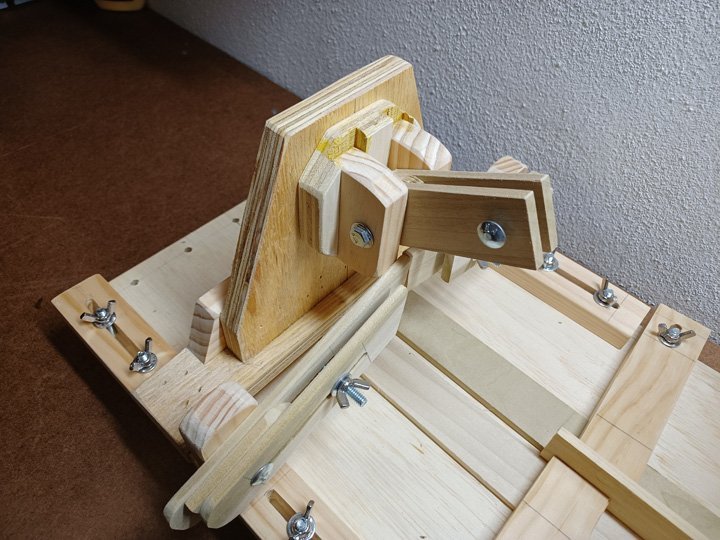
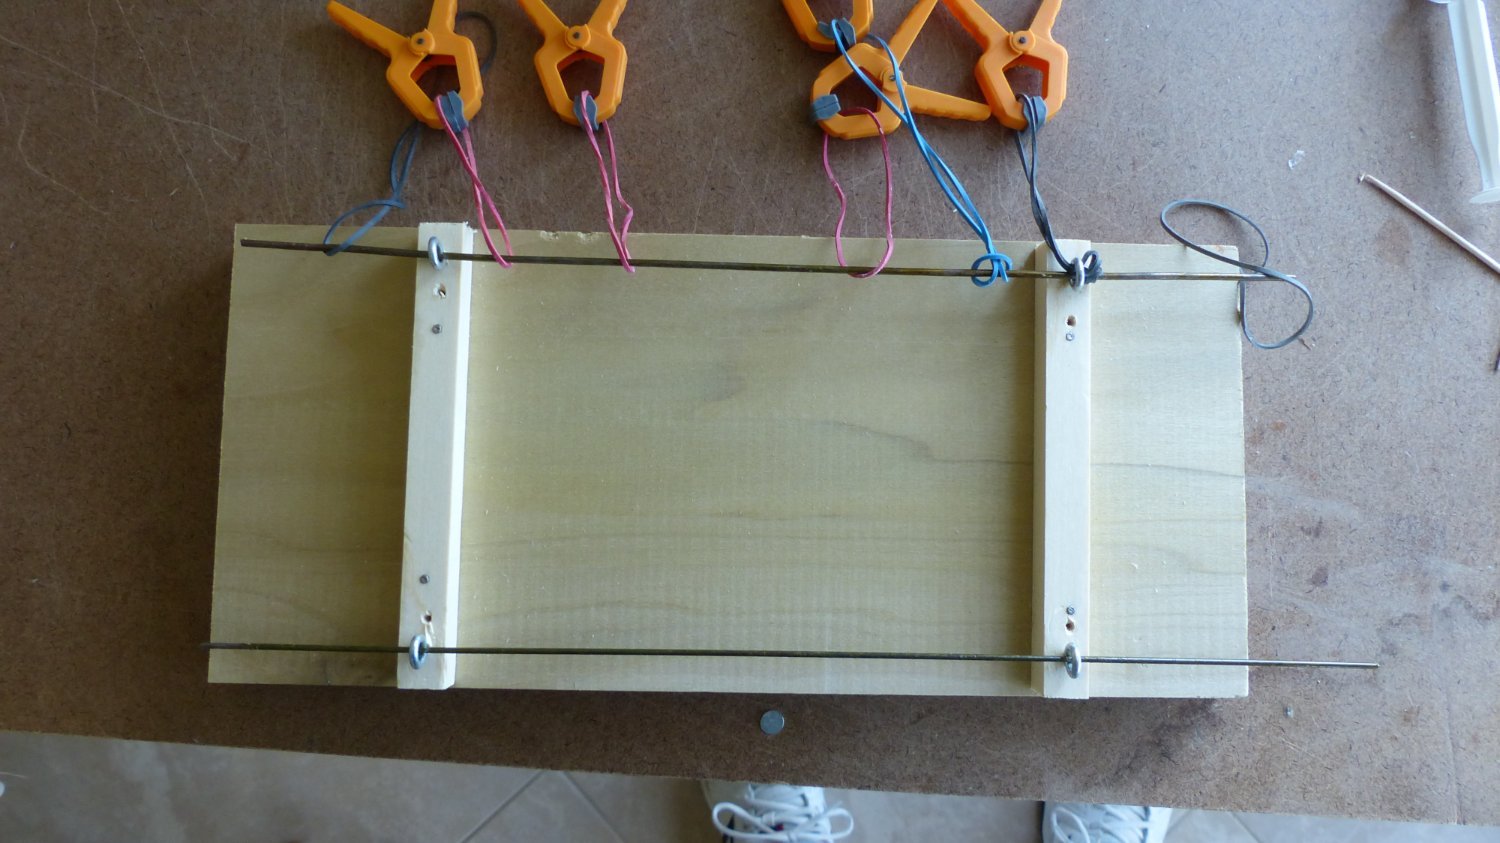
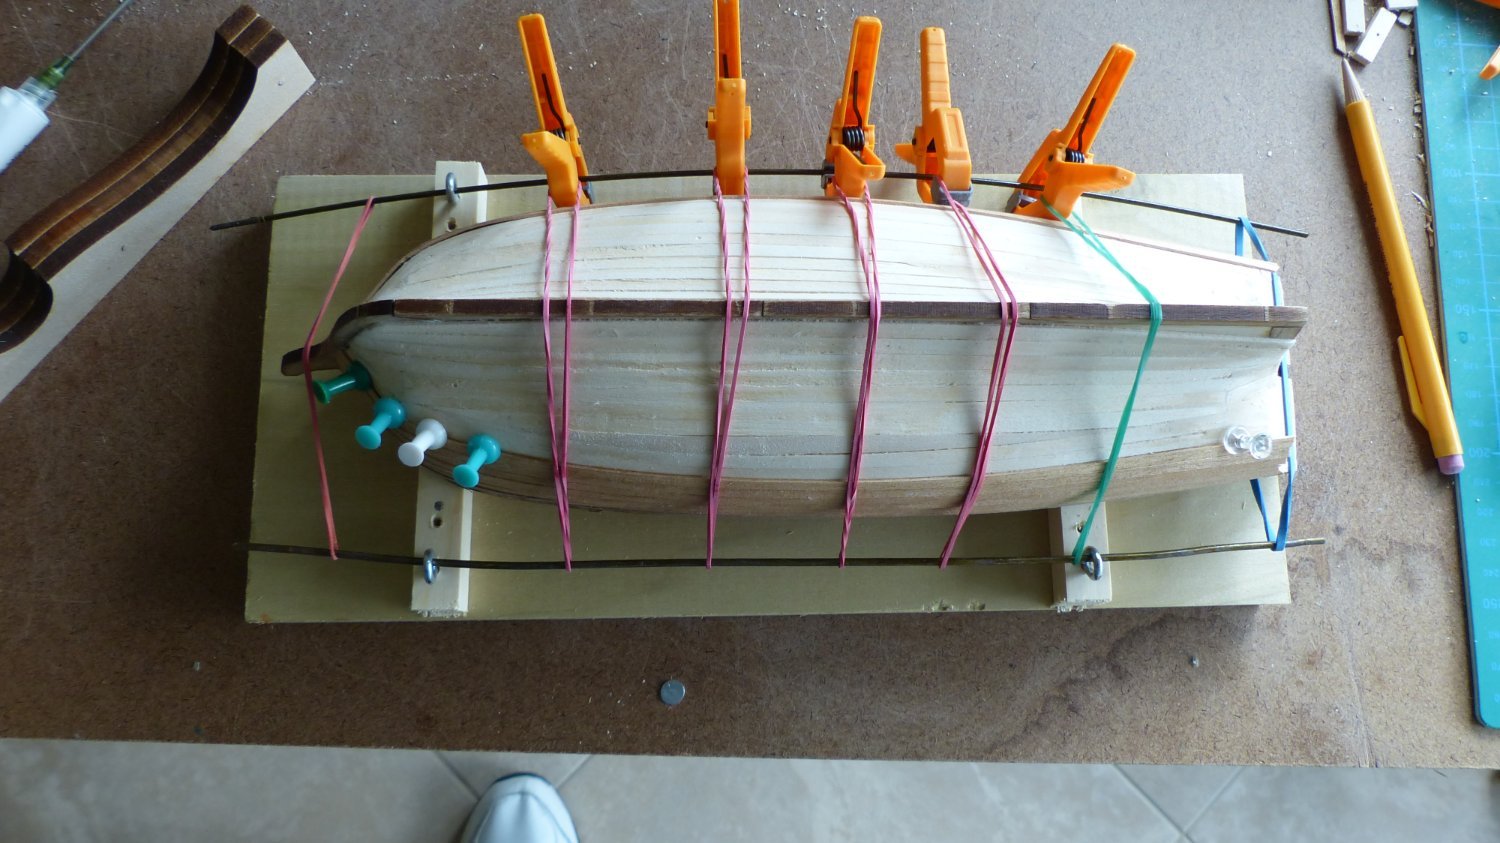
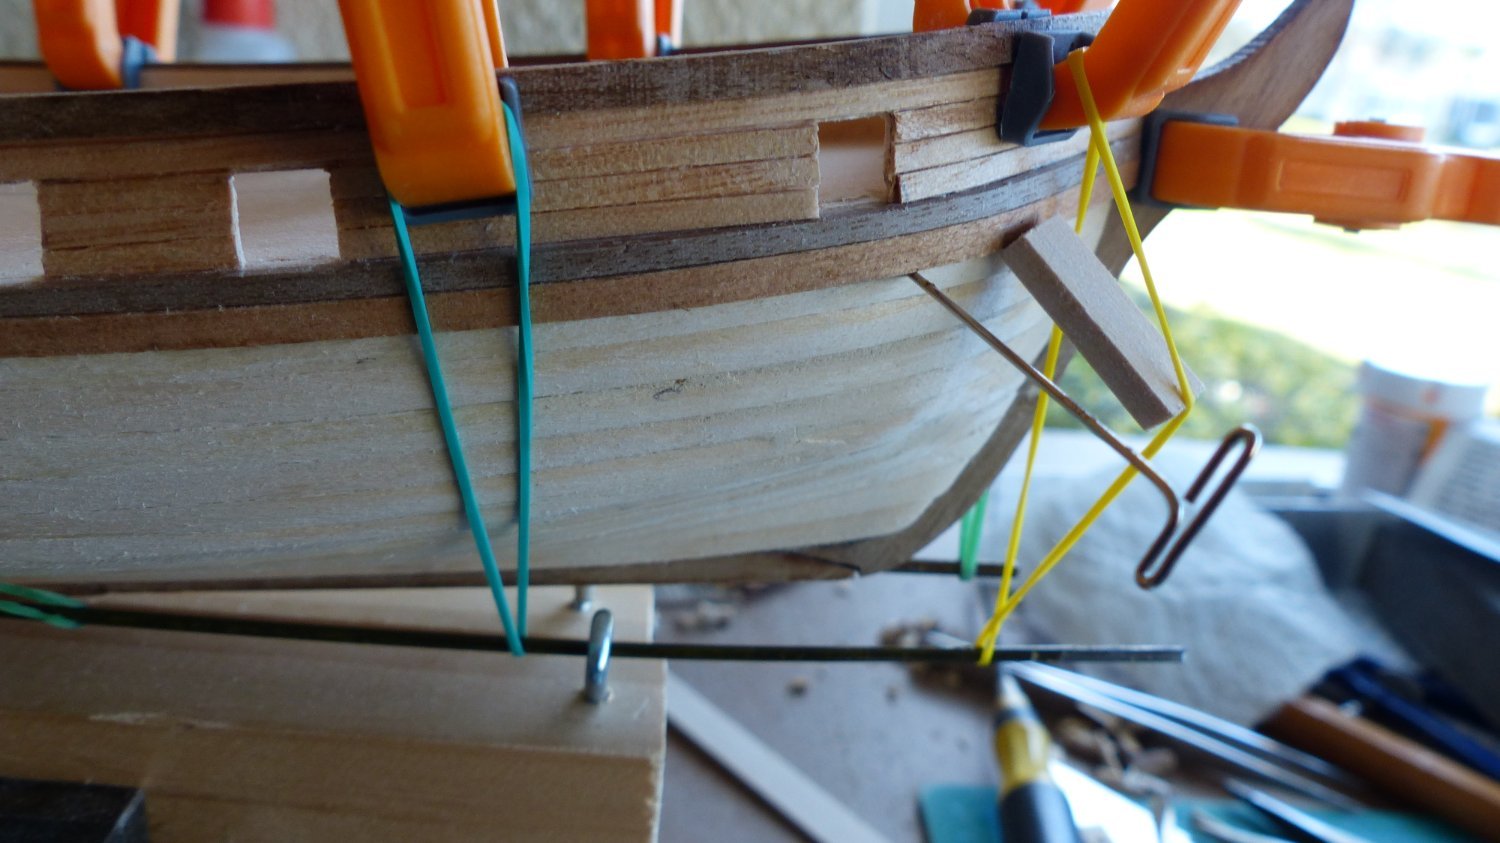
Adding a few more pics today, the jig that I made has helped a lot to hold it in place, it was modeled after one that was offered by a European Company
and I tried to purchase it but they had gone out of business.
Jack
.thumb.jpg.40829ec959b31af2bb790f5e1c407c4c.jpg)

- javajohn, Thukydides, Knocklouder and 4 others
-
7
-
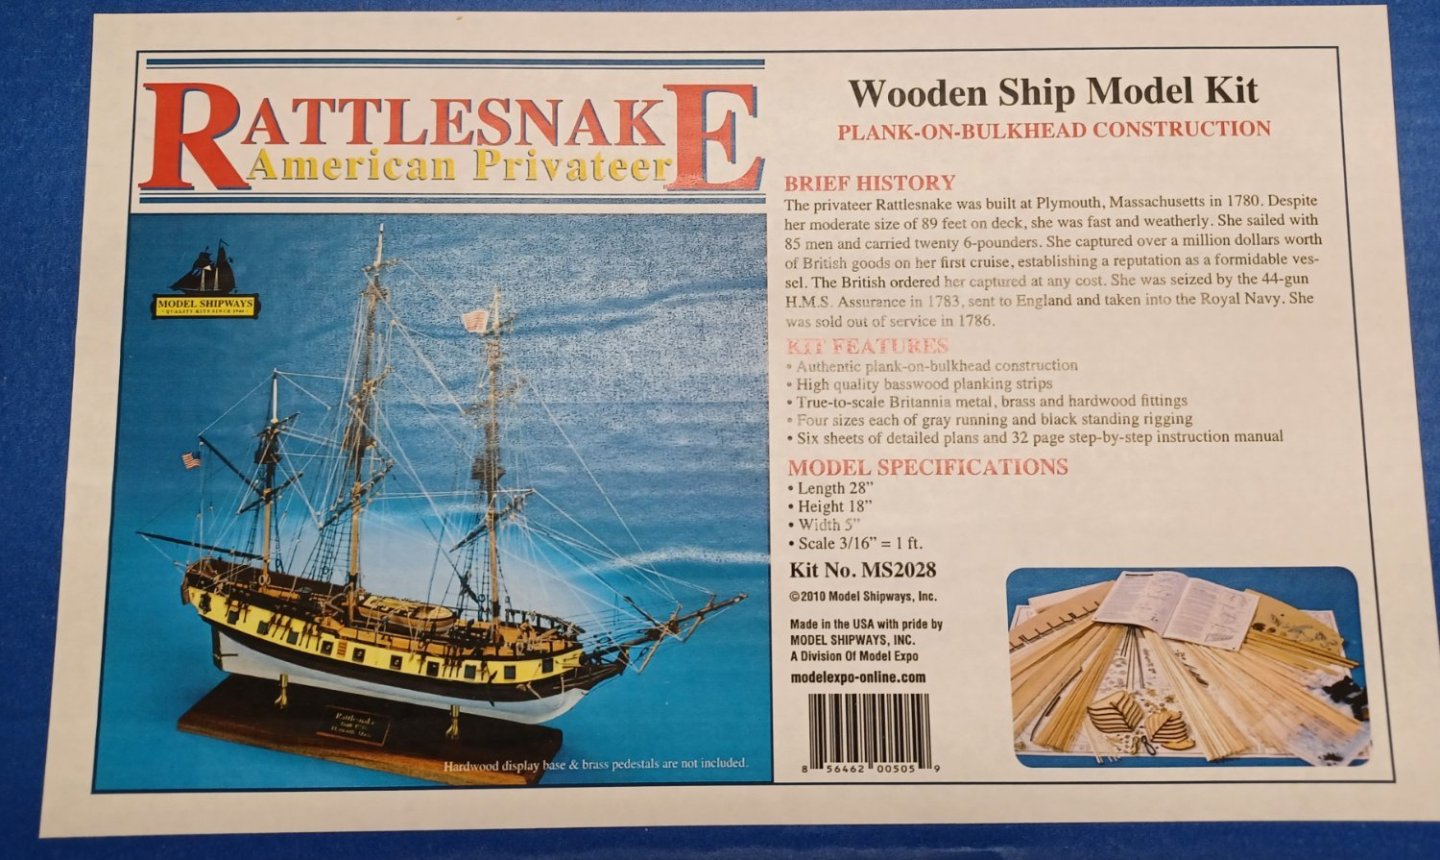
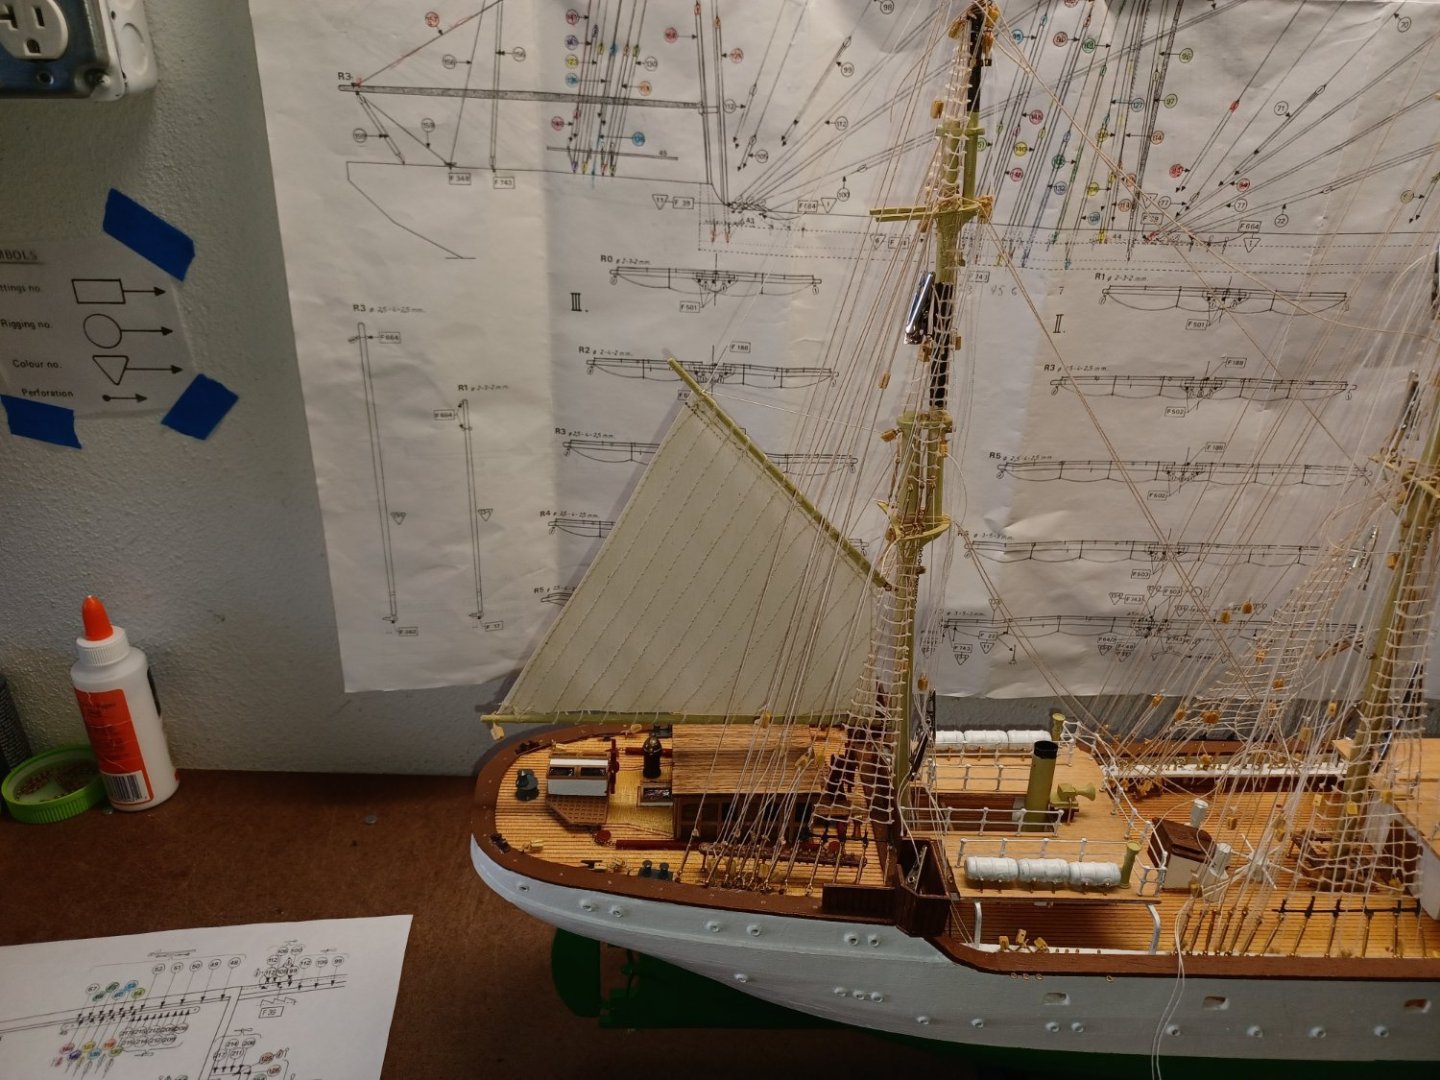
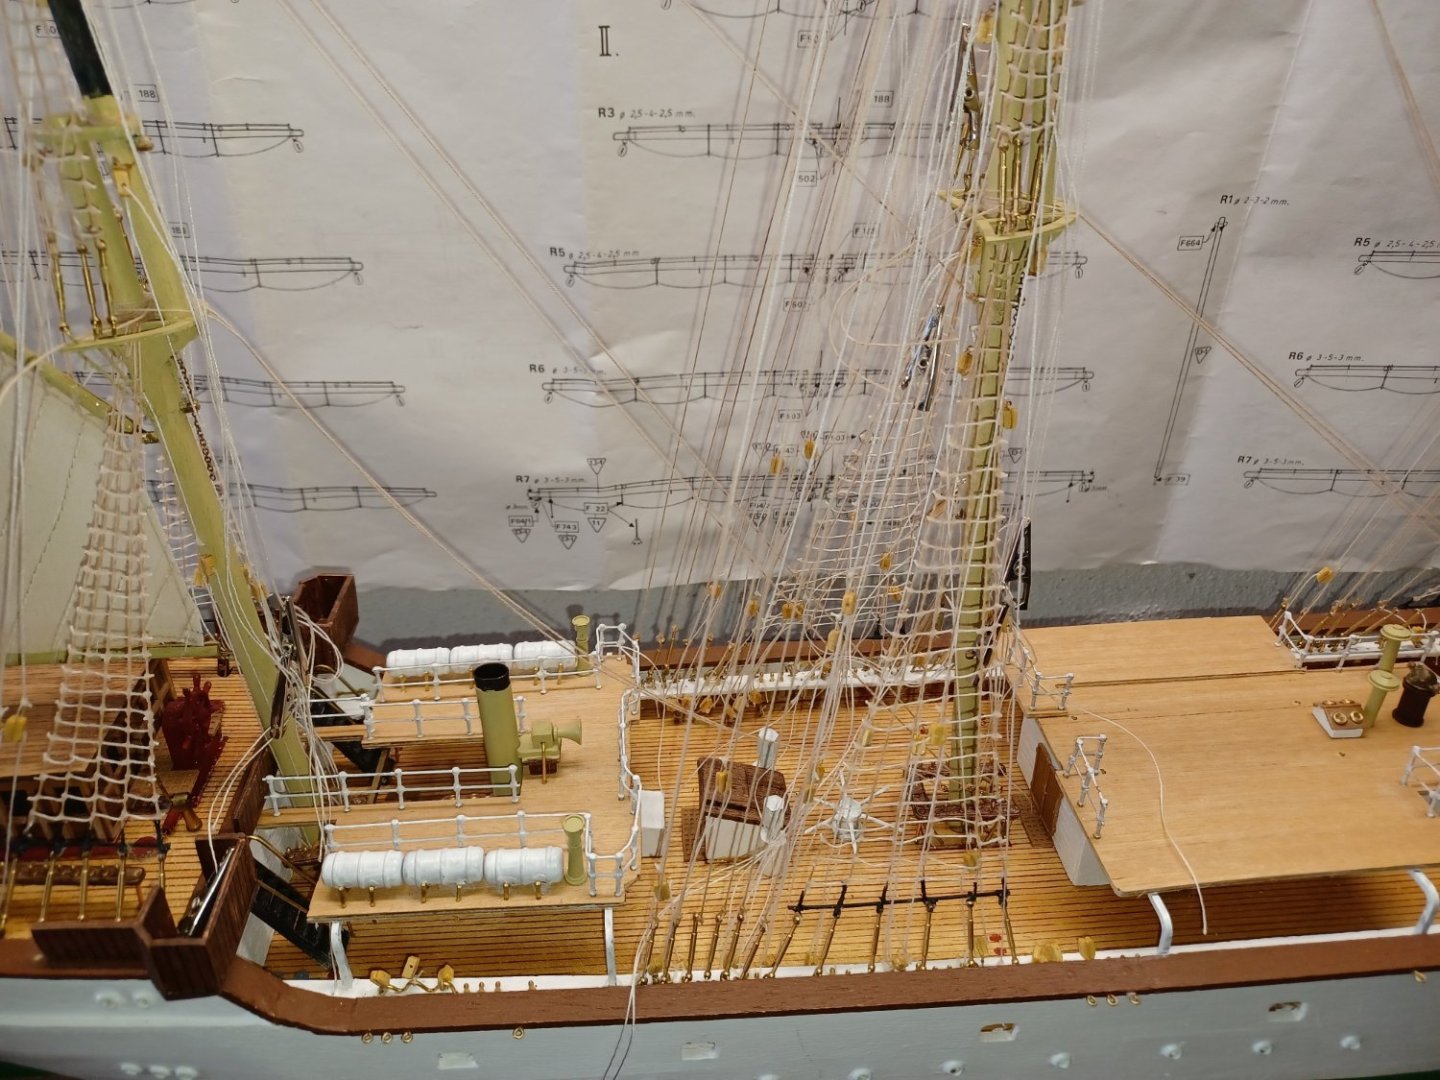
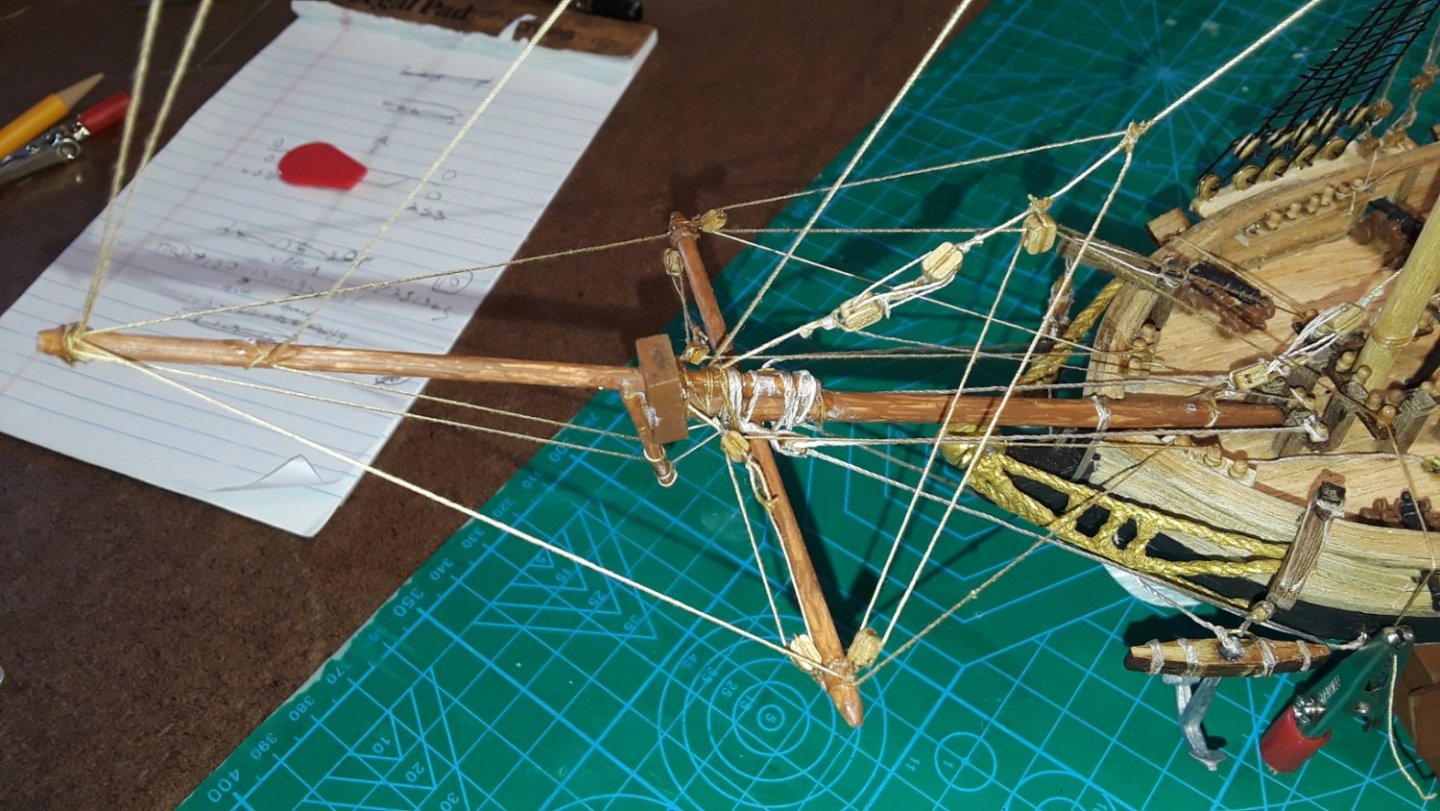
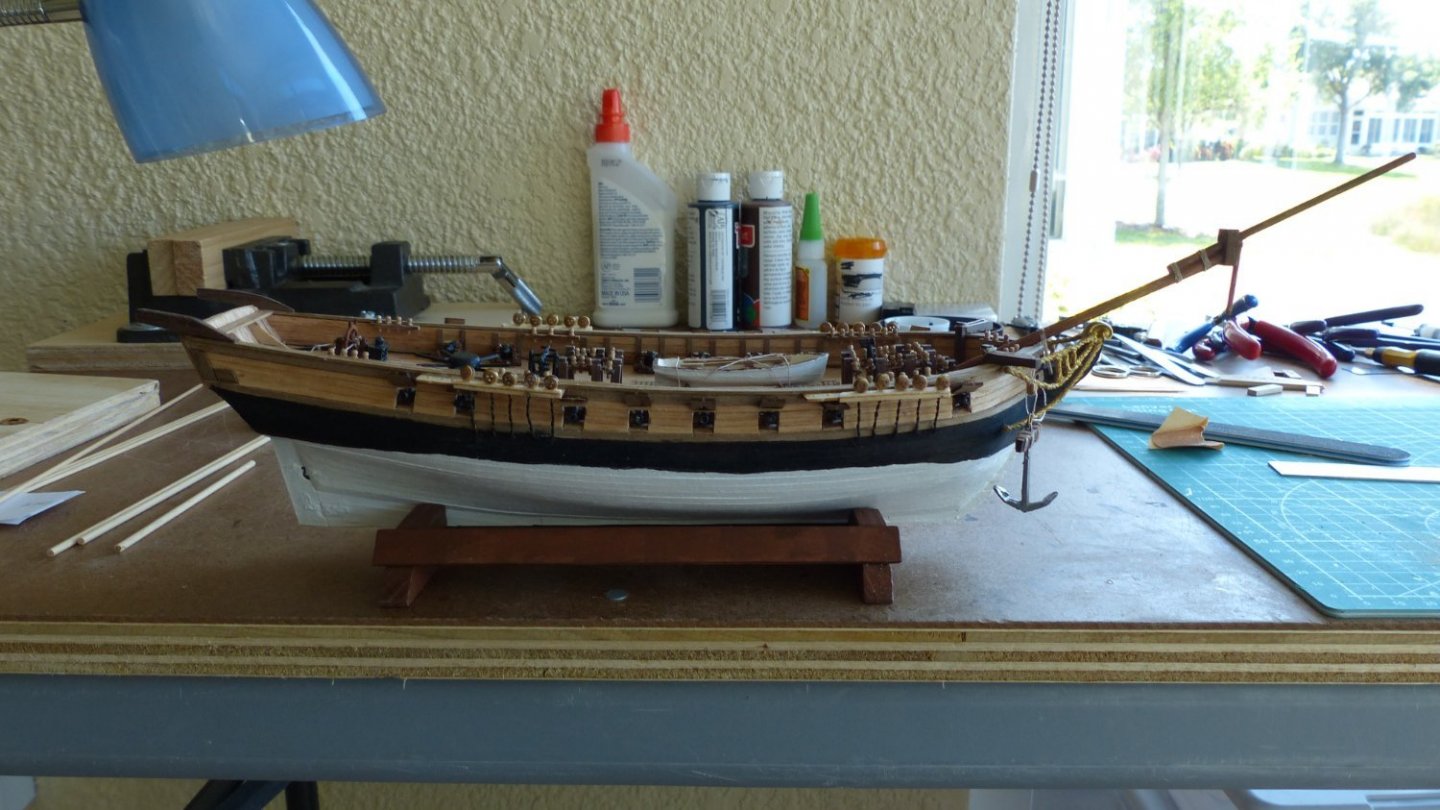
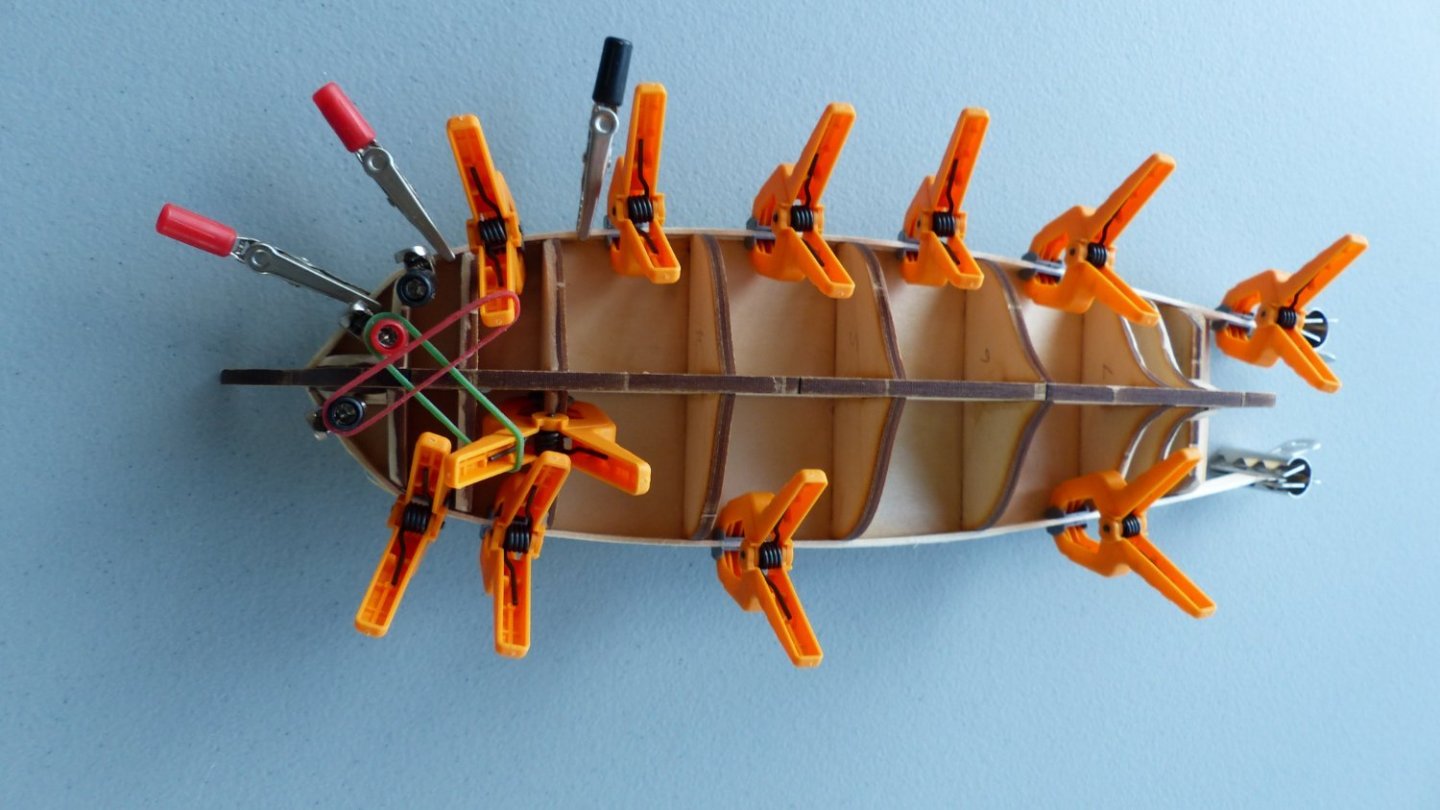
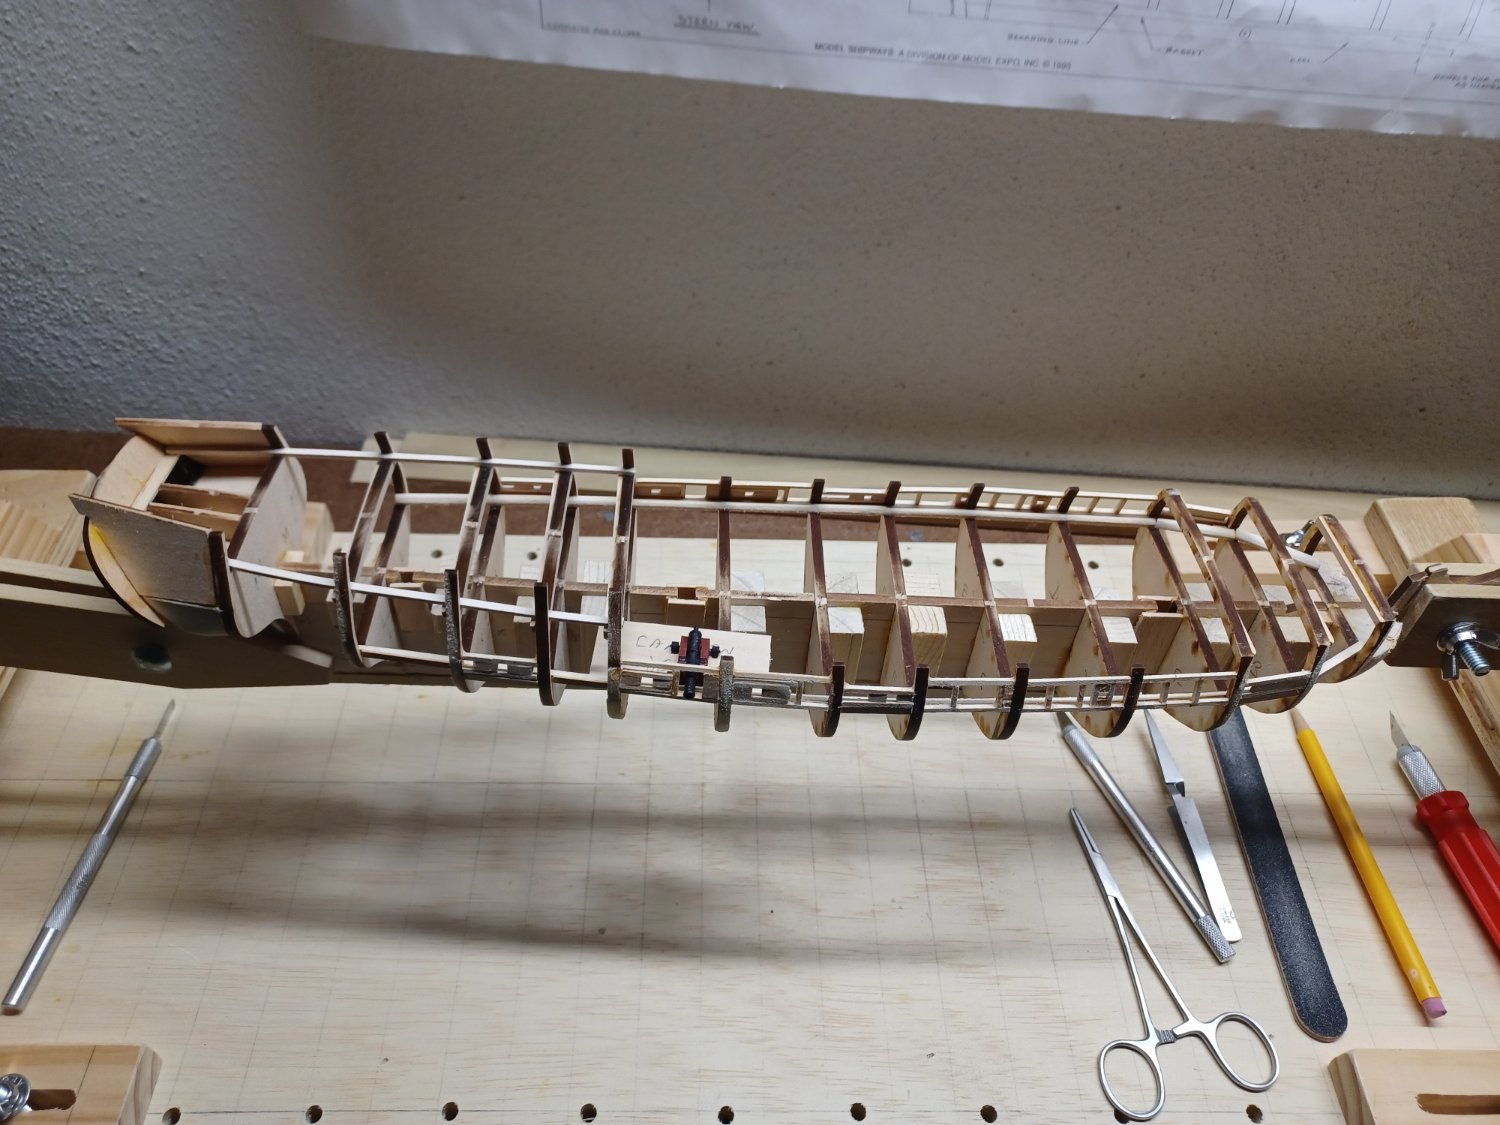
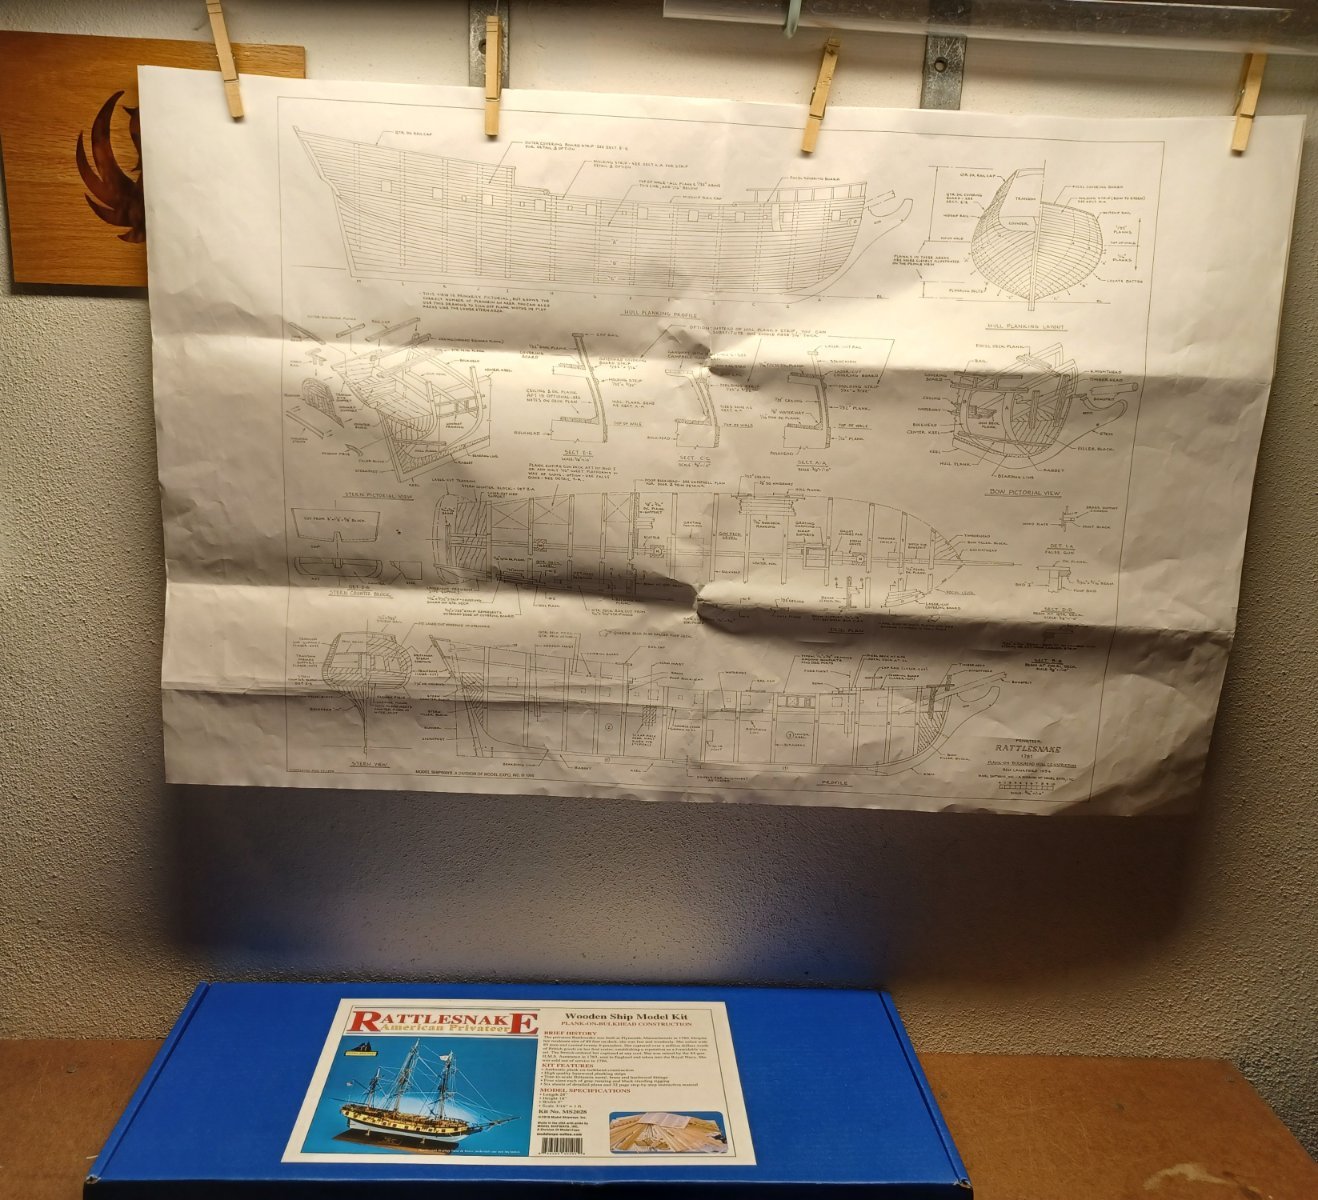
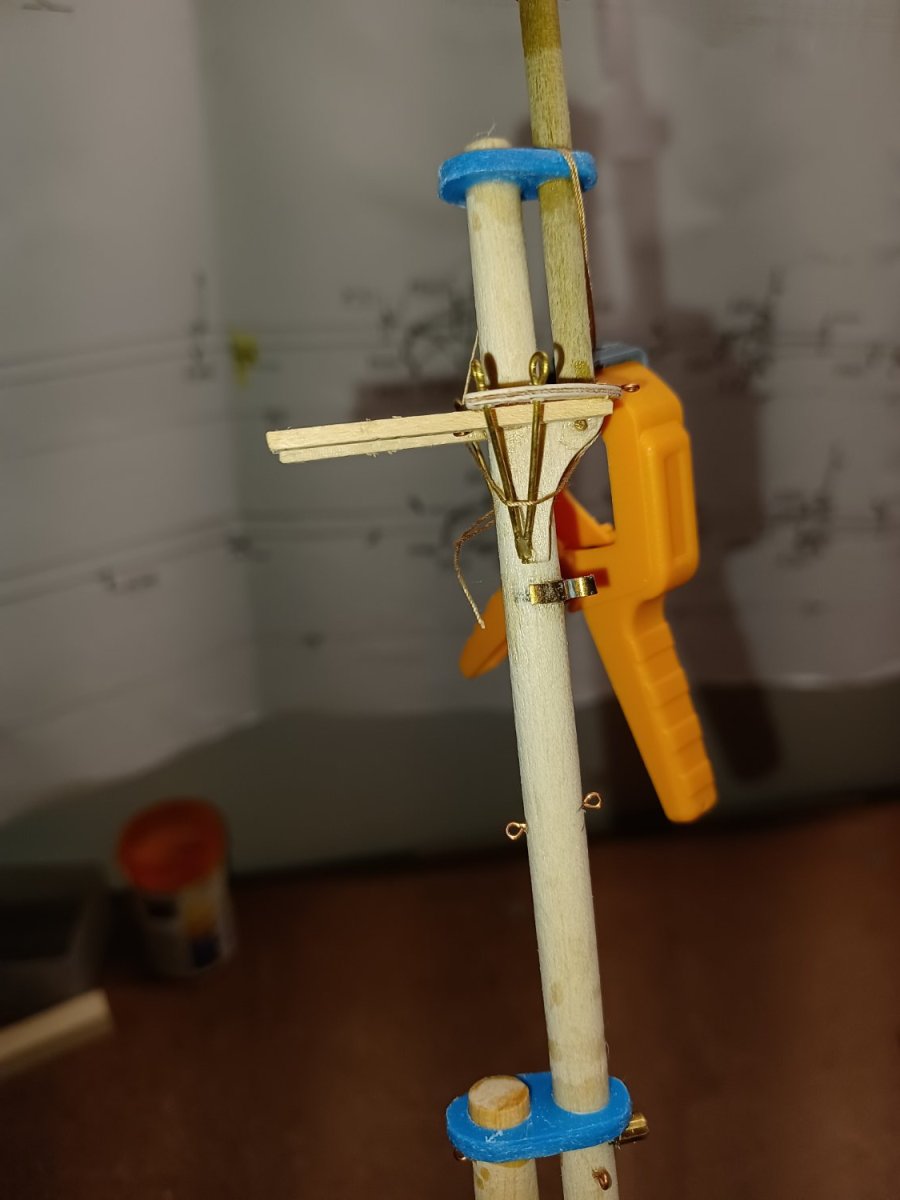
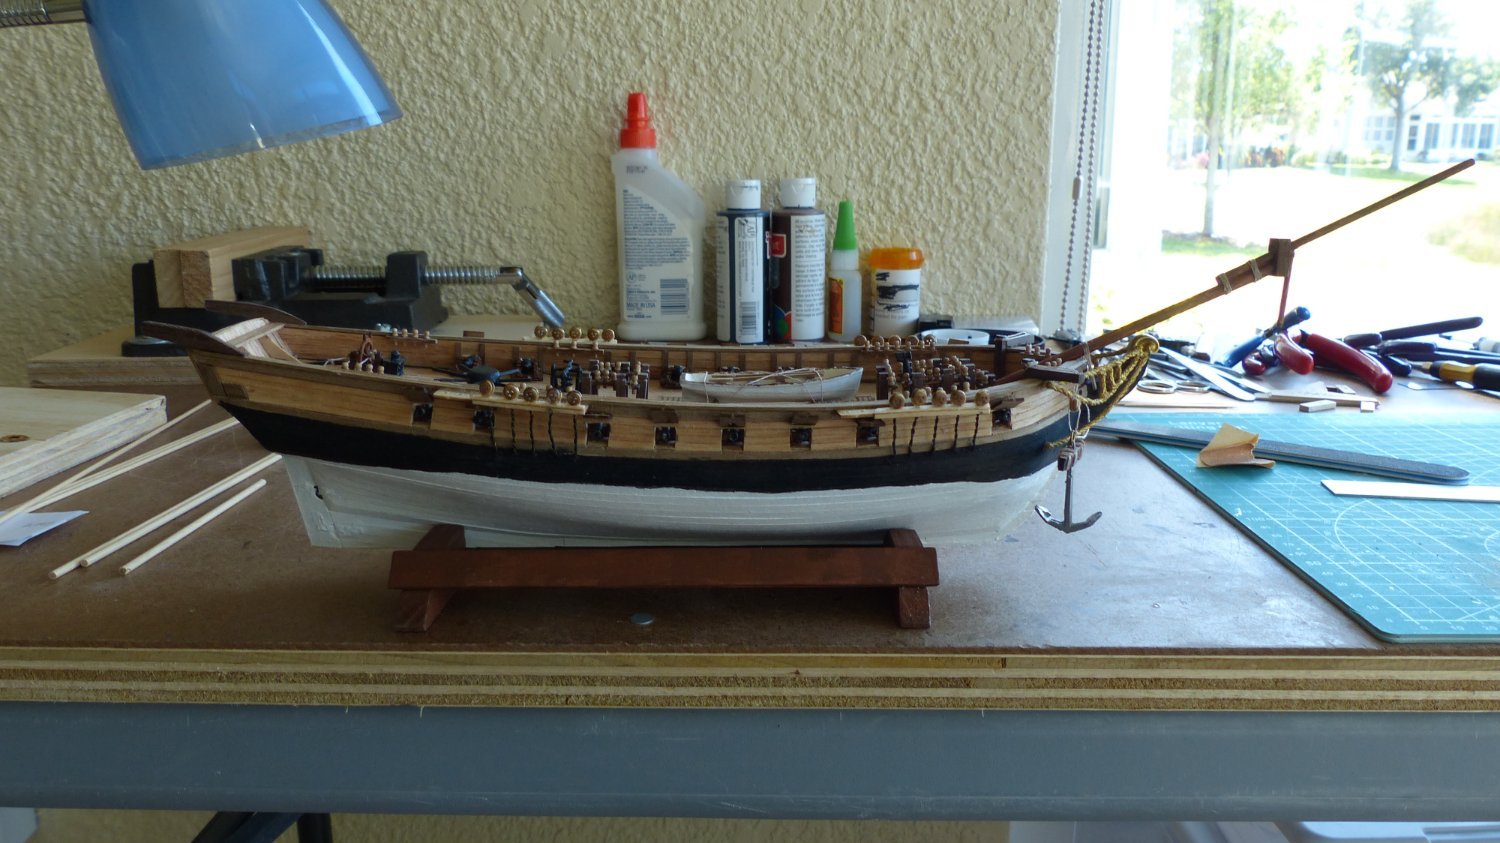
Finally cooling off in Florida - time to start another build, the rigging plan on this one is a nightmare, the set that I got the plan is all black and white.
The instruction booklet says that the running rigging should be in red.
Contacted Model Expo a couple of weeks ago to try to get the plan with running rigging marked in red and so far no response.
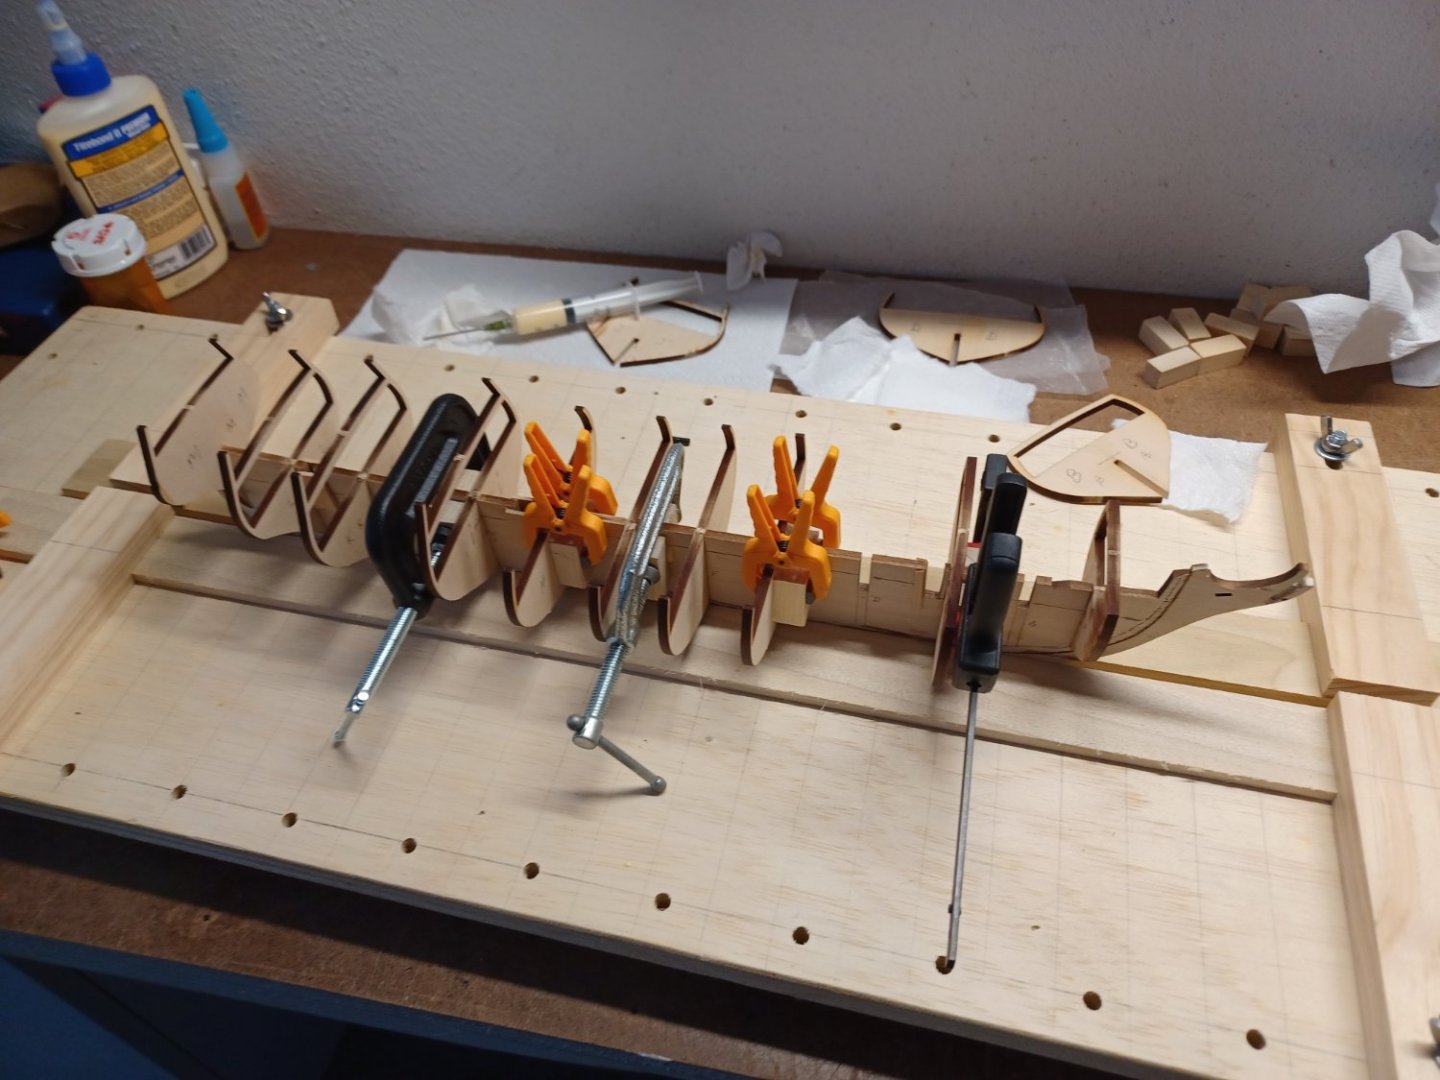
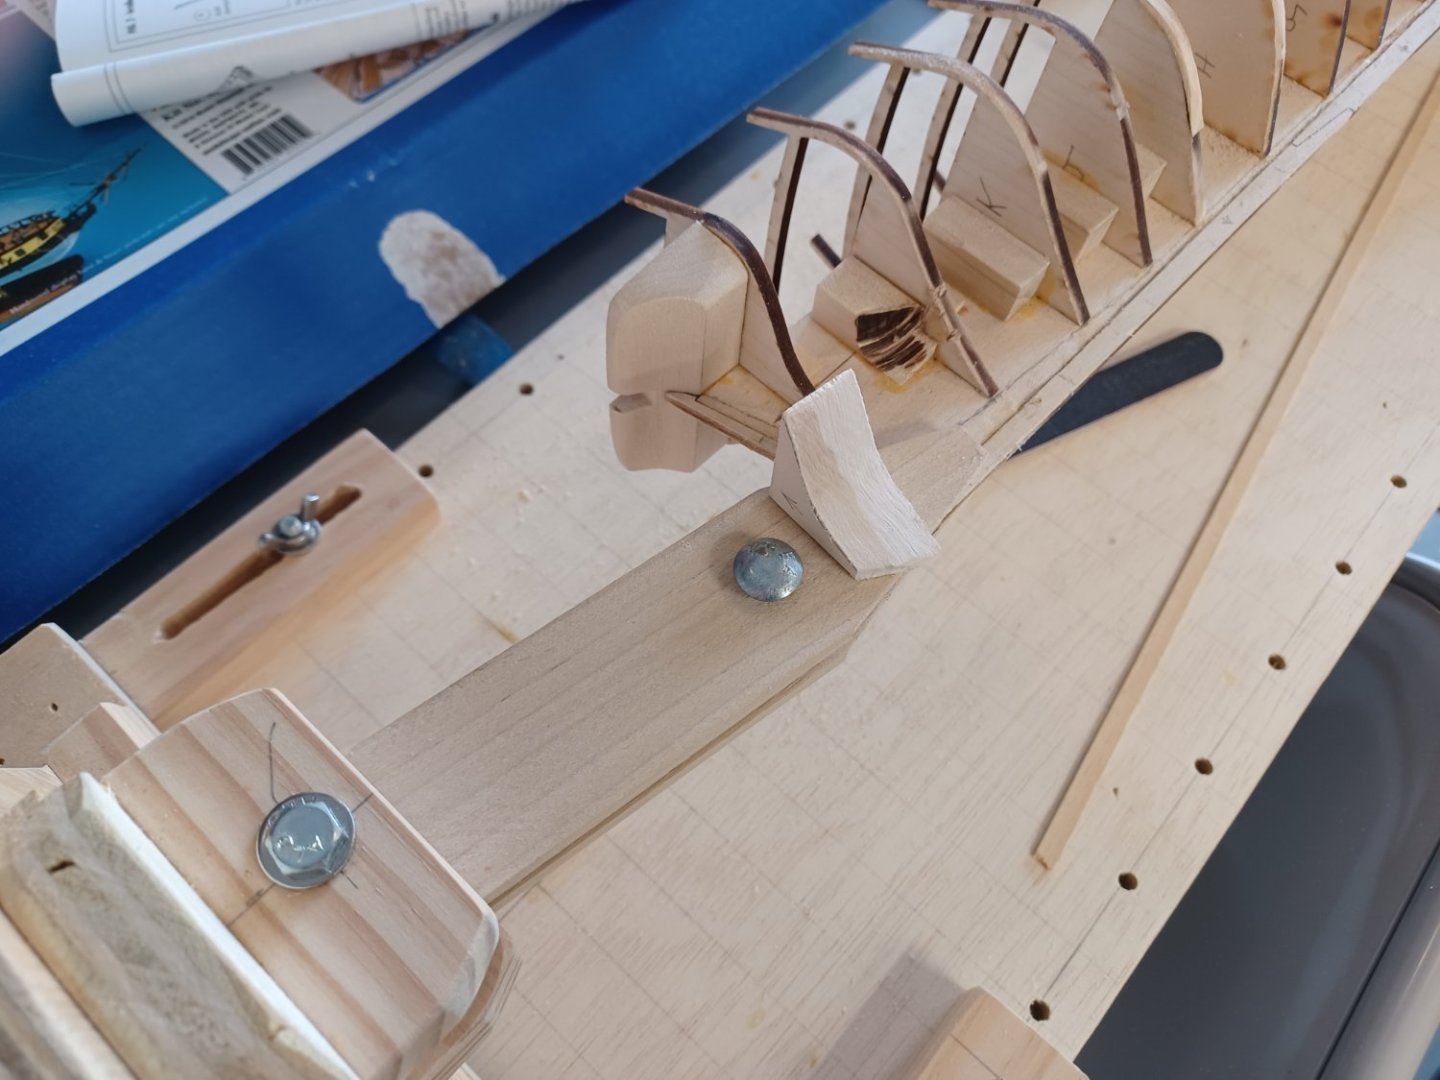
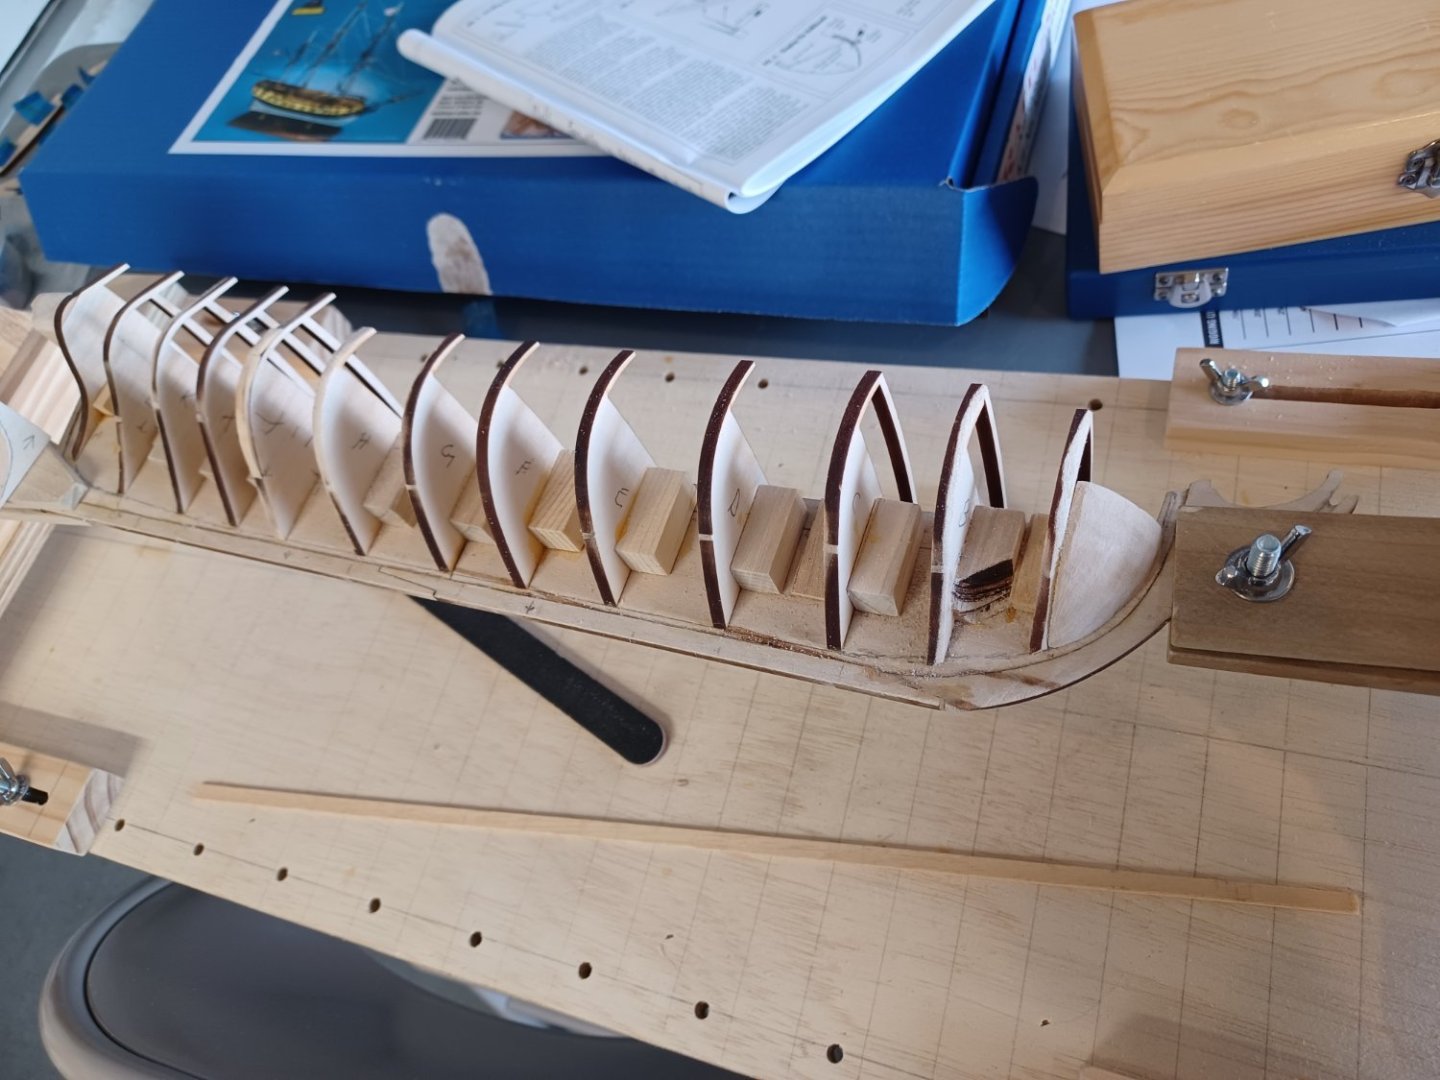
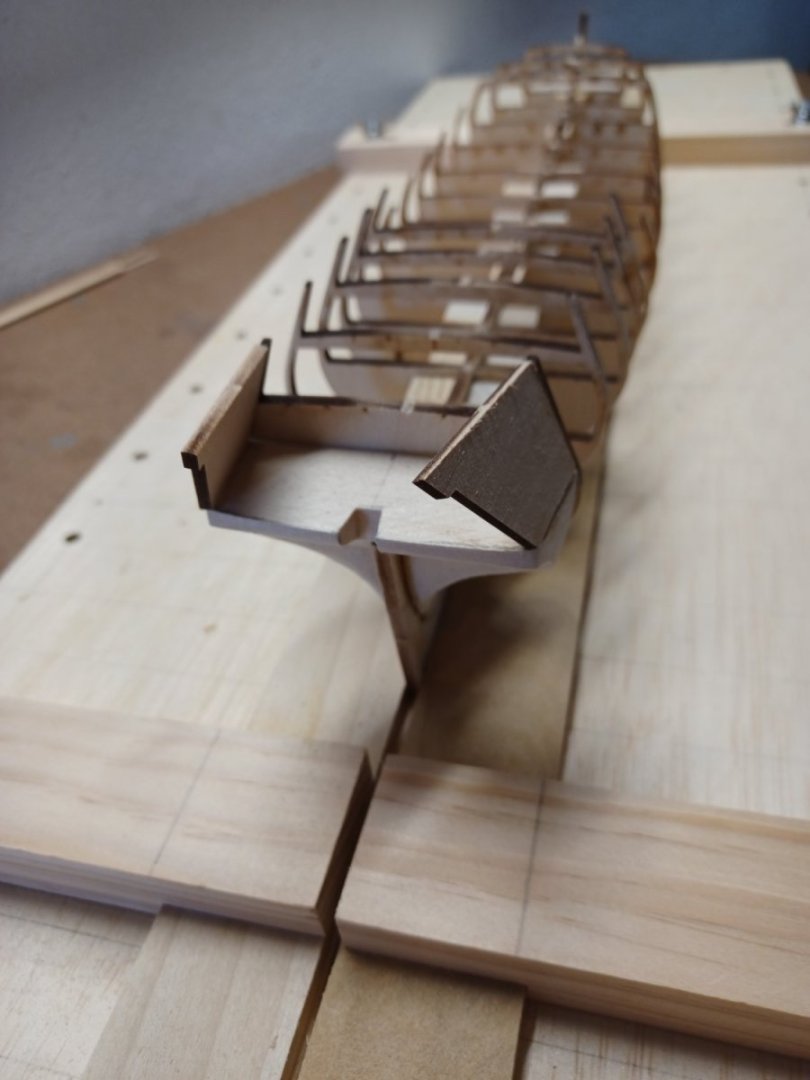
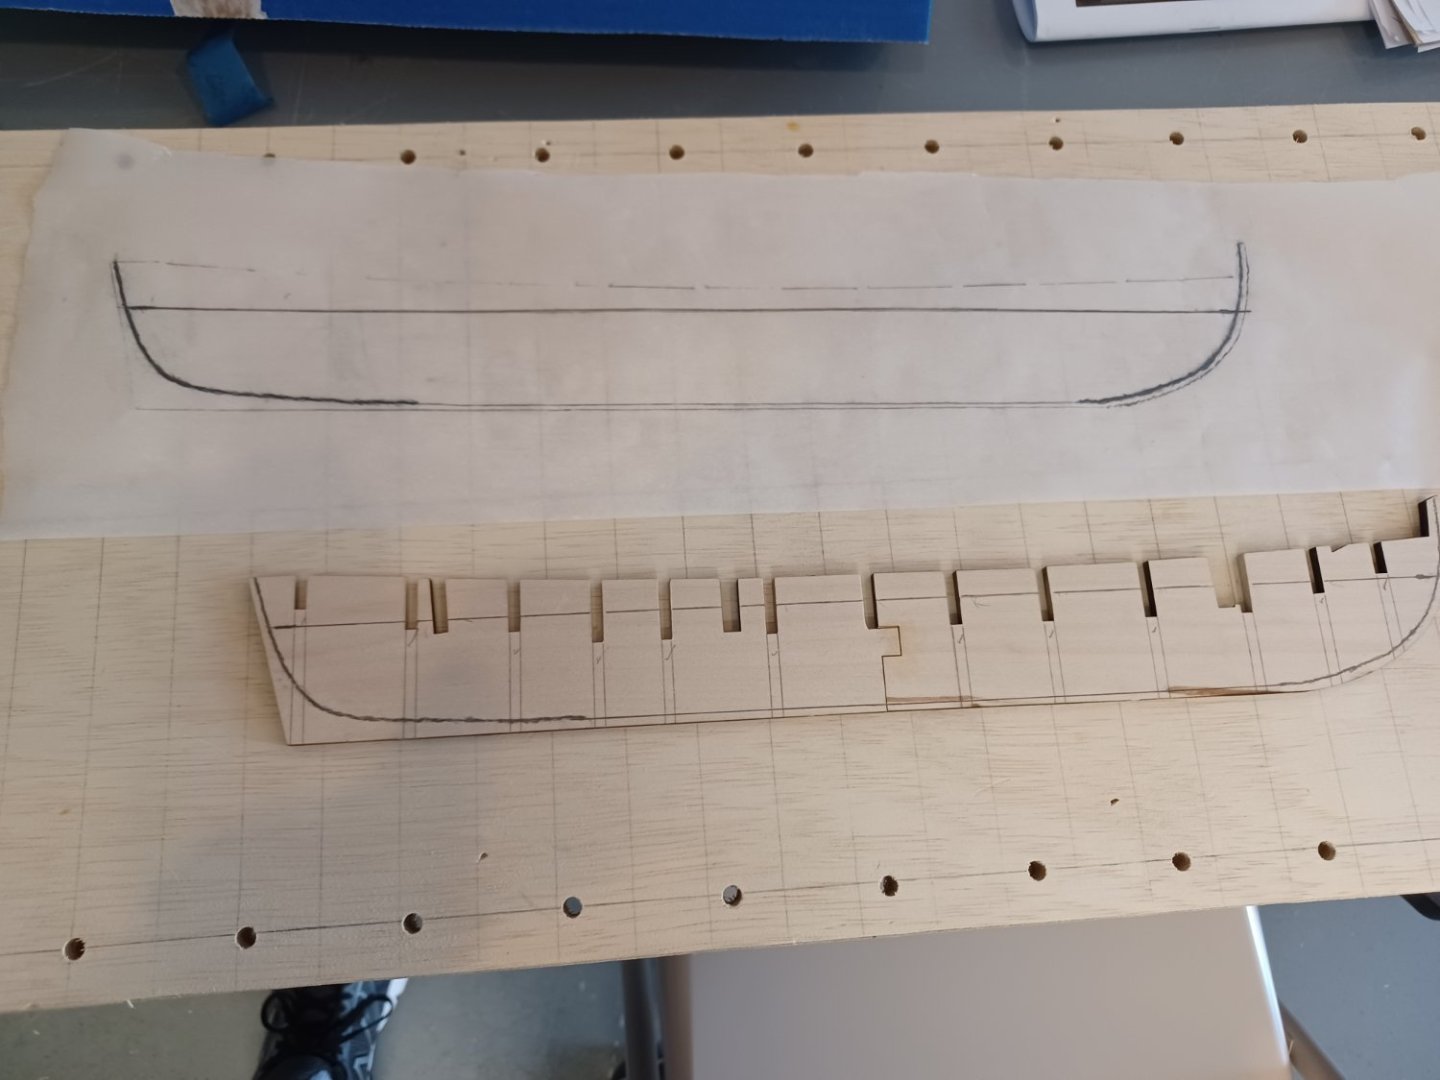
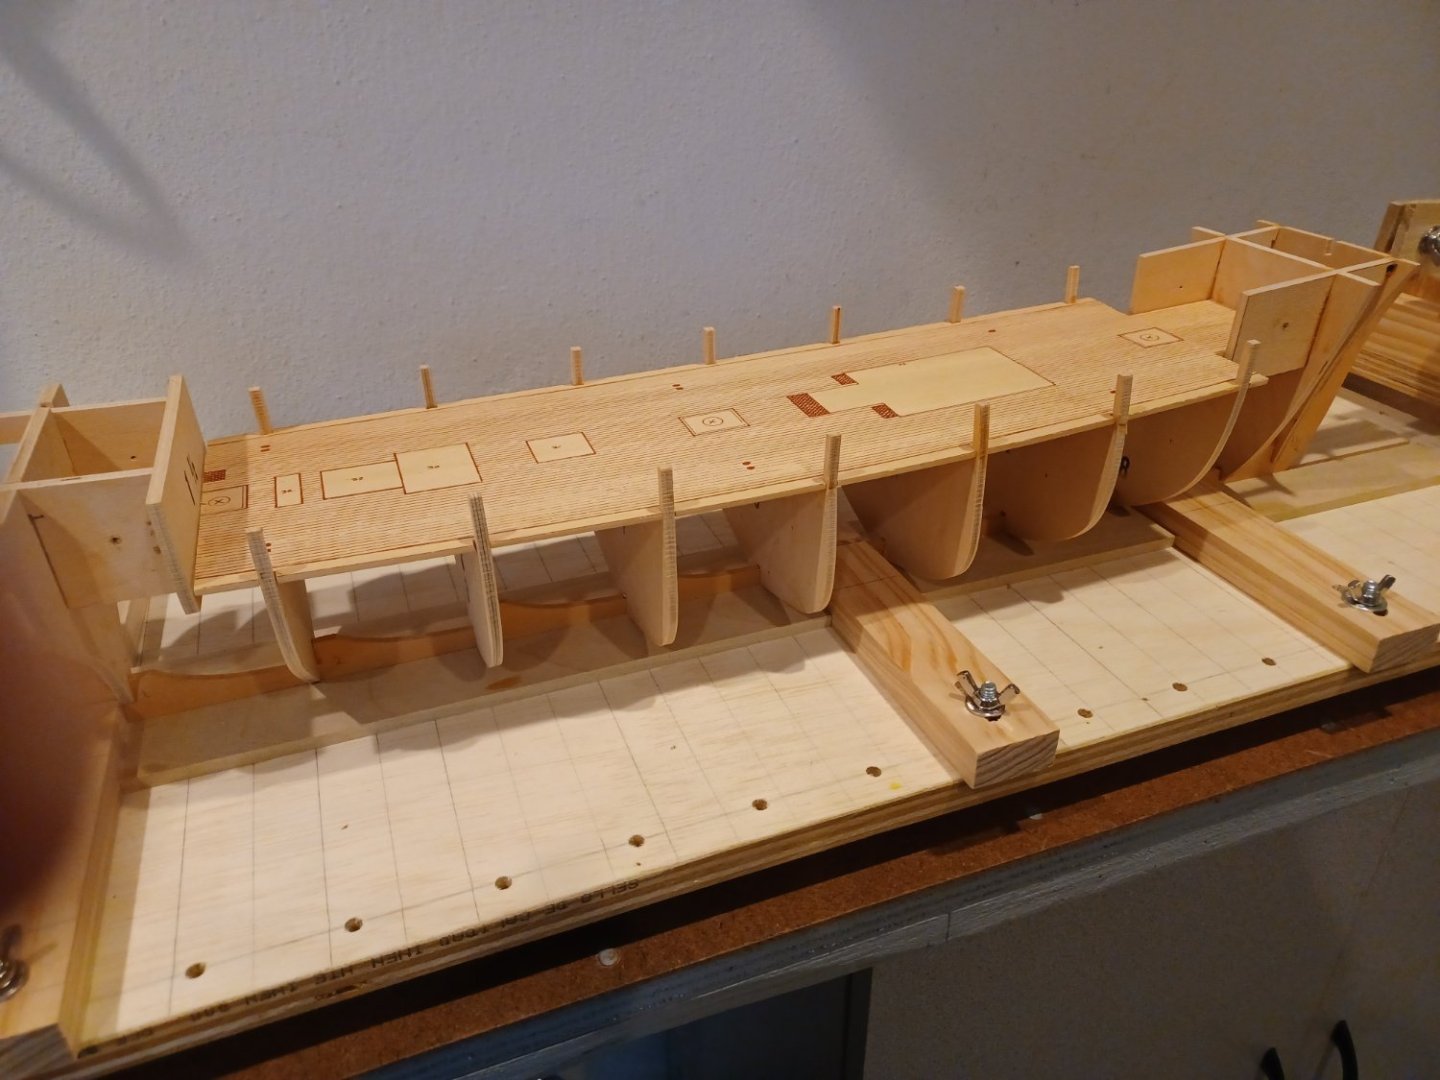
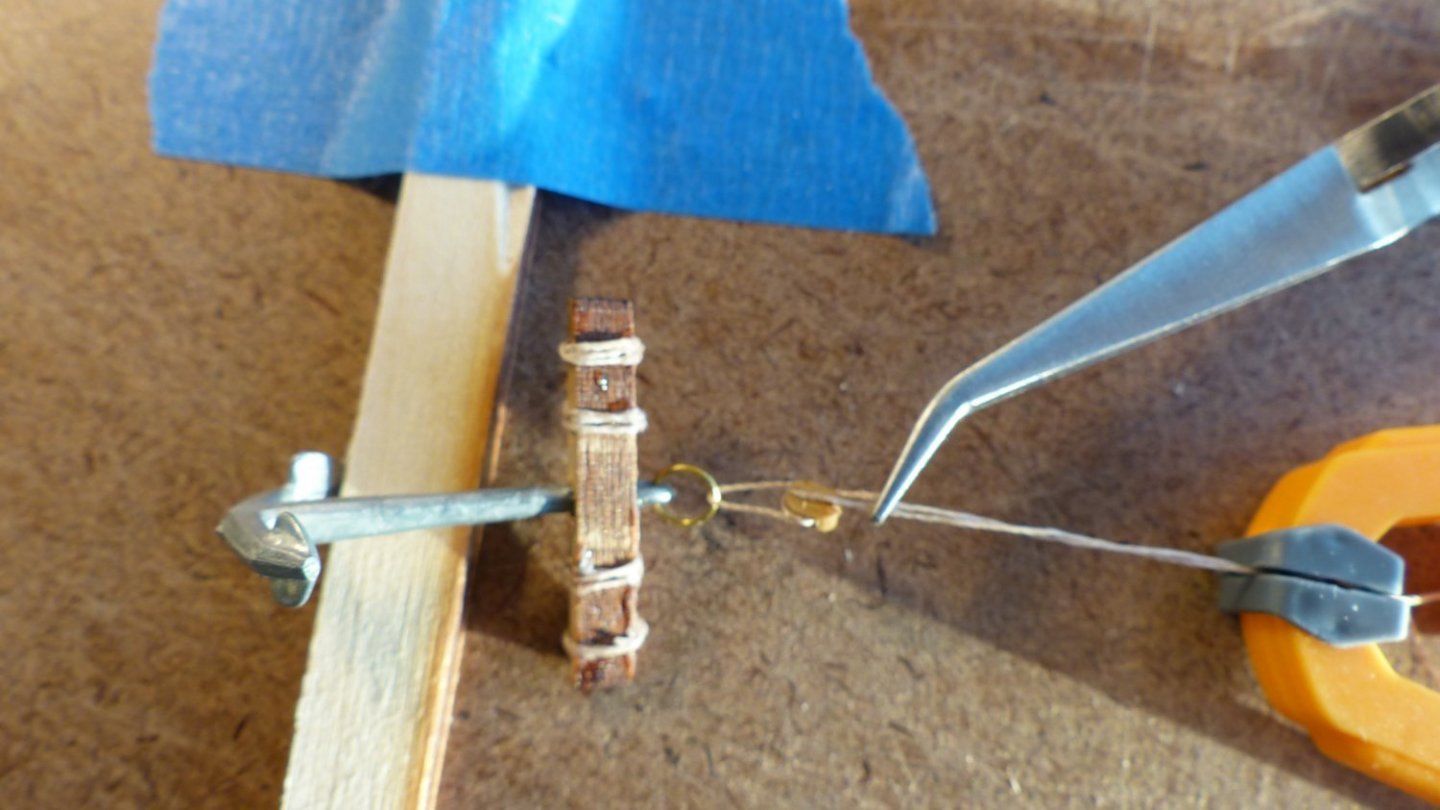
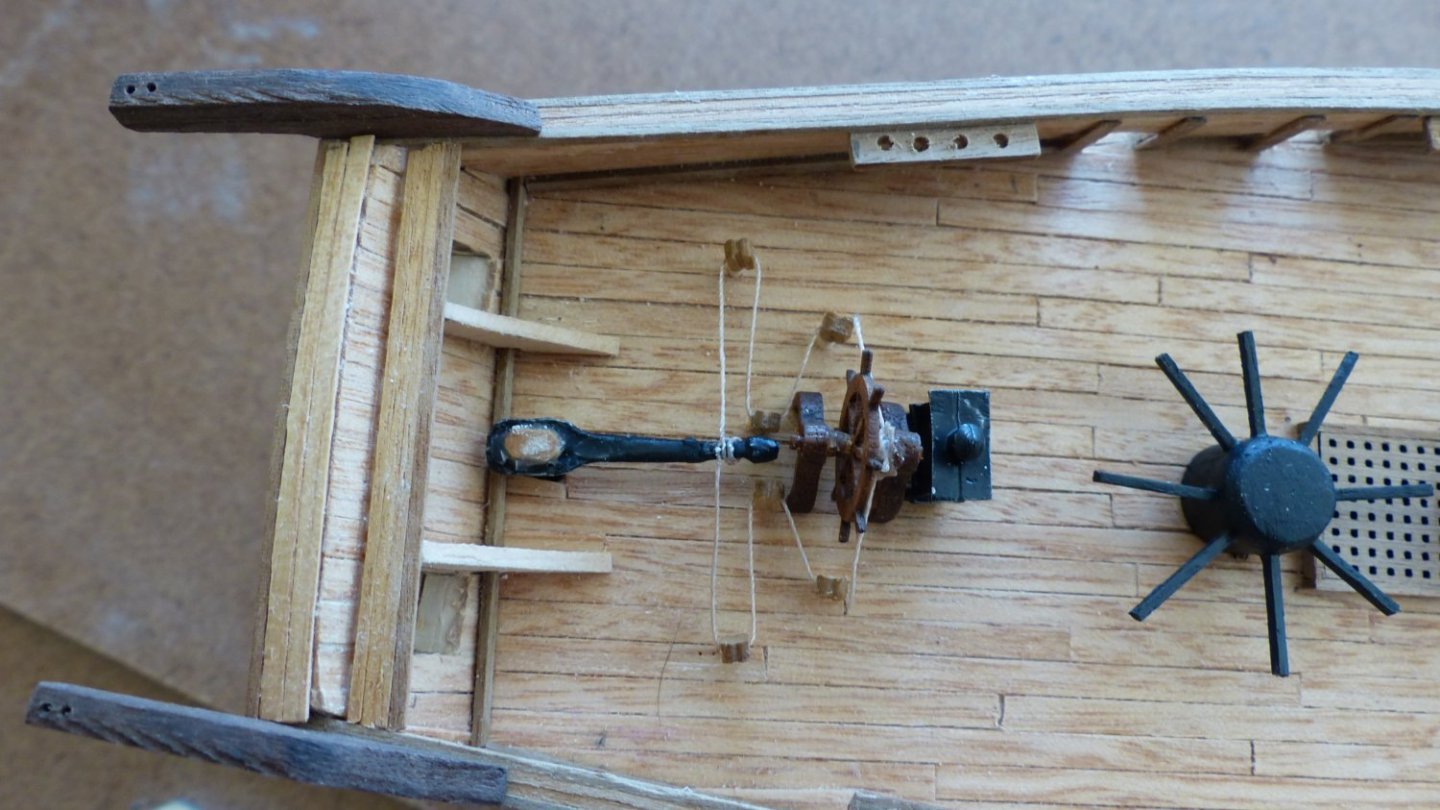
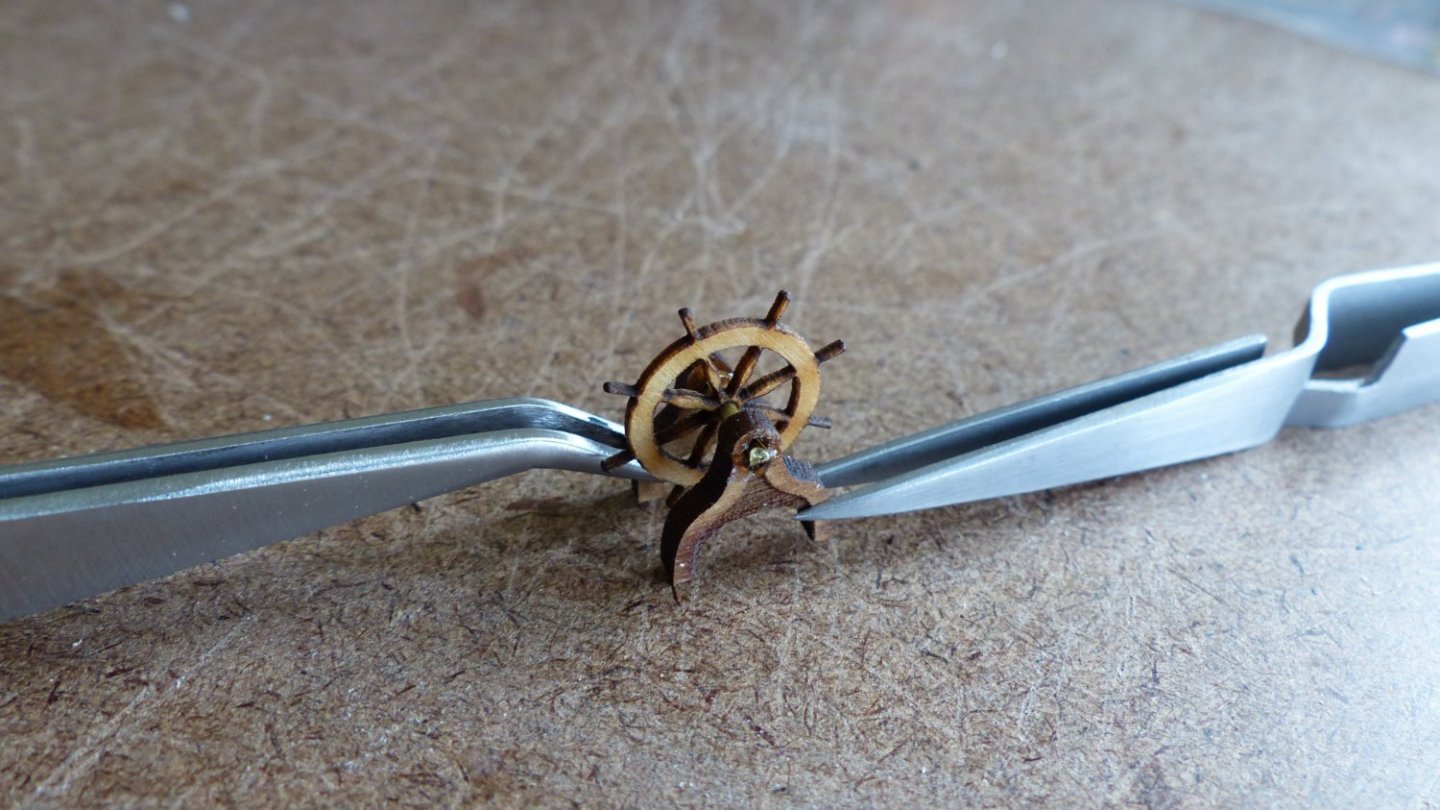
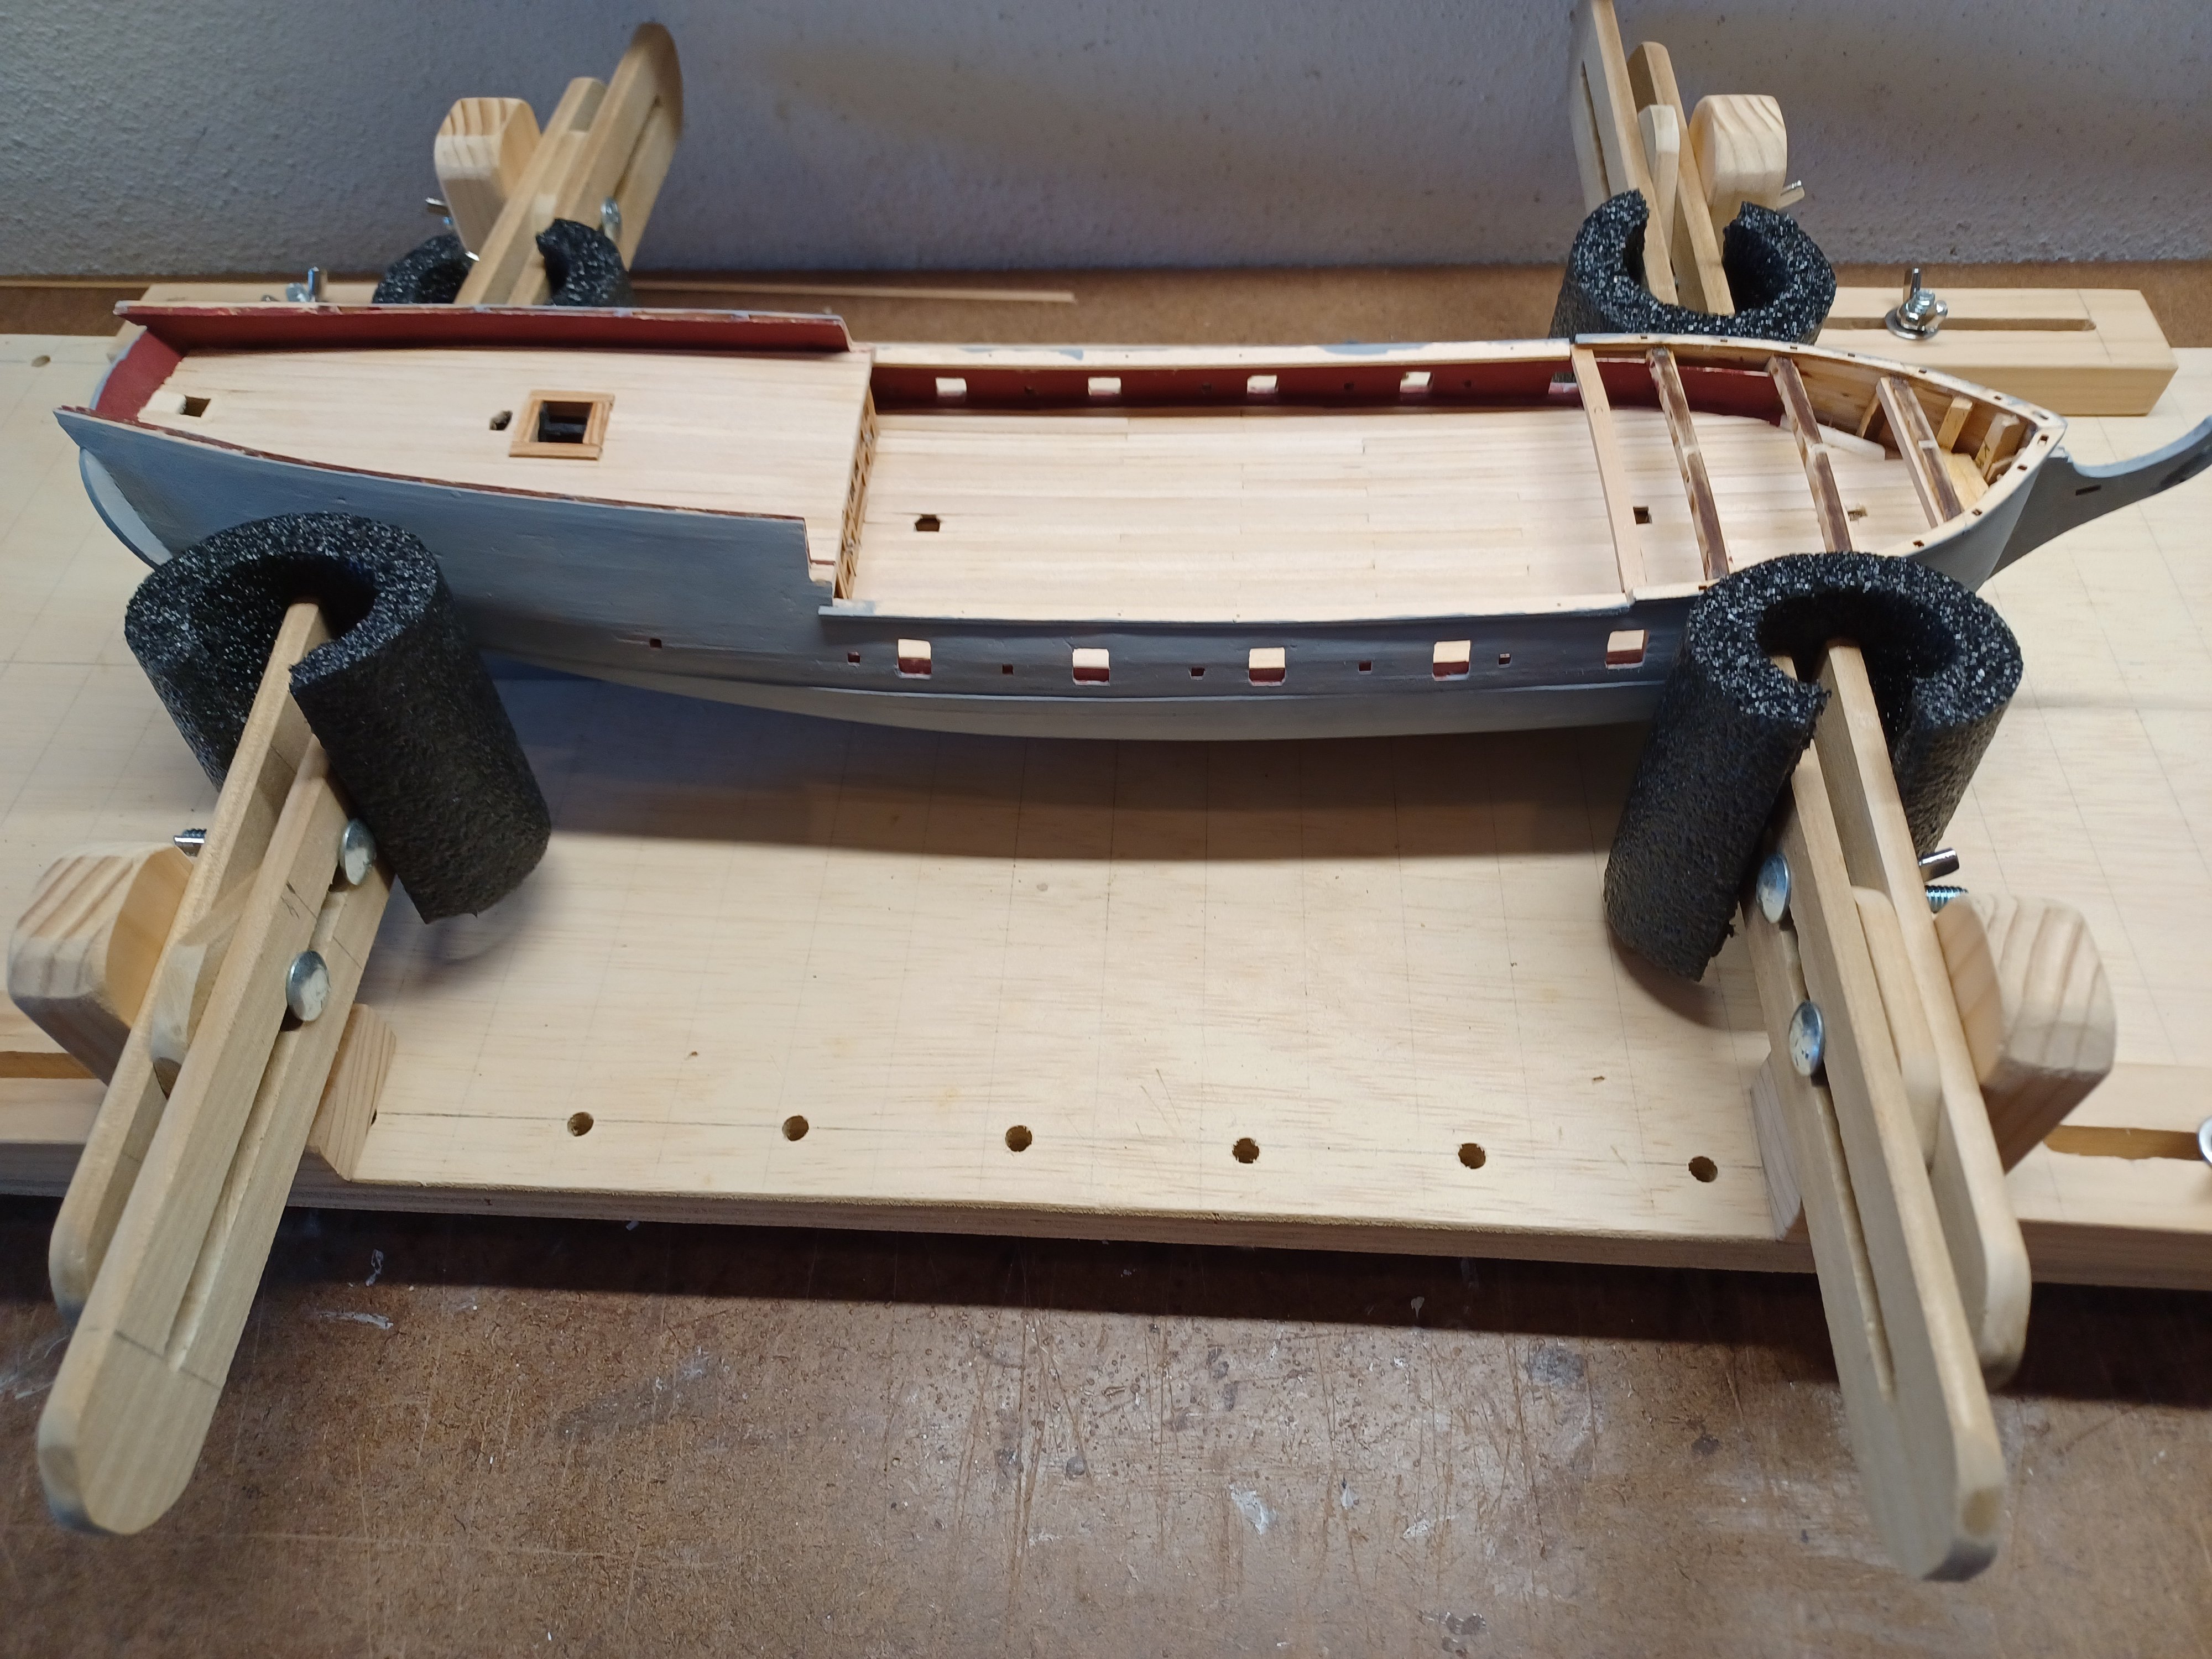
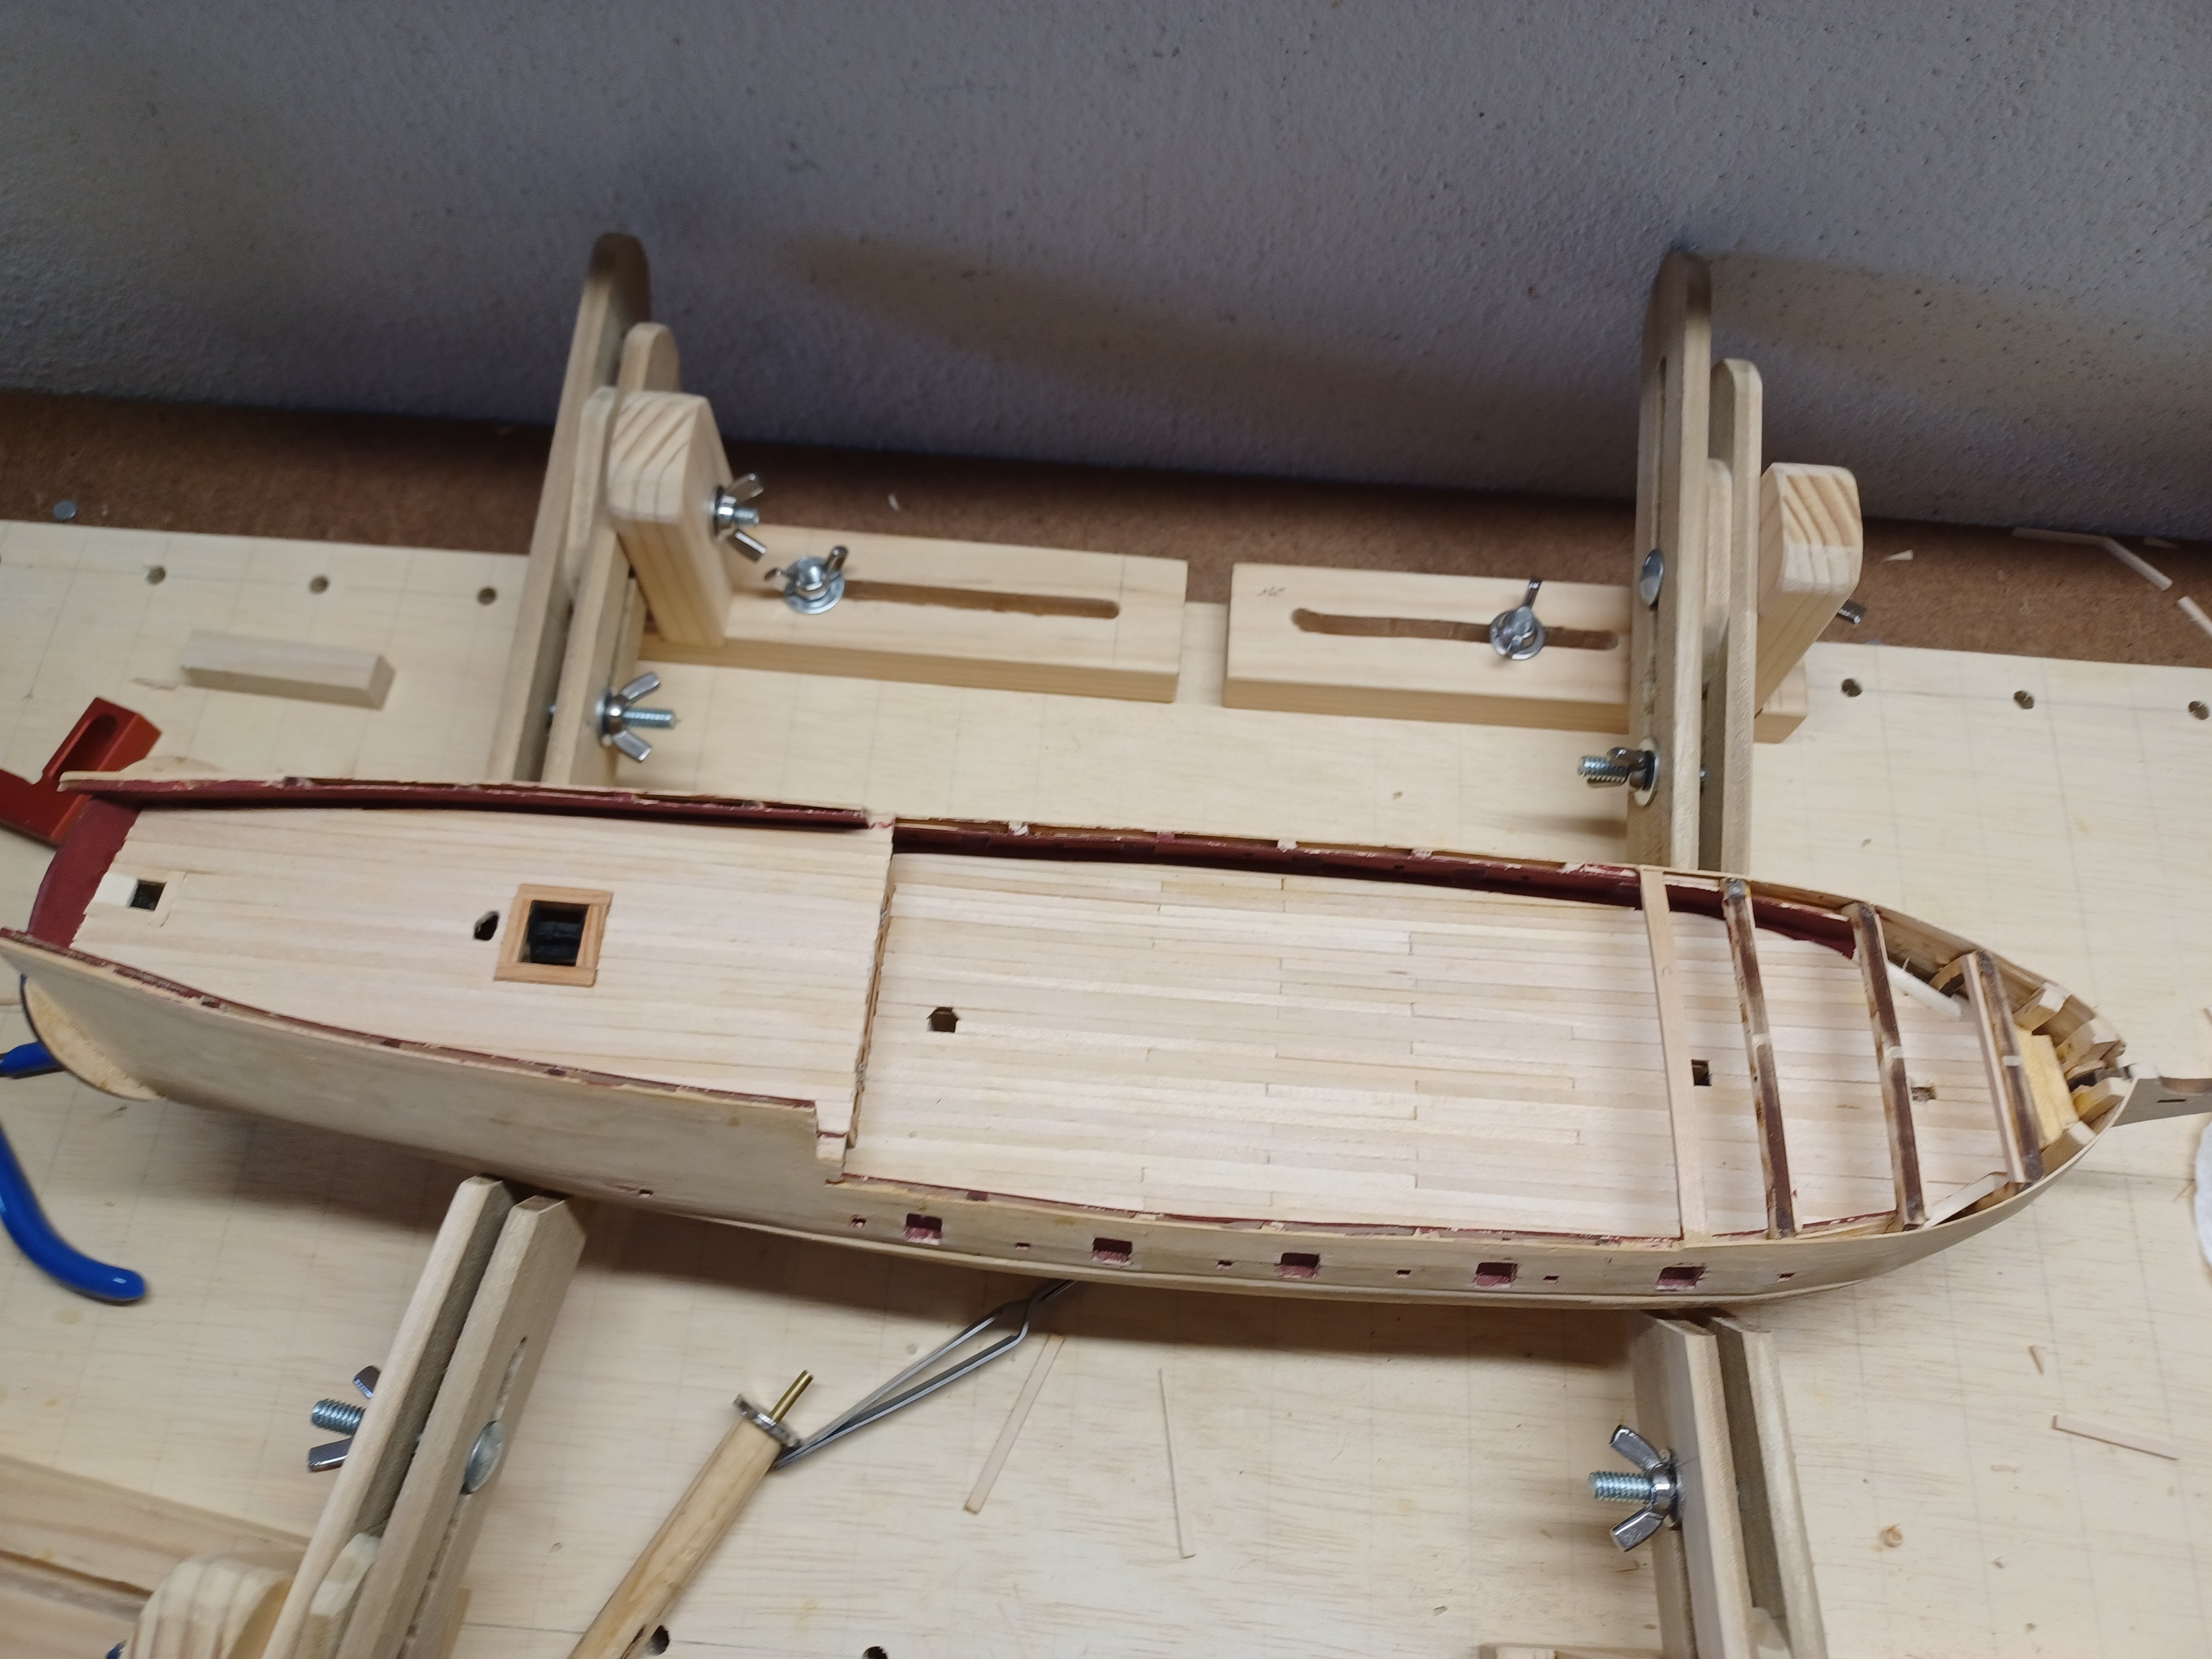
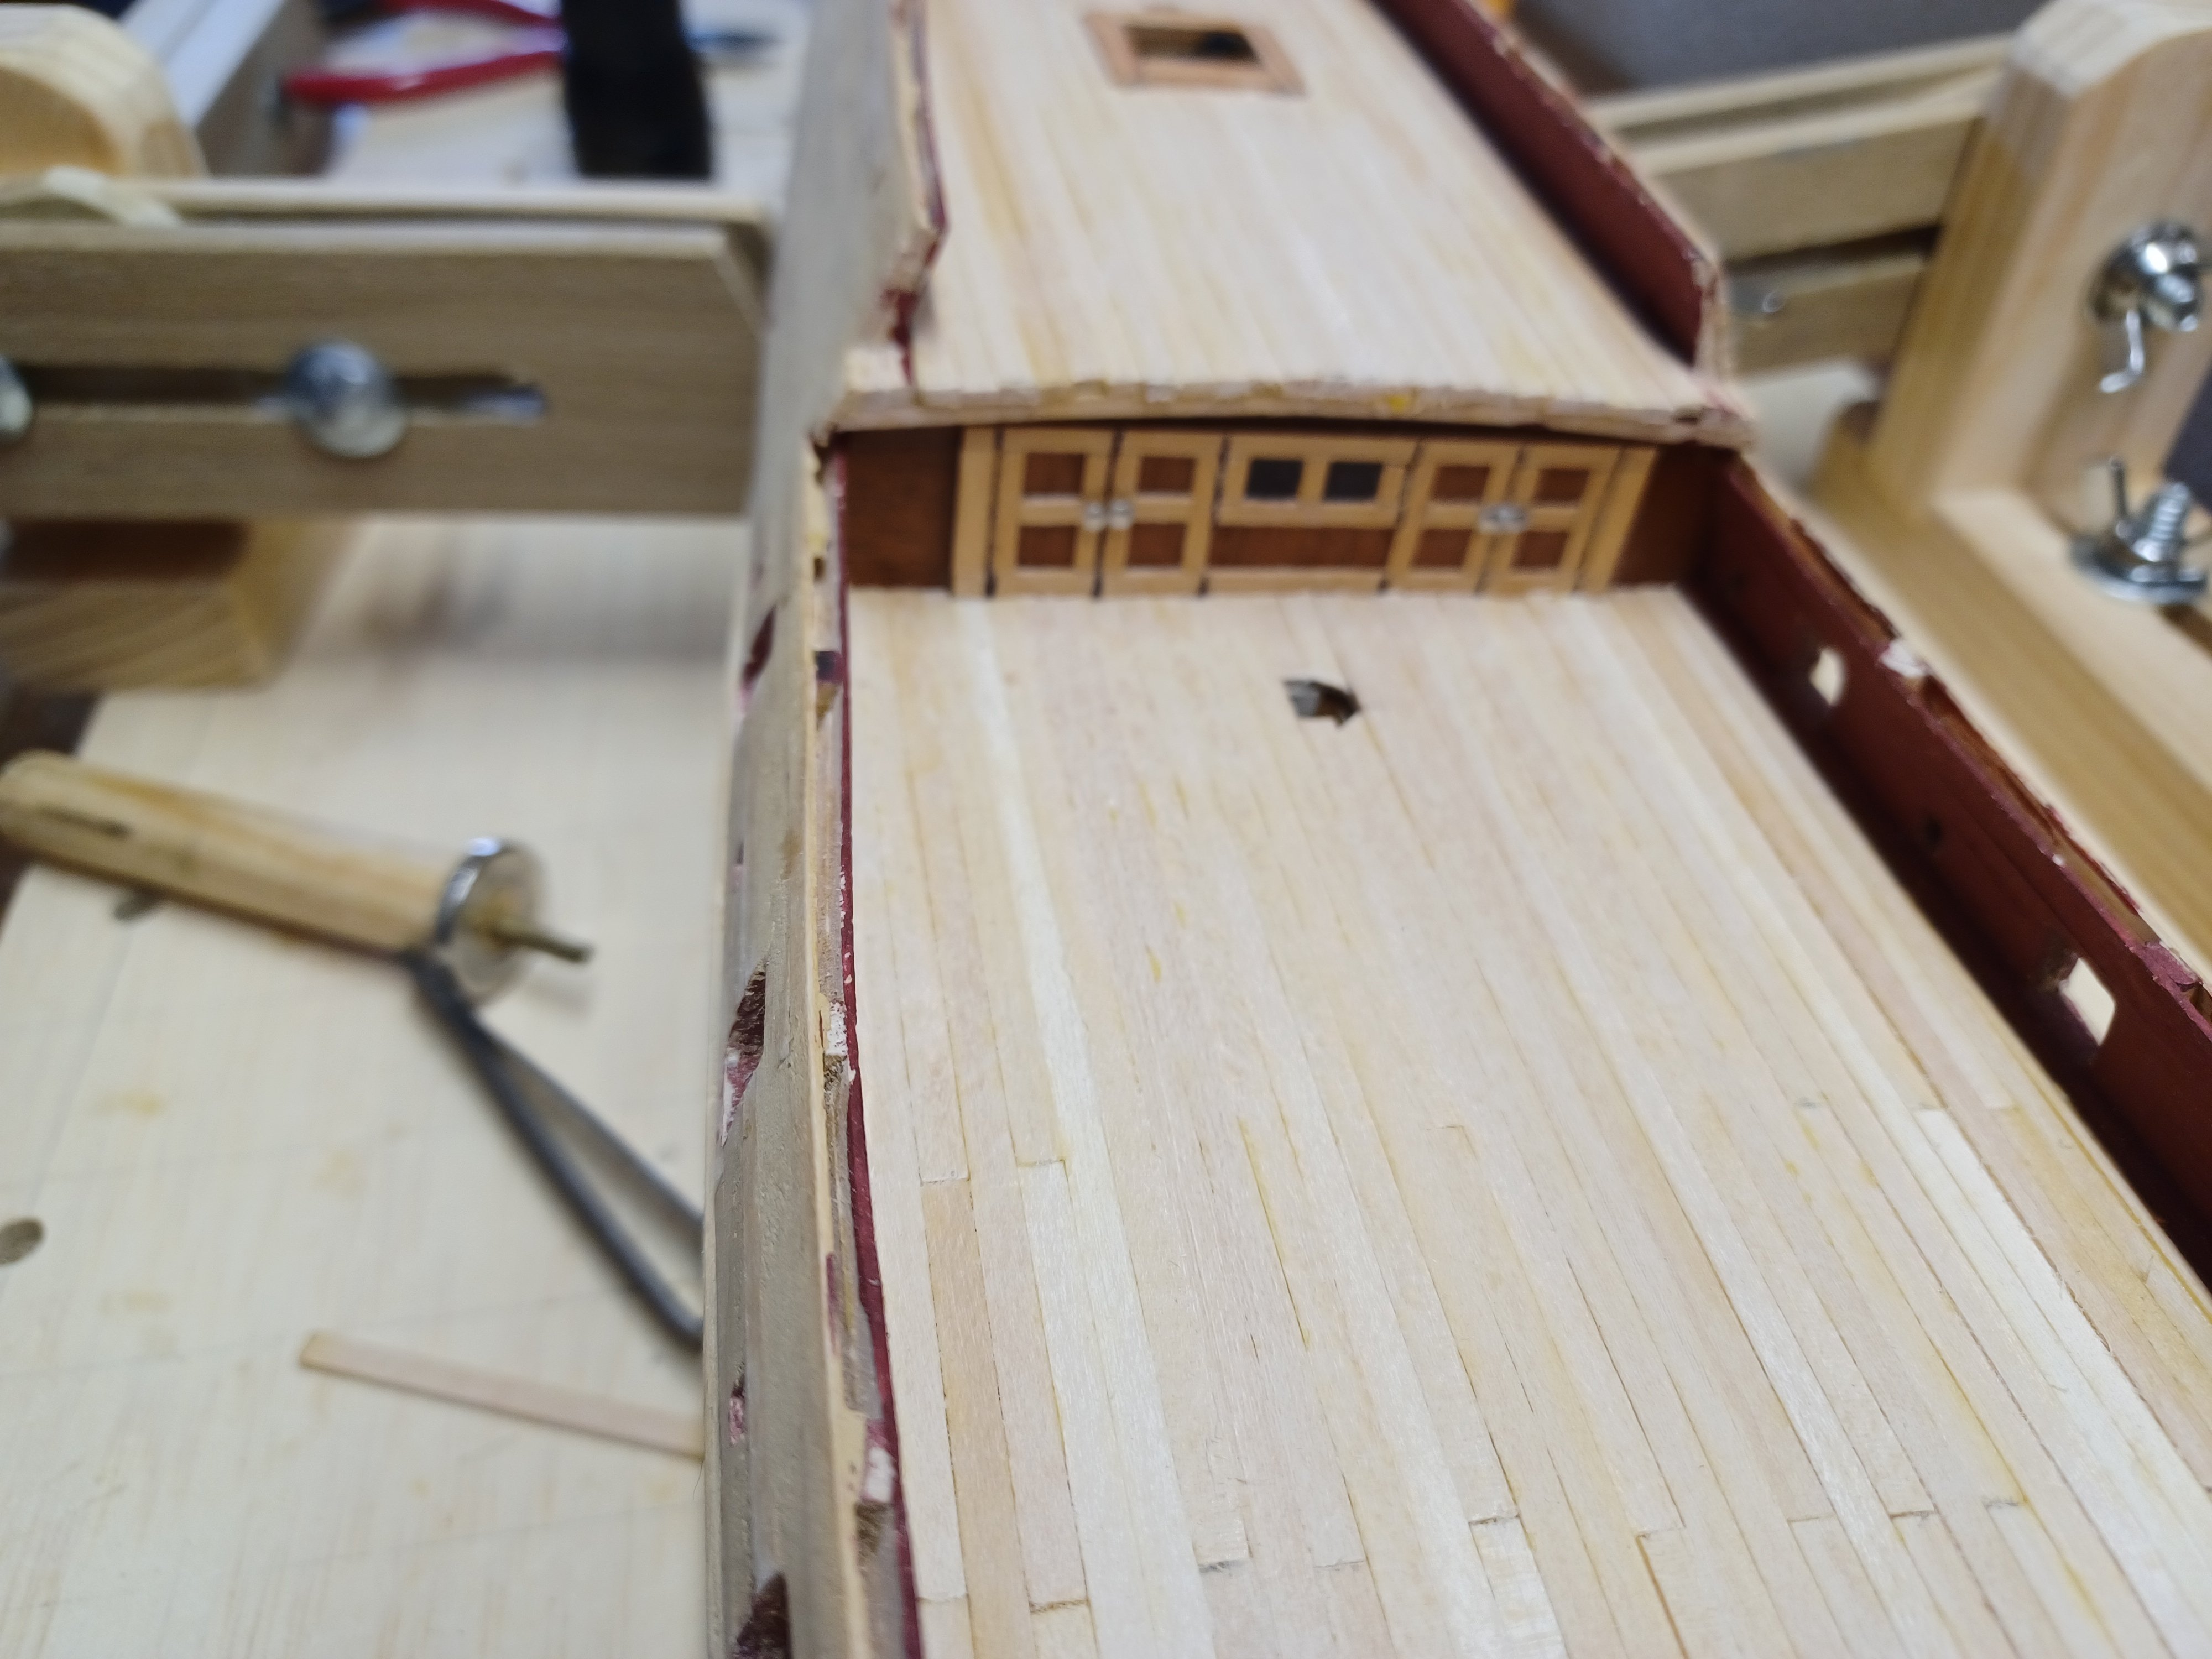
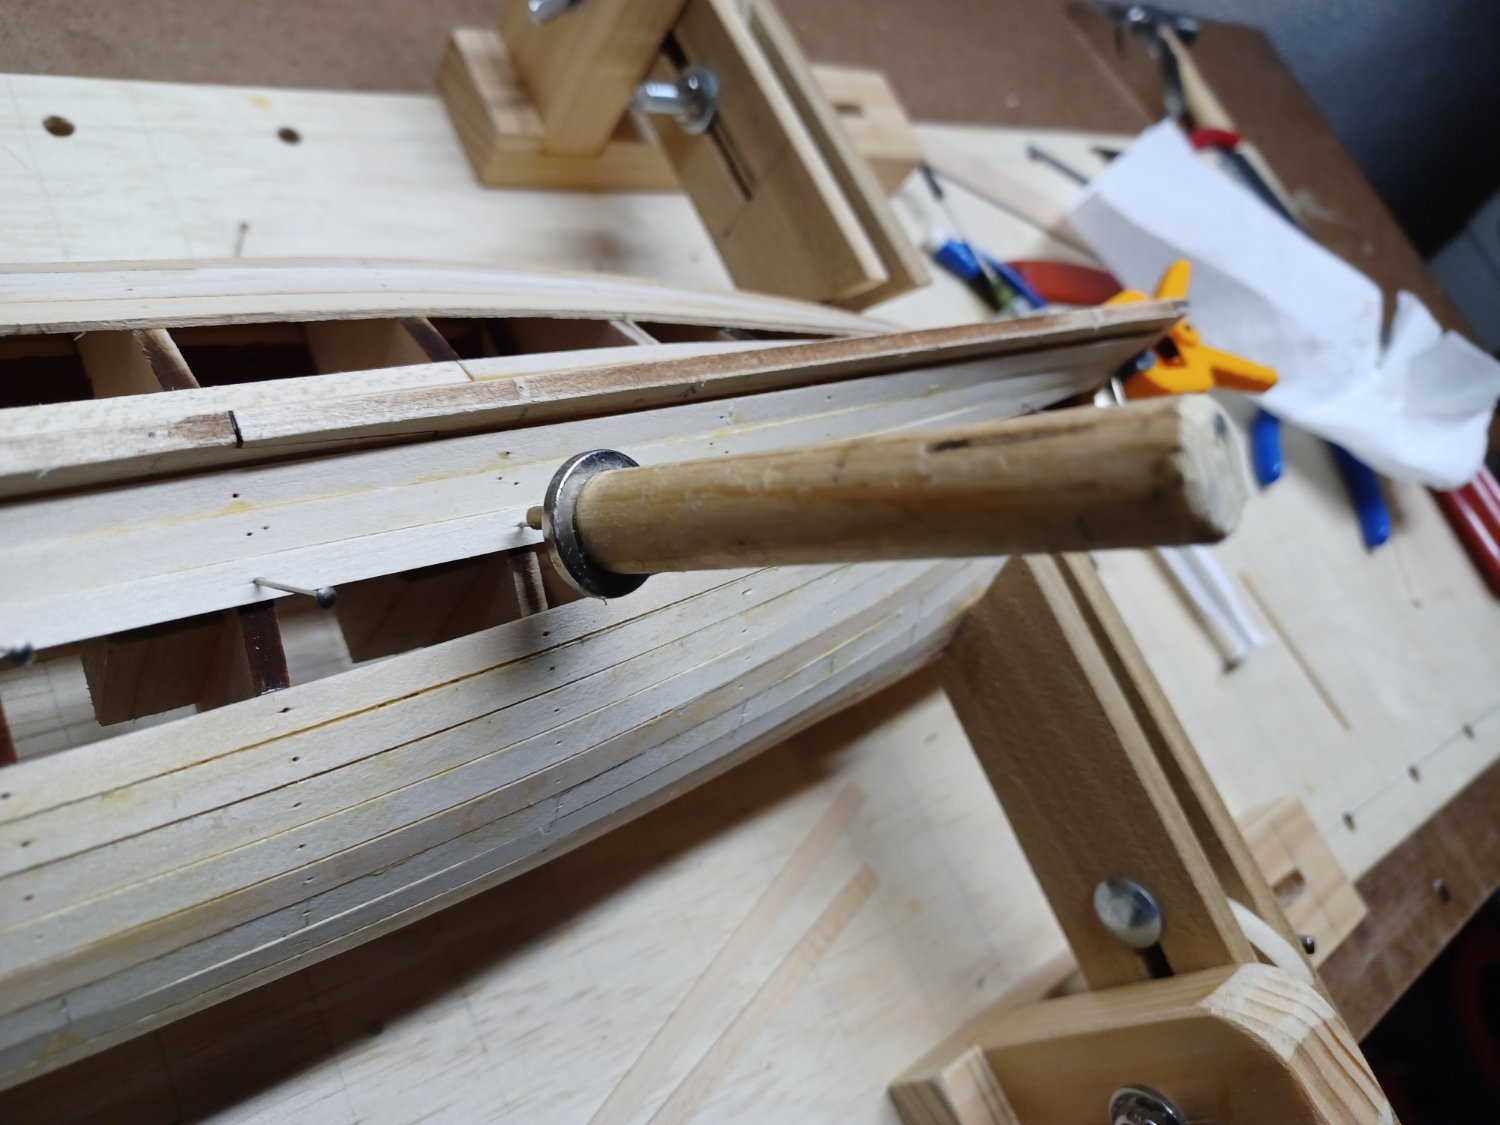
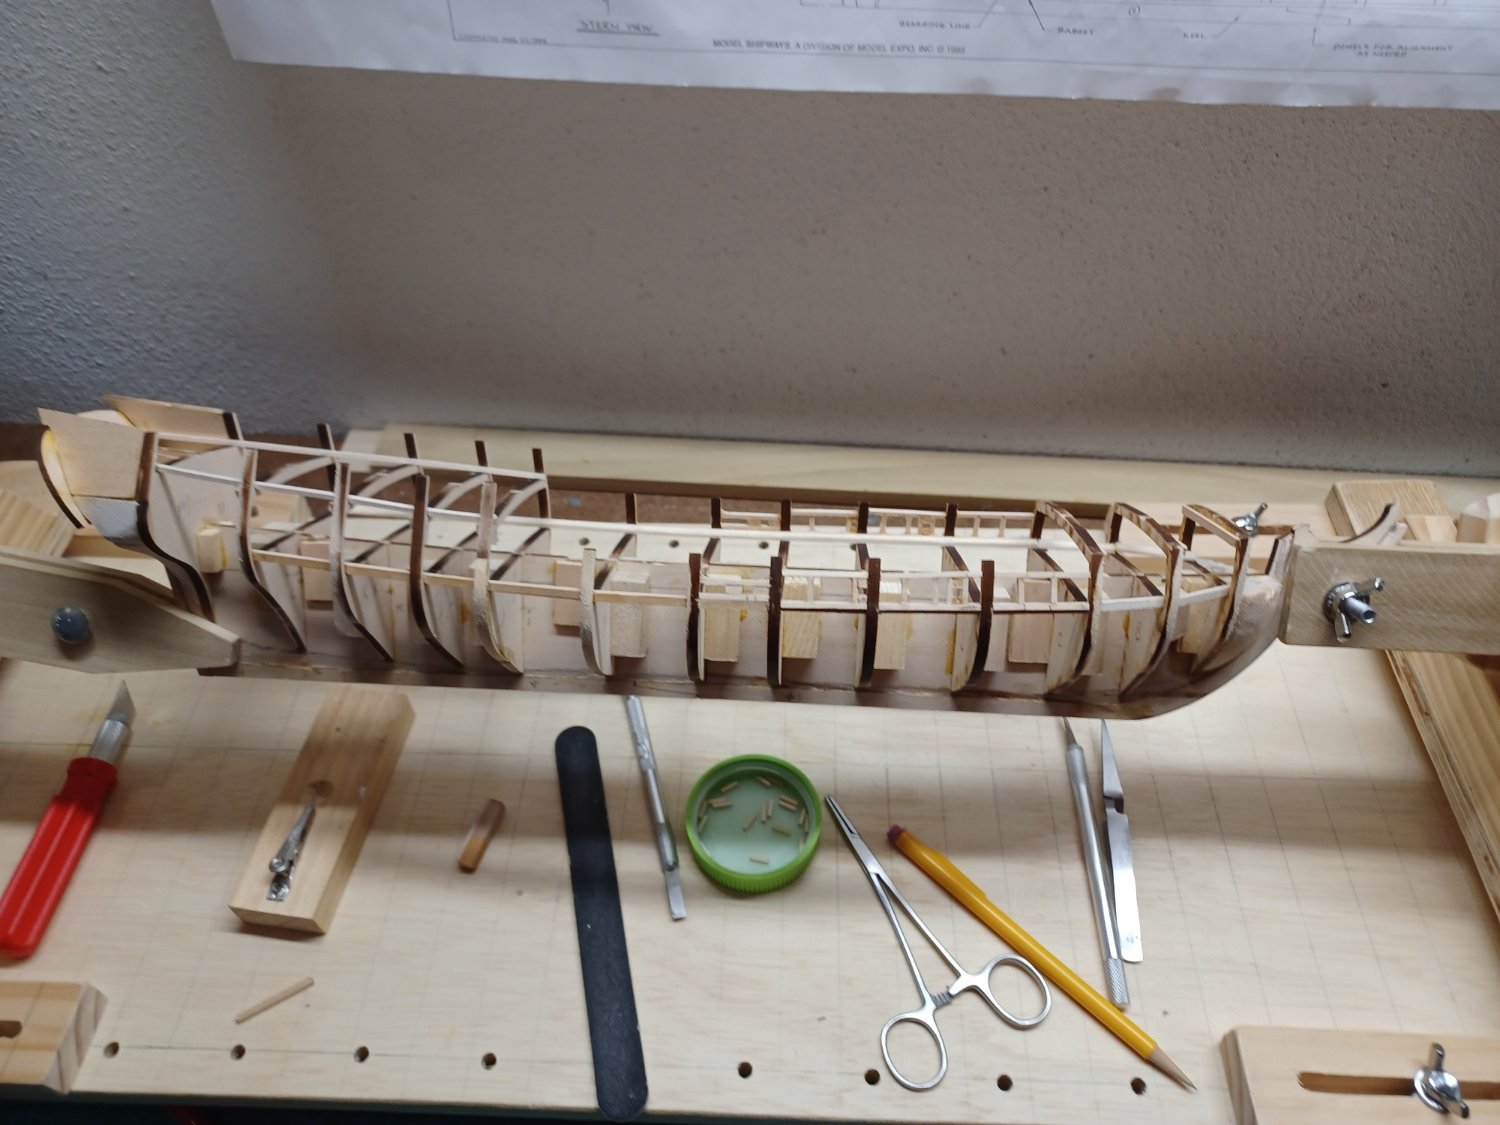
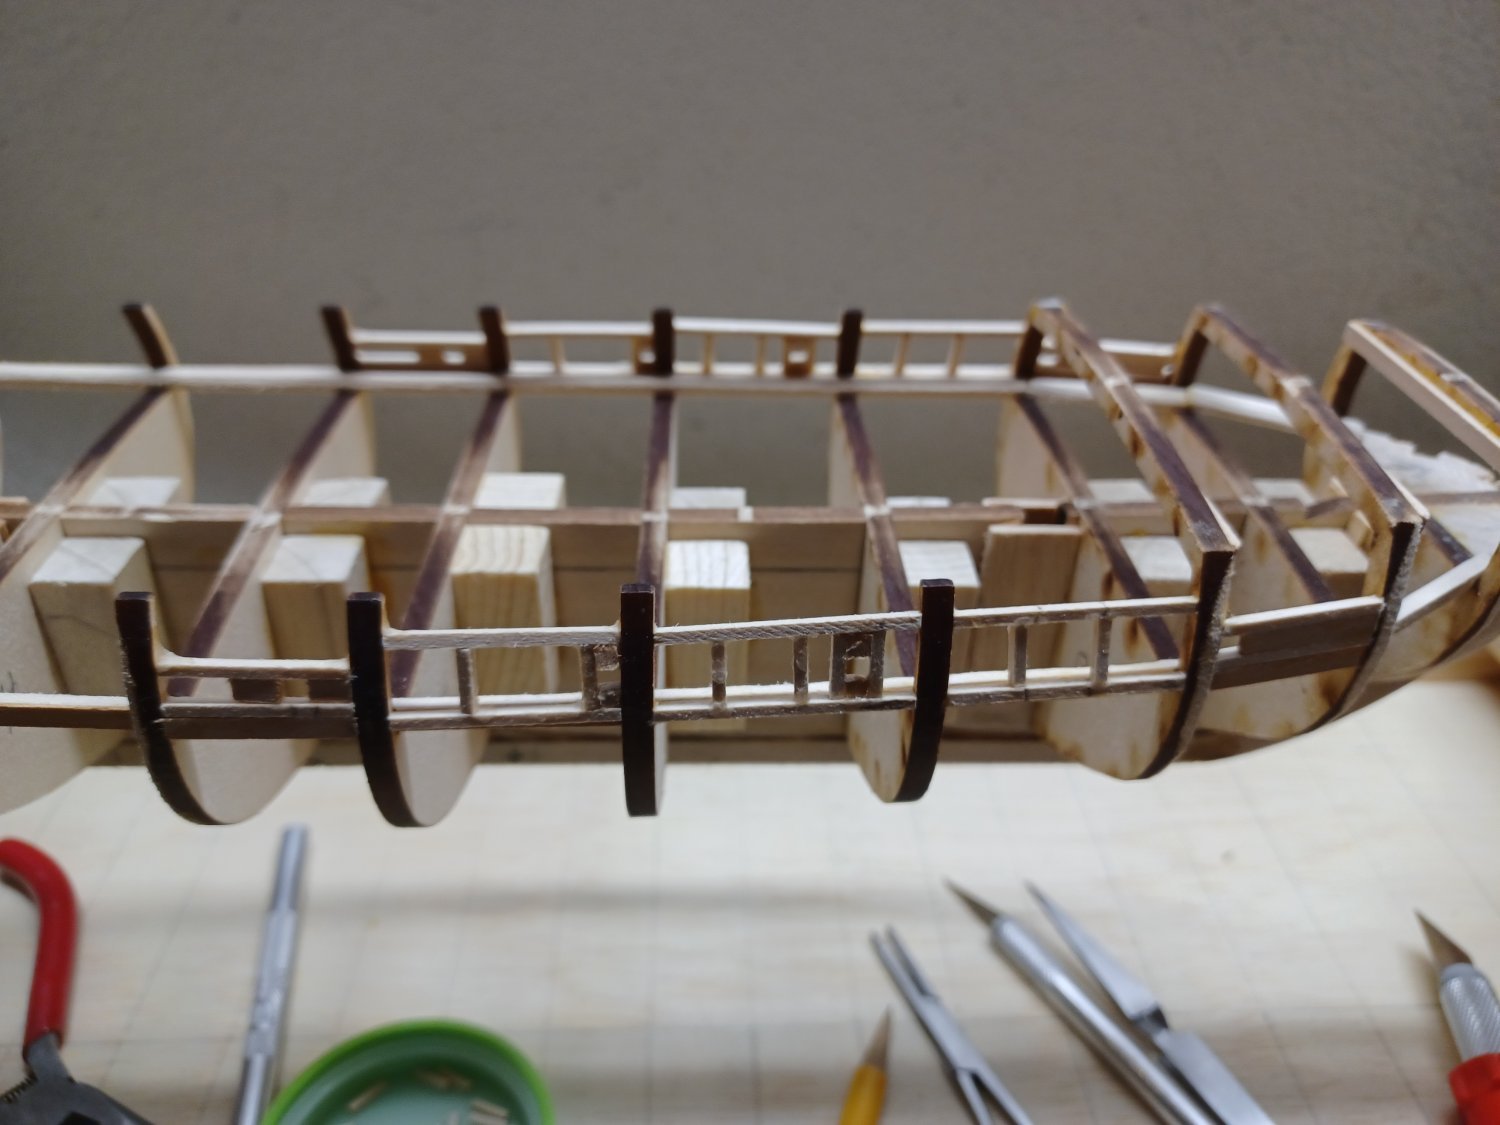
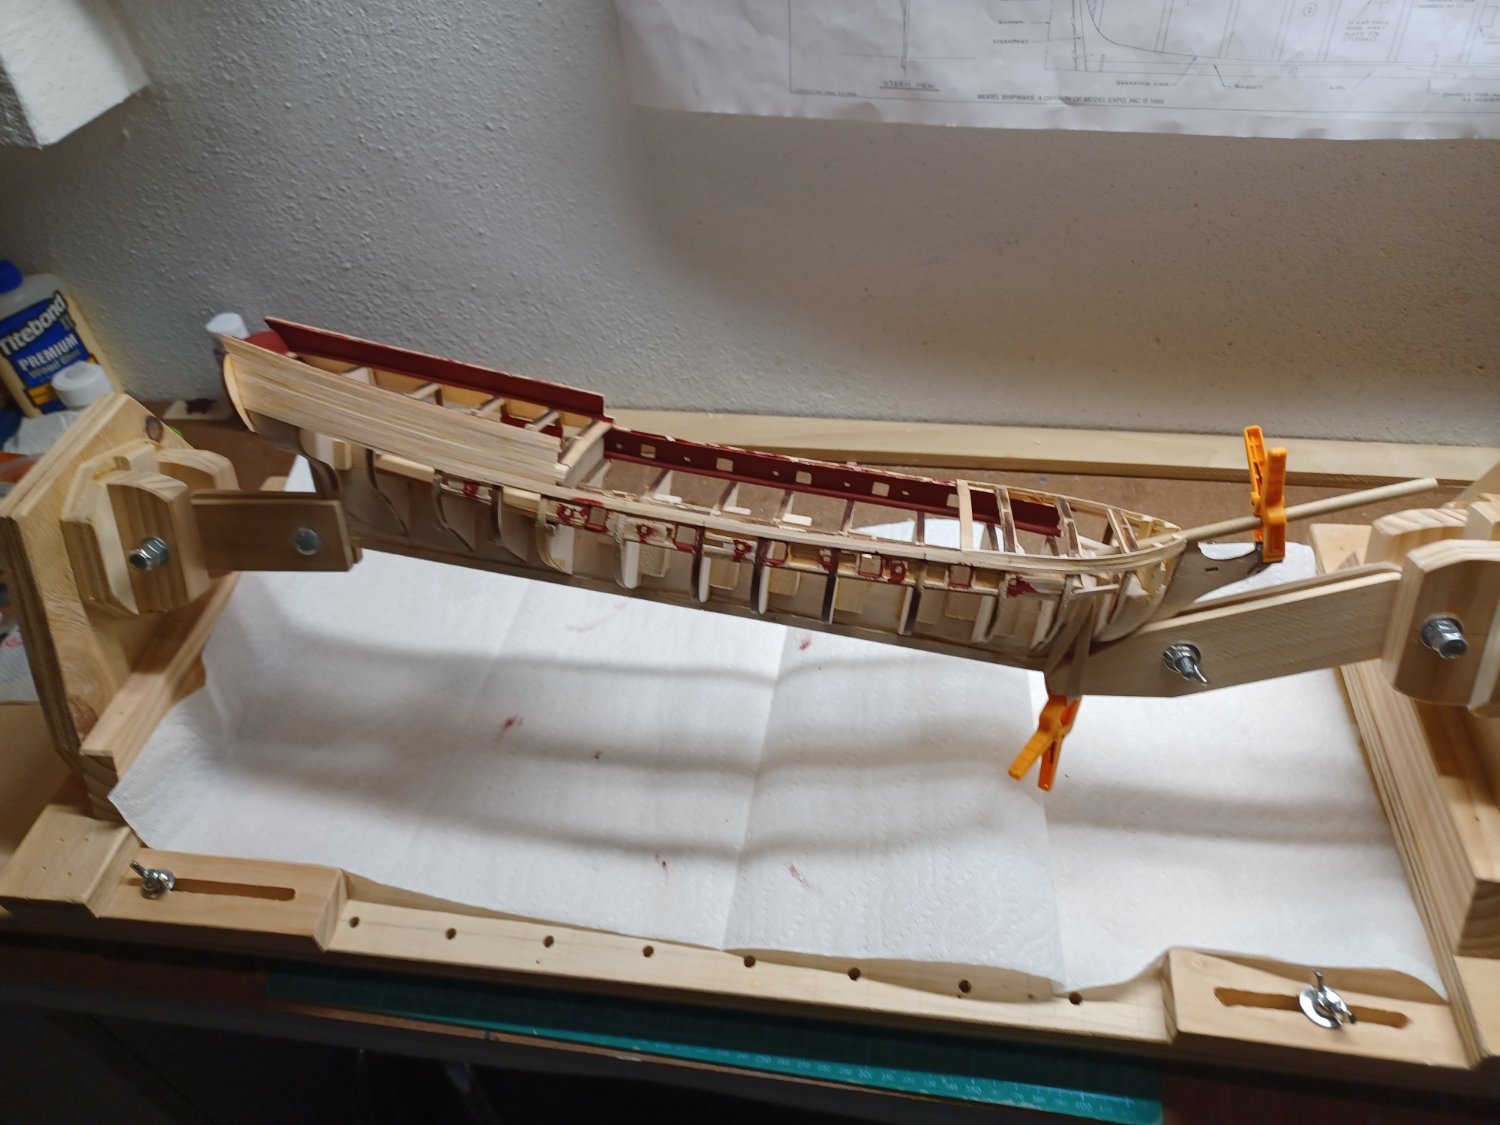
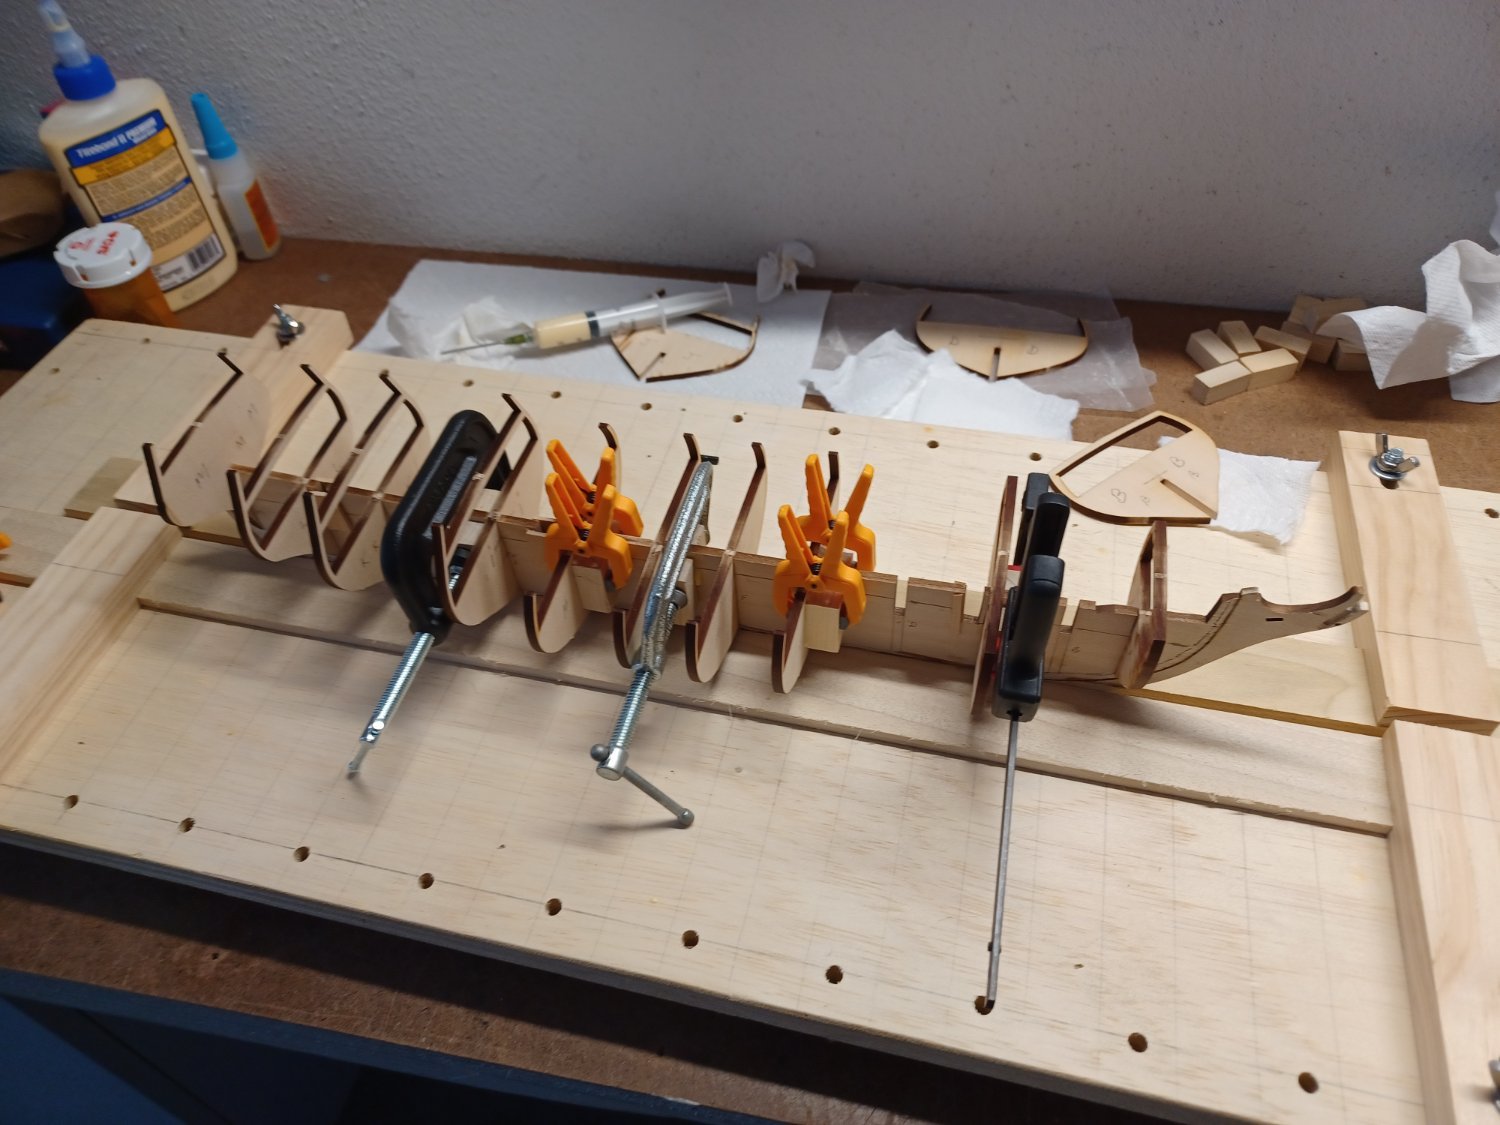
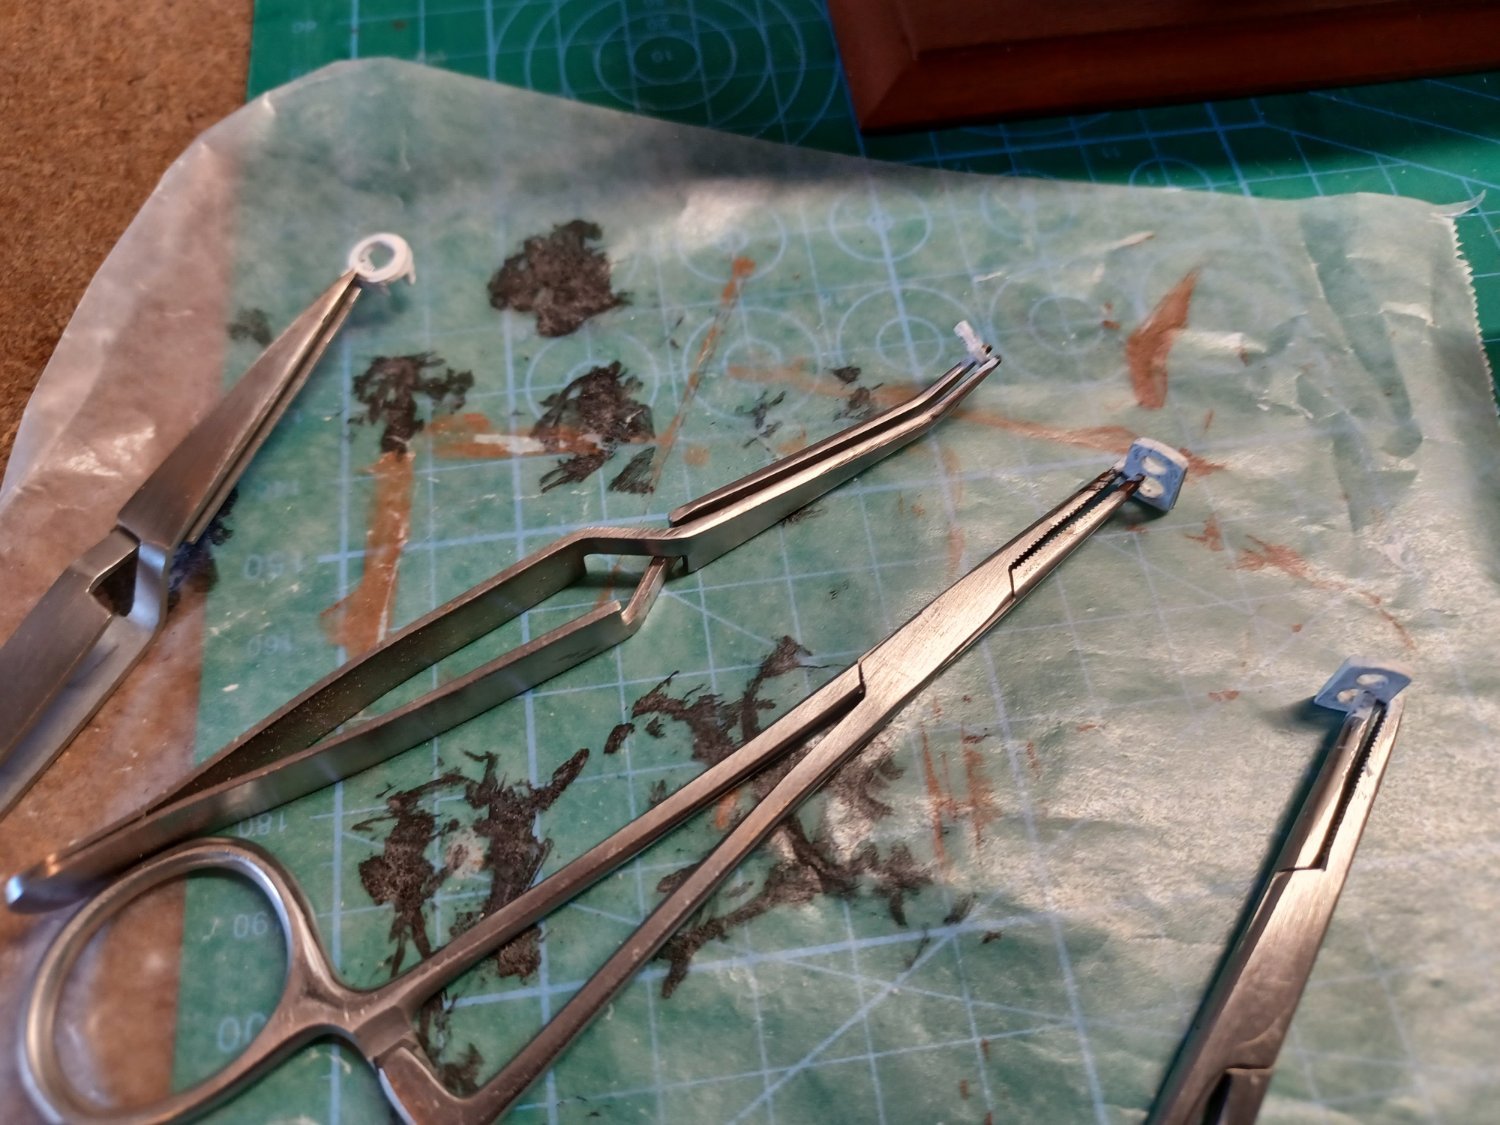
Used dremel drill press to drill pilot holes in the keel to pin it in place. Slots in bulkheads were all too tight and had to be sanded to widen.


-
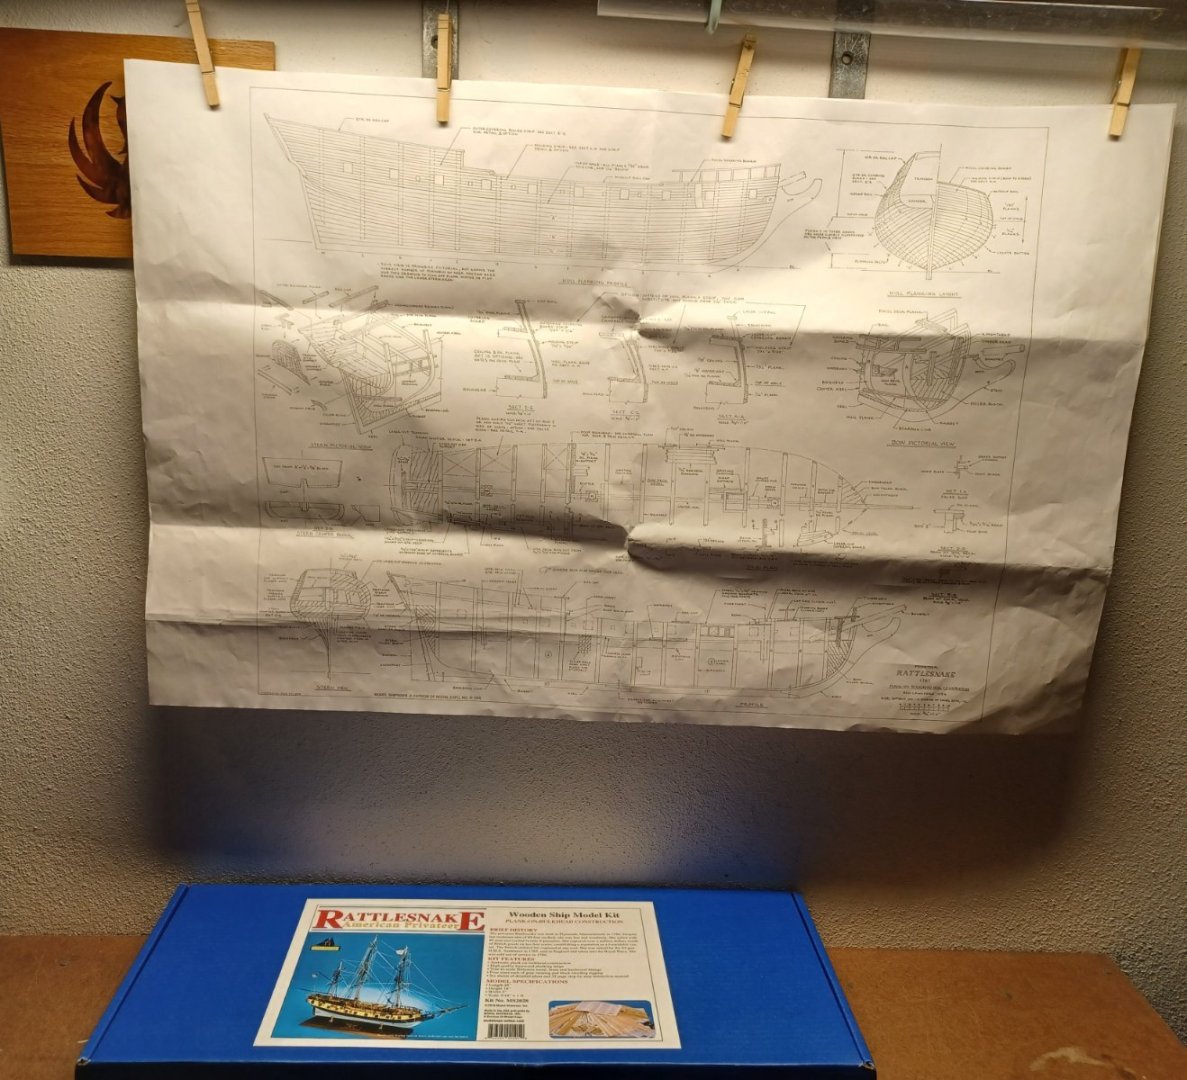
Current Build Rattlesnake - Model Shipways
Completed Builds:
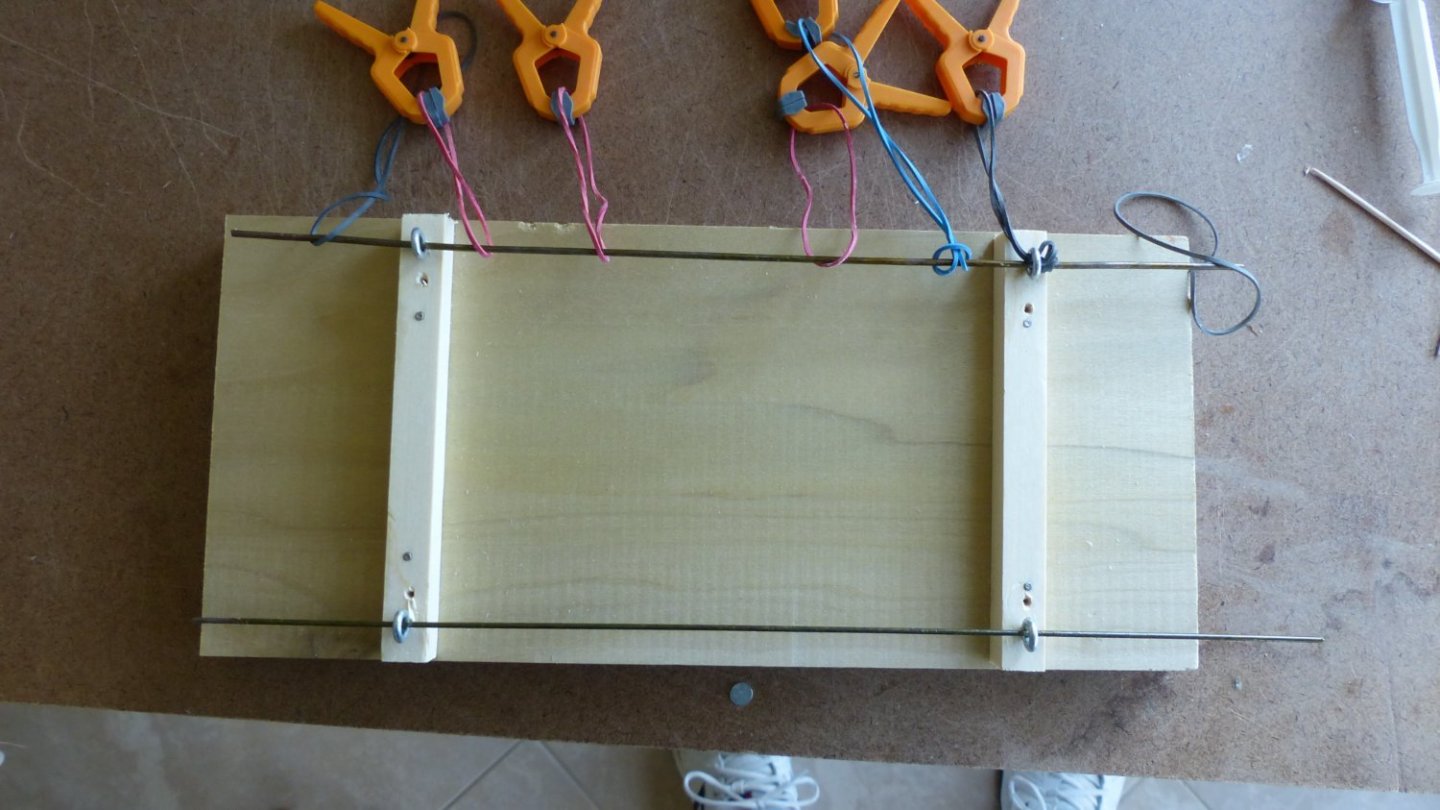
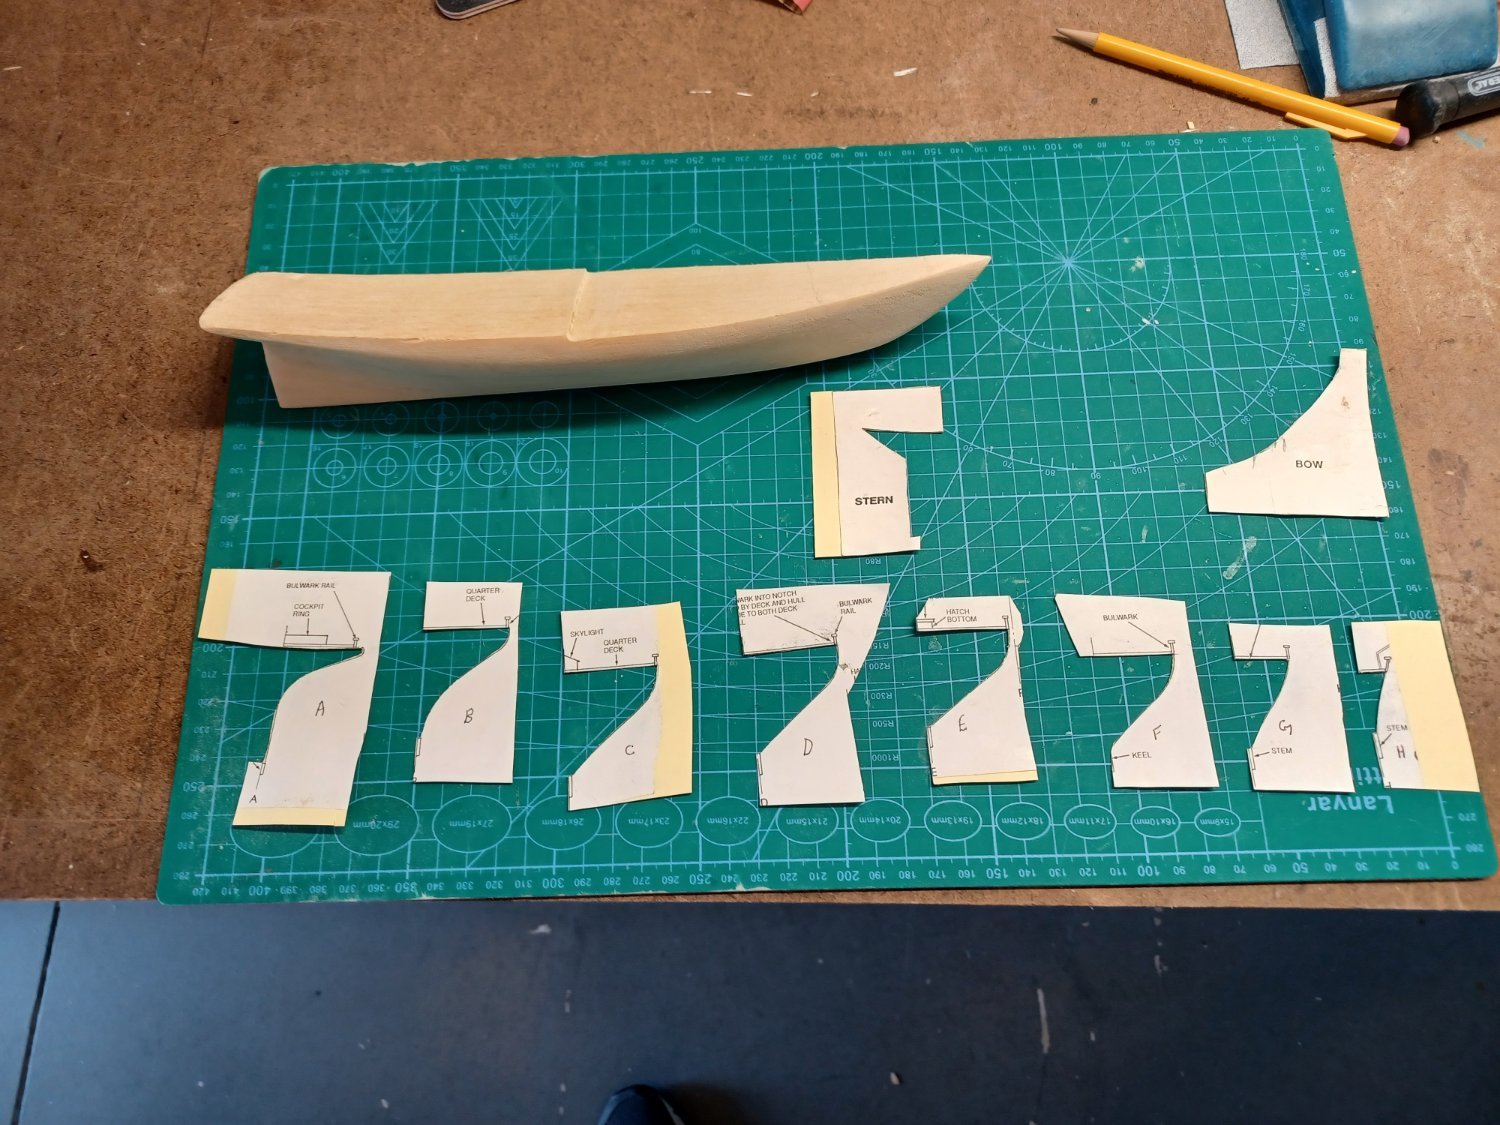
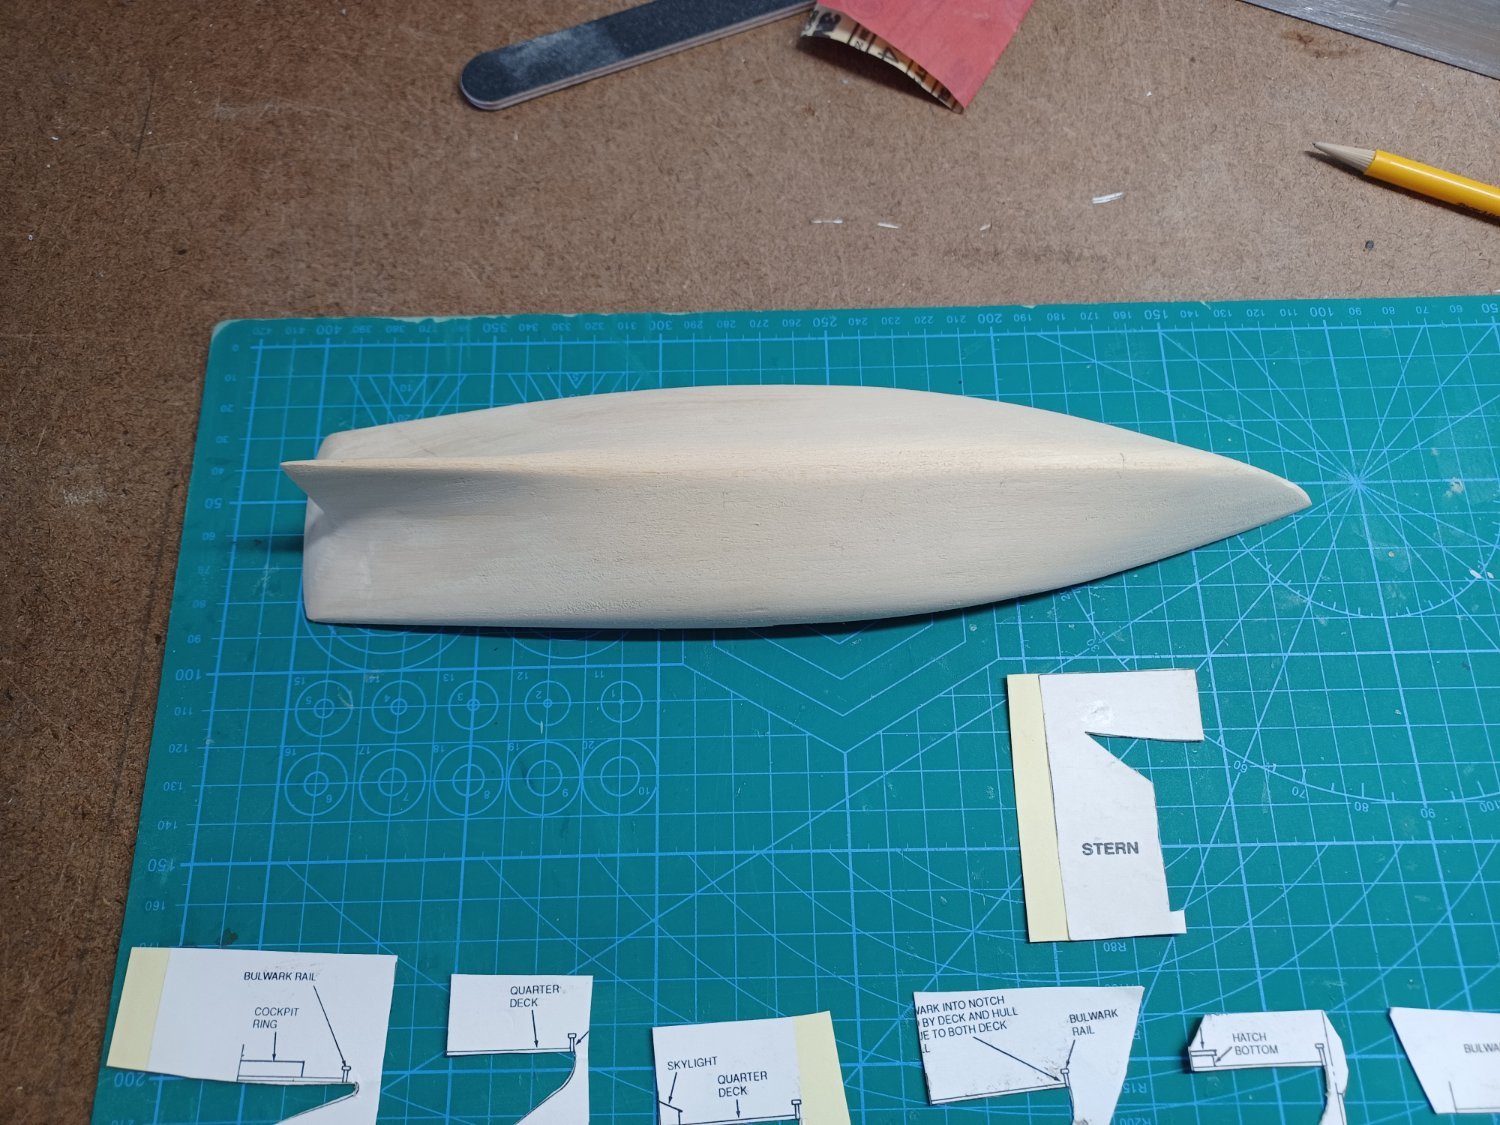
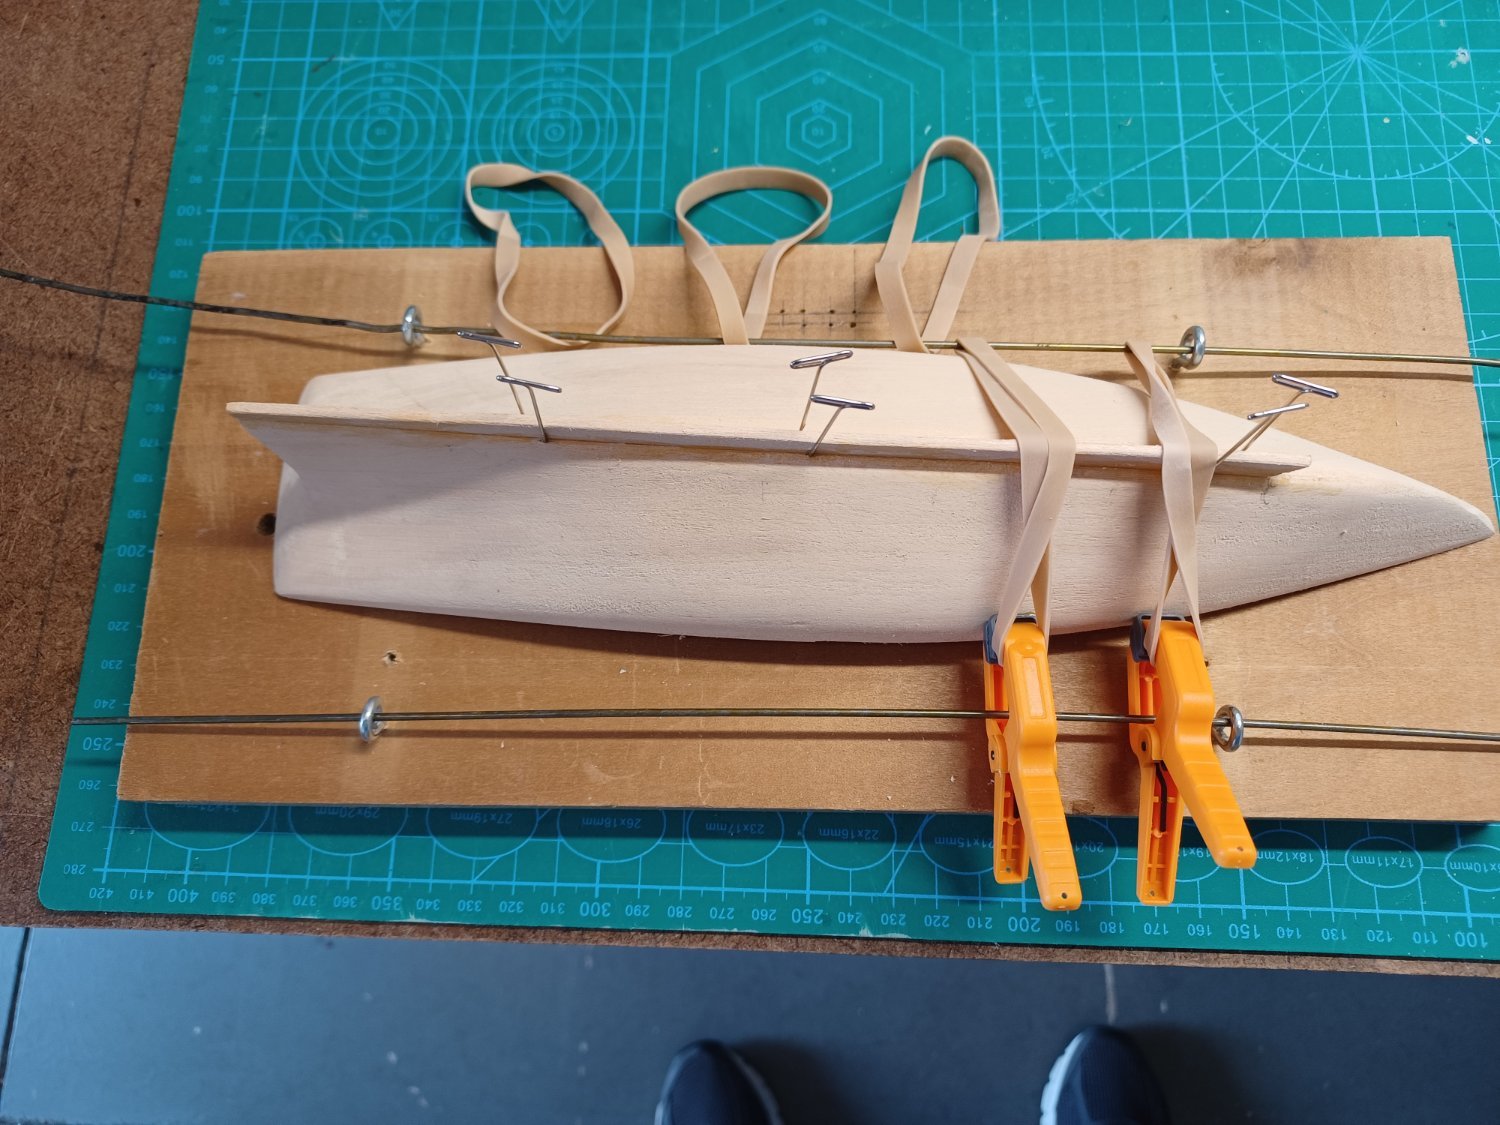
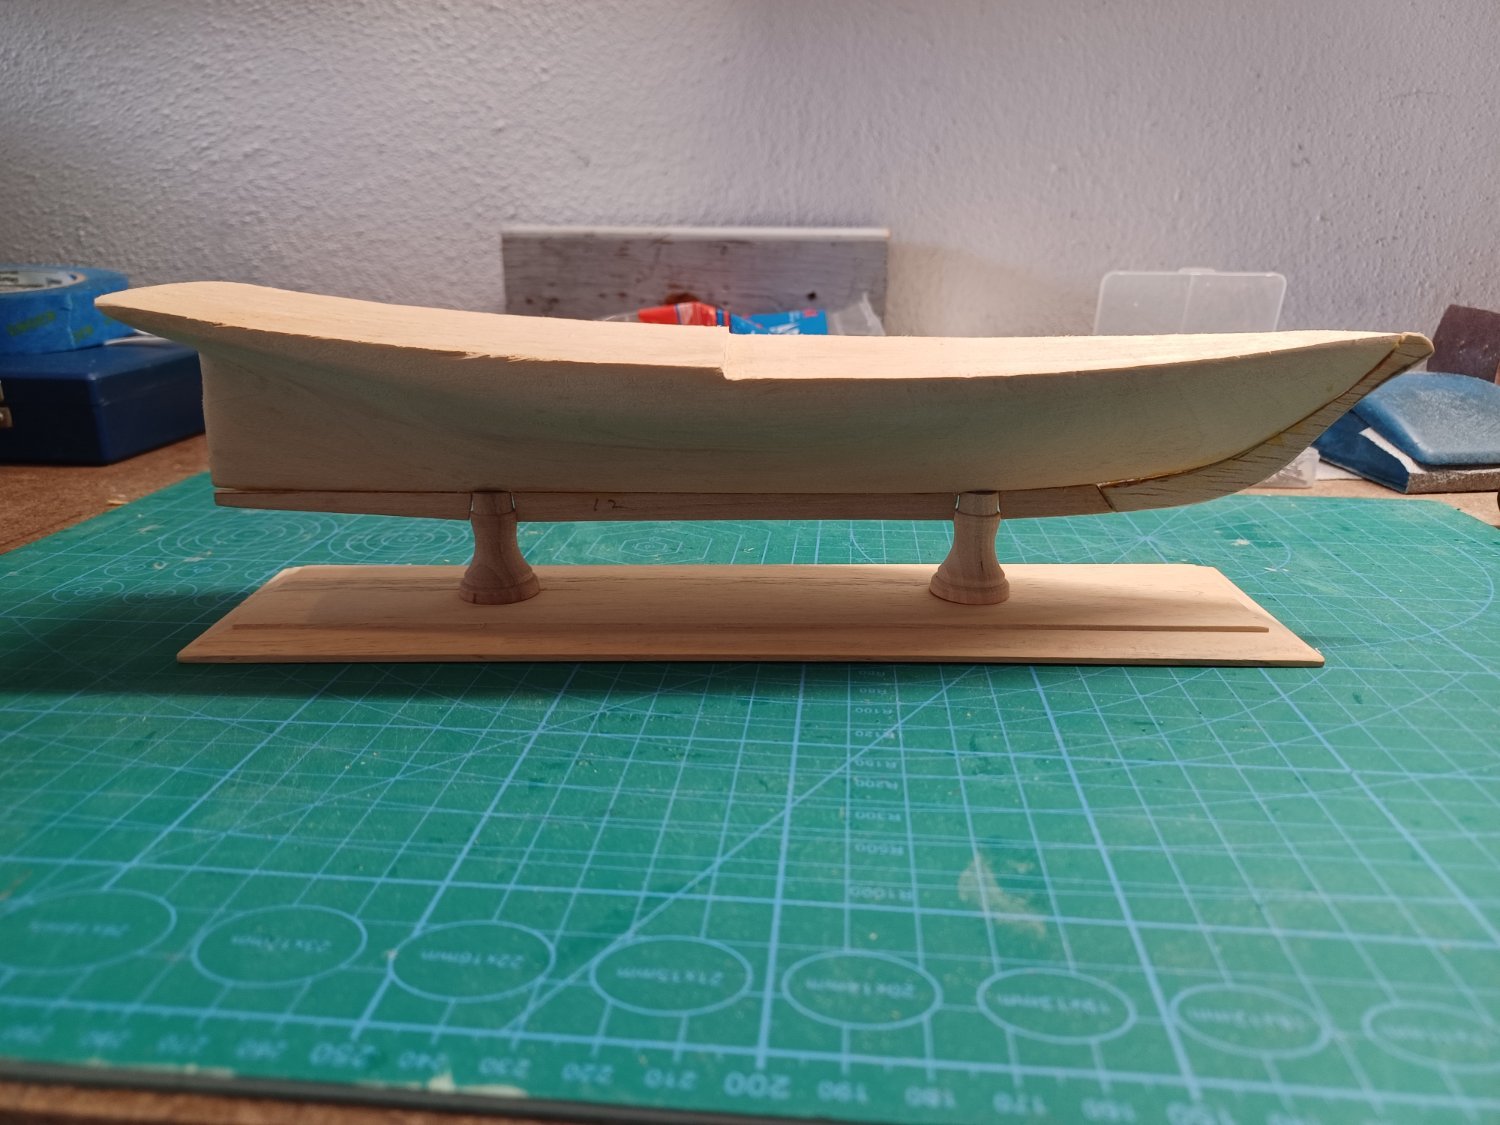
New Bedford Whaleboat – Model Shipways – 1:16
Model Ship Building Slip
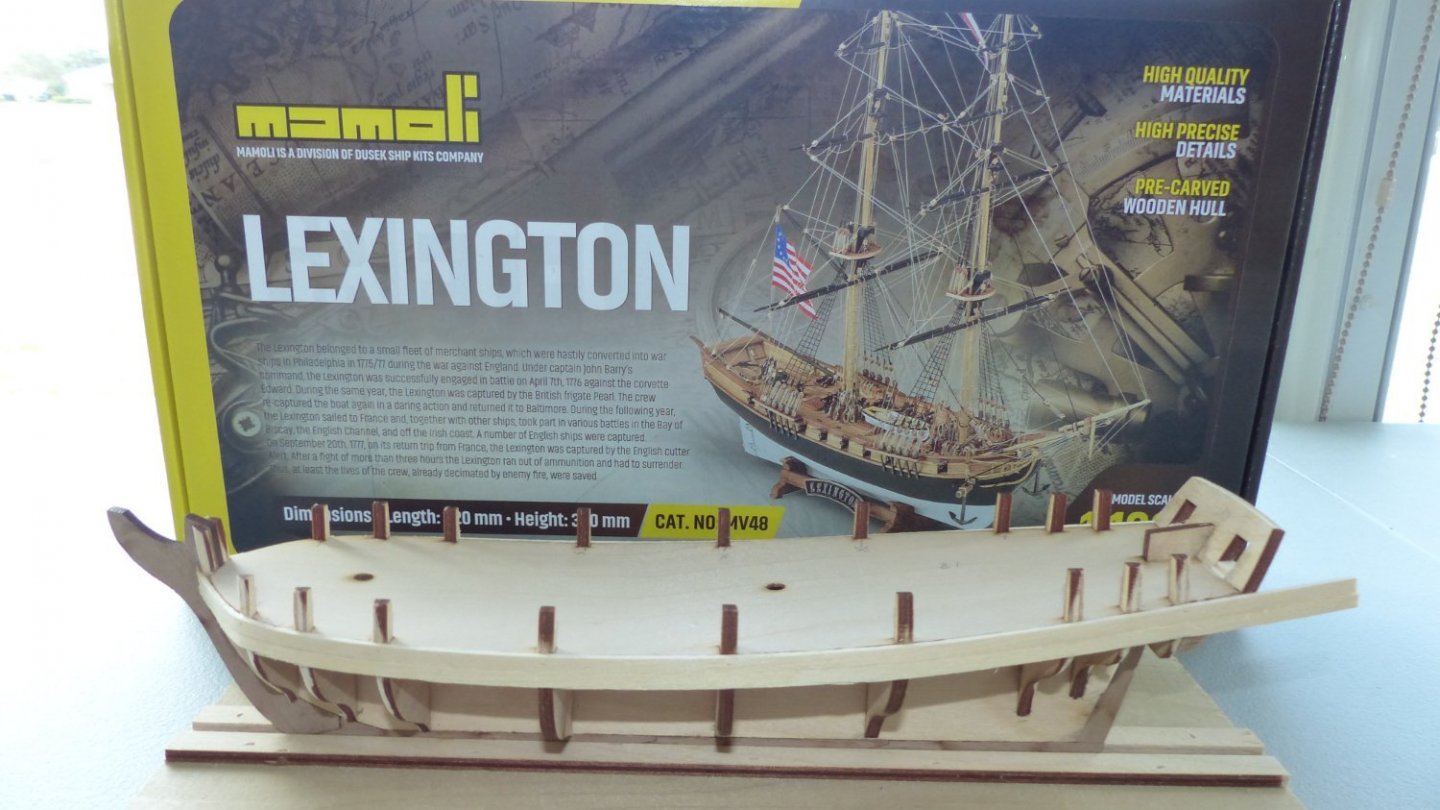
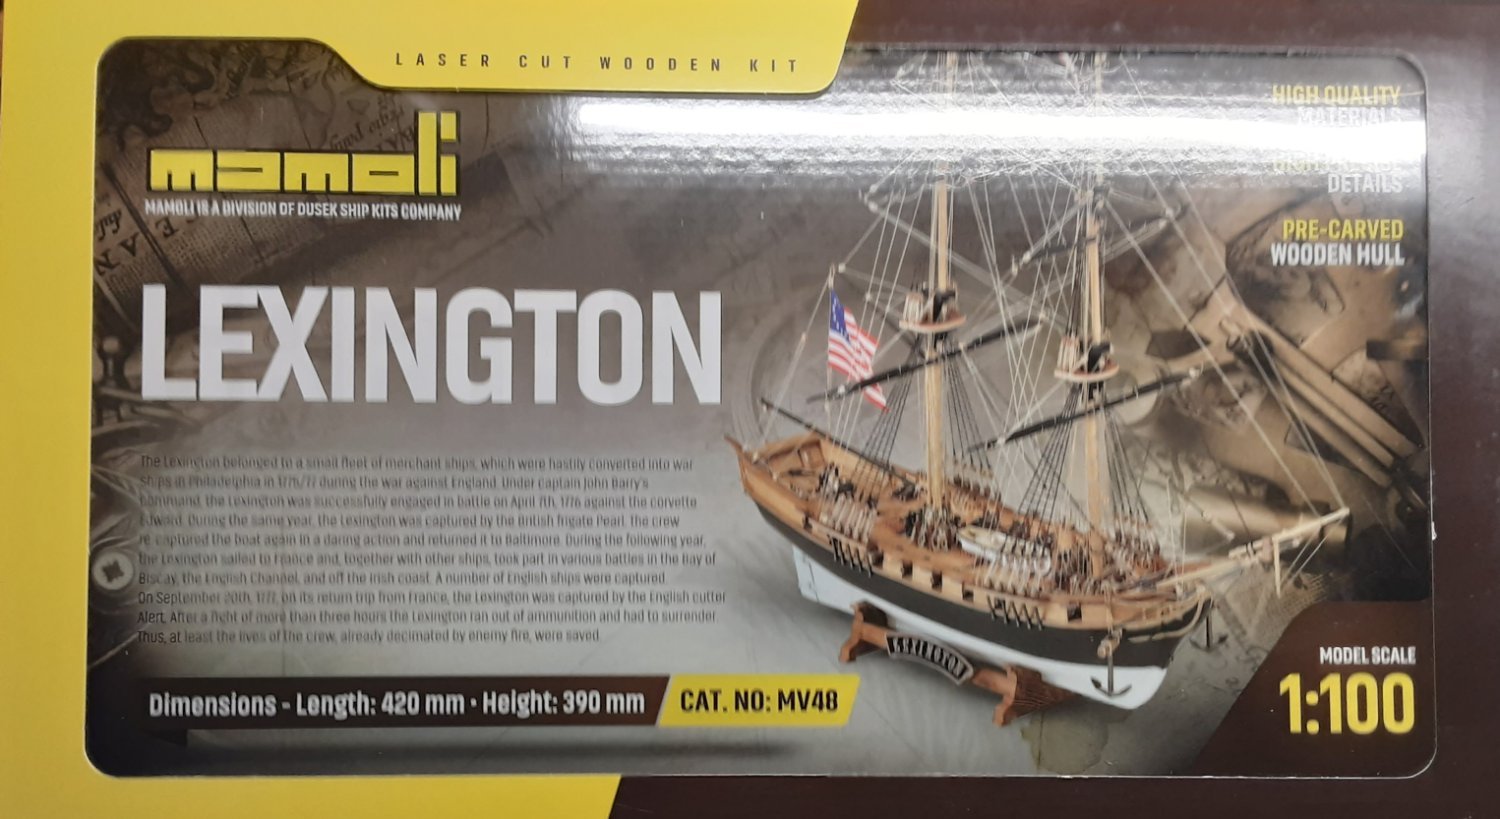
U.S.S. Lexington – Mamoli – 1:100
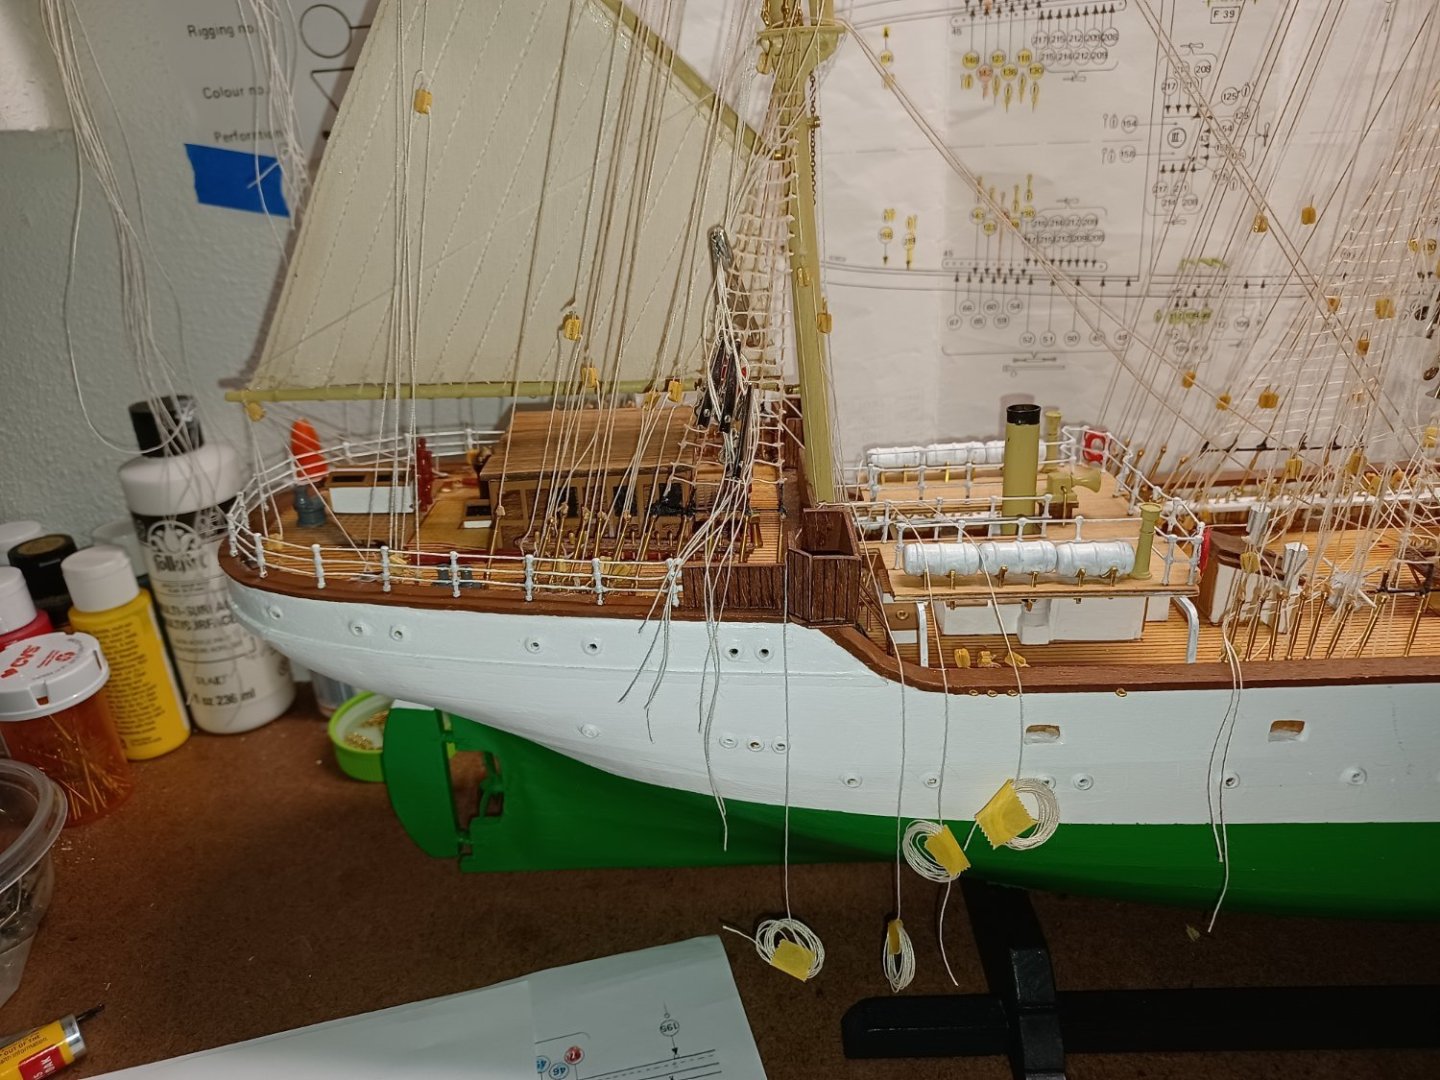
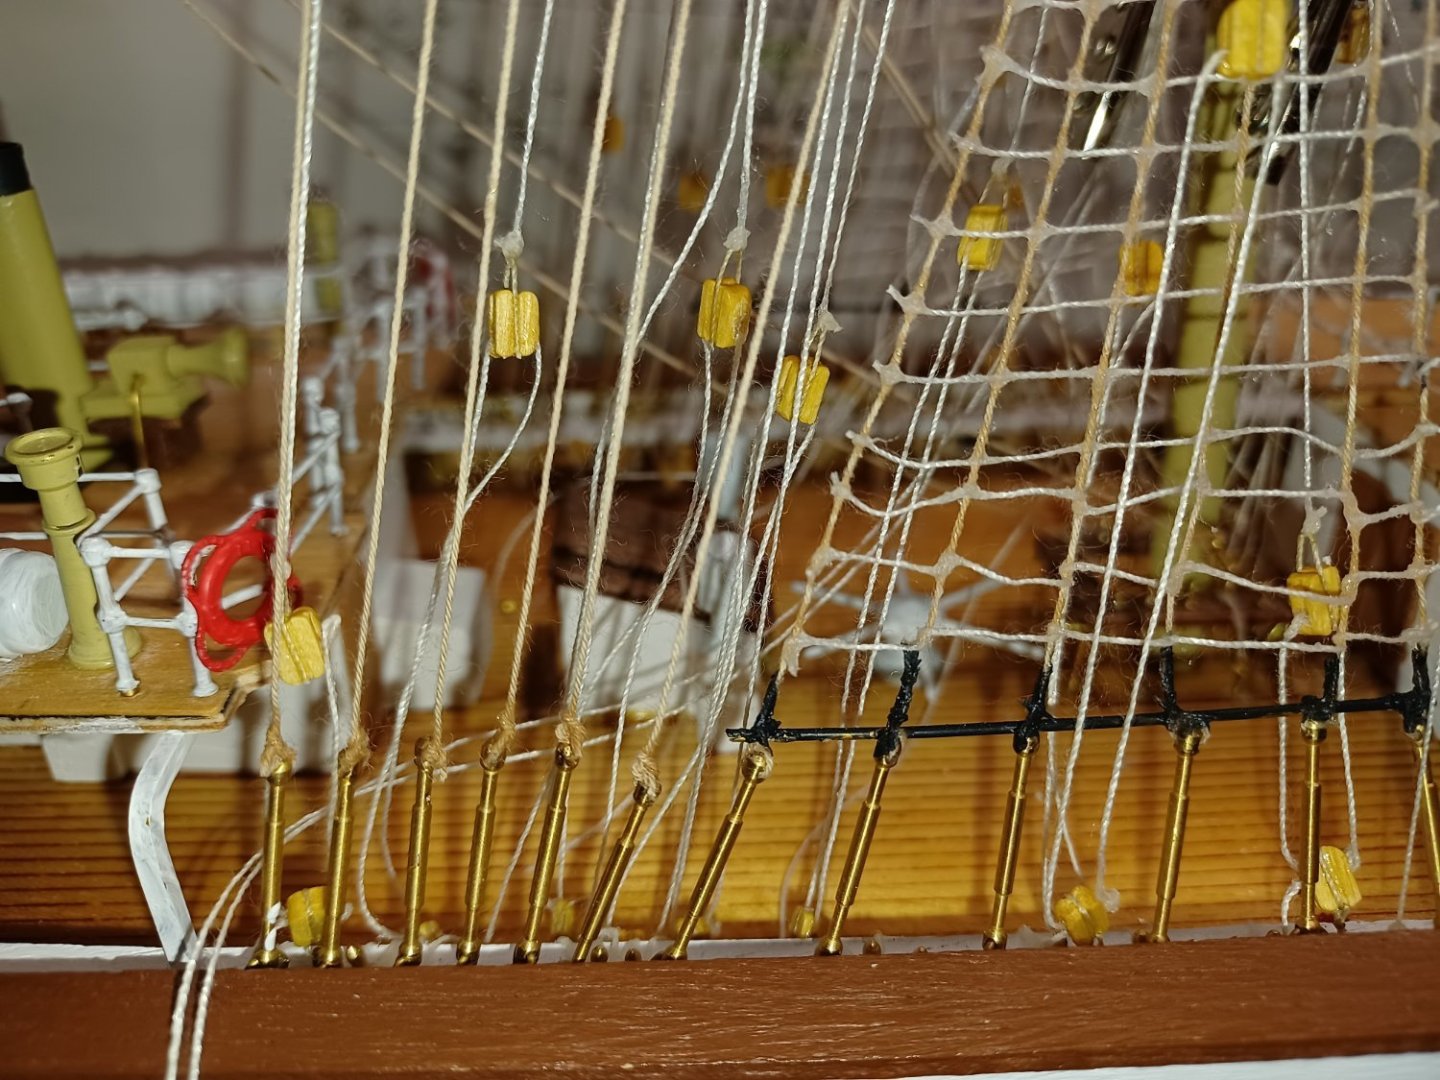
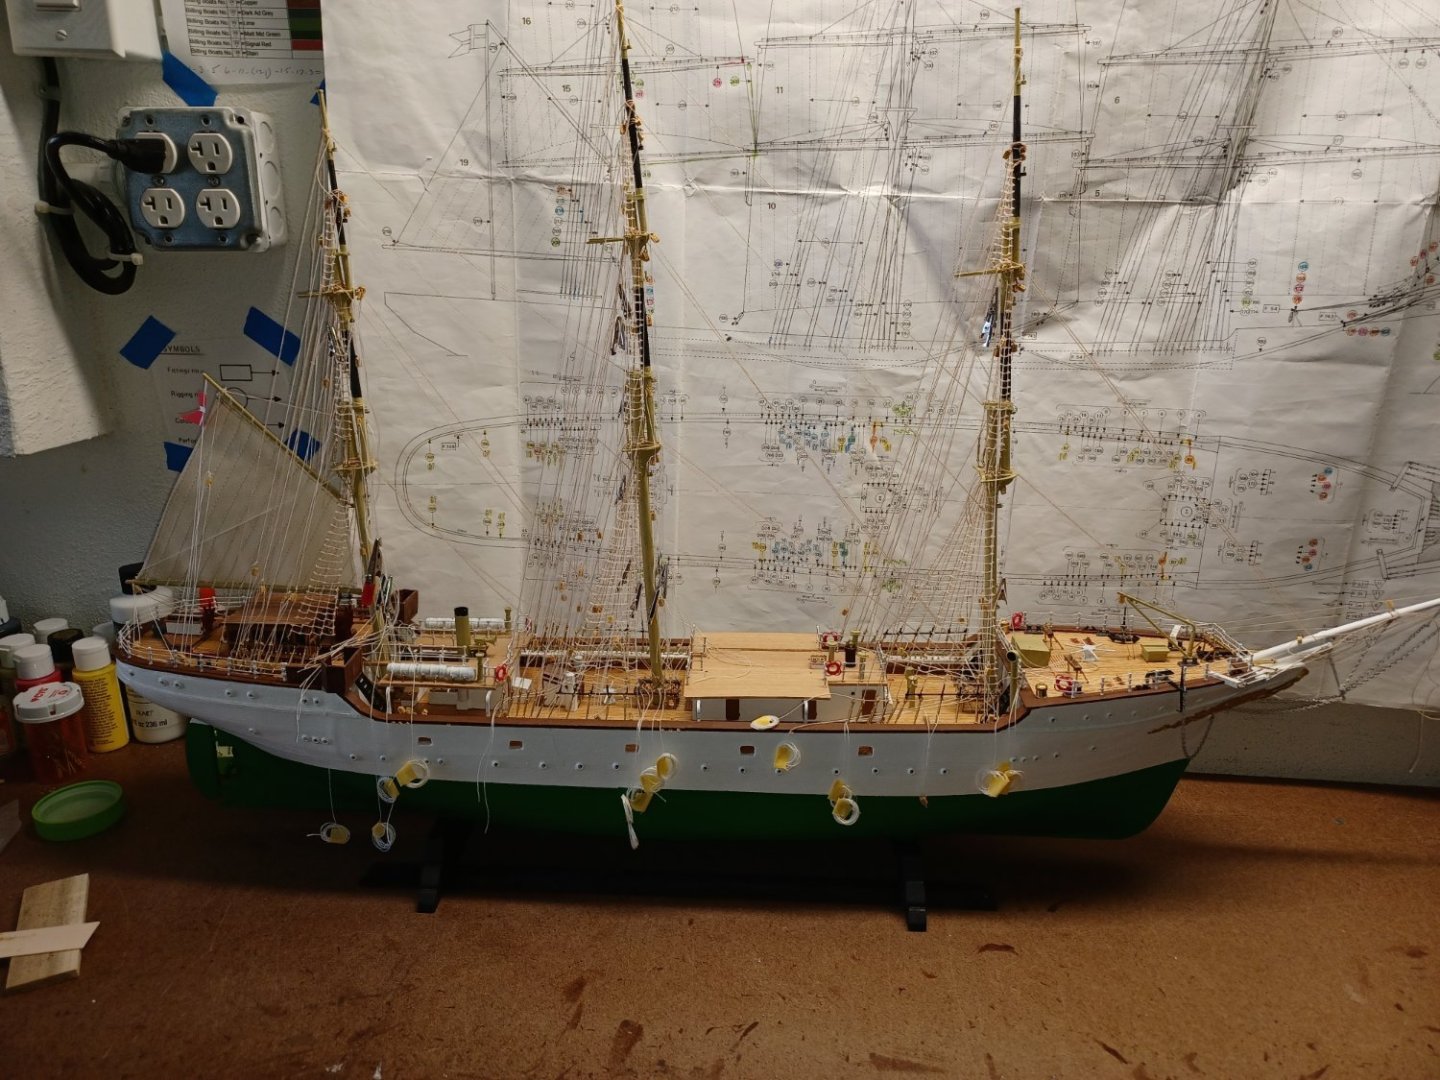
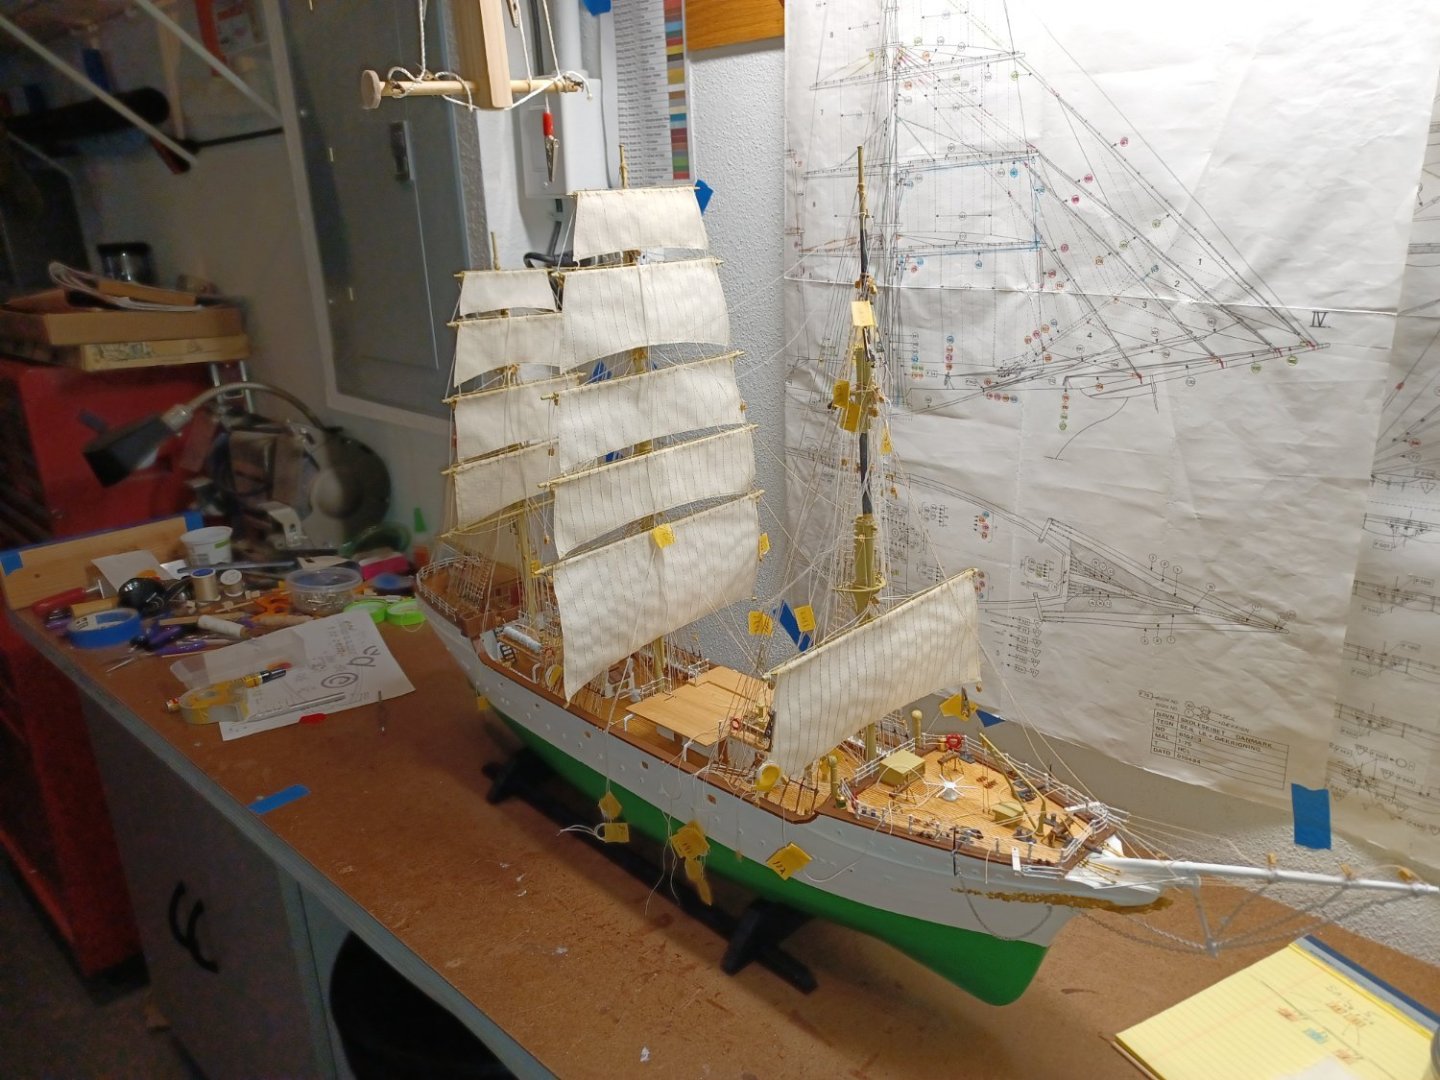
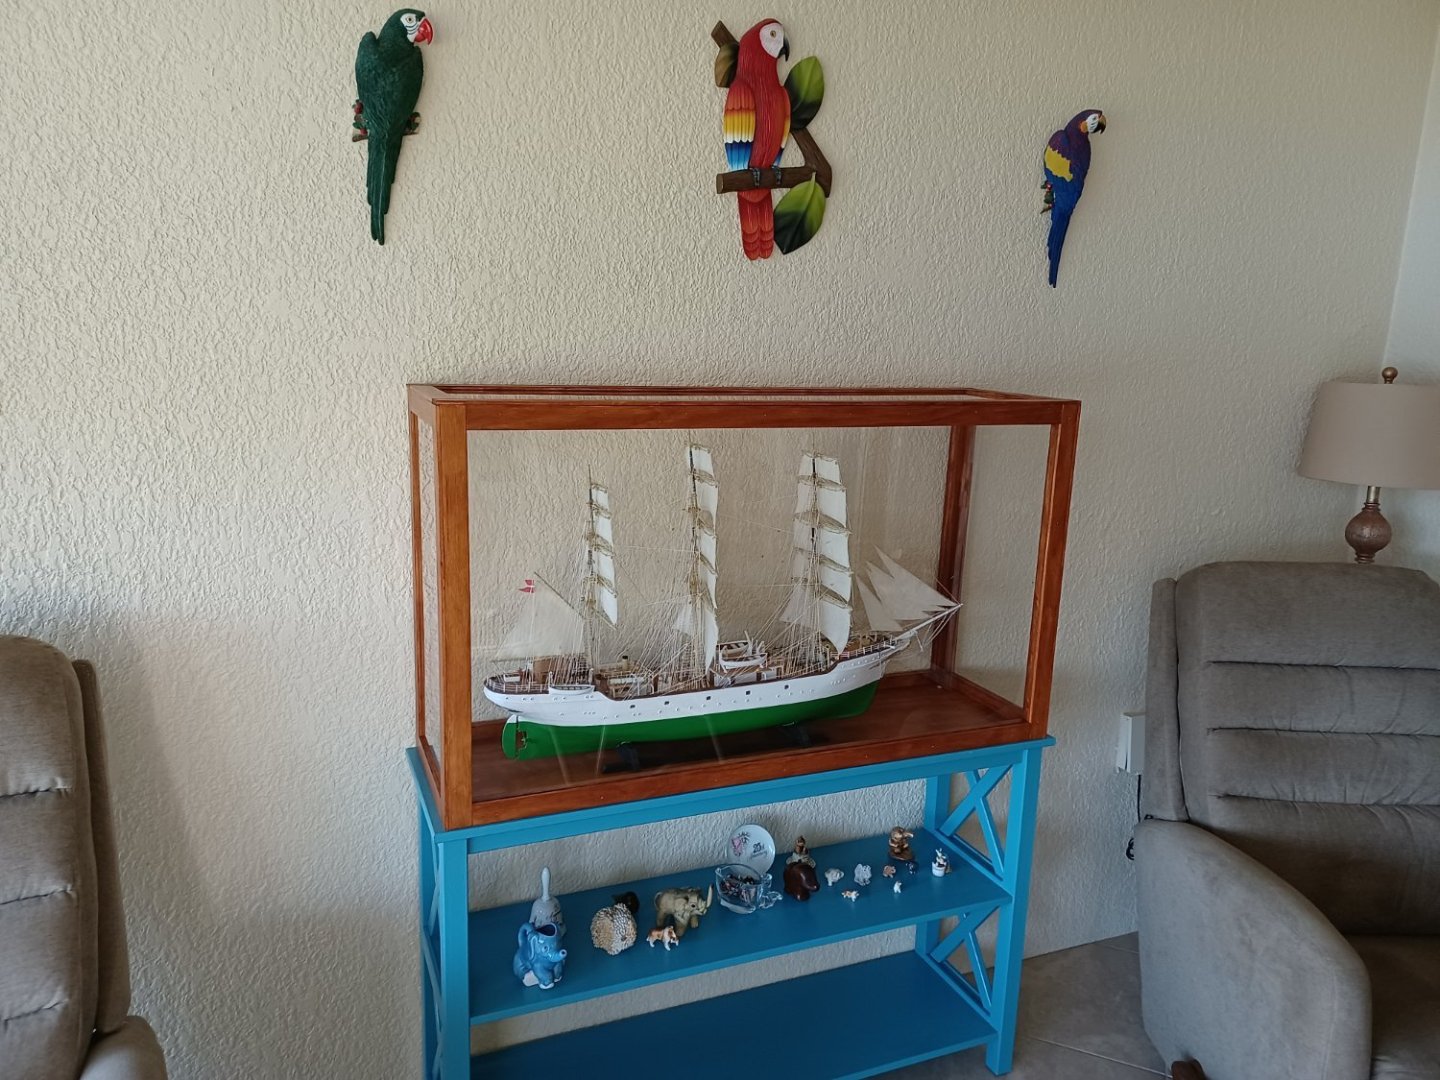
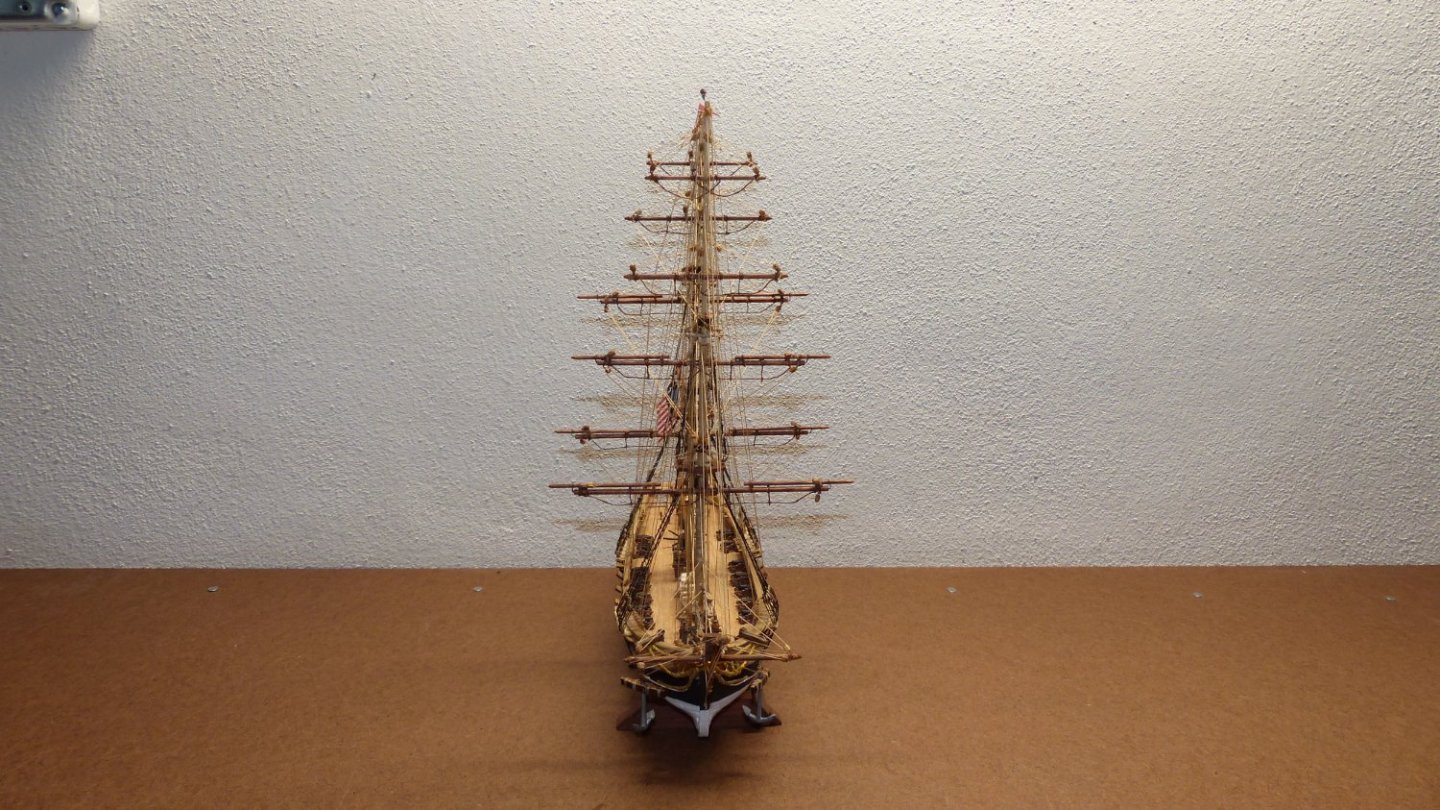
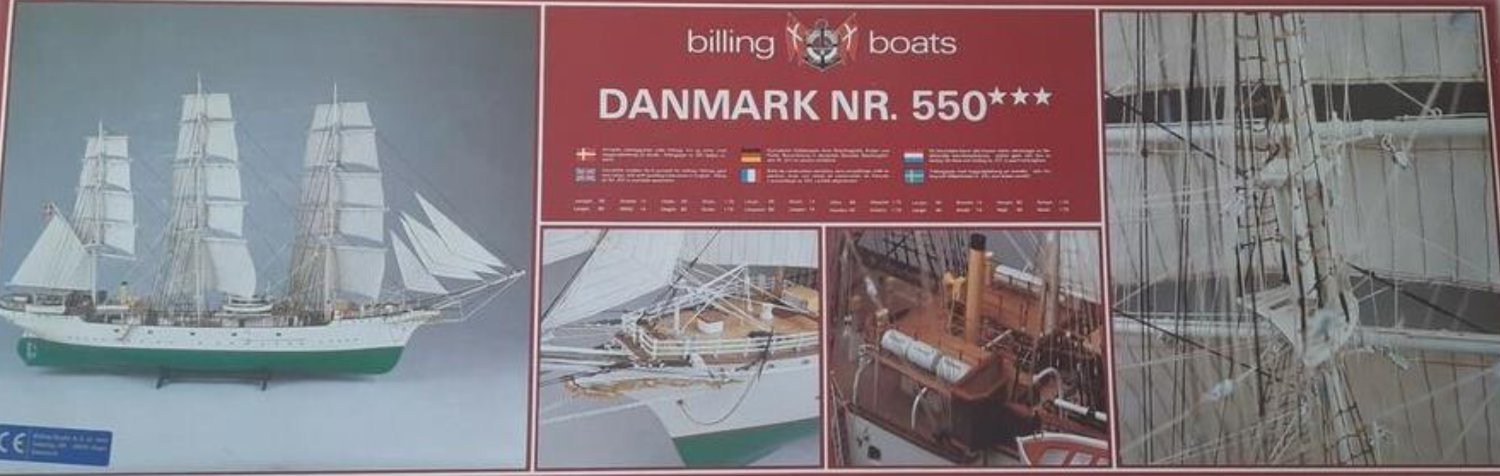
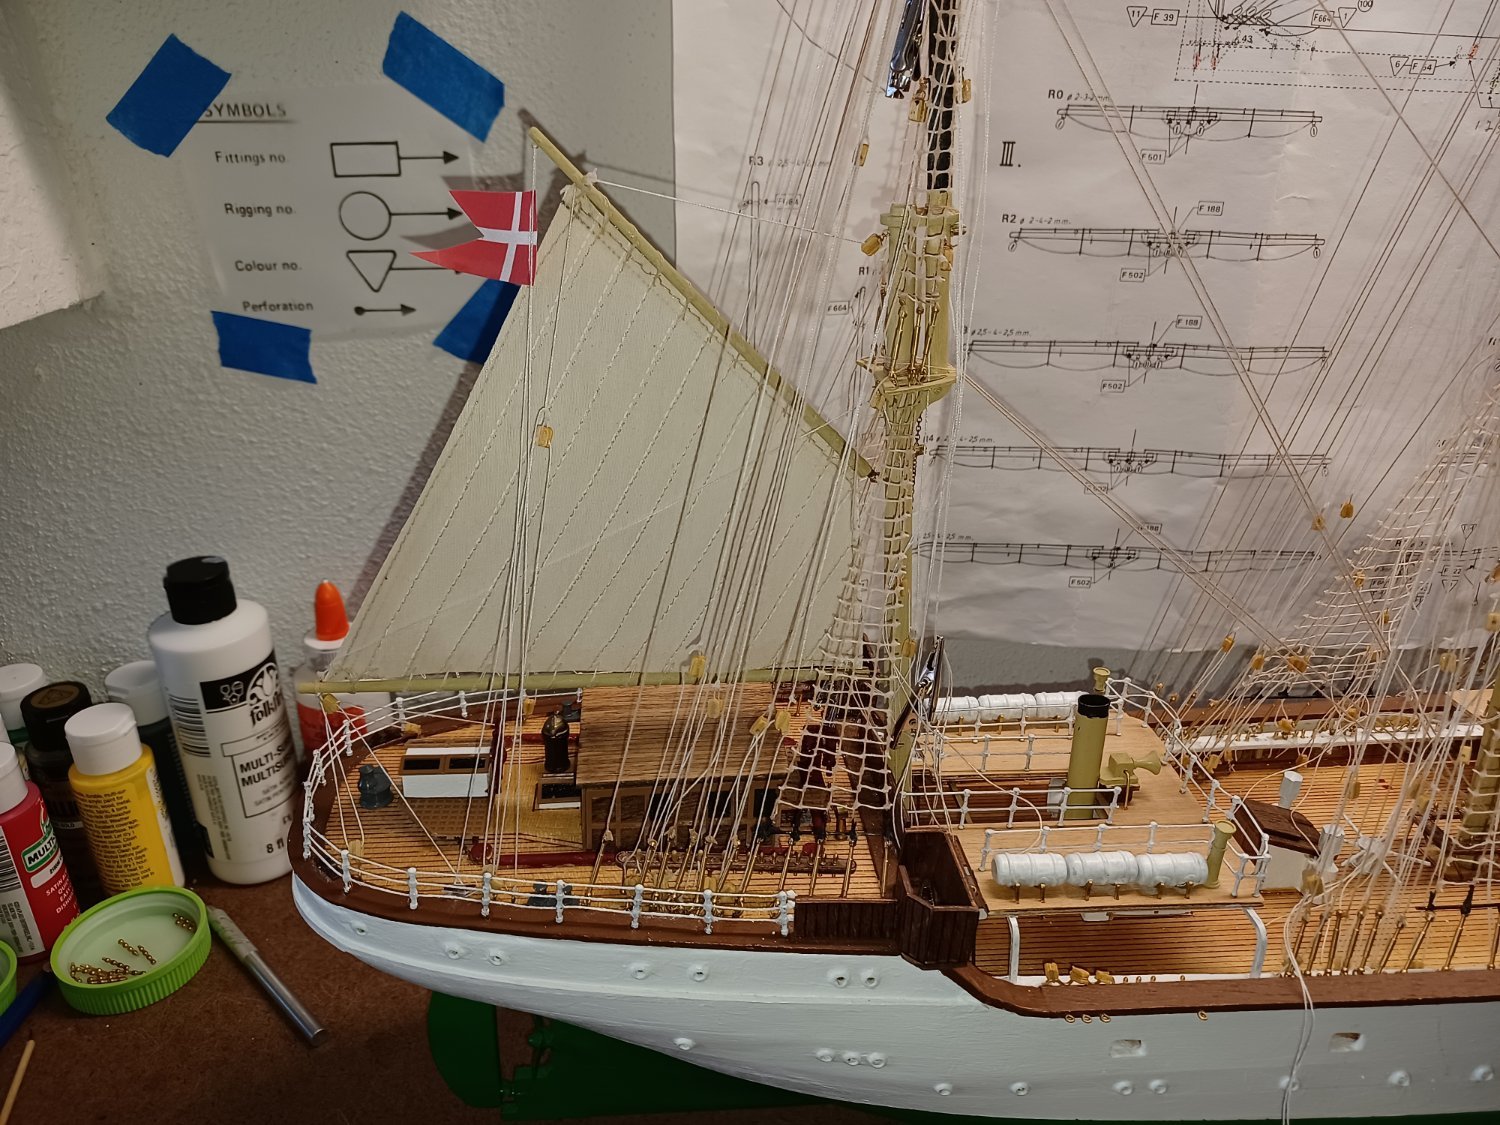
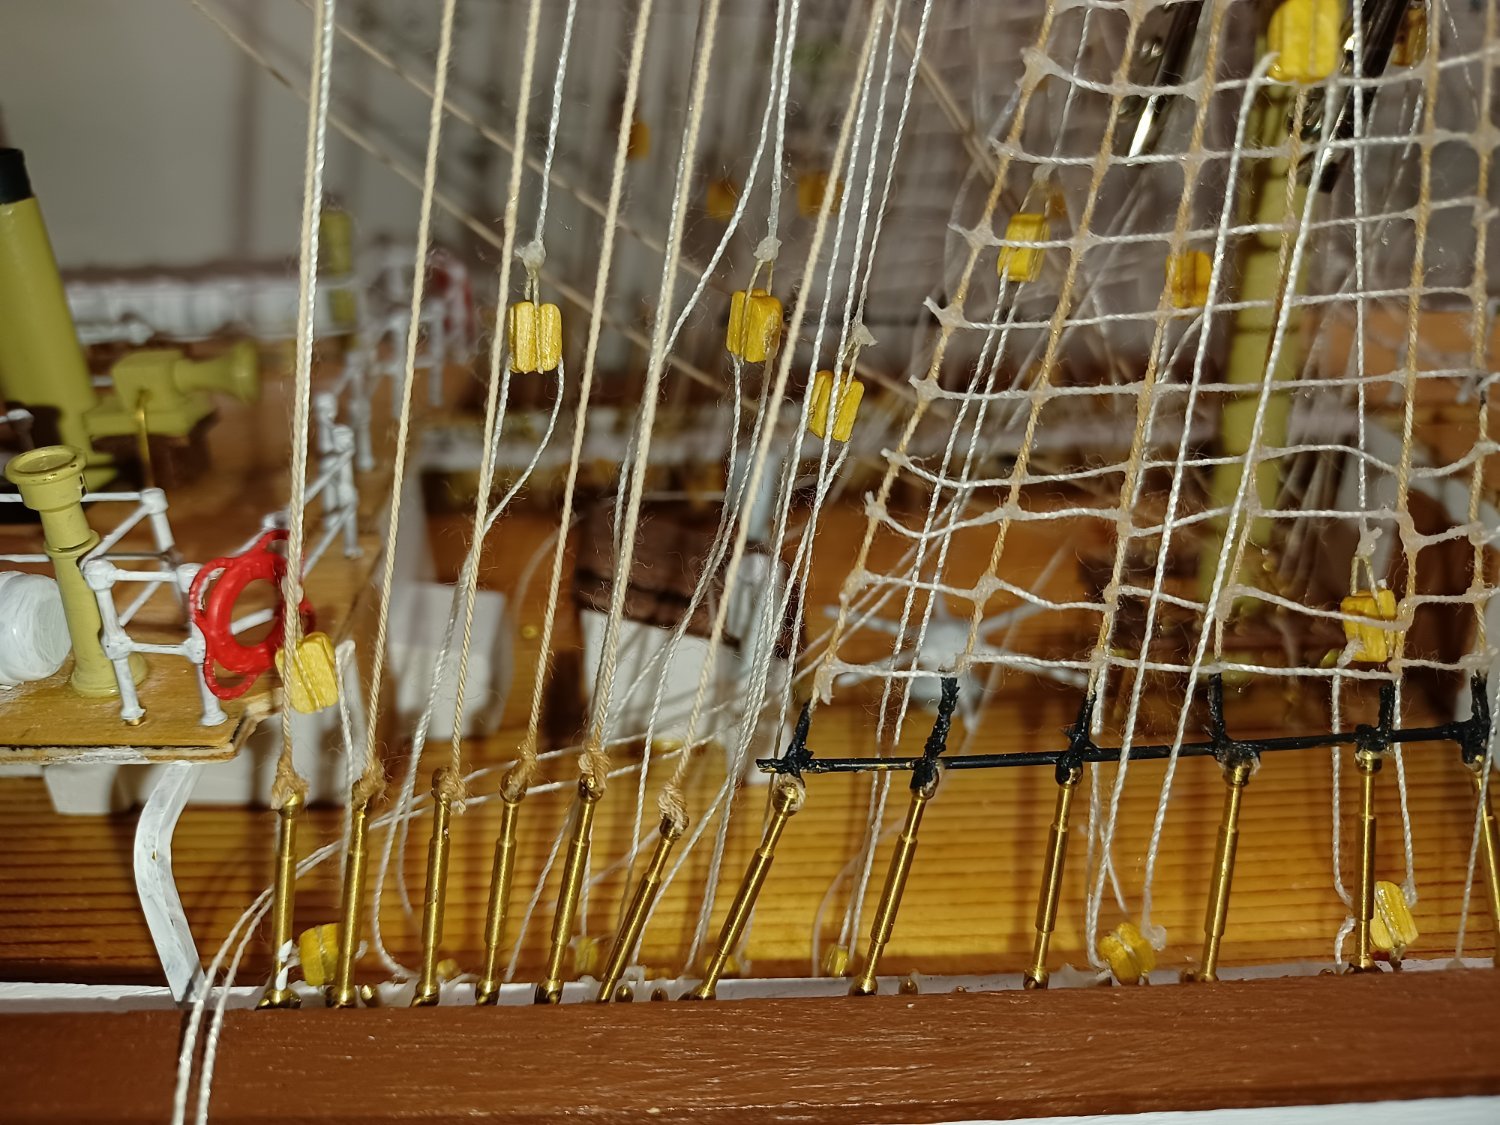
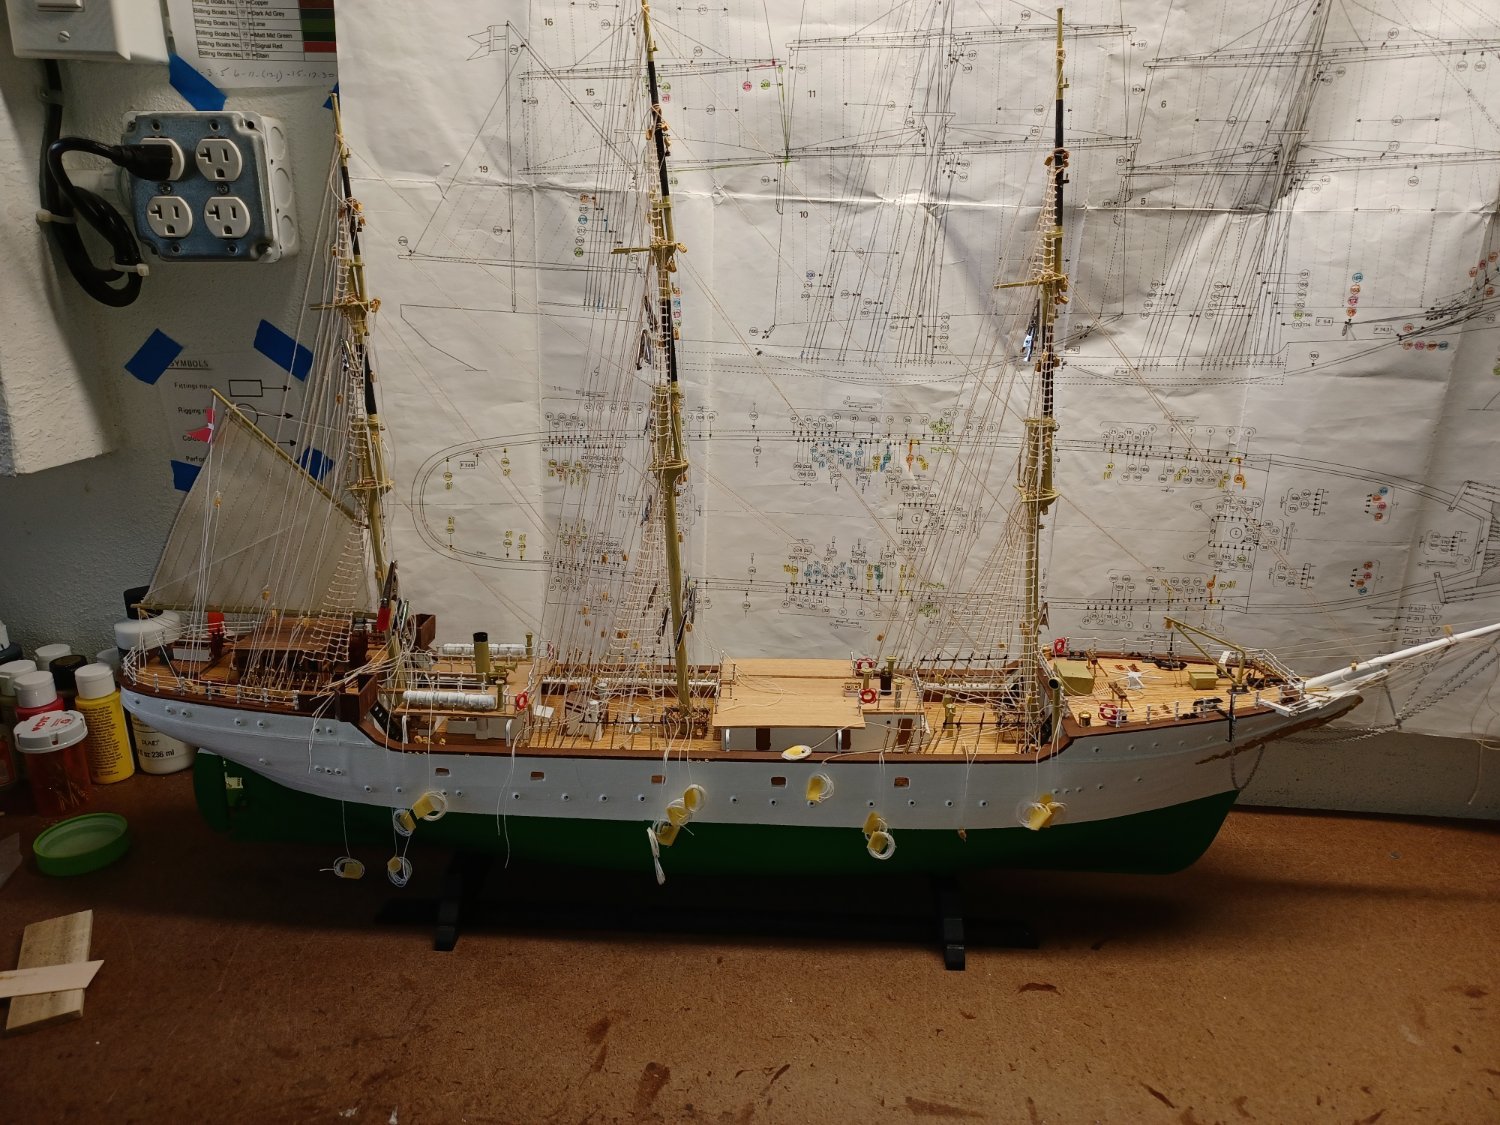
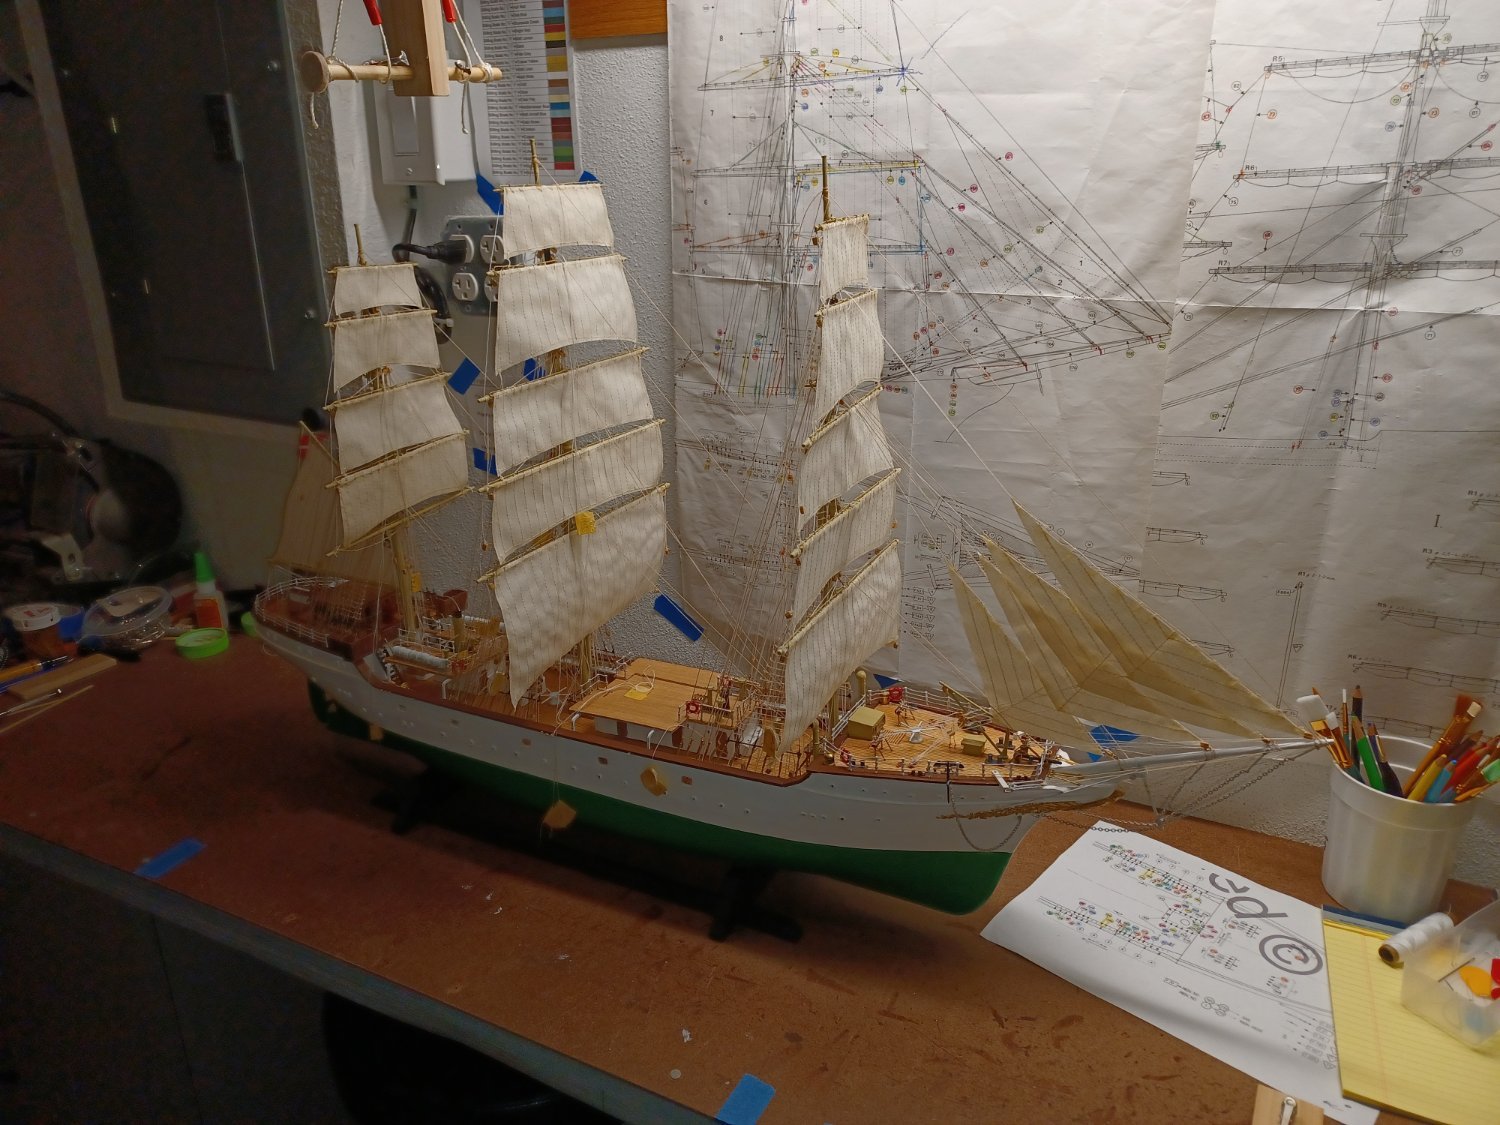
Danmark – Billing Boats – 1:75
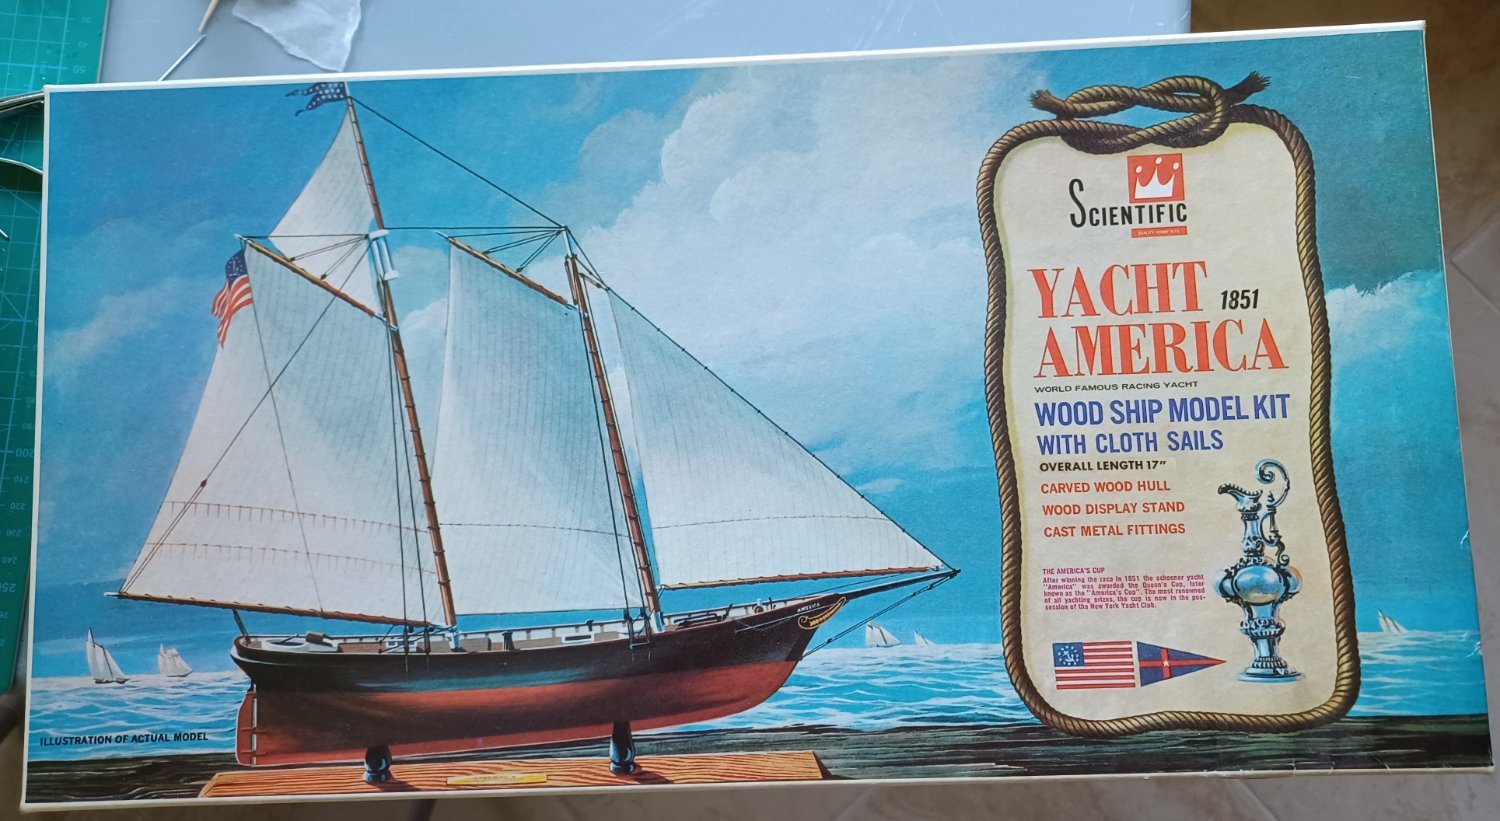
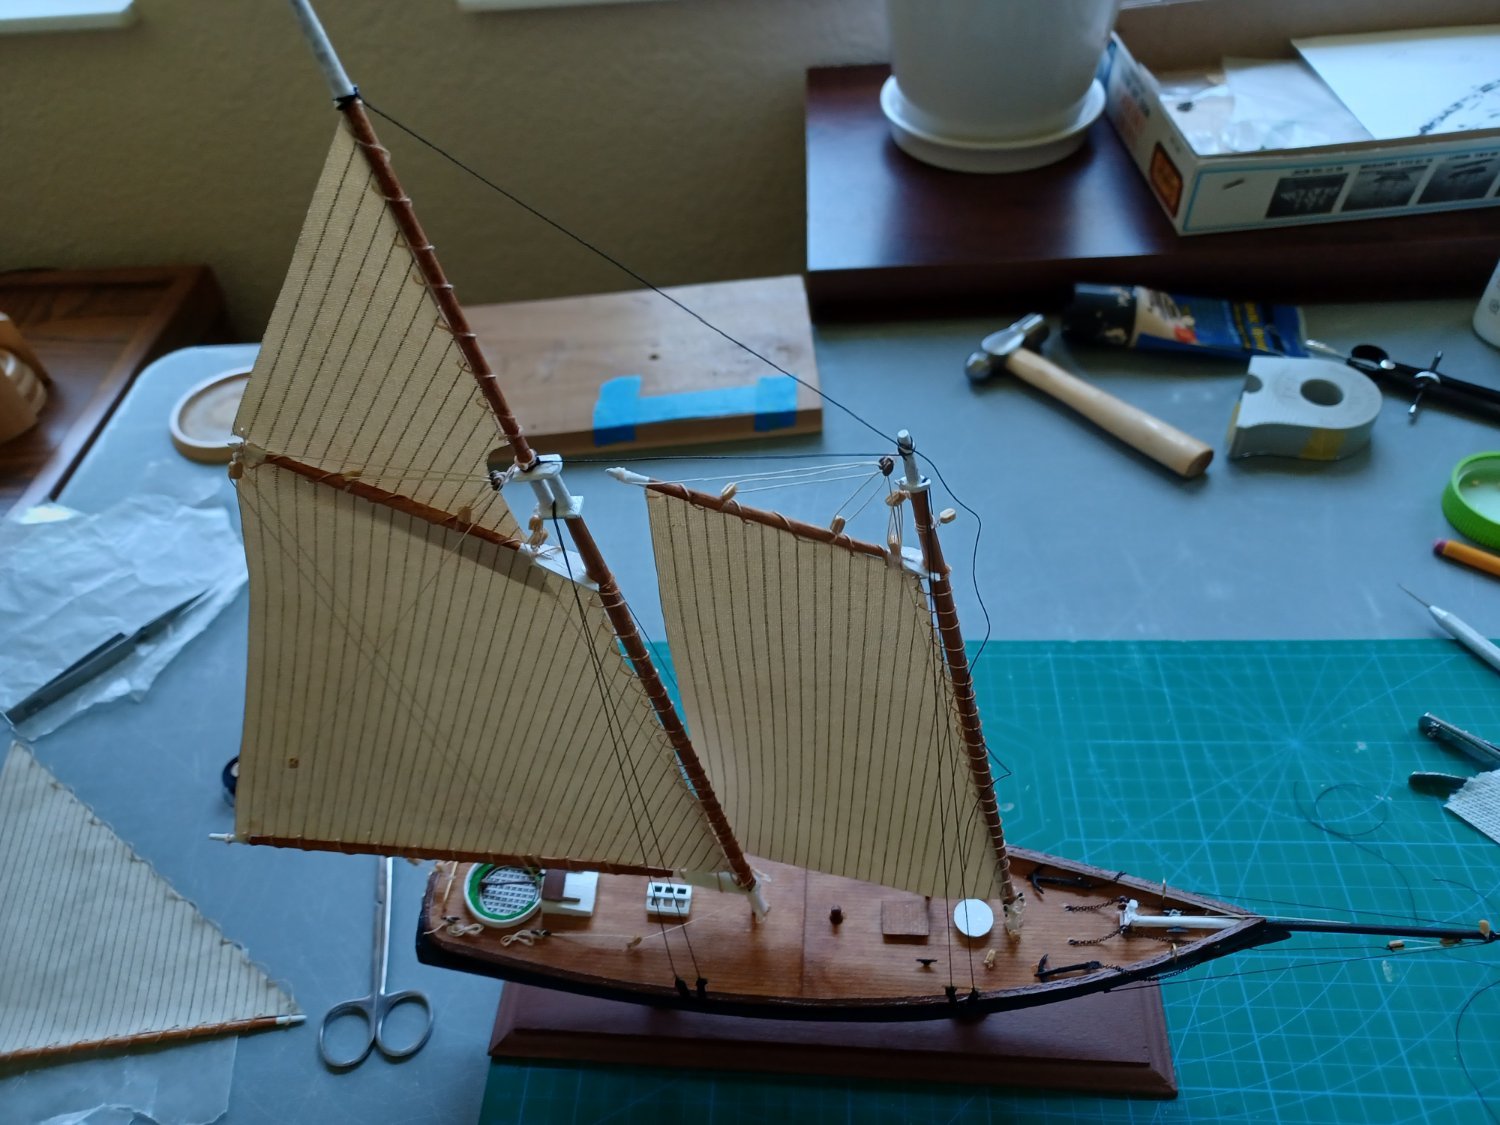
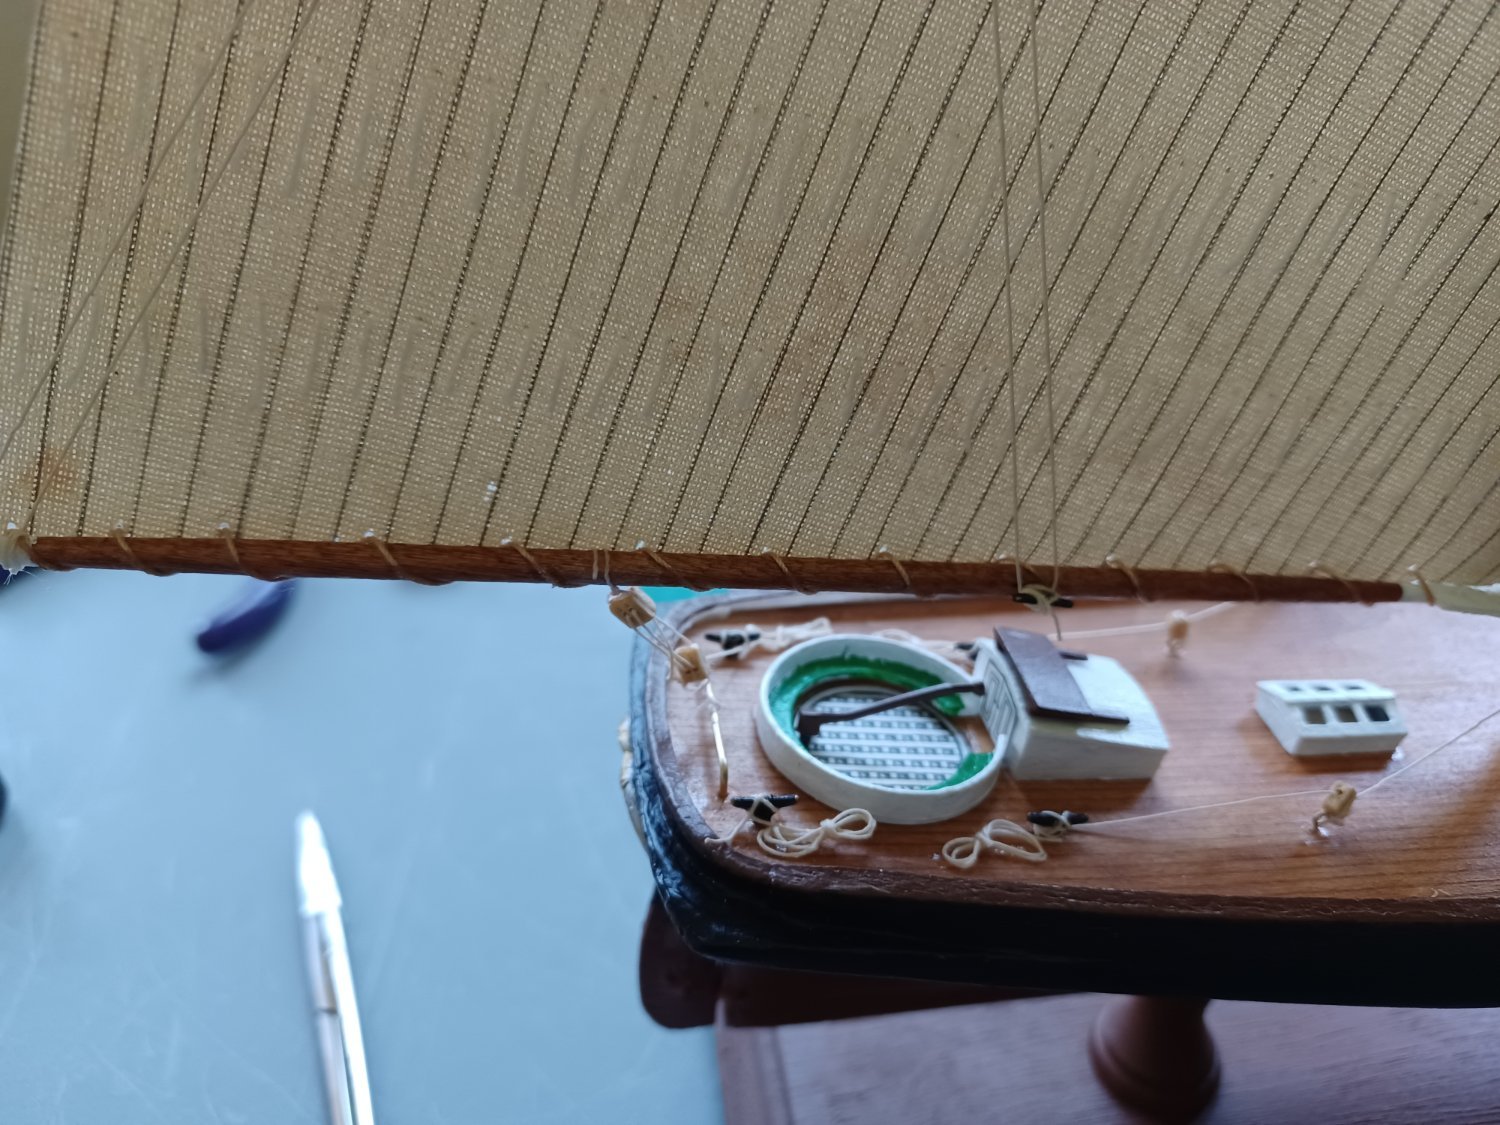
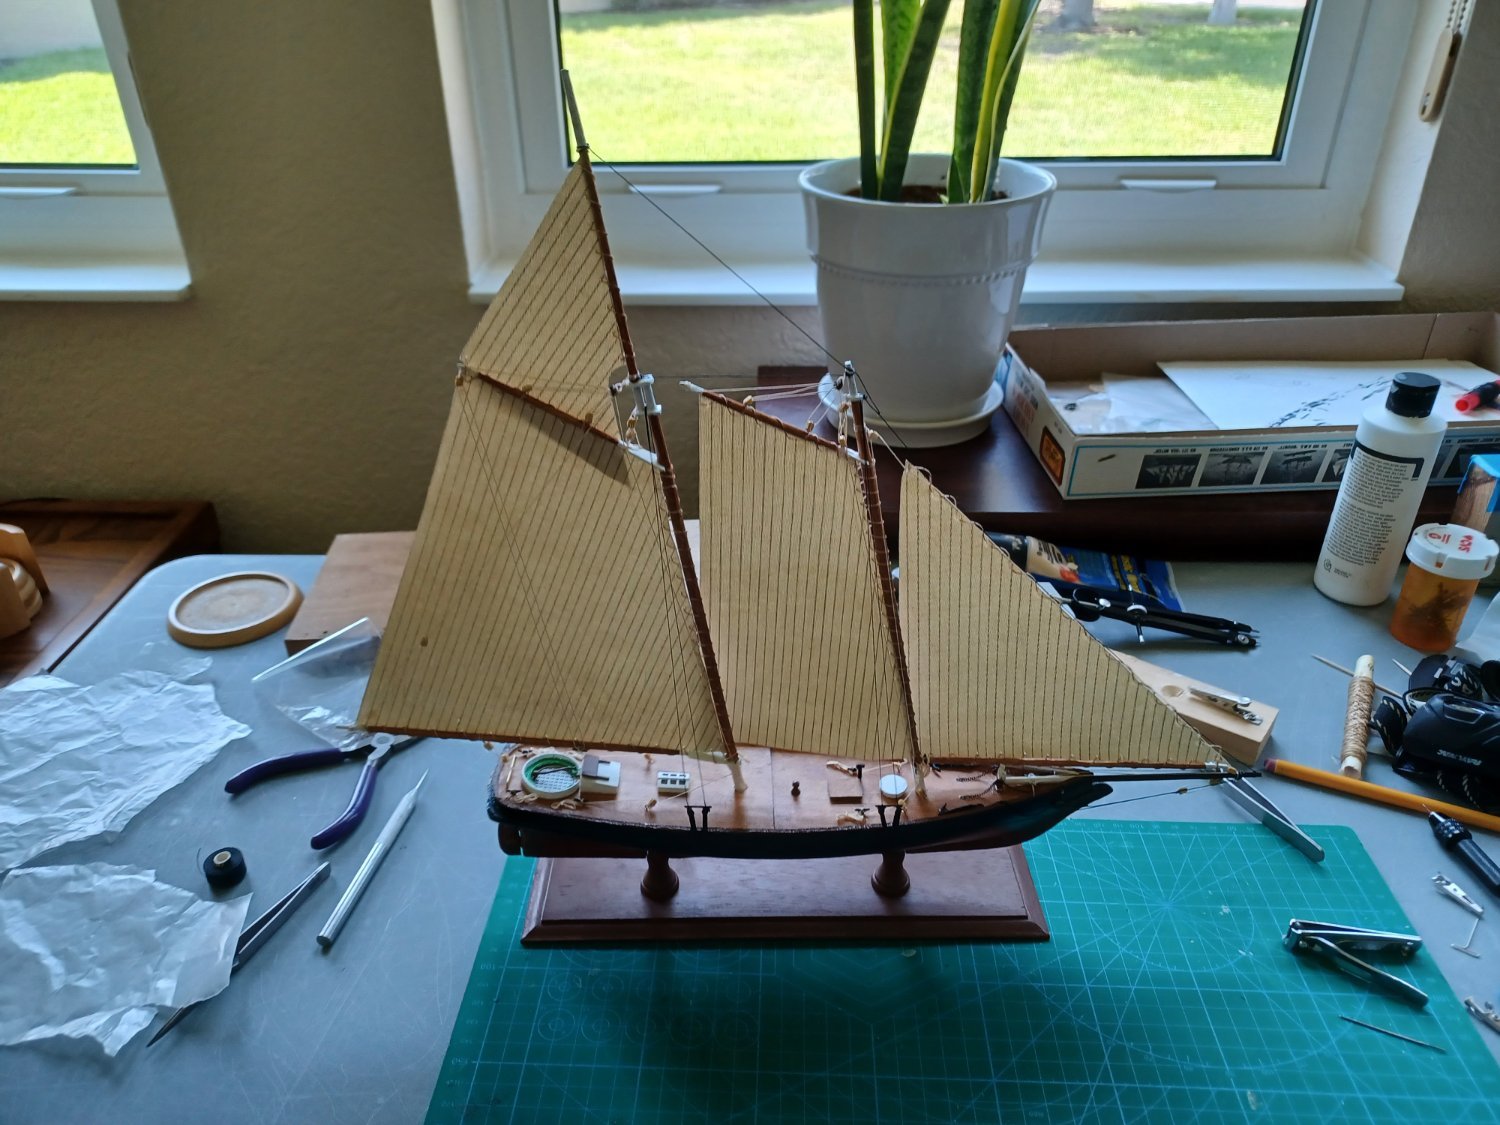
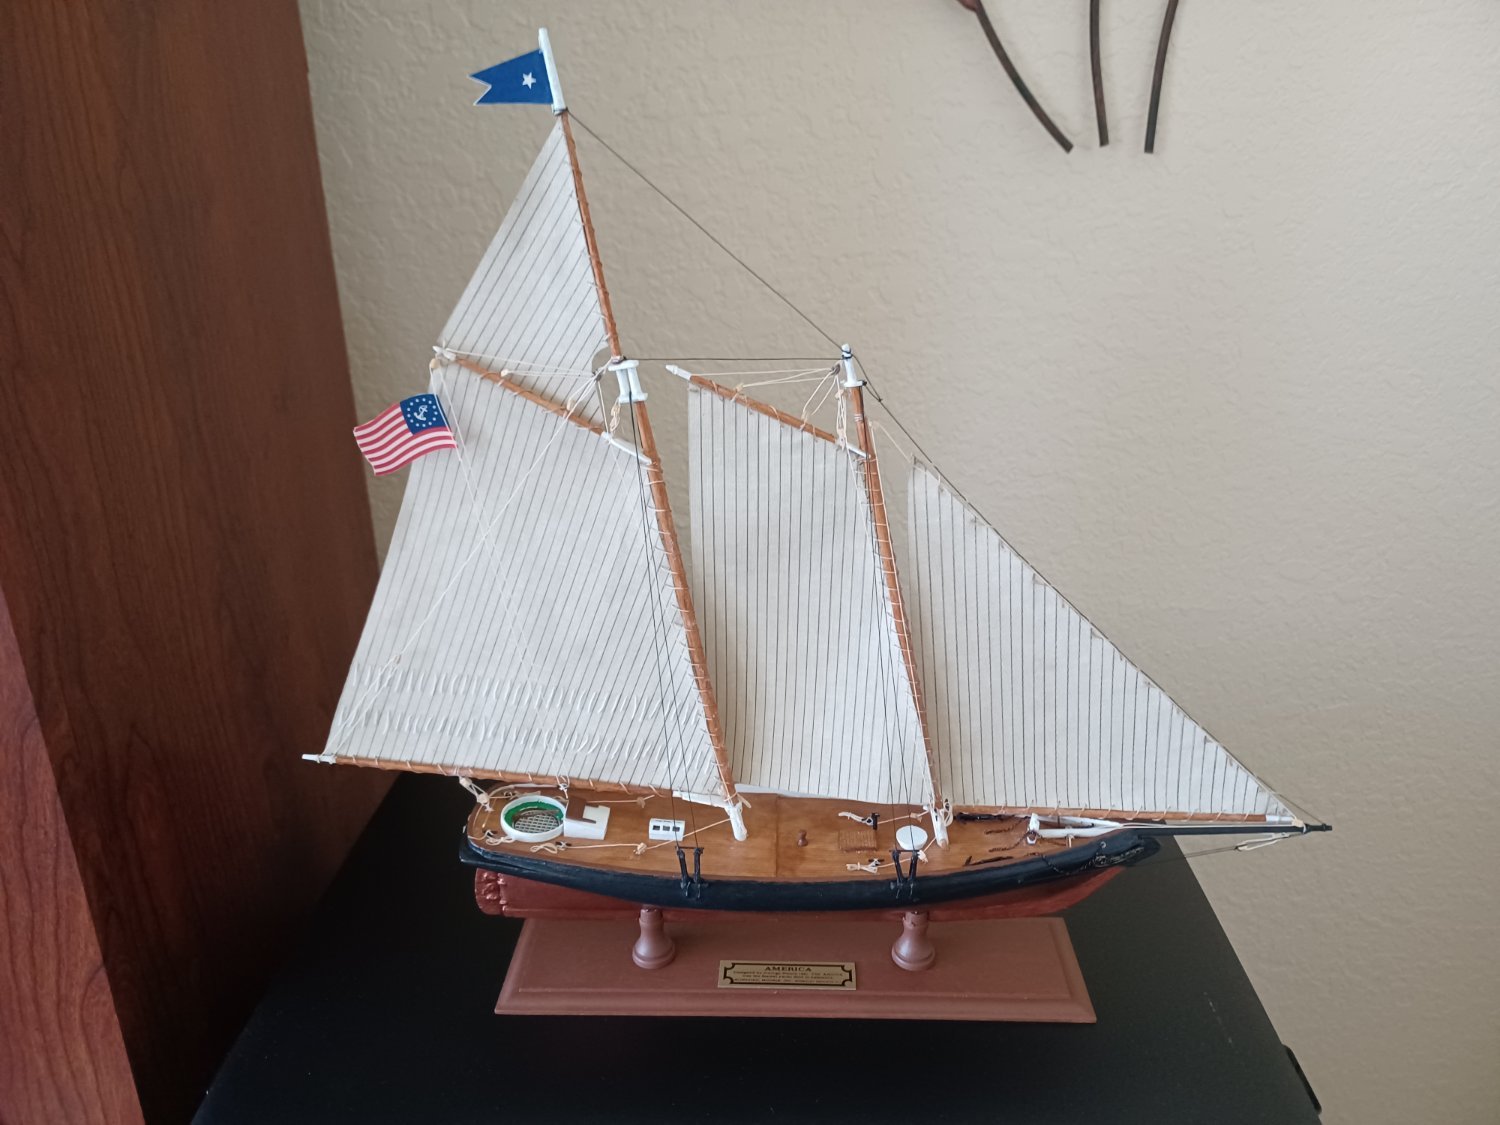
Yacht America 1851 Scientific Models
-
-
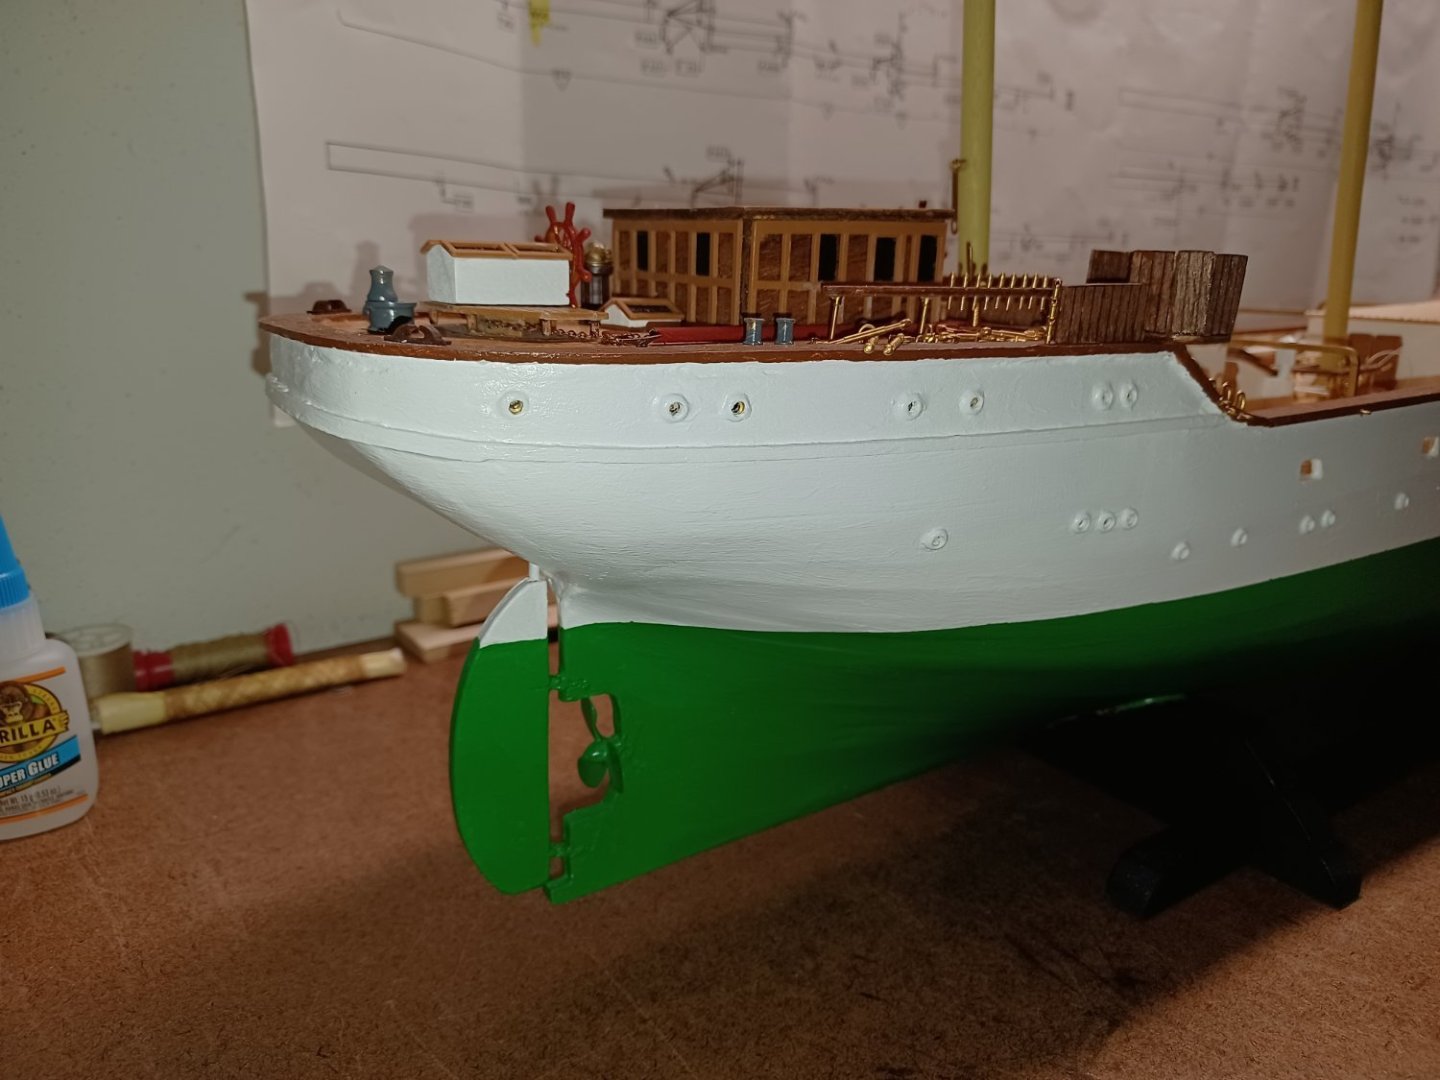
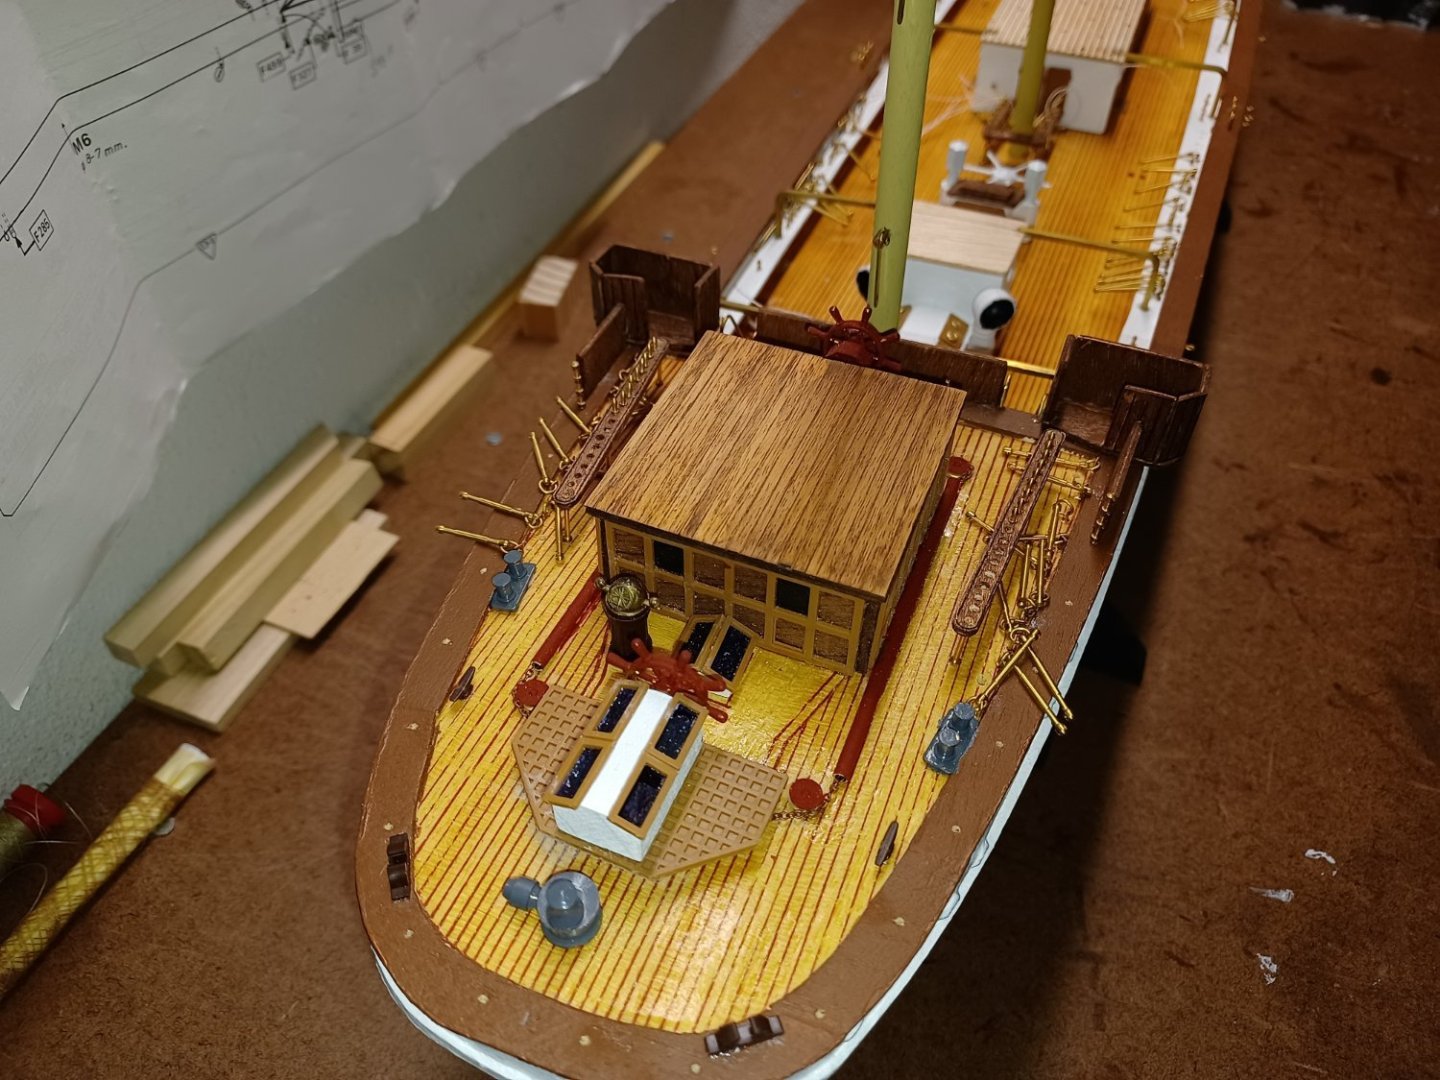
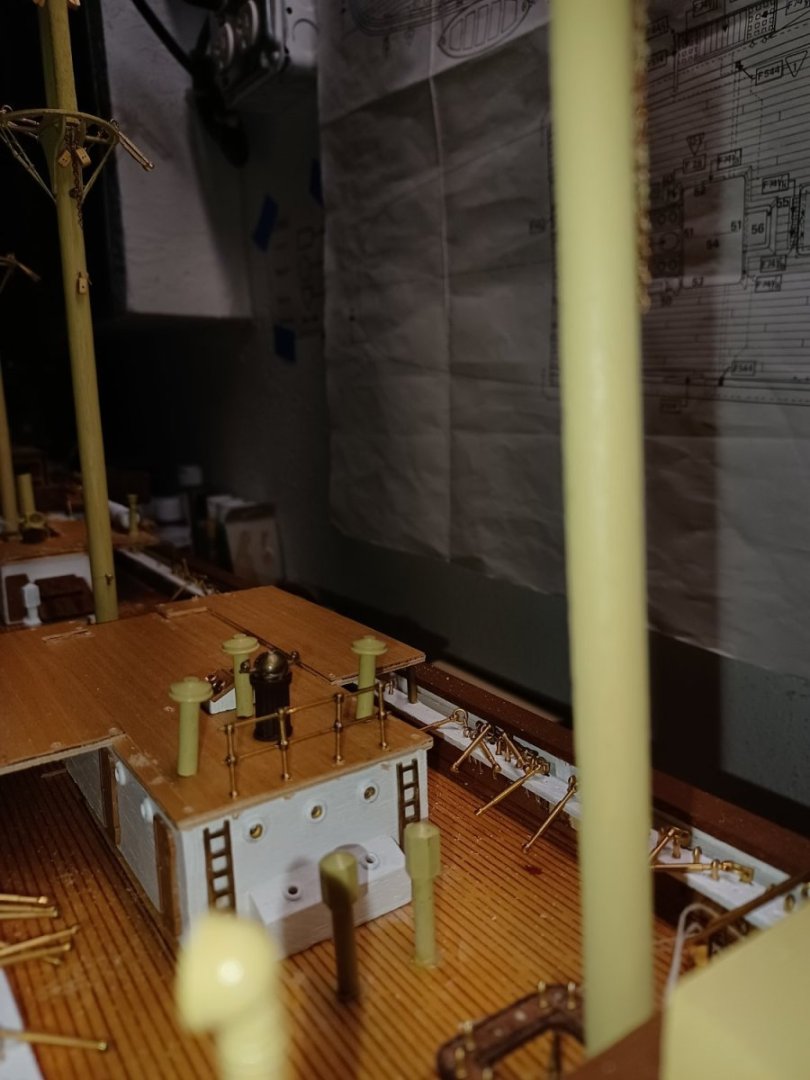
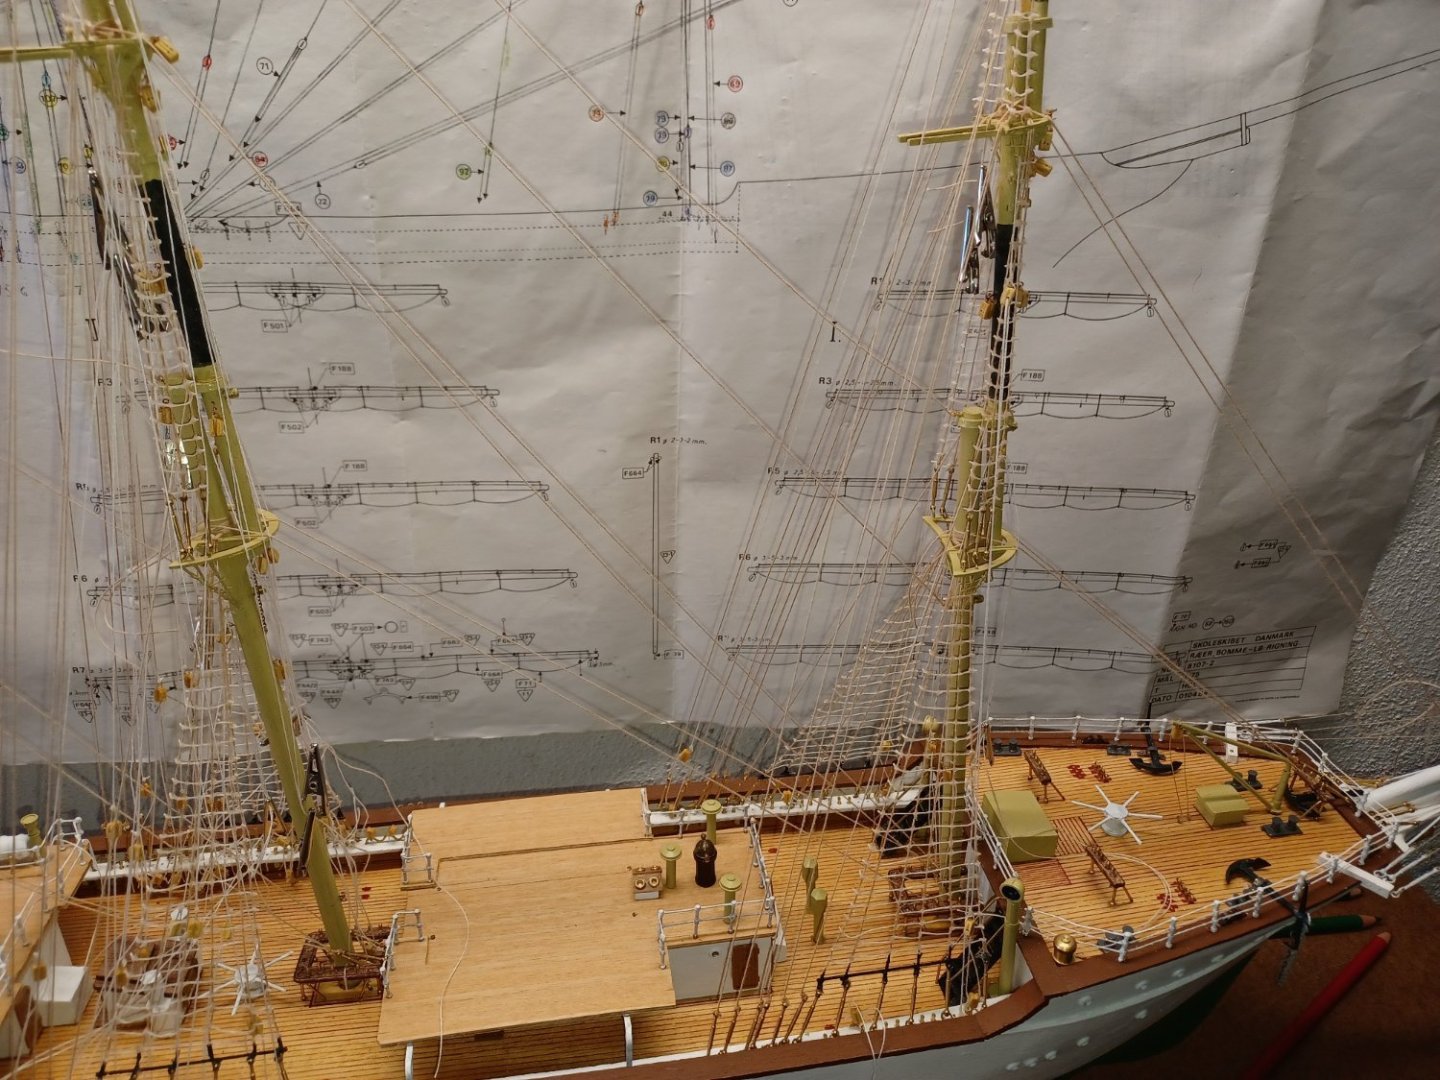
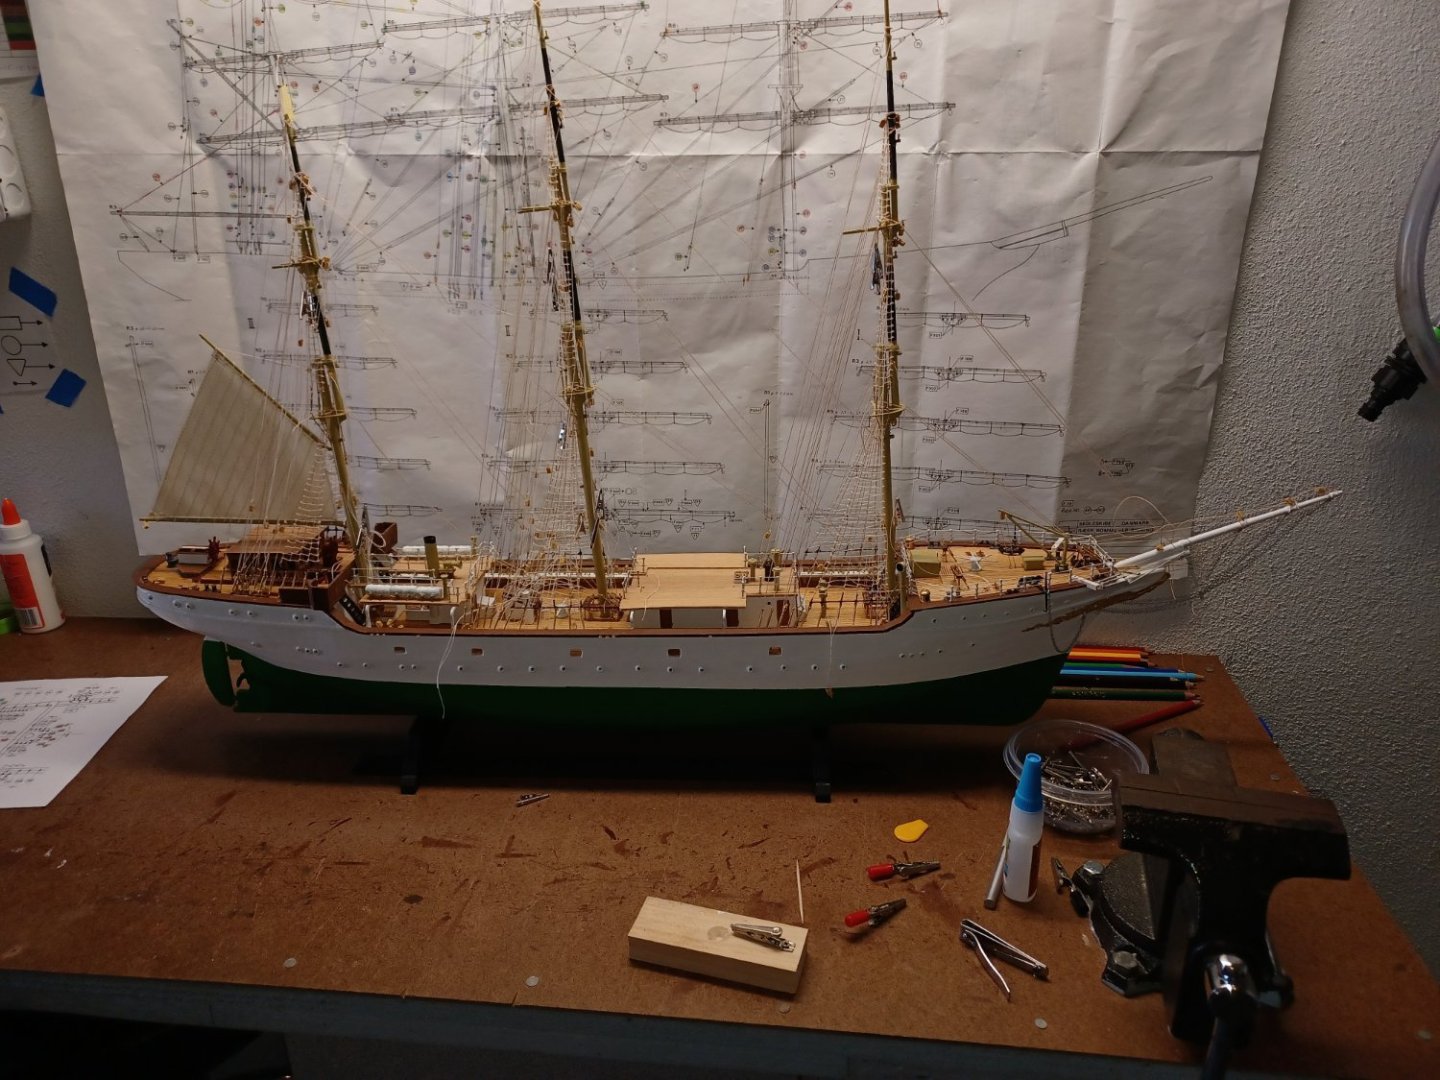
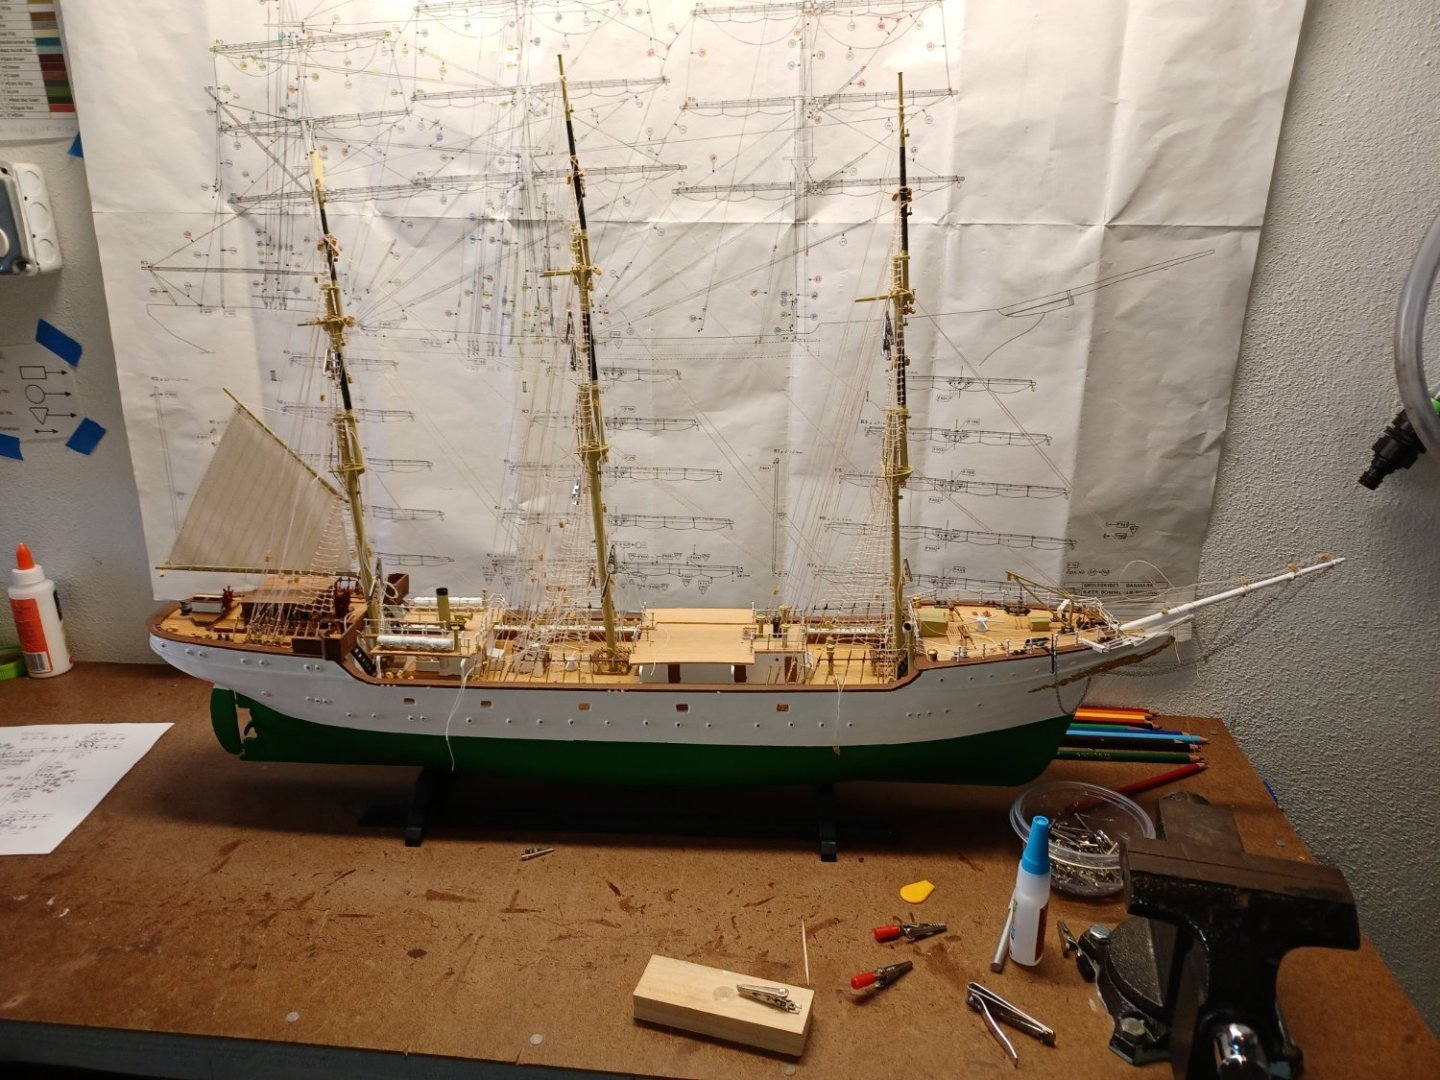
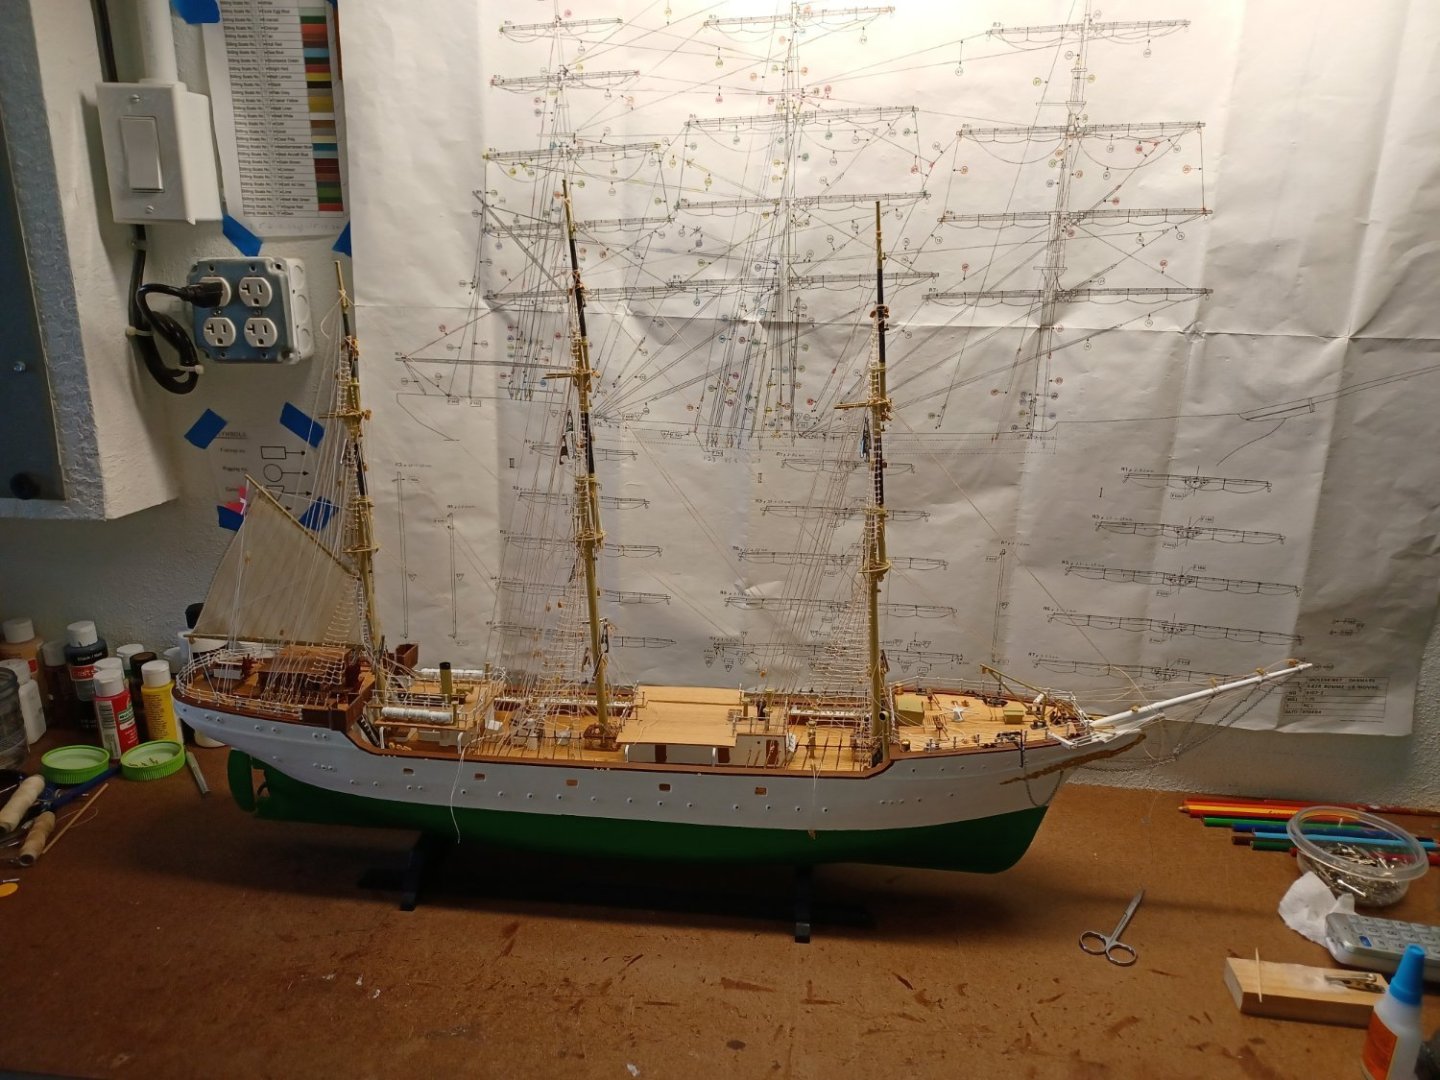
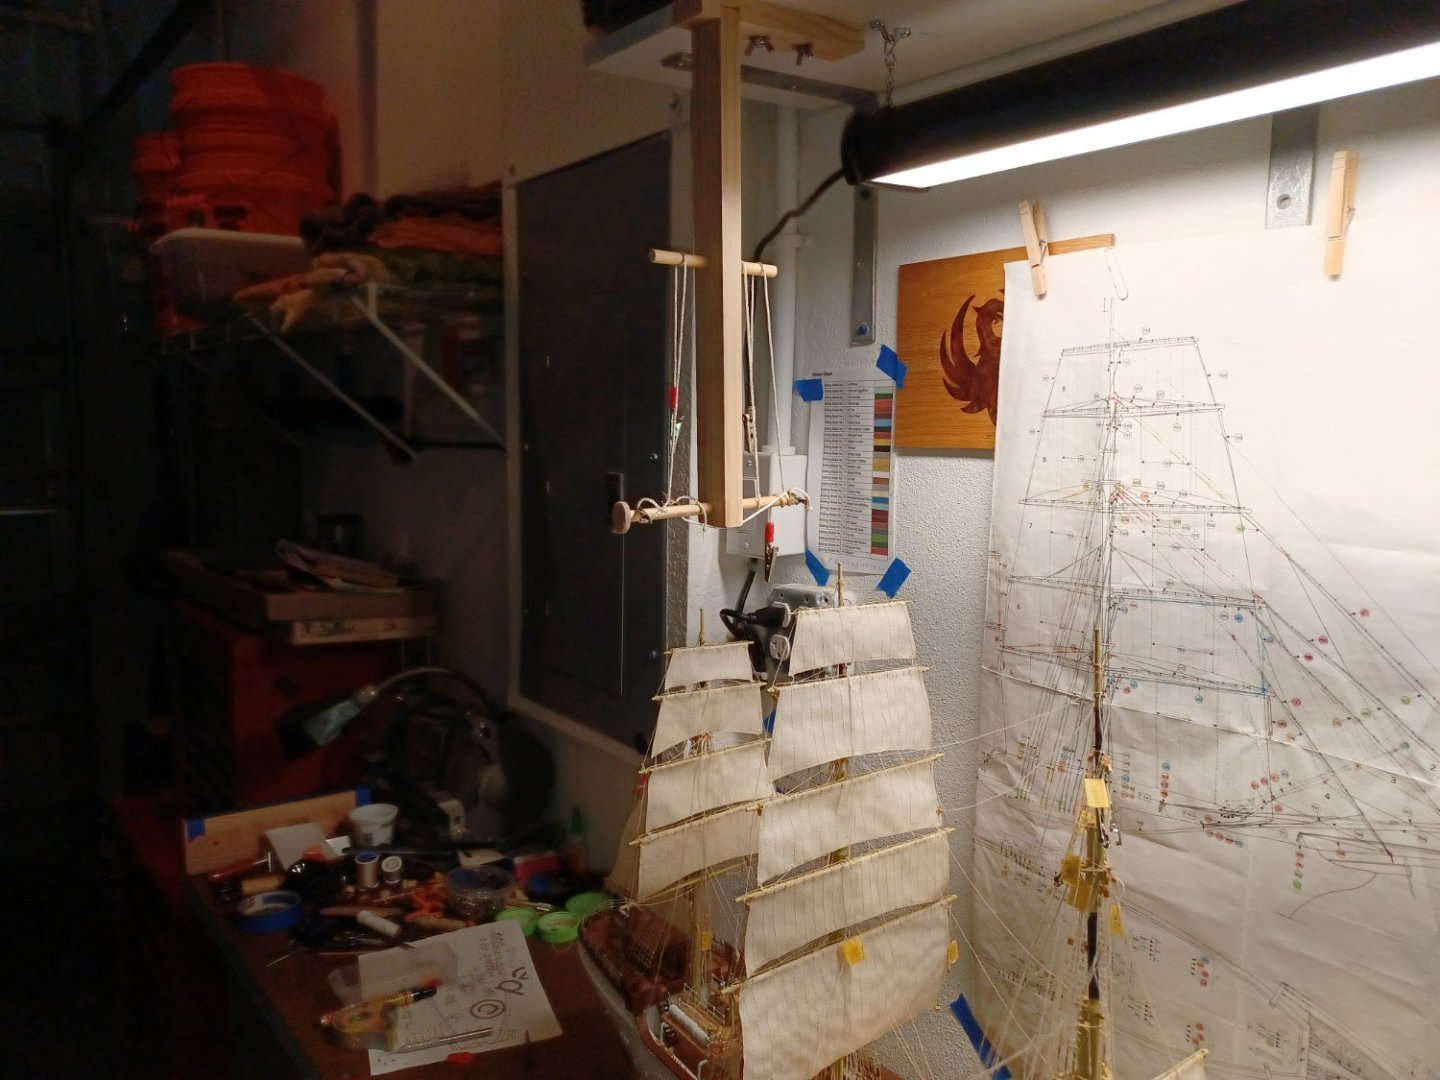
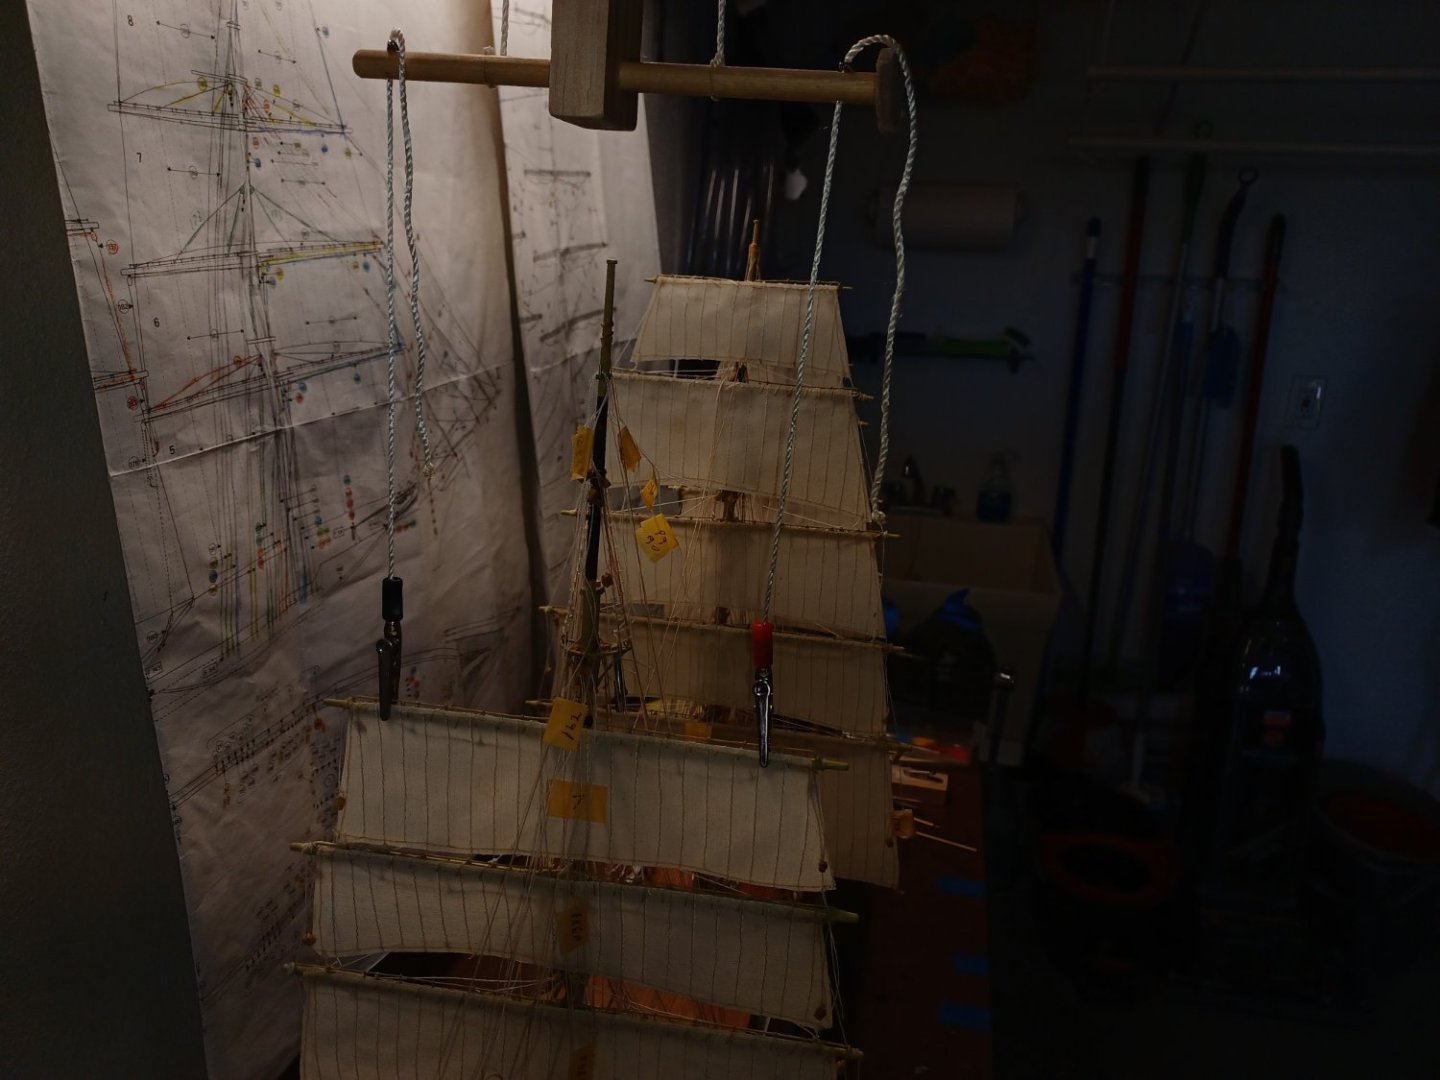
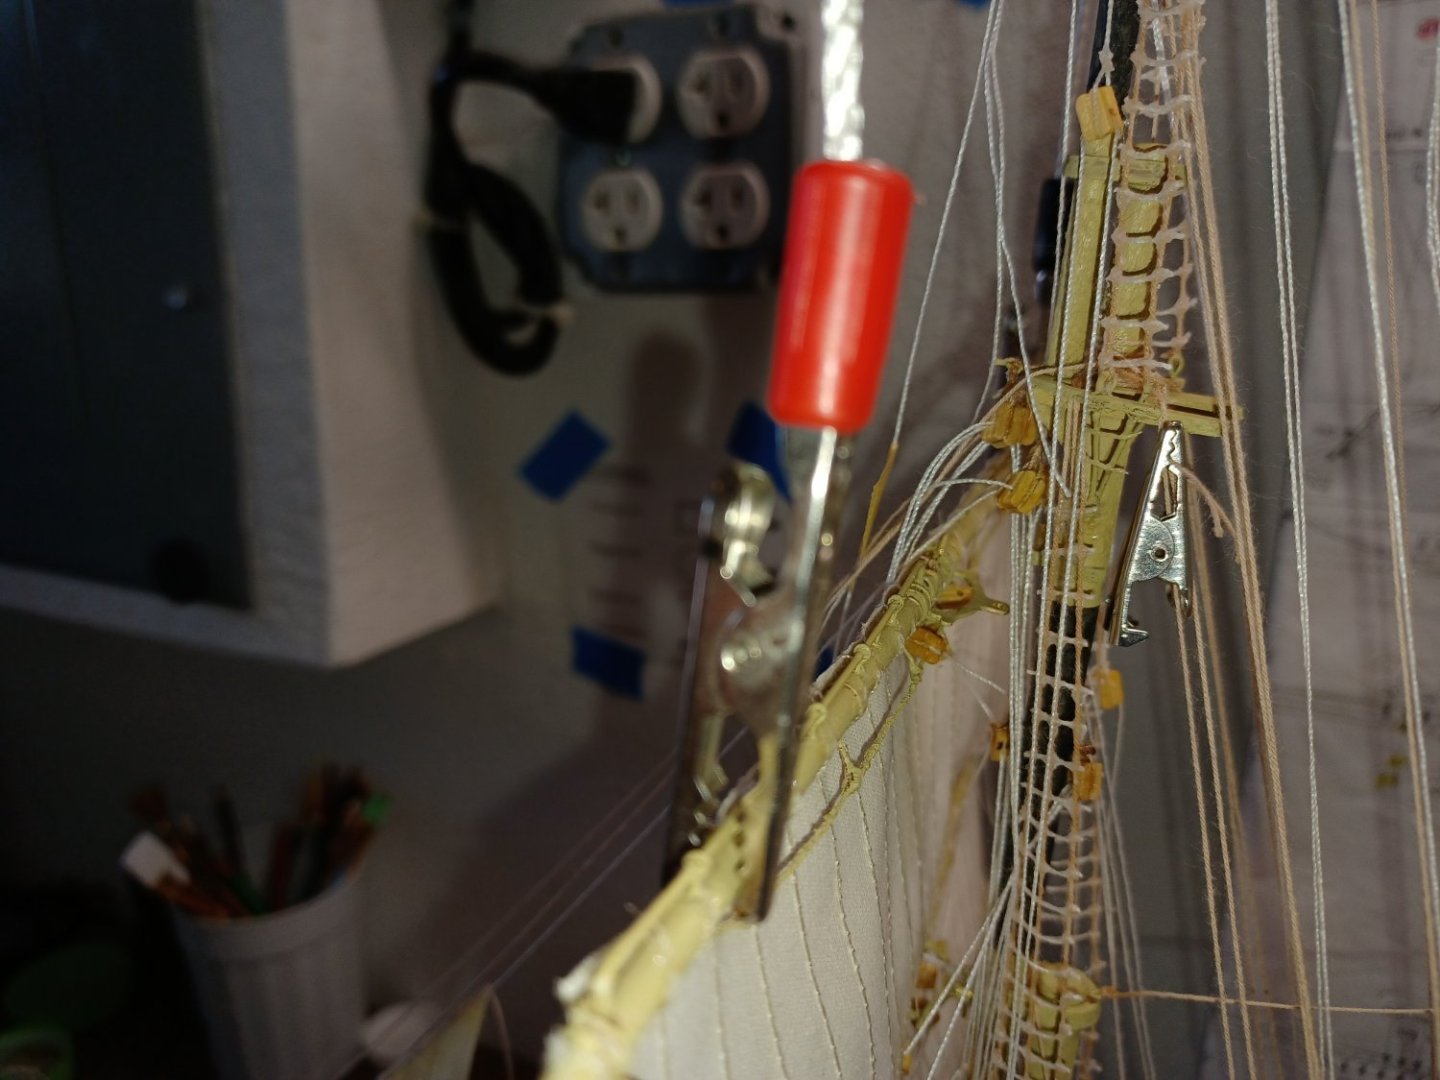
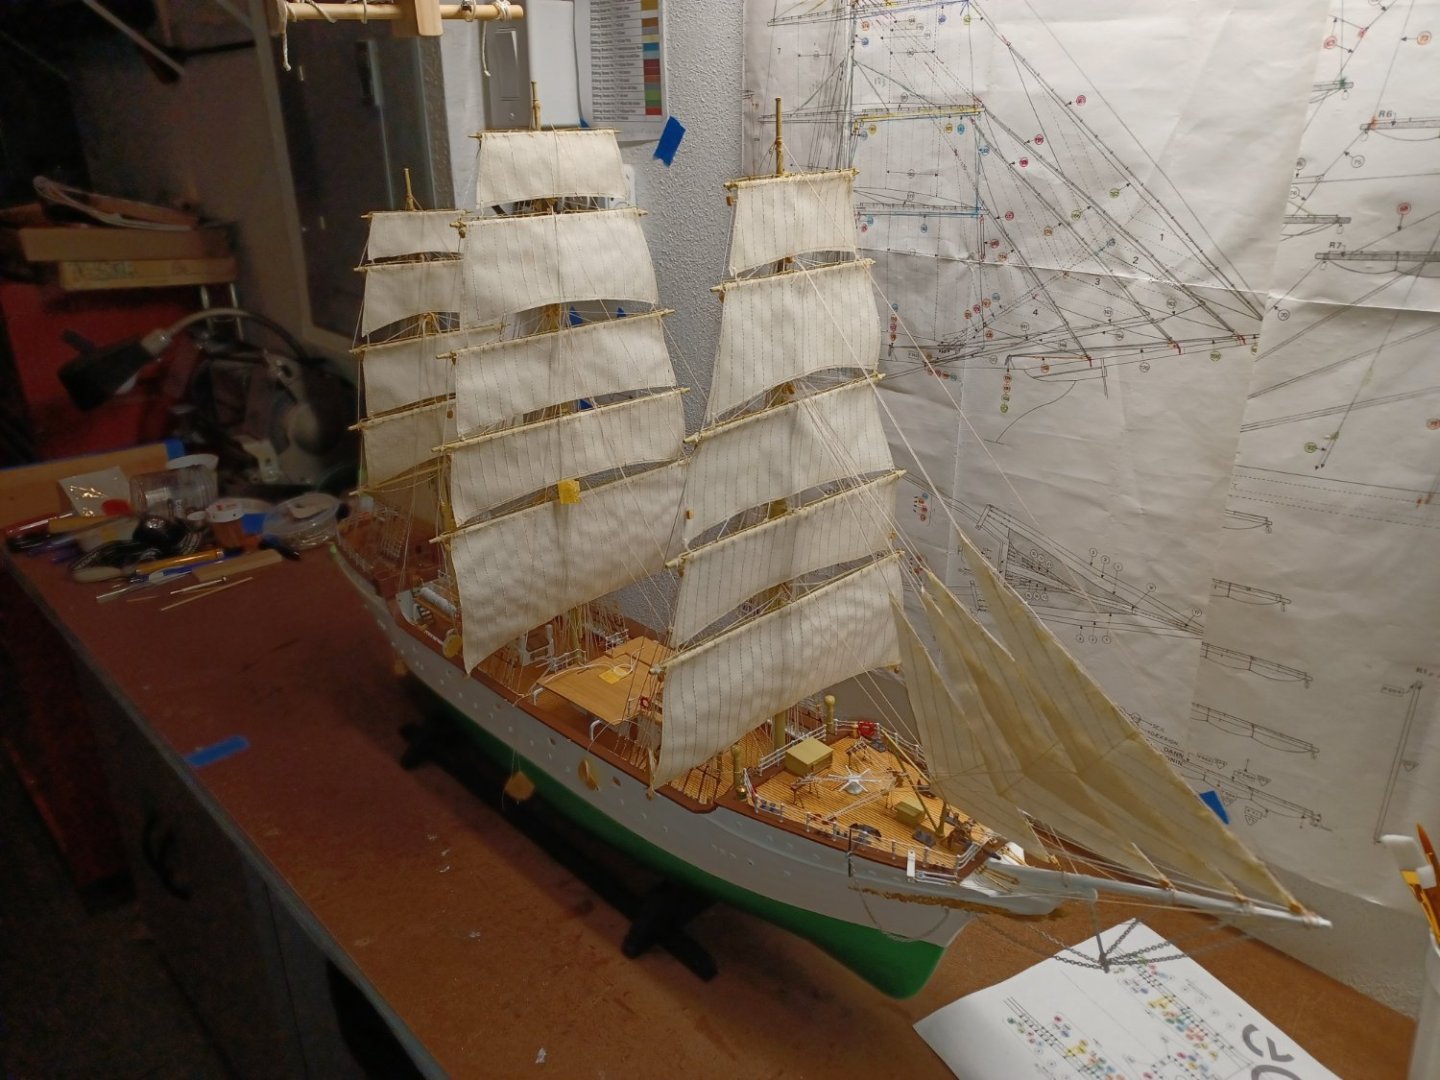
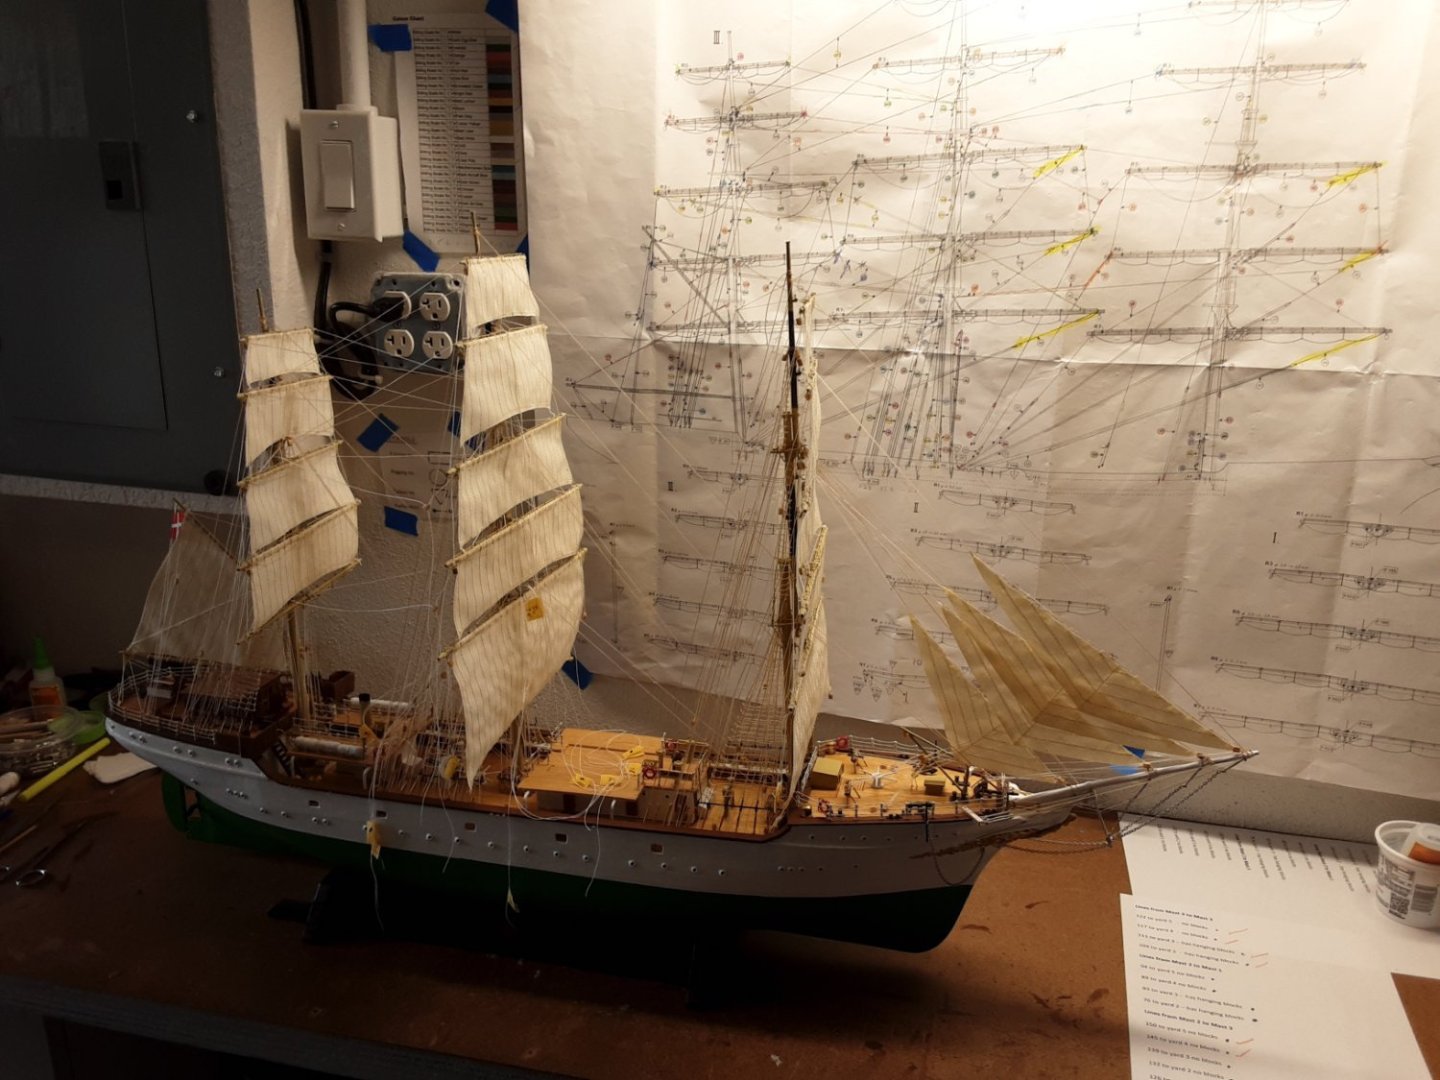
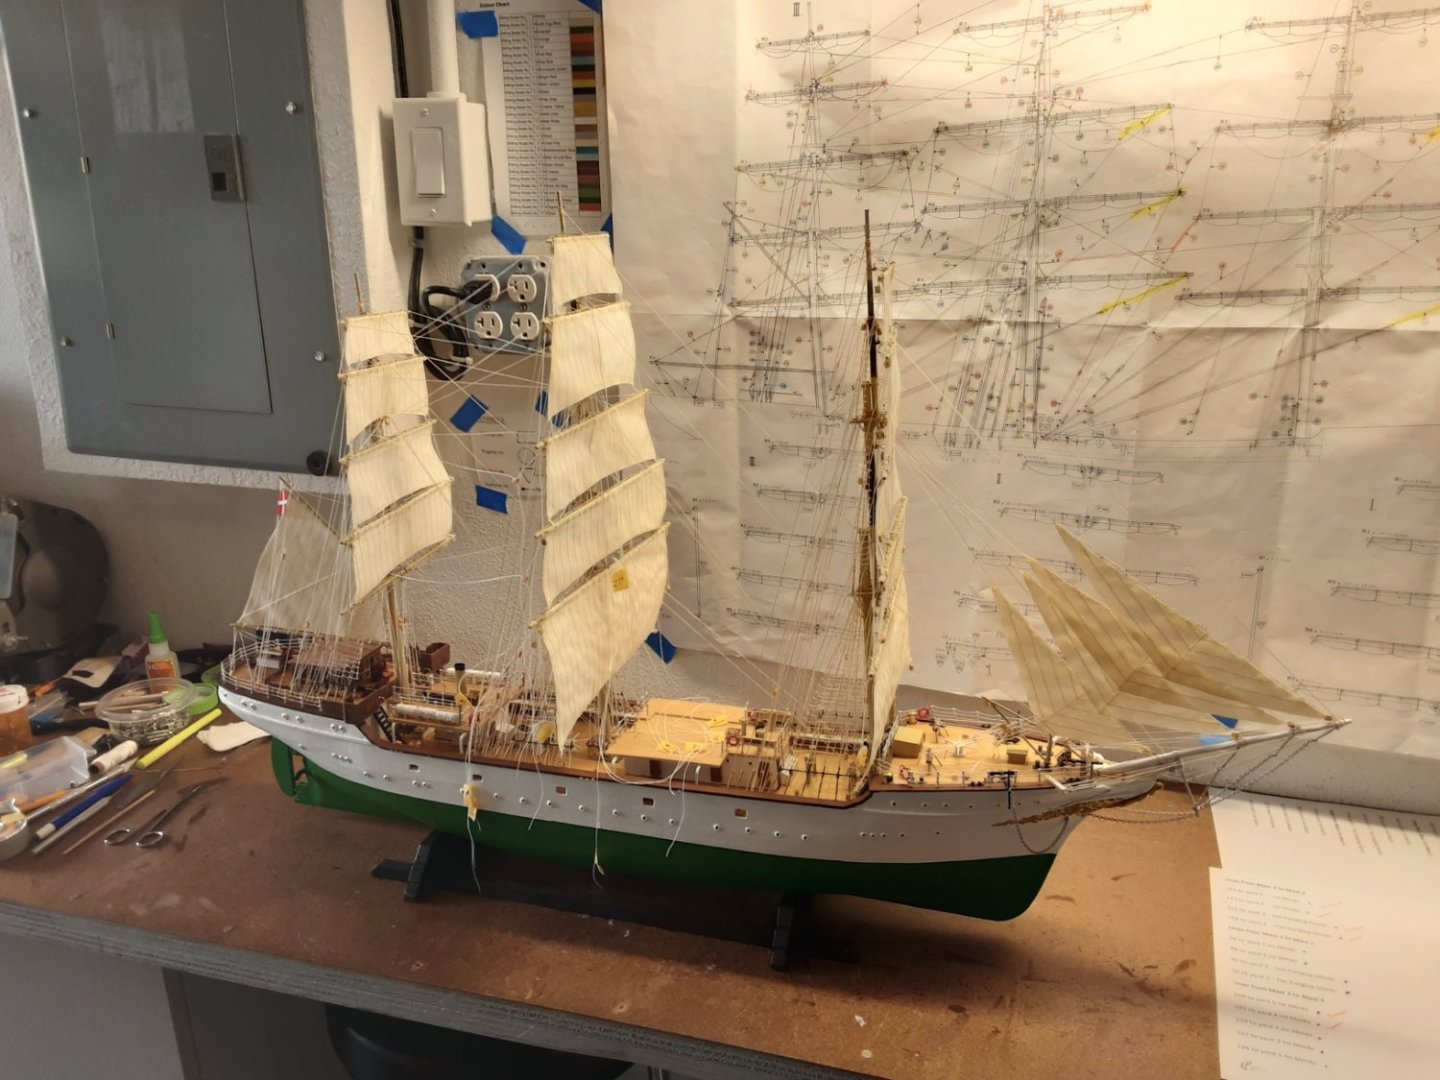
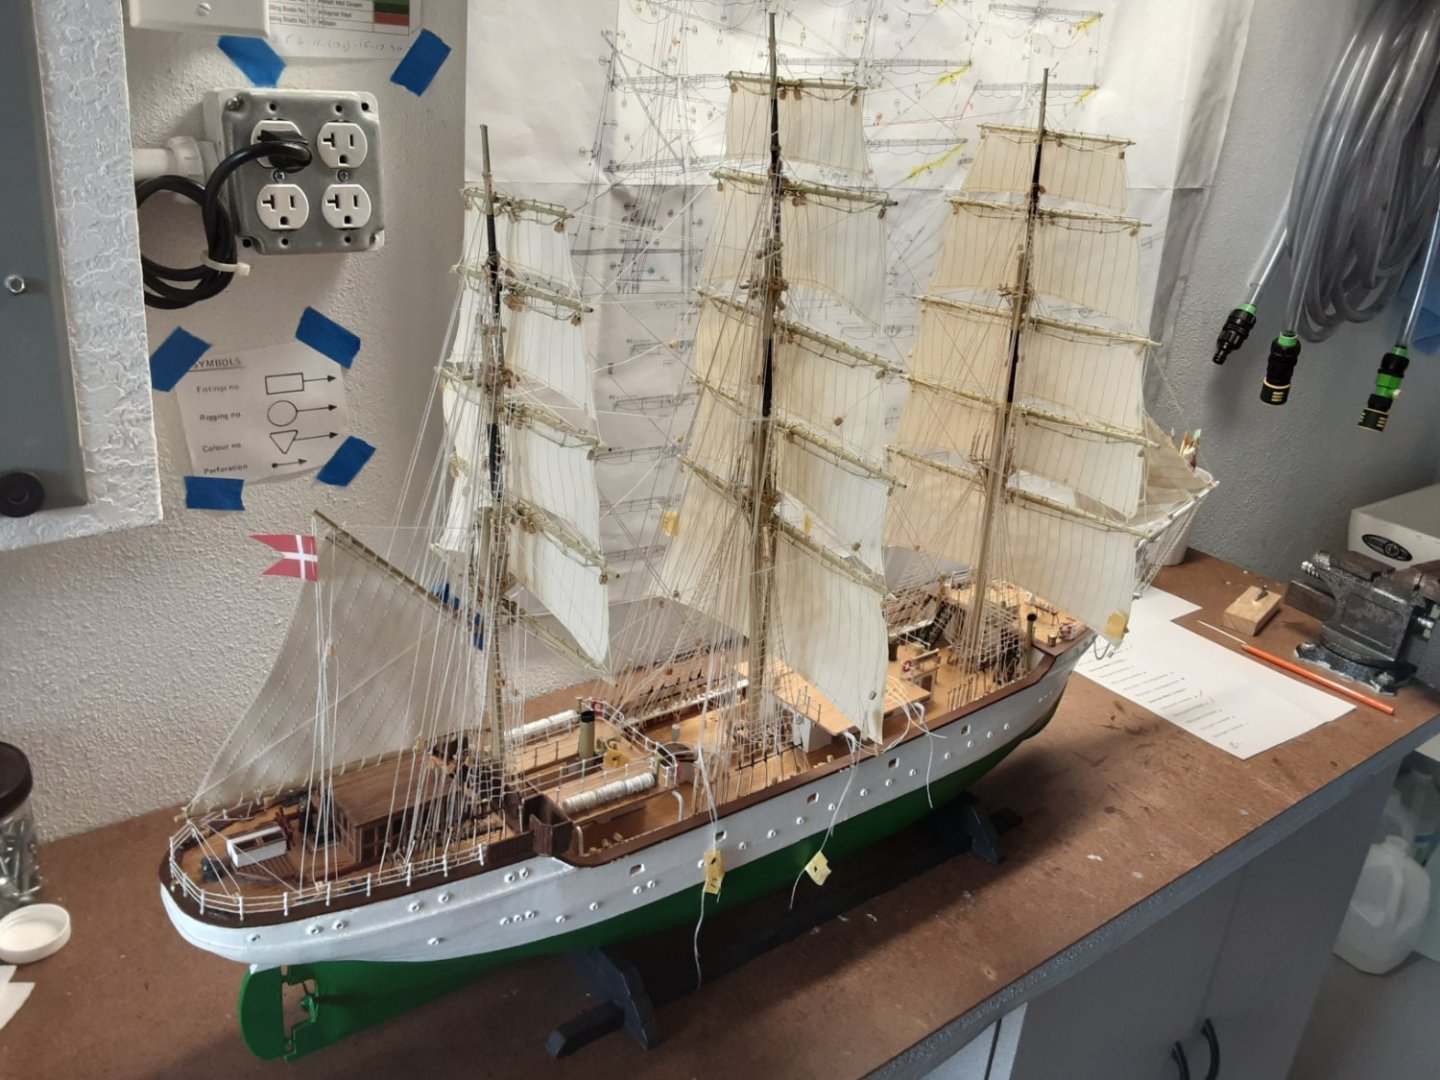
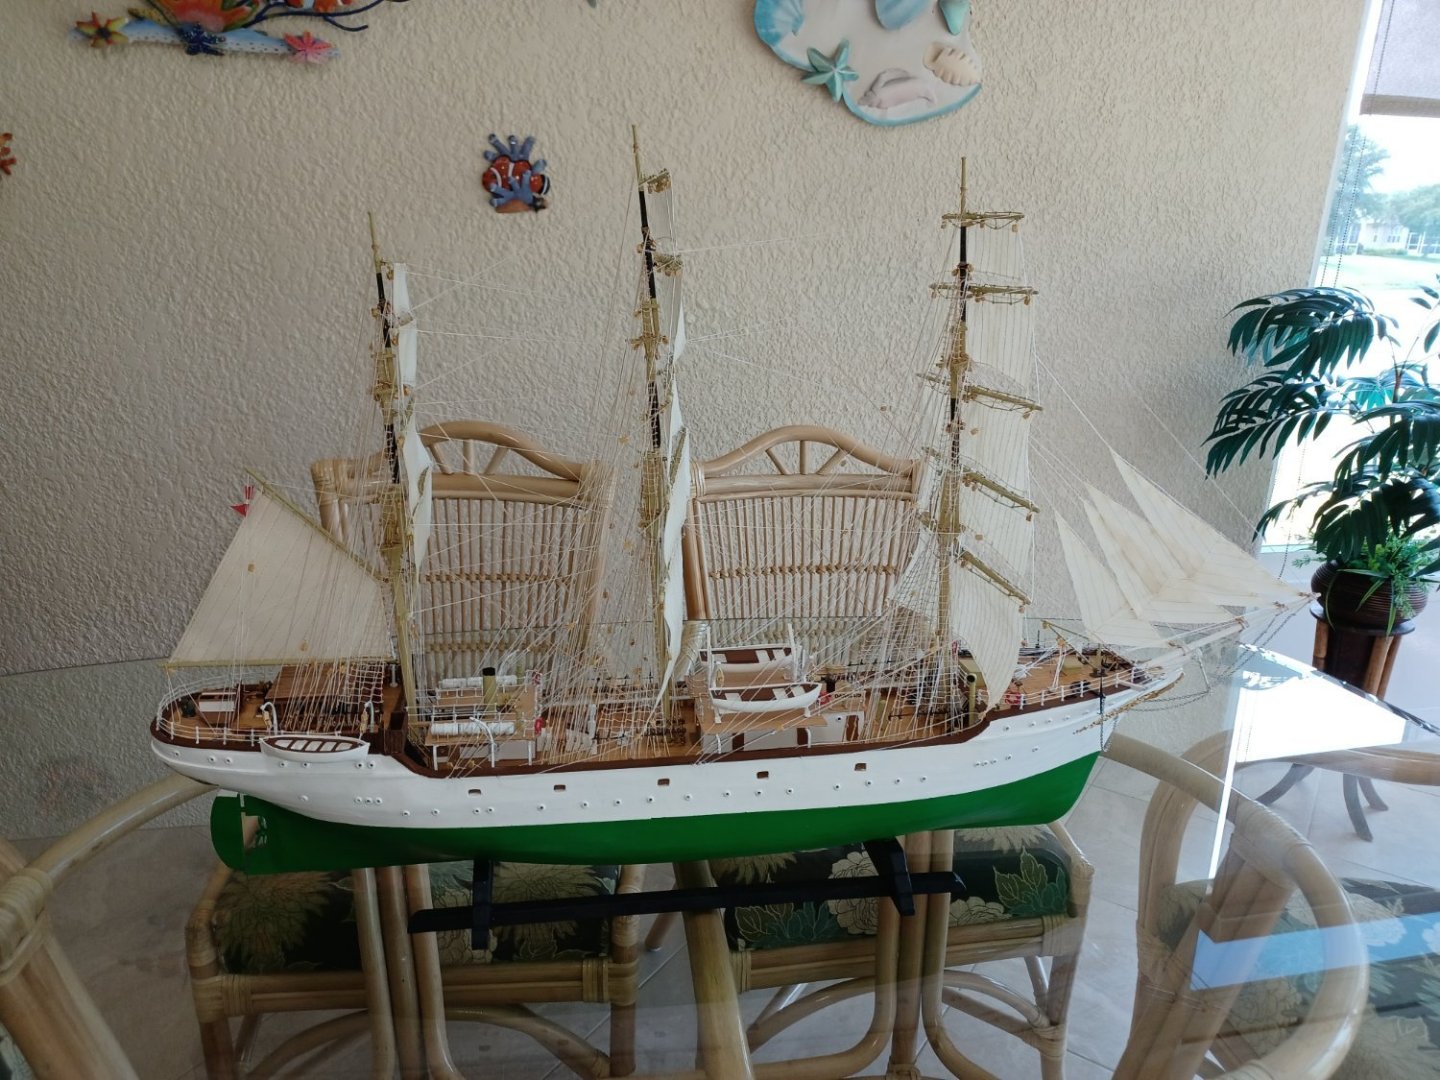
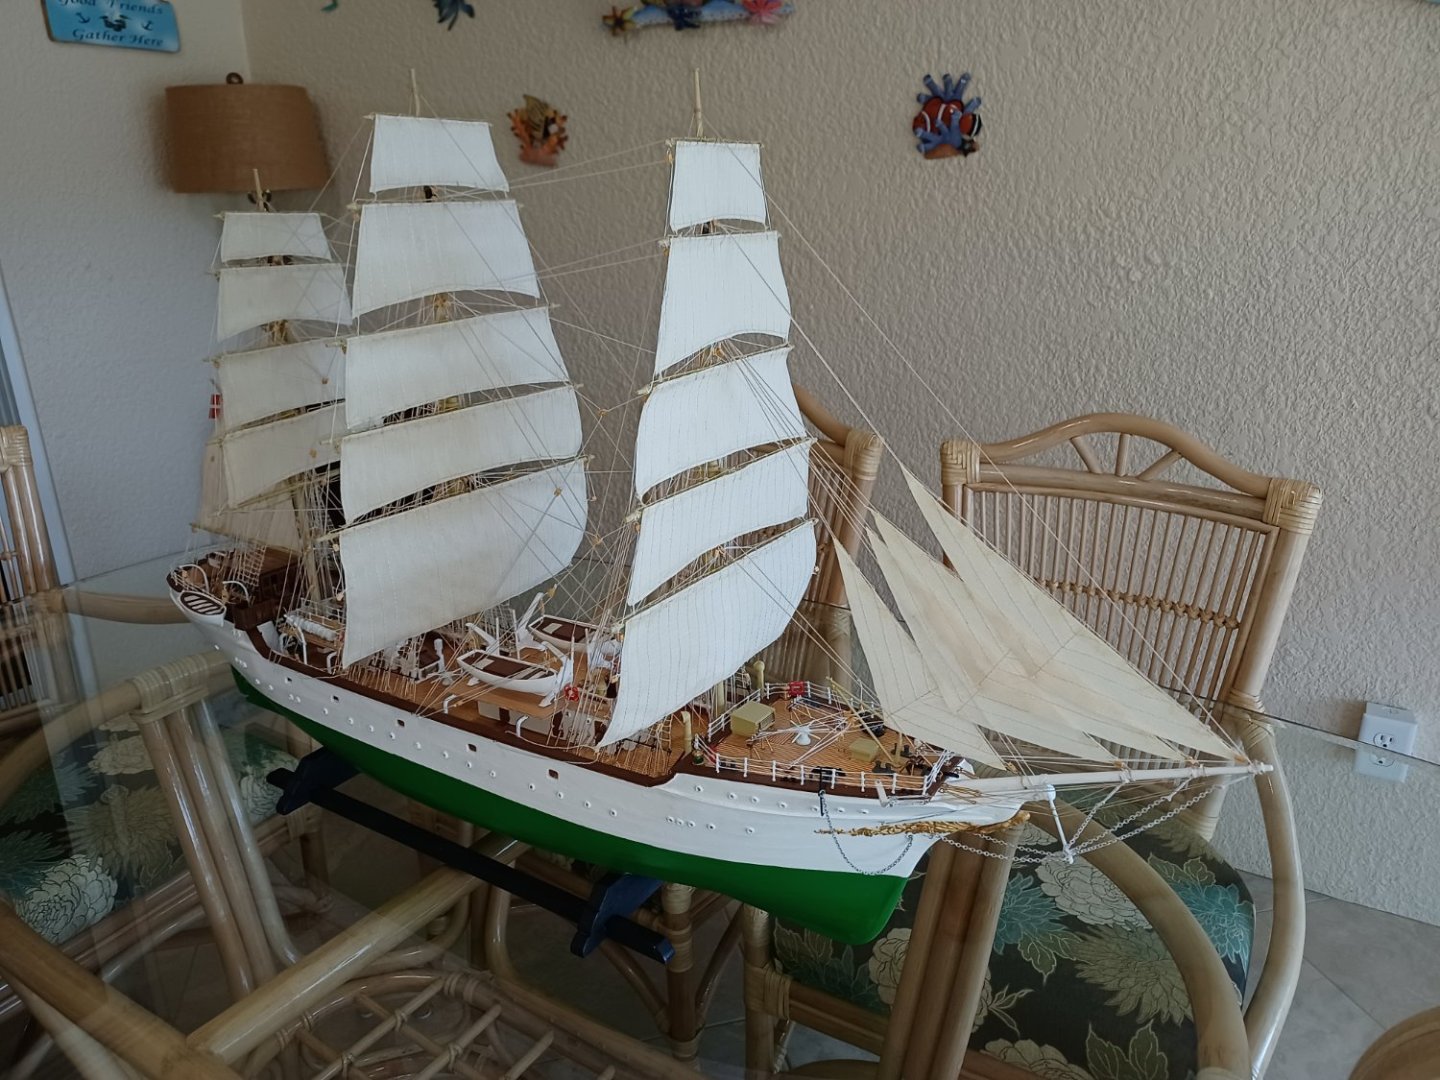
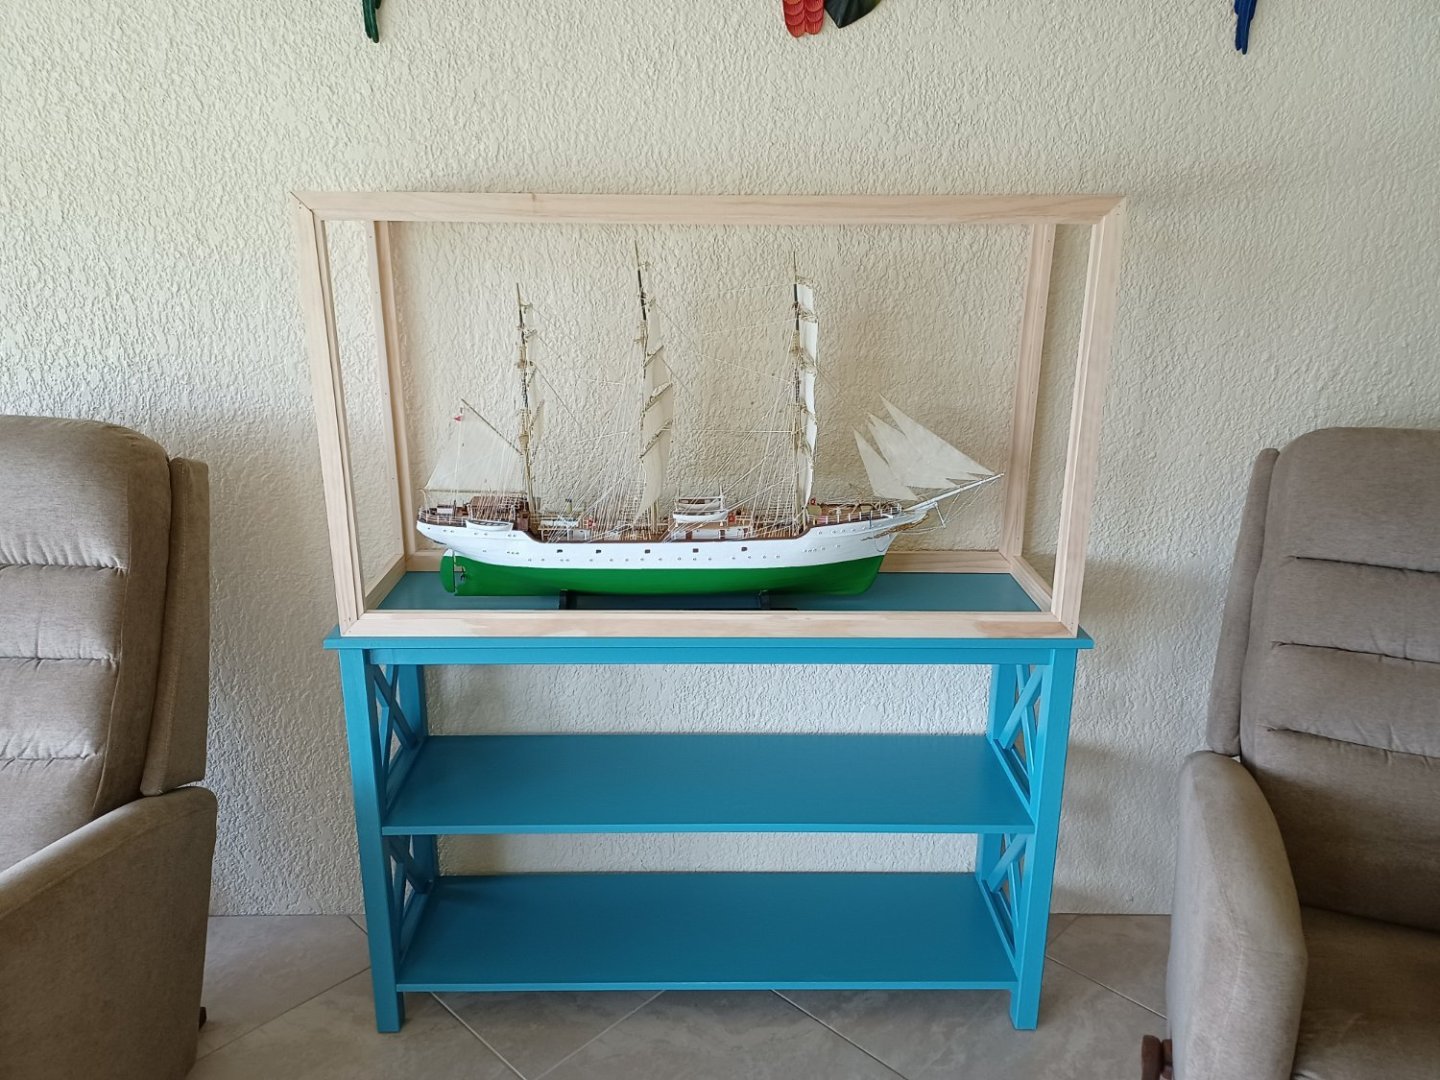
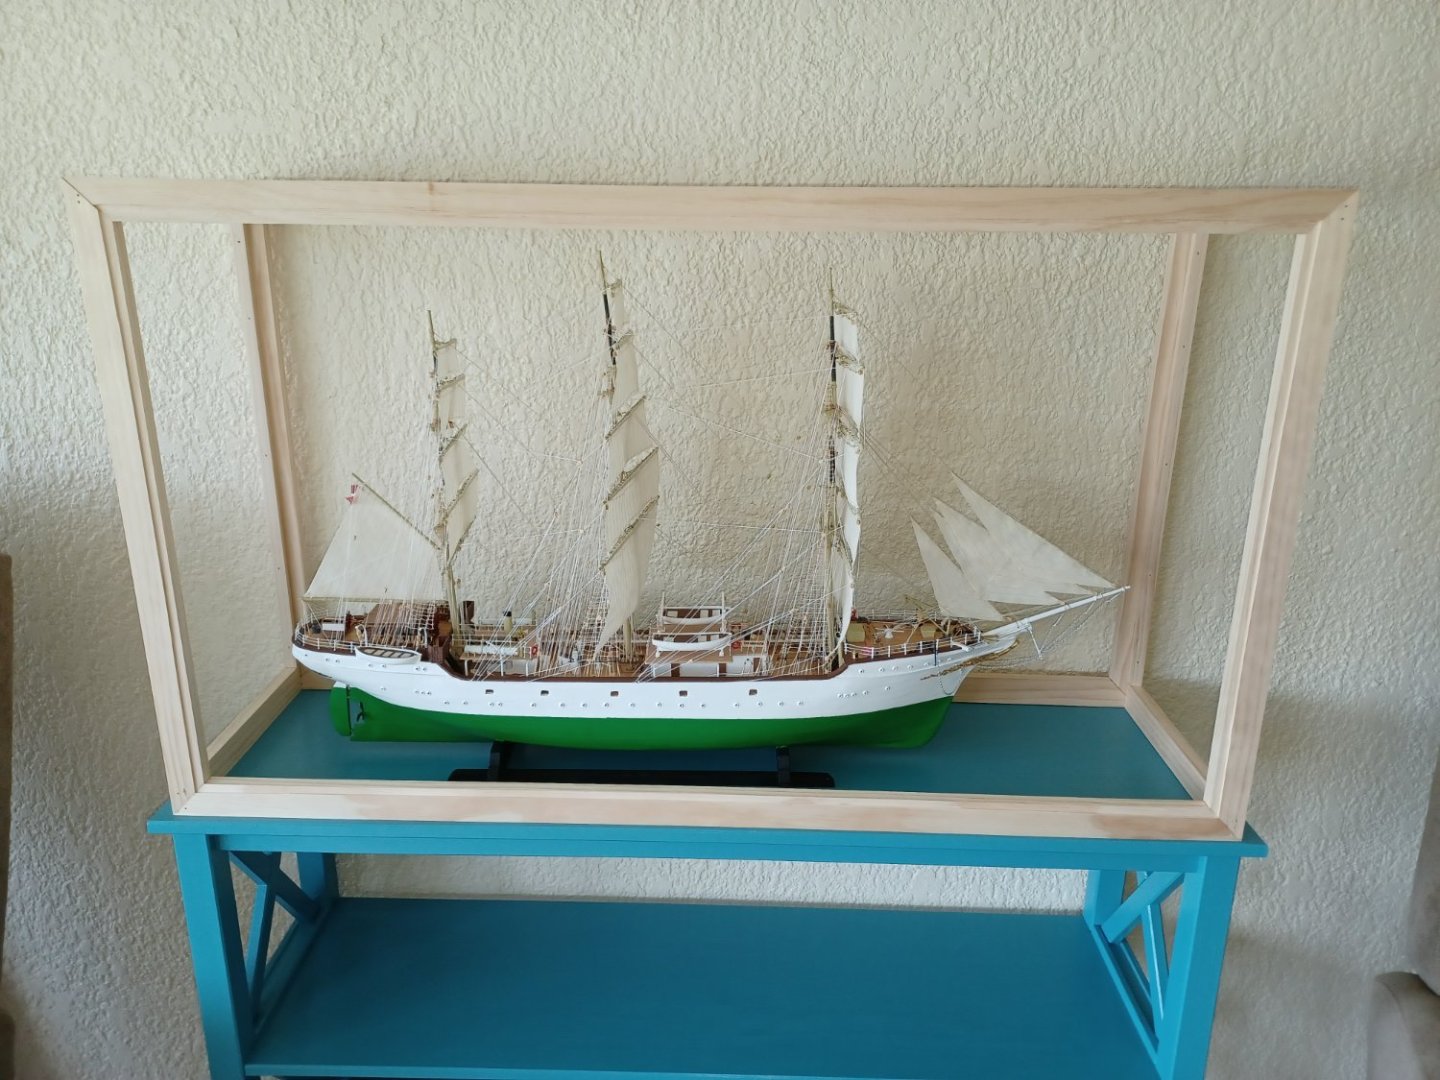
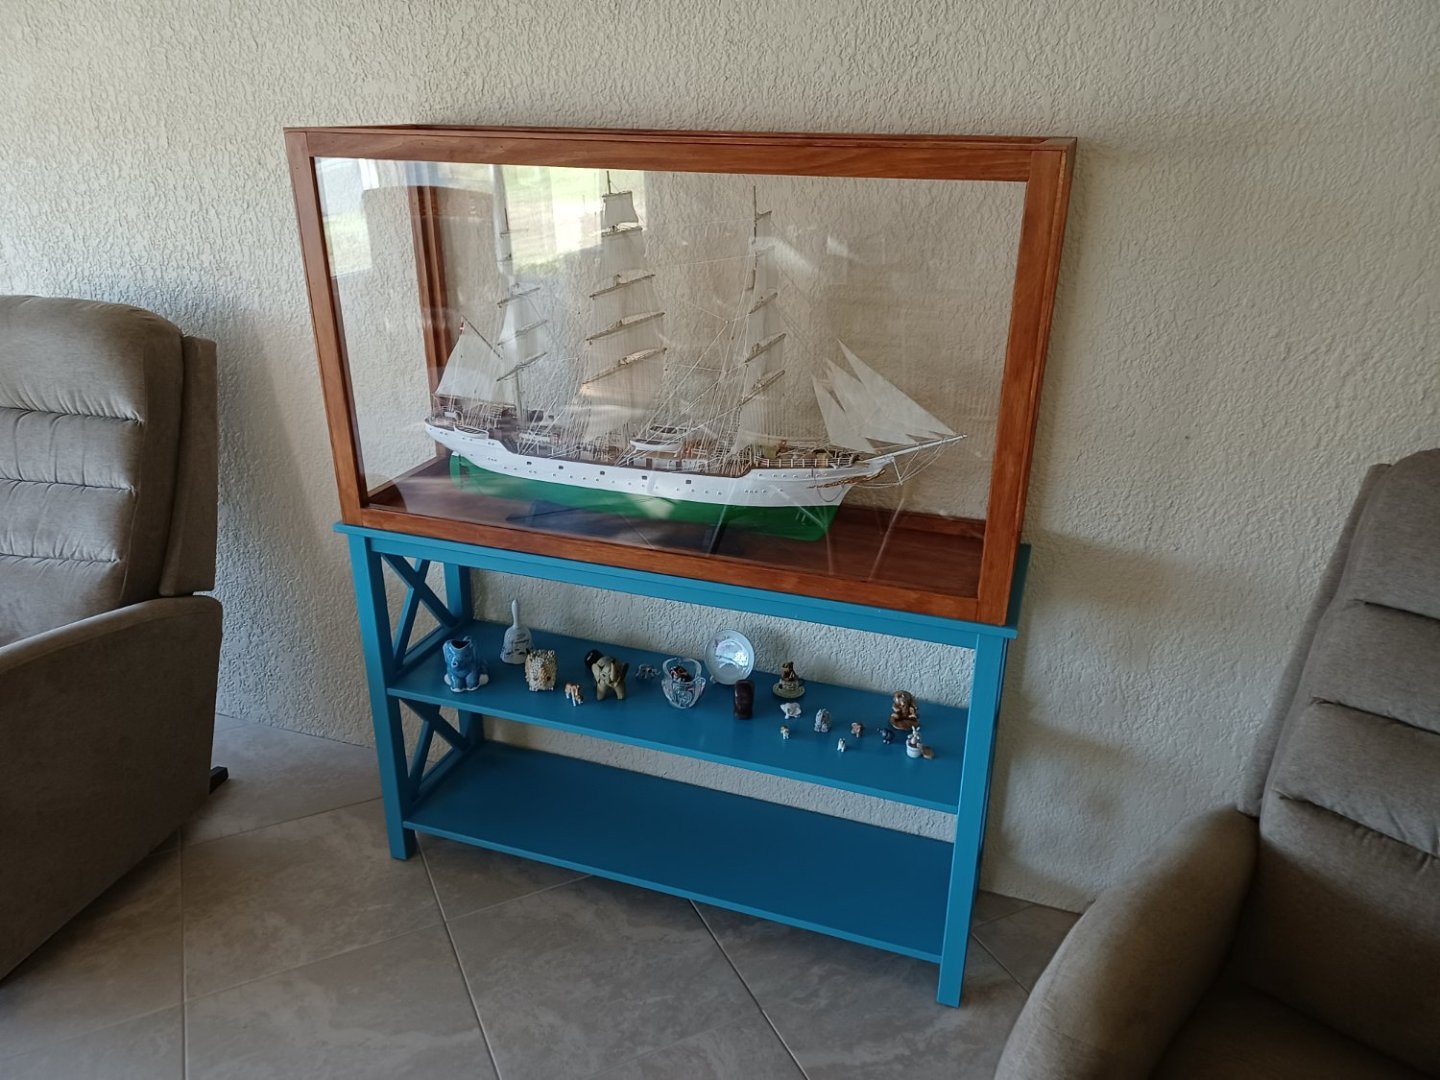
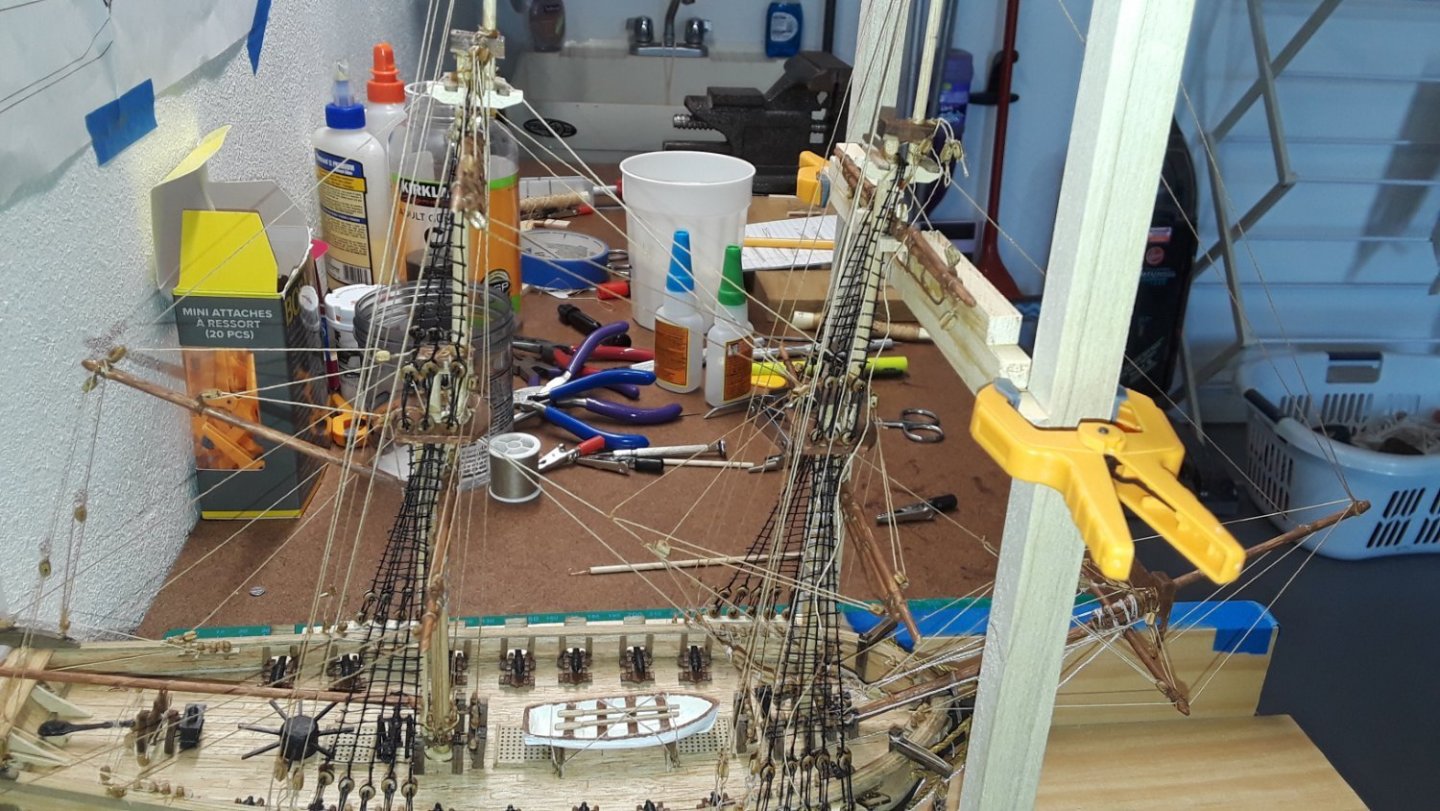
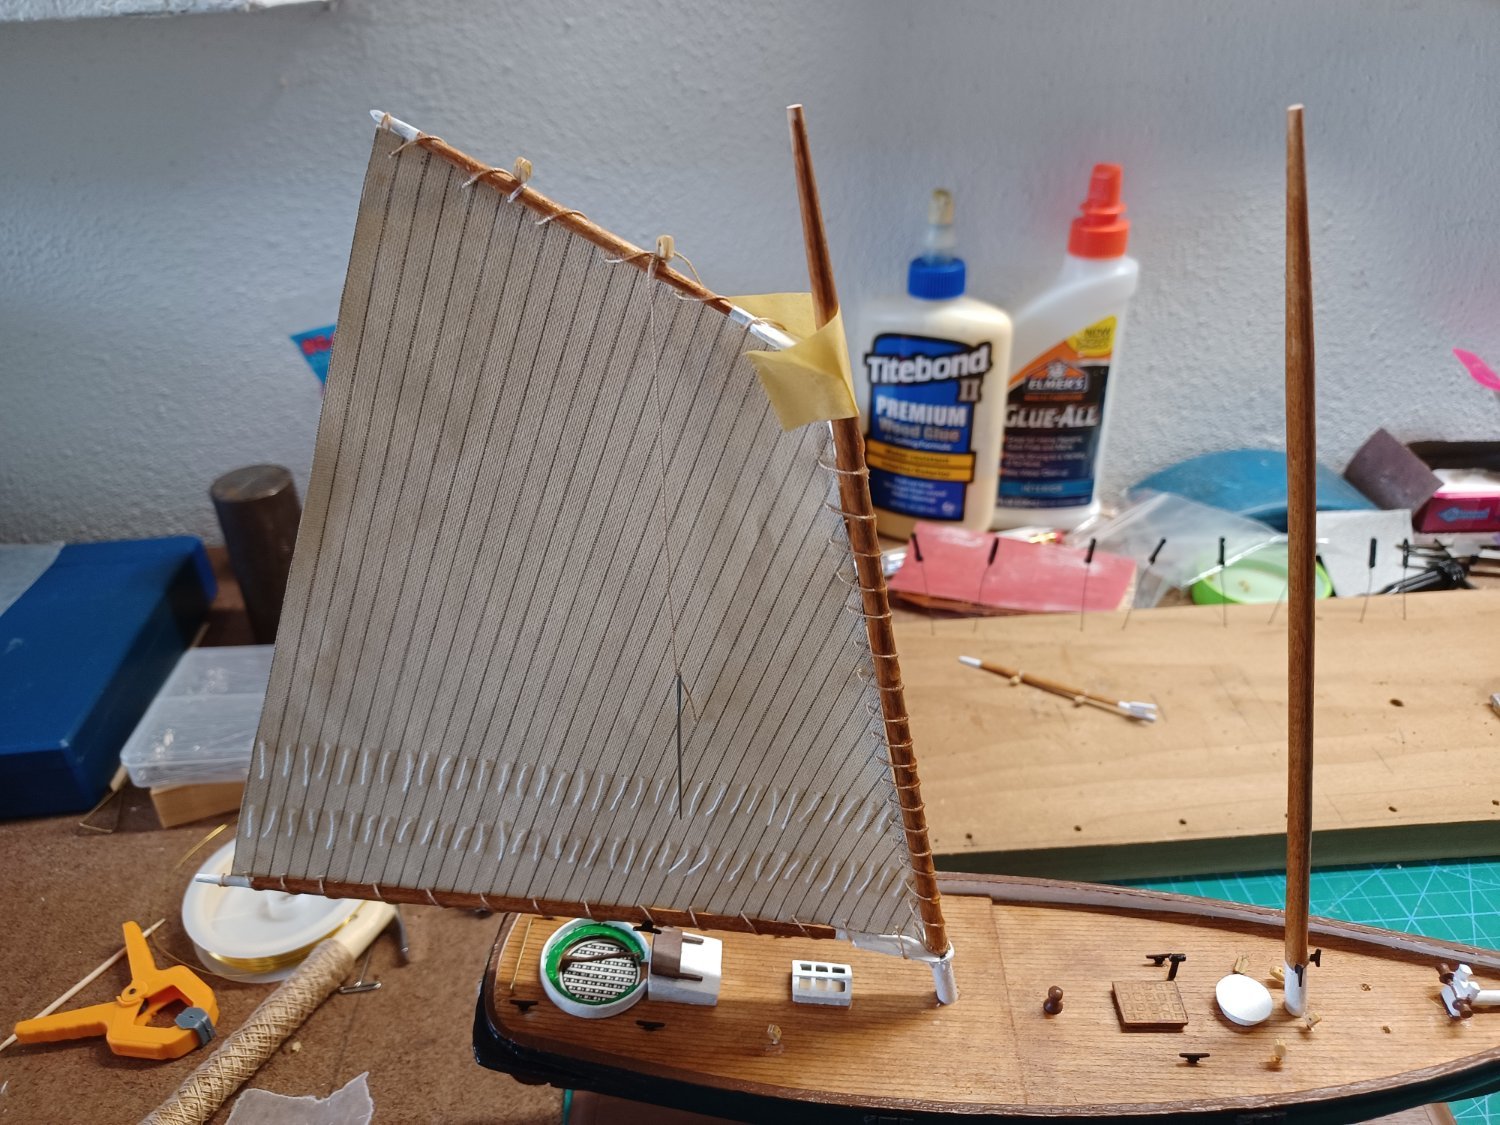
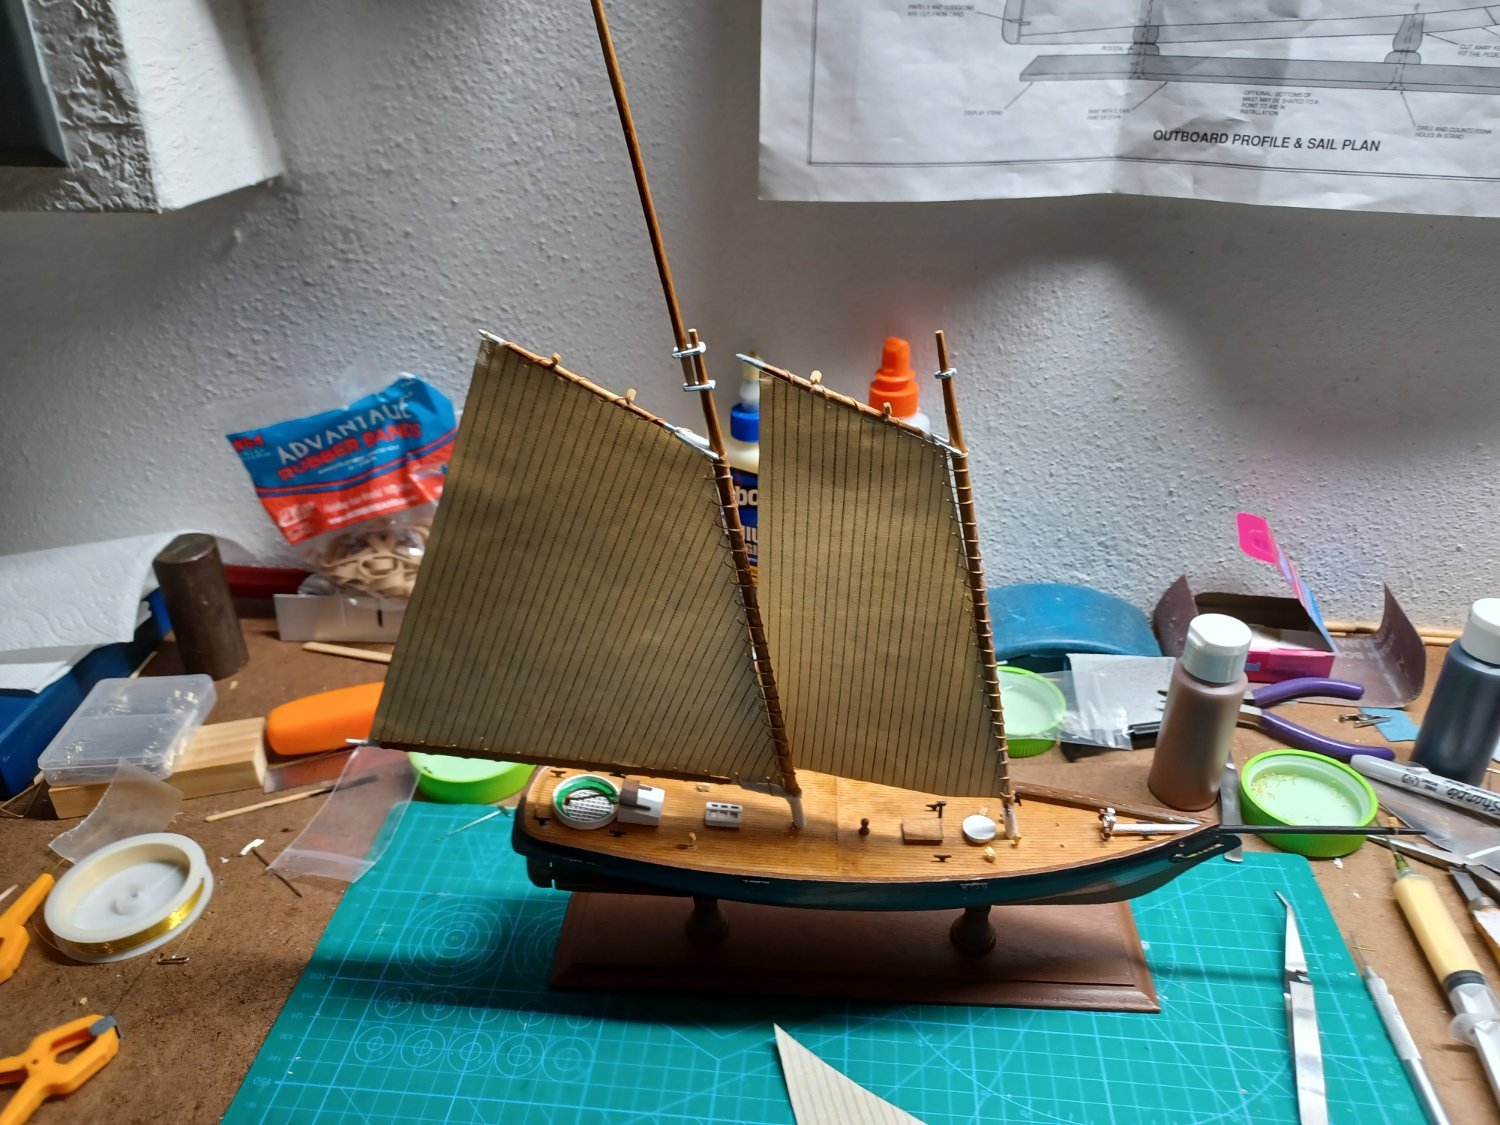
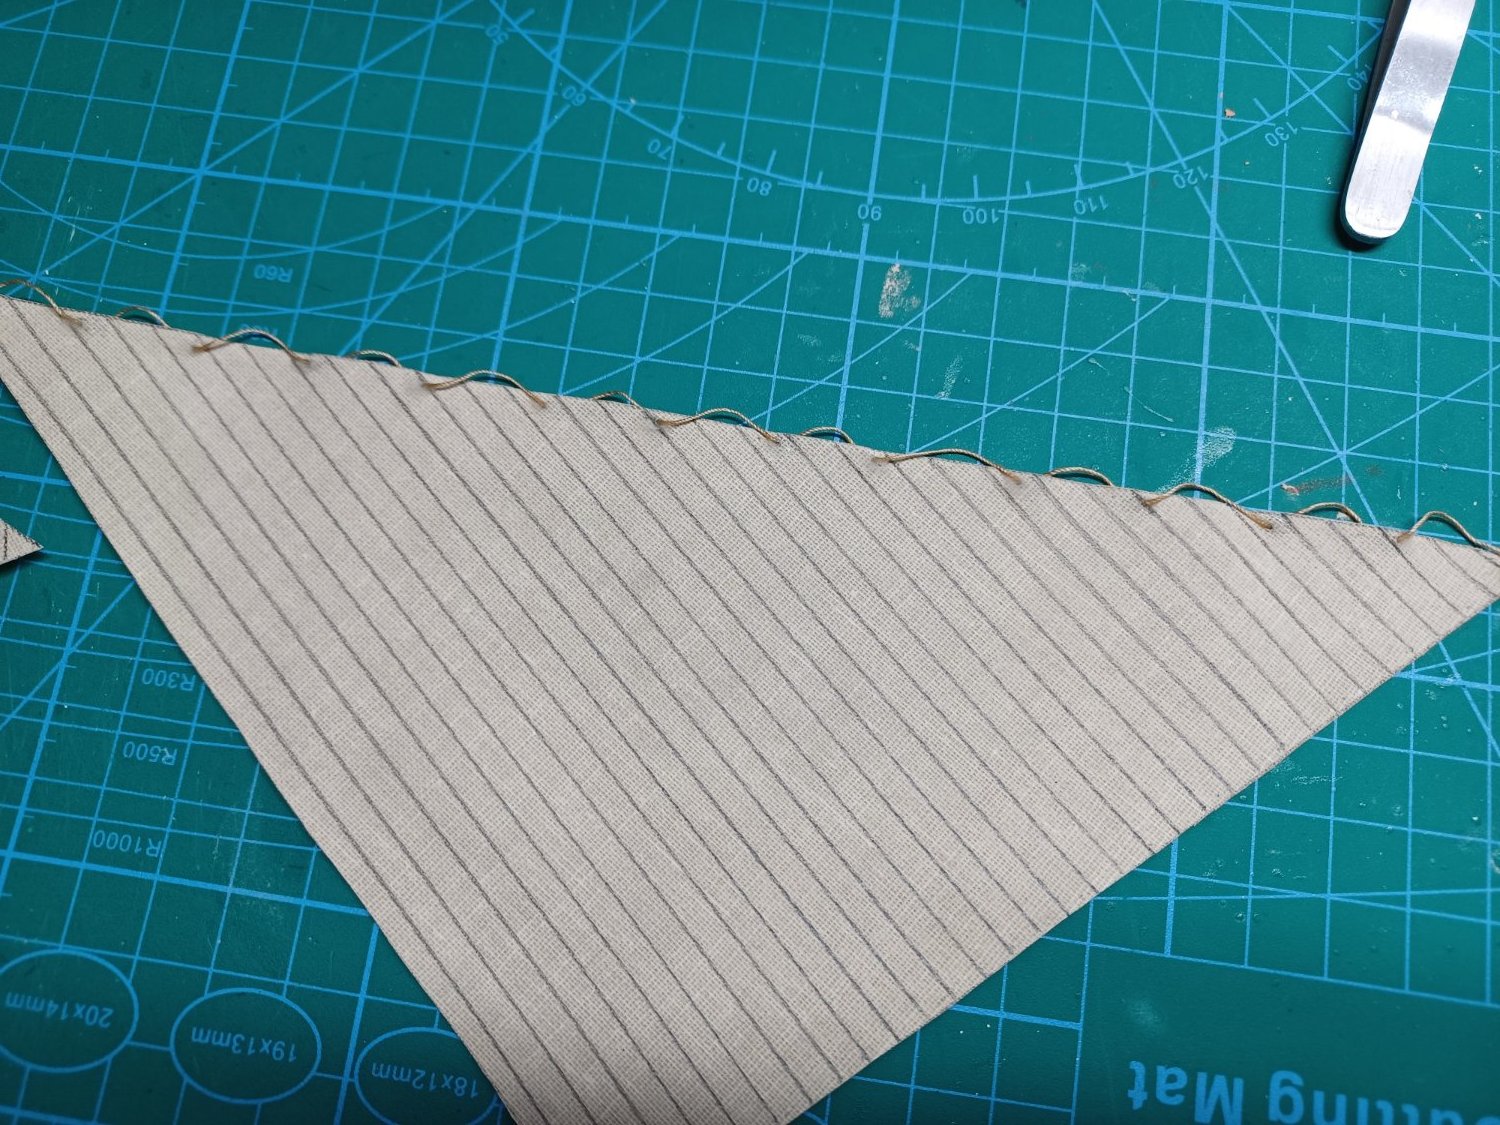
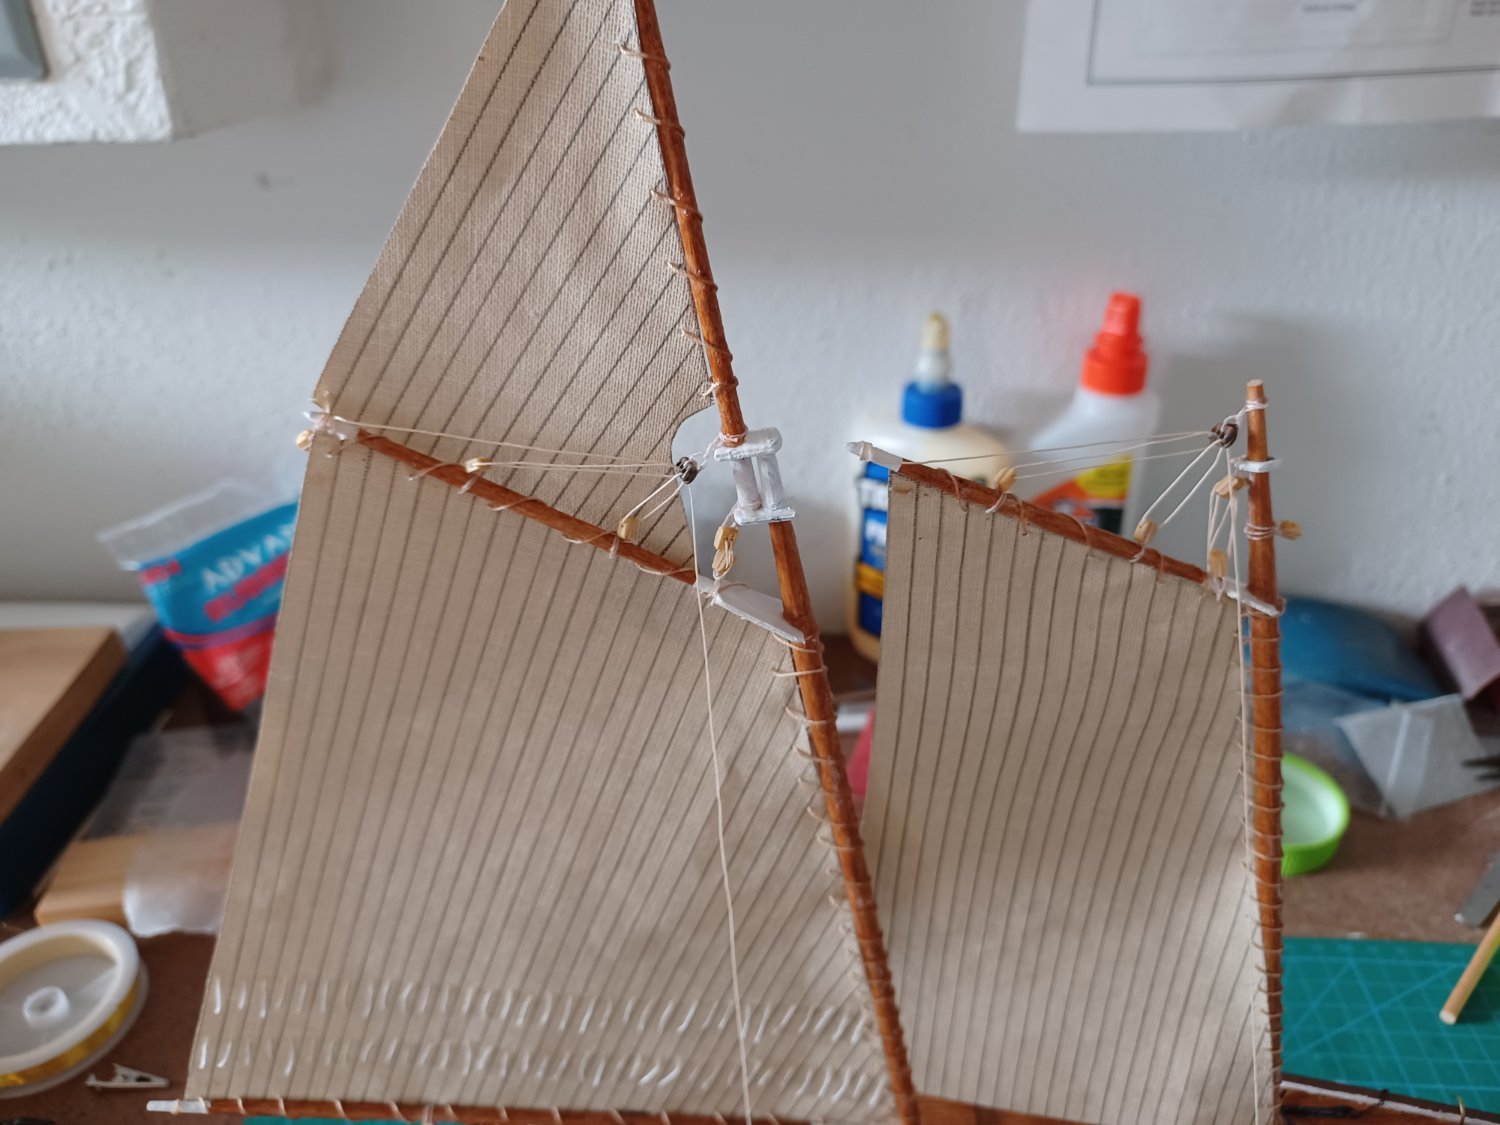
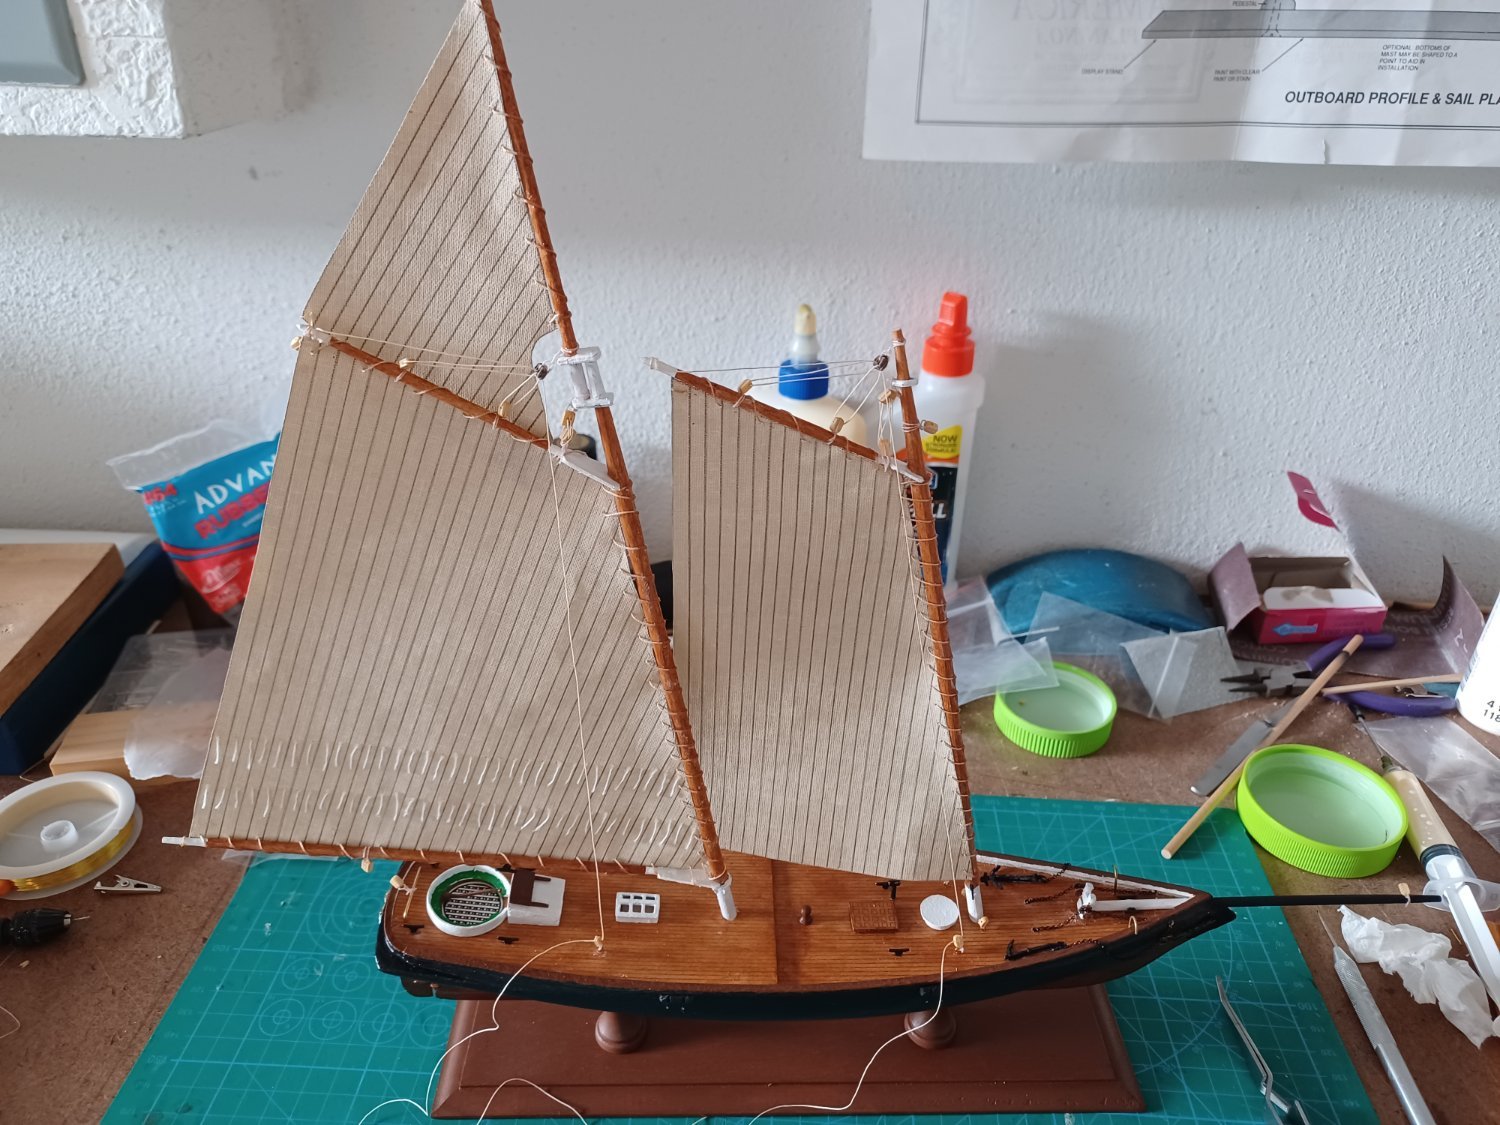
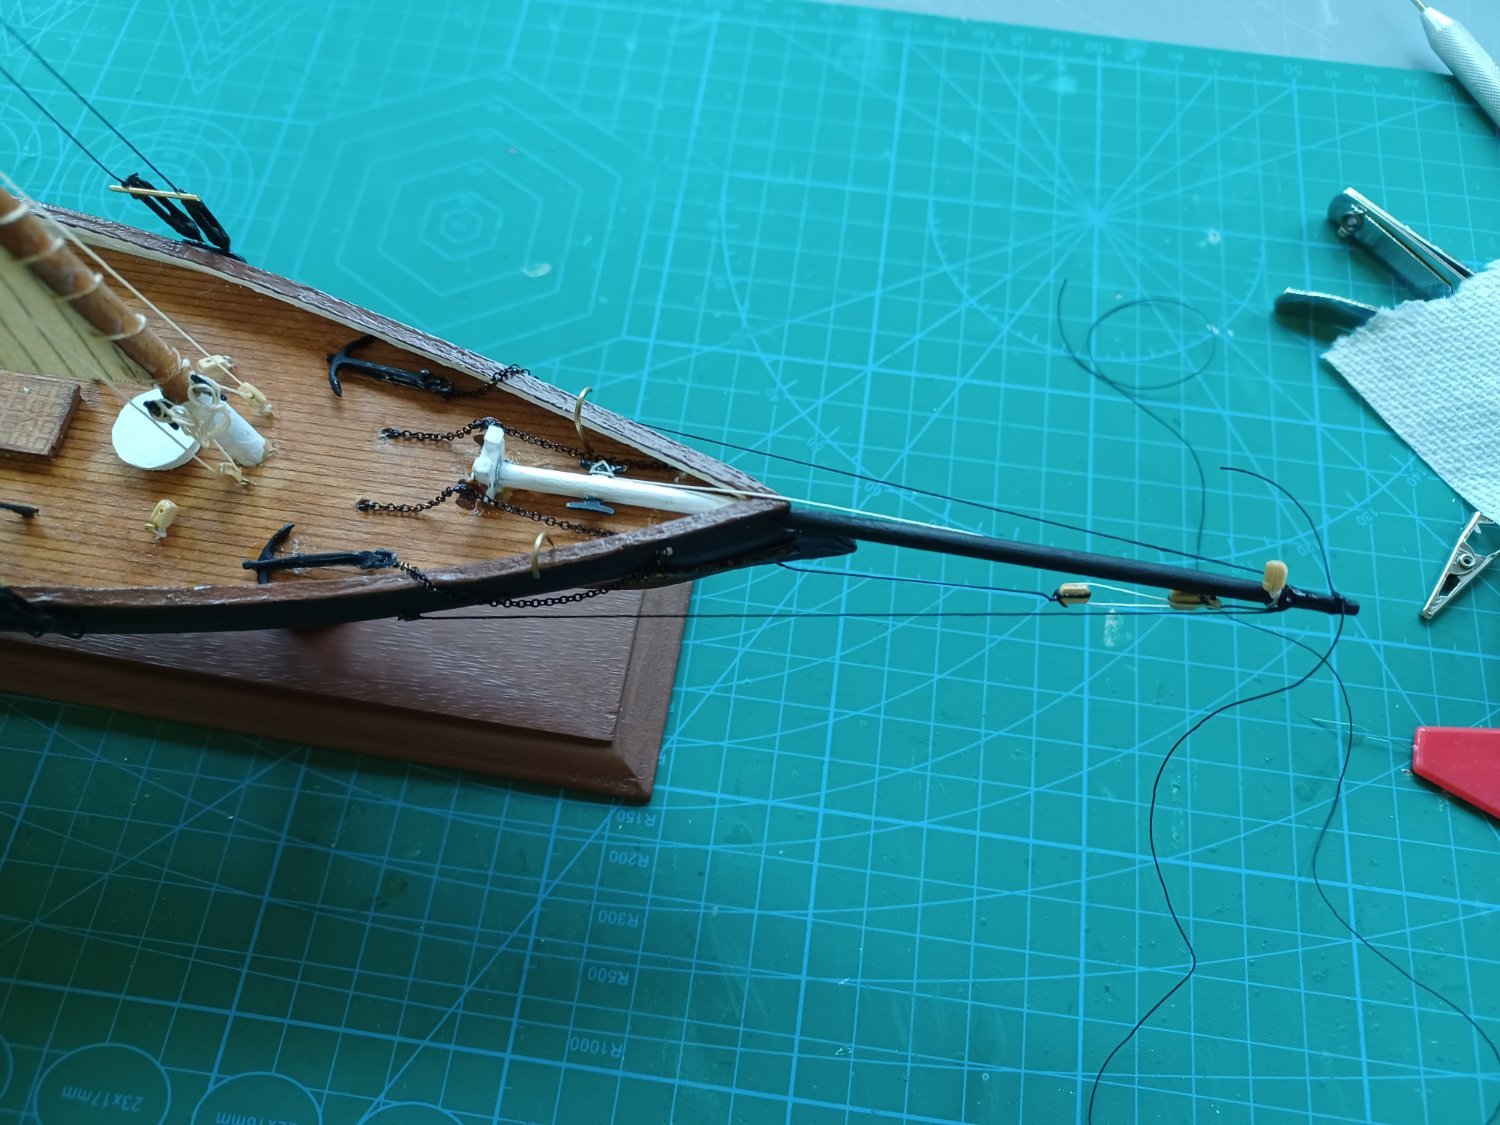
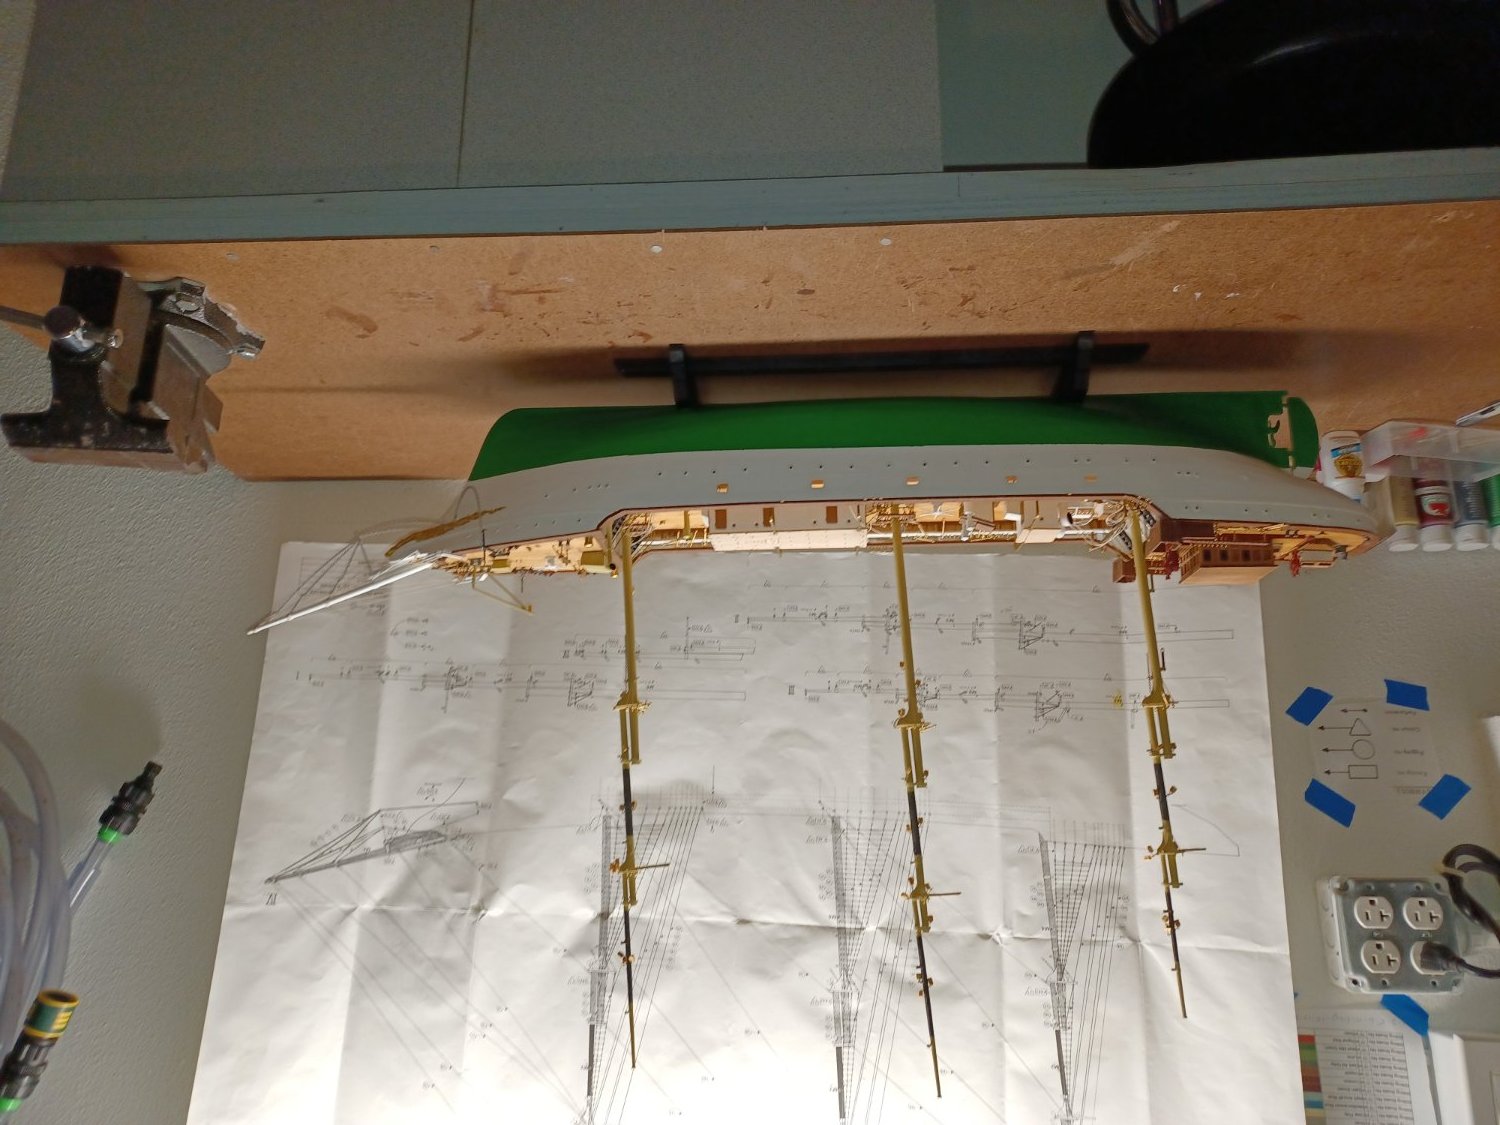
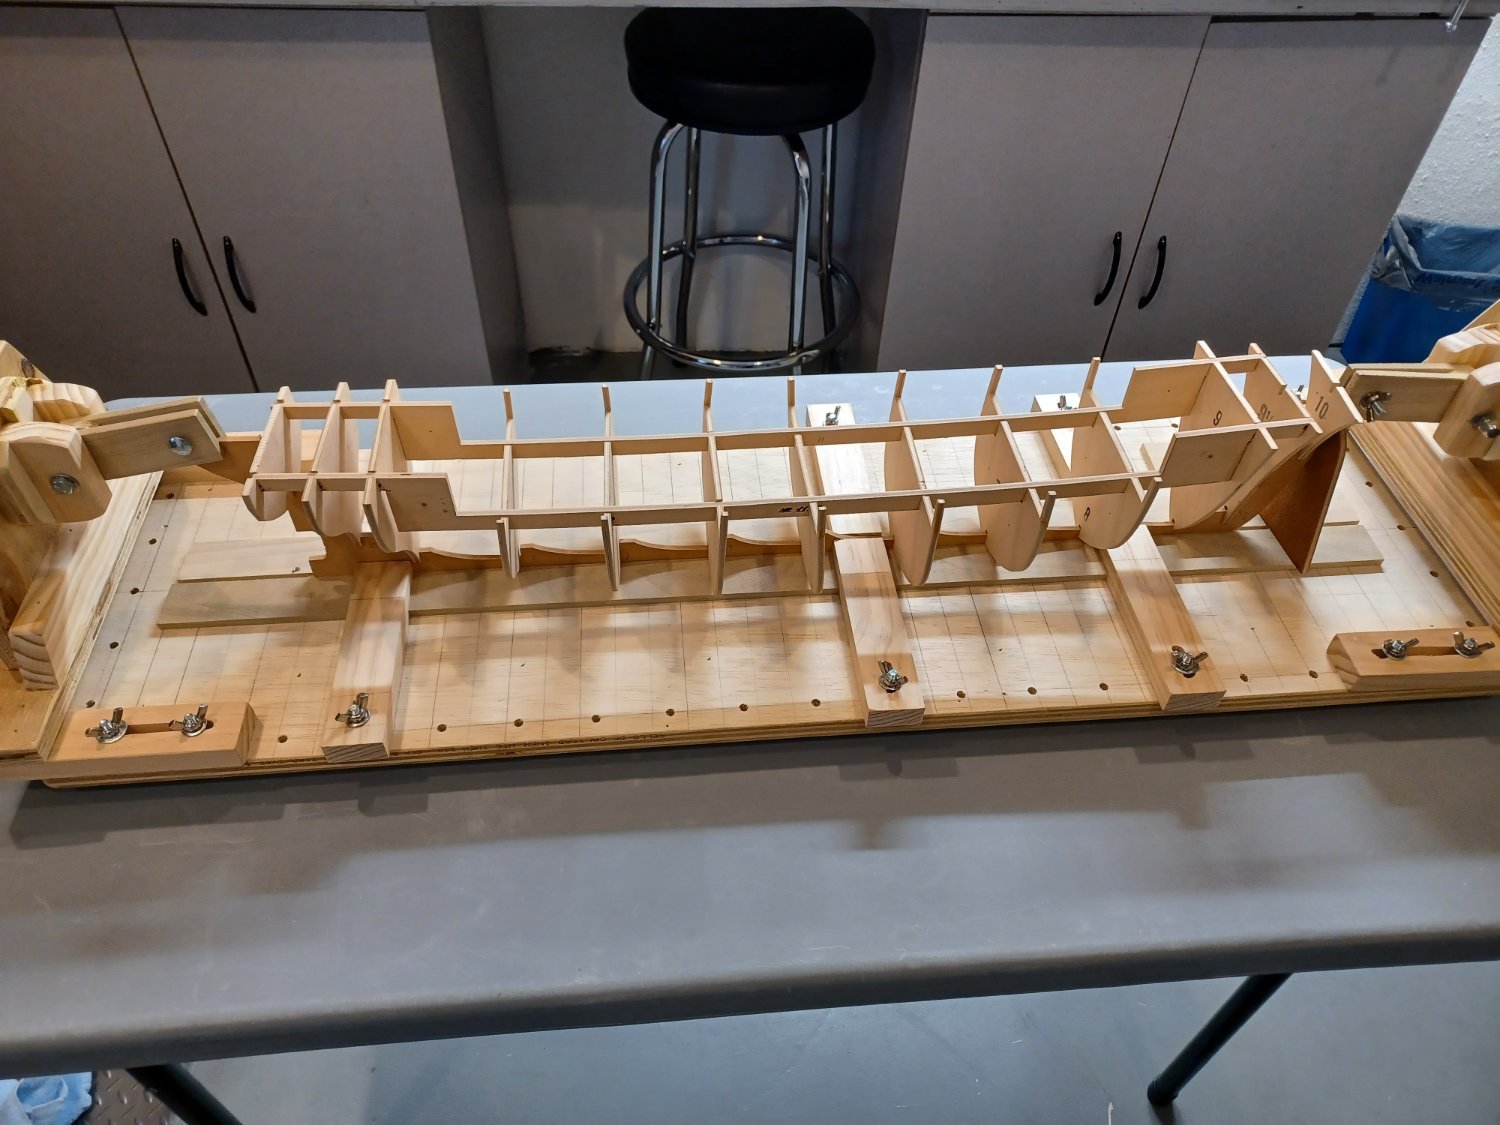
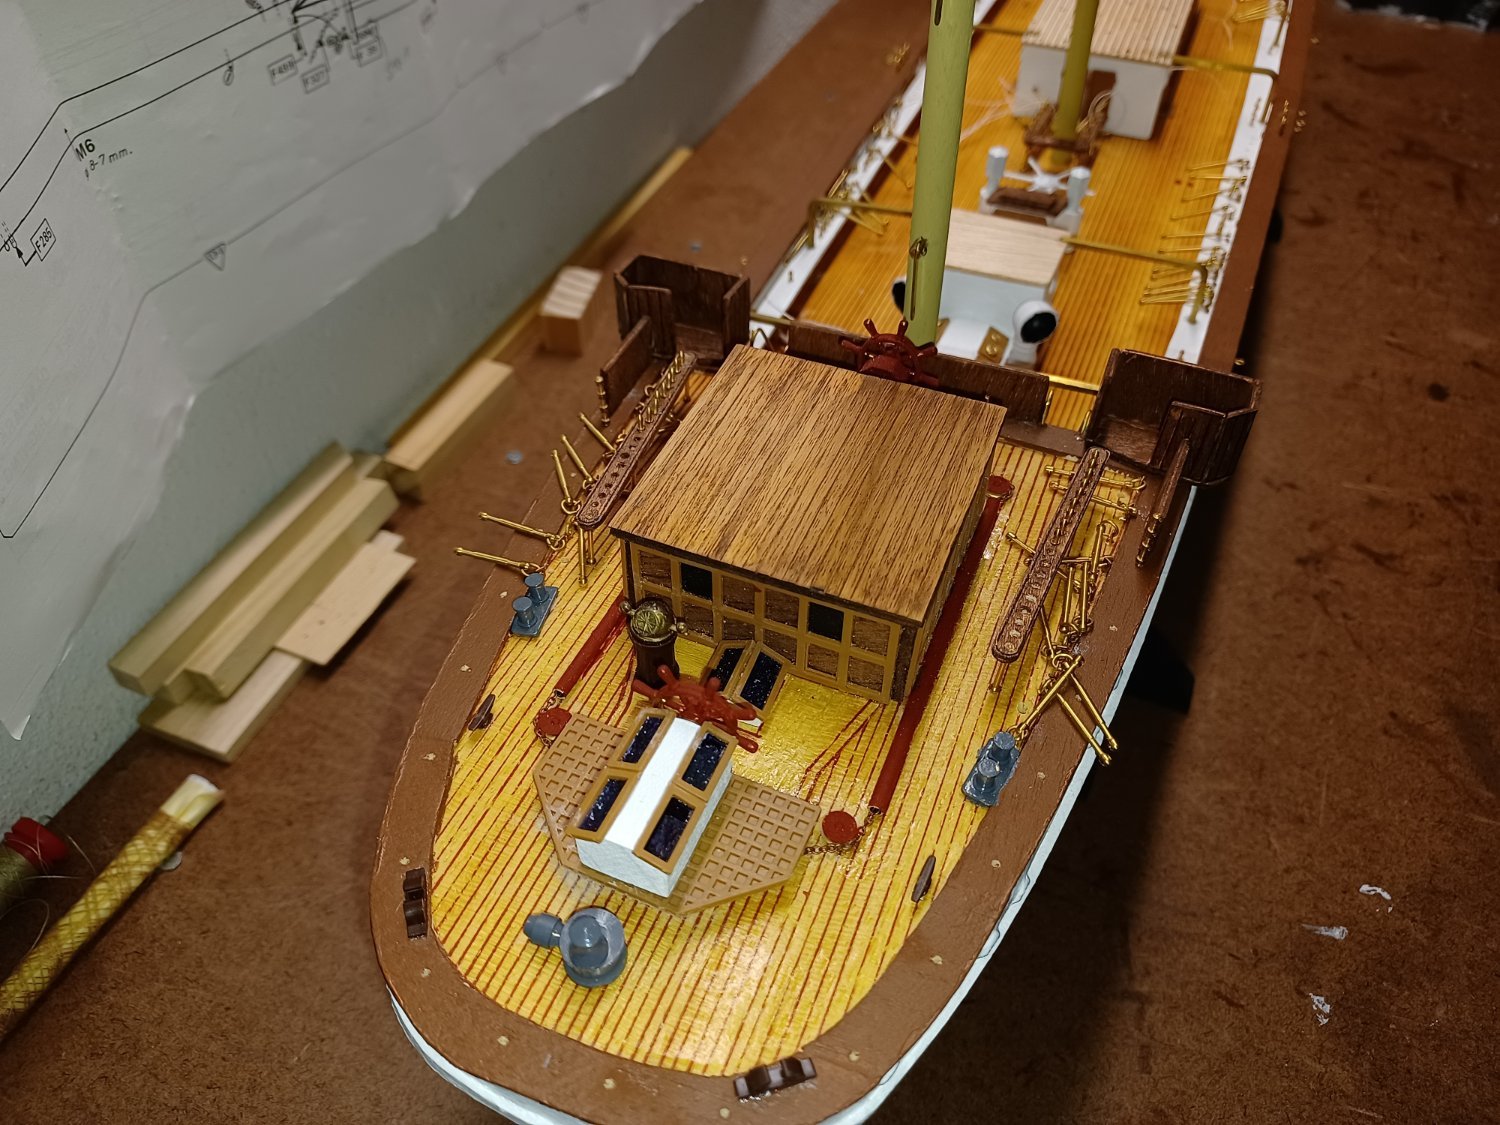
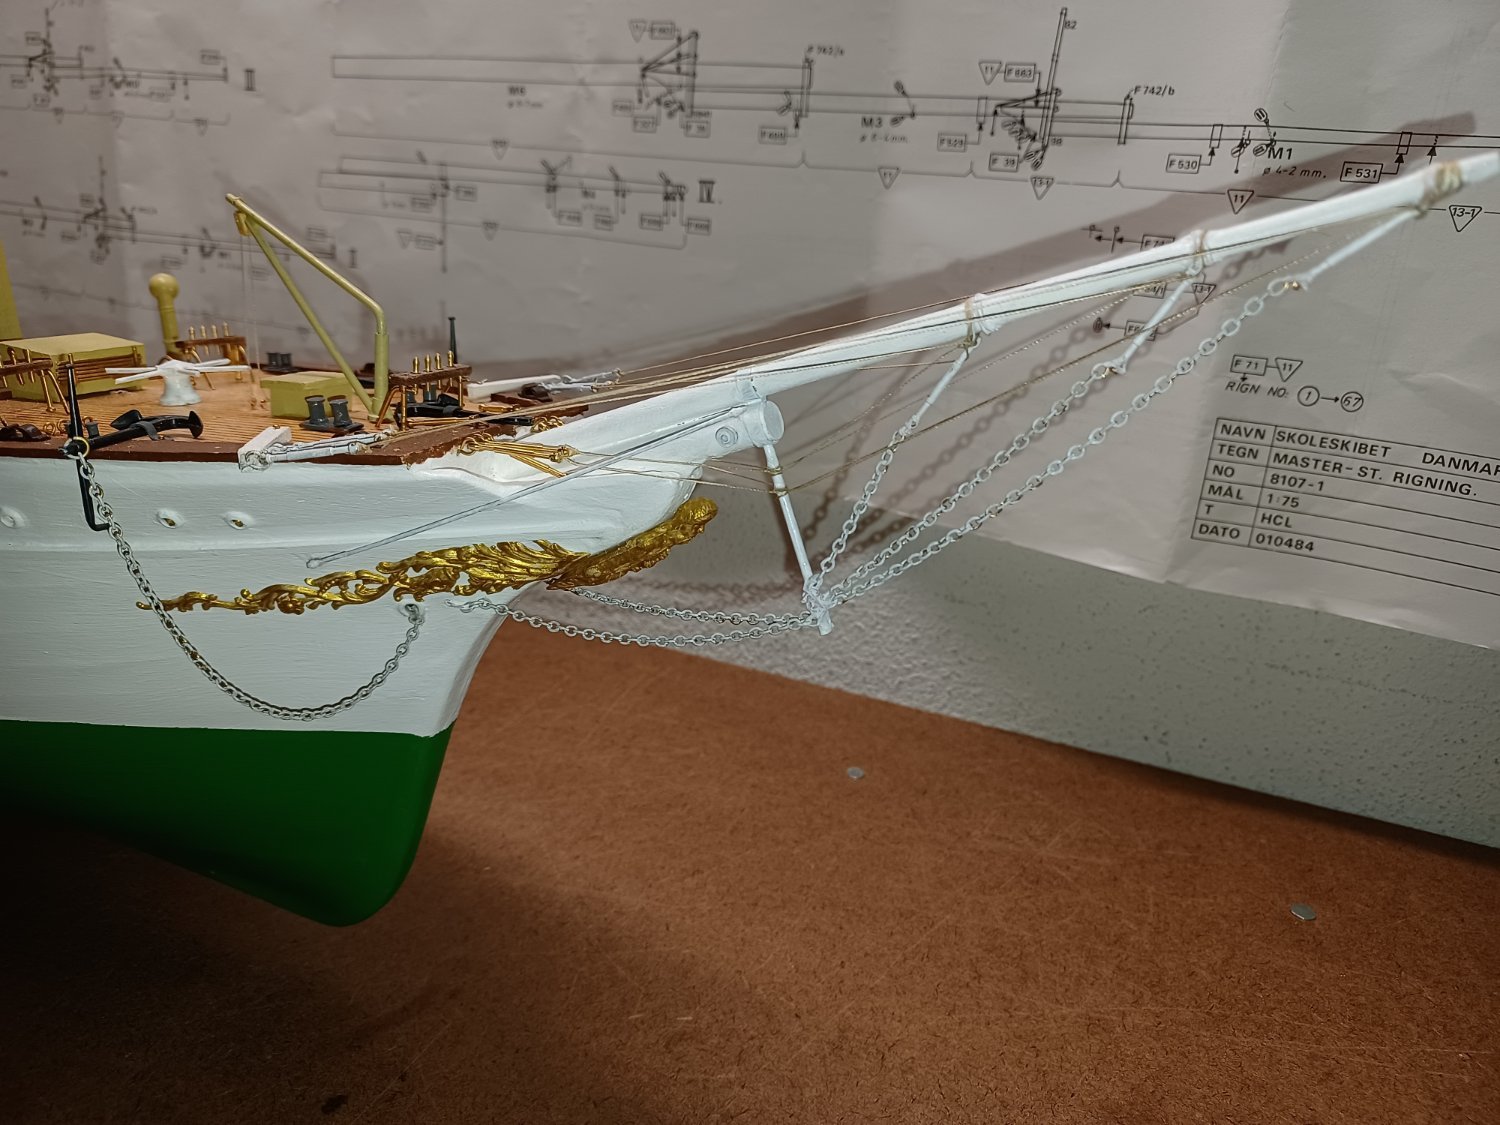
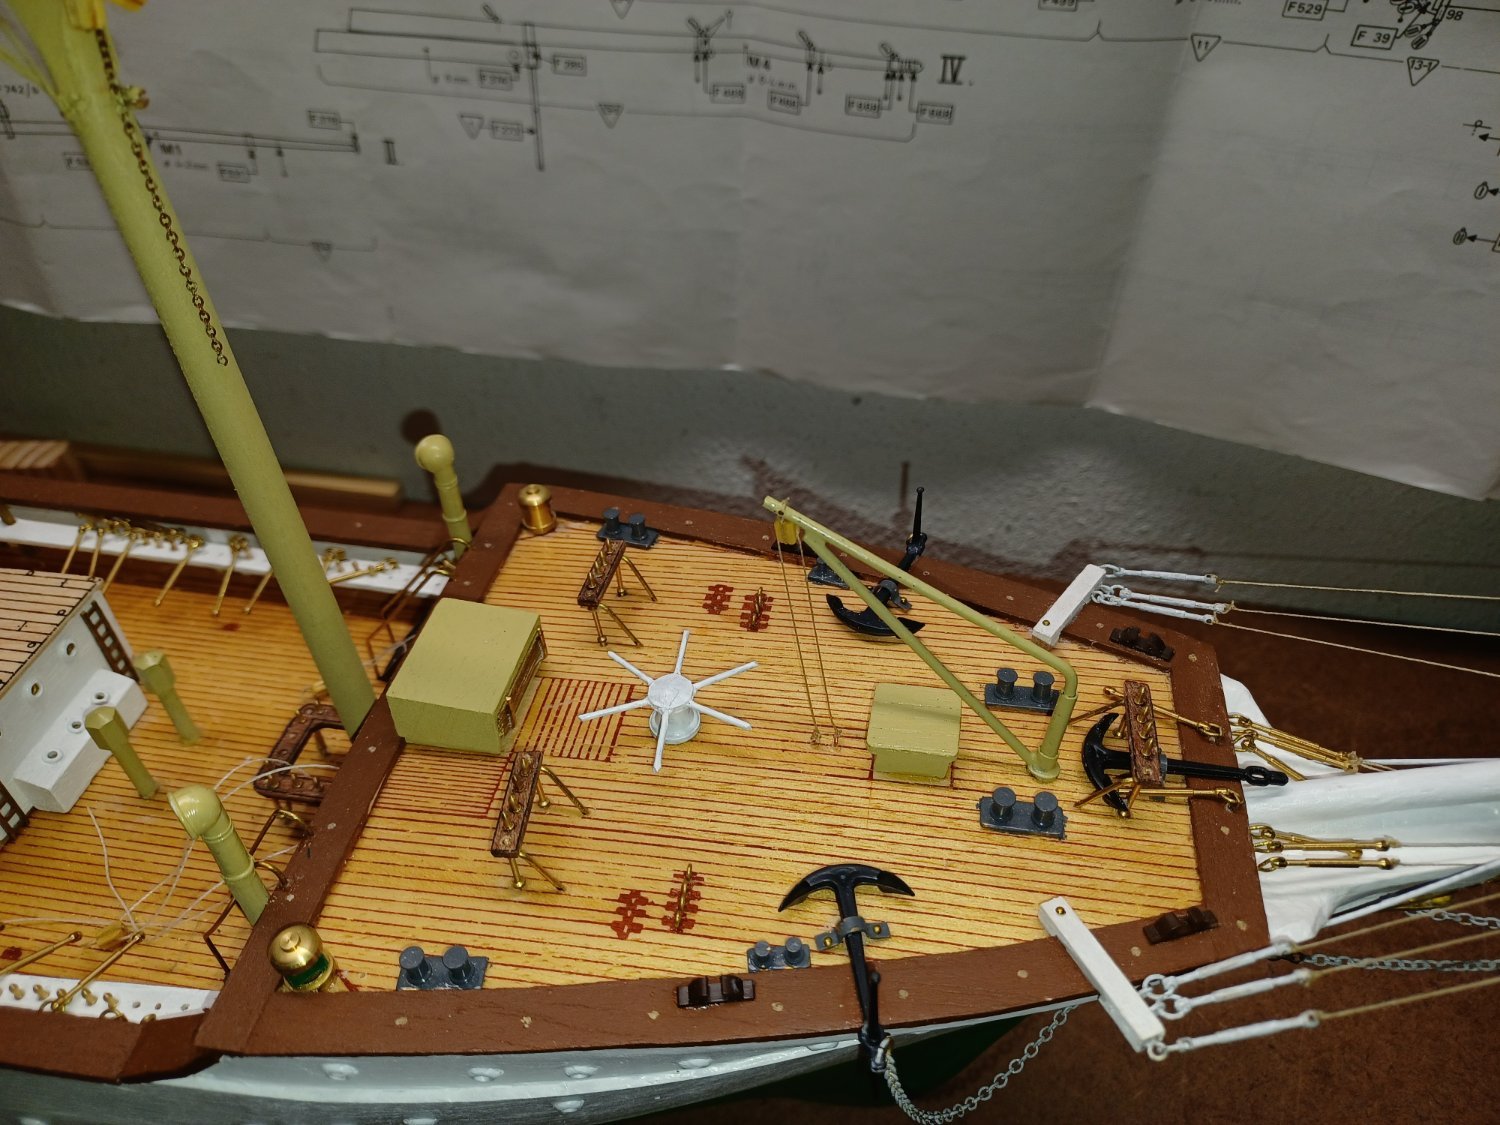
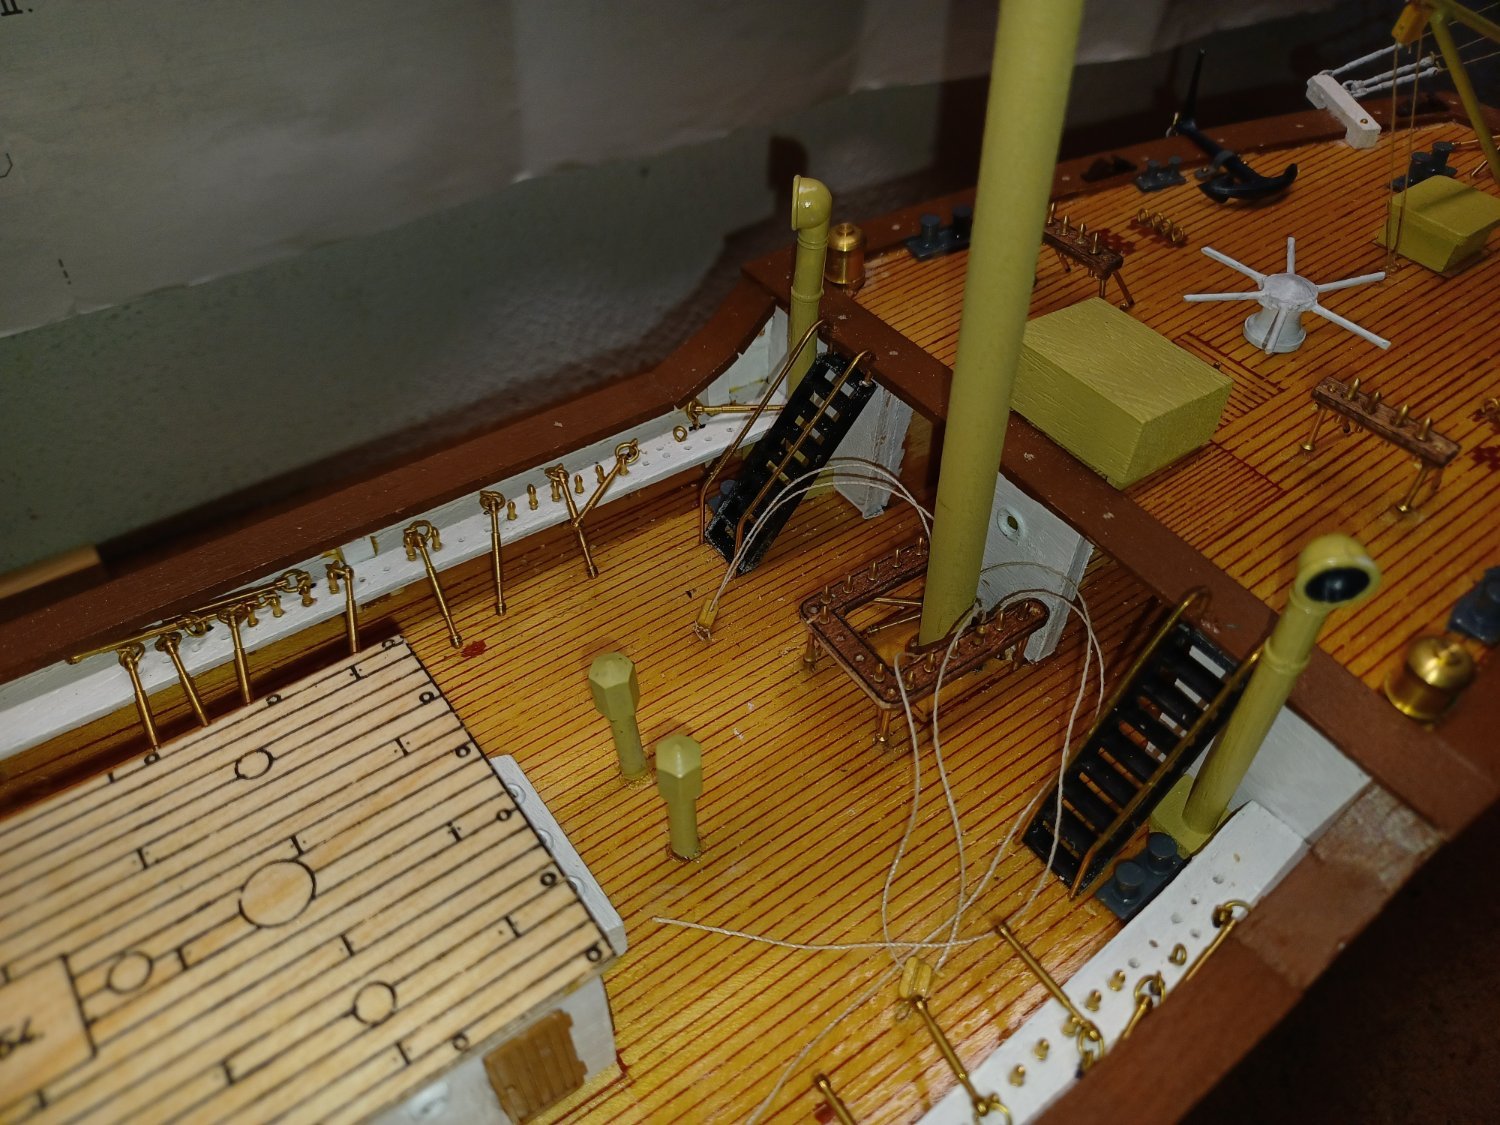
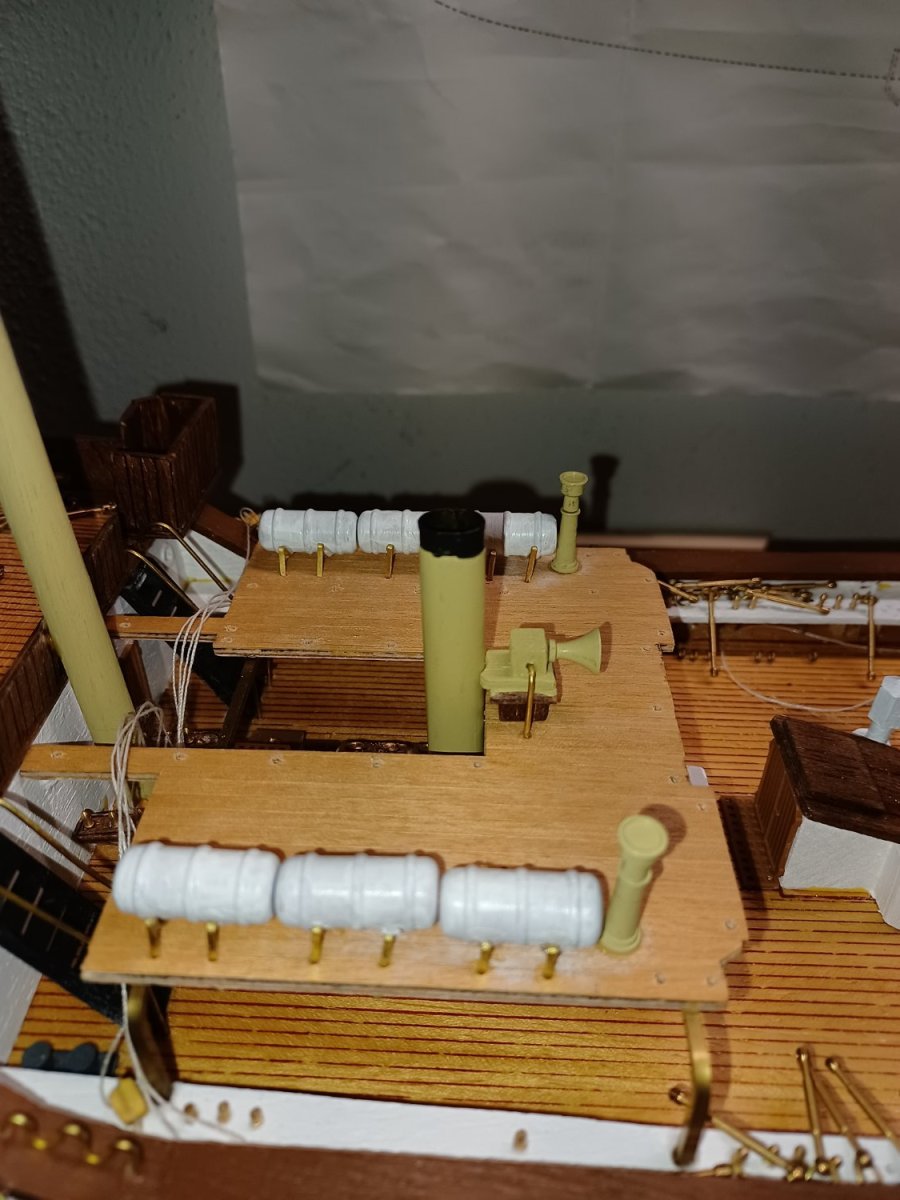
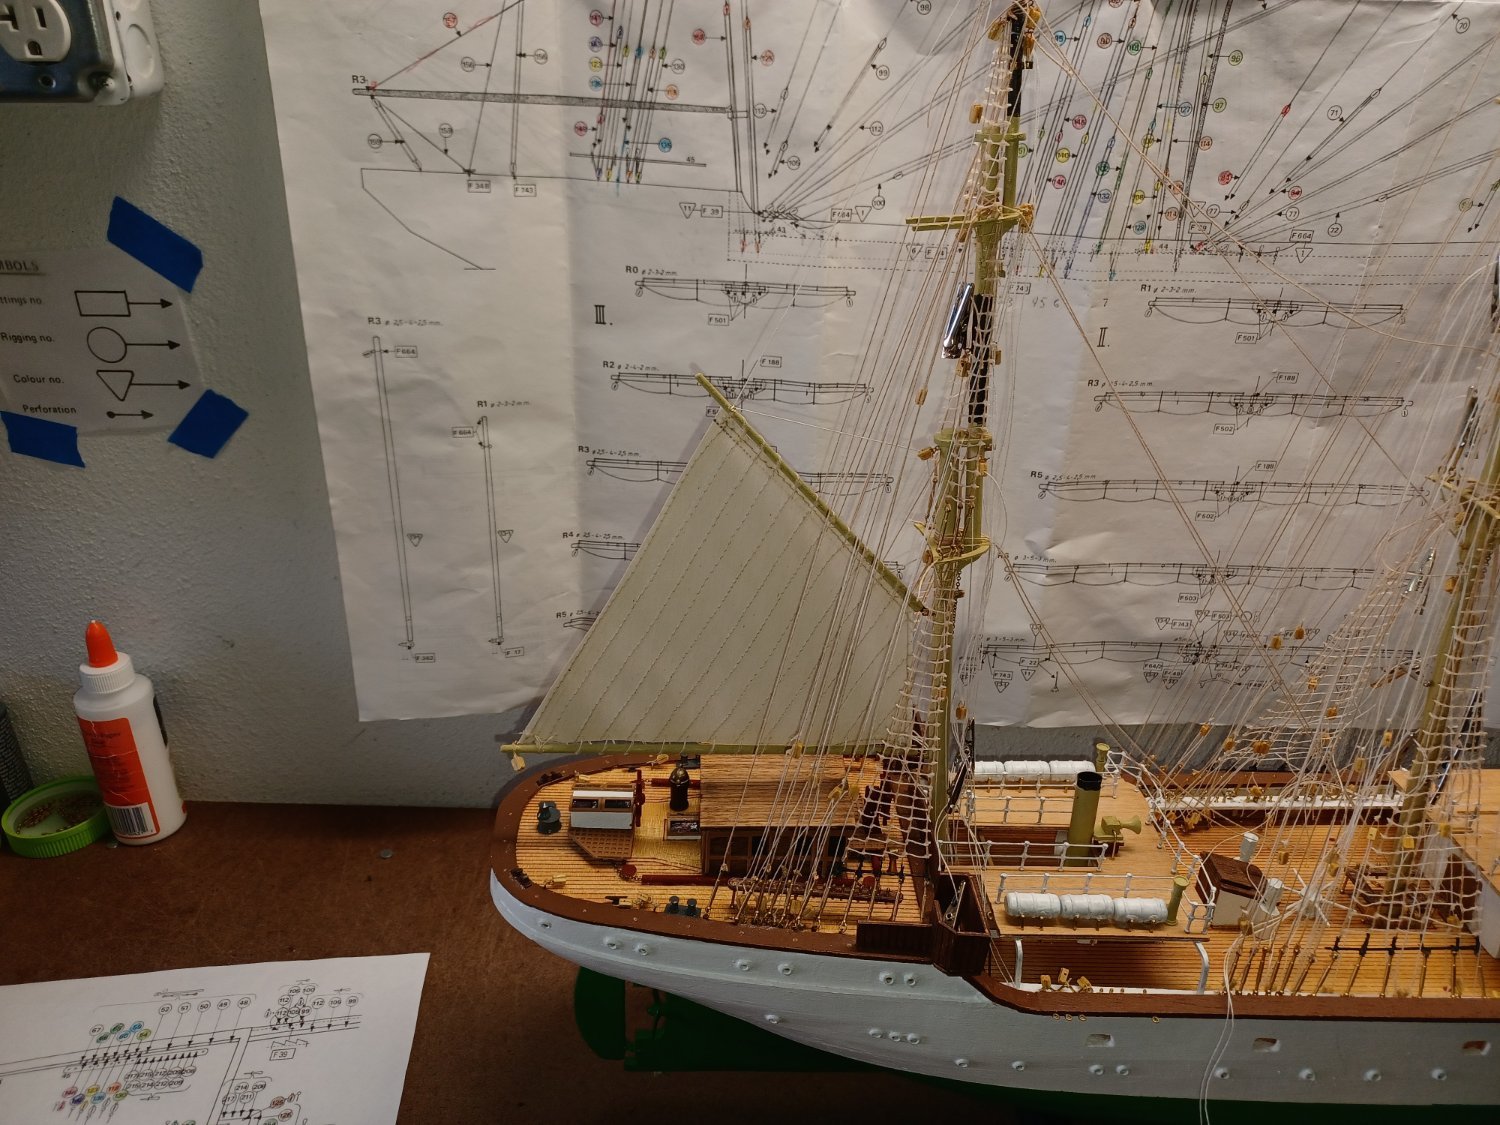
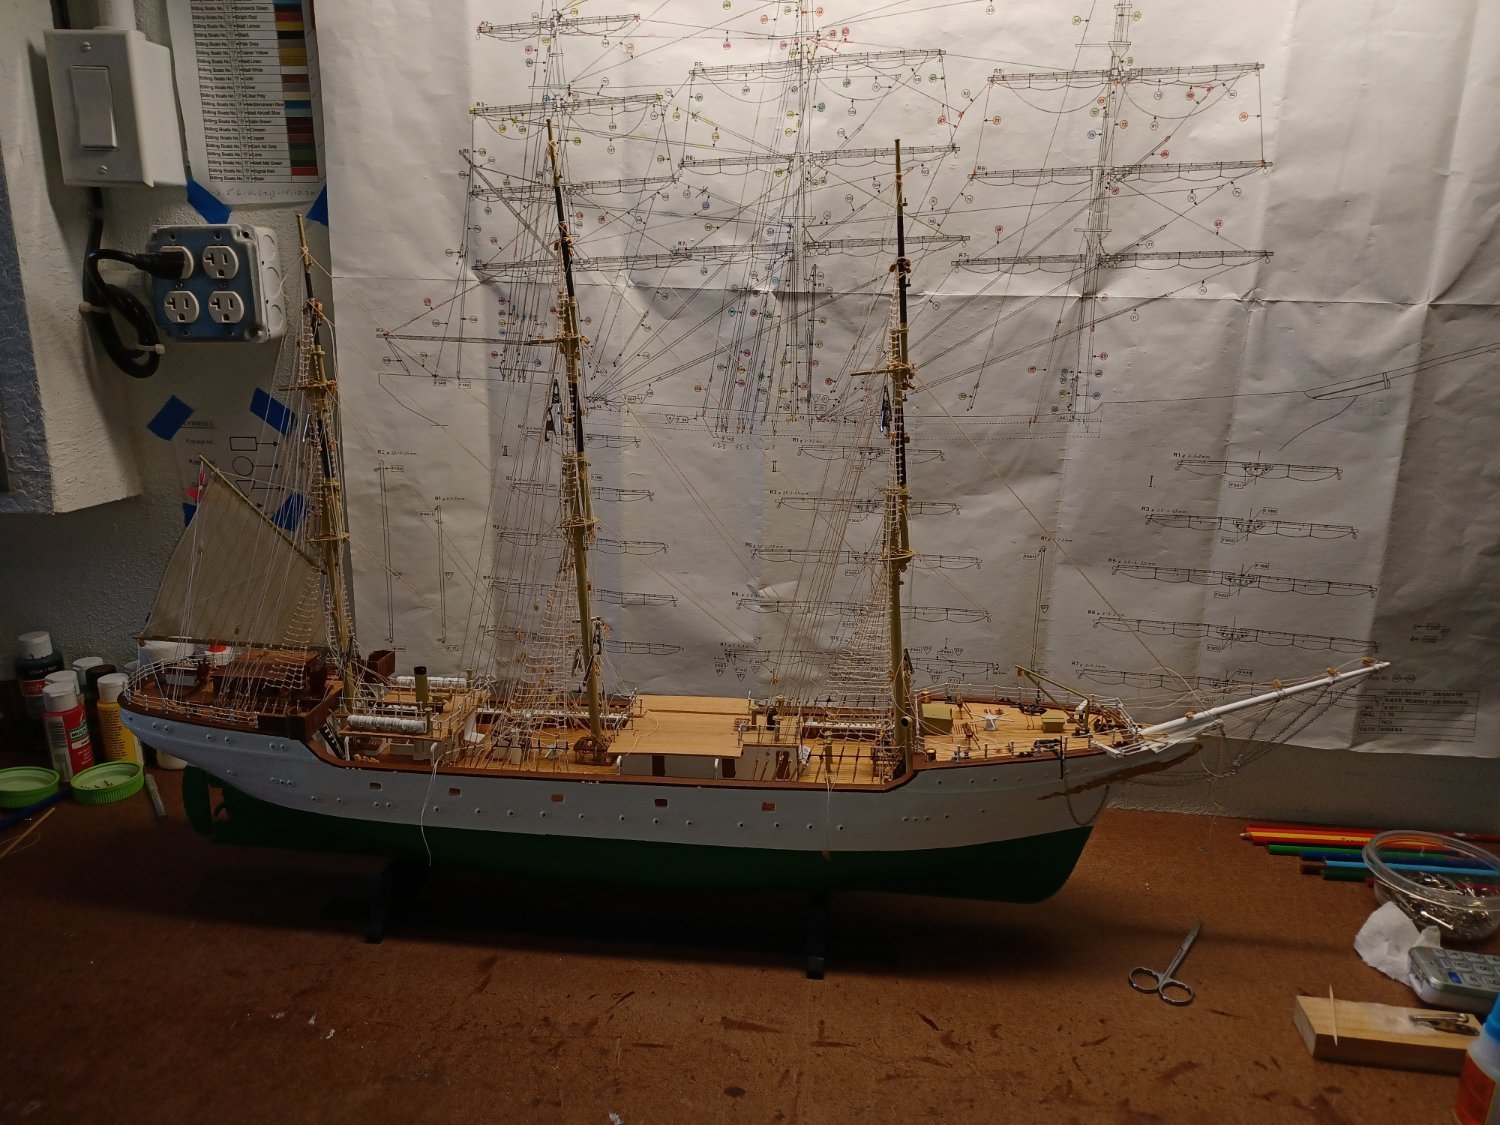
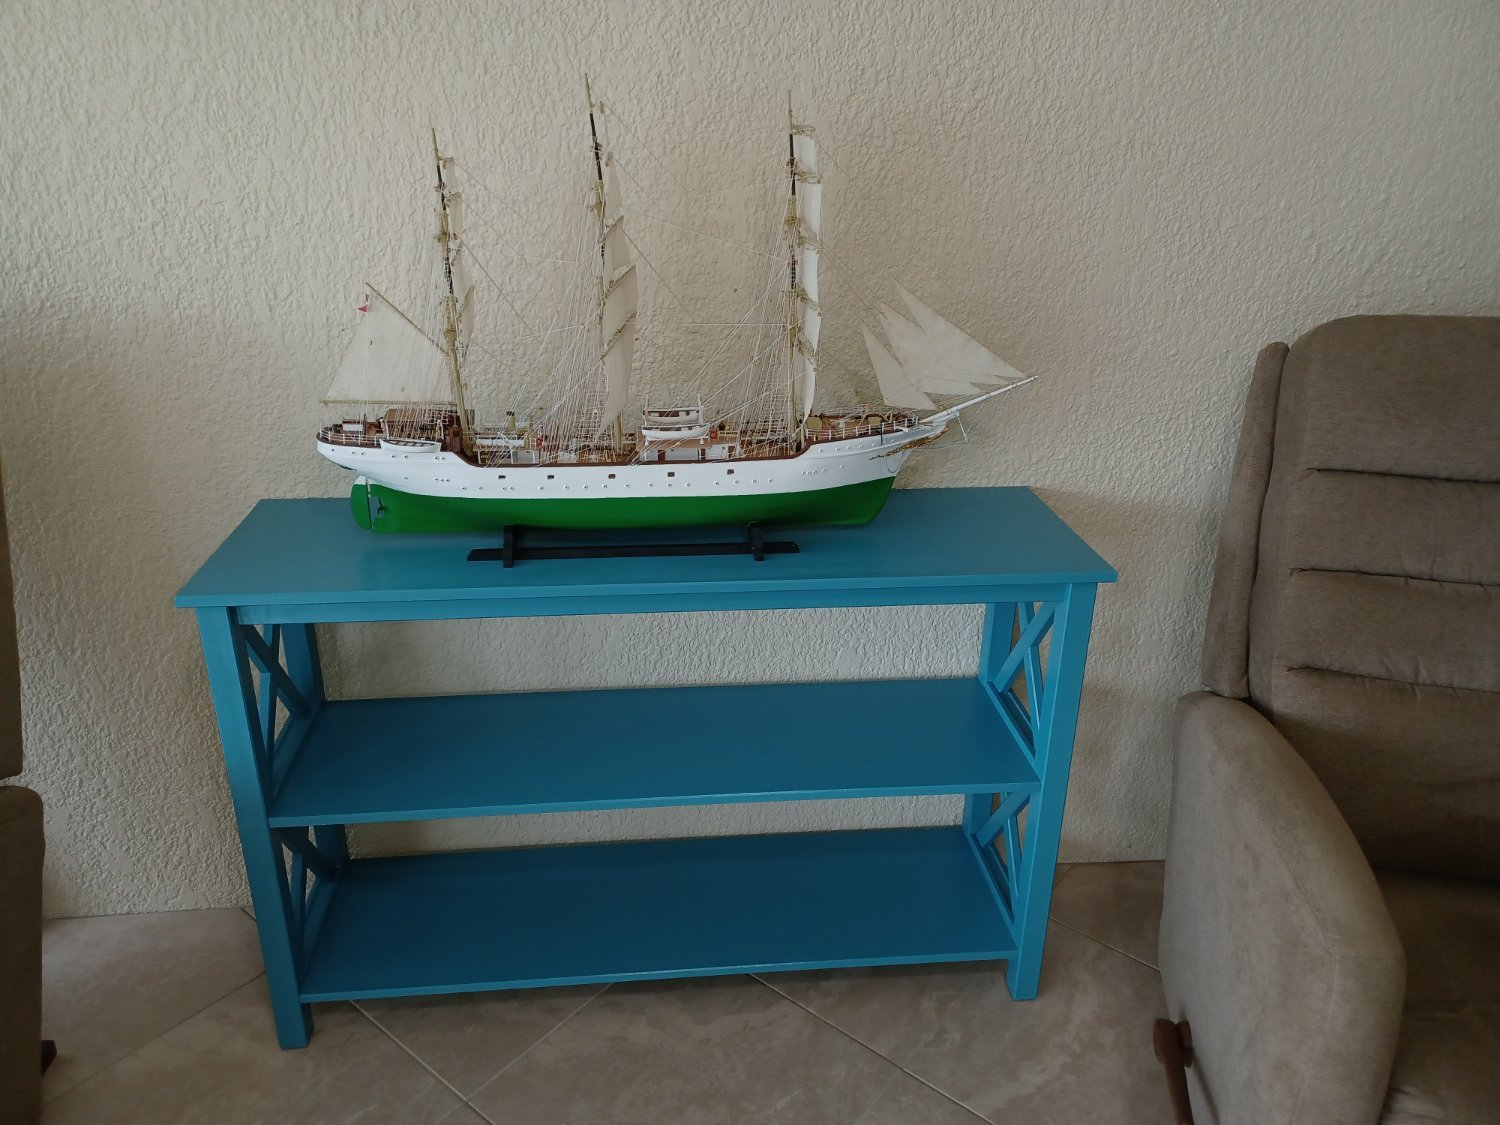
Danmark took a little over a year to complete. Hull construction and deck fittings went well. I made a slip to help hold and align the keel and bulkhedas. Rigging was another story, I found that the best way to follow the rigging on the plans was to mark them with color pencils and number the lines with tape. Purchased a mini sewing machine for about 25 dollars to complete the sails. Made an overhead jig to hold the sails while rigging & made the showcase out of 1x2 pine and 1/8 plexiglass.


.thumb.jpg.6043ad639a58e8ca5fe47f3ee52a97ae.jpg)


.thumb.jpg.b957542dccecc8fa8a895e731ceb1d40.jpg)

.thumb.jpg.613226ba83edce59b22fea6d7bf844b3.jpg)

.thumb.jpg.9658ec90225eef8ed180adfe4e69efb9.jpg)


.thumb.jpg.bf13b38f26969d26859cb9ec737de962.jpg)

.thumb.jpg.7c2a11579b1537d517efb7c7a12133dc.jpg)
- Dave_E, michaelpsutton2, ccoyle and 1 other
-
4
-
-
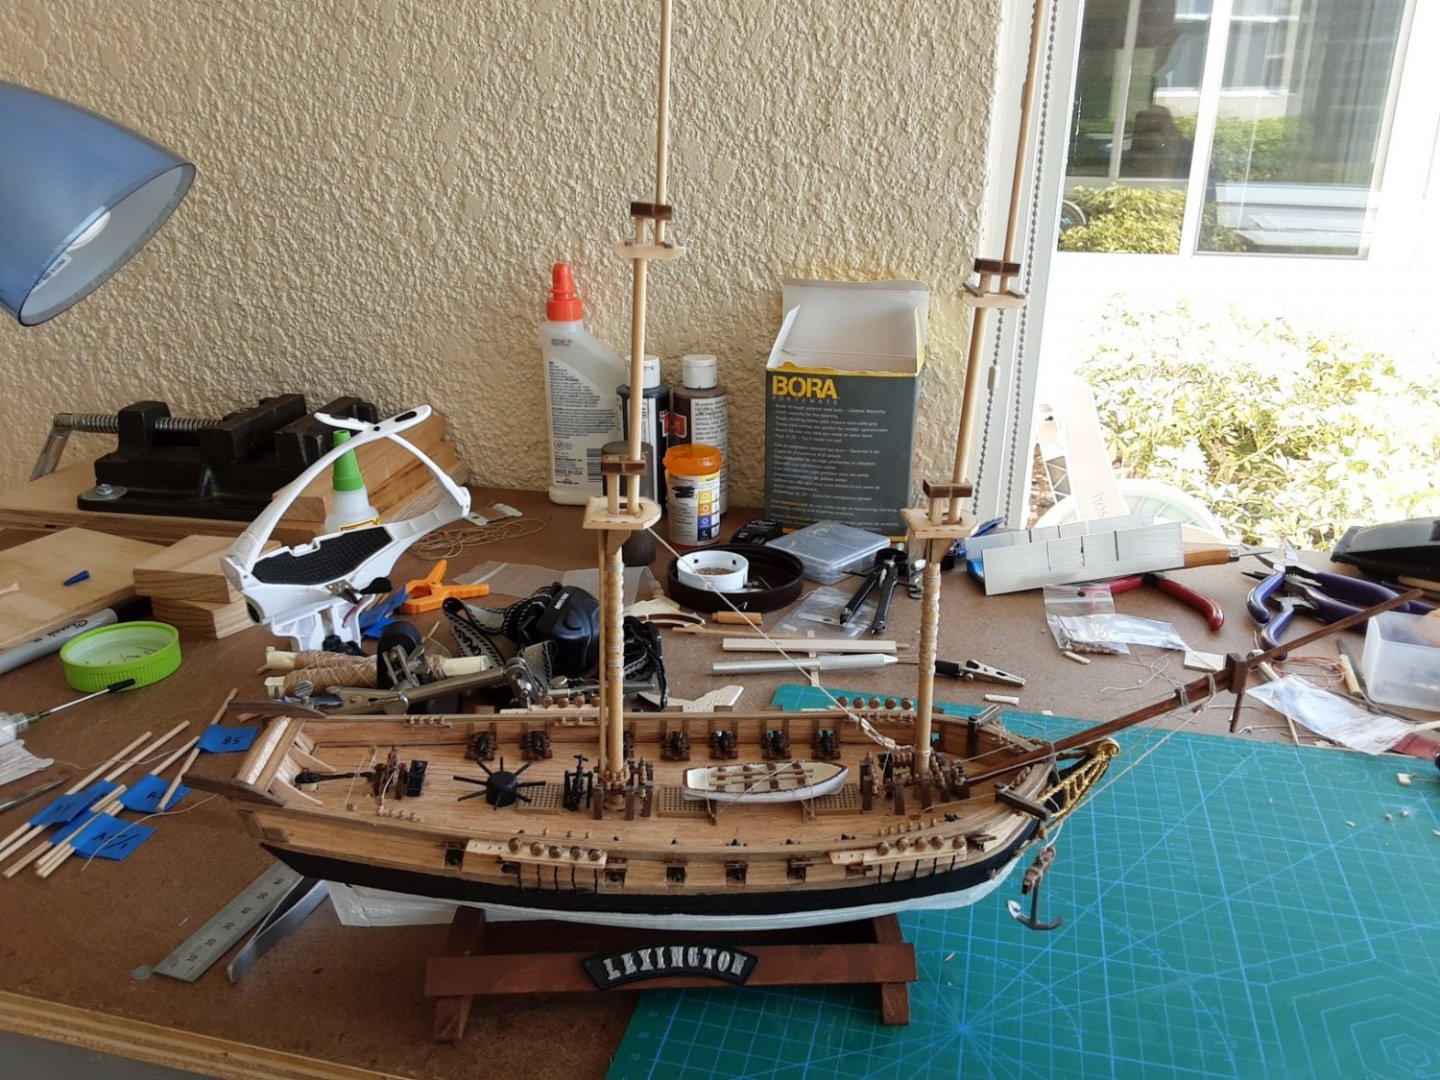
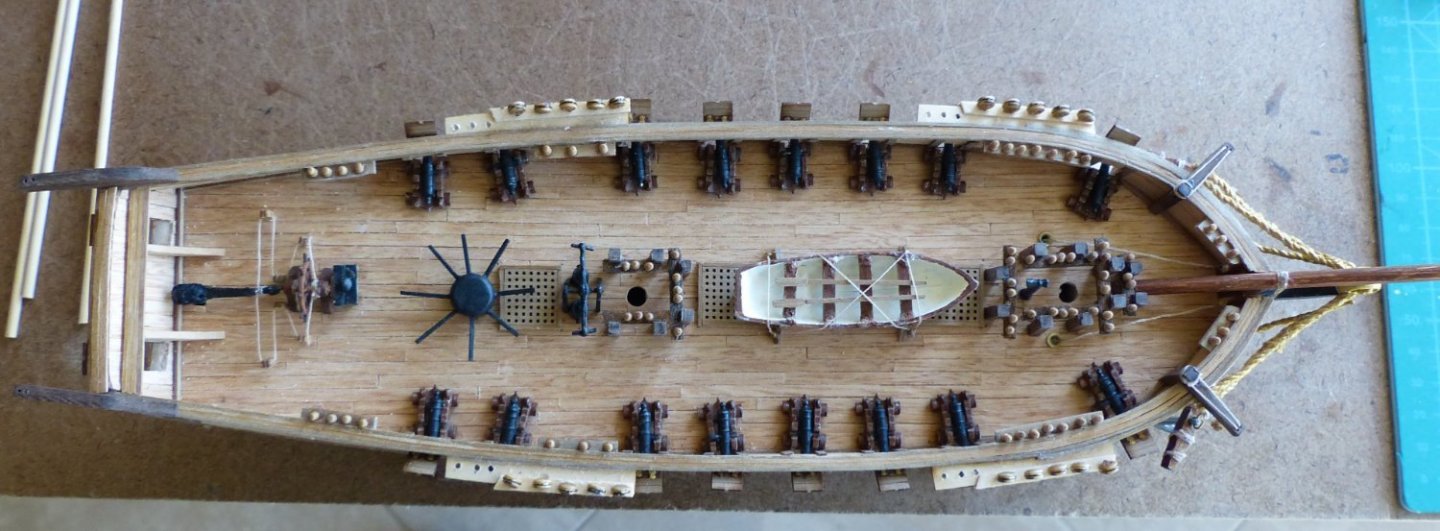
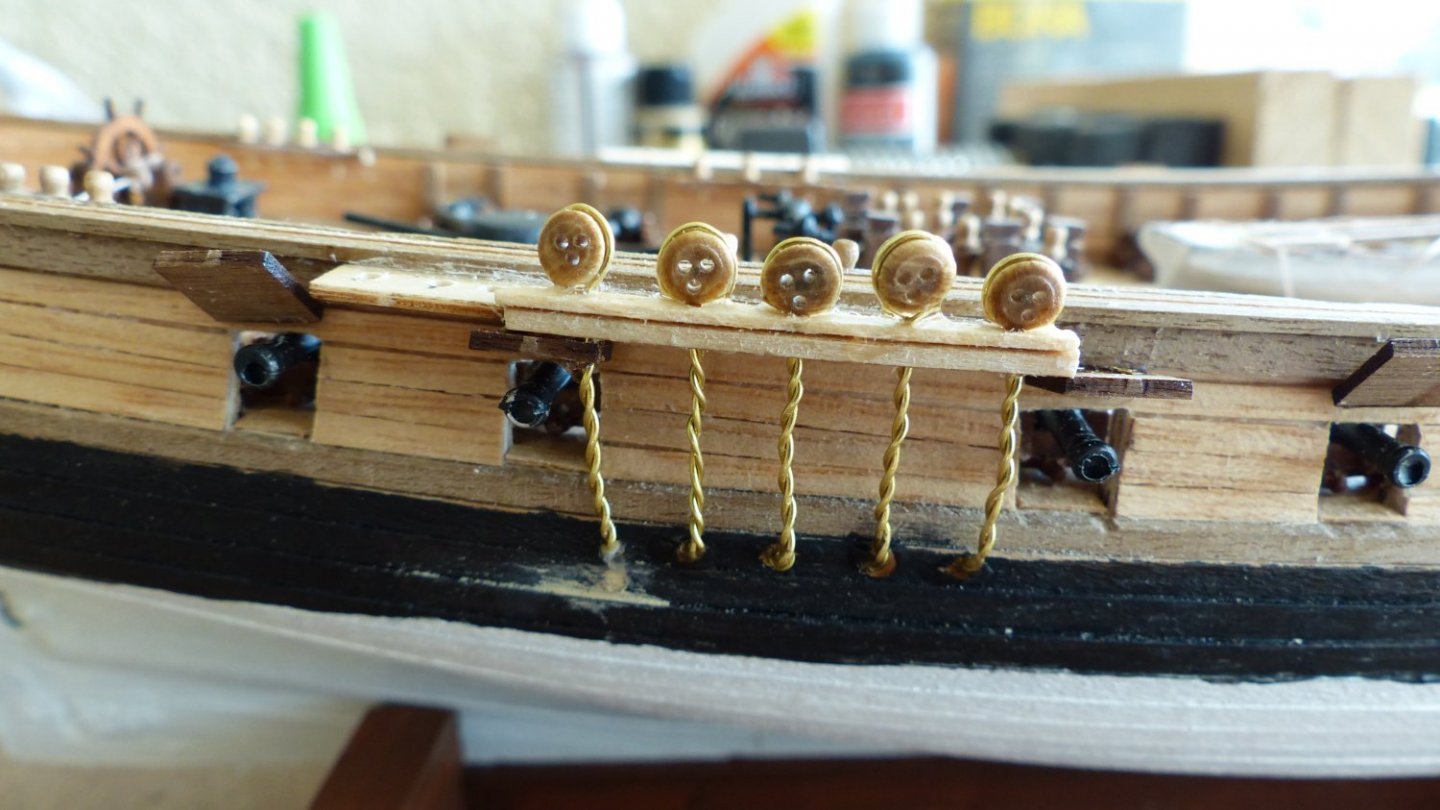
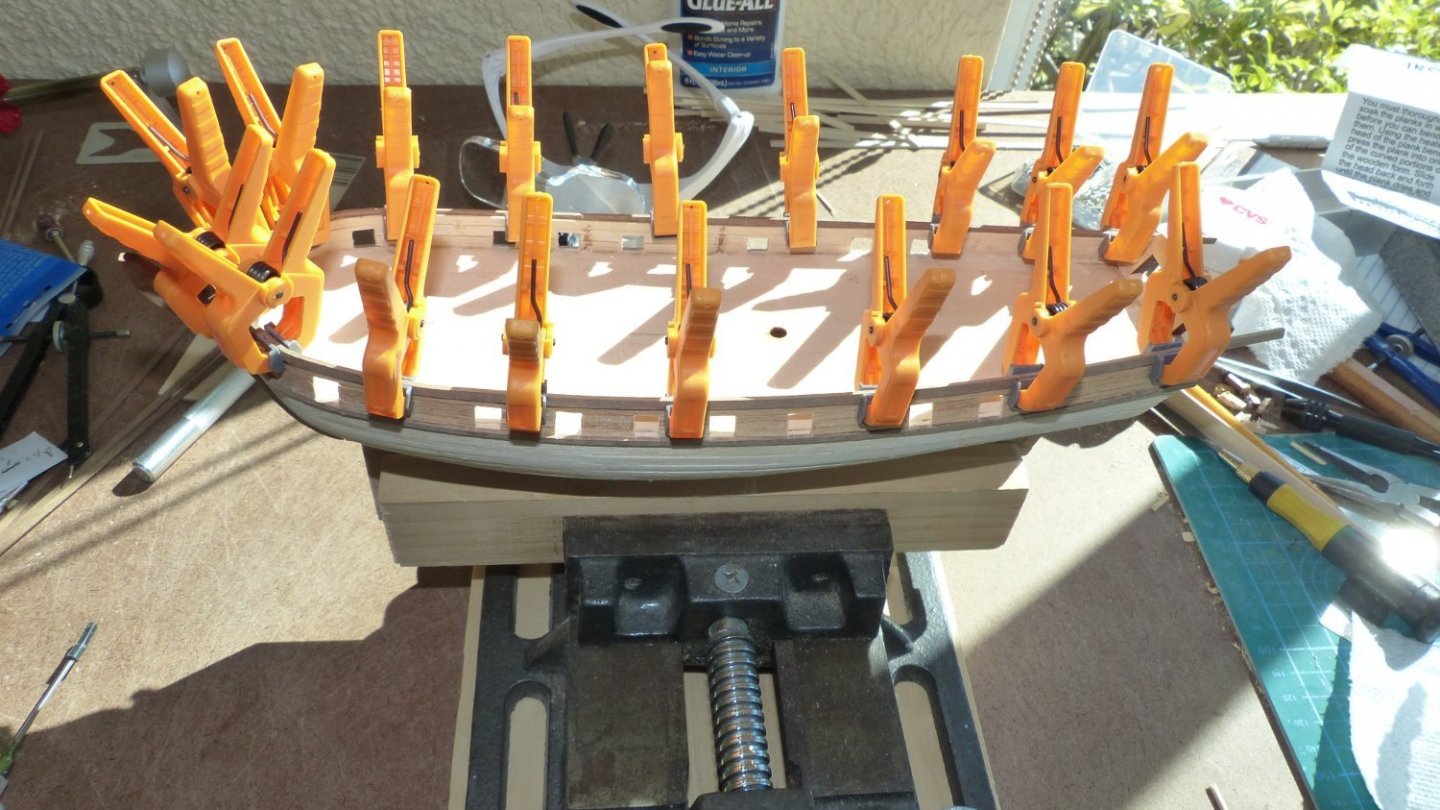
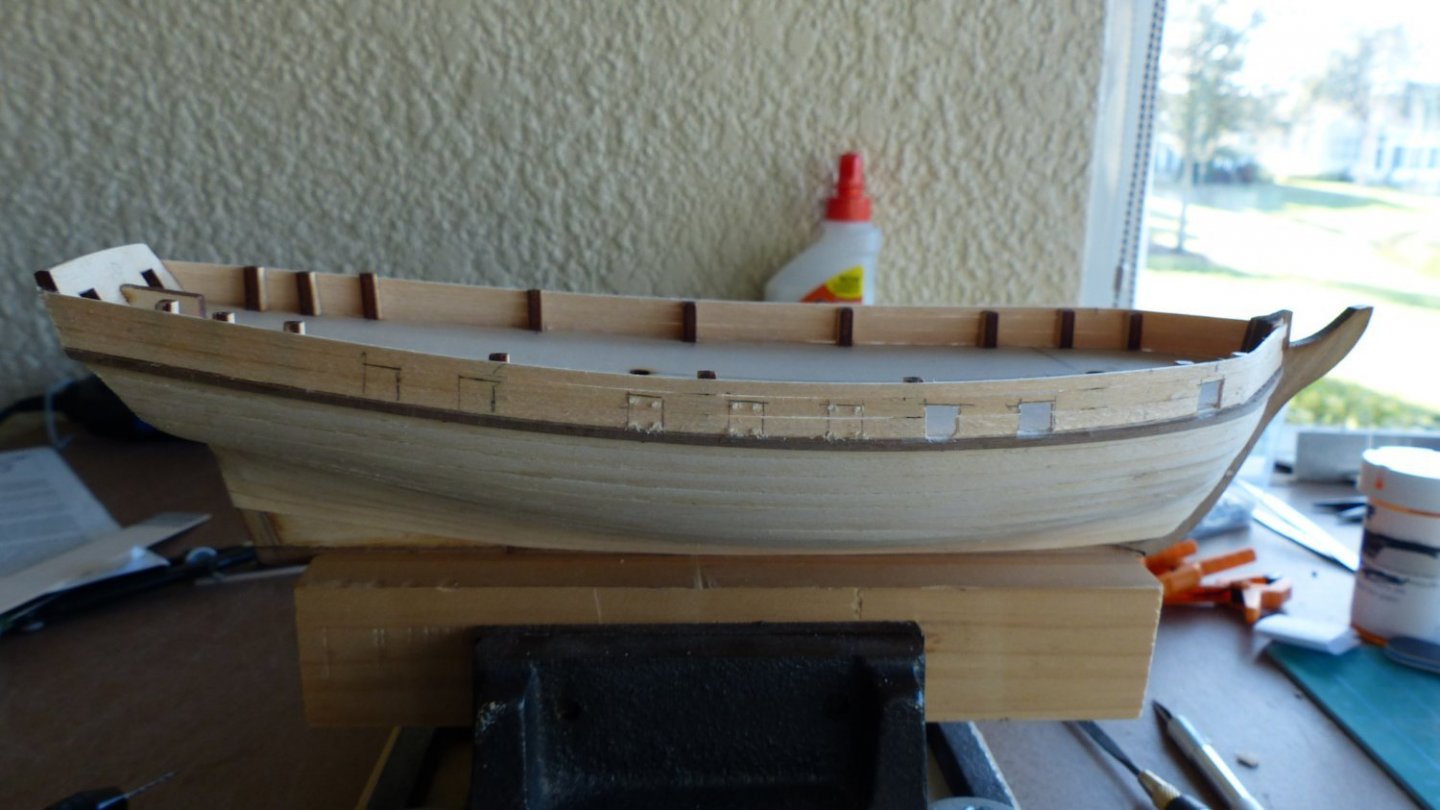
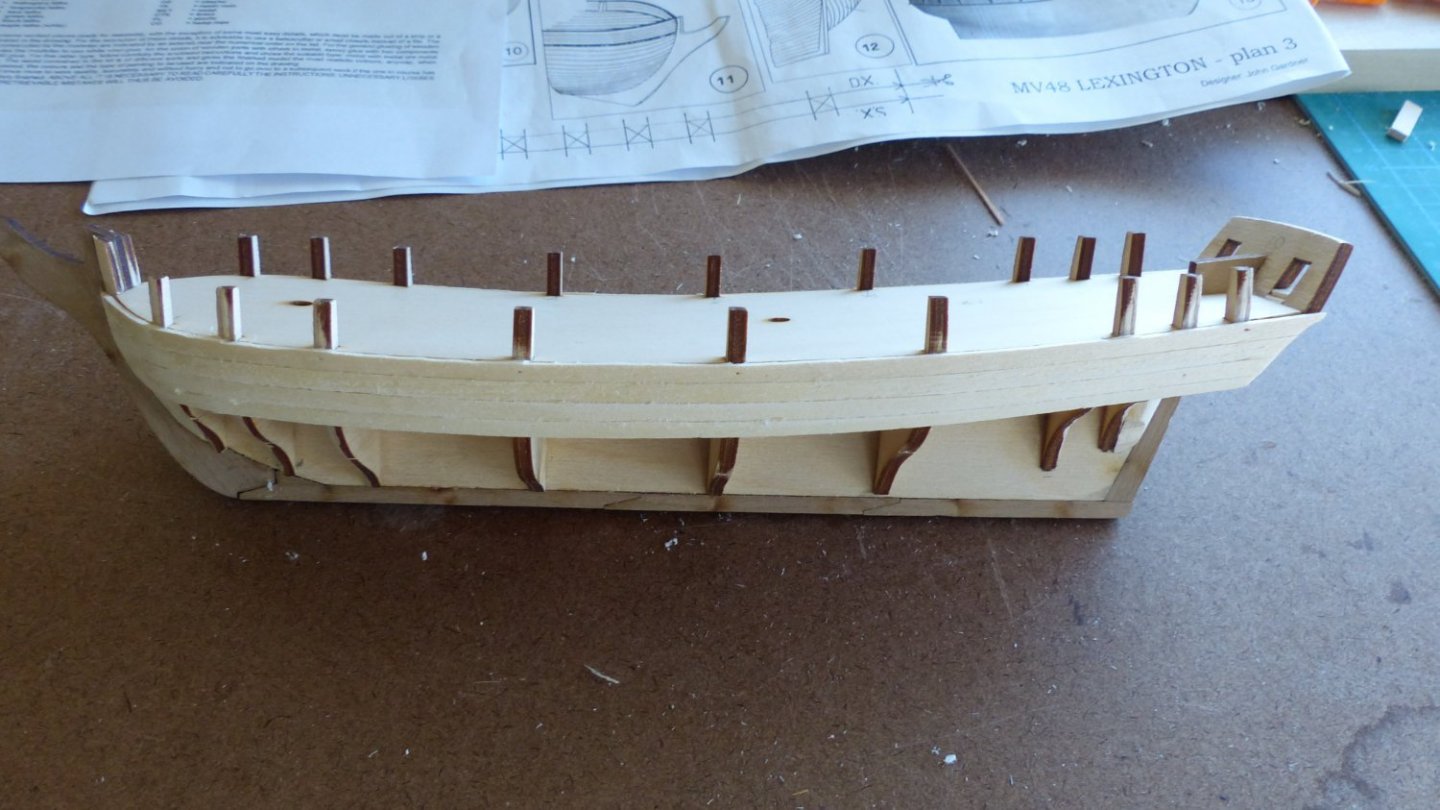
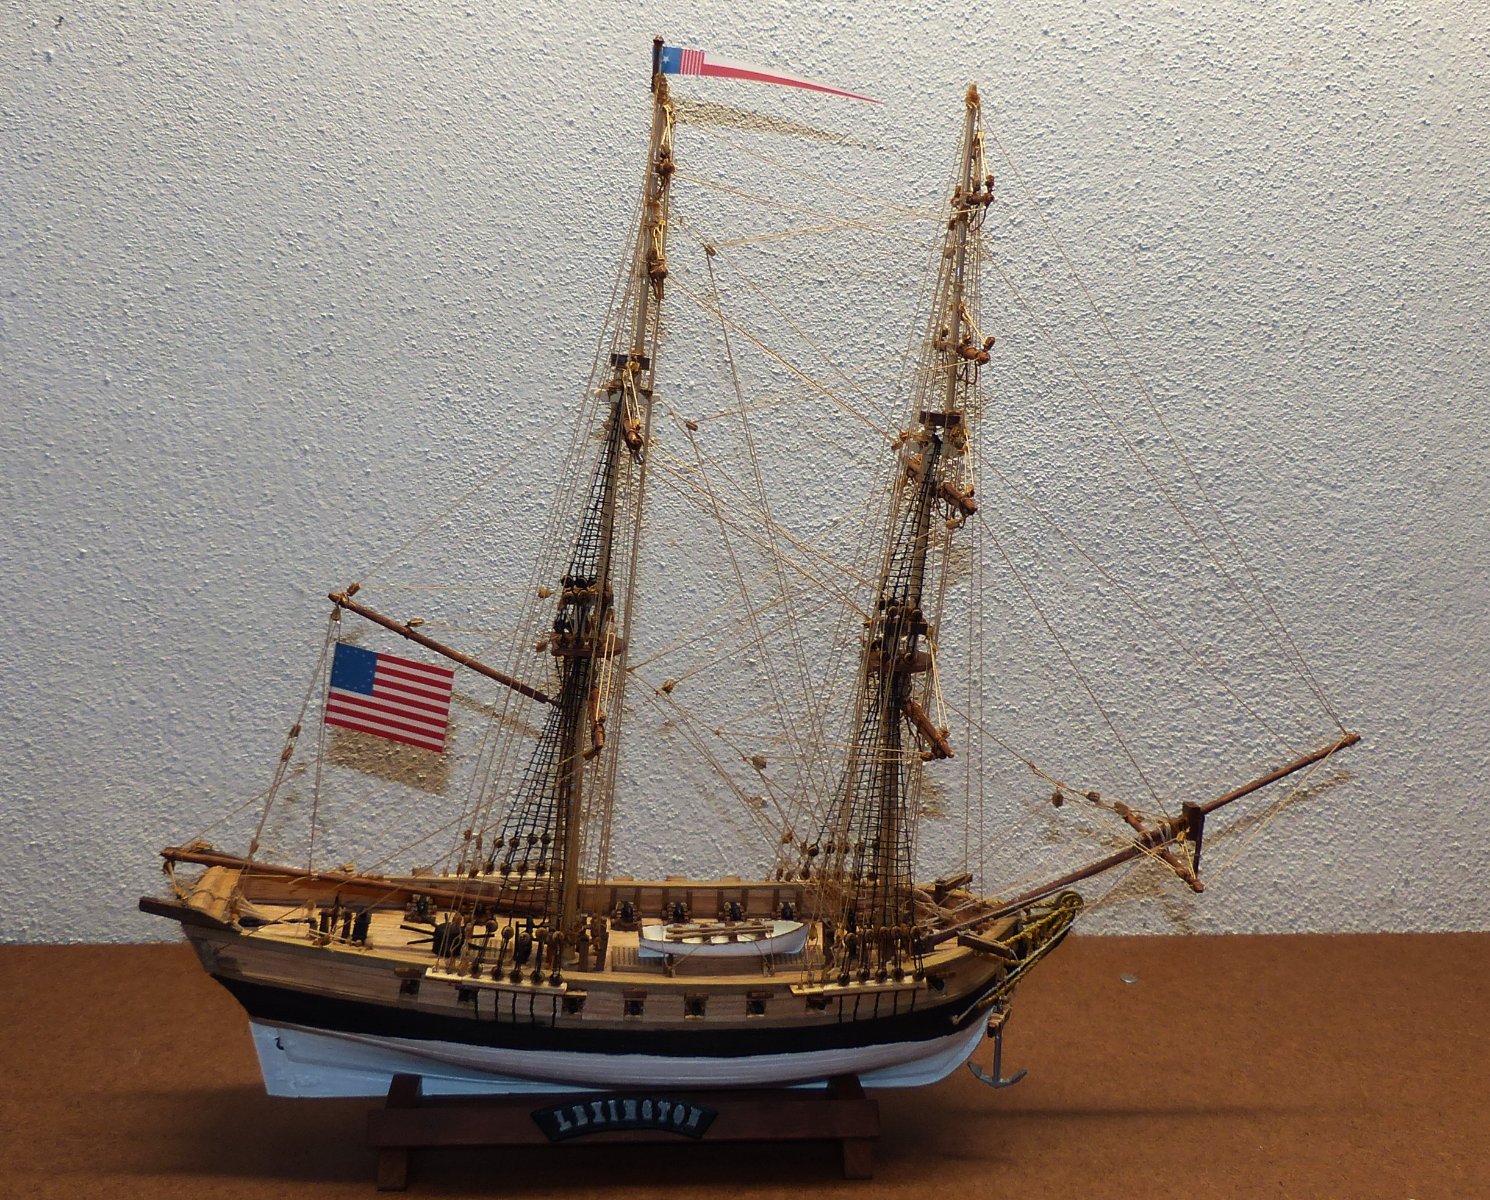
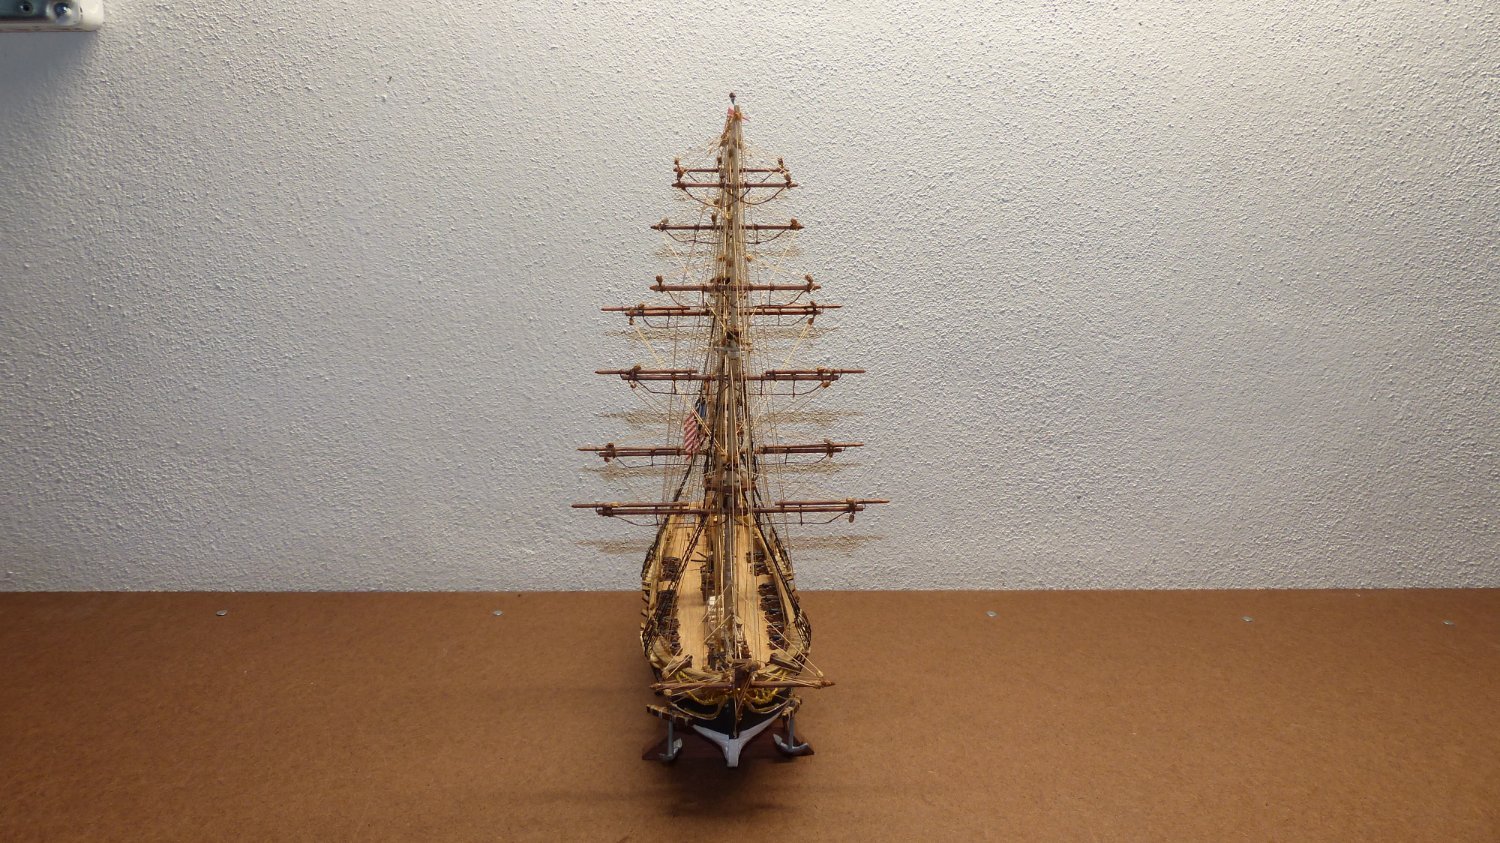
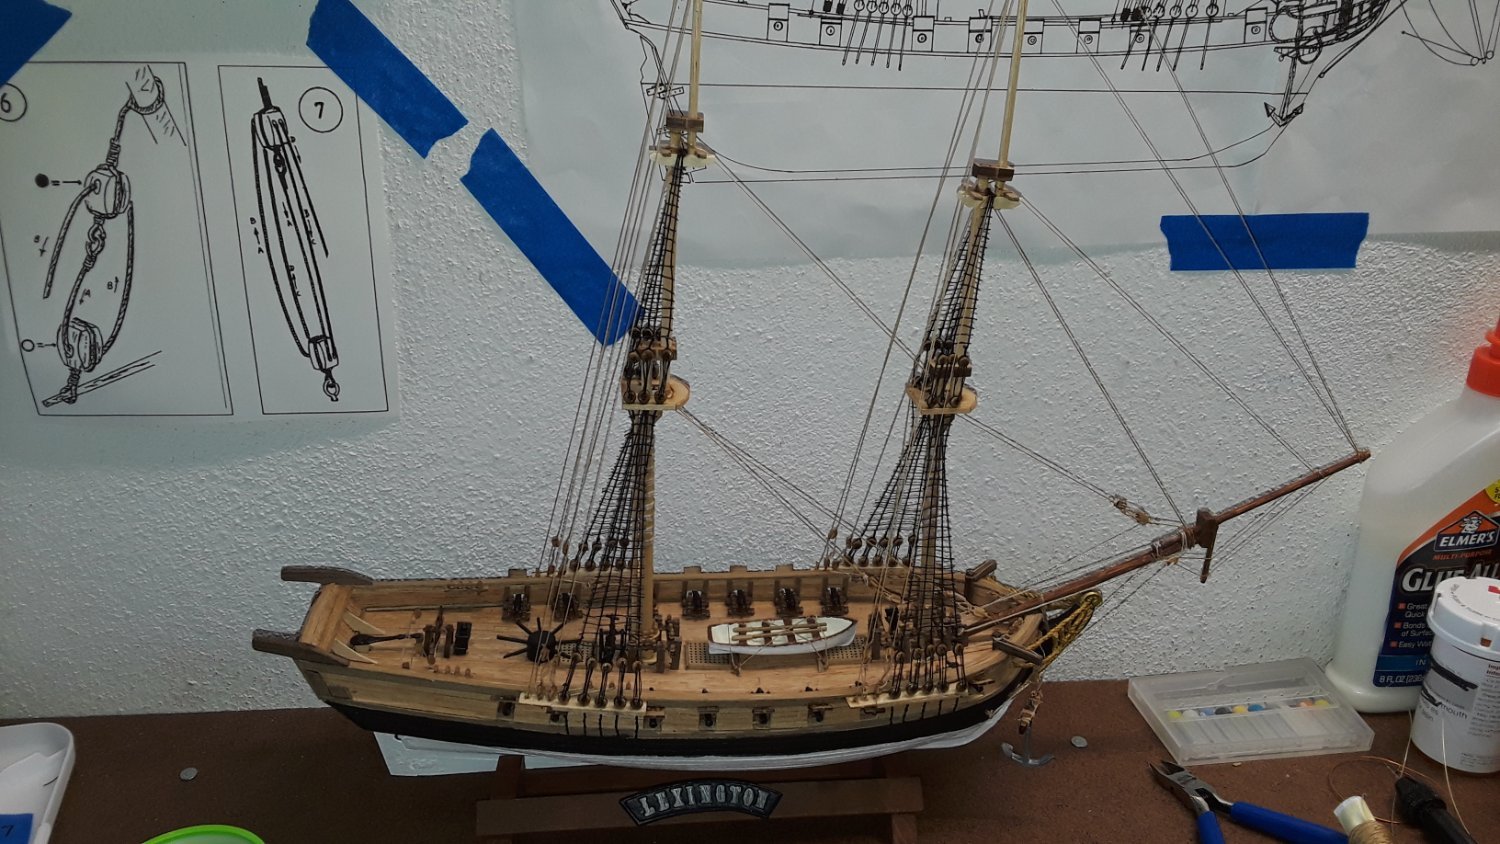
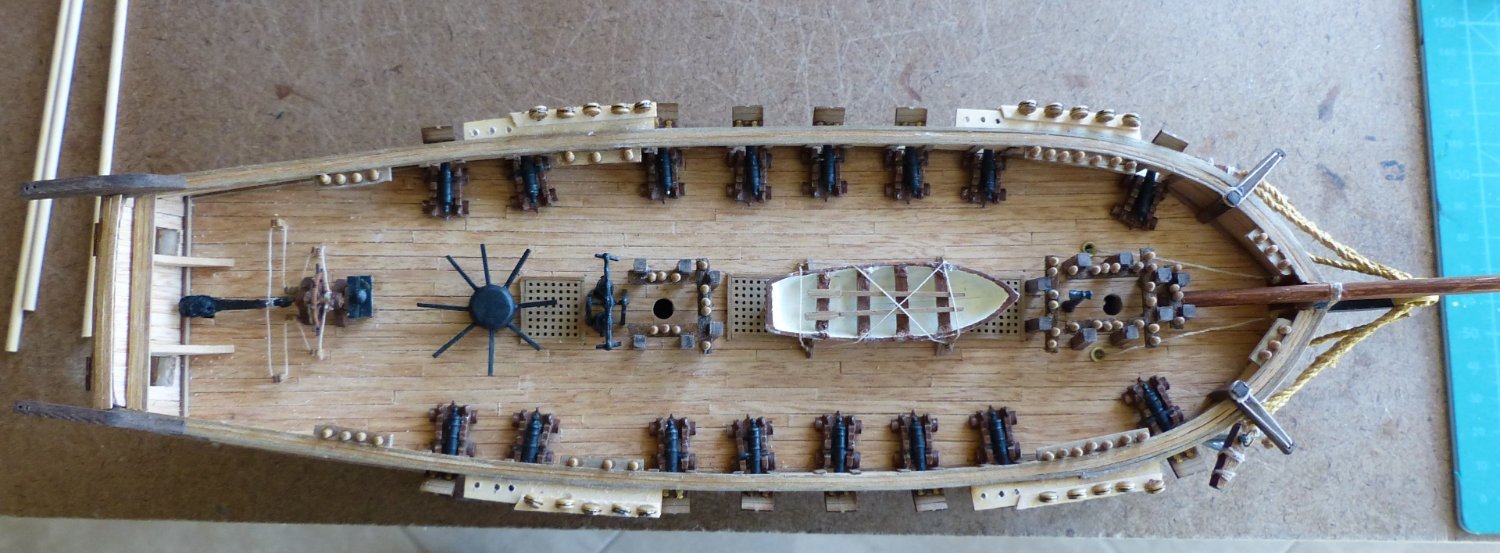
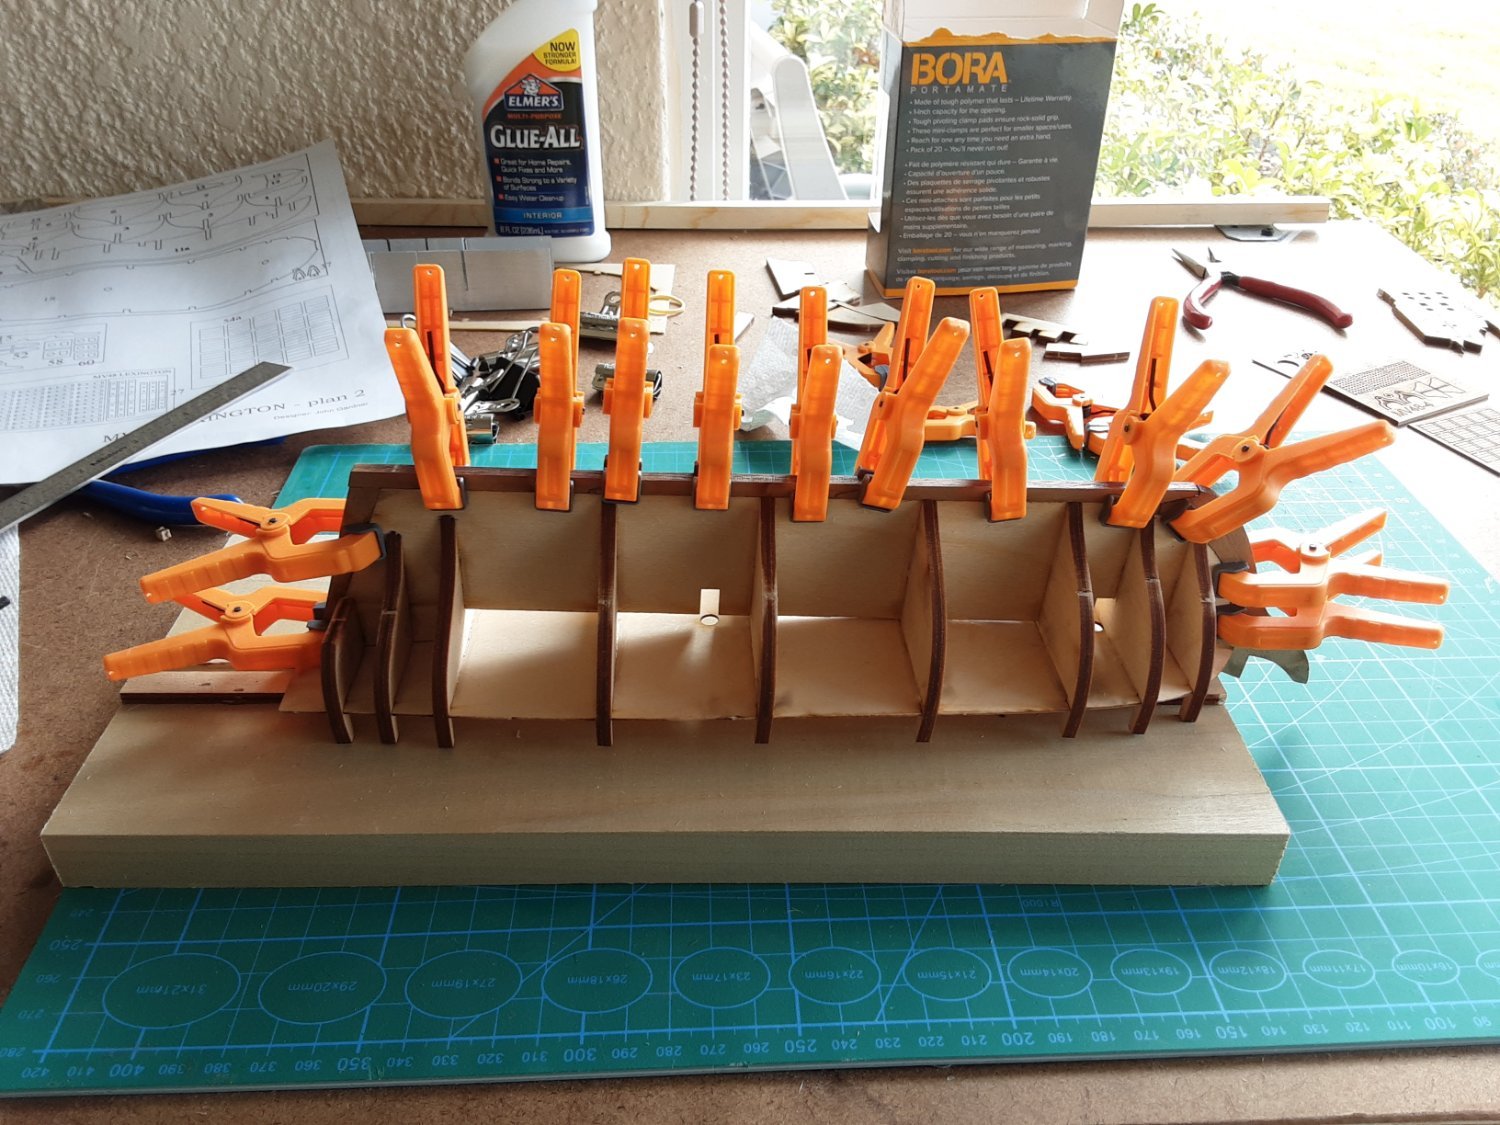
Building the Lexington took a little over six months.
Directions were easy to follow, although my painting skills leave a lot to be desired (need steadier hands). All things considered it was very enjoyable
to build and learn about it's history in the process. Making various jigs to hold the planks in place while the glue dried helped a lot.


.jpg.c22d5086798b127fd711a60befb8f2a1.jpg)


.jpg.ce2d676444512b6b10b380d77a1e0931.jpg)


.jpg.7b45f672664cc5a3018f375d3a136beb.jpg)
.jpg.4df1ed121e9668159772abd48abf8209.jpg)
.jpg.674d0708c7dbb0c6cc2923a3a4e55ceb.jpg)


.jpg.8575cbd3319a296541d12b8ba100c2eb.jpg)


.jpg.7946f697d66ab19900675527dfdb4708.jpg)


Rattlesnake by CapnJack43 - Model Shipways - 1/64 - American Privateer
in - Kit build logs for subjects built from 1751 - 1800
Posted
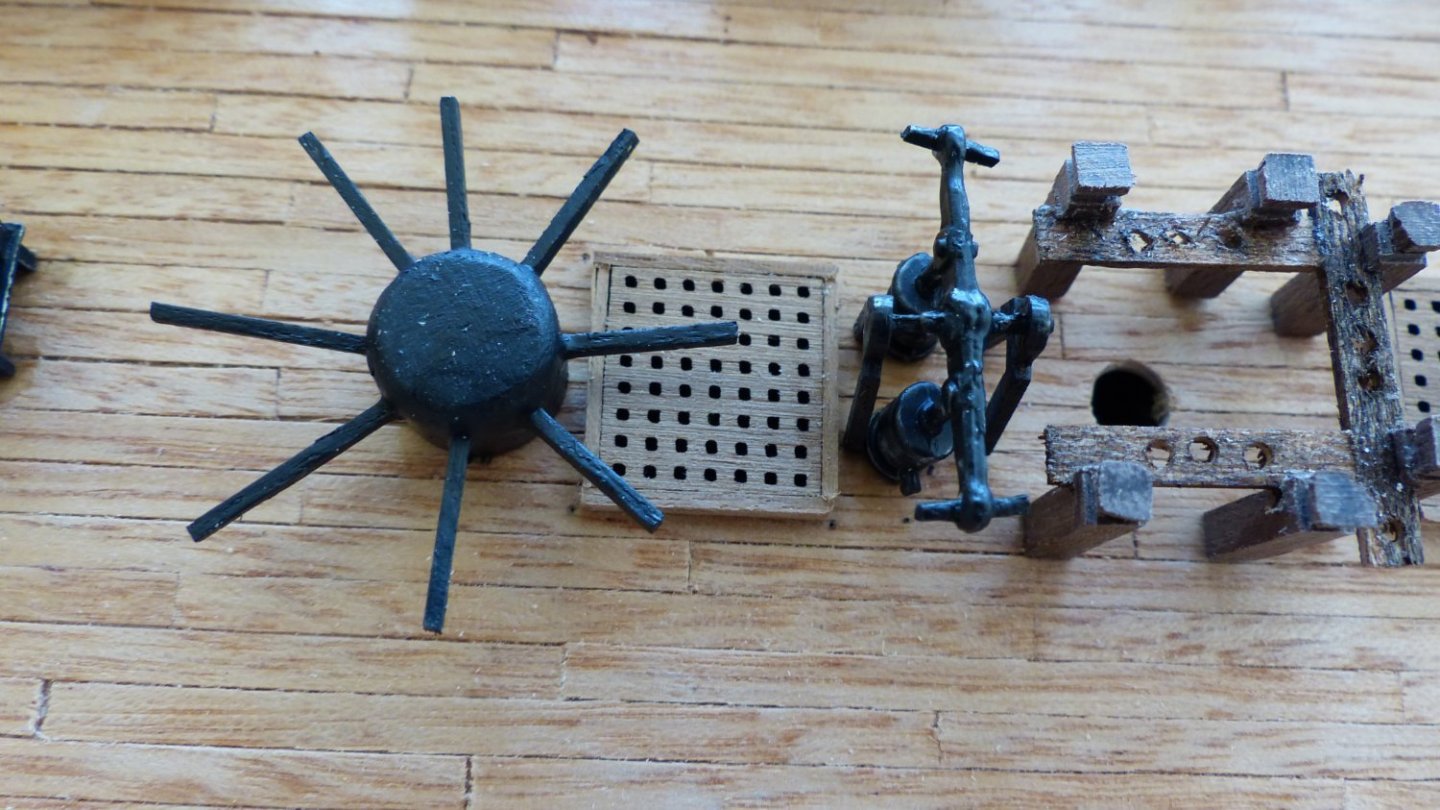
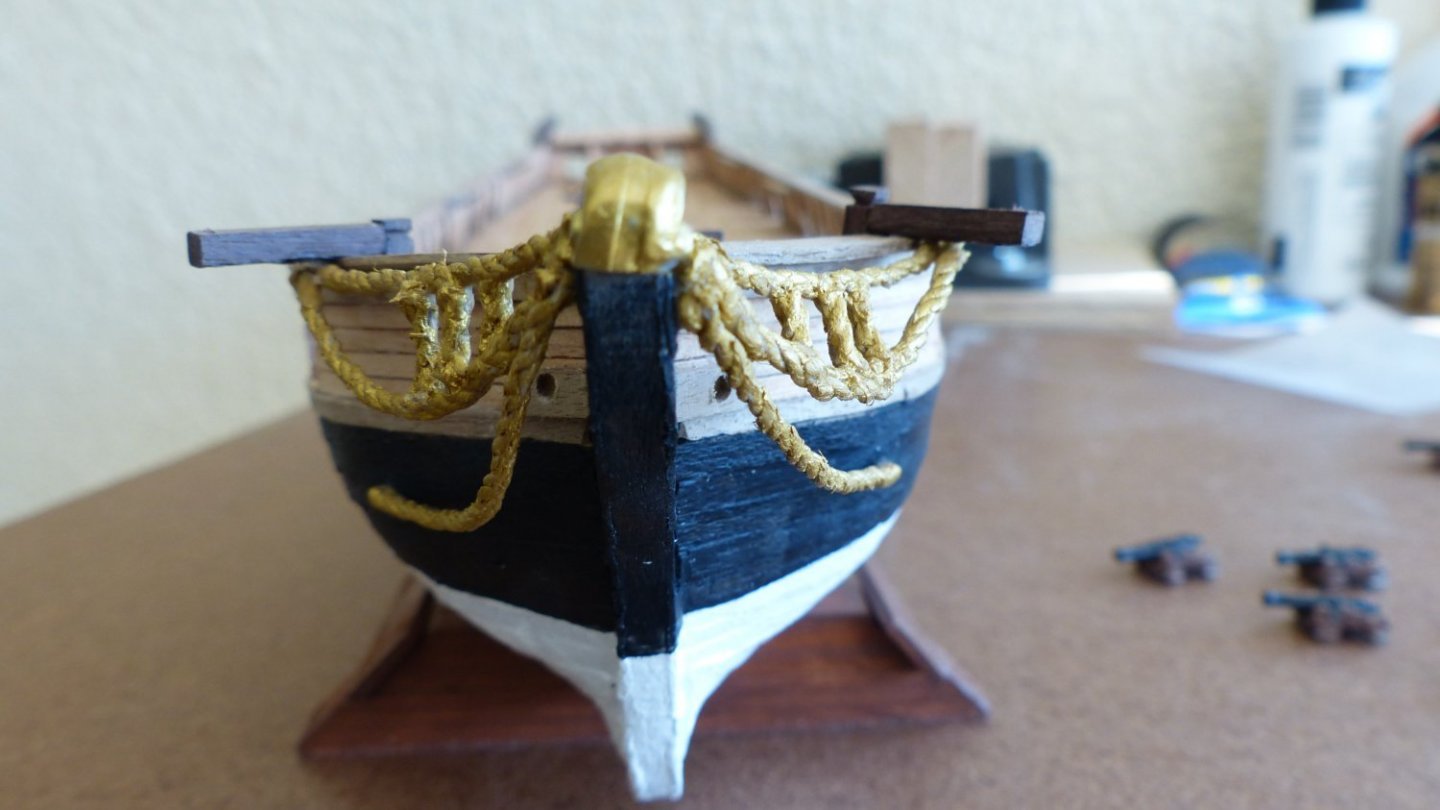
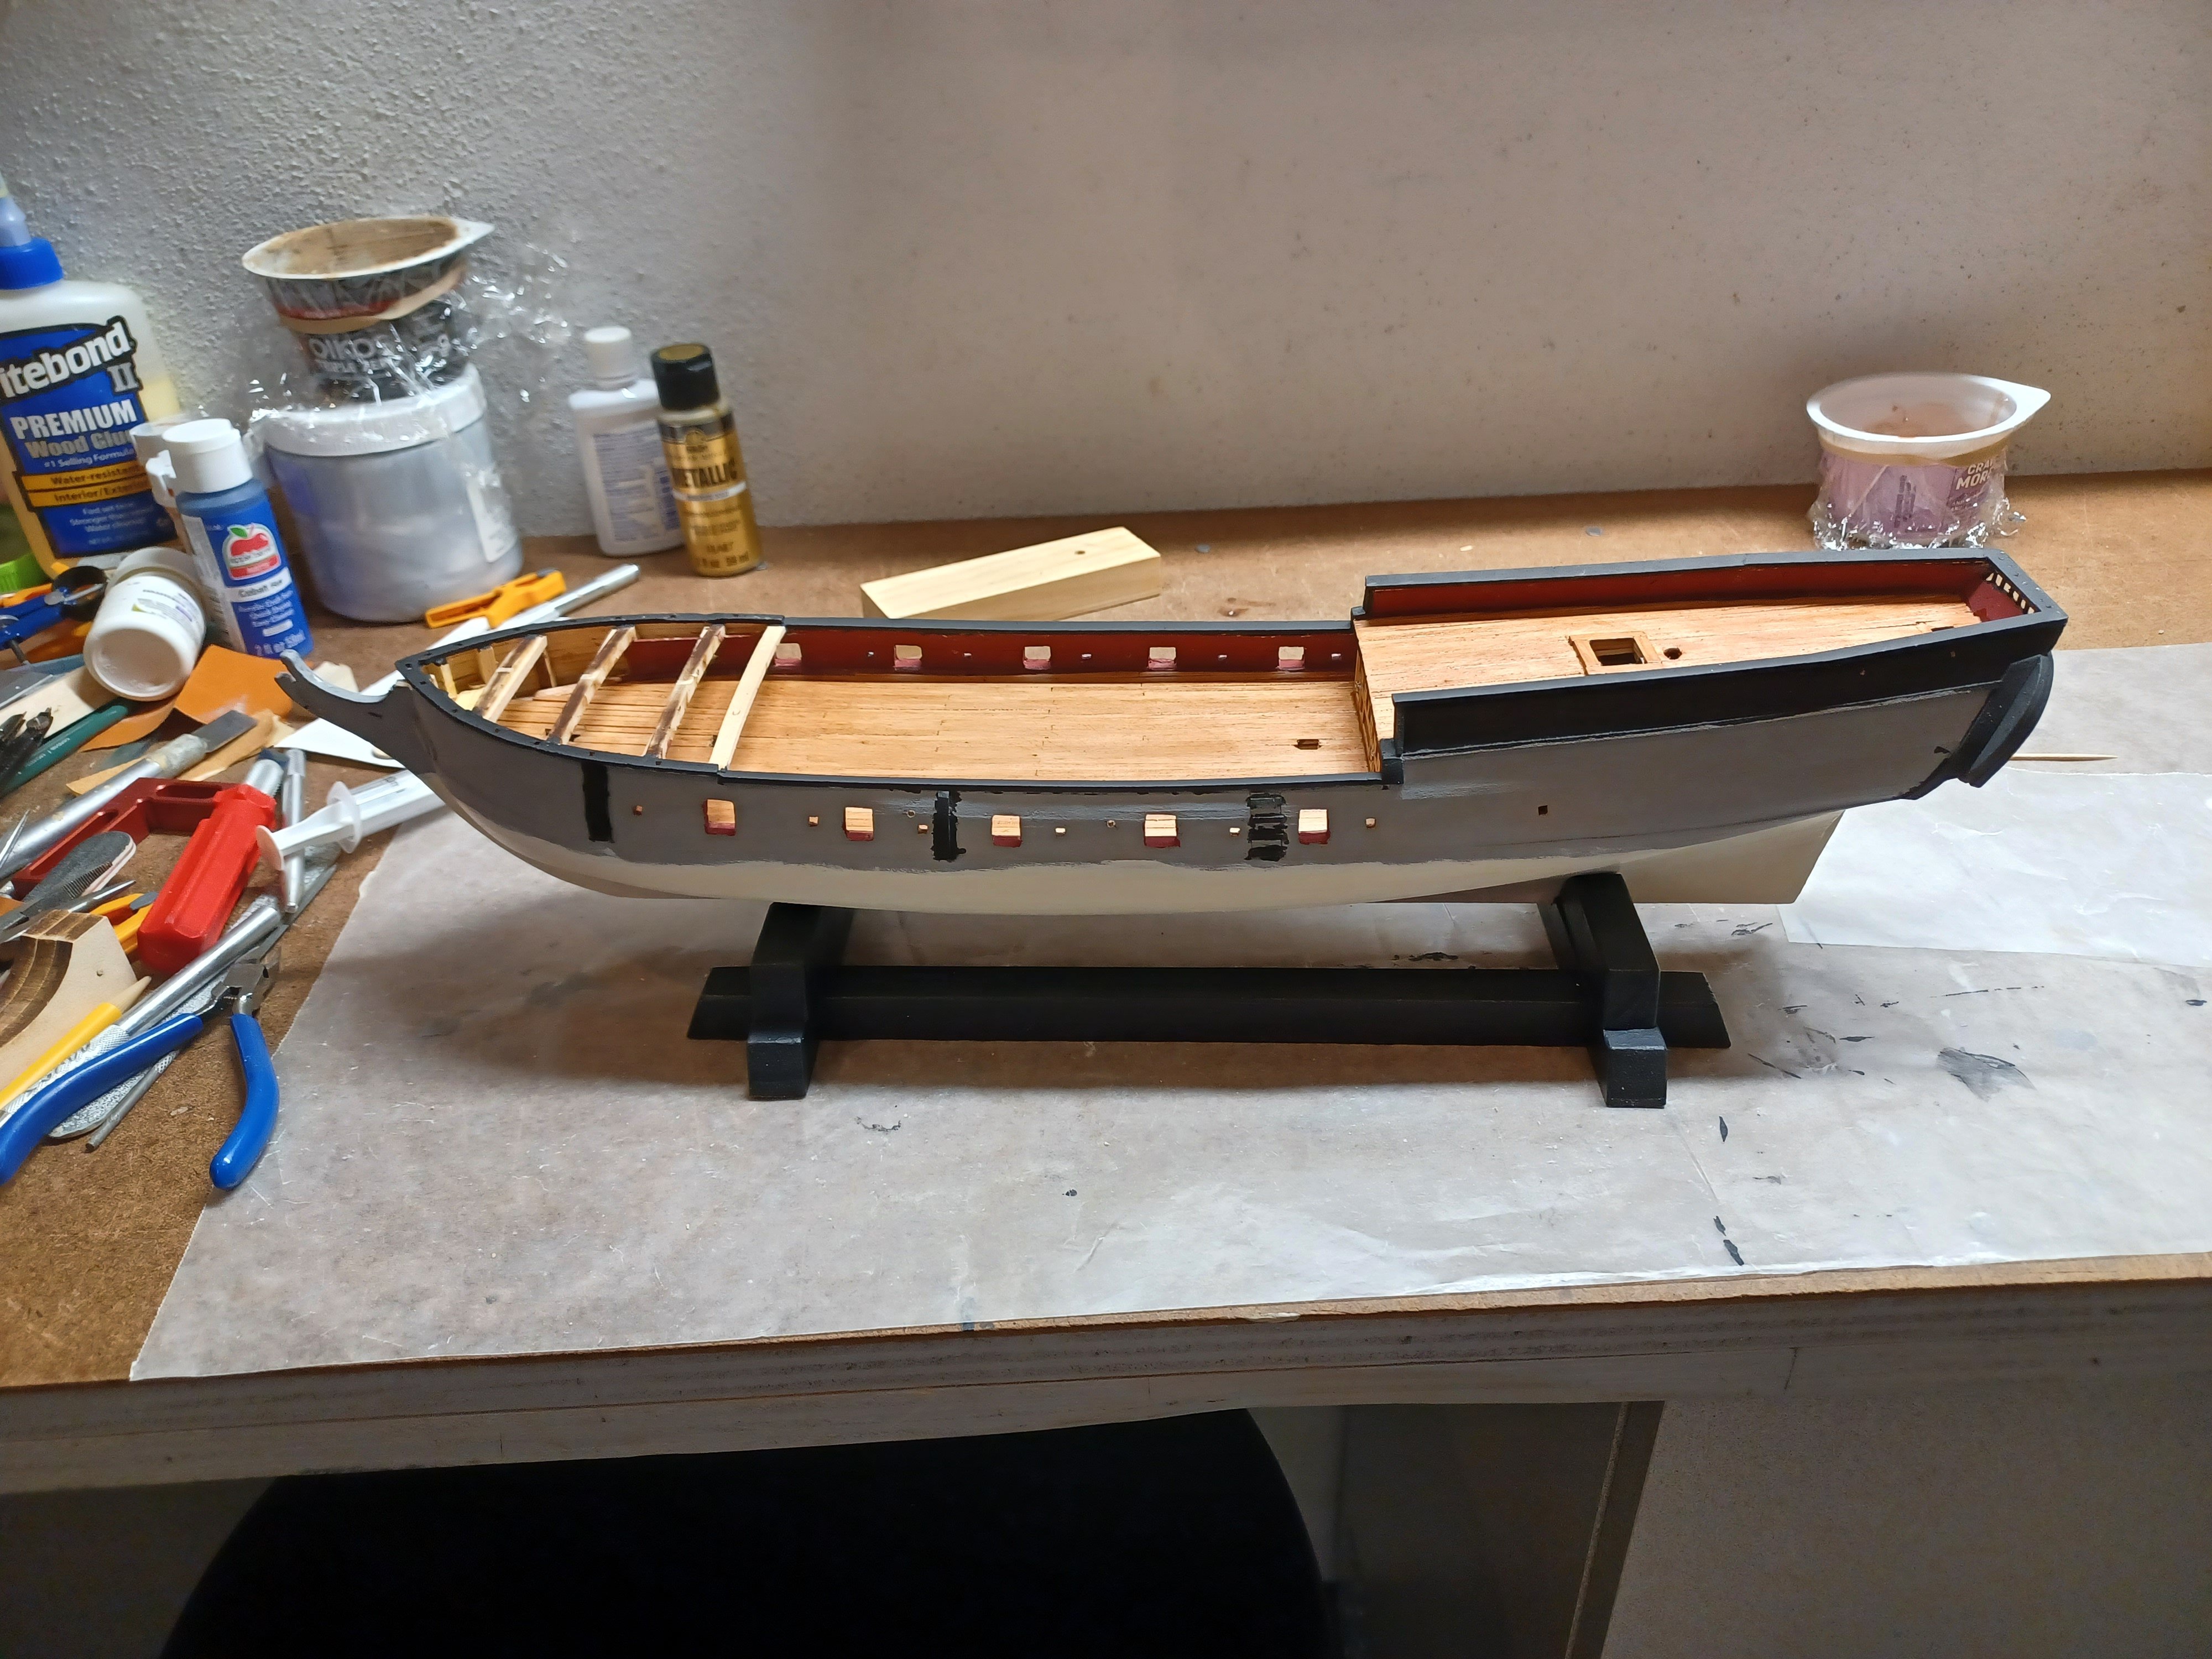
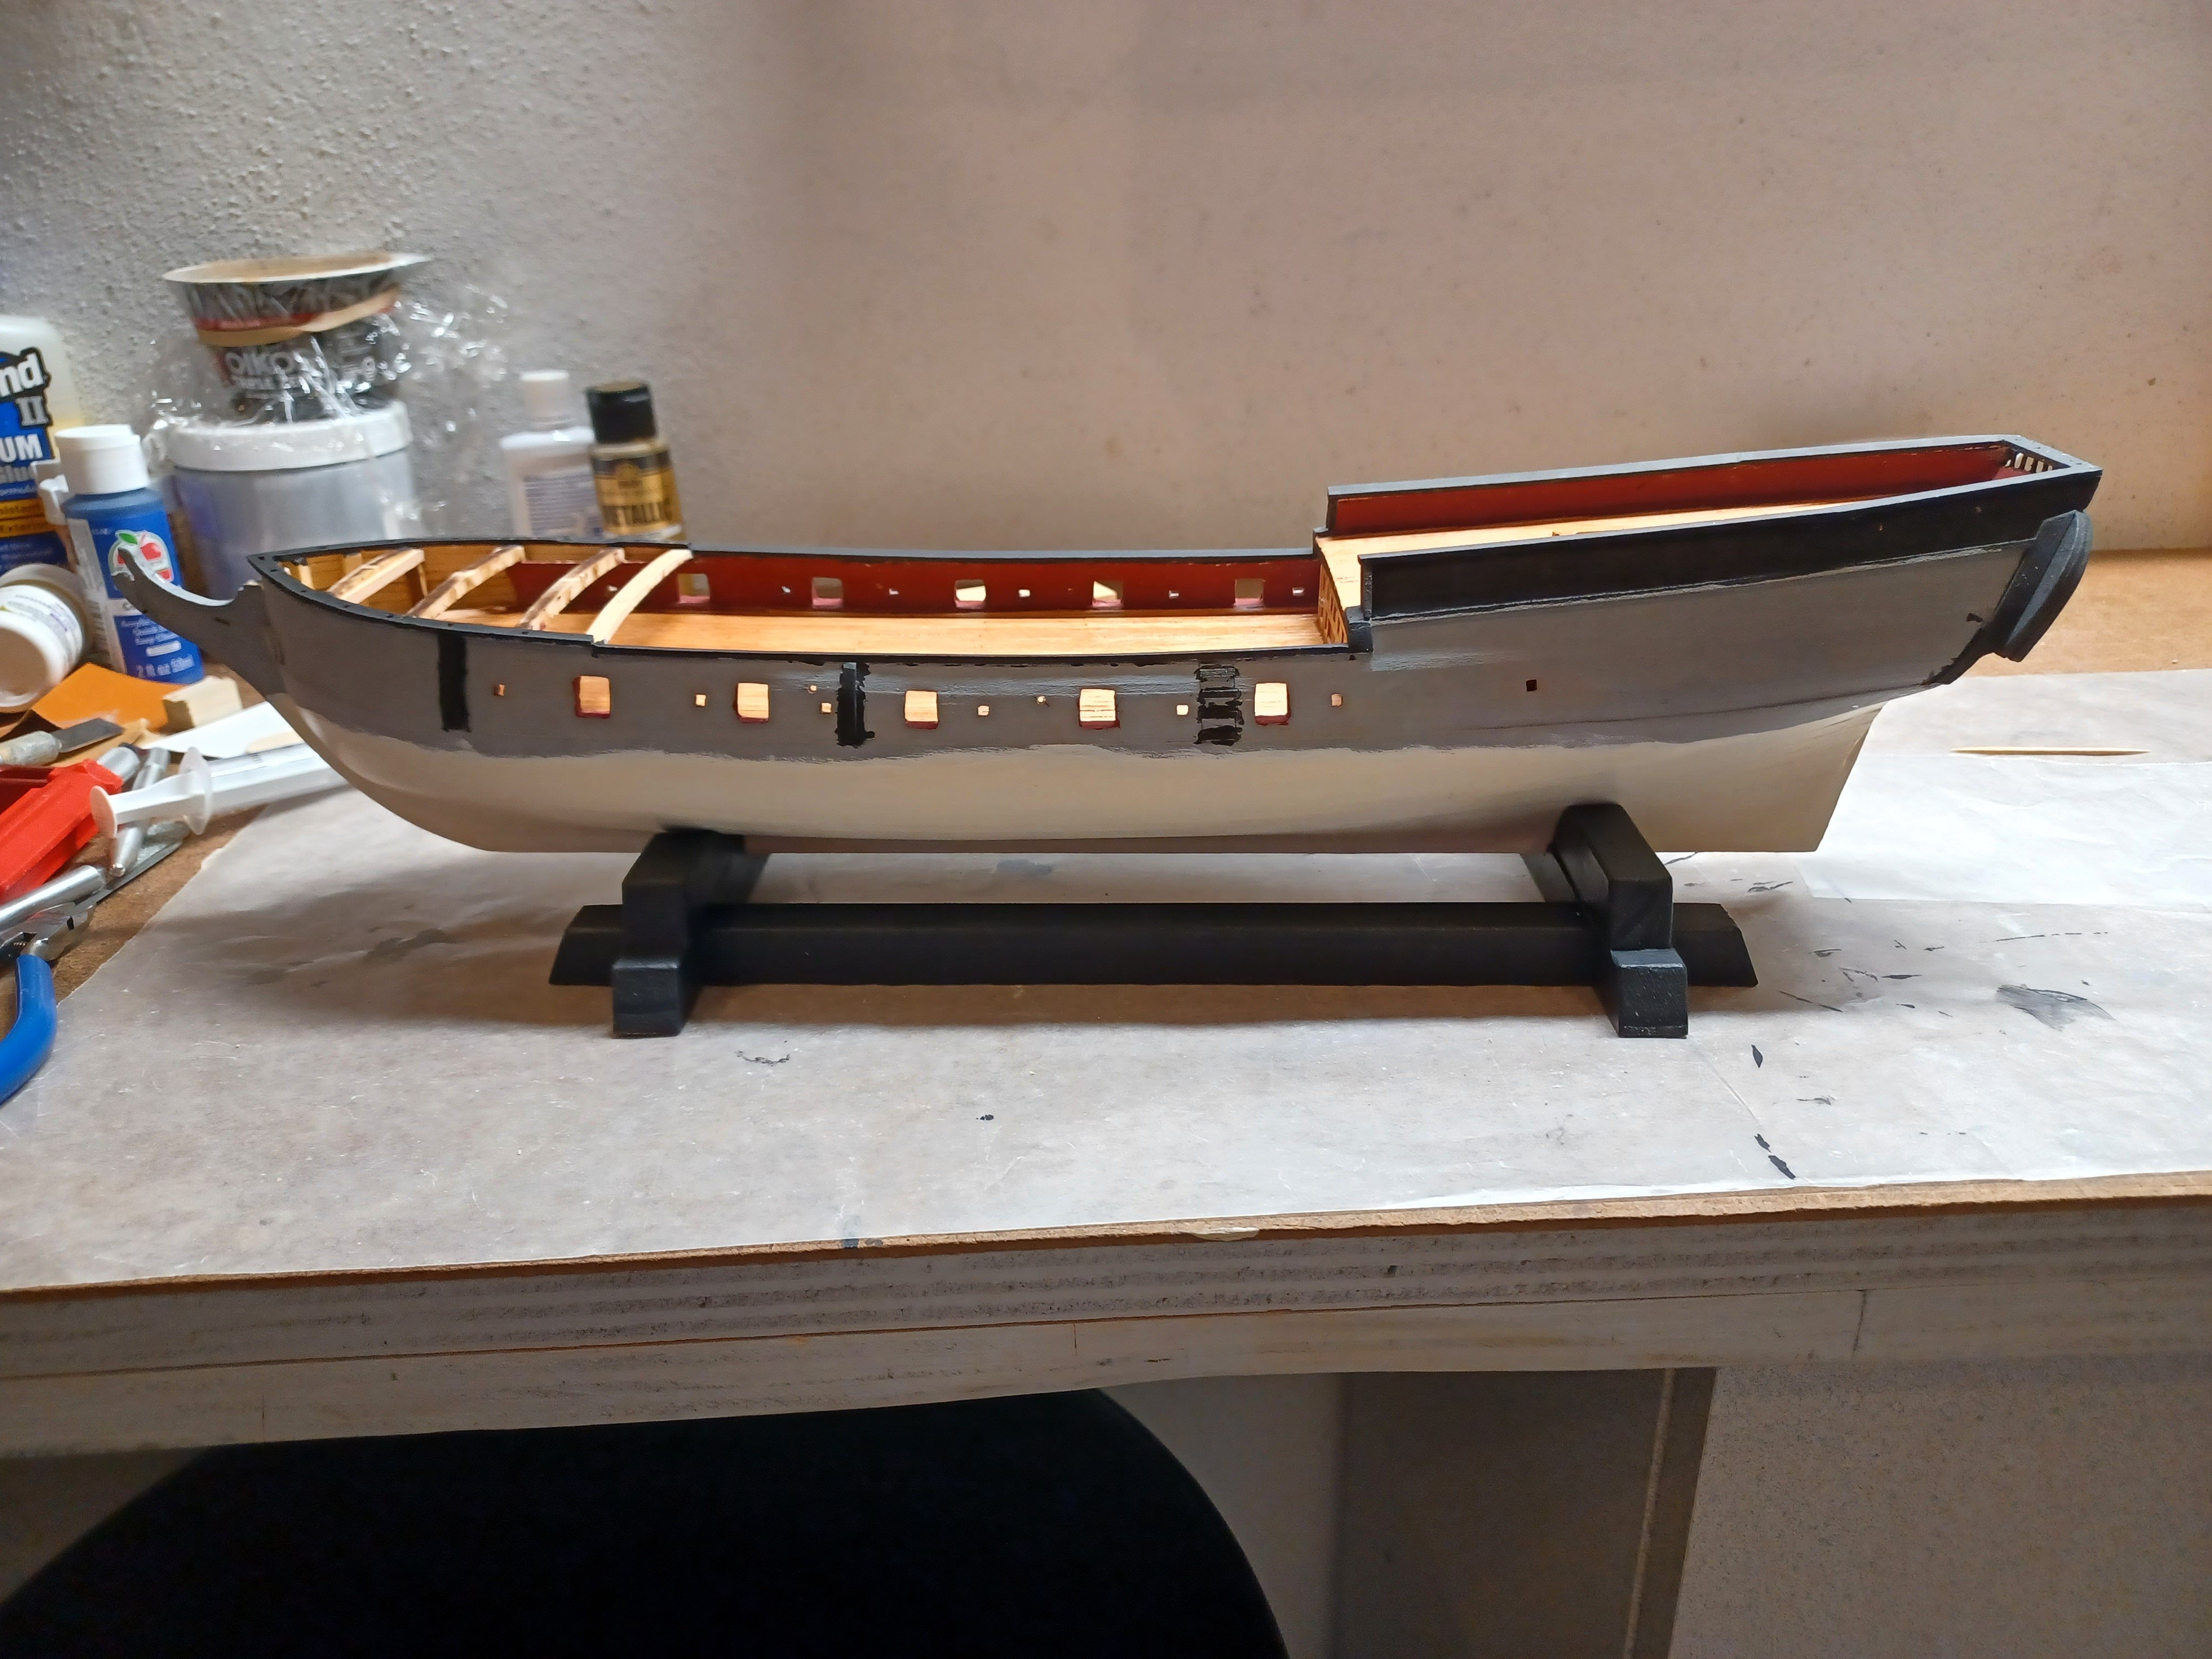
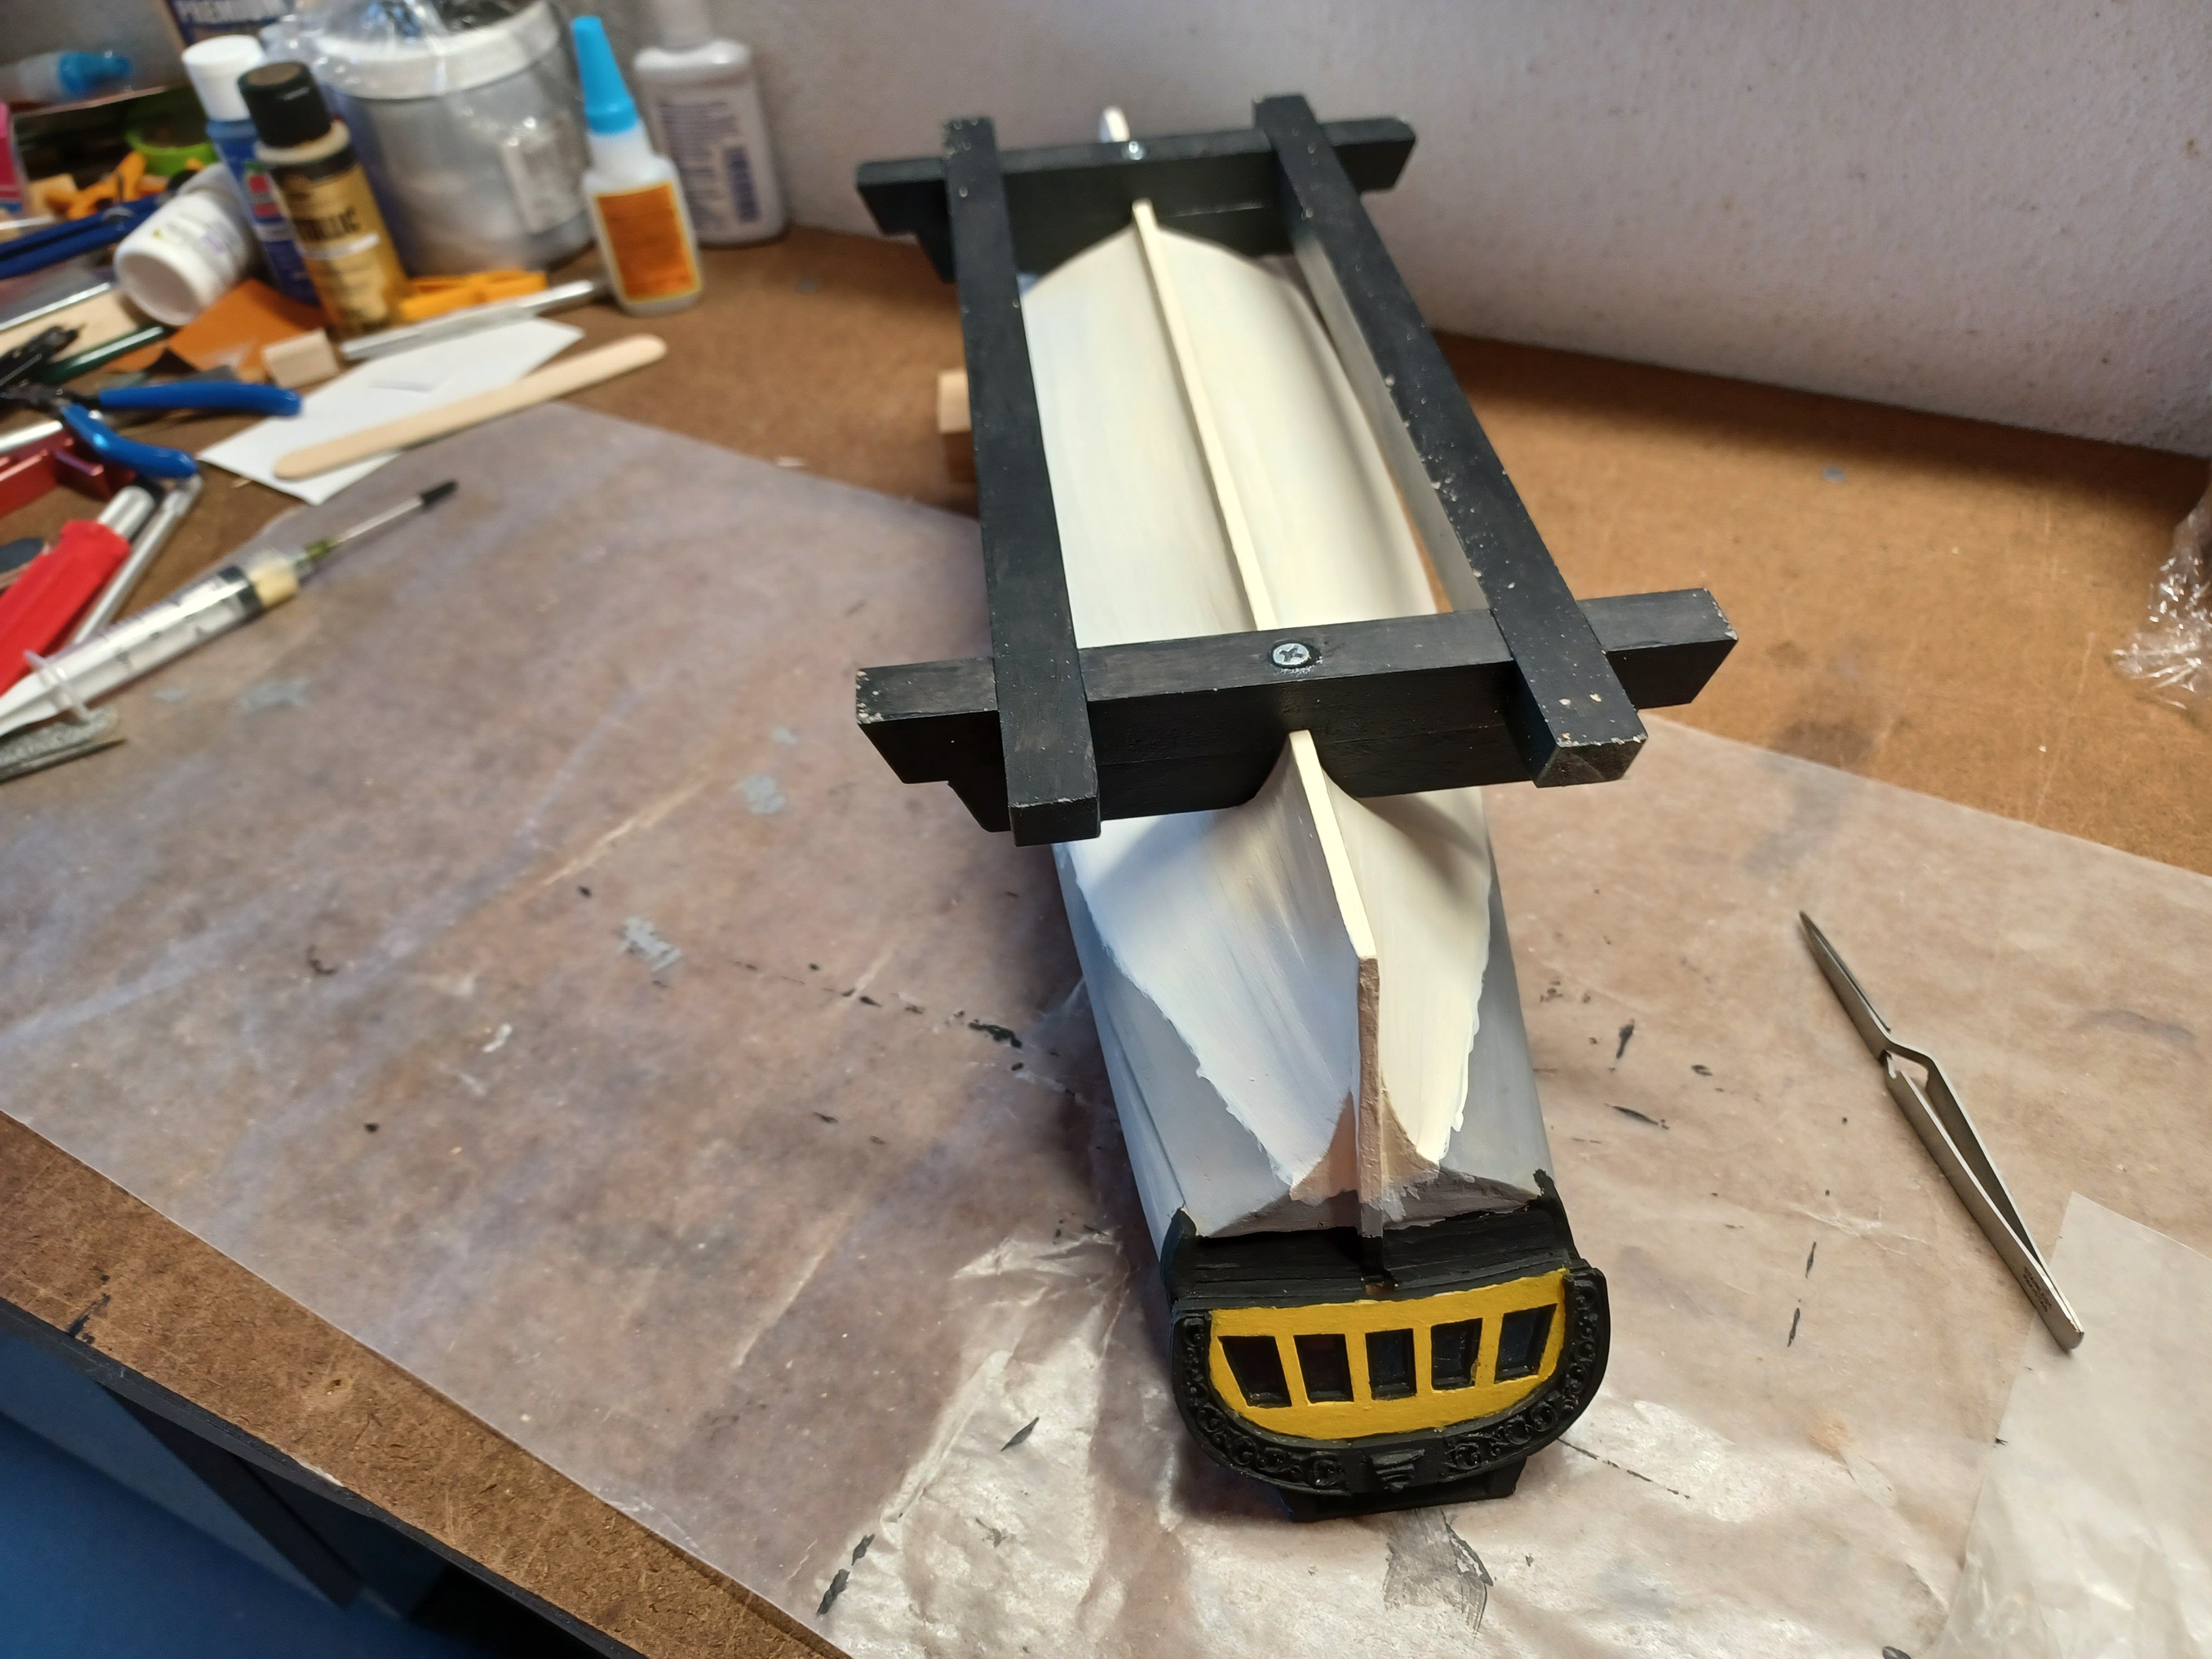
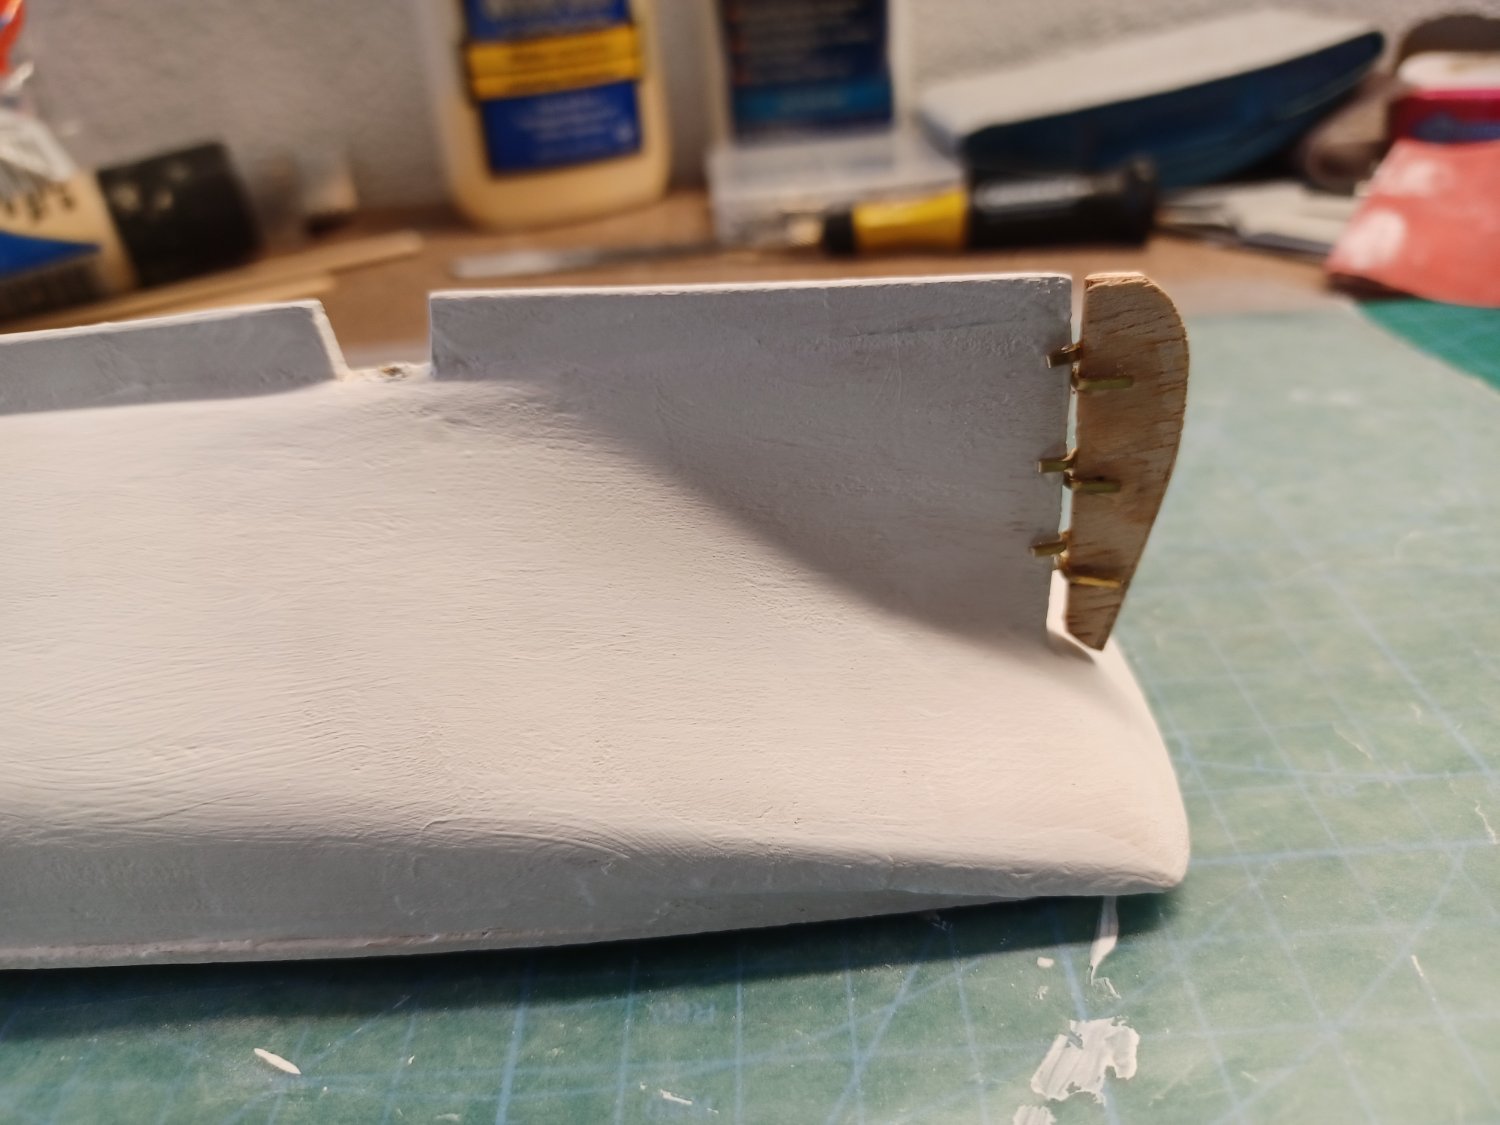
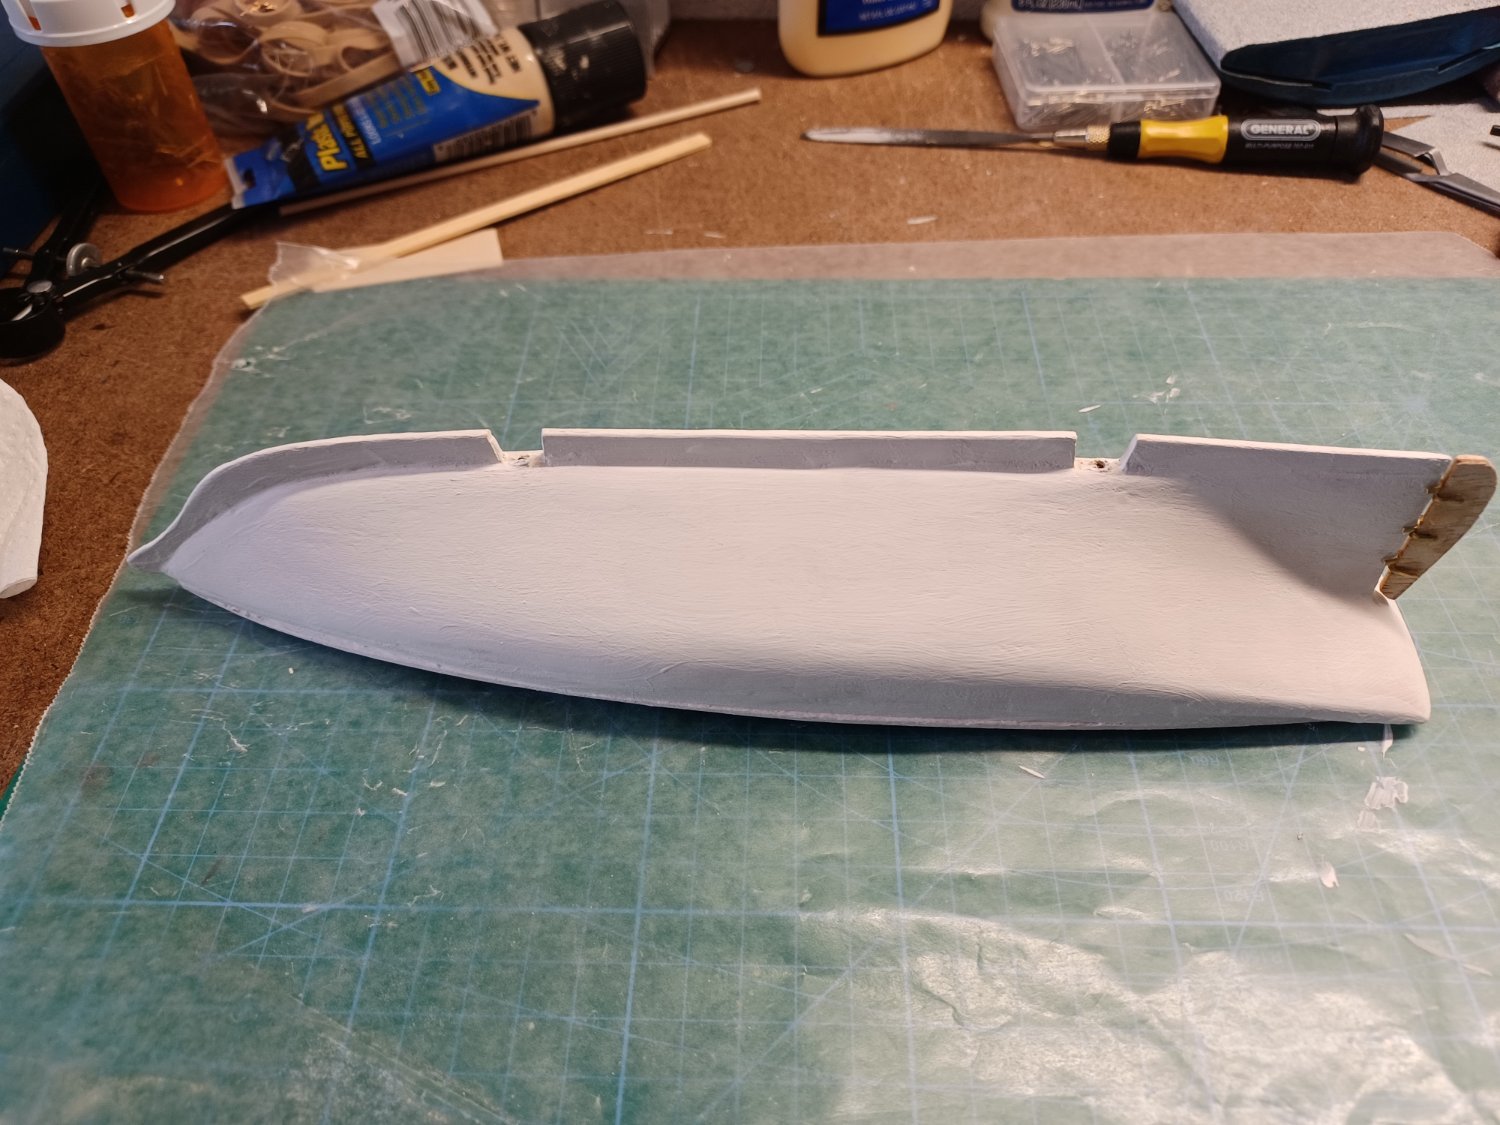
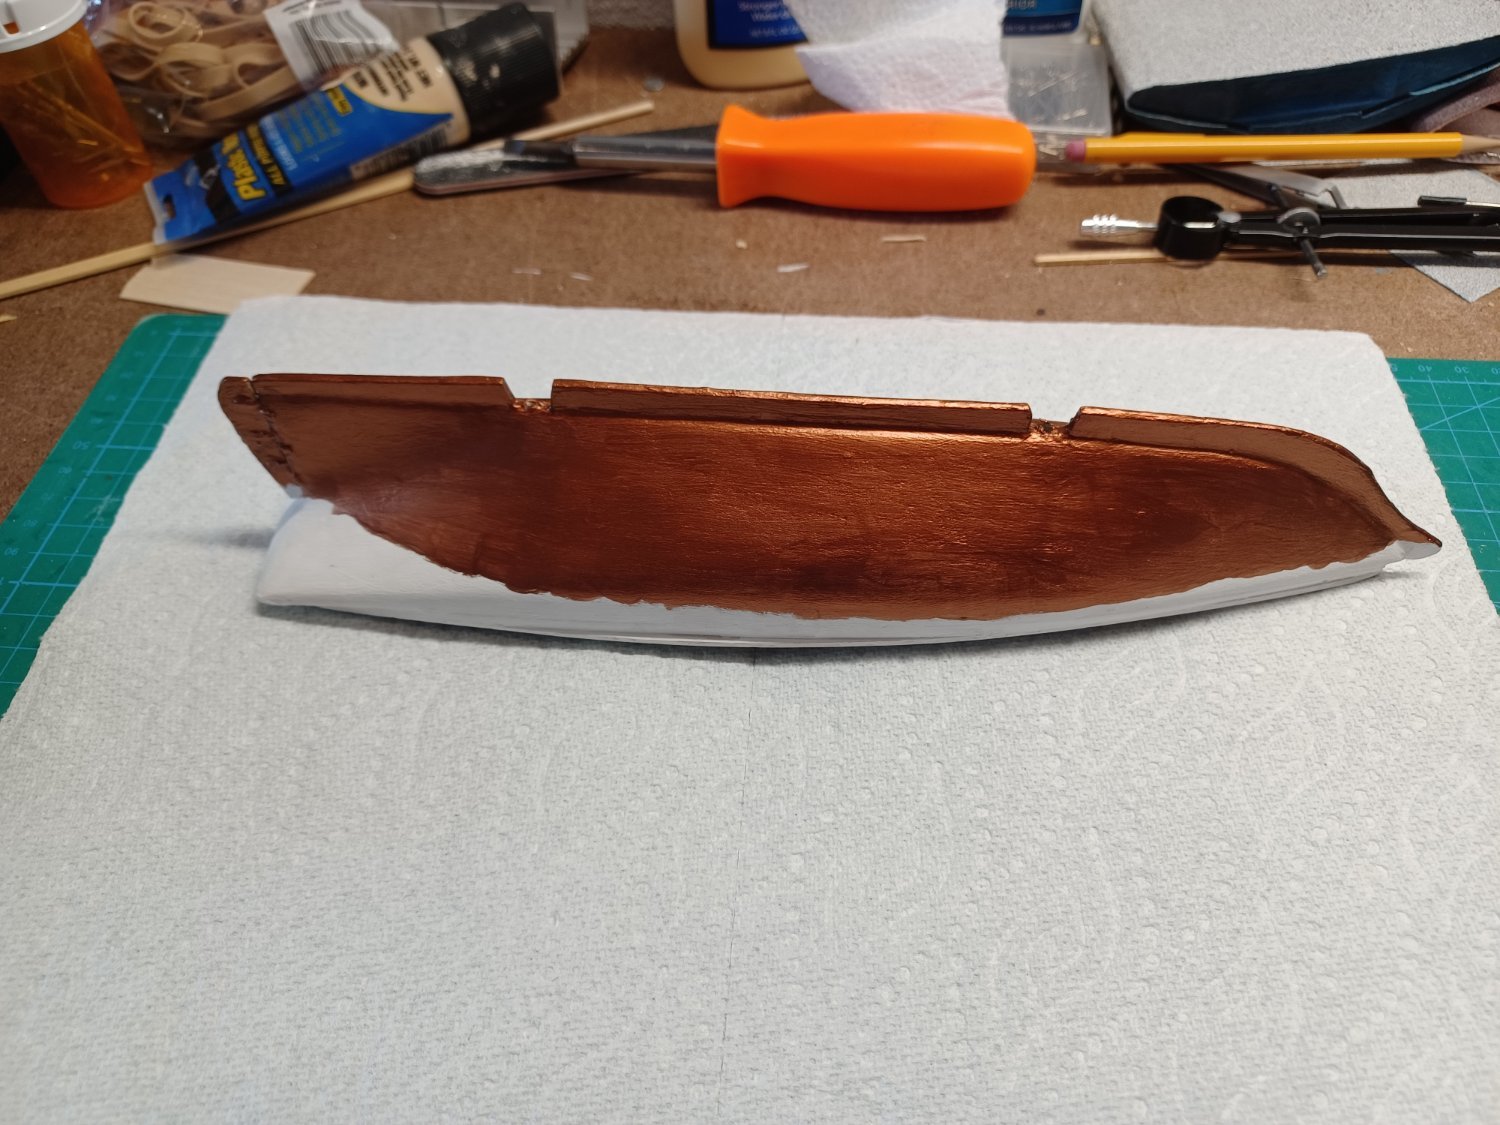
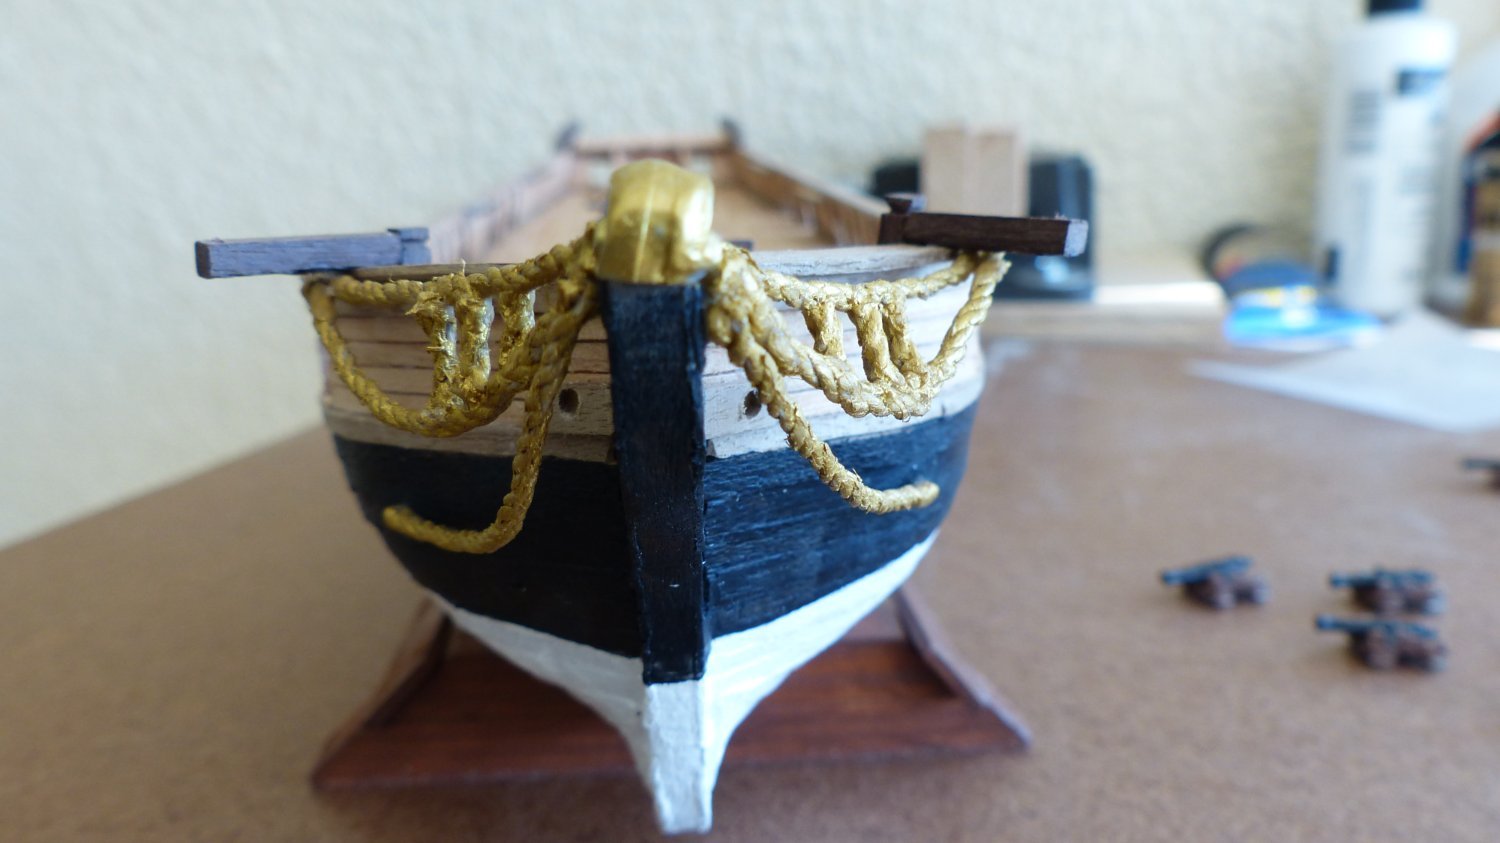
Had to cut the Britannia fitting because it was too small, cut out the snake and mounted it on a piece of wood
added the gold by dipping a q tip in gold and rolling most of it off on
a paper towel before rolling it across the surface
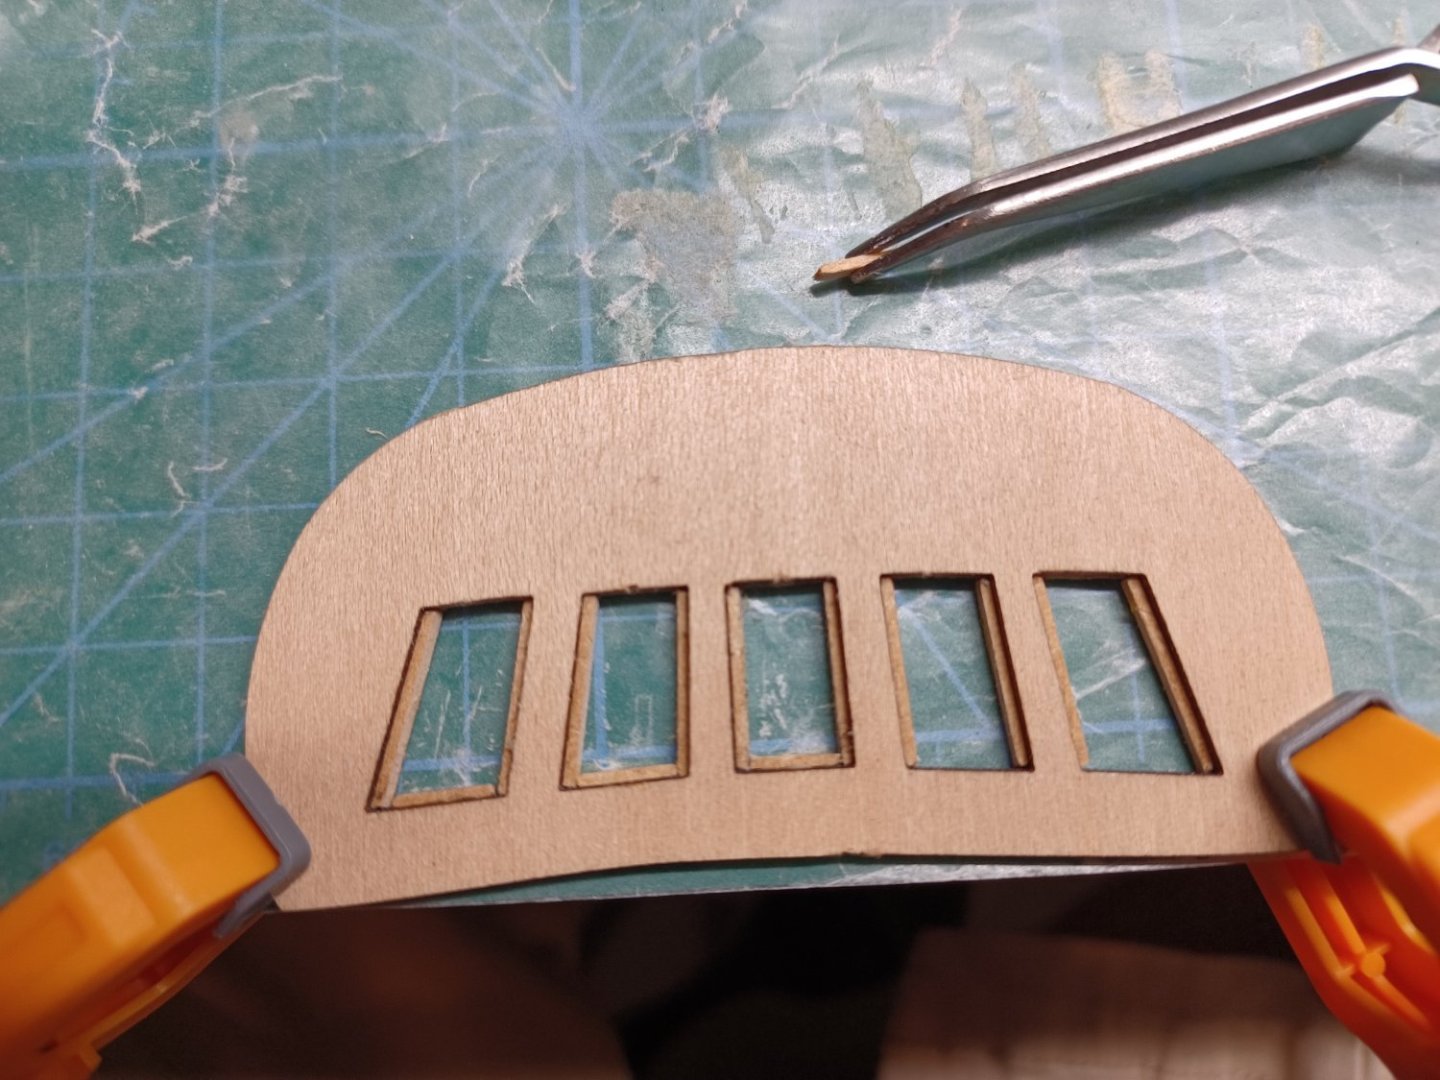
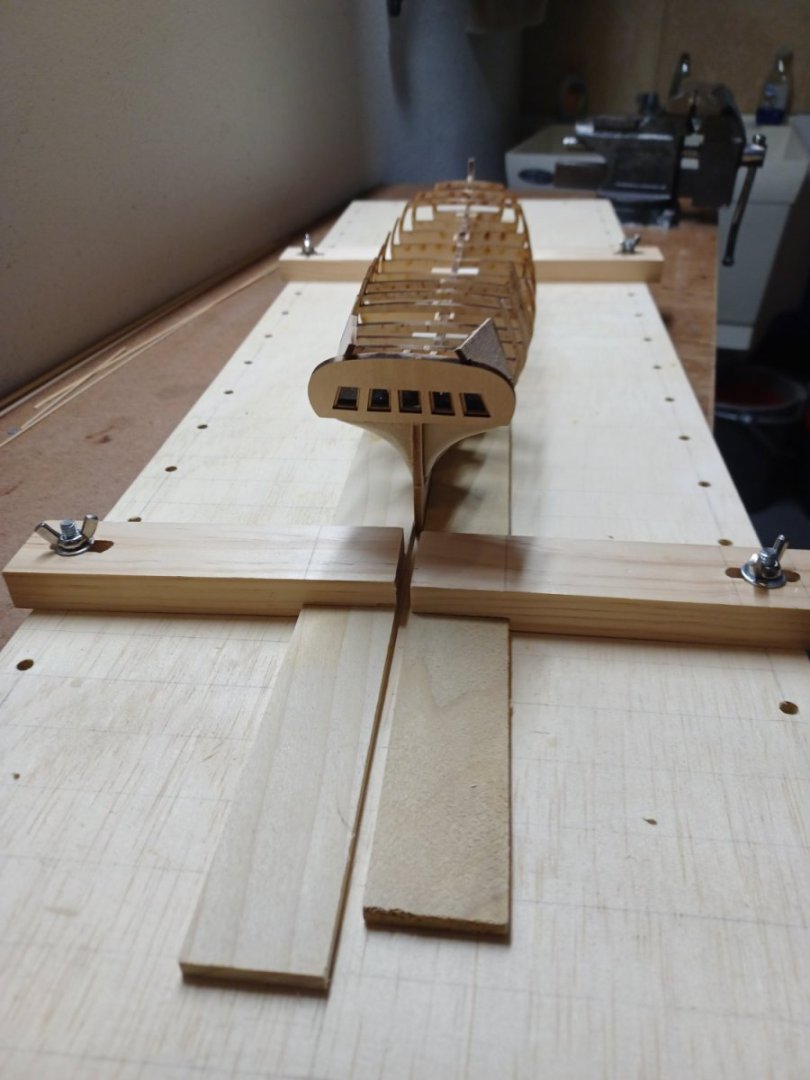
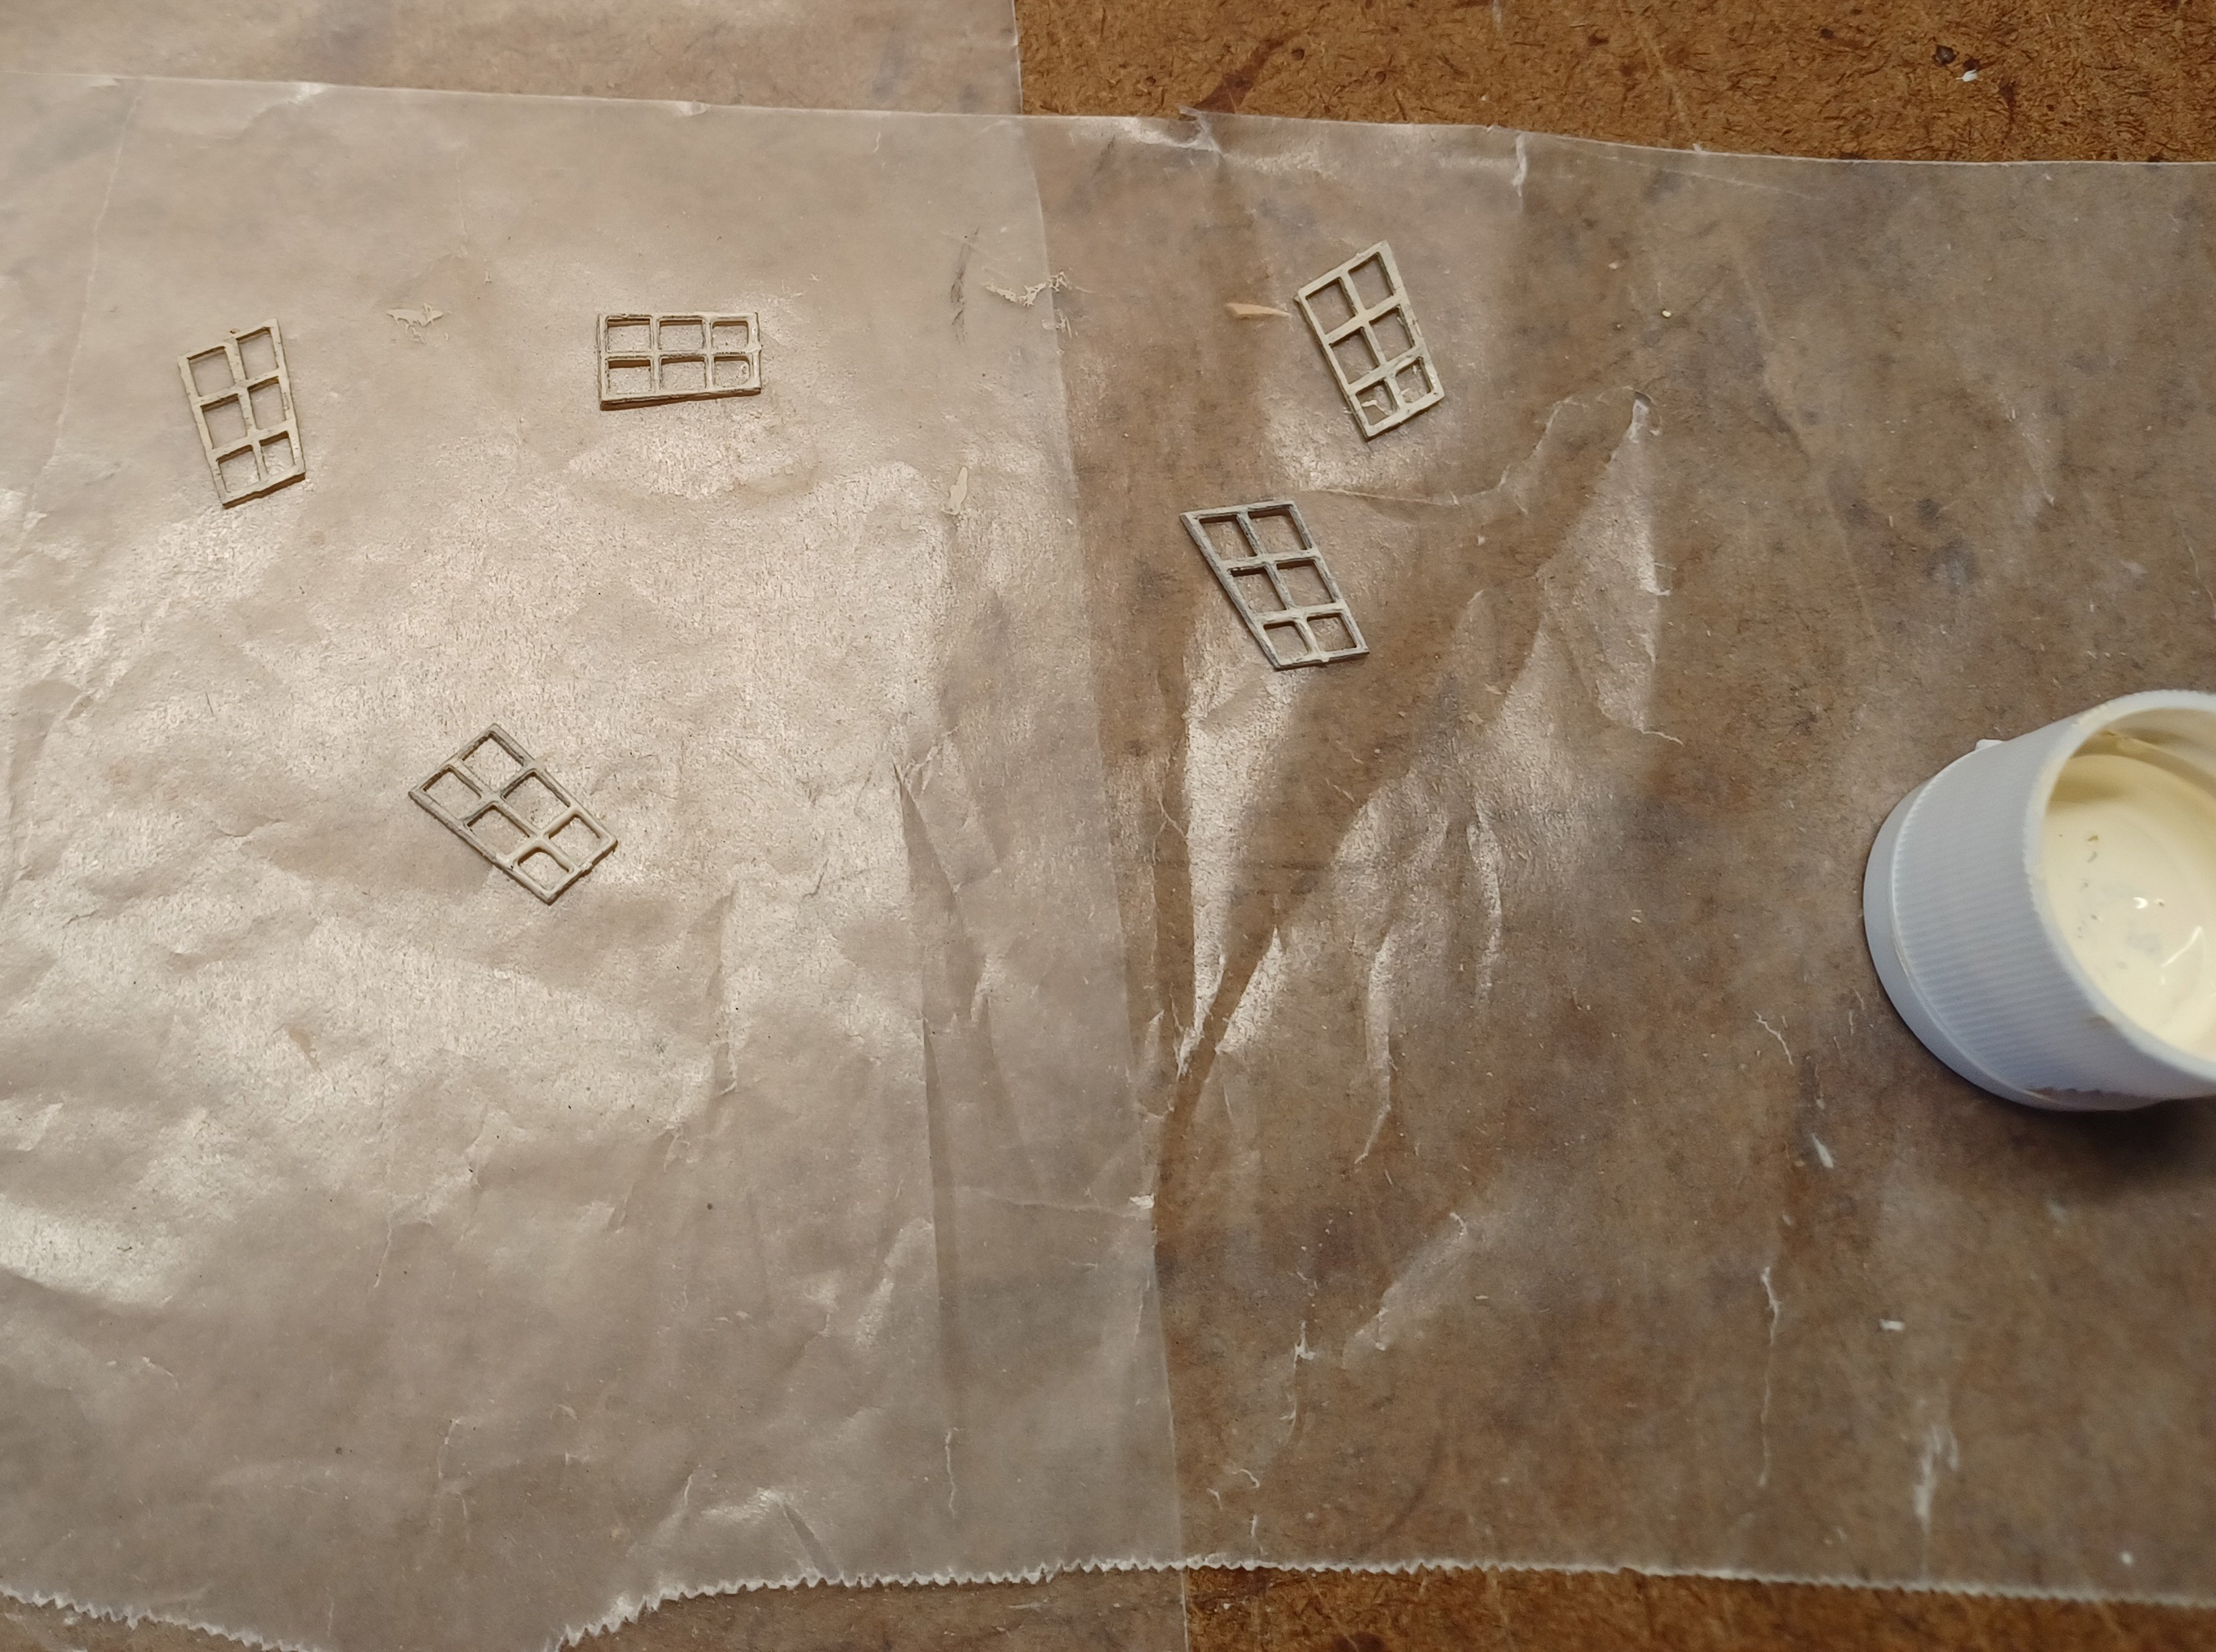
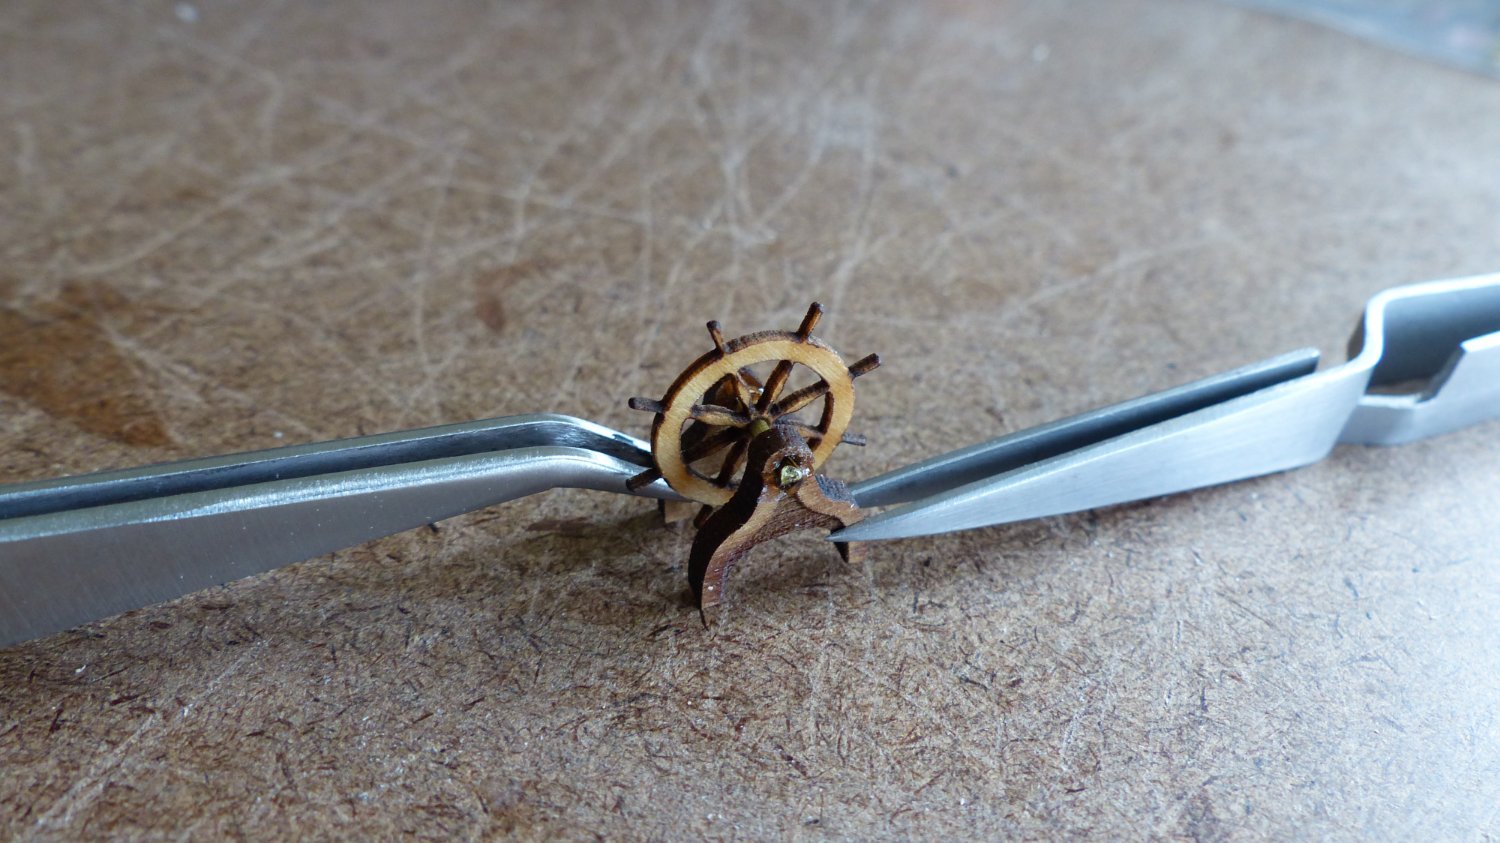
Window frames in white seem to make it stand out better