
.jpg.20294e2bd83b7791b32fc4f4a9059022.jpg)

Nautical 1
-
Posts
40 -
Joined
-
Last visited
Content Type
Profiles
Forums
Gallery
Events
Posts posted by Nautical 1
-
-
7 hours ago, highlanderburial said:
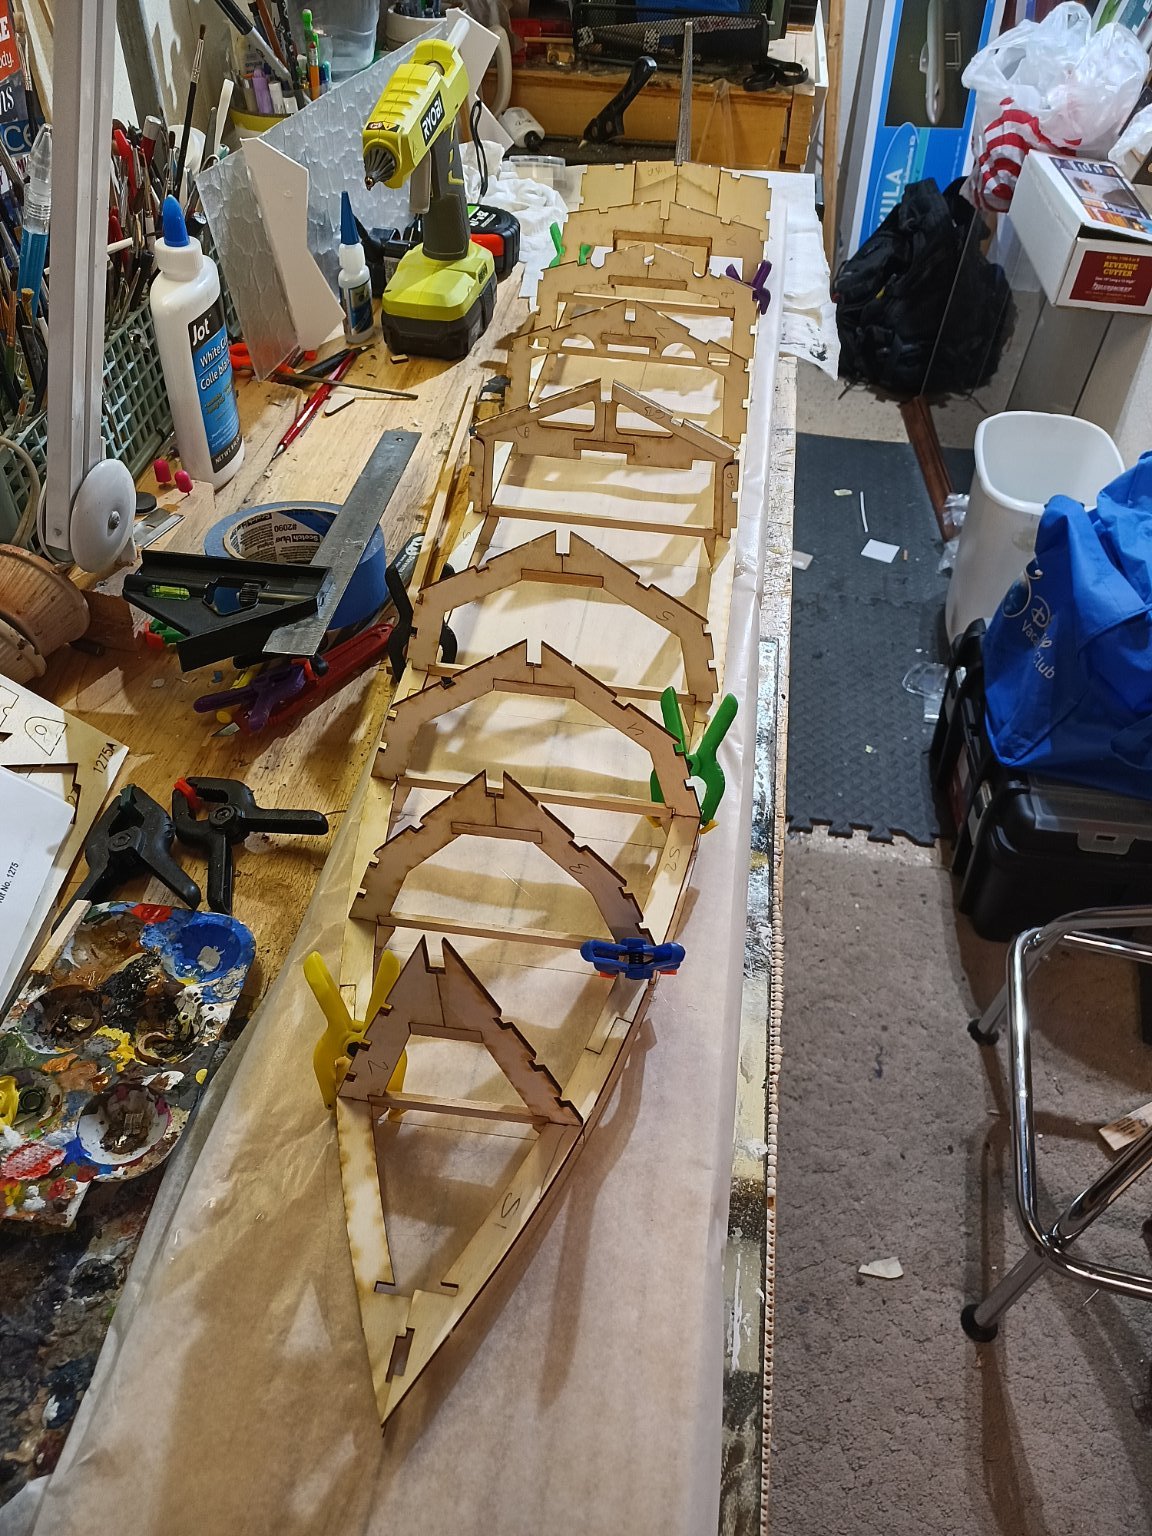
I decided to try and make the stern more accurate based on the original design. The stern has defined tunnels which house the rudders. I do not totally have the basis of the structure lined up, but I wanted to get this set prior to putting on forming putty.


Very nice work you have created! To me your model looks as the real deal! Man, you are doing well!!!
John
-
3 hours ago, mtaylor said:
Hi John,
Two place that might be better on asking about your Gondola.... https://modelshipworld.com/forum/13-discussions-for-ships-plans-and-project-research-general-research-on-specific-vessels-and-ship-types/ for general non-CAD discussion and then here if about CAD: https://modelshipworld.com/forum/34-cad-and-3d-modellingdrafting-plans-with-software/
As always good man Mark, I thank you so very much!!! You are a continual source of inspiration and creativity for me! Thank you!
- mtaylor, Canute and Old Collingwood
-
 3
3
-
Man, what an awesome display of fine creativity and craftsmanship! Well done!!!
John
-
On 8/29/2021 at 1:08 PM, Nautical 1 said:
I PM’d you Joe. Let me know.
Thank you Joe! Your presentation is phenomenal. Thanks for sharing! Hope to see more of your work.
John
- mtaylor, Canute and Old Collingwood
-
3
-
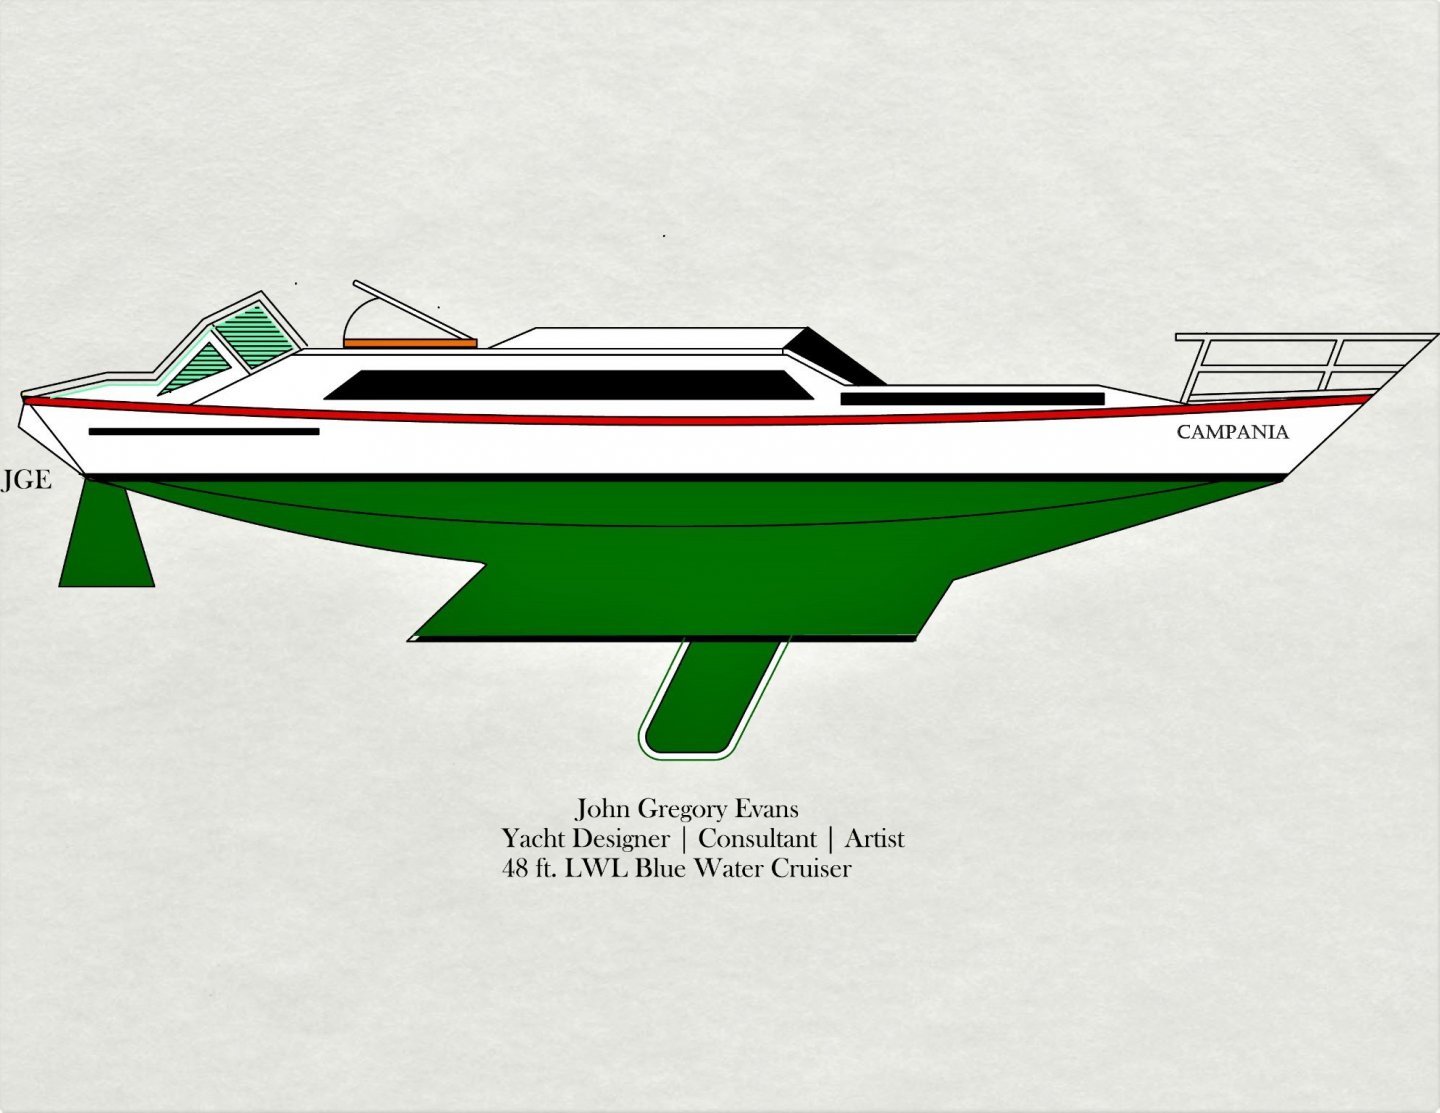
Well friends my build is slowly sitting aside for now. One thing I will mention is my greatest ambition aside from modeling is 2D and 3D CAD design of famous boats, yachts, and ships. I am working on a design for a Venice Gondola Venitienne. Tough work on the body section but my profile and half breadths are looking well enough to work with. Can anyone assist and advise the body section or is this allowed to even ask??? If so I can post what I have and be assisted. Looking forward to advice. Then back on the Lifeboat. Thank you dearly friends!!!
John
- Old Collingwood and mtaylor
-
2
-
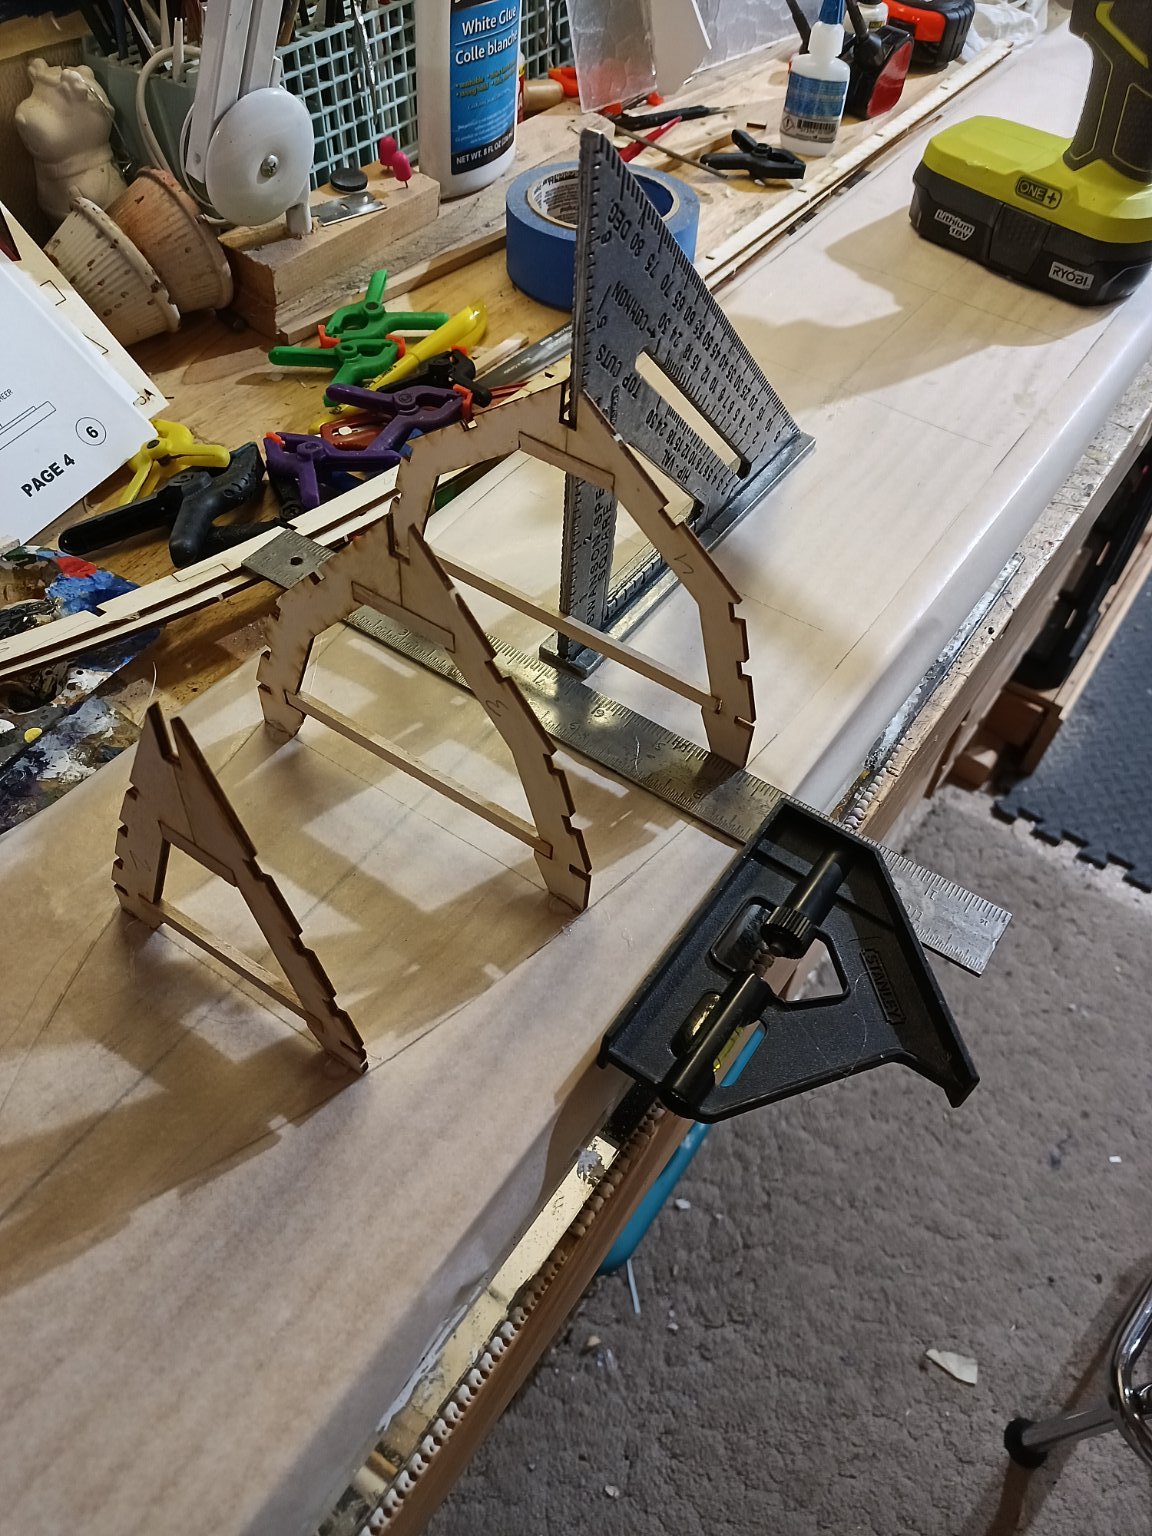
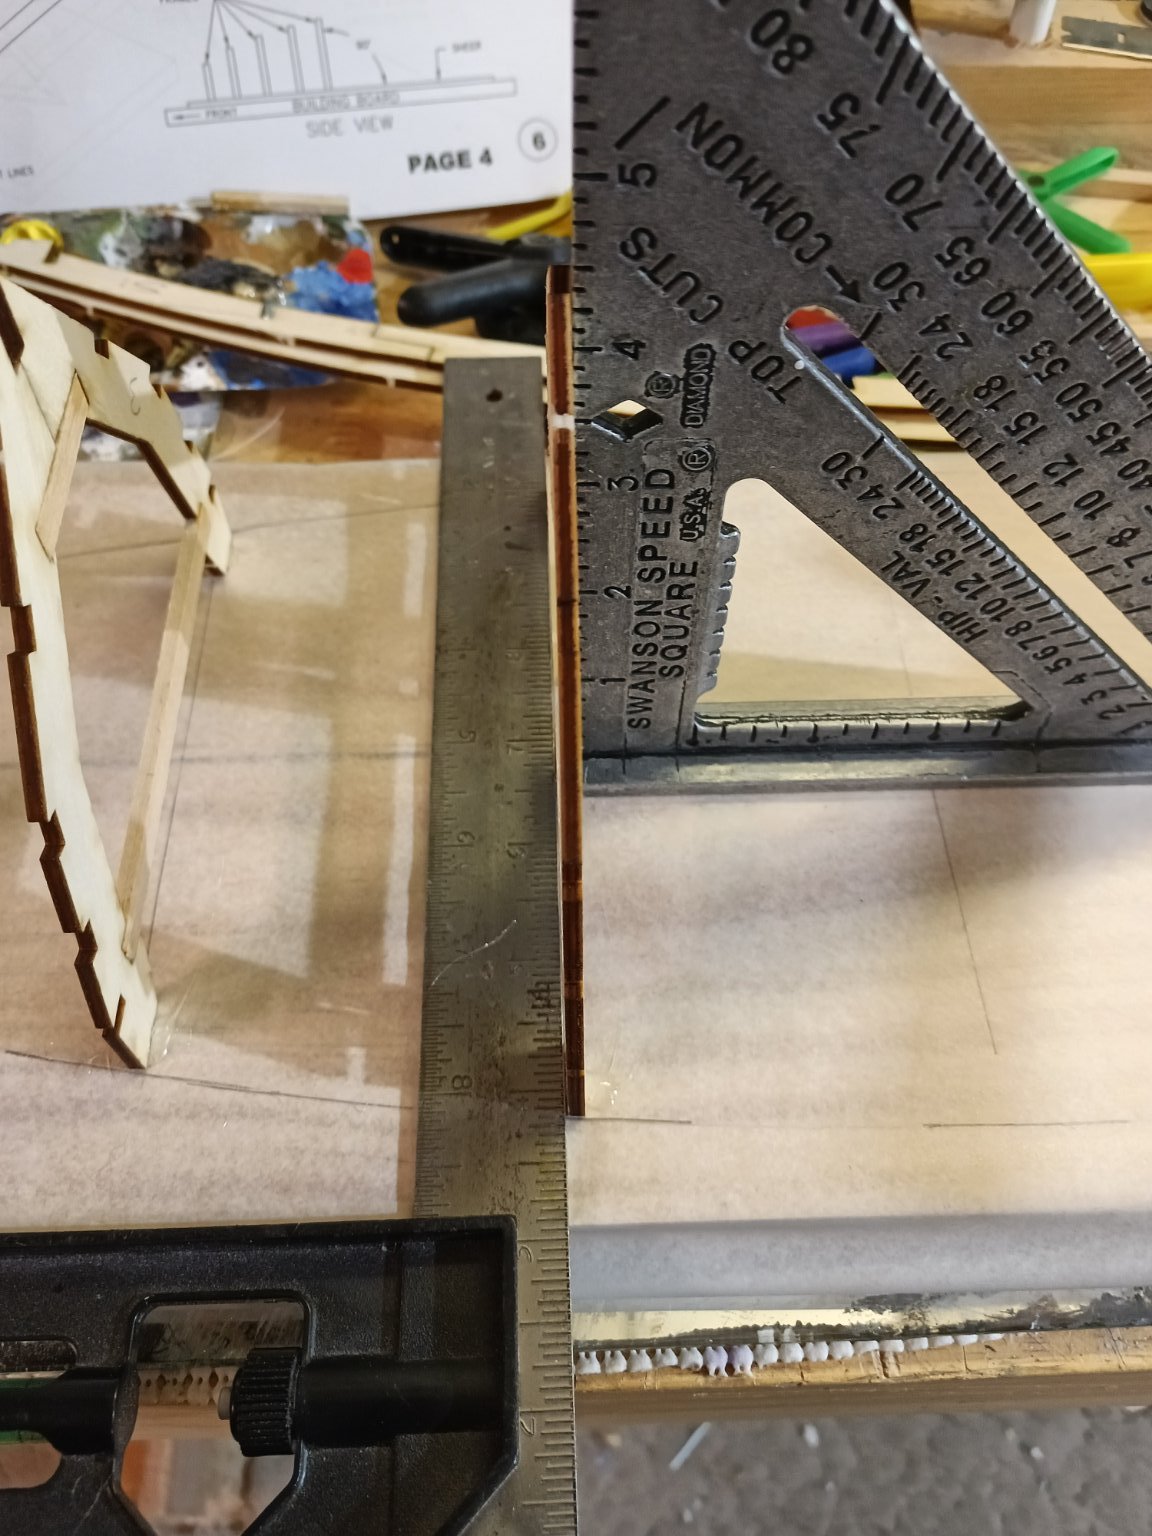
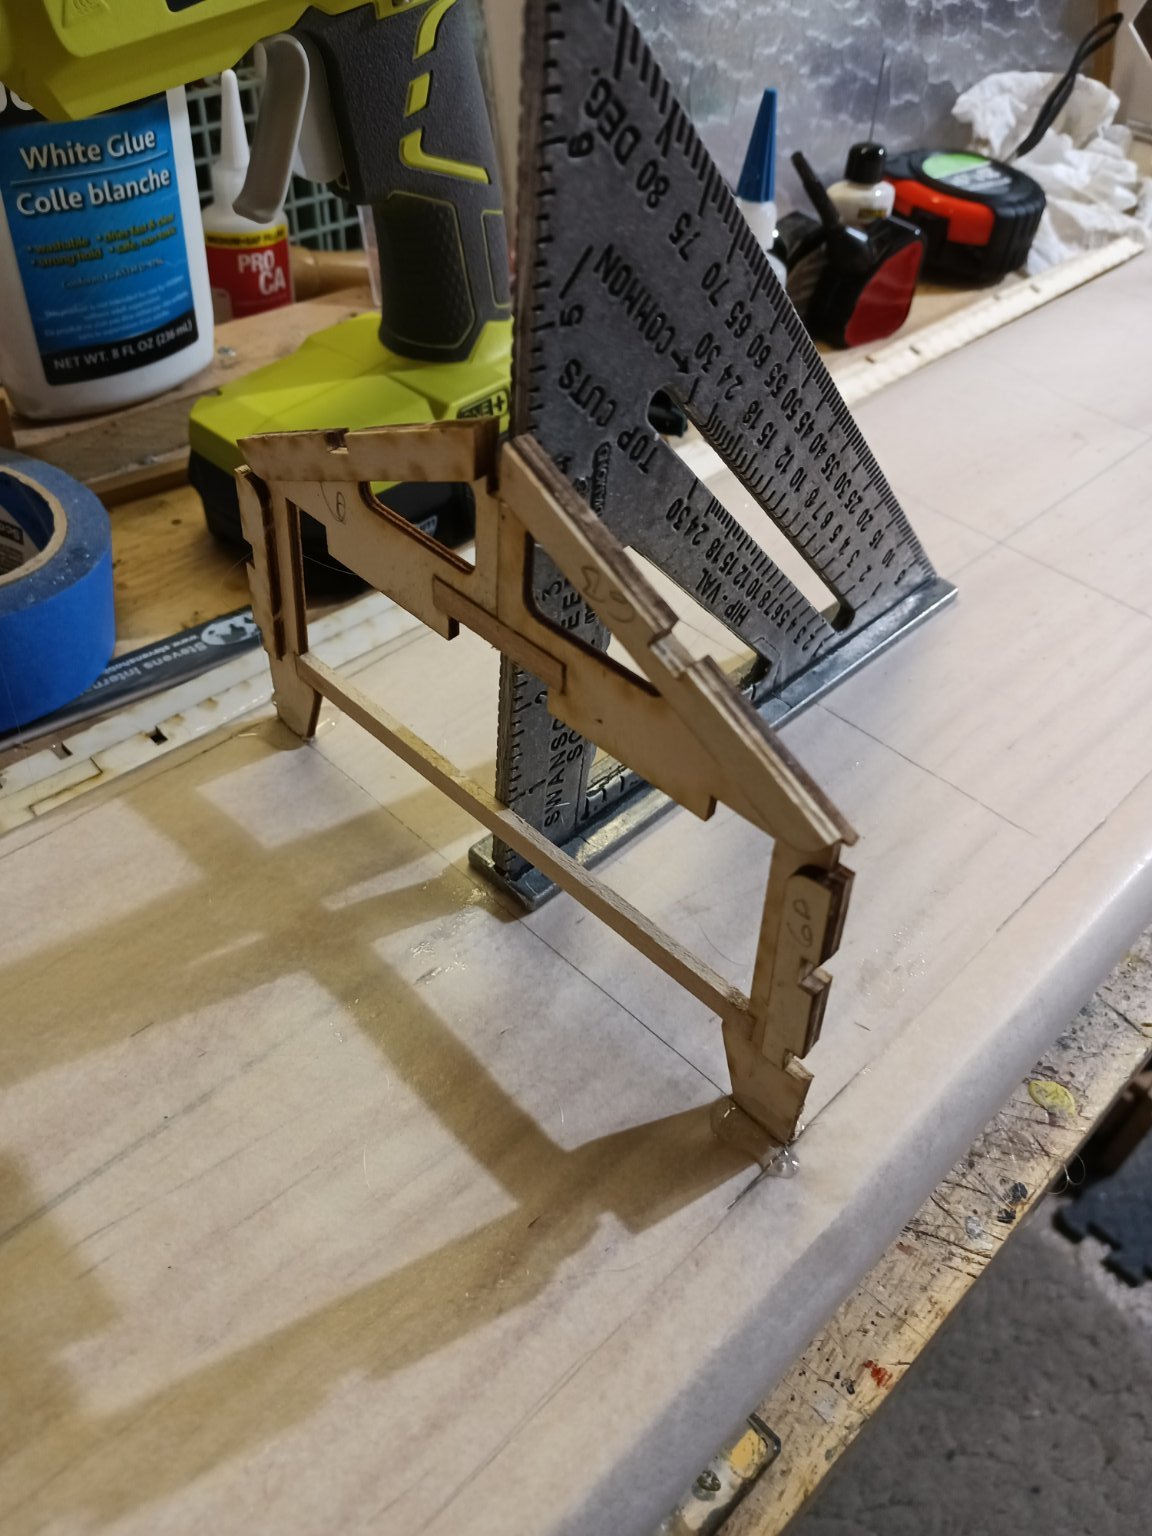
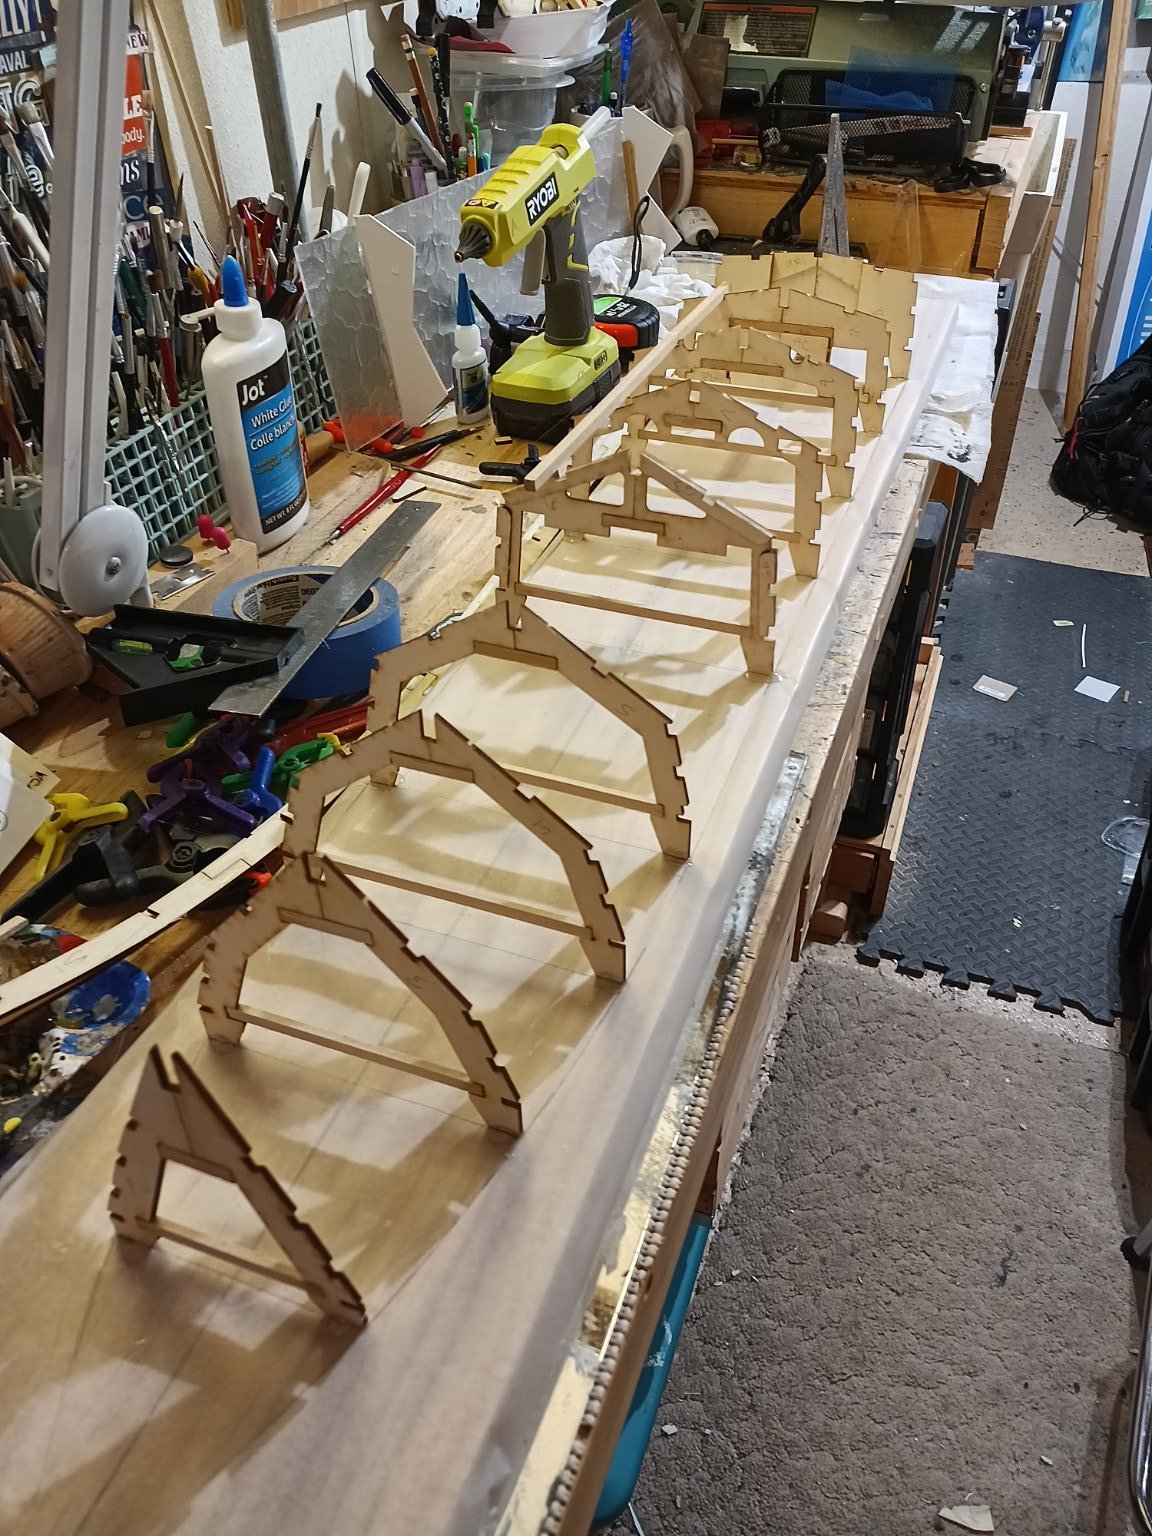
On 8/1/2021 at 10:52 PM, highlanderburial said:
Laying out the frames and assembling the lateral supports. Really spend some time drawing out where the frames need to go. I glued them down with hot glue. Frames 6 and 10 have a specific orientation so be careful with those 2. The parts slid into place. Use epoxy to glue the supports together to keep them flexible.


What a beautiful work of art, design, and engineering you are crafting! Your build thus far is awesome! Congrats!
John
- Canute, mtaylor and highlanderburial
-
2
-
 1
1
-
Awesome!!! You have crafted quite well!
-
Thank you very much for your help and encouragement fellow members!
- Canute, mtaylor and Old Collingwood
-
3
-
22 hours ago, Nautical 1 said:
Thanks Roger Pellet. At this point I am not certain whether she will be an RC or static model. I like the challenges of an RC, but my first regards were to create a display. I would really like to have all working features on this vessel including lighting, mechanical, or anything else I can think of.
This model will be static for sure! I have plans for the next model, just have not decided the vessel I will build. Interested in 19th century paddle warships of Admiral Perry’s era.
-
8 hours ago, Thistle17 said:
Too often I think we characterize this branch of service as secondary to the Navy. They are not! I recently did a presentation on this service for our model group on another lifeboat of the USCG. If you wish I will share it with you. PM me as I do not want to highjack your blog.
Joe
I PM’d you Joe. Let me know.
- mtaylor, Old Collingwood, Canute and 1 other
-
4
-
9 hours ago, Jim Lad said:
A good start to a fine small craft.
John
Thank you Jim!
-
-
Yes, I like very much!!! Your imagery is quite nice, as well.
- Canute, highlanderburial and mtaylor
-
2
-
1
-
5 hours ago, Roger Pellett said:
John
If this is to be a static model, non-Sailing, Titebond wood glue should work fine.
Thanks Roger Pellet. At this point I am not certain whether she will be an RC or static model. I like the challenges of an RC, but my first regards were to create a display. I would really like to have all working features on this vessel including lighting, mechanical, or anything else I can think of.
-
6 minutes ago, Old Collingwood said:
Thats a good start John - dont be affraid to ask anything from the members here - we dont bite unless its food.😁
OC.
Thanks very kindly OC! I must as I have mentioned, begin anew. There is so much after 39 years of being away from modeling I do not know. You have been encouraging to me so I thank you. Now to peruse your builds. Have an enjoyable evening.
John
-
I have much work ahead of me. I realize I have MSW protocol to follow and shall. I believe I saw a class in the news from NRG a photography class I will participate in watching. I am certain I will learn so much. Thank you for stopping by good people.
John
- mtaylor and thibaultron
-
2
-
On 8/1/2021 at 10:52 PM, highlanderburial said:
Laying out the frames and assembling the lateral supports. Really spend some time drawing out where the frames need to go. I glued them down with hot glue. Frames 6 and 10 have a specific orientation so be careful with those 2. The parts slid into place. Use epoxy to glue the supports together to keep them flexible.
What a wonderful gift you have for modeling this vessel! I have learned so much with you posting your pictures! I can see in my build where I may be wrong. You have a very interesting article via images and I am so intrigued. Thank you sir for sharing your creativity!
-
Hi Keith!
What a remarkable build. And article features with images. My goodness but you have done well for yourself. Myself, I am beginning my world of model shipbuilding anew. I will certainly learn from you so much! Your USS Tennessee is a beautiful model. Keep up this fine work and craftsmanship you have created and be courageous with you creativity.
John
- Keithsalter, JeffT, Keith Black and 1 other
-
3
-
1
-
Hello to MSW & NRG!
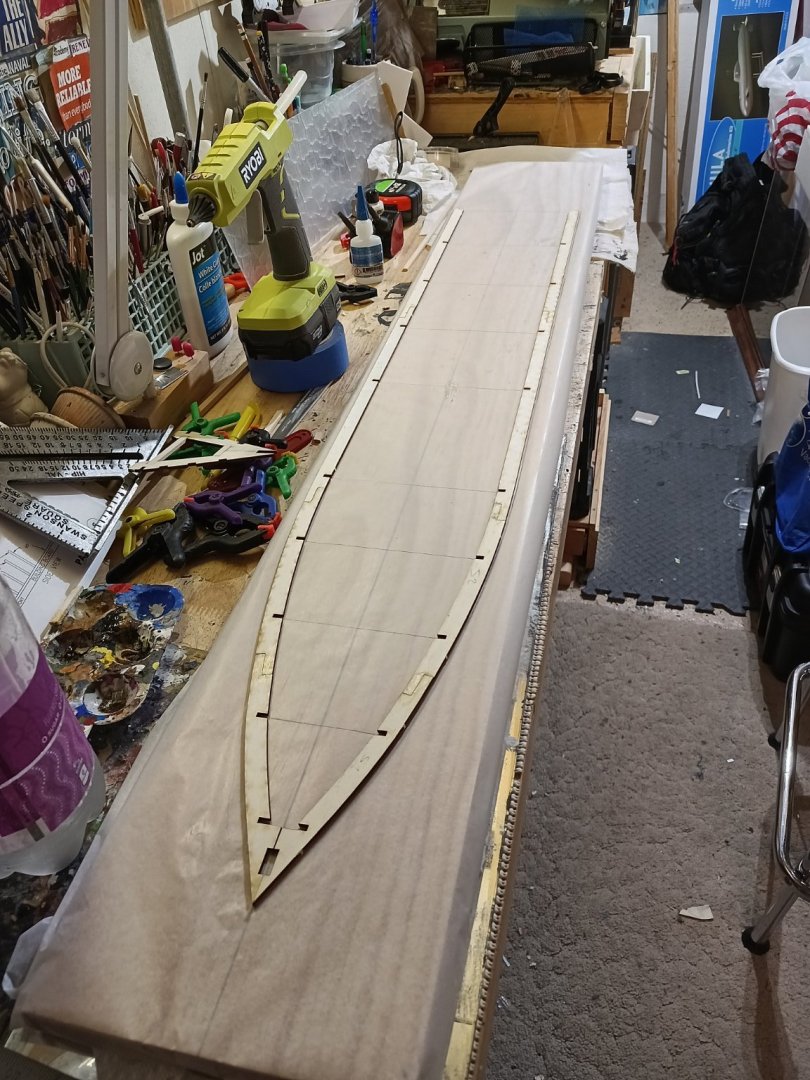
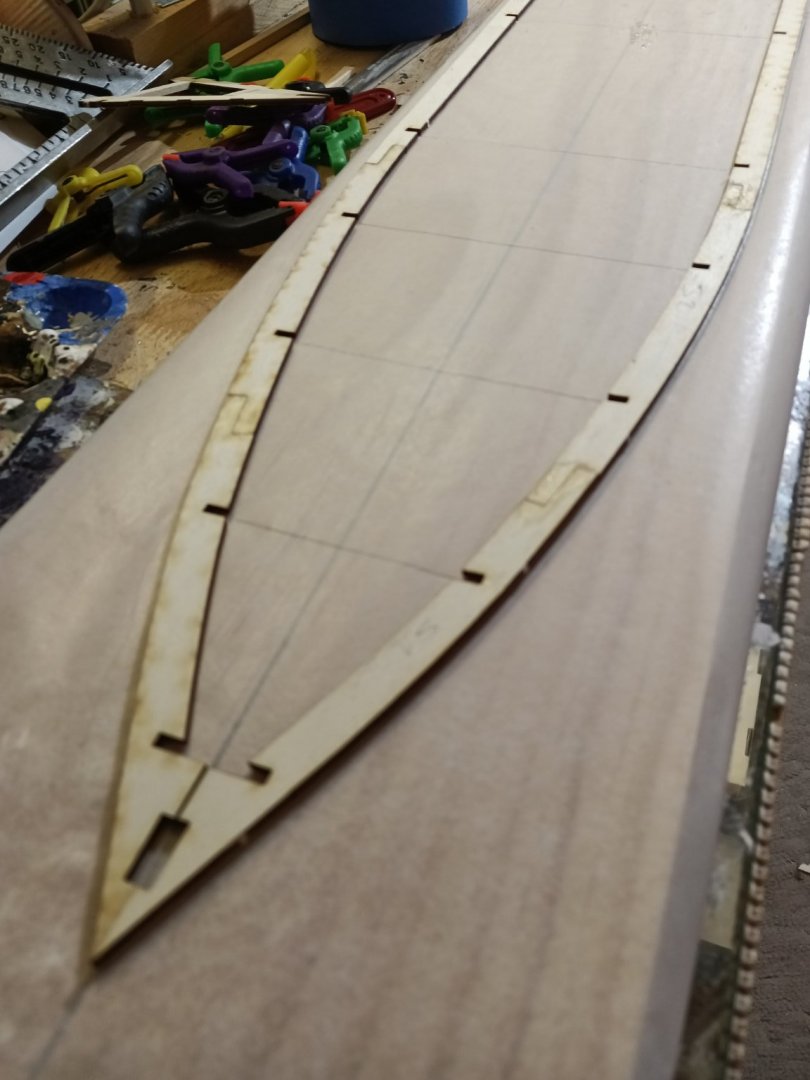
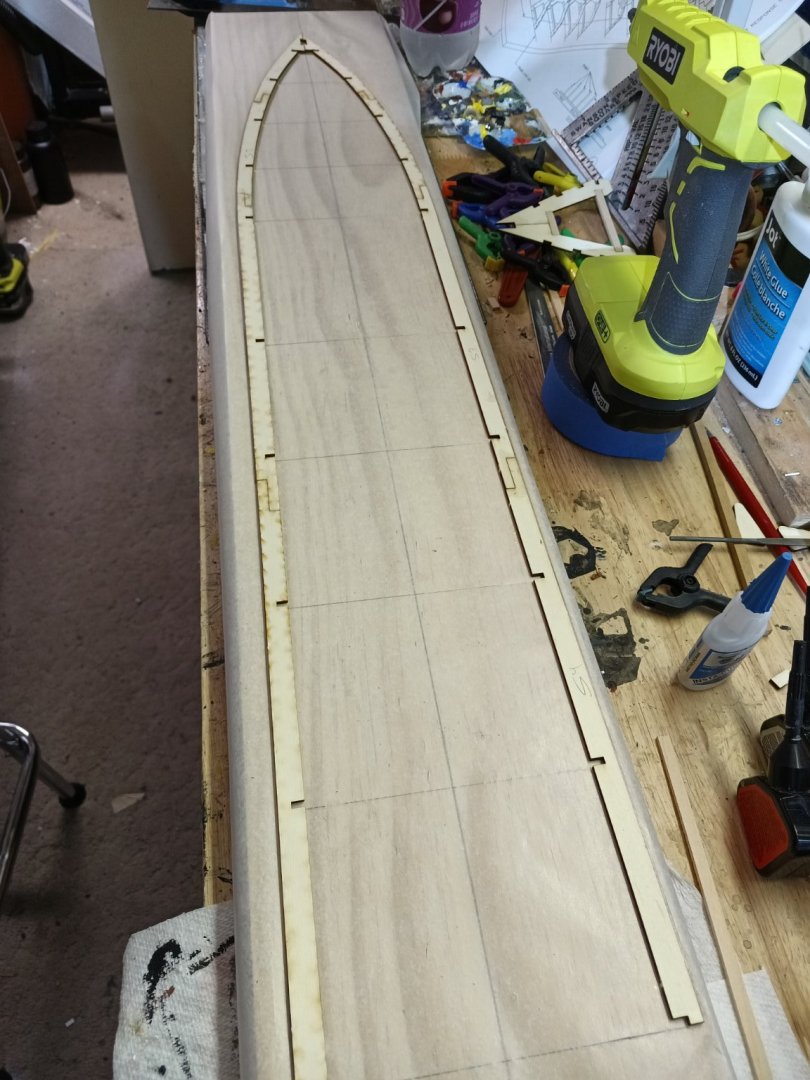
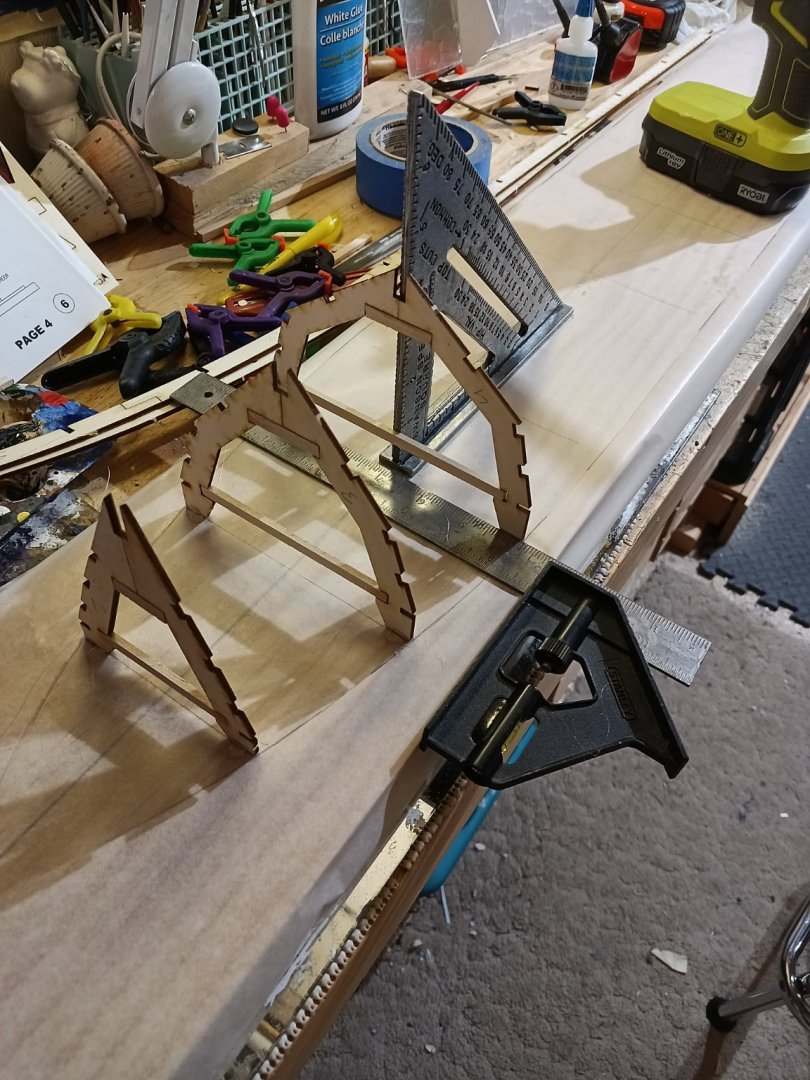
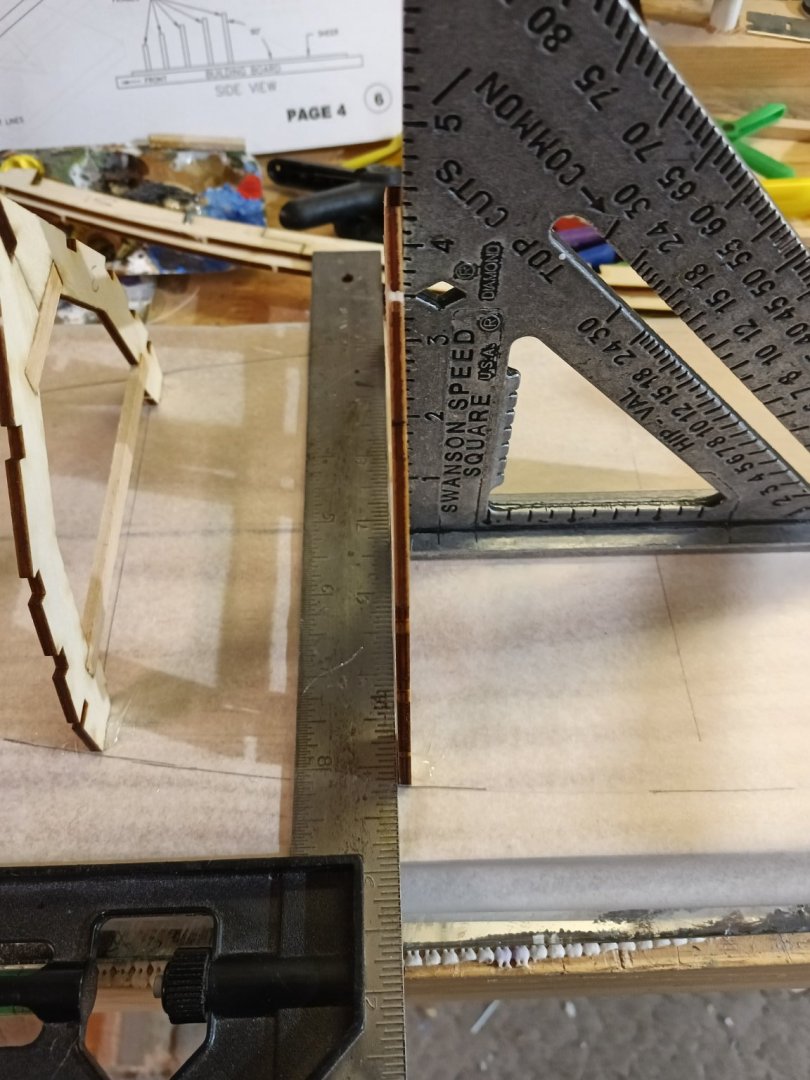
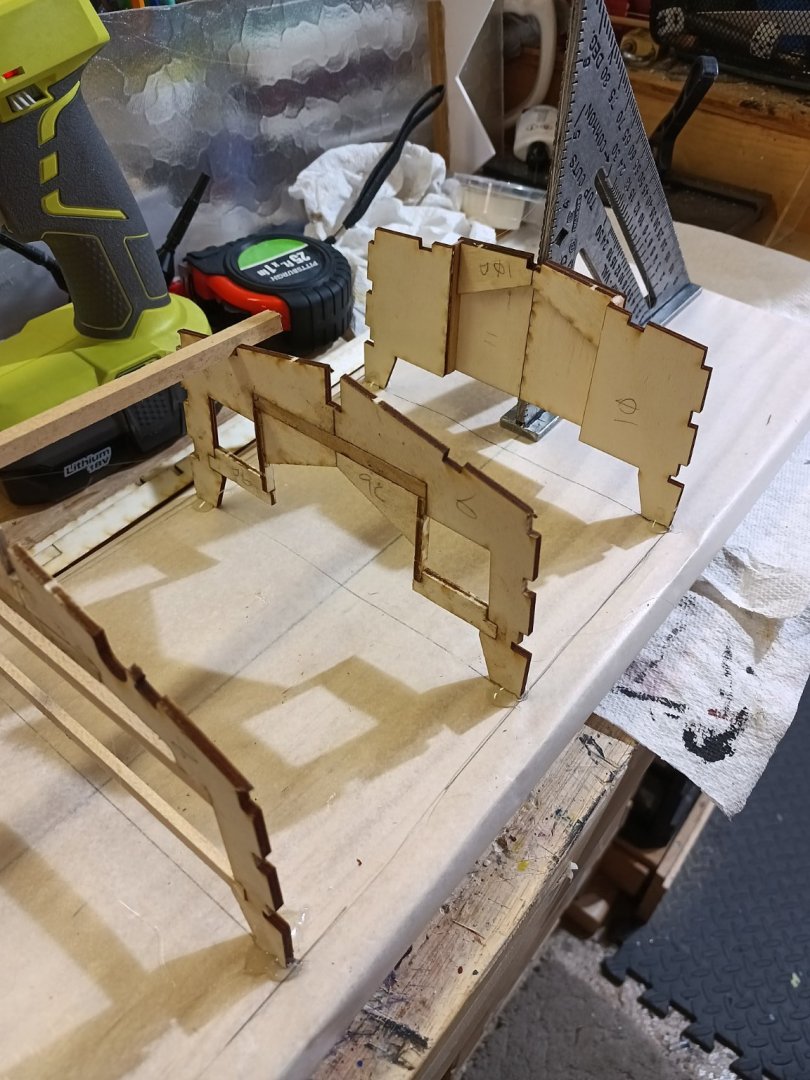
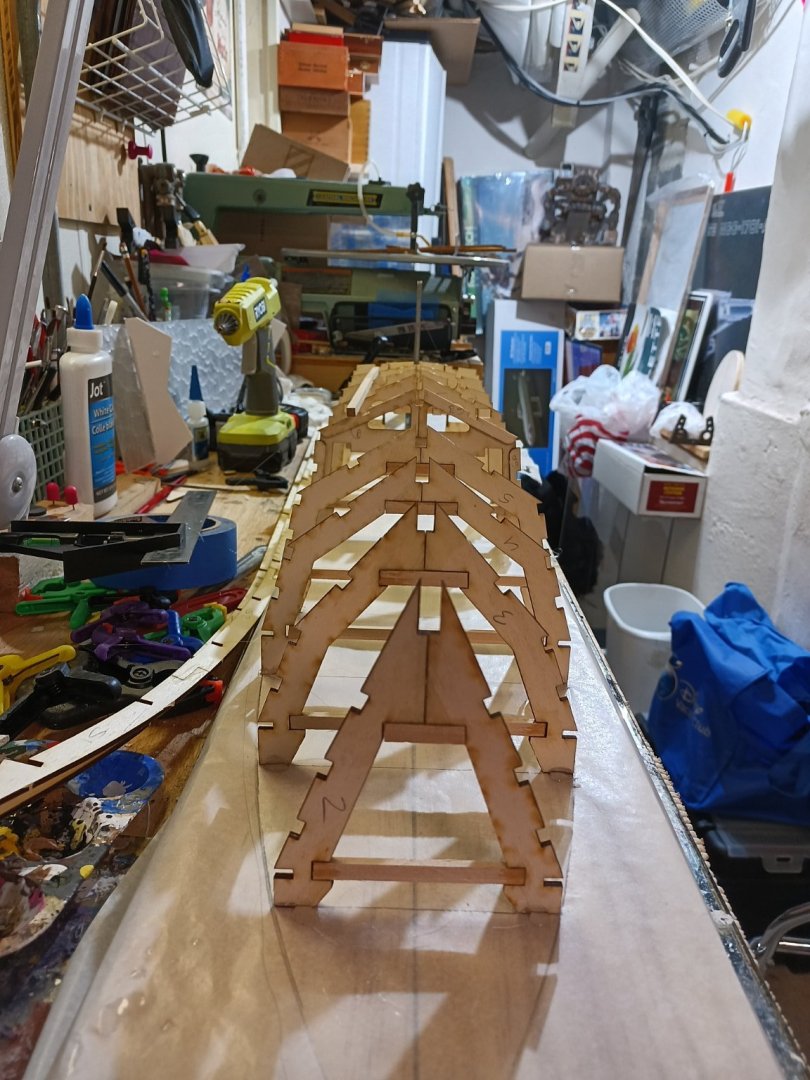
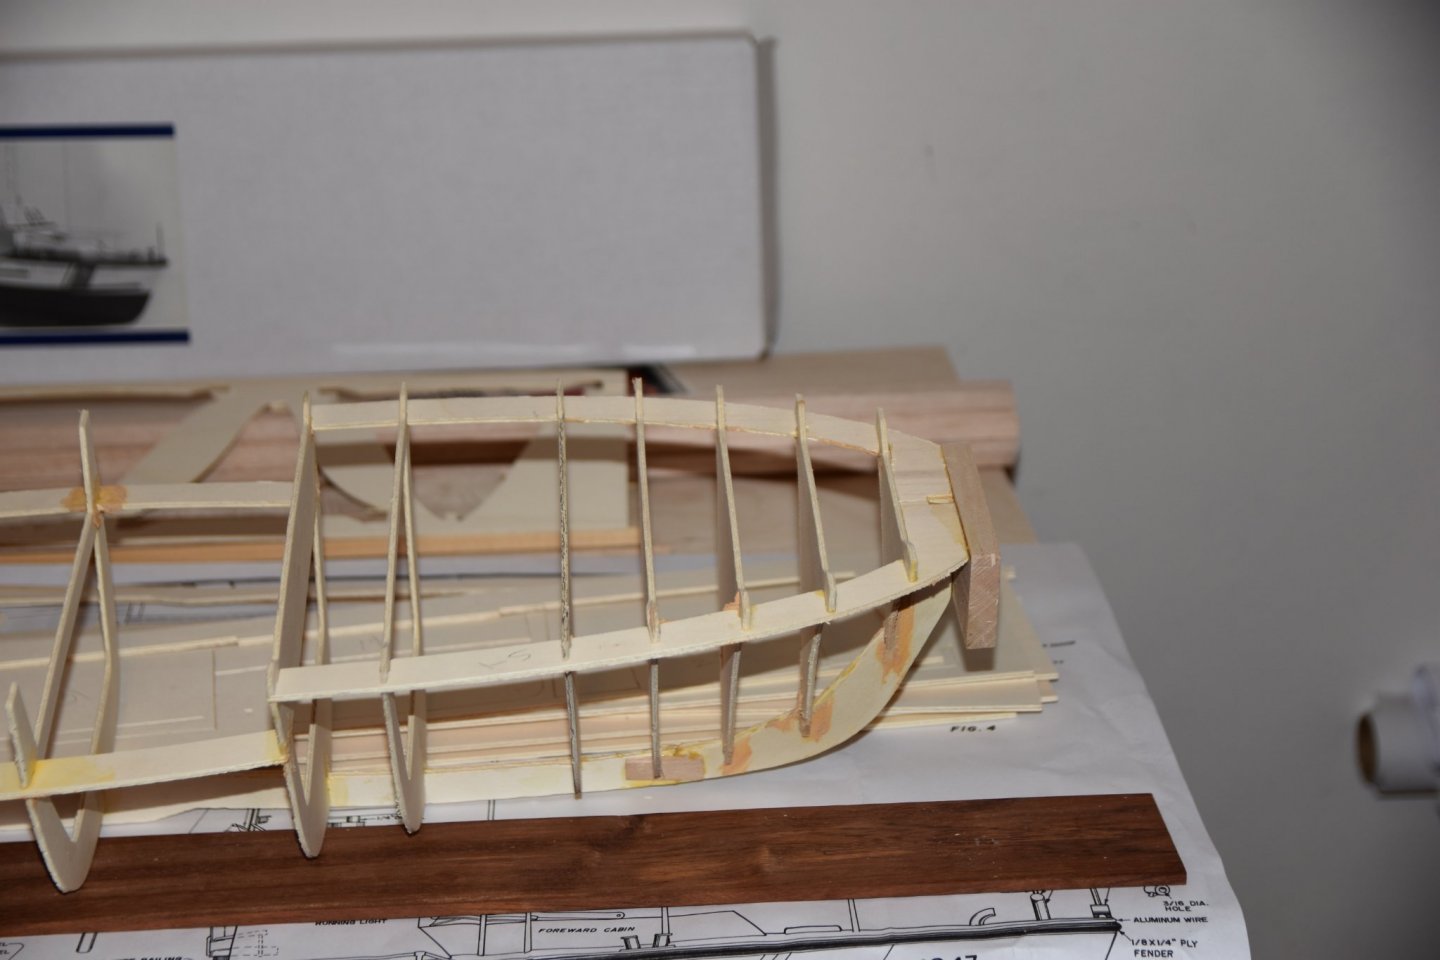
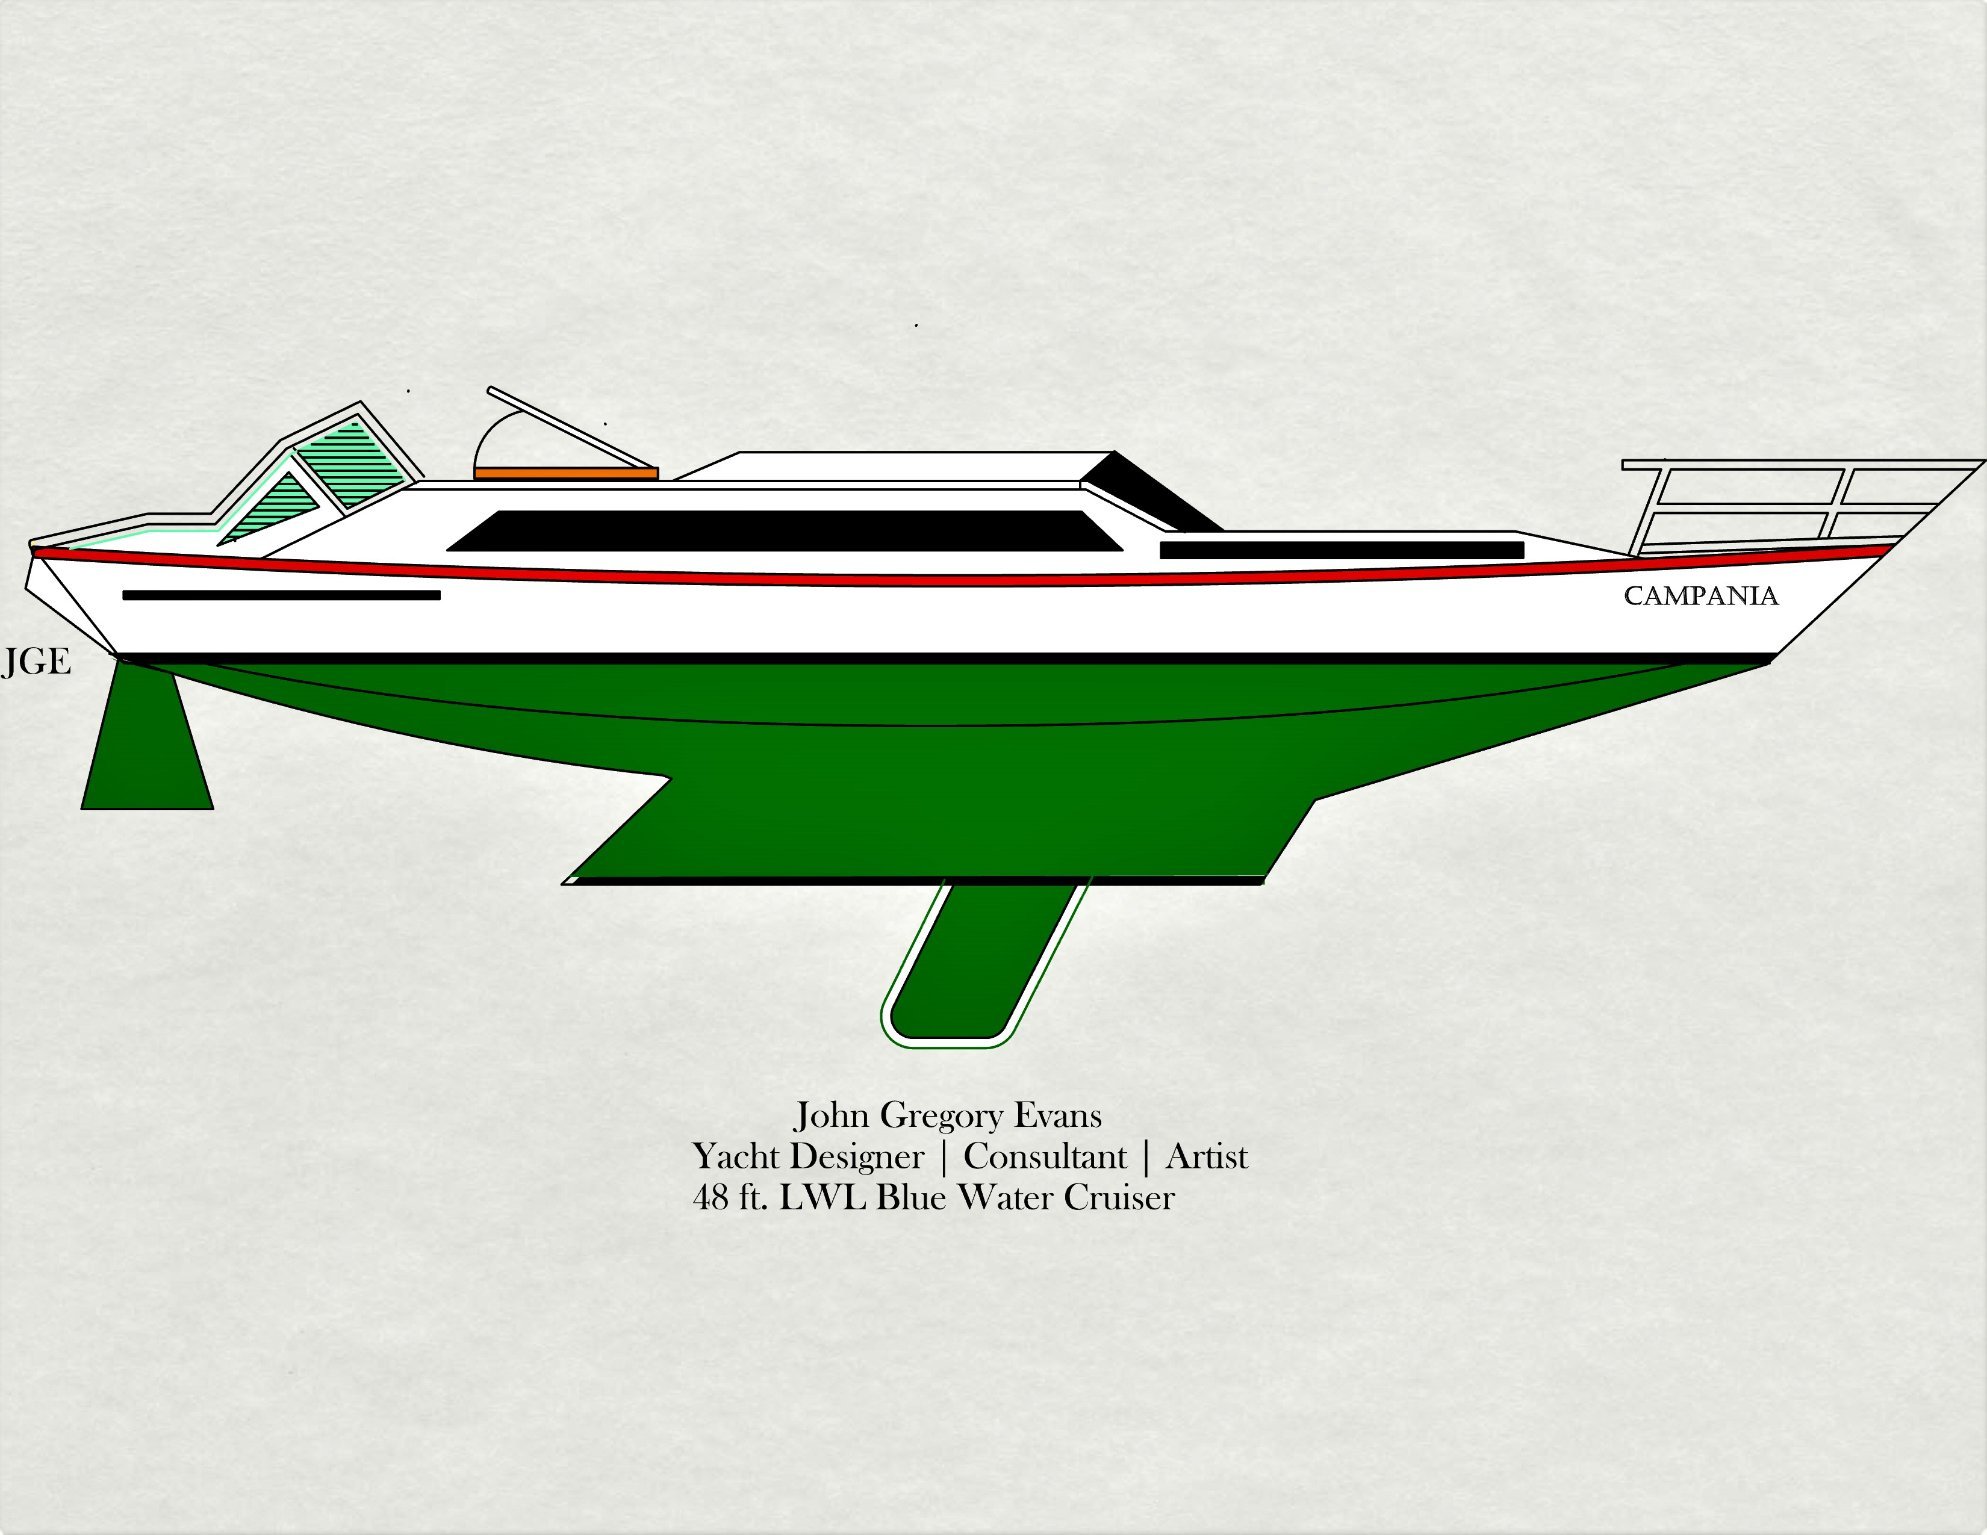
My last twelve hours have been spent constructing the keel, deck & keel supports, bulkheads, and bulkhead frames. The images I will show demonstrate a rough hull beginning to take shape. I am certain glue and wood filler is very much visible in my attachments, but for me, I have constructed this manner for additional strength. The directions state epoxy or my choice of adhesives and all that was present for me beginning the hull was Tite-bond wood glue. Although the glue is water soluble I add epoxy at a later stage for waterproof qualities. I have also included a bow block to shape and begin planking within a day or so. I must state as well, my learning curve I have created goes beyond instructional materials. I love to research the adhesive qualities of various forms. I also love to improvise when necessary. At any rate, I am displaying three construction images that are rough, but I have begun. I am also including an image for a yachting model I am designing to build myself as another model for a personal appeal and goal. I welcome all friendly faces to see for yourself but please bear in mind, no sanding has been completed. There does remain much, much sanding to perform. To make the job easier I am using a Proxon modeling belt sander to sand all wood-filler and glue spots to a smoother finish. Upon completion of this I will be painting the heel, and bulkheads white glossy.
This is an interesting model in the design features that the vessel does not sink in a rough sea state and resistance is minimal. I have always had a love for the Coast Guard lifeboats because they cut the water fiercely fine and the powerplant powerful enough to accomplish her mission of saving lives at sea, coastal areas, and even rivers. I will be engaging more and more into research of this fine watercraft vessel. A powerhouse of life-saving equipment and I want one for recreational purposes.
.thumb.JPG.d0fe6332cb1112014612da49c331b765.JPG)
.thumb.JPG.f334cde5679bb24ef79b221ec1e5a9db.JPG)
- Old Collingwood, yvesvidal, mtaylor and 4 others
-
7
-
Good question, Bob! I will be constructing as a RC model. I will be searching cost for all components, but if it gets too expensive I will let this model go as static. Thanks for reminding me.
John
-
Thank you Bob! Thank you for your dedicated 40 years! We sure need folks as you.
John
- mtaylor and thibaultron
-
2
-
Yes it is Mark. I am not sure where I should have posted. Any assistance is greatly appreciated. Thank you friend.
John
- thibaultron and mtaylor
-
2
-
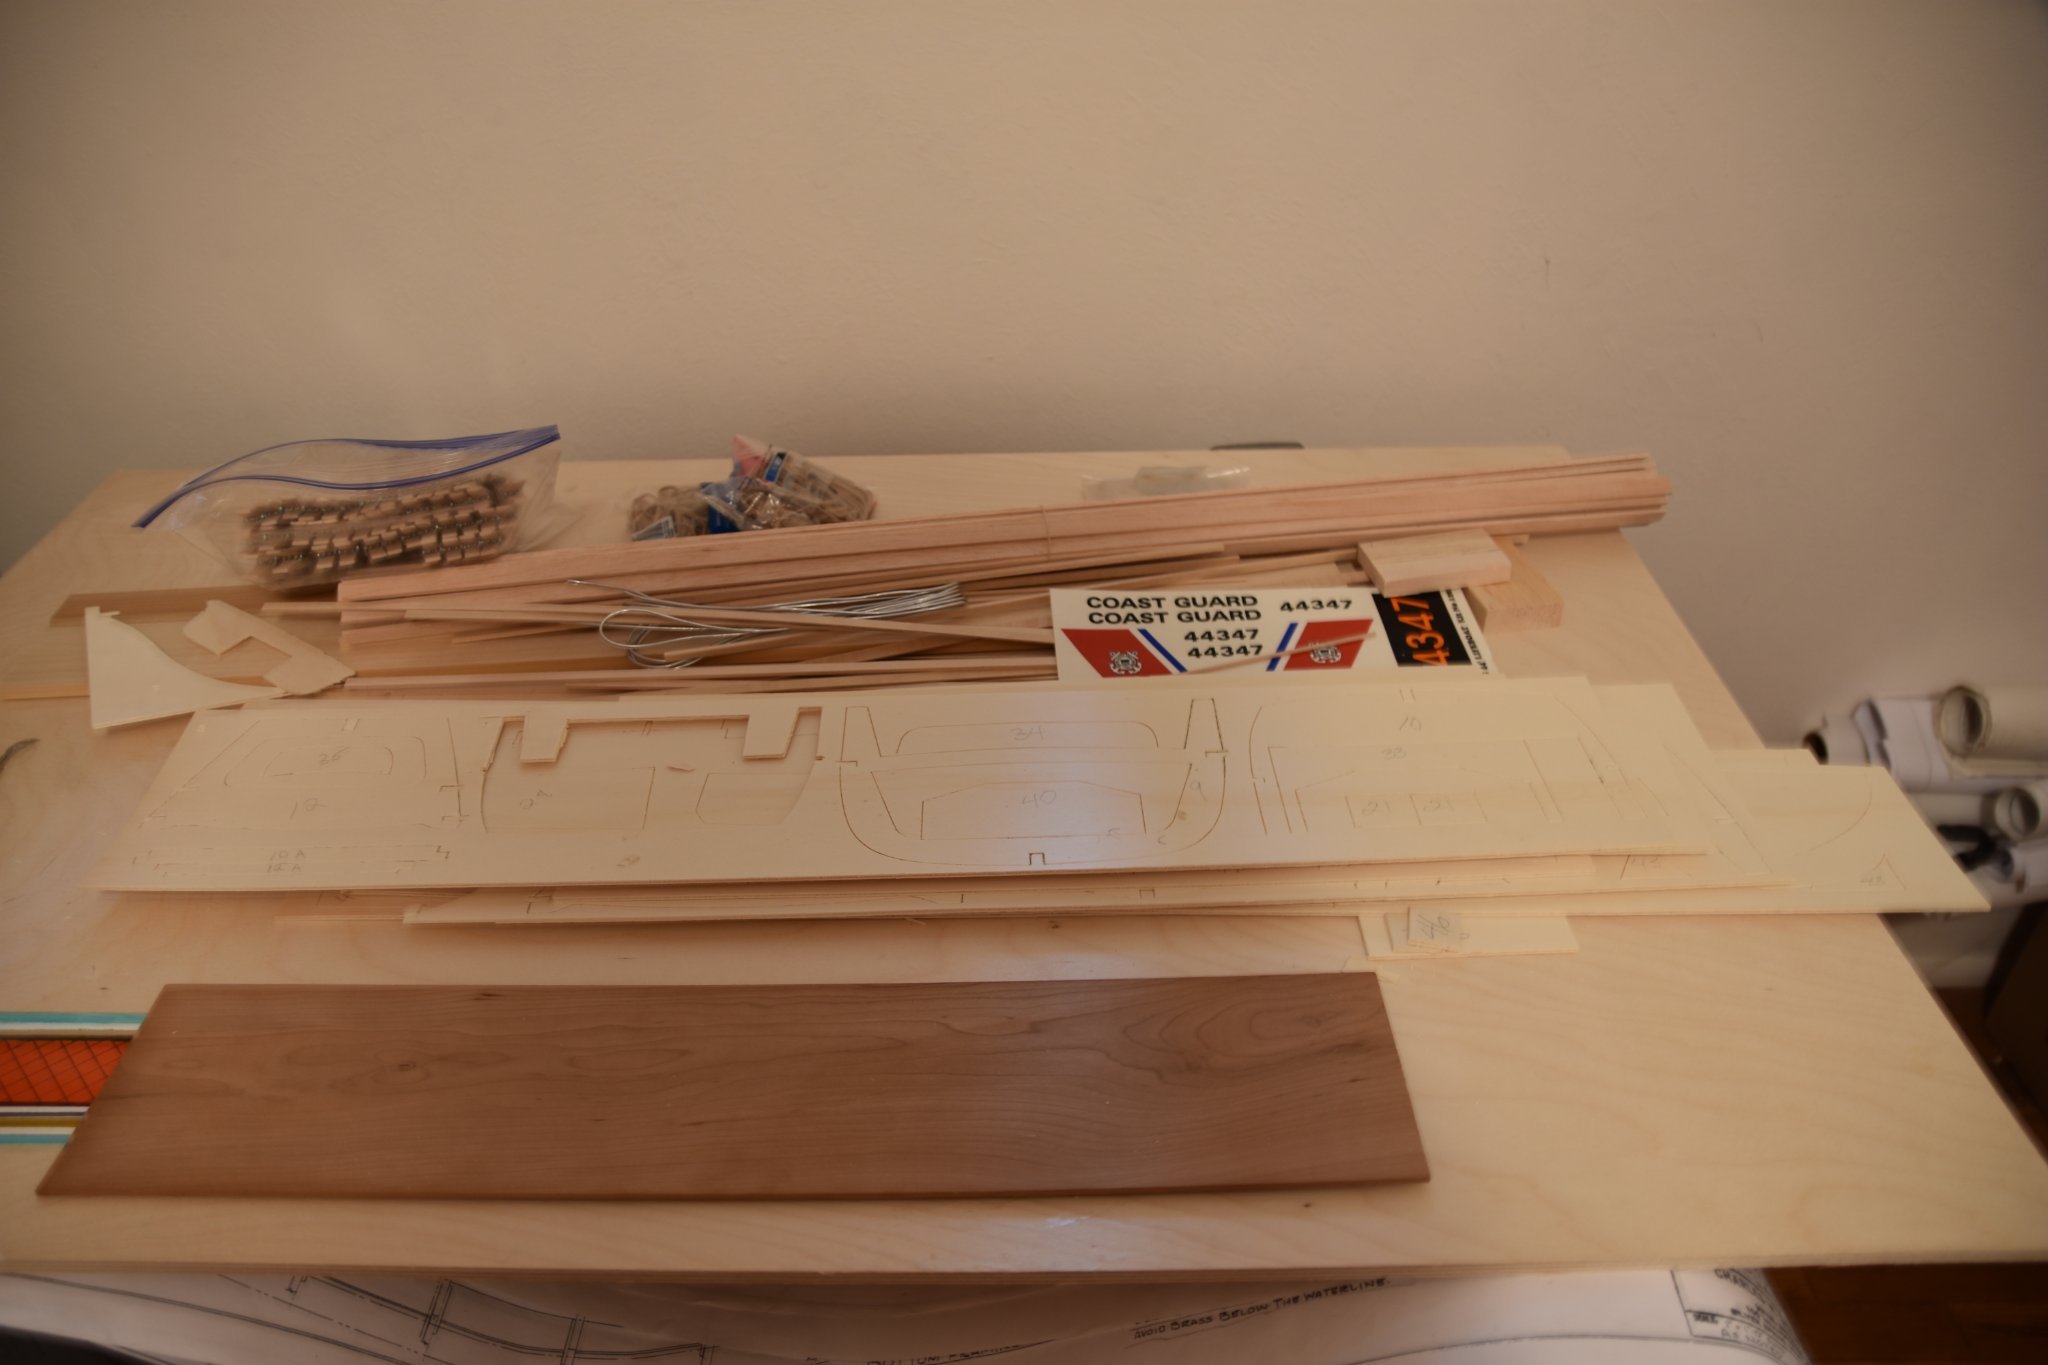
.thumb.JPG.7daa2ad1caa4ed122b27a755332d307d.JPG) The beginning. Let us hope and pray that I take my time, think everything through, cut safely, Sand carefully, measure two, three, or four times before I cut, always cut outside the line, apply epoxy or resin in small quantities, and clip with pins to hold together. I have also begun trimming the boat's cradle with cushioning (not pictured), and away we go. Take good care friends.
The beginning. Let us hope and pray that I take my time, think everything through, cut safely, Sand carefully, measure two, three, or four times before I cut, always cut outside the line, apply epoxy or resin in small quantities, and clip with pins to hold together. I have also begun trimming the boat's cradle with cushioning (not pictured), and away we go. Take good care friends.
John
.thumb.JPG.0051bbcb9a0c3b0b34ebb1aab6519c05.JPG)

- Roger Pellett, ccoyle, yvesvidal and 2 others
-
5
-
Creativity is a wonderful gift! You have talent!
John


.JPG.10d0fa7f1a8d629001efebbc246da030.JPG)
.JPG.1be130e3b2d72ff380707fb72bfe1677.JPG)
.JPG.ee80687deb7983ffca04759f1857e949.JPG)
.JPG.5bb384730b13c69dfb3e87e674d1b99d.JPG)
Greetings from Idaho
in New member Introductions
Posted
Thanks very much!!!