


Spaceman Spiff
-
Posts
205 -
Joined
-
Last visited
Content Type
Profiles
Forums
Gallery
Events
Posts posted by Spaceman Spiff
-
-
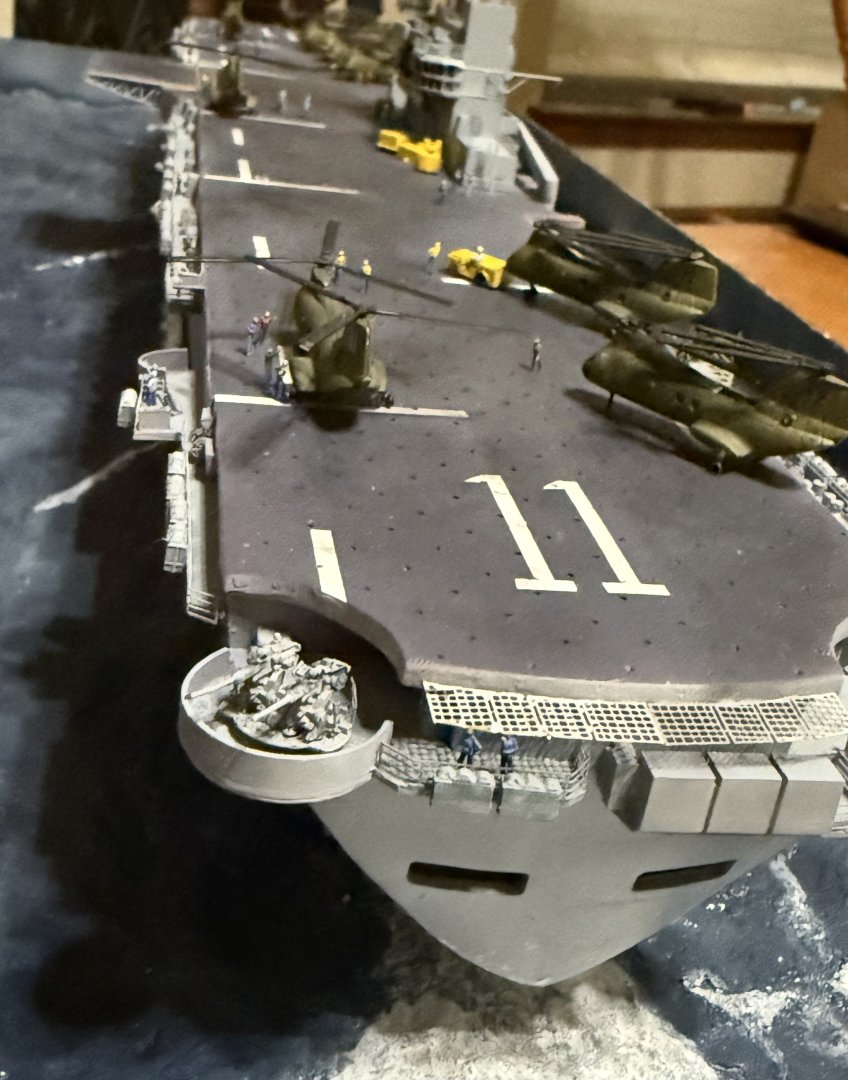
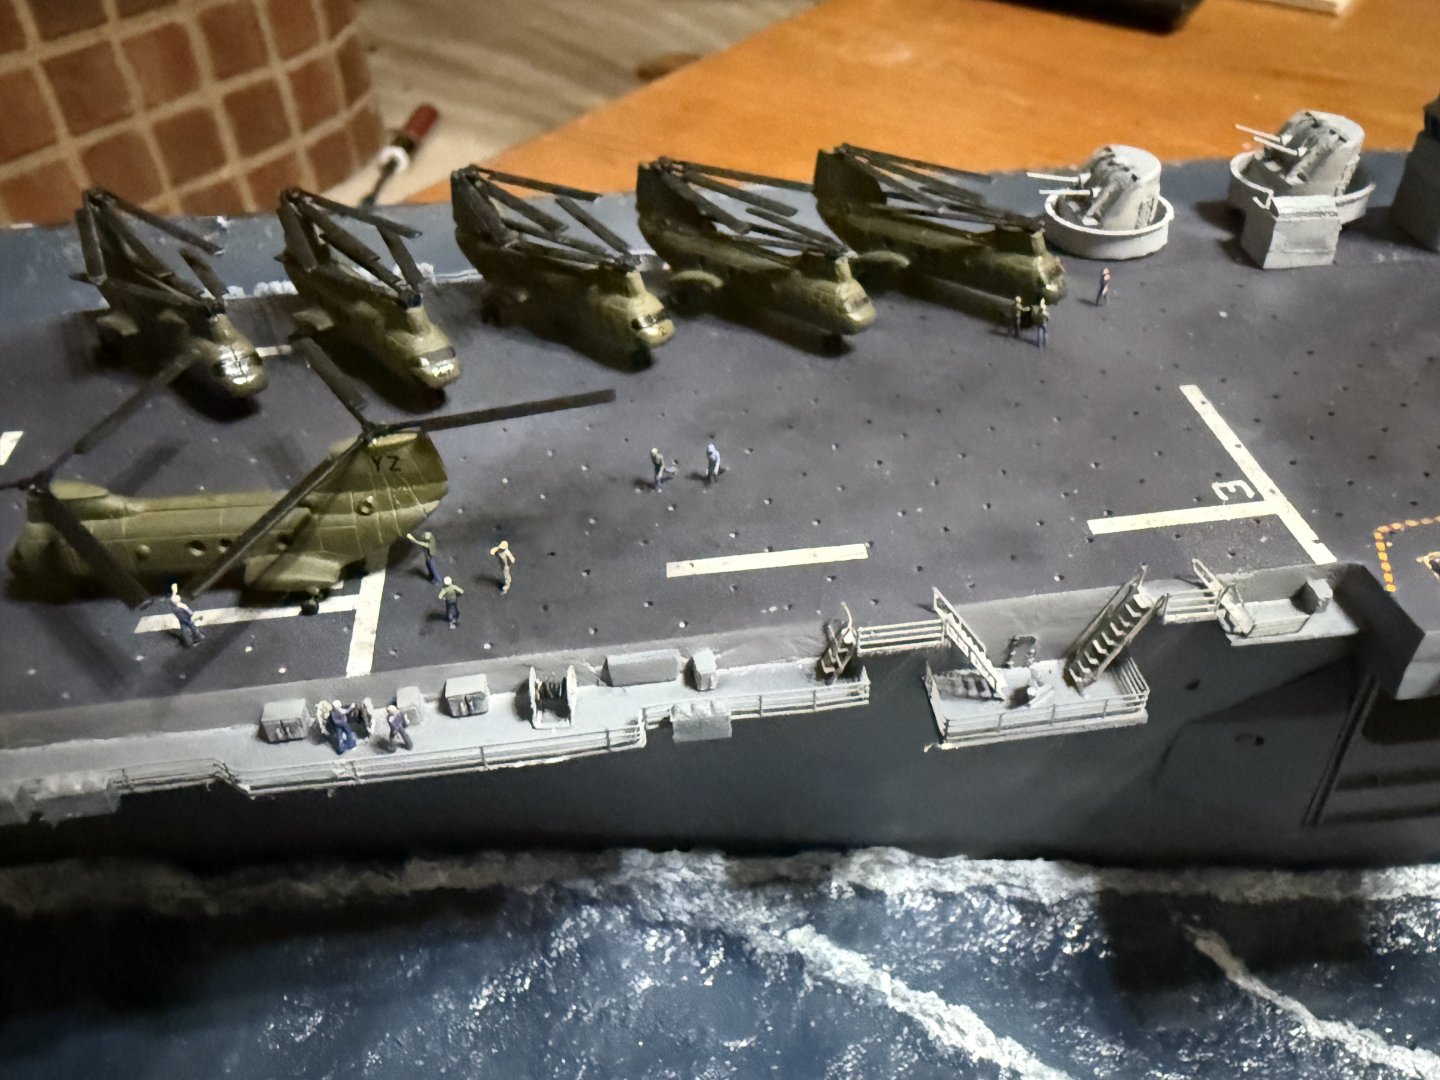
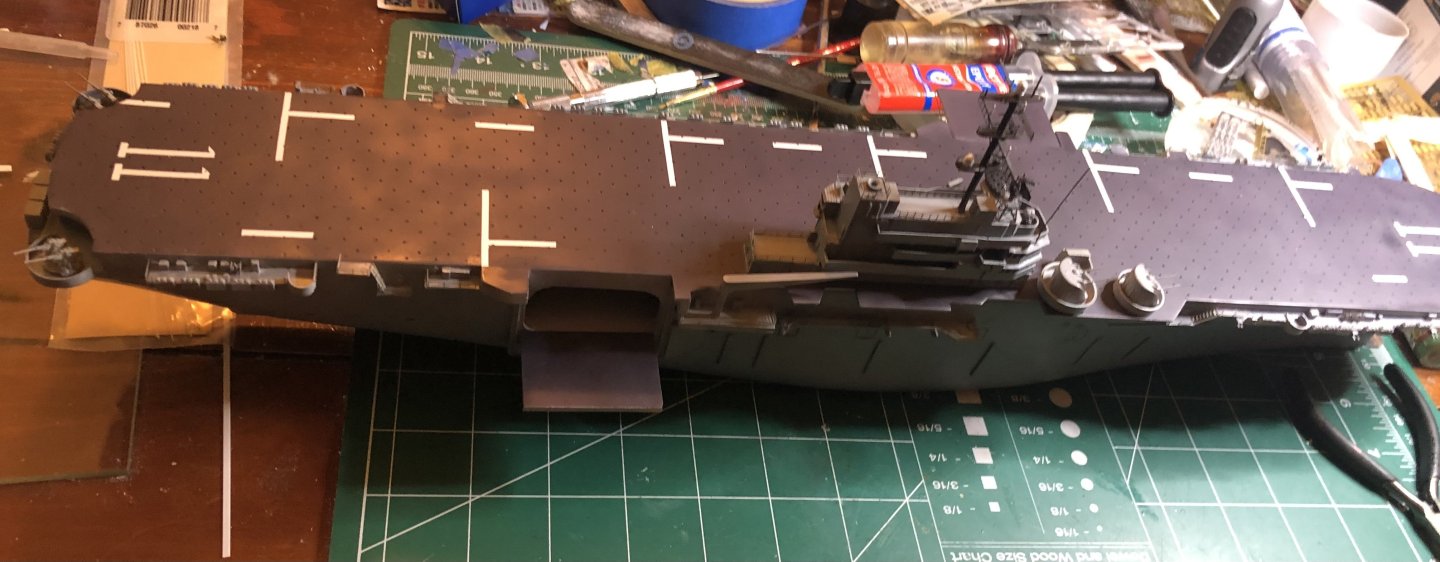
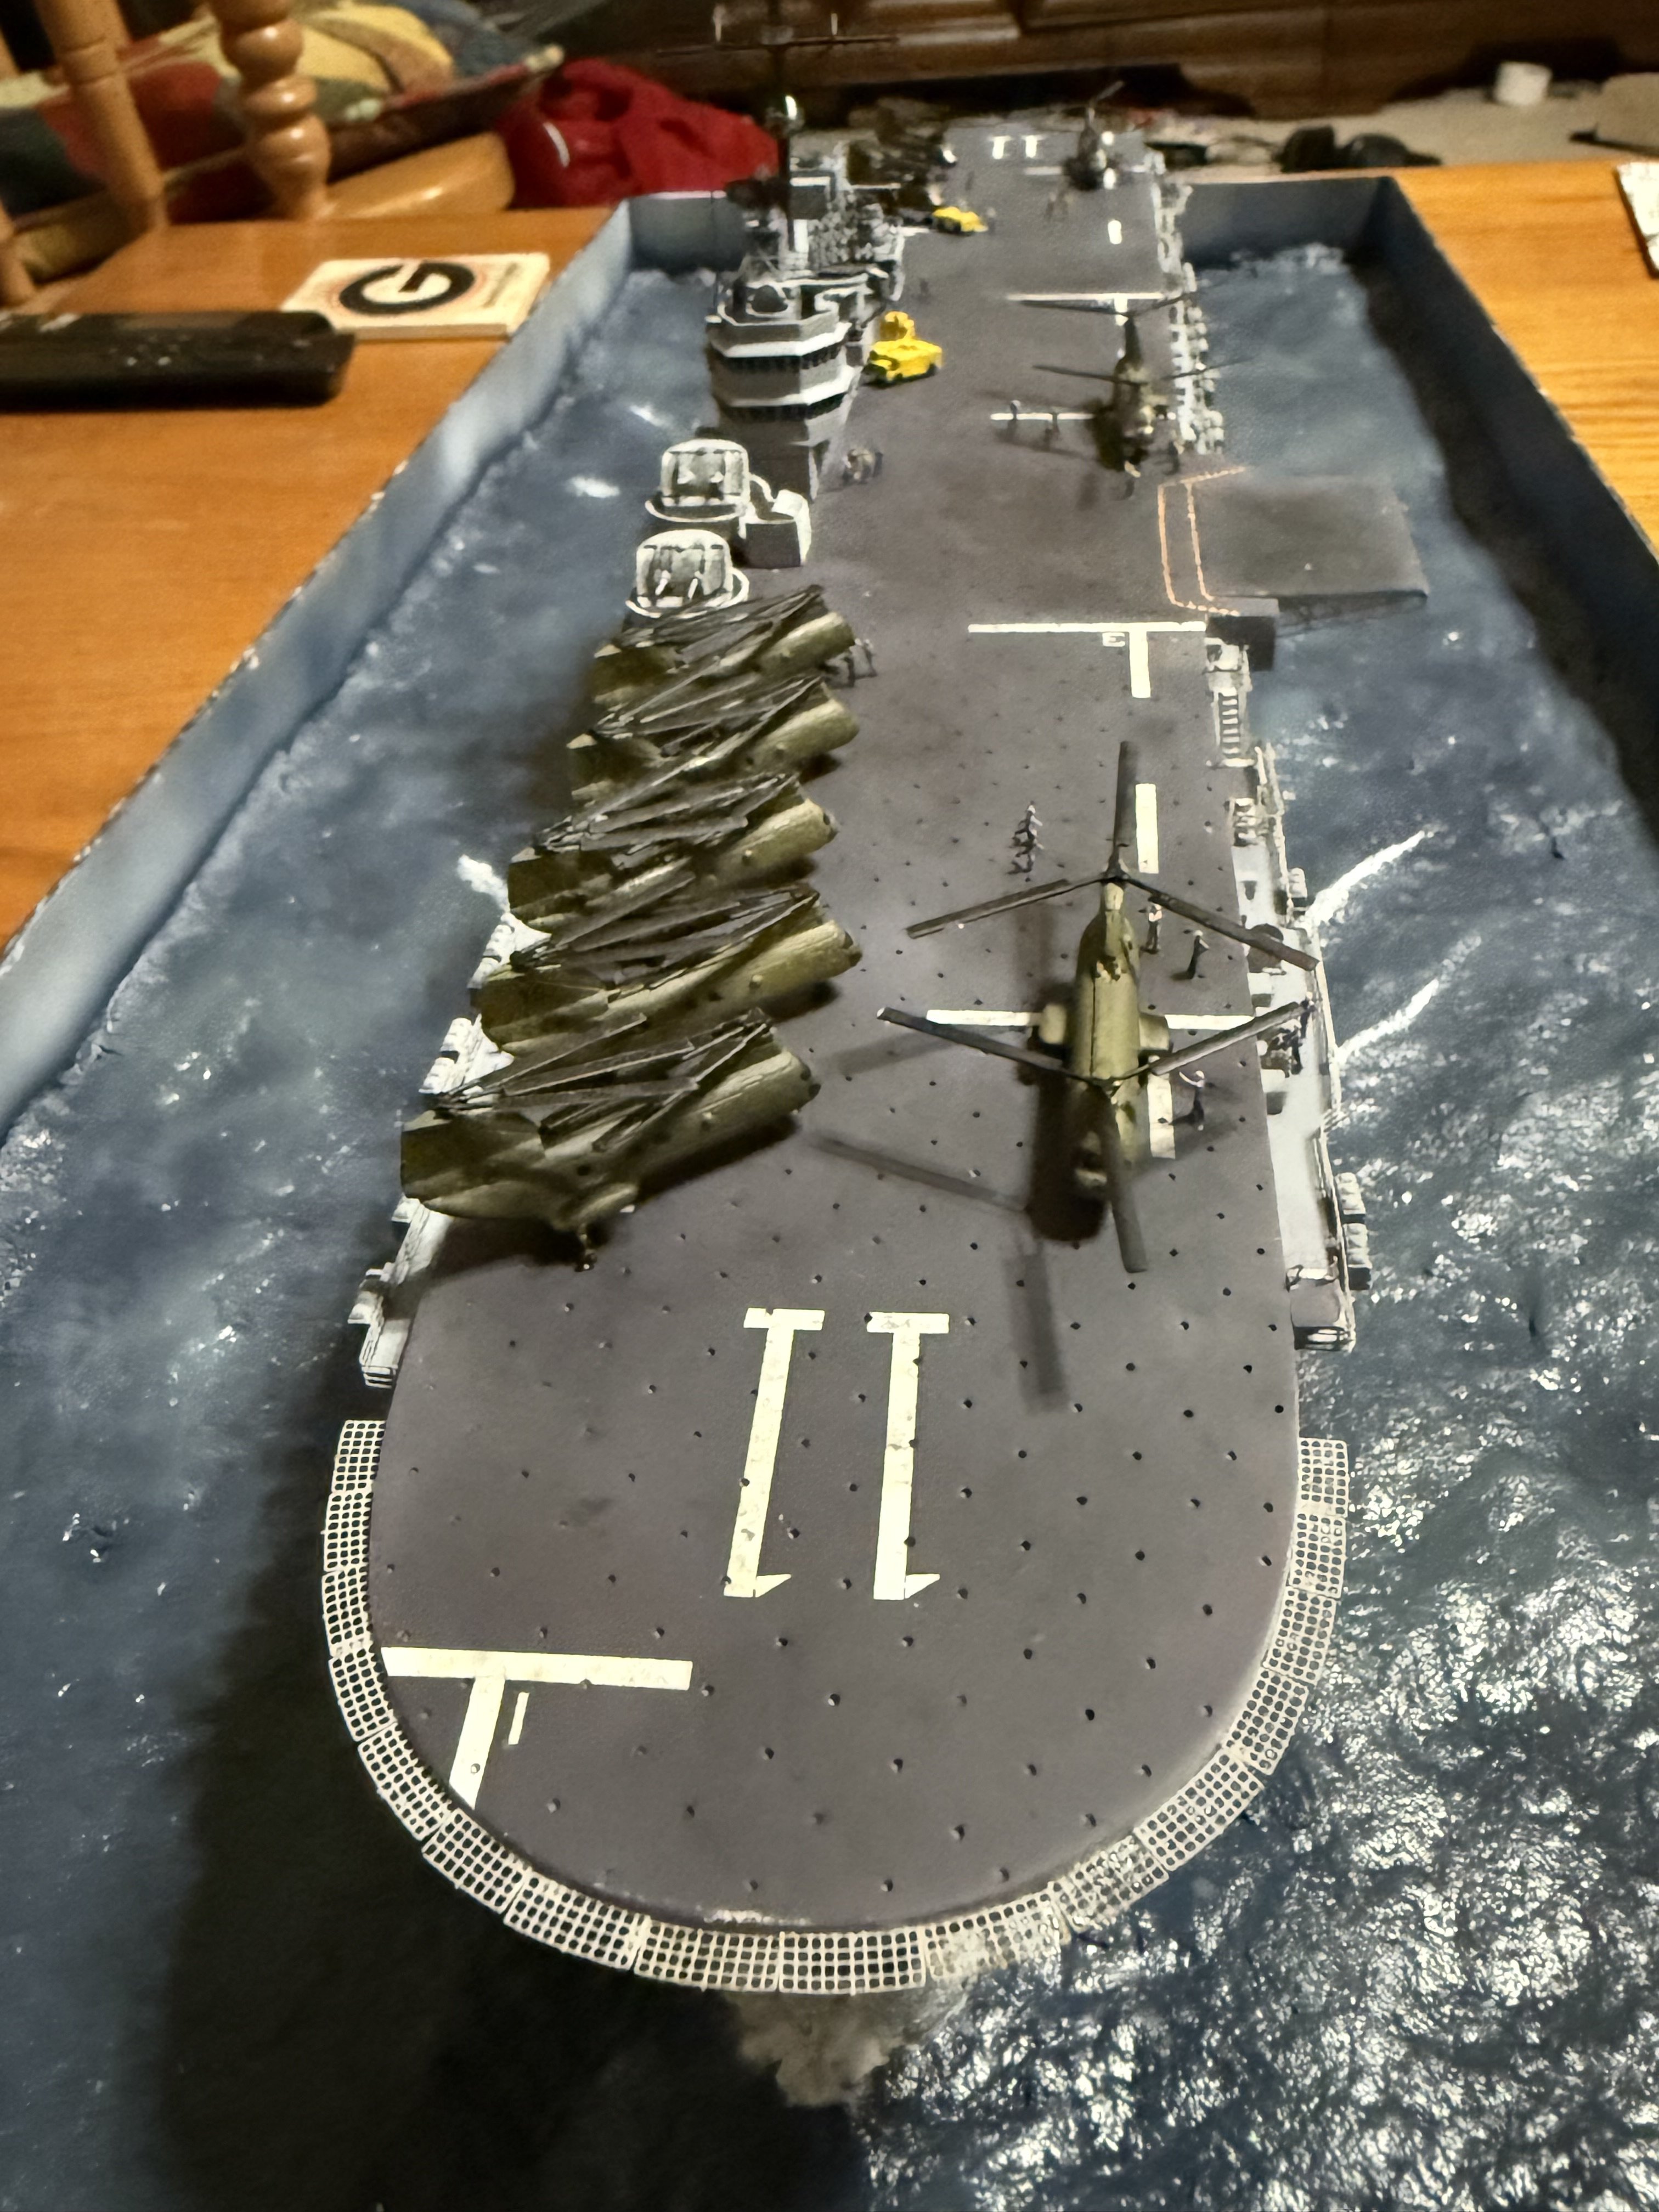
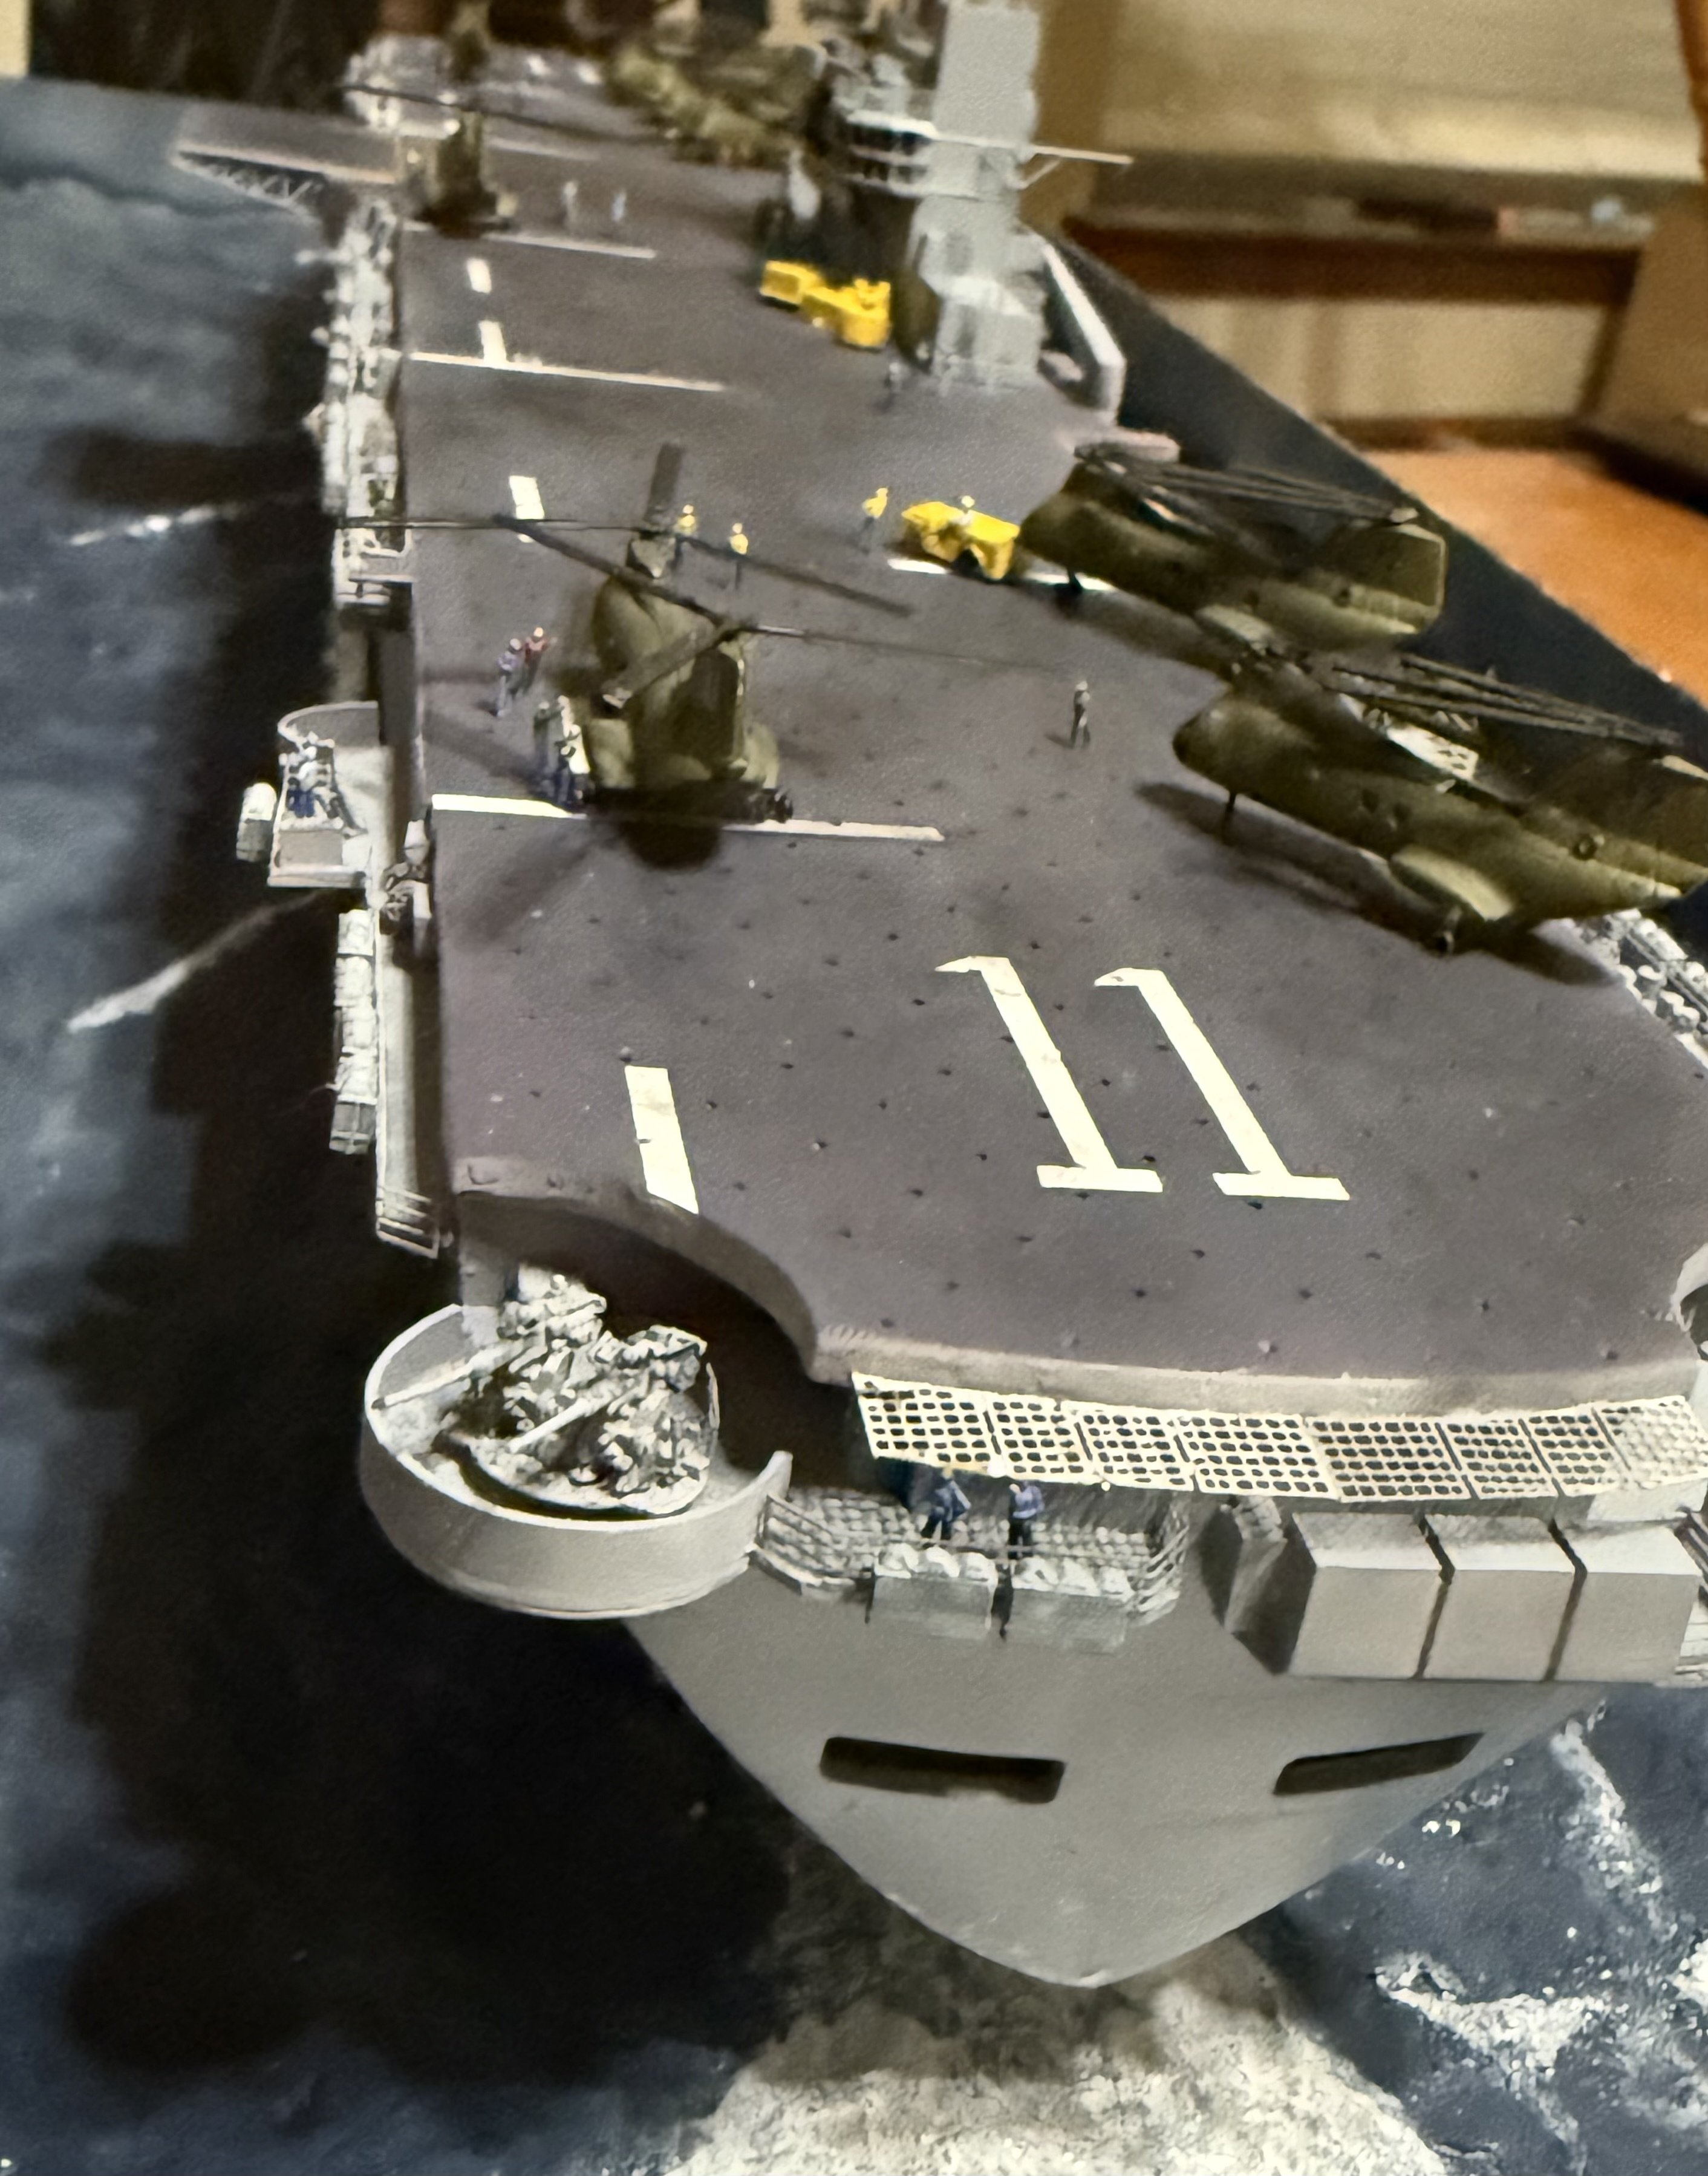
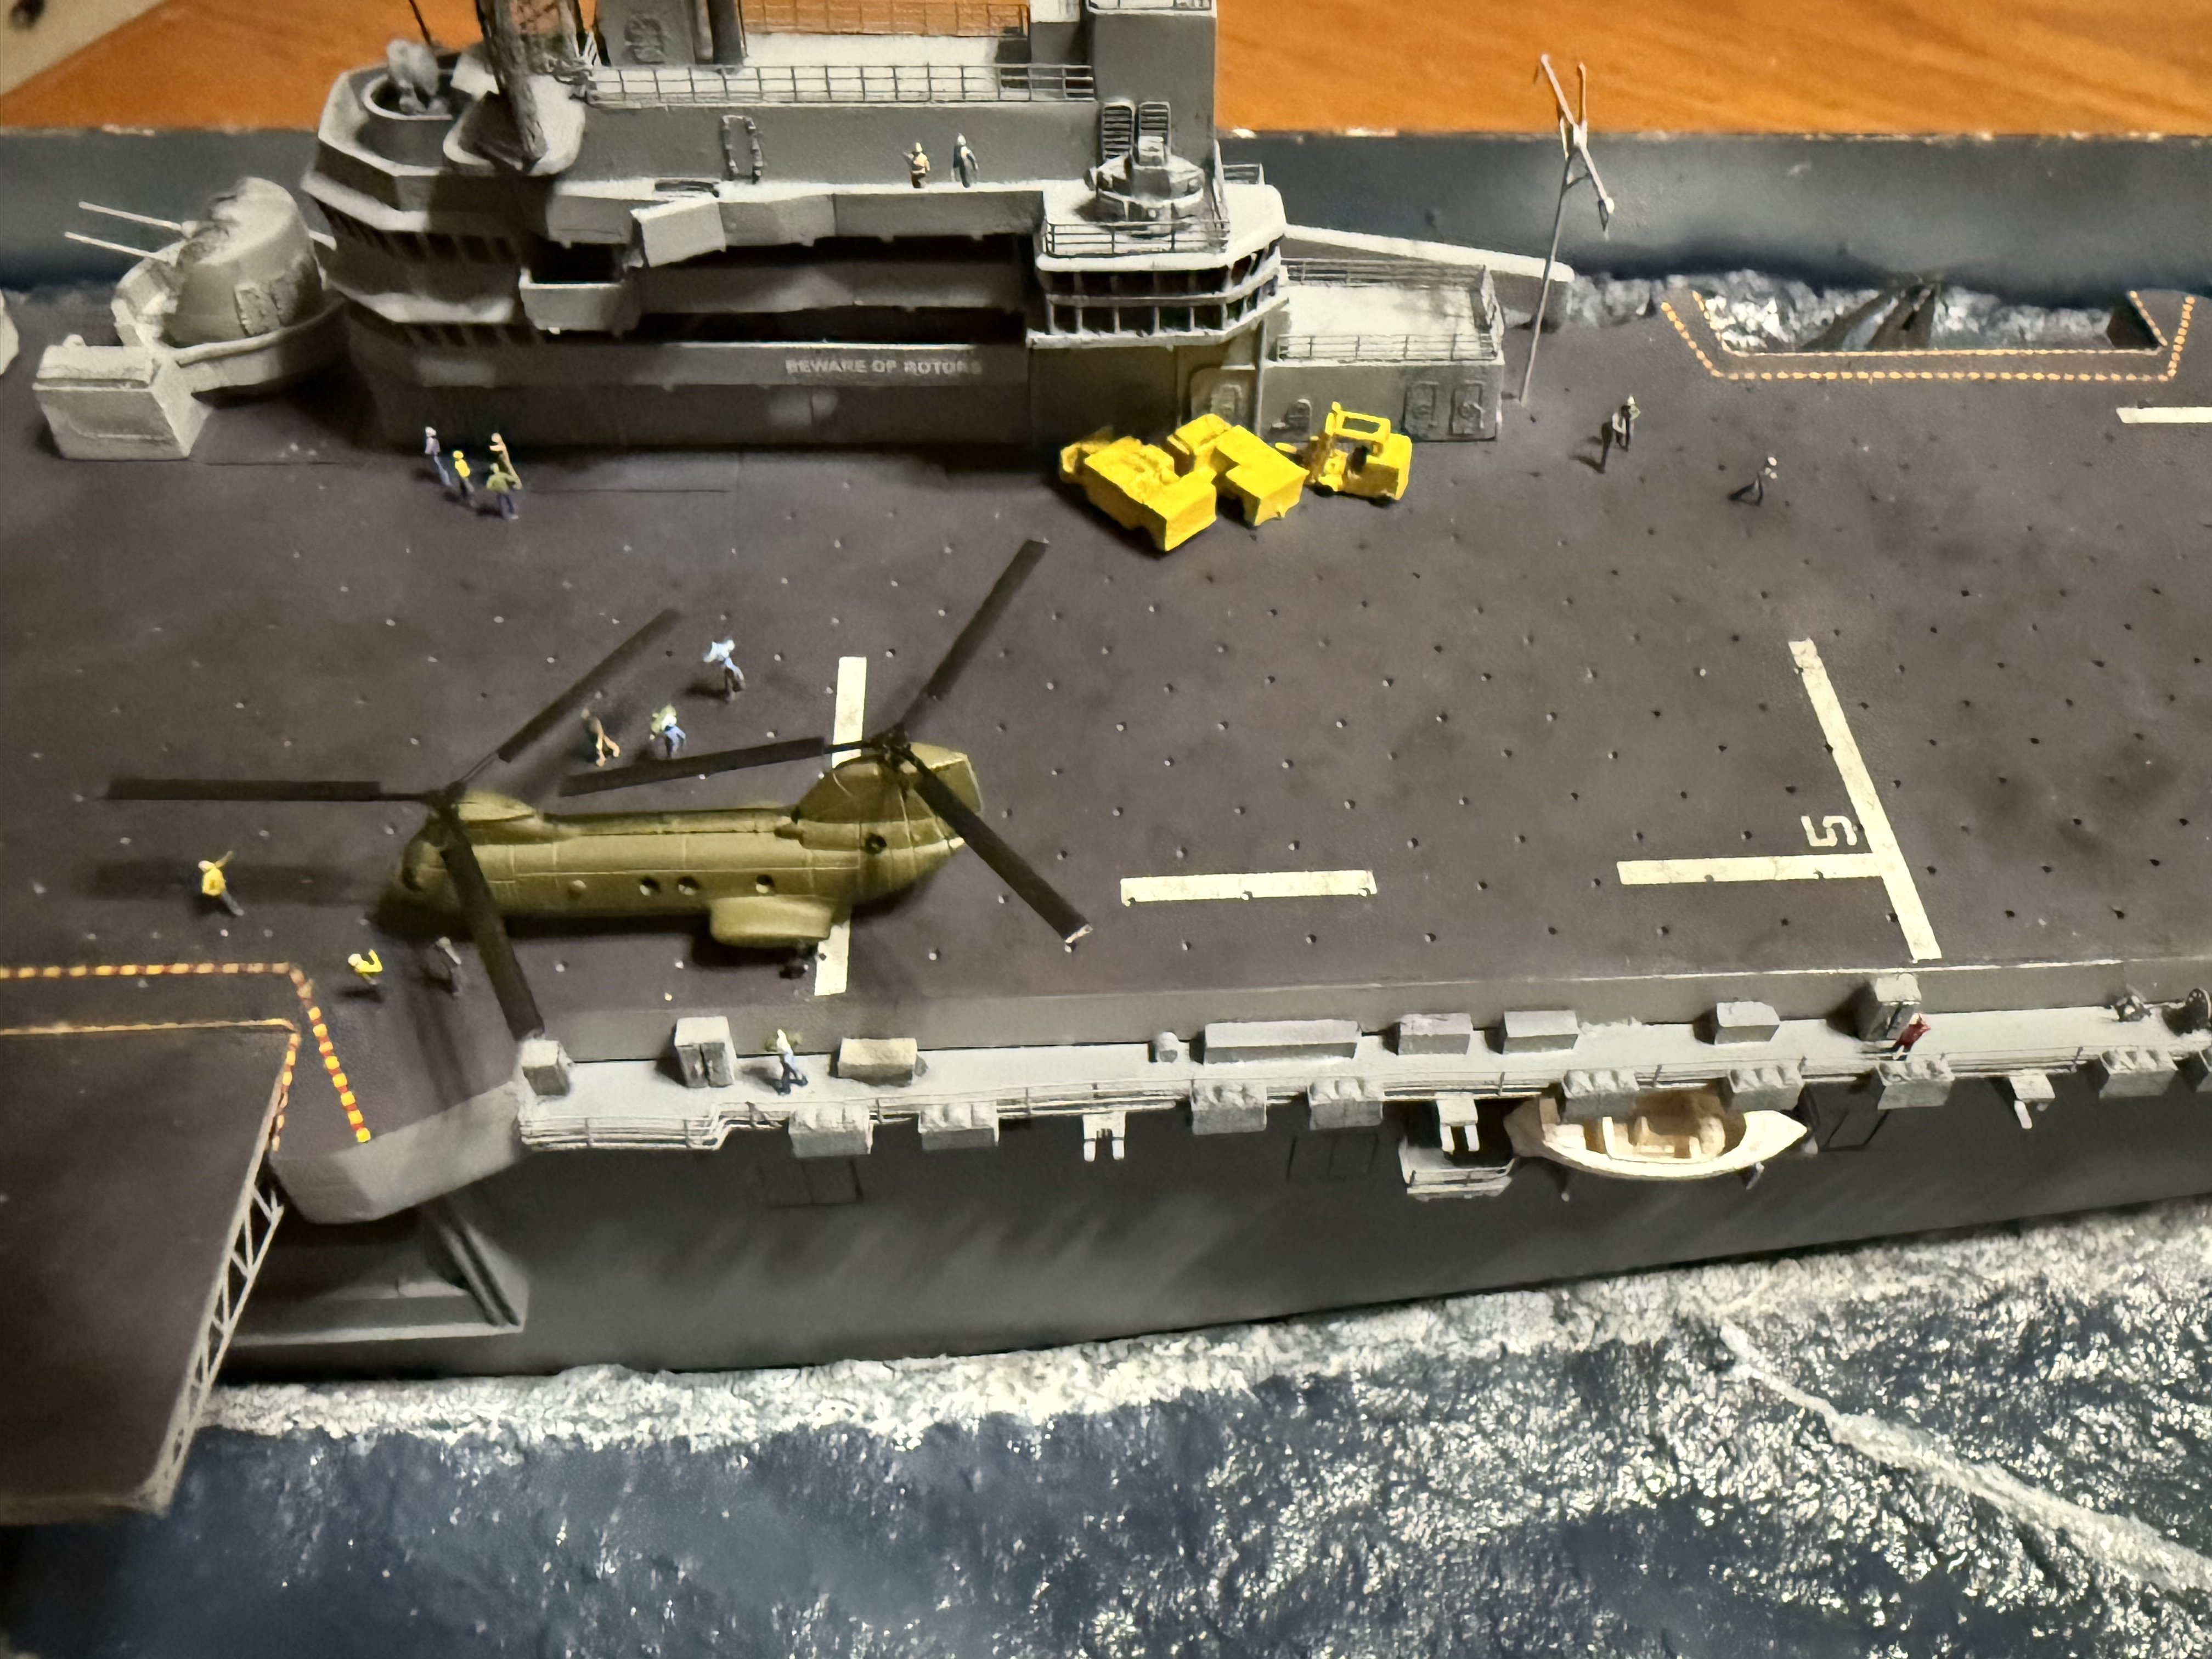
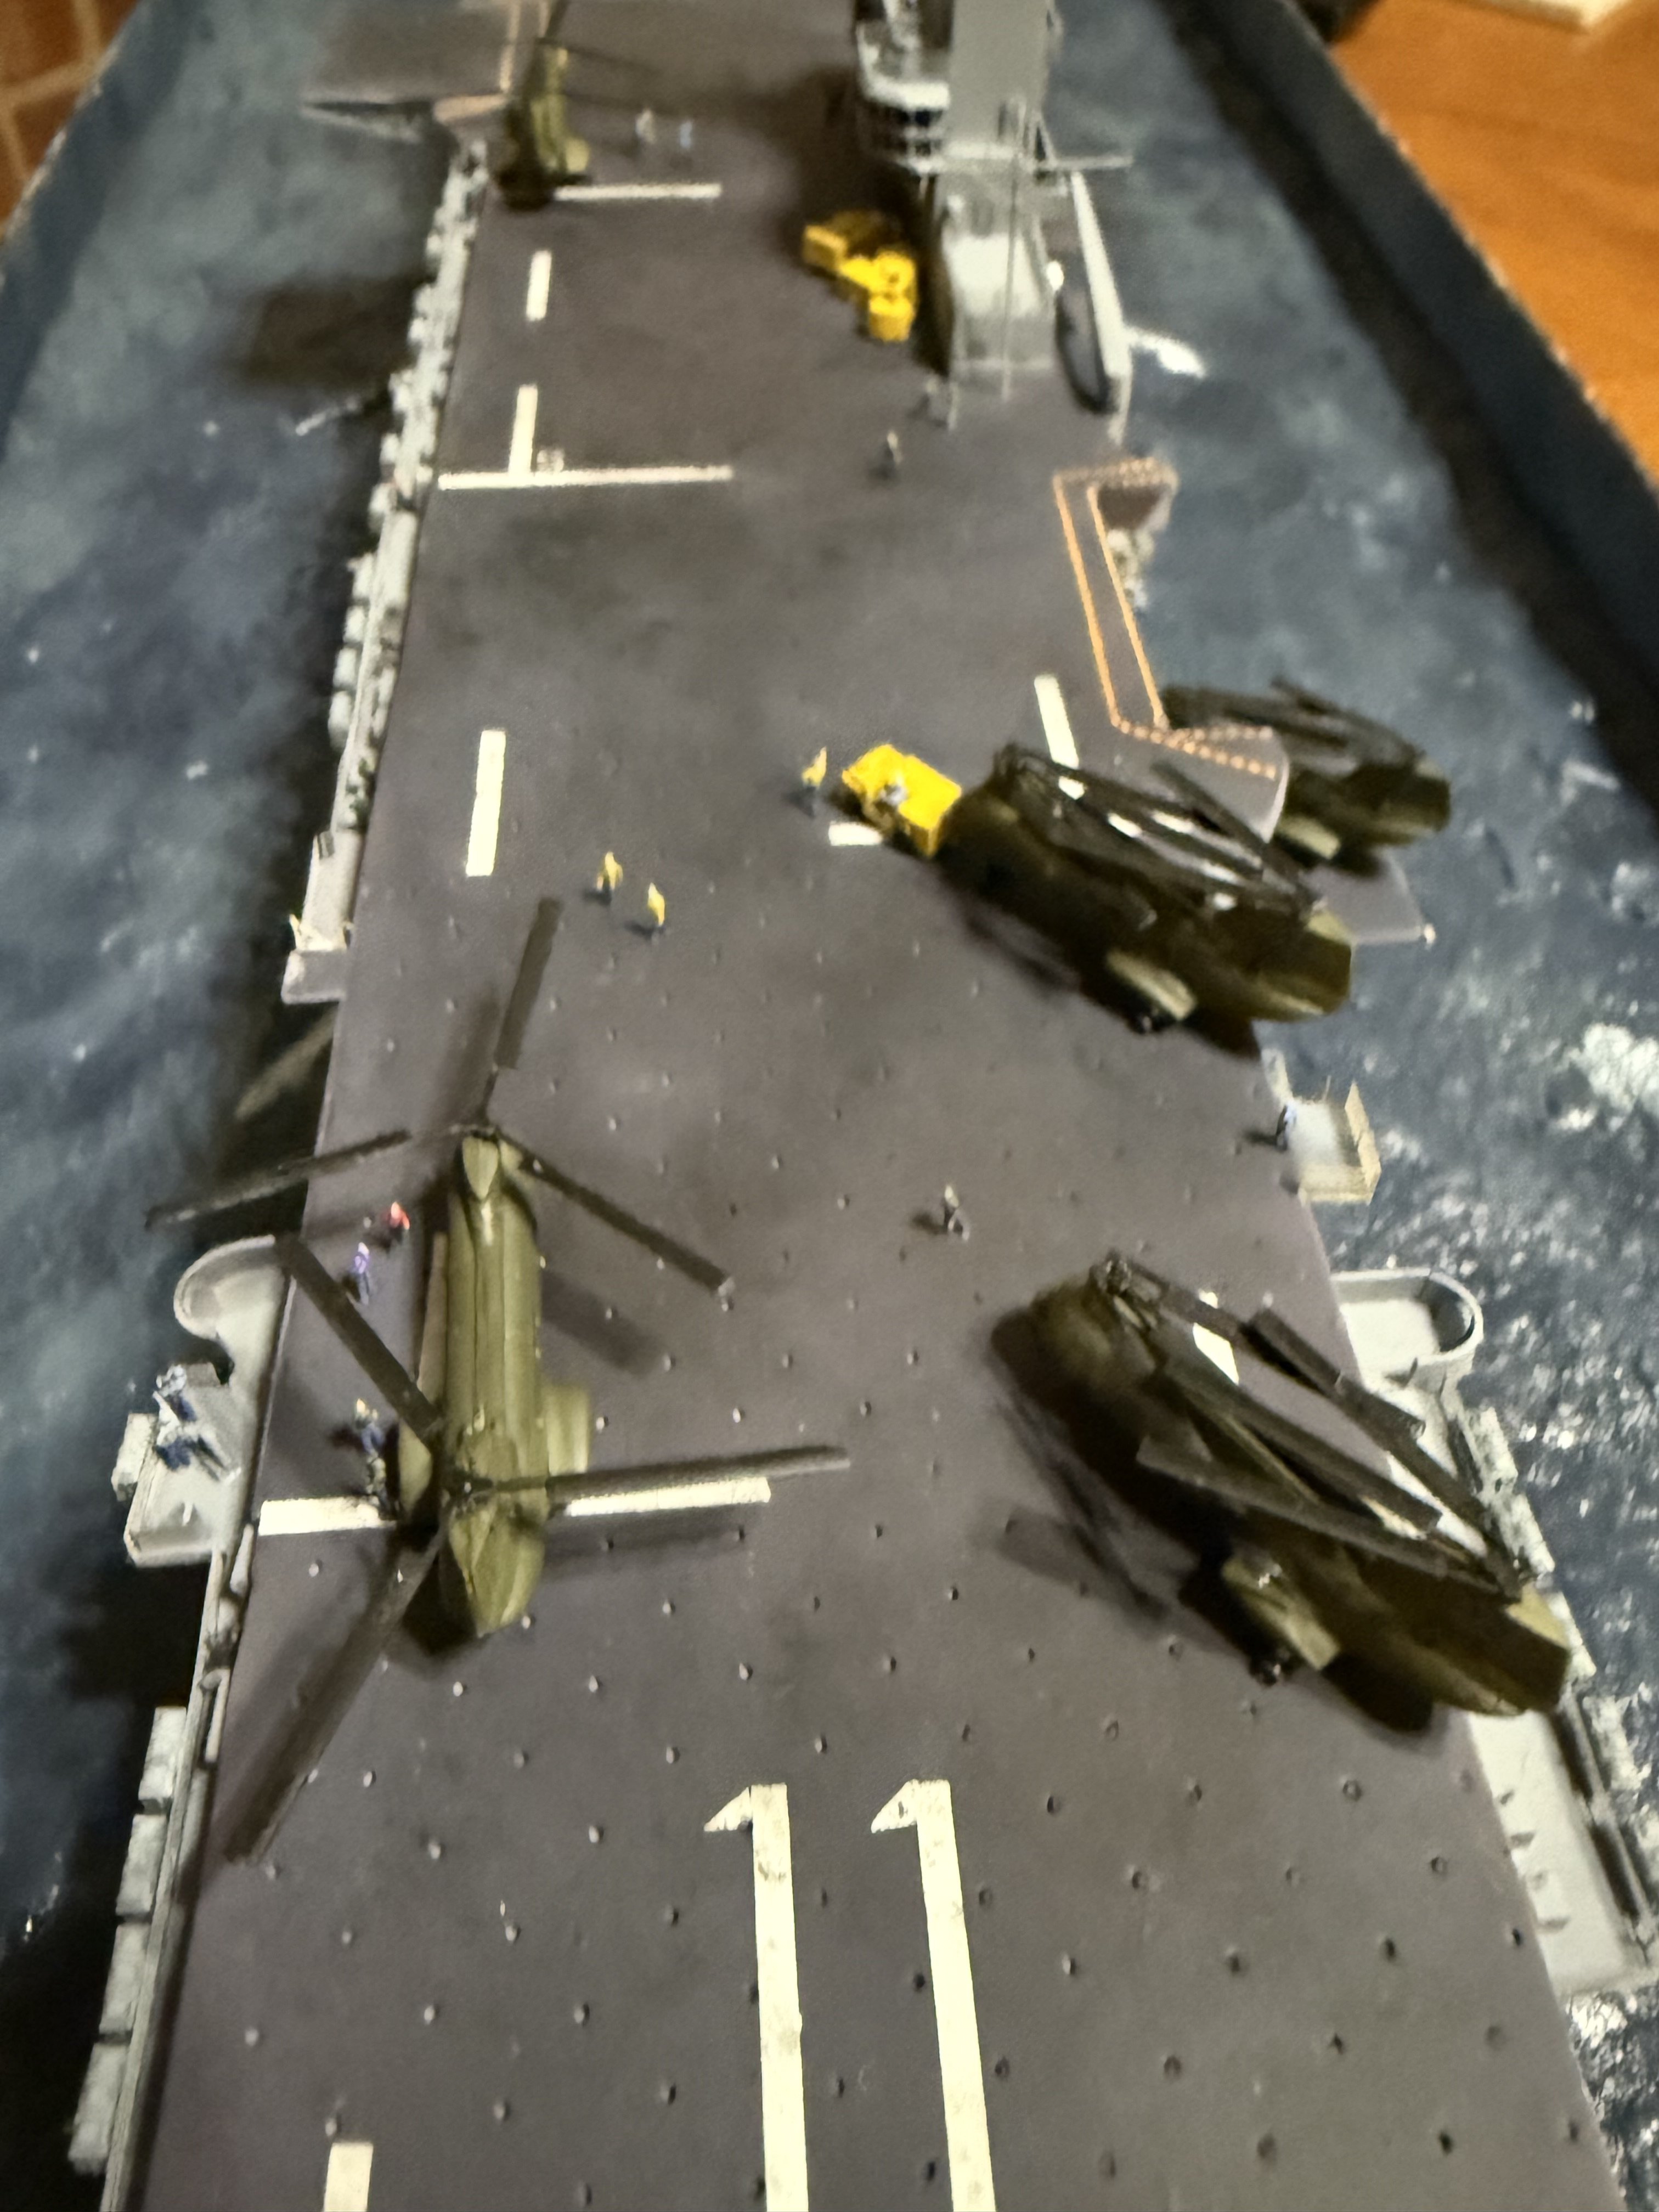
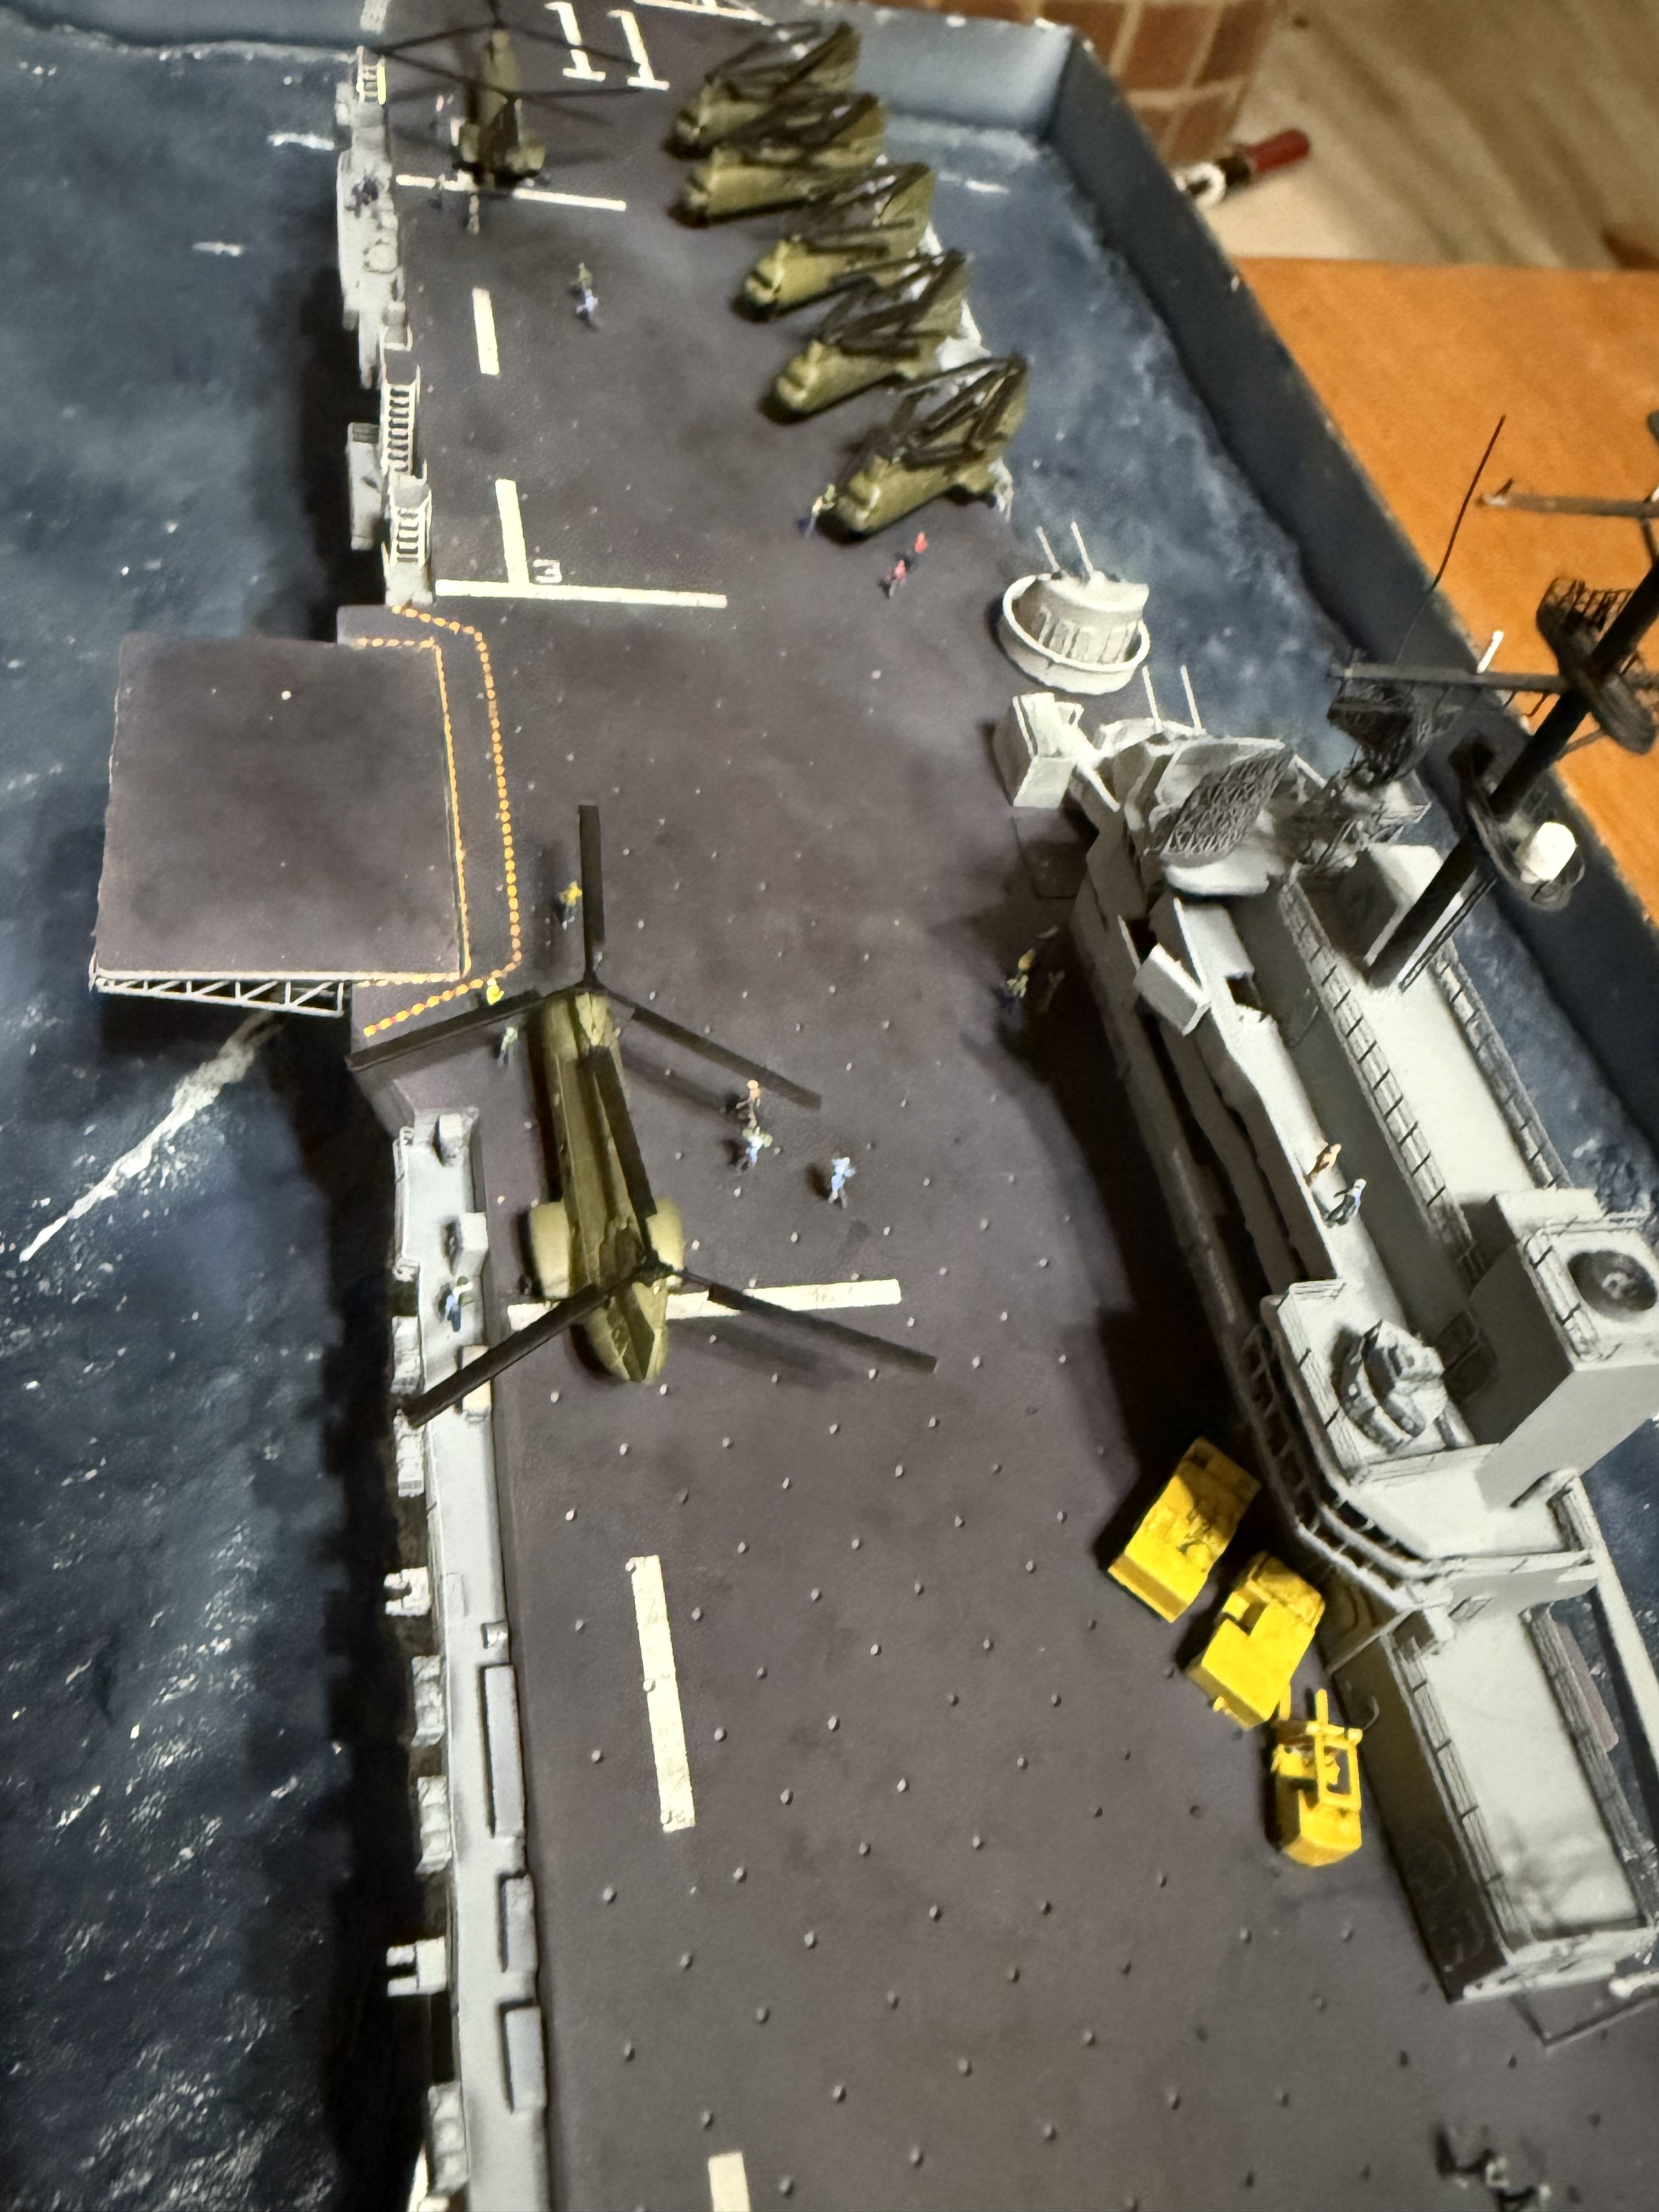
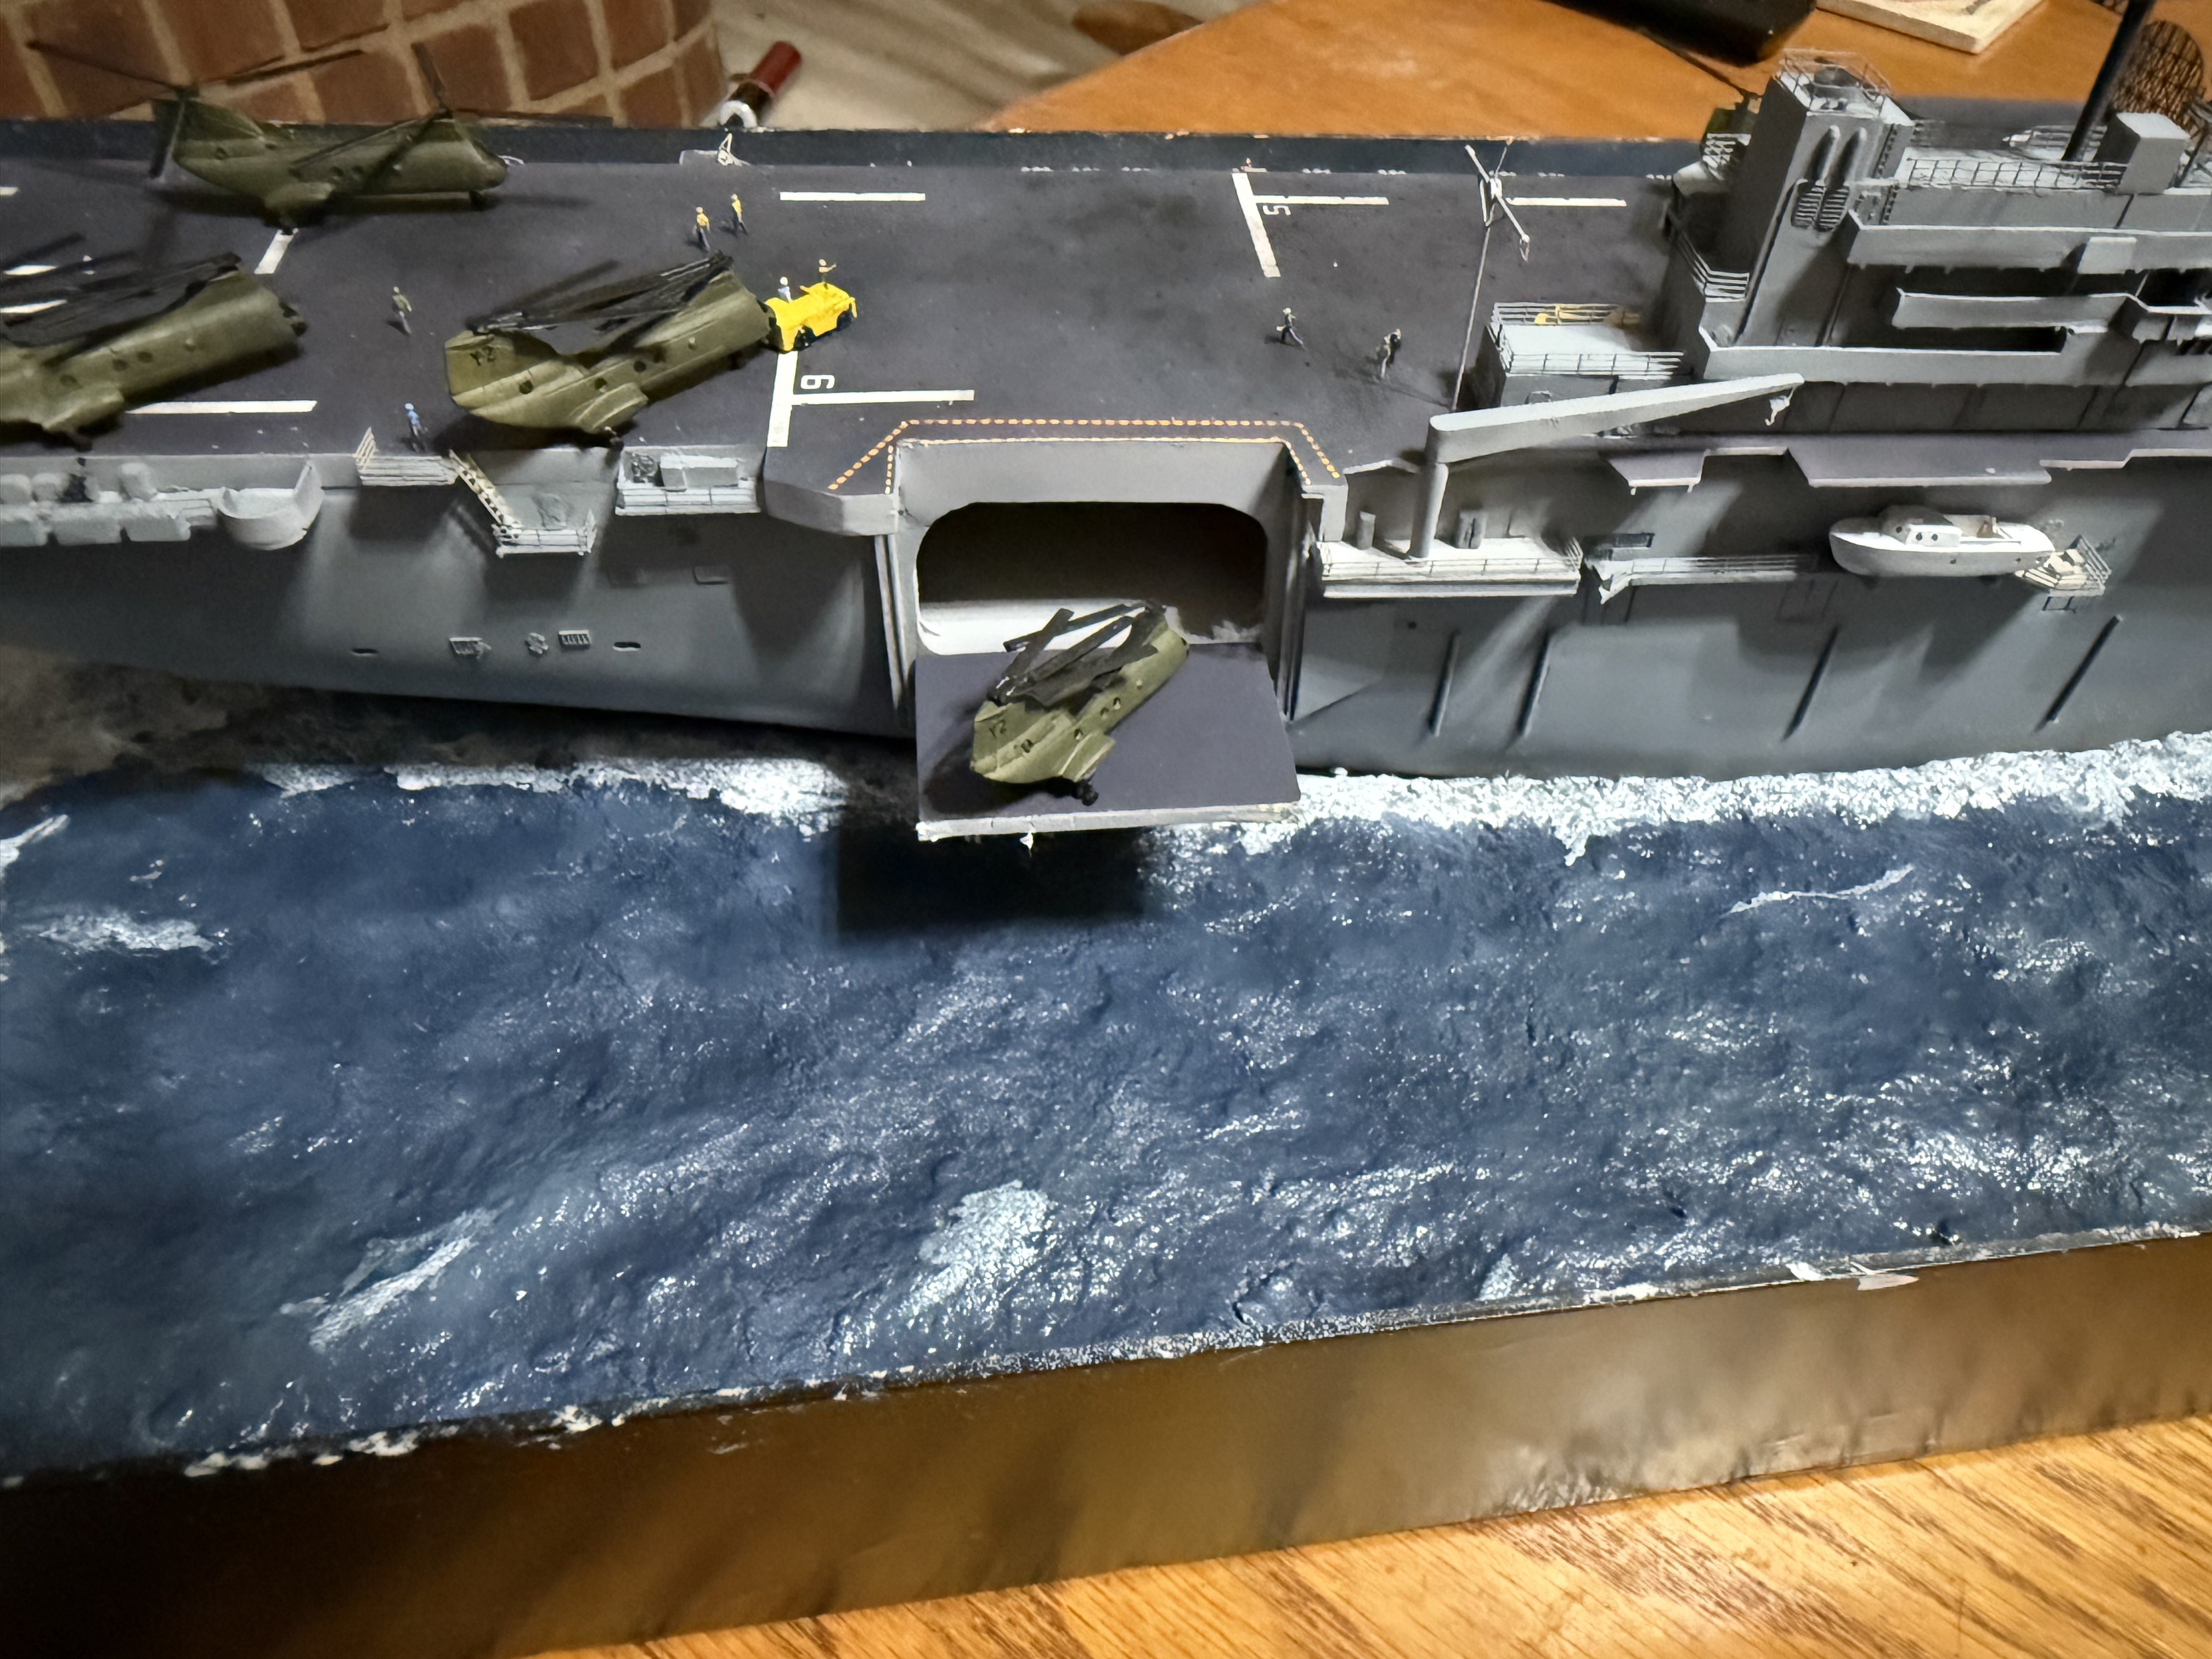
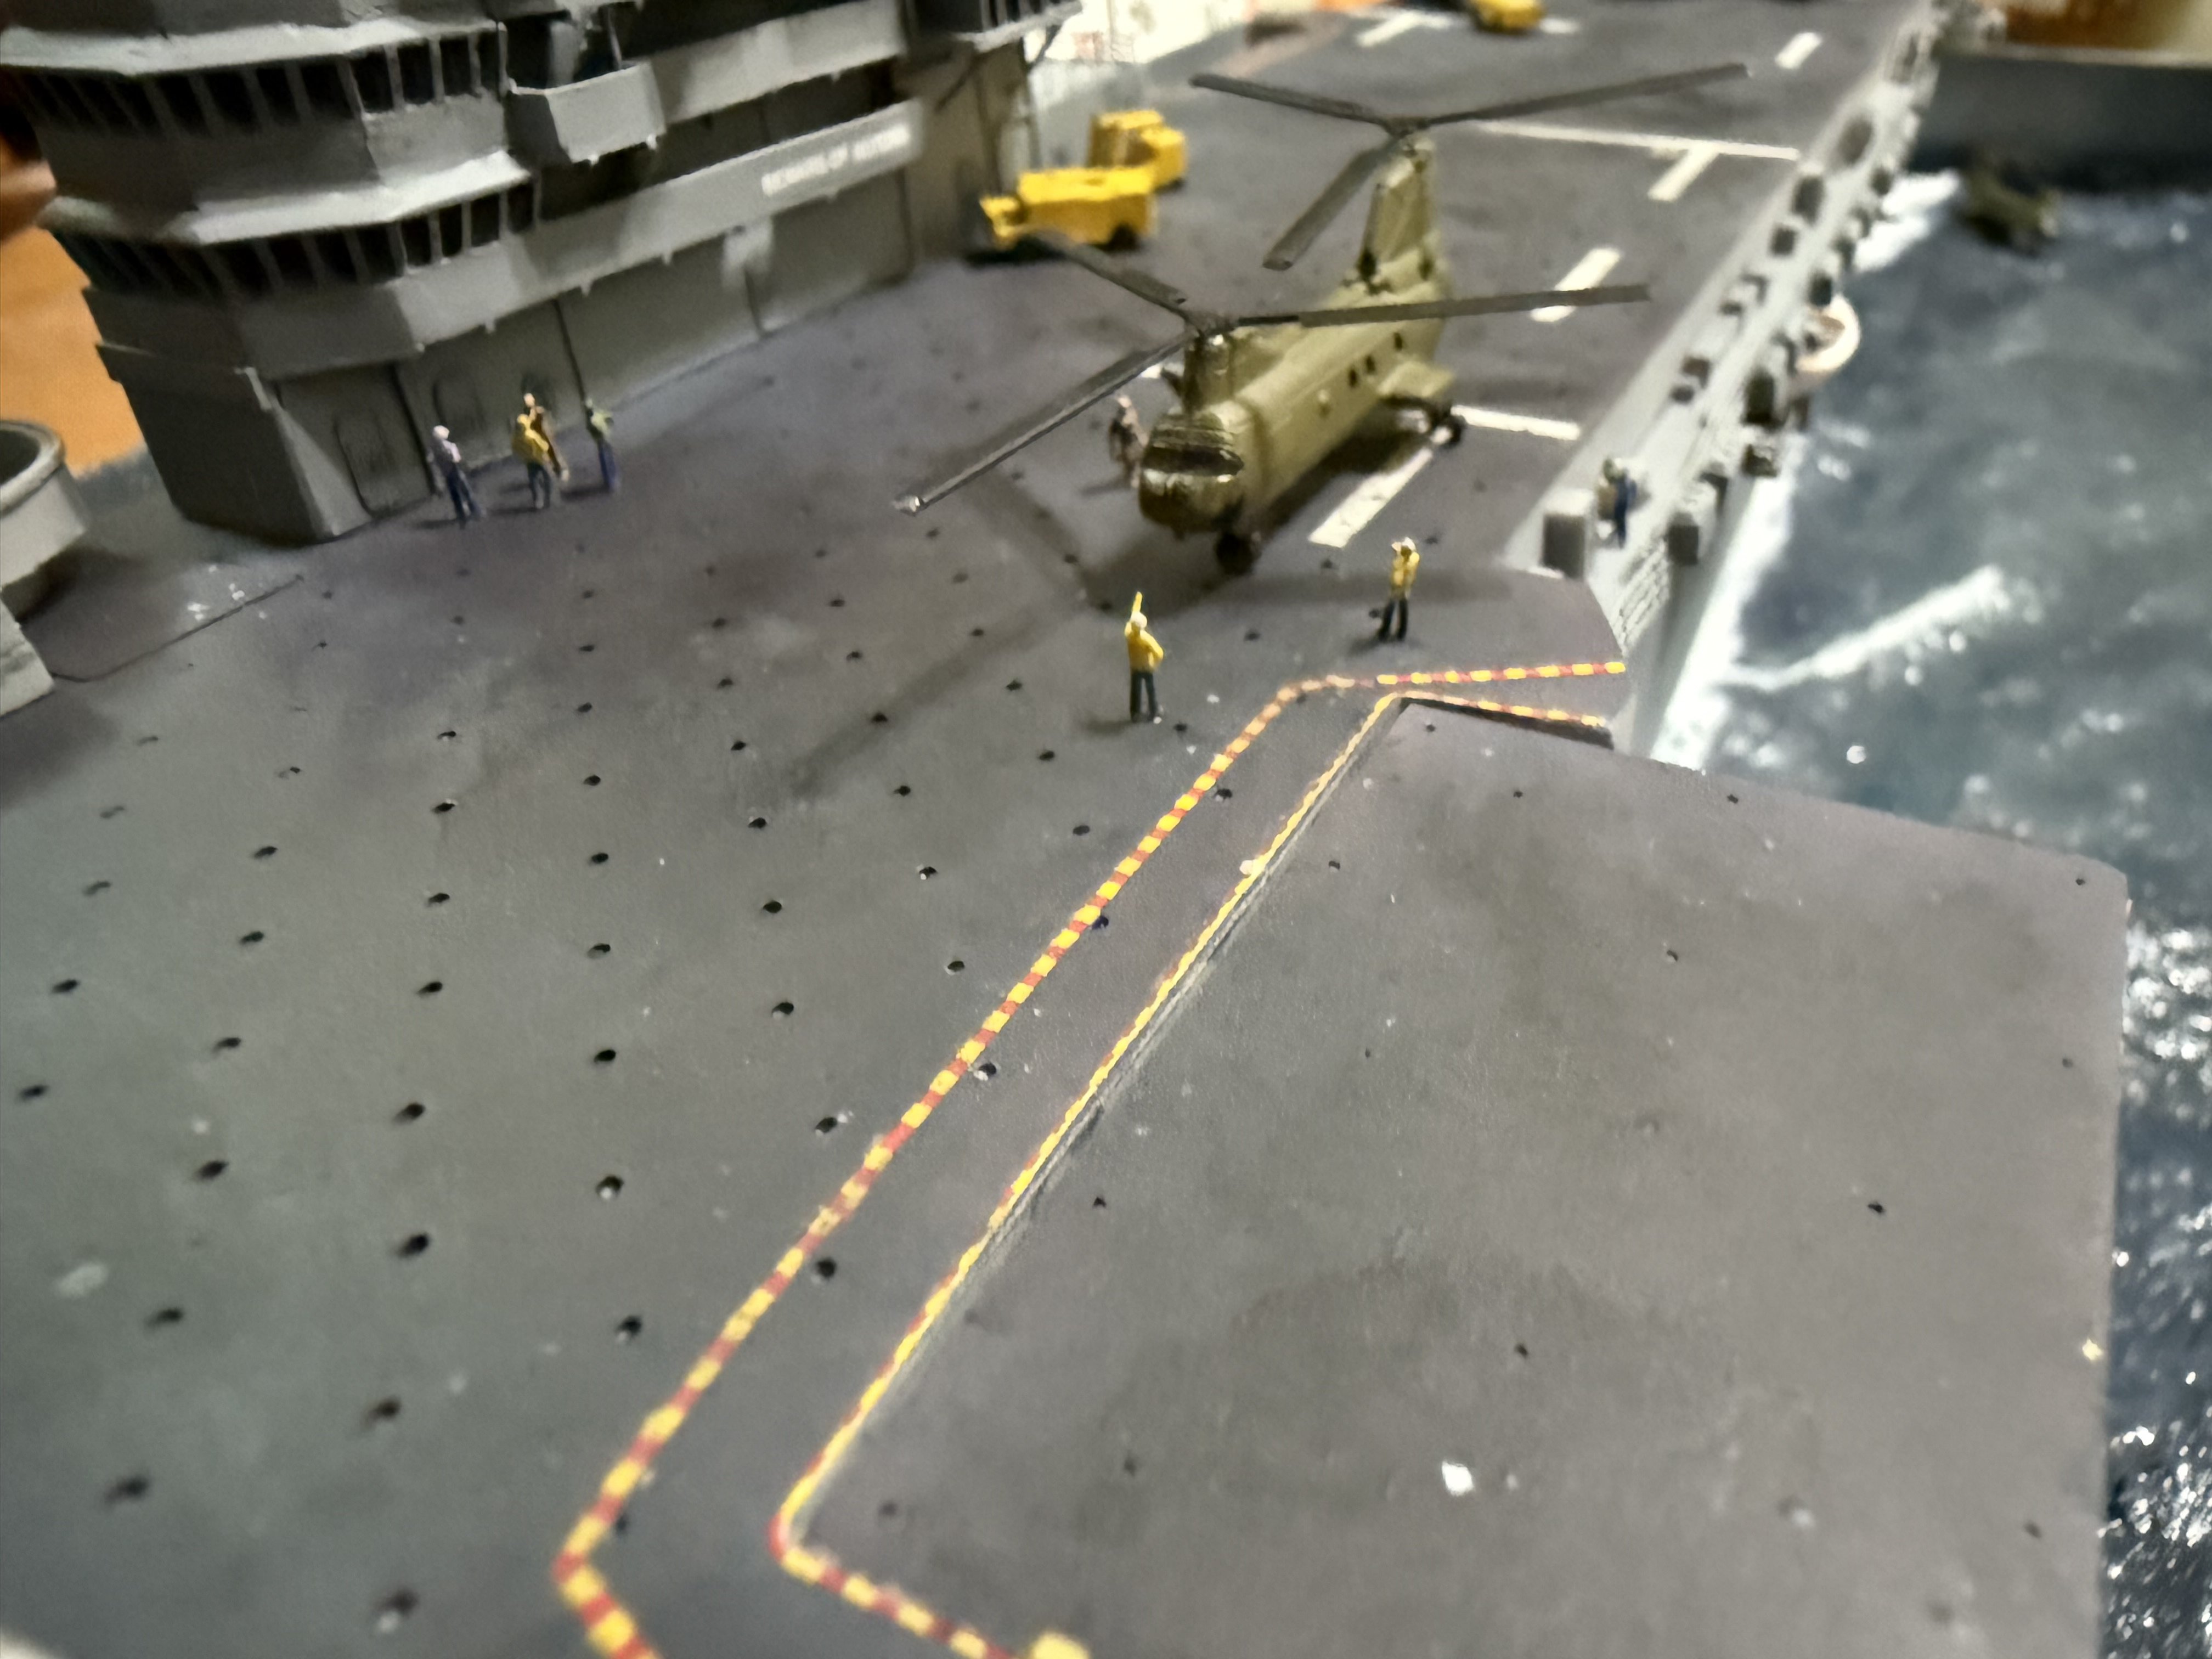
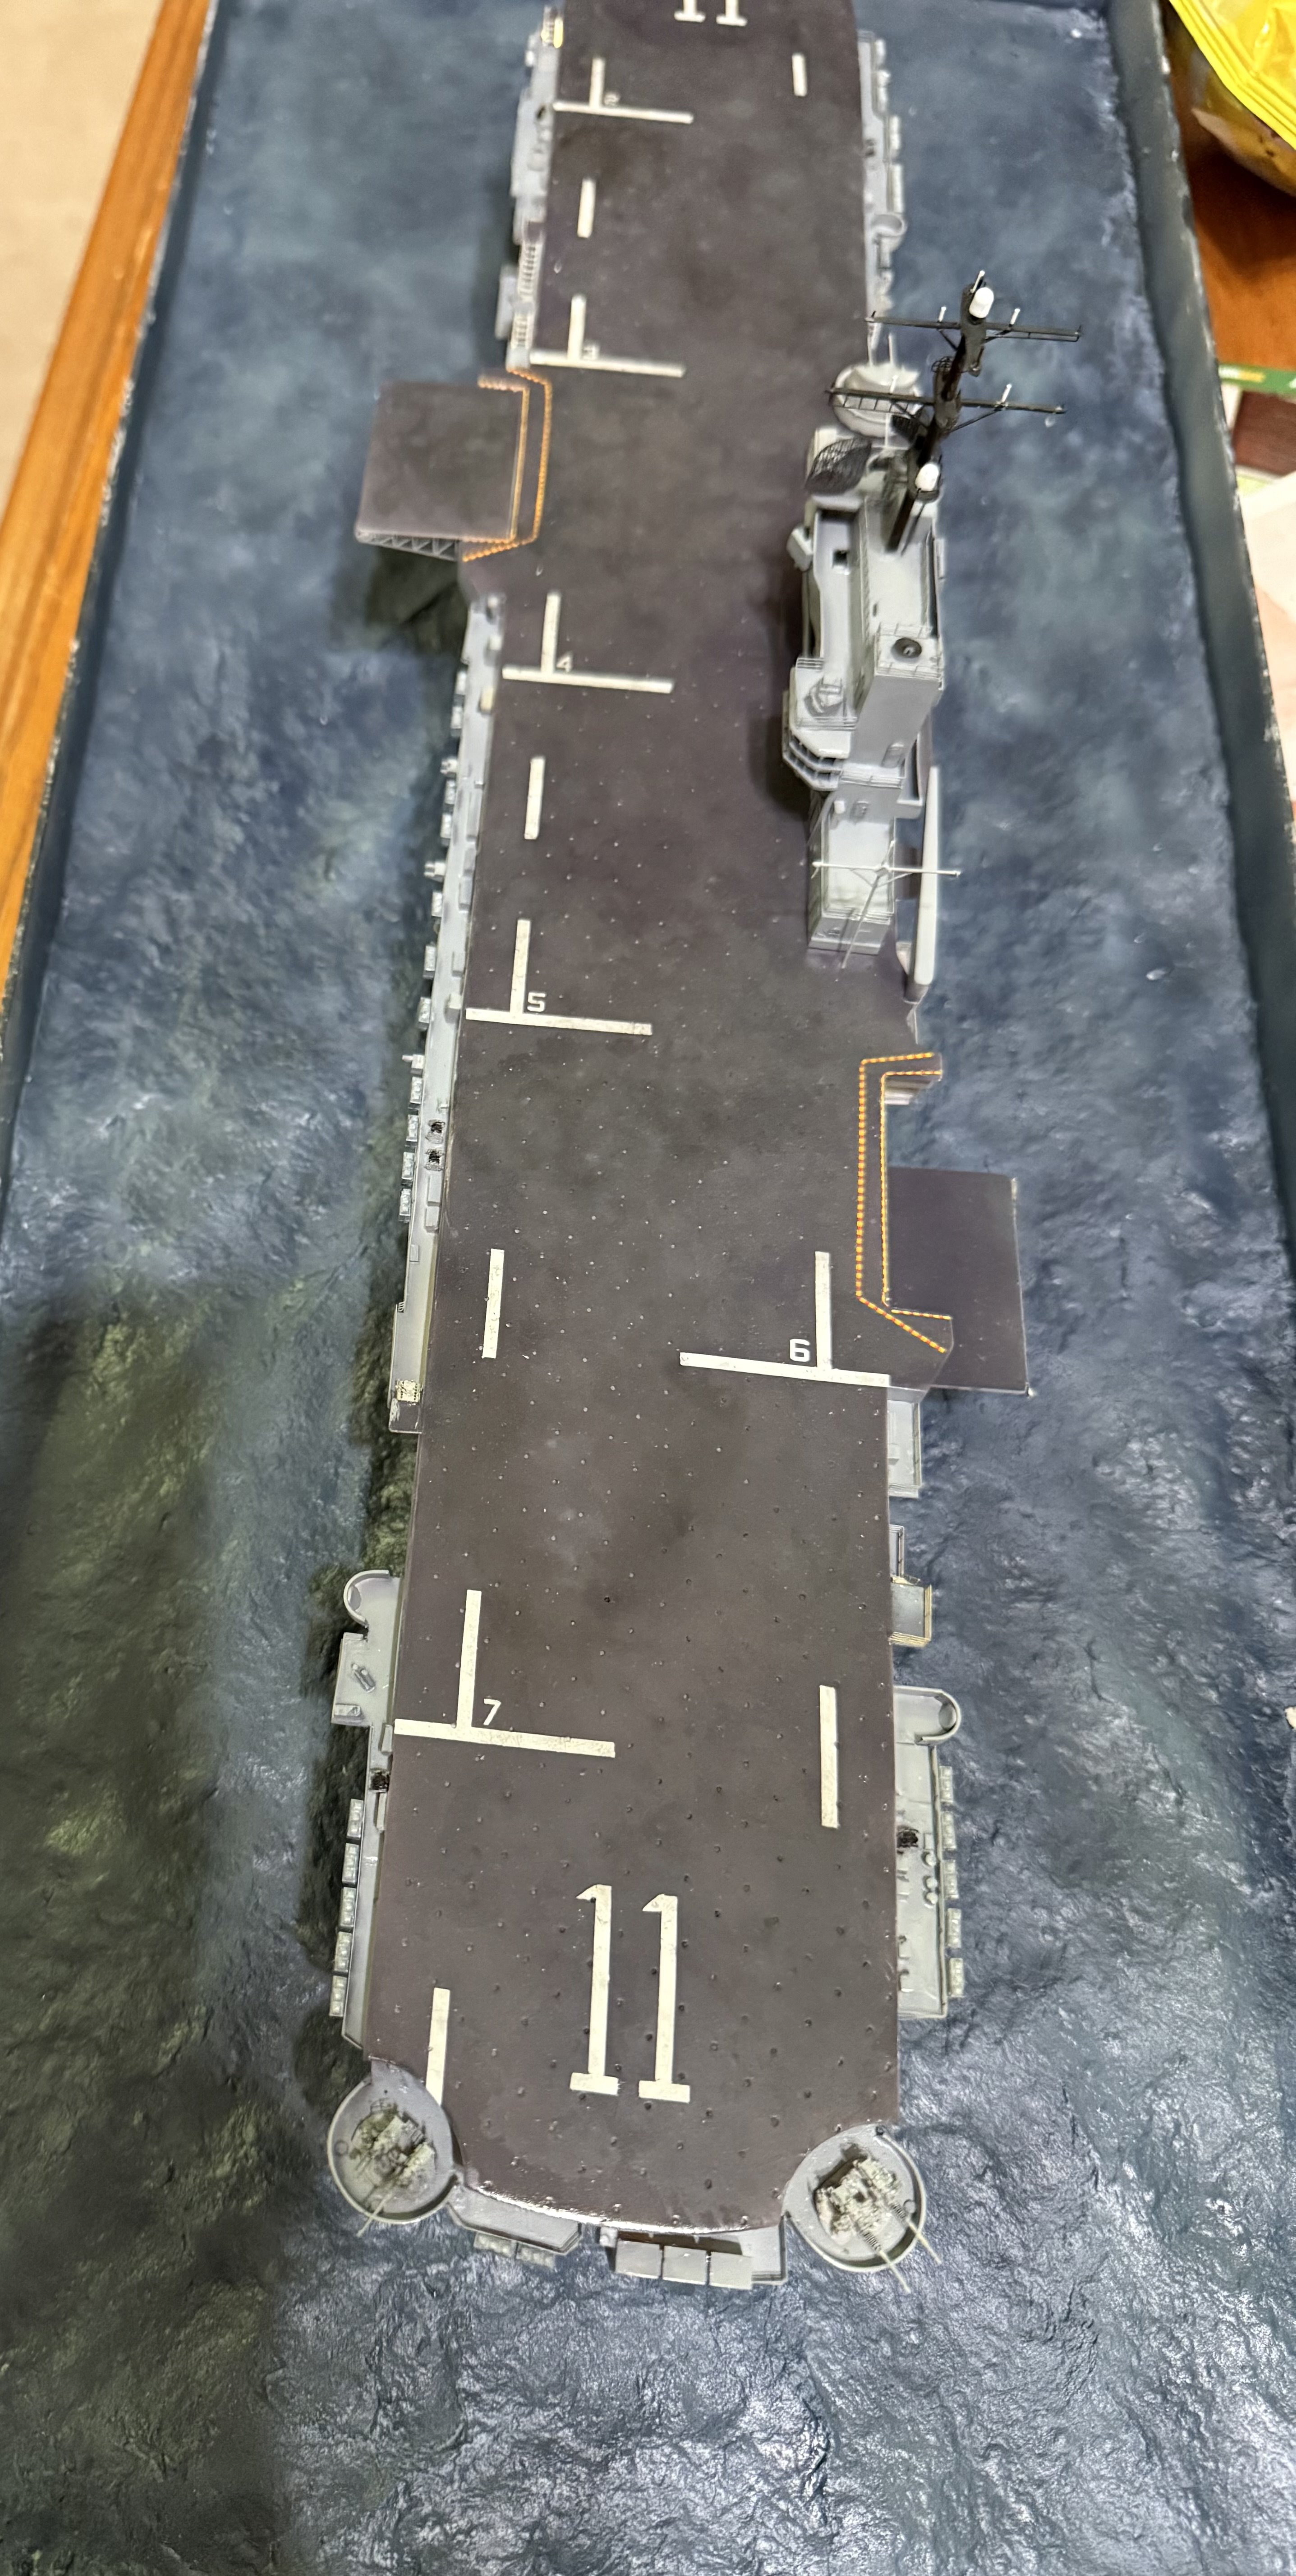
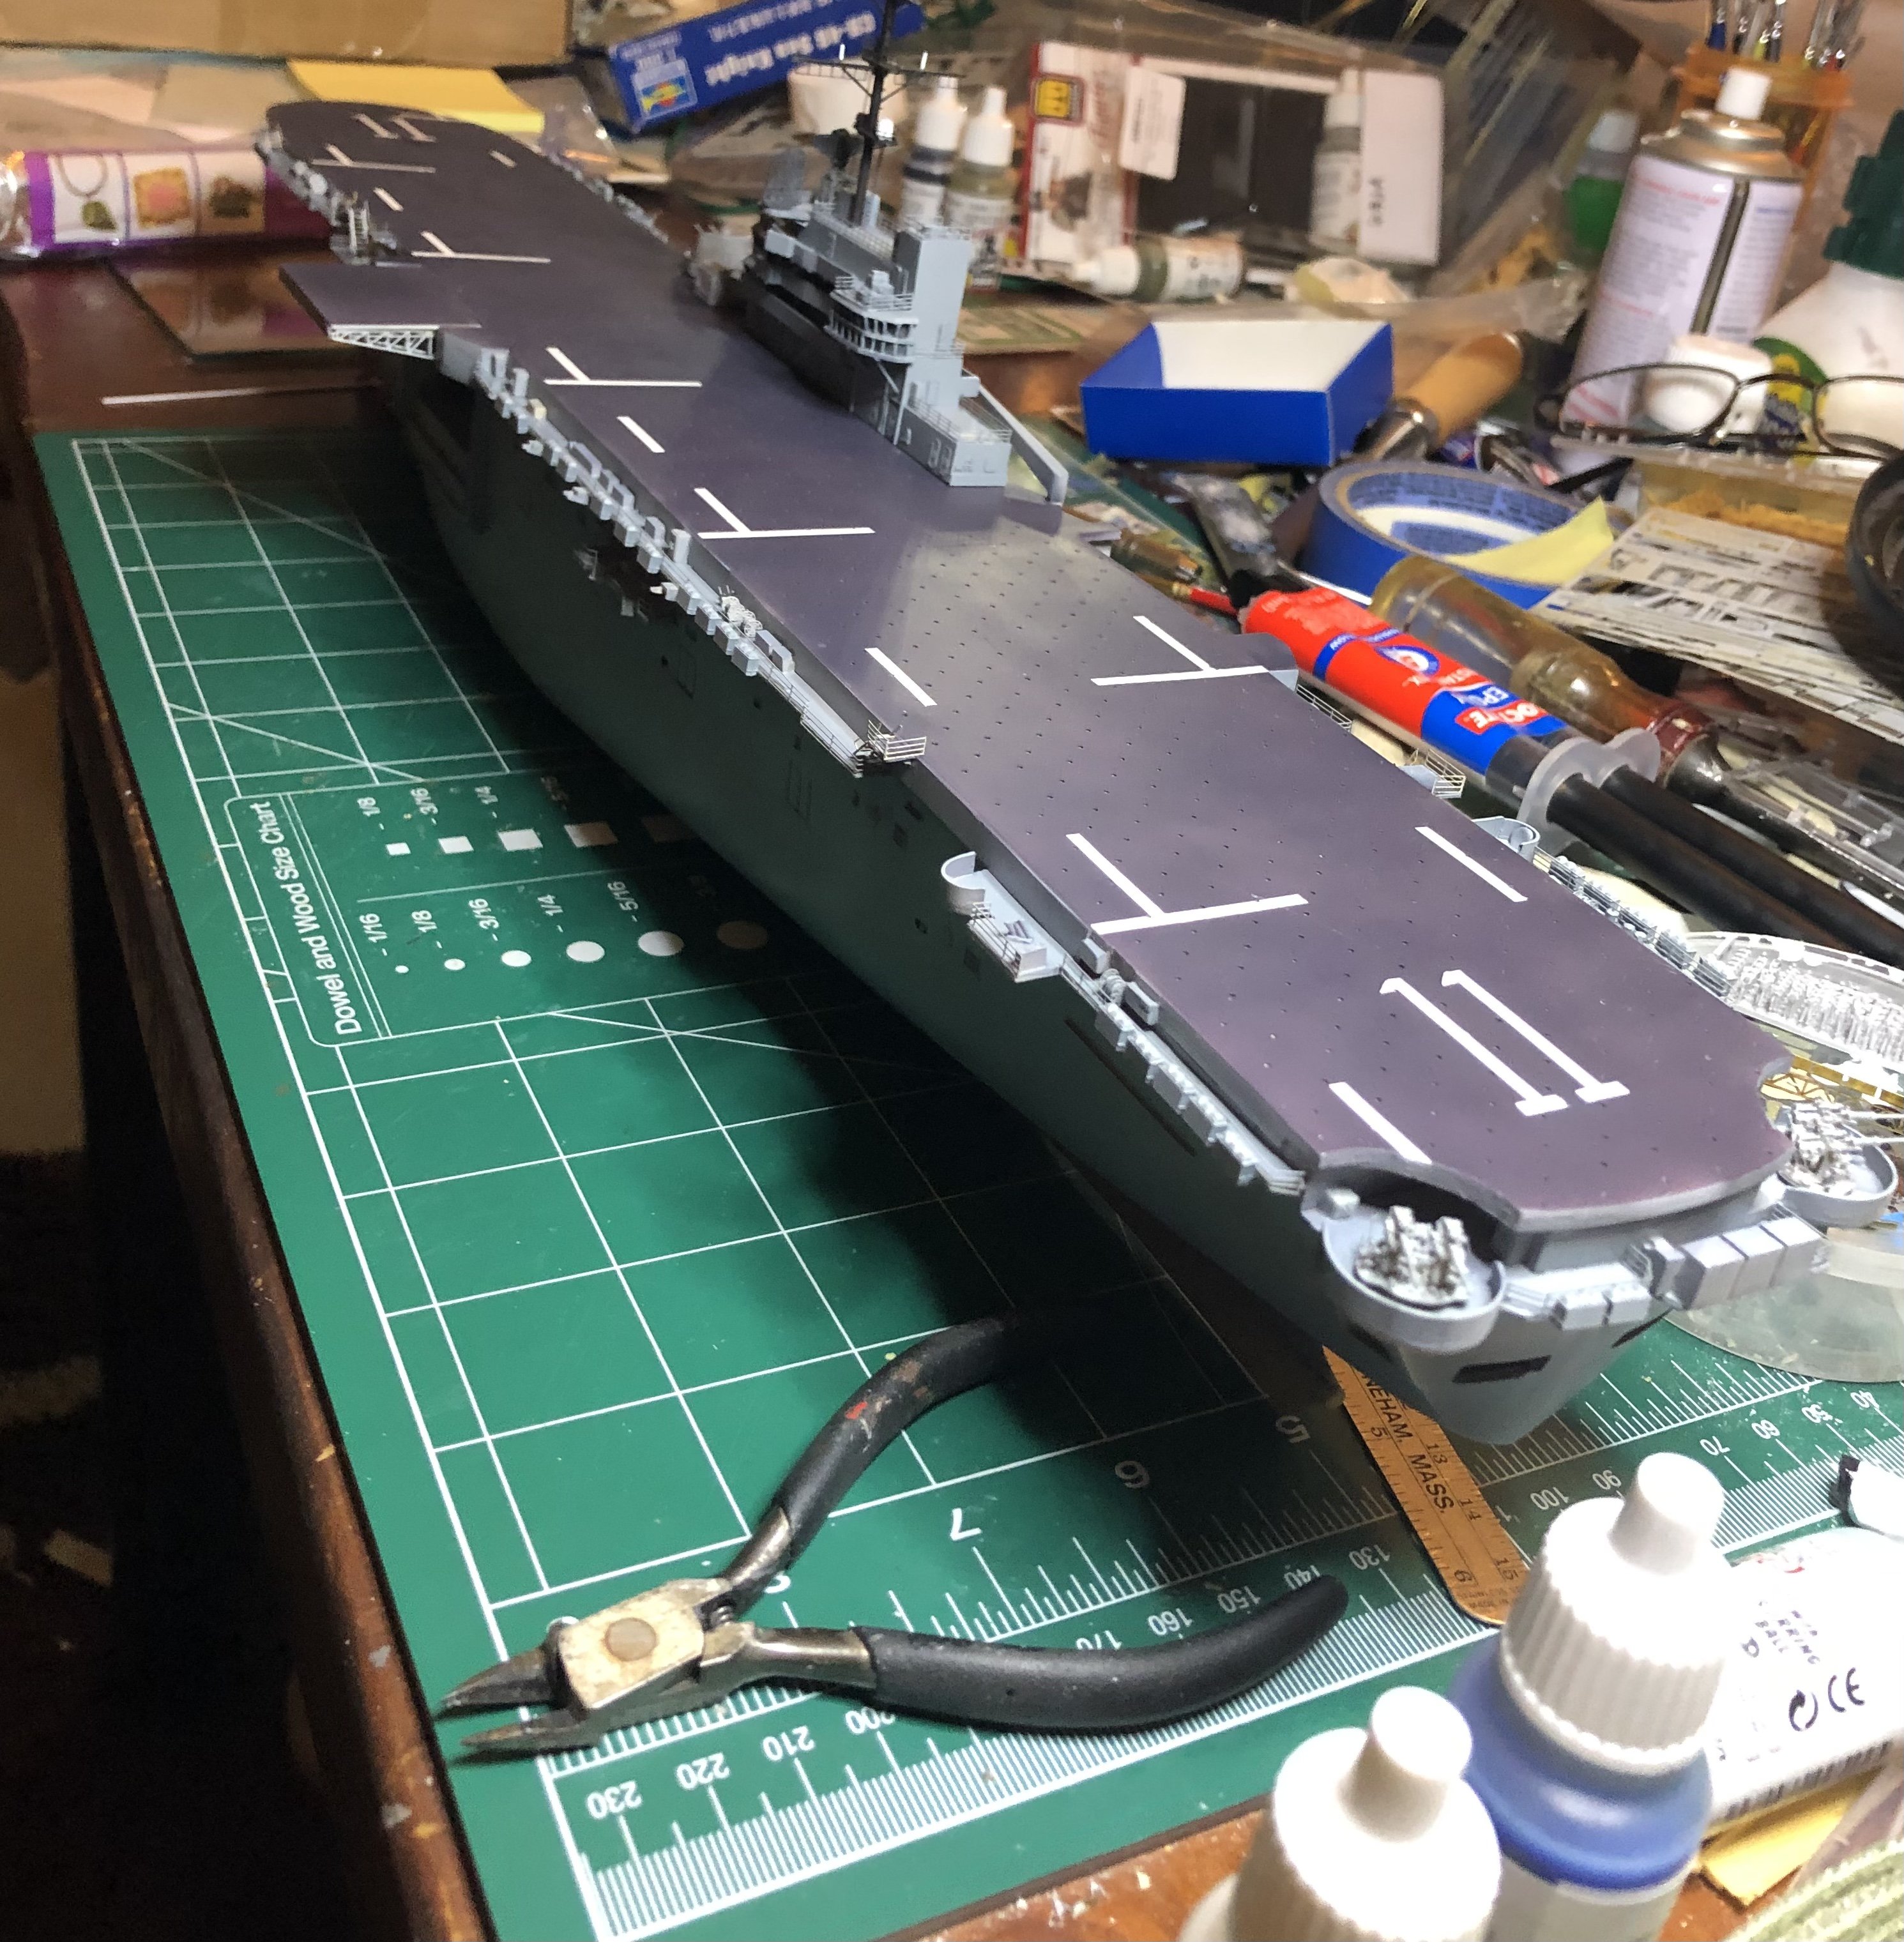
From the model desk: 1/350 USS New Orleans LPH-11. After 10 years of off/on working on it, I’m calling it done. This kit fought me all the way to the end and I considered giving up more than once. All walkways, both masts, and a LOT of other stuff was scratch built using plastic sheet. I had to go by Dad’s cruise book and period photos to backdate her to 1970. Good grief. Still more I could have done, but I’m calling it. If I feel like it, I may do more another time. Im satisfied with it. Enjoy.


-
-
-
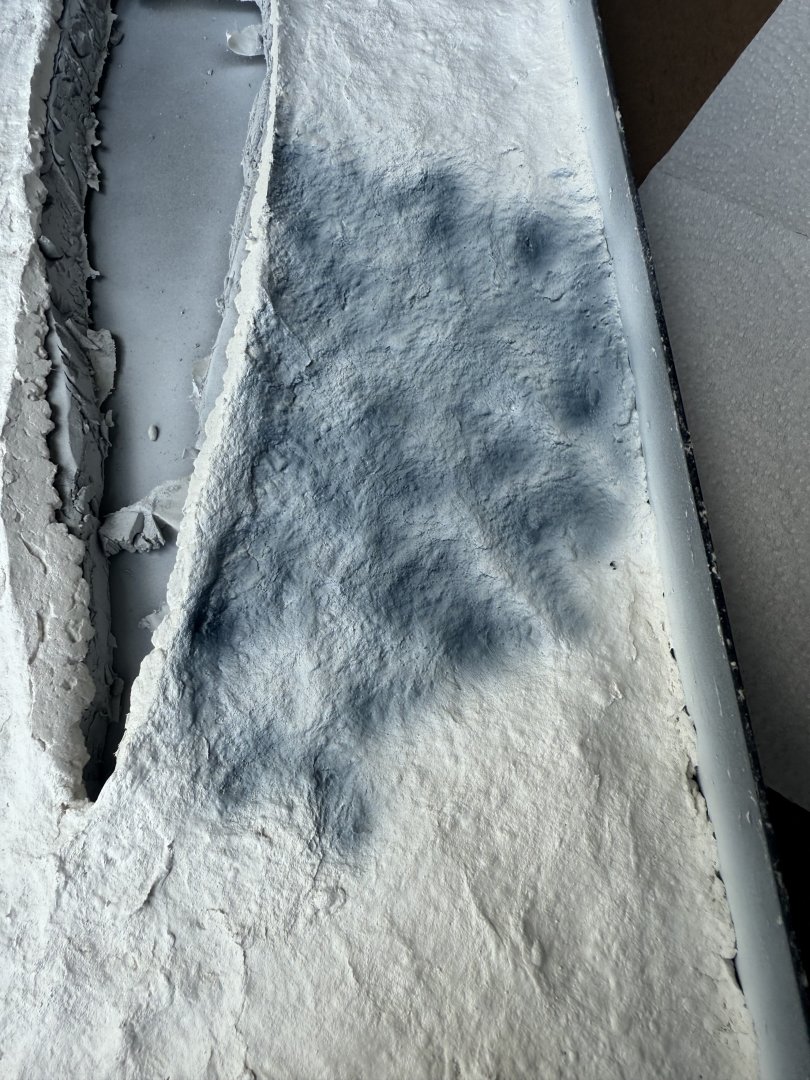
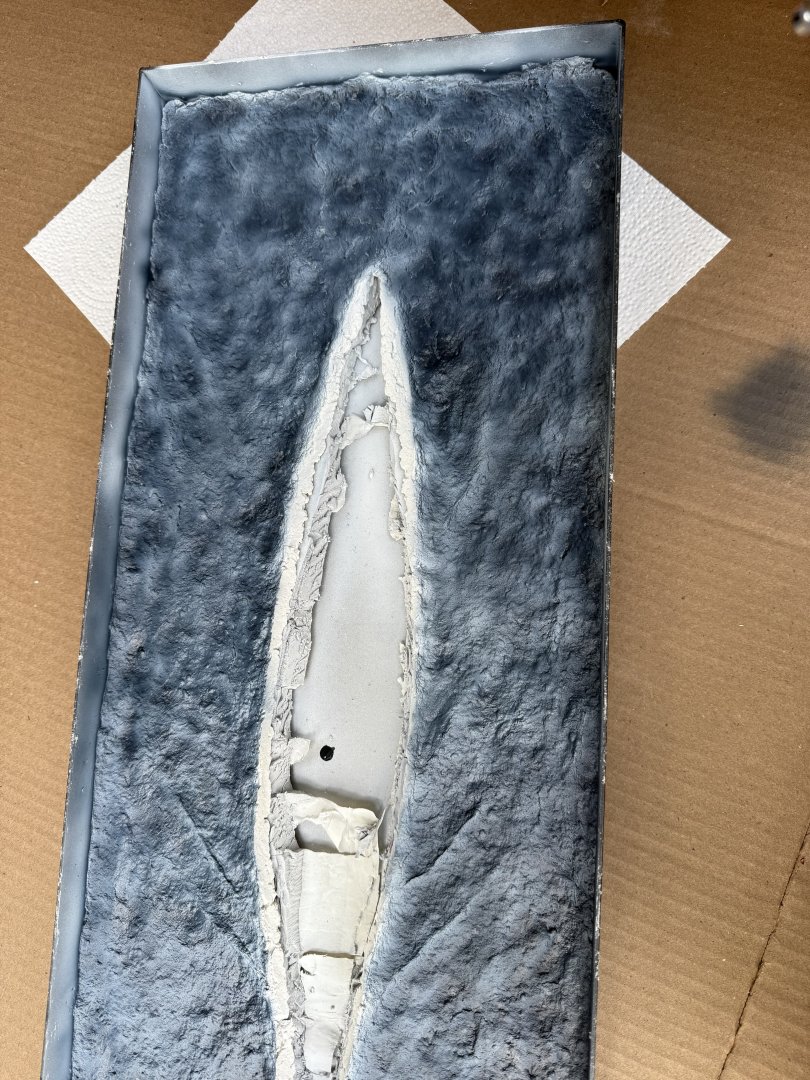
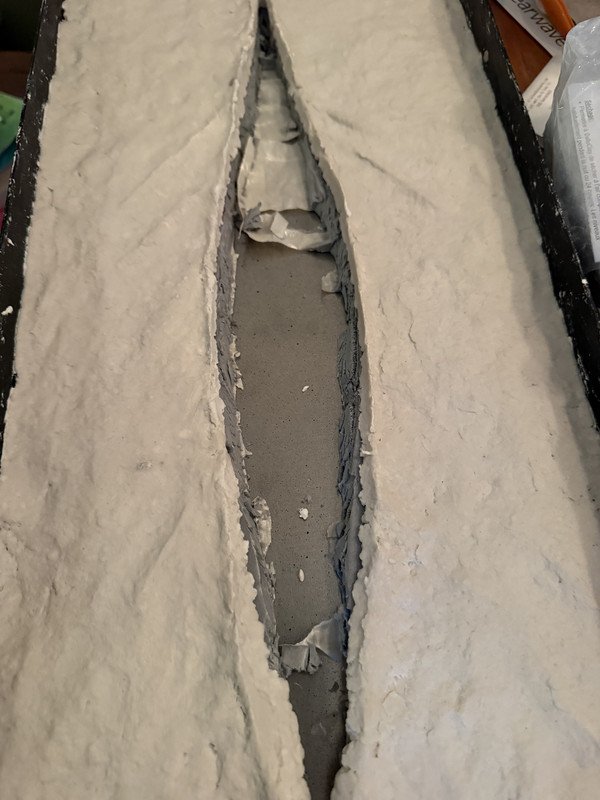
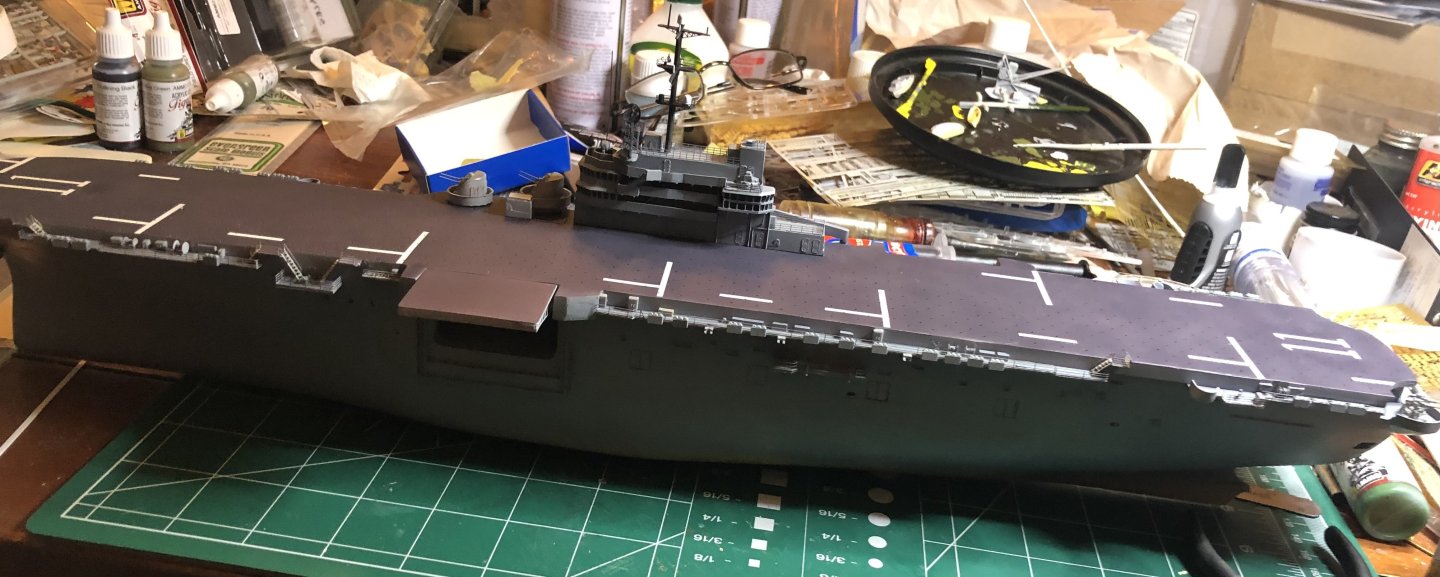
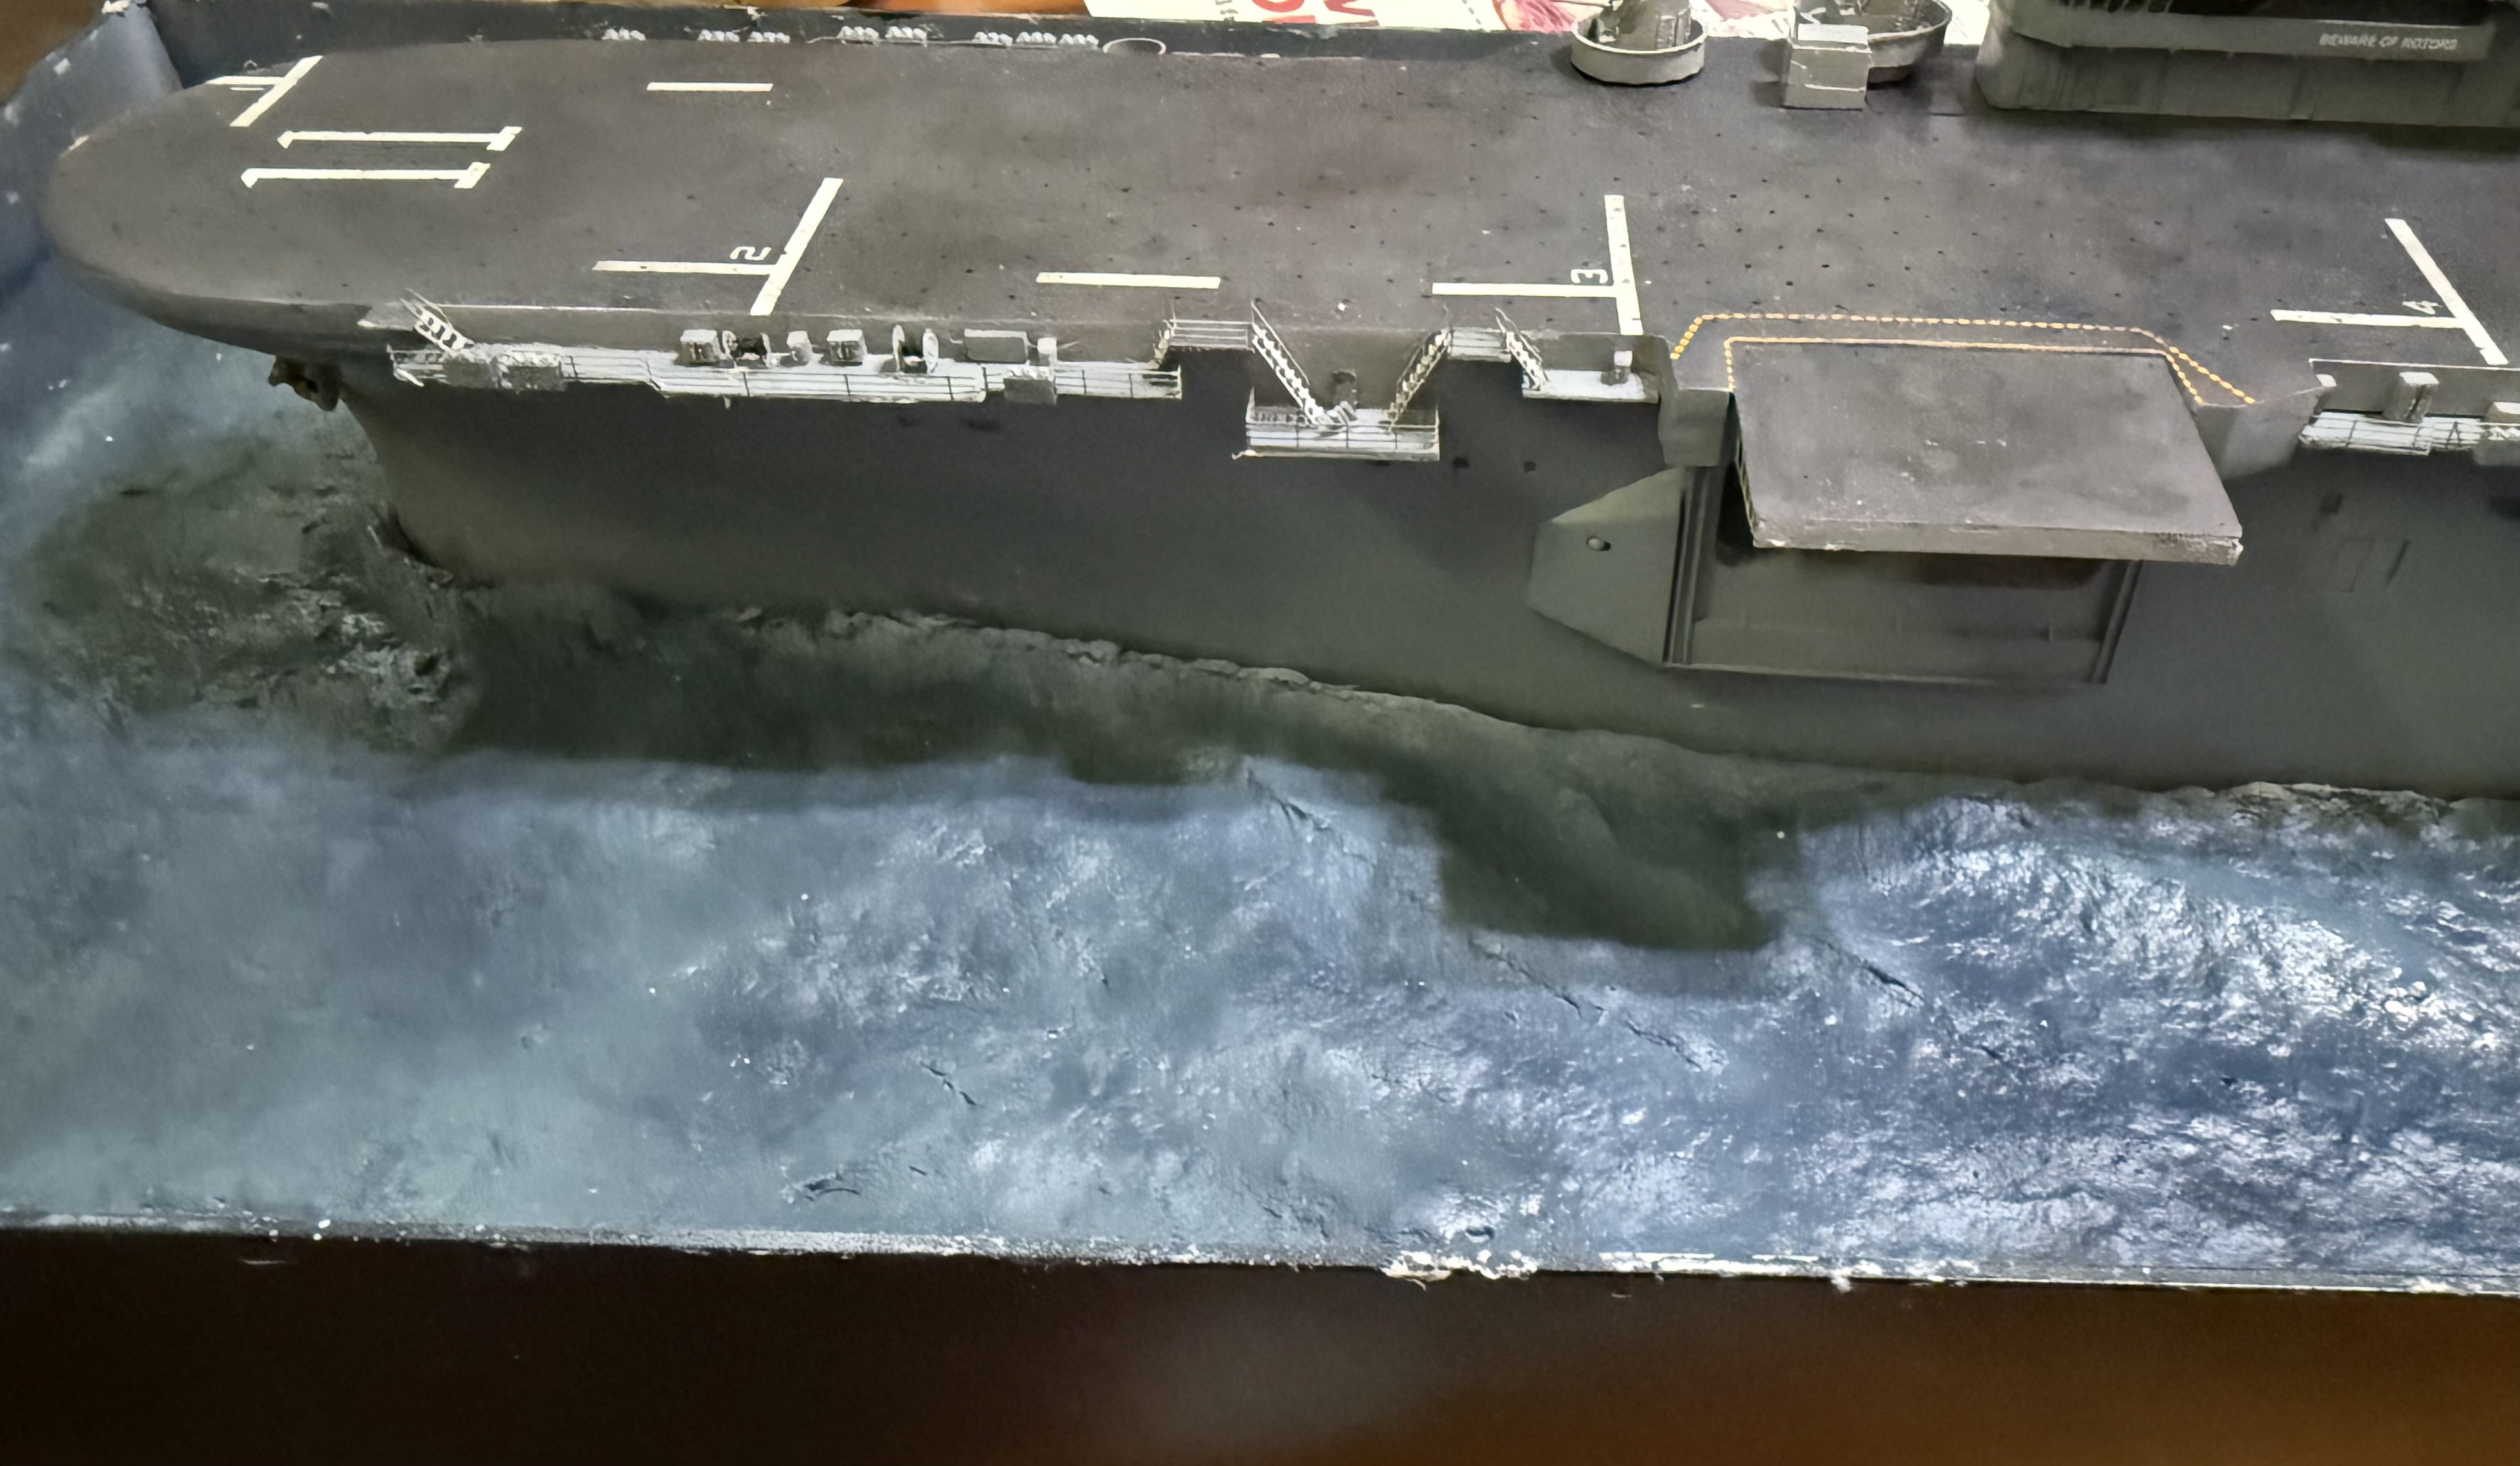
Small update time - my attempt at painting ocean water, something I pretty much suck at. Started with overall dark with the depest parts the darkest. Mixed lighter colors for the upper wave parts. Too light? Too much contrast? After an hour of painting, I’ve had enough for the time being. Maybe I need to go back with dark blue and blend it better. Thoughts/criticisms appreciated. After the paint dries, I’ll gloss it
Paints used: MRP Sea Blue, Intermediate Blue, white and Hataka Yellow.

-
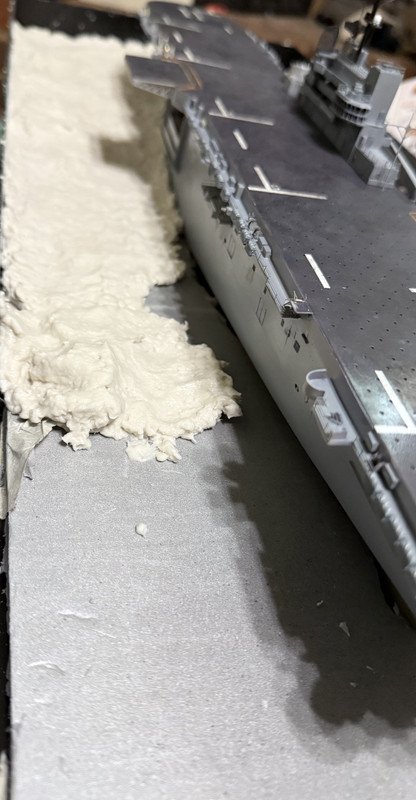
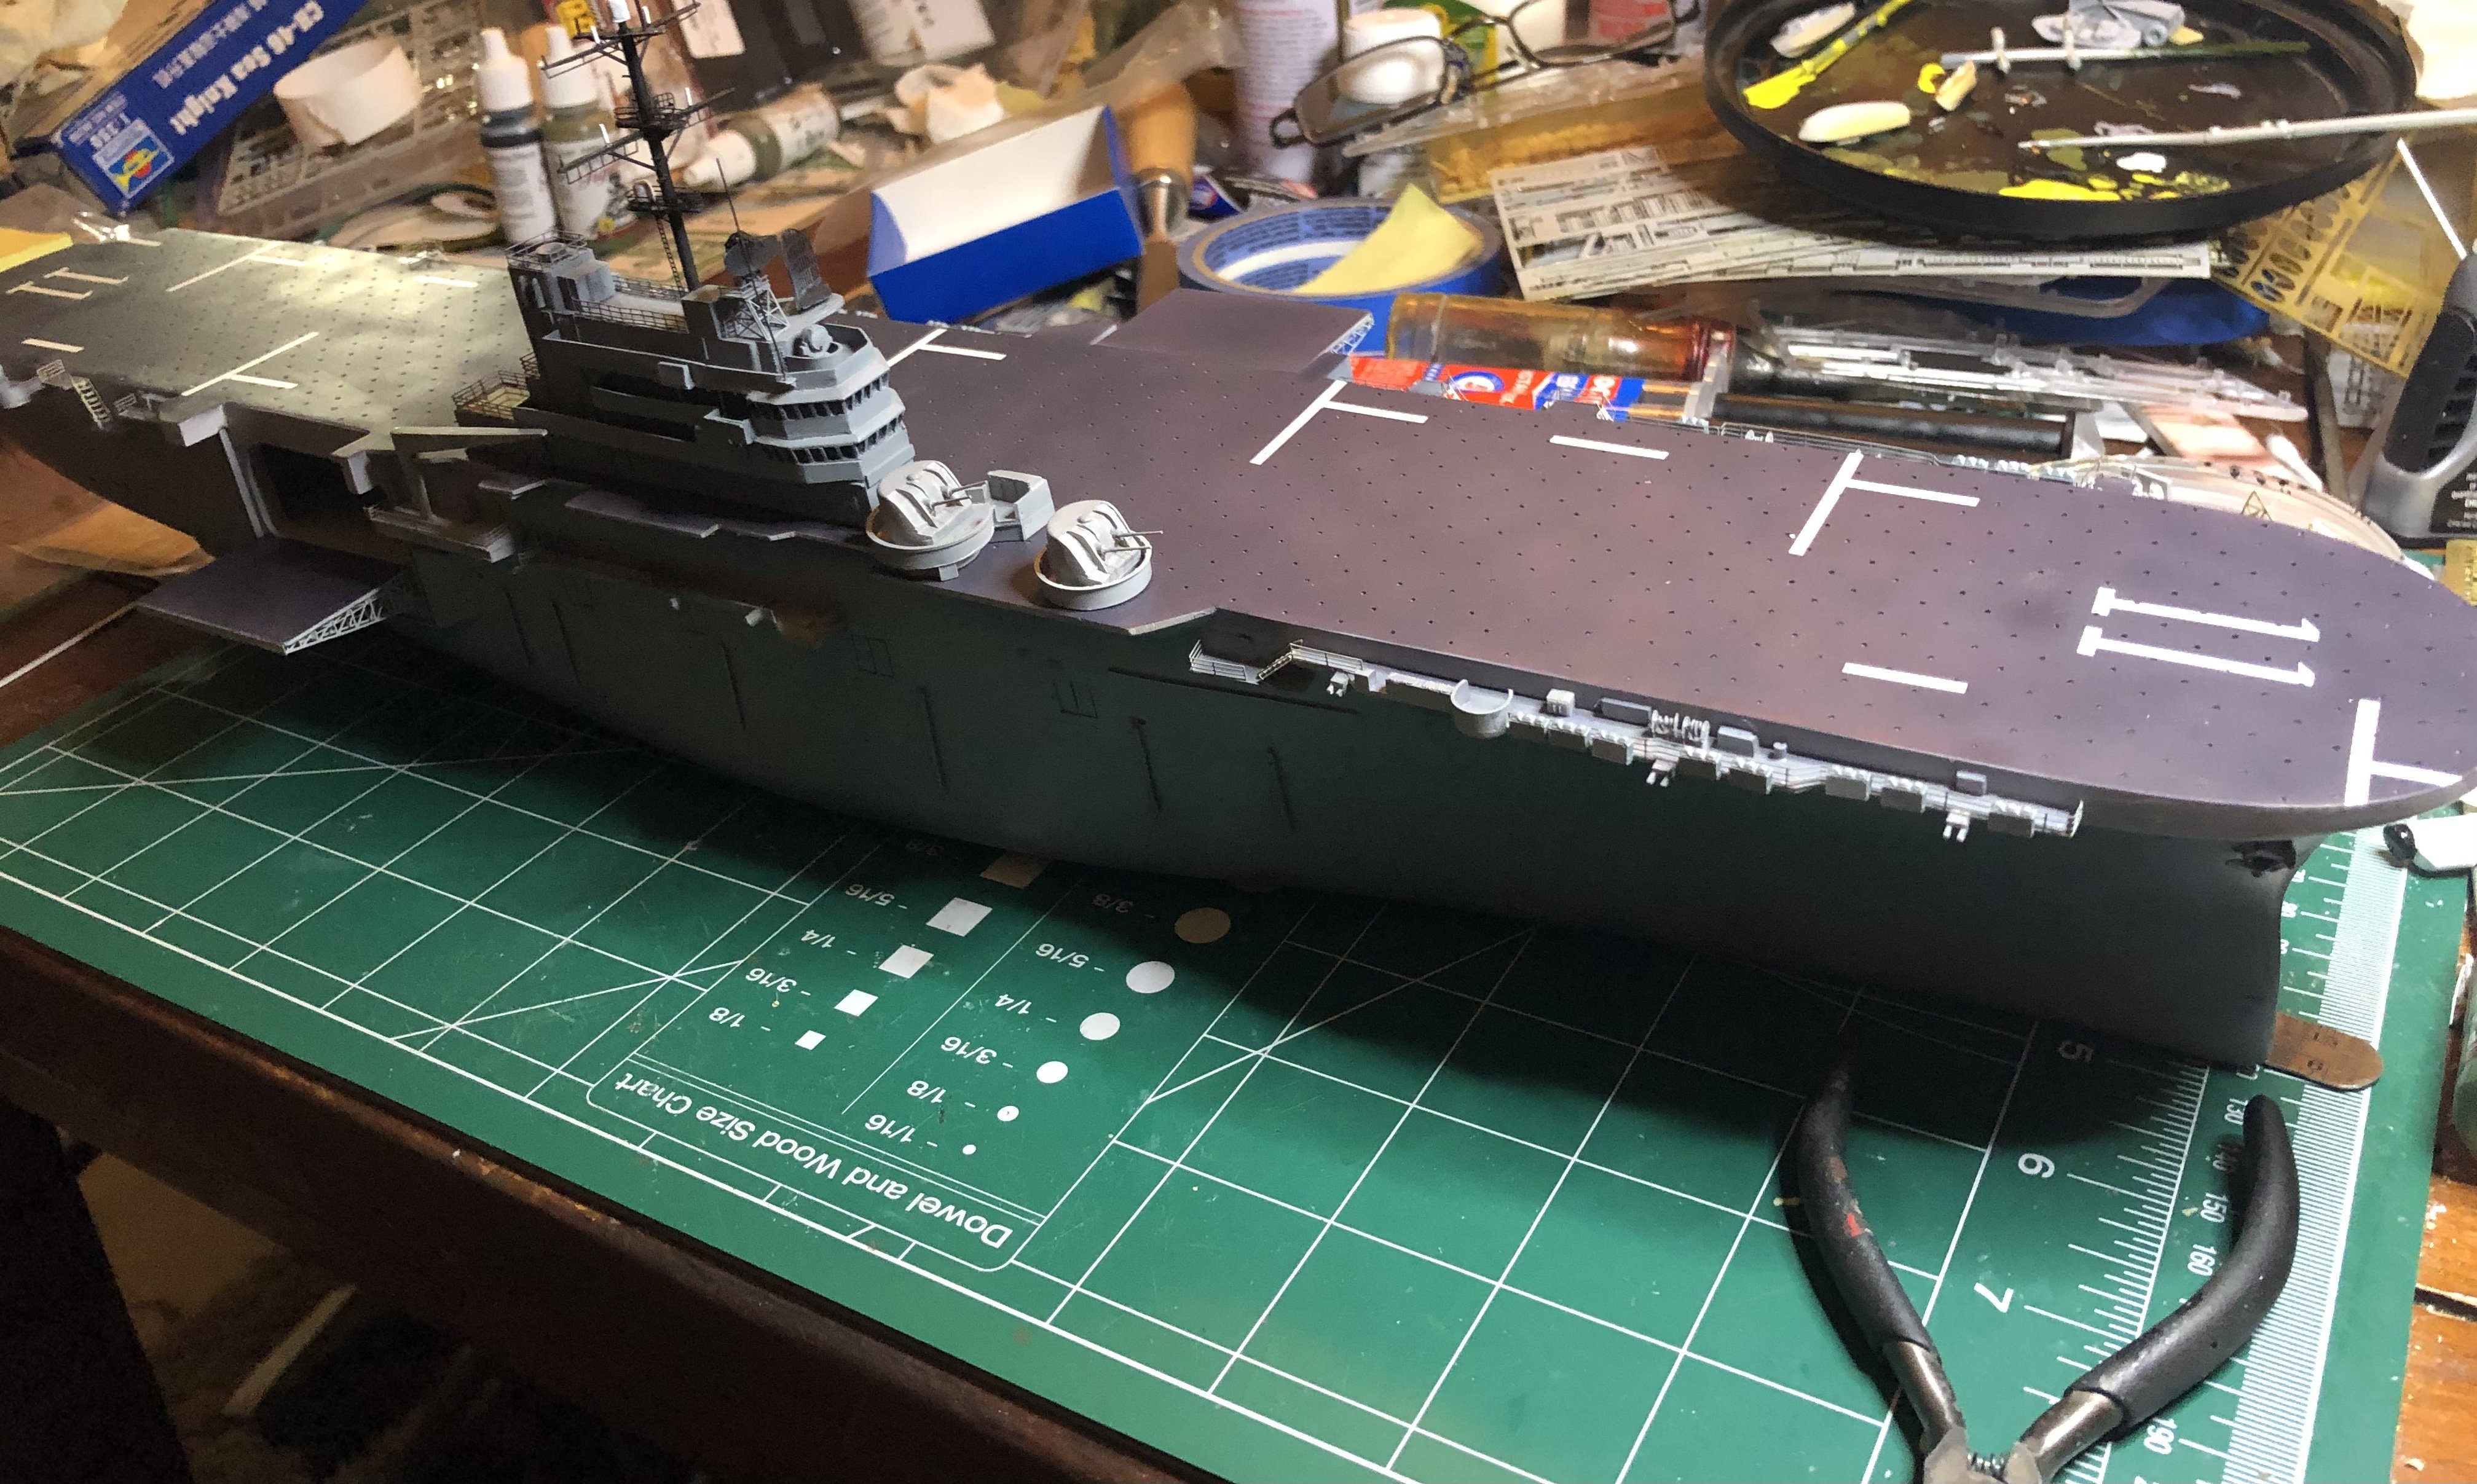
Update time. Aside from a few repairs for minor broken parts, the ship is done. The air wing is, too. Still painting a few figures and deck tractors, but I'm calling this one. Current part is making the water base. I'm using Celluclay for the water. I studied pictures and tried to replicate them, but I'm not that good. After the cellulcay dries, I will seal it and then paint it. Will be using varying blues and whites for the ocean.
-
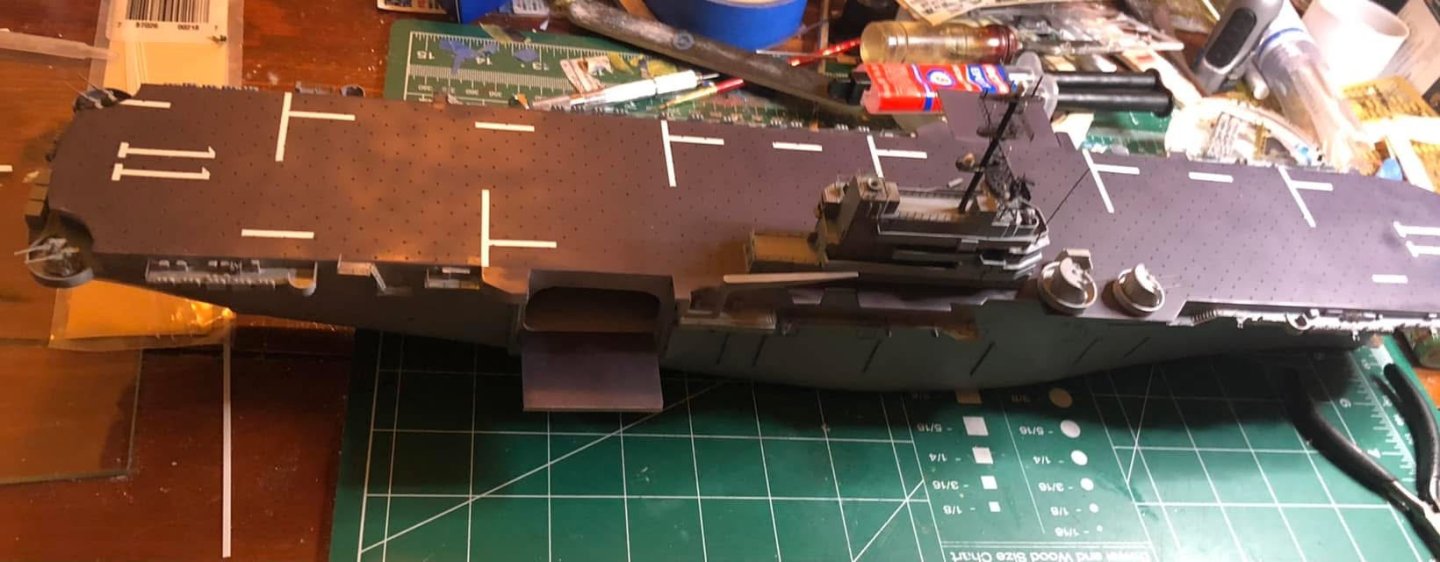
Update time. With a few minor additions, I’m calling this one done. Am actually pleased with it. Before weathering, I gave it a coat of Future floor polish, which is an acrylic gloss coat. Weathering was done with black, brown, white, gray, and yellow oils. Sort of like the dot filter method. Mixed up orange to simulate rust. As those who have served aboard are all too familiar with rust while at sea. Also mixed an enamel pin wash. The mini-mast looks crooked, but it isn’t. All white deck markings were painted.
Next up is to finish the air wing, paint the deck tractors, cranes, etc, and then the figures. Enjoy.


- ccoyle, NavyShooter, GrandpaPhil and 4 others
-
 7
7
-
Small update. The end is in sight. Sorry for the crappy pic quality - I will have better ones later. Except for a few more bits of PE, the ship is almost finished. Still have to add the mini-mast. Tomorrow I’ll seal the deck and decal it, then weather (my second favorite part after painting) it. The air wing needs to be finished. Then it’s on to making the sea dio. Is it perfect? Far, far from it. Dad likes it and that’s all that matters. Y’all have no idea how’s much I hate this kit 😂


- schooner, patrickmil, mikegr and 5 others
-
8
-
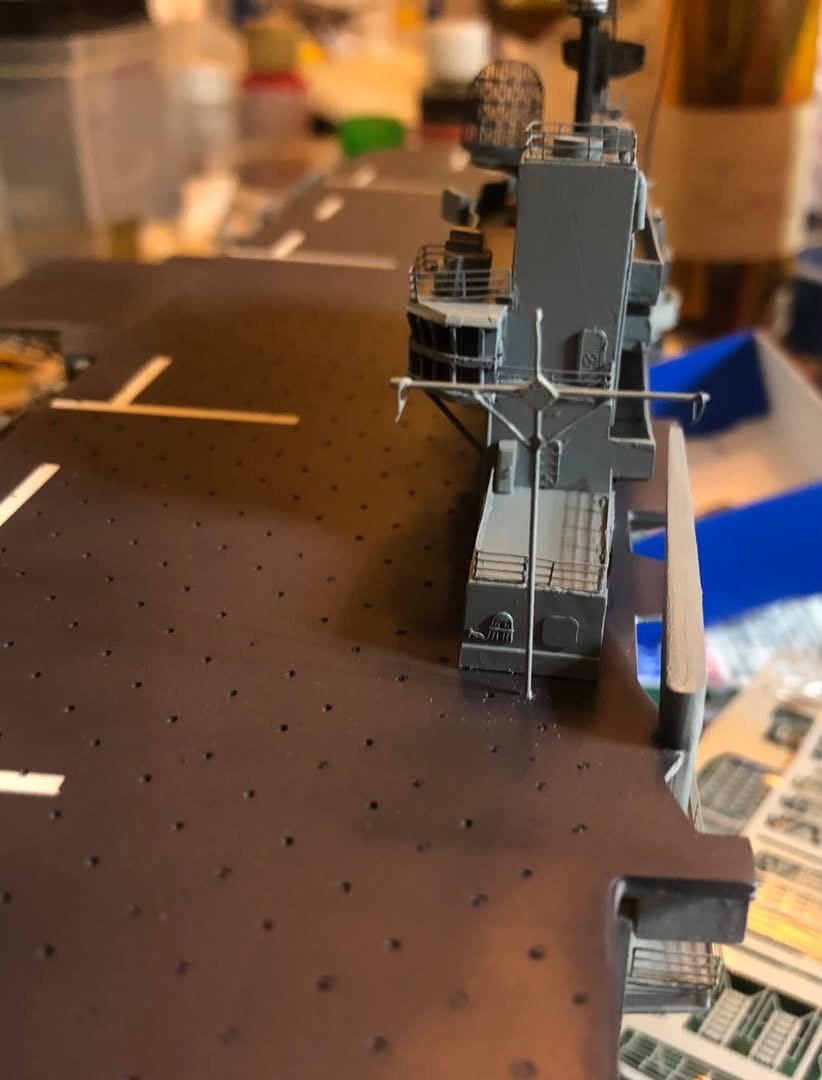
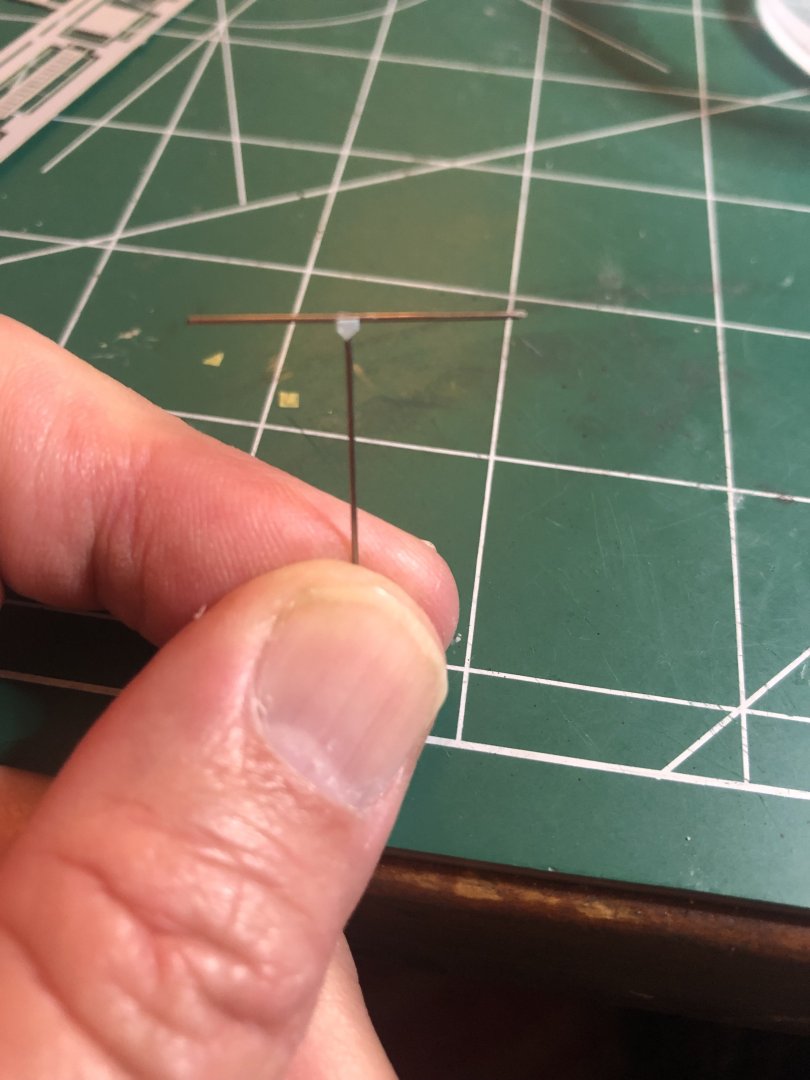
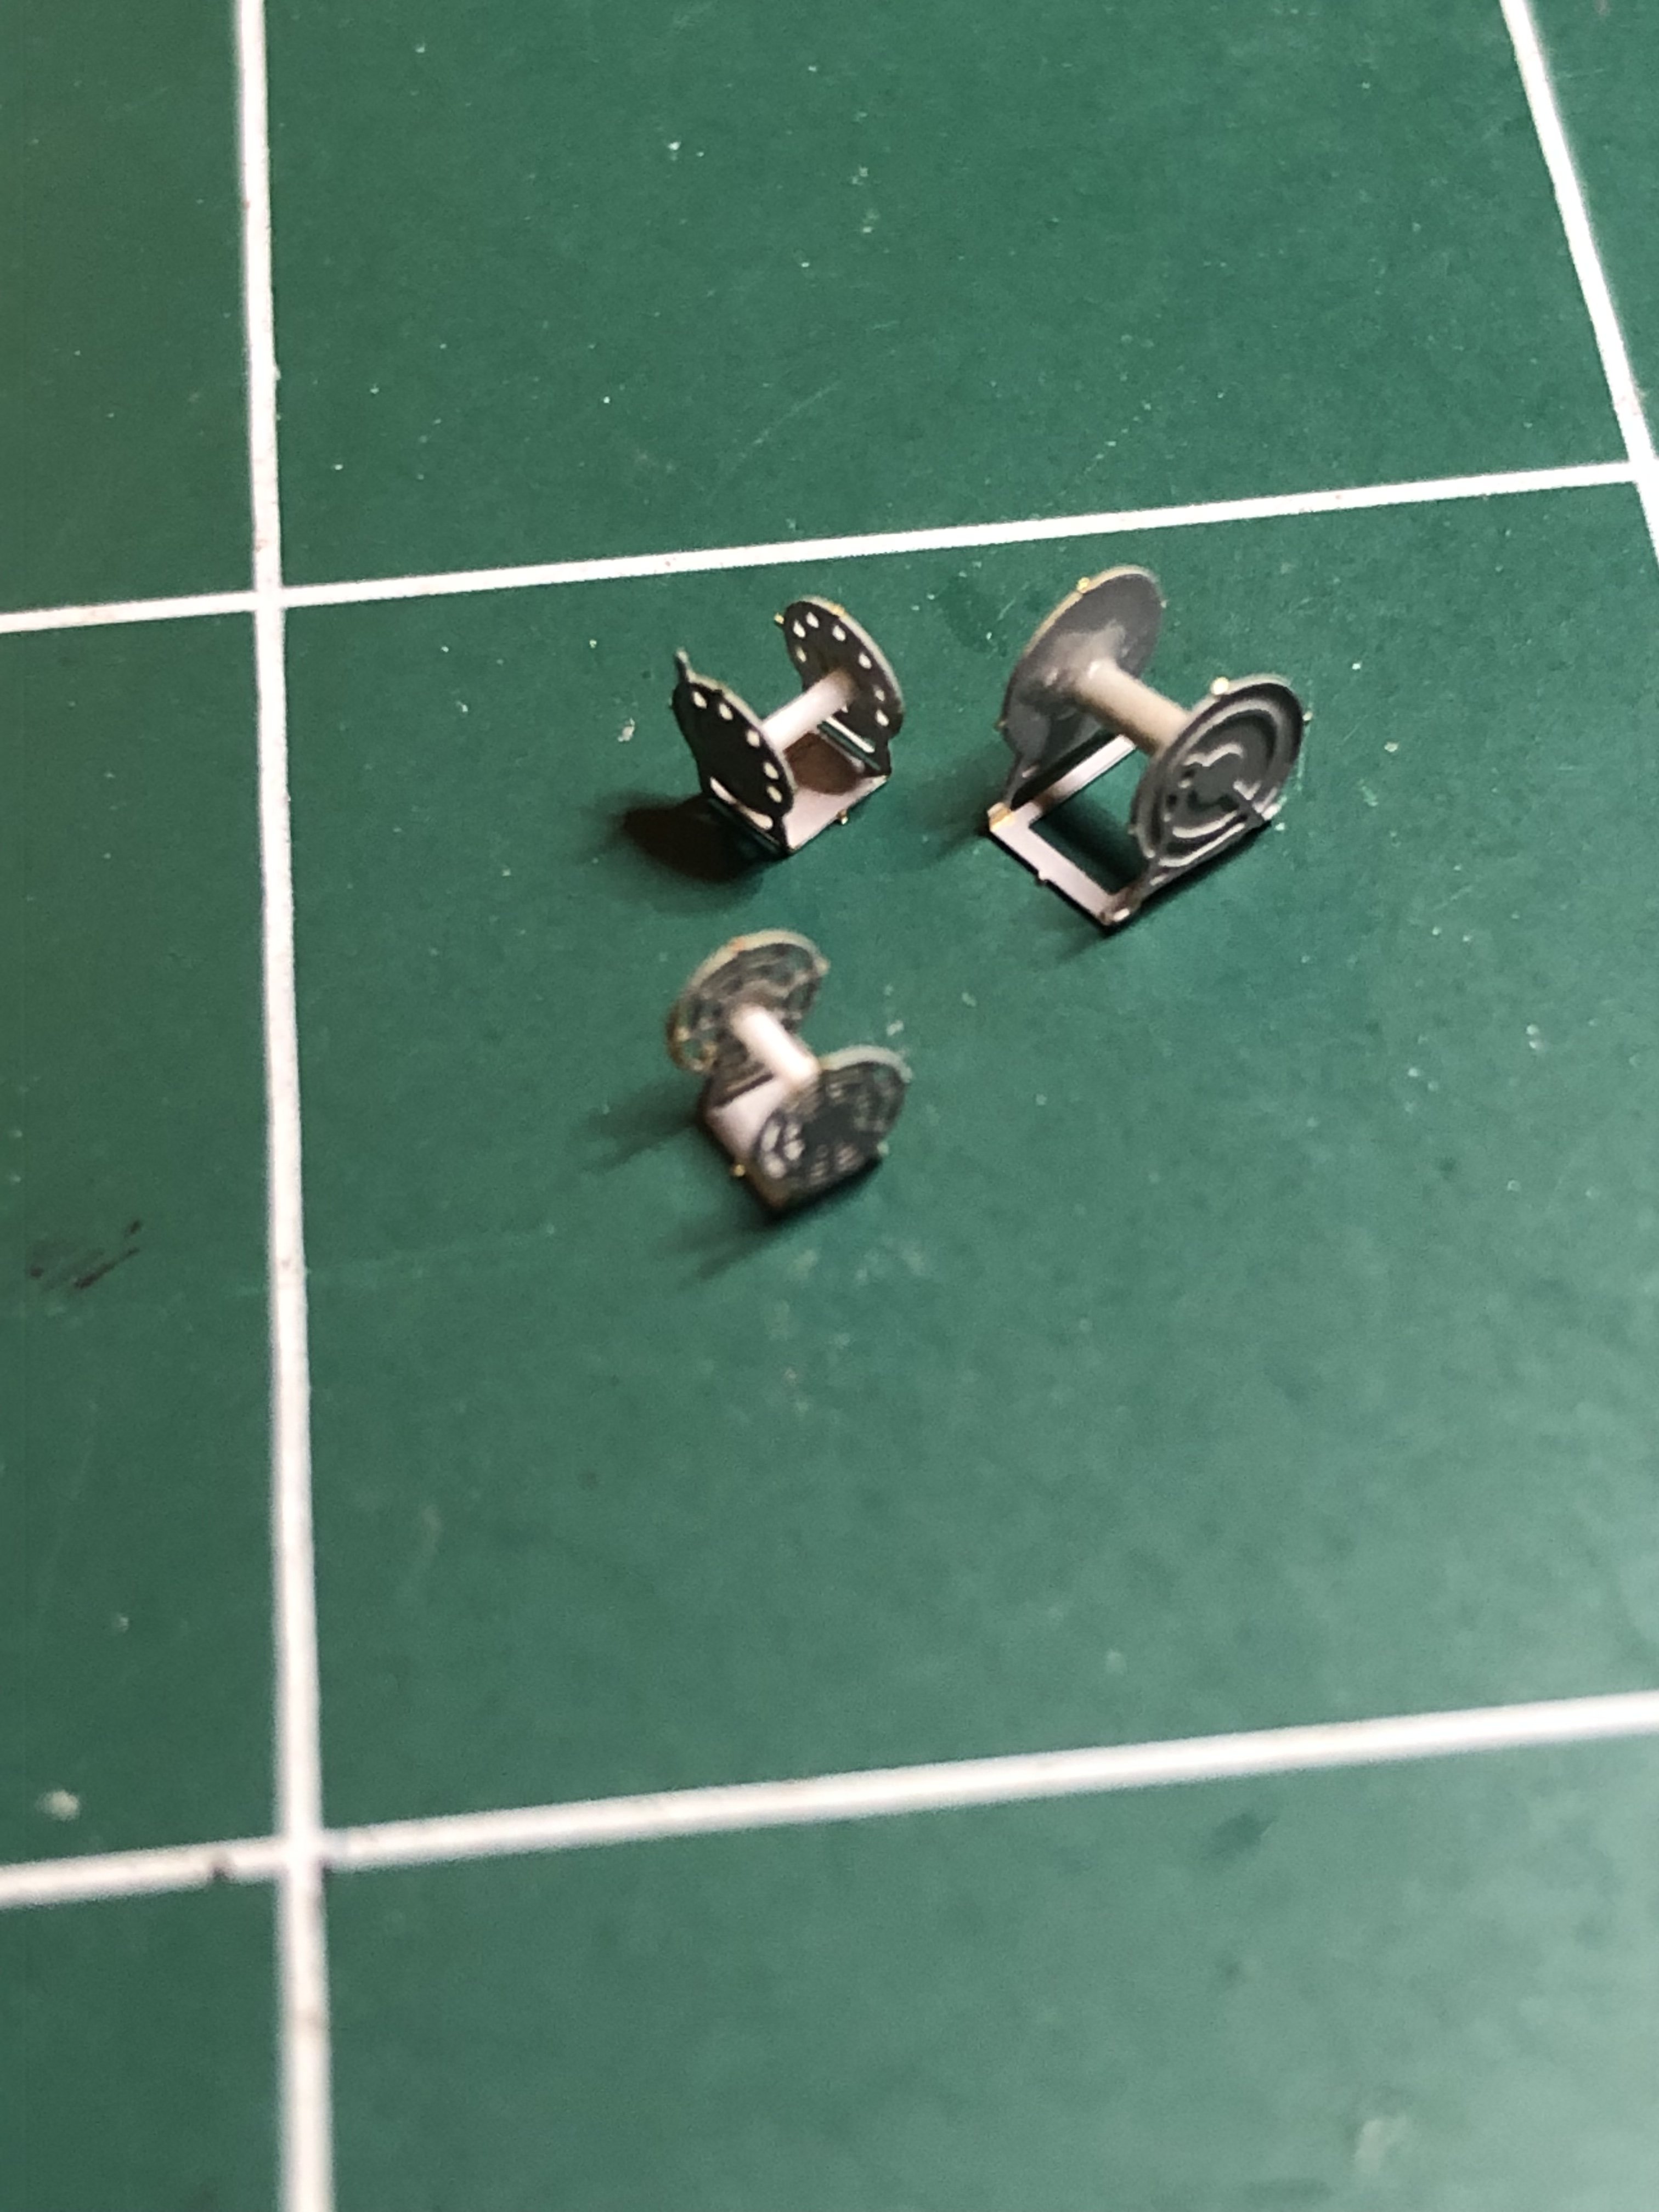
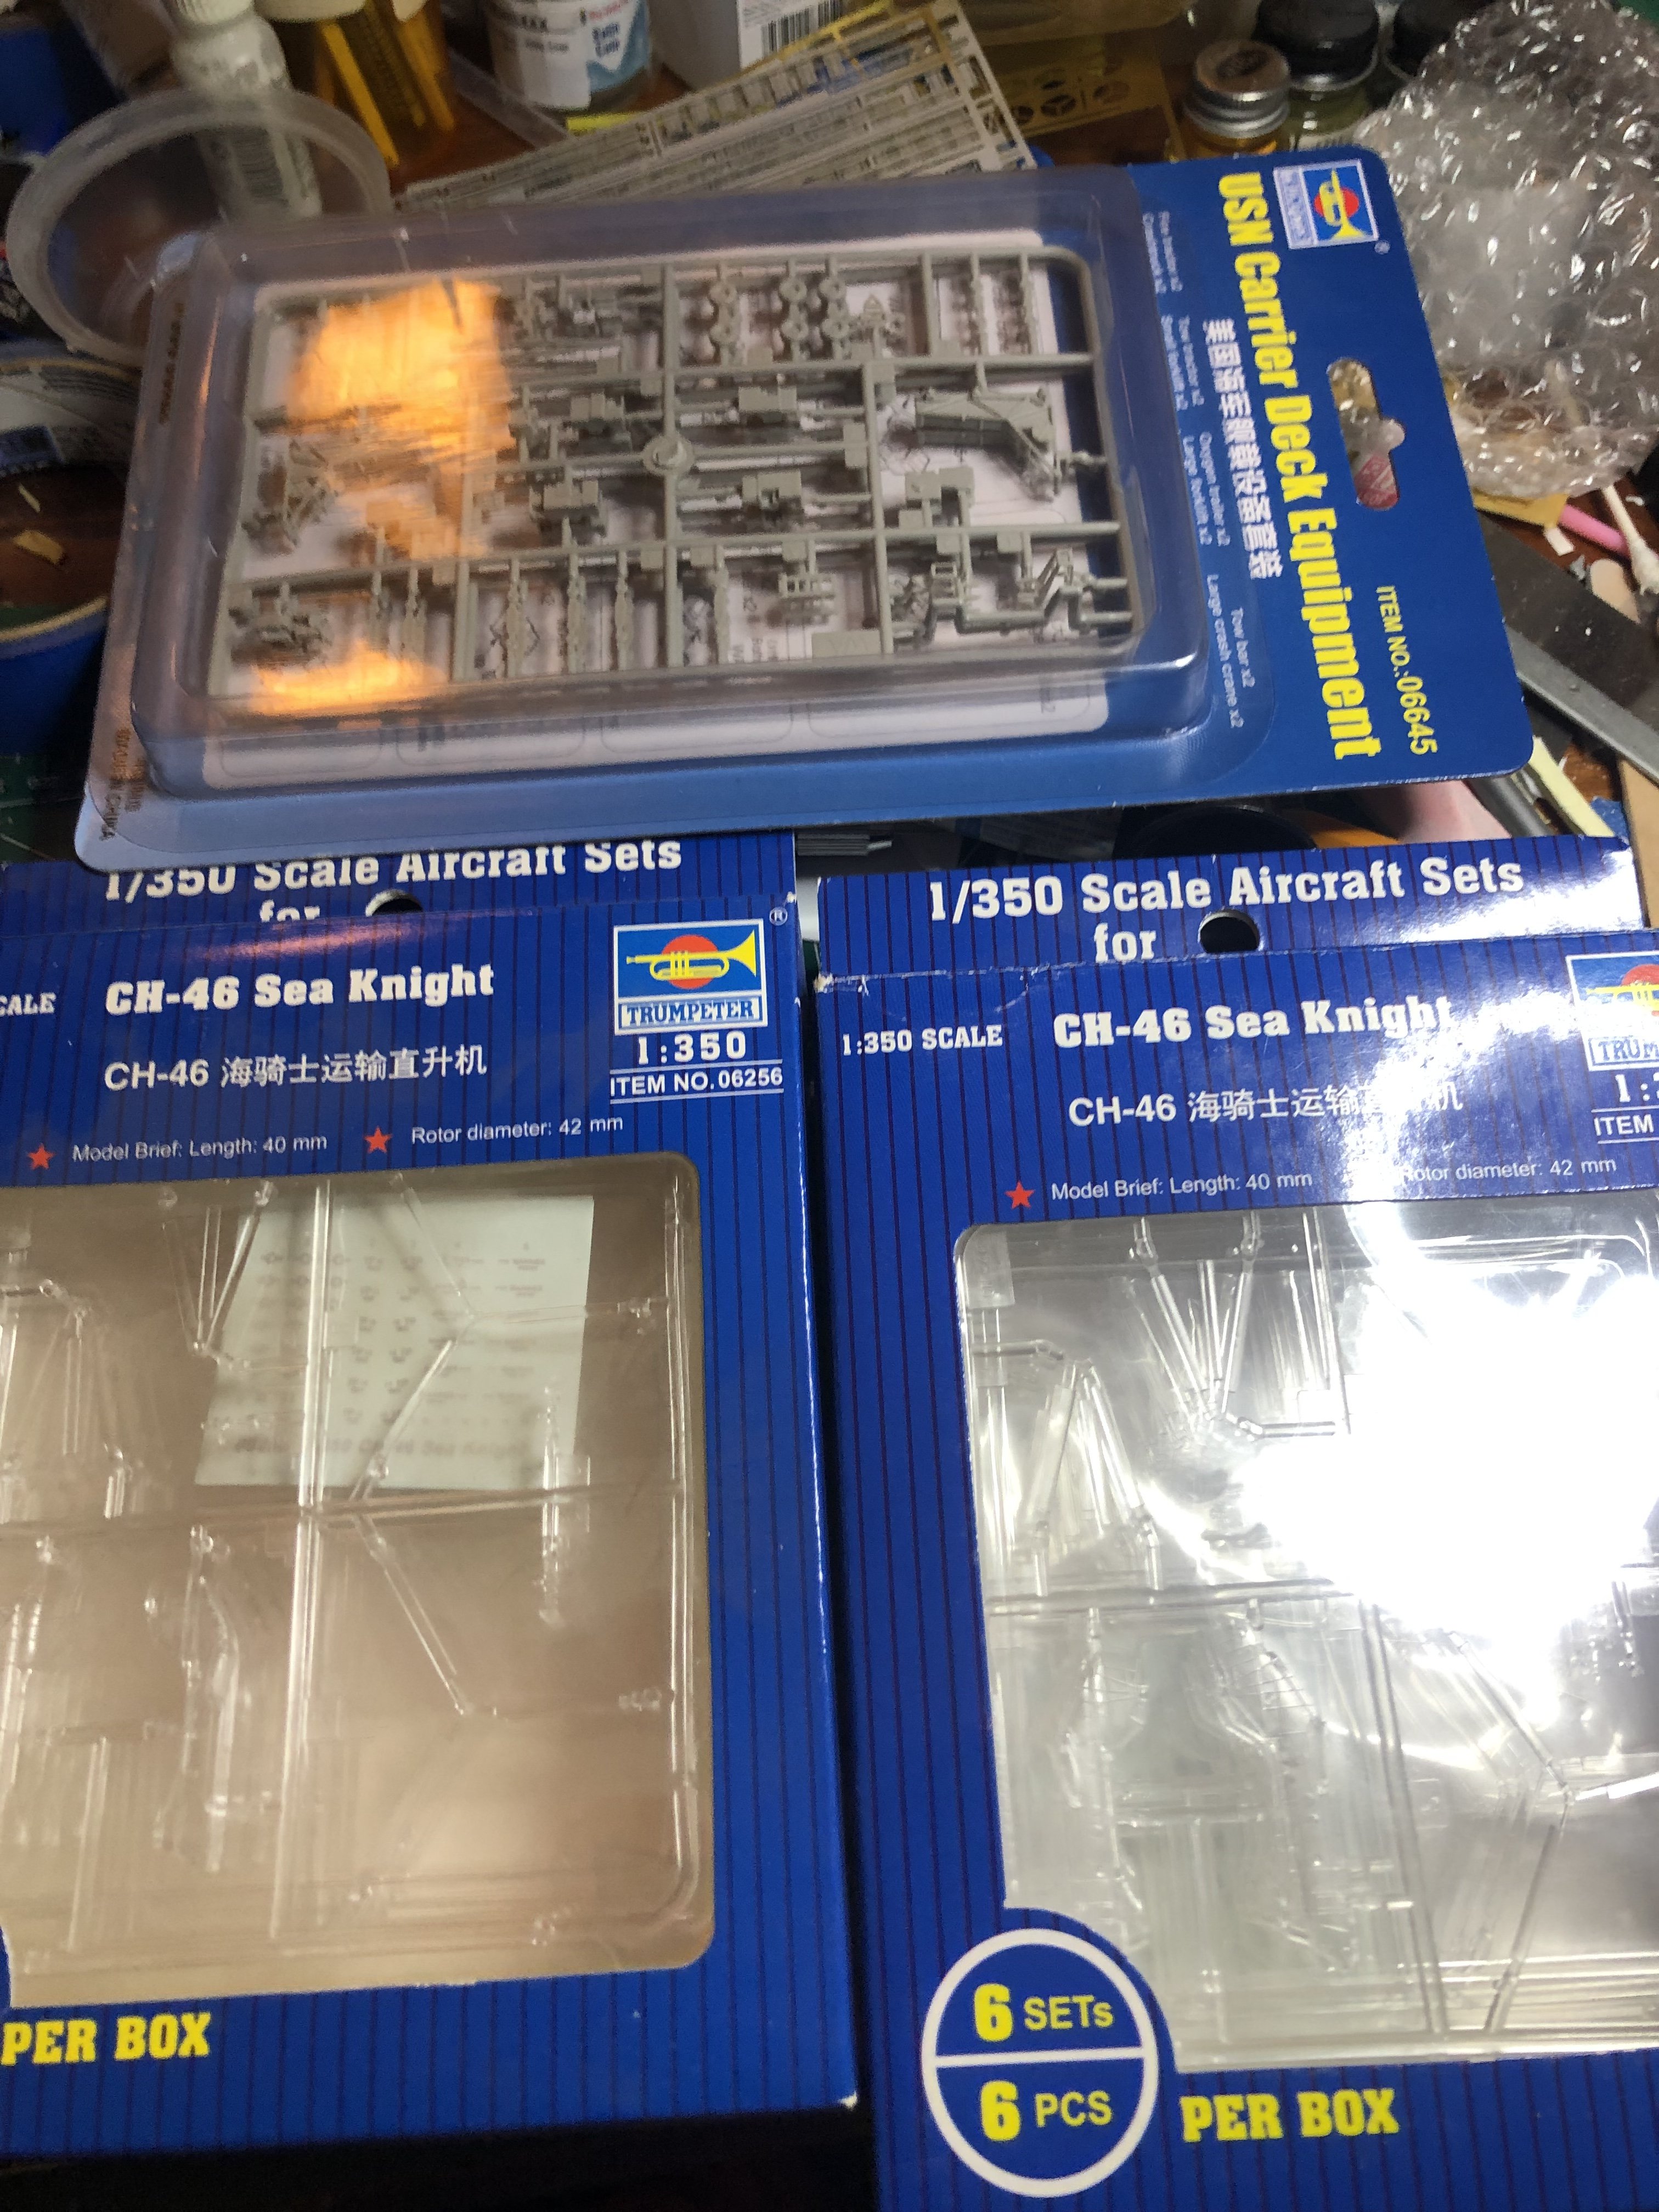
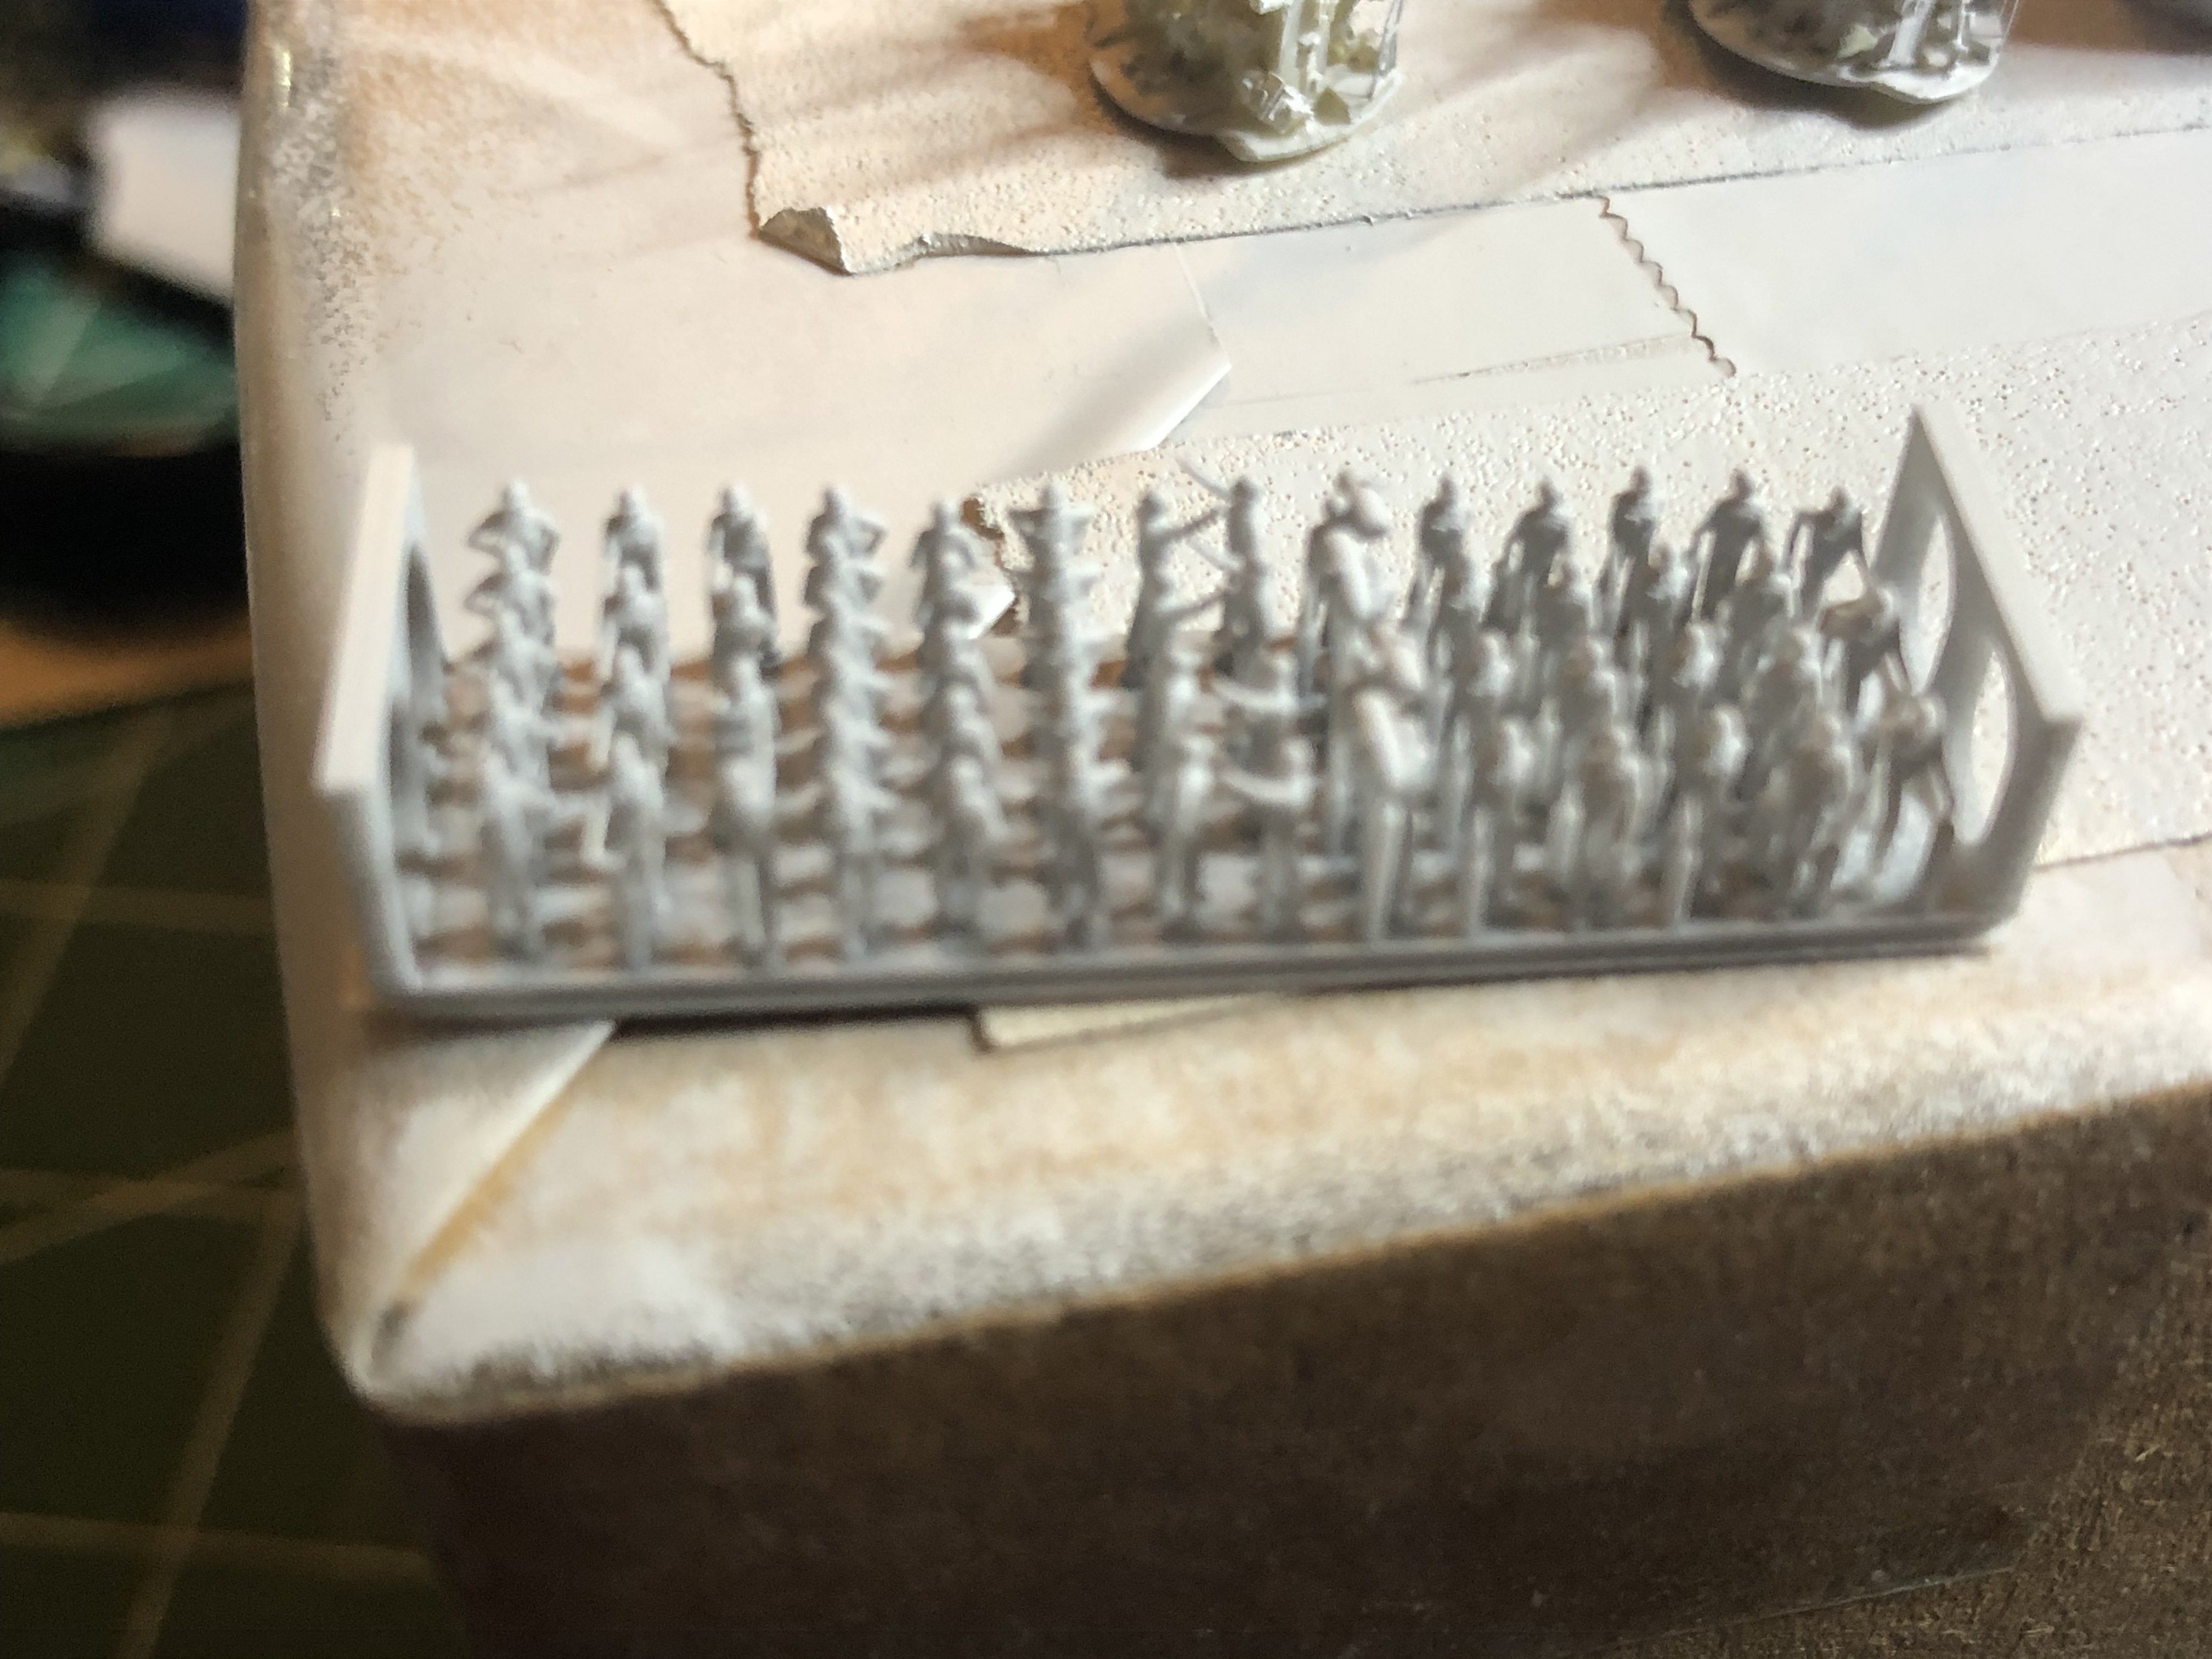
Thanks. Going to set that mini-mast aside for now and think about what I want to do. May just leave it as is. Started on the cable/fuel/fire reels PE by White Ensign - I’ll use lead wire and/or black thread for the hoses.Then on to the helos - the supplied ones were so bad I just purchased someTrumpeter birds. Oh, and since there are practically always crew on deck, picked up a set of 1/350 black cat sailors. Now this should be fun. Once all that is together to include the PE railings/ladders/etc , mask off the black waterline stripe and flight deck and start with the haze grey (MRP lacquer)


- GrandpaPhil, Canute and yvesvidal
-
3
-
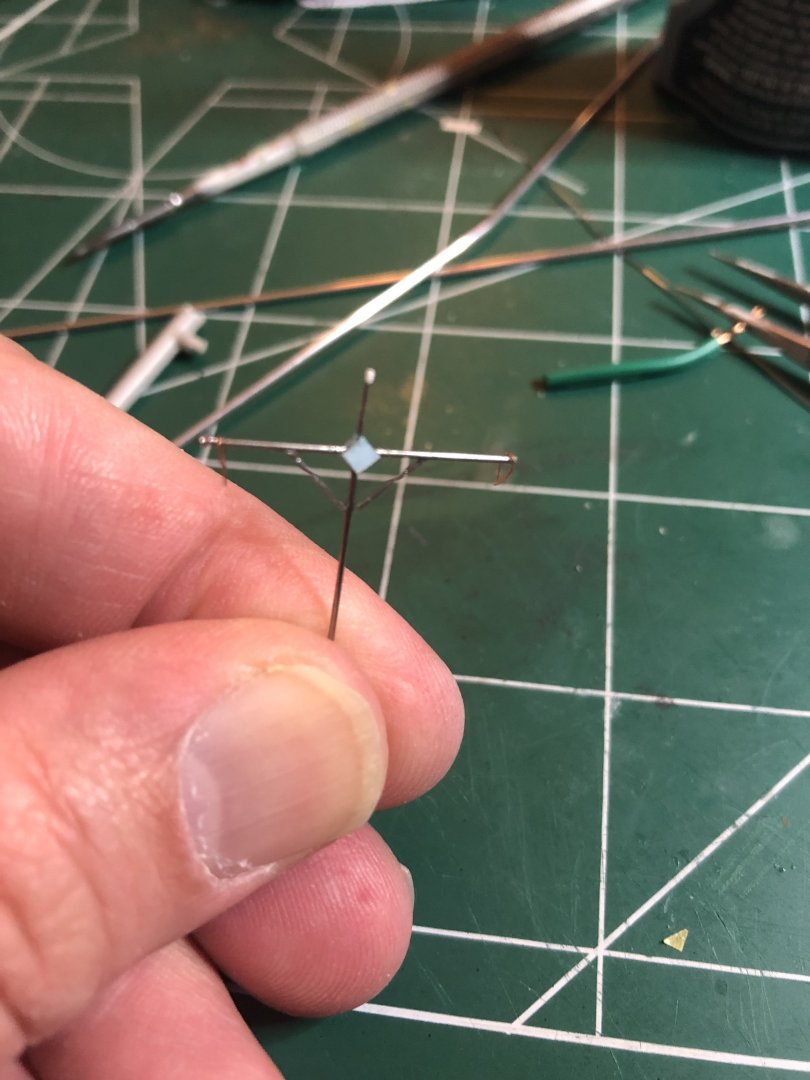
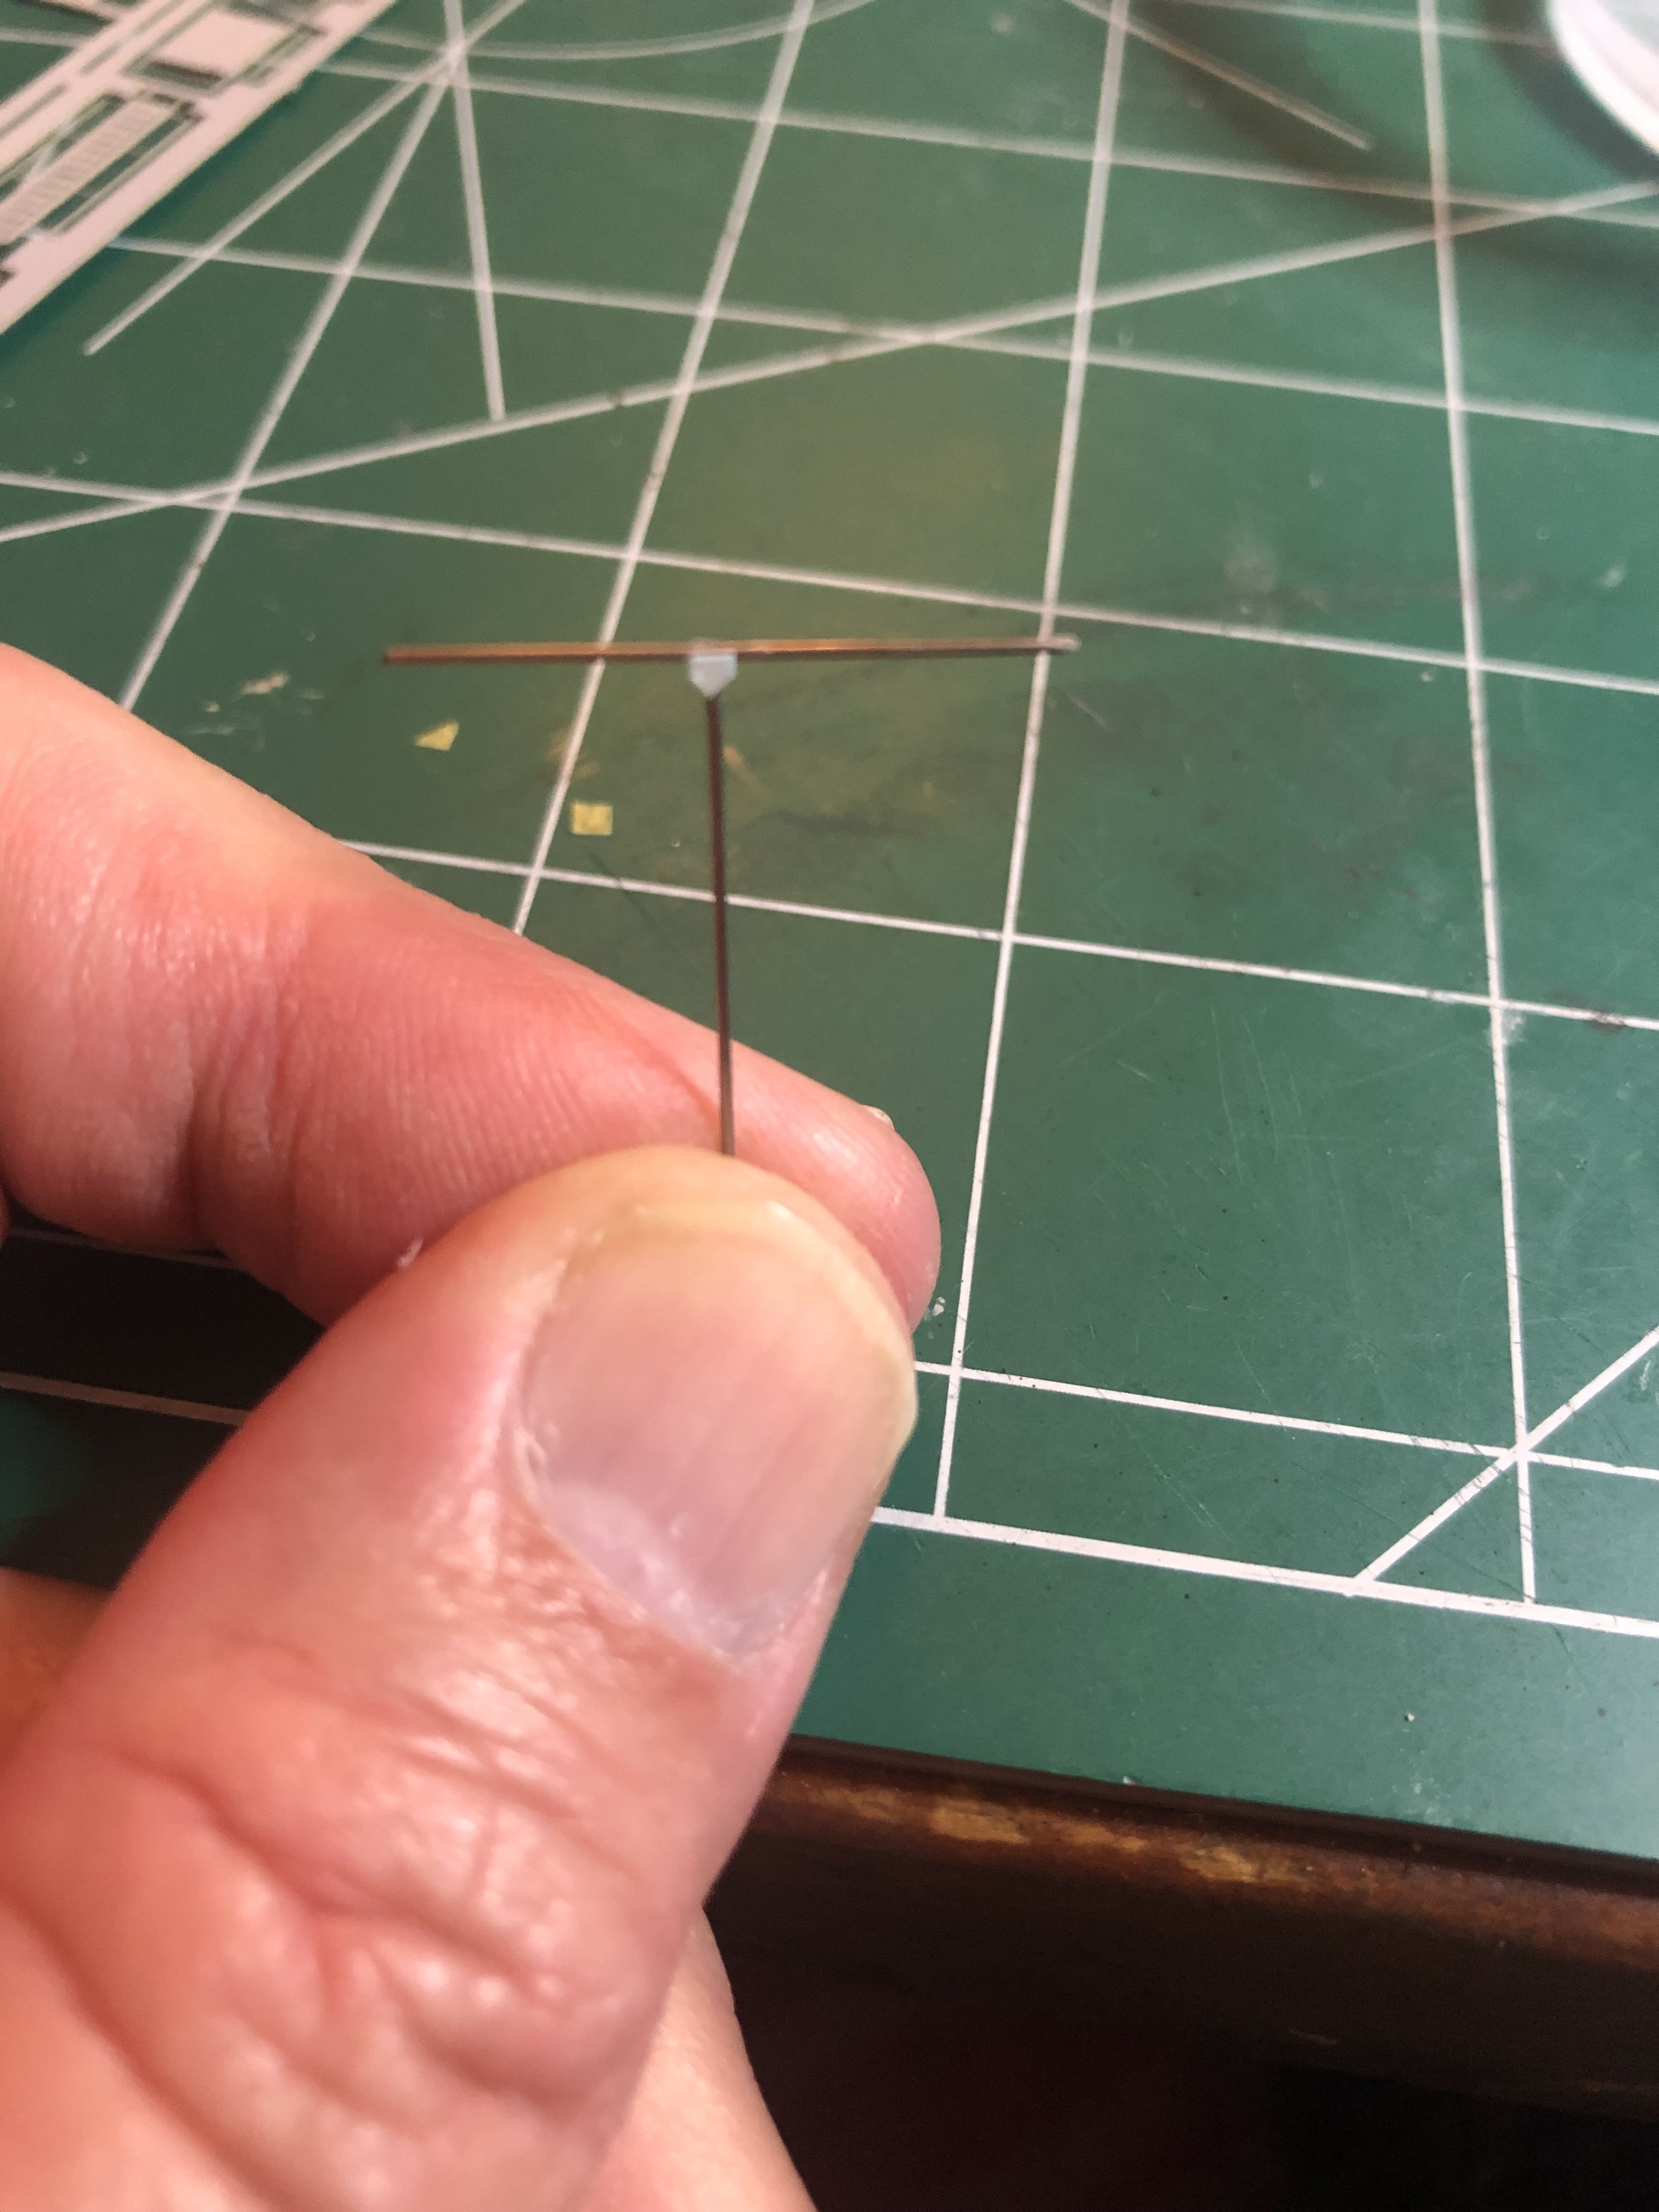
Little mast part 2. Hypodermic needles, lead wire, decal paper, speaker wire, and styrene all were used. Still needs work, but thoughts?
- Canute, GrandpaPhil, Old Collingwood and 1 other
-
4
-
Working on a fix and should have the next version tonight. For the supports and part going above, I’ll use stretched Sprue, if that doesn’t work then maybe lead wire but I believe the sprue will be fine. For the loops at the end s, I’ll use lead wire. Great stuff that I use in wheel bays and cockpits of the planes
- Old Collingwood and Canute
-
2
-
I think I’m getting close on the little mast. I cut decal paper to make the connectors. It’s a start - let me know what you think…
-
It’s the “connector” area where the two mast and spar/boom/whatever meet
- Old Collingwood and Canute
-
2
-
This one. Two different attempts just plain sucked
- GrandpaPhil and Canute
-
2
-
Hope everyone had a great Thanksgiving!
Stalled a bit now because I have zero idea how to make that mini mast. Zero. 😂
- GrandpaPhil, Canute and mtaylor
-
3
-
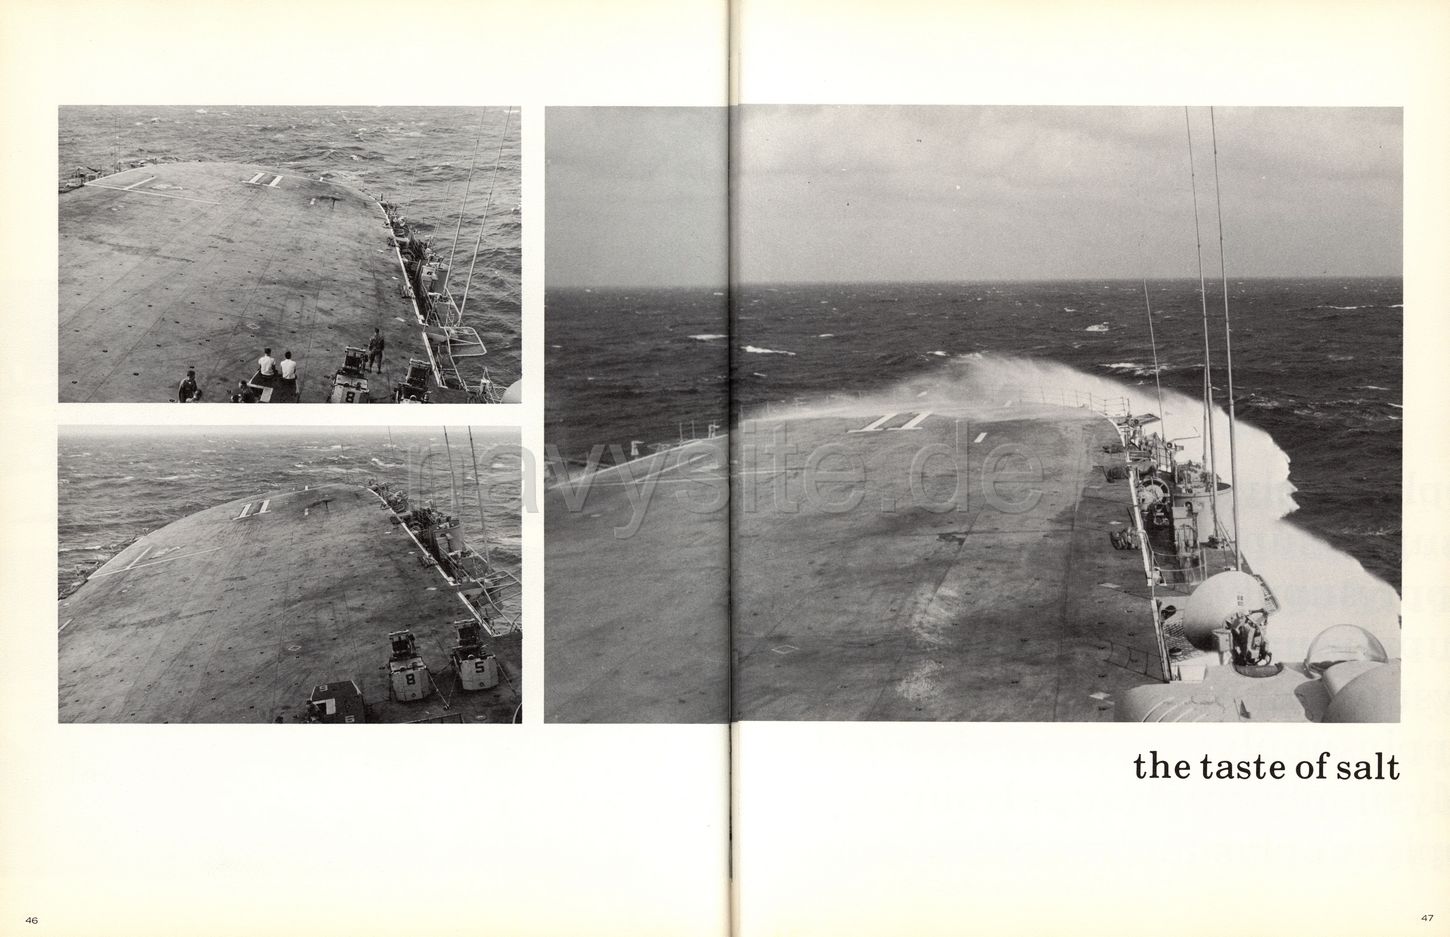
That is awesome! Thanks for sharing - wish it had talked about Dad’s ship a little more. Towards the end of his cruise, they asked if he wanted to re-up for the Apollo 14 recovery mission in ‘71. He said no - he was ready to come home. I wasn’t a year old before they left on their Vietnam cruise (69-70). Thanks again!!!!
-
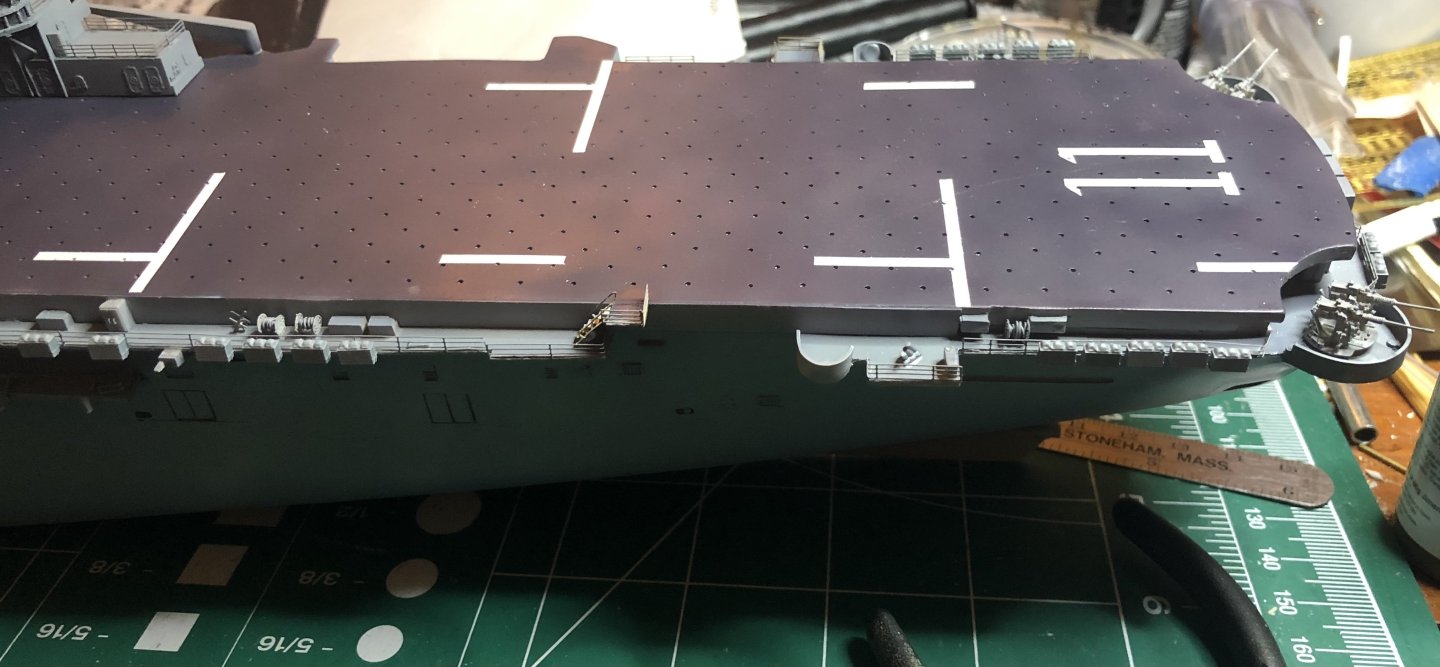
Very small update - just pulled the tape off. Very pleased with it, except I feel the numbers are a little funky. Weathering will come later and will also tone down the stark contrast a bit. Thoughts?
- mikegr, mtaylor, GrandpaPhil and 3 others
-
6
-
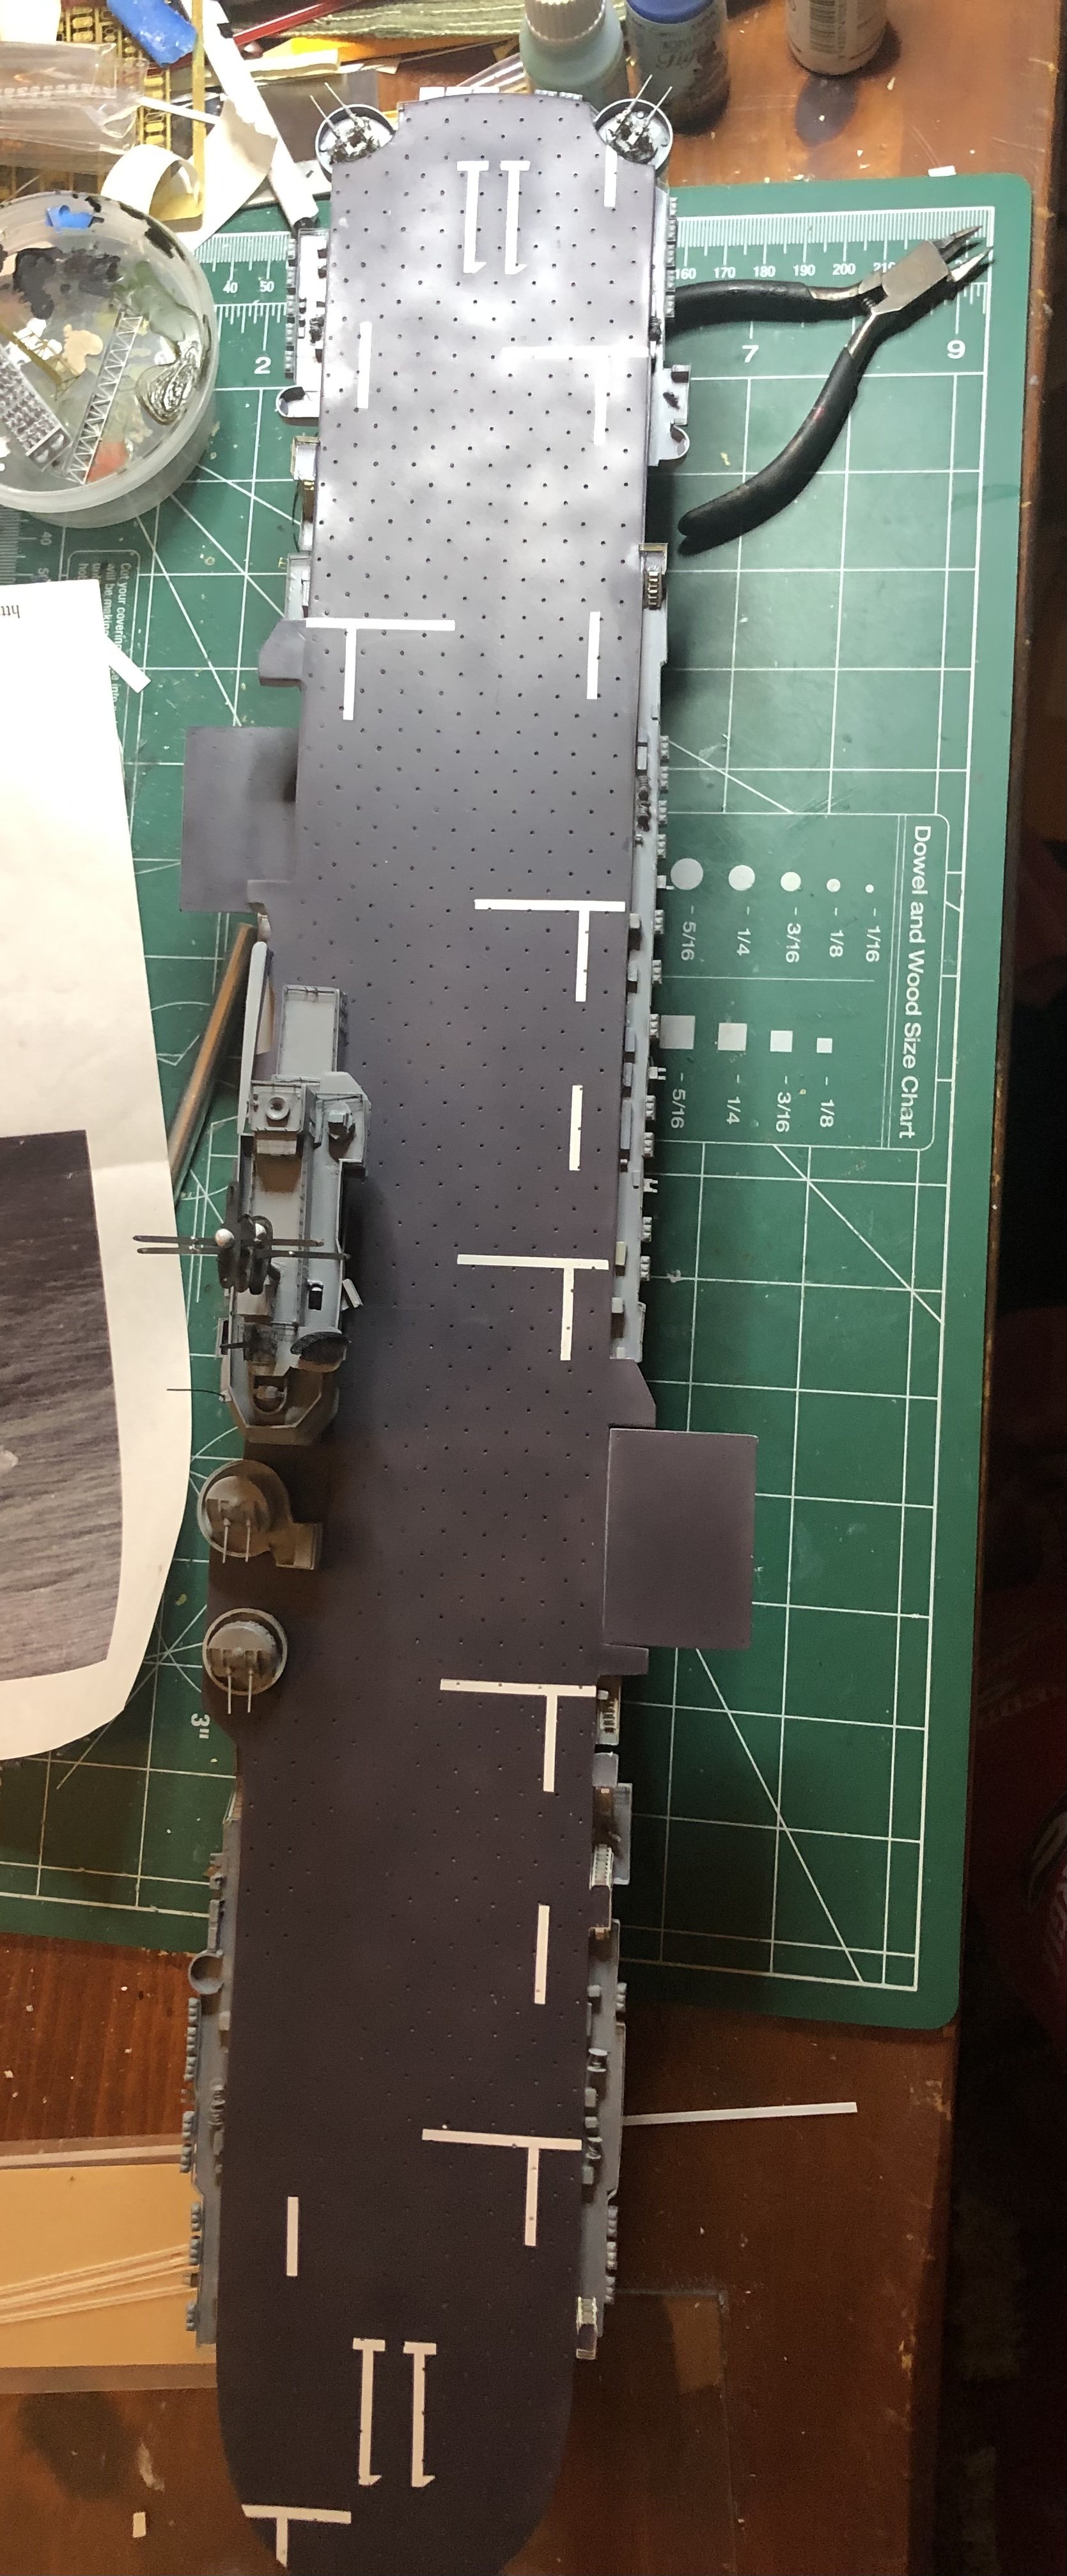
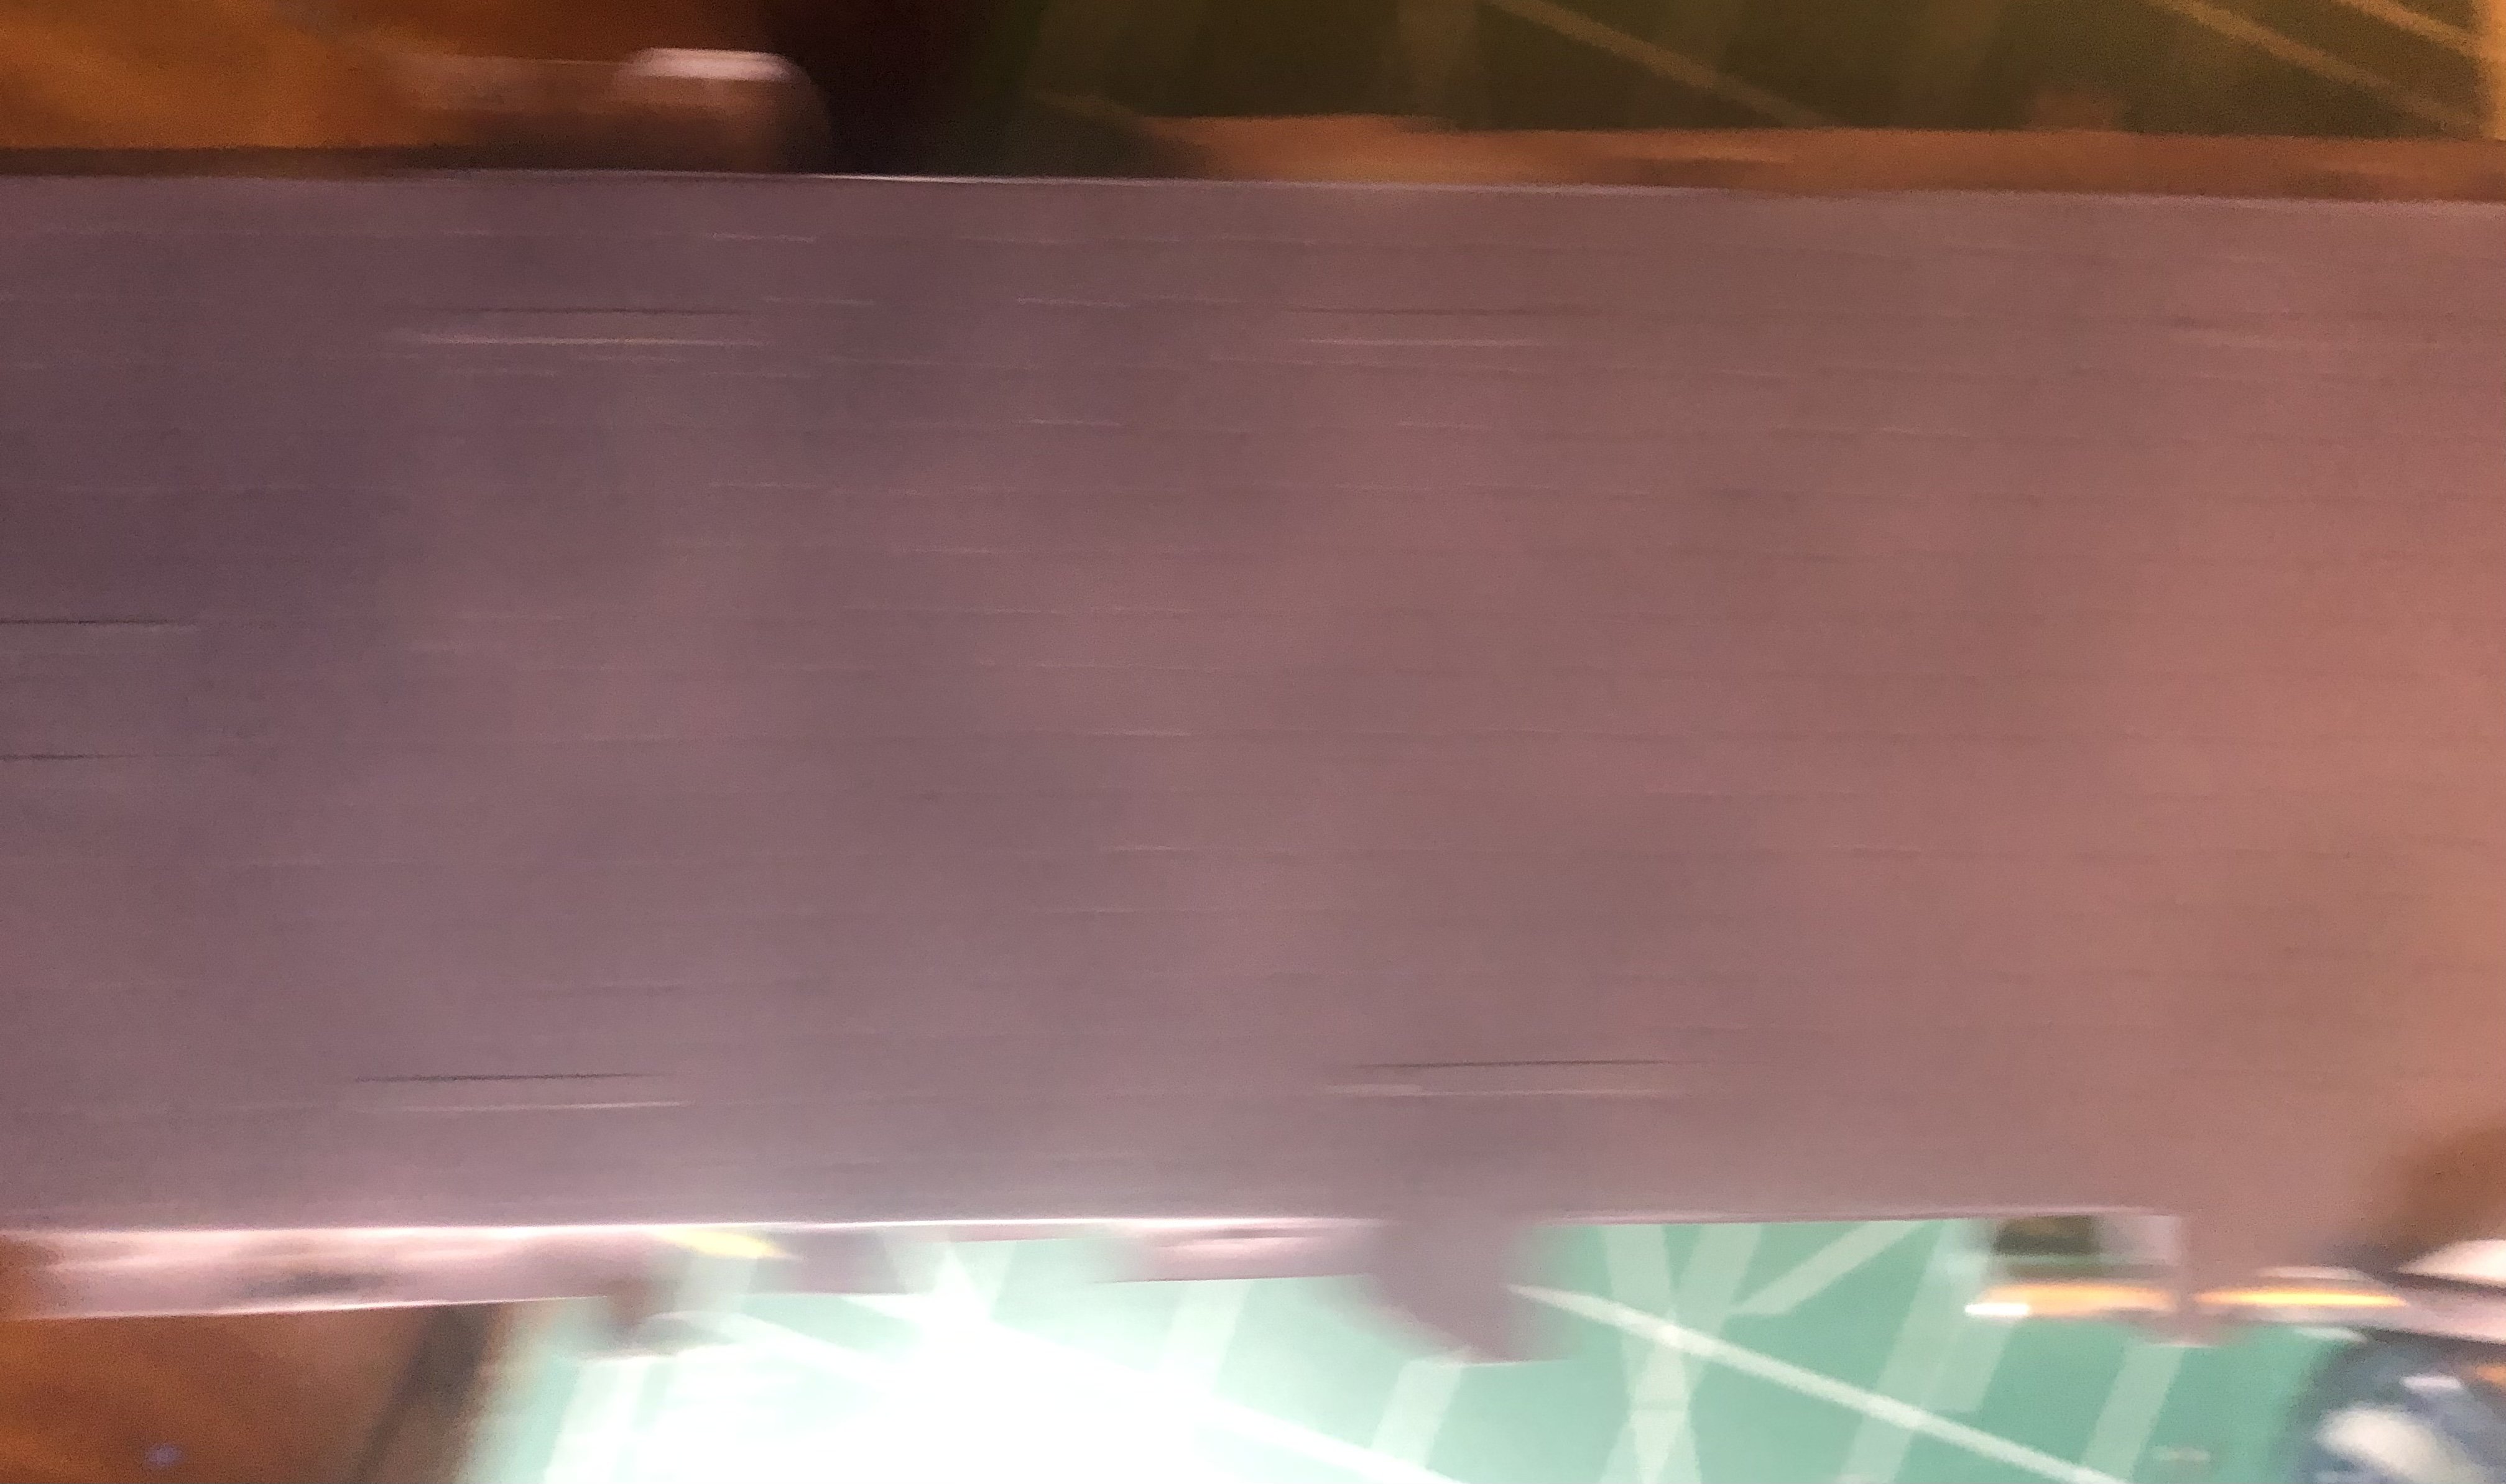
First - and maybe only - coat on the flight deck. I have a couple of touch ups I’ll need to do, but I’m pretty happy with the tonal variations, although they aren’t really visible in the pic. Looks better in person. I think I may just leave it and use oils to weather/lighten when the time comes. I used MRP lacquer Dark Grey, FS36076. MRP is one of my all-time favorites. Once it’s all dry and I’m satisfied, I’ll remove the masking. Speaking of masking, I didn’t mask for the shadows as that was kicking my butt and I couldn’t get it right. Maybe I’ll come back and hand paint it.
Next up is build try mini-mast and start adding stuff and prep for the haze grey… Sorry for the crappy pics.


- mikegr, Canute and GrandpaPhil
-
3
-
Opinion time: of all the pics I’ve posted showing her and the flight deck, is it my old eyes or is there really a shadow shade around the “11”? Masking that is a little more difficult 😂
-
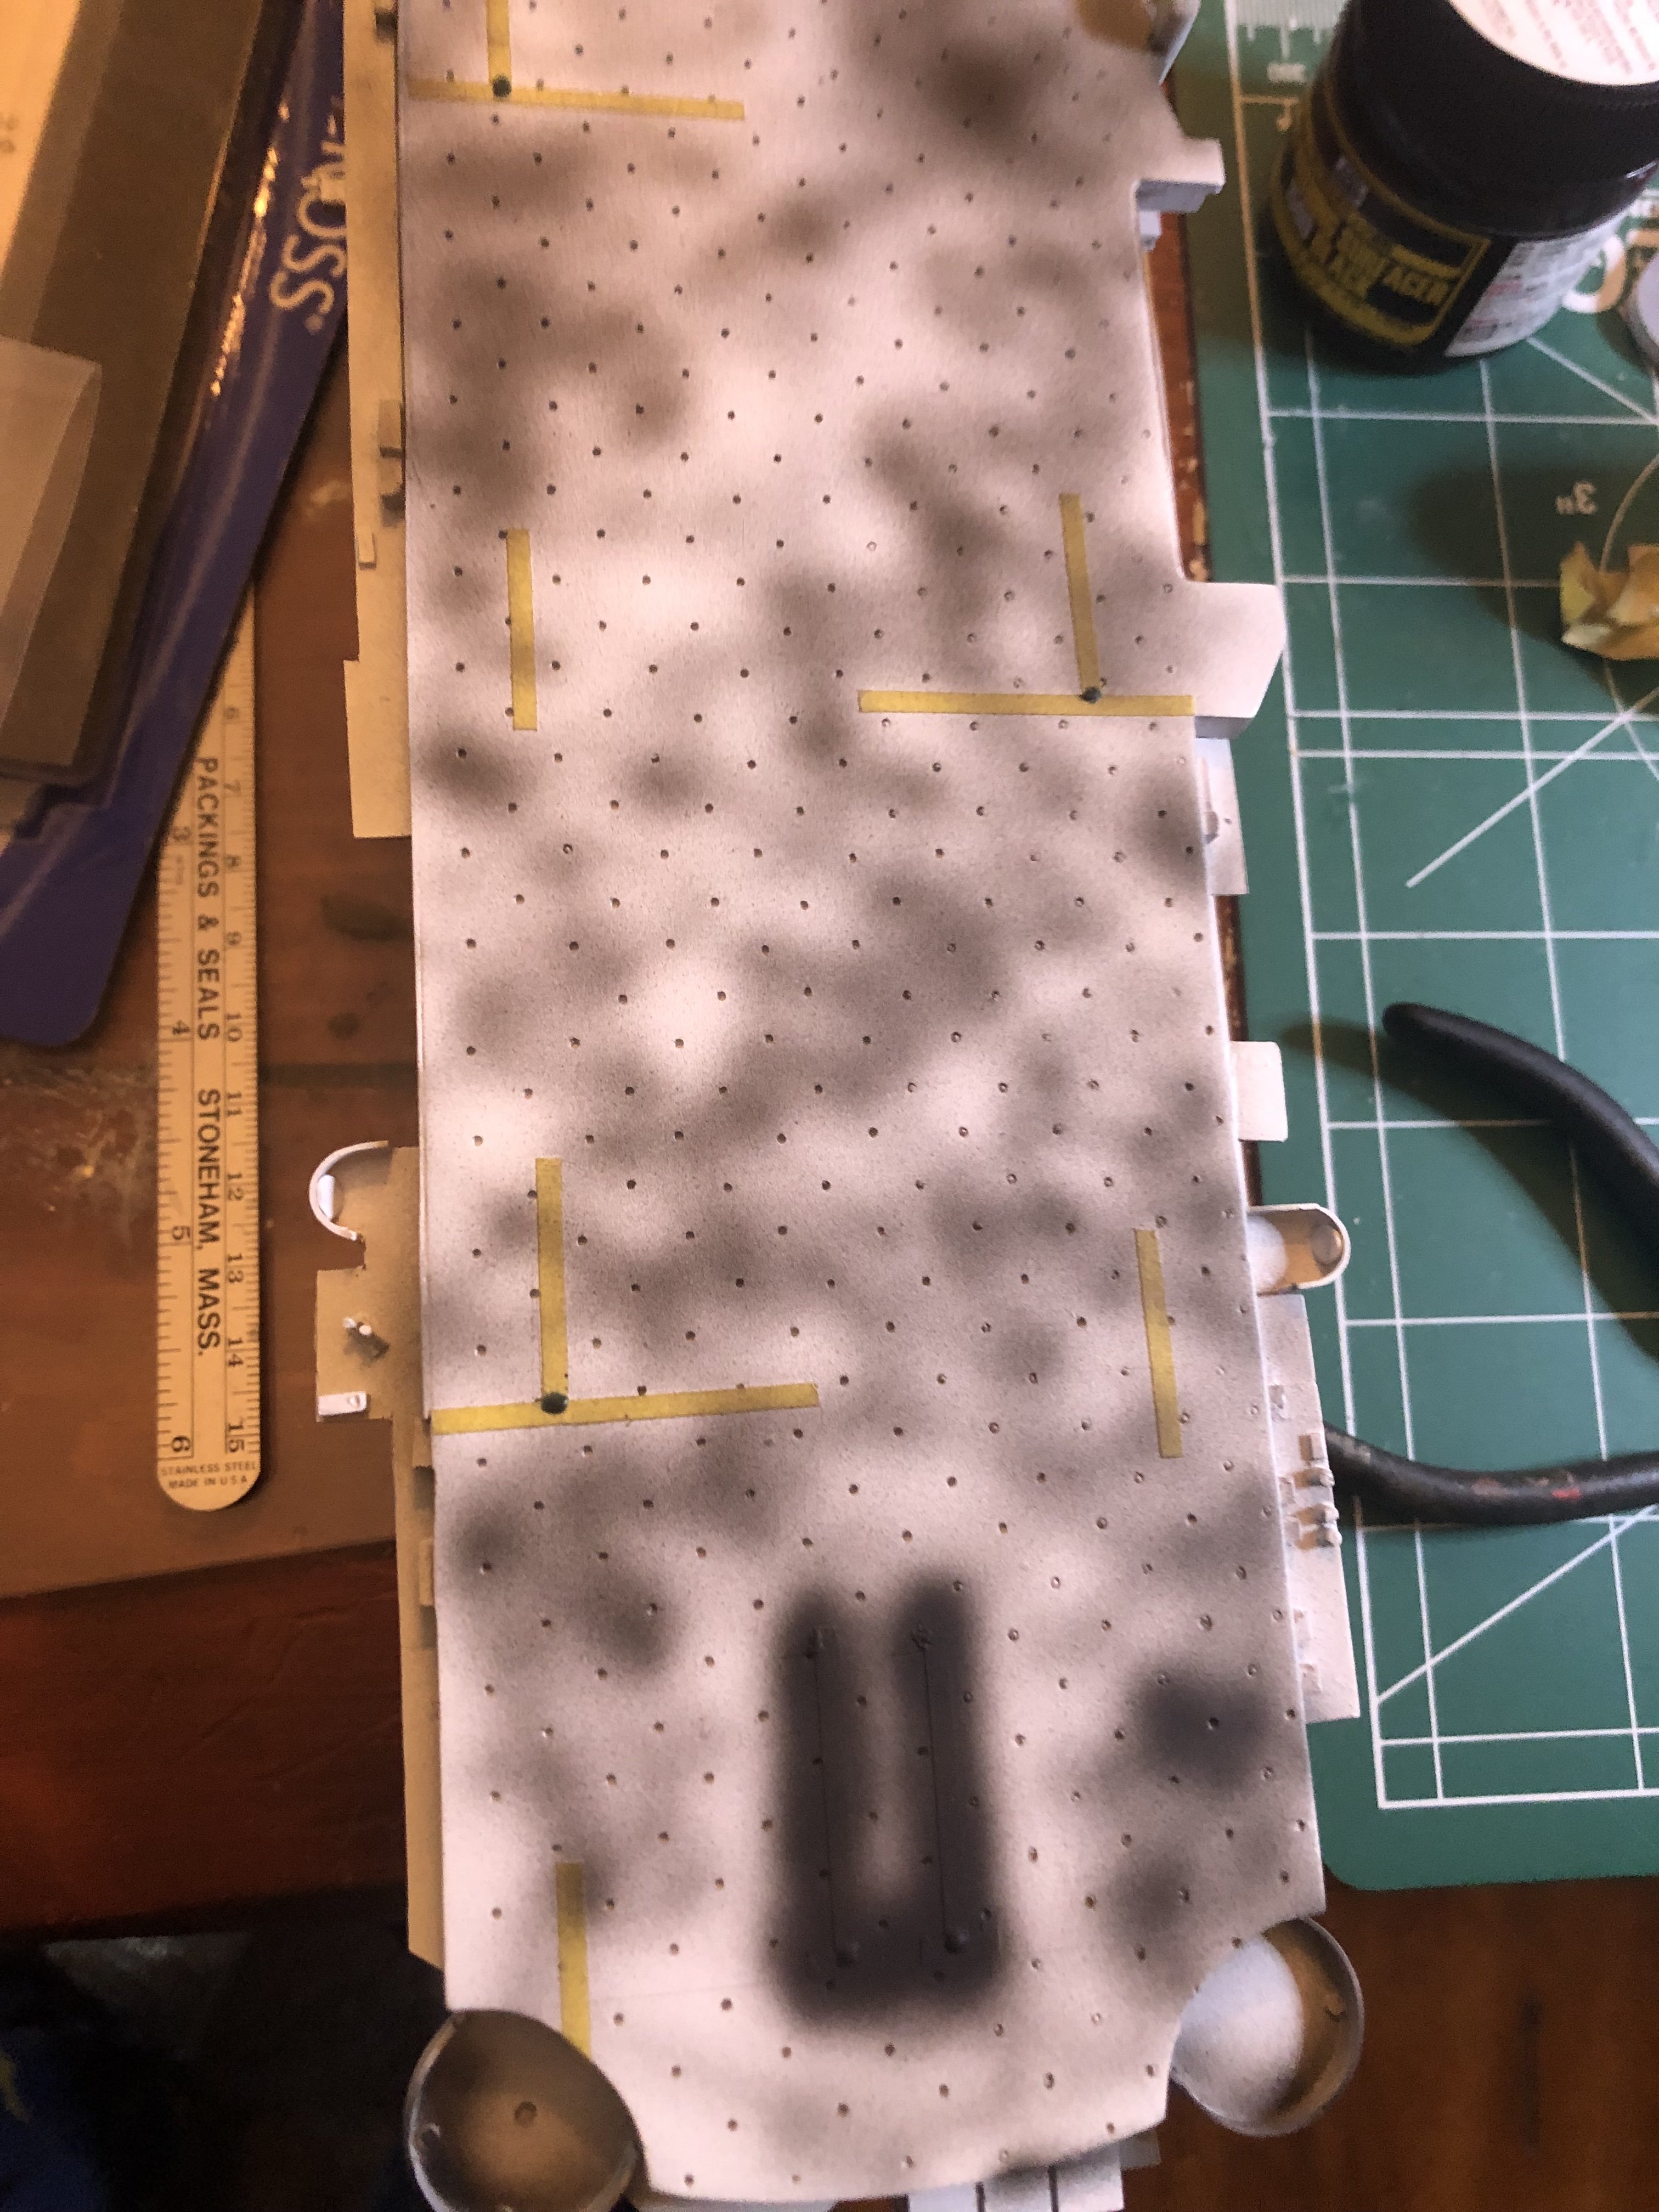
I was going to wait until I had finished painting the flight deck before I posted again, but decided against it. I fired up my trusty Iwata airbrush and got to work. Did I mention that painting is my favorite part of a build? I did sort of a reverse black basing technique - where I put down the black second. I love this basing method as it allows for tonal variations, something I’ve used on my 1/48 birds. The black actually isn’t black paint, but Mr Surfacer 1500 (black) thinned with Mr Color Leveling Thinner( this thinner is liquid gold) to the consistency of skim milk. You’ll notice I went a bit too heavy around the numbers, but that’s because in wanted to ensure complete shading. My next step is to mask the shadows before painting
My hope is that can lay down the dark grey in thin enough layers to show the tonal differences. We shall see. I may have to add some white to the paint.
- GrandpaPhil, king derelict, Javelin and 1 other
-
4
-
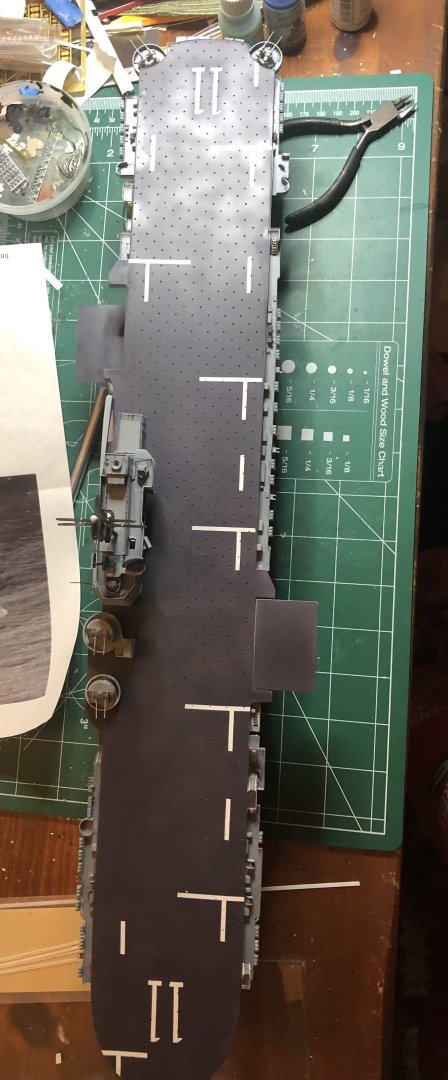
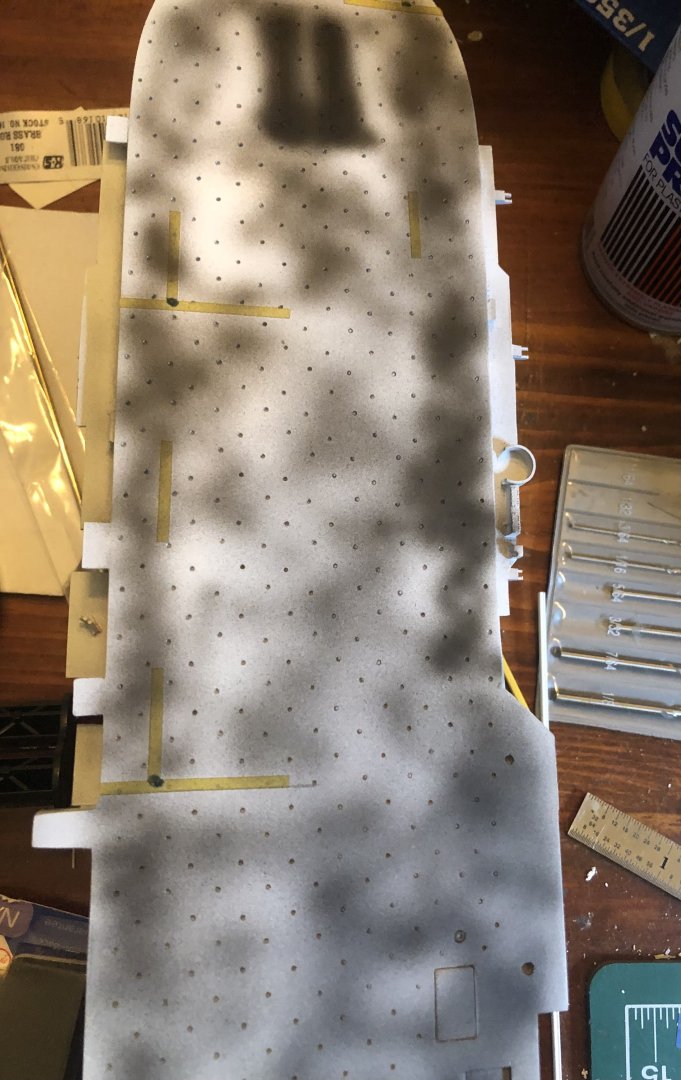
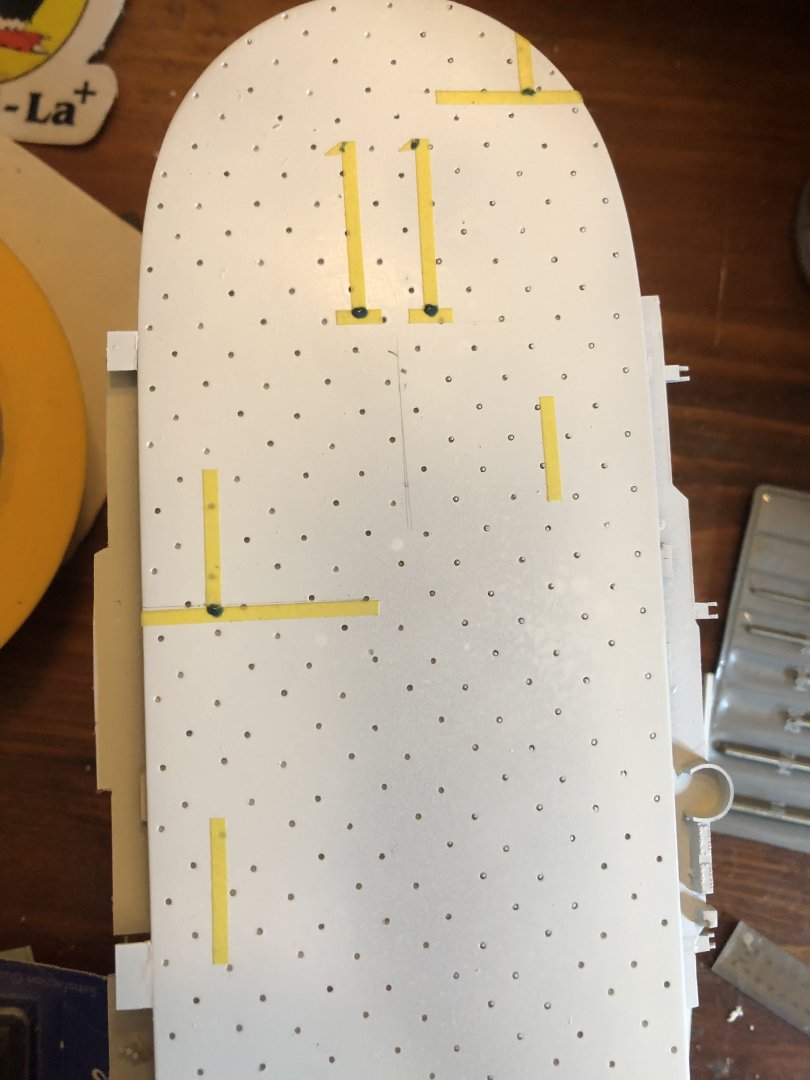
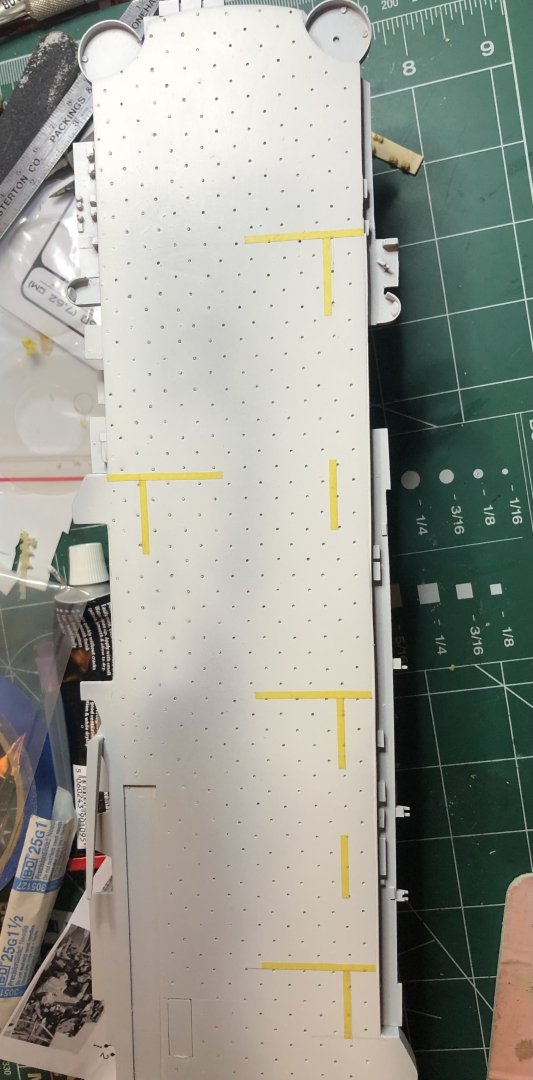
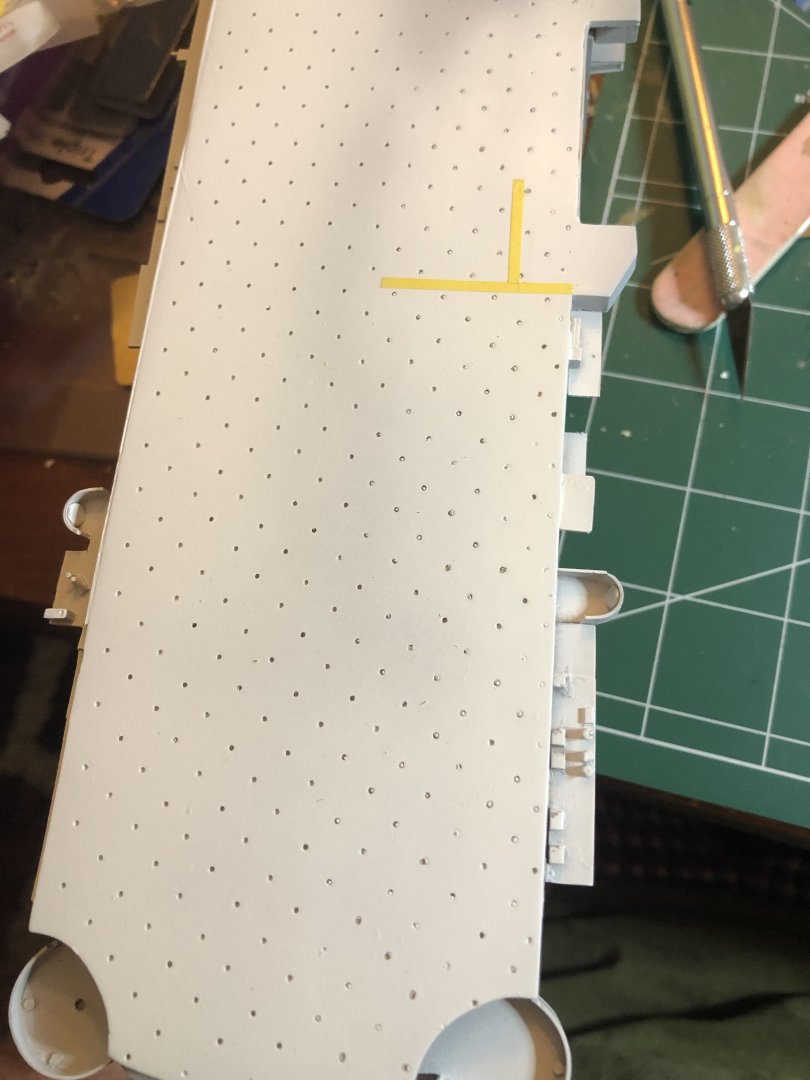
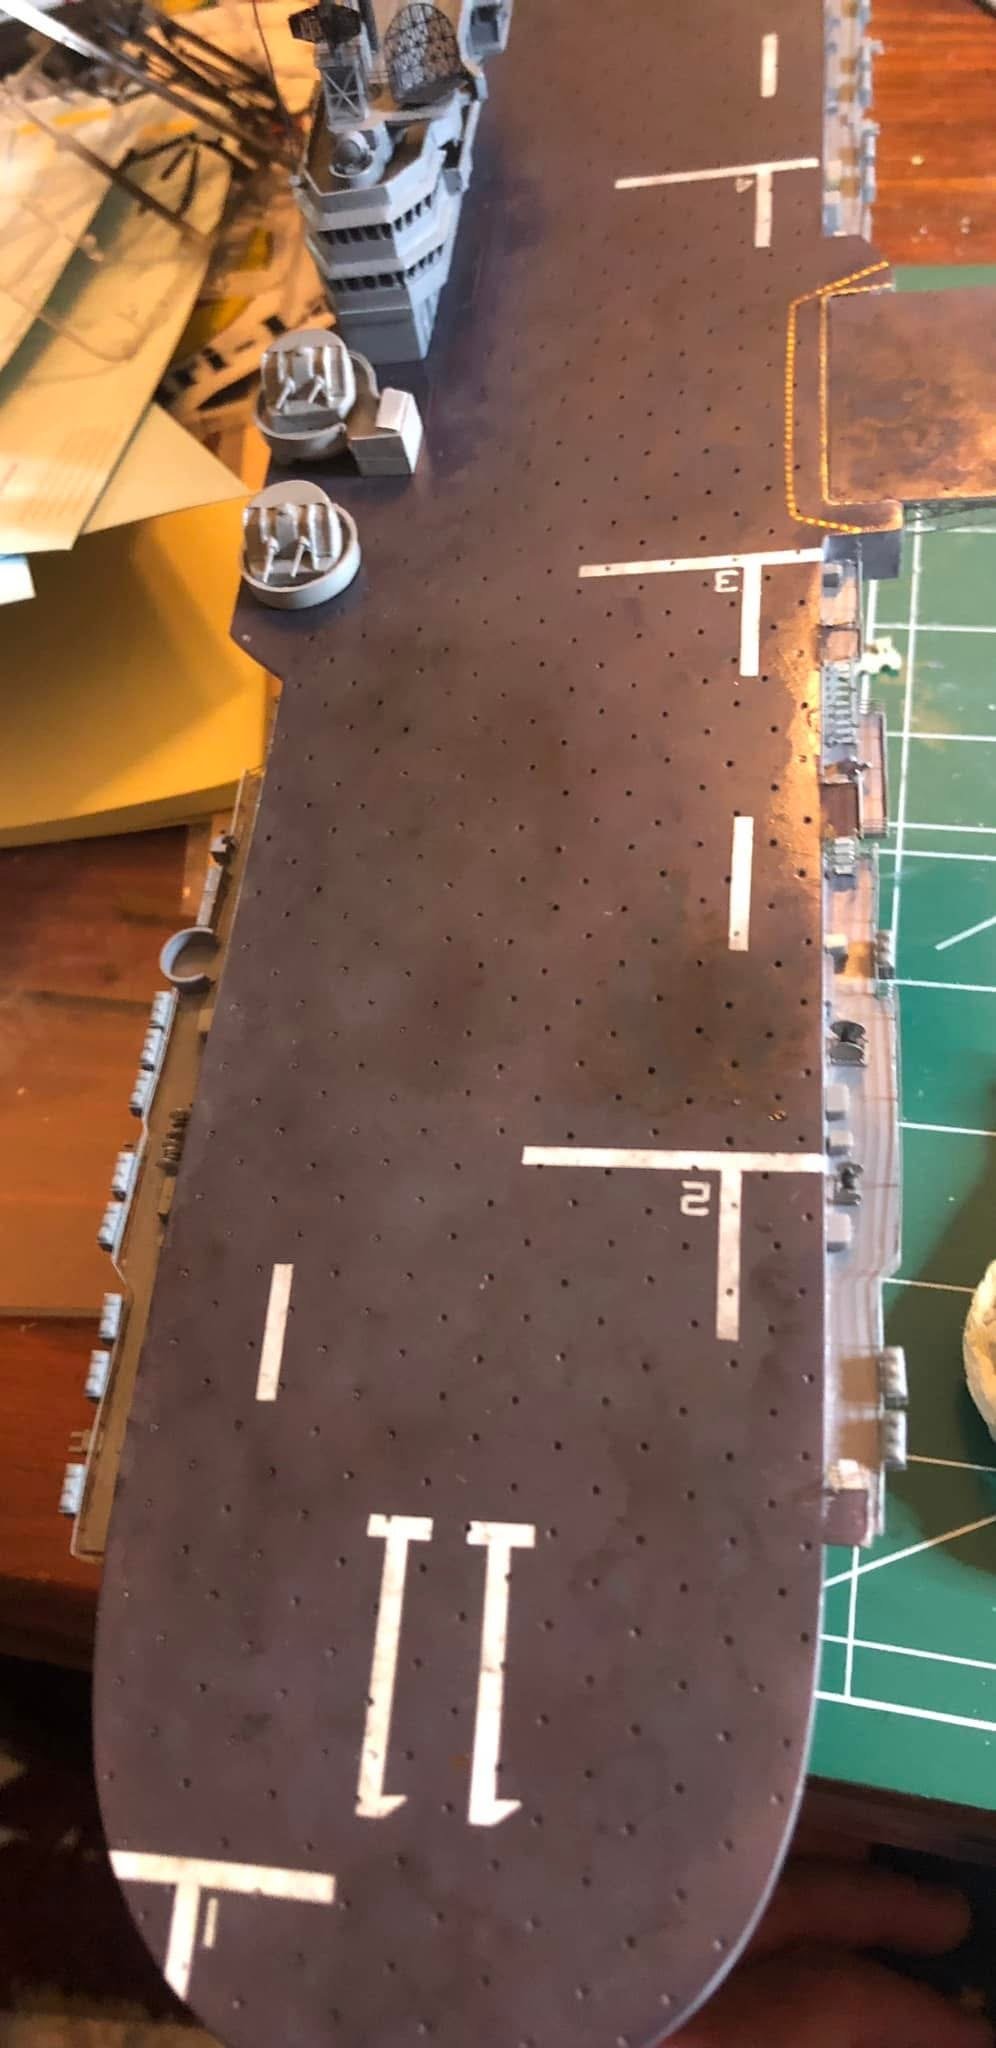
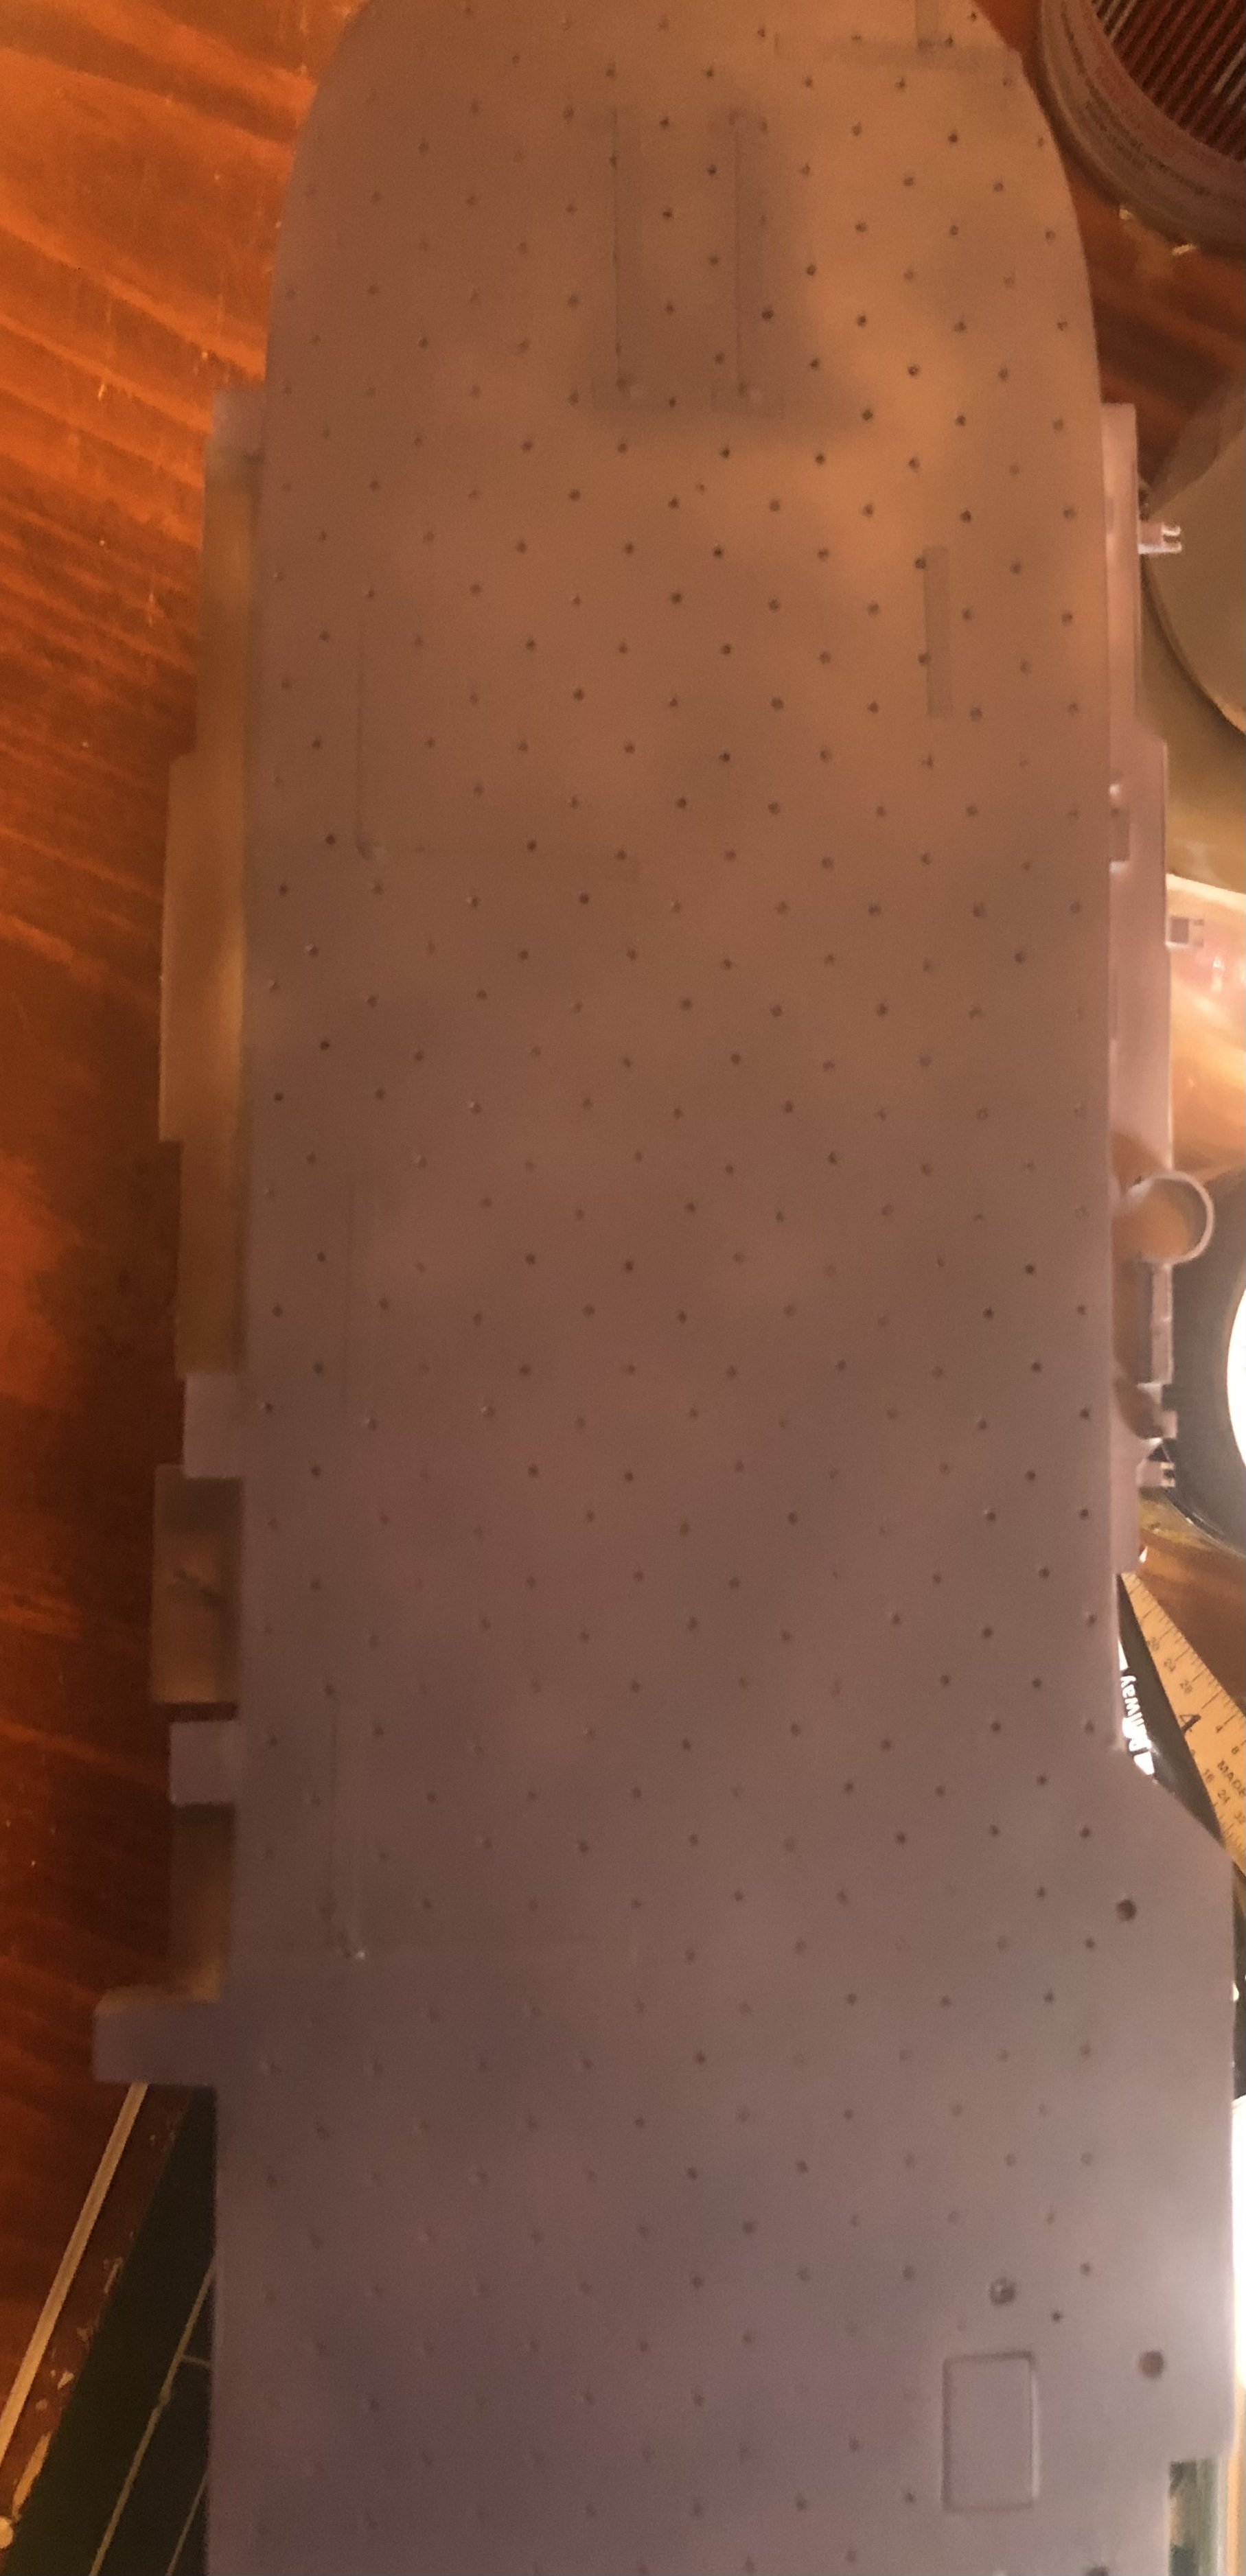
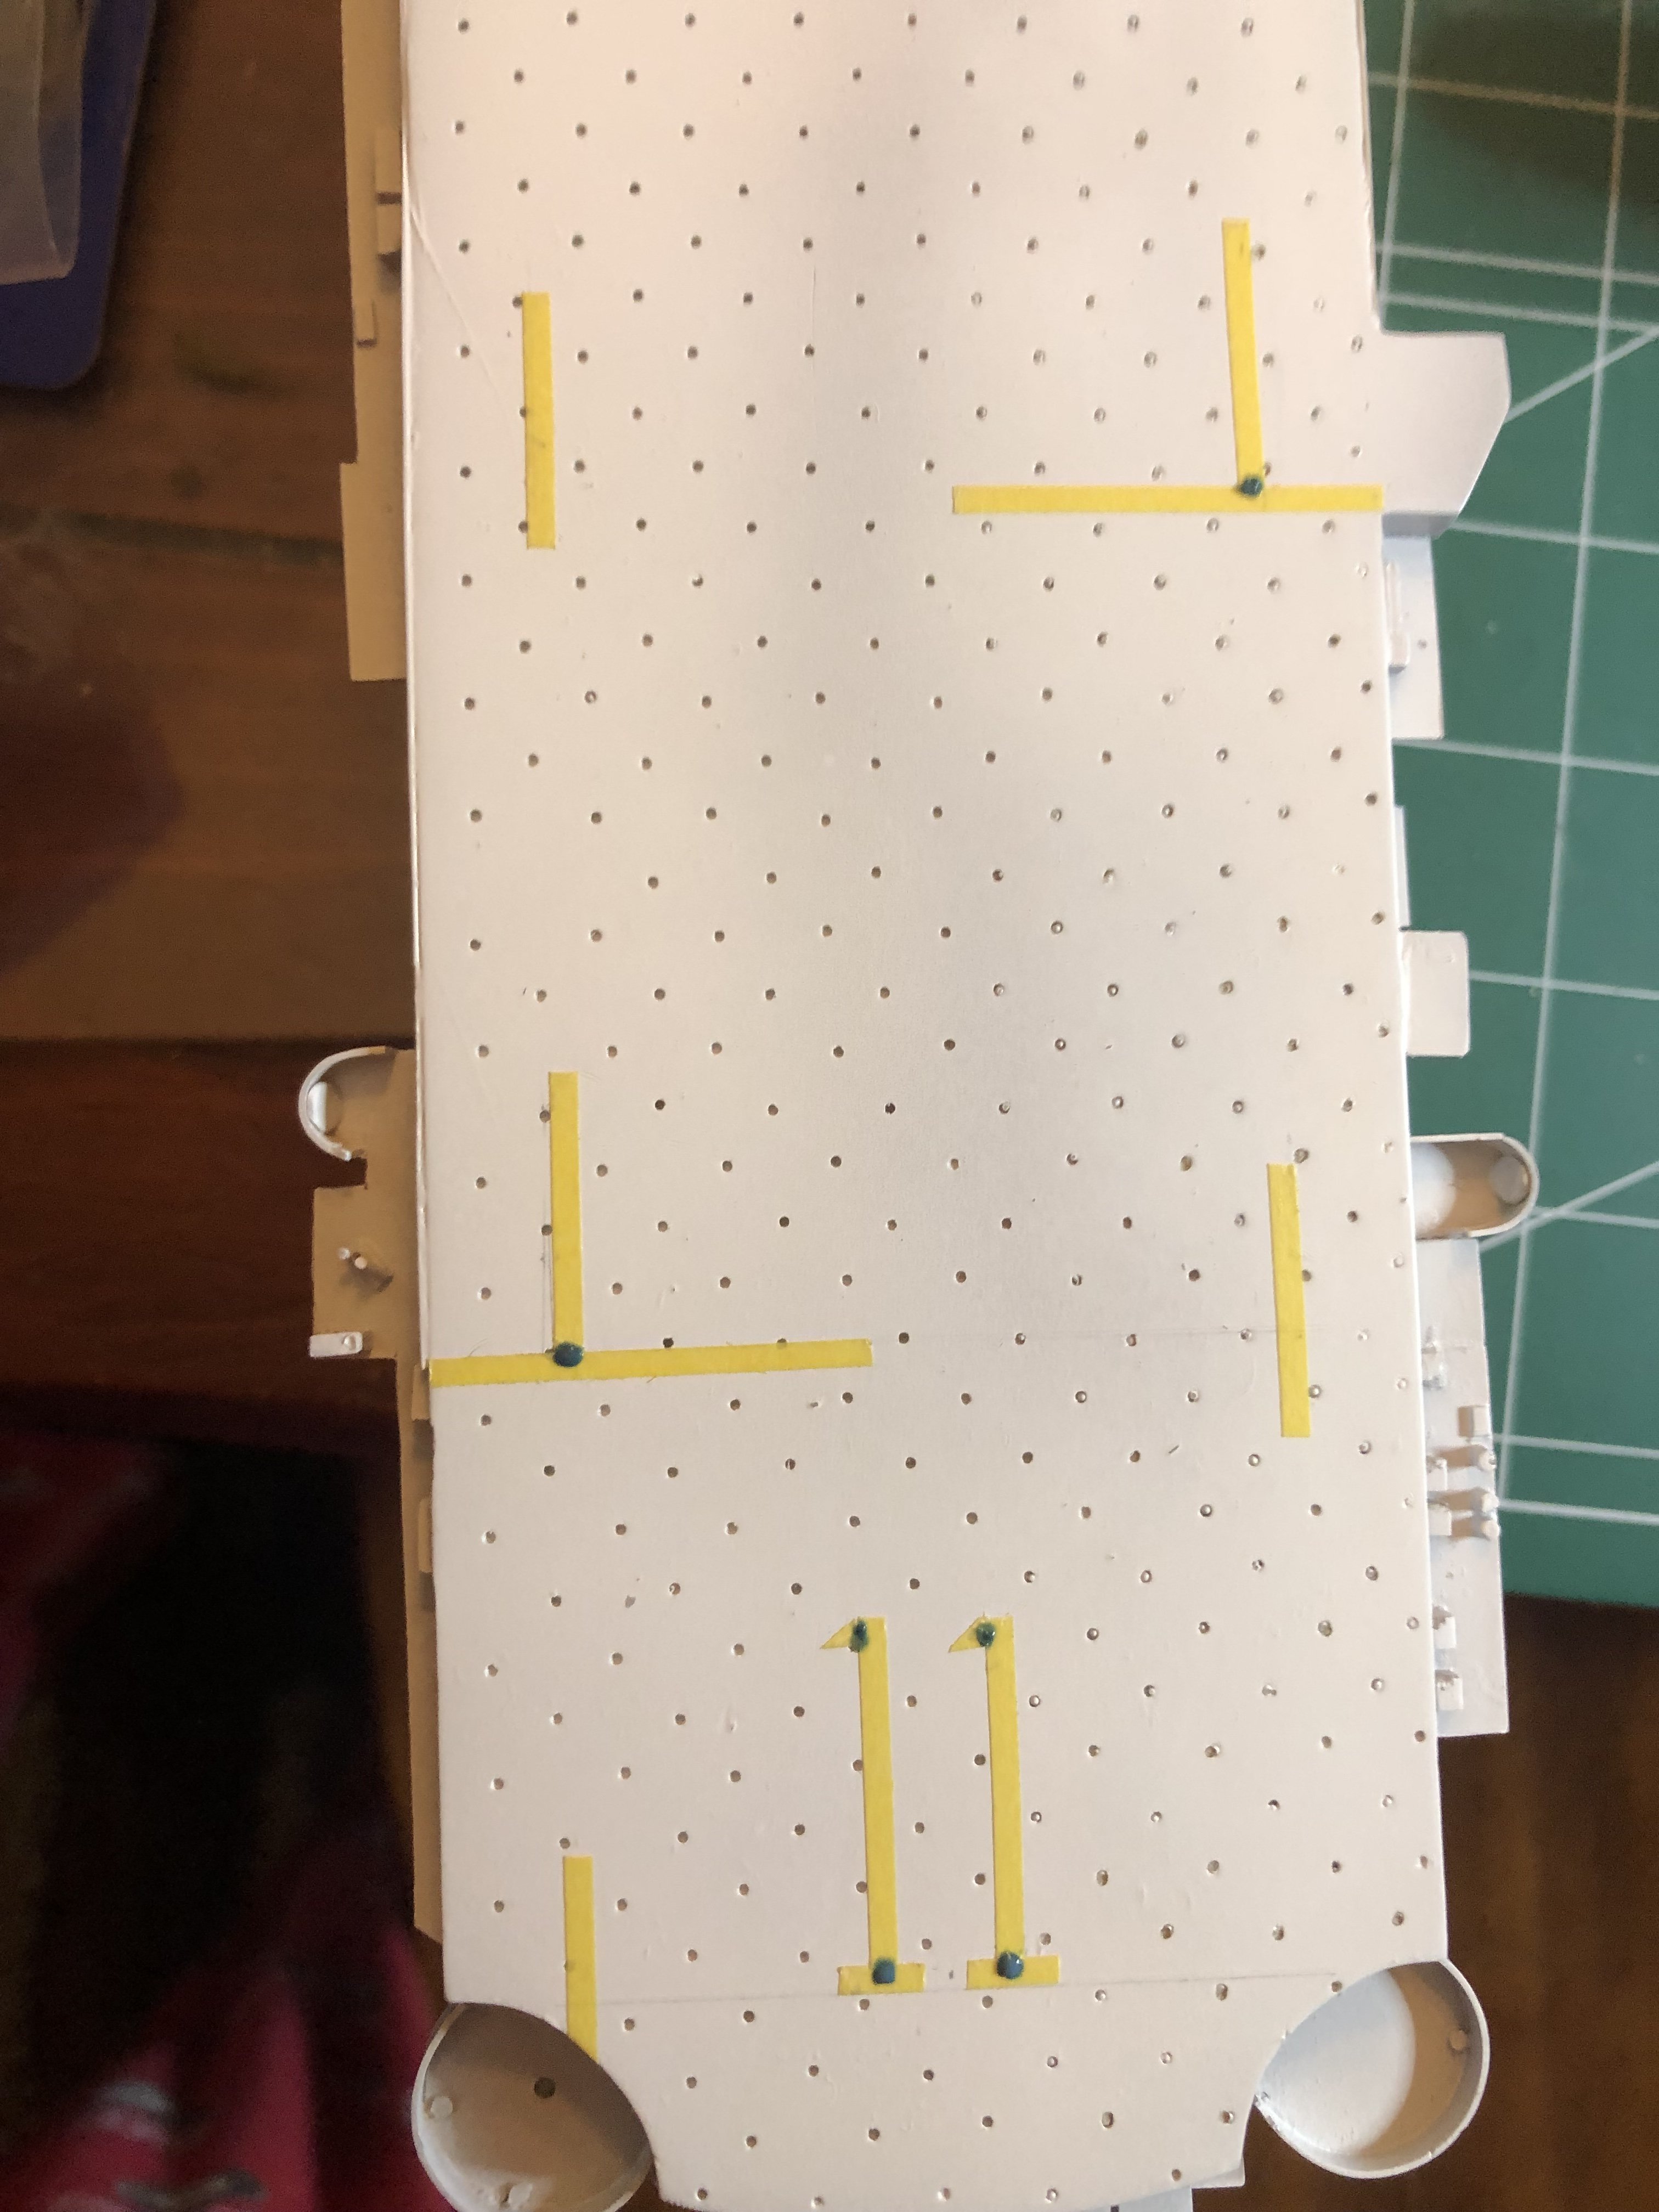
All deck markings have been laid out using Tamiya’s 2mm masking tape. I used Ammo by MiG’s masking fluid to seal the seams where the tape meets, hence the dots, in order to prevent any paint from seeping in. First step will be the black for the number shadowing. Also will spray black for the waterline even though most of it will be covered when I put it to sea.

- Canute, yvesvidal, Old Collingwood and 4 others
-
7
-
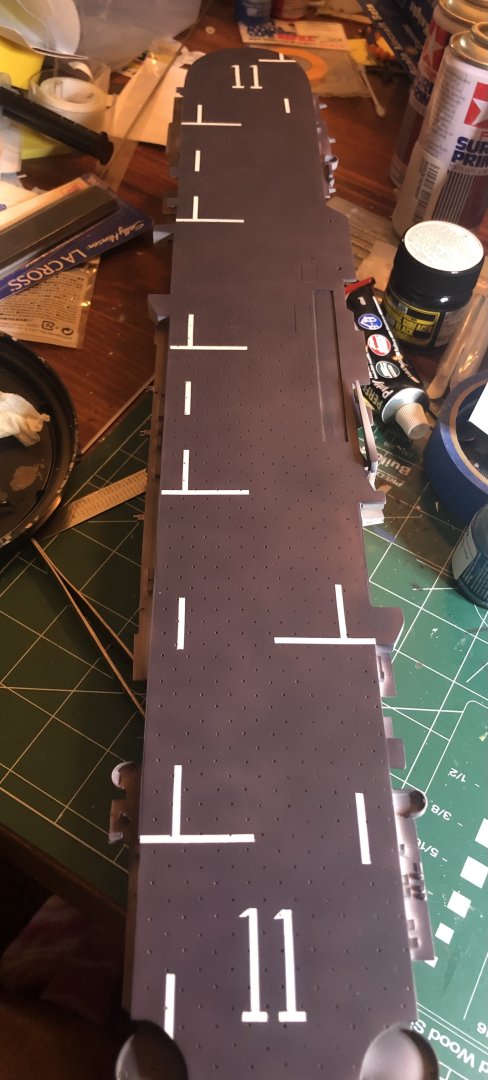
Small update. Just about have the back-half lines on. It was a b***h getting them lined up. Once the rest are down and the numbers ready, I’ll start pre- painting and then painting. I know I have other things to build but just wanted to do something different.

- GrandpaPhil, mikegr, Canute and 2 others
-
5
-
Using 2mm Tamiya, I laid out the first of the landing/parking markings. Measurements came from the decals. This will take a while and then it’s on to painting the deck.
- patrickmil, Canute, Old Collingwood and 1 other
-
4
-
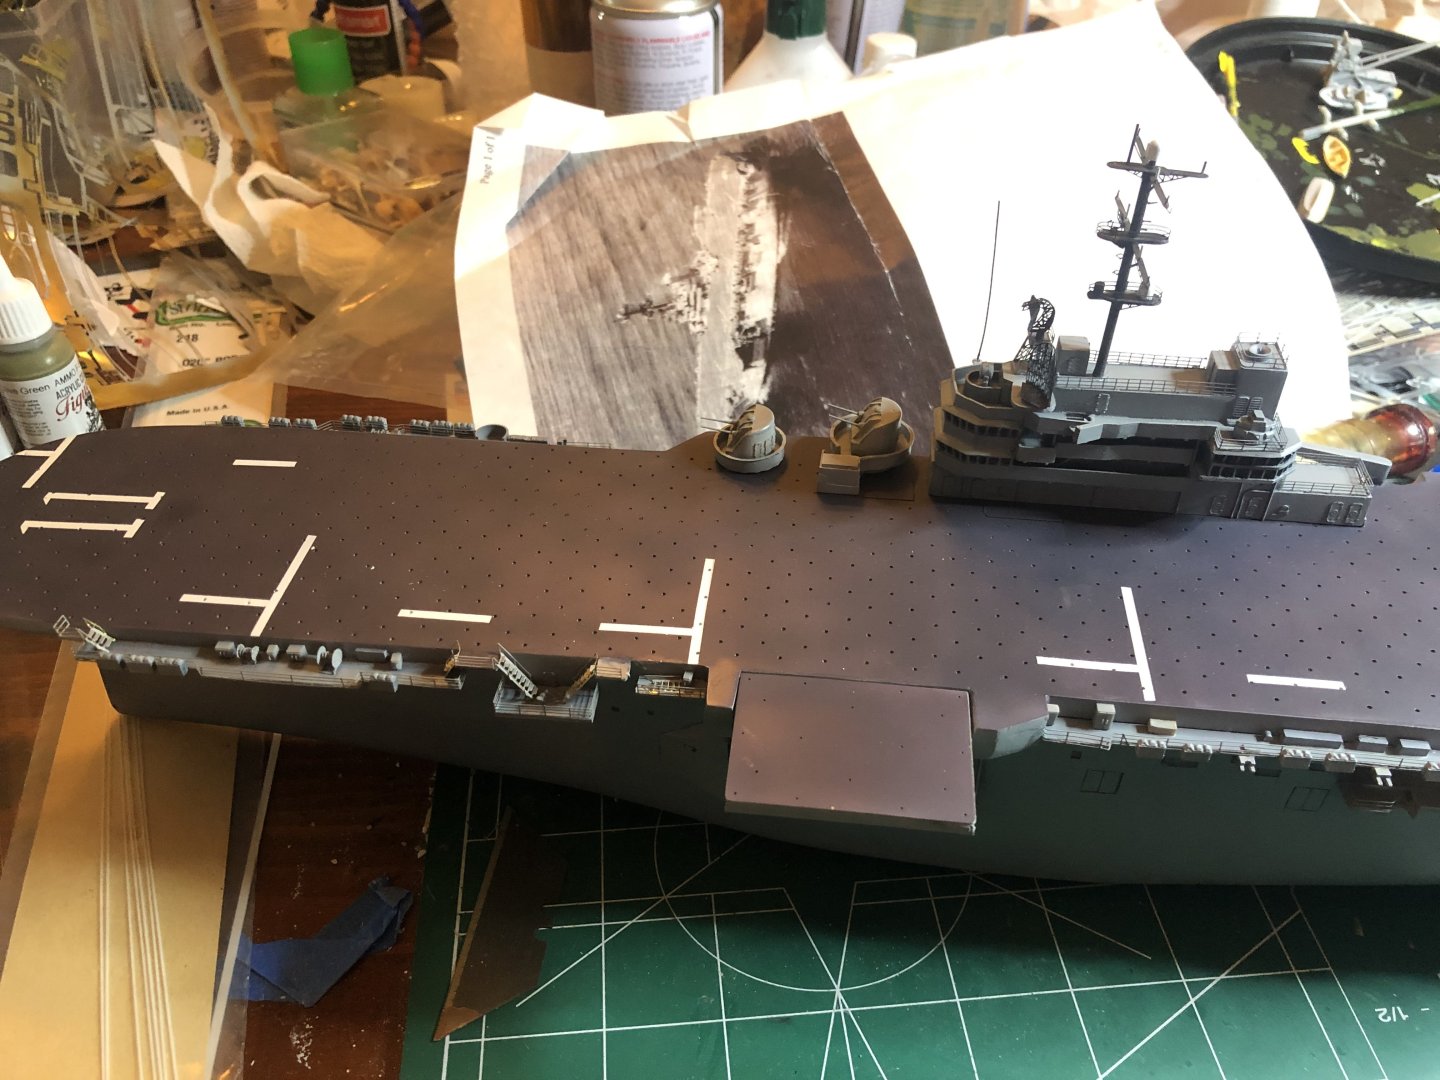
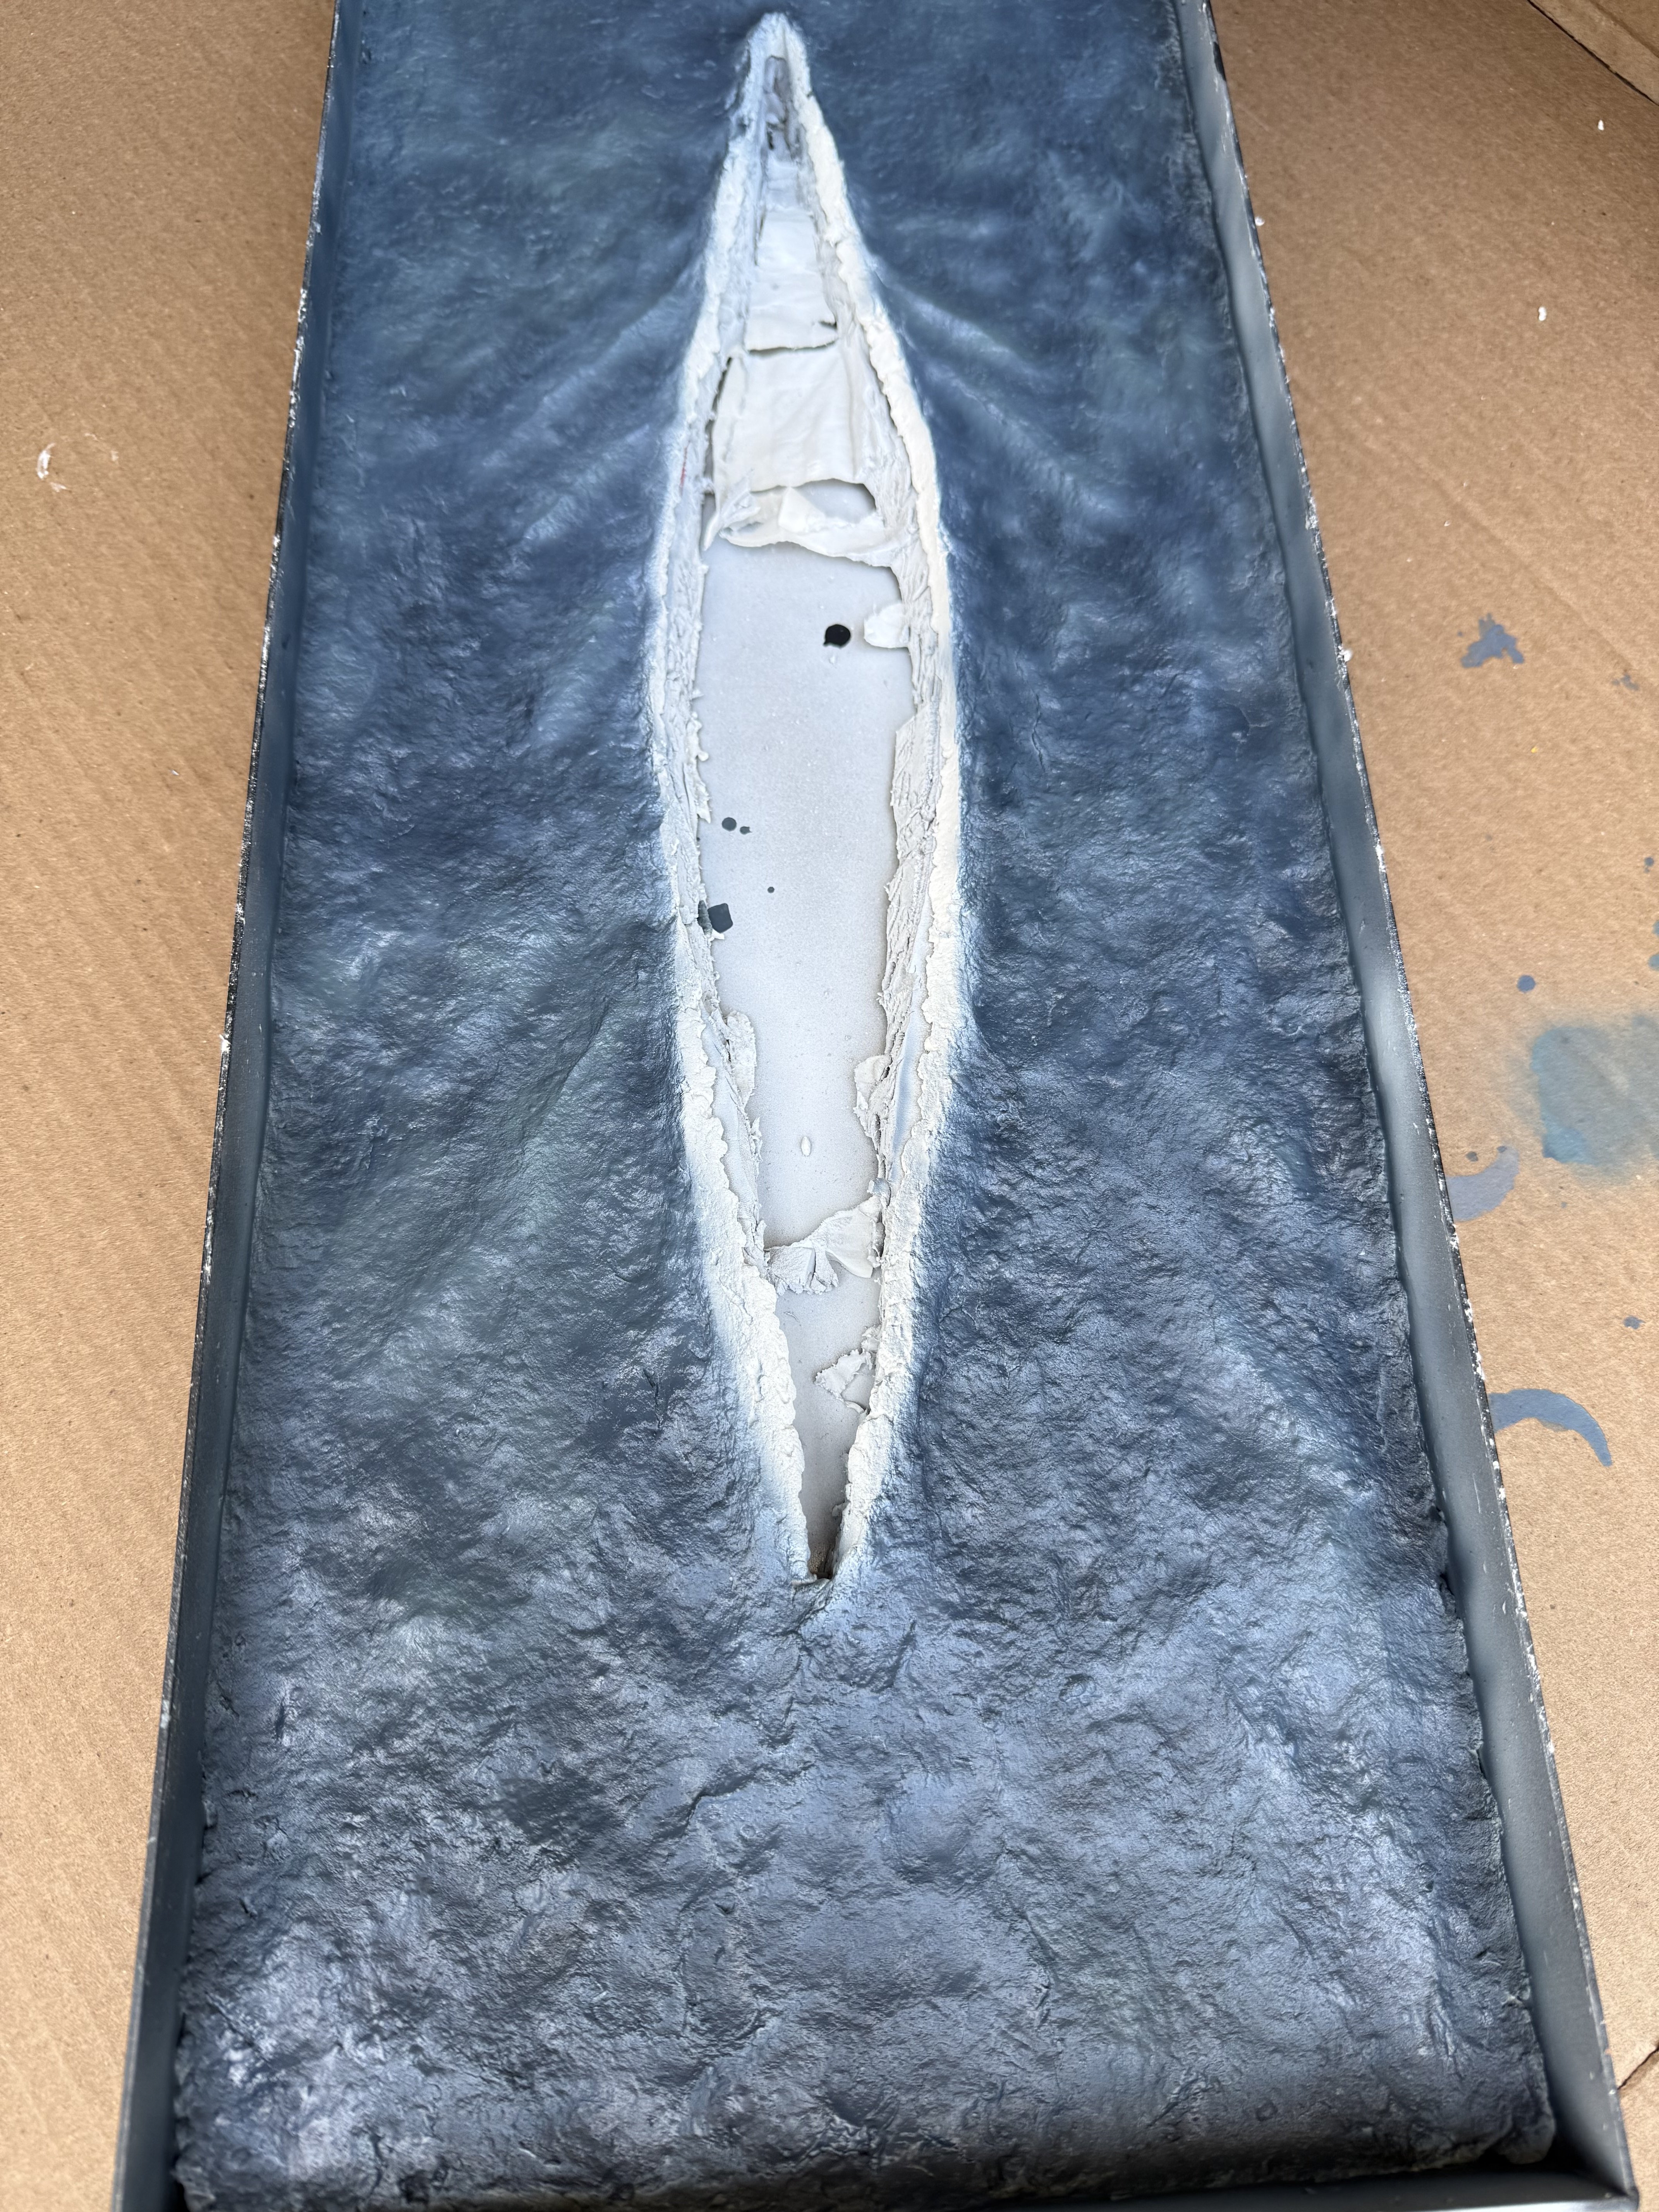
This settles it once and for all on the deck markings. They will be painted on. Note the shading on the numbers. Not going to worry about painting a white edge around it. Also note the deck is very heavily weathered.
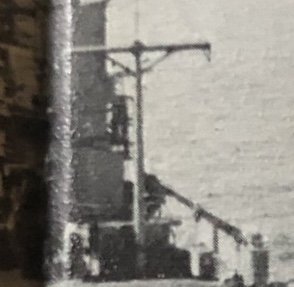
And here is the open 3"/50 mount. Have not been able to source this type. If anyone could point me where to go, I would greatly appreciate it!

- Canute and GrandpaPhil
-
2
-


LPH-11 USS New Orleans by Spaceman Spiff - FINISHED - Iron Shipwrights - 1/350 - RESIN
in - Kit build logs for subjects built from 1901 - Present Day
Posted
Thank all of you for the kind words and following along this journey. It's one that I've been on for so long that I feel as if I'm losing an old friend. All that is left is to make the clear plastic cover to protect it.
My luck would be that a highly detailed kit would come out soon lol