


mark.bukovich
-
Posts
95 -
Joined
-
Last visited
Content Type
Profiles
Forums
Gallery
Events
Posts posted by mark.bukovich
-
-
Update
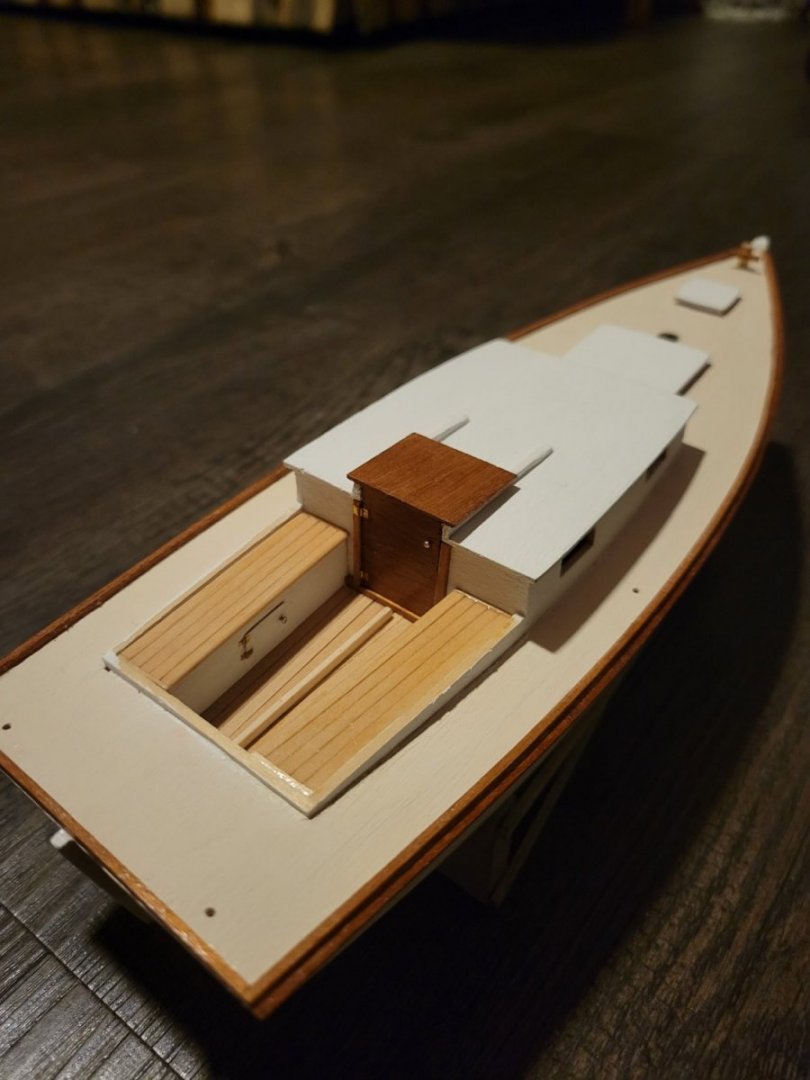
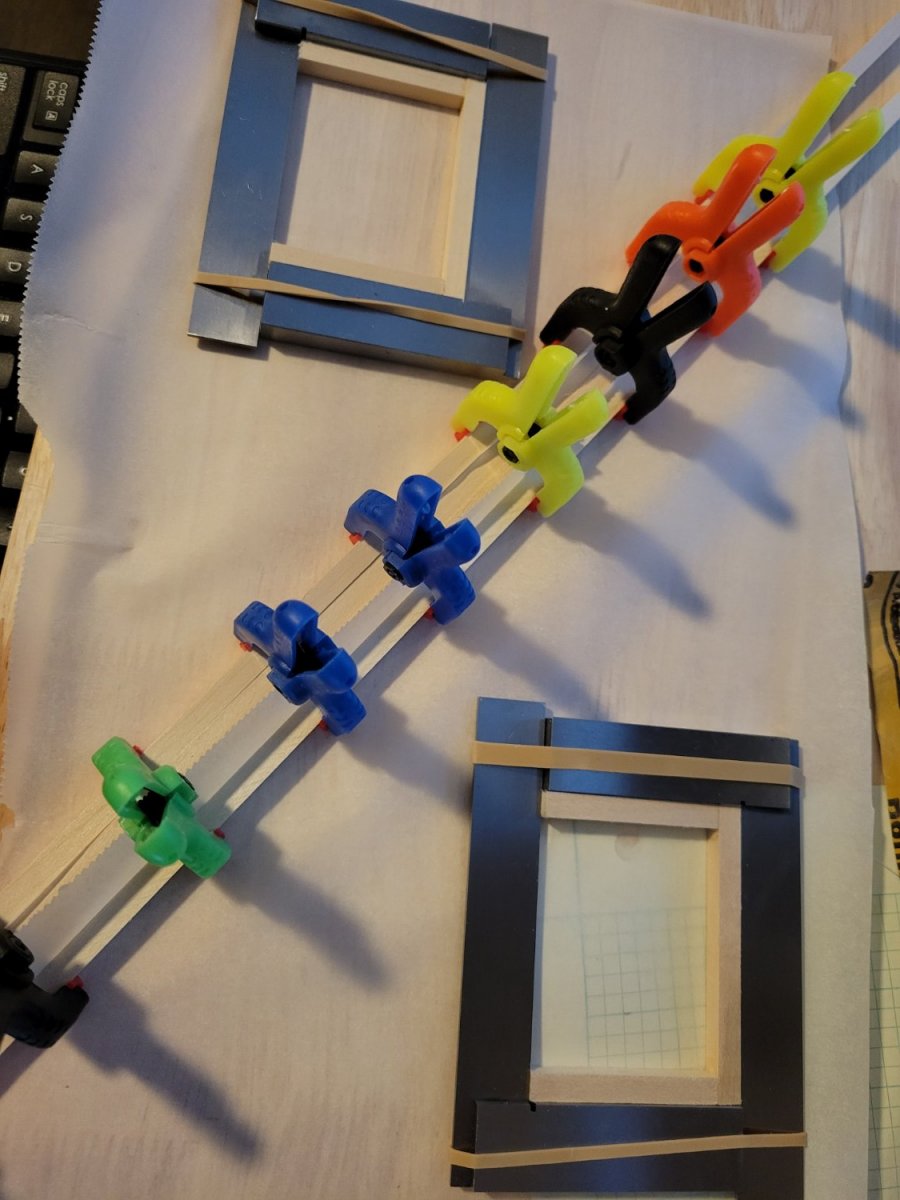
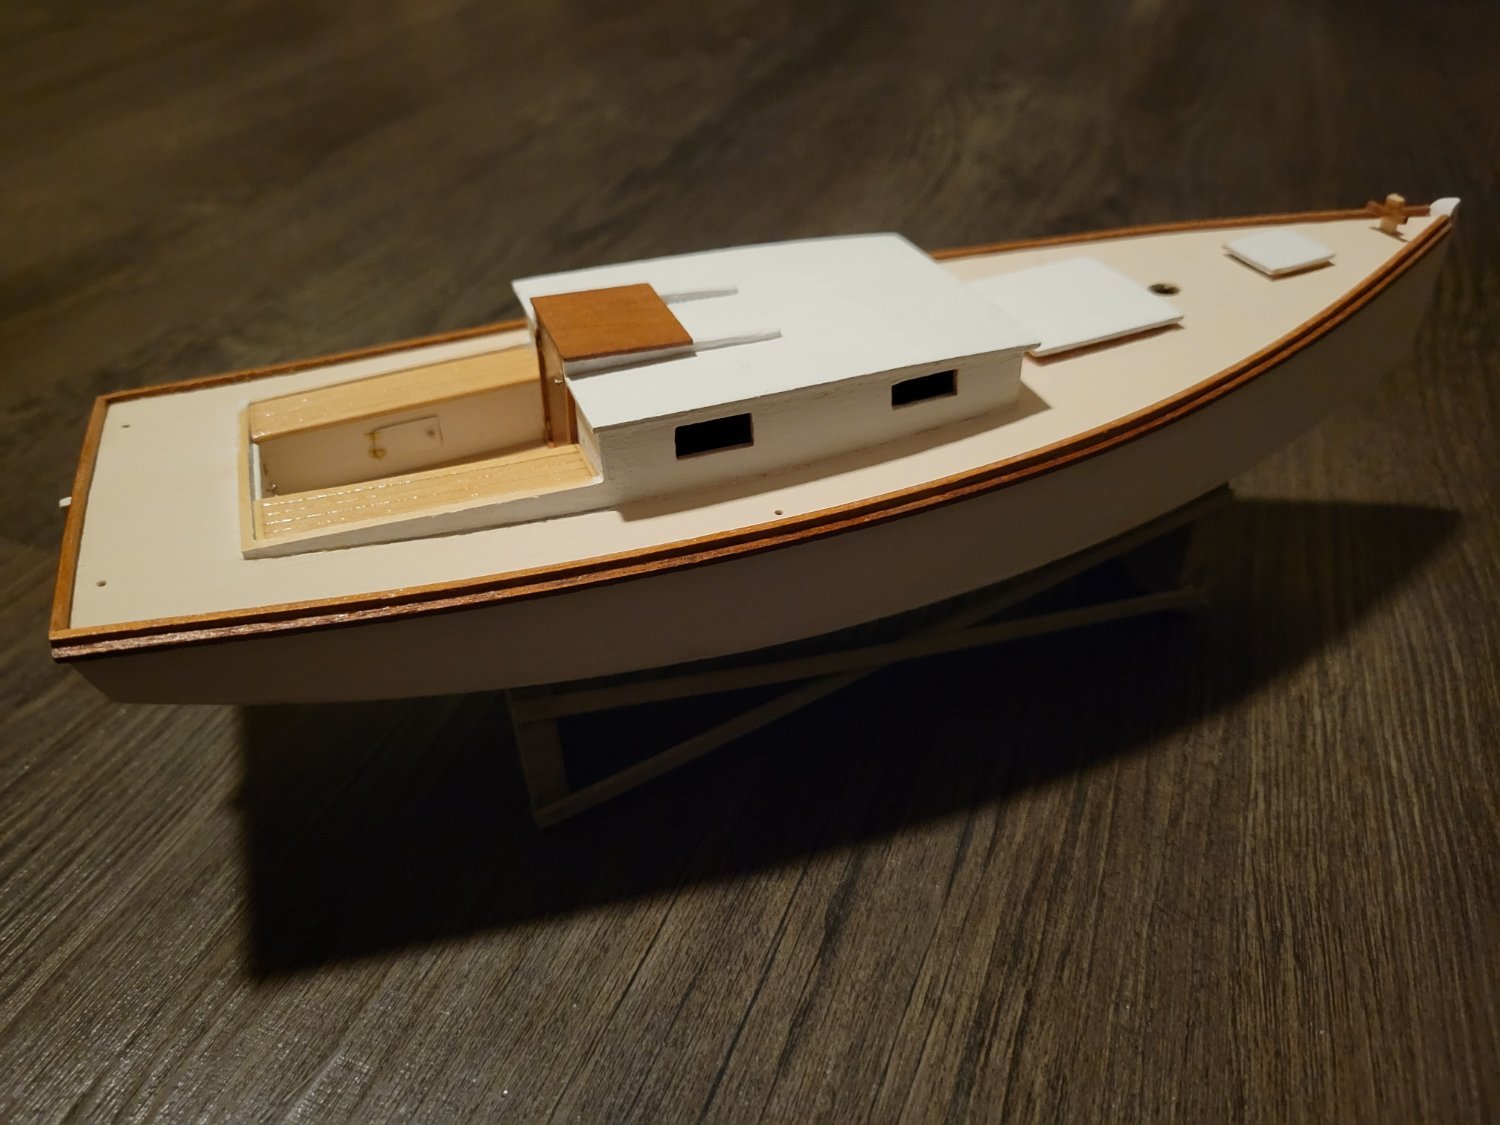
I'm just about done with everything except the rigging and a few fittings.
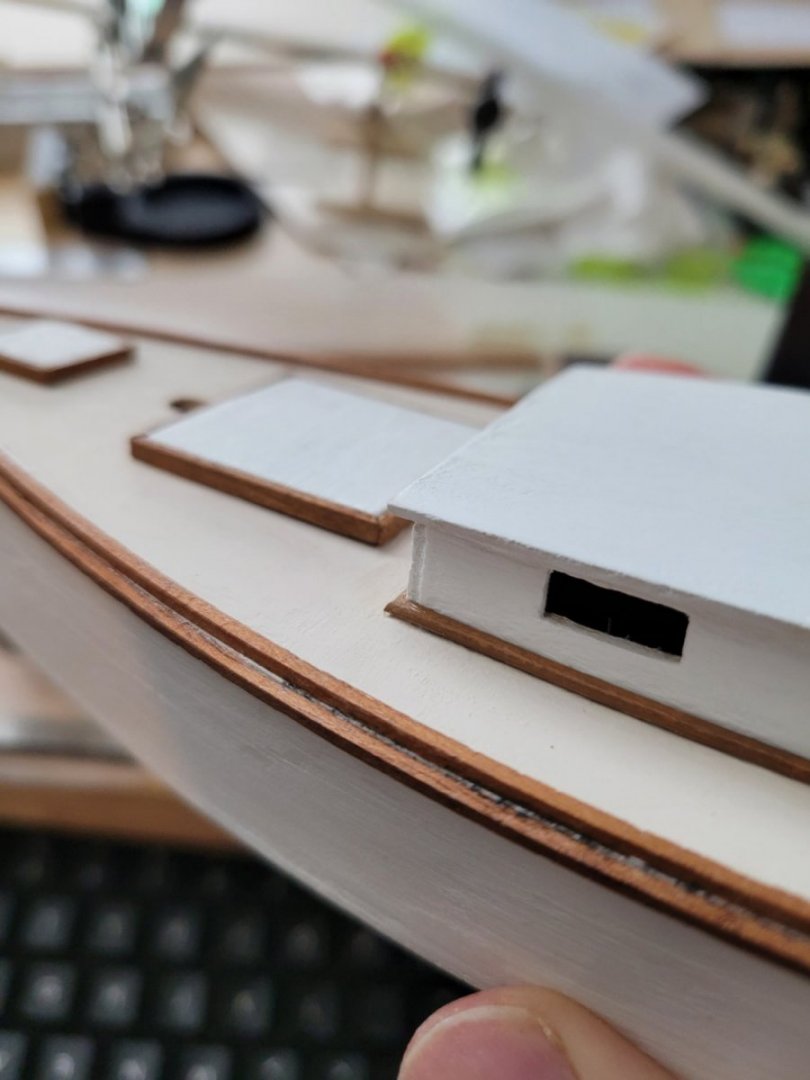
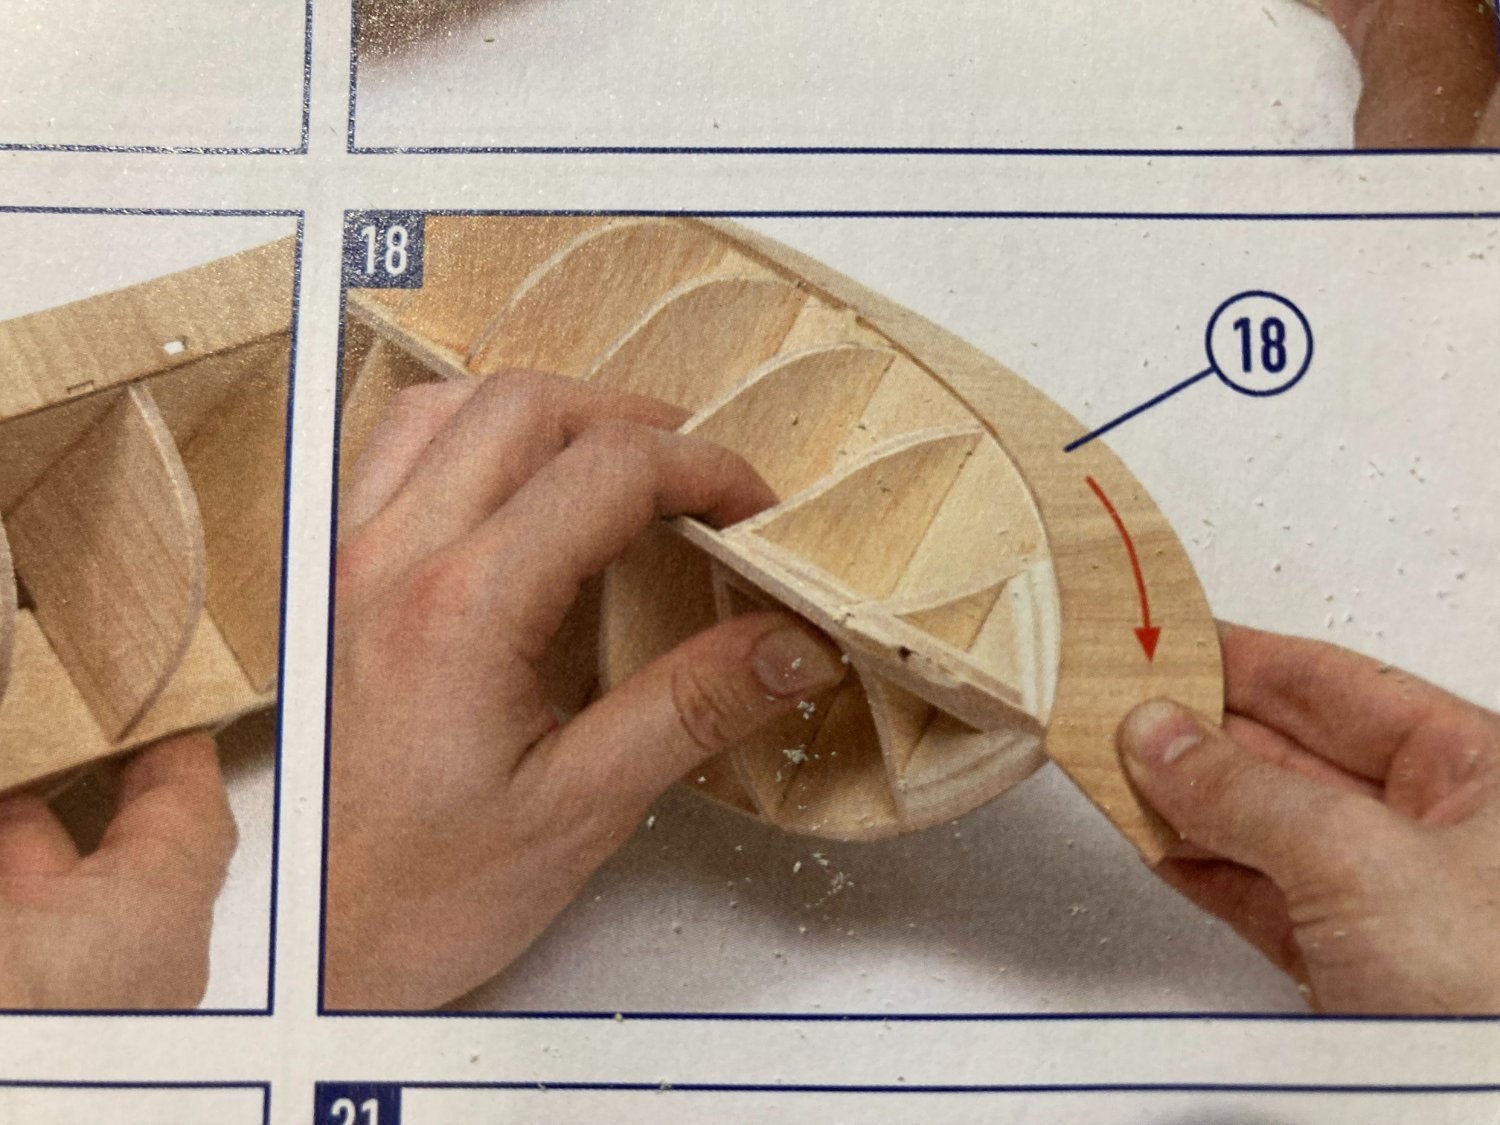
deck trim
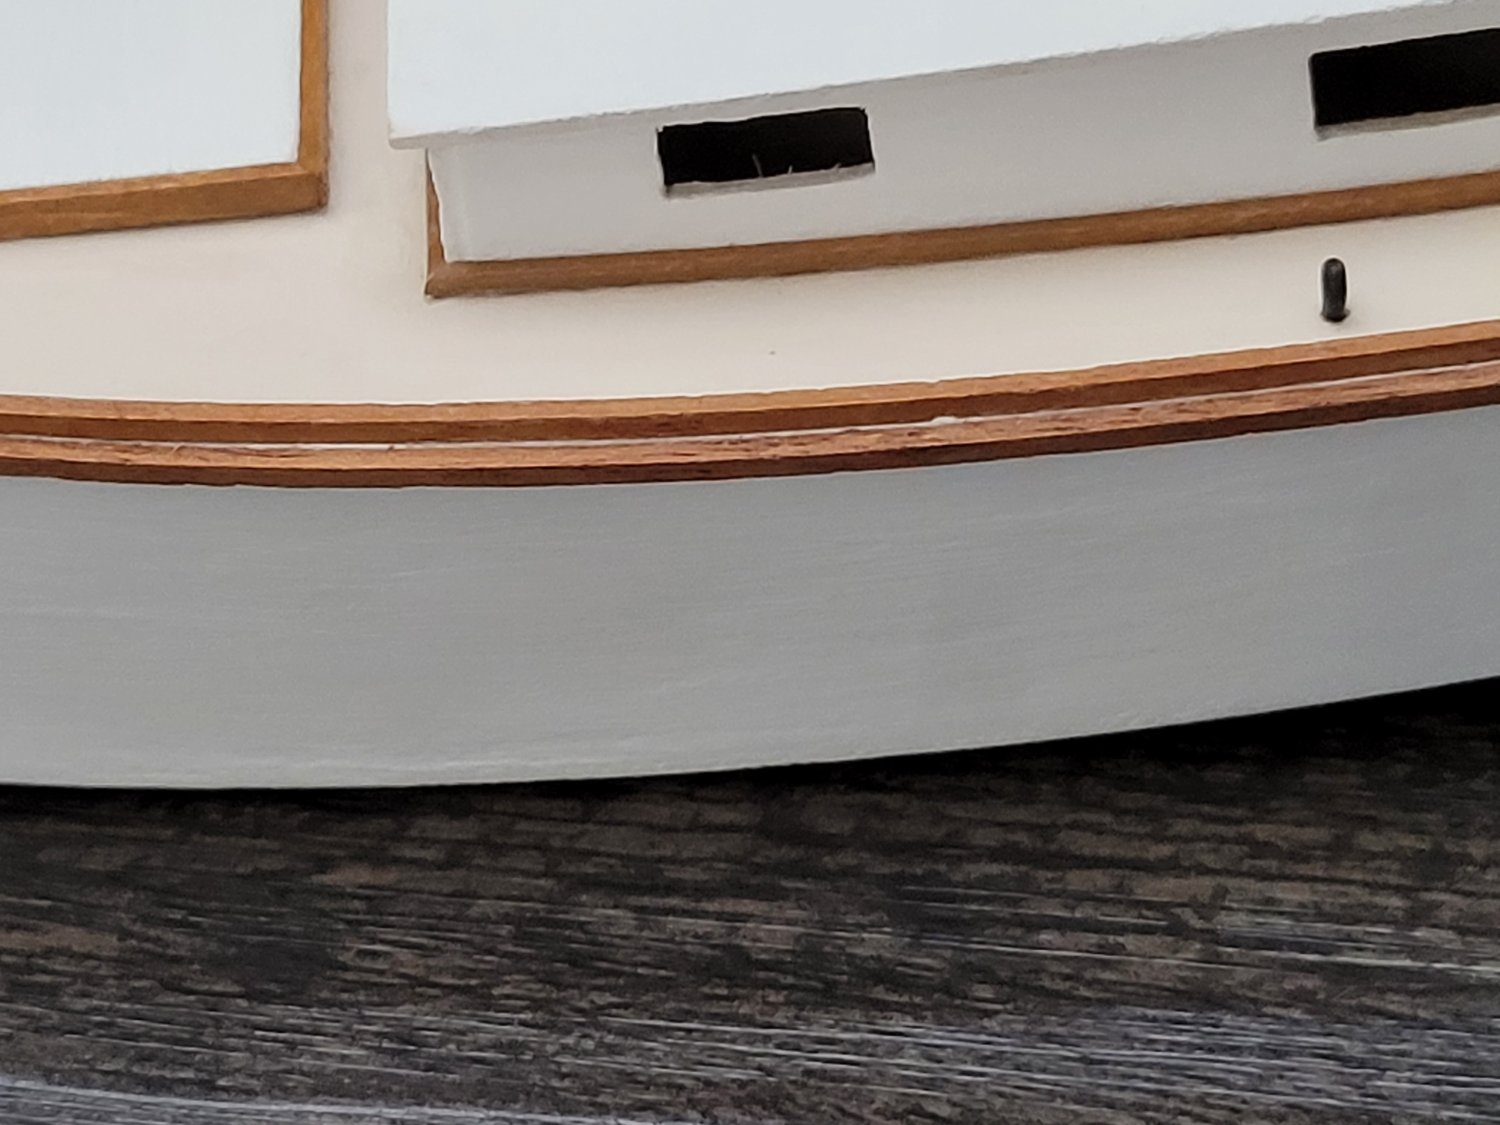
My paint job greatly suffered around the cabin where it met the deck, and also around the hatches. I decided to add some extra trim to cover it up, and I think the result turned out very nice.
I used the "English Oak" stain from Model Shipways. It turned out to be an almost perfect match for the mahogany pieces that came with the kit. It is more of a paint than a dye, but by applying and wiping it off several times, I think I got a decent result.
The offending paint job:
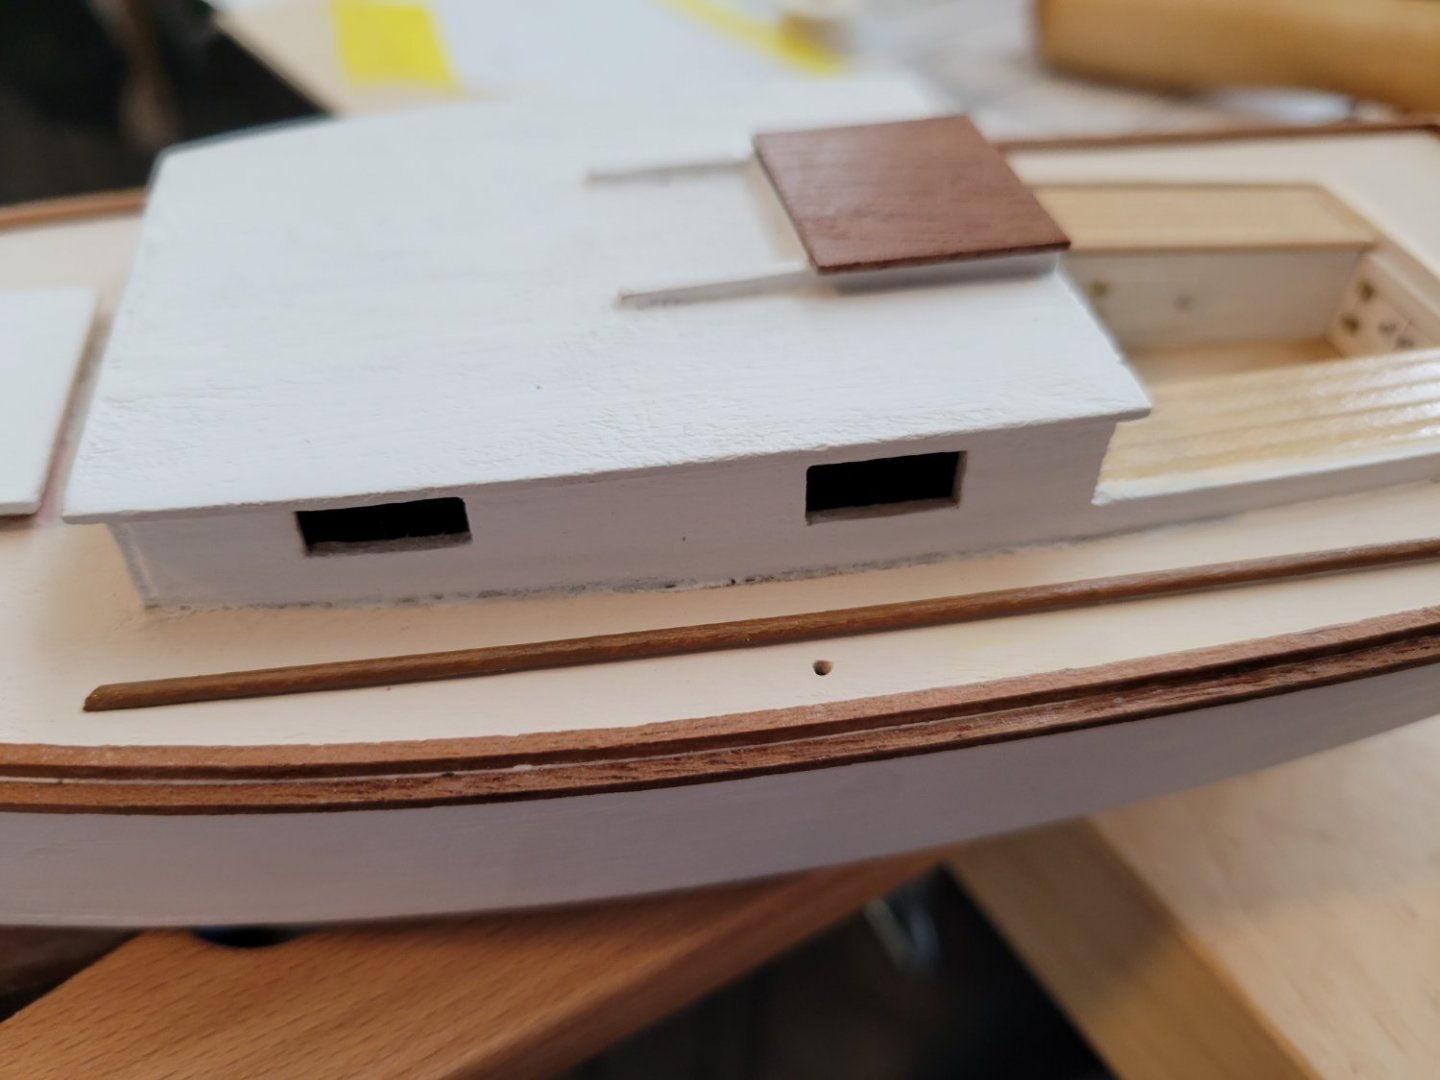
The results:
I also decided to try to fix some white showing through between the toe rail and rub rail:
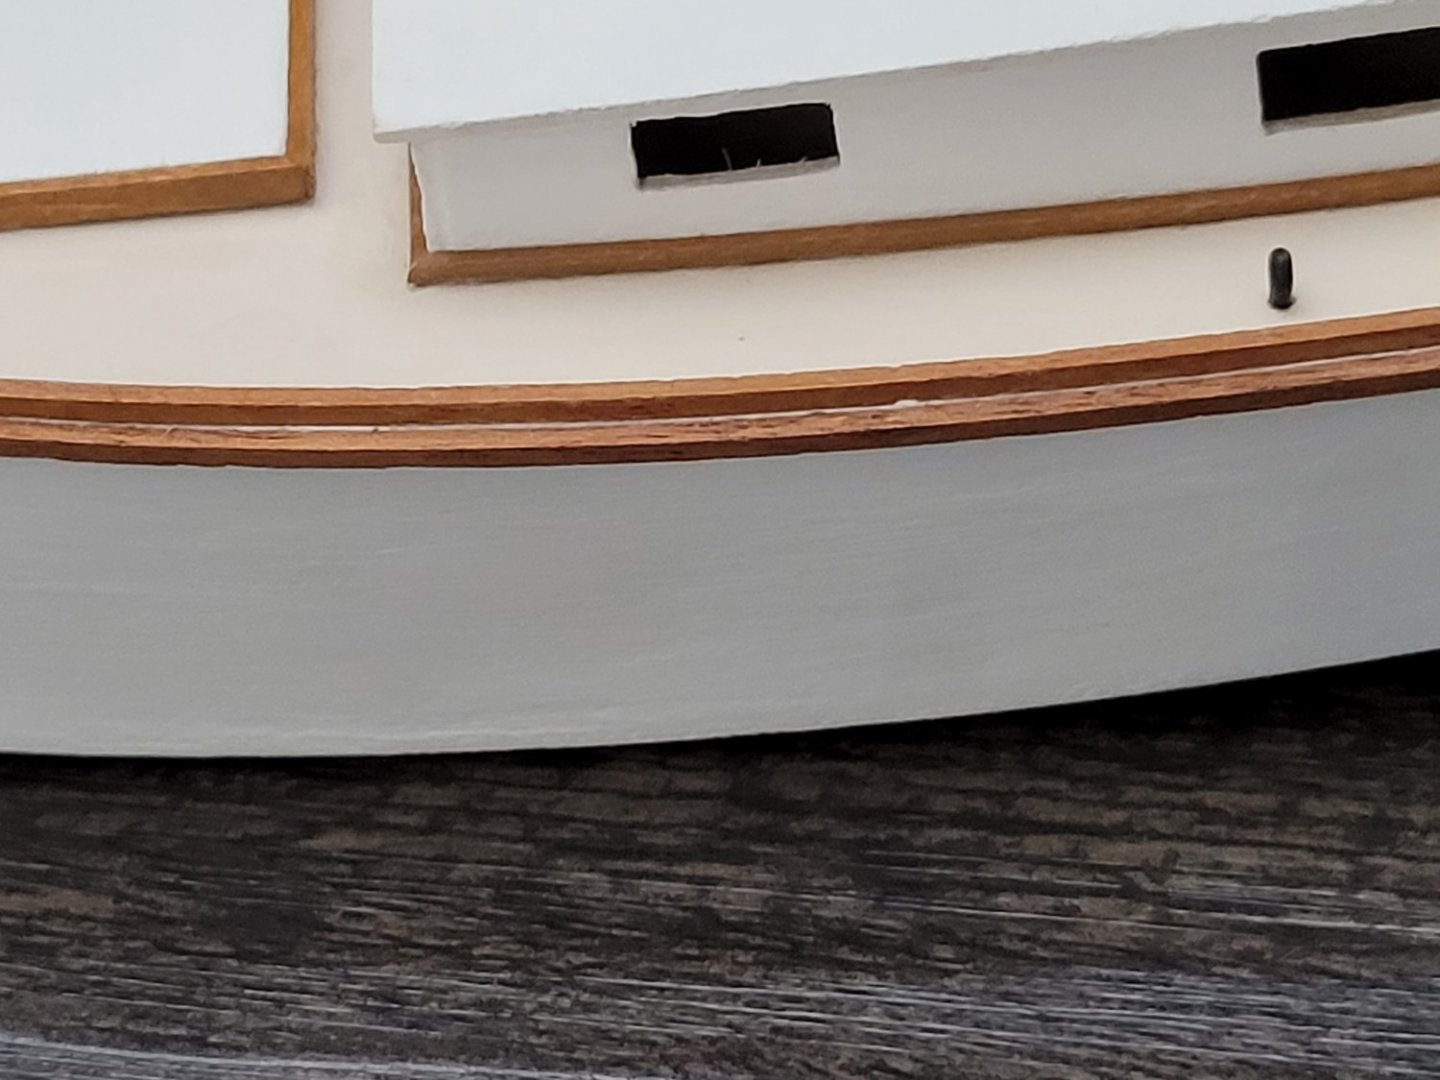
I used a hobby knife to give a mechanical pencil a very sharp point:
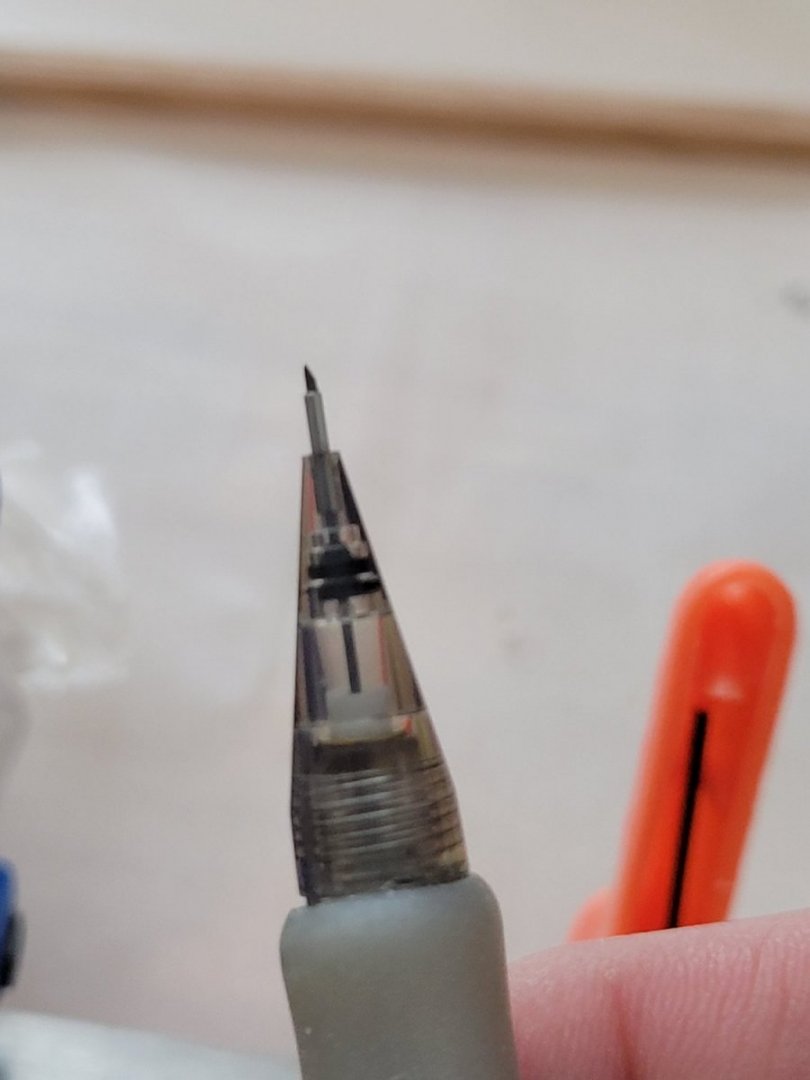
Here you can see a section with pencil next to the white showing through:
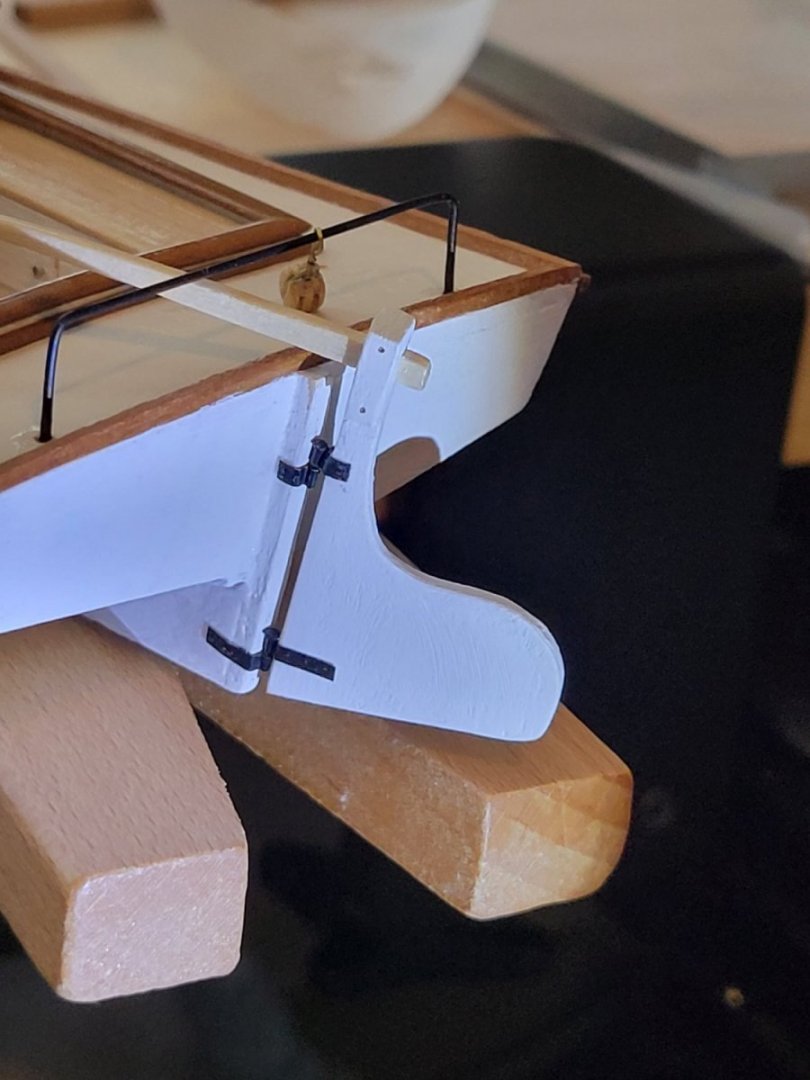
rudder
I glued on the gudgeons and hung the rudder. This allowed me to also glue in the traveler. The rudder swings pretty well, and I got a good result.


-
1 hour ago, DanB said:
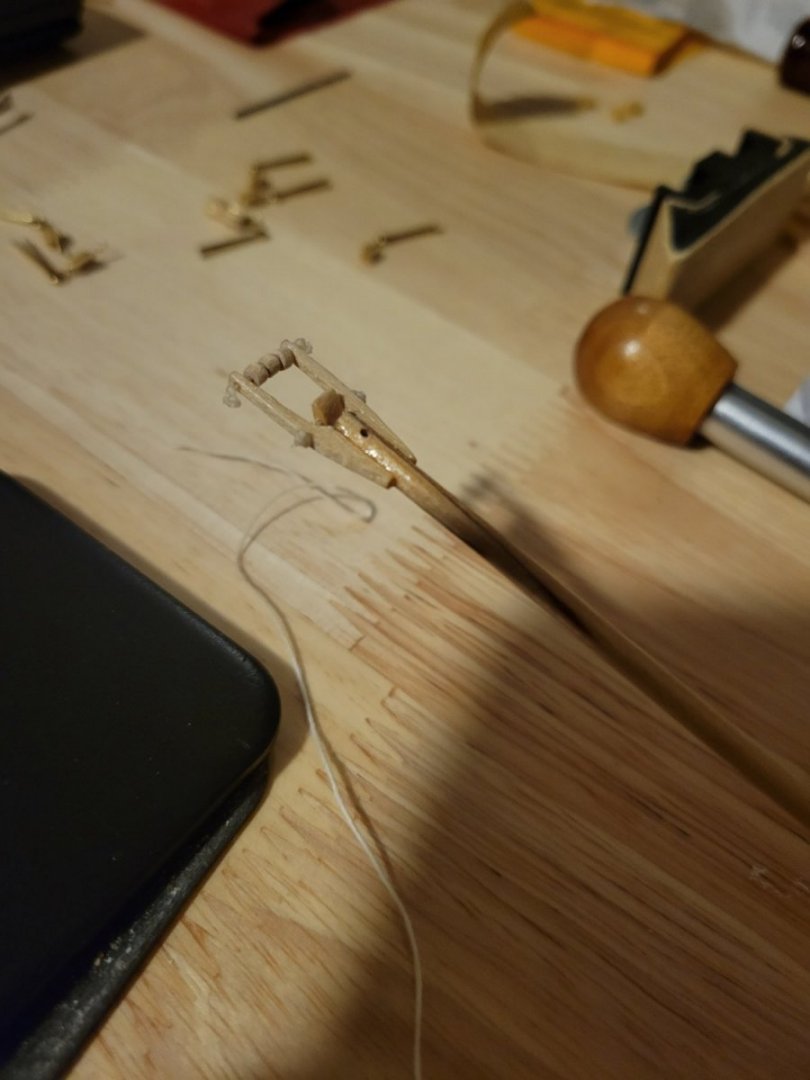
Attaching the sail to the mast, gaff and boom. This is just like the Pram, but I forgot how to do it and had to read the instructions in the manual several times, look at the instructions in the back of the manual , and look at the Pram instructions. I still managed to mess it up a few times I used up the 0.4 mm line, but I think the rest of the rigging is 0.7mm. I am sure that Model Expo thought they supplied enough line, but it would have been helpful to include a bit more to account for mistakes.
I added the beads for each parral that holds the mast and Gaff. The manual says to use seed beads but does not say what size and they come in a lot of different sizes . The first ones that I ordered were too small. The ones I finally used are size 8/0 and seem to be about right and look similar to the picture in the manual. I now have a lifetime supply of these beads unless I decide to give up on ship models and make jewelry instead😃. I had a better picture but the file will not upload and I just get Error 200 message .
Onward to attaching blocks
Dan
Nice! I think rigging the sails is an exciting part of a build.
-
I'm about finished with the model I've been working on (Midwest Chesapeake Bay Flattie) and beginning my next one.
The Light Melonseed is a small skin-on-frame sailboat designed by Dave Gentry and based on Jersey Melonseed gunning skiffs.
If you want to check it out, here is a link:
http://gentrycustomboats.com/Melonseed.html
I purchased the plans and intend to build the full-size boat once I have the space to do so. Until then, I will be building a scale model and posting the progress here.
This will be my second boat/ship model and my first "scratch" build. The main difference with a kit here is that I need to plan and acquire all the materials and fittings as well as cut out my own frames and stuff like that.
This will also be interesting in that it is a skin-on-frame design, so instead of being planked, it will be "skinned".
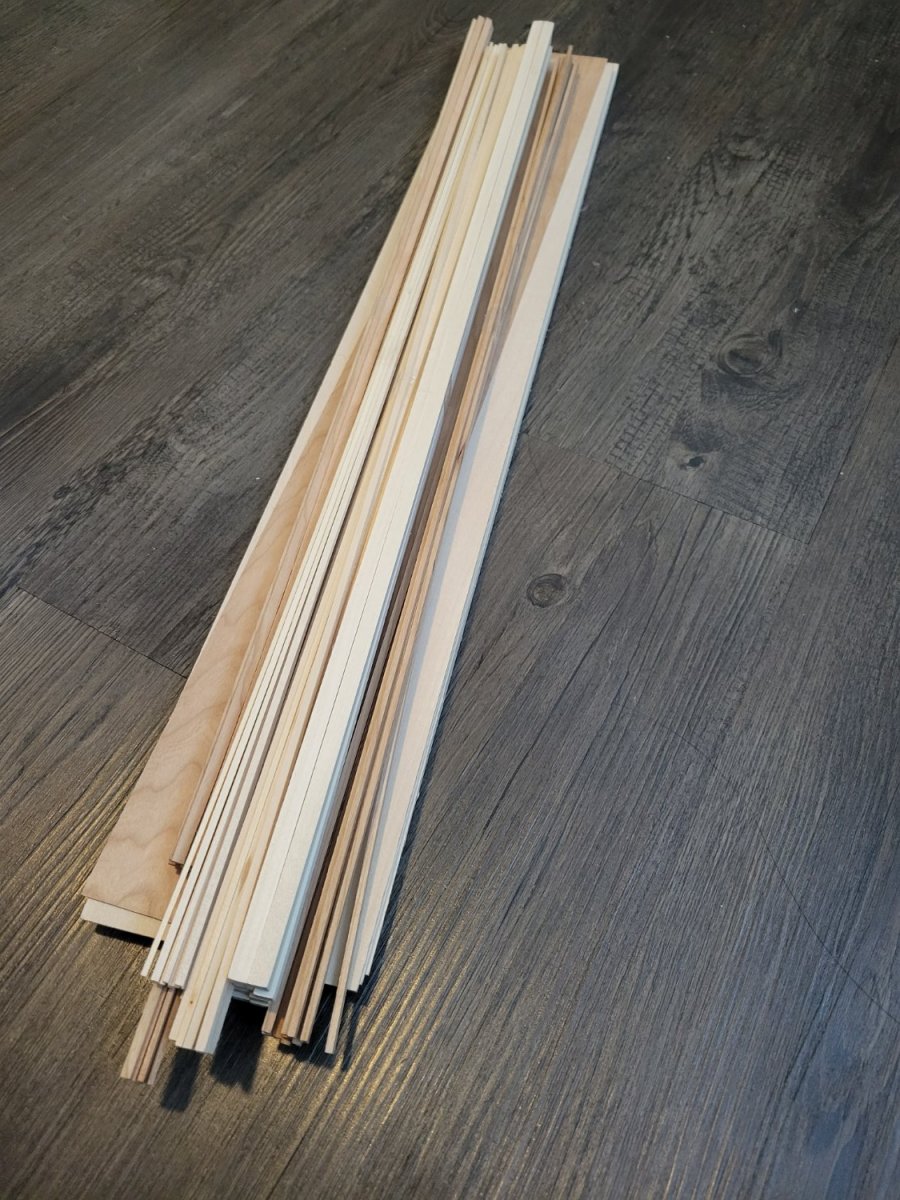
I ordered my lumber from Model Expo. I will be able to match scale dimensions perfectly for most components of the boat by laminating pre-cut strips. I will be doing a good amount of laminating for this model.
The lumber.

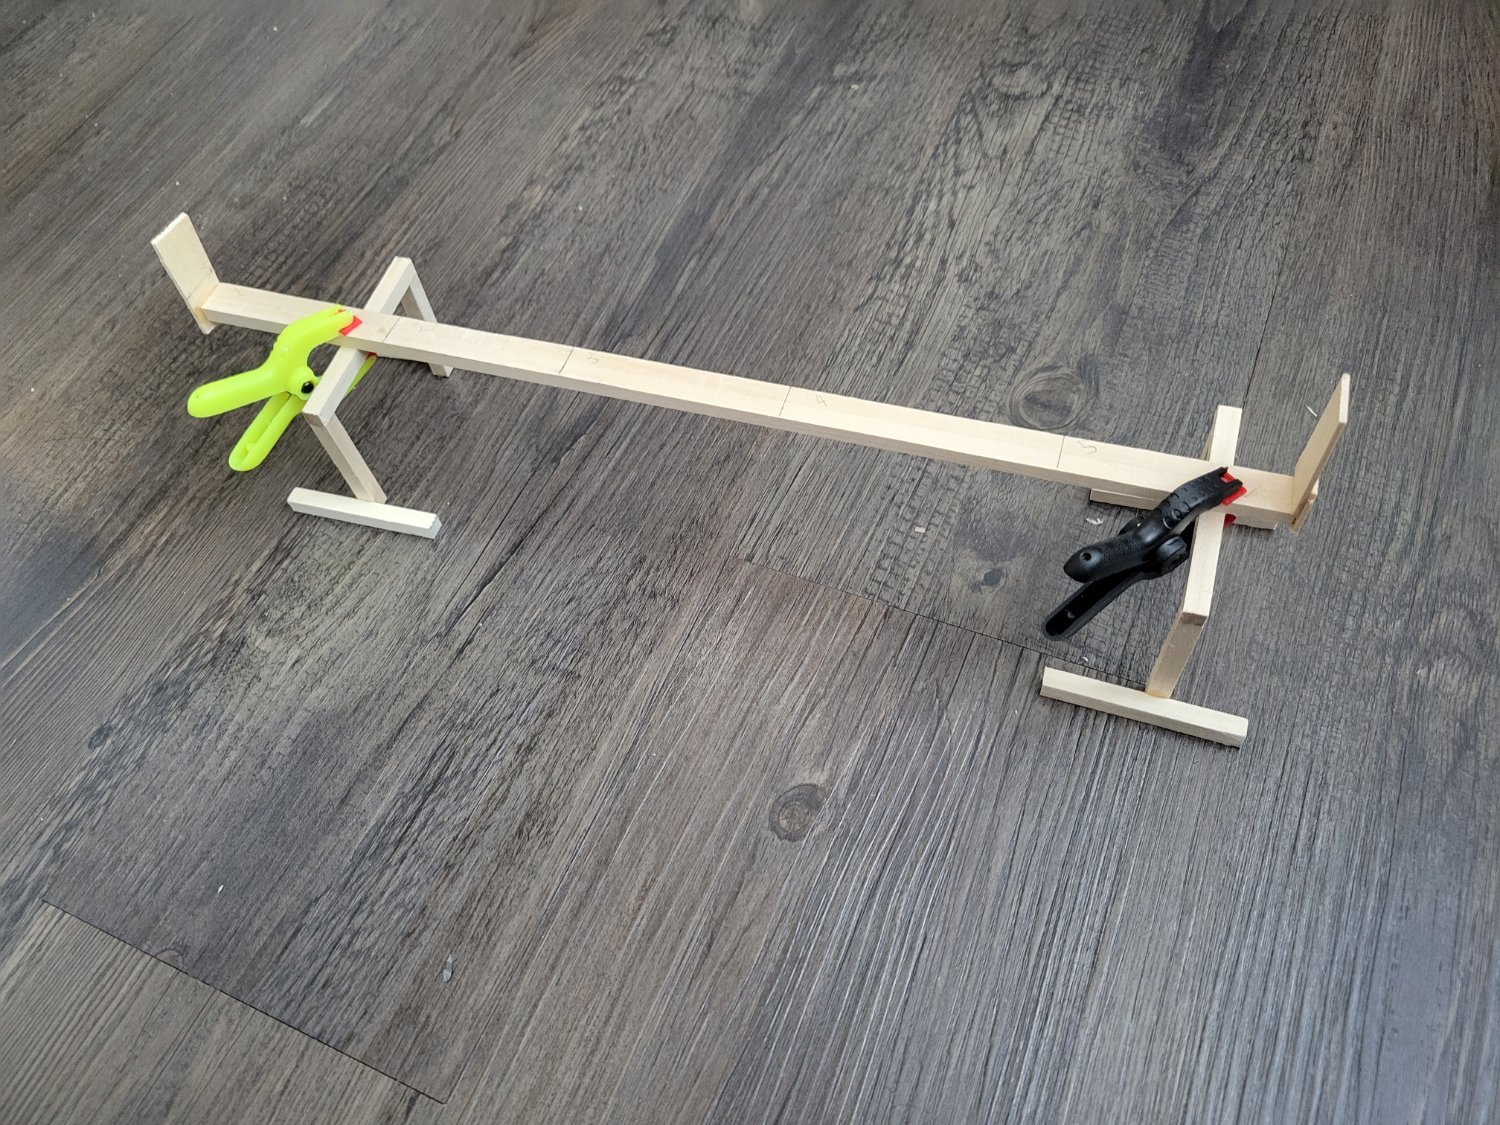
Building a "strongback" that will facilitate accurate framing of the boat.

-
4 hours ago, DanB said:
Yes, the sail material is stretched first by taping it to a flat surface. (I found I also need to iron out the folds) Then paint diluted white glue on the sail and allow it to dry. Then mark out the sail and add reinforcing strips by gluing them with more diluted glue. It seems to work well, and after doing it a few times I think I could now do this for a model that did not have sails supplied.
Cool. I like the reinforced portions of the sail. In addition to looks, this will probably help avoid damaging the sail while bending it to the spars and rigging everything up. Does the sail have rings/grommets at the holes, or just punched through the cloth?
I just got done with sails for the kit I'm working on and used an acrylic varnish. It looks like the Model Shipways Lobster Smack is more involved and advanced in many ways. I'm definitely considering doing this kit at some point.
-
10 hours ago, DanB said:
Finished the mainsail. Now working on attaching it to the mast and gaff.
Nice!
In this kit, does the sail get any coating like clear-coat, Polyurethane, or diluted glue?
-
Thanks! I agree and I'm finding that this community and hobby is filled with encouragement and tons of help.
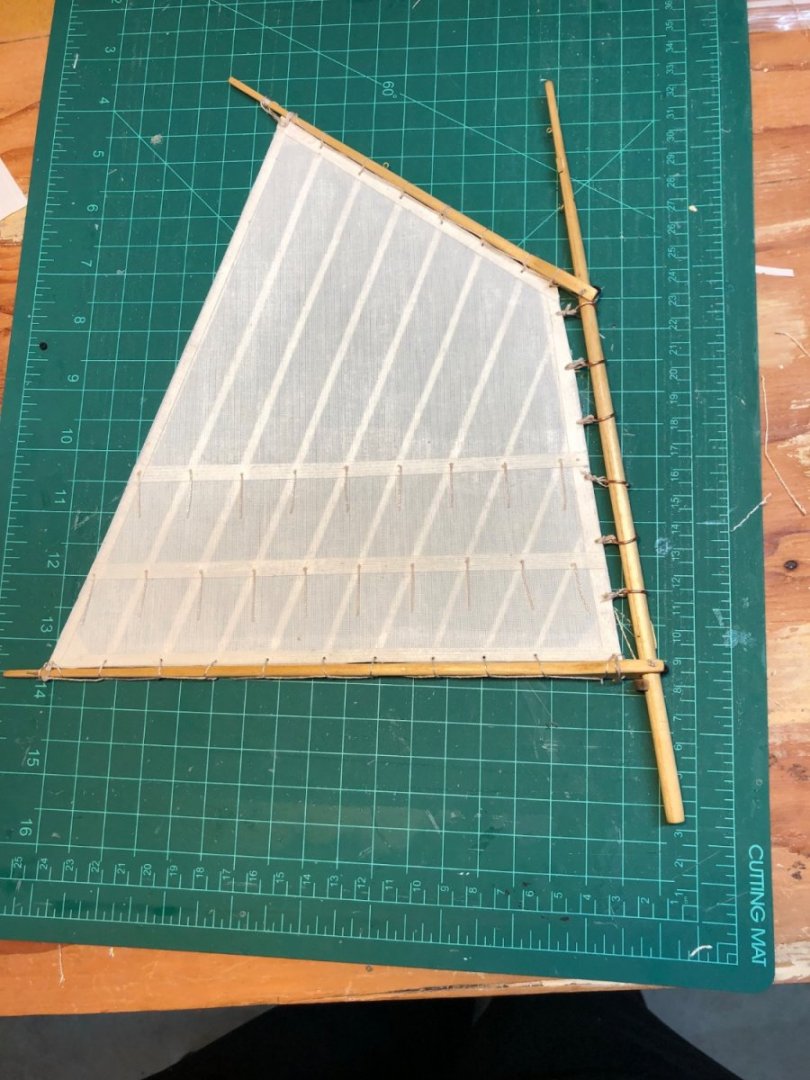
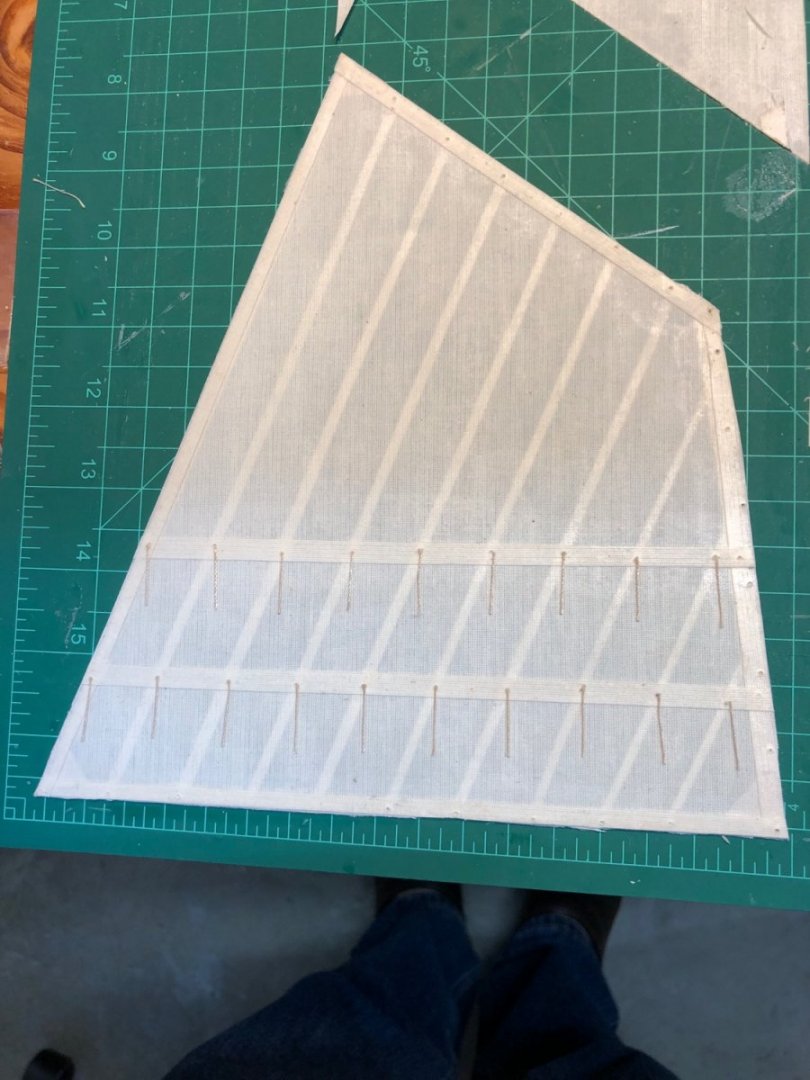
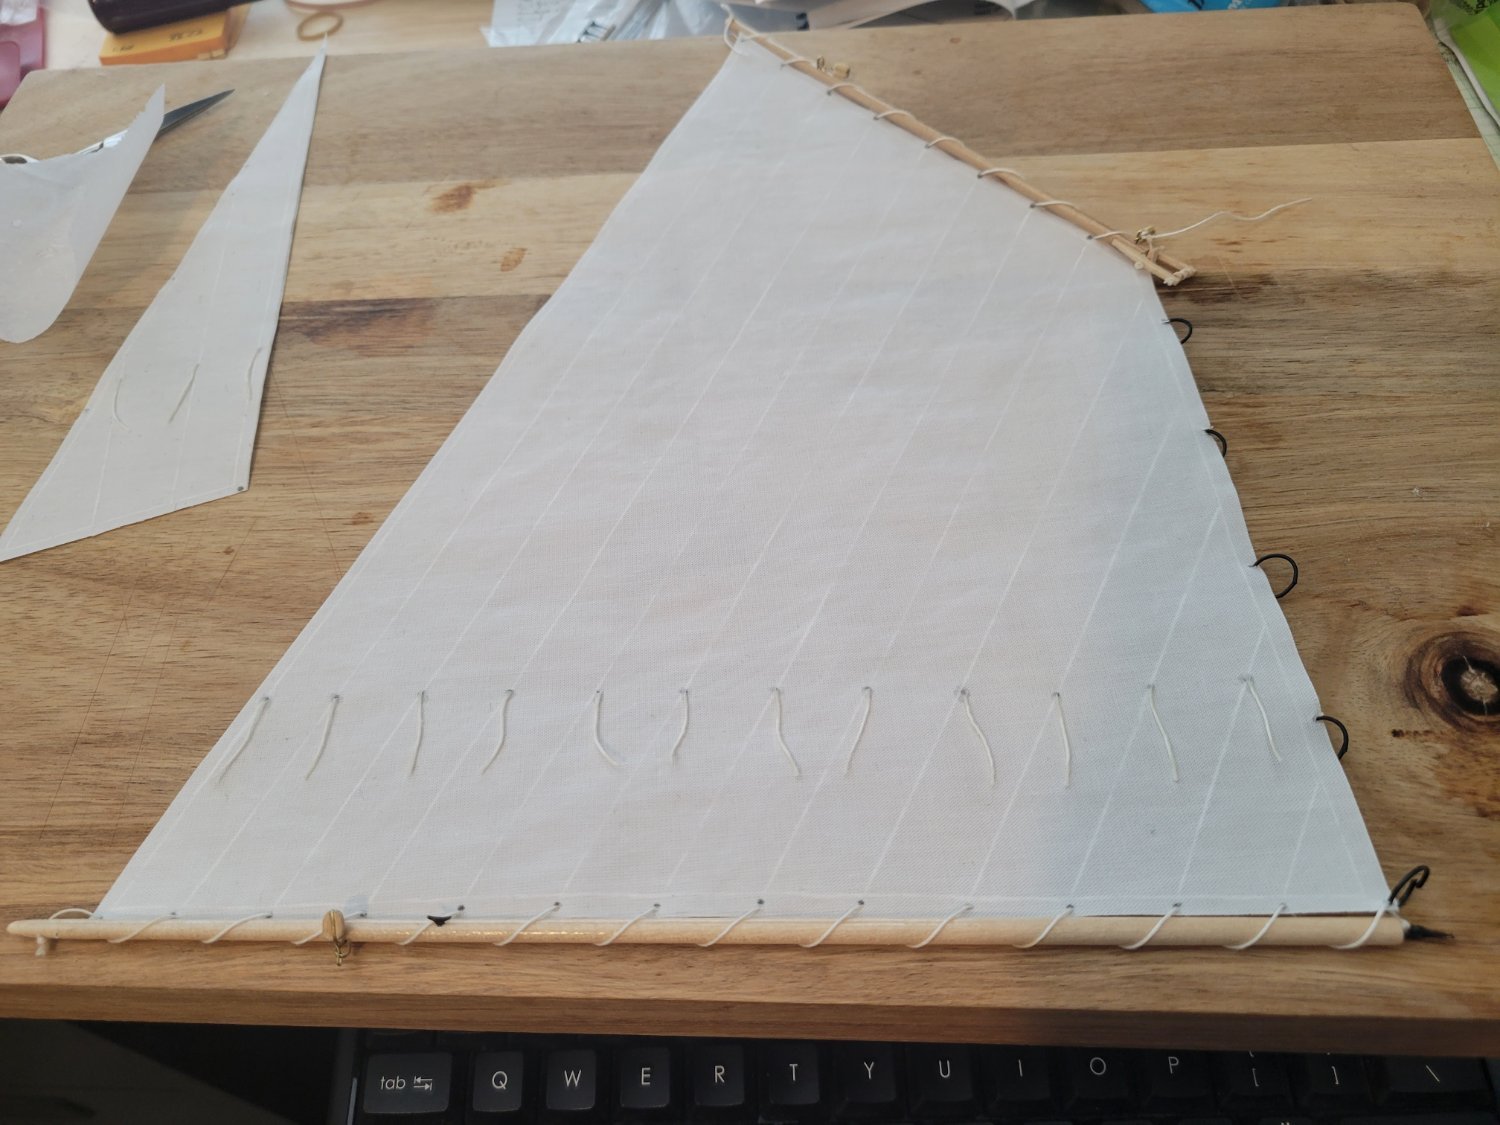
I have been working on the rigging and sails and having a lot of fun. It's not easy working with thread and tying tiny knots and such, but I'm enjoying it. Here is the progress:
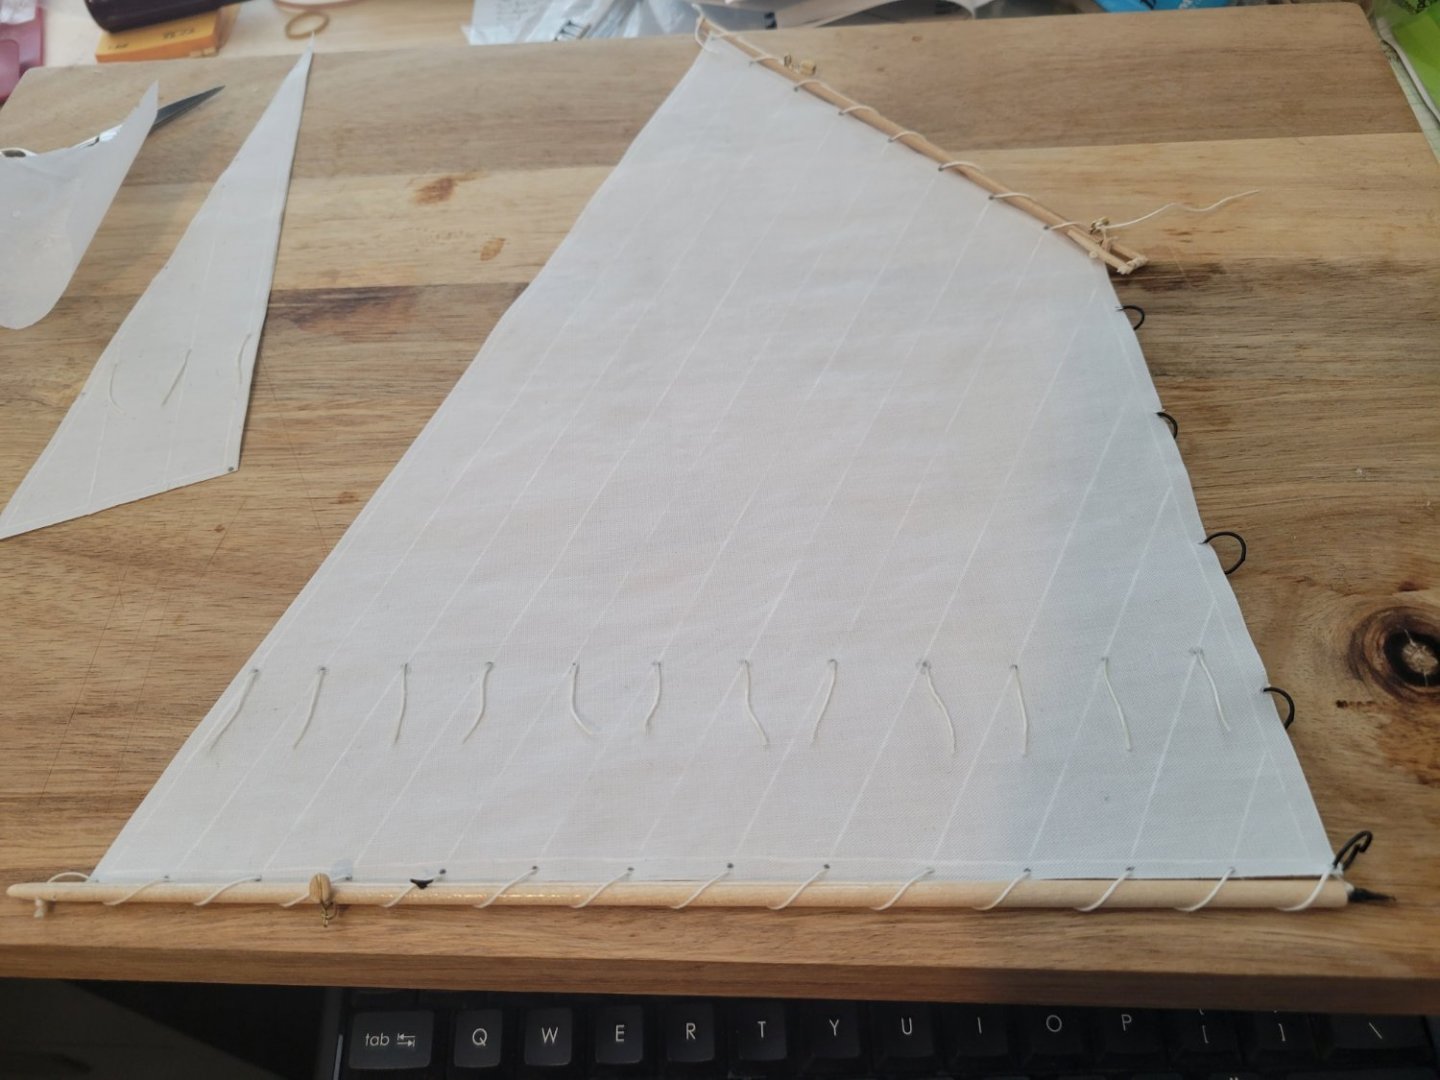
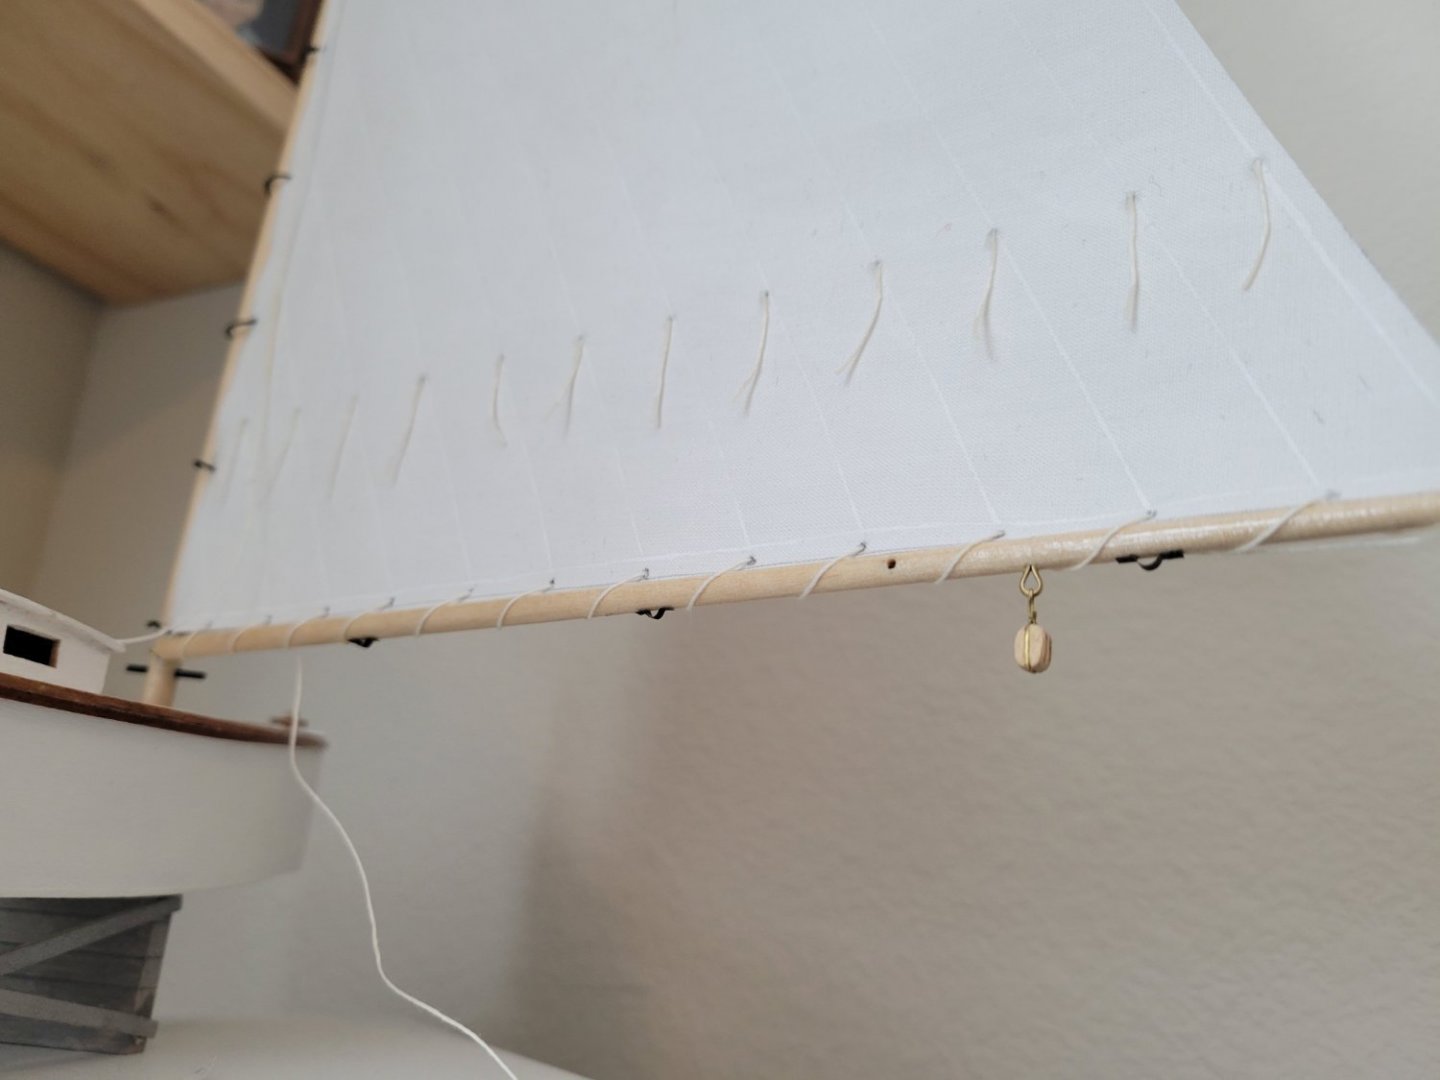
Boom bent to the main-sail and reefing lines attached:
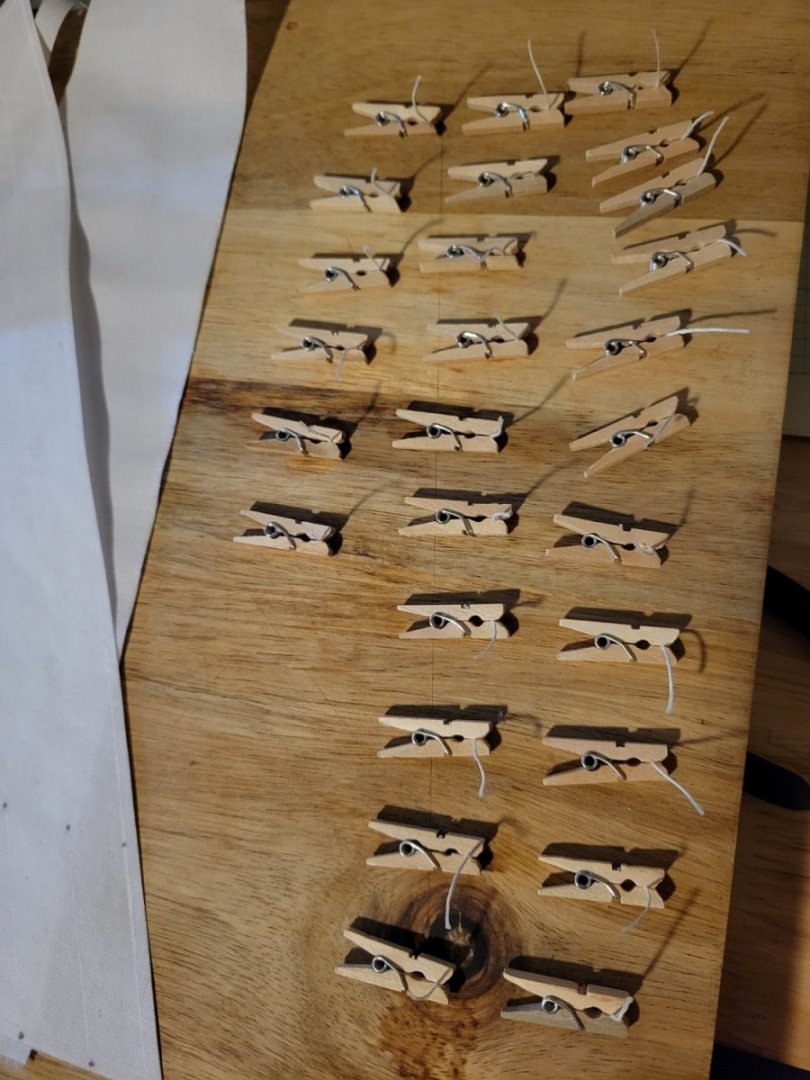
I really didn't like the idea of individually gluing the tip of each reefing line and holding it apart from the sail to let the glue dry one at a time. So before attaching the reefing lines, I used clothesline pins to hold each reefing line in order to glue the ends:
I used a round turn and two half-hitches for most cases where line needed to be hitched to something. In "The Young Sea Officer's Sheet Anchor," this is called a "Rolling Hitch".
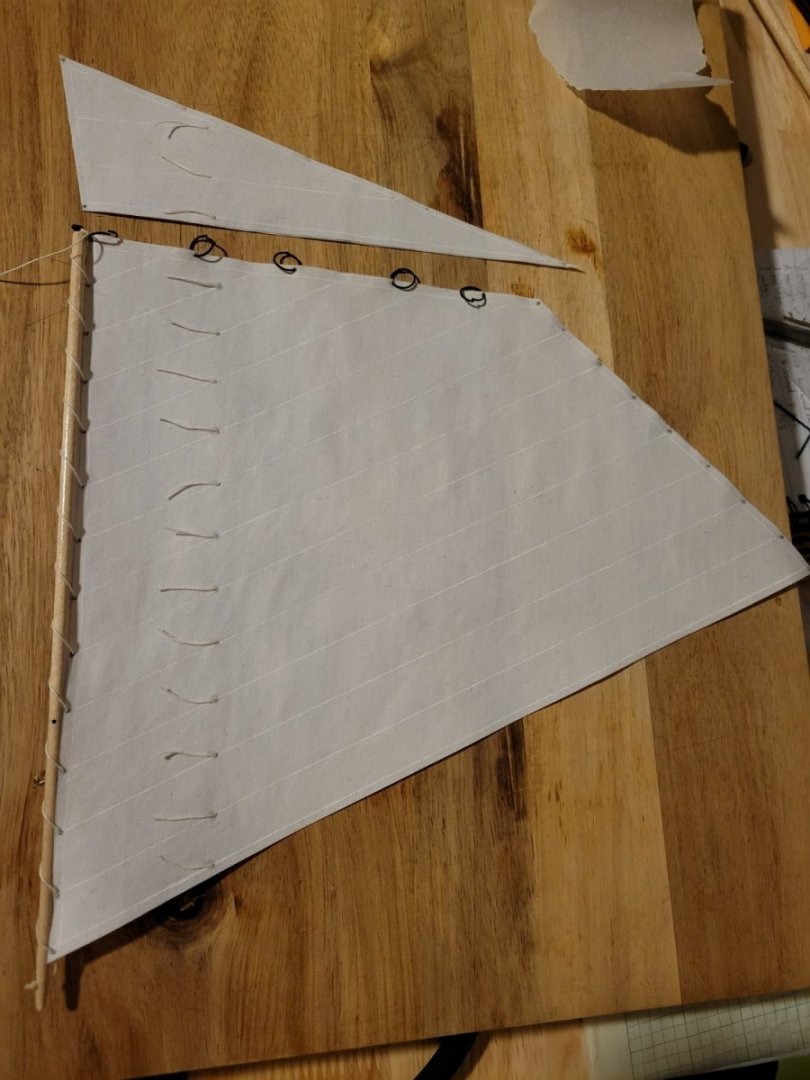
Sail bent to both spars. Because I painted the mast hoops, I decided to attach them to the sail first before attaching it to the mast since I didn't want to bend the mast hoops wide and scratch the paint. If you decide to do this, I would recommend gluing the boom gooseneck to the mast before bending the boom to the sail (contrary to what the directions say). I wound up tearing the corner of my sail while fitting the gooseneck into the hole on the mast. I was able to fix the tear with glue luckily, but I would do it differently next time.
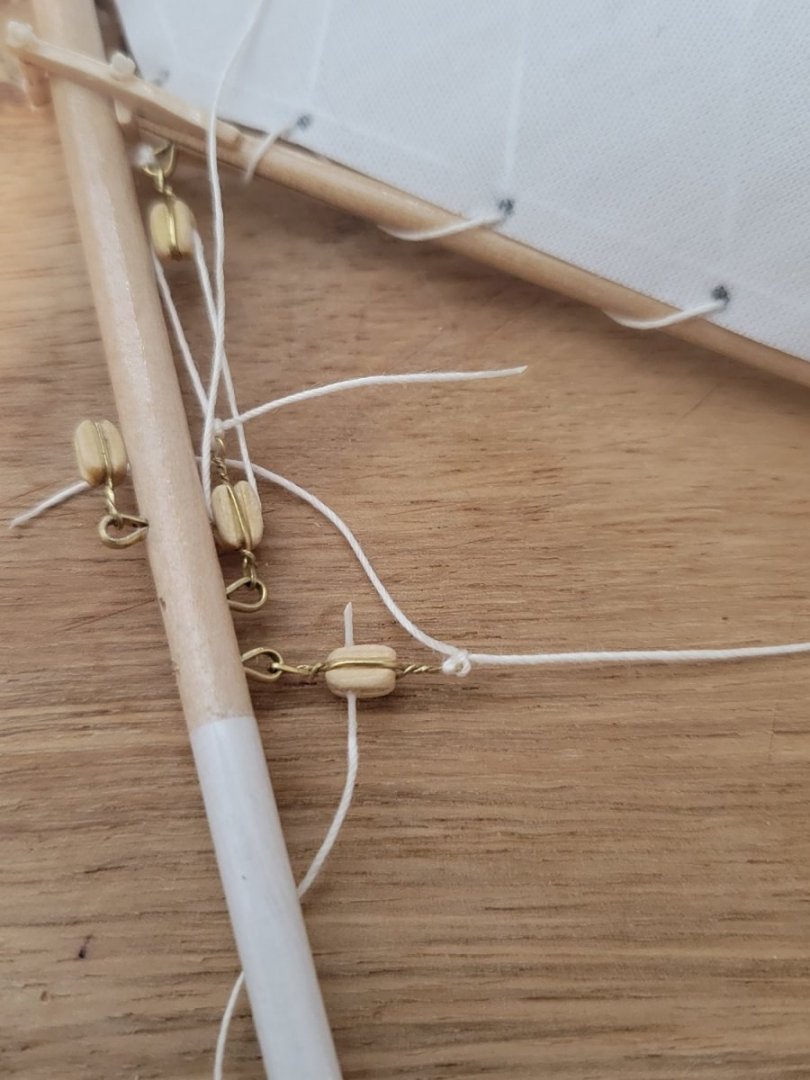
A close up to show the glue "needle" technique suggested in the directions. I found that it worked really well. Just soak some CA glue on the end of the thread and, once dried, snip it at an angle. You can see the "needle" easily passing through a block in the lower part of this picture.
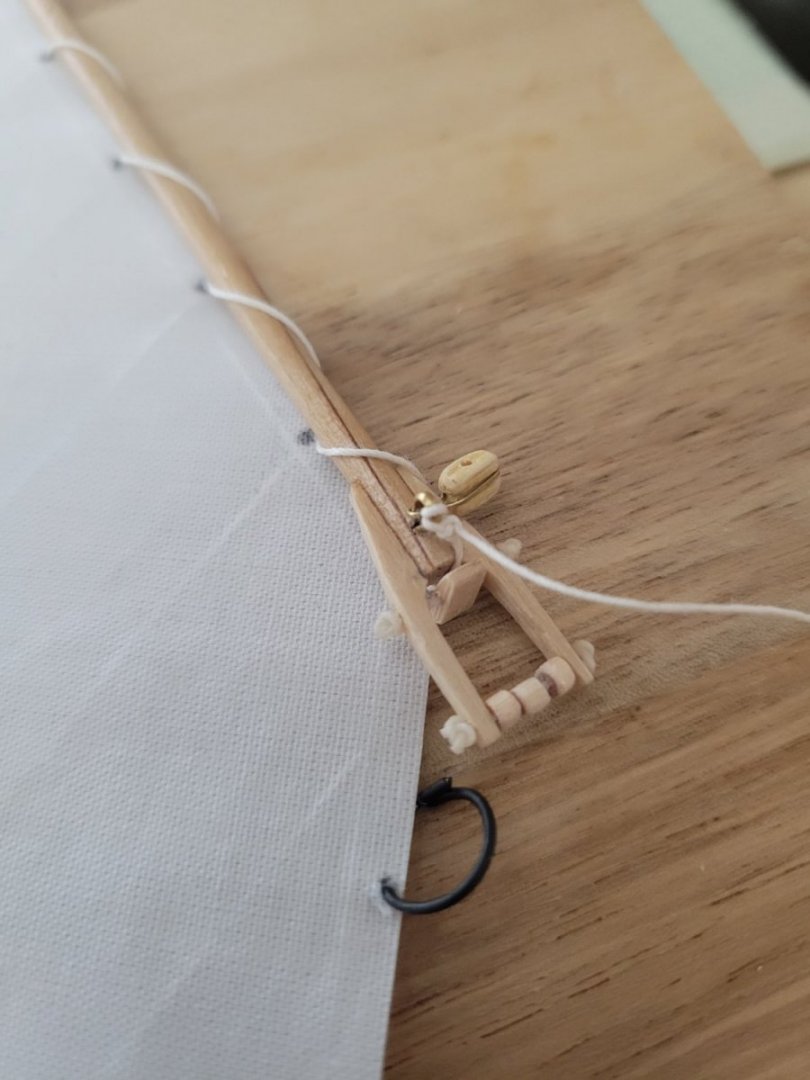
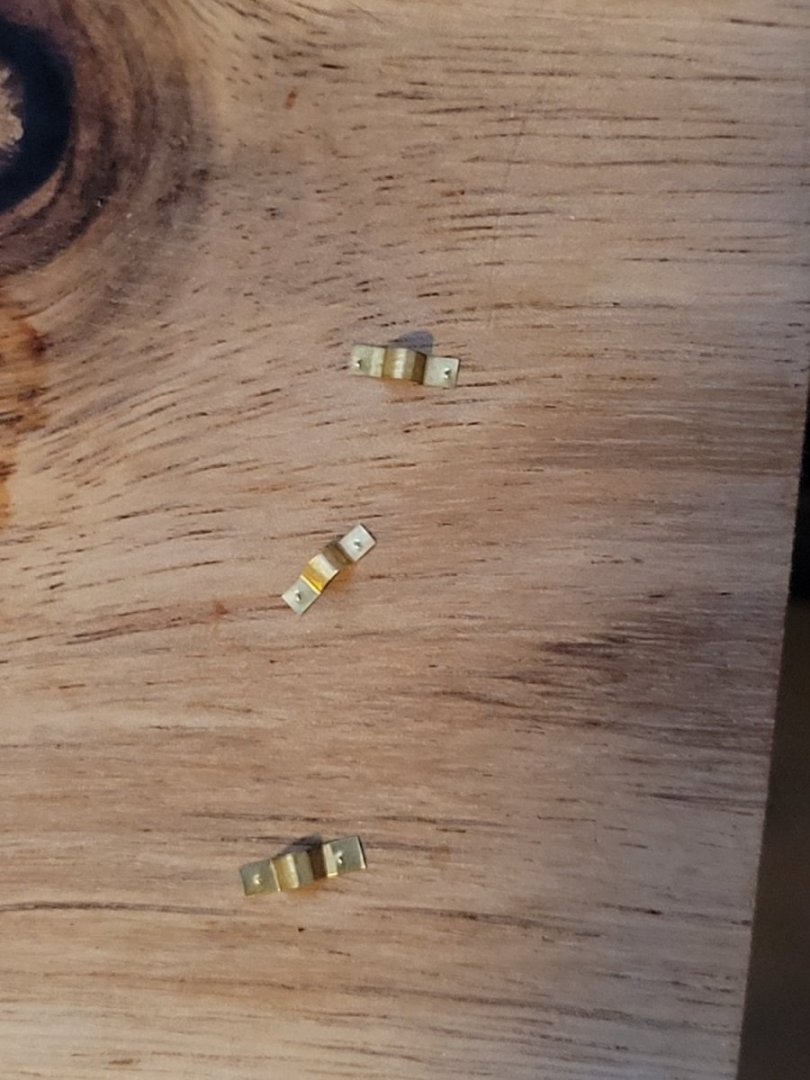
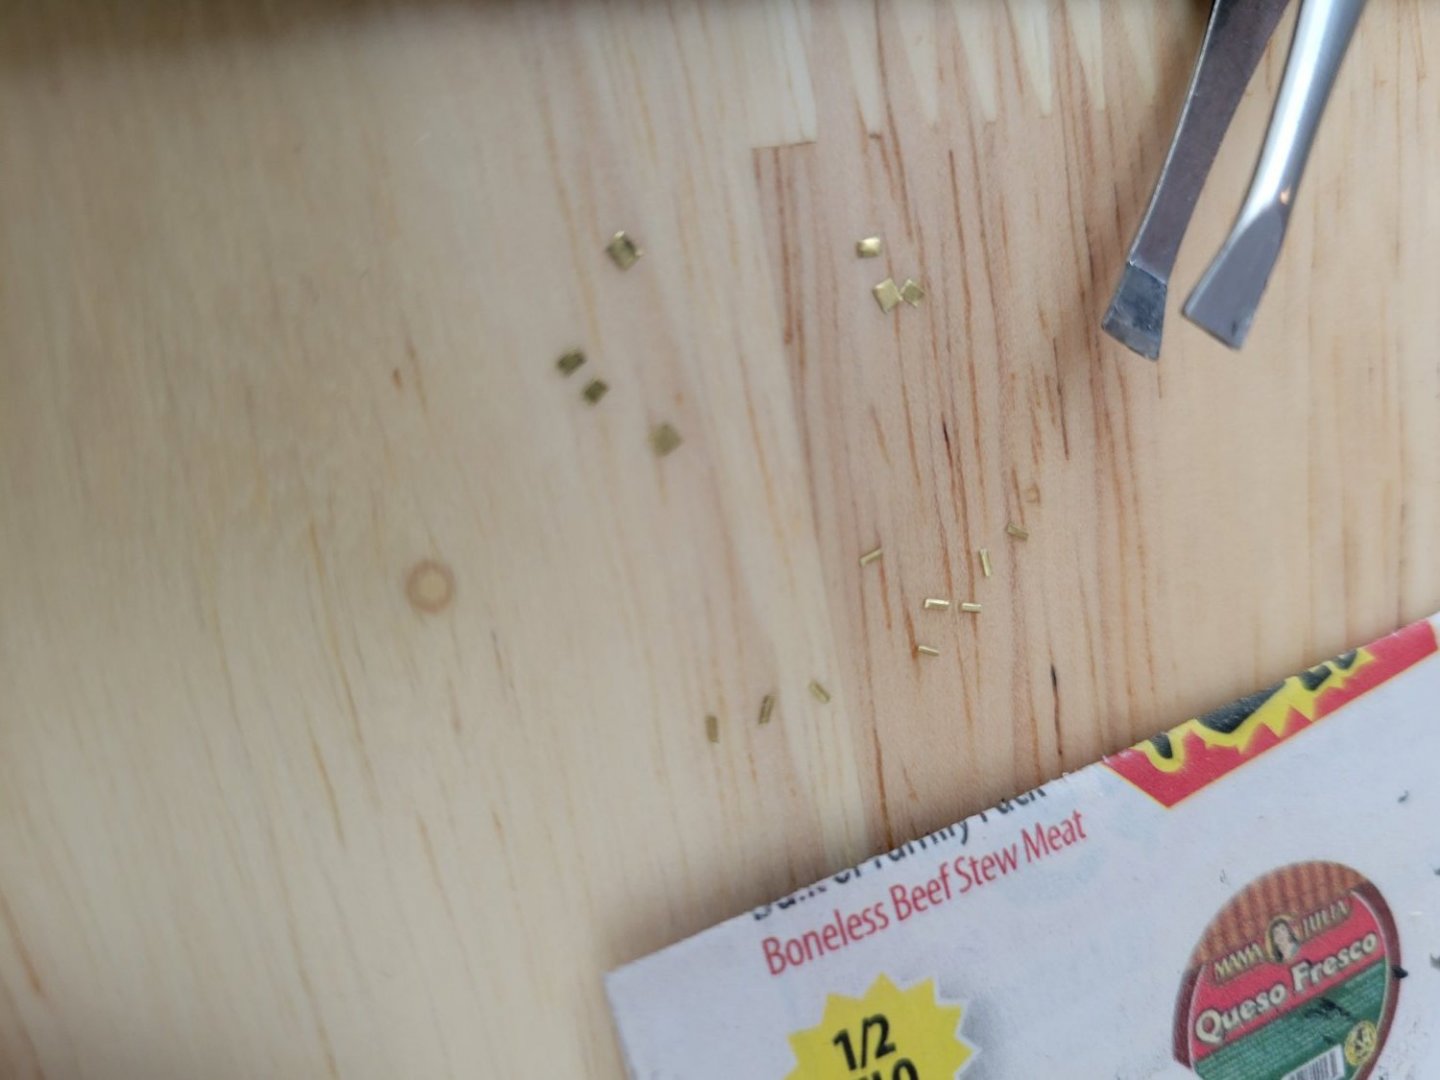
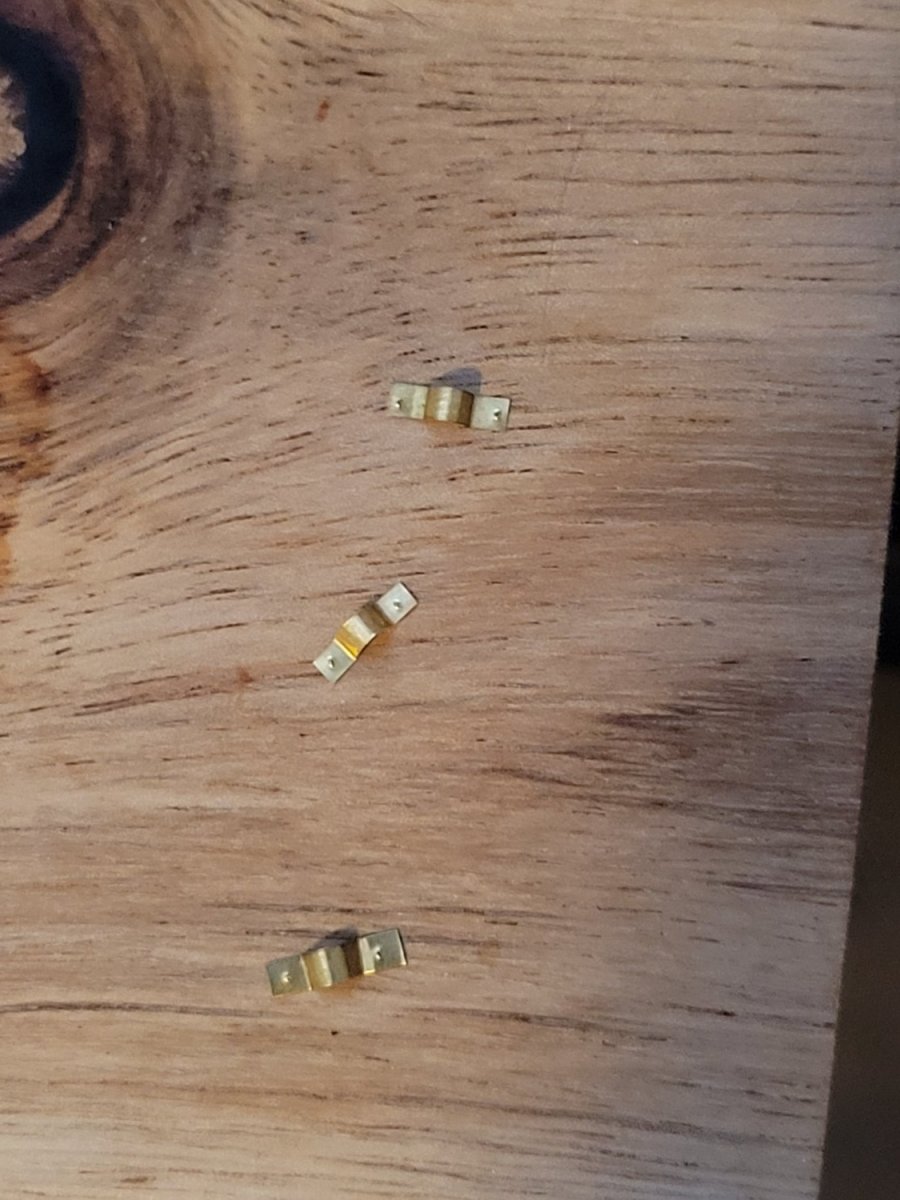
I didn't like the kit's suggestion to just glue lazy jacks to the bottom of the boom, so I made some fittings from brass sheet and painted them with black primer:

- ccoyle, Prowler901, bruce d and 2 others
-
 5
5
-
On 4/19/2022 at 7:17 PM, Melissa T. said:
Hi Mark - I’m new to the hobby, but also interested in 17th Century Dutch history, including their ships. The Kolderstok kits are high quality, and the customer service is excellent. 😊🇳🇱
Awesome! I'm adding the Speel Jacht to my list of next models to build and definitely plan to add this Statenjacht afterwards as well. That cabin is just so cool!
Is @*Hans* a representative from Kolderstok?
- *Hans*, thibaultron and mtaylor
-
3
-
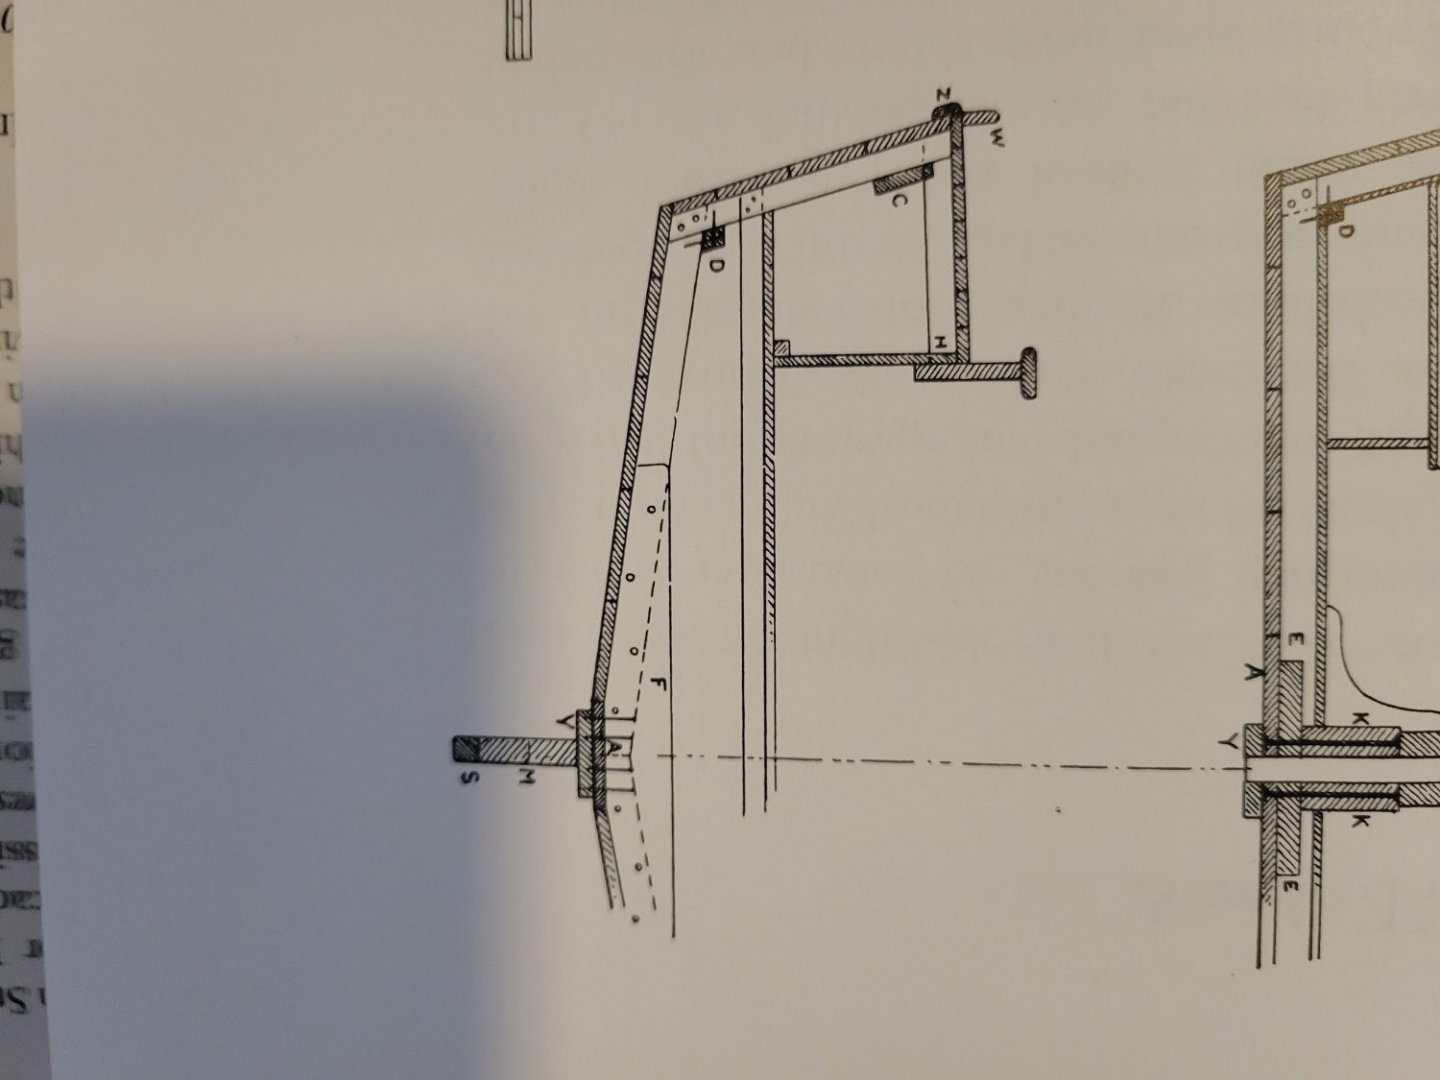
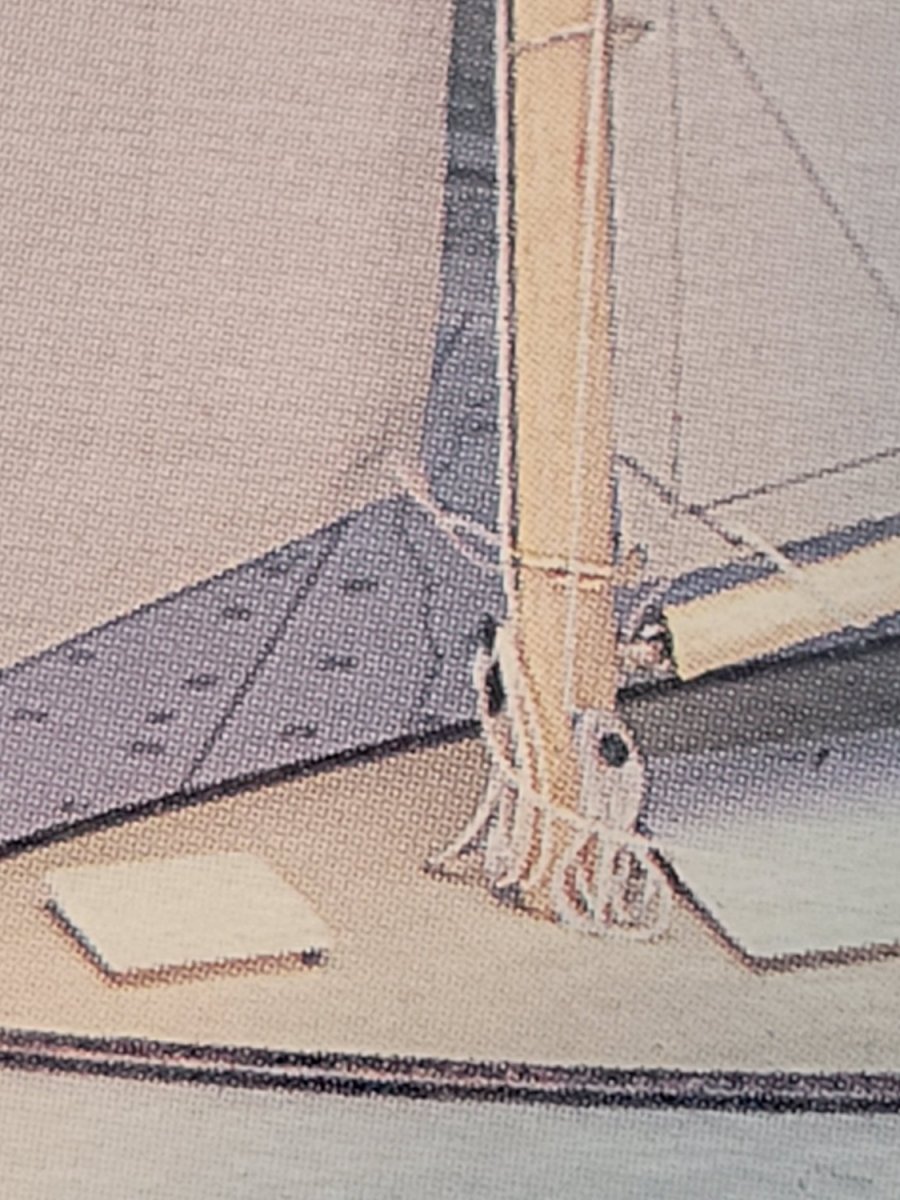
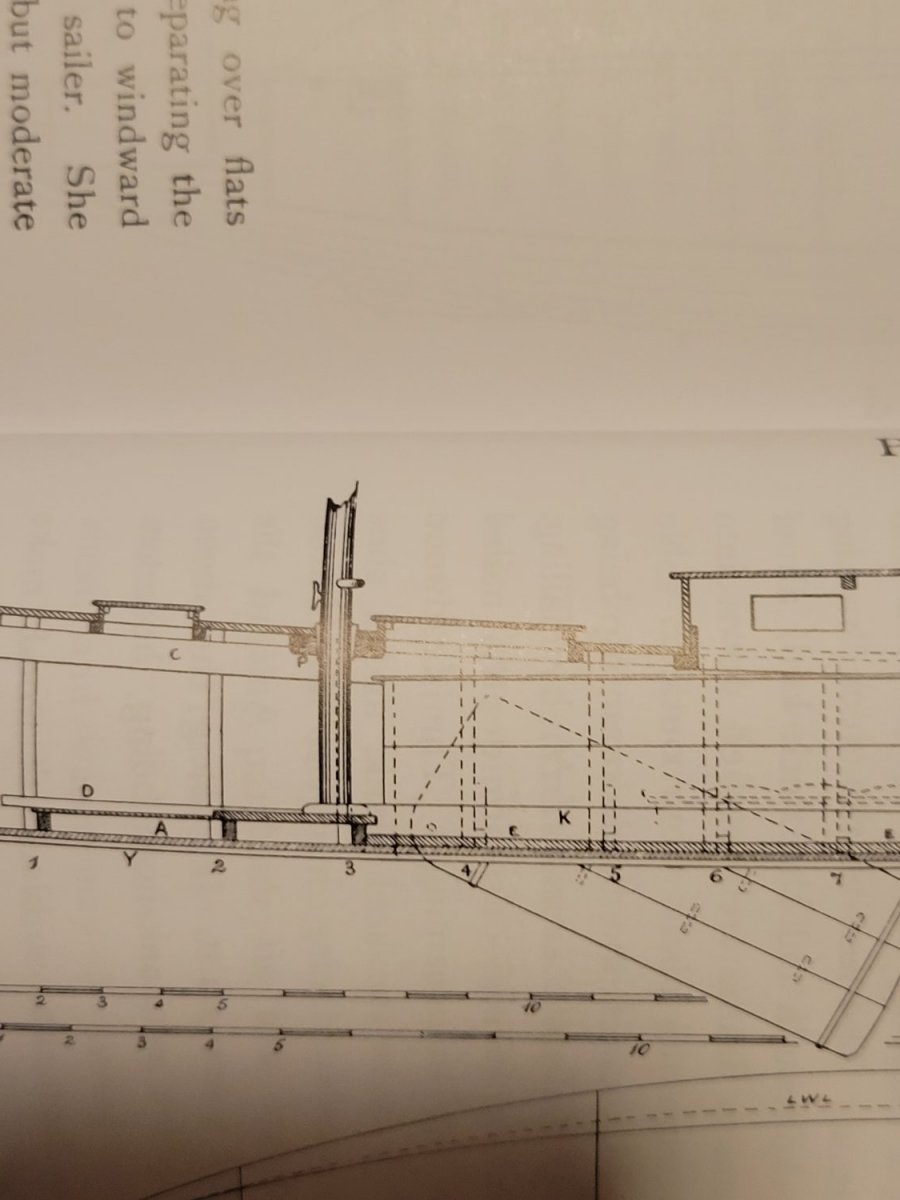
The kit I'm working on has the throat and peak halyards of a gaff sail stayed to the simple rod shown in the images. I can verify that this is how the plans are drawn for the real yacht the kit is based on (plans from Kunhardt's "Small Yachts" book).
The instructions say to just wrap the line around the rod, but I highly doubt that's how it would have been done on the real deal. Would a hitch be tied to the rod, and the rest of the rope coiled on deck? Coiled on the rod?
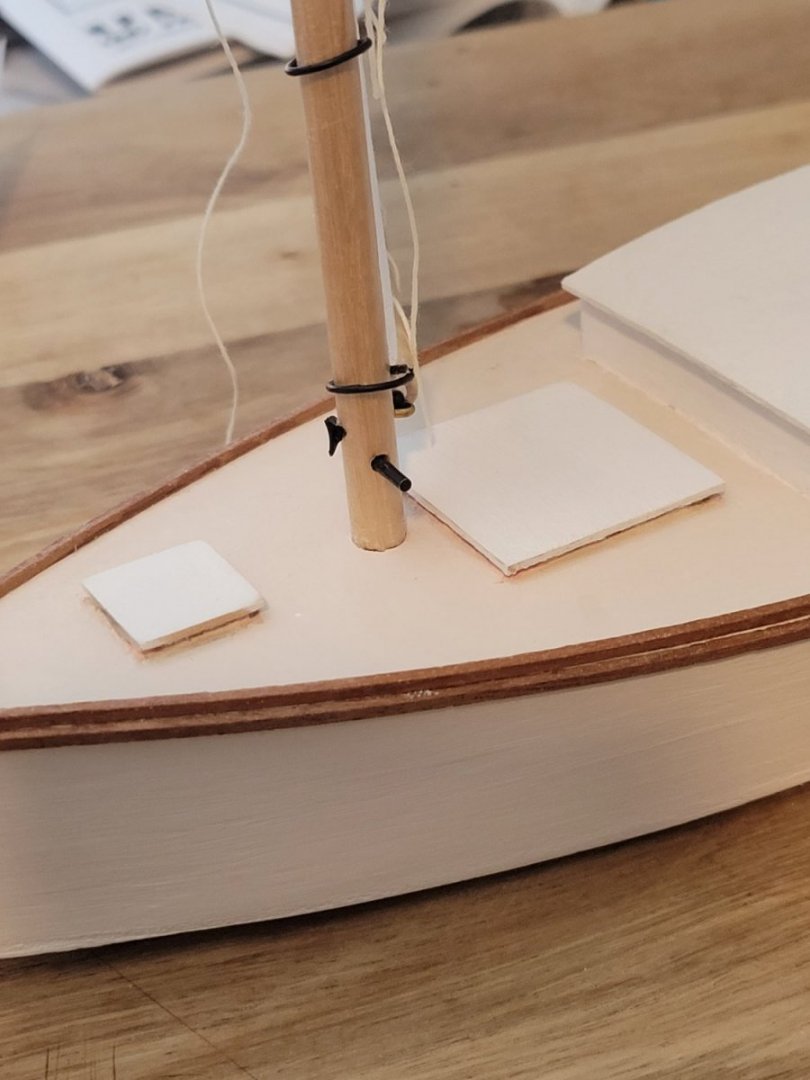
My current model (the cleat is for the jib halyard):
Close up of the kit's example:
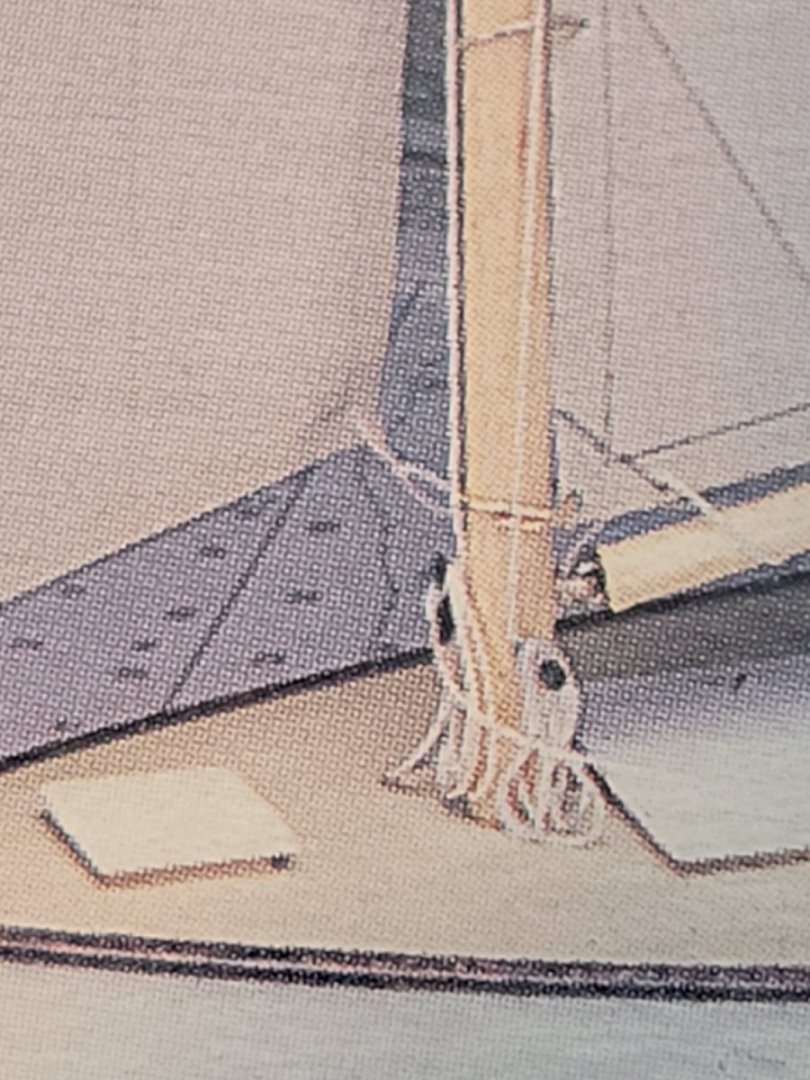
From Kunhardt's plans:
-
7 minutes ago, EricWilliamMarshall said:
You’re doing a wonderful job! She looks great!
Thanks! It was your build log that encouraged me to do more than just follow the instructions. I really liked the custom stuff you did on yours, and I'm finding it so much more fun
-
I'm waiting on some supplies to arrive to finish working on the deck. In the meantime, I am going ahead and working on the rigging and sails.
I'm pretty much just following the directions for the sails with one exception. Instead of using a pencil for the seams, I'm using a "GELLY ROLL" white gel pen. I got this idea from another Chesapeake Bay Flattie build log by @EricWilliamMarshall
I know some like to make the sails look filled with wind by painting with diluted glue on a balloon or something. I will probably try this in a later build. For now, I'm just leaving them flat.
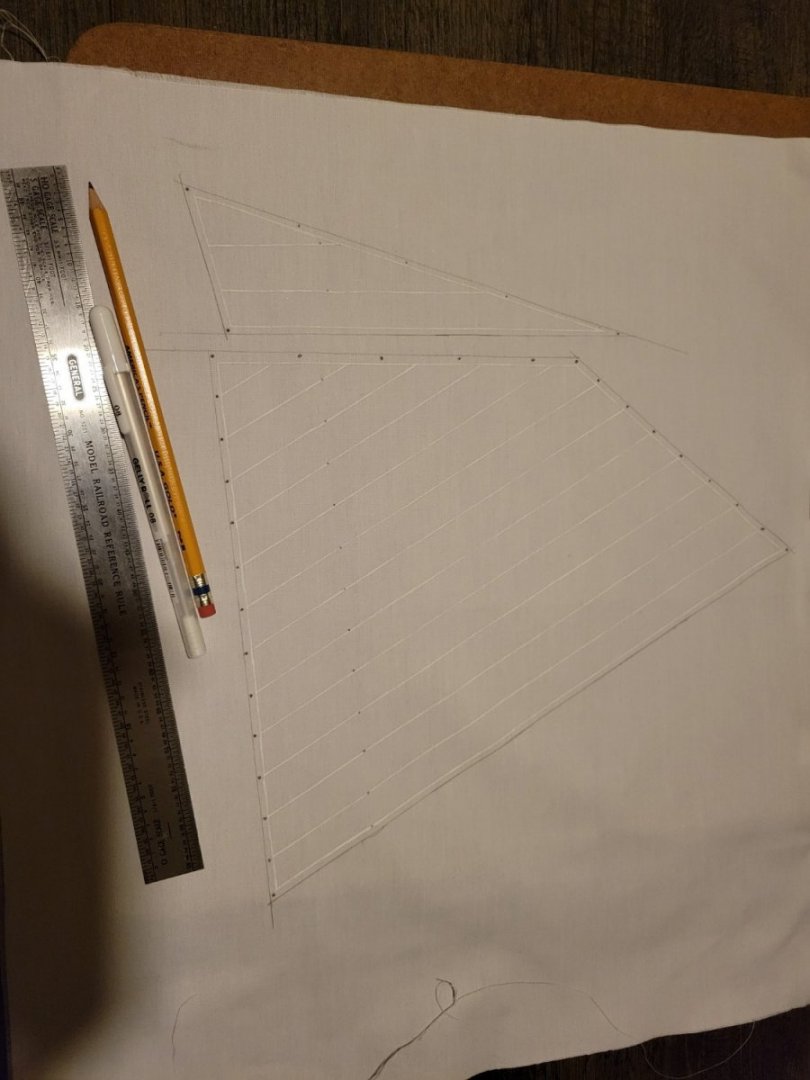
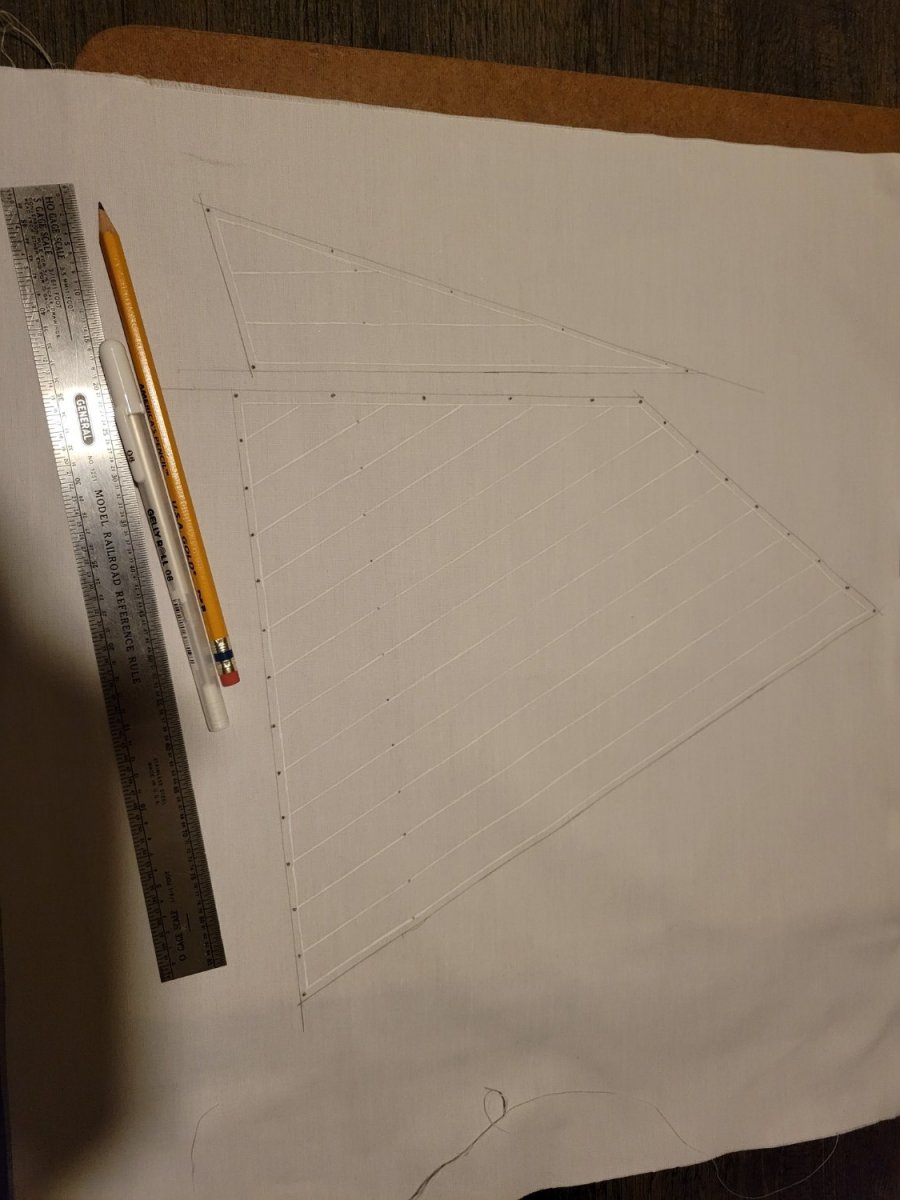
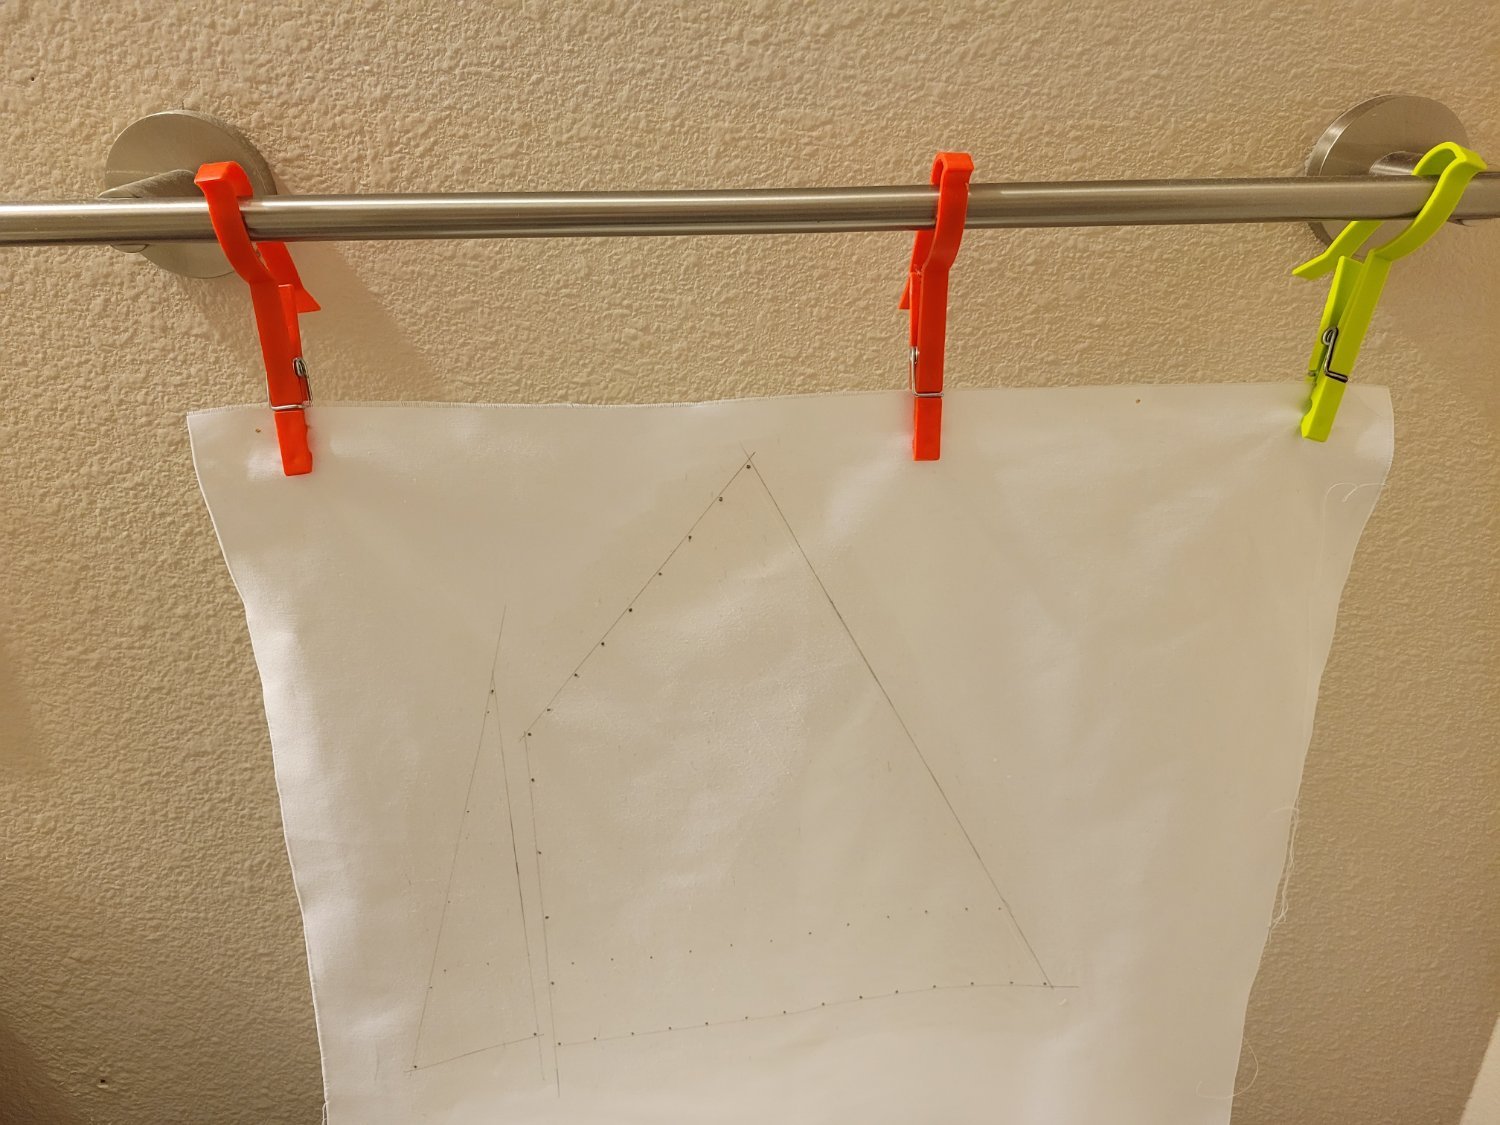
After tracing the sails from the plan sheet to the sailcloth.
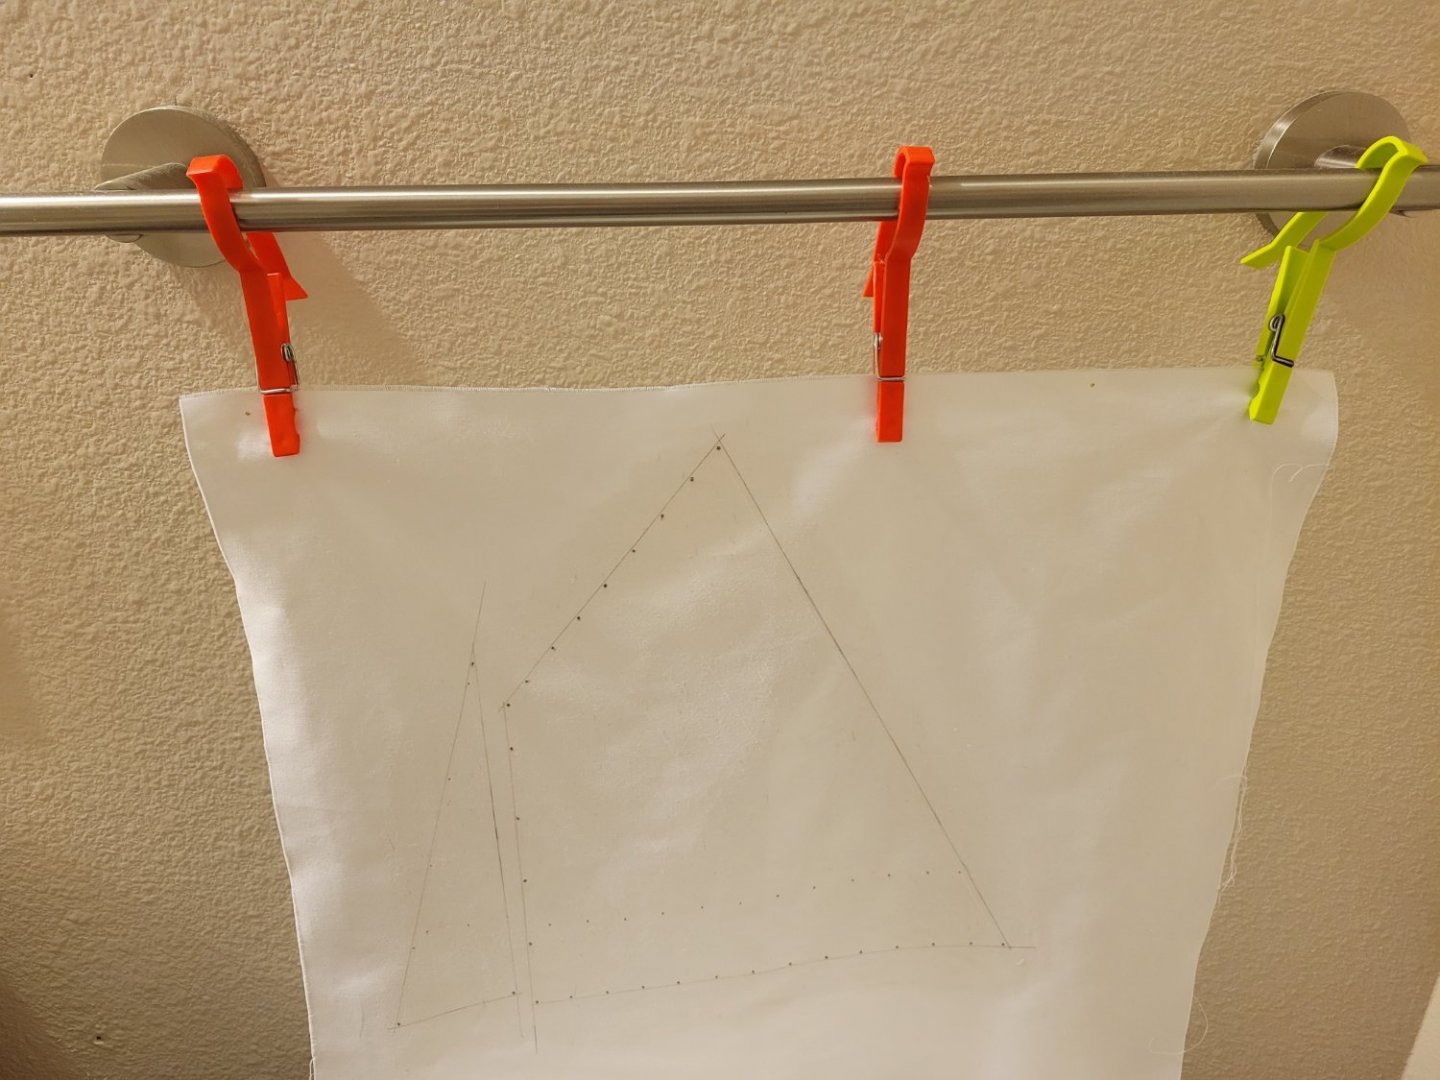
Painted with clear acrylic and hung to dry.
Next step for the sails will be cutting them out and bending them to the spars.
-
On 4/6/2022 at 6:37 PM, mester03 said:
My first build.....
So far everything is good - and spirit is high!😀
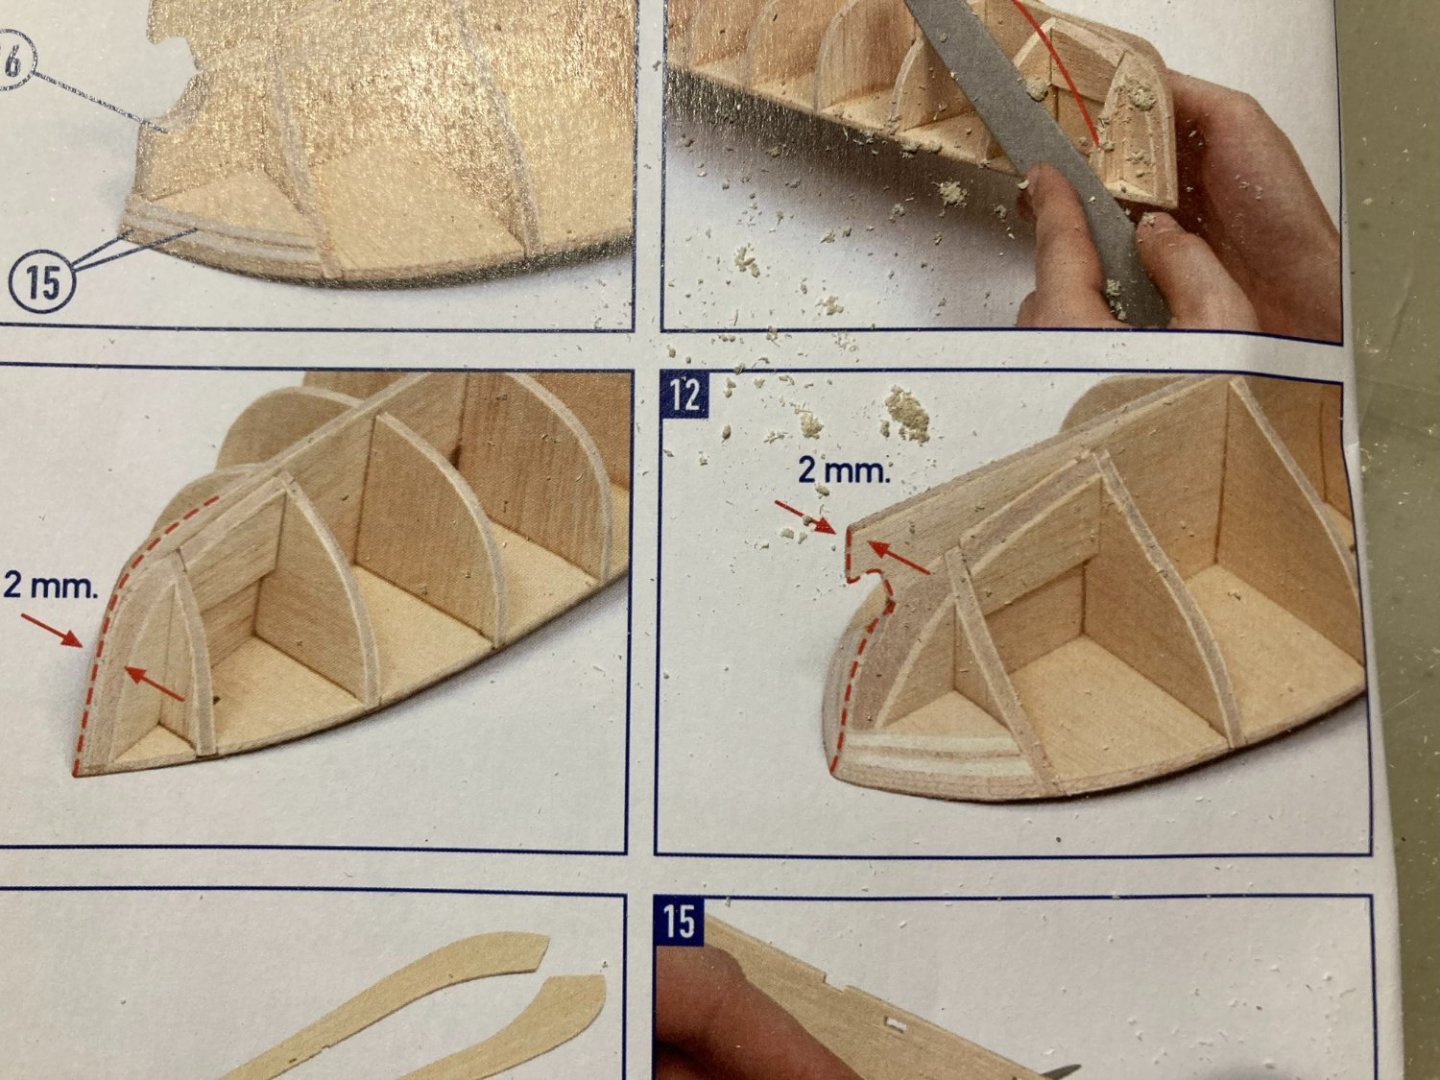
Still have a lot of filing/sanding to do on the battens and frames, before the first real "hard part" starts.
Next will be the fitting of bulwarks and then later lining strakes.
These parts needs to be made more flexible before fitting and for this i would need some expert advise:
*Per the instructions the "bulwark should be dampened with water or applied heat before twisting in place", and the Lining strakes should be "soaked in water"
Any advise on how the above is done best would be highly appreciated!
Thanks


Looks like an interesting craft. Also looks like you're getting a lot of good advice. I will follow along and see if I can learn something.
-
On 4/1/2022 at 1:20 PM, Glen McGuire said:
Hey Brian, welcome aboard from a fellow Texan!
And hi from yet another Texan (from the dfw area)
I'm also a noob.
I've been working on a Chesapeake Bay Flattie model from Midwest Products (no longer in production), and I've been loving it and having more fun than I thought I would.
I found your build log and will follow.
- Glen McGuire, mtaylor and Keith Black
-
3
-
This is very cool! I've always been interested in the 17th C Dutch vessels, but didn't know about Kolderstok. I might have to try one of their kits.
I look forward to seeing your progress!
- mtaylor, *Hans*, thibaultron and 1 other
-
4
-
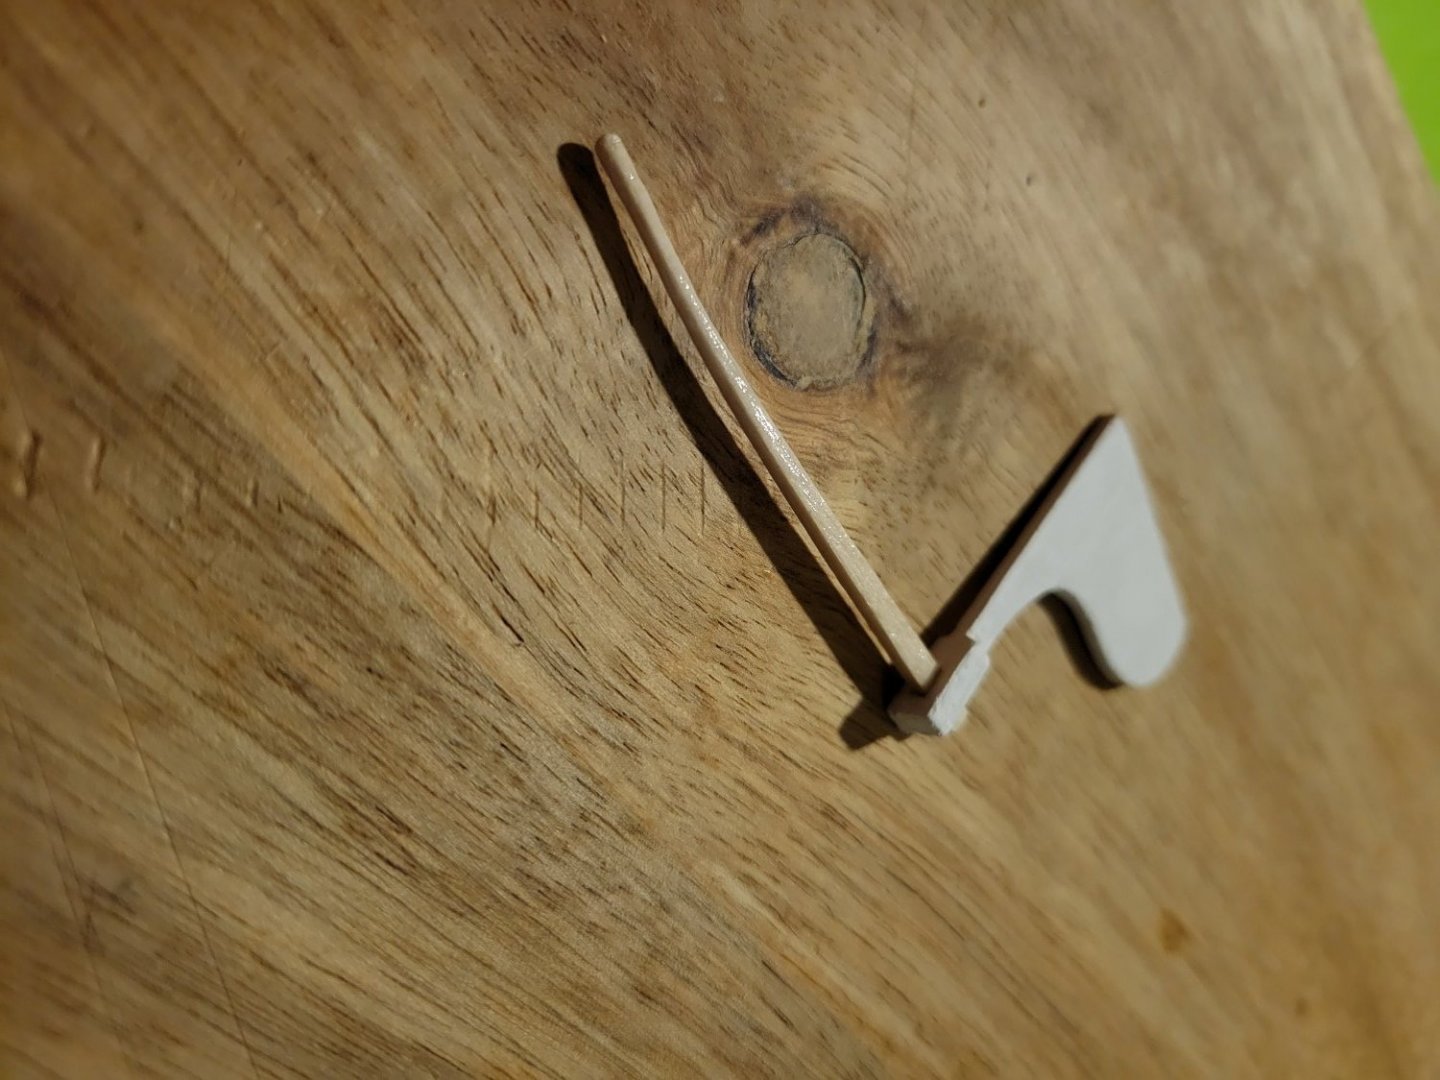
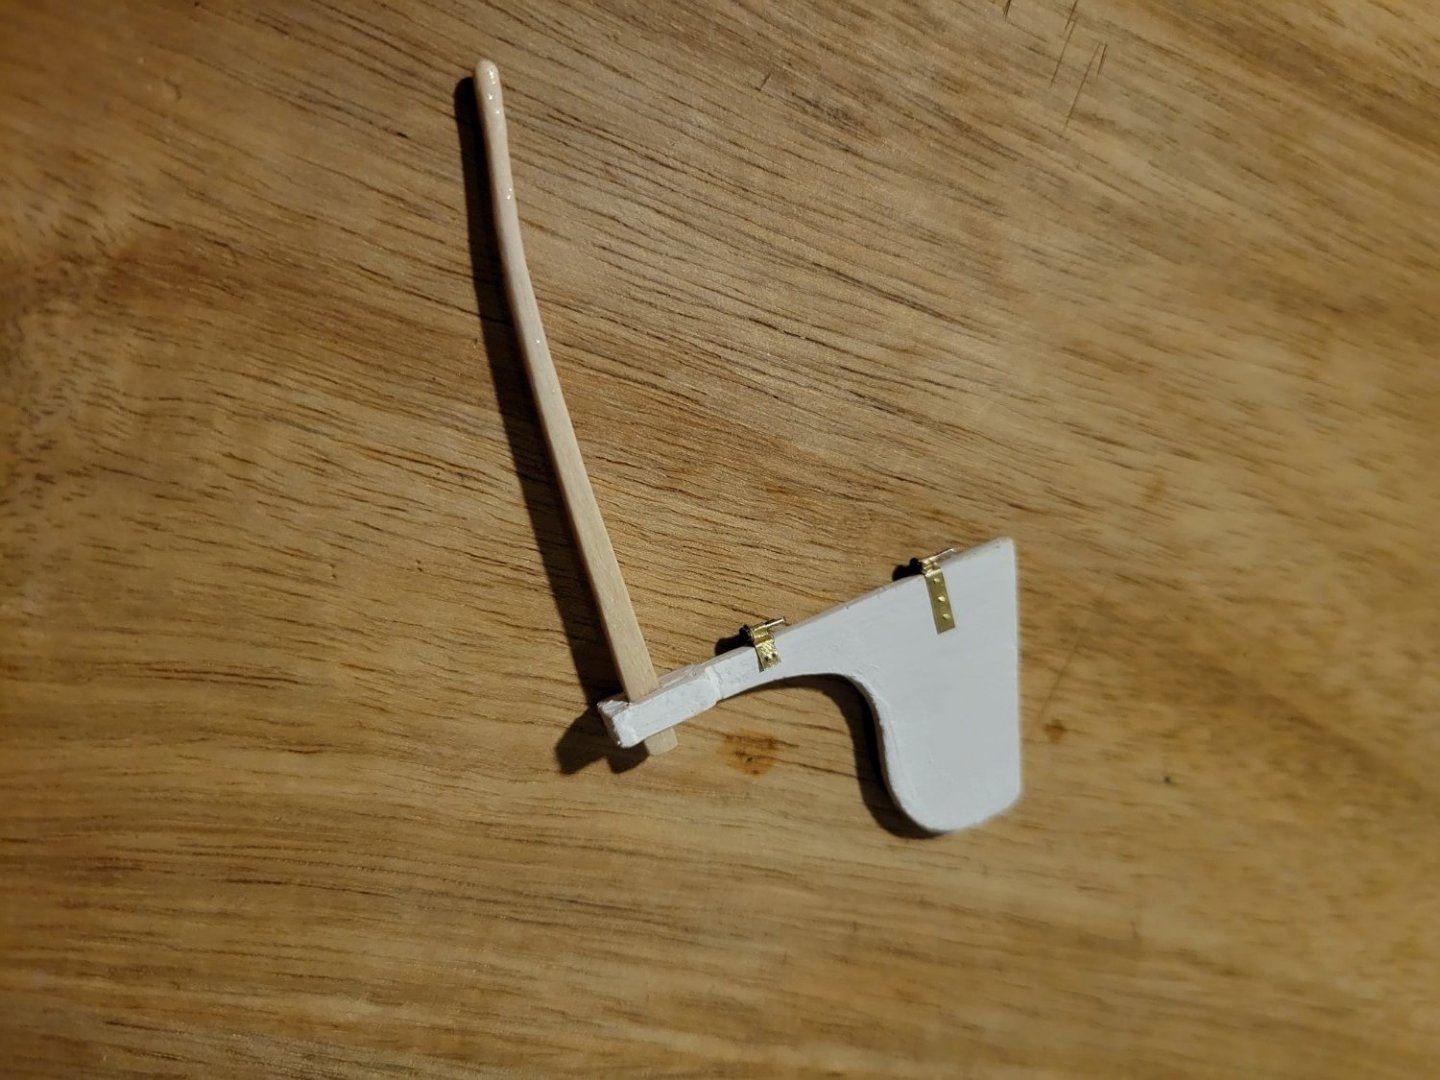
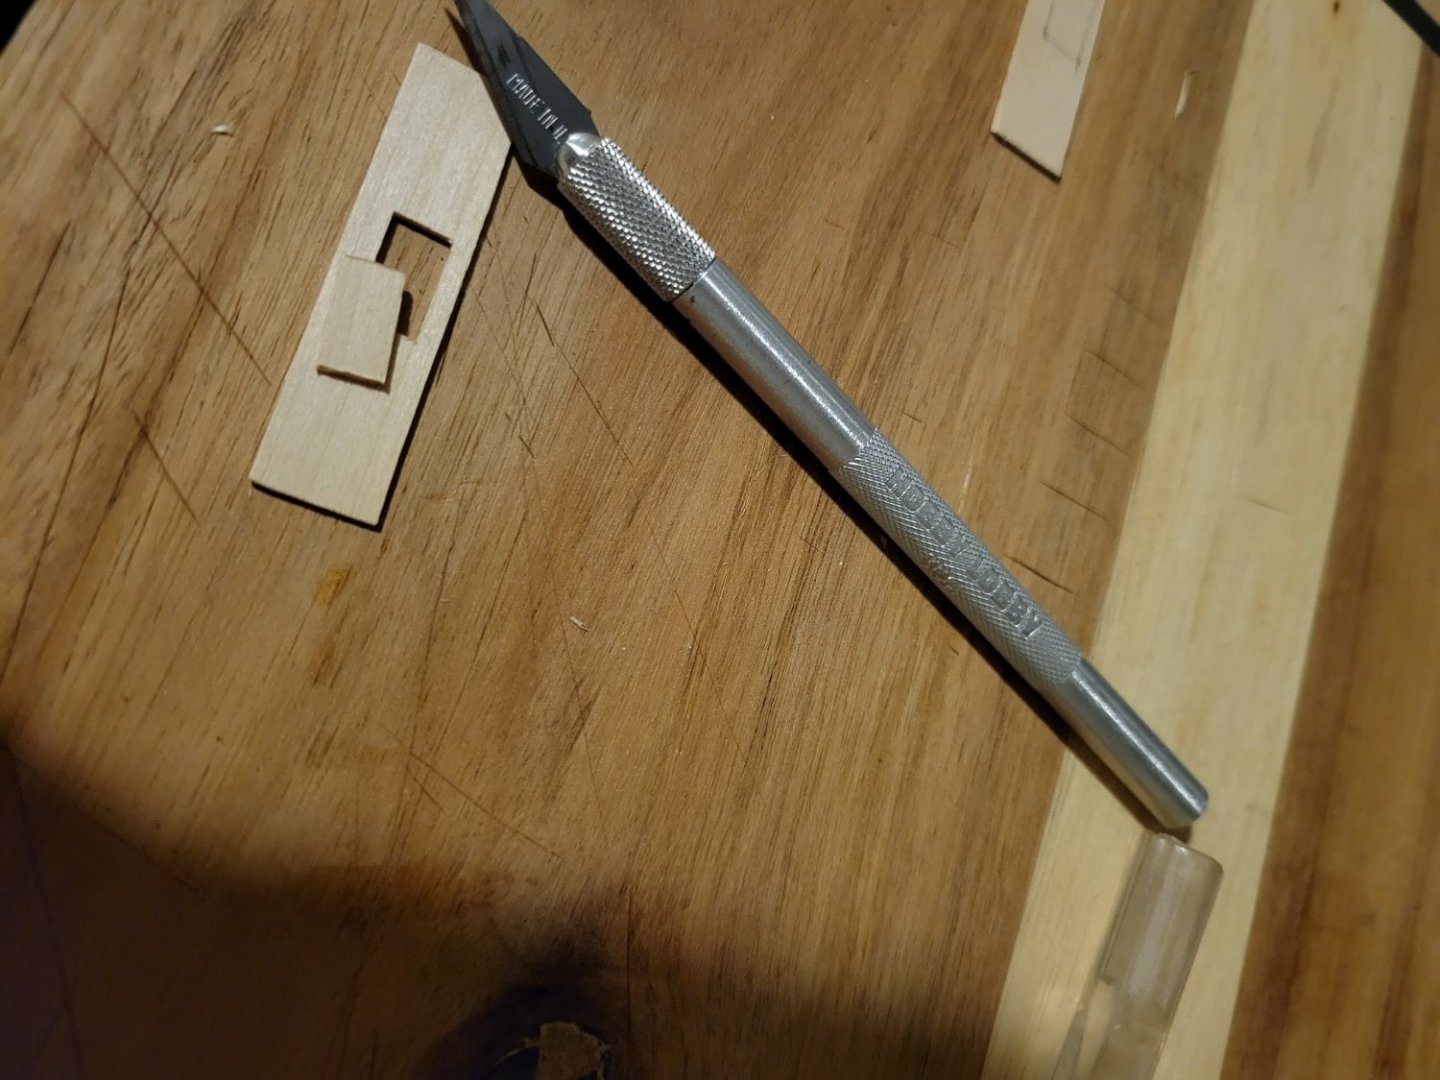
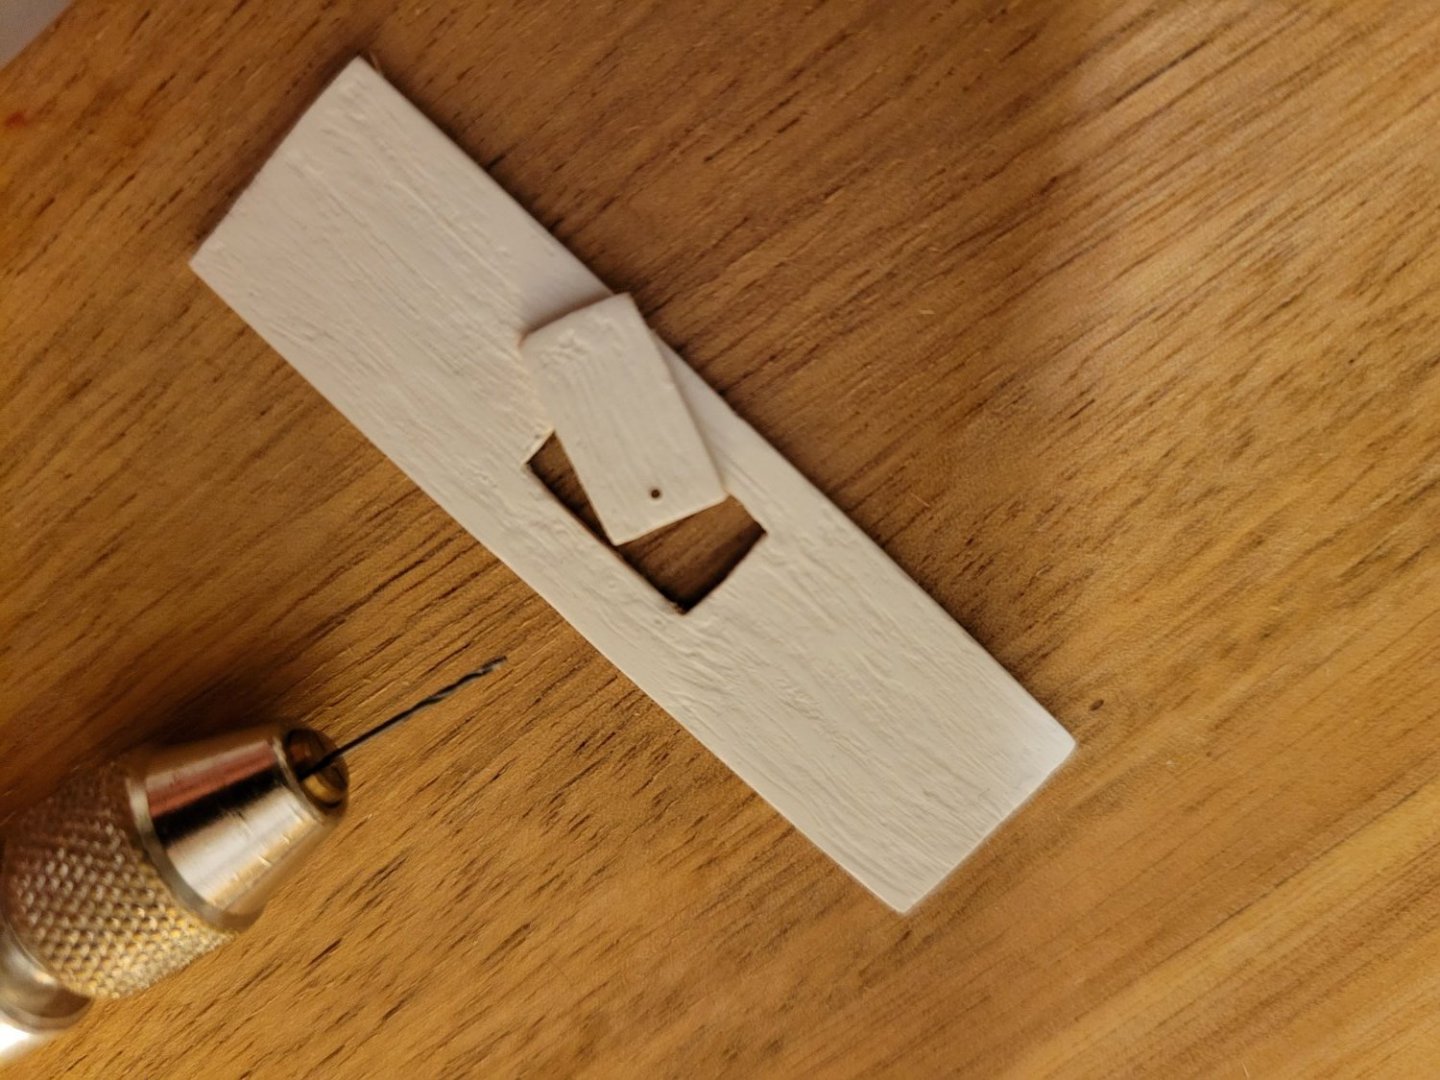
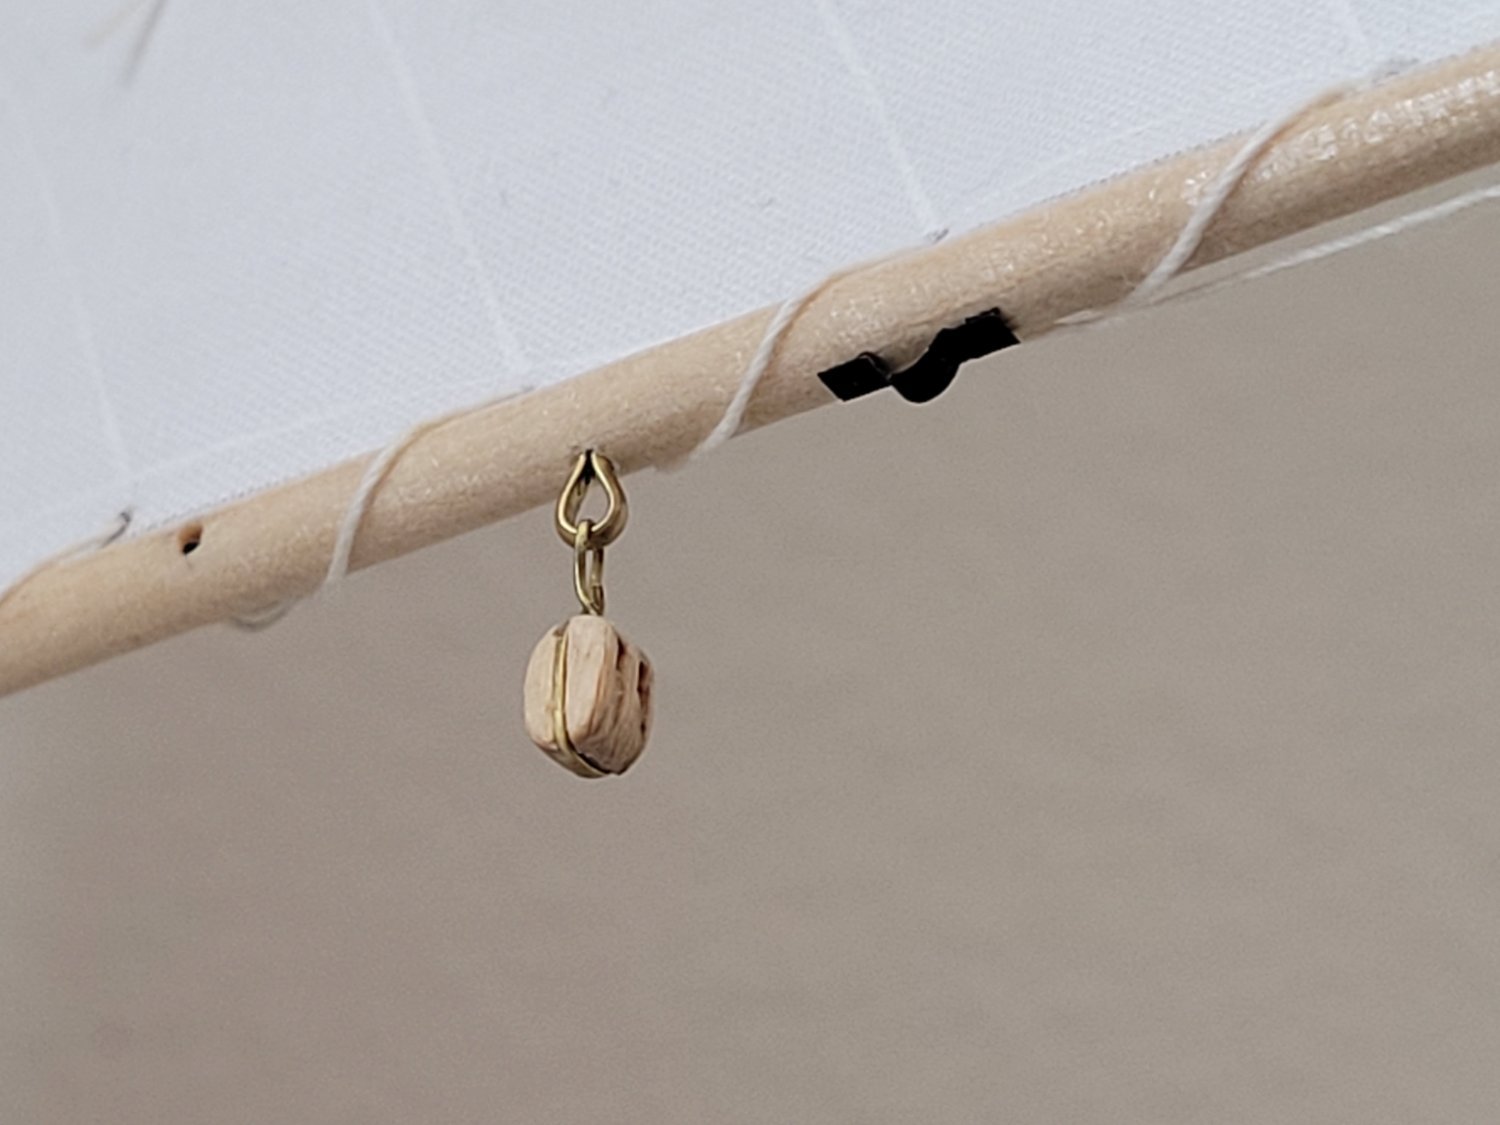
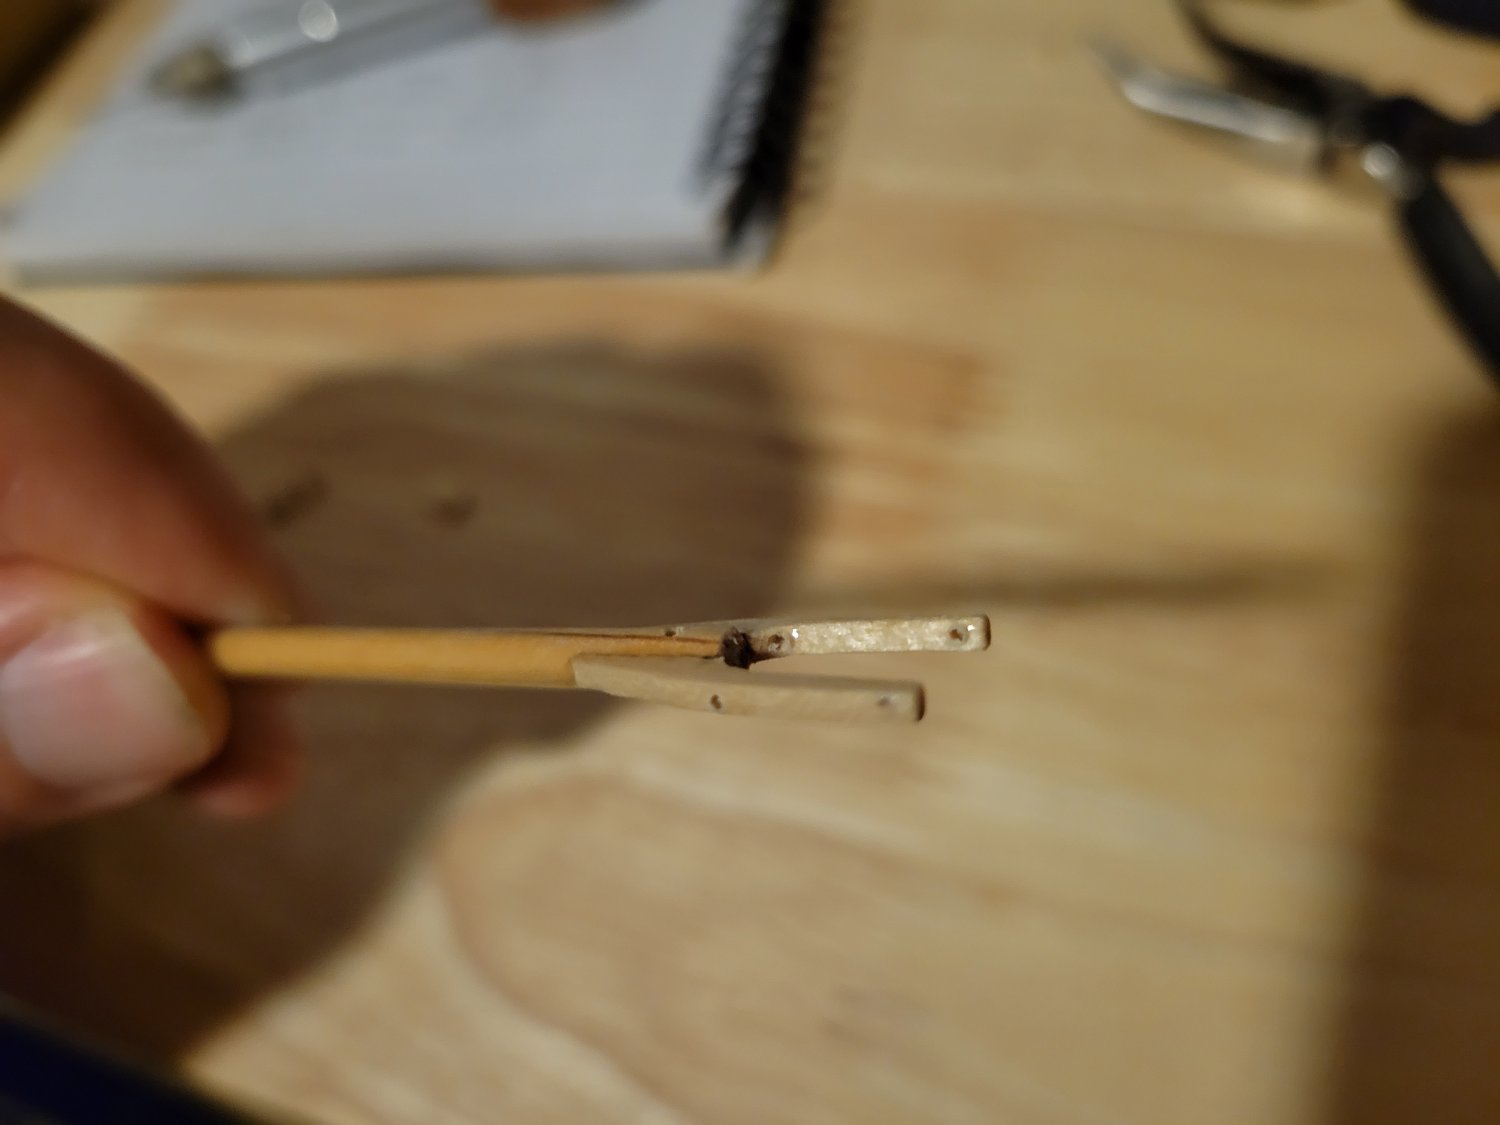
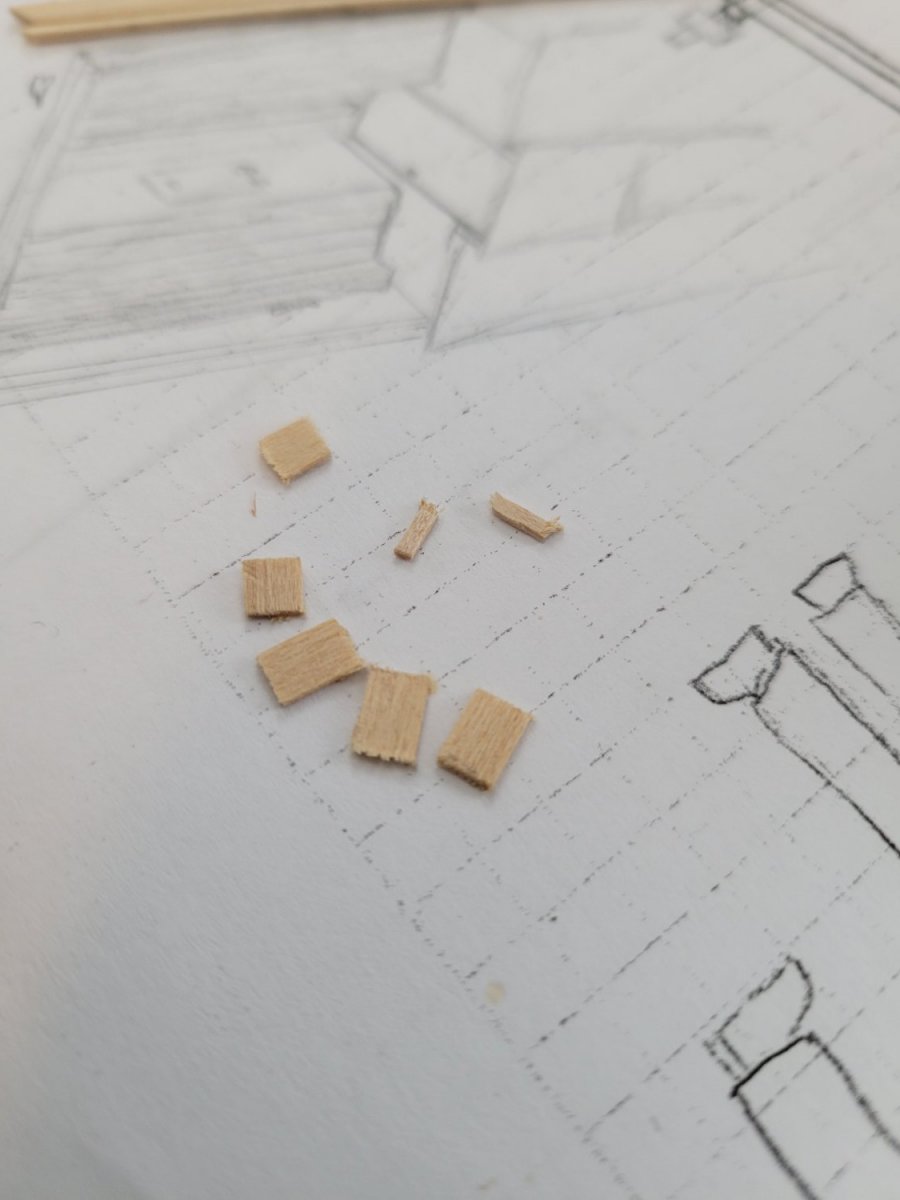
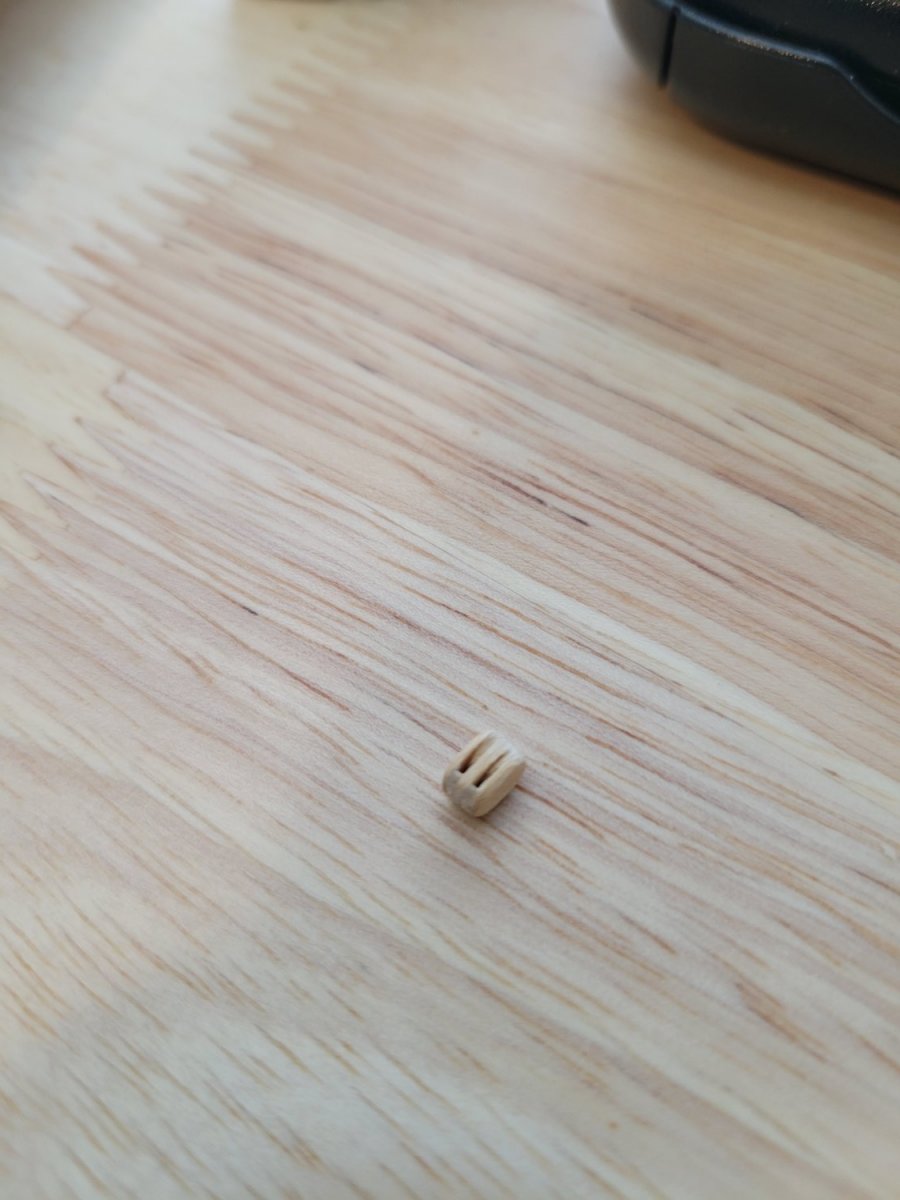
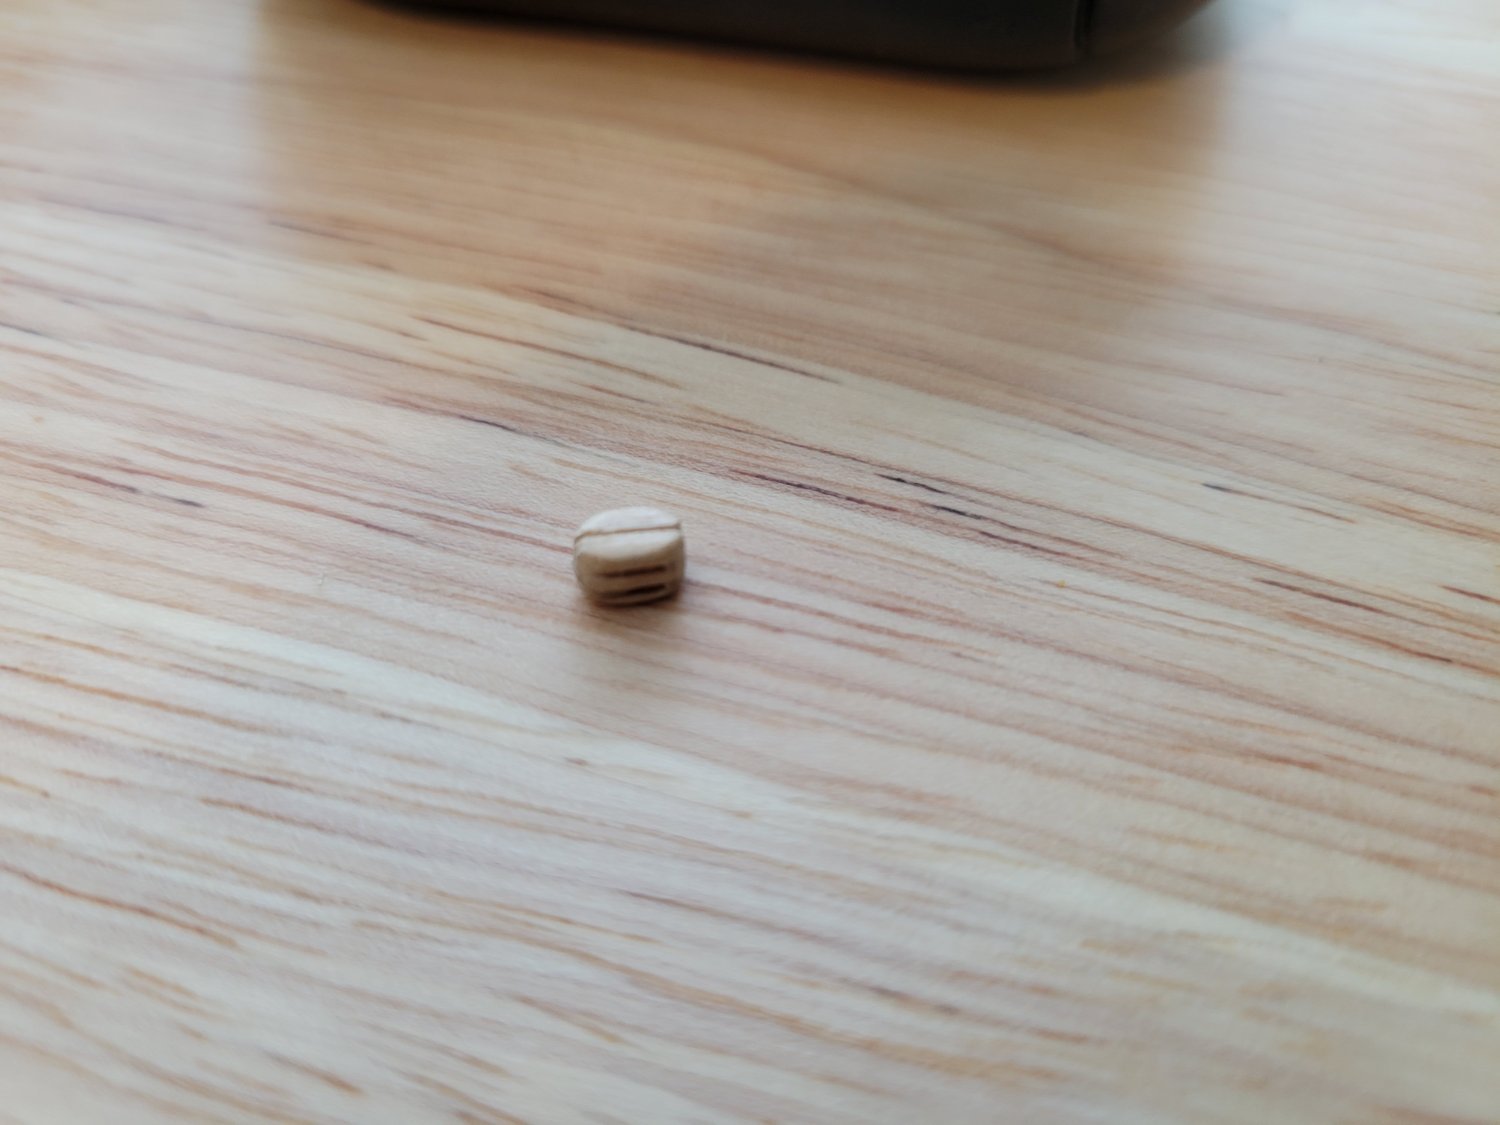
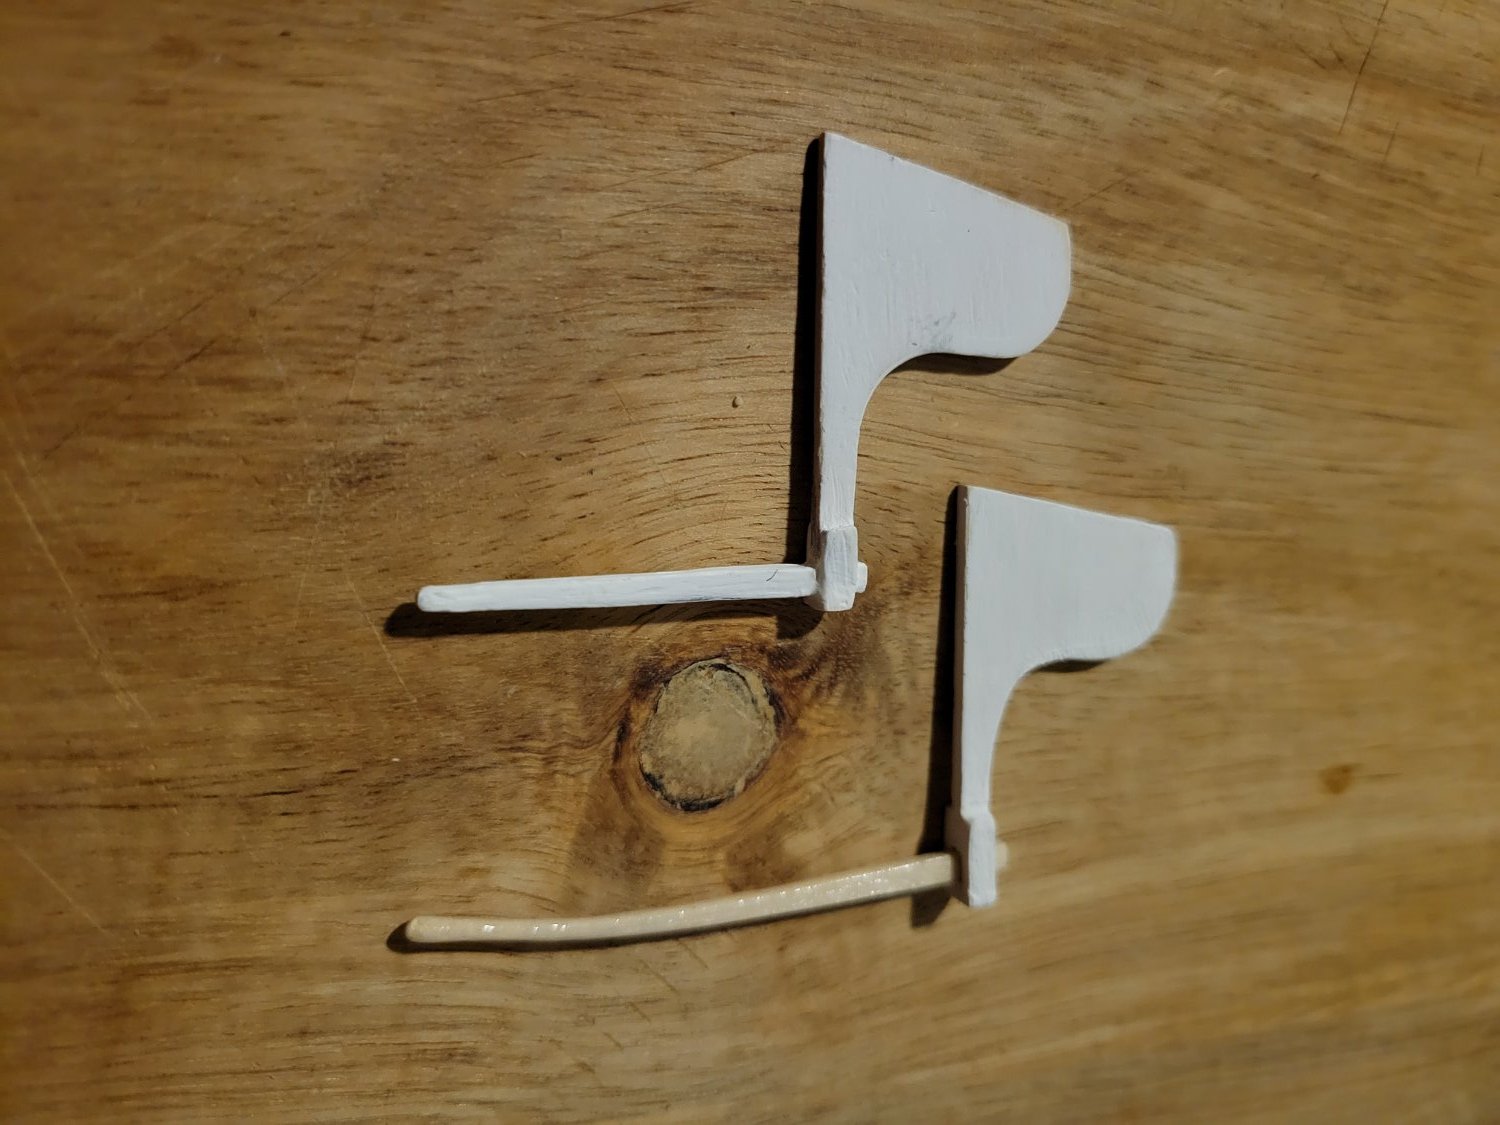
Fixing up the gaff
I cut off three pieces from a small dowel and also a small 1/16" thick rectangle, and drilled through the middle.
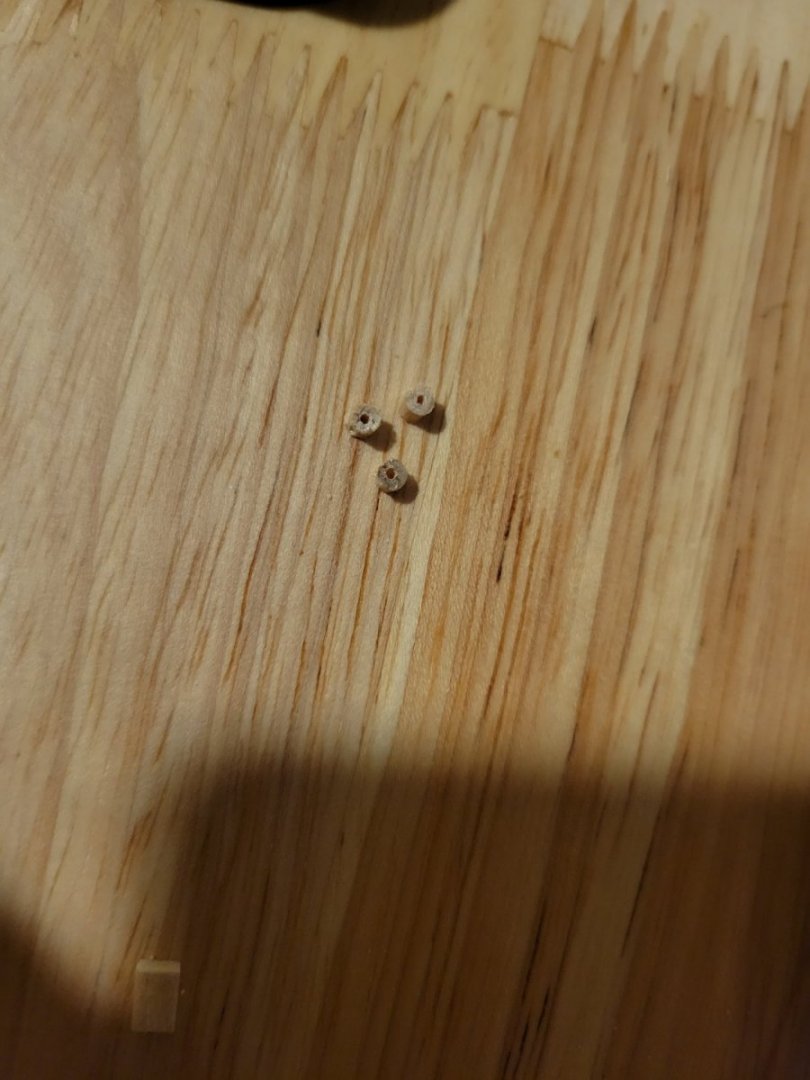

I then sanded these pieces to round the edges and smooth everything over. I found using a pin to hold the tiny beads very helpful. I just had to be mindful of where the sharp end of the pin was pointed.
Then I drilled four little holes in the gaff jaws.

Then I threaded some of the line included in the kit through everything and tied figure-8 knots to keep everything in place. I added a dab of CA glue to the knots to keep them from unraveling.
- thibaultron, bruce d, Bildad and 2 others
-
5
-
I'm waiting for some supplies to arrive for staining the trim pieces and part of the sail preparation.
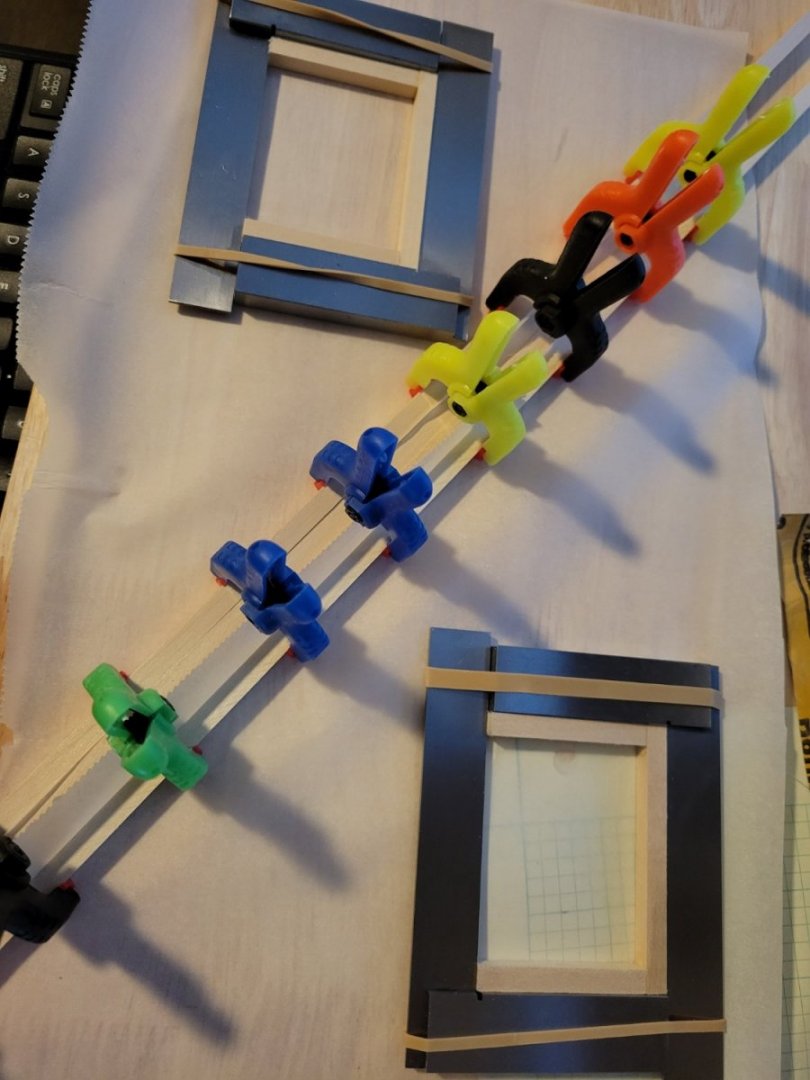
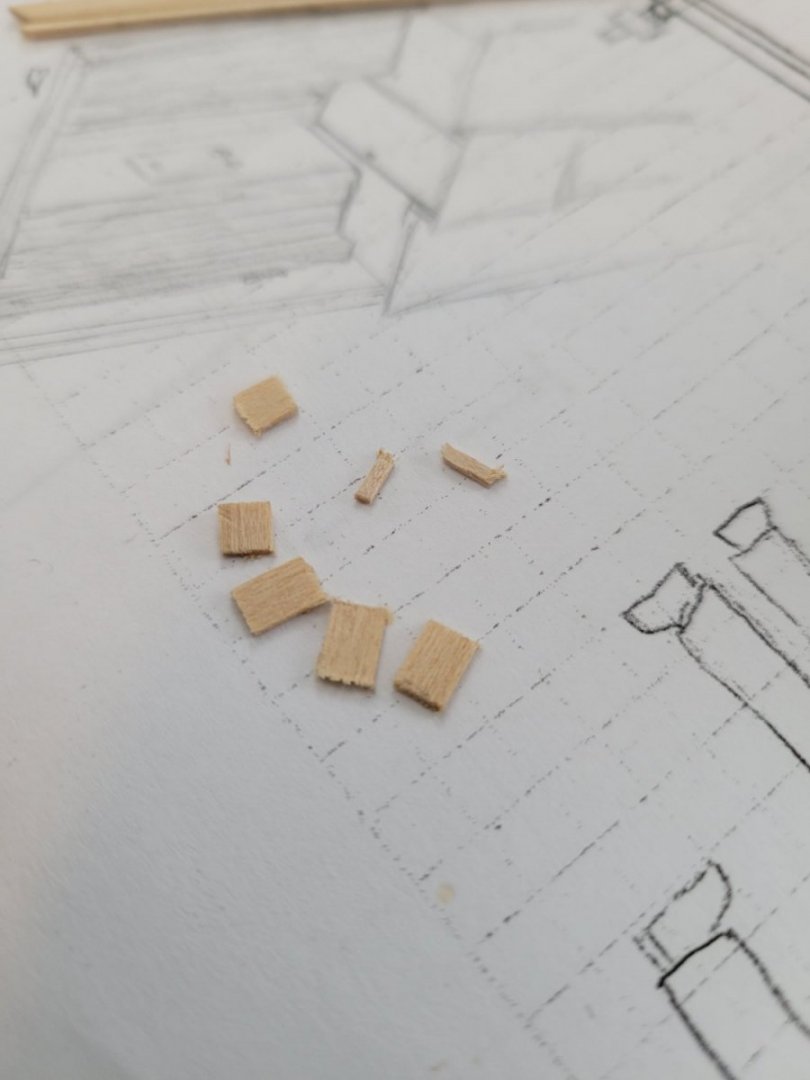
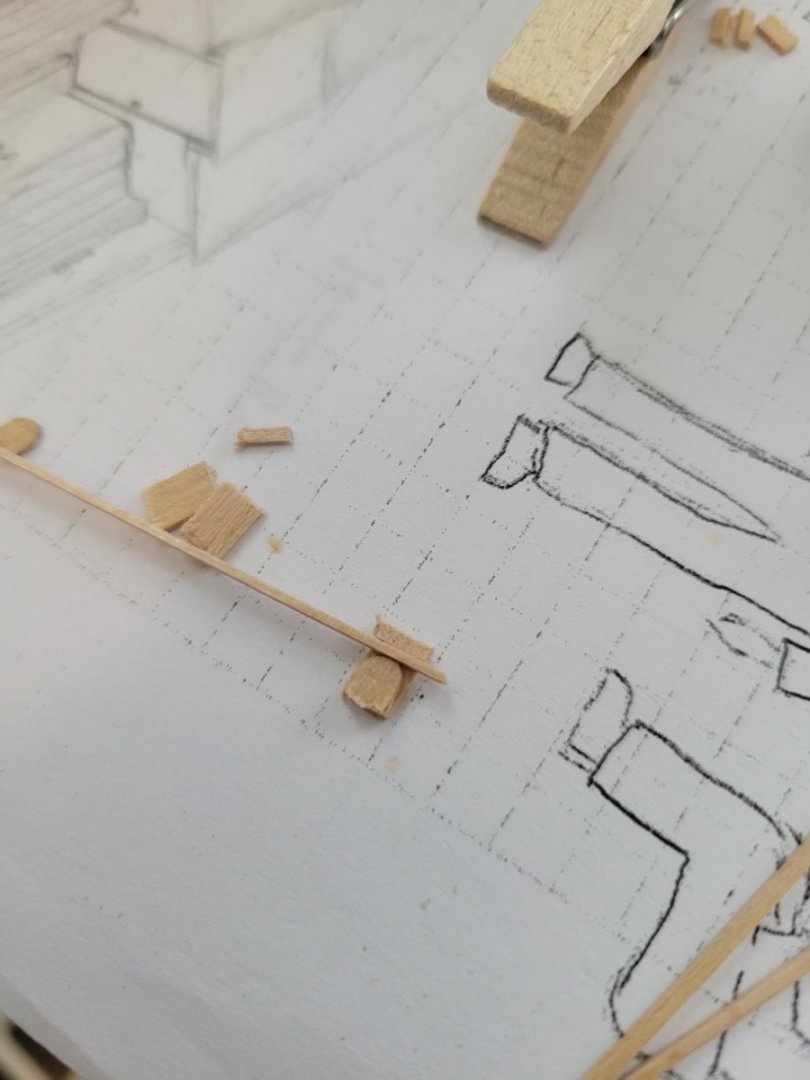
While I wait, I decided to try my hand at making blocks. I tried the method from Milton Roth's "Ship Modeling from Stem to Stern" on pg 179. Basically laminate the block from small strips of wood.
There will be two of these double blocks on my model to work with the main sheet. Other blocks will be the single blocks that came with the kit, but I will shape them with sandpaper so they look a little nicer.
Here are the initial pieces:
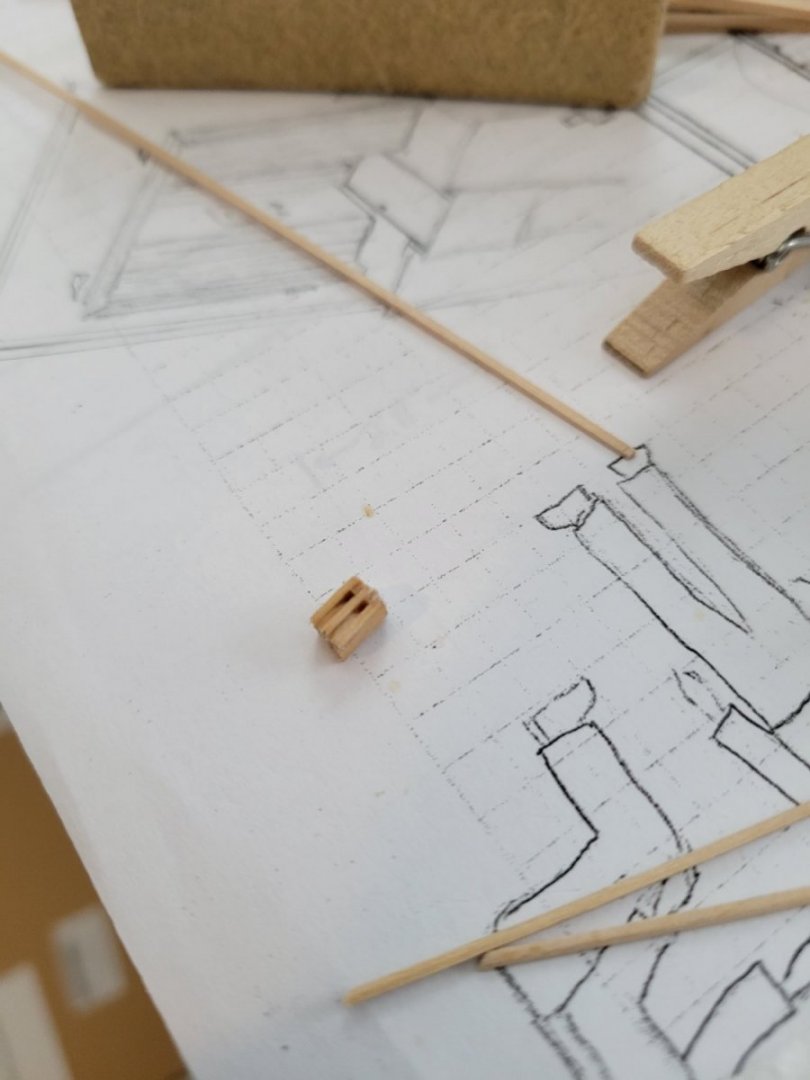
I rounded the top of the smaller strips and glued them to the the larger piece using a strip of wood to achieve proper spacing with the thin top piece. (I used normal white wood glue)
A block "sandwich" glued together:
I clamped it all together with a clothesline pin using a little torn piece of parchment paper to keep from accidentally gluing the block to the pin.
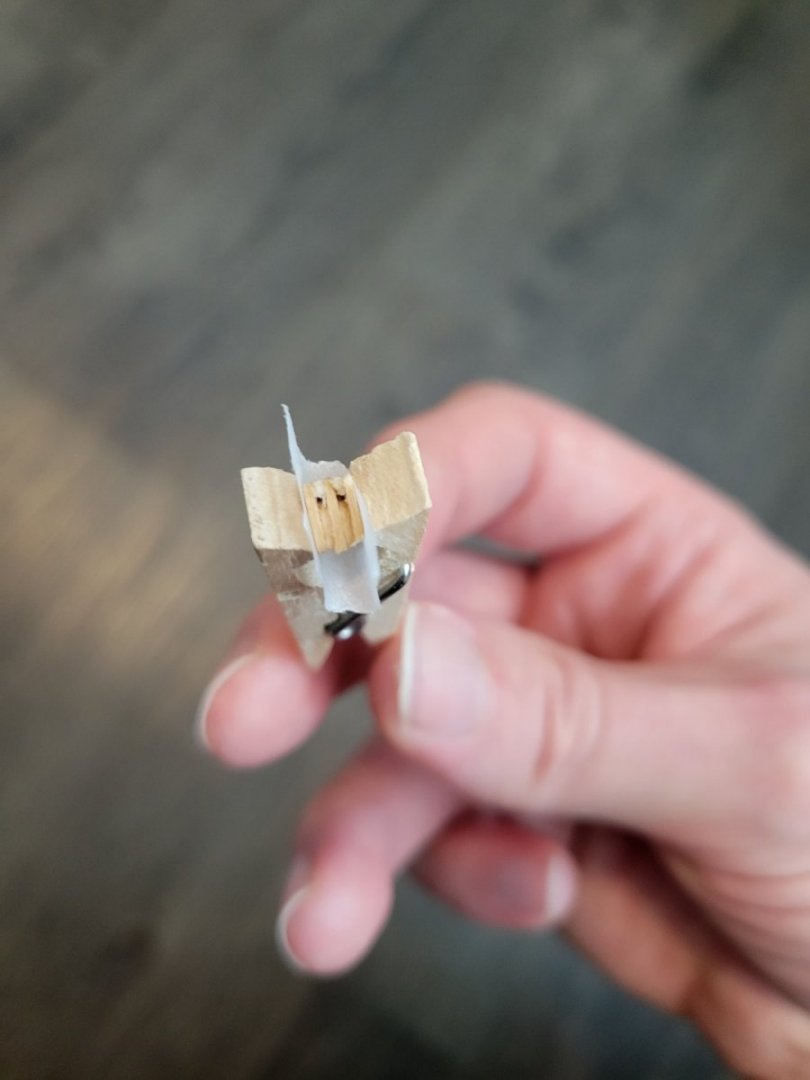
After allowing the glue to cure for 24 hours (actually about 48 hours in this case), I used sandpaper to shape the block:

Then I used a saw to lightly cut a shallow groove around the block for the strop:


-
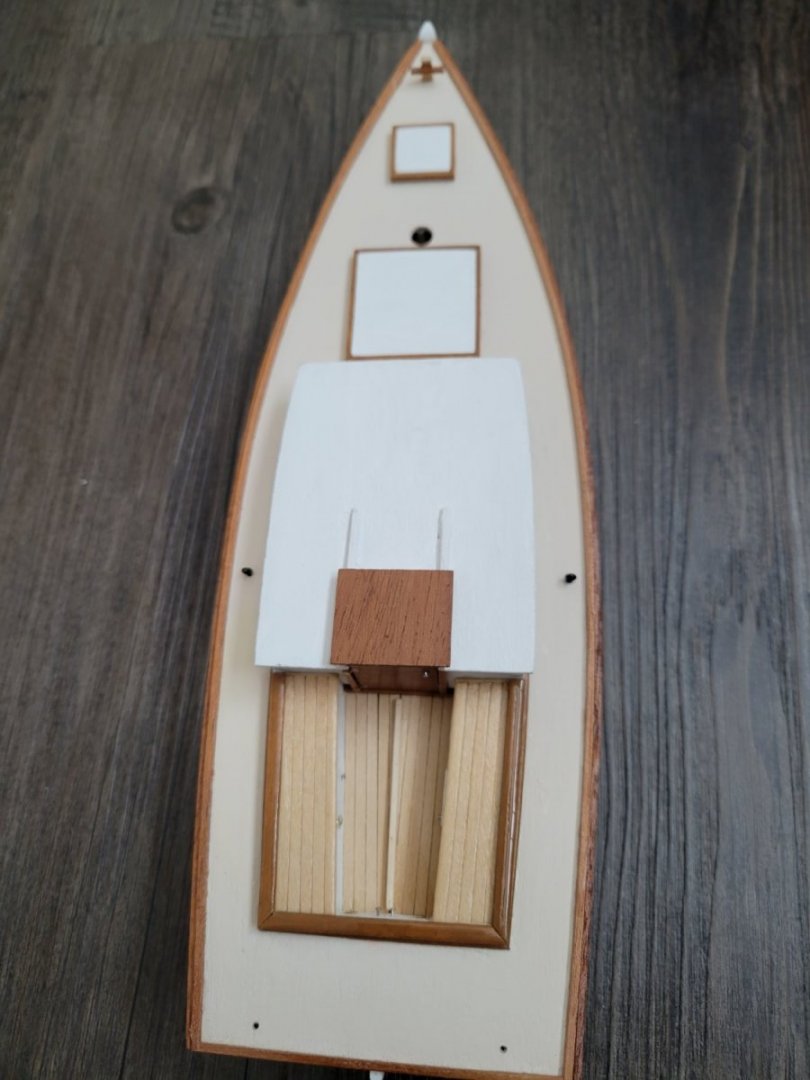
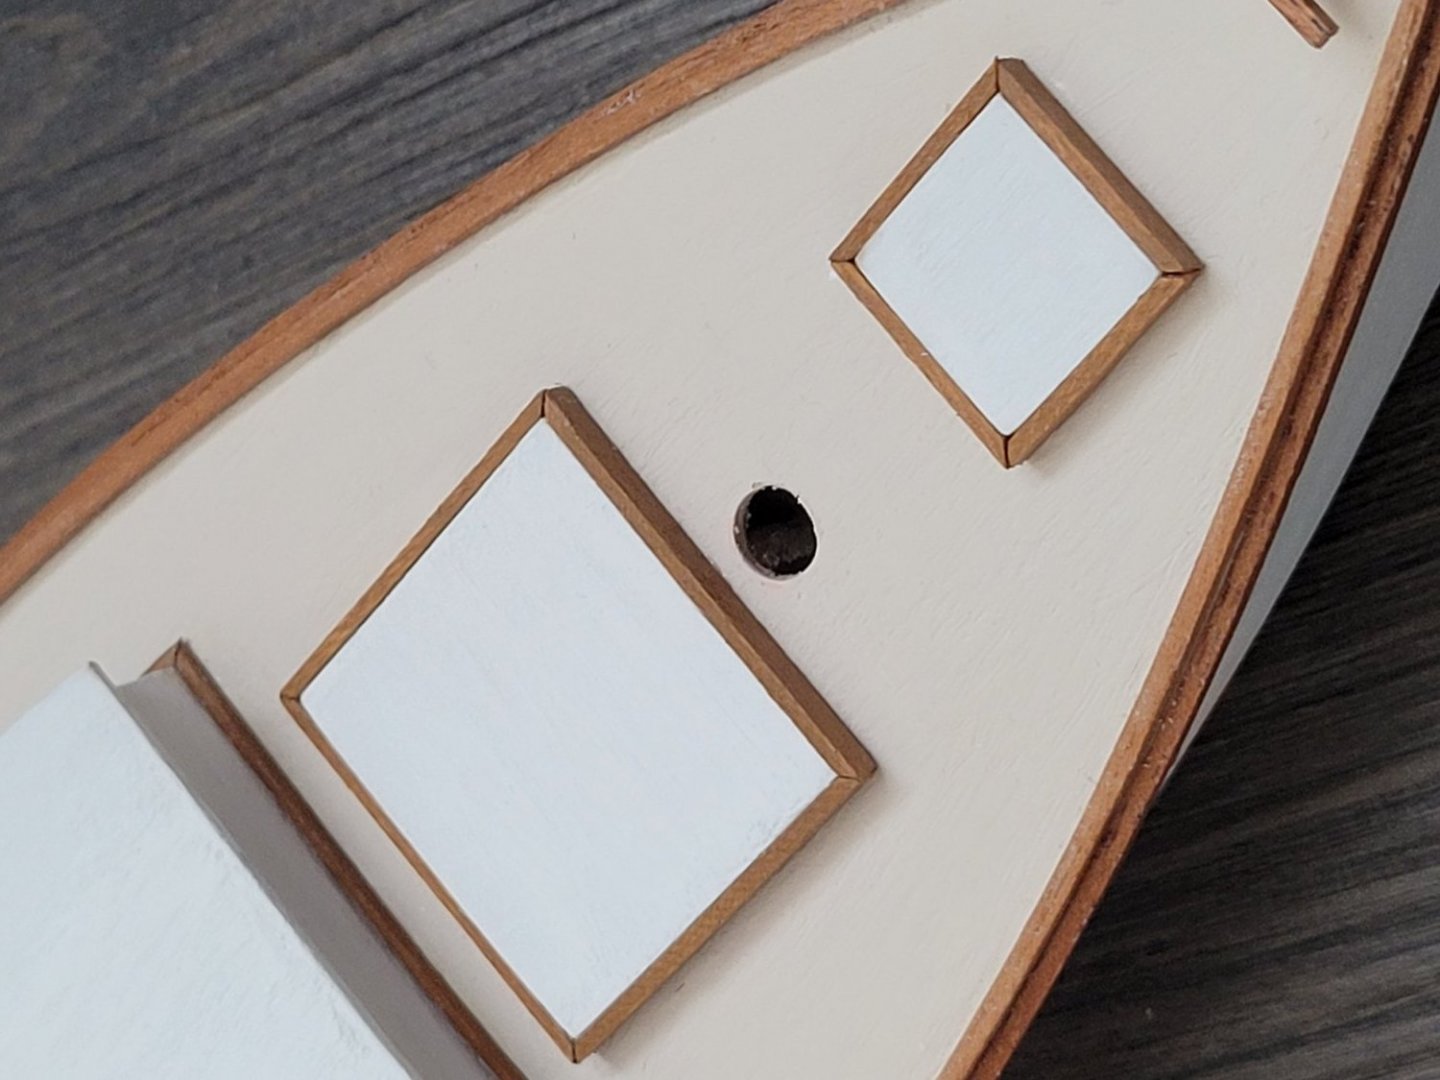
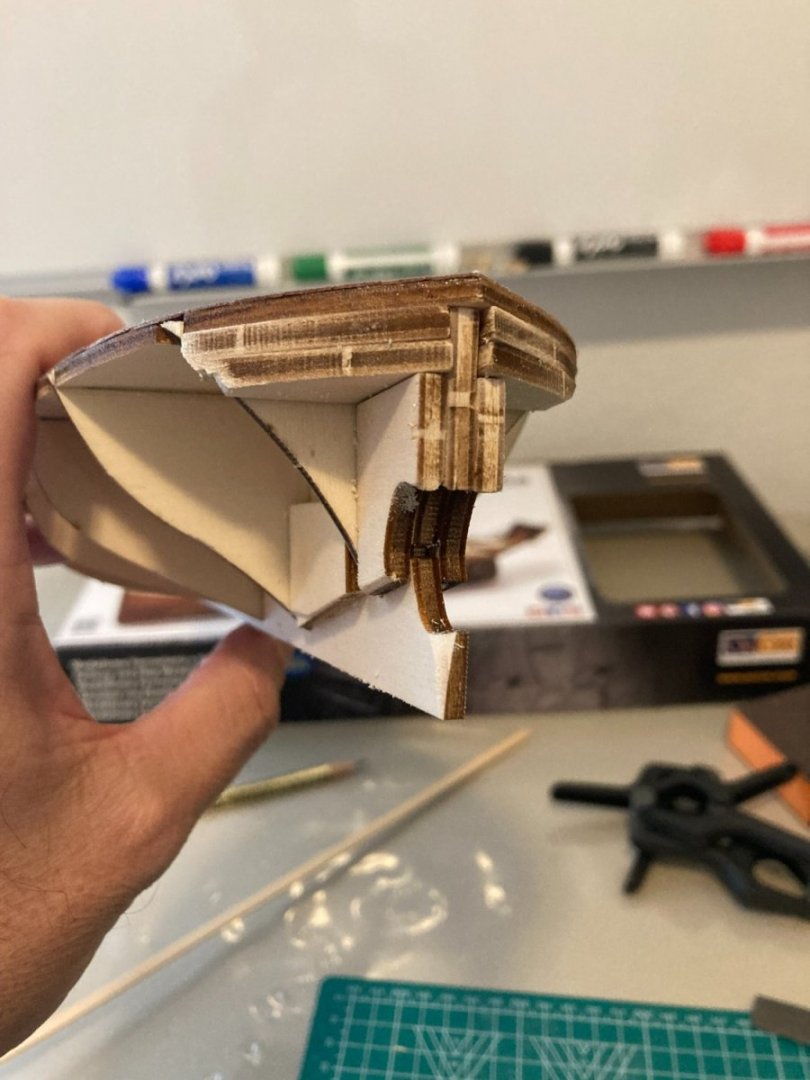
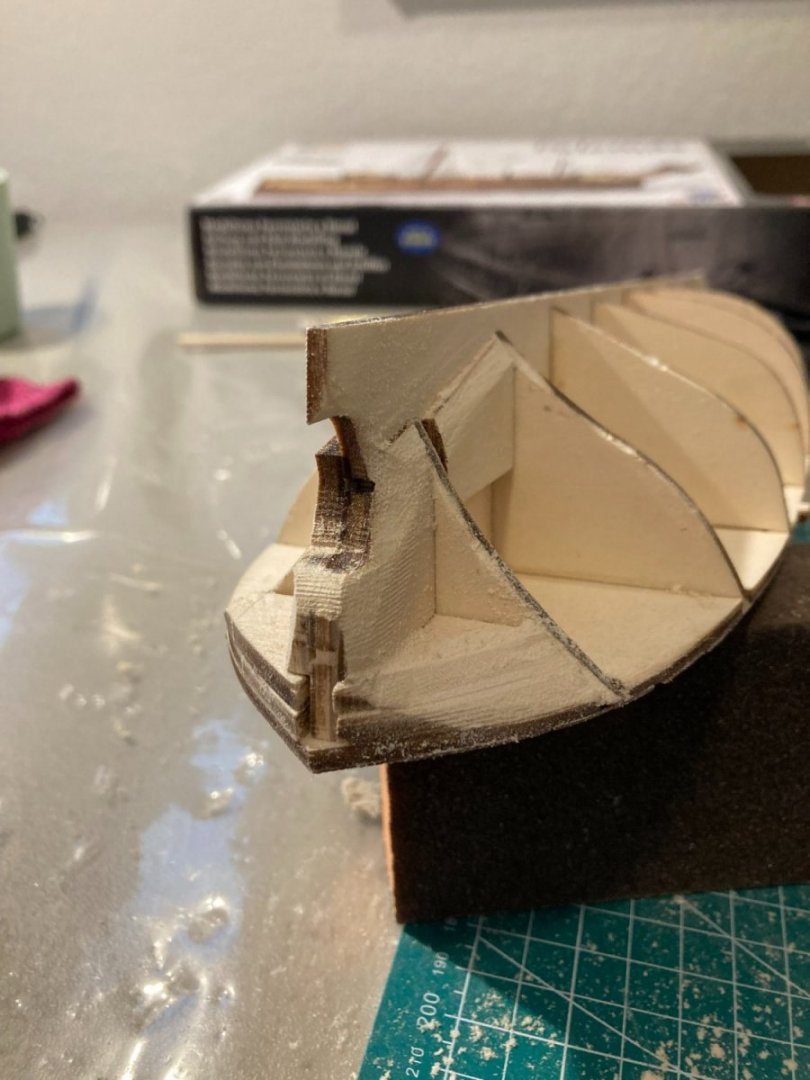
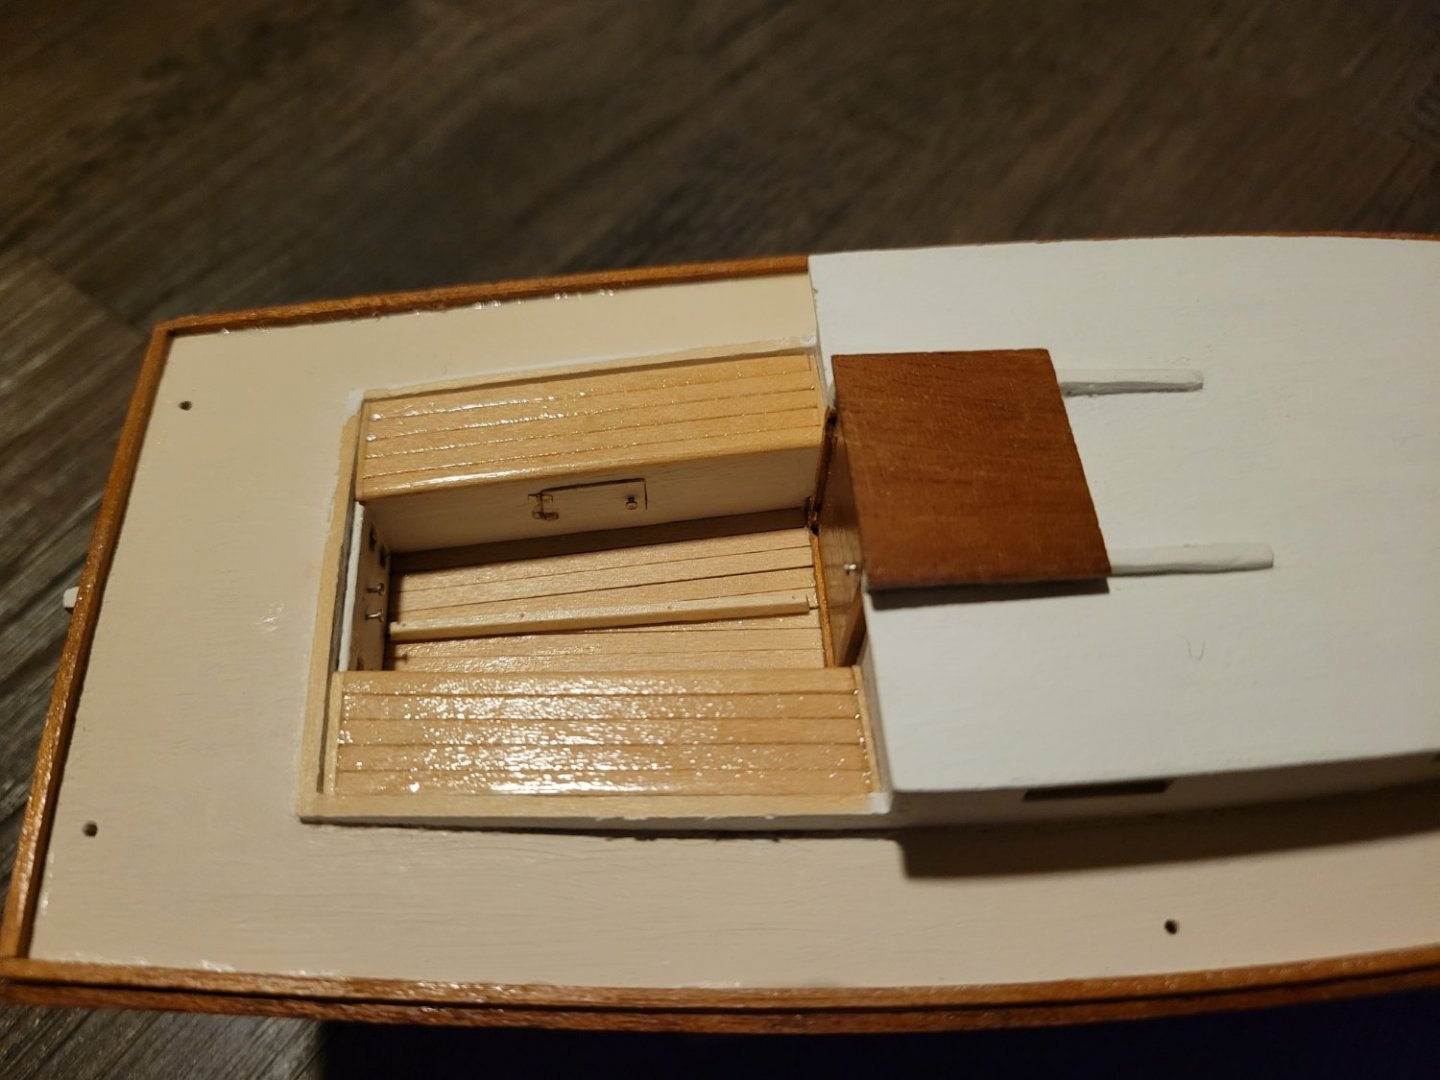
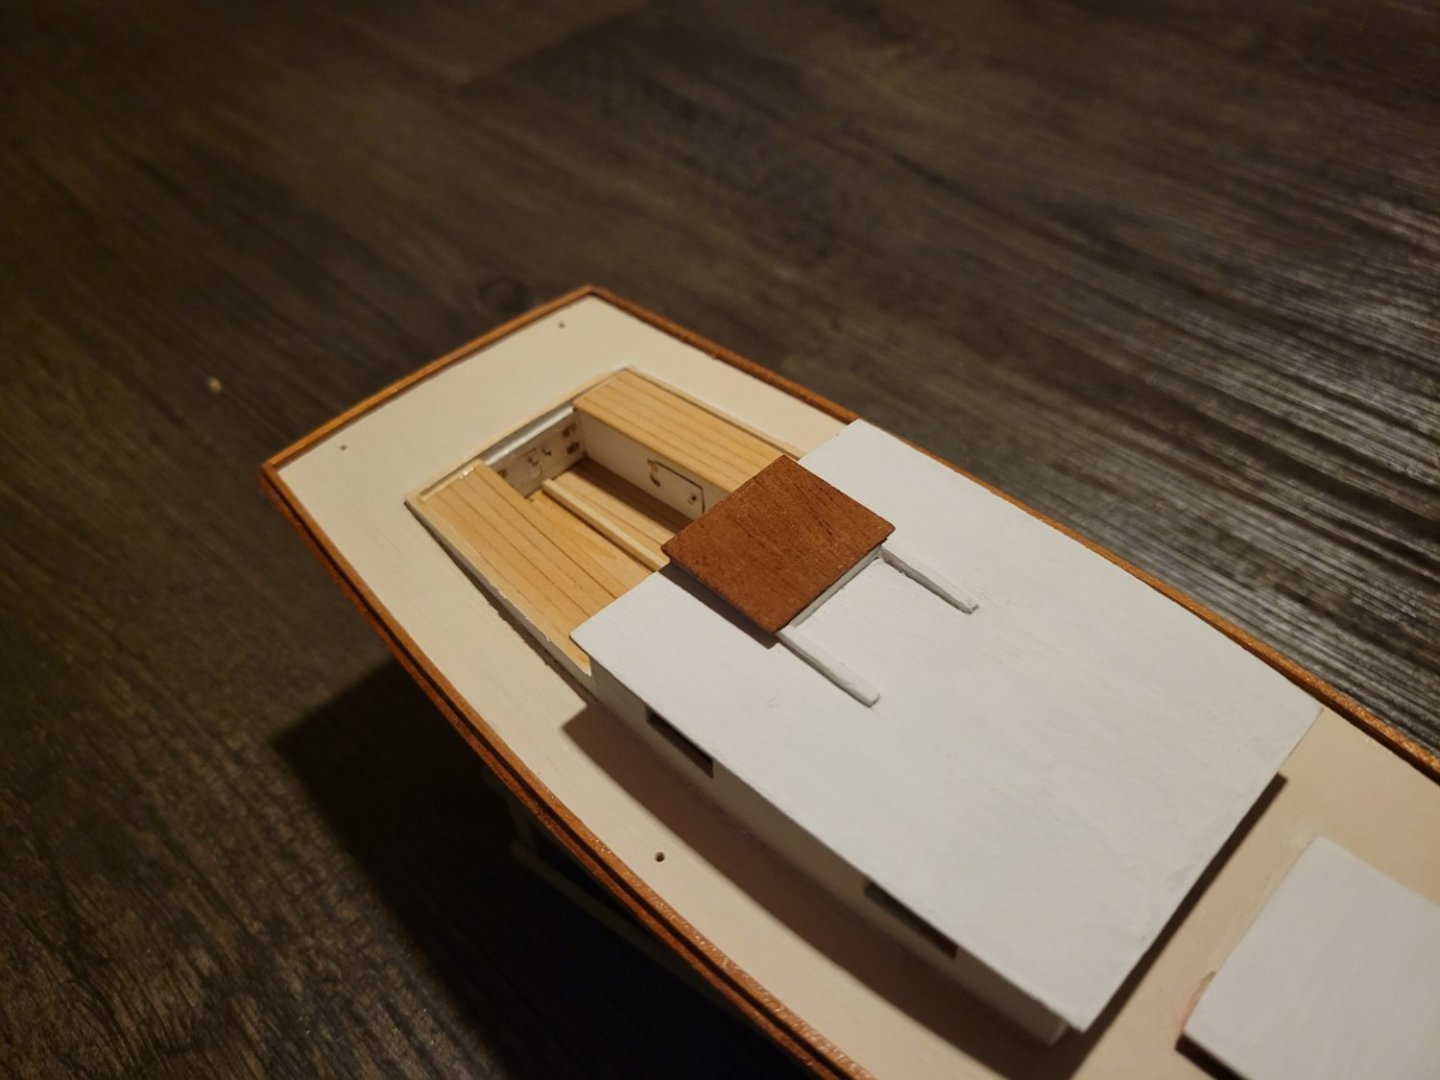
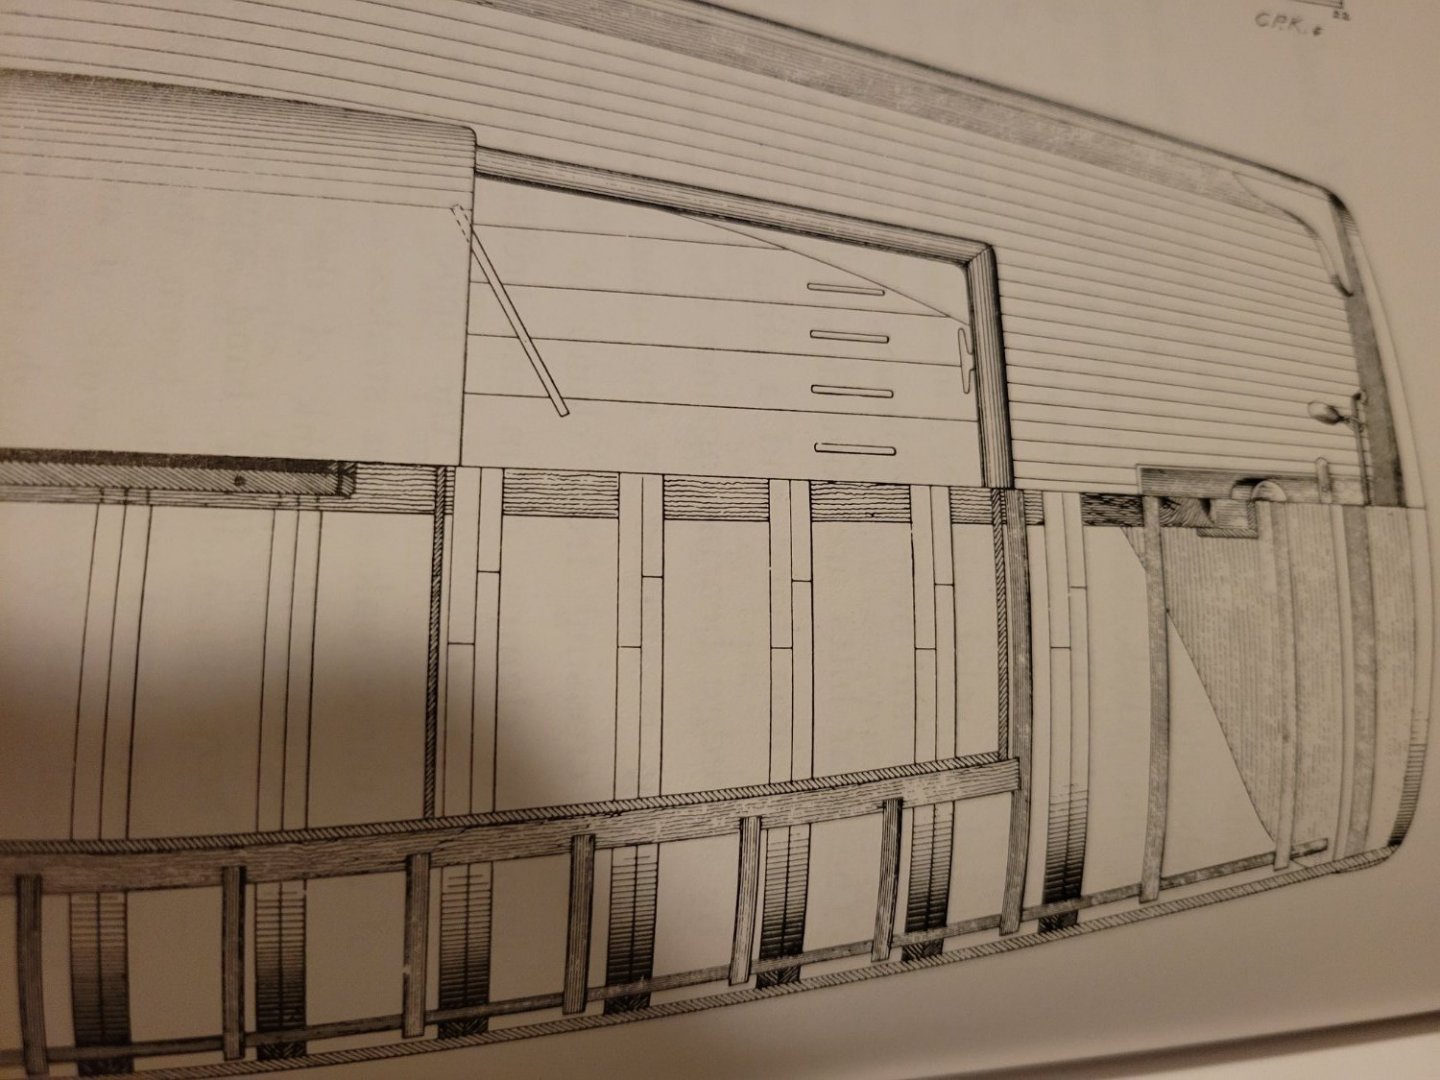
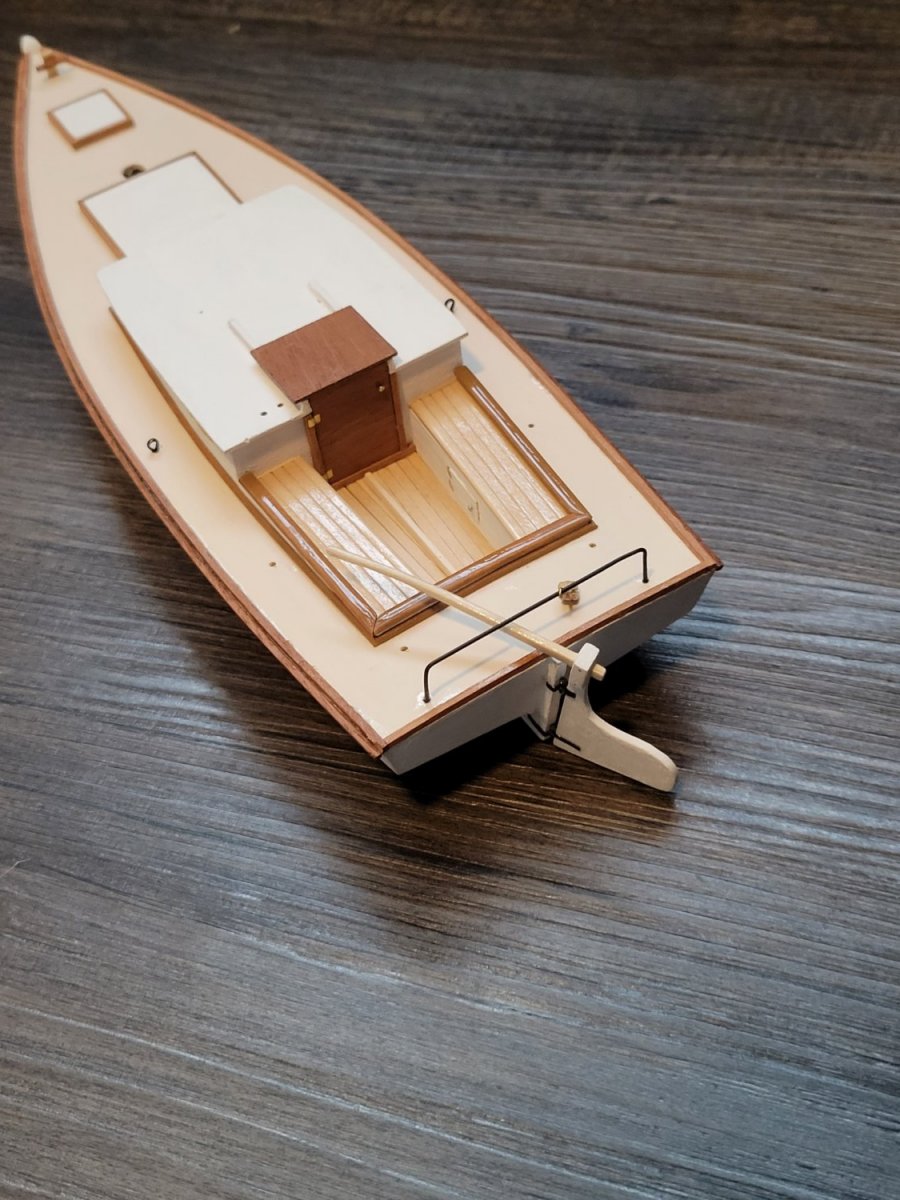
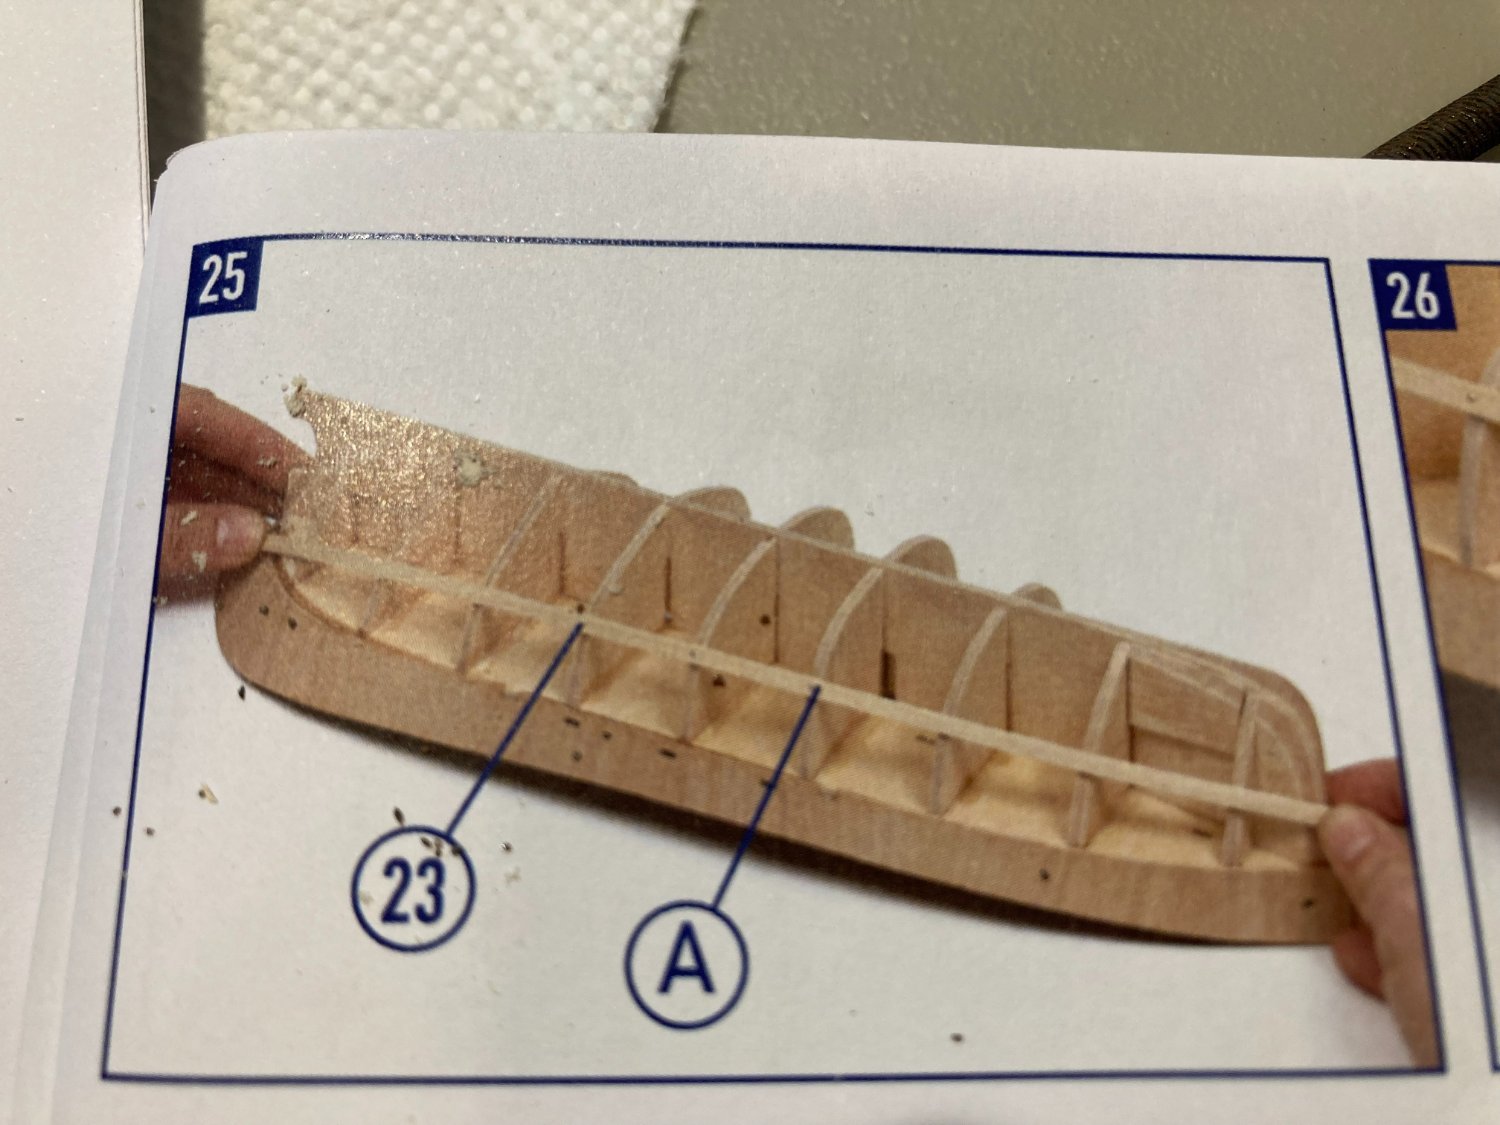
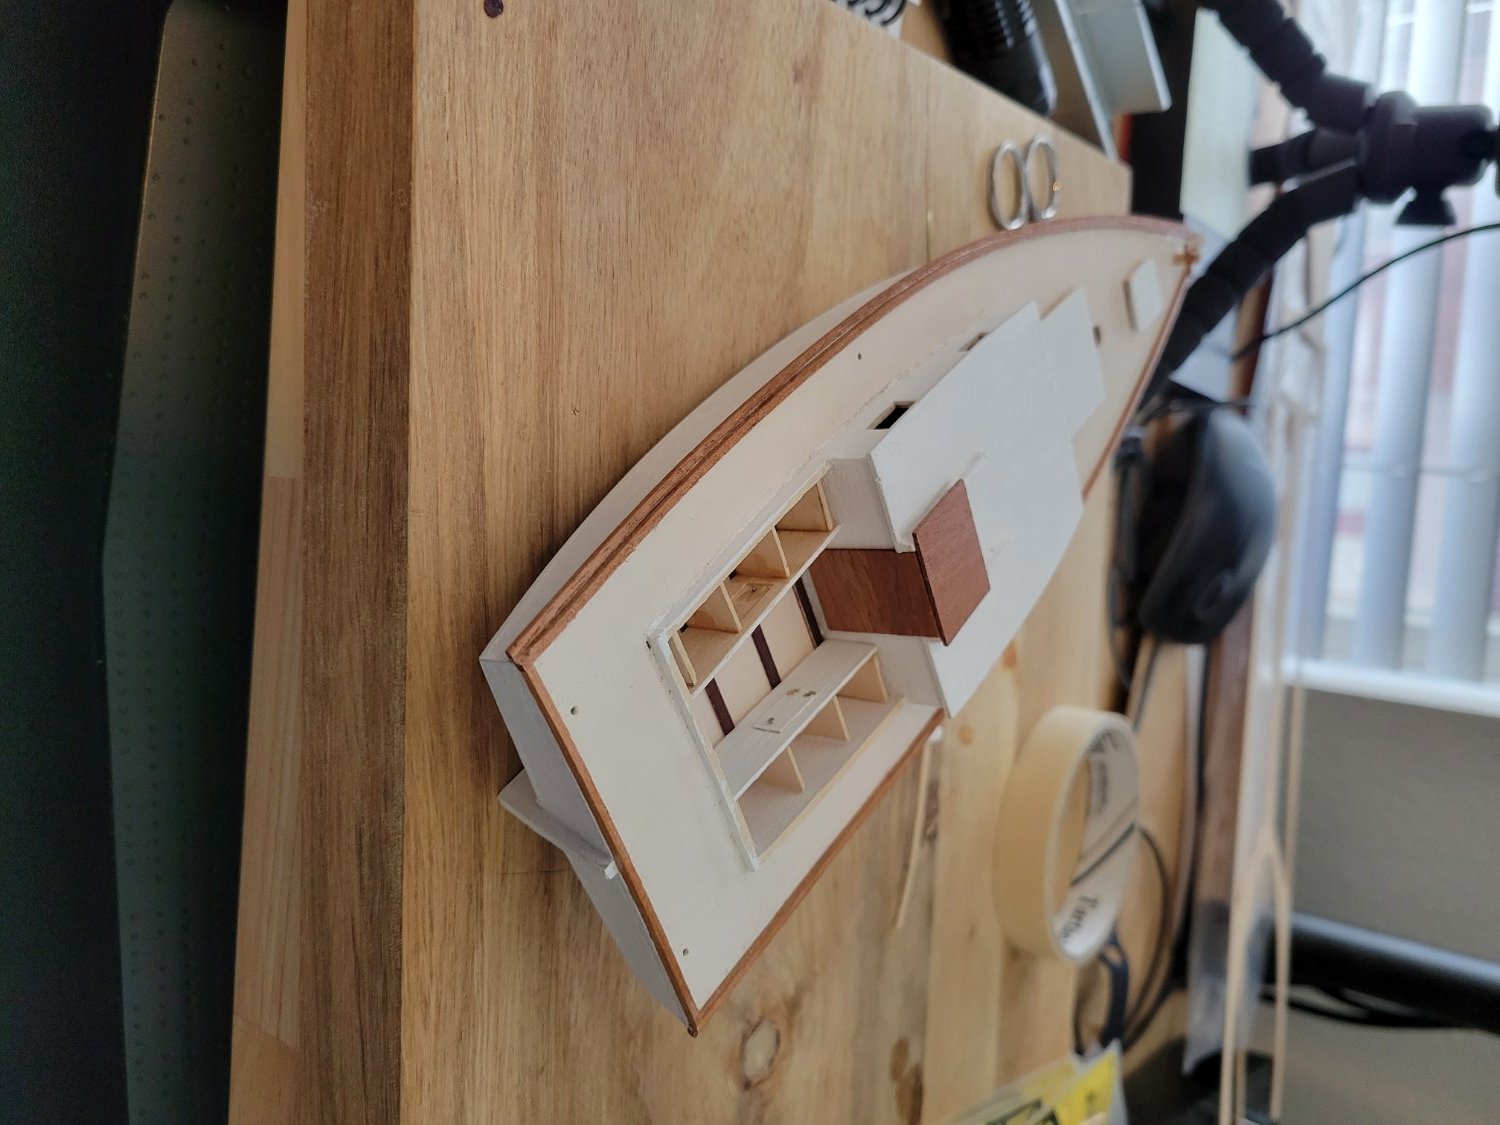
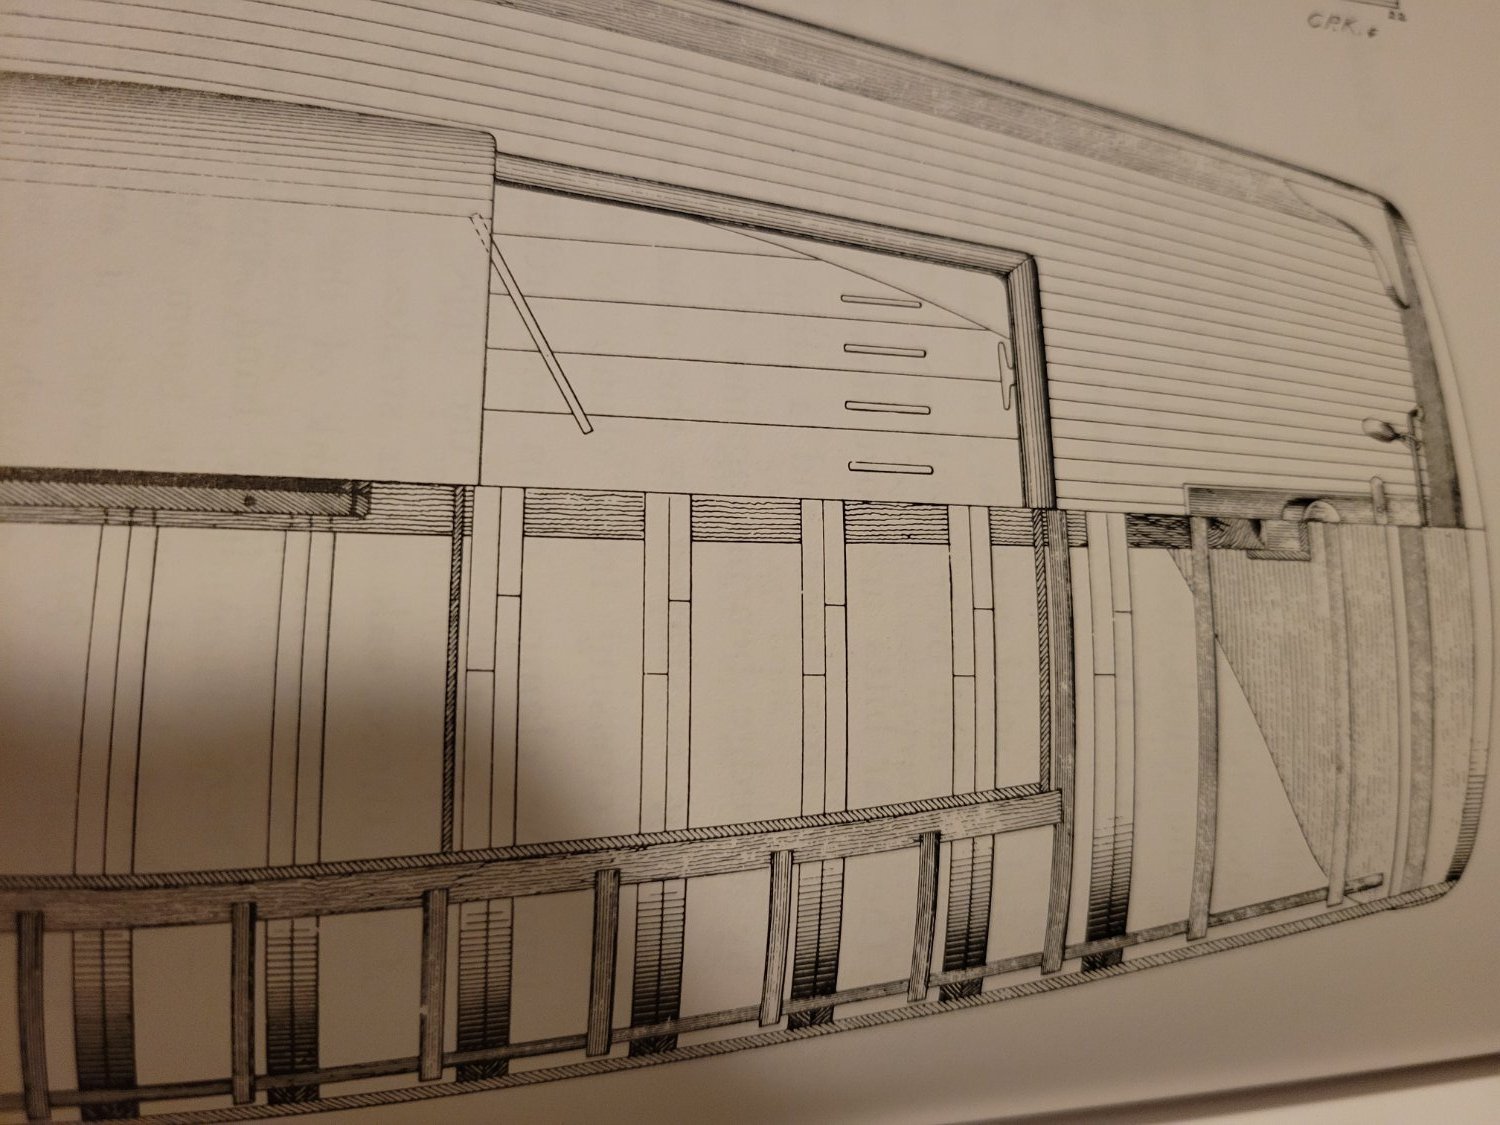
Just a quick update. I've finished the cockpit floors, lockers, benches, and companionway. Next step for the hull is the coaming rails and I will add some trim around the cabin, cockpit, and hatches that will cover some of the poor paint job.
I'm also working on some of the fittings and rigging items and will post pictures of that soon (creating a couple of blocks).

-
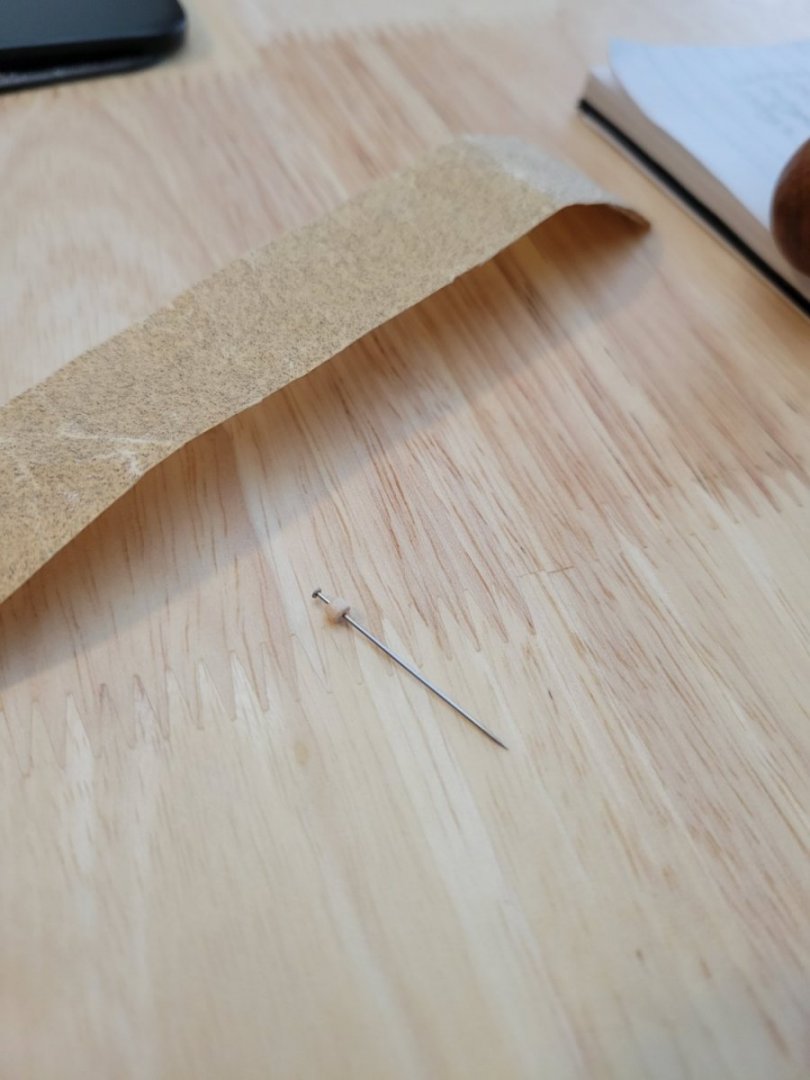
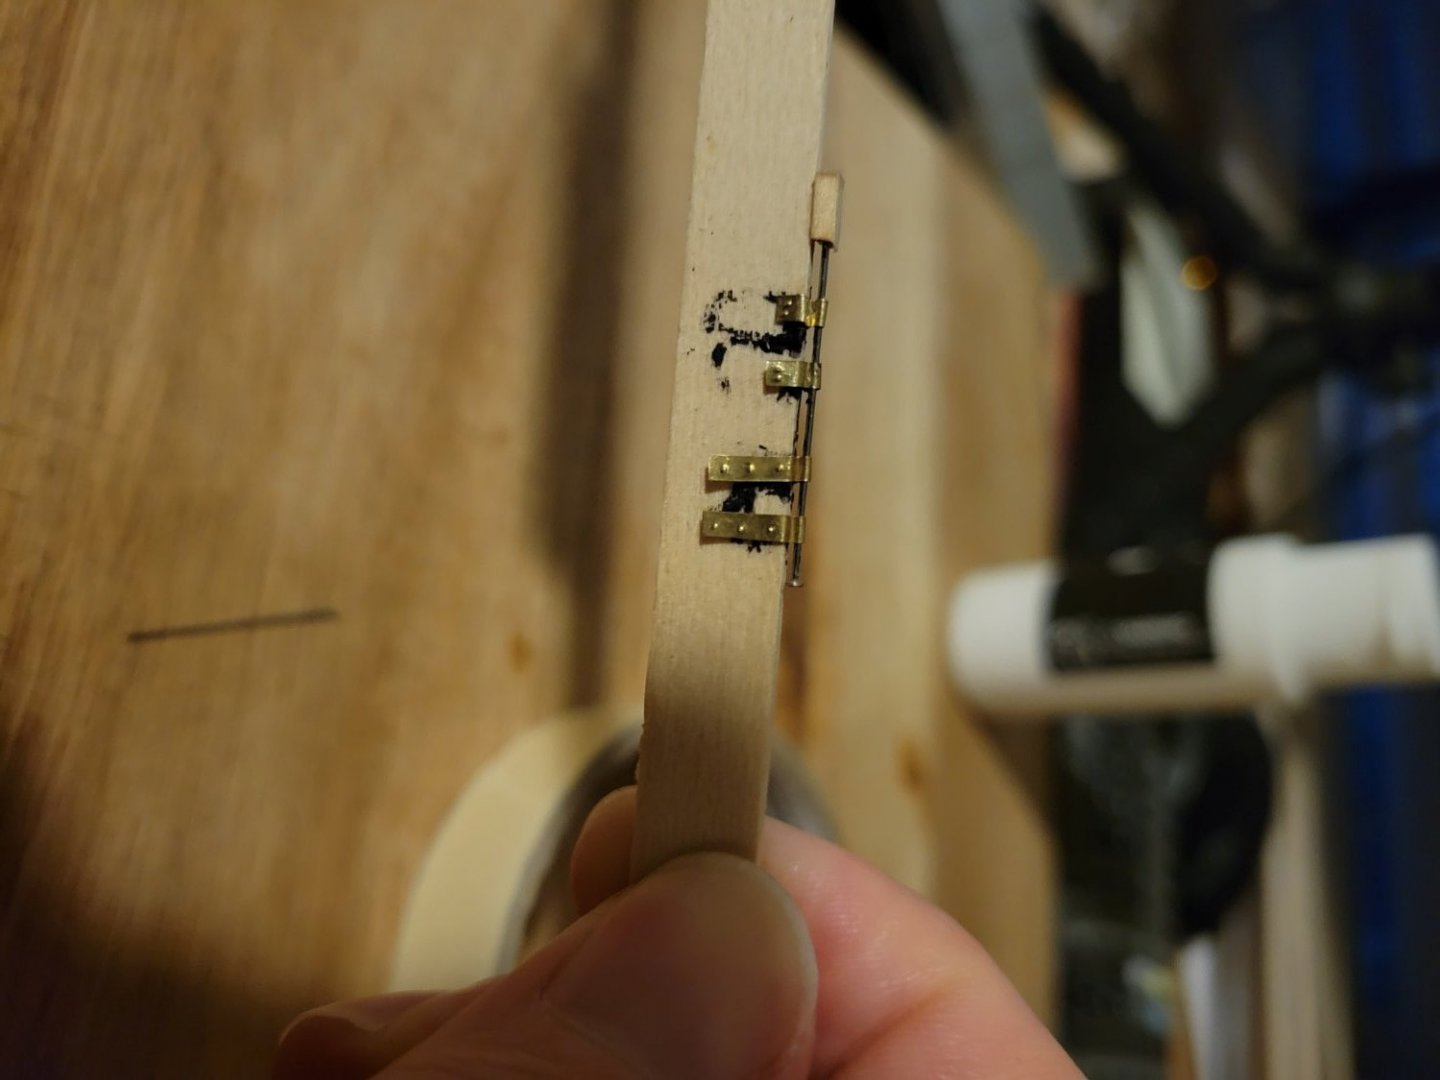
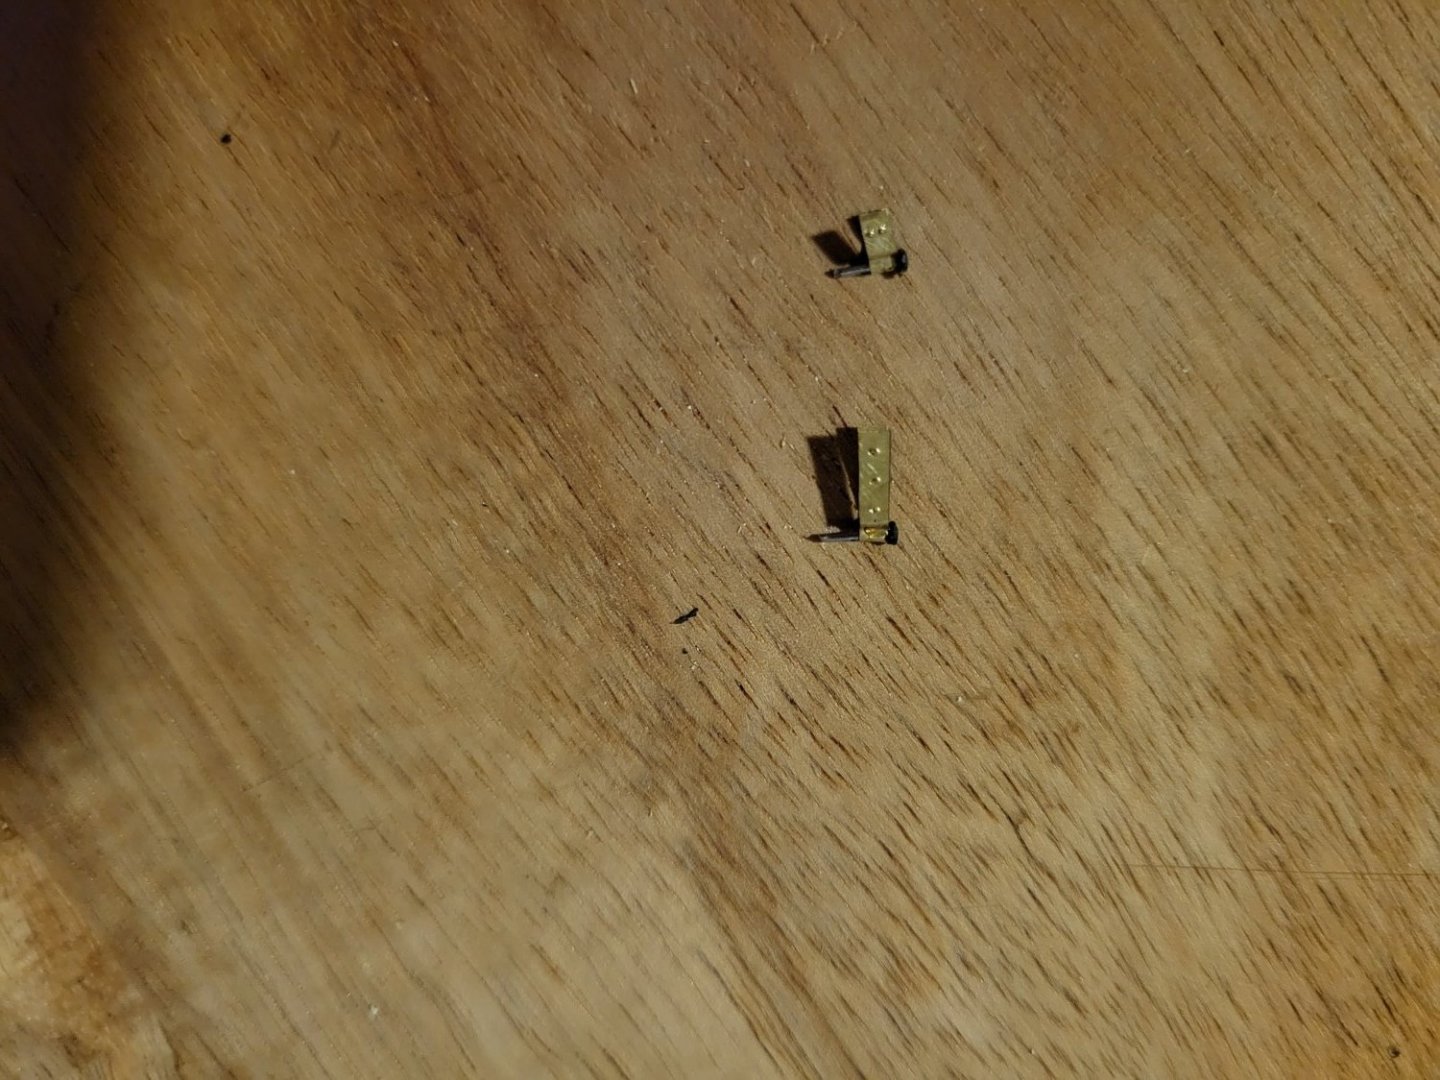
Update
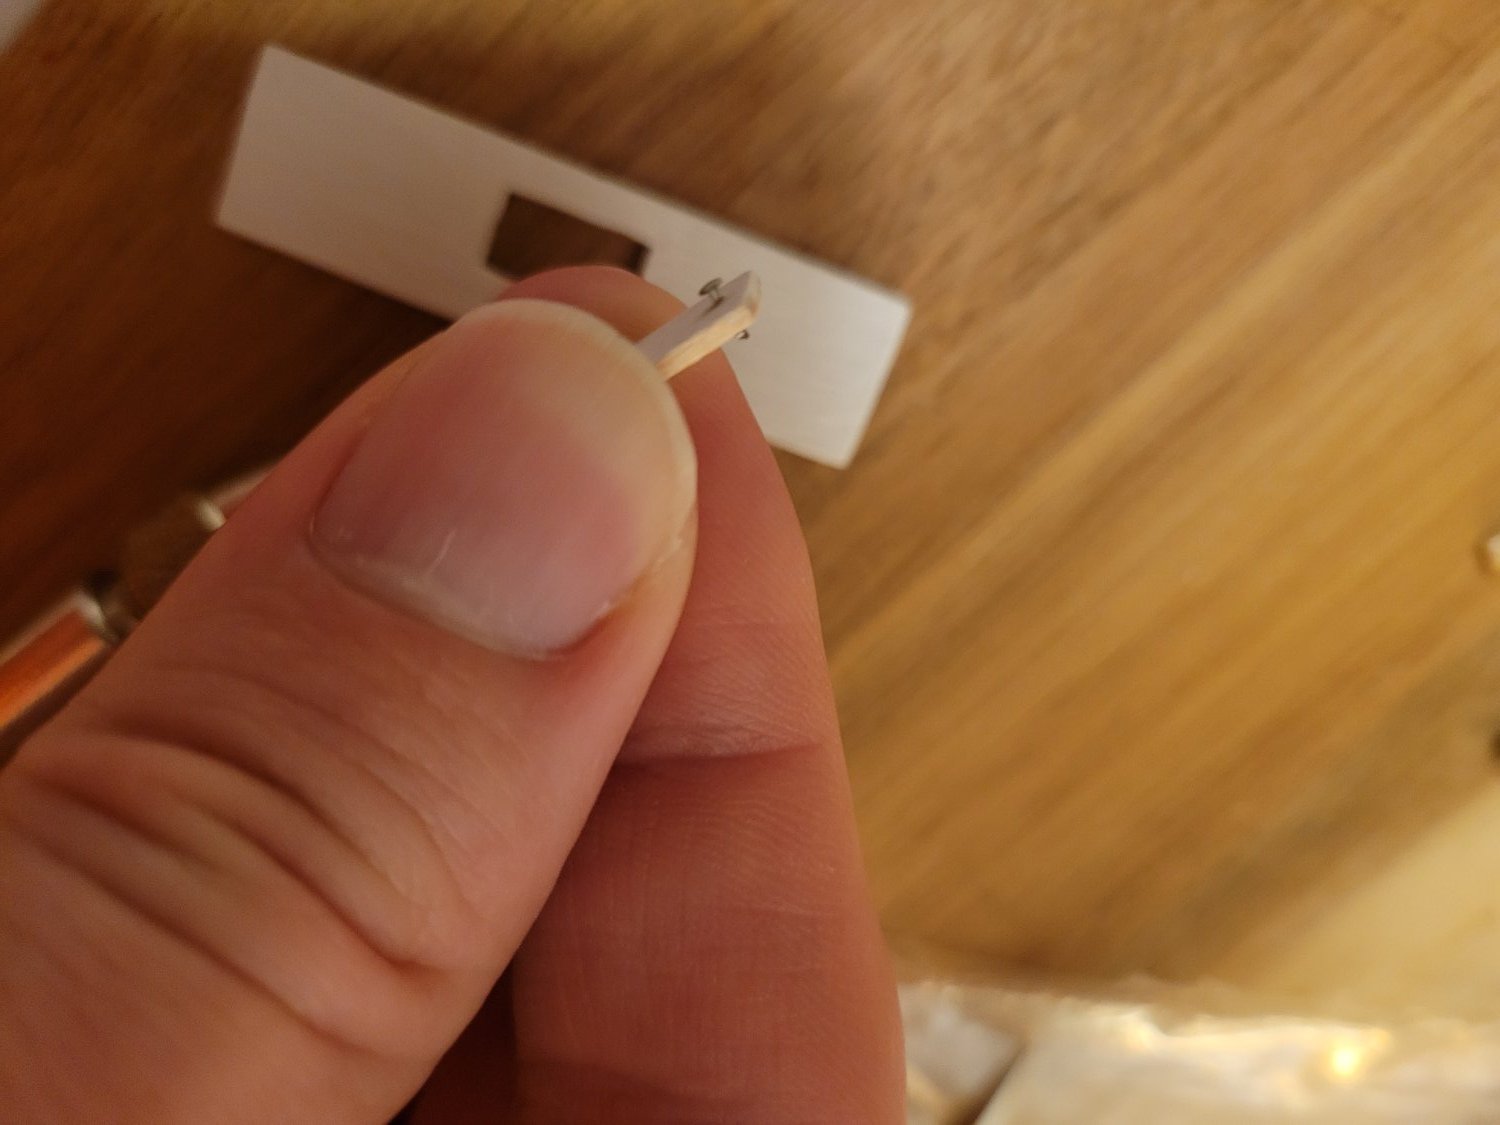
I have made pintles and gudgeons using a little temporary jig made from a pin and some scrap wood. I will paint these with some black primer before gluing on to the rudder and sternpost. My pintles are just gudgeons with a cut down pin glued:
I have a new rudder assembly now. It needs a little more finishing, but I think looks much better than my previous one:

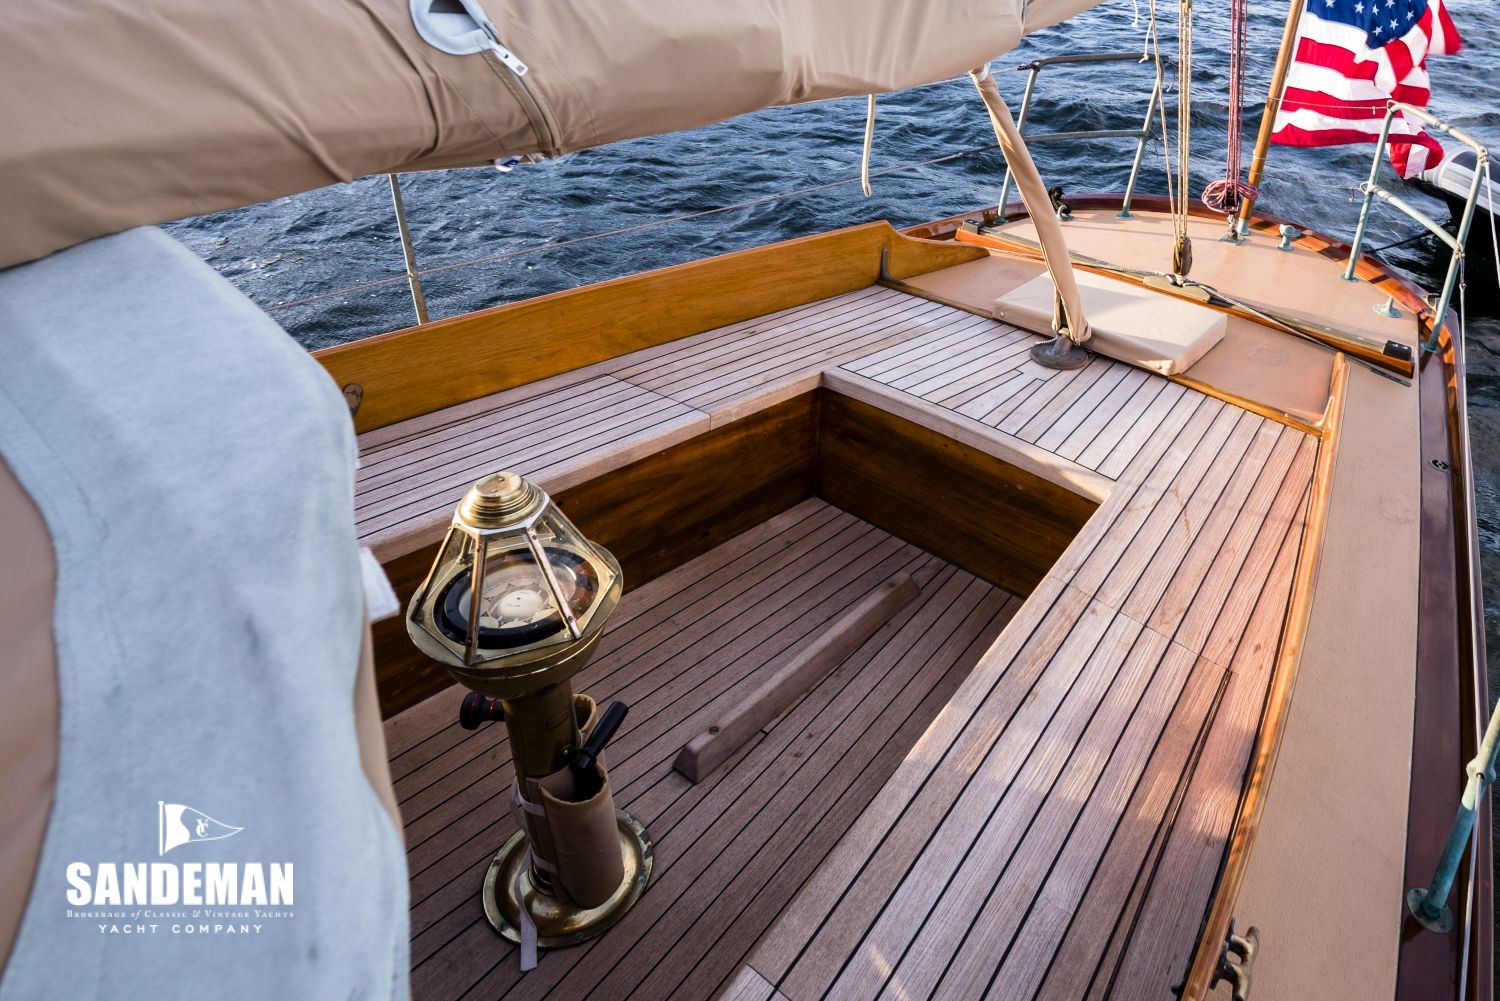
This is the progress on the modified cockpit:
Without gluing anything down, I test fit with the model:

-
2 hours ago, VTHokiEE said:
Wow just saw your log - what a great job so far. I really like what you did with the floor; I wish I had done that on mine but it was my first rodeo so I stayed pretty true to the kit.
Thanks!
I'm getting deeper into it than I originally anticipated, but I'm enjoying it. I think what made me decide to do modifications was two things:
1) when I put on the toe rails and rub rails, it totally changed the way I saw the boat and I wanted to give it some TLC.
2) @wefalck told me about regrets regarding not doing what you could have done. It seems especially true when the model is sitting on the shelf reminding you everyday.
I'm doing the cockpit flooring a little different now with the cockpit modification I'm doing, but it will still look similar.
-
Ok, time for an update!
I've had a great discussion on the other thread I mentioned, and I've finally decided on a plan for the cockpit.
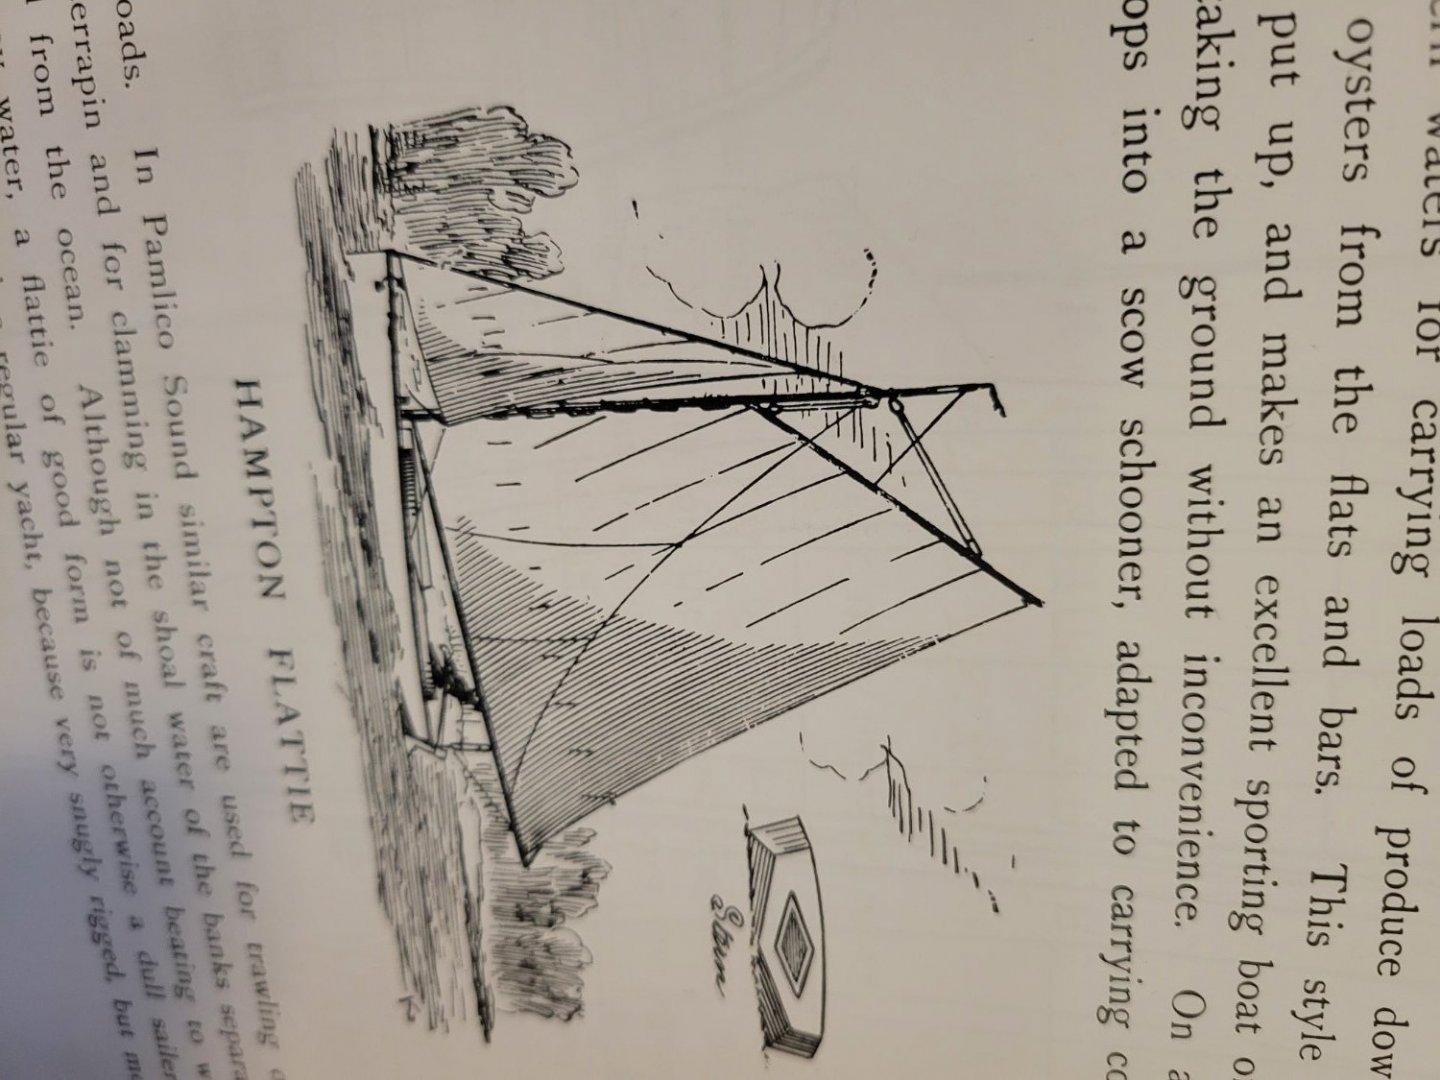
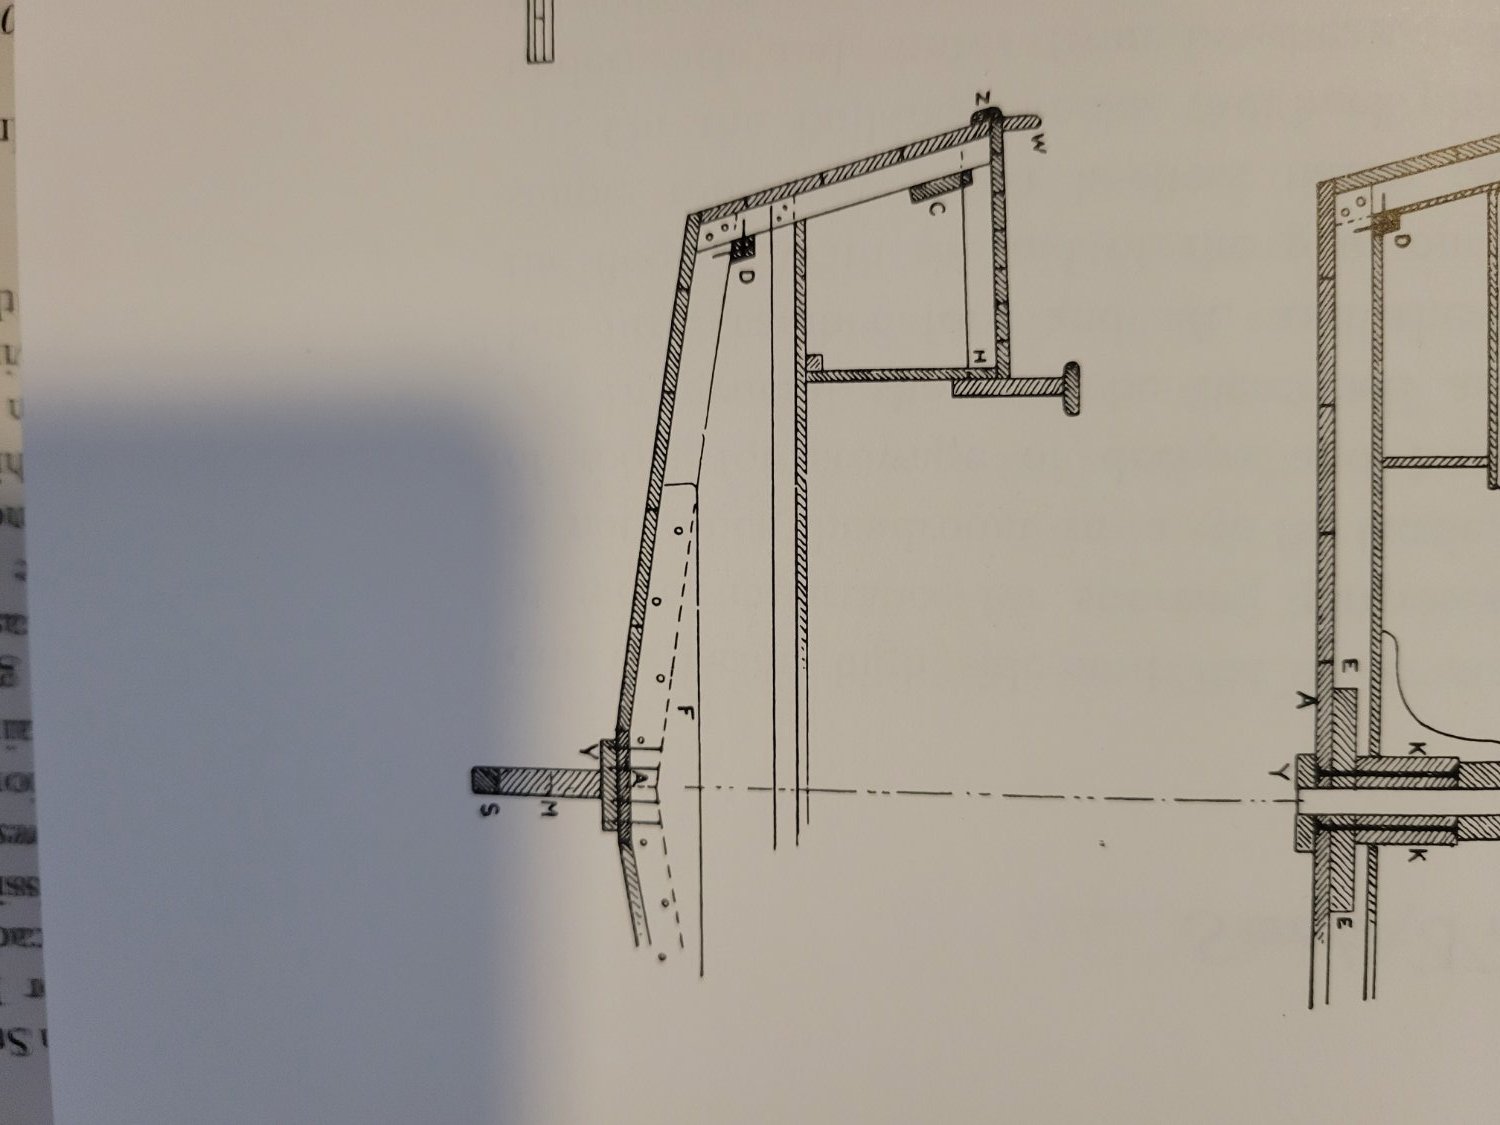
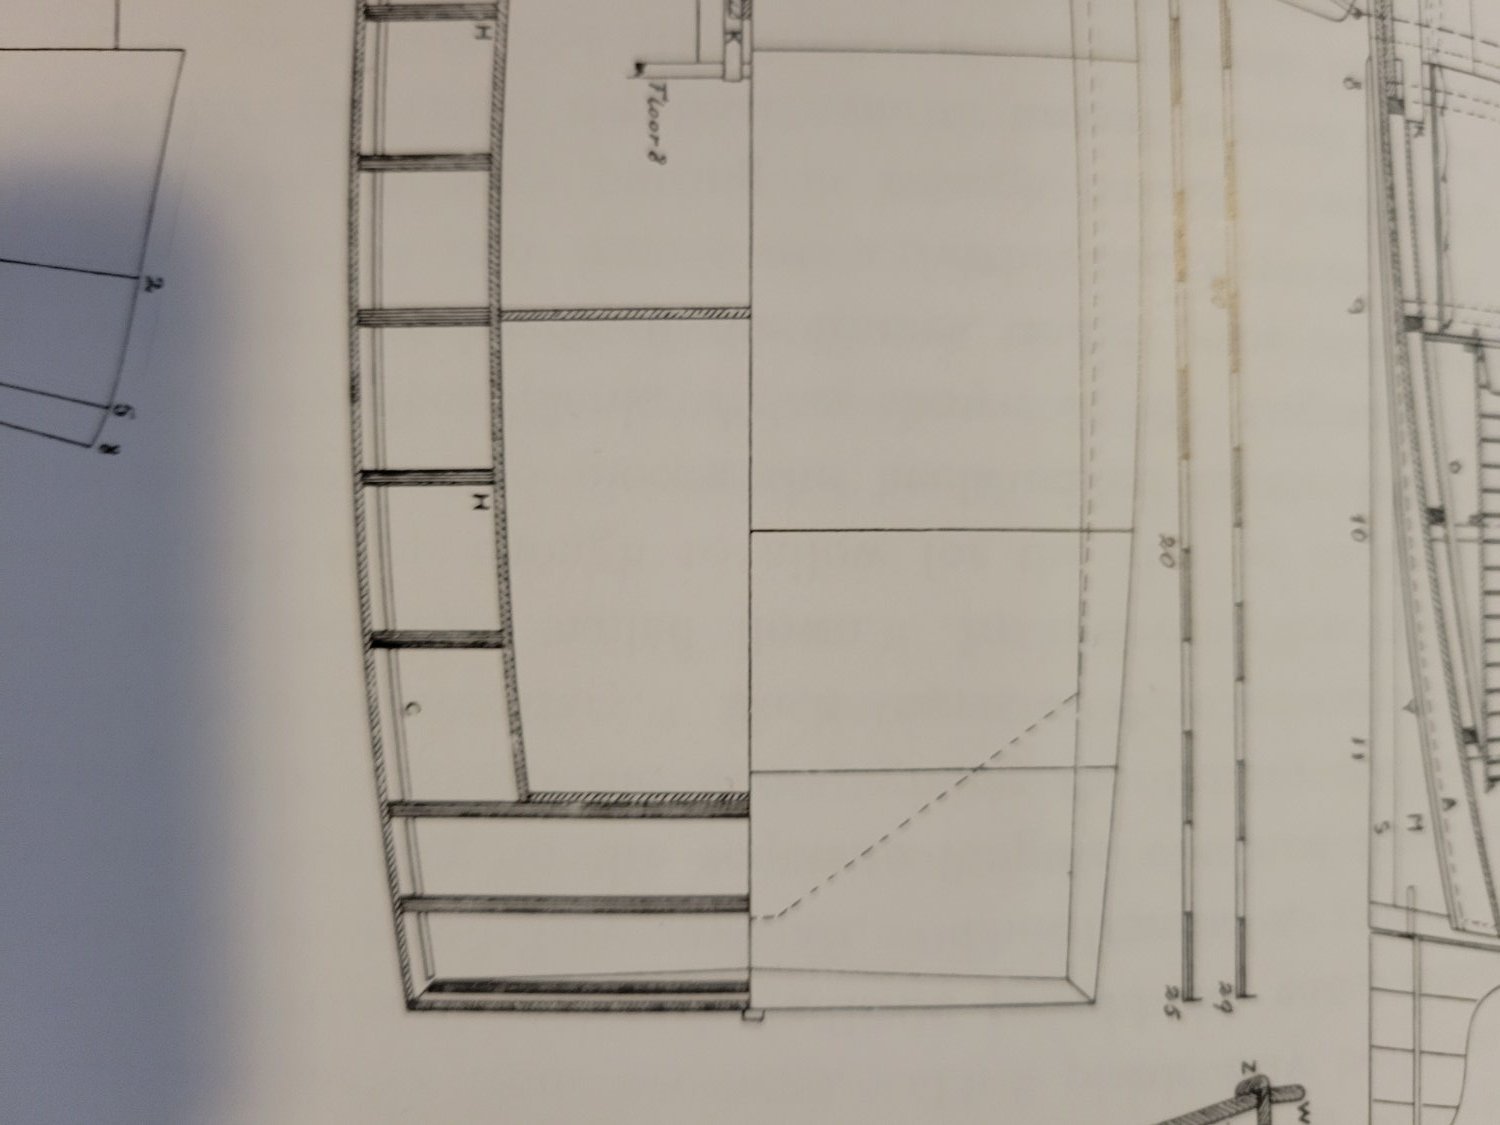
As part of that discussion, I've been doing some research. There is a Chesapeake Bay Flattie in both Howard Chapelle's American Small Sailing Craft and Kunhardt's Small Yachts.
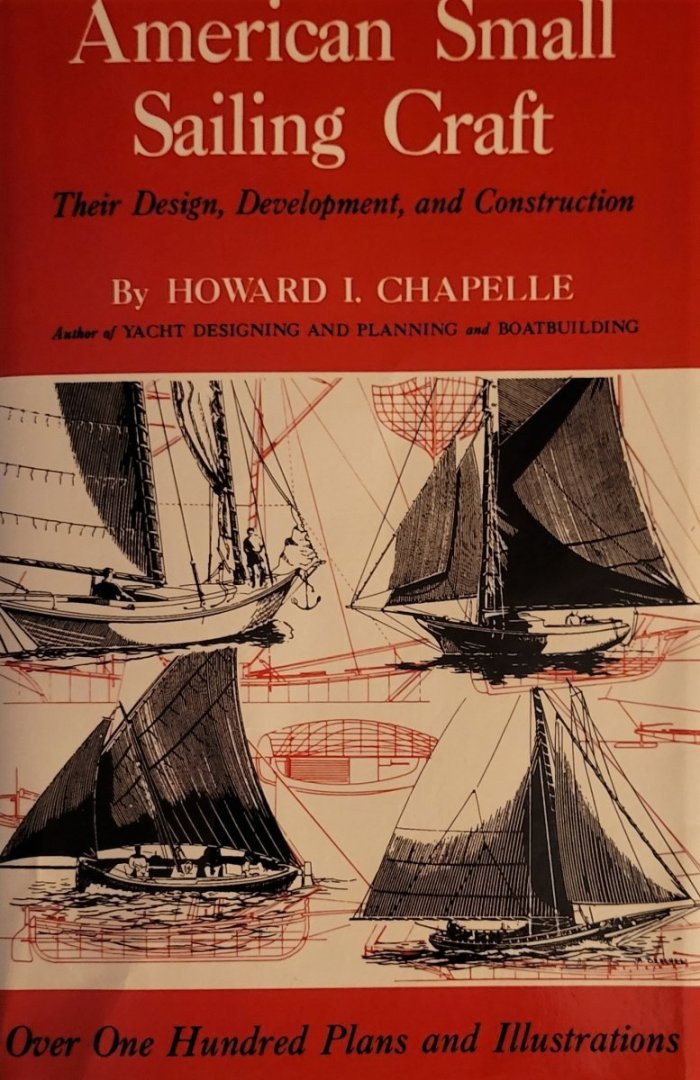
It turns out that the flattie in Kunhardt's book is exactly what the Midwest kit is based on.
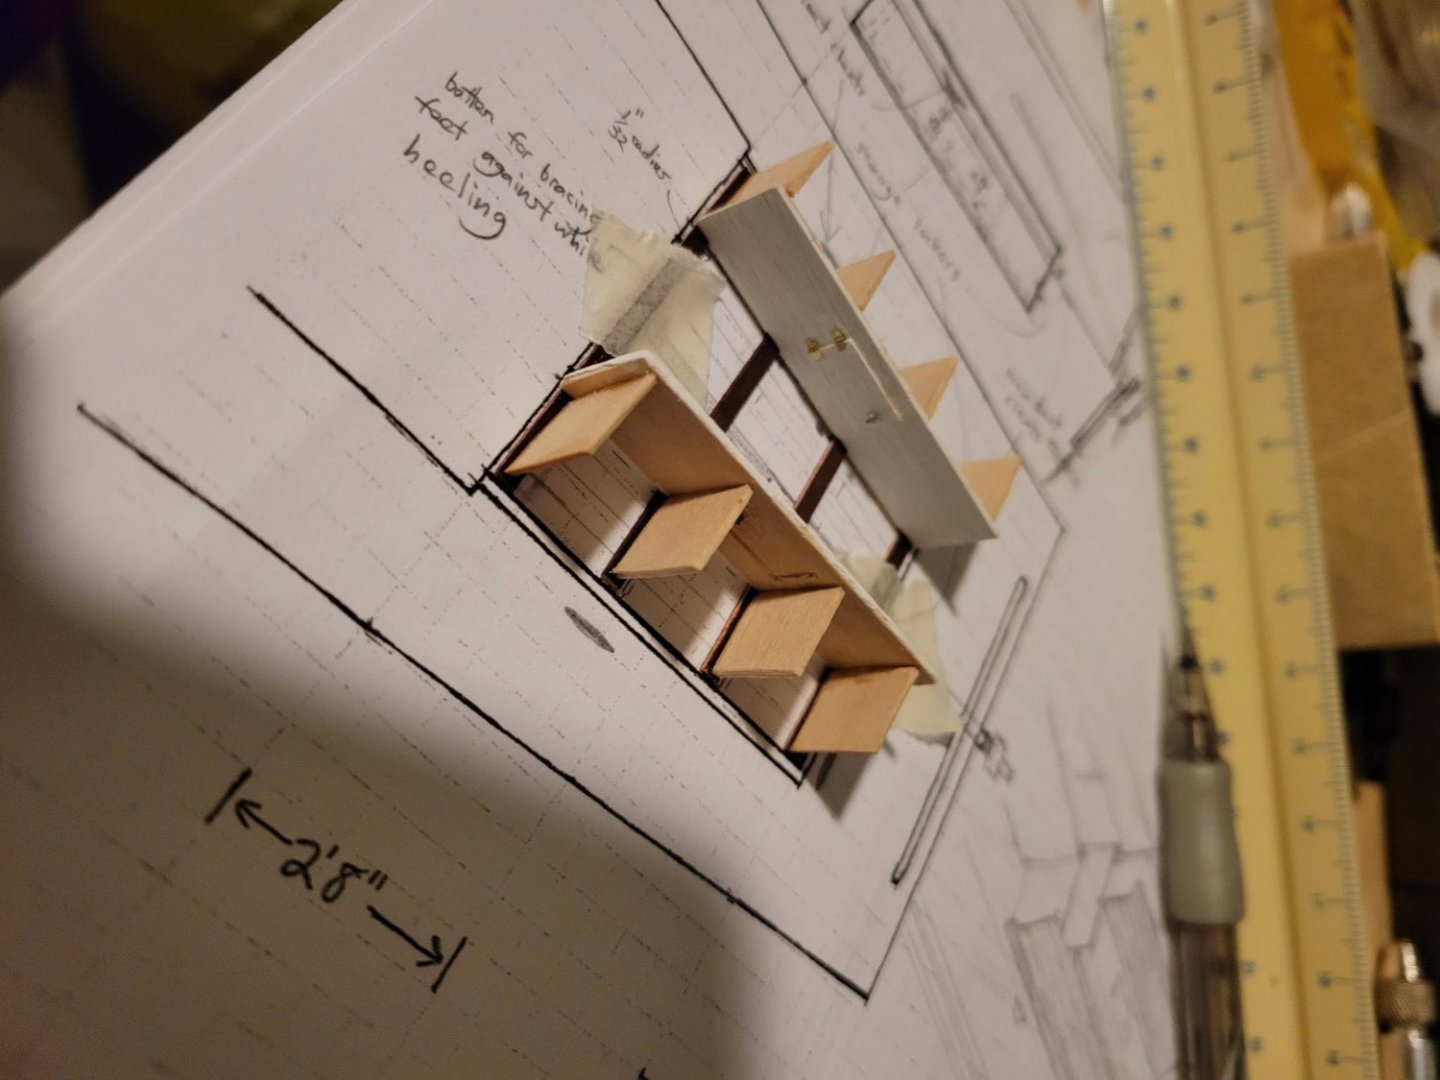
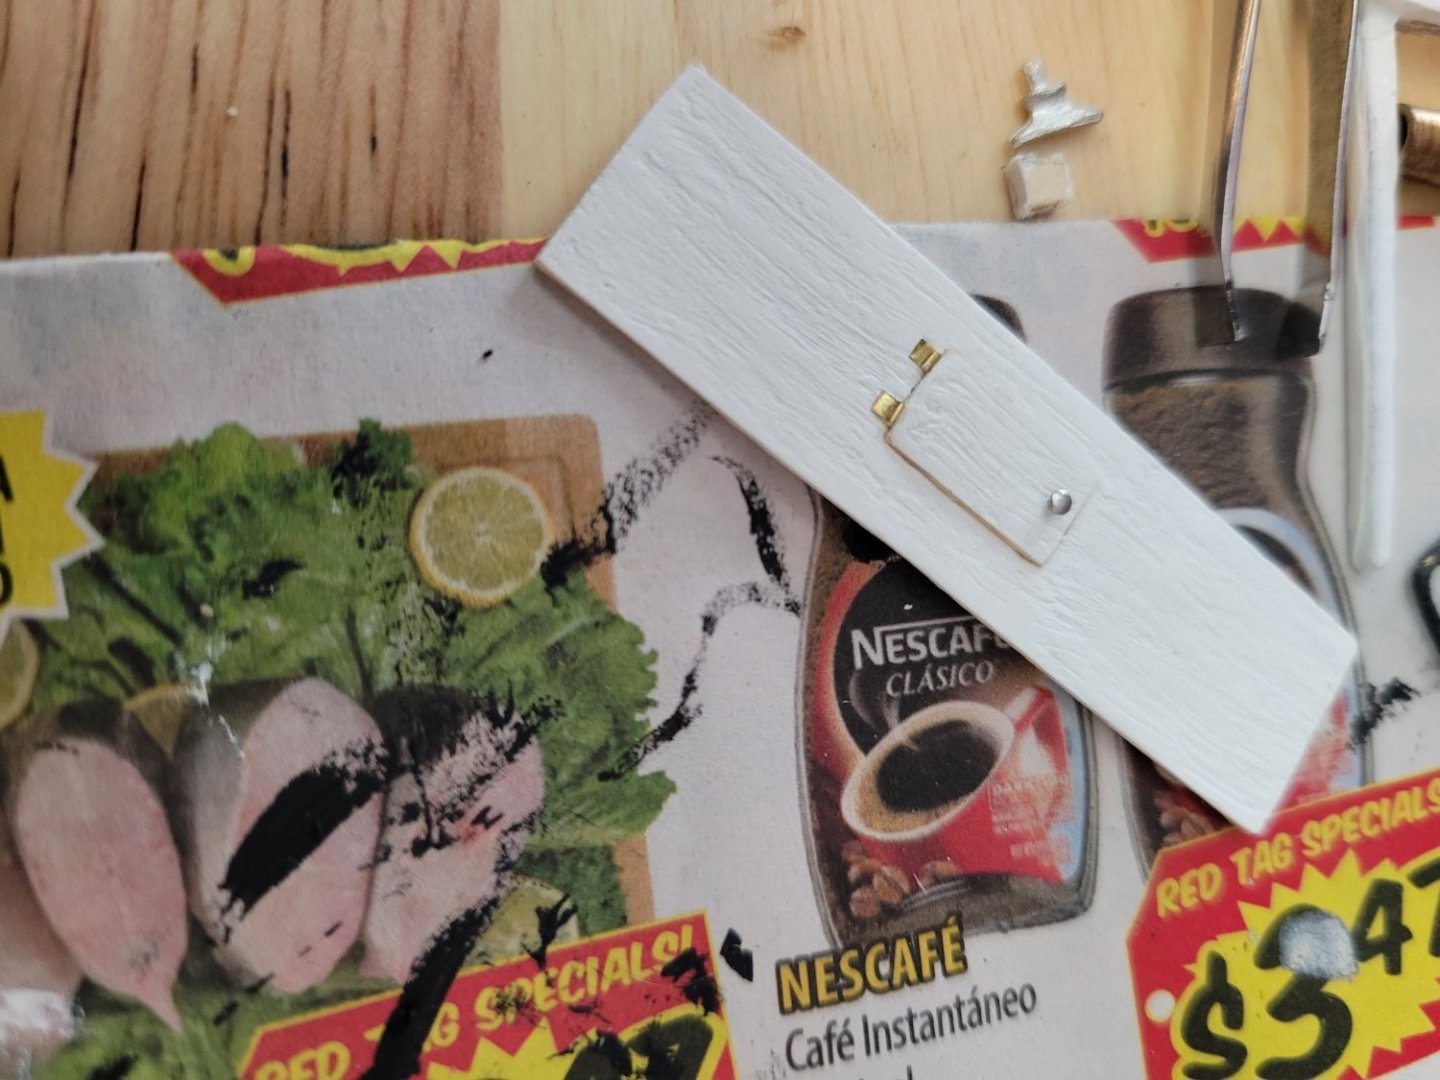
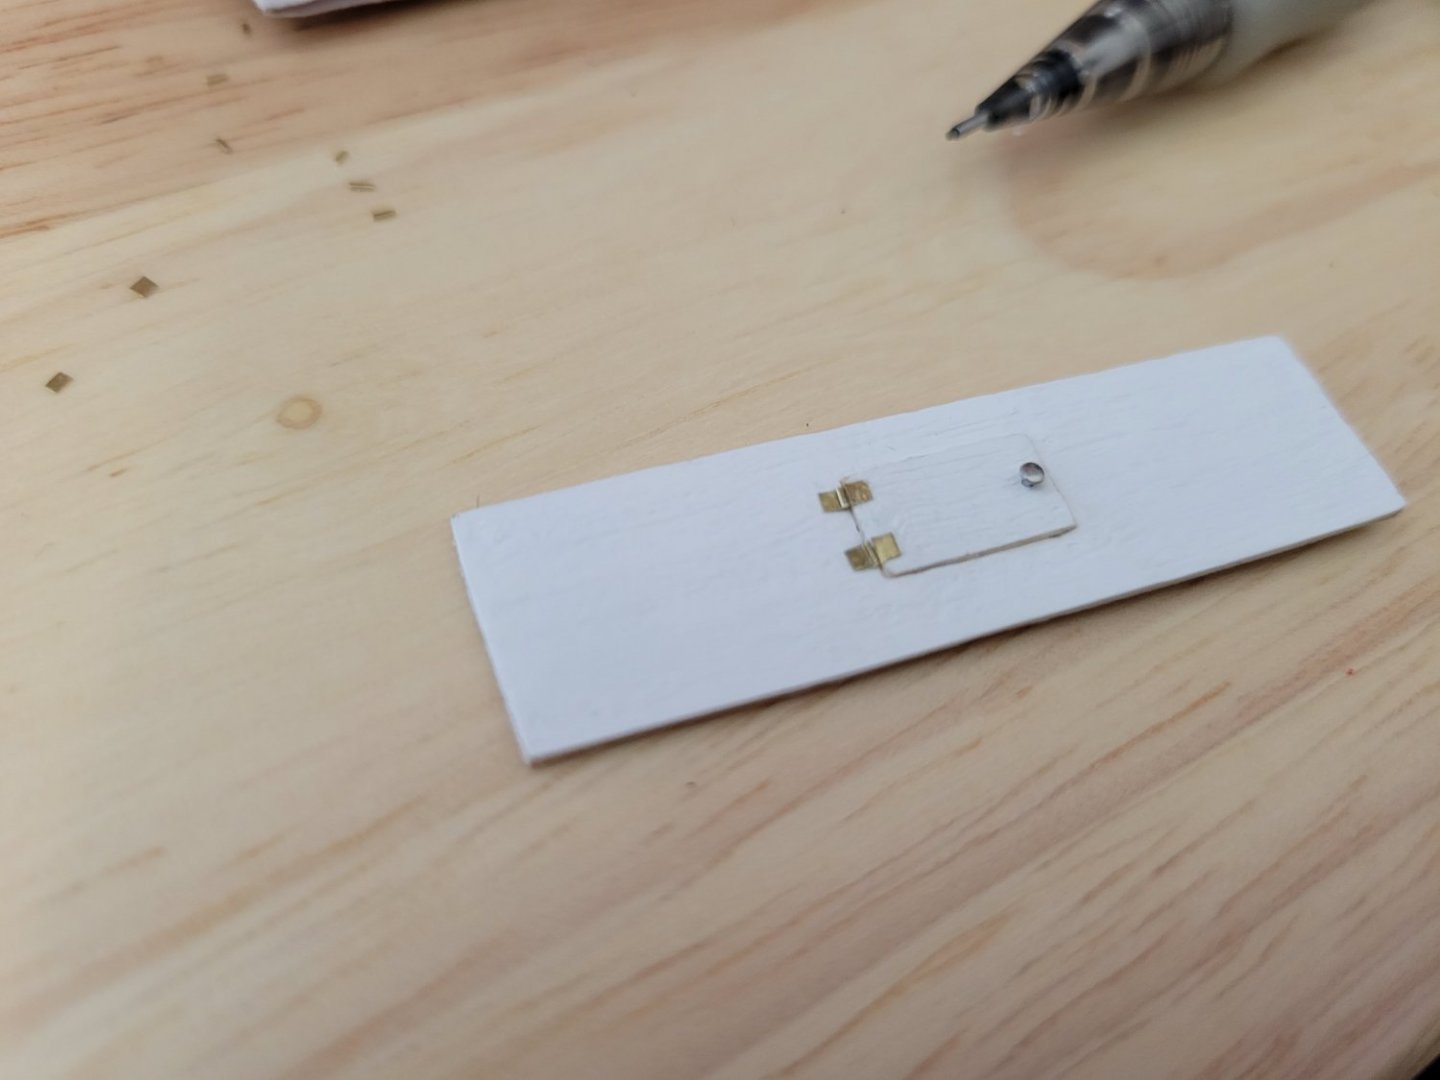
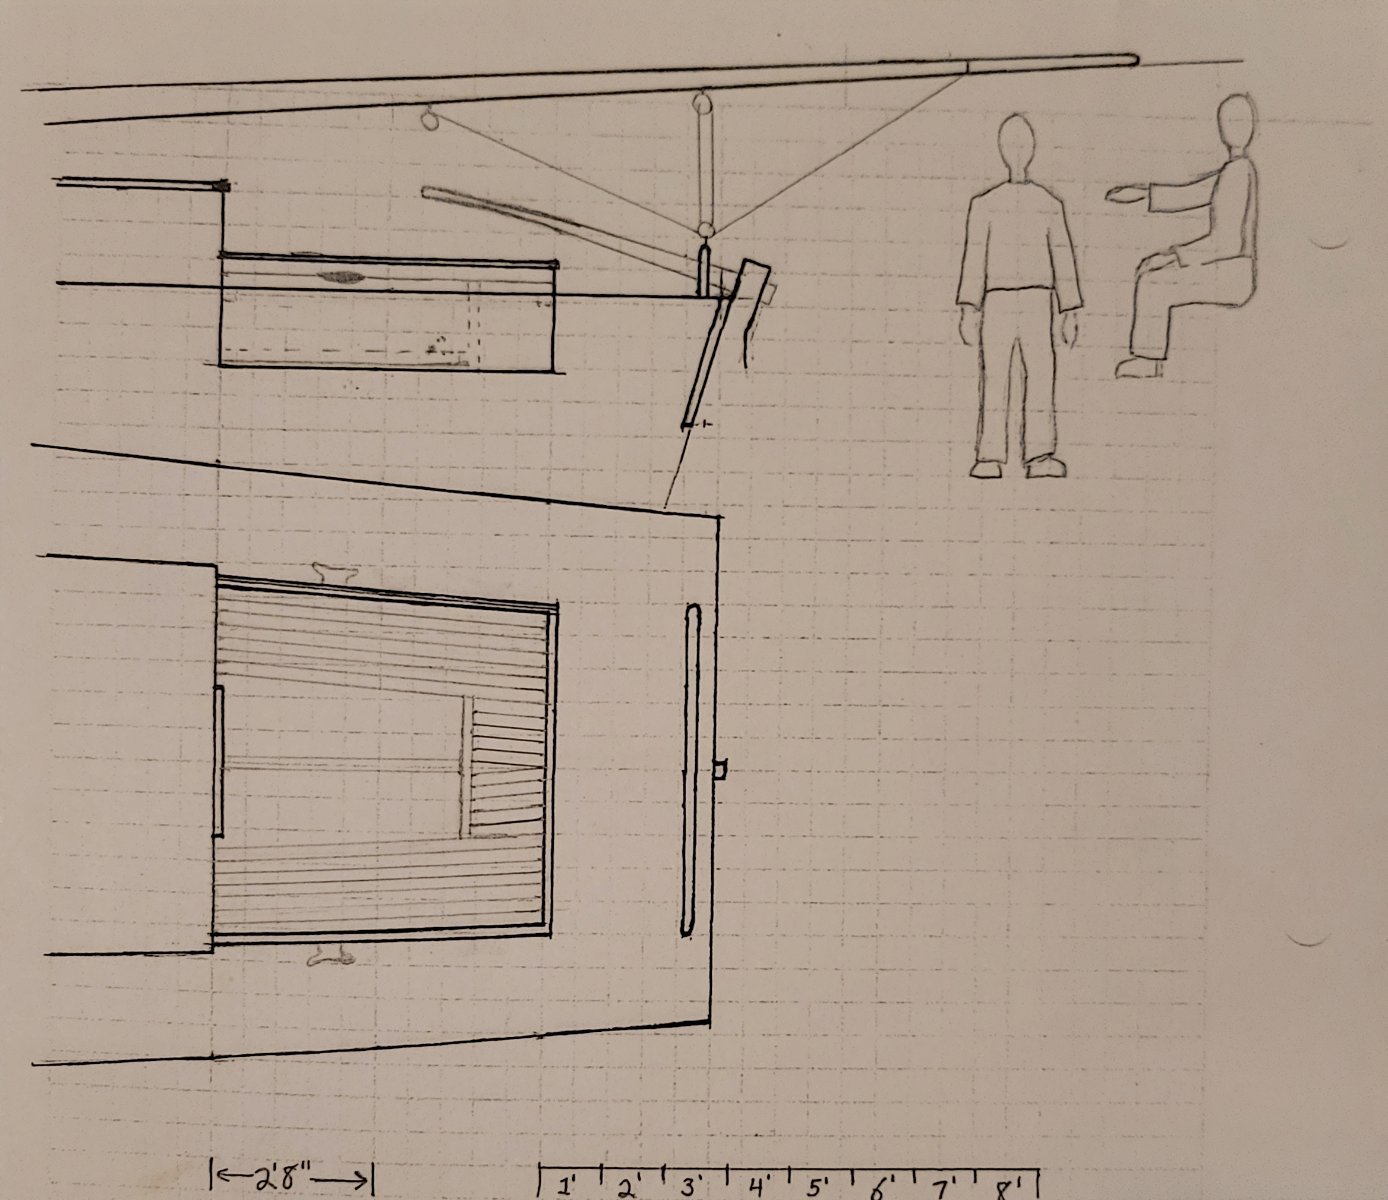
Anyhow, this is a drawing of how I will configure the cockpit:

And here are some pictures showing work on the panels that go below the cockpit benches:
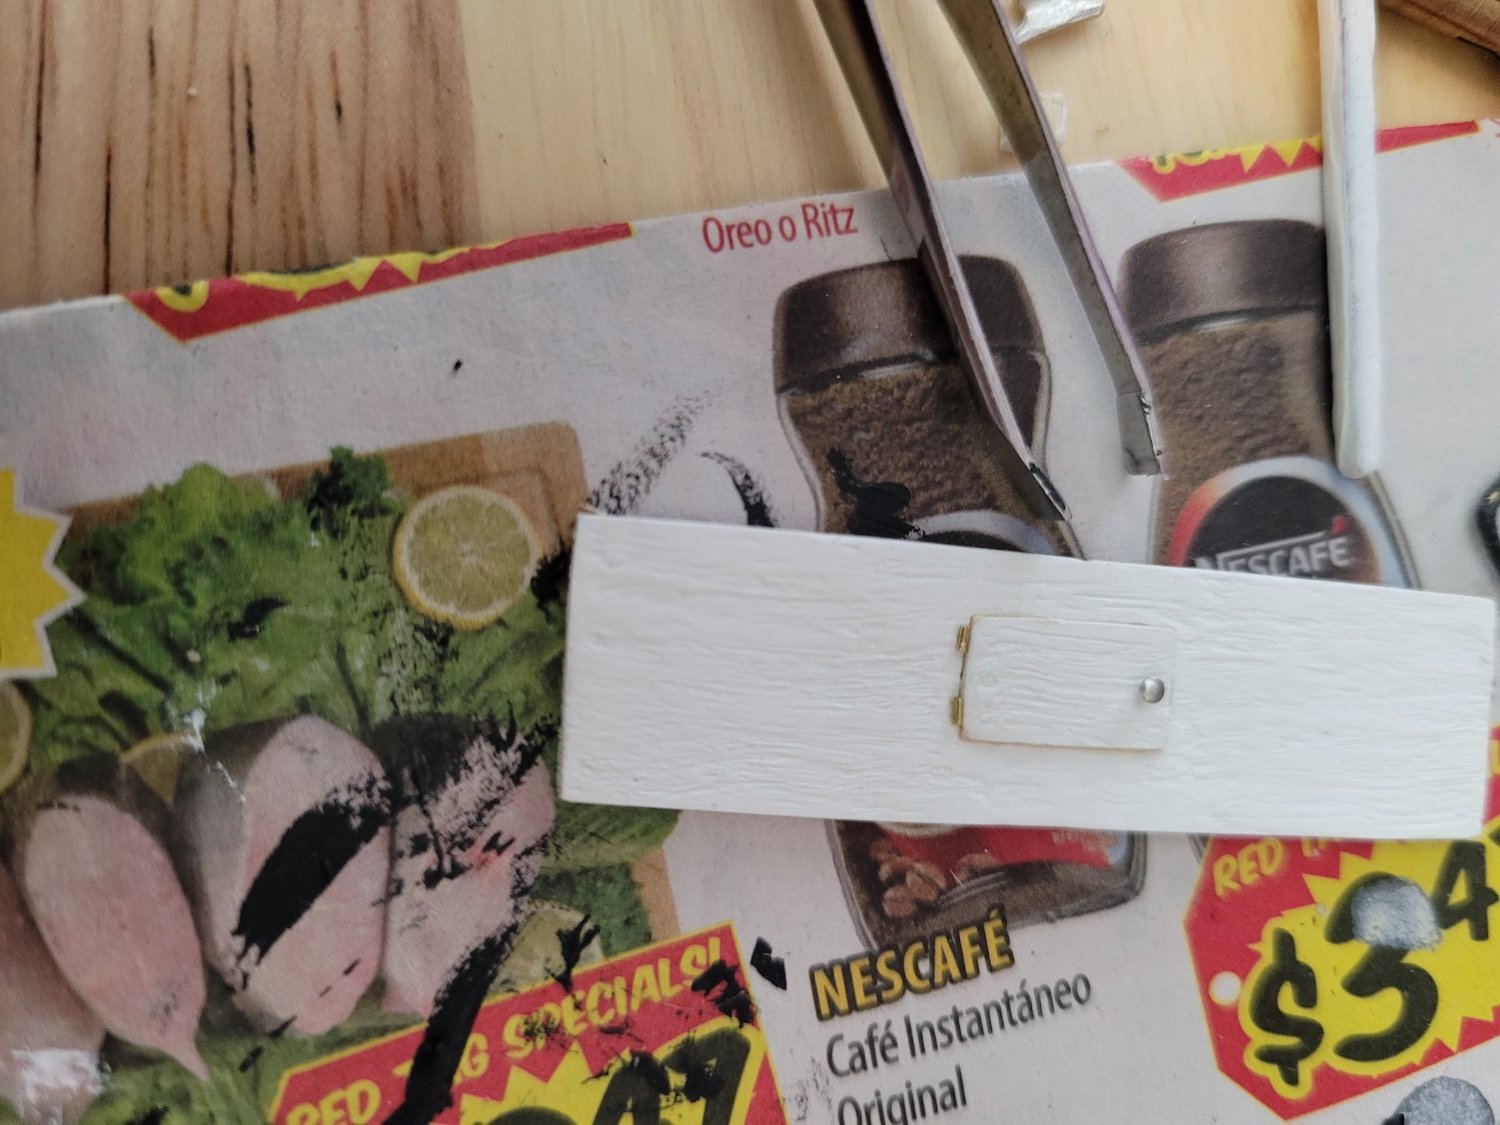
Painted white and drilled a tiny hole
A pin glued into the hole and the needle snipped short.

Panel glued back into the larger panel slightly protruding.

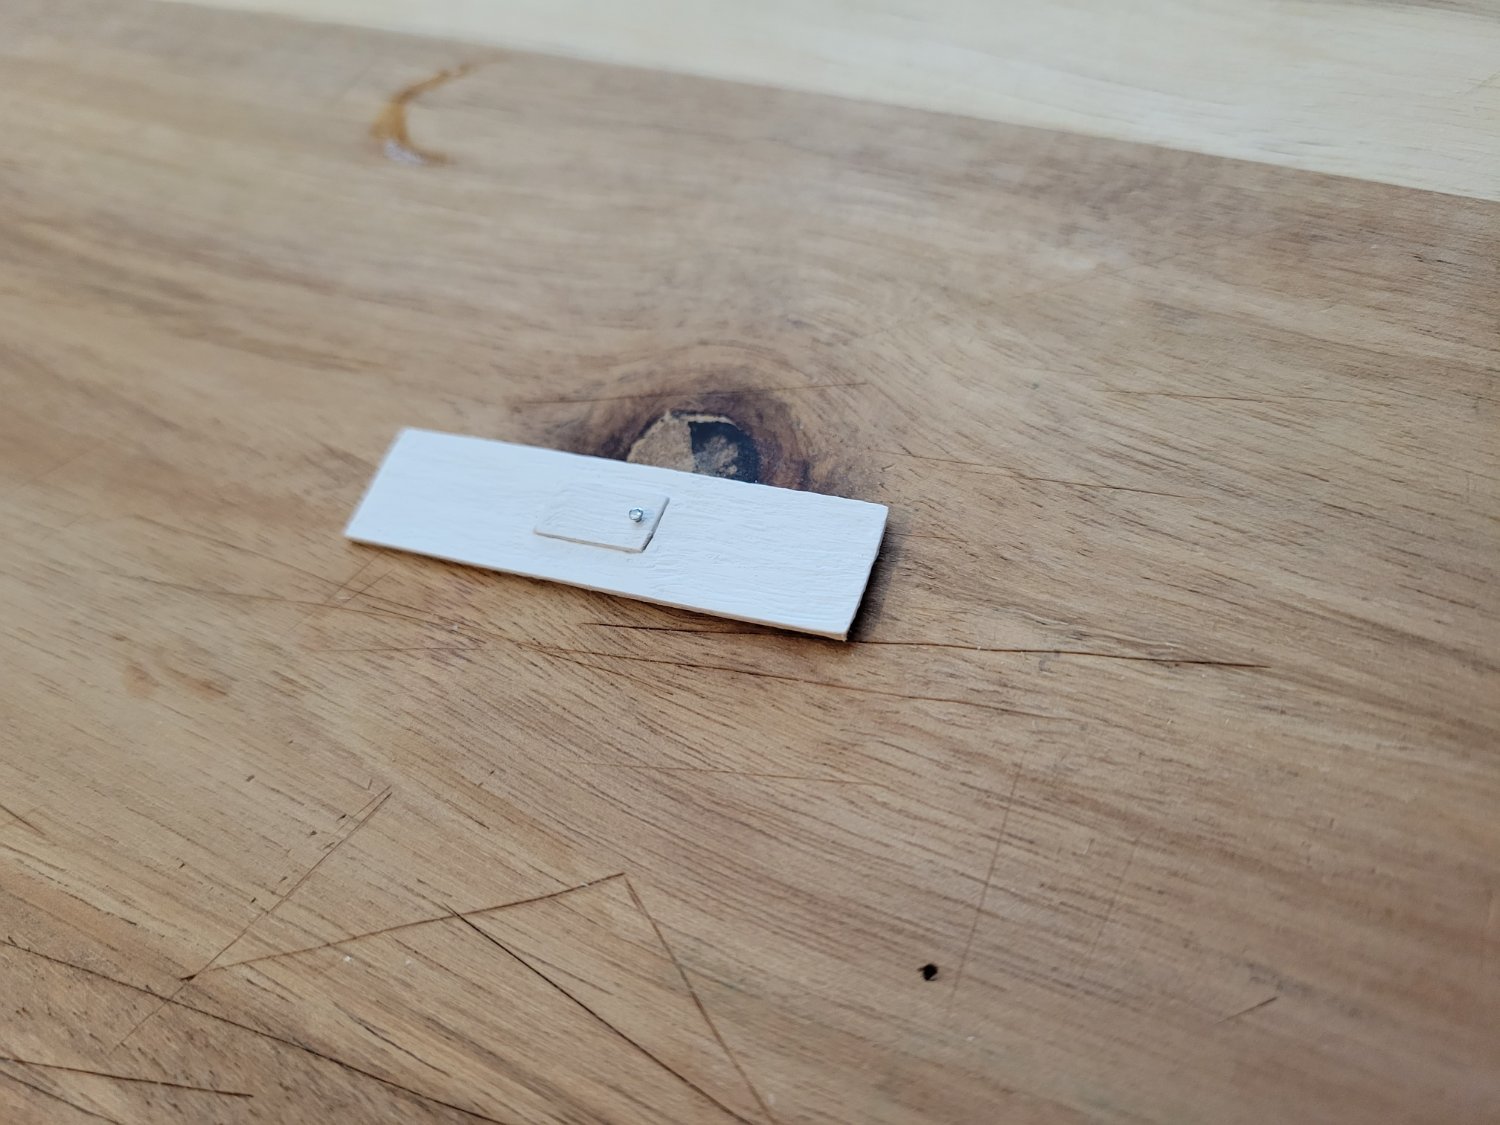
The tiny little pieces used for the hinges:
First, I glued the little snips of wire, then the lower part of the hinge, and the the upper part:

-
22 hours ago, mnl said:
Yes, with a tiller it’s not really a convenient place to sit, but it makes an ok place to set your lunch.
I would put main cleats on the deck behind the back corners of the cockpit.
BTW, the sides of the cockpit where you have the jib cleats must be stout and the cleats through bolted. It’s really a drag to get hit with a big puff and have the cleat rip out, or the side of the cockpit. One problem with putting them up in the air like that is there is now a lever arm down to wherever the side attaches.
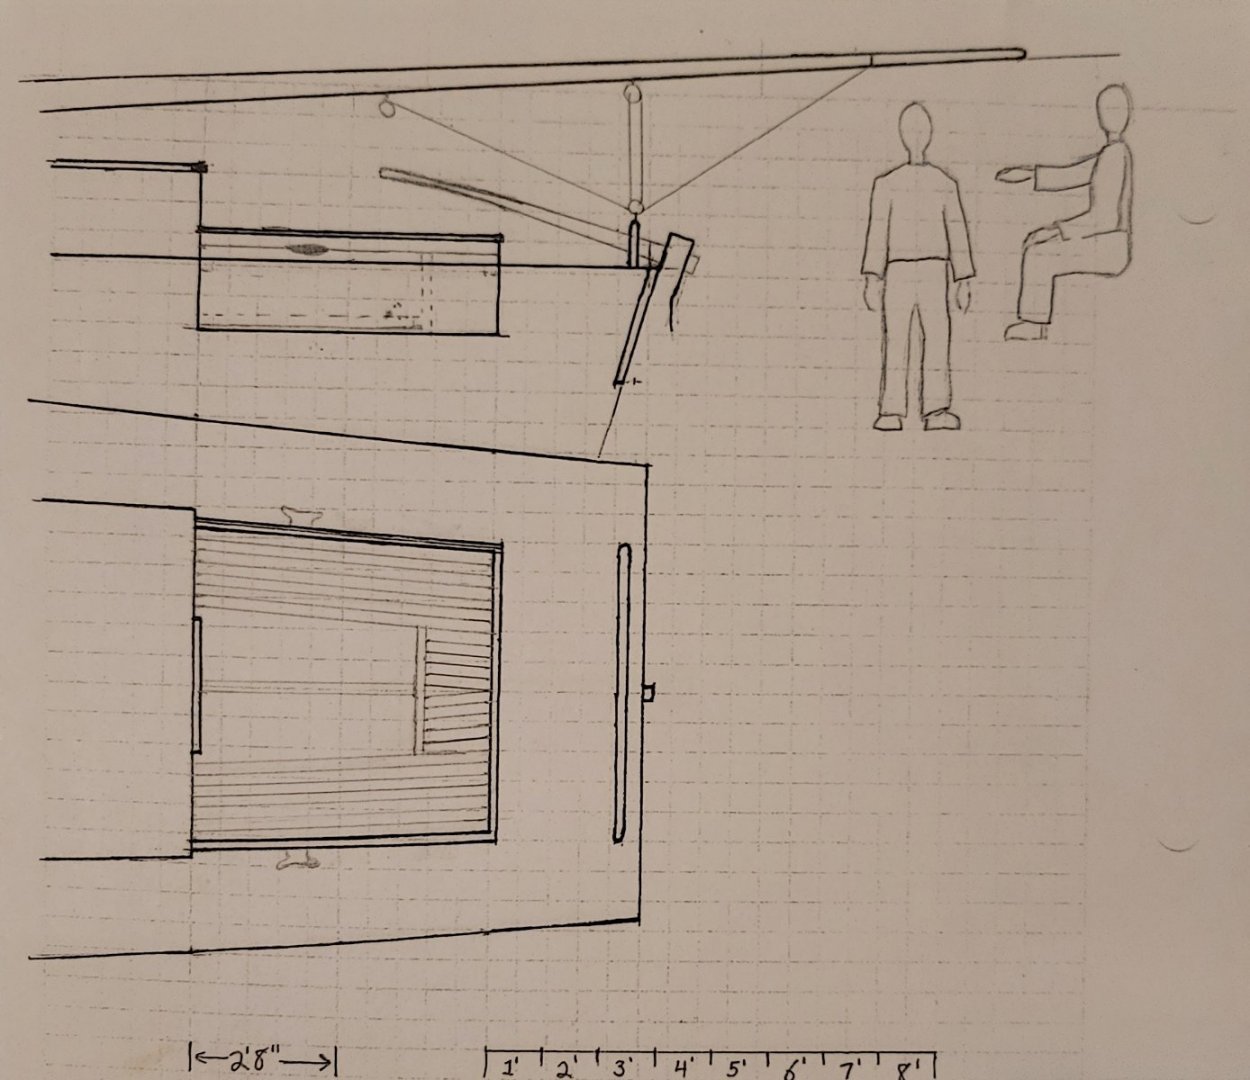
Ok, this might be my final drawing. Let me know what you think. I also have one more question about the centerboard line and cleat if you guys are up for it.
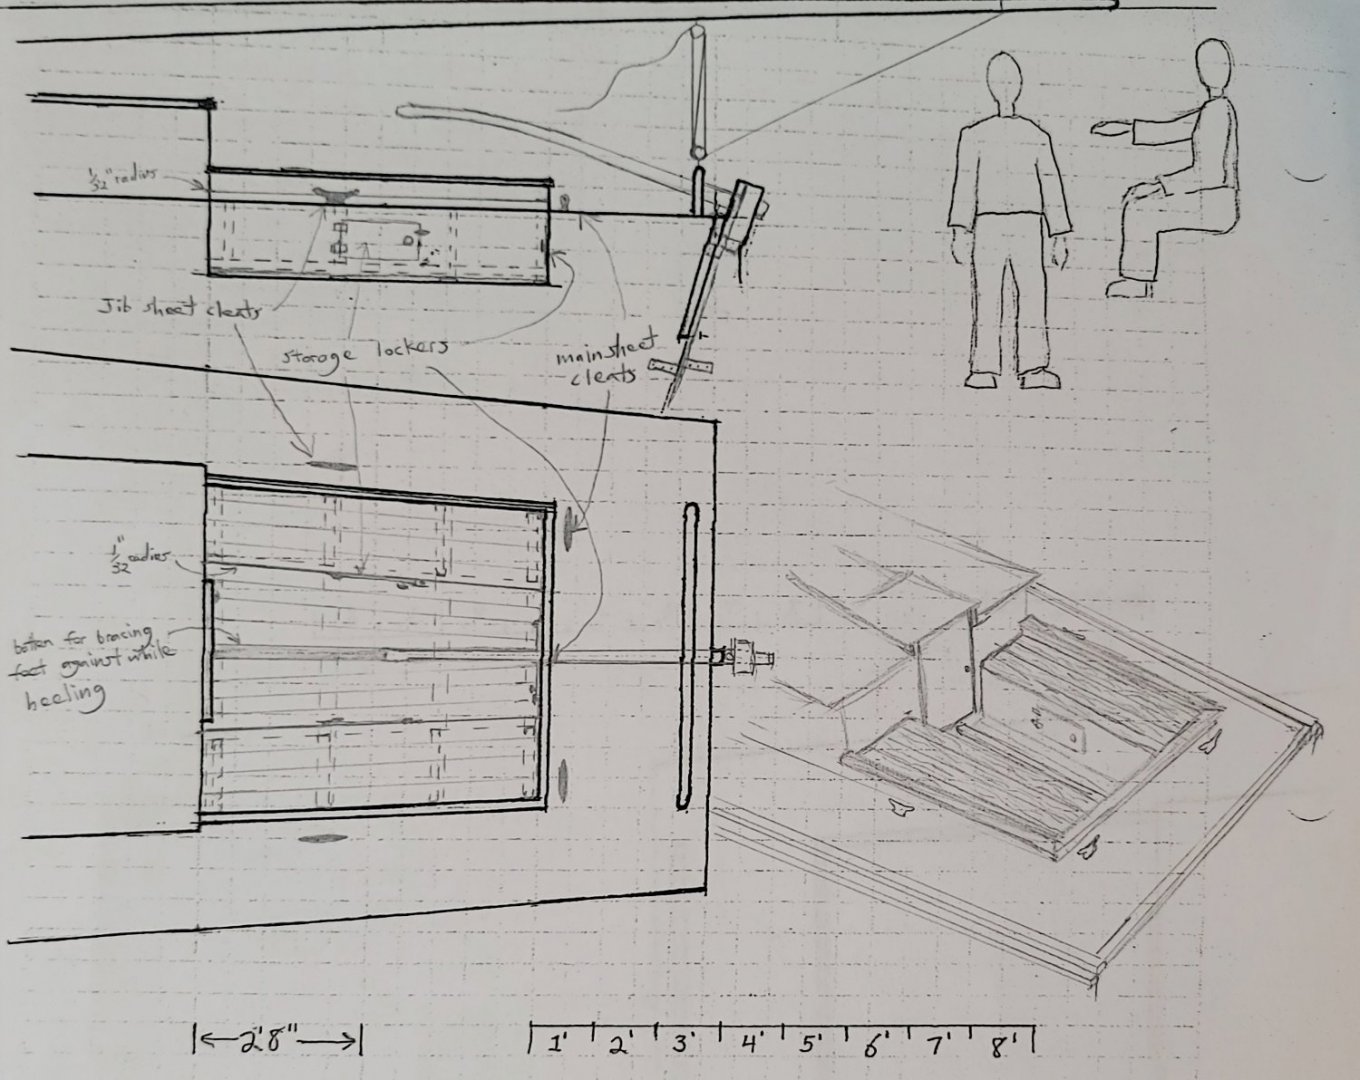
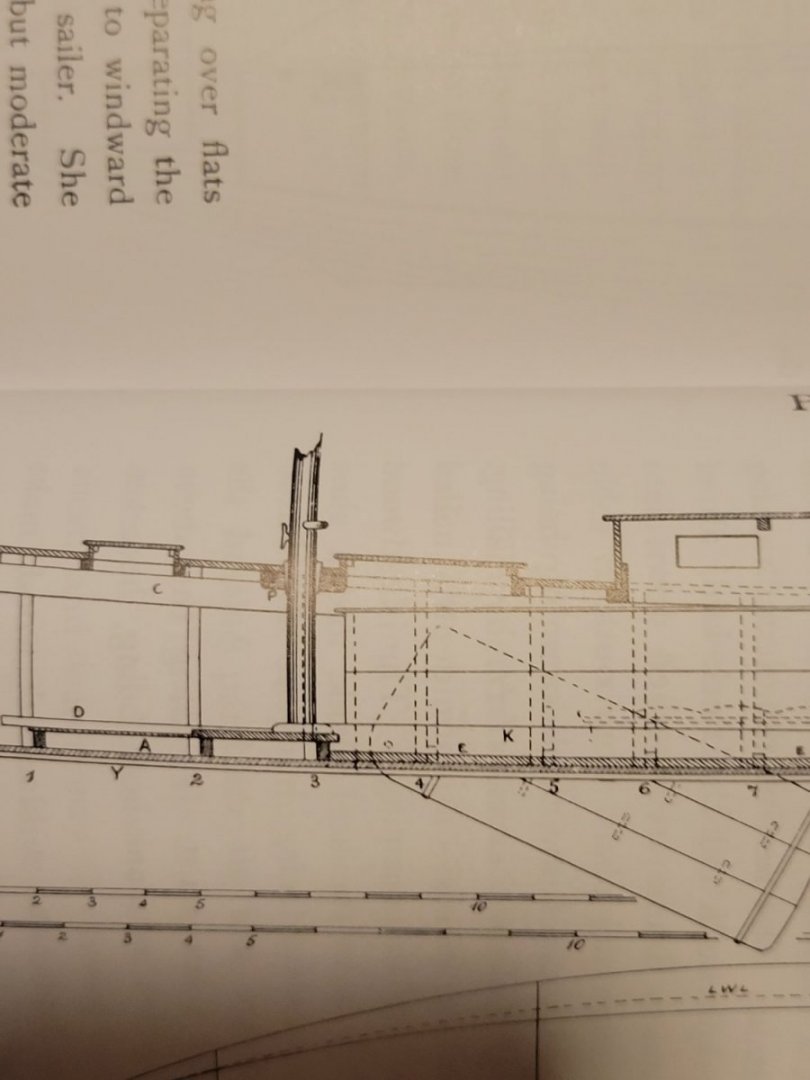
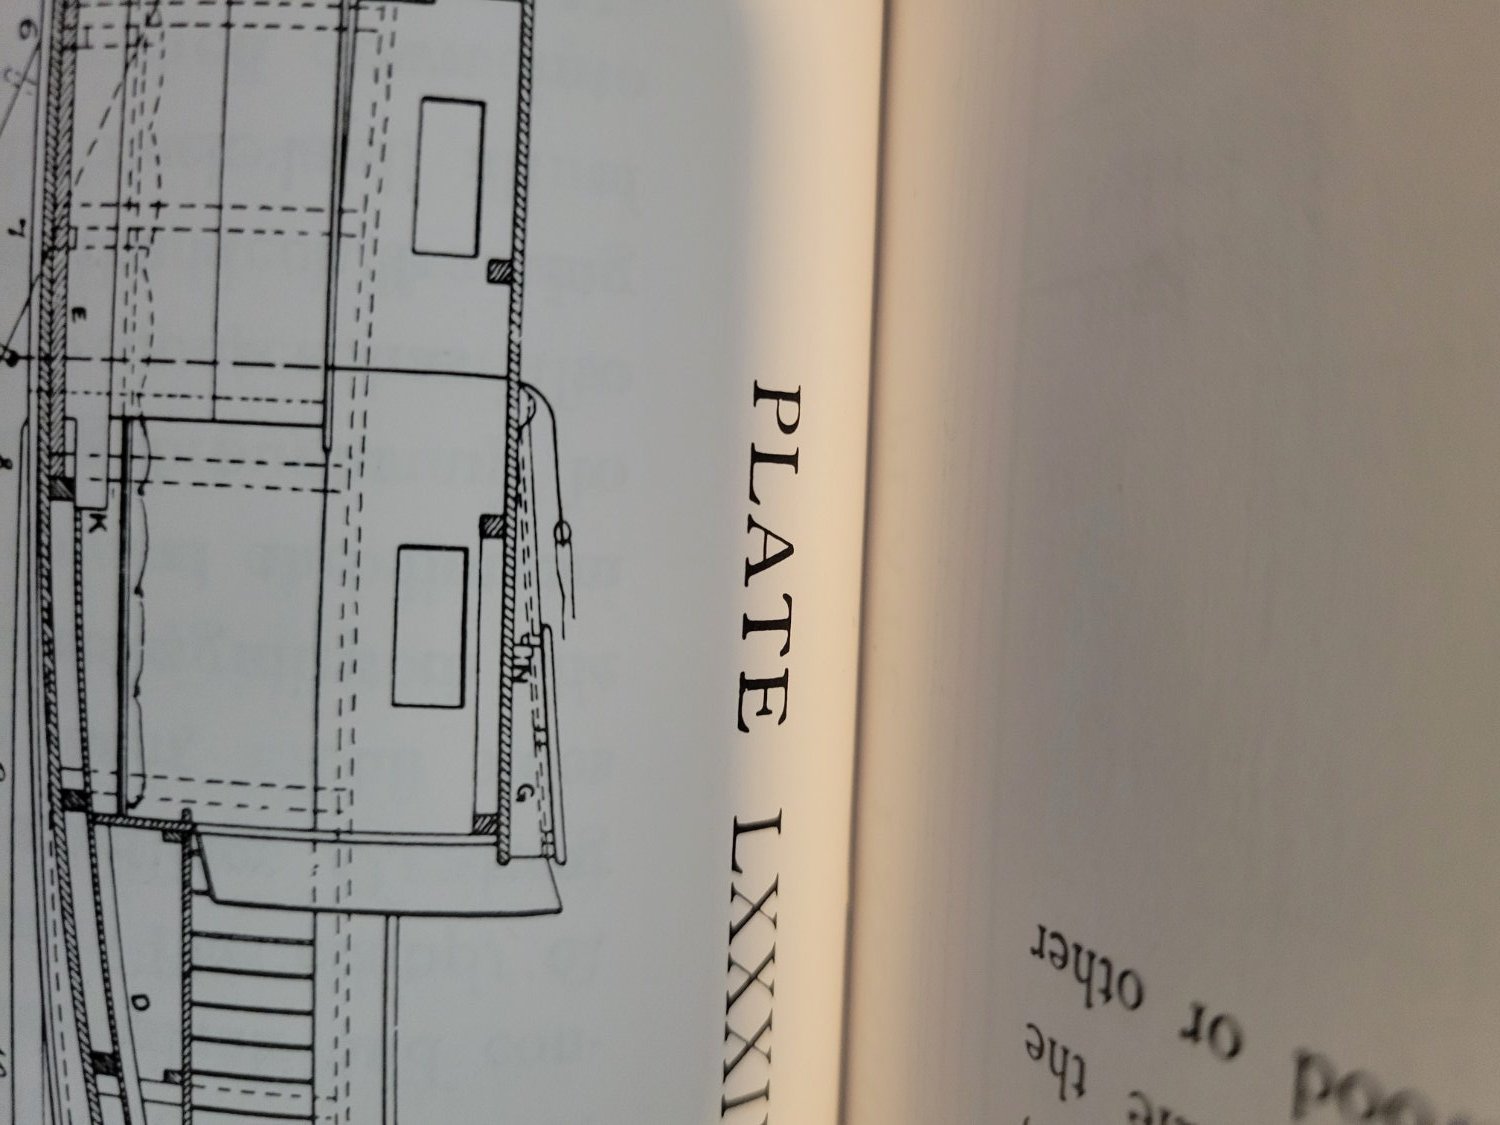
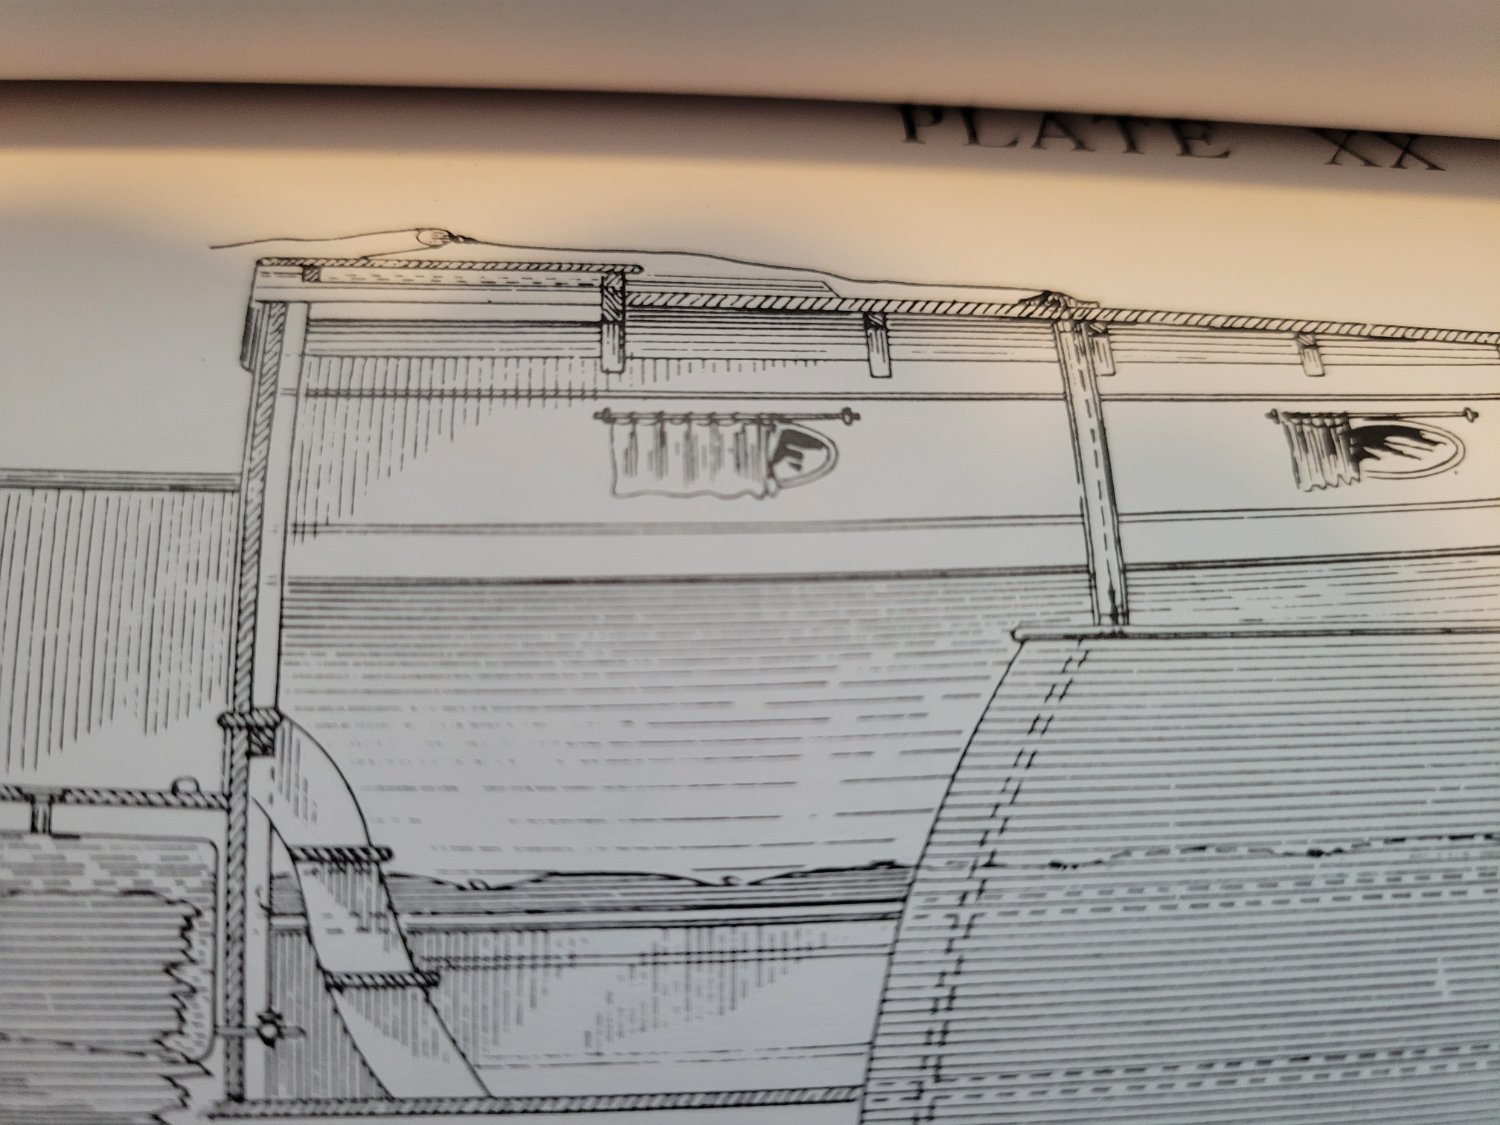
In the kit, the centerboard line comes out of the cabin roof and goes directly to a cleat, and that's it. In Kunhardt's drawing, the centerboard line is attached to a block that has a line going through. According to Kunhardt, the standing end of the line is attached to the cabin roof, and the working end is tied to a cleat on the cabin roof close to the cockpit. However, he doesn't explain or show how the standing end is fastened to the cabin roof. Would it be another cleat? How would you go about fastening such a line? Here is the centerboard line on Kunhardt's flattie, and following is another yacht in Kunhardt's book with a similar setup:

-
19 hours ago, mnl said:
Look at your bottom picture. It’s much easier to see where you’re going from the high side.
The article you found looks like it gives some solid advice. Also if in the picture of the cockpit there is a large batten running down the center to brace your feet against. In the lower picture you can see that the helmsman is also using the binnacle as a foot brace.
It’s hard to get comfortable if you don’t feel secure and sliding around is a great way to not feel secure.
Yeah, it looks like for the guy sitting on the low side, the whole boat is in his way.
If you imagine yourself piloting the boat in my drawing, and you could choose to remove the aft portion of the seat (in between the side benches), would you?
Although it looks nice, seems like this rear seat is pretty much useless and in the way when a boat has a tiller.
Also, assuming those cleats in my drawing outside the coaming are for the jib sheets, if you were piloting that boat and needed to sheet the main temporarily, where would you hope there was another cleat?
-
3 hours ago, mnl said:
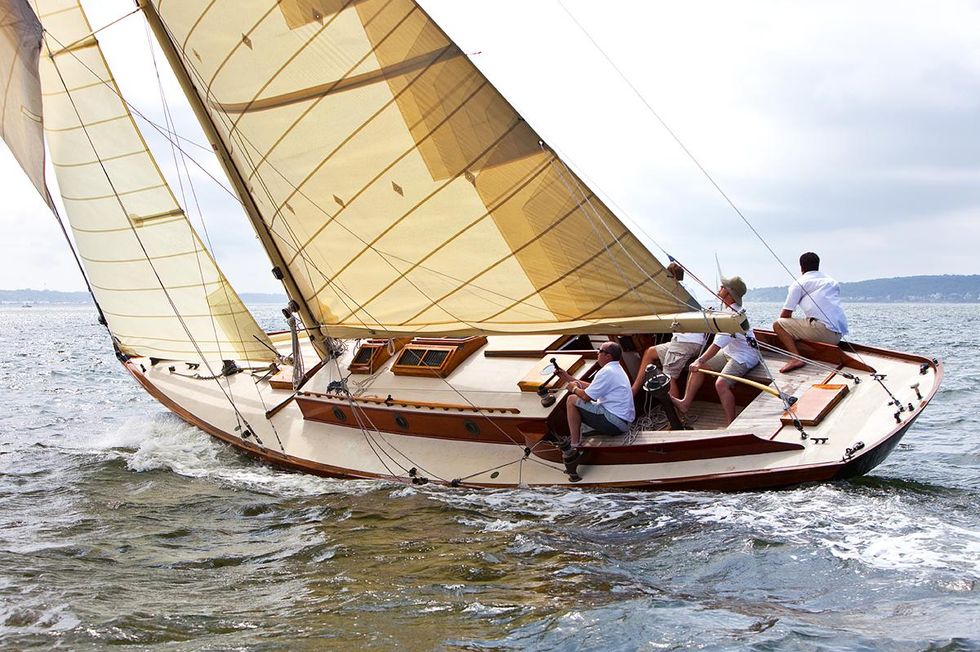
You missed the most interesting feature in that picture. Look at the person sitting in front of the wheel. They are sitting across the cockpit with their feet braced against the seat on the other side. That's why cockpits tend to be about that wide, so it is easy to brace yourself. Also, you can brace yourself on a wheel, it's much harder to do that on a tiller.
The flattie above looks to be fairly far off the breeze. The boom is out beyond the corner of the transom. There will be less heel and it will be easier to wedge yourself in the corner on the low side. You can also see the battens on the cockpit sole to give some foot purchase.
It will be a little less fun if the boat is a little closer to the breeze so that the boom is just inside the corner of the cockpit. Now there isn't room to get between the boom and the tiller so you have to steer from the high side. Also if there is a bit of a breeze there will be a little more heel which makes it harder to stand. Add in the current running the opposite direction, generally happens twice a day on the Bay, and you get the washing machine slop. That makes it really hard to have to steer standing up.
So basically, it's quite important for the cockpit to accommodate sitting on the high side while healing? Take a look at my updated drawing see if you think it would take care of that. Also, do you think the seating in the aft cockpit would be superfluous? (Note that I added a plank on the cockpit floor center to brace feet against.)
I am basing the dimensions on this article:
https://www.practical-sailor.com/sailboat-reviews/comfortable-sailboat-cockpit-seating
And taking some inspiration from this Herreshoff yacht:
-
Another quick update.
I saw this Herreshoff Newport 29 design:
http://www.herreshoffdesigns.com/newport29.html
Although this is a larger and more modern boat, the cockpit is similar in size (possibly a little bigger), so I think it's a good example of how to make it work. Basically, the coaming "rails" are true seats instead of just rails.
I'll do another drawing and upload. Basically, I will replace the kit's coaming rails with seats set on top of the coamings (along with appropriate supporting structure) . The distance to the cockpit floor is a little higher than ideal, but I can raise the planked flooring or add cleats that act as foot rests and braces while heeled.
Edit: looking closer at the brochure, I can see that coamings still rise slightly higher than the seats on the sides. It also has a wheel instead of a tiller.
-
Update
(Let me know what you guys think about this)
A copy of Kunhardt's "Small Yachts" arrived today, and it was a bullseye. The Midwest Chesapeake Bay Flattie kit is absolutely based on Kunhardt's plans. Based on the book, it also seems like Midwest wasn't far off.
Kunhardt's plans do not show any seating in the cockpit or any cleats or rigging for this boat. In fact, the only running rigging shown is the line that controls the centerboard.


Throughout the book, Kunhardt does show cockpit seating in some designs in the book, the cockpit is usually much deeper and narrower for those designs. Some designs also show cleat locations, both inside the coamings and without. The "Coot" has a similar but smaller cockpit with cleats inside the coamings similar to the Midwest kit.
Kunhardt also shows a Hampton Flattie with the helmsman leaning against the aft coaming.


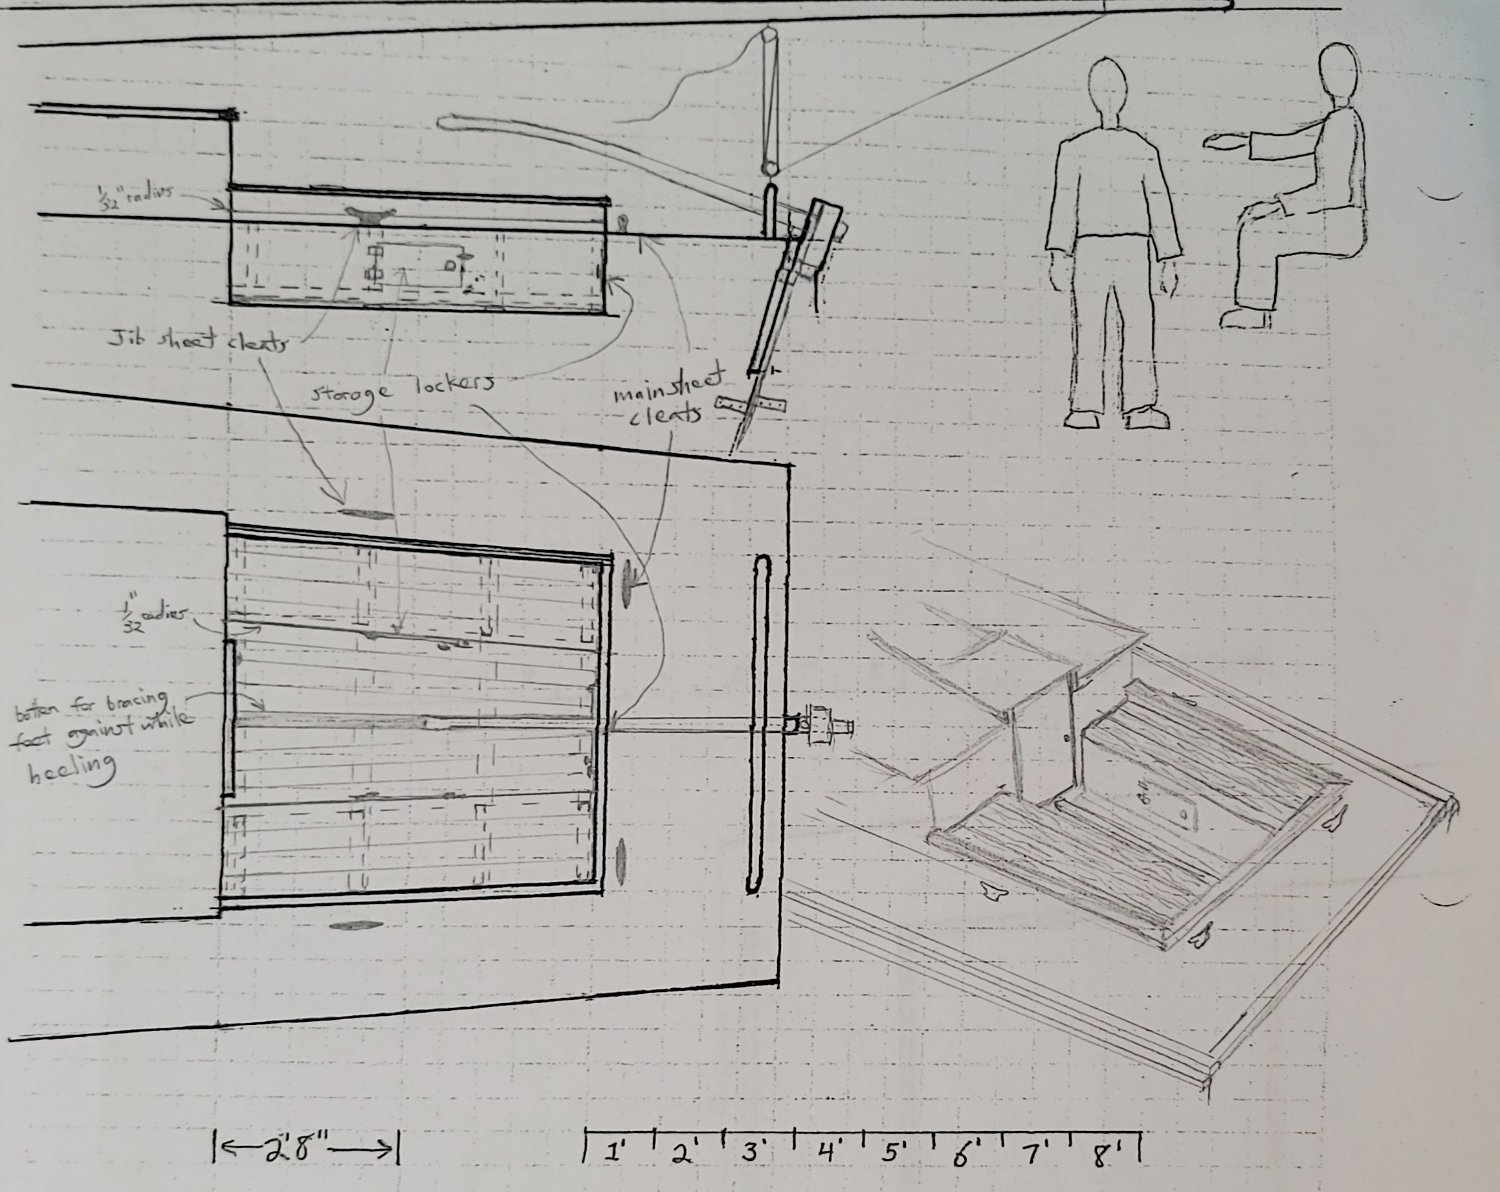


Where to locate cleats around the cockpit on late 19th C small working vessels
in Discussion for a Ship's Deck Furniture, Guns, boats and other Fittings
Posted
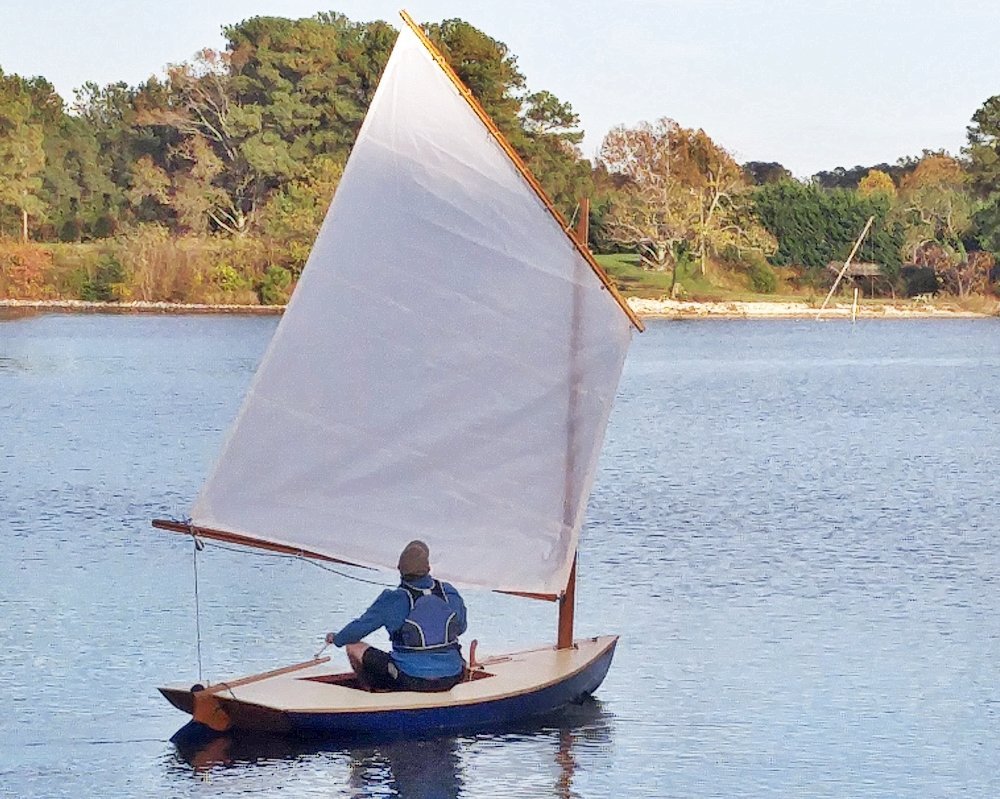
It's been a while, but I just wanted to post in here to show the fruits of this discussion. She's almost finished, and this thread has been a huge help and influence.
@mnl I'm thinking about how I want to finish the mainsheet. I'm thinking in this configuration, the boat is likely heeling to starboard, and the helmsman sitting on the port bench. If he needed to cleat the main, he would probably do that on the port cleat with the sheet crossing over the tiller, right? I'm guessing the remaining line would be coiled on the cockpit floor maybe?
I'm also guessing all that extra coiled line for the centerboard lead on the cabin roof is unnecessary. I kind of like it though 😄