rtropp
-
Posts
936 -
Joined
-
Last visited
Content Type
Profiles
Forums
Gallery
Events
Everything posted by rtropp
-
Just got back with the natural stain. Just to make sure, I would use 20-40% Golden Oak and then 80 to 60% natural. There would be more natural than golden oak. RT
-
Augie, No and no, thought about it than skipped right to staining... lesson learned. I have obtained some minwax prestain to use for the rework. I also wonder about the value of sanding sealer. I had not considered diluting with natural. The color of the finish on the side that is "not too bad" looked ok. What do you think? The color in the photo is pretty accurate on my PC. Rowen, I equivocated between all wood and paint and copper. I was going to upgrade the wood but than thought that since this is my first model, that would be adding to the expense of what is basically a learning exercise. I would hate to have bought expensive wood, in addition to having paid for the kit itself, and then chew them up as I learn. So, I decided to build this kit as is, with the parts that came with it. As I improve my skills I plan to build the Syren again, this time as a scratch build. That's where it will be all wood finish with upgraded materials and parts. Richard T.
-
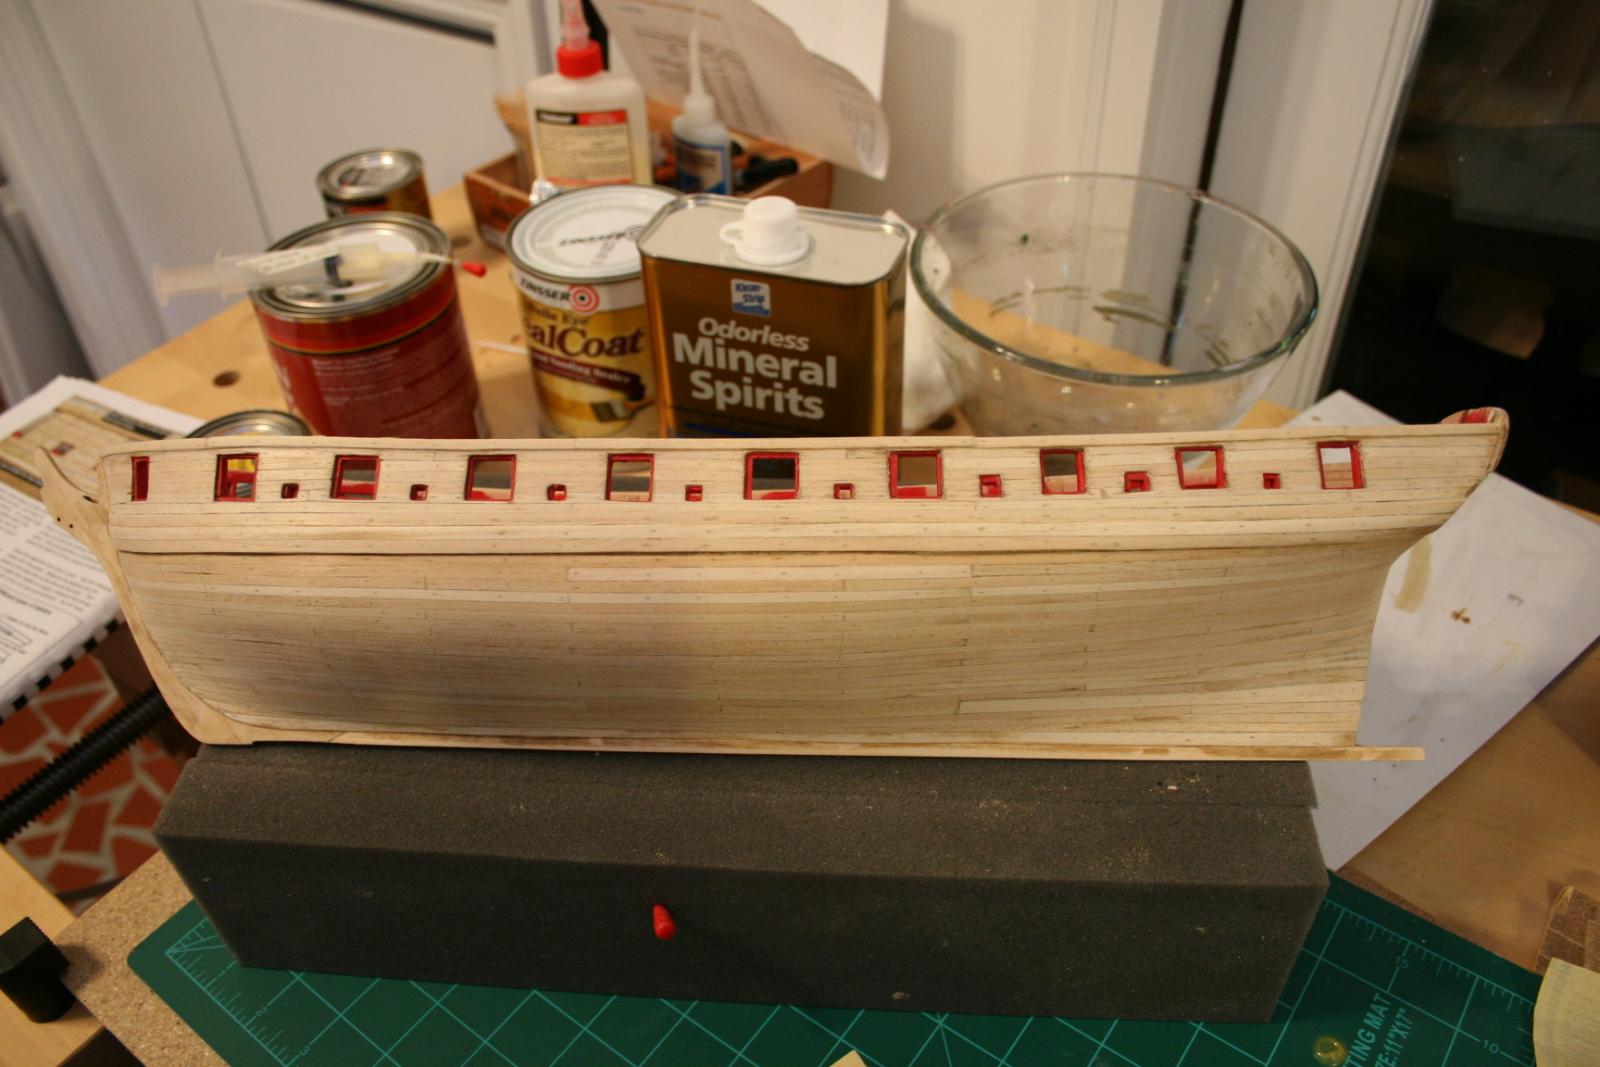
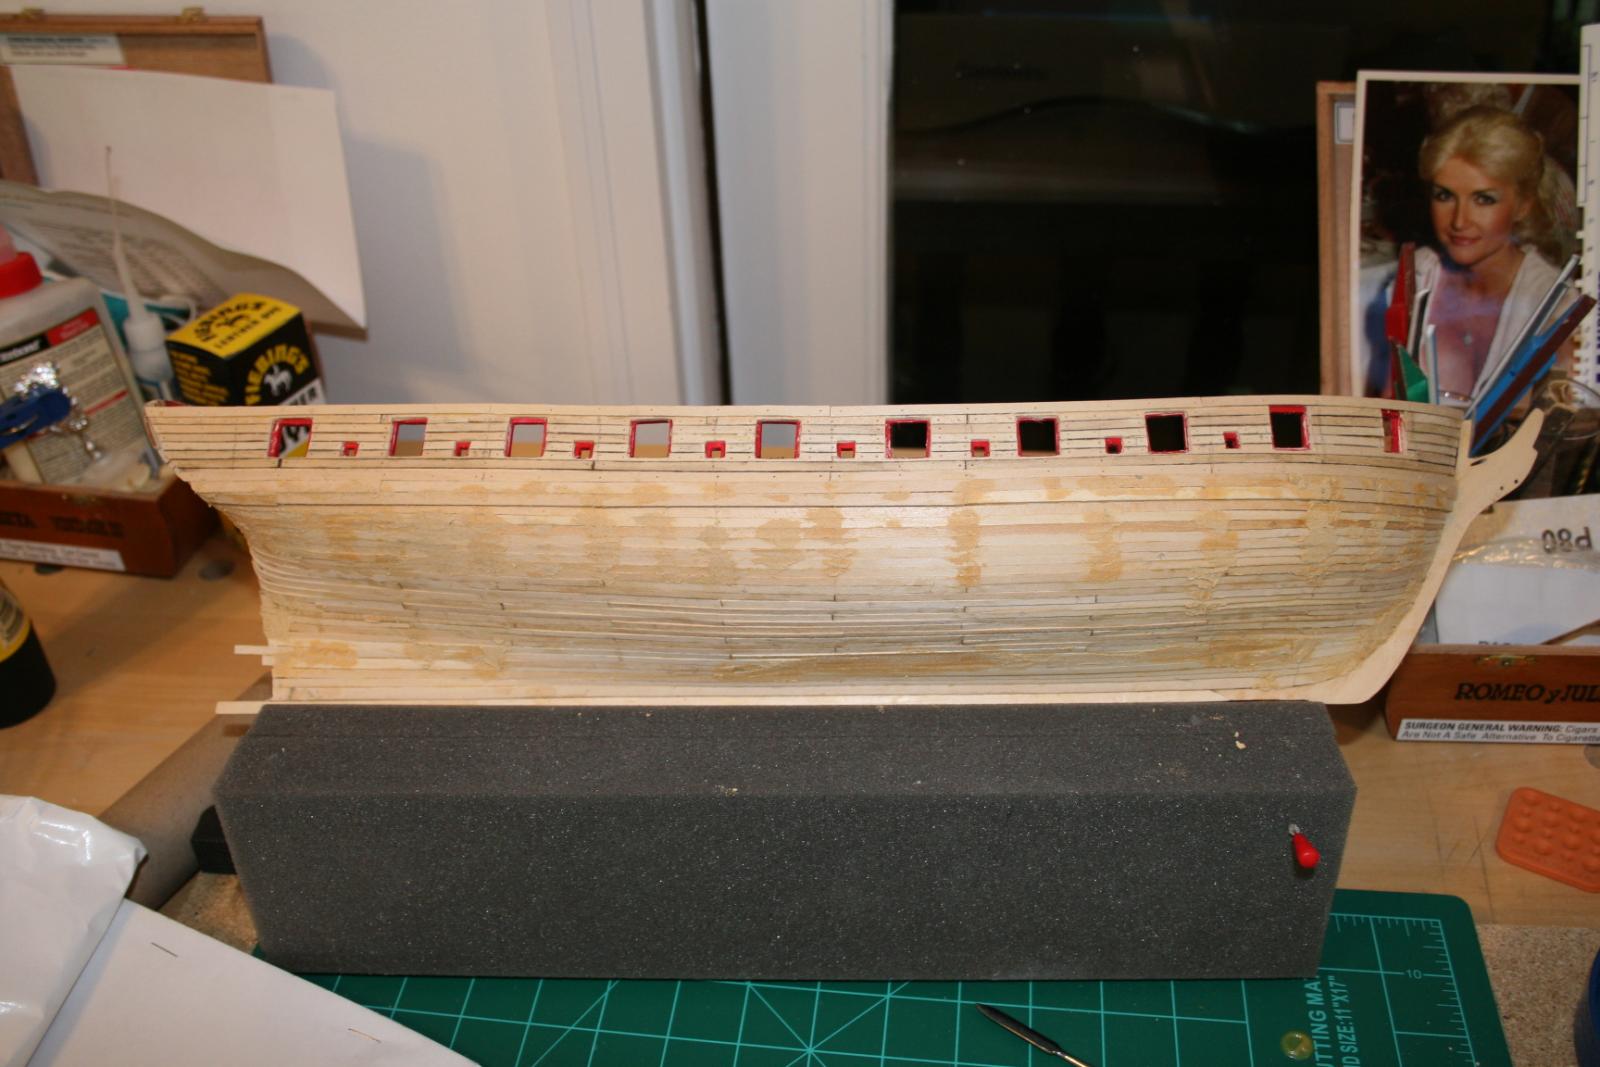
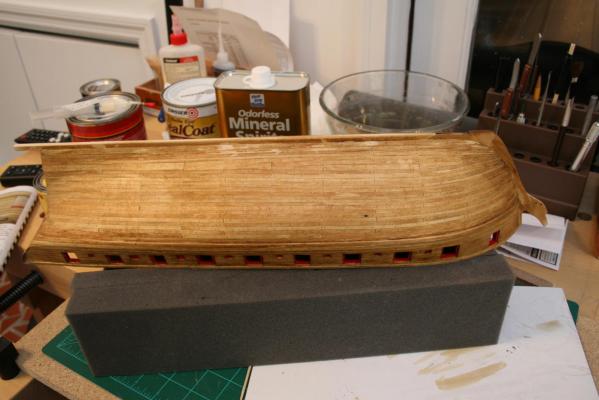
Ok, so when last we looked I had finished planking the hull and had it sanded. Well, it went downhill from there. I did a terrible job of staining one side and not so hot on the other. The side below is "not so hot The next side is terrible... I was way to heavy handed with the stain (golden oak-minwax). and I did not handle it well. So I decided to remove the stain by sanding... and sanding.... and sanding... well, you get the idea. I was not sure how that would turn out so I only did the really bad side. I started from the keel since that would be covered up anyway with copper I thought I would sand of so much that I would create a hole. But as Chuck has said, there is a surprising amount of depth to the wood and you can really sand it. Next I sanded above the wales, The good news is that I realize just how much rework the wood can take if necessary. Lesson learned. Now my choice is to stain it again with the golden oak, or sand down the other side and go for a different finish. I am leaning towards re-staining but with a lighter touch and more focus as I am working. If that comes out decently I may just sand and refinish the other side also. (Just that the thought of all the sanding makes my shudder....) Richard T

-
I agree with Augie, many use a 2b. When I was doing my Syren, I was reminded not to go too heavily. You will find that even the graphite will powder a bit, not as badly as the charcoal but enough to cause difficulty. At first I did and the graphite started to get on the front of the plank giving it a dirty look as it was handled for gluing. Richard T.
-
Chuck, I appreciate your quick response. I checked and Hobby Mill and they list 1/16 x 5/32 but I am not sure that it will make enough of a difference to stray from your instructions. I will review the practicum and possibly try a piece or two to see how they look and work. The .028x5/32" (~4 mm) nails were cheap enough so I ordered them to get an idea of the scale and fit for the copper plate jig. Meanwhile, I would appreciate anyone else letting me know what size they used and where they were obtained. Thanks Richard T
-
I am beginning to look at building the copper jig. Not sure what size copper nails to use. Can anyone advise if .028x5/32" (~4 mm) would work? Thanks Richard T
-
Floyd. A math major huh.... well, I won't hold it against you In fact, I greatly appreciate your helping me with the formula. I am having a little difficulty translating scale to working measurements. Yes, I am considering 3/16" vs. 1/8" plank widths. As I read zu Mondfeld, it sounded like 3/16 " better fits the 1/64 scale based on historical information and the tree nailing could look more accurate in planks of that size. Also a major consideration for me is that the larger size should help me to better shape planks for spiling and stealers. (You know, fat fingers, tiny space, still building skills...) I was hoping to also hear from Chuck P, since he designed the kit, to see his take on changing the size of the planks. If 3/16" is inaccurate or inadvisable I would stick with 1/8" Thanks, Richard T
-
Hmmm... gonna make me work for I huh? 3*(64/16) or is it 3*64 16 Either way it seems to work out the same. 64/16=4 3*4=12 inches. According to zu Mondfeld's book, Historic Ship Models, Up to the end of the 17th century planks varied between 18ins and 13ins. In the 18th century from 14ins to 11ins and in the 19th century averaged 12 ins. (Guess they were cutting down trees quicker than they could grow.) Then he also adds that the thickness of the strakes could vary from 3-4 inches at the bilges to 6 inches on either side of the wales. So, 12 ins should be right on target. When I try the same with the ME supplied 1/8 inch wood I get: 1*(64/8)= 8 inches. Based on zu Mondfeld, this would seem to be on the smallish side. Now, this is all predicated on my using your formula correctly. Hey... I was a Liberal Arts major Richard T.
-
I have a question about hull planking. Is 3/16" planking within the bounds of the kit's scale for hull planking? Thanks Richard T
-
How convenient. I will start using the like button. sounds easy and gets the point, thanks Dirk and Augie Richard T
-
On a different note, I have seen where people will "like" a post. What is that for? (I don't have much experience with social media other than LinkedIn.) Richard T
-
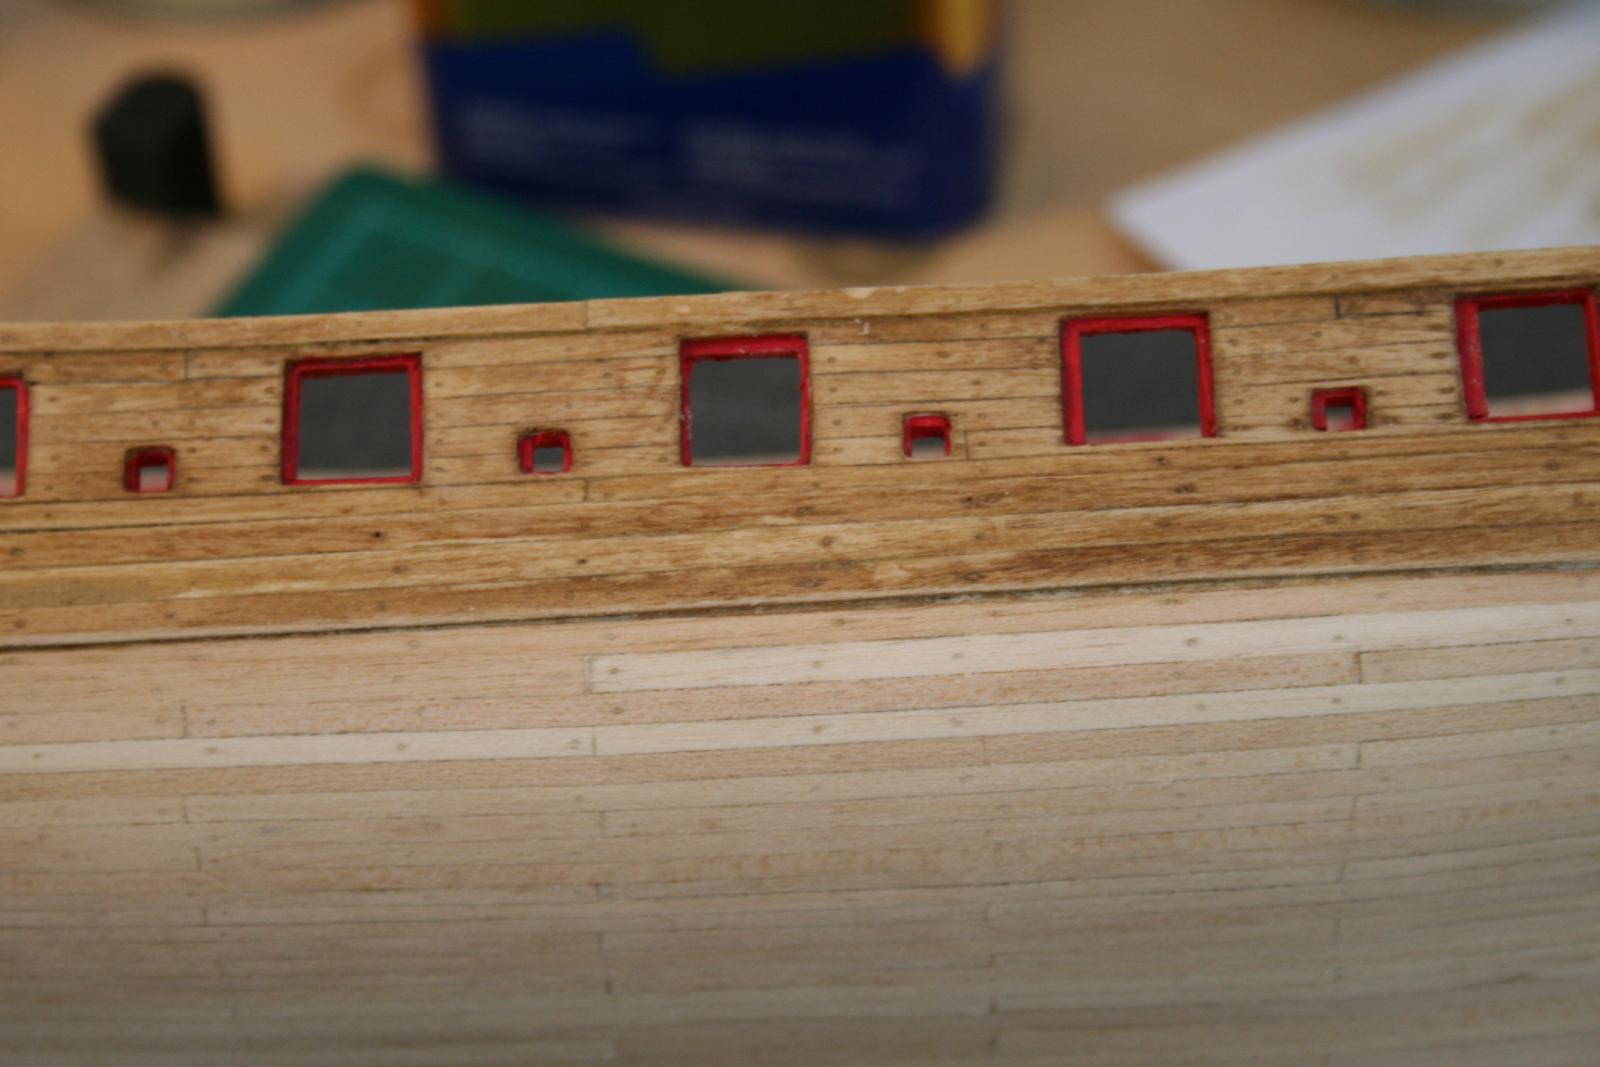
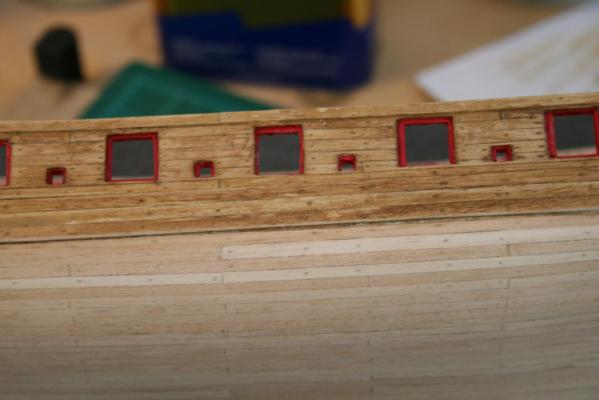
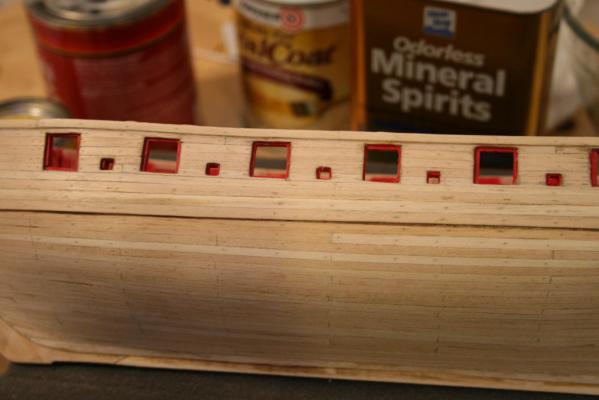
Charley, I read about your problem with the template. I am sure Chuck can help. We Syren builders are pretty lucky to have him on this forum. For me, building the ports was not too bad. Of course it helped that my template was correct. Also, there are a couple of threads where other builders show the use of wood spacers that help keep the measures correct. That is what helped me most, I could put two spacers and fit the sill, lintels and etc. spot on. My lack of skill showed up when cutting the planks around the ports. I am not pleased with the outcome. I saw a tool on Micro Mark that was a right angle chisel. It might help, but the price is kind of high and I really should be able to accomplish that with a knife and sandpaper. I noticed that Dirk went back in to smooth and square the ports after planking and they ended up a bit larger than called for In the plans. His look really good so I may try his approach. I agree with him that a larger size would be less noticeable than an uneven lip around the port. After the first two sandings I should have a better idea of how they will look. Also, I need to see how the treenails come out. I used Elmer's wood filler and right now they are pretty hard to see. Not sure I will have to rework some of those. Dirk, I like your simple approach to sanding. Just sand and oil. Did you use the natural oil or one with a stain to it? Thanks Richard T
-
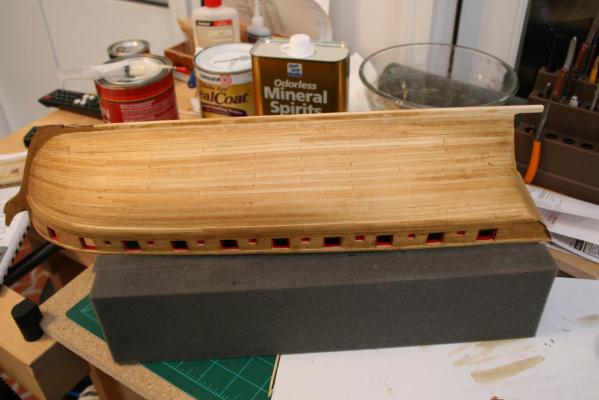
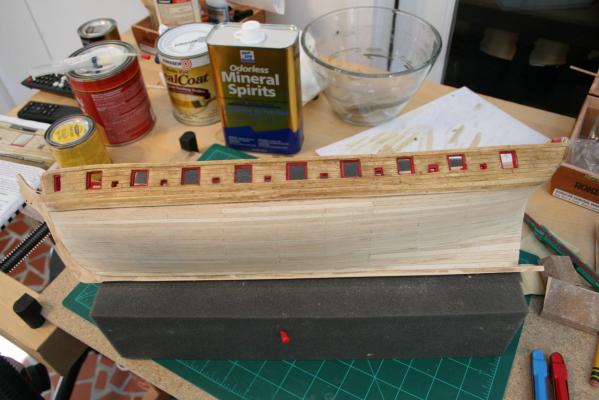
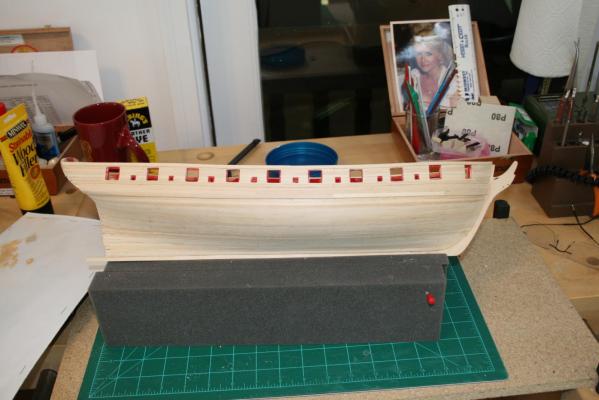
Hi all, I finally finished adding the hull planks. I am not crazy about it but it seems ok for a first model. The first picture is the starboard side with the "raw" planking. You'll notice that I played with individual planks rather than just laying the strake. I tried different techniques so you will see that it is uneven but I figured since it would be covered up by the copper plates I might as well practice. As you can see the practice was really needed. It took a lot longer to complete the planking, but I think the knowledge picked up was worthwhile. I plan on an all wood hull for my next attempt so this really helped me build the skill. They say one learns from their mistakes... well, I must have learned a lot!! The next photo is after it was filled and partially sanded. I used 100 grit and then 220 grit. I plan on going to 320 and 400. I suspect that I will also do a bit more filling. I am looking for some advice before going further with sanding. I sanded without any surface prep, i.e., no sanding sealer etc. 1. should sanding sealer be used before starting to sand? 2. should anything be applied between using finer grits of sandpaper? 3. should anything be used after sanding to protect the upper hull and should anything be used on the portion that will be copper plated? Thanks all Richard T

-
Sanding Block
rtropp replied to Hexomega's topic in Building, Framing, Planking and plating a ships hull and deck
Micro mark sells similar items, 60382 and 60383 but they are $17 - $18 dollars. I have no experience with them and no idea of their quality. Seems like a lot. They have a 1 inch power sander, Microlux Power Sander #15229. It is 12 volt and looks like it would operate with my proxxon 12 volt transformer. I was considering it for sanding hull planking. Does anyone have any experience with this? There is also a power sander/filer 81065 (both ac and battery). looks like the Iso-tip that is also sold on Amazon. I wonder if anyone has experience sanding hull planking with it? Richard T -
Ropewalk Scale Rope Making Tool by ME - opinions?
rtropp replied to rtropp's topic in Modeling tools and Workshop Equipment
Tony, Thanks for the input. In deciding which way to go, having a detailed set of plans will probably fit into the decision process. I do know that the ME Ropewalk is not the way for me to go and that the other, more expensive ones that are discussed in these forums would probably not be a first step. I also have to take into account the good quality and low cost of model rope that is sold on a couple of sites. I think I would want to try to build and use a rope walk, if only for the challenge. I appreciate your thoughts Richard T -
Ropewalk Scale Rope Making Tool by ME - opinions?
rtropp replied to rtropp's topic in Modeling tools and Workshop Equipment
Tony, I really like the look of the two you for which you provided links. Just think they would be beyond my skill set. I wasn't giving up on rope making, just on more building more complex versions i.e., metal or electric versions. A few days back I posted a picture from some plans for a manual, wood model that I found on another site. The plans were multipage and fairly explicit. I think I could add a drill to power it instead of the hand crank. It does not show a weight so not sure if its design does not require one. My thinking is that since it is all wood it could be built using existing tools and skills. If I decided I did not really want to make my own rope it would be no big loss. If I did like rope making it would pay to upgrade to one of the better built models that would be quicker and easier to use. Richard T Here is a copy of that Oct 15th entry. It kind of looks similar to the ME model but a lot more solid and having the topper that I understand was used in the full size process of rope making: -
Interesting, wonder how long he had to soak the steel before getting the solution to where he wanted it. Its worth a try. From what I am hearing about working with ebony, it might be worth finding a work around. Richard T
-
Ropewalk Scale Rope Making Tool by ME - opinions?
rtropp replied to rtropp's topic in Modeling tools and Workshop Equipment
Thanks for the link. It looks the similar in operation to the wood ones I have seen. Really nice looking. But, I do not think I have the skills to build the metal one... at least not yet. I have received the prices for buying rope walks from the various sources you see on this site and all are pretty expensive. Especially expensive when I am not sure that, as an individual, I will make that much rope. Richard T -
Ropewalk Scale Rope Making Tool by ME - opinions?
rtropp replied to rtropp's topic in Modeling tools and Workshop Equipment
For me the power rope machines seem to be pricy for the amount of rope I would make as an individual builder. Building a manual one seems to be pretty cheap so using it to learn about rope making would make sense because would not be tough to discard if I decided not to use it. It seems that for short lengths you can get or build one of the hand crank types pretty cheaply, just a matter of time. Bob makes a good point that rope making also depends on how much time you have. After all, the cost of premade rope is pretty low and some of it looks really good. I guess like anything else in modeling it is a question of how much you want to do yourself and what part of the build you like to do. I am really considering a scratch build for my next attempt and so it would make sense to make my own components, but then I see the stuff that is available, for instance on Chuck's site as well as others and wonder if I could do any better any cheaper. I would not really know unless I tried. Richard T -
QA, Thanks for the link. These seem to be much less than the Matutoyo. Do you have experience with these and if so, how are they on batteries? Richard T
-
Ropewalk Scale Rope Making Tool by ME - opinions?
rtropp replied to rtropp's topic in Modeling tools and Workshop Equipment
Well, that pretty much answers that. I had been disappointed by a couple of their laser cut tools and jigs. I ran across some plans for building one that seemed pretty basic but the site closed down. I did get a copy. I have copied one page below. There are more detailed pages, but this gives an idea of what it looks like. Any thoughts? Richard T
-
Lou, I may test some of the peach. While I am at it, I may try a couple of different local woods to see how they work. I need to learn the process for drying and getting it ready for use. I understand the drying process can be a long one so might as well put up some now. All, The ebony sounds nice but not sure if it is worth the mess. I will get some to test and see how it works for me. At the same time I will try the staining suggestions. Thanks, Richard T
-
Creating Hull Planking
rtropp replied to fnkershner's topic in Building, Framing, Planking and plating a ships hull and deck
Floyd, The sanding sequence makes sense. You make a good point about flexibility. I have found a couple of shops that will supply a considerable variety of woods but at the prices of pre cut it gets expensive. The lumber yard cost seems to be a lot less. While I am able to afford much of this now, in a couple of years I will be watching costs so now might be the time to invest. (Can't help it, part of my background is value analysis and it still rears its head.) I have a shop vac that works pretty well with the proxxon tools. I even use it while hand sanding and it keeps most of the dust down. Sounds like the shop vac also works with the table saw and thickness sander. That would keep me indoors in bad weather. Otherwise, I will have to work out on the patio under an awning. While Georgia is not to bad, it does have bad weather in winter and hotter and more humid than heck in the summer. Thanks for the info. Richard T -
Ropewalk Scale Rope Making Tool by ME - opinions?
rtropp replied to rtropp's topic in Modeling tools and Workshop Equipment
Curious, there do not seem to be too many builders on this site who have used the Model Expo Ropewalk, or have an opinion about it. I wonder if that is good or bad. Richard T -
Bob, I have the same experience with batteries on the cheap model I bought. Was wondering, does anyone know if Mitutoyo or another quality manufacturer makes a caliper that reads inches, mm, and fractions? Richard T.