HOLIDAY DONATION DRIVE - SUPPORT MSW - DO YOUR PART TO KEEP THIS GREAT FORUM GOING! (Only 13 donations so far - C'mon guys!)
×


rtropp
-
Posts
936 -
Joined
-
Last visited
Content Type
Profiles
Forums
Gallery
Events
Everything posted by rtropp
-
Dirk, Thanks for the tips. They are greatly appreciated. I have already removed a partial strake because I had damaged the planks. I have wooden clothes pins that seem to be gentler in holding and since the are wood, they do not mar the plank. Also, I realize that with Titebond type glue (PVA??) I can just hold the plank for a bit and it seems to set. (I just need to get my arms in a comfortable position.) I think I was carrying over unnecessary practices from the CA use where it had to be firmly clamped then CA was added. (Once you have stuck your fingers together with CA you really work to avoid doing it again ) The chamfer picture is worth a thousand words. Do you chamfer both edges on all planks or just one edge to fit it to the un-chamfered edge of the plank already in place? Not sure I accurately understand you're point about nails or nail holes. I looked at your build pages for the above-wale planking but I did not see any pin holes, are they just too small to see? It sounds to me like you are advising to use pins but use them where I would later put the nail holes. Is that correct? I will use CA in the bow and continue using wood glue for rest. I am getting better at removing the excess CA. I still cause a little scratching but hope that will come out with final sanding. Also wanted to ask, do you put in the entire strake as one piece then mark it to show as individual planks, or do you make and mount each plank in the strake individually? Once again, thanks for the help. Also, it is really helpful to review your build before I start a new section. Richard.
-
note to self: always start new work on the starboard side. Then plan on displaying model from port side Richard
-
Augie, Thanks for the advice. I decided not to use CA. I am using Titebond. I would hate to go through all this effort then find the finish a problem. But, I am just clumsy enough to disturb one plank while putting another one next to it, so, for now, I am waiting for the first length to dry for 30 minutes. There are about four planks to each strake. (Strake... hah... he can be trained.) Seems like a lot of clamping, not sure if I am overdoing it. Richard
-
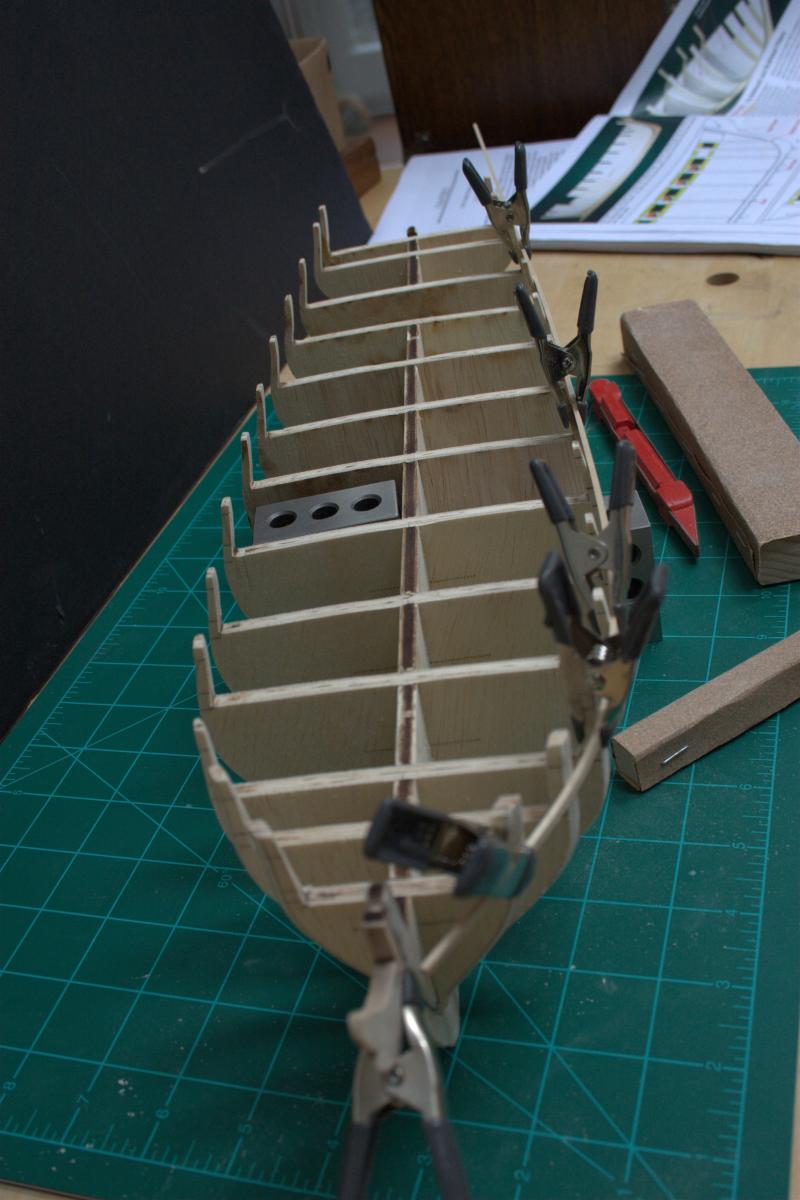
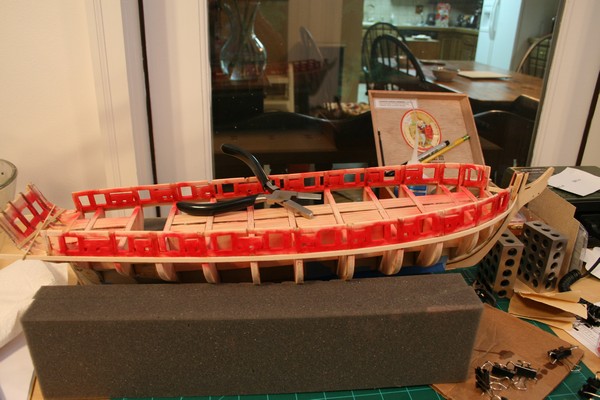
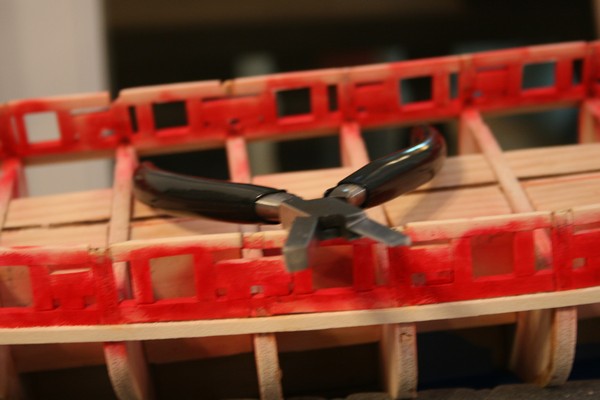
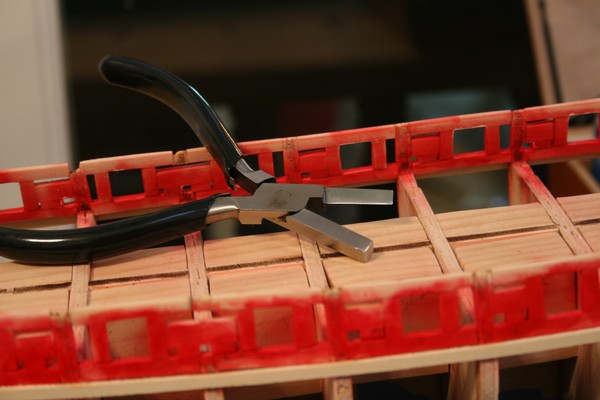
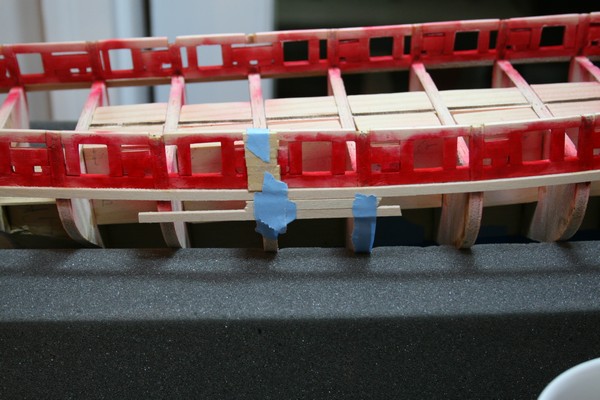
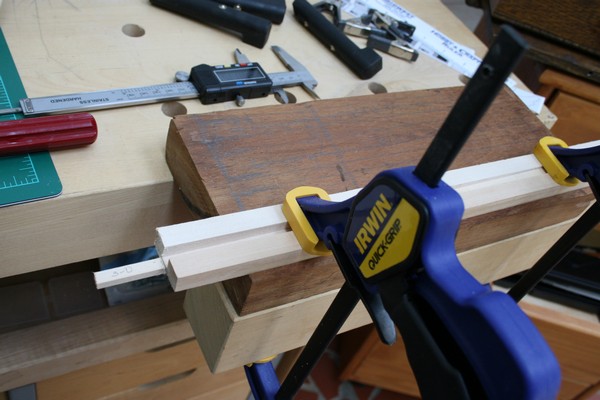
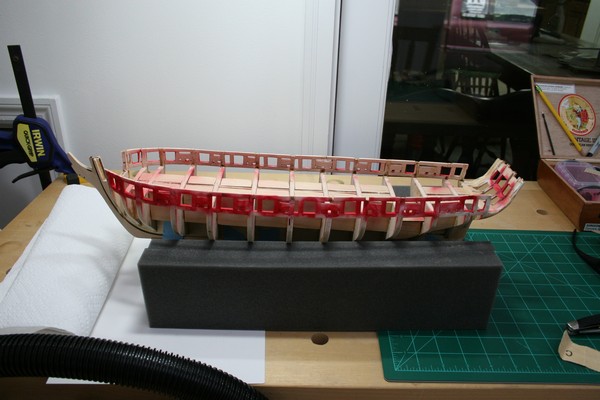
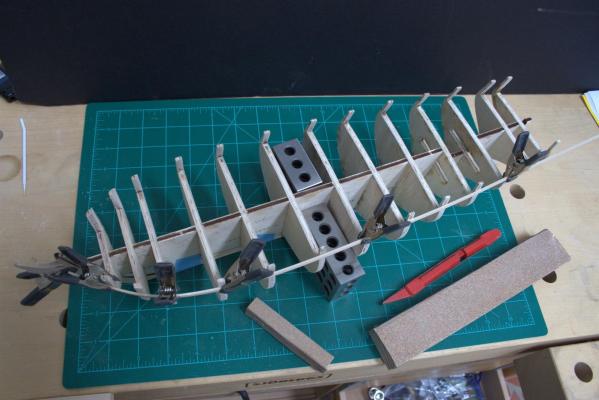
Well, the children and grandchildren are back on their way home so I can get back to the Syren. I am at the point of adding the wales. I really took my time reading and re-reading the practicum. I think was nervous about adding the first plank... such a commitment! Here is a view of my steps, First pinning and then examining her. I glued seven short lengths of planking to help gauge the position of the first wale. Finally needed to flip the switch and just glue it. But, I had a decision to make there. I have been using CA. I liked the process of fitting, clamping then adding some CA which would soak into the joint. Since additional layers of wale would be added, the first layer of wale would not be viewed so I went ahead with CA. But I am getting to the point of adding parts (planks) that will be on the surface and I am not sure how the CA, even to the degree I had learned how to use it, would effect the wood when staining. Any thoughts please let me know. First wale: I needed to decide on which wood bending method to use. I tried the soaking and using the jig that is described in the practicum. It was slow. More importantly, I kept breaking the dried plank when removing it. (Pretty clumsy huh??)I could probably resolve breaking the dried planks but decided to try a plank bender I bought earlier on. I like the fact that no soaking and no heat required. It also allows me to craft the bend of each plank. It will not answer any need for bending planks laterally but, at this point, not even sure if that will be needed. This worked very well. It was quick, gave me control of the bend, and I did not score so hard that it cut the wood all the way through. I was wondering if anyone had any experience with this plank bender and could advise as to whether I might face problems down the road? By the way, the red used for the gun ports appears brighter in the pictures than it actually is, but not by much. I am not sure if adding the planks will make the red appear less overpowering or if I should repaint it darker, maybe add a bit of blue to darken it. I need to decide before starting the upper planking. I have seen in other posts questions about tool holders. I have found that cigar boxes make pretty good tools and parts holders. You can see one in the picture but I have a few that I use. Well, that's it for today. Thanks, Richard
-
sorry I could not be more help, good luck. Richard
-
Mick, Do you have any pictures of your boat from the instructions or the box? That would help see the manufacturer's intent, especially manufacturers pictures that also show the bow, stern as well as the side view. That might help us see what the manufacturer intended. Also, the address below will take you to a great... really helpful, free PDF article on another part of this site. http://modelshipworldforum.com/resources/Framing_and_Planking/plankingprojectbeginners.pdf You can also get to it, and many more great guides, by going to the main menu at the top of the screen, select "Model ship world main site & article downloads" and then select "Ship Build Articles." You will find a list of PDF's, one of them "Simple Hull Planking for Beginners". At the site, you will also find other "instructional" PDF's from some very experienced builders. "Simple Hull Planking for Beginners" is comprehensive, detailed and actually takes you through planking a POB hull. **Around page 21 it shows a side by side picture of "right" and "wrong" looks for planking the hull. This PDF may have some of the answers you need. I am using it to guide me on my model which is my first ship model. I have found that if I do some research first, I am better able to pose questions that other members can answer. Remember, I am a rank beginner so this is what works for me. Hope this helps. Richard
-
Good point Sam, perhaps, for the tough ones, instead of cutting out the part, I should cut away the waste until the part is clear. Richard.
-
Ron, which kit did you get? Richard
-
Gregor, Nice figures, but I am looking for 1:64 scale (about 25-30mm). please let me know if i missed them. I do not speak French. Thanks for the tip. They are beautiful figures. Ron, Is the 25mm do not look correct, I will order the larger ones. I'll get back to this thread when they arrive. Thanks to all Richard
-
Thanks all, This helps. I guess the only way to know if there is scale creep is to measure after it arrives. I found a company callers Cornwall model boats. They list some by scale, I.e., 1:64. I will try a couple of theirs. Shipping is really not too bad to the U.S. I really wanted one or two figures to help get a feel for the size of a 1:64 ship model I am workin on. Hoped it would help put not only the boat, but parts like cannon, blocks, etc into perspective. May be se how close to reality they really are. Luckily Cornwall has sailors who are not orcs. I think the last time I dealt with orcs was in an MSDOS text game. Yes, that was awhile ago. Again thanks to all Richard
-
How large would a standard figure (5-6ft tall) be at 1/64 scale? My calculation is 6ft = 72 inches. 72/64=1.125 inches or 28.5 MM. Is this correct? Thanks, Richard
-
Thanks Dirk, good to know that the tweaking is possible later on. Given that this is my first kit in 40 + years, it is really a learning experience. I was tempted to start a second kit to see how much difference the new skills make, but that would be a distraction. Come hell or high water, I want to get this kit done, at least up to the rigging, before considering anything else. Richard
-
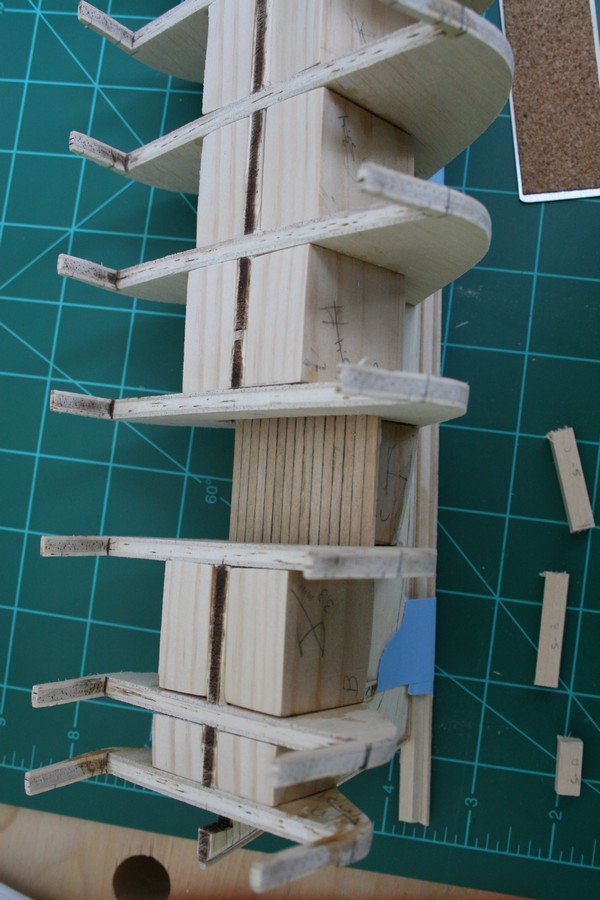
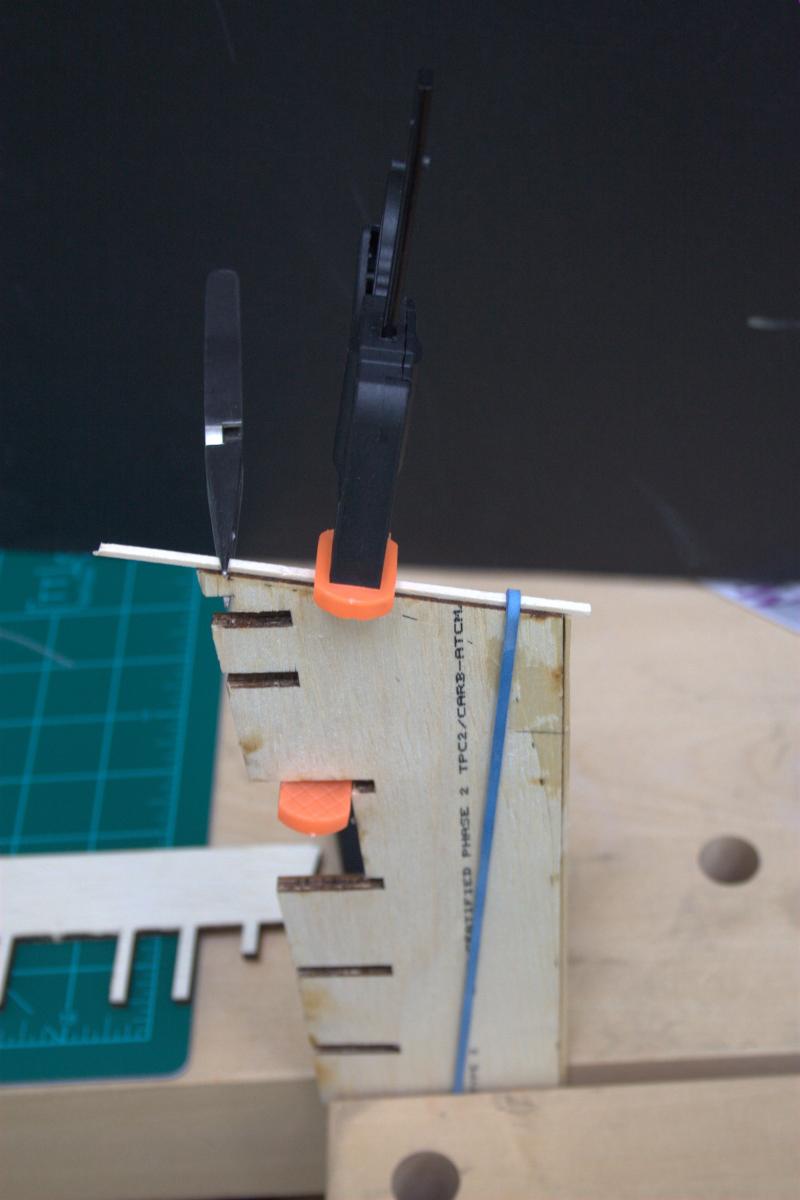
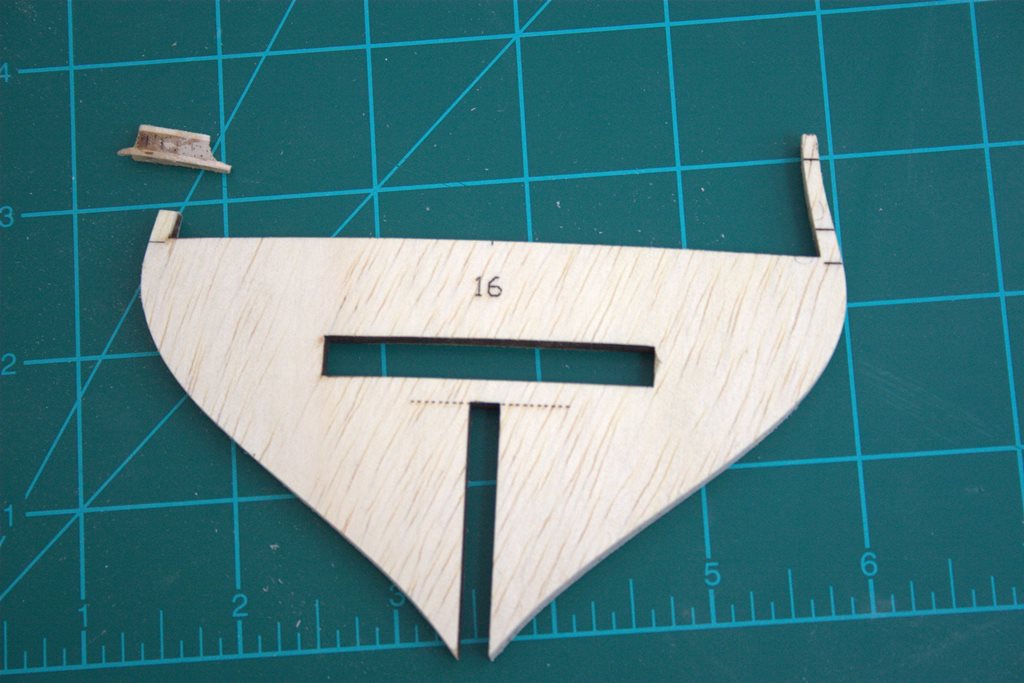
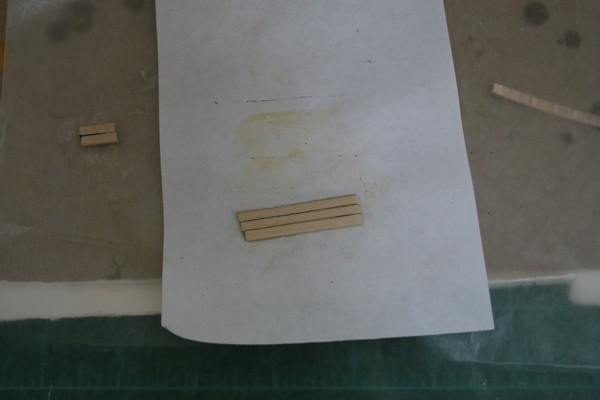
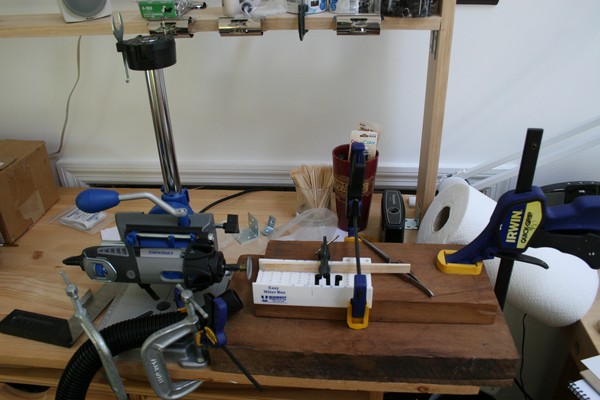
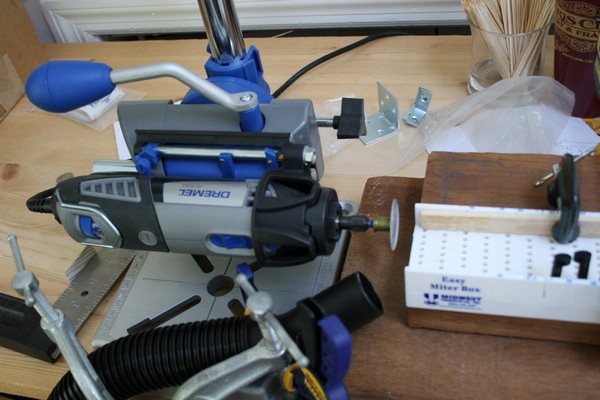
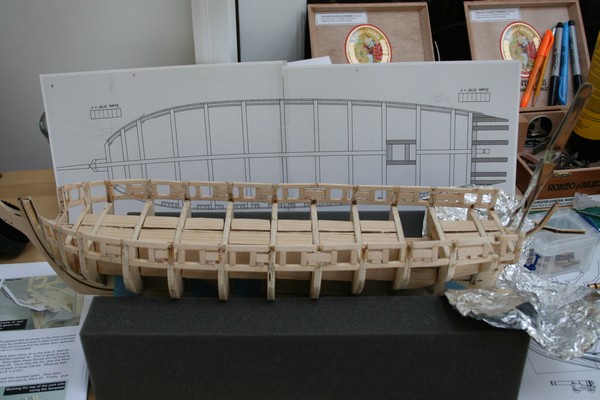
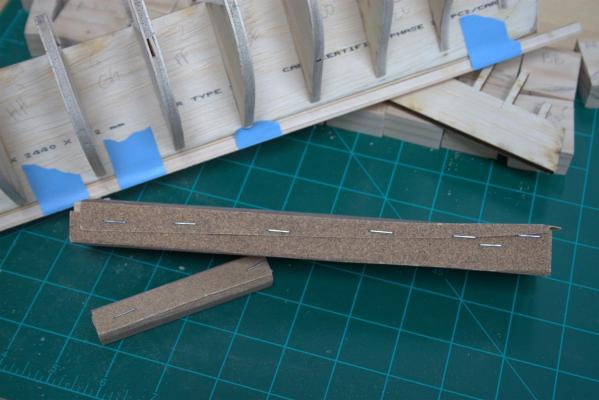
Hi all, I am working steadily on the build but the updates to the log are a little behind so I will try to catch up here. Also, have family visiting from California, with small children, so will probably not have much time. The following is my build for the lower deck. I glued a few pieces together to test finishes. I used MinWax Golden Oak. I was having difficulty gluing the small planks side to side, so I used a piece of freezer paper as a base and glued some planking to it, then, after both gluing and staining, peeled the paper away. Pretty easy. Next I made the lower deck full size. I found it easier to use the freezer paper as a glue and peel base rather than gluing each plank individually. I used a soft pencil for the caulking. Anything else I tried, watercolor markers, stain markers, etc., all allowed the color to spread through the wood so pencil worked best for me. Next it was time for gun and sweep sills/lintels etc. I found it really hard to cut and sand right angles. I was cutting a little large to enable fitting, but then my sanding ruined the angle. I tried two similar jigs. For cutting: and for sanding: The piece to be cut was placed along the corner where the two jig pieces meet, then cut or sanded against the edge. These worked ok, but since I used the same wood as the kit, the jigs eventually were distorted. (I should not have been surprised at that outcome!!) And since I still was lousy at cutting right angles could not just cut away to reshape edge. (Catch 22??) About this time my plastic hobby miter box arrived and that took care of the right angle cutting. Sanding was still a problem. Even with the right angle jig, the hand held sanding block was still not giving me a good right angle. So I took out the my new Dremel tool stand to see what I could cobble together. You can see the that the Dremel holder is set up side ways. This allows me to use the handle to move the sanding head forward (laterally). I am using the dremel quick release sanding head because it is smooth all the way across with no screw head protruding. I also tried the Proxxon sanding head, which I like better, but it is smaller so more difficult to use. A ruined plastic Miter box is used to hold the wood piece. After squaring everything up, all I do is put the piece against the side of the miter, move the piece a small bit so it clears the end of the plastic miter box and then use the handle on the dremel stand to move the sanding head in towards it. It is producing a nicely squared sanding that I can keep going back to until the part fits. What's nice is that this sands to a square head even if the part is not cut squarely. (I'm so proud of me!!) Also, you will notice the hose end from my shop vacuum clamped near the sander. It really works, and since I work in our sunroom, keeps everyone happy. Below is the completion of the sills. The bad news is that I am not really happy with the result. It is not as "faired" as I would want it to be. Part the problem is skill. Part was the need repair/replace many of the bulwarks (thin pieces at top of frames) because they were burned badly enough that the centery ply would crumble. My repair job was not... well, not great. So, the gun and sweep ports are difficult to fair. Also, the top of the lintel is not as straight horizontally across the ship as it should be, not sure how this will impact that top rail. I have tried to smooth and even out as much as I can without thinning the wood too much. After much thought, I decided not to redo the work because that would mean reworking from the beginning with the bulkhead former. Instead, I will push ahead with the planking and see how it turns out before making that decision. I also checked the other laser cut parts and, now that I know what to look for, ordered replacements for those that look bad. Next I painted the gun and sweep ports. I obtained an airbrush for another project and decided to use it when painting the kit. Lots of new experiences here. And that brings it up to date for now. I would appreciate getting your input, not just to the build itself, but whether this log is ok or if I am being too wordy! Richard

-
Floyd, I am finding it easier to build my own jigs than buy those that are manufactured. Luckily, I found this site and after going through most of the posts, I held back on buying too many. There are enough ideas on MSW 2.0 and it is kind of fun to do it yourself. More of a sense of accomplishment. The only tools I am looking at are power tools, but I do not think I will need much unless I try my hand at scratch building. As I proceed to upload pictures I will also show some of the jigs I use. I am not great at creating clean, right angles, either in cutting or sanding, so my homemade set ups are geared to those at this time. When my jury rigged creations work it reduces the need to buy but... BUT I like to buy tools so I have to exercise self control. Mark, Thanks for the comment. I had been complaining about parts and finally I even got tired of hearing me. The positive side is that trying to fix the parts issues are giving me more experience. As I have mentioned before, if this continues I may try my hand at scratch building. Depending on how the Syren comes out, I may use its plans and instructions for duplicating it as scratch build. It would be interesting to see if the learning has taken hold. Dirk, You had been urging me to set this up for awhile so I finally bit the bullet. As I prepare for the planking I know that I am going to see the kit build through to the end, so I am confident that this log will not be one of those that is dropped. I really heartfelt thanks to you for all your work on your log. Without it, and the logs of some others, I would not have gotten this far. Richard
-
thanks for the pictures (worth a thousand words.) It helps me feel more confident about adding a second layer if need be. I am building the Syren with one layer of planks and plates below the waterline. The planking is basswood and I have been toying with double planking to get walnut finish. With what you showed, I may try my hand at double planking the whole boat and having a nice wood finish vs. the plates and paint. I think it would look nicer. Either way I go, I can see from the pictures that rather than worrying at it, I should just move ahead knowing I can handle whatever happens. I appreciate your taking the time to post the pictures Richard
-
Elroy, I would like to see some pictures if possible. Thanks, Richard.
-
Since the rabbet is already established per the plans for single planking, will that present a problem?
-
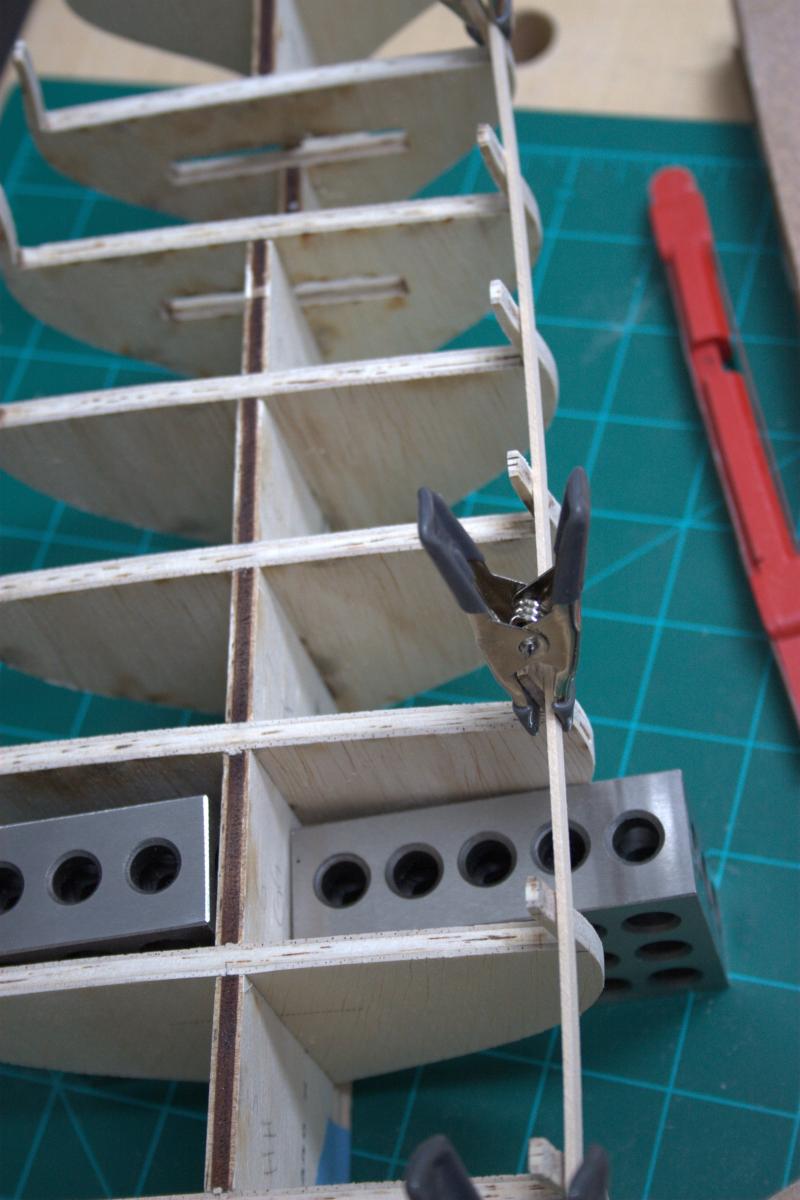
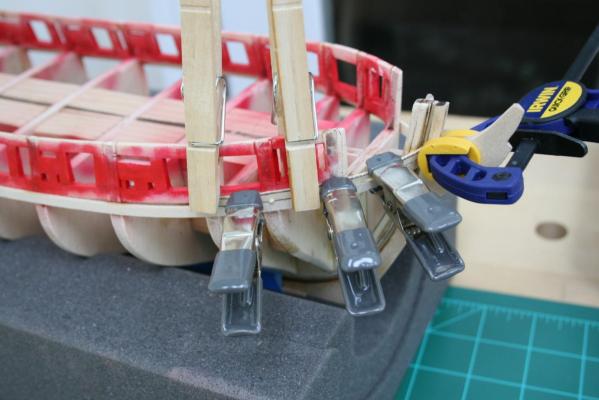
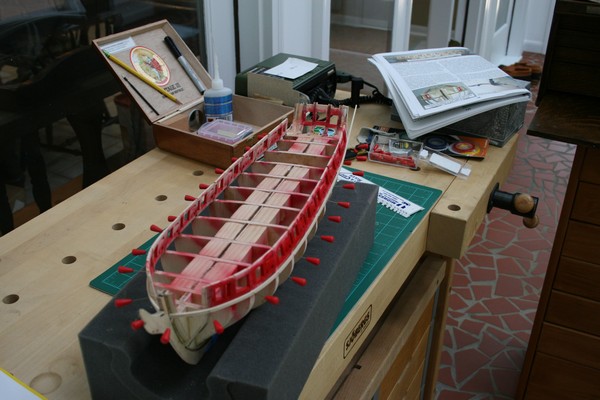
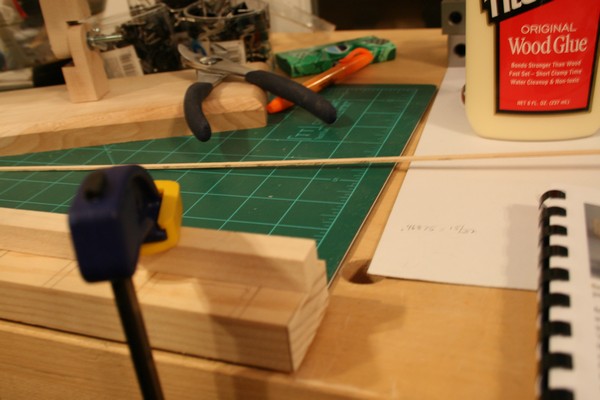
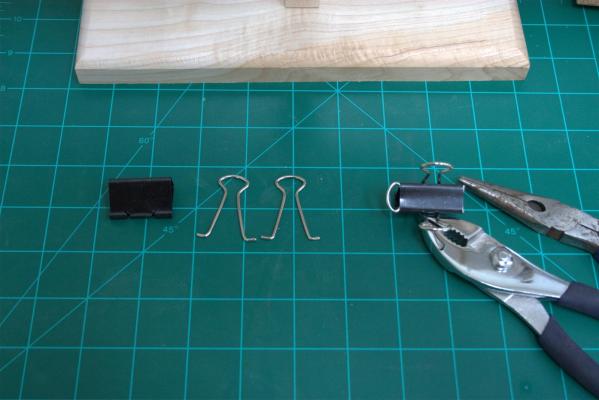
While I was waiting for replacement parts I tried to keep myself occupied. One of the things I did was to find a planking clamp. I tried the Model expo planking clamp. Turns out to be a build it yourself with more of those laser cut parts. I put them together but they are sitting in the draw unused. Seem to require more effort then necessary to use. So, I did some more research and found various homemade clamping jigs. The one I settled on is pictured below. I think it was offered in one of the forums in Model Ship World. It uses bulldog clamps, any size that is appropriate to the kit. it only will work on the first layer of planking. Remove the "handles" from one bulldog clamp and insert one each into other bulldog clamps. Richard
-
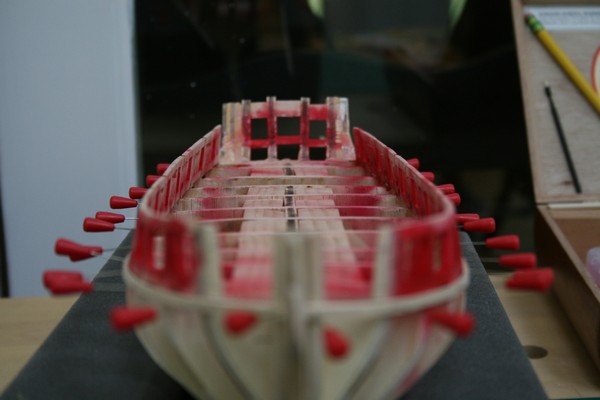
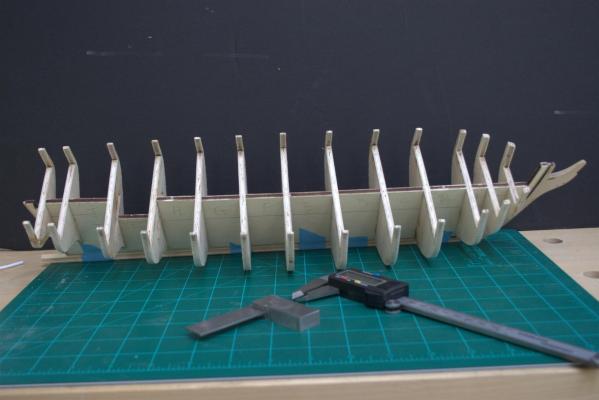
And so, in the beginning I was fine up to this point... not very far huh? Then I wish I had thought to take a photo of the other side. This is where the burn marks really showed. The center ply had been burned to the point it crumbled as I removed it. Wouldn't have been so bad but this was only the first of many. More than half of the frames had to have the small upright piece replaced. My inexperience probably made things worse. I did not realize then how this might impact gun port sills and the hull planking, Still not sure because I have not gotten to the planking yet. Installed Bulkhead frames


-
Note: I will have closer pictures of the model itself as soon as I have all this figured out. Thanks Richard
-
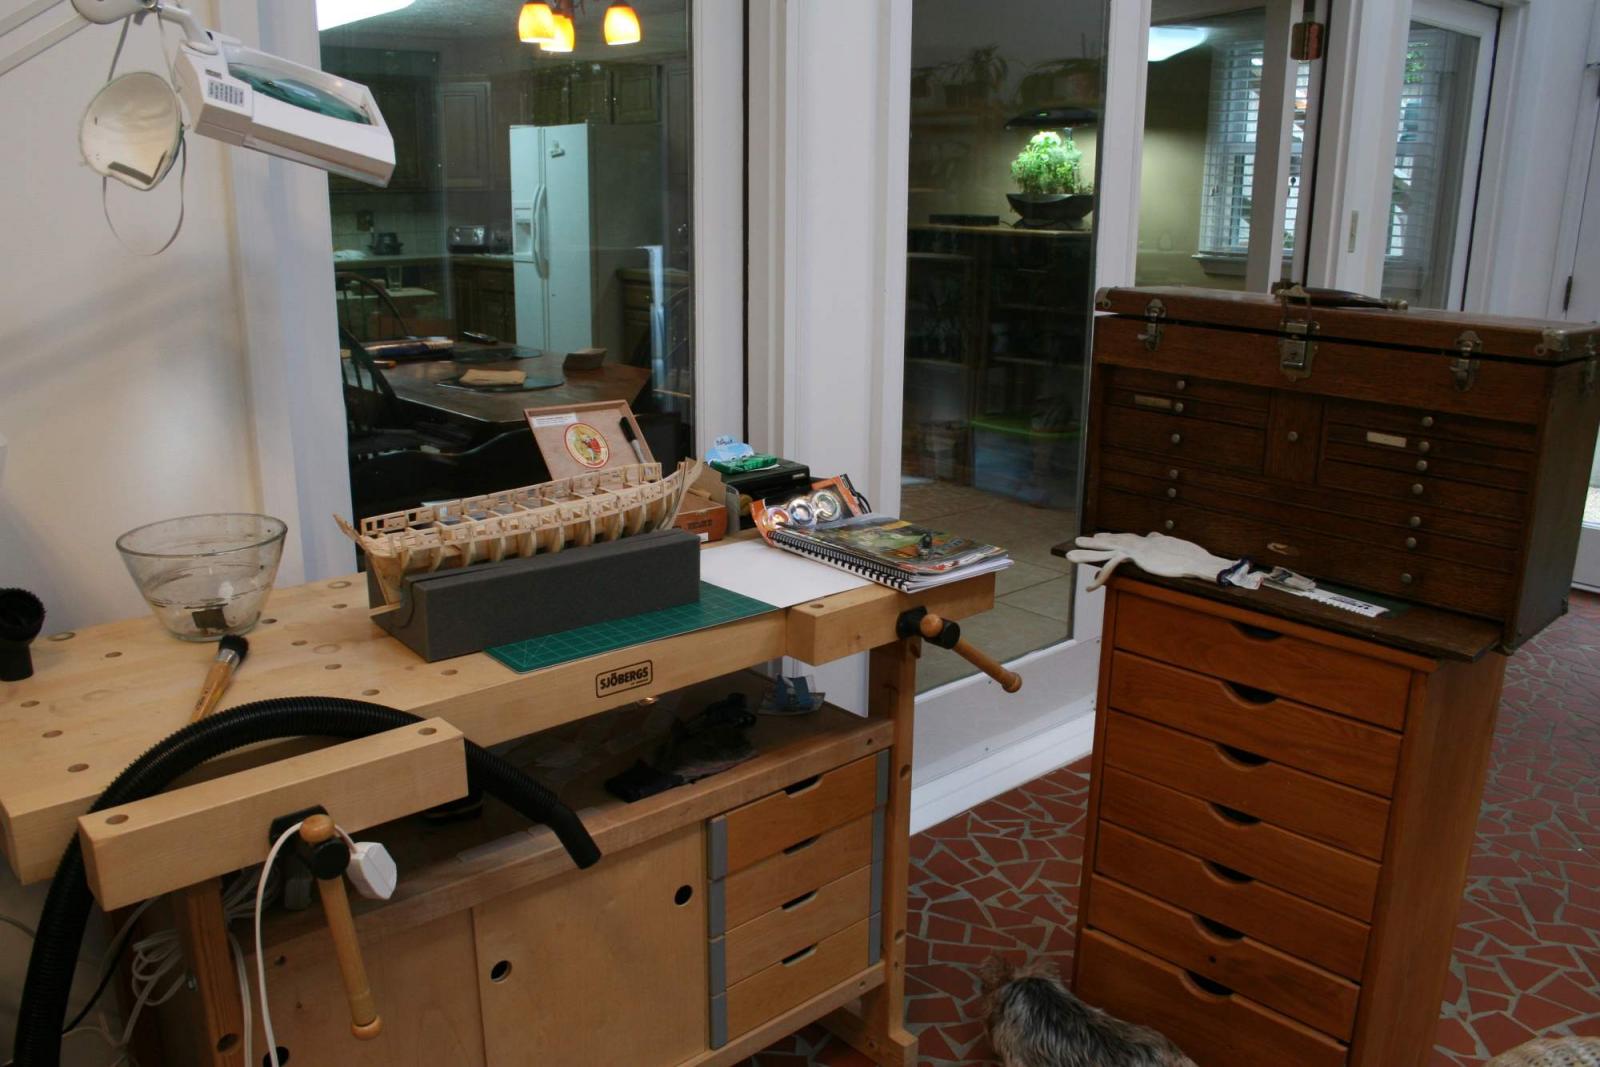
Yes, another Syren. This one a little different from the others. I am a rank beginner who is learning kit building as I go. That means that unlike some of the other builds, this will probably be more of a treatise on what not to do. Thank goodness for the build logs on the site. I would not have gotten even this far without them. While I began the kit in May, 2013, I held off on a build log until I was sure I would this was a hobby I was going to continue working on. A number of builders have been urging me to create the log and, having gotten to the point of being ready to plank, I figured it was time to make the plunge. I have been taking photos from the start of the build so I have history from the beginning. I am not normally a handy person, clumsy is more like it. I work slowly to allow myself time to think about what I will be doing. At the same time as I am building the kit, I also work with fine arts projects. I bought an airbrush to help with painting the kit, but I have already begun to test it my fine arts projects. The sunroom in my house is my studio and I have a pretty nice set up with mostly hand tools and a Dremel. I am converting the kit build photos to a smaller format so they will upload and should begin having something up fairly soon. I look forward to not only the input from more experienced builders but also the conversations that make this an enjoyable social activity. I will start with a picture of my build as it is today, then backtrack to earlier phones. Richard

-
Hi, As I get ready to begin planking the hull on my first kit, and having read the caveats about single planking being an advanced skill, I wonder how difficult it would be to just add a second layer to a kit designed as one layer if it does not turn out as desired? Richard
-
Bulwarks: ply vs solid wood
rtropp replied to rtropp's topic in Building, Framing, Planking and plating a ships hull and deck
your right, the title says bulwark while the first post discusses bulkheads. It was bulkheads I intended to discuss. Mea Culpa. Richard. -
Bulwarks: ply vs solid wood
rtropp replied to rtropp's topic in Building, Framing, Planking and plating a ships hull and deck
I thought the reason for using plywood (and birch plywood at that) is to prevent bending? See the june 26 post from Janos which is above. Richard -
Hi, I have been experimenting with airbrushing M.E. acrylics. I have tried distilled water and also a commercial thinner from liquitec. Both work but the commercial thinner seems a little better with M.E.'s white. The key for me was to only put in a couple of drops of water or thinner at a time, mix thoroughly and keep repeating until at the consistency I want. (Mixing it all at once would come out lumpy.) By the way, a question. In a review at an airbrush site a Chinese airbrush, the Veda 130 or 180 was recommended as coming from the same factory as a "name" brand but for a lot less. Has anyone heard of this brush? Richard