


Nearshore
-
Posts
157 -
Joined
-
Last visited
Content Type
Profiles
Forums
Gallery
Events
Posts posted by Nearshore
-
-
-
Hi Kevin,
Thank you for the informative video. I am on cannon duty now on my build and found some of your techniques very useful.
Nearshore
-
Hi Fecap,
Very nice job on the first layer of planking. You are making good progress.
Nearshore
- Mr Whippy and Paul Le Wol
-
 2
2
-
Hi Frecap,
Your Bellona is coming along nicely. Those bends around the stern are tricky and looks like you did them well.
-
9 hours ago, SaltyScot said:
A very true statement. I have worked with a lot of different tools all my life and can say with all honesty, you get what you pay for. I like the look of the quality of those Innocraftsman tools, something I will be taking a good look at. thanks for the link. What size drill did you get? I only ask because it looks like the Powerpro model will take drill bits up to 6.5mm. Did you find that to be sufficient. My feelings were that the Universal model might turn out to be a bit too small. Your thoughts would be appreciated.
I went with the collet chuck model. The runout was better and I found that using the 3.175mm shank on the micro bits run straighter than the standard drill bits of the same size. If I need to drill anything bigger than the capacities of the drill I have another tool for that. I did purchase a longer stem to give me more space between the drill bit and the top of the vise. I am very pleased with the performance and the quality of construction is second to none.
Nearshore
-
1 hour ago, SaltyScot said:
I like the setup you have going on there, particularly that mini drill you had in a couple of the images. What make is that? I am slowly coming to the realization that I do need some mini power tools (sander, perhaps a mill.... but definitely a drill press). The quality of your work inspires me anew, sir
")
Hi Mark,
Thank you for the complement. i purchased the mini-drill press from https://innocraftsman.com/products/mini-drilling-machine I also purchased the mini vise and it works well holding the small parts that we are required to deal with in our sport. 😉 The Ultimation sanding disk and chop box are also very handy. Sometimes your only as good as your tools, and I firmly believe in having the right tool for the job. Of course a good set of magnifying glasses don't hurt either.
Cheers
Nearshore
-
Hello All,
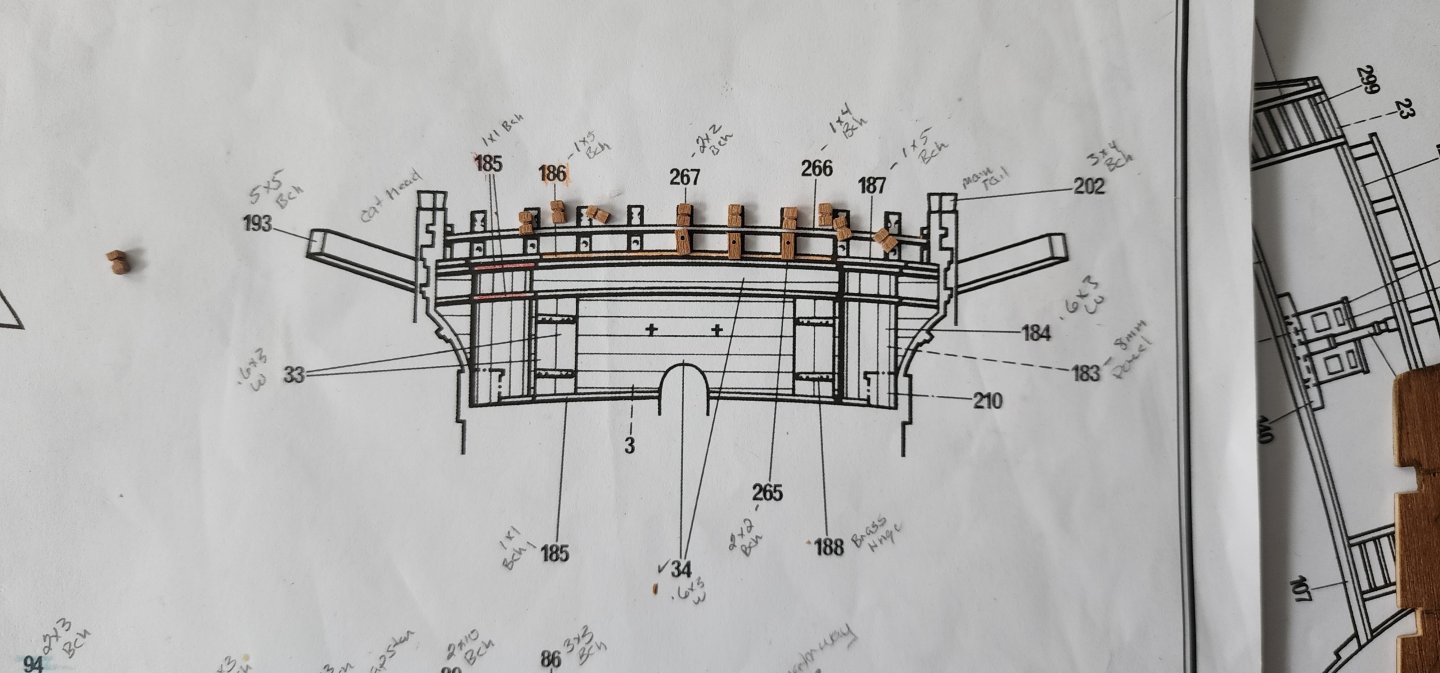
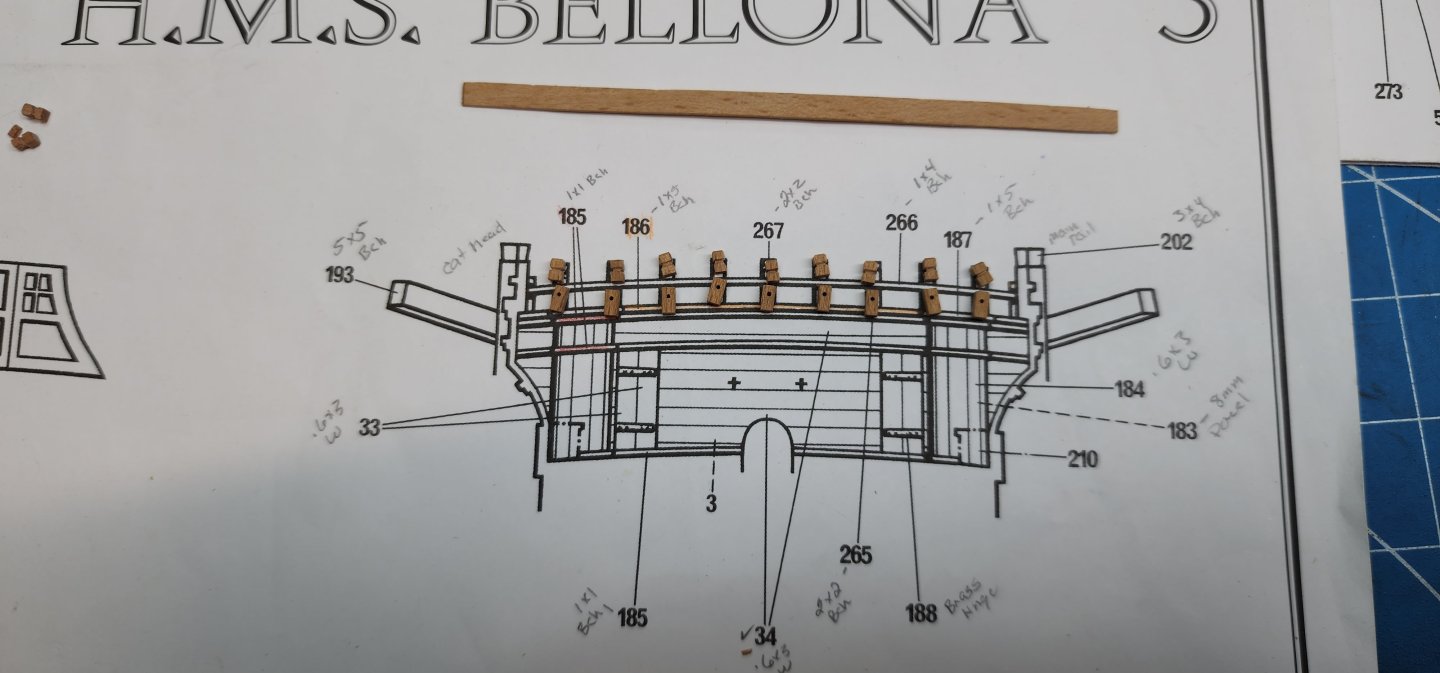
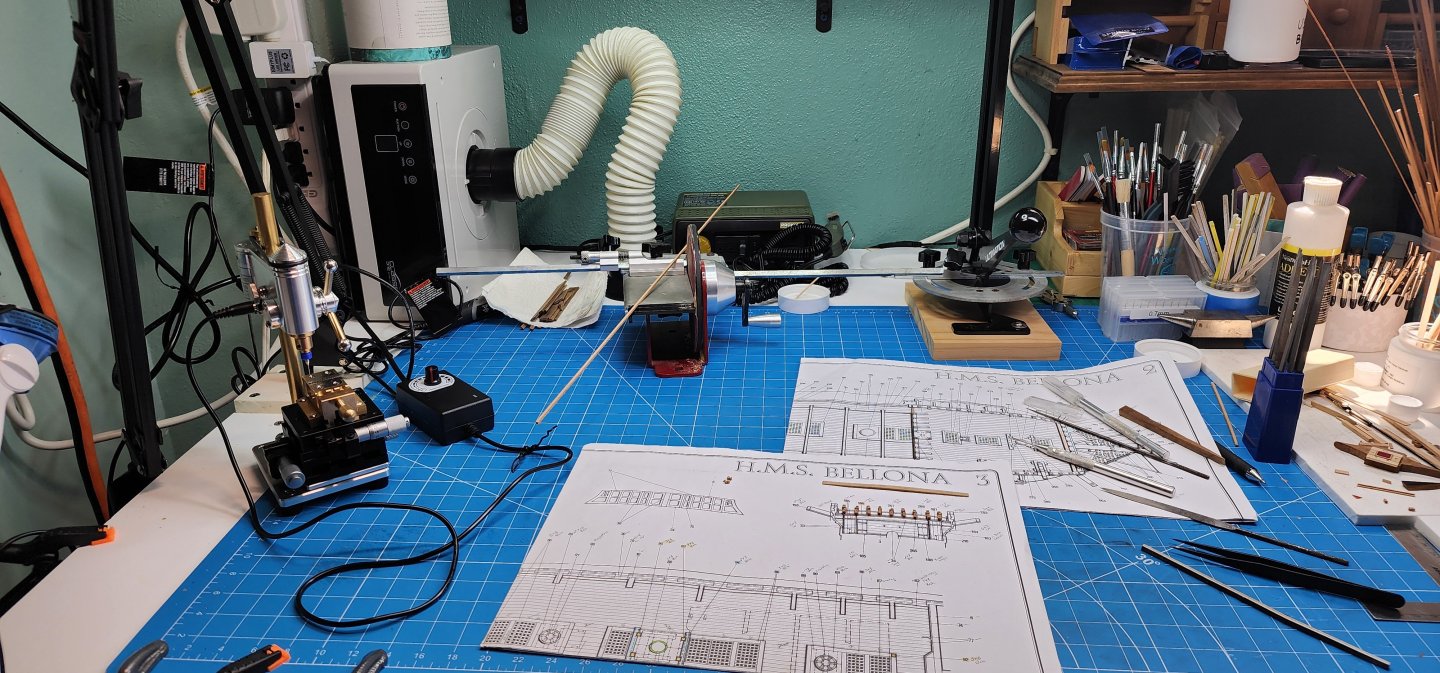
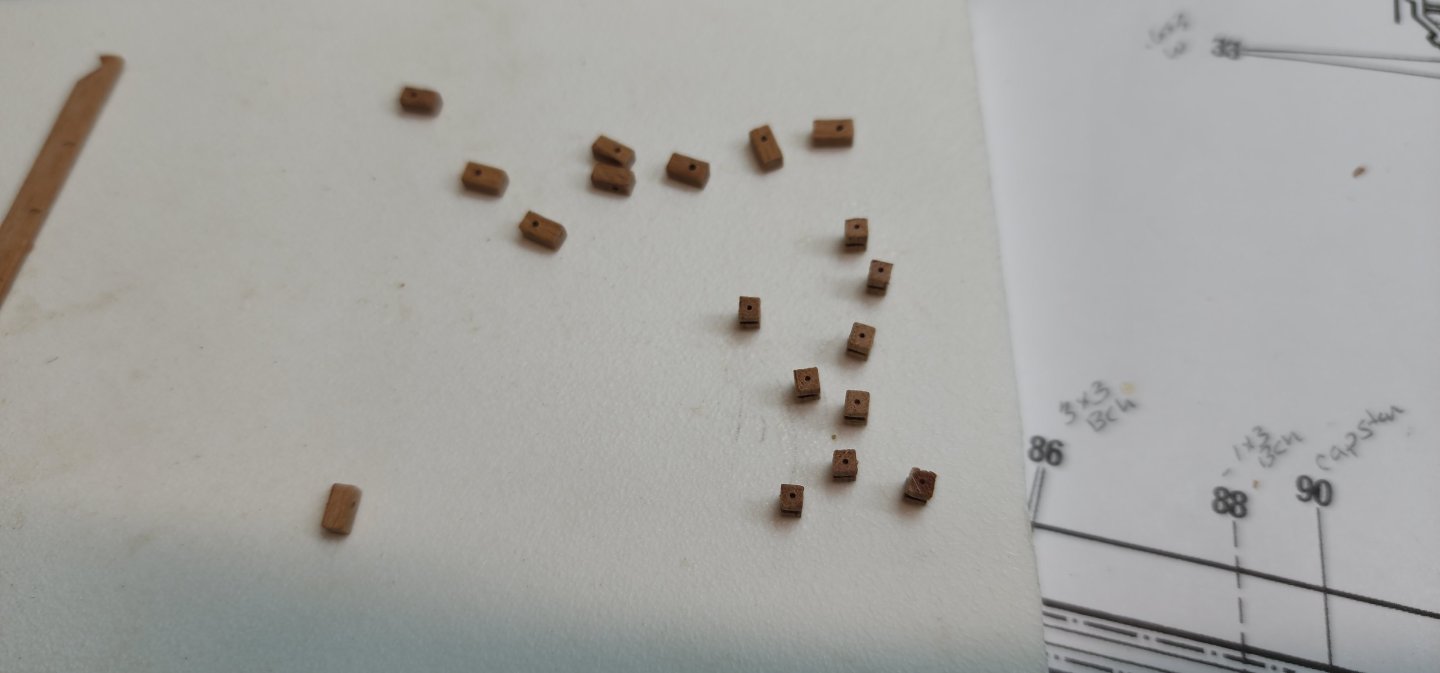
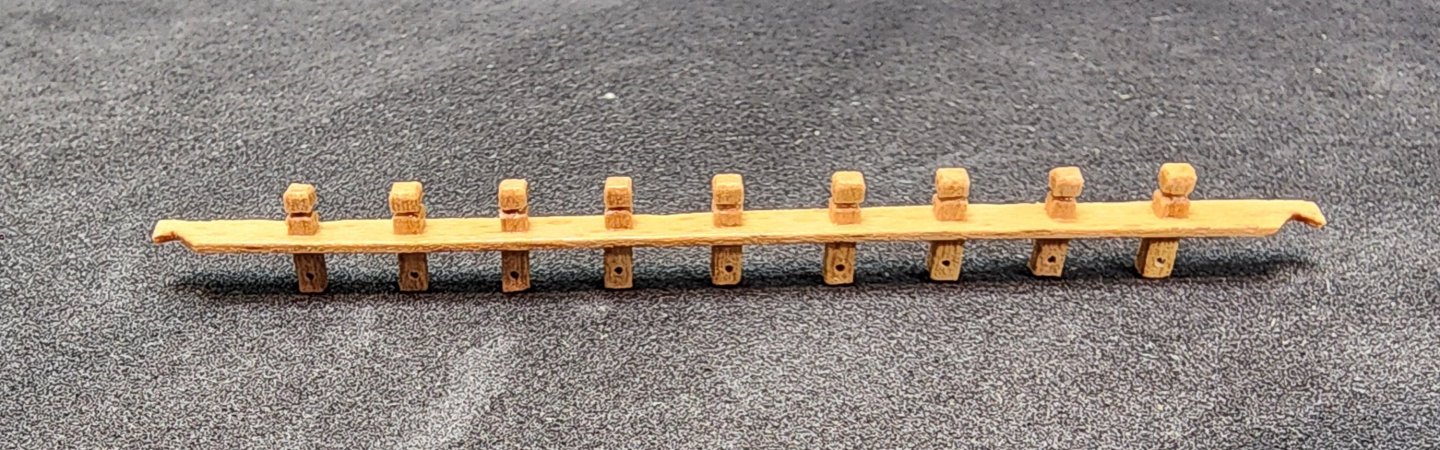
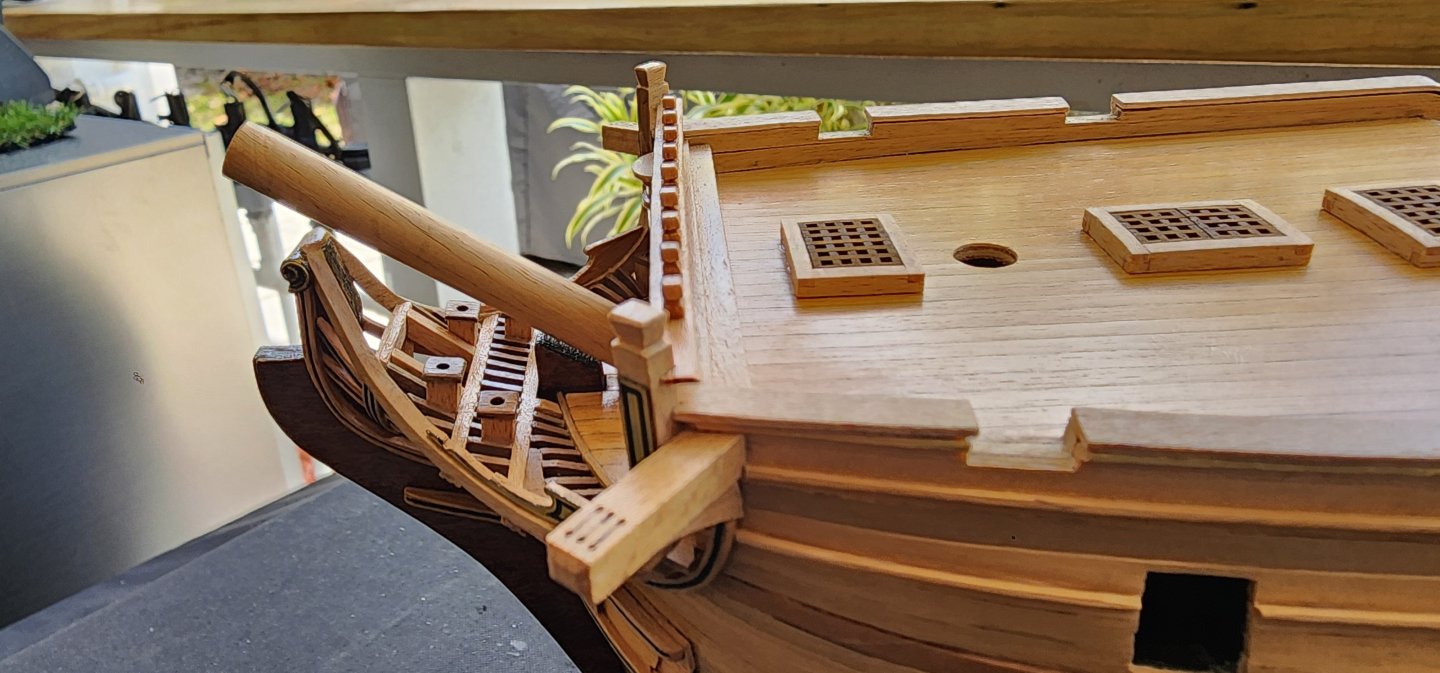
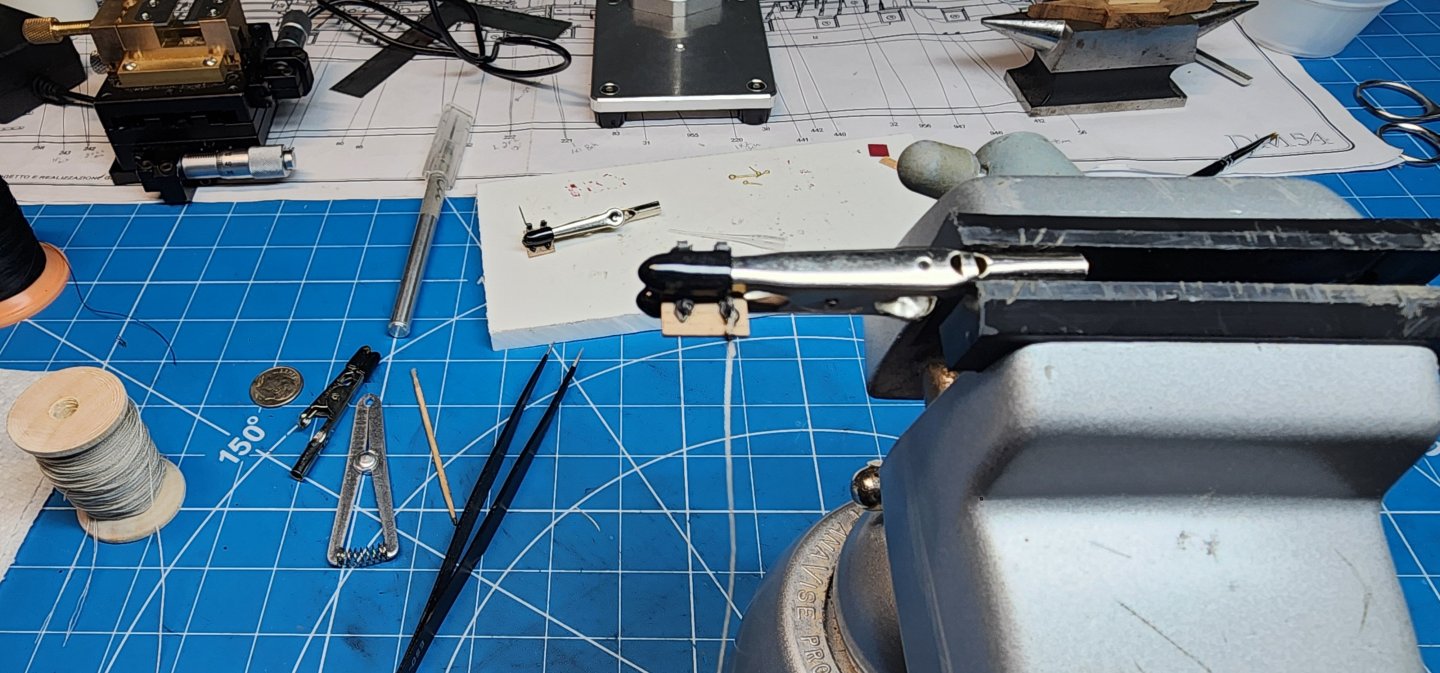
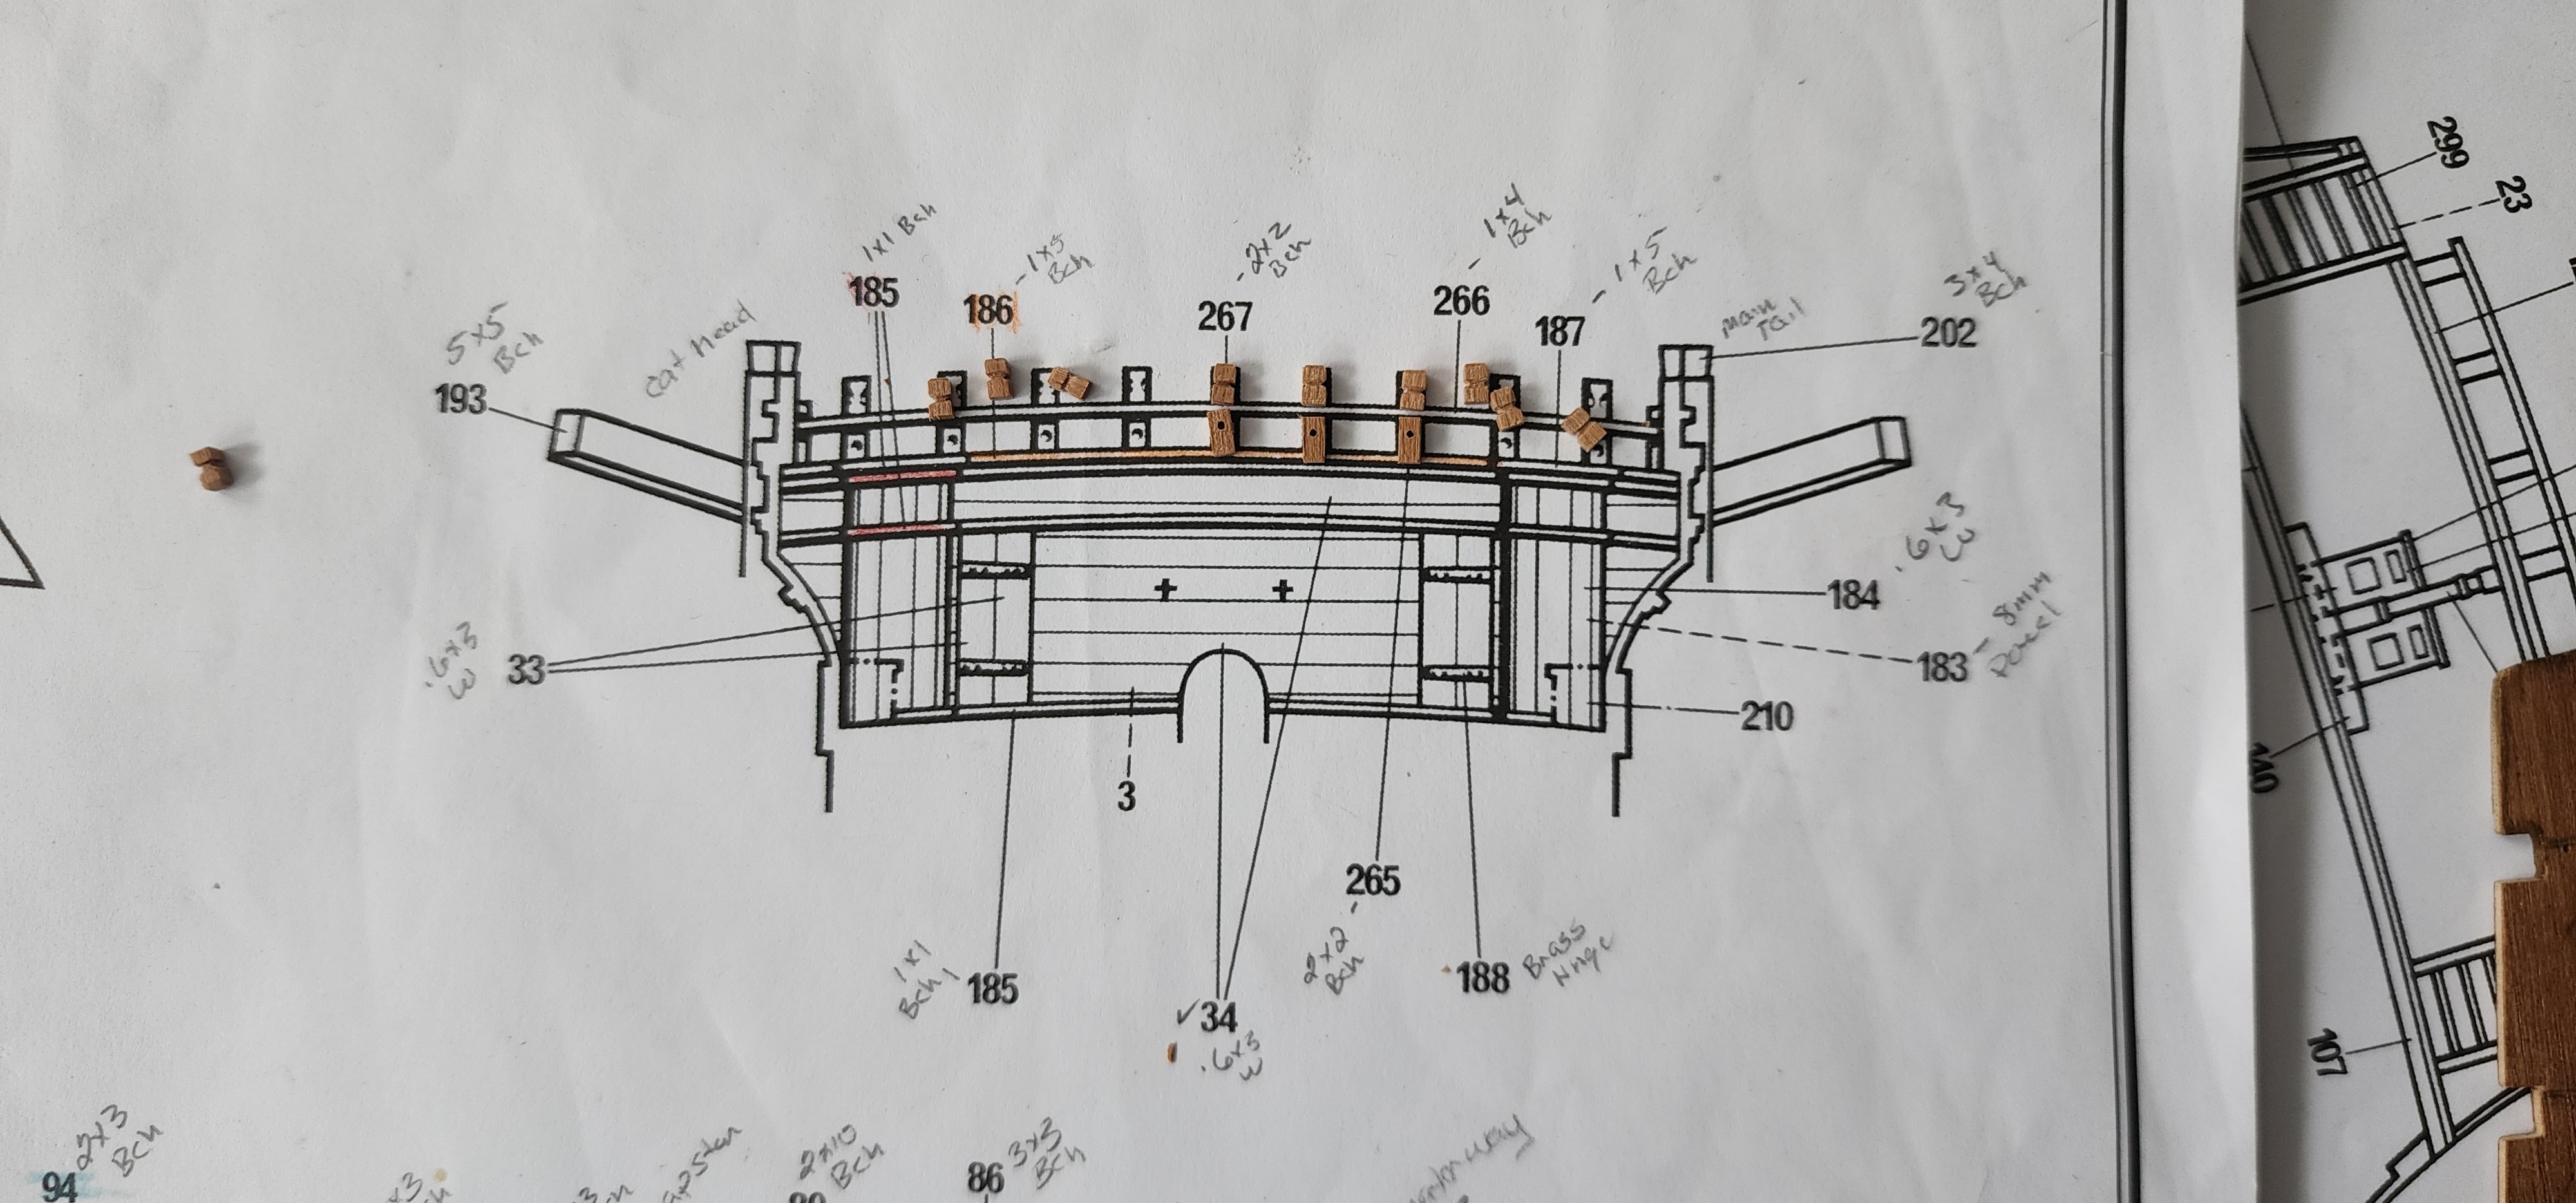
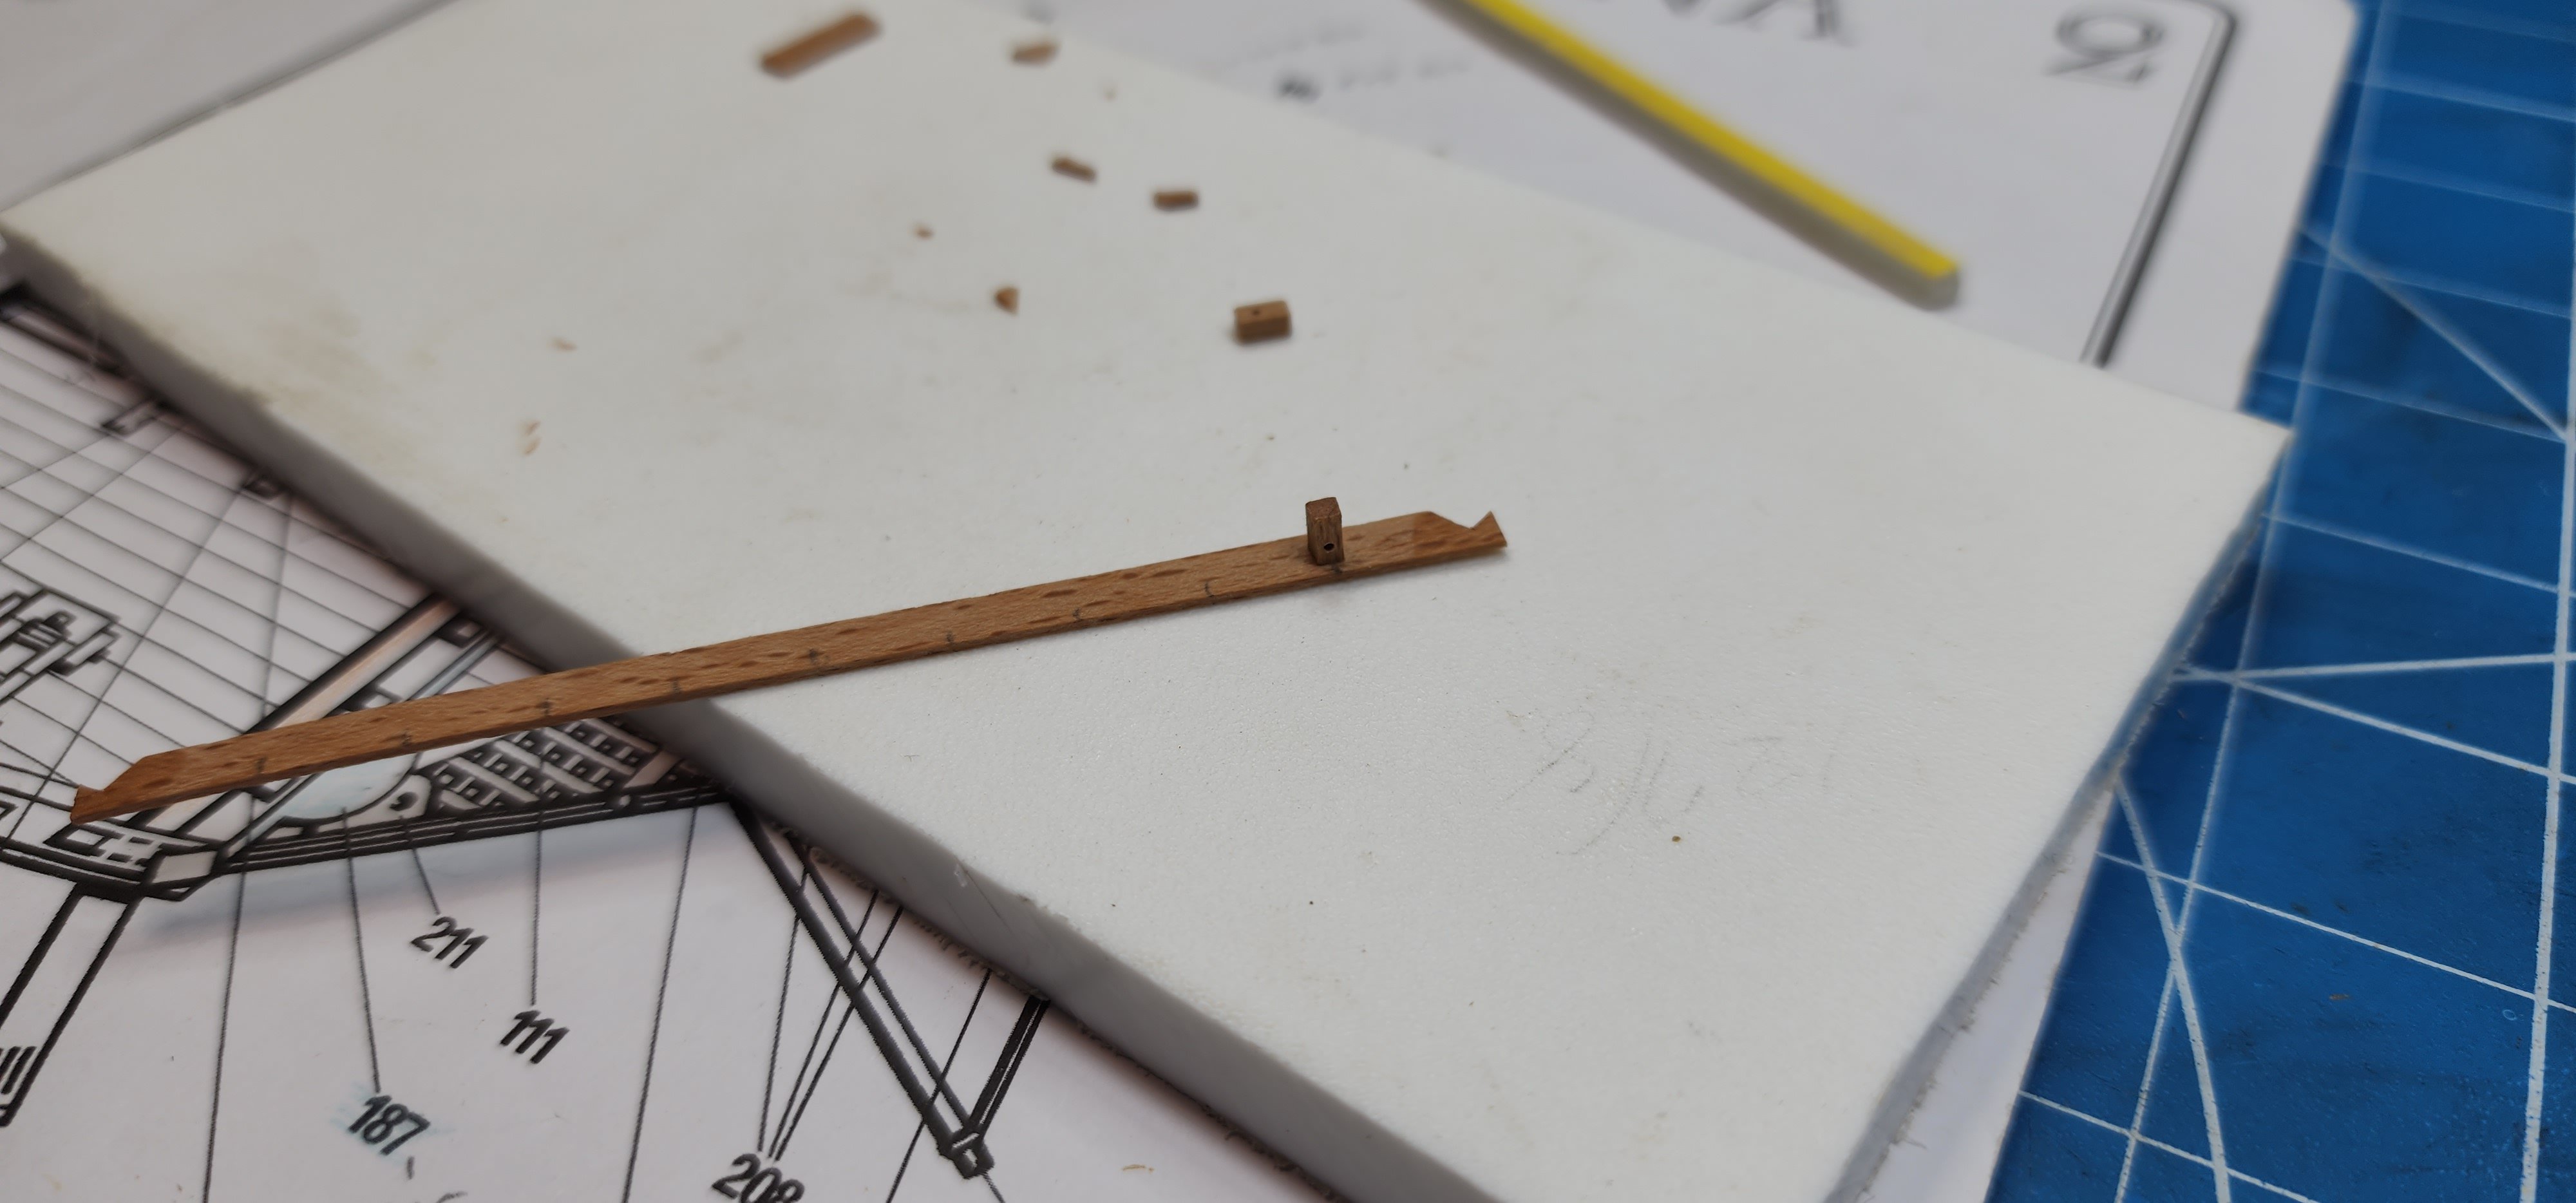
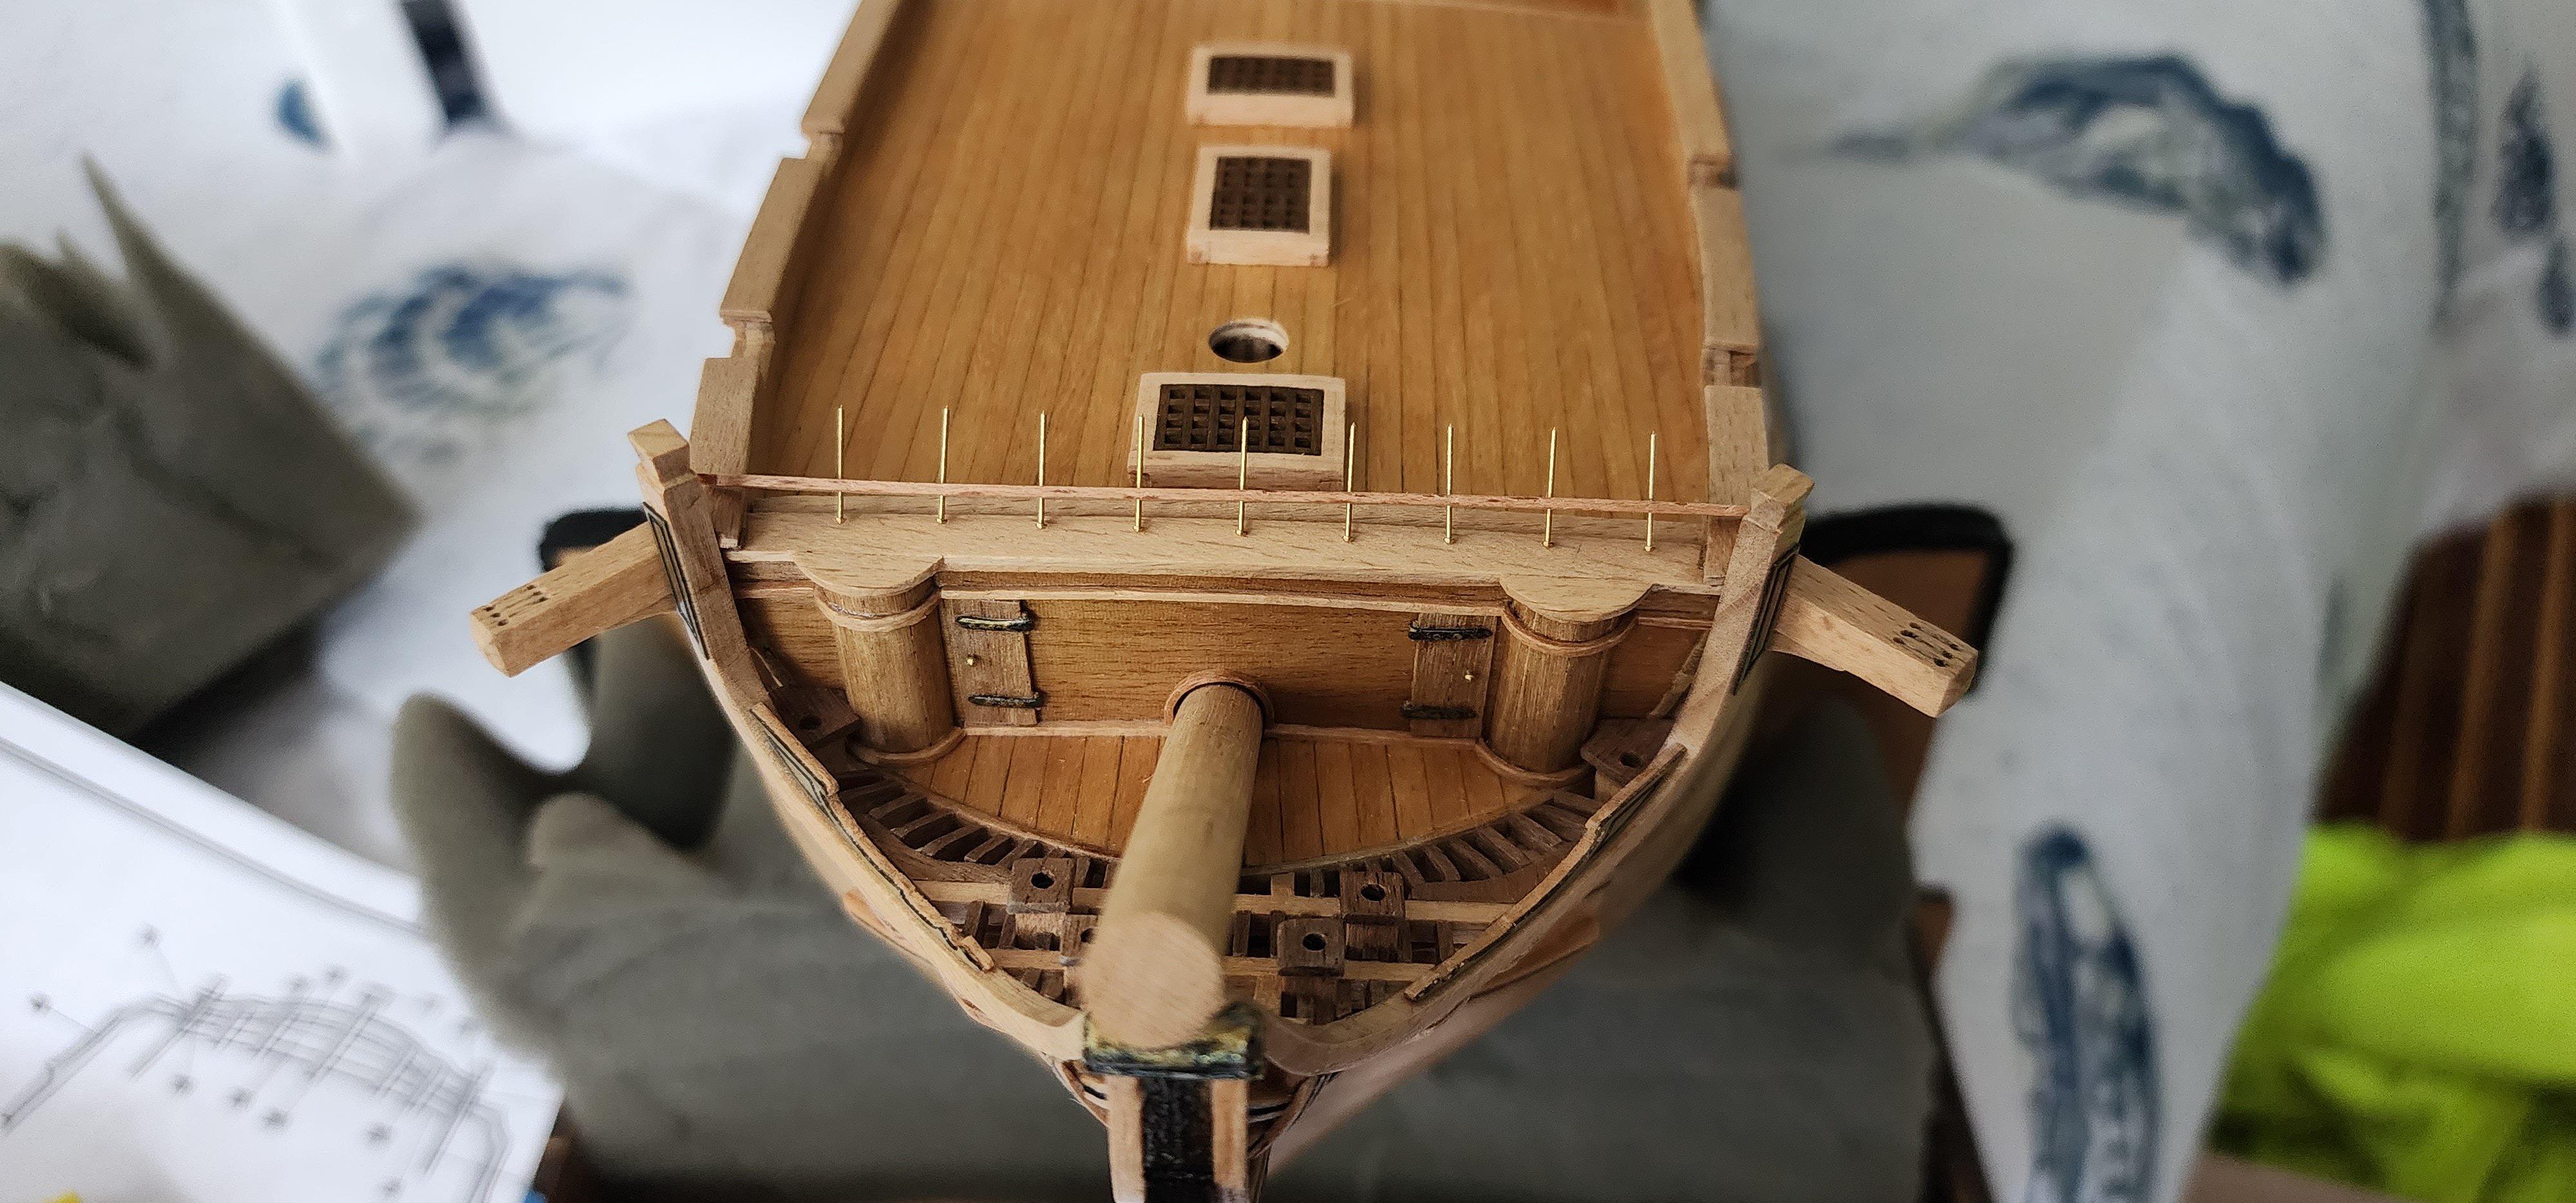
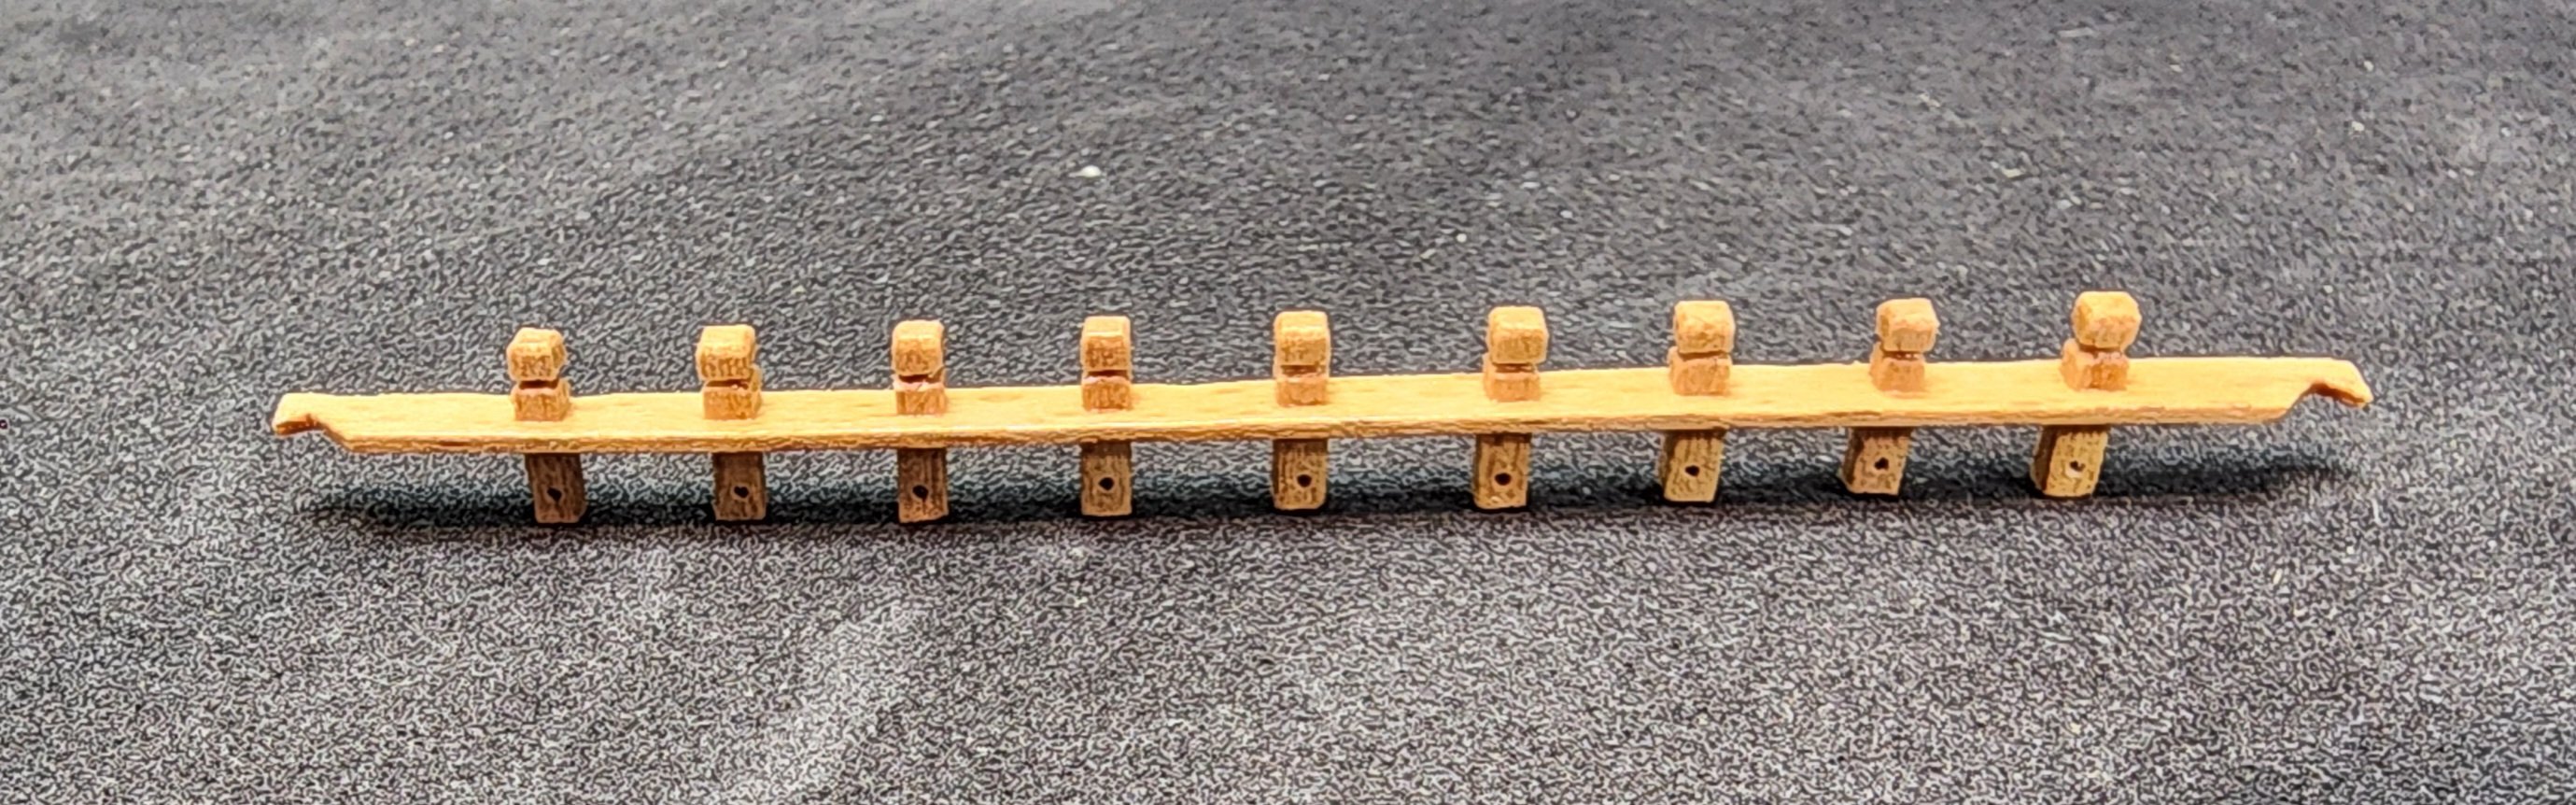
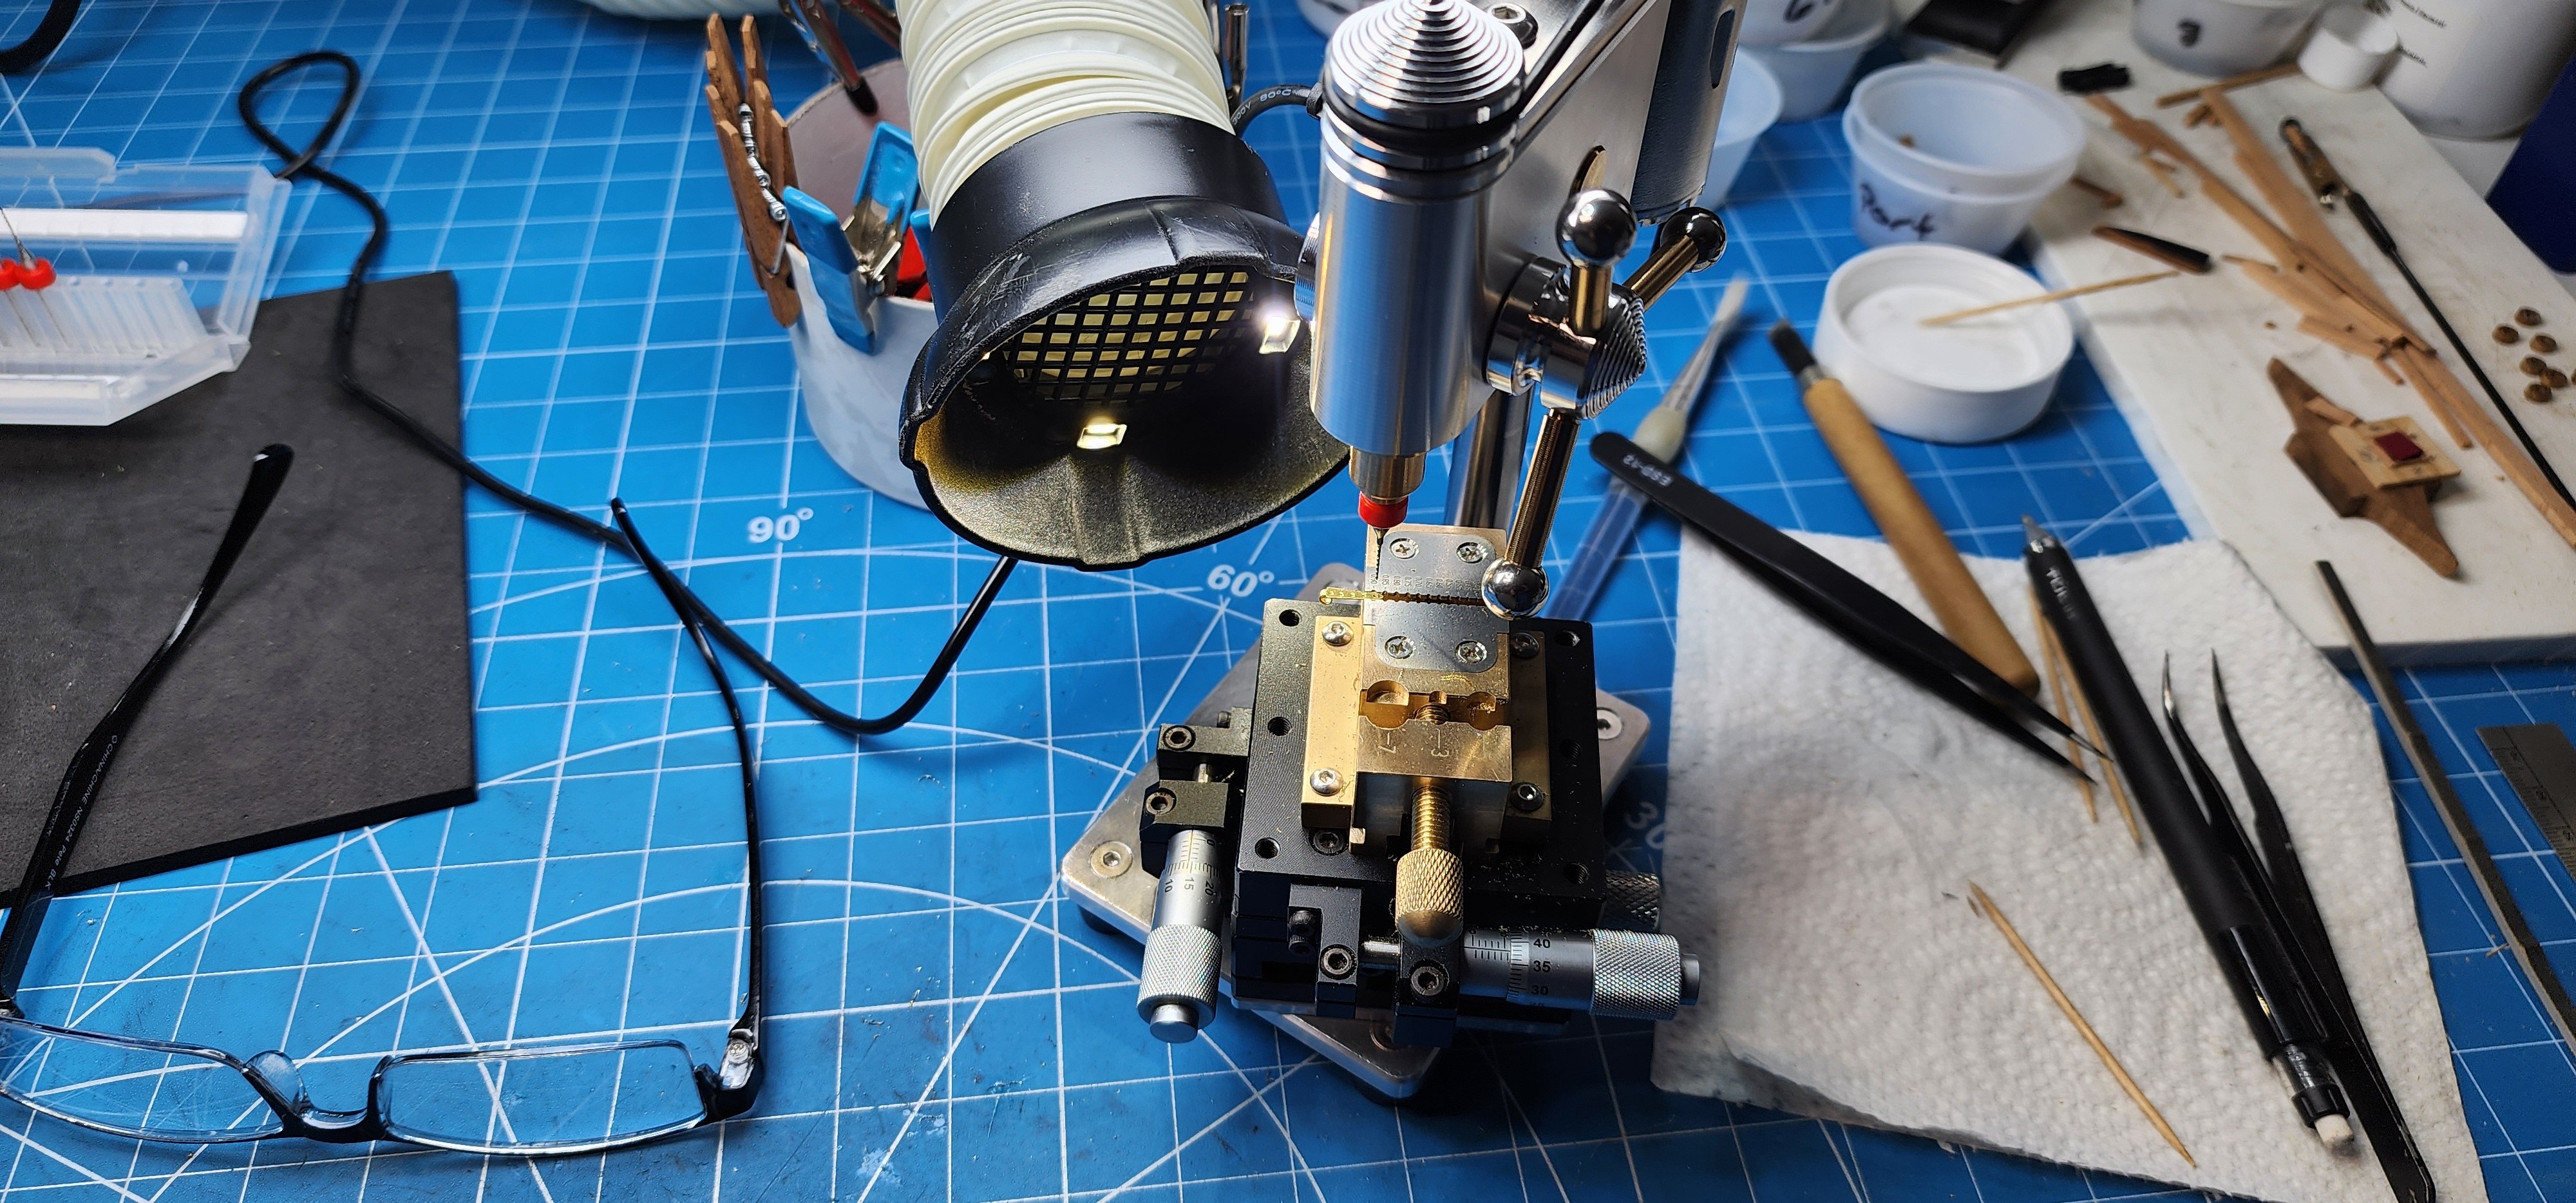
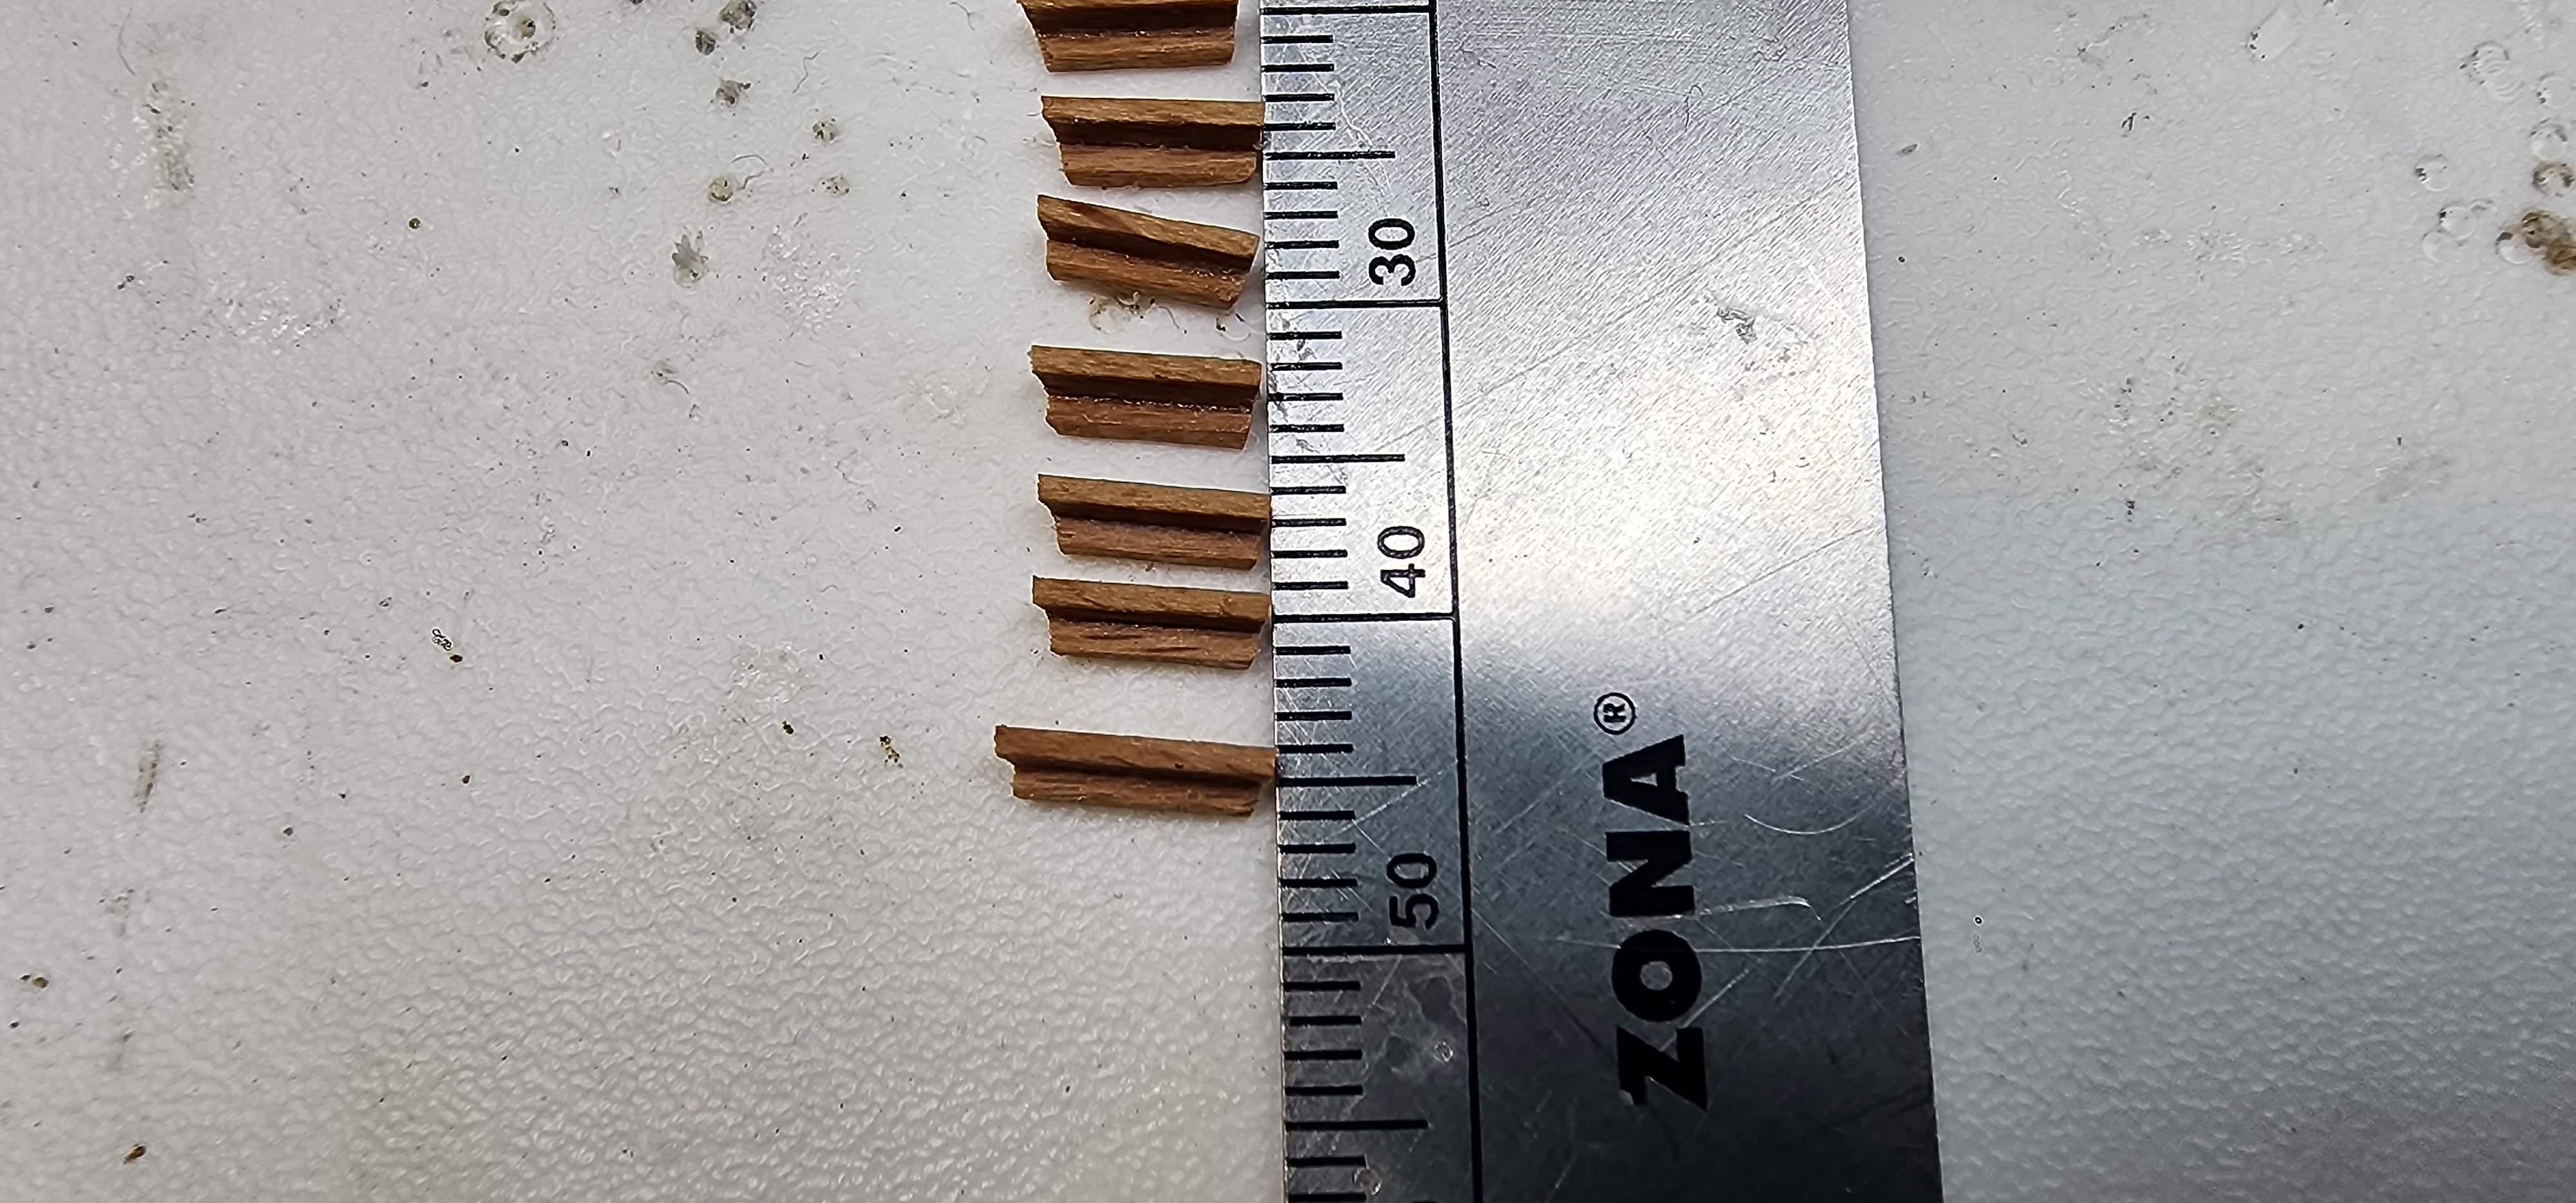
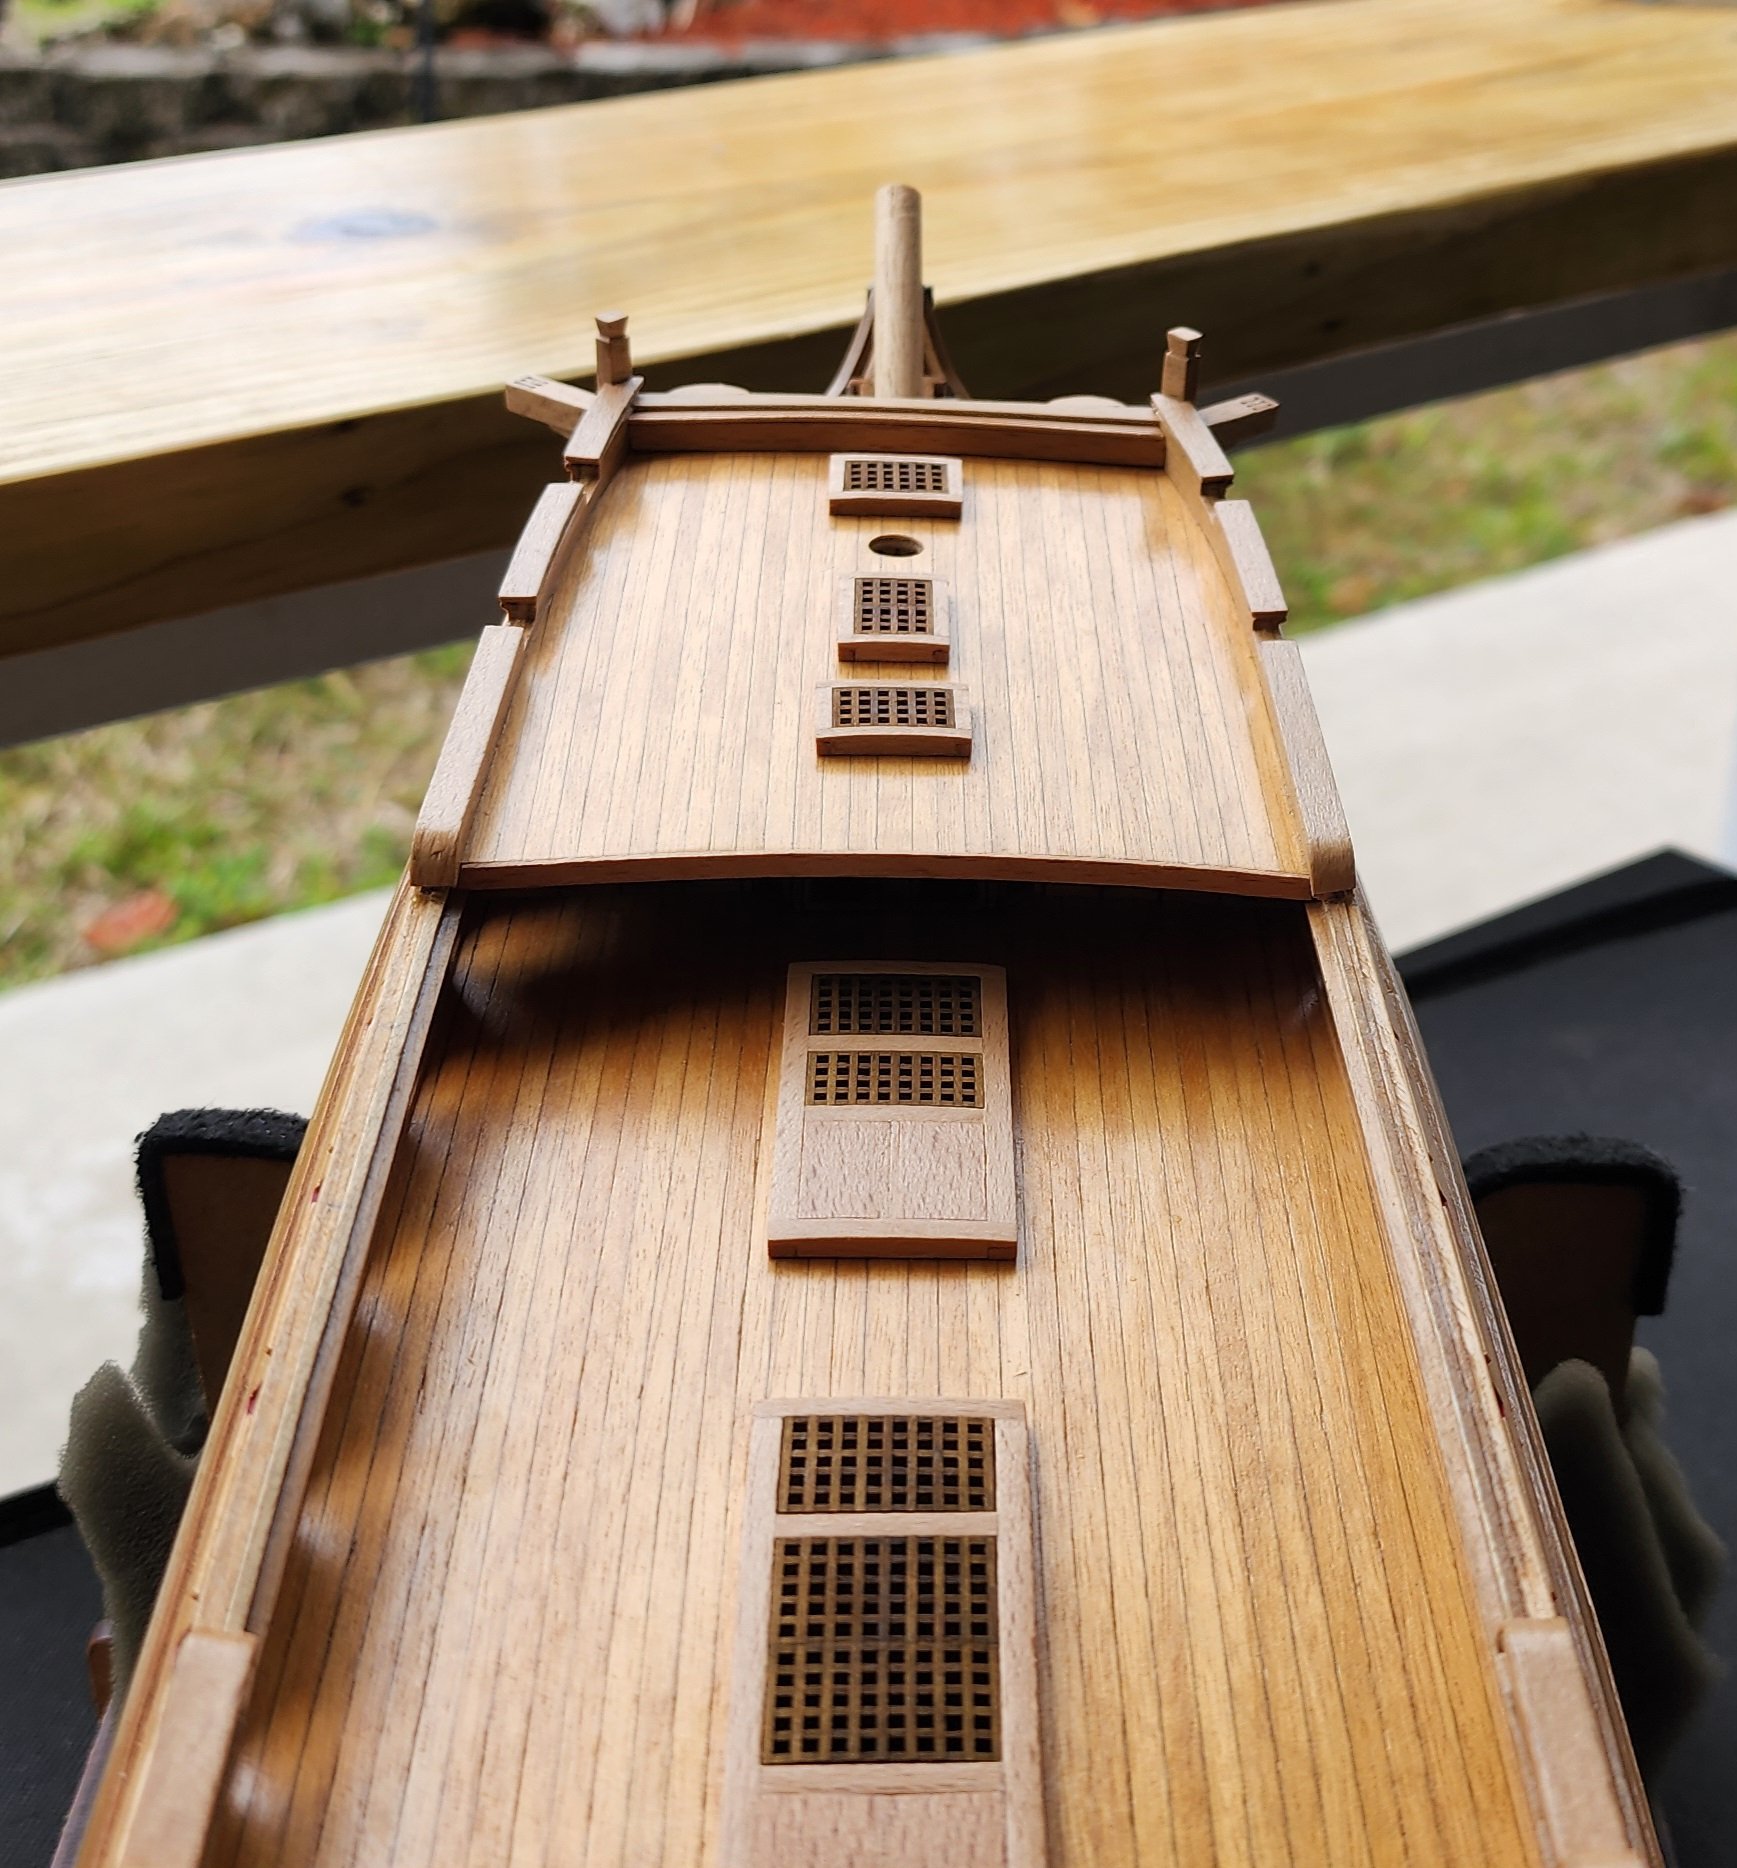
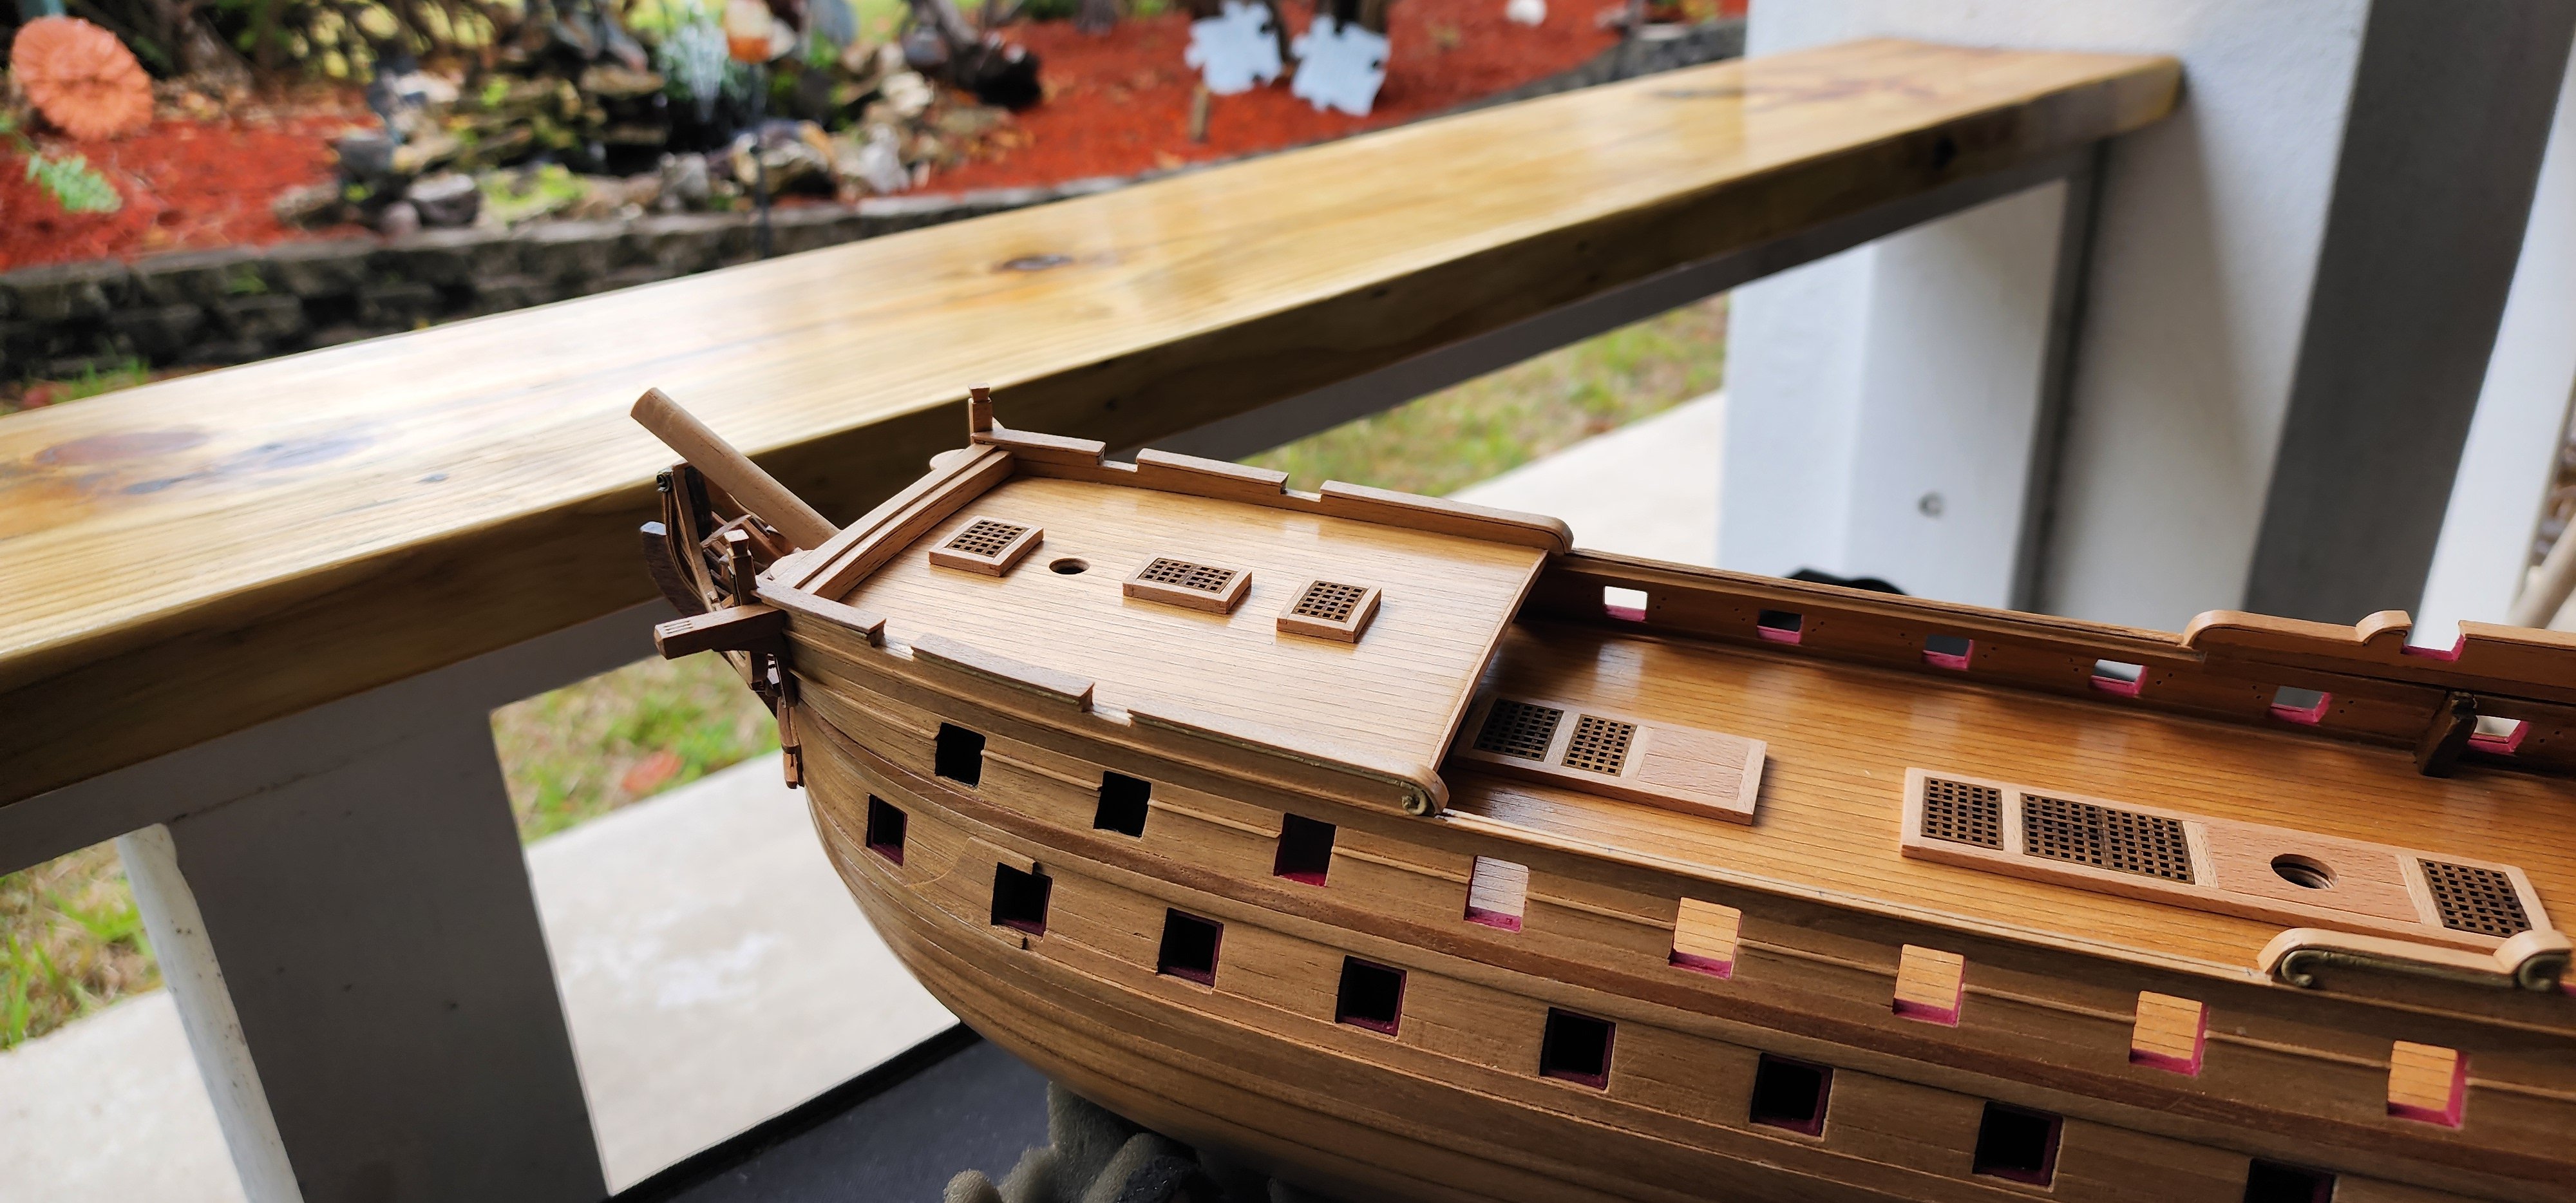
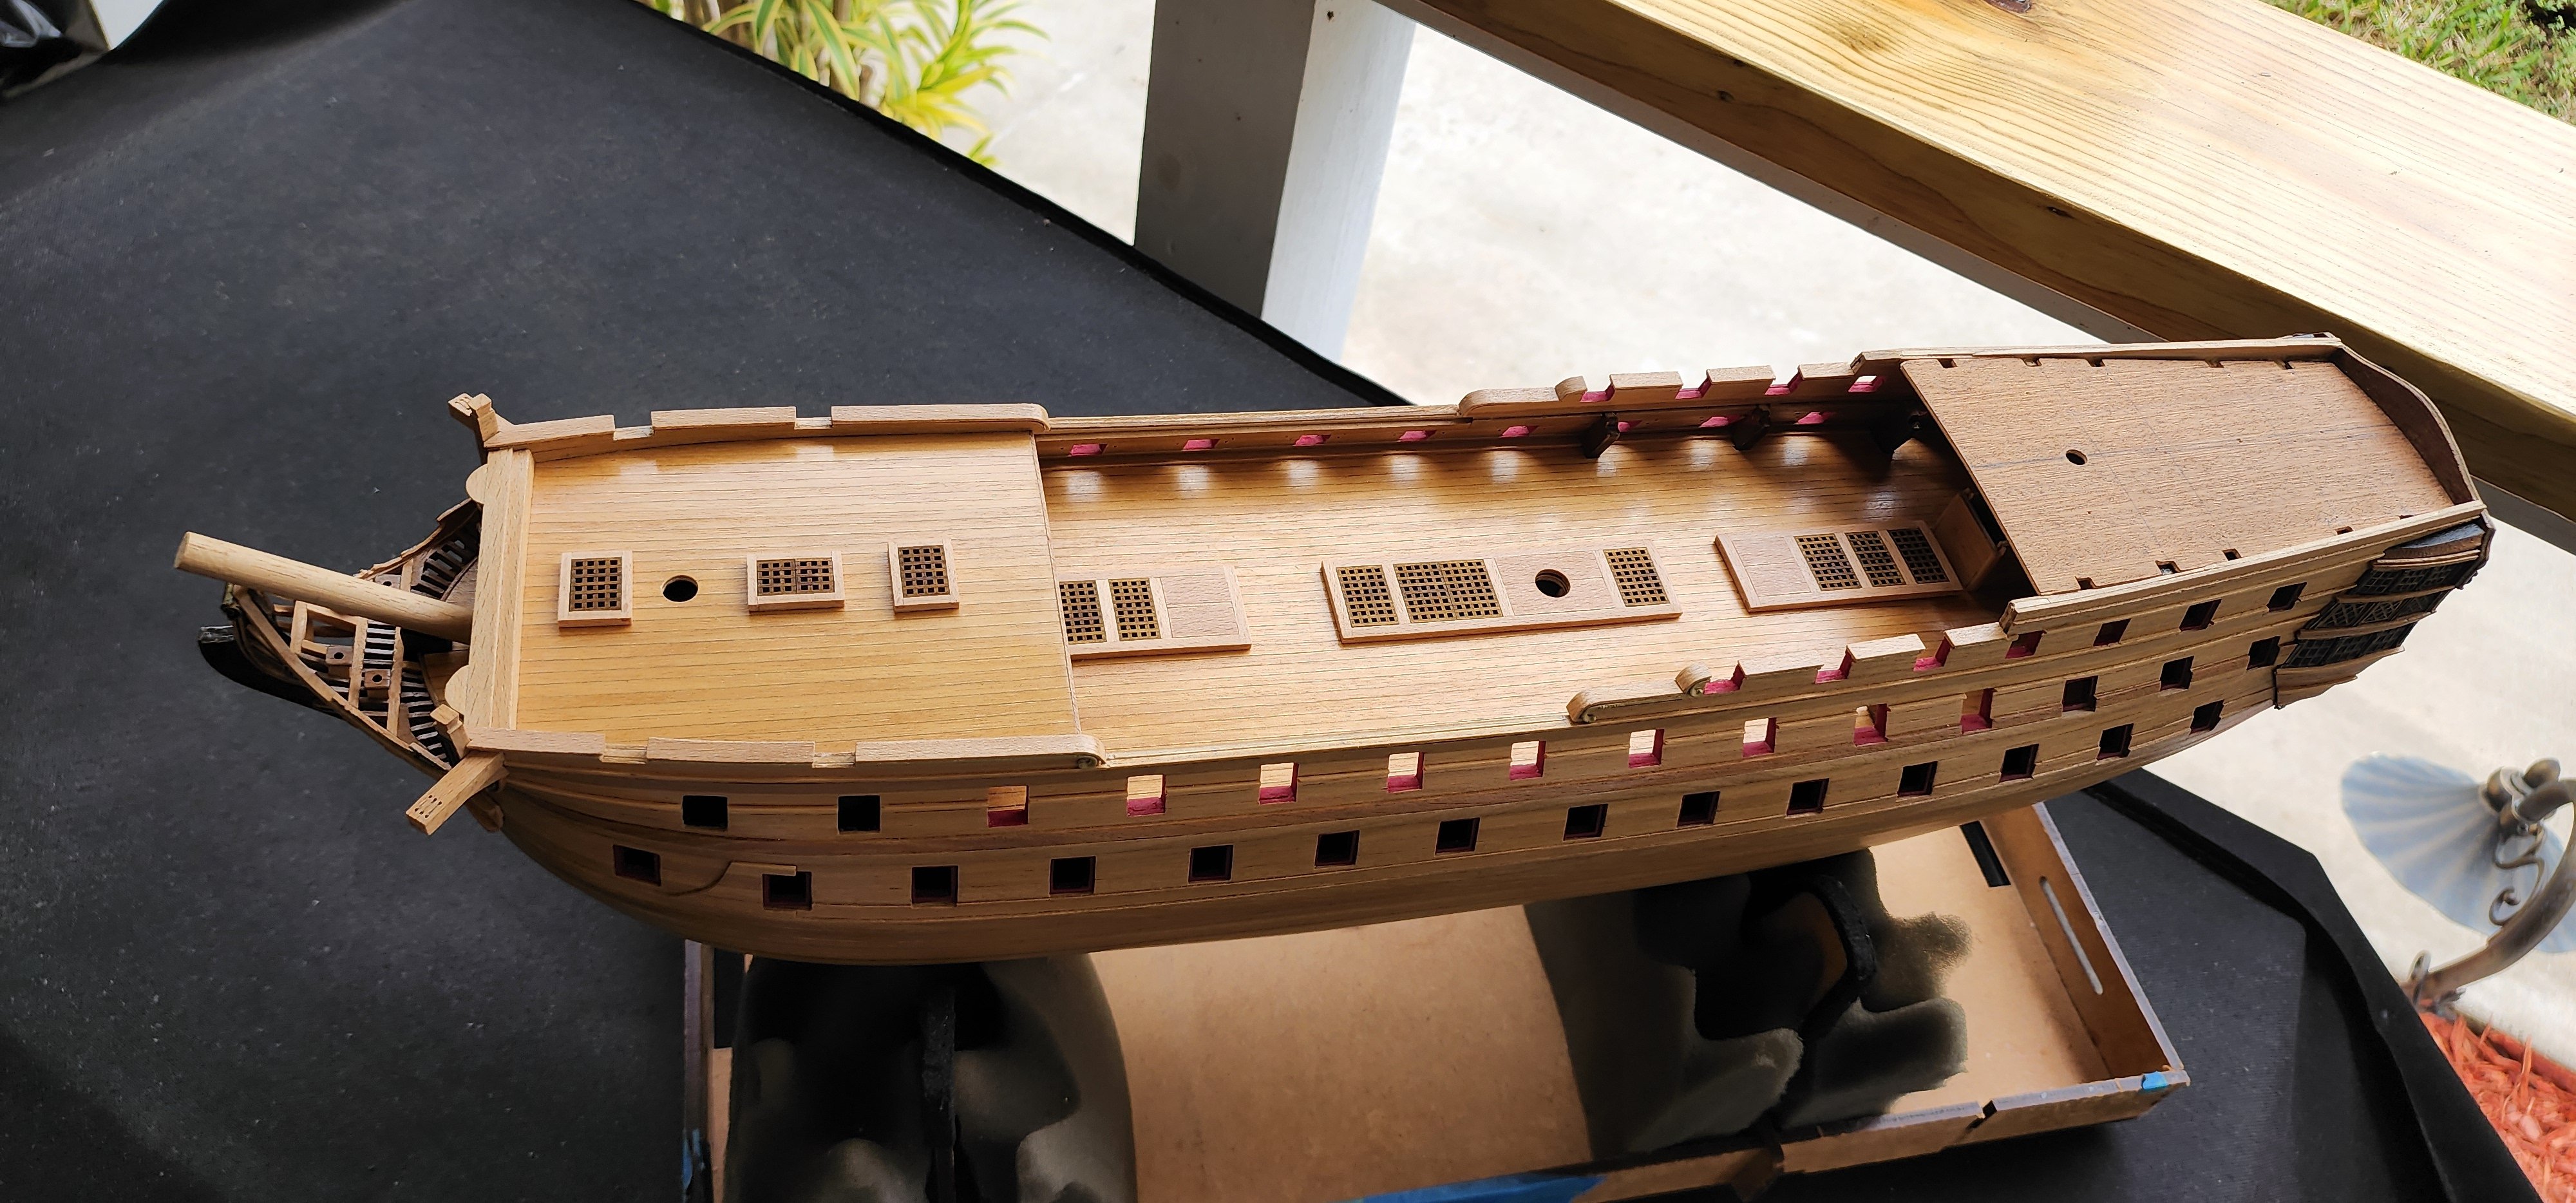
My last post left off with the dilemma of what sequence of assembly I need to take in reference to the cannon port hatches. Because of the conflict I believe I am going to have with the chain plates, I decided that I should start working on the channels. The plywood channels that came with the kit were not very pleasing to me, so I decided that I would make my own using some Walnut stock that I have. This was a straightforward task as all I needed to do was trace the kit parts onto the Walnut stock and cut them to size and shape the ends of each channel. The Walnut stock that I used is a bit thicker, being 2mm versus the 1.5mm kit parts. This will allow me to insert a pin into the channel to help secure it to the hull when the time comes. I started working on the chain plates to get a feel of what the process is going to be when I start my mass production of those assemblies. I needed to take a break from this part of the build, so I decided to shift gears and circle back to the forecastle. I started by fabricating the stanchions that are going to be part of the head rail. The overall dimensions for the stations including the railing are 8mm. So, I first shaped the top stanchions from 2 x 2mm beechwood and then cut them down to 3mm. I then cut the lower stanchion from the same 2 x 2mm beechwood to 4mm. The railing is 4 x 1mm which left me with an overall height of 8mm. I dilled the holes for the future lines that will be passing through the lower stanchions using my mini drill press and a .5mm drill bit. I shaped the railing to fit around the headrail and then laid out the spacing of where the stanchions would be. I then drilled out the railing and inserted pins to secure the stations when installed. I drilled the stanchions to accept the pins and then installed them on the railing. After this was completed, I applied a couple coats of WOP and put them whole assembly to the side to install later. Well, that’s all I have for now. I appreciate you reading and as always, your comments and guidance are always welcome.
Cheers
Nearshore


- Mr Whippy, petervisser and Ronald-V
-
3
-
Hello All,
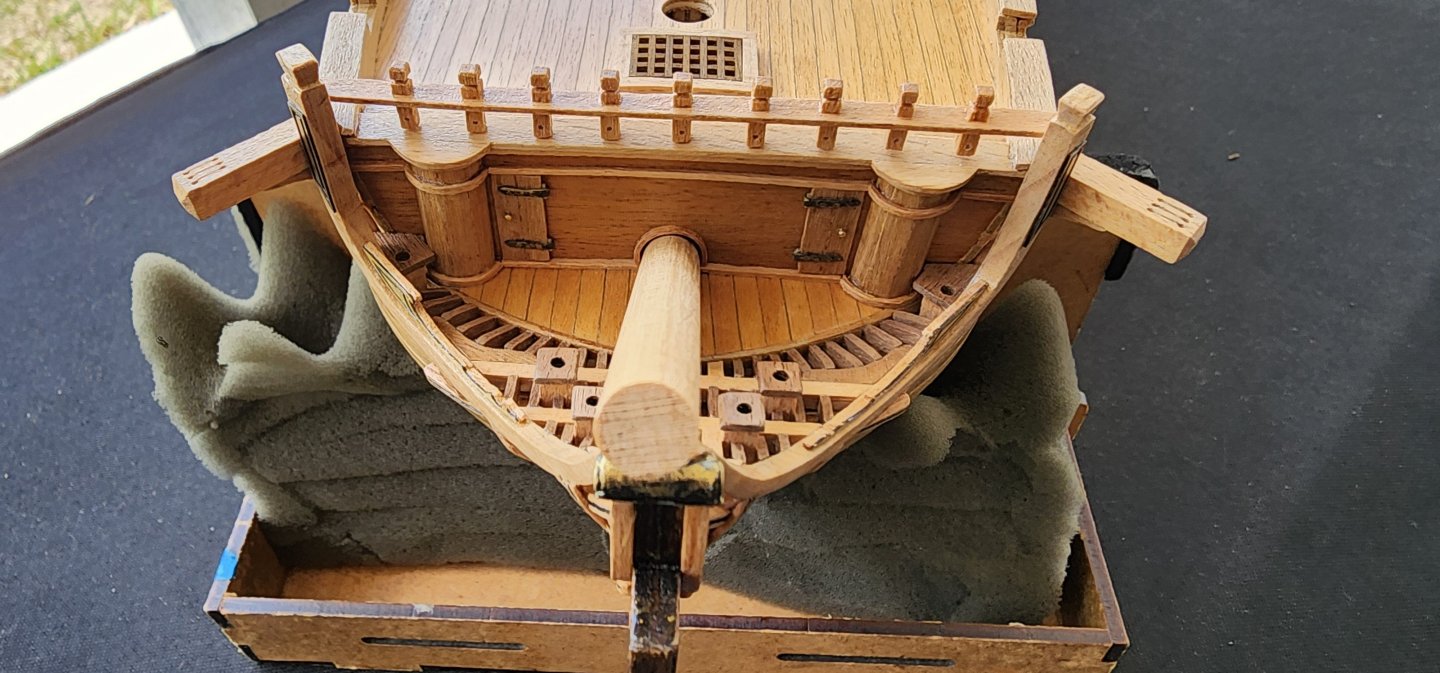
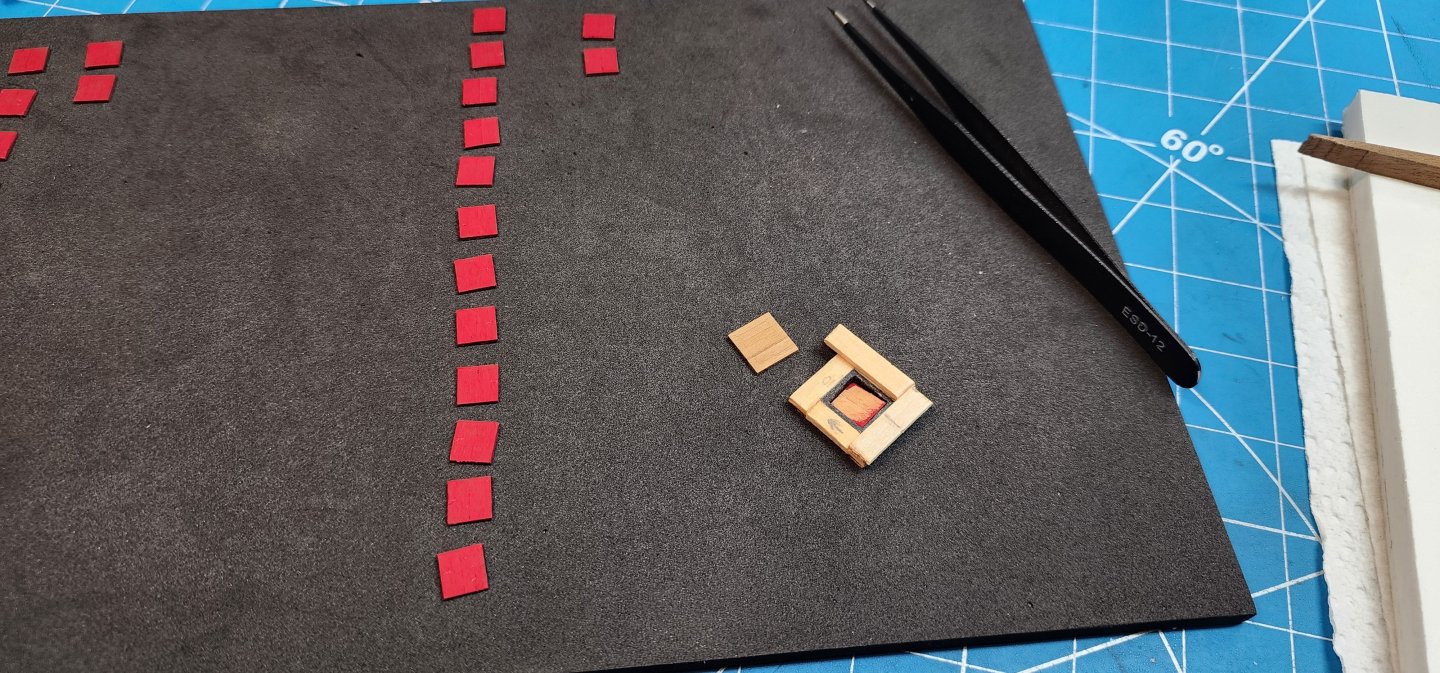
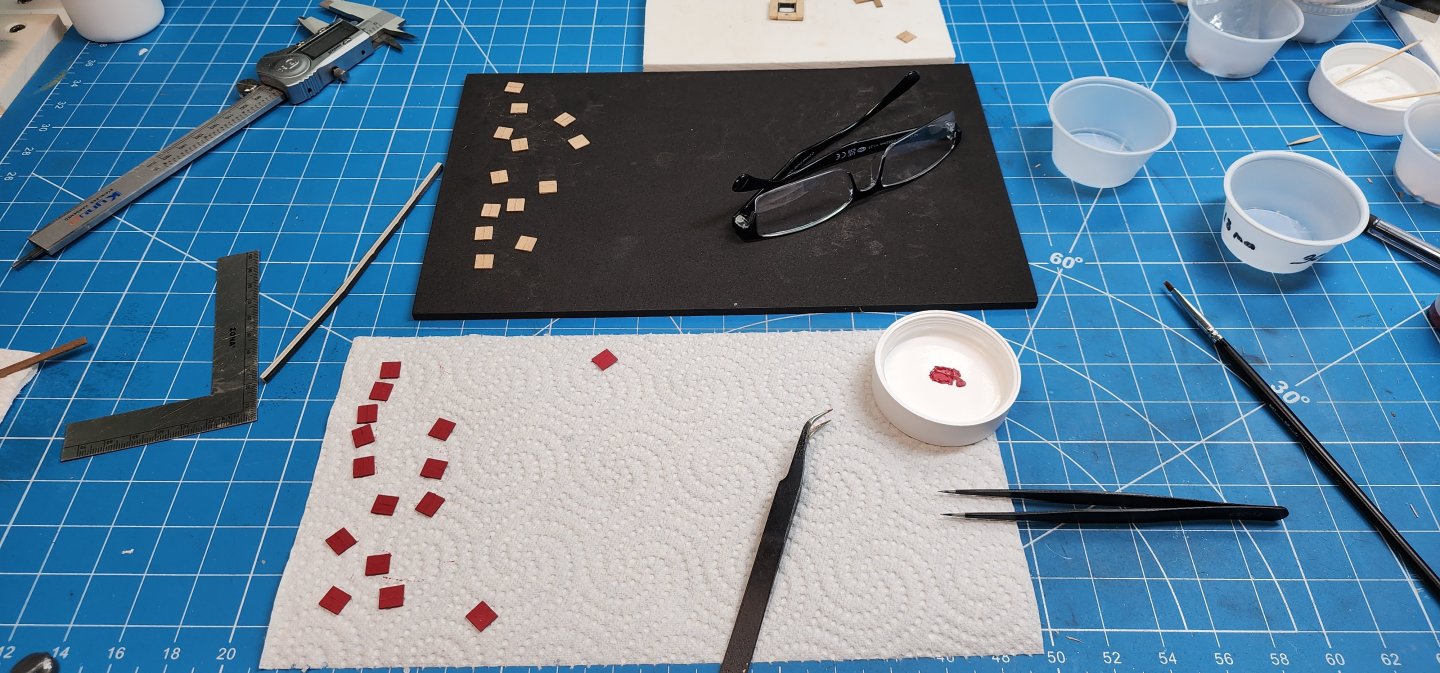
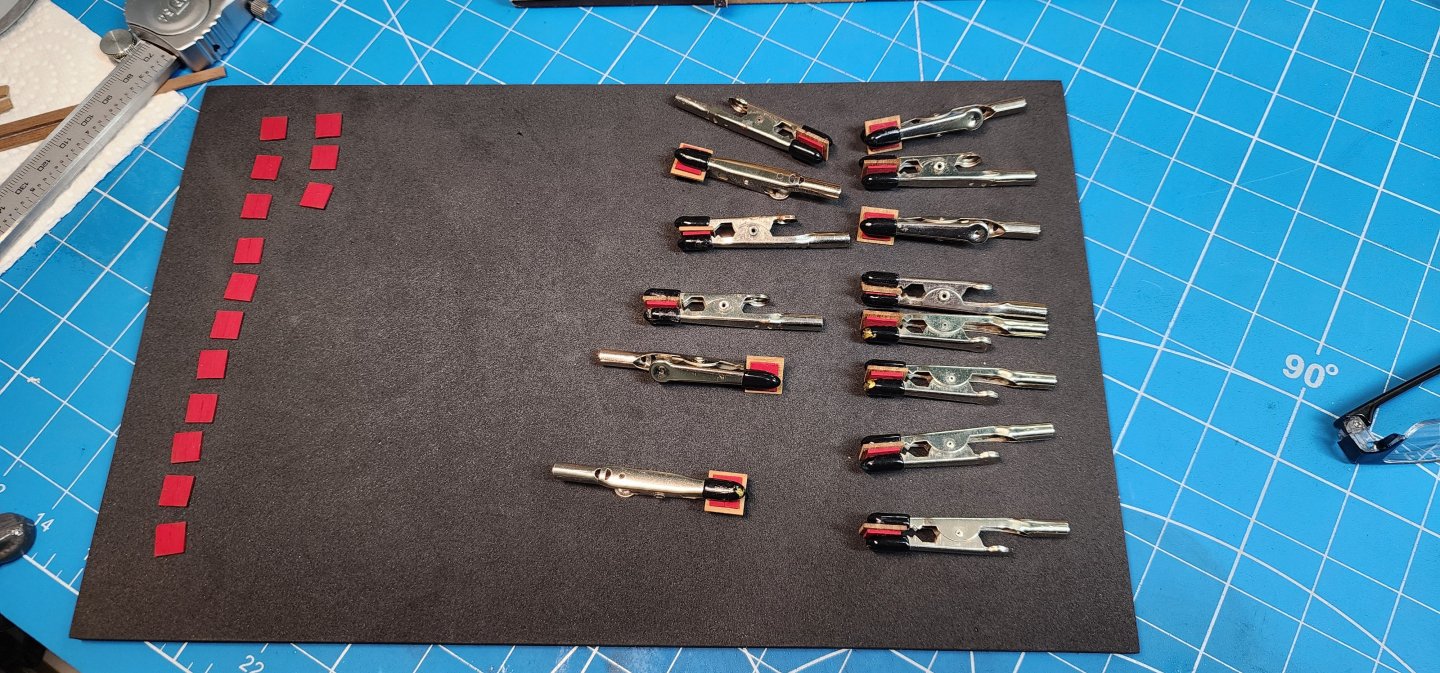
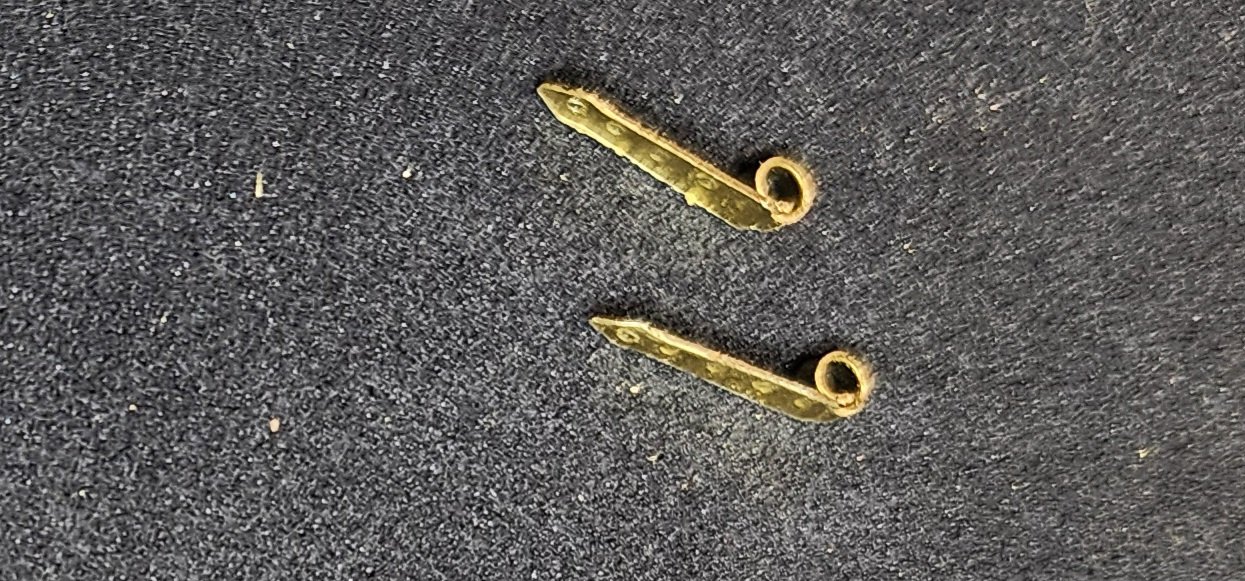
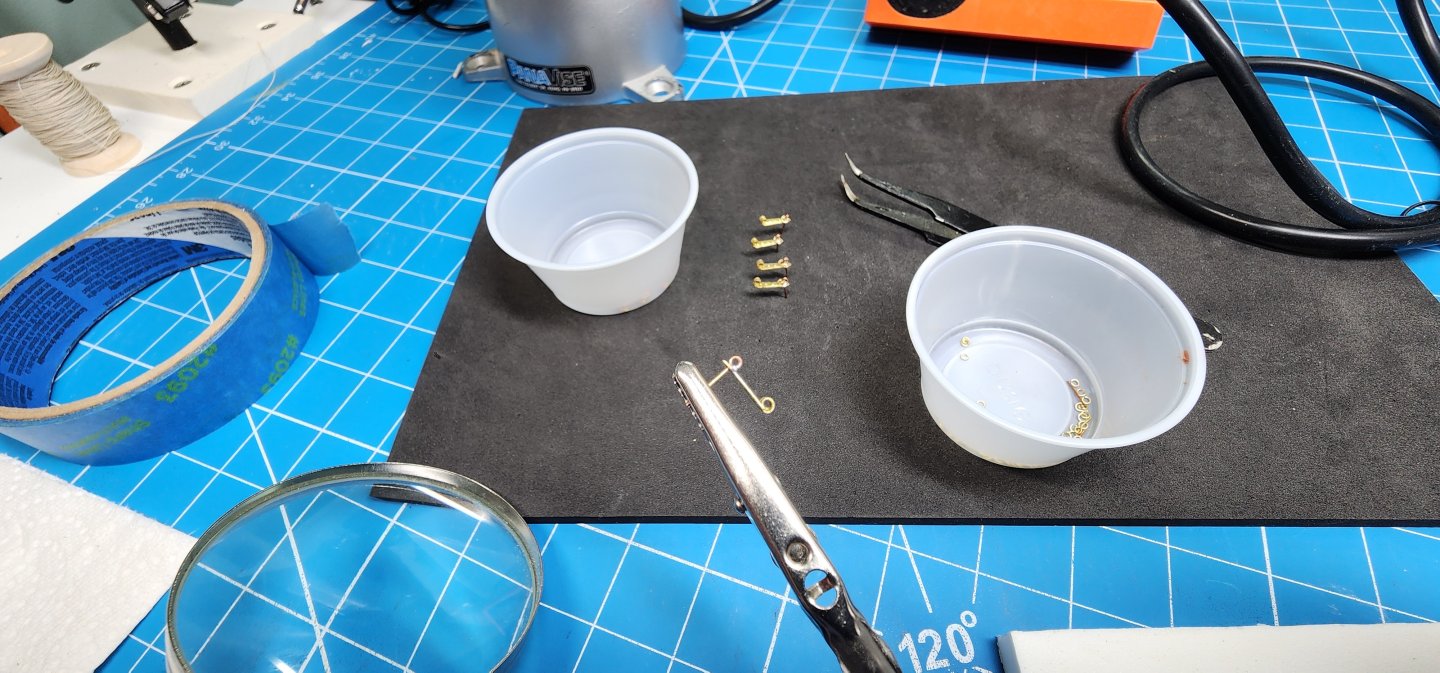
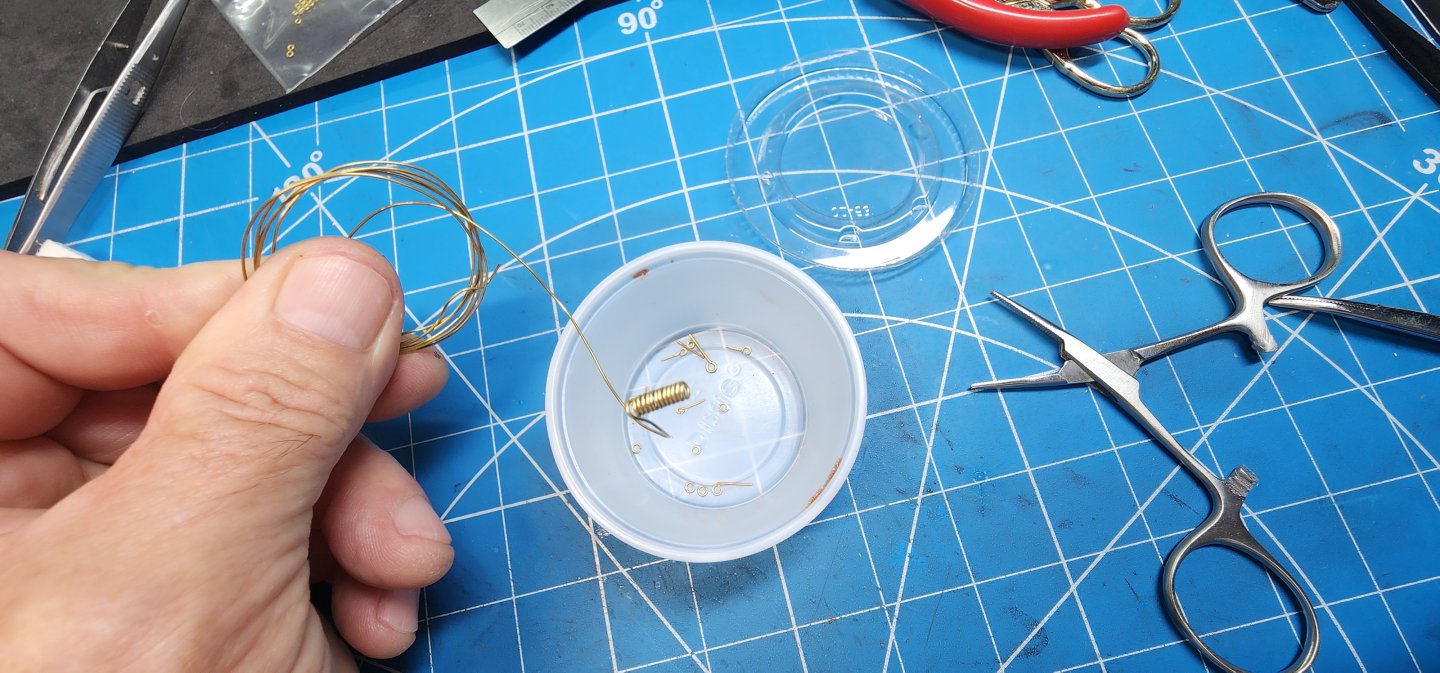
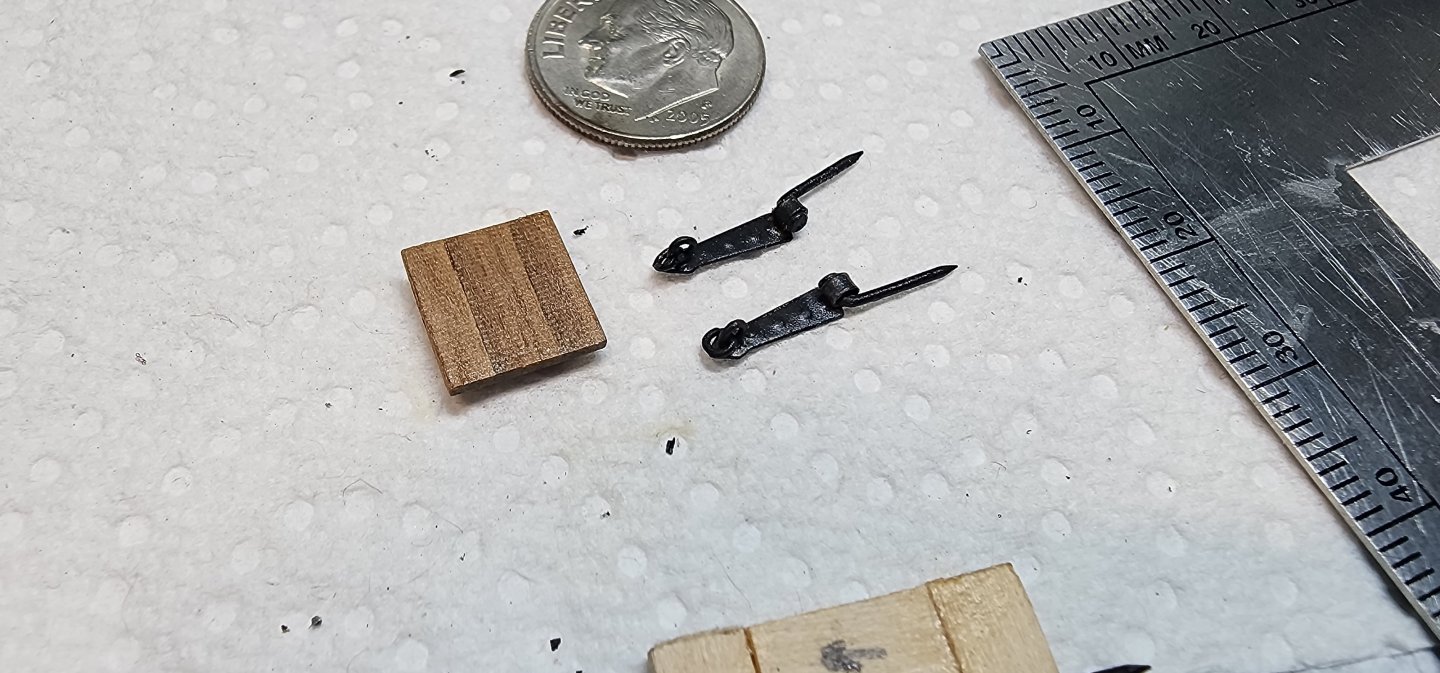
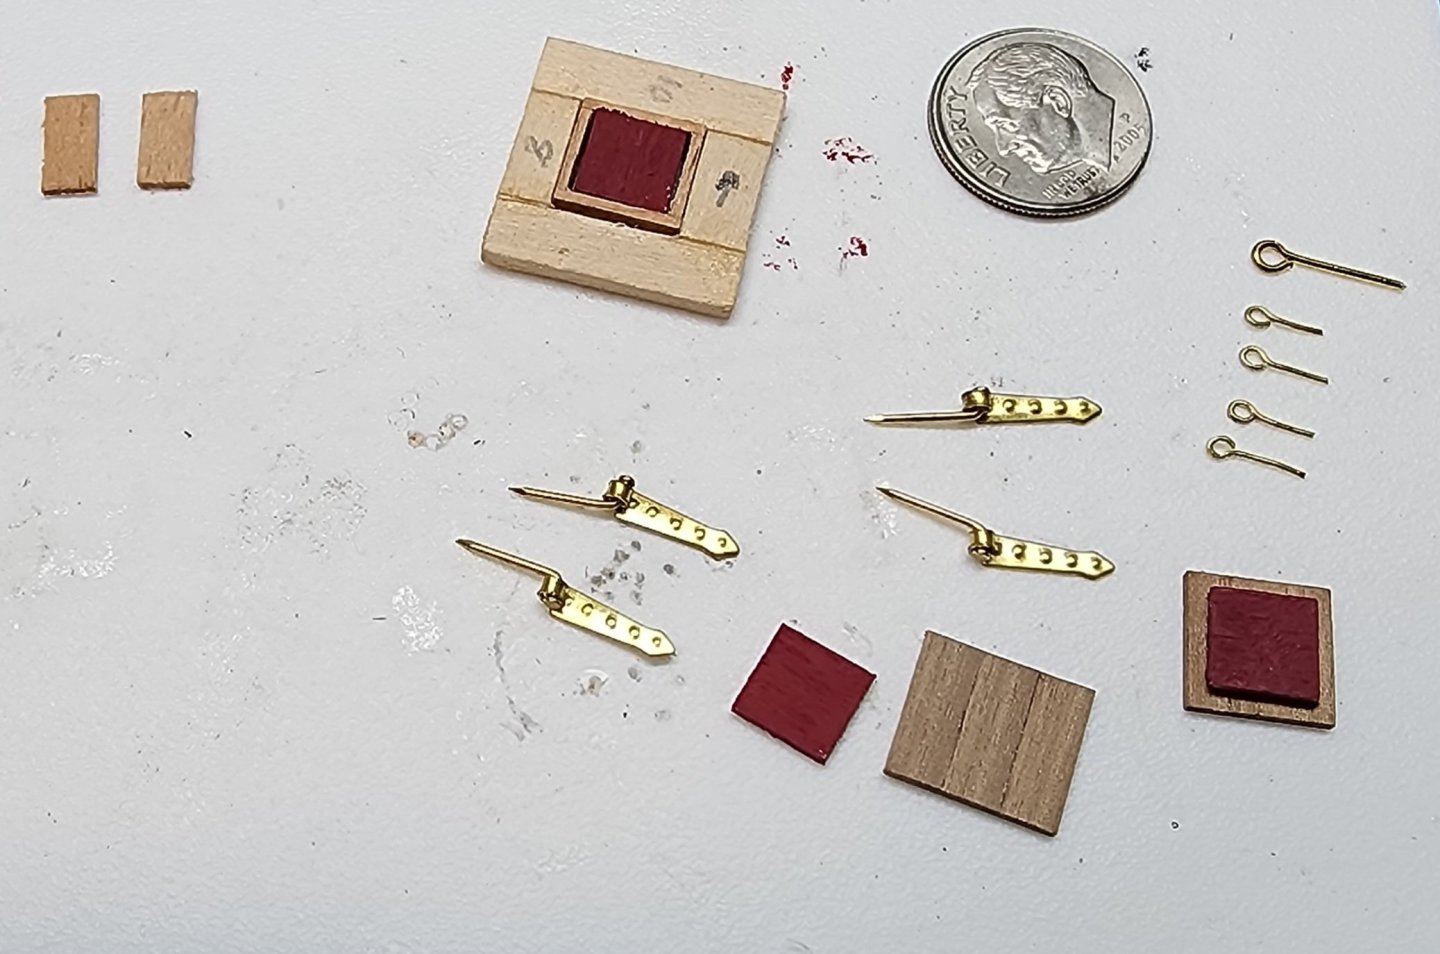
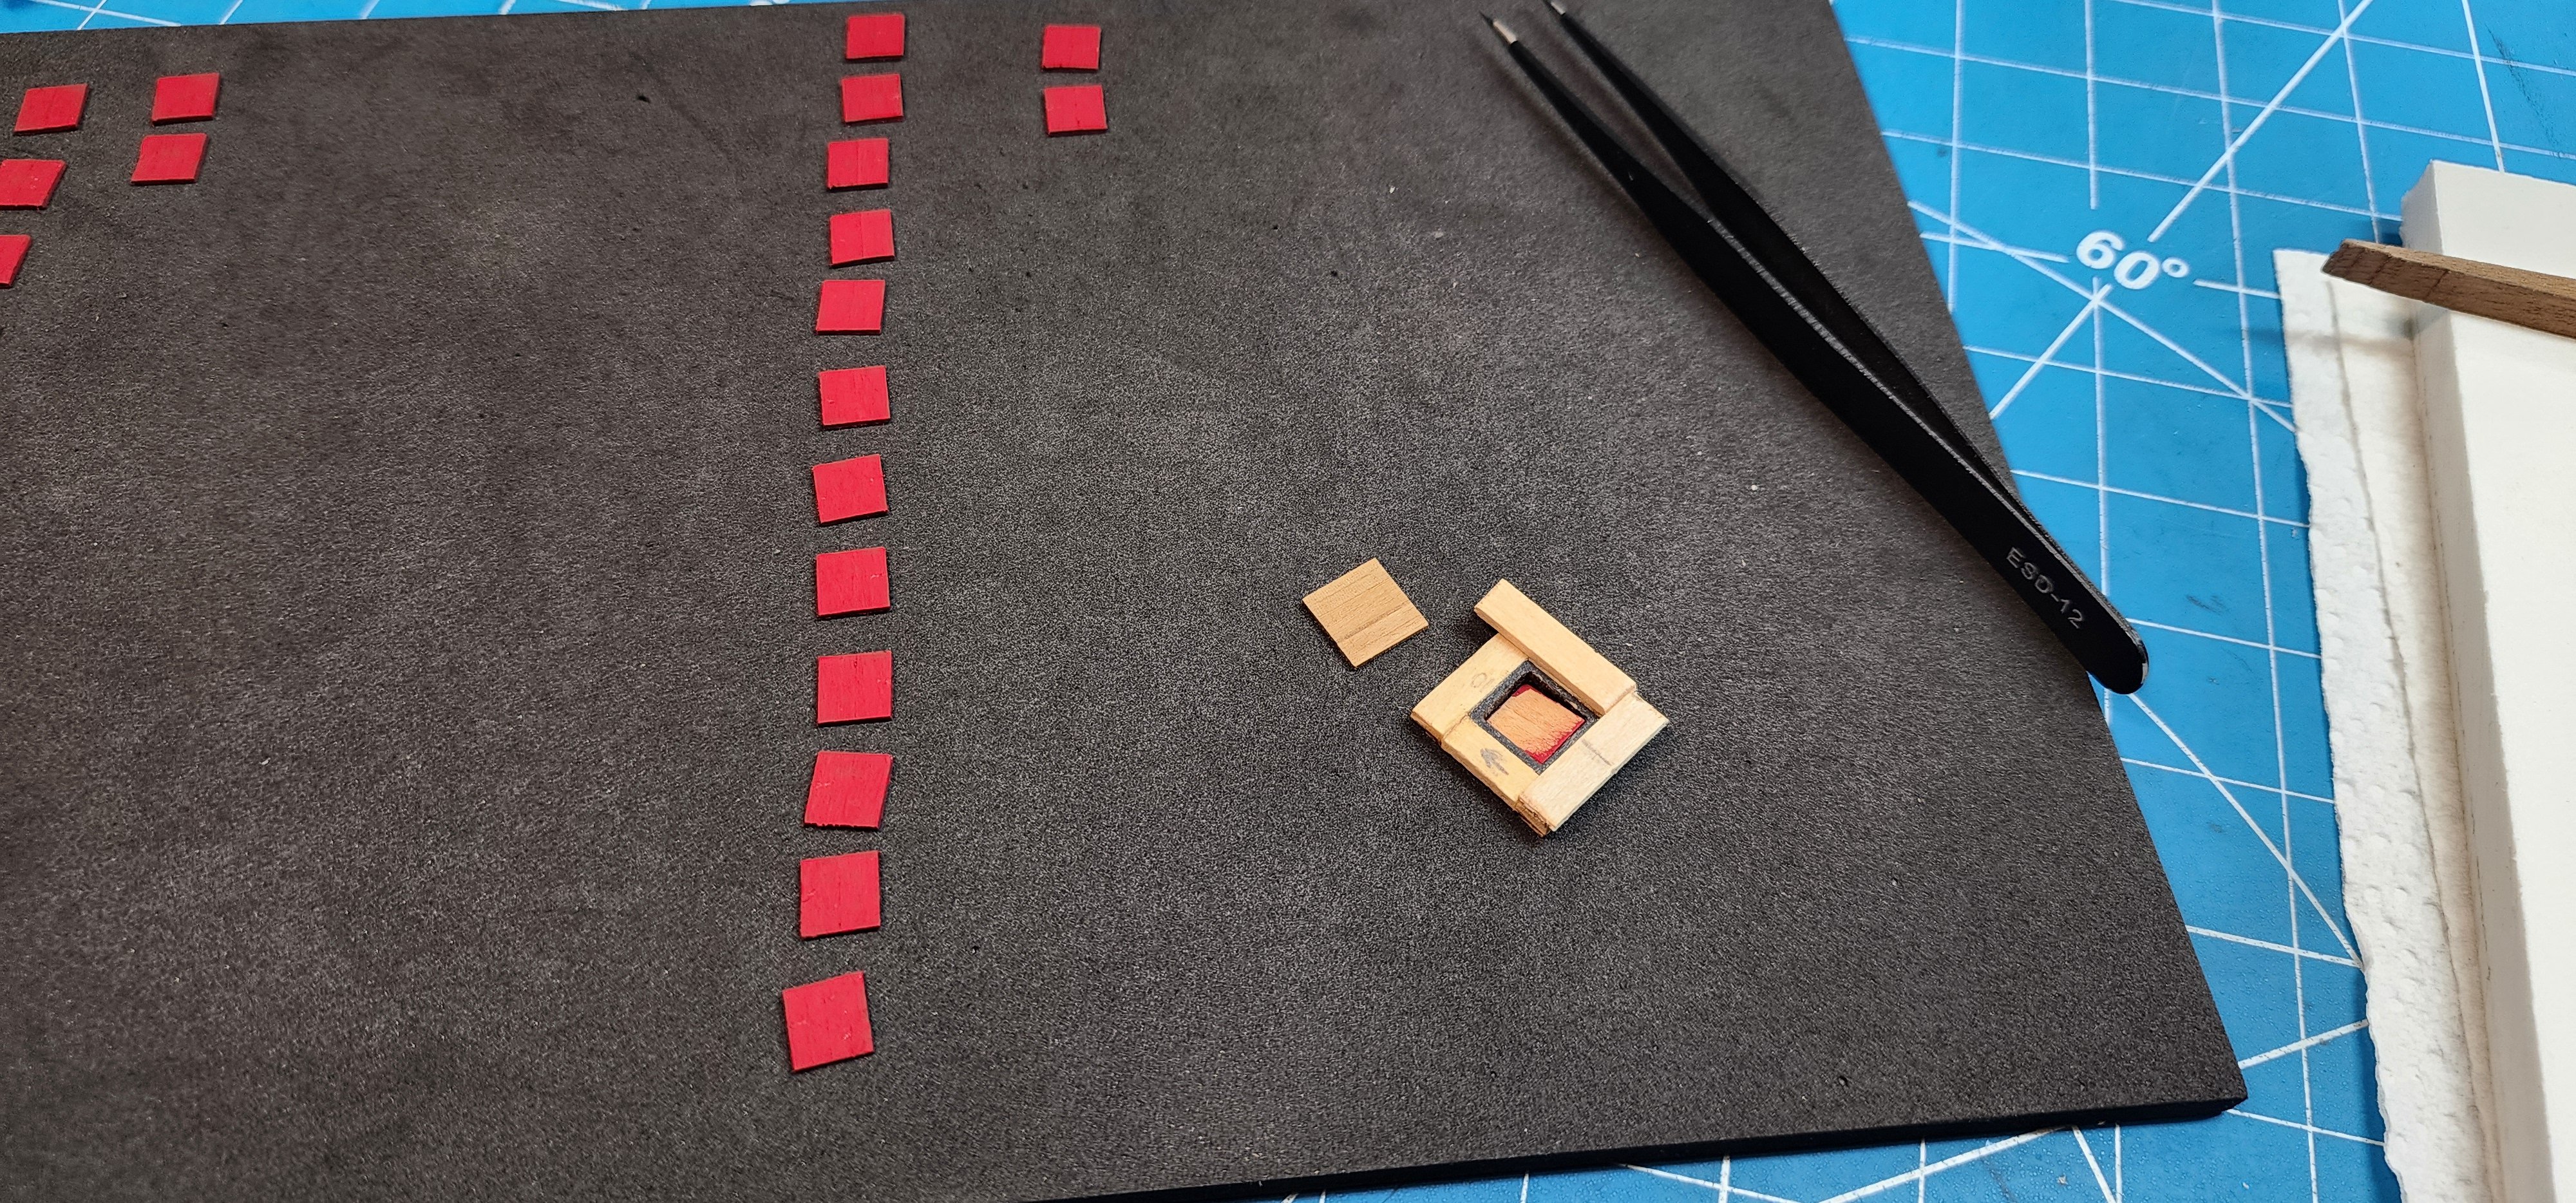
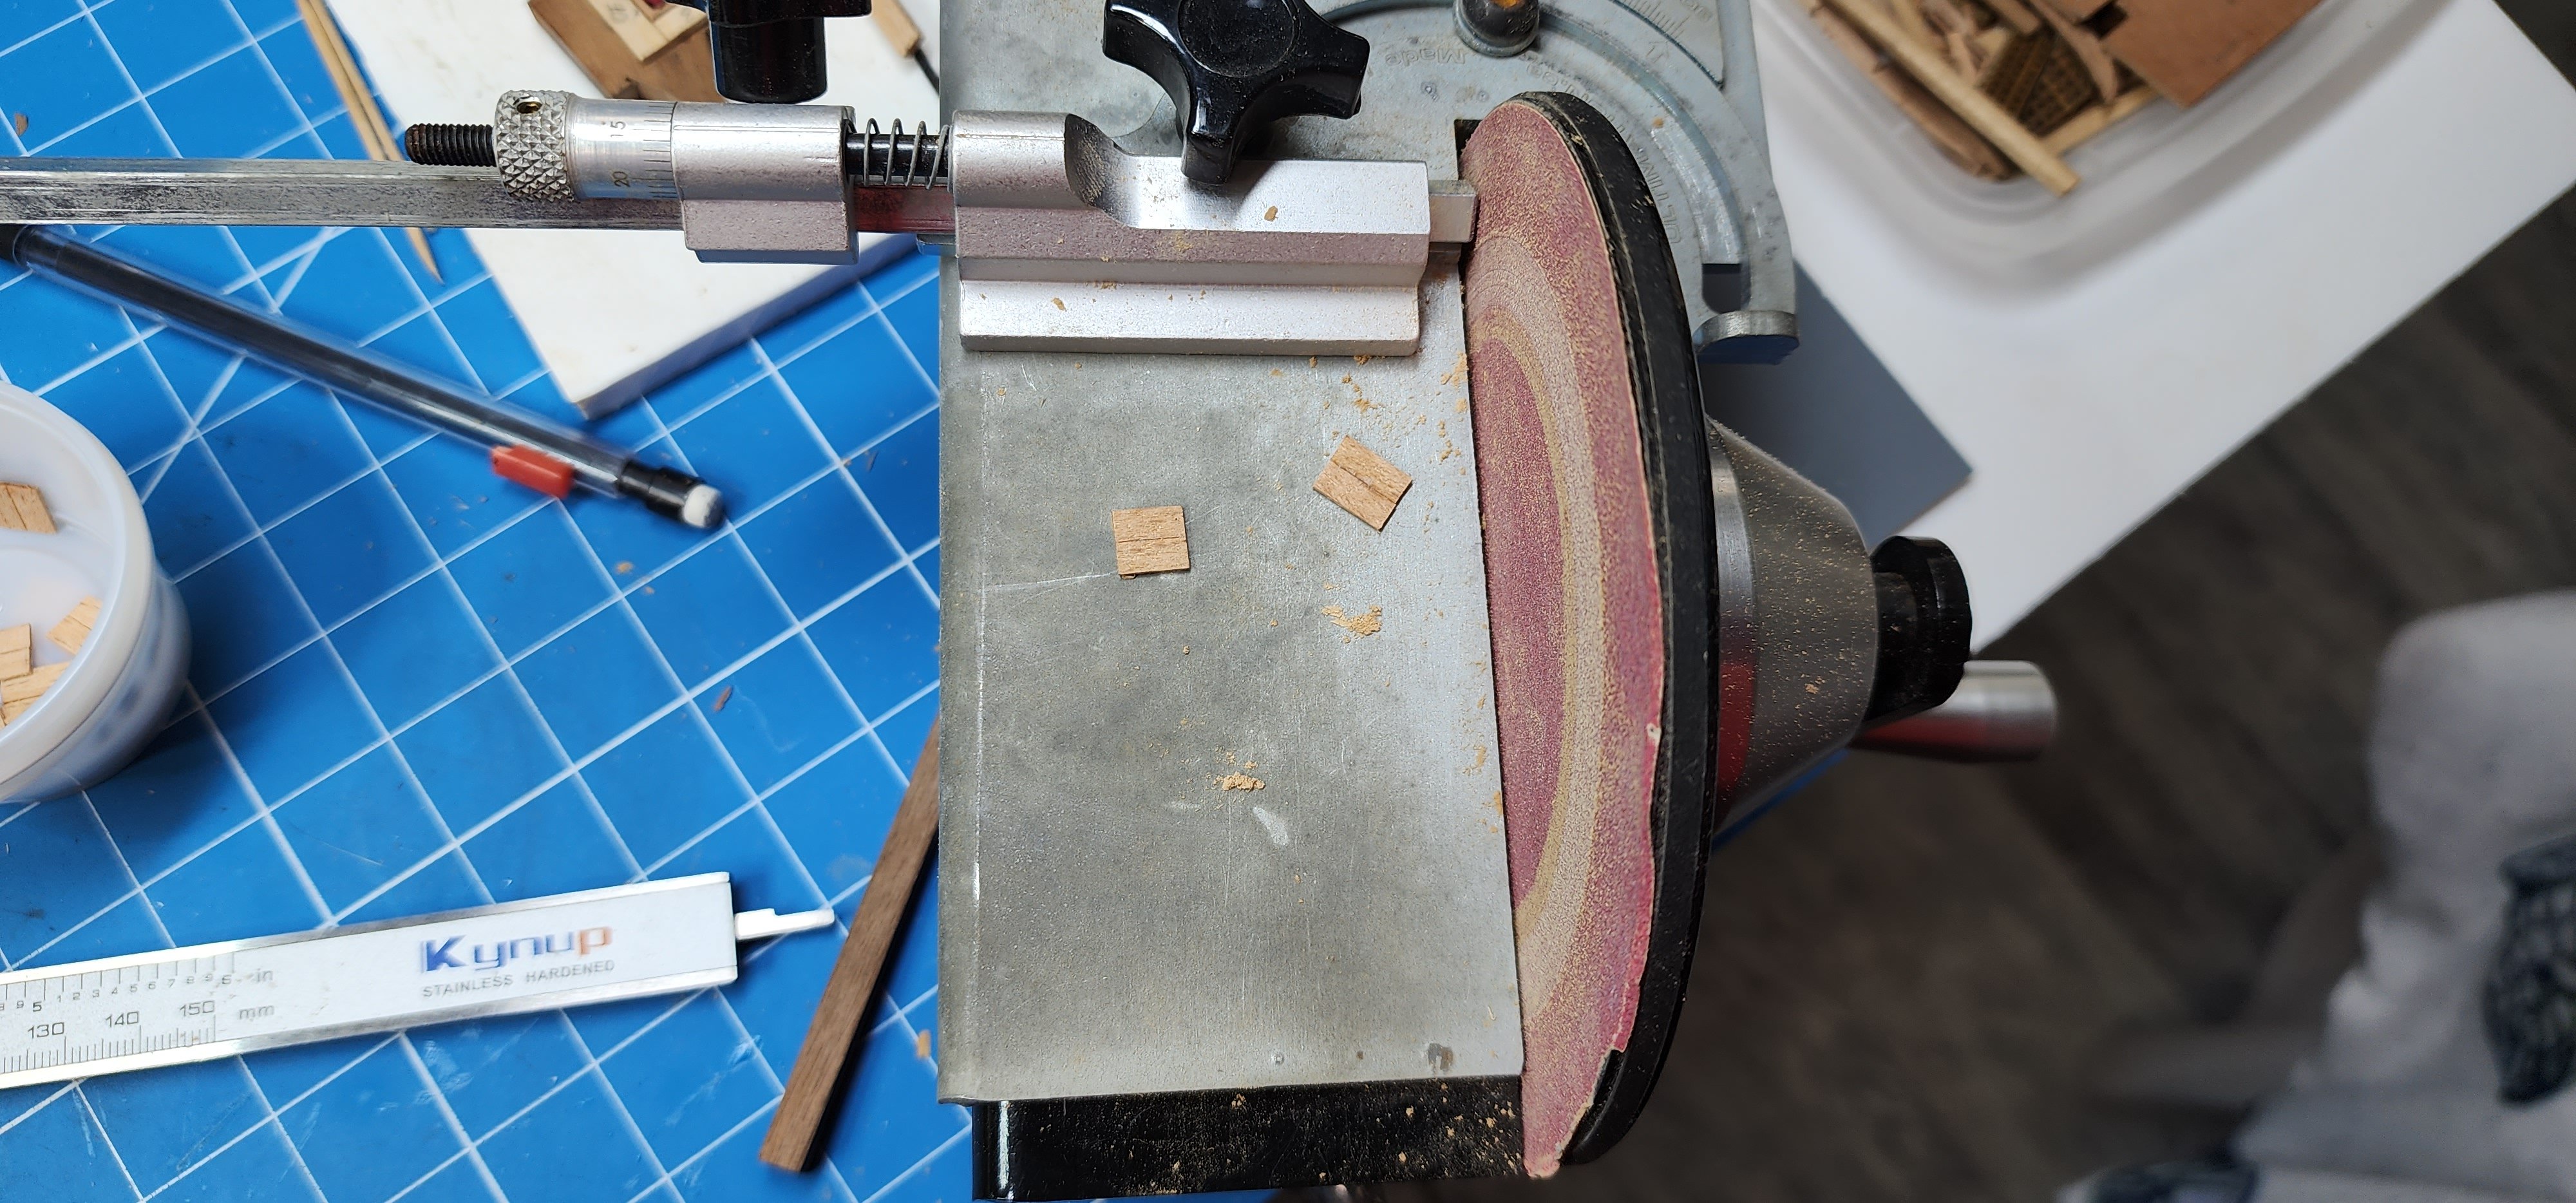
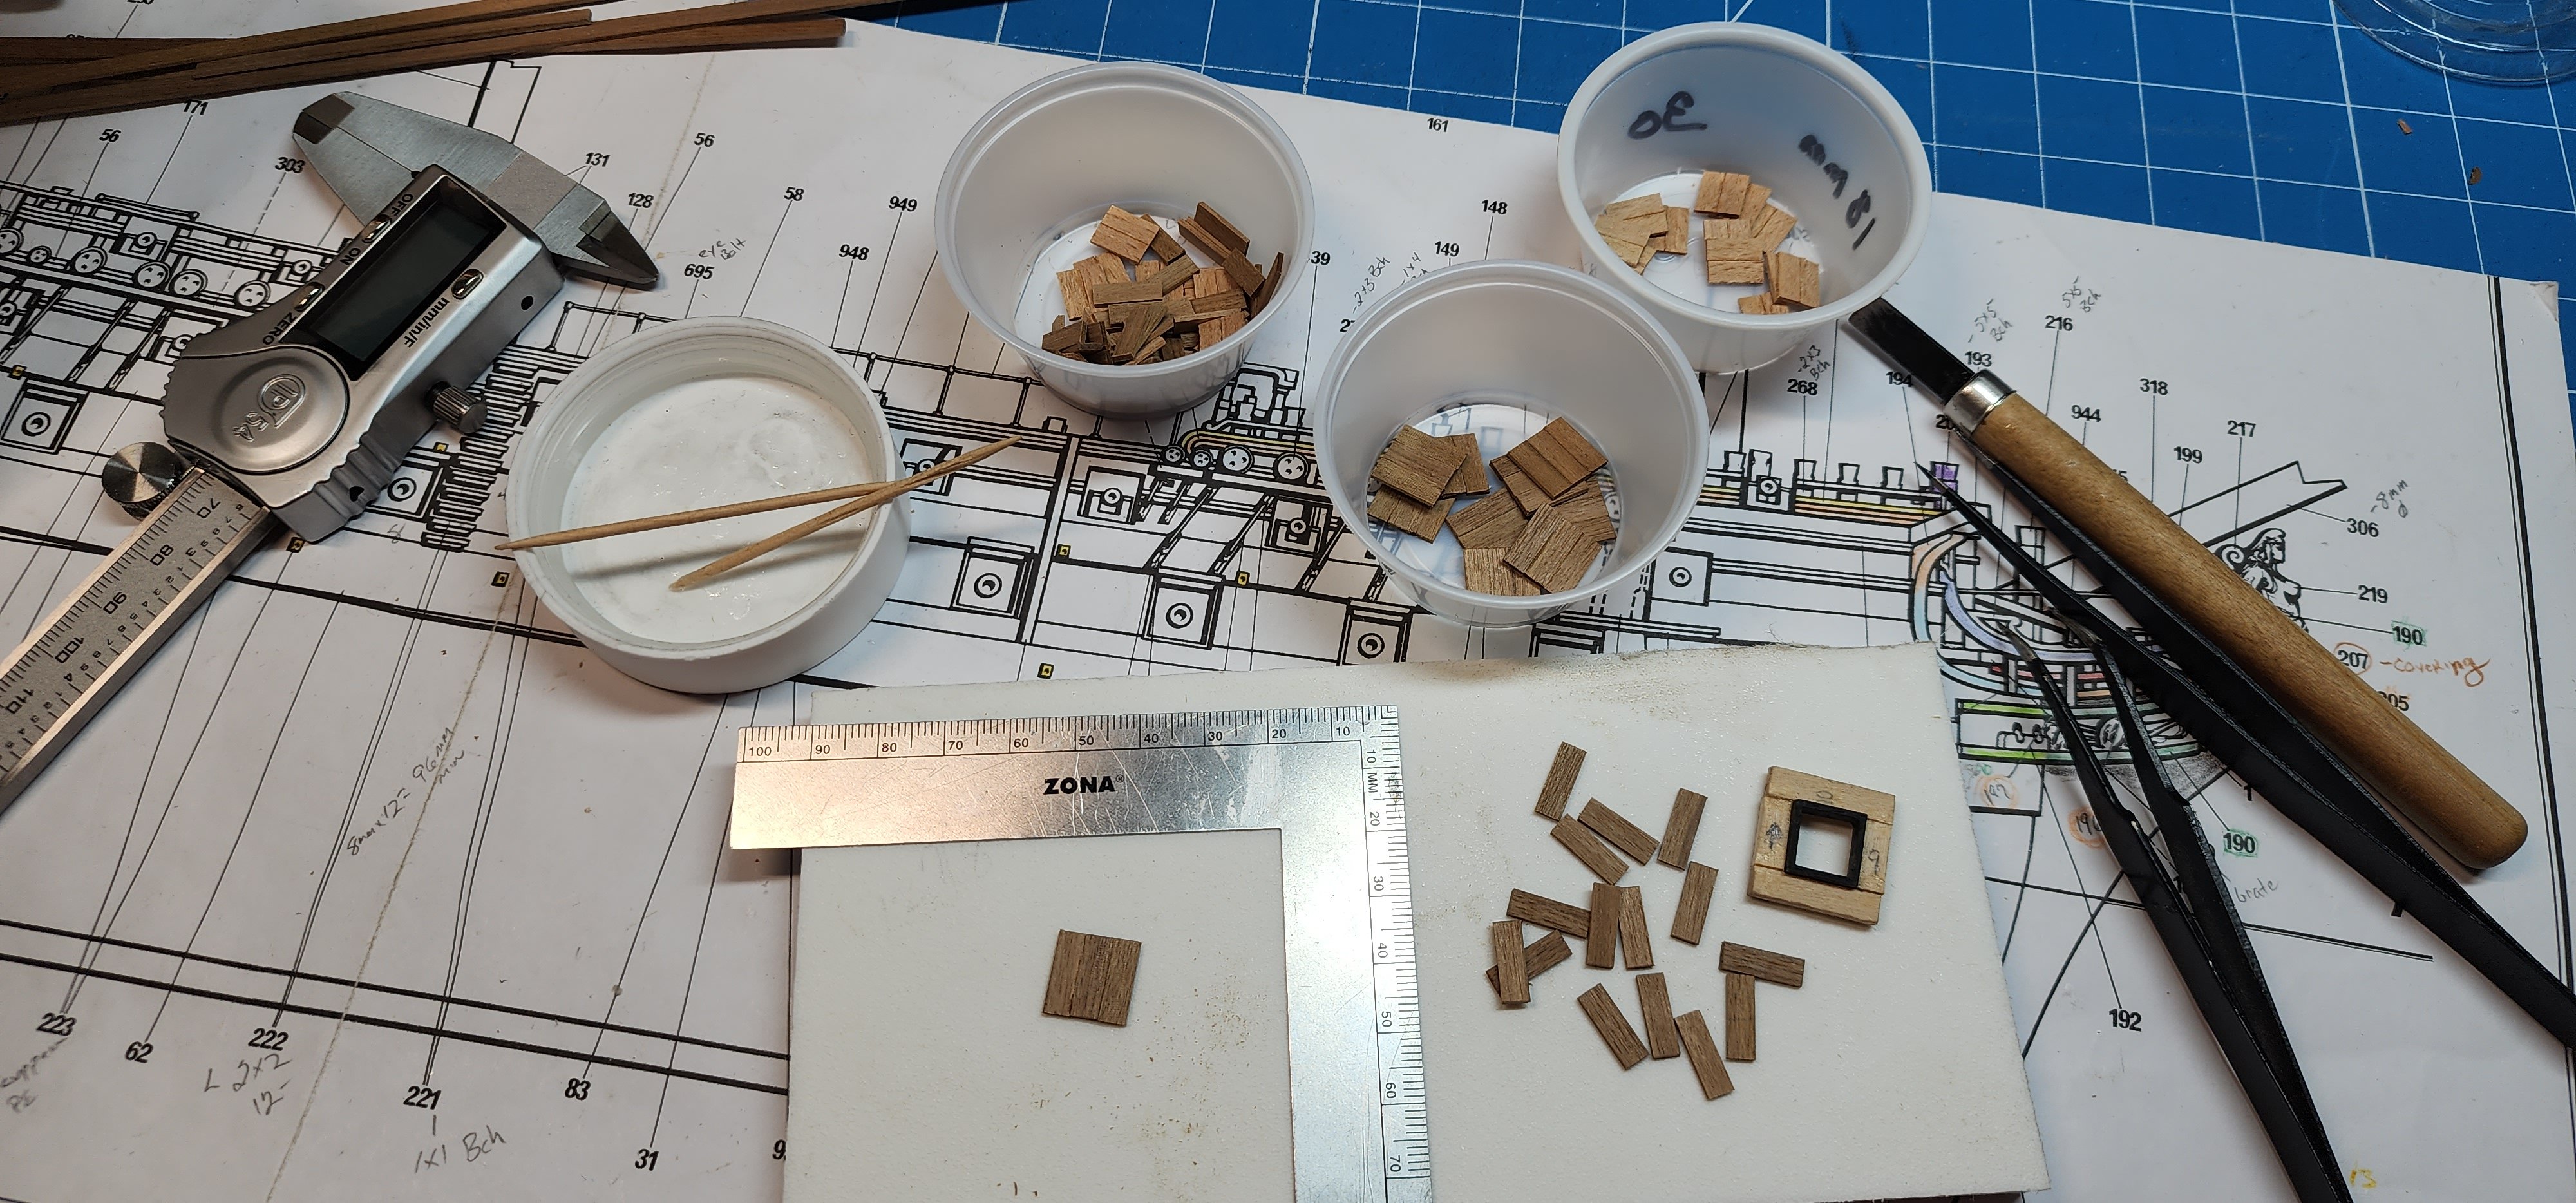
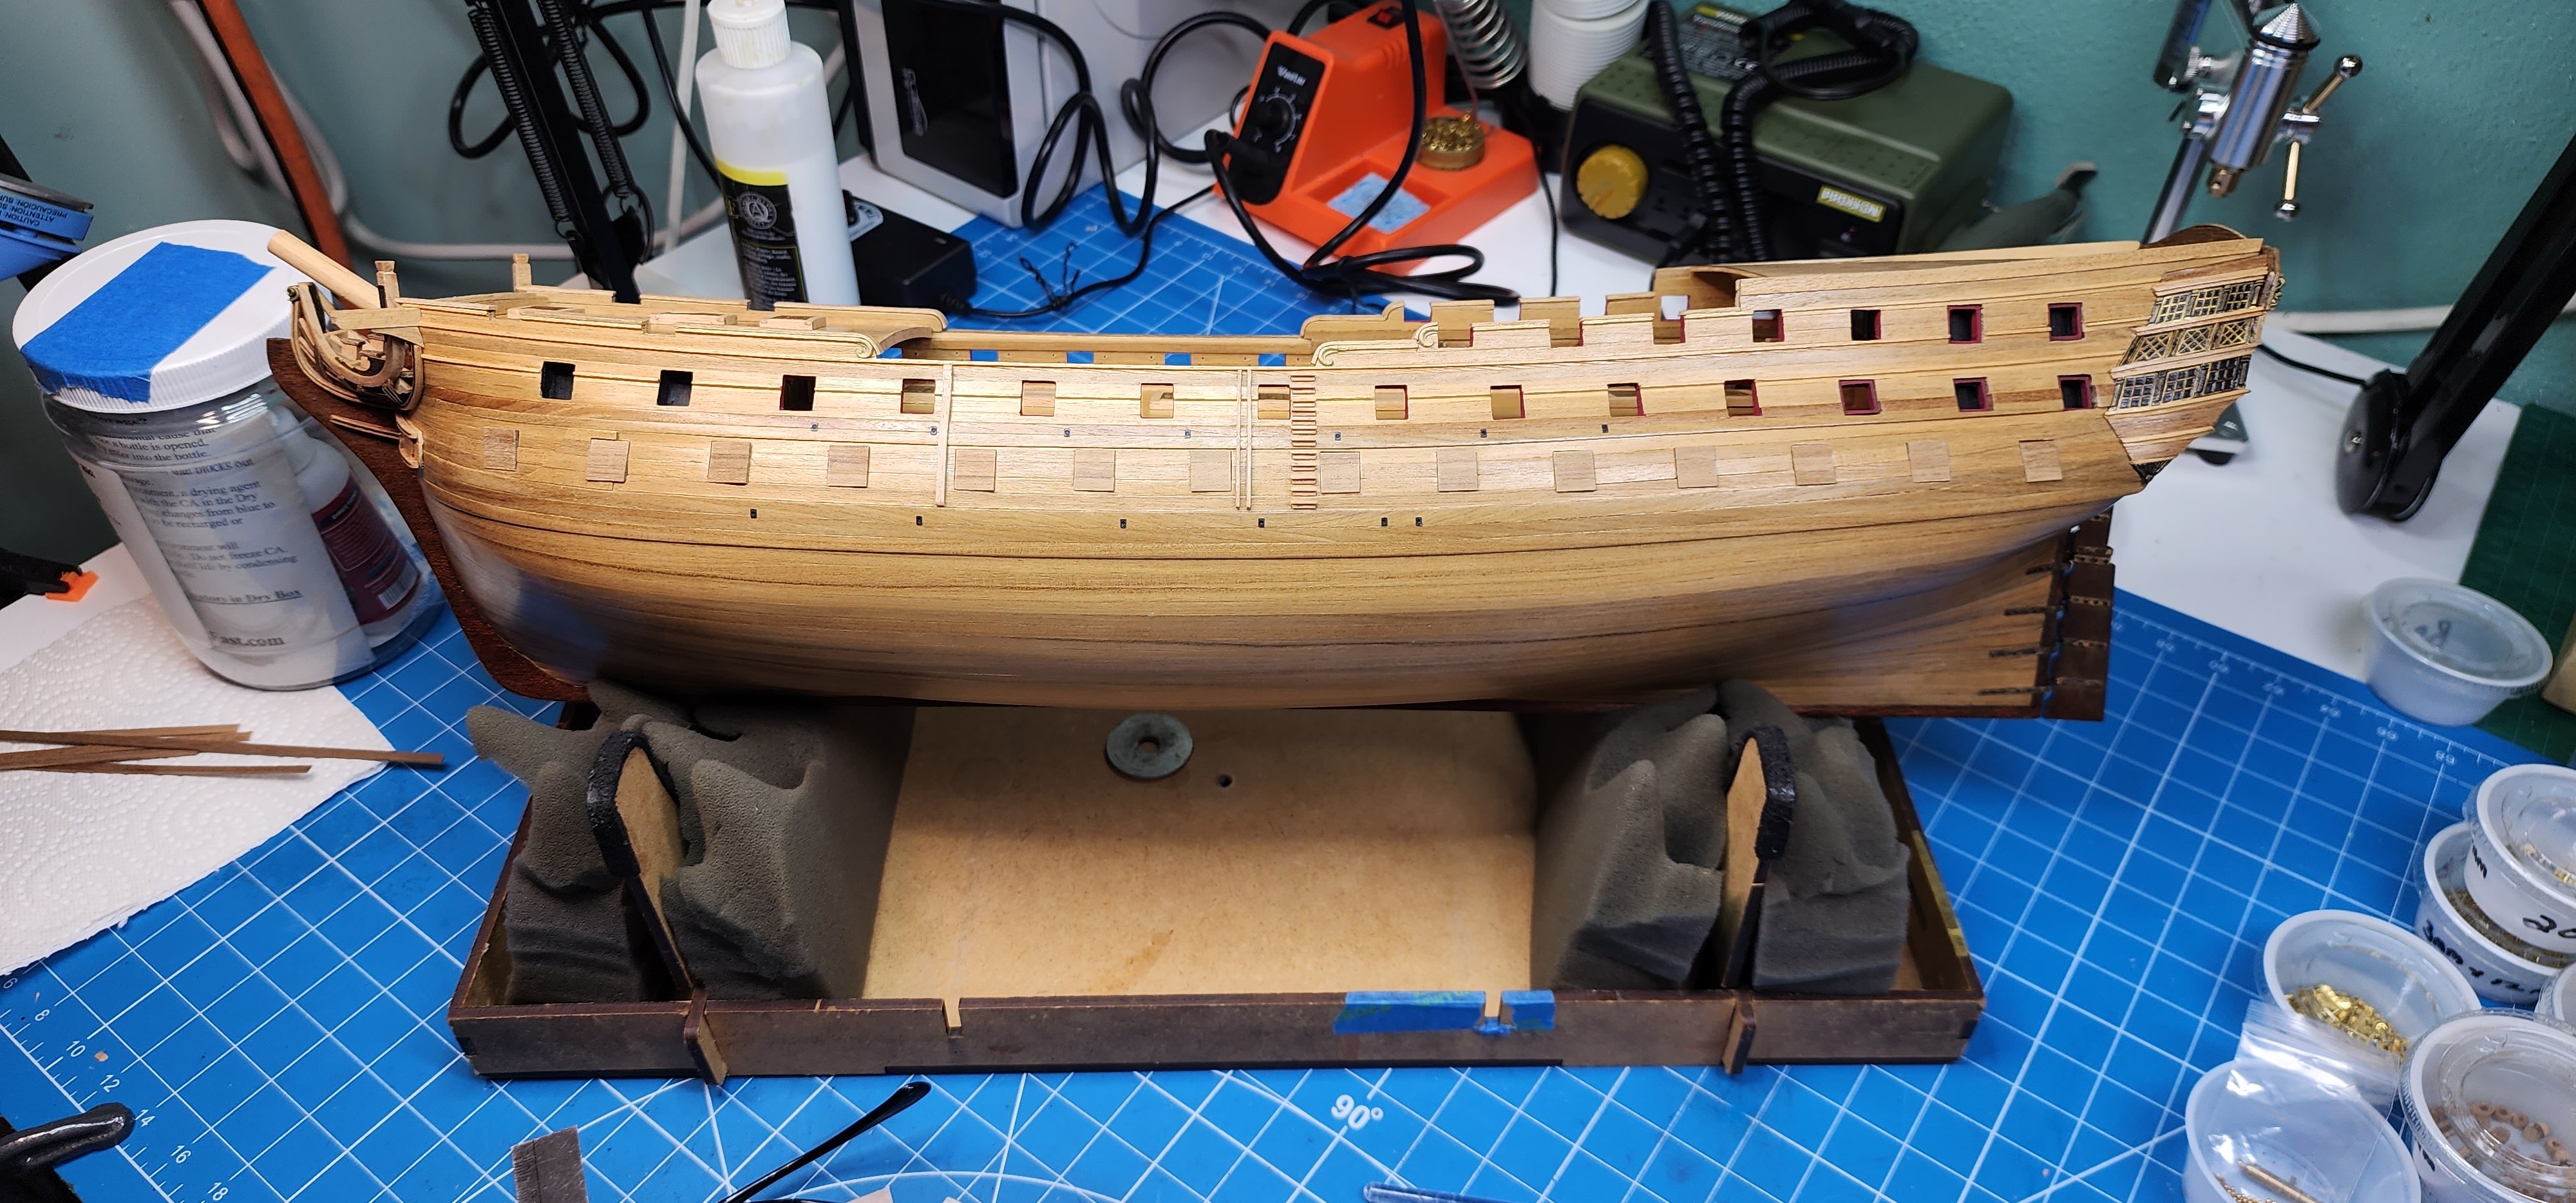
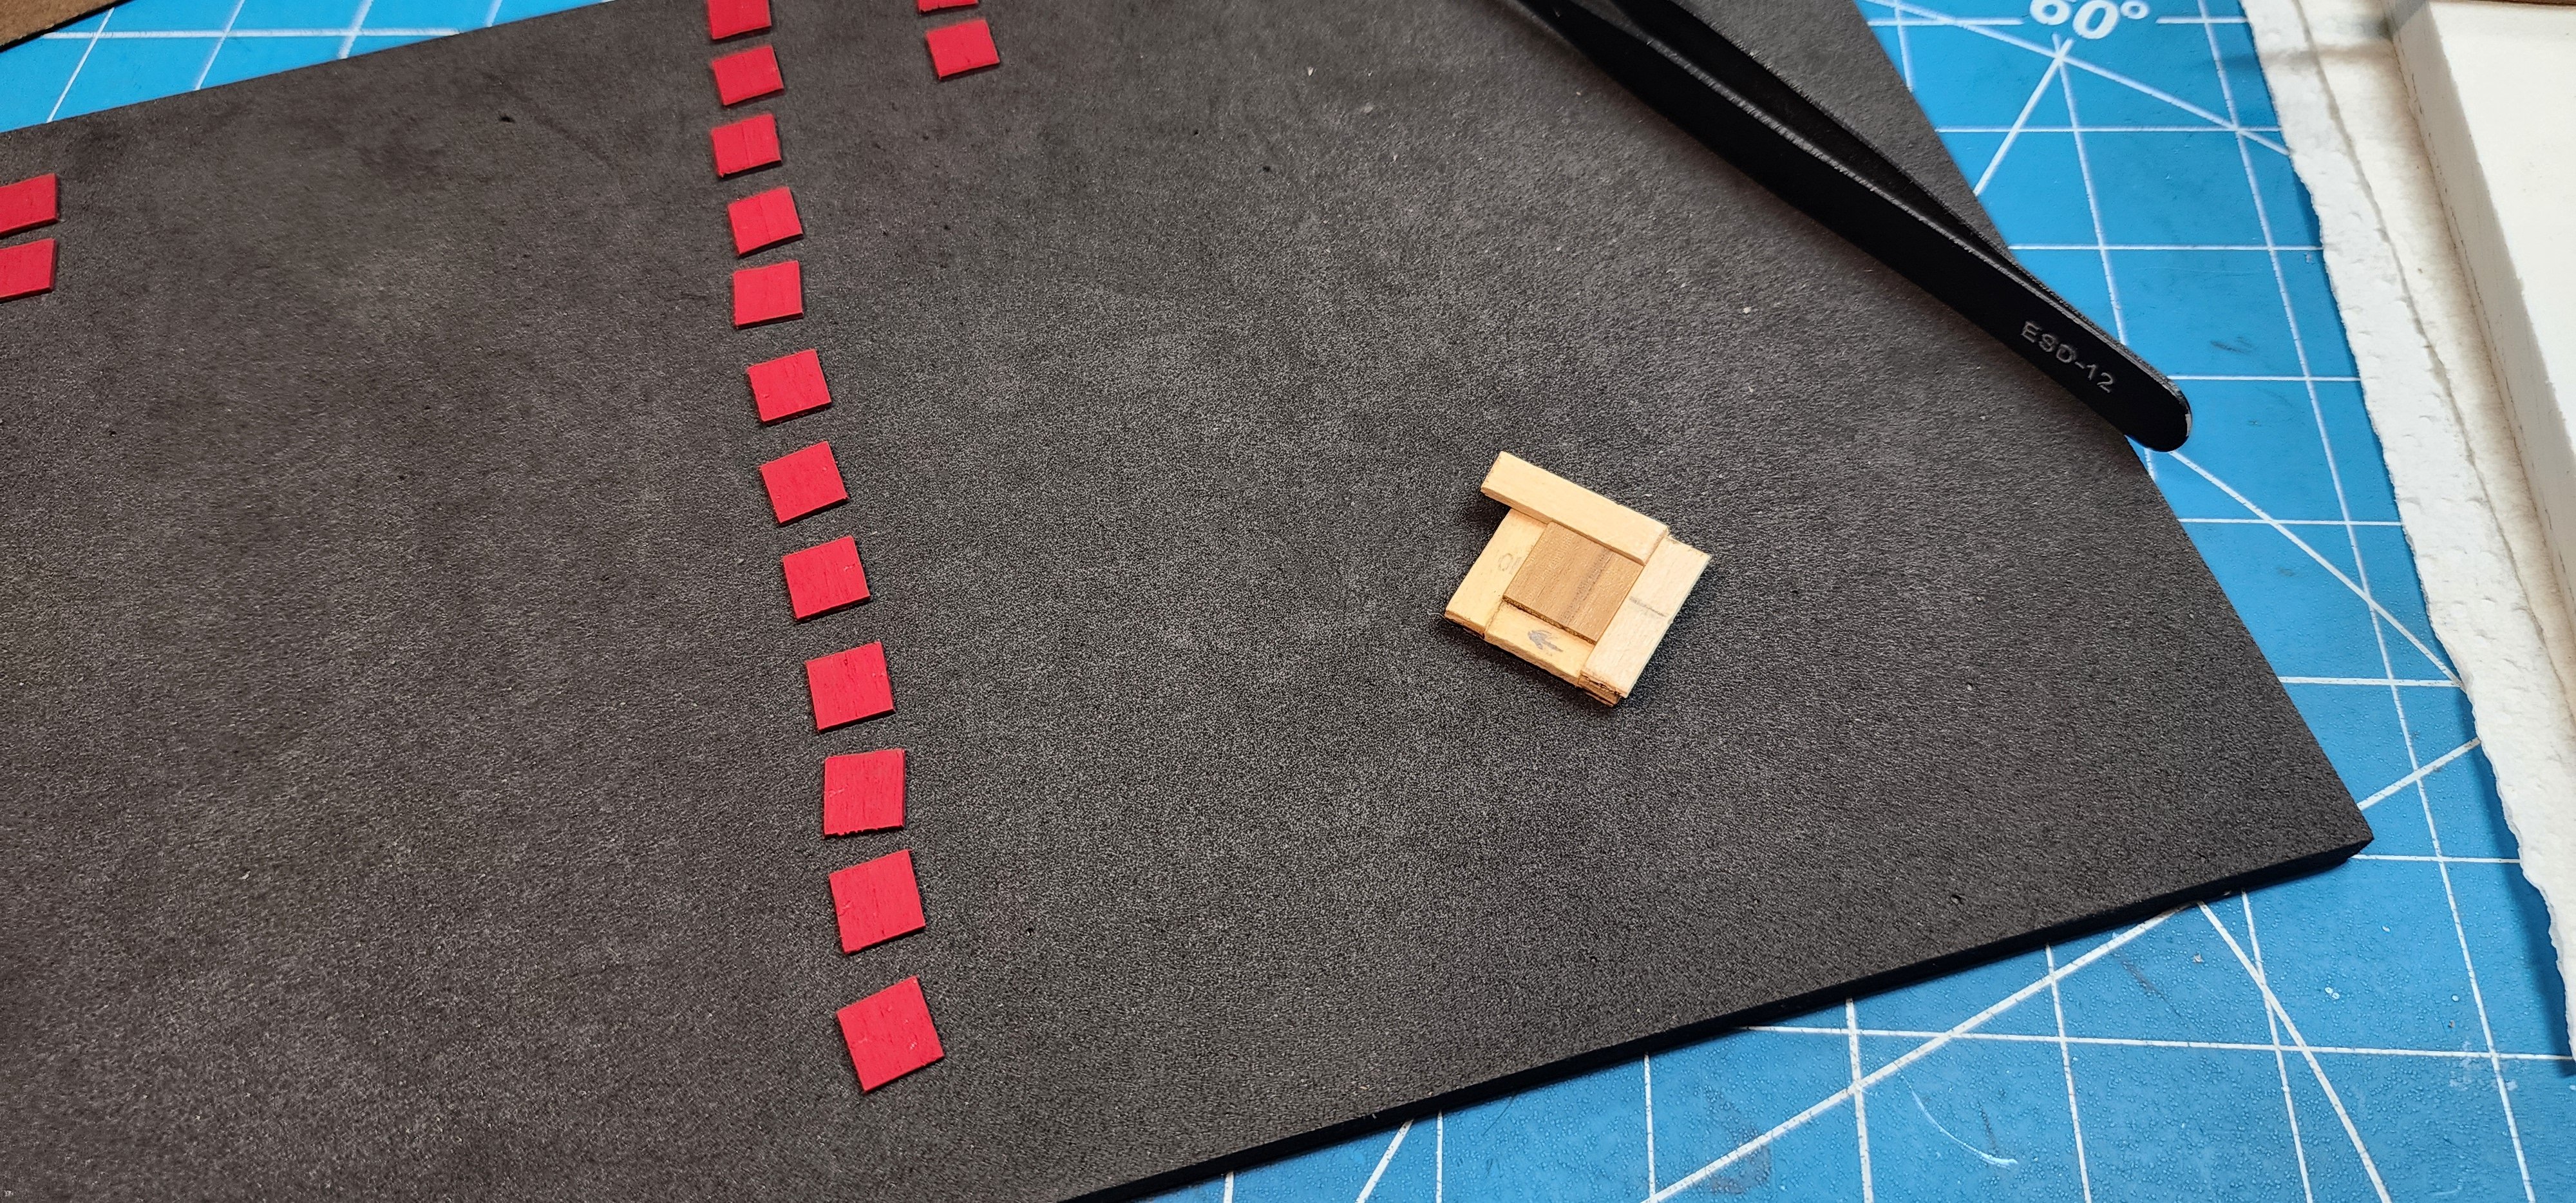
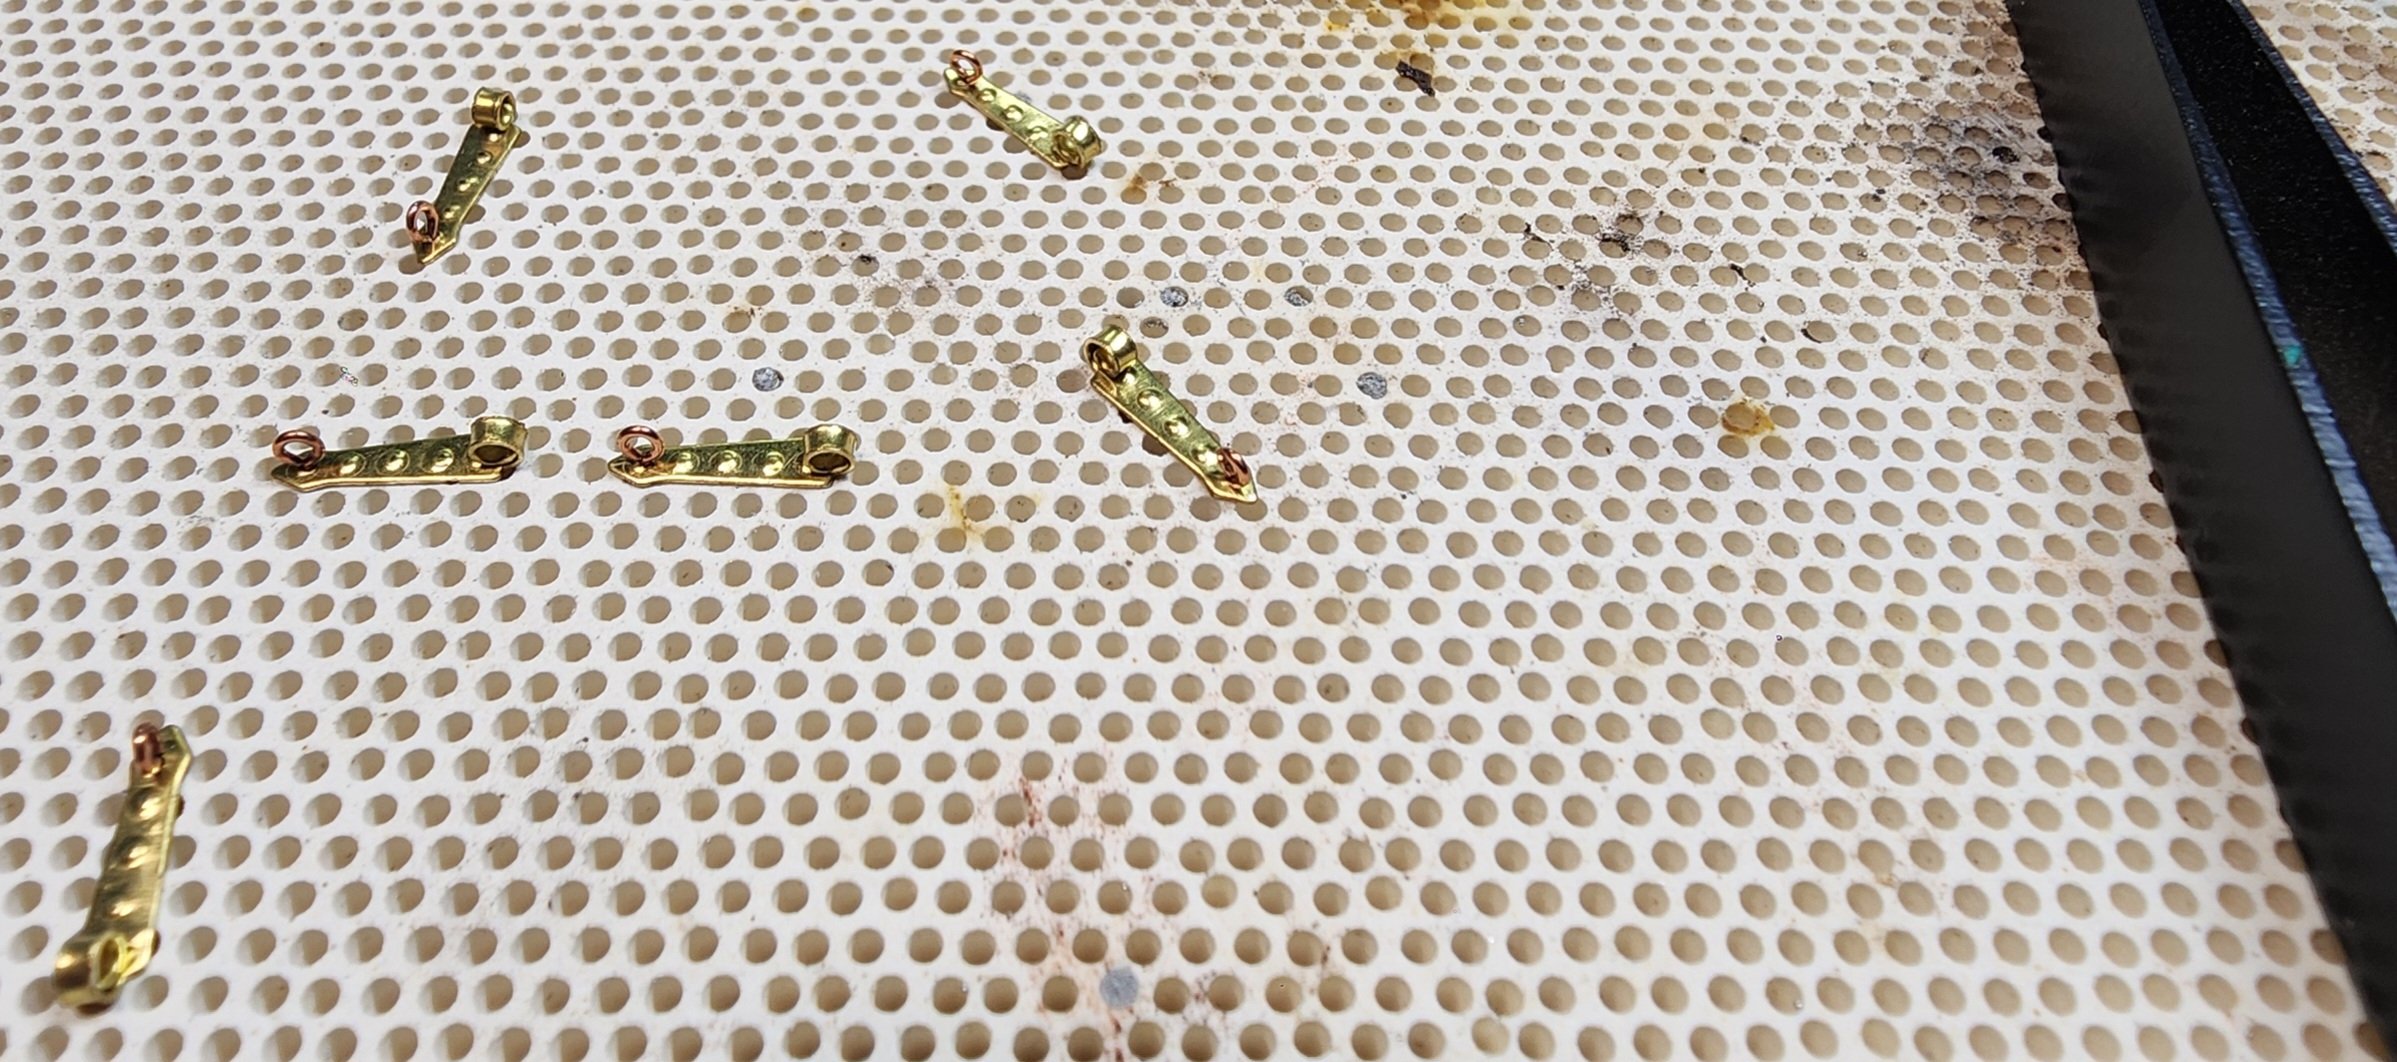
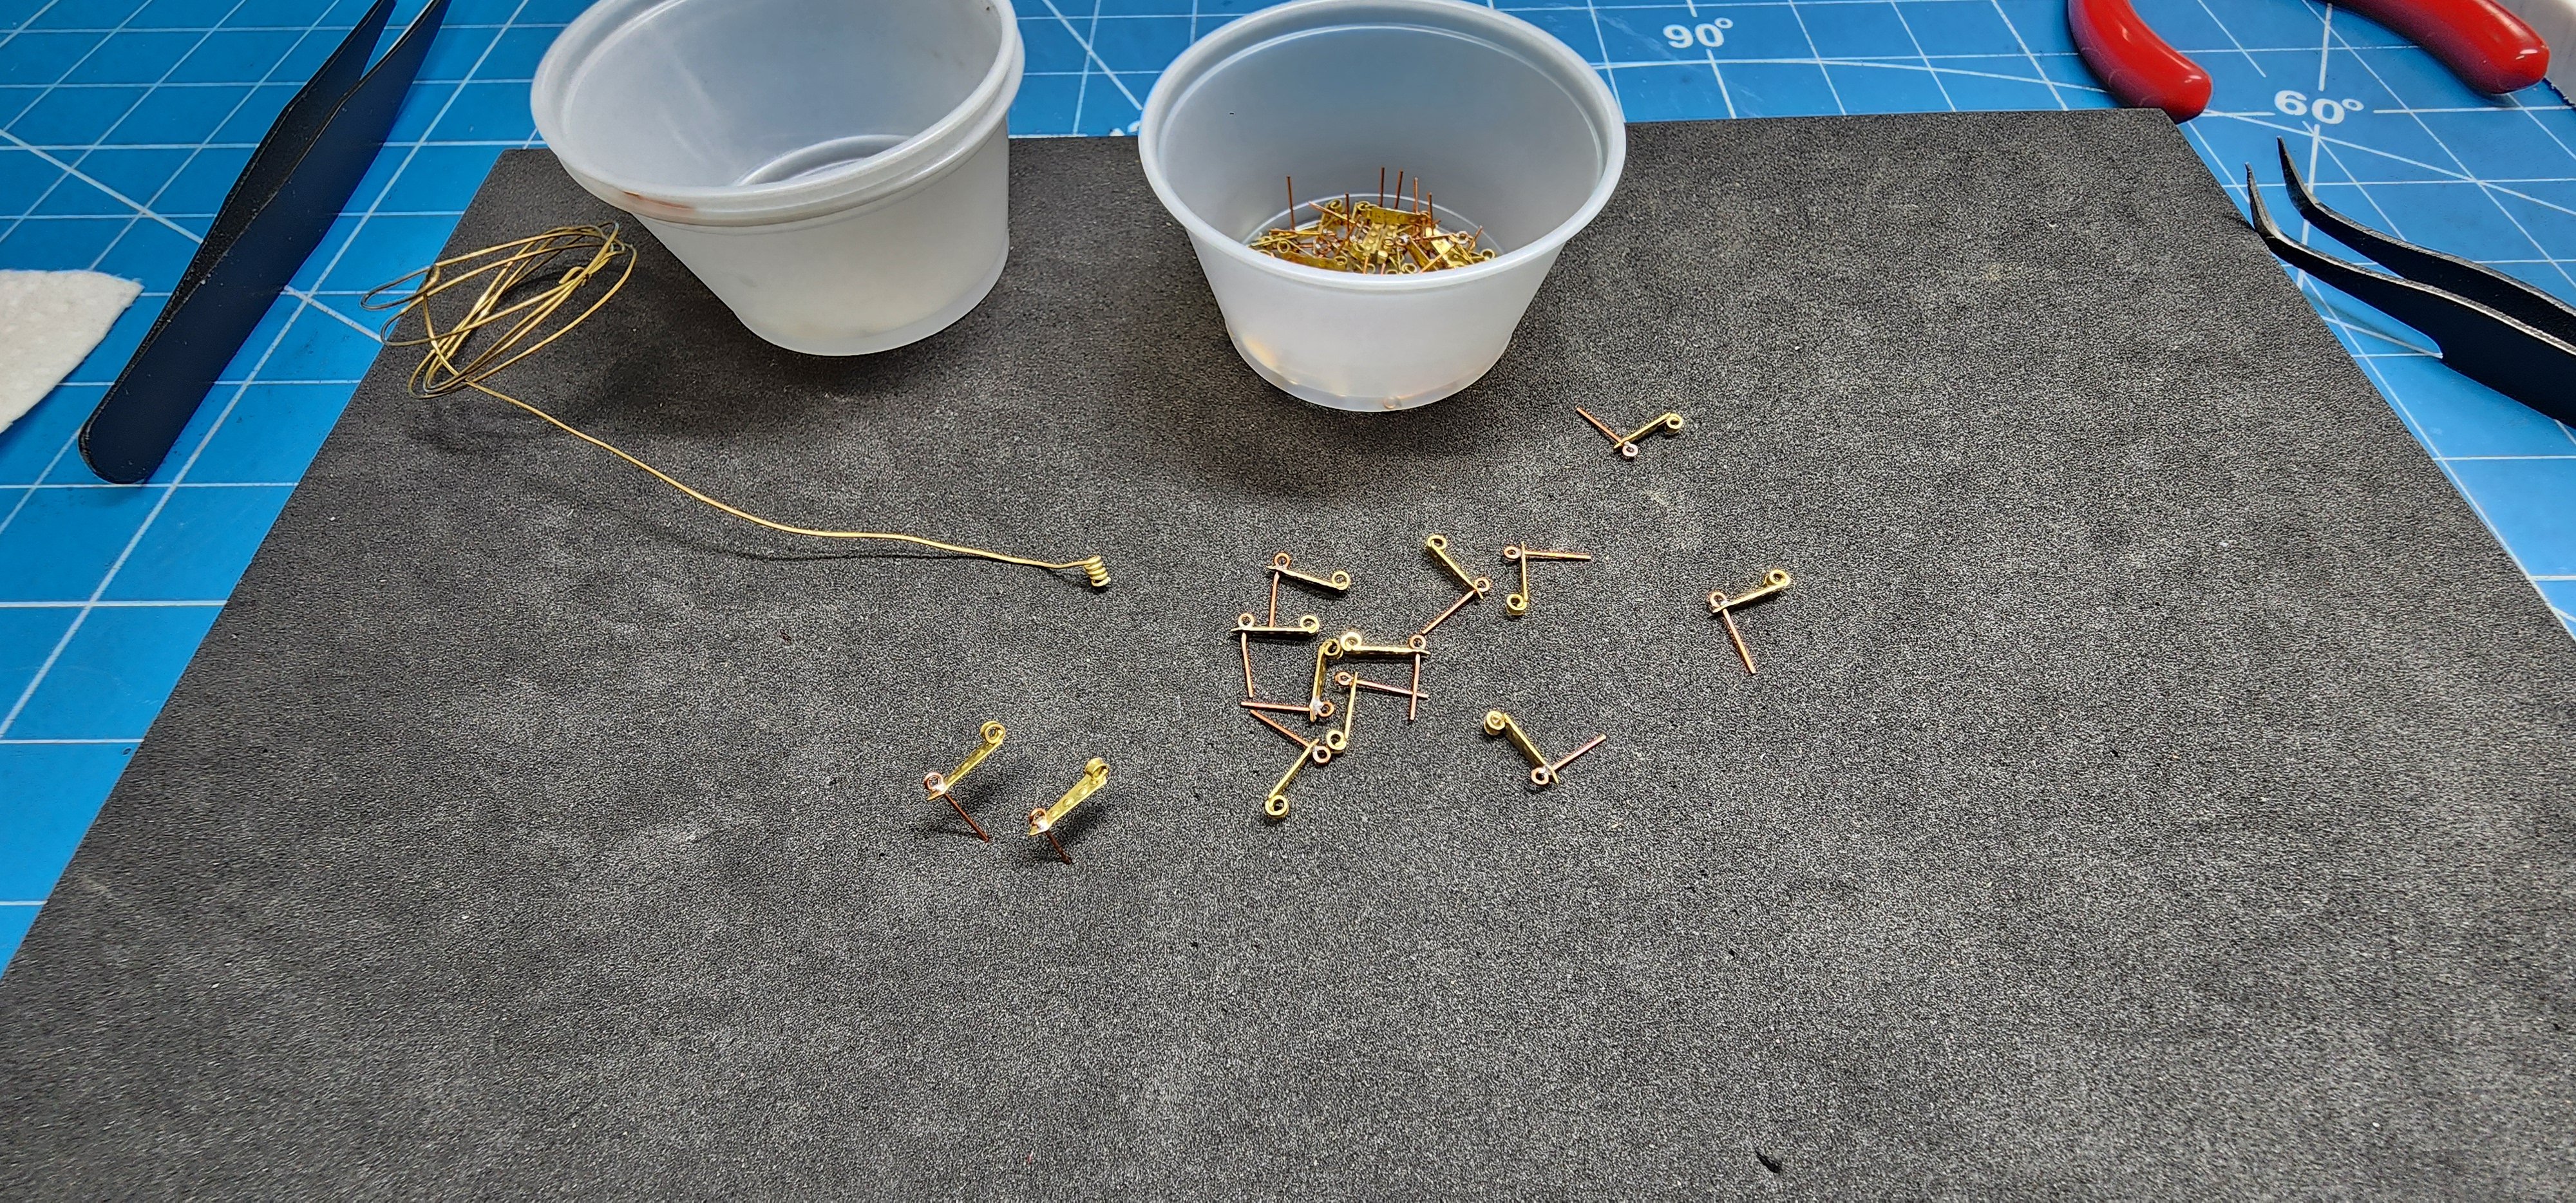
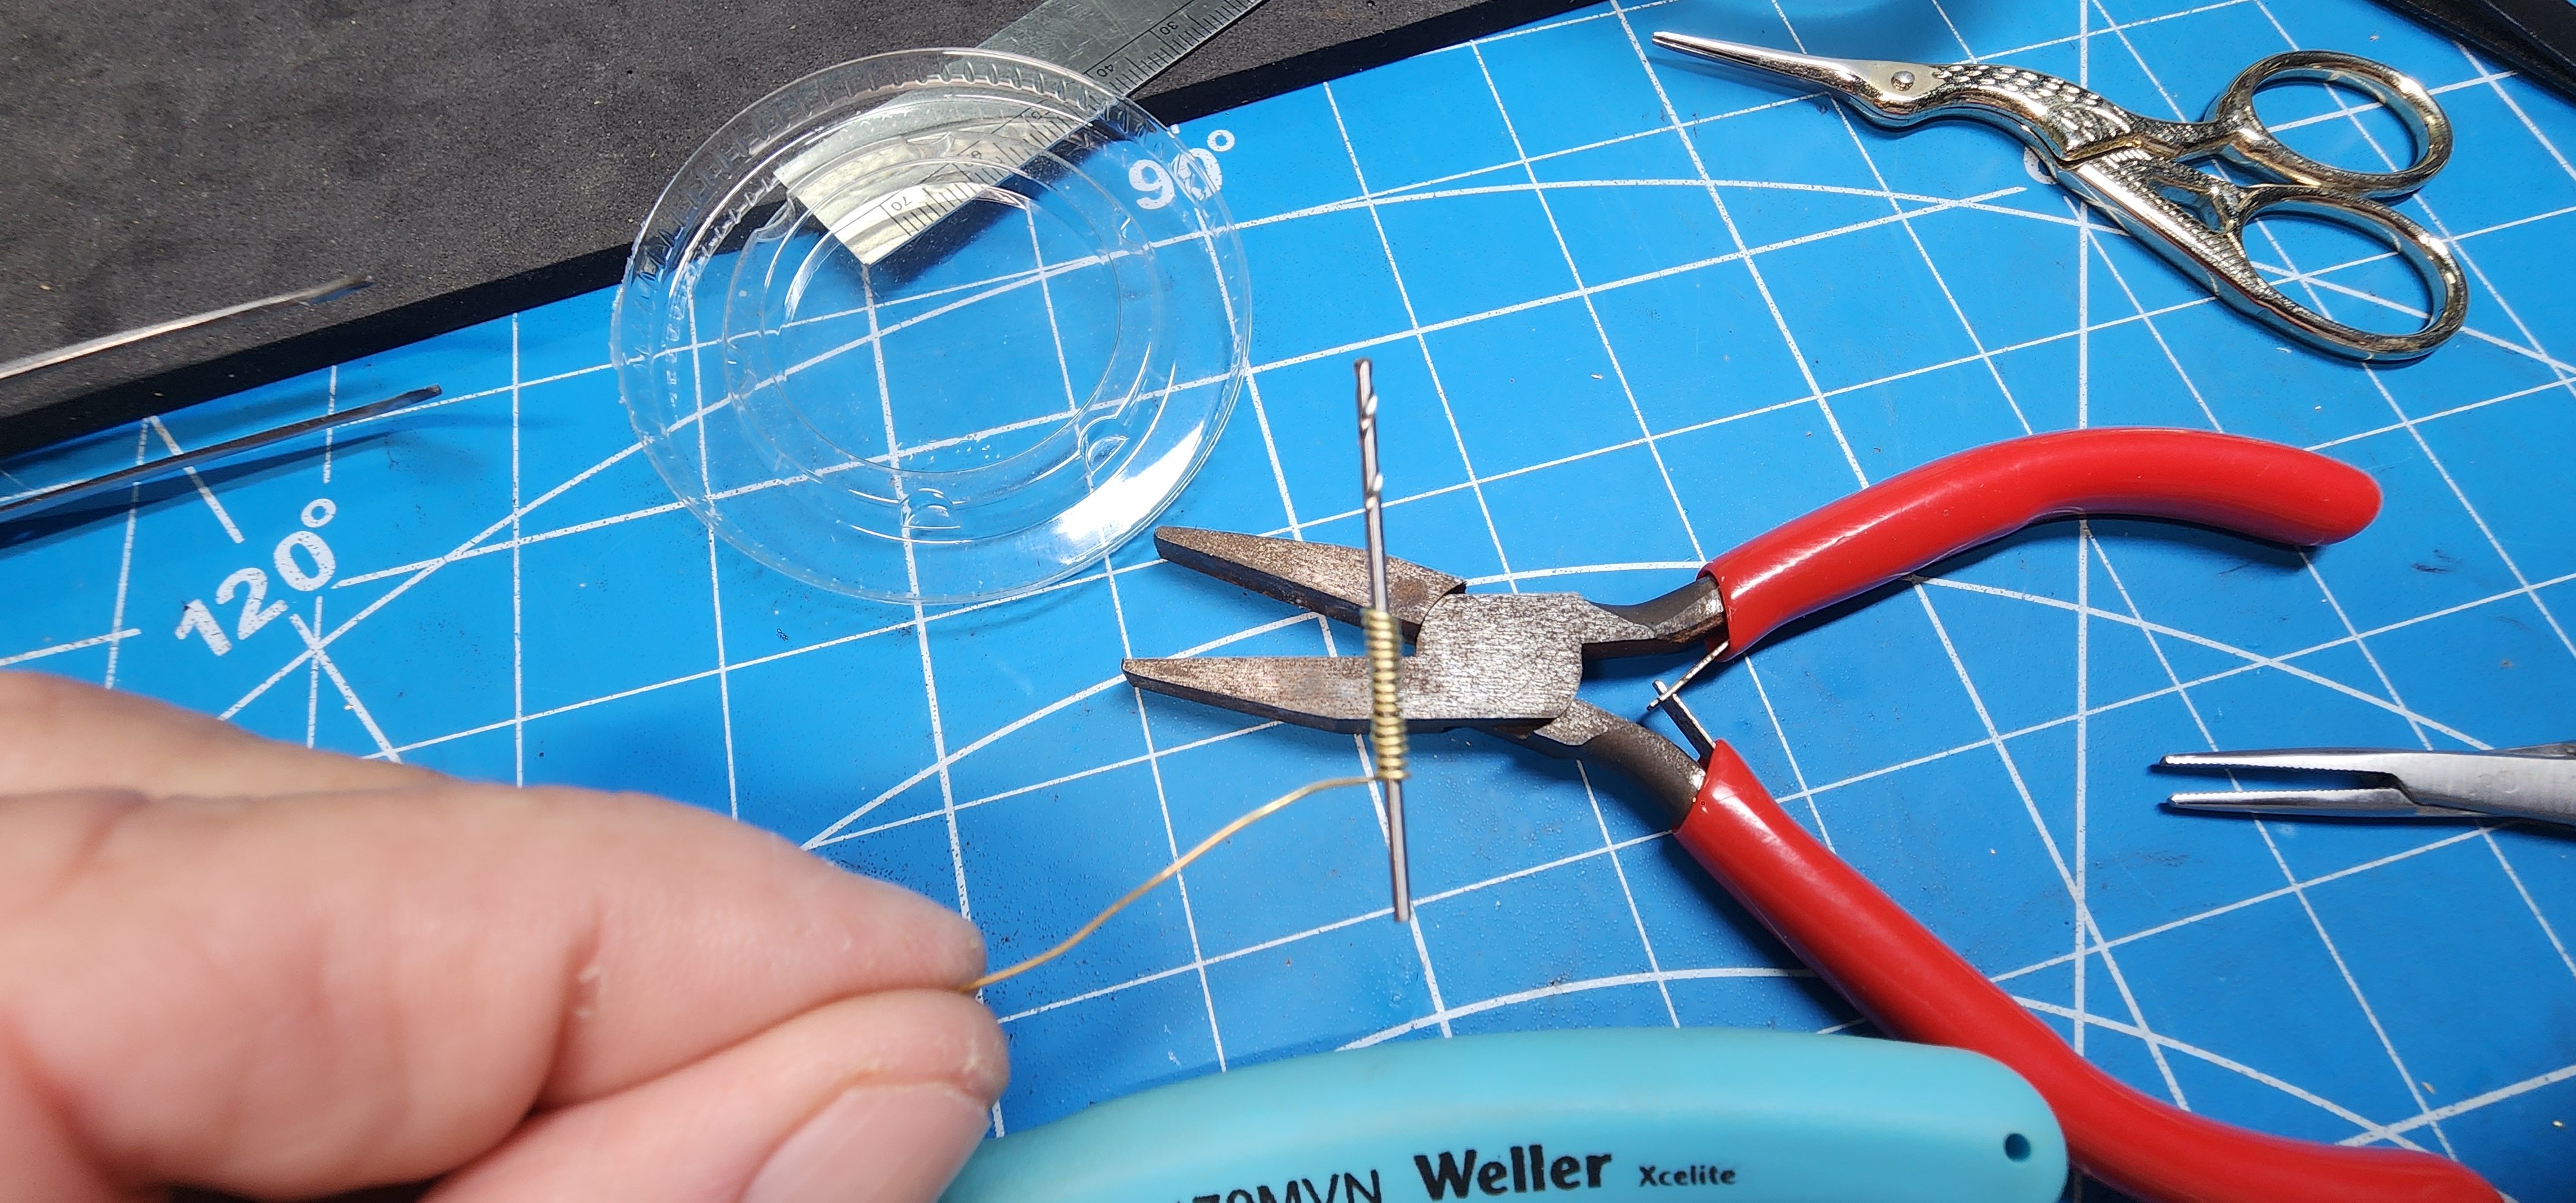
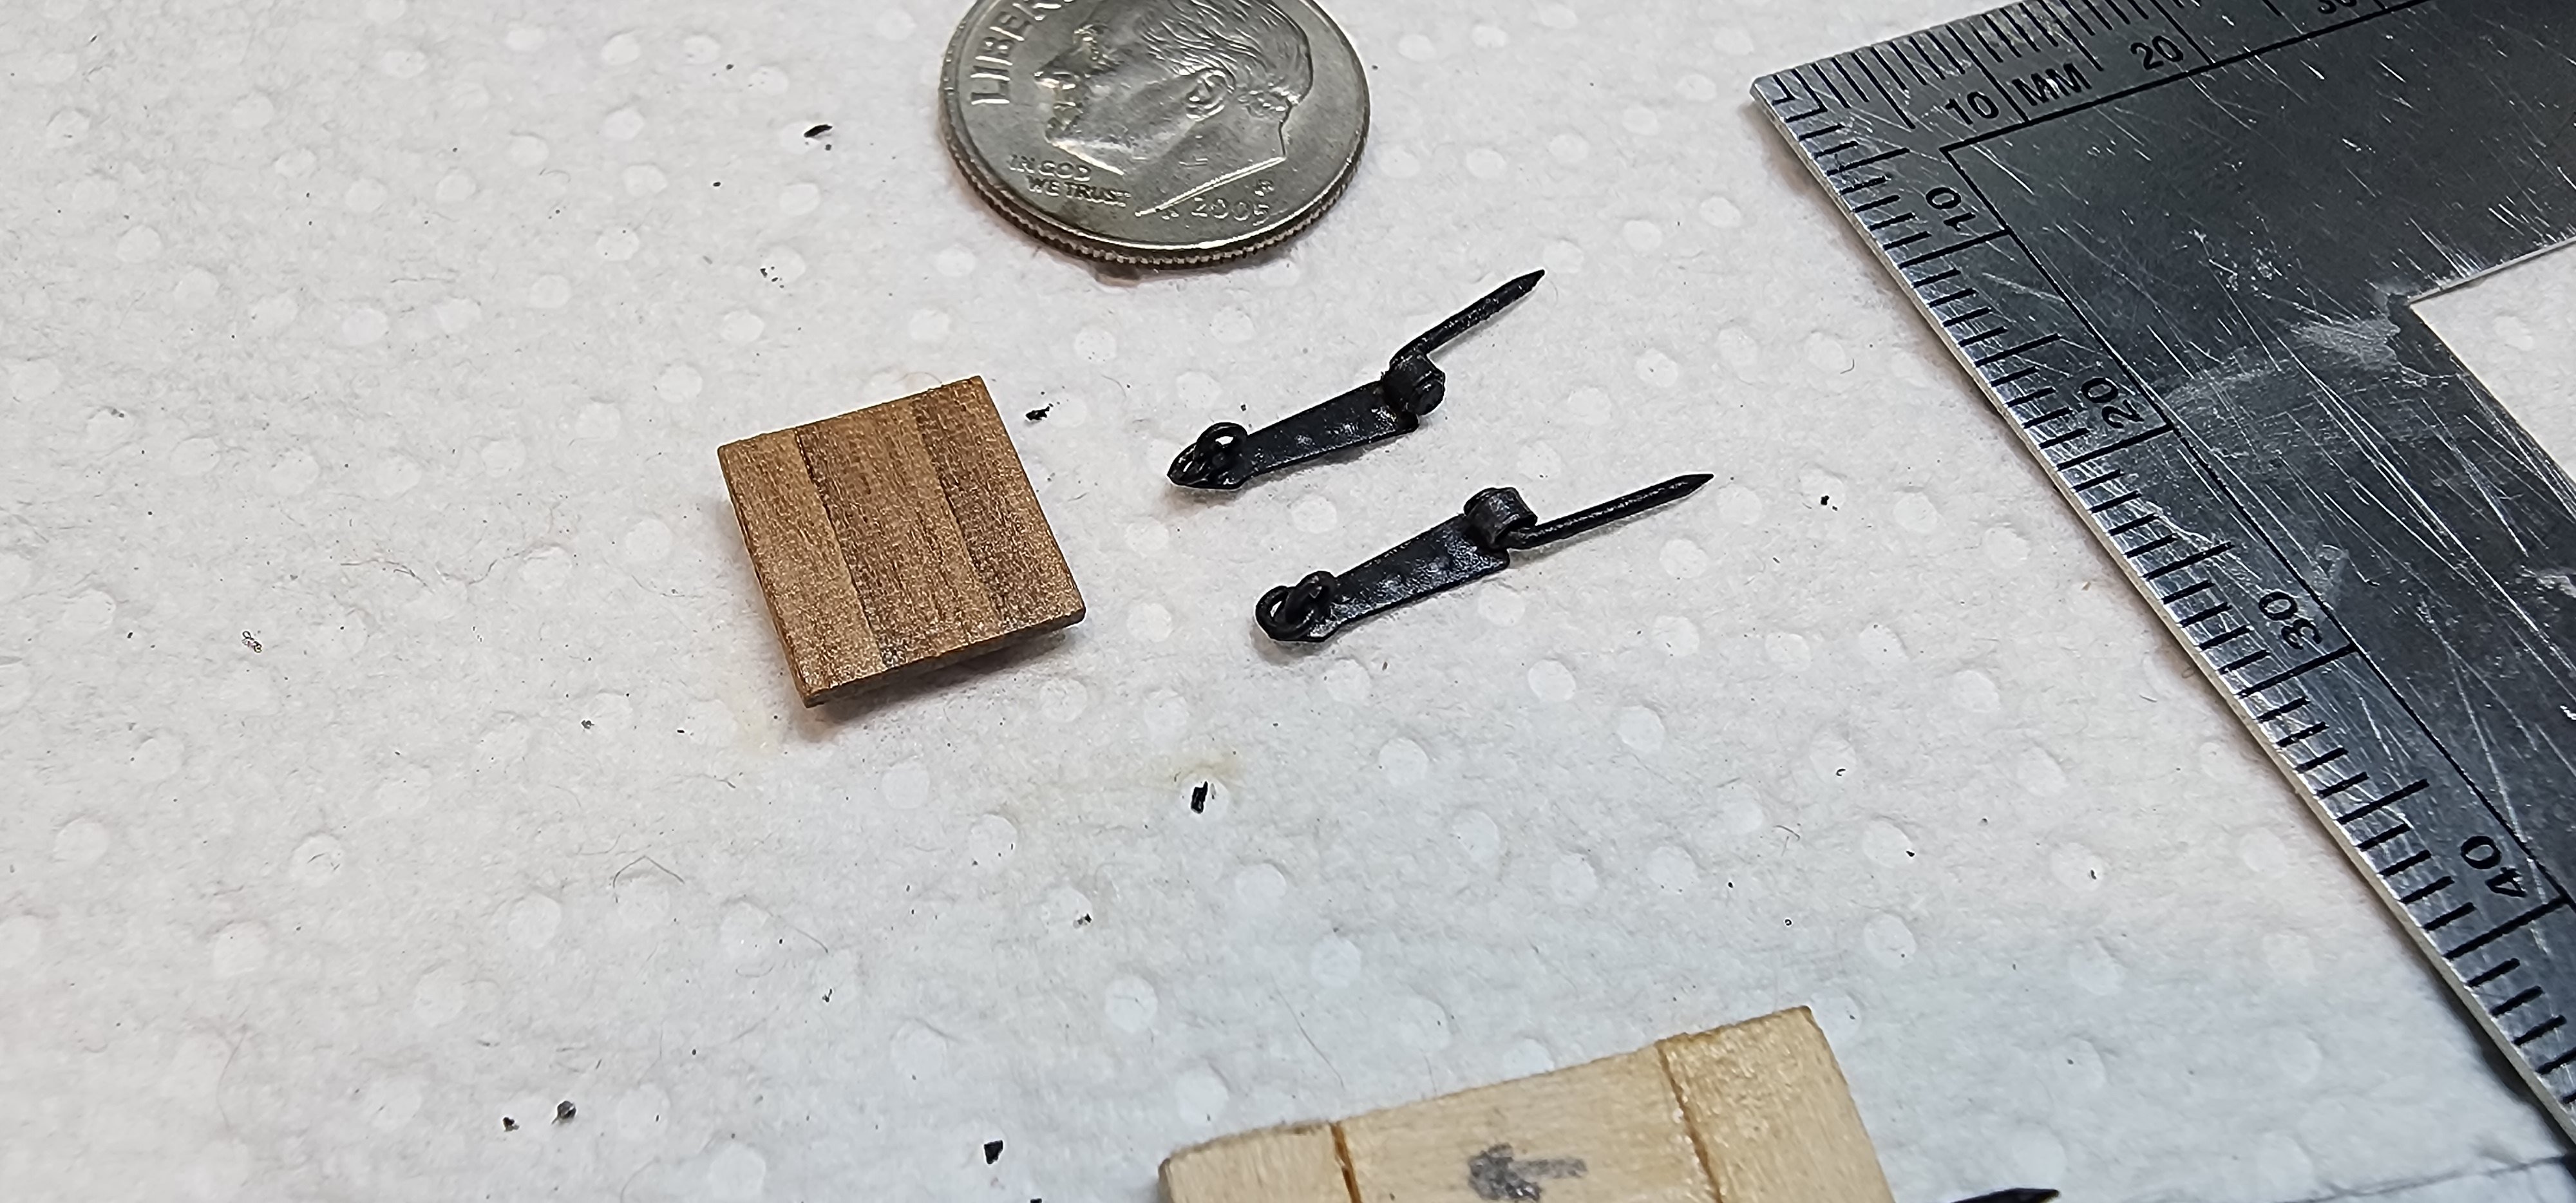
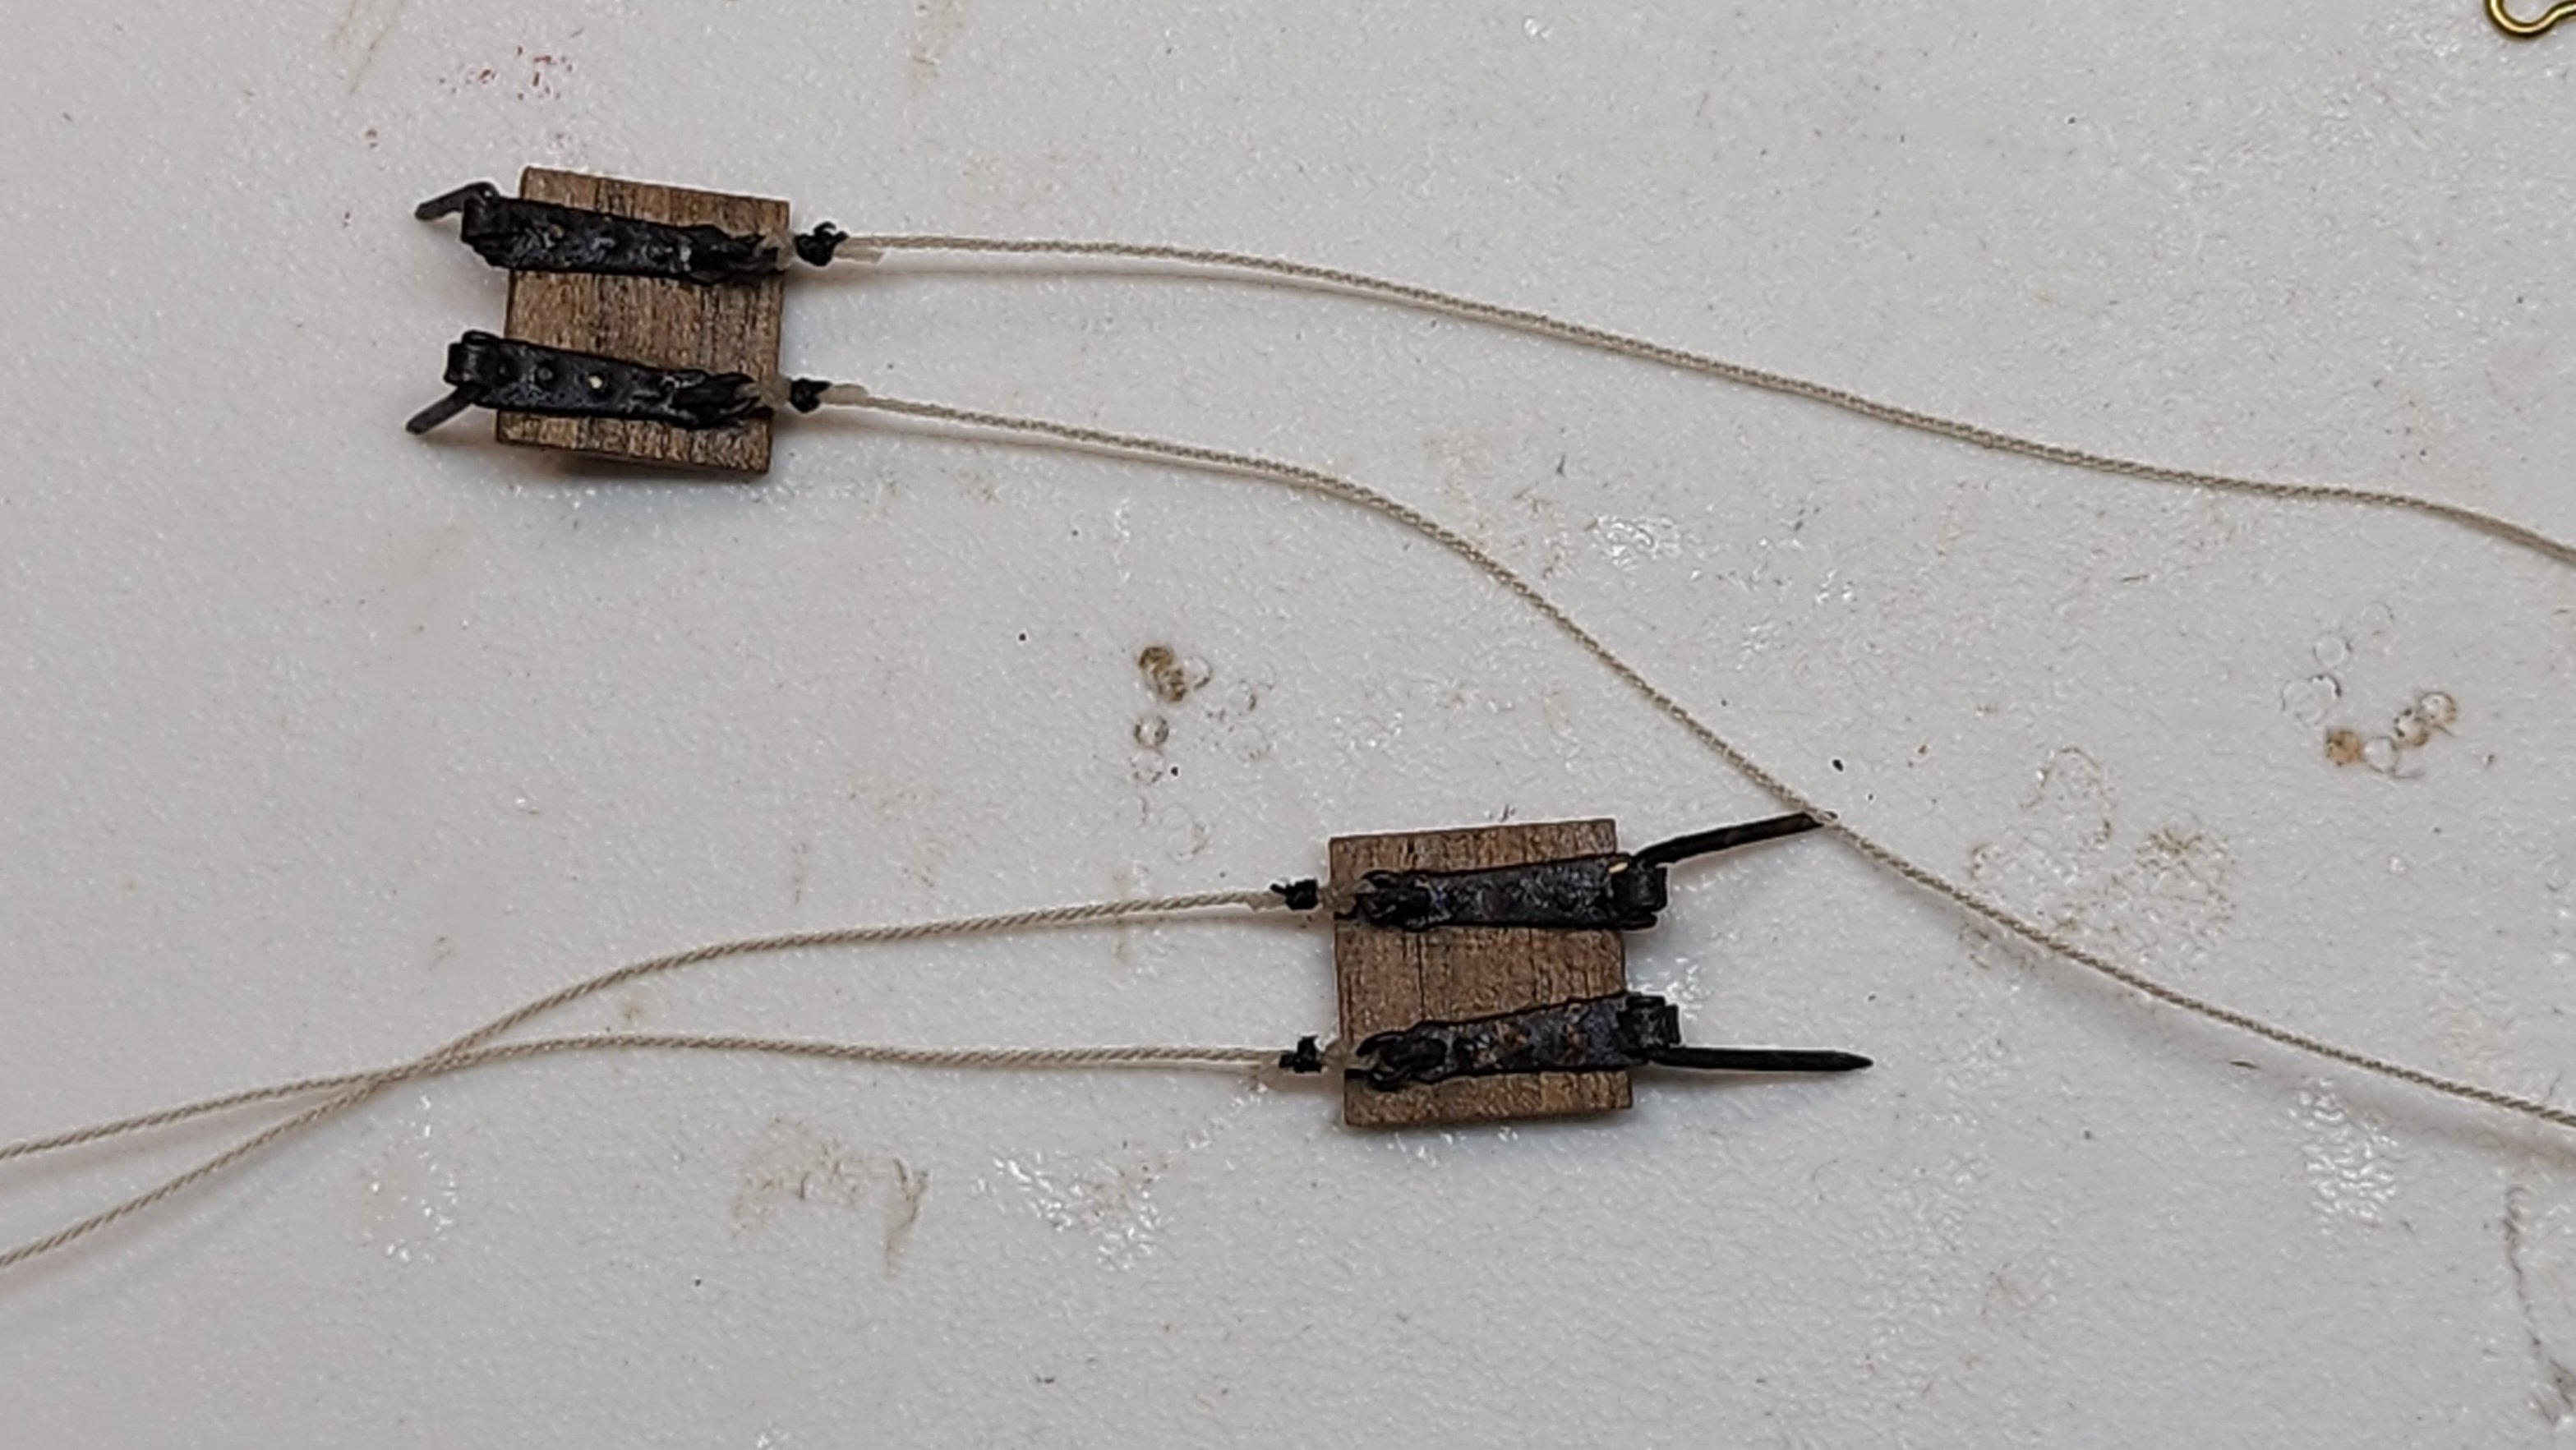
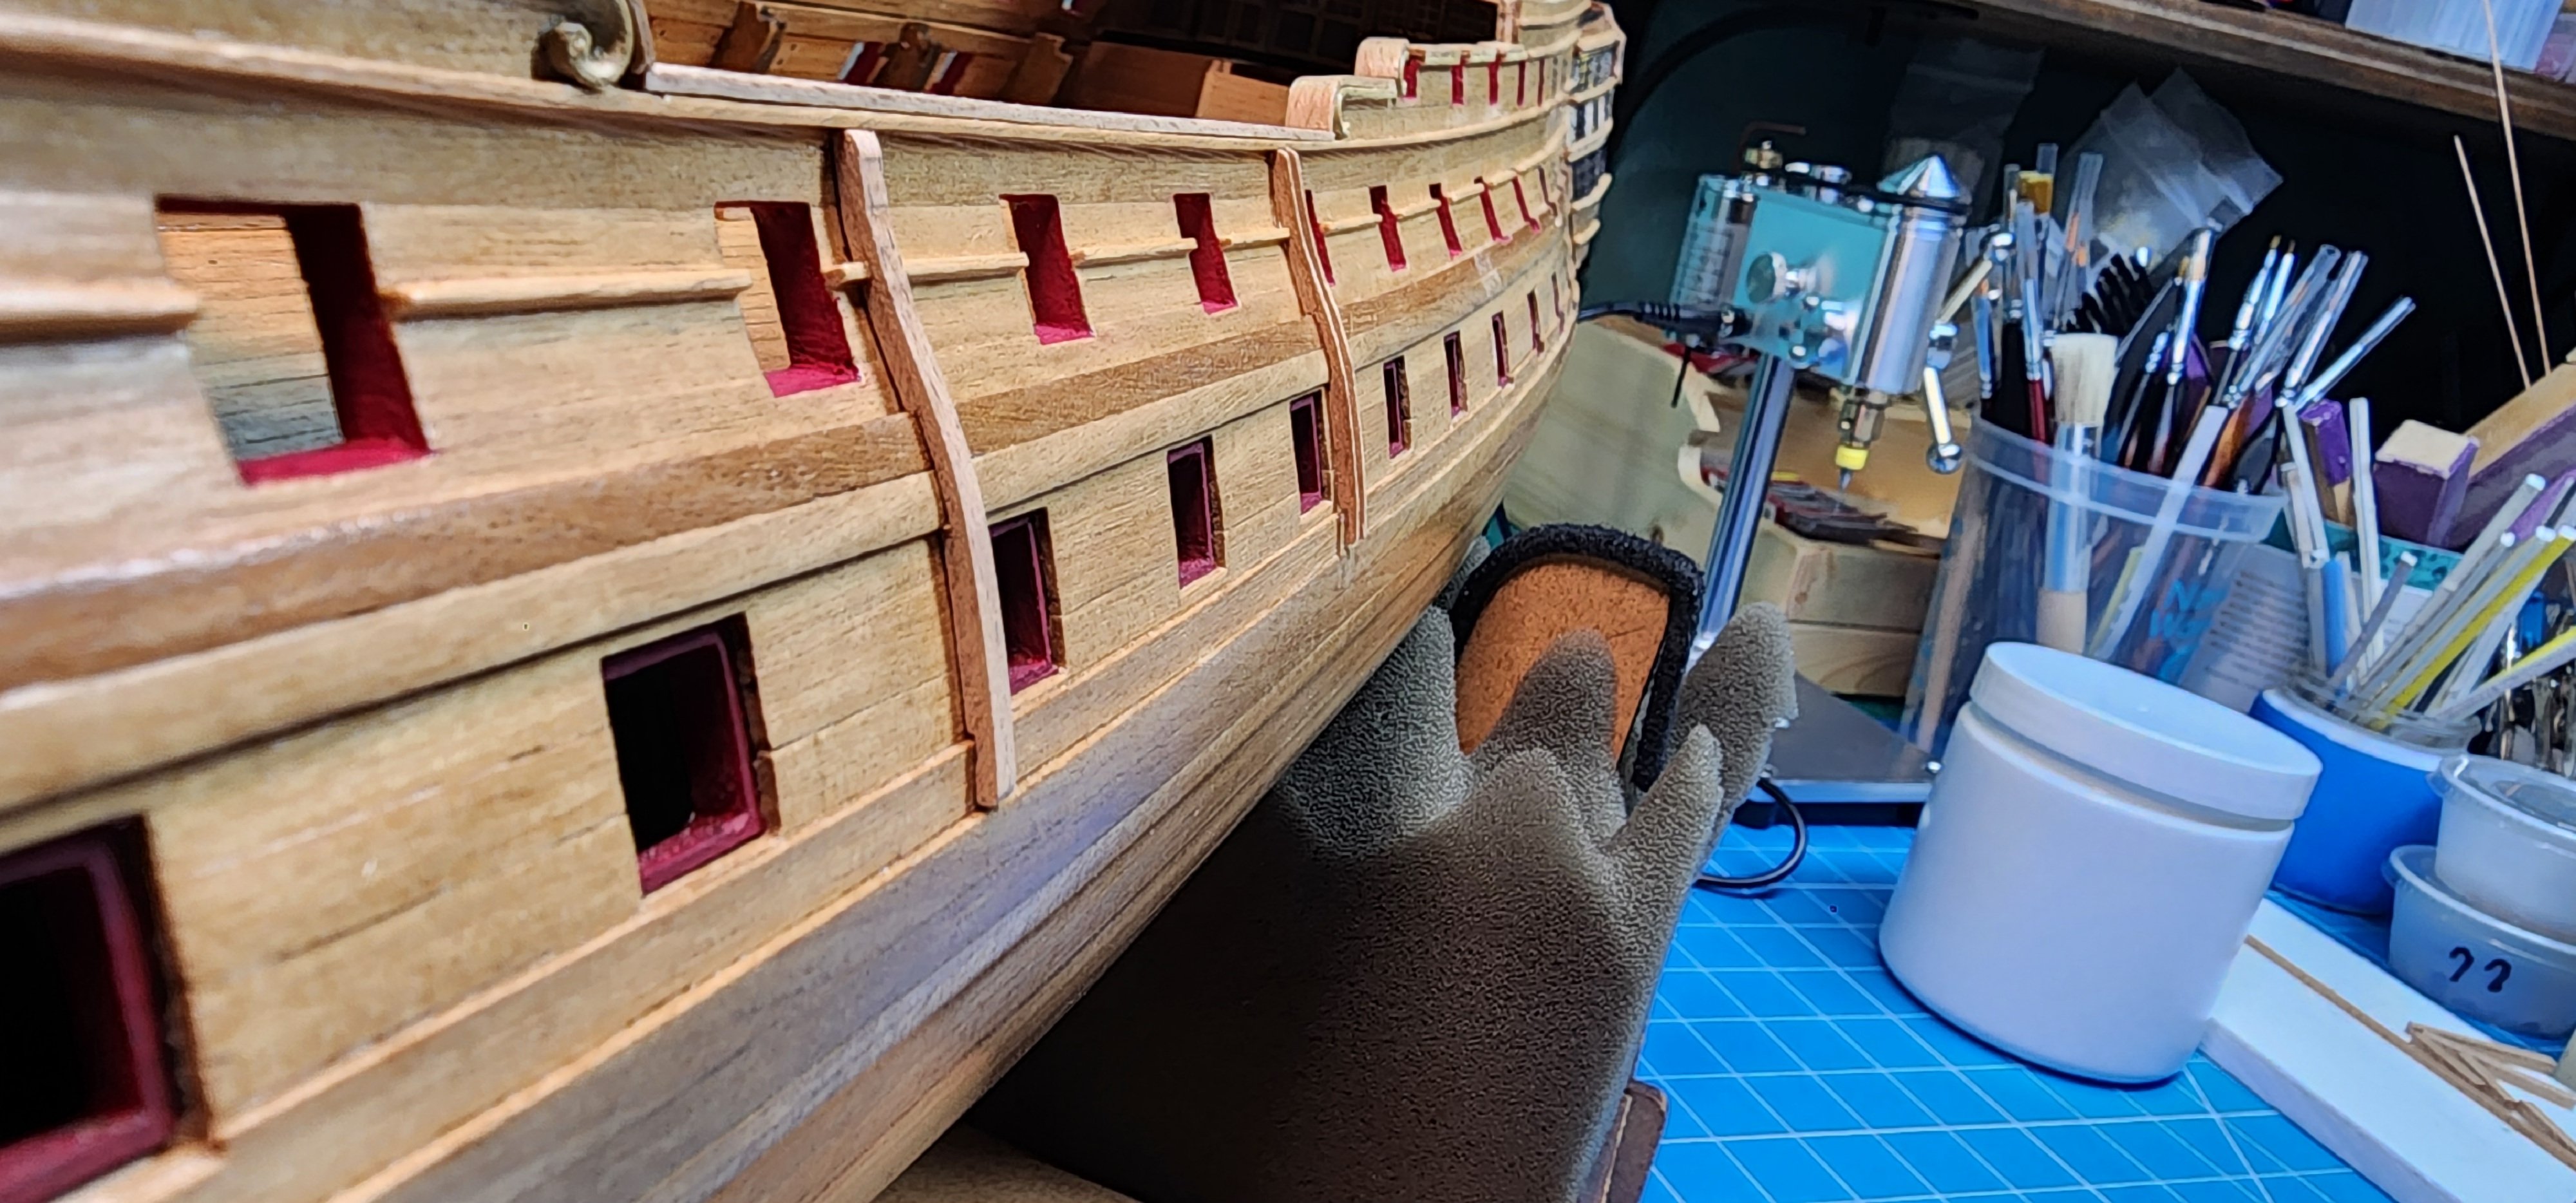
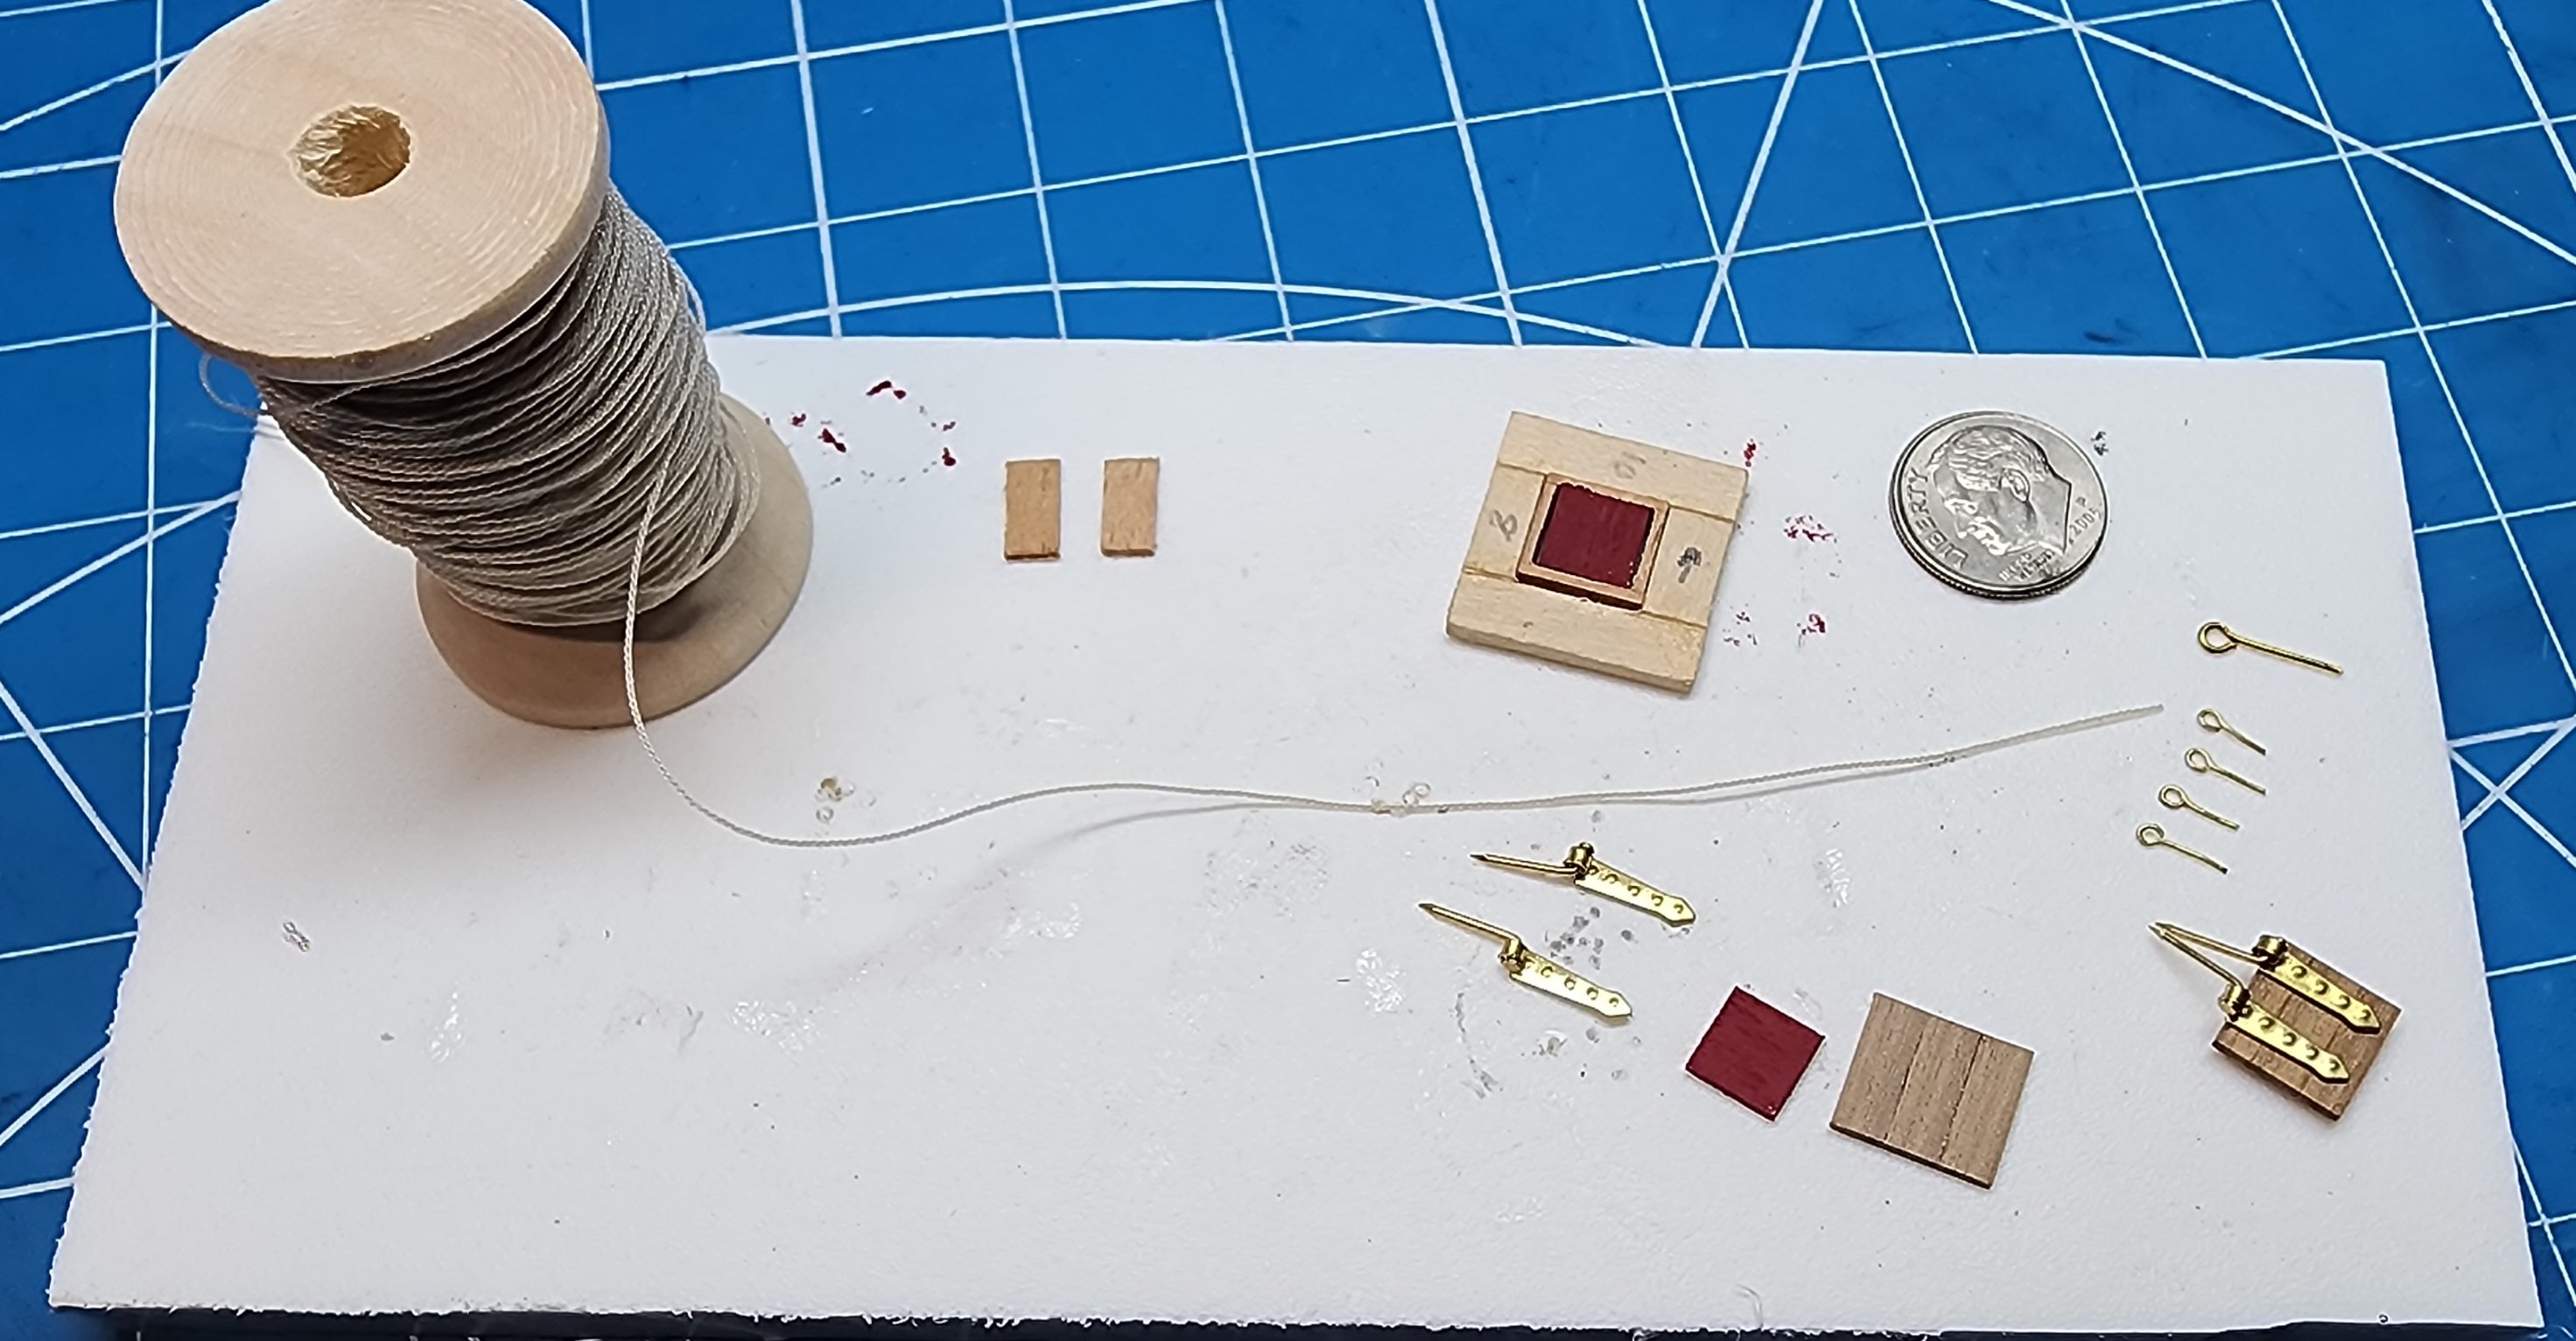
Well, this is my monthly update on the Bellona progress. I started constructing the lower cannon port hatches. I figured since I completed the stern hatches that I might as well continue with hatches since I sort of had a routine going. Again, I used the jig I made for the port post and used the extra frame I had and inserted in the jig. I made parts 949 and shaped them to fit inside the framing in the jig. I used my manual sanding disk that has an attachment to make duplicate parts without having to remeasure each time. Big time saver. I painted parts 949 red and then duplicated the same method of construction for parts 948. I used the cannon ports to get the proper size of those parts and placed each of the parts on the ports to verify that they were the correct size. After the two parts were made, I used the jig to assemble them. I first put part 949 in the jig and then glued the outer hatch cover 948 to that part using the jig to keep everything square and consistent. After this was completed, I continued to fabricate the hinges. I used my miniature drill press to drill the hole needed for the eye bolts. After all the holes were drilled, I filed each of the hinges flat as they had a bit of a ridge on them from when they were manufactured. I found when I did the stern hatches that the hinges did not sit quite flush on the hatches and the glue did not want to adhere well. After the hinges were prepped, I soldered the eye bolts to them. The eyelets that came with the kit were too large in my opinion, so I made my own using a .5mm brass wire and a 1.25mm drill bit. I wrapped the wire around the drill bit and then cut the wire down the center. This gave me a 1mm eyelet after cutting. I installed the eyelets to the eyebolts after they were fabricated. I fabricated the hinge pins using brass nails and bending them at a 90-degree angle. At this point I have all the pieces made and ready to blacken the brass parts before assembling them onto the hatches. And then it hit me……modelers block!!! I went down the rabbit hole of what comes first, the chicken or the egg. Before I can assemble the hatches and predrill the holes on the hull for the cannon port hatches, I have to know where the conflicts are going to be with the chain plates. I don’t want to drag this post on so I will provide and update on this subject in another post.
Cheers
Nearshore


- eatcrow2, petervisser and Mr Whippy
-
3
-
-
-
Welcome Aboard. Good Luck on your journey!!!
-
Welcome!!
Nearshore
- Keith Black and mtaylor
-
2
-
Your build looks amazing. Congratulations on the Sphinx and on your new family member.
- brunnels and hollowneck
-
1
-
 1
1
-
Very nicely done so far. She is really starting to take shape.
- yvesvidal and Paul Le Wol
-
1
-
1
-
-
-
Hello All,
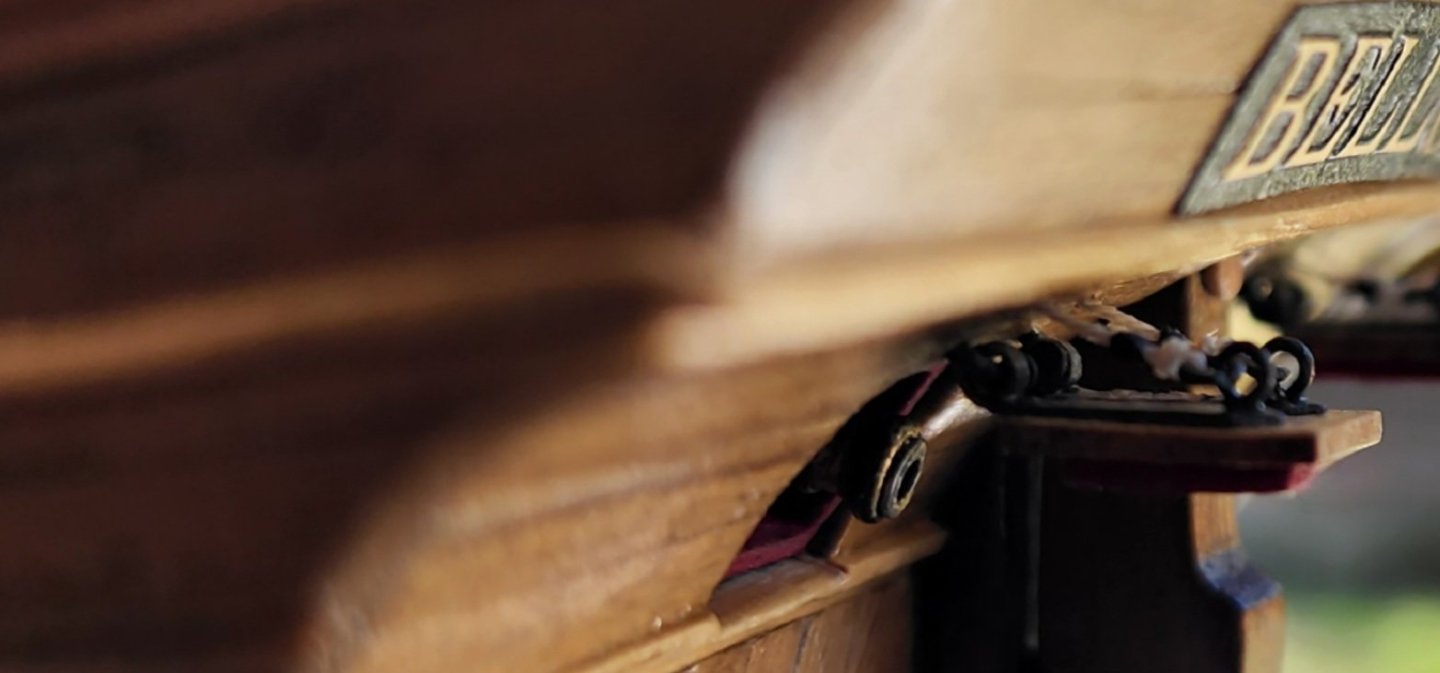
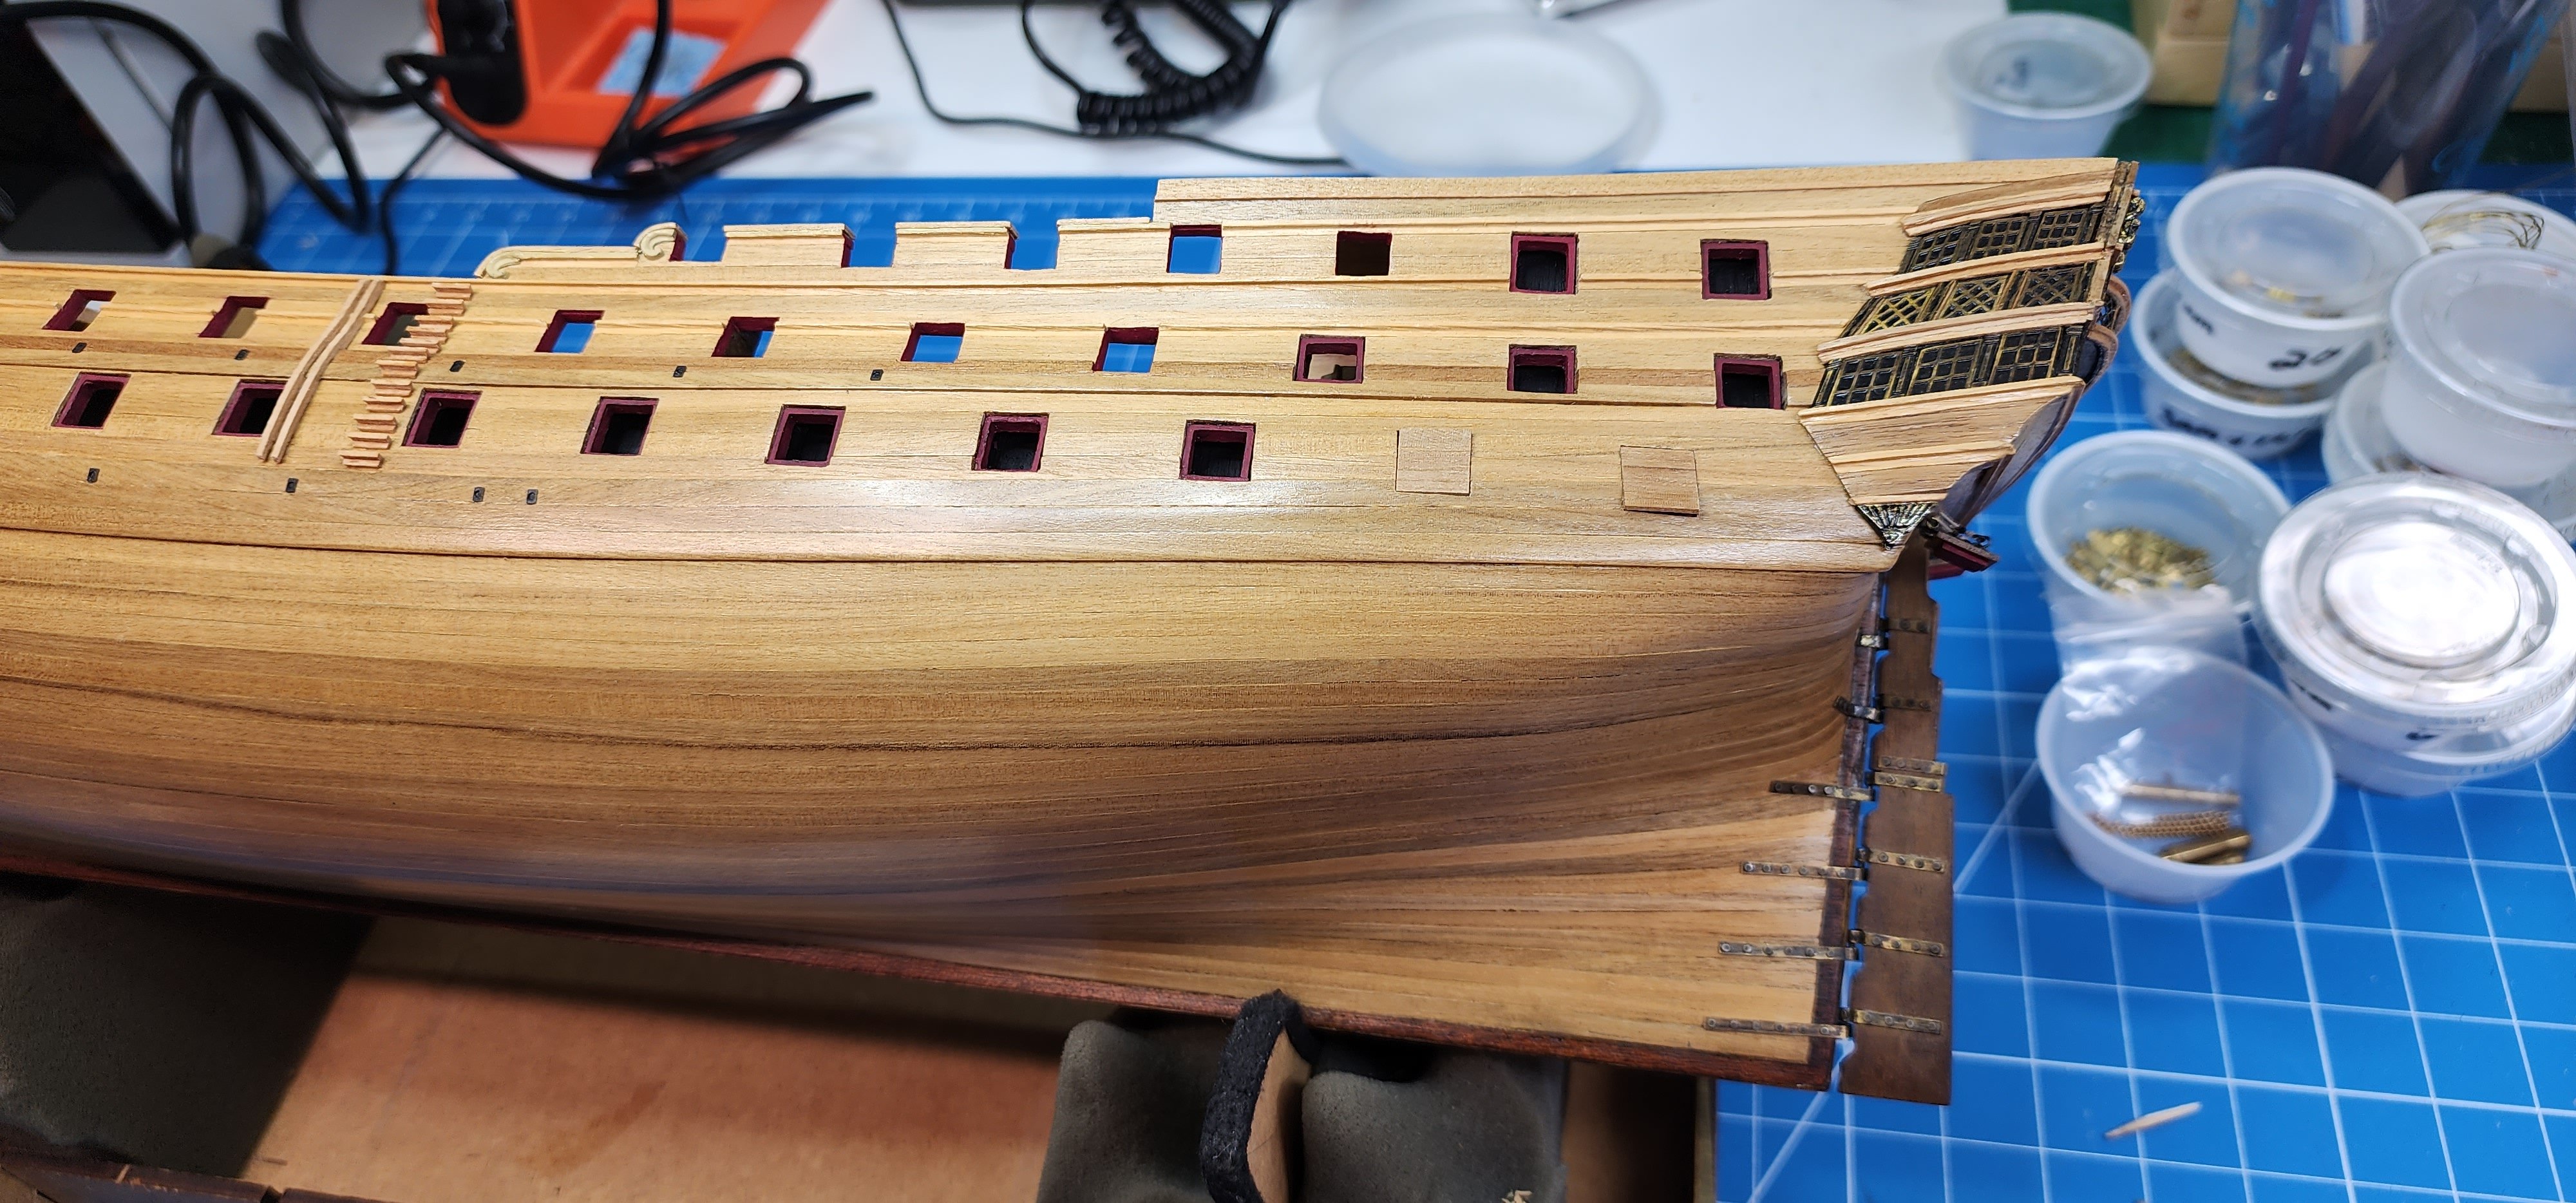
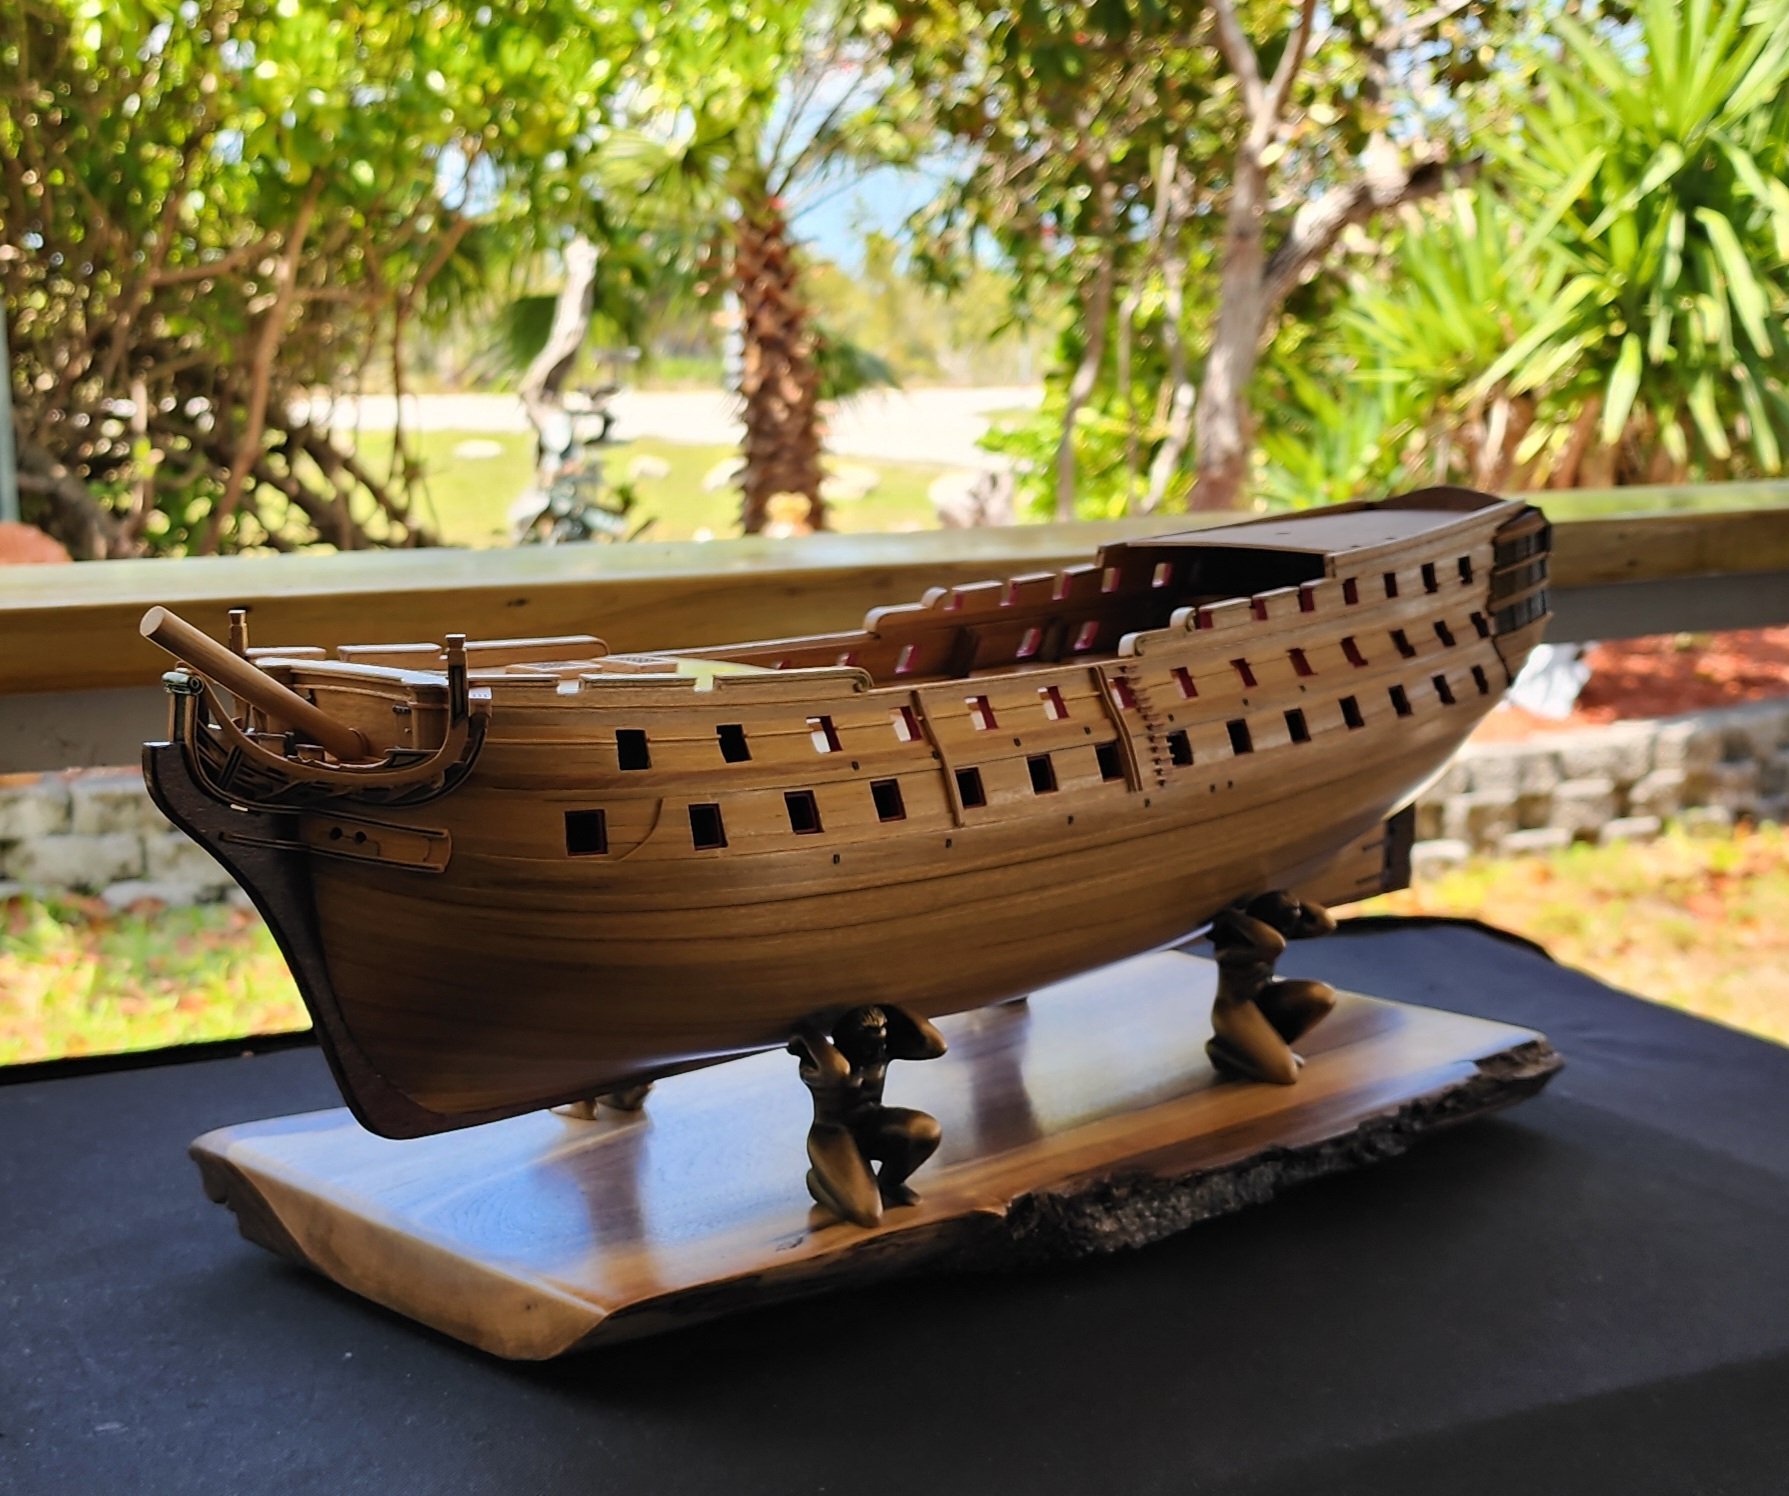
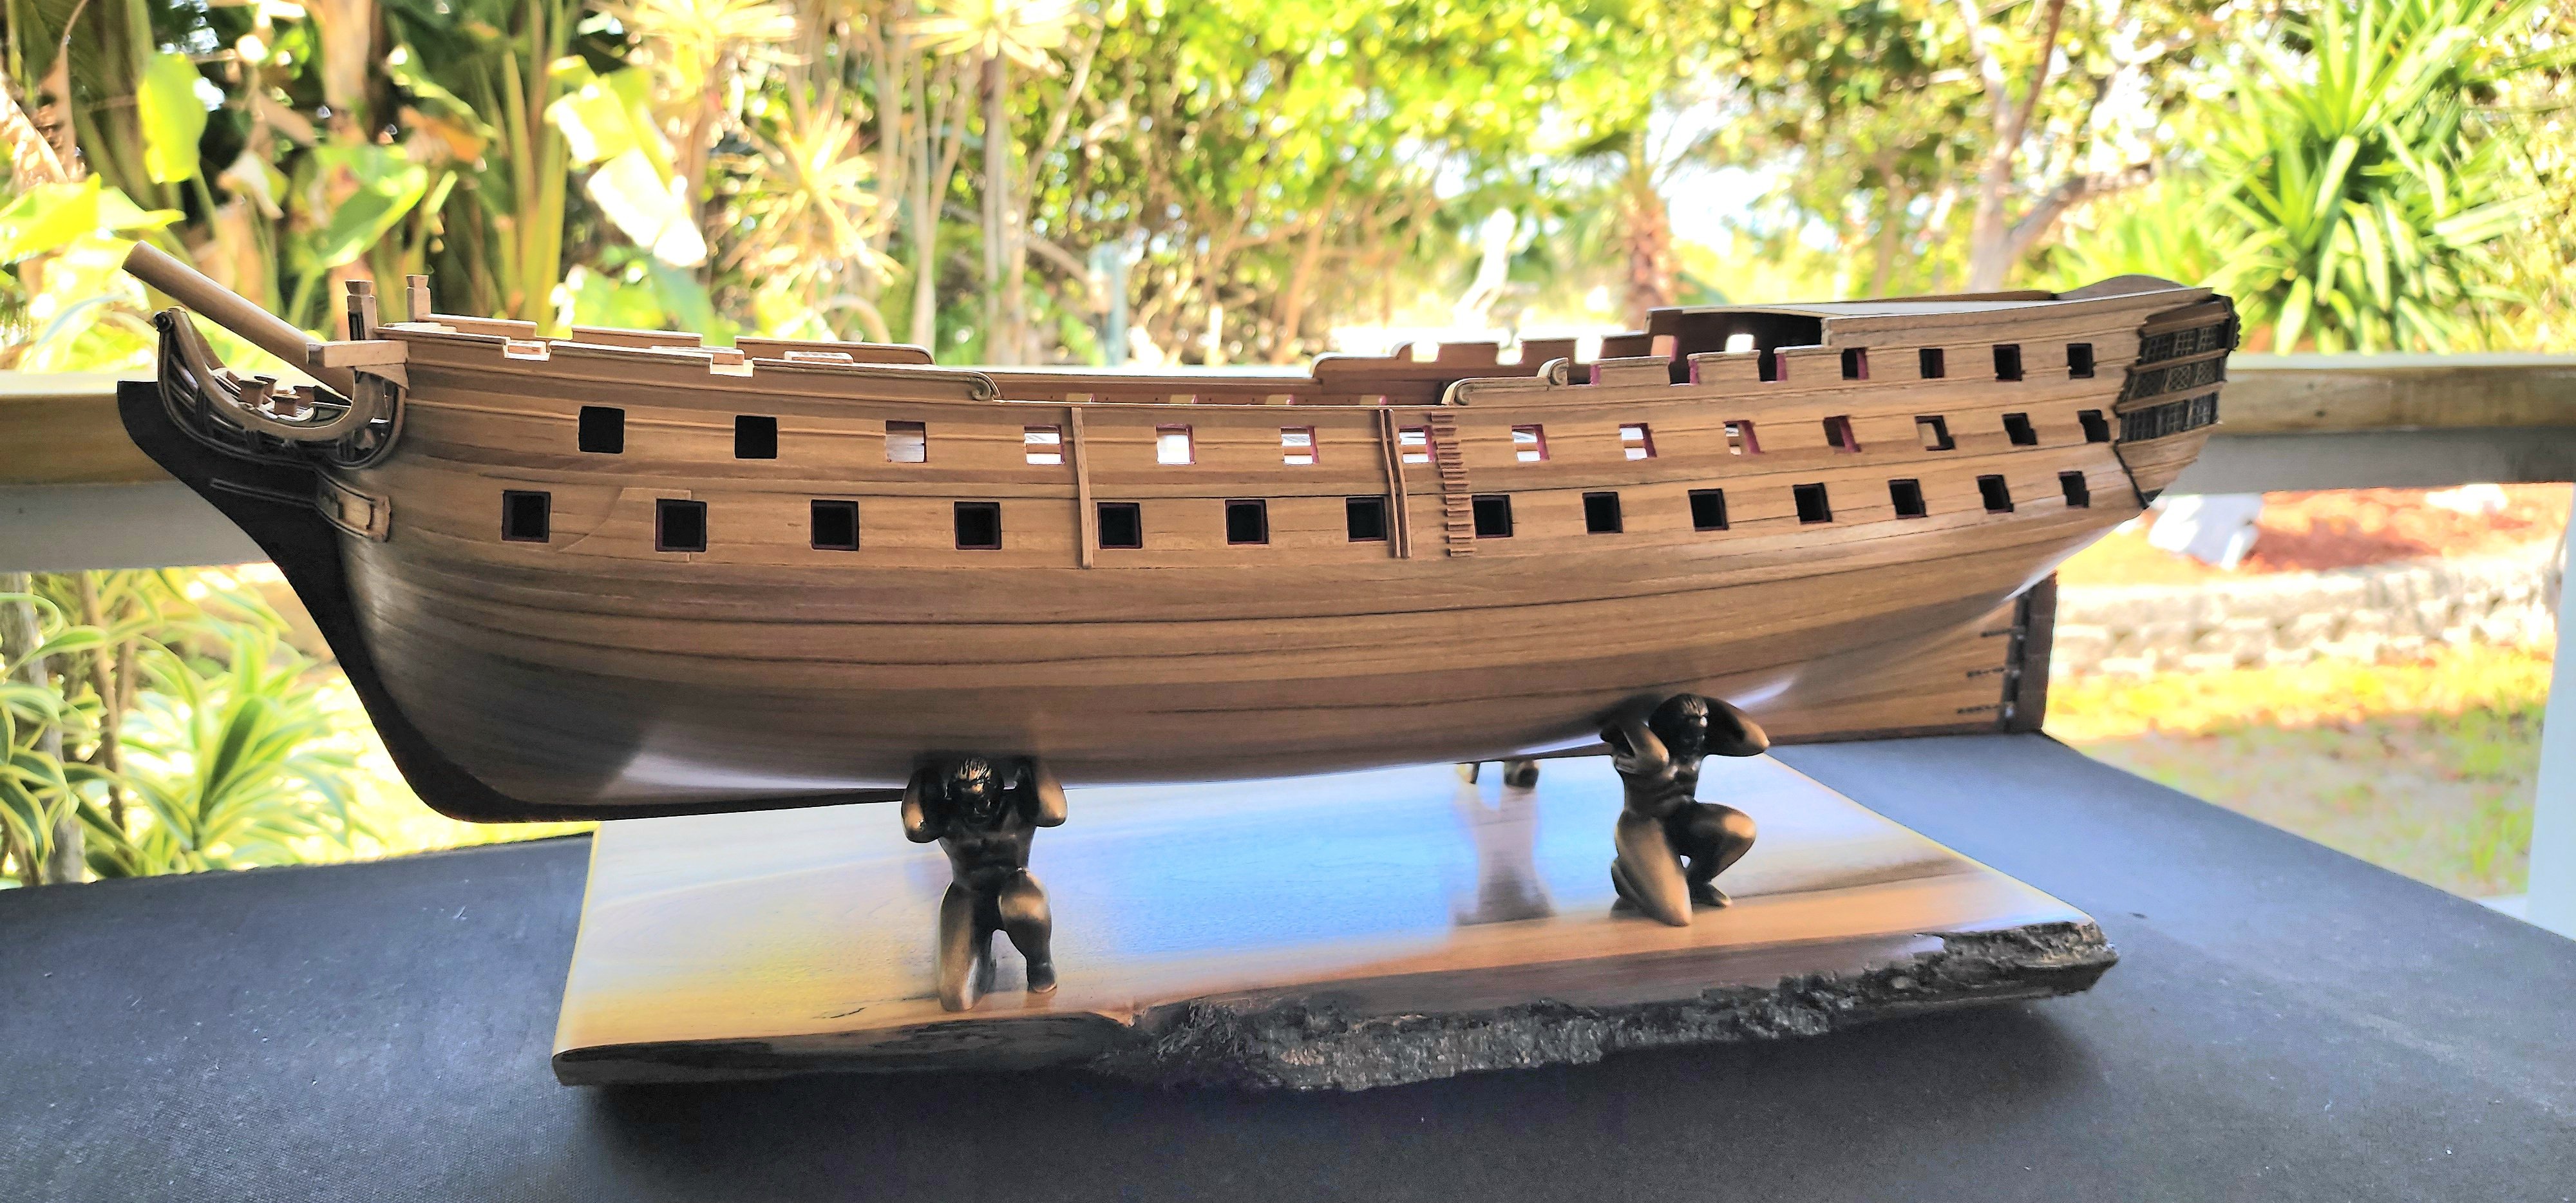
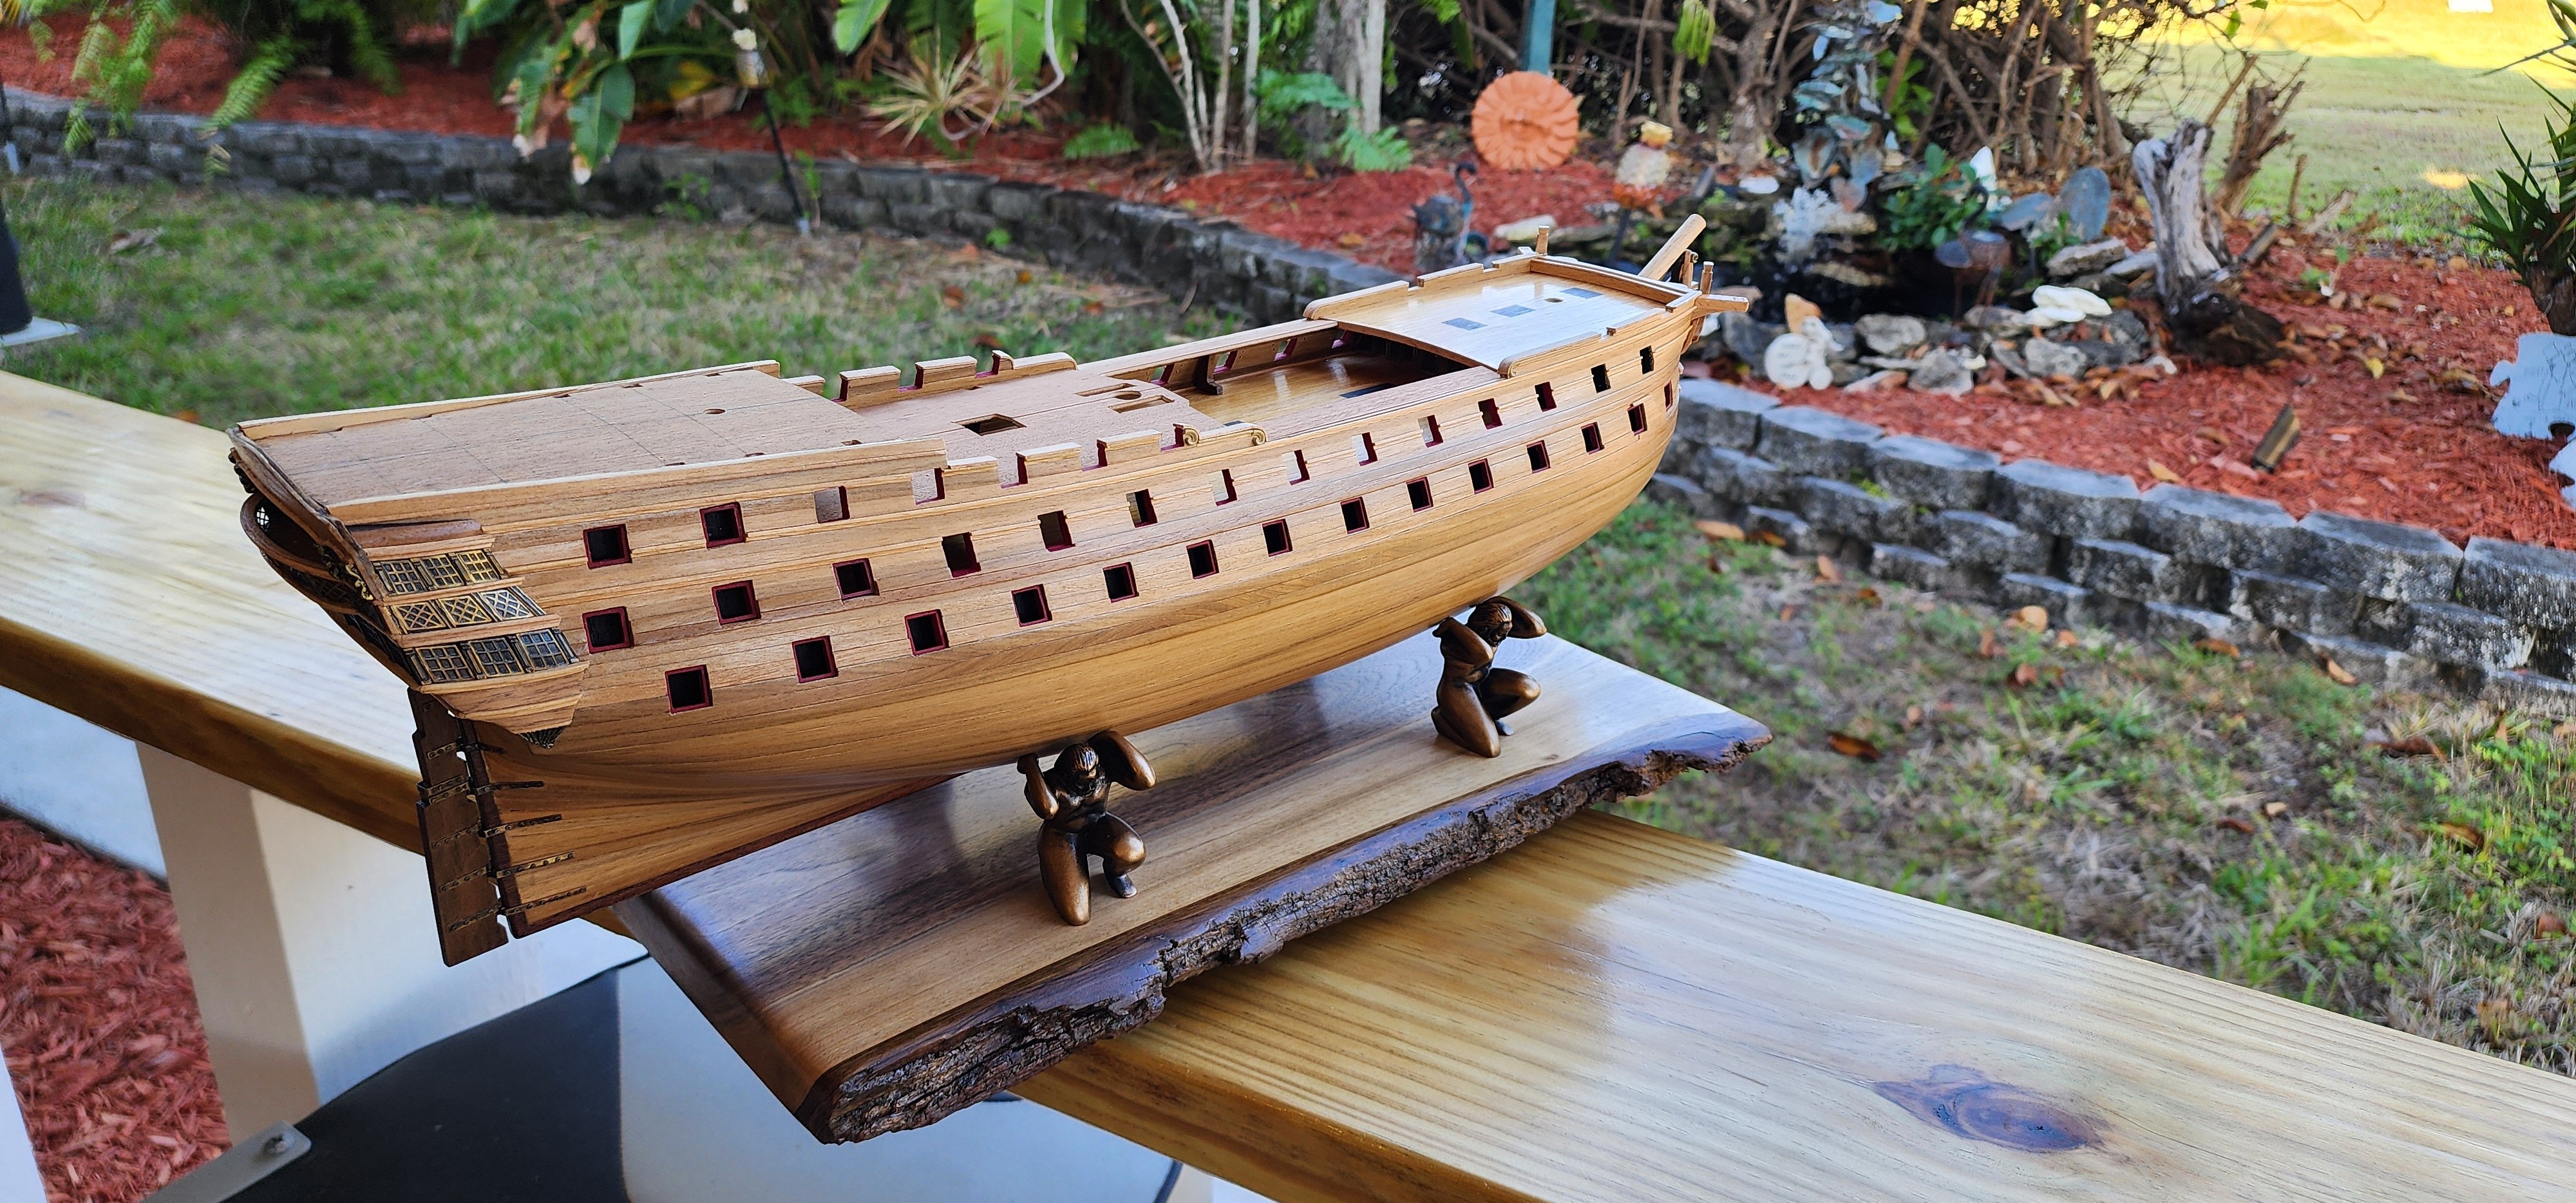
Small update on Bellona. I completed the installation of the stern cannons and port hatches. I used the jig I made when I built the port post some time ago. I used the extra frame I had and fitted the inner planks to fit inside the framing. I drilled the hatch hinge and soldered a 1mm eye bolt to the hinge. I made 1mm split rings and installed them on the eye bolts that were soldered to the hinge. I used brass nails and bent them at a 90-degree angle and inserted them into the hinge. I blackened the hinges and applied a clear acrylic finish. I glued the hinges to the port lids and installed the ropes used to raise the hatch. I drilled the holes for the hatch hinges and ropes and dry fitted them so I could align the cannons properly. I used a bit of brass buff and rub on the cannons to give them a bit of color before glueing them in place. After I was satisfied with how everything lined up, I glued the pieces in place. I will document the process better when I do the remaining 38 hatch covers that I have to make for the remaining cannon ports. I installed the scuppers on the port side. They were made from PE so I blackened them and applied clear acrylic before installing them. Well, that’s all I have for now, and as always, your comments and guidance are always welcome.
Cheers
Nearshore


- Mr Whippy, Paryzek, petervisser and 1 other
-
4
-
-
Hello All,
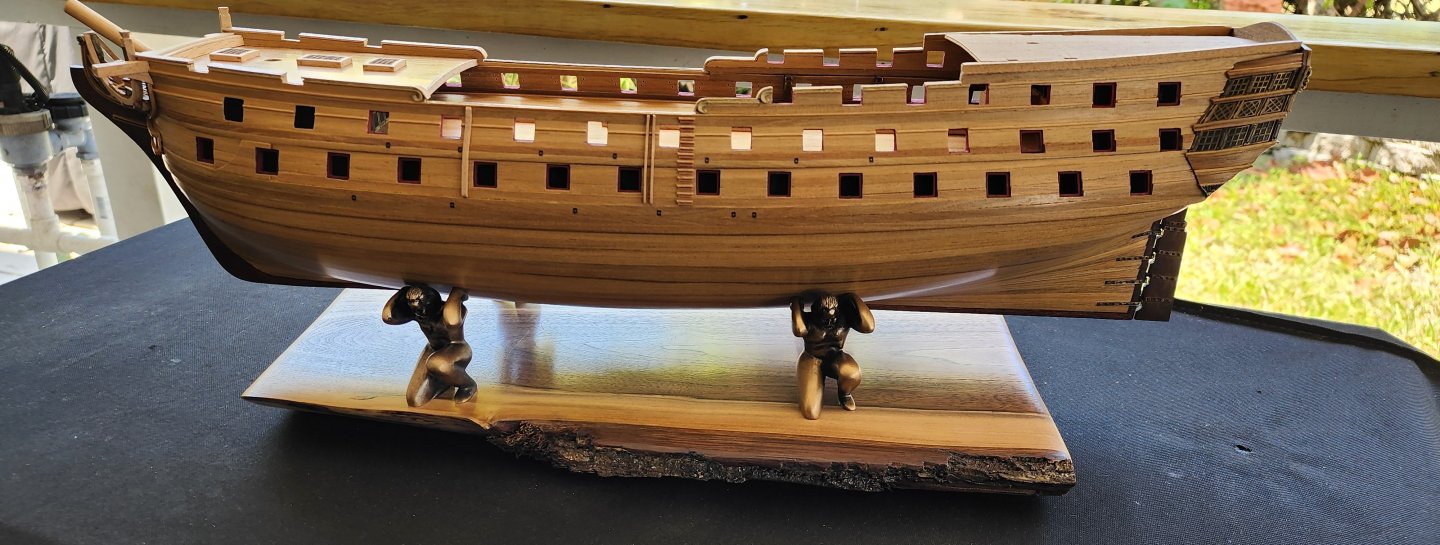
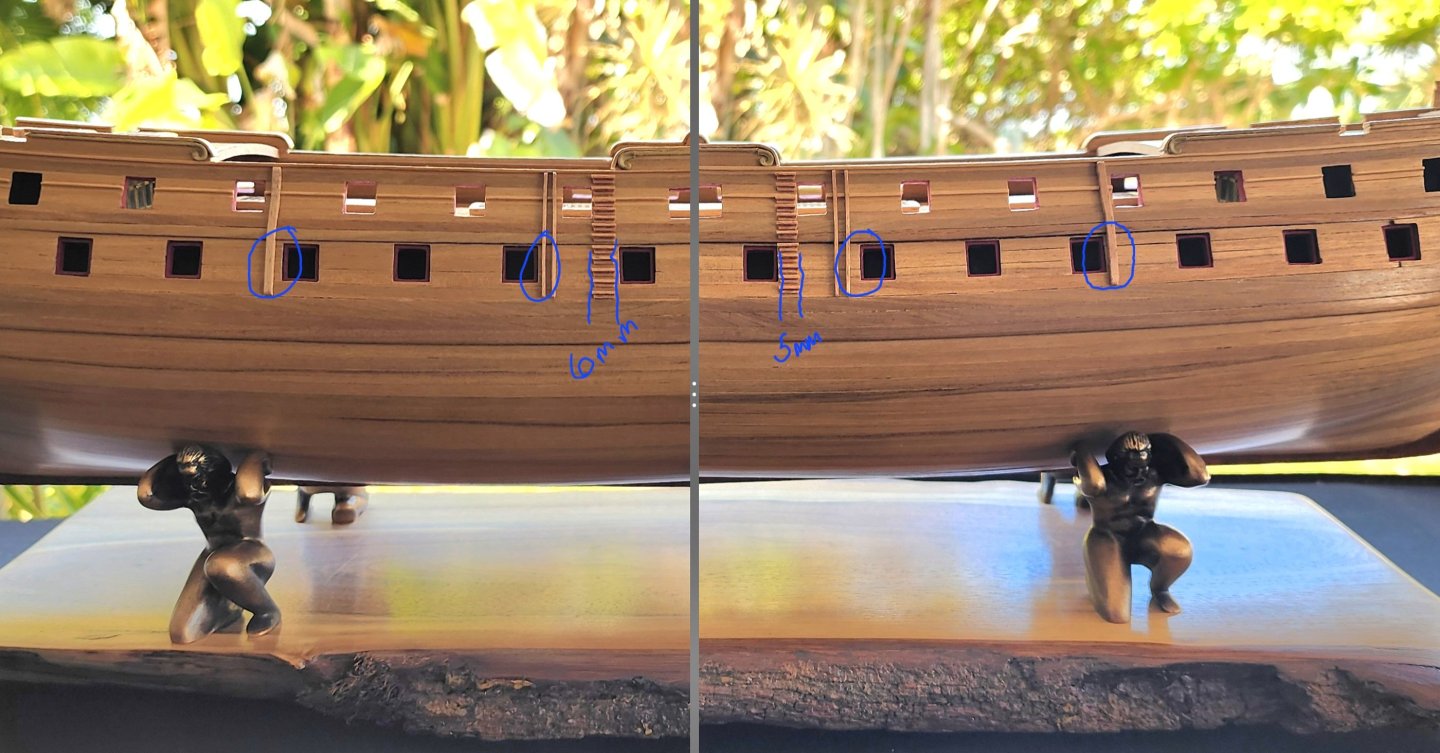
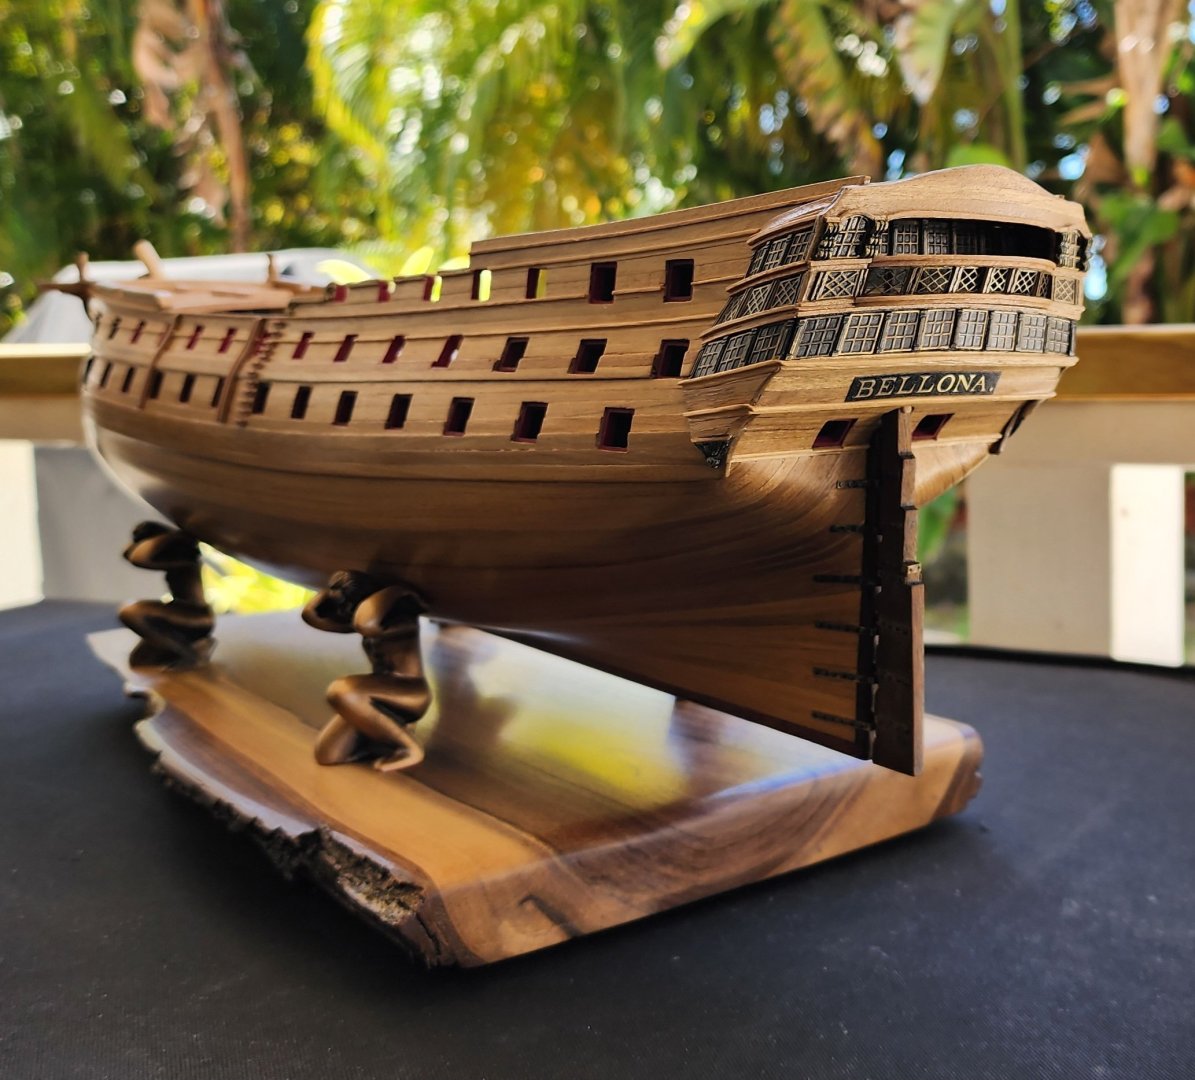
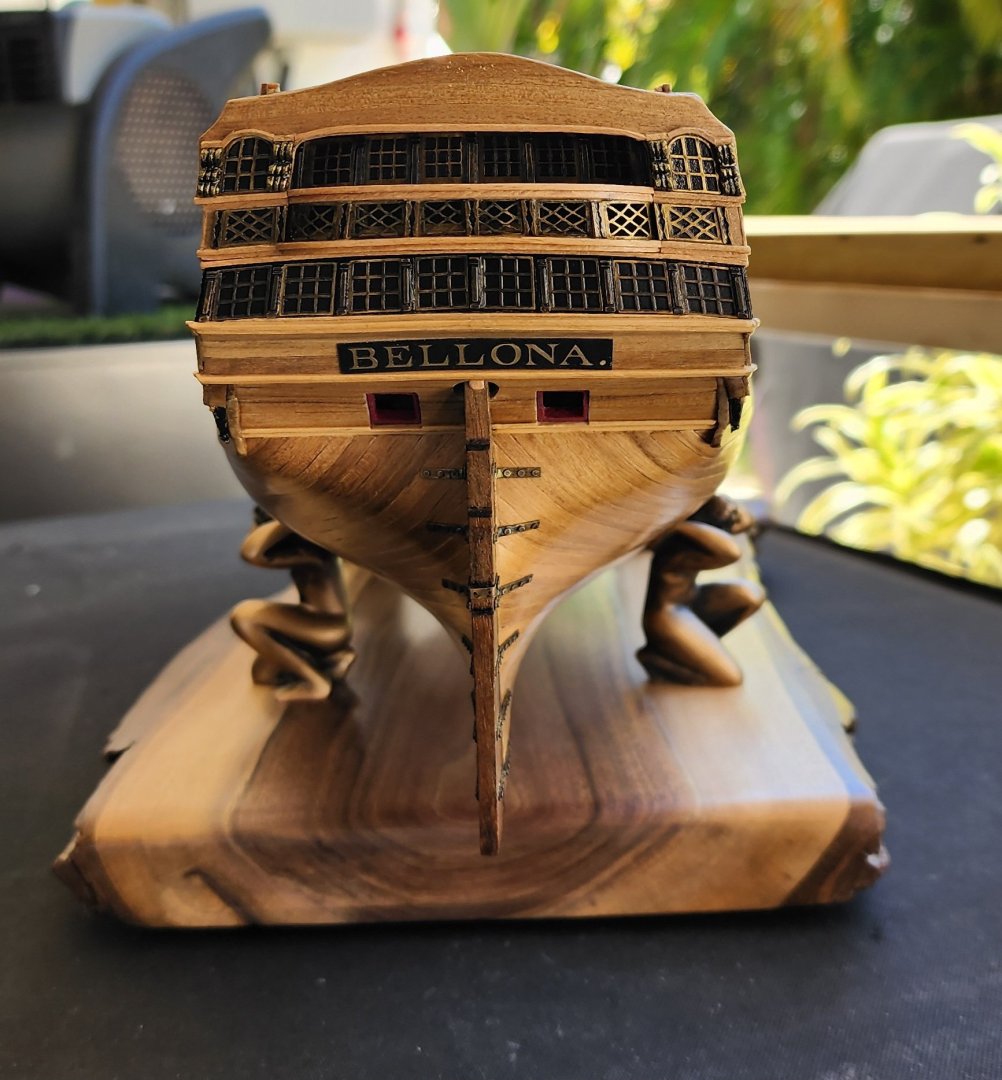
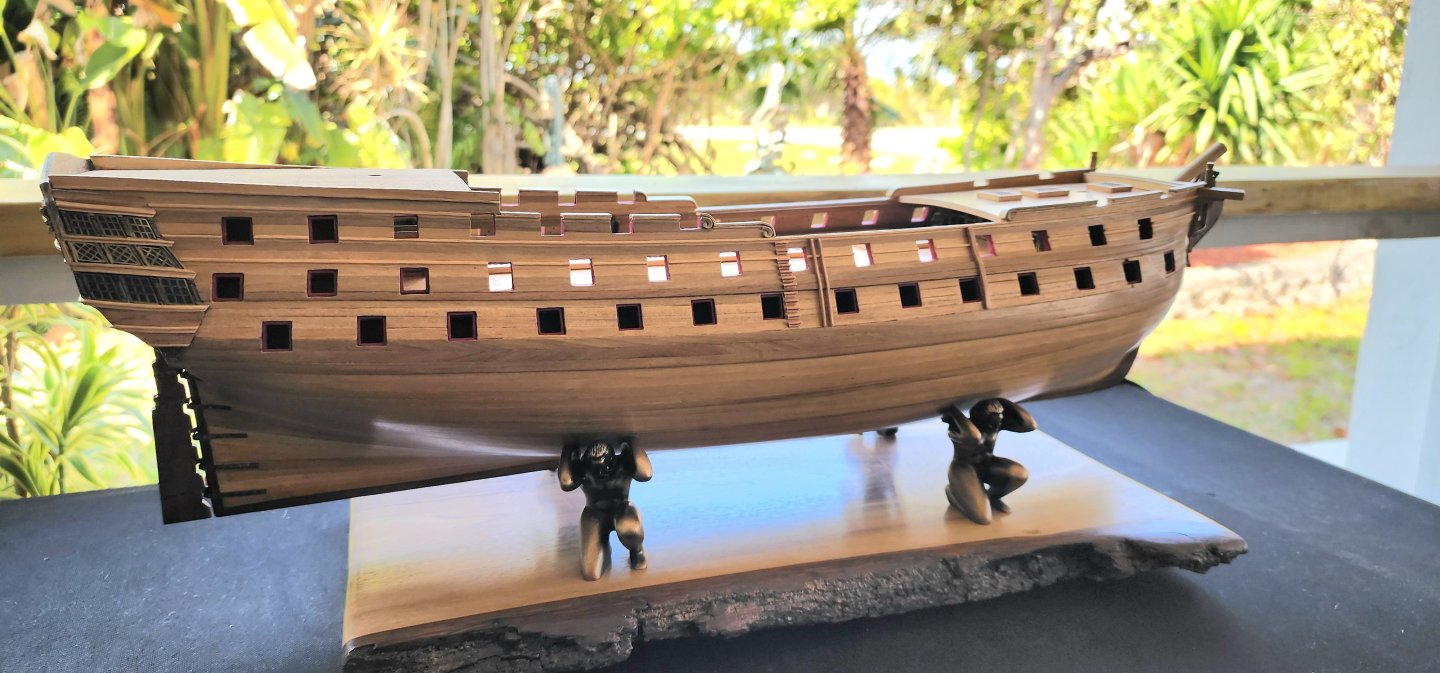
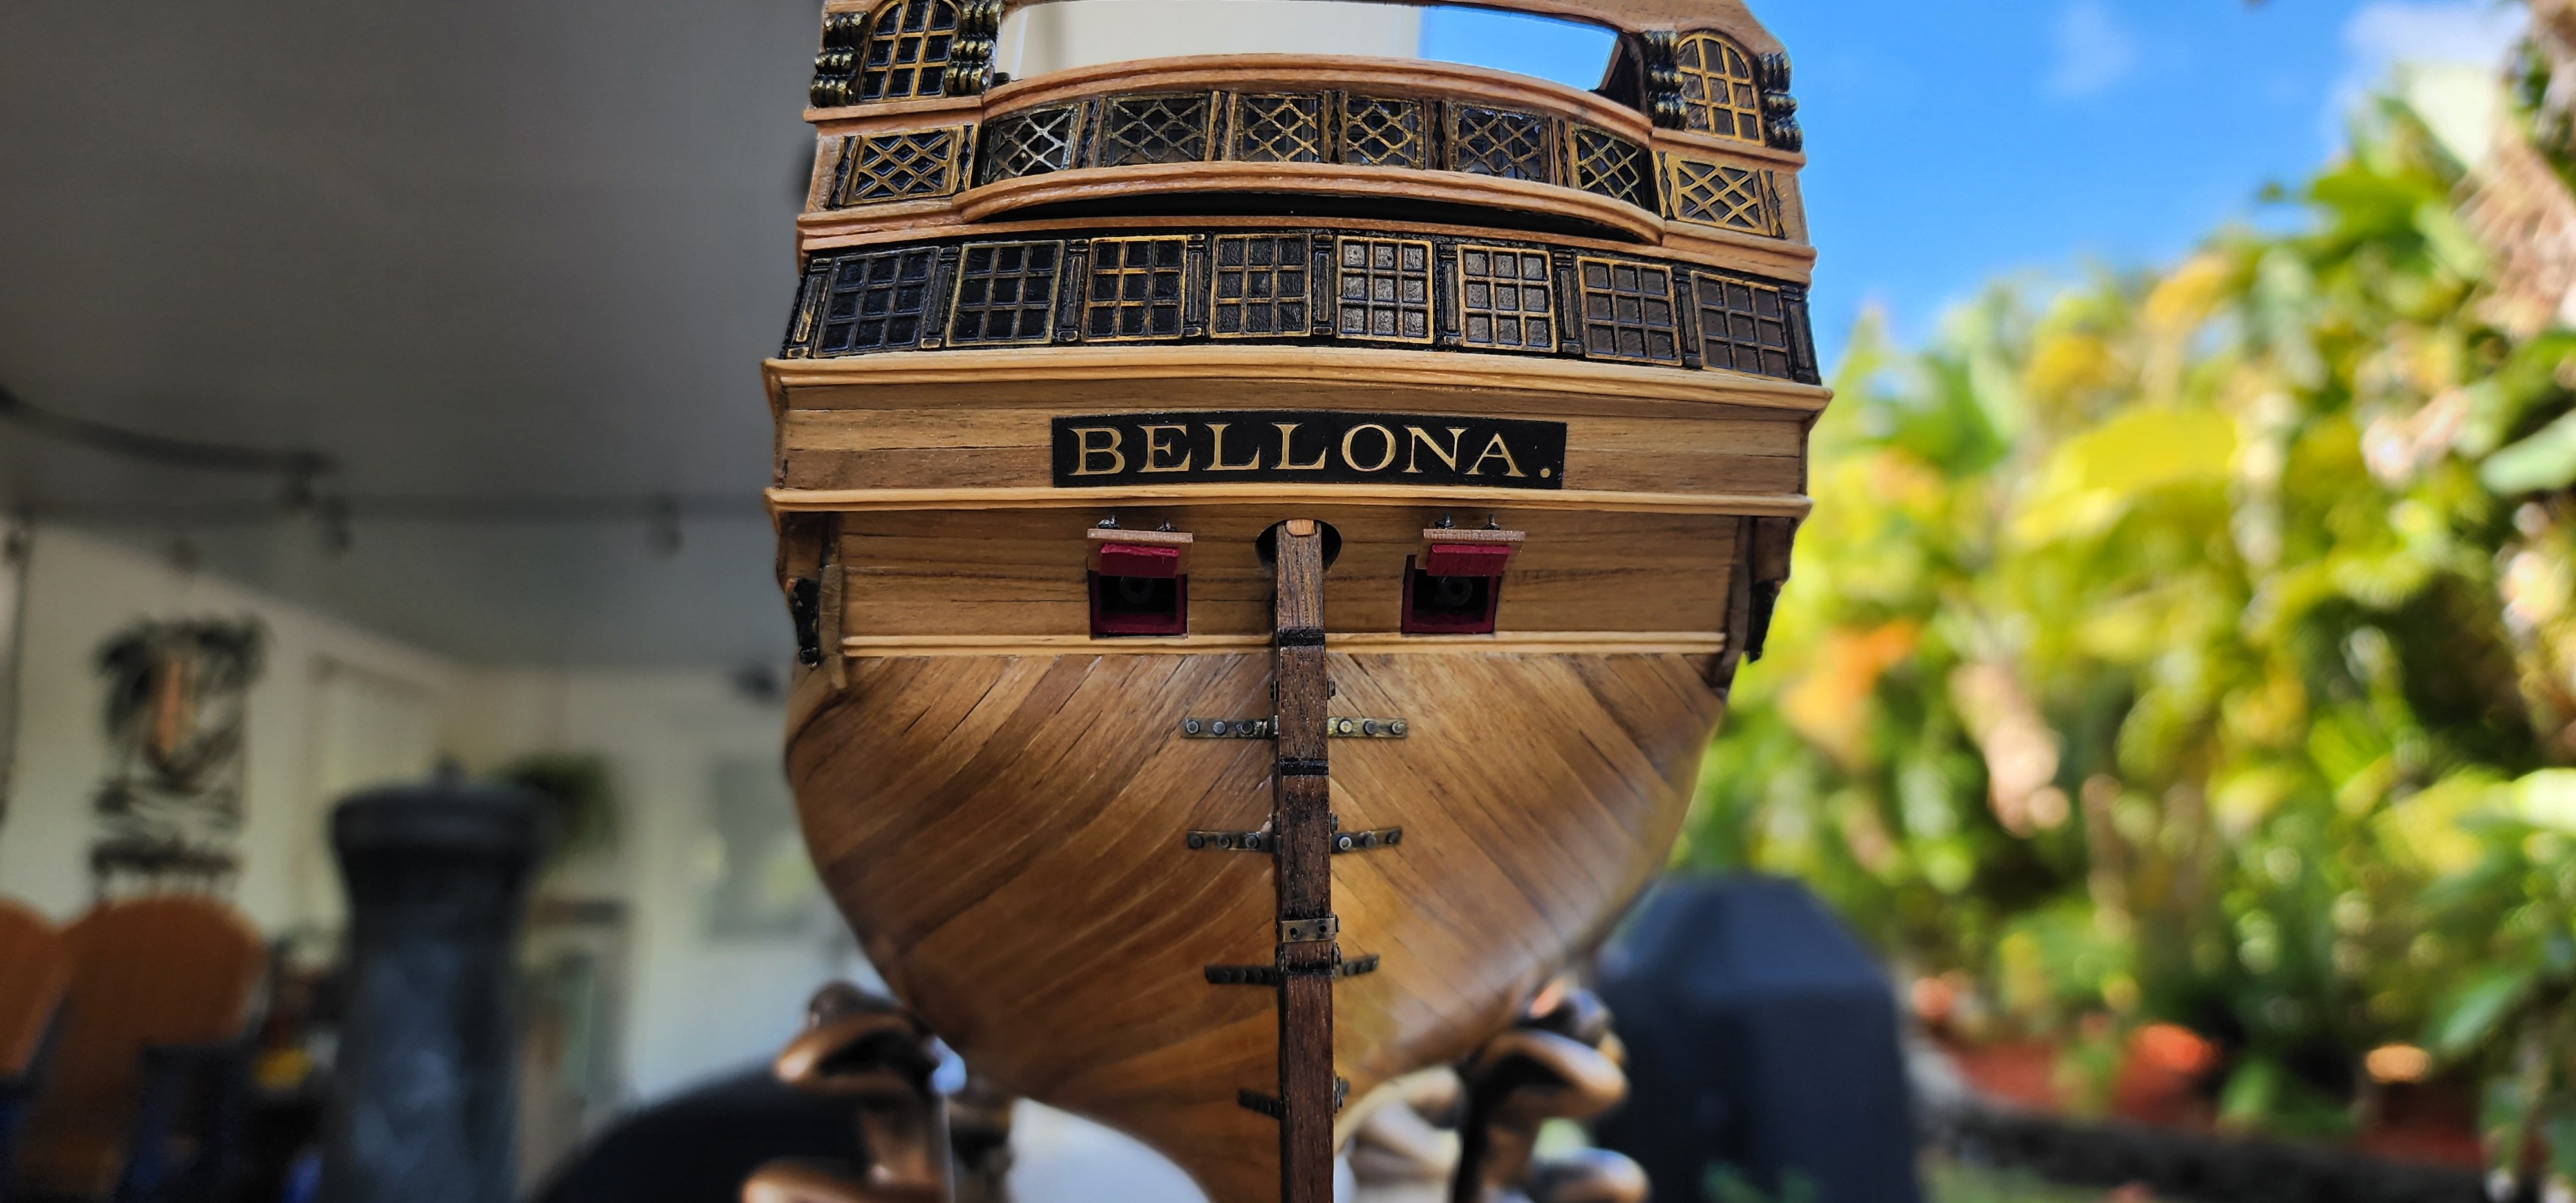
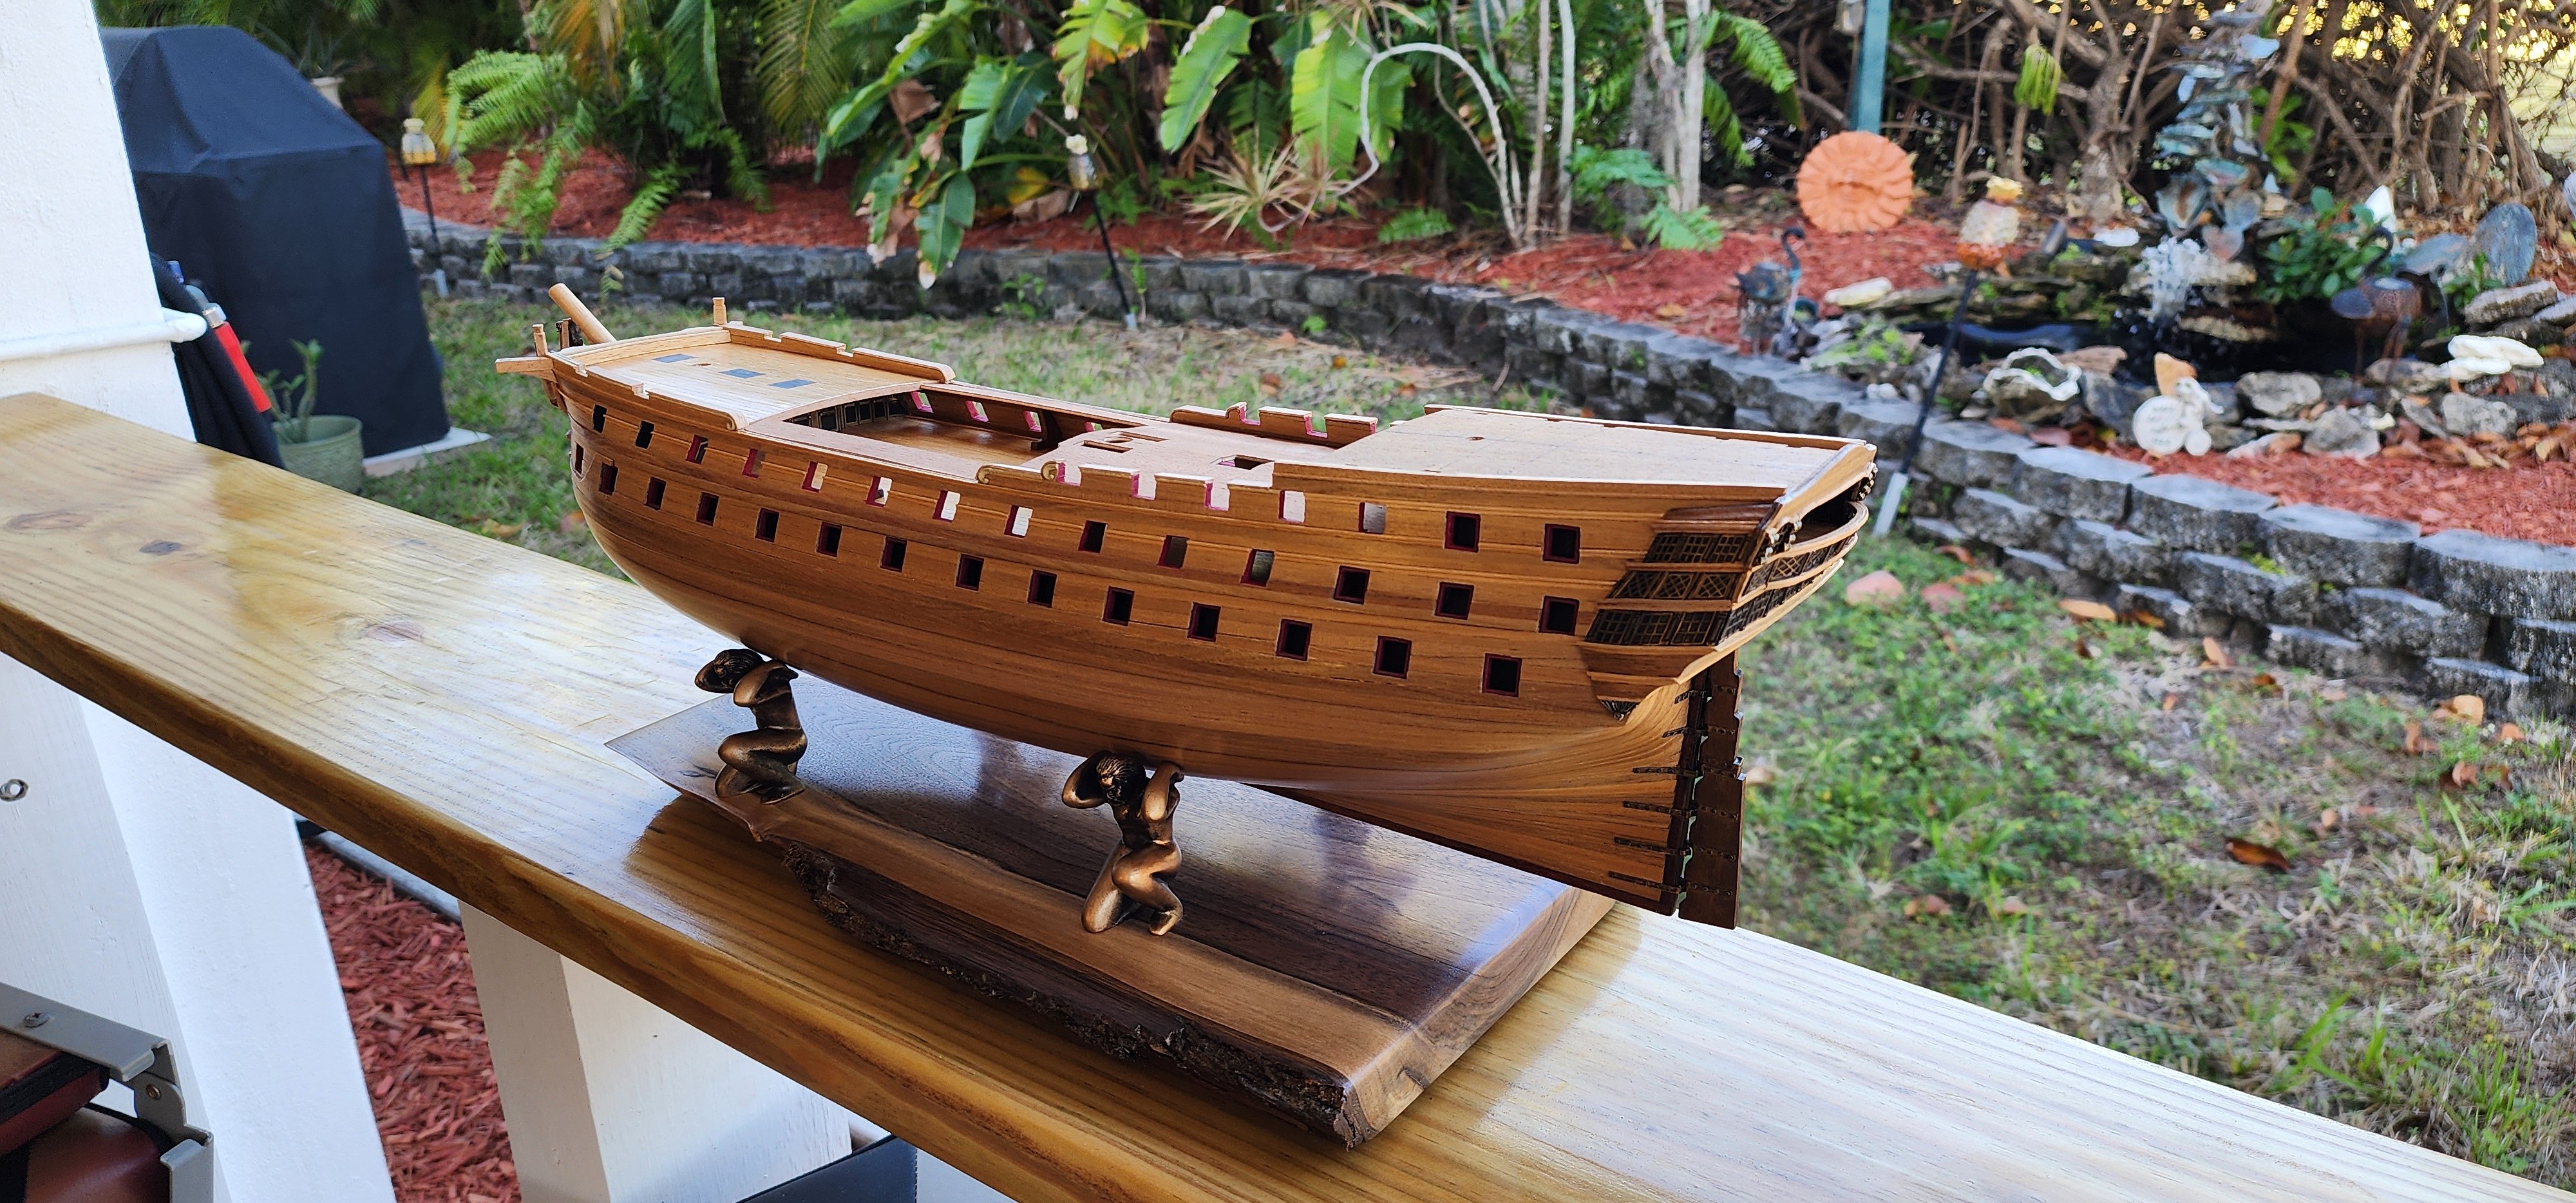
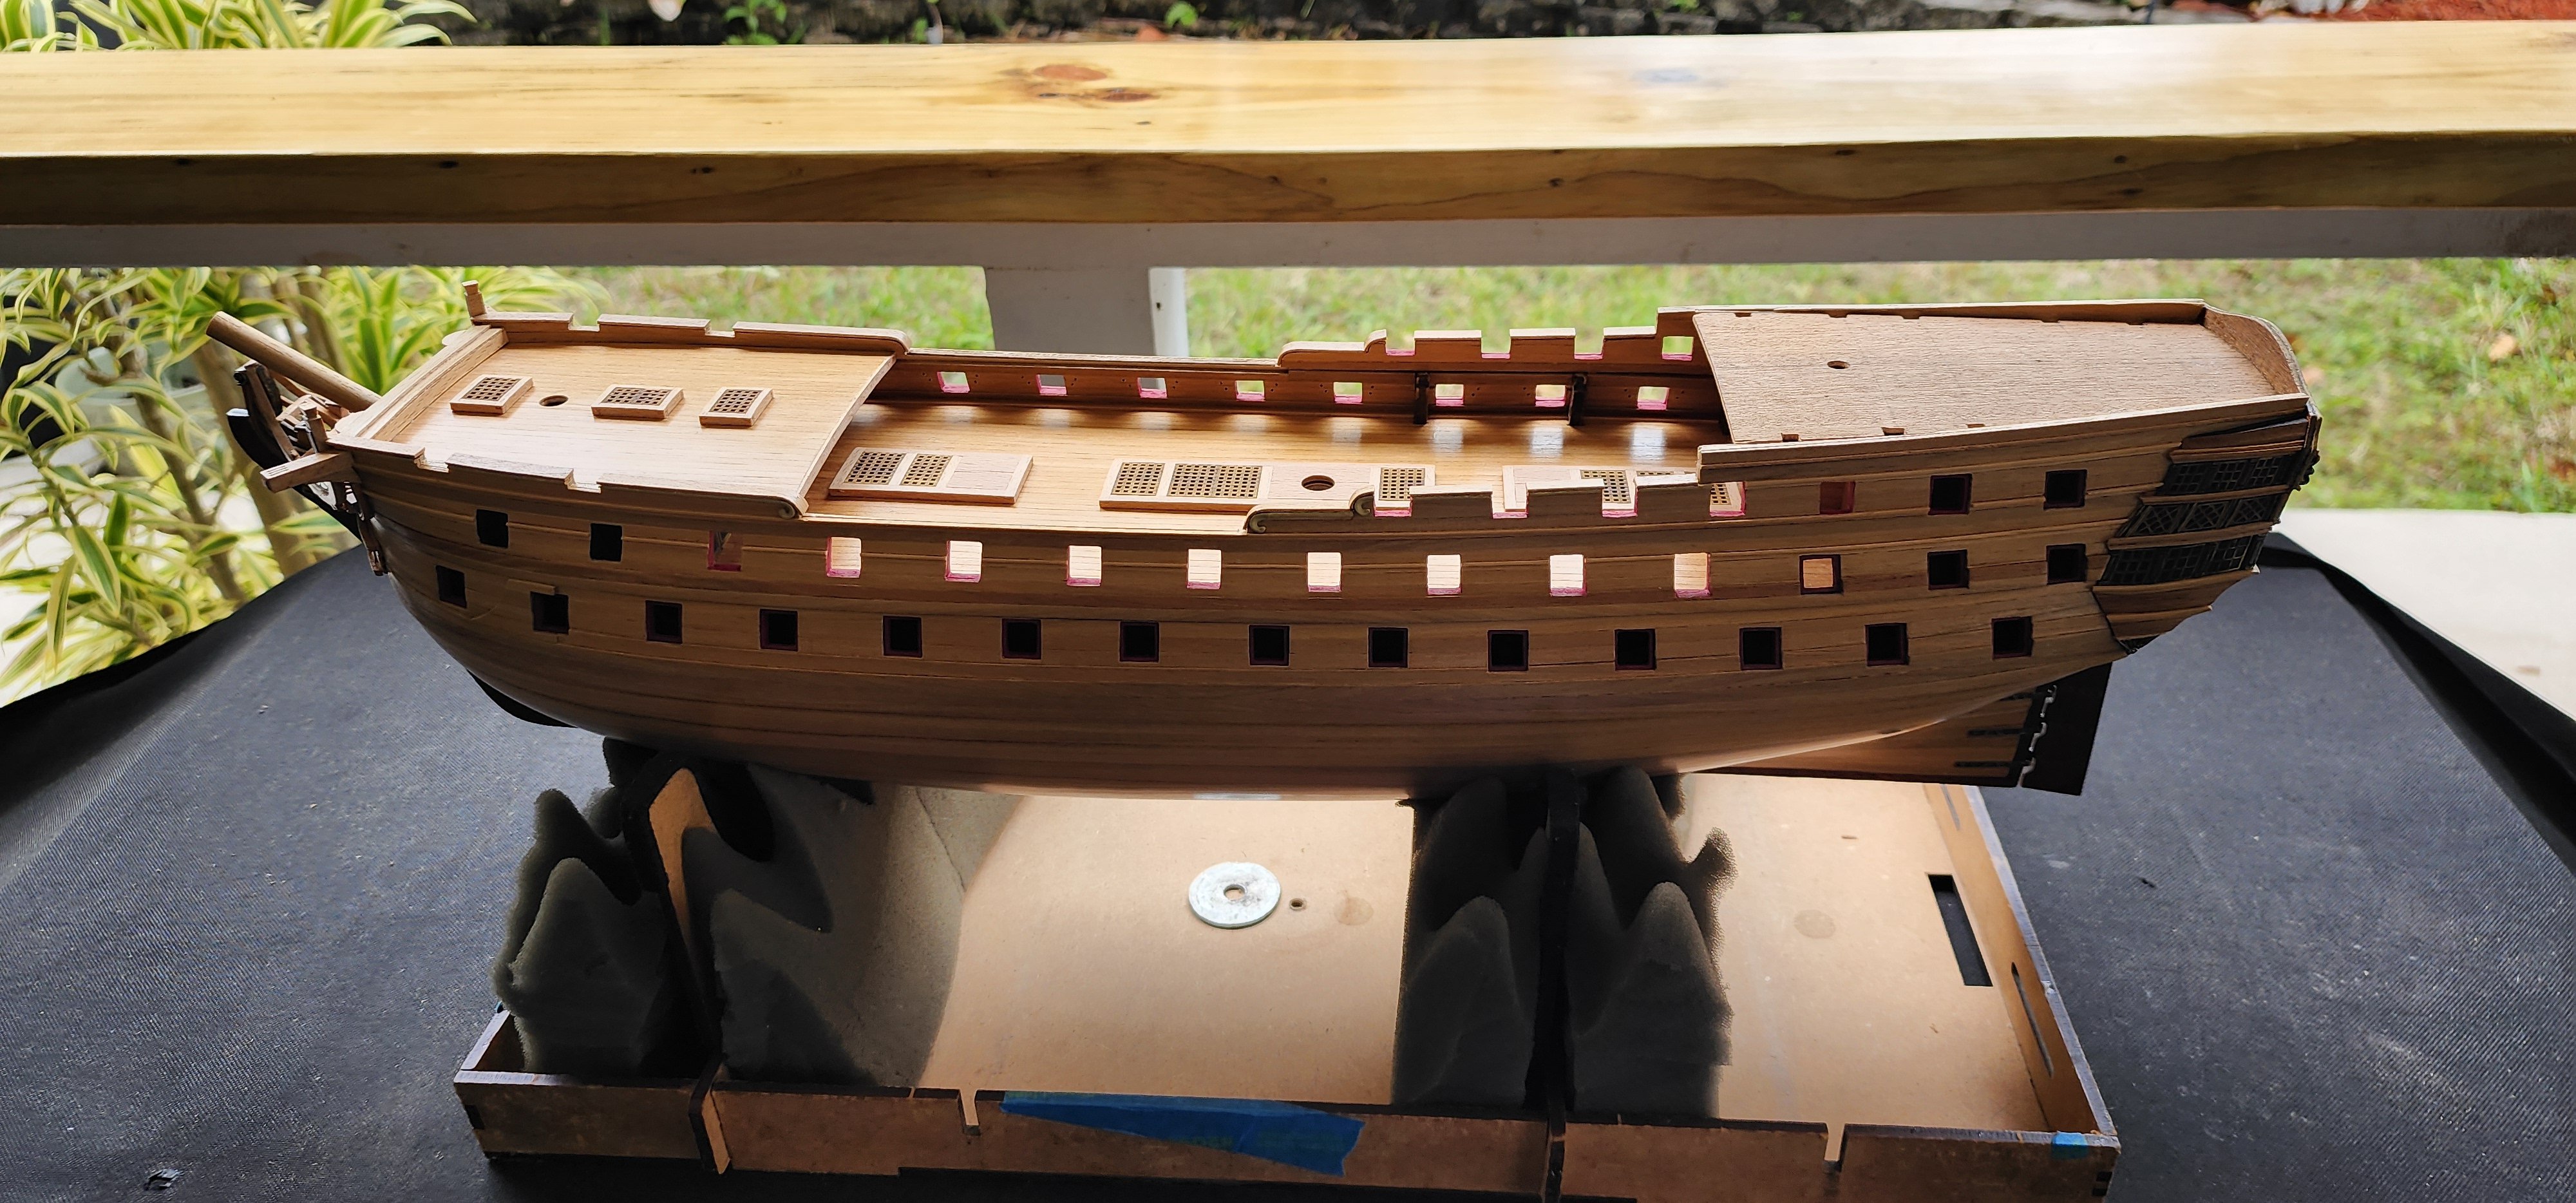
I have a small update on the Bellona. I have moved on to installing the skid beams and stairs on both port and starboard sides of the ship. I notched the beams to fit around the Wales and shaped them to match the contour of the hull. I notched the molding on the ship to allow them to fit snug against the hull. This was a rather easy task, but I ran into a problem that I did not anticipate. When cutting out the false gun ports some time ago, I somehow was off on my measurements by about 1mm. This really tripped me up and I had to adjust the width of the stairs from 6mm on the port side to 5mm on the starboard side. It also messed up the location of the skid beams in relation to the gun ports. Well, I guess I won’t be displaying her with a mirrored back drop so you can see both sides of the ship at the same time. 😊 After the installation of the skid beams and stairs, I decided that it was time to put the name on the ship. I blackened the PE name plate and applied a clear coat of acrylic. After the acrylic dried, I polished the lettering and then applied another coat of acrylic. I glued the name to the ship, its official, she has a name. I have started putting together the stern gun port hatches and will provide another update as I progress. Well, that’s all I have for now, thanks for reading and as always, your comments and guidance are always welcome.
Cheers
Nearshore


-
Hi Mark,
Look forward to following your progress. Good luck on your journey.
Nearshore
-
Hi Steve,
Welcome aboard.
Nearshore
- Keith Black and mtaylor
-
2
-
Hi Yves,
Absolutely stunning so far. You are doing an amazing job! Thank you for the fantastic description on your process.
Nearshore
- yvesvidal and Paul Le Wol
-
1
-
1
-
1 hour ago, SaltyScot said:
The word "exquisite" comes to mind. Very nice work indeed. I was just admiring your weather from these pics down there in Key West. The CEO and I have decided to spend a month down there next February to escape the cold here on the Chesapeake. She is even talking about making it 2 months after the snow we just had
Hi Mark,
Thanks for the complement. If you make it down this way, maybe we can meet for a pint or two.
Cheers
Nearshore
-
Hi All,
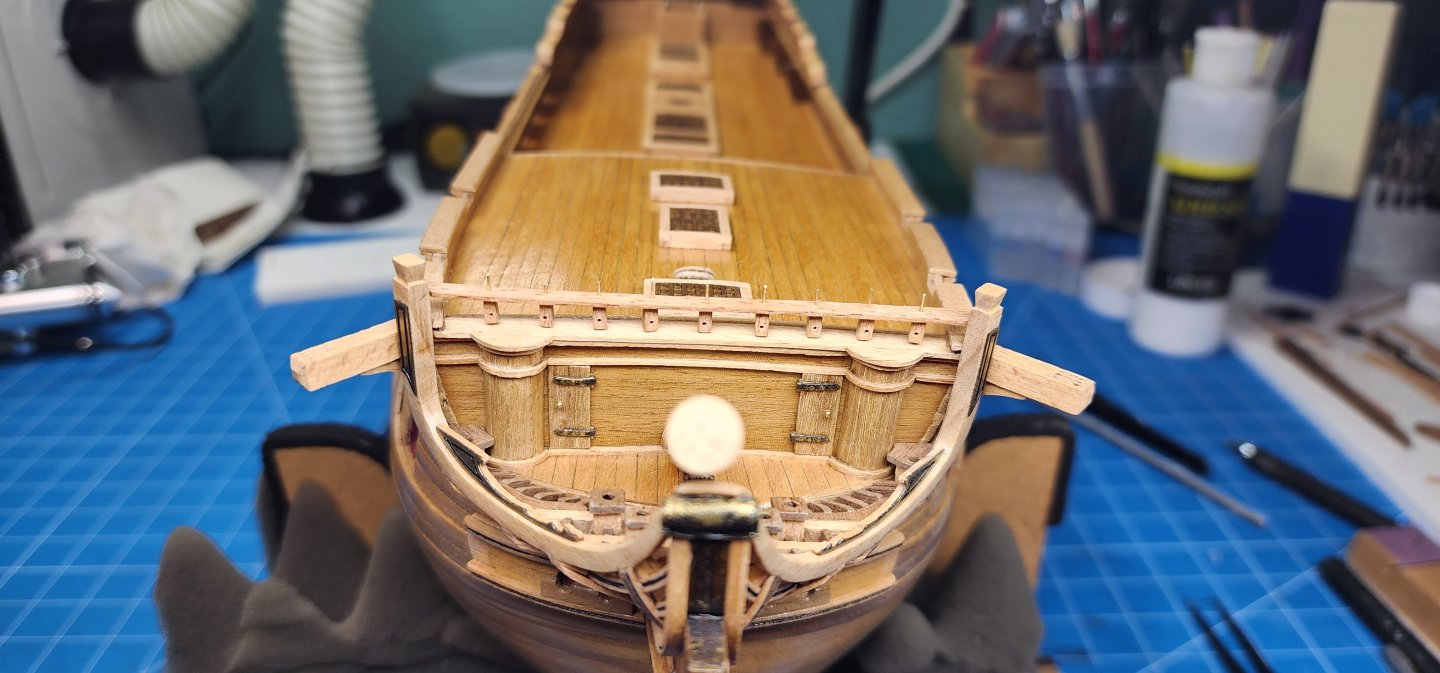
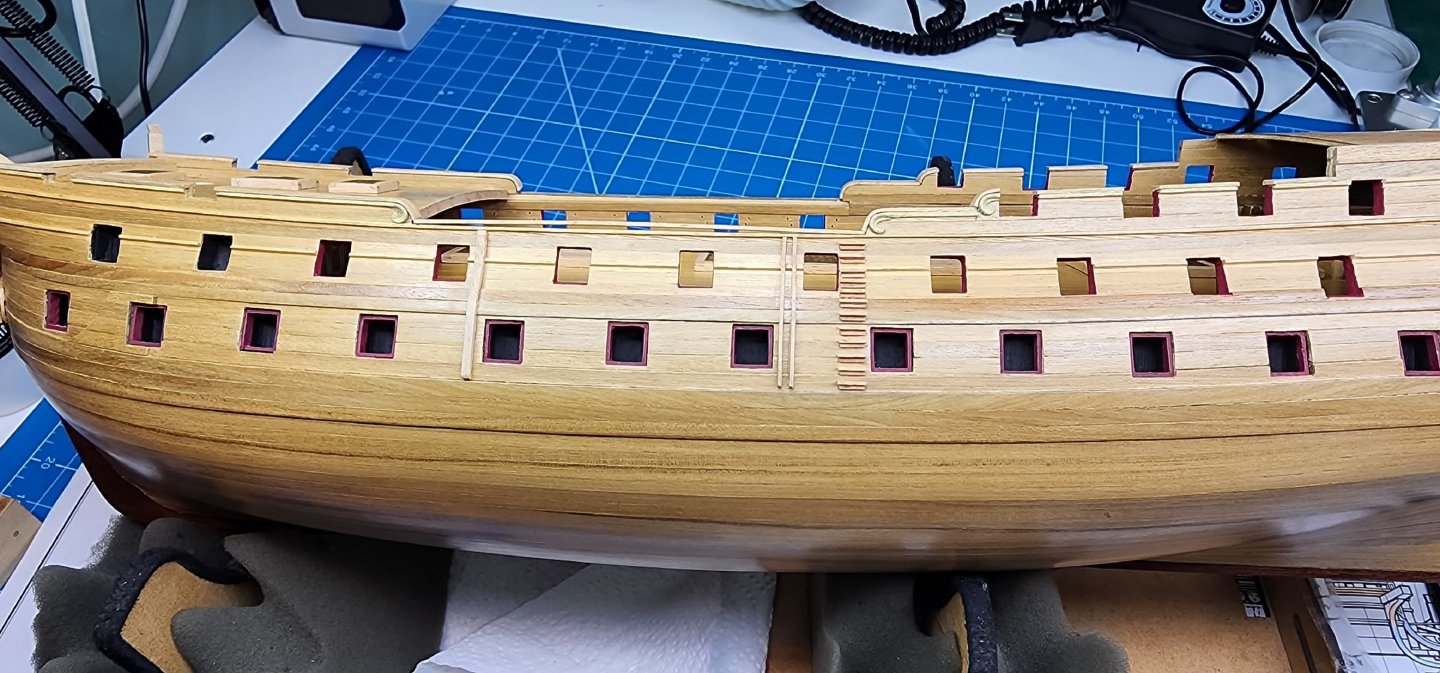
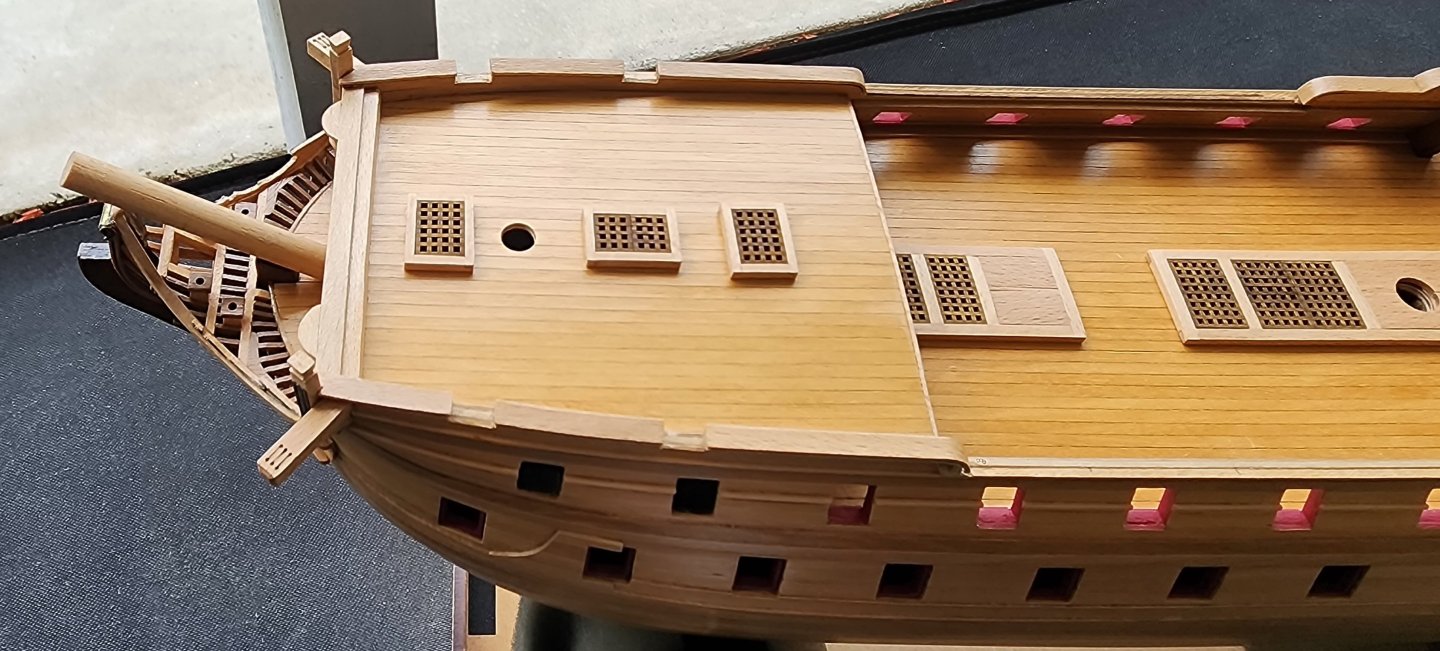
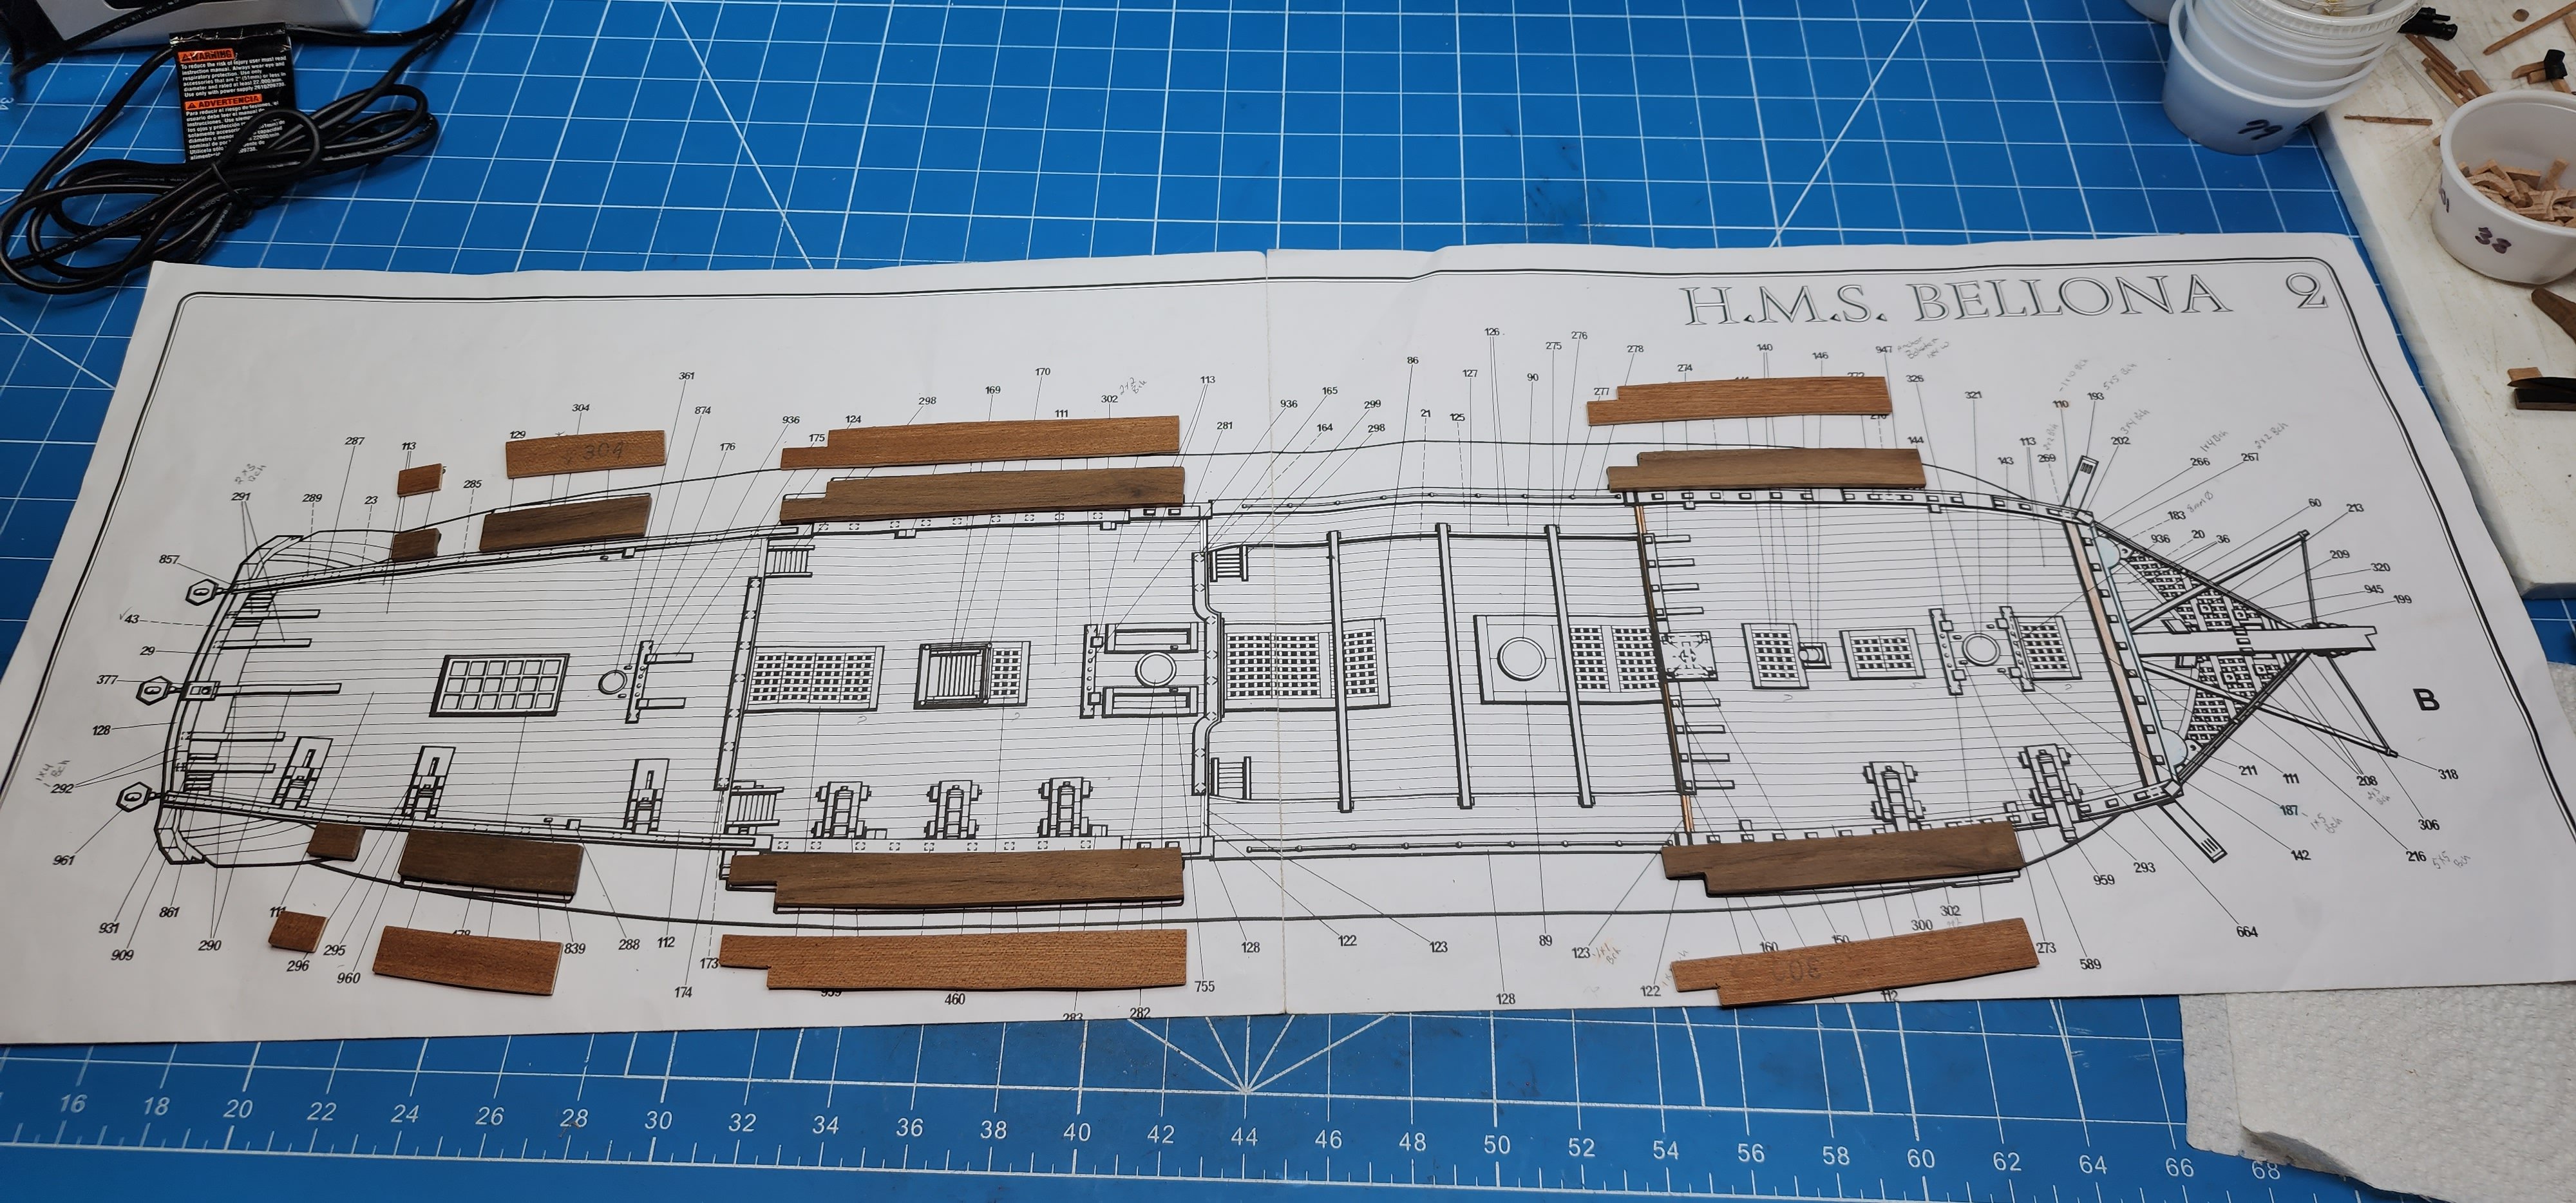
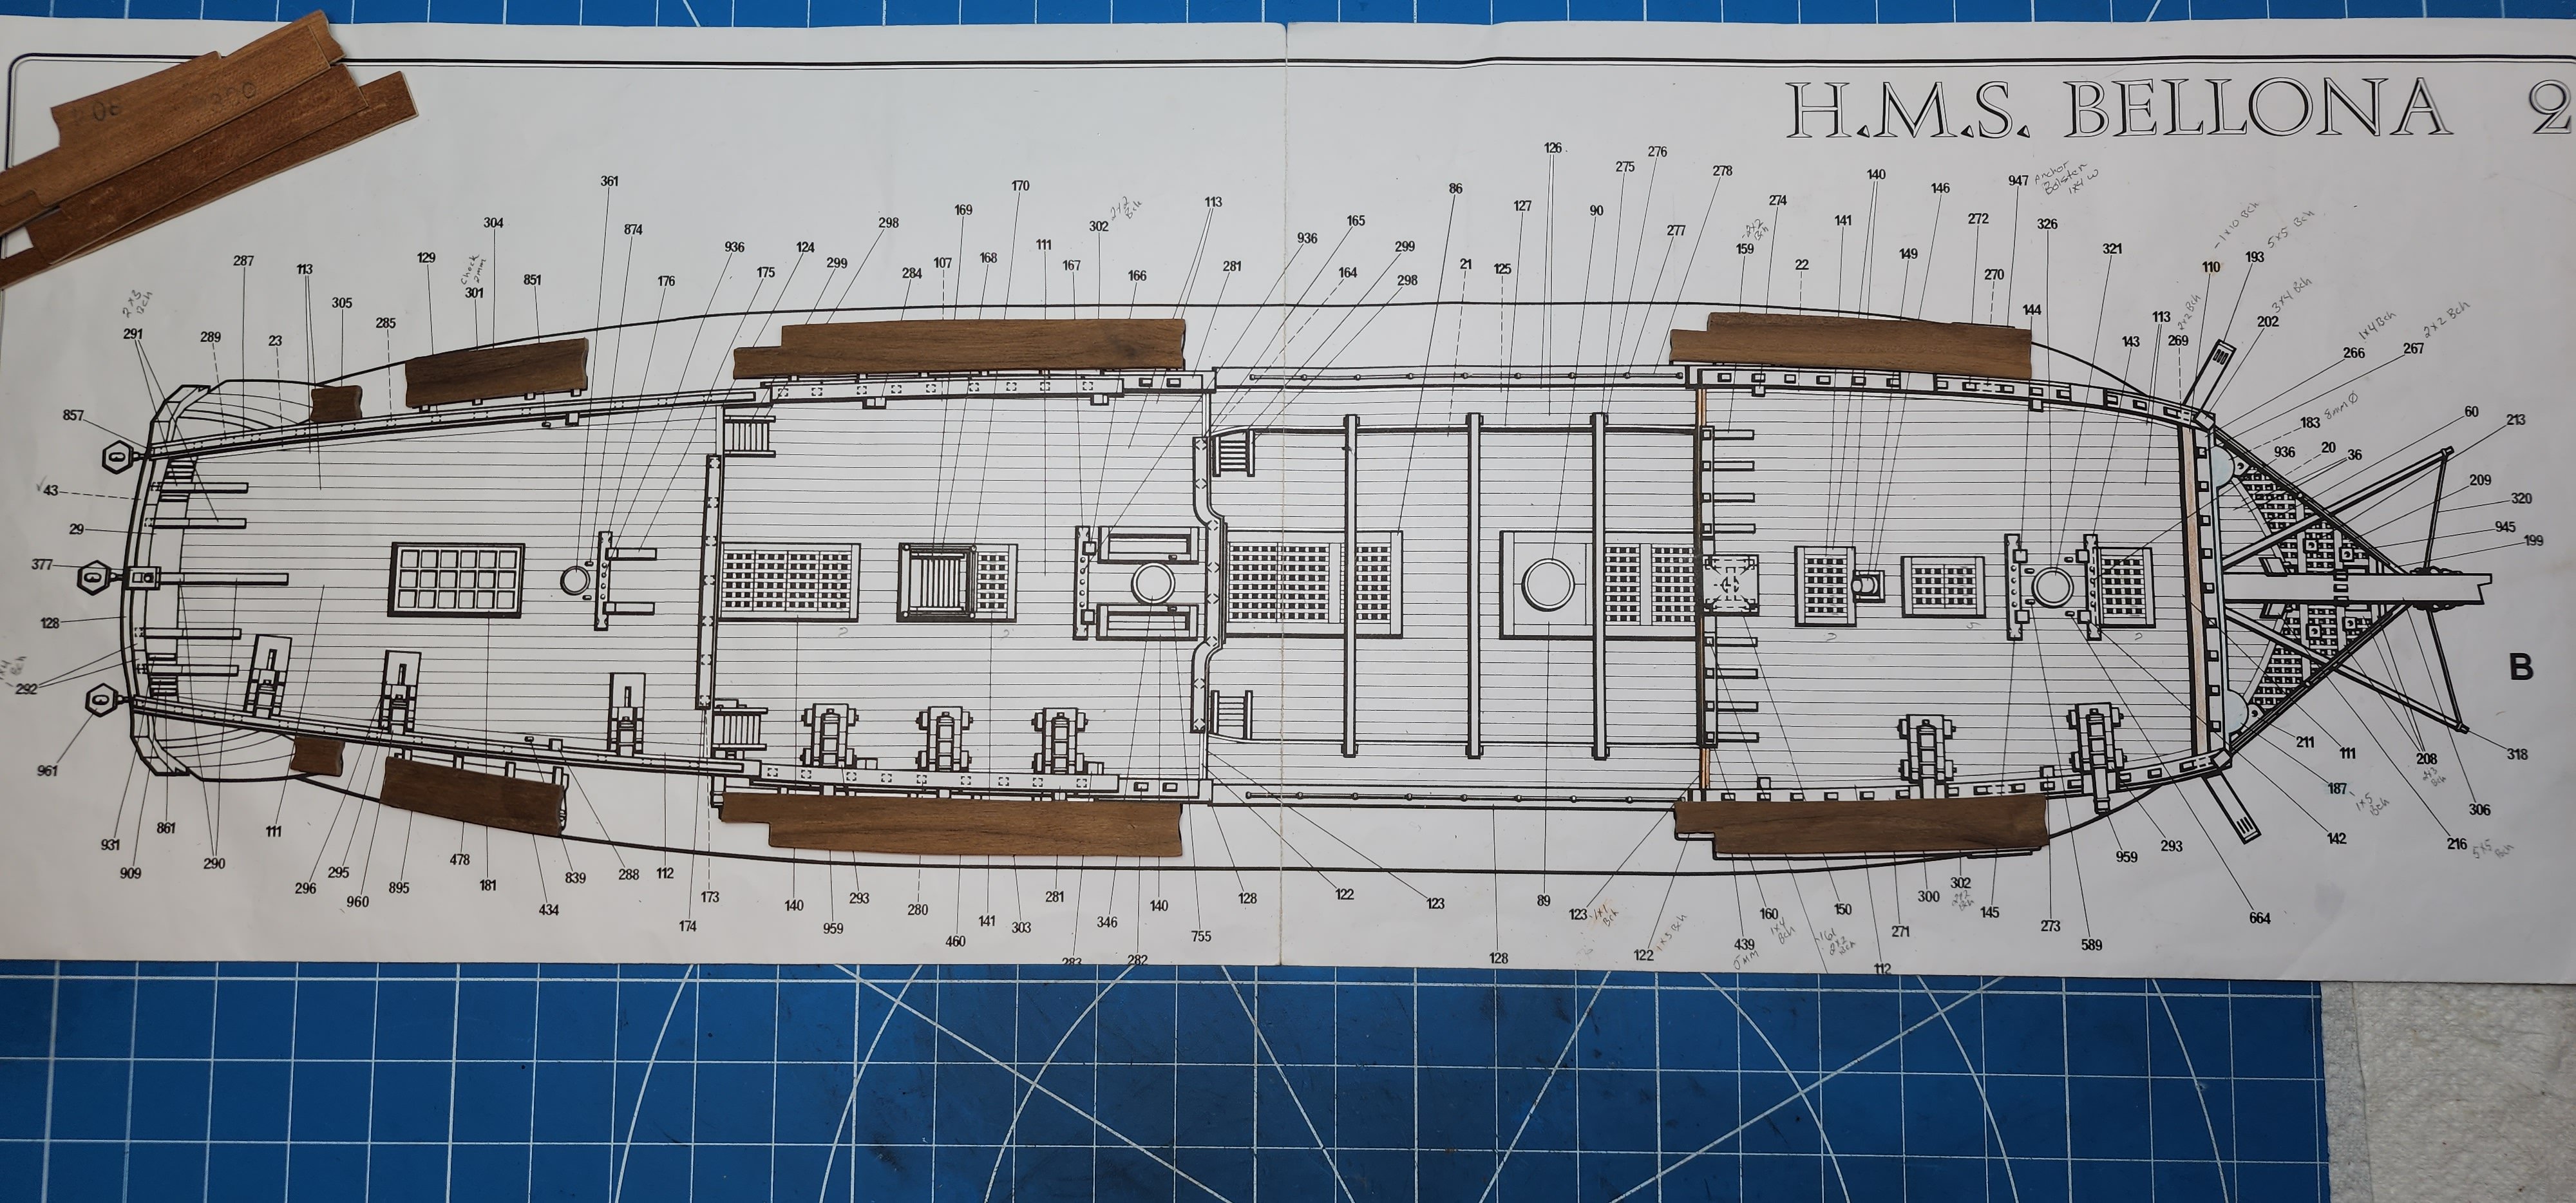
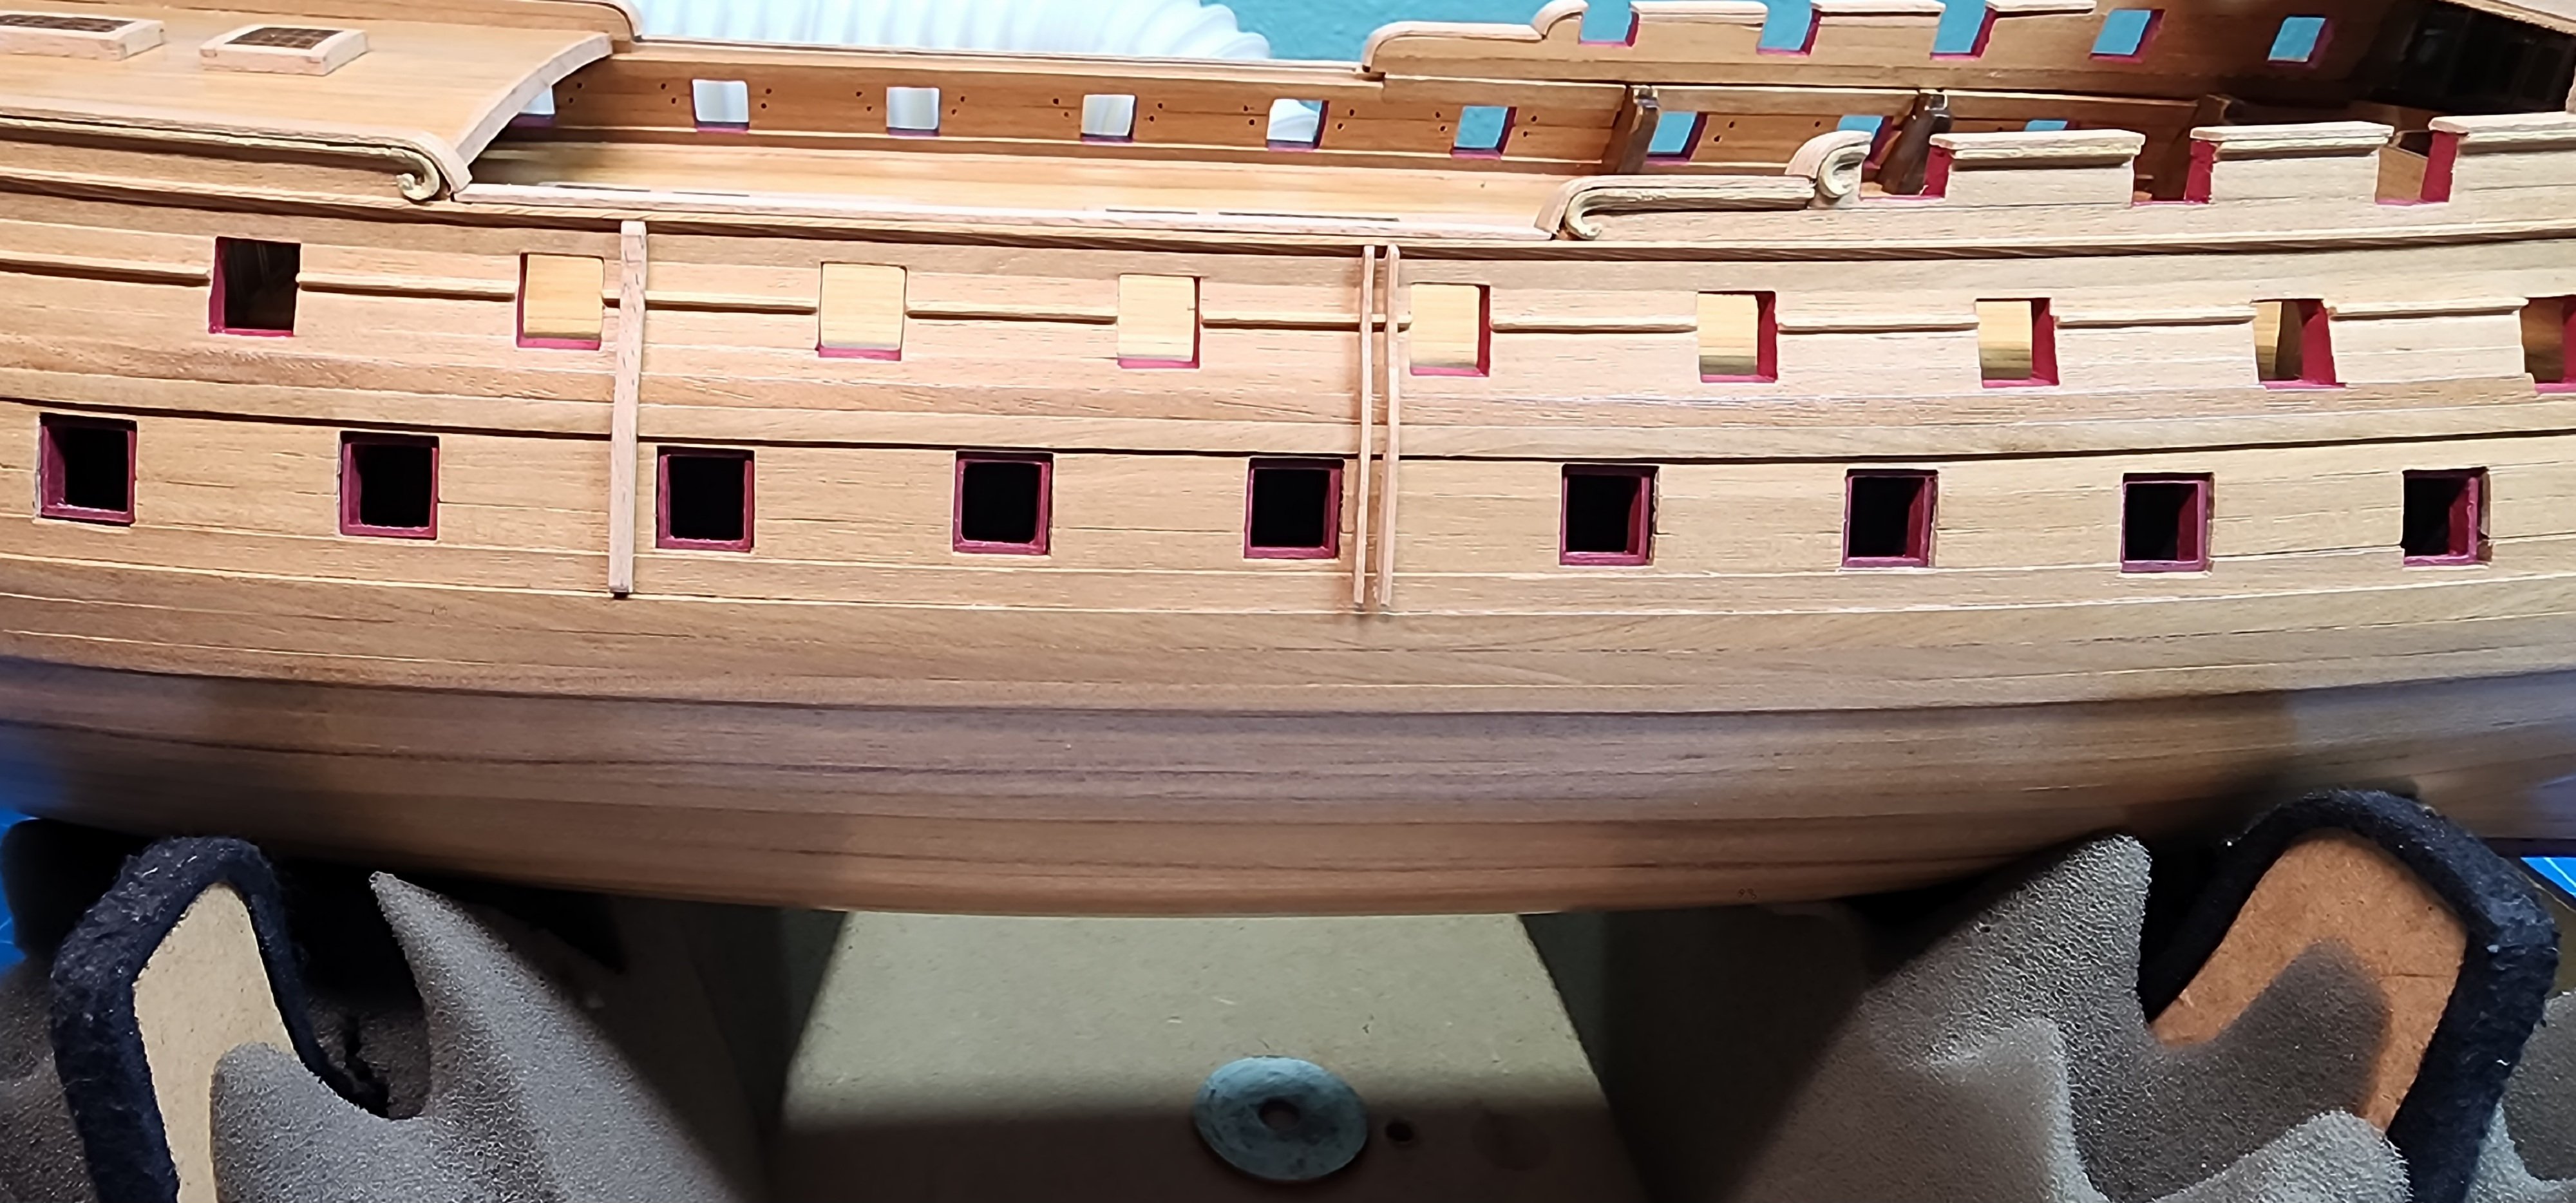
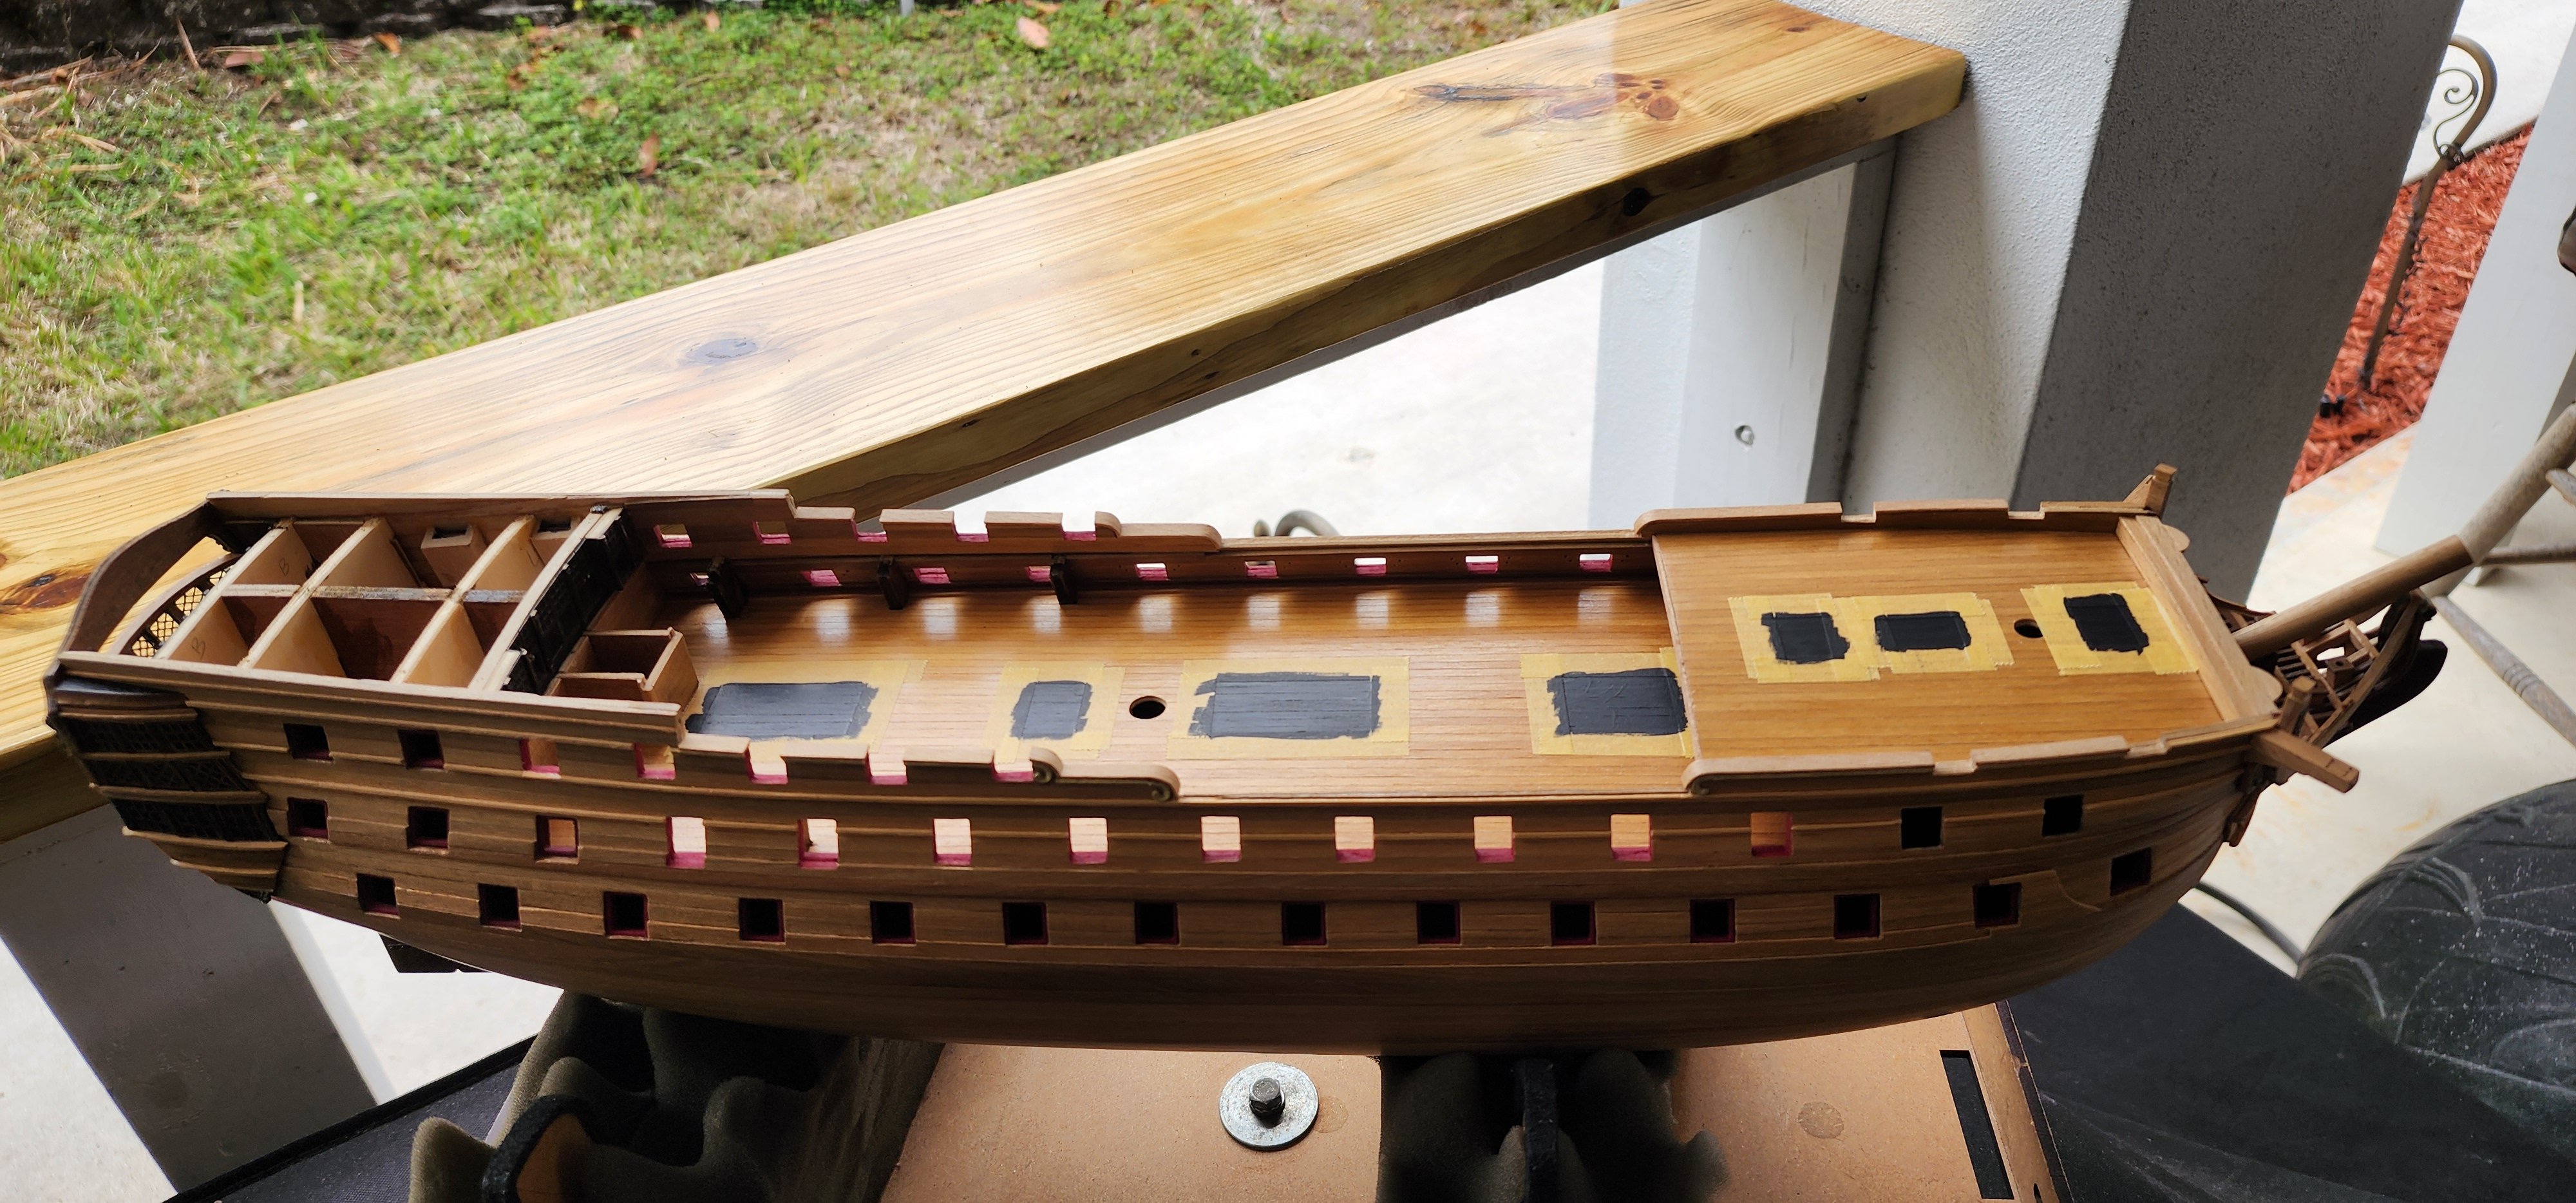
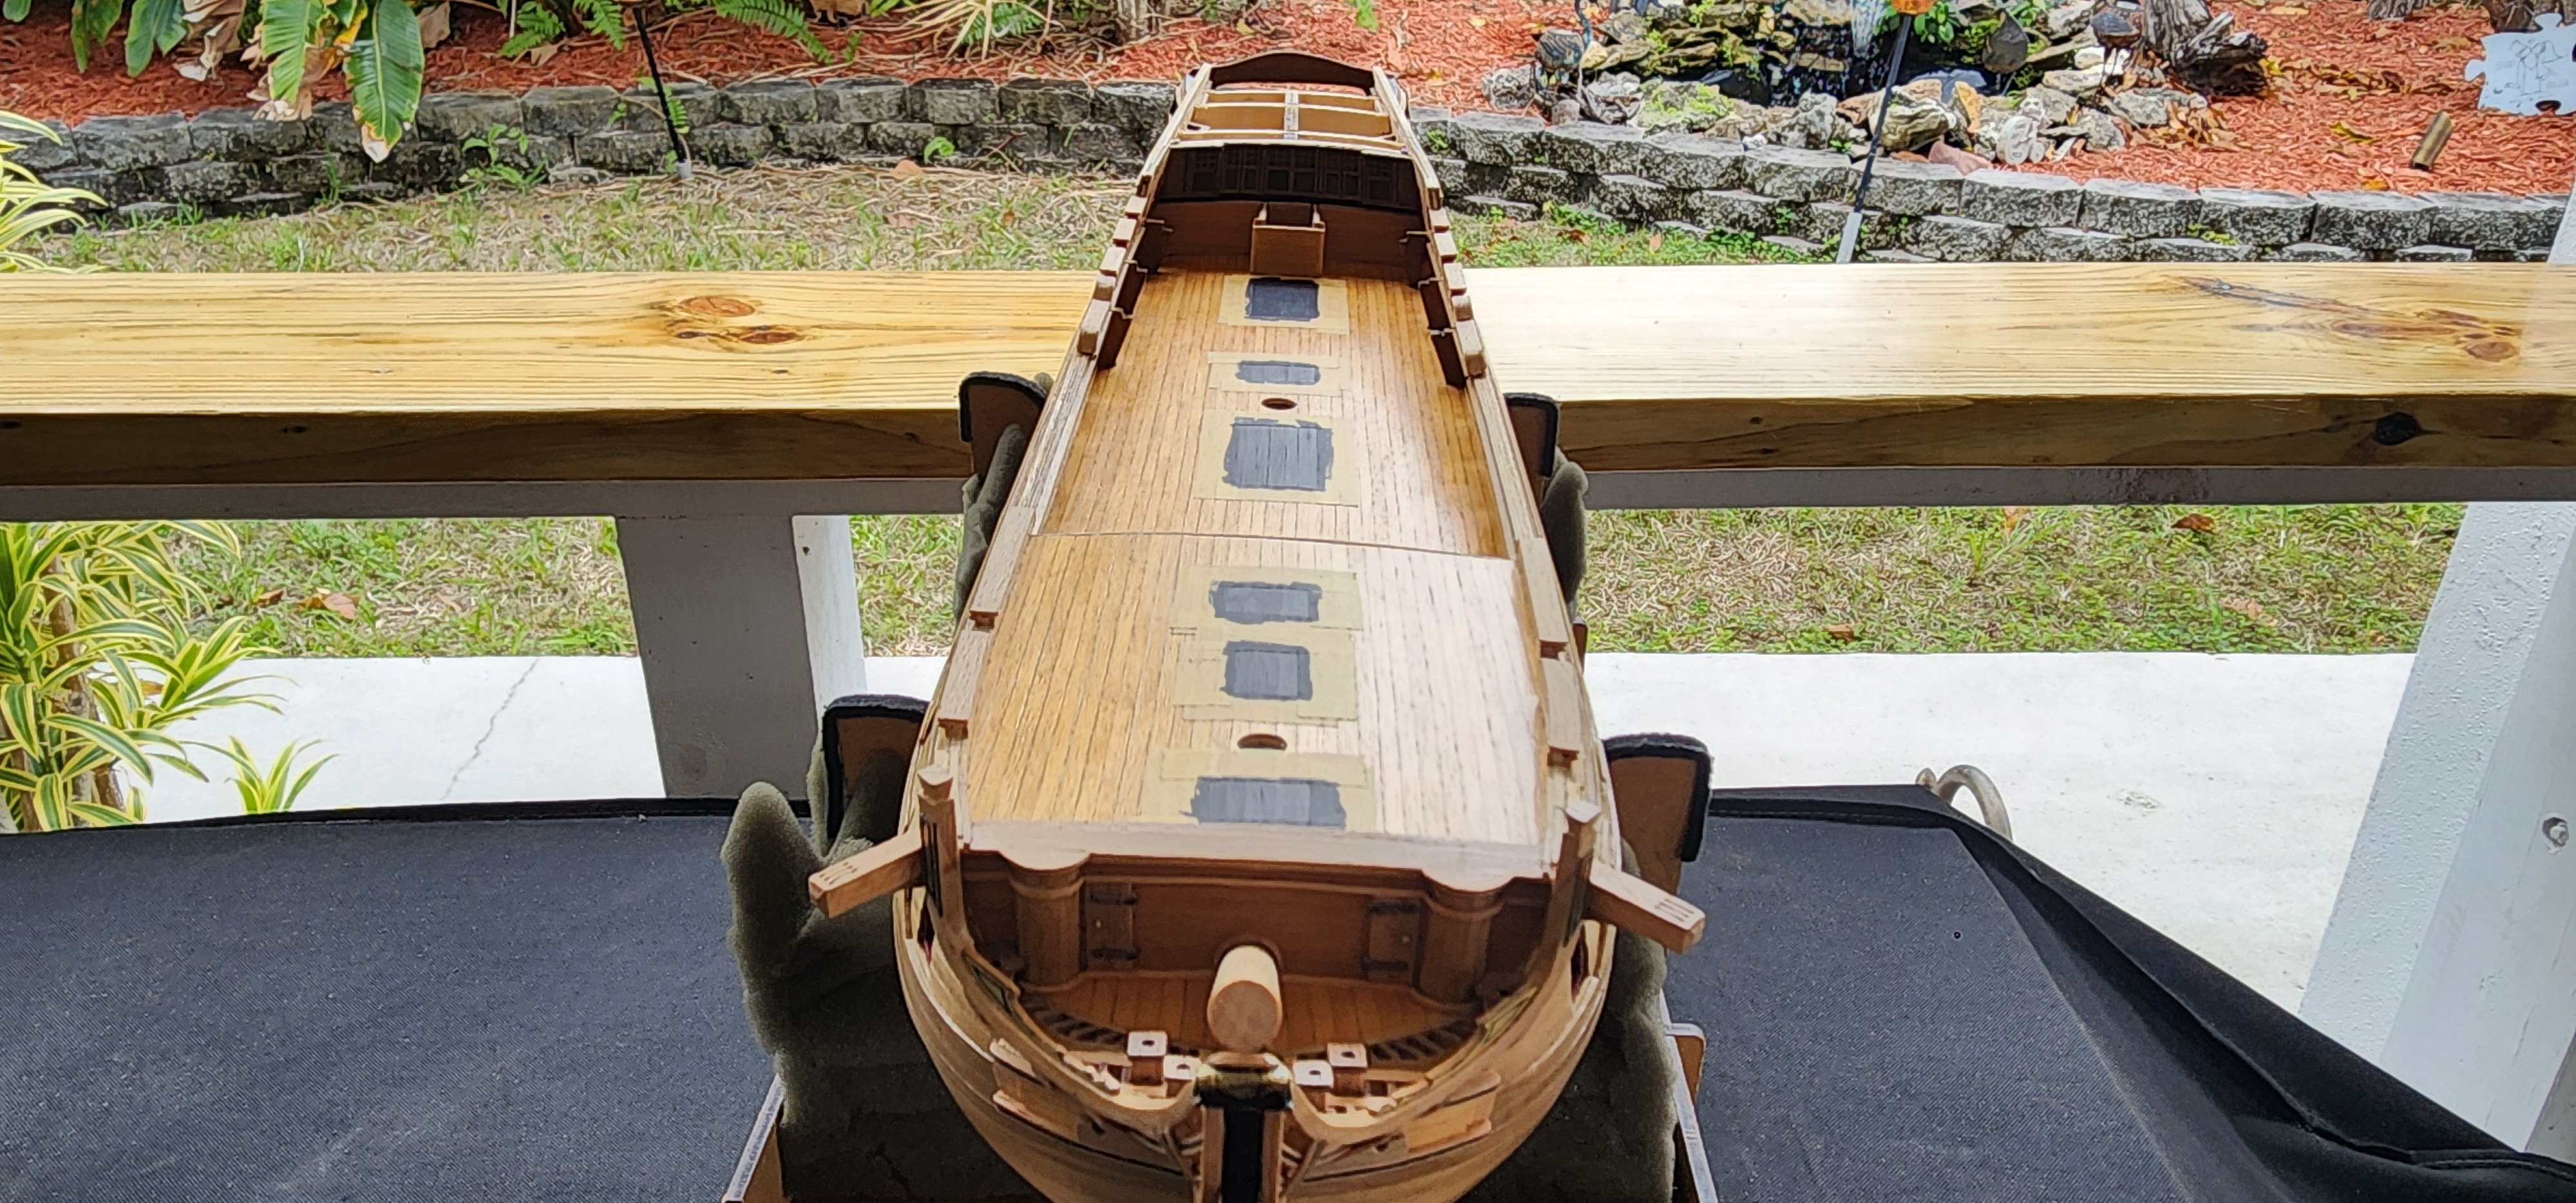
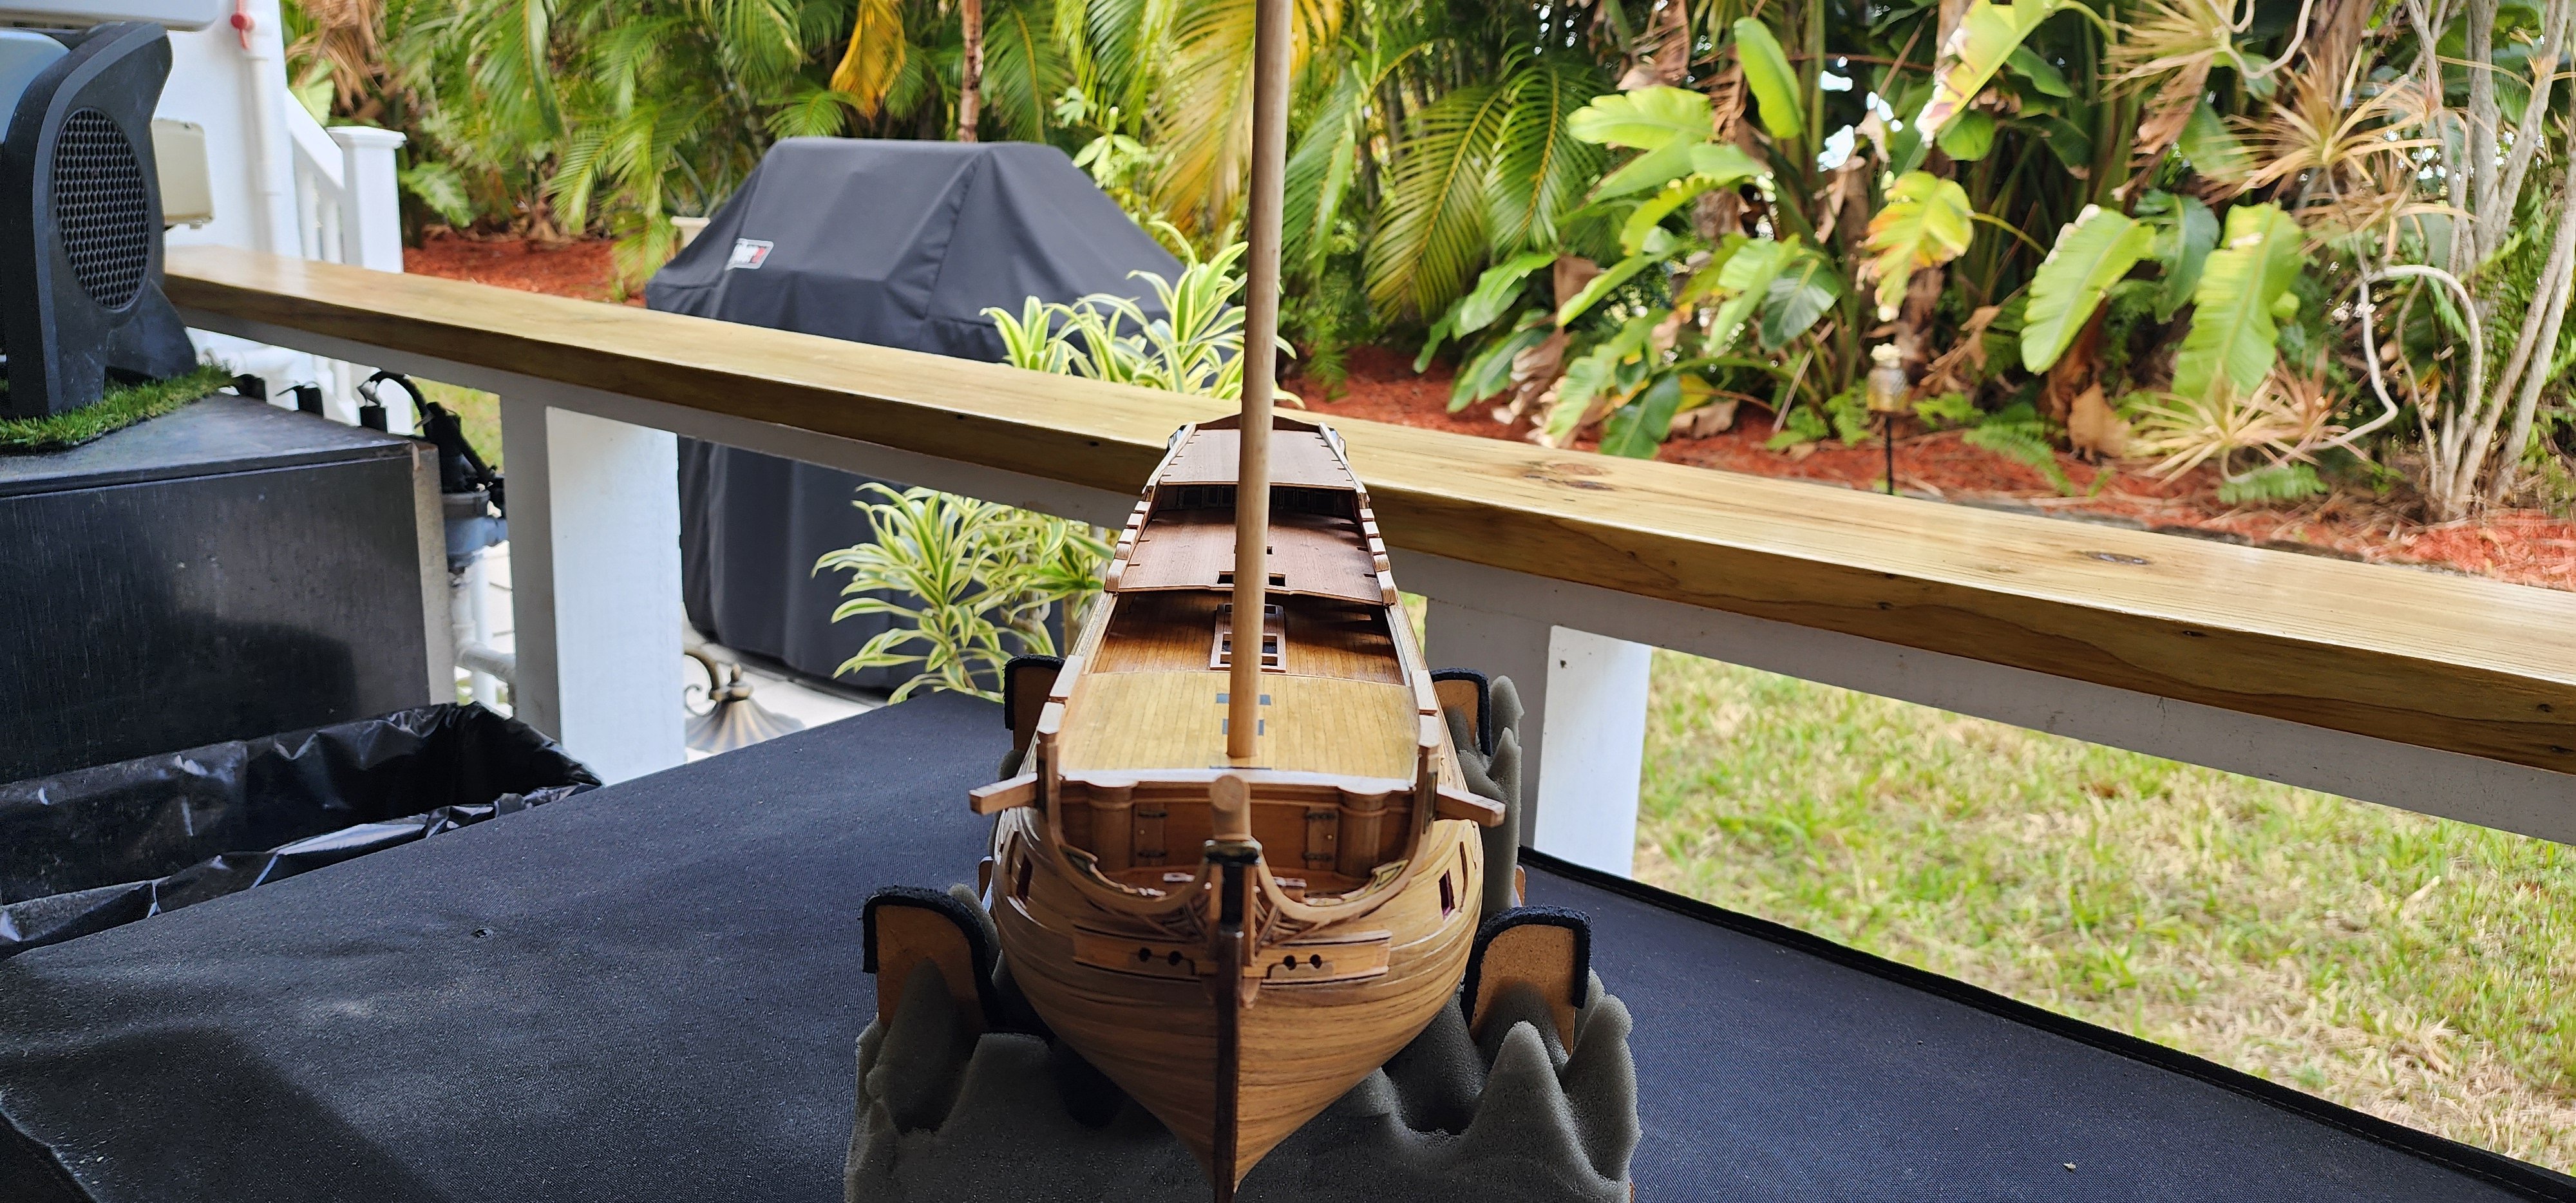
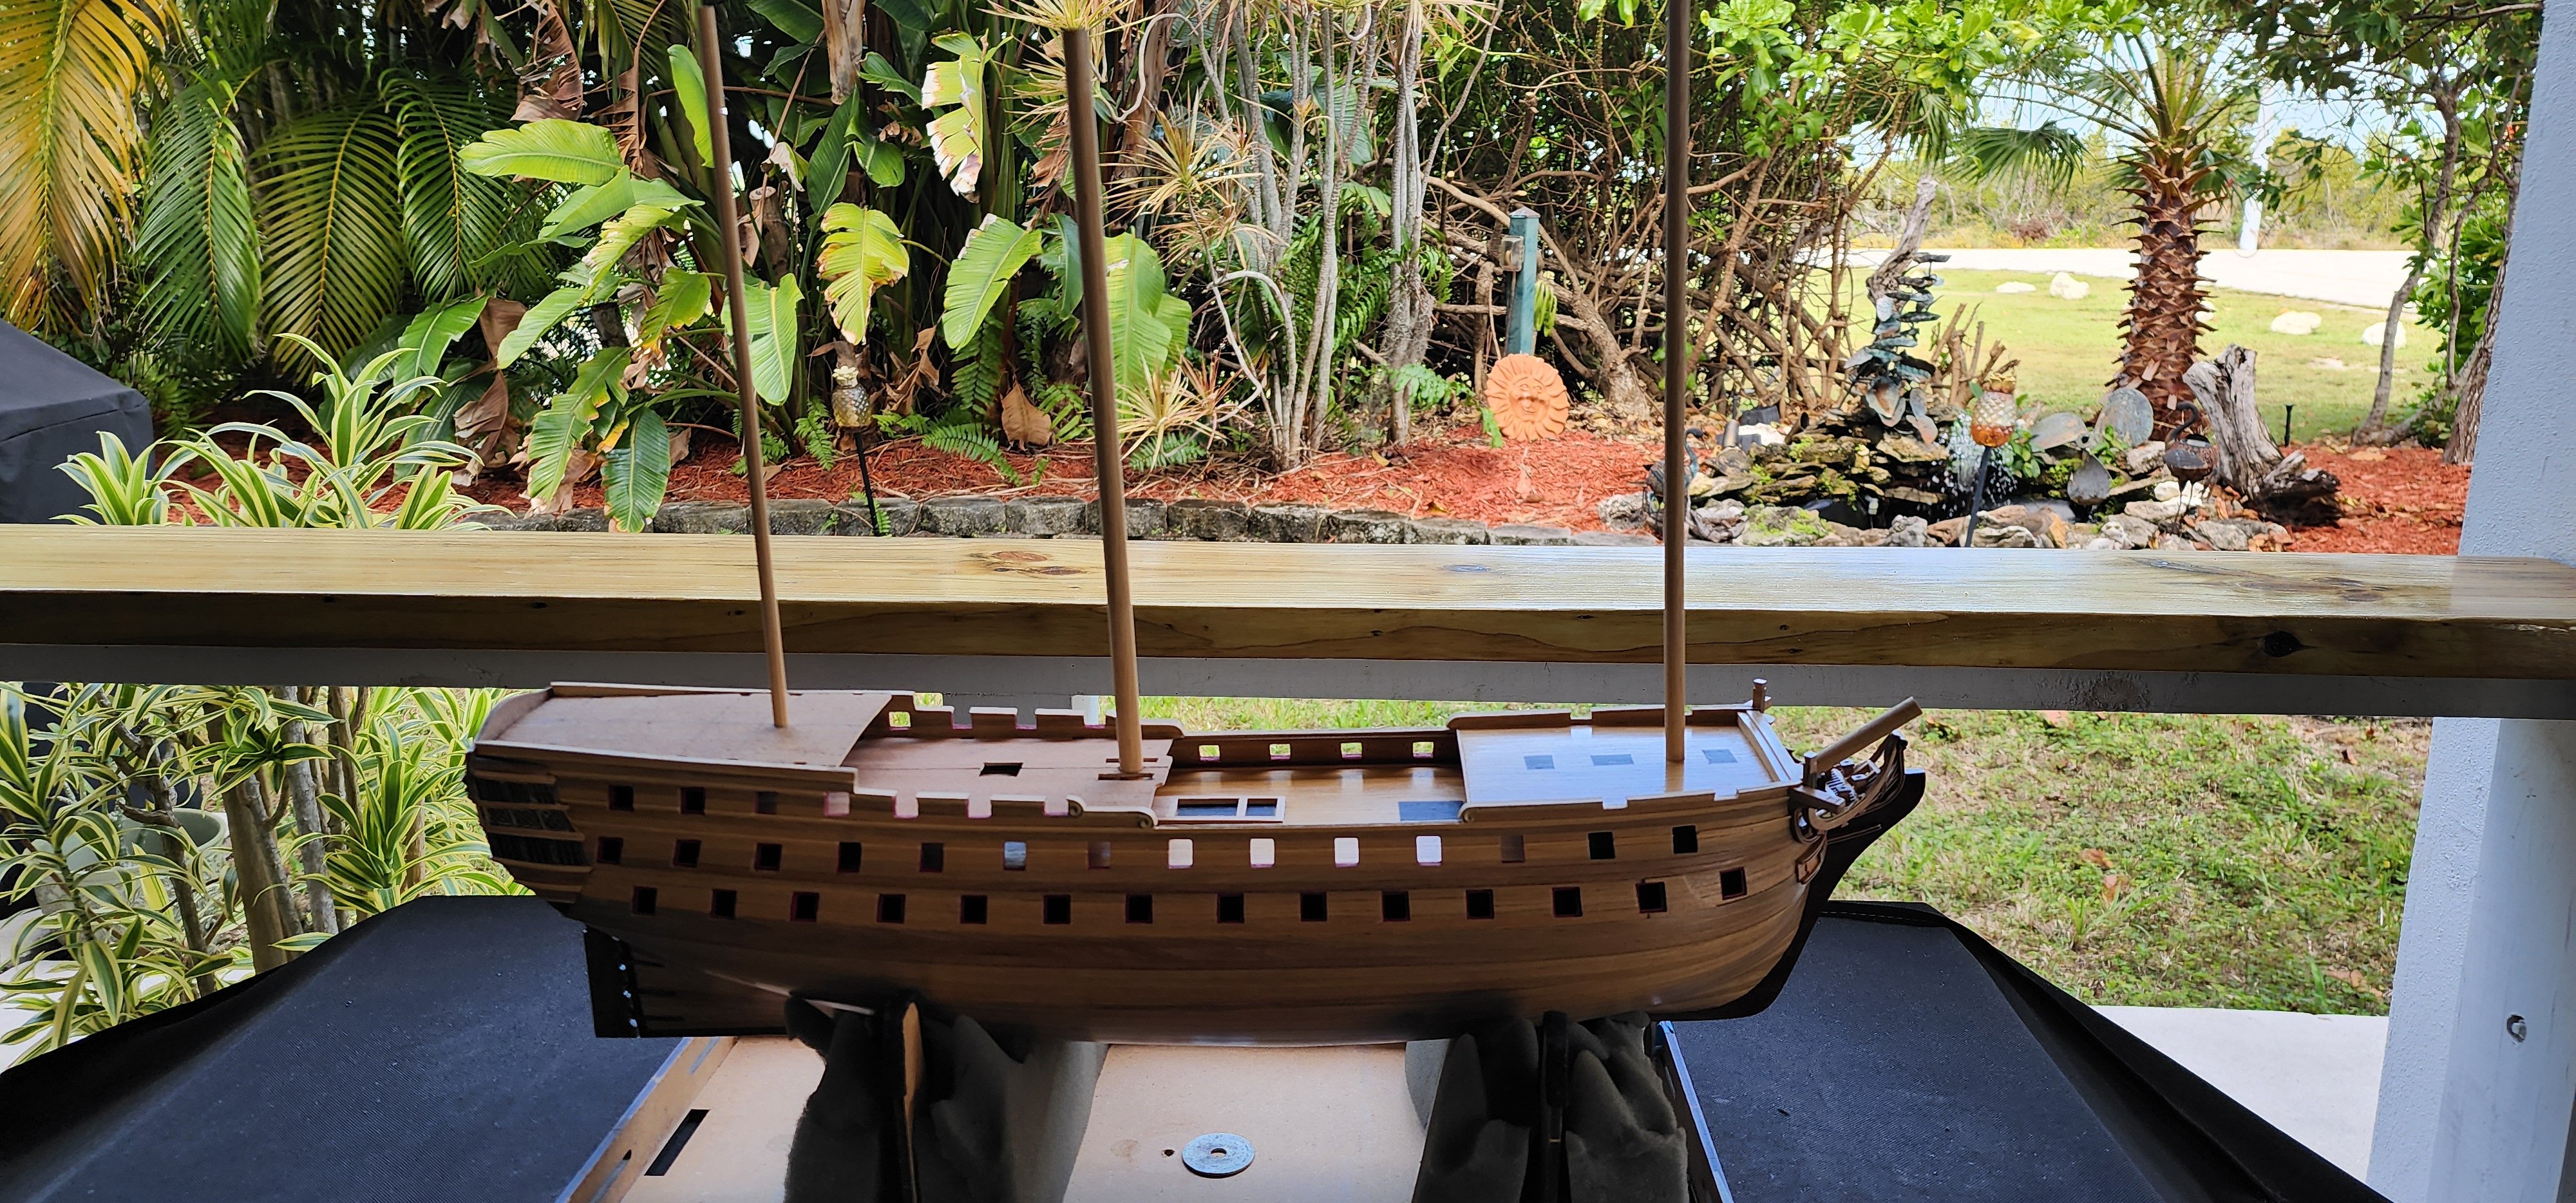
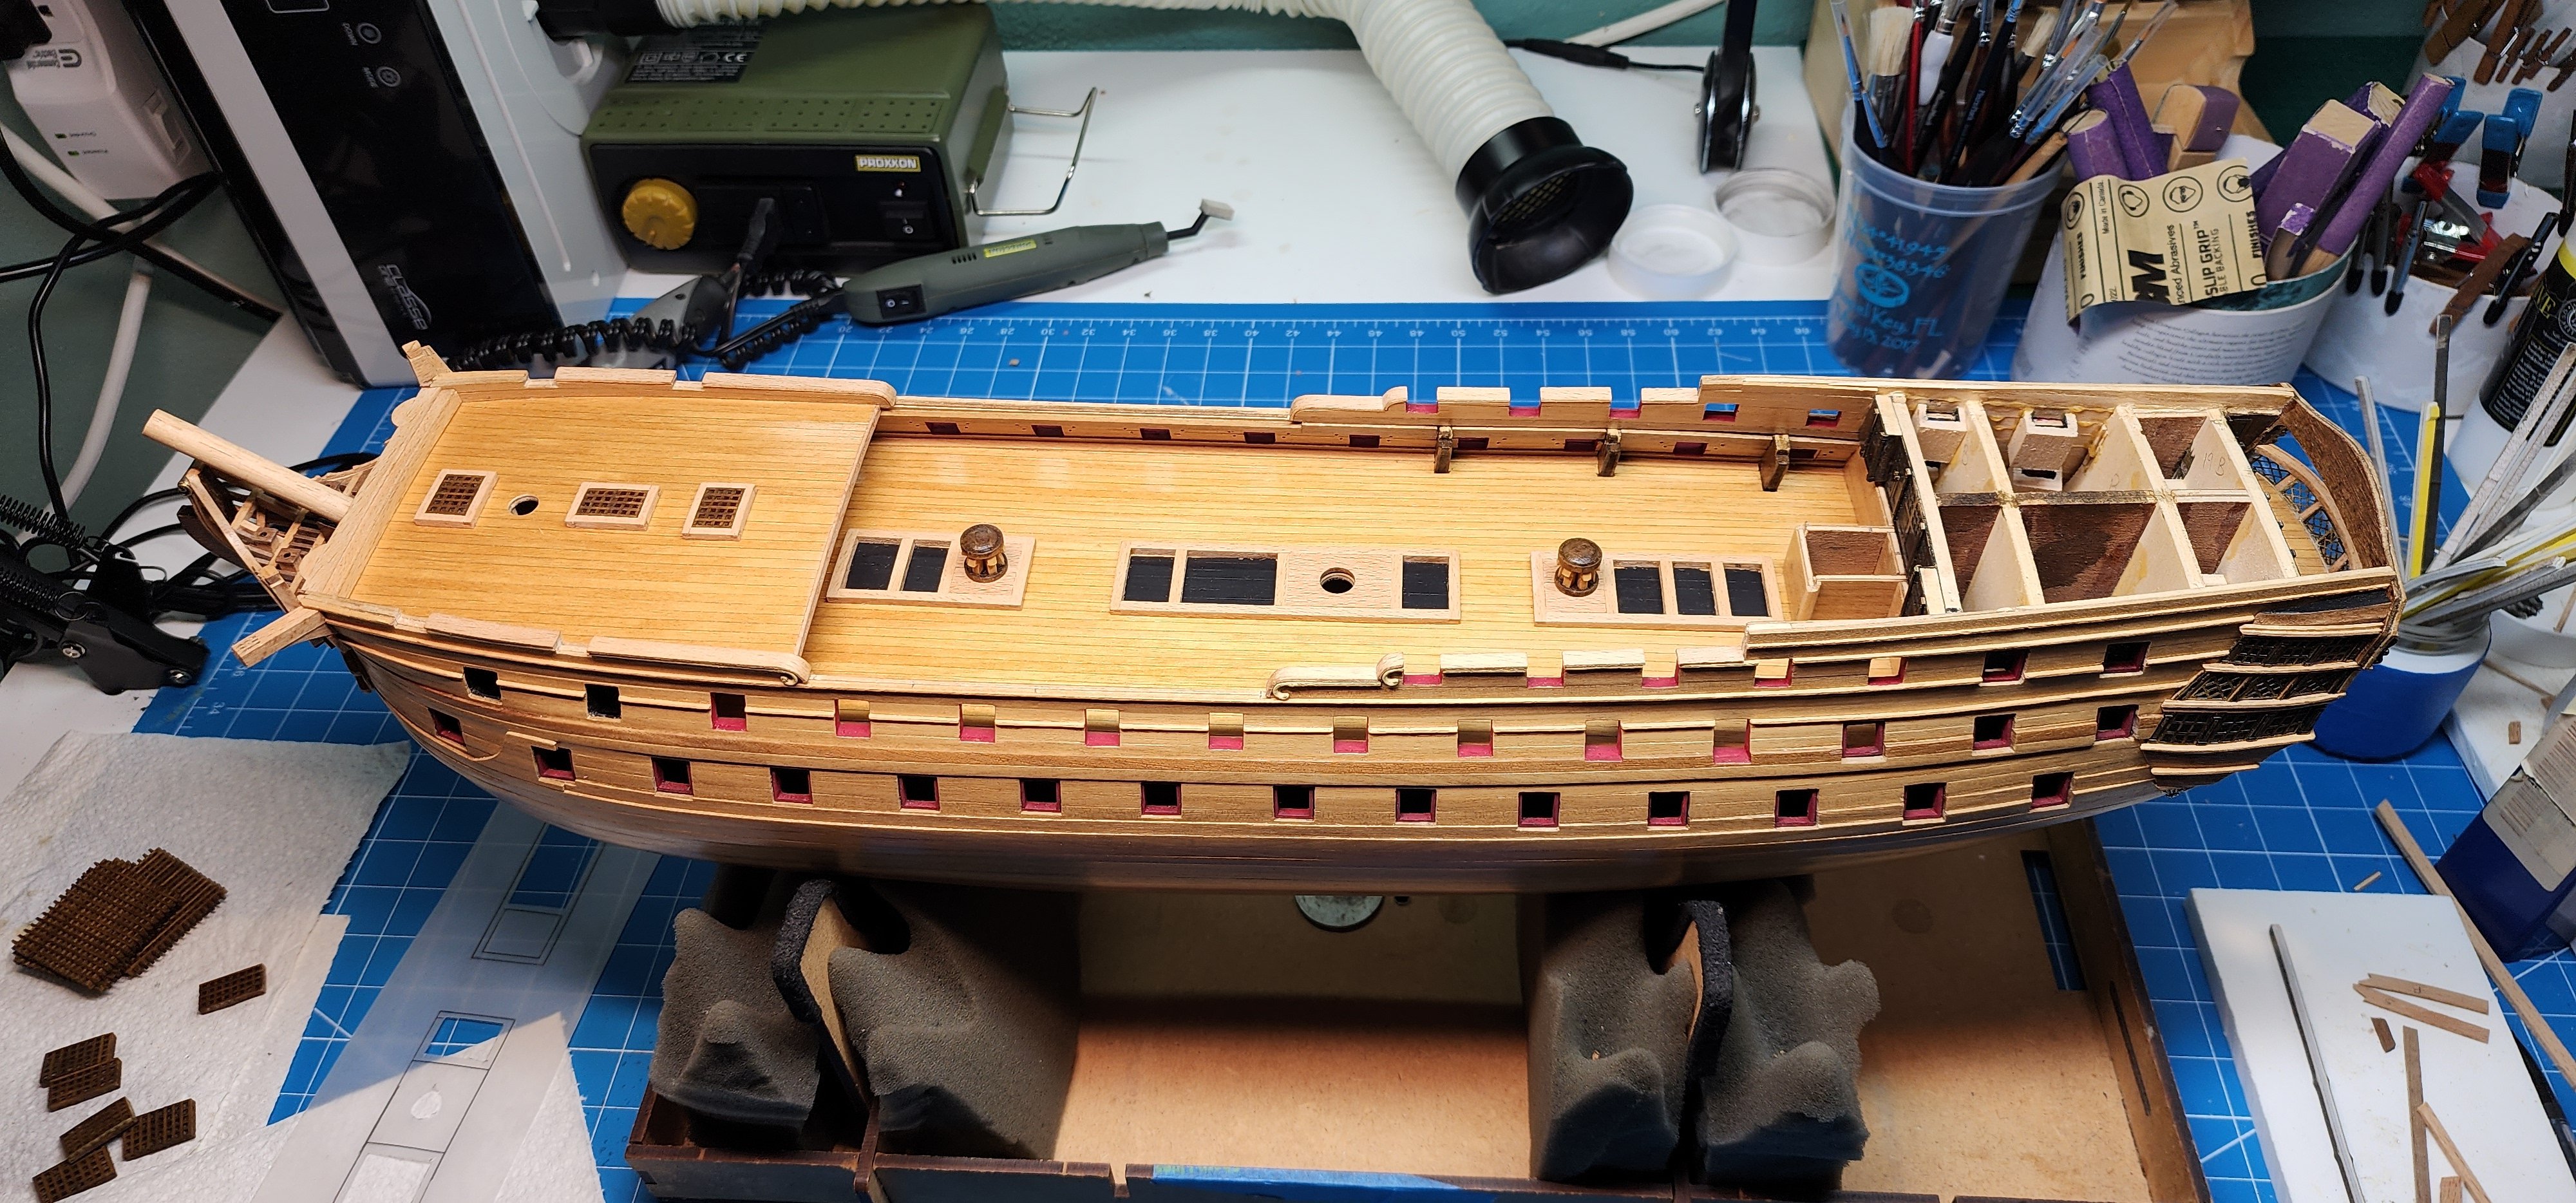
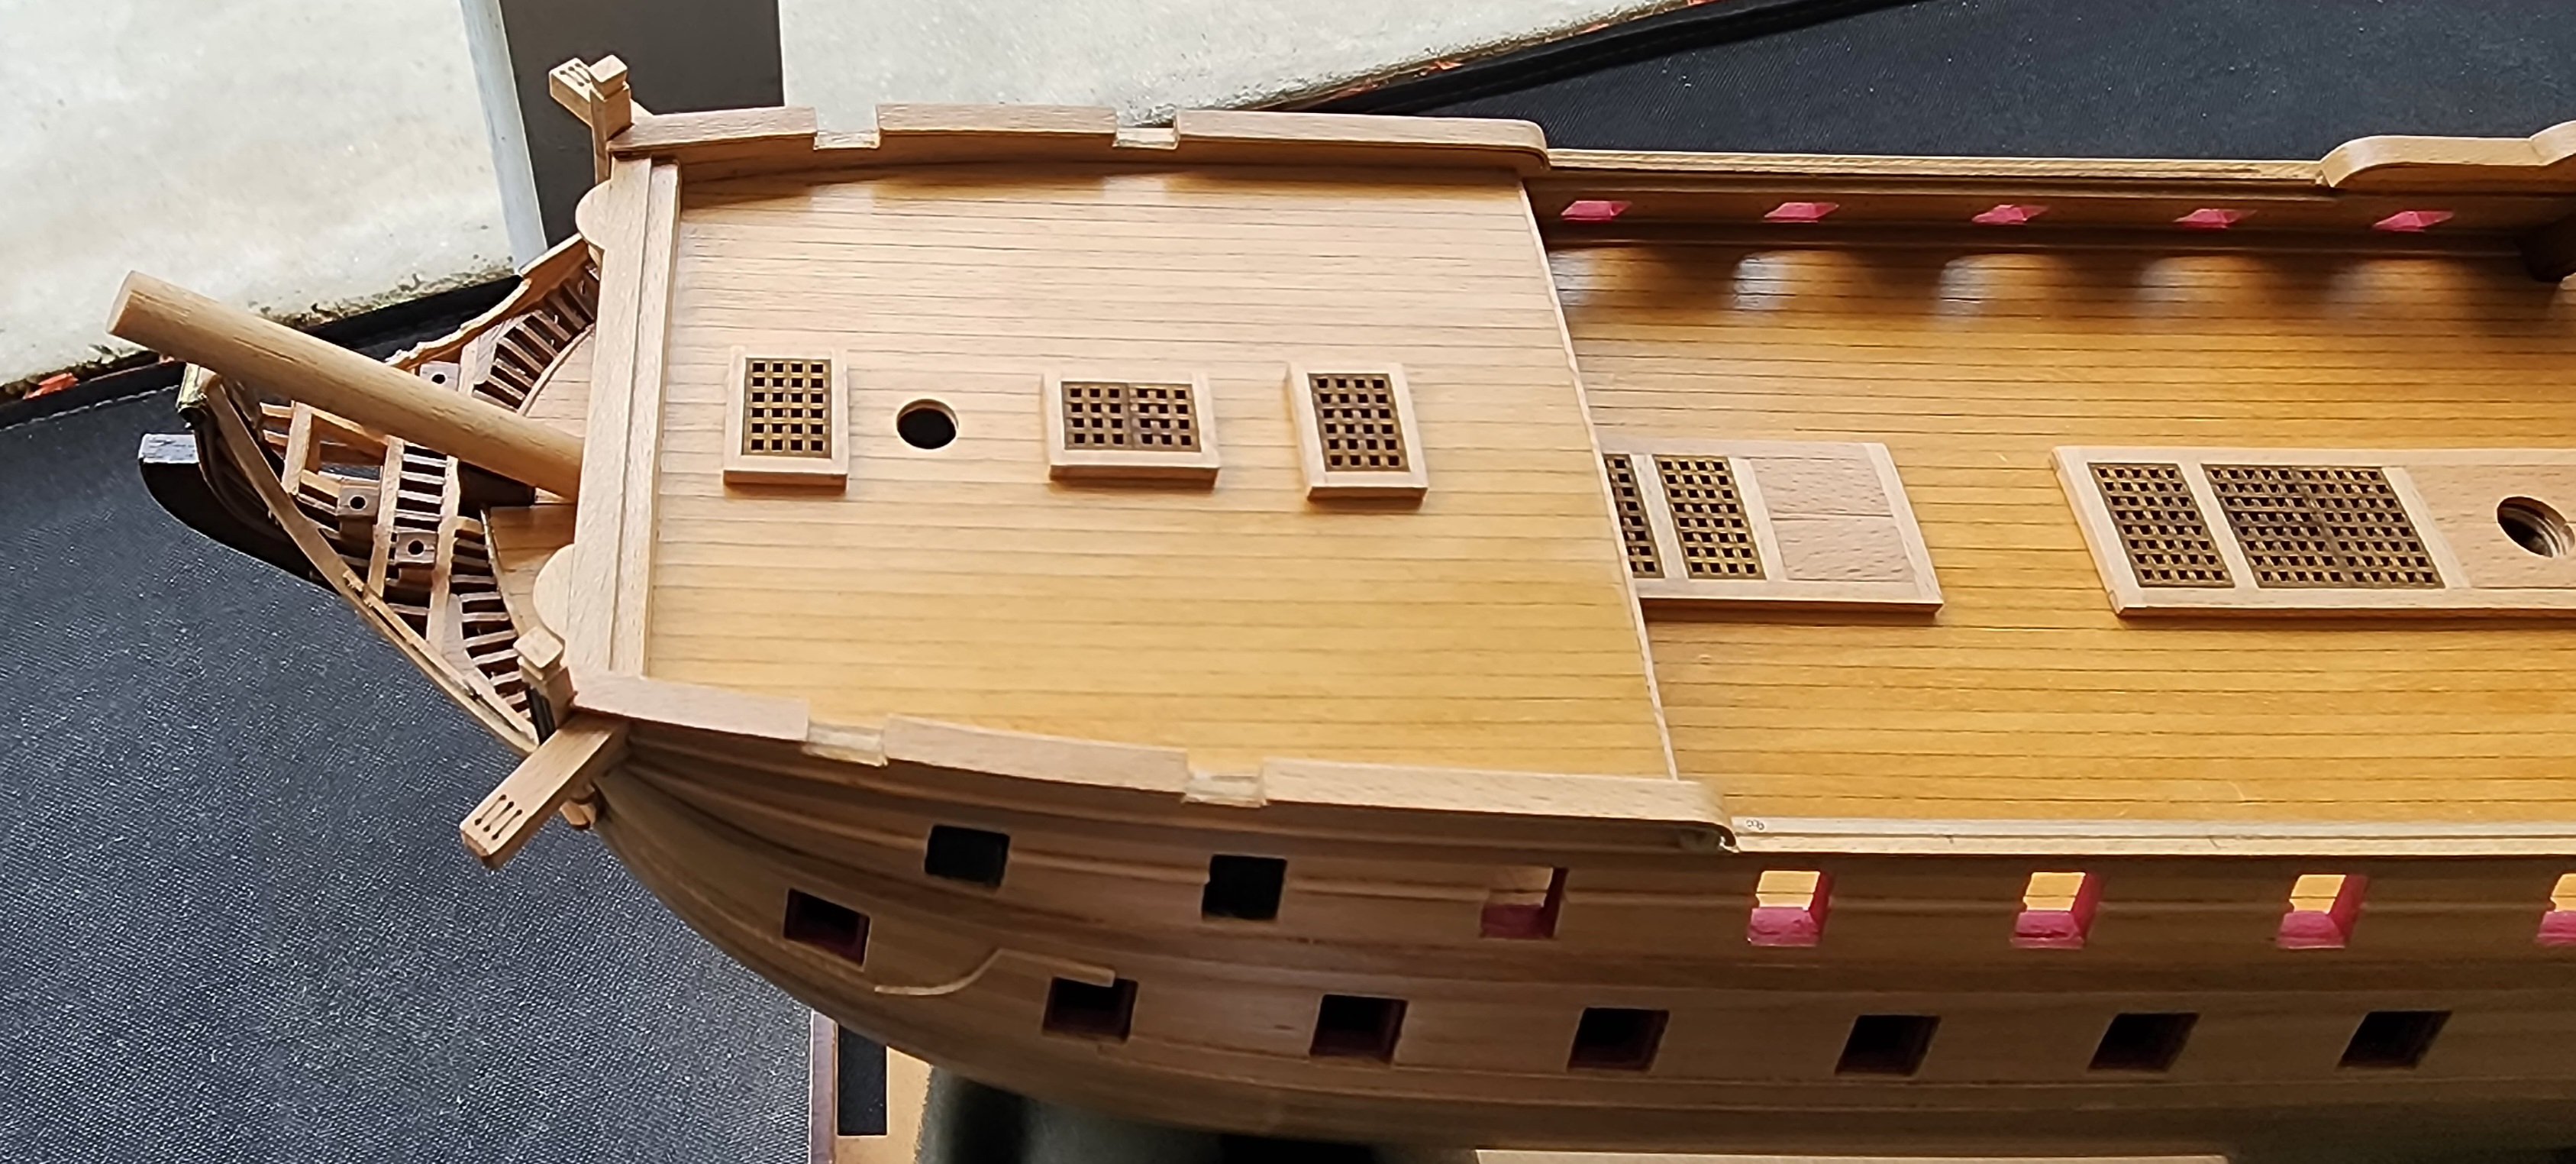
Small update on the Bellona progress. I taped off and painted the deck where the grating will be with a matt black paint. Before I glued the grating in place I decided that I should dry fit the Quarter deck and gangways. I made the holes needed for the mast and did a dry fit check of the masts. This is the first time that Bellona has had her mast installed, kind of gives a good impression of the final look. After I was satisfied with the fit of the quarter deck and gangways, I glued the framing in place for the grating. I touched up the black paint that I scratched up during the dry fitting of the quarter deck and then glued the grates in place. I also installed the remaining sheer plank on the forecastle bulwark. Well that’s all I have for now, I will provide another update when I make some more progress. I have been working a little bit on the cannons, but that’s for another post. Thanks for reading and as always, your comments and guidance are always welcome.
Cheers
Nearshore


HMS Bellona by Andy Thurston - Corel - 1/100
in - Kit build logs for subjects built from 1751 - 1800
Posted
Hi Andy,
I see that you are considering or perhaps already installed the poop deck. If i may offer a suggestion, I would not do that and instead take an approach of building up from the main. i have not perminitlly installed the poop deck for this reason or the quarter deck. I just think that fitting all the components on the main deck without the other decks will give better access to those components and make an easier installation..... Just a thought. You are doing a great job so far!!
Nearshore